

Stress relief has never been so accessible! These DIY stress balls are not only fun to make but also provide an effective way to alleviate anxiety. Whether you’re looking for a calming activity with kids or seeking a personal stress-relieving tool, this easy craft is perfect for the whole family. As someone who’s a big fan of stress balls, I can attest to their ability to soothe and calm. But what makes them truly remarkable is the science behind their effectiveness.
When you squeeze the ball in your palm, it stimulates nerve endings, triggering your nervous system to help regulate stress and manage hormone levels. It’s amazing how something as simple as a stress ball can have such a profound impact. The best part? You don’t need any special skills or equipment to create your own stress balls at home. With just a few basic supplies, you can craft and personalize your very own stress-relieving buddies.
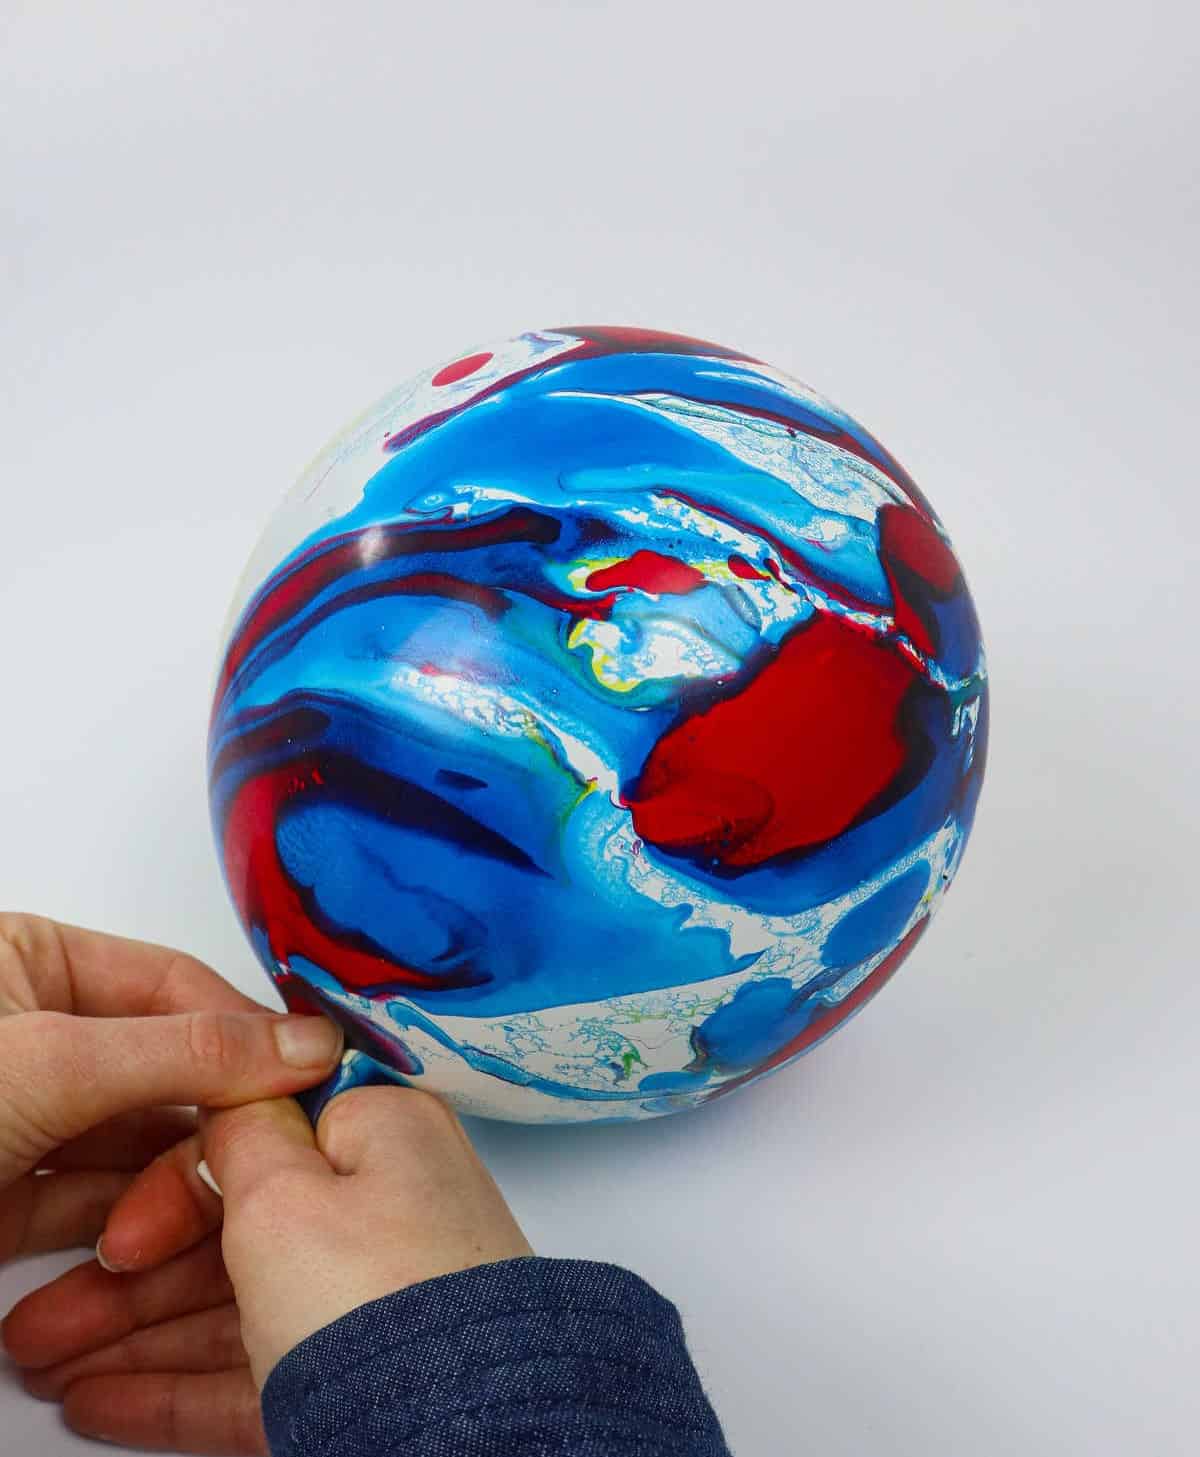
And let’s be honest, there’s something incredibly satisfying about watching those balloons transform into lovable, squishy spheres.
Supplies You’ll Need
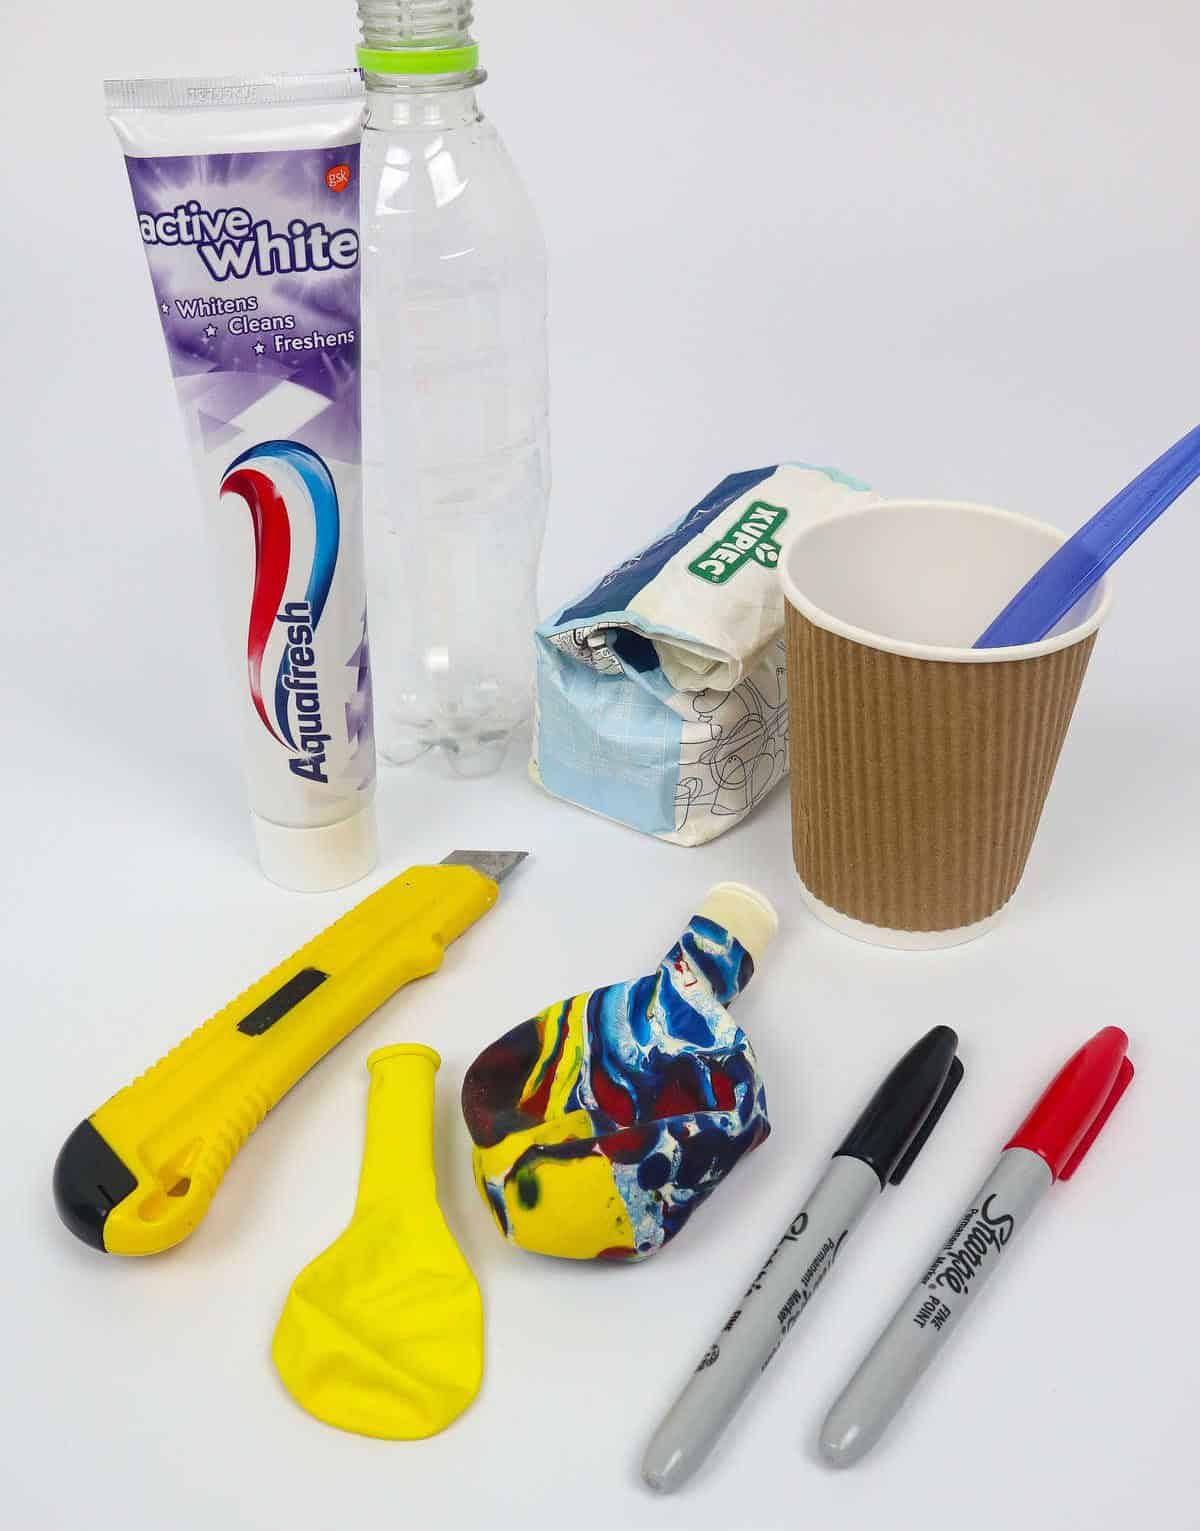
When it comes to crafting, having the right materials at your disposal can make all the difference. For instance, a few everyday items like balloons, cold water, and plastic bottles can be repurposed as makeshift molds for creating unique shapes with clay or dough. In addition, retracted knives, teaspoons, and paper cups or bowls can be used to shape and mix various substances. Even personal care items like toothpaste can find their way into your crafting projects.
And don’t forget about the power of permanent markers, which can add a pop of color and personality to any creation. But what’s really interesting is that certain pantry staples like potato starch, cornstarch, or wheat flour can also be used in creative ways, such as adding texture or creating unique patterns.
How to Make Stress Balls
As you prepare to embark on this creative adventure, don’t forget to stock up on supplies that will help contain the chaos. A stash of newspapers or paper towels should be within arm’s reach, as things are likely to get messy in a hurry. The more you’re prepared for spills and splatters upfront, the smoother your overall experience will be.
Step 1
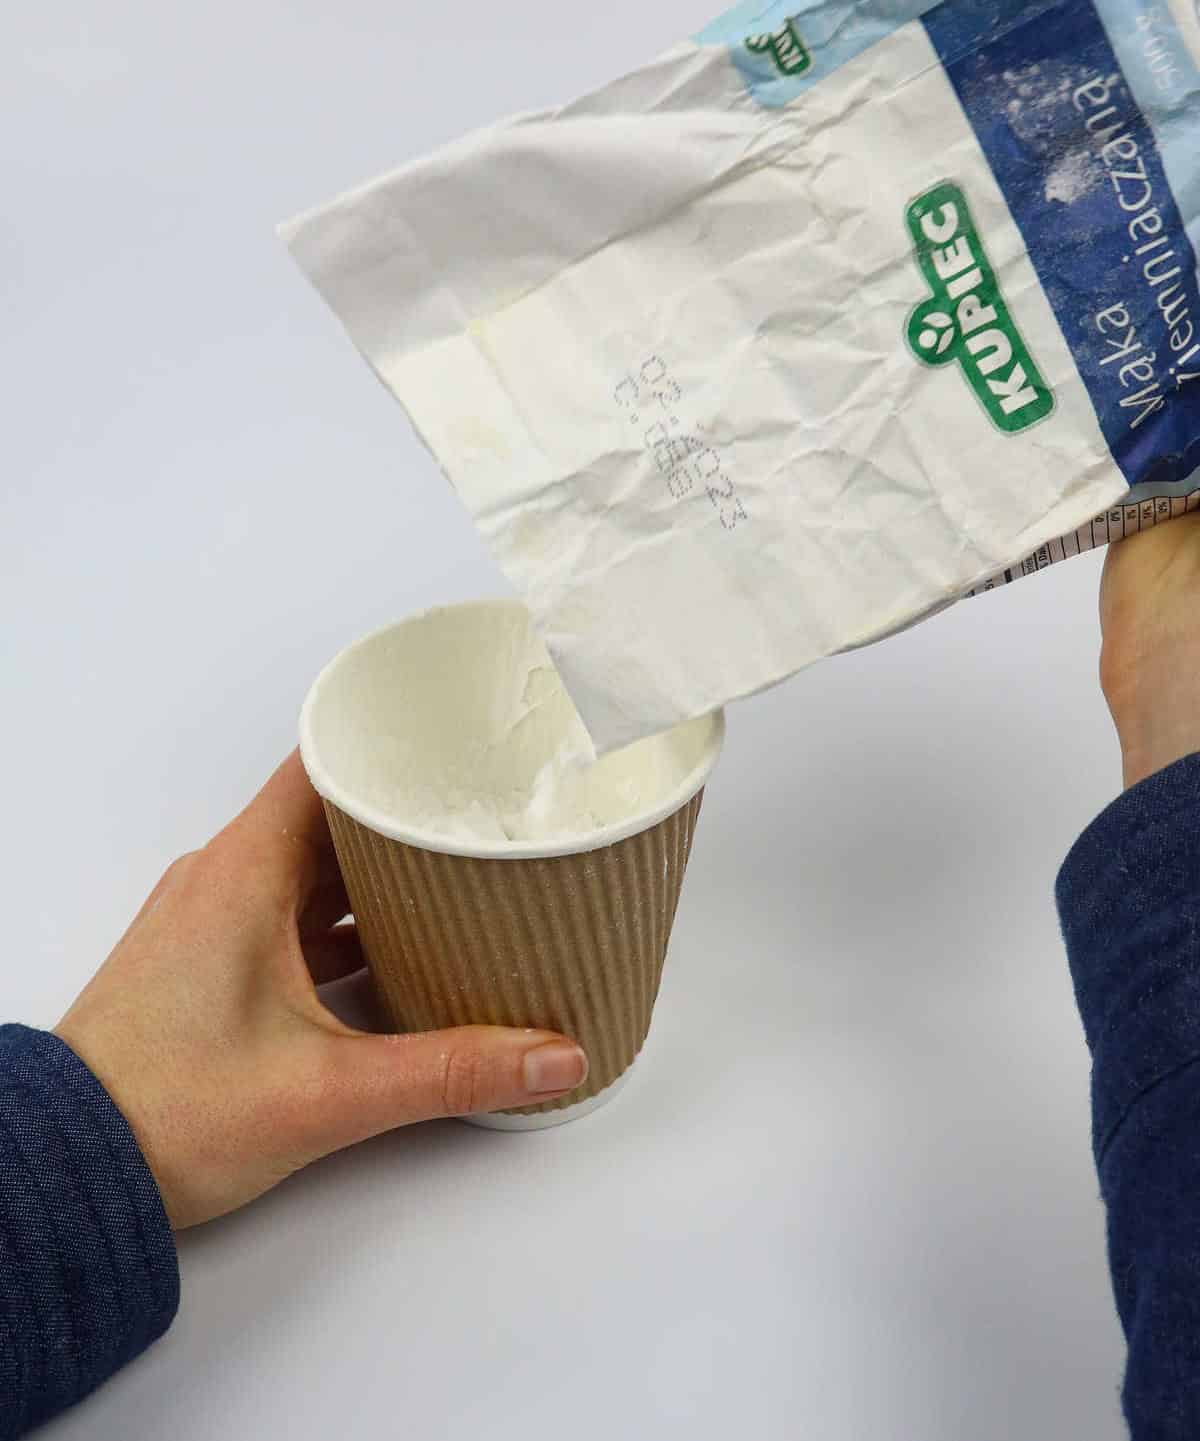
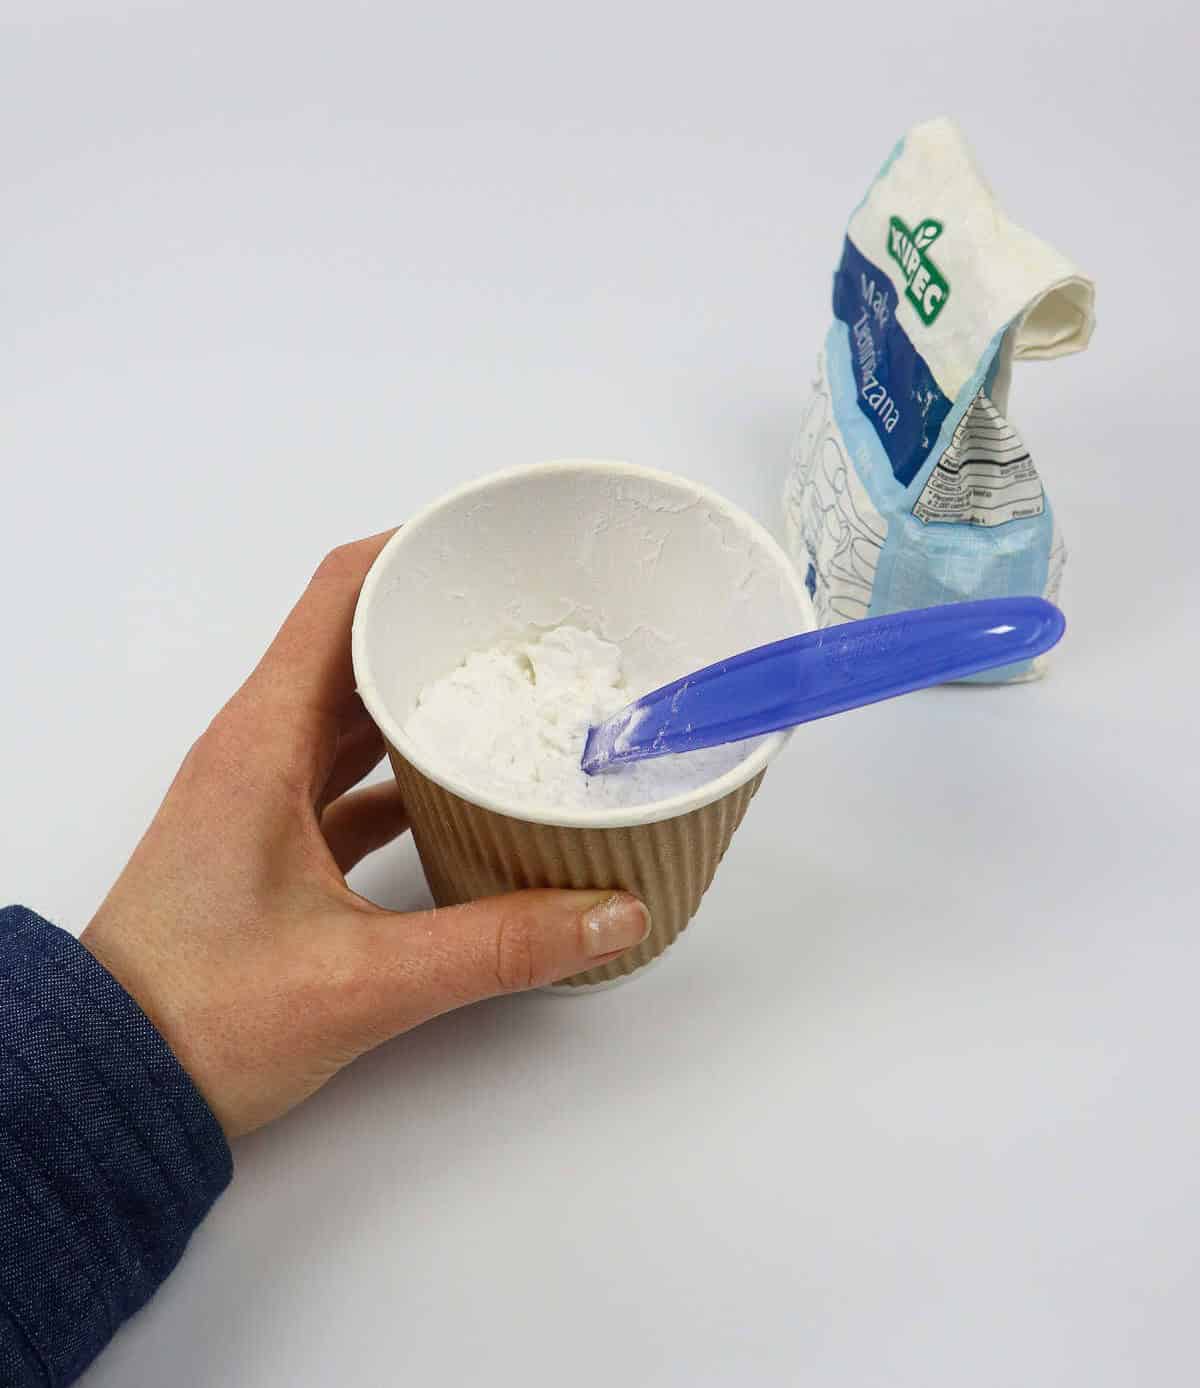
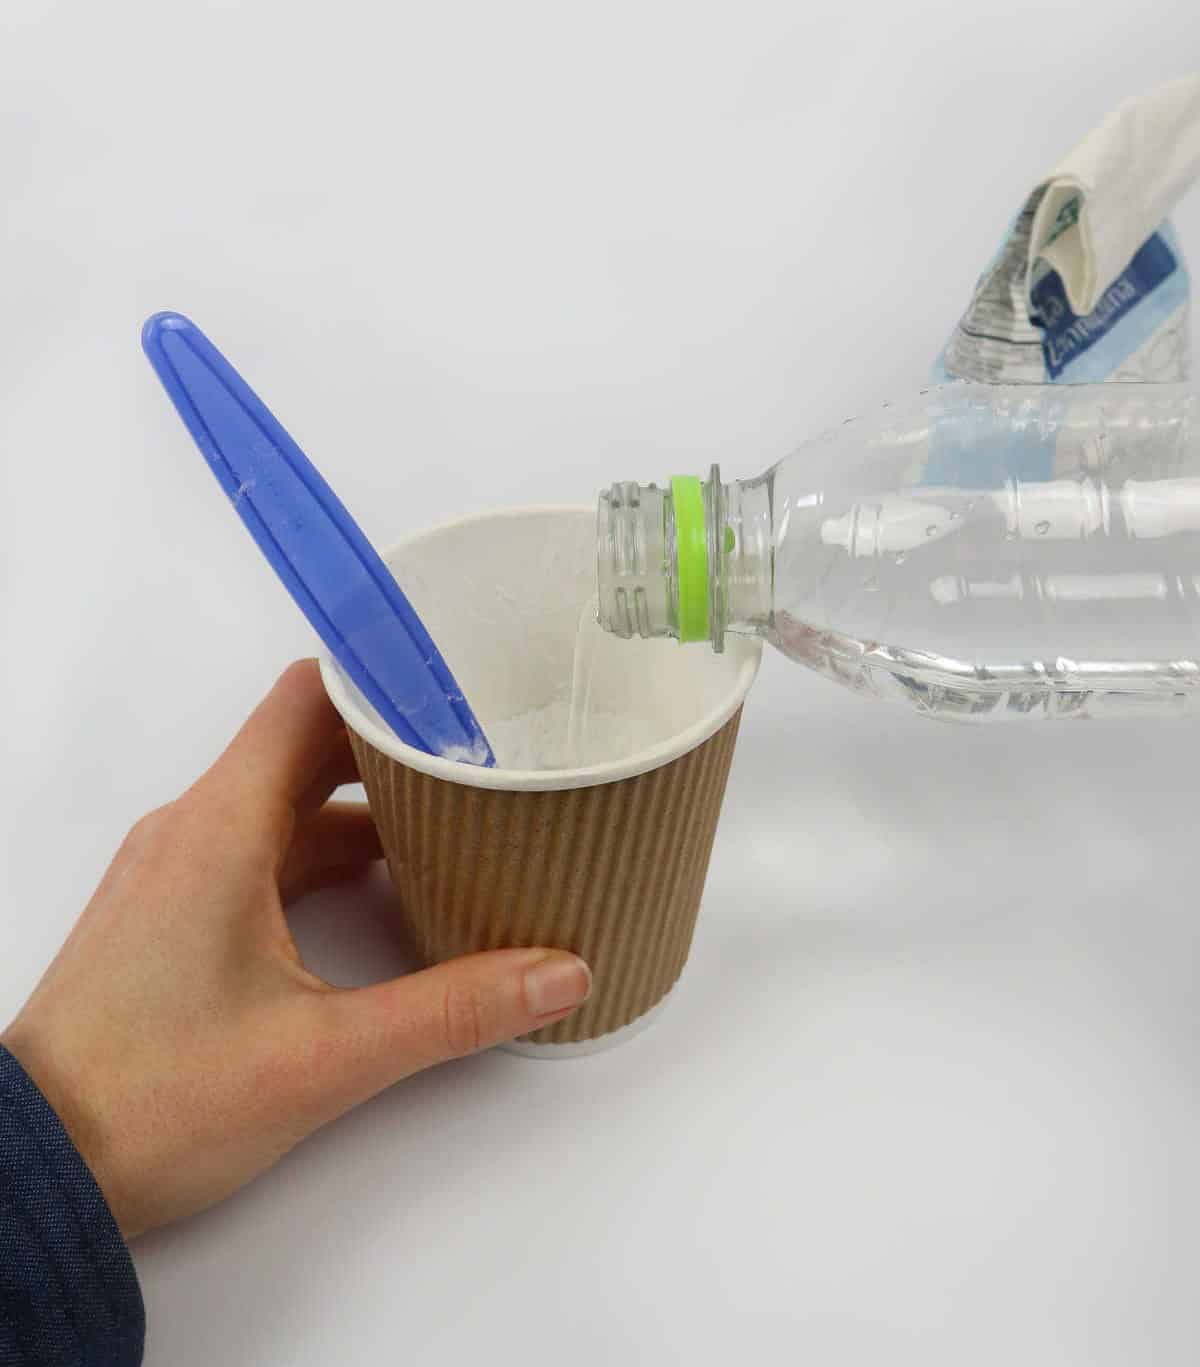
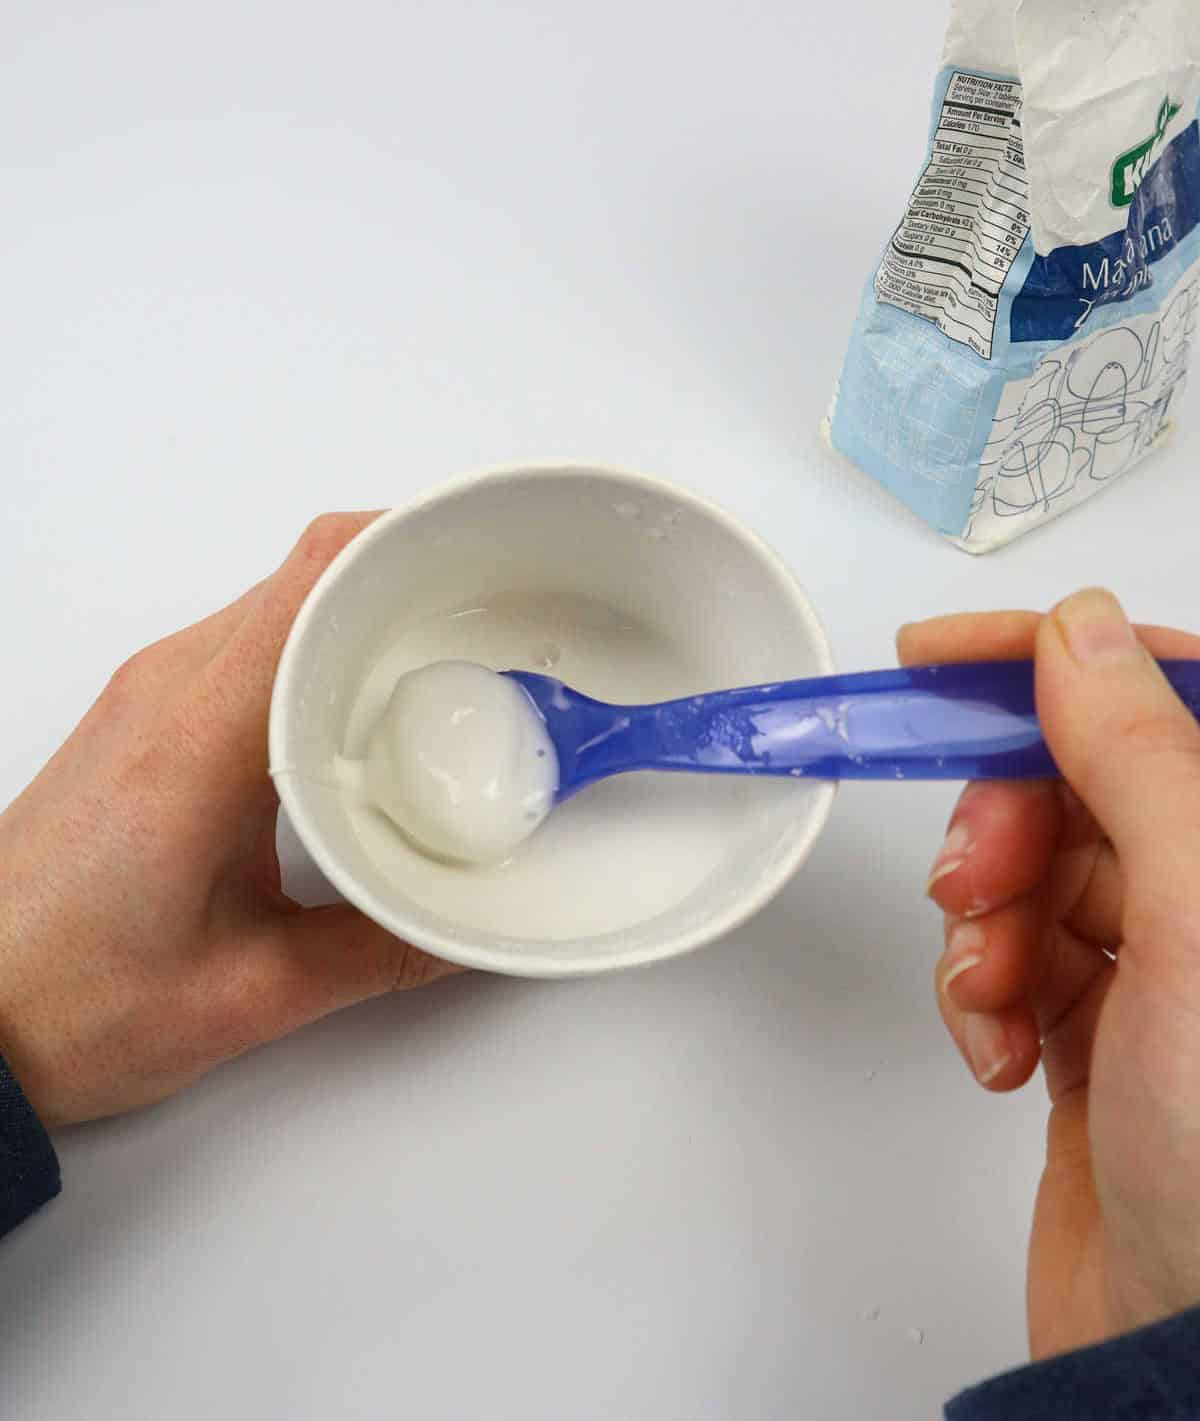
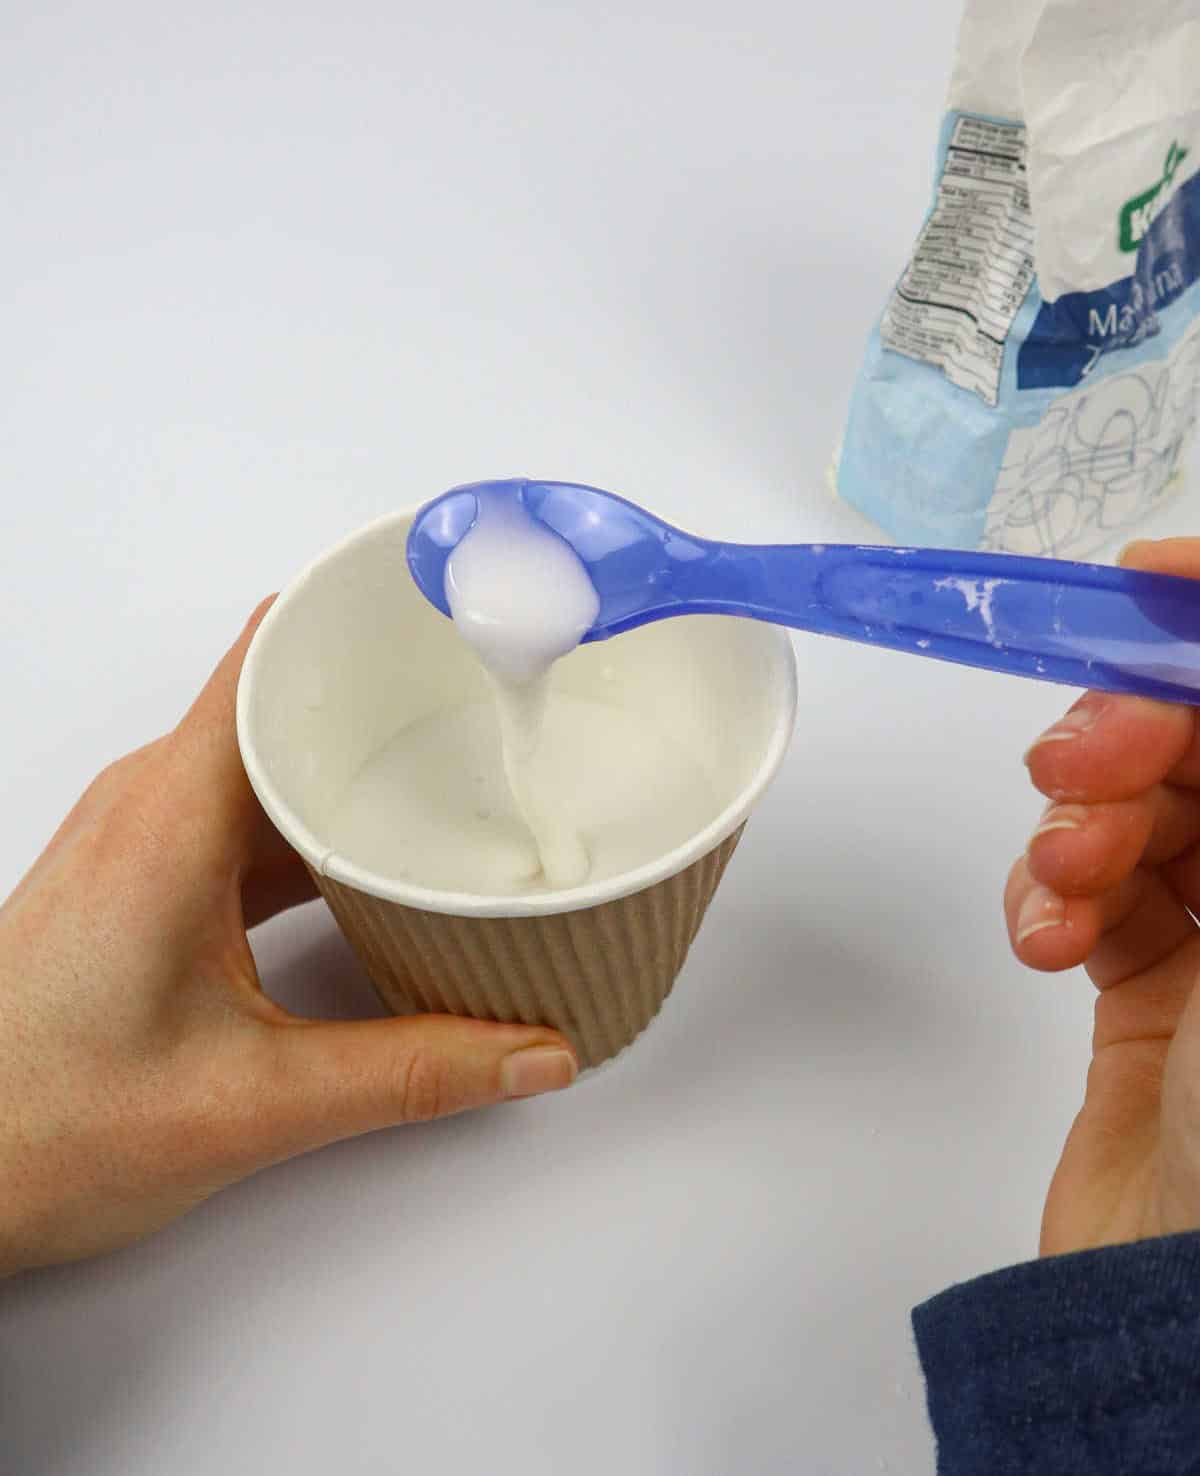
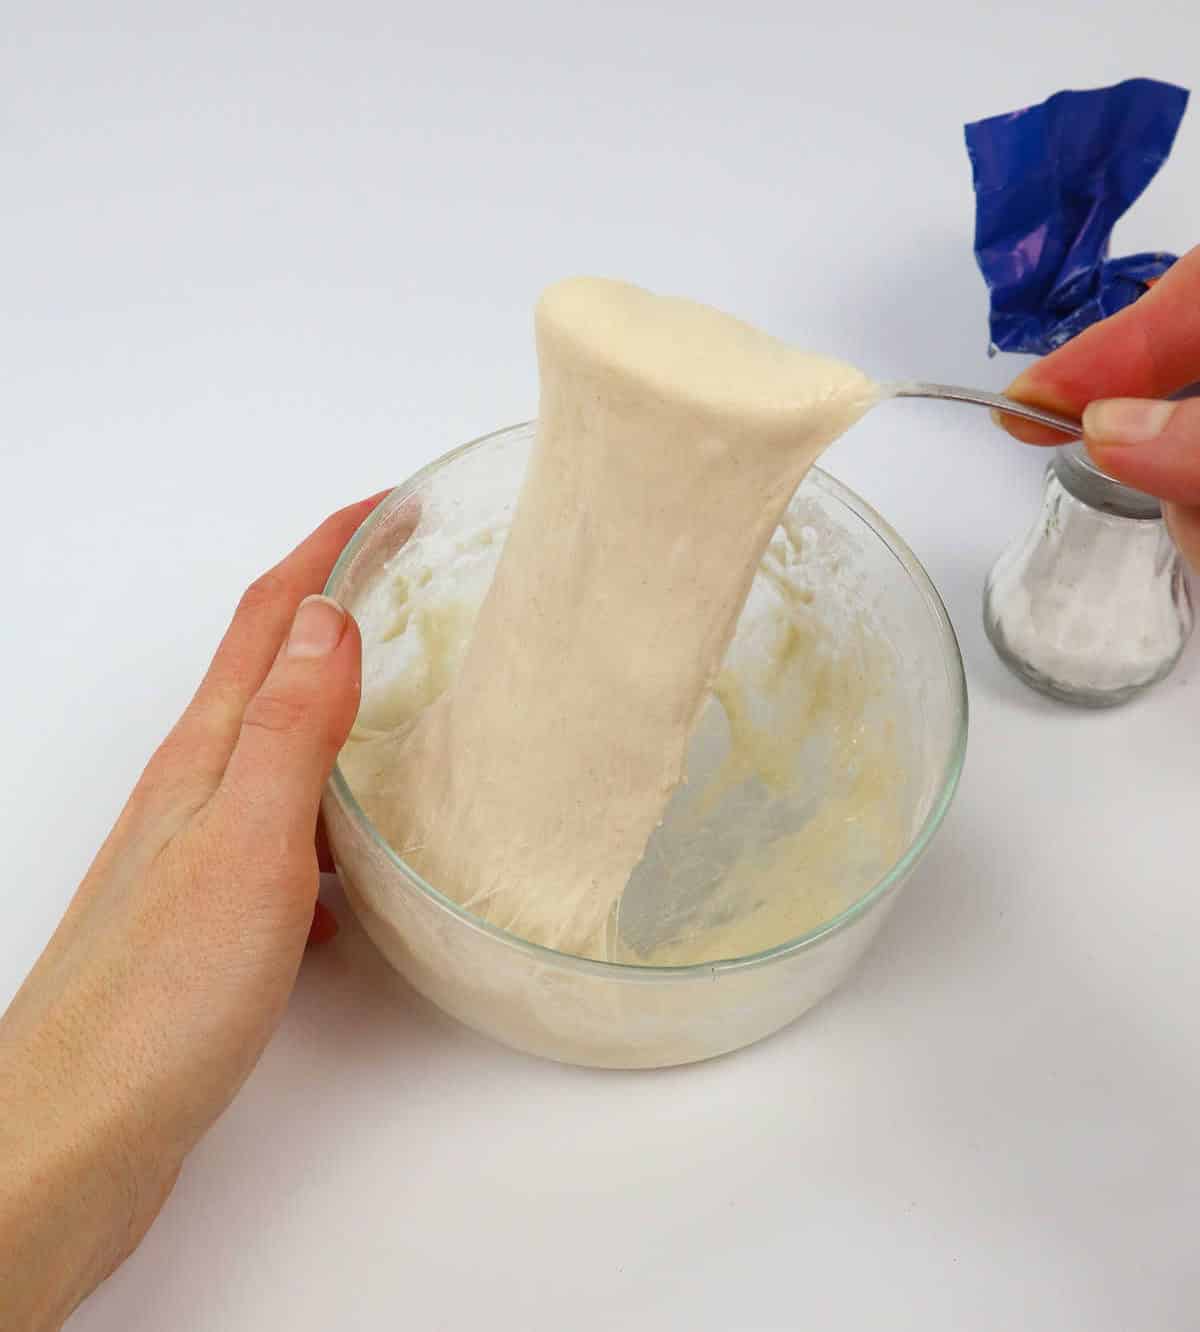
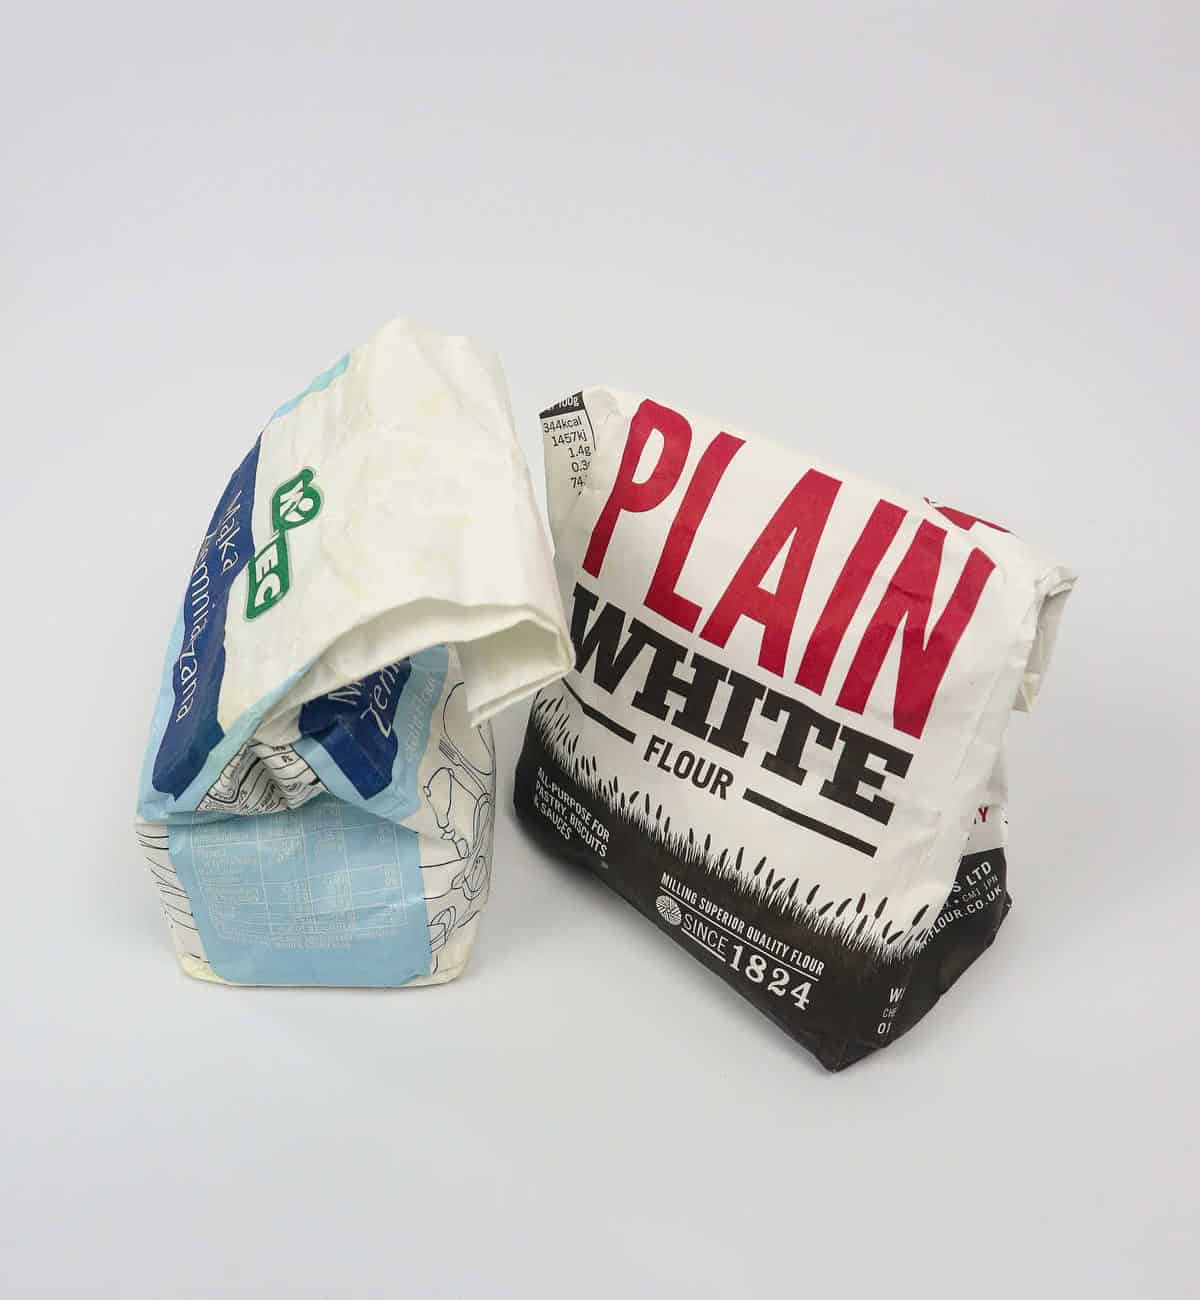
Now it’s time to craft your own paste. To get started, combine a cup of water with some starchy substance like potato starch or corn flour in a paper cup. Alternatively, you can use wheat flour for a distinct texture. The ratio of water to flour will affect the consistency of the final product, so feel free to add the water gradually and stir as you go until you achieve your desired outcome.
The type of flour used will influence the paste’s texture.
For example, corn flour produces a watery, glazed-like consistency, while wheat flour yields a smooth and sticky mixture reminiscent of sourdough dough but with a slightly looser consistency.
Don’t be afraid to get hands-on and experiment with the paste until you’re satisfied with its consistency. Take this opportunity to have some fun and enjoy the tactile experience of working with the paste, even if it means getting your hands messy in the process!
As a final touch, consider adding a pinch of salt to extend the lifespan of the paste.
Step 2
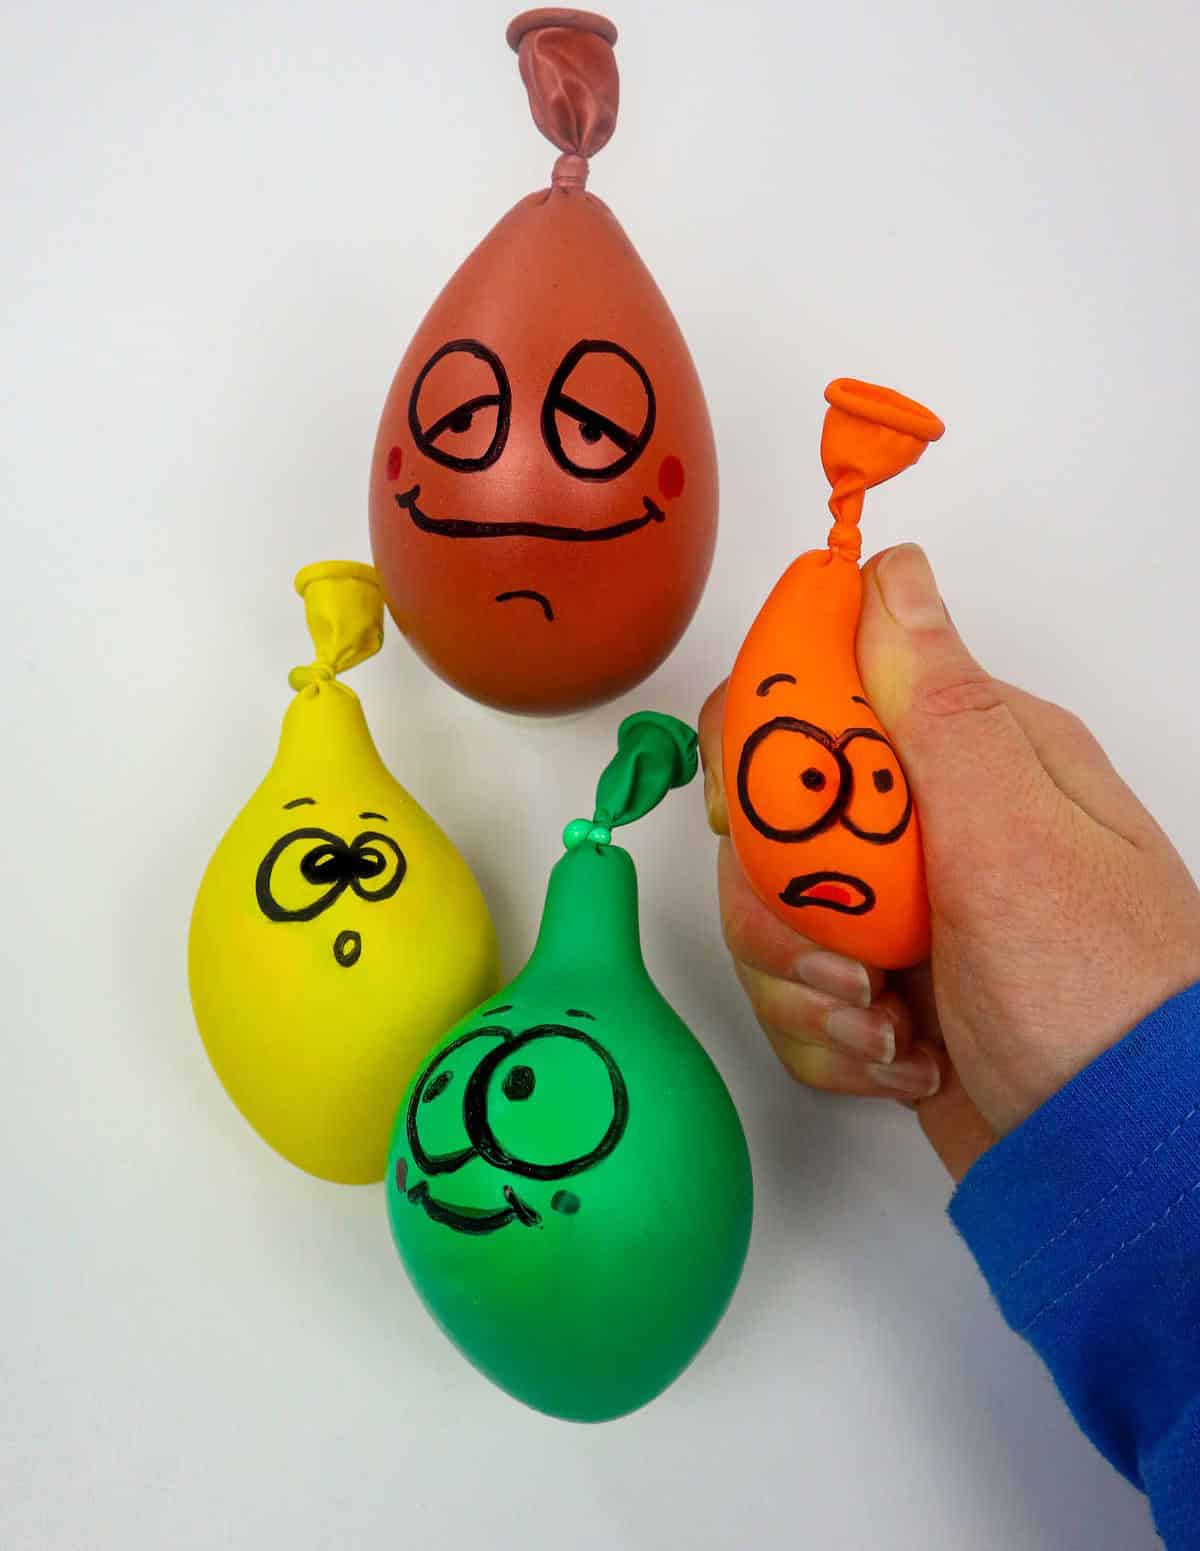
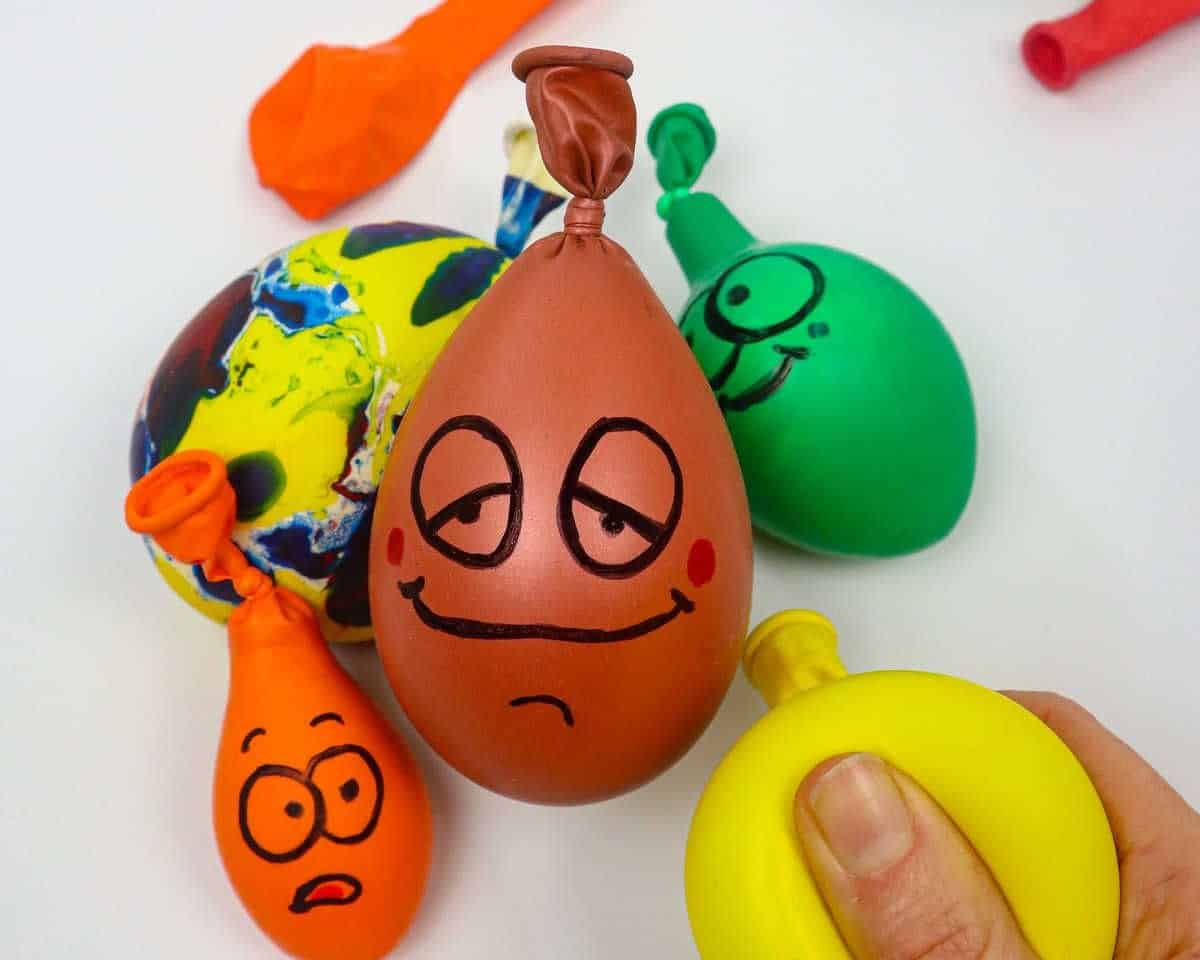
As you begin your party planning, let’s start with the excitement of selecting the perfect balloon. With a vast array of vibrant prints to choose from, this step is often the most enjoyable part of the process. If your current balloon collection only consists of plain ones, don’t worry! You can easily breathe new life into them by using markers to draw playful emojis on their surface. Once you’ve got your balloons ready, it’s time to blow one up to its full potential.
The more you stretch it out, the more room you’ll have to fill it with treats or other party favors.
Step 3
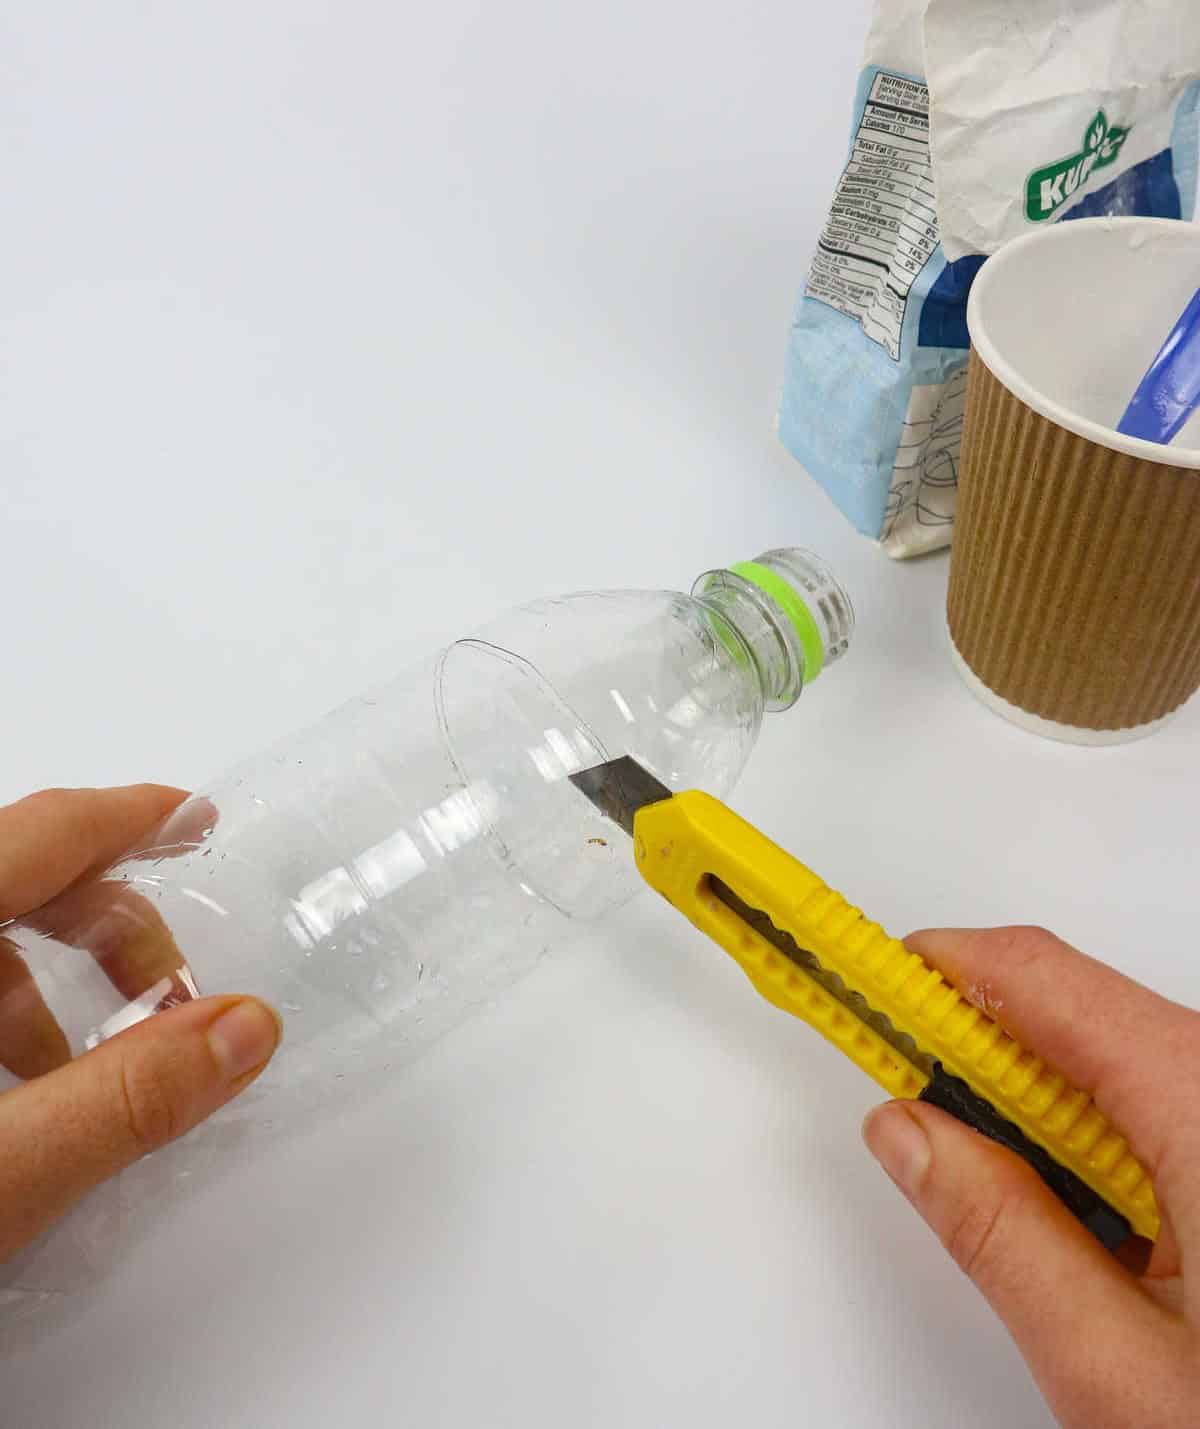
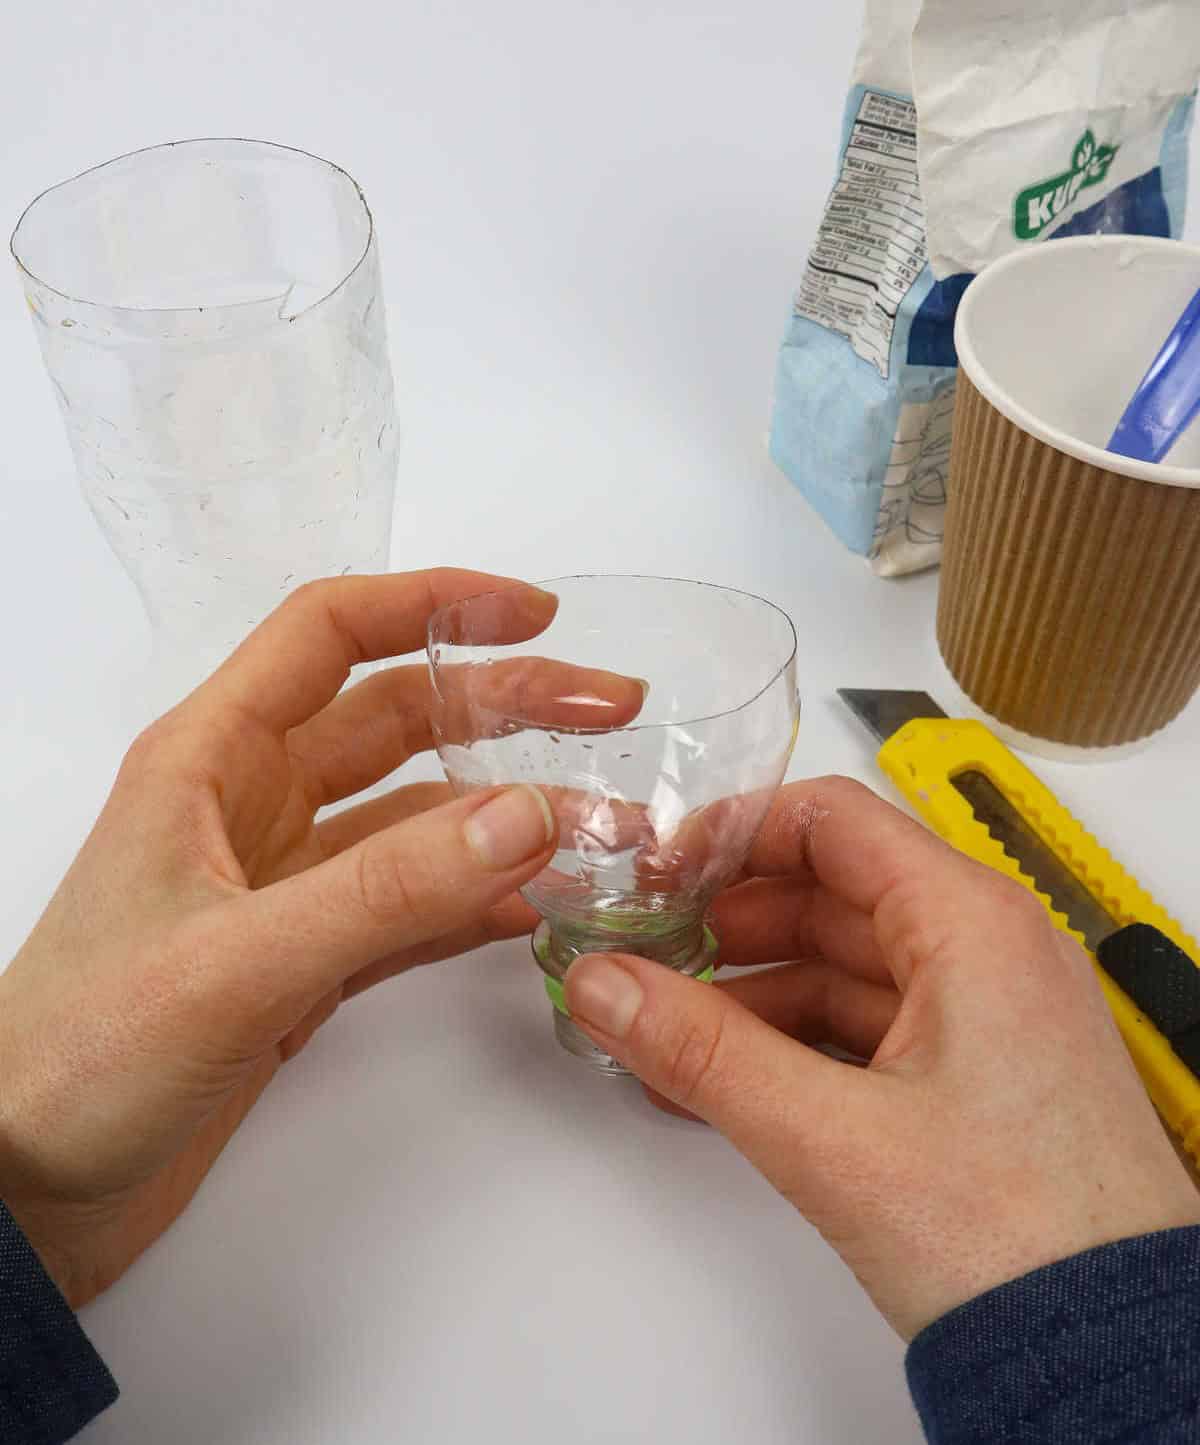
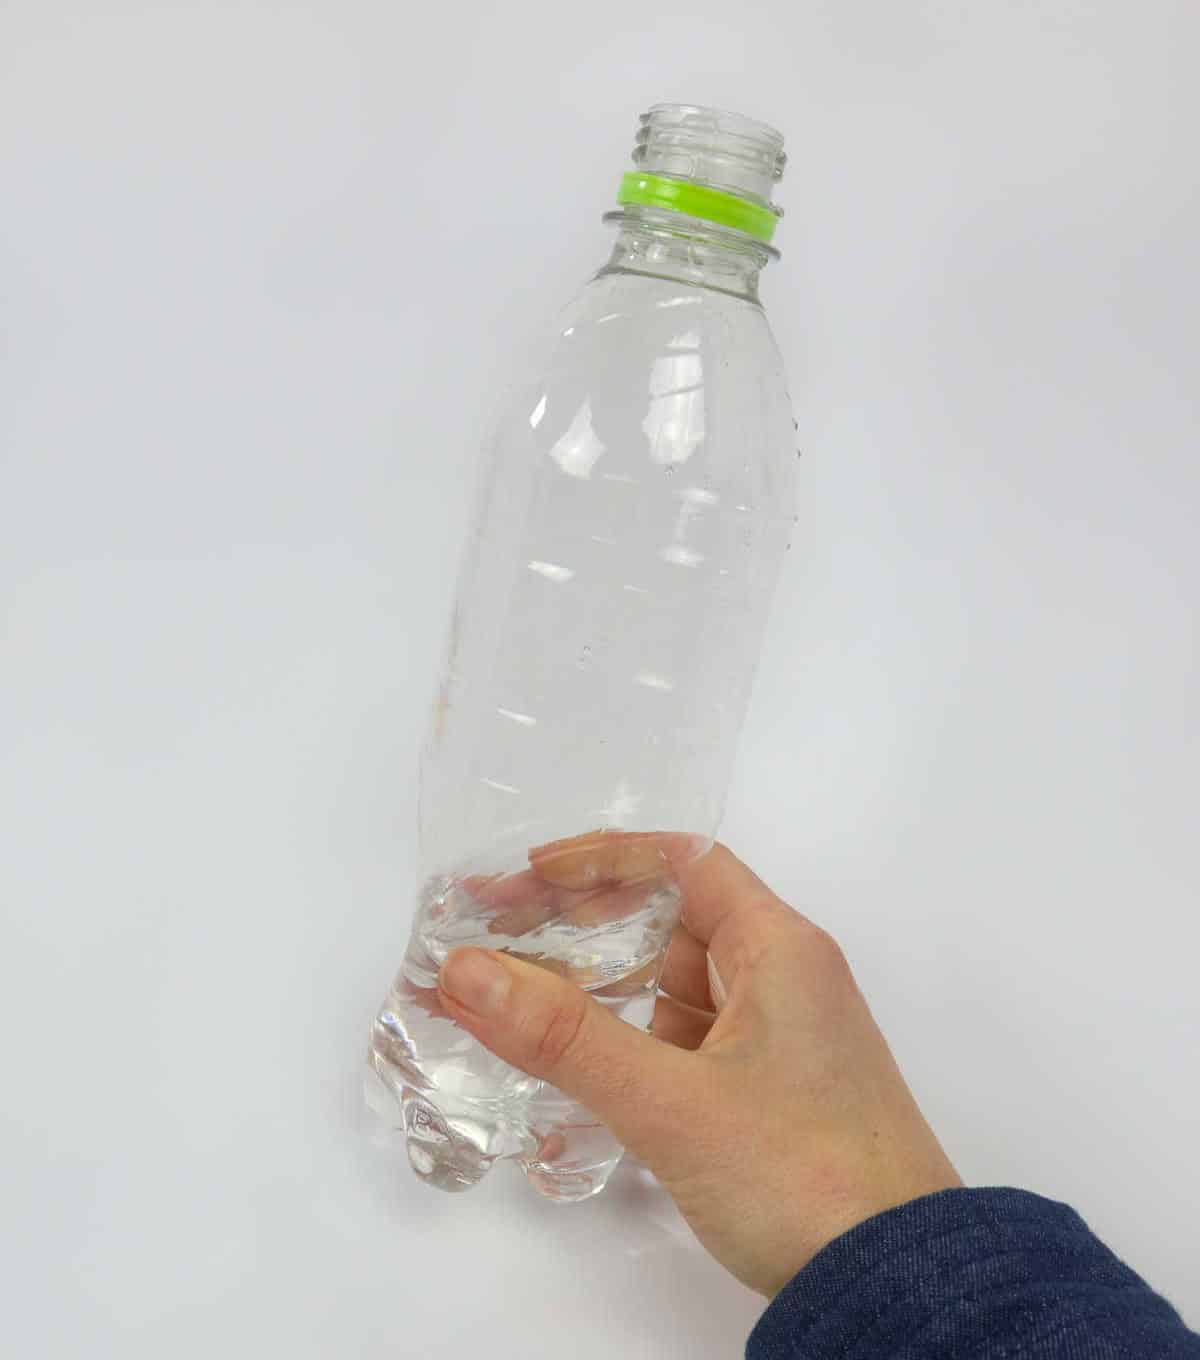
To facilitate the insertion of paste into a balloon, there are two methods to consider. The first approach involves utilizing a water bottle as a makeshift funnel. To set this up, grab a water bottle and a cutting tool. Then, cut the top off the bottle to create a tapered device that can guide the paste into the balloon. This technique offers a convenient solution for getting the paste inside the balloon.
Step 4
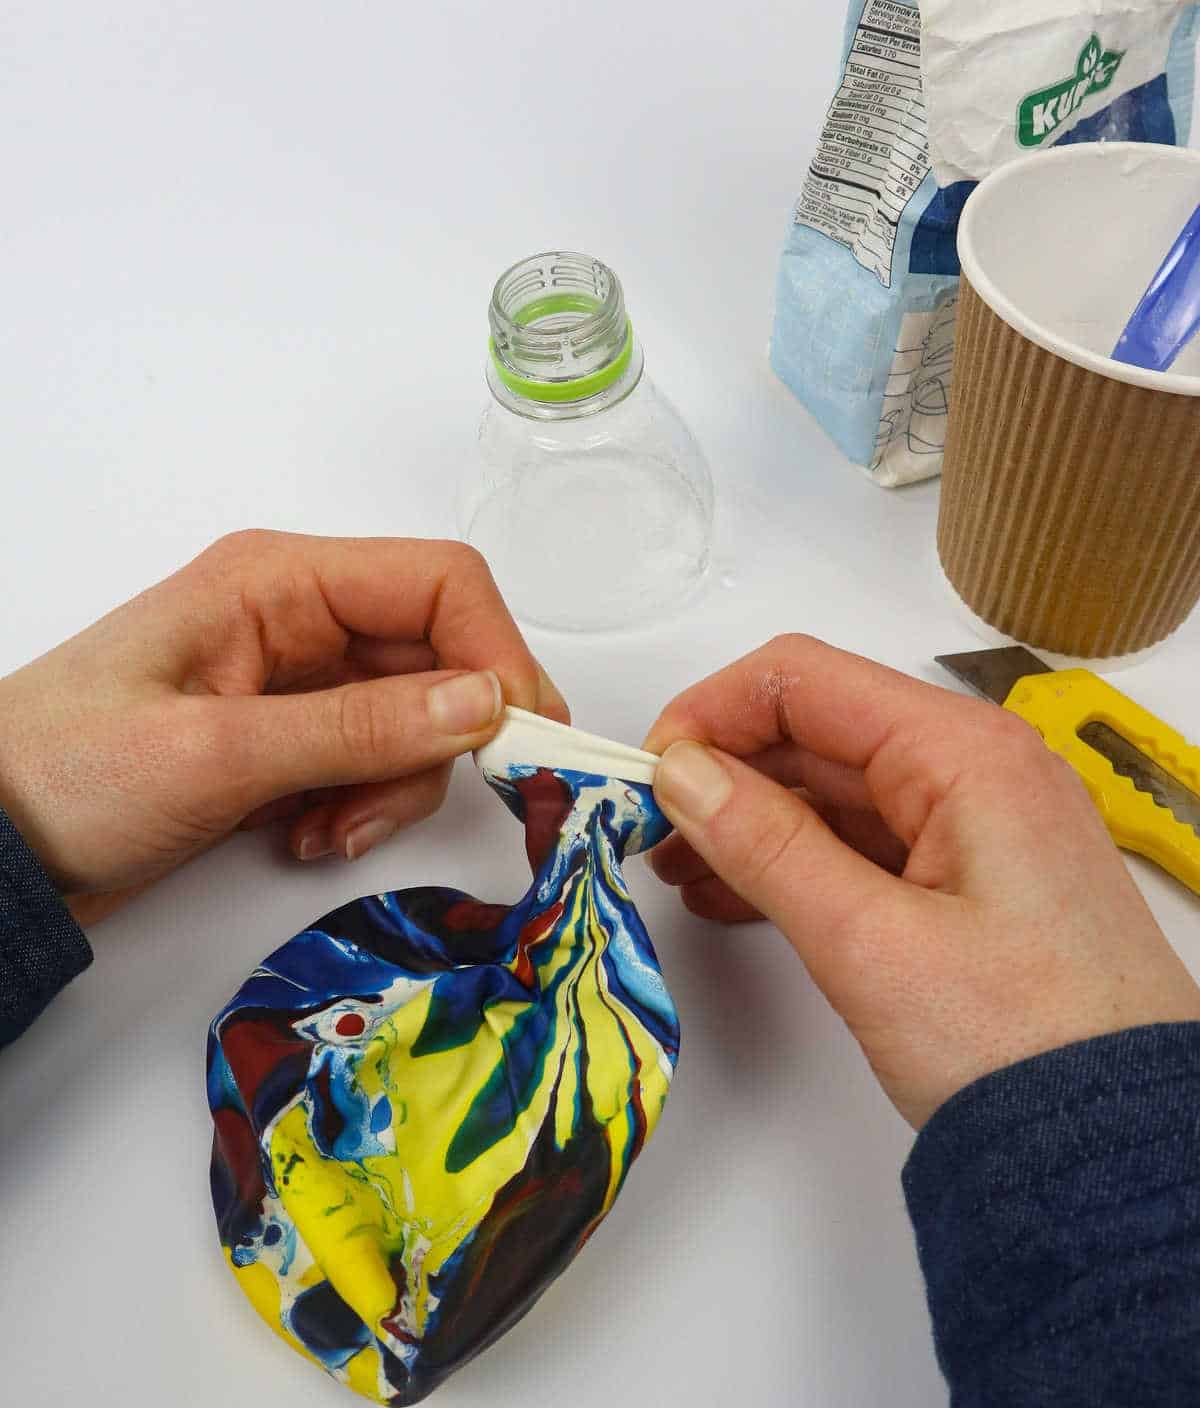
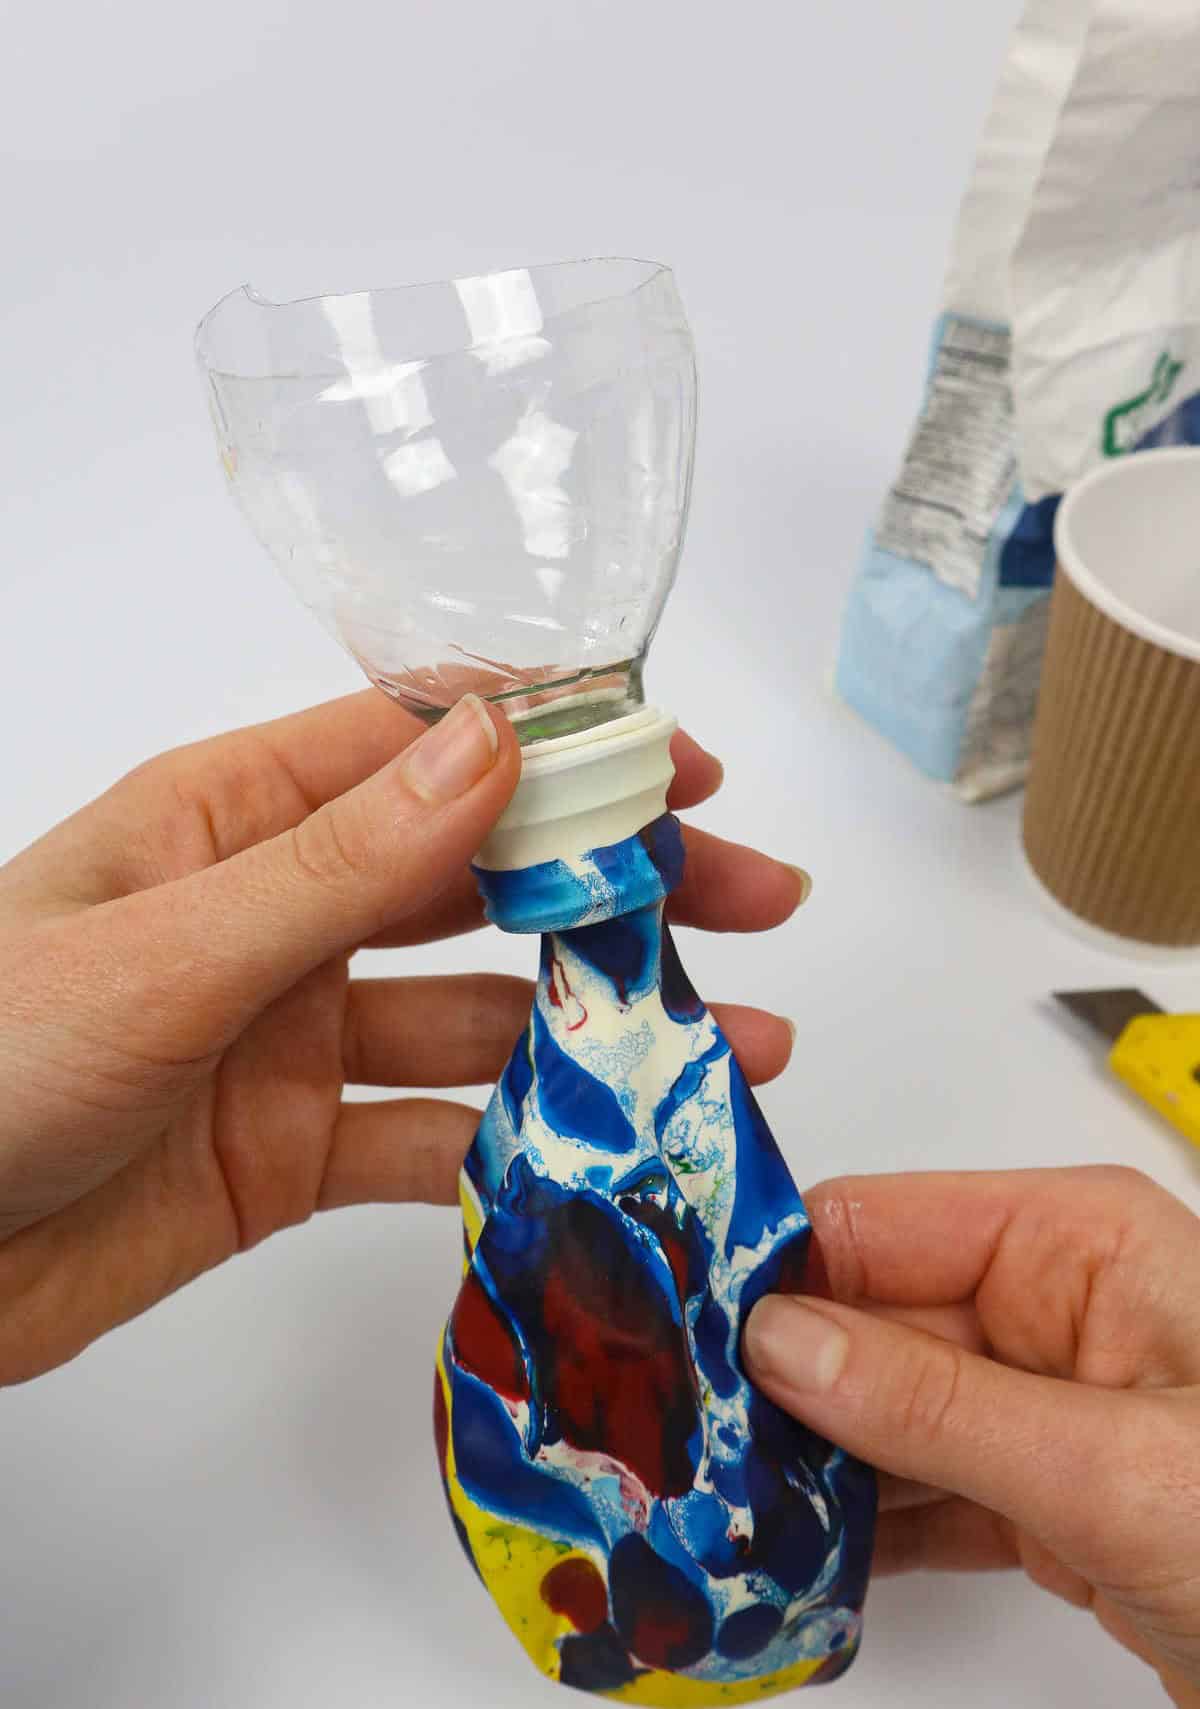
To create a makeshift airlock, gently stretch the mouth of the balloon and slide it carefully onto the mouth of the water bottle. Make sure to remove the cap beforehand, ensuring a secure fit.
Step 5

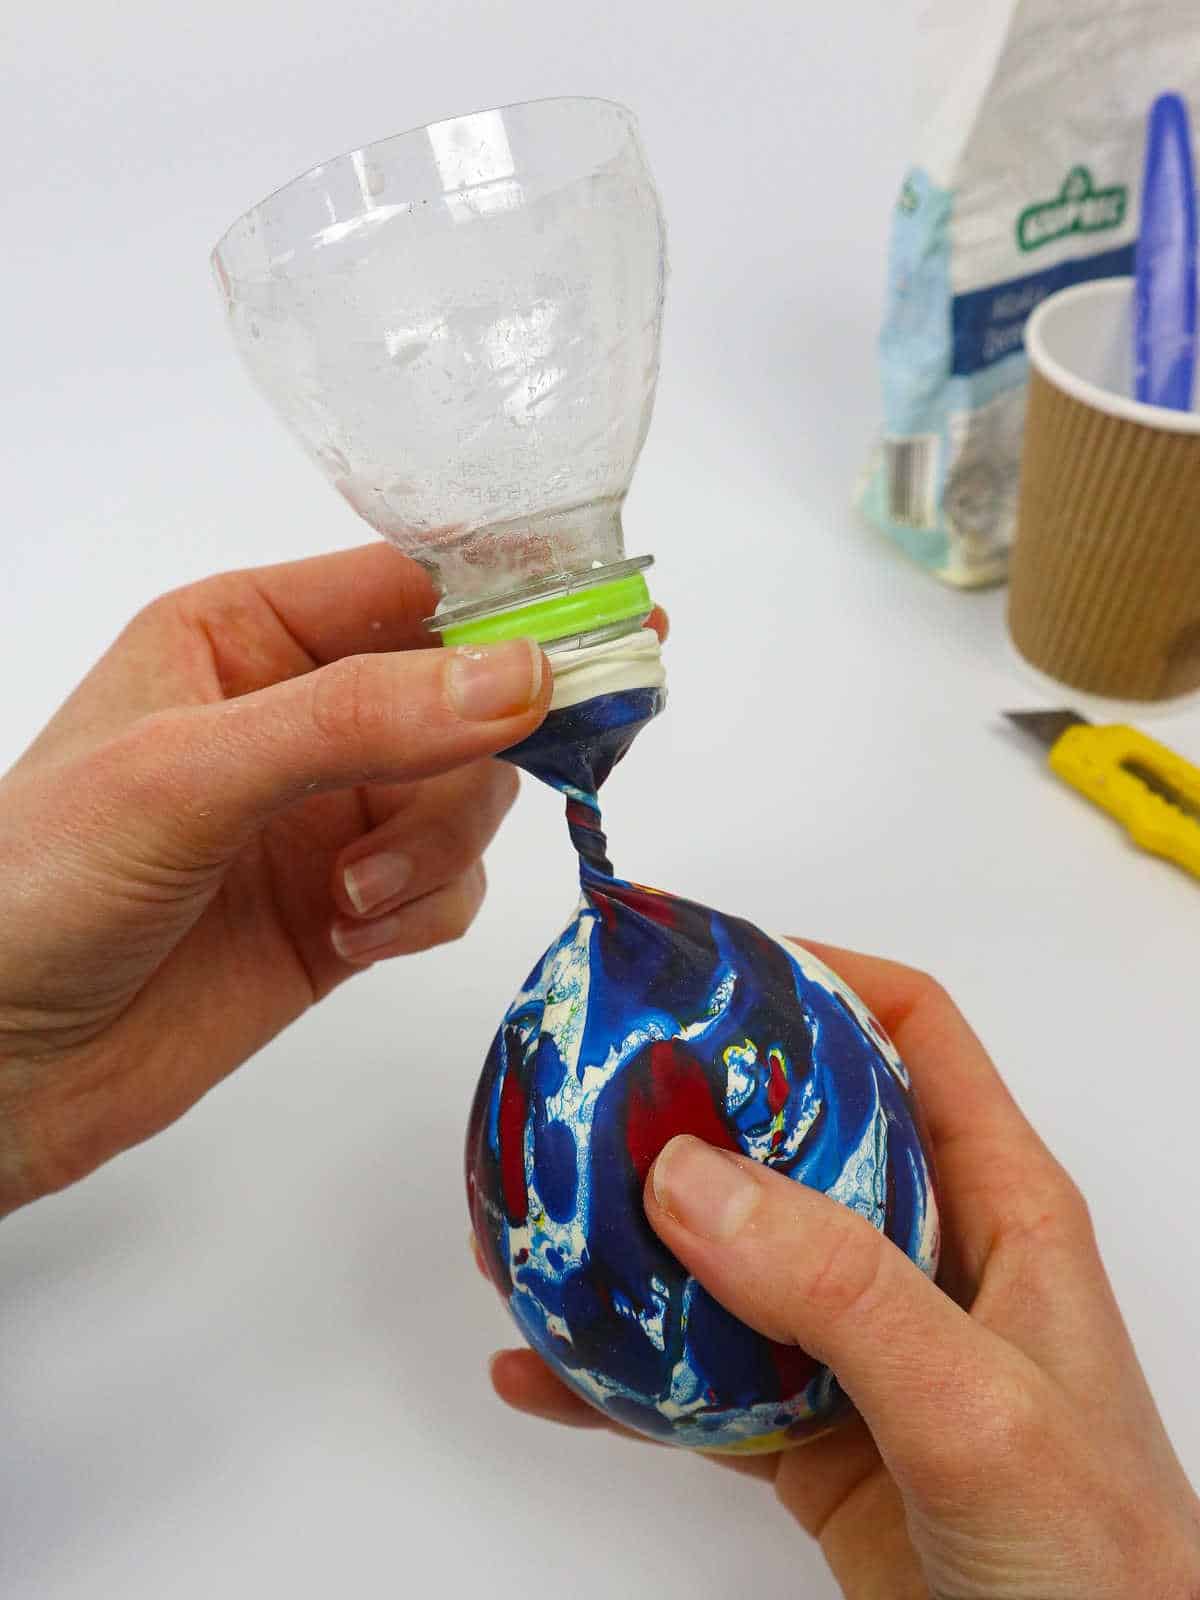
To begin, carefully guide your paste into the funnel, allowing it to flow freely into the balloon. Aim for a generous amount, ideally reaching the maximum capacity of the balloon. The more paste you manage to squeeze in, the greater the potential for a delightful sensory experience.
Step 6
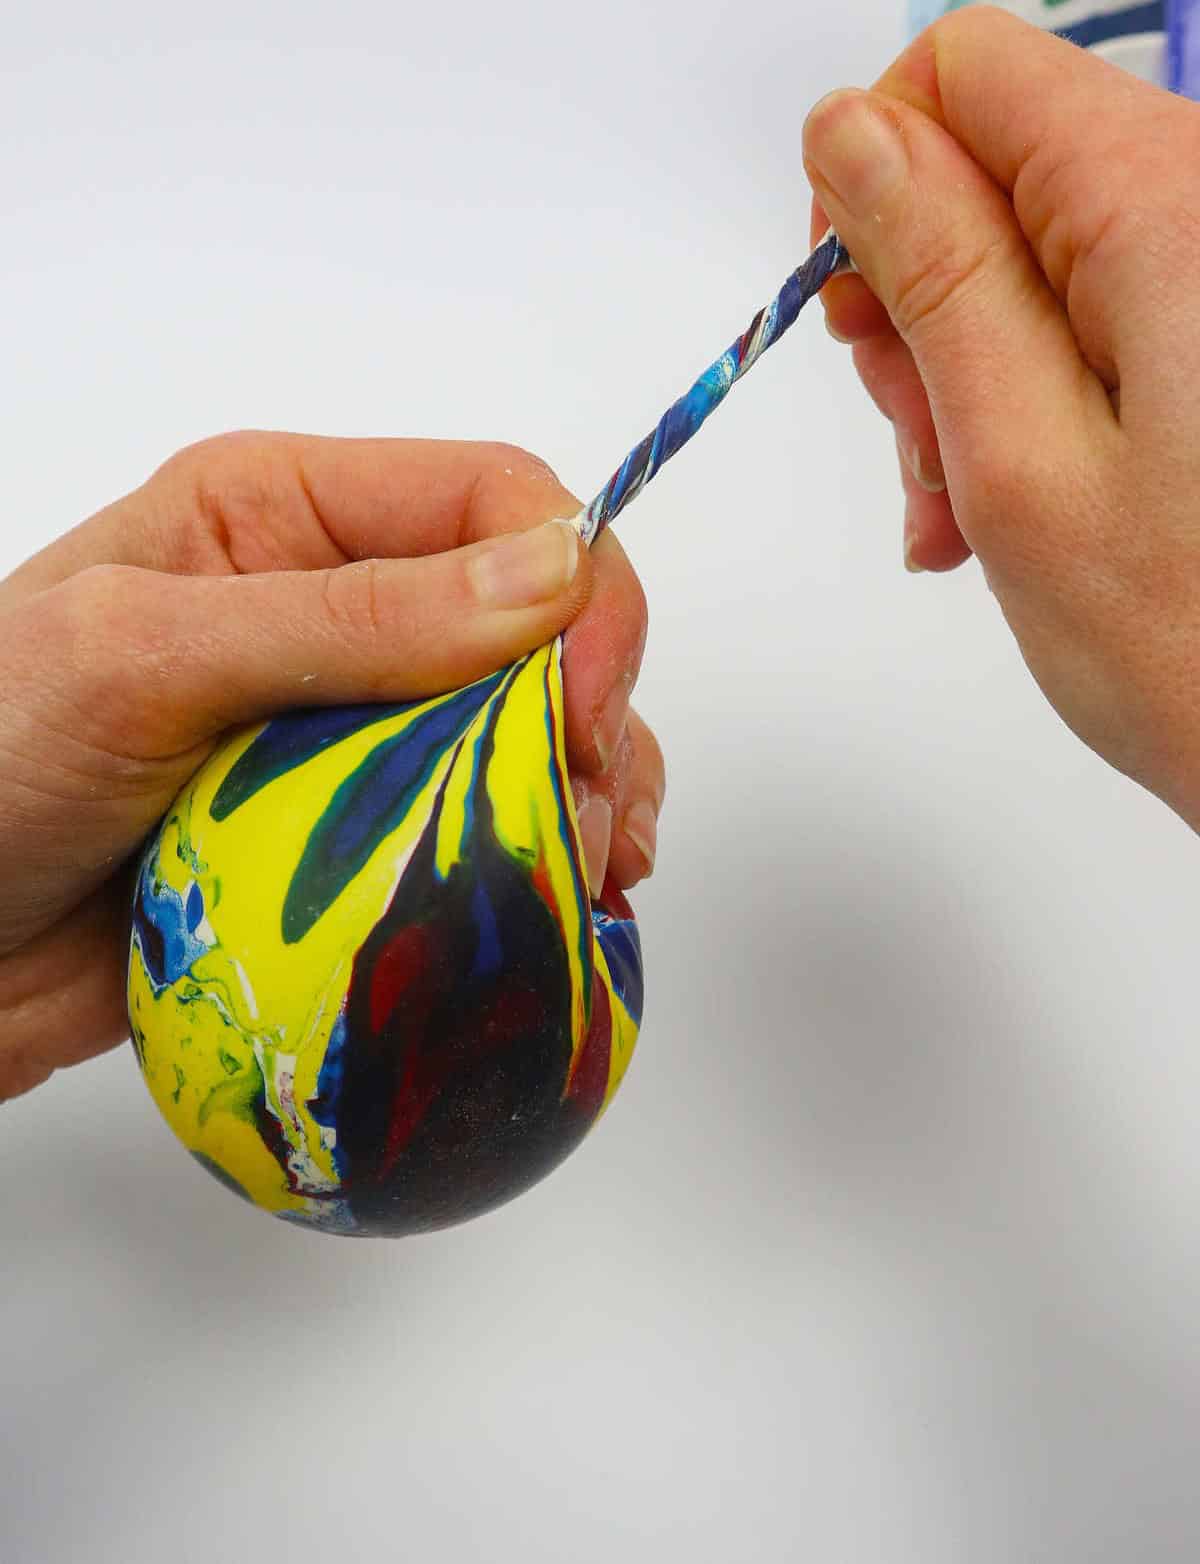
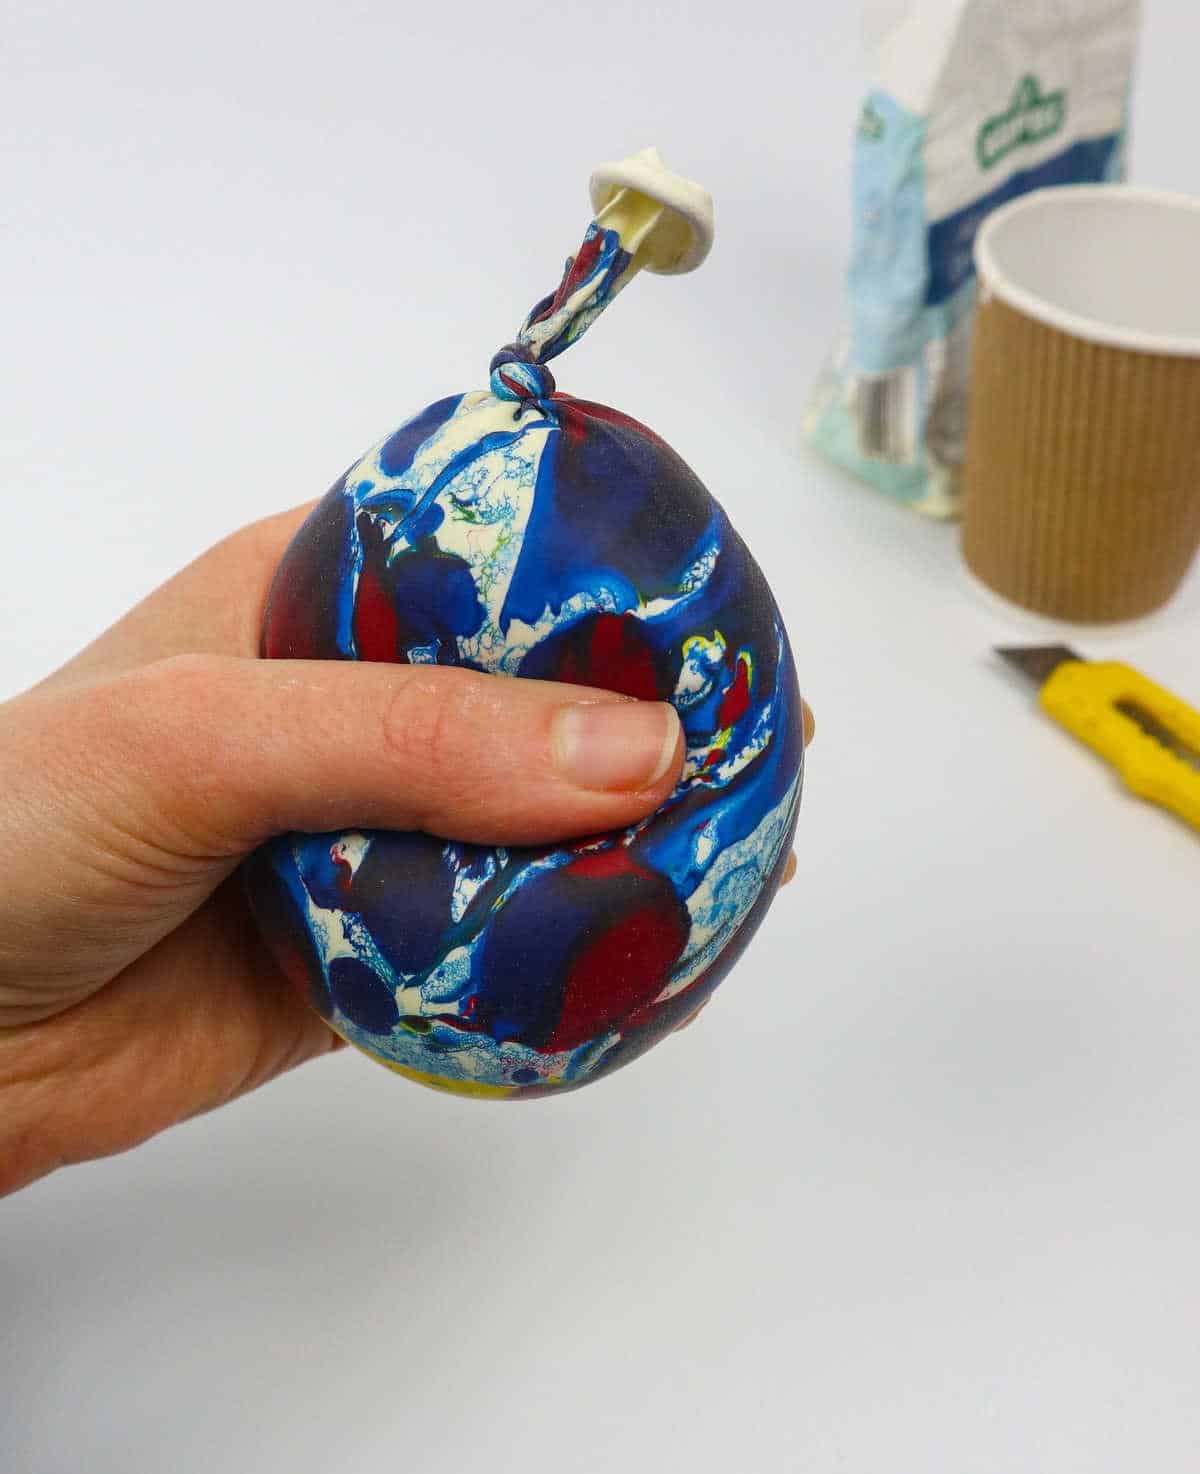
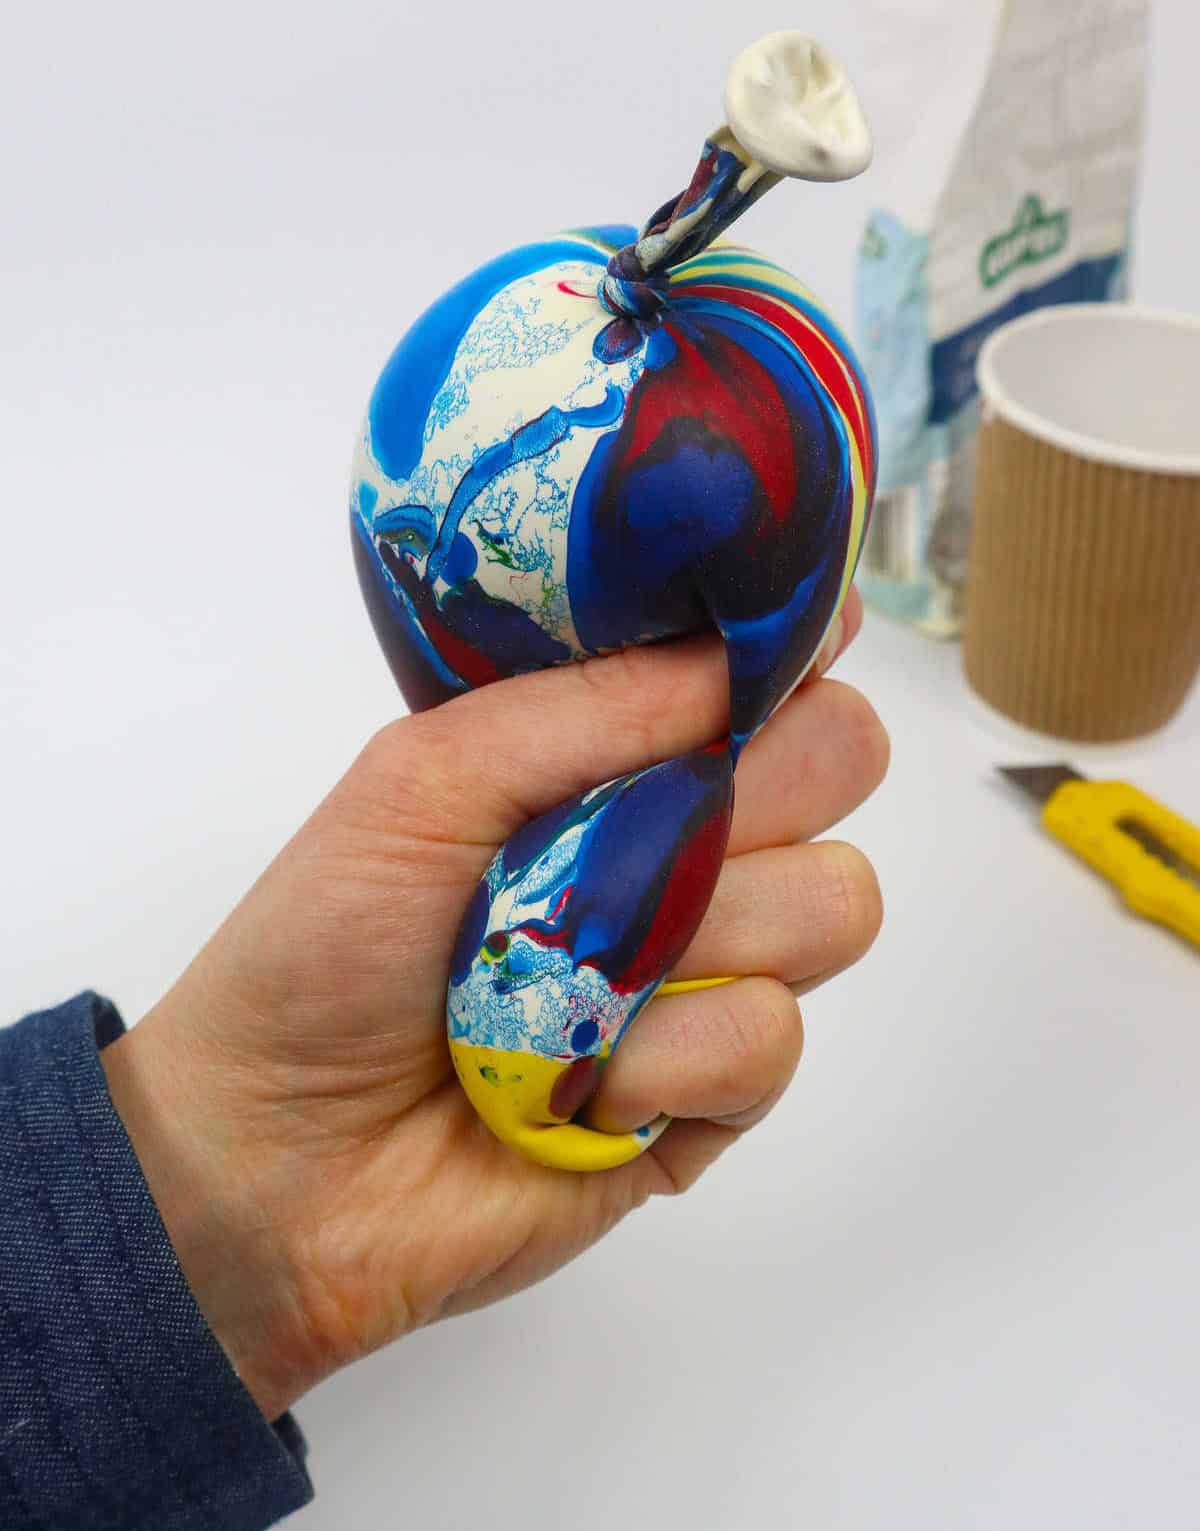
To detach the mouth of the balloon from the bottle rim, exercise caution to prevent a messy scenario. Begin by twisting the neck of the balloon a few times before removal. This simple step can save you from a potentially chaotic outcome. Once ready, carefully pull the end into a knot or double knot, and voilà! Your DIY project is now complete.
Step 7

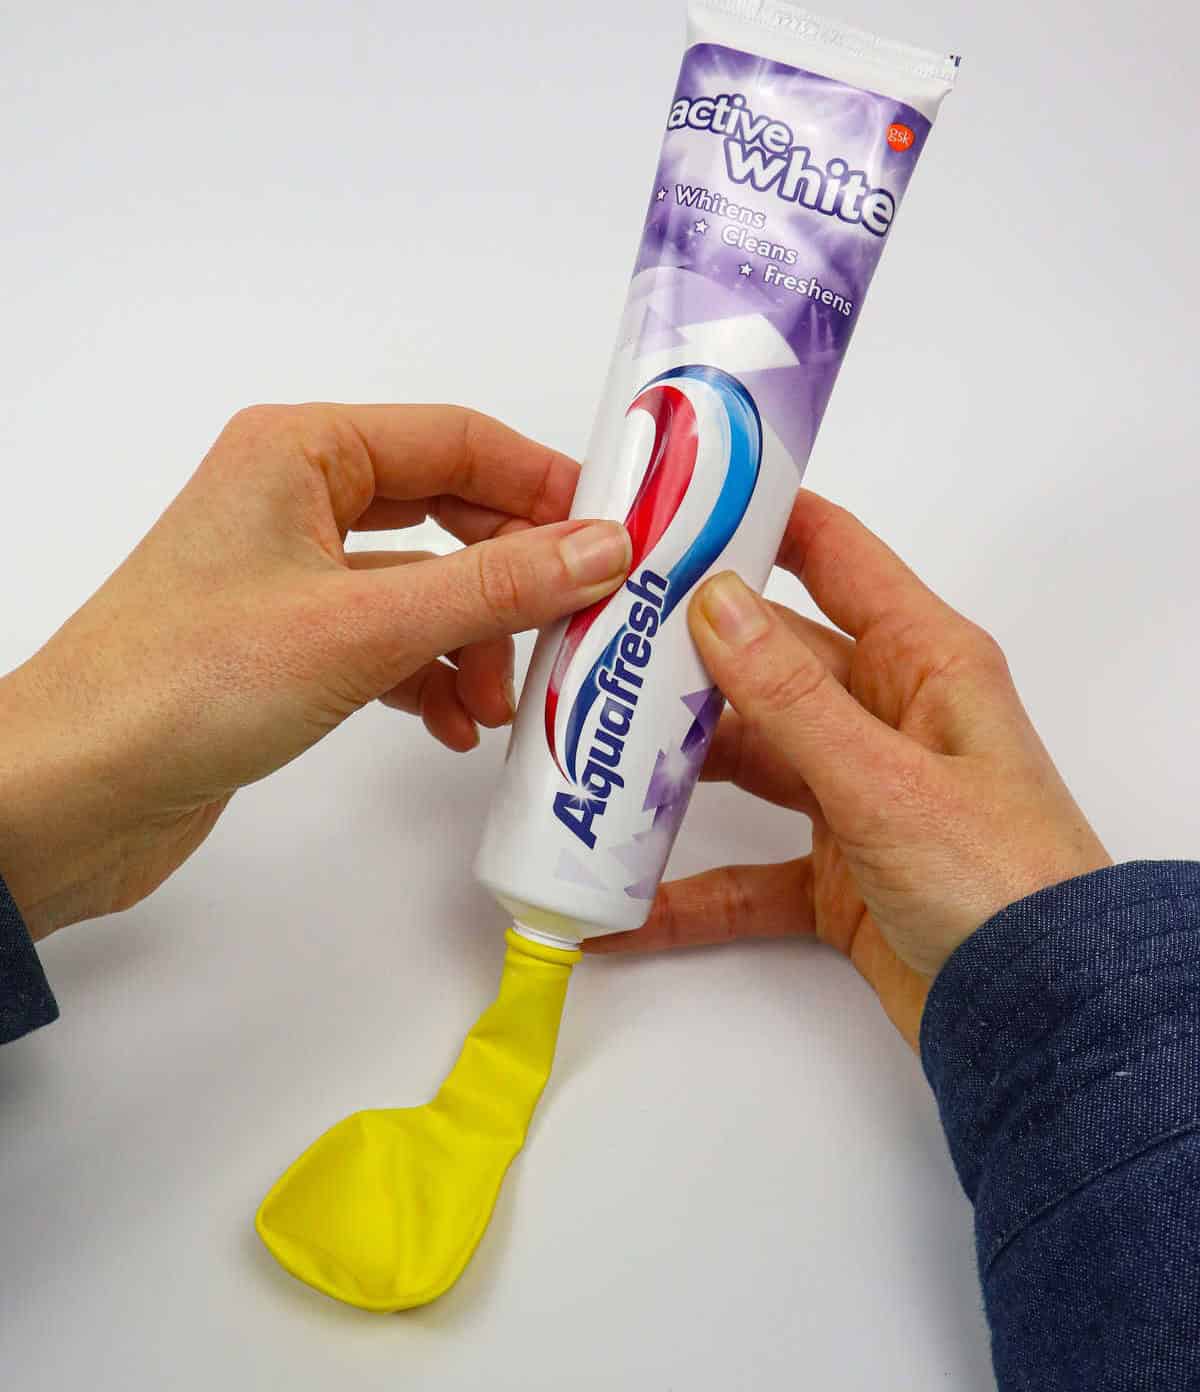
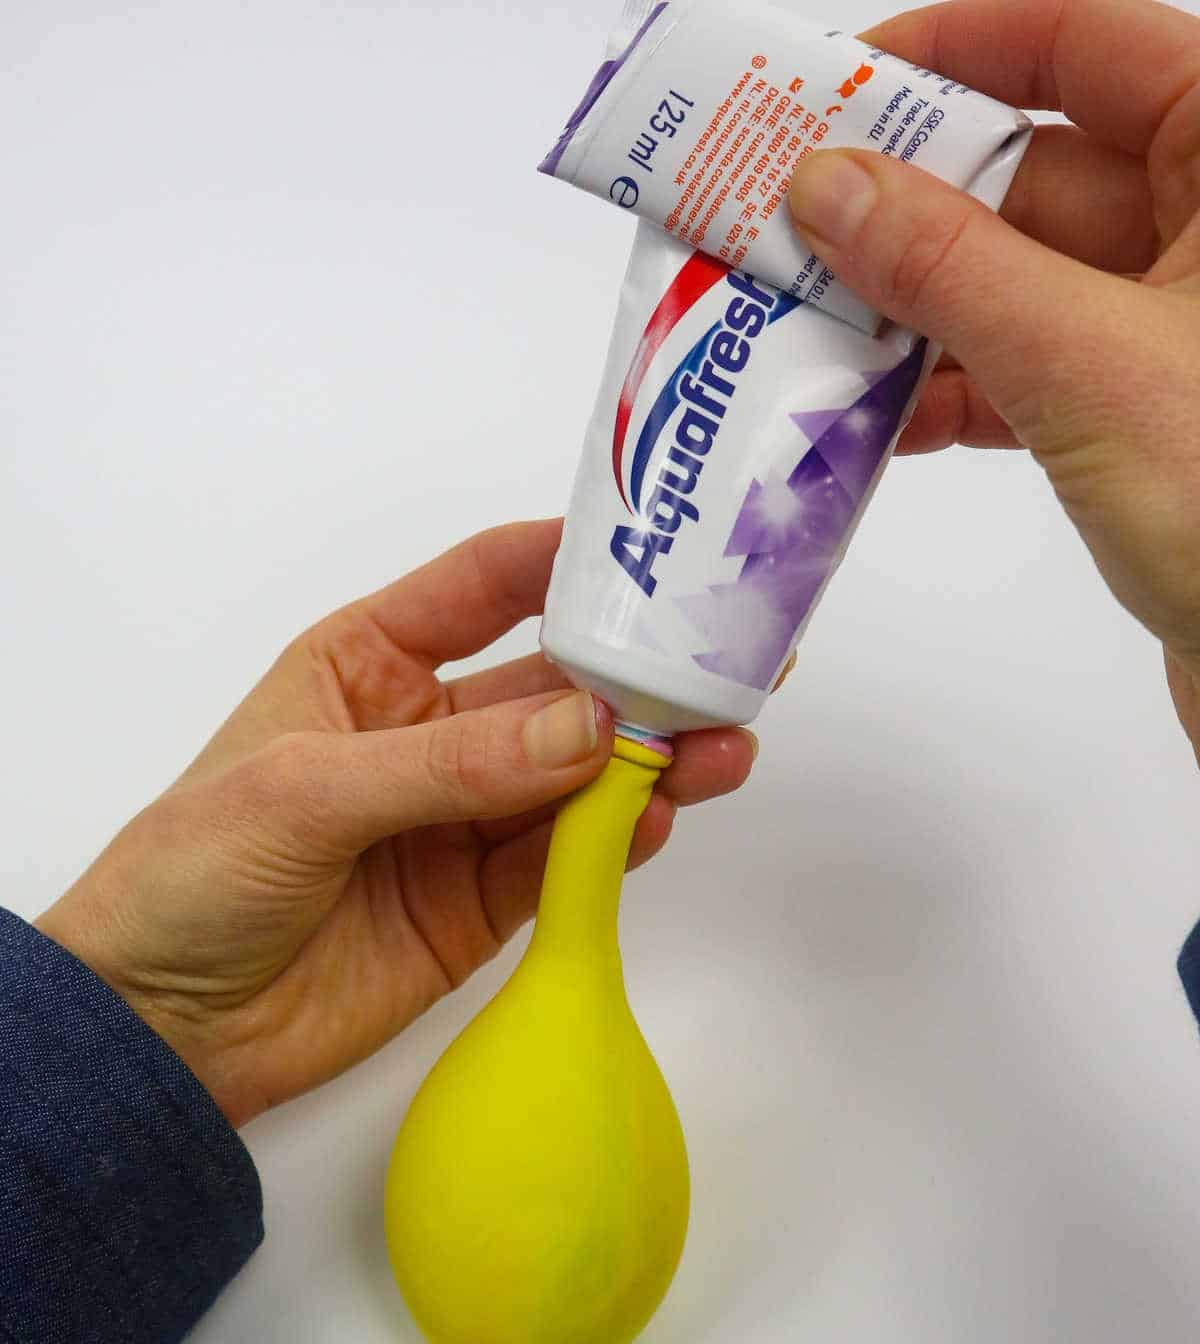
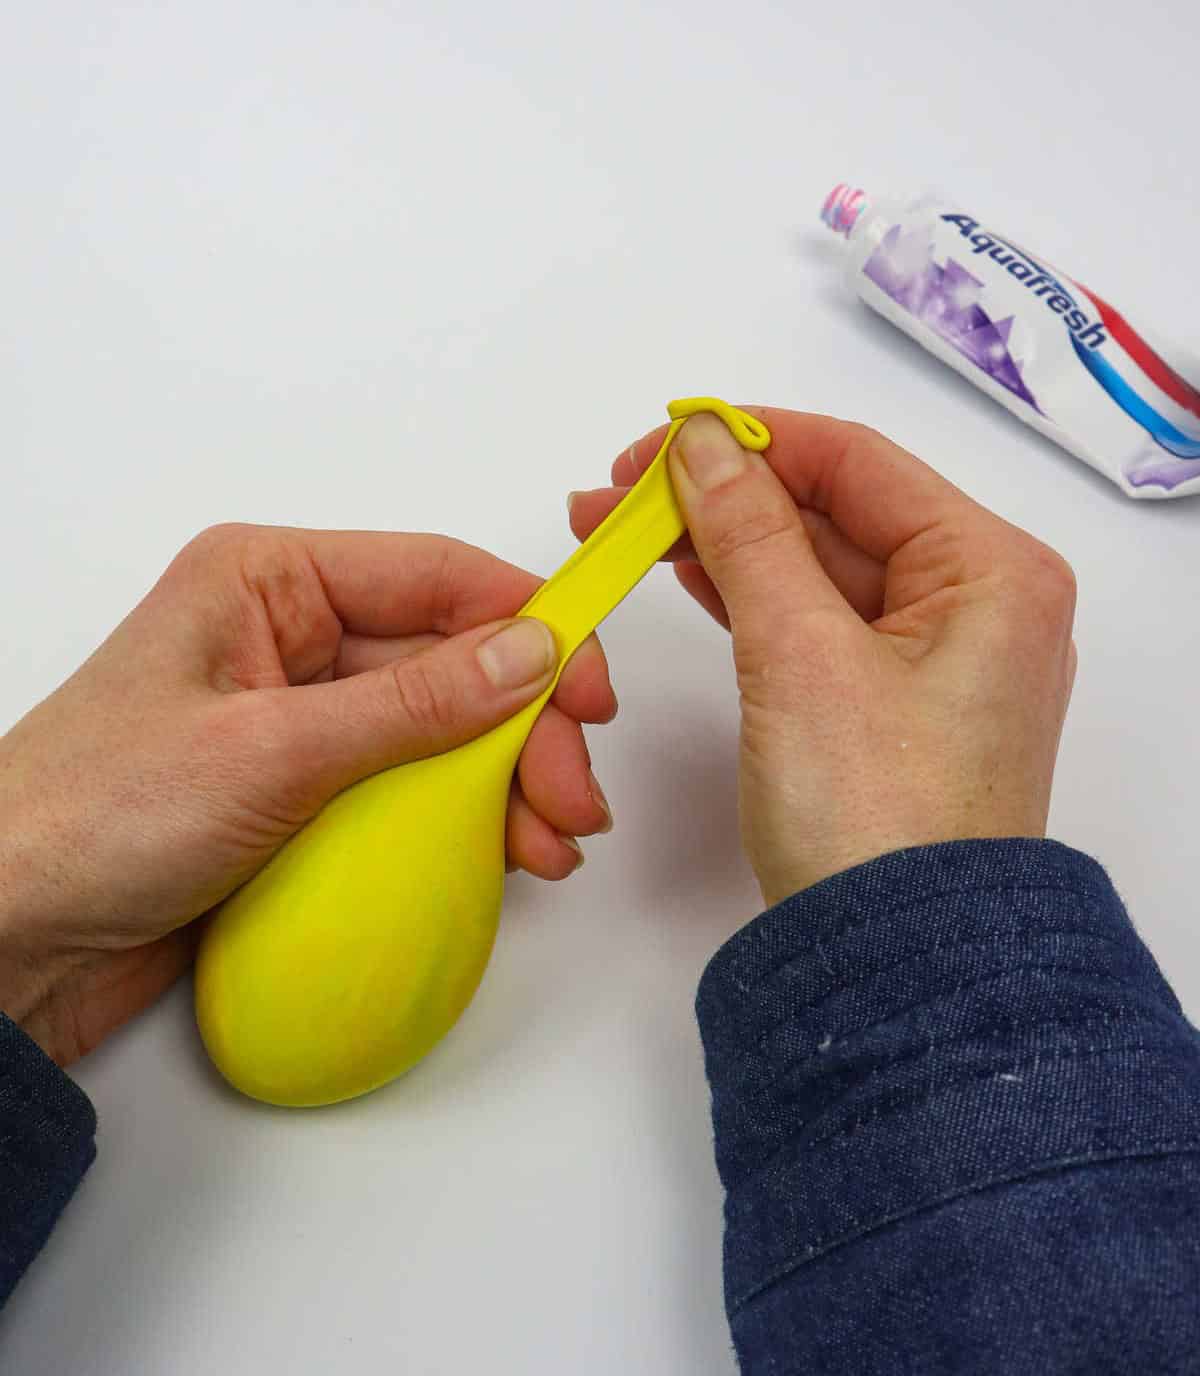
While the next method may not be the most conventional way to create a stress ball, it’s a quick and easy hack that eliminates the hassle of making a paste from scratch. The key is to use toothpaste as a substitute for traditional clay or dough. One of the benefits of this approach is that the resulting paste will keep indefinitely since it’s not made with perishable ingredients. Plus, you’ll have the added convenience of having everything pre-packaged in a squeezable tube.
Simply dispense the toothpaste into a balloon and add some cute emojis for a personalized touch. With minimal effort, your DIY stress balls are ready to help you unwind.
Other Crafts You Might Want to Make
Whether you’re a seasoned crafter or just starting out, there’s nothing quite like the joy of creating something with your own hands. For beginners, we’ve curated a selection of 61 adorable and easy paintings that are perfect for getting started. Meanwhile, our collection of 41 crafts designed specifically for 3-year-olds is sure to delight both little ones and their grown-ups. Paper plate crafts are always a hit, which is why we’ve put together 47 fun and creative ideas for kids to enjoy.
For the smallest of artists, handprint crafts are a delightful way to preserve memories – and we have 37 adorable examples to get you started. Teenagers can also join in on the fun with our 31 easy DIY projects using items from dollar stores. And when it’s time to get sticky, our 41 hot glue gun crafts offer endless possibilities for creative expression. Finally, who says toilet paper rolls are just for flushing?
Our ladybug crafts made from toilet paper rolls prove that even the most mundane materials can become something truly special – and we have a whole DIY projects category featuring 47 inspiring ideas to get you started on your own creative journey.
How to Make a Stress Ball (Step-by-Step)
Transform everyday moments into a fun and therapeutic experience by crafting your very own DIY stress balls! This engaging project is perfect for making with kids, while also providing an outlet to relieve stress. With just 5 minutes of prep time and 10 minutes of active creation, you can have a batch of personalized stress relievers in no time. Whether you’re looking for a creative activity to enjoy with little ones or seeking a mindful way to unwind, this DIY project is sure to please.
Equipment
To avoid the hassle of having to wake up to a dark screen, you can prevent your device’s auto-lock feature. To do this, simply follow these steps: First, locate the settings menu on your device and navigate to the display options. Once there, look for the ‘screen lock’ or ‘auto-lock’ setting and toggle it off or adjust the timeout to a longer duration that suits your needs.
By doing so, you can ensure that your screen remains active for as long as you need it, without the risk of it going dark unexpectedly.
Materials
When it comes to creating a DIY sensory bin, you need the right materials. A few essential items include balloons for adding a fun and tactile element, cold water to create a soothing atmosphere, toothpaste to introduce a familiar scent and texture, permanent markers to add a pop of color, and starchy ingredients like potato starch, cornstarch, or wheat flour to provide a gentle tactile experience.
Instructions
To begin creating your DIY stress ball, prepare a clean workspace by gathering necessary supplies. Ensure you have ample paper towels to contain any spills and disposable cups for mixing the paste. Next, combine flour and water in a suitable ratio, adding water gradually while continuously stirring to prevent lumps from forming. The starch quotient of the flour used will impact the consistency of the resulting paste.
If needed, utilize your fingers or hands to manually mix the paste until it reaches the desired consistency. Once ready, proceed with crafting the funnel by cutting off the top portion of a water bottle and removing the cap. Blow up your chosen balloon to the desired level of inflation; the stretchier the balloon, the more paste it can hold. Place the mouth of the balloon over the bottle’s opening, securing it firmly around the rim.
Fill the balloon with the prepared paste through the funnel-like opening, allowing it to fill to your liking. When satisfied, twist the balloon’s neck a few times before removing it from the bottle to prevent any potential spills. Secure the stress ball by fastening a knot or two. Alternatively, you can quickly and mess-free fill the balloon directly with toothpaste from its tube, as this non-perishable substance will also last longer.
Finally, don’t forget to add personality to your stress balls through creative drawings of emojis and quirky faces.