Gift-giving just got a whole lot more personal and affordable! Who says you need to break the bank for a thoughtful present? With just a few simple materials and some creative flair, you can whip up your own unique gift box in no time. The best part? You get to customize it to fit your loved one’s style and make the gift-giving experience even more special. I mean, let’s be real – store-bought gift boxes can be a bit of a hassle (and pricey!) when you’re trying to show someone how much you care.
But with this DIY project, you’ll be able to create something truly special in under an hour. So why not take matters into your own hands and get crafty? Your loved ones will appreciate the thought and effort that goes into making something just for them.
Supplies for a Gift Box
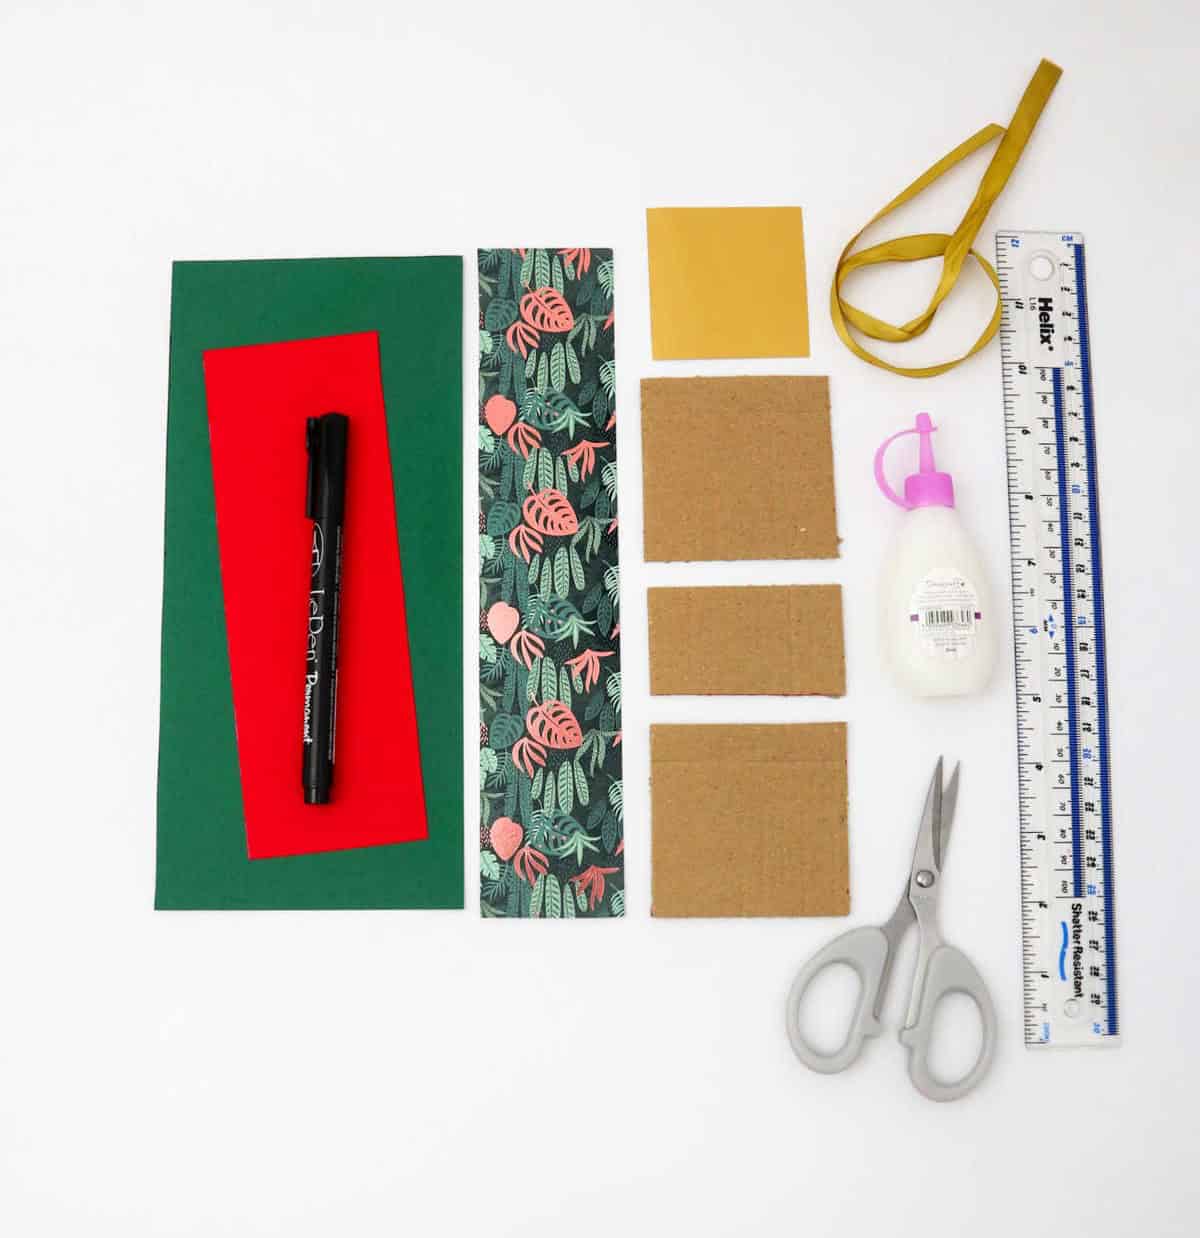
To get started on this DIY project, you’ll need to collect the following essential supplies. Make sure to gather them all before proceeding. For this project, you’ll require two cardboard squares measuring 3 inches by 3 inches, as well as one rectangular piece of cardboard that’s 3 inches by 1.5 inches in size. Additionally, you’ll need various types of craft paper, including green paper (9.5 inches by 4 inches), red paper (8 inches by 2.5 inches), and ornamented paper (10.5 inches by 2.
5 inches). Don’t forget a smaller piece of yellow paper that’s also 2.5 inches by 2.5 inches in size. You’ll also need some basic crafting tools, including craft glue, ribbon measuring 20 inches long, scissors, a ruler, and a pencil.
How to Make a Gift Box
To craft a unique and thoughtful DIY gift box, accuracy in measurement is crucial. Begin by determining the dimensions of your gift box that will accommodate the intended contents. With these measurements in hand, you can then focus on creating a personalized gift box that reflects the recipient’s style or your own creative touch.
Step 1

To construct the design, begin by placing each cardboard segment individually onto the green craft paper. The two larger pieces should be positioned to fully enclose the smaller piece, leaving a minimum of 2 cm gap around the edges. Furthermore, maintain an equal distance between the cardboard pieces themselves.
Step 2
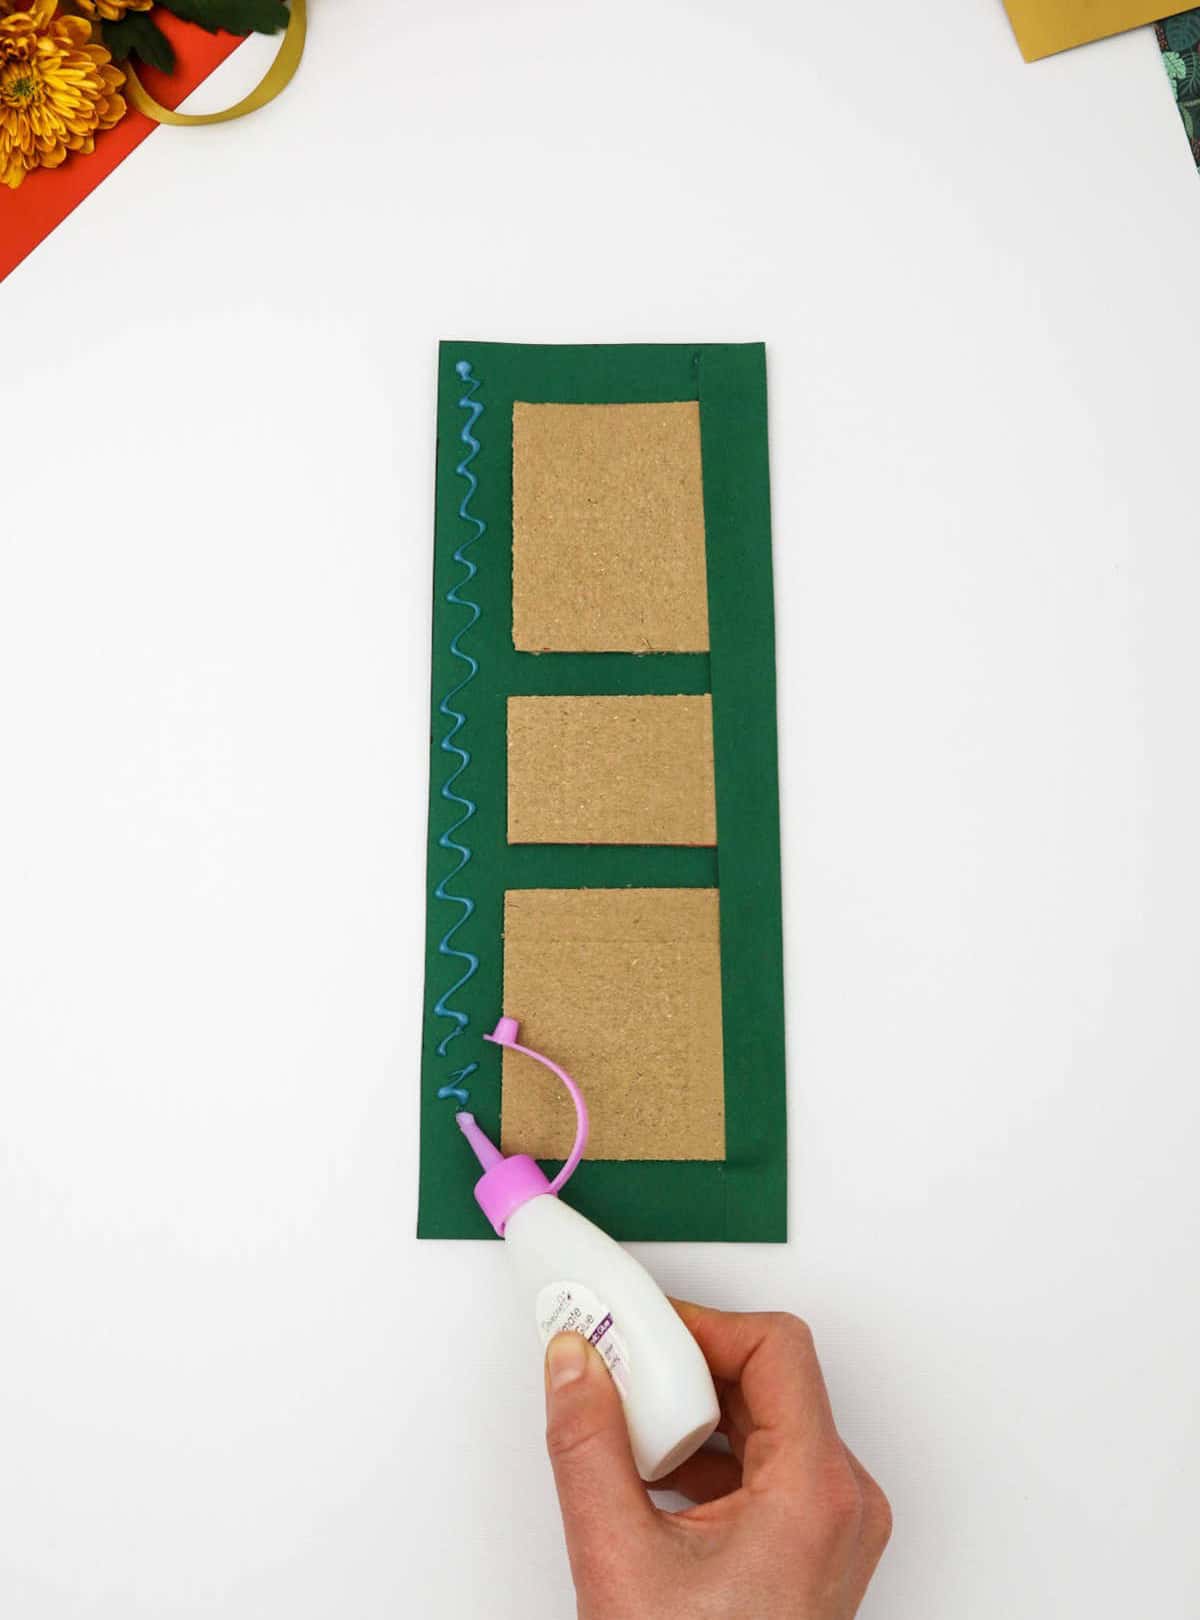
Secure the adhesive by applying a thin, even layer of craft glue along the perimeter of the material or object you’re working with. Make sure to cover the entire edge to ensure a strong bond.
Step 3
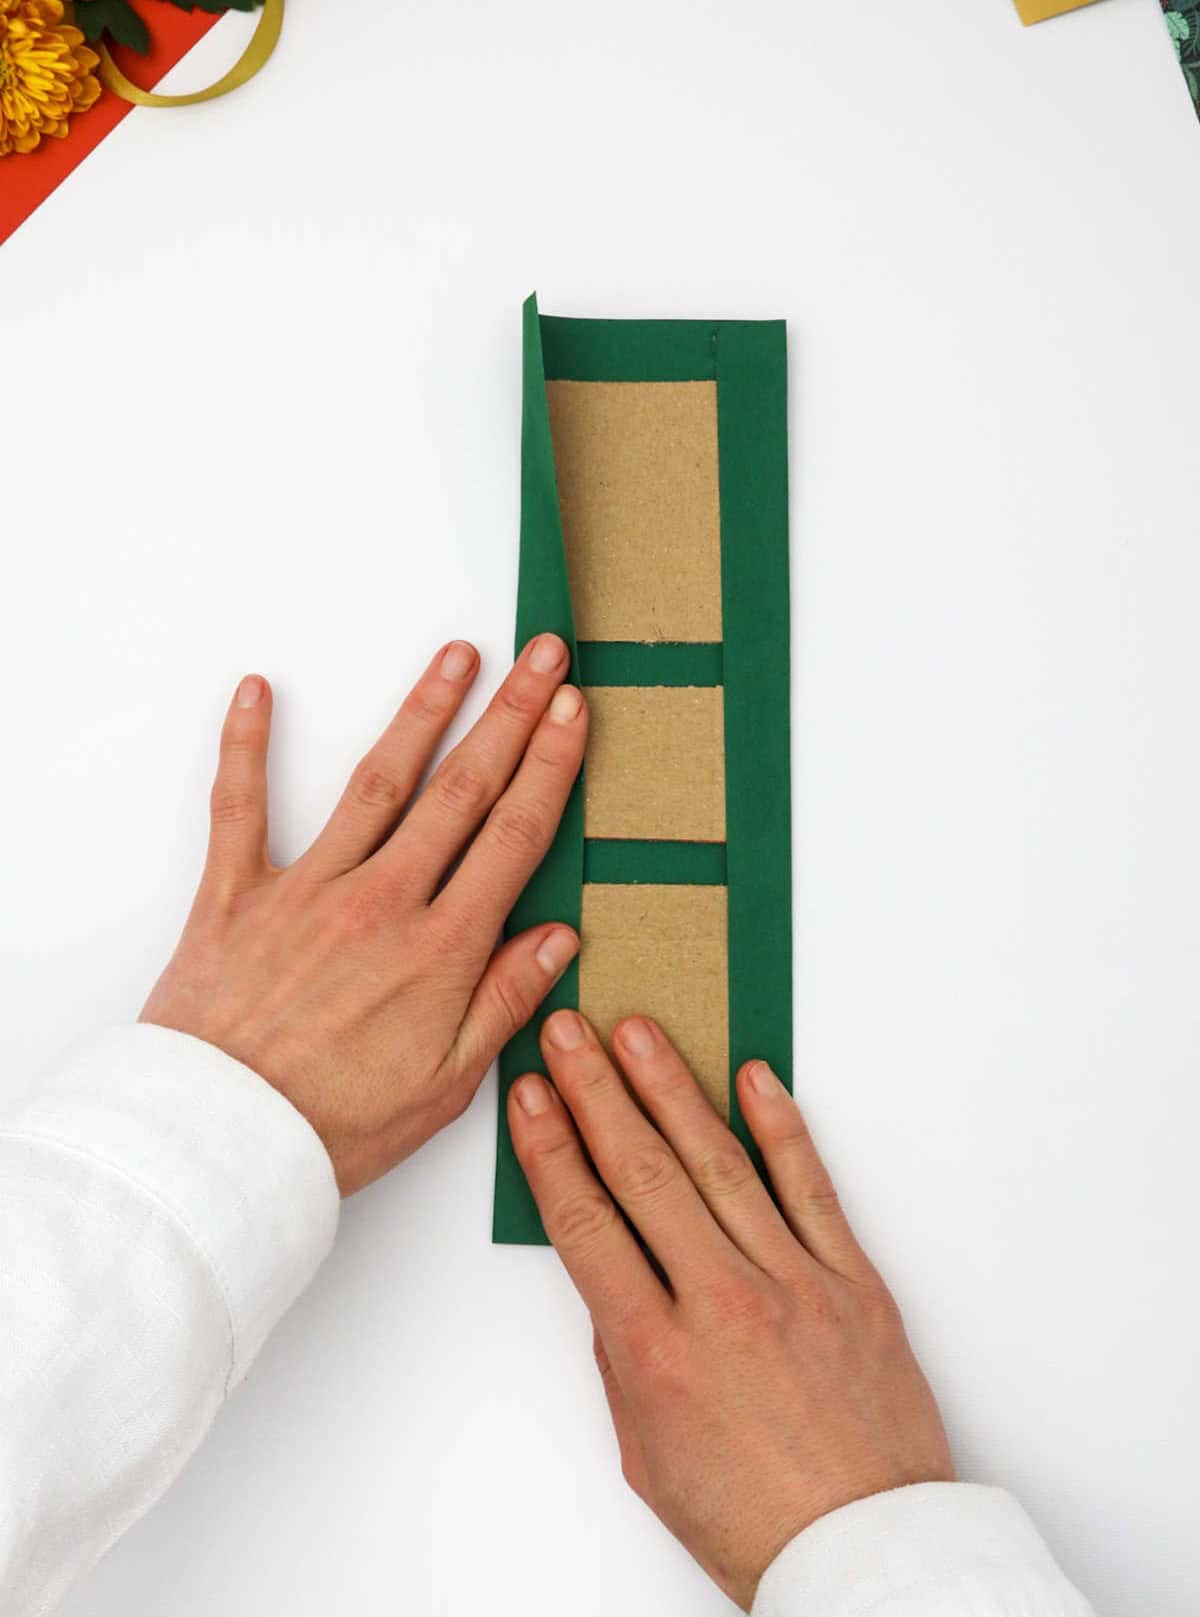
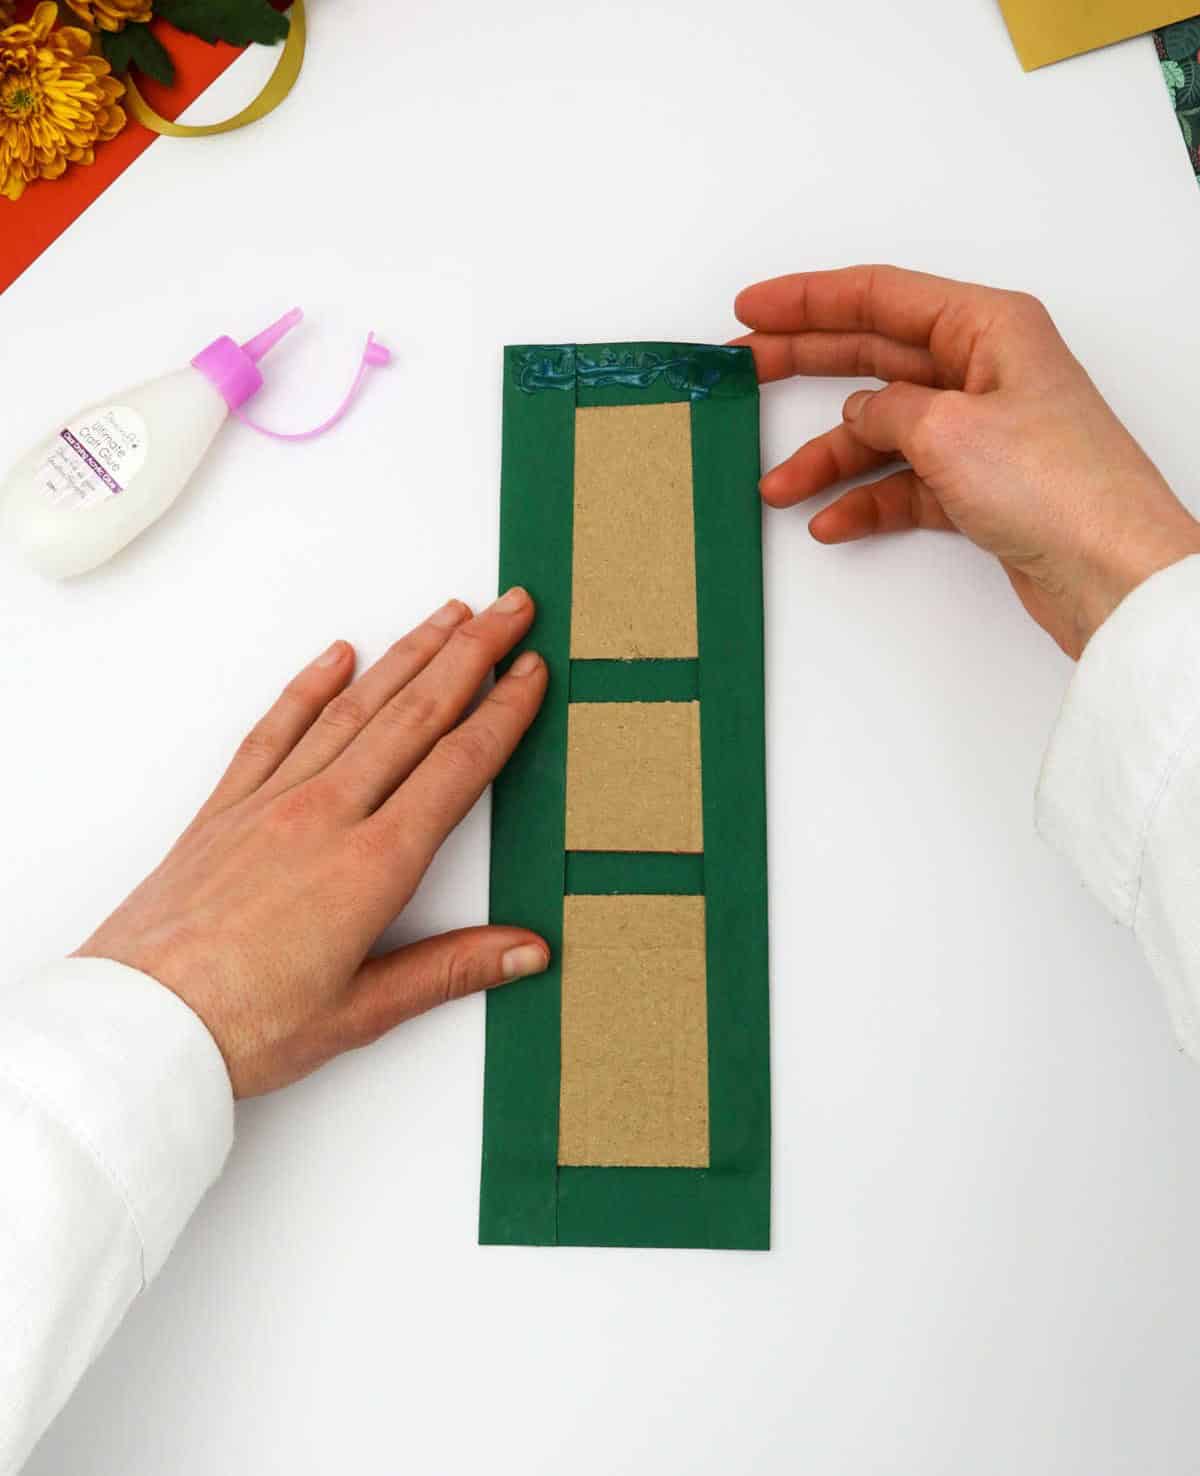
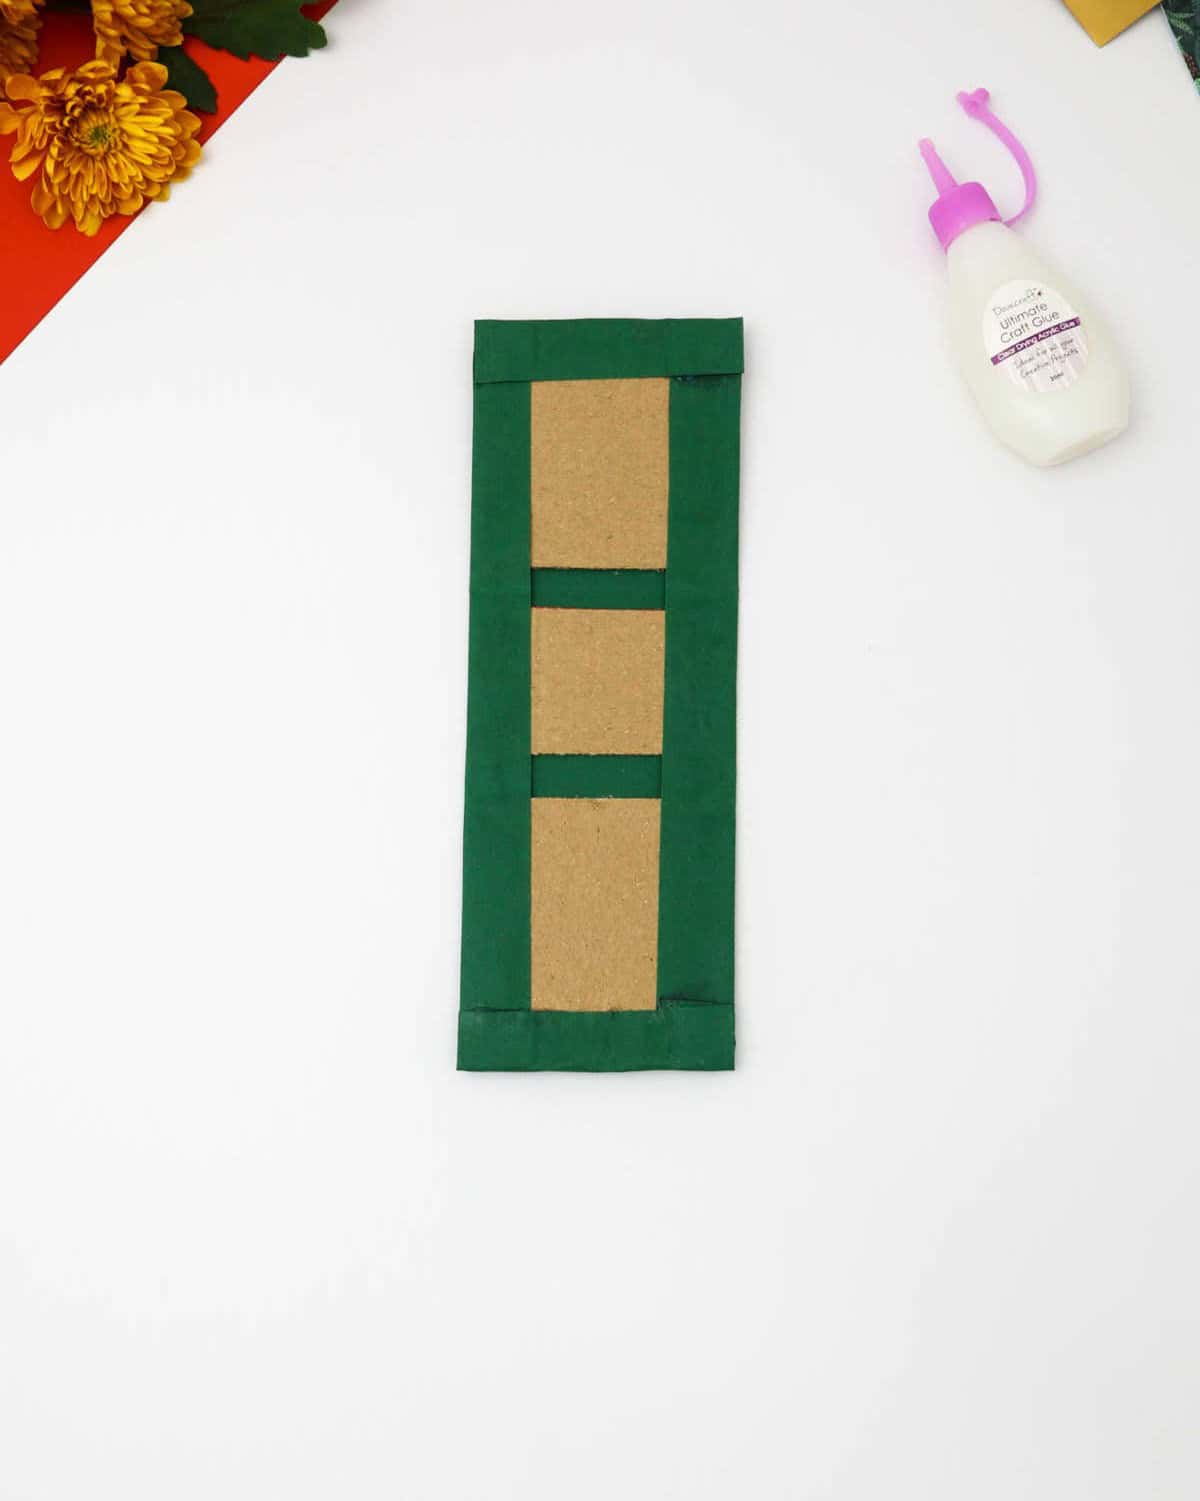
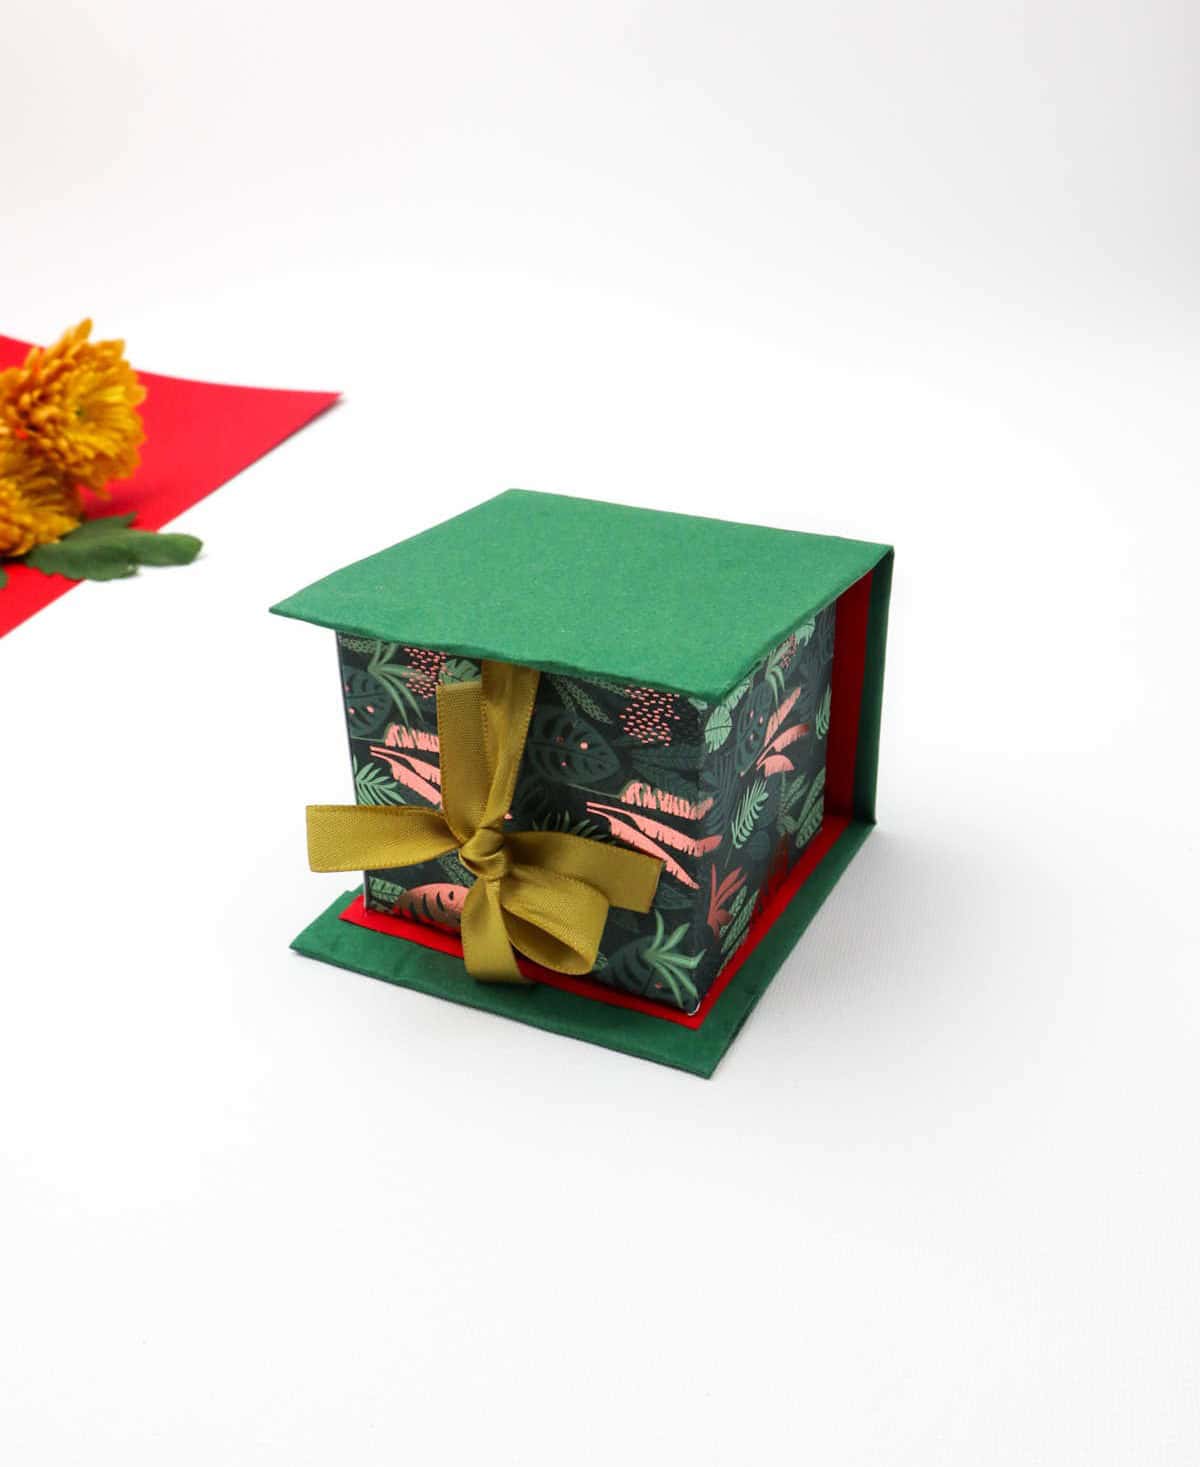
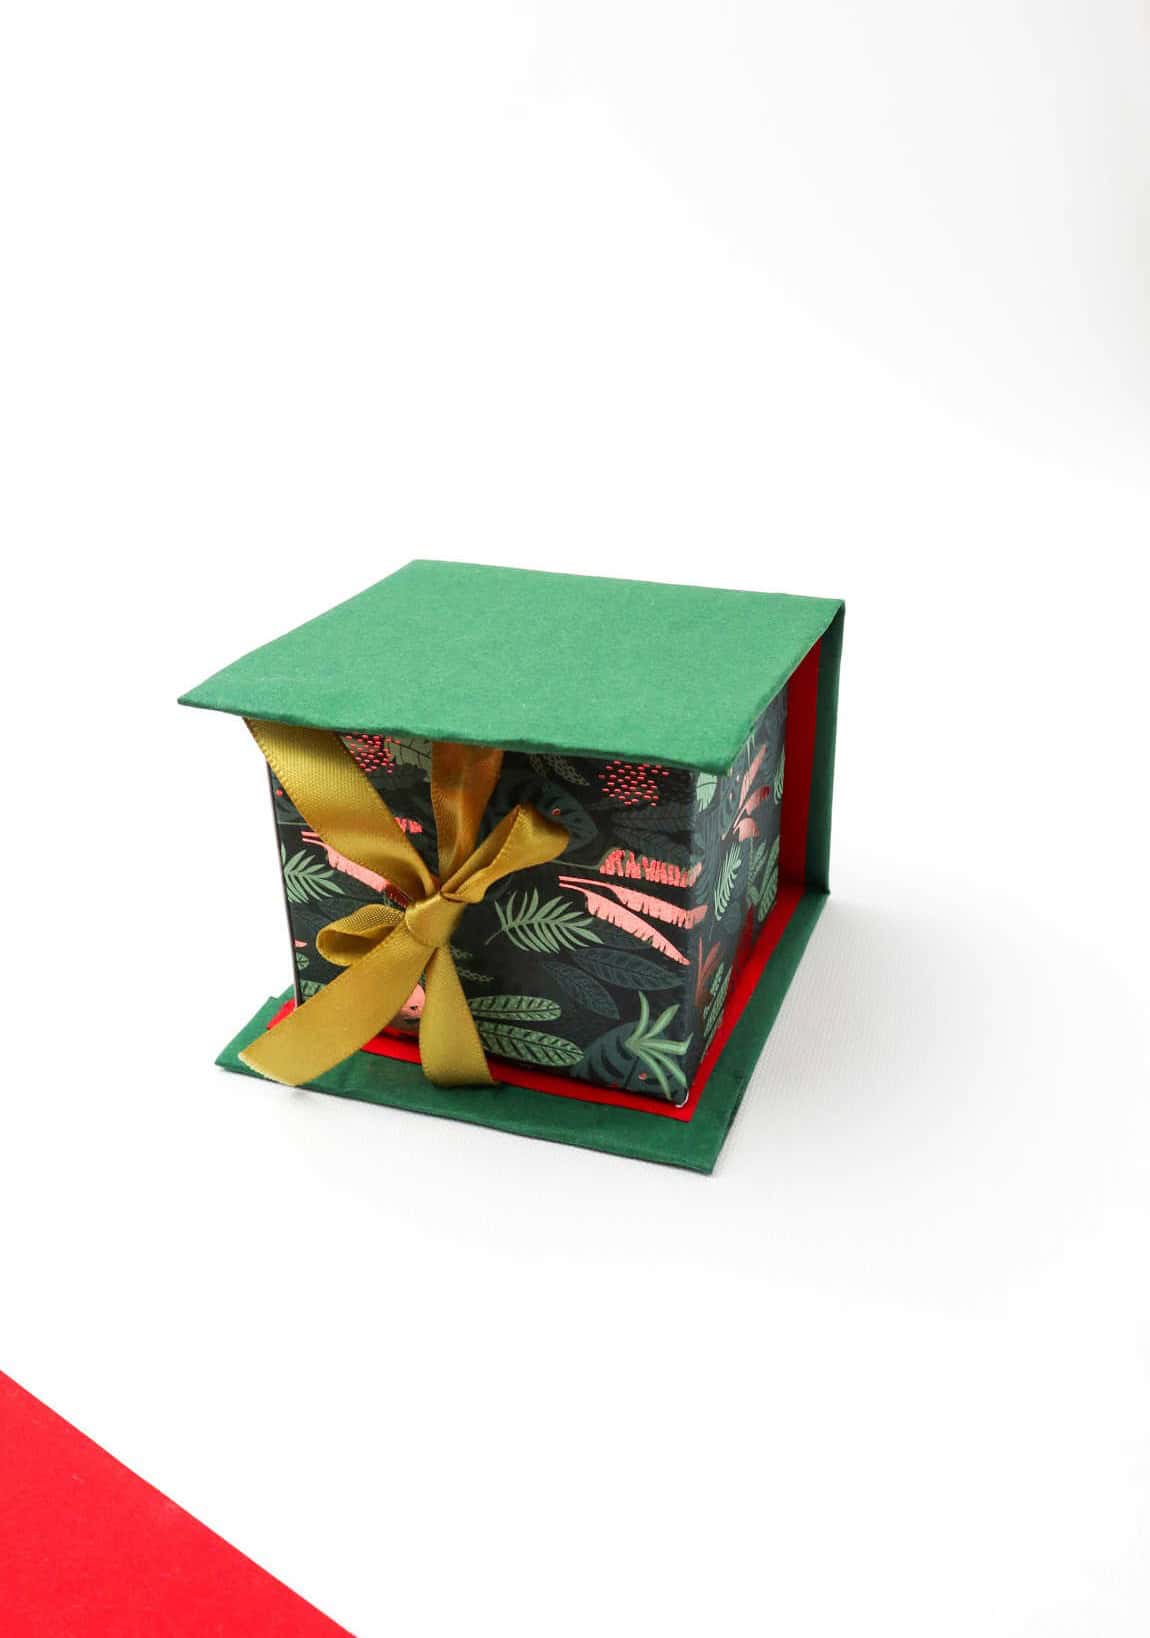
To complete the transformation, start by folding the left edge of the paper inward to cover the cardboard pieces. As you apply adhesive, fold the edges inward again to secure them firmly. Visual guidance is available through accompanying images to ensure a smooth process. Once all edges are folded and stuck in place, your cardboard should resemble the finished product shown.
Step 4

To complete this step, take a piece of ribbon and gently position it along the center of the cardboard. Secure the ribbon in place by applying a small amount of adhesive, making sure to leave the ends extending freely beyond the edges.
Step 5
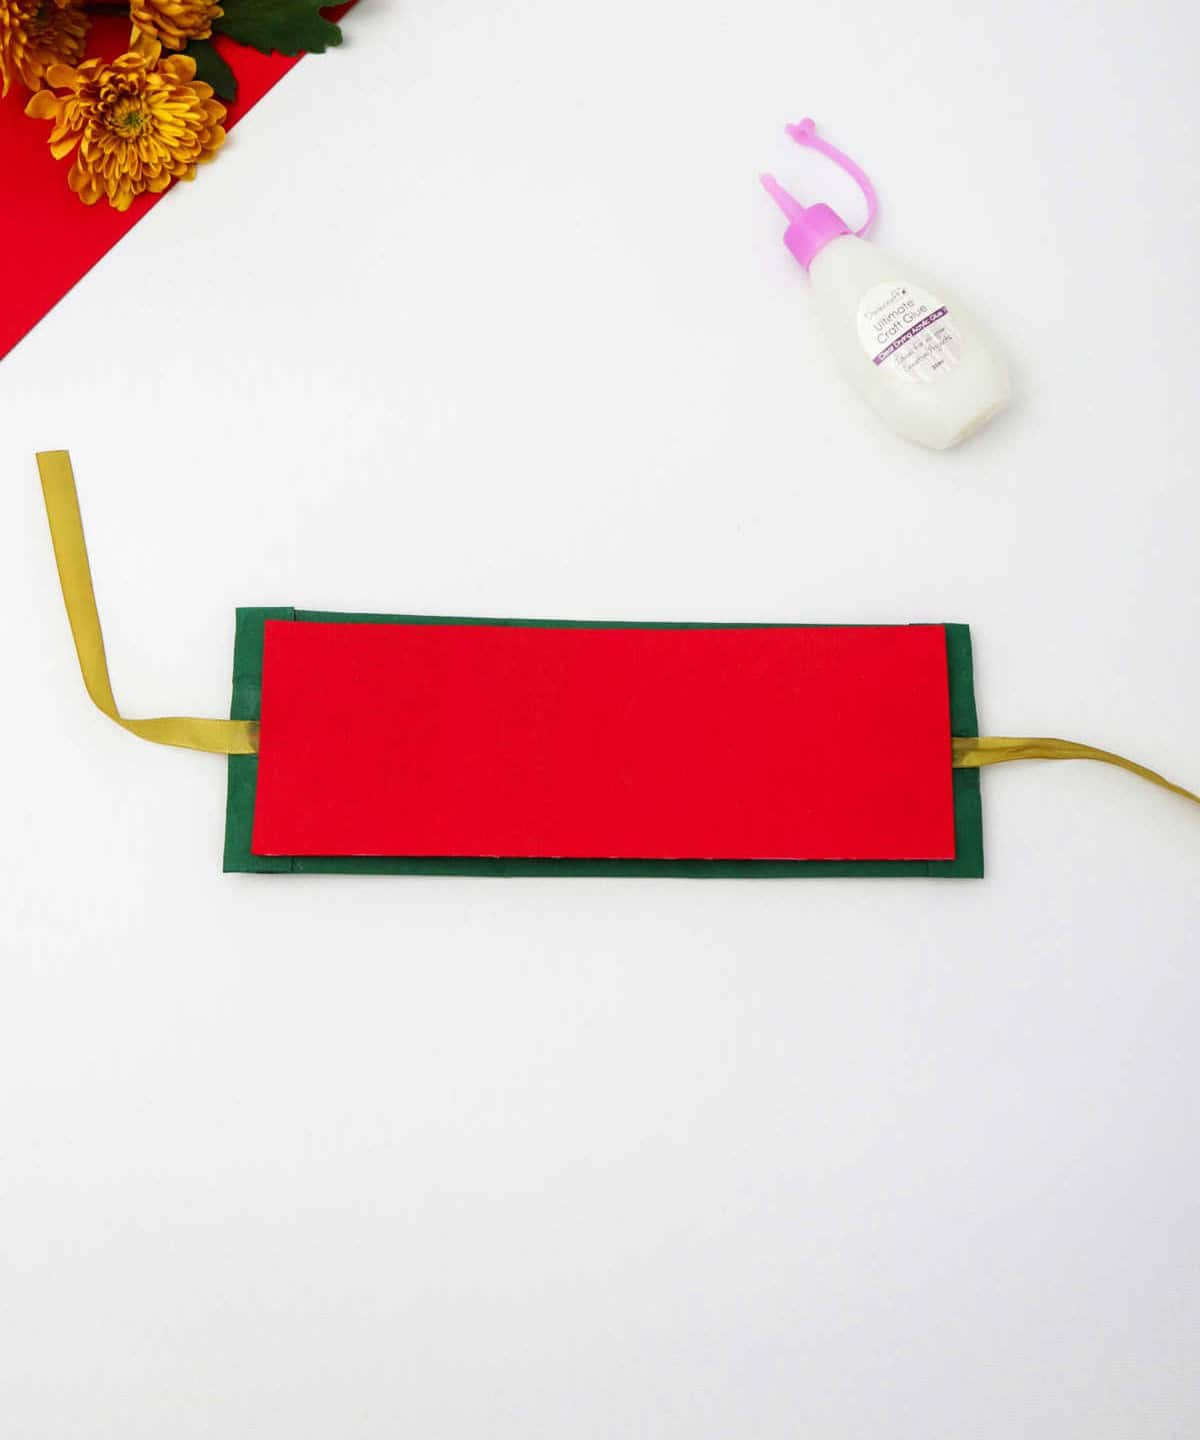
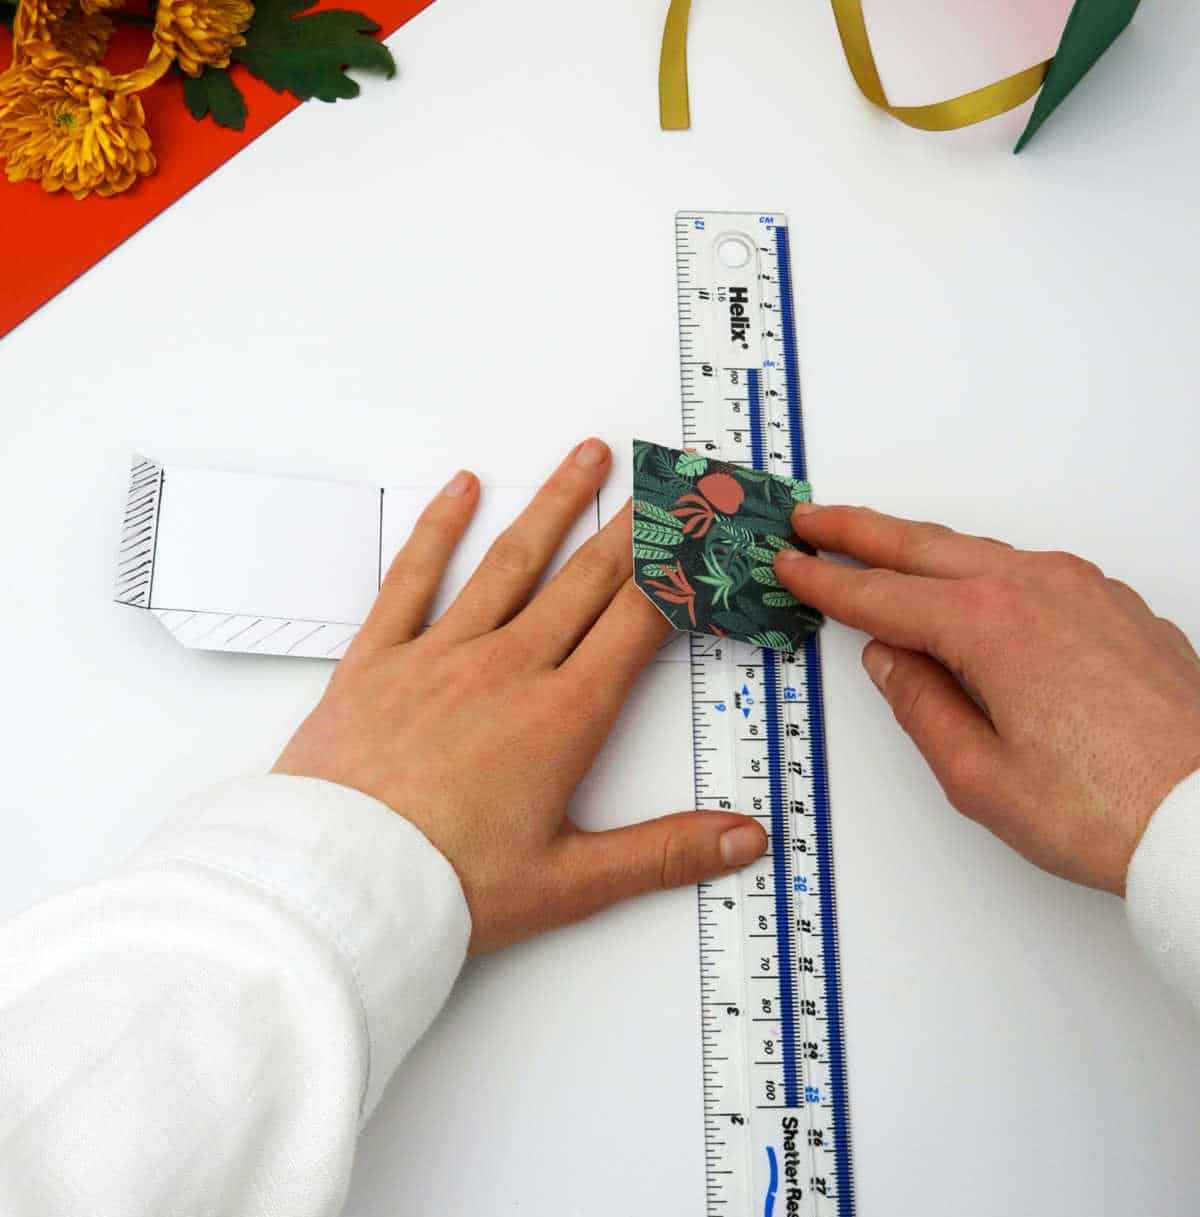
To move forward, carefully calculate the necessary dimensions for a new layer of craft paper. This layer will serve as an overlay for the existing structure, comprising ribbon and cardboard. Your goal is to ensure a precise fit, which can be achieved by taking accurate measurements before applying the additional craft paper.
Step 6
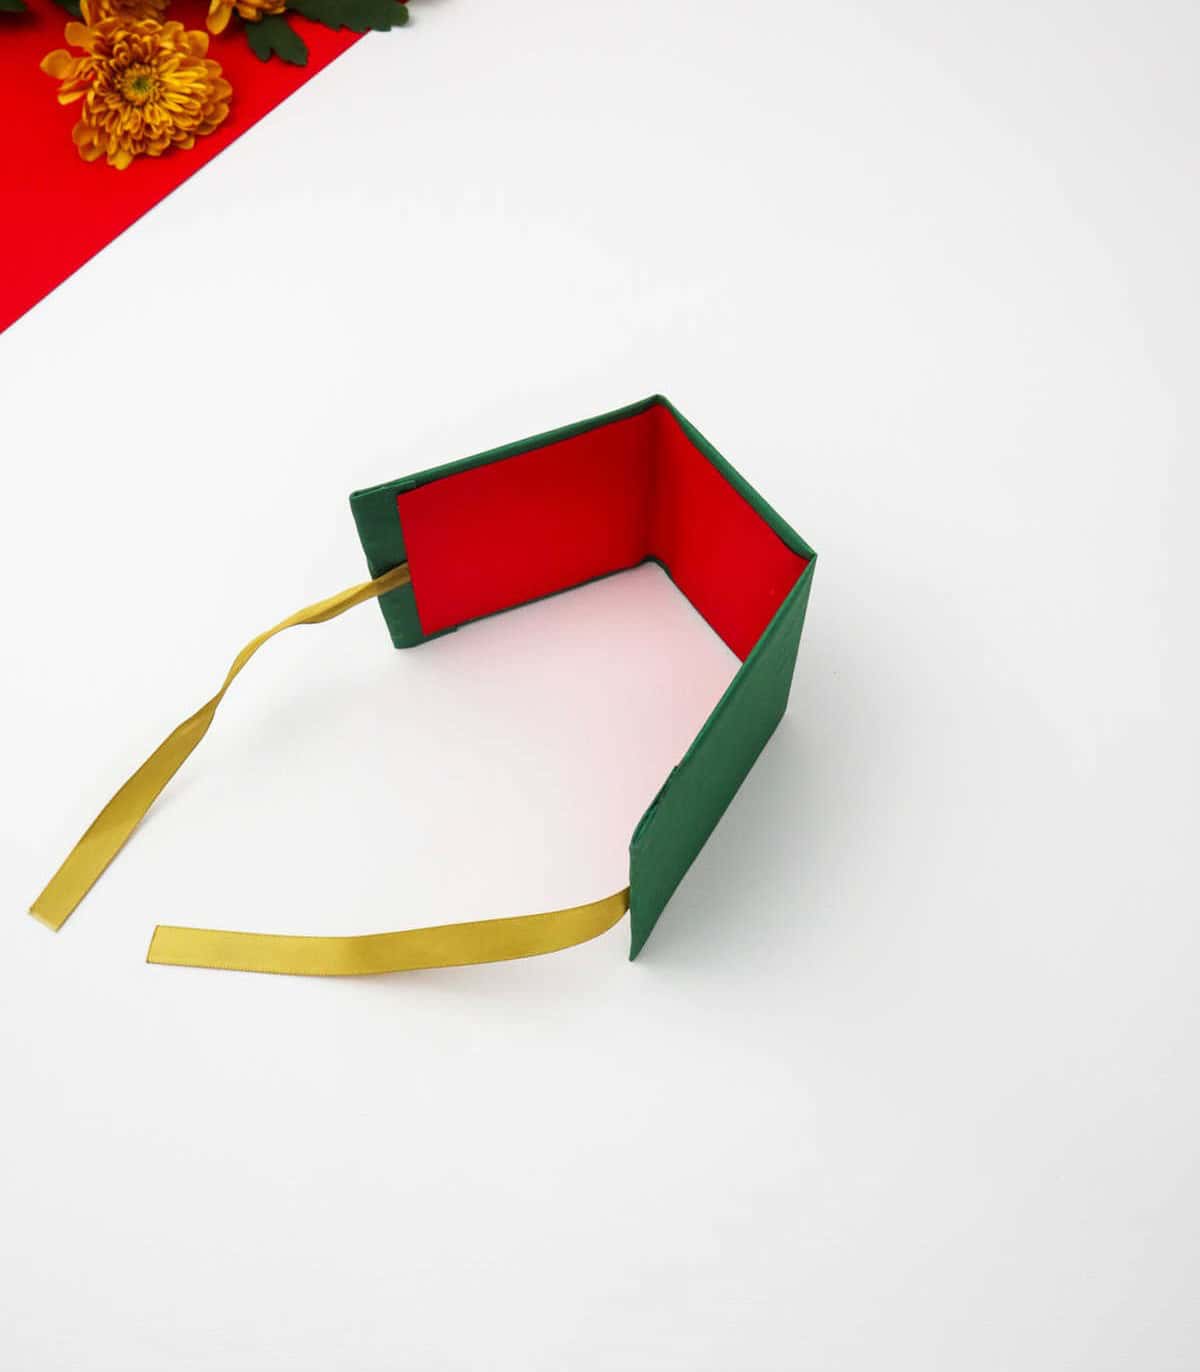
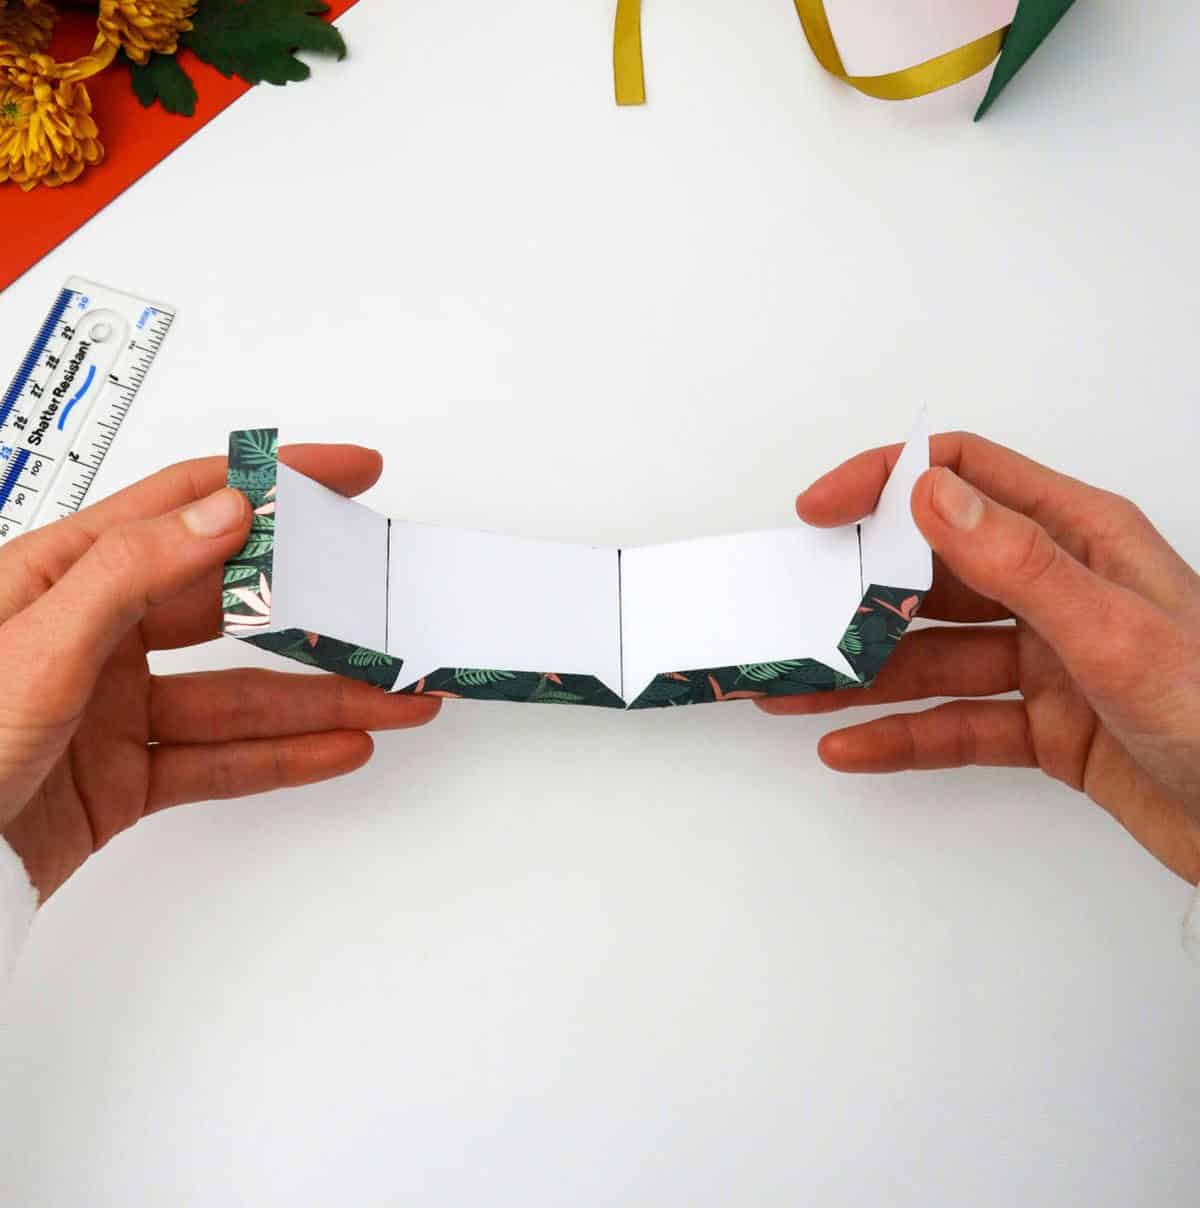
To successfully complete this step, it’s essential to identify the location of the cardboard components. Start by using your fingers to locate the ridges on the box, and then gently fold them inwards as demonstrated below. As you do this, you’ll be creating a three-sided structure that can be set aside for later use.
Step 7
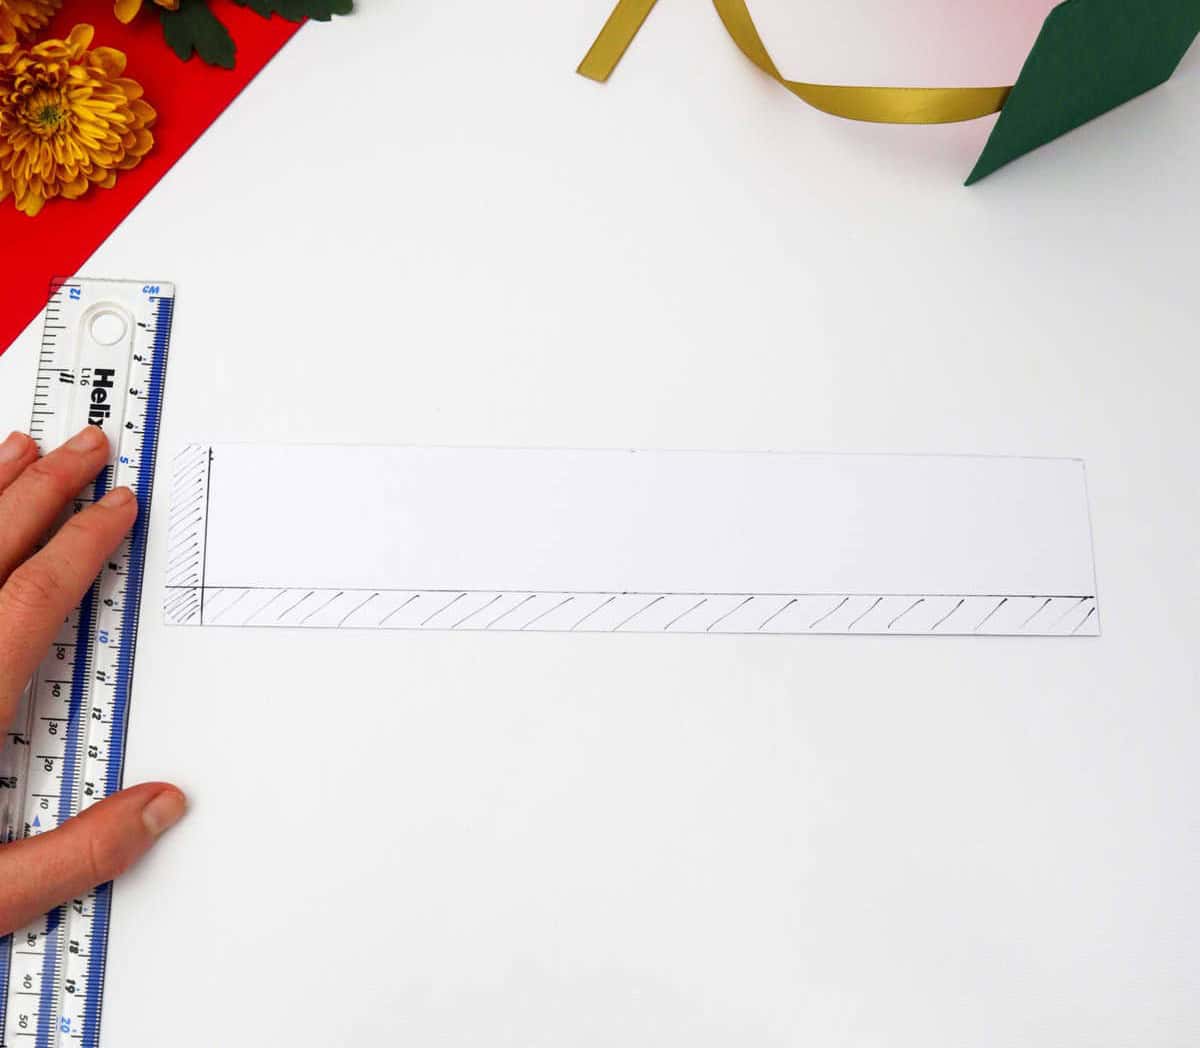
To create the overlap, take a separate sheet of paper and sketch out an outline that includes both the horizontal and vertical flaps. Ensure that these flaps are consistent in size, measuring about 1 centimeter each. A visual reference can be found in the accompanying image to facilitate your understanding of this step.
Step 8

To efficiently partition the overlapping area, create four equal sections by inserting vertical lines at regular intervals. Specifically, draw three additional lines at a distance of 6 centimeters from each other, effectively dividing the overlap into four distinct parts.
Step 9
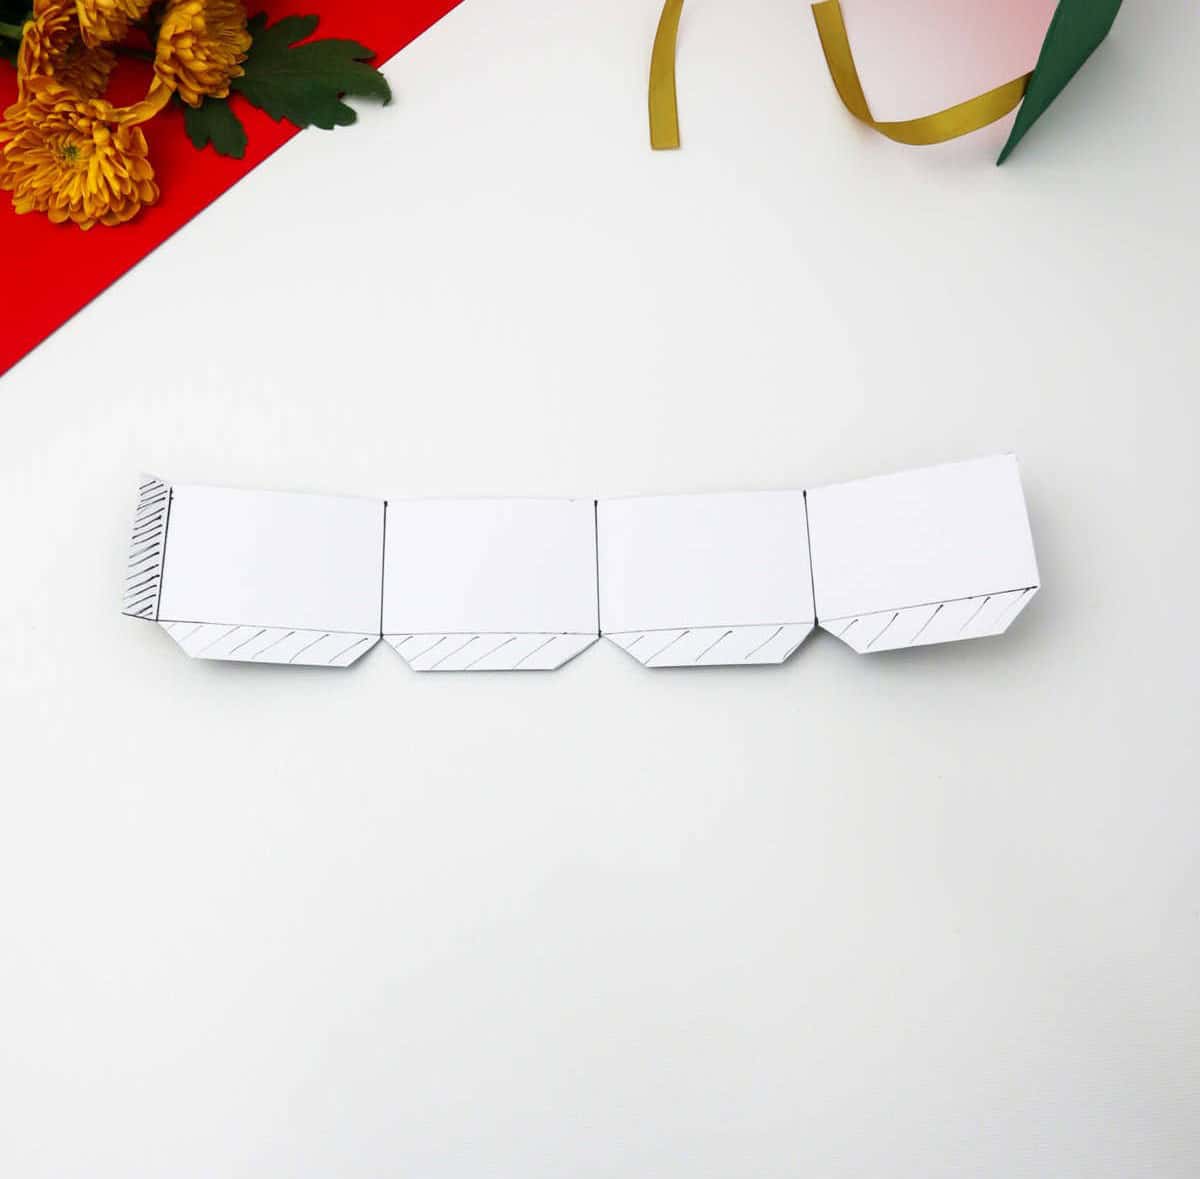
To precision-cut the paper design, utilize either craft cutters or high-quality scissors. As demonstrated earlier, carefully trim the edges along the designated lines. Pay attention to the angled flaps; these have been intentionally designed with a slanted edge. To ensure a seamless integration of the flaps, meticulously remove any excess material by clipping away the unwanted sections.
Step 10
To achieve a precise and clean finish, utilize a ruler to carefully manipulate the overlapping sections along each vertical seam. Moreover, don’t forget to address the excess fabric flaps that protrude beyond the edge of the fold, ensuring they are neatly folded inward for a polished appearance.
Step 11
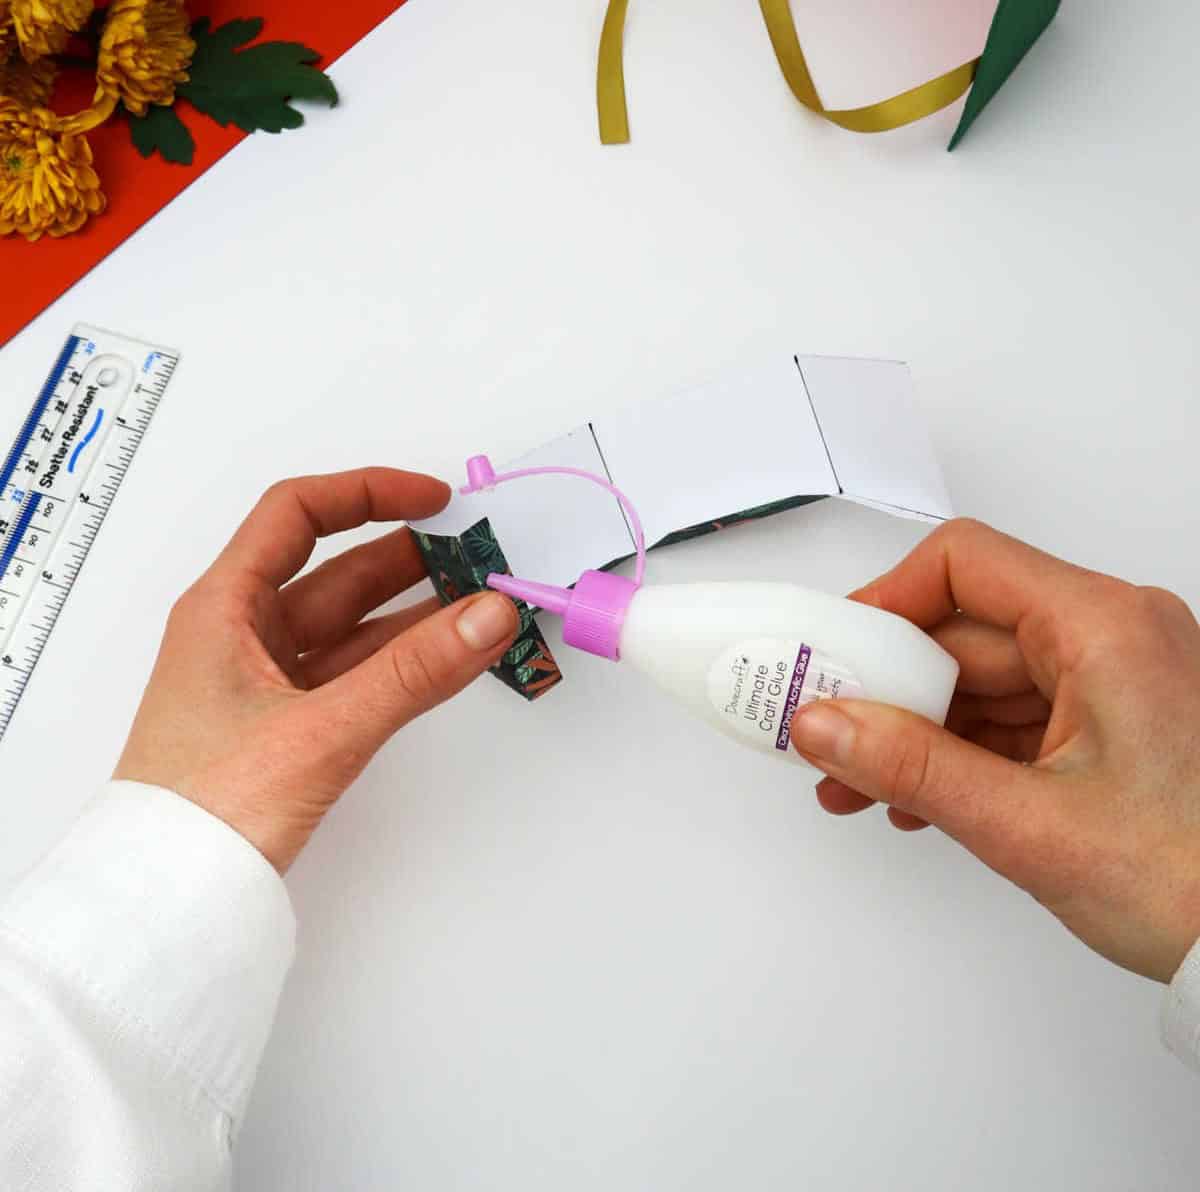
To add an extra layer of durability and protection to your craft project, carefully apply a small amount of glue around the edges of the paper. Be mindful not to overdo it, as excessive glue can cause the paper to become soggy or even disintegrate. Instead, aim for a subtle yet effective bond that will hold your design together without compromising its integrity.
Step 12
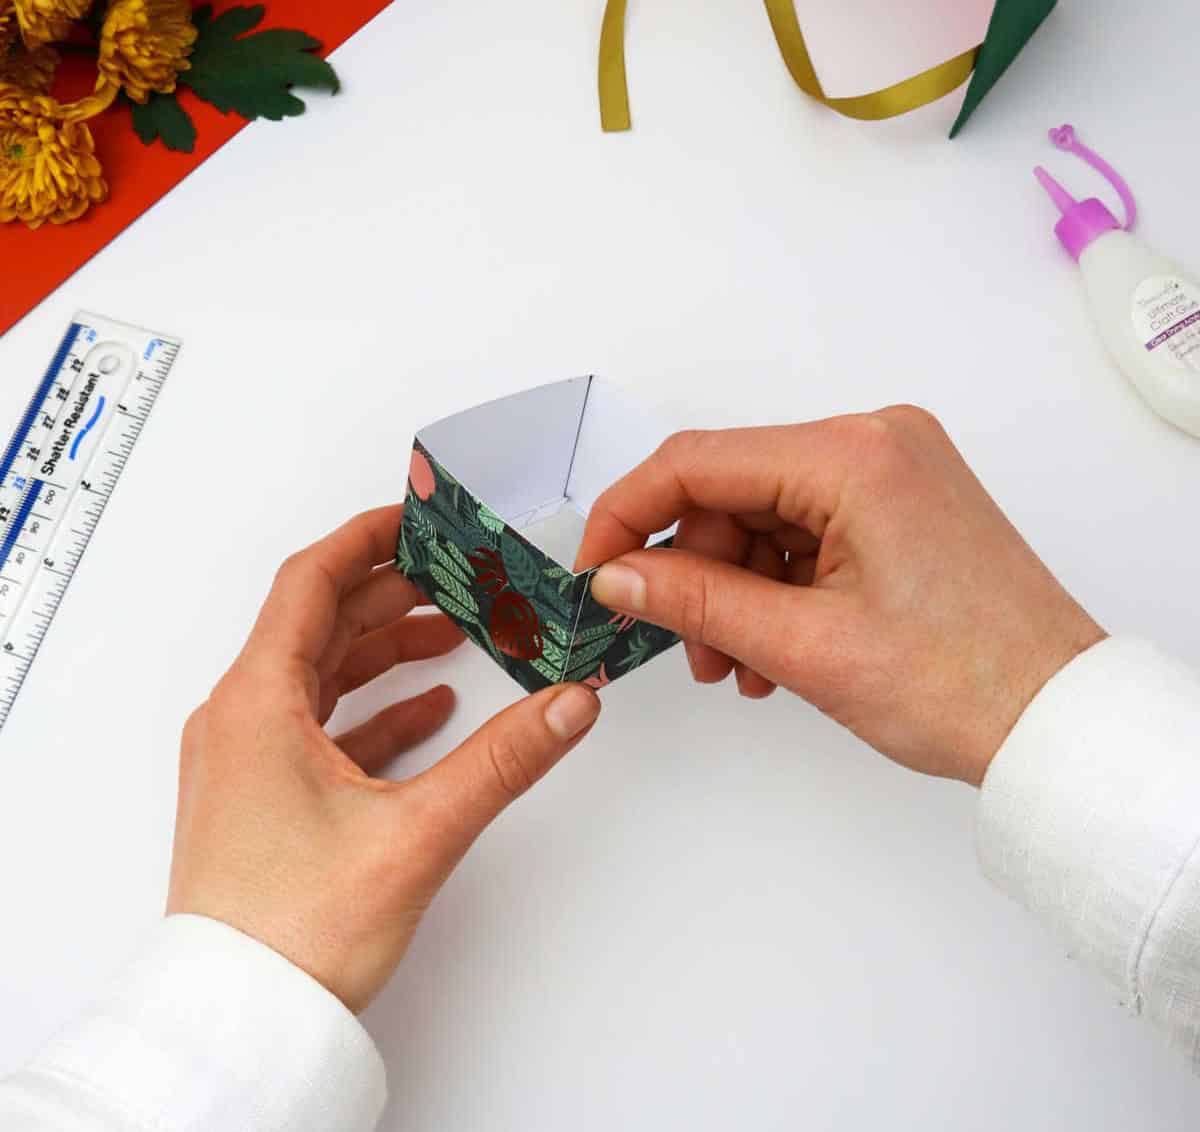
To achieve the desired shape, carefully manipulate the paper into a three-dimensional quadrilateral framework by folding it inward. Ensure the paper is thoroughly dry before proceeding with the subsequent steps in your creative endeavor.
Step 13
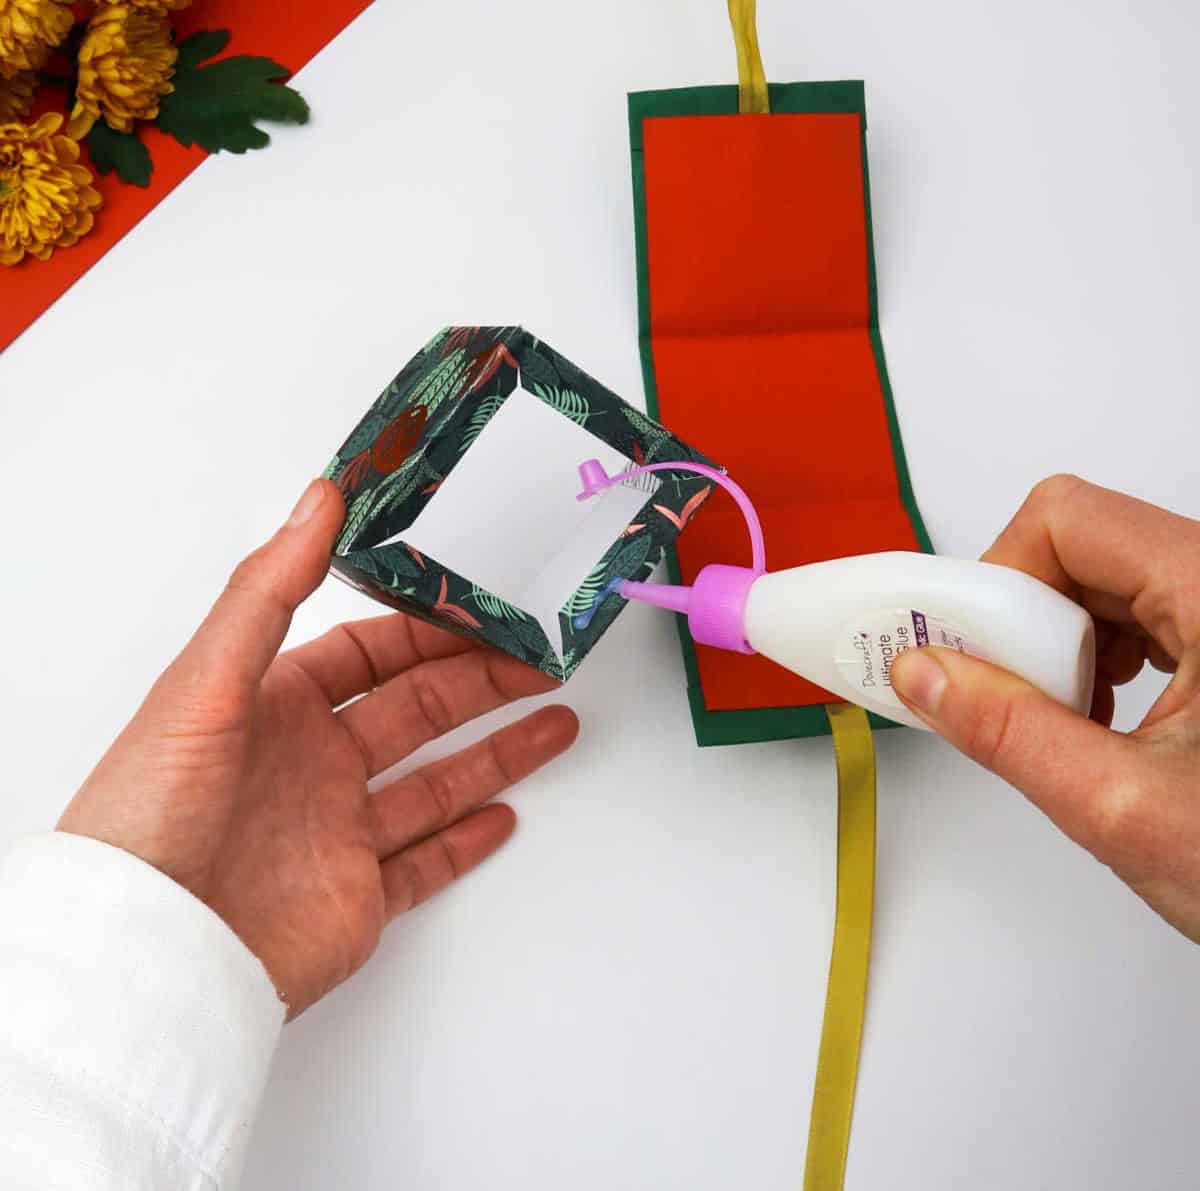
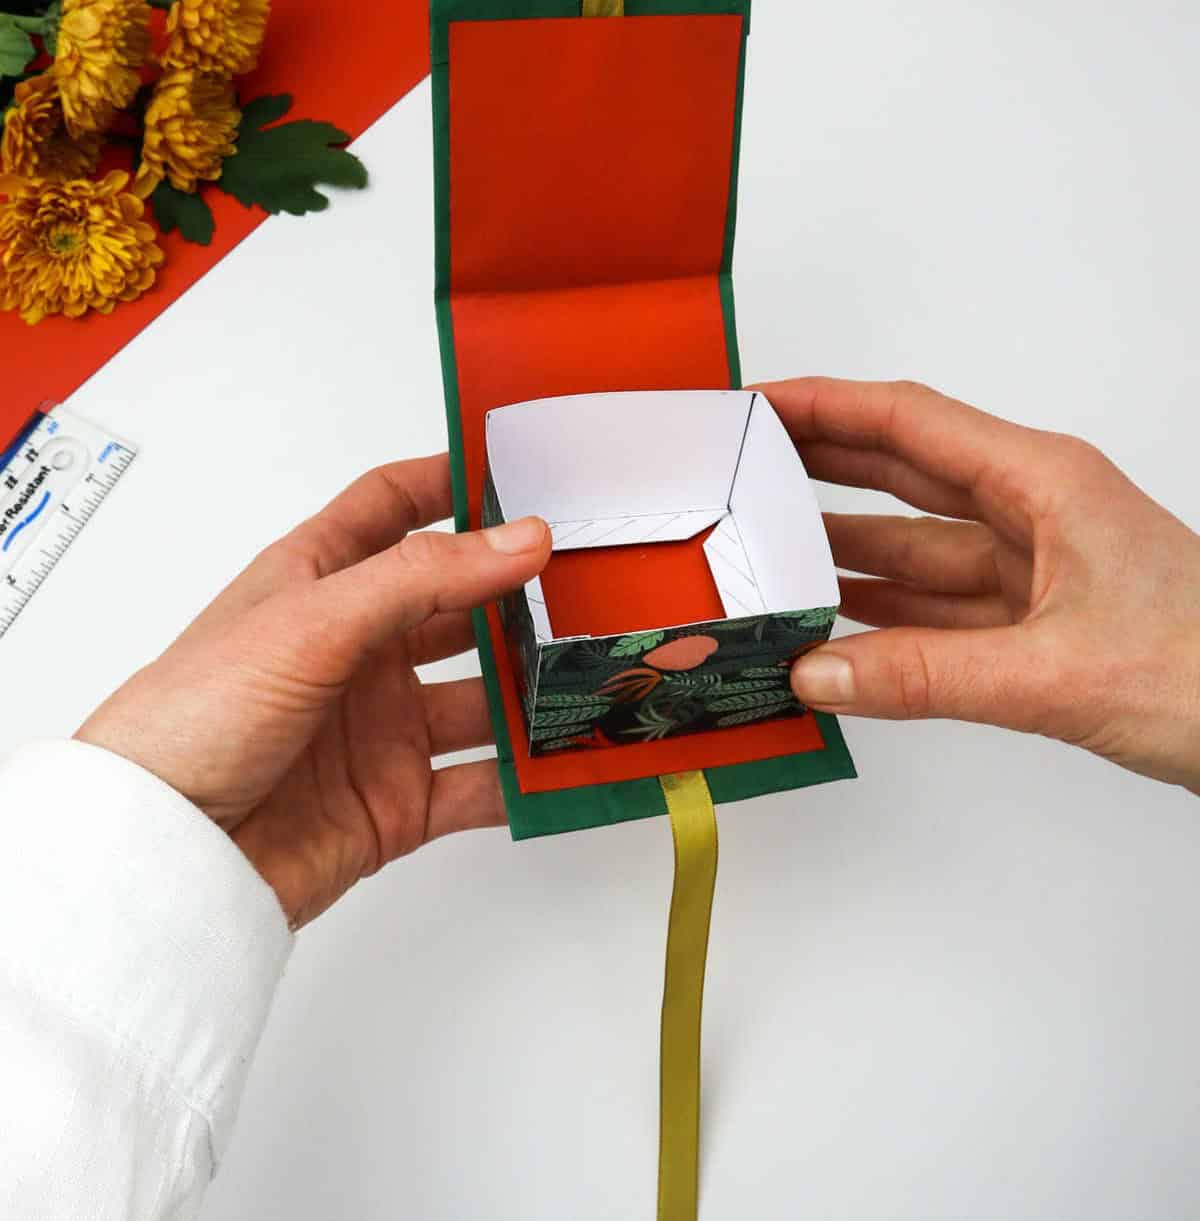
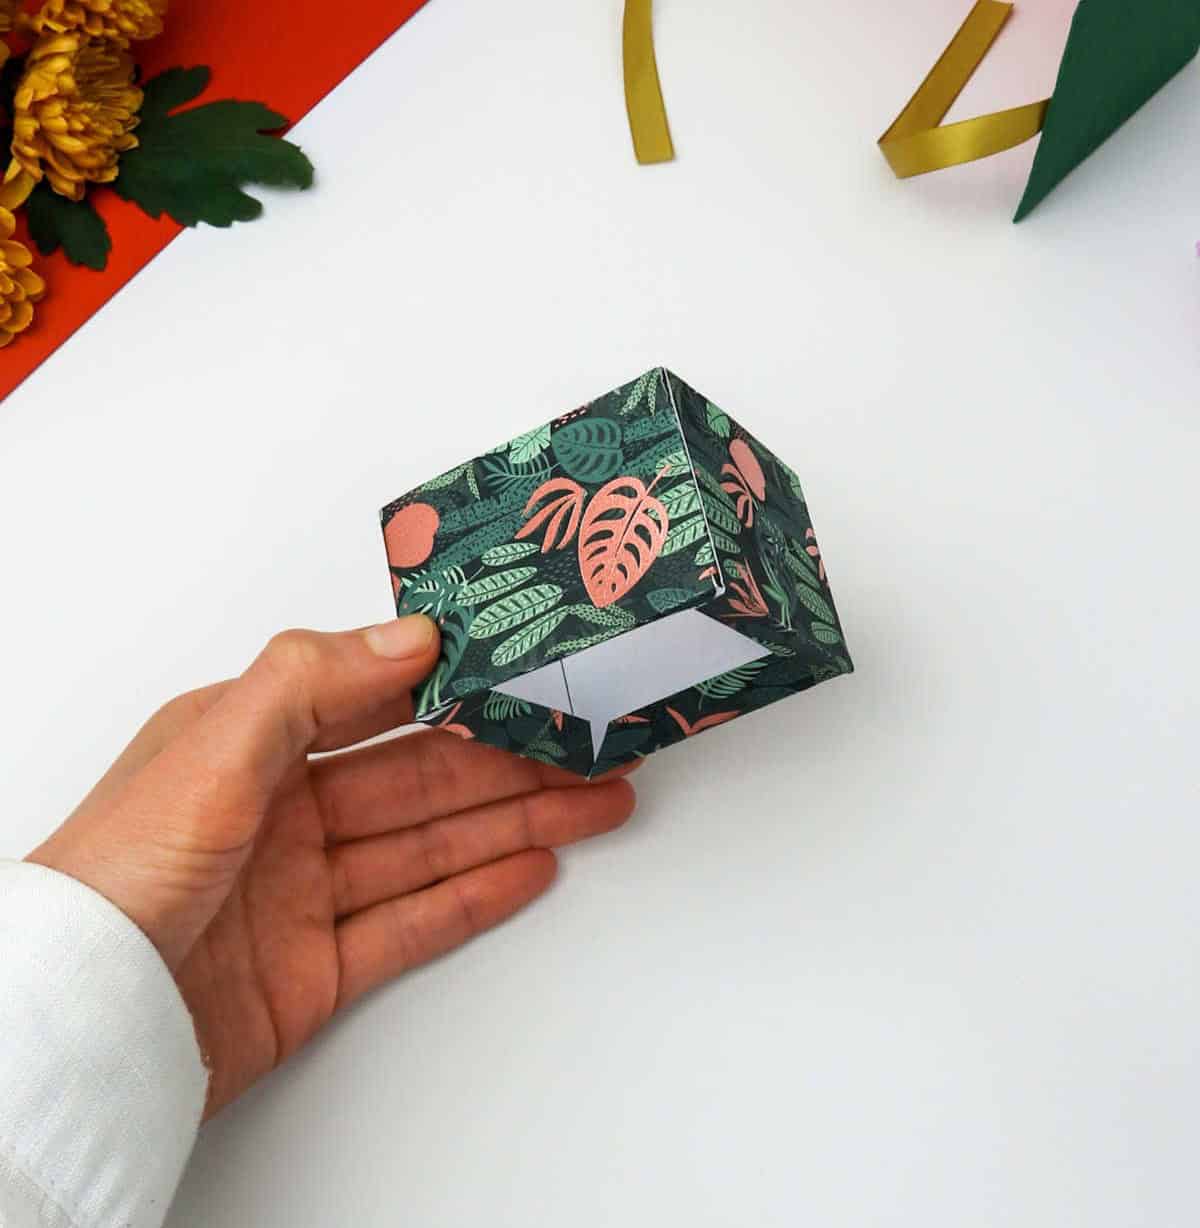
As you prepare to assemble your project, take a moment to re-apply your craft glue and spread a thin layer across the underside of the flaps. This will ensure a strong bond between the components. Next, carefully position the cube onto the surface of the initial component you set aside earlier. Be mindful not to apply too much pressure as you attach the cube, as this could cause the delicate paper walls to crumple.
Instead, use a gentle touch to secure the cube in place, allowing it to adhere naturally.
Step 14
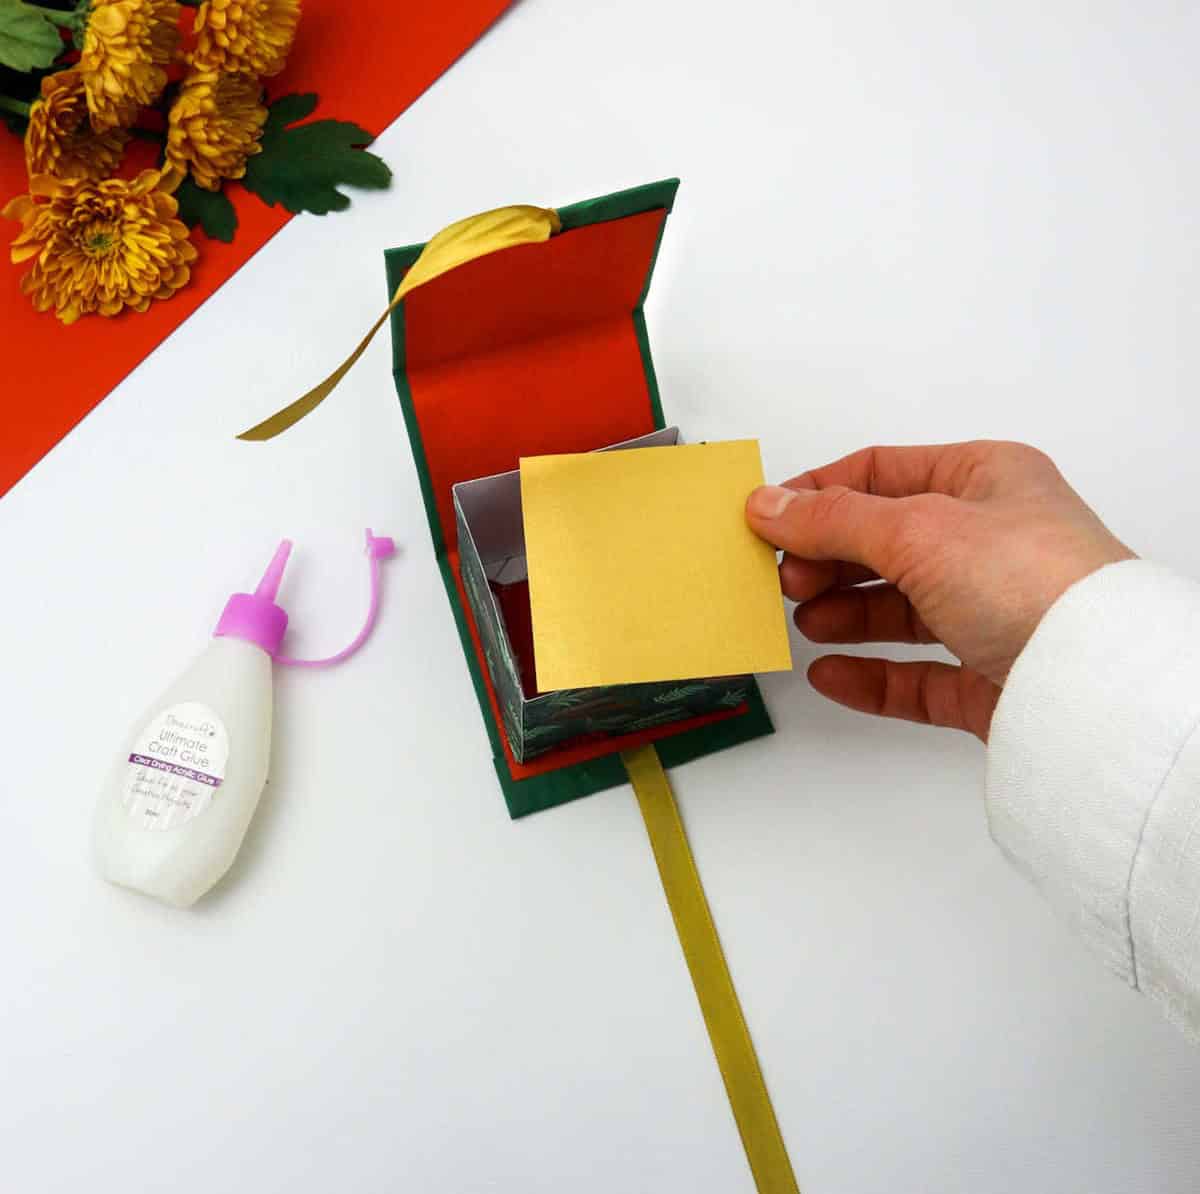
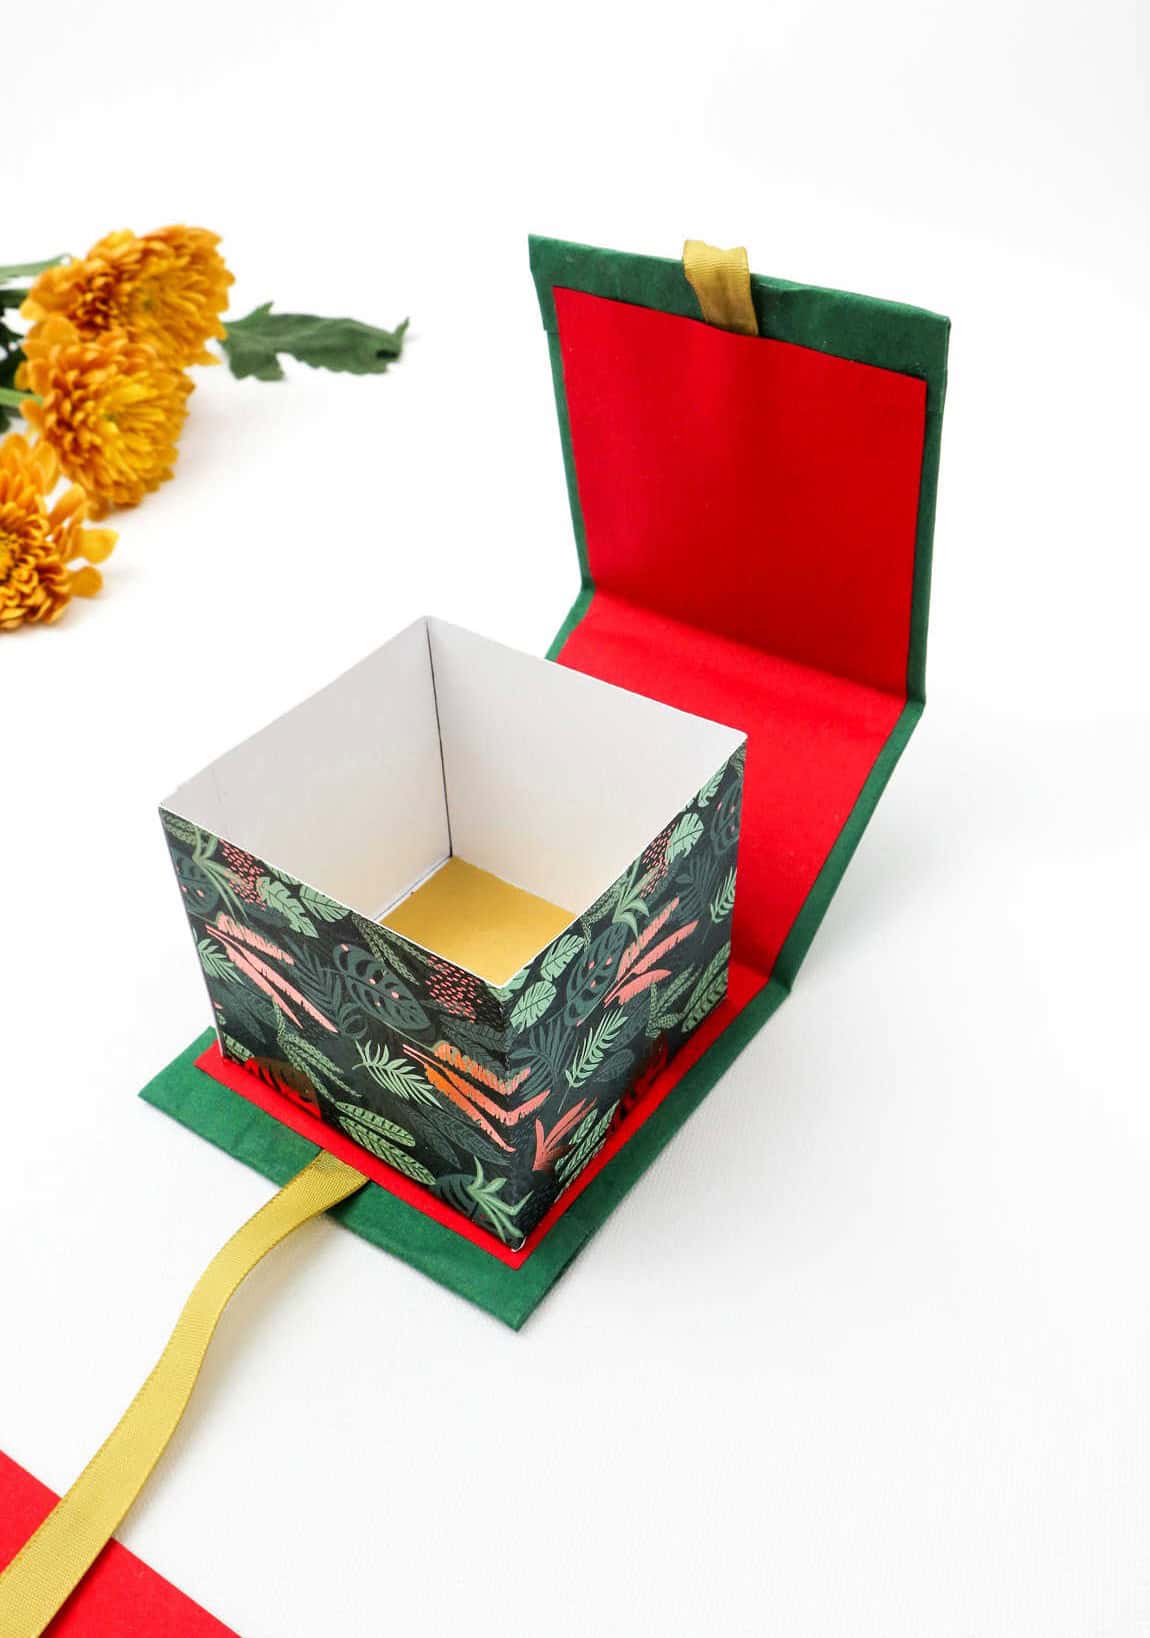
Recall that earlier, you had partitioned the cube structure into four equal segments. This initial measurement will guide you in cutting out a small piece of paper to serve as the foundation for your gift box. Specifically, you’ll need a 6cm x 6cm base scrap to anchor everything. Once you’ve placed it correctly, you can consider this tutorial on making a gift box at home complete. Take it one step further by creating not just one, but an entire dozen of these charming containers.
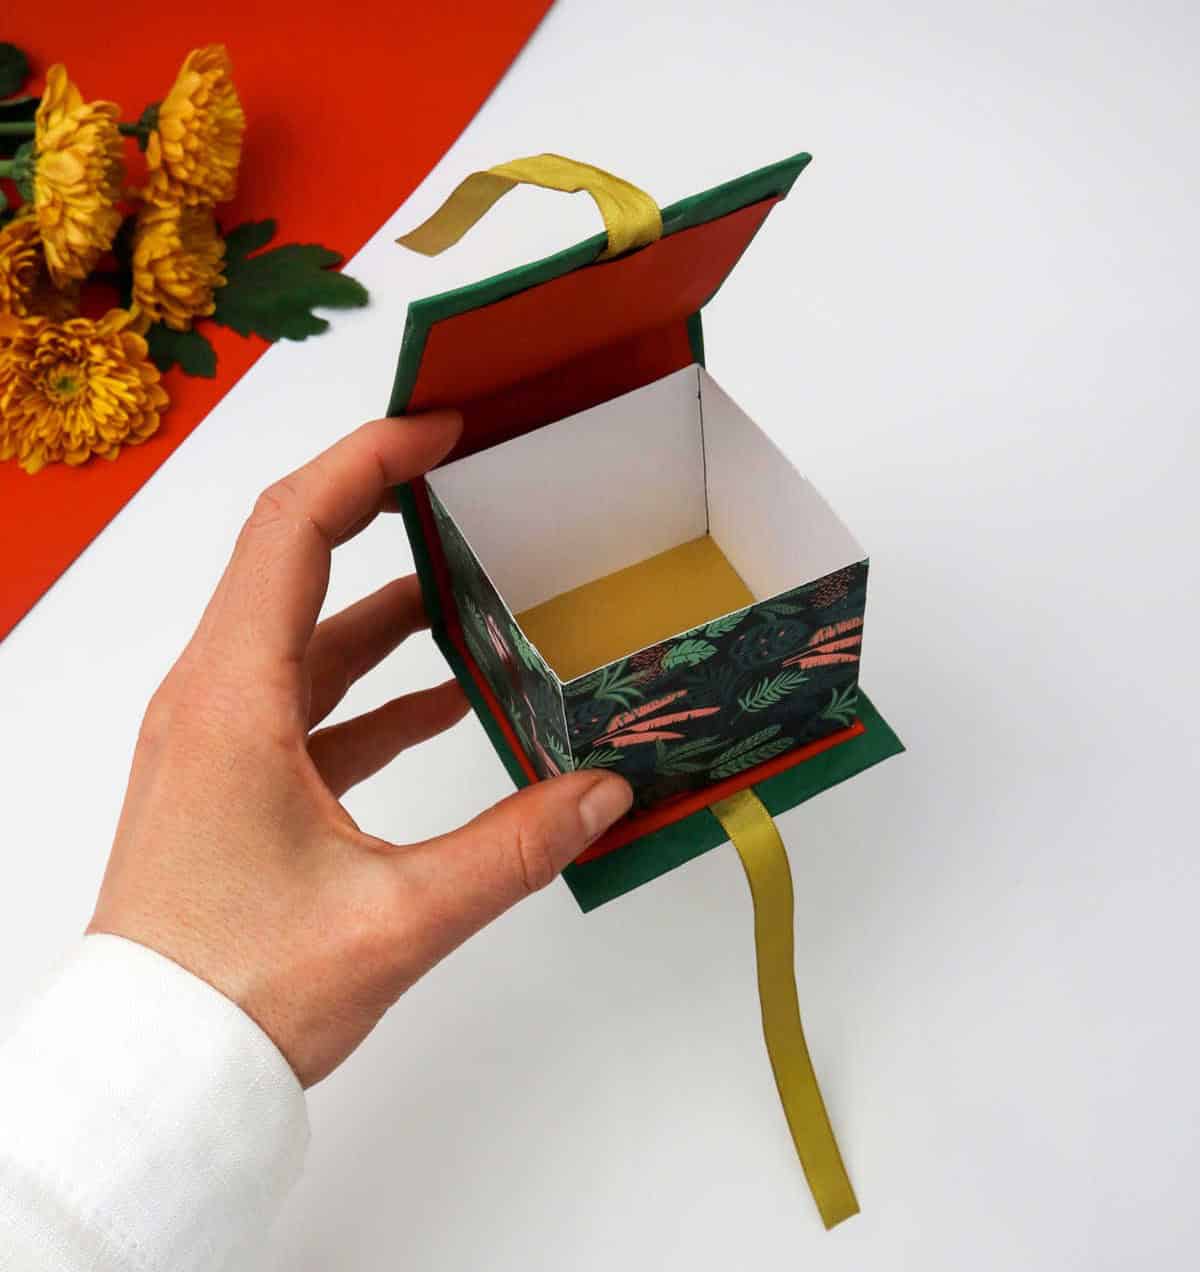
What Can You Use This Gift Box For?
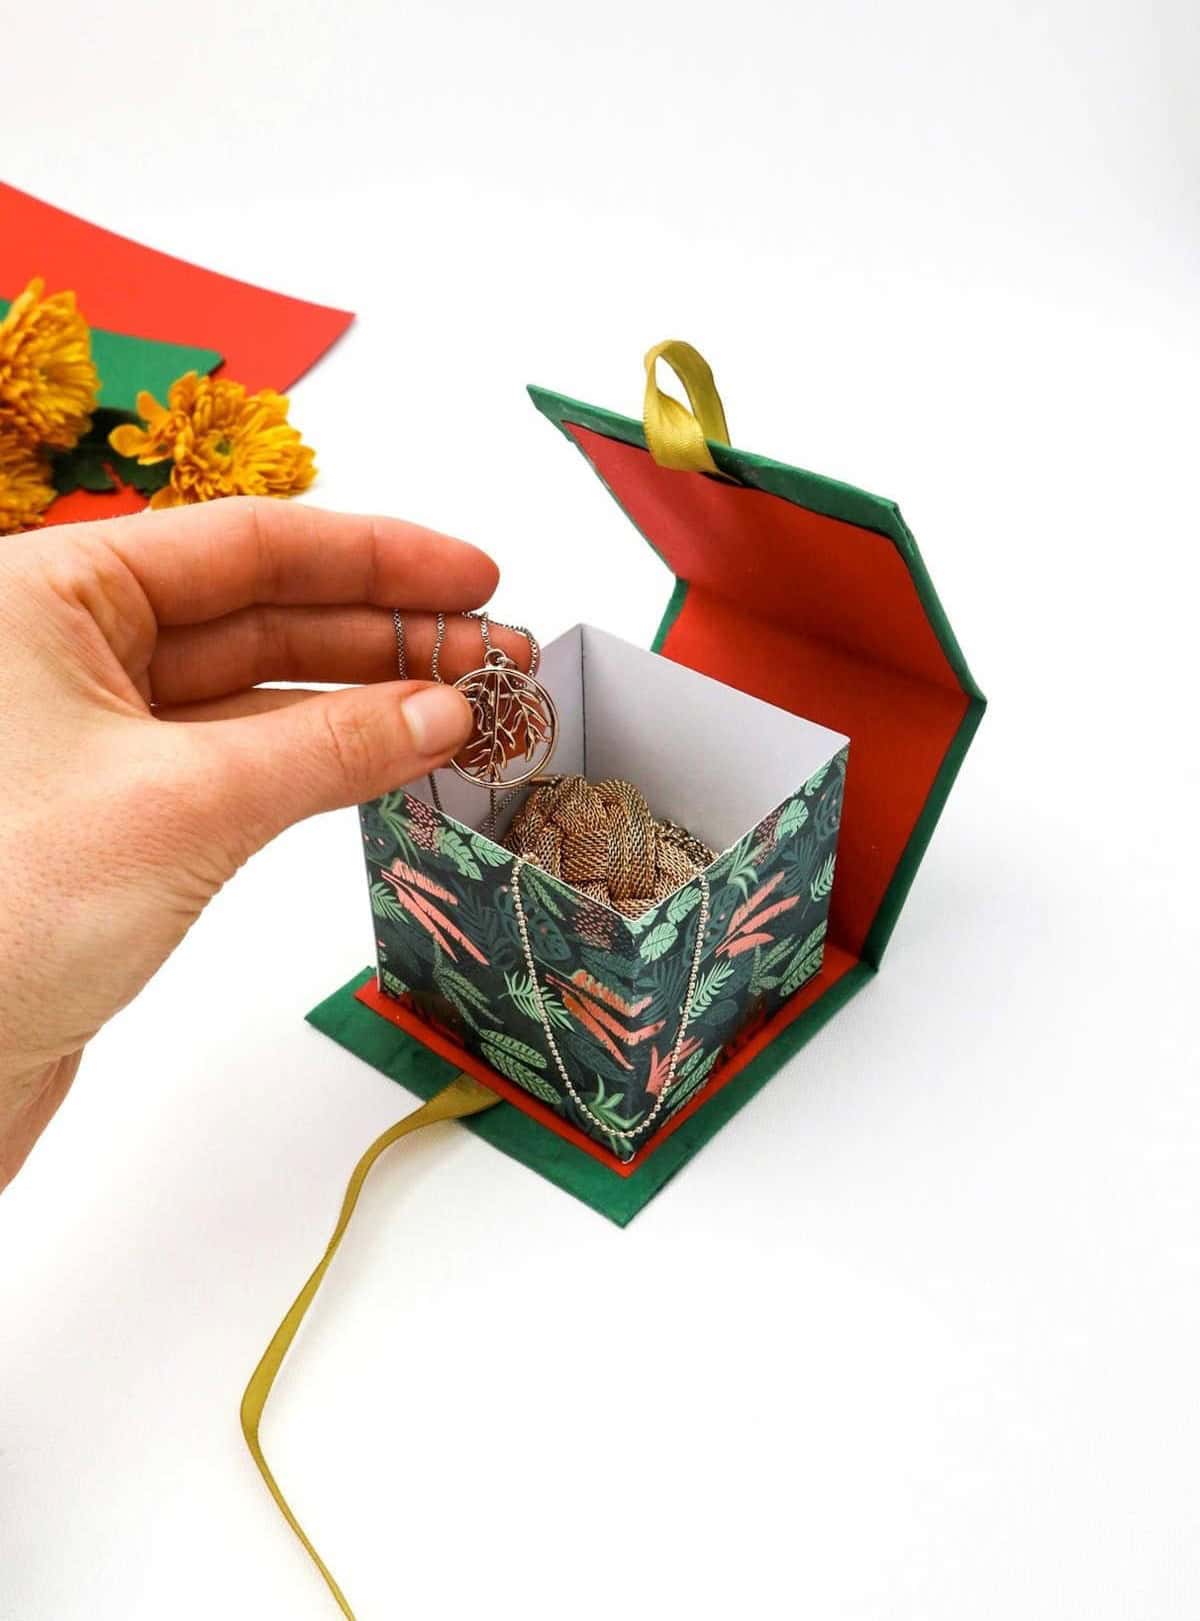
This versatile gift box offers endless possibilities. It can be filled with trinkets, party favors, confetti, or even sweet treats, making it an ideal present for friends, mothers, or sisters. If you’re looking for inspiration for your mom’s gift, consider our curated list of 20 Christmas gift ideas that are sure to delight her! Additionally, the box can be repurposed as a jewelry storage container, perfect for holding rings, earrings, and other precious items.
Other Gift Ideas
Looking for the perfect gift or card to show your loved one how much you care? From DIY projects to thoughtful tokens, we’ve got you covered. Whether it’s a birthday, anniversary, graduation, or holiday, our collection of unique and personalized ideas will help you find the ideal way to celebrate the special people in your life. Check out our selection of creative wire ornaments, romantic gifts for him, Christmas presents for mom and dad, and more.
How to Make a Gift Box
Transform a simple cardboard and craft paper combination into a thoughtful gift box that adds a personal touch to any DIY present. This accessible project is perfect for both teens and adults, requiring only 30 minutes of your time to create something truly special.
Equipment
To avoid interruptions while working on a creative project, ensure that your screen remains lit by adjusting the display settings on your device. This can be done by navigating to the relevant menu option and selecting ‘Never’ or ‘Until I wake up’ as the sleep timer. Alternatively, you can also use third-party apps or software to keep your screen awake for extended periods, ideal for long hours of focus.
Materials 1x2x3x
To create the DIY ornament, you will need a few basic materials. For the base of the ornament, you’ll require two cardboard squares measuring 3 inches by 3 inches, as well as one longer piece that is 3 inches wide and 1.5 inches tall. You’ll also need four different colors of craft paper: green for 9.5 inches by 4 inches, red for 8 inches by 2.5 inches, ornamented paper for 10.5 inches by 2.5 inches, and yellow for a smaller piece measuring 2.5 inches by 2.5 inches.
To hold everything together, you’ll need some craft glue. Finally, to add a decorative touch, you can use ribbon that is at least 20 inches long.
Instructions
Get ready to create a stunning DIY gift box! Begin by laying out a sheet of green craft paper on your work surface. Next, arrange three cardboard pieces side by side, with the smaller one nestled between the larger ones. Make sure there’s enough space around and between them. Secure the sides of the green craft paper with glue, folding the edges inward and over the cardboard. Cut a length of ribbon and attach it to the cardboard, leaving the ends sticking out.
Then, take red craft paper and cover the ribbon and cardboard, allowing it to dry completely. Gently bend the cardboard pieces into a three-walled structure. Draw an outline for the overlaps on another sheet of paper, cutting along those lines. Fold the overlap edges inward four times along vertical lines, securing them with adhesive. Carefully attach the ends of the overlaps to form a cube shape. Place the overlaps over the cardboard, ensuring they’re evenly spaced.
To complete the box, cut a square of craft paper and adhere it inside as the base. Allow the glue to set before filling the box with your treasures!