Transform ordinary toilet paper rolls into extraordinary DIY phone holders that will delight both kids and adults. The creativity of upcycling never ceases to amaze! Who needs to buy a phone holder when you can craft one in the comfort of your own home? This clever project is not only budget-friendly but also ridiculously easy to make, using materials you likely already have on hand.
So why not give it a try and join the ranks of DIY enthusiasts who relish the thrill of turning trash into treasure?
What You’ll Need to Make These Phone Holders
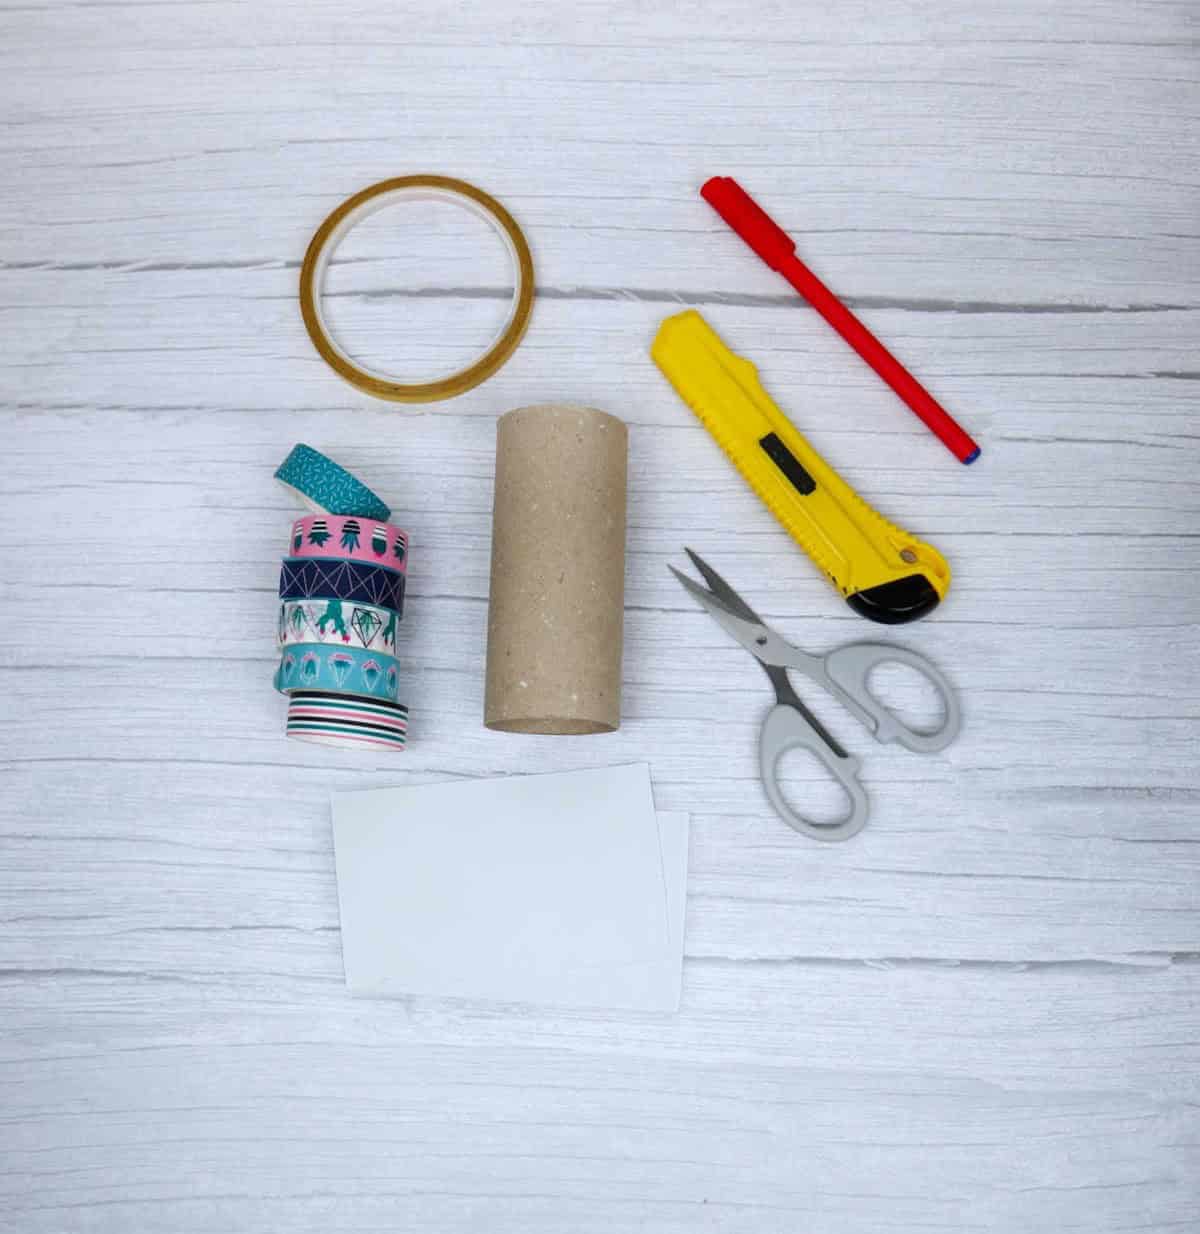
To get started on this DIY project, you’ll need a few basic supplies. Make sure you have the following materials at hand: scissors or a cutter for trimming any excess material, a marker for labeling purposes, a toilet paper roll that will serve as the base of your creation, some washi tape to hold things together, double-sided tape or glue to secure everything in place, and two pieces of paper measuring 2.5 by 3 inches each.
A ruler is optional but can come in handy if you need to make precise cuts. Once you have all these supplies ready to go, you can proceed to the step-by-step tutorial that will walk you through the process.
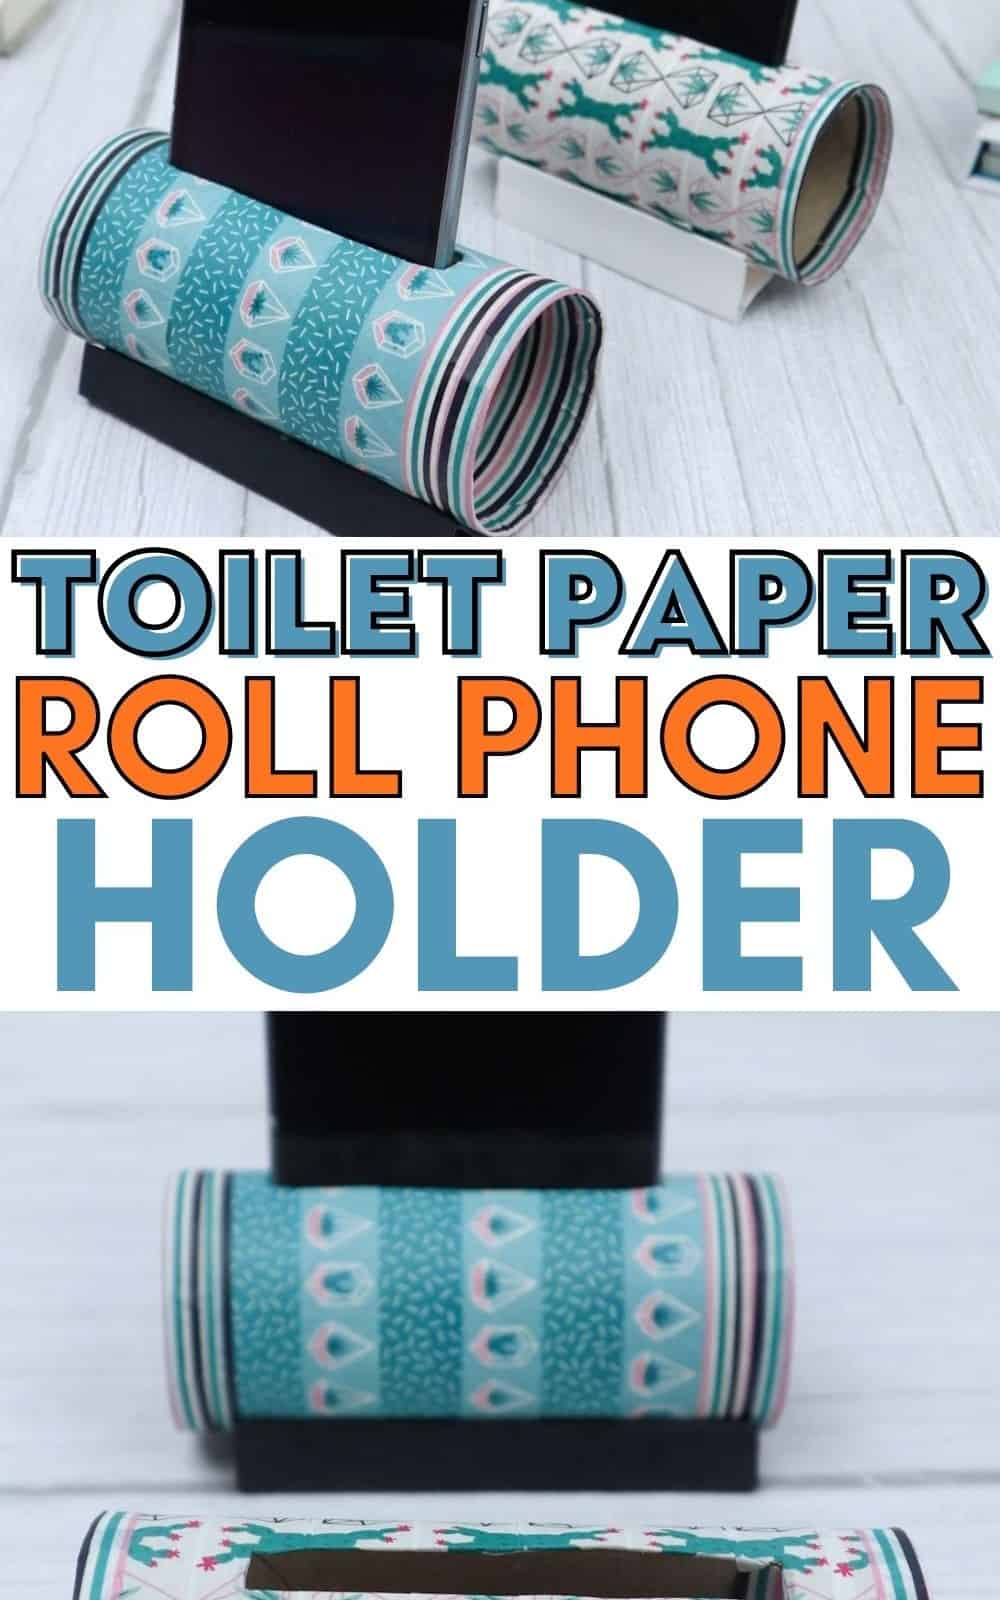
How to Make DIY Phone Holder from Toilet Paper Roll
Before diving into the nitty-gritty details of this DIY endeavor, let’s take a moment to prepare ourselves. Take out your trusty mobile device and have it readily available – we’re about to get started!
Step 1
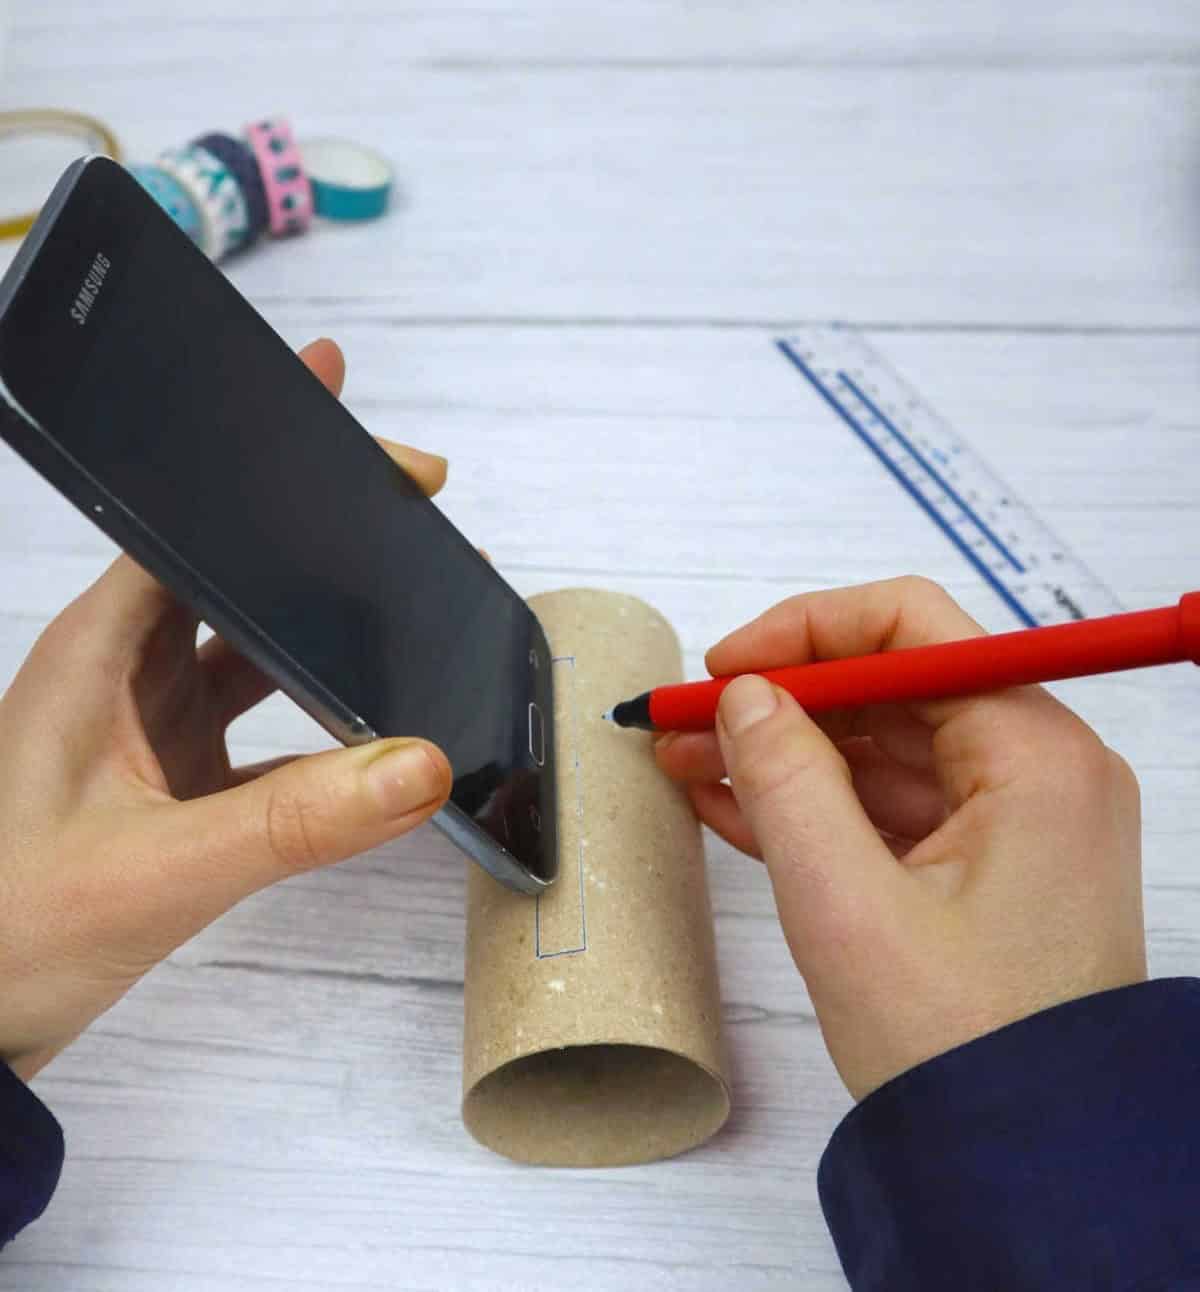
To determine the ideal size of your mobile holder slot, simply place the toilet roll against your mobile stand and draw a pencil outline around the base of your phone. Be sure to leave sufficient clearance for easy placement and removal of your device, while also ensuring a snug fit to prevent it from shifting or falling off.
Step 2
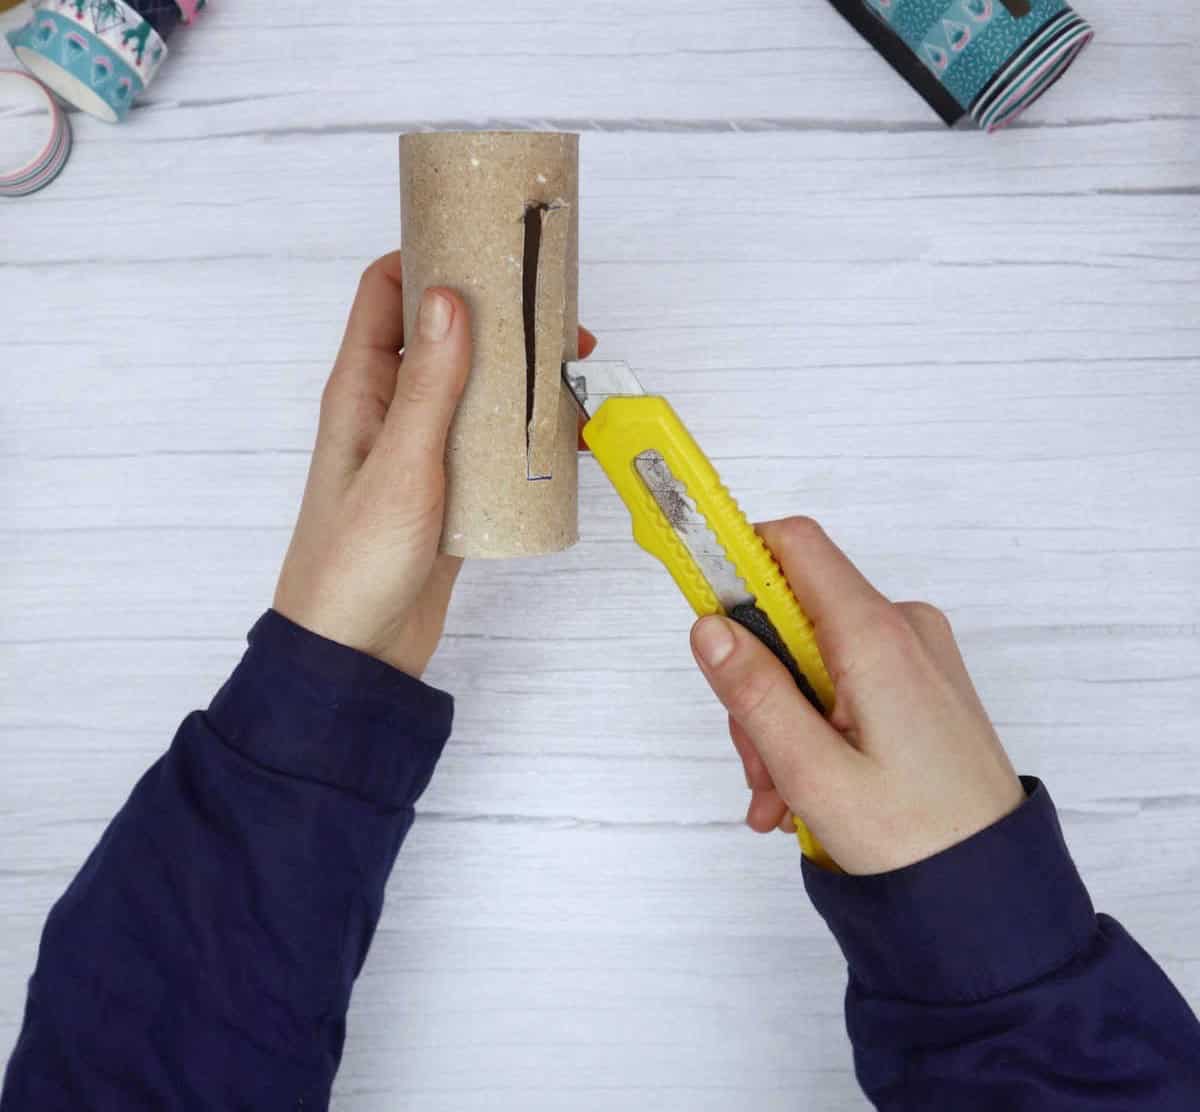
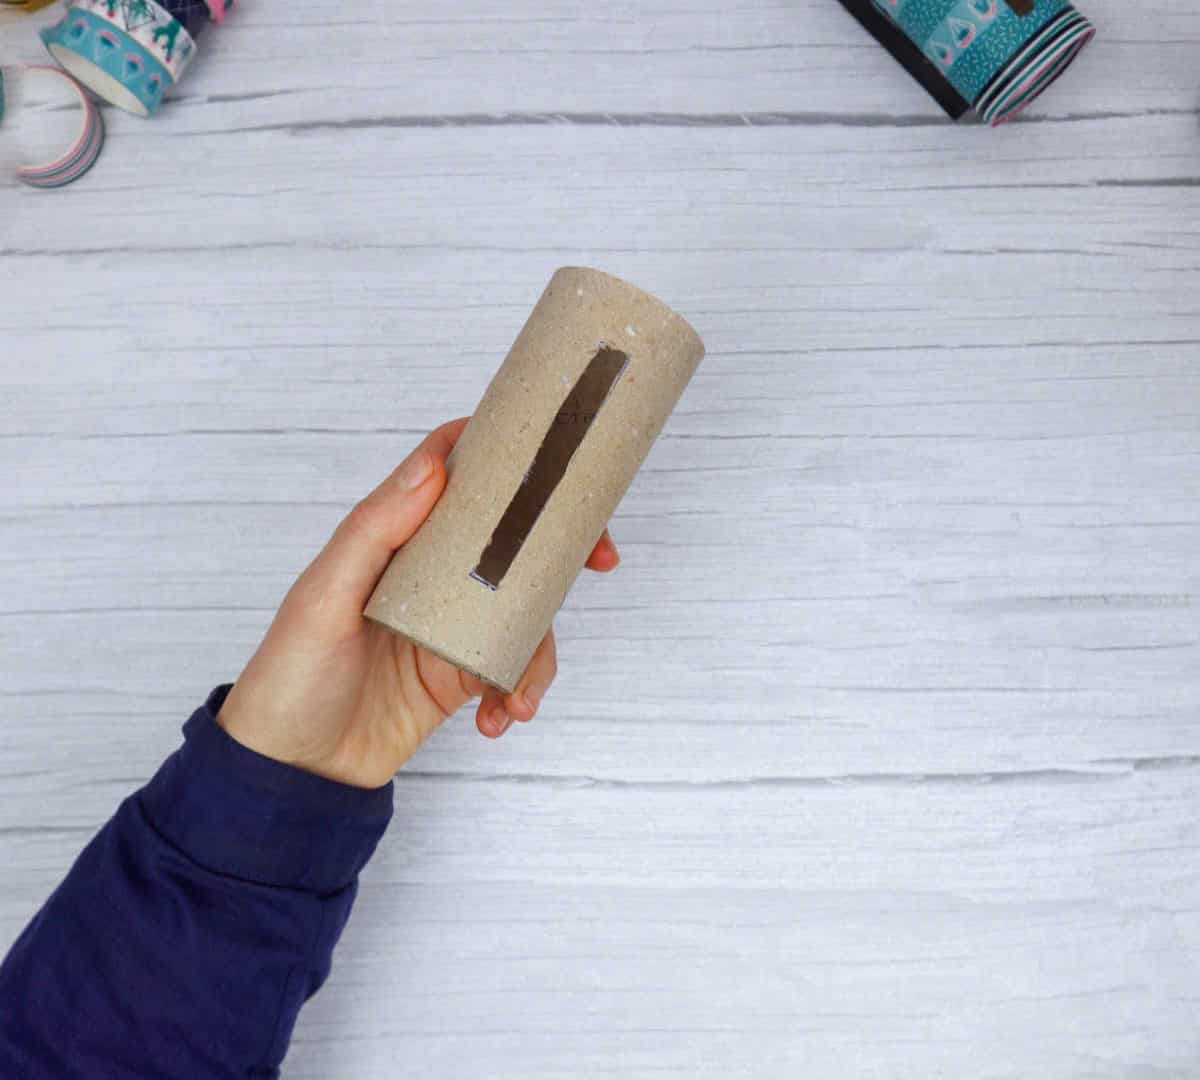
To complete the design, utilize your craft cutter to carefully excise the outline you’ve just created. It’s crucial to achieve a seamless edge, free from any rough or jagged areas. As a result, your toilet paper core should now have a smooth, refined appearance.
Step 3
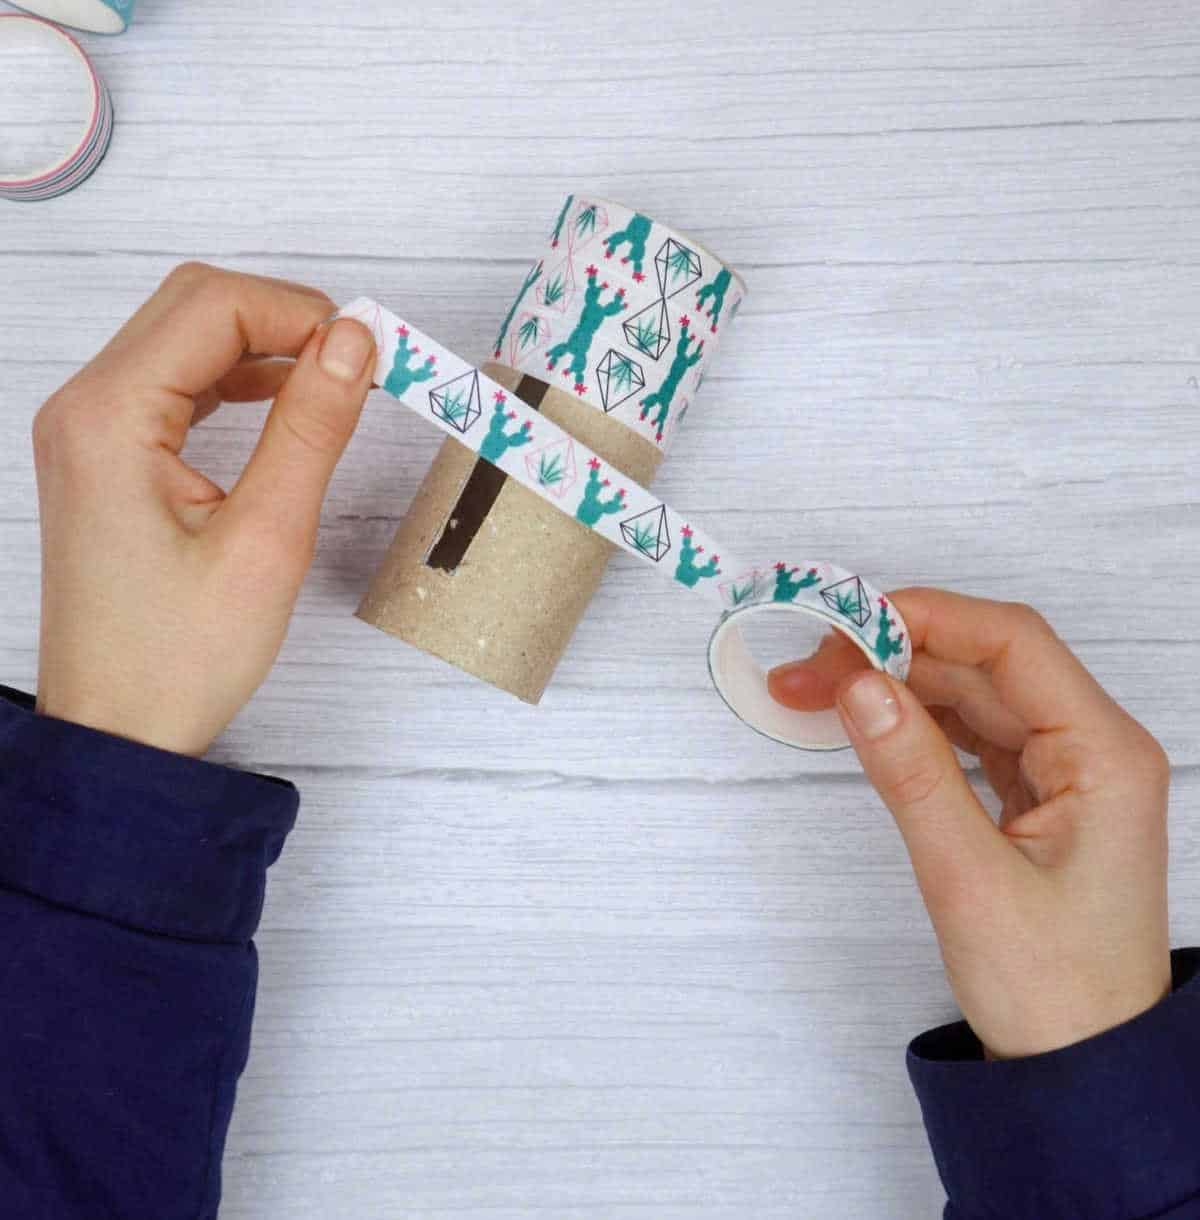
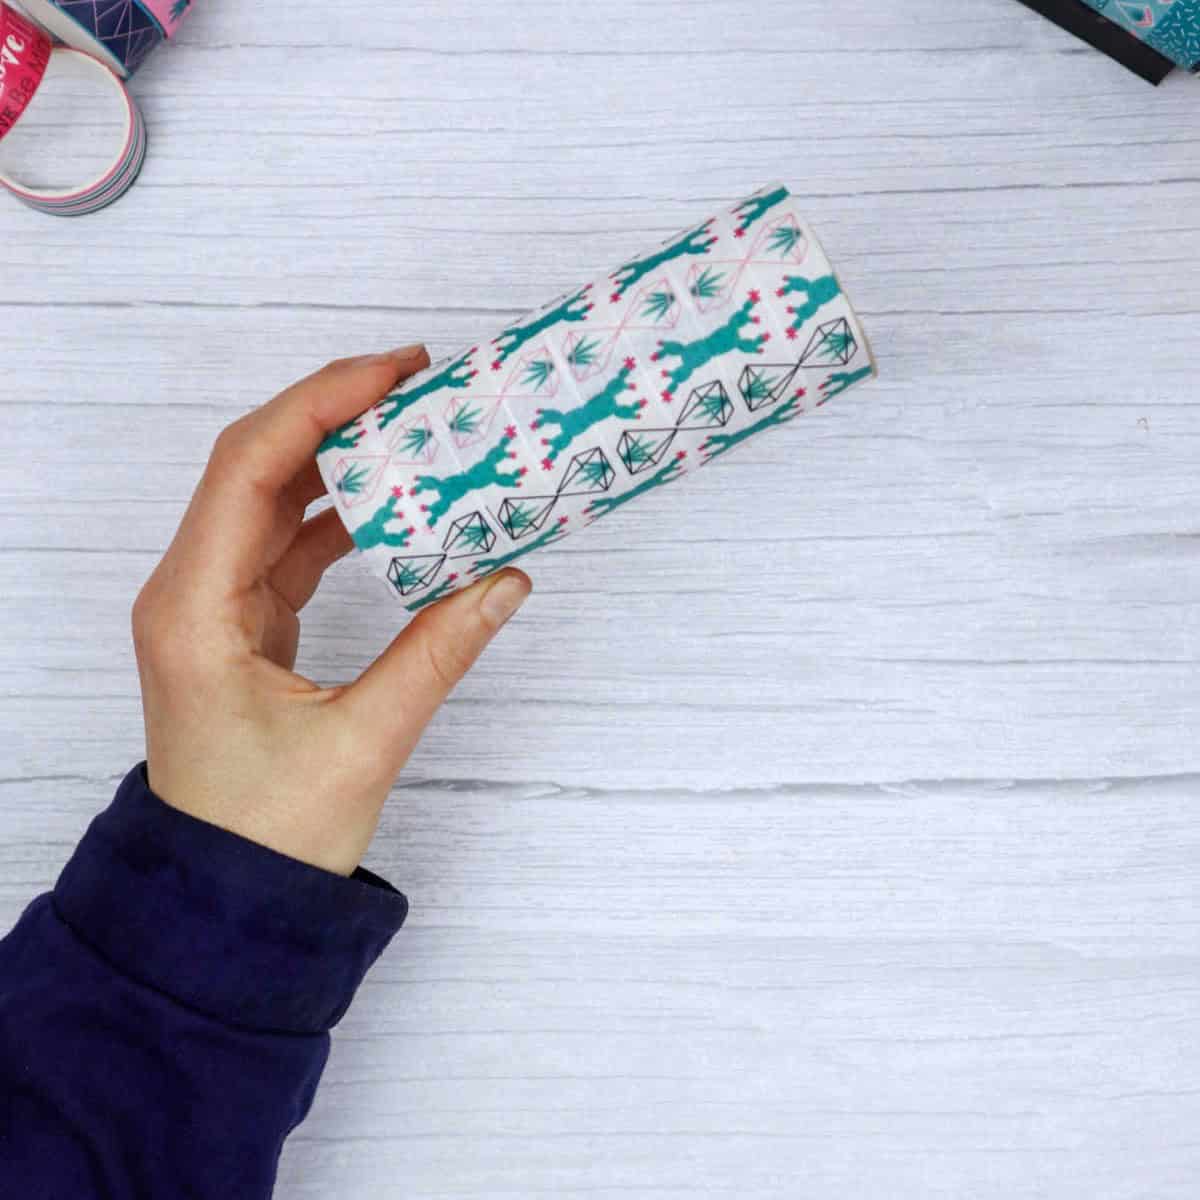
As the most enjoyable aspect of this DIY project, decorating brings the entire endeavor to life. To get started, make sure you have a stash of washi tape at your disposal. Then, take those rolls and begin wrapping them artfully around the toilet paper roll. Feel free to stick with a single design or let your creativity shine by incorporating different patterns and colors.
Just remember, we’ll be addressing the phone slot later in the process, so don’t worry too much about covering it up just yet.
Step 4
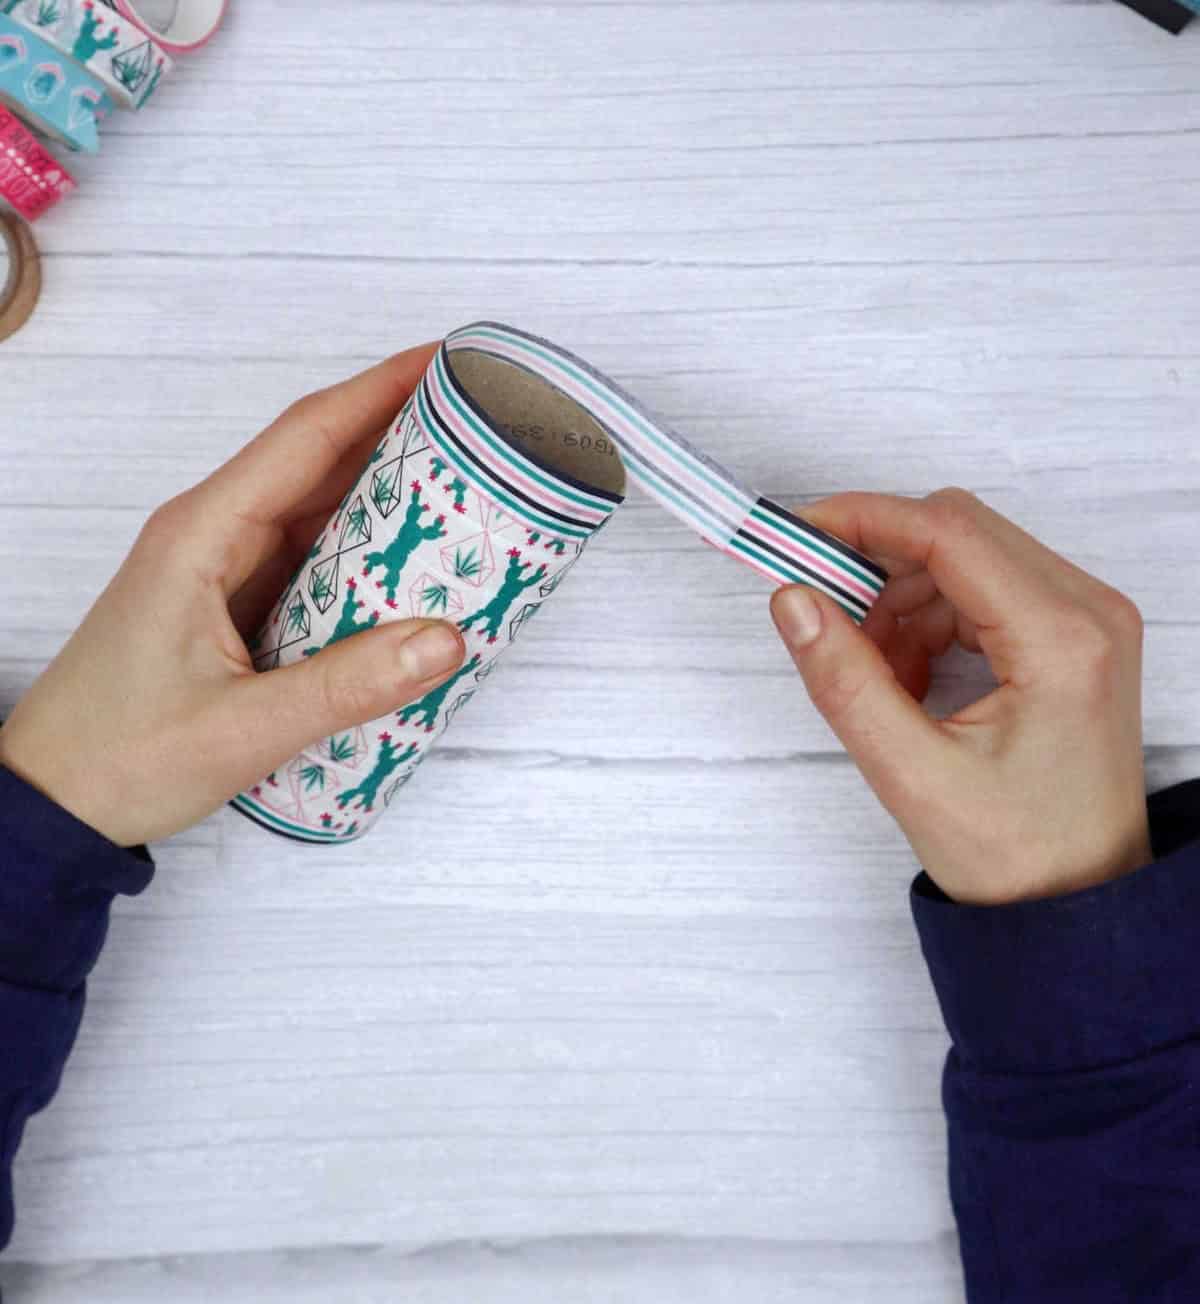
To transform your toilet paper holder into a charming decorative piece, take a closer look at the exposed rims and brown cardboard interior. This is where you can add a pop of color and style. Reaching for your trusty washi tape once more, apply a layer around the rim, ensuring that three-quarters of it protrude beyond the roll.
Step 5
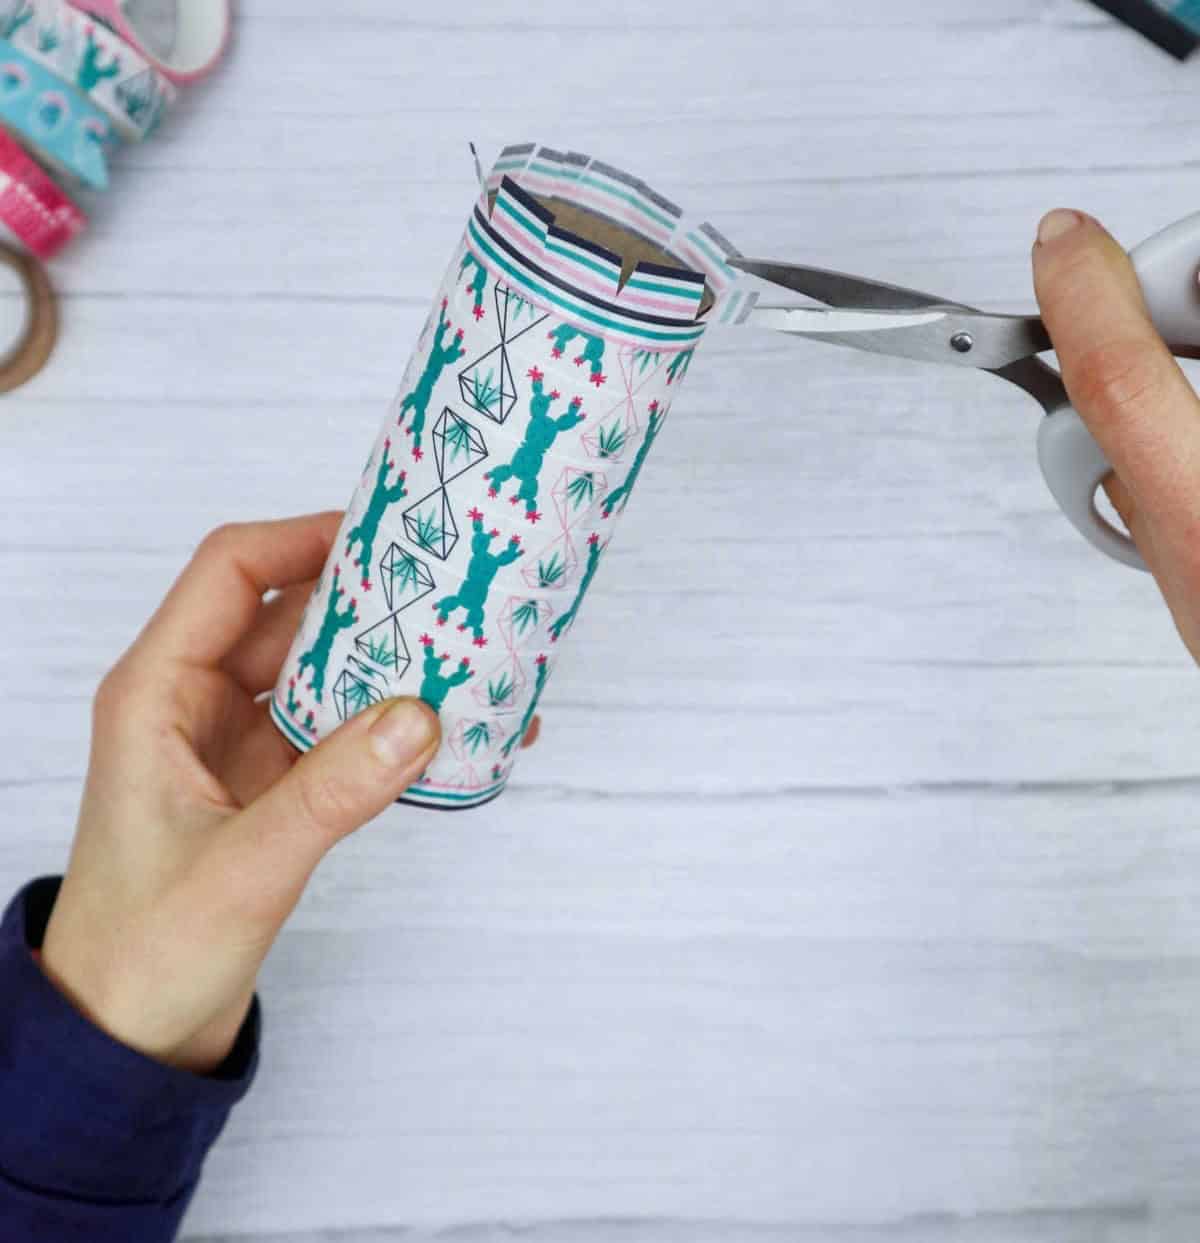
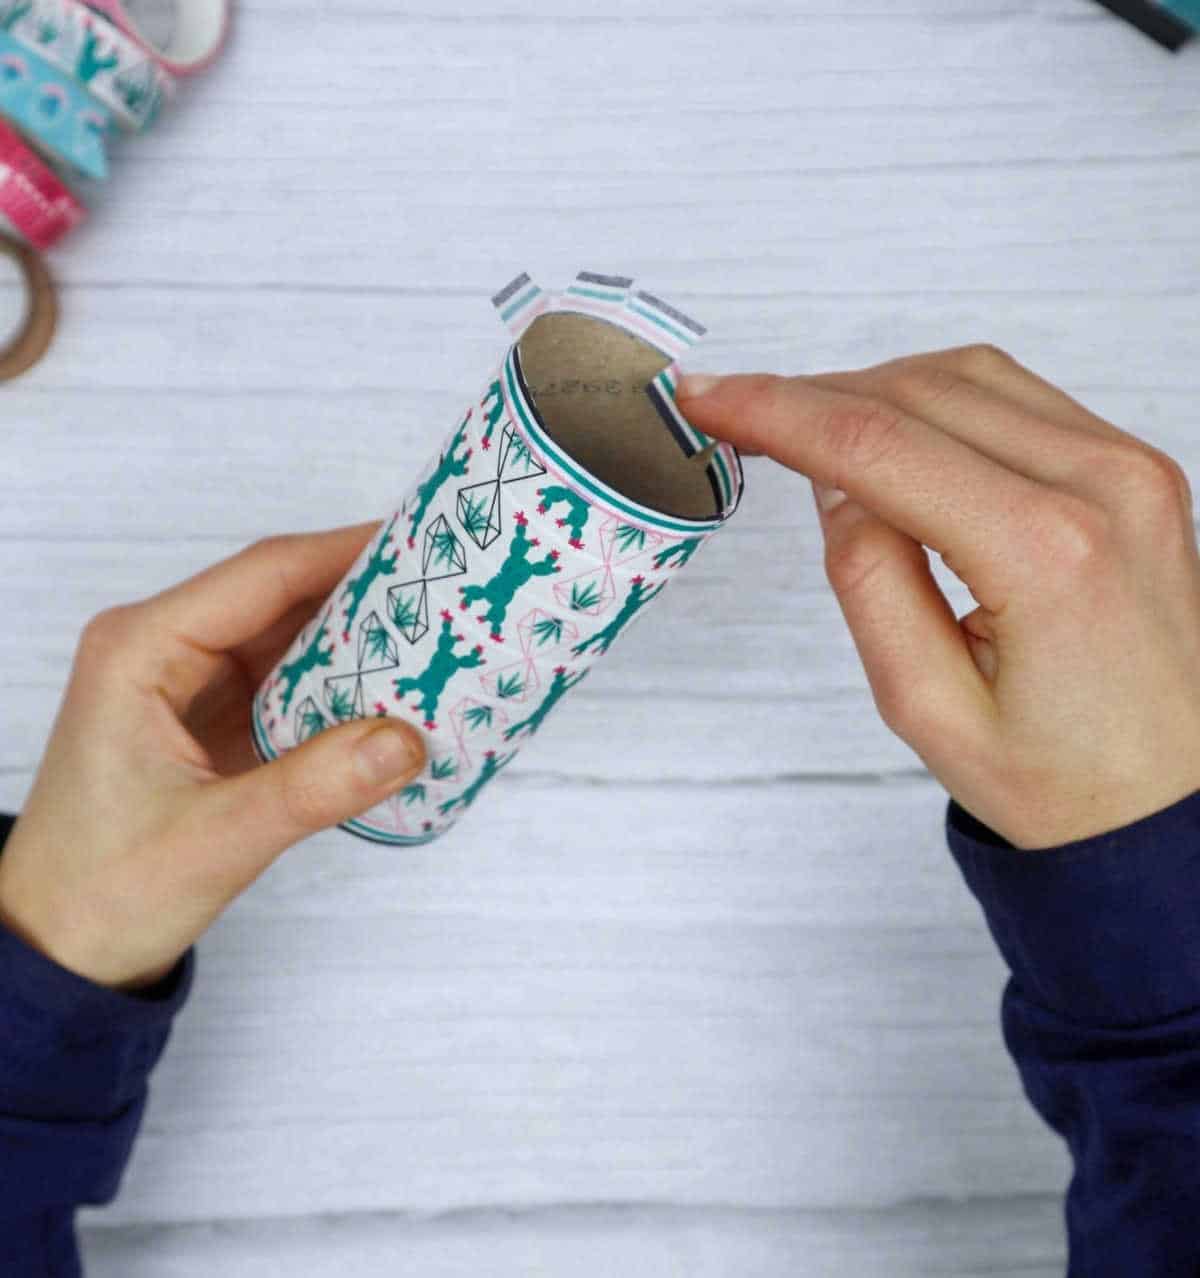
To enhance the appearance of your DIY project, start by carefully cutting small slits around the adhesive tape’s perimeter using scissors. This will create movable flaps that can be manipulated to achieve the desired look. Next, gently press each flap inward, folding them towards the cardboard as you go. Once all the flaps are in place, apply the tape to the cardboard, ensuring a seamless bond.
As a finishing touch, add a decorative border along the entire diameter of the tape, effectively concealing any remaining edges and giving your project a polished appearance.
Step 6
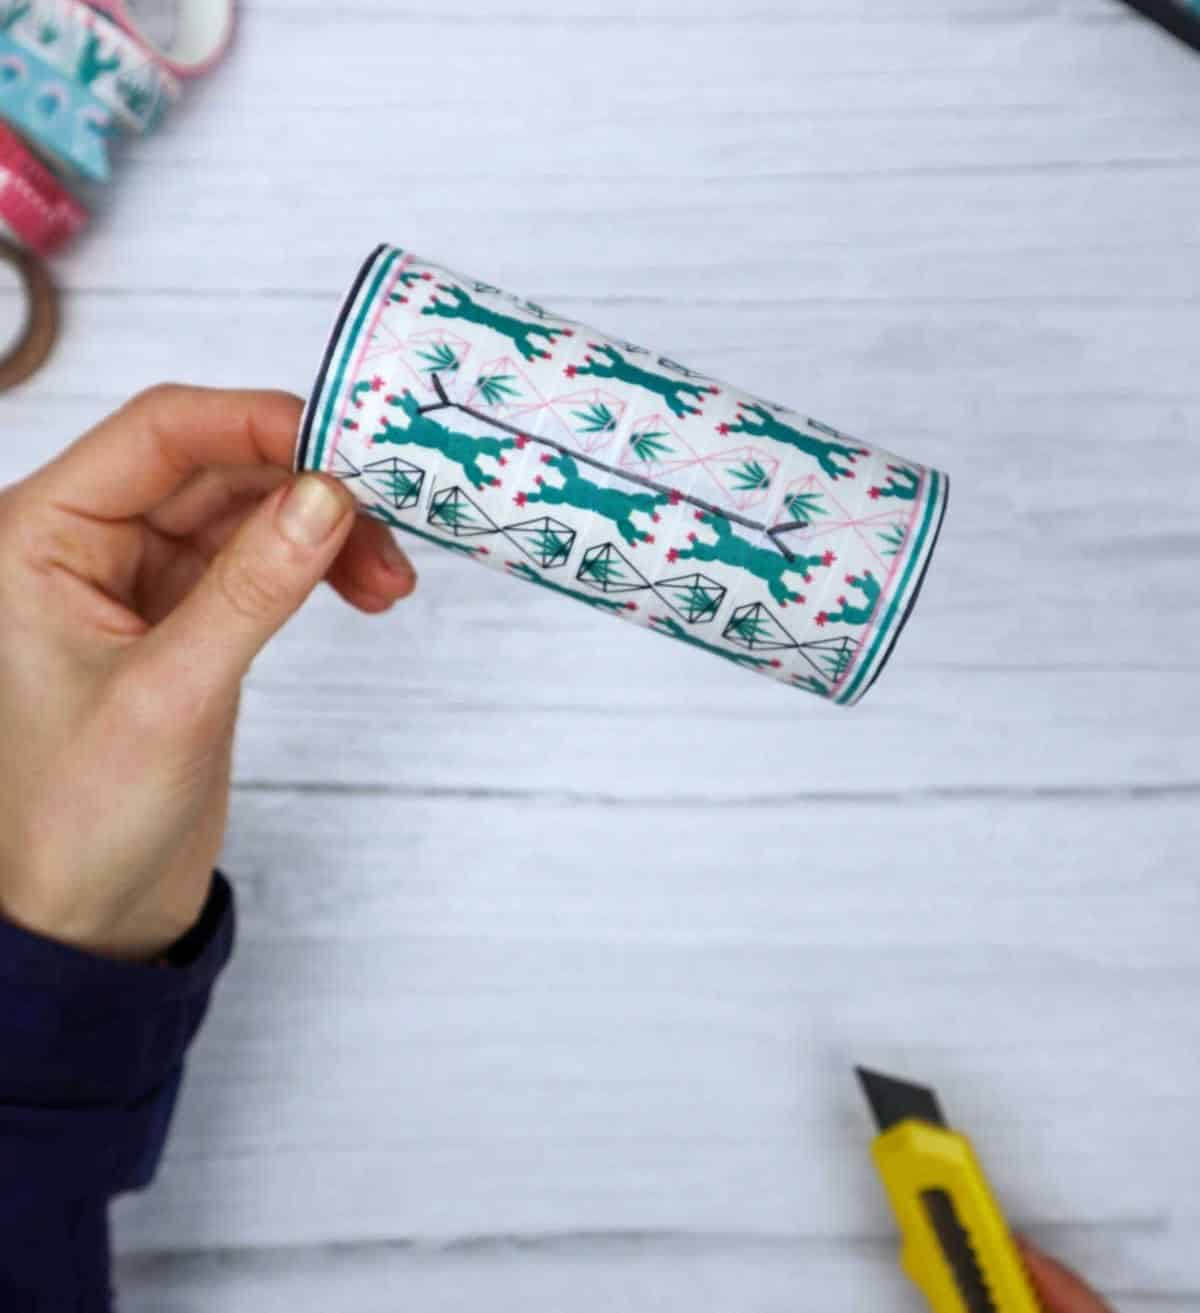
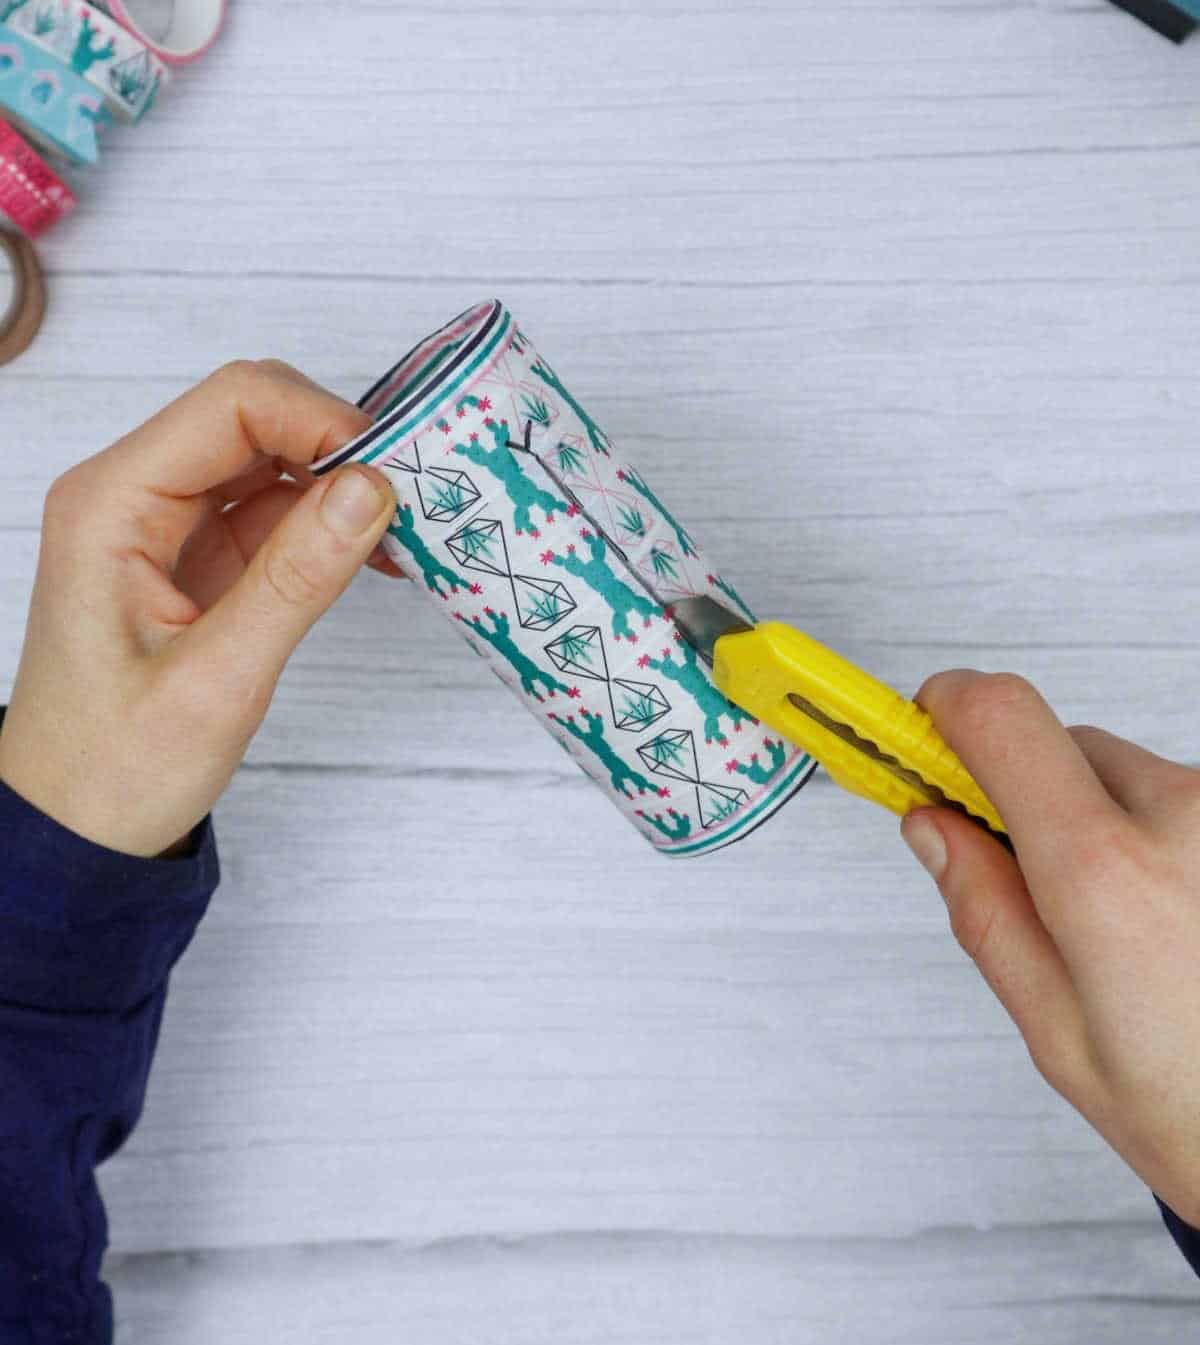
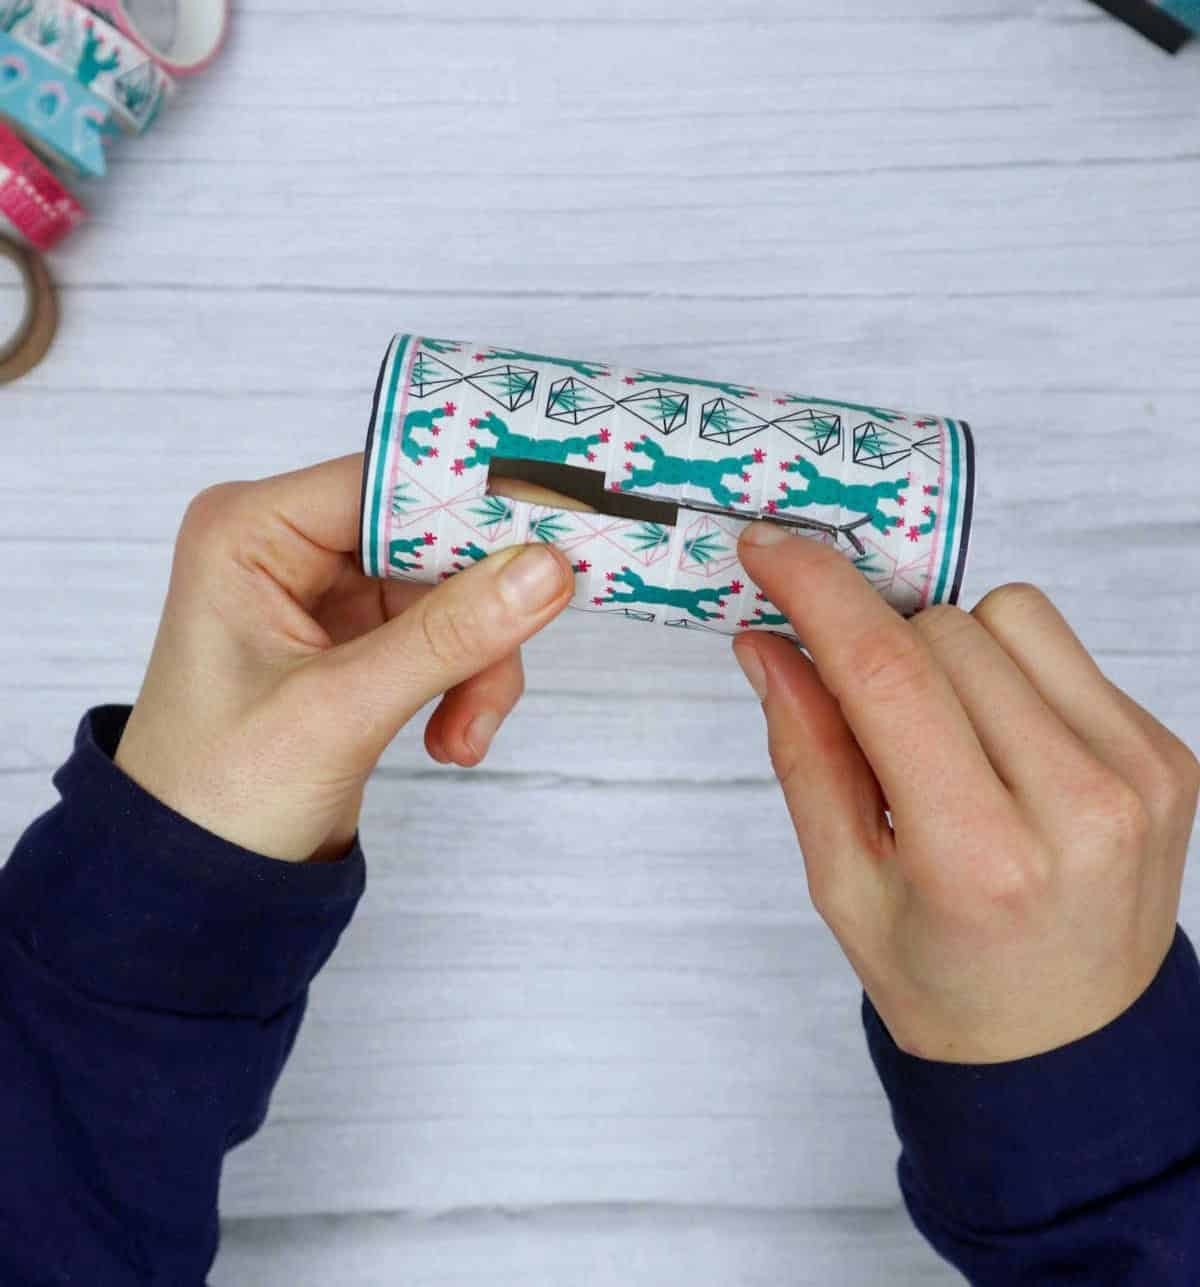
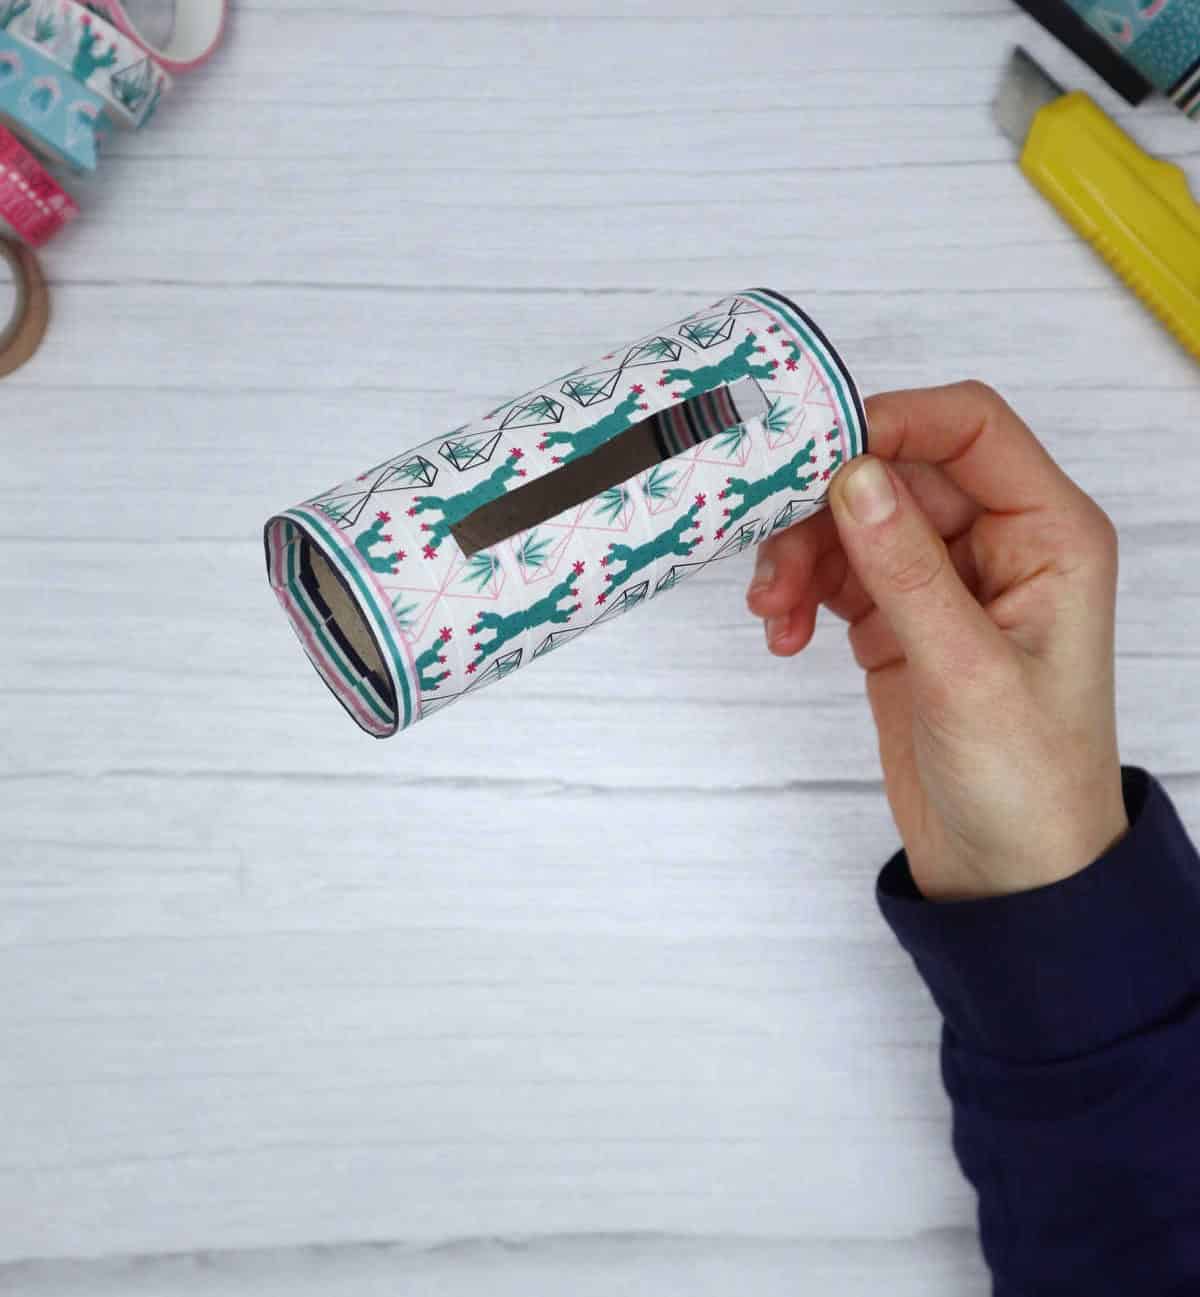
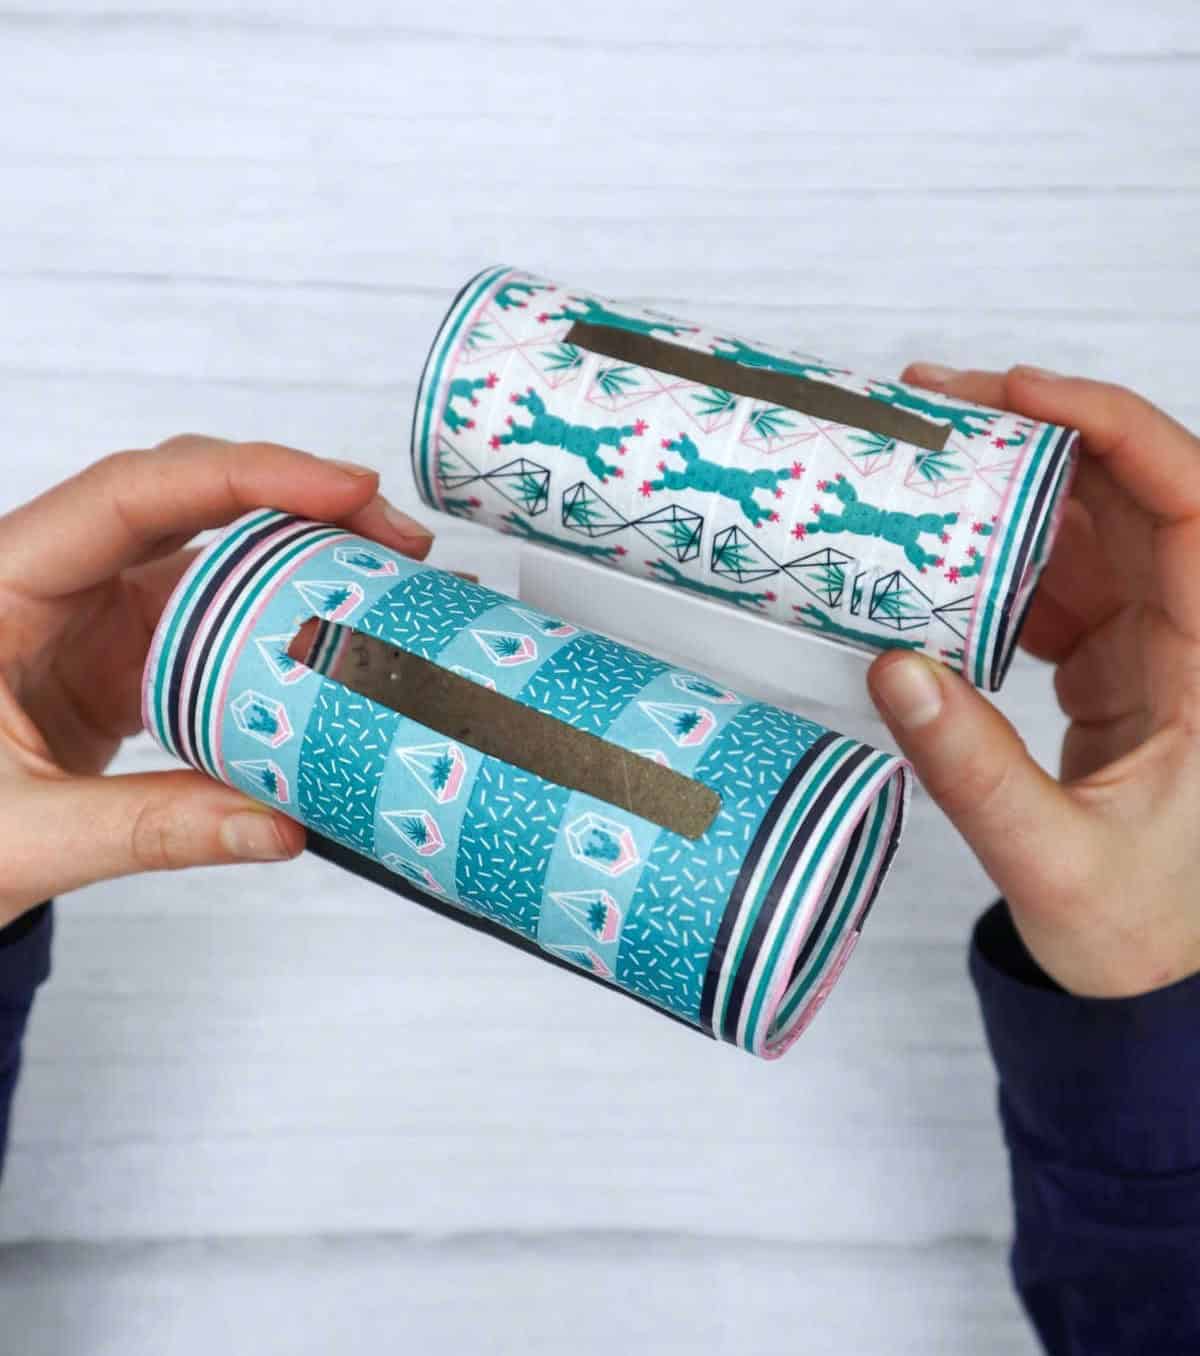
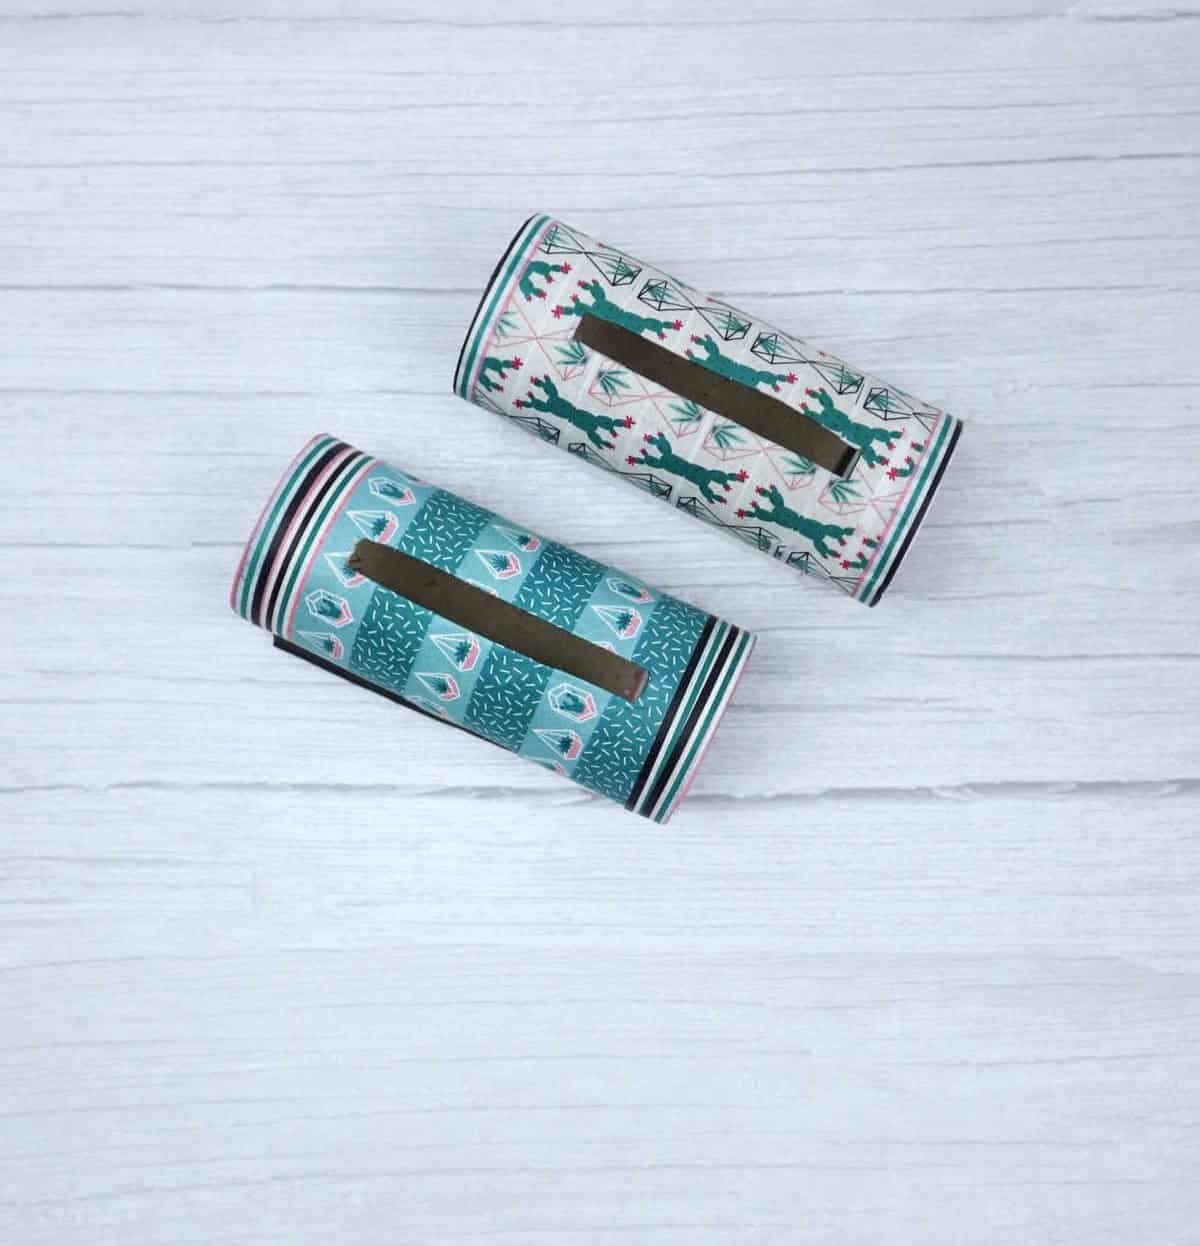
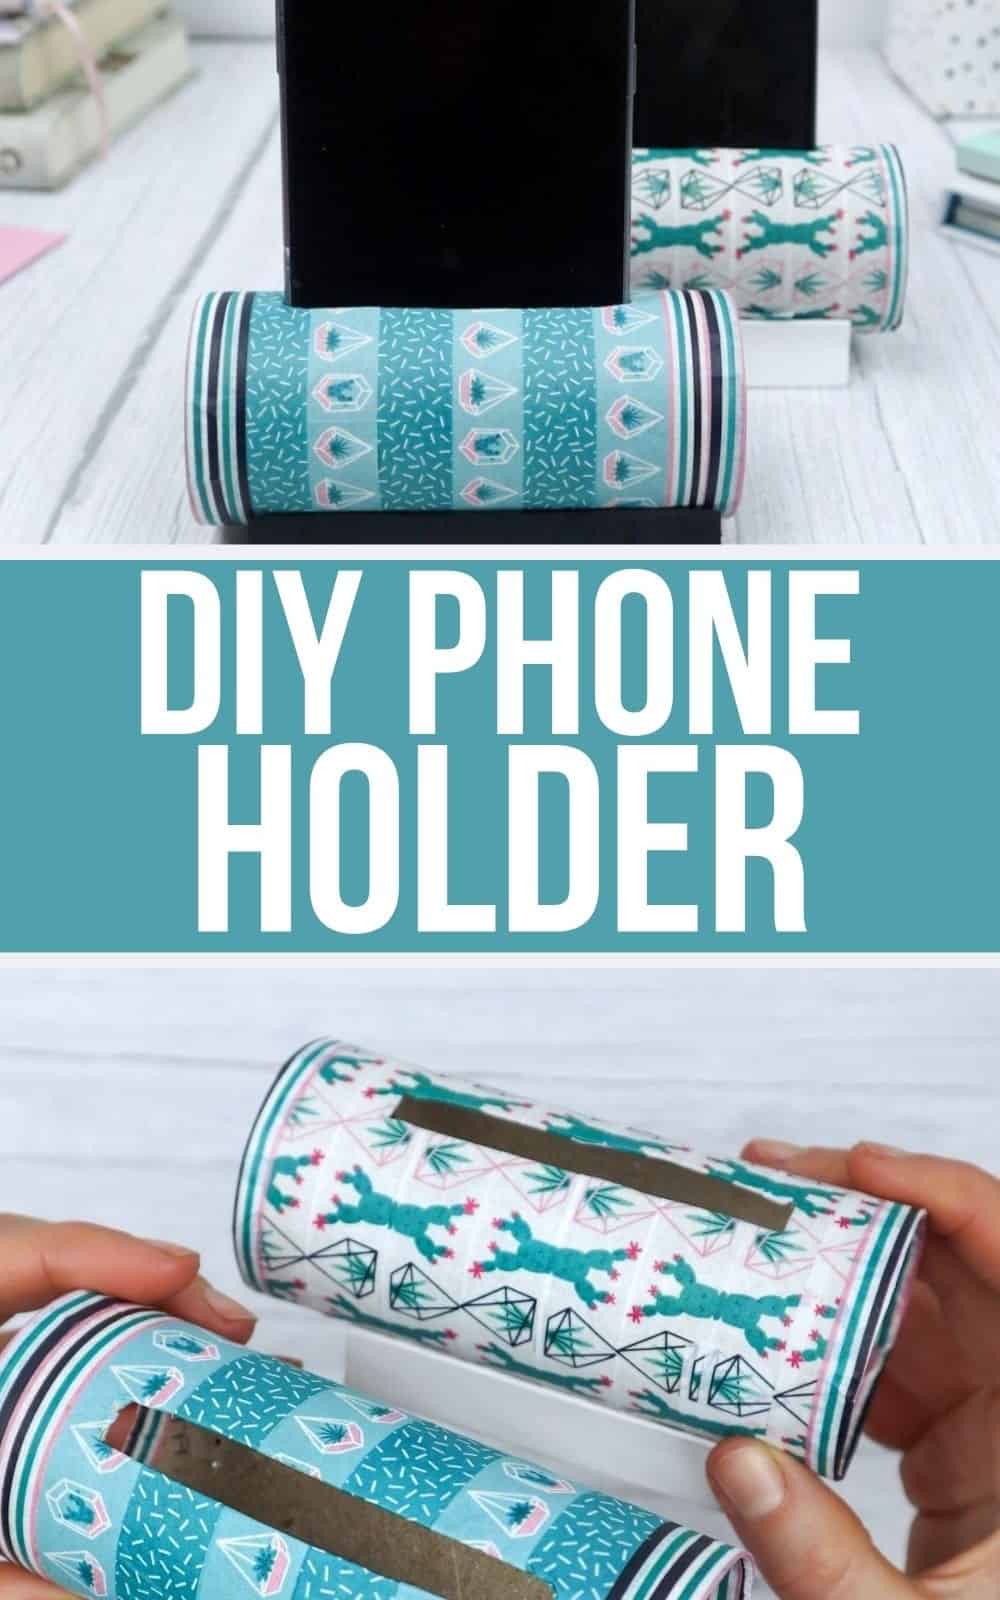
If you’ve encountered a stubborn phone slot cover, don’t stress! Now’s the perfect opportunity to tackle that pesky issue. Grab your trusty craft cutter and meticulously cut a precise line along the outline of the hole. A valuable tip: when trimming the tape to size, ensure you make one smooth pass with two subtle v-shaped notches at either end. This clever technique will allow you to smoothly press the tape into place, lining up the edges perfectly as you go.
By doing so, you’ll effortlessly conceal any cardboard interior, resulting in a polished and professional-looking finished product.
Step 7
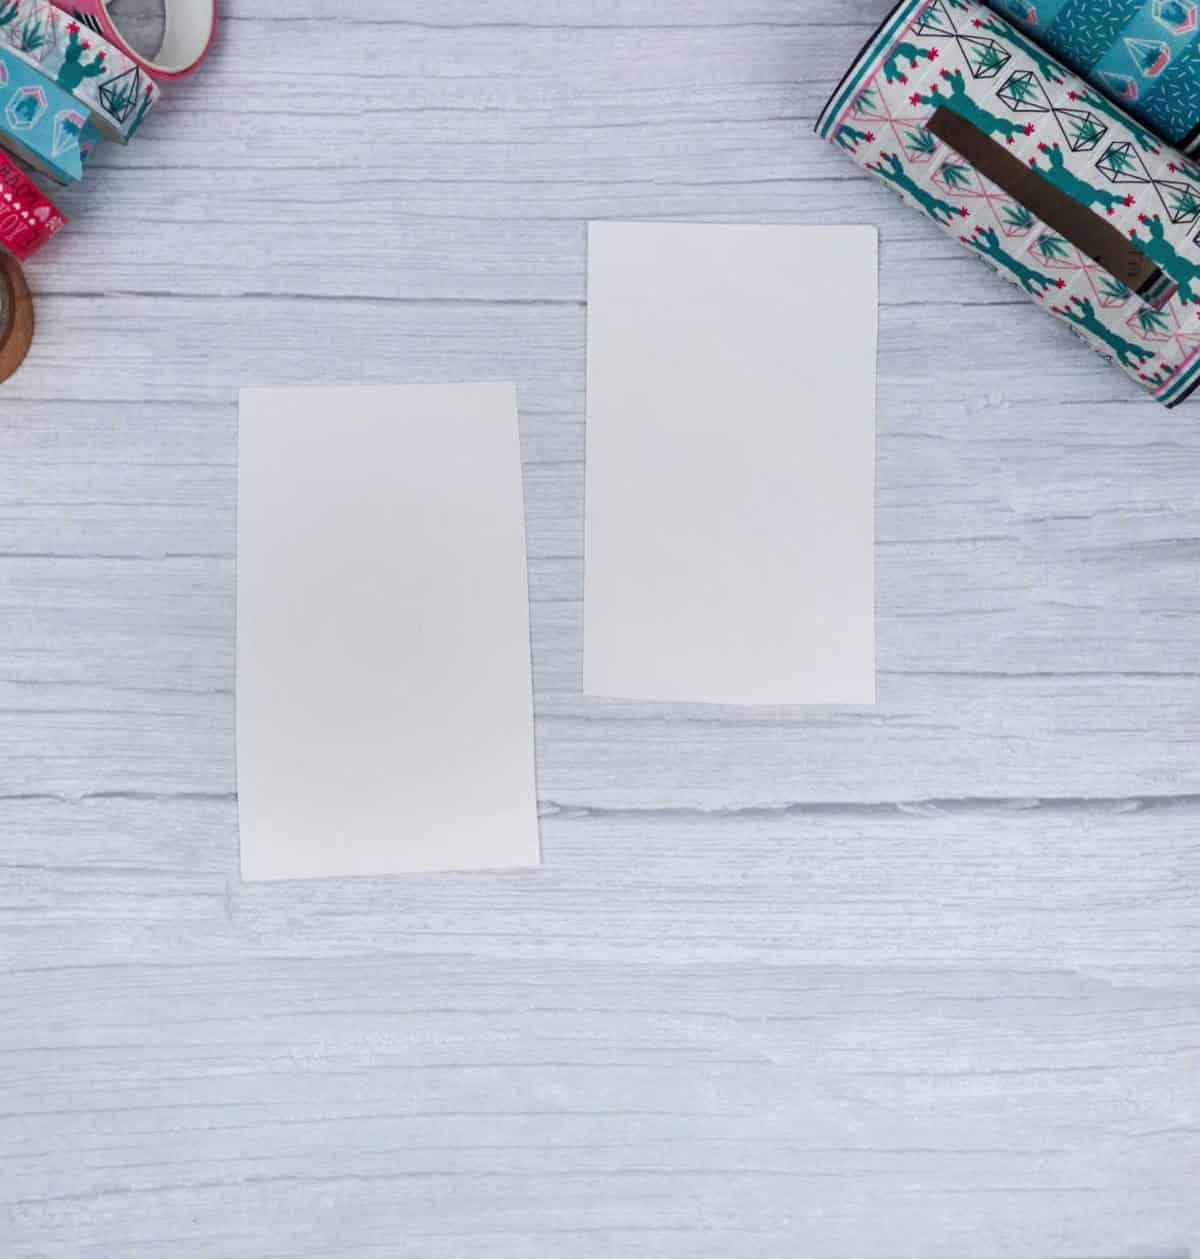
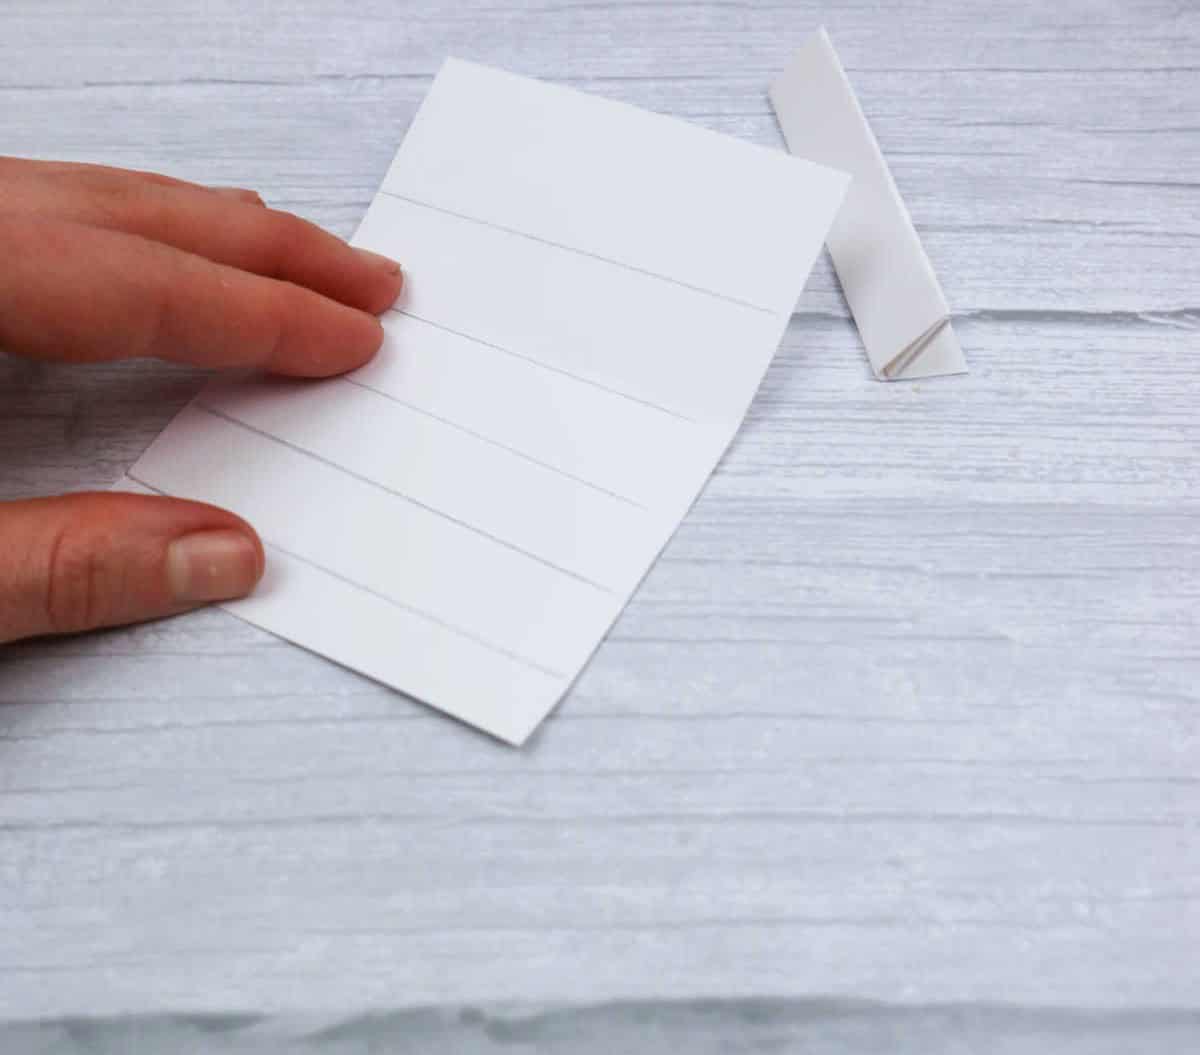
As you prepare to bring your DIY vision to life, it’s now time to tackle the creation of the legs or holders that will provide support for your project. This step is relatively straightforward and requires only a simple tool: paper. To get started, take one sheet of paper and divide it into six equal strips. This initial step lays the foundation for the rest of your DIY journey.
Step 8
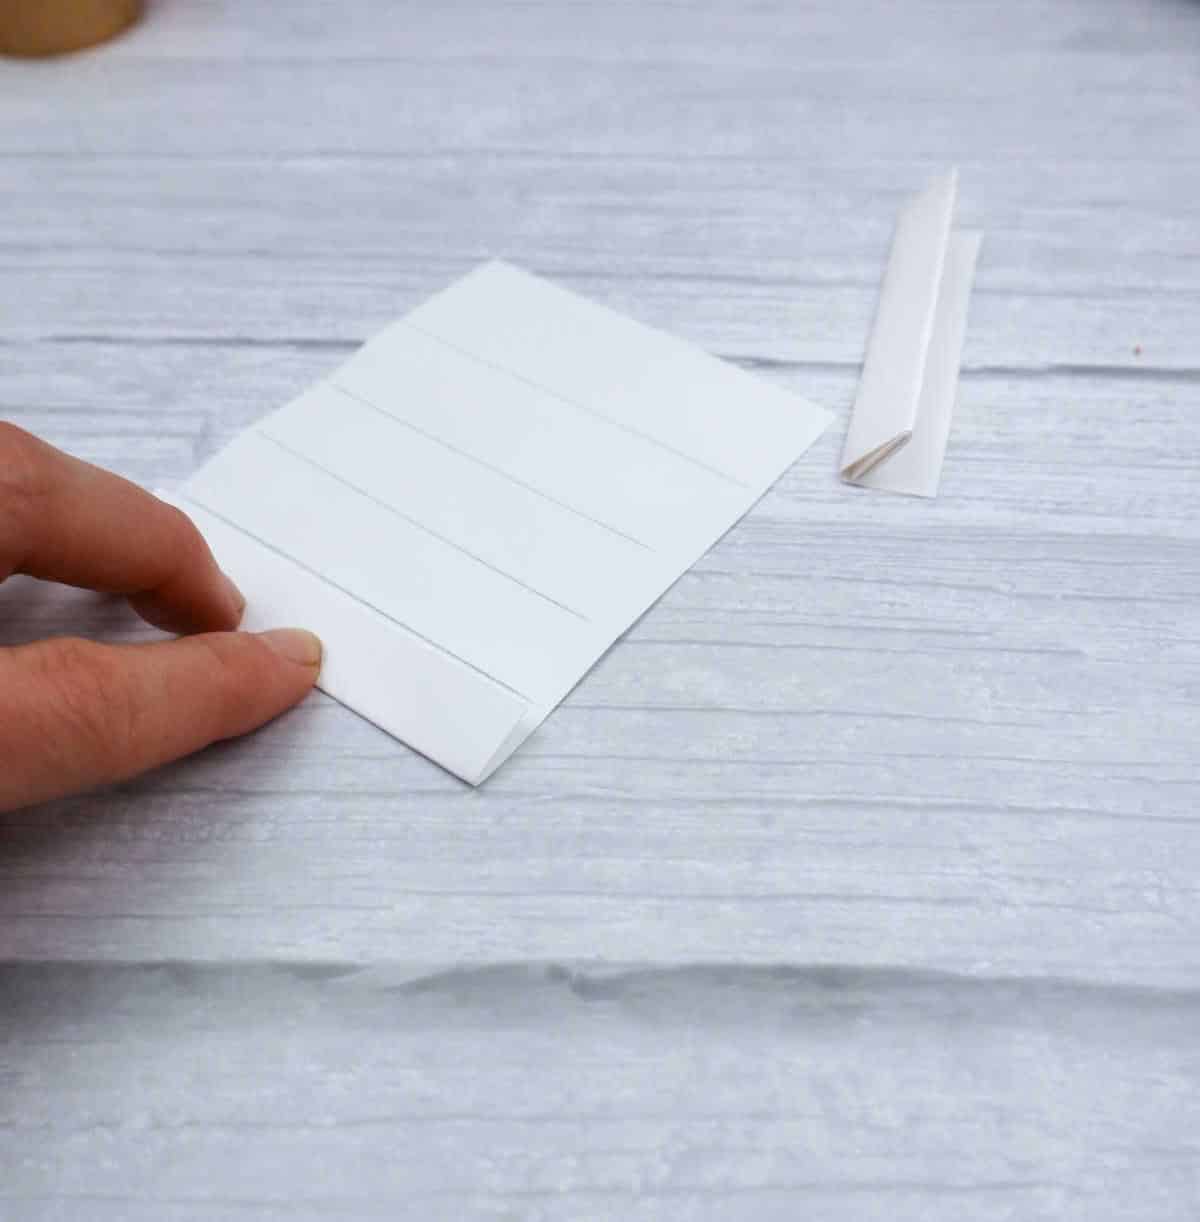
To create the desired shape, start by folding each strip inward along the center line, ensuring they are symmetrical. Press down firmly to create a crisp crease in each fold. Once complete, carefully unfold the strips, allowing them to spring back into their zig-zag formation. The result should be a pleasingly textured and visually appealing strip of paper.
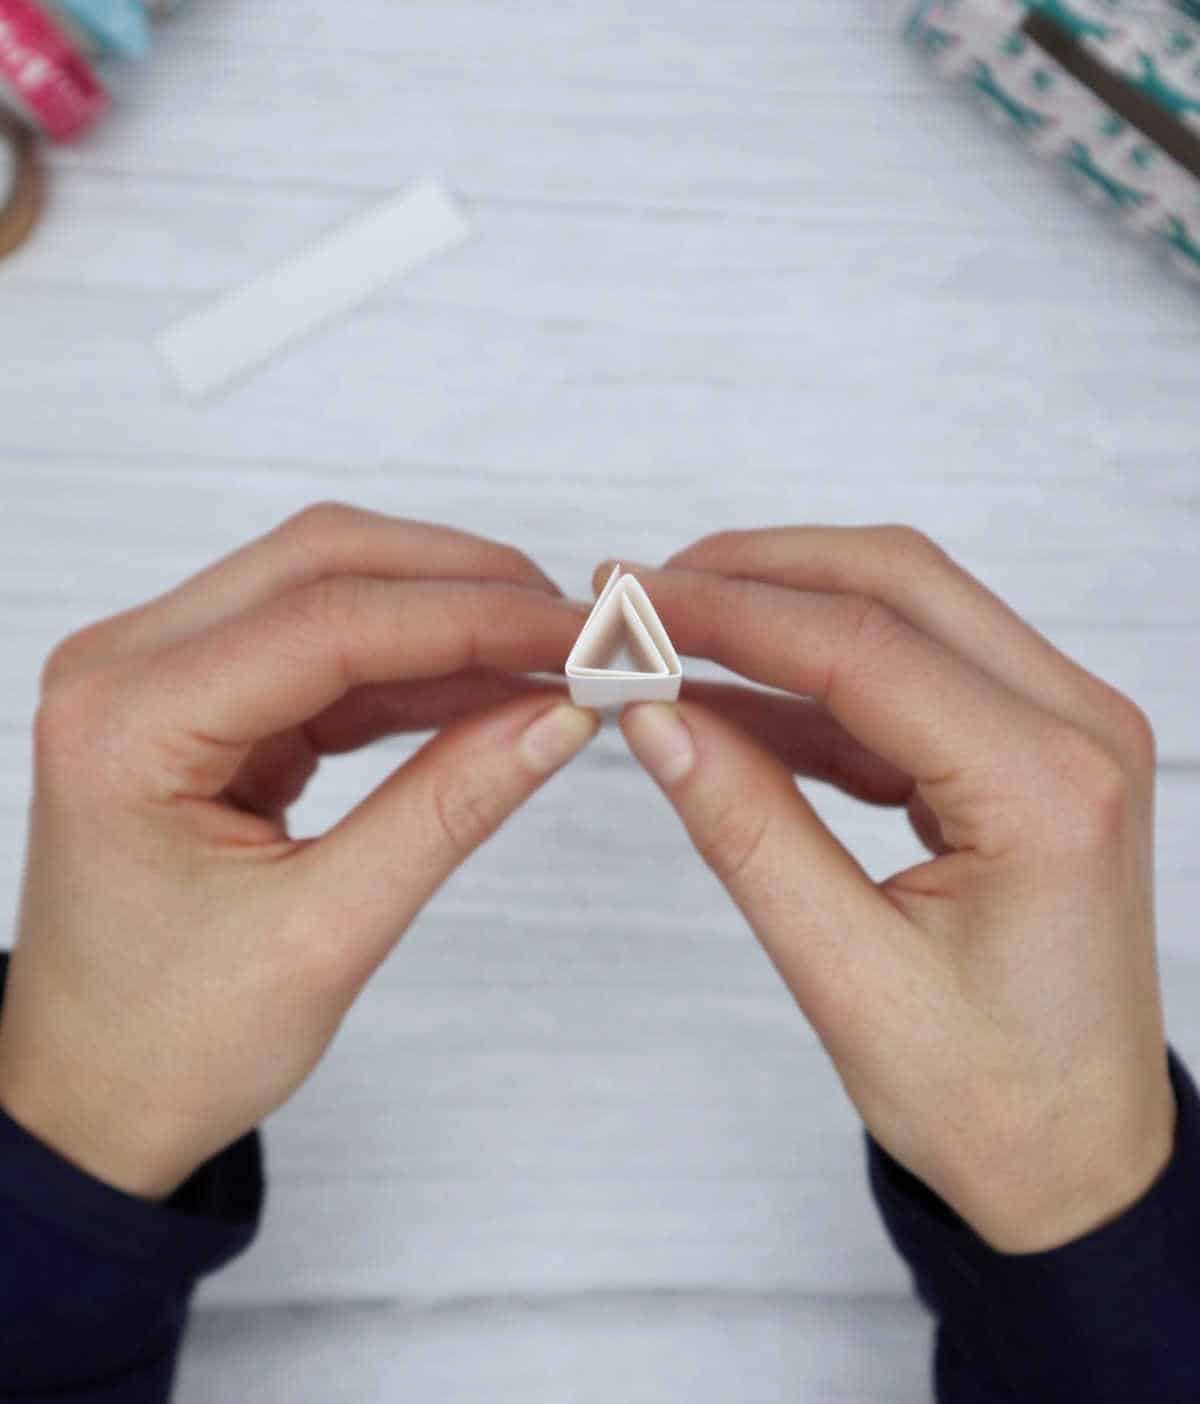
Step 9

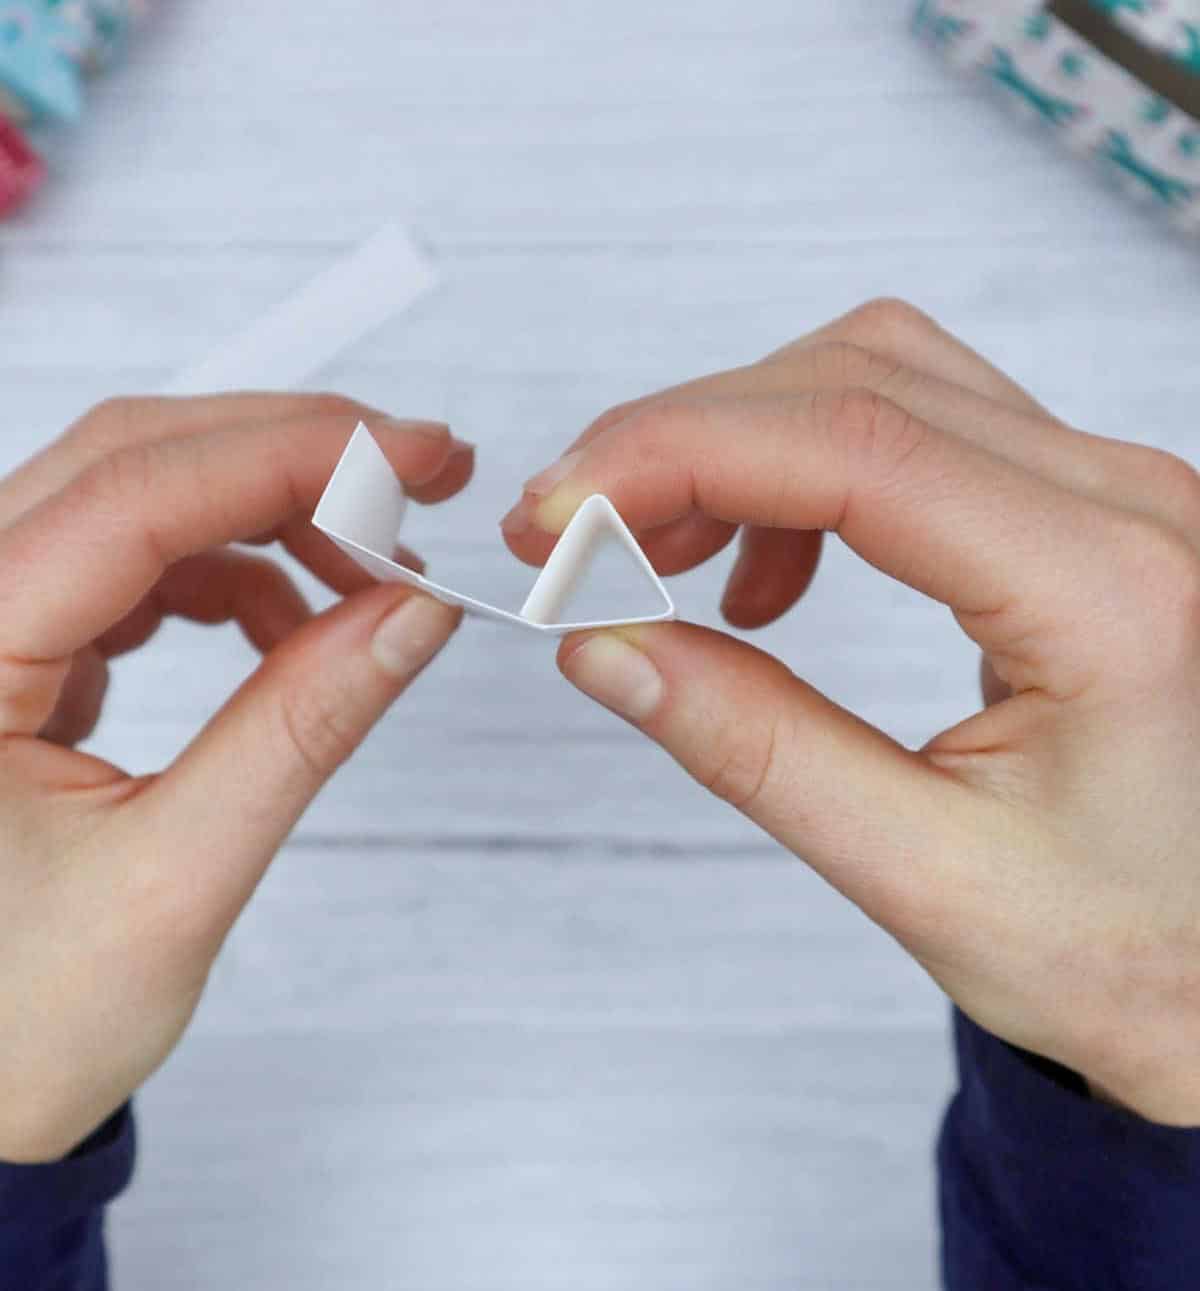
To bring your origami design to life, start by folding the strips into a 3D triangle. This requires some precise folding, but don’t worry if it takes a few attempts to get it right. The goal is to create a sturdy, three-sided structure that resembles a triangular prism. As you fold, make sure each edge is aligned and crisp, giving your finished piece a clean and polished appearance.
Step 10
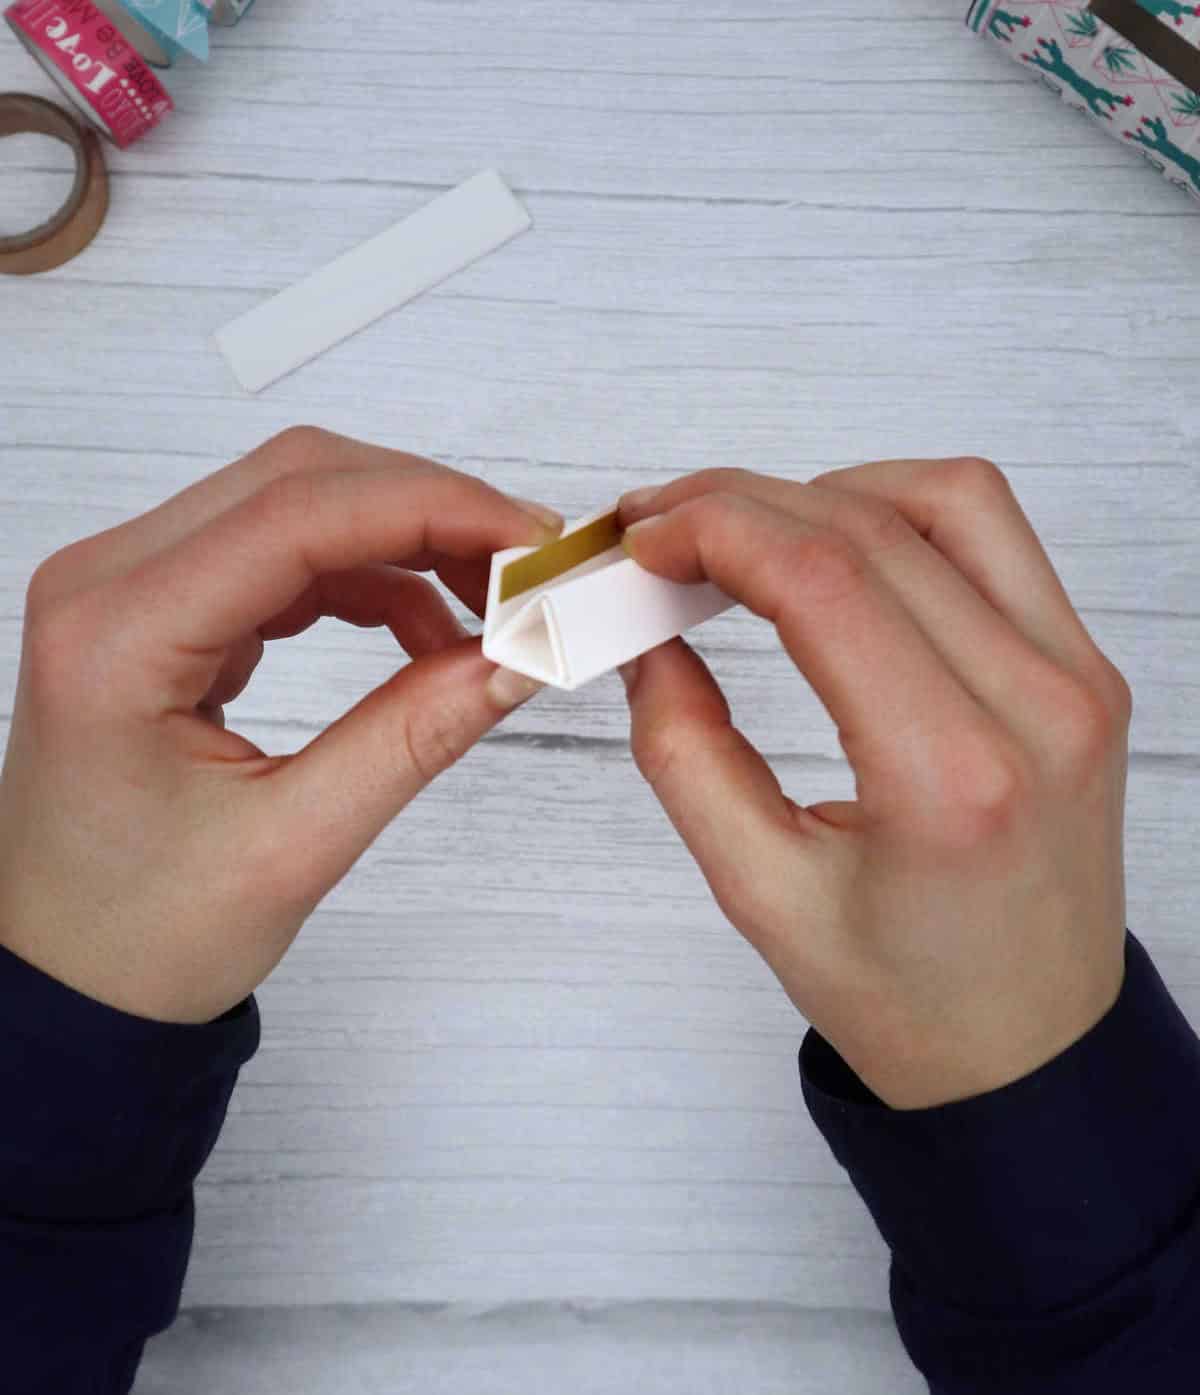
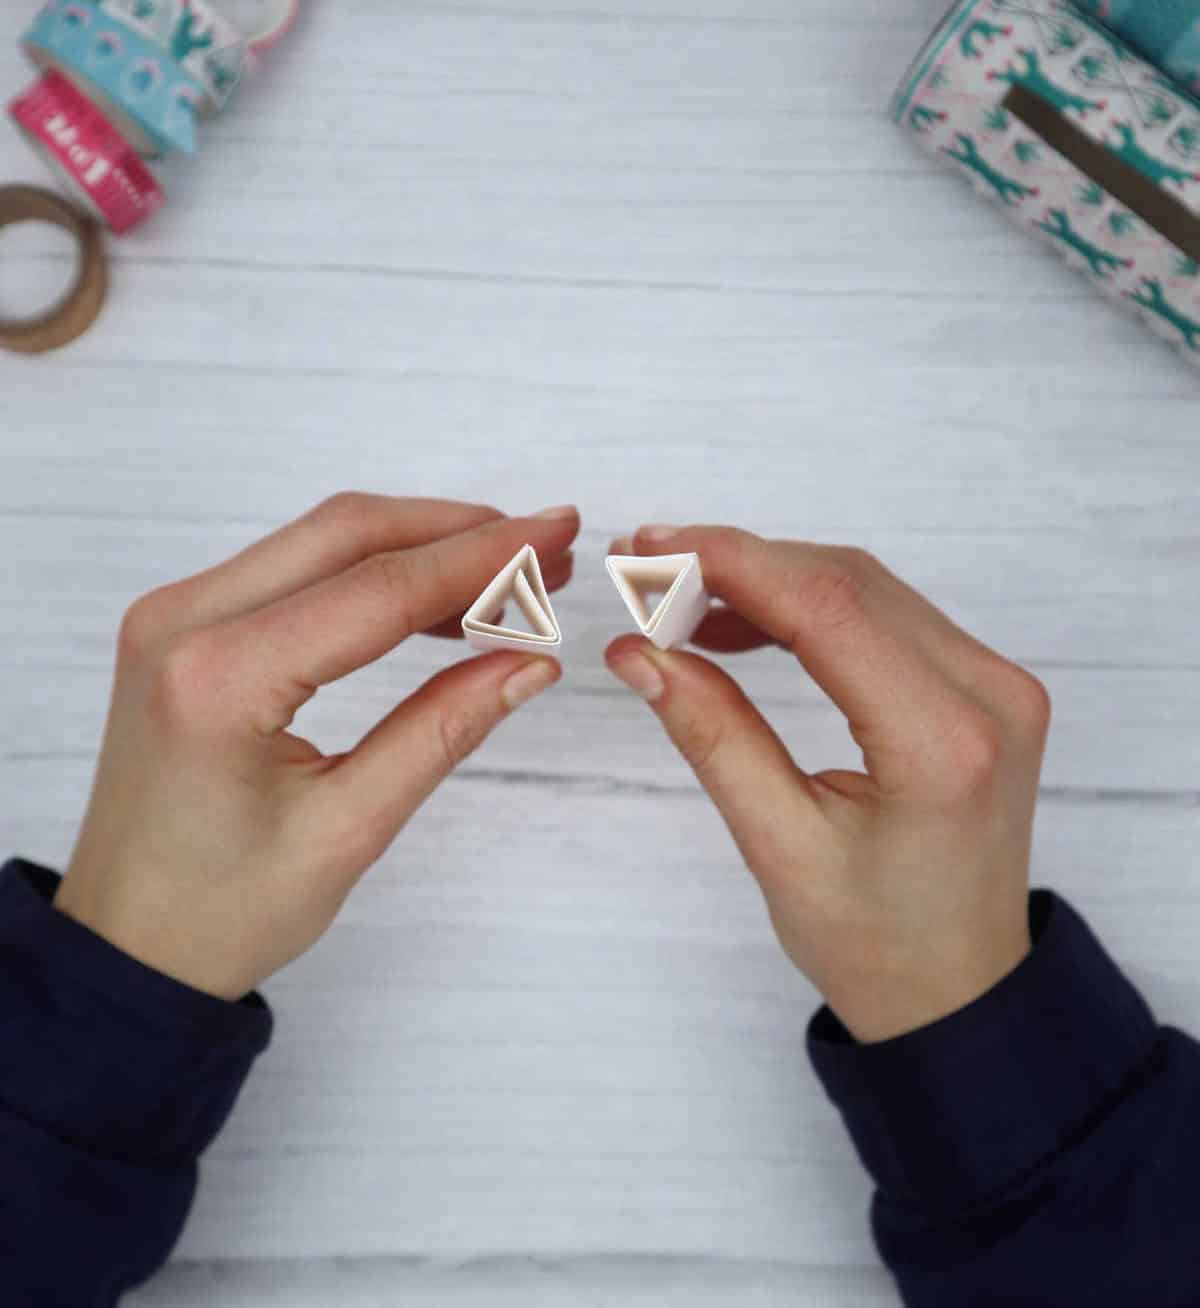
To complete the setup, begin by securing the open ends of each stand using double-sided tape. Gently press the tape onto the adhesive to ensure a strong hold. Repeat this process for both stands, ensuring they are evenly prepared and identical in appearance.
Step 11
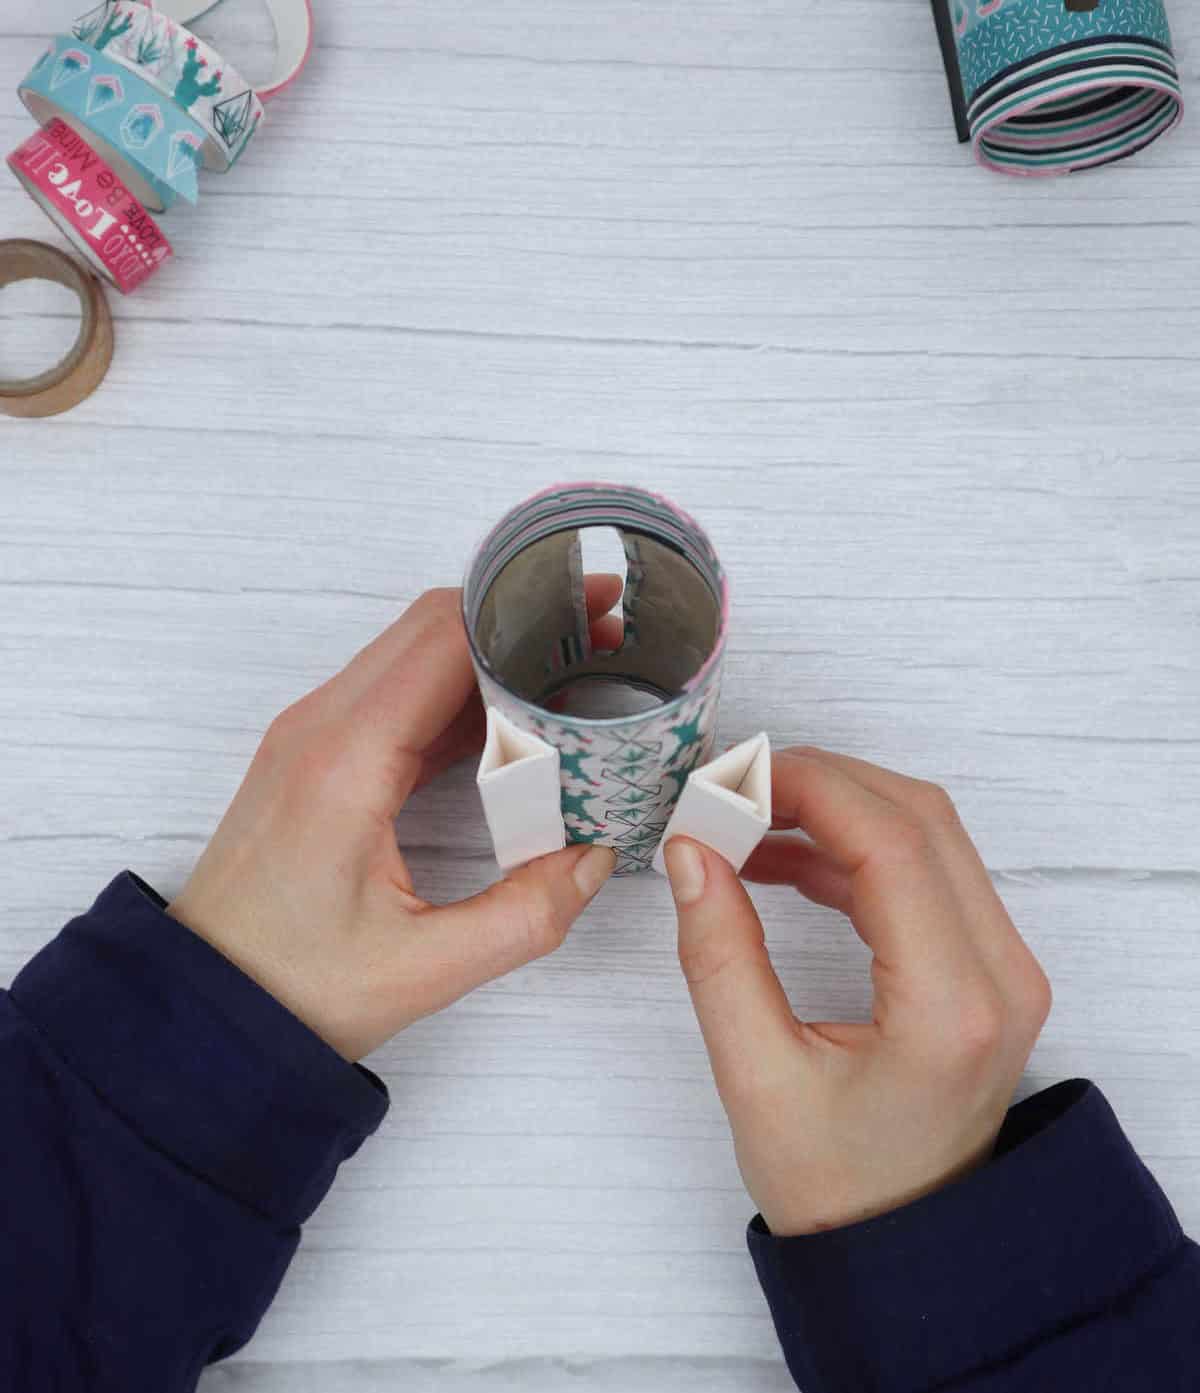
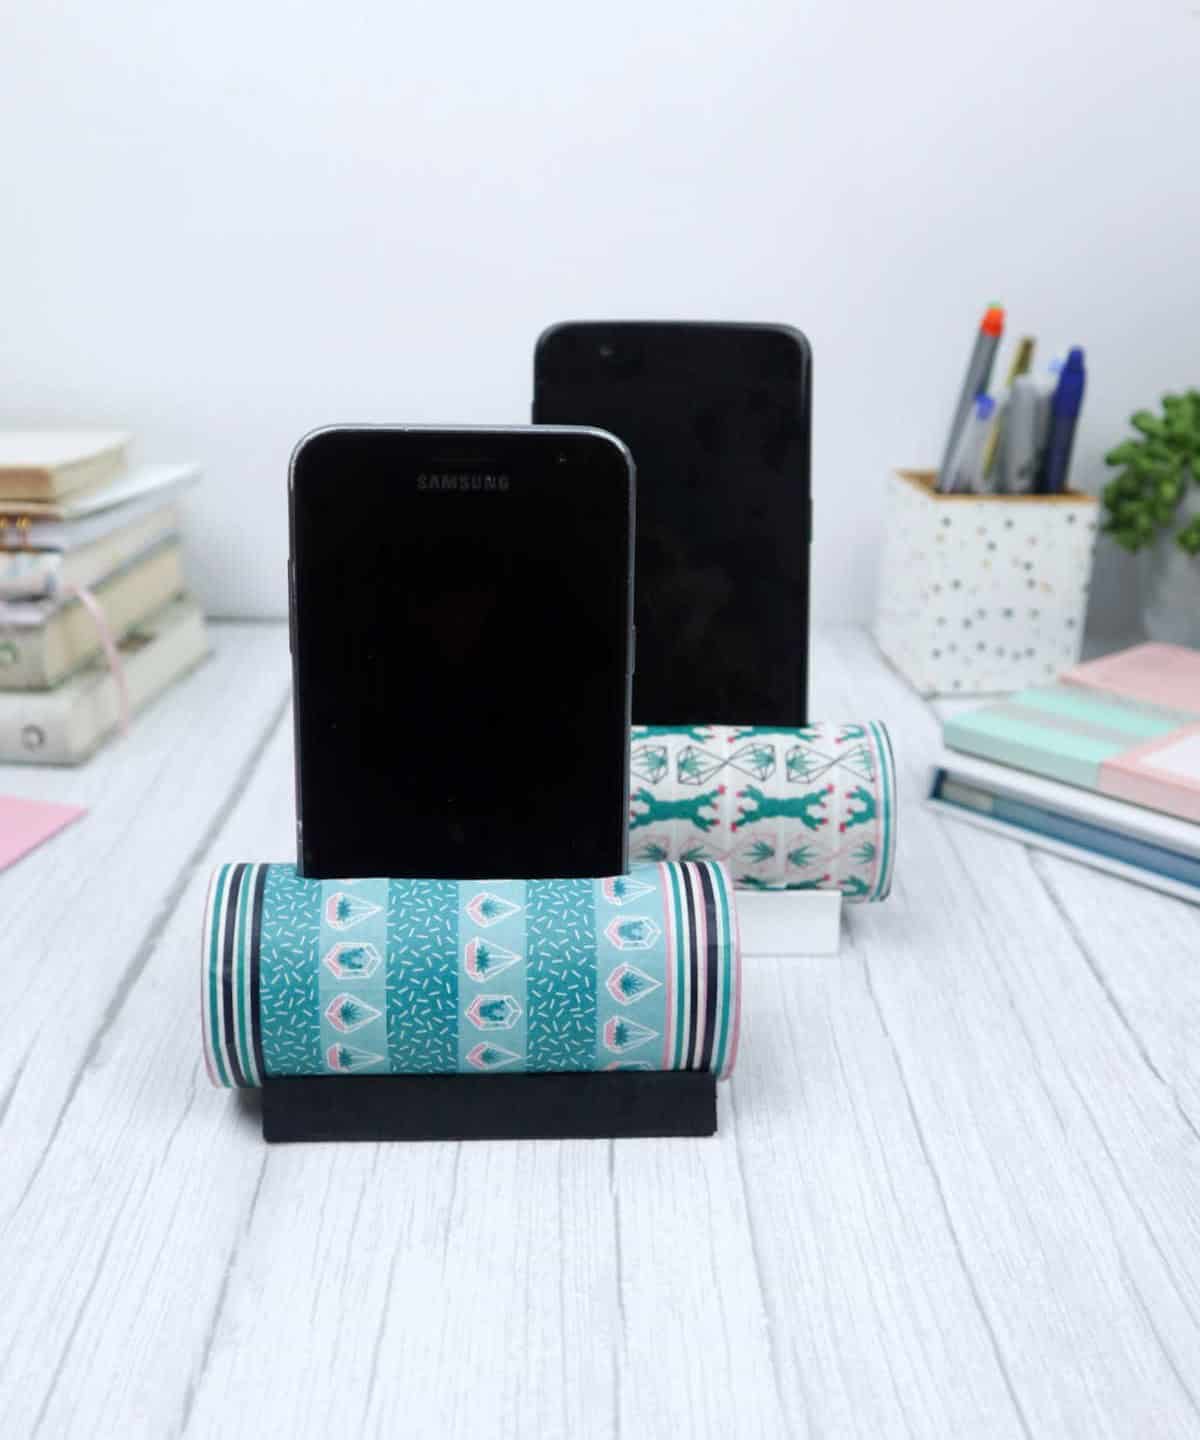
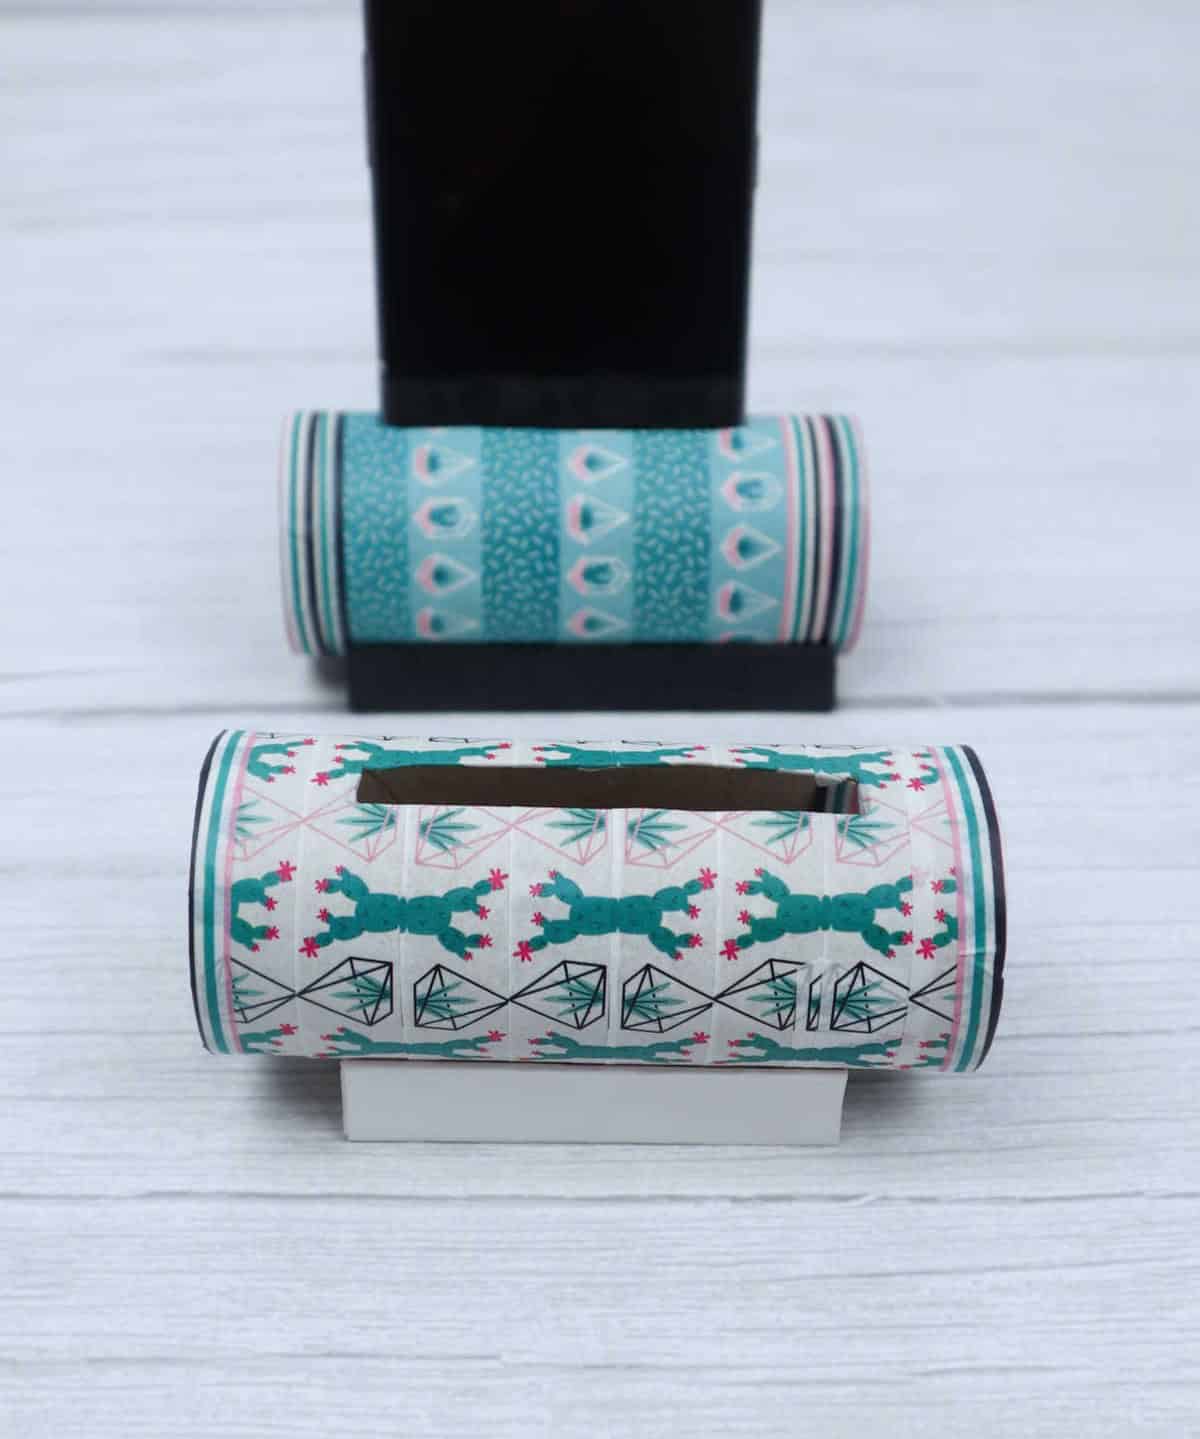
Before crafting your toilet paper roll phone holder, feel free to add a decorative touch by wrapping the roll with washi paper in a pattern of your choice. Once you’re satisfied with the wrap, secure the legs to the roll using double-sided tape or liquid glue, keeping in mind that the latter may affect the integrity of your washi tape. Once assembled, place the phone holder on its legs and verify that it remains stable and sturdy enough to hold your device.
As an alternative, you can substitute traditional legs with pushpins, a time-saving option that achieves similar results. Simply insert your phone into the holder, and voila! Your toilet paper roll phone holder is complete, boasting a unique charm. For more creative inspiration, explore these 20 fun and easy toilet paper roll crafts.
Other DIY Crafts

Get creative with paper crafts! From construction paper masterpieces to unique summer activities for kids, there’s something for everyone. Whether you’re an adult looking for a relaxing hobby or a parent seeking fun projects for your little ones, we’ve got you covered. Our collection of paper crafts includes tutorials on how to make a paper envelope, as well as inspiration for teens and adults who want to turn their creative passion into a profitable venture.
Dive in and discover the endless possibilities that await when you combine imagination with paper!
DIY Phone Holder from Toilet Paper Roll
Transforming discarded toilet paper rolls into functional phone holders is a creative way to reduce waste and add a personal touch to your home. This simple DIY project can be enjoyed by individuals of all ages, making it an excellent activity for families or groups. To create this unique holder, you’ll need approximately 25 minutes of active time, with an additional 5 minutes required for any necessary adjustments.
Equipment
To ensure uninterrupted work, it’s essential to have a few simple tools at your disposal. A reliable pair of scissors or a cutter will come in handy when you need to trim any excess paper or create precise cuts. While a ruler is not strictly necessary for this task, having one on hand can prove useful for measuring and aligning your pages with precision. Additionally, it’s crucial to prevent your screen from going dark by adjusting the screen timeout settings or using a screen saver.
This will allow you to focus on your work without worrying about the sudden loss of visibility.
Materials
To set the stage for a creative and functional space, one can start by gathering a few essential materials. These might include a marker to jot down important reminders, a toilet paper roll that can be repurposed as a makeshift pen holder or desk organizer, some washi tape for adding pops of color and texture, and double-sided tape or glue to secure items in place or create unique collages.
Instructions
To create a functional and aesthetically pleasing phone holder, start by preparing your materials. Begin by tracing the outline of your phone’s base onto a toilet paper roll, which will serve as the slot for inserting your device. Next, use a craft cutter to carefully cut the cardboard roll and remove any excess edges. Wrap the toilet paper roll with washi tape, taking care to cover the entire surface.
To conceal the visible cardboard around the rims, apply a strip of washi tape, leaving the ends exposed. Using scissors, cut flaps around the washi tape and press them inward to fully cover the cardboard. The next step is to modify the washi tape covering your phone slot. Simply create an incision down the center of the gap and two V-shaped cuts at either end, allowing for smooth and attractive edges.
For the legs of your phone holder, divide a sheet of paper into six equal strips and fold them inward, ensuring each fold is firm and creased. Unfold the paper, then form 3D triangular legs by folding the creased strip until you have a three-walled structure. Secure the ends with double-sided tape or alternative use push pins to act as the legs. Once satisfied with the stability of the legs, your phone holder is ready for use.