Whether you’re looking to create a playful prop or simply spend some quality time with the little ones, making DIY paper hats is a delightful activity that’s sure to bring a smile. And let’s be honest, who didn’t wear a homemade paper hat as a kid and then proceed to have an epic adventure? From party hats to pirate headpieces, these easy-to-make creations can be customized to fit any occasion or theme.
Not only are they a great way to get the kids involved in some creative crafting, but they’re also an excellent way to encourage imagination and self-expression. So gather those papers and get ready for a fun-filled hour or two of creative play!
Supplies You’ll Need
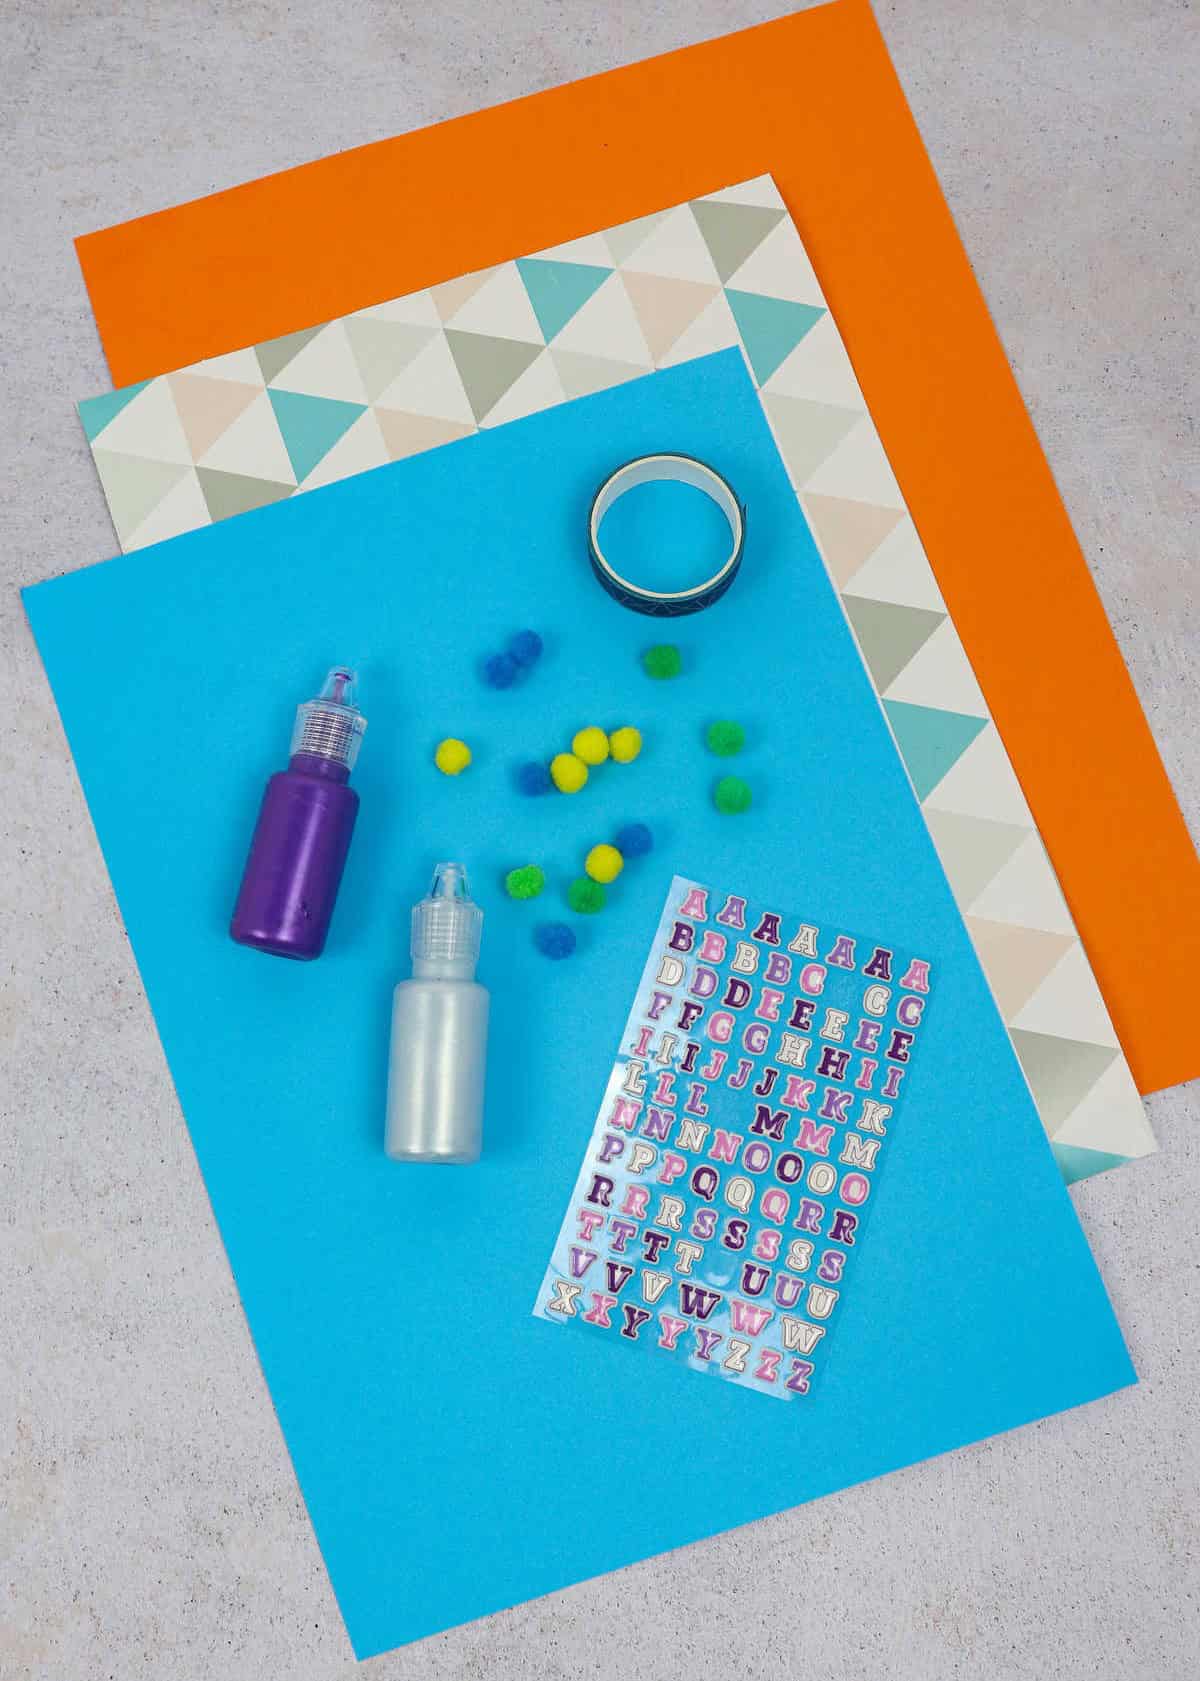
Before diving into your creative project, it’s essential to gather all the necessary supplies. Start by collecting a range of rectangular paper sheets in different sizes such as A4, A3 or A2. For adding that extra touch of decoration, you’ll also need craft pom poms, washi tape, letter stickers and decorative glue. Having these materials at your disposal will ensure a smooth and enjoyable crafting experience.
How to Make Paper Hats
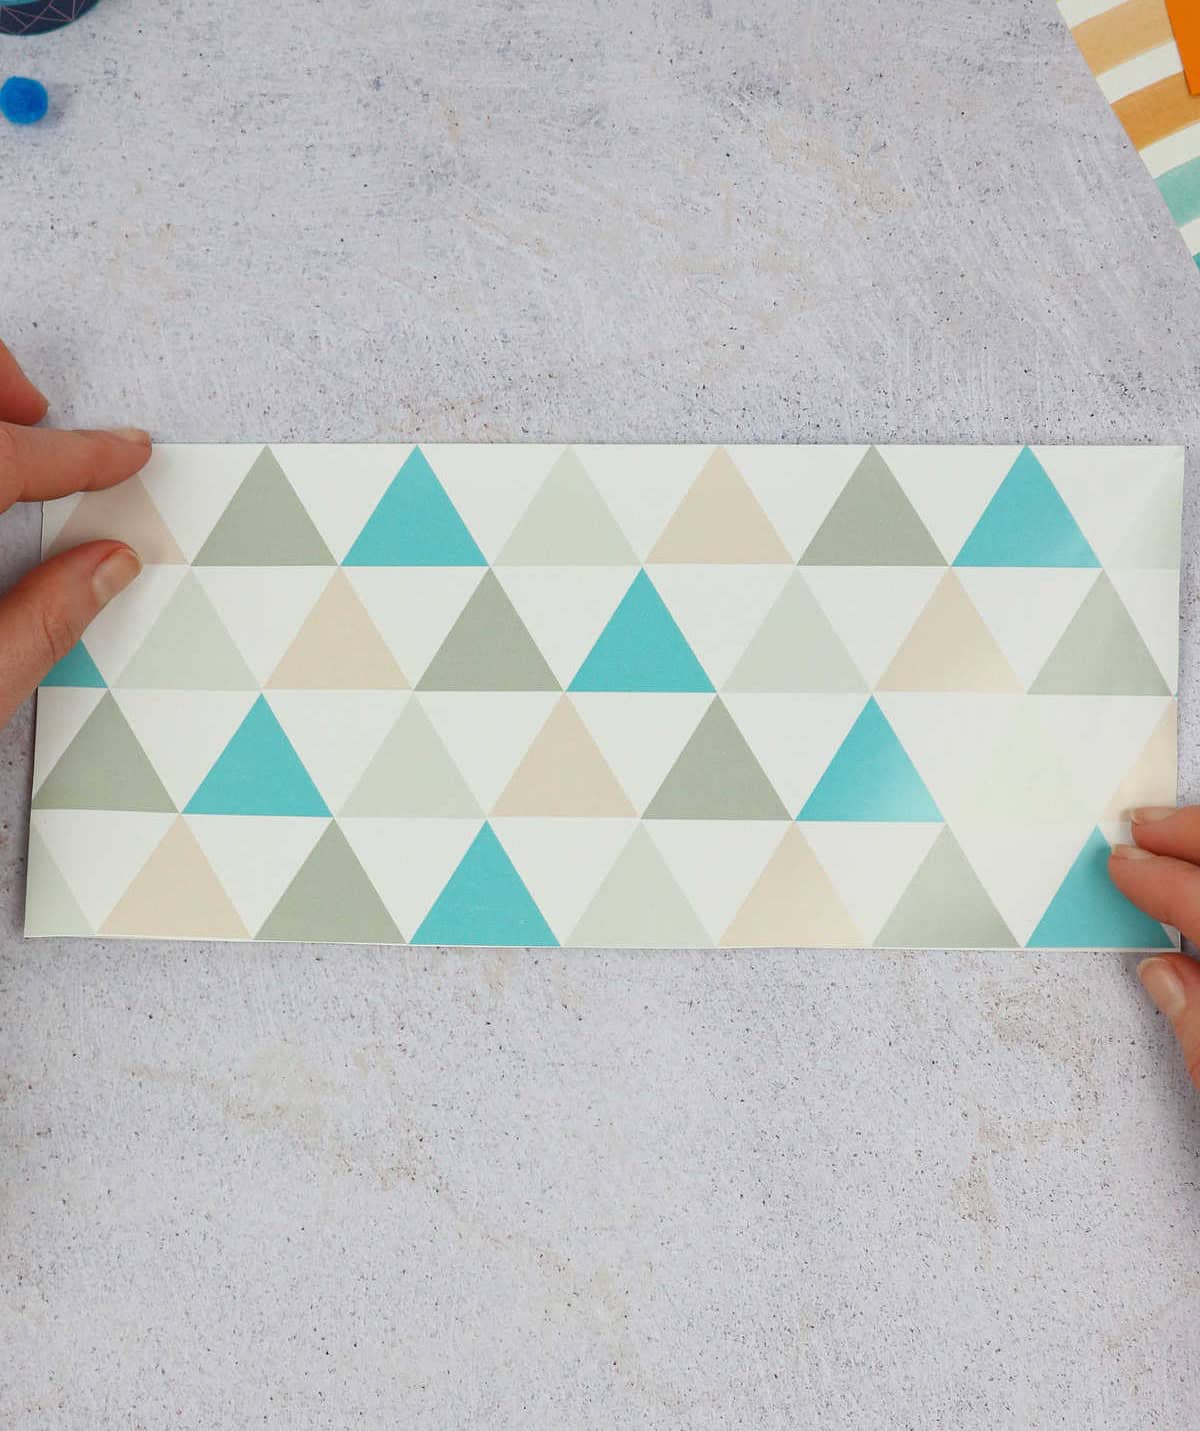
When preparing for this creative project, take the time to select a suitable colored paper that suits your needs. While traditional plain paper is an option, consider using textured or patterned varieties as well. As long as they are foldable, you can experiment with different designs and textures. For added dimensionality, opt for a larger sheet of paper if desired.
Just keep in mind that the size of your starting material will directly impact the final dimensions of your finished hat, so plan accordingly.
Step 1
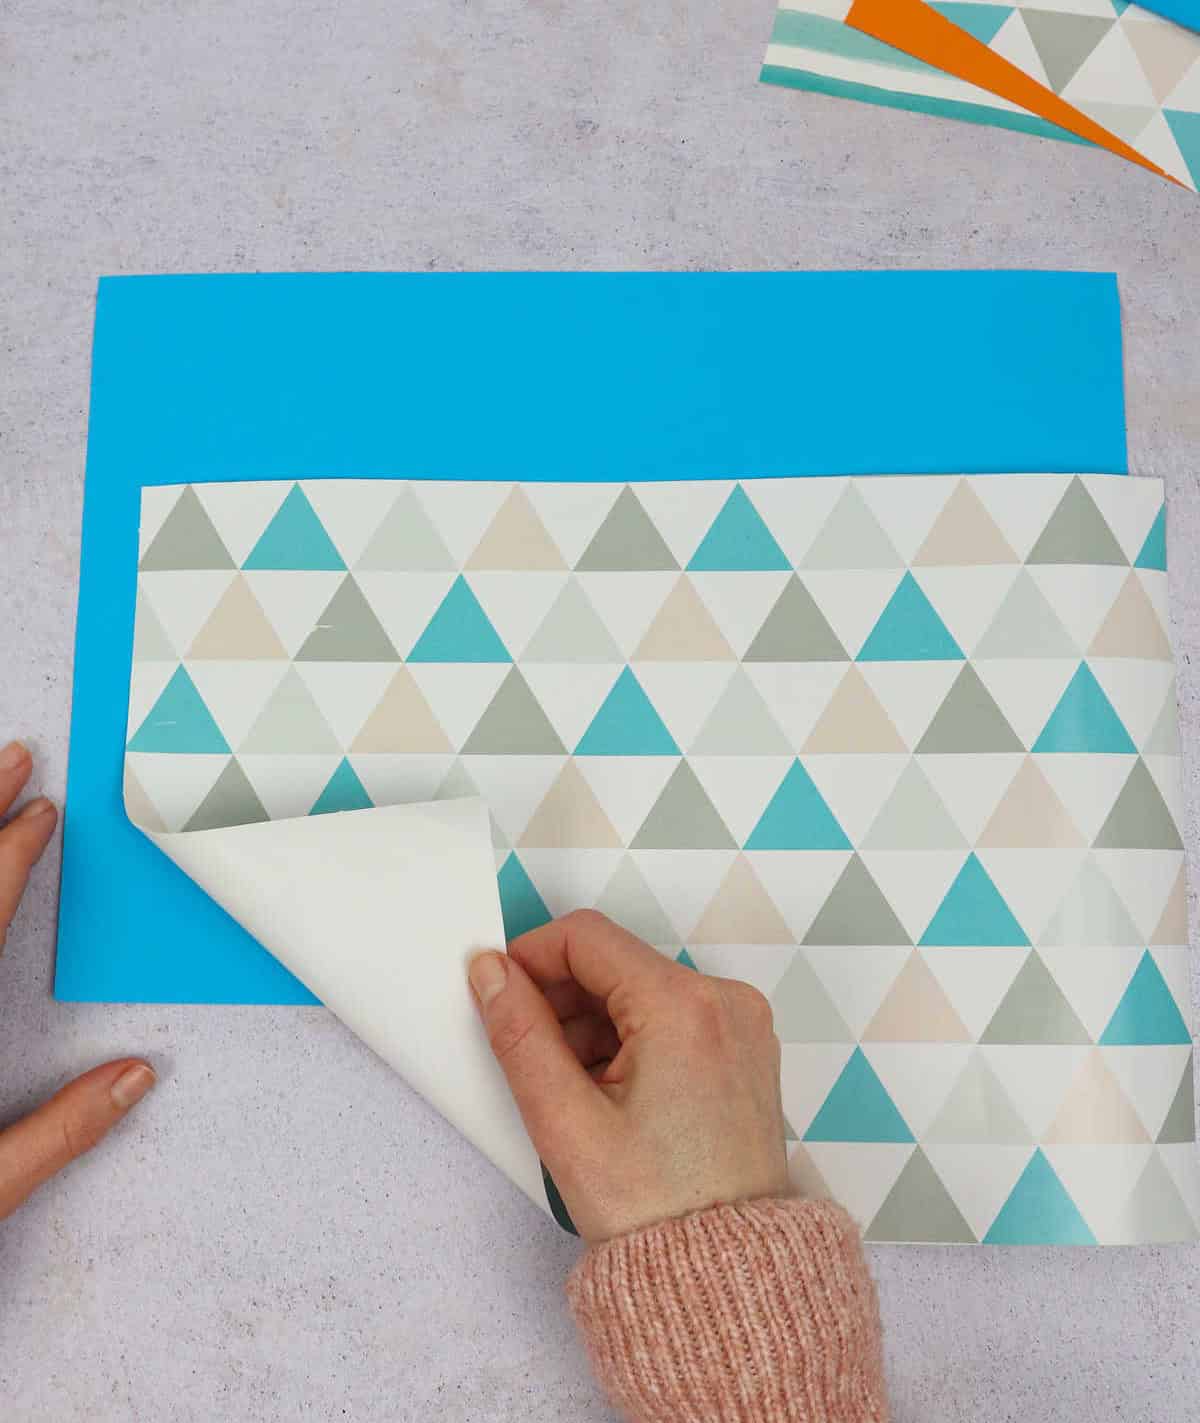
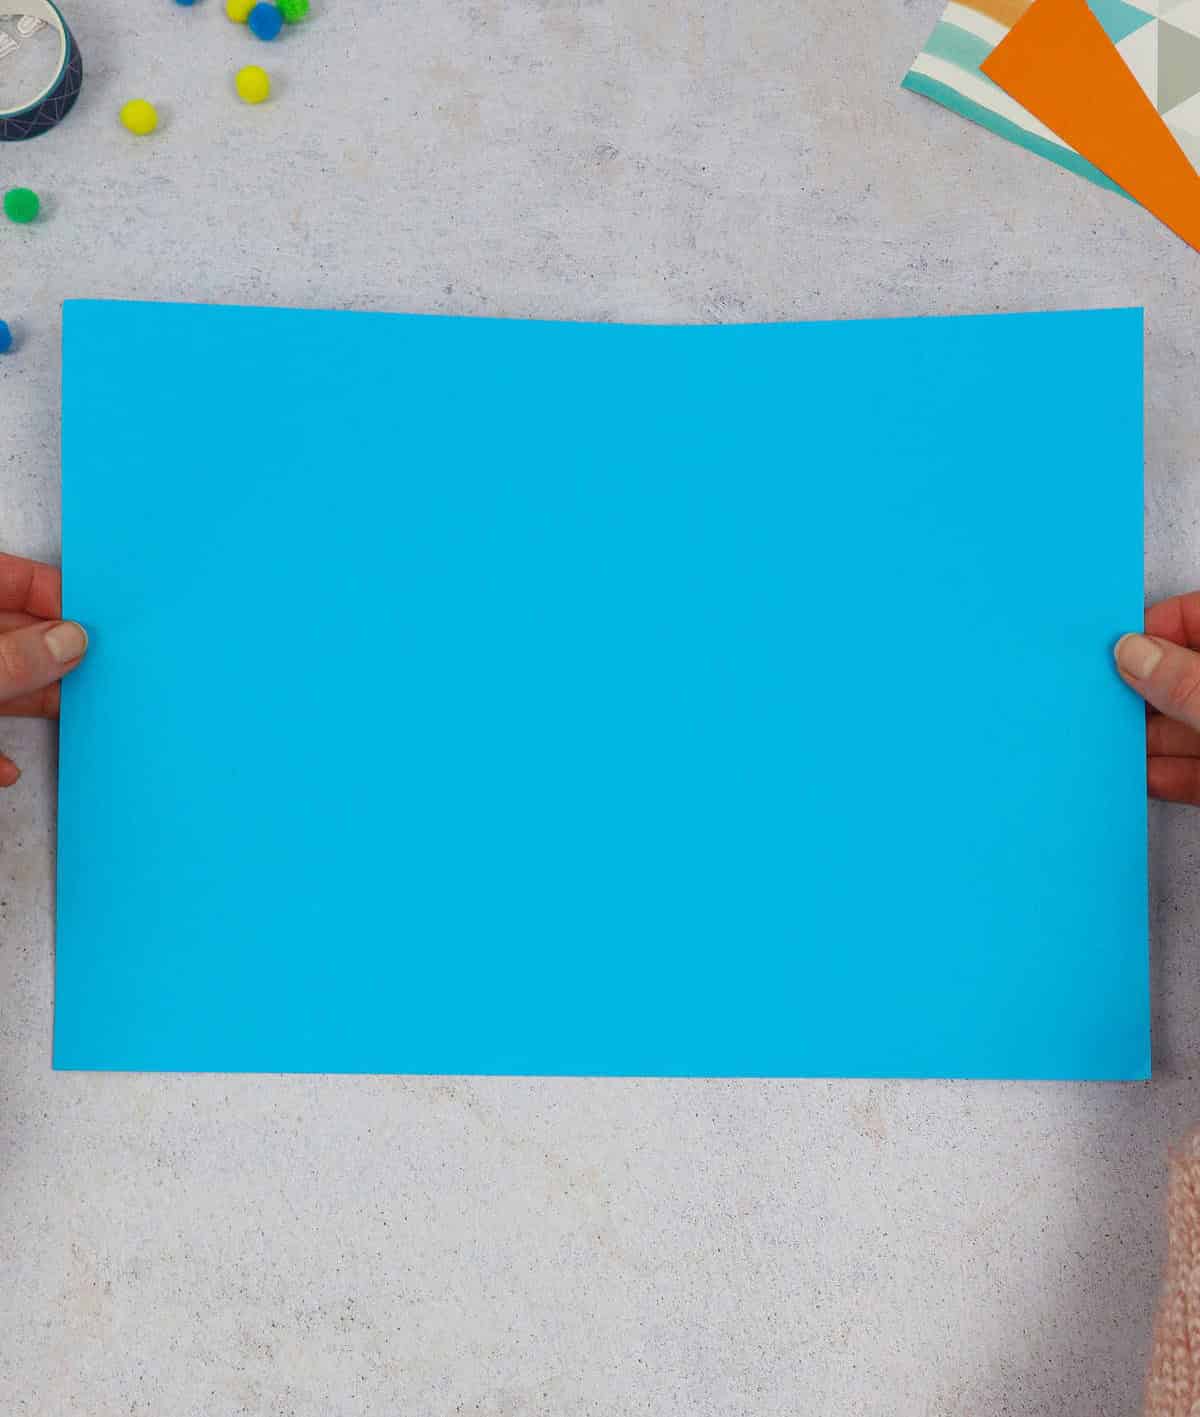
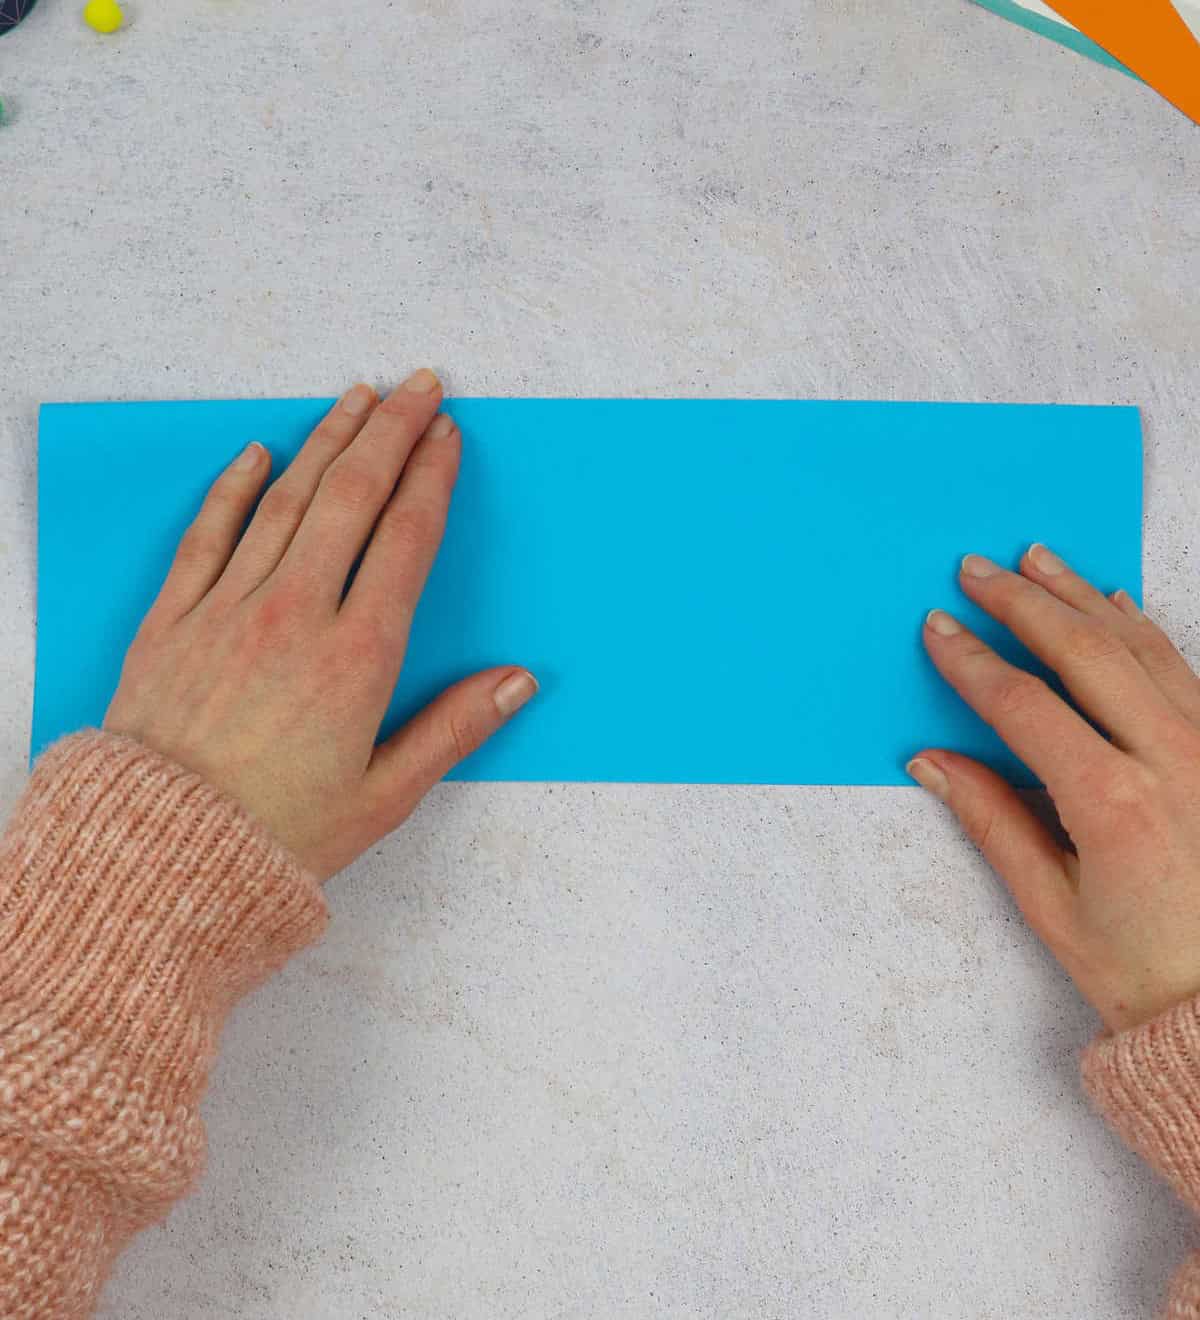
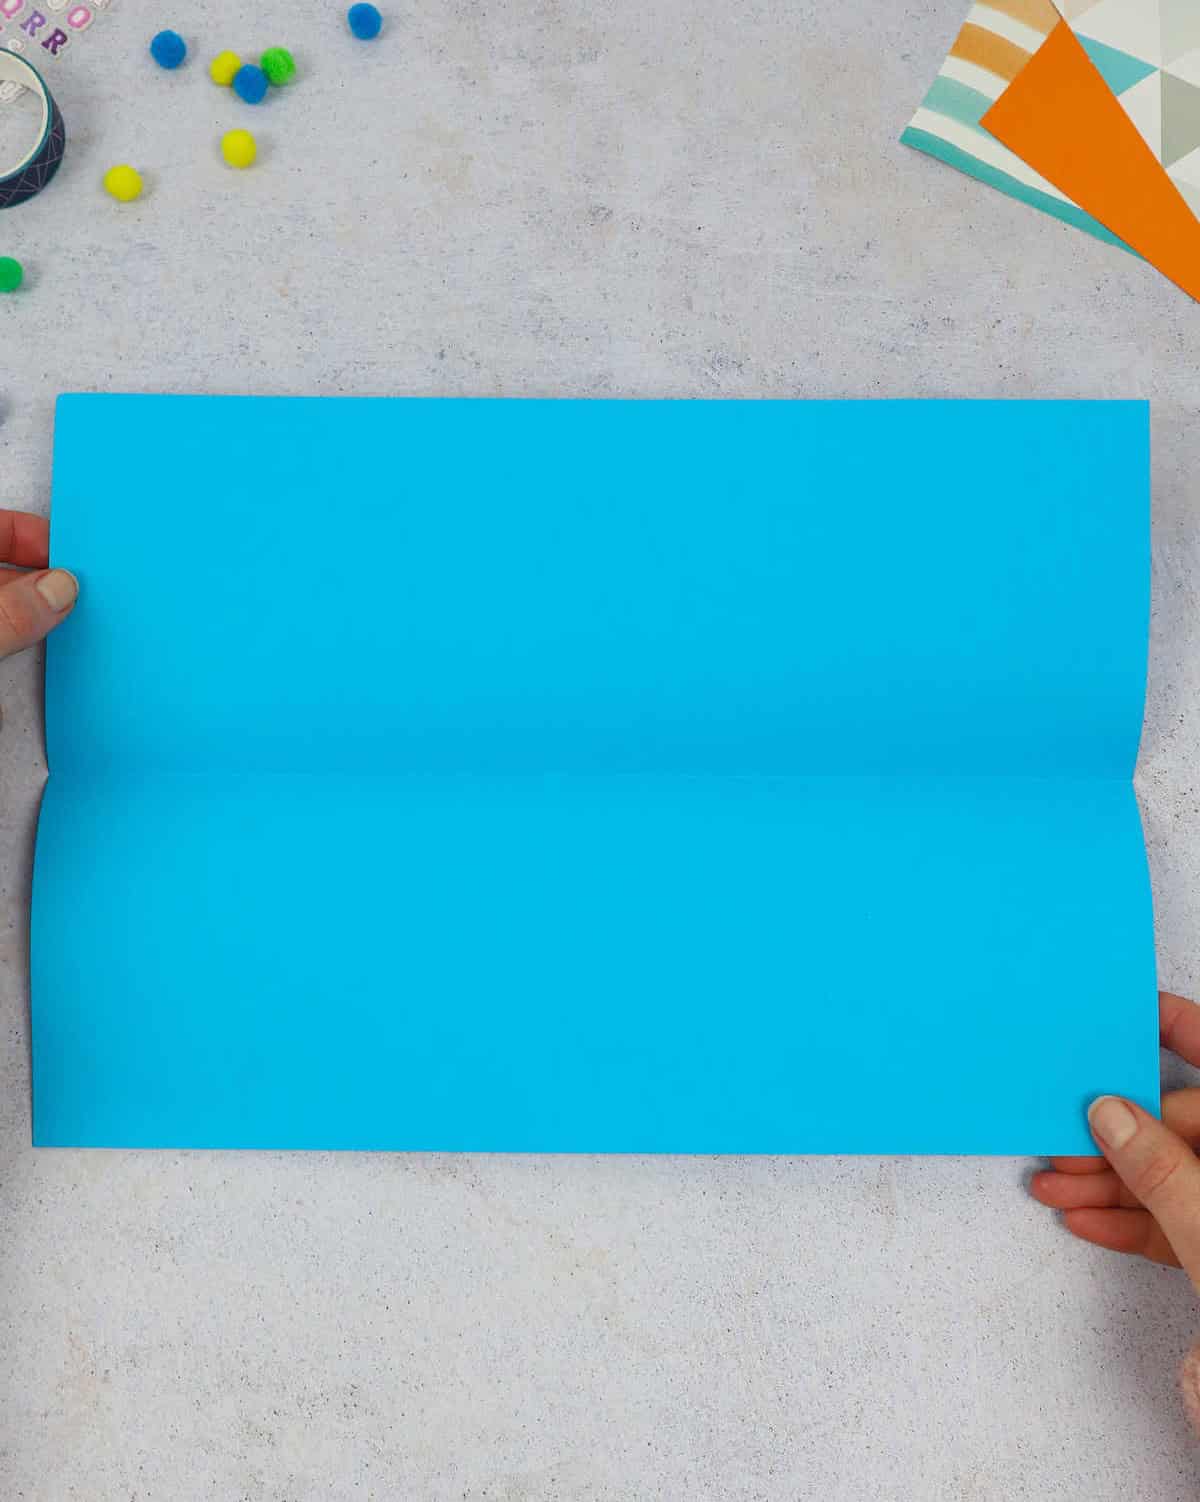
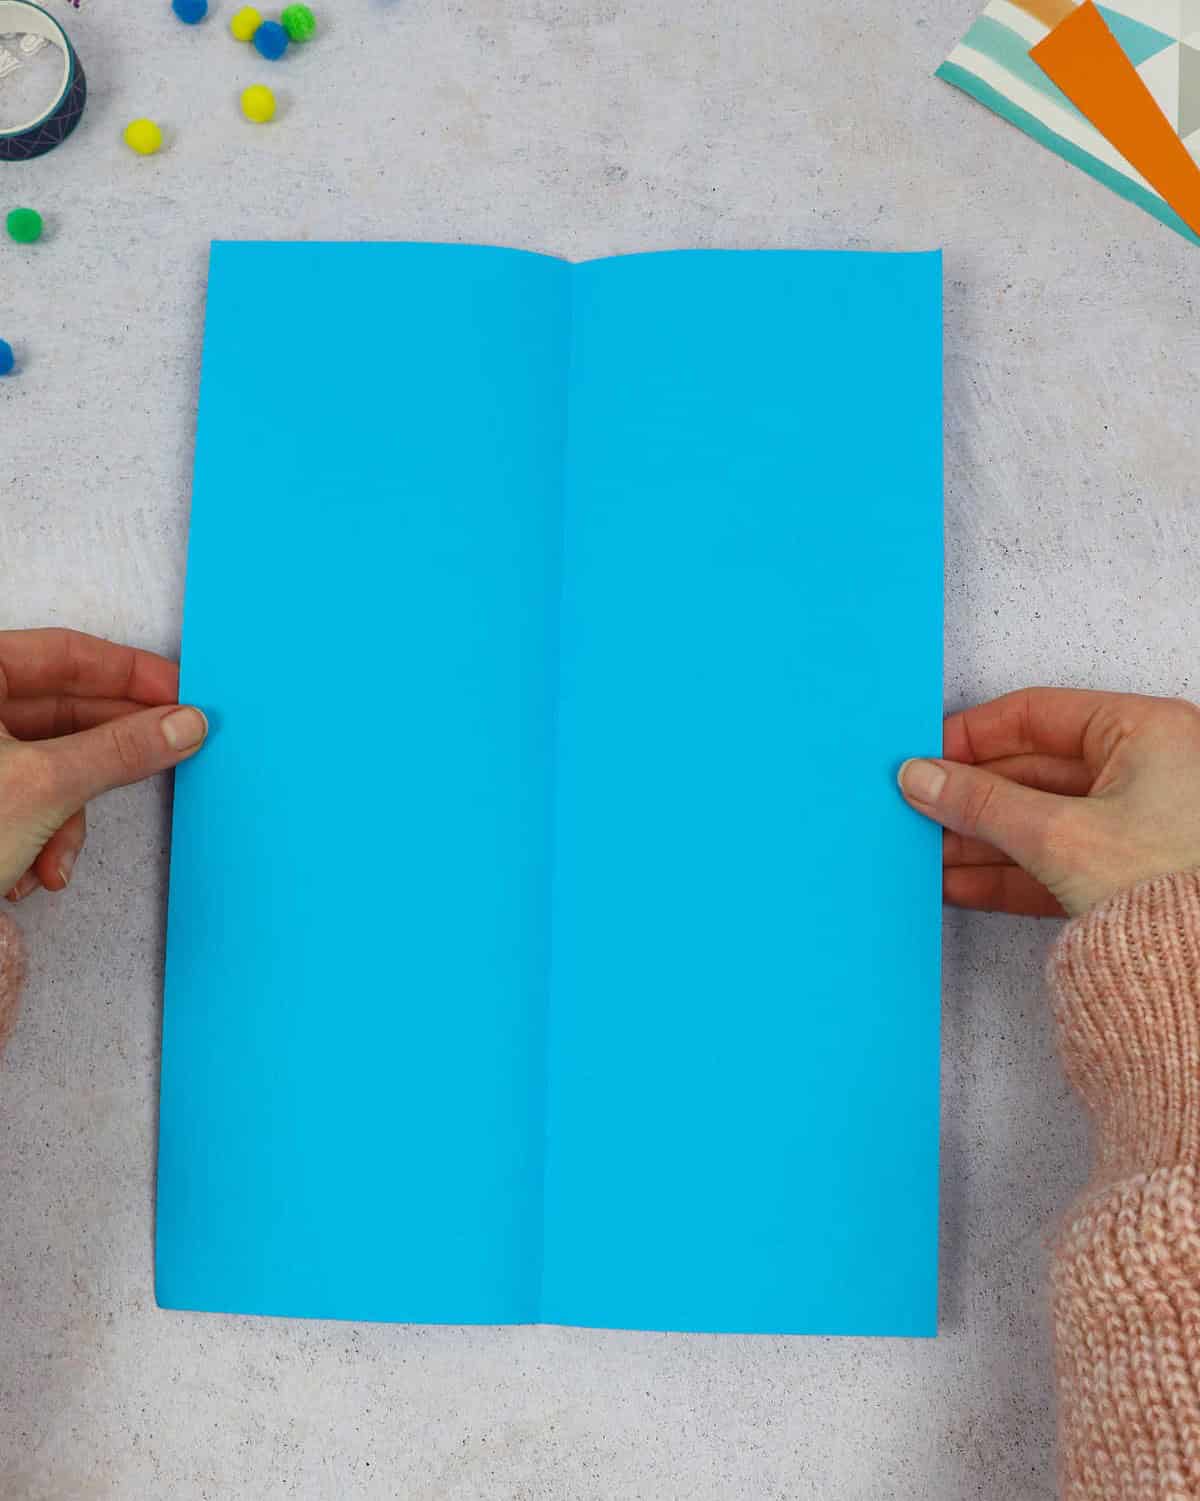
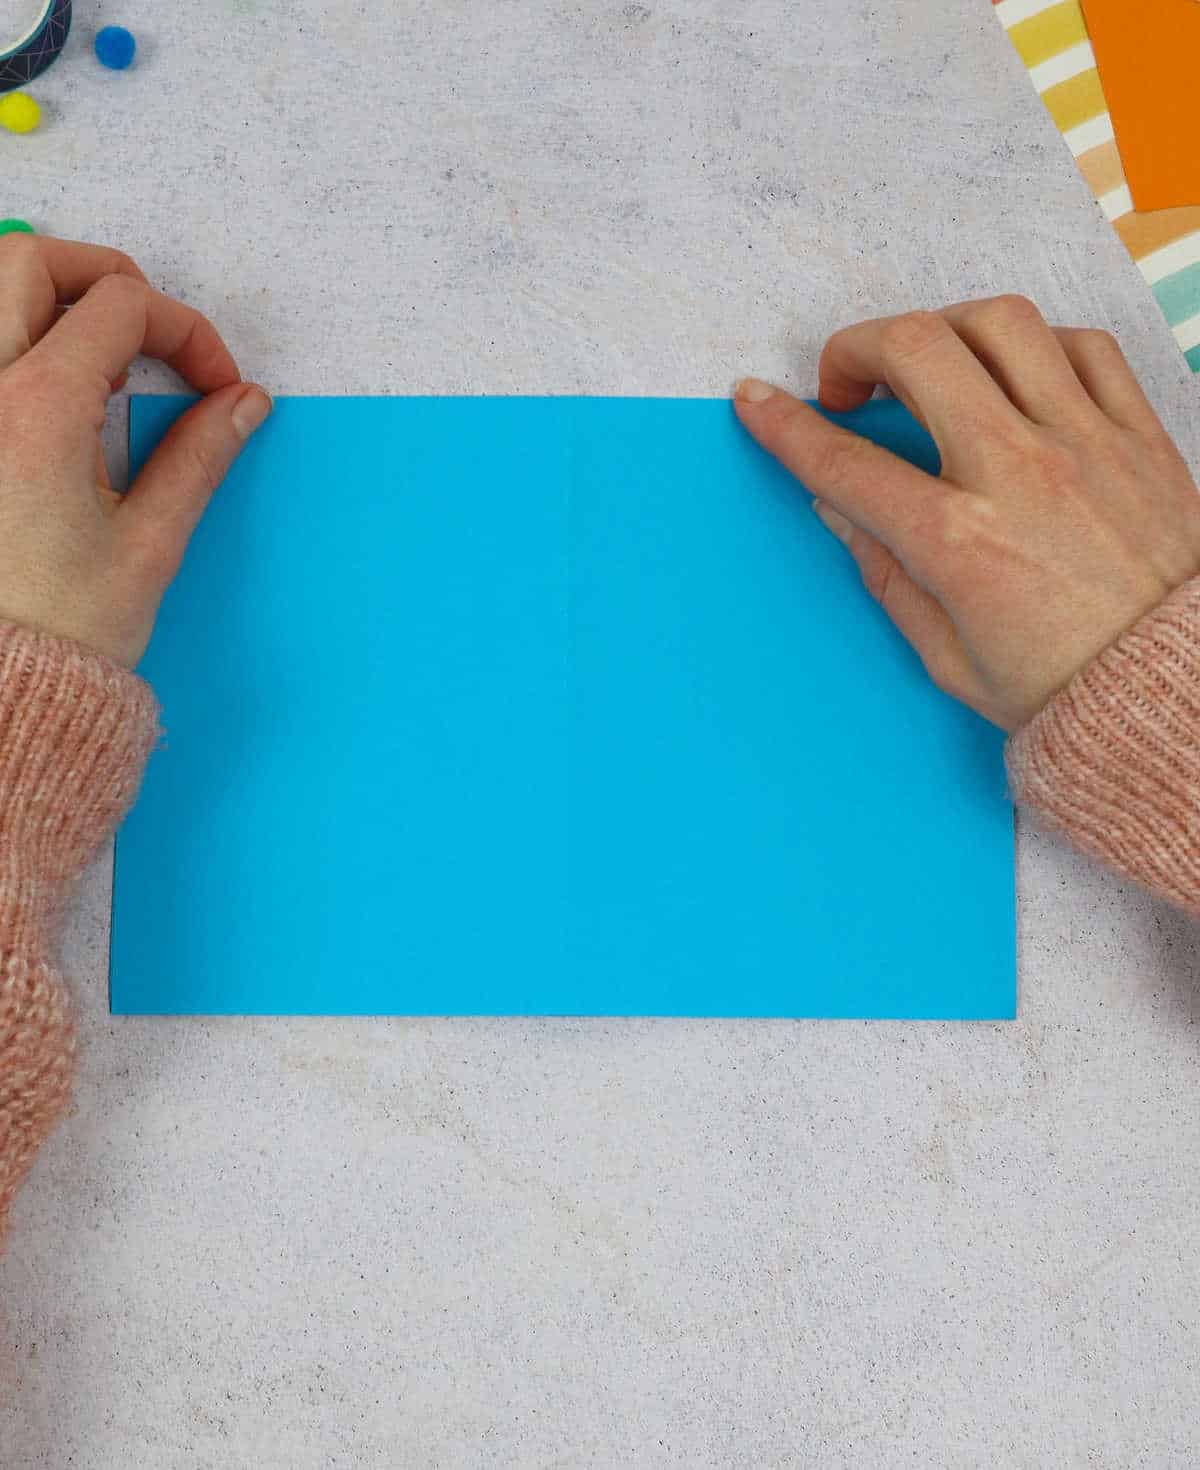
Begin by placing your paper on a stable work surface. Next, grasp the longer edge of the sheet and carefully bring it across to meet its counterpart, creating a straight crease as you fold it in half. Release the fold and then rotate the resulting half-sheet around, so that the folded edge is now facing away from you. Finally, repeat this process by folding the paper in half once more, ensuring a precise alignment of the edges.
Step 2
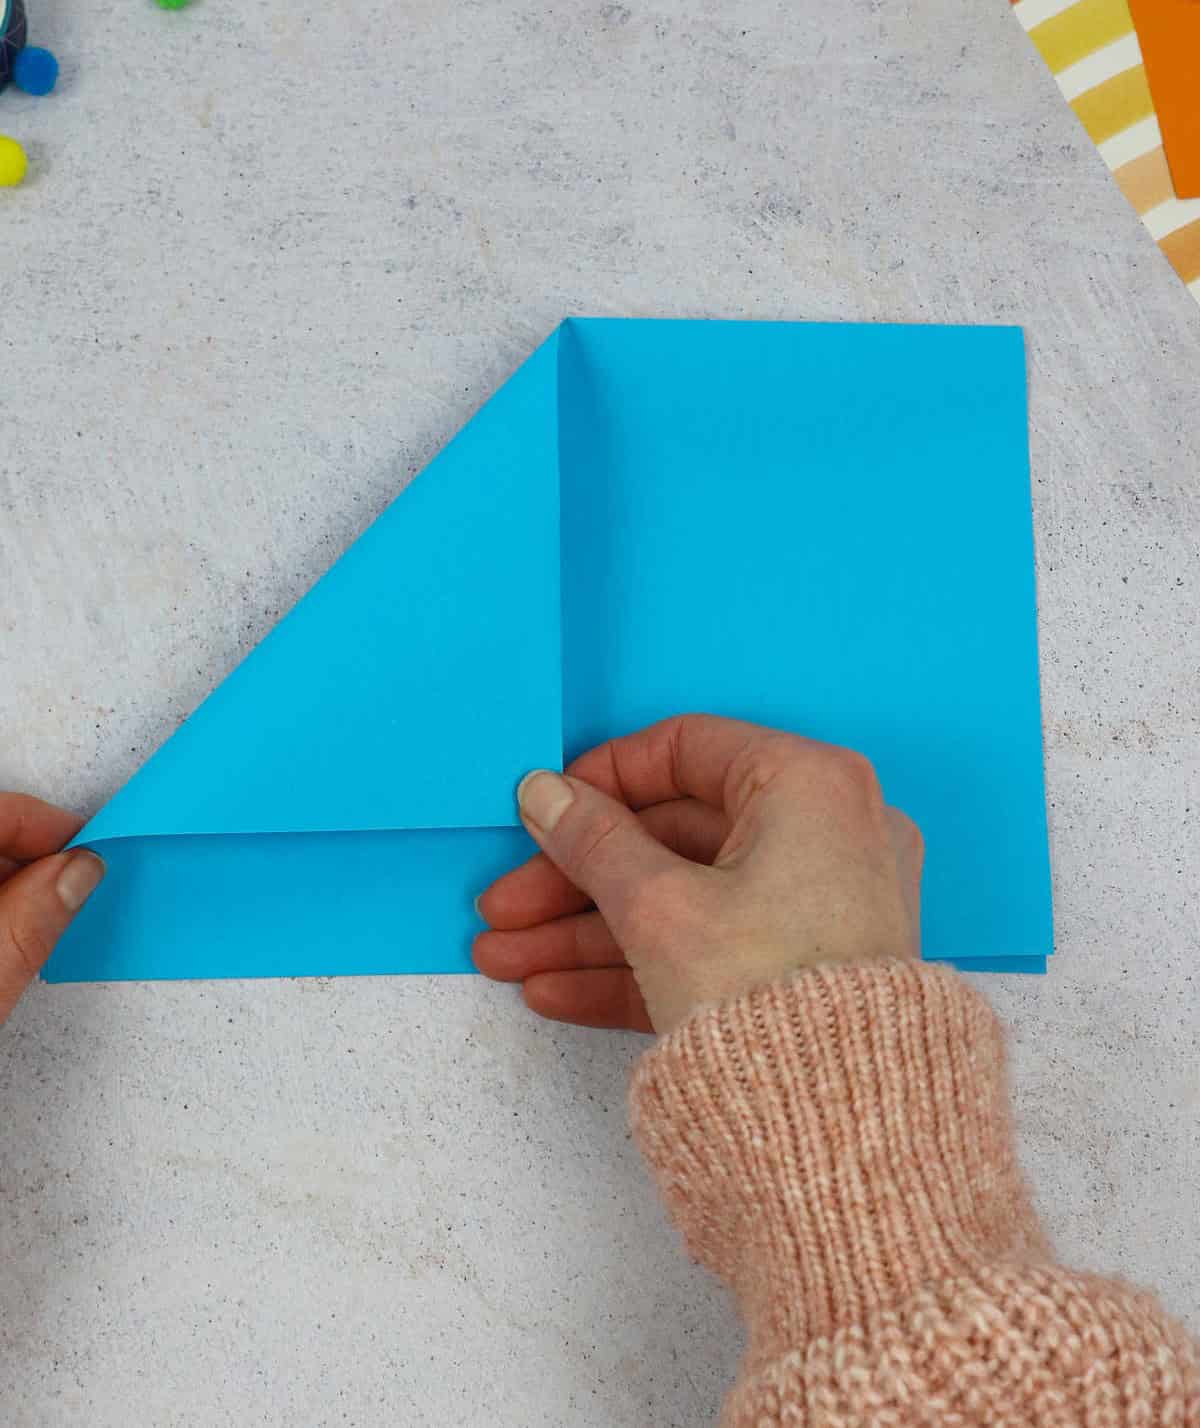
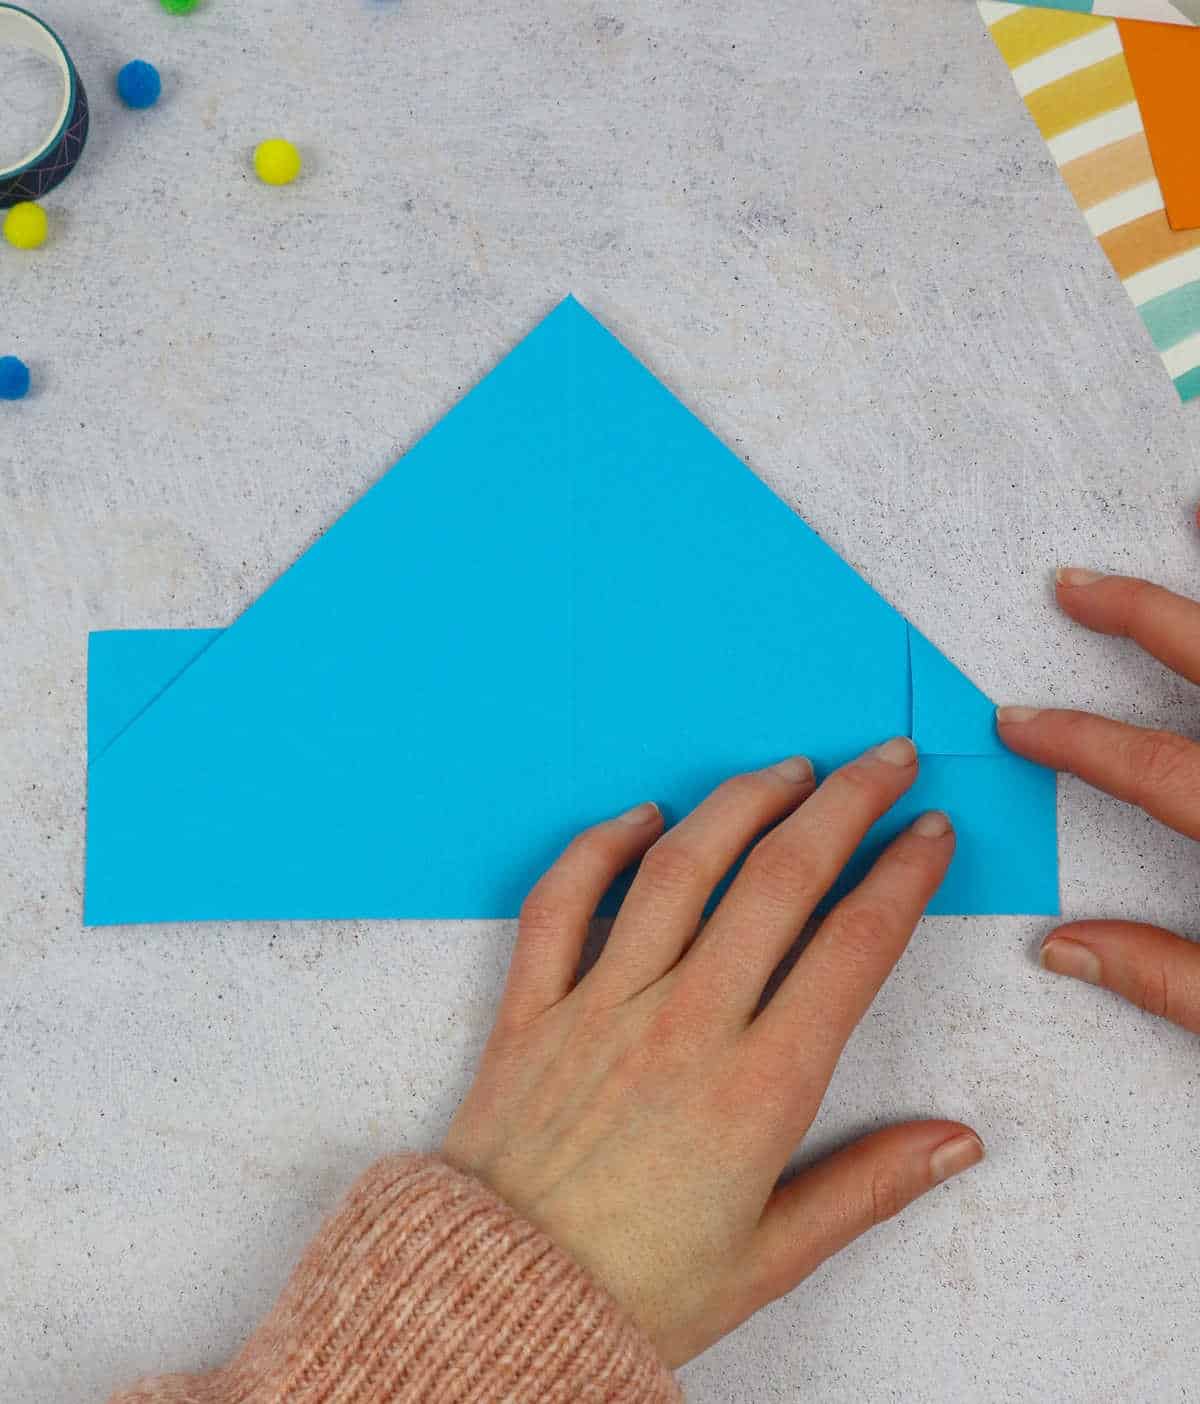
Fold the top left corner of the paper downwards to meet the central crease created in the previous step, ensuring a precise alignment. Then, replicate this action by folding the opposite corner inwards, mirroring the first fold and maintaining a consistent distance from the central axis.
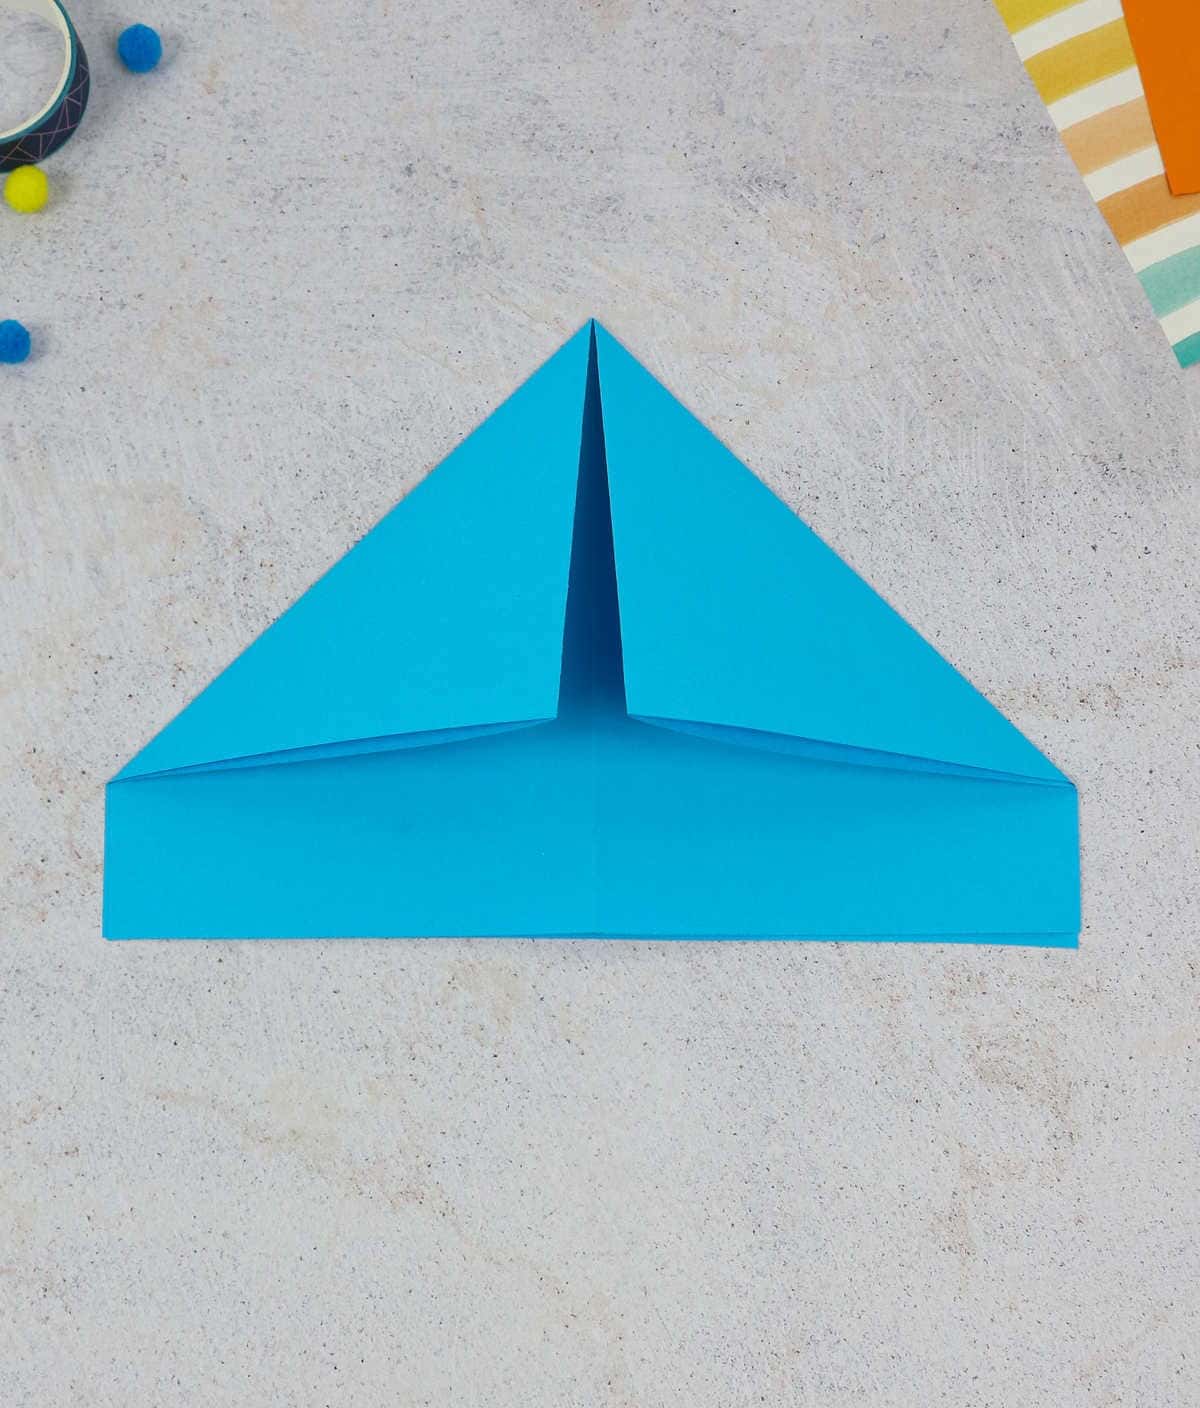
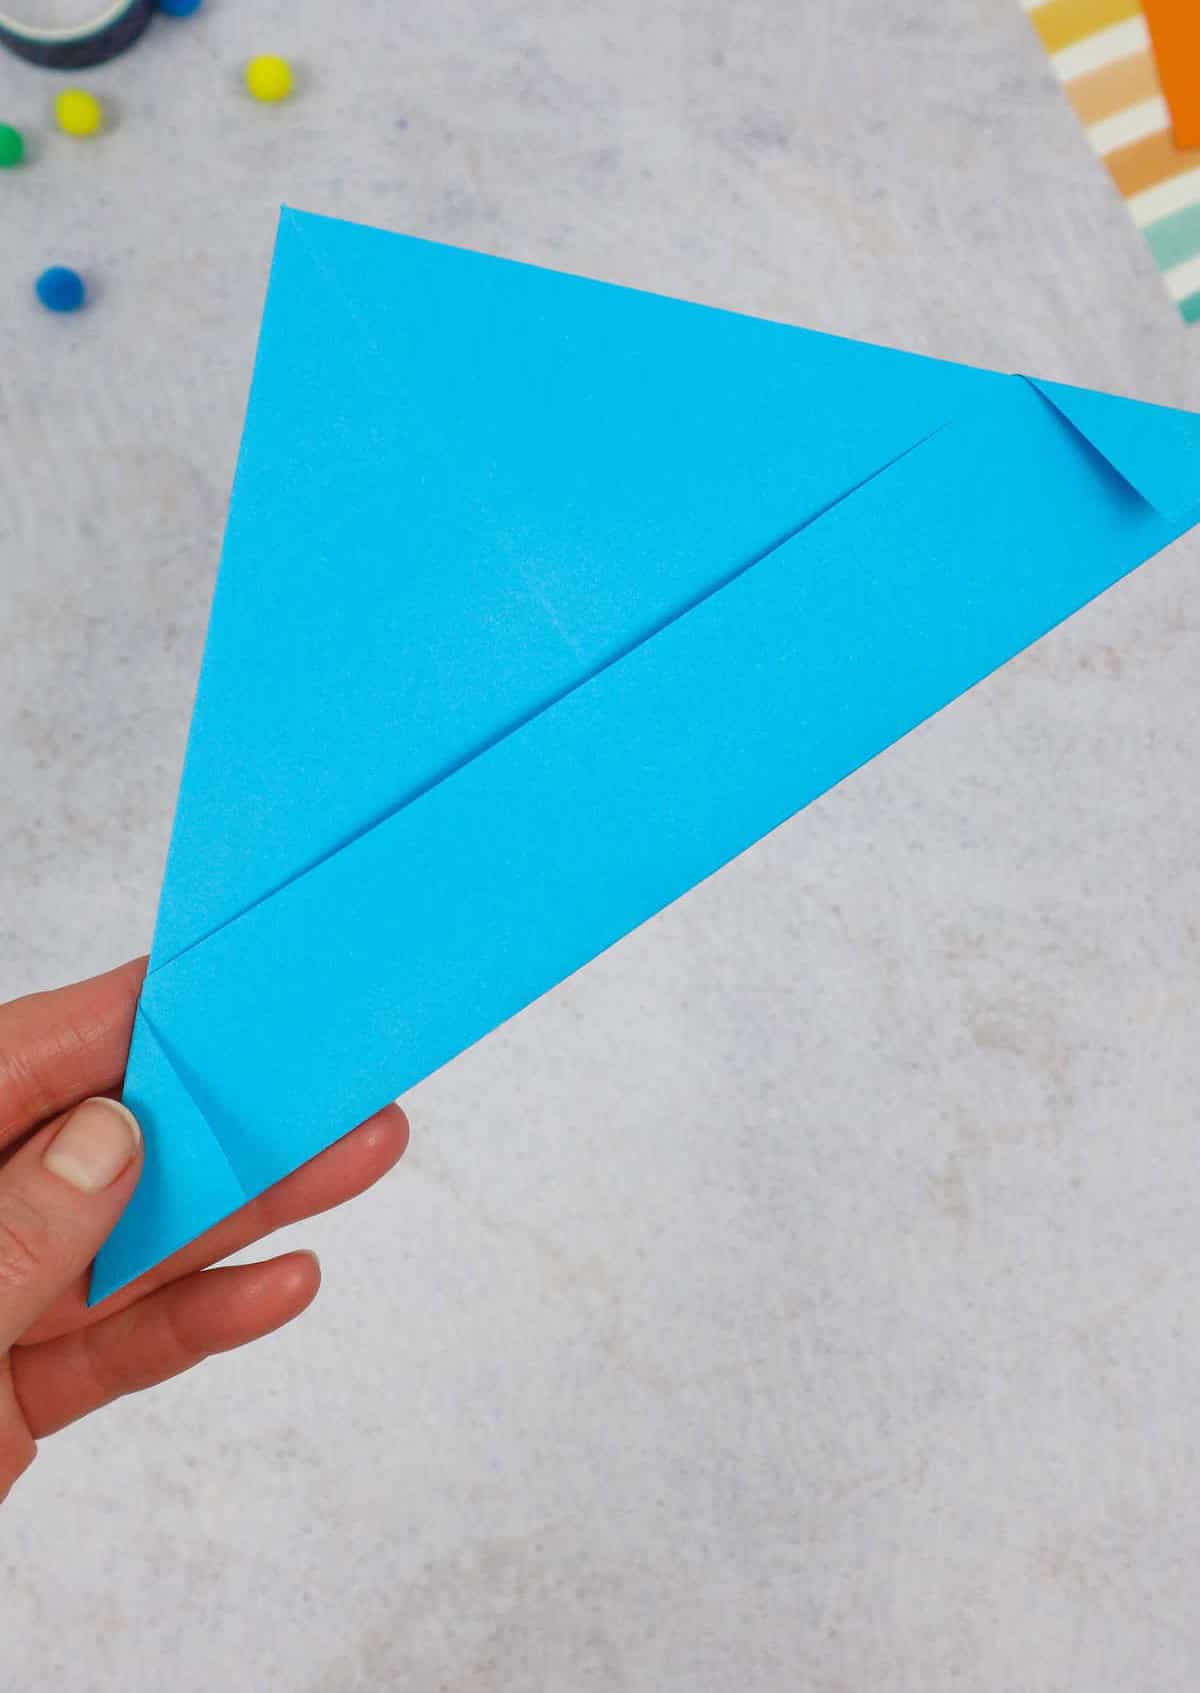
Step 3

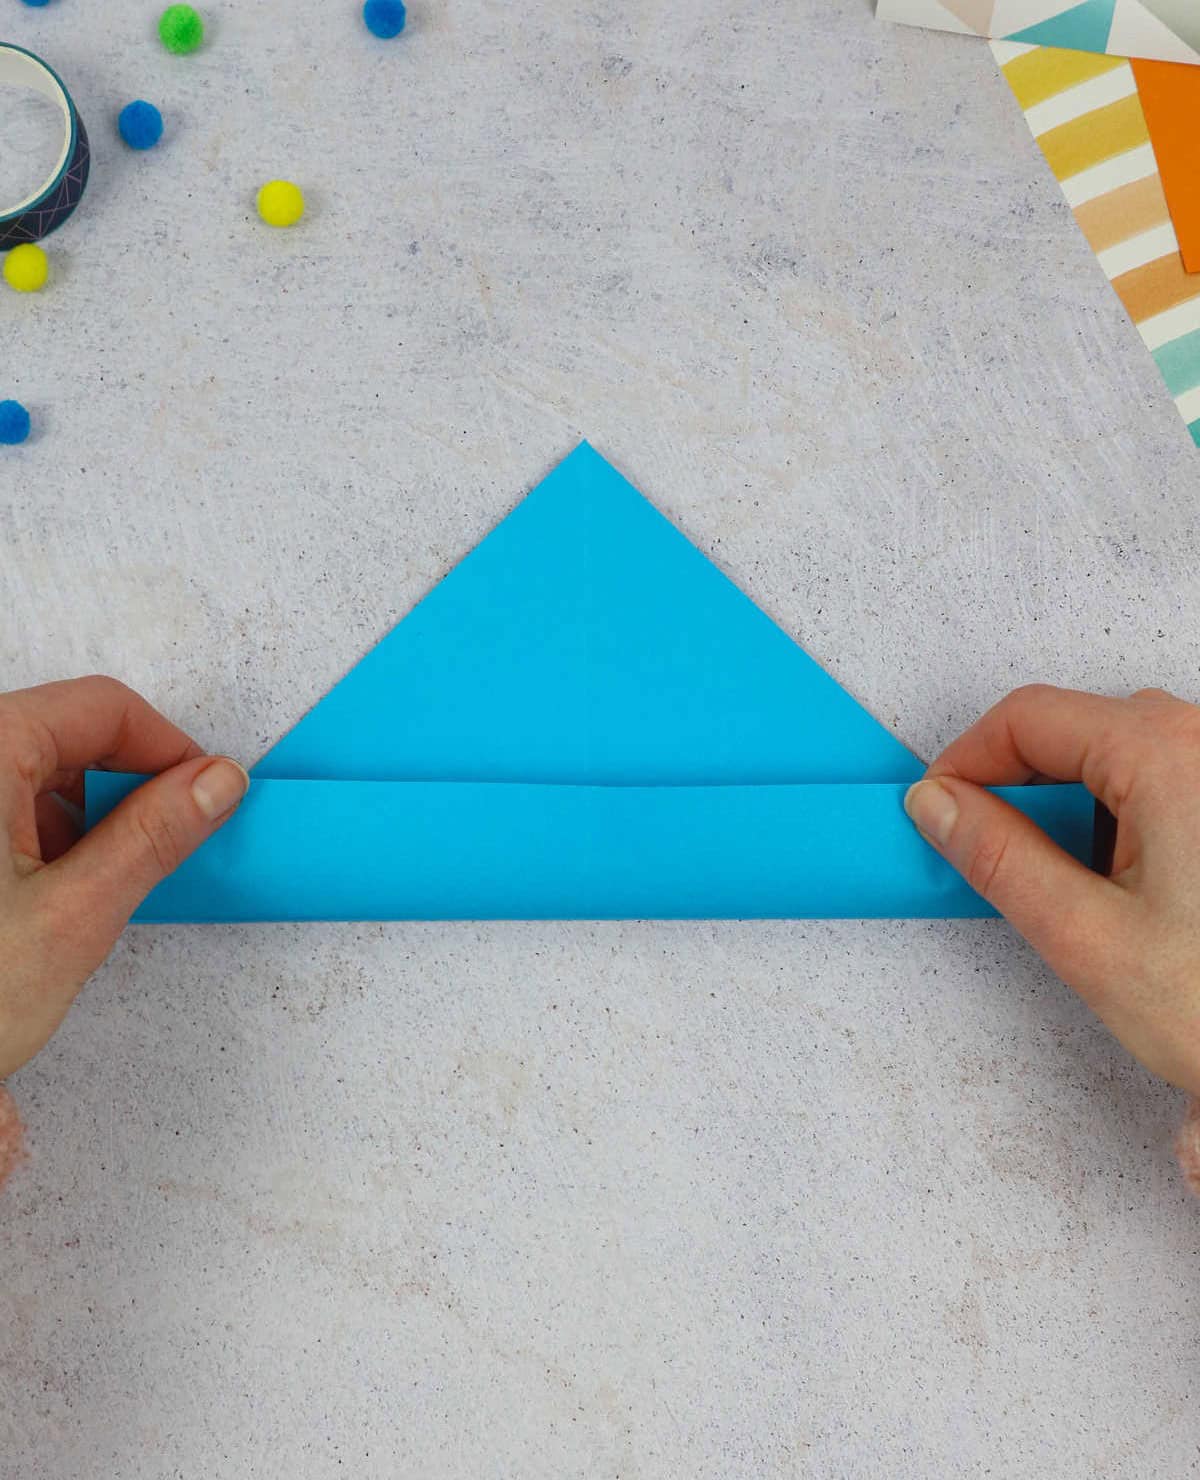
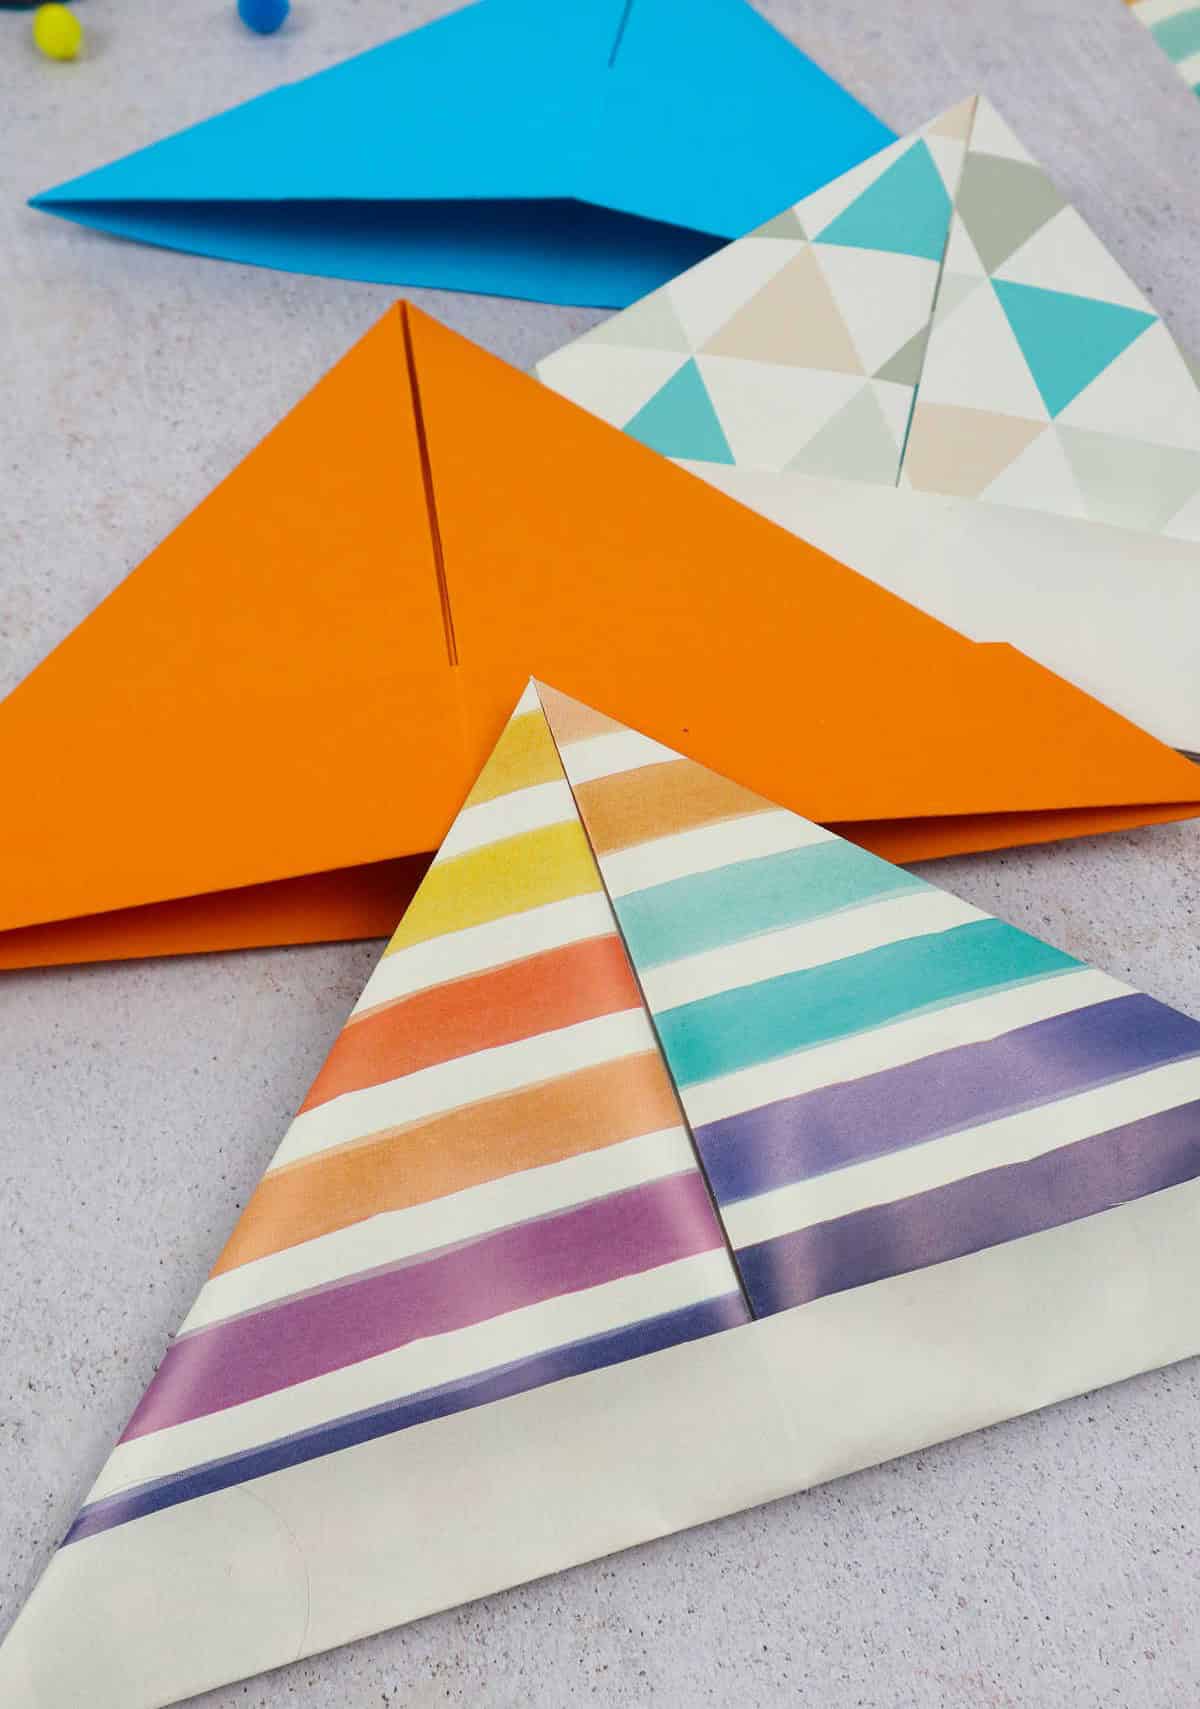
When following the instructions, you’ll notice that the resulting structure consists of two separate sheets. To complete the process, simply fold one of these sheets, specifically the topmost one, and position it so that its bottom edge aligns with the triangles formed by the folded corners. For a clearer understanding, reference the visual guide provided below.
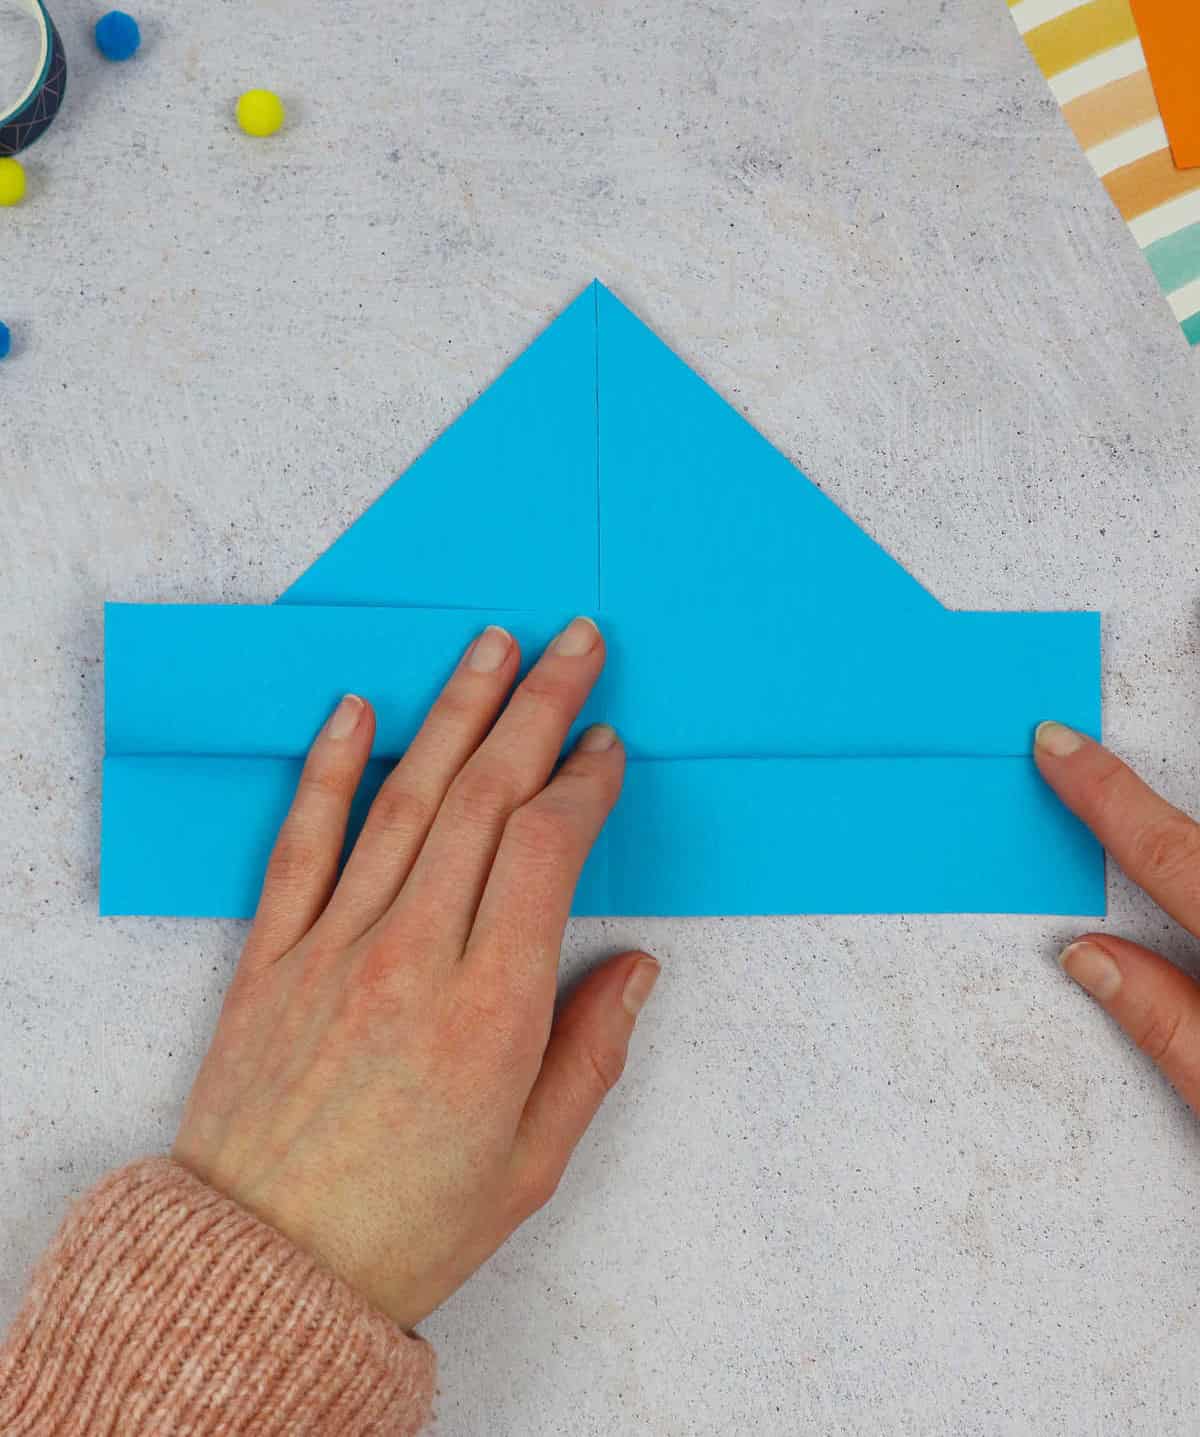
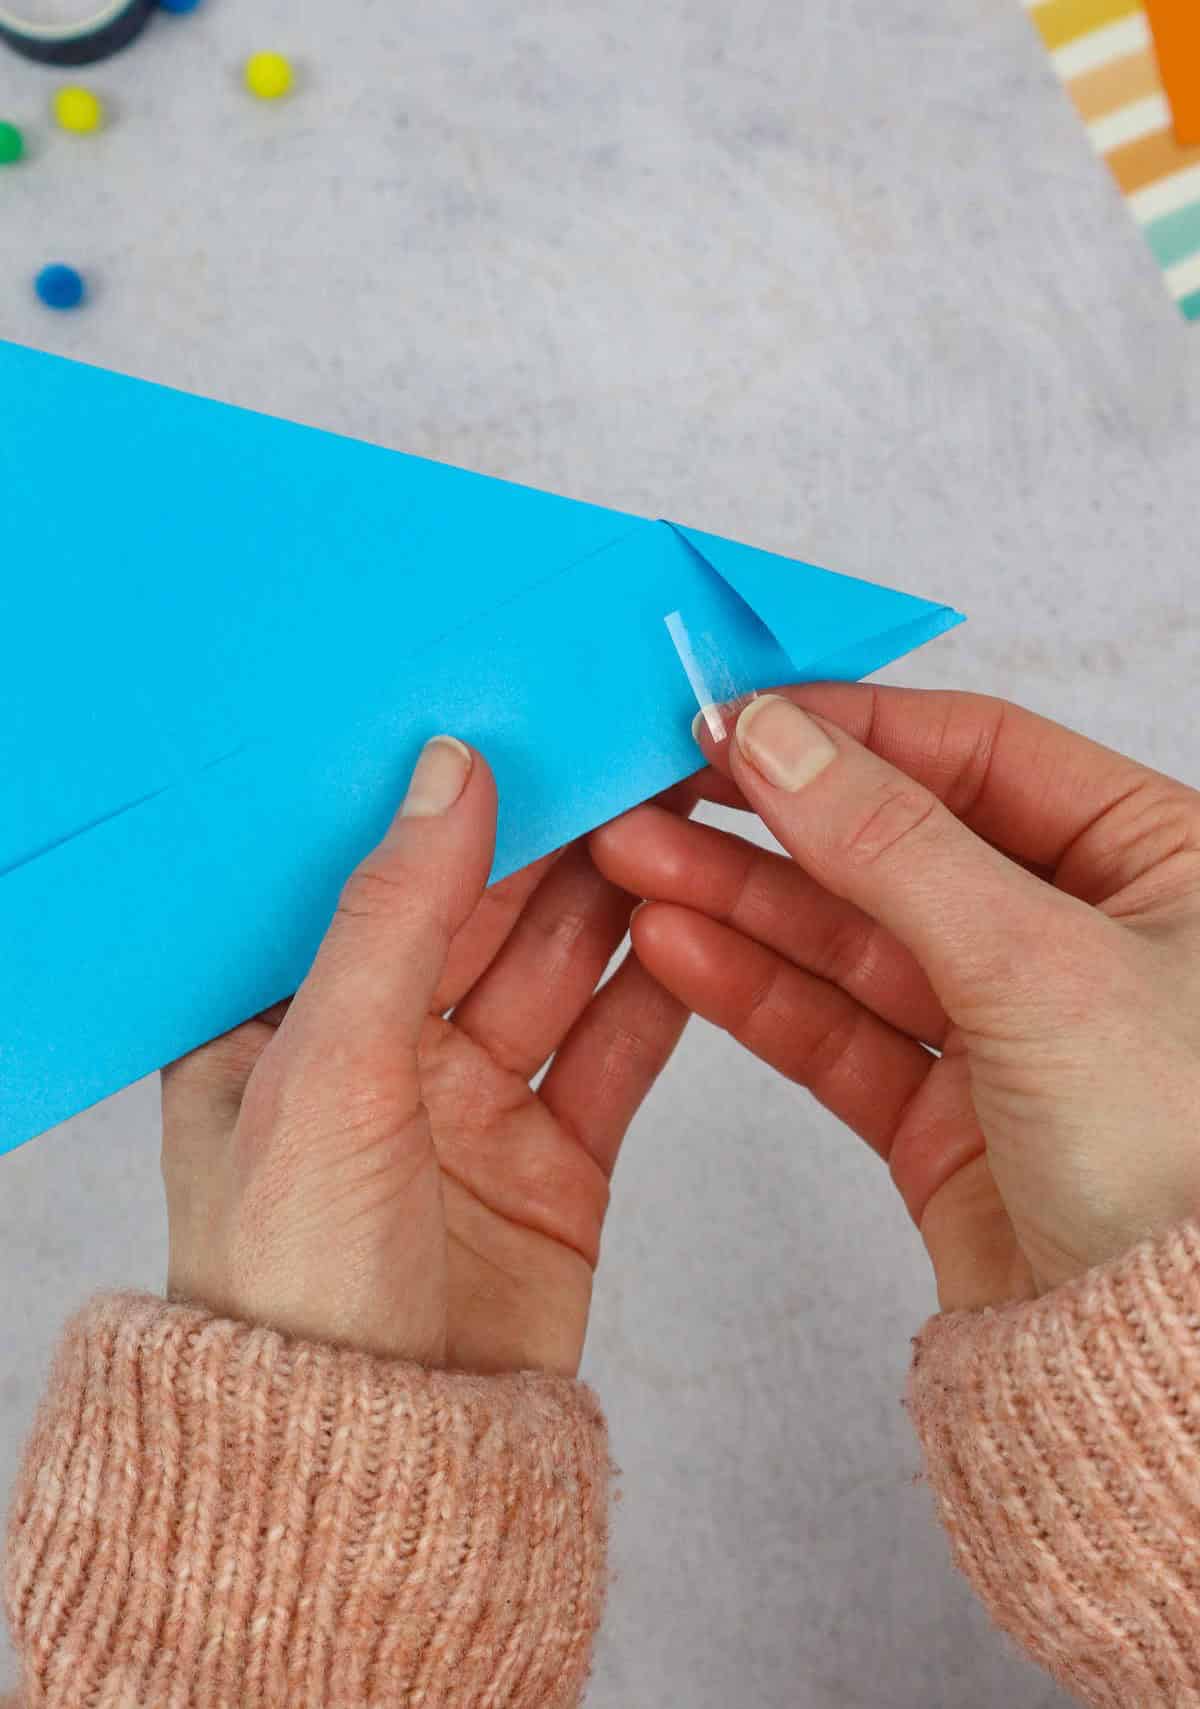
Step 4
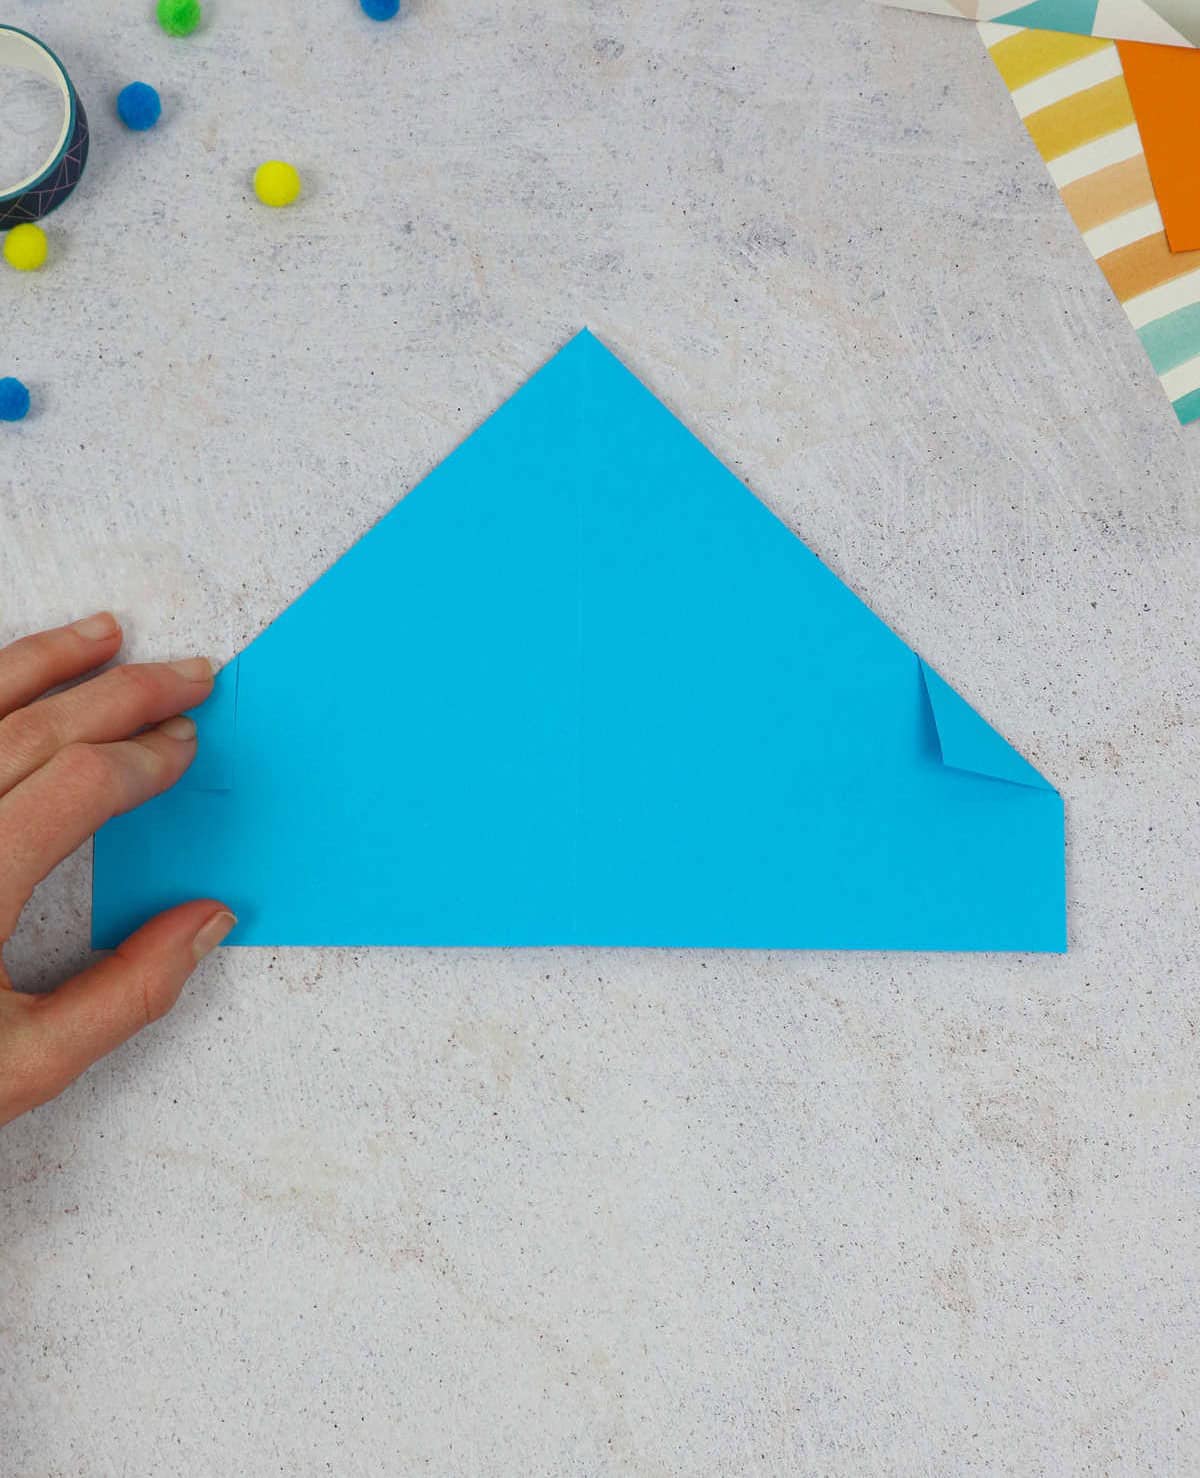

To further refine your fold, consider taking an optional yet effective approach. Simply tuck the small triangle flaps inward, neatly aligning them with the rest of the design. Next, take the second half of the paper and fold it inwards, ensuring that the crease meets the top edge of the paper. This meticulous attention to detail will elevate your craftsmanship and result in a polished finished product.
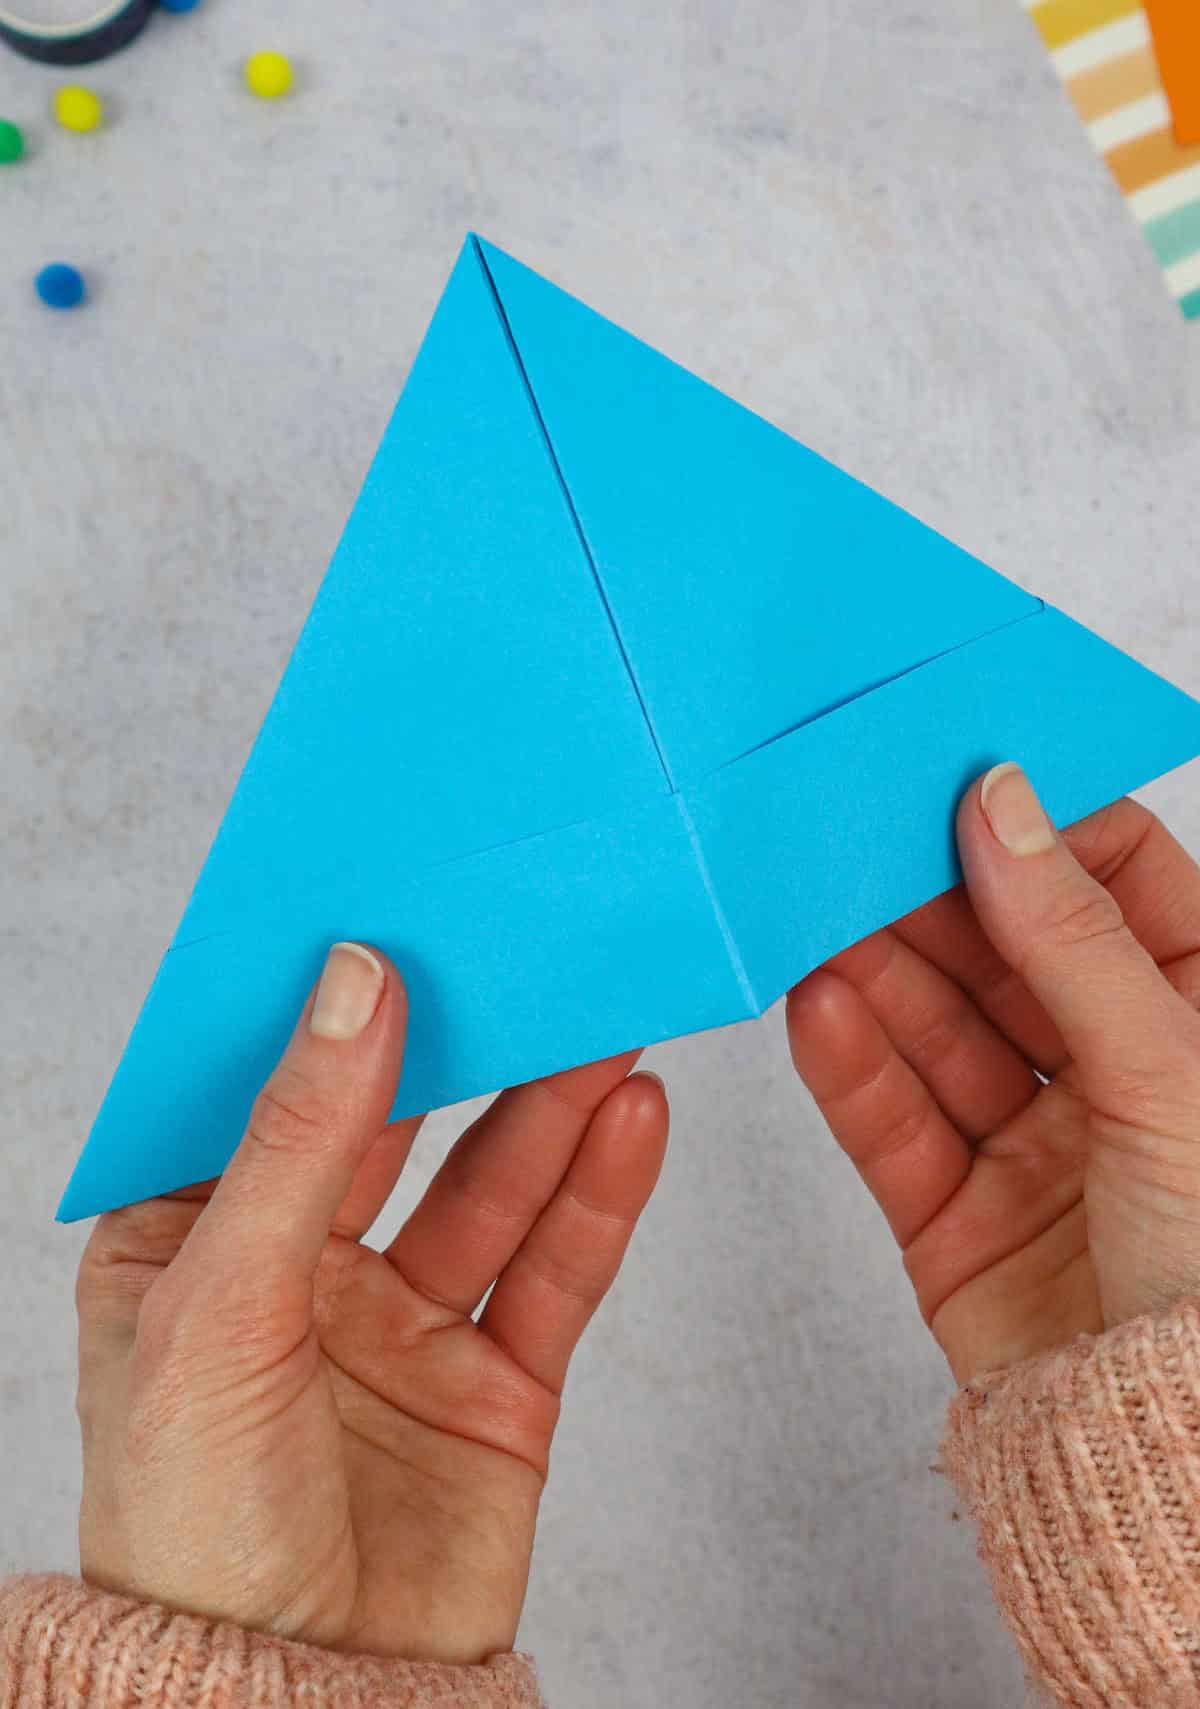
Step 5
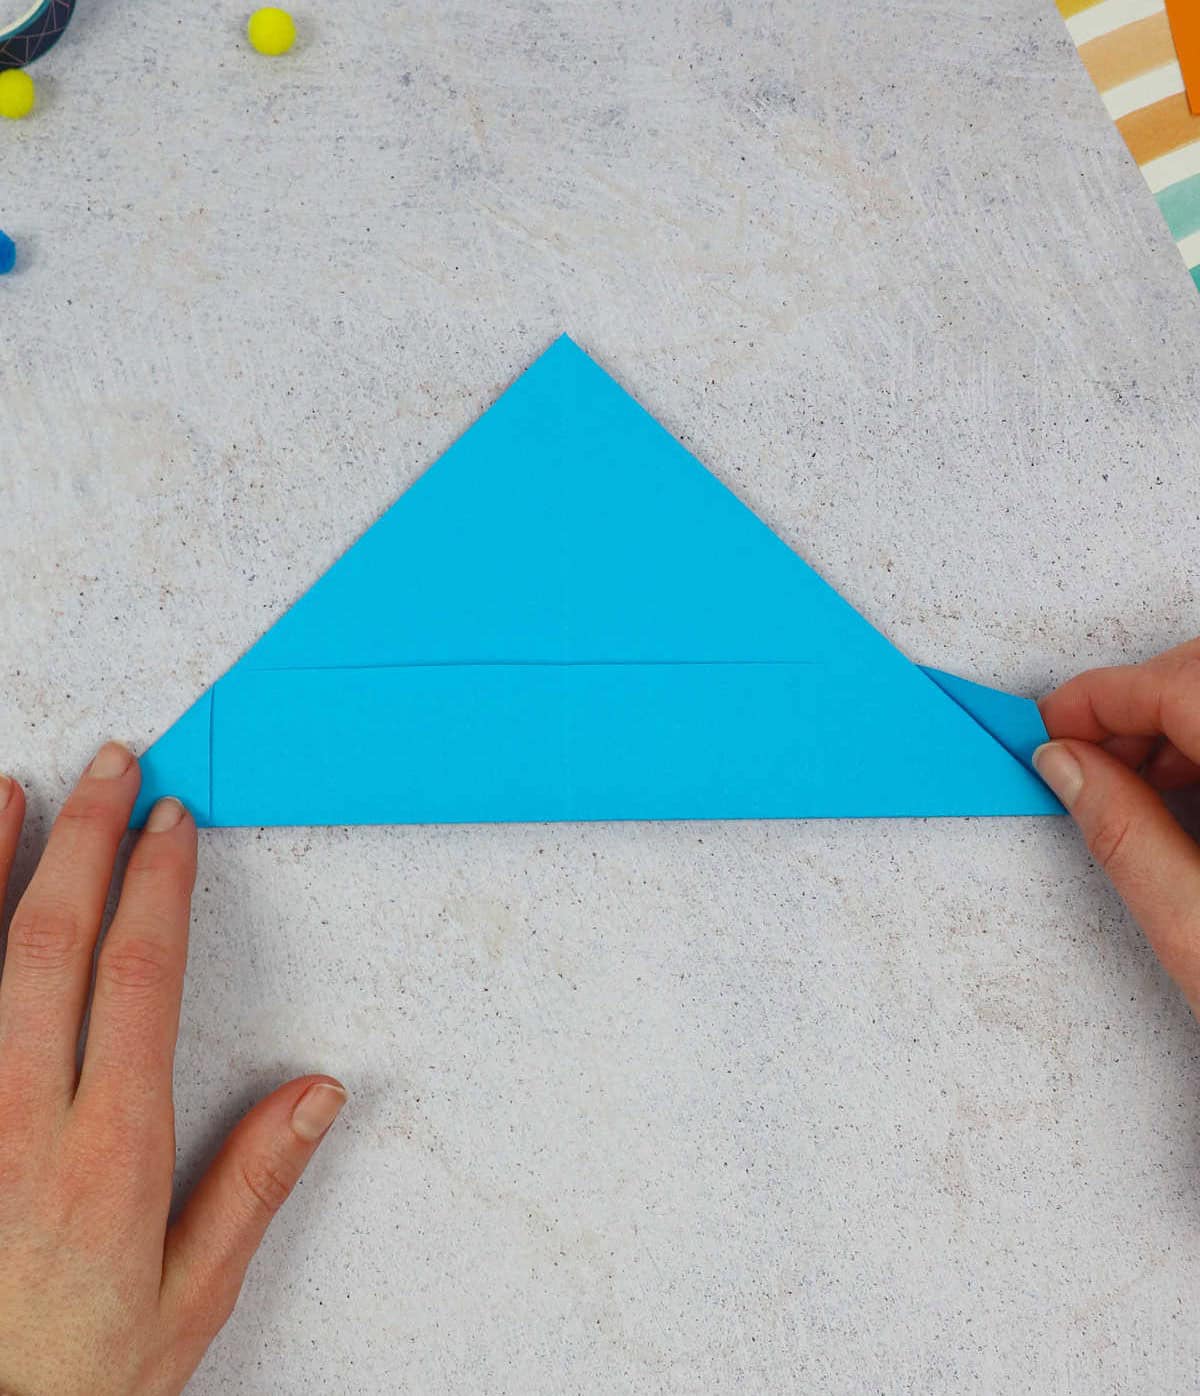
To ensure a crisp finish, gently press the folded edges into place. A quick tap with your finger is all it takes to keep them secure and prevent any unsightly wrinkles or creases.
Step 6
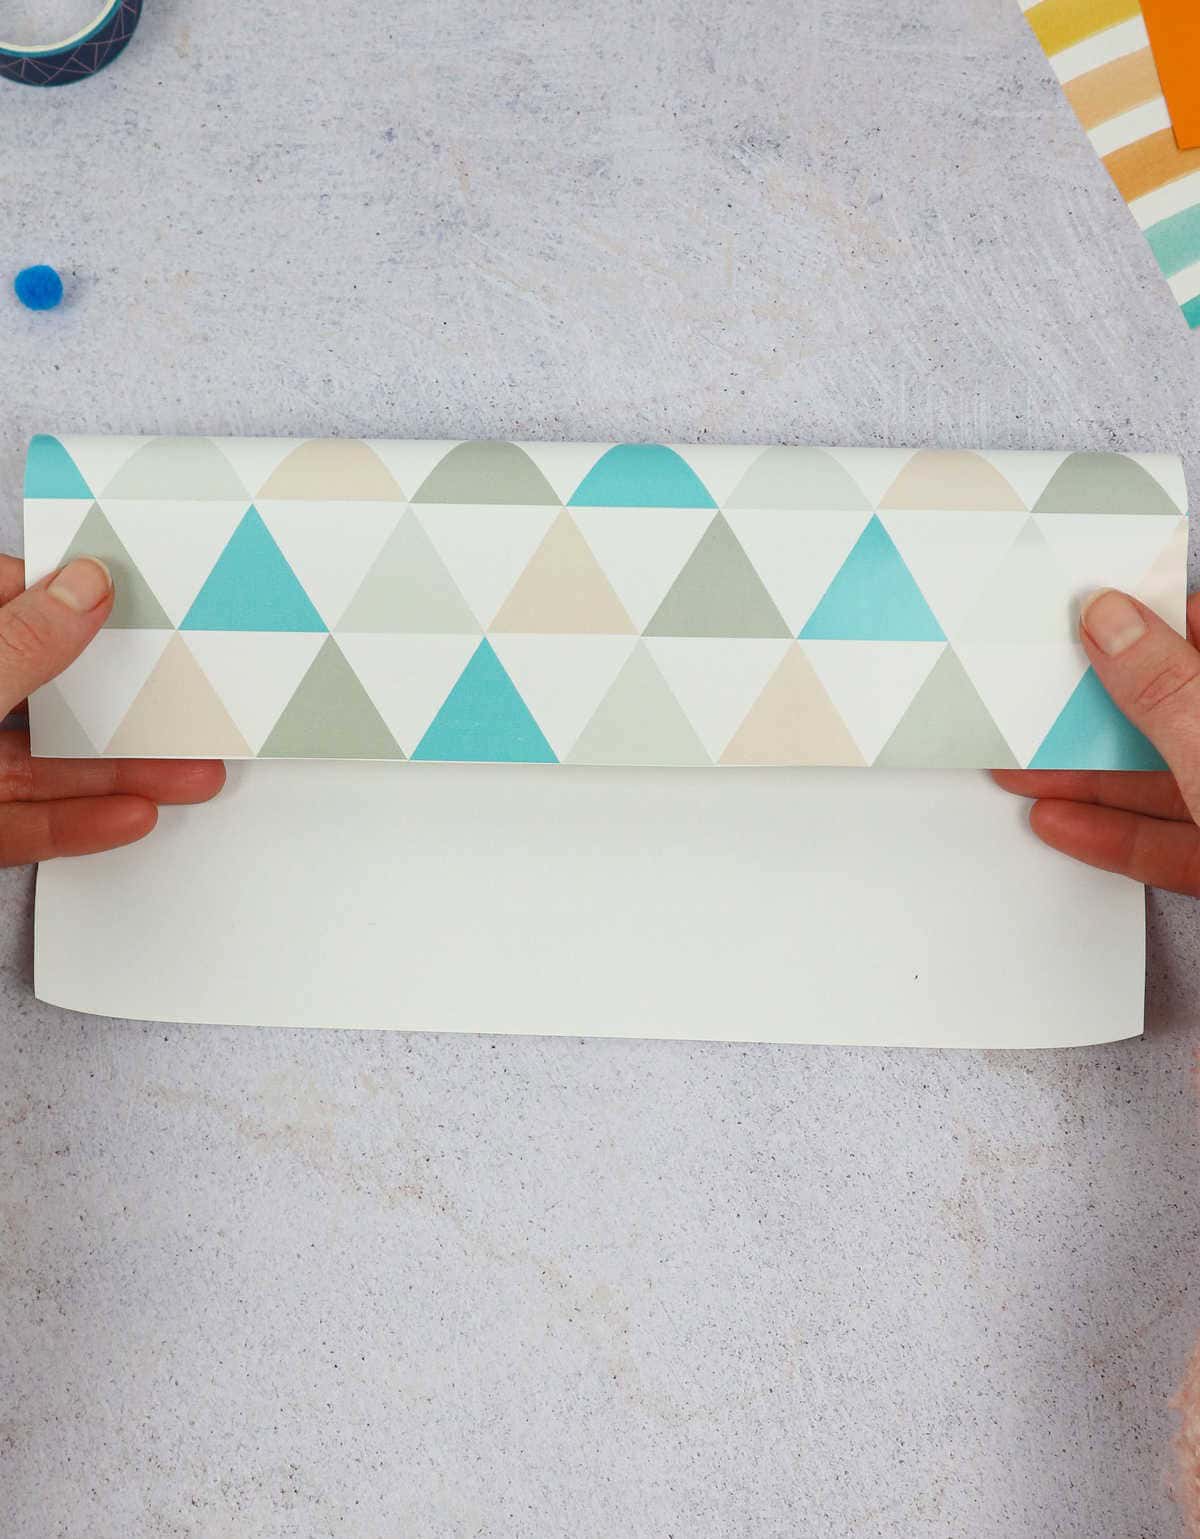
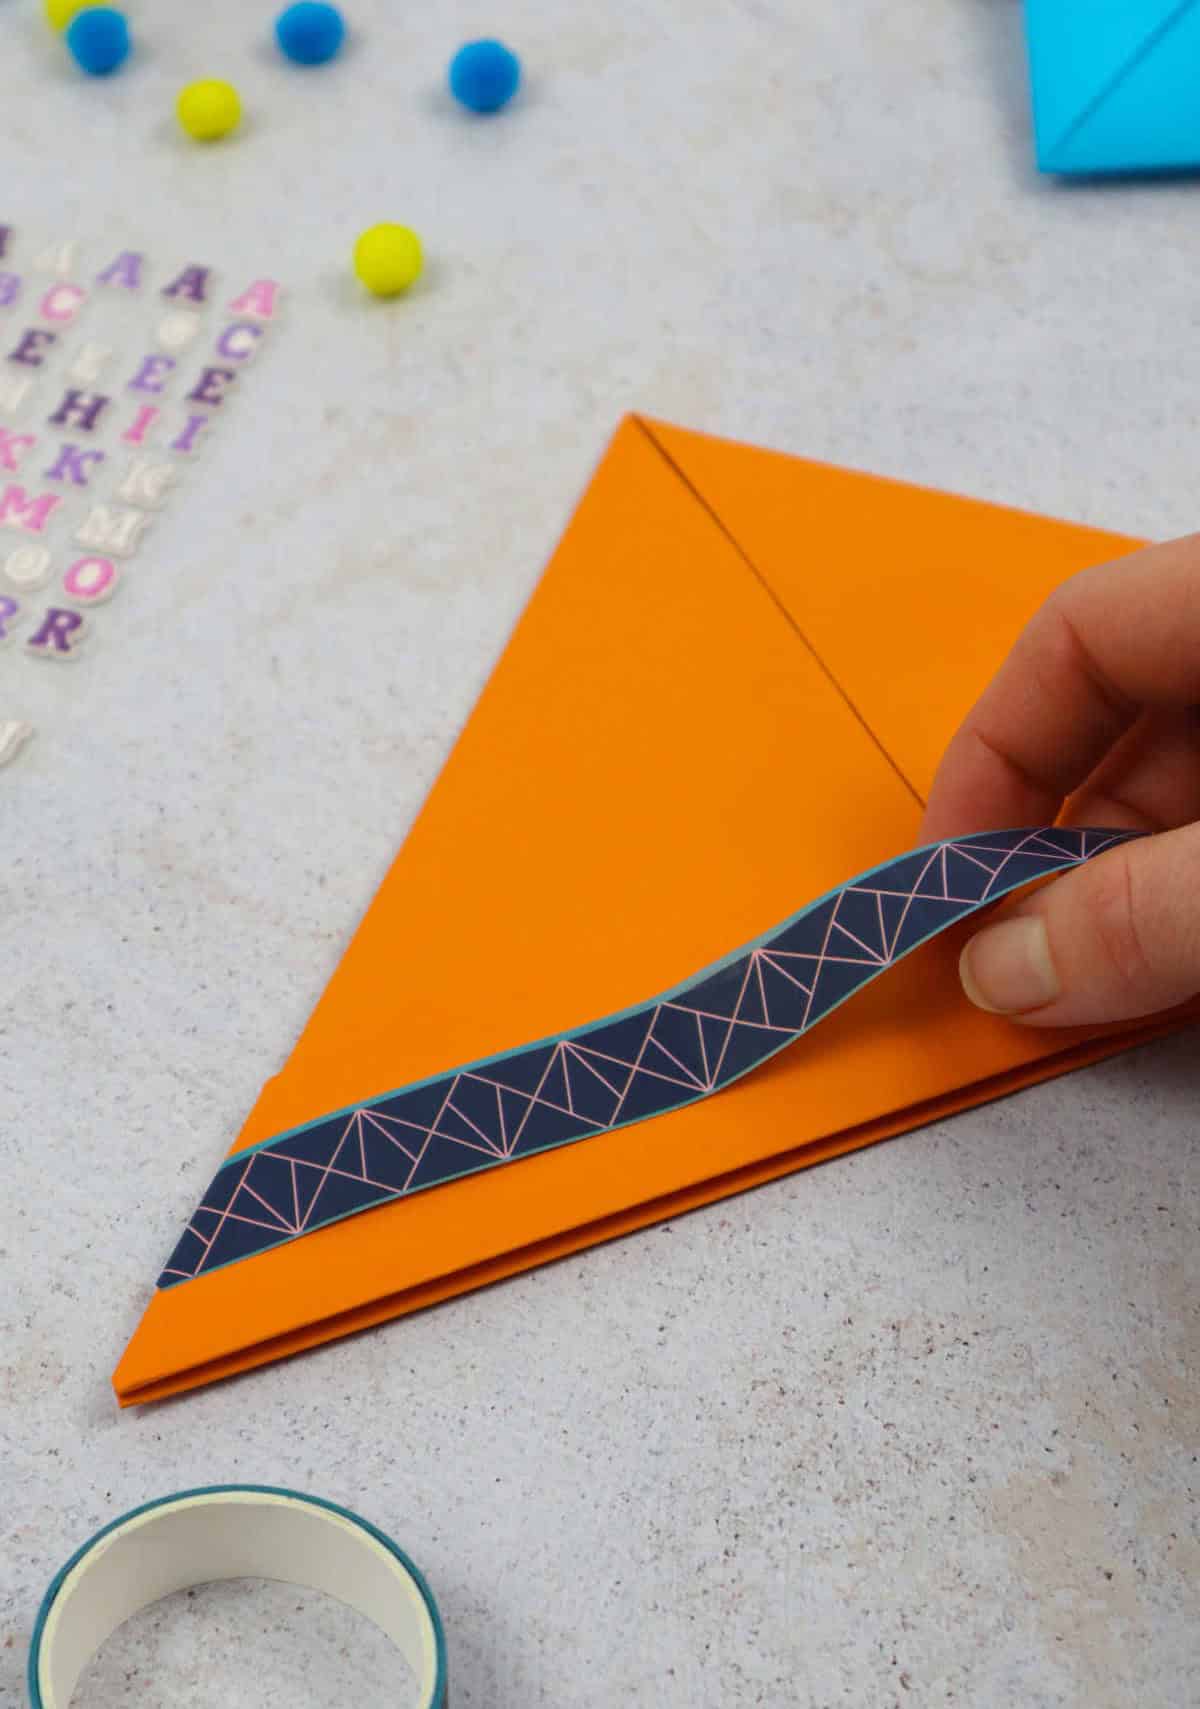
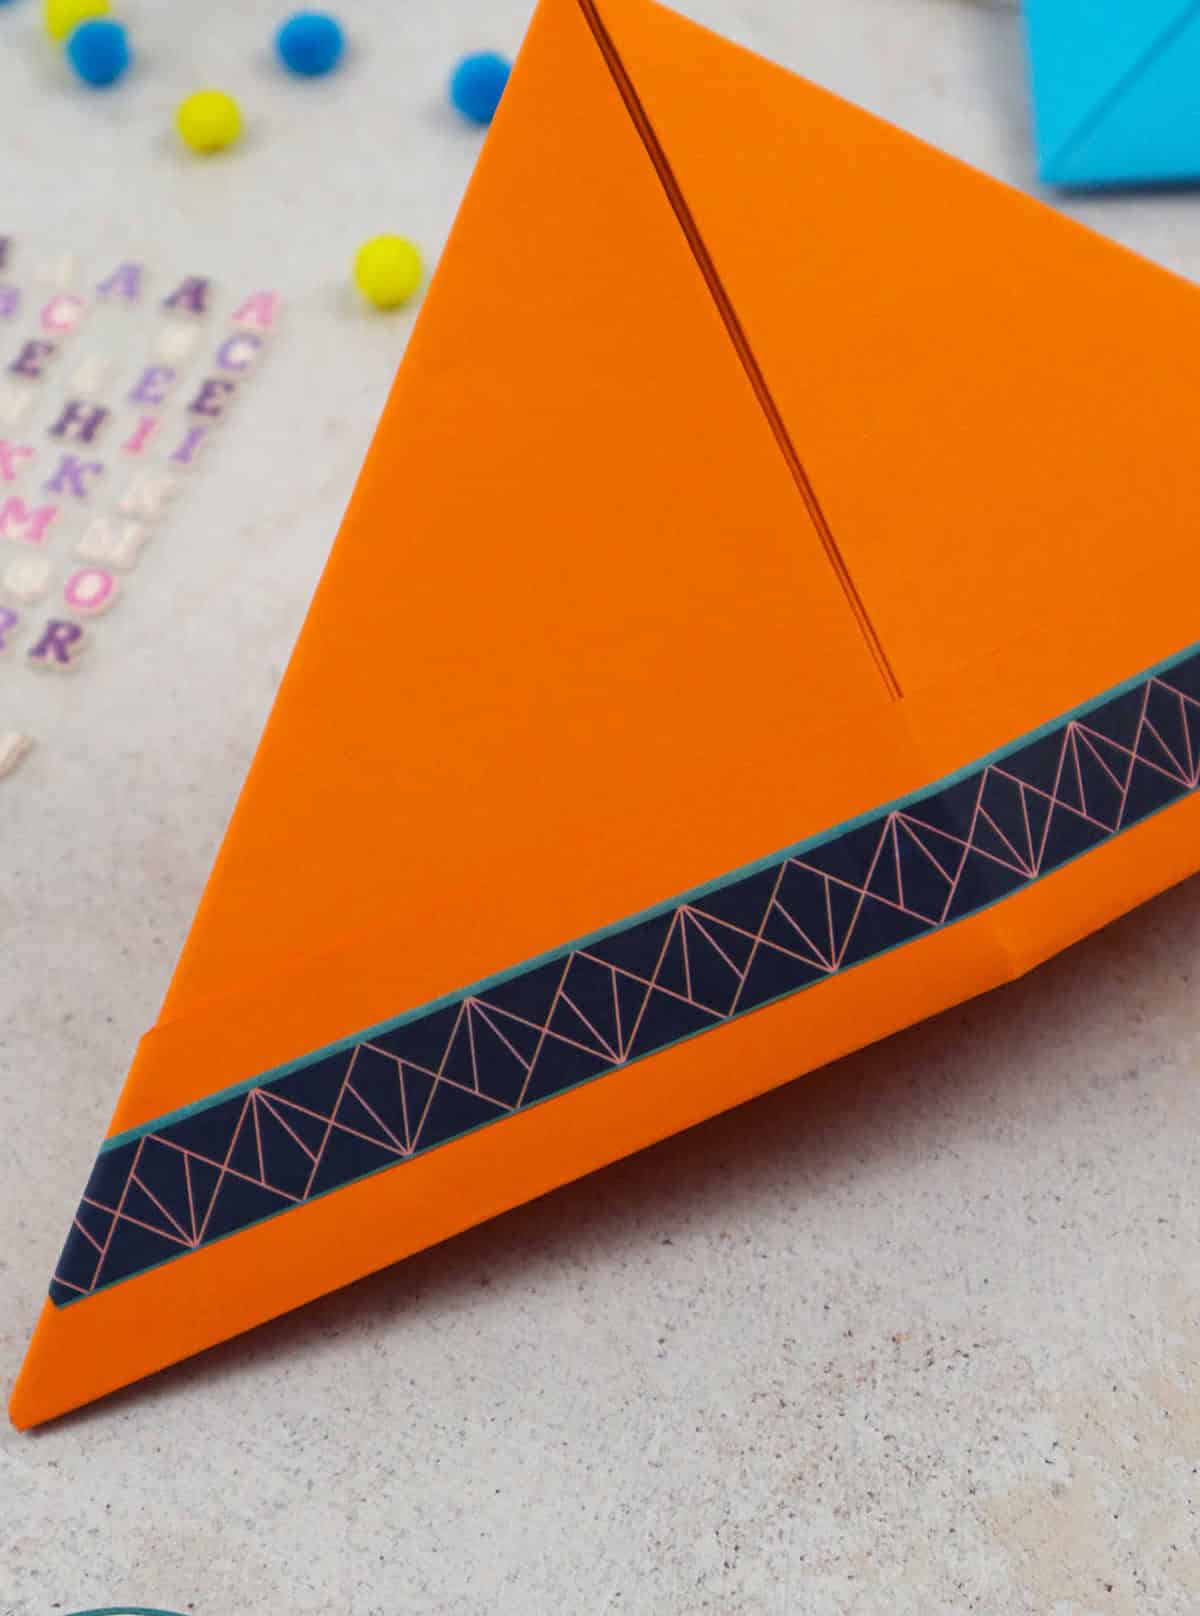
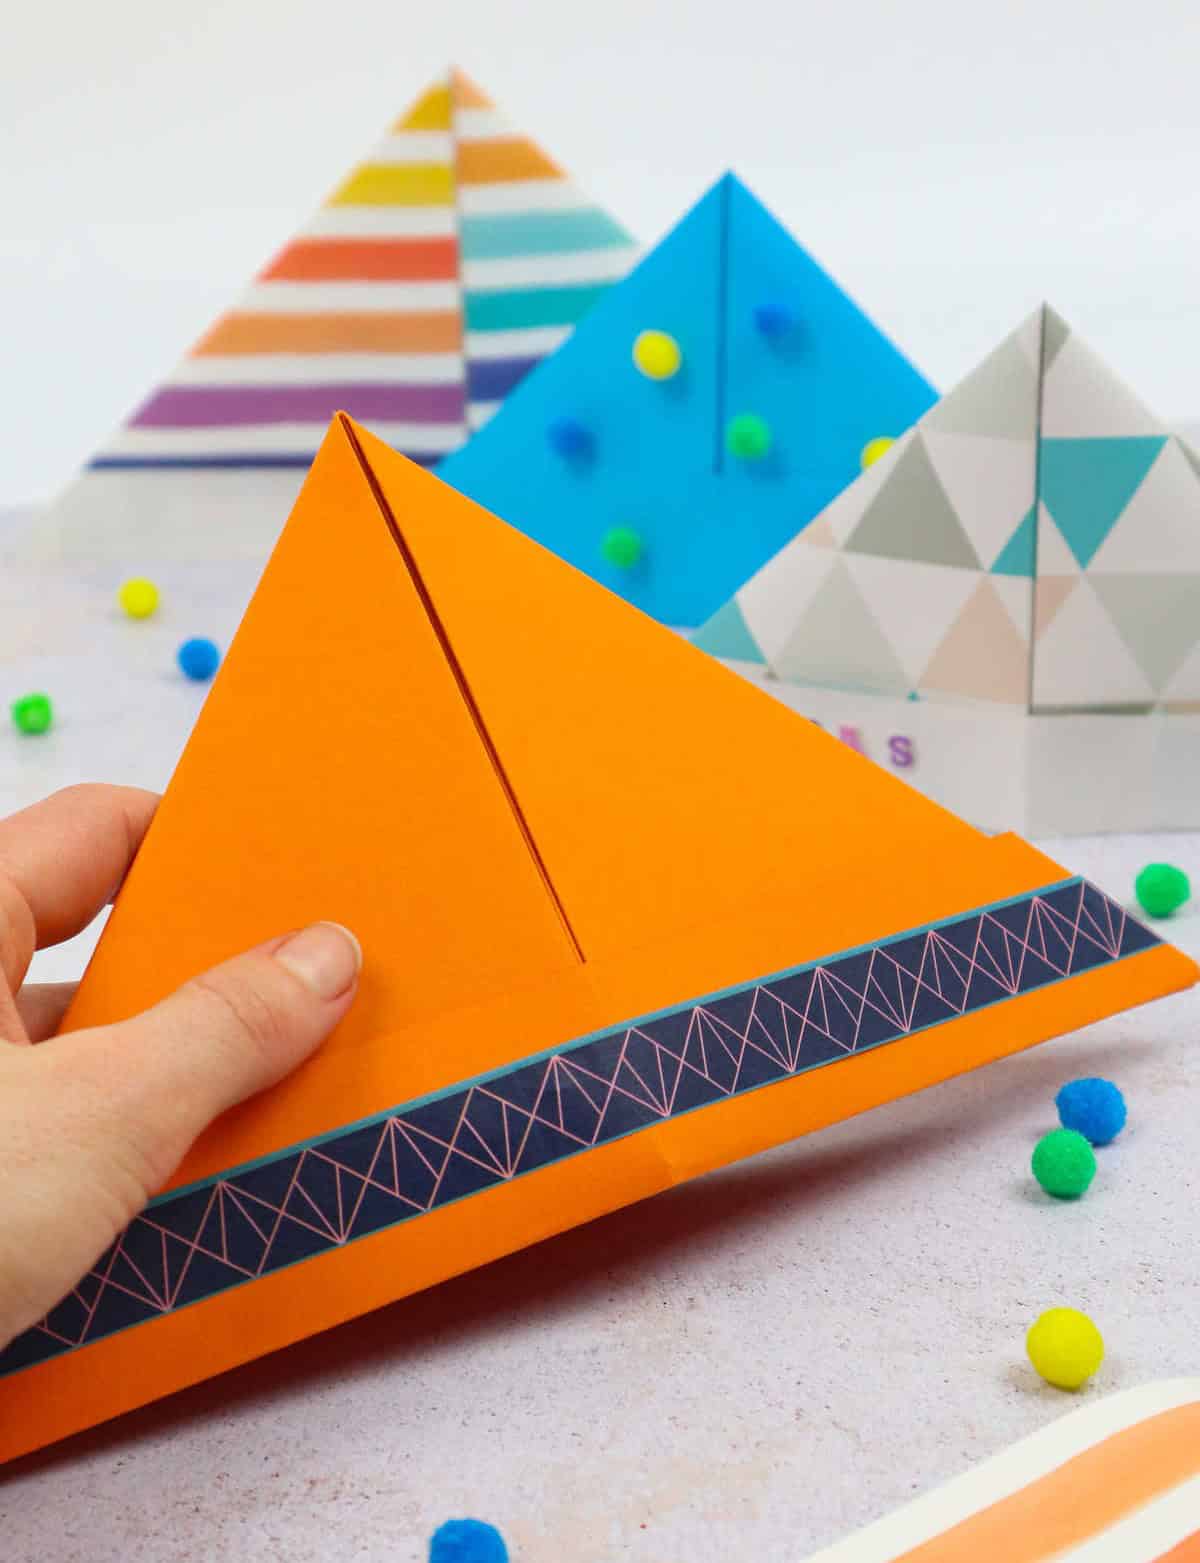
When dealing with a single-sided paper featuring one color or pattern, the process remains largely unchanged. Simply ensure that the colored side is facing upwards and outwards, while the plain side is directed inward. This minor adjustment ensures that your design is accurately positioned. The creative possibilities are endless! You can enhance the look of your hats by applying multiple strips of washi tape along the edges and corners.
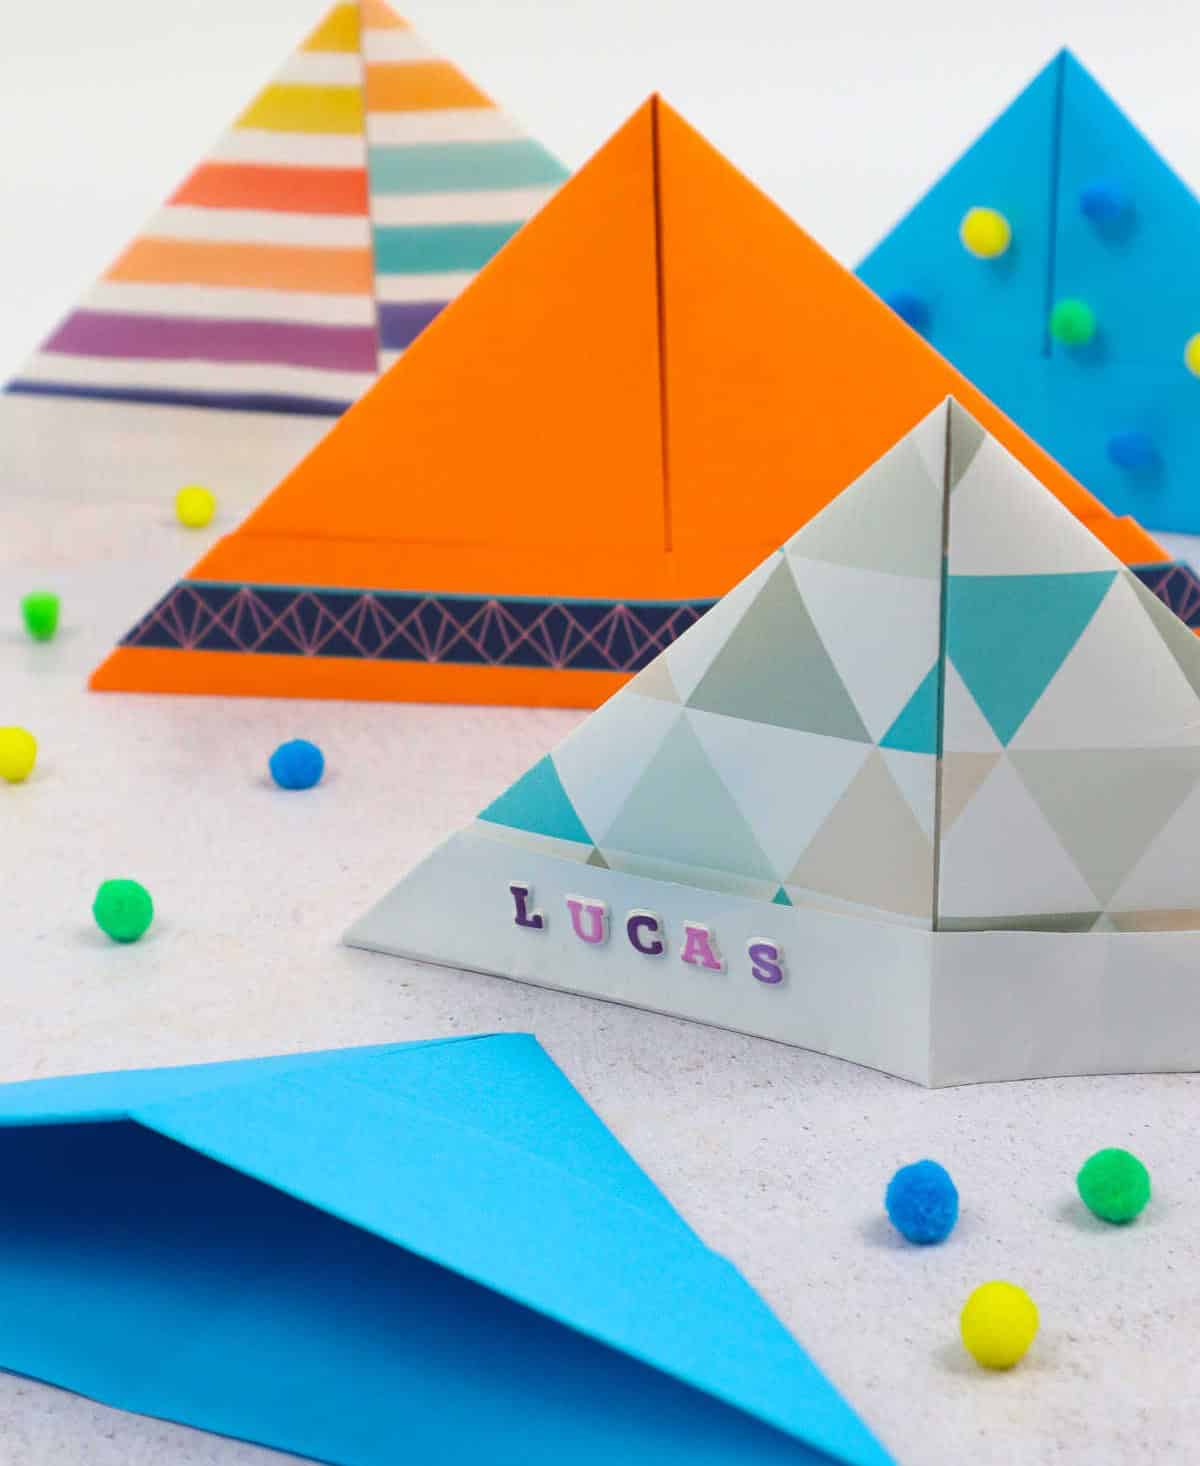
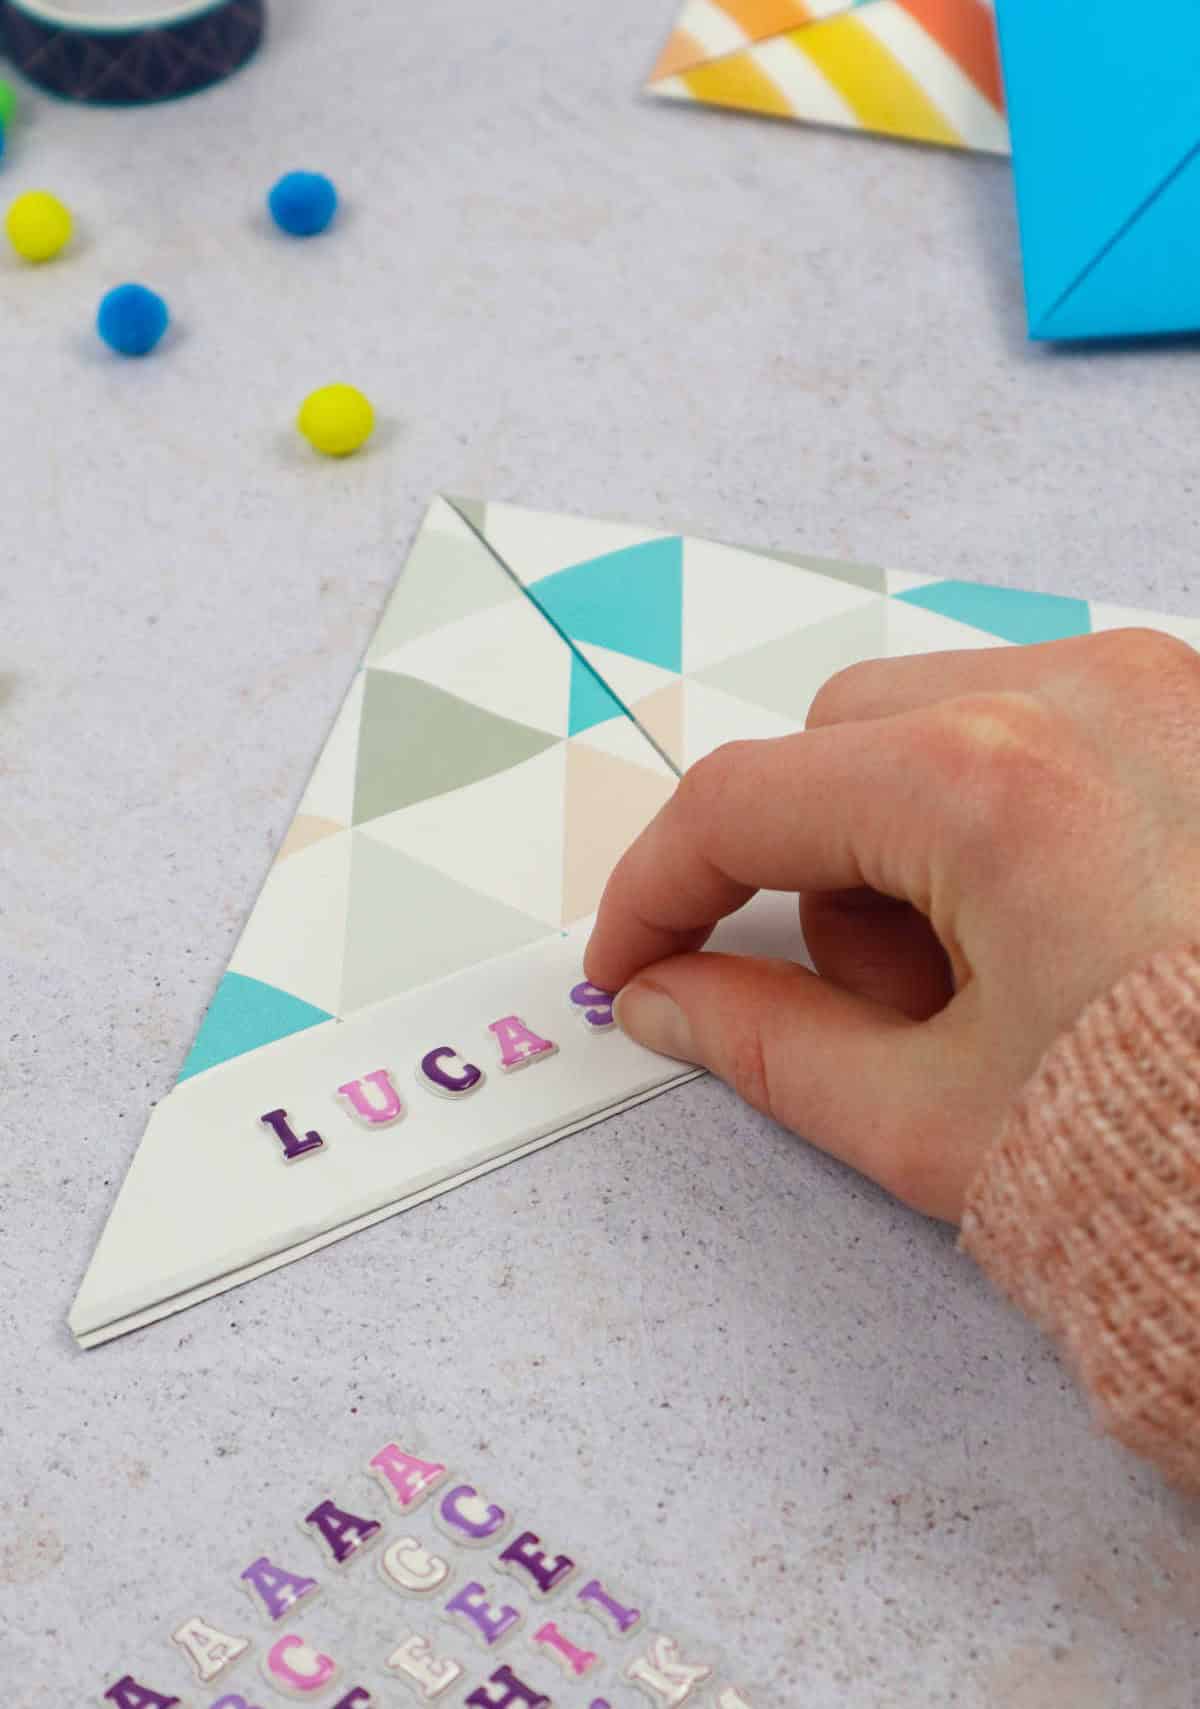
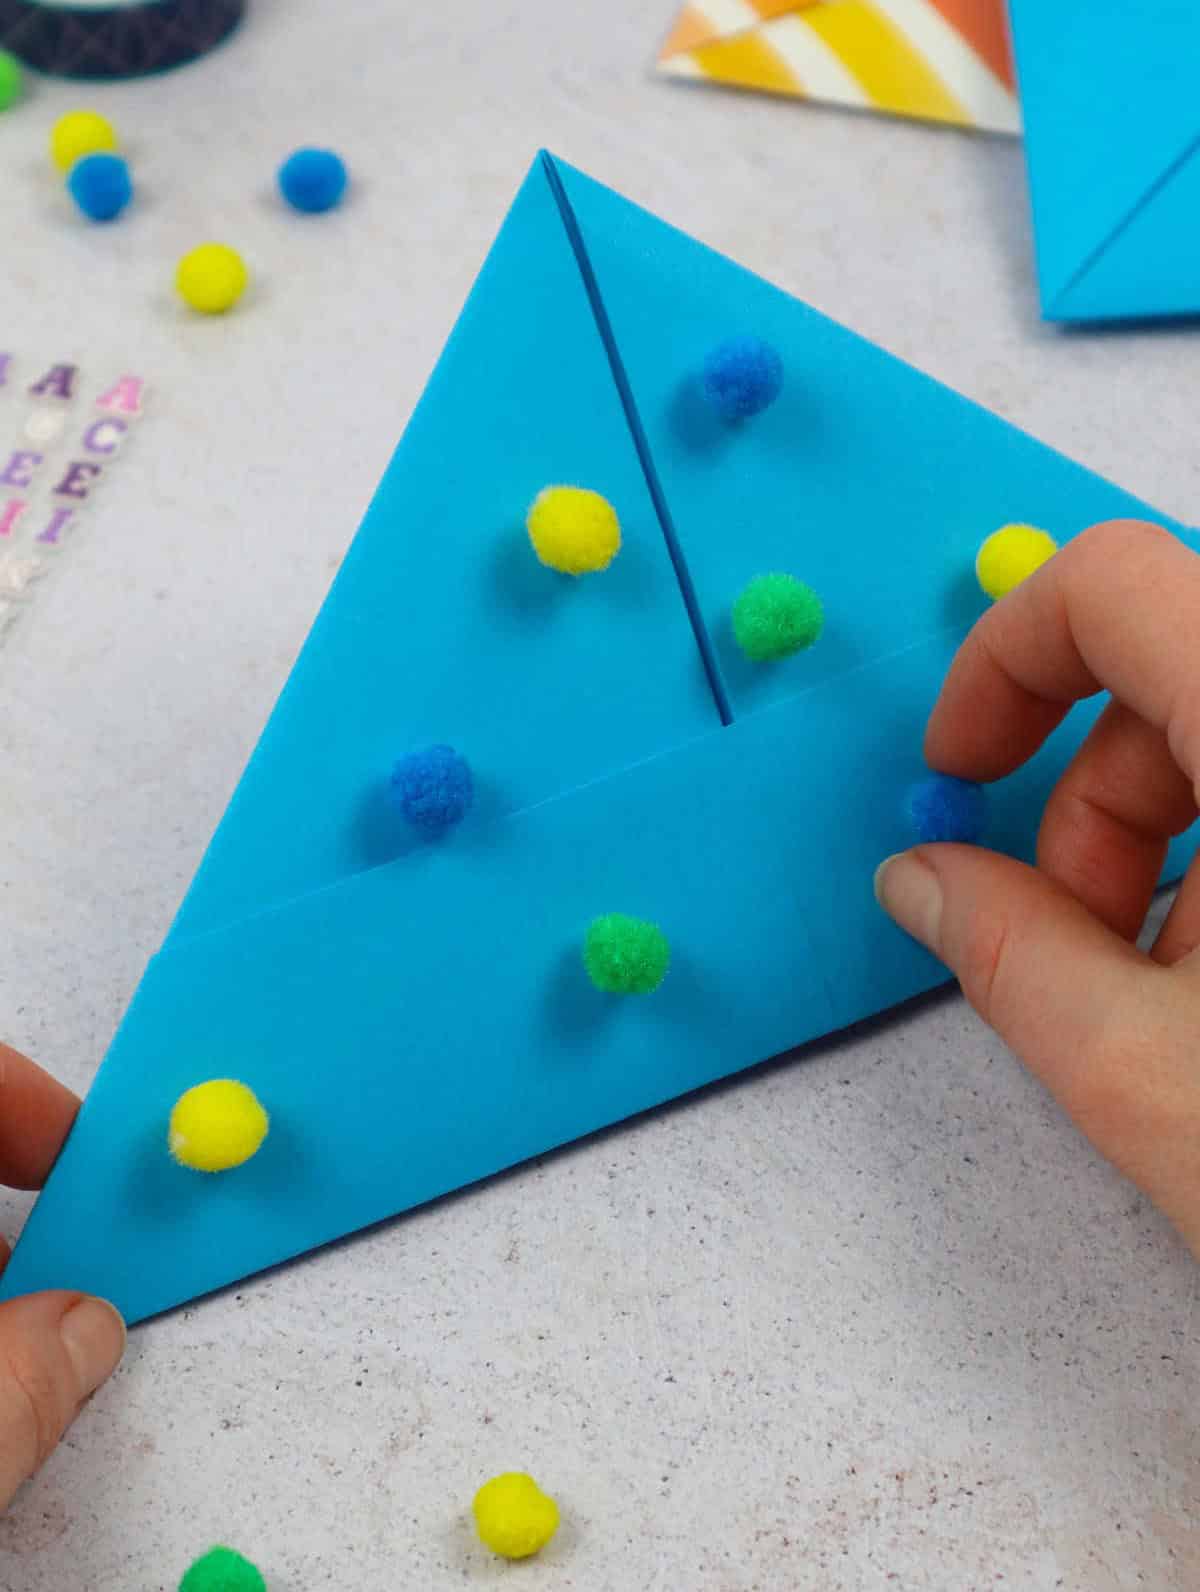
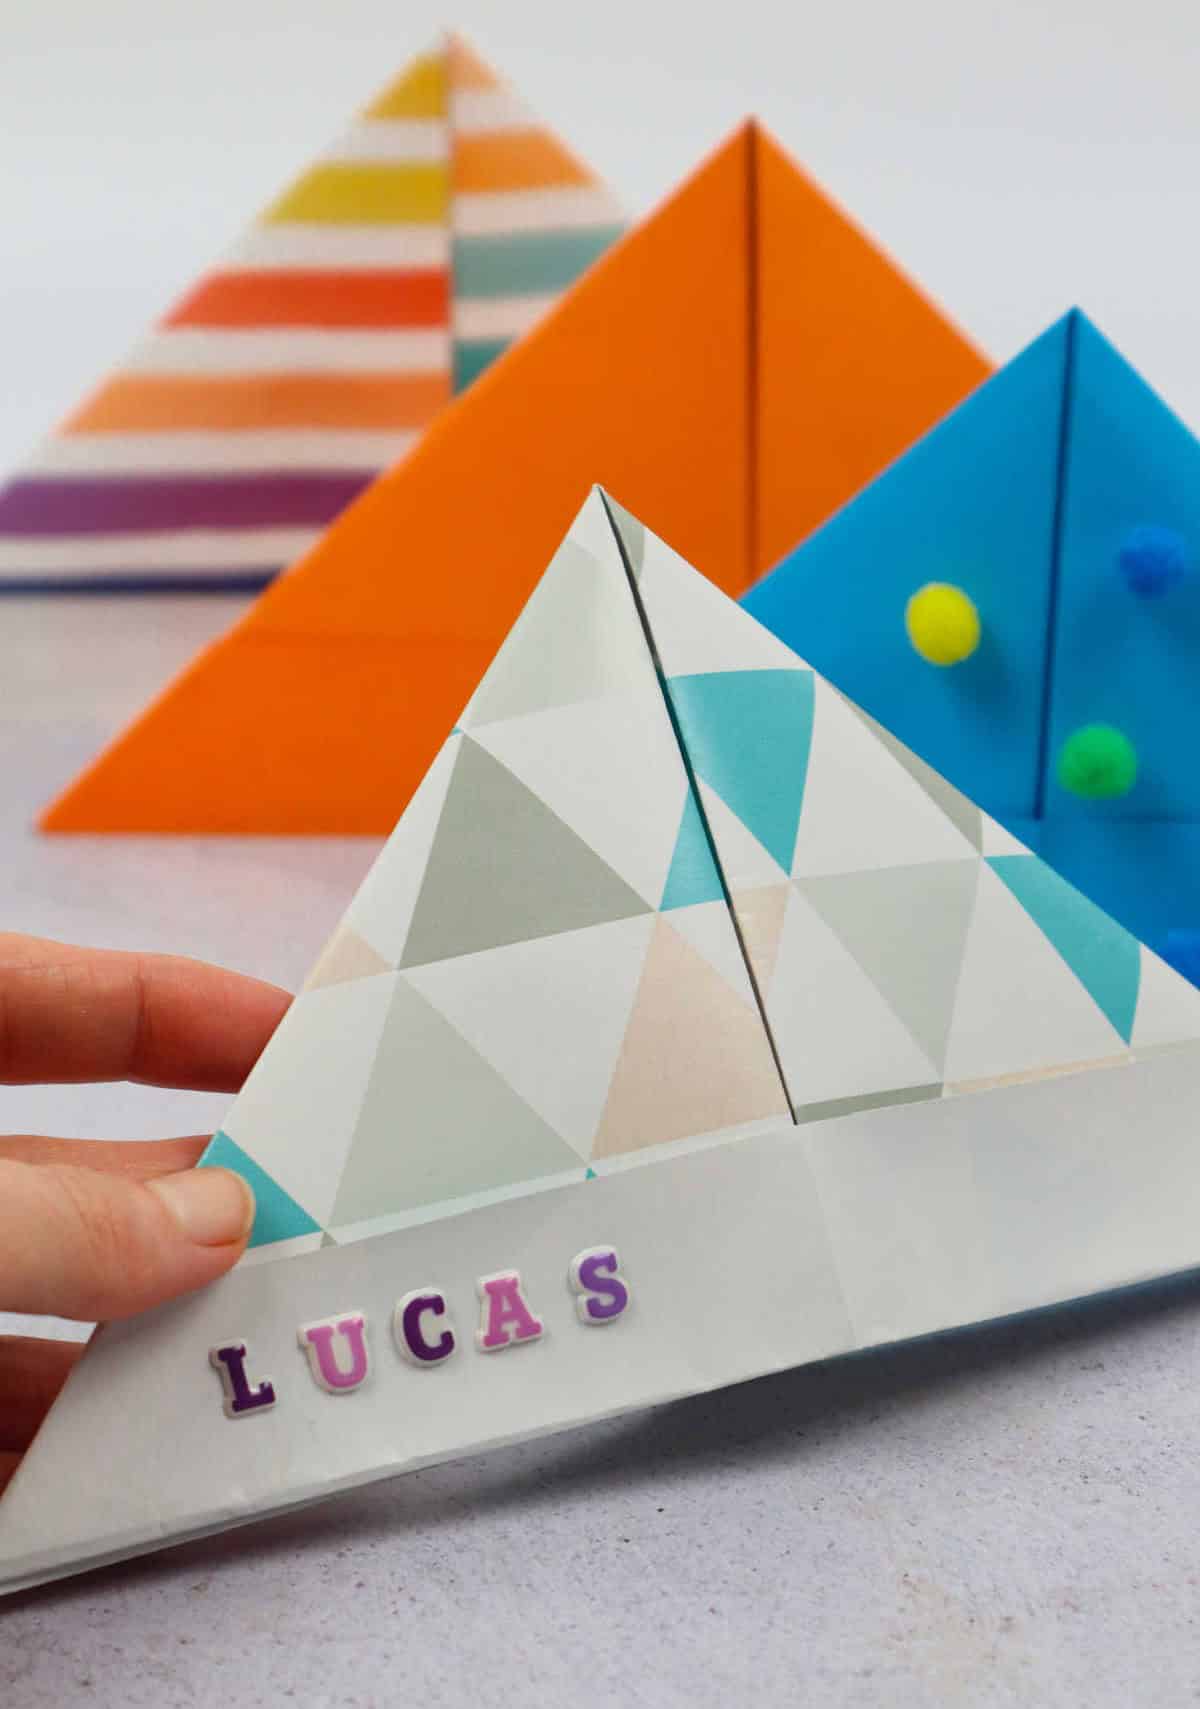
Additionally, feel free to add some sparkle with glitter, beads, or other embellishments. For a more textured appearance, dot the surface with small amounts of glue and attach pom poms accordingly. To make it truly unique, consider adding personalized elements such as your child’s name in bold letters – a simple yet thoughtful touch that will surely delight.
Other Paper Crafts
Looking for creative ways to engage your kids in arts and crafts, or seeking inspiration for your next DIY project? Look no further! With a range of paper-based activities, you’ll find endless fun and versatility. From the simplicity of making paper lanterns to the intricacy of crafting tissue paper flowers, there’s something for everyone. Explore the world of paper plate crafts with 47 fun projects that will keep kids entertained for hours.
Alternatively, try your hand at traditional paper mache techniques or create adorable squishies for a tactile experience. For those looking for a more grown-up creative outlet, discover 31 paper crafts designed specifically for adults. And if you’re after something entirely new, dive into the realm of construction paper with 36 unique and exciting projects. Lastly, indulge in the delicate beauty of tissue paper crafting with an impressive 37 designs to choose from.
How to Make a Paper Hat
Looking for a fun and easy craft to enjoy with the kids? Crafting paper hats is an excellent way to spend quality time with your little ones, making it perfect for family bonding and celebrations alike. With minimal prep and just 20 minutes of active crafting time, this project is ideal for busy families or those short on time. In total, you’ll need around 25 minutes to complete this delightful DIY paper hat-making experience.
Materials
The creative process often requires a medley of materials to bring ideas to life. In this case, it’s all about combining the right tools to spark inspiration. For starters, you’ll want to gather your basics: rectangular paper sheets in standard sizes like A4, A3, or A2. These will serve as the foundation for your artistic endeavors. Next, add some whimsy with craft pom poms – their textured, rounded shape can add a delightful tactile element to your projects.
To hold everything together (literally!), you’ll need some sturdy adhesive, such as washi tape. Letter stickers can also be a great addition, allowing you to add personalized touches or clever design elements. Finally, don’t forget the decorative glue that will bring it all together – its versatility and ability to create unique textures will be invaluable in your creative pursuits.
Instructions
To begin creating your DIY paper hats, start by gathering your supplies. You can opt for colorful or patterned paper, or keep things simple with a double-sided sheet. If your paper has only one colored or patterned side, don’t worry – the process remains the same. Just ensure the colored side faces upwards and outwards, with the plain side facing inwards.
Place your paper on a flat surface and bring the longer edge up to fold it in half.
Unfold the paper, flip it over, and fold it in half again. Next, take the left corner and bring it down towards the center crease, aligning the edges as you go. Press the paper firmly to create a crisp fold.
Repeat this process with the right side by bringing it down and folding it once the edges are aligned along the centerfold. You should now have two flaps at the bottom – bring the lower edge up and fold it as you go, just like before.
Turn the paper over and repeat the same folding motion for the second flap.
If desired, you can tuck the corners into the folds to conceal any jutting ends. Secure these corners with small pieces of tape. Your DIY paper hat is now complete! Simply decorate it, personalize it, or customize it to your heart’s content – and you’re all set!