We’re huge fans of Dollar Tree, and we think it’s a treasure trove for crafty teenagers on a budget! With a little creativity, the affordable items at Dollar stores can be transformed into amazing projects that showcase your artistic side. From essential crafting supplies to versatile materials like mugs, frames, candles, and more, these retailers have everything you need to get creative without breaking the bank. The best part?
Everything is remarkably inexpensive, making it a haven for teenagers looking to express themselves through art while being mindful of their allowance. With so many affordable options at your fingertips, crafting just got a whole lot more accessible! If you’re eager to unleash your creativity and create something truly special, we’ve curated 31 easy and quick dollar store crafts perfect for teens like you.
Dollar Tree Lantern
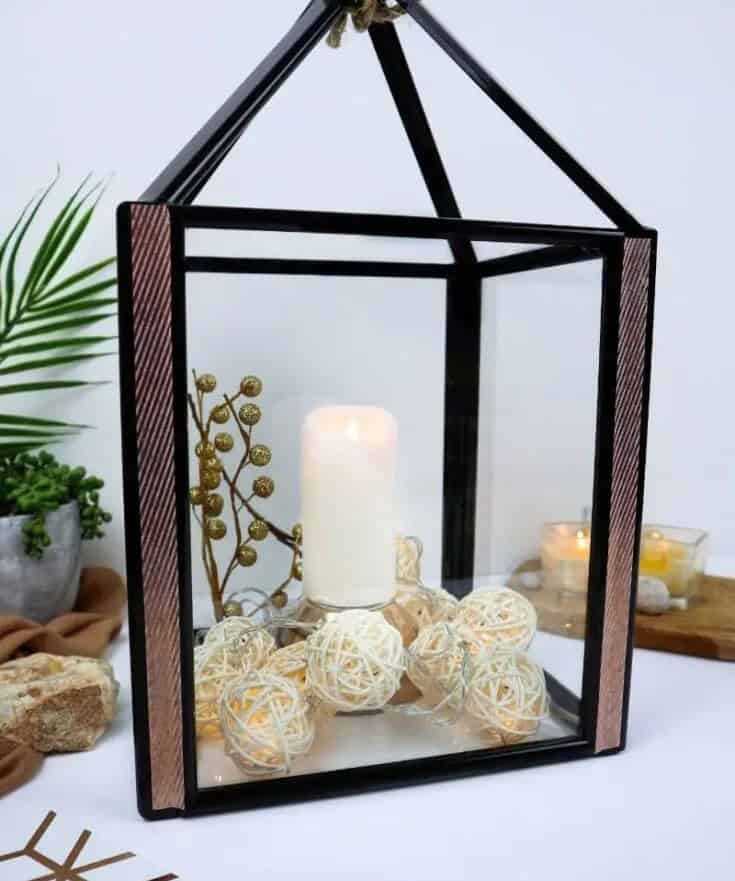
Imagine my surprise when I created a stunning lantern using only photo frames from a dollar store! It’s surprisingly easy – just gather your favorite frames, disassemble them into various pieces, and reassemble them into the desired lantern shape. Of course, some basic tools are necessary to get the job done, including pliers and a hot glue gun. Additionally, you’ll need an assortment of craft supplies to embellish the frame with decorative tapes, stickers, or even paint.
With minimal effort and creativity, you can transform these inexpensive frames into a beautiful piece that will add a personal touch to your home.
Geometric Painted Flower Pots

Get creative without breaking the bank by using plain white or terracotta pots from dollar stores as your canvas. With just a few basic supplies like acrylic paint, brushes, and painter’s tape, you can transform these humble containers into unique works of art. To achieve crisp geometric designs, use tape to create precise patterns before applying the paint.
Once your masterpiece is complete, seal it with a good layer of protection and then fill the pot with a charming arrangement of faux succulents, pebbles, and rocks.
Dollar Tree Wreath
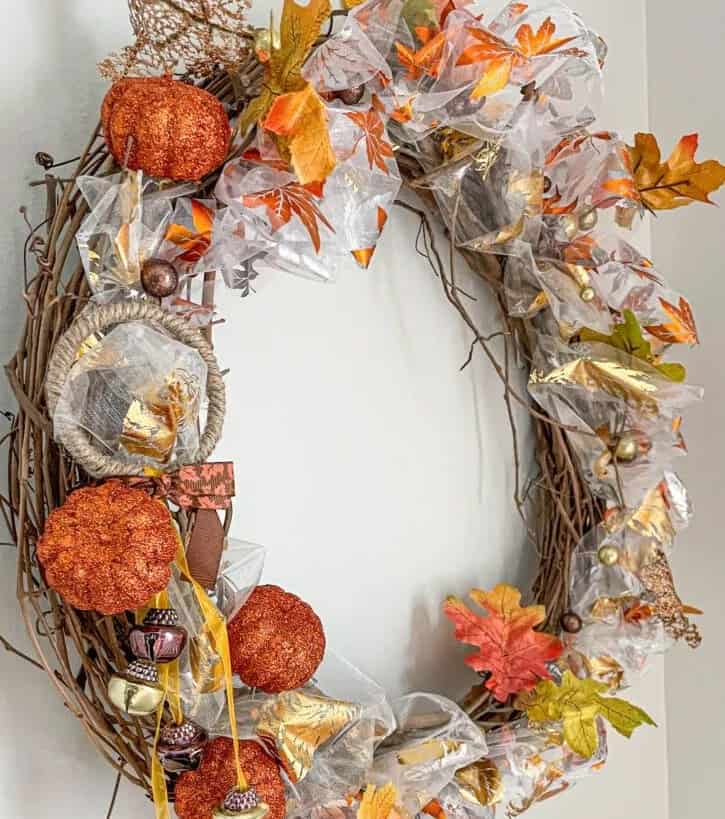
Transform your home with an elegant and budget-friendly fall wreath made entirely from dollar tree finds! With just $10, you can create a stunning centerpiece that exudes warmth and coziness. To get started, snag a grapevine wreath form as the base. Then, gather an assortment of faux fall elements like leaves, florals, mini pumpkins, beads, bows, acorns, and more to bring your design to life. Don’t forget to add some sparkle with a fine layer of bronze or gold glitter spray paint.
To tie everything together, pick up plenty of ribbons to accentuate your masterpiece.
Leaf Candle Holder
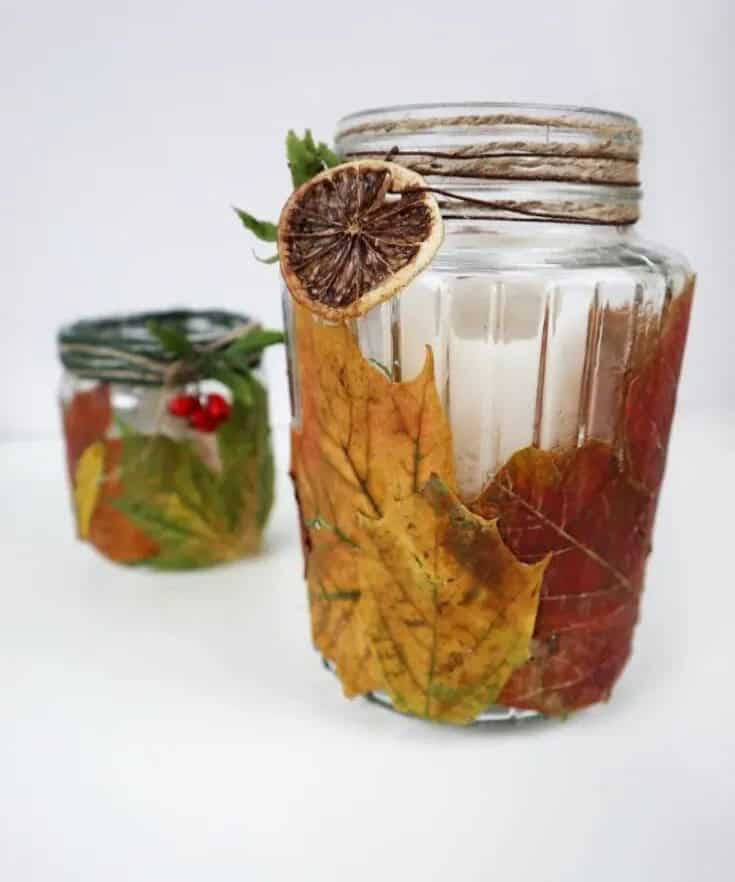
When working on your wreath project, you might have accumulated some faux leaves that can be repurposed into a beautiful leaf candle holder perfect for the fall season. To bring this design to life, you’ll need mod podge, which can be found here, to decoupage the leaves onto the glass jar. Don’t stop there – explore other materials like twine, dried cranberries, cinnamon sticks, or various types of leaves such as pine, holly, or cedar to add texture and depth.
This unique decoration is not only ideal for autumn but also serves as a great conversation starter at parties.
Dog Snuffle Mat
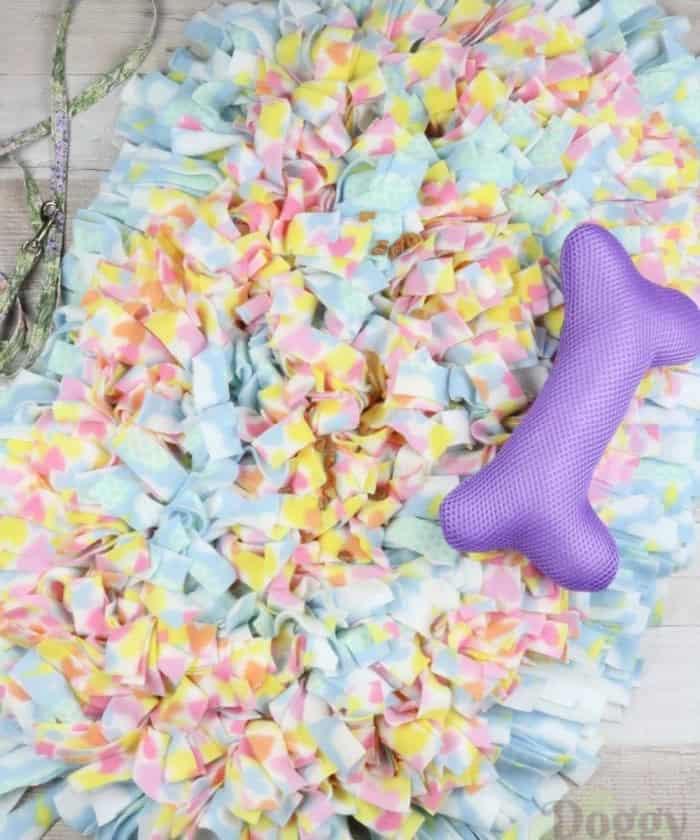
Crafting for canine companions can be a delightful experience, especially when creating a snuggle mat that doubles as a cozy bed for your furry friend. This DIY project is perfect for teens who enjoy working with their hands. The best part? It’s surprisingly affordable, thanks to the versatility of dollar store finds. With a few hours and some basic materials, you can create a one-of-a-kind snuggle mat that will keep your pup warm and happy.
Start by selecting a clear grid bath mat from the nearest dollar store, featuring holes for inserting strips of fleece from your blankets. To complete this project, you’ll also need a pair of scissors at the ready, although a rotary cutter and mat would work just as well.
Dollar Tree Farmhouse Signs
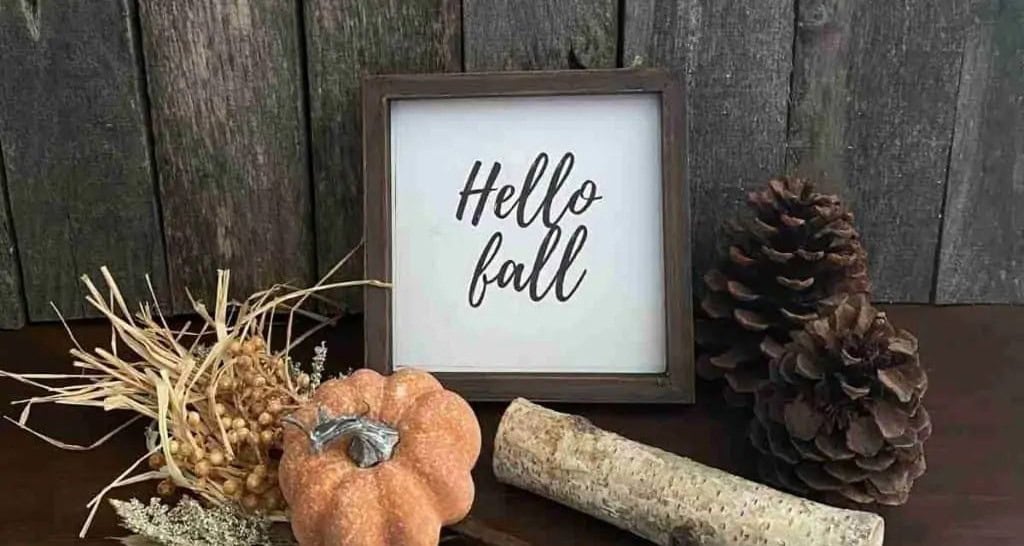
When seeking materials for DIY signboards, I often find myself at Dollar Tree, where an array of frames awaits. These affordable finds can be transformed into functional signs that complement my desired farmhouse-chic aesthetic. The popularity of such signs is easy to understand – a simple yet impactful addition to any room that can either offset or enhance a pre-existing decor theme.
The versatility of these frames allows for creative expression, too.
Painting the frames with a chalk finish paint adds a touch of elegance while maintaining their rustic charm. This versatility makes them an attractive option for adding a personal touch to my space.
Yarn Wrapped Glass Vase
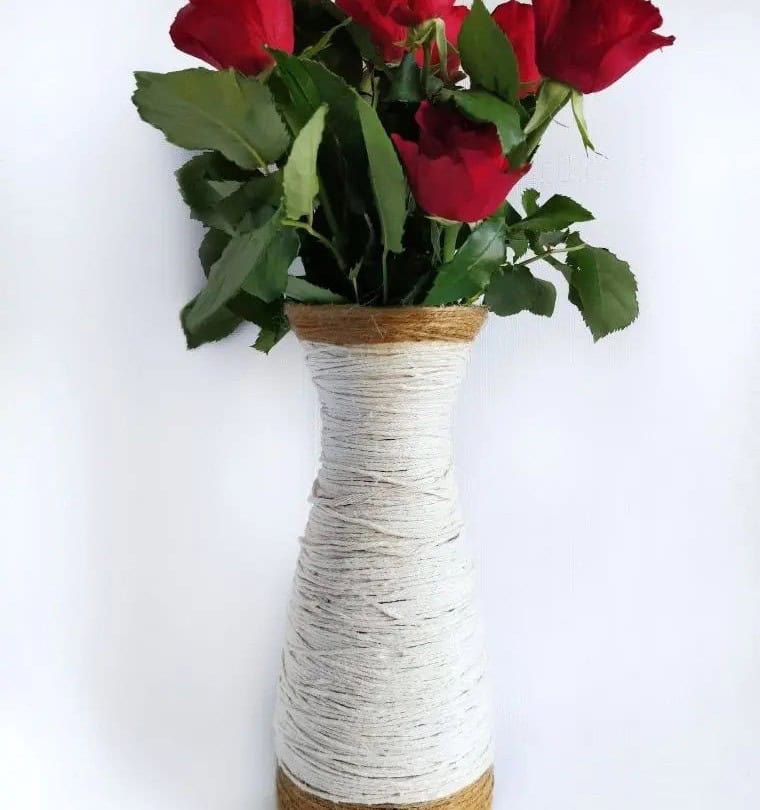
Transforming an ordinary glass vase into a one-of-a-kind masterpiece is just a wrap away! Wrapping yarn around this plain vessel not only adds texture and color, but also cleverly conceals any imperfections. This DIY project is perfect for giving new life to thrift store or dollar store finds that may have otherwise been relegated to the back of a shelf.
Simply grab a skein of yarn and some jute twine – feel free to alternate between the two to add an extra layer of visual interest – and get creative!
Salad Tongs
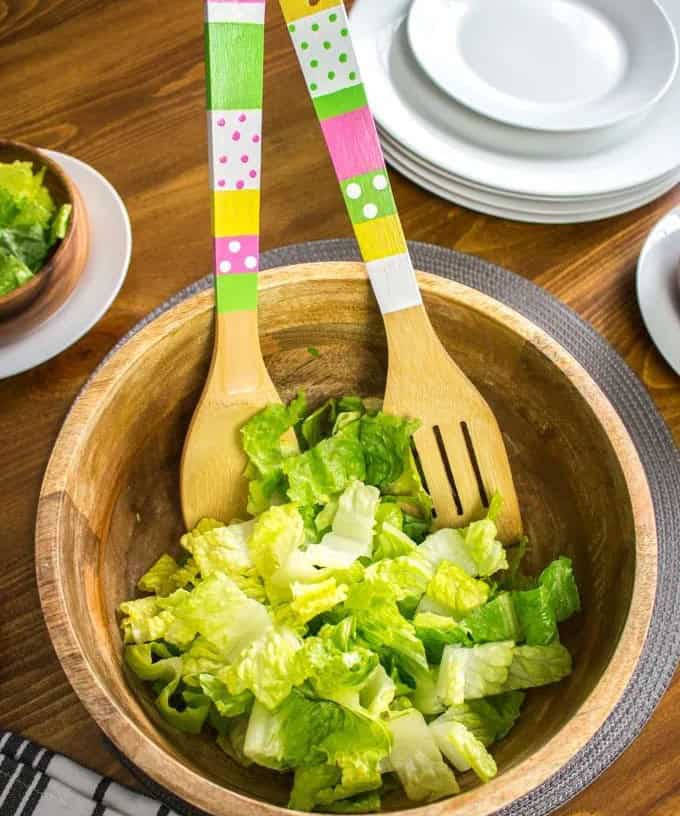
In my household, we often struggle to get everyone on board with the idea of adding a fresh salad to our meals. Despite salads being delicious, a little extra motivation is needed to encourage us to grab those tongs and serve ourselves up a healthy helping. One trick I’ve found to be particularly effective is to present the salad in an appealing way – kids are naturally drawn to bright colors and fun shapes, so why not take advantage of that?
A simple upgrade from traditional metal tongs to something more visually appealing like wooden tongs can make all the difference.
Hershey’s Kisses Christmas Tree
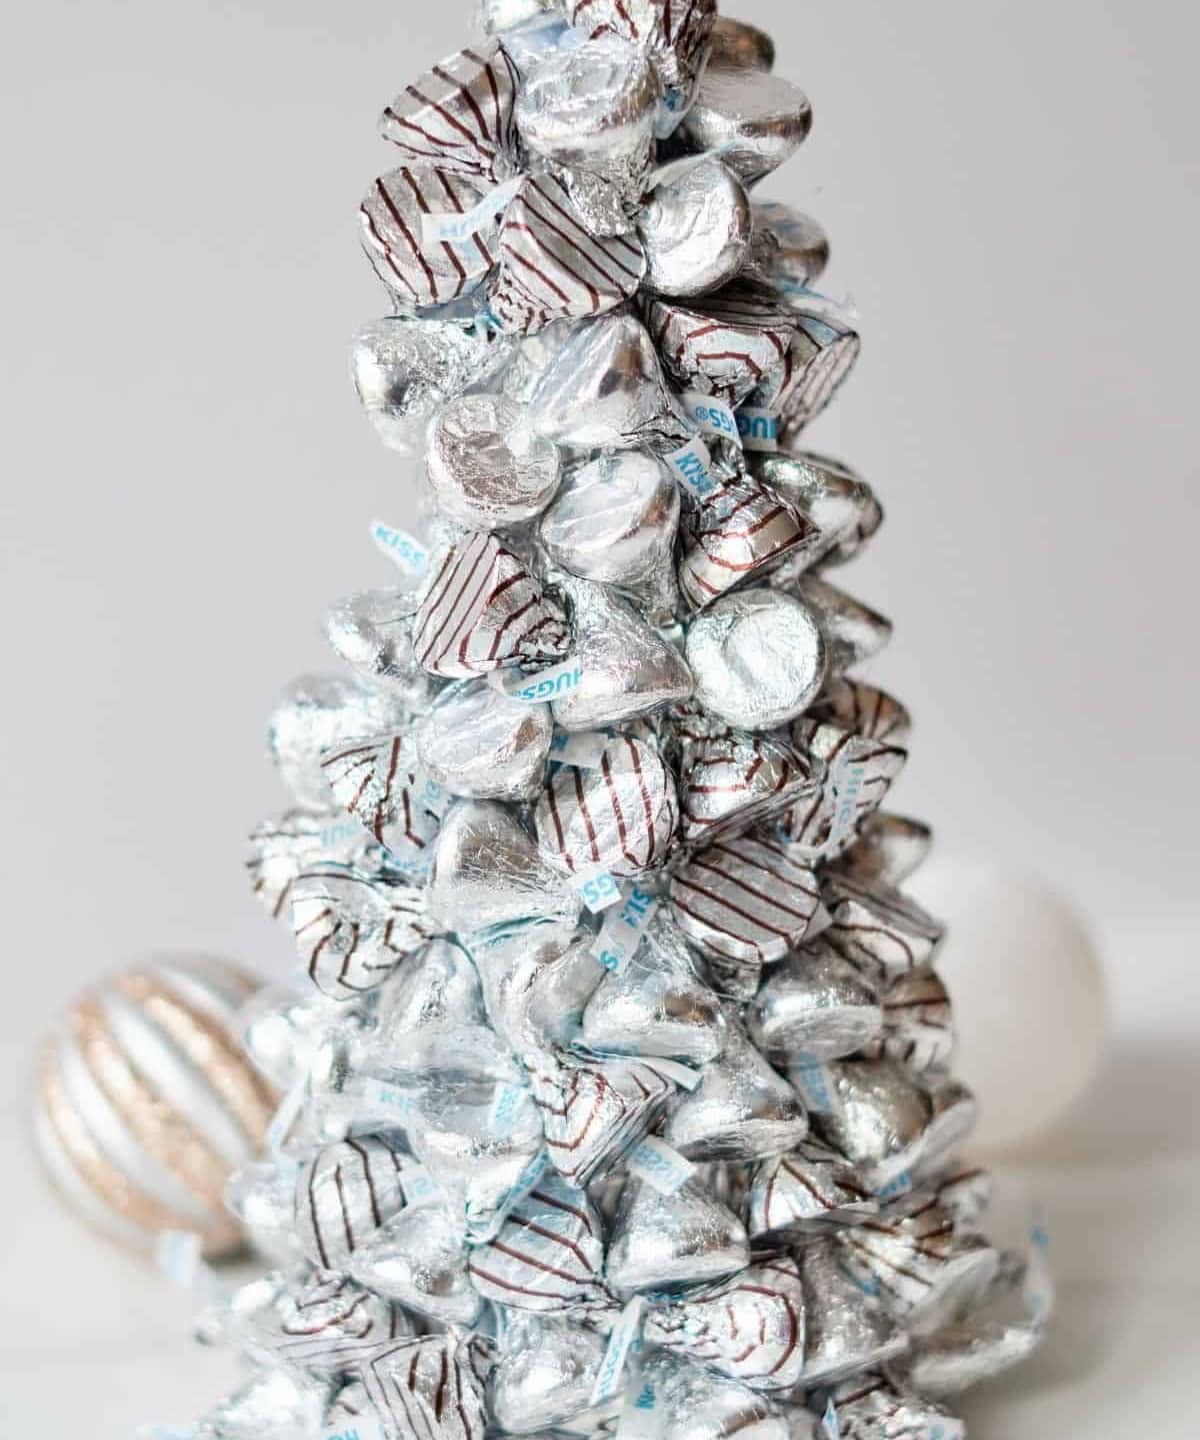
I’m perpetually obsessed with indulging in Hershey’s Kisses. If you know someone who shares my passion for these bite-sized treats, I’ve got a fantastic gift idea that will surely bring a smile to their face. The ultimate showstopper is this incredible Hershey’s Kisses Christmas tree! Not only is it adorable, but it also doubles as a delicious snack – the perfect combination.
To get started, grab a large bag of Hershey’s Kisses and then gather the following materials: a styrofoam cone, aluminum foil, a hot glue gun, cellophane wrap, and finally, a stunning big bow or star for the top.
Bath Bombs
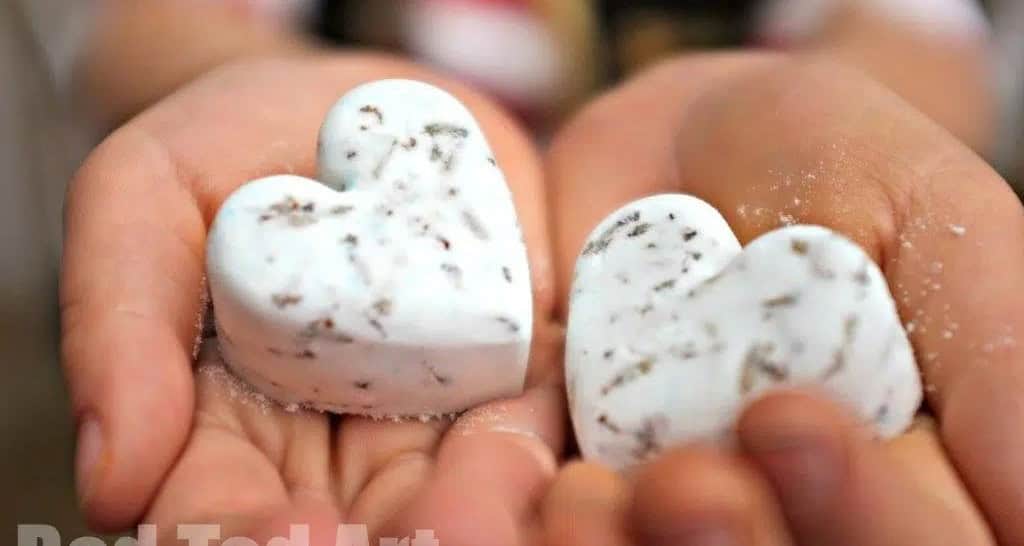
As much as I adore bath bombs, their premium prices can be a significant drawback for teenagers on a budget. The thought of spending a substantial portion of one’s allowance on luxurious treats can be daunting, to say the least. But what if I were to reveal that making your own bath bombs is not only possible but also significantly more affordable?
Not only would you have an endless supply at your fingertips, but you could also incorporate unique and alluring ingredients like rose petals, lavender buds, and many other surprises. Just imagine sinking into a warm bathtub surrounded by the soothing aroma of freshly added rose petals – it’s the epitome of relaxation!
Dollar Store Mickey T-Shirt
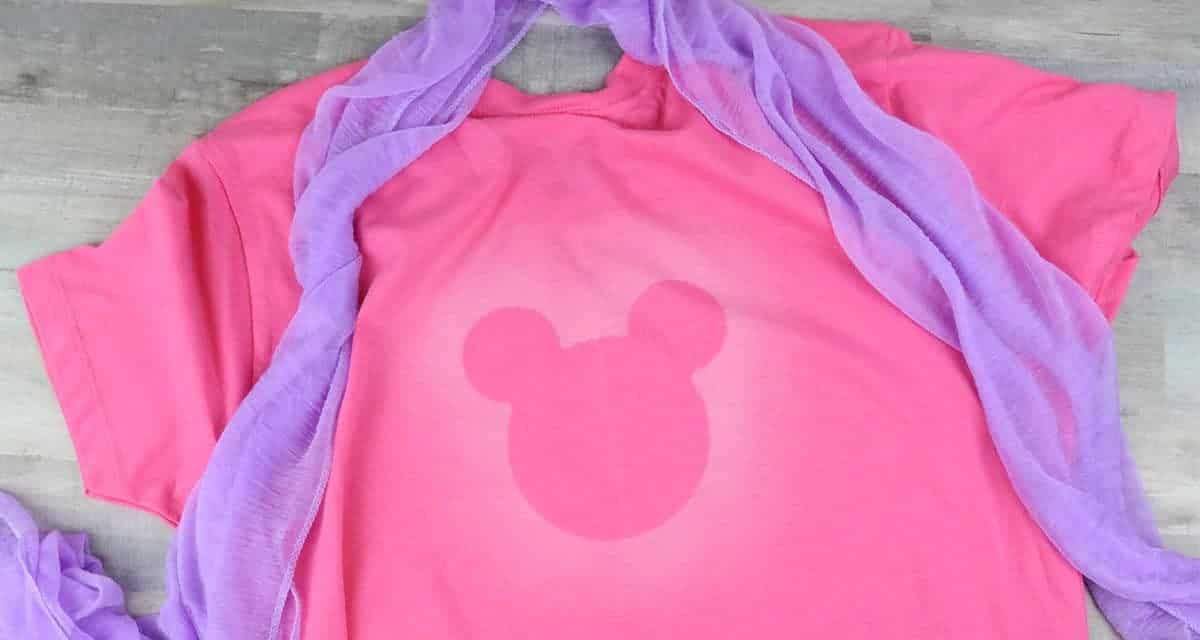
Get ready for a quick, fun, and budget-friendly DIY project that’s perfect for a sunny summer day. You likely already have everything you need at home. Start by digging out an old, unworn t-shirt from the depths of your closet – I’m sure you have one lying around. Next, head to your local dollar store and pick up a Mickey Mouse palette. Then, place the palette on the tee and use bleach spray to reveal a crisp Mickey Mouse silhouette.
Felt Kite Headband
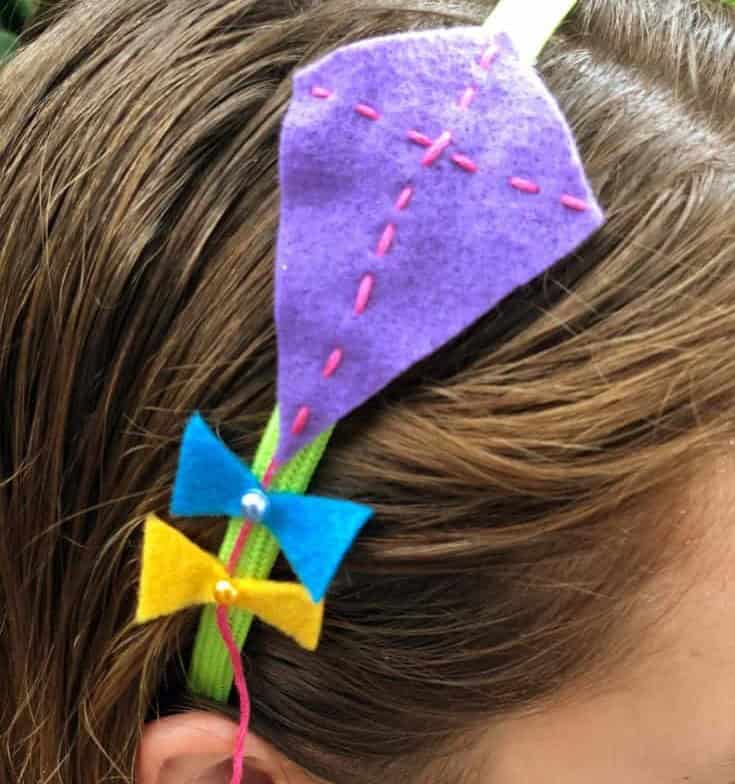
For a simple and fun sewing project, consider crafting a felt kite headband. Start by purchasing felt sheets from your preferred supplier or upcycle plain headbands you already have at home. Add some visual interest by sewing on beads, rhinestones, or buttons to the kite’s design. The real showstopper is the delicate yarn tail that adds a whimsical touch. If you’re looking for more DIY inspiration, be sure to explore our other projects, including a unique headband tutorial.
Hot Chocolate Ornament

As Christmas magic fills the air, there’s no denying that hot chocolate plays a starring role in our festive celebrations. It’s like a refreshing glass of lemonade on a sweltering summer day – pure bliss! In fact, I love it so much that I’m excited to share with you a fun DIY project that combines my passion for hot chocolate with a touch of holiday cheer: a hot chocolate ornament! Most of the materials can be found at your local dollar store, while plastic dessert cups can be sourced online.
And don’t worry – this edible-free decoration won’t stop you from indulging in a rich and creamy cup of hot chocolate as you work on the project!
Skull Pedestals
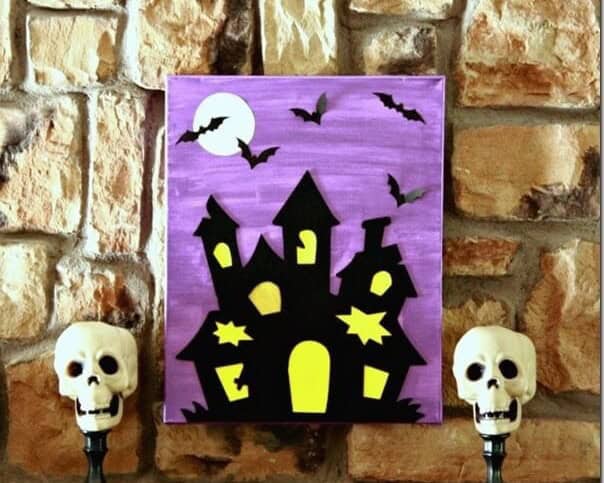
Transform your home into a hauntingly good scene this Halloween with a little creativity. A pedestal like the one described, designed to showcase a skull, is perfect for creating an eerie atmosphere. Simply place it on your mantle or throughout your home to set the tone for a spooky season. To take it to the next level, consider pairing the pedestal with a gravestone plaque, adding an element of surprise and delight. And the best part?
These ‘pedestals’ are simply repurposed candlesticks that have been given a creative makeover. You can find these affordable props at your local dollar store, along with the skulls themselves, for a few dollars apiece.
Leprechaun Garden

Transforming a humble fishbowl into a whimsical wonderland for your very own imaginary leprechauns is an excellent way to bring a dash of good fortune into your life. Start by filling the base with lush green moss, and then add some delicate silk clover stems, a few sparkling glass rocks, and any other decorative elements that strike your fancy. To complete this enchanted mini-garden, sprinkle a pinch of gold glitter throughout to create an irresistible allure for those mischievous leprechauns.
Book Stack
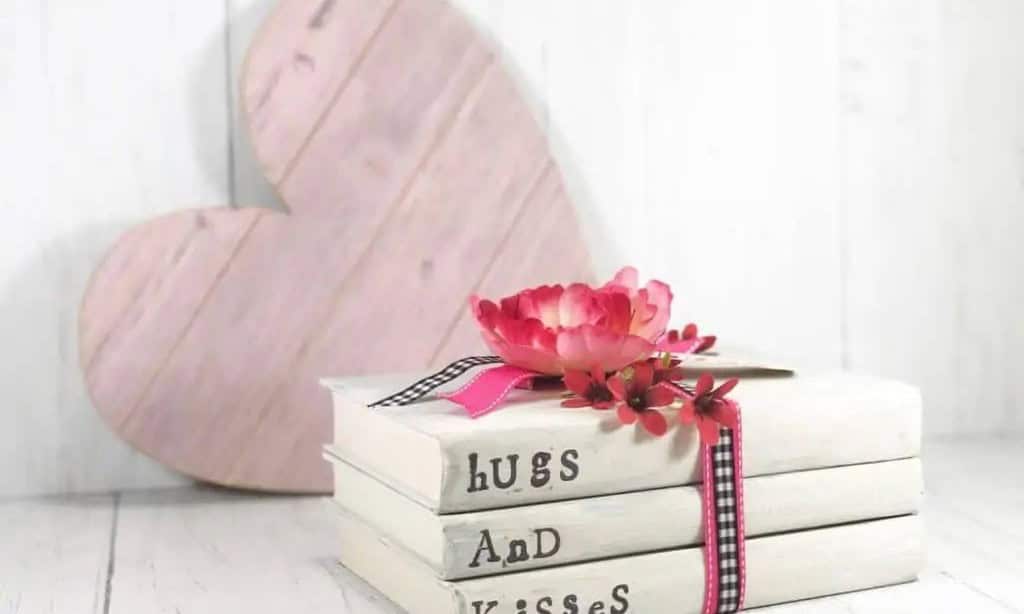
For book lovers looking to add a touch of elegance to their home decor, consider repurposing hardcover books as decorative pieces. To create this unique look, start by gathering a few books of similar sizes. You’ll then need to wrap each book in attractive paper or fabric, which can be painted with a soft white hue for a subtle effect.
Once the covers are wrapped, it’s time to add some personalized flair. One option is to paint your message directly onto the spine of the books.
Alternatively, you could invest in a stamping kit to add a touch of whimsy and make the process easier.
Upcycled Sunglasses Case
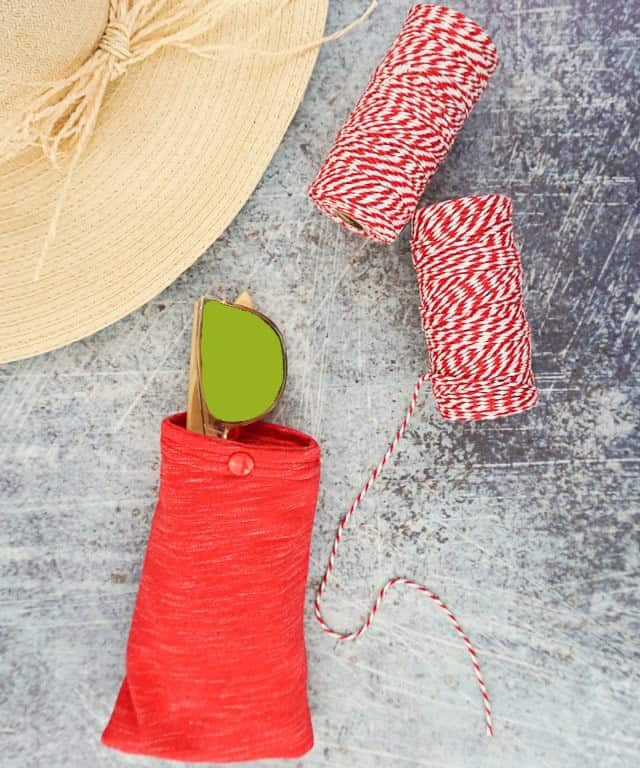
The frustration of searching for sunglasses in a cluttered bag is all too familiar. The struggle to find them amidst the chaos is enough to drive anyone crazy. It’s not only inconvenient, but also potentially damaging to your glasses if they’re not properly protected. That’s why it’s essential to take preventative measures and keep them safe. One creative way to do this is by repurposing an old t-shirt sleeve into a sunglass case.
Not only will you be reducing waste, but you’ll also have a unique and eco-friendly solution to your problem. If you don’t have an old t-shirt lying around, you can use scrap fabric from a thrift store or even upcycle an old piece of clothing that’s no longer needed. The possibilities are endless when it comes to creative reuse.
Pencil Toppers
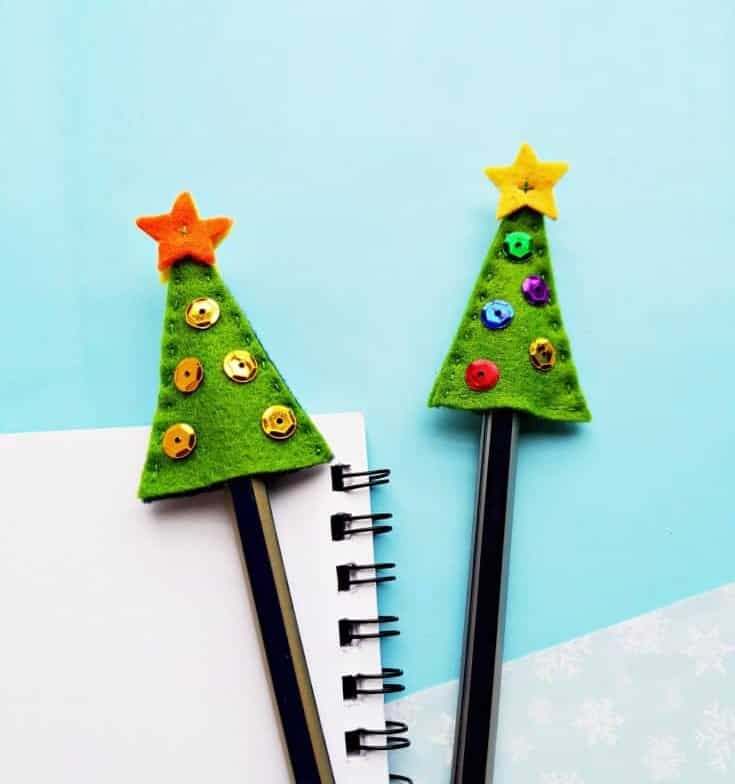
As you delve into the depths of complex math problems, the temptation to chew on that pencil tip can be overwhelming. It’s a common struggle we’ve all faced. But fear not! These soft and squishy felt pencil toppers are here to save the day. They’ll provide a harmless outlet for your nervous energy, and you won’t be tempted to indulge in their chewable goodness. Instead, get creative and embellish them with beads, buttons, or other tiny trinkets.
Simply sew small cone-shaped trees using felt and thread, then let your imagination run wild with the decorations.
Candle Holders
Having an ample supply of candle holders is a wise move, as it ensures you’ll always have the perfect vessel for holding a fragrant candle. For me, there’s no such thing as too many candles in my home. I like to scatter jars of scented candles throughout every room, as lighting them up and allowing their fragrance to fill the space has a profound impact on ambiance. When decorating, be sure to pick up your favorite essential oils from here – you never know when you might need an extra boost.
And if making your own candles is something that piques your interest, there’s no better place to start than with a comprehensive tutorial on how to make scented candles.
Unicorn Phone Case
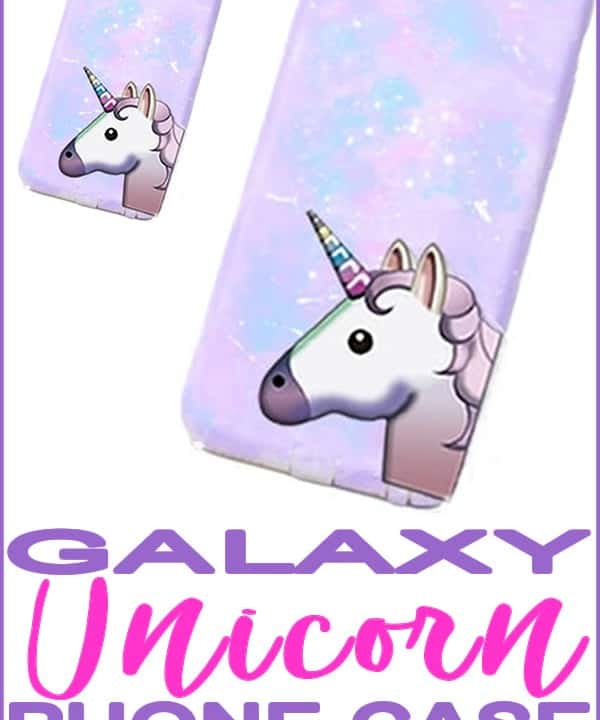
While some may be skeptical about the existence of unicorns, I firmly believe that these majestic creatures are more than just a myth. And who knows? Maybe in an alternate universe or dimension, there’s indeed a horned horse with a shimmering coat, just waiting to be discovered. This DIY phone case, however, is less about mythical creatures and more about combining two of my favorite themes: unicorns and space.
Yes, you read that right – this phone case isn’t just any ordinary unicorn-inspired design; it’s a galactic one! It’s a project that requires a lot of creativity, some basic crafting skills, and of course, plenty of glitter (because what’s more magical than a little sparkle?). If you’re as excited about this idea as I am, or simply want to find a plain phone case without any extra flair, I’ve got you covered. Head on over to [insert link] to explore the vast selection of phone cases available.
Choose your favorite design and get ready to make your mobile device truly one-of-a-kind.
No-Sew Gnome
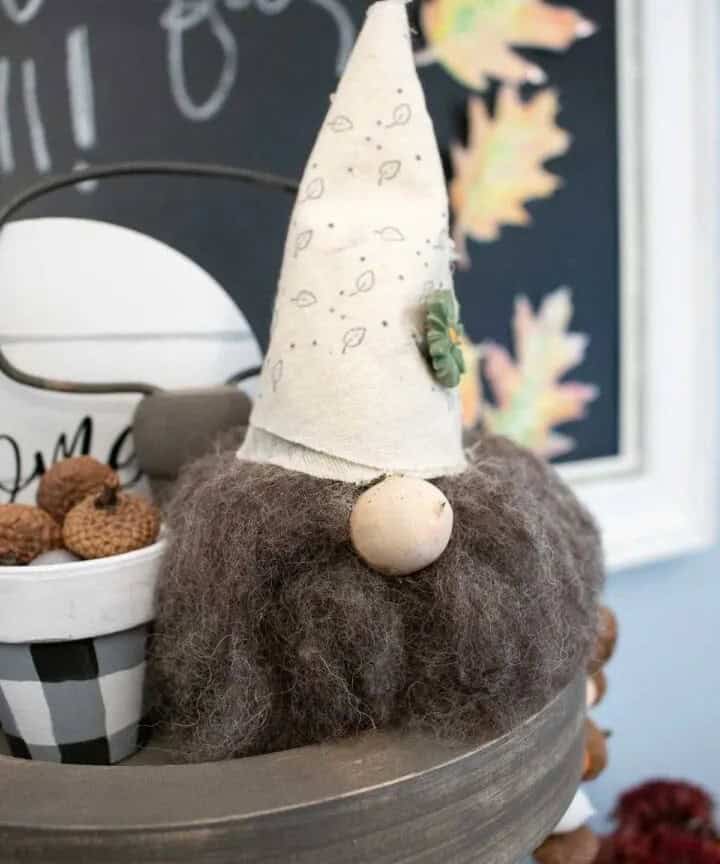
Discover the charm of a no-sew DIY gnome that brings good luck to your home. These adorable gnomes come with their own felt hat, distinctive stubby noses, and lengthy beards crafted from yarn or pipe cleaners. Not only are they an excellent addition to your home decor, but they also symbolize good fortune. If you’re feeling crafty, why not use any leftover pipe cleaners to create one of many other intriguing pipe cleaner craft projects?
Mug Planters
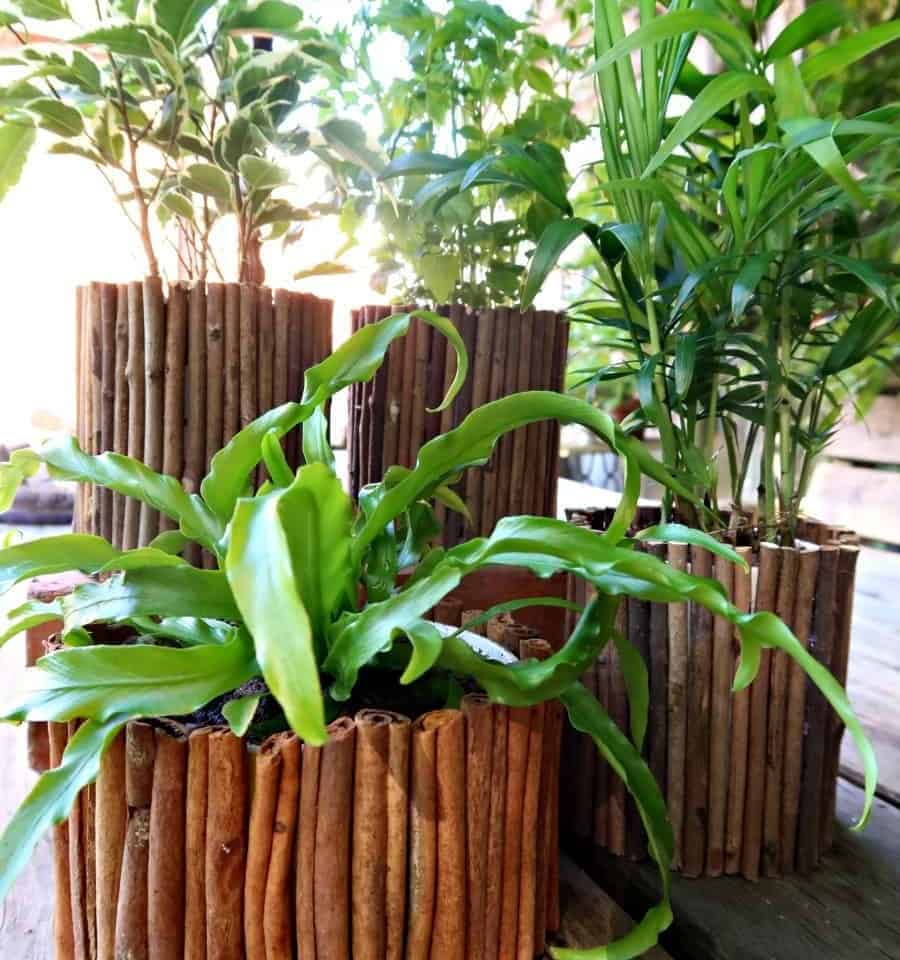
Why not think outside the box – or mug? Using mugs as planters is a creative way to repurpose household items. The shape and variety of designs make them an excellent substitute for traditional pots. Even chipped or cracked mugs can be transformed into mini planters, perfect for small plants or herbs. You can take it a step further by painting the mugs or bowls in your favorite colors.
And if you’re looking for more inspiration, there are plenty of innovative planter ideas out there – like these affordable and adorable Dollar Tree planters.
Summer Wreath
As the cold winter months seem to drag on, it’s natural to feel a sense of restlessness for the sunshine-filled days of spring and summer. But, instead of counting down the days until warmth returns, why not use this time to get a head start on crafting projects that will make your summer brighter? Take inspiration from this stunning summer wreath, created with just a few simple materials: a dollar store wreath form or a repurposed pool noodle, duct tape, scissors, and a handful of leis.
With these humble beginnings, you can craft an exotic blue masterpiece that will be the perfect addition to your outdoor decor.
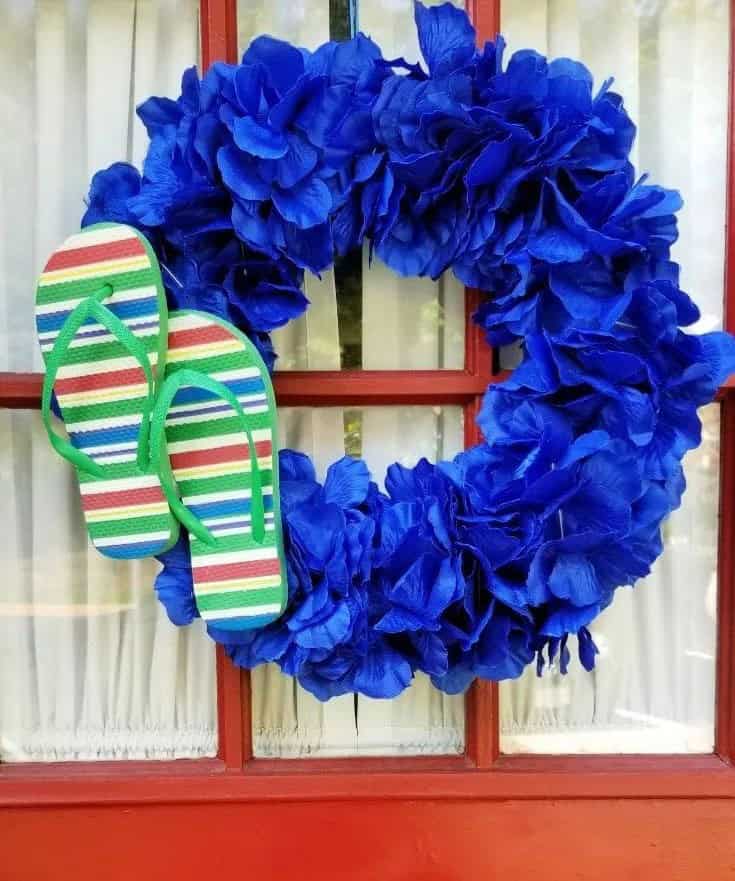
Flip Flop Sign
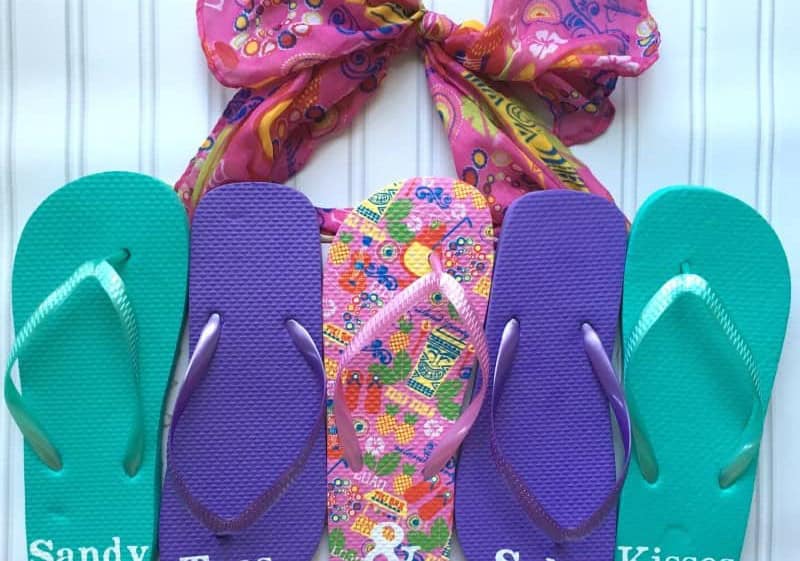
Transforming a humble pair of flip-flops into an impromptu signboard is a clever hack. Begin by arranging the sandals side-by-side and securing them with hot glue. This foundation will serve as the base for your creative endeavors. To add a finishing touch, you’ll need a scarf or ribbon to suspend your sign from its newfound pedestal. A trusty hot glue gun will also come in handy for bonding all the elements together seamlessly.
For an added layer of customization, consider utilizing your Silhouette Cameo to craft vinyl stickers that spell out your preferred phrase. This clever combination of materials and tools can help bring your signage to life.
Map Coasters
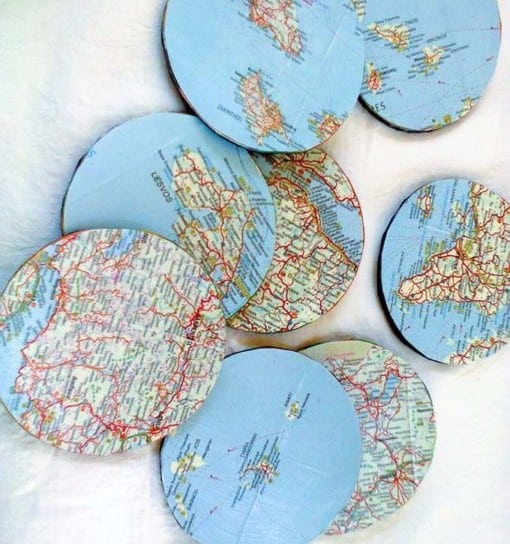
In the never-ending quest for perfectly placed beverages, having an ample supply of coasters is essential. I personally believe that it’s always better to err on the side of caution and have a stash in every room, ready to swoop in at a moment’s notice to save your furniture from water stains.
To add a touch of adventure to your home decor, why not try making map coasters?
It’s a straightforward process that requires just a few simple materials: wood slices, old maps (which you likely have stashed away from your school days), and some mod podge for decoupaging the maps onto the wood. With these pieces in place, you’ll be well on your way to creating one-of-a-kind coasters that will leave your friends green with envy.
Tote Bag
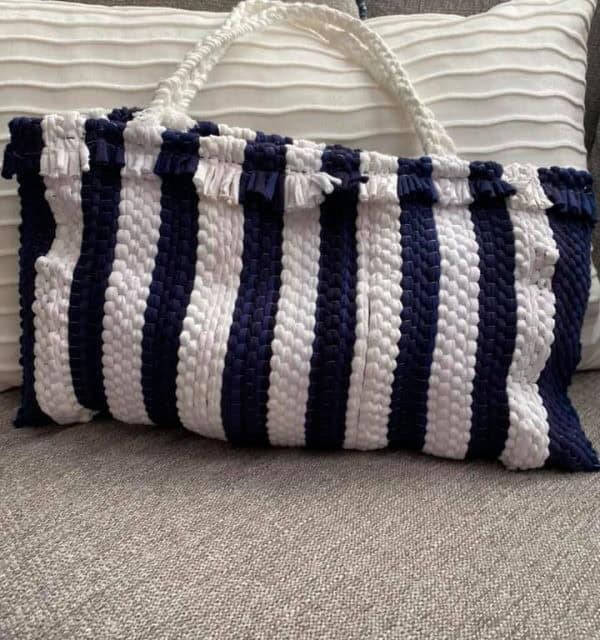
Making a tote bag is surprisingly simple and extremely practical. Not only do I use mine to transport my books, but it’s also come in handy for grocery shopping. This particular tote stands out due to its unique material – an upcycled carpet that provides added stability. Additionally, the sturdy corded handle ensures that the bag remains secure during transport. To get started, select a carpet or rug from your local dollar store or similar outlet. You’ll also need a dowel for the bag’s opening.
Glitter Tumbler
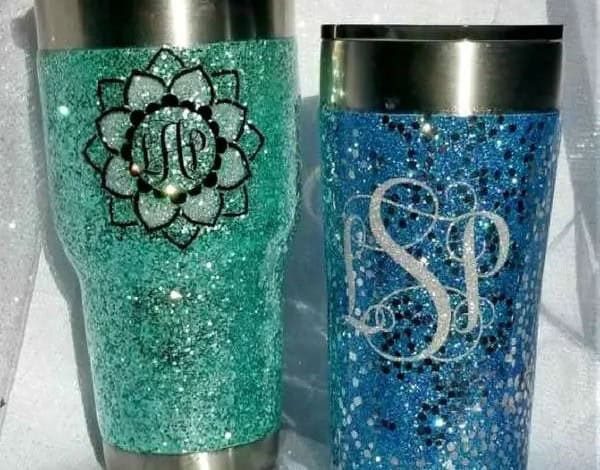
I’m sure many of us are familiar with the humble aluminum tumblers or flasks sold at Dollar stores – affordable, yet uninspiring. However, with a dash of creativity, these unassuming containers can be transformed into stunning, glittery vessels that make carrying your daily essentials a stylish experience. To achieve this makeover, you’ll need to set aside some time and an ample supply of glitter. Fortunately, printable instructions are available to guide you through the process.
Travel Mug
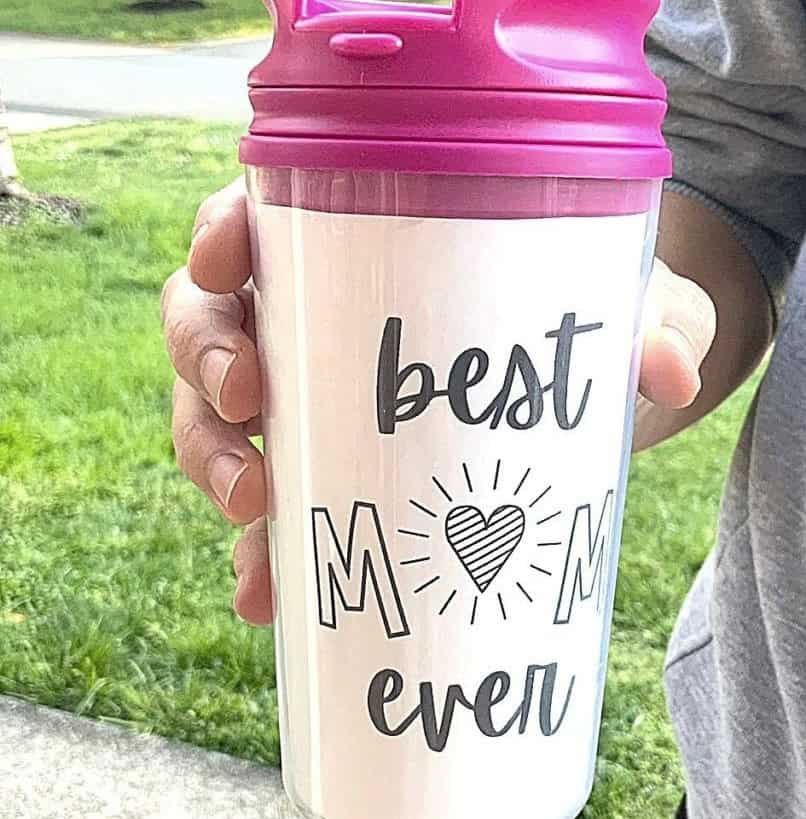
In addition to refreshing your tumblers, you likely have a stash of plain travel mugs that are crying out for a creative makeover. Fortunately, many of these mugs can be easily disassembled, allowing you to get crafty and customize them to your heart’s content.
Not only do these DIY projects make for wonderful Mother’s Day gifts, but they’re also an excellent way to add some personal flair to your daily routine.
Simply detach the mug’s components, decorate the inner surface with a thoughtful message, and voilà! A unique and meaningful gift that will surely bring a smile to Mom’s face.
Jewlery Holder
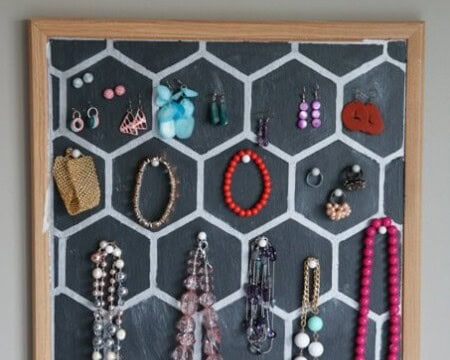
Tired of wasting time searching for that missing earring? Say goodbye to the daily scavenger hunt through your jewelry stash! A well-organized jewelry holder can be a game-changer. Not only will it keep your accessories tidy, but it’ll also save you precious minutes in the morning. With this simple DIY project, you can create separate holders for your chains, earrings, and bracelets. Start by grabbing a cork board from the link provided.
Once you’ve got your jewelry holder sorted, why not take it to the next level by crafting your own unique rings and earrings? The possibilities are endless!
Flower Covered Letters

Dollar stores are treasure troves for crafty enthusiasts, particularly when it comes to finding versatile materials like large cardboard or plastic letters. These humble bases can be transformed into a wide range of DIY projects, such as the charming flower-covered letter display. For those seeking a straightforward yet aesthetically pleasing way to personalize their space, these floral letters offer a trifecta of texture, color, and creativity.
The beauty lies in the flexibility, allowing you to mix and match flowers to achieve the desired look, even incorporating some greenery for added depth.
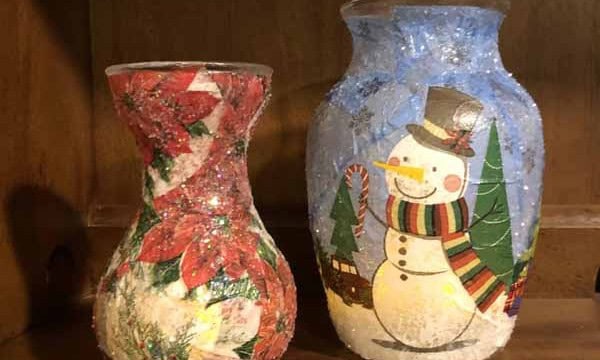
Snowman Mason Jar
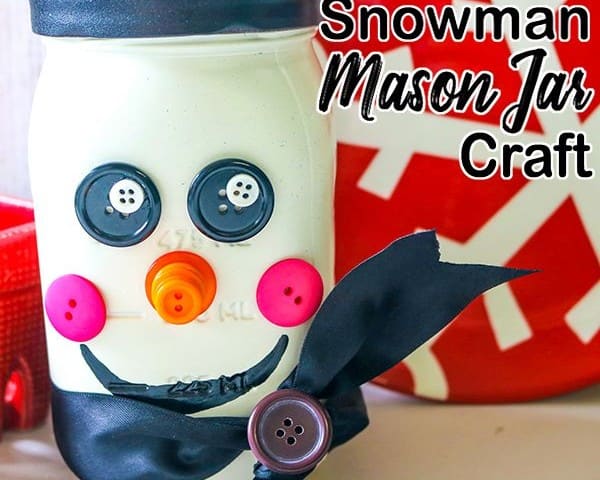
Mason jars are a staple in many households, often collecting dust in cupboards or recycling bins. But these humble containers can be transformed into charming decorations, perfect for adding a touch of whimsy to your room. To create these adorable snowmen, begin by giving the mason jars a thorough cleaning and allowing them to dry completely before painting. Once the paint has fully dried, you can add buttons and beads to bring your snowman’s face to life.