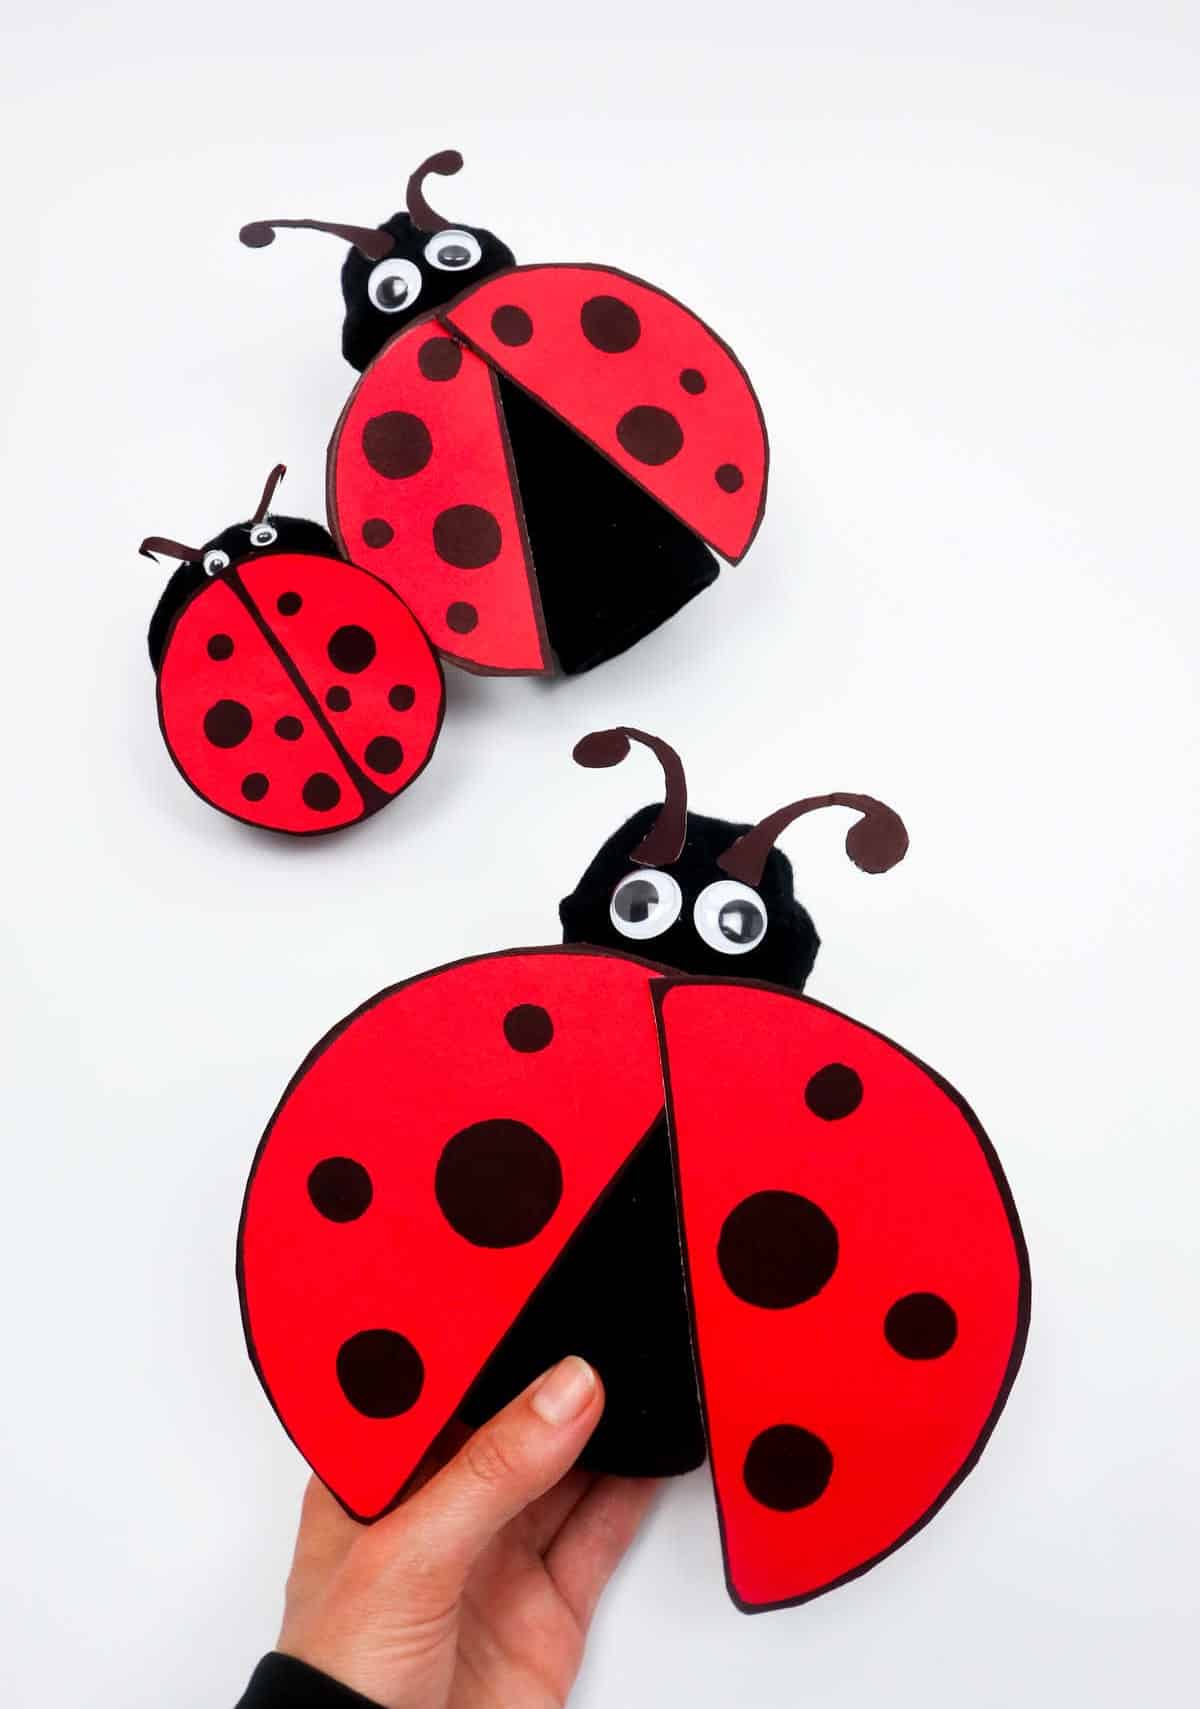
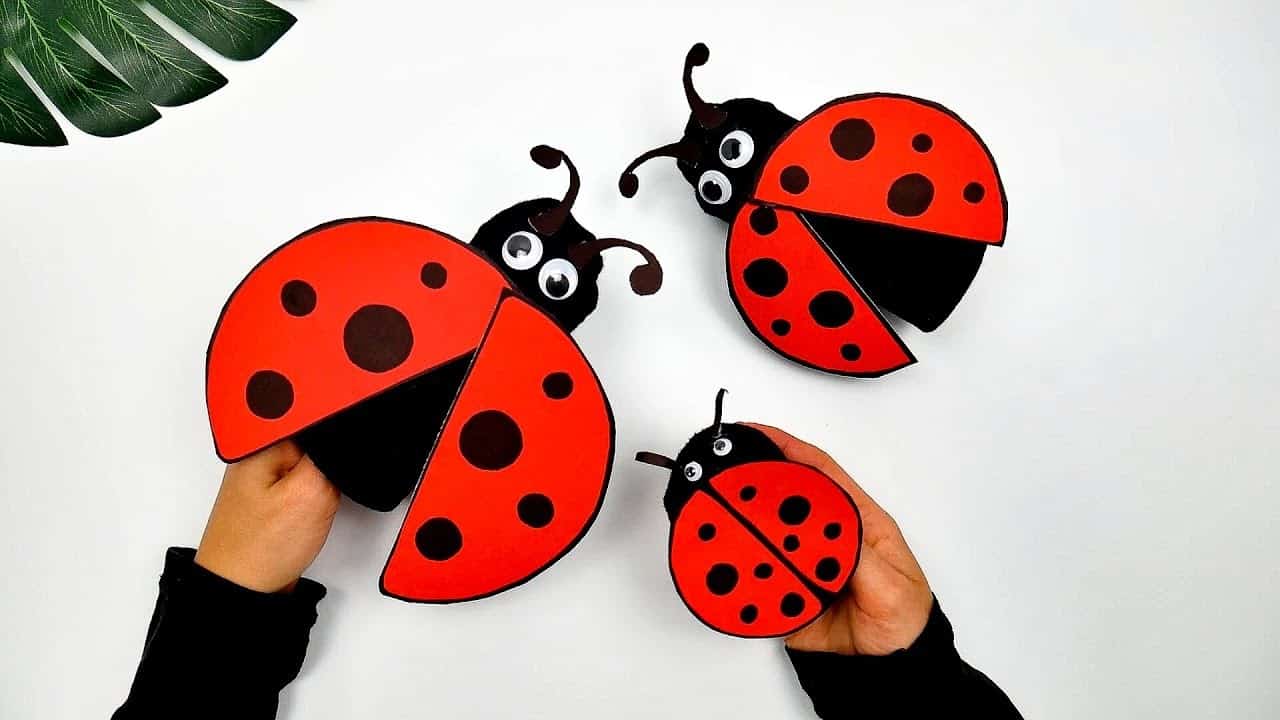
Transform your home into a whimsical wonderland with an adorable DIY ladybug craft using humble toilet paper rolls! This delightful project is perfect for children of all ages when accompanied by adult supervision. If you’re a parent, you know that tiny hands are often the ones that bring excitement (and chaos) to your space, courtesy of bugs, toys, or other unexpected treasures.
For those who share my fascination with ladybugs but may not be fond of creepy-crawlies, fear not – this craft is sure to delight! By combining toilet rolls, a pair of socks, colored paper, and other art supplies, you can create these vibrant, charming ladybugs. Let’s dive into the necessary materials for this enchanting project.
Supplies and Tools You Will Need
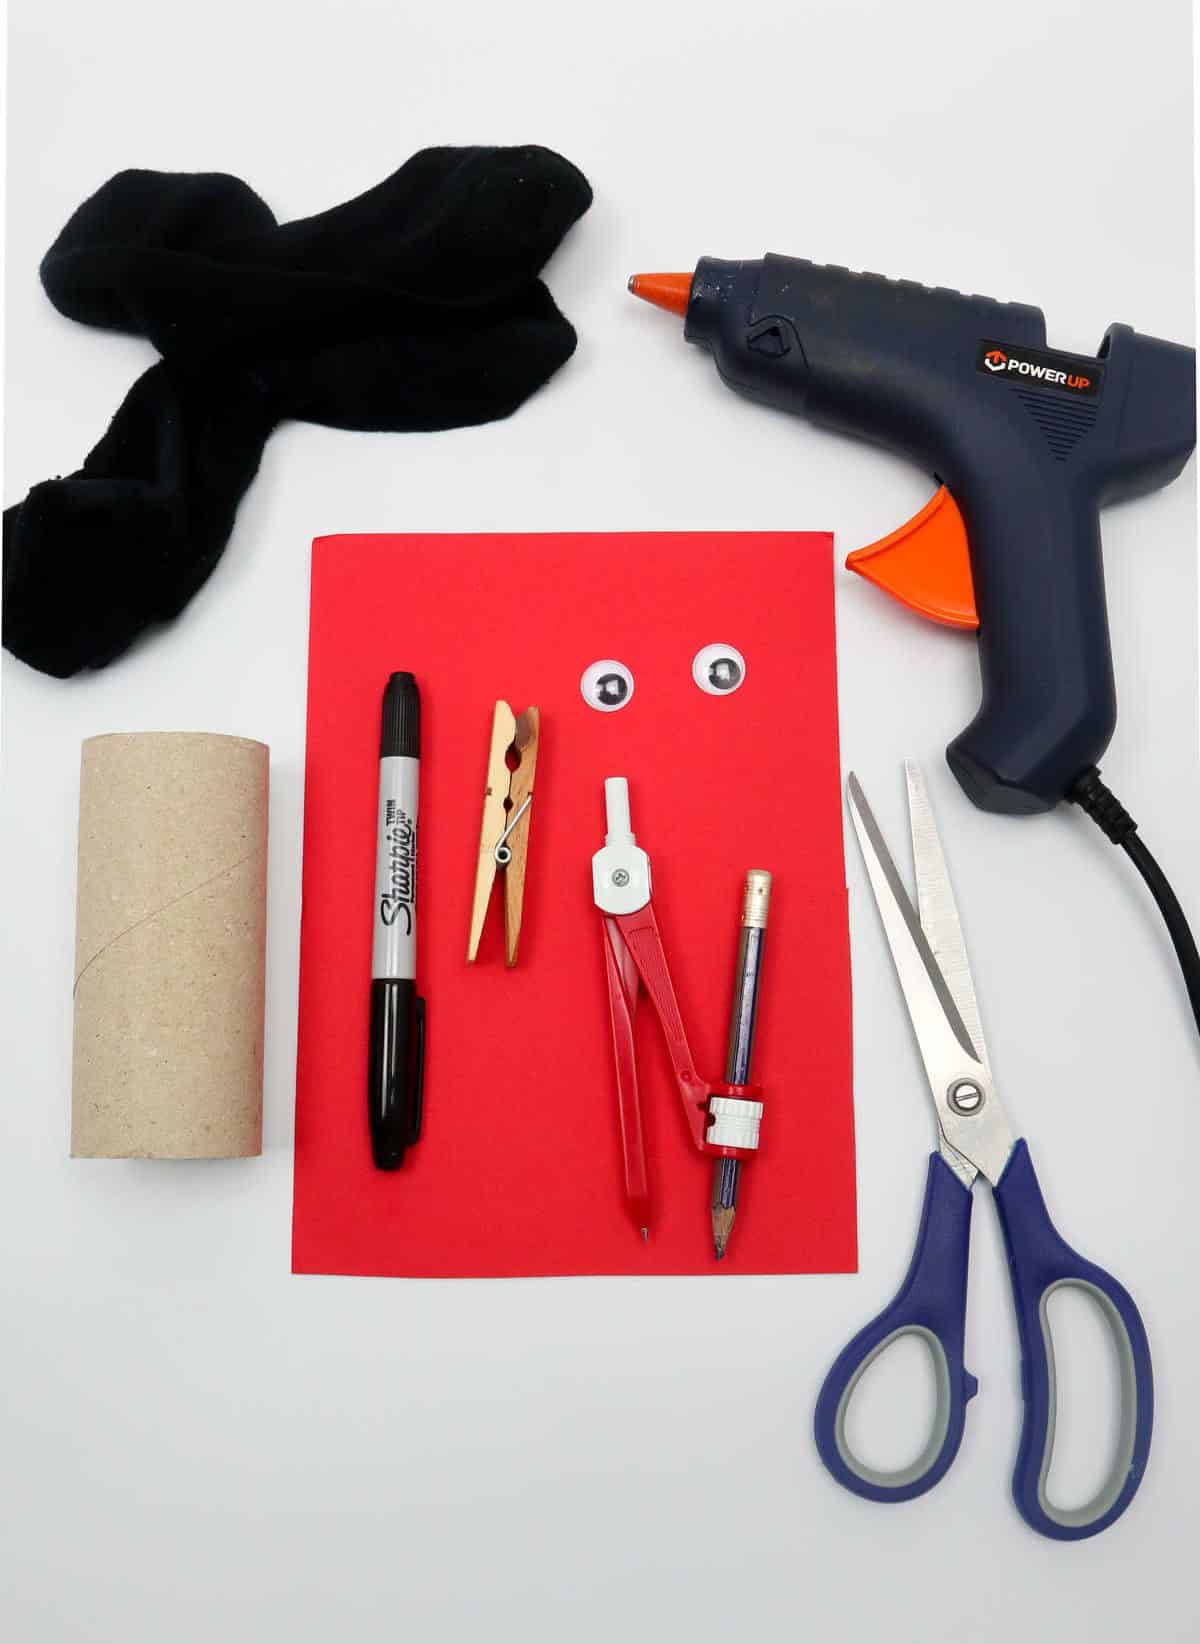
For a successful craft project, it’s essential to have the right supplies. Here’s a comprehensive list of what you’ll need: a steady supply of toilet paper, a unique thick red sheet of A5 paper, a pair of black socks, precision scissors, a reliable black marker, a hot glue gun for bonding purposes, whimsical wiggle googly eyes to add personality, and a trusty compass with a pencil for navigation.
If you’re feeling adventurous, you may also consider having one clothes peg on hand as an optional addition.
How to Make a Ladybug Craft
To embark on the journey of creating these charming insects, follow this comprehensive guide. In just a few simple steps, you’ll be well on your way to crafting your very own mini-beauties.
Step 1
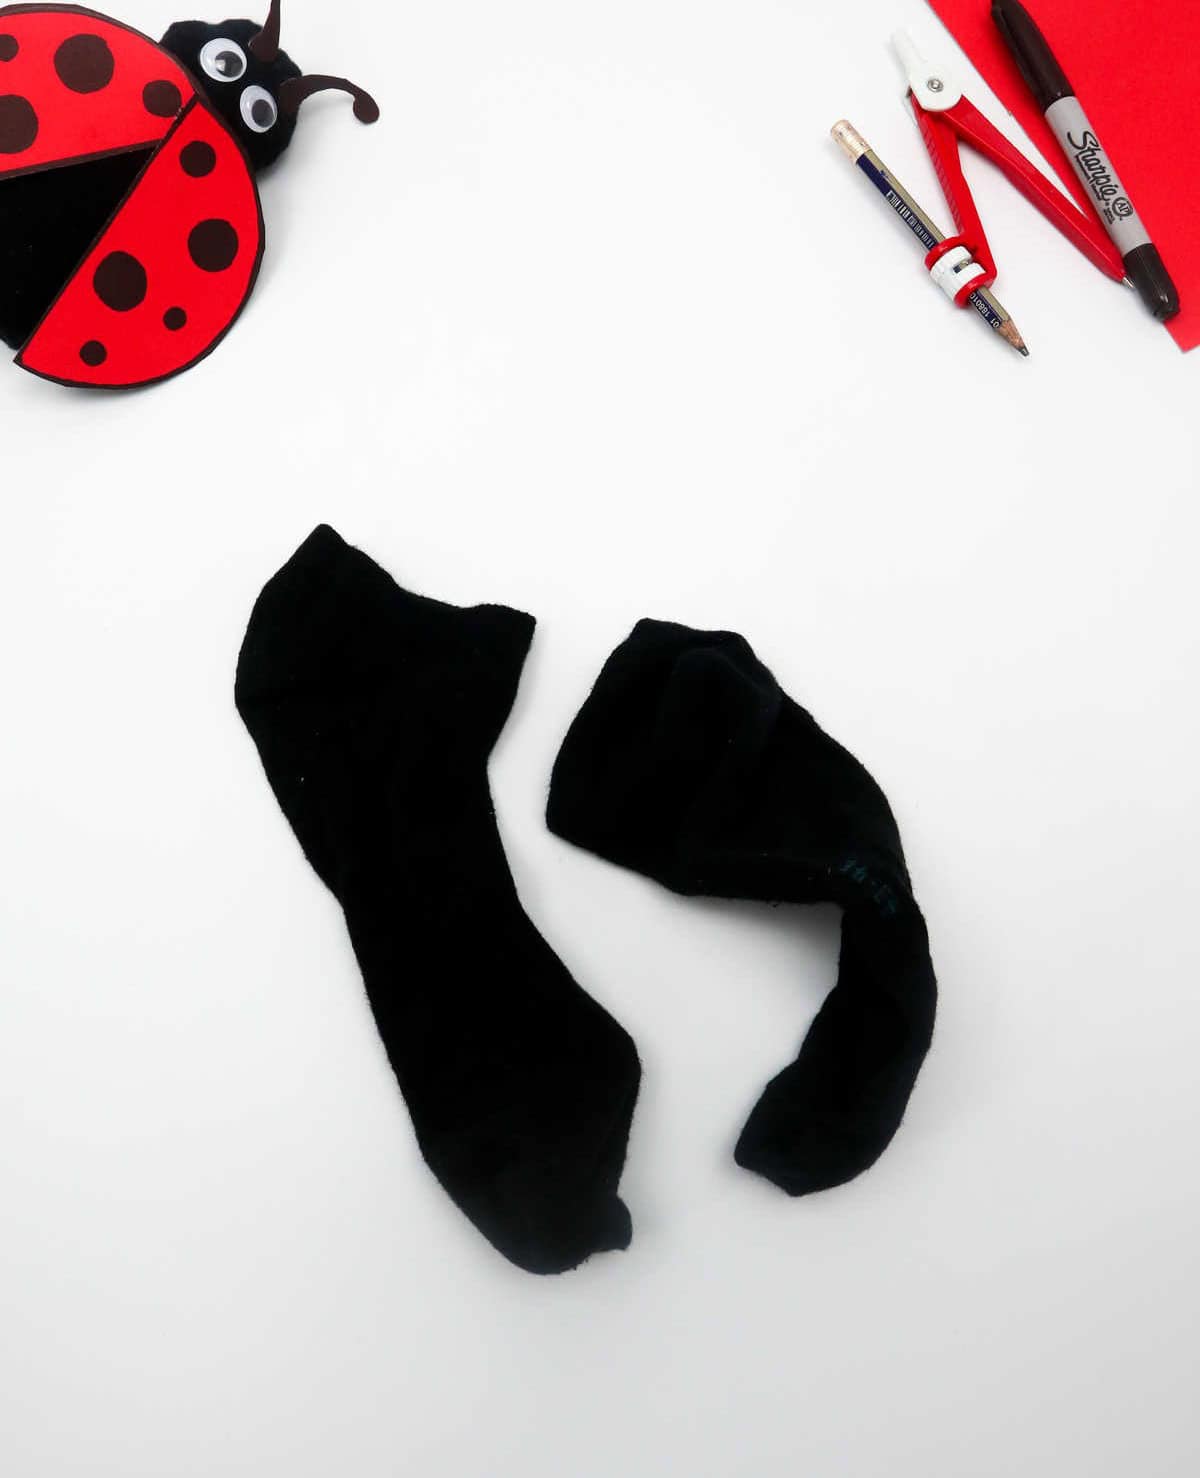

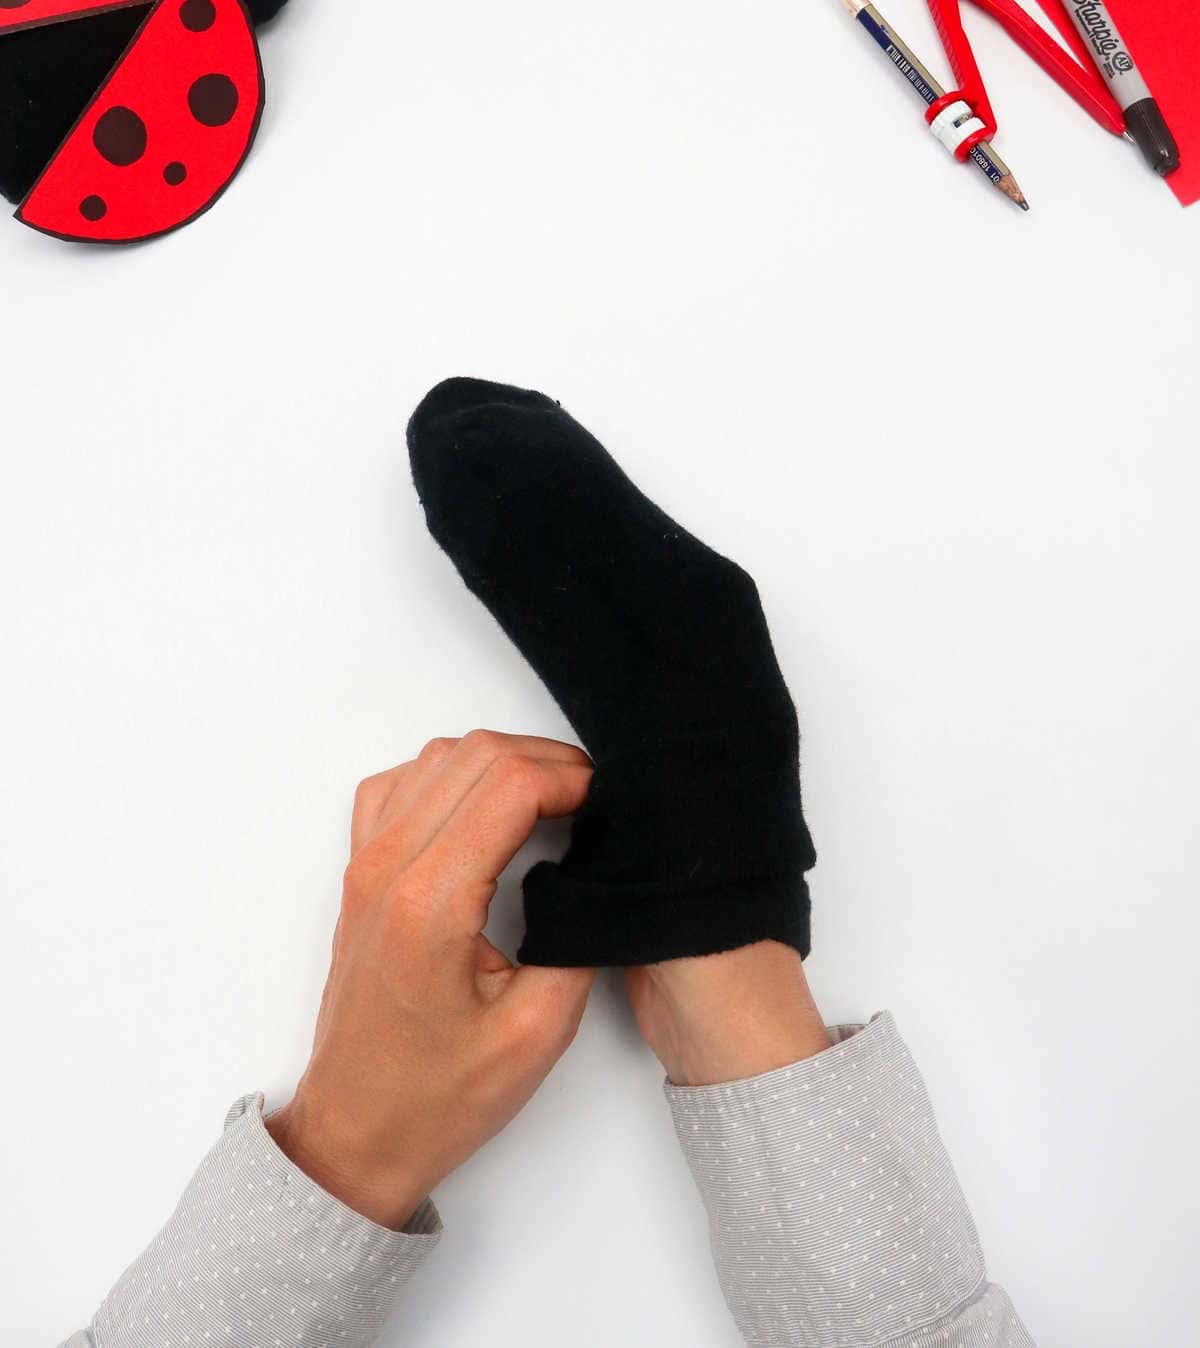
To initiate the process, take one sock and manipulate it into a spherical shape. Once you’ve achieved this, move on to the second sock and insert the newly formed sock ball into it. Continue pushing the sock ball all the way to the end of the second sock.
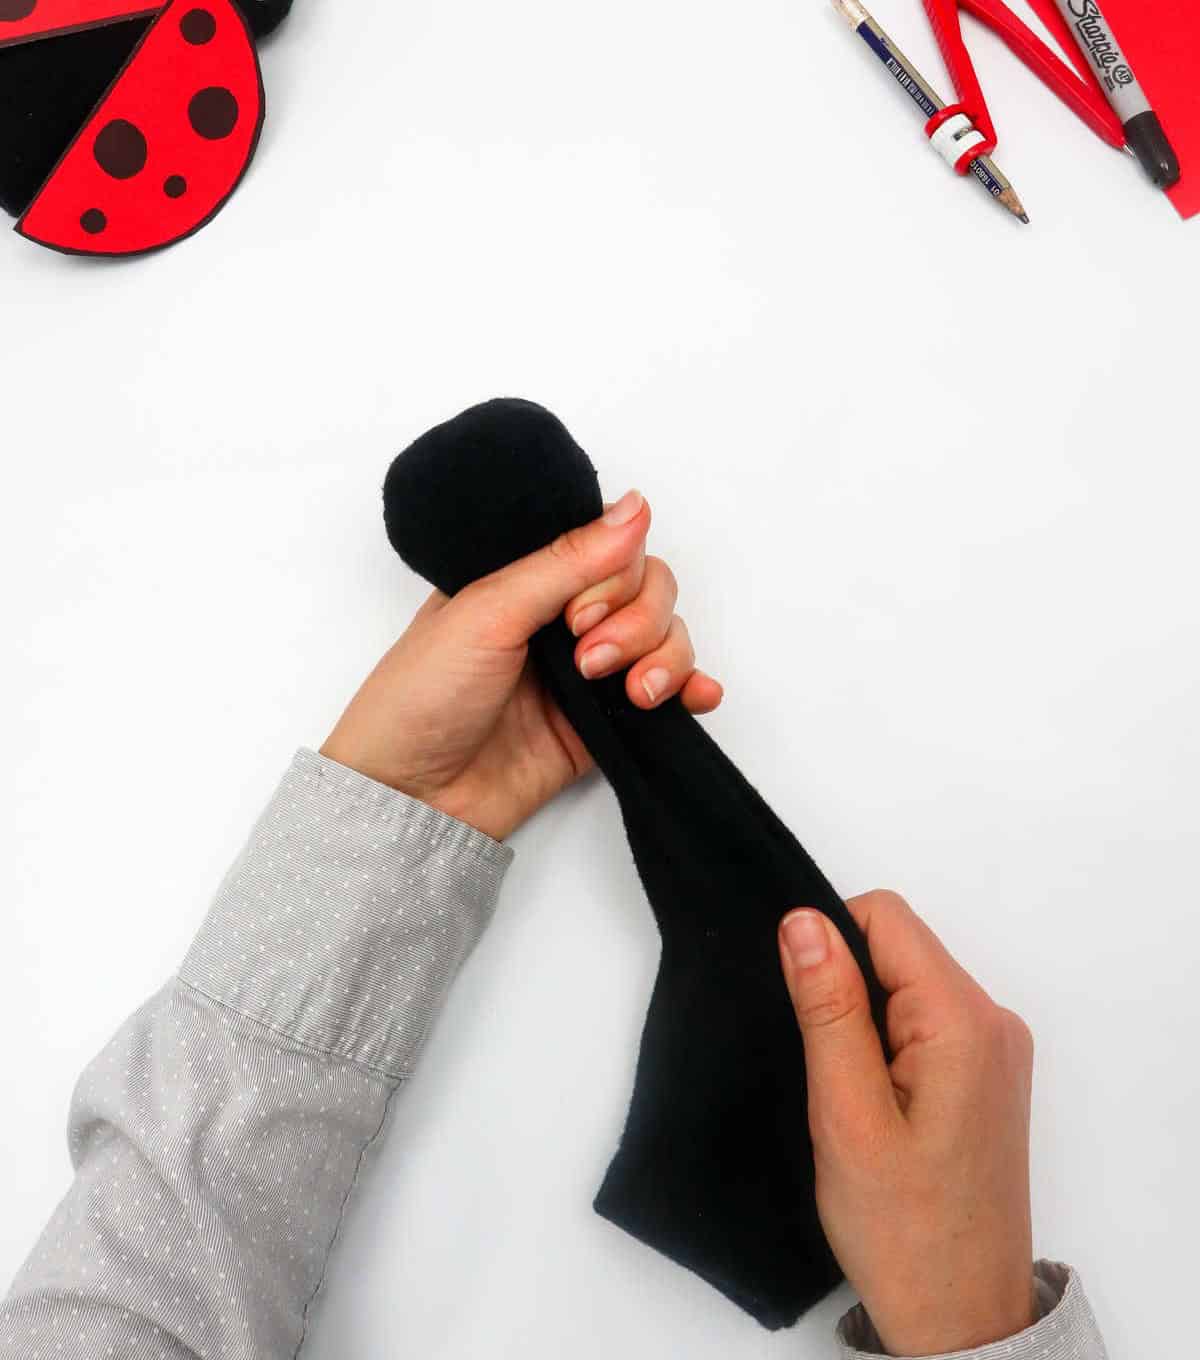
Step 2

To continue, grab an empty toilet paper roll and slide your sock over it. This clever hack requires you to select a sock with a longer design that extends beyond the ankle. As you choose your sock duo for this creative endeavor, keep in mind that longer socks are essential for achieving the desired outcome.
Step 3
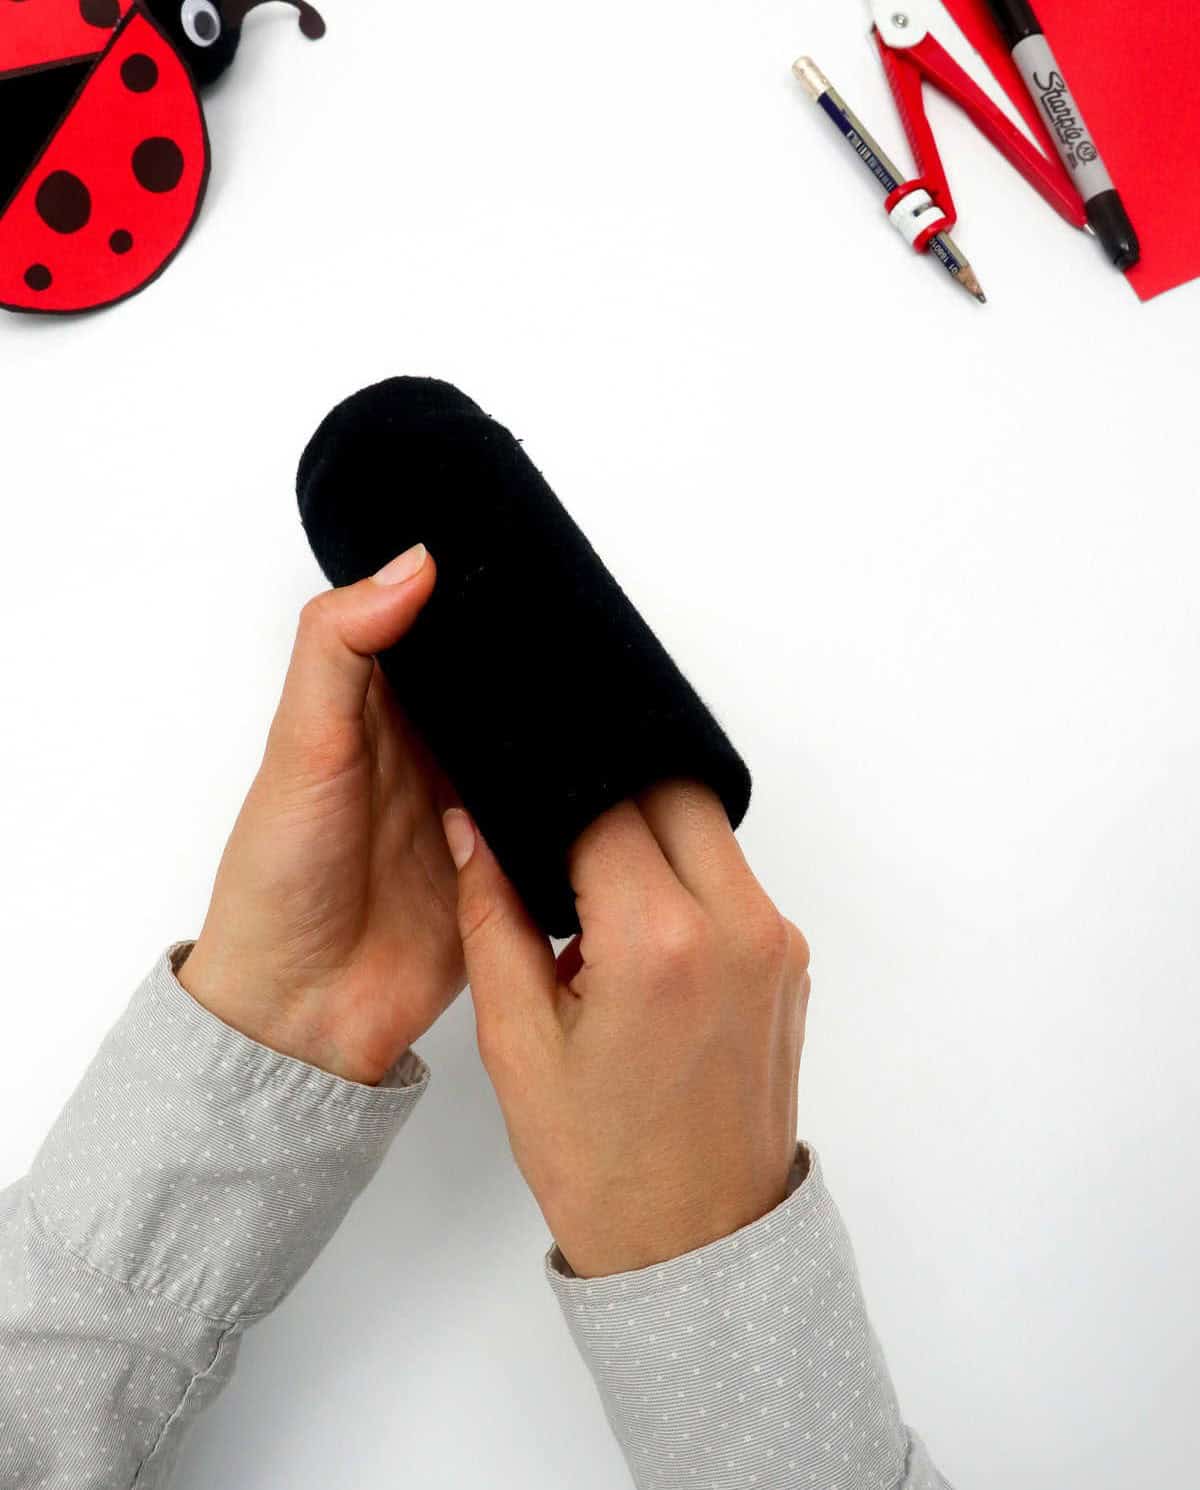
As you prepare to create the perfect sock roll, take a moment to carefully manipulate the loose ends, guiding them snugly into the formation. Ensure the bunched-up sock now resting on the inner rim of the toilet paper core is secure and even. This process will naturally involve tucking the corners into the opposite end of the toilet roll’s cylindrical shape. Moreover, it’s crucial to smooth out any wrinkles that may have formed during this step, guaranteeing a neat and tidy appearance.
Step 4
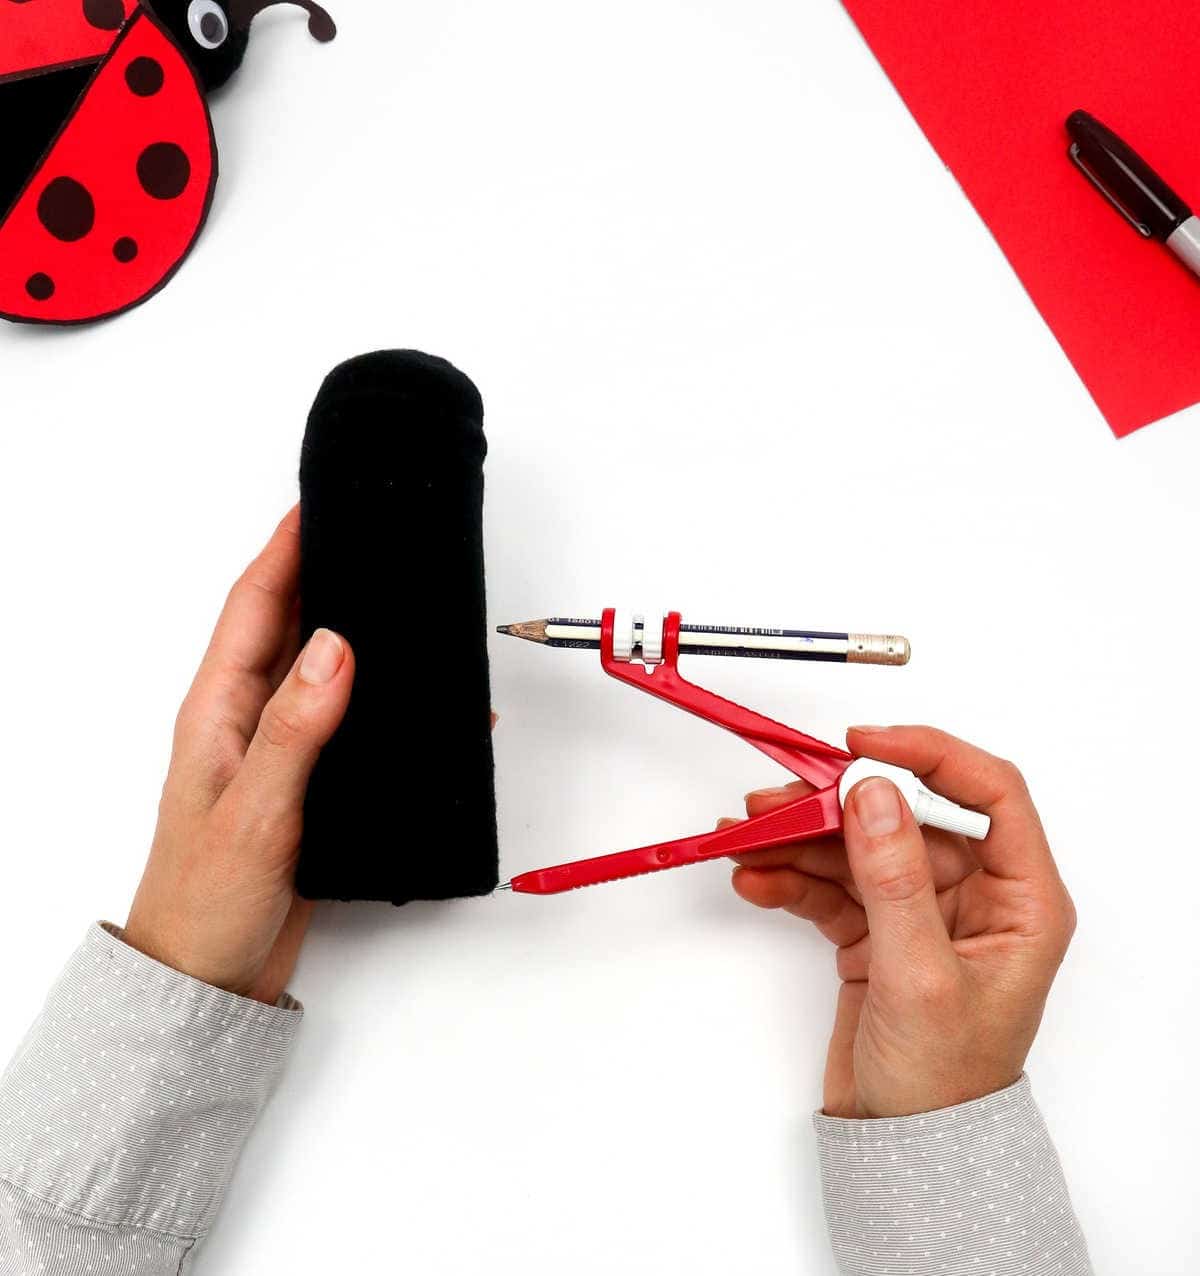
To craft the wings, begin by employing a compass to pinpoint the exact midpoint of the toilet paper roll. This can be achieved by ensuring the needle aligns with the center axis. Keep in mind that the resulting shape may be slightly asymmetrical, but this variation is entirely acceptable if you prefer a more subtle wing design.
Watch: DIY Ladybug
For those who prefer learning through visual aids, I’ve got you covered. A comprehensive video tutorial is available for your viewing pleasure.
Step 5
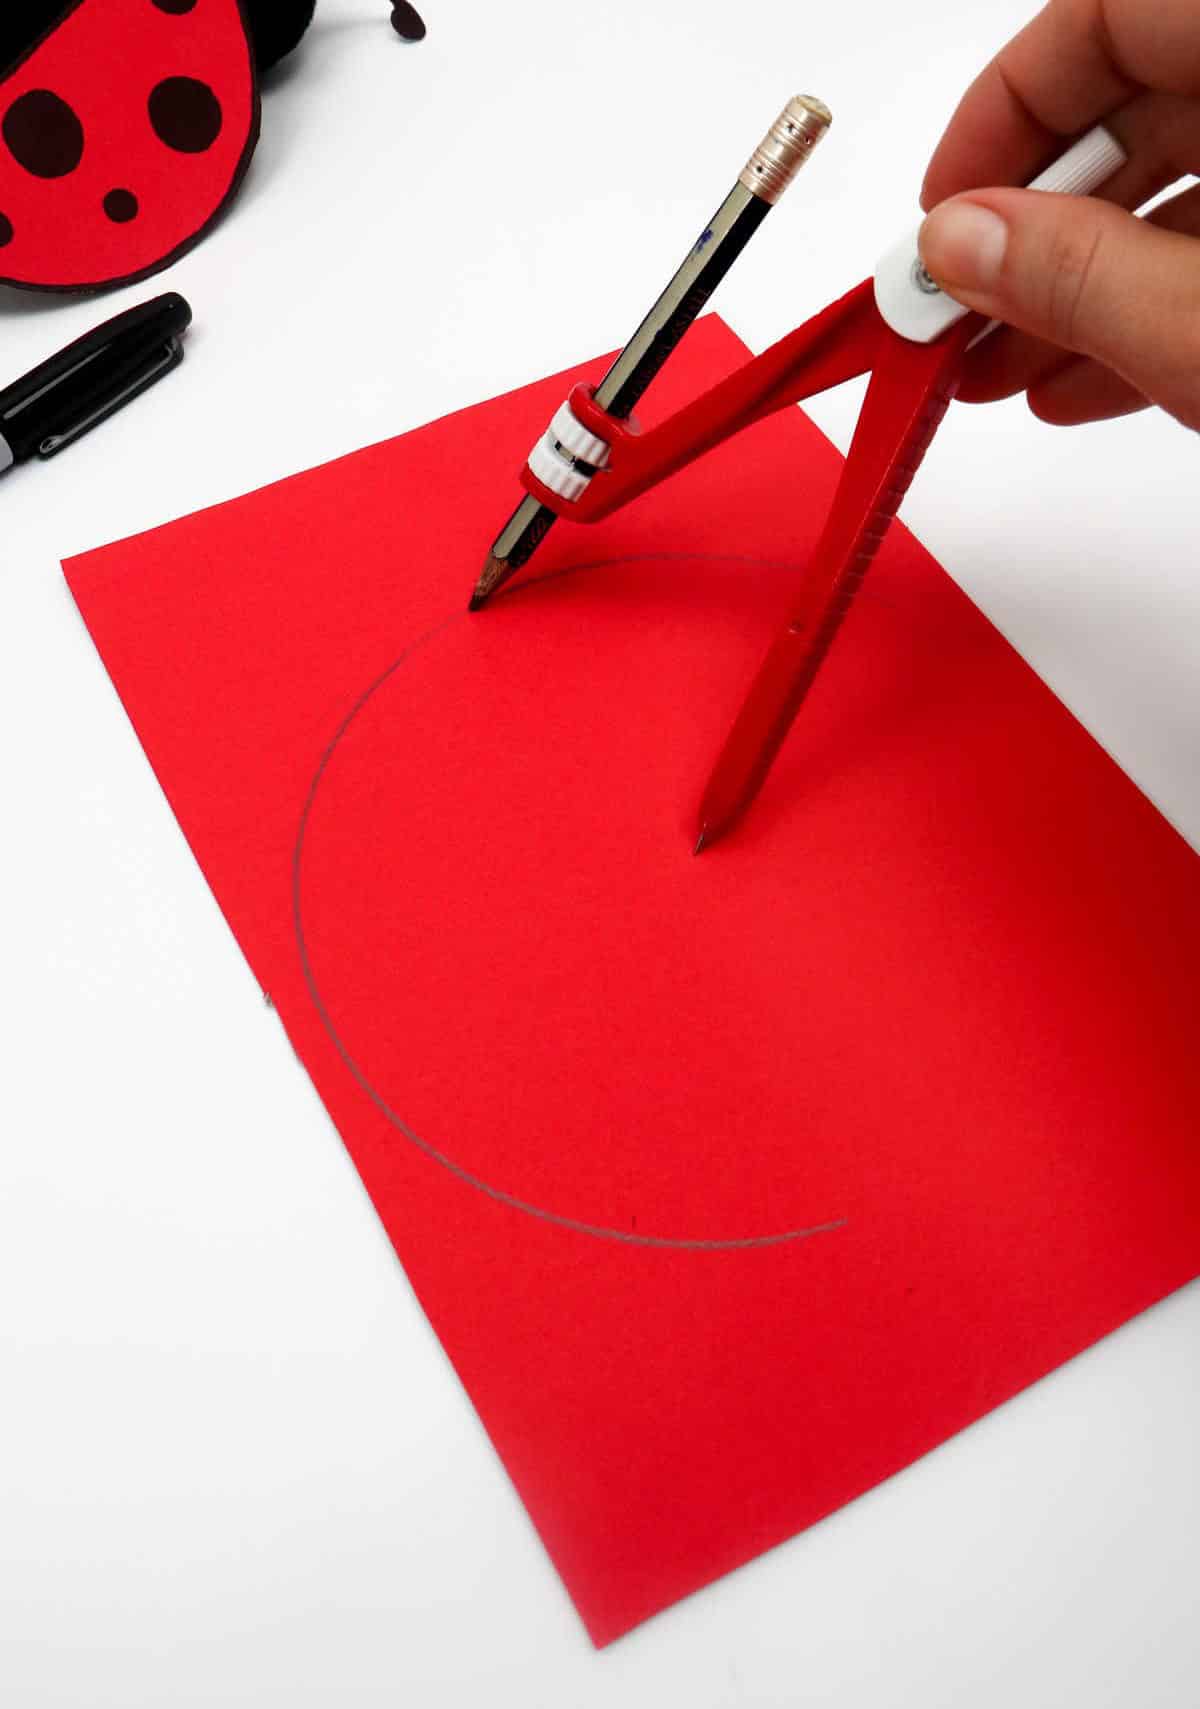
Measure out the desired circumference of your paper toilet roll holder by folding the red paper in half and measuring the distance from the folded edge to the opposite corner. Next, use this measurement to draw a circular shape on the paper, ensuring that it is symmetrical and evenly spaced. The radius of the circle should be equivalent to one-half the length of the toilet roll itself, guaranteeing an accurate and precise fit once complete.
Step 6
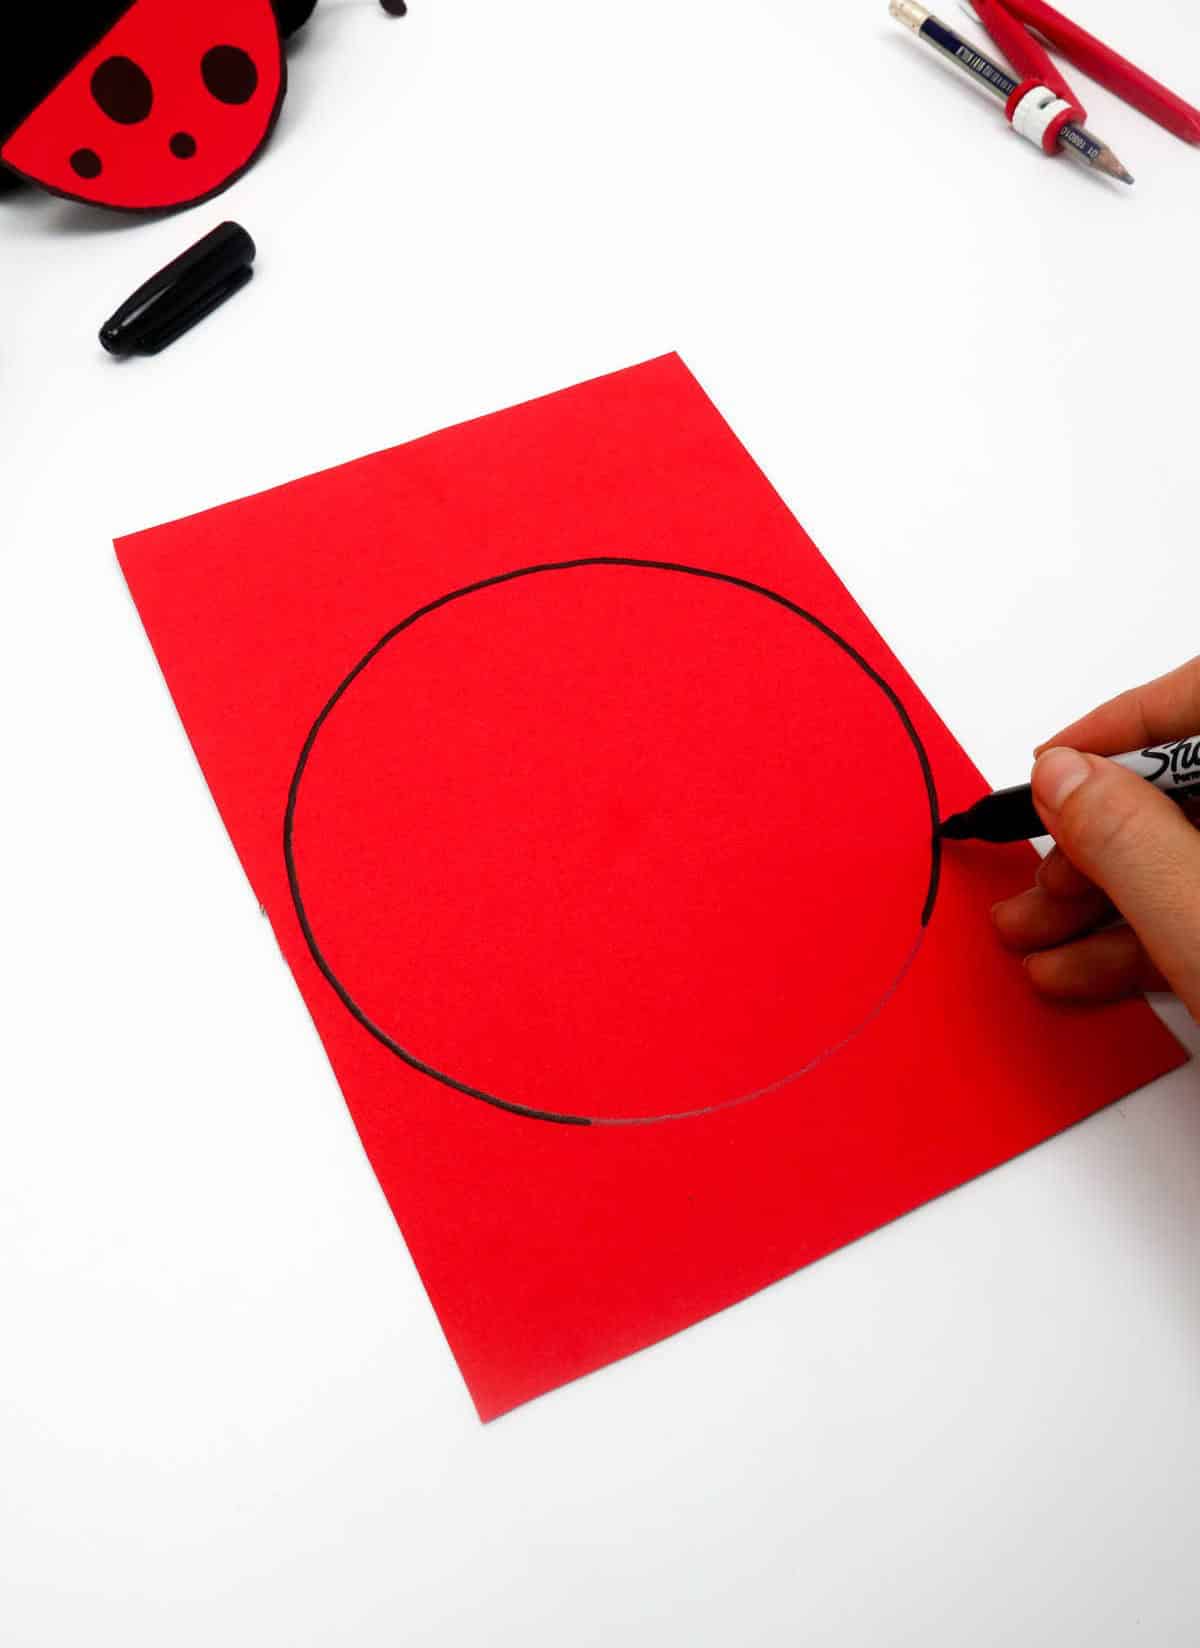
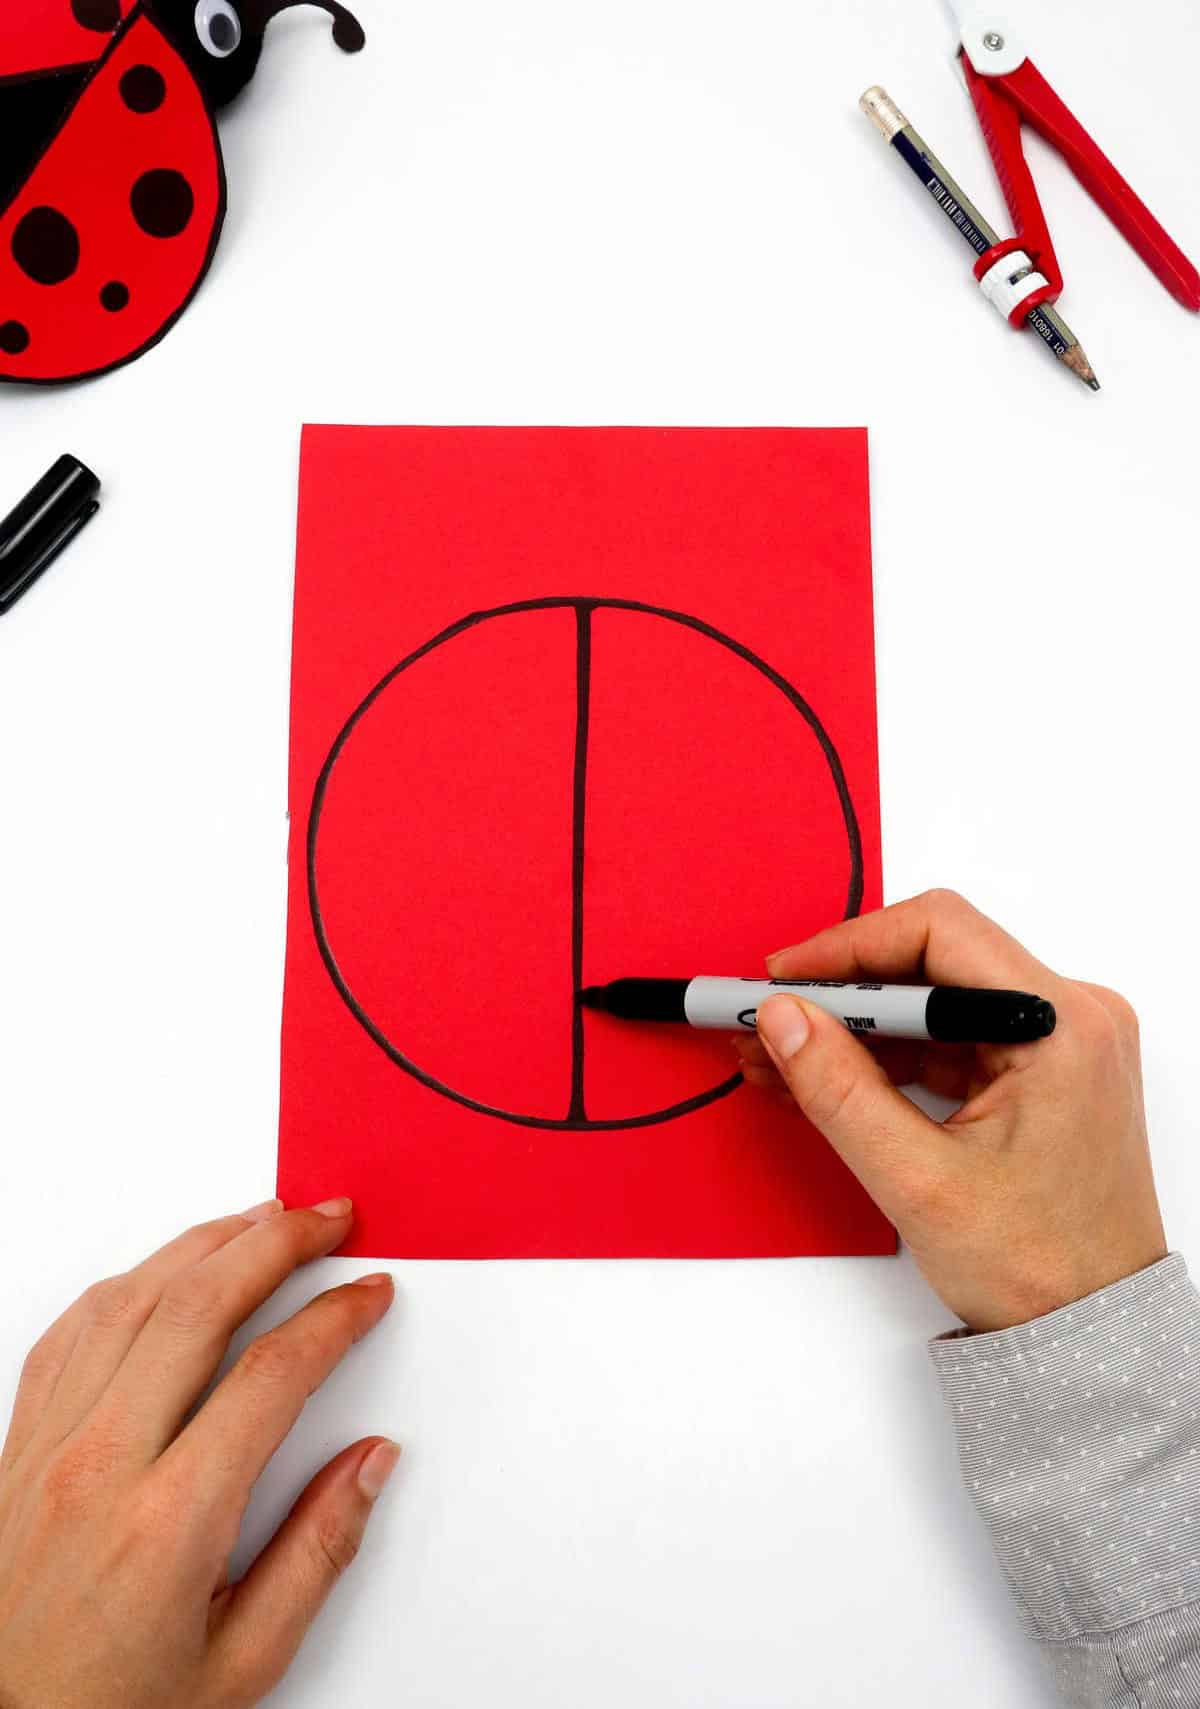
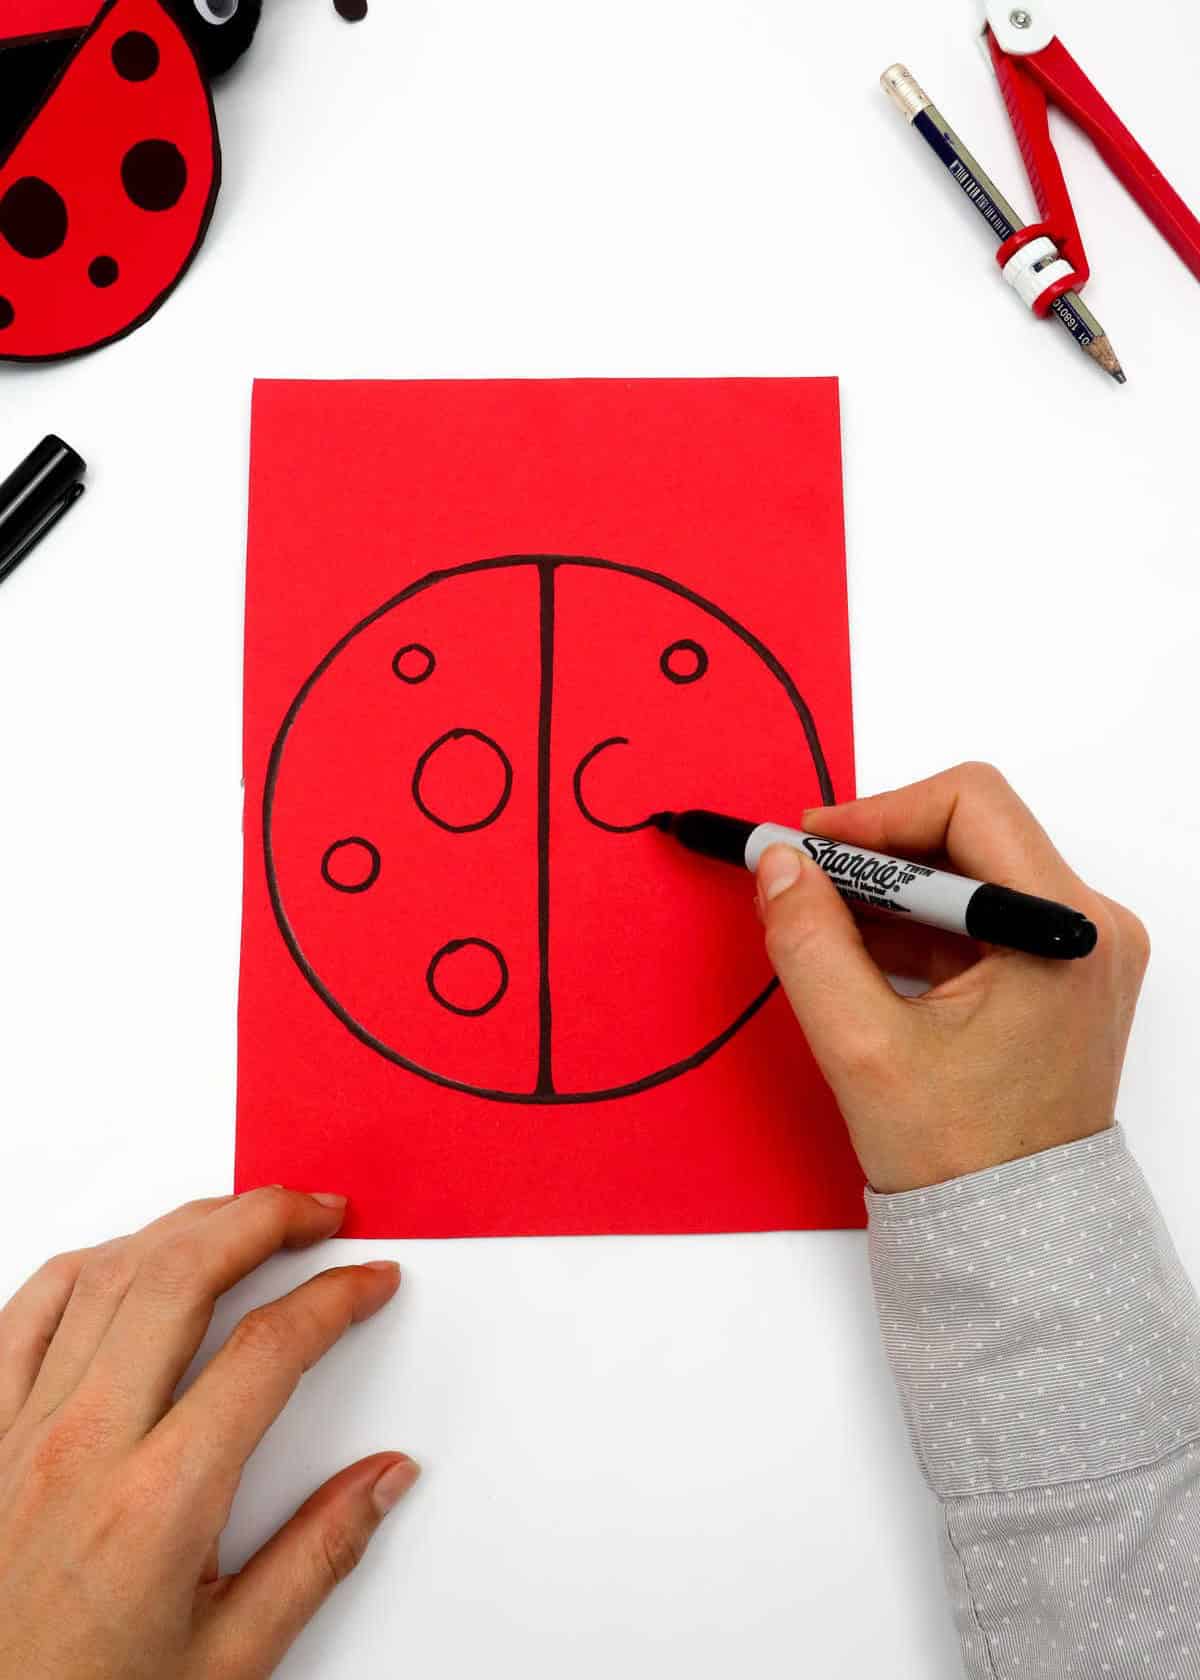
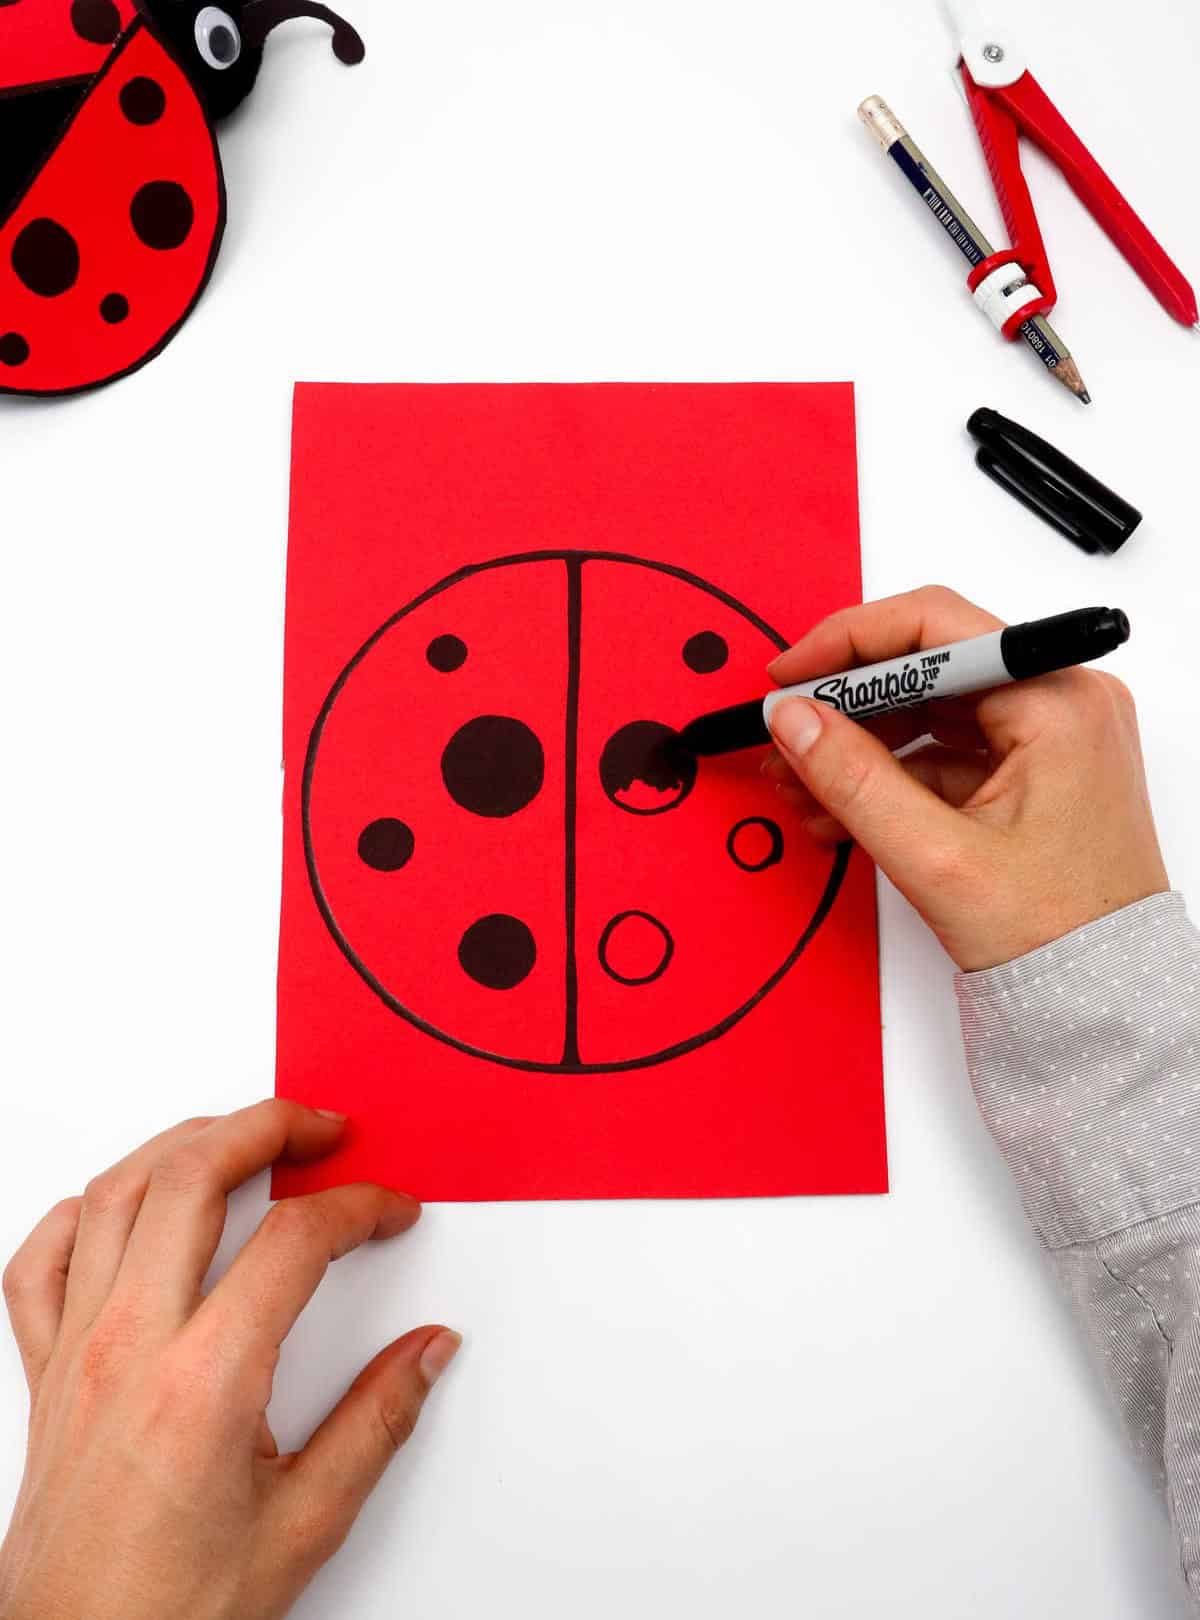
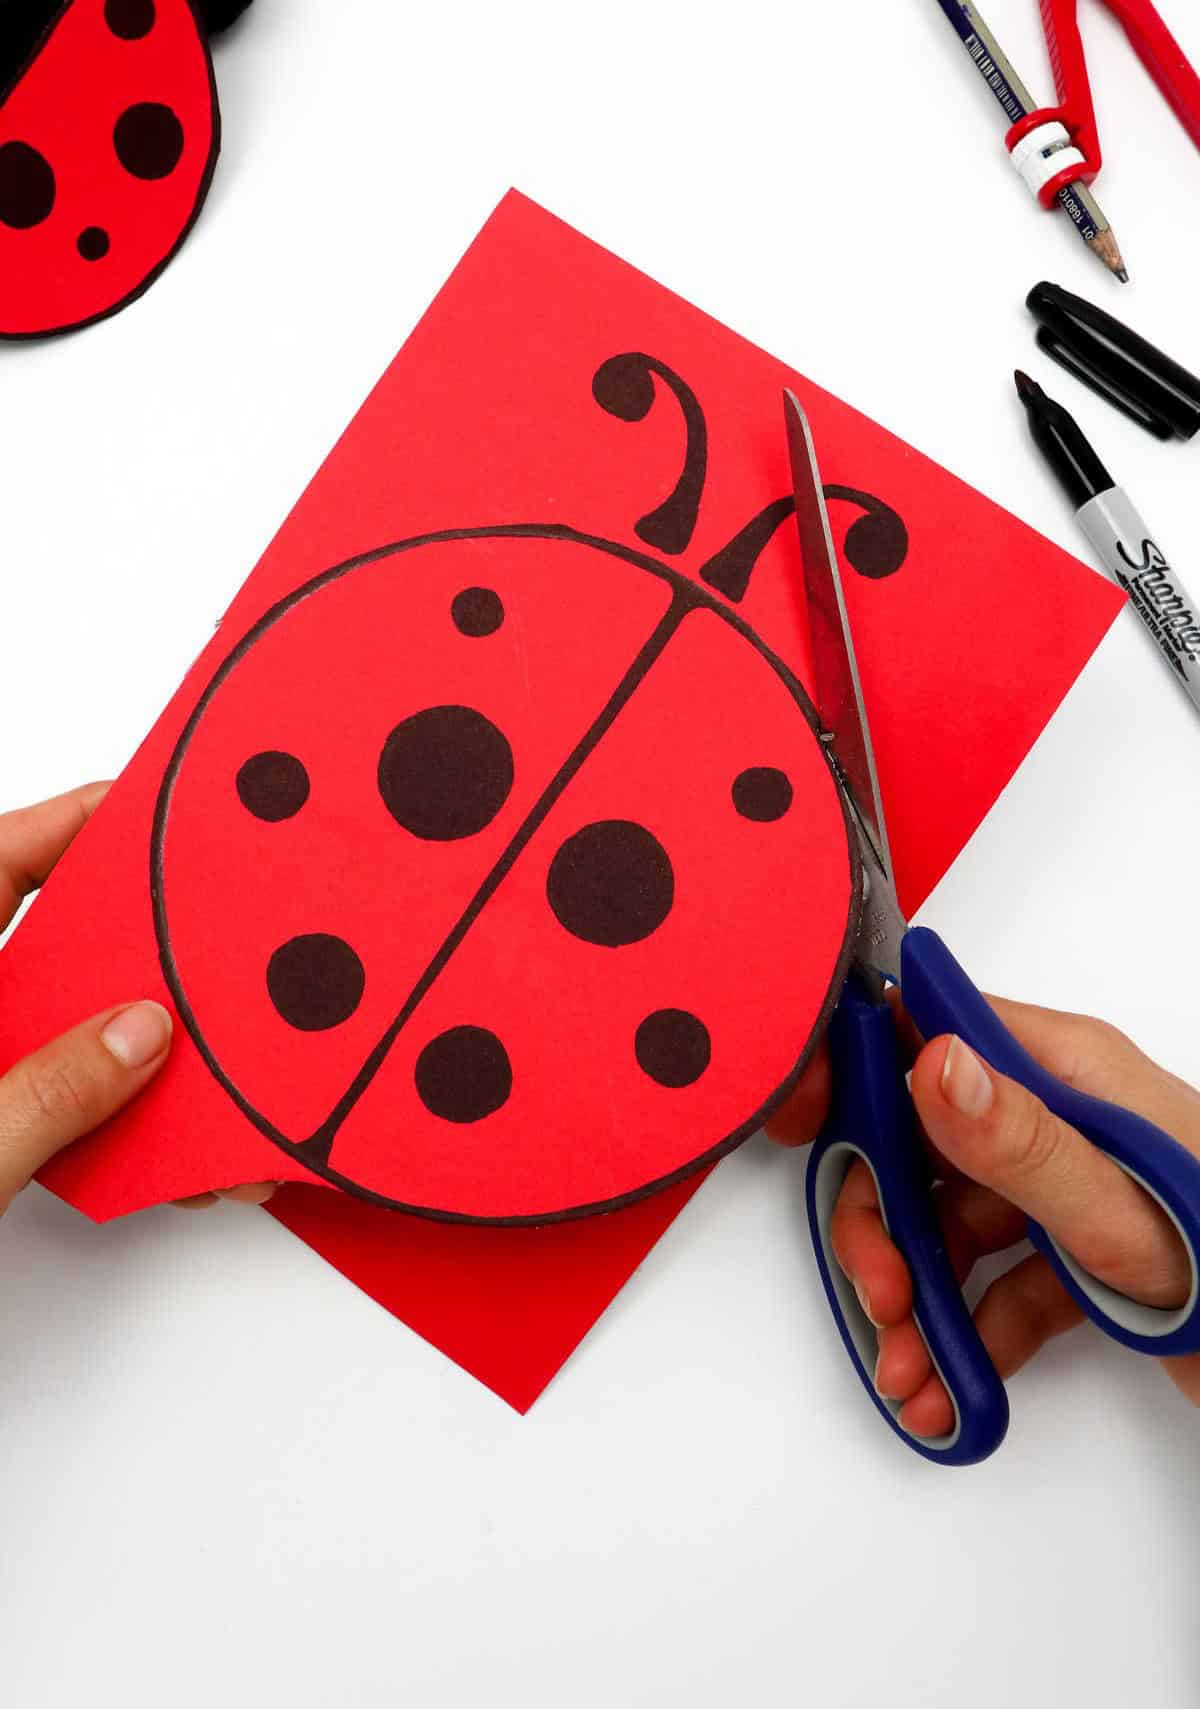
To create your ladybug’s body, start by outlining a circle with a black marker. Ensure you’re using thicker paper to prevent any potential damage to the delicate wings. If you’re concerned about keeping the wings intact, consider attaching them to a small piece of cardboard before gluing them onto the ladybug. Divide the circle into two halves by drawing a line down its center. On each half, draw smaller circles that will serve as the ladybug’s distinctive spots.
Once these are complete, fill them in with color to bring your ladybug to life.
Step 7
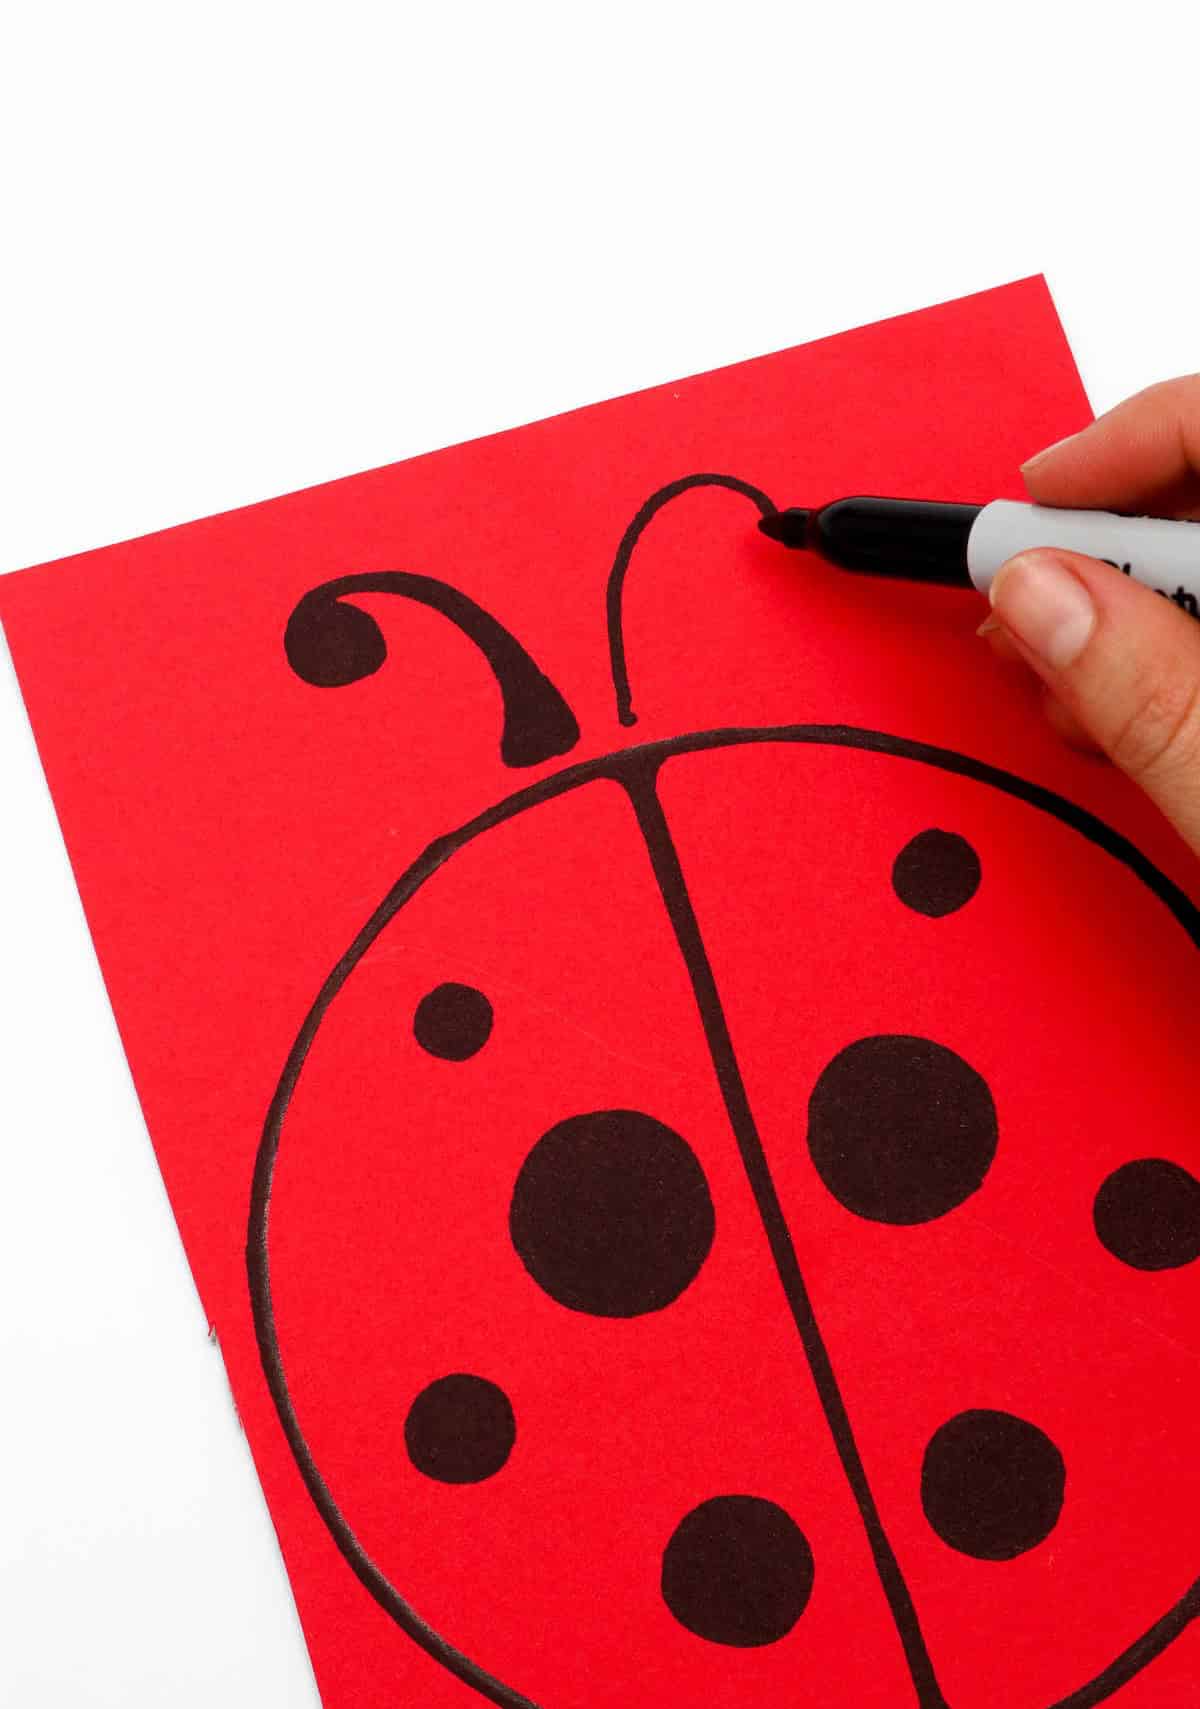
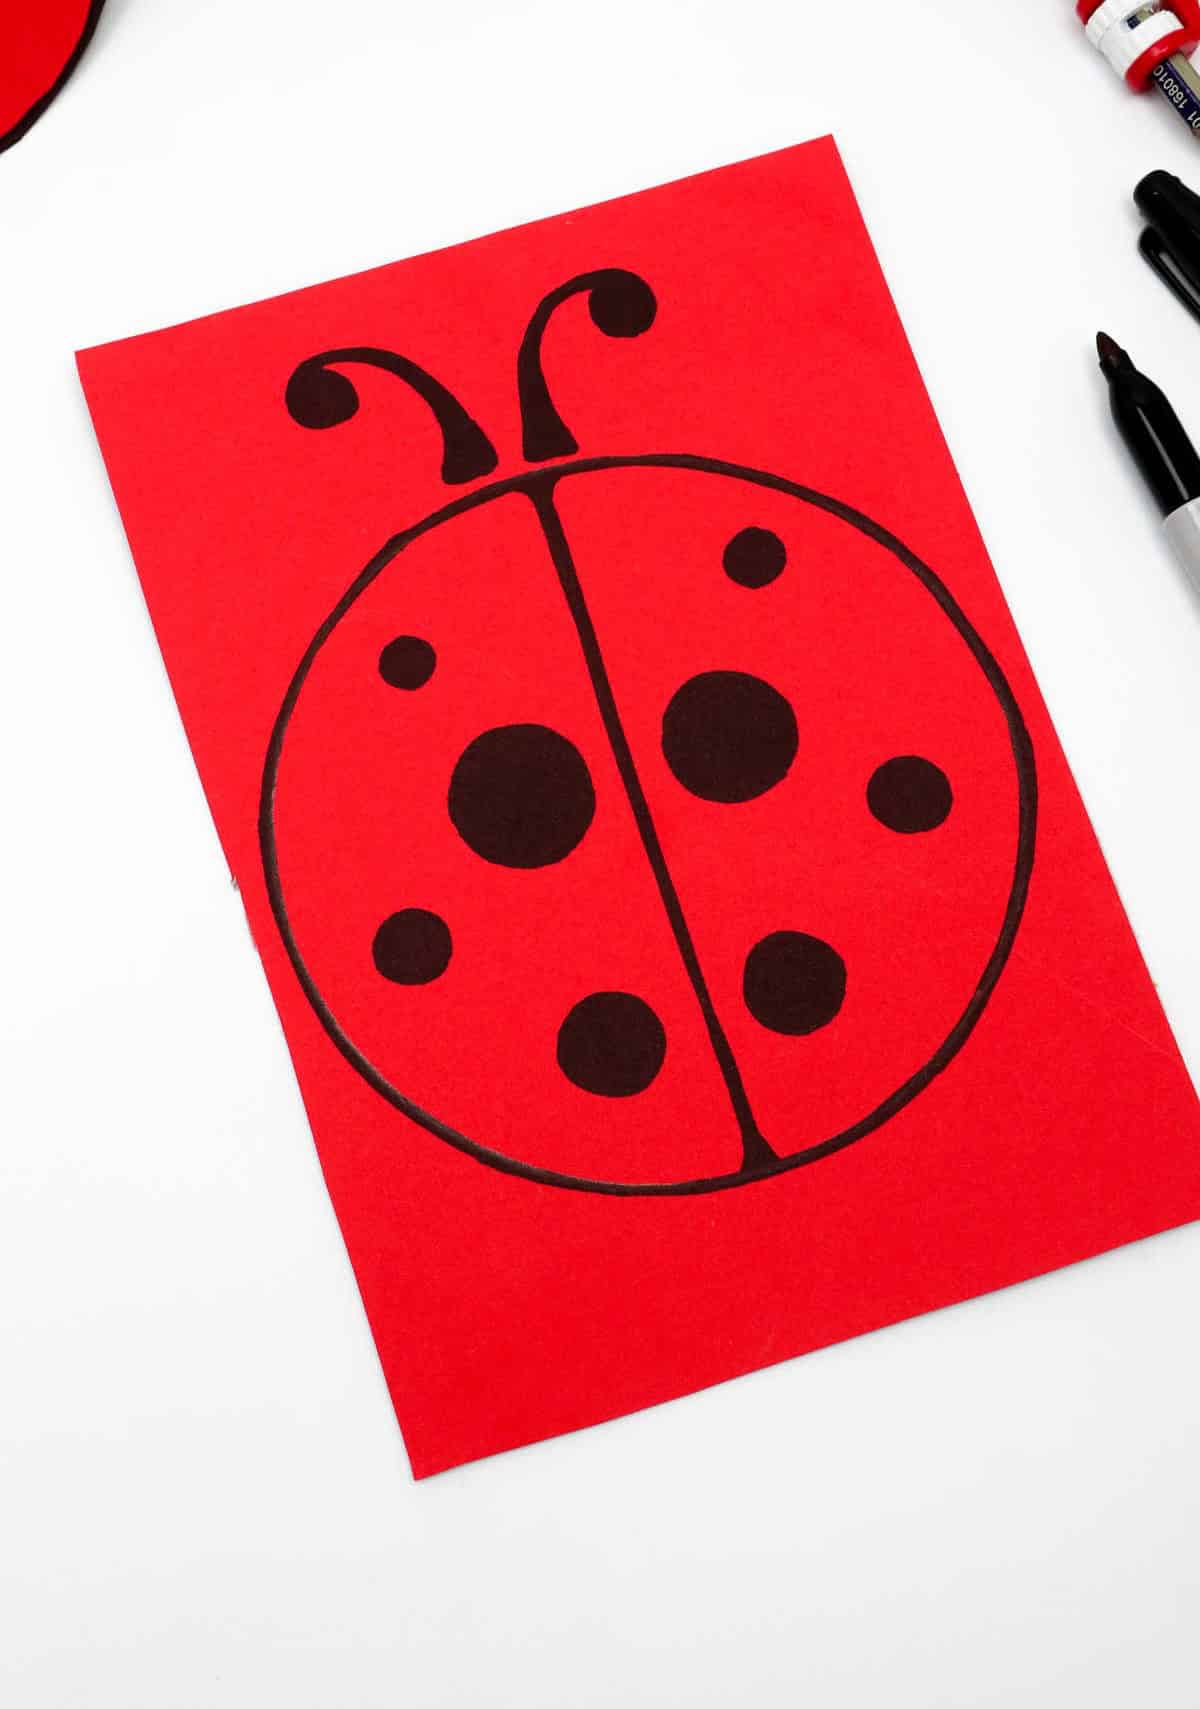
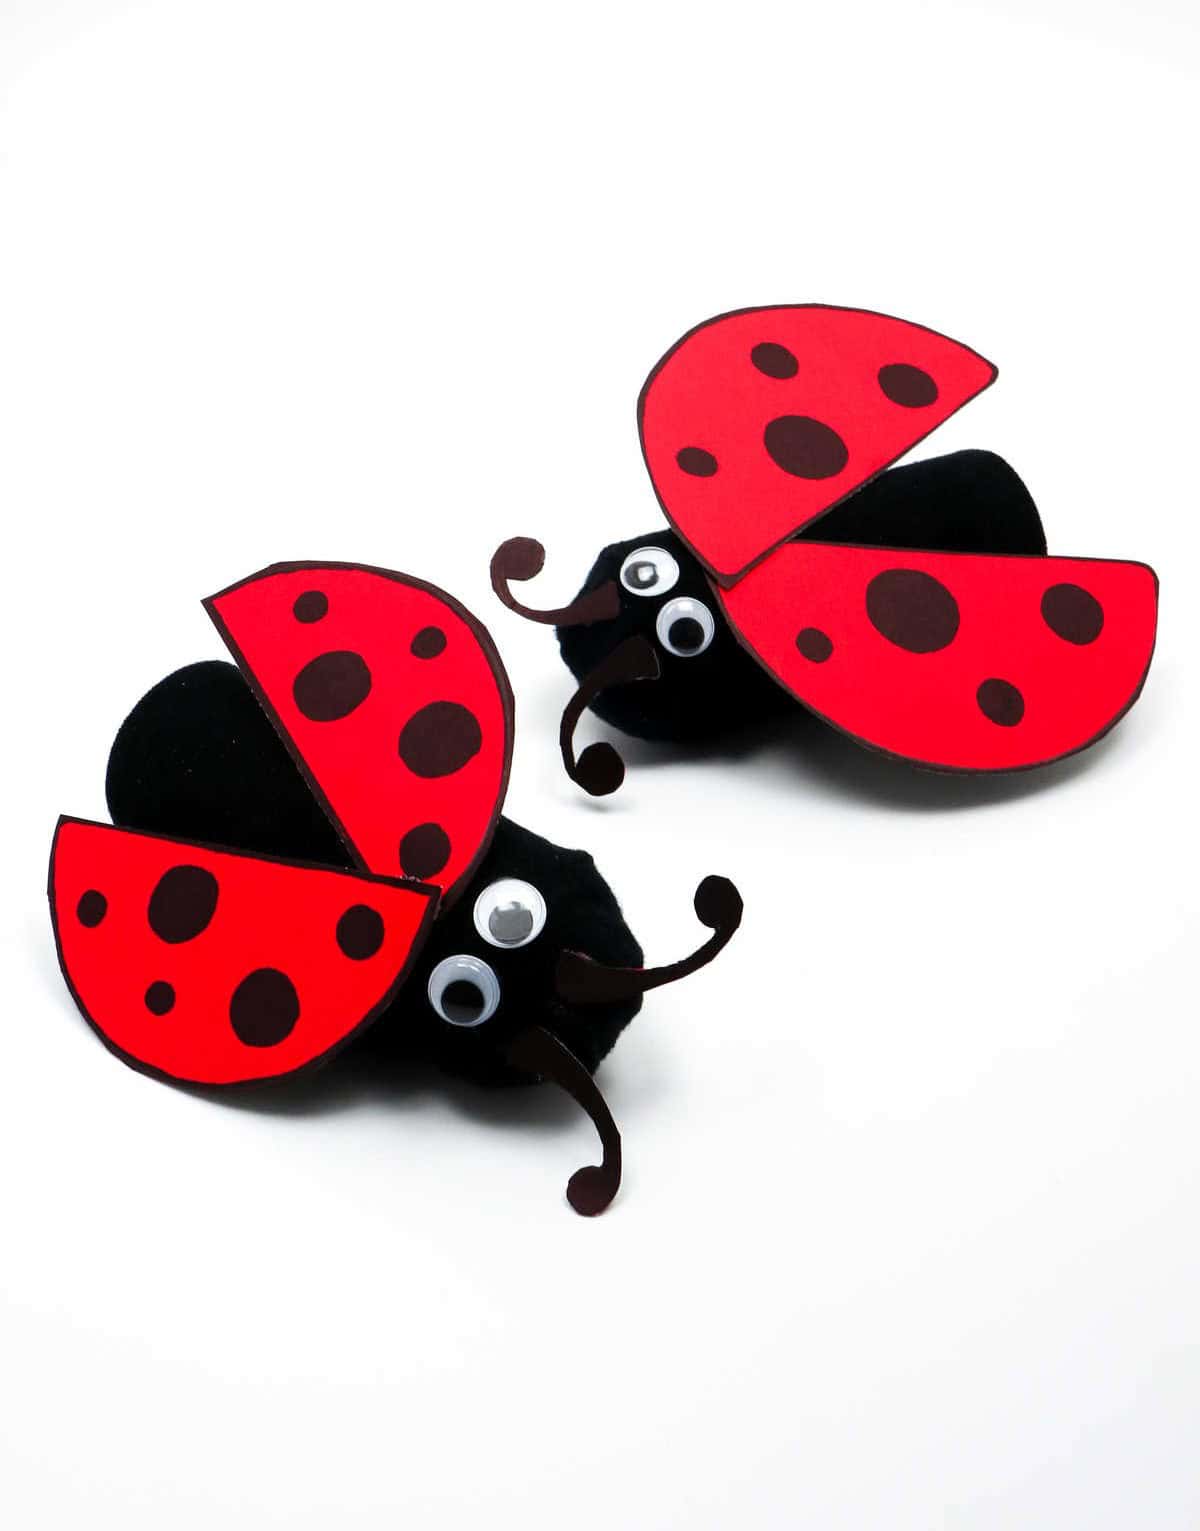
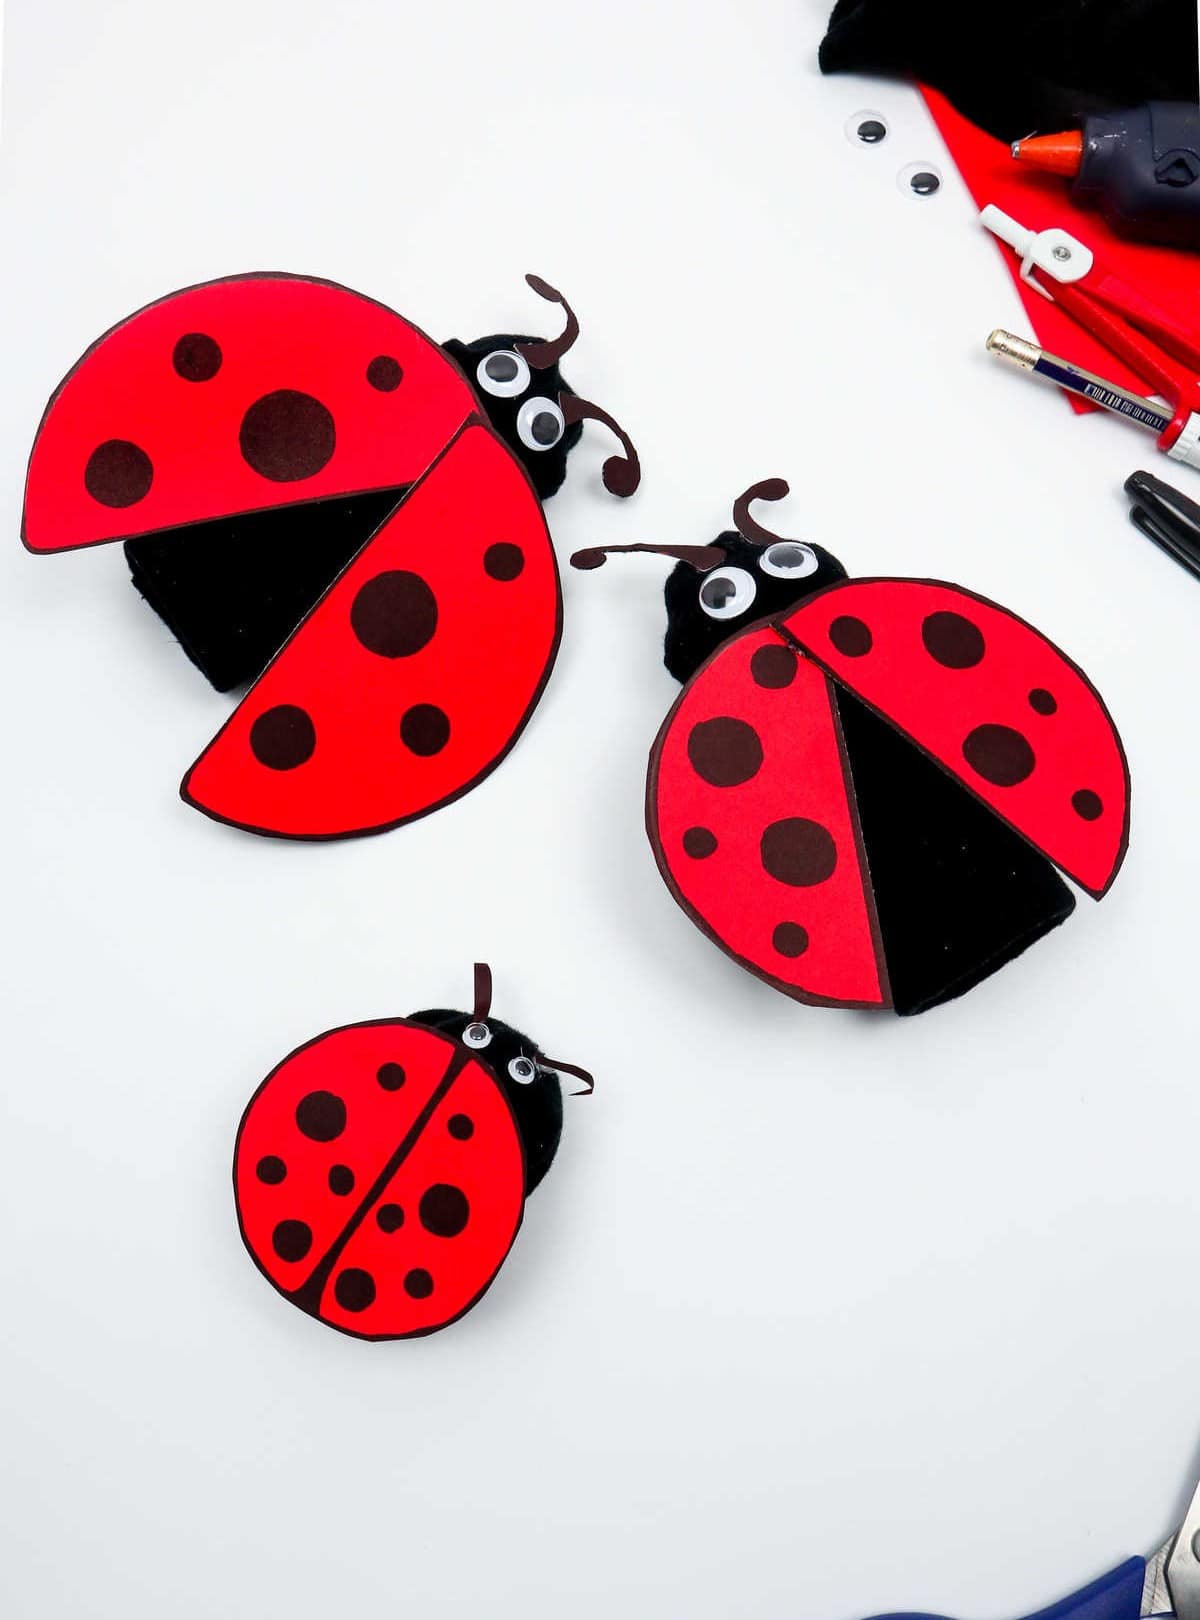
To complete your ladybug craft, it’s time to add the finishing touch: drawing the antennae. Once you’ve done so, your ladybug should resemble the one shown here. This step can be a fun and creative project for kids to tackle independently.
Step 8
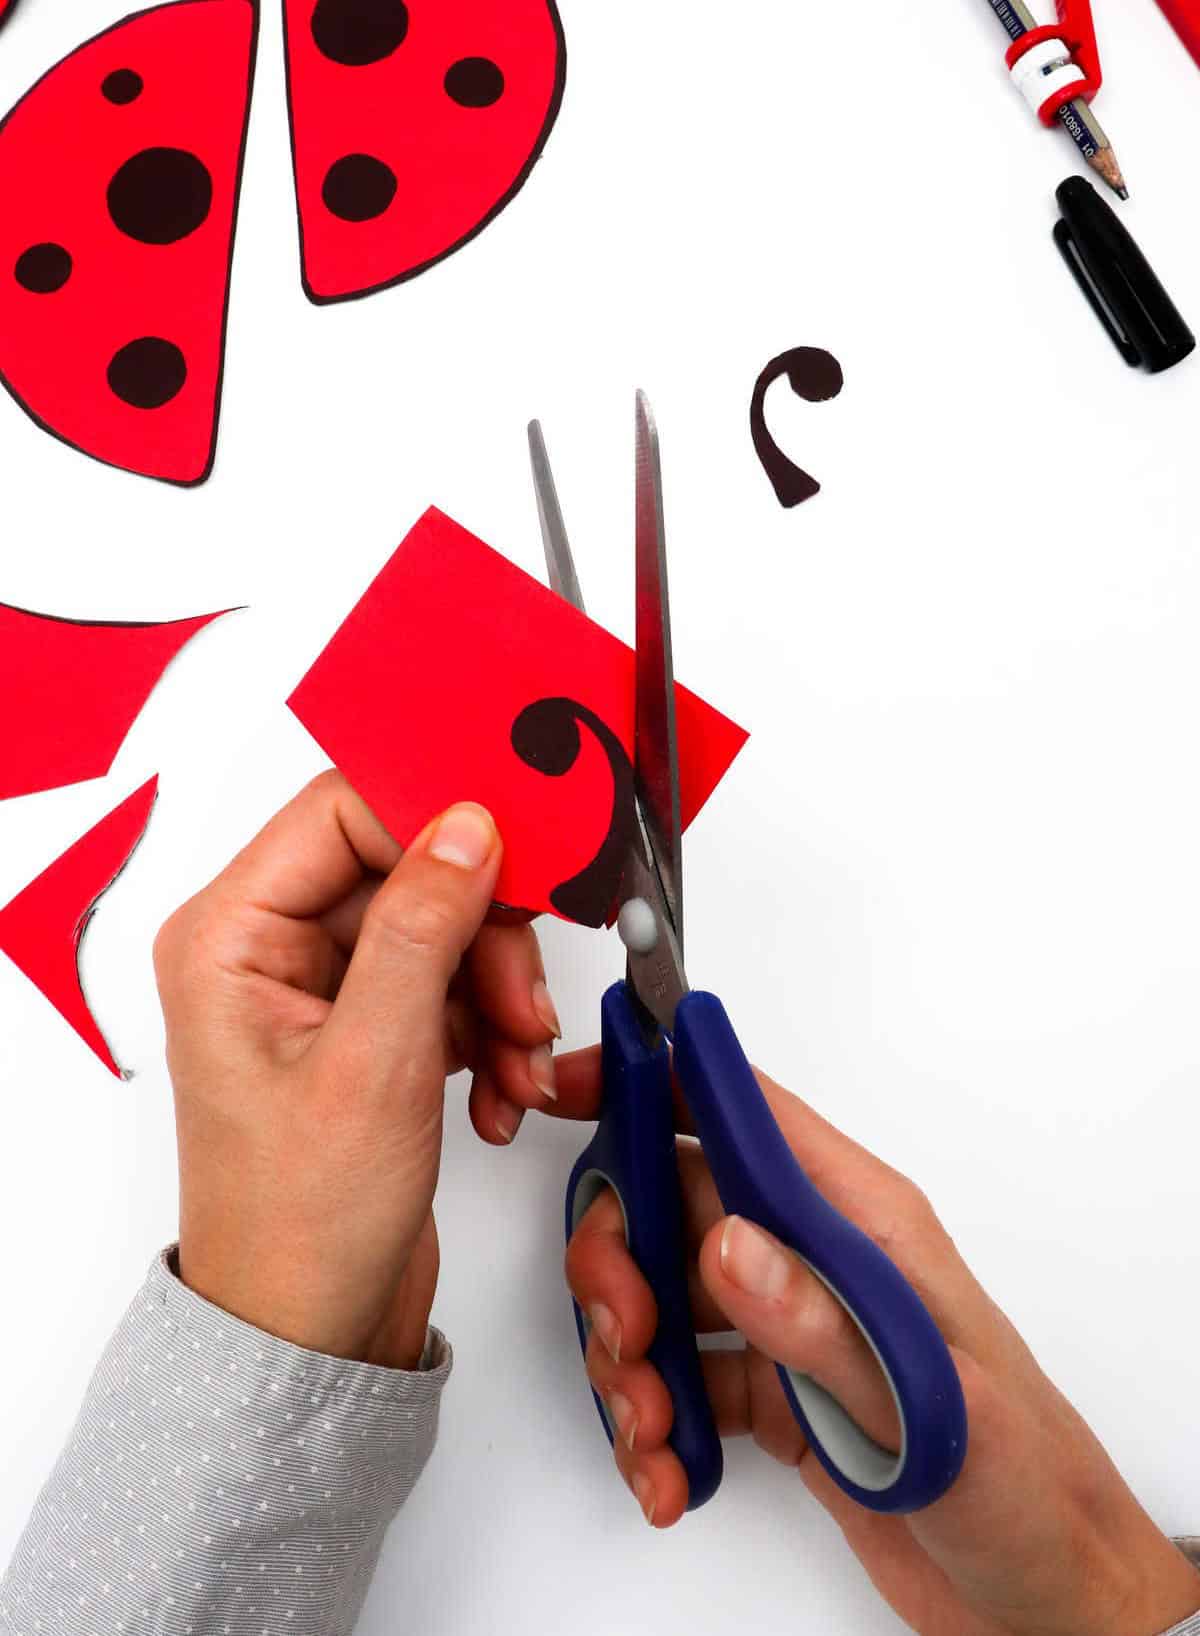
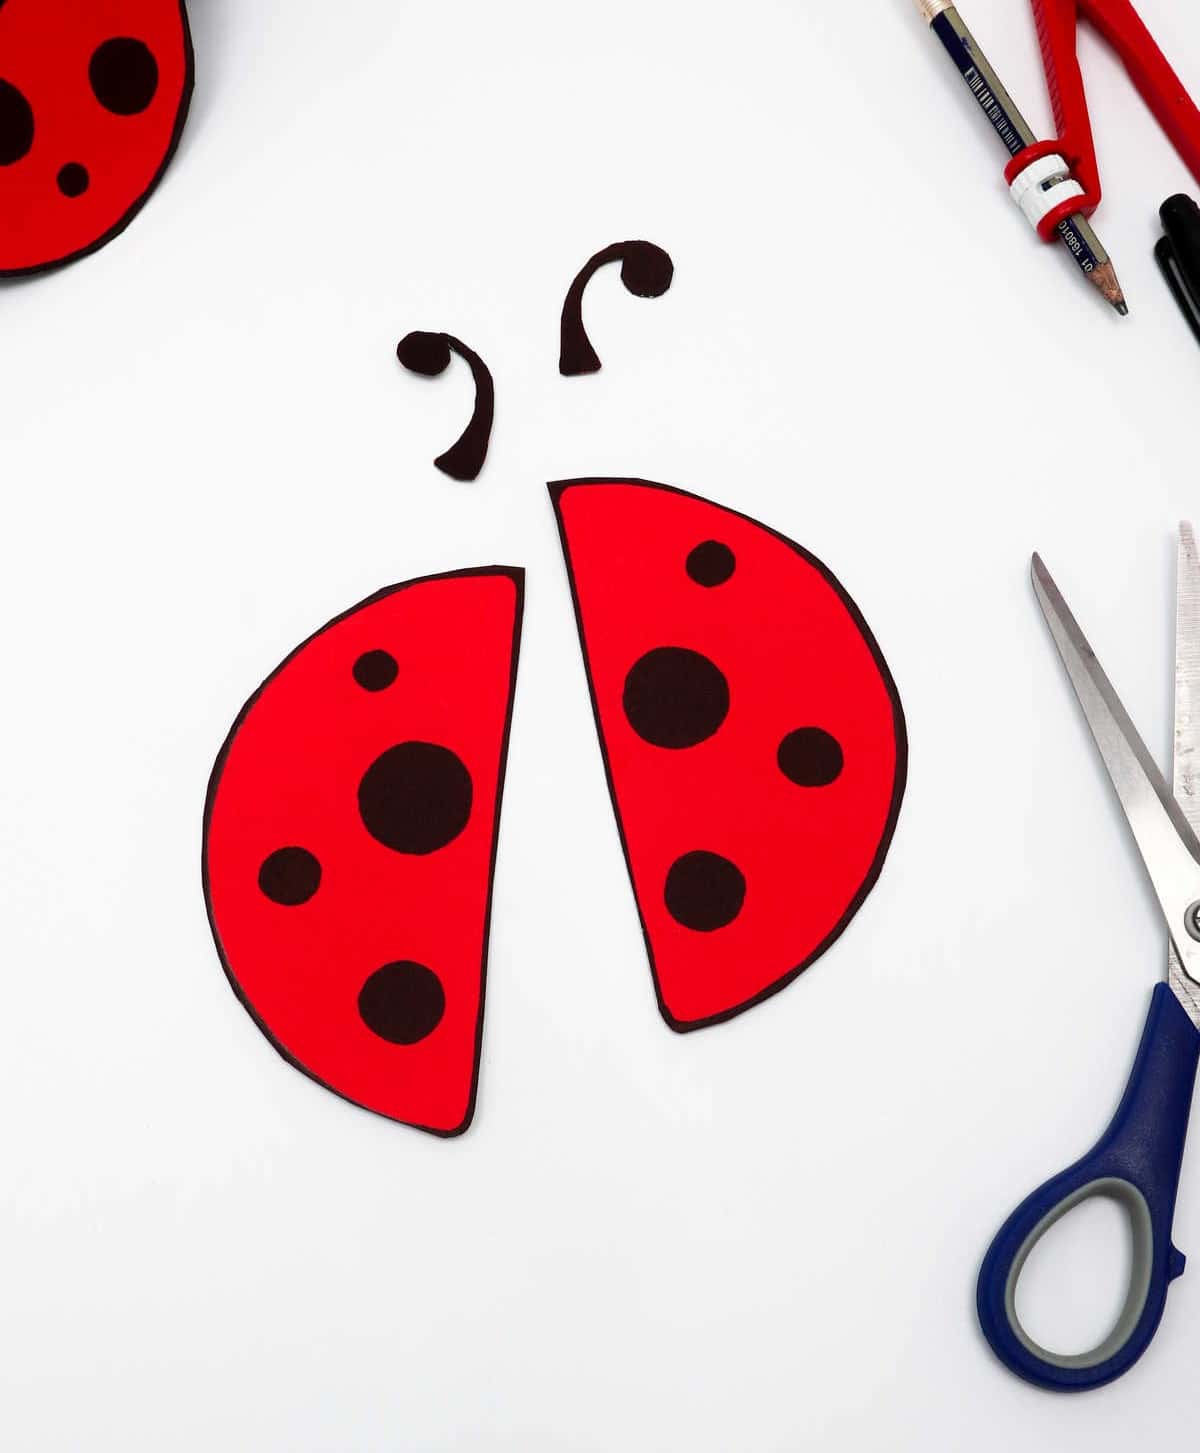
To simplify the process, it’s time to break down the dragon design into manageable parts. Begin by visualizing a vertical line bisecting the circular body, effectively dividing it into two identical halves that will form the wings. Don’t forget to carefully excise the antennae from the design, as these will no longer be needed.
Step 9
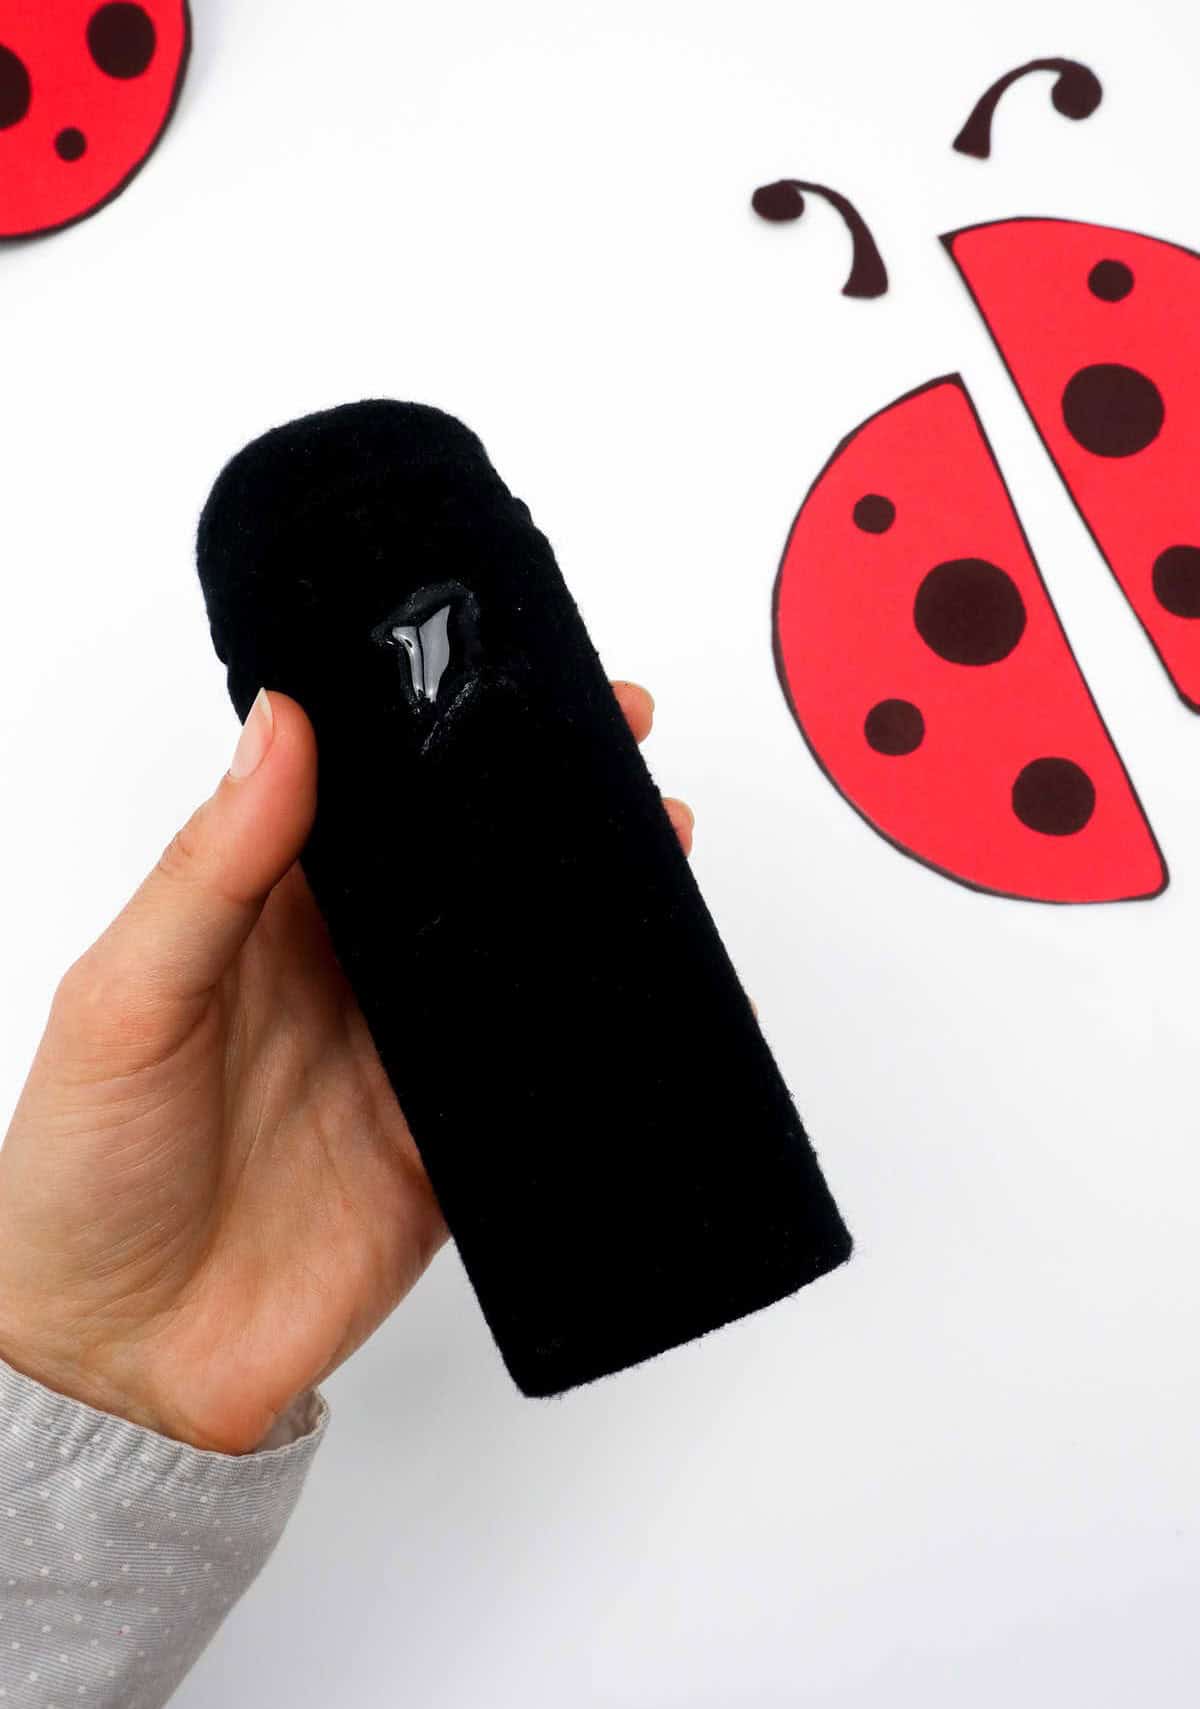
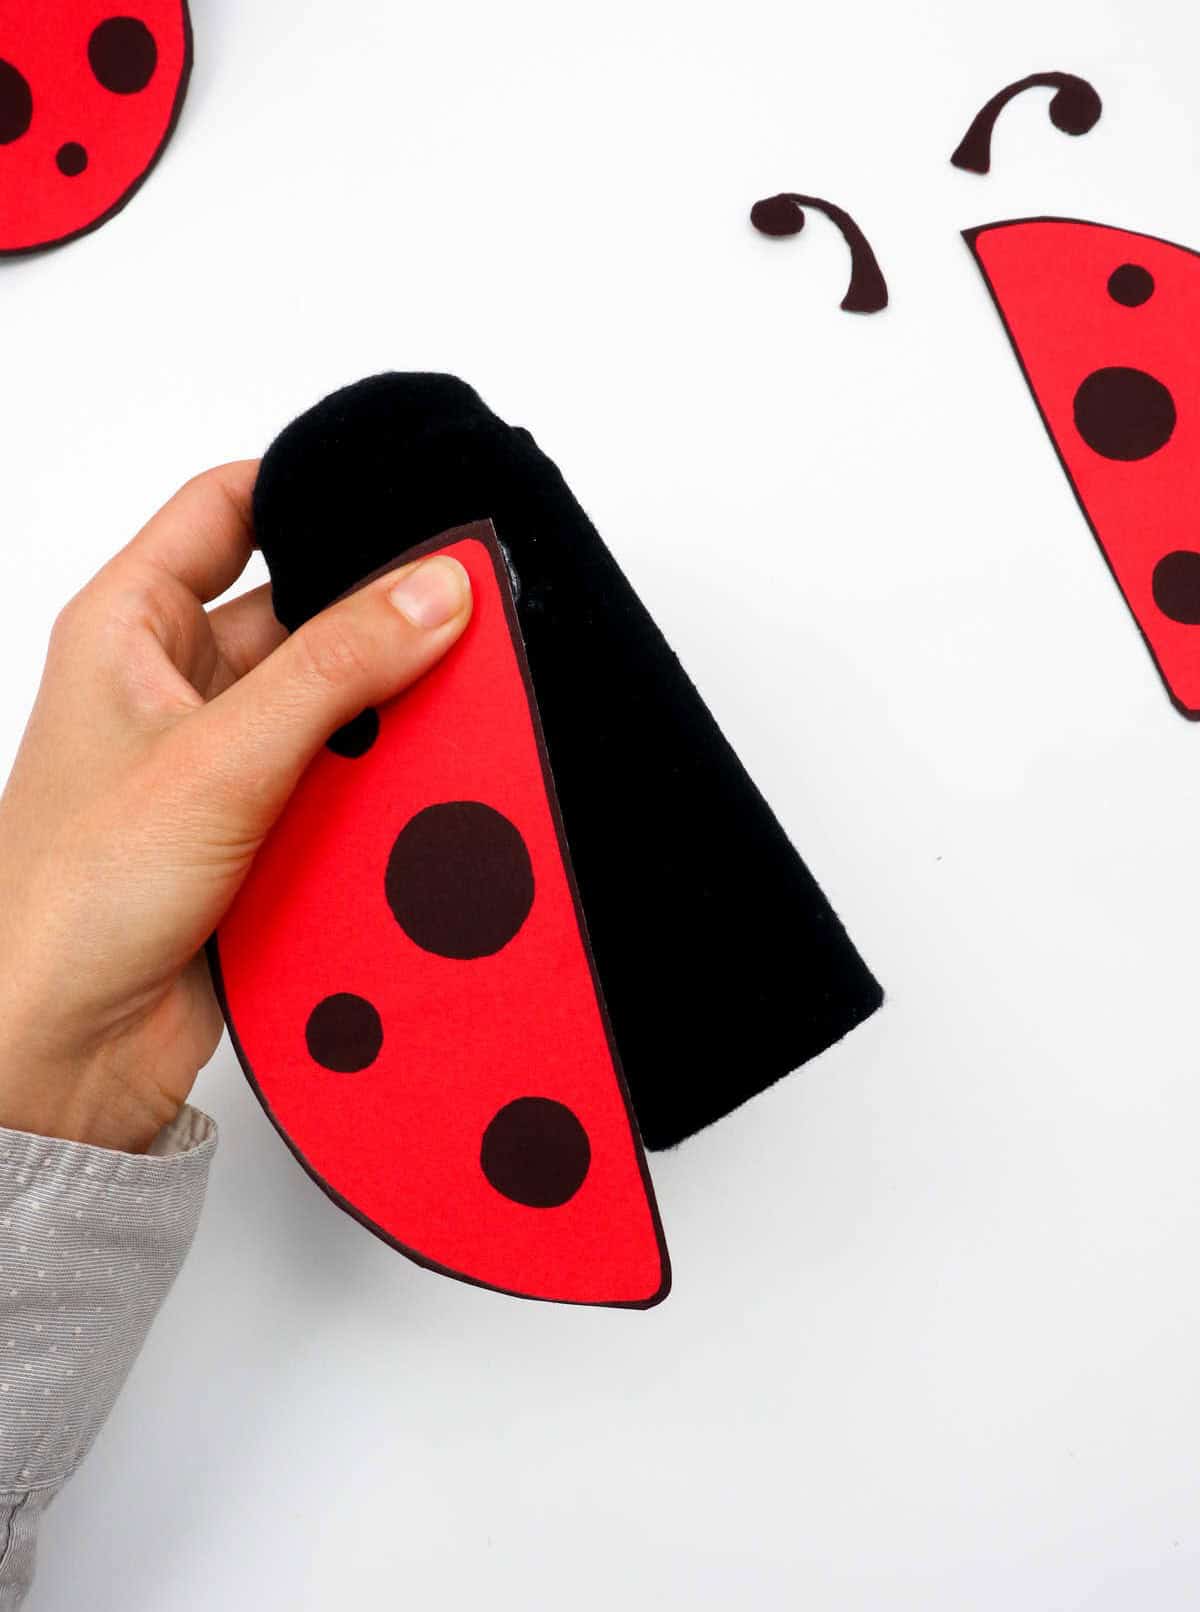
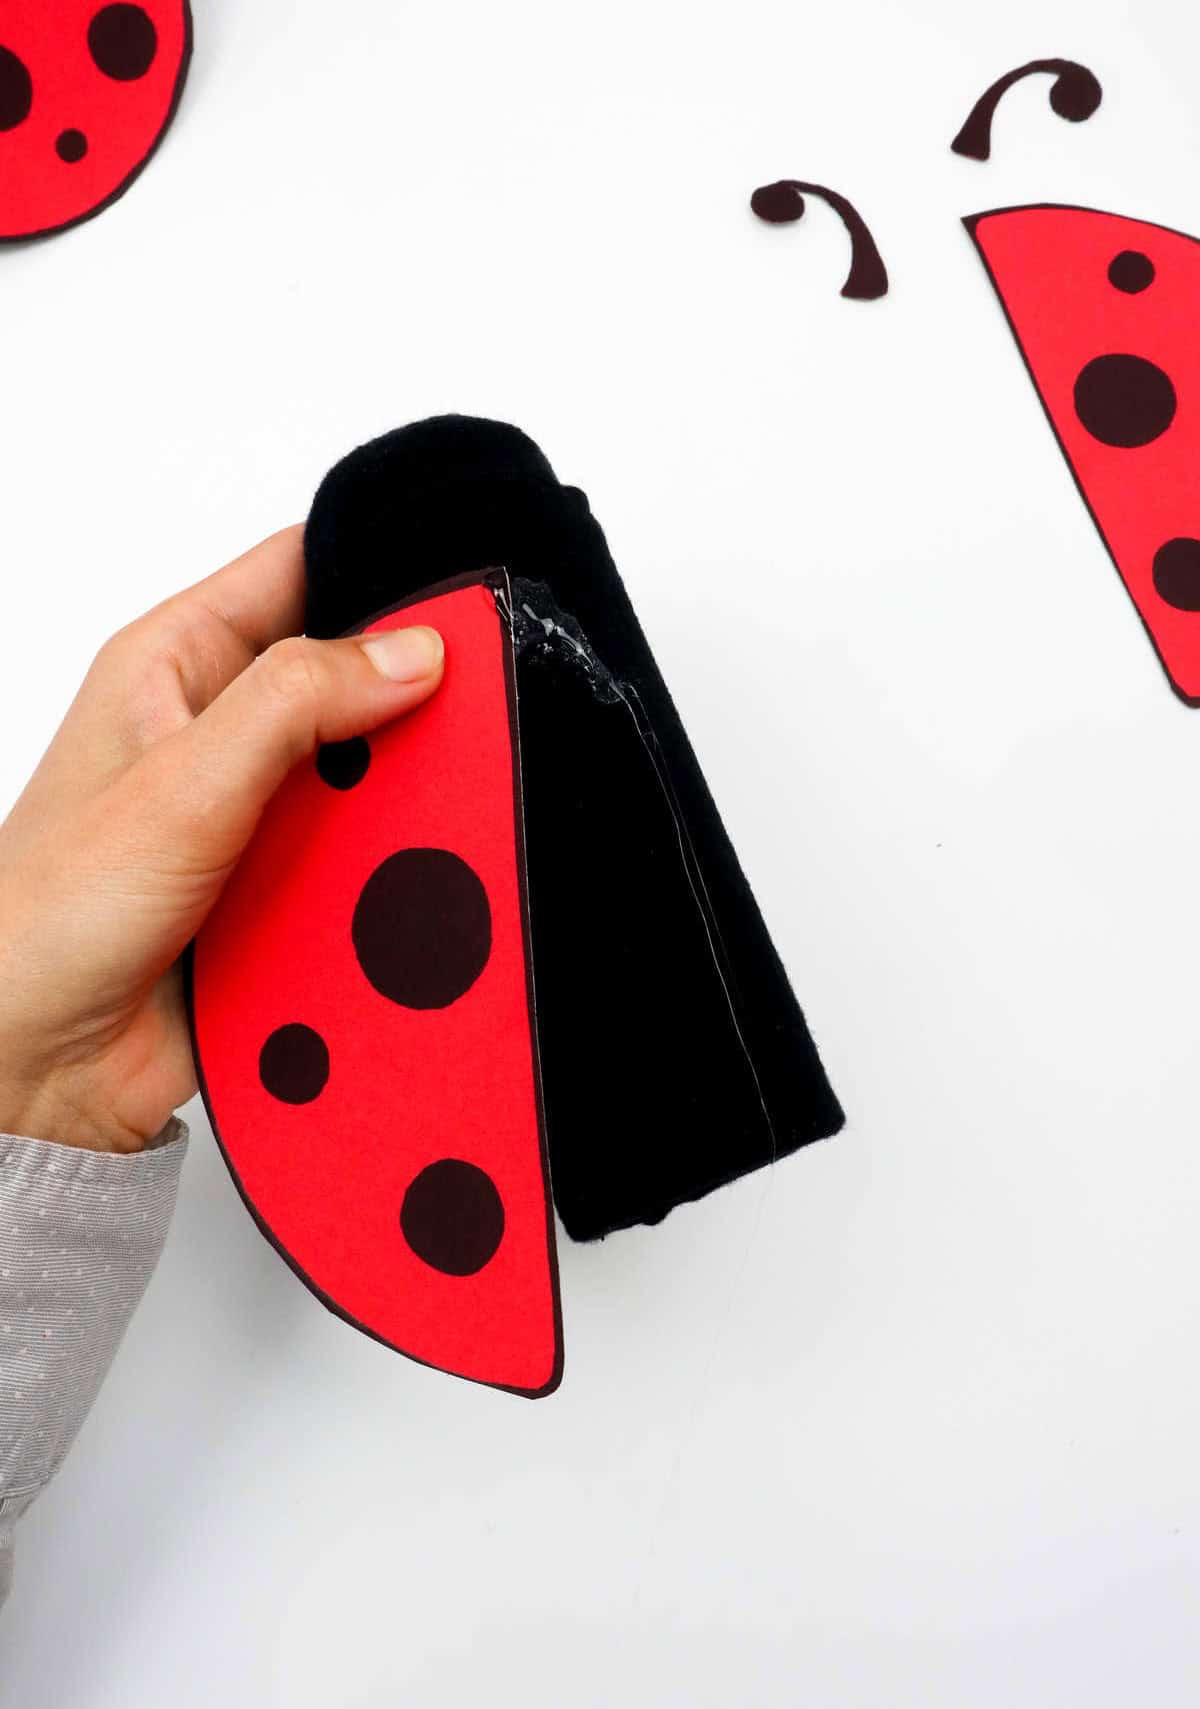
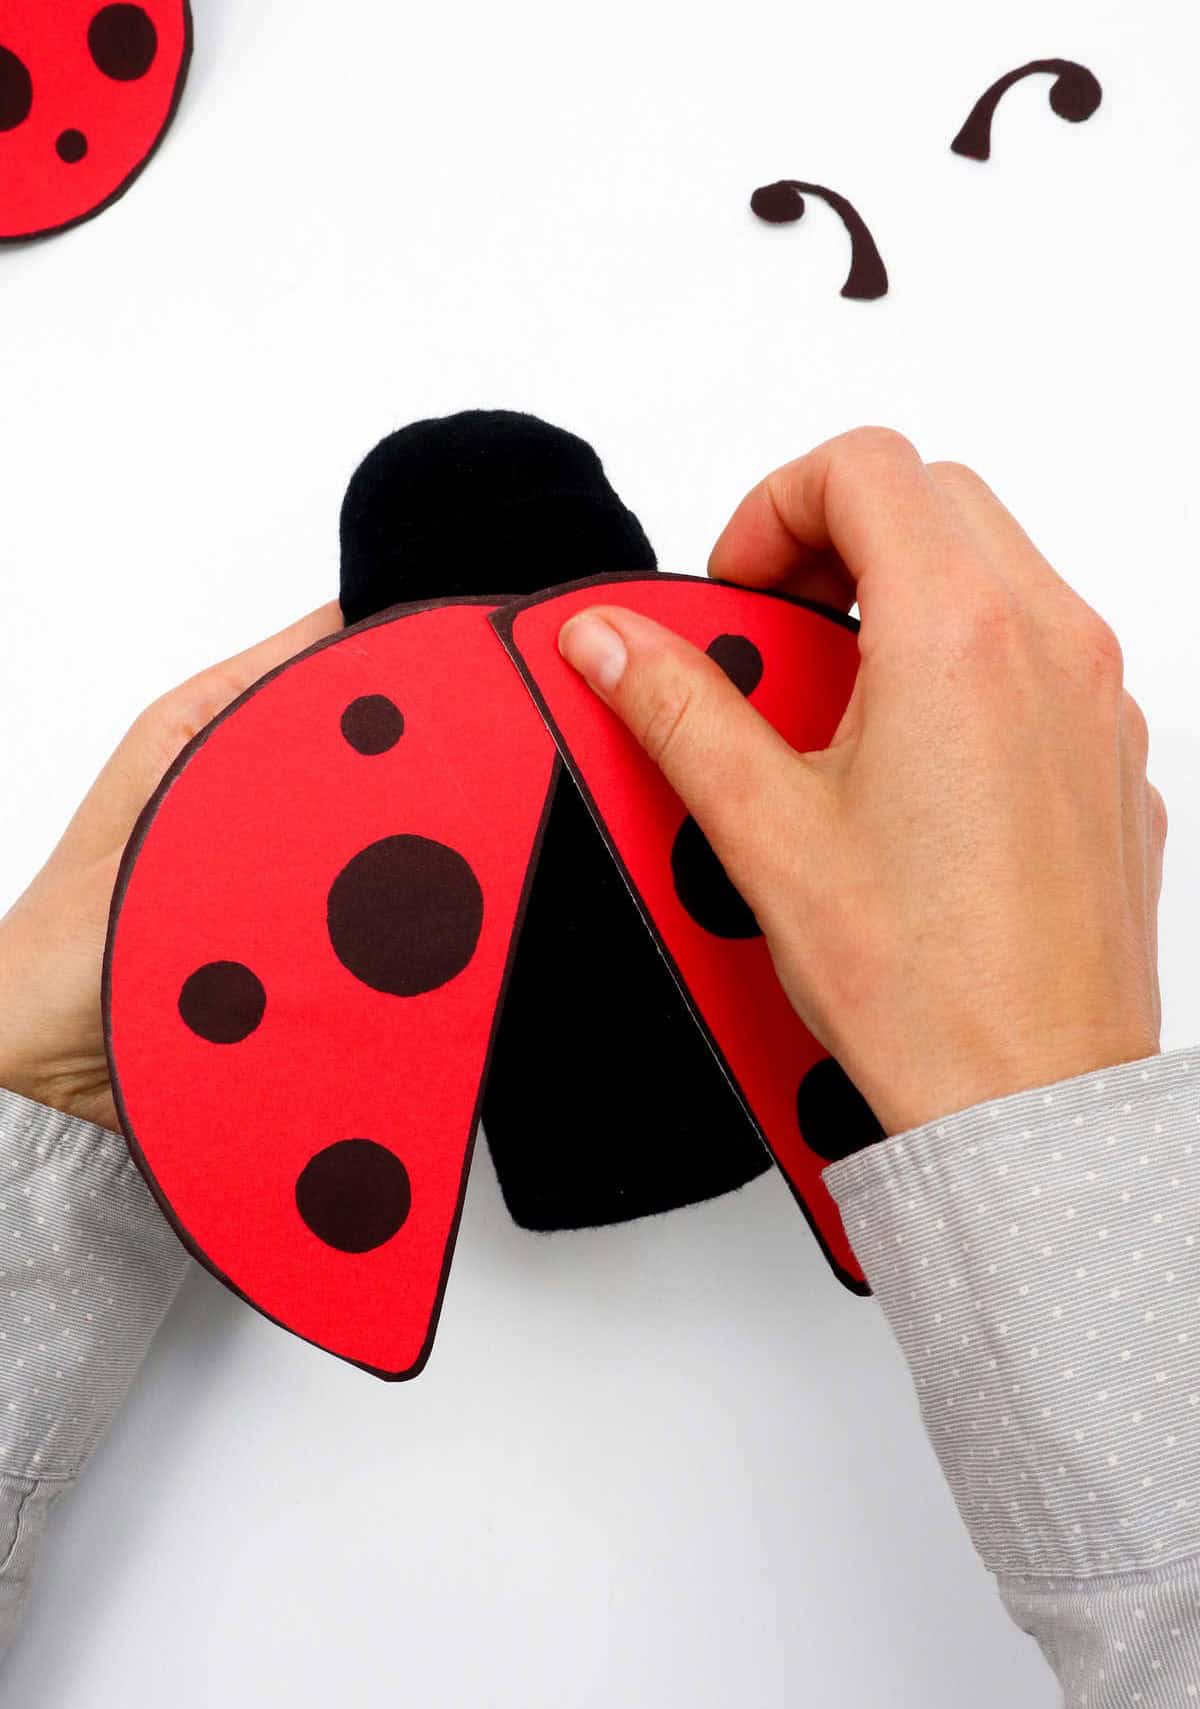
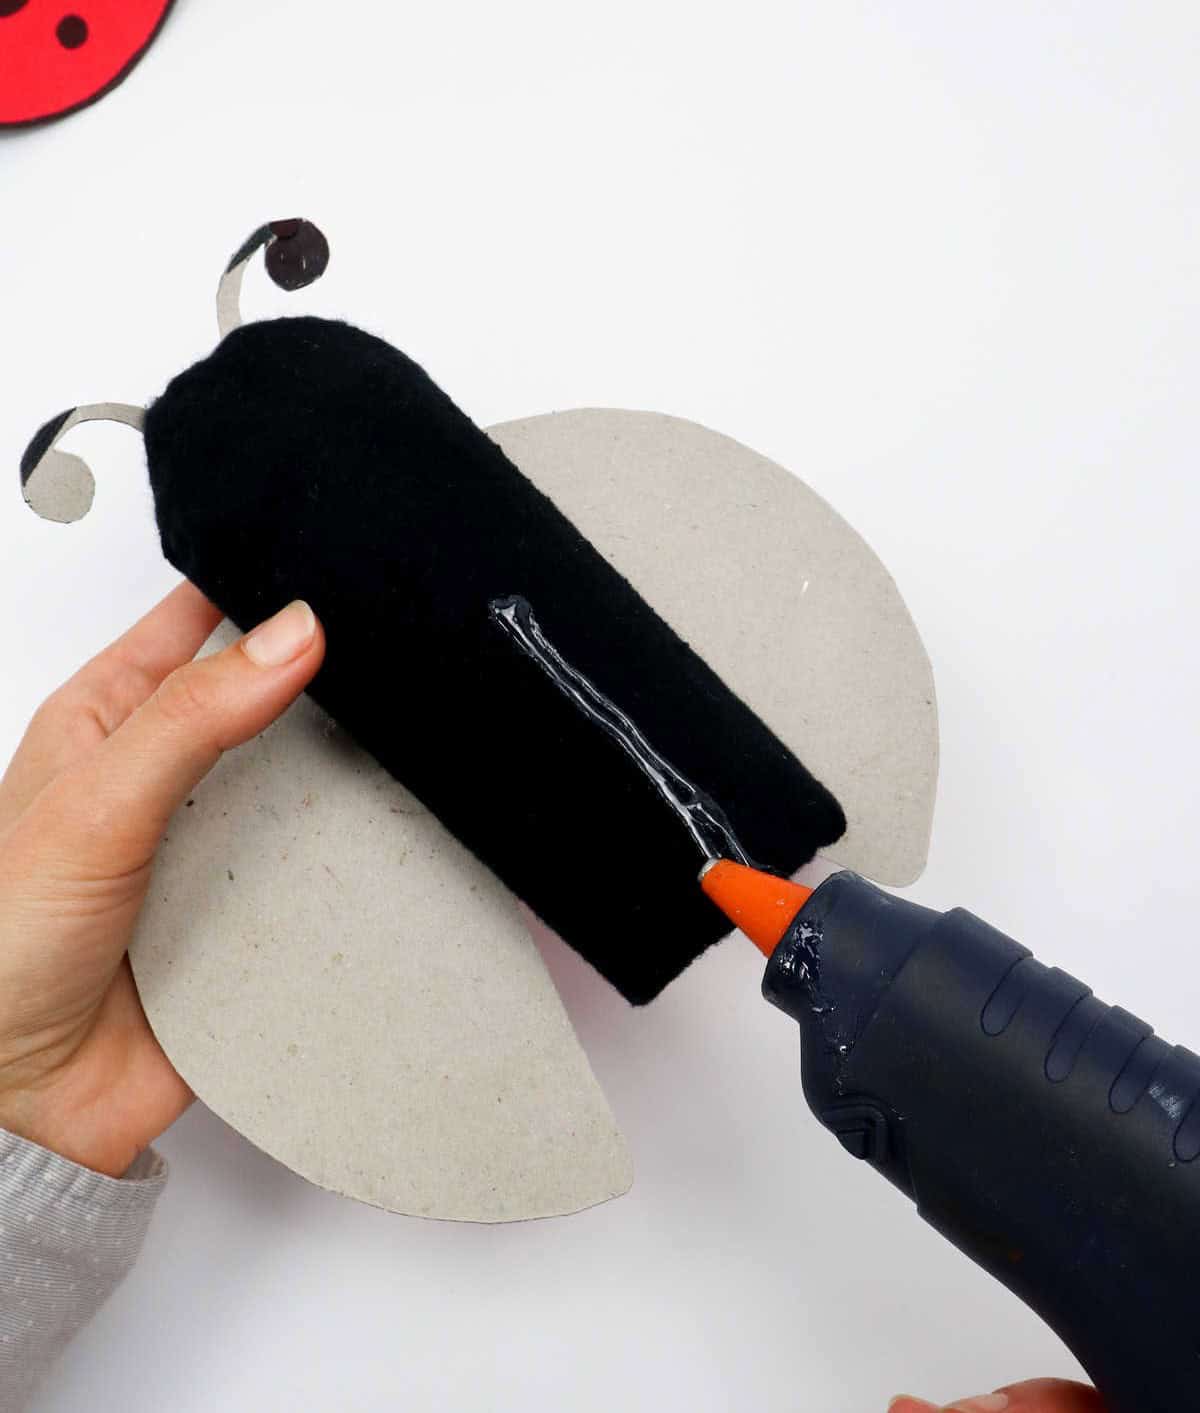
To attach the winds and antennae to the ladybug’s body, start by applying a small amount of hot glue to the ‘neck’ area. This is where you’ll be attaching the wings. Hold the paper firmly in place for a few moments to allow the glue to set and ensure it sticks properly. Once dry, repeat this process for the second wing, taking care not to glue the entire wing to the toilet roll. Only secure the top portion of each wing to maintain its natural shape and allow for easy movement.
Step 10
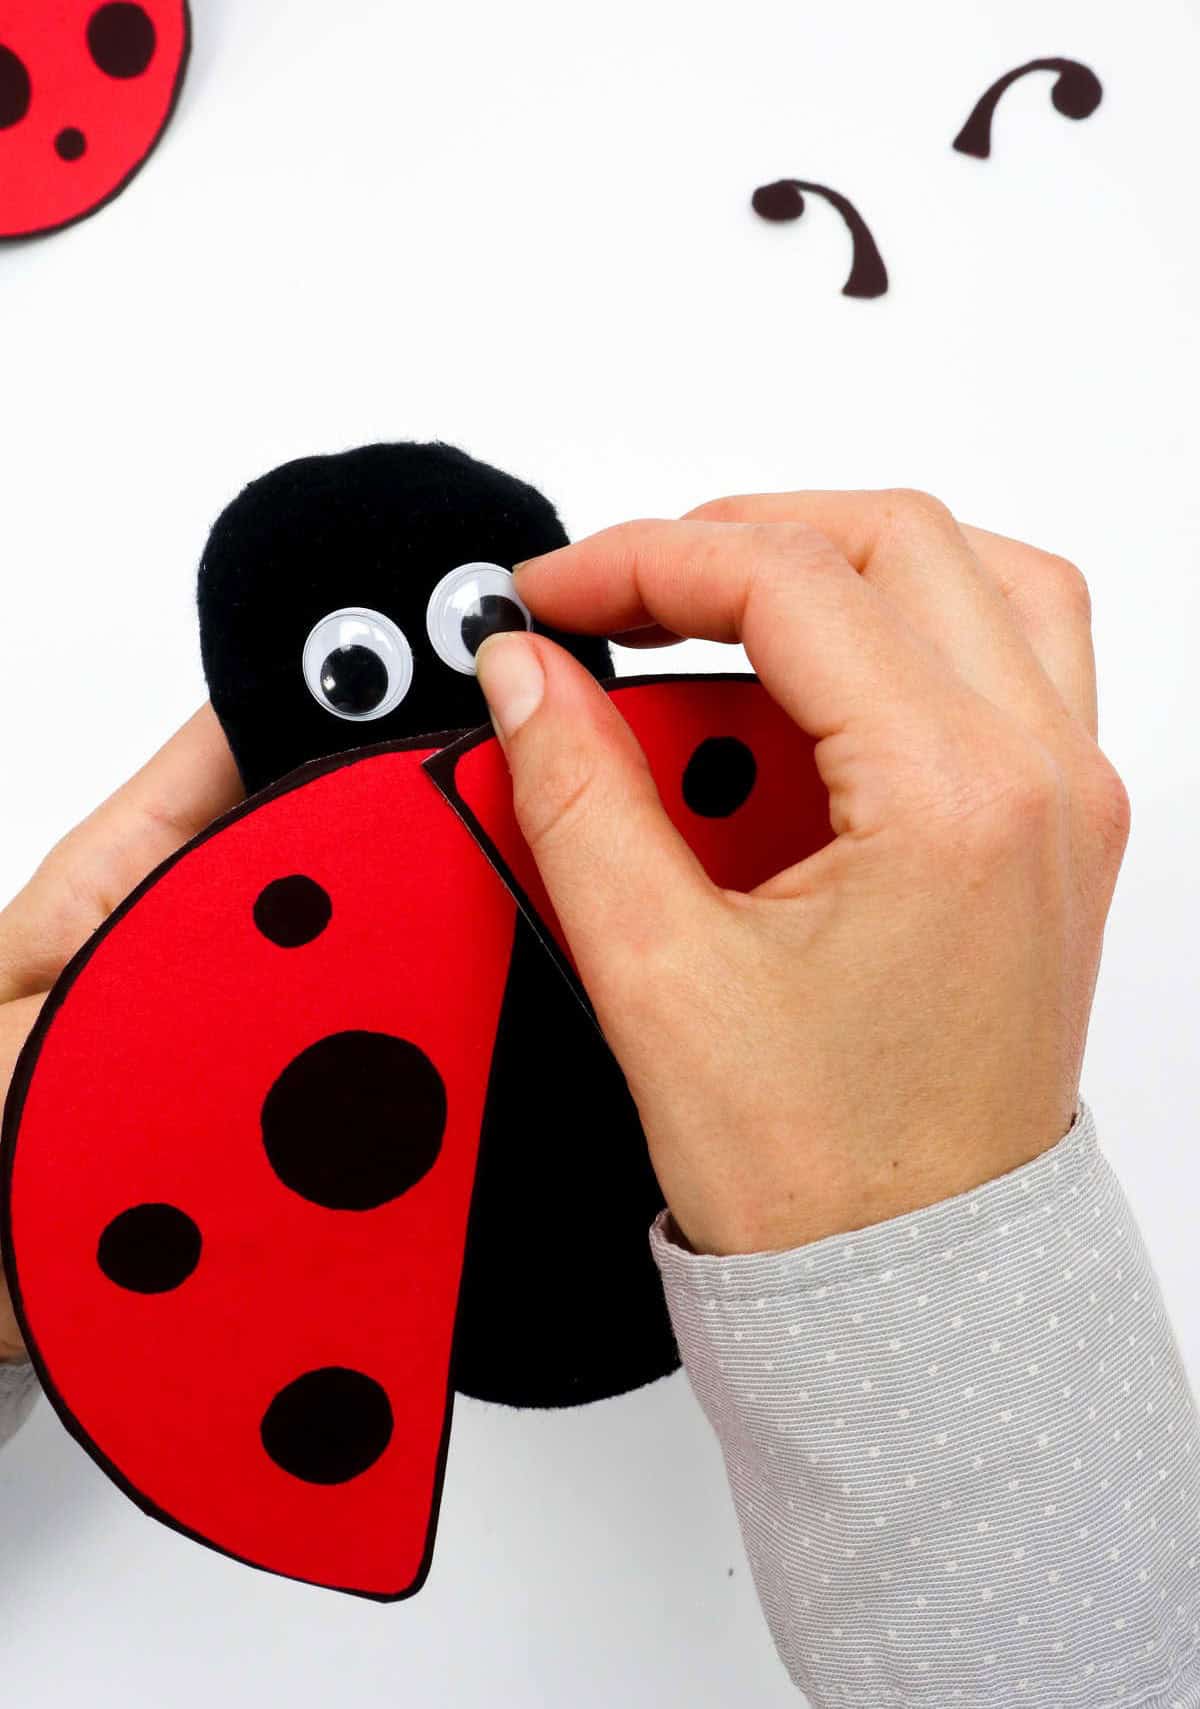
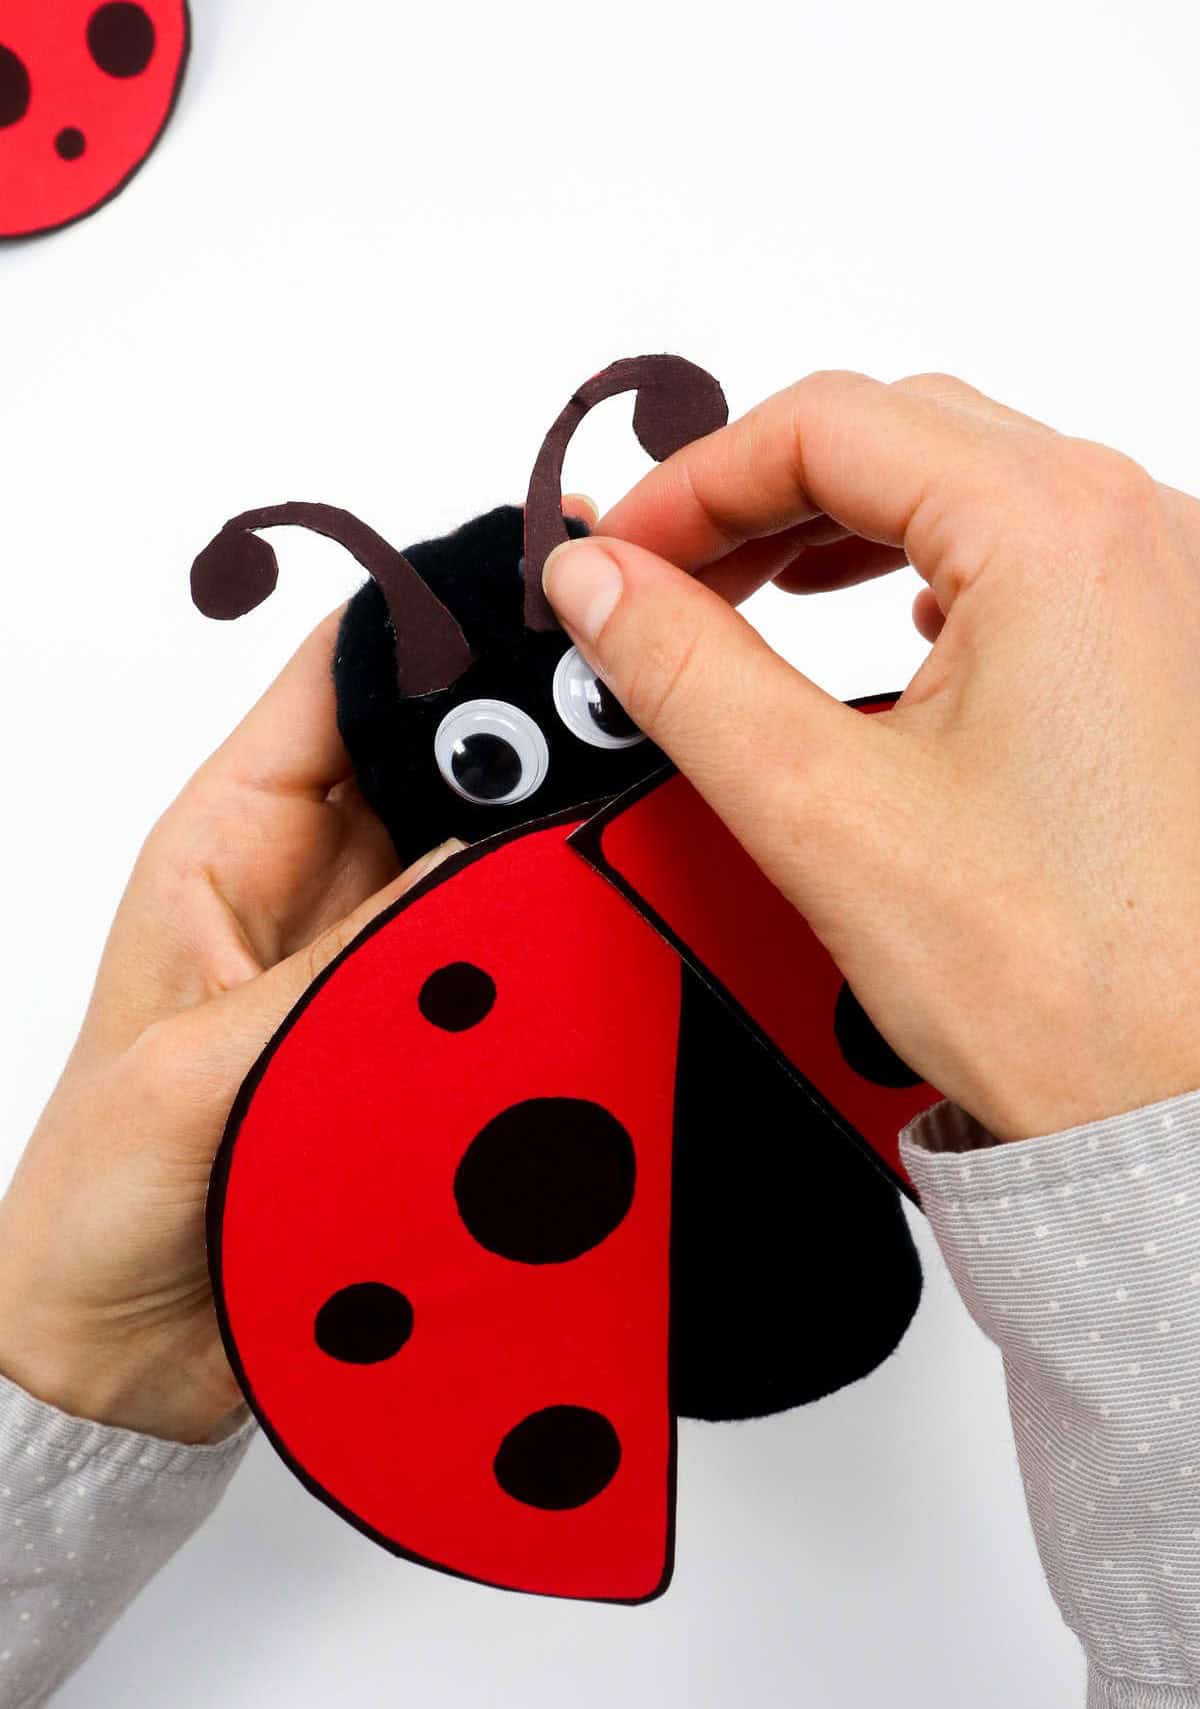
To add a dash of whimsy and character to your handmade ladybug, begin by attaching a pair of googly eyes to what will become its ‘face’. Using hot glue, carefully position these playful details onto the head of the insect, taking care to ensure they’re securely in place. Next, attach the antennae, completing the ladybug’s endearing features.
Step 11
While step 11 is entirely optional, it offers an opportunity to get creative and customize your ladybug further. You can choose to leave it as is or take it to the next level by attaching a clothespin to its back. This will enable you to transform your ladybug into a clip-on accessory that can be used to add a touch of whimsy to your workspace.
Who Can Make These Ladybugs?
This creative endeavour holds broad appeal across age groups, from tiny tots to pre-schoolers, who would undoubtedly adore its playfulness. However, its versatility doesn’t stop there – it’s equally captivating for older kids, tweens, and even teenagers and adults, offering a fun and engaging outlet for their creativity.
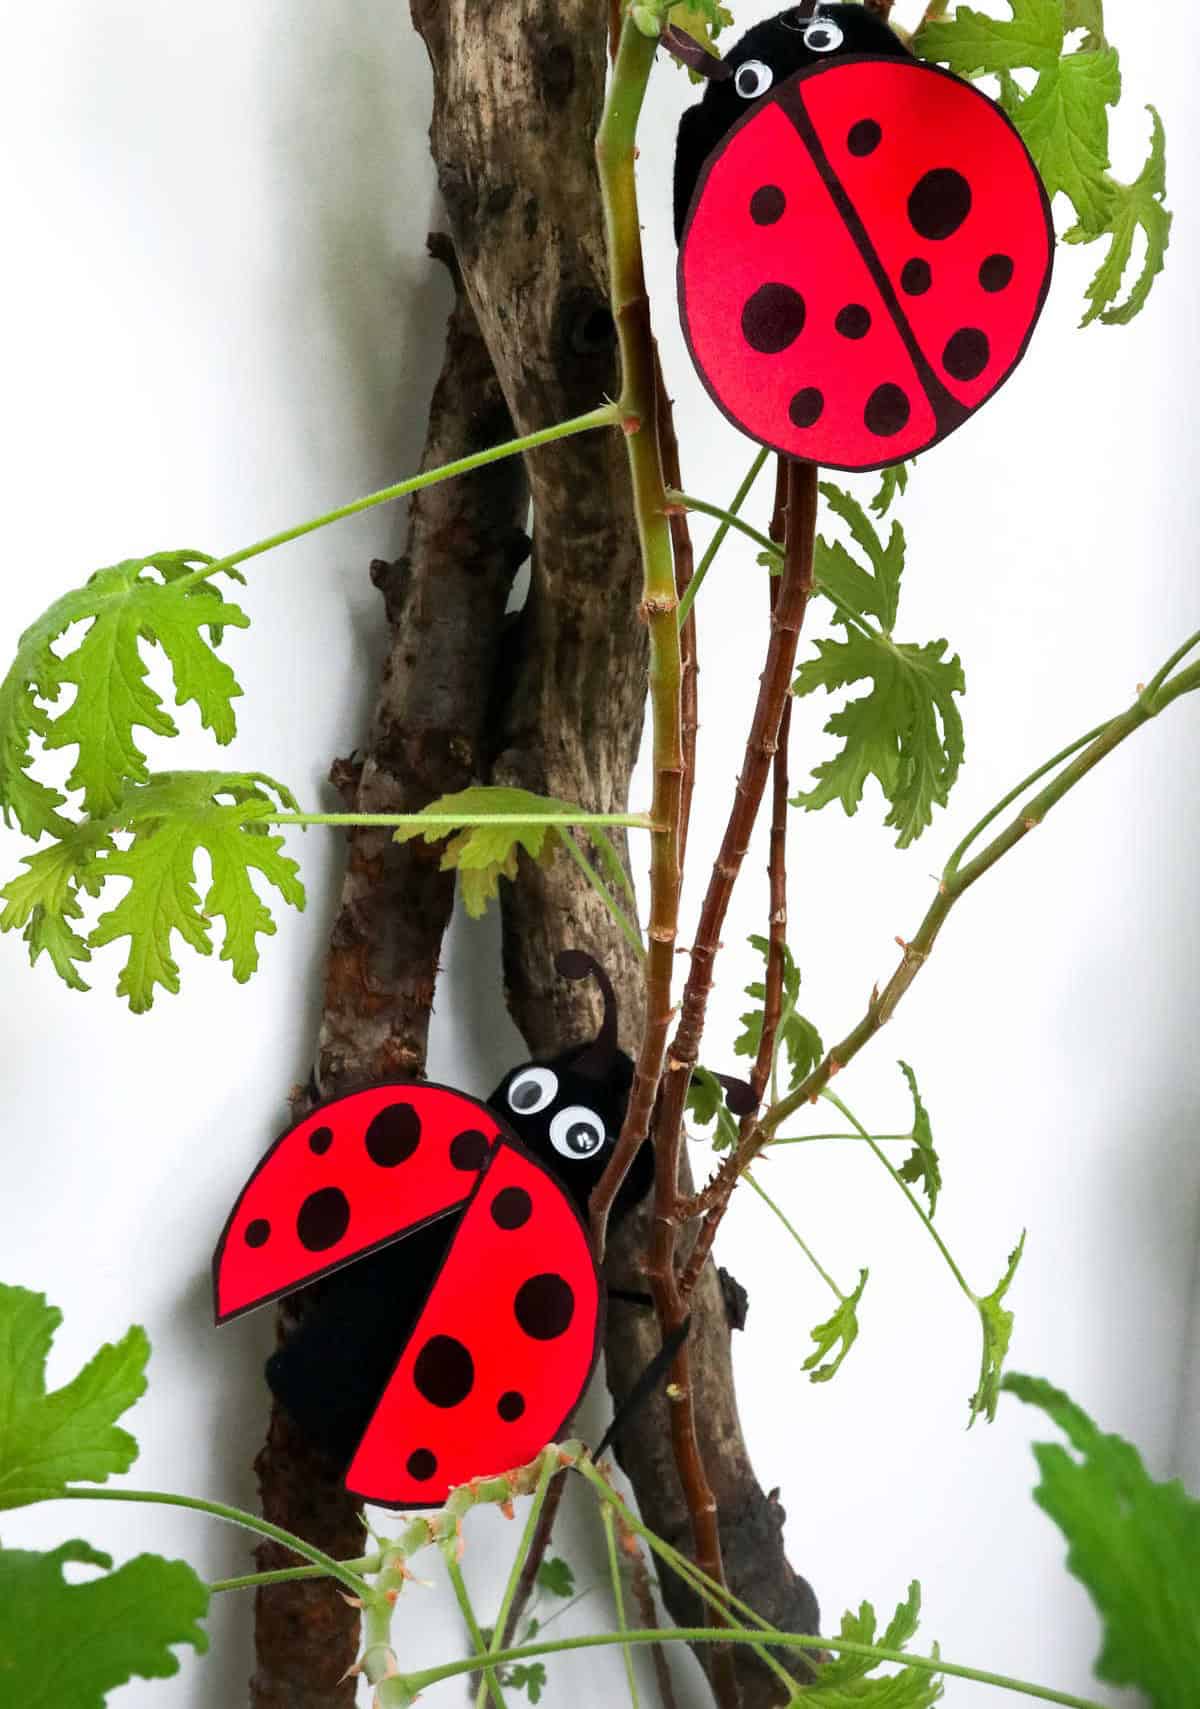
Where Can I Use These Ladybugs?
Imagine the effortless charm these ladybugs would bring to various surfaces within your home. Consider placing them strategically atop plants, where they can add a touch of whimsy to your botanical displays. Alternatively, use clothespins to secure them to your curtains, allowing their cheerful presence to peek out from behind the fabric folds.
You could also position them on your craft desk or your kids’ nightstand, where their playful energy can infuse creative spaces and inspire imaginative play. And why not use them as a delightful addition to a themed decorative arrangement, adding an extra layer of personality to your room’s decor?
Other Crafts You Can Make
There are countless creative outlets that can bring joy and fulfillment to our lives, and DIY projects are no exception. One such delight is crafting with paper, which has given rise to a plethora of fun and engaging activities. For instance, making squishies out of paper requires nothing more than some basic folding skills and a bit of patience, while creating flowers from the same material can be a great way to relax and express yourself artistically.
If you’re looking for something a bit more wearable, consider crafting a shoelace bracelet that’s both stylish and easy to make. On the other hand, if you’re feeling whimsical, why not try your hand at turning a toilet roll into a unicorn? The possibilities are truly endless when it comes to paper crafts, with over 36 different construction paper projects waiting to be explored.
For those who love crafting with little ones in tow, there are no fewer than 31 toddler-friendly activities to enjoy together. Summer is also an excellent time to get creative, with 31 fun and easy summer crafts for kids that can help beat the heat and keep imaginations fired up. And if you’re looking for something a bit more low-key, consider making one of the many paper roll crafts available – there are at least 20 different options to choose from!
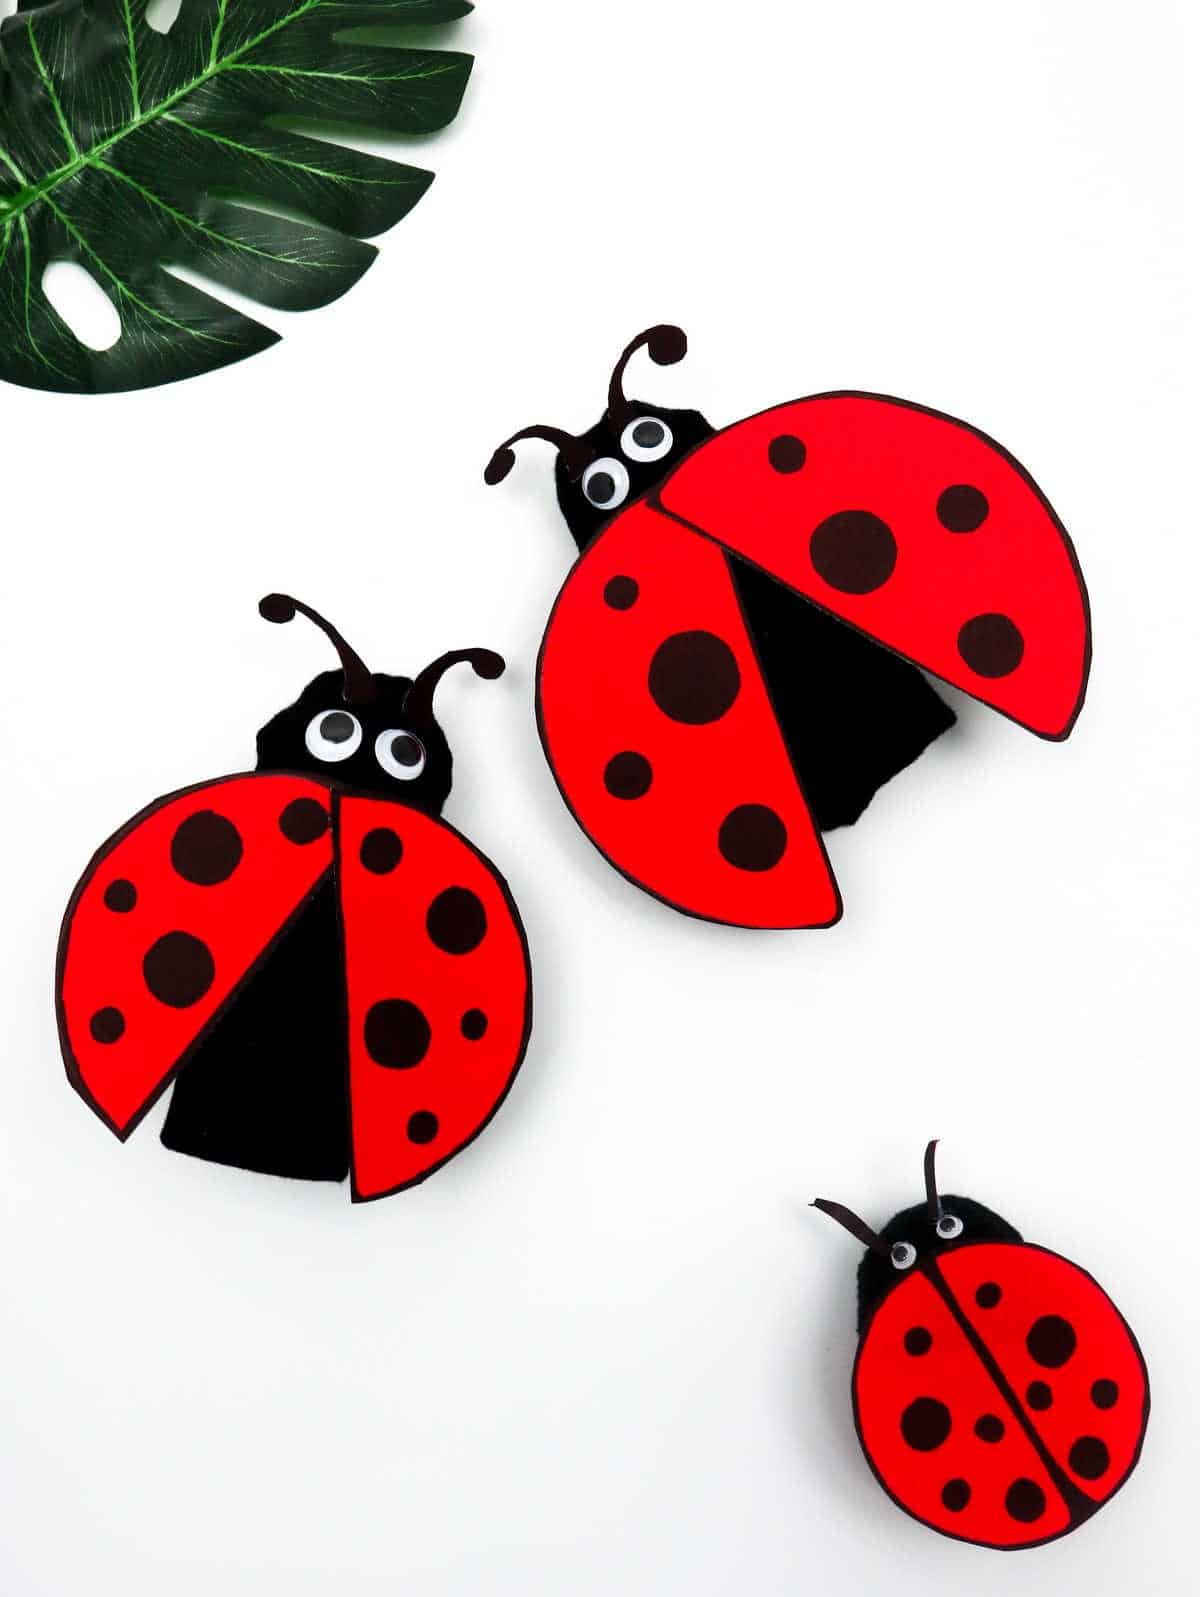
Ladybug Craft Out of Toilet Paper Roll
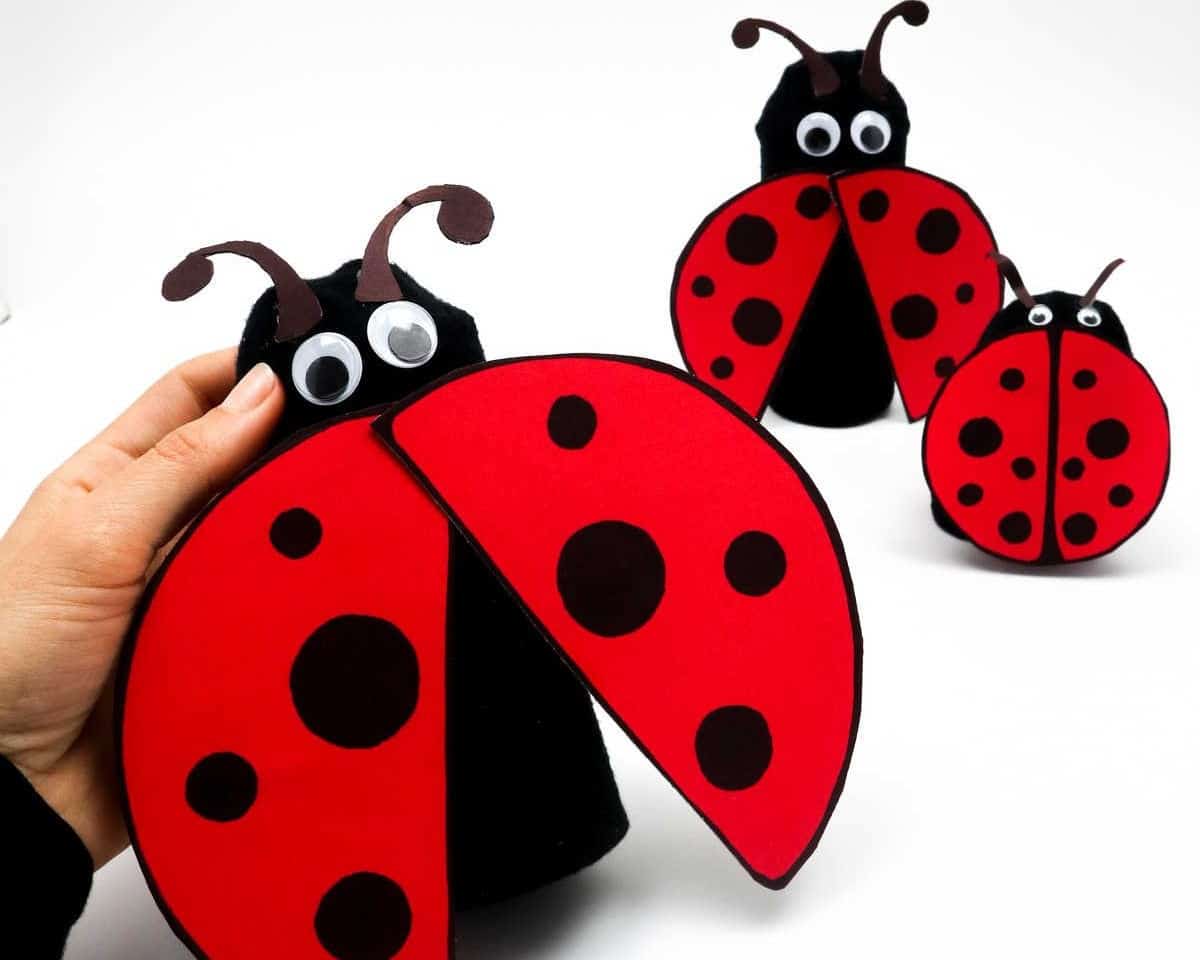
Transform ordinary toilet paper rolls into charming DIY ladybugs, perfect for a fun and creative activity with kids and teens. This upcycling project requires only 25 minutes of active time, plus an additional 5 minutes to prepare, making it a quick and engaging DIY endeavor.
Equipment
To keep yourself engaged and focused, it’s essential to create an environment that minimizes distractions. This includes taking steps to prevent your screen from going dark. To do this, try keeping the following tools within reach: a pair of scissors for quick cuts or edits, a black marker for jotting down notes or highlighting important points, a hot glue gun for those creative projects, and a compass with a pencil for sketching out ideas.
With these simple yet effective tools at your disposal, you’ll be well on your way to staying focused and productive.
Materials
To create a unique and quirky gift, you’ll need a few unusual items. Start by gathering a toilet roll, which will serve as the base of your creation. Next, grab a thick red A5 sheet of paper that’s sure to add a pop of color to your project. You’ll also need a pair of black socks, which might seem like an odd choice but trust us, they’ll play a crucial role in the final product.
To give your gift some extra personality, consider adding wiggle googly eyes – these will undoubtedly bring a smile to the recipient’s face. Finally, if you’re feeling extra creative, you can use a single clothes peg to add an extra layer of whimsy to your design.
Instructions
To initiate this project, collect all the necessary supplies as listed. Begin by creating a compact shape with one sock and then place it inside another, leaving no space at the end. Next, position the toilet paper roll within the sock until it reaches the balled sock. Secure the ends of the sock around the roll to achieve a smooth finish. Grab your compass and measure half the height of the toilet paper roll, or adjust according to preference.
On red paper, draw a circle without altering its radius – equivalent to half the toilet paper roll’s height. Use a black marker to define the pencil outline. Draw a central line and divide the circle into two equal hemispheres. Fill in the circular patterns on either side of the centerline. Don’t forget to add antennae details. Cut out the separate components using scissors, including the two hemispheres and antenna shapes.
Adhere one wing’s top edge to the toilet paper roll, holding it until it secures. Repeat this process for the second wing. Apply googly eyes and then attach the antennae. To facilitate attachment of the ladybug to various surfaces as needed, consider attaching a clothespin to the roll’s base.