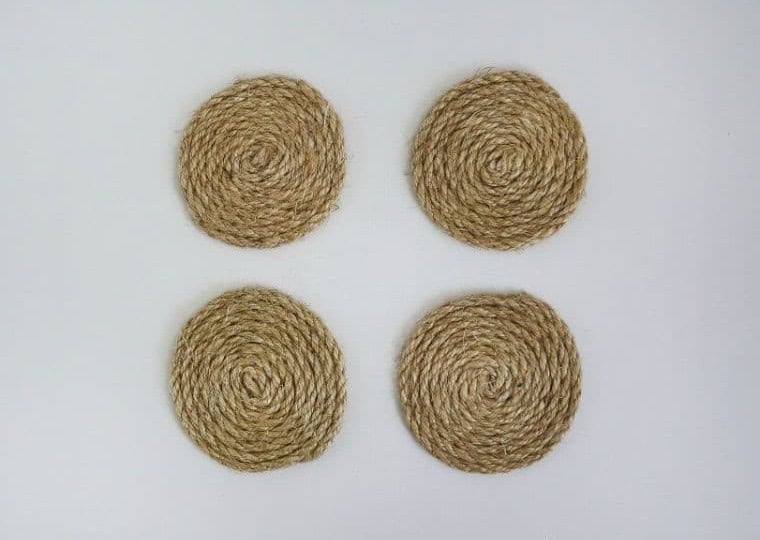
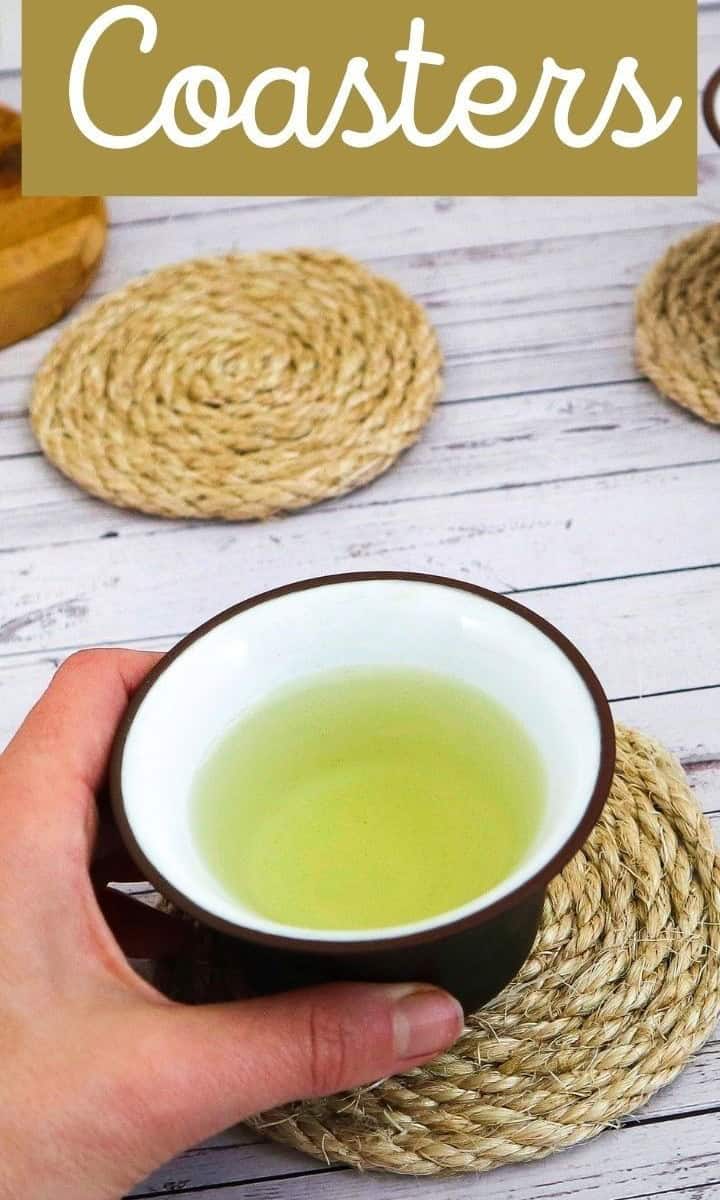
Elevate your home decor without breaking the bank by creating simple and easy DIY rope coasters. These coastal-inspired accessories are perfect for adding a touch of beachy charm to any room.Rather than splurging on pricey store-bought options, you can achieve the same laid-back ambiance at a fraction of the cost. The best part? You can customize your coasters with different rope colors or materials to fit your unique style and vibe.
What You’ll Need for Coasters
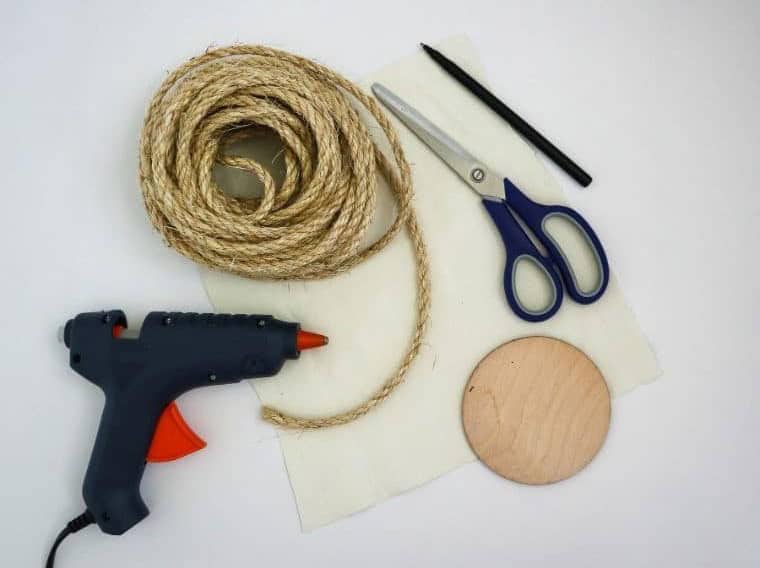
When it comes to crafting a unique and personalized ornament, you’ll need some essential tools. First, gather your materials: thick manilla rope for added texture and durability, a trusty hot glue gun for securing everything in place, a pair of sharp scissors for trimming any excess material, a reliable pen for jotting down notes or adding decorative details, a piece of paper or fabric for adding a touch of creativity, and a sturdy wooden circle, disc, or CD as the base of your ornament.
How to Make DIY Rope Coasters
Step One
Now that you’ve gathered all the necessary materials, it’s time to begin crafting your coasters. While any material can serve as the foundation, I opted for fabric due to its pliability and lightweight nature. Alternatively, you can choose not to use a base at all, but knowing the ideal size of each coaster is crucial. To achieve this, you’ll need a template or base shape.
For my example, I employed a circular piece of lightweight wood, though cardboard or even a CD could also work effectively as a substitute. Next, simply trace the outline of your chosen base onto the material using a pen.
Step Two
Seamstresses, get ready to snip! Start by carefully cutting out the fabric piece, ensuring you’ve selected a durable material that resists fraying. A well-chosen fabric is crucial, as it will withstand repeated use without compromising the integrity of your craft project.
Step Three
To get started with creating your macrame coaster, you’ll need to prepare the rope first. Regardless of whether you’re using traditional macrame rope or repurposing an old piece from your garage, it’s crucial to make it workable. Begin by winding the rope into a shape that approximates the length needed for your coaster, then cut out that section. To avoid running short, it’s better to err on the side of caution and have a bit of extra rope.
When cutting the rope, try angling the scissors slightly to create a pointed tip. This will make it easier to reattach the tip to the main rope later, allowing for a tighter loop in the middle.
Step Four
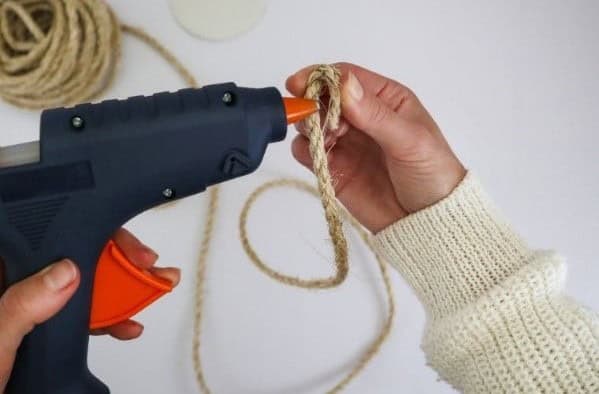
With the hot glue gun at the ready, carefully reattach the angled tip to the main body of the rope, creating a loop shape. Apply a generous amount of adhesive to secure this shape in place, ensuring the loop remains taut and even. This initial application will serve as the foundation for the coaster’s central core.
Step Five
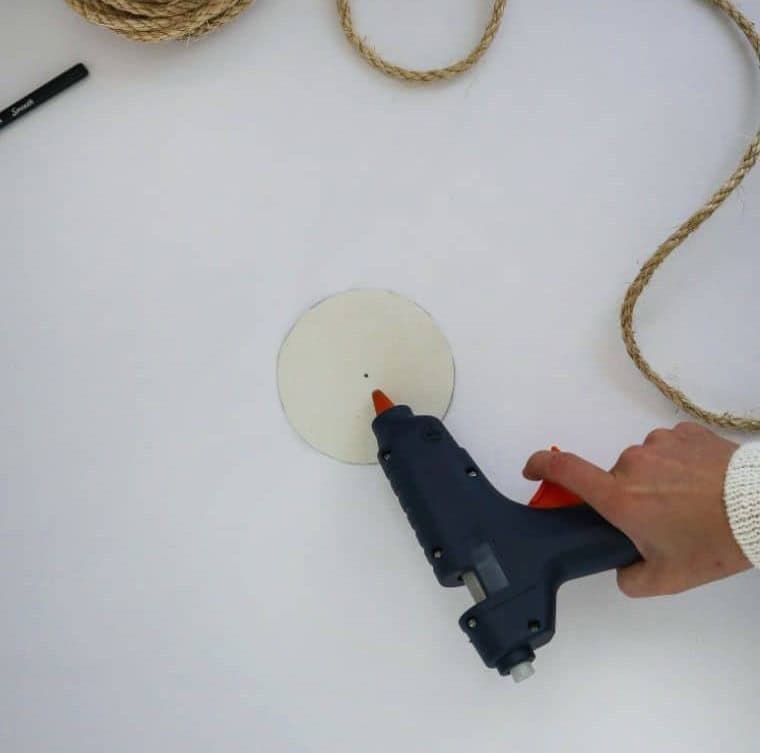
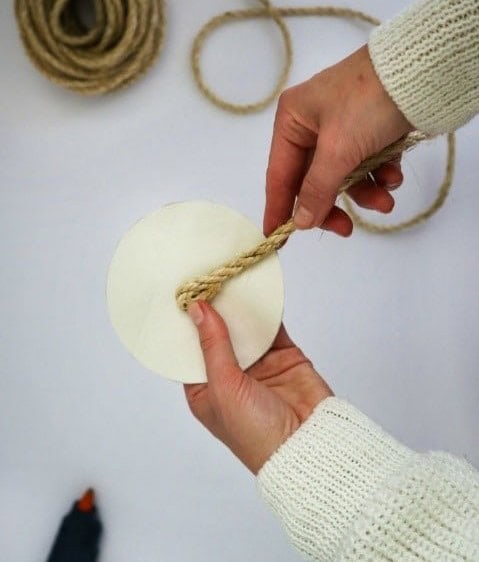
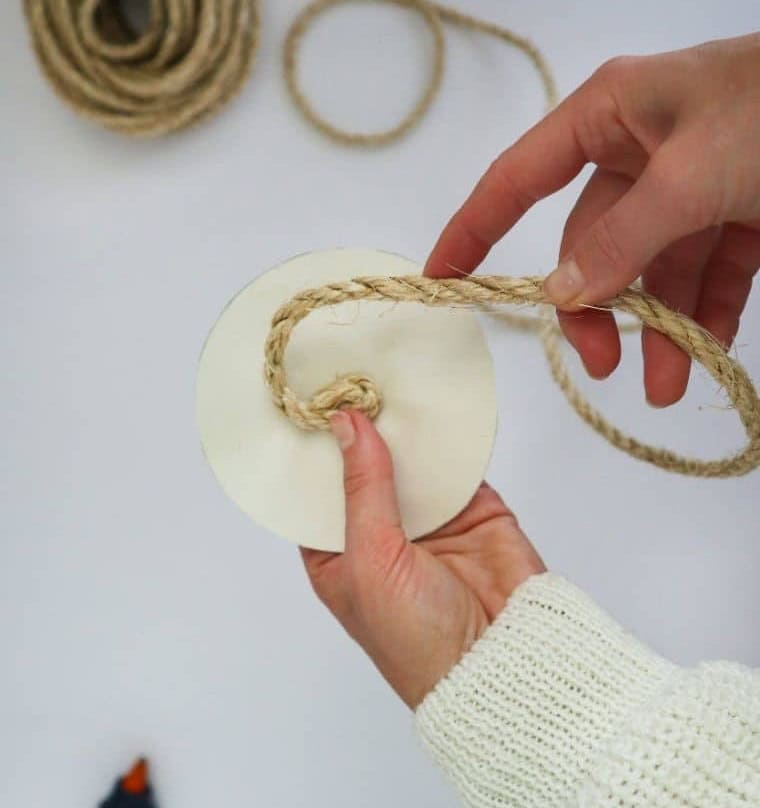
To initiate the winding process, first locate the central axis of your base using your pen to create a precise mark. Next, position the glued loop directly atop this marker, ensuring it is securely fastened. This marked point will serve as the foundation for your coaster’s design.
Step Six
To secure the rope’s center, begin wrapping the cord around the core while ensuring each loop is pulled tight as you progress. Utilize hot-glue to set the loops in place, strategically adding them where needed to maintain stability. As you work, confirm that each loop is held firmly for sufficient time to allow the adhesive to reach tackiness before proceeding with winding. Failing to do so may result in a messy and complex arrangement.
Step Seven
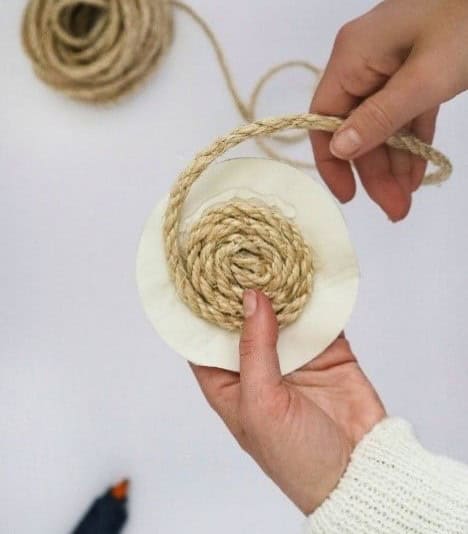
As you approach the outer edges of your coaster, maintain consistent tension to ensure tight loops. This is crucial for building a robust and stable structure that can withstand wear and tear. Moreover, keeping those loops snug will also yield a visually appealing result. To achieve this, start by applying a thin layer of glue as the foundation, followed by carefully winding the rope on top. Be cautious not to overdo it with the adhesive – just the right amount is key.
Step Eight
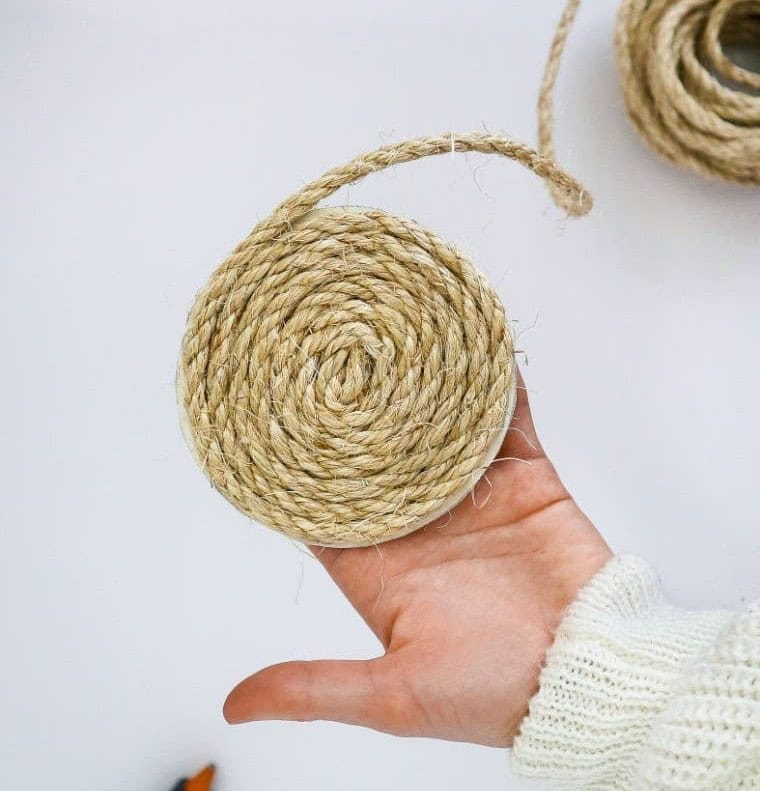
When completing the winding process, it’s essential to stop at the edges of your base or once you’ve achieved the desired size. If using a base, ensure you don’t overwind, leaving a substantial portion of rope for later manipulation. In the absence of a base, simply pause when the coaster reaches the desired dimensions. A generous amount of rope should remain at the end, which will be crucial for trimming and adhering to the finished product.
Step Nine
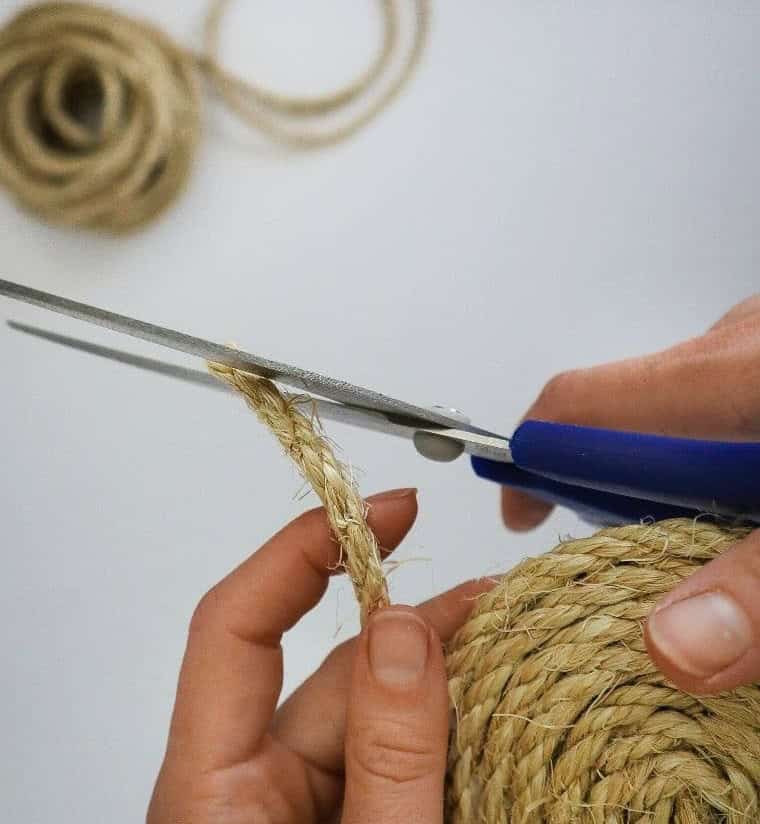
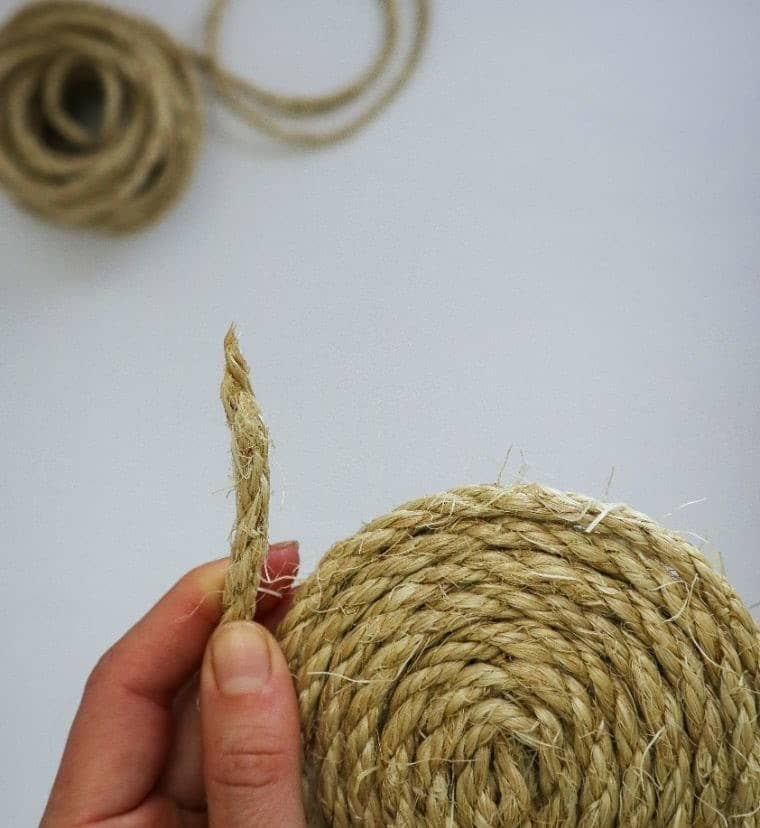
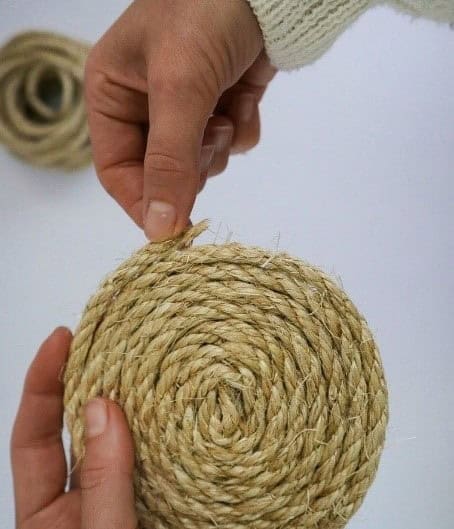
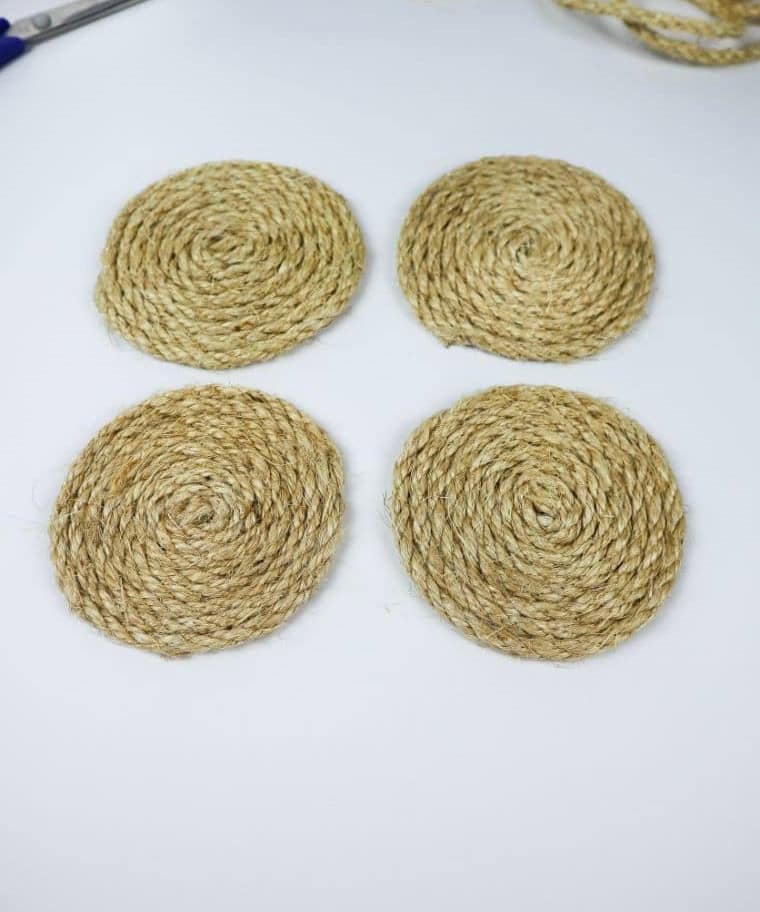
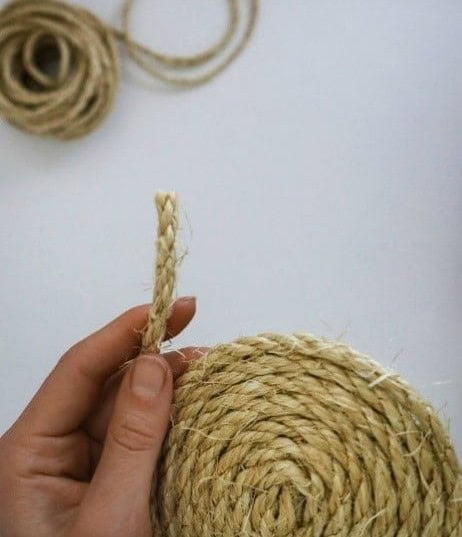
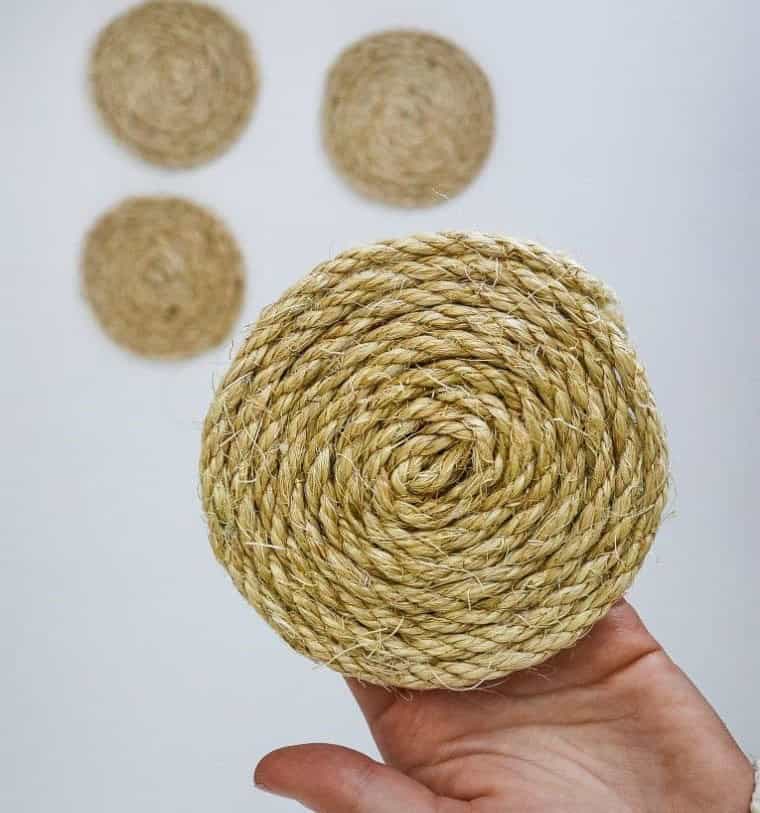
To achieve a smooth circle with your rope coaster, it’s crucial to address the bulky end of the rope. Simply gluing it in place can result in an uneven appearance due to the chunky tip. To rectify this, cut the rope at an angle, just as you did when forming the starting loop, to create a pointed tip. This will provide a more seamless integration with the rest of the coaster. Once you’ve achieved this, apply glue to the point and secure it to the finish.
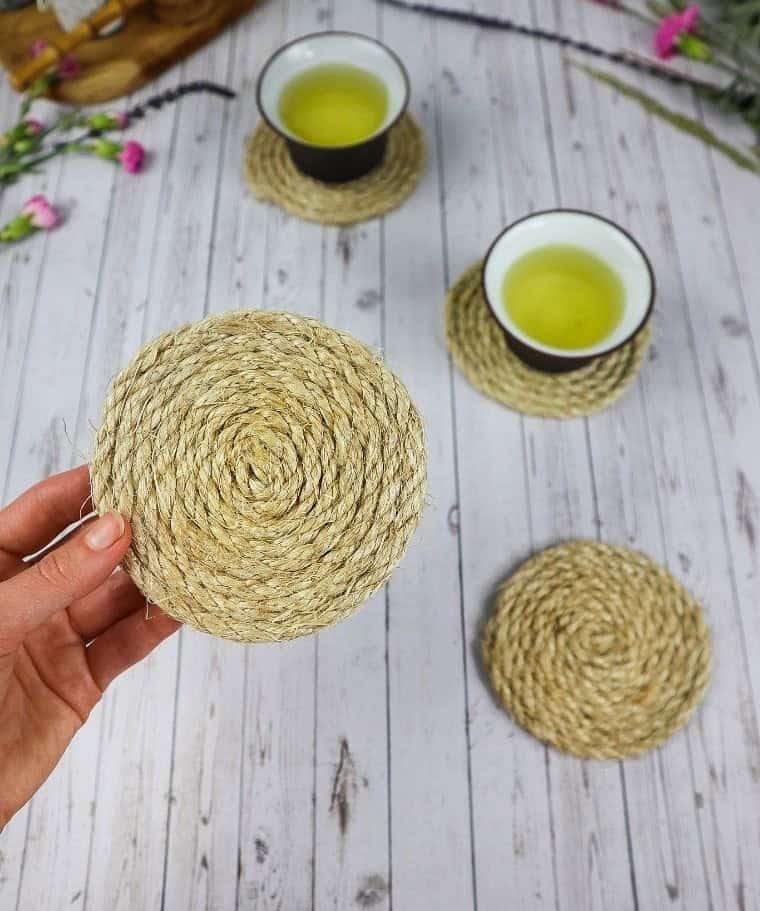
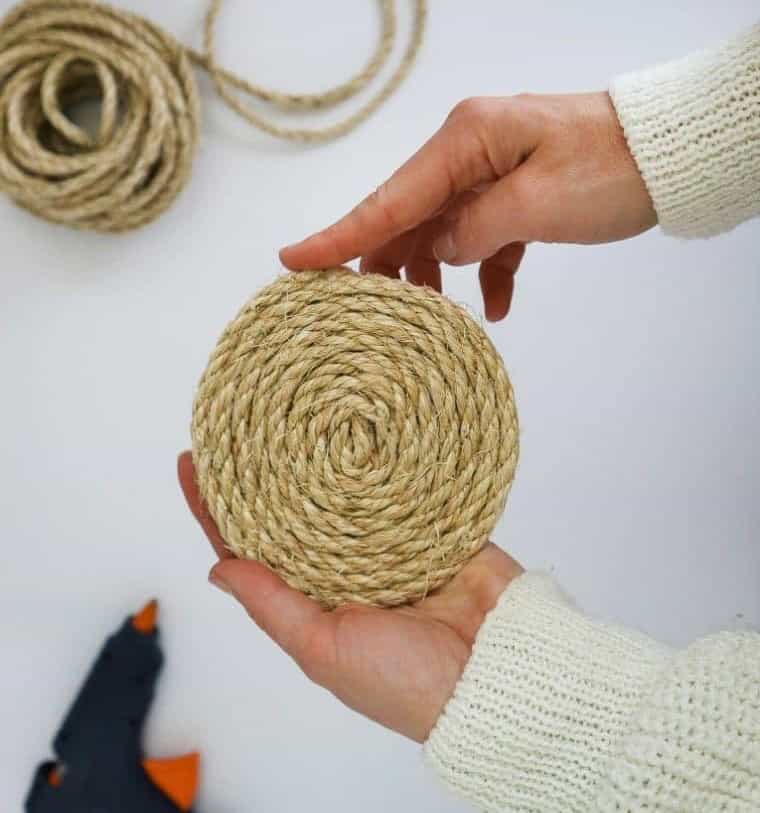
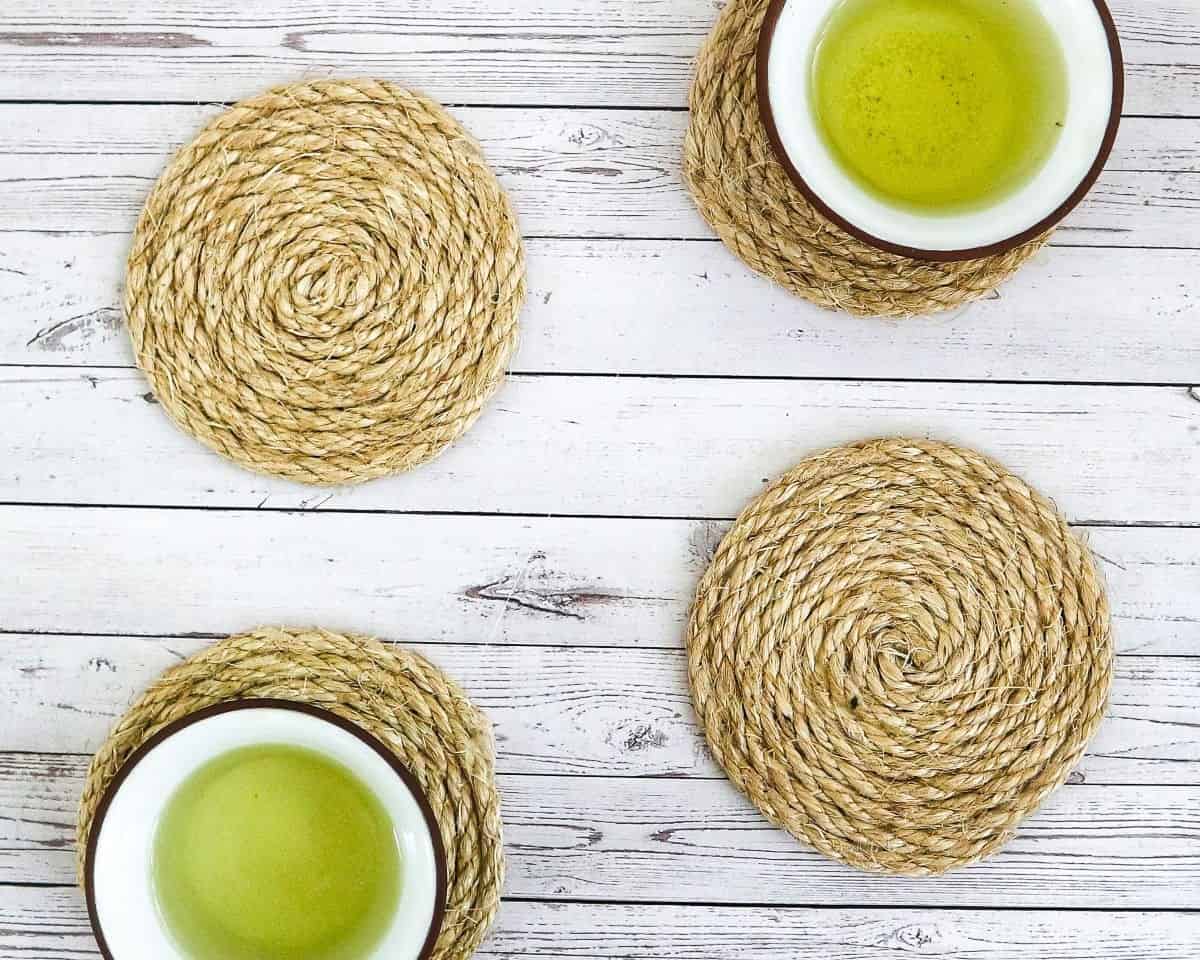
With this technique, you’ll be able to craft multiple rope coasters with ease.
What Can You Use These Rope Coasters For?
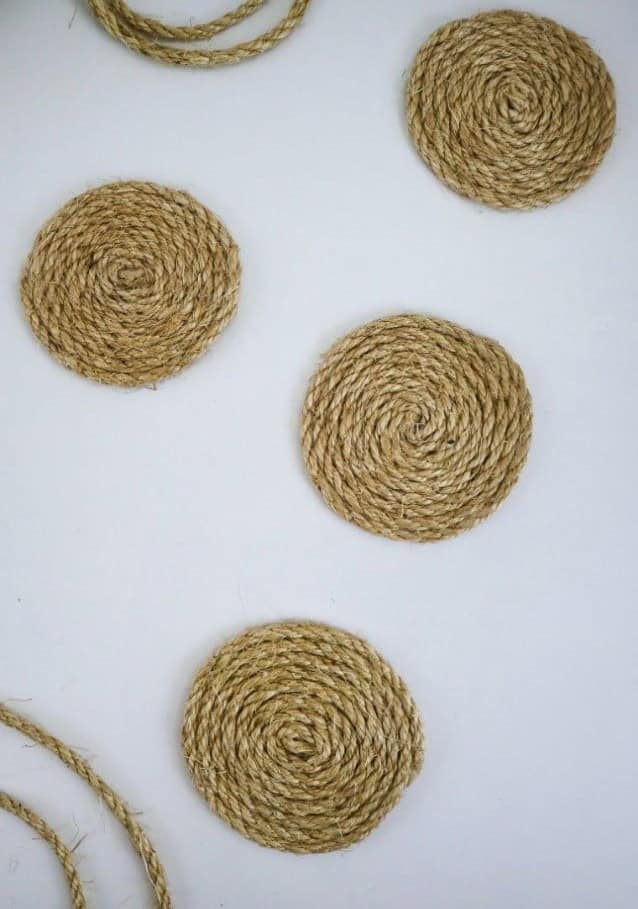
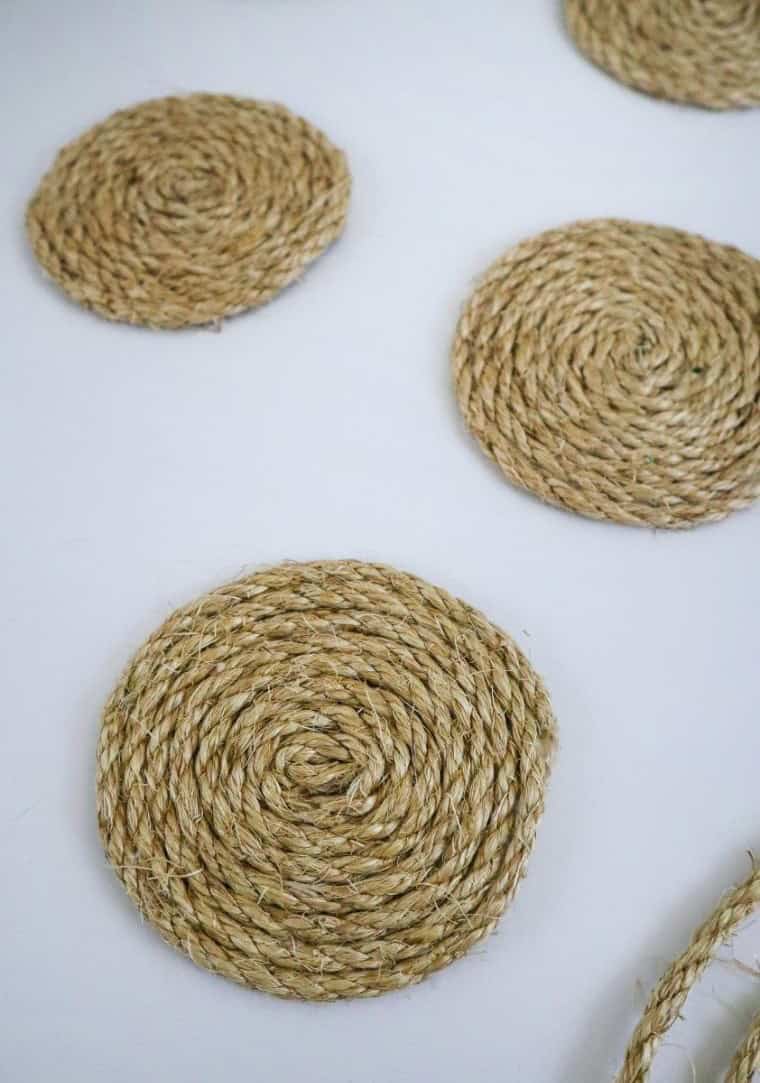
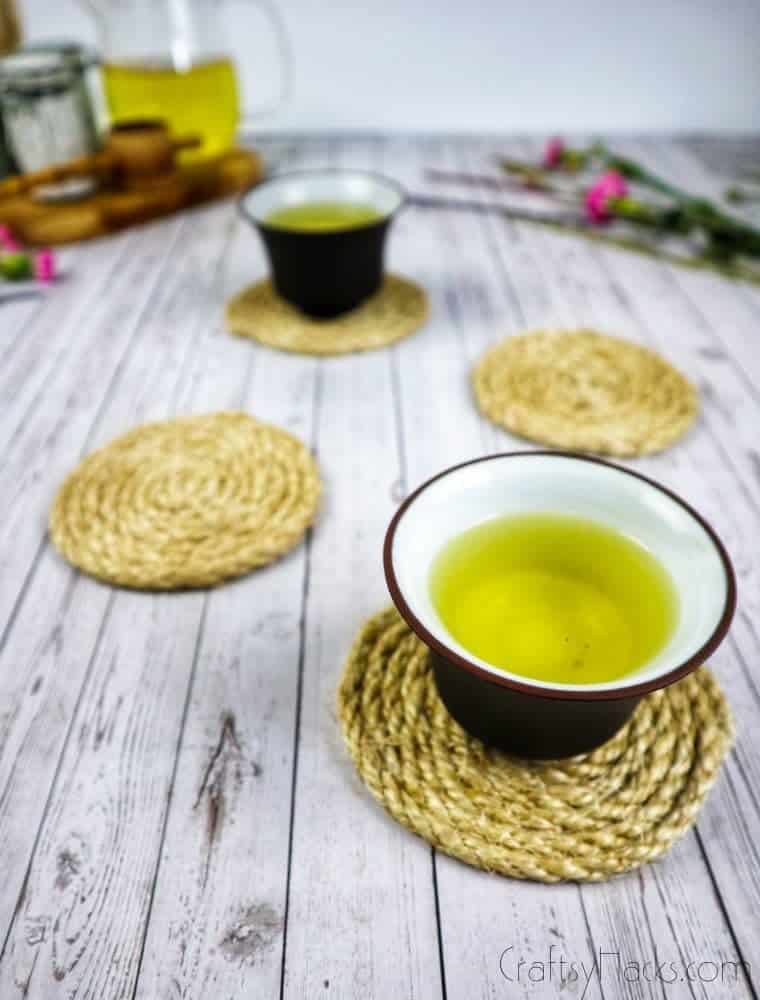
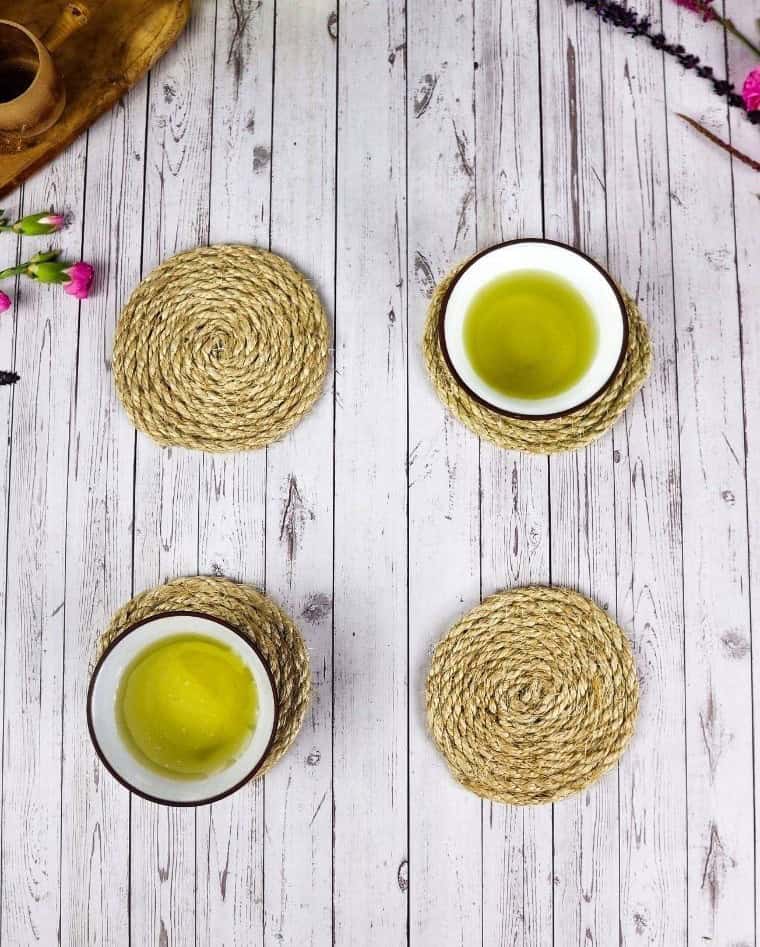
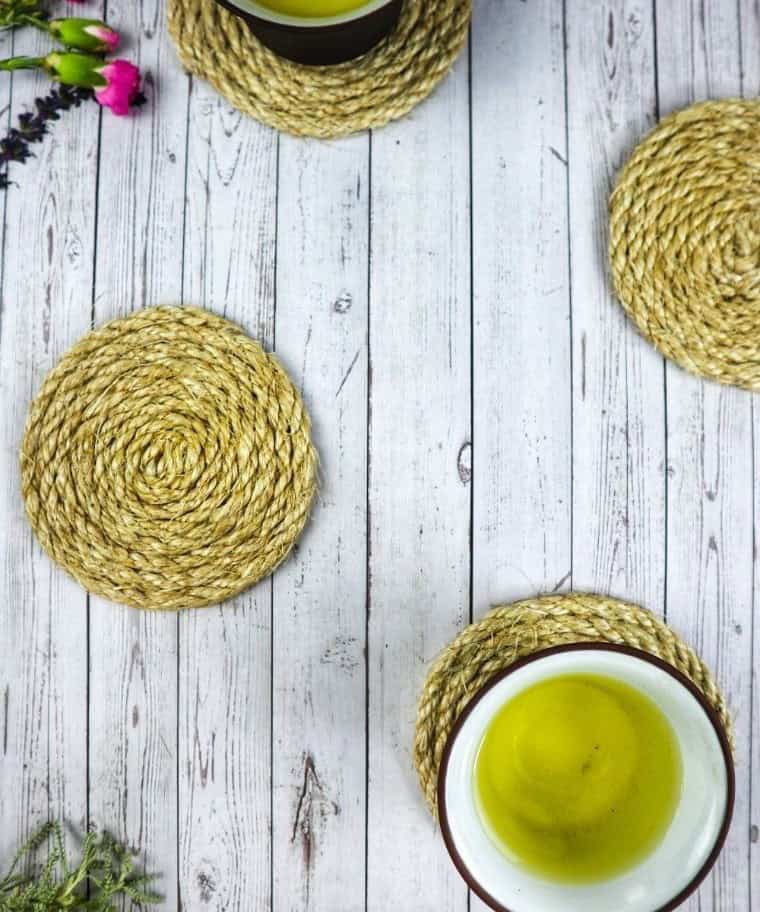
The versatility of these DIY rope coasters is truly remarkable. Their size can be easily customized to fit various needs and purposes around the home. Consider creating a statement piece by making one large coaster to serve as a centerpiece on your dining table. Alternatively, you could use them as heat pads in the kitchen to protect surfaces from hot pots, pans, and cooling racks.
For a more decorative approach, hang them on the wall to add a beachy vibe or use them to protect any surface in your home. Additionally, these coasters can be used beneath indoor plant pots to keep floors safe while also complementing the natural aesthetic. With this technique, you can essentially create a giant rug for your living room or go all out and use it as a unique solution to protect any surface in your house.
Other Crafts You Can Make


When it comes to crafting, there’s something special about creating unique and personalized items that reflect your personal style. One way to do this is by exploring the world of macrame and woven designs. From intricate earrings to functional home decor pieces, the possibilities are endless. For instance, you can try your hand at making DIY macrame leaf earrings or a beautiful yarn-wrapped DIY glass vase.
If you’re looking for something a bit more rustic, consider creating a yarn-wrapped DIY flower pot or even a woven bowl with yarns. And if you need some inspiration to get started, be sure to check out our list of 20 dollar store decorating ideas that can help you create a cohesive look on a budget.
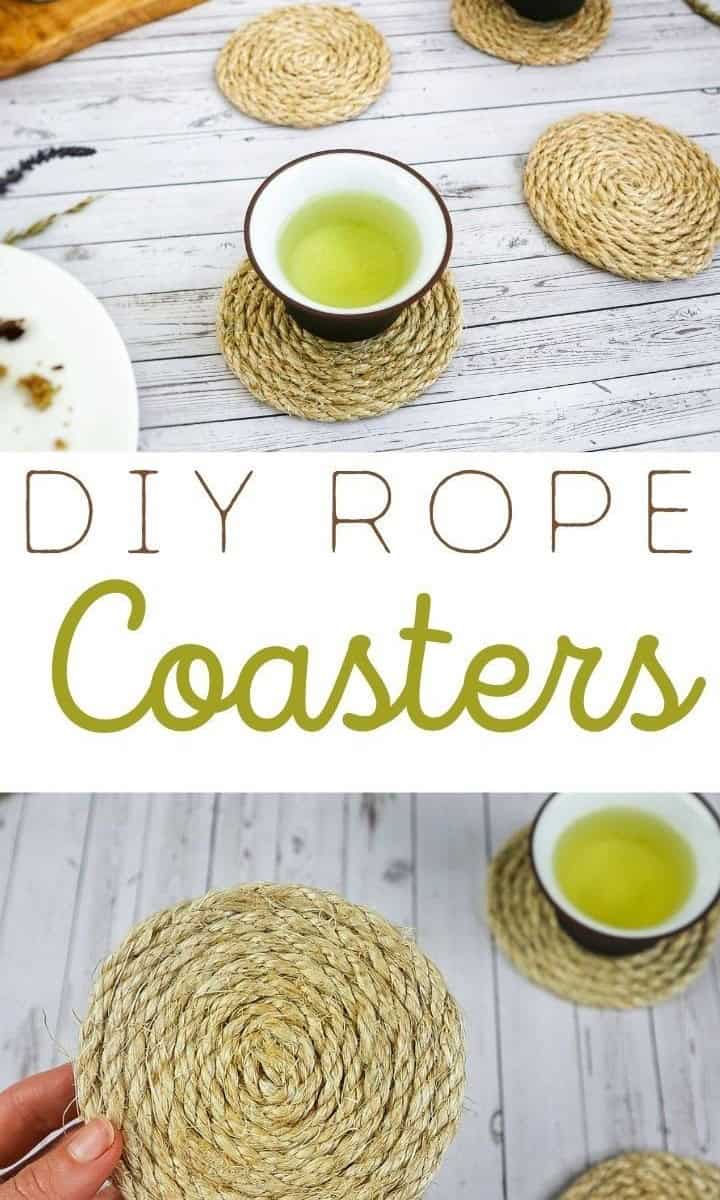
DIY Rope Coasters
In a few easy steps, you can create beautiful and functional DIY coasters that bring a touch of the beach to your home. Not only do they protect surfaces from water marks and spills, but they also add a natural charm to any room.
To start, be prepared to spend just three minutes on prep work before diving into the 10-minute active crafting process. After that, you’ll need another 10 minutes to let everything dry and set.
In total, you’re looking at about 23 minutes of your time to create a single coaster.
Equipment
To avoid interruptions while working on a creative project, it’s essential to prevent your screen from going dim. One way to do this is by using the built-in power management features of your computer or device. Another option is to invest in a hot glue gun holder or pen and scissors organizer that can keep your workspace clutter-free. This will help you stay focused and avoid distractions, allowing you to work efficiently without interruptions from your screen going dark.
Materials 1x2x3x
When creating a makeshift drum, the materials required are surprisingly simple and accessible. One crucial component is a sturdy foundation, which can be achieved by using a thick manilla rope as the base. Additionally, a piece of paper or fabric can serve as a makeshift head, while a wooden disc or CD can provide the necessary surface area to produce sound.
Instructions
Begin by preparing your materials. If using a base, start with that step. Otherwise, proceed to winding the rope. Use the wooden disk as a template to draw a circle on the fabric. Cut out the fabric and mark the exact center with a pen. Next, cut the starting point of the rope at an angle, creating a tapered end. This will aid in gluing it down later. Form a loop by wrapping the tip of the rope back onto itself. Secure the loop with glue and allow it to dry for a minute.
Place the loop on your base (if using), aligning it with the center dot. Begin winding the rope around its own circumference, keeping tension even as you apply glue. Be cautious not to use too much adhesive! Once you reach the end, trim the tip into a pointed shape once more. Glue the conclusion and you’re finished. A stunning, professionally presented beachy coaster awaits.