Making resin coasters is a fantastic way to get creative and produce something unique for your home or as a gift. This DIY project is perfect for adults and even teens looking for a fun and easy craft to work on. Coasters are an excellent choice for a variety of occasions, whether you want a quick and simple project, something that doesn’t require new supplies, or an elaborate design to showcase your creativity.
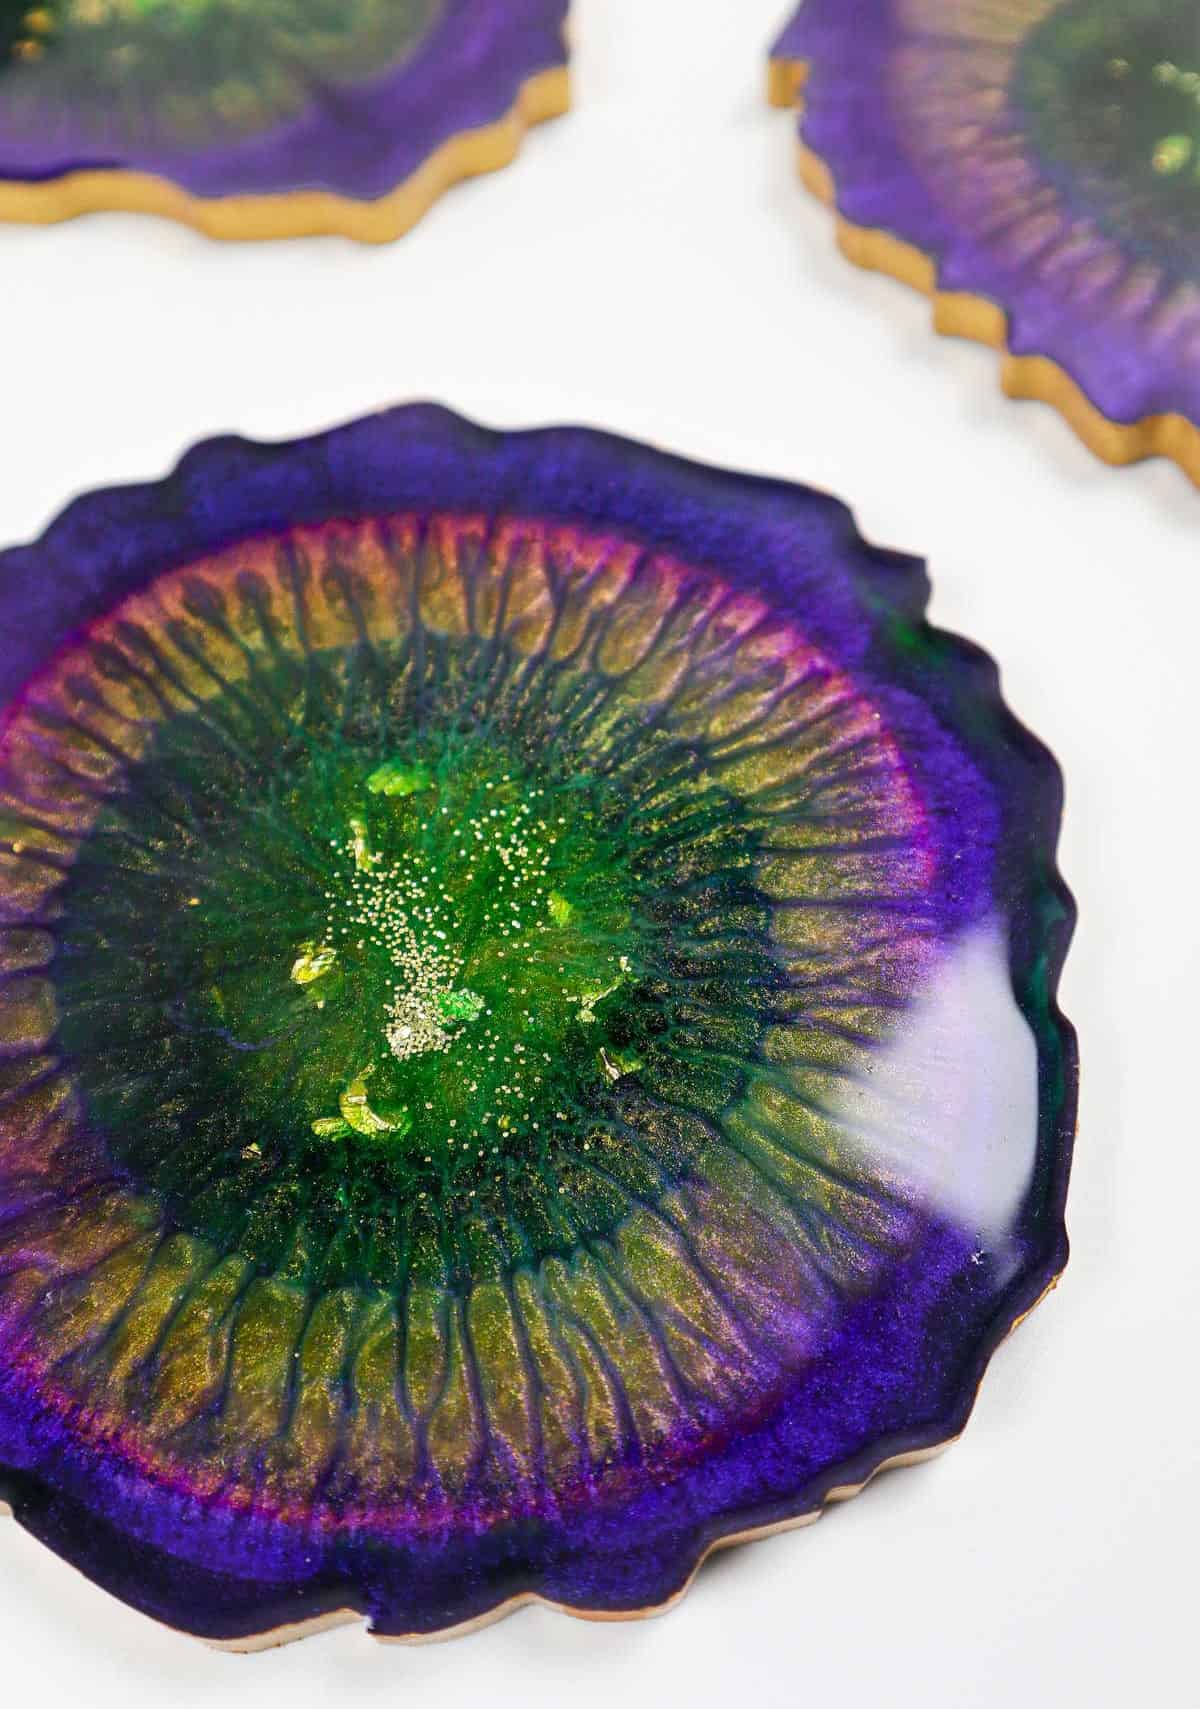
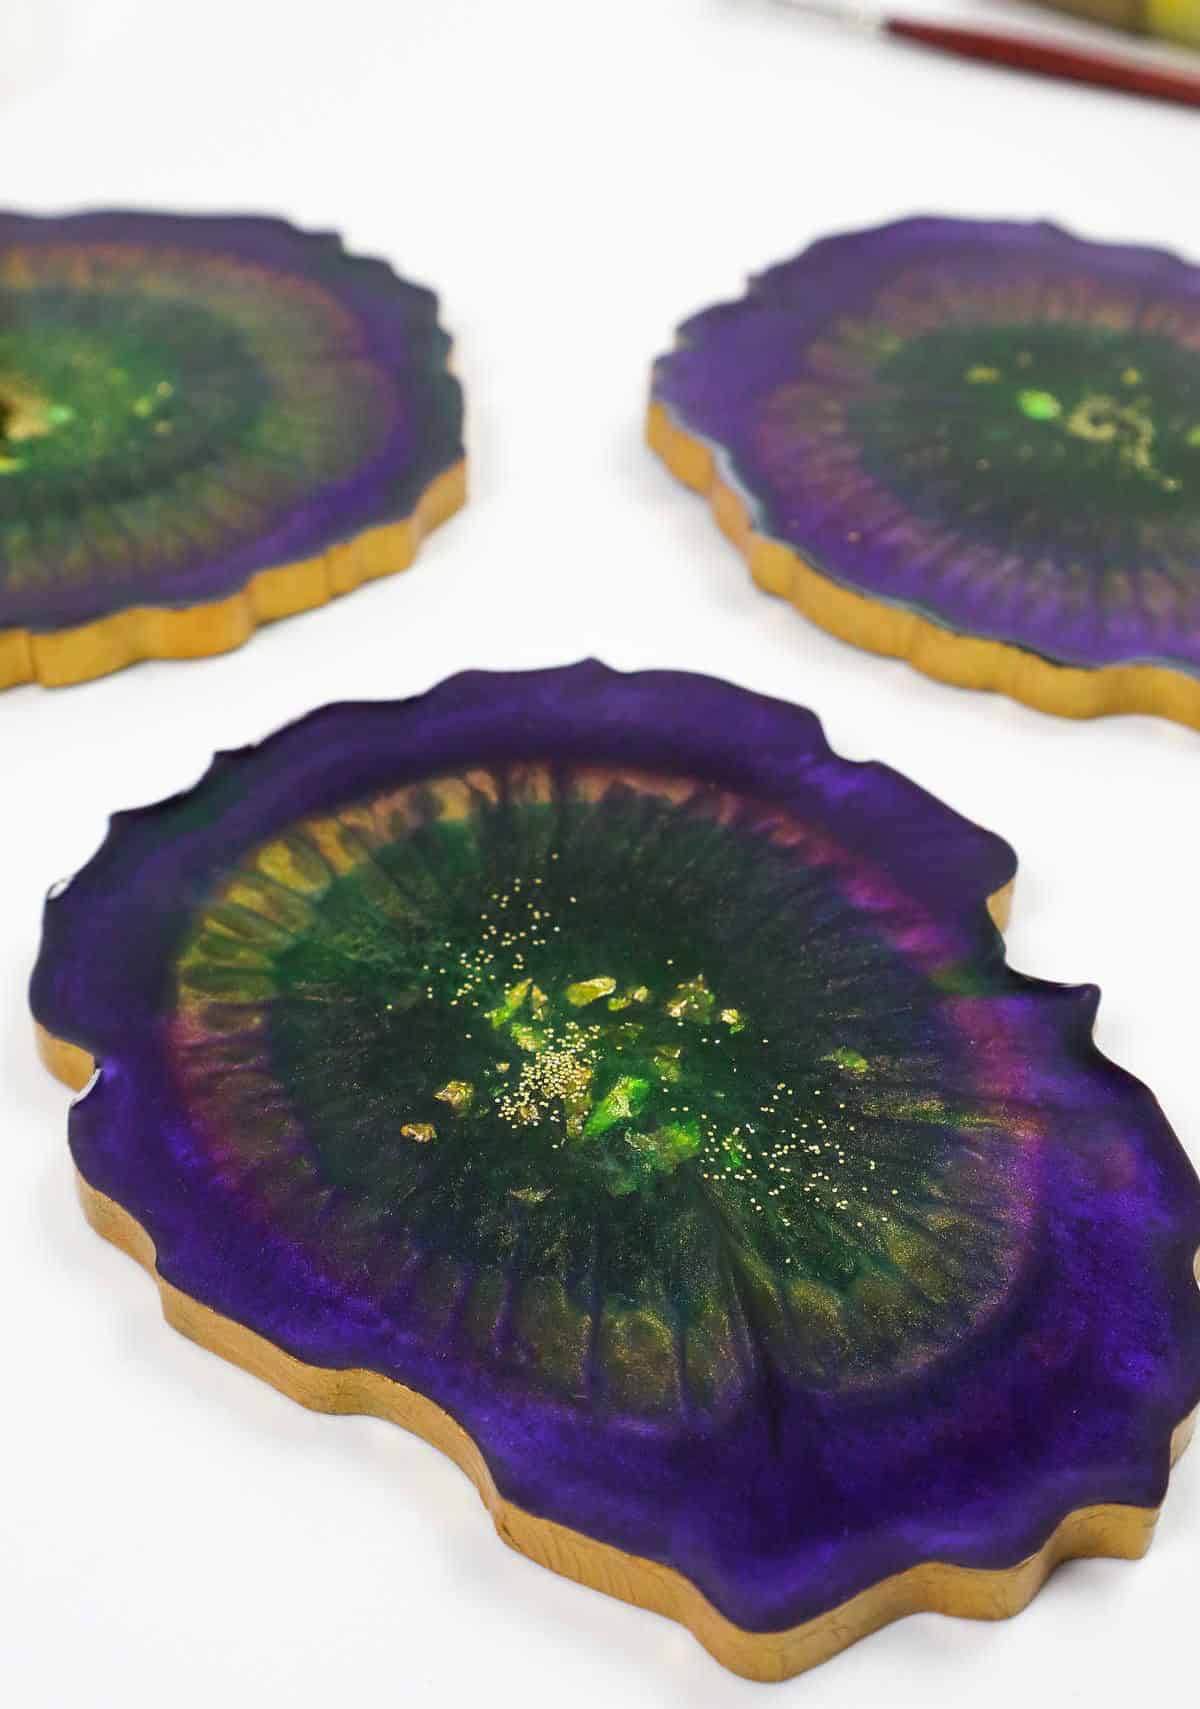
Epoxy resin is the star of this show, allowing you to create exquisite and one-of-a-kind coasters with a range of colors and textures. With the right combination of purple, green, and gold, for example, you can create a stunning piece that’s both elegant and eerie – like a mesmerizing work of art.
Supplies and Tools You’ll Need
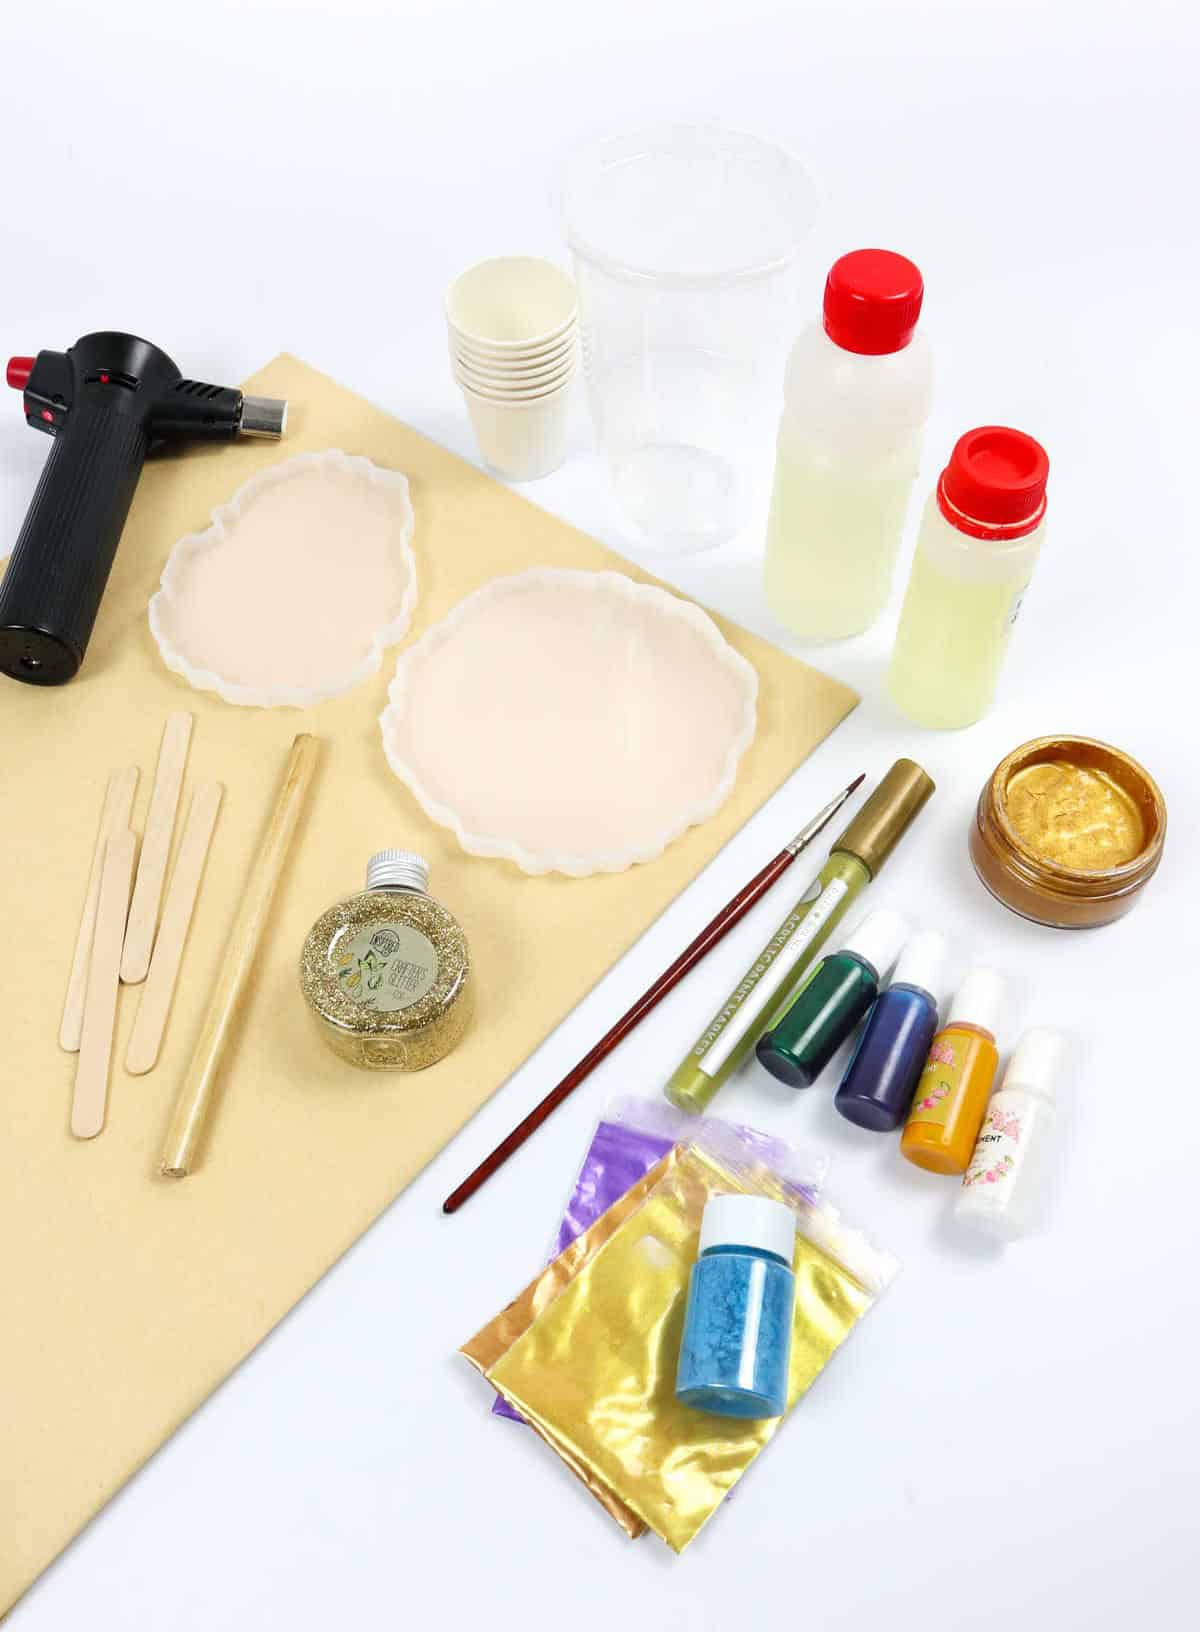
To get started with this resin craft, you’ll need to gather a variety of materials. The core components include epoxy resin and its hardener, which will form the foundation of your project. Additionally, you’ll require silicone molds to shape your creation, as well as plastic cups for mixing and measuring purposes. A placemat or other flat surface is also essential for containing any spills or messes that may occur during the crafting process.
To add color and texture to your resin, you can utilize resin pigments and mica powder. You’ll also need a range of tools, such as spatulas for mixing and spreading, a kitchen torch for curing the resin, and acrylic markers or paint for adding additional details. A brush is helpful for applying these finishes, and it’s always a good idea to protect yourself with a face mask and gloves when working with epoxy resin.
Finally, if you want to add some extra sparkle to your project, consider incorporating glitter into your design.
How to Make Resin Coasters
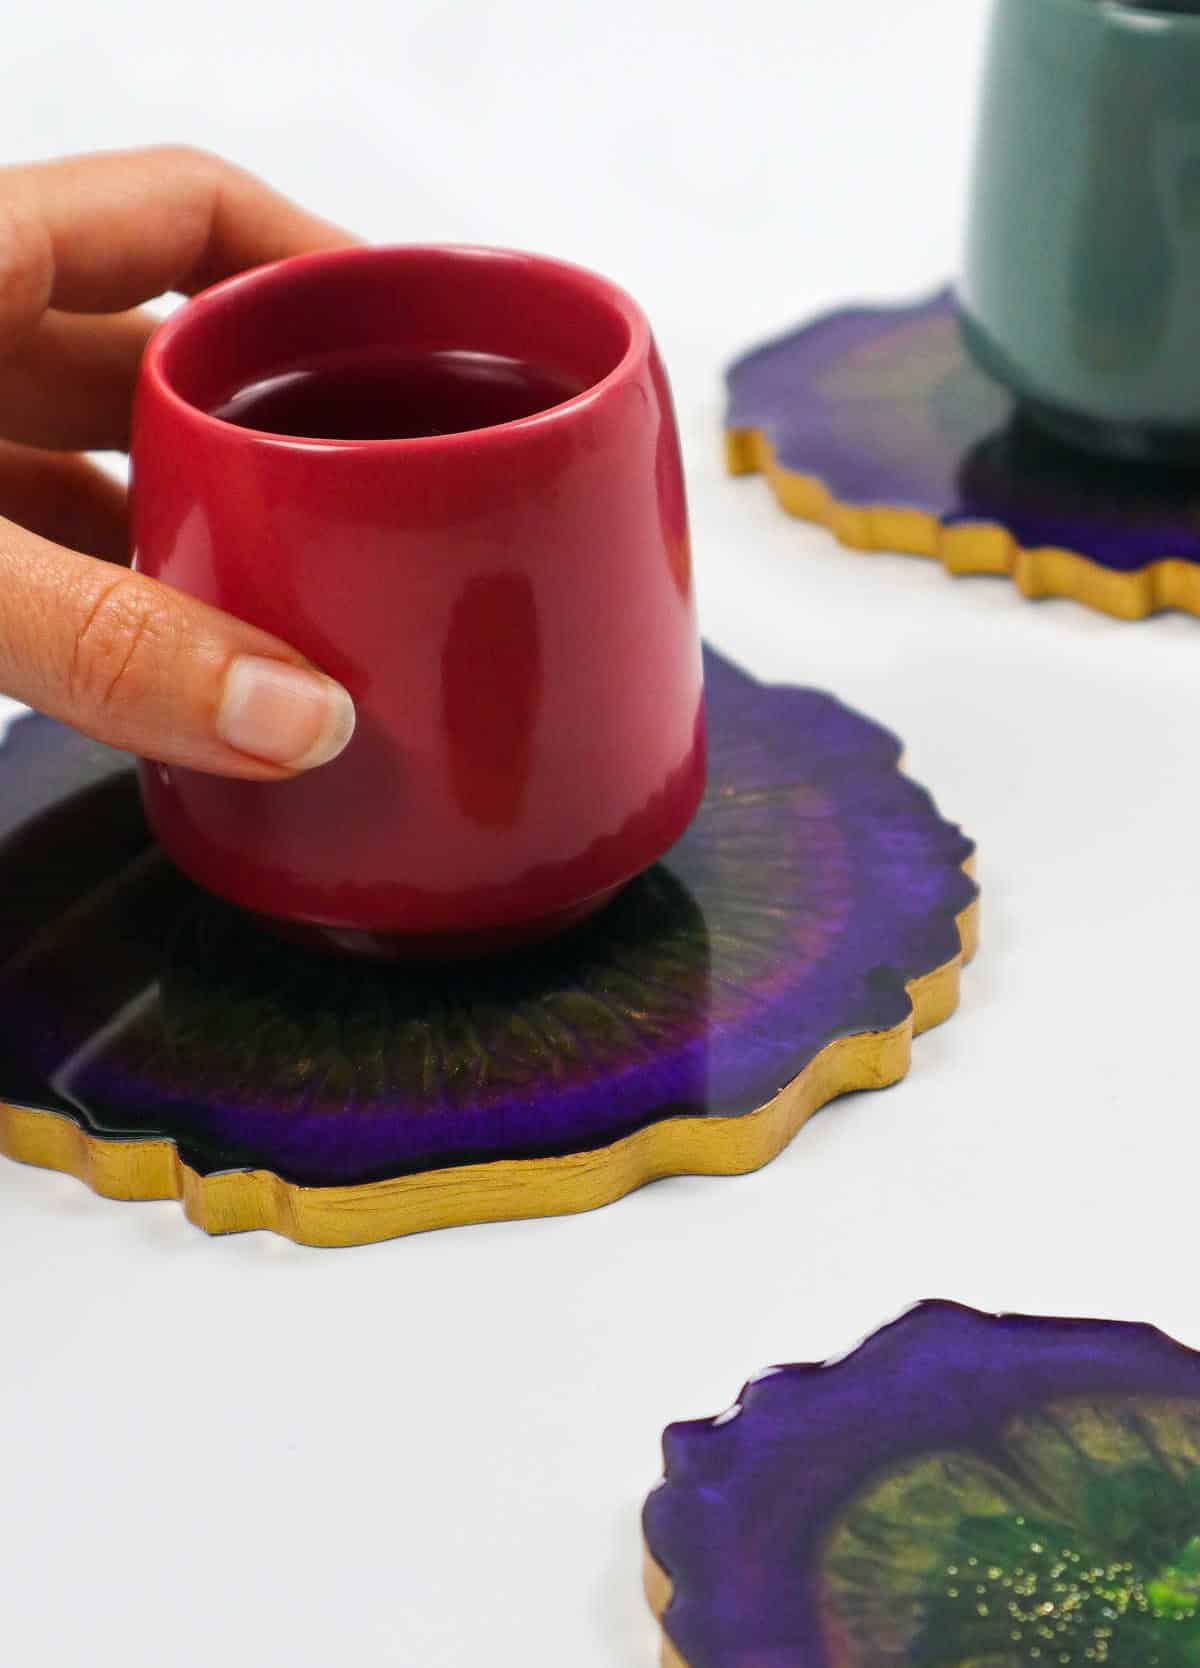
Before diving into working with epoxy resin, it’s essential to grasp its fundamental properties. Take some time to educate yourself on how this substance behaves, as a solid understanding of its characteristics is crucial for successful application. In particular, when using epoxy resin as a coaster for hot cups, ensure that the specific type you’re selecting is heat-resistant. If not, the vibrant colors you’ve incorporated may undergo unwanted changes over time.
Once you have a firm grasp on these basics, you’ll be well-prepared to embark on your project.
Step 1
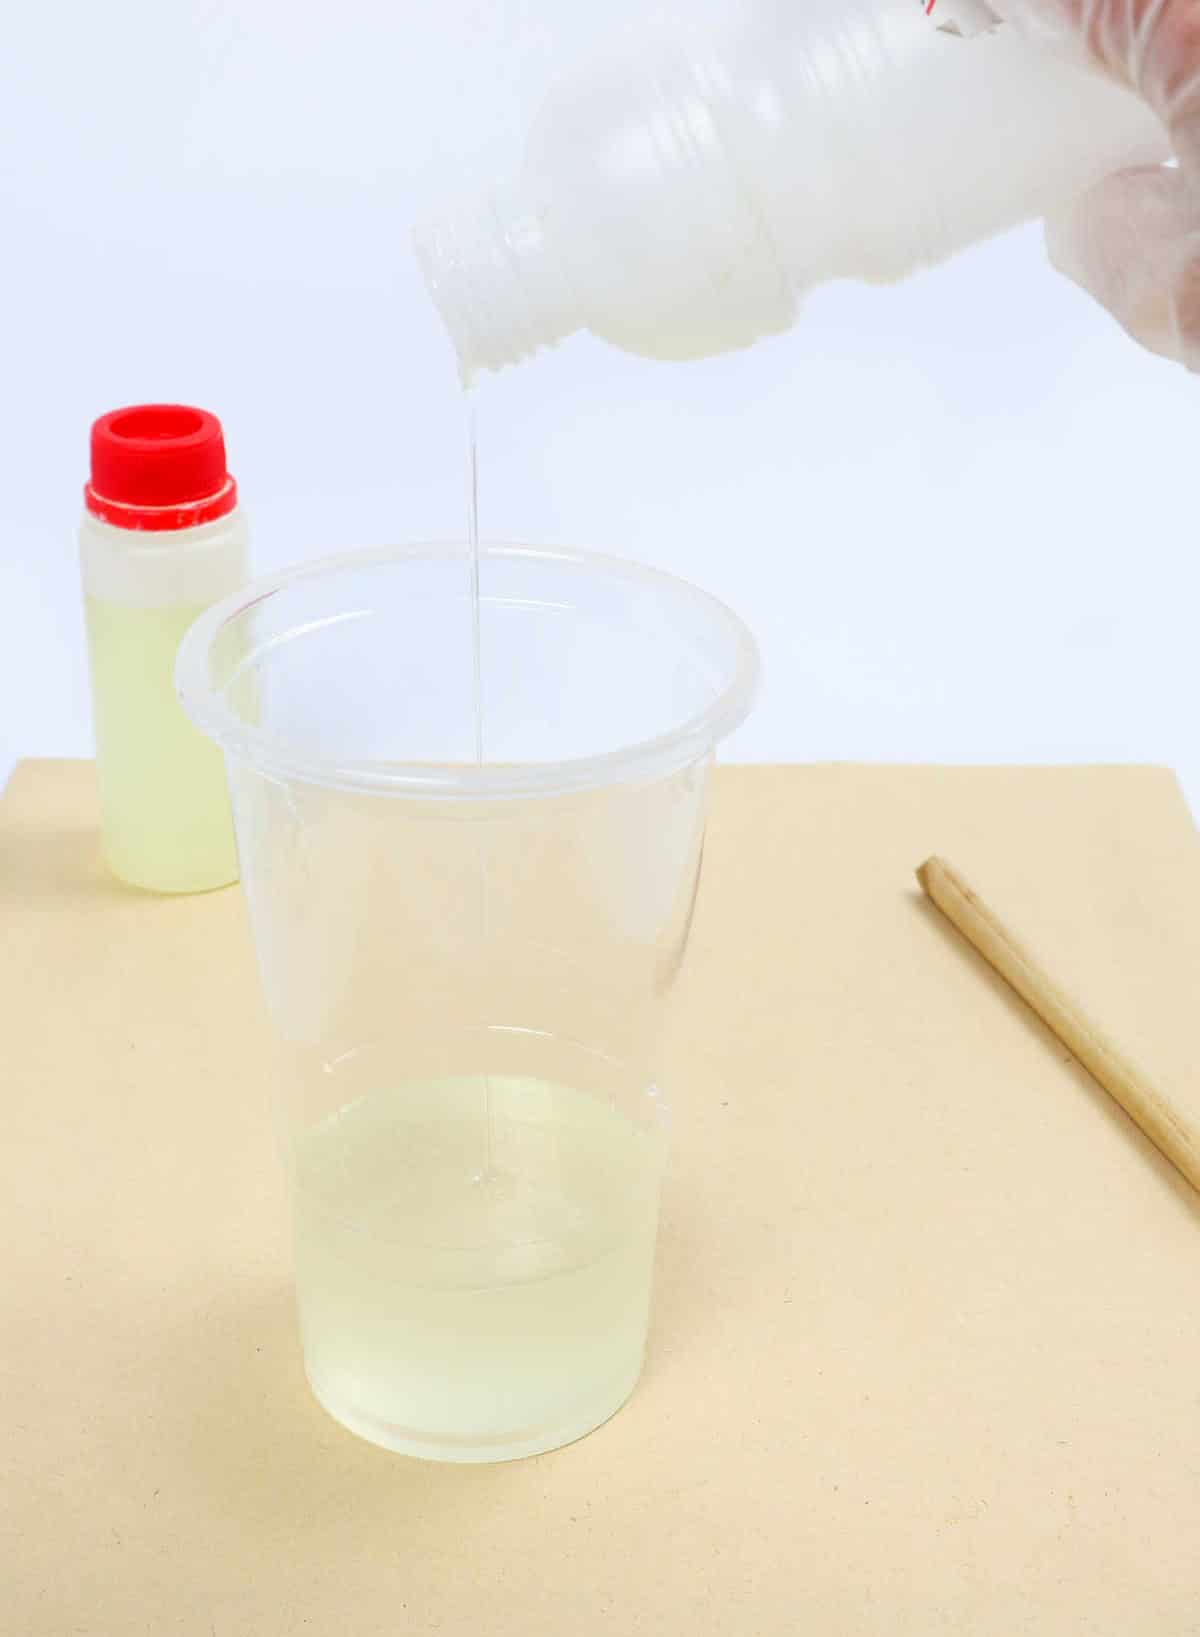
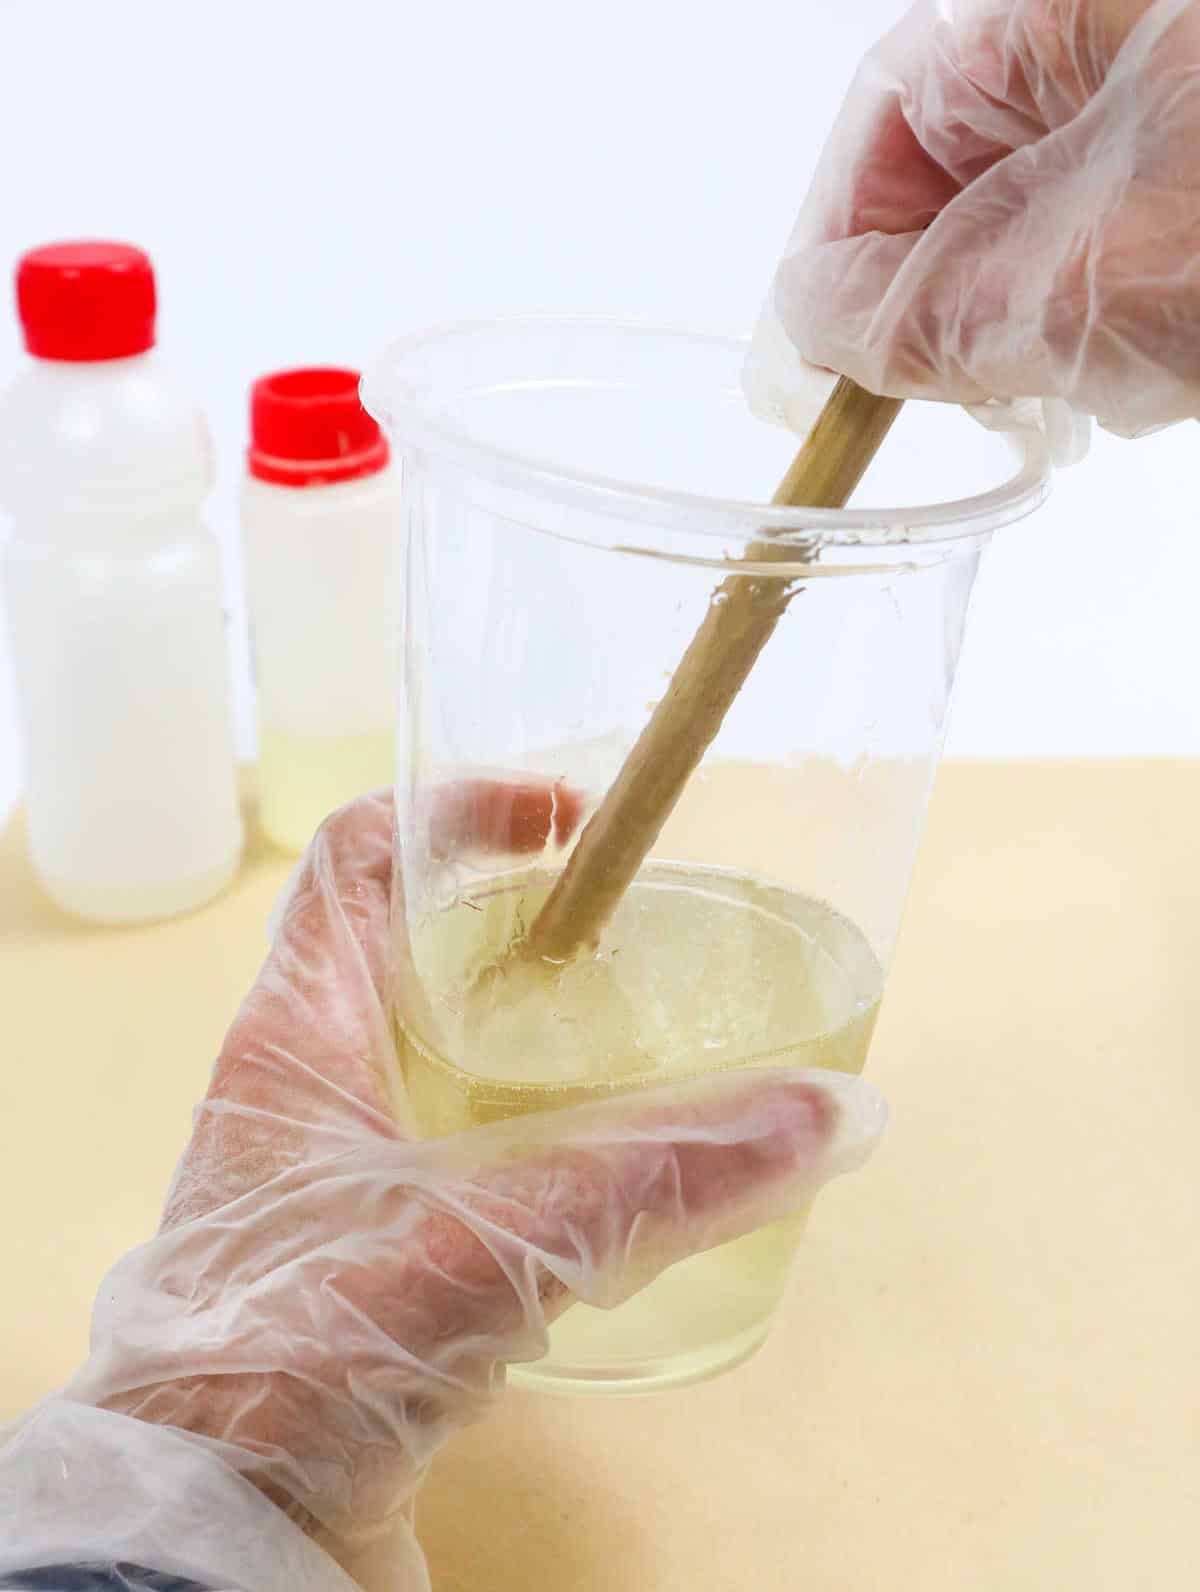
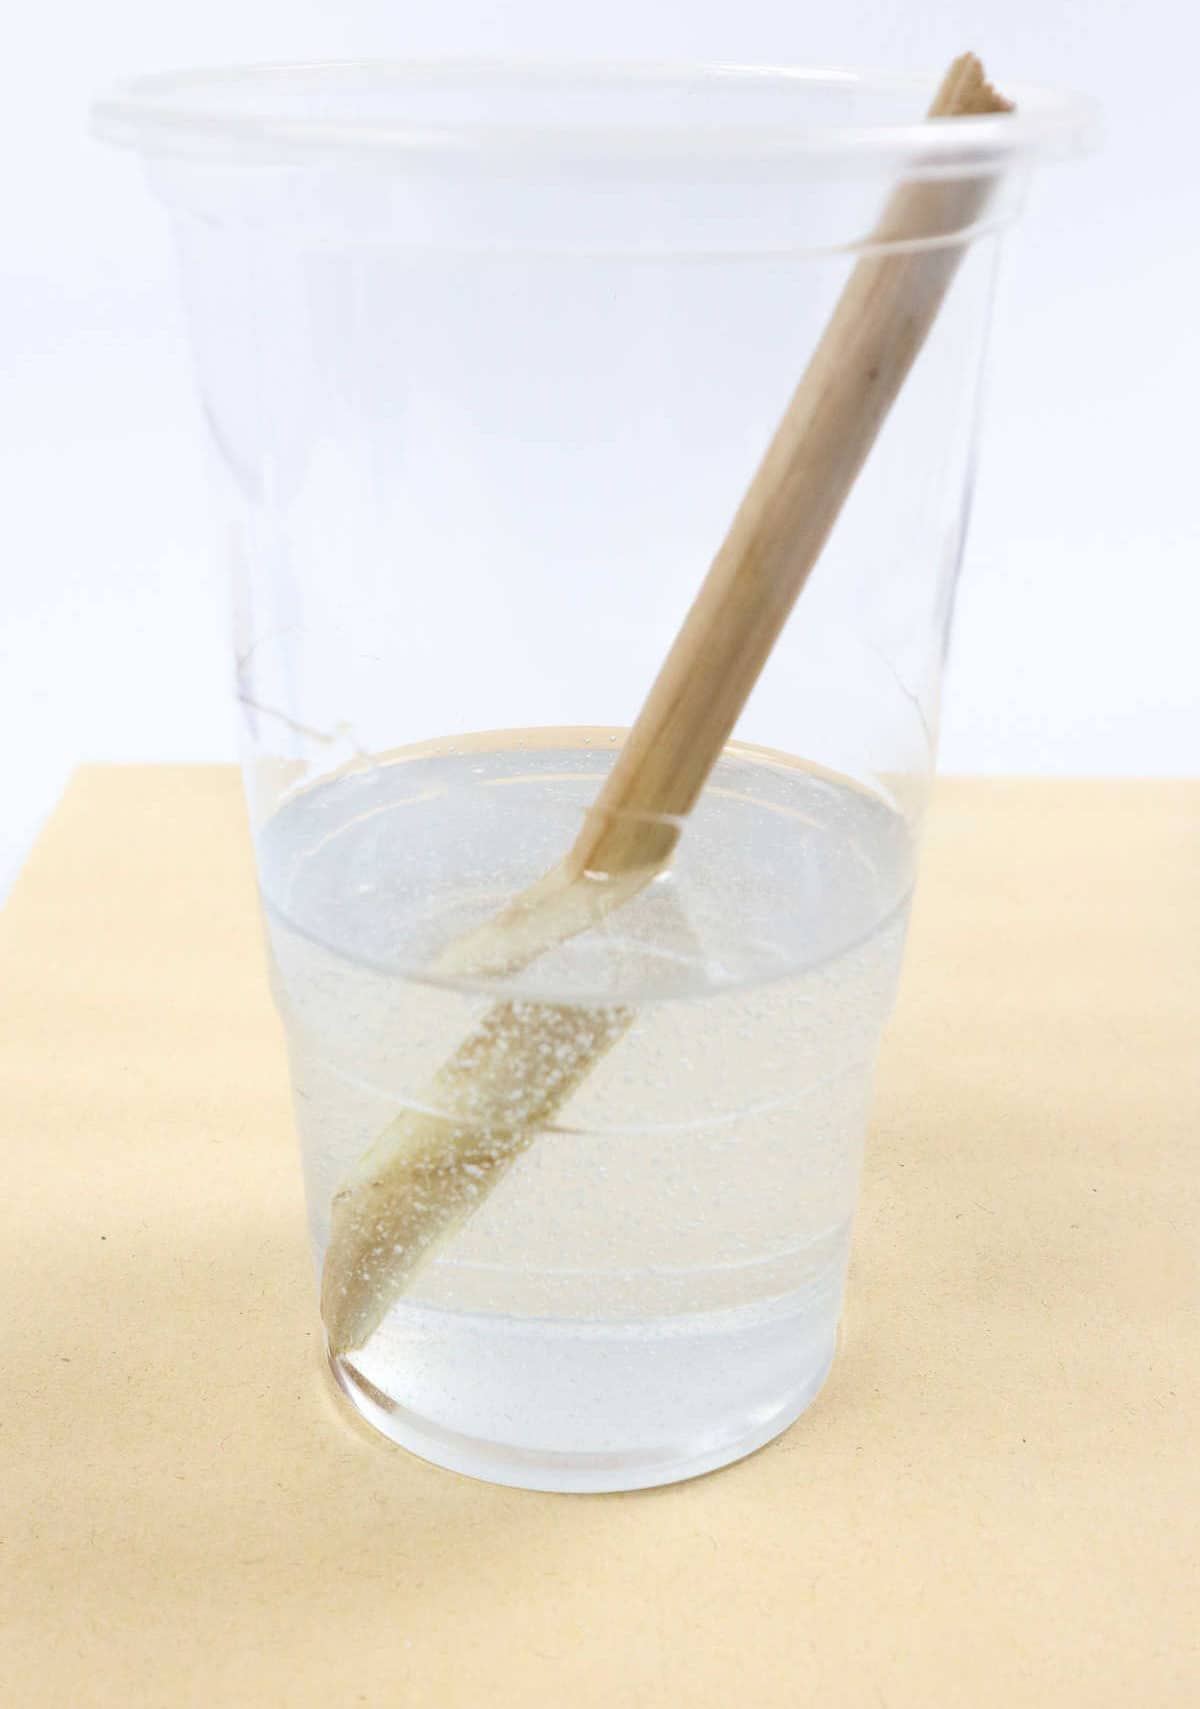
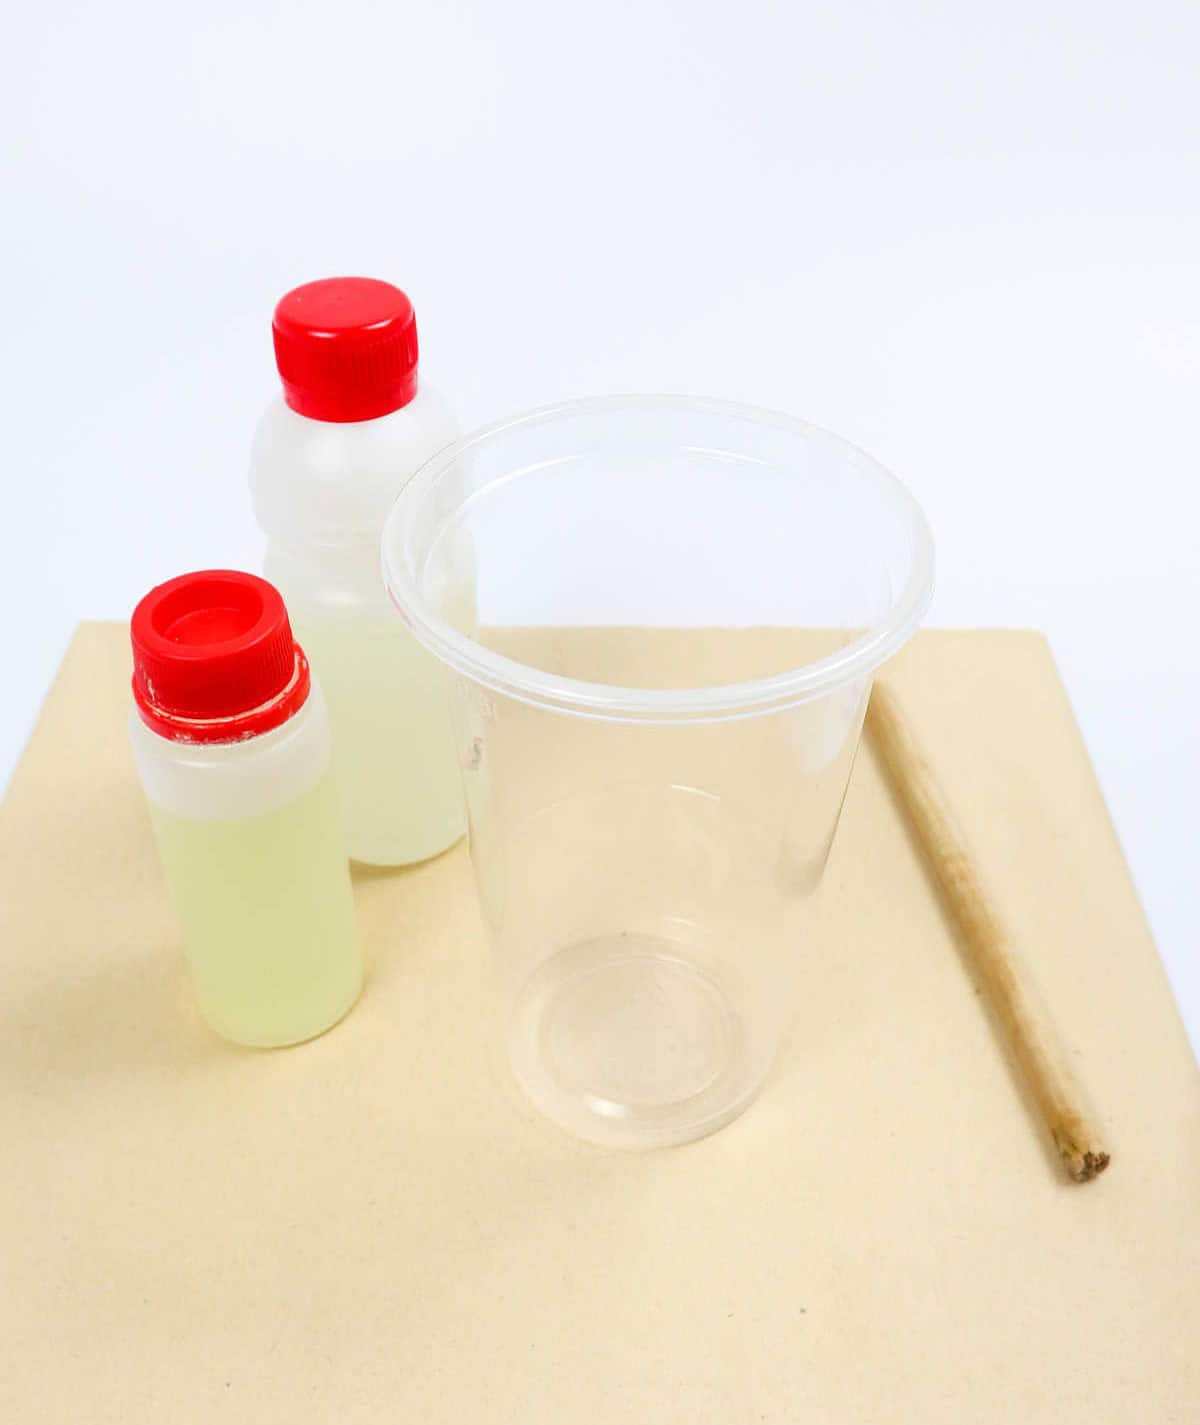
To create the resin mixture, combine the resin and hardener in a plastic cup, ensuring the proportions are correct as specified. Use a wooden stick or popsicle stick to thoroughly blend the two substances together. It’s crucial to mix the components properly, so if you’re unsure whether you’ve achieved a thorough blend, continue stirring until you feel confident about the mixture’s uniformity. Improper mixing can lead to uneven hardening of the substance when it sets.
For now, disregard any bubbles that form; you’ll have an opportunity to address them later.
Step 2

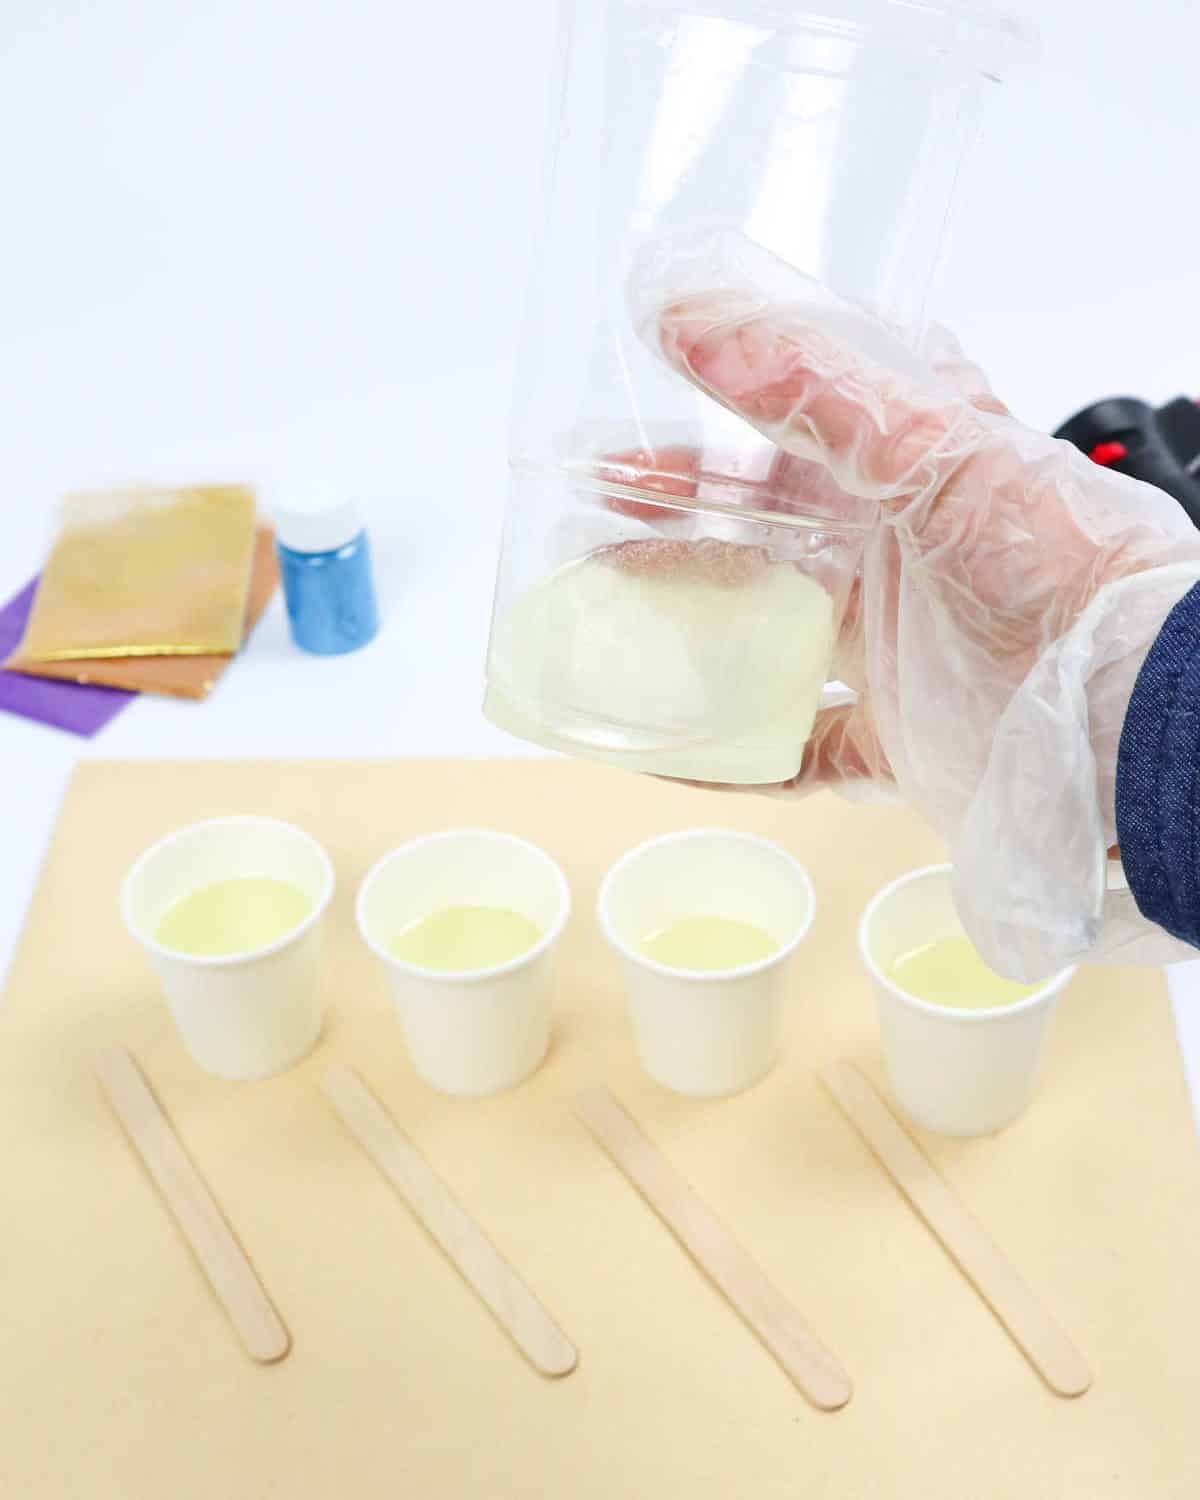
Divide the resin mixture evenly among four separate containers, preparing each one for the addition of color soon to come. It’s crucial not to overwhelm the cups with the entire batch at once, as you’ll need to set aside a portion of the clear resin for future use.
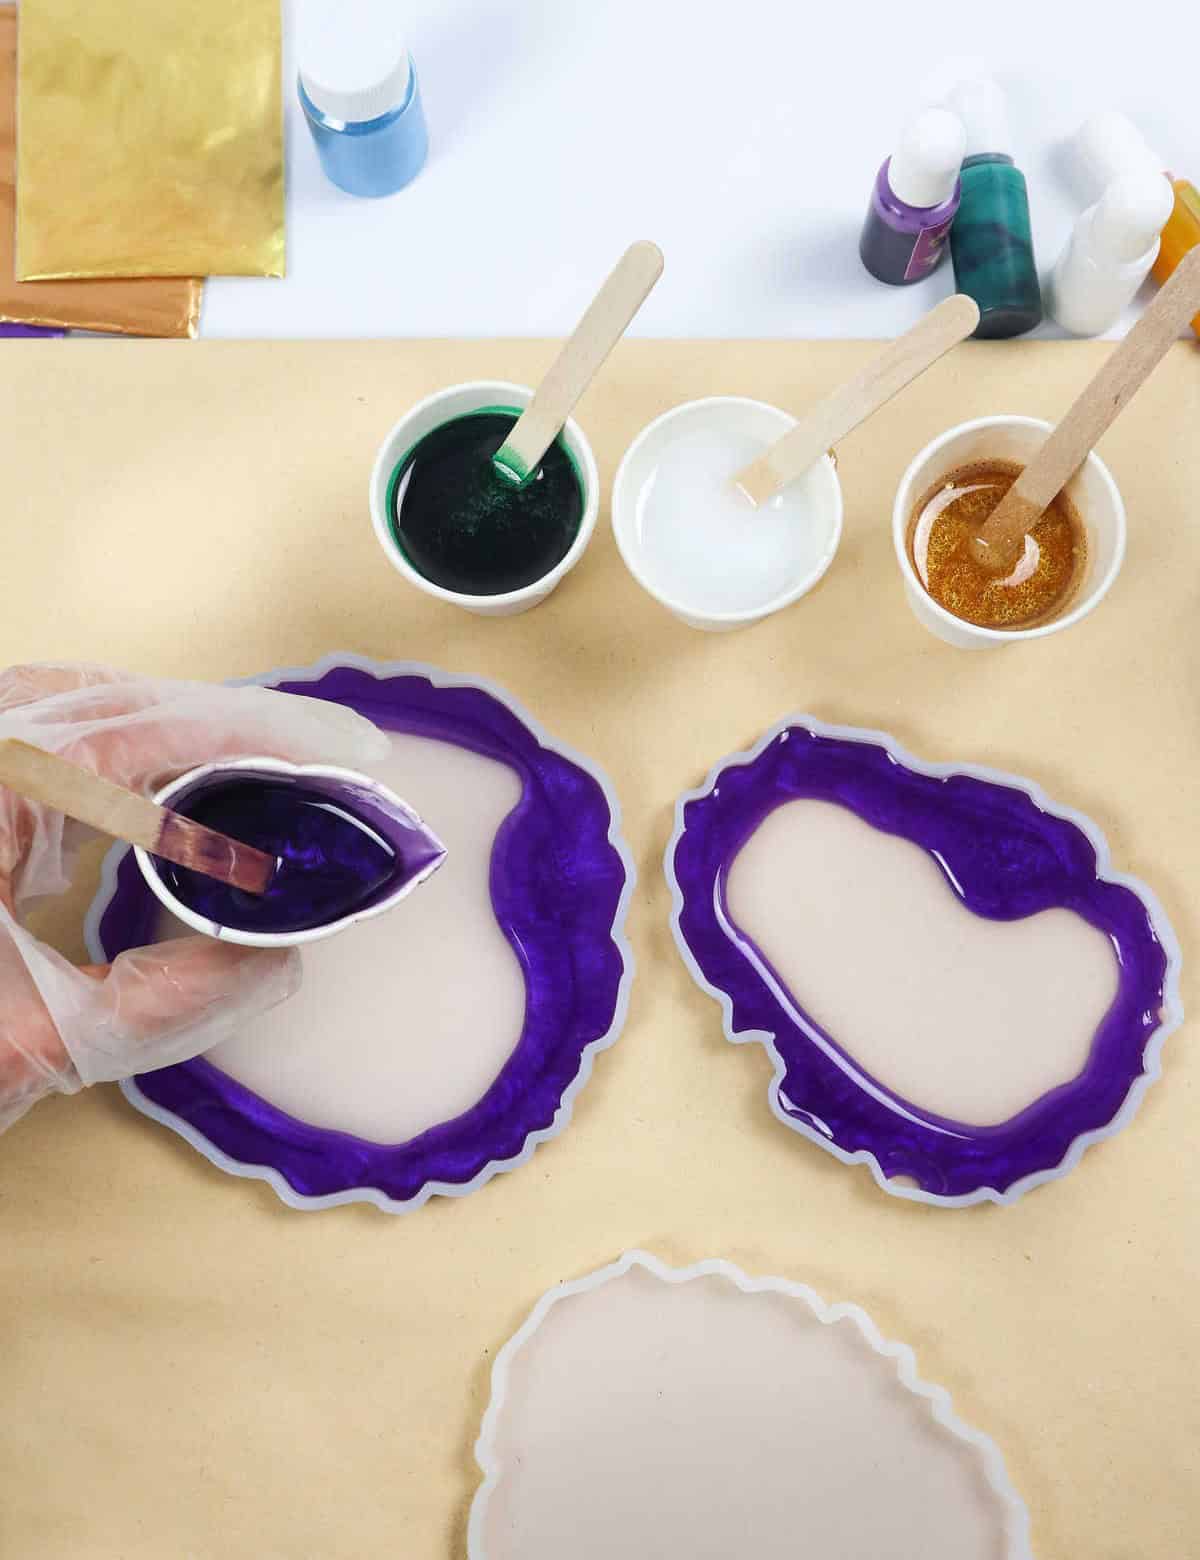
Step 3
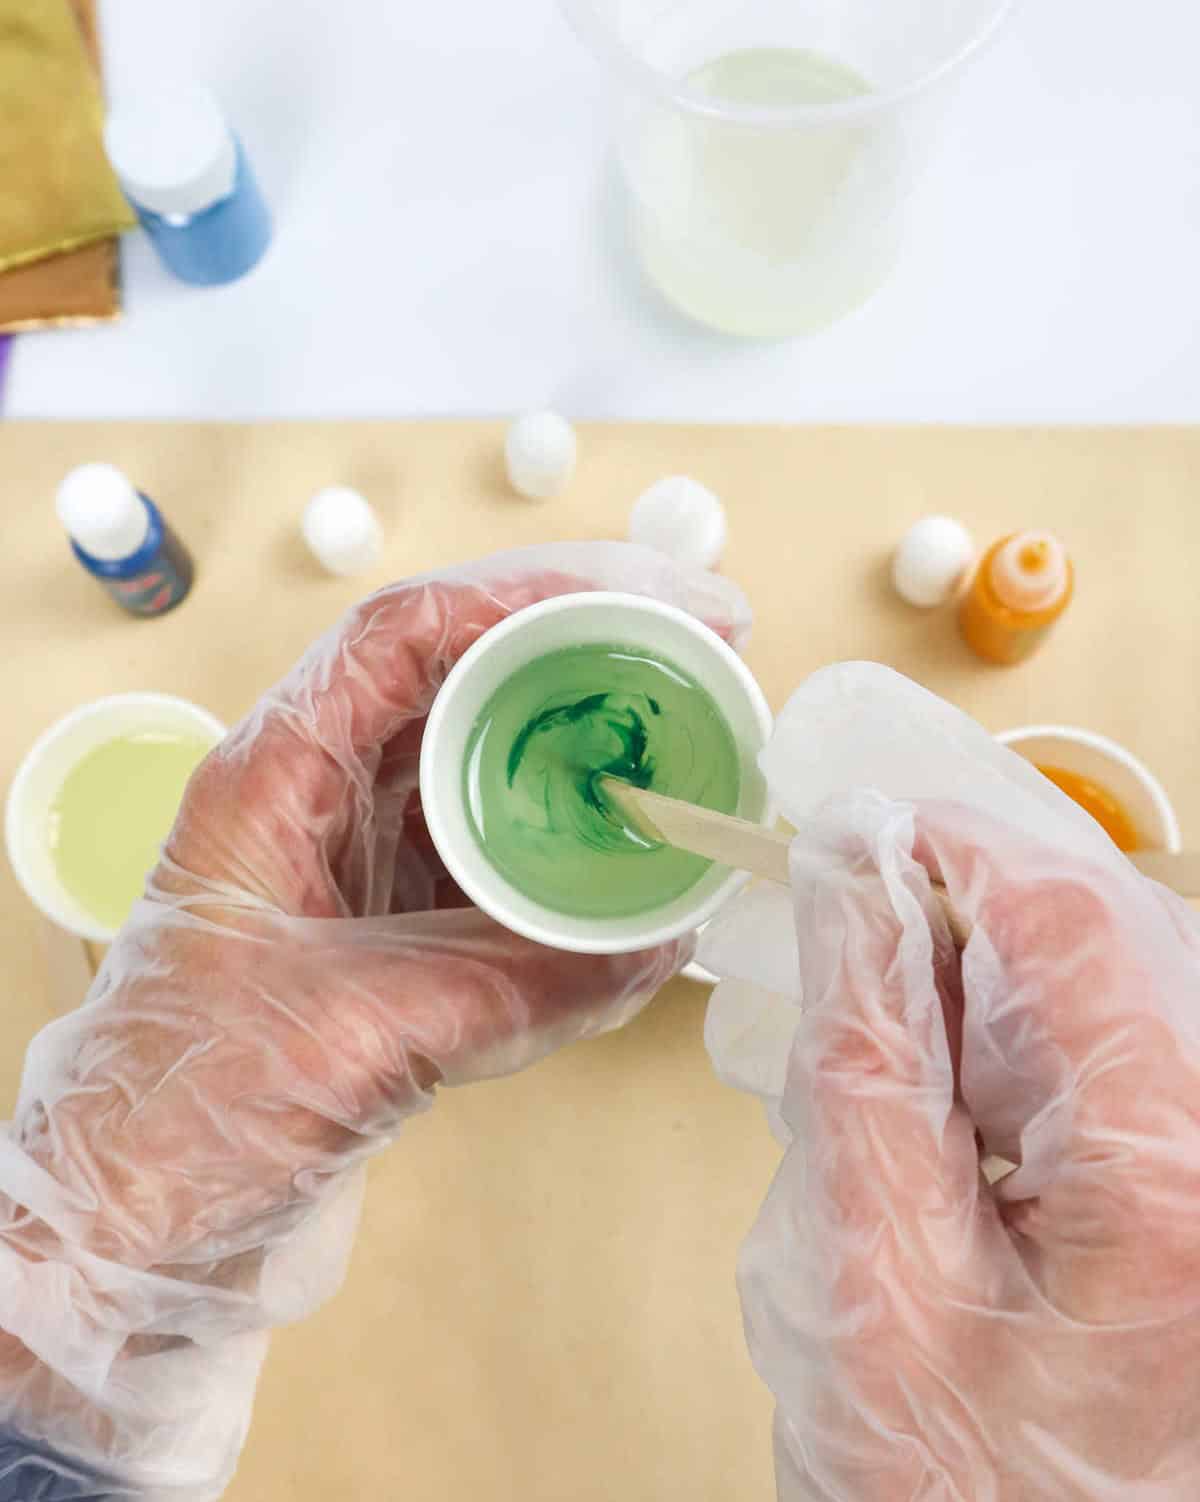
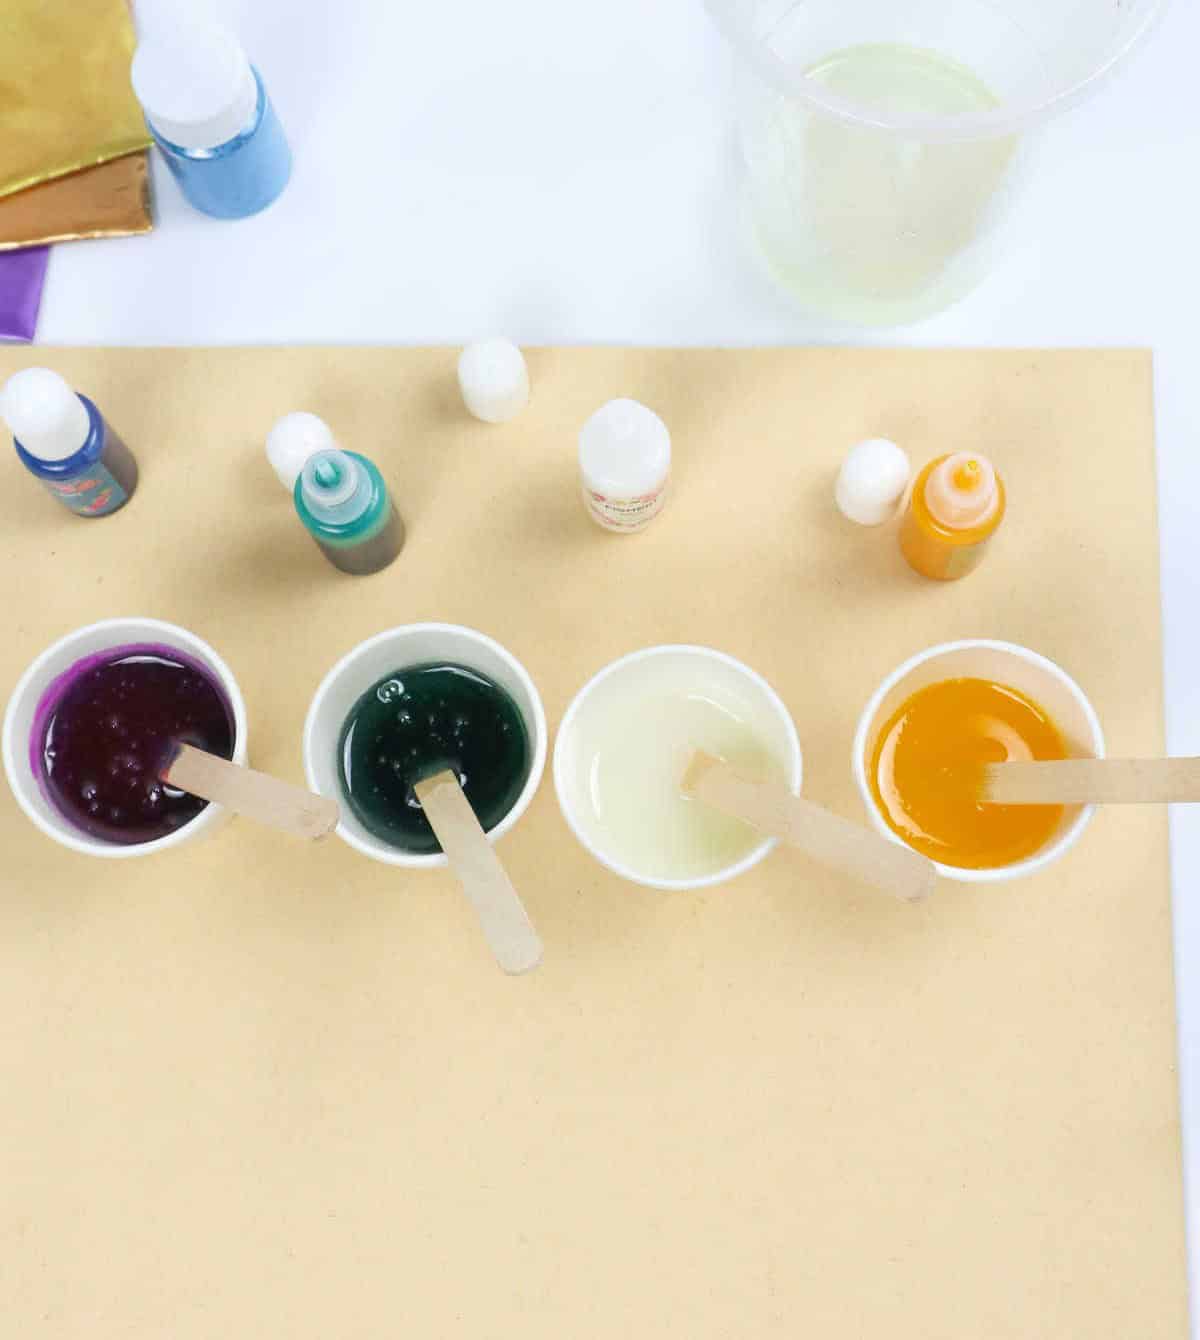
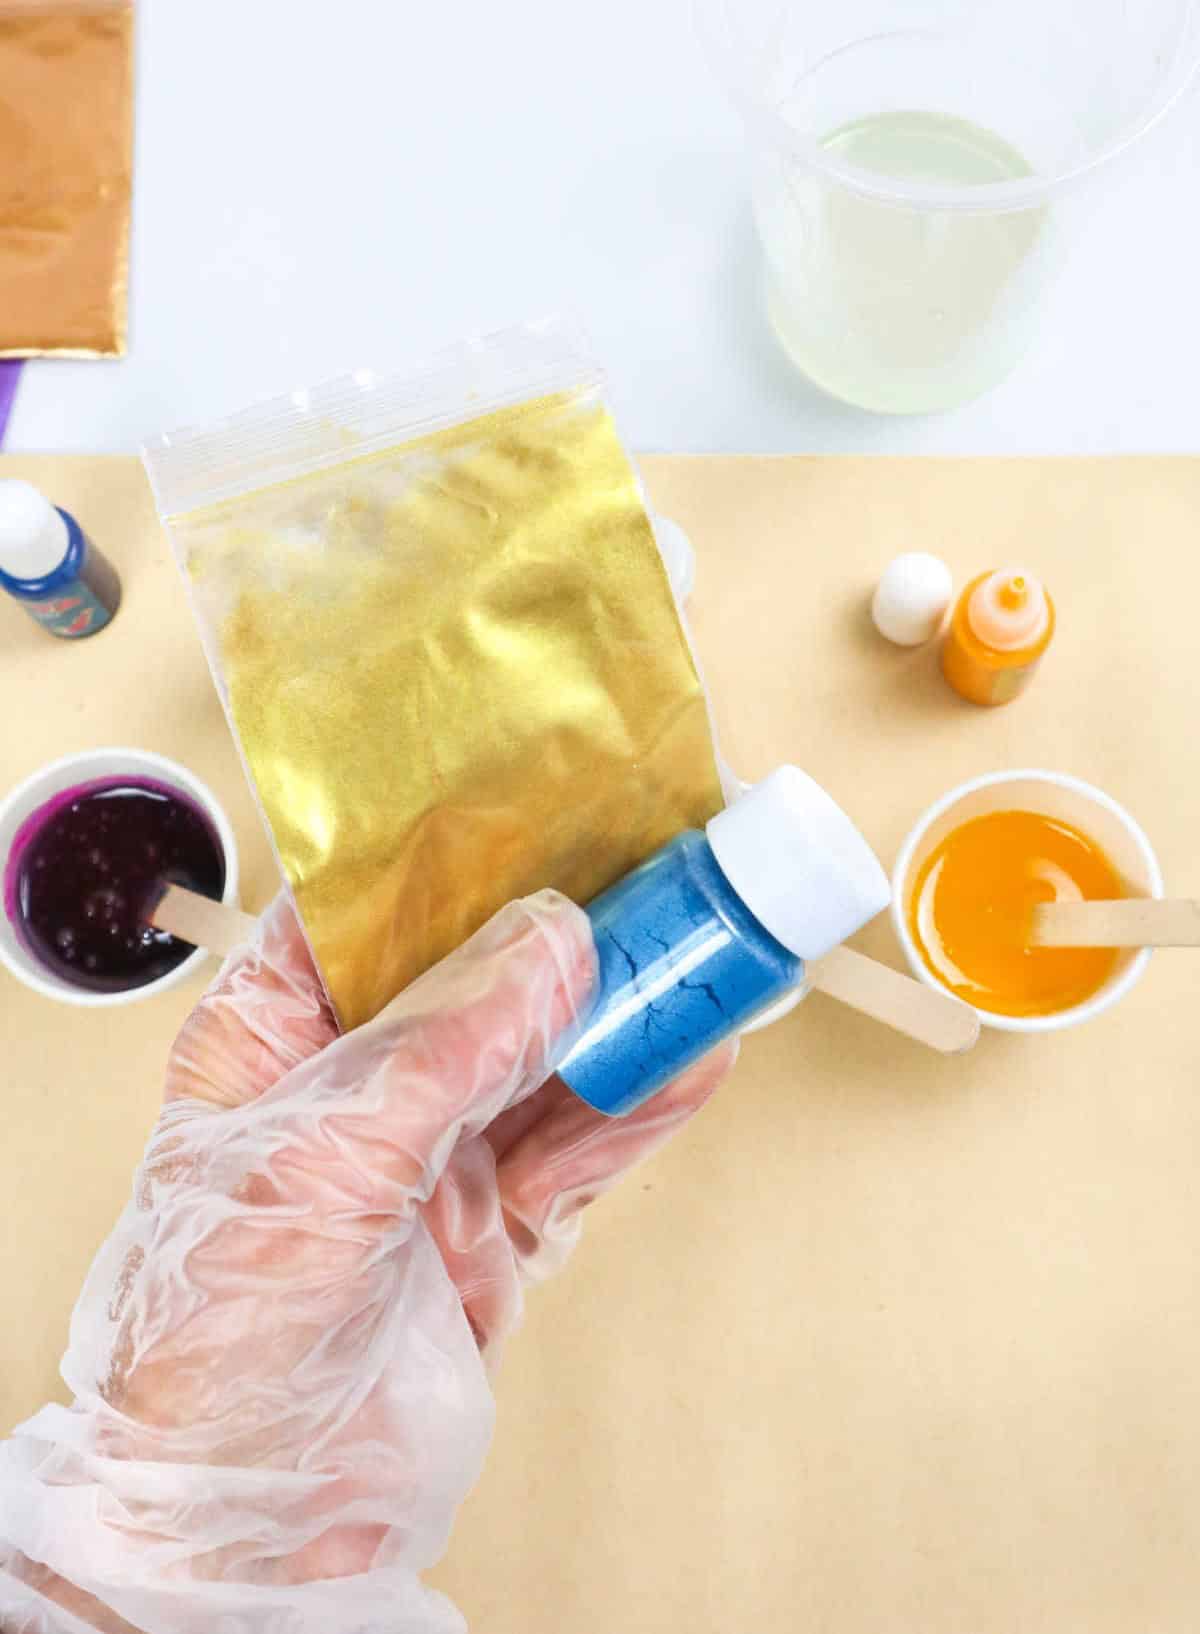
To take your resin creations to the next level, it’s time to introduce a range of vibrant hues. For this step, you’ll need small amounts of purple, green, gold or yellow, and white dyes. If you want to add an extra layer of luxury, consider incorporating mica powder, which will imbue your mixture with a silky smooth texture and a radiant sheen. To blend the colors, simply combine both liquid colorants and mica powders using a stirring stick, continuing to mix until the desired shade is achieved.
Don’t be afraid to experiment – you can also add glittering mica powder to create a truly show-stopping effect.
Step 4
To begin crafting your coasters, it’s essential to prepare the molds by ensuring they are spotlessly clean and completely free from any residual moisture, oil, or dirt. A thorough cleaning will guarantee a smooth and successful casting process.
Step 5
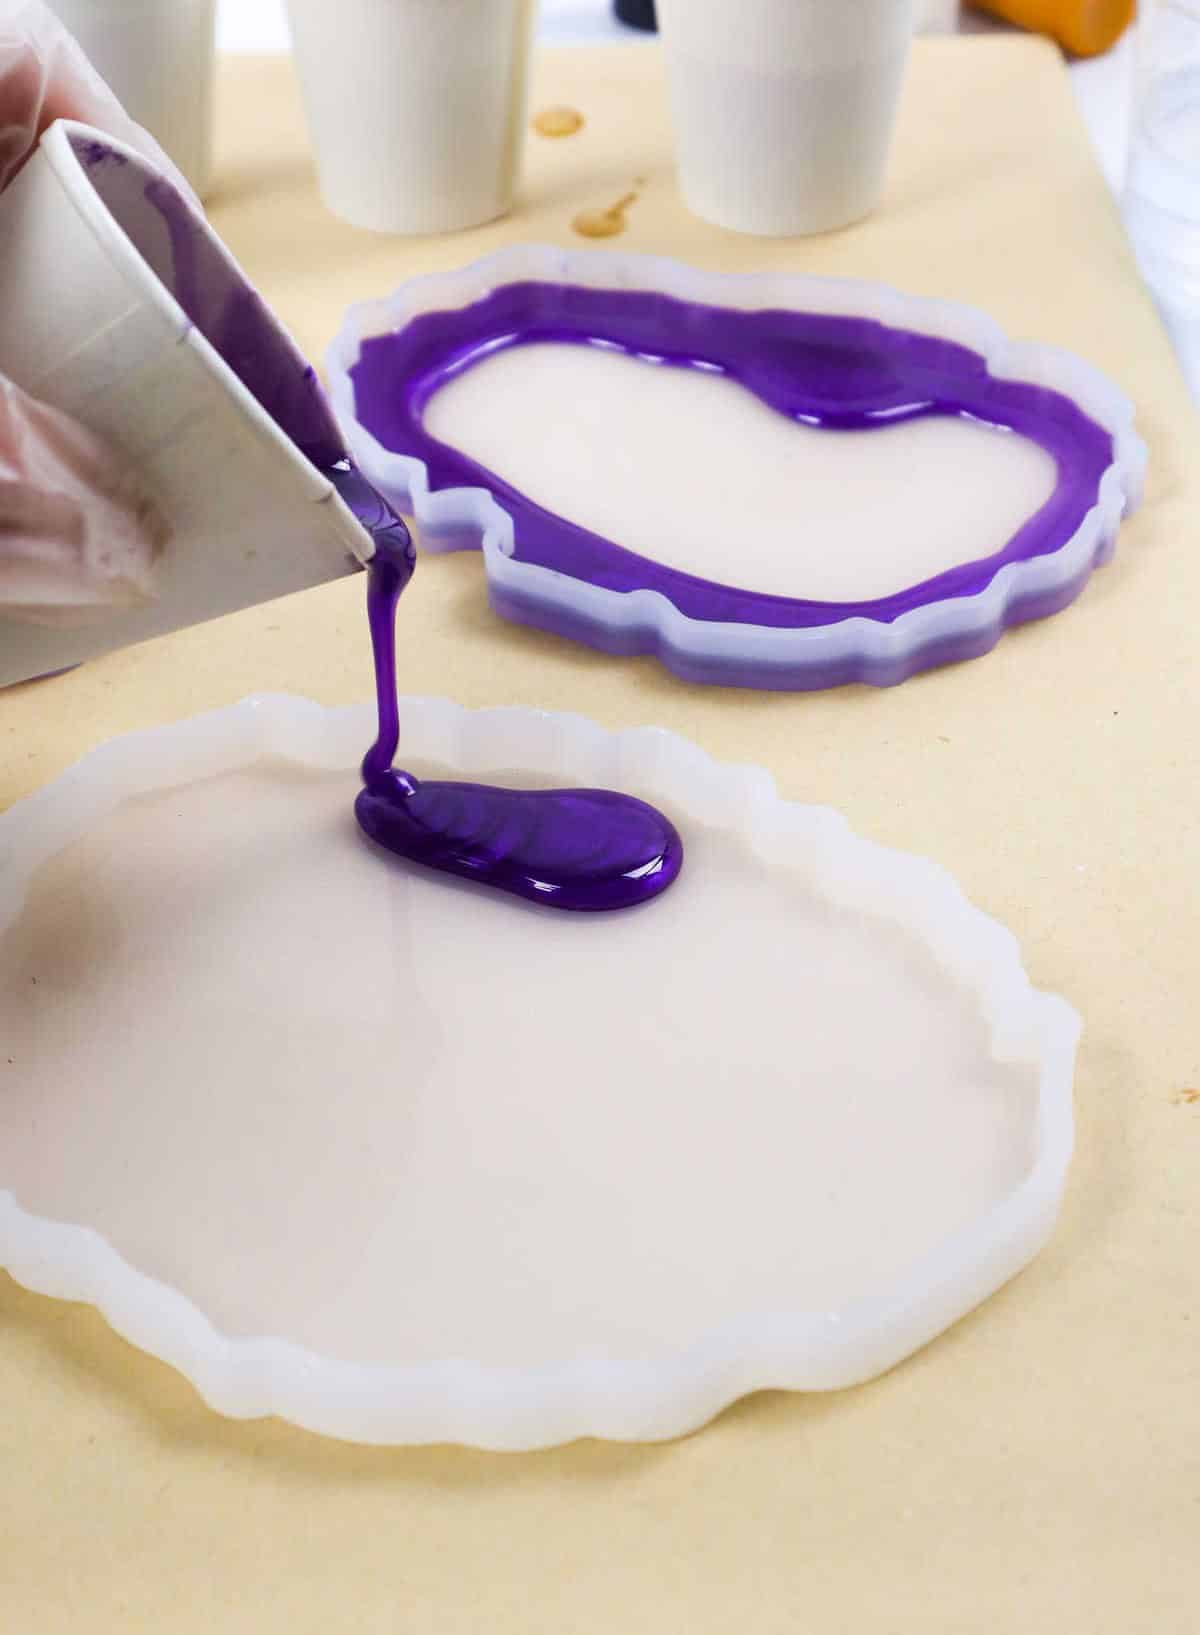
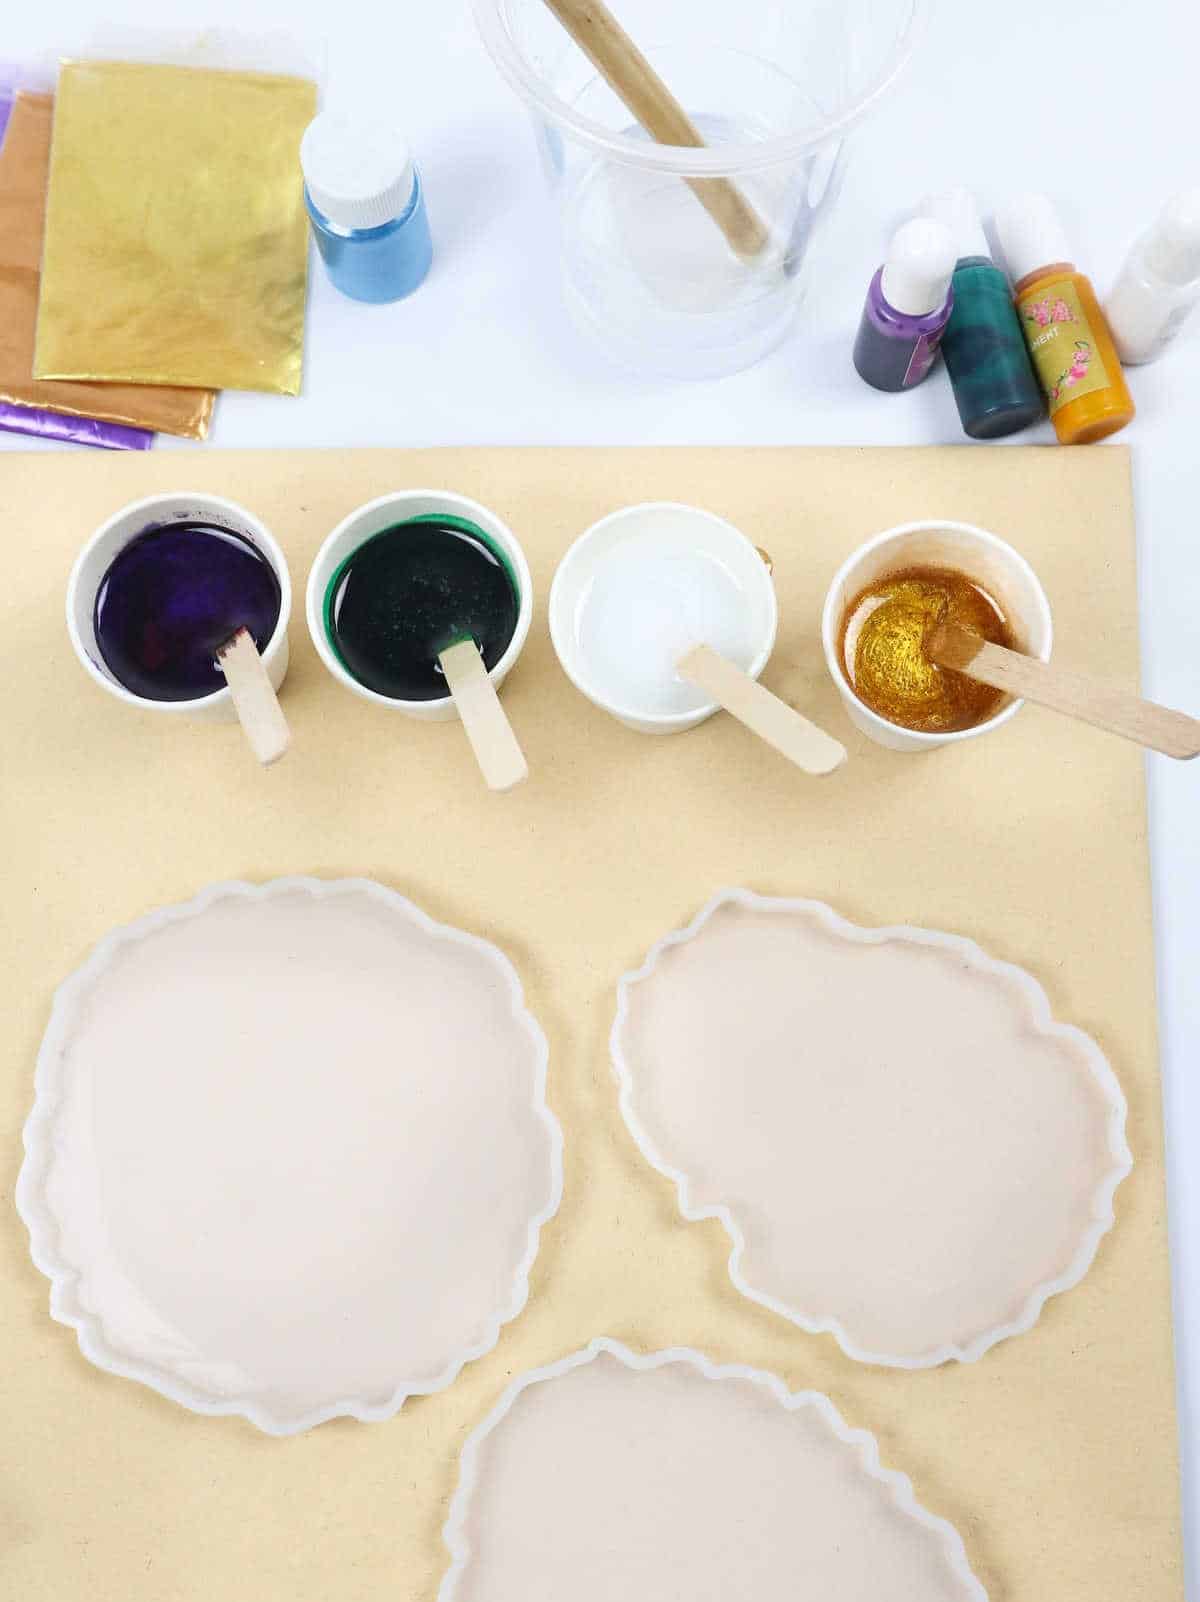
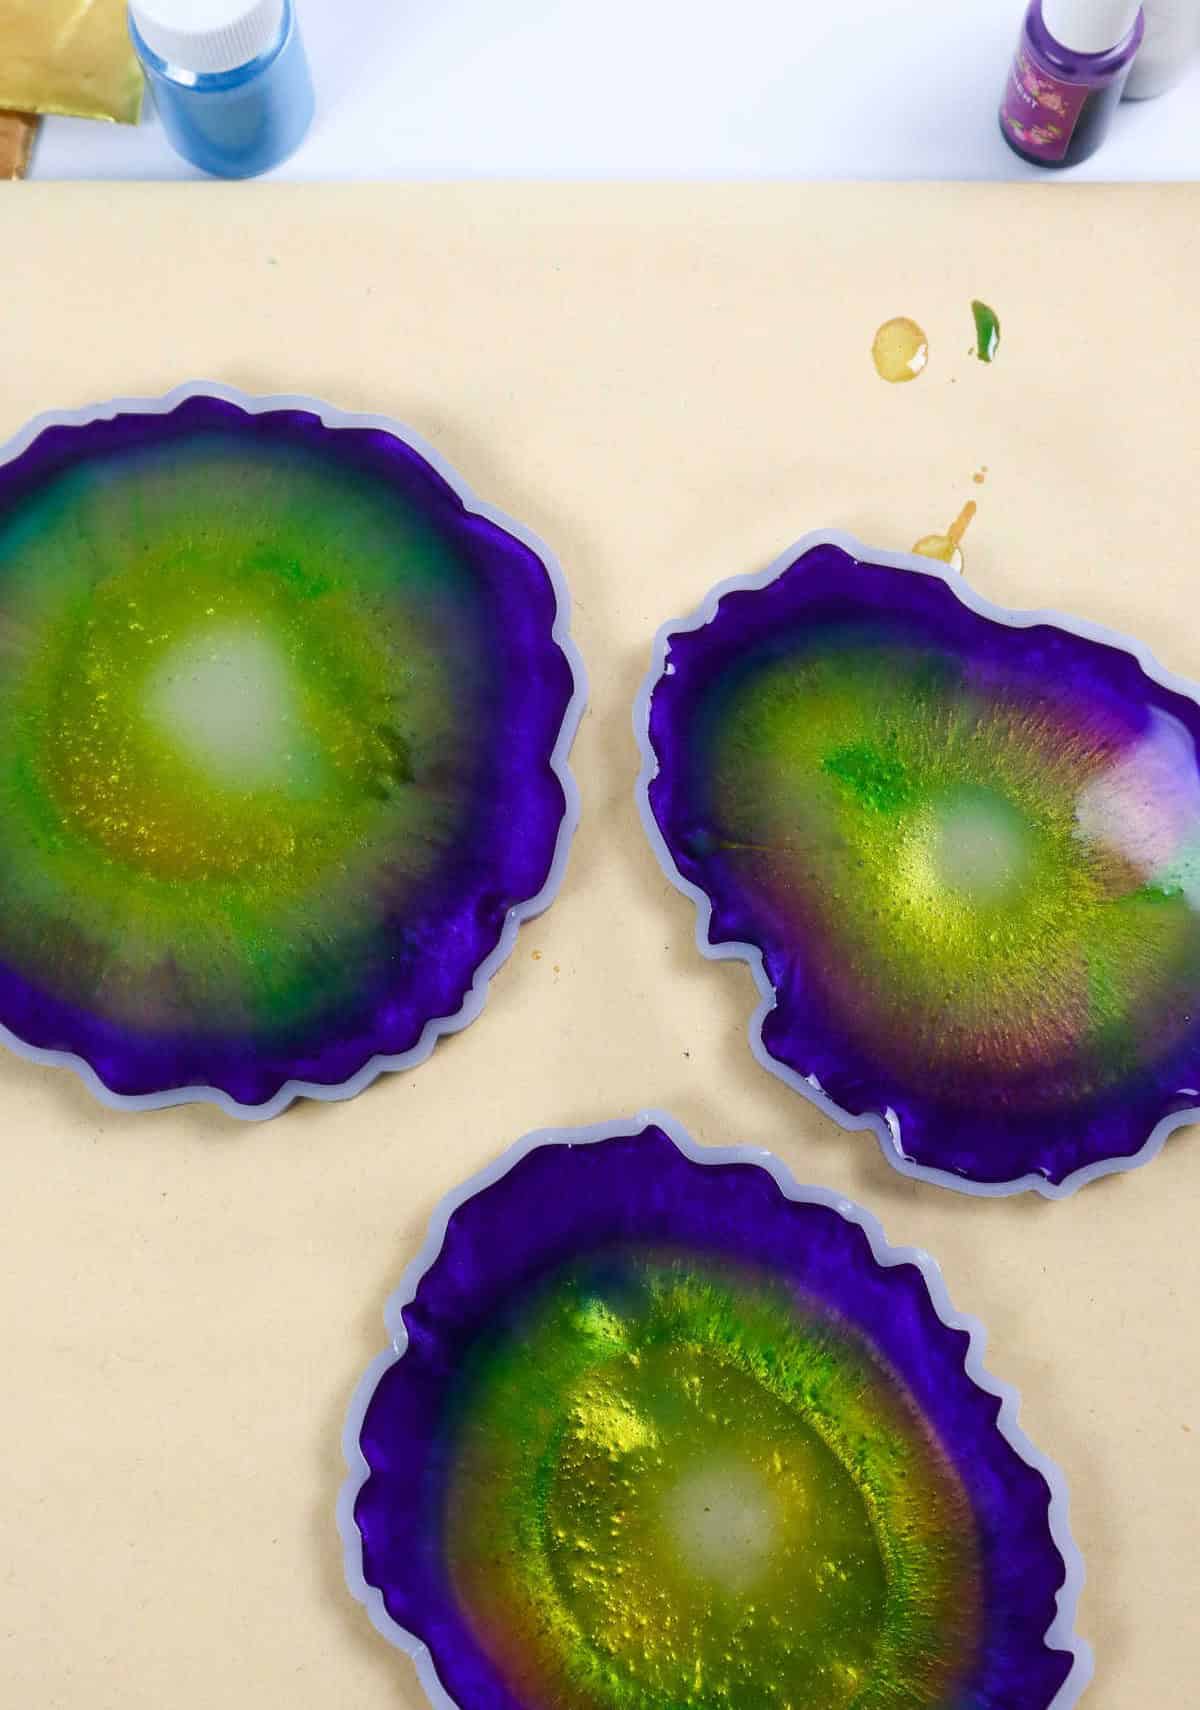
To begin, carefully pour a thin layer of purple colored resin onto the mold’s surface. This is crucial in achieving the desired pattern and controlling the resin’s curing process. By starting at the outermost layer and gradually working your way towards the center, you’ll be able to manipulate the flow and setting of the liquid resin with greater precision.
Step 6
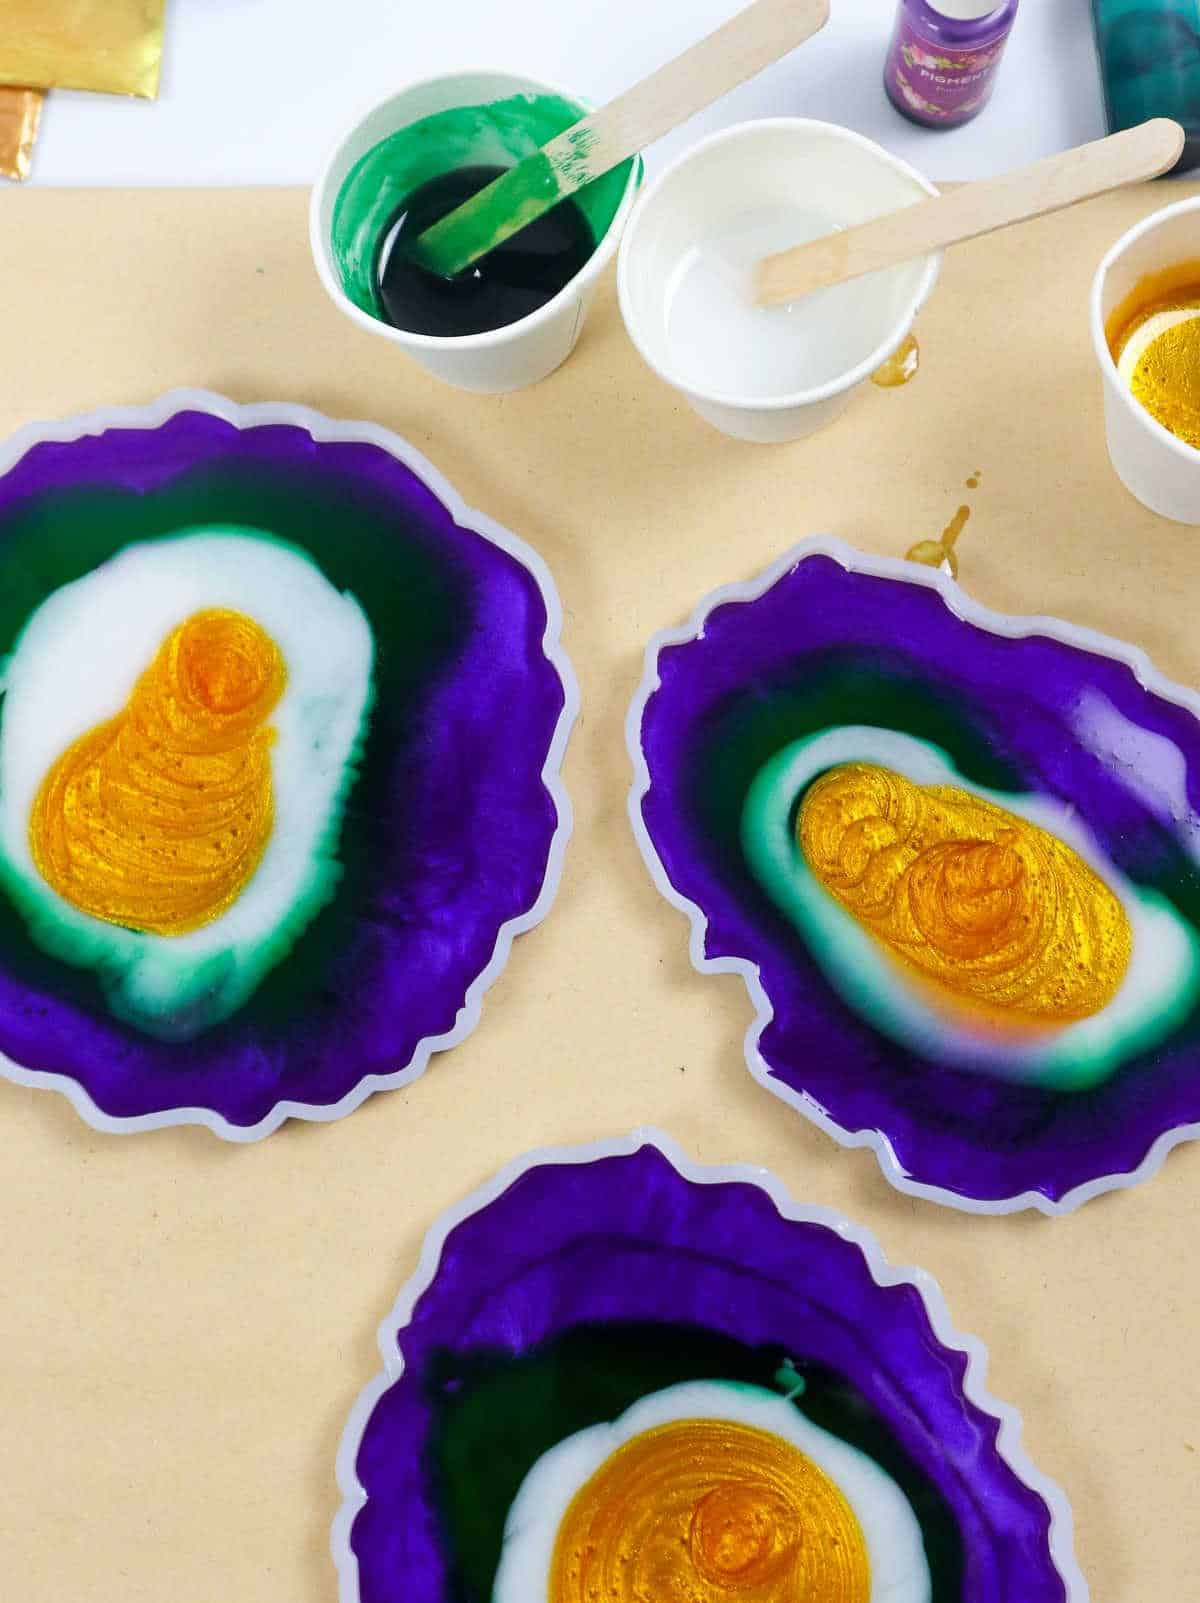
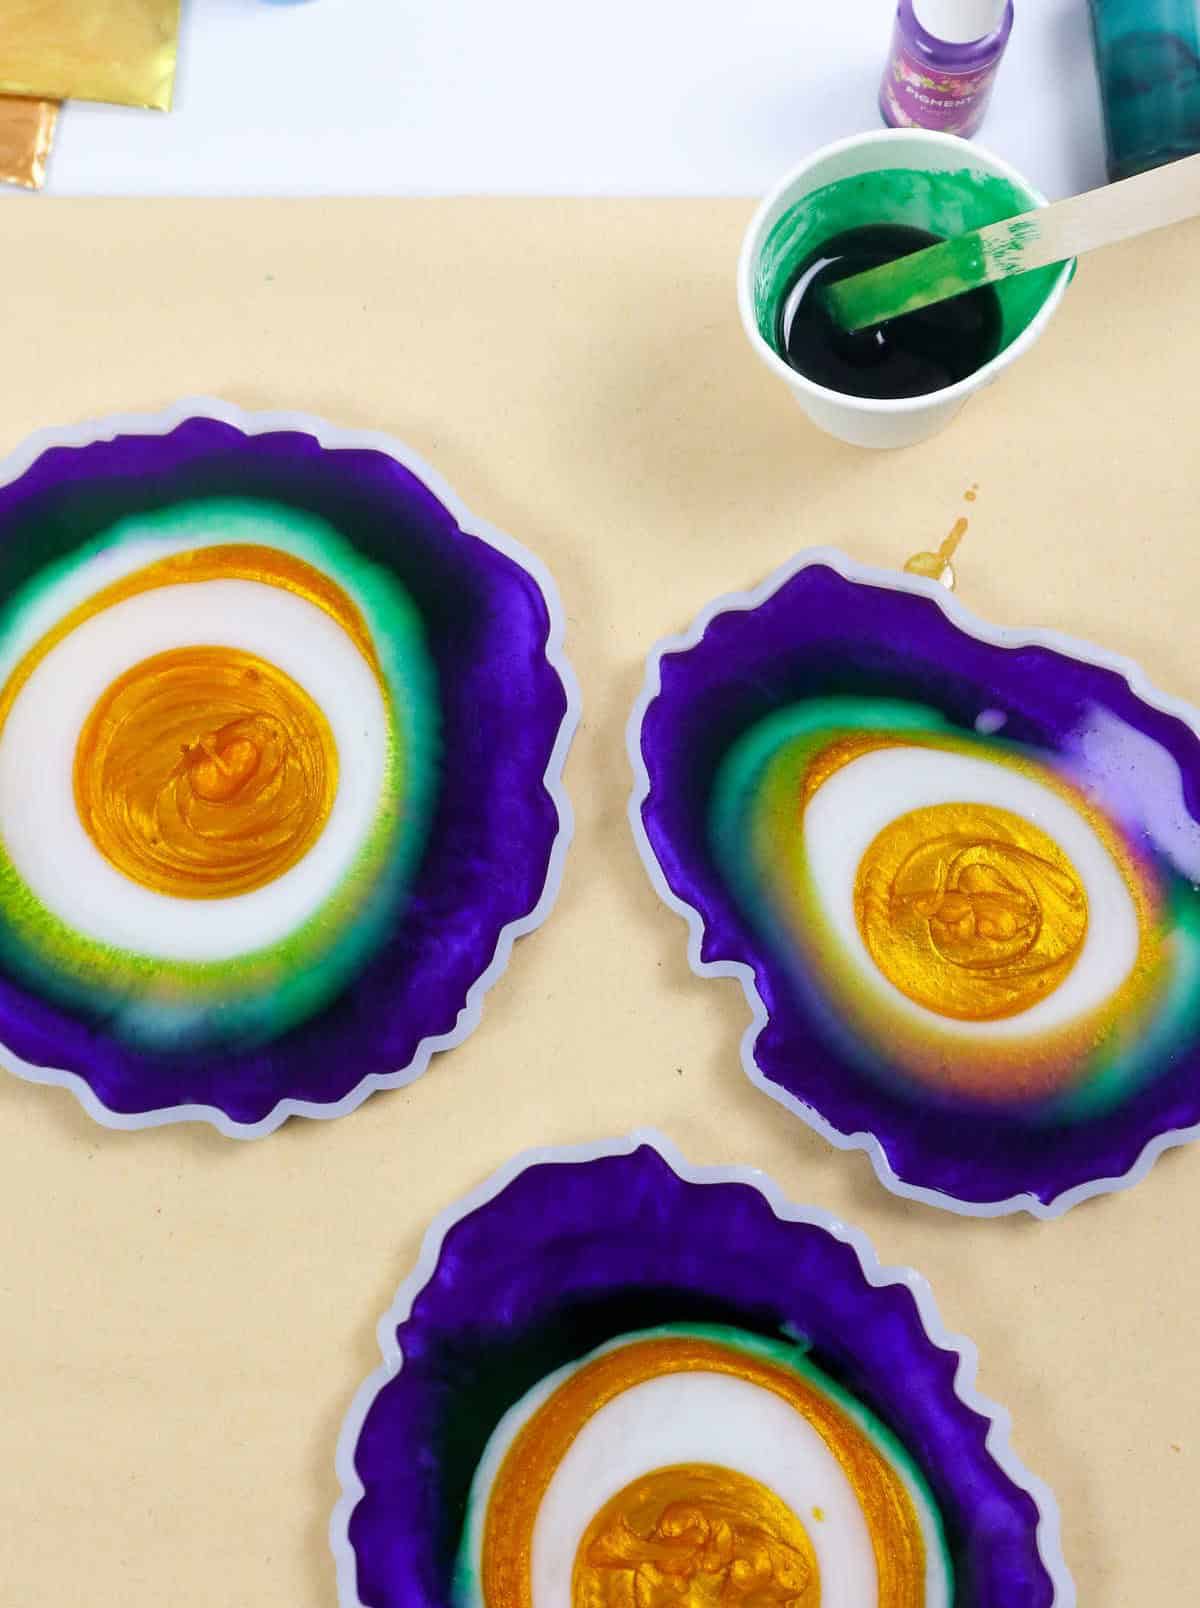

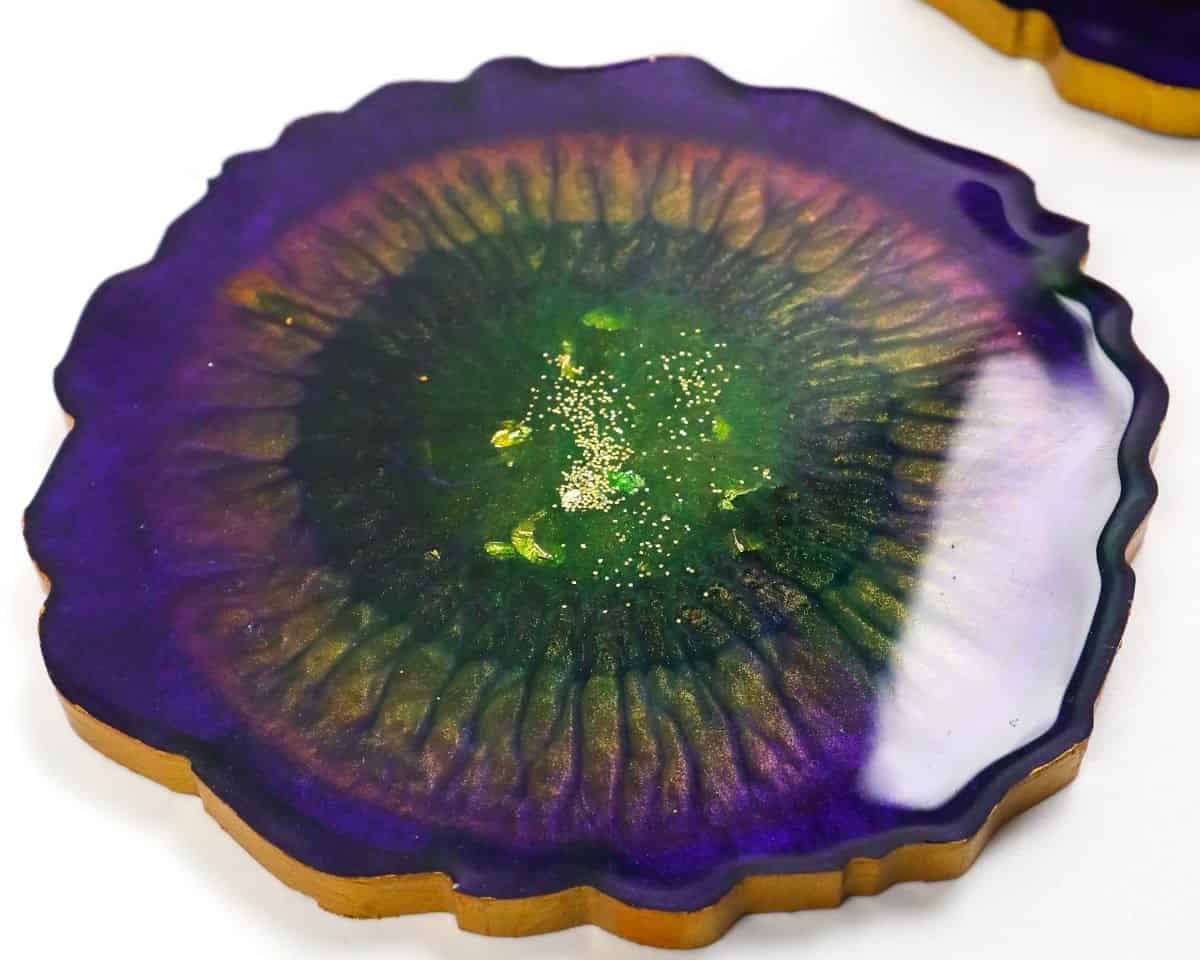
As you proceed with filling the mold, pour the remaining resin into the center, gradually working your way down each layer. The result will be a visually appealing coaster with the gold-colored resin as its centerpiece. Remember, there’s no one-size-fits-all approach to designing this unique piece, so take your time and feel free to experiment with different layer combinations until you’re satisfied with the final product.
Step 7
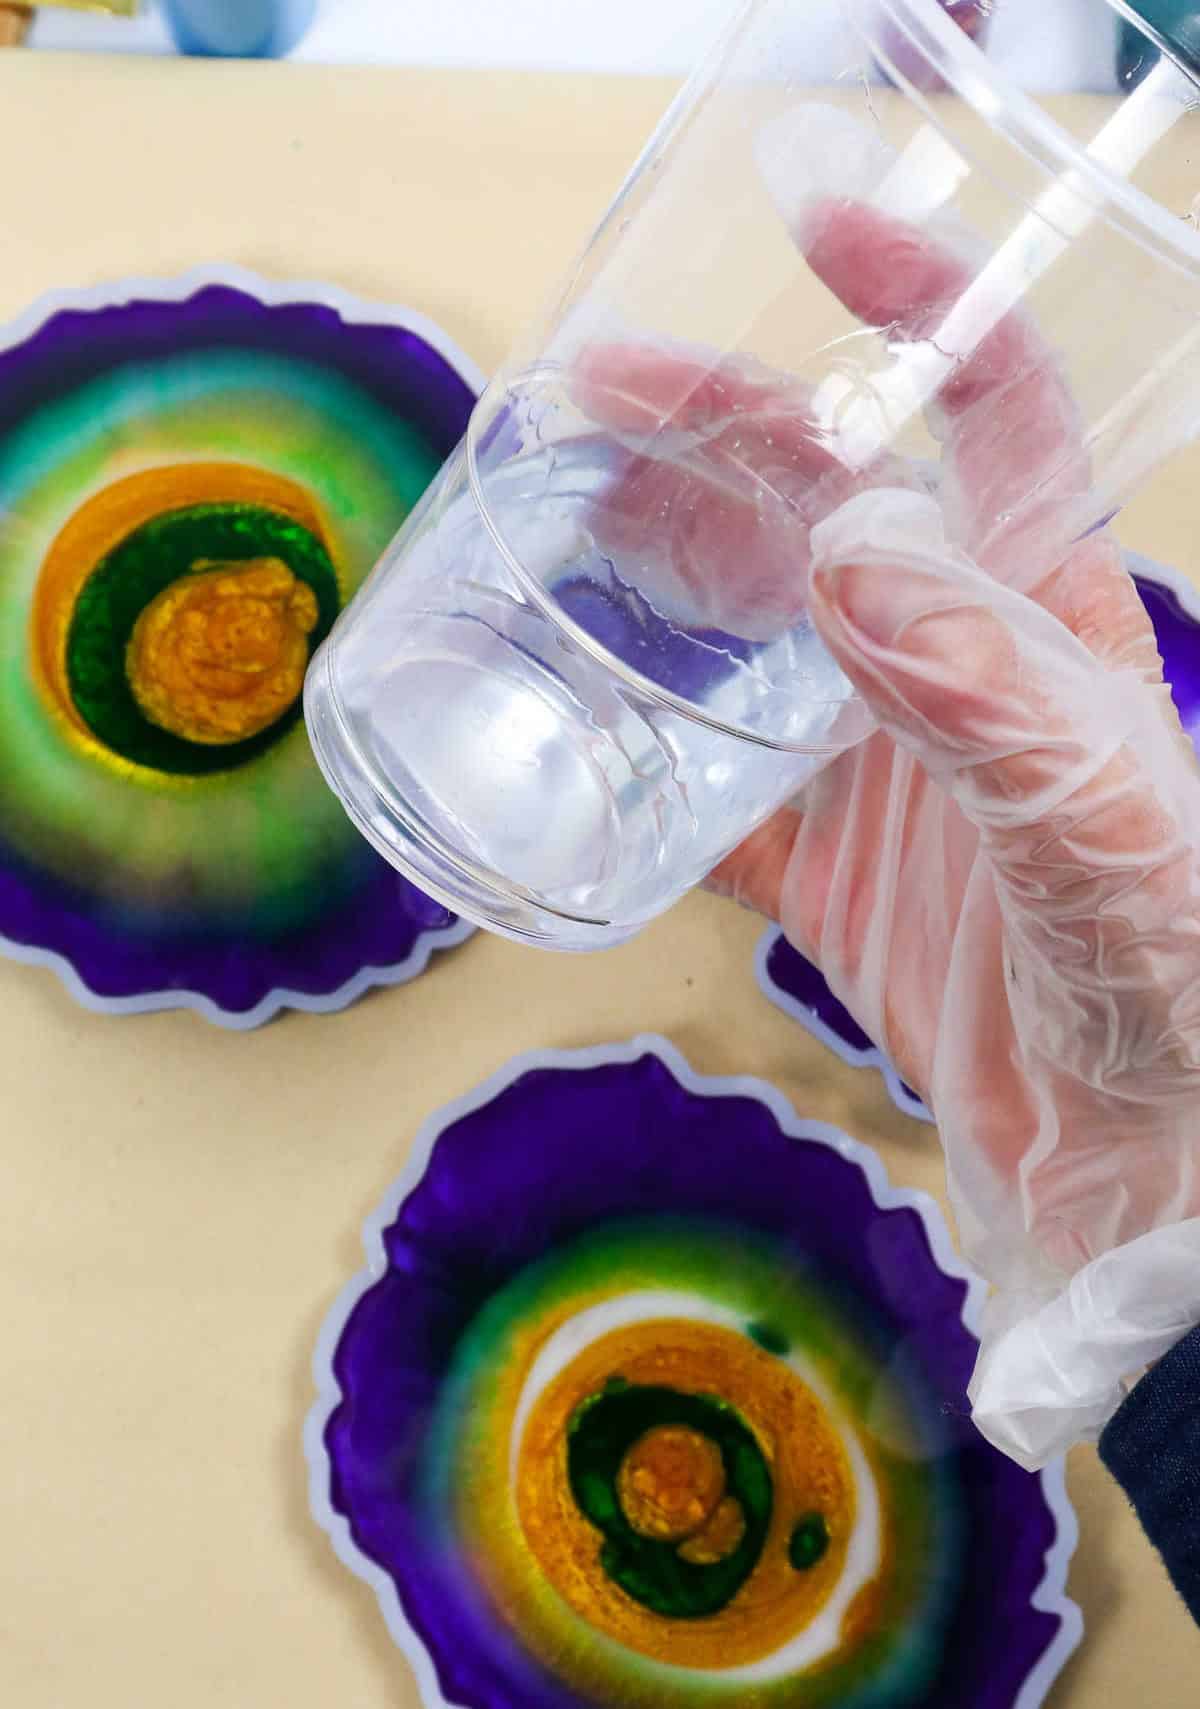
As we move forward with the project, recall the clear resin you reserved earlier. It’s time to reintroduce this transparent material into the mix. Its primary function is to envelop the recently crafted colored layers, inducing a domed effect that promotes uniform setting of the colors.
Step 8

When you first apply the resin, you’ll likely notice a number of air bubbles forming on the surface. Before the resin has a chance to harden, it’s essential to remove these bubbles to ensure a smooth finish. One approach is to use a toothpick to gently prick each bubble and then move on to the next one, taking care not to linger over the resin for too long.
Alternatively, you can employ a blowtorch to quickly dispel the bubbles.
Just be mindful of the proximity between the flame and the resin or mold, as excessive heat can cause damage. A brief, targeted pass with the torch should be sufficient to eliminate the air pockets, leaving your surface bubble-free.
Step 9
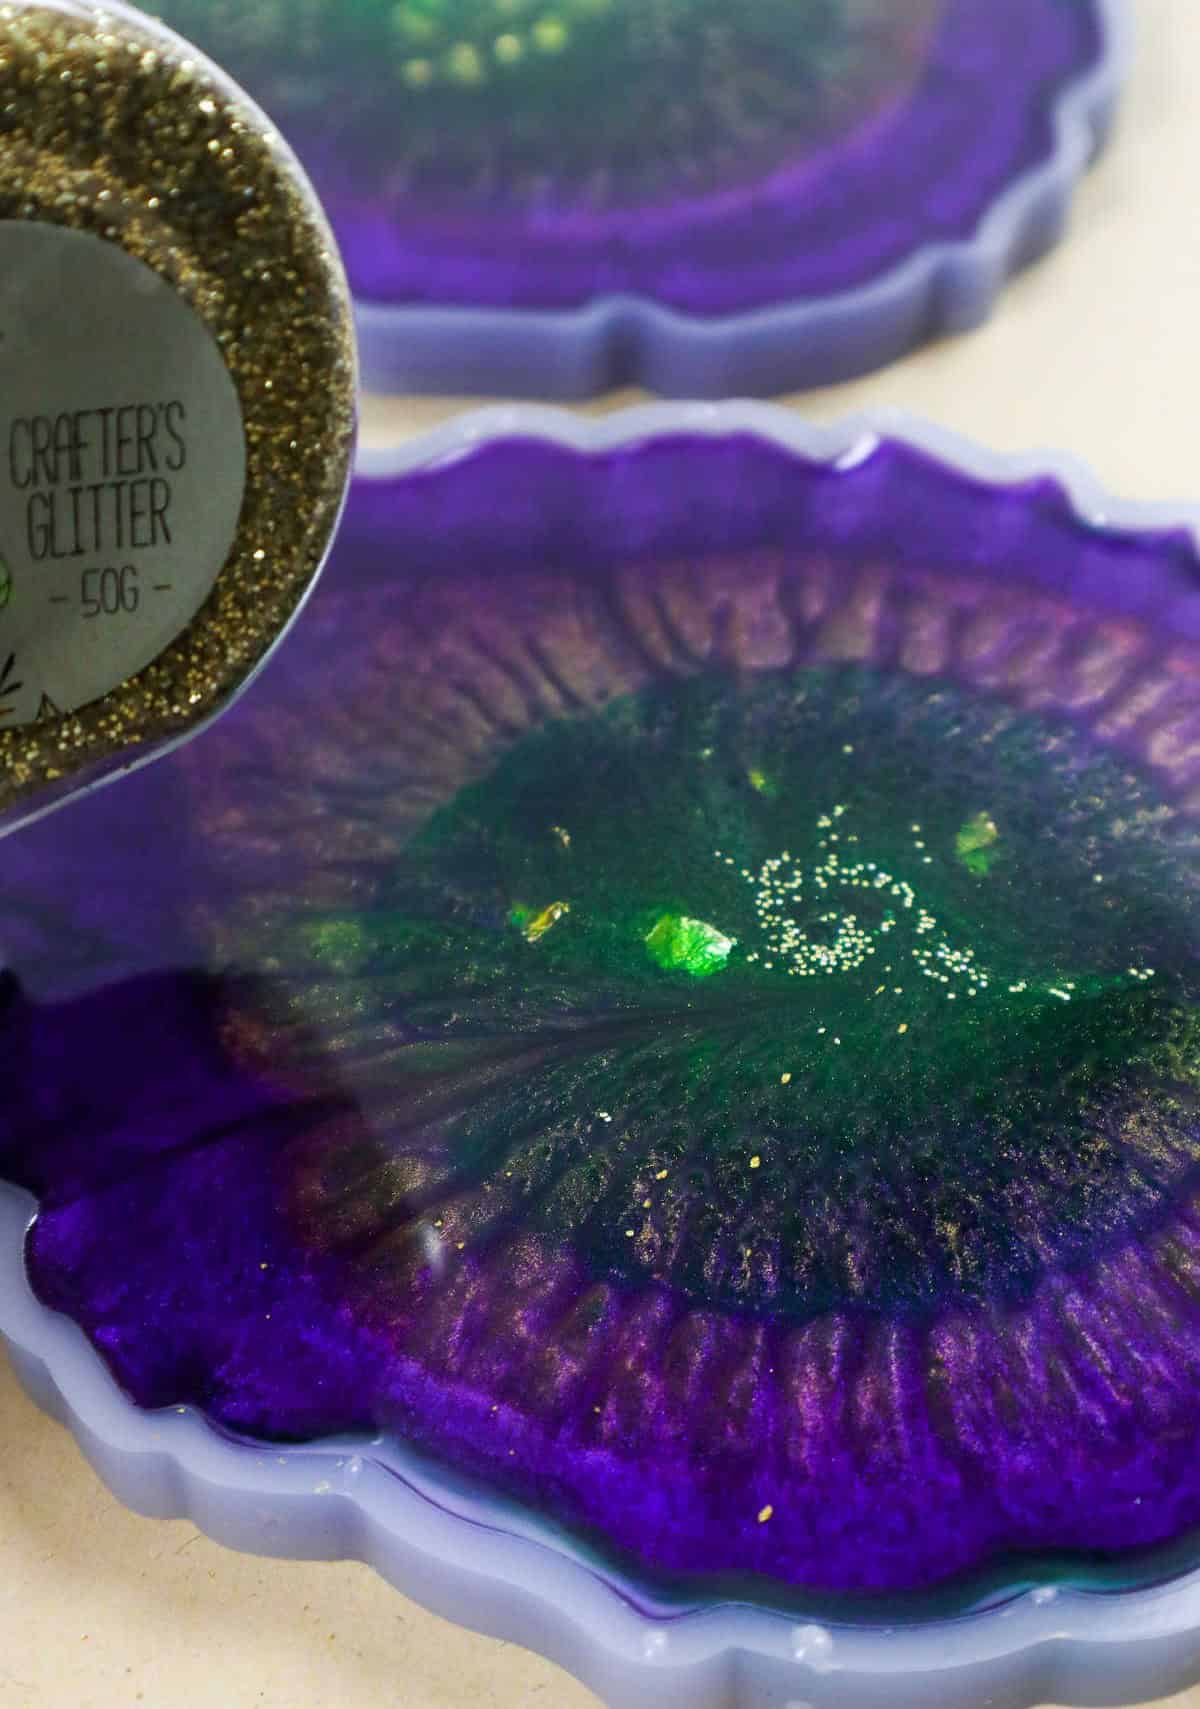
As you near the final stages of crafting your resin coasters, it’s time to unleash your creativity and add a touch of personality with decorative elements. Consider adding glitter, sequins, beads, or even small mementos to give each coaster its unique charm. This is also an opportunity to get creative with color and texture, experimenting with different combinations to create truly one-of-a-kind pieces.
Step 10
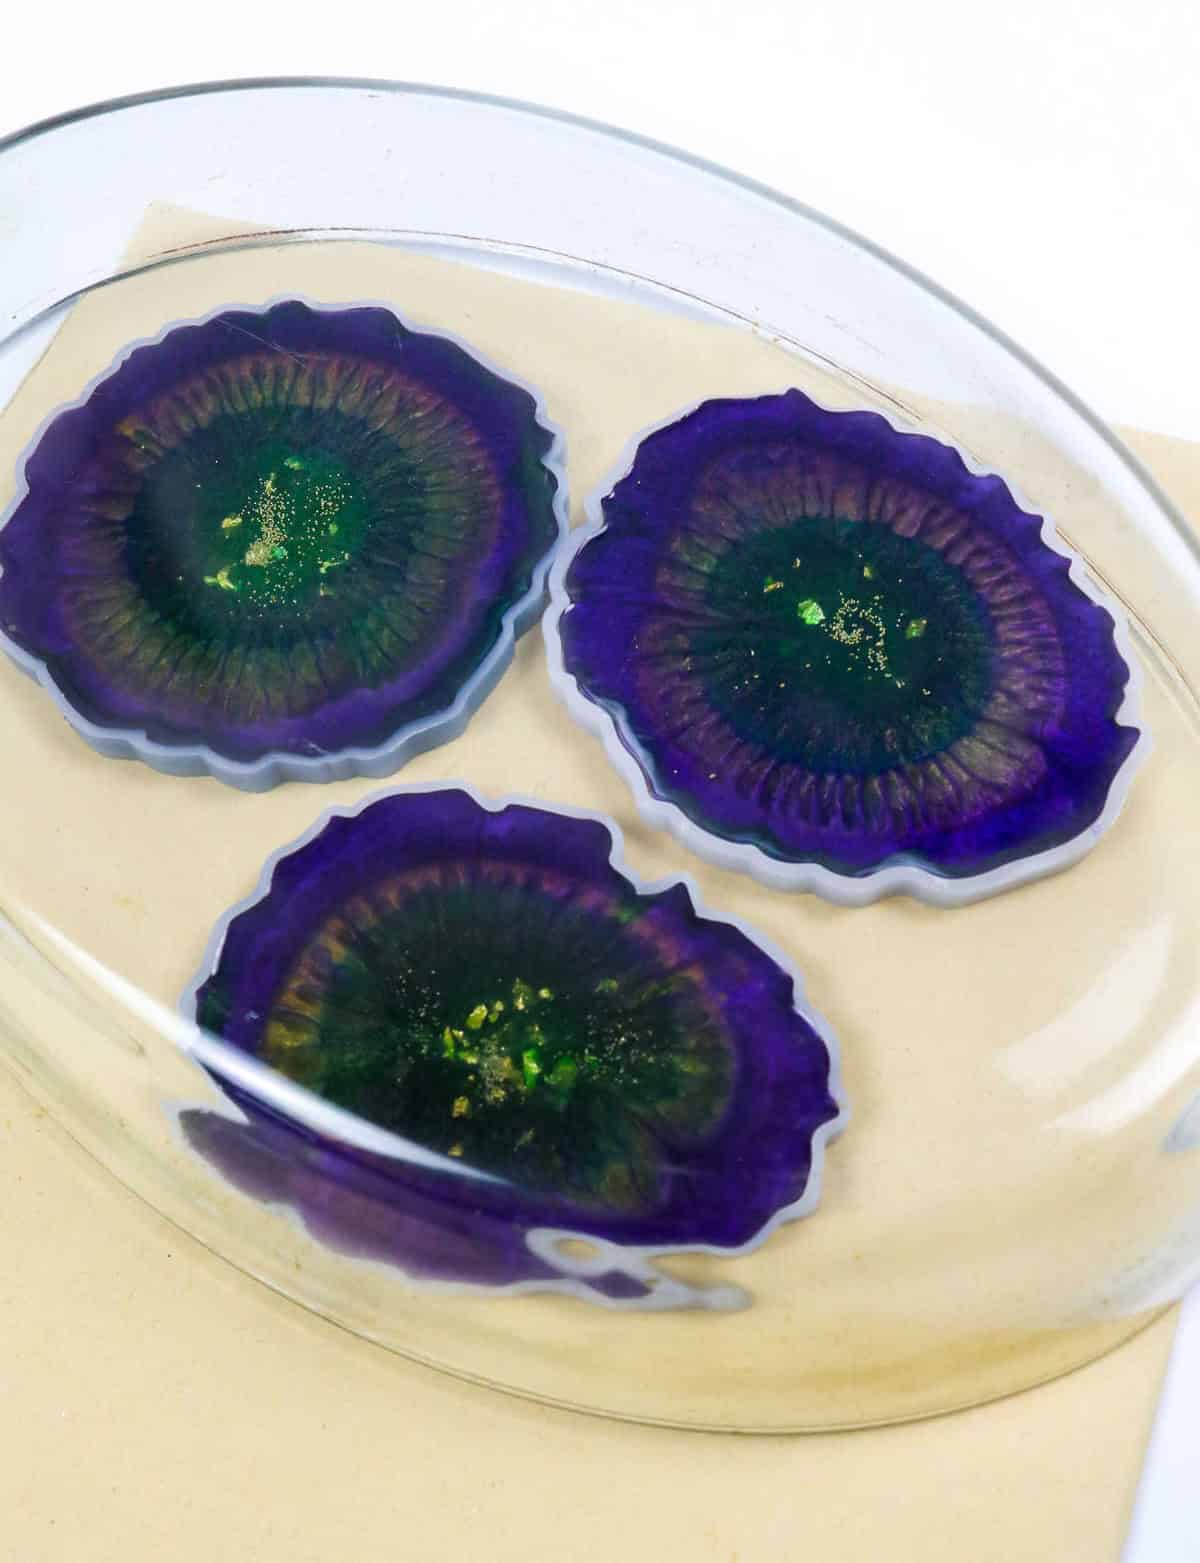
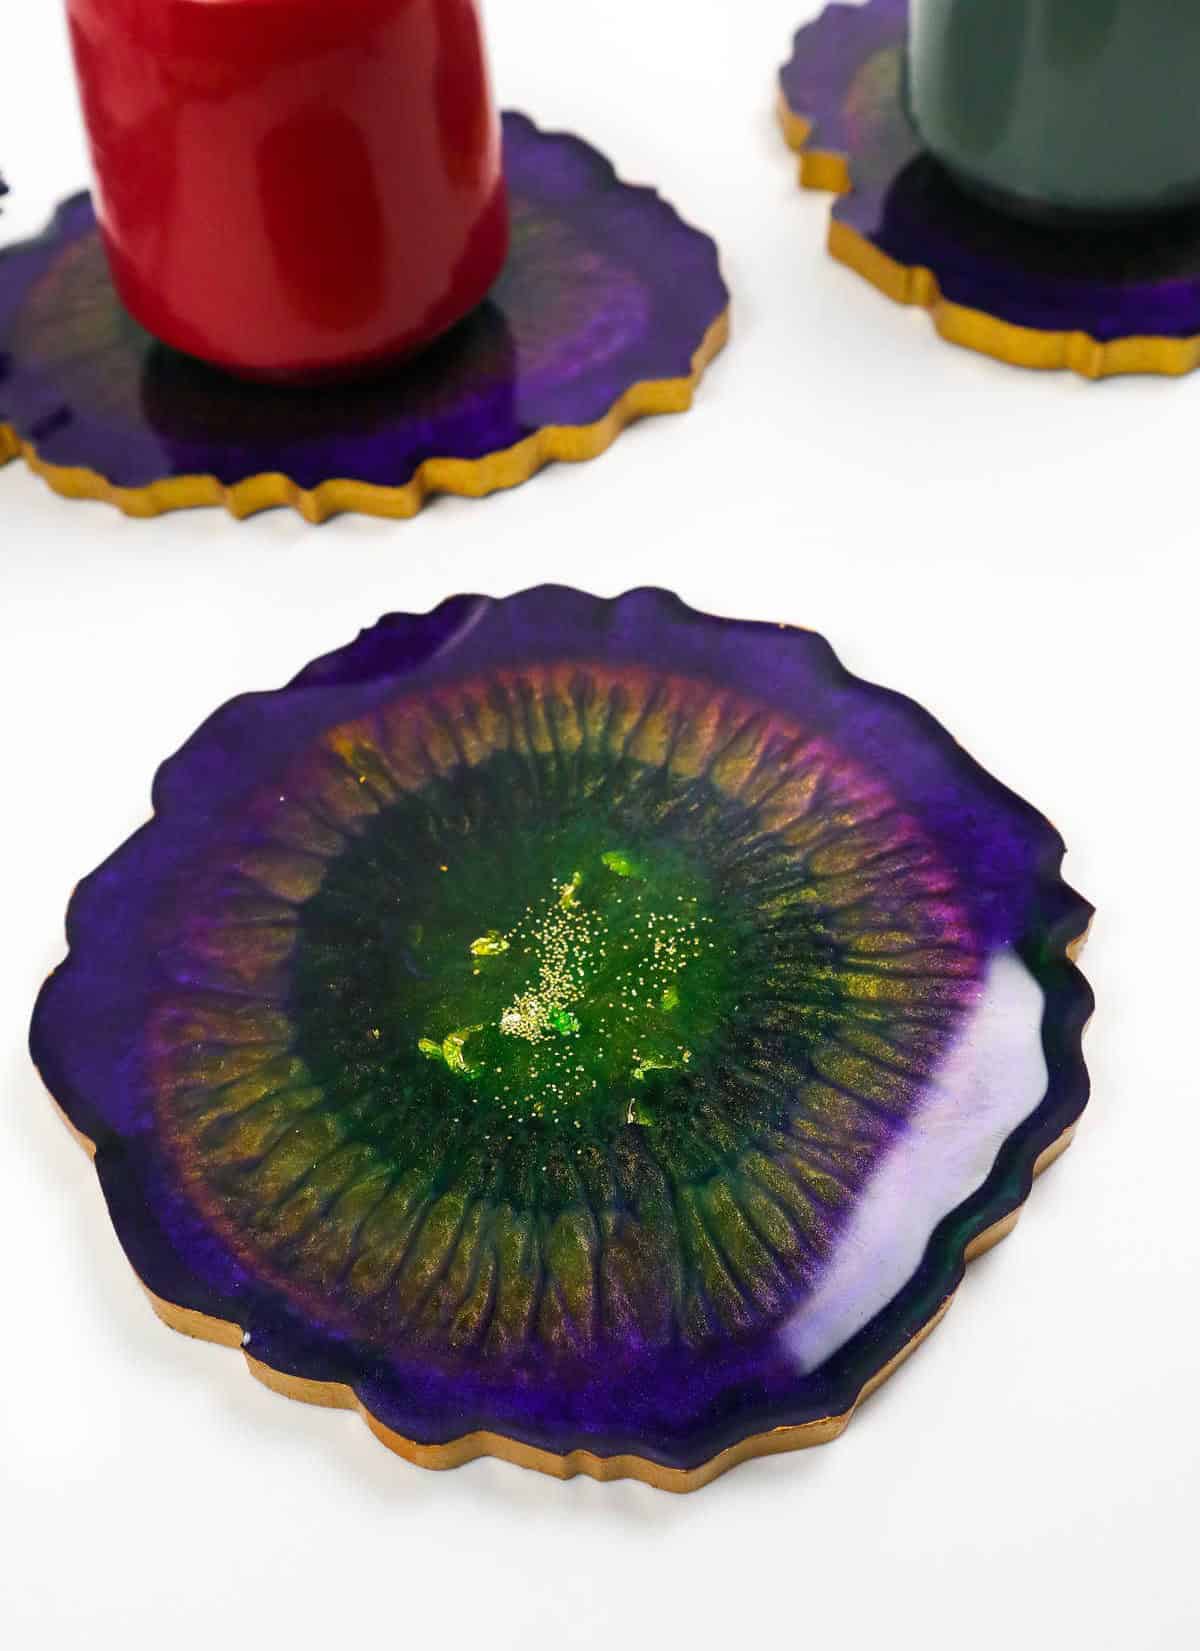
To safeguard your newly cleaned coaster, apply a raised glass or plastic protector, shielding it from dust and dirt particles as it dries. This process typically takes 24 to 48 hours, allowing the protector to effectively shield the surface without compromising its integrity.
Step 11
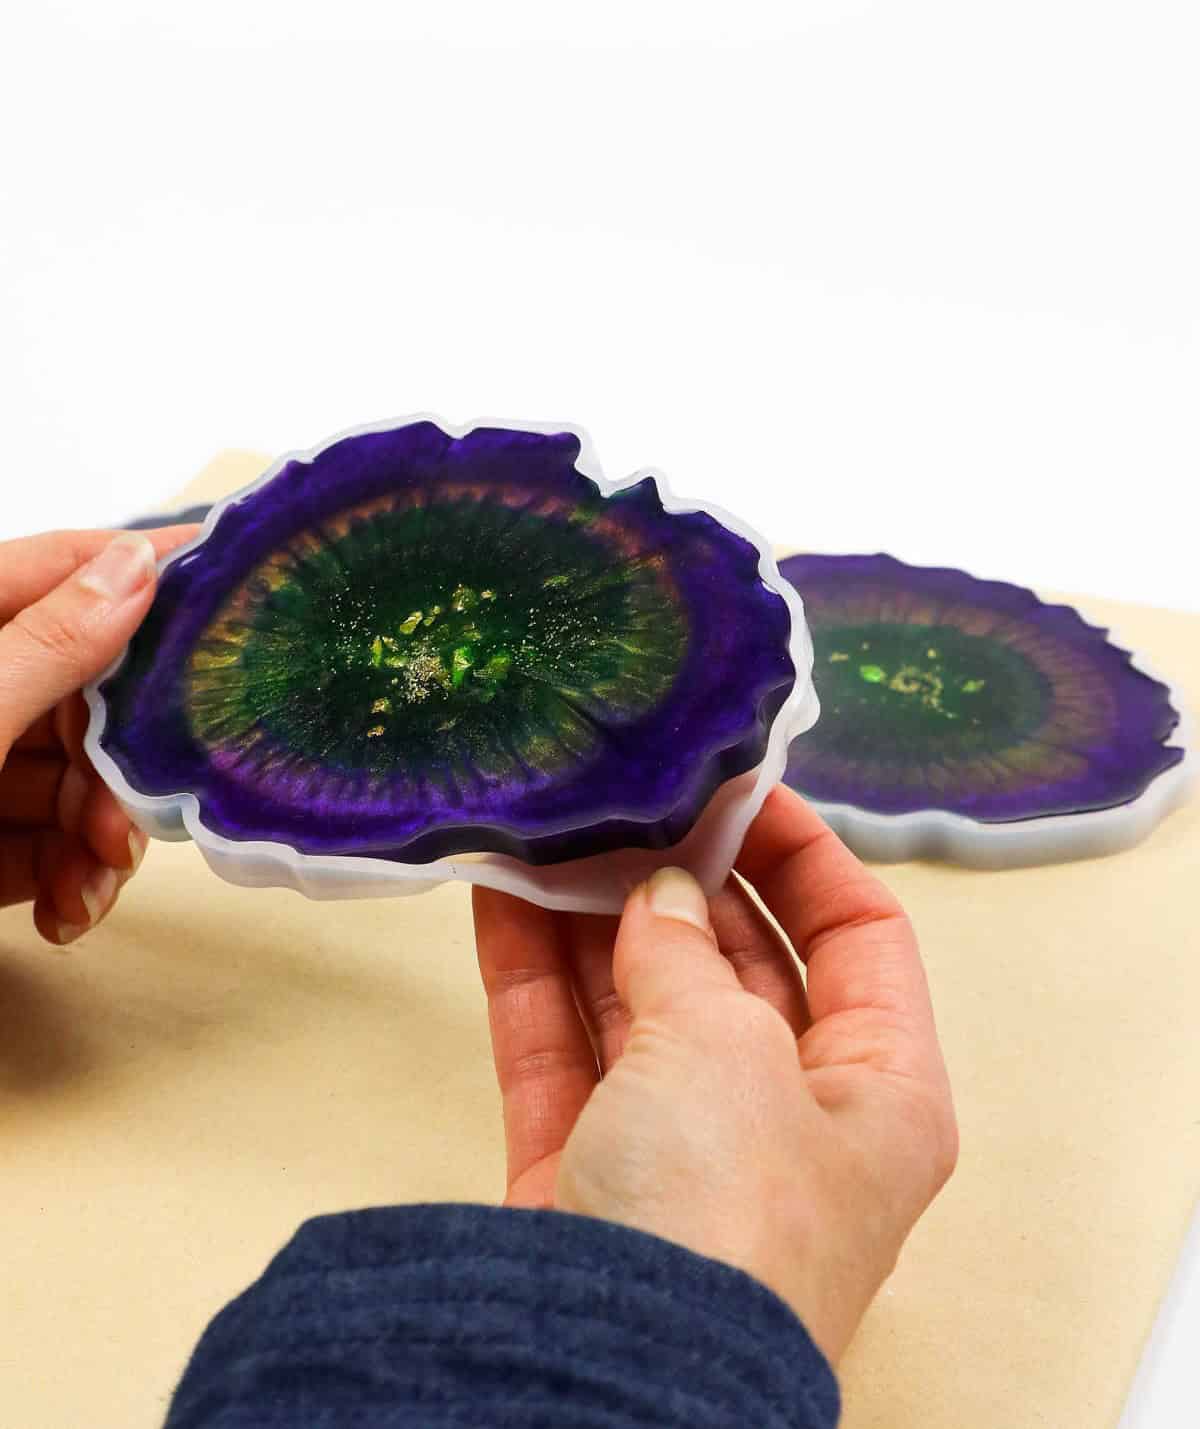

Once the resin has achieved complete dryness, proceed with gentle caution to remove the mold’s backing and coax the finished coaster free from its constraints.
Step 12
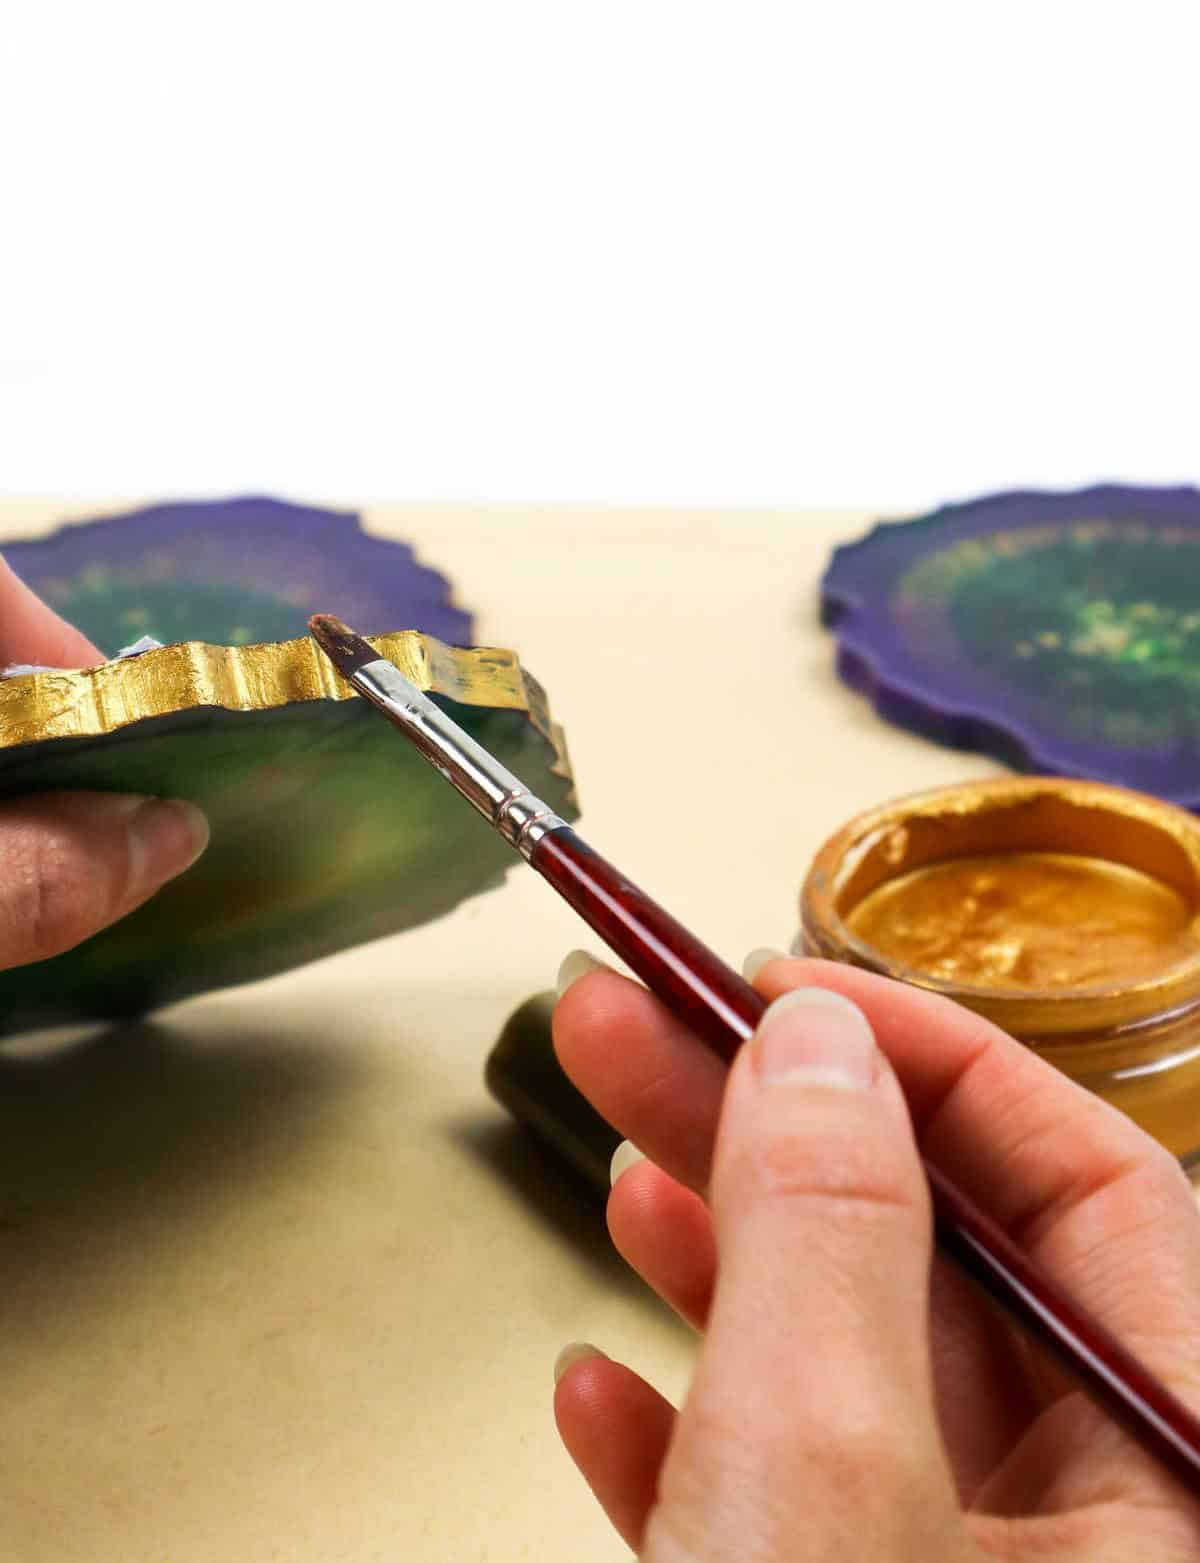

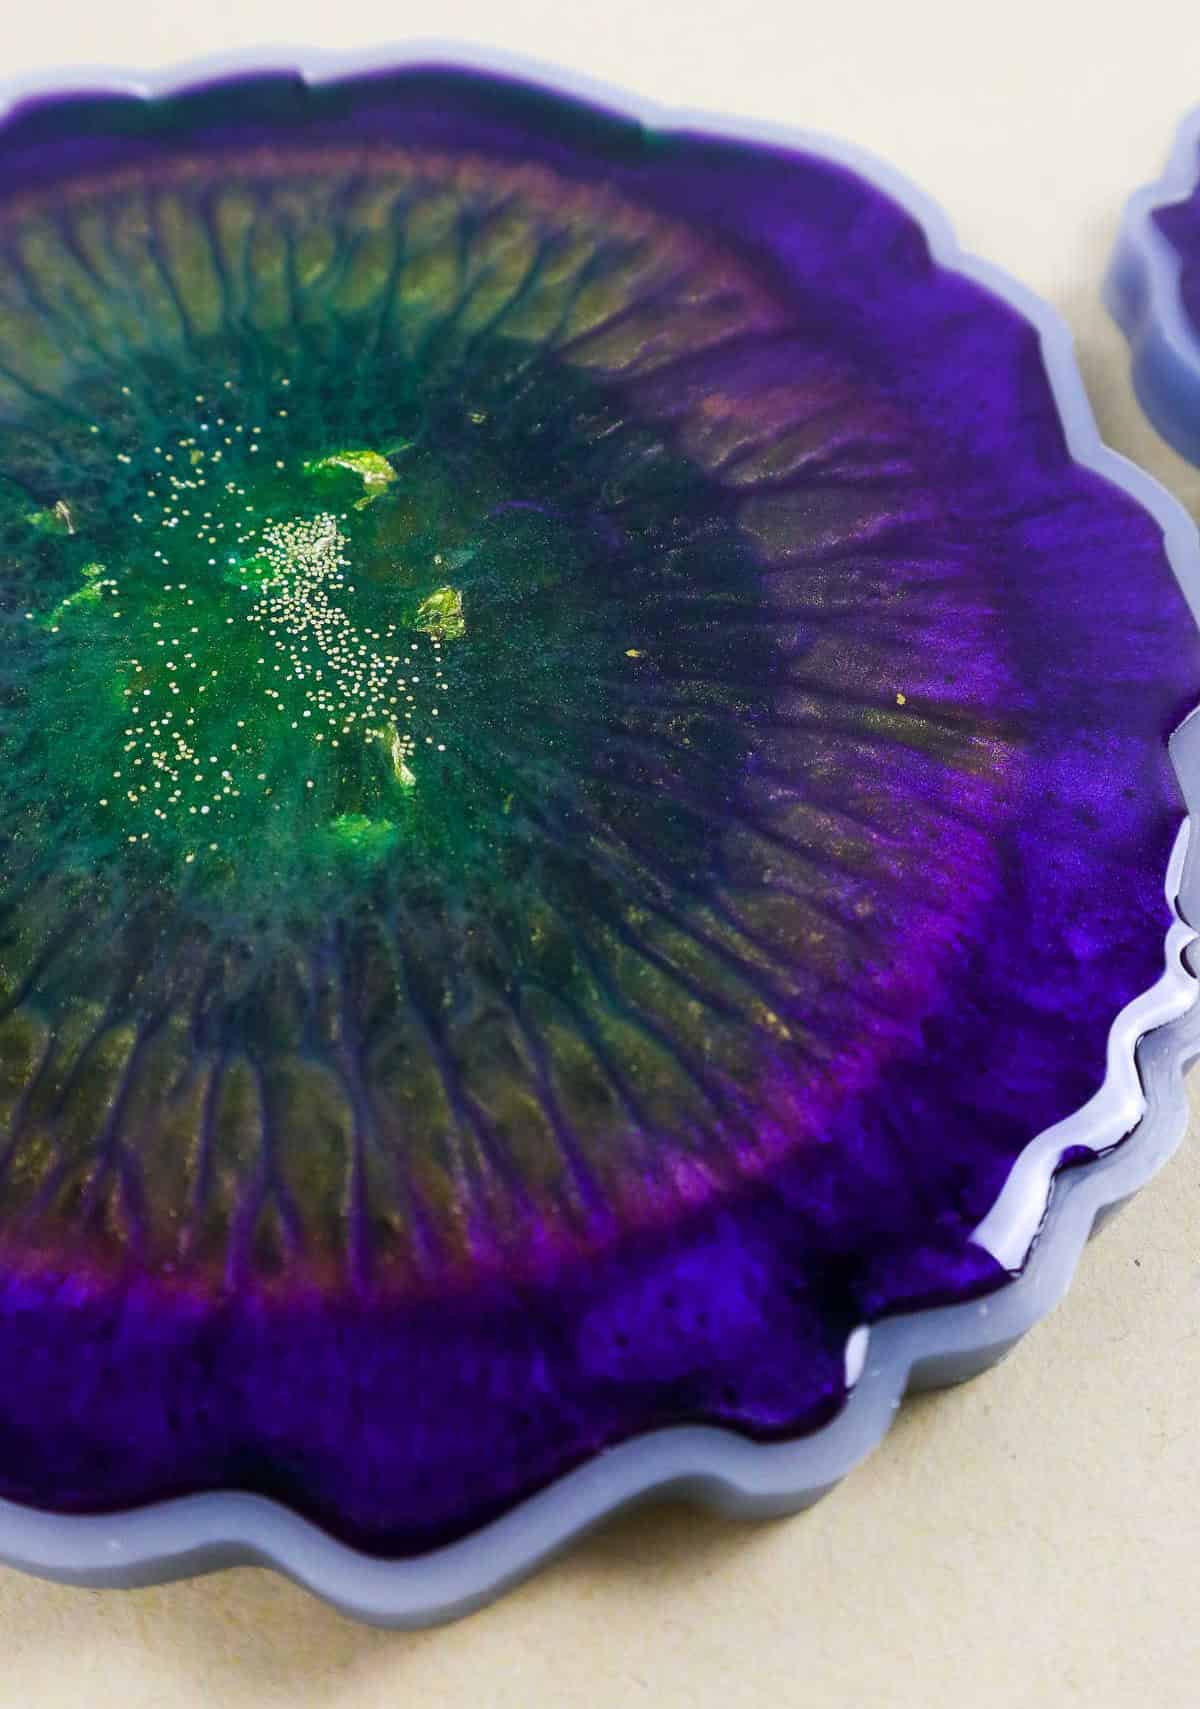
To elevate the visual appeal of your coaster, consider adding a touch of glamour by painting the edges with metallic gold paint. This finishing touch will give your coaster a sleek and sophisticated look.
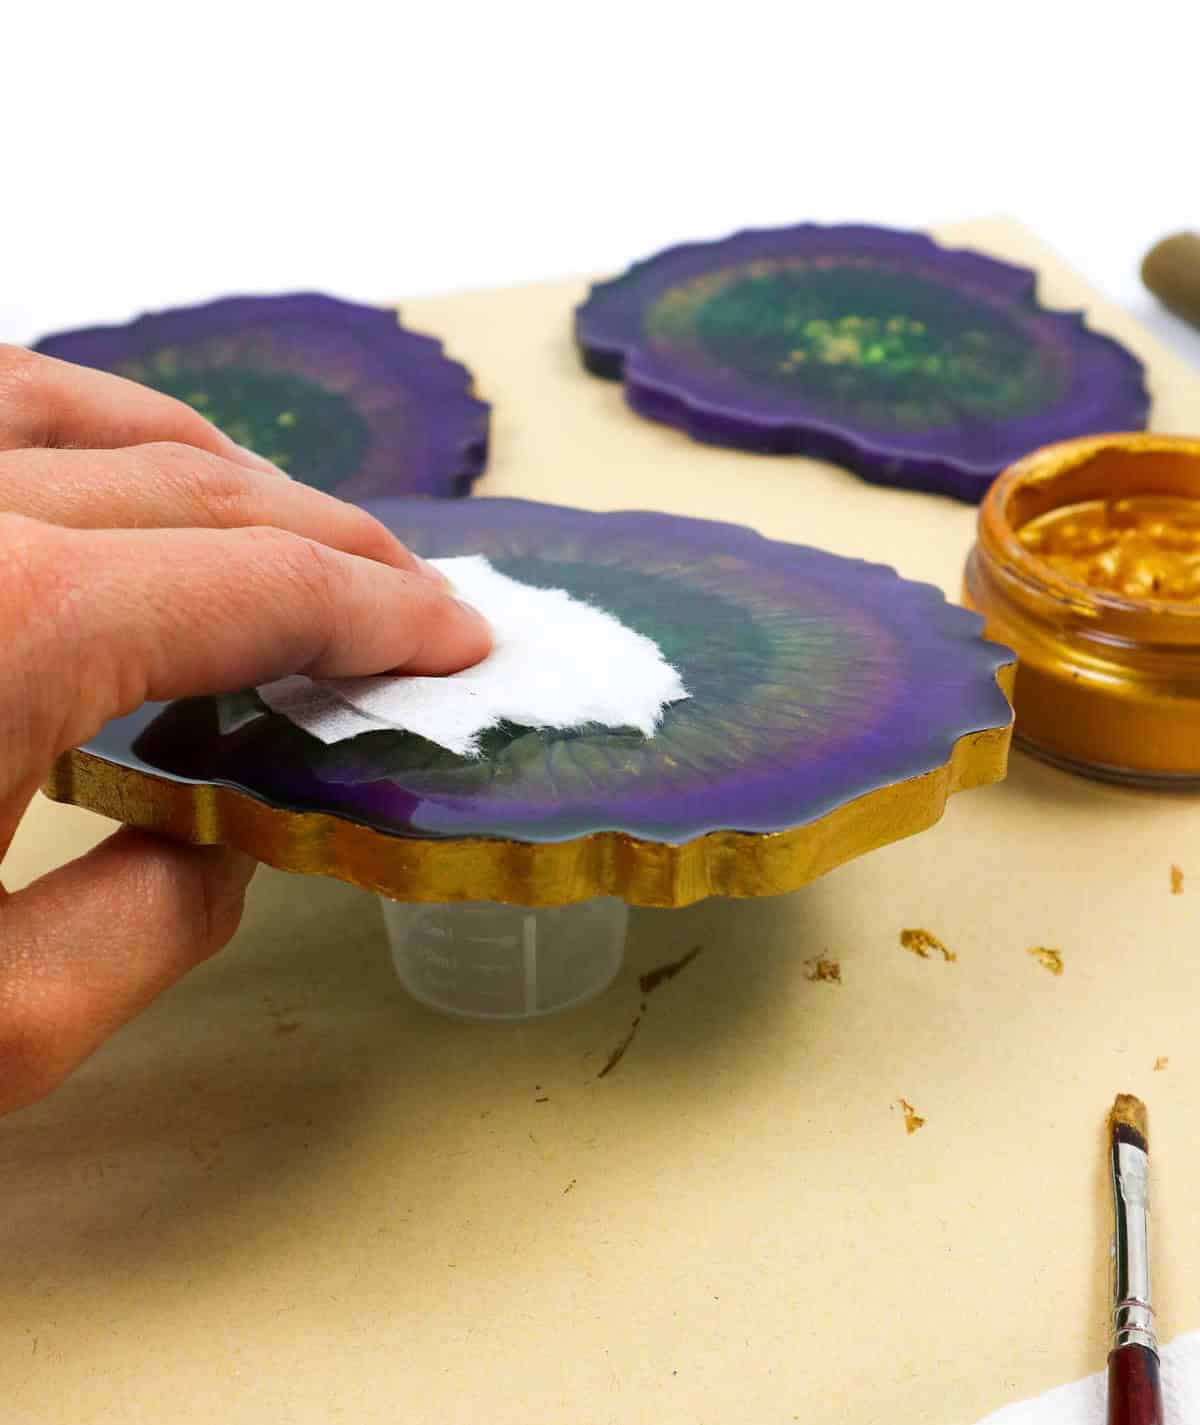
When applying the paint, make sure to prop up the coaster on a cup while it dries to prevent any smudges or fingerprints. Use a tissue to handle the coaster during this process to maintain its glossy finish.
Once the edges have fully dried, your DIY coasters are now ready for use, complete with their new sparkly accents.
How Long Should Resin Coasters Sit?
The drying process for your coasters can span anywhere from 24 to 48 hours, depending on their thickness. As a general rule, the thicker the coaster, the longer it will take to fully dry through. To be on the safe side, consider allowing them to set for at least two days before using. This prolonged period of drying time allows any excess moisture to evaporate, ensuring your coasters are completely dry and ready for use.
Is There a Difference Between Epoxy and Resin?
While it’s common for people to use the terms epoxy and resin interchangeably, they are actually distinct substances with different uses. The key difference lies in their application or function. Epoxy resin is designed to coat surfaces, whereas casting resin is intended to set or shape materials within molds. This distinction can be further complicated by various types of resin, such as epoxy coating resin, casting resin, and polyester resin.
However, the fundamental difference remains: epoxy resin is used for coating purposes, while casting resin is employed in molding processes.
How to Make Sure Coasters Are Heat Resistant

To create a coaster using resin, it’s crucial to select a product that can withstand high temperatures. If the resin is not heat-resistant, placing hot mugs on its surface will cause damage or alteration of the material. To ensure your coaster remains unaffected by heat, opt for a resin specifically designed for this purpose. When purchasing resin, verify that it has been formulated with heat resistance in mind to guarantee a durable and long-lasting coaster.
Other Crafts You Might Want to Make
Get creative with these DIY projects that are perfect for beginners! Whether you’re looking to spruce up your home decor or create unique gifts, these affordable ideas will inspire you. Start with some clever Dollar Store decorating tricks, then get crafty with rock painting, yarn creations, and pine cone crafts. If you’re looking to monetize your creativity, consider making crafts to sell. And don’t forget about the fun projects for teens that are perfect for bonding or just having a good time.
With 20, 37, 33, and 41 ideas to choose from, you’ll be all set to unleash your inner DIY enthusiast!
How to Make Resin Coasters (Step-by-Step)
By transforming a few simple materials into beautiful DIY resin coasters, anyone can add a touch of personal style to their home. This fun and easy craft is perfect for adults and teens looking to express their creativity. With only 30 minutes of total time invested, you’ll have a unique decoration that’s sure to impress.
Equipment
When it comes to cooking, having the right tools can make all the difference. From silicone molds that ensure perfect shapes and releases for cakes and desserts, to plastic cups and placemats that provide a clean and organized workspace, having a well-stocked kitchen is key. But what about the little things that can make a big impact? Take spatulas, for instance – they’re essential for scraping the sides of bowls and folding ingredients together with ease.
And then there are the more specialized tools like a kitchen torch, perfect for caramelizing sugars or adding a crispy texture to dishes. A paint brush might seem out of place in the kitchen, but it’s actually great for applying sauces or seasonings evenly. And finally, there are the personal protective items that can help keep you safe while cooking, such as face masks and gloves.
By having these tools at your disposal, you’ll be able to prevent sleep deprivation caused by constantly having to adjust your screen brightness – just let the recipe guide on your device stay lit for you!
Materials
When it comes to crafting with epoxy resin, having the right materials at your disposal is crucial. At the foundation of any successful project are the fundamental components: epoxy resin itself, hardener, and pigments that give it color and texture. For added visual interest, you may also want to incorporate mica powder or other decorative elements. But what about when you’re looking to add a little extra flair?
That’s where acrylic markers and paints come in – providing a range of creative possibilities for embellishing your resin creations. And if you’re feeling particularly festive, why not toss some glitter into the mix?
Instructions
To begin creating your coasters, gather all the supplies and take note of the proportions of resin and hardener. In a plastic cup, mix both substances together thoroughly using a stick, taking care not to leave any lumps or unevenness. Set aside a small portion for later use. Divide the mixed resin into four smaller cups, adding different colors of liquid dye and mica powder to each cup and stirring until well combined.
Pour each color onto the mold, starting from the outer layer and working your way inwards. This will give you control over the spreading of the liquid. Feel free to experiment with various color patterns and designs. Once satisfied, pour the clear resin set aside earlier over the colored layers, allowing it to spread evenly to the edges. To eliminate bubbles, use a toothpick or quickly pass a blowtorch flame over the surface, being cautious not to burn the resin or mold in the process.
You can also add gold flakes and glitter at this stage, pouring more resin over them for a top coat. Repeat the bubble removal process. Cover the coasters with a protective layer to shield from dirt and dust particles. Allow the coasters to dry for 24-48 hours before popping them out of the mold. Next, paint the edges with glittery gold paint and prop them up on a small cup while waiting for the paint to dry. Once dried, your coasters are ready for use!