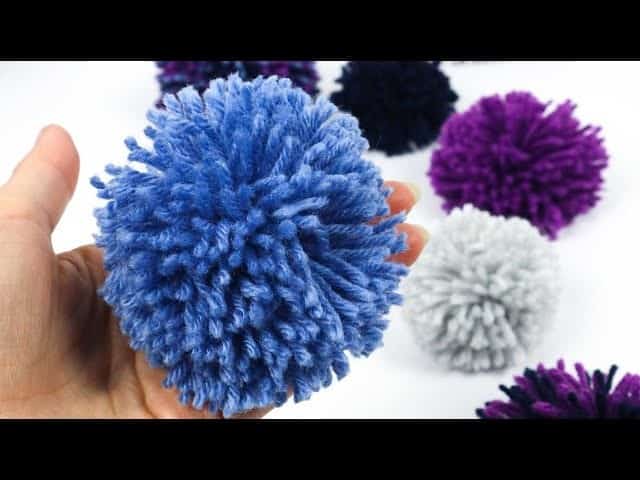
Pom poms are an incredibly fun crafting project that can be enjoyed by people of all ages. Whether you’re a kid, teen, or adult, making yarn pom poms is a great way to add a playful touch to your clothing and accessories. These little balls of fluff have the power to brighten up anything they’re attached to, from beanies to scarves. What’s even more exciting is that making pom poms is surprisingly easy and affordable.
I used to buy them in packets online, but once I discovered how simple it was to make my own, I never looked back. With just a couple of hours to spare, you can create dozens of pom poms and store them away for future DIY projects. The best part? You get to customize your pom poms to your heart’s content! Experiment with different sizes, colors, shapes, and fluffiness levels to create unique little creations that reflect your personality.
Supplies and Tools You’ll Need
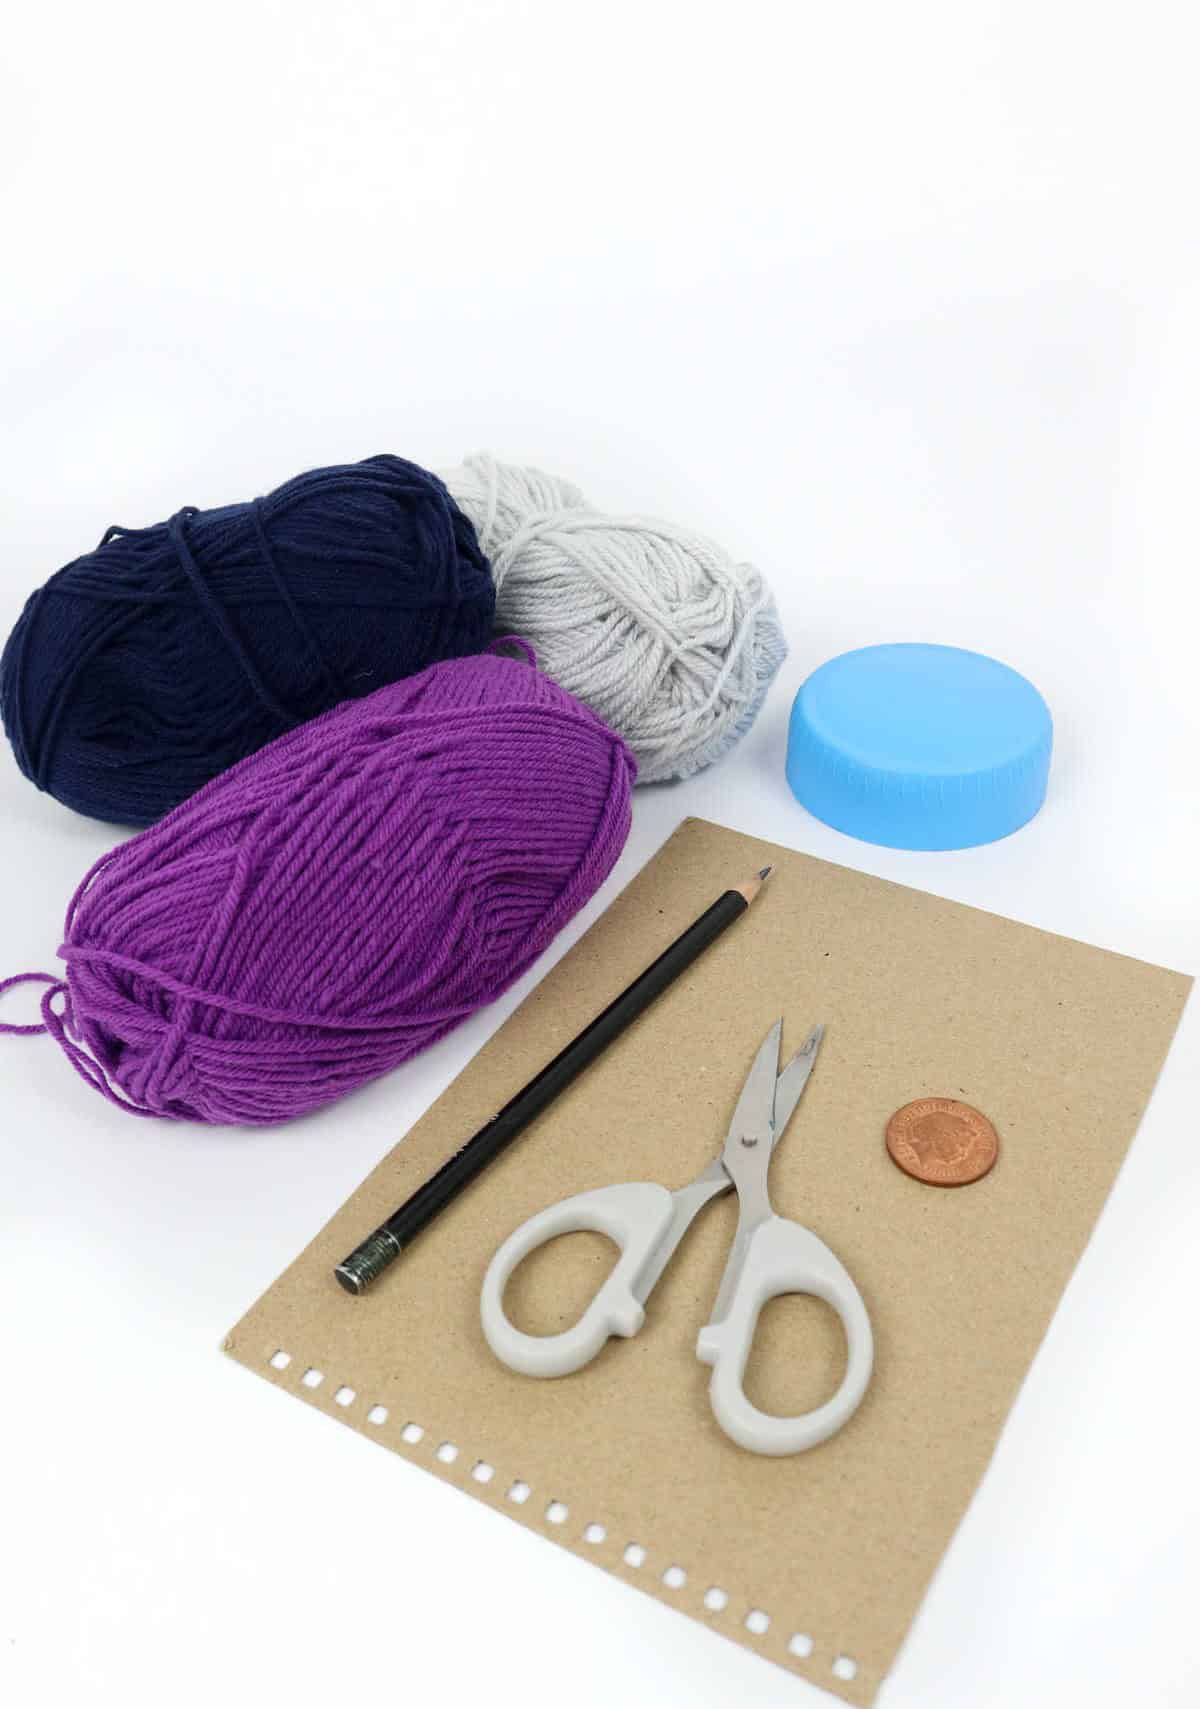
Create your own DIY pom pom maker without breaking the bank! While many people opt for store-bought tools, you can just as effectively craft one using everyday materials. To get started, gather these simple supplies: a sturdy piece of cardboard, a shaker lid from your kitchen, a trusty pencil, a pair of scissors, some knitting yarn in your favorite color, and a humble coin. With these items at hand, you’ll be ready to turn your creativity into reality.
Watch: DIY Yarn Pom Poms (Step-by-Step)
How to Make Yarn Pom Poms
With your materials at the ready, you’re now prepared to embark on the creative process of crafting your very own pom poms. The fun is finally within reach!
Step 1
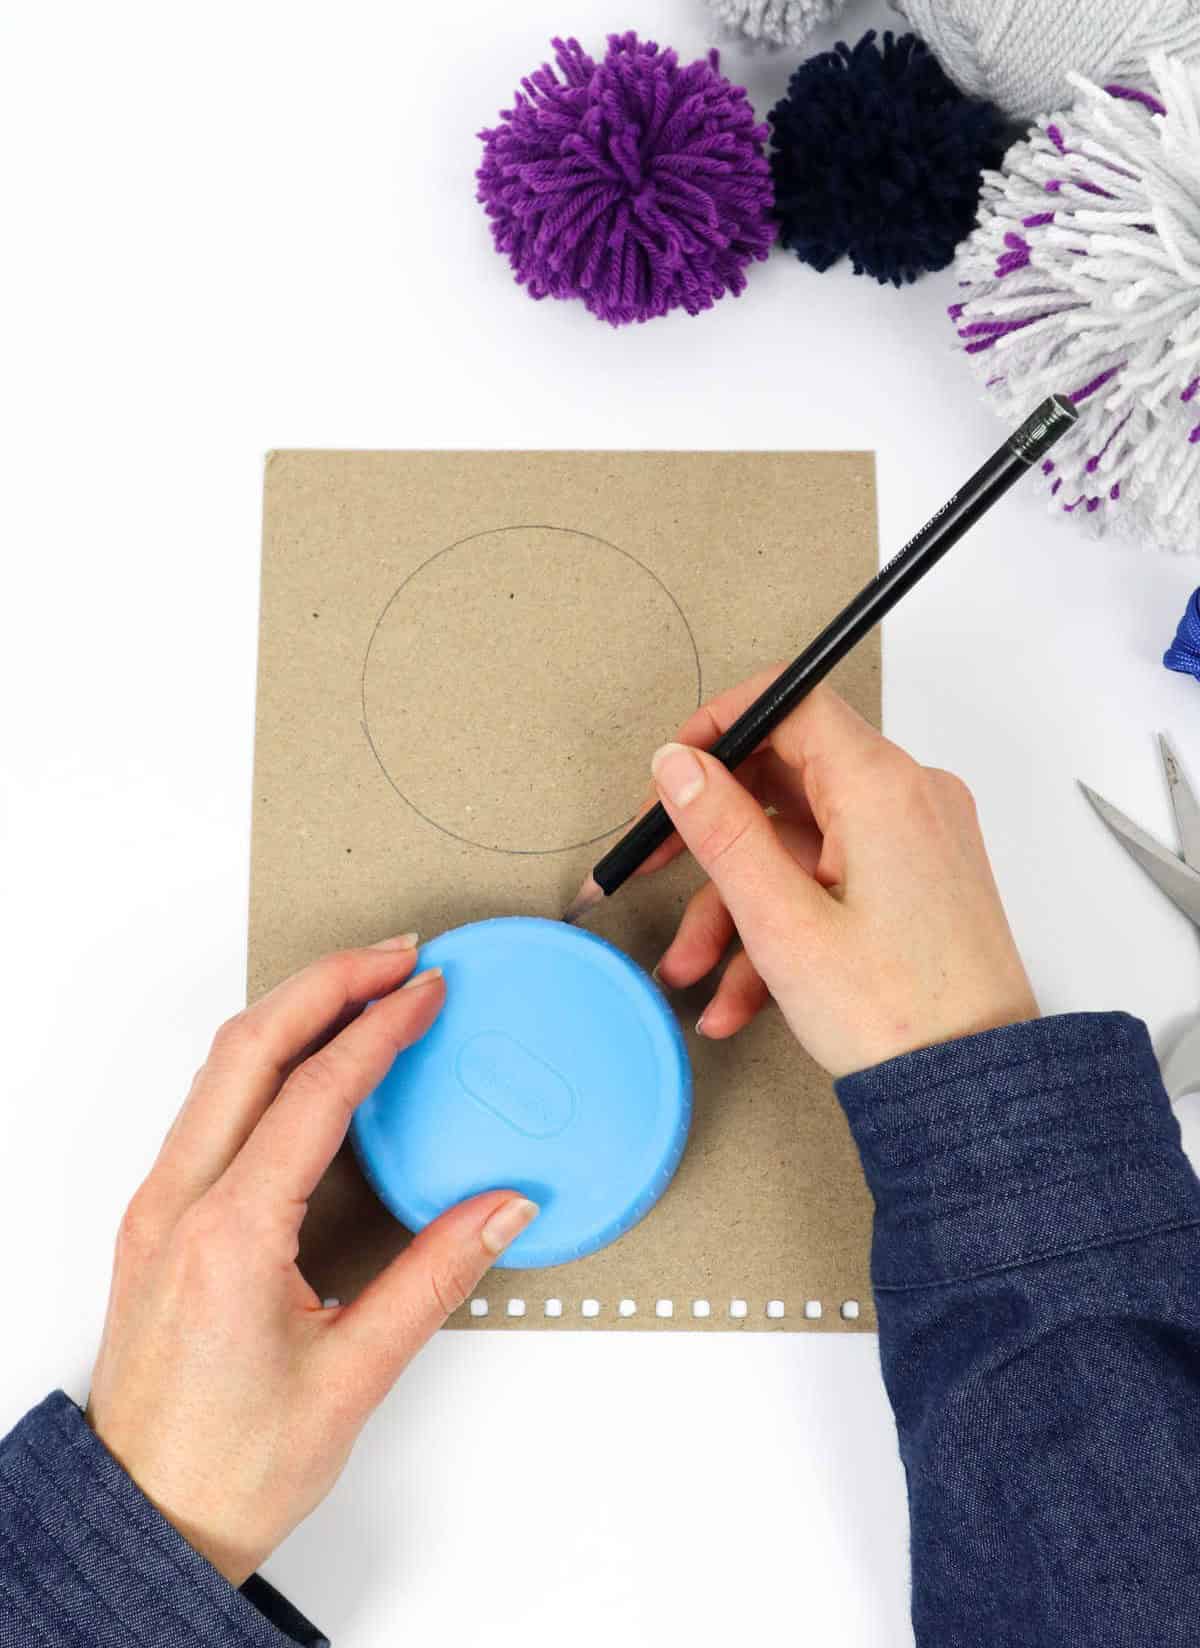
To begin, place any container with a flat surface over a piece of cardboard. This could be a plate, bowl, or even a box lid. Draw the shape’s outline onto the cardboard using your pencil. Repeat this process to create a second outline, ensuring both are identical and symmetrical.
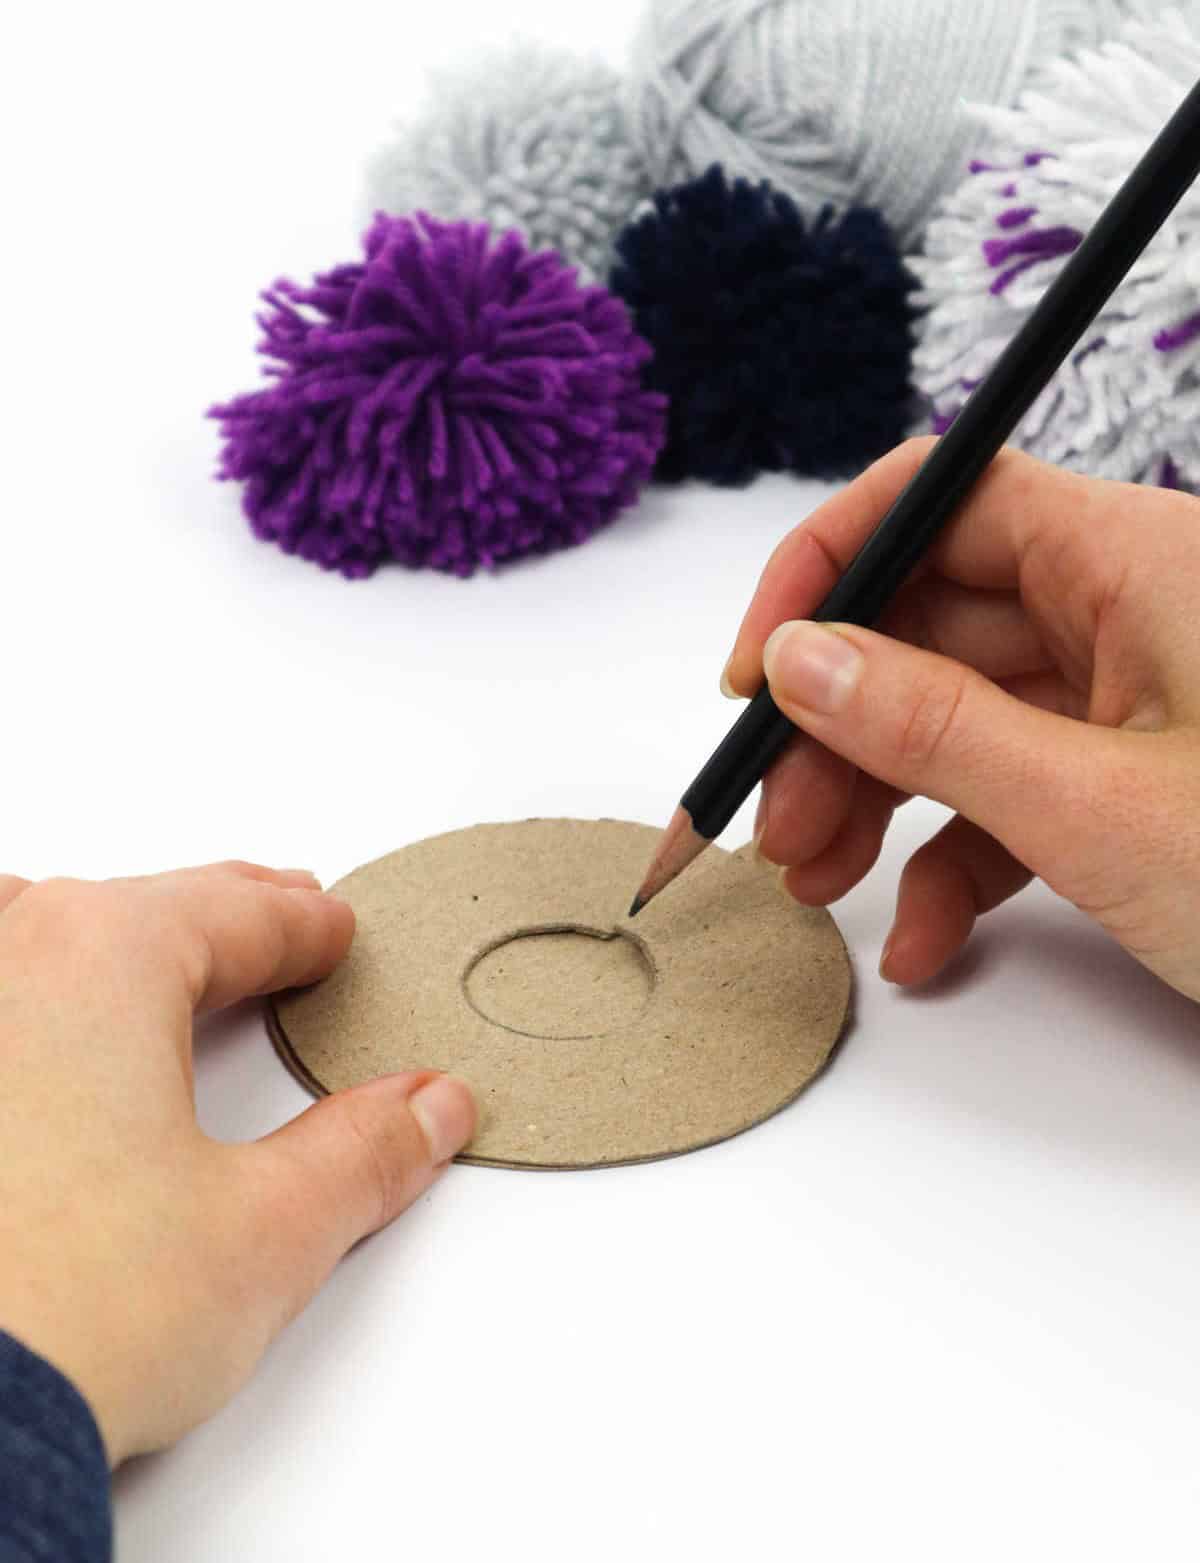
Step 2
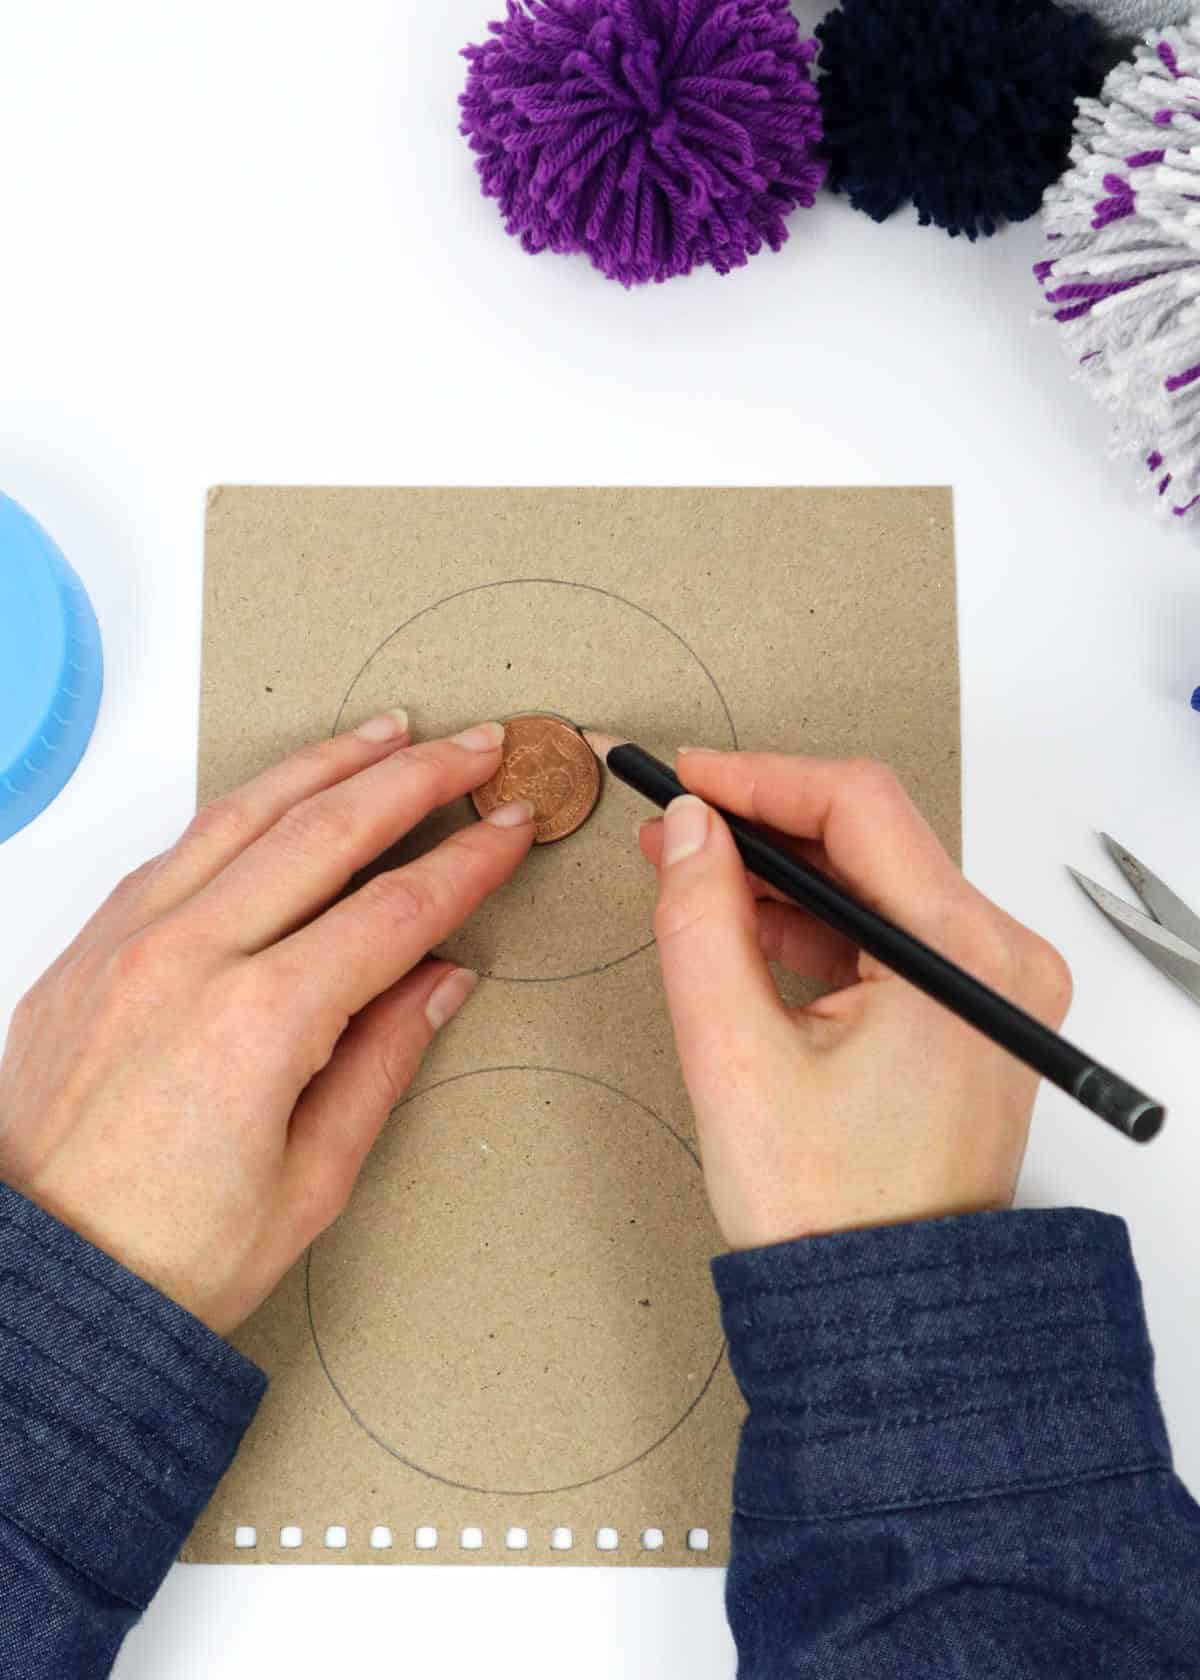
Now that you’ve got your initial circle outlined, take a coin and position it in the center of the inner circle. Then, carefully draw an outline around the coin, making sure to keep the lines smooth and steady. This step is crucial in creating a precise and symmetrical design.
Step 3
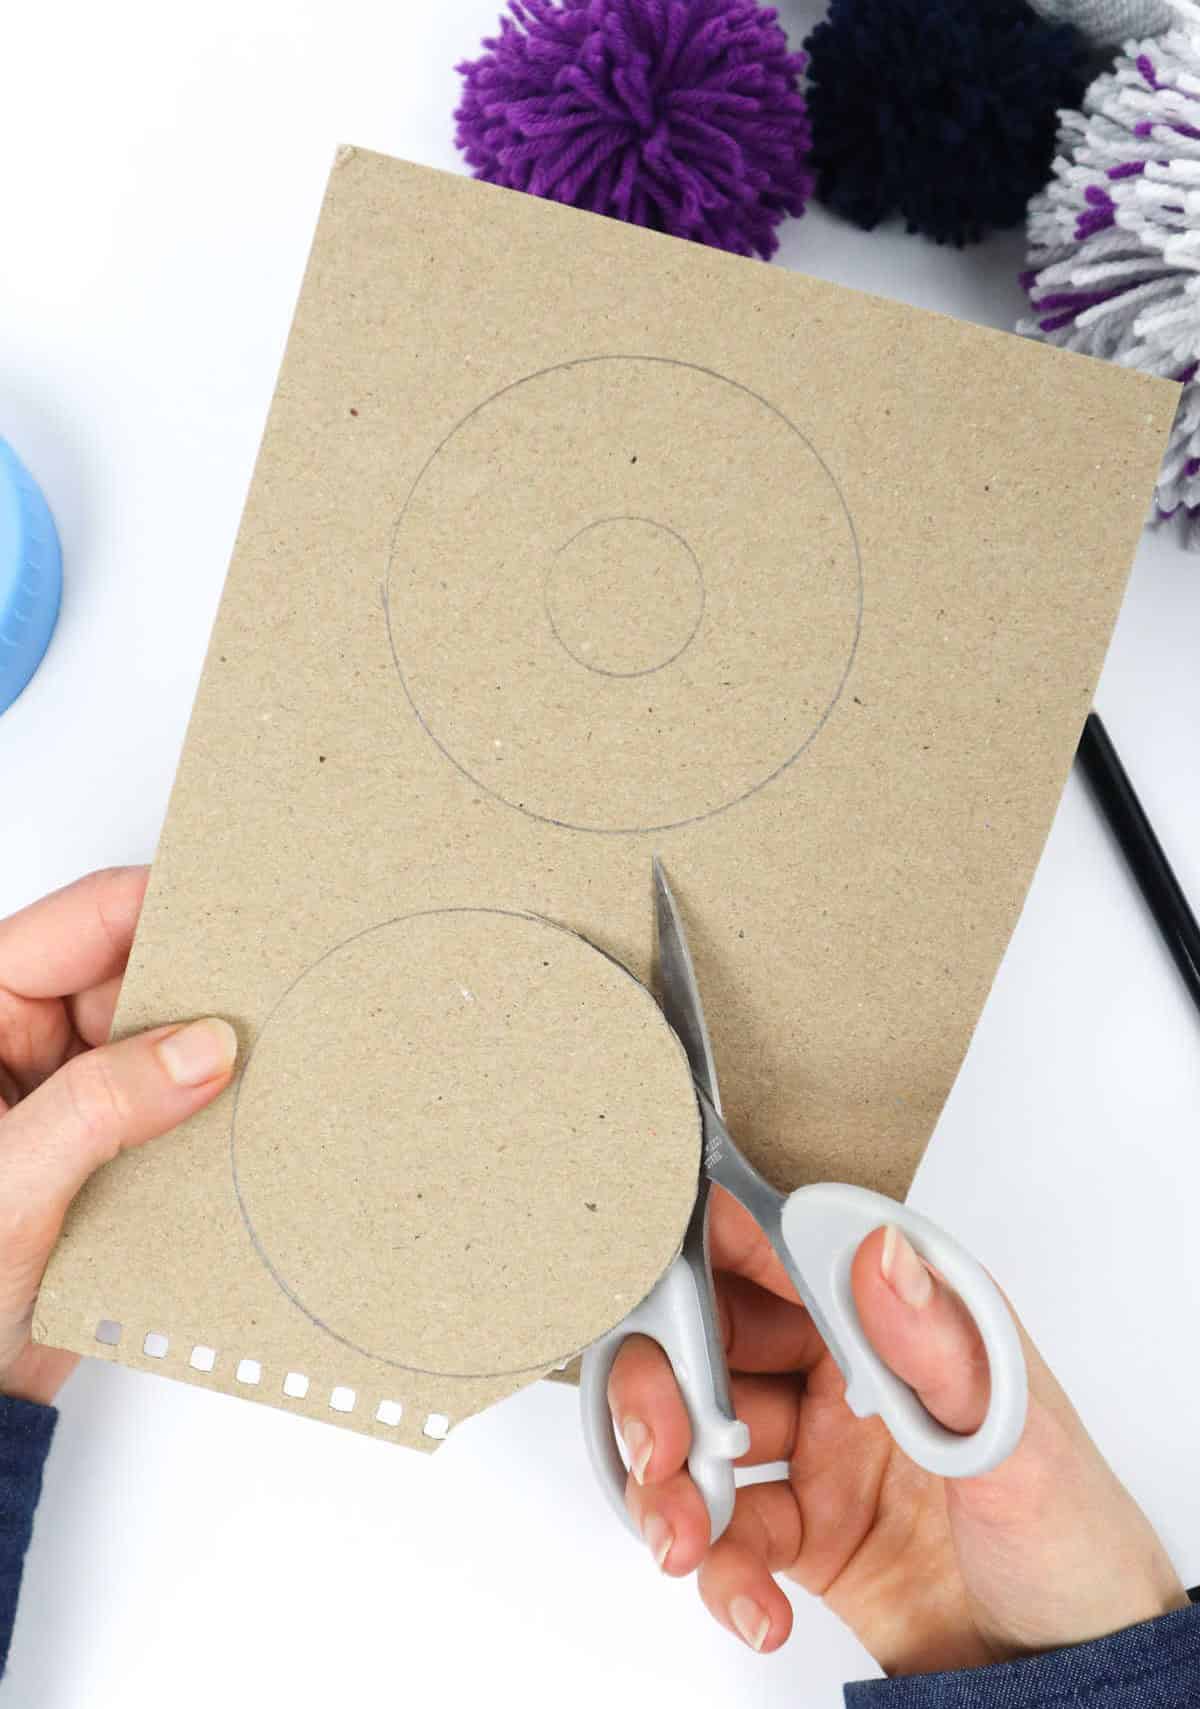


To complete this step, simply divide the outline in half by cutting a straight line across the middle, extending from the edge to the center. You can achieve this using scissors or opt for a more precise approach with a craft knife, carefully slicing along the designated path.
Step 4
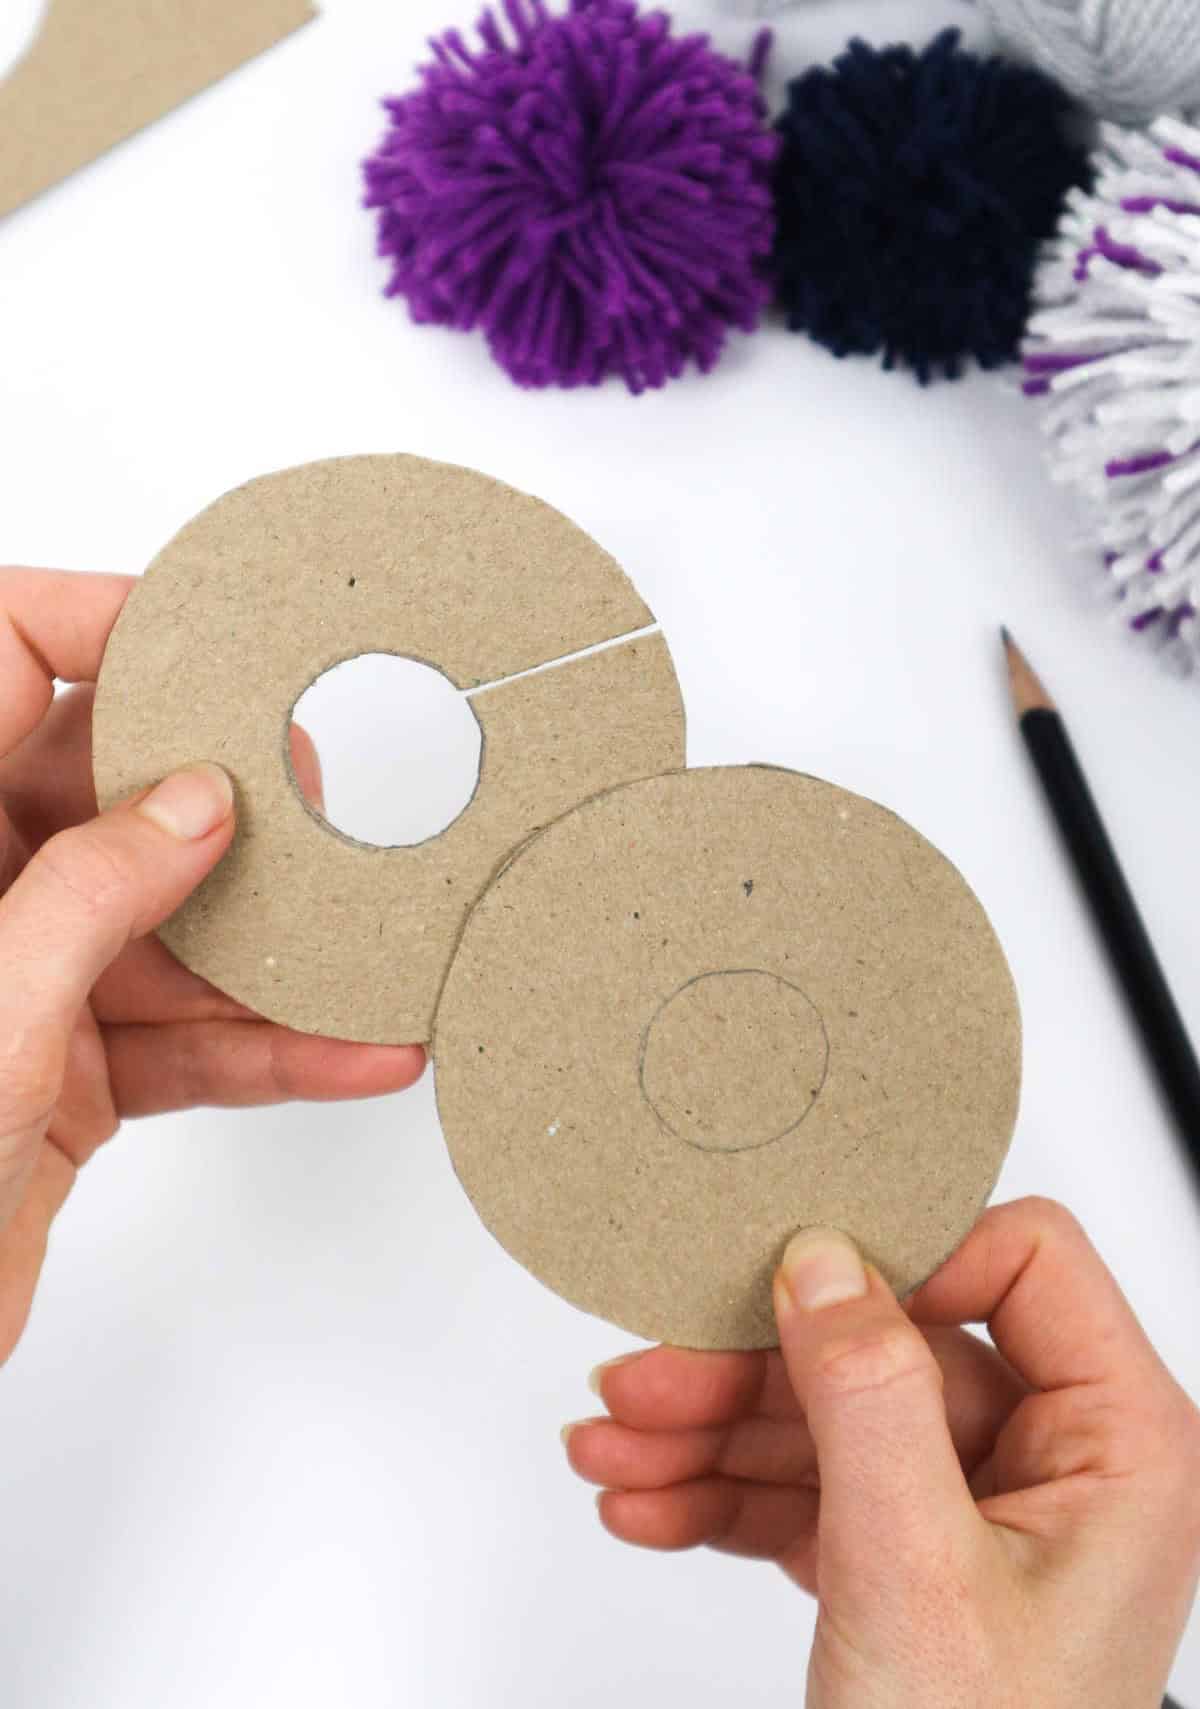
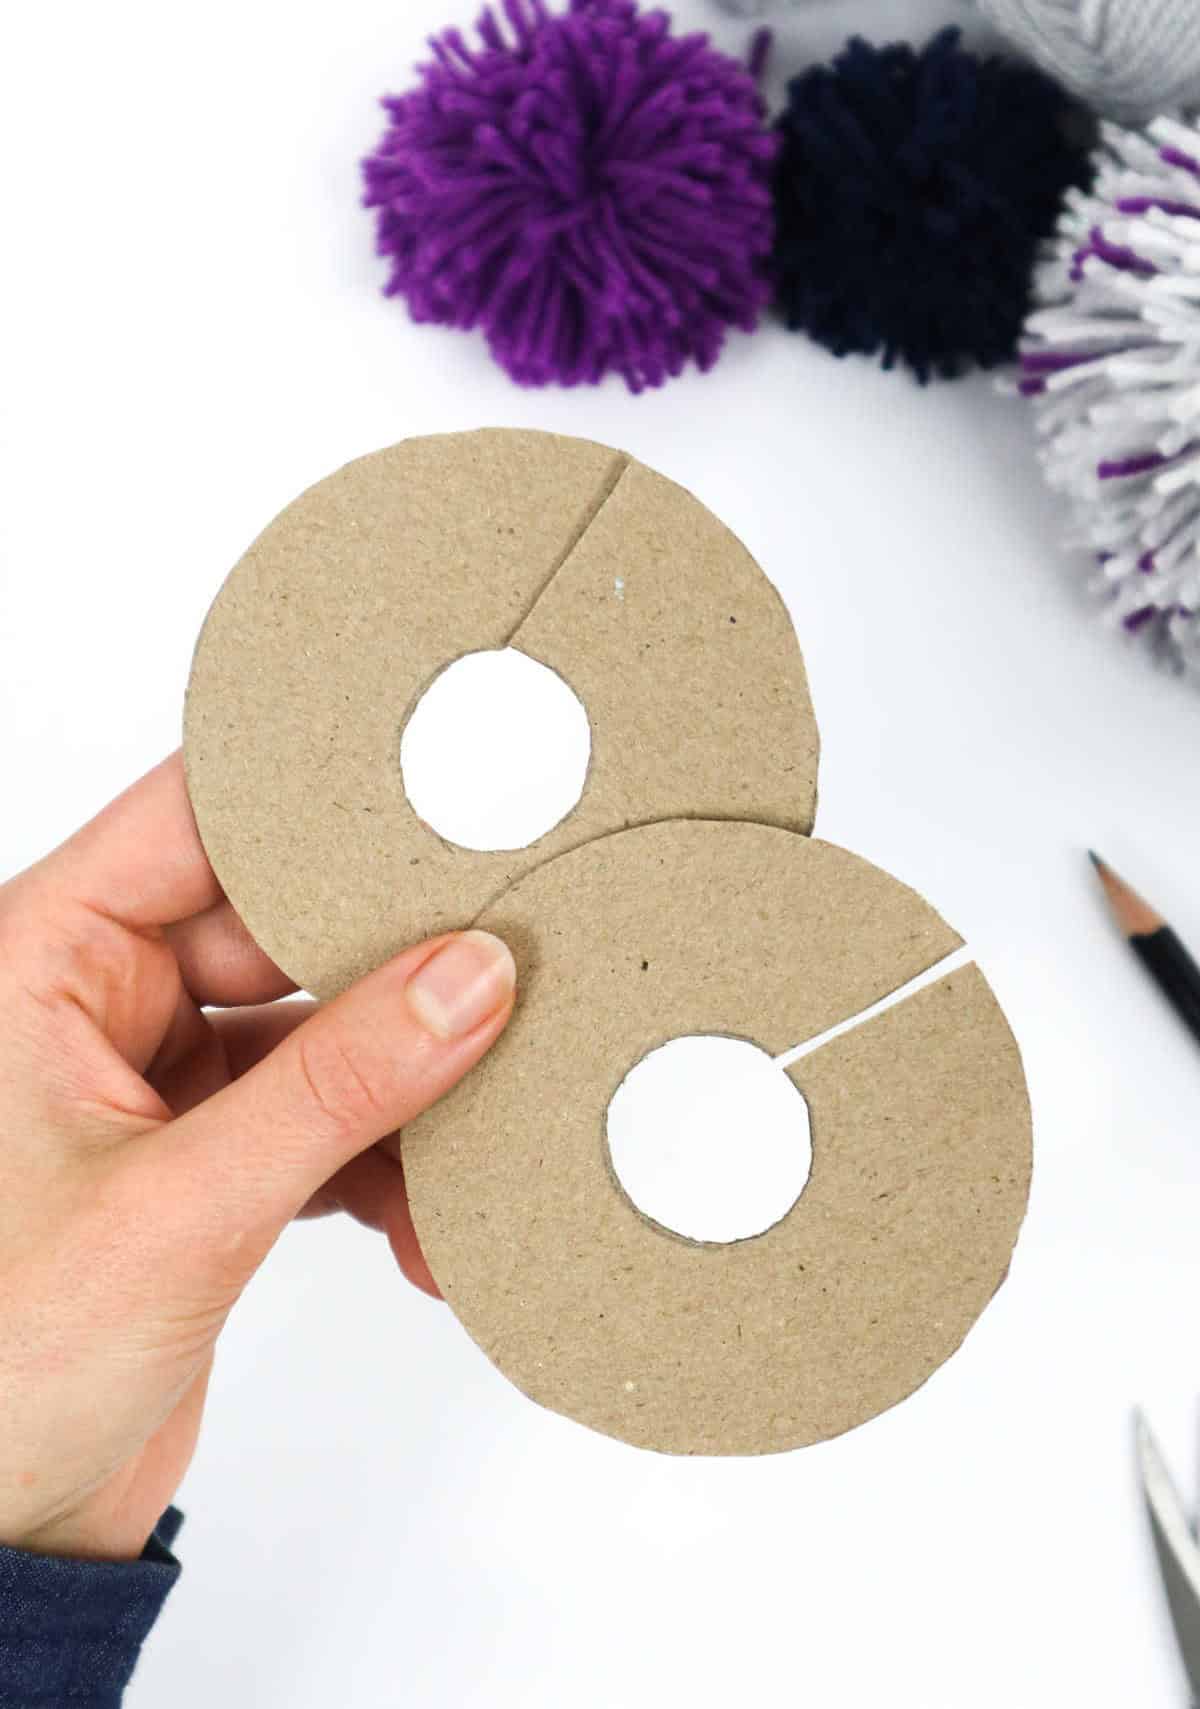
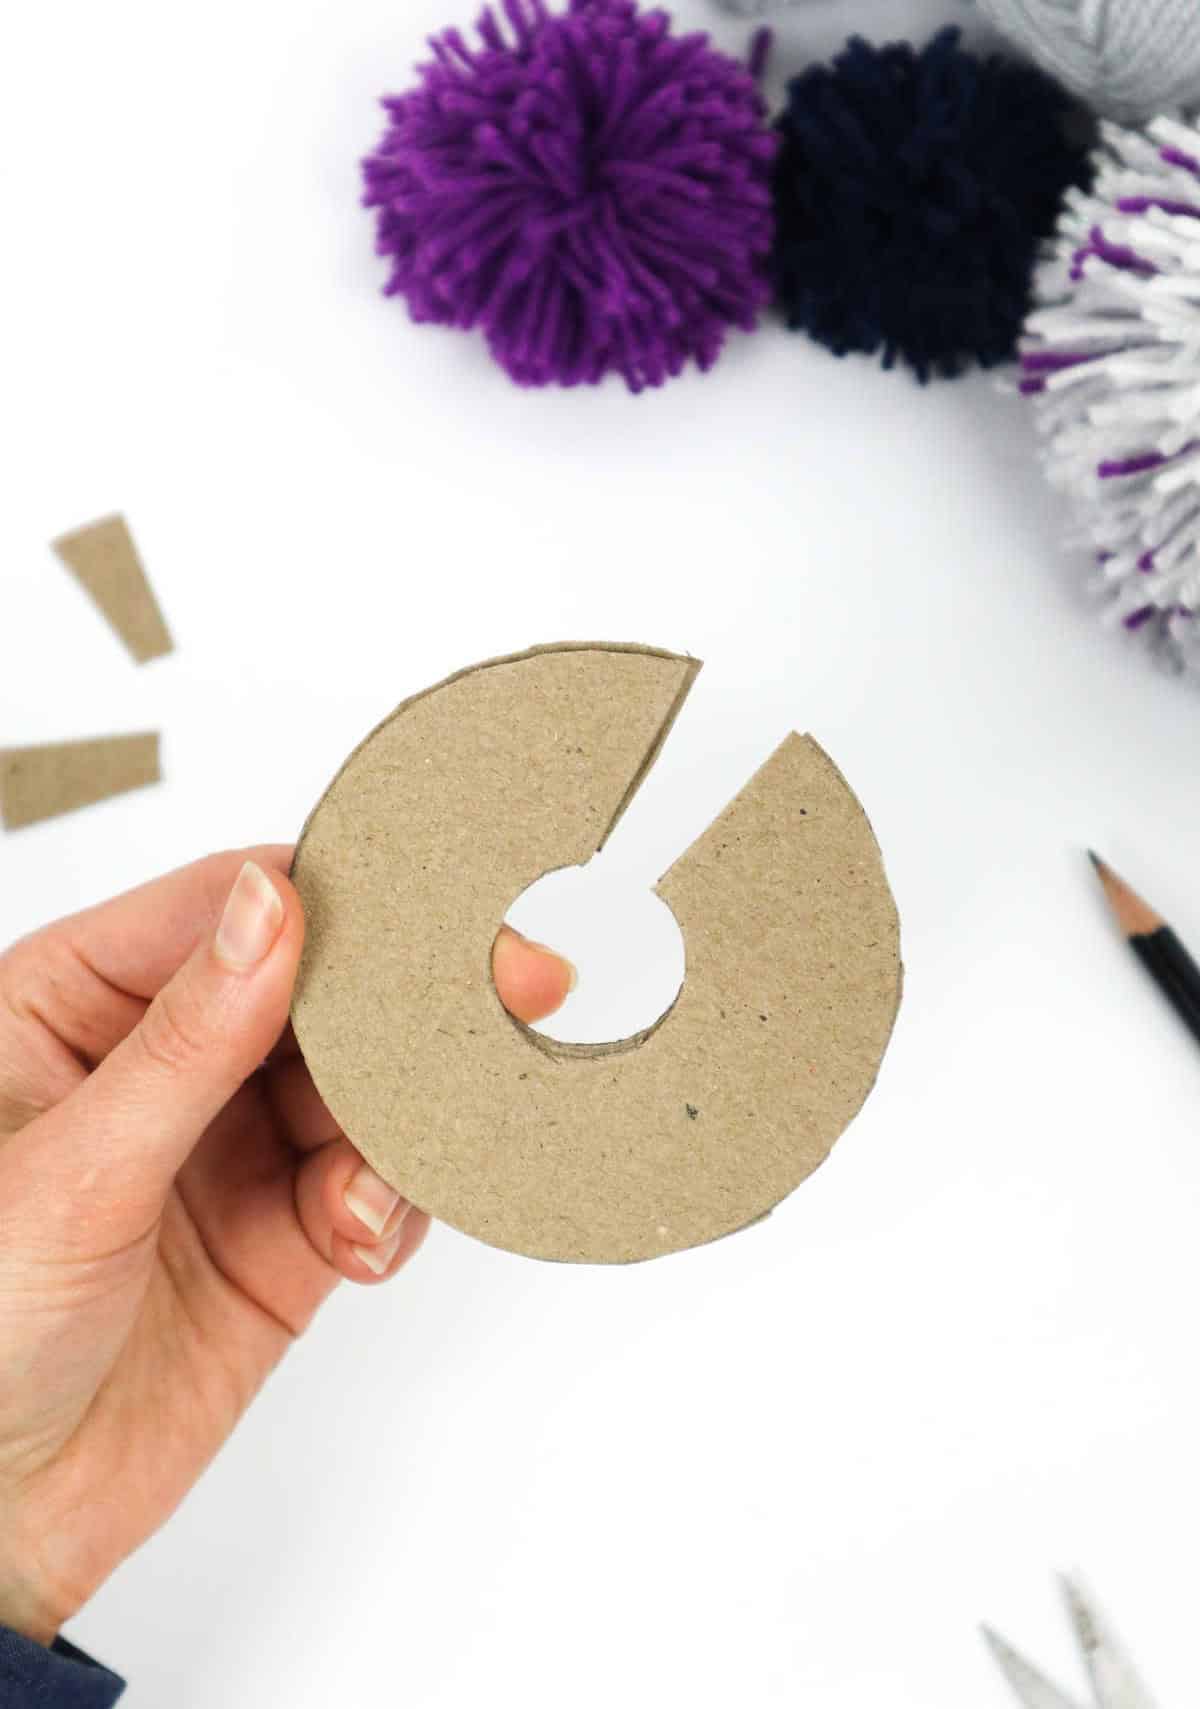
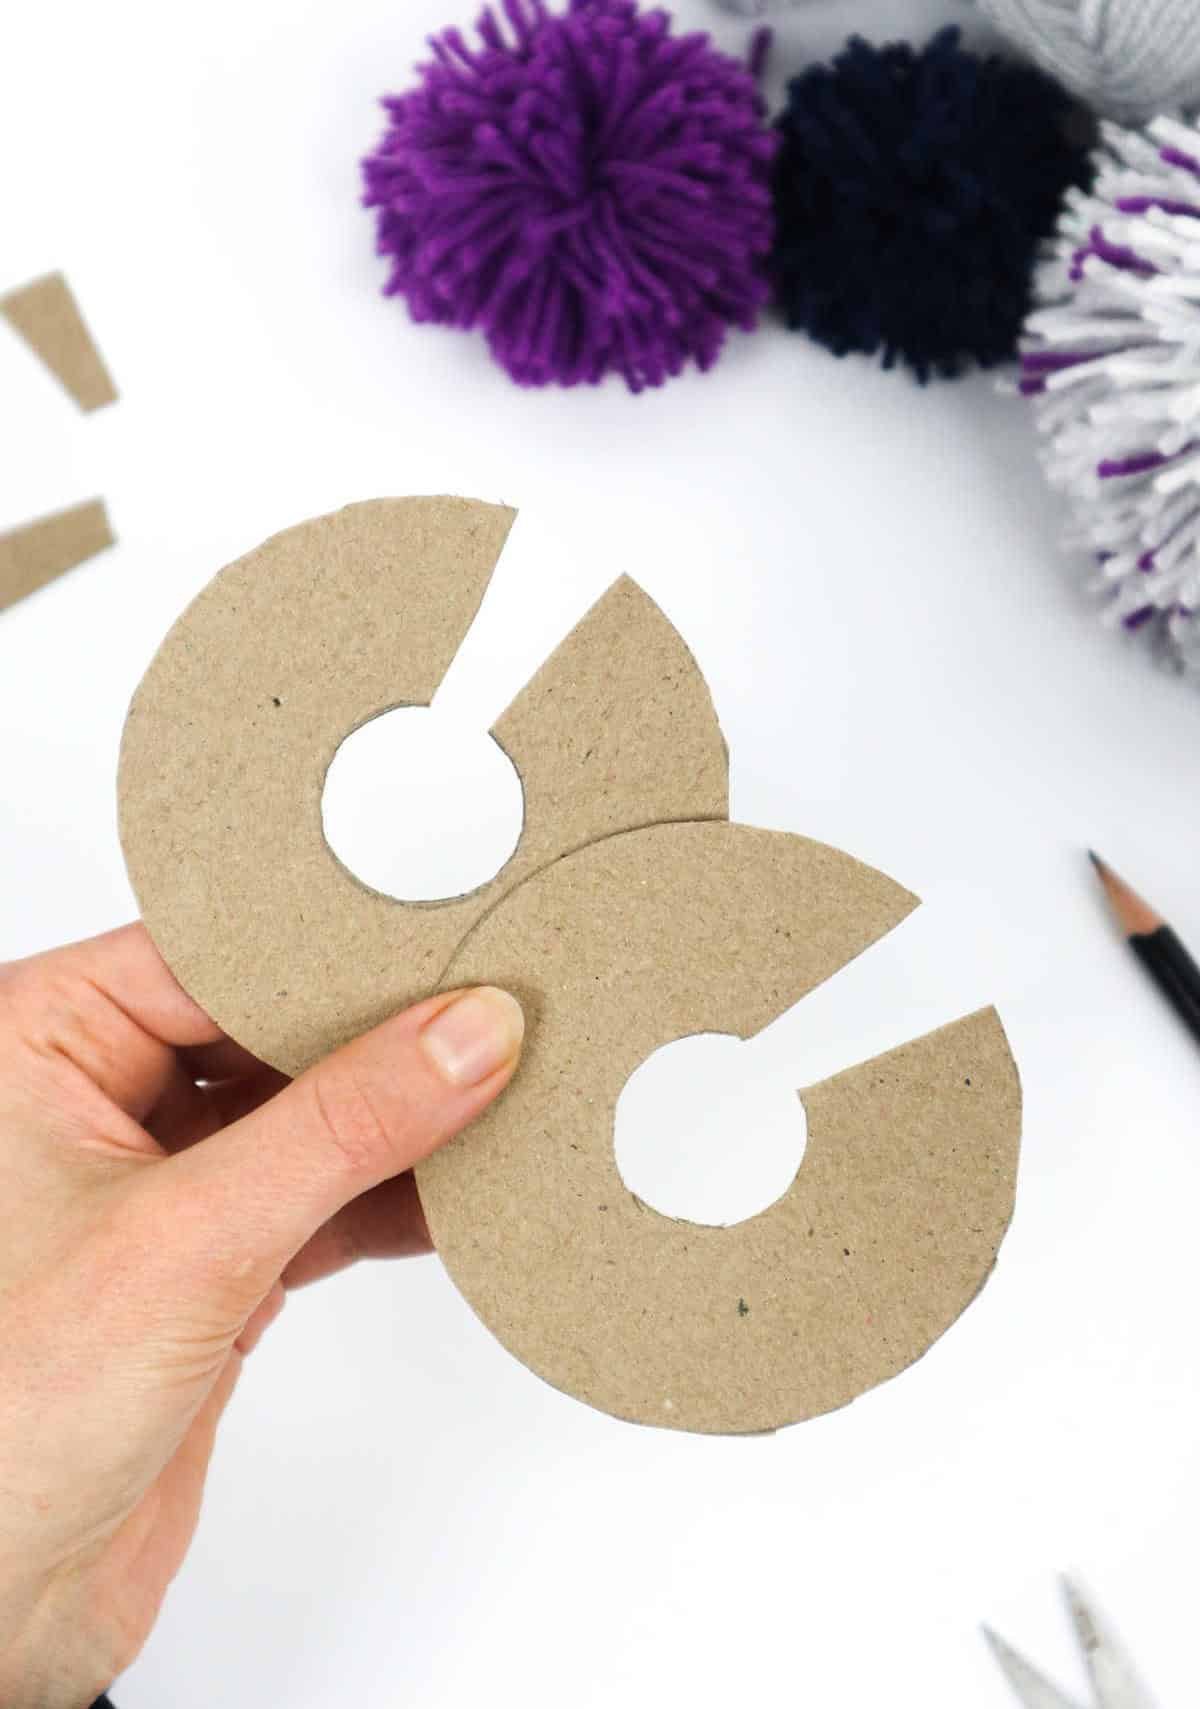
To assemble the donut-inspired pendant, start by aligning the two circle cutouts with the donut hole disk on top. Next, use a pencil to draw an outline of the inner circle onto the bottom circle, then carefully cut out the inner circle from both pieces. This will create the desired shape for your pendants. As you work, make sure to align the disks and trim a small amount of cardboard from the earlier incision to create an entrance point that will allow you to wrap yarn around it later.
Once complete, your two pendants should resemble a donut with a hole in the middle.
Step 5
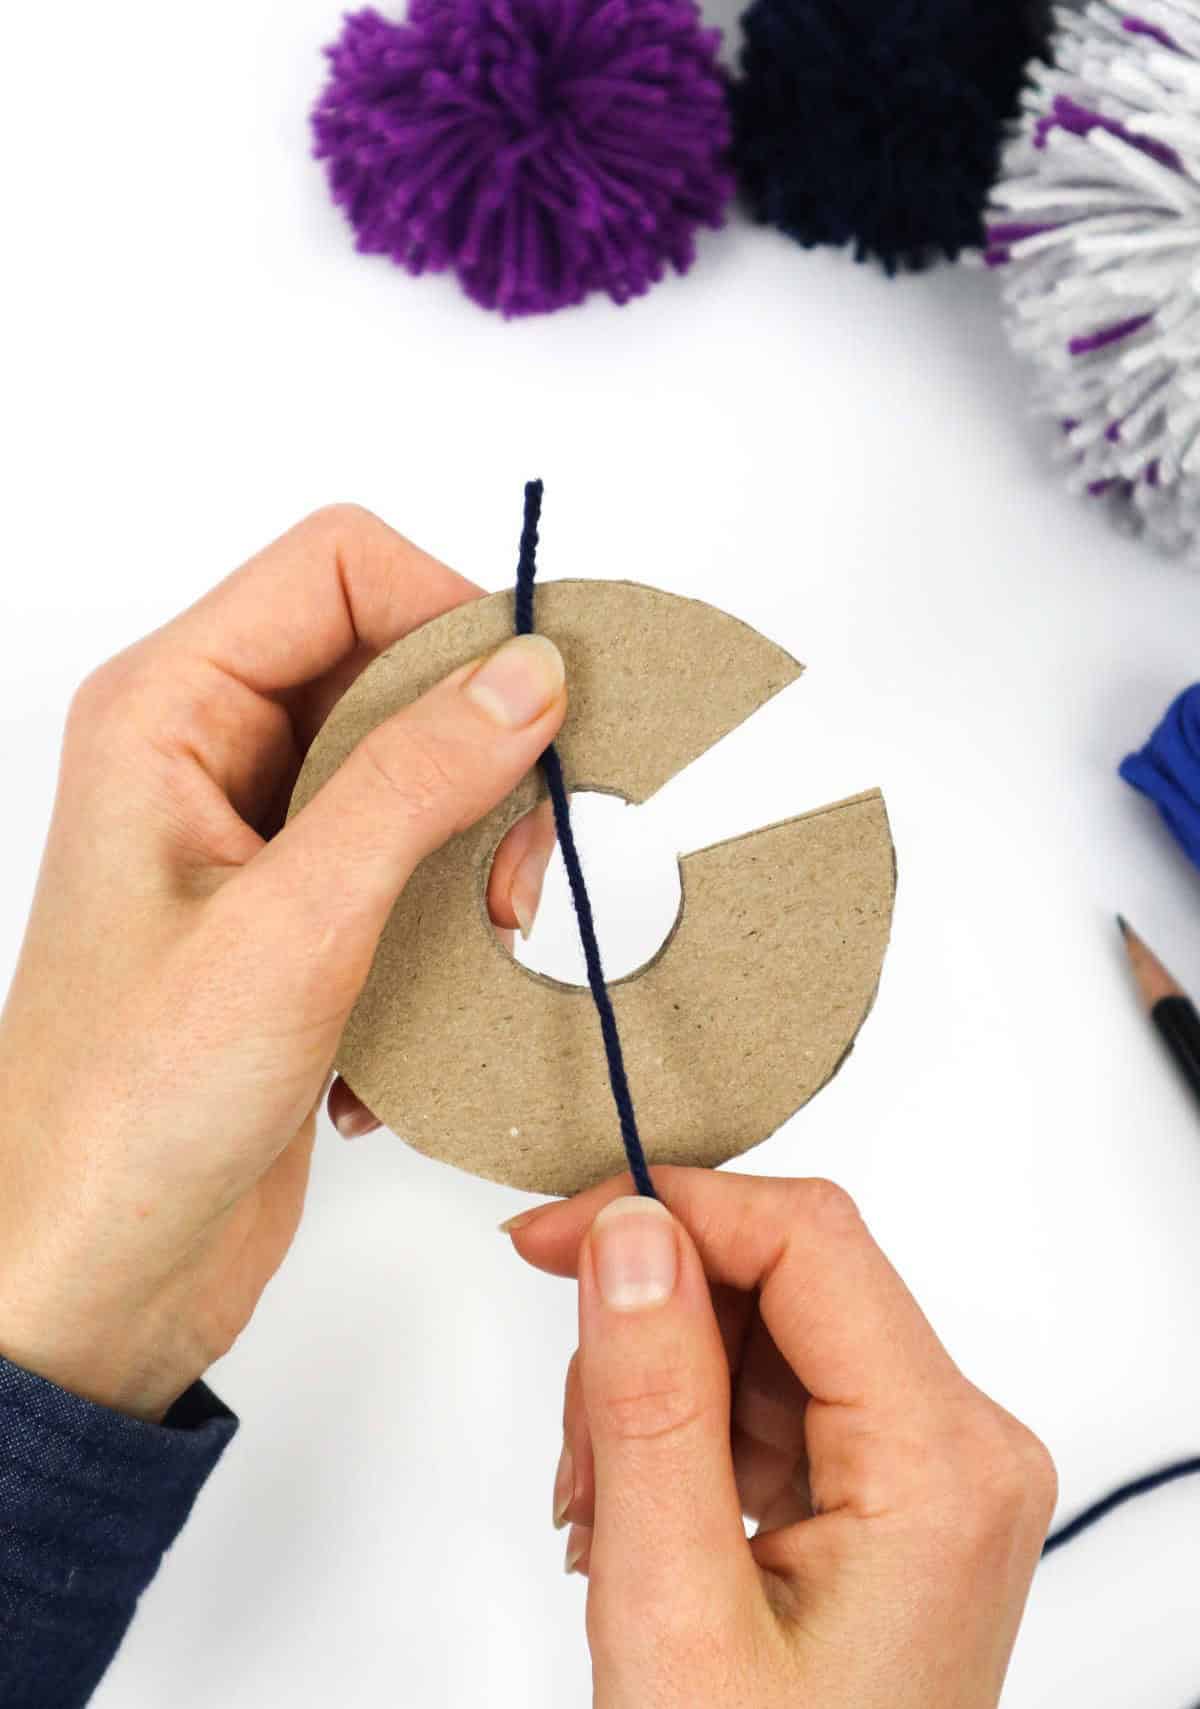
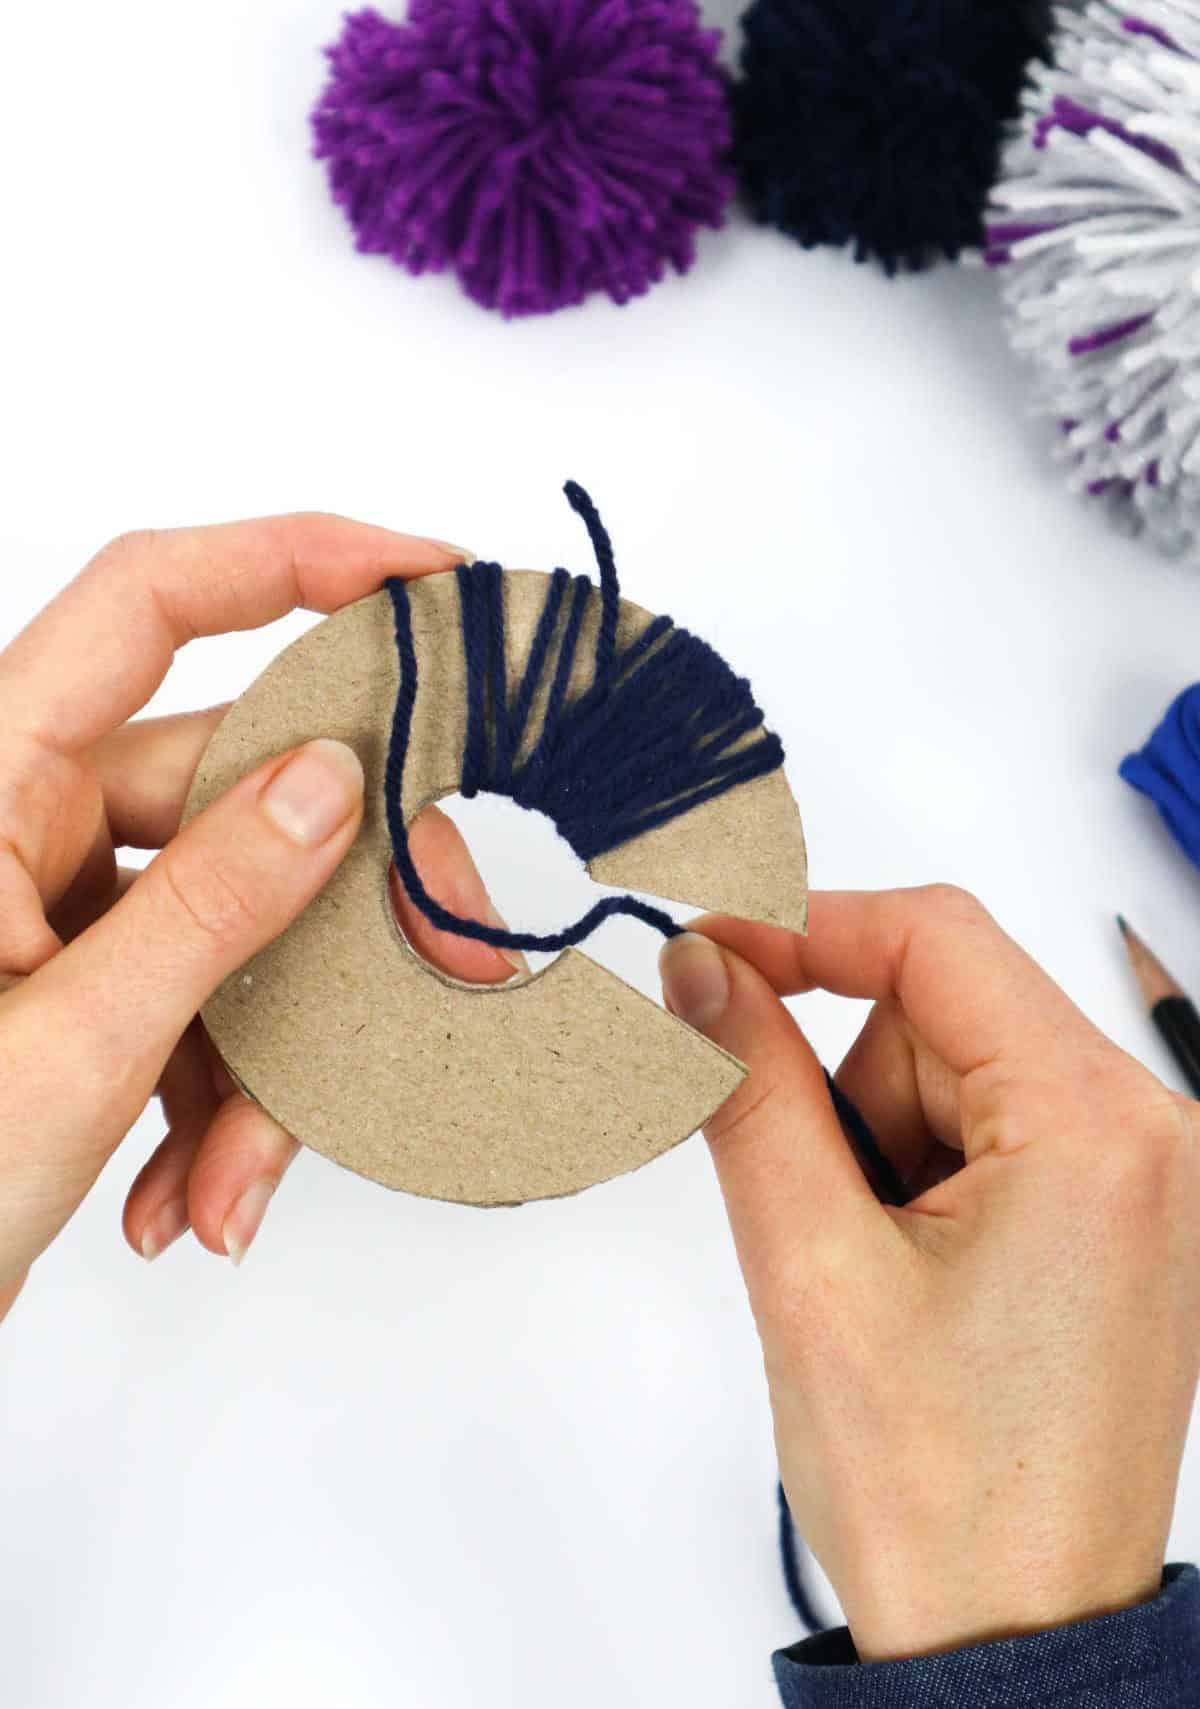
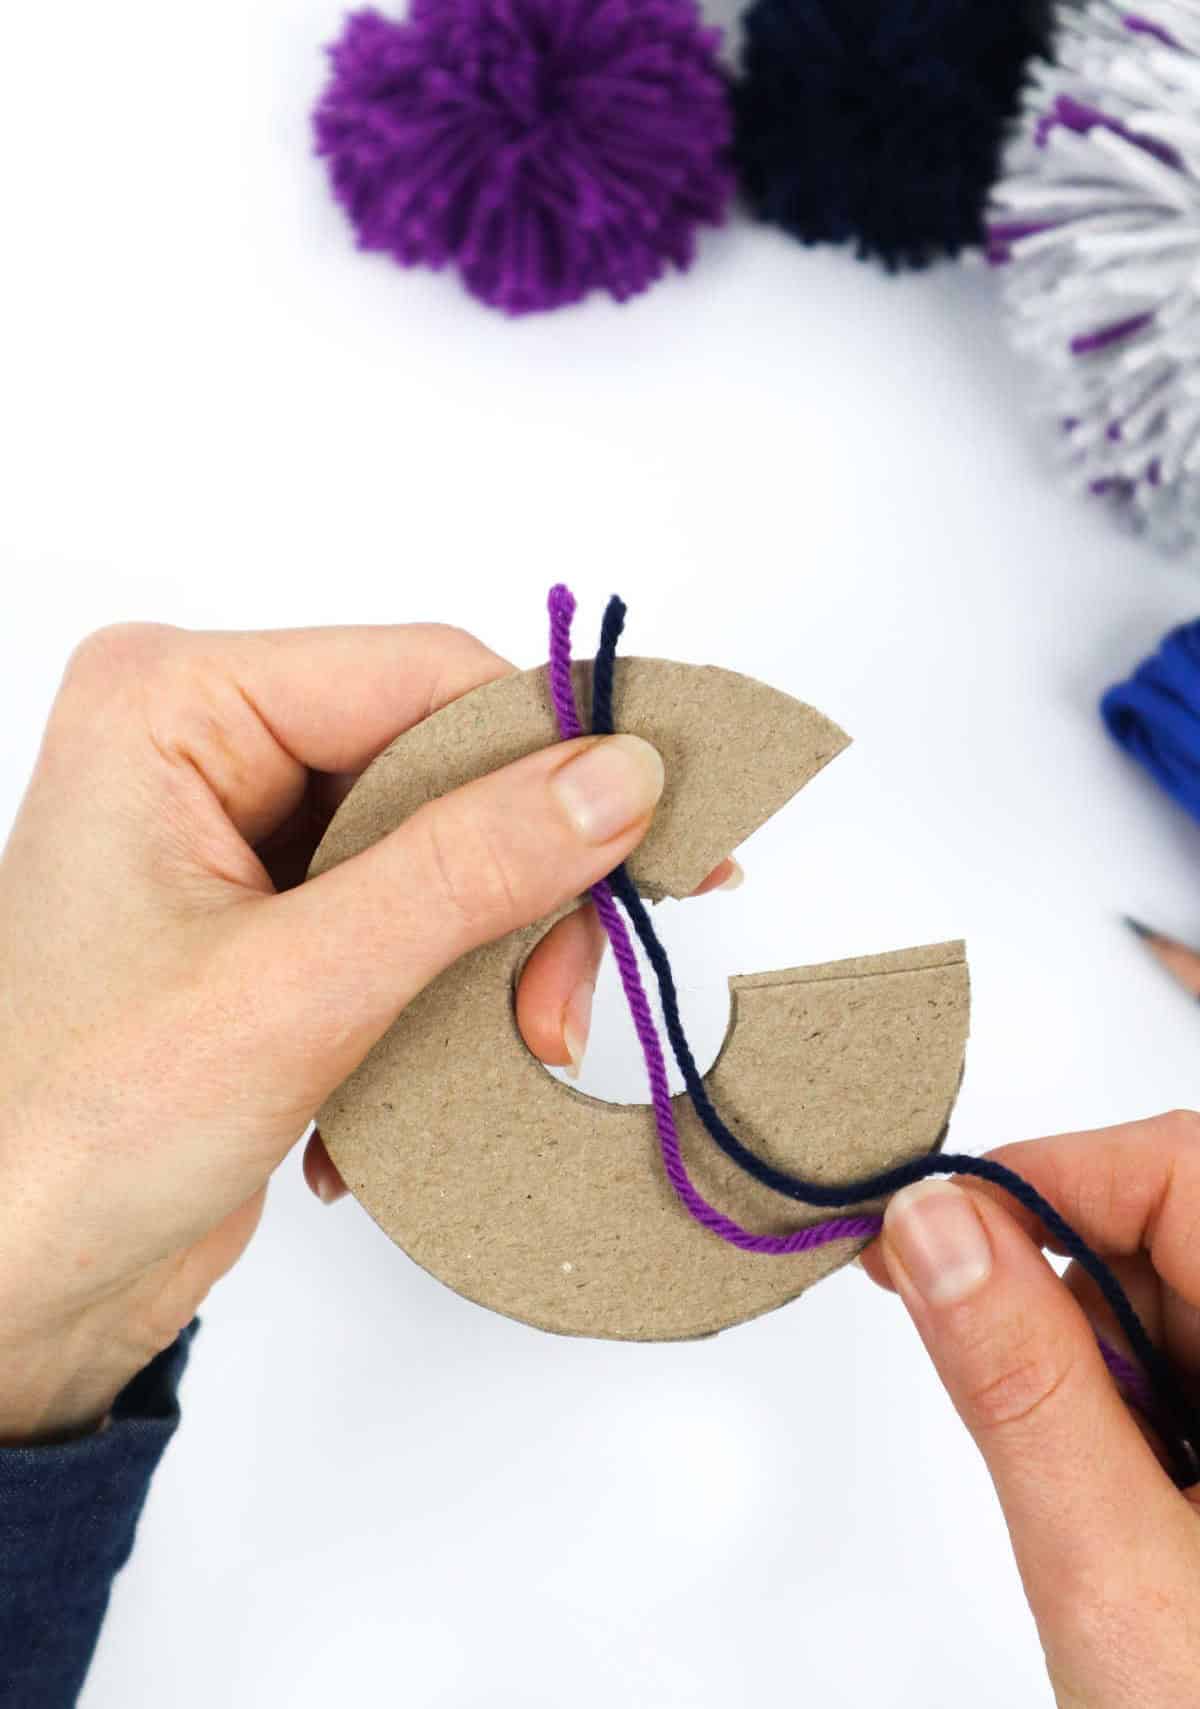
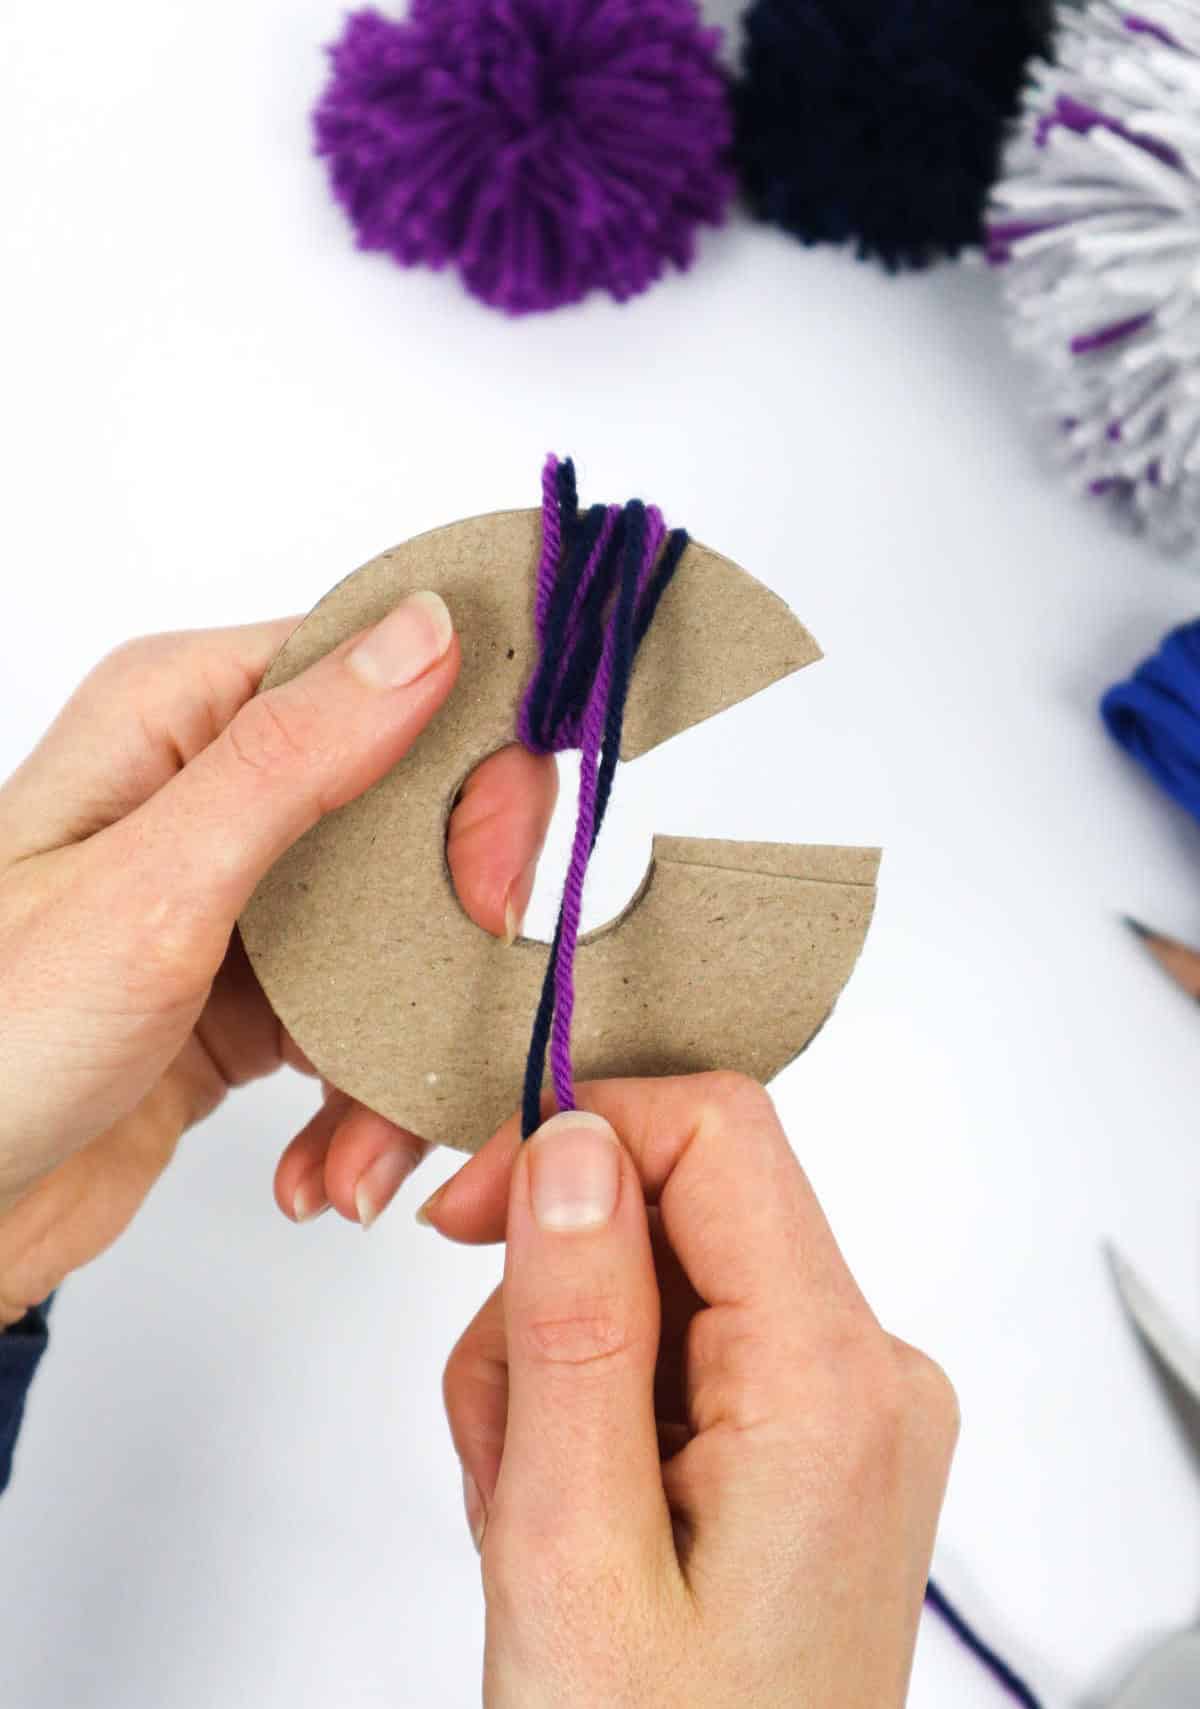
Thread the yarn through the hole on the disk, ensuring the end emerges on top. Next, start wrapping the yarn around the outer rim of the disk, situated just above the aperture. To create a subtle color blend, you can interweave two strands – one from each desired hue. Continue wrapping the yarn in overlapping loops until you’ve completed a full rotation. Once satisfied with your design, simply trim the excess yarn to complete the process.
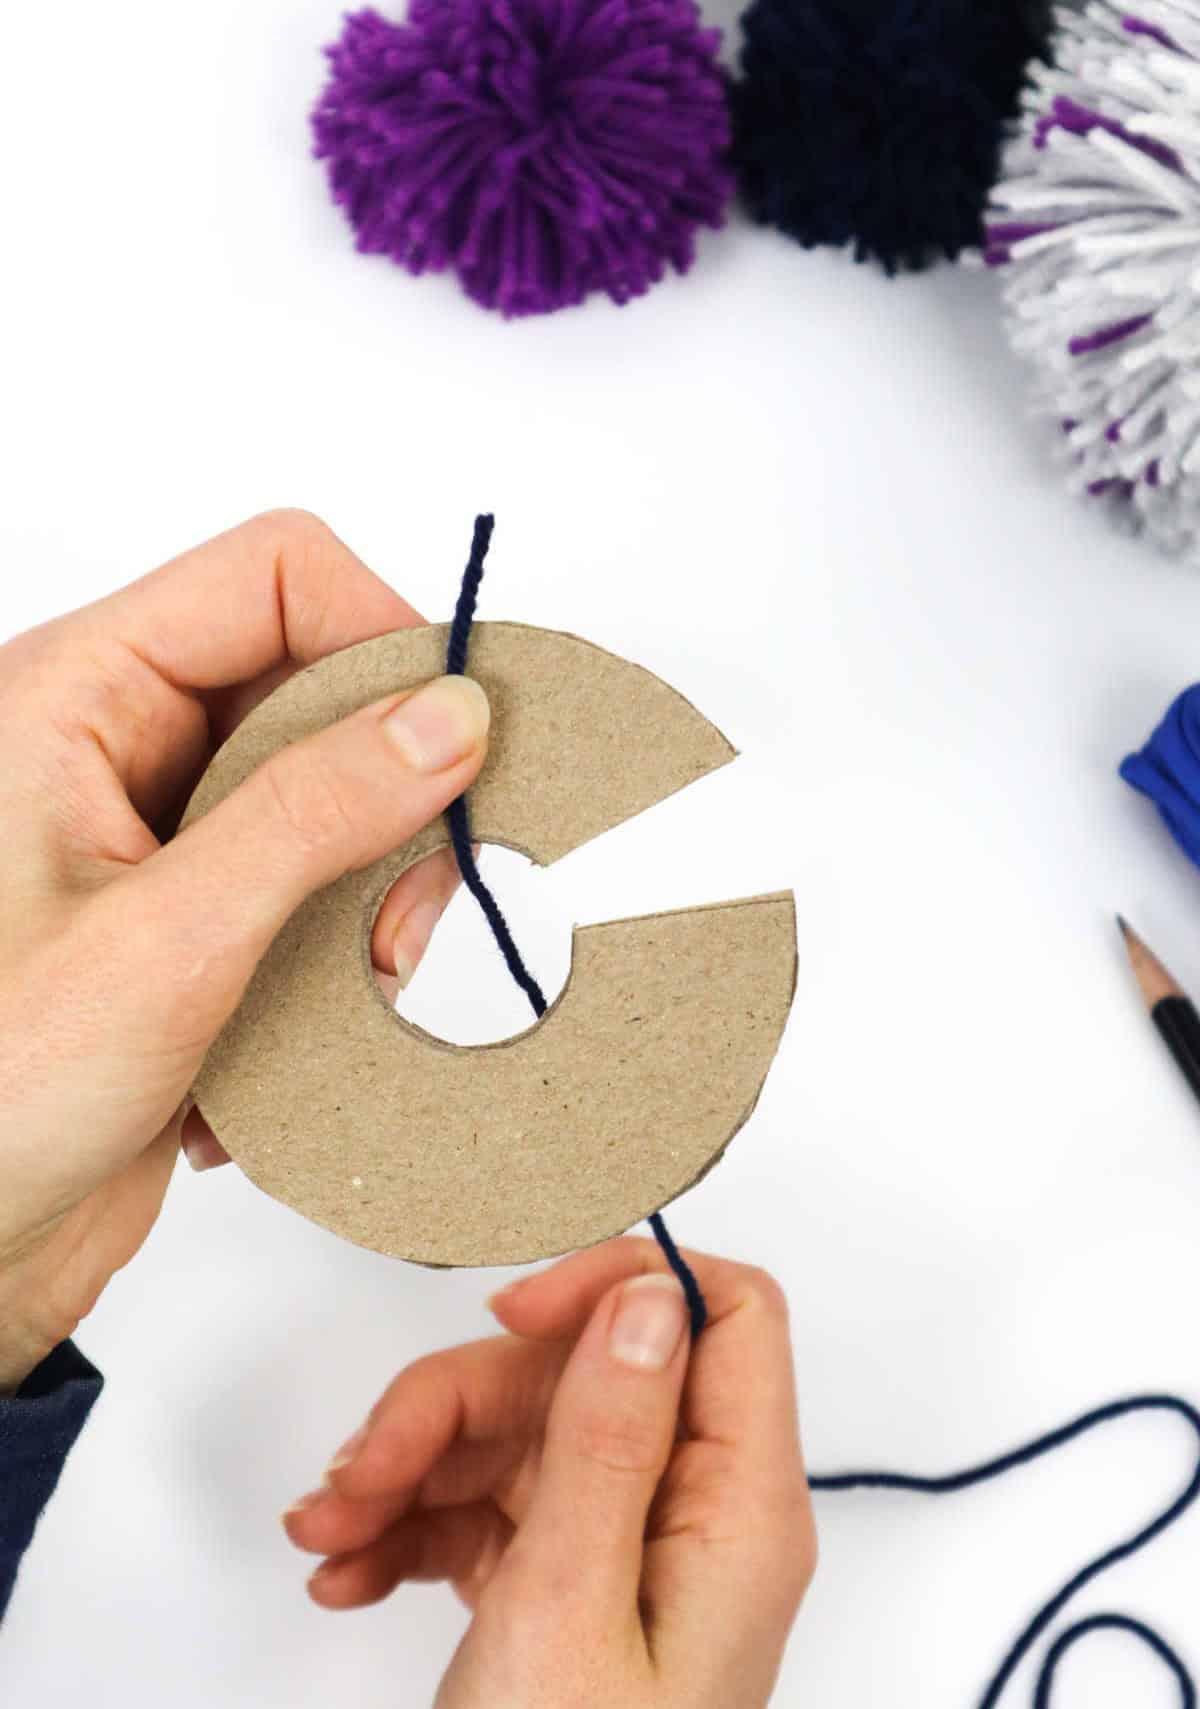
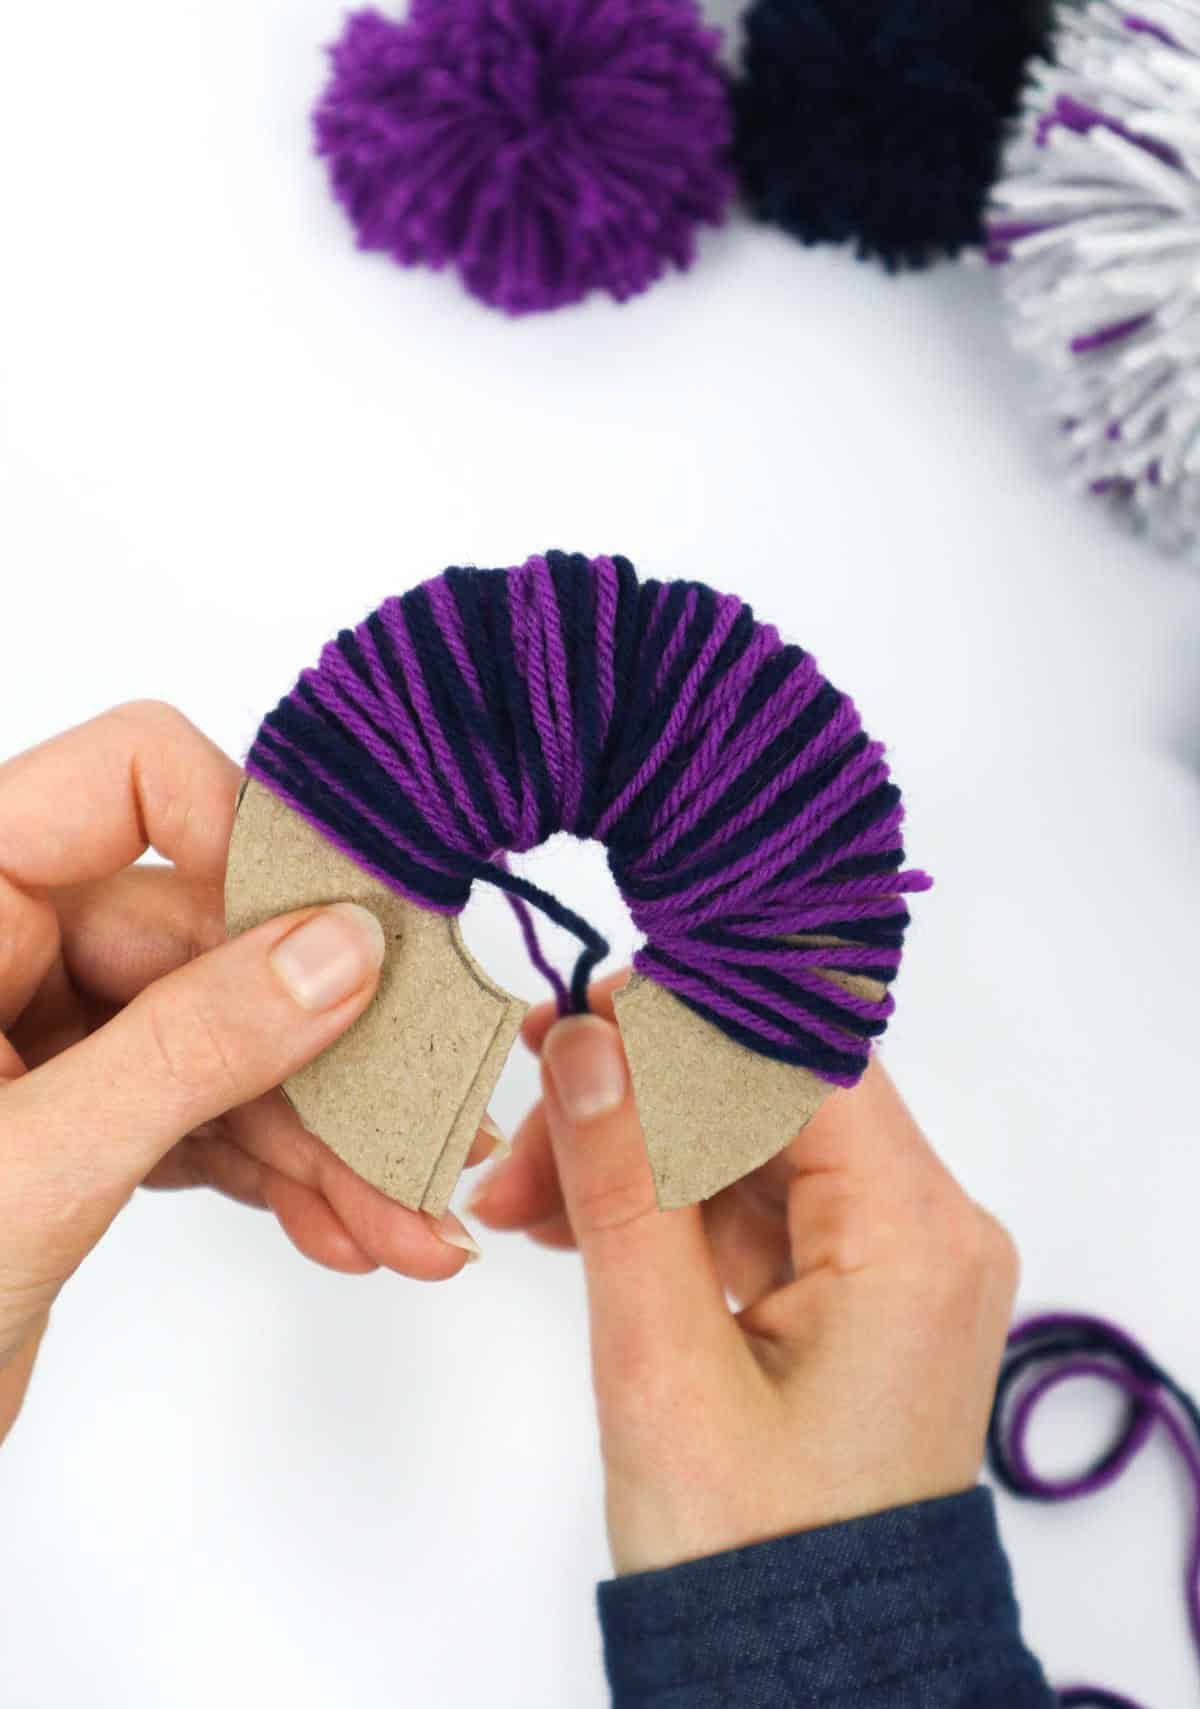
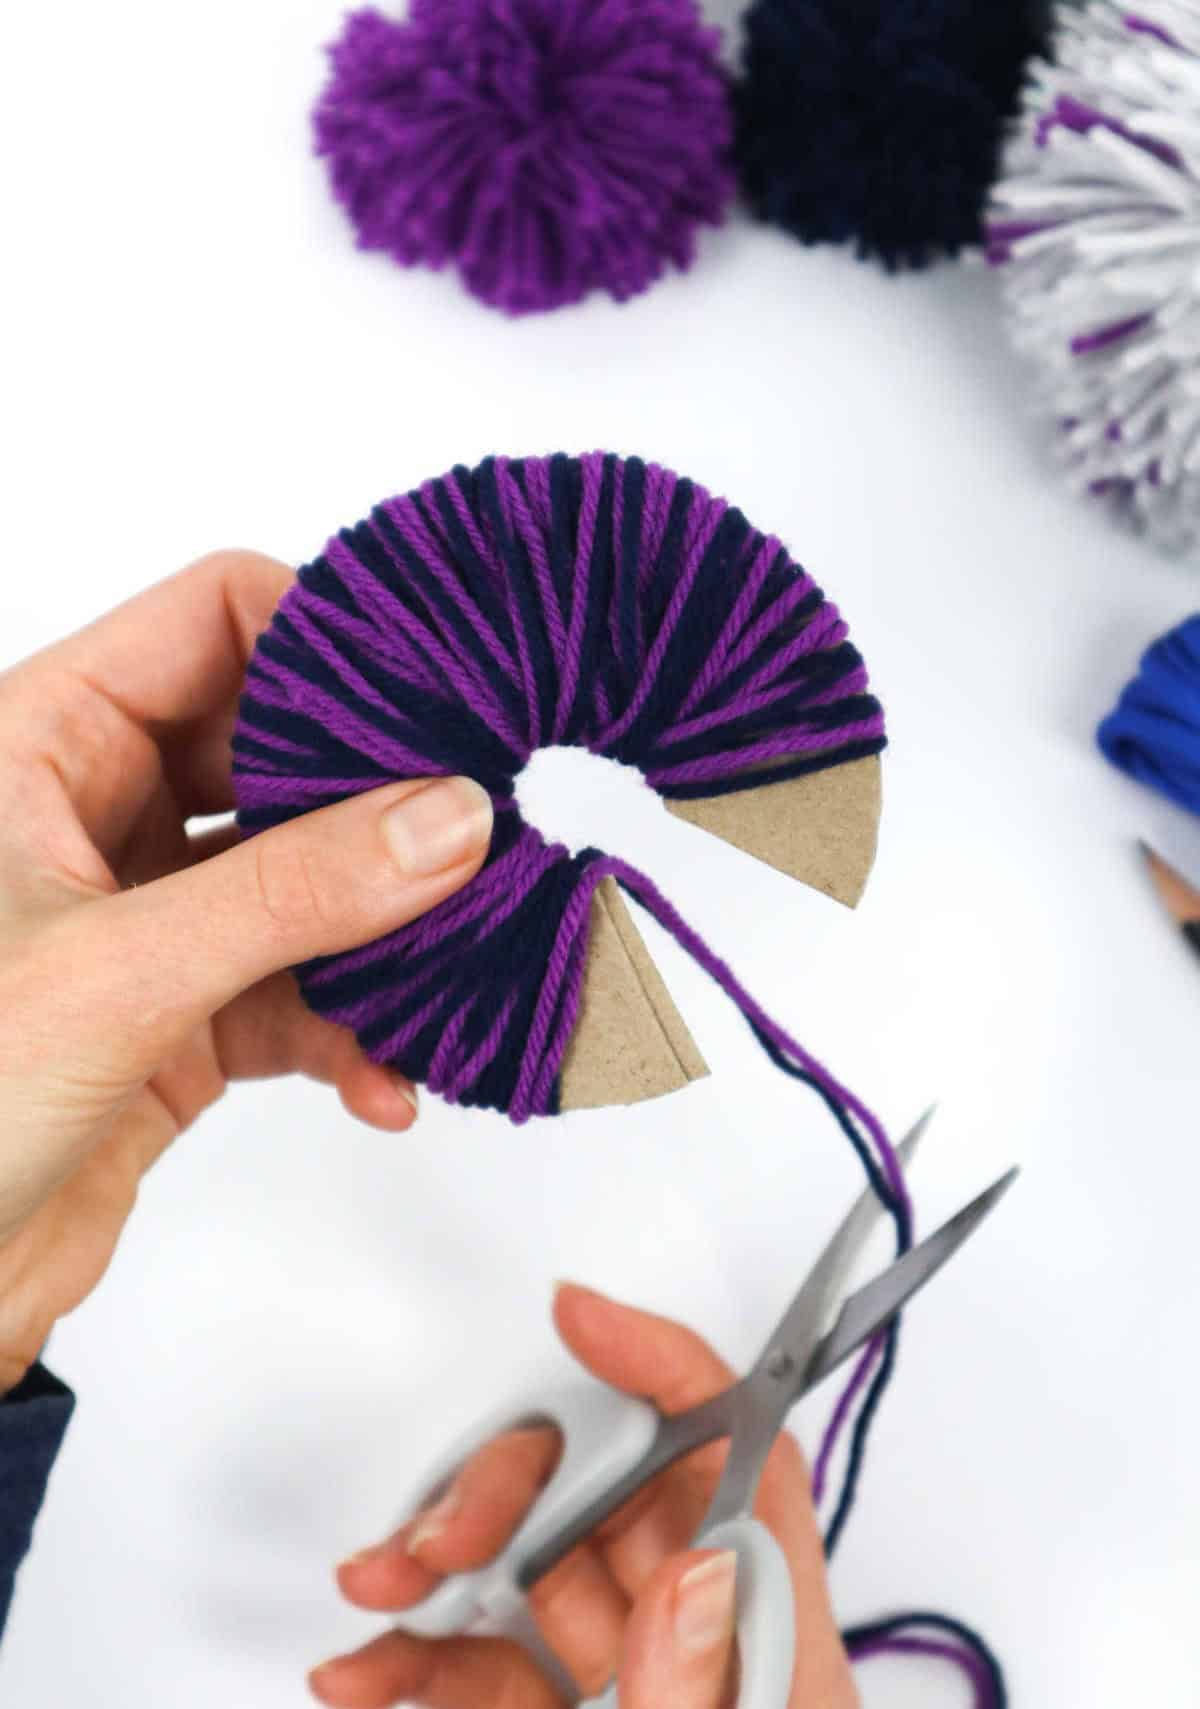
Step 6
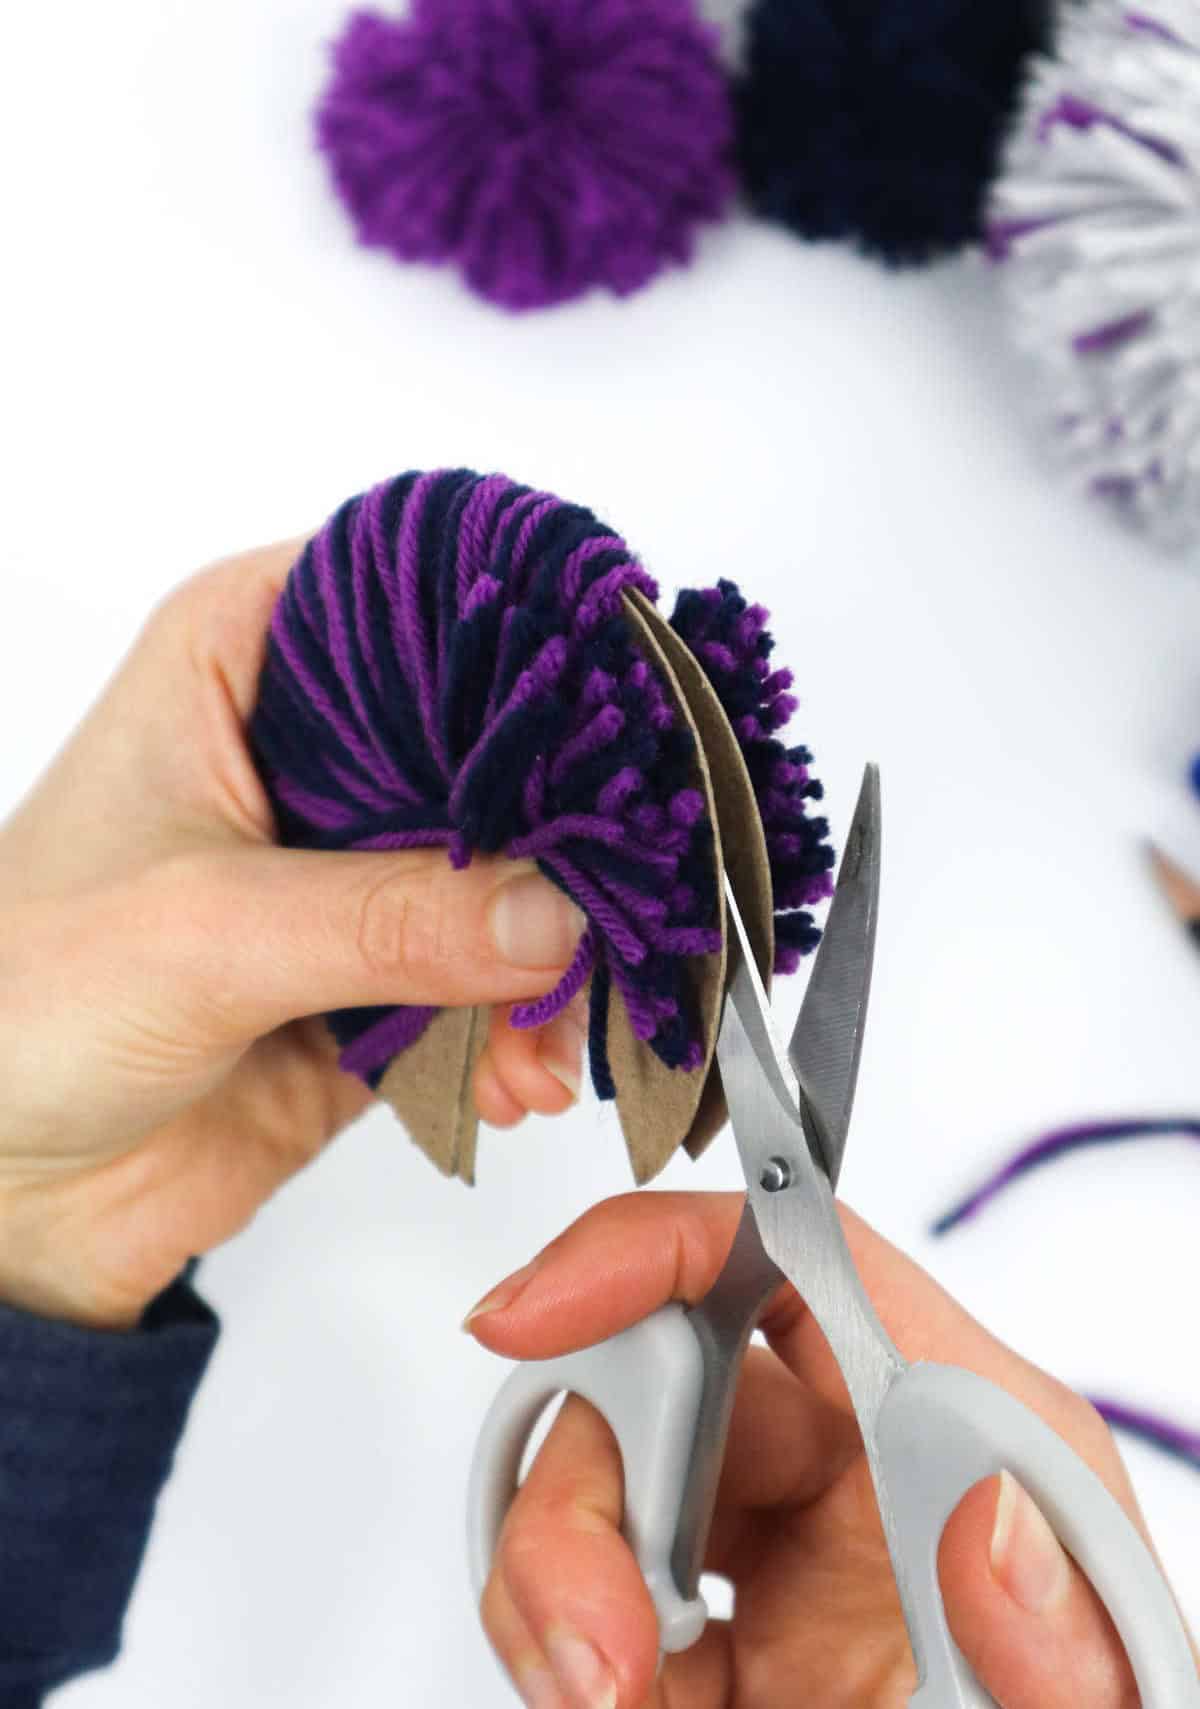
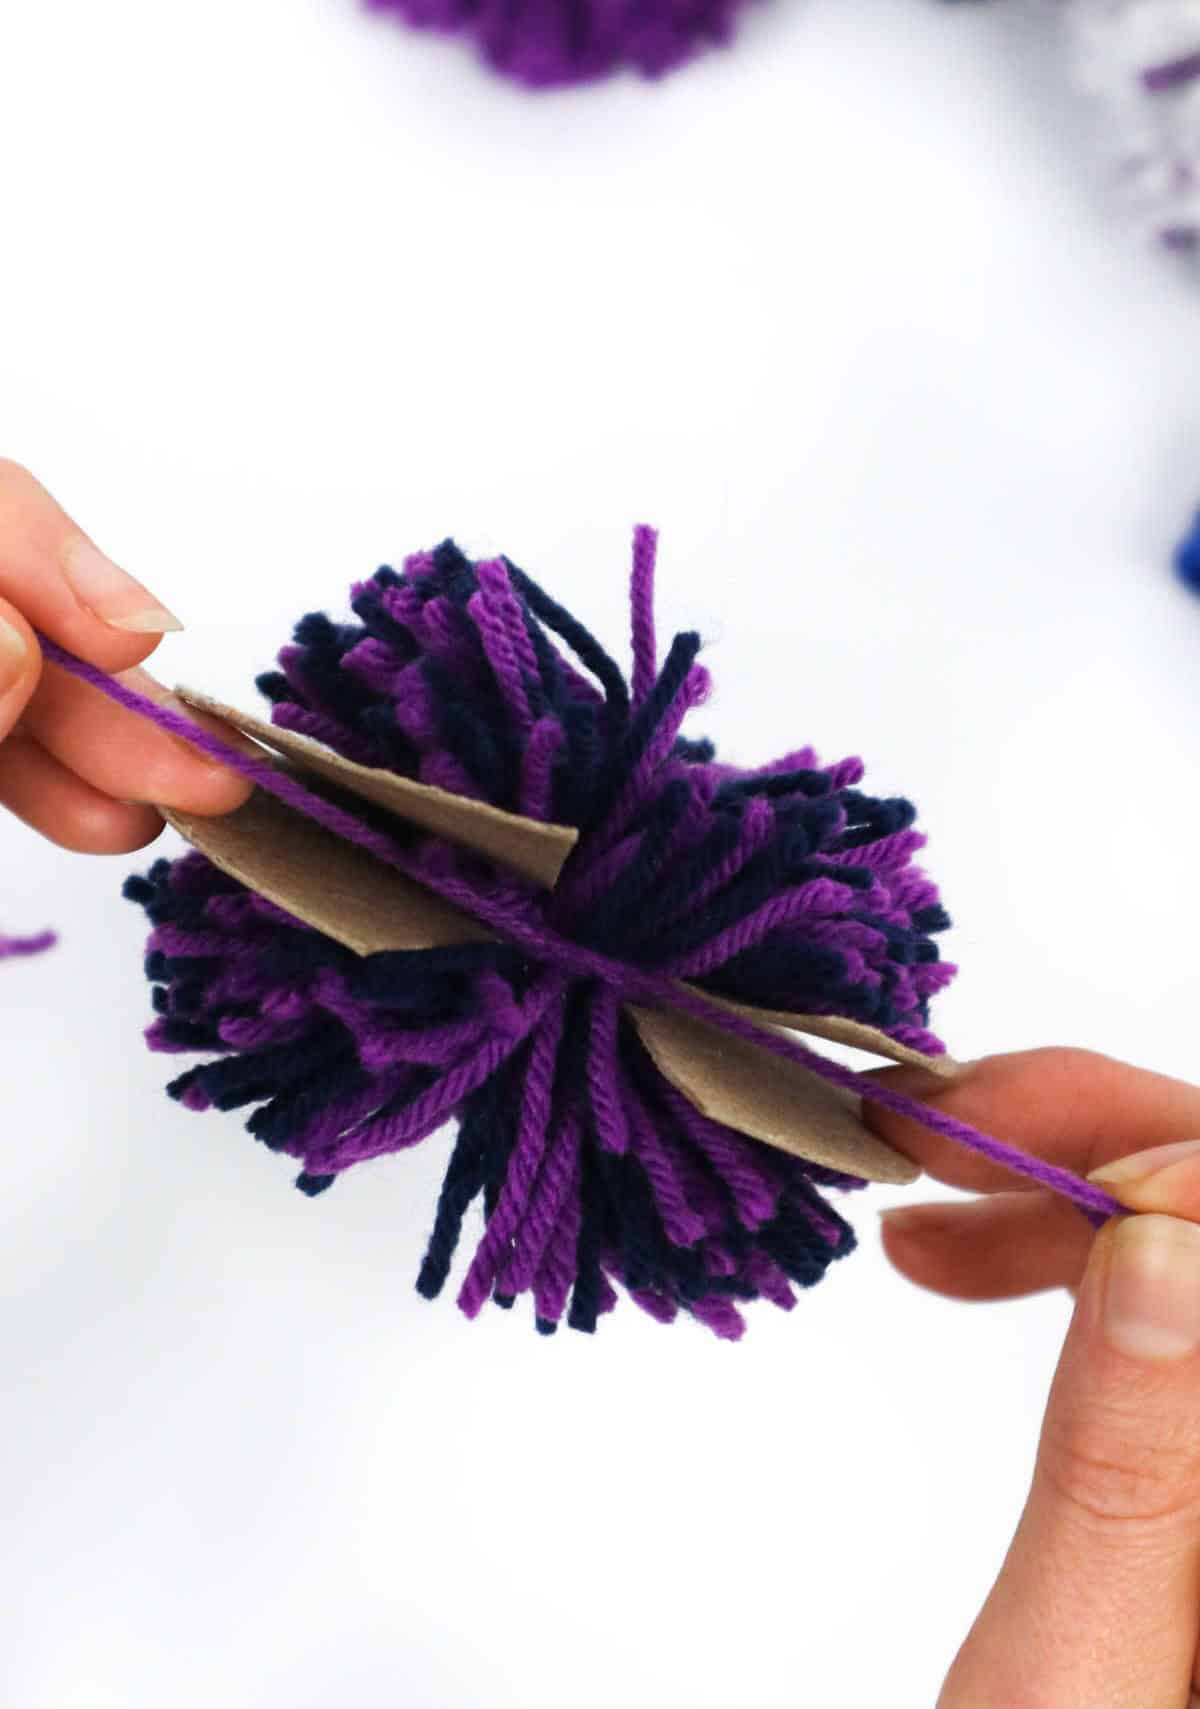
As you prepare to finish your project, don’t put away those scissors just yet. You’ll still need them to make a precise cut through the yarn. Take note of the narrow slit that separates the two disks and carefully cut along it from the entrance point, working your way around in a continuous motion. To avoid any accidental yarn slippage through the central hole, be sure to maintain a firm grasp on the yarn as you complete the cutting process.
Once finished, your yarn-covered disk should resemble the following:
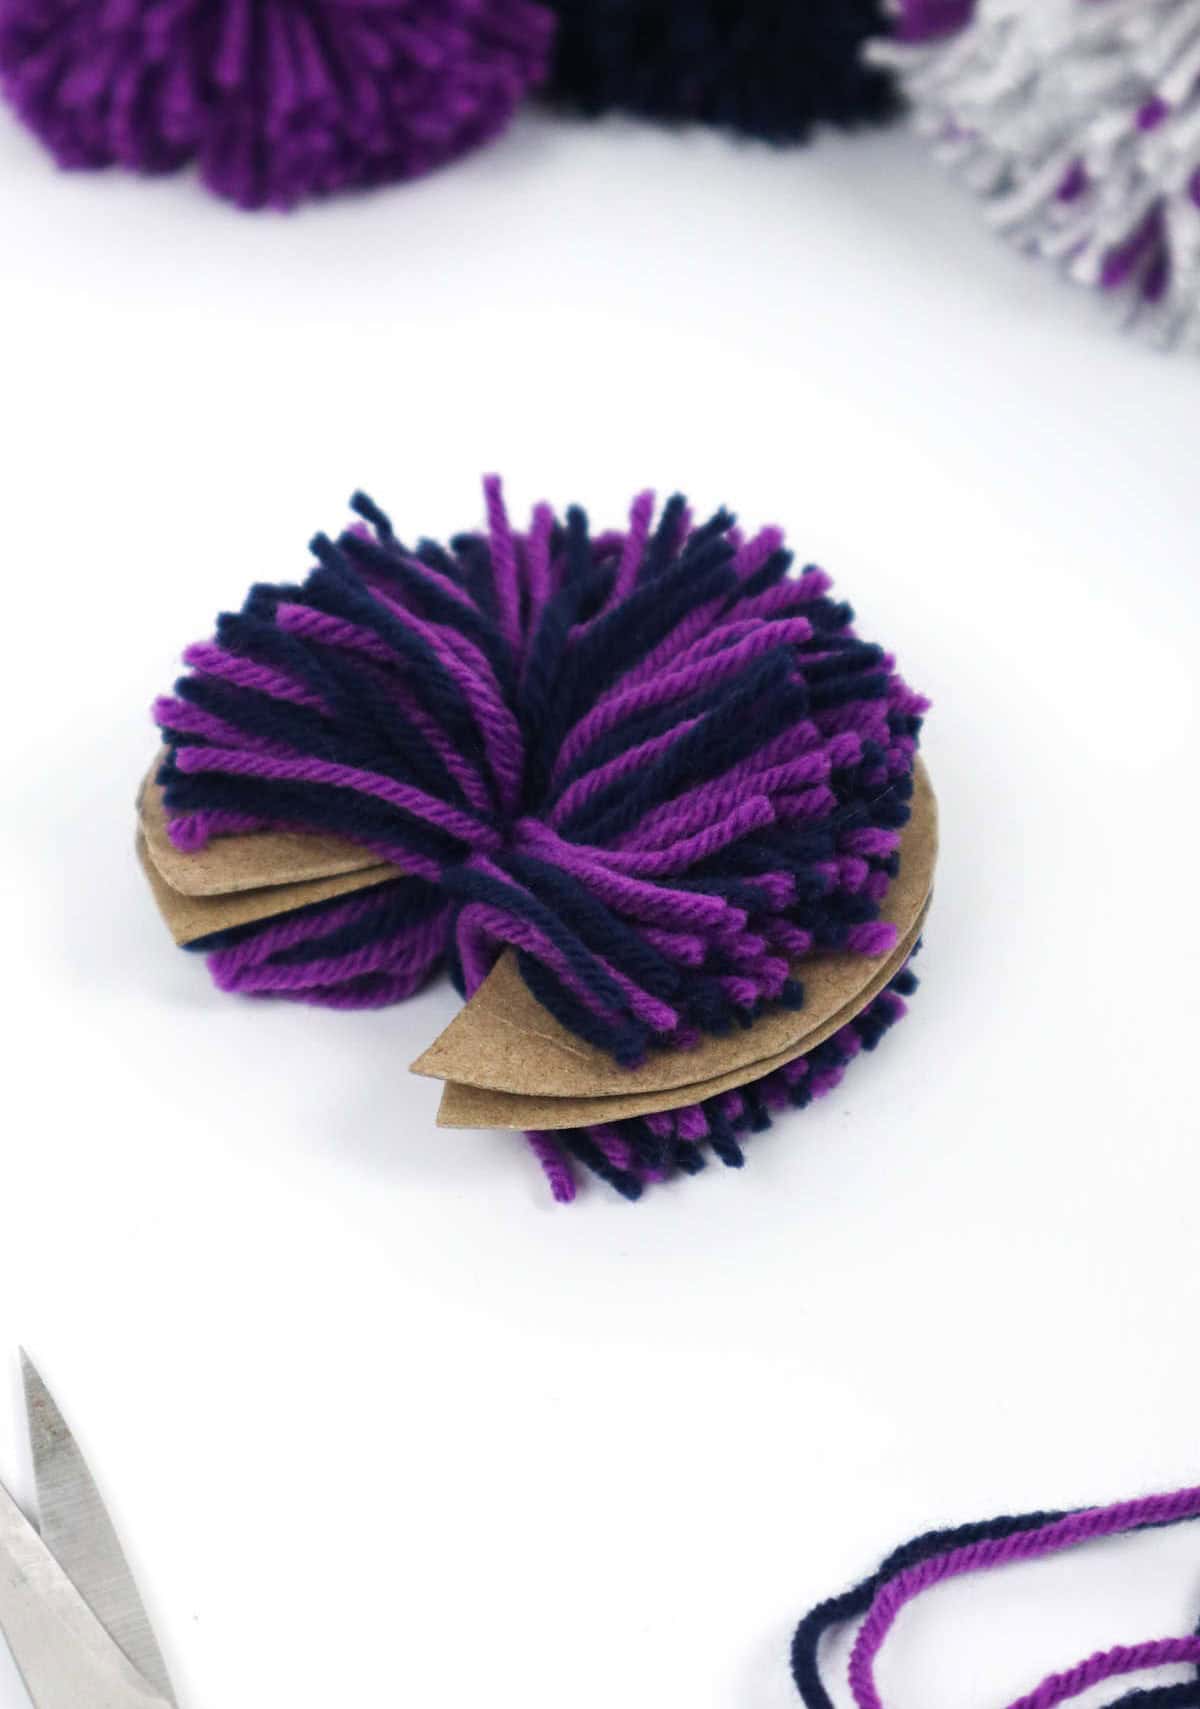
Step 7
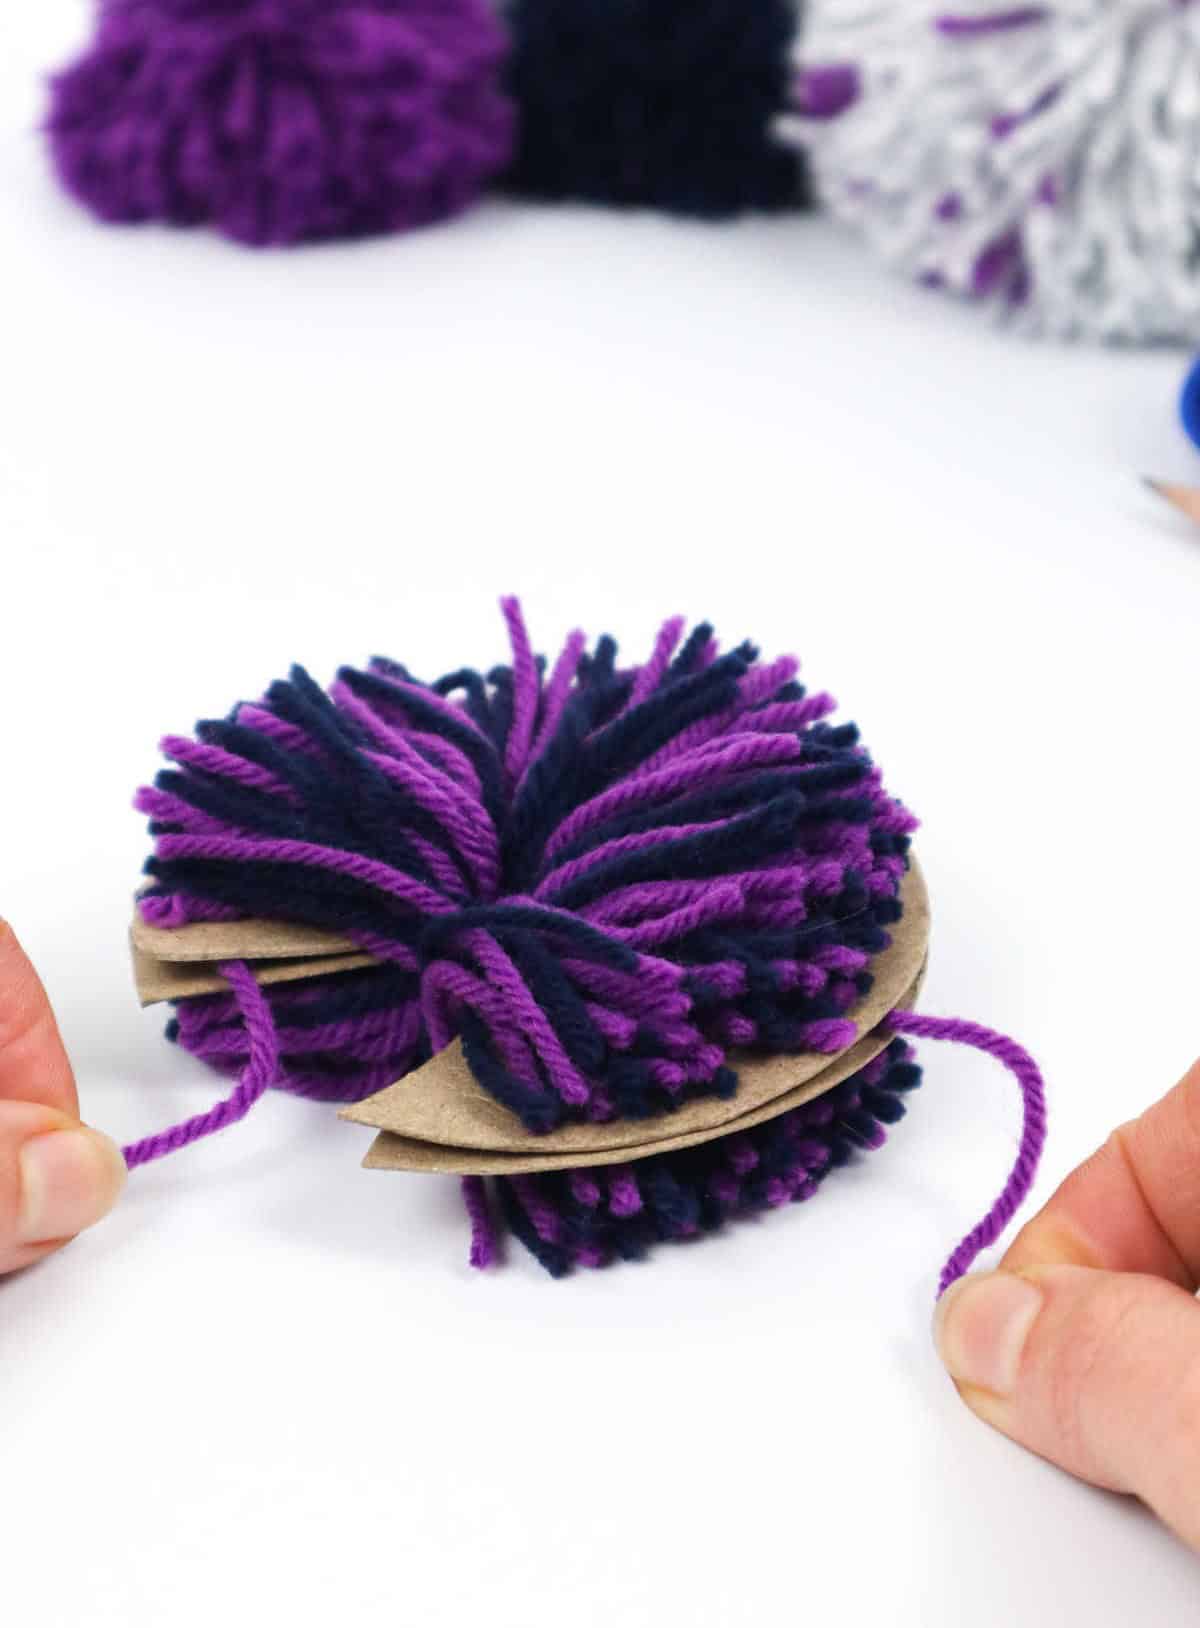
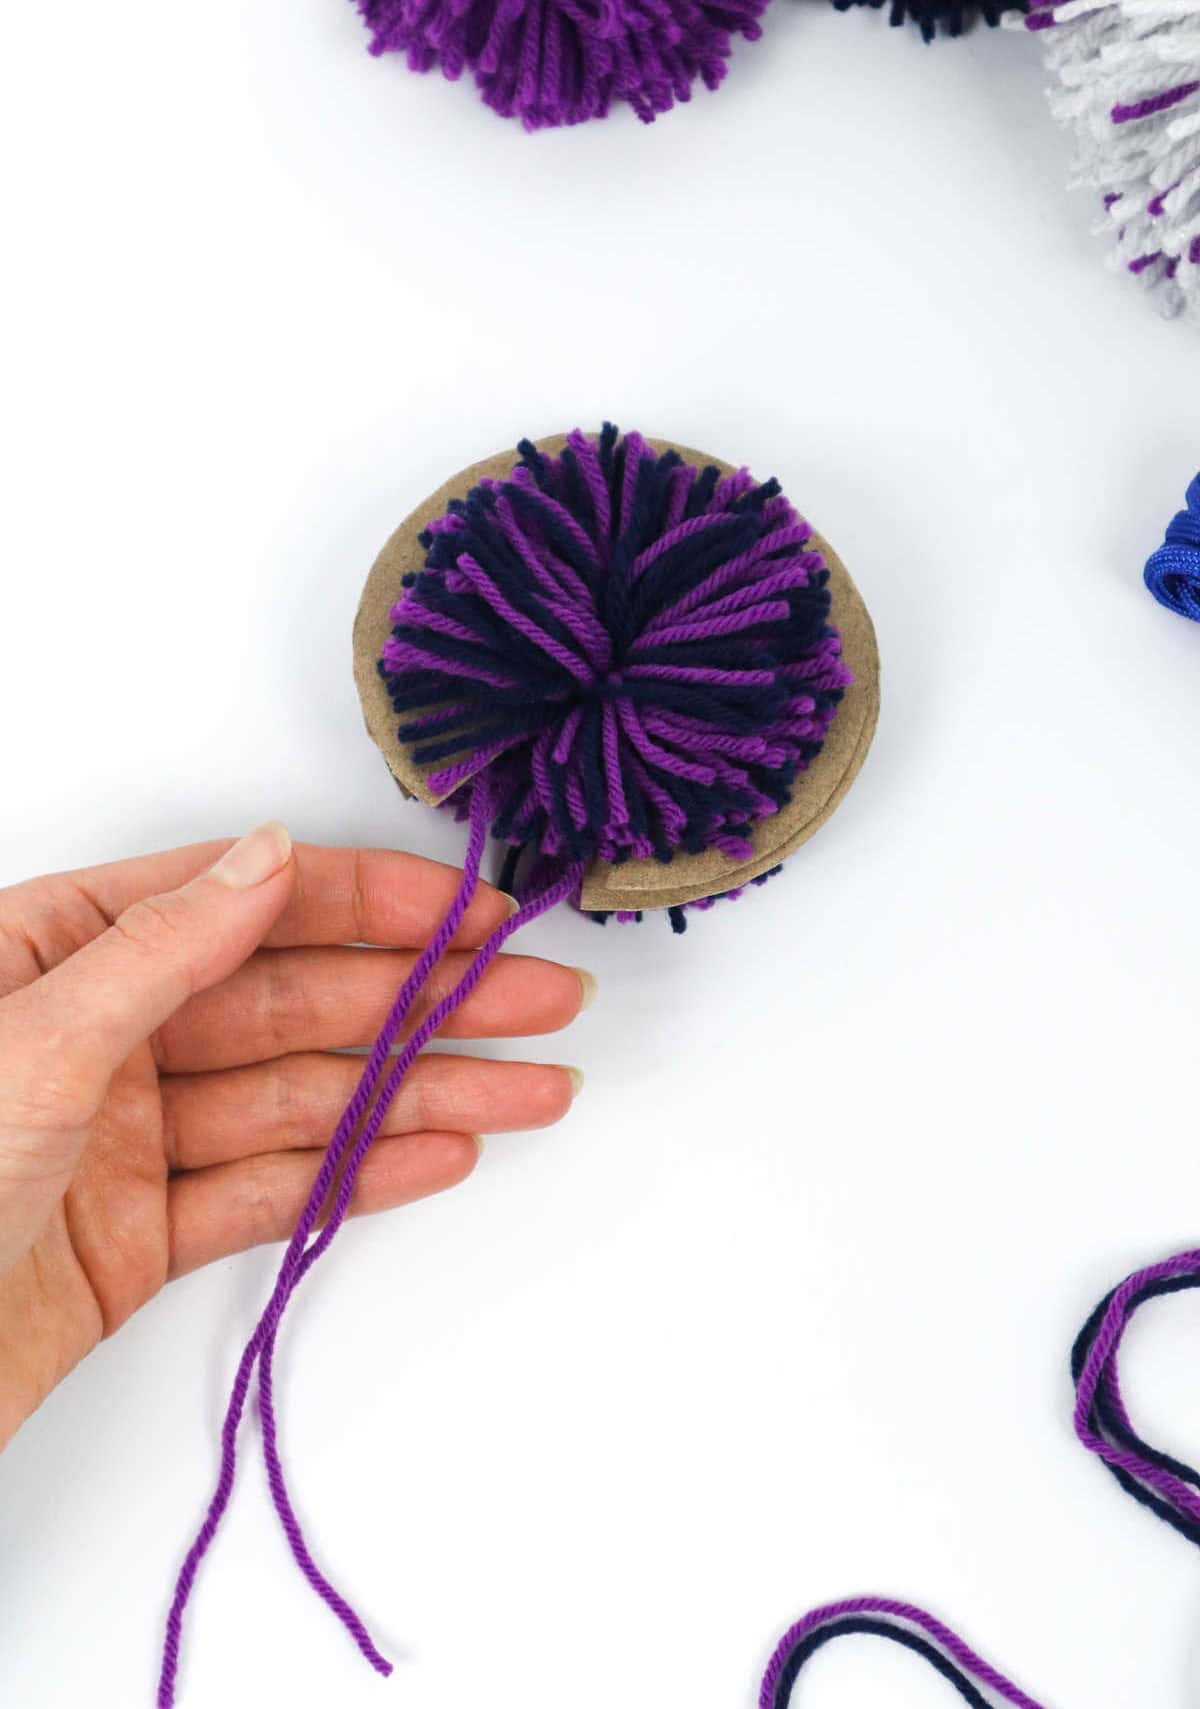
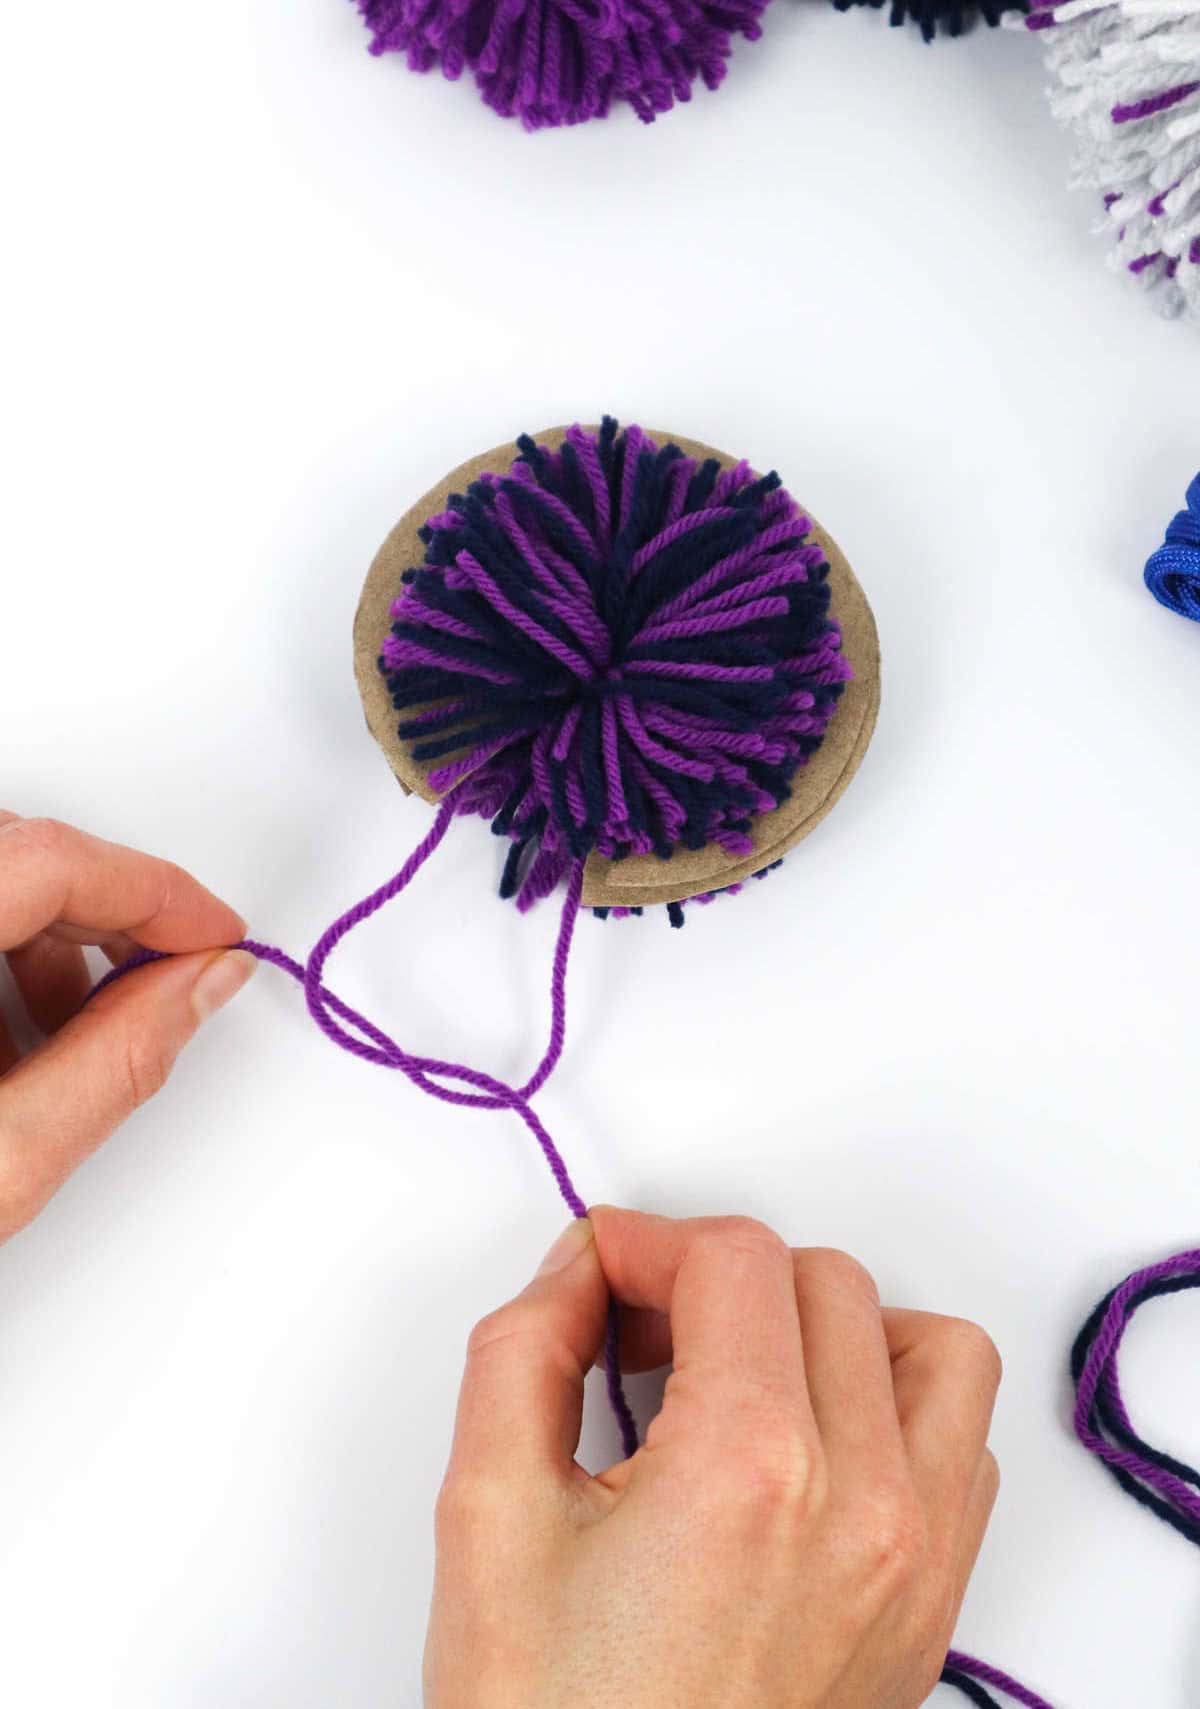
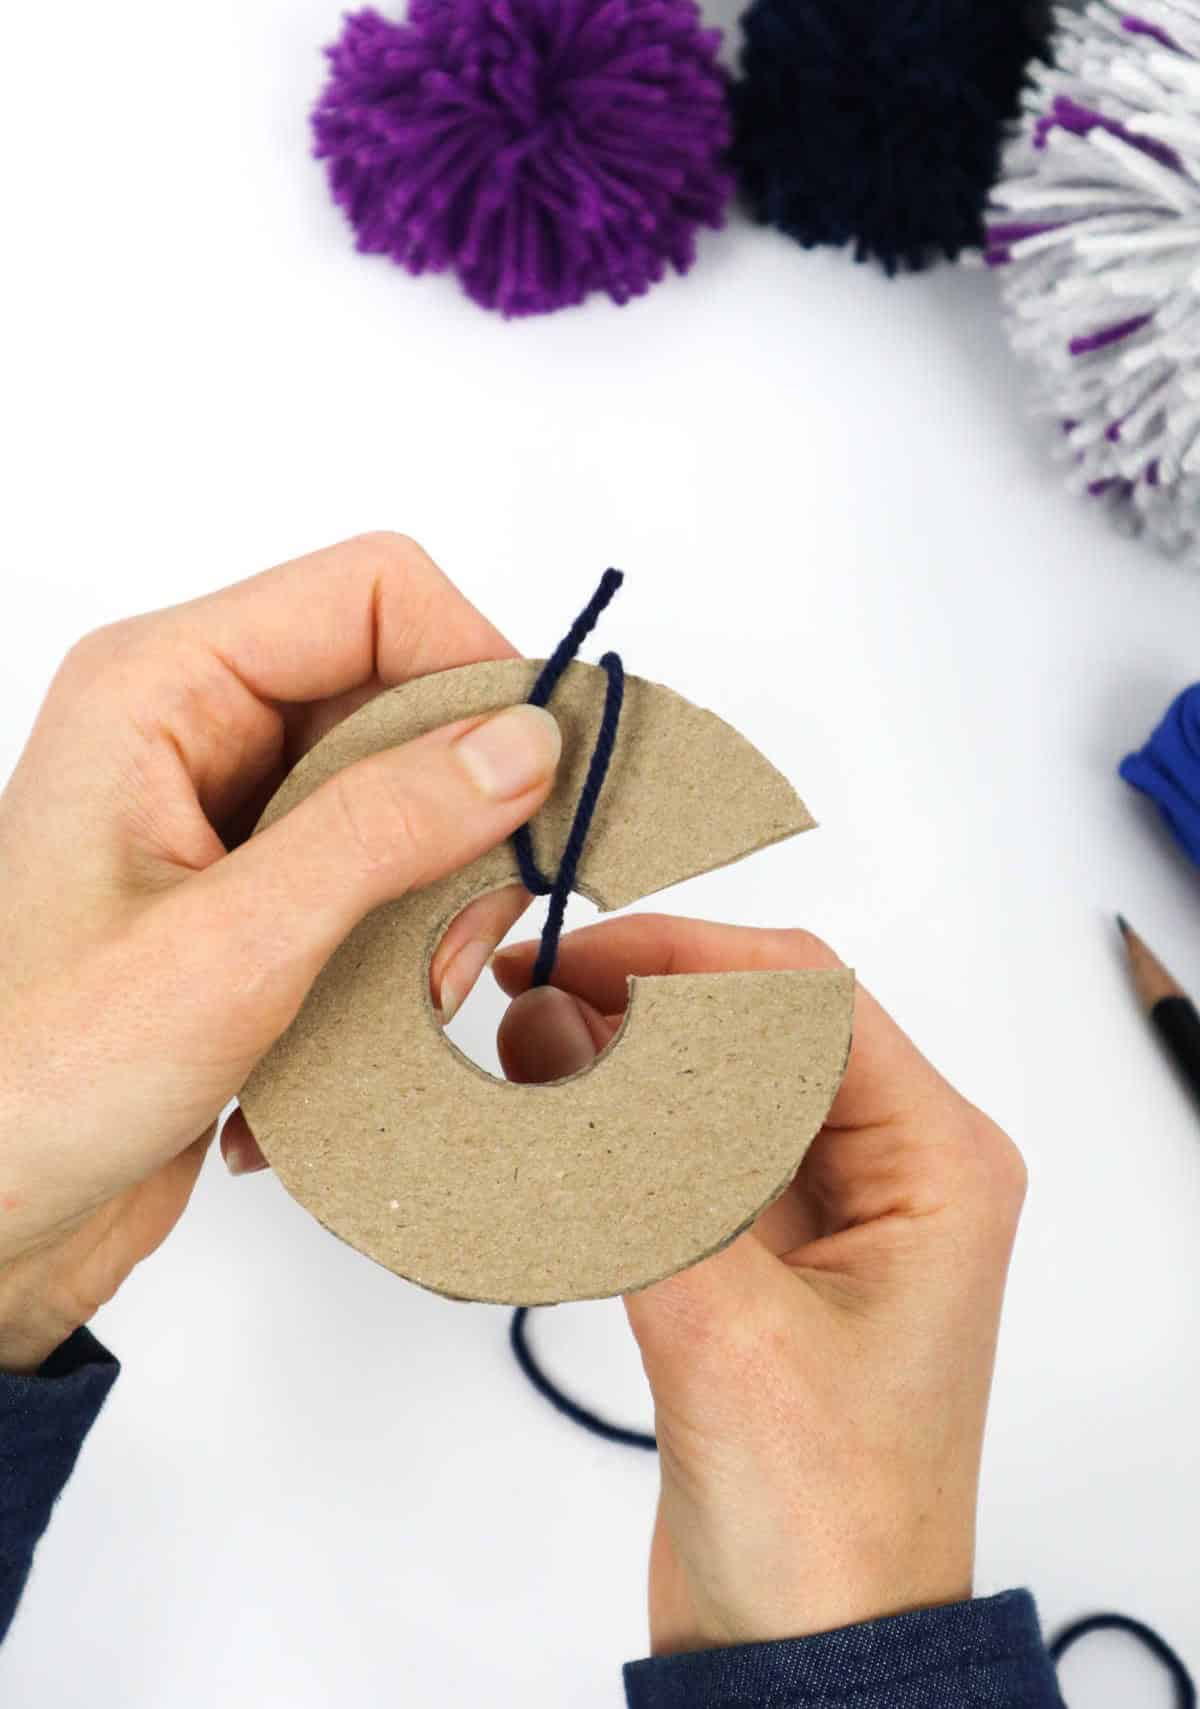
To begin securing the two spinning disks, take a length of yarn measuring around 8-10 inches and insert it between the two disks. Carefully pull the yarn out through one of the entrance openings on either side. Next, create a knot at each end of the yarn by folding the ends inwards twice and tightening them to secure the yarn firmly within the disk.
Step 8
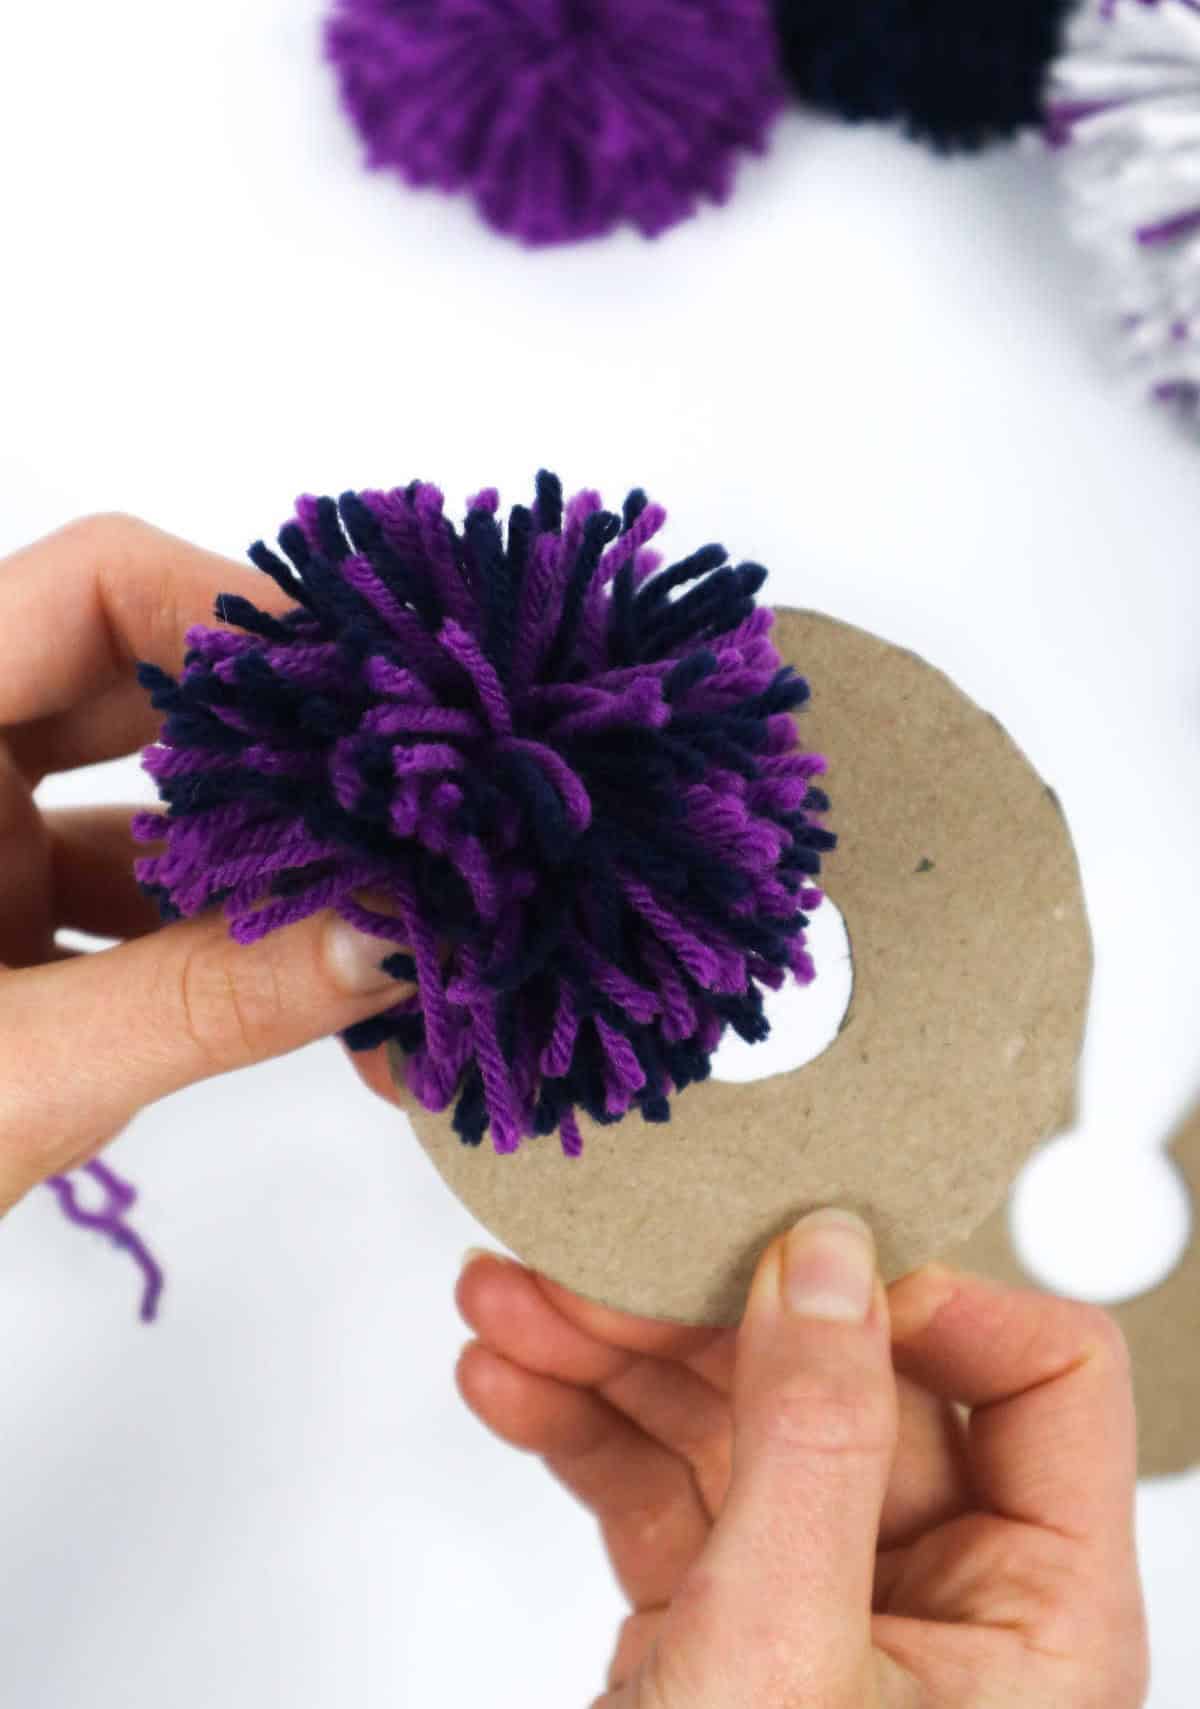

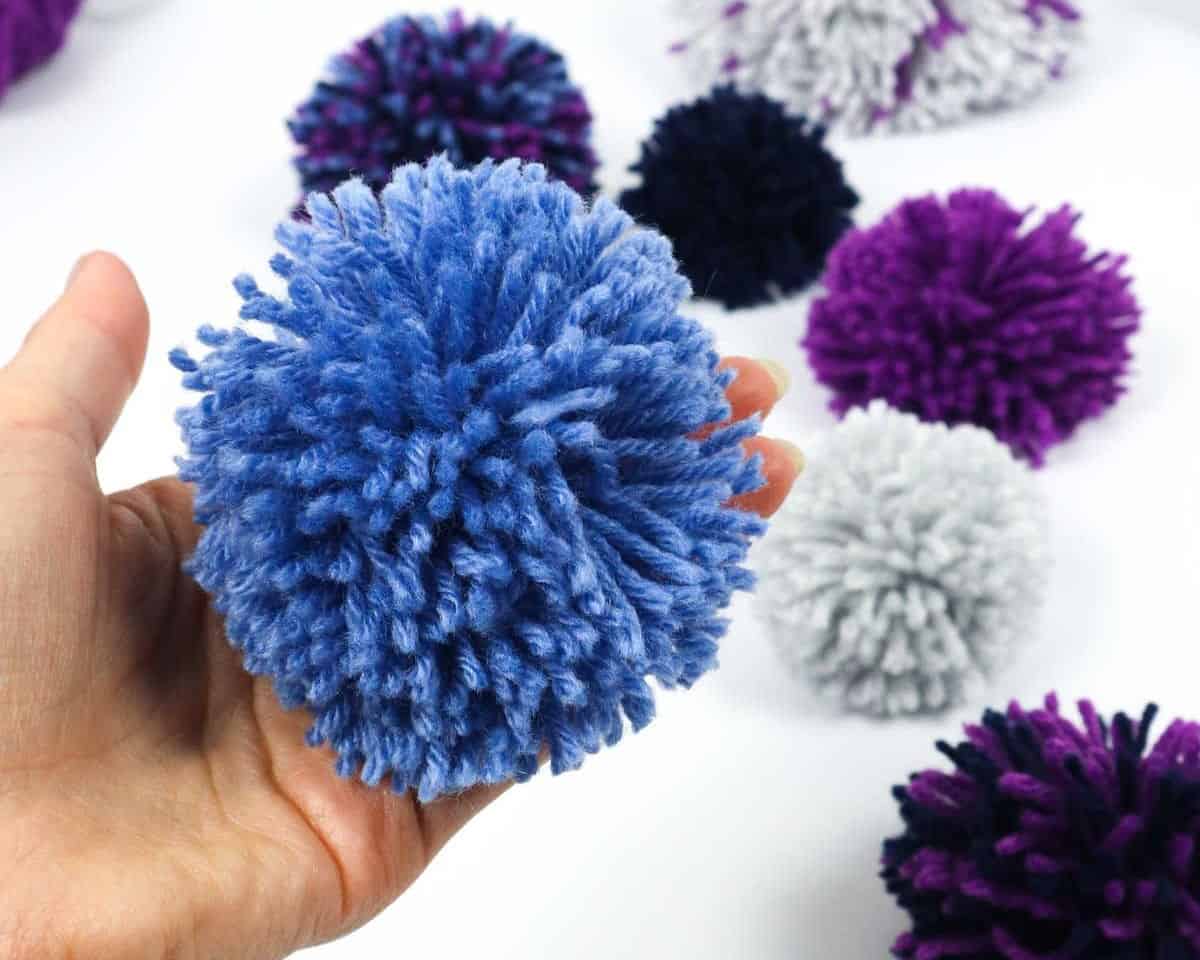
To complete the look, carefully remove the pom pom from its entrance. Although it already appears quite impressive, a bit more attention to detail is required to achieve the desired appearance. This involves fluffing out the pom pom and tidying up any stray fibers.
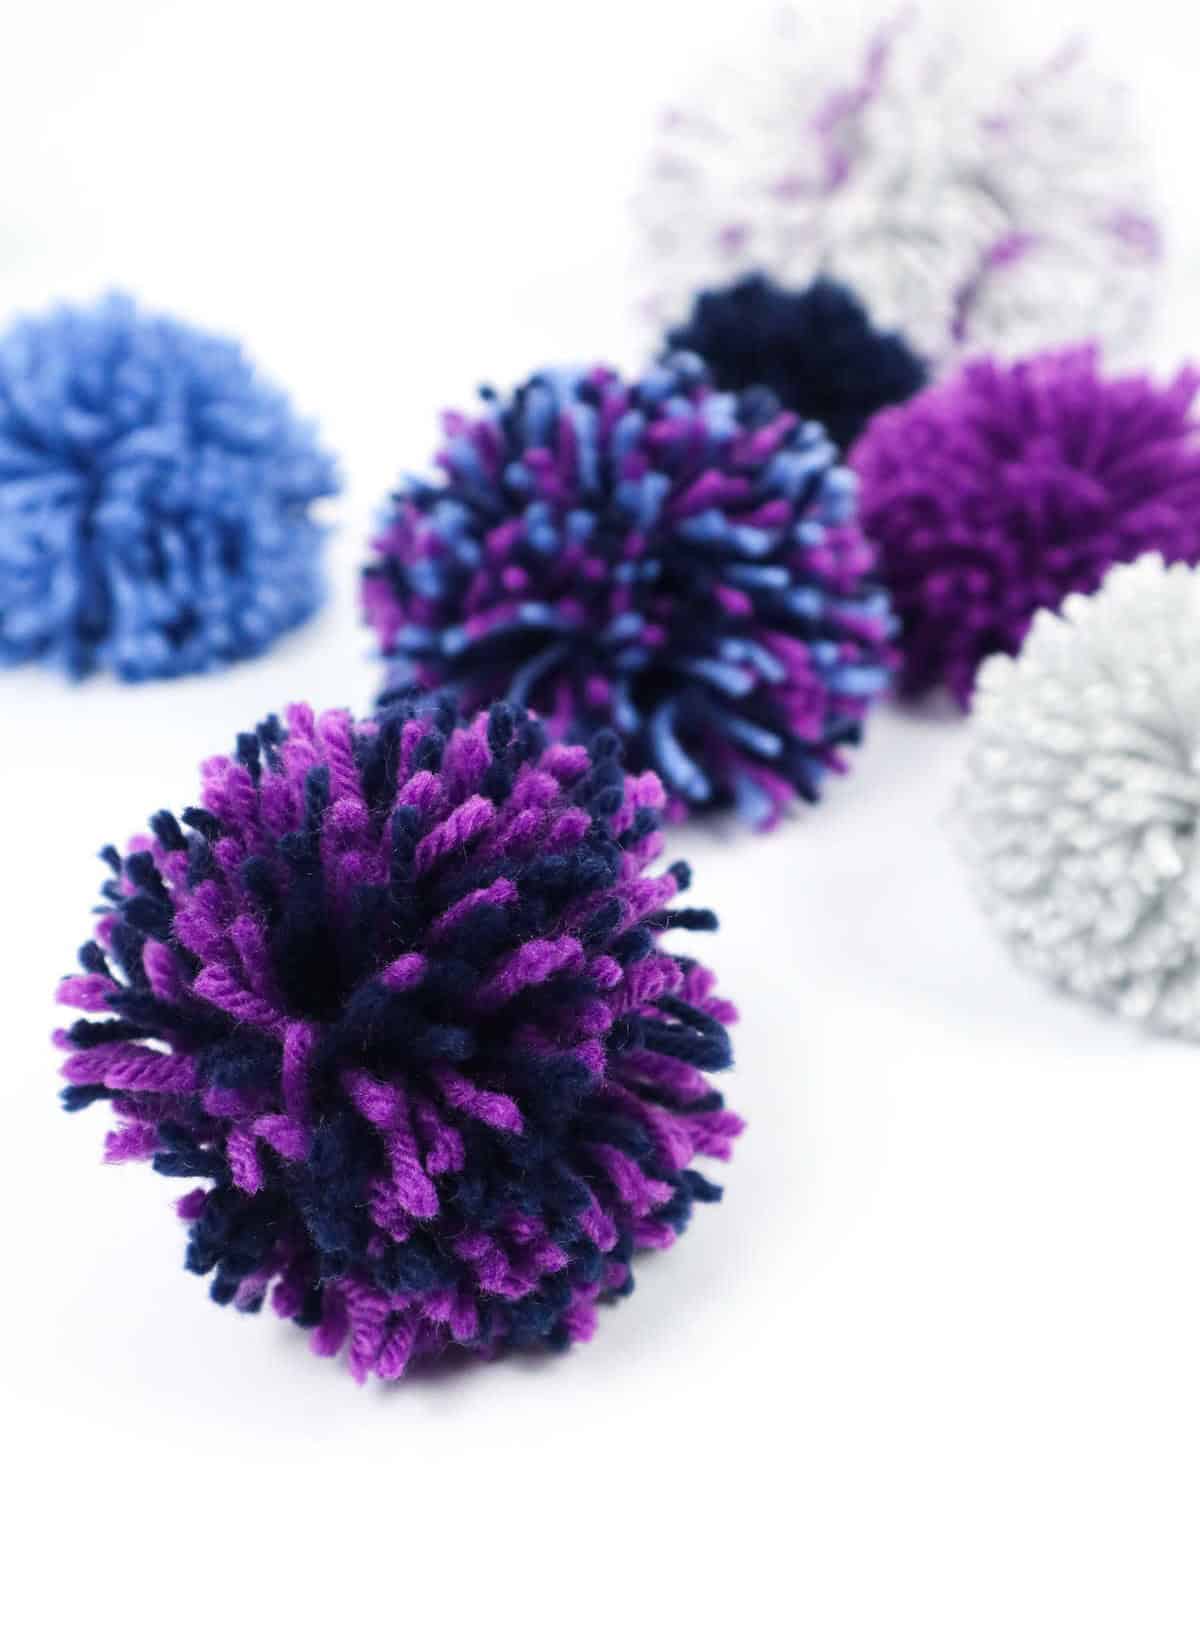
How Do You Make Yarn Pom Poms Fluffy?
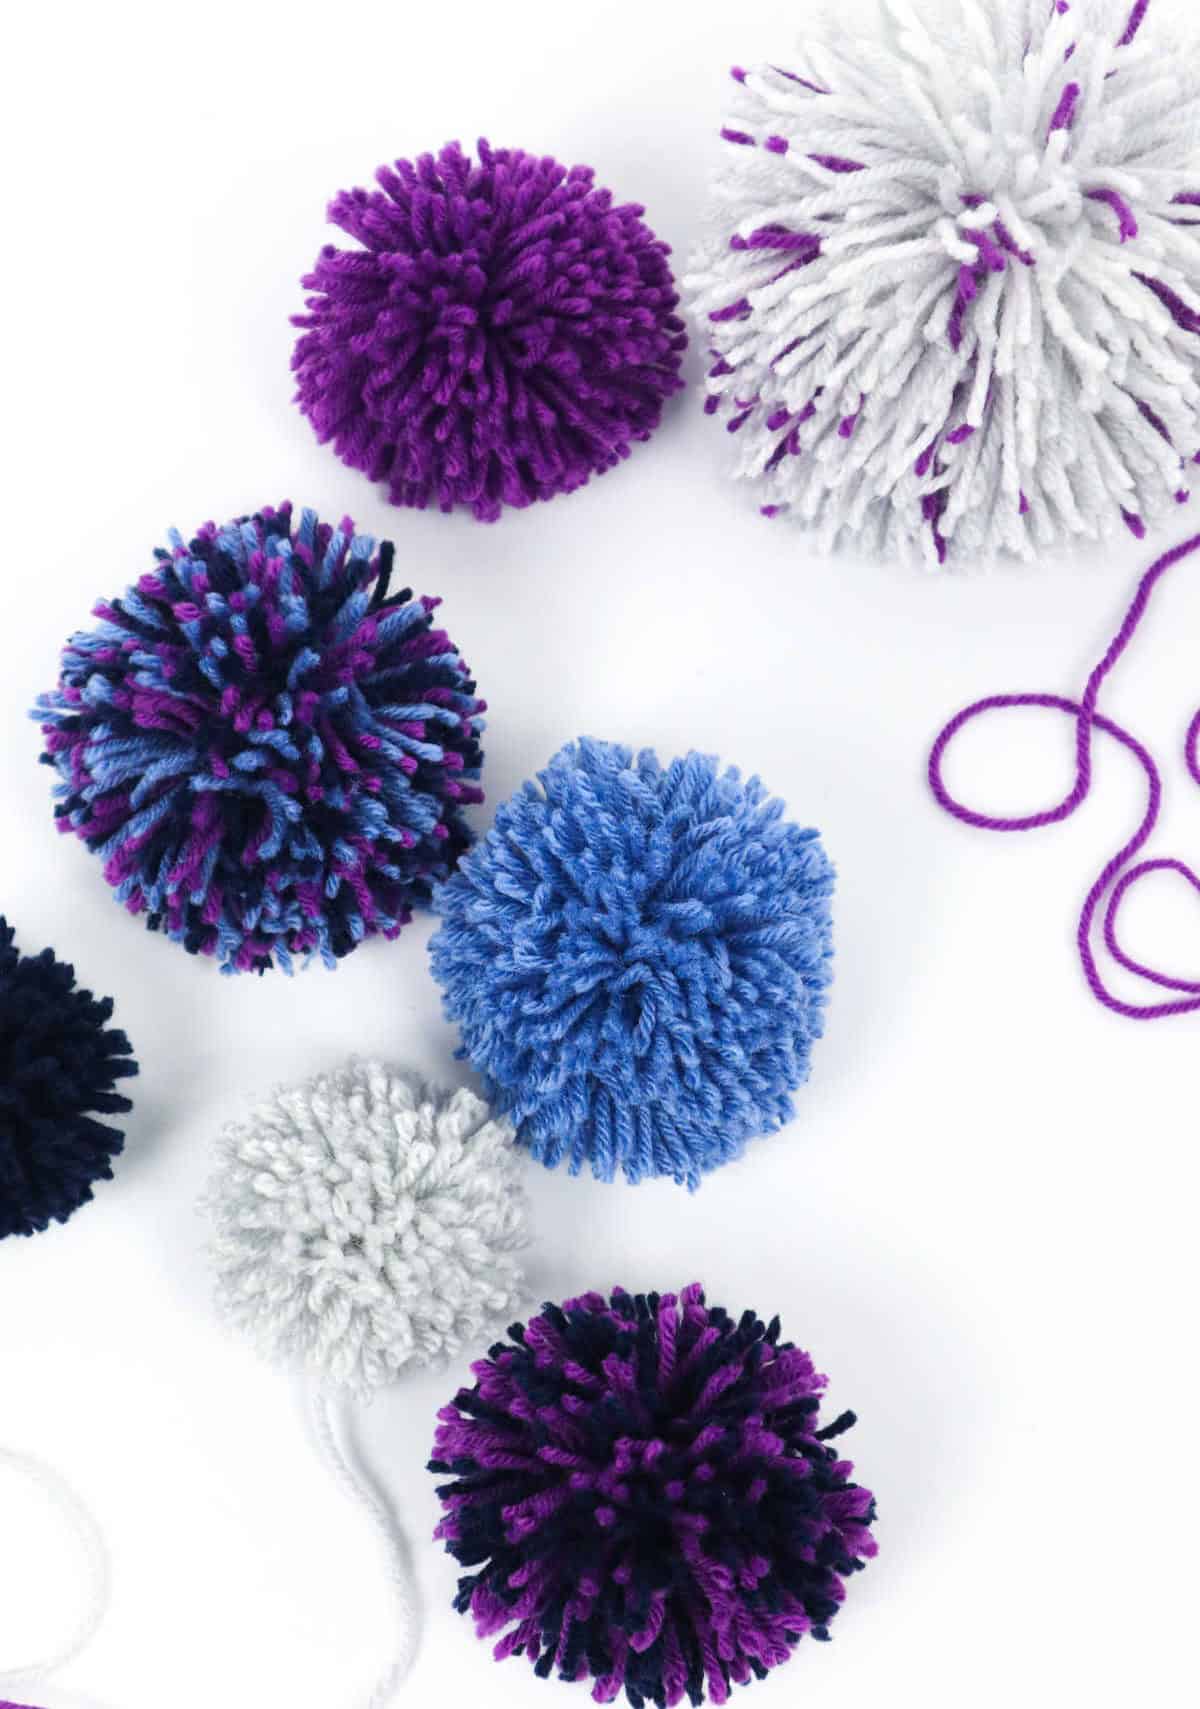
By wrapping more yarn around the disk, you can create thicker, fluffier pom poms. However, this is just the beginning. To take your pom poms to the next level, try running a grooming brush through the strands to further enhance their texture and volume. When you do, you’ll be rewarded with impressively large and luxuriantly fuzzy pom poms that are sure to turn heads.
Where Can You Use These Pom Poms?
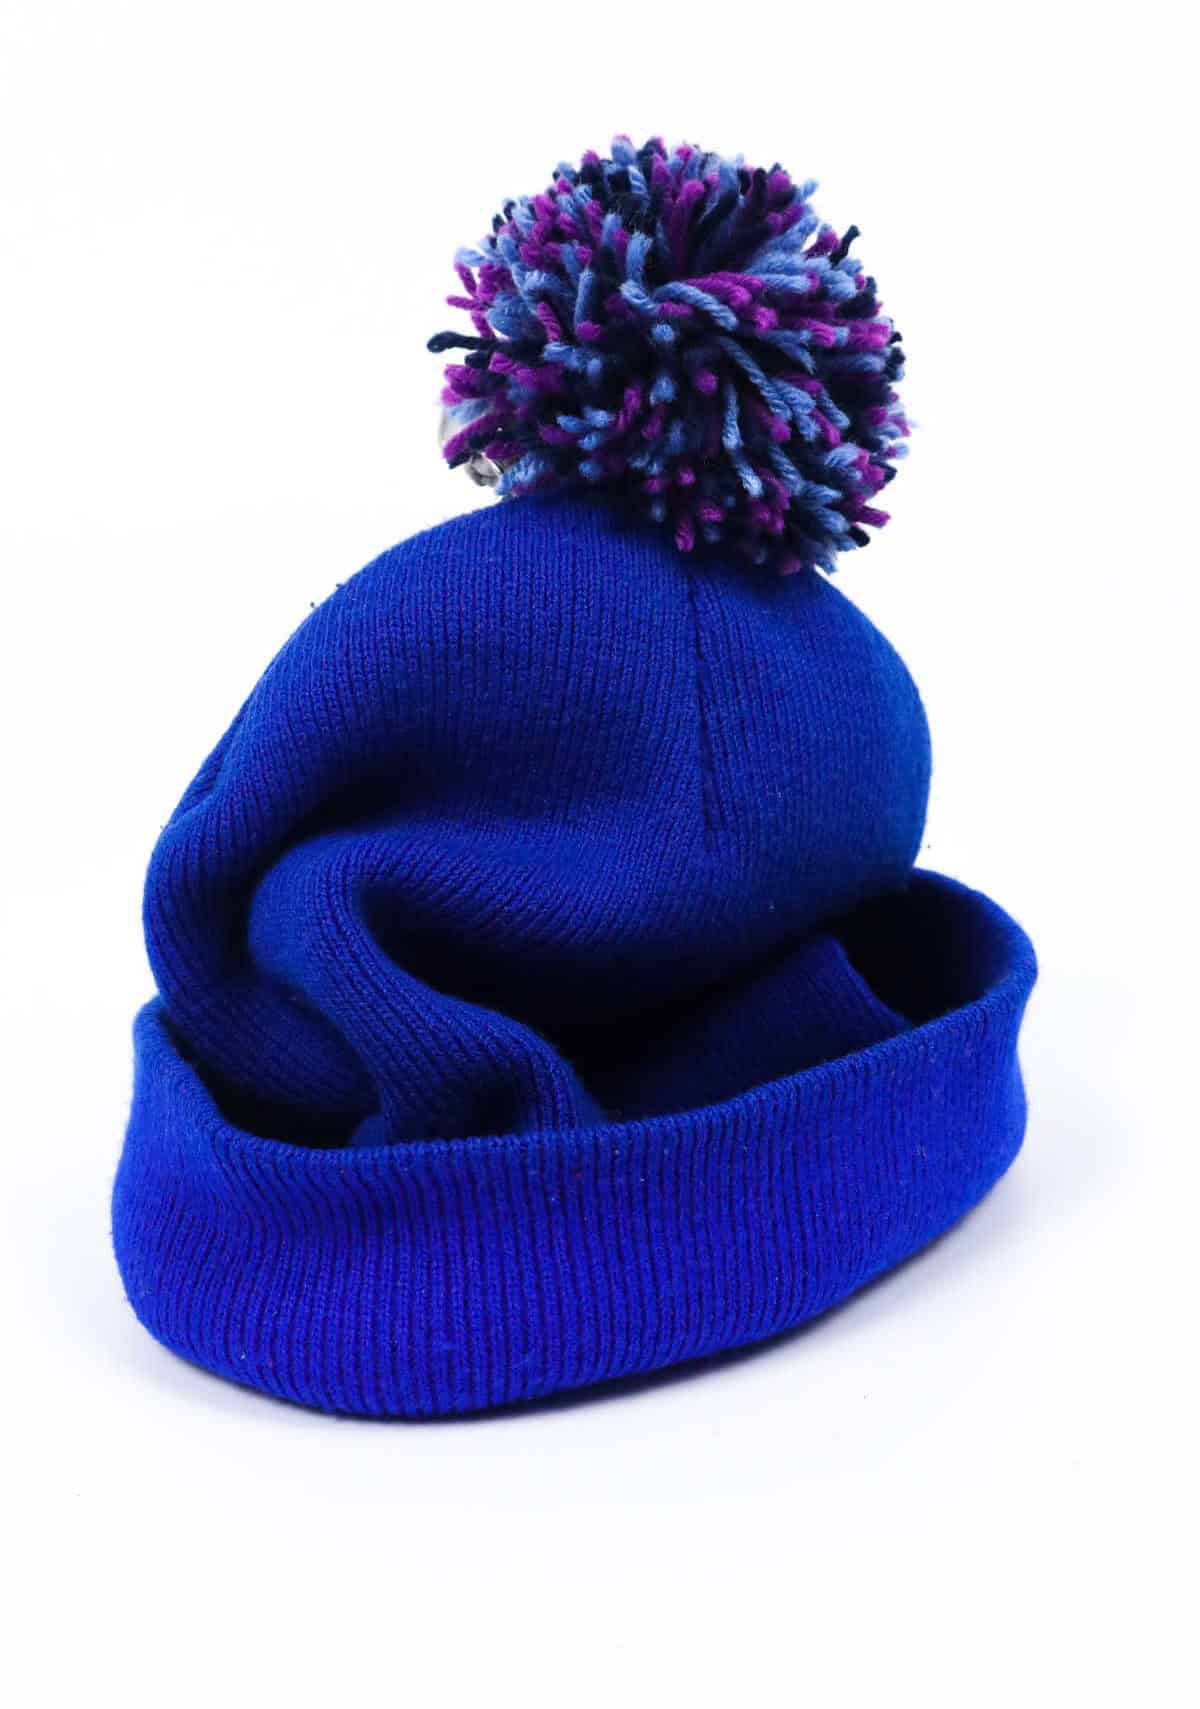
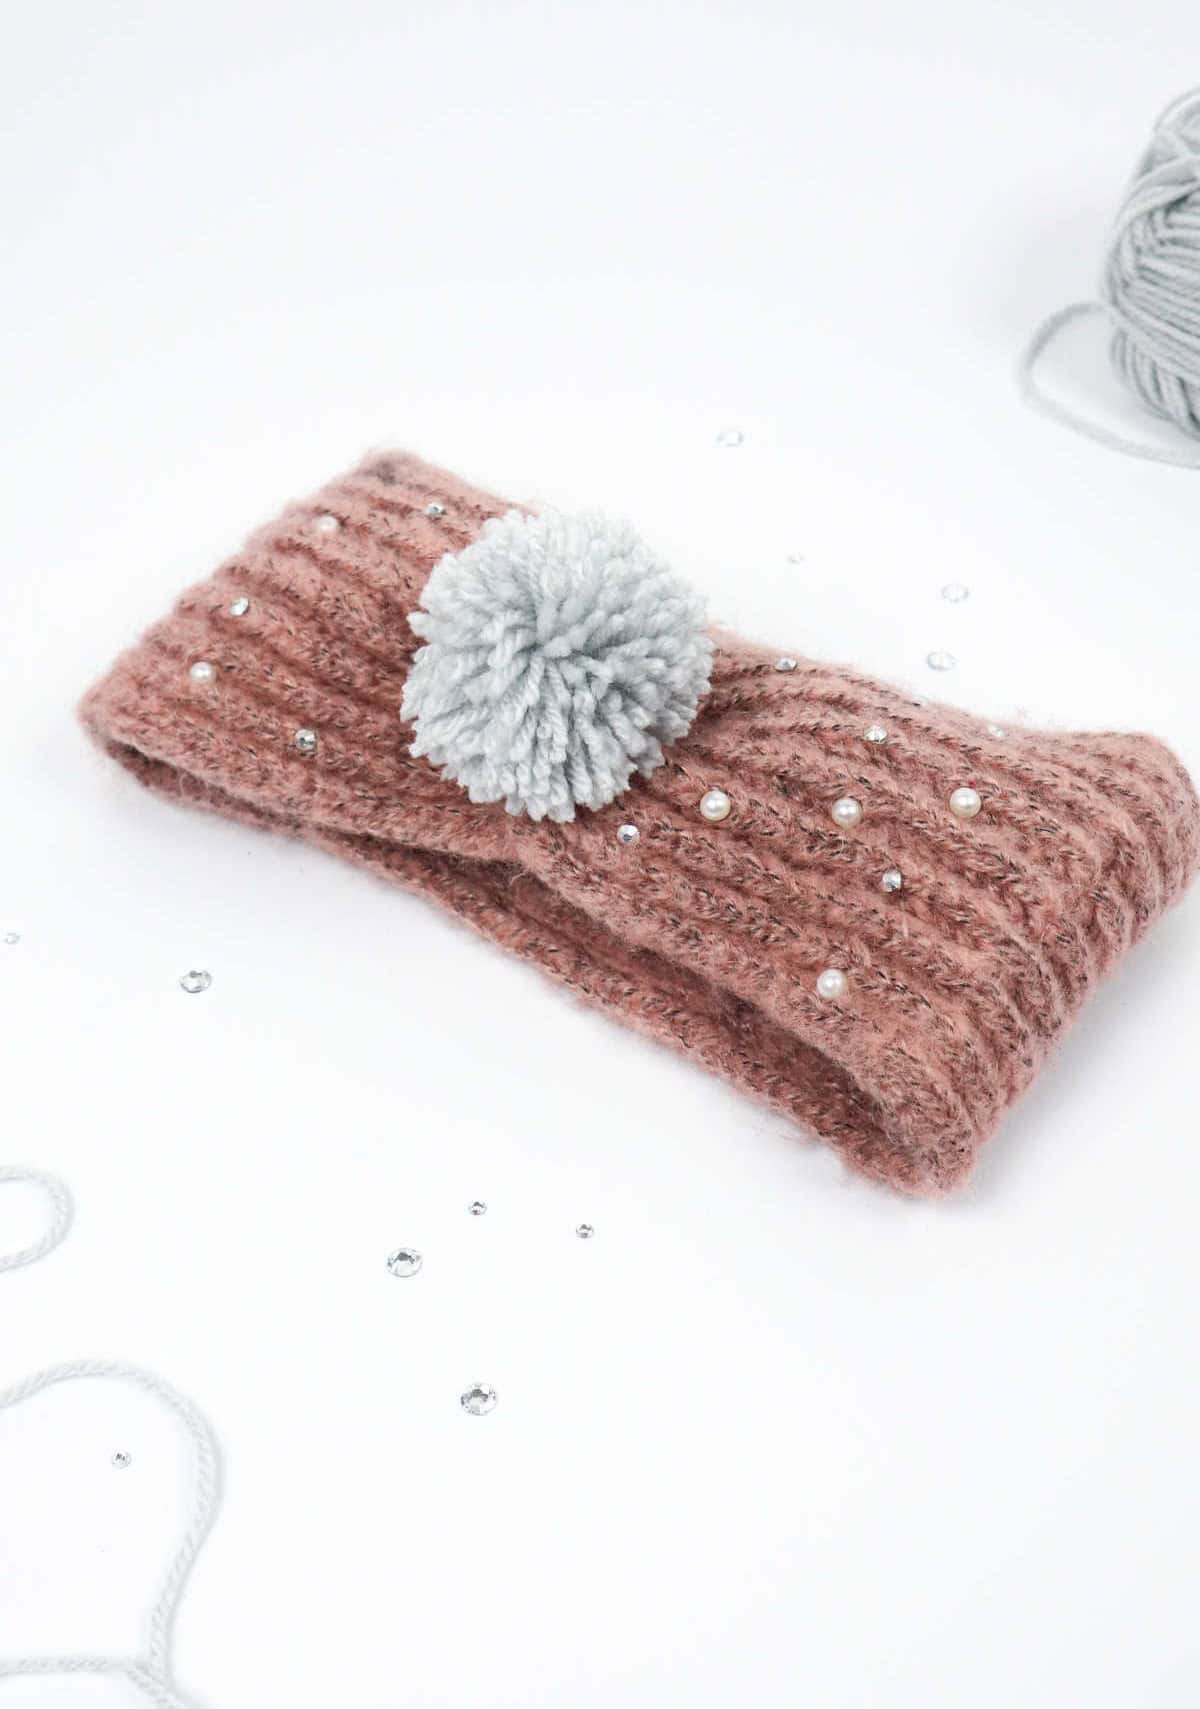
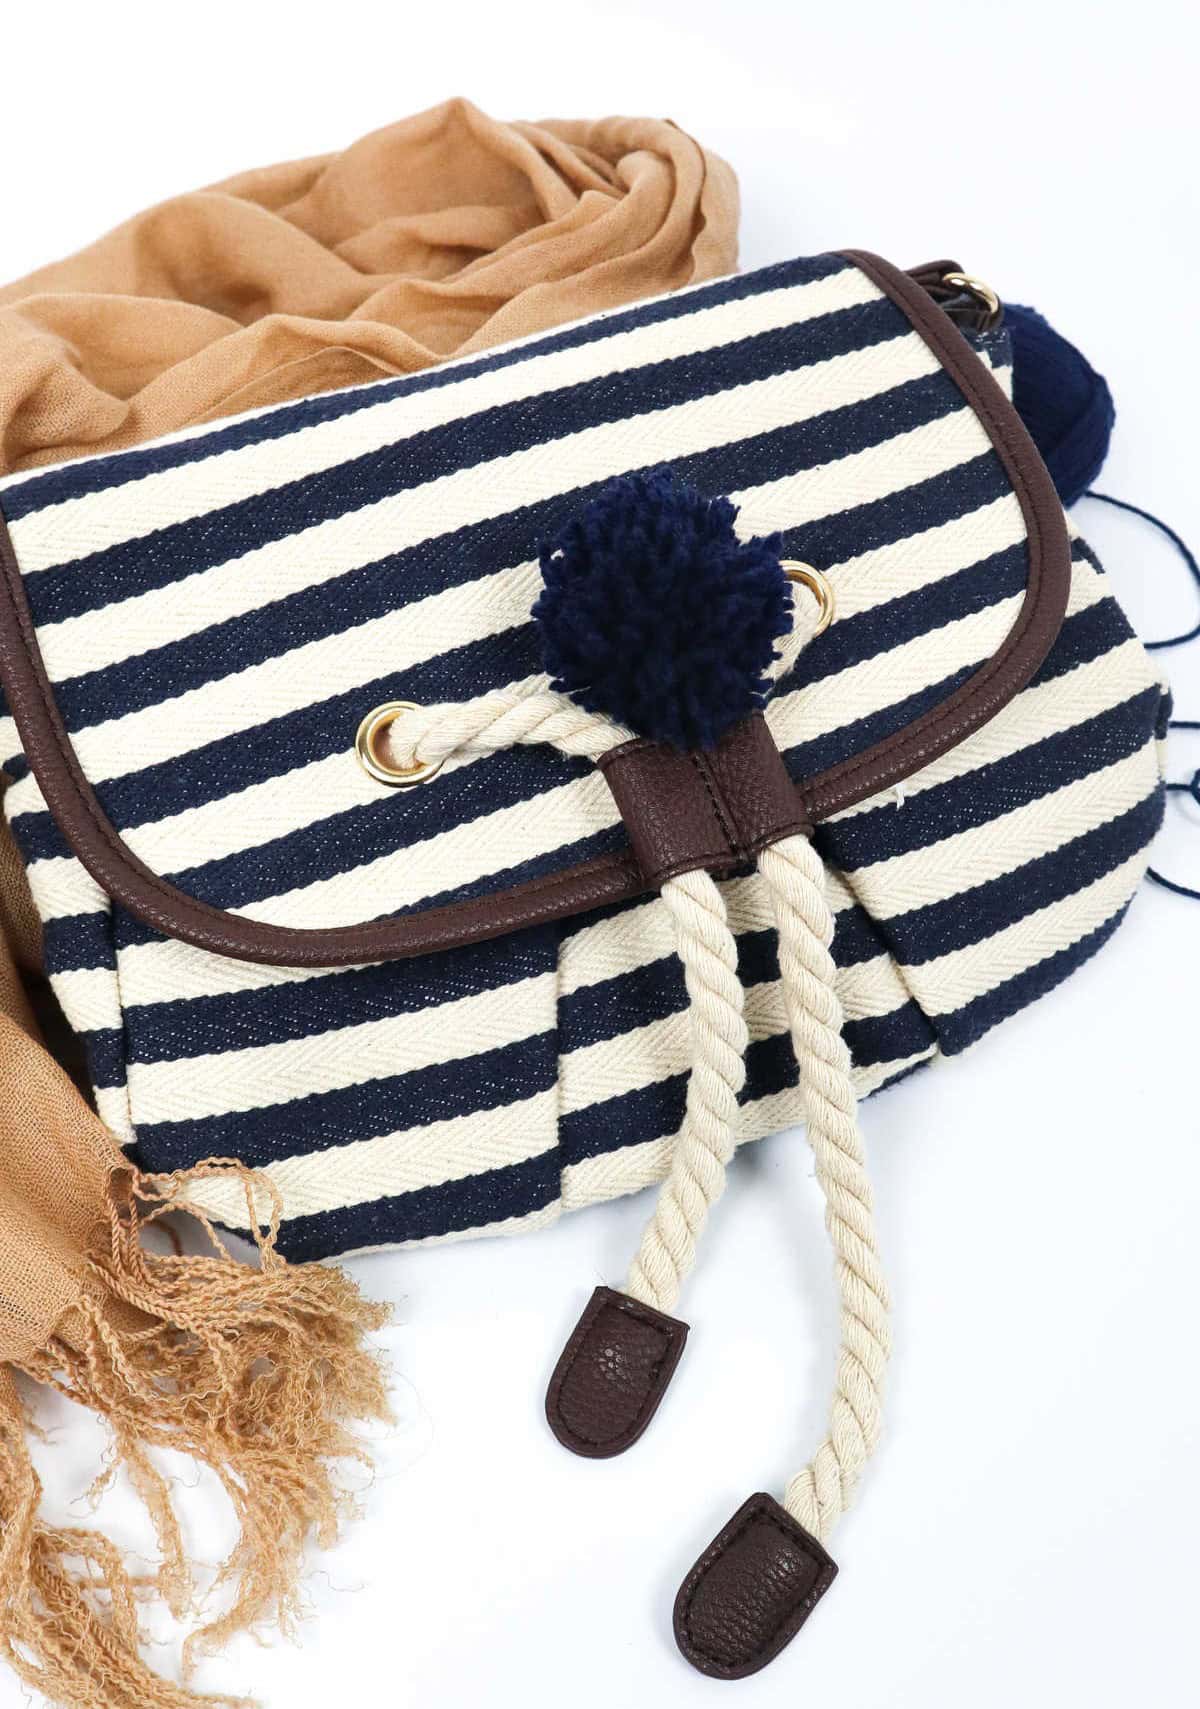
When it comes to utilizing pom poms, the possibilities are truly endless. They can be cleverly integrated into various creative endeavors. For instance, you can adorn your Christmas tree with these colorful orbs, creating a whimsical and festive atmosphere. Alternatively, stringing a few together forms a charming garland that’s perfect for hanging on walls or across mantles. Pom poms also make wonderful additions to hats, beanies, scarves, headbands, and bags, infusing them with a playful touch.
Moreover, they can be used to elevate gift boxes or goodie bags, making them an excellent choice for special occasions. In the realm of crafting, pom poms can be employed to create unique mats or rugs that exude warmth and character. With their versatility and charm, it’s no wonder why pom poms have become a staple in many creative pursuits.
Other Crafts You Might Like
Whether you’re a seasoned crafter or just looking for some creative outlet, there are countless ways to express yourself through DIY projects. From the humble beginnings of cardboard and hot glue guns to the intricate world of macrame and upcycling, the possibilities are endless! In this collection of projects, we’ve got 47 easy sewing ideas to get you started, along with a range of creative uses for hot glue guns (41 projects!) that will have you crafting in no time.
But it’s not all about fabric and glue – our list also includes 41 cardboard crafts and 33 pine cone creations that showcase the versatility of everyday materials. And if you’re feeling adventurous, why not try your hand at making a dreamcatcher or some paper flowers? With 47 upcycling ideas to draw from, the only limit is your imagination!
How to Make Yarn Pom Poms
Want to learn the art of creating adorable yarn pom poms? These versatile crafts can be seamlessly integrated into your clothing, accessories, and home decor. With just 5 minutes of preparation time and 15 minutes of active crafting, you’ll have a delightful project completed in under 20 minutes! Whether you’re looking for a unique accent to elevate your wardrobe or a creative outlet for relaxation, yarn pom poms are the perfect solution.
Equipment
To combat the urge to doze off, it’s essential to keep your screen well-lit and your surroundings engaging. Simply place your laptop or tablet on top of a shaker lid, glass, or small bowl, ensuring the screen remains visible. Additionally, have a pencil, scissors, and coin nearby to maintain a sense of fidgeting and mental stimulation. This combination will help prevent your screen from going dark as you work or study.
Materials
Instructions
To create your pom-poms, start by gathering all necessary supplies. Begin by tracing two circles onto a piece of cardboard using a lid or glass bowl as a guide. Place a coin in the center of one circle and trace its outline, then cut out both disks. Cut an incision down the middle of the disk with the inner circle and a hole around the inner outline. Align the two disks with the donut hole on top, drawing an outline of the inner circle onto the bottom disk.
Repeat the process for the second disk. Widen the incision to create an entrance for both disks. Wrap yarn (or two strands for a multi-colored effect) around the entire disk, securing it by trimming off excess when desired. Cut along the edge of the top disk using scissors, carefully holding the yarn in place as you work. Next, pull 8-10 inches of yarn between the disks and secure with knots on either side of the entrance. Slide the yarn off the disks and trim edges to even them out.
Your pom-poms should now resemble round, fluffy balls.