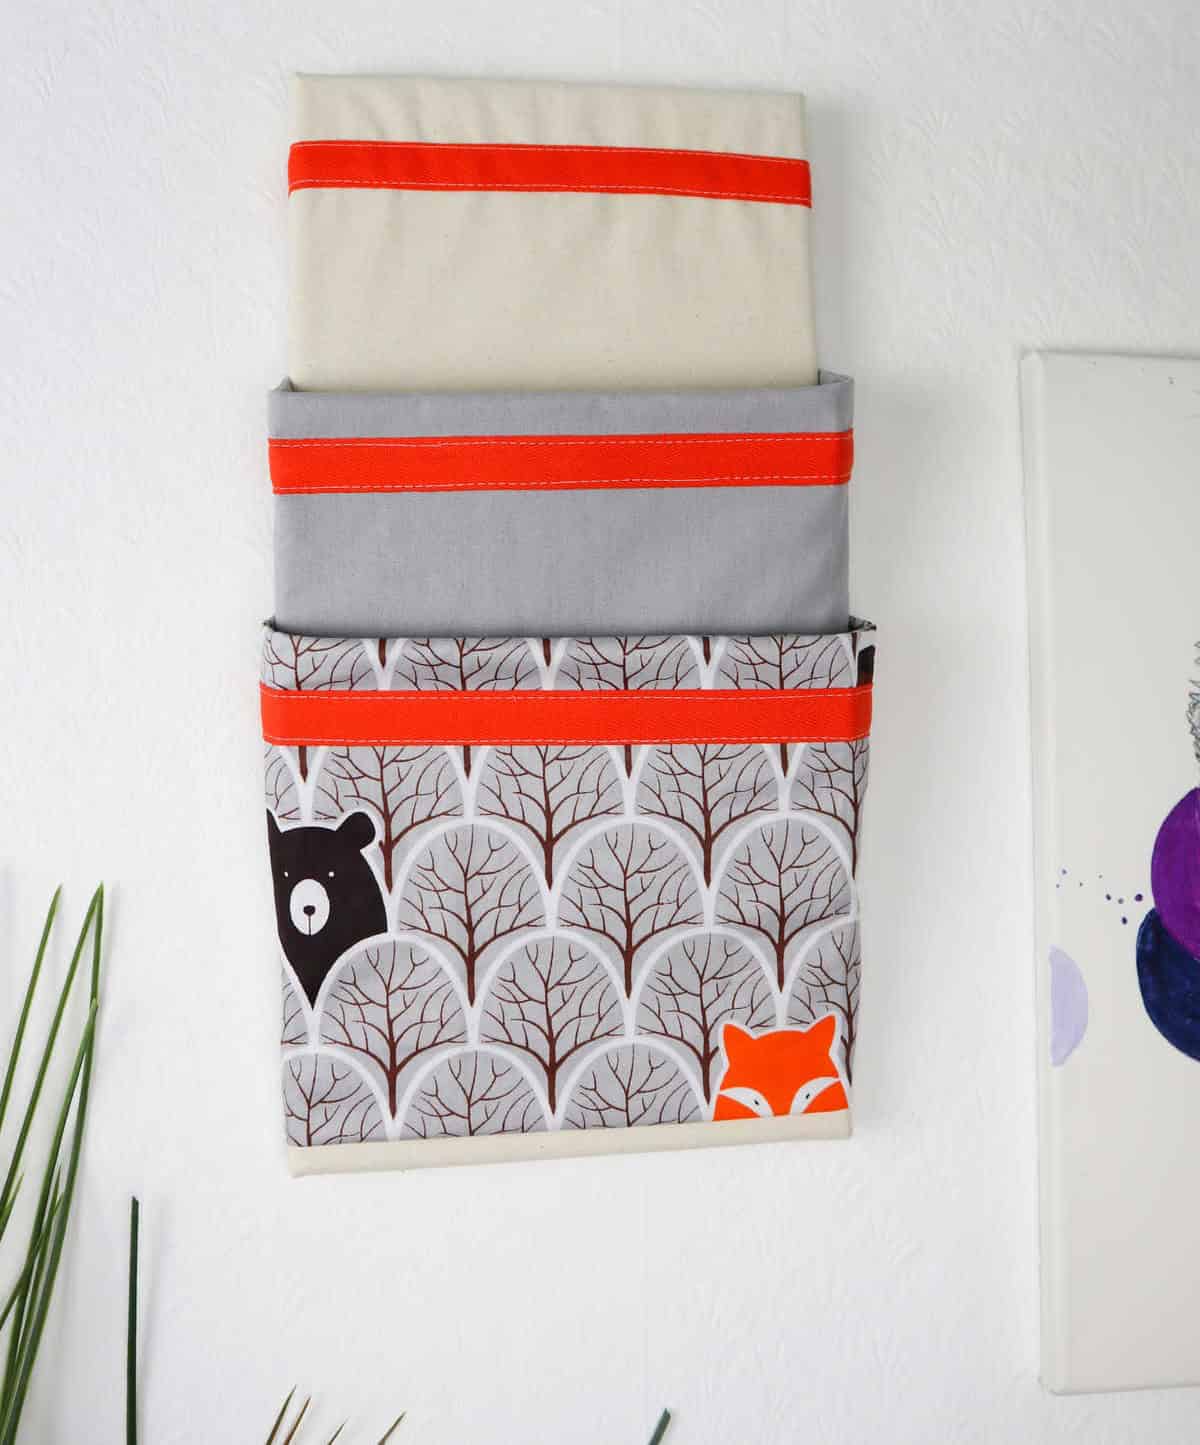
Imagine the sense of calm and control that comes with having a dedicated space for managing your mail. No more cluttered countertops or rummaging through piles to find a specific bill or letter. By creating your own DIY organizer, you can easily keep track of your correspondence, categorize it, and stay on top of important deadlines. This simple yet effective project is a game-changer for anyone looking to streamline their daily routine.
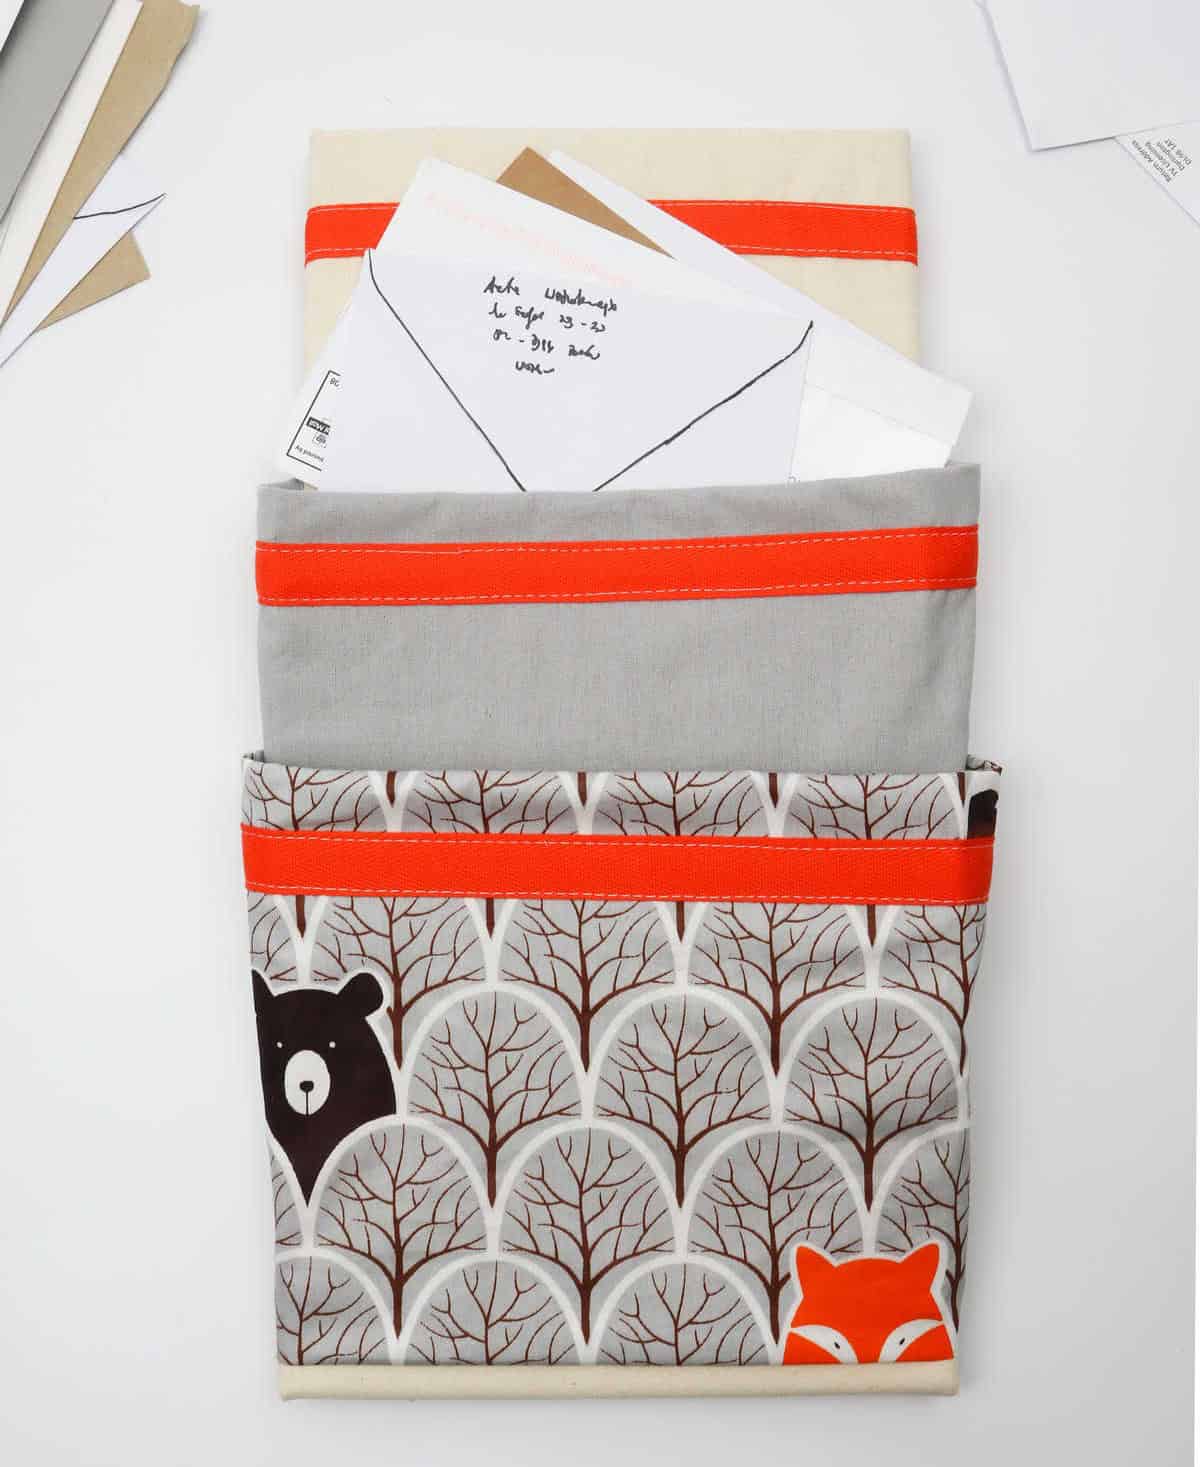
With multiple pouches to sort and store your mail, you’ll be able to tackle that pile of bills and letters with ease, making the task less daunting and more manageable.
Supplies and Tools You’ll Need for the Organizer
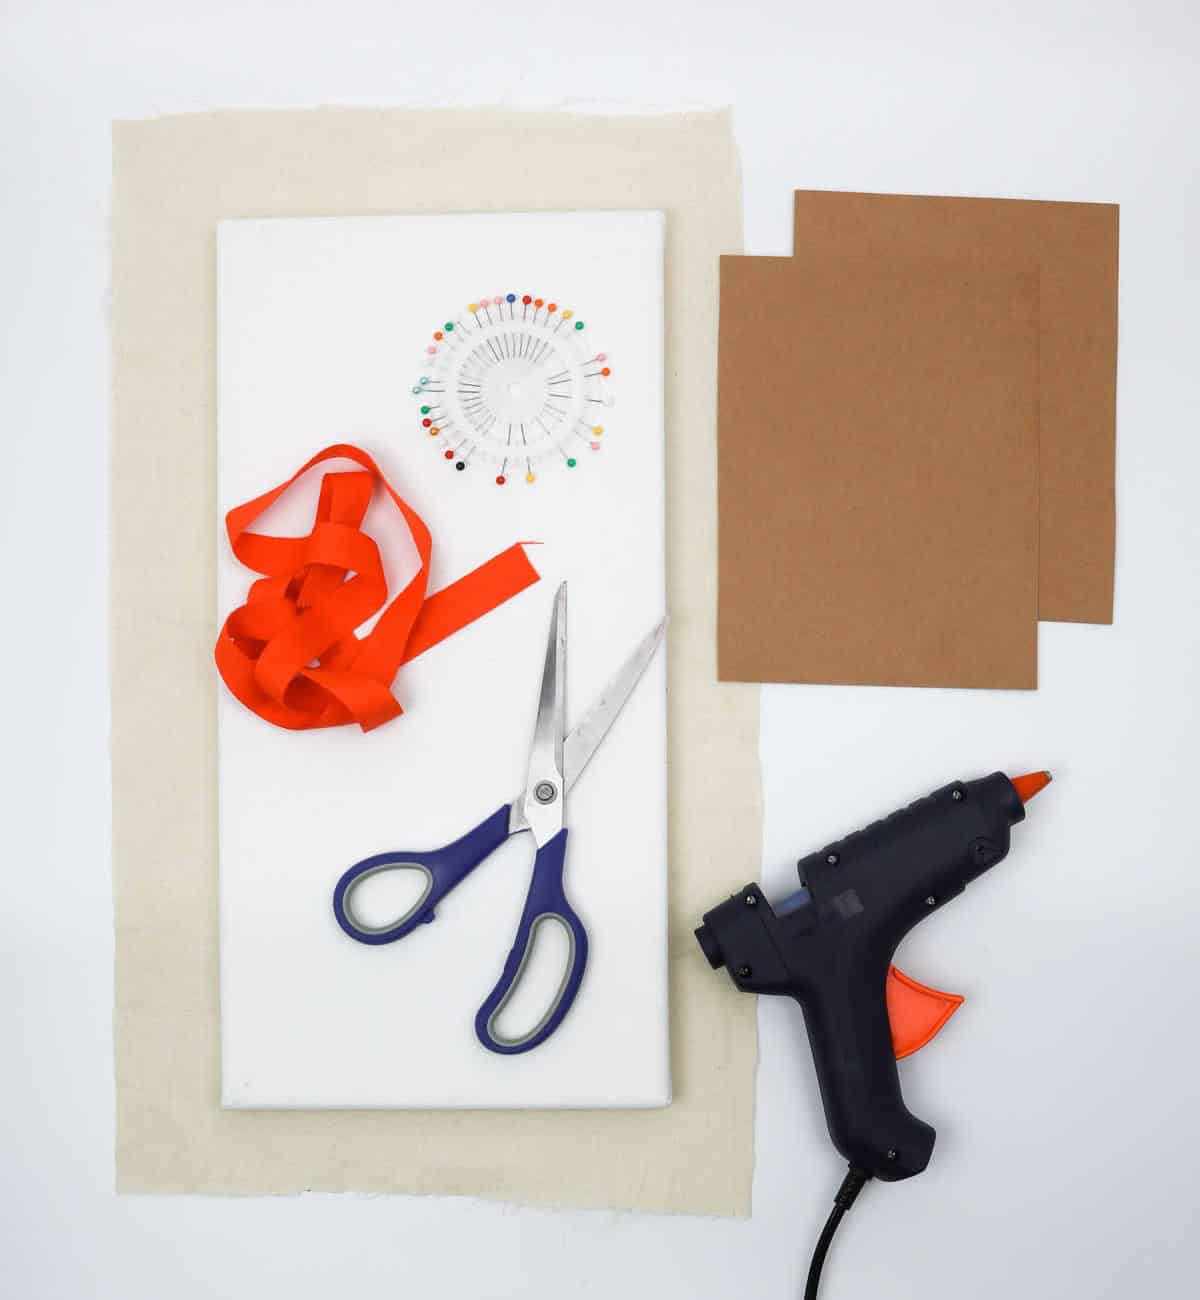
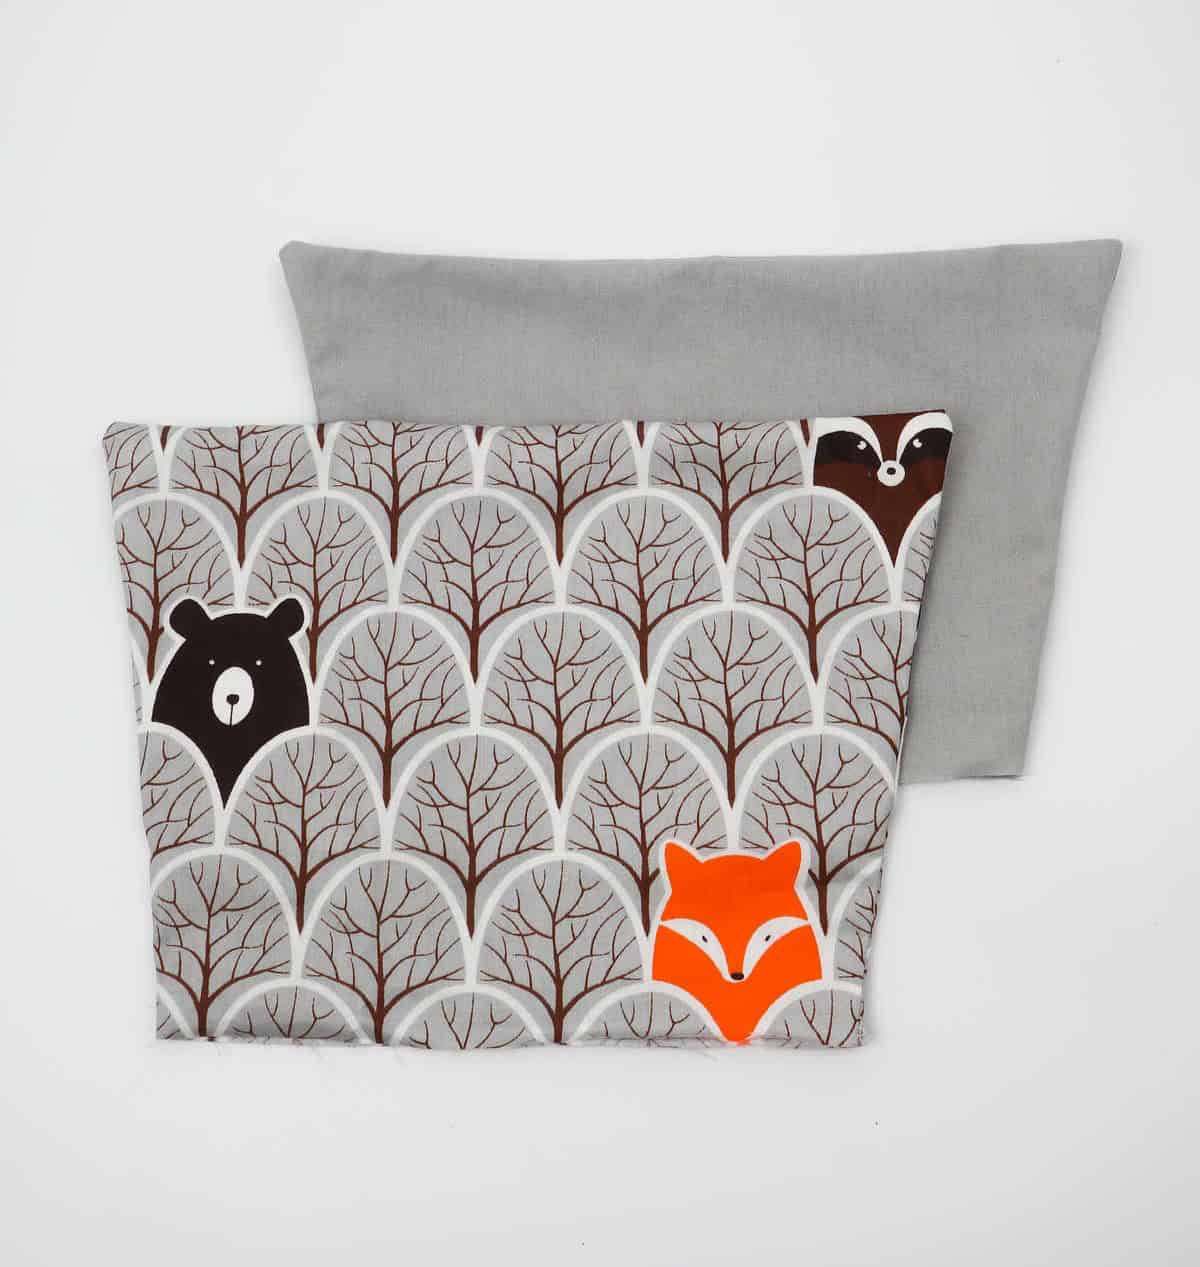
To bring your sleeve organizer to life, you’ll need the following materials: * A large piece of artistic canvas measuring 10 inches by 16 inches. * The main fabric piece will be slightly larger at 14 inches by 20 inches. * You’ll also require two cardboard pieces with dimensions of 6 inches by 10 inches each. These will serve as the foundation for your organizer’s pockets. * A hot glue gun will come in handy for binding the components together.
* Scissors and sewing pins are essential for trimming and securing the fabric. * Cotton twill tape will be used to reinforce the seams of your sleeve organizer. * Don’t forget your trusty sewing machine, which will help you stitch everything into place. Finally, if you’re looking to add two pockets to your design, you’ll need four pieces of fabric cut into trapezoidal shapes.
These should measure 16 inches in length, with the smaller end measuring 12 inches and the height coming in at a steady 7.5 inches.
How to Make a Mail Organizer
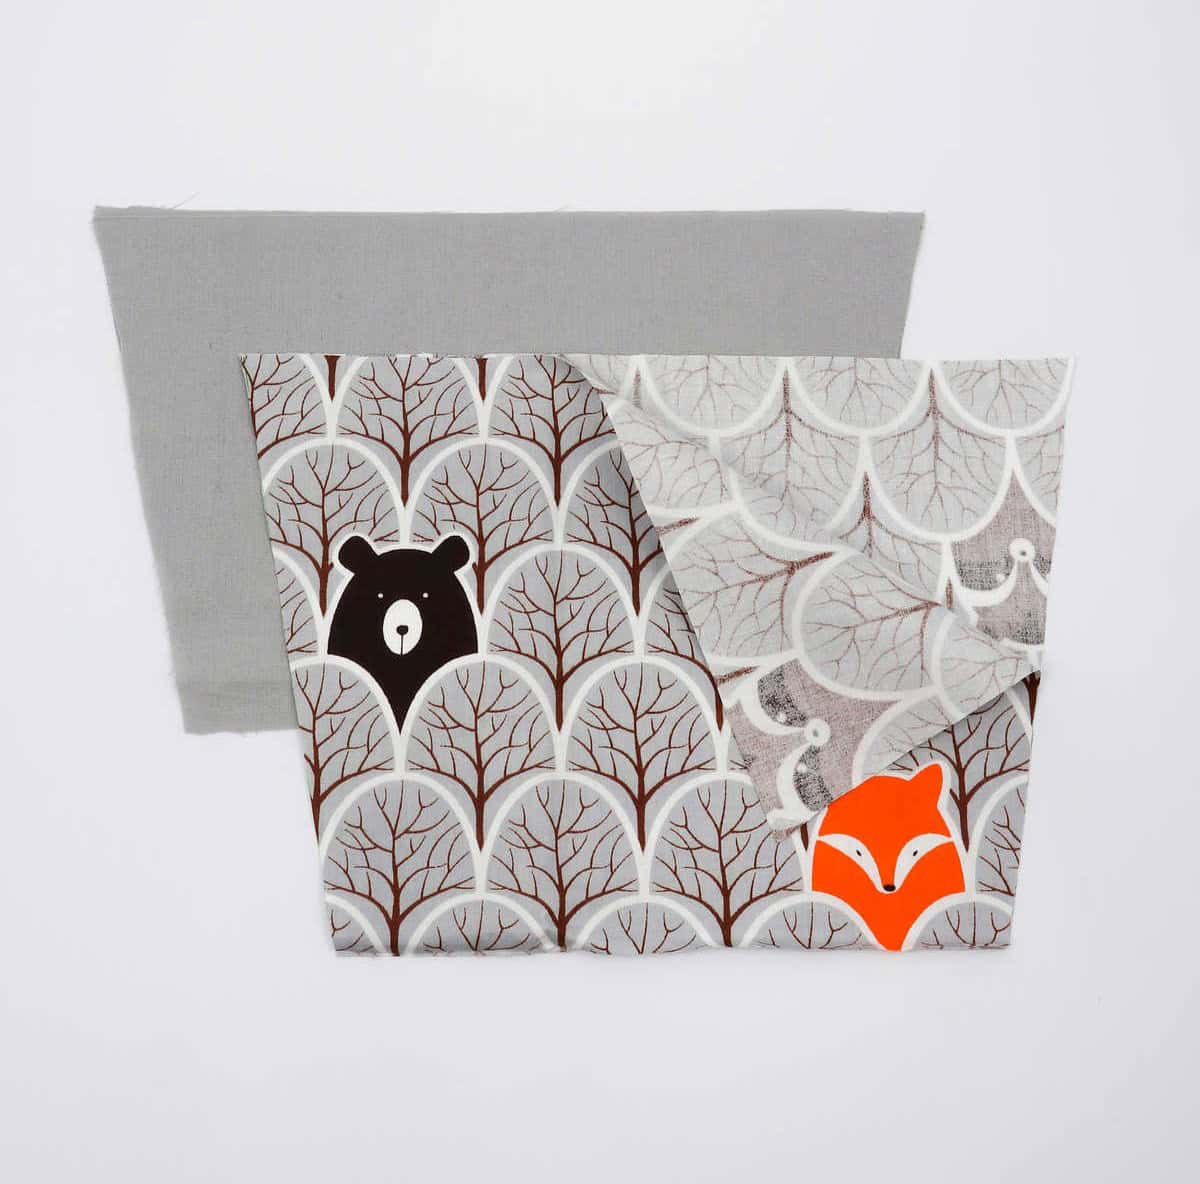
Once you’ve determined the optimal number of pockets for your organizer, you can proceed to select a patterned fabric that resonates with you. The fabric should not only complement your design vision but also provide the necessary durability and functionality for your project.
Step 1
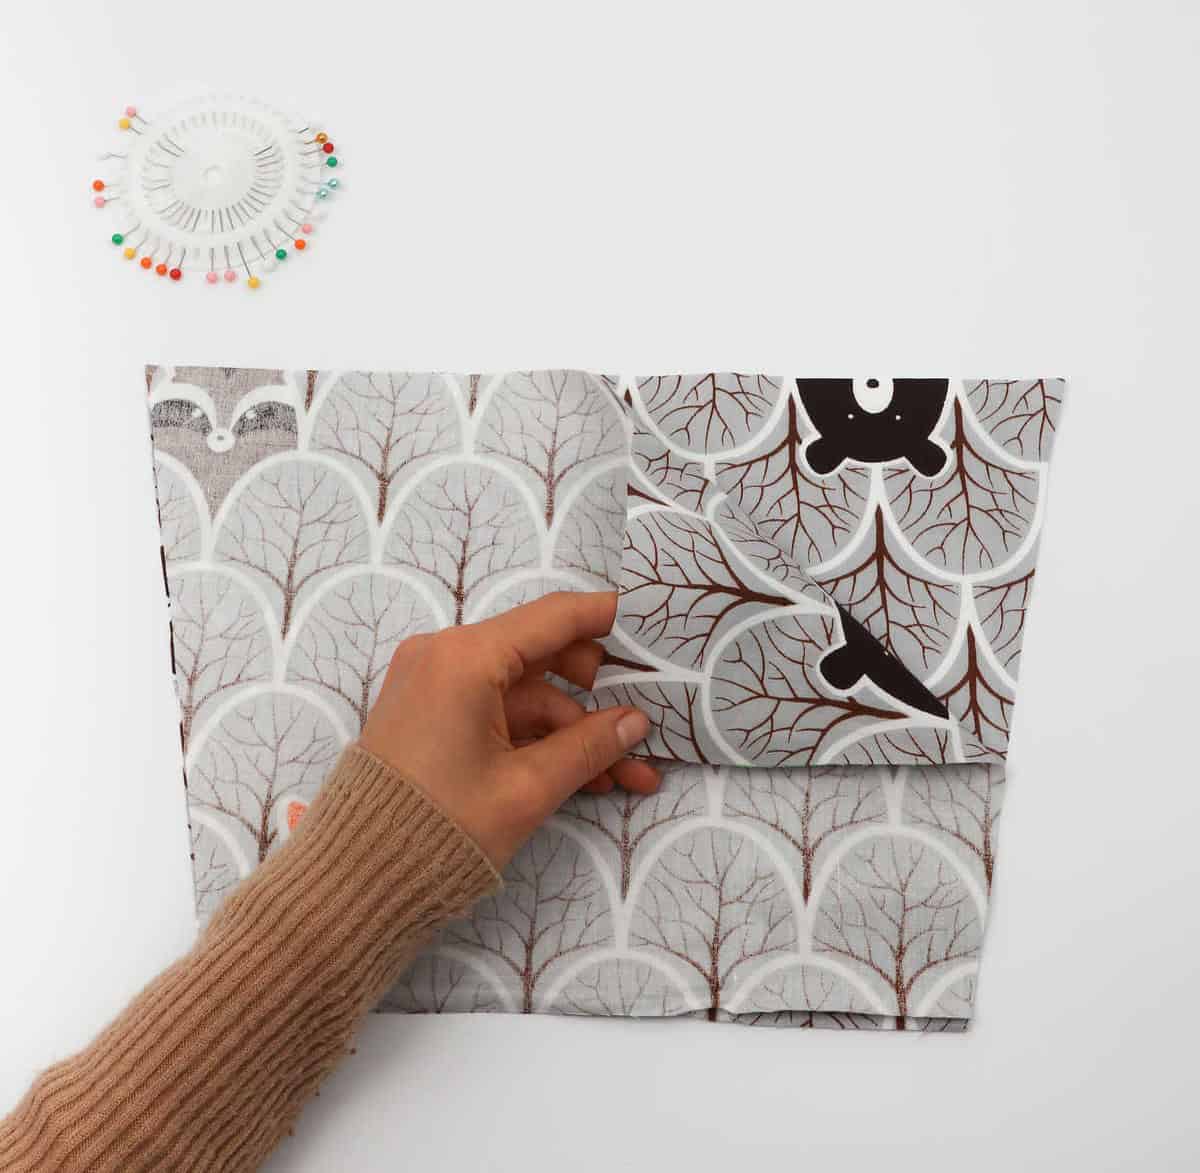
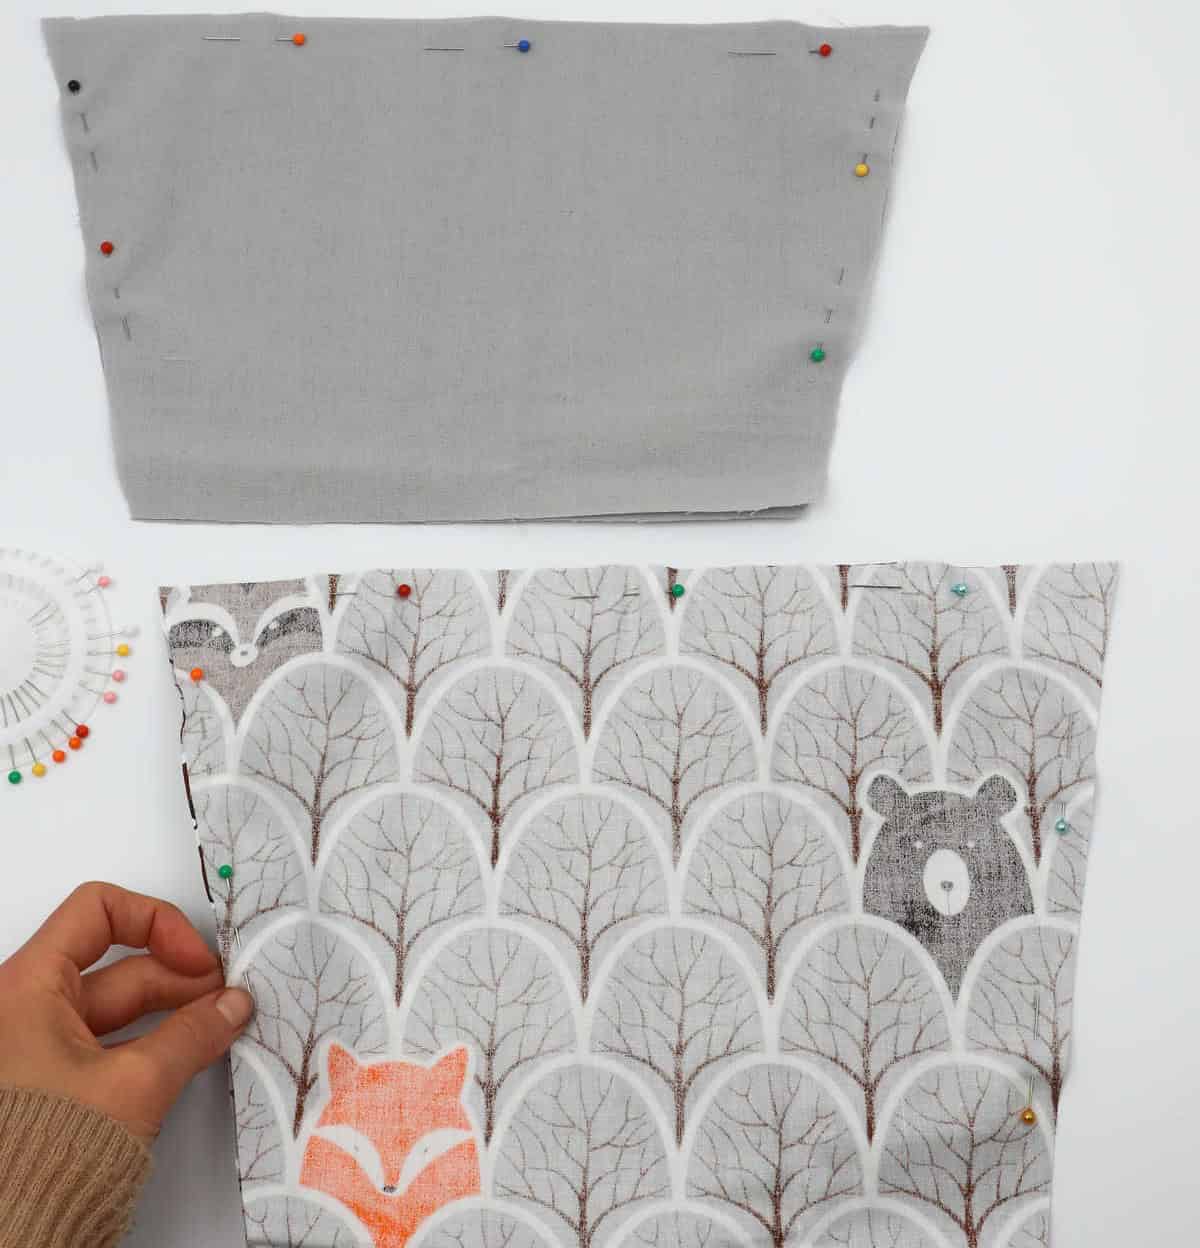
Begin by preparing your fabric for the pockets. Lay it flat on a stable work surface and fold it in half, making sure the wrong side is facing upwards. To keep the corners in place, use sewing pins to secure them, but leave one long edge unpinned. Repeat this process with all of your pocket fabric pieces.
Step 2
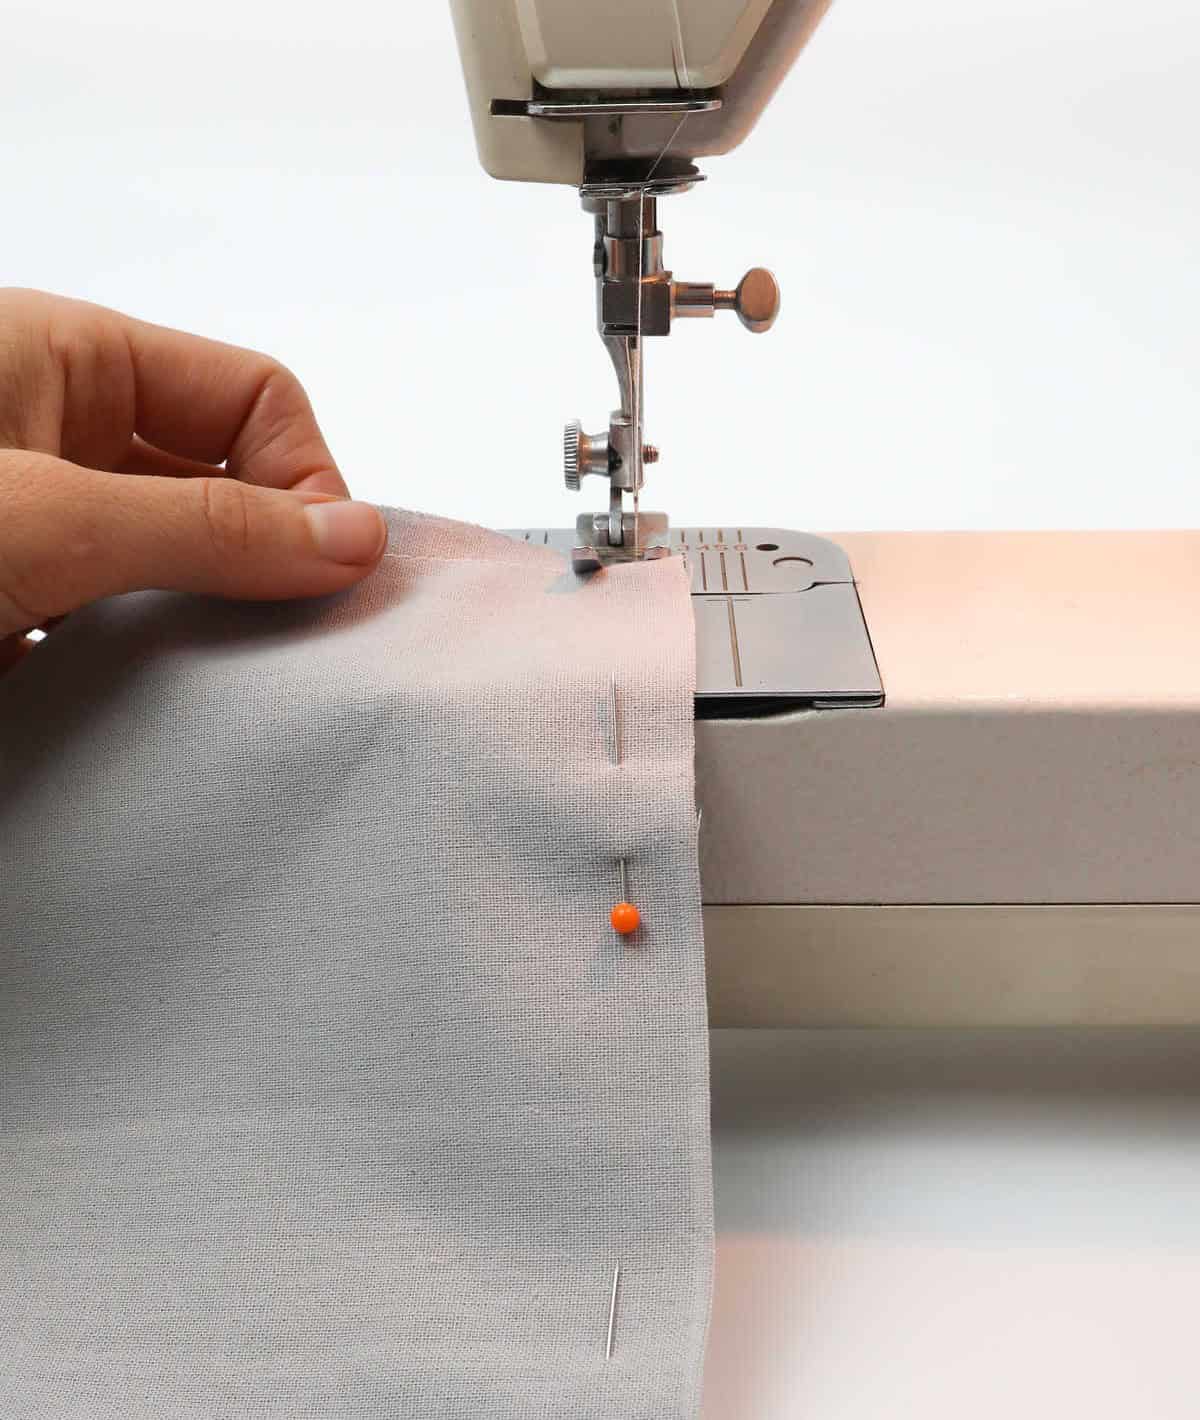
To proceed with the project, bring out your sewing machine and position it on your workspace. Next, operate the machine to sew along the edges of your fabric, leaving one side unsewn according to the guidelines. As you complete this step, your fabric pockets should start taking shape, eventually resembling the finished product.
Step 3
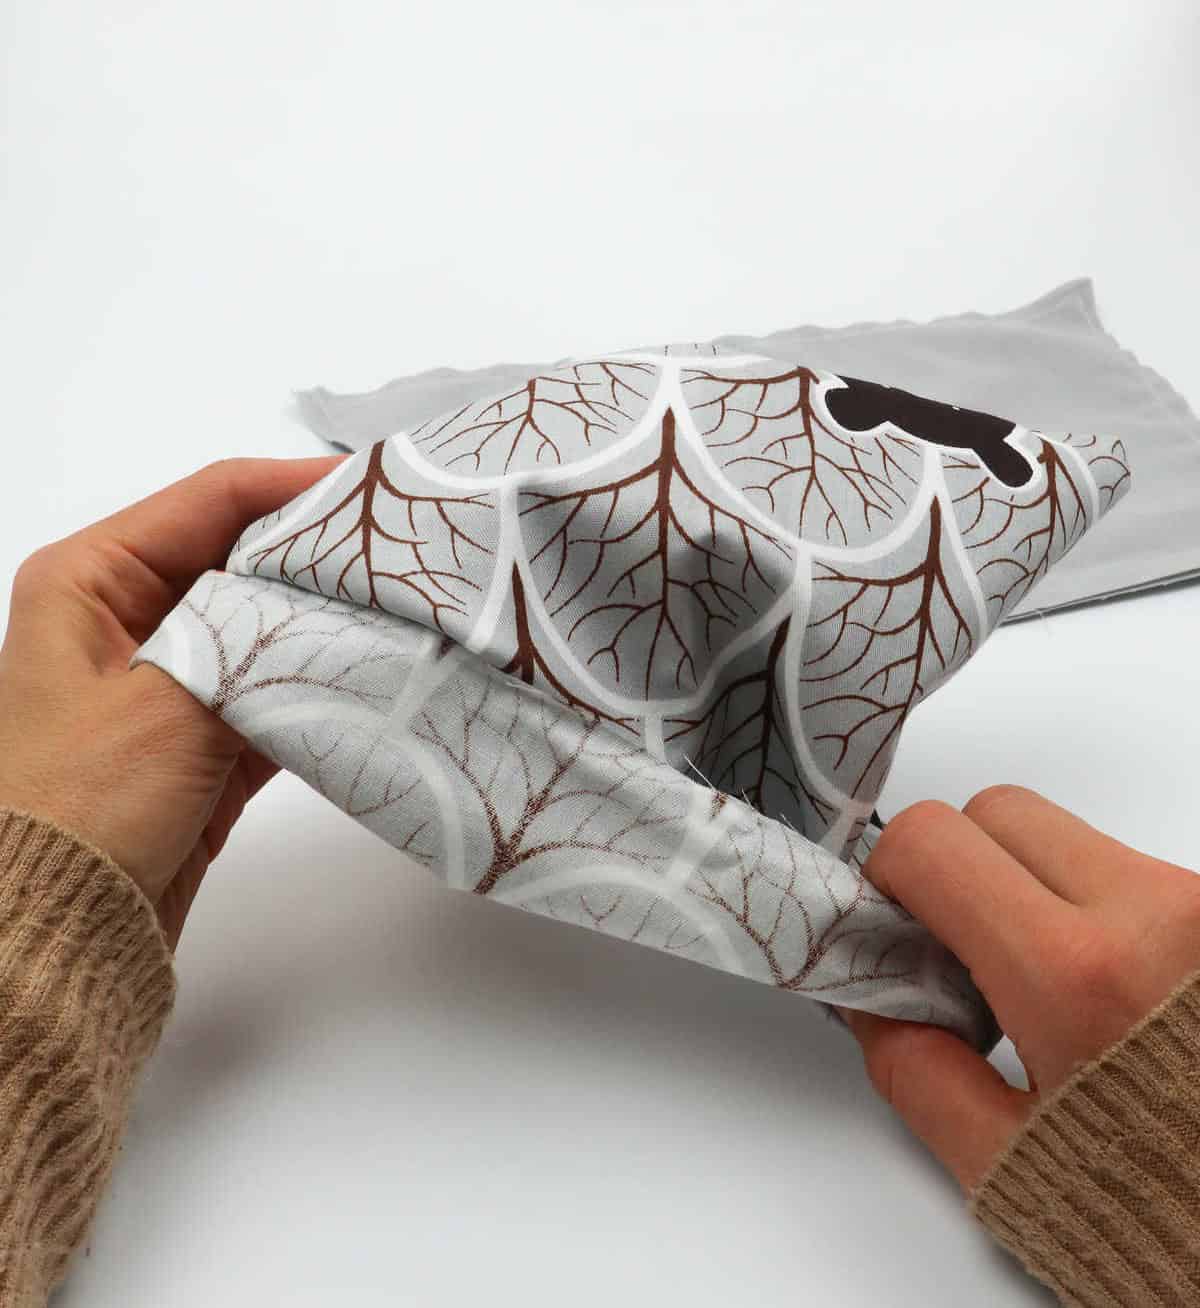
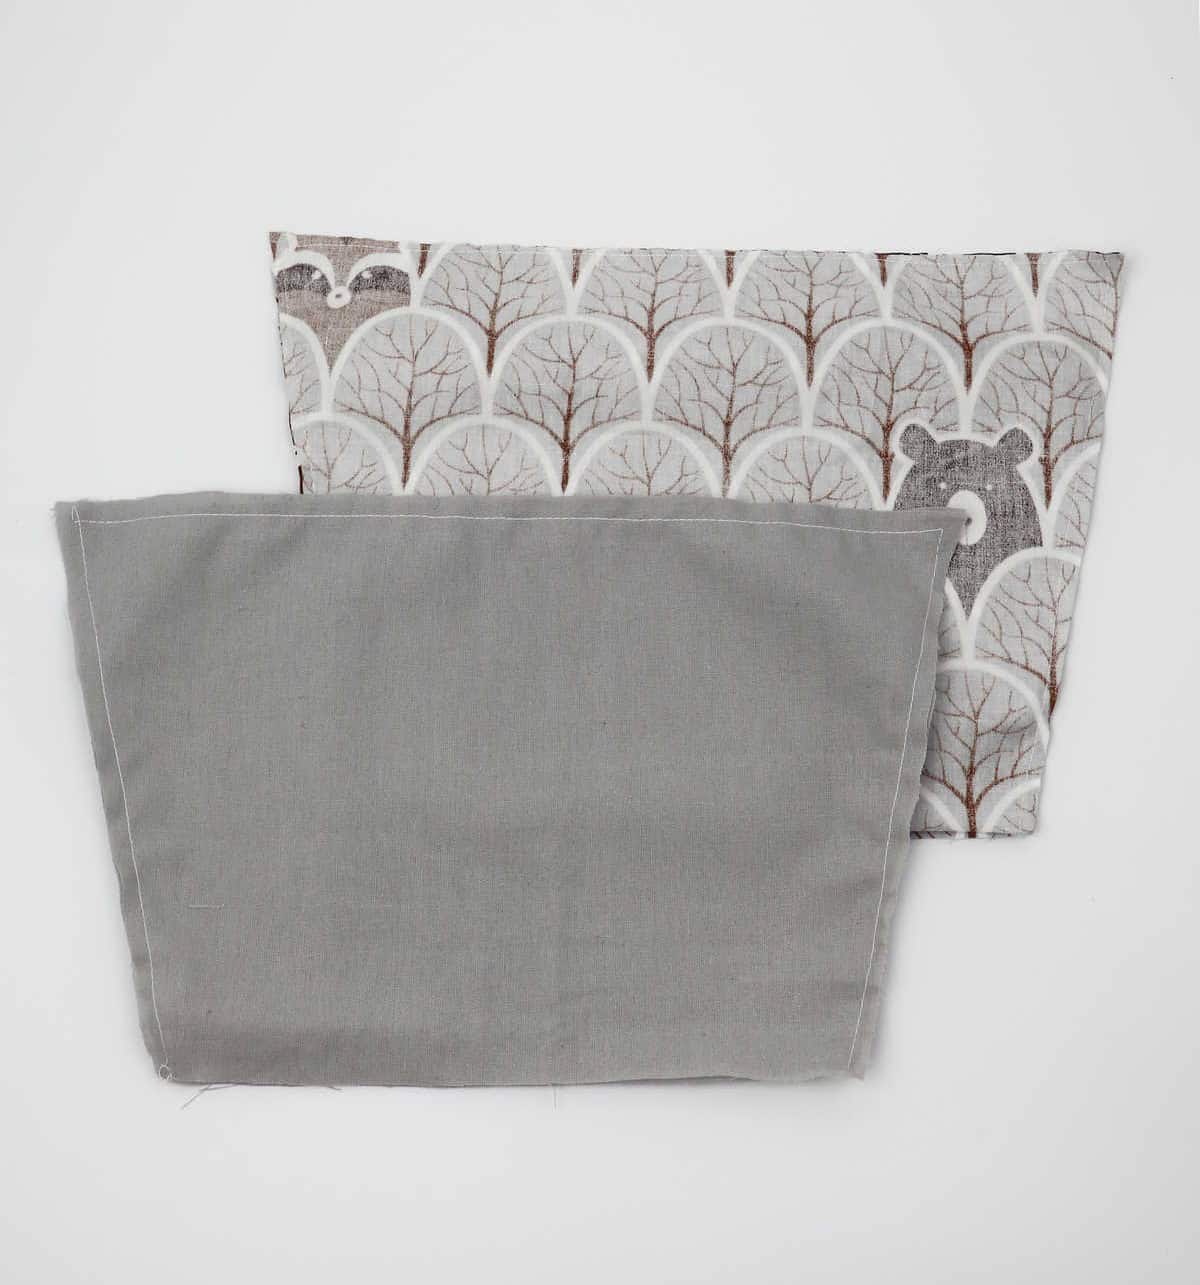
To begin, carefully flip the fabric over, ensuring that the side featuring the desired pattern is now facing away from you. This simple step will allow you to work with the correct side of the material as you proceed with your project.
Step 4

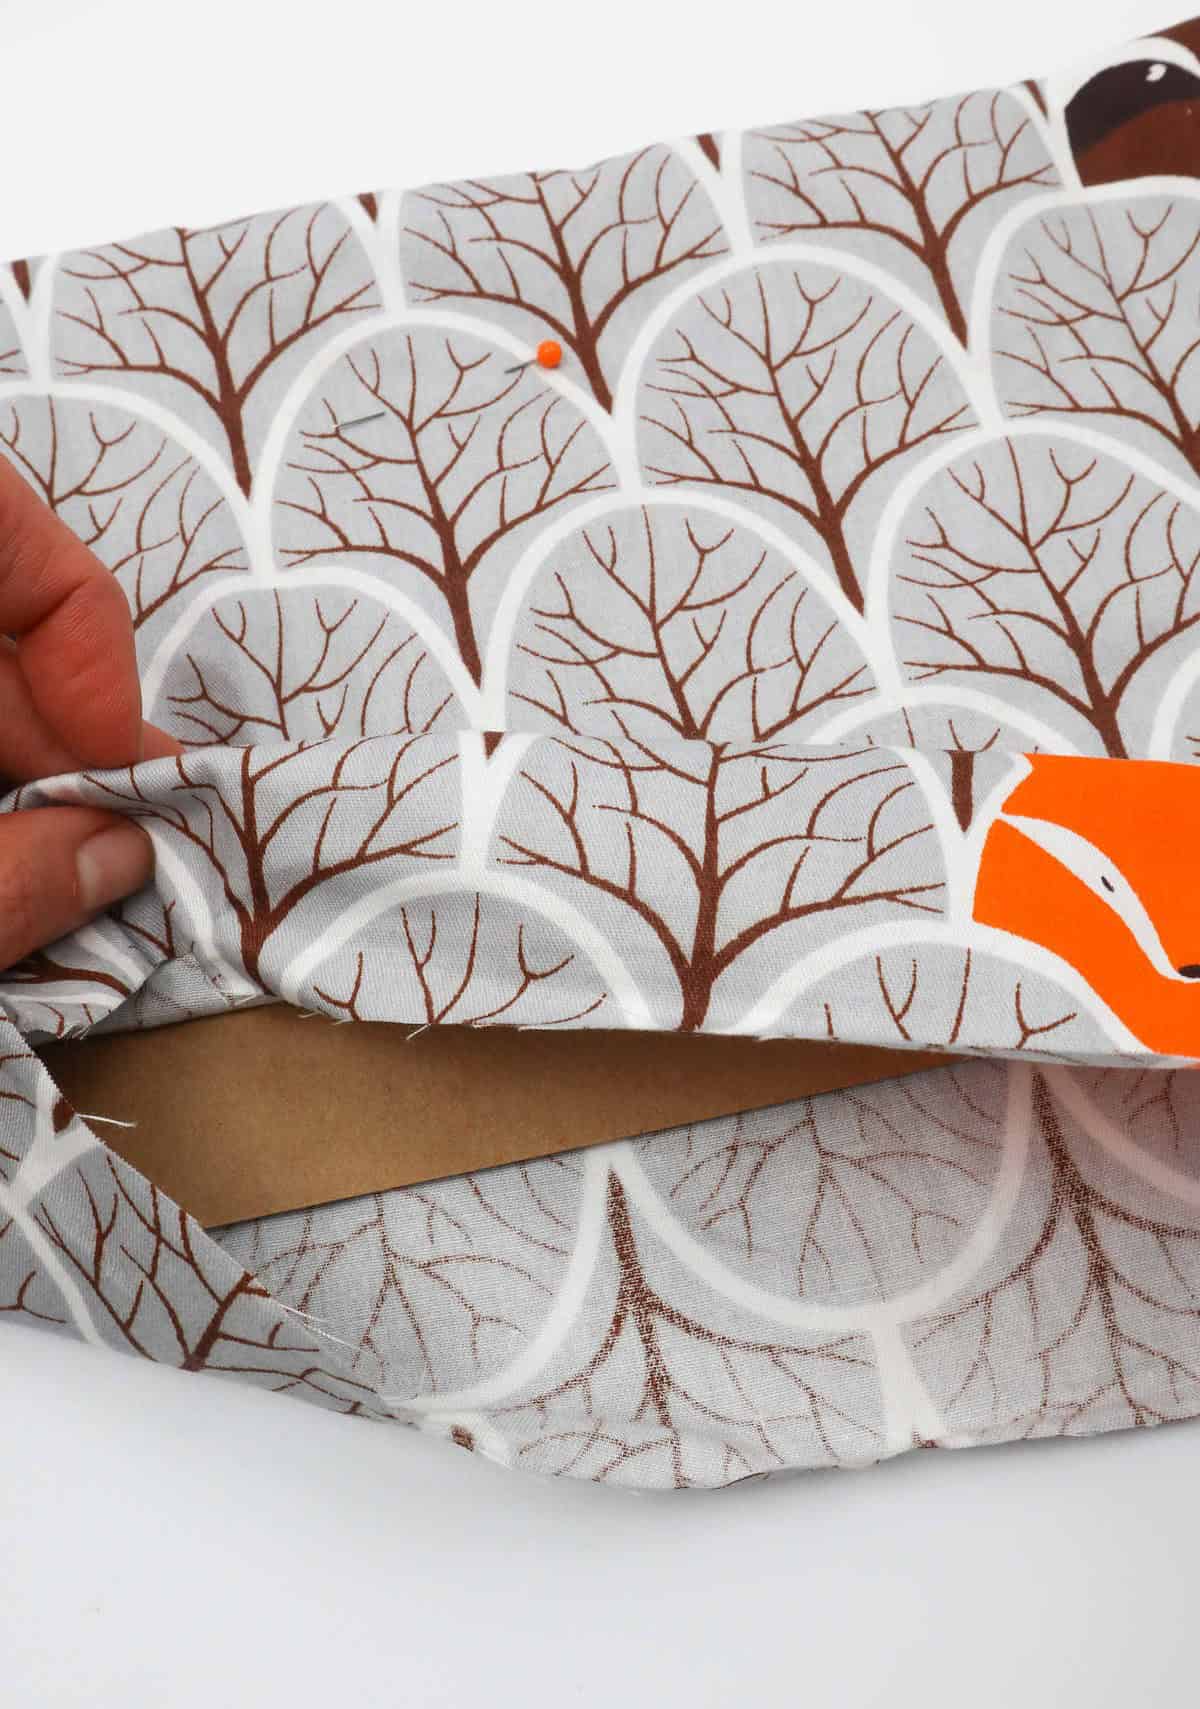
To add stability to your makeshift pockets, take a piece of cardboard and trim it to fit snugly within the pocket’s opening. Insert the cardboard into the fabric, ensuring it’s centered and evenly surrounded by an equal amount of fabric on all four sides.
Step 5
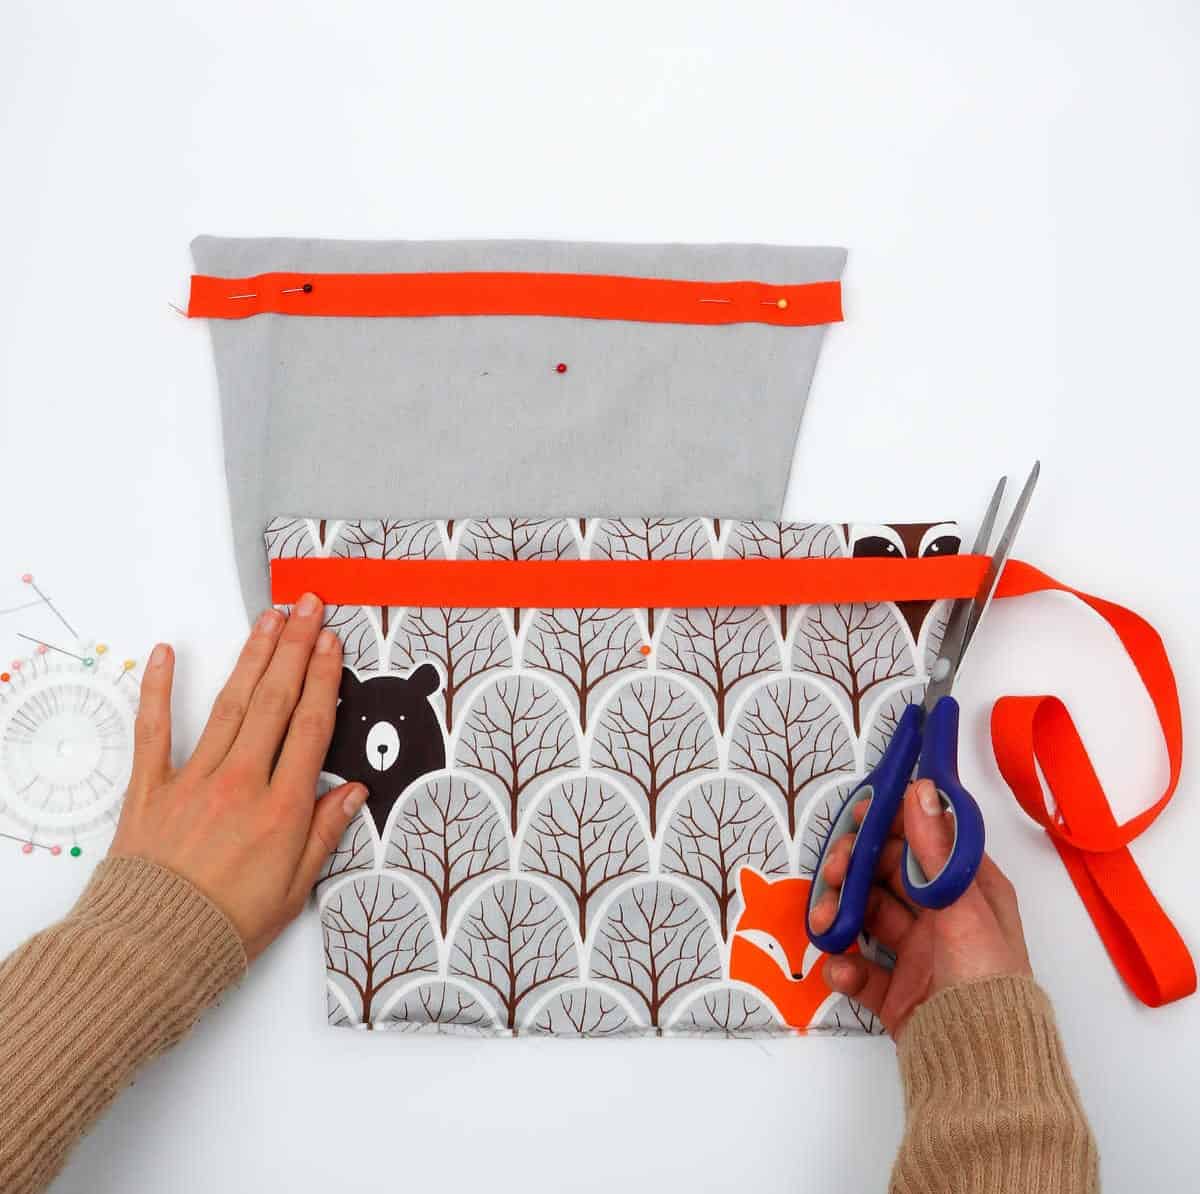
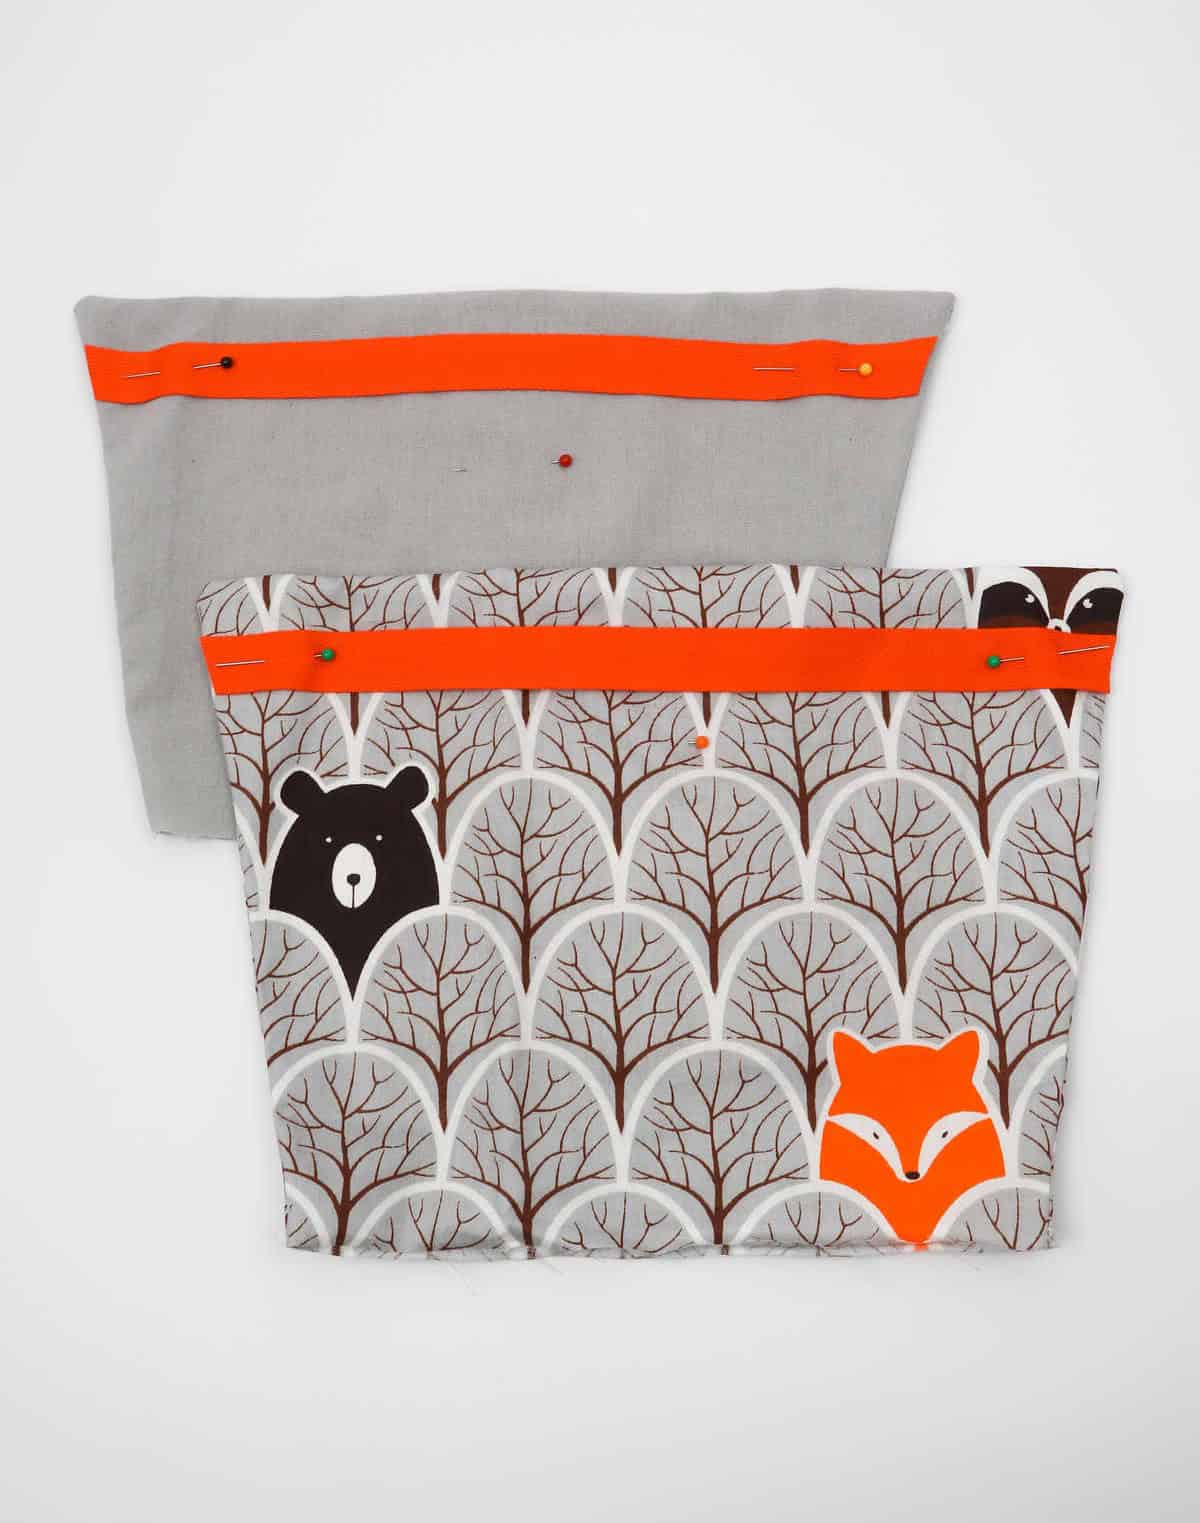
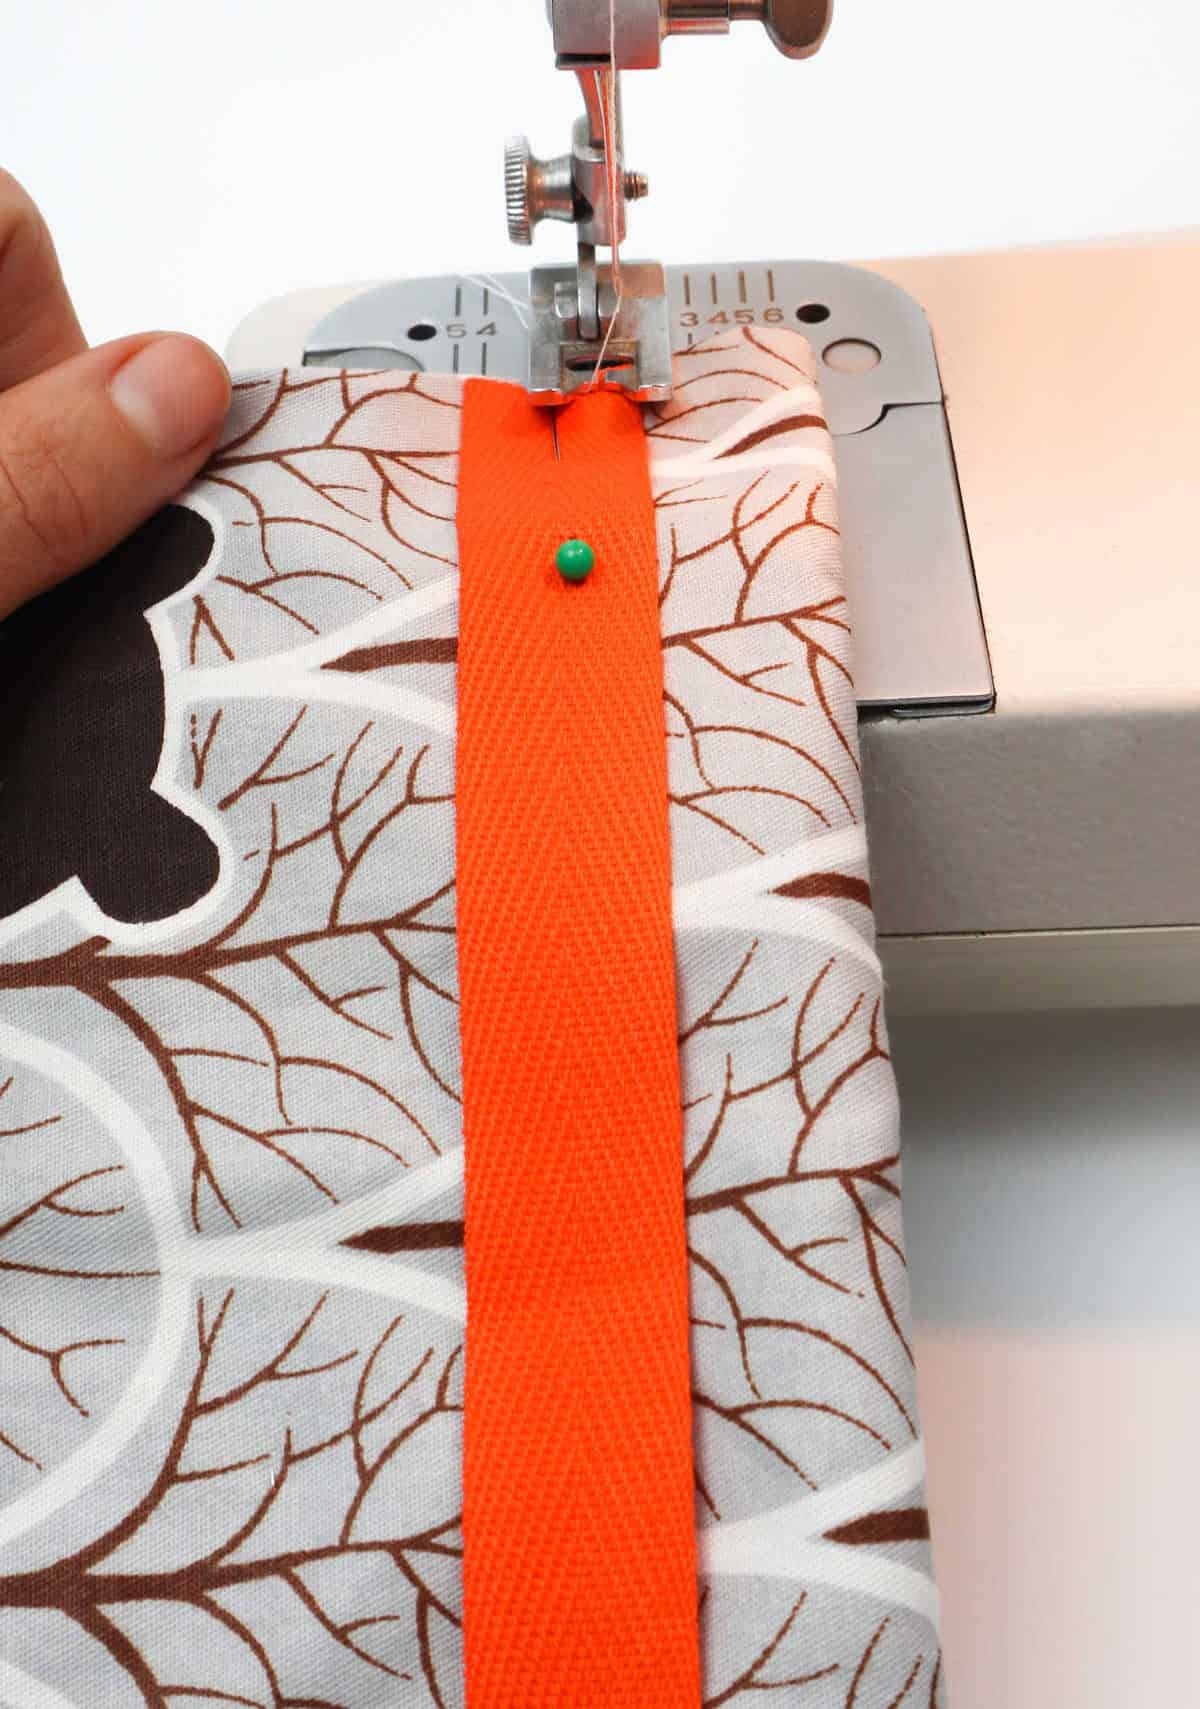
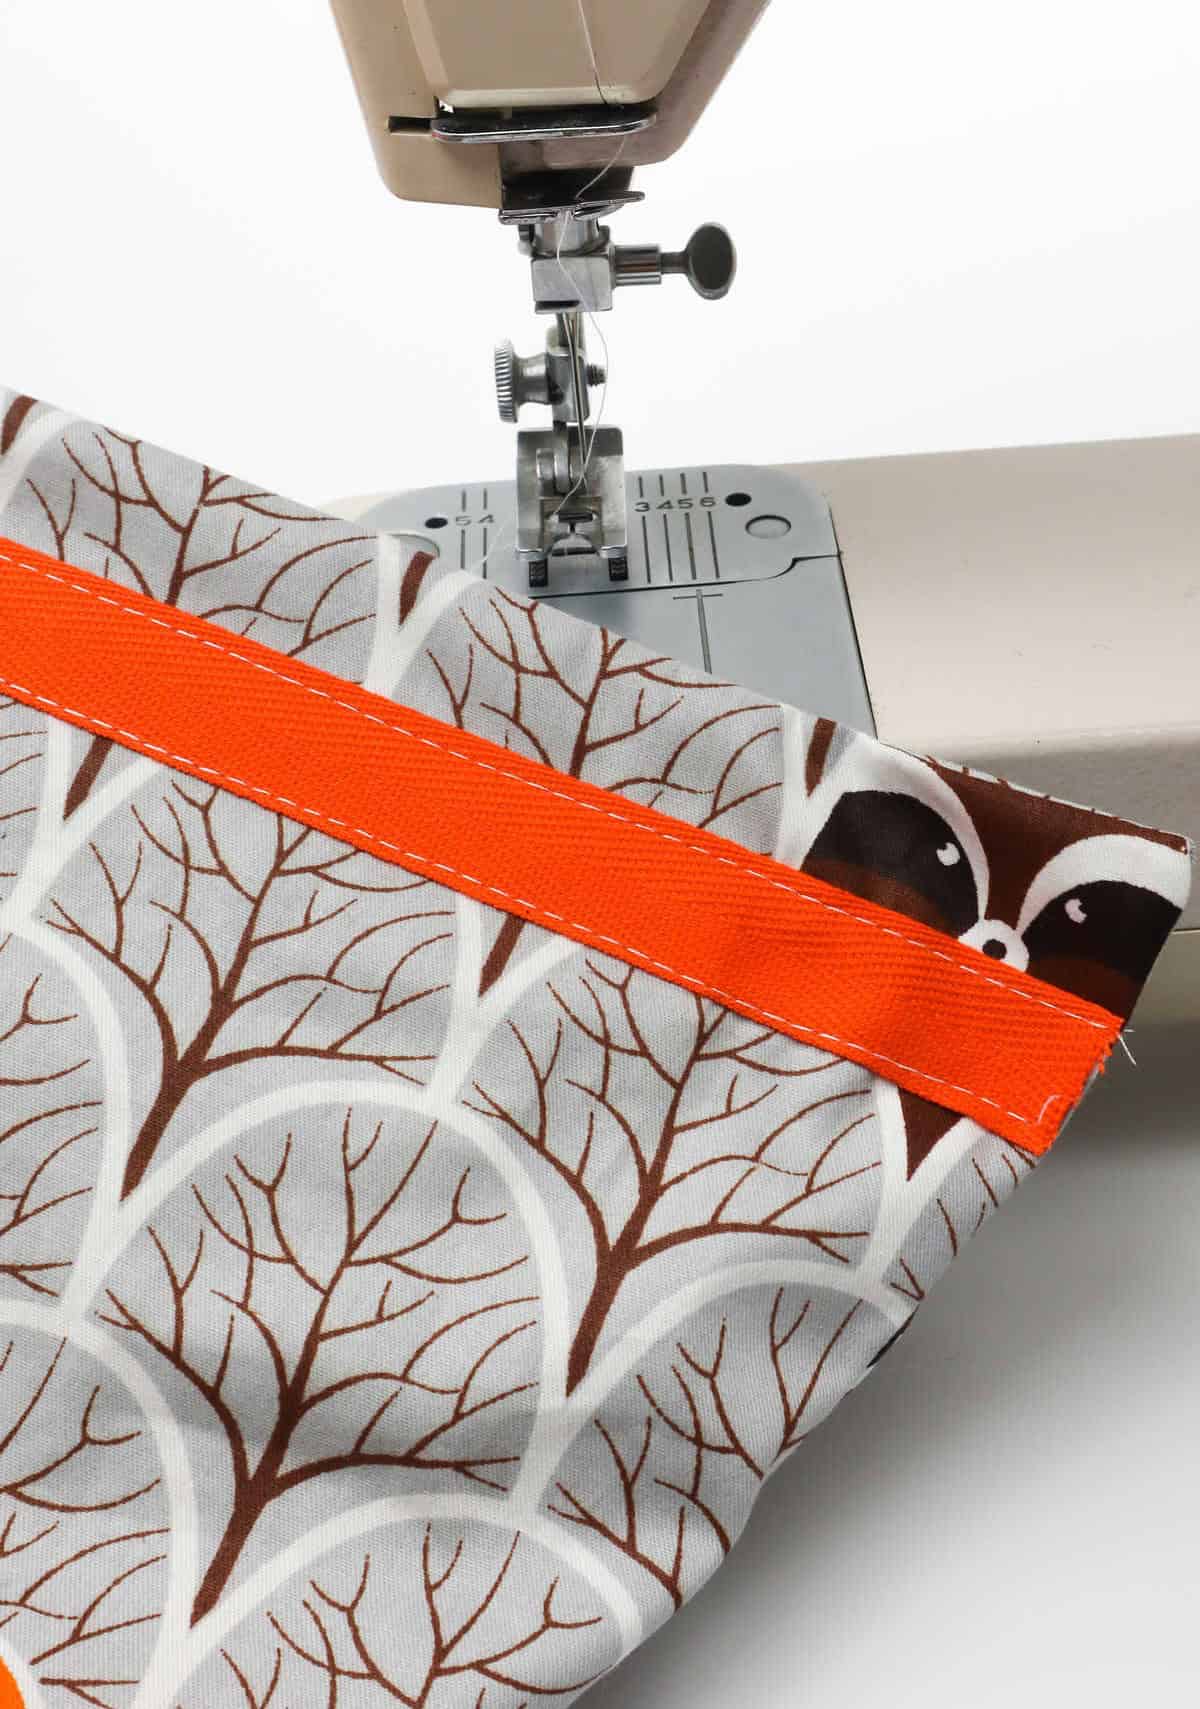
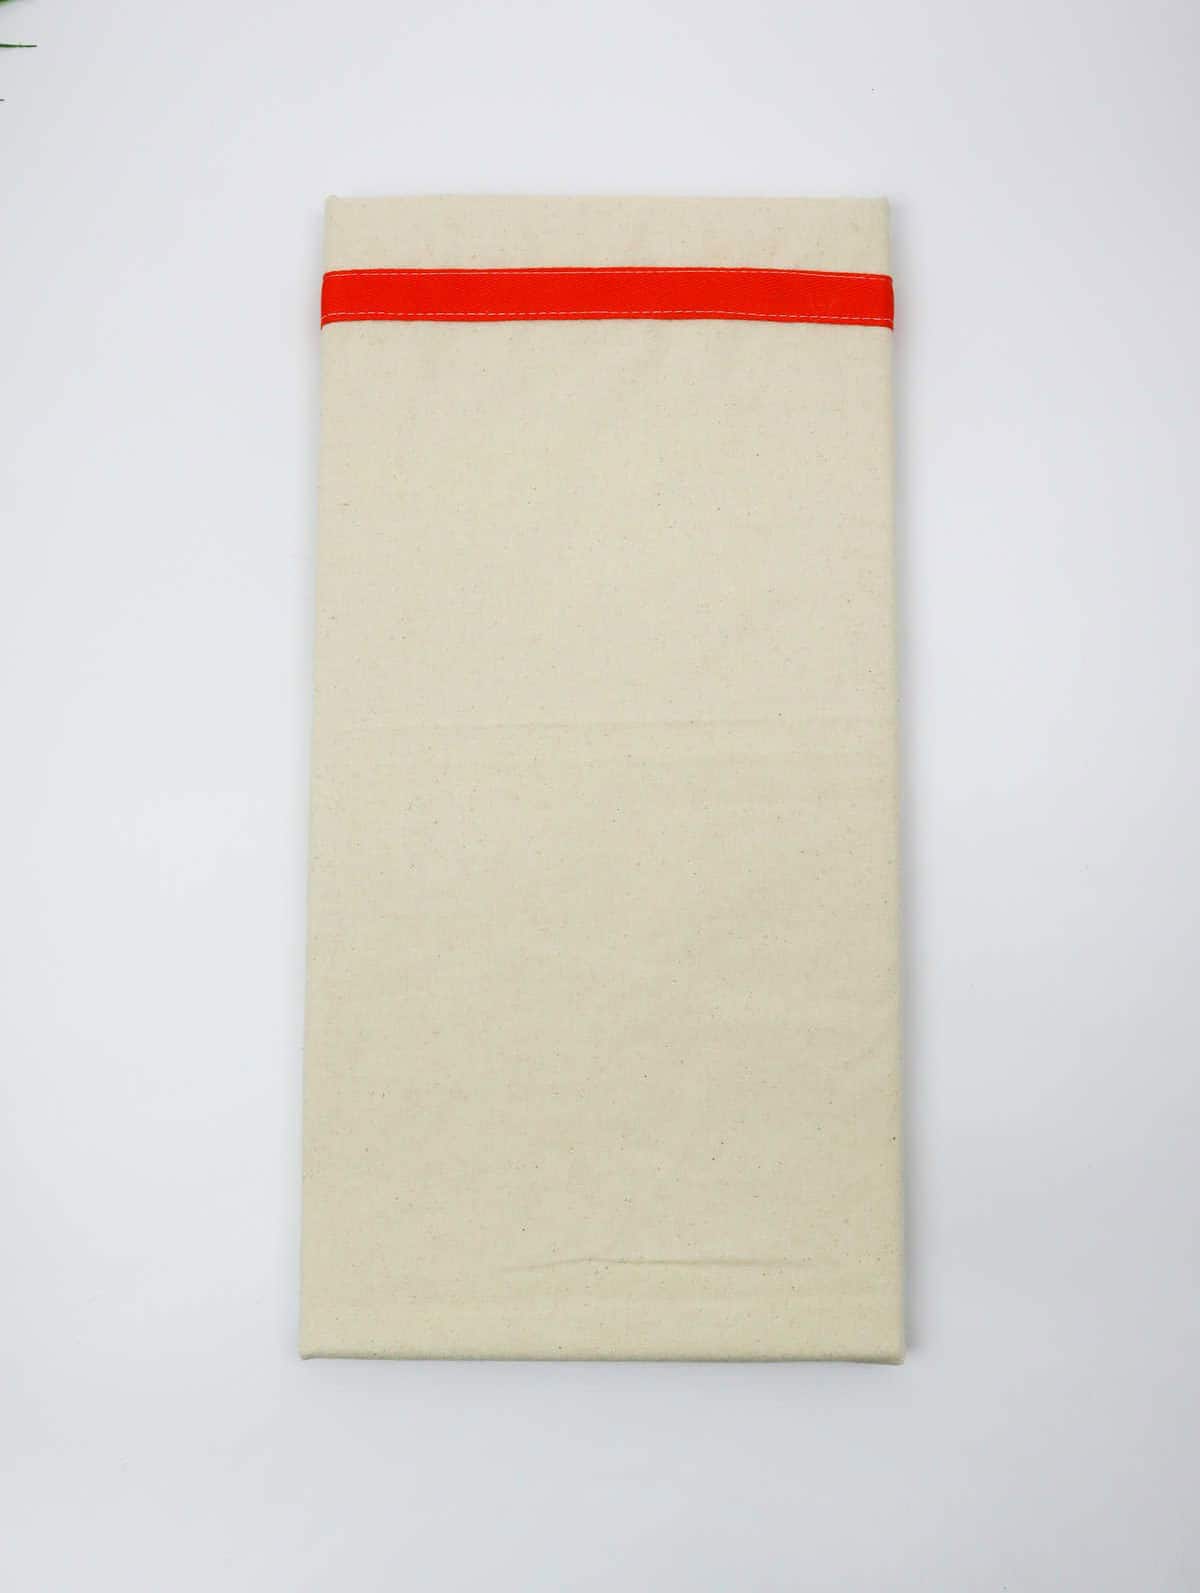
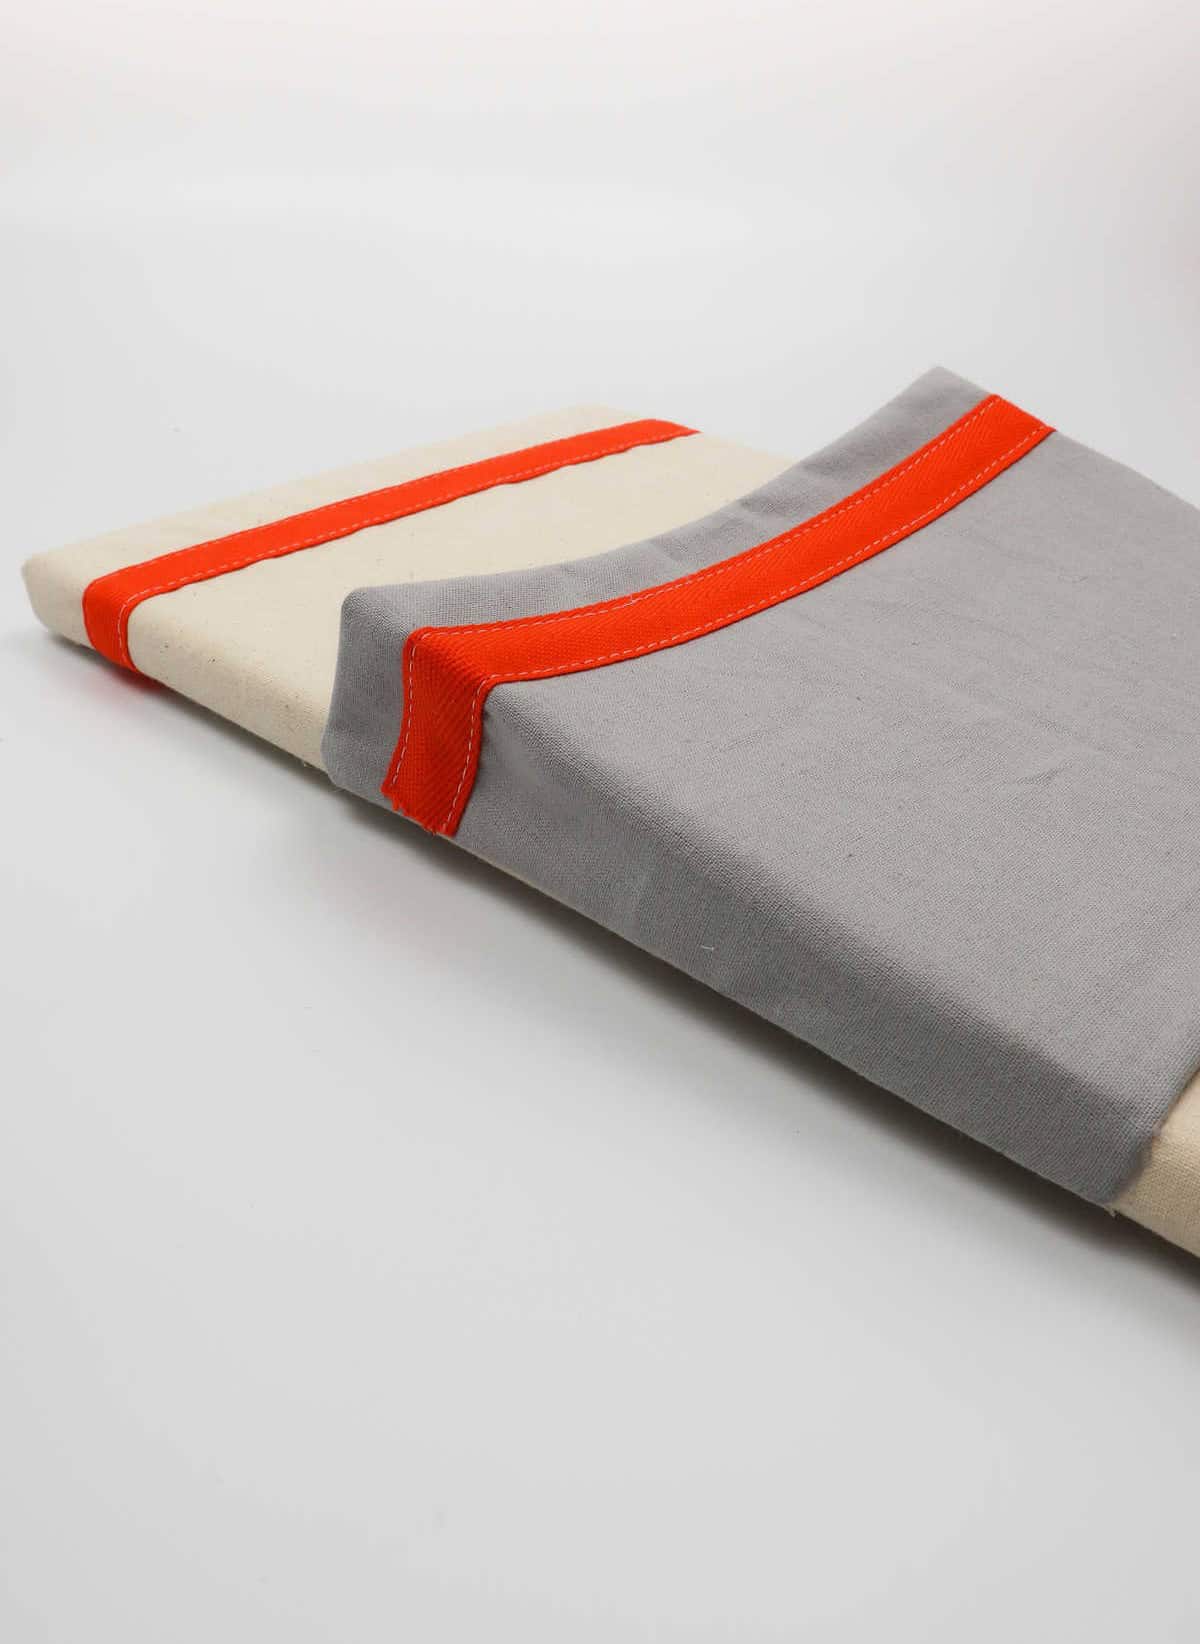
To add a decorative touch to each pocket, start by lining twill tape along the top edge, securing it with pins as you go. This not only adds visual appeal but also ensures that the cardboard insert remains in place when sewn. When sewing the tape into the fabric, use your machine’s straight stitch option and carefully guide the fabric through the machine, taking care to maintain a steady pace.
If you’re concerned about the cardboard shifting during the sewing process, employ the assistance of a few pins to keep it steady. To complete the look, repeat this step along both the top and bottom edges of each pocket, then move on to the next one.
Step 6
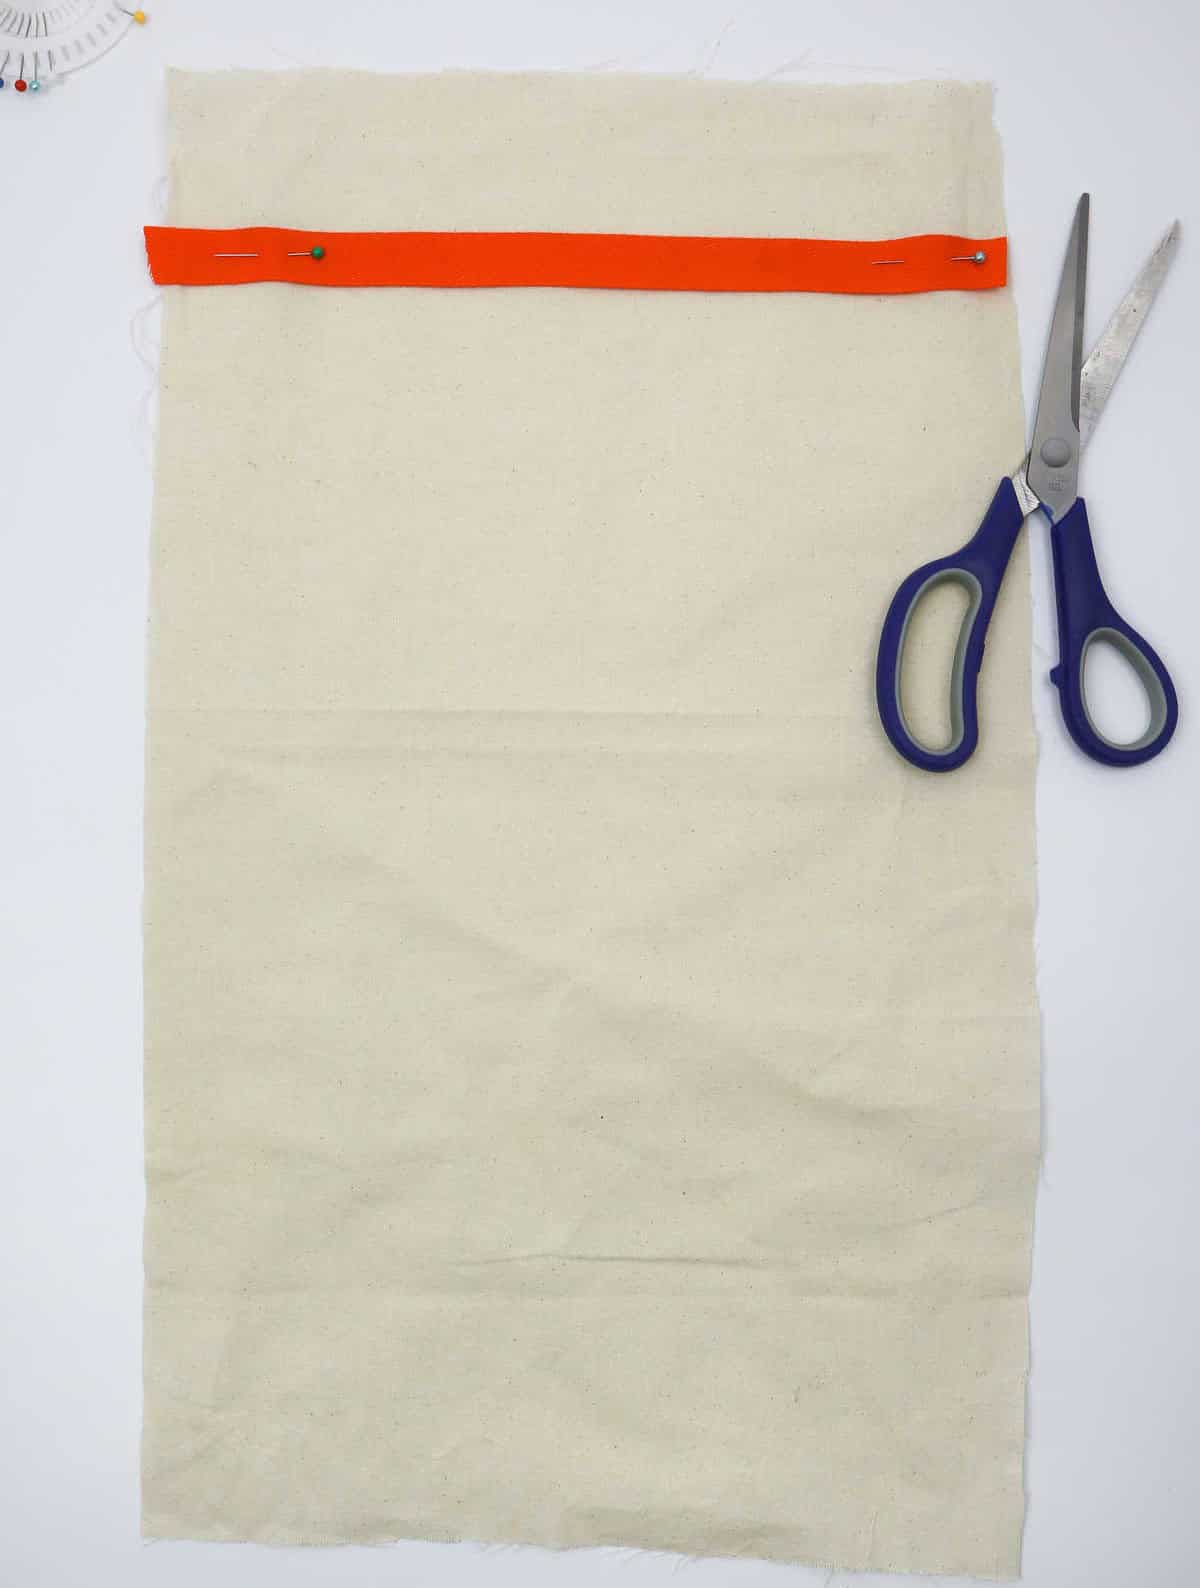
To complete the project, you’ll need to attach the twill tape strip to the base fabric. Begin by pinning the strip in place, ensuring it’s securely fastened. Next, sew along the edges of the tape and the fabric, mimicking the same stitching technique used for the earlier fabric pockets.
Step 7

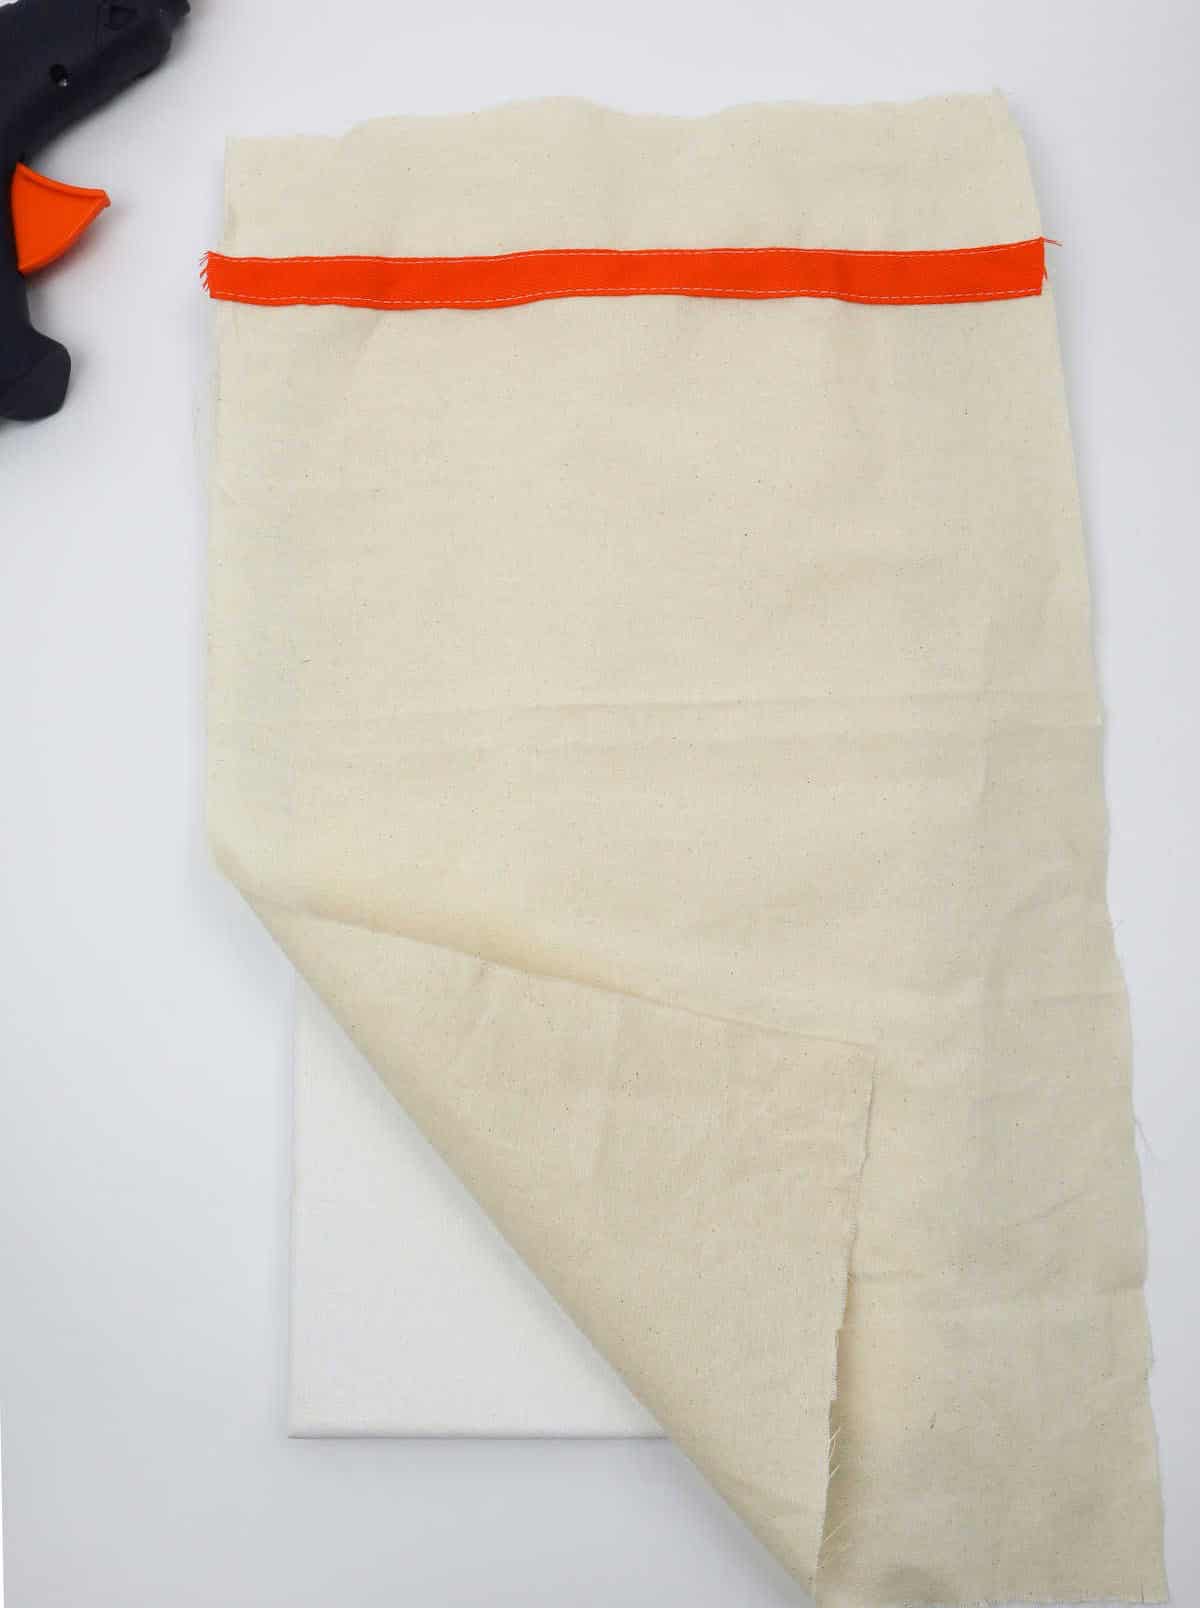
To complete this step, start by flipping the base fabric over, so that the side featuring the twill tape is facing downwards. Next, place the canvas over the fabric, taking care to position it centrally. Verify that you have fabric on all four sides to ensure proper alignment.
Step 8
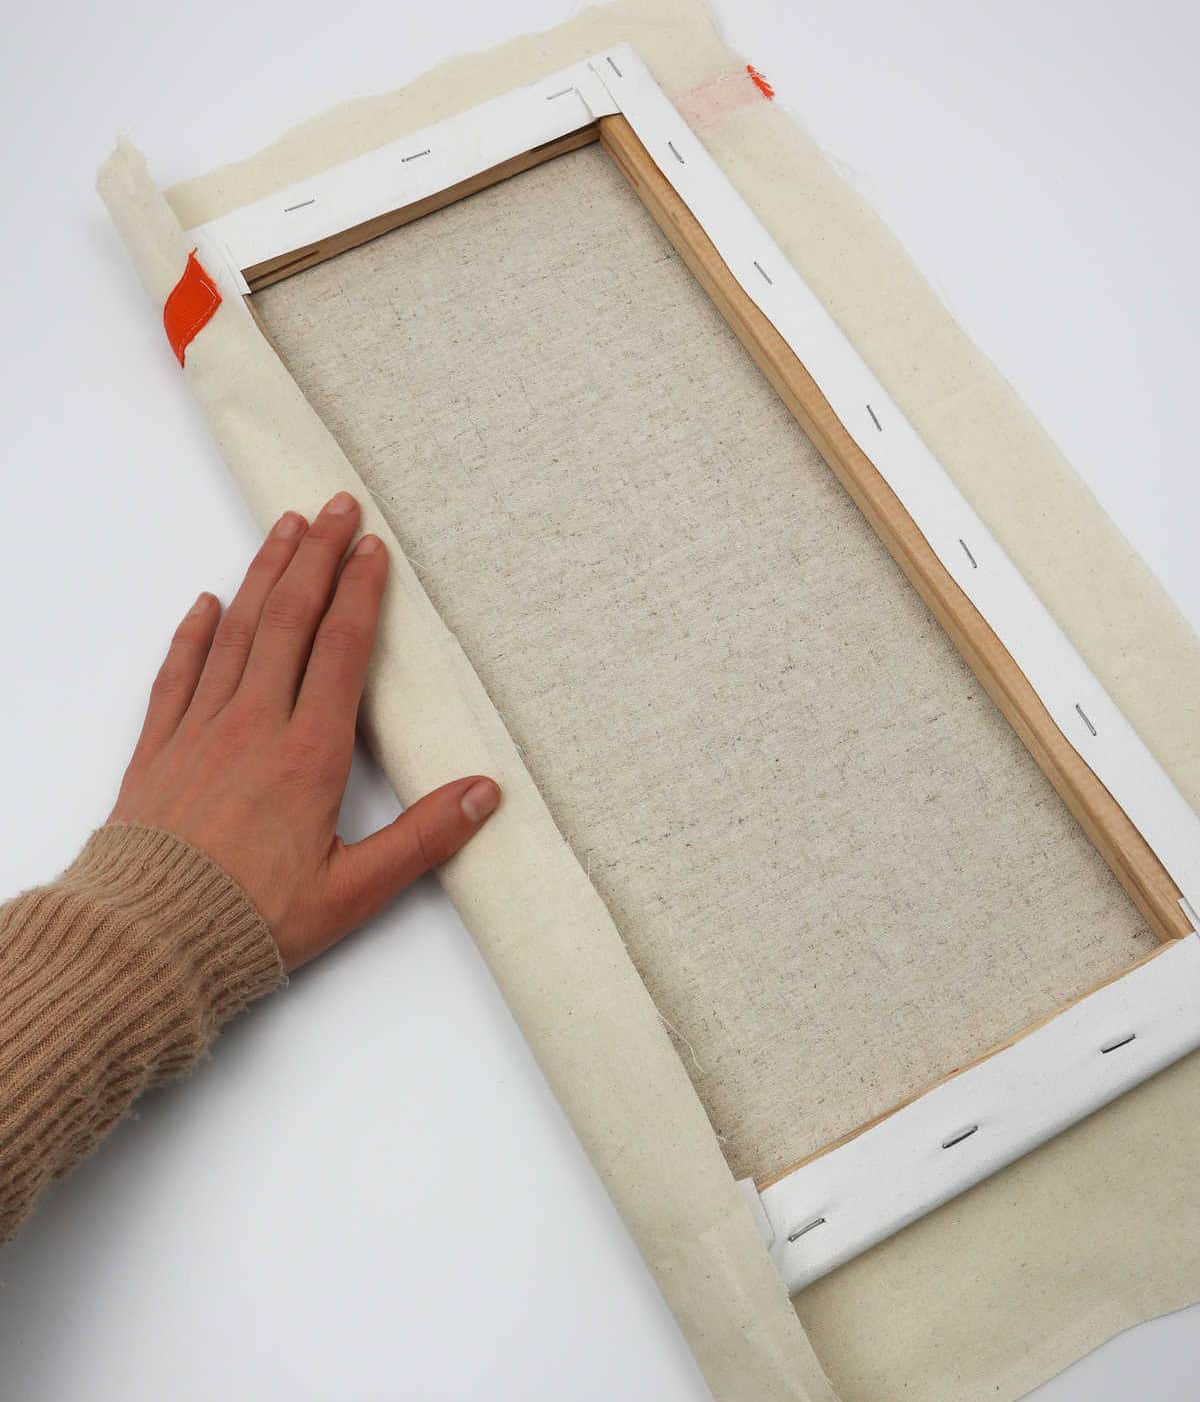
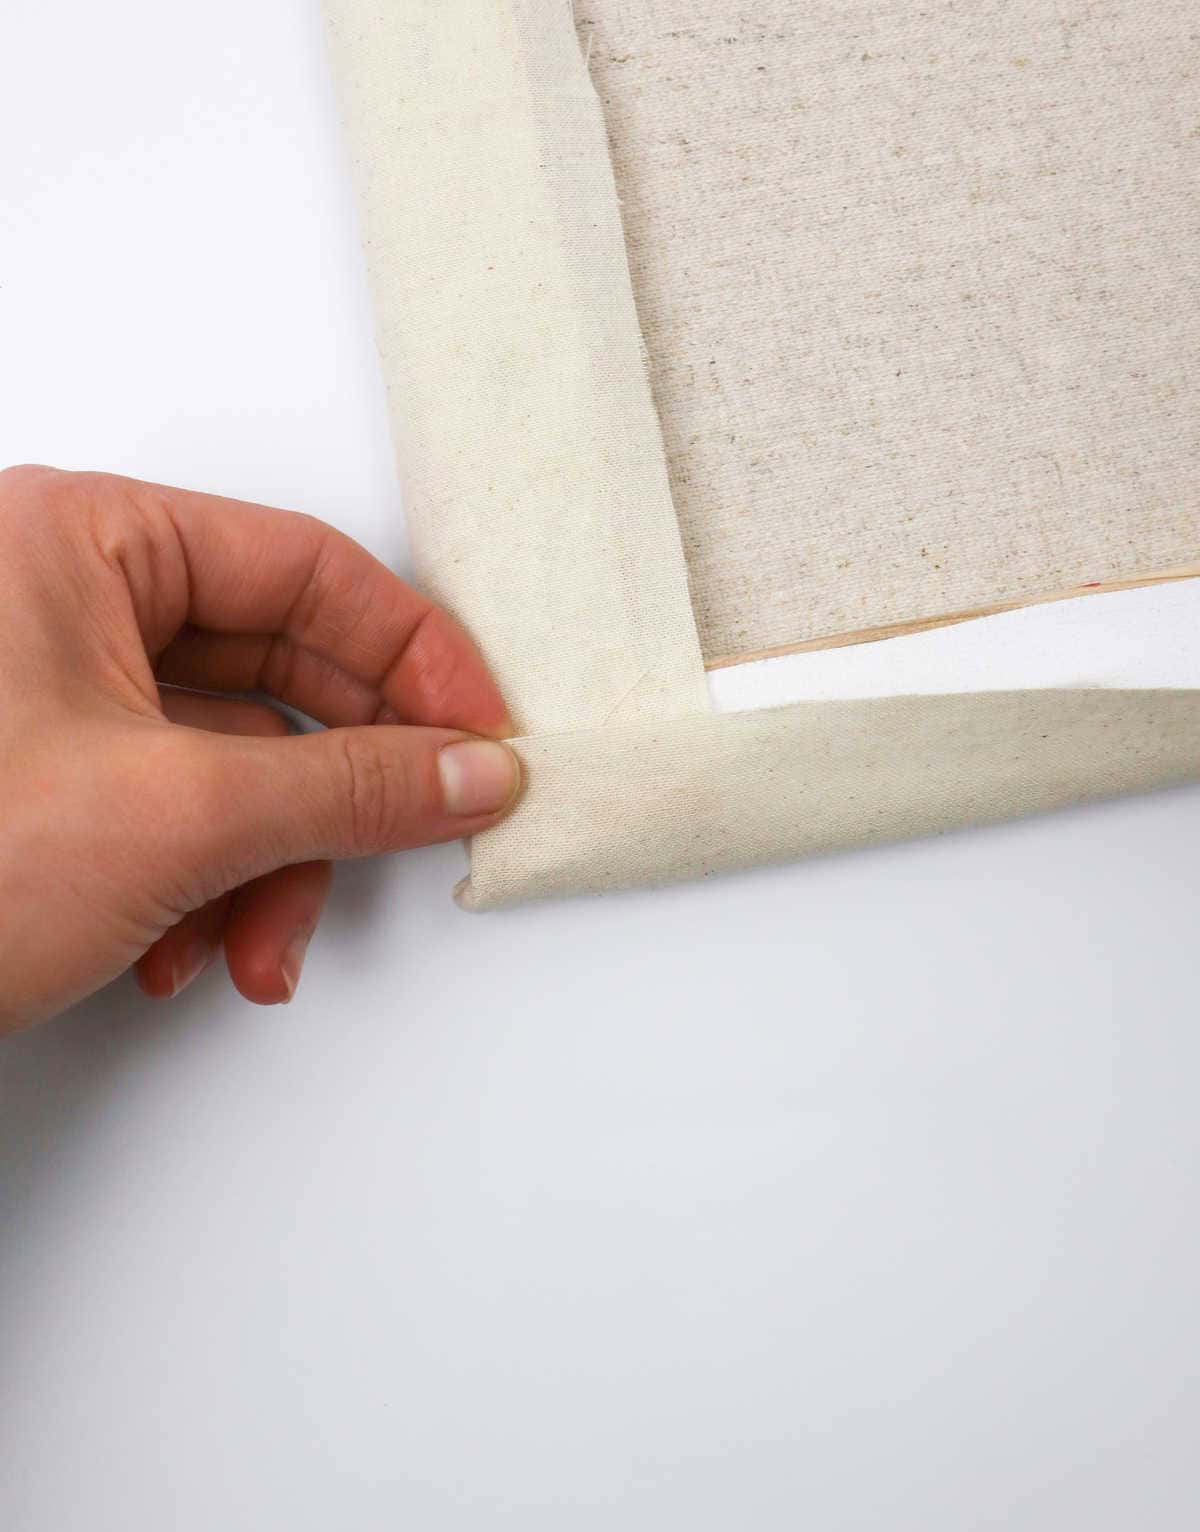
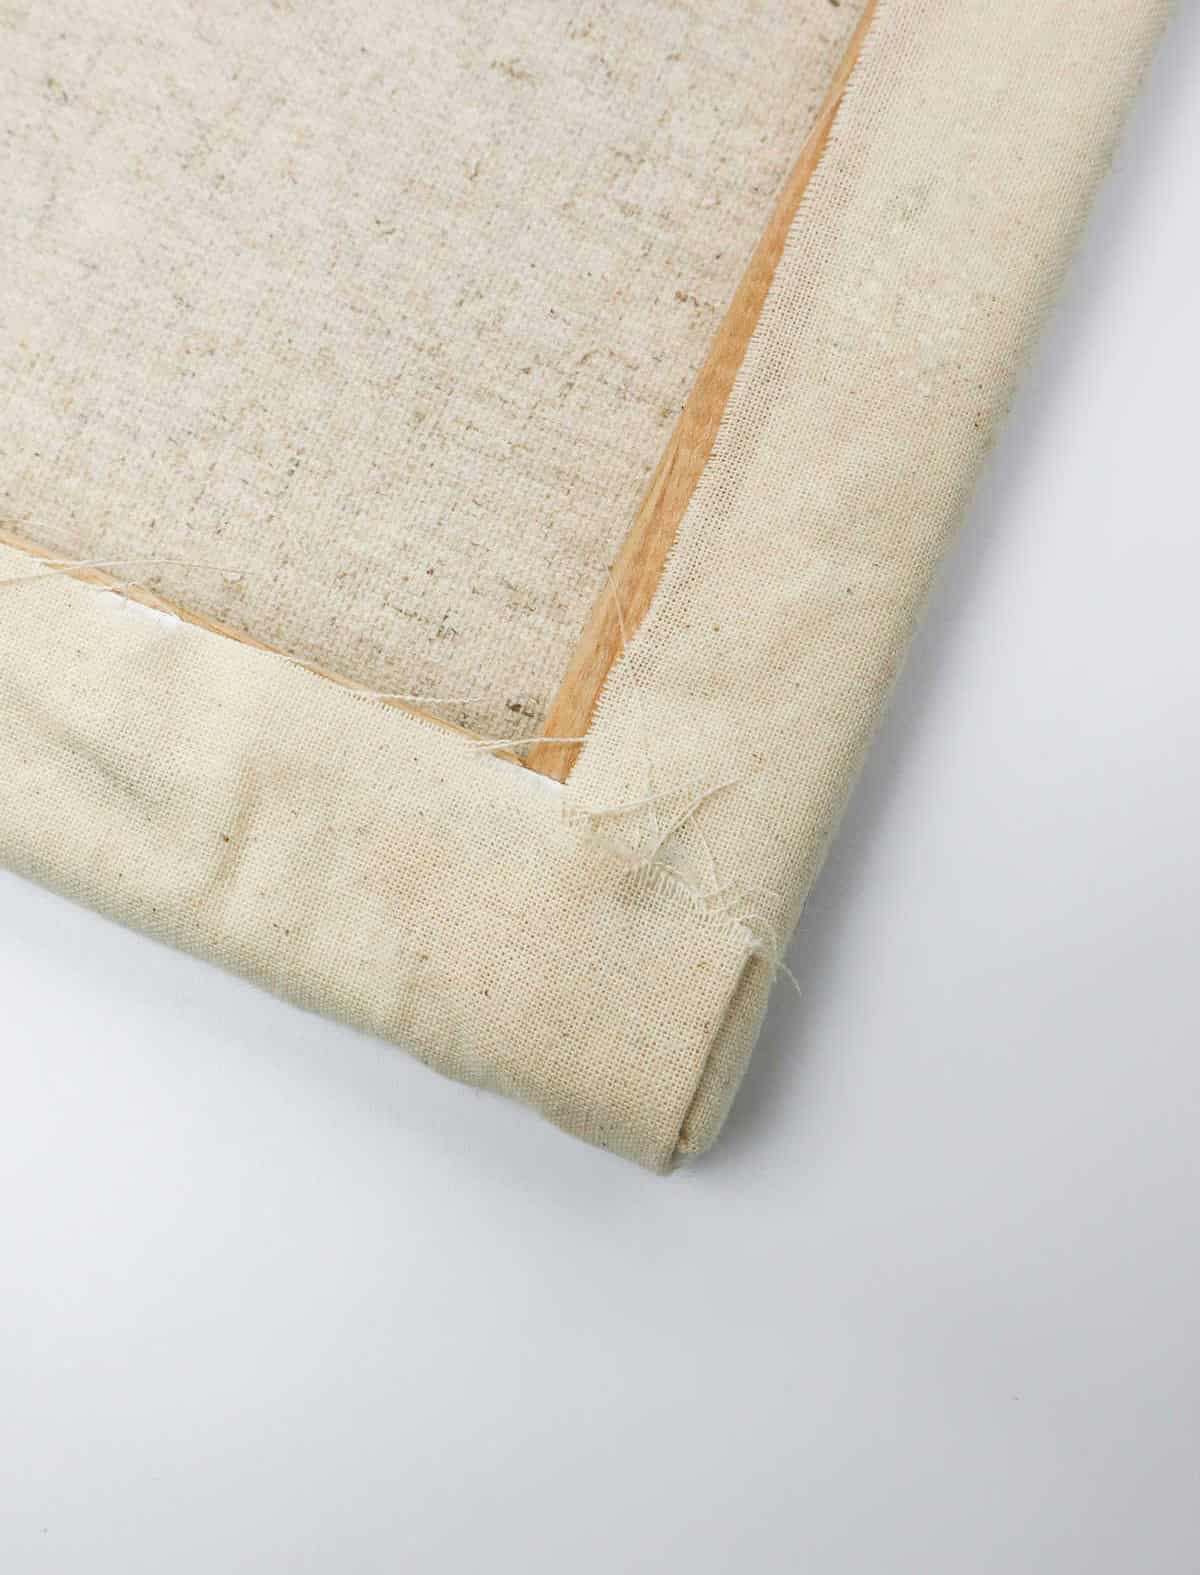
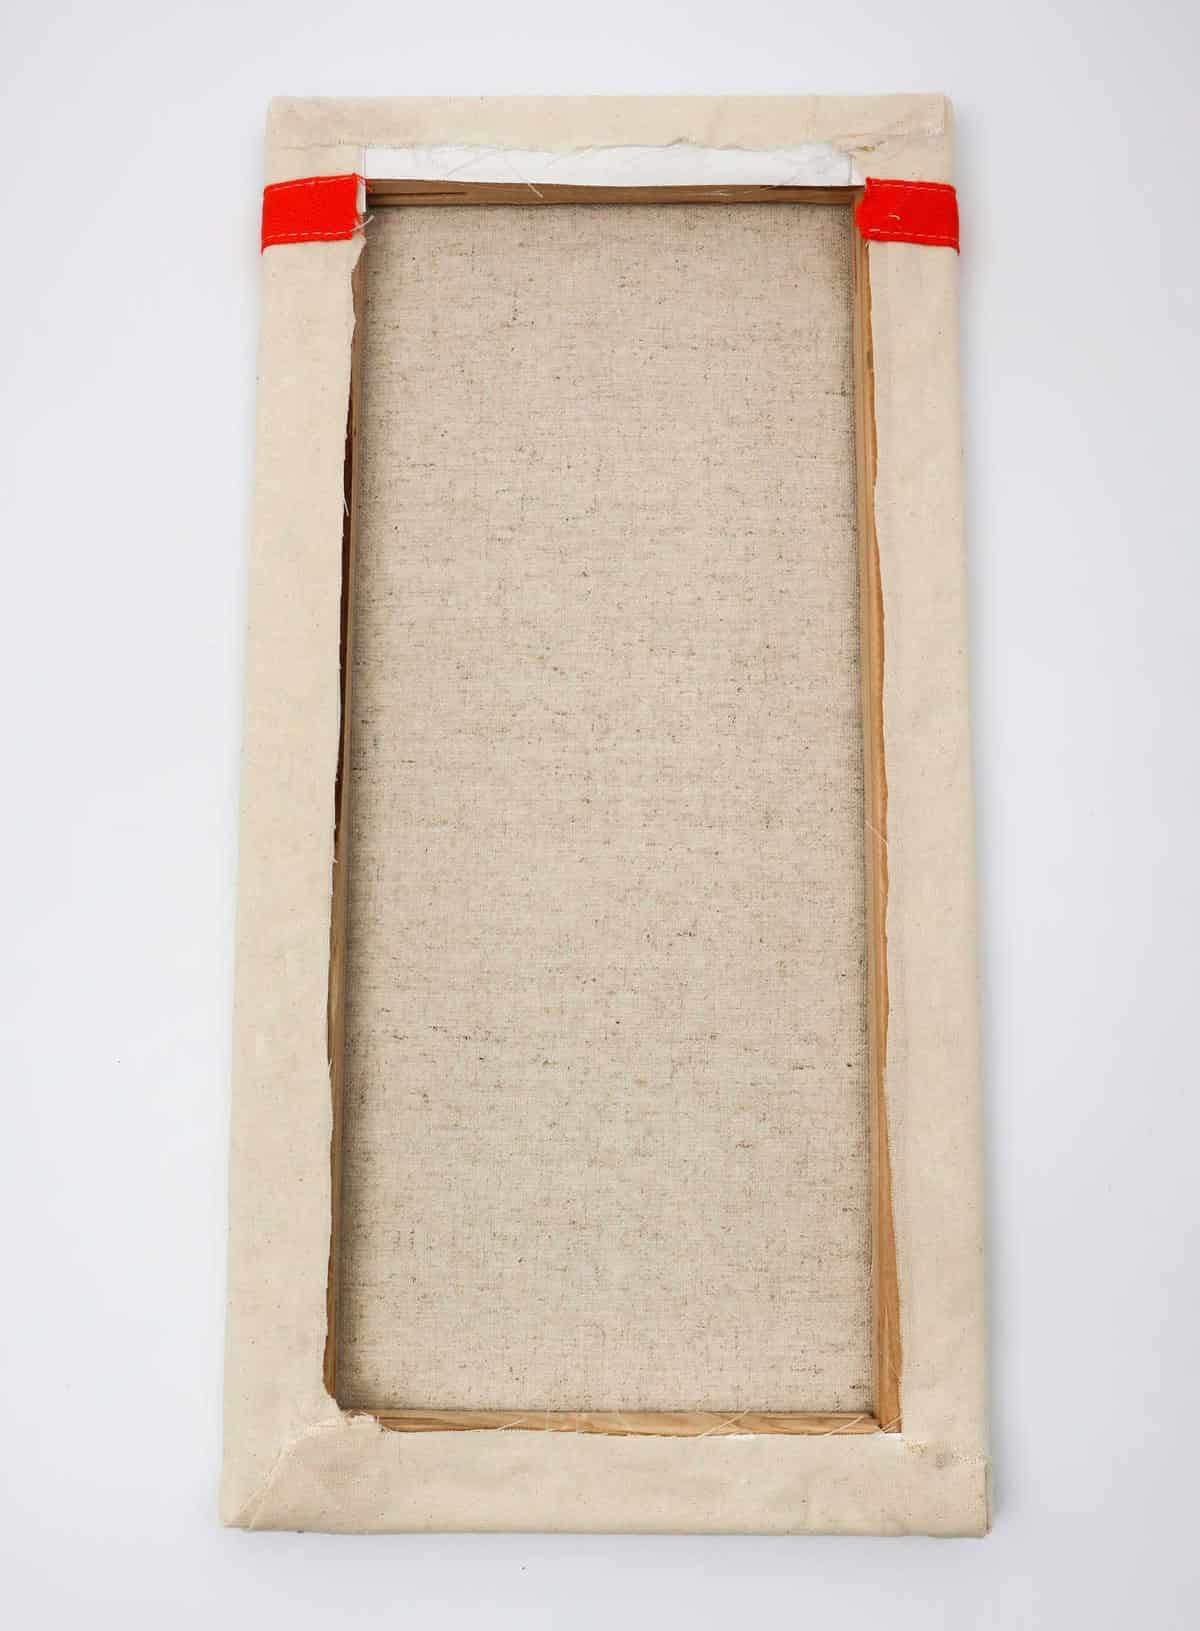
To begin, prepare your workspace by heating up your hot glue gun. Next, apply a thin layer of glue along all four sides of the canvas, ensuring an even coverage. With caution, gently pull the fabric over the glue and press down firmly, securing it to the canvas. Repeat this process for each side, folding them inward and tucking in any excess fabric neatly. If desired, reinforce the overlapping ends with additional hot glue for added stability.
Once complete, allow the glue to dry thoroughly before flipping your canvas over to its right side.
Step 9
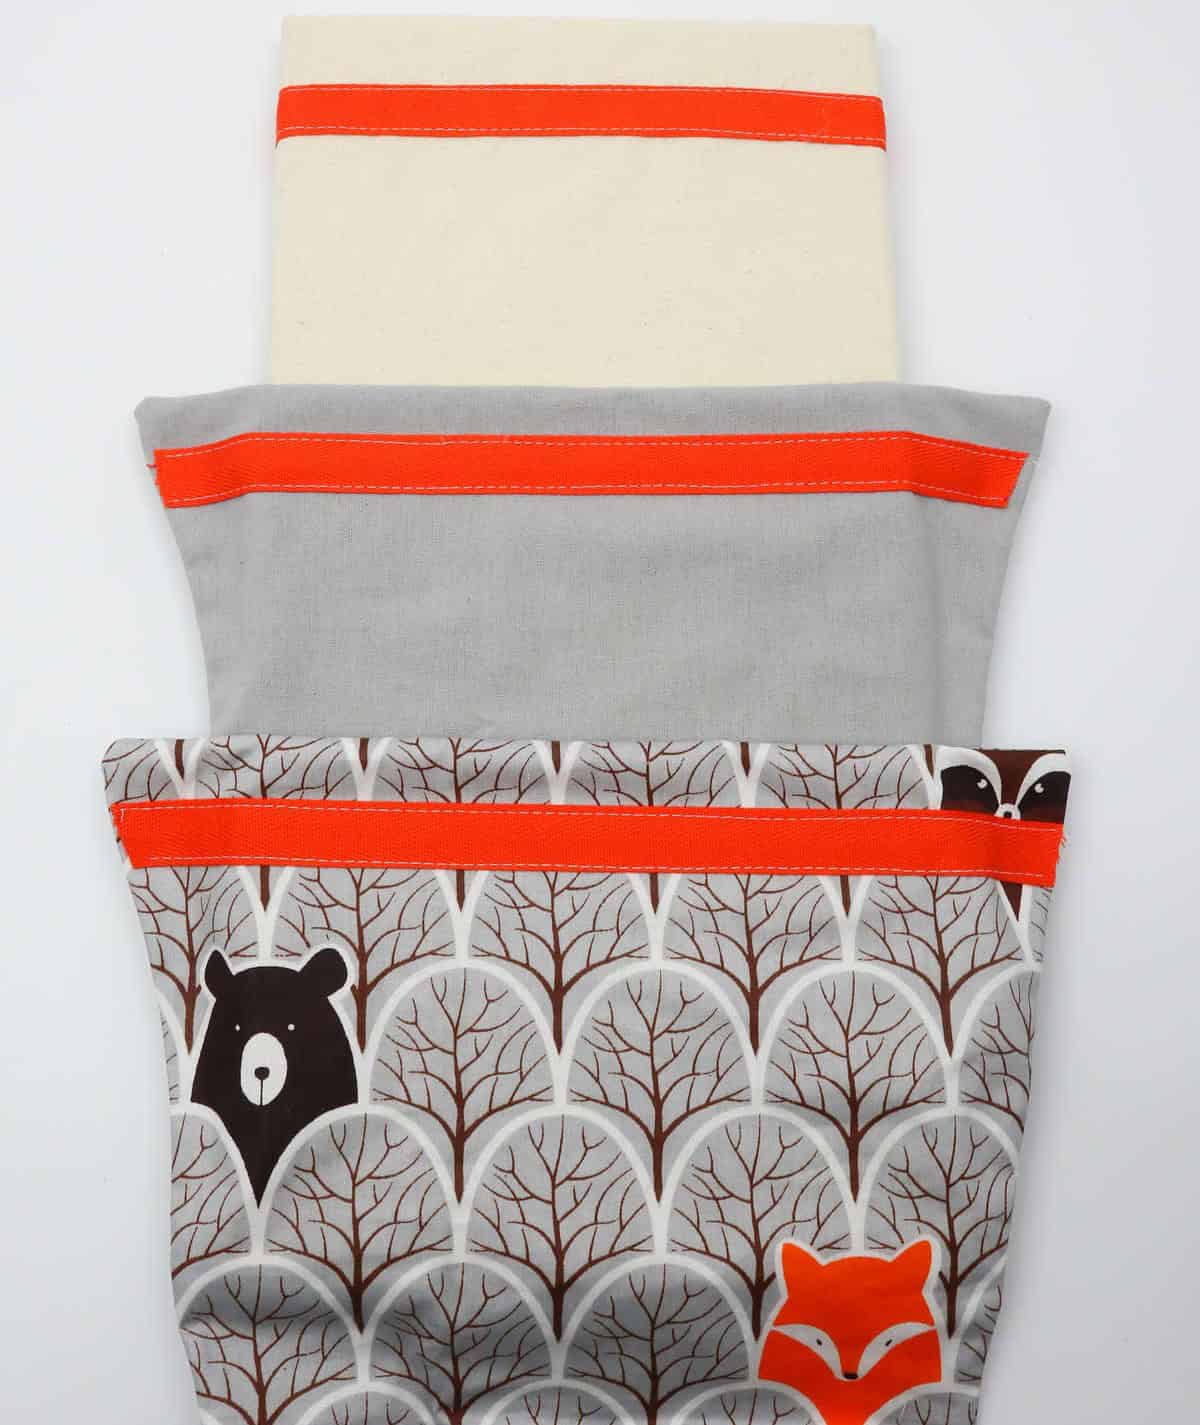
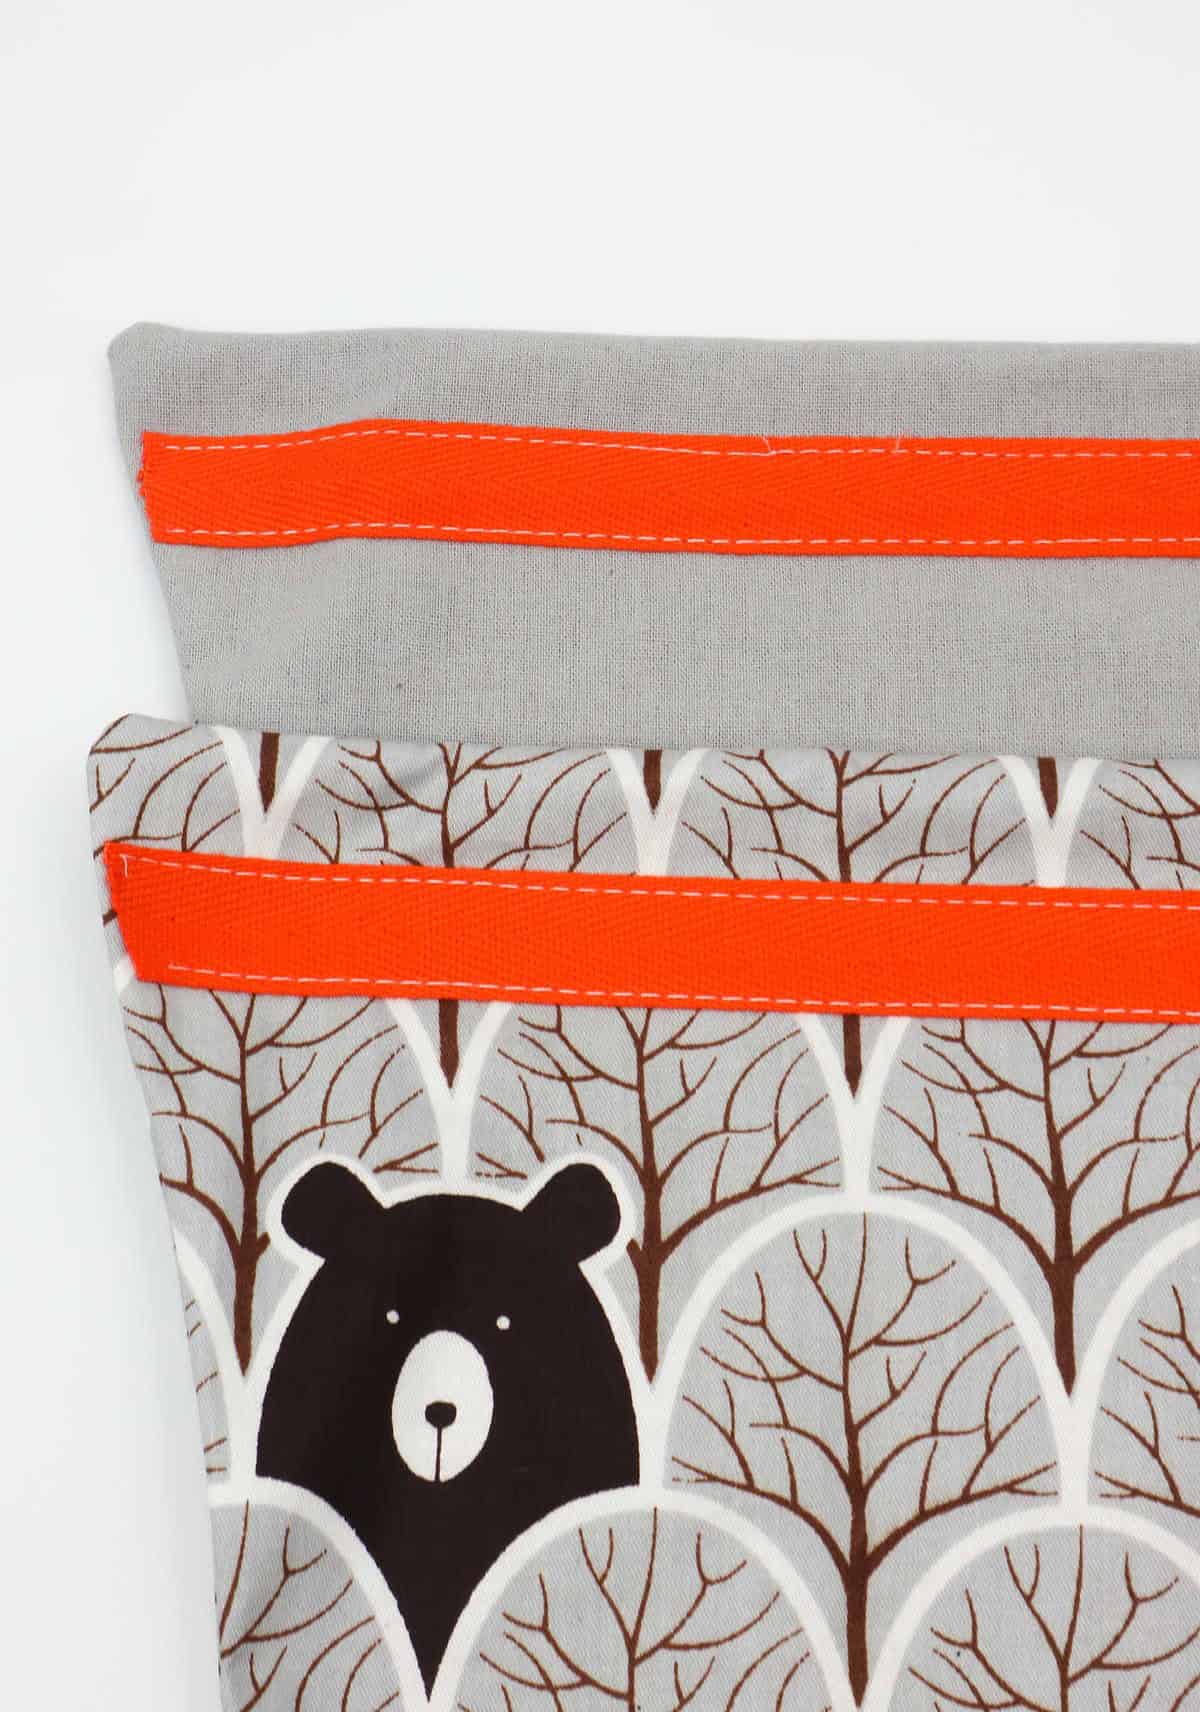
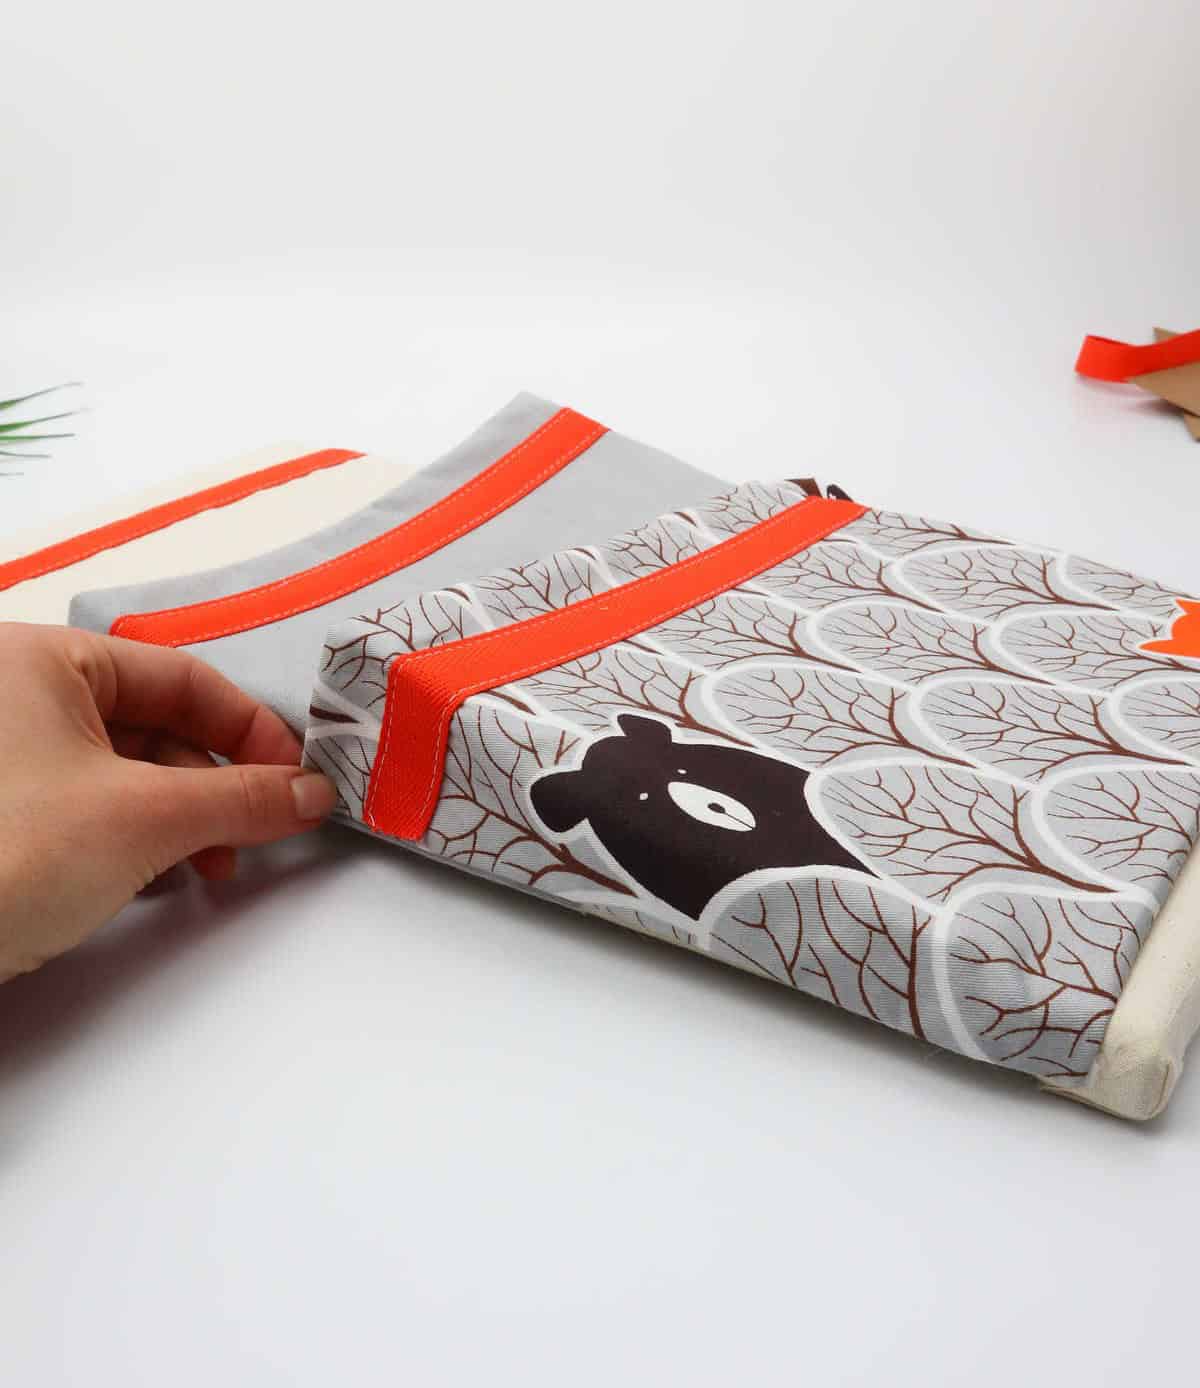
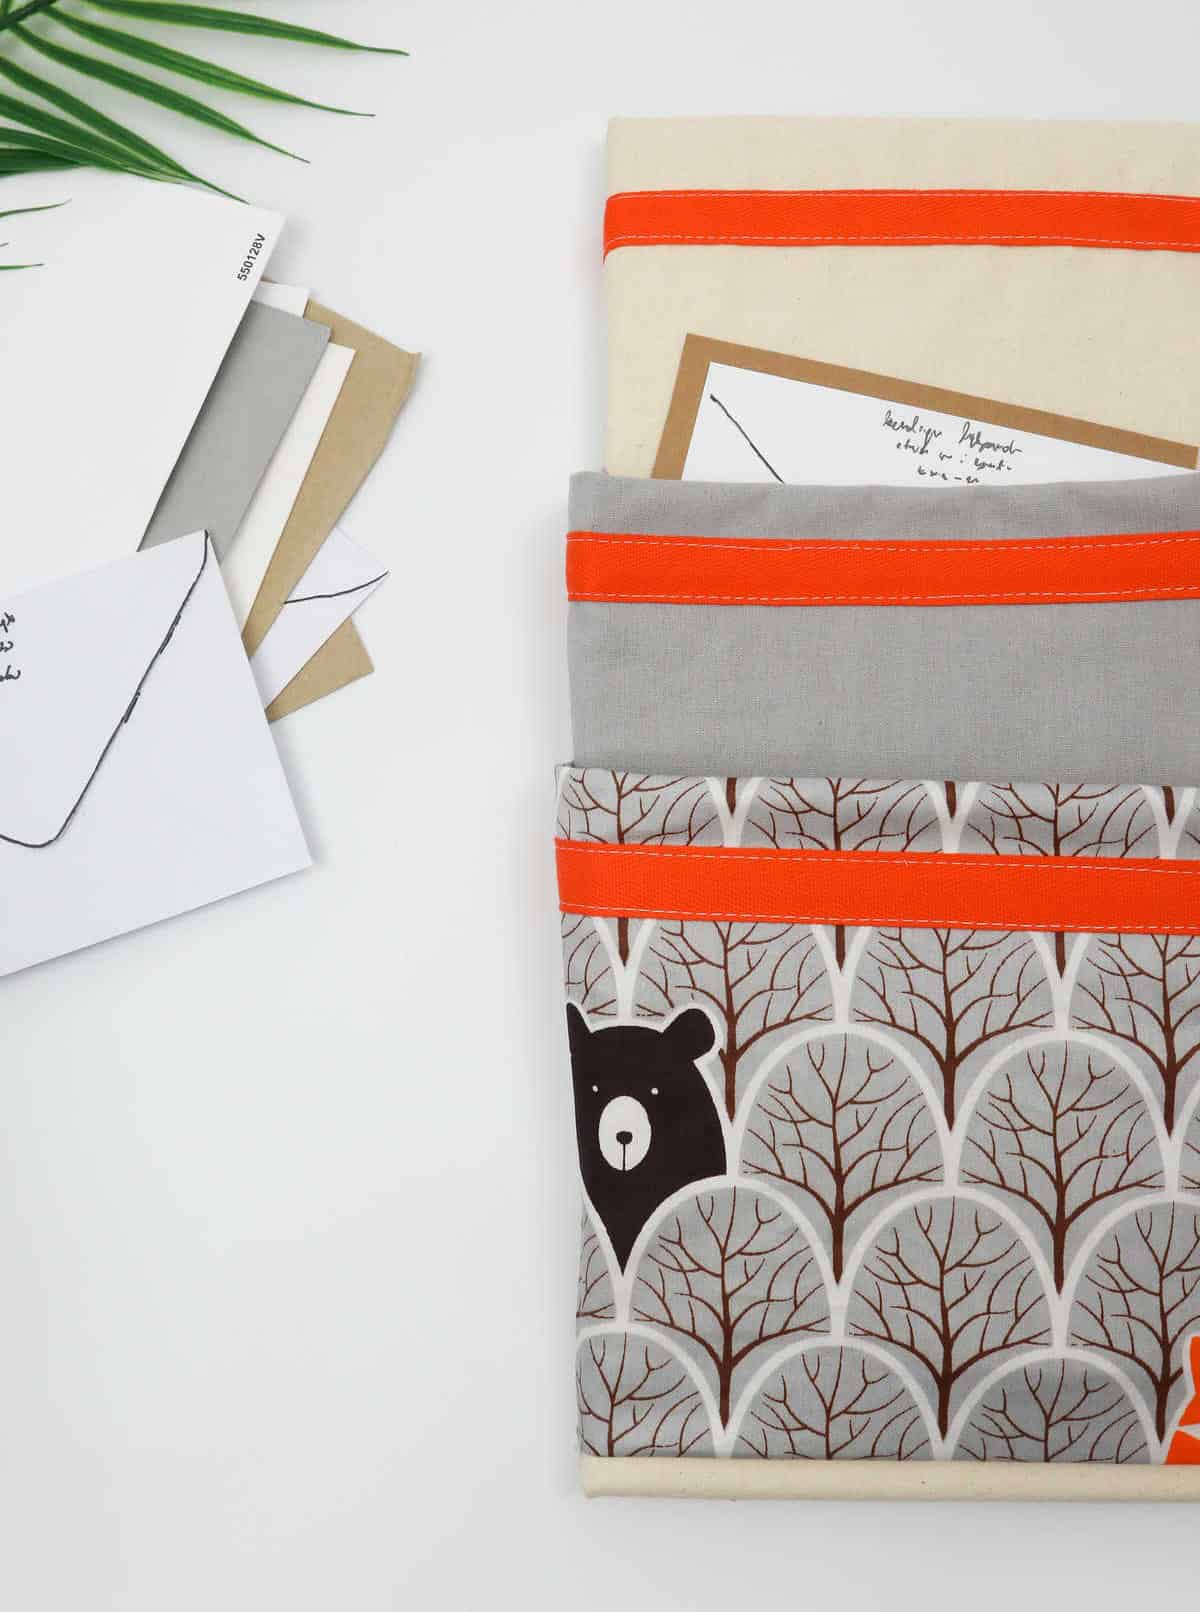
When it’s time to add the fabric pockets to your canvas, begin by positioning the topmost pocket first. This will ensure a smooth and even layering process. Start with the largest pocket at the bottom and work your way up, placing each subsequent pocket on top of the previous one, ensuring they’re properly aligned. To visualize the correct layering sequence, take a moment to study this illustration and get a sense of how each pocket should be stacked.
Step 10
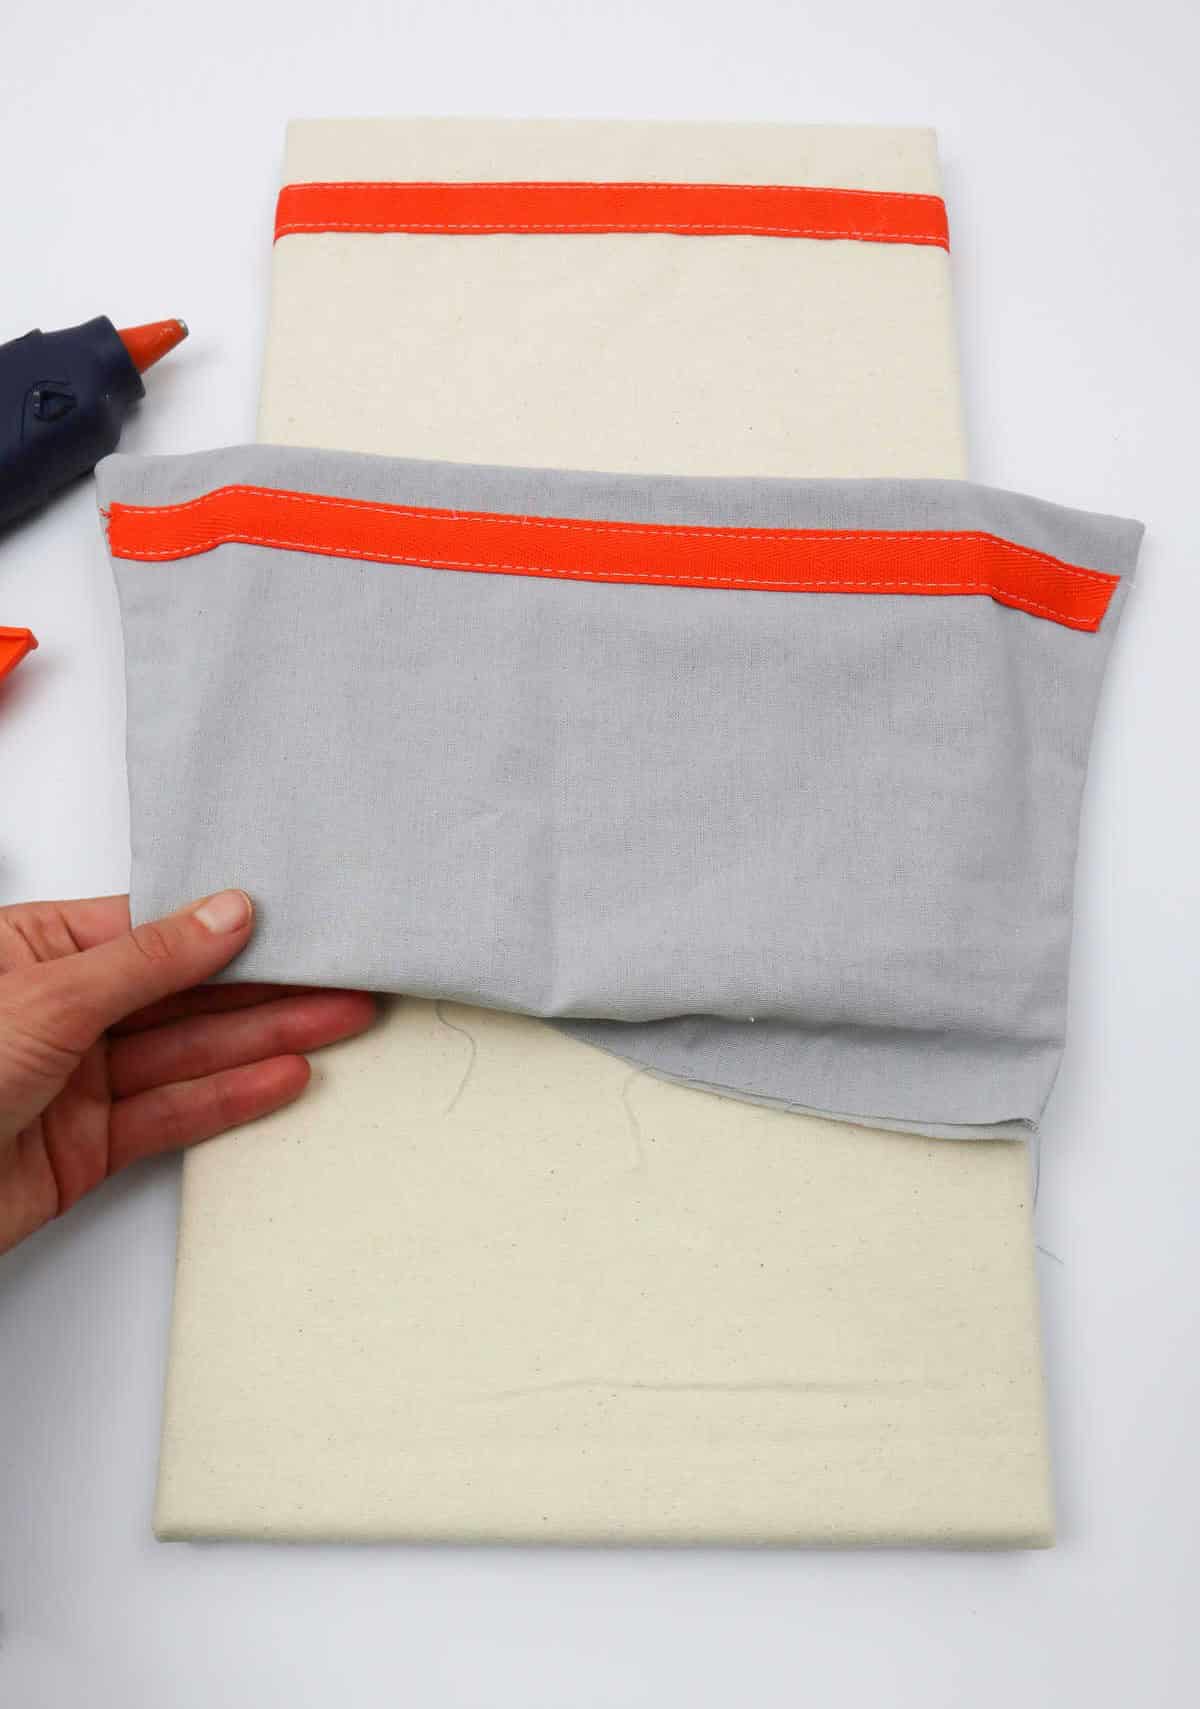
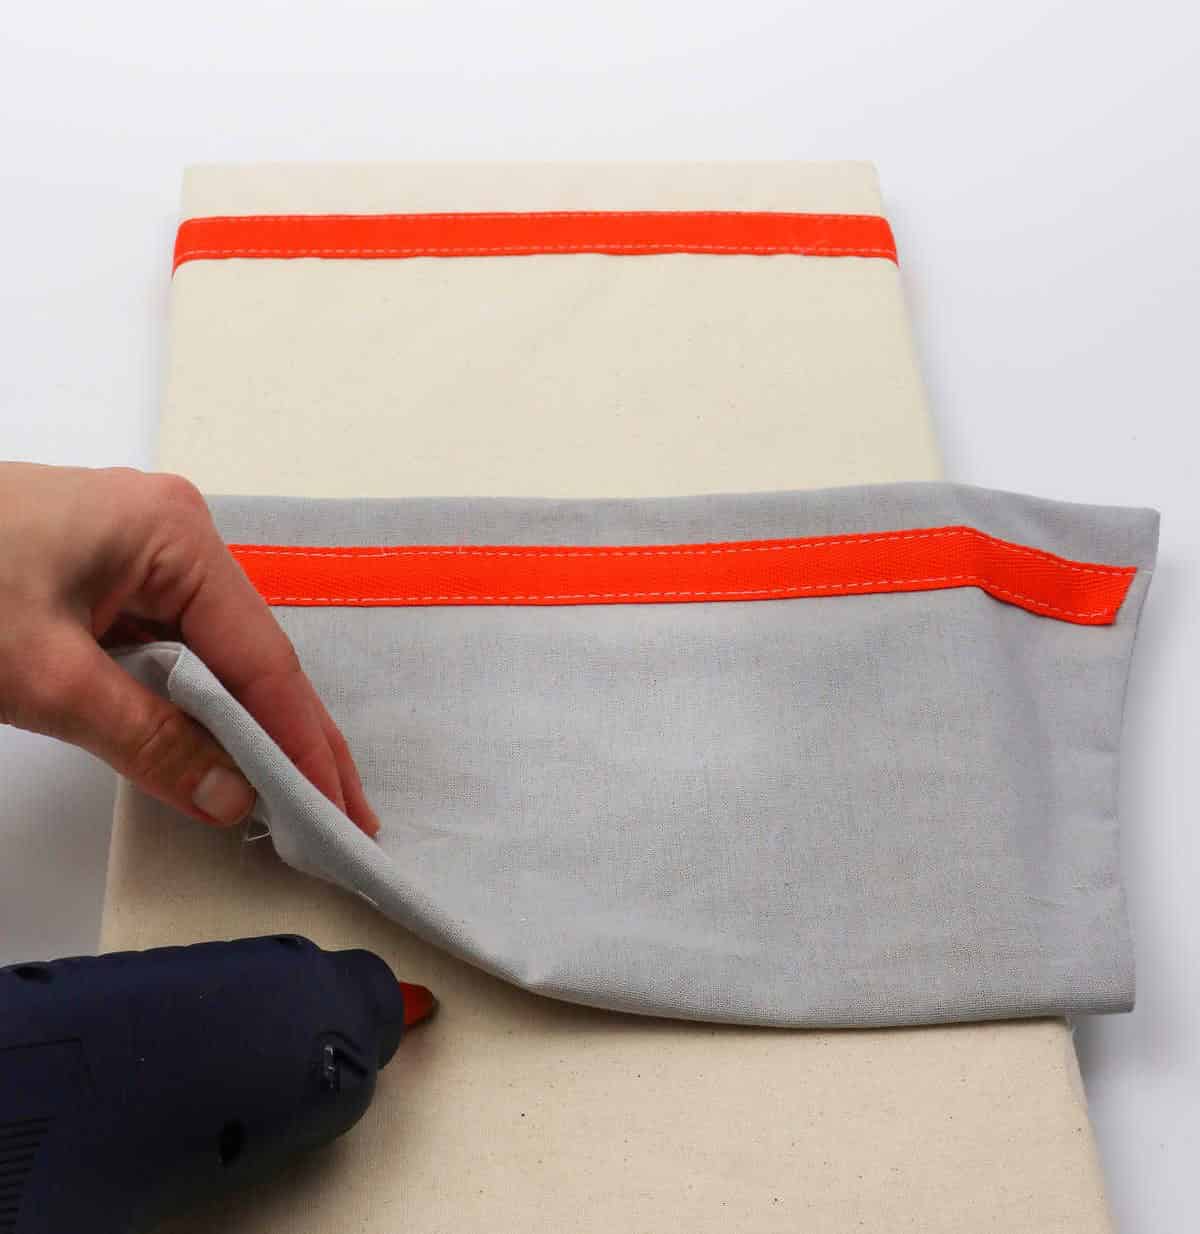
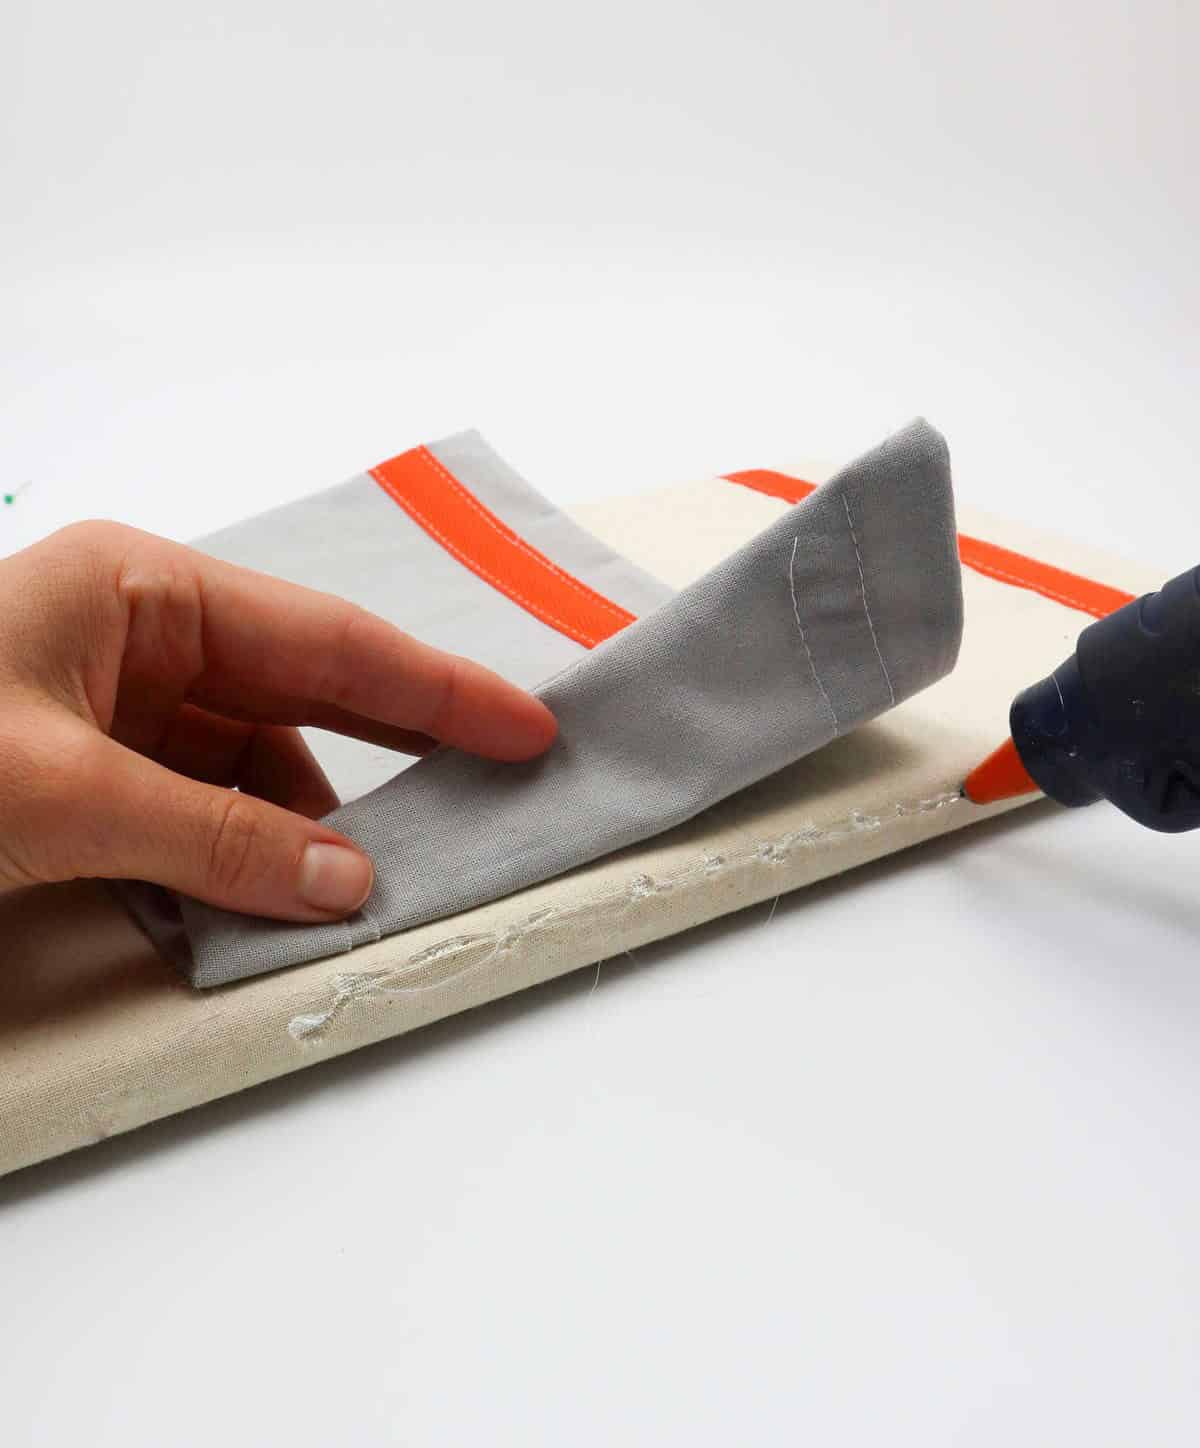
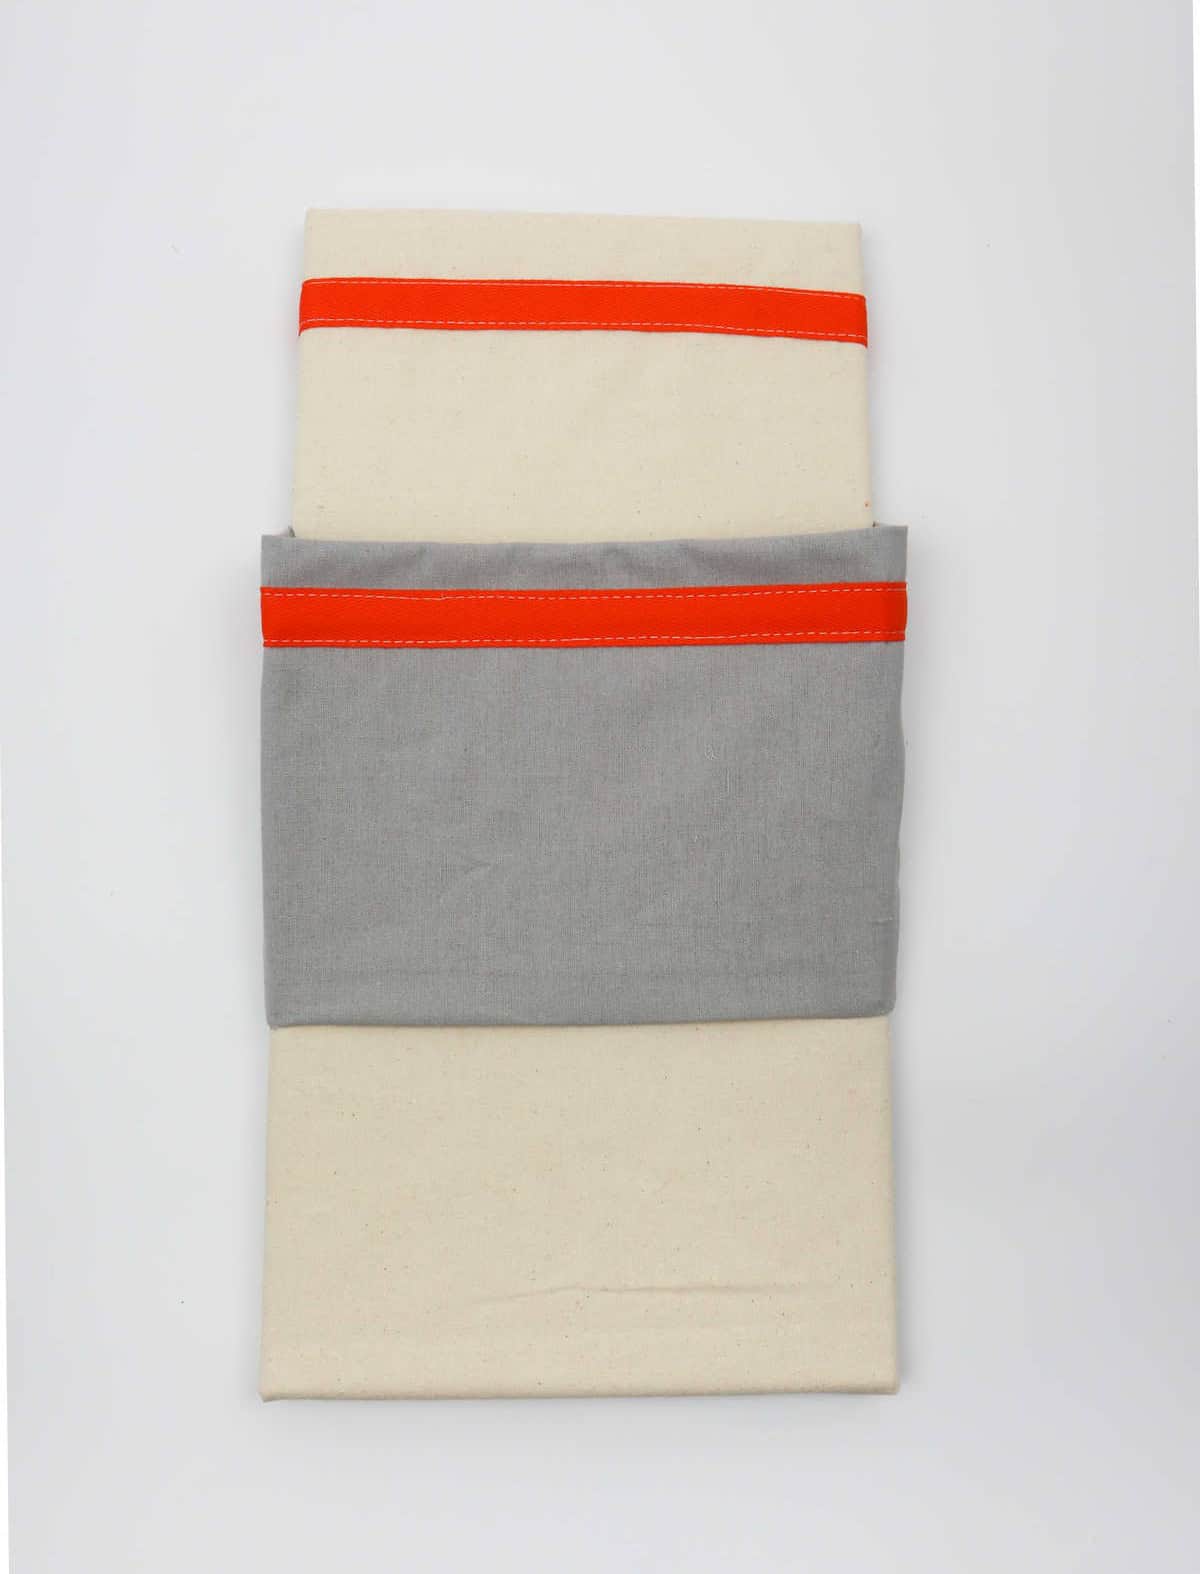
As you’re satisfied with the overall design, it’s time to secure the second pocket onto the canvas. Since this pocket will be placed on top, start by folding the bottom edge of the pocket inward. Next, apply a thin line of hot glue along the canvas, positioning the pocket so that its folded bottom aligns with the top edge of the canvas. Hold the pocket in place for a few seconds to ensure it adheres properly.
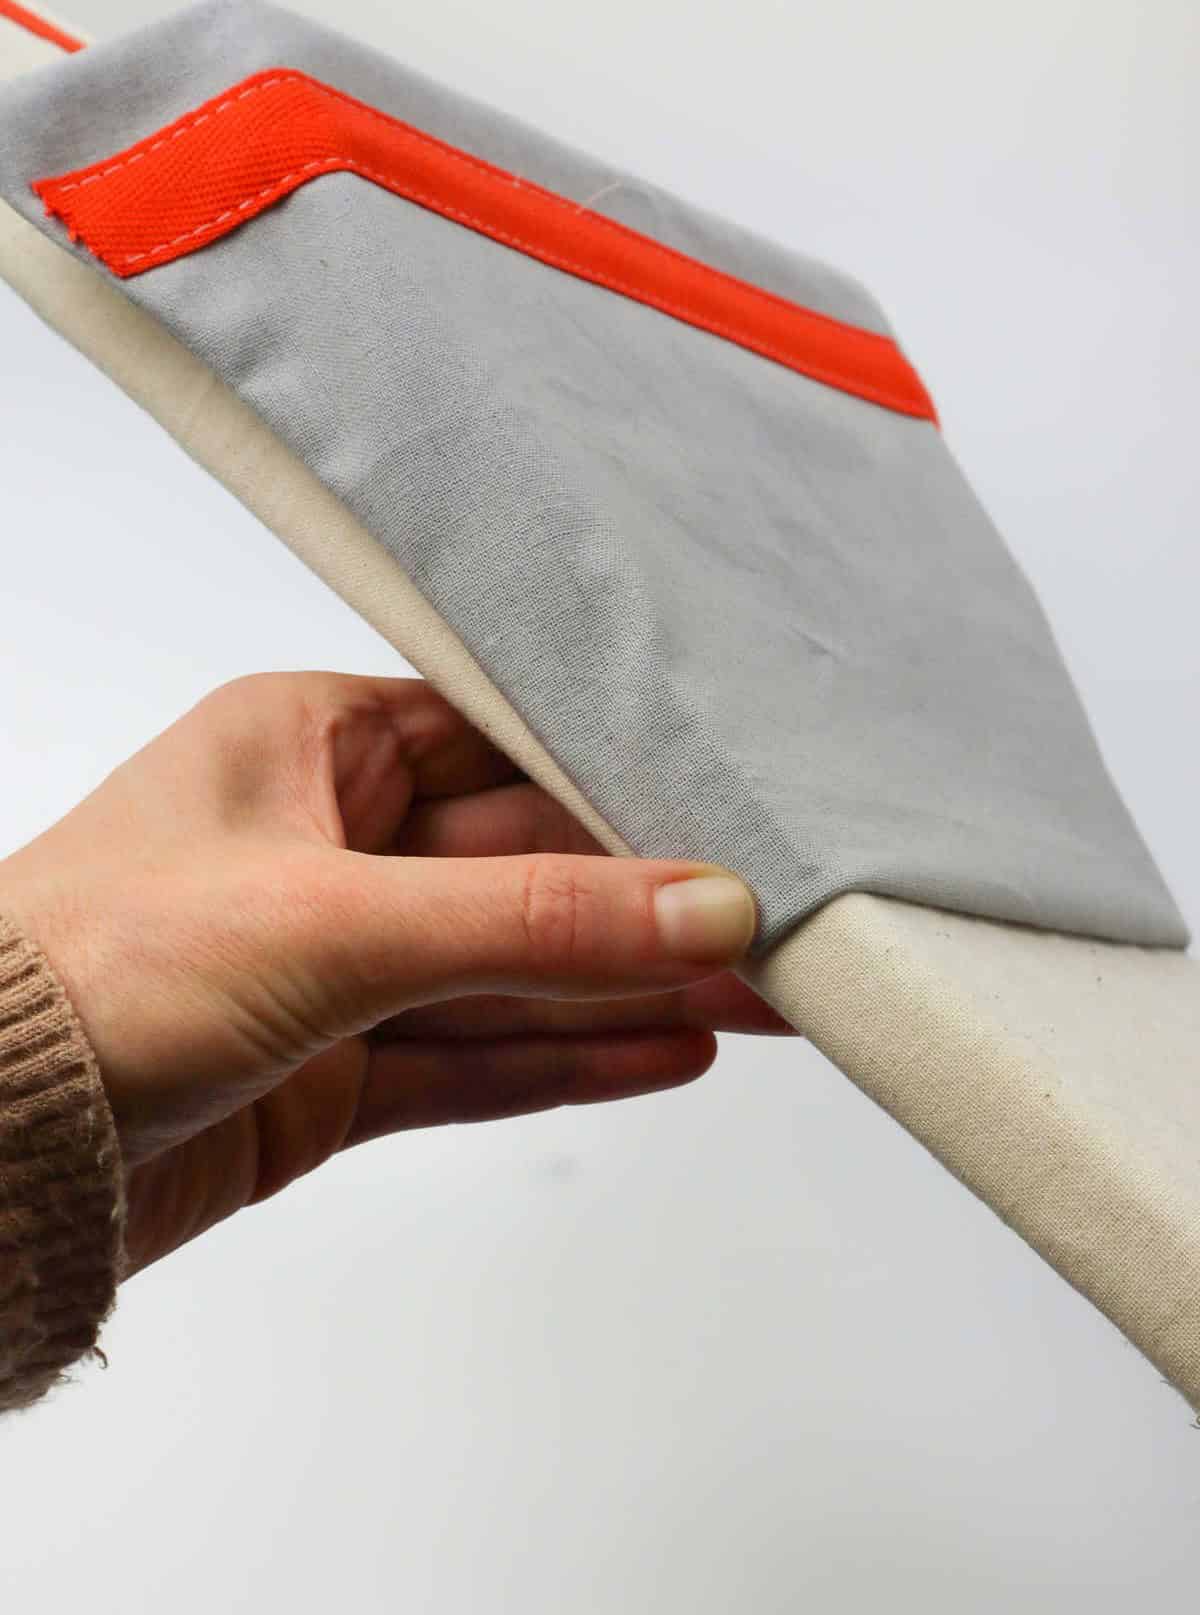
Don’t forget to stretch the sides of the pocket over the edges of the canvas and secure them as well, making sure they’re evenly attached on both sides. With this step complete, your top pocket should now be firmly in place. Now, let’s proceed with attaching the bottom pocket.
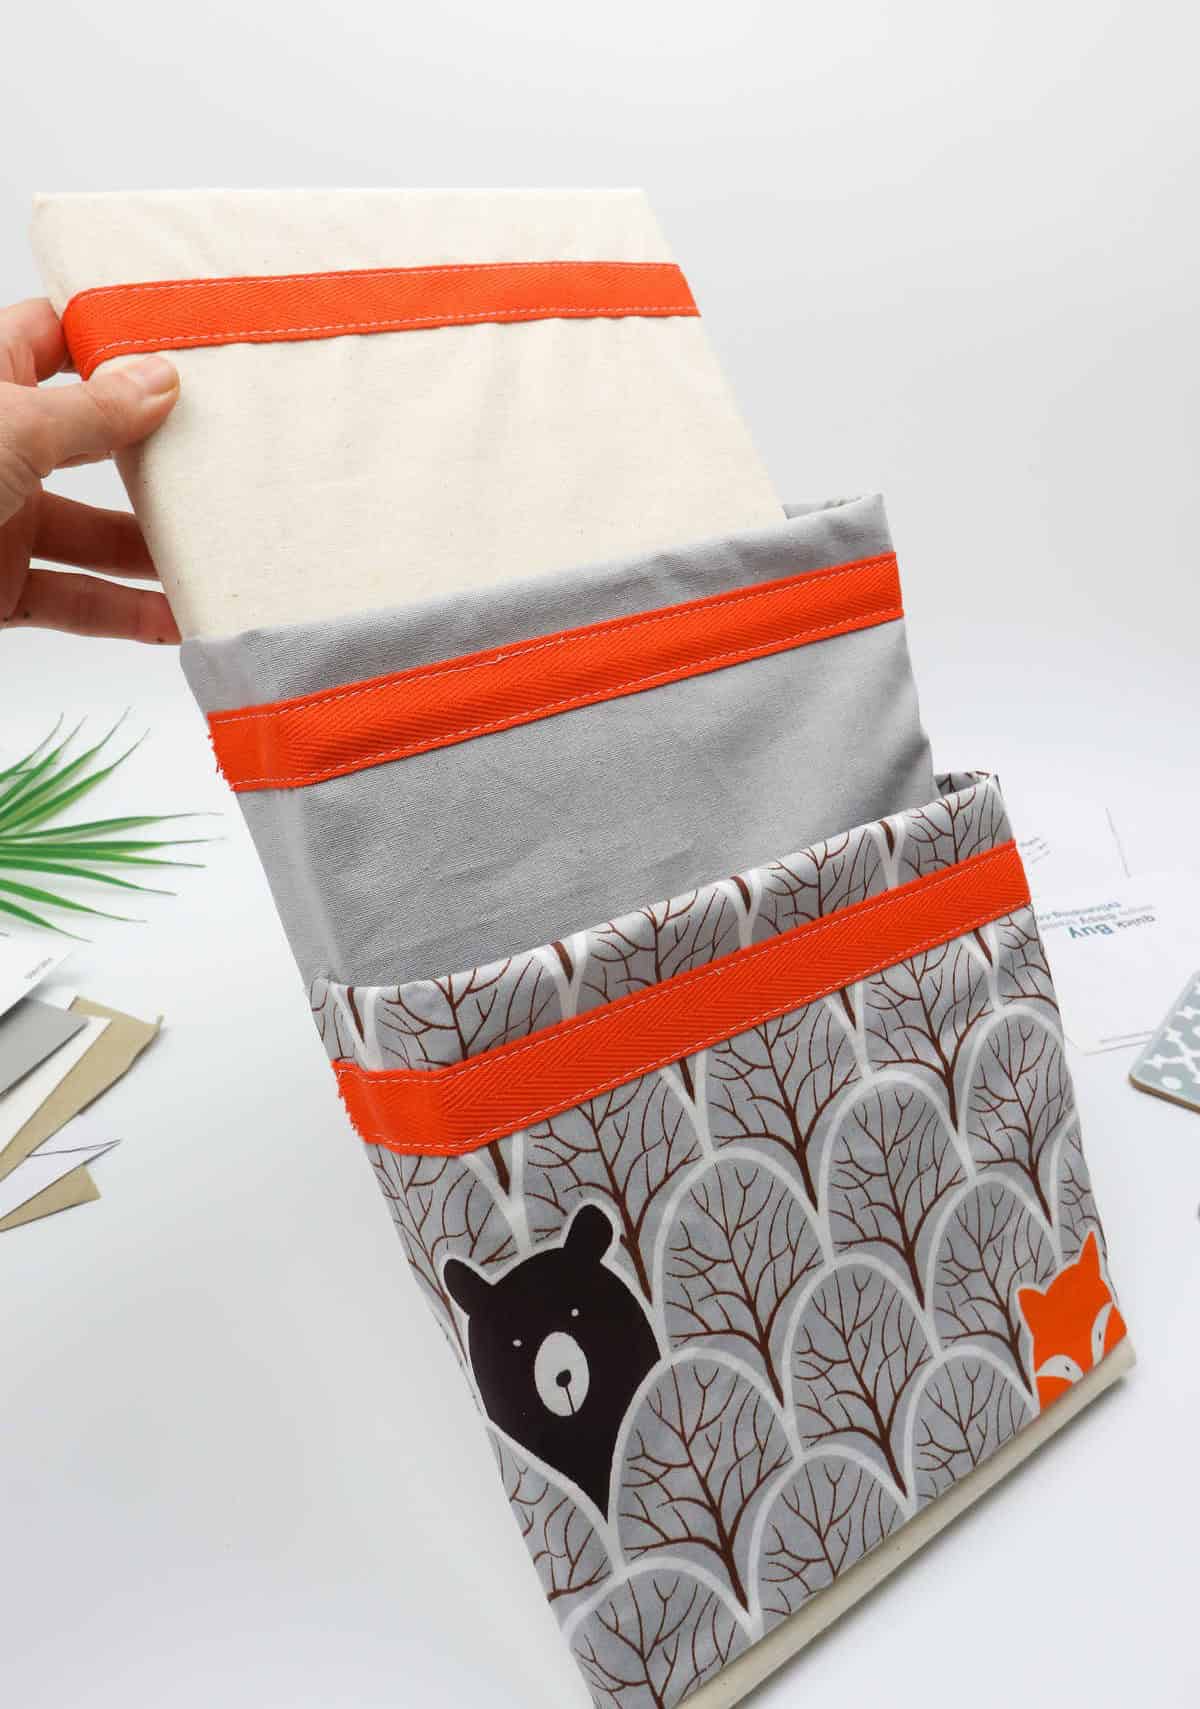
Step 11
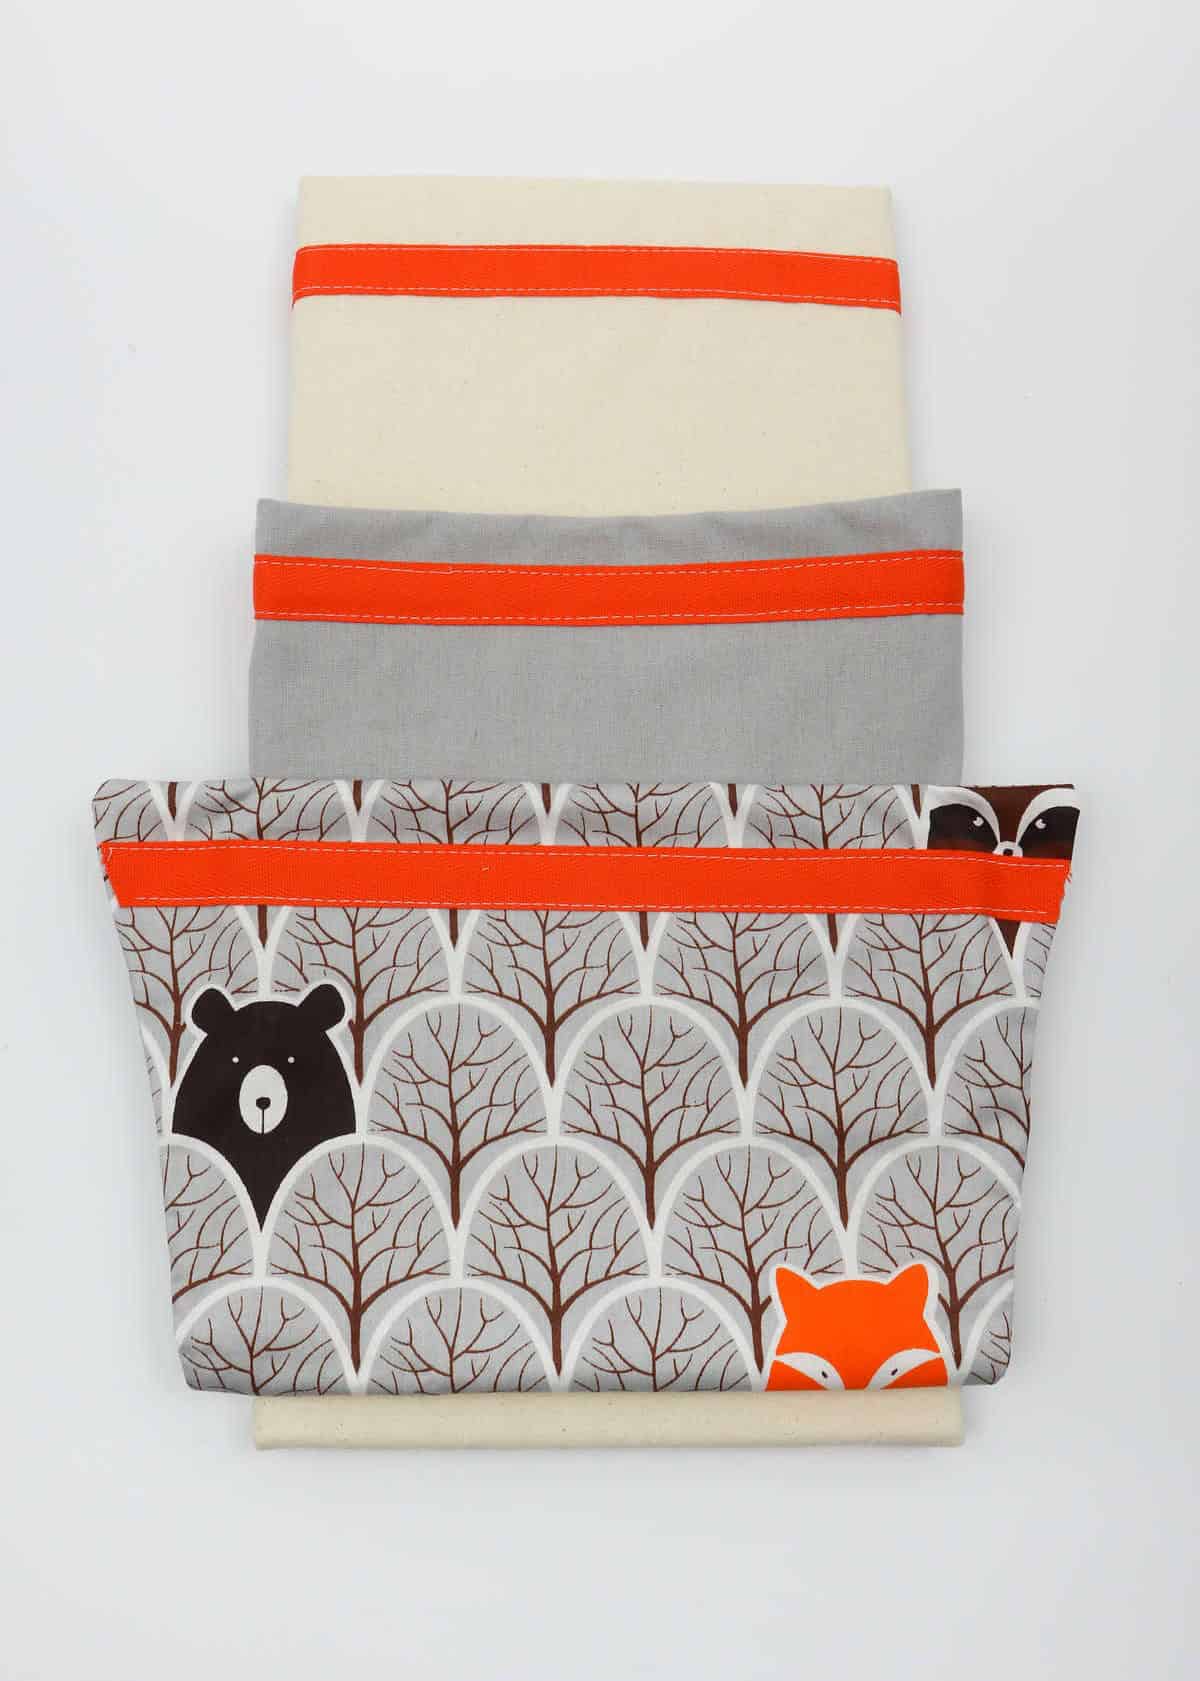
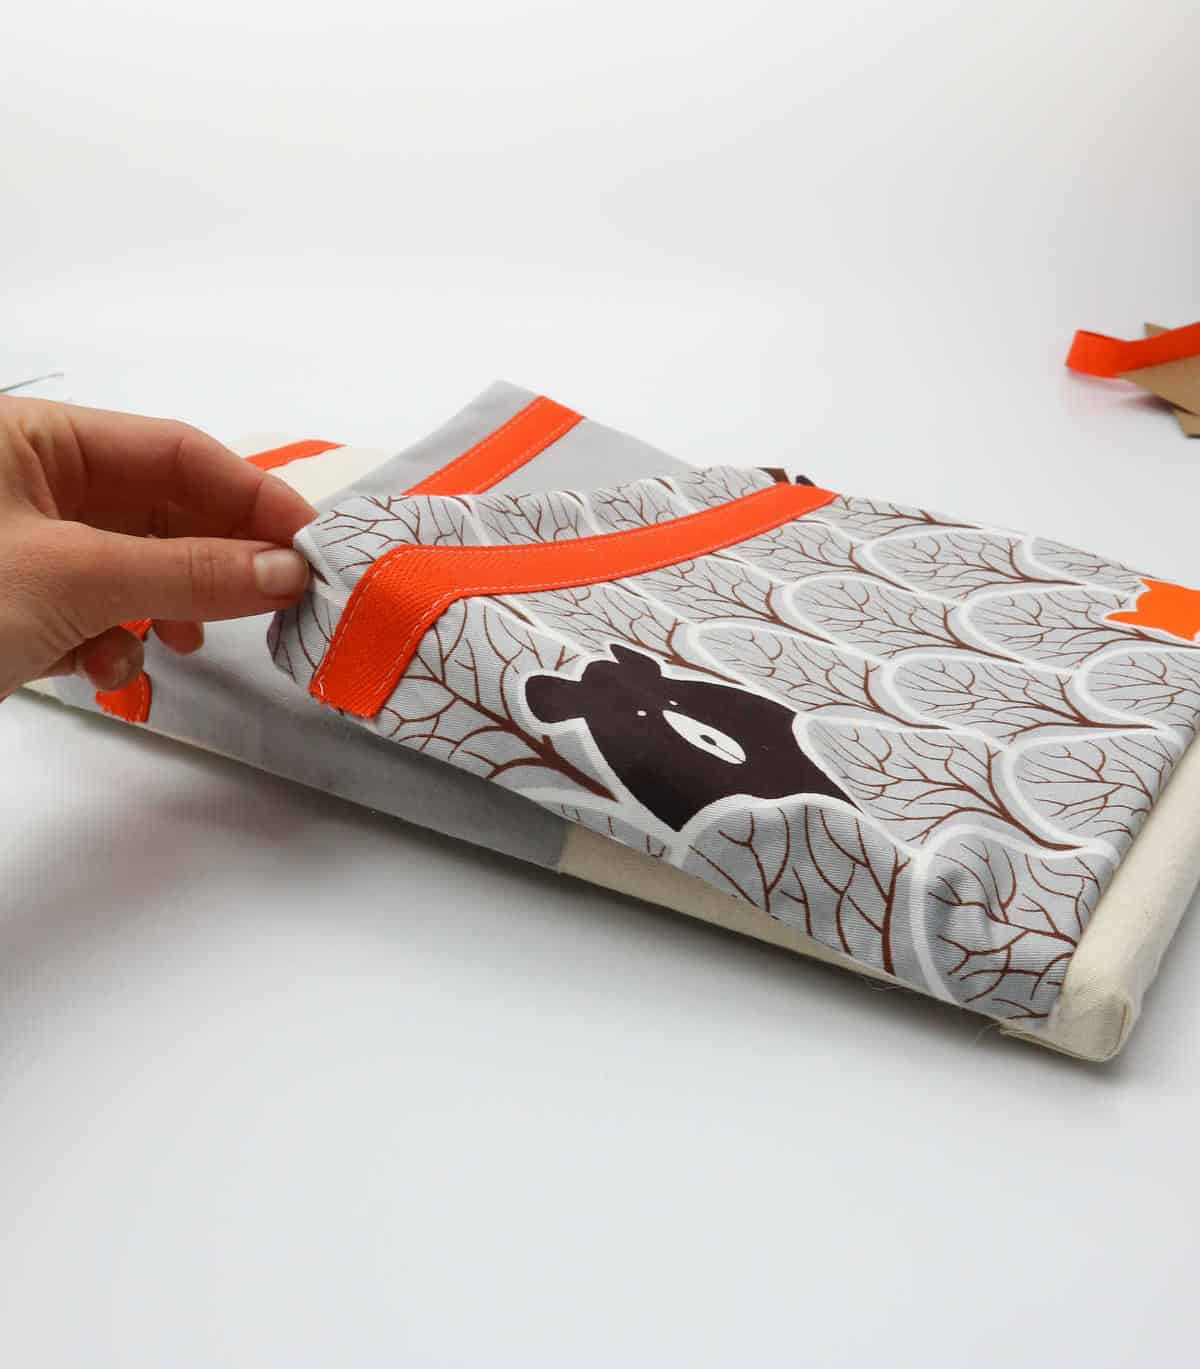

To complete your DIY mail organizer, start by preparing the bottom pocket. Align its edges and leave a small margin of canvas at the base to ensure even weight distribution. Next, follow the same process as before: fold the bottom and sides of the fabric, then secure them with hot glue. Make sure to adjust the top ends so that they protrude slightly. Once complete, your DIY mail organizer is ready for use.
What Types of Fabric Can I Use?
When it comes to choosing the right fabric for your project, cotton canvas is often the top pick due to its widespread availability and affordability. With a wide range of patterns, prints, and colors to select from, you can easily find a suitable match for your needs.
However, there are other fabrics worth considering as well: silk offers luxurious texture, linen provides a natural, earthy feel, denim adds a rugged touch, leather or suede swatches bring a premium look, synthetic options like rexine or synthetic suede cater to vegans, vinyl and wool provide unique textures, while medium-weight fabrics like brocade, crepe, velvet, or satin add depth and dimension. Finally, neoprene rubber can be used for its durability and water-resistance.
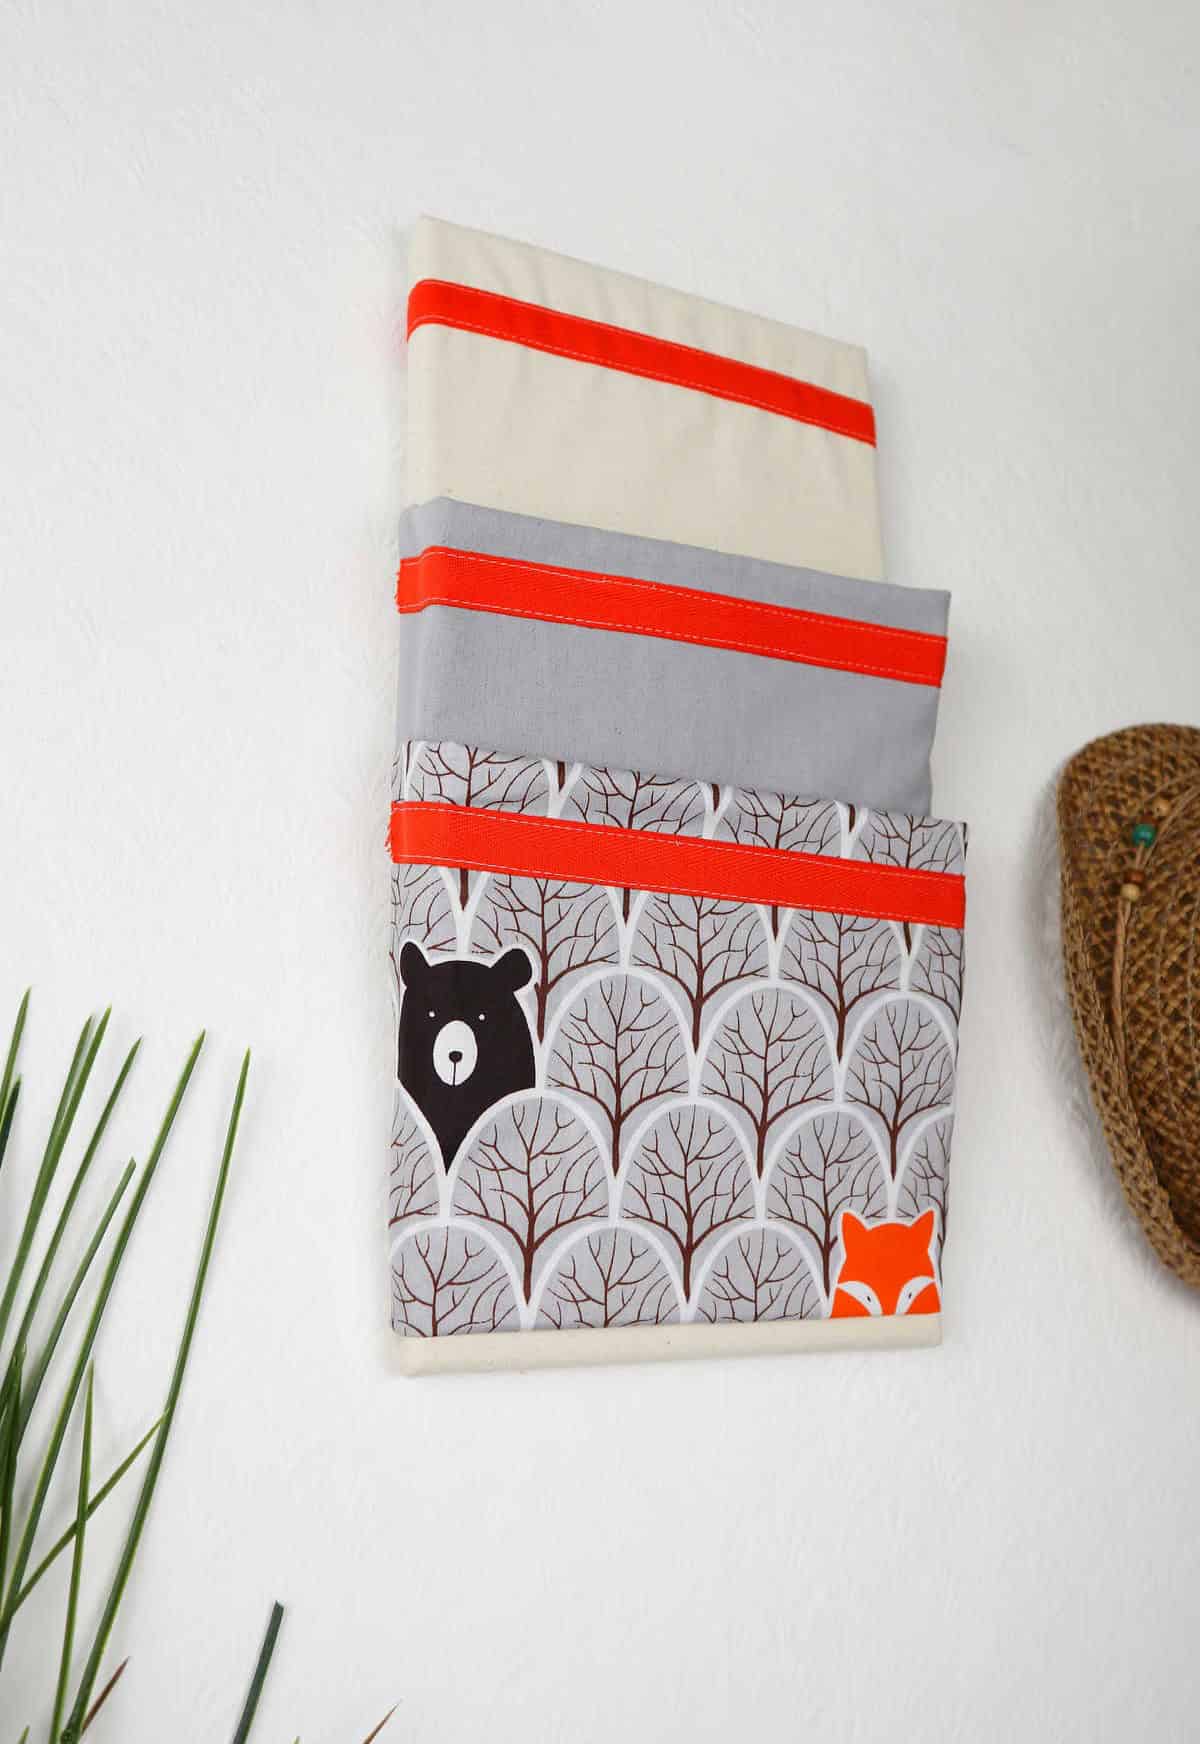
Can I Hang This Mail Organizer Up?

For added versatility, this organizer’s canvas frame provides sufficient support for standing upright against a wall. Alternatively, you can transform it into a mounted or hung display by attaching a command hook to the rear of the canvas using hot glue. With minimal effort, you’ll be able to effortlessly suspend your organizer on the wall, effortlessly showcasing its contents.
Can I Make This Without a Sewing Machine?
While it’s possible to sew this project entirely by hand, a word of caution: using hot glue might be a more practical approach when it comes to securing the twill tape. The combination of the cardboard sheet and the tape can make it challenging to hand-sew, so consider applying a small amount of hot glue to hold everything in place.
Where Can I Place It?
If you’re lucky enough to have a craft desk or work table situated against a wall, setting this organizer up will be a breeze. Its versatility doesn’t stop there – it can also be easily mounted almost anywhere you prefer. One spot worth considering is where you typically deposit your mail upon returning home. It’s a habit that can be challenging to change. To capitalize on this opportunity, why not hang the organizer next to your usual mailbox spot?
This way, you’ll naturally develop the habit of placing your mail there instead, streamlining your workflow in the process.
Other Organizers You Can Make
Transform your space with creativity and simplicity by tackling DIY organizing projects. From clever uses of paper to magnetic marvels, the following ideas will have you whipping up functional solutions in no time. Start by giving your jewelry a stylish home with a DIY earring organizer or craft a pencil holder that’s both eco-friendly and efficient. For those who love the kitchen, a cabinet organizer is just what you need to keep ingredients within reach.
And for office dwellers, 40 ideas await to tame that paperwork chaos. The bedroom, too, can be tamed with 20 clever organizing tips. When it comes to storage, think outside the box – or in this case, the rope basket. Add some rustic charm to your bedside caddy and never lose sleep again. And finally, get ready to hang loose with a DIY hanging organizer that’ll make you wonder how you ever managed without one. With these 47 organizing ideas, the possibilities are endless!
DIY Mail Organizer (Step-by-Step Tutorial)
Transform your workspace with a stunning DIY wall mail organizer. This fabric project is the perfect solution to declutter your office and keep your correspondence in order. With only an hour of active time and an additional 20 minutes, you can create a beautiful and functional piece that will keep your mail at bay. Perfect for those who want to add a touch of elegance to their work area.
Equipment
When it comes to crafting and DIY projects, having the right tools can make all the difference. Whether you’re a seasoned pro or just starting out, having a hot glue gun, scissors, sewing pins, and sewing machine on hand can help you tackle even the most ambitious tasks with ease. But what about when you need to focus on your project without worrying about your screen going dark? By taking a few simple precautions, you can prevent your screen from turning off and stay engaged in your work.
Materials 1x2x3x
The creative foundation for this project begins with the selection of specific materials. A 10-inch by 16-inch artistic canvas serves as the main focal point, providing a sturdy base for the design to unfold upon. In conjunction with this, a larger fabric piece measuring 14 inches by 20 inches plays a crucial role in anchoring the overall composition. To add depth and dimensionality, two cardboard pieces, each measuring 6 inches by 10 inches, are used to create visual interest.
Finally, cotton twill tape is employed as a versatile binding agent, capable of securing the various elements together while also adding a touch of rustic charm to the finished piece.
Instructions
To initiate this project, first gather all necessary supplies and lay your chosen fabric on a work surface. Fold the fabric in half, with the wrong side facing out, and secure three sides with sewing pins, leaving the mouth open. Repeat this process for the second fabric, as you’ll need two identical pockets to proceed. Next, use a sewing machine to sew each pocket separately, ensuring that the mouth remains open throughout the process.
Once complete, flip each pocket inside out, so that the right side is facing outwards. Cut a piece of cardboard to the desired size and insert it into one of the pockets, centering it to ensure equal fabric coverage on all four sides. Secure the cardboard in place using twill tape, which should be pinned across the pocket with the cardboard aligned at its center. Repeat this process for the second pocket.
Following this, attach twill tape to your base fabric and lay it out flat on a table, ensuring that the taped side is facing downwards. Position a canvas board over the base fabric, centering it accurately. Apply hot glue to all four sides of the frame, carefully pulling the fabric over and pressing it down to cover the structure fully. When folding in the corners, use additional glue to tuck the fabric securely in place.
Once complete, flip your canvas over and arrange the pockets on top, with the larger pocket positioned at the bottom. This will create an overlap effect, with the larger pocket extending above the smaller top pocket. To secure the pockets in place, heat up a hot glue gun and fold the bottom and sides of each pocket approximately one inch before adhering them to the canvas. Ensure that all sides are glued securely. Repeat this process for the second pocket.
Your DIY mail organizer is now ready for use once the glue has fully dried.