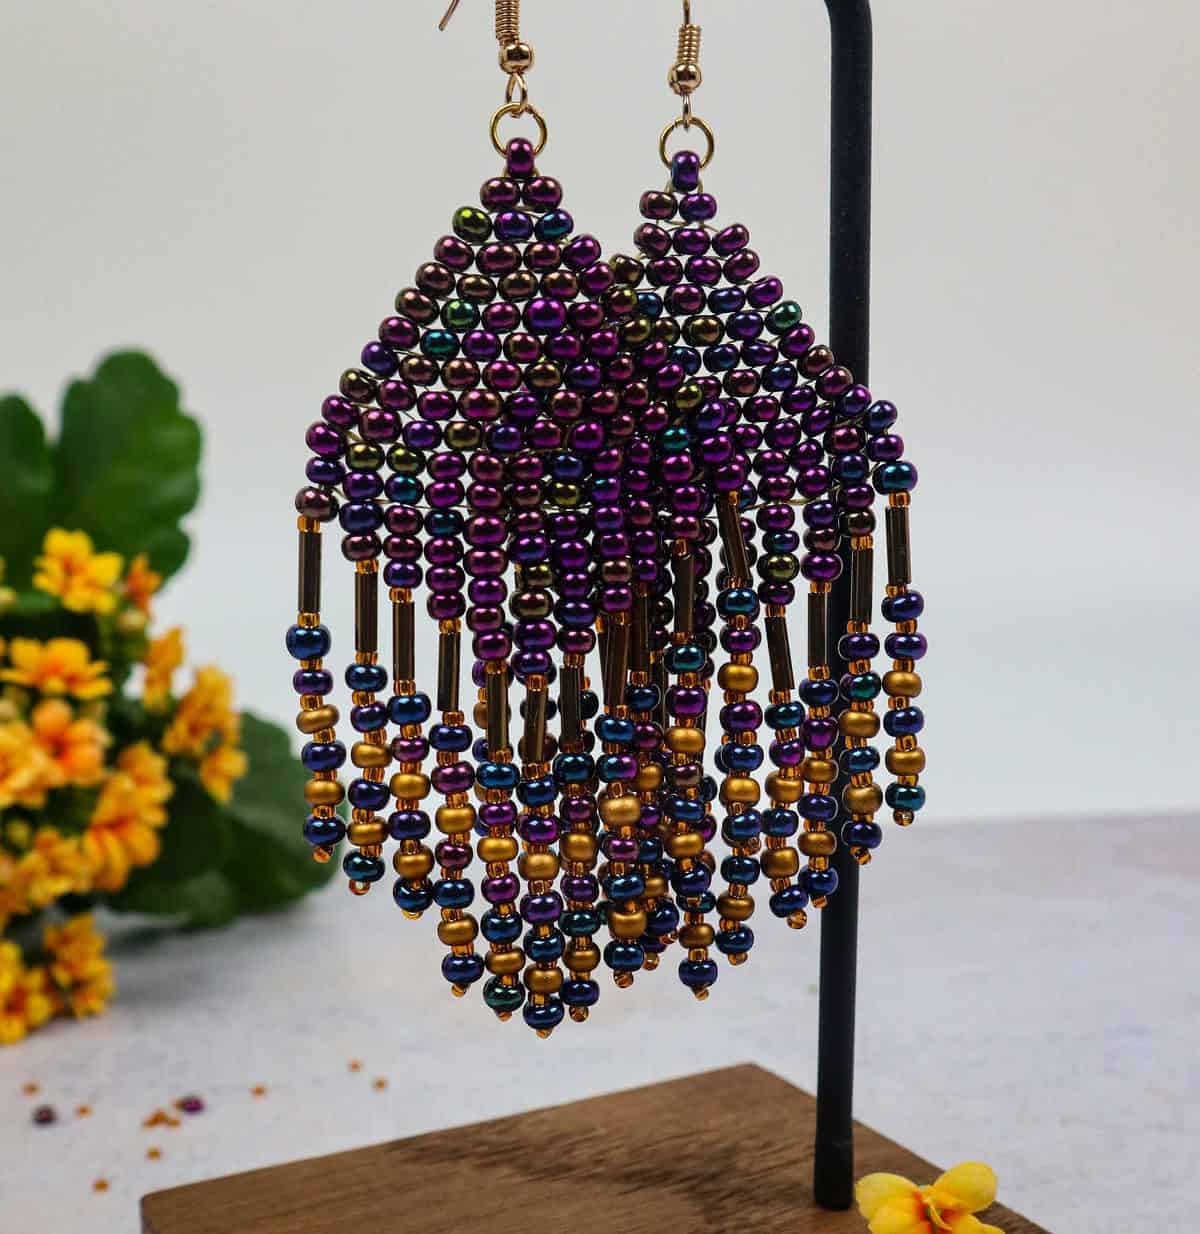
Whether you’re a crafty person or looking to add a personal touch to your gift-giving, these beaded earrings are the perfect project. The best part? They’re surprisingly easy to make and require minimal investment. To get started, simply gather a few different-sized beads and let’s dive into the process.
The key to success is taking your time and being organized.
It may take some practice to get the hang of it, but once you’ve mastered the basics, you’ll be building off that foundation in no time. And if you do happen to run into any issues along the way, don’t worry – I have a tutorial on my YouTube page that can help guide you through the process.
One of the best things about this project is its accessibility. Whether you’re a bold beginner or just looking for a fun activity to do with friends, these earrings are suitable for anyone.
So why not give it a try? You might be surprised at how quickly and easily you can create your own unique piece of jewelry.
Supplies You’ll Need
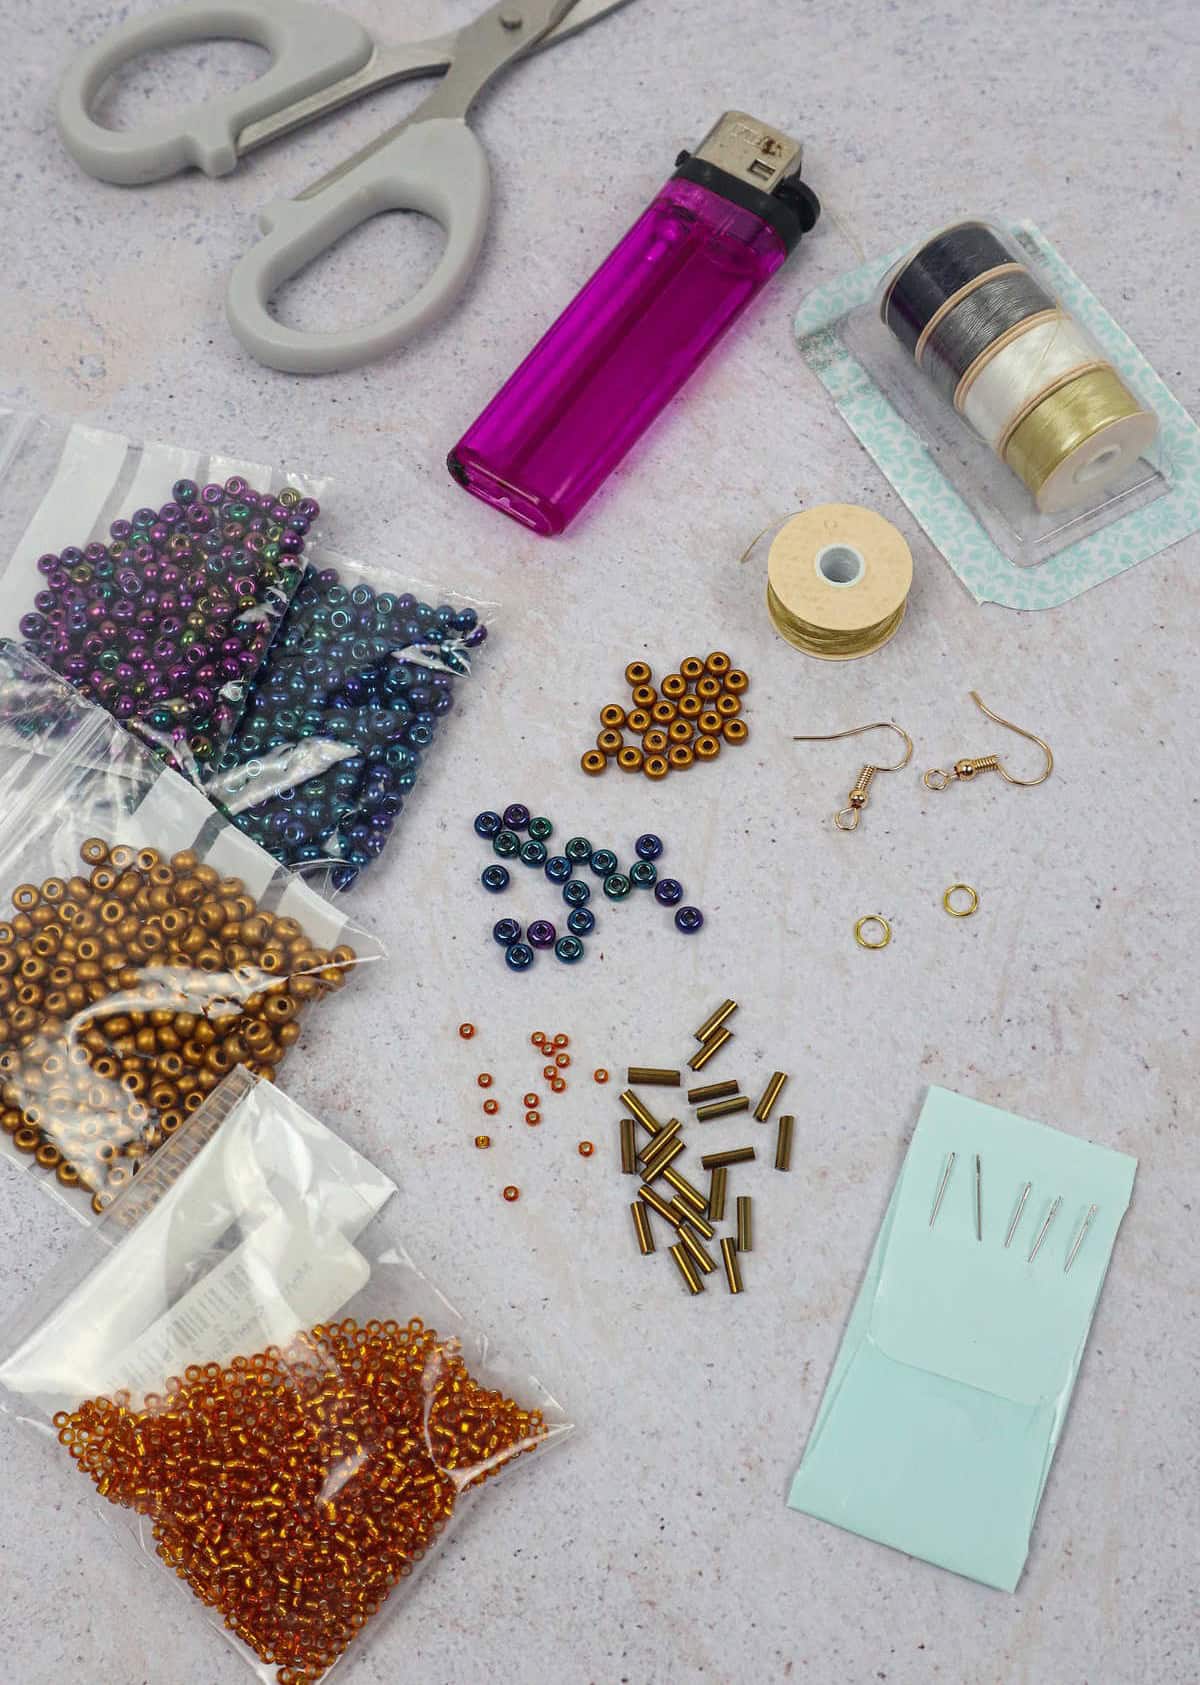
When it comes to crafting your jewelry piece, having the right materials is crucial. A selection of quality supplies will ensure that your project turns out as envisioned. Here’s a rundown of some essential components you’ll need to get started: seed beads in sizes 6 and 11, which can be substituted with smaller options like size 10 or 12 beads if needed. Additionally, consider adding bugle beads for added texture and visual interest.
For stringing your beads together, nylon beading thread will suffice. A Size 12 beading needle is also necessary for efficiently threading the beads. Finally, don’t forget the finishing touches: two earring hooks, two jump rings, a pair of scissors, and a lighter for any necessary flame-working or shaping.
How to Make Beaded Earrings

Take a moment to collect yourself, gathering all necessary materials and designating a suitable workspace that fosters creativity. It’s essential to savor the experience – for me, there’s no greater joy than setting aside time to craft something like jewelry, allowing myself to fully immerse in the process. With our tips now out of the way, let’s dive into the tutorial at hand.
Step 1
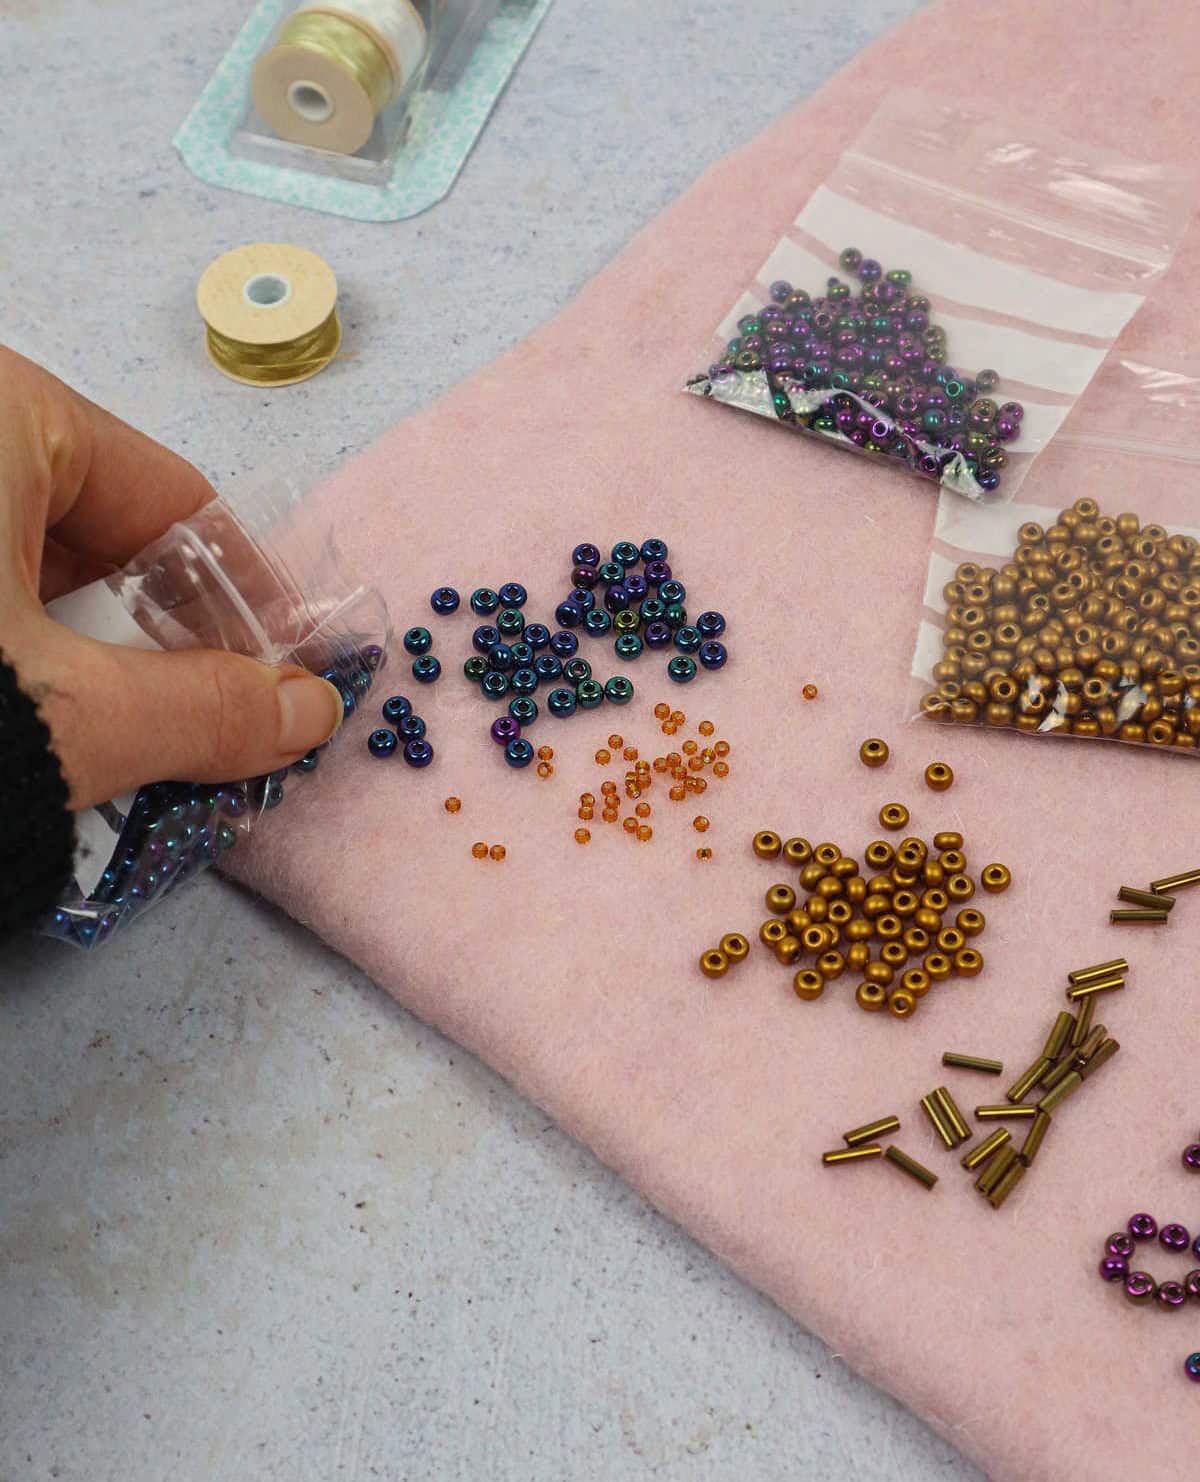
When commencing this project, it’s essential to establish a dedicated workspace for your materials. By doing so, you’ll eliminate the risk of loose threads or stray yarns getting tangled elsewhere. I’ve found that using a textured fabric serves as an effective anchor for my supplies, ensuring everything remains in its place. This approach also allows me to visualize the entire project layout, making it easier to plan and execute subsequent steps.
Step 2
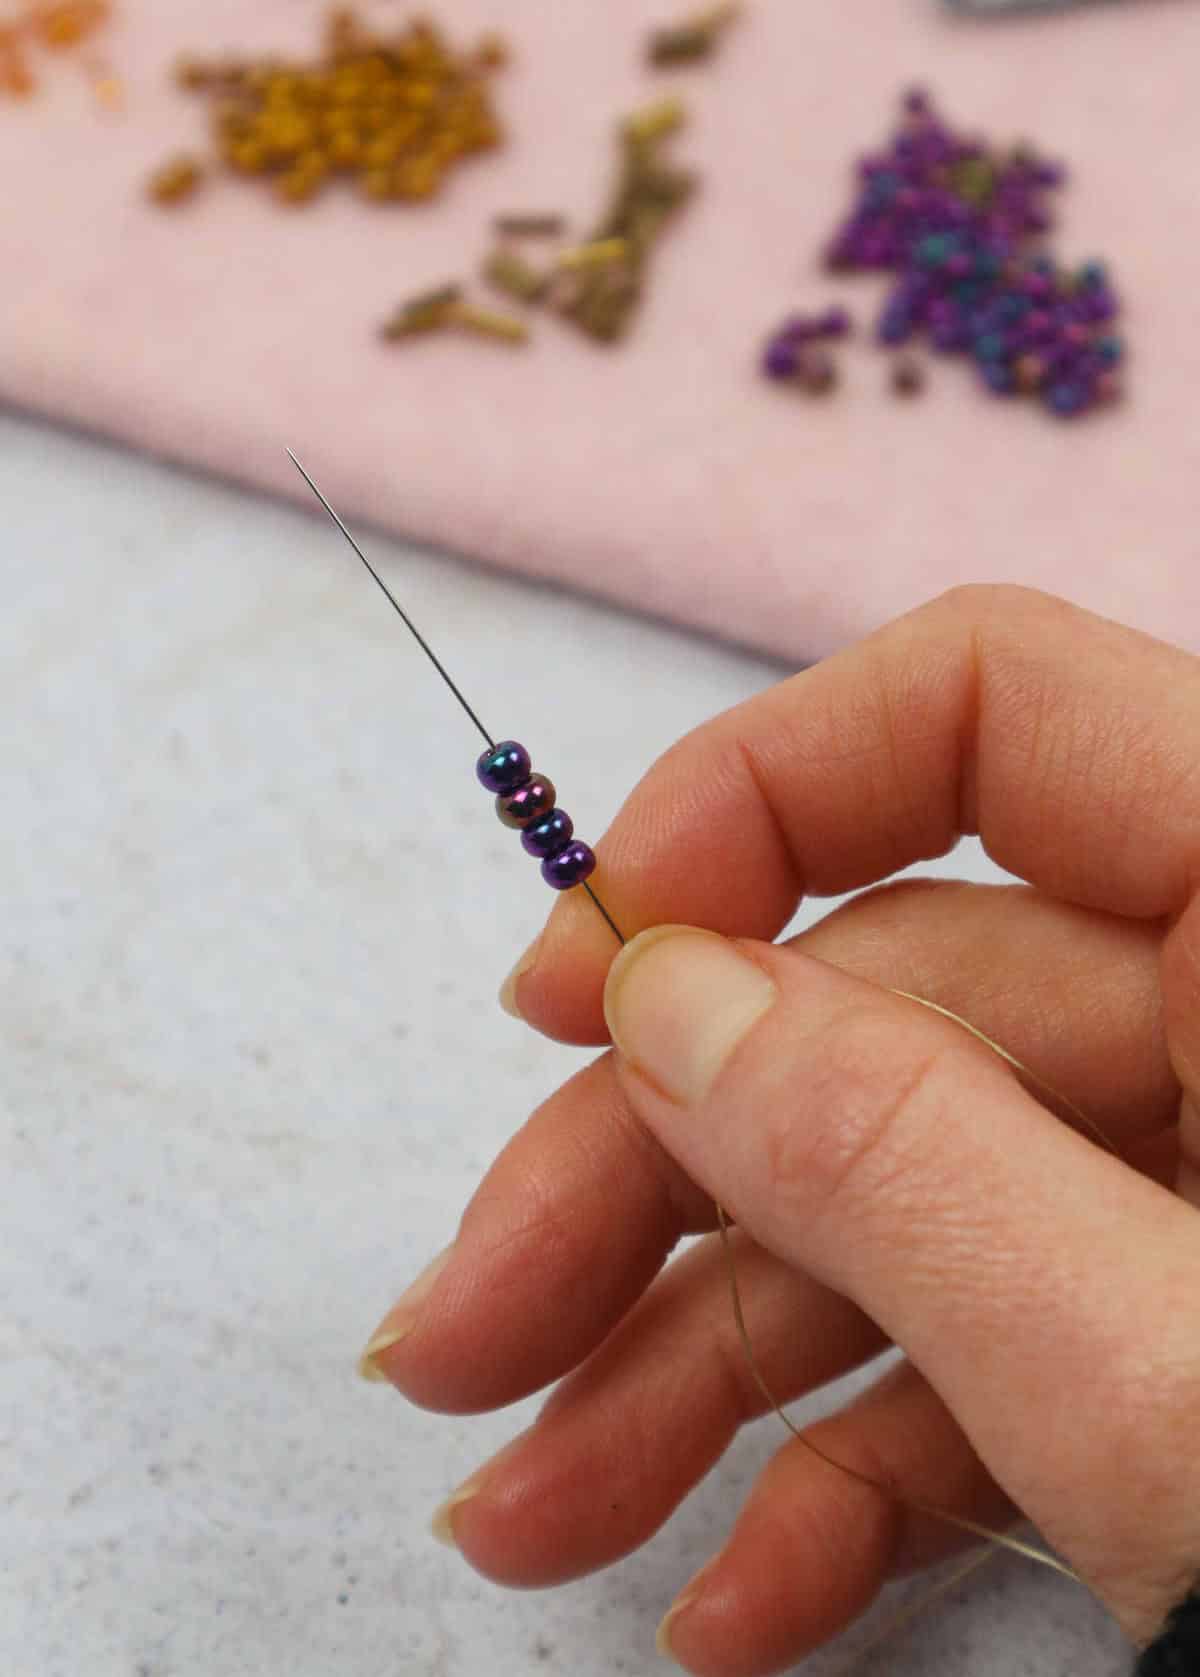
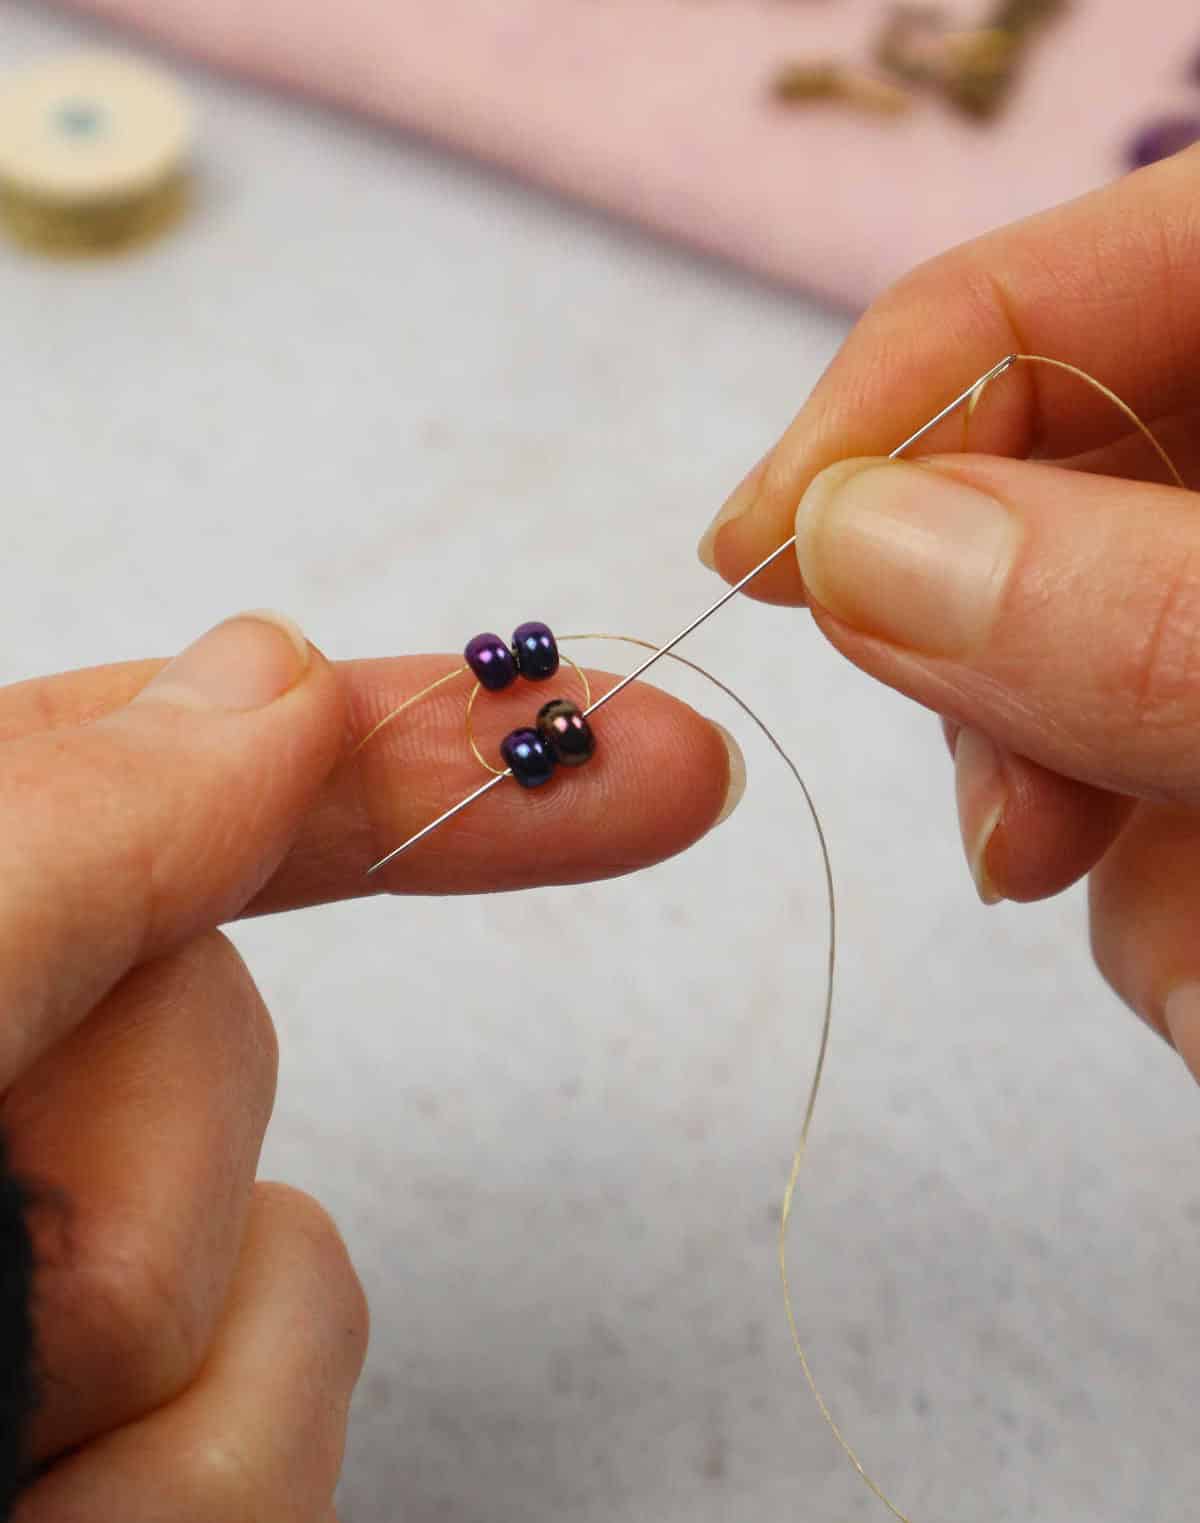
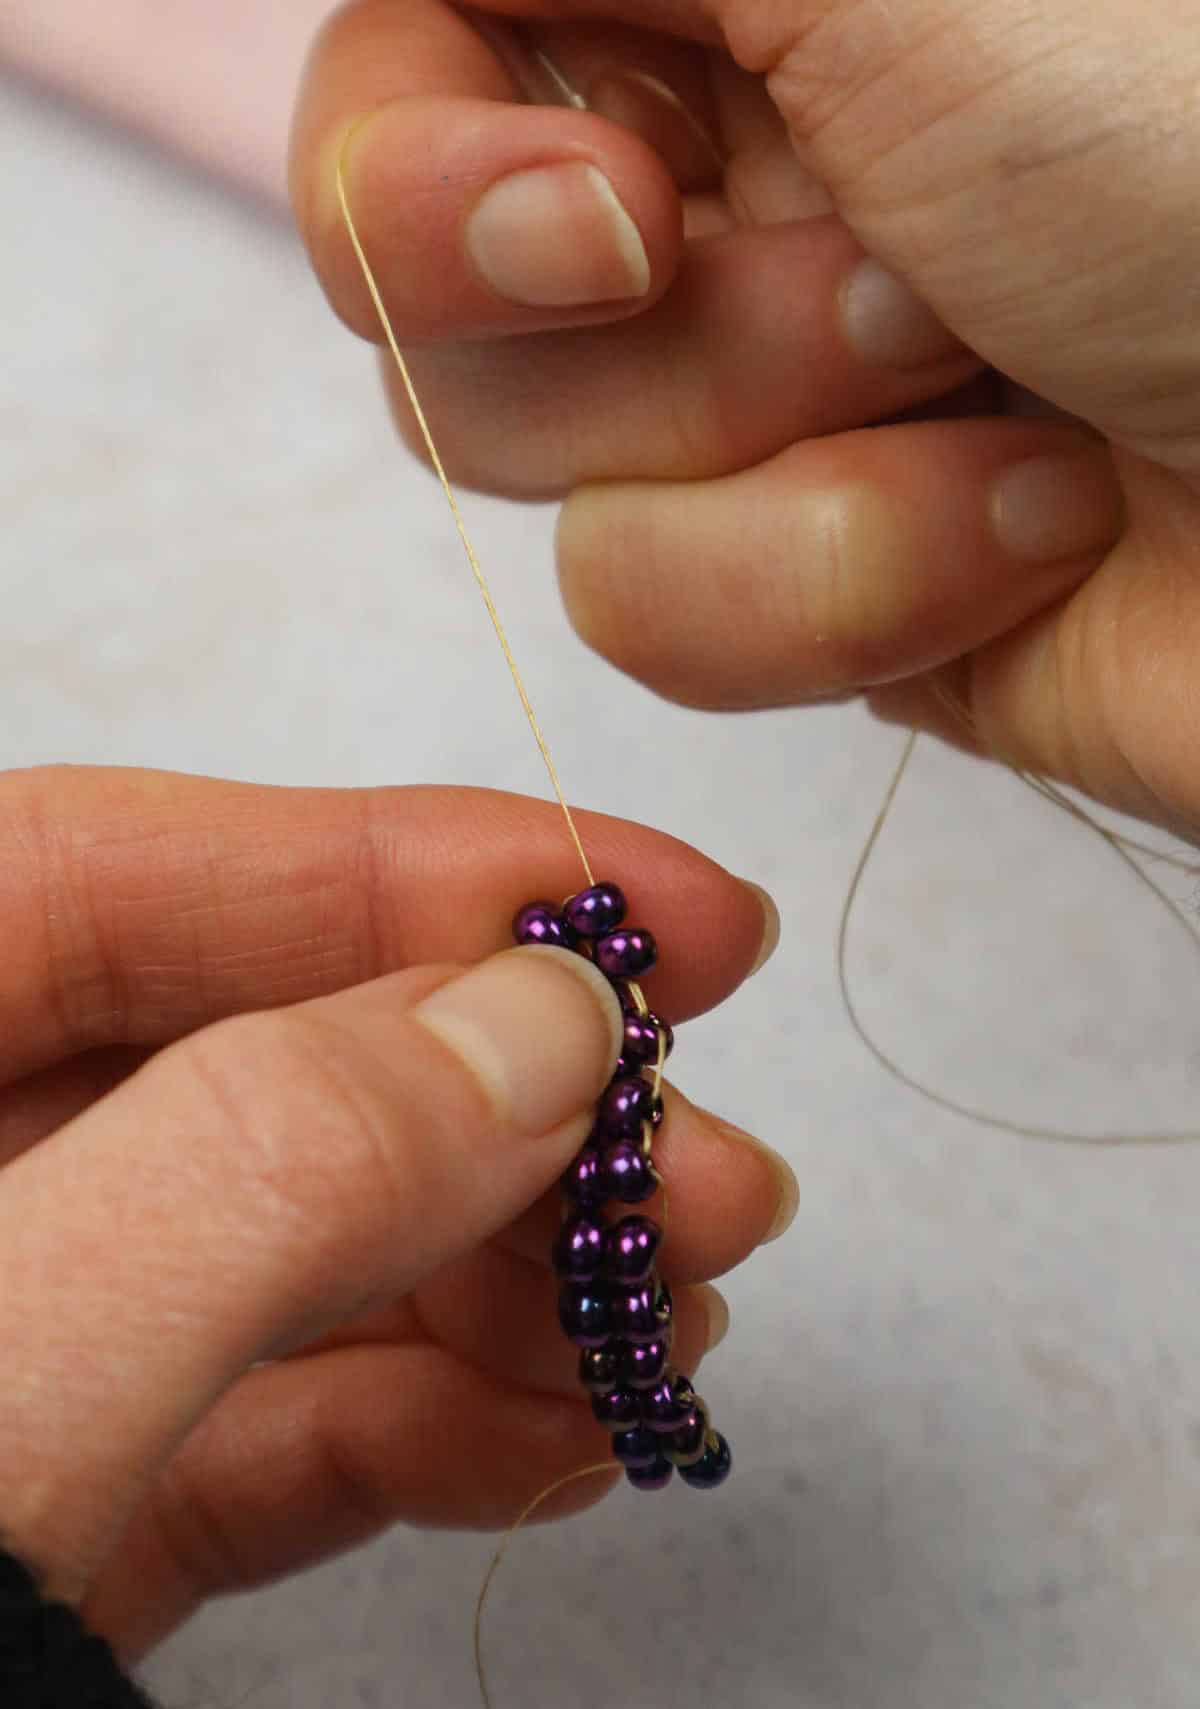
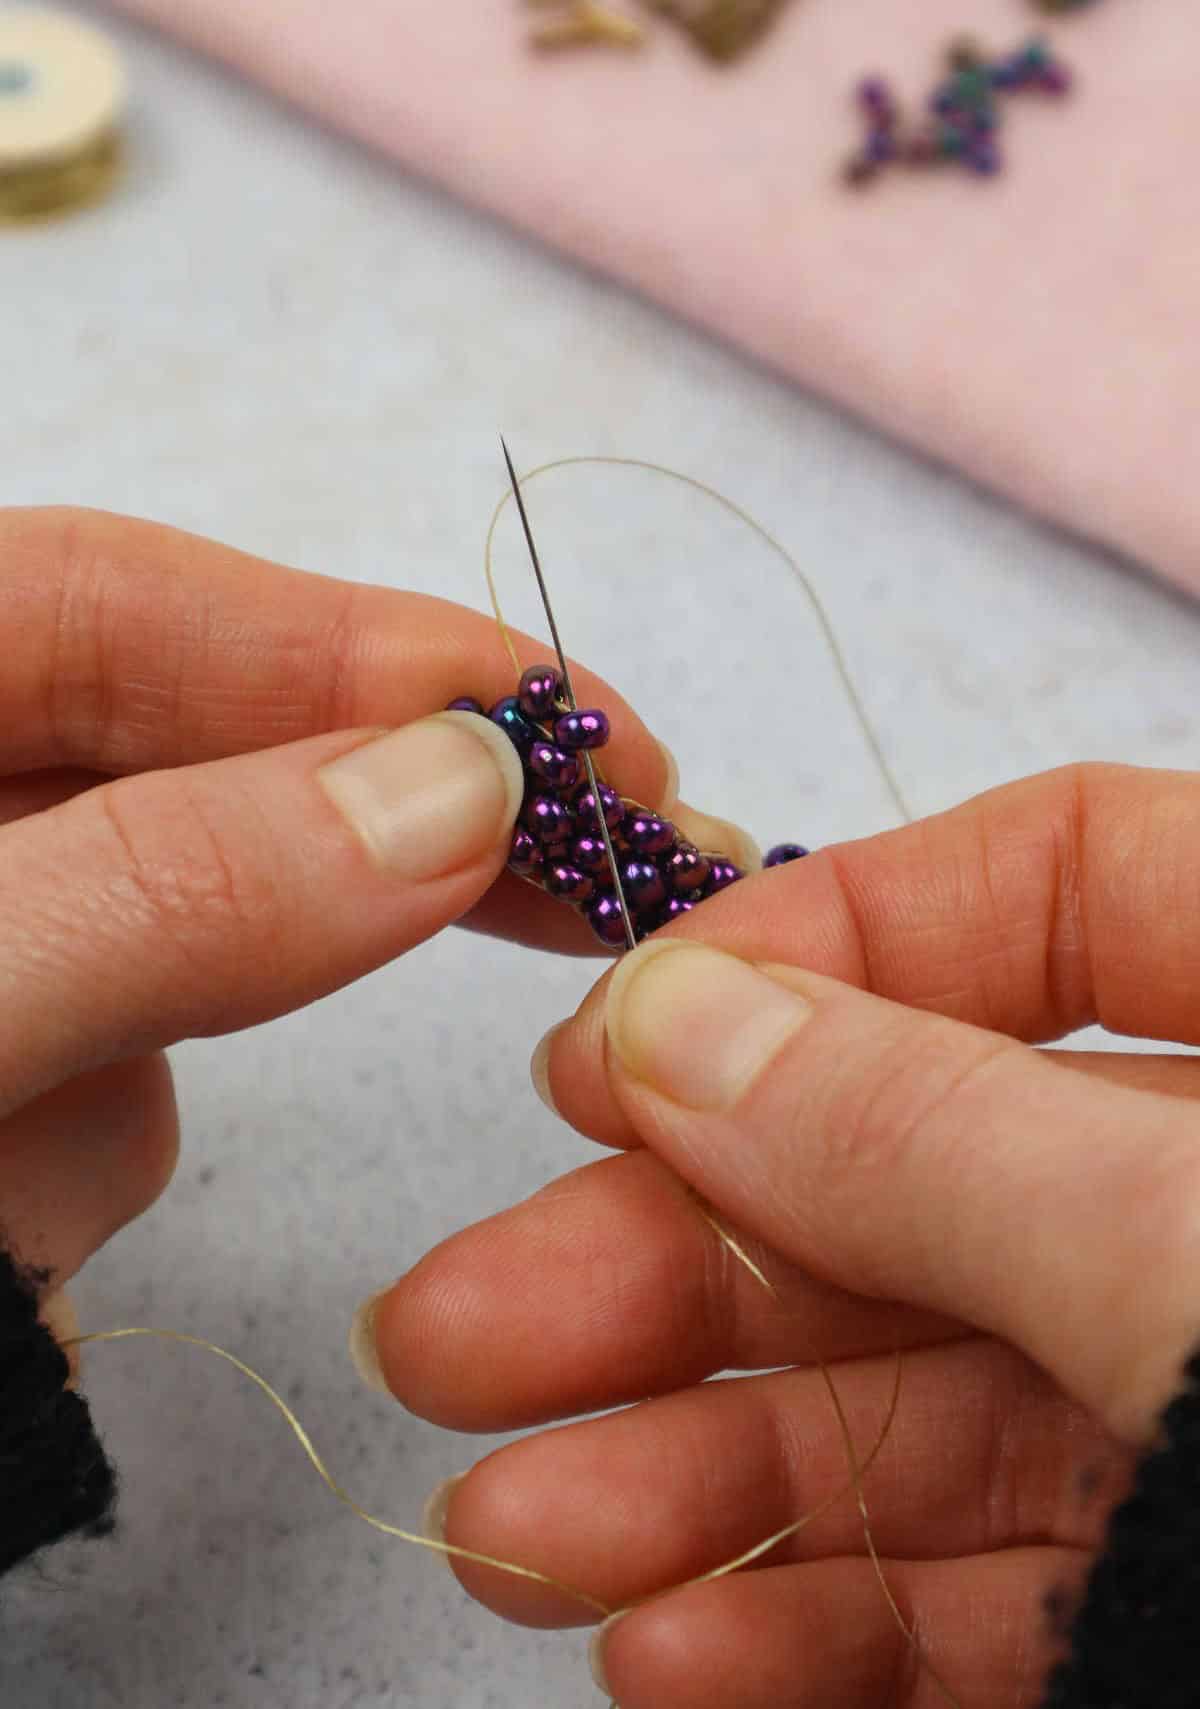
To begin, we’ll start by cutting a length of thread and threading it onto our needle. Next, we’ll add four beads to the thread, spacing them out evenly along its length. Once the beads are in place, find a comfortable spot on the line where you can easily manipulate them and work without restriction.
Step 3
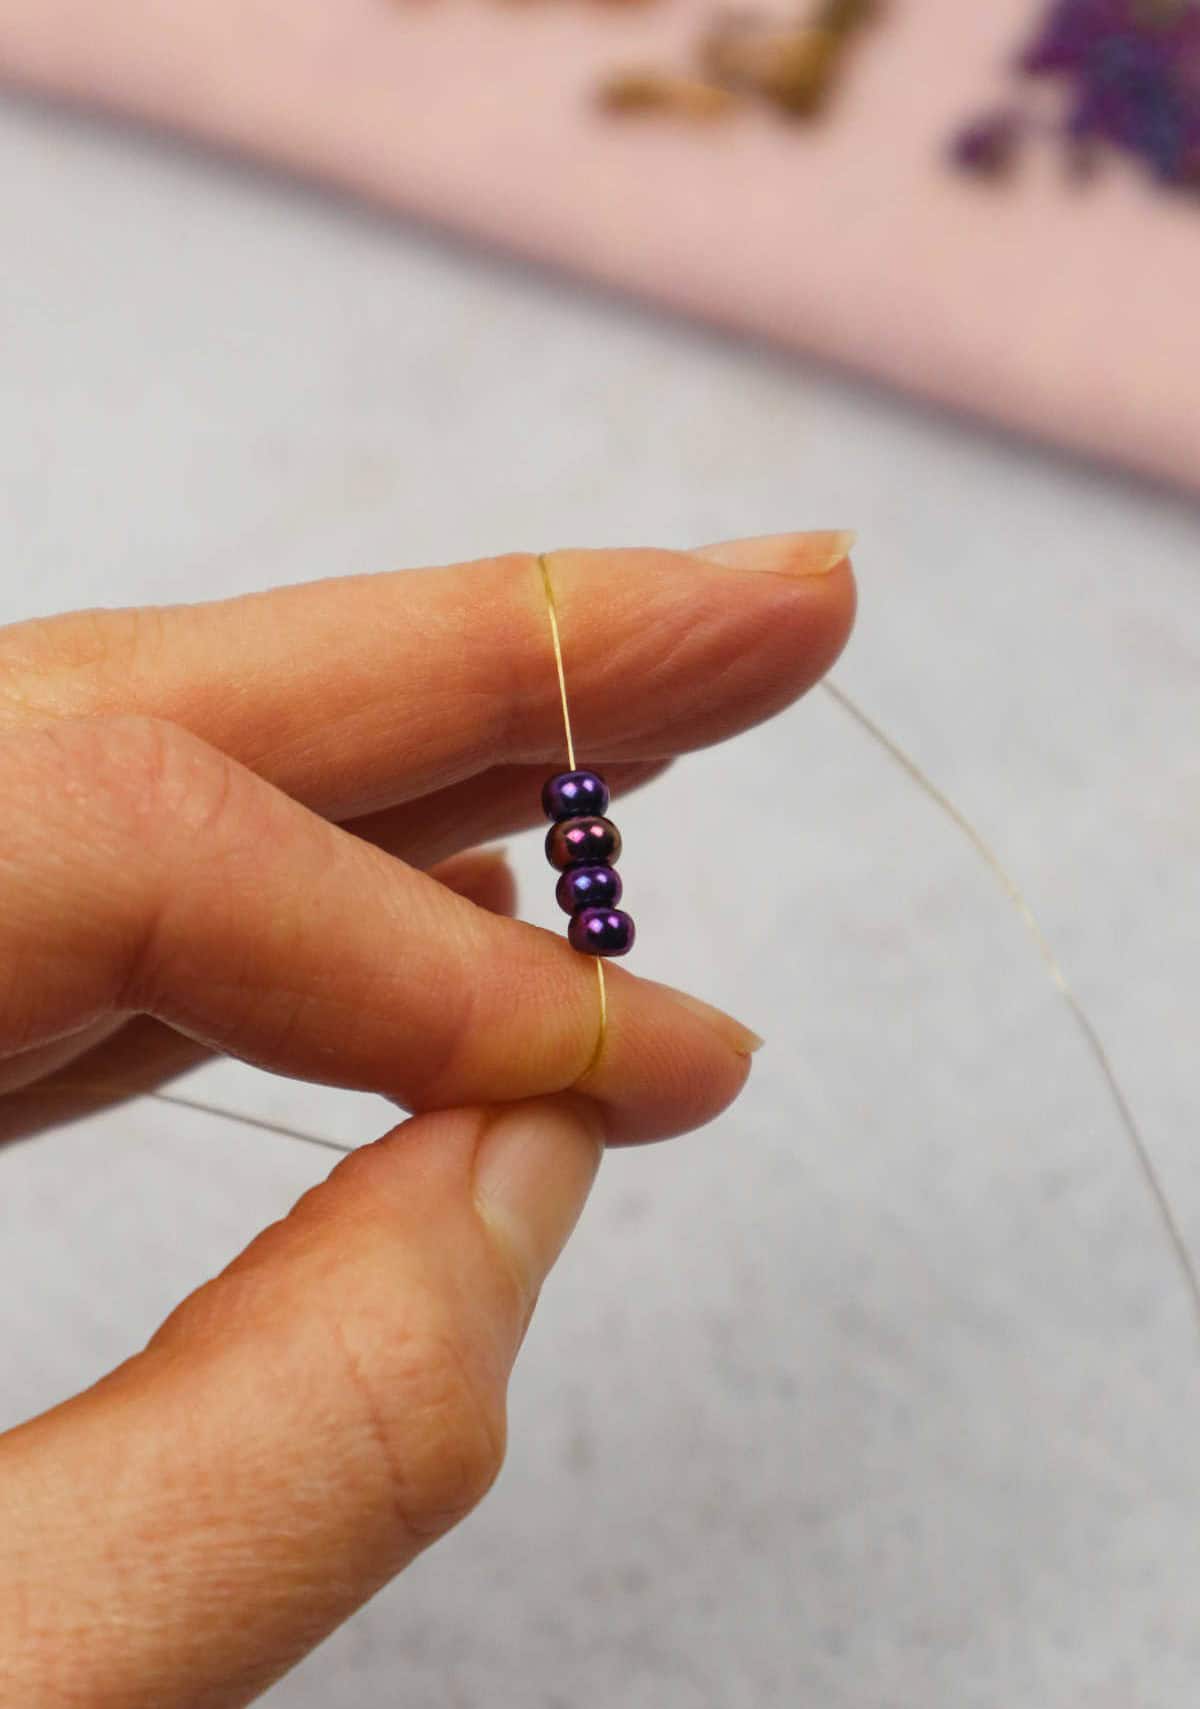
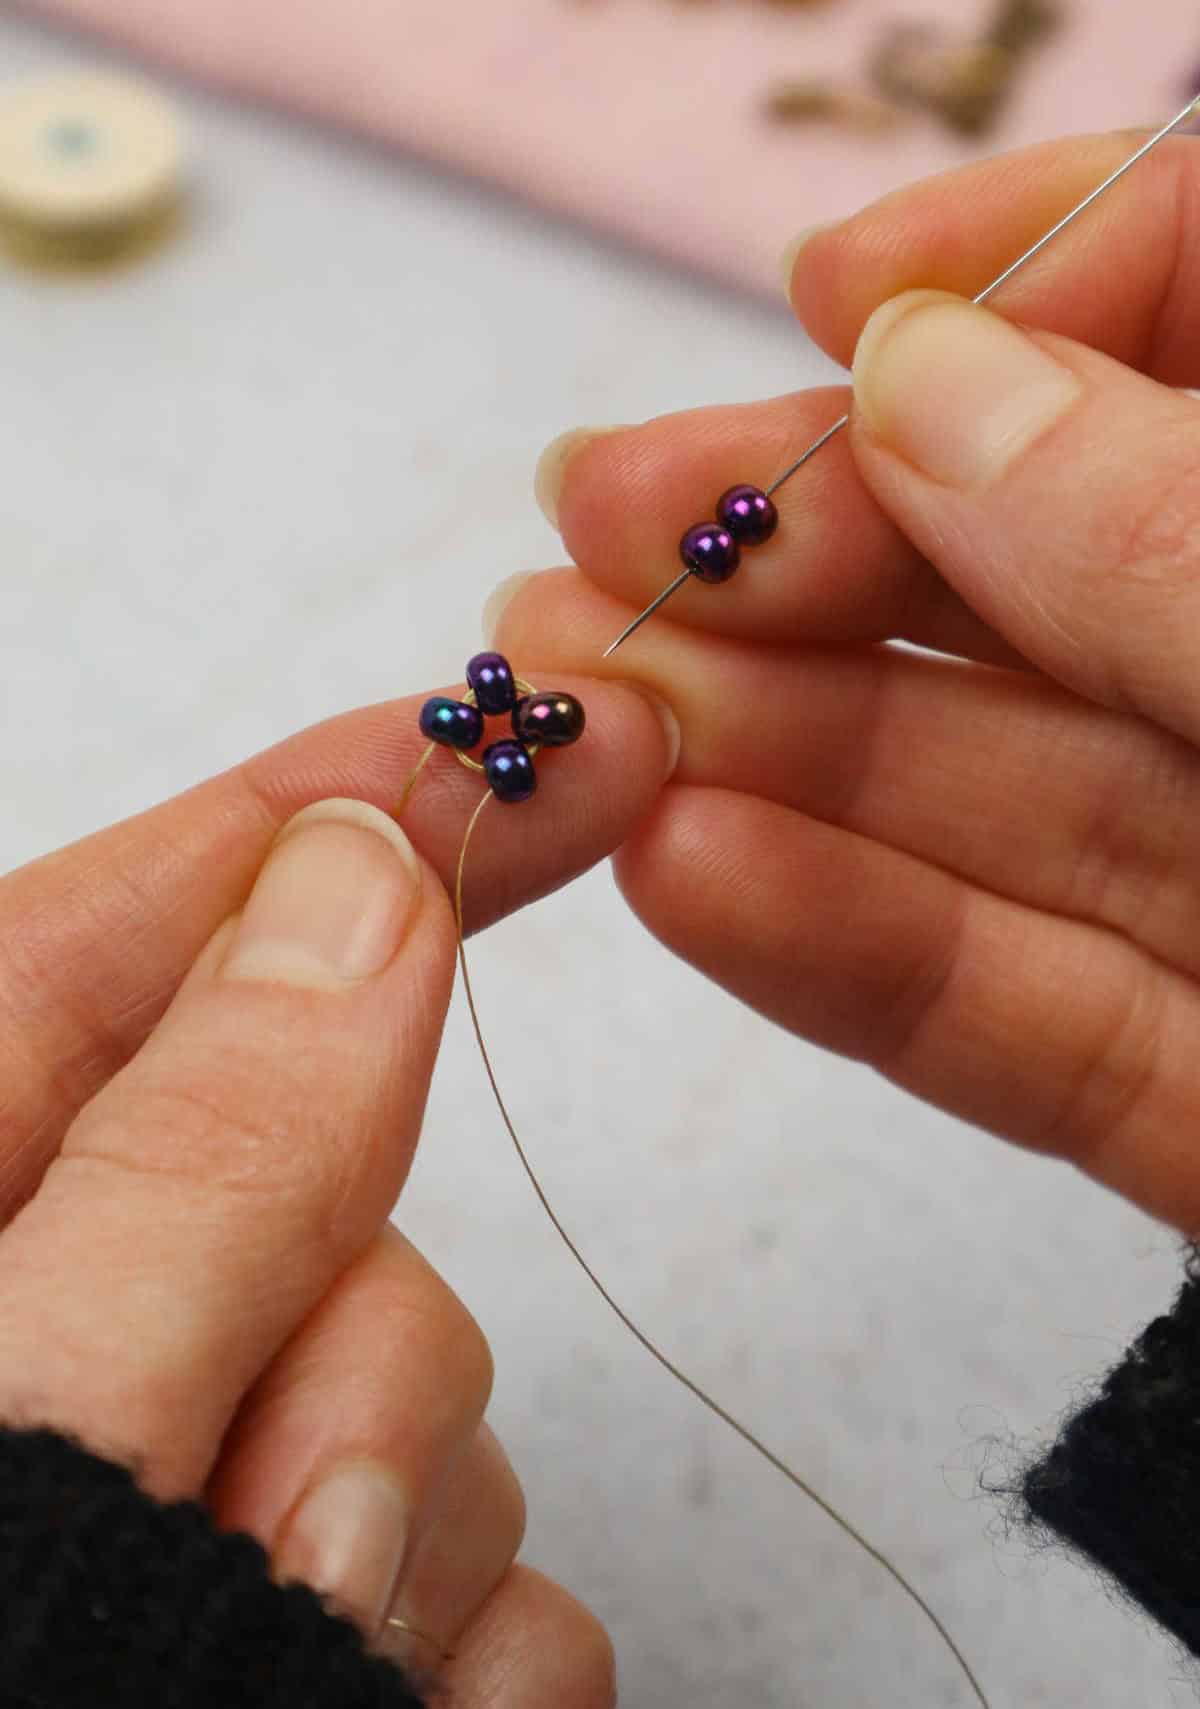
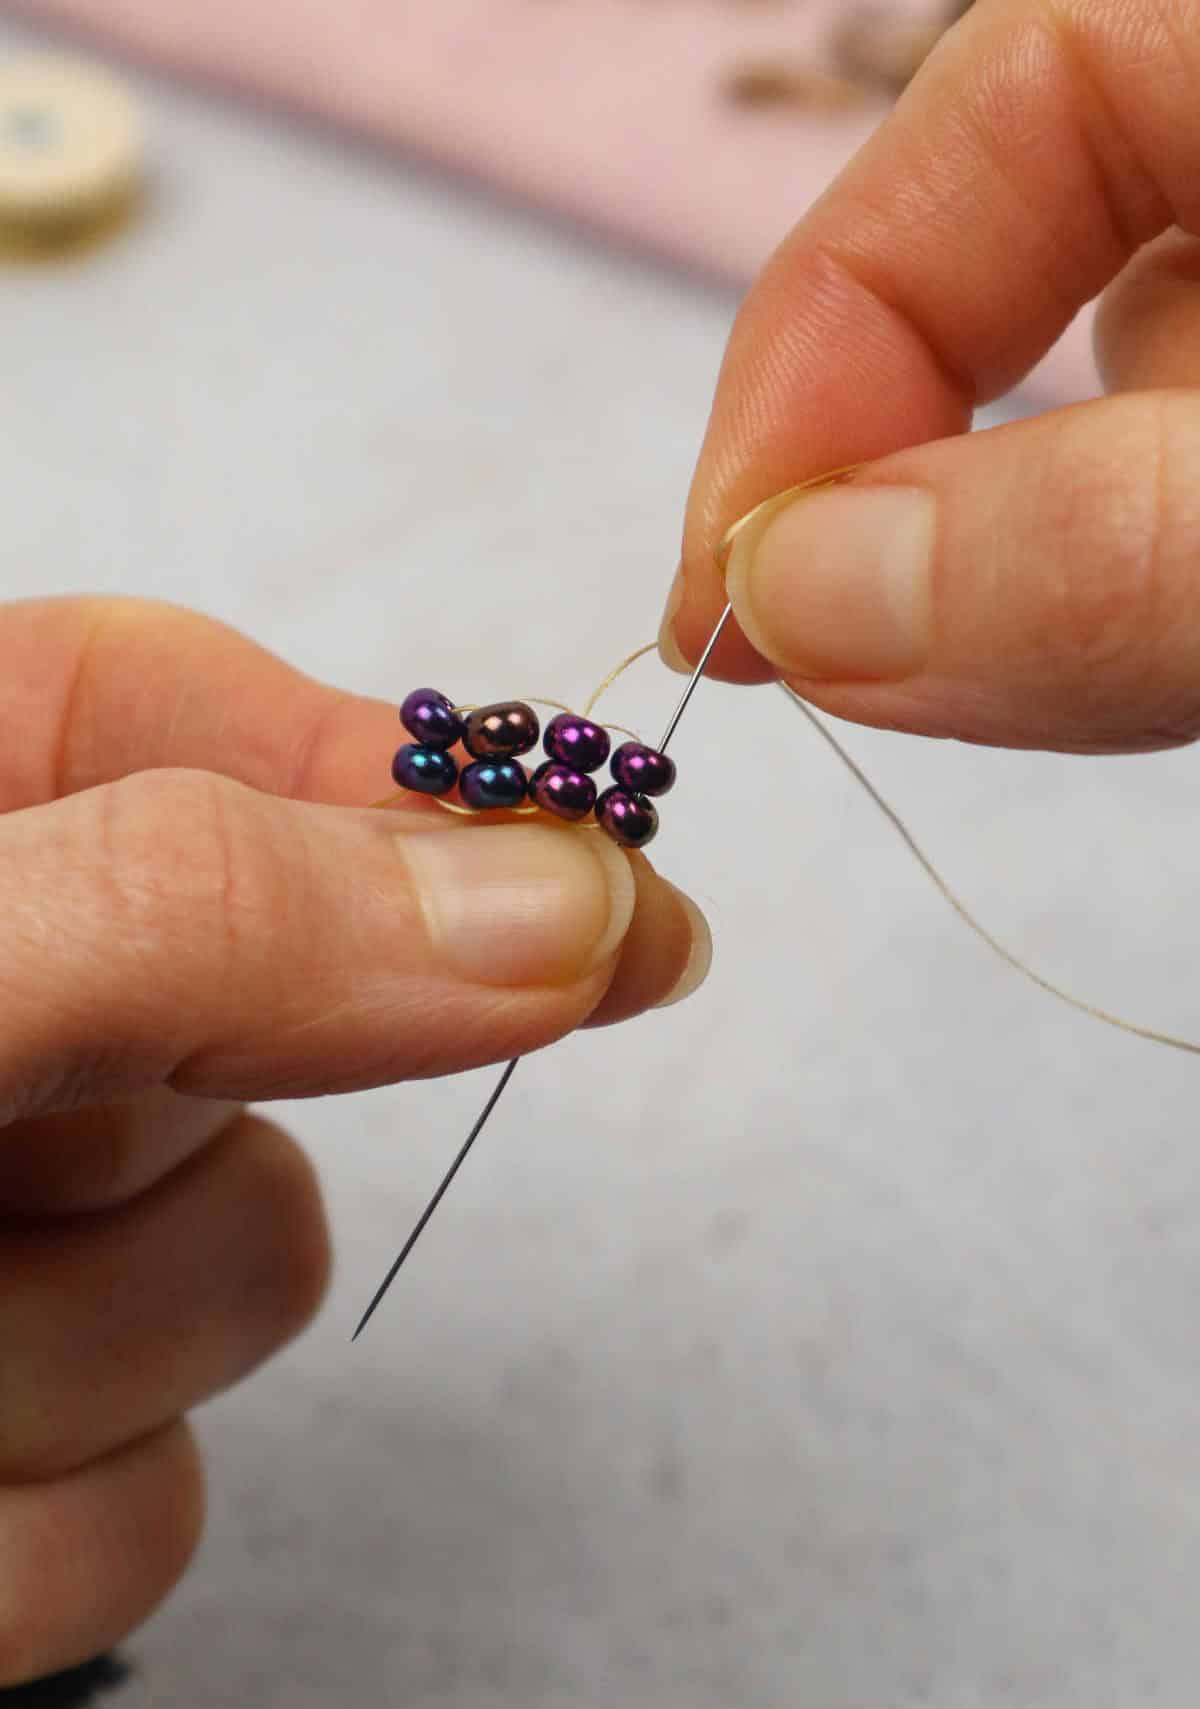
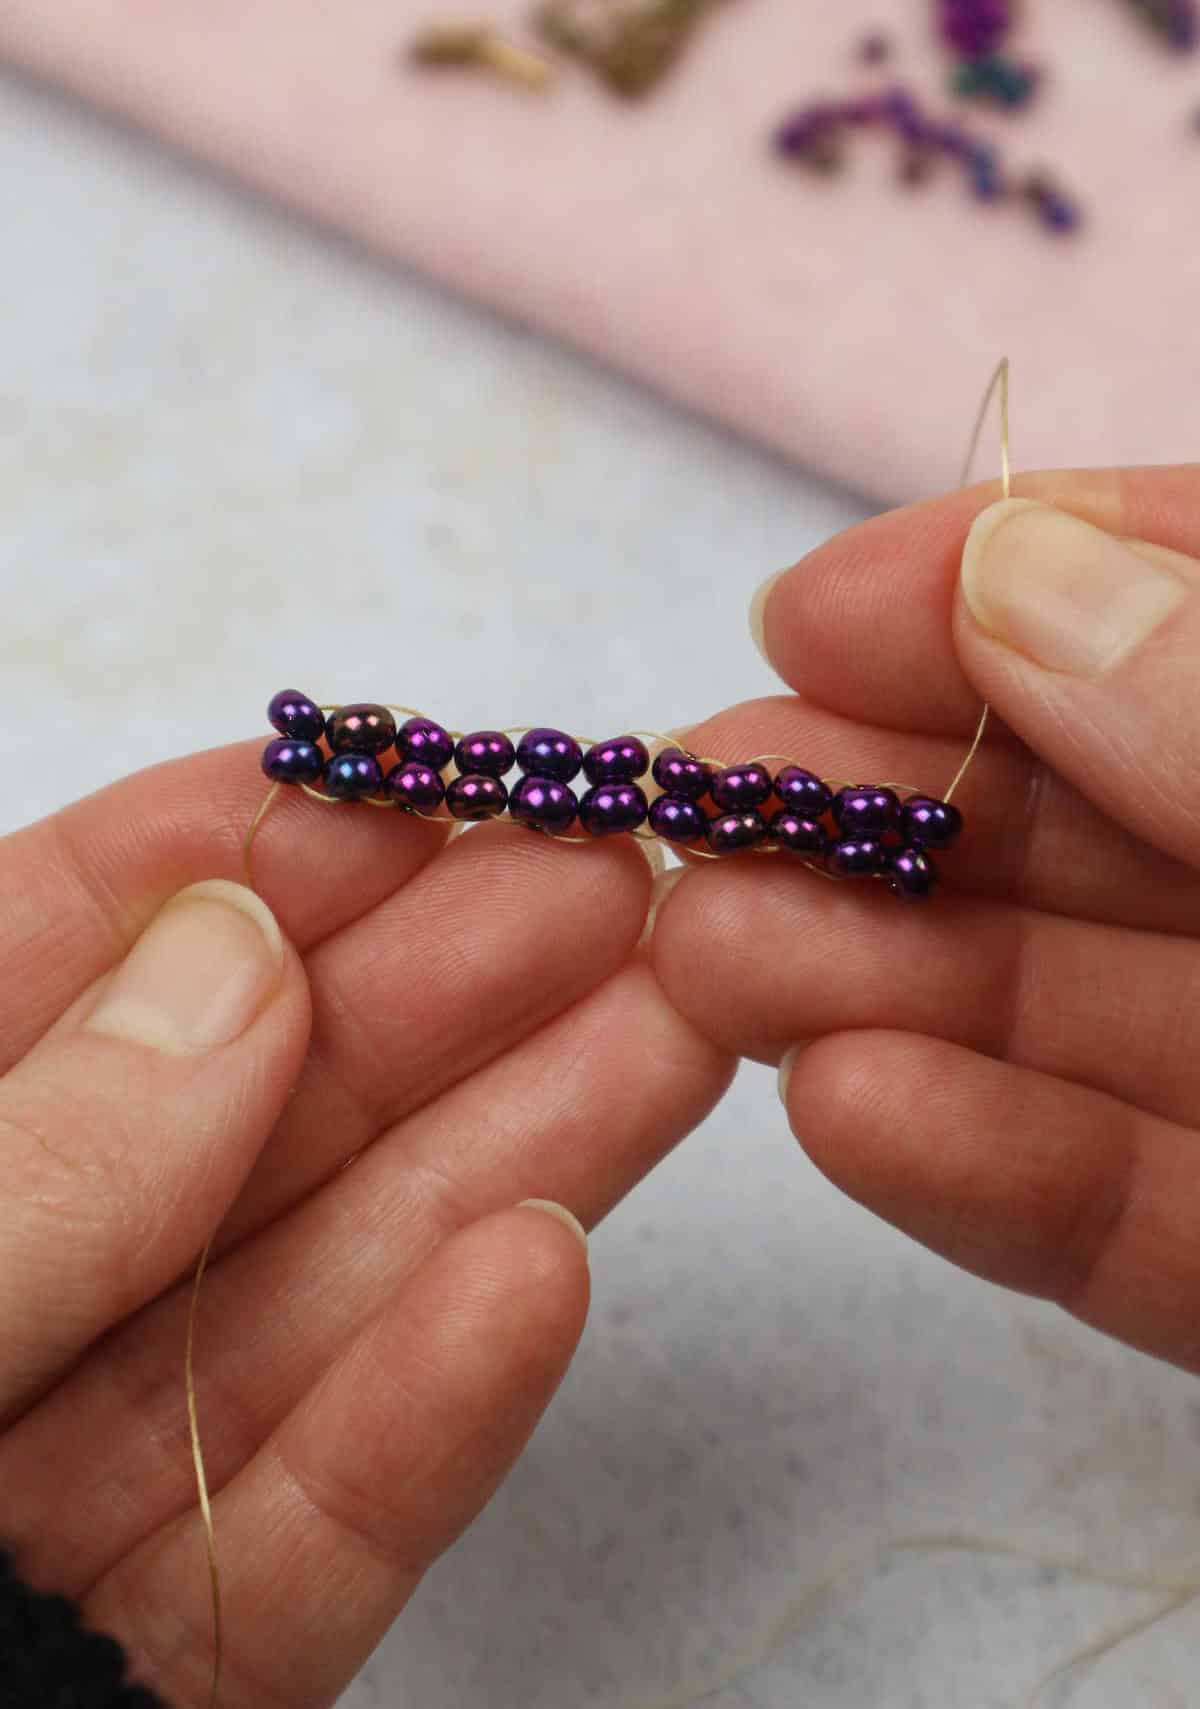
When wrapping up your beadwork project, it’s essential to maintain at least five to six inches of tail to ensure flexibility and ease of completion. To achieve this, prepare to sew back through the bottom two beads as you work on the current stage.
As depicted below, the beads naturally form a square shape, commonly referred to as the ‘ladder stitch’ technique.
Step 4
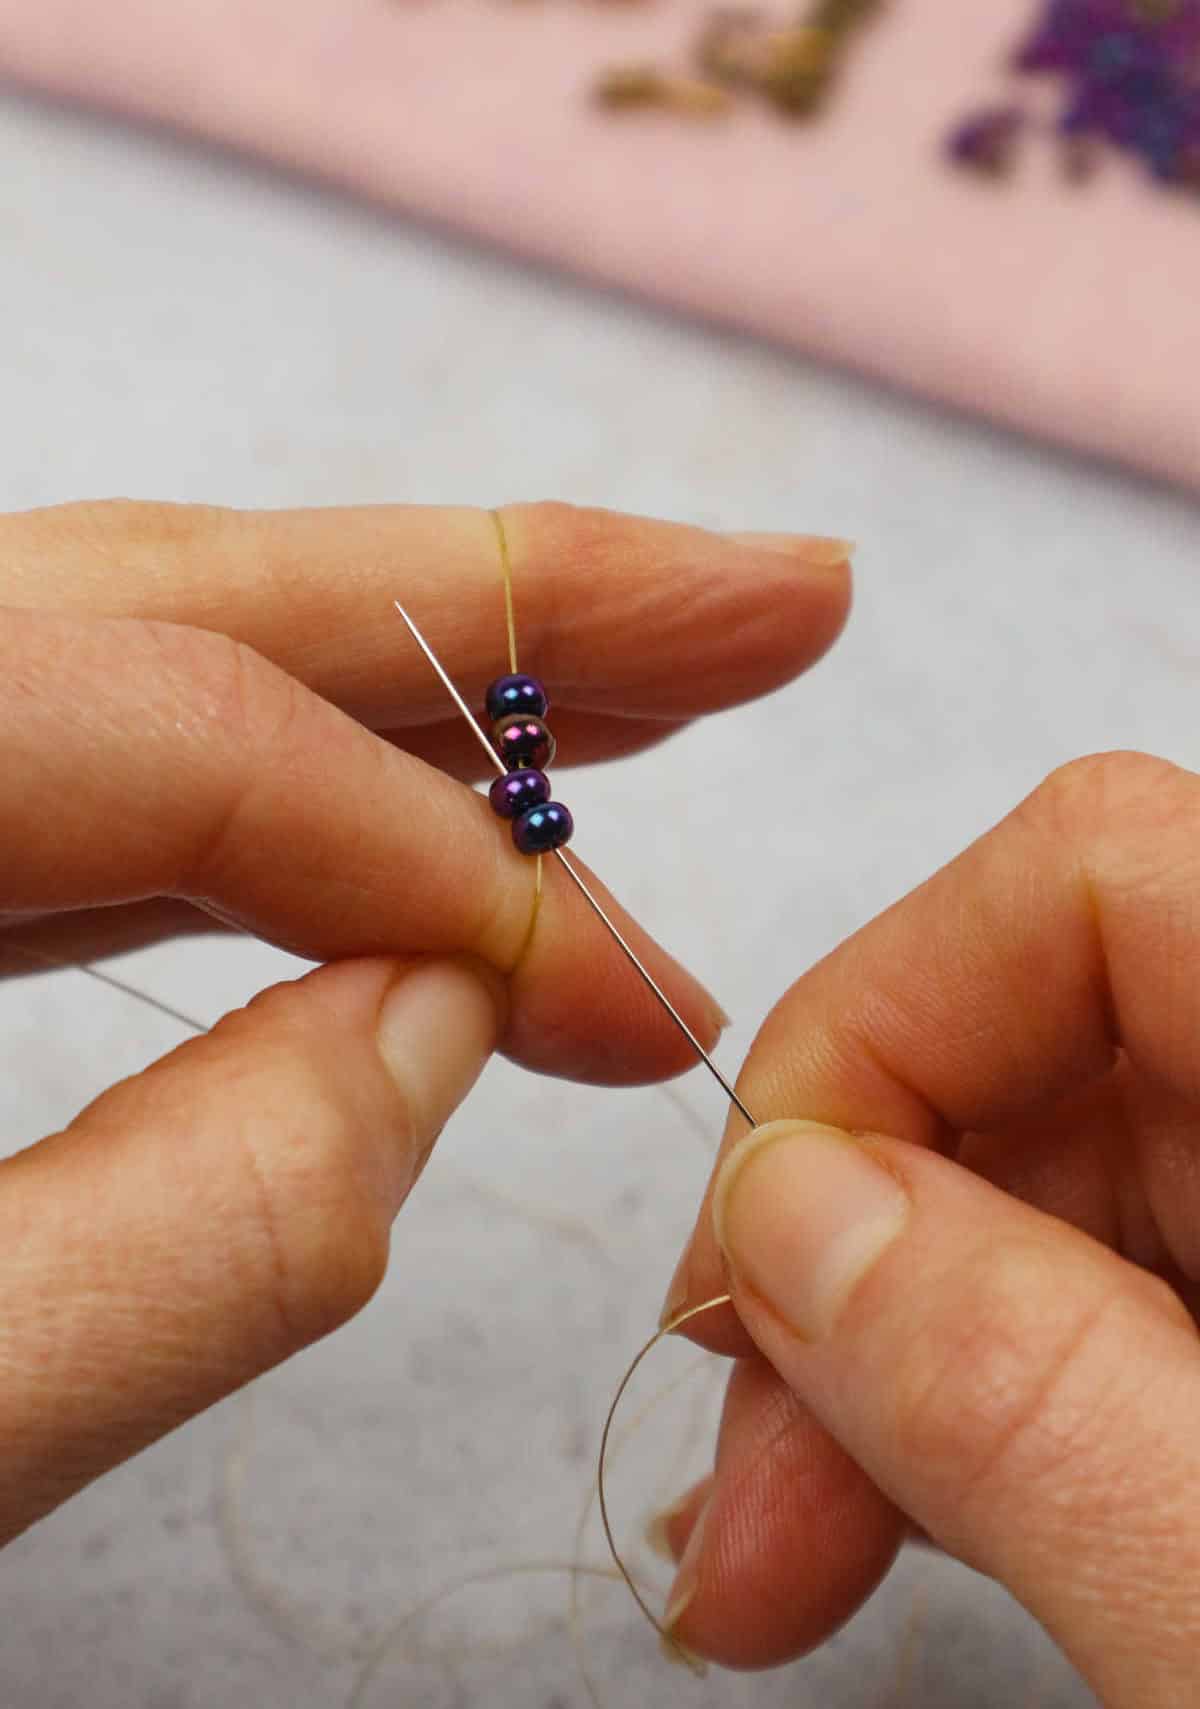
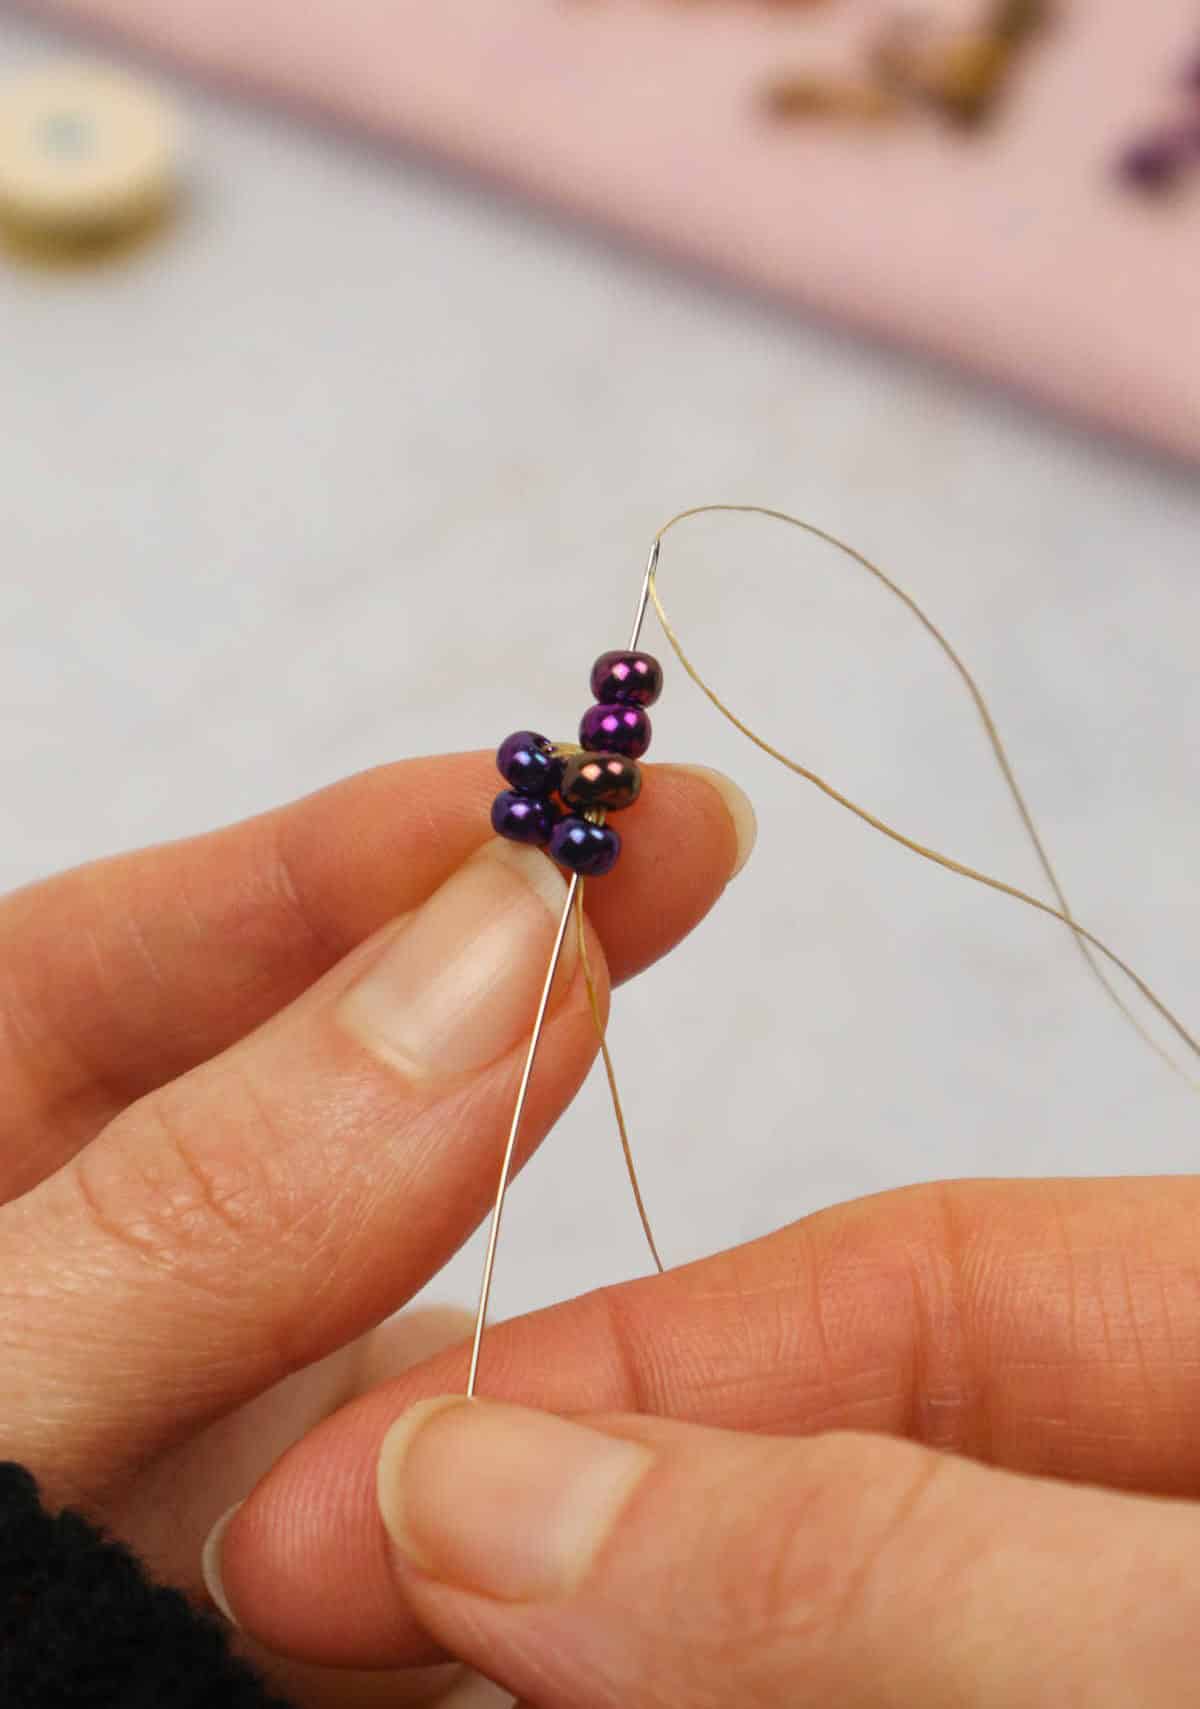
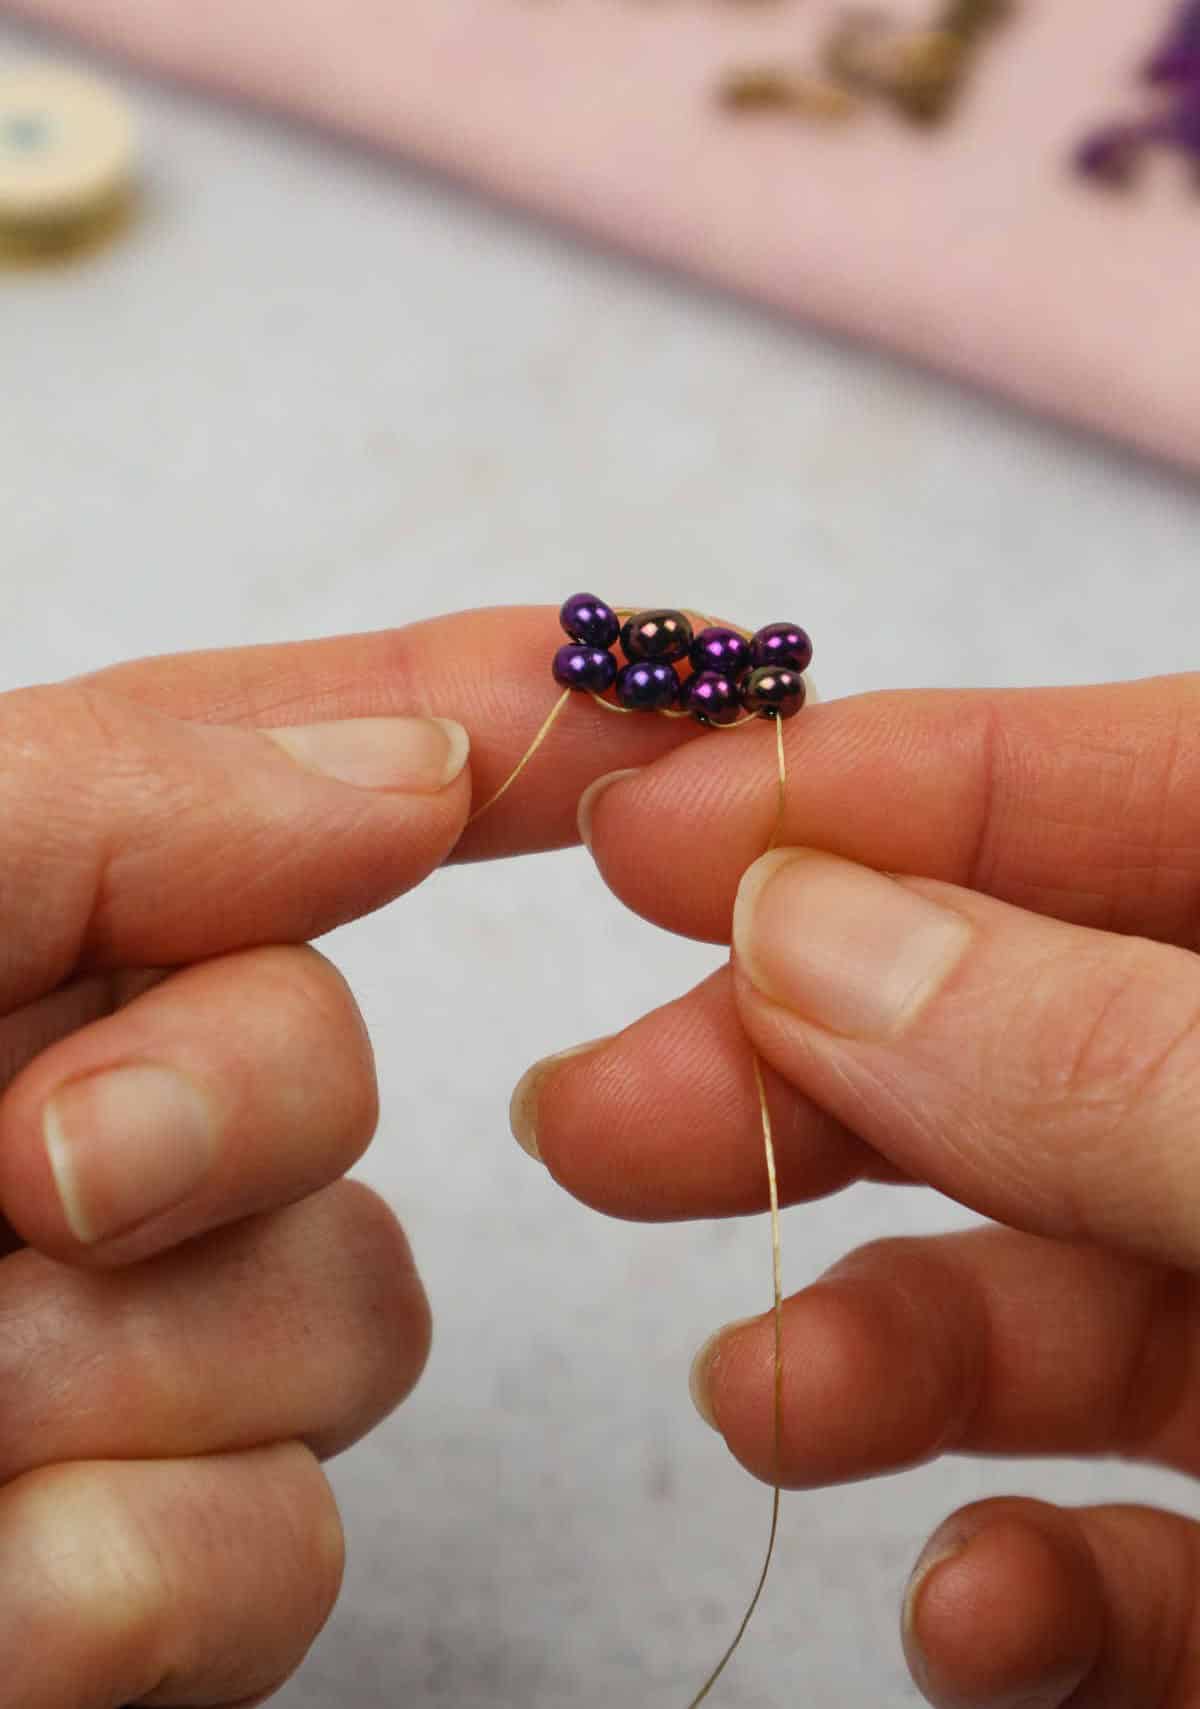
As you continue with the process, it’s essential to ensure that the two squares are perfectly aligned and parallel. Once they’re in sync, gently bring all the elements together, creating a snug fit or meeting at their respective center points. This crucial step is where the foundation of your ladder stitch begins to take shape, laying the groundwork for a strong and stable construction.
Step 5
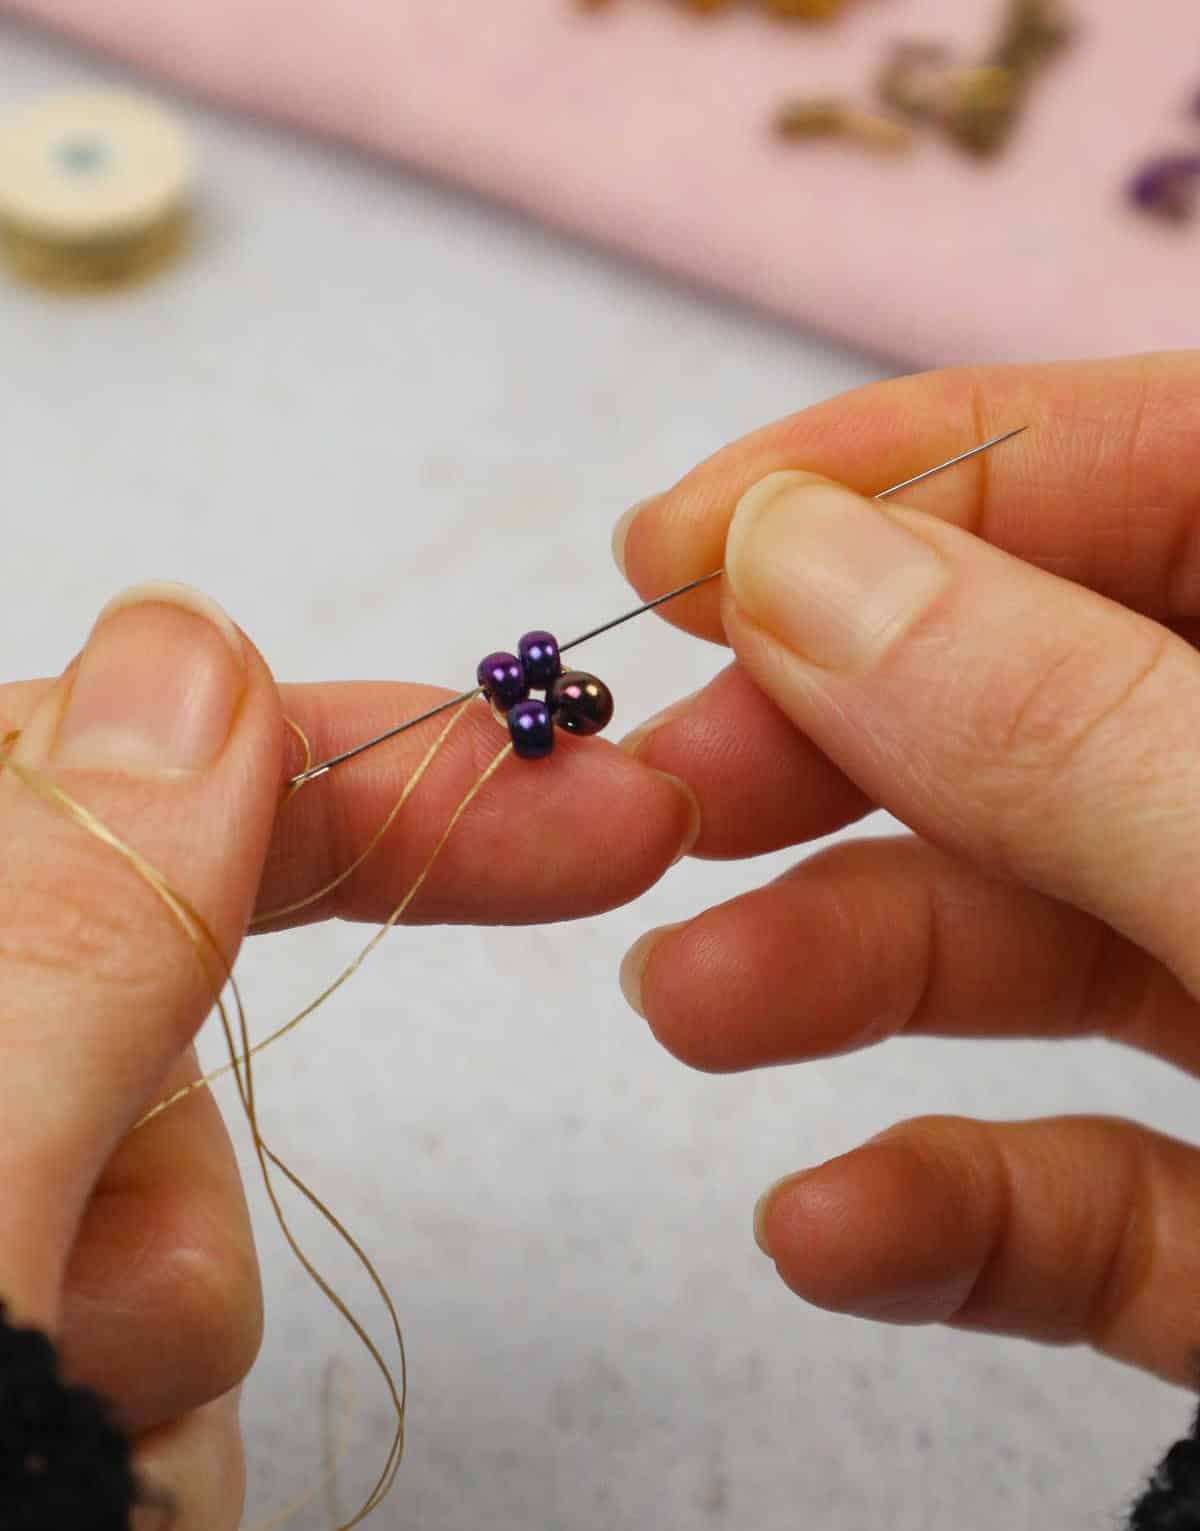
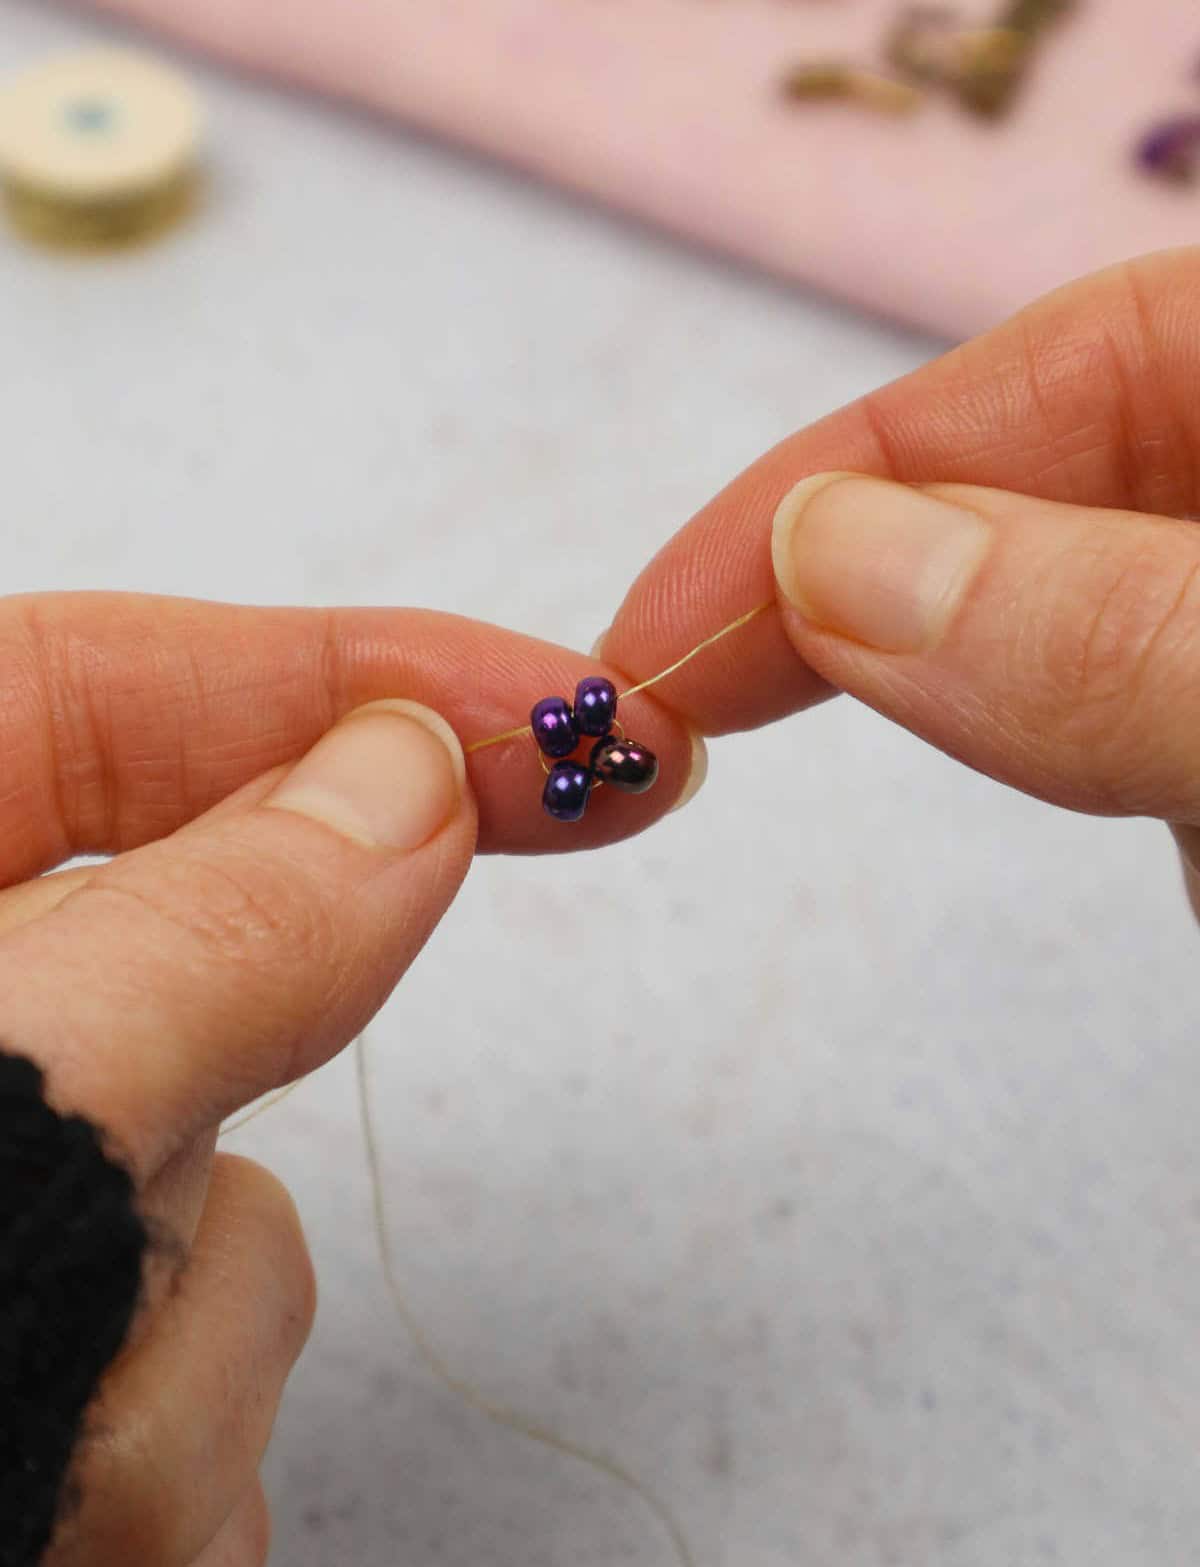
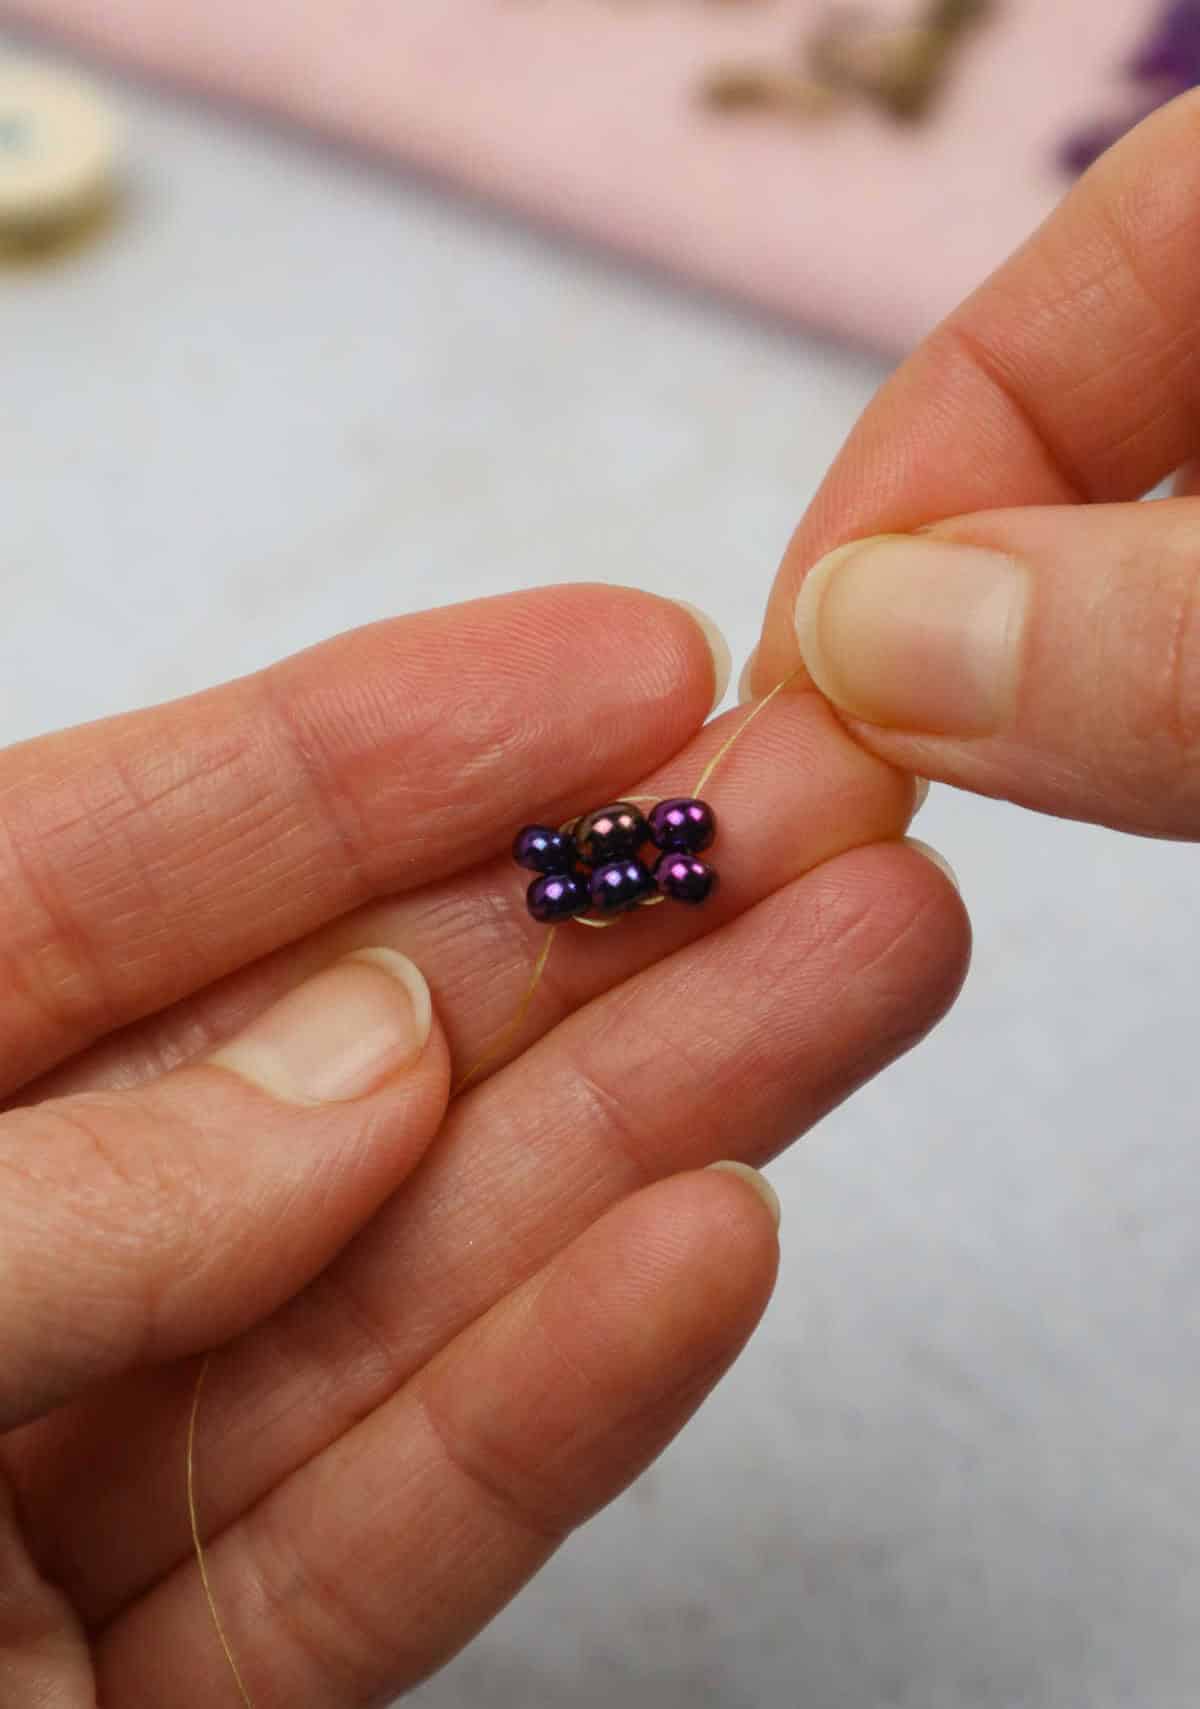
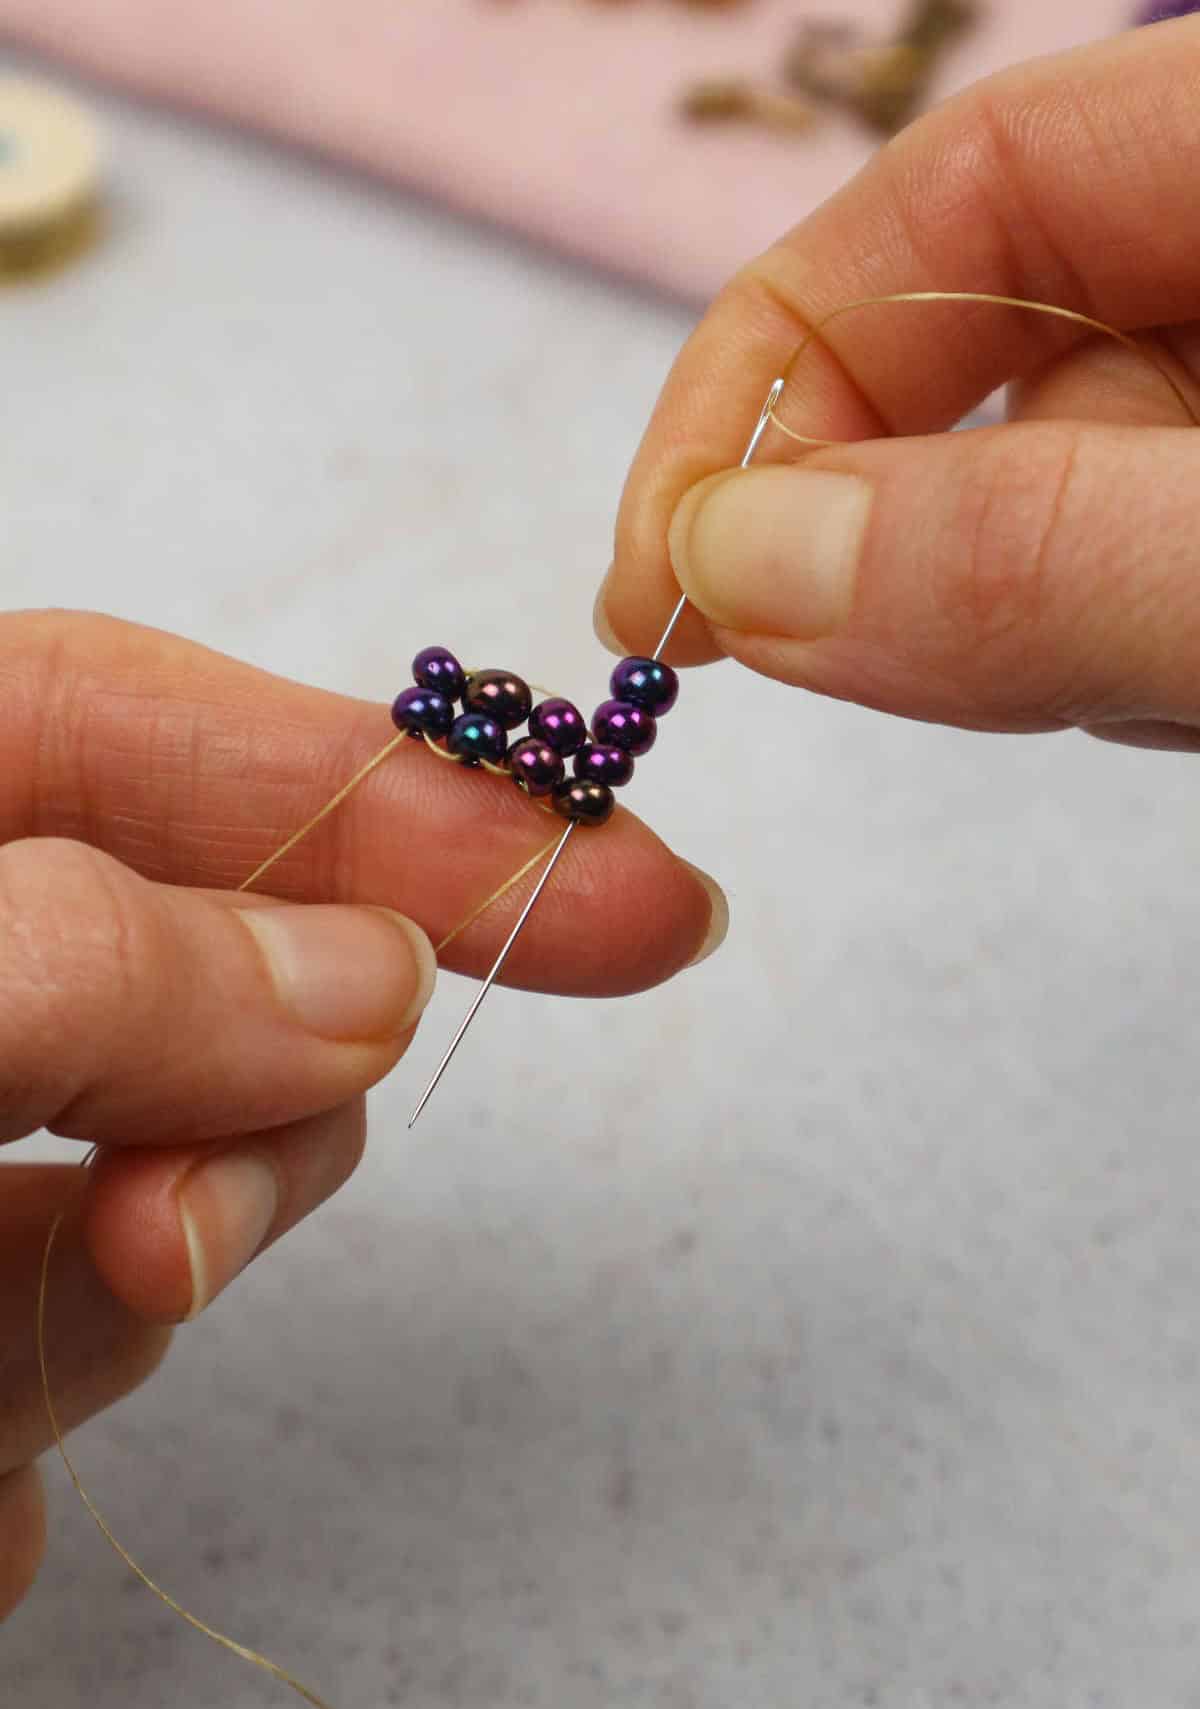
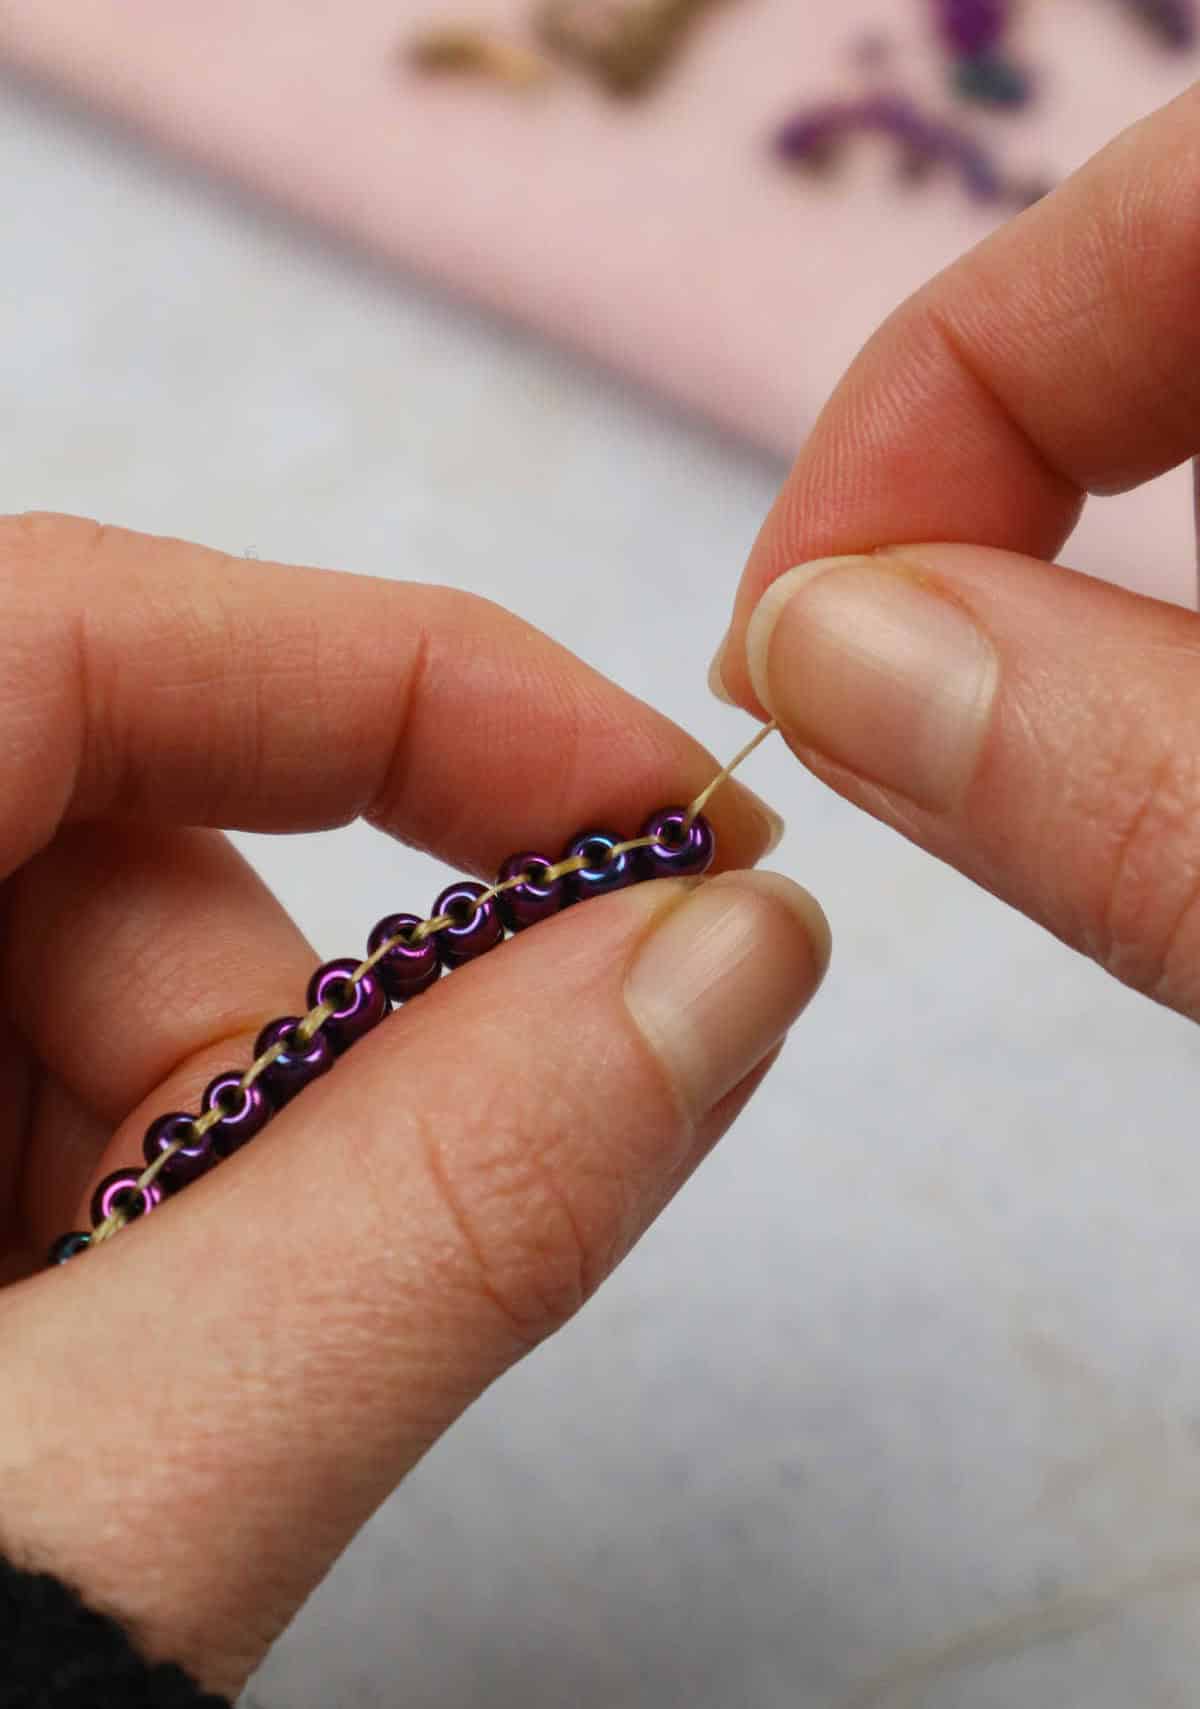
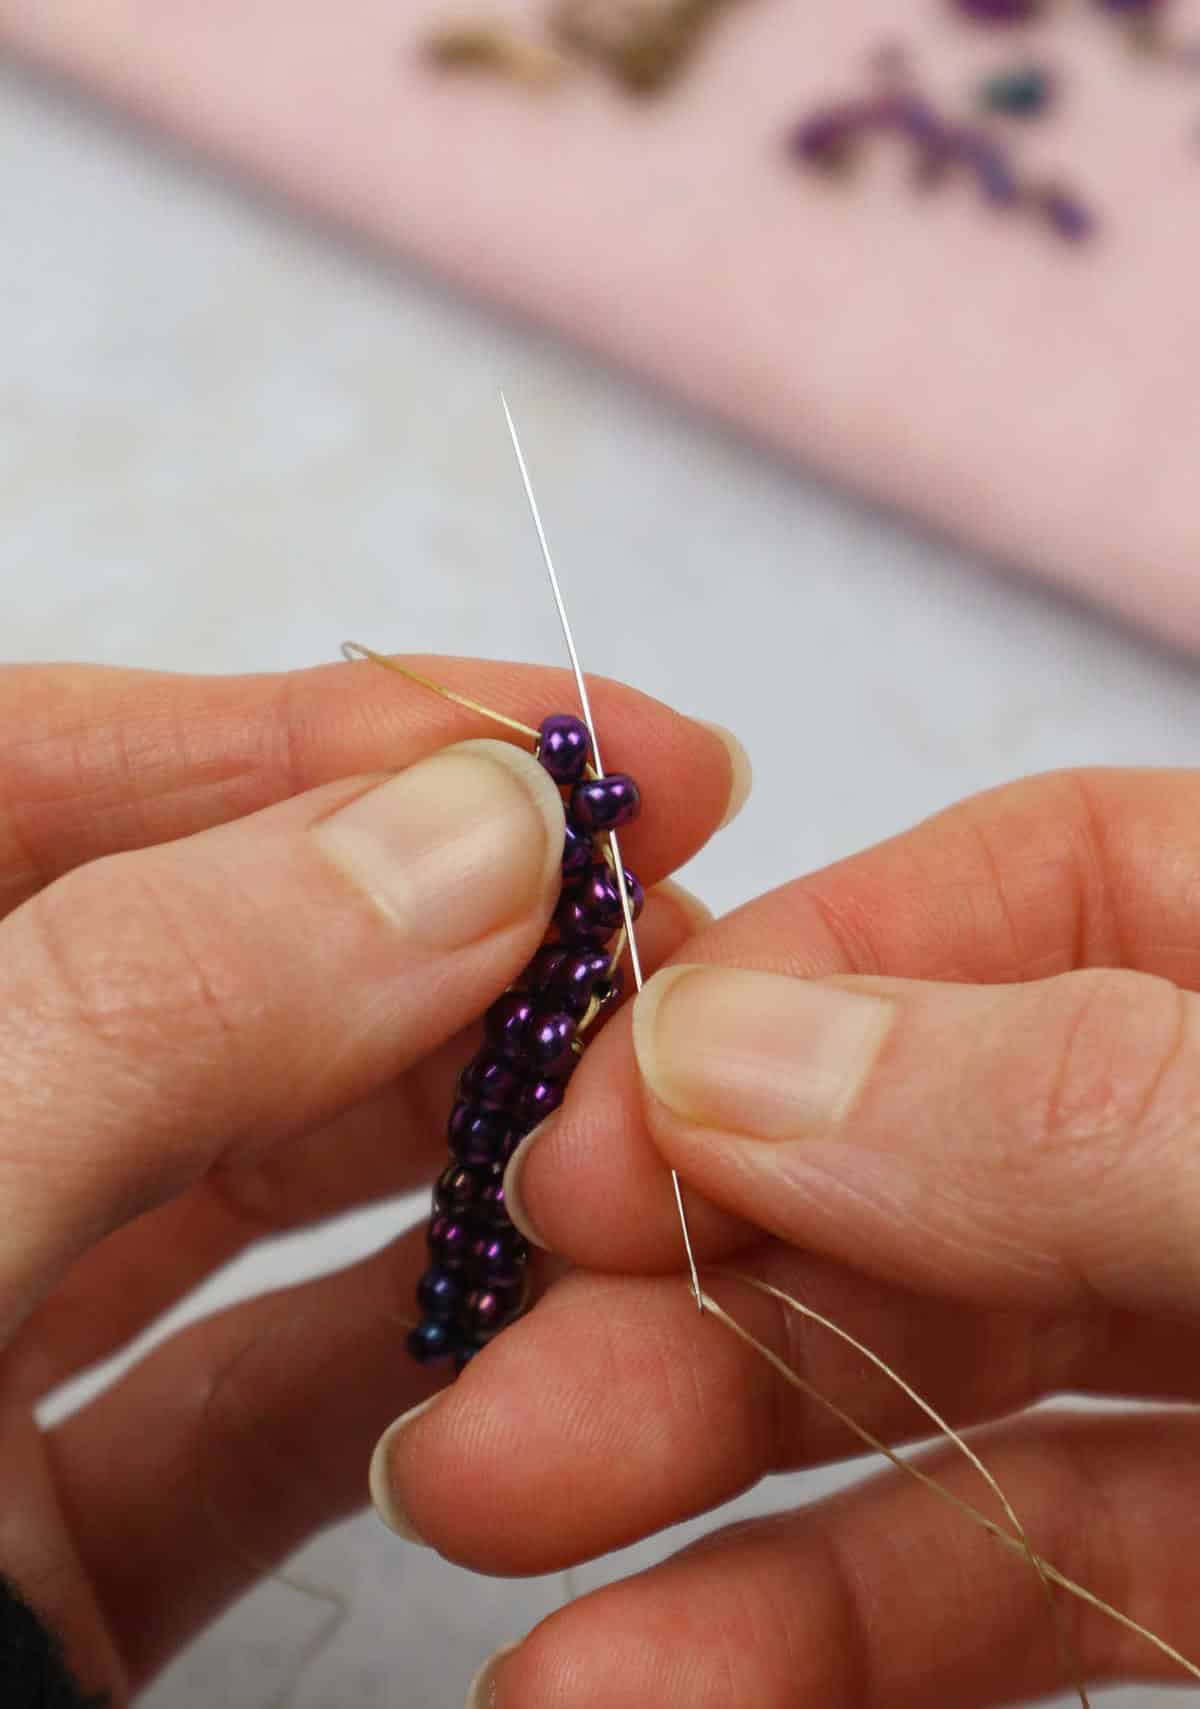
As the foundation of our earring takes shape, it’s crucial to anchor it securely. To do this, we’ll pass the needle back through the initial two beads, ensuring they’re firmly in place. This reinforcement step will be repeated on both sides of the ladder, by looping the needle through the original beads once more. Once complete, we can confidently move forward to the next stage.
Step 6
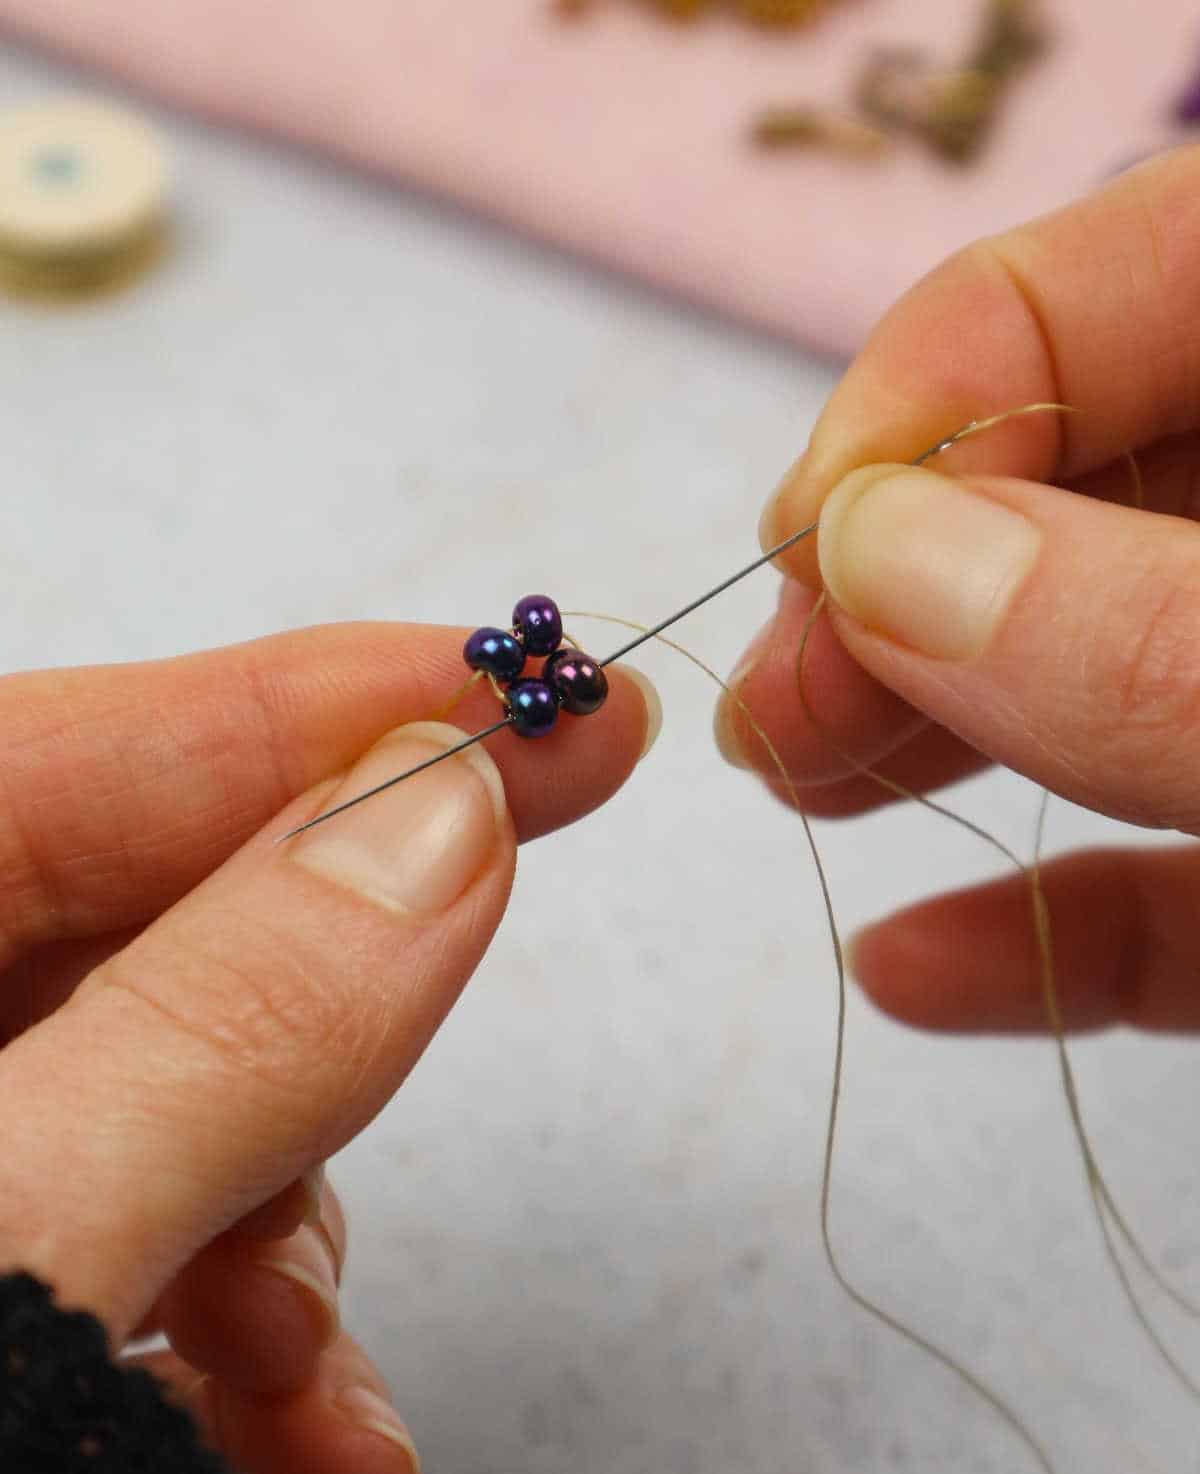
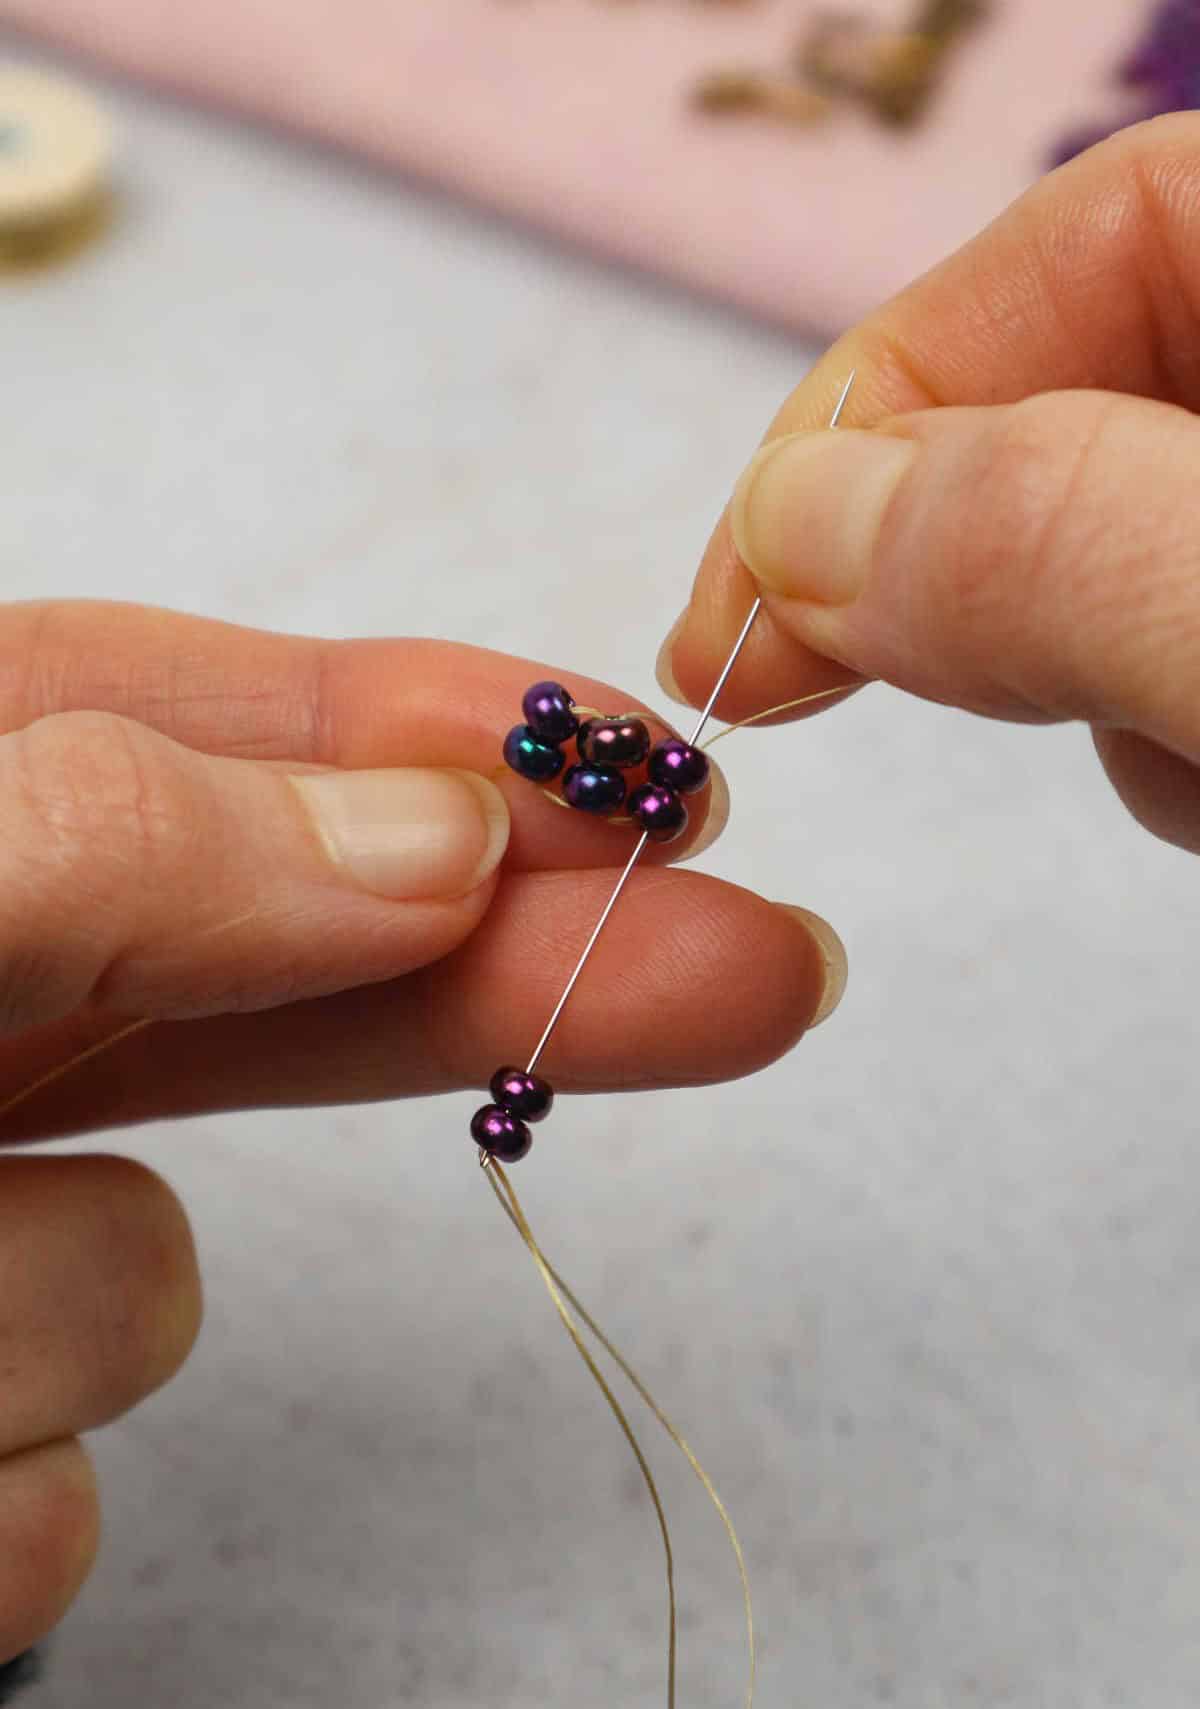
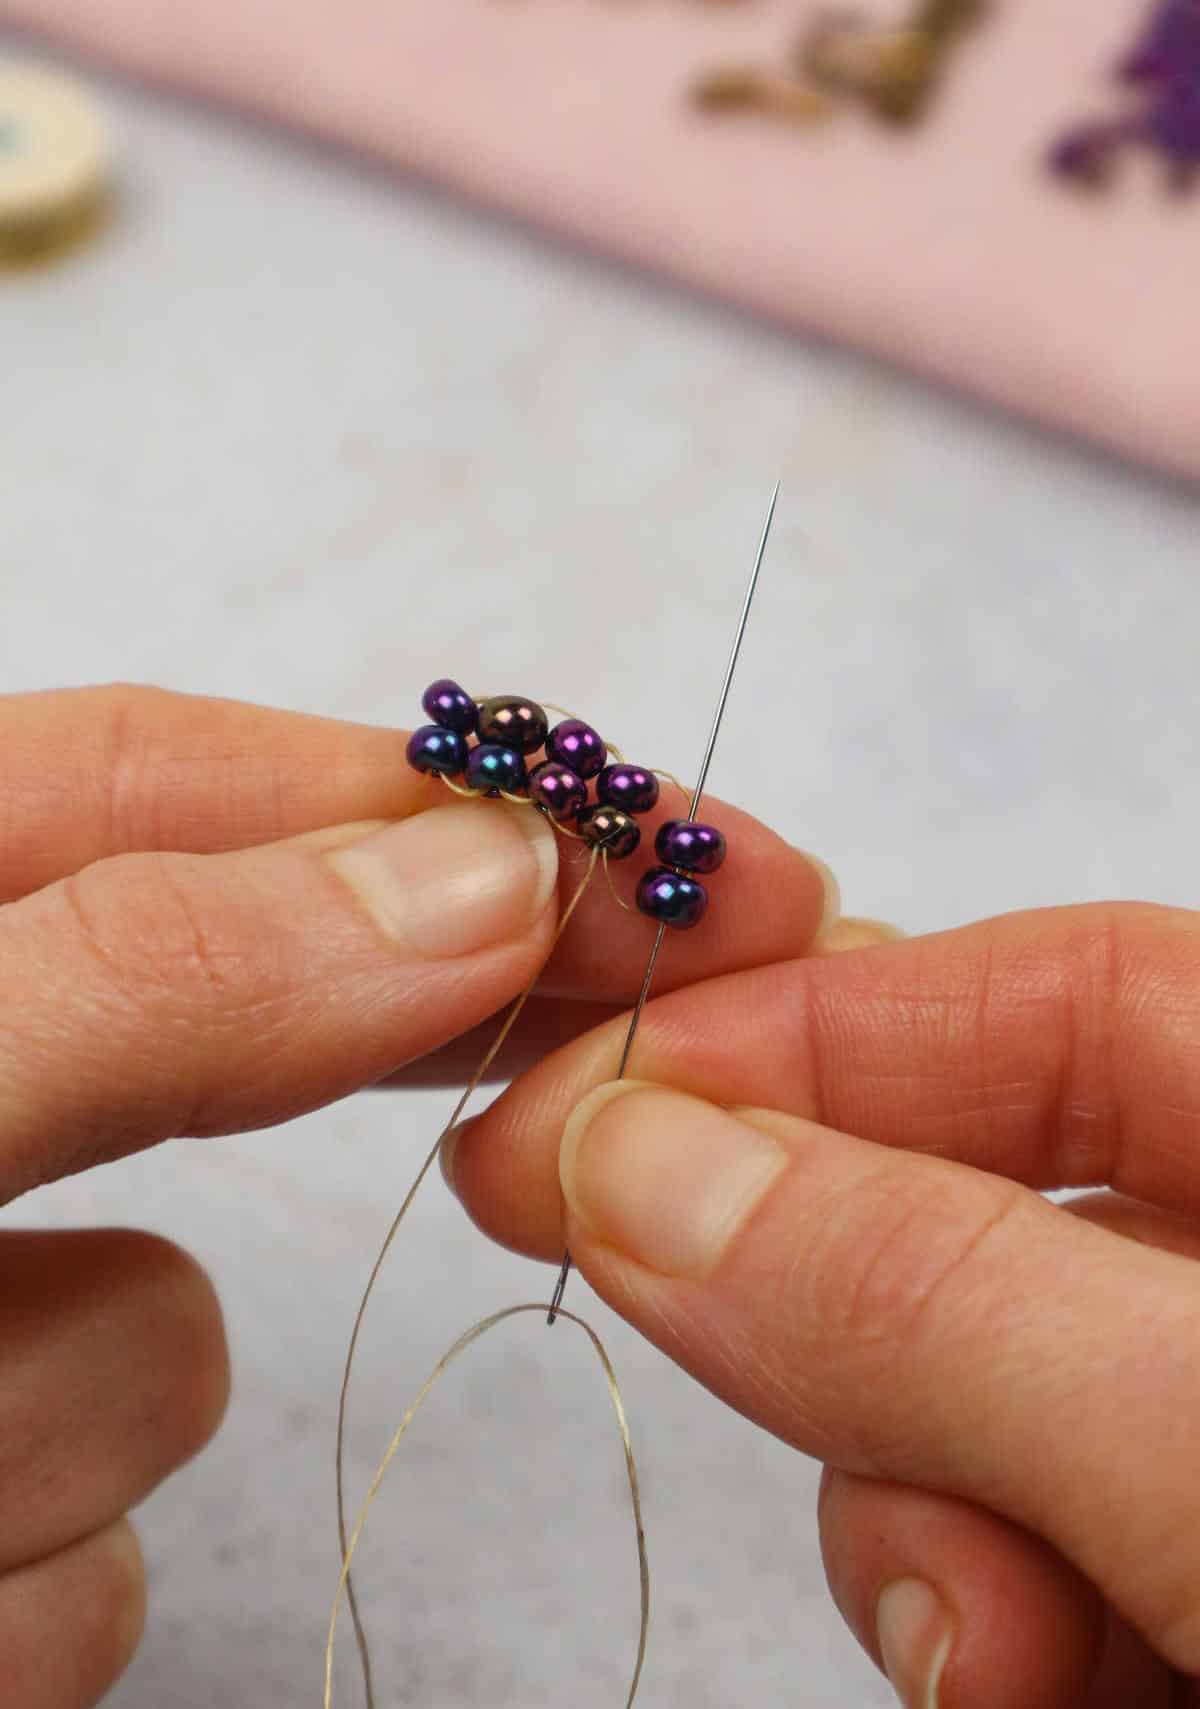
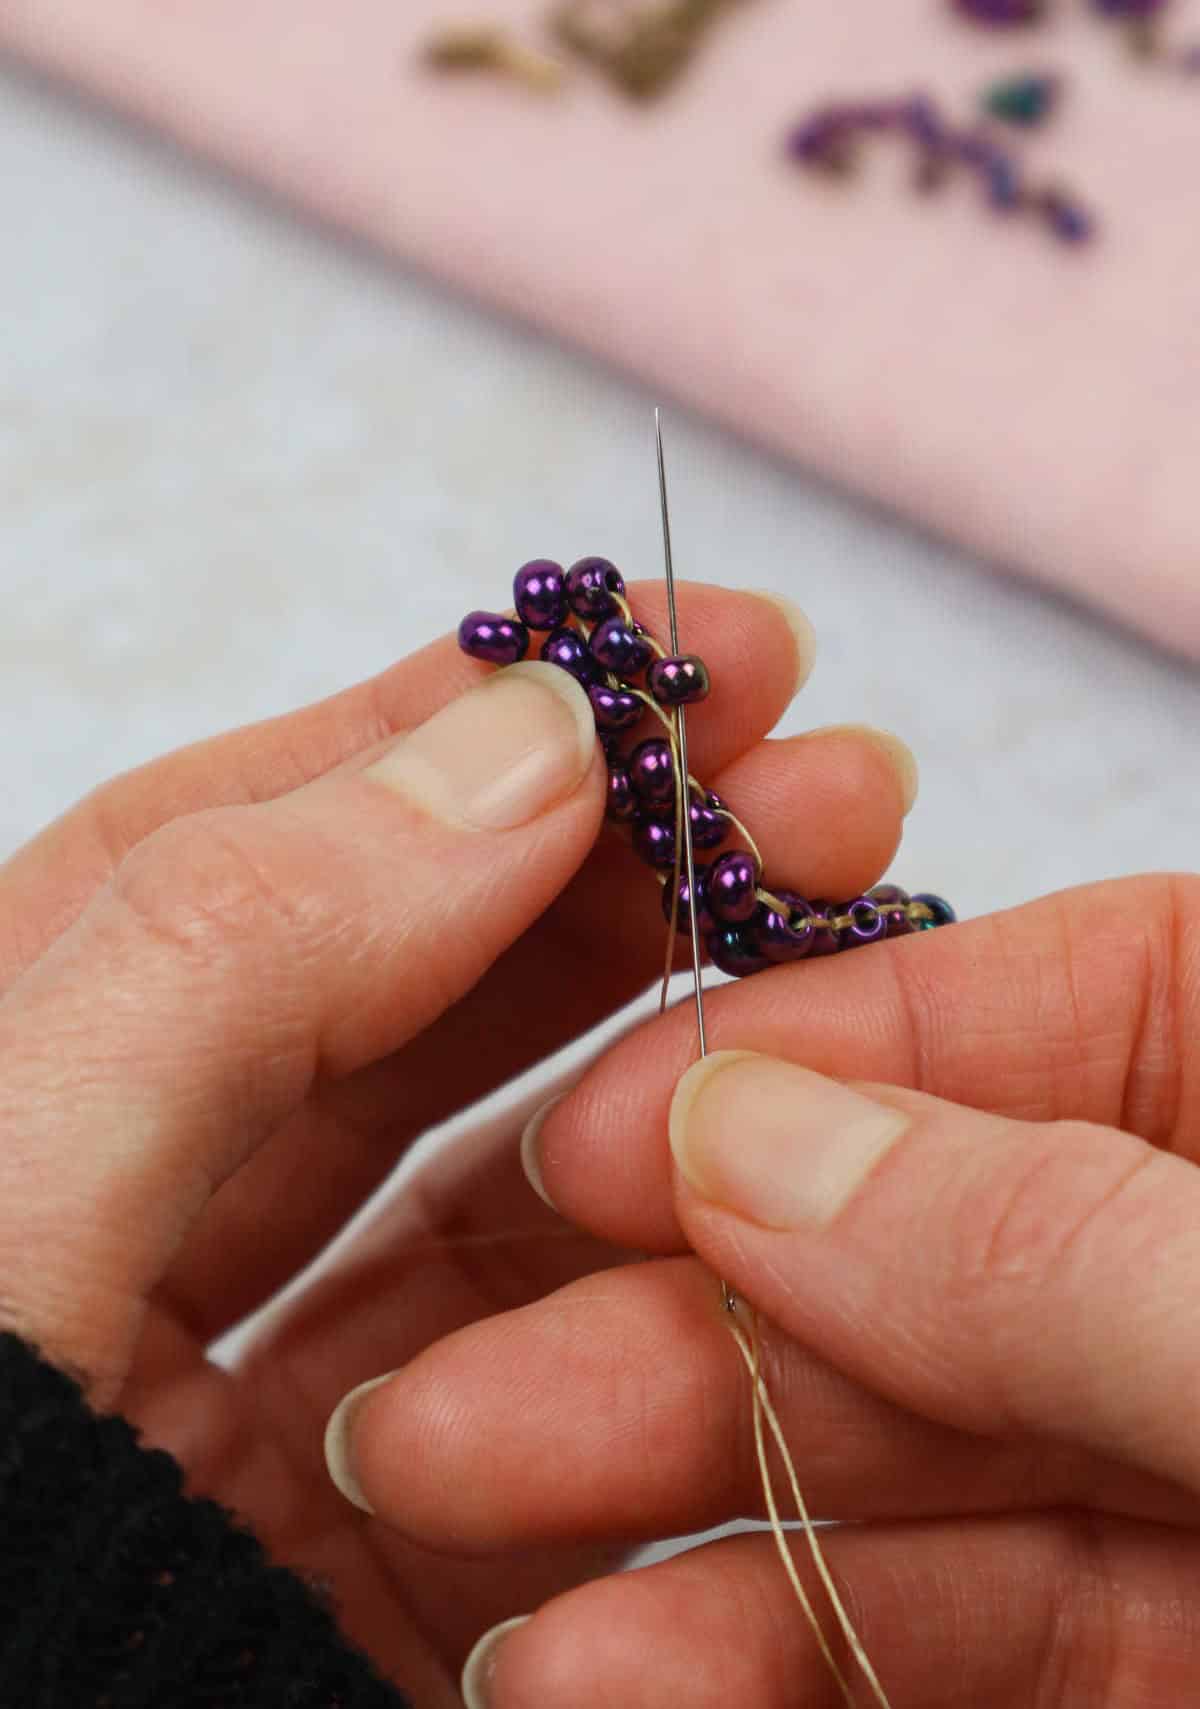
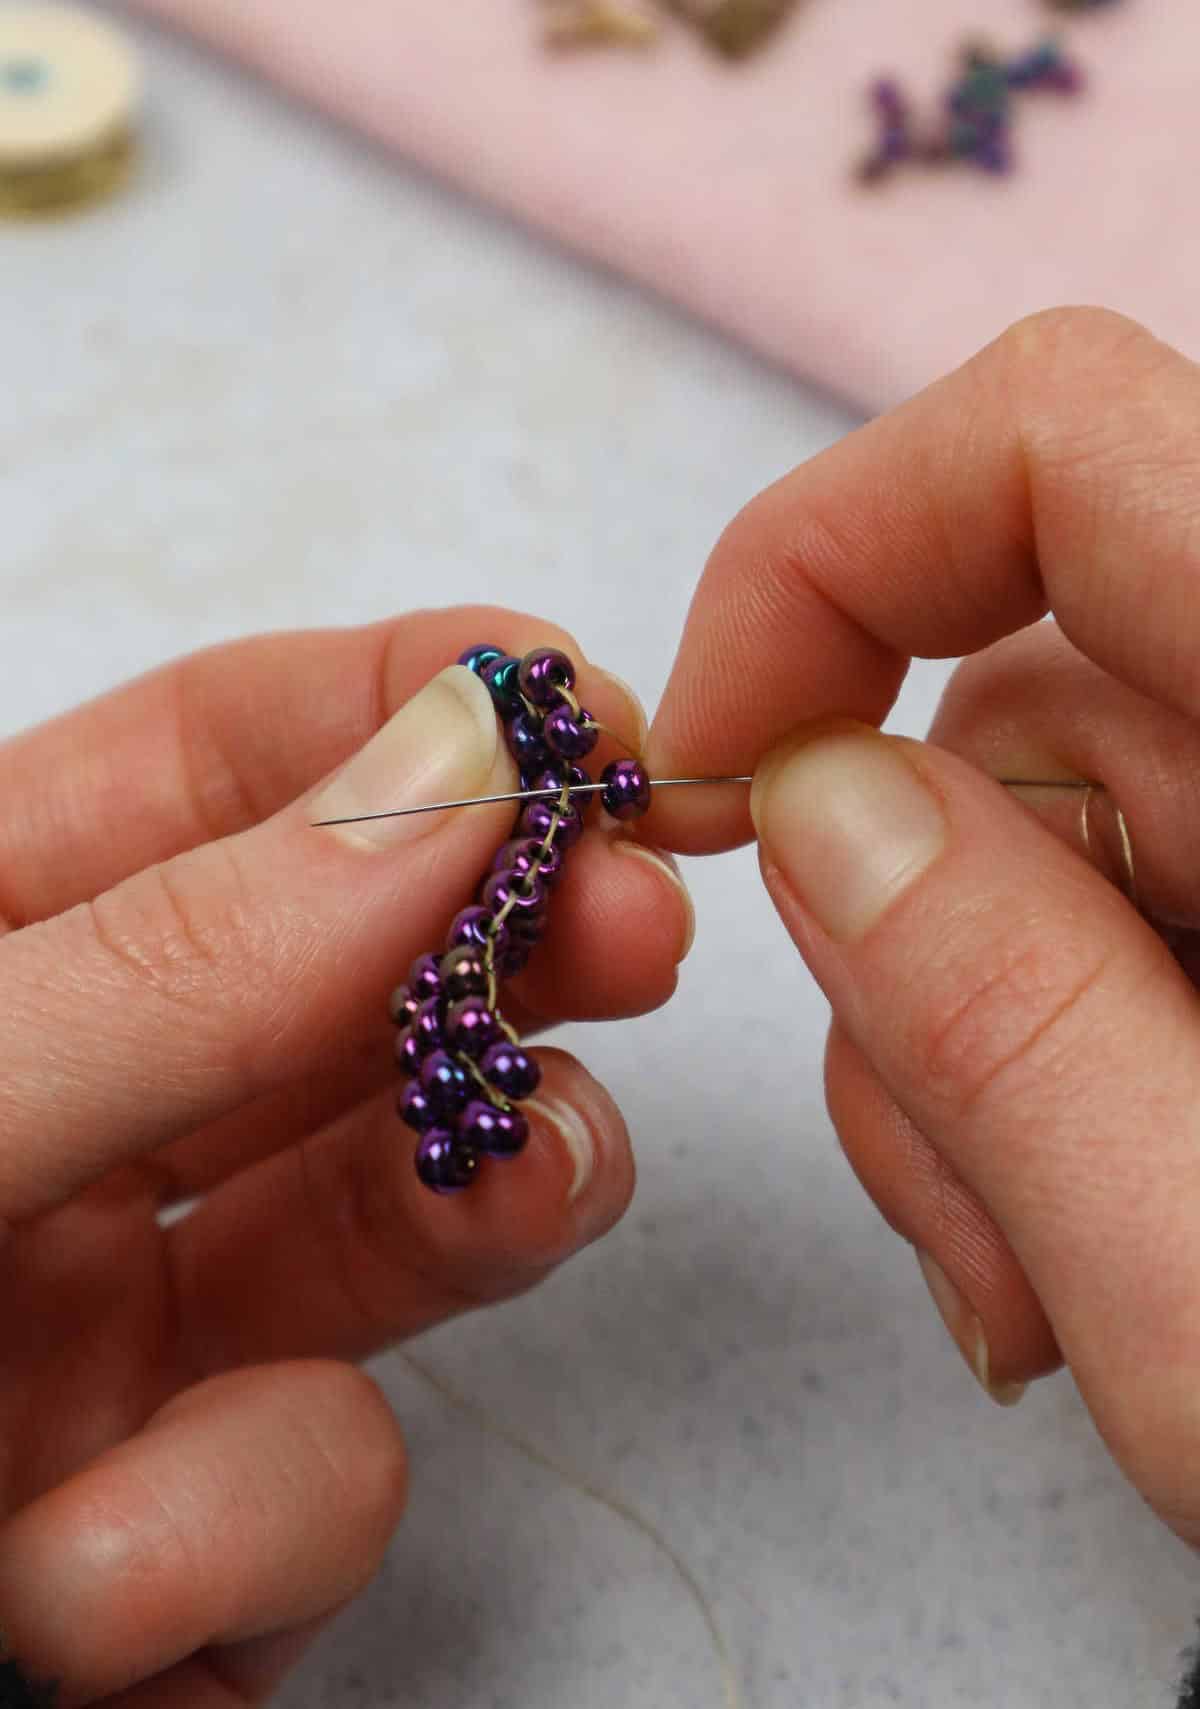
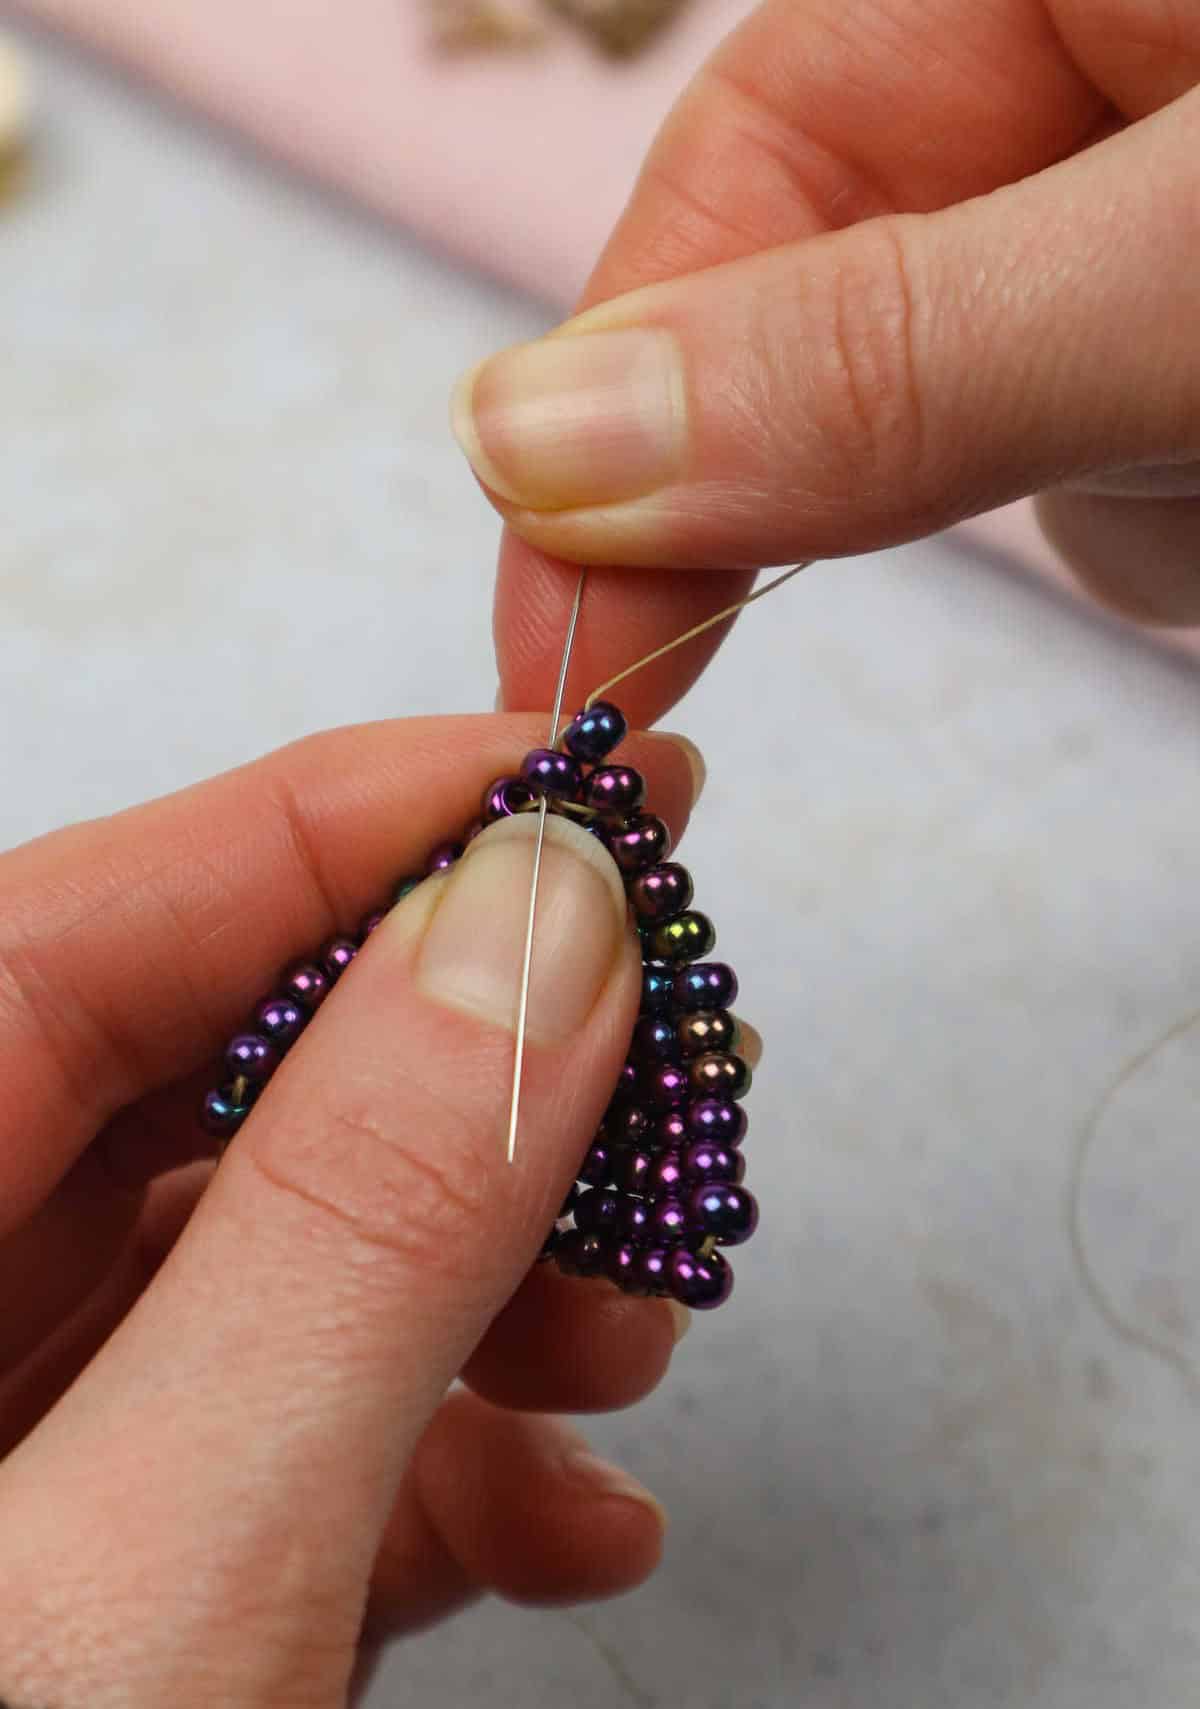
The majority of the earring’s structure follows a consistent pattern. Each round begins by adding two new beads, which builds upon the previous threading sequence. It’s crucial to acknowledge the two tails that emerge during this process: one tail, typically associated with the dominant hand, will start to shorten as you progress. Another vital consideration is the way you reinforce your beads.
When doing so, it’s essential to thread your needle through an opening that didn’t just come out of the string. Failing to do so can create multiple complications down the line. At this point, we’ve completed our third row and need to secure it by threading through the new bead sequence. As a result, our right tail should now be emerging from the top opening of a bead.
Step 7
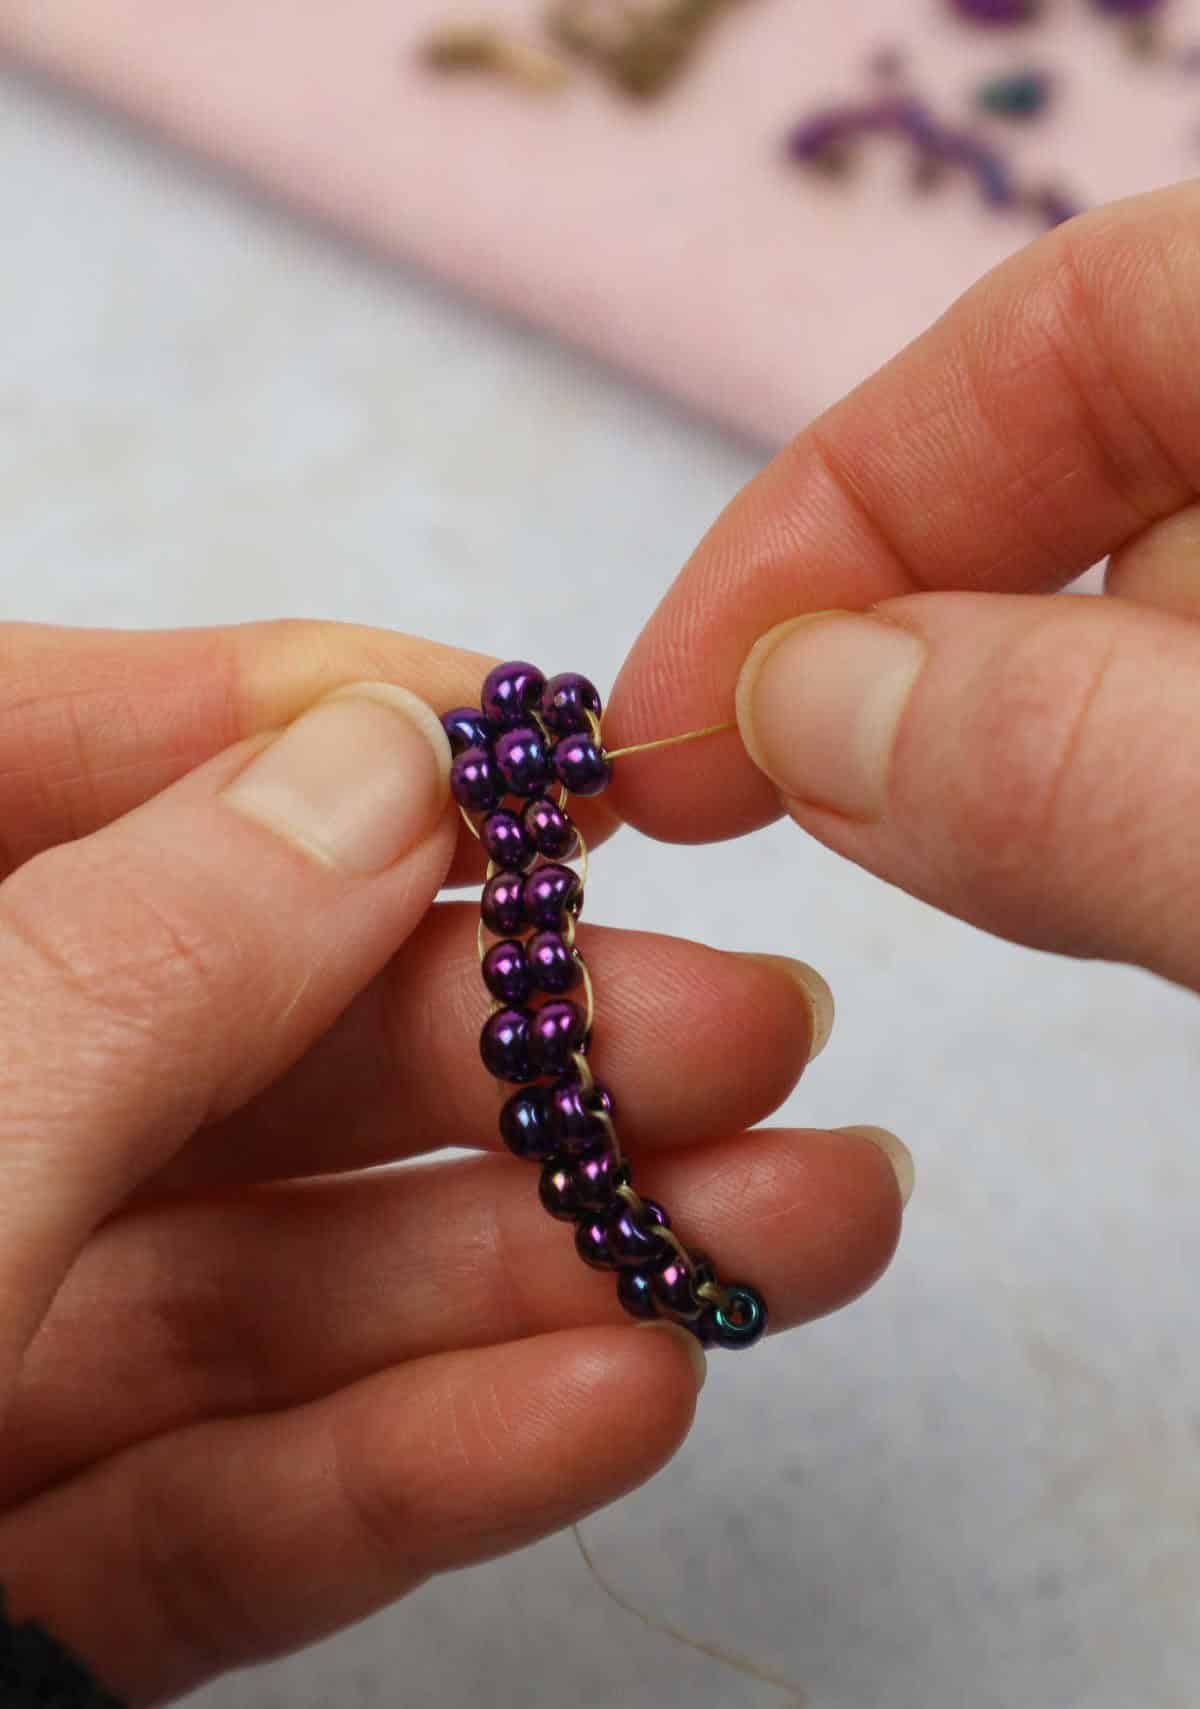
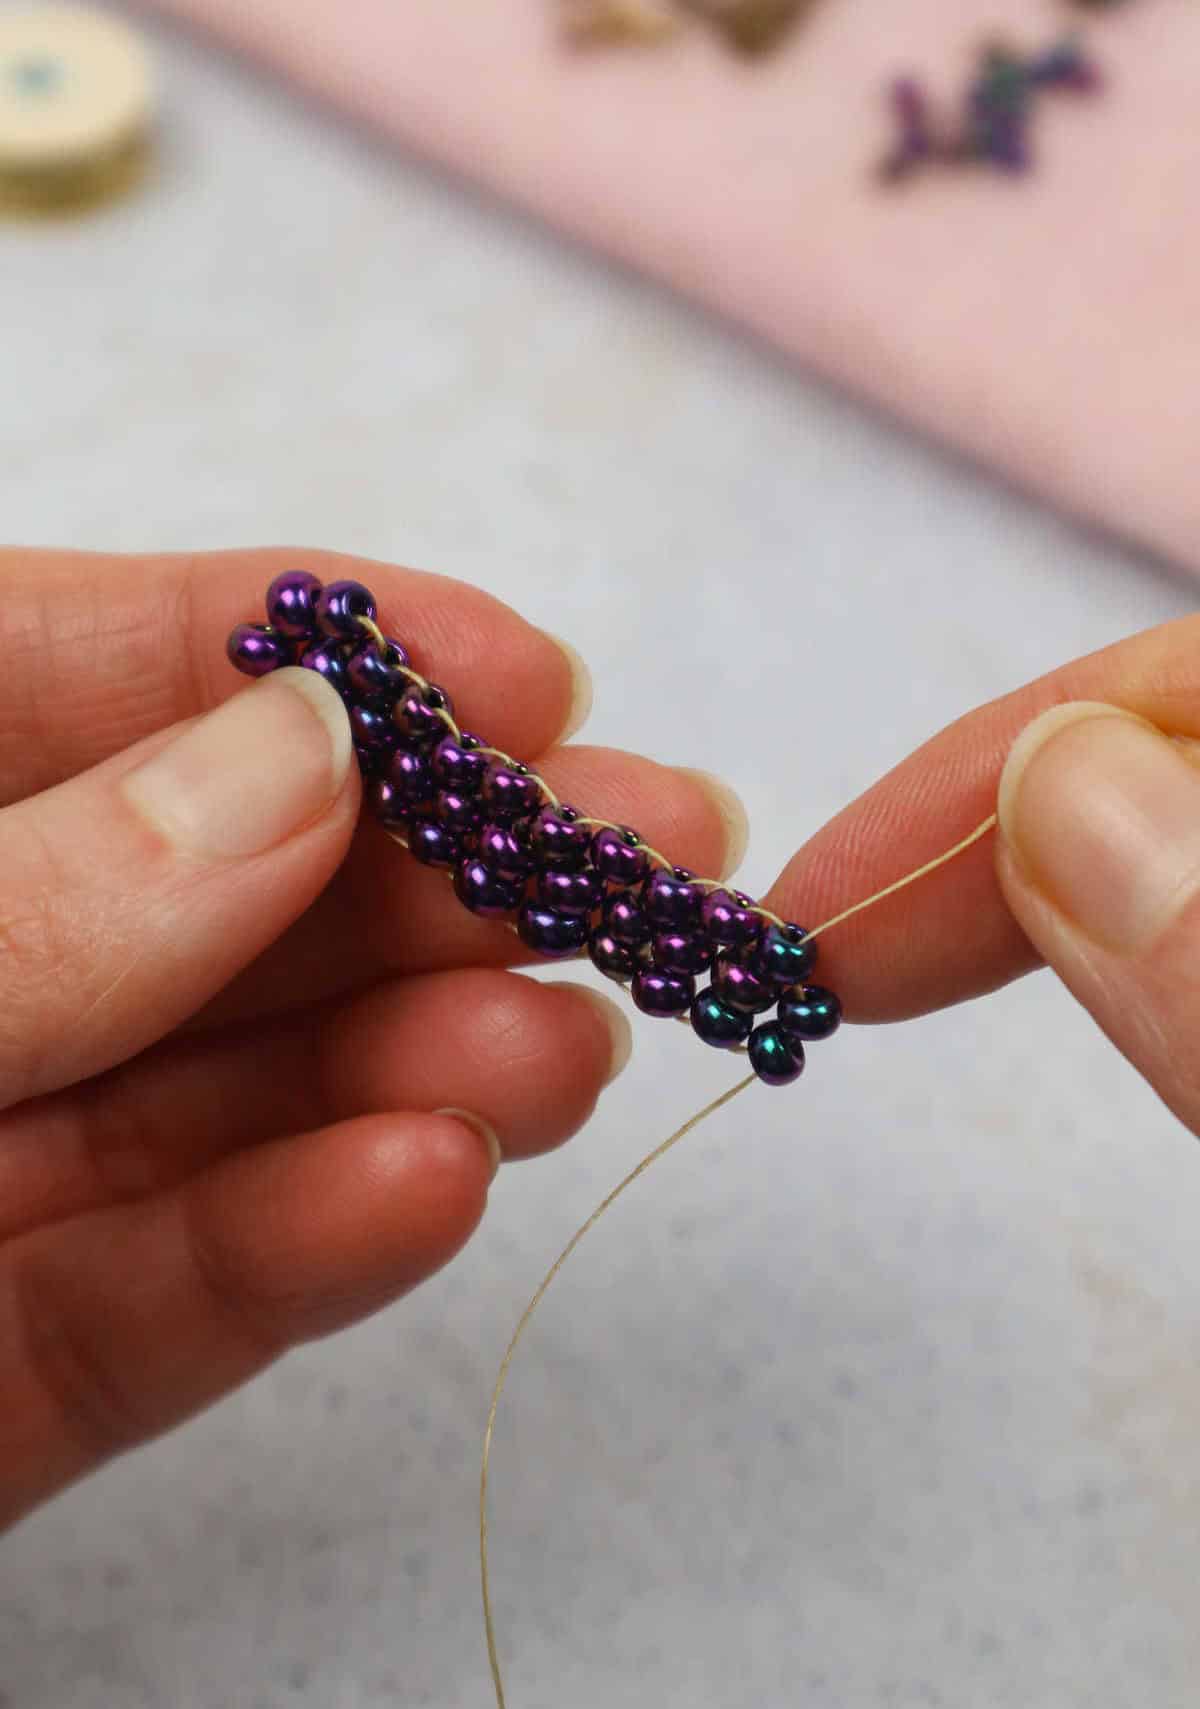
As you work on securing each row, bring the needle up from the bottom to complete the set. This process will be repeated until a full ladder has formed. A crucial detail is that the number of rows must be an odd number; for this particular earring, I’ve chosen eleven rows. Once the initial ladder is built, it’s essential to inspect your work before proceeding with the next step.
Only when you’re satisfied with the current state will you start creating the next part of the earring by introducing two new beads.
Step 8
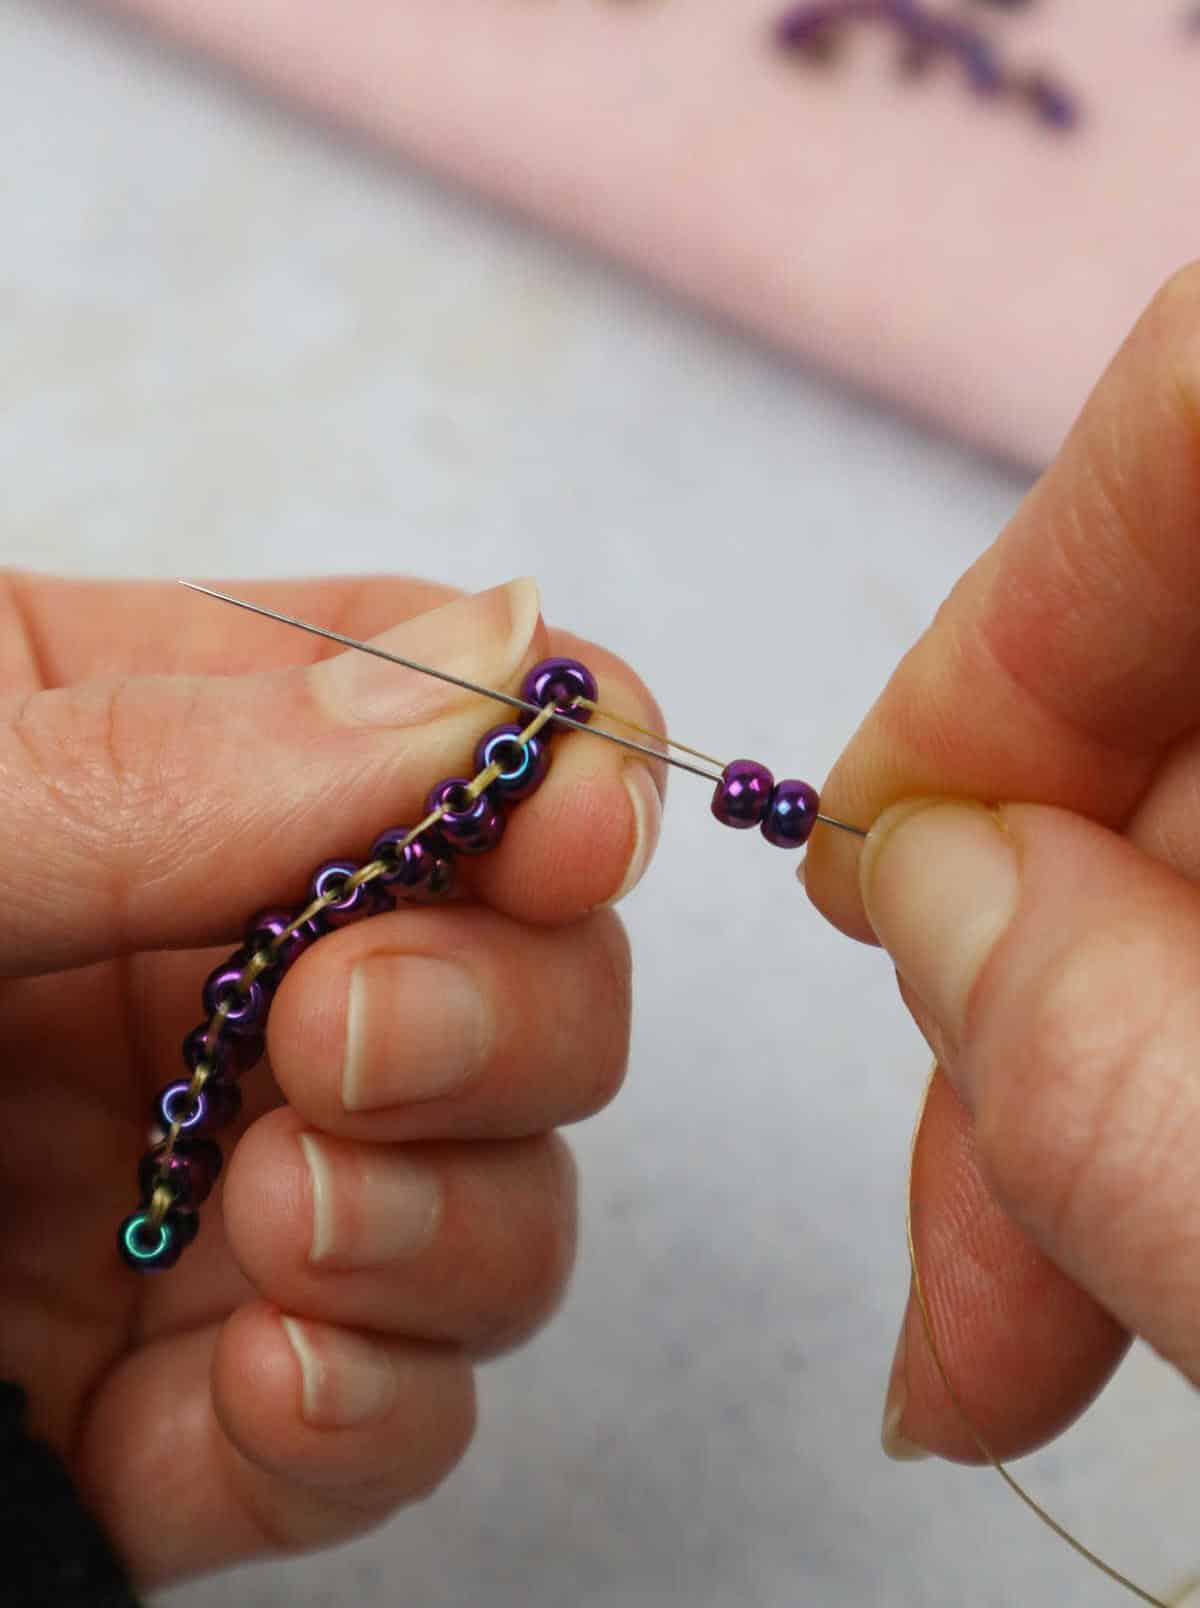

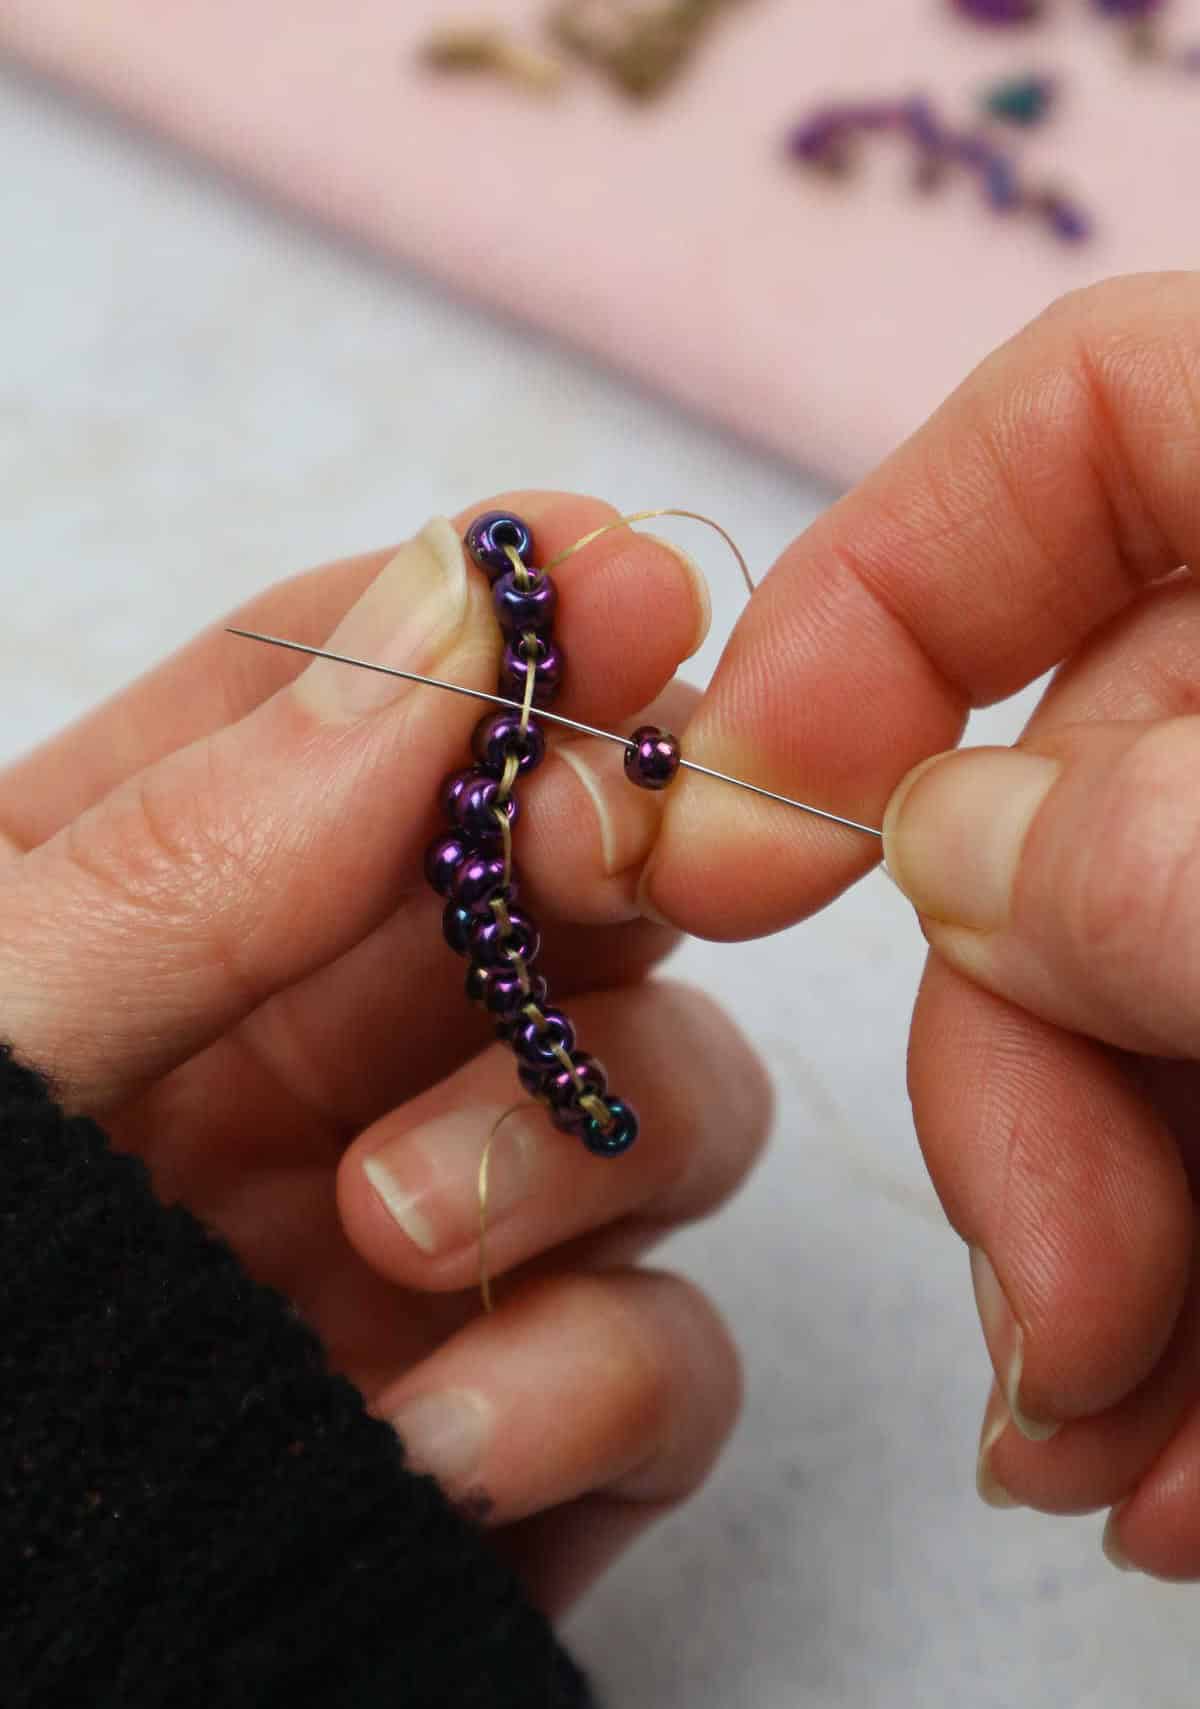
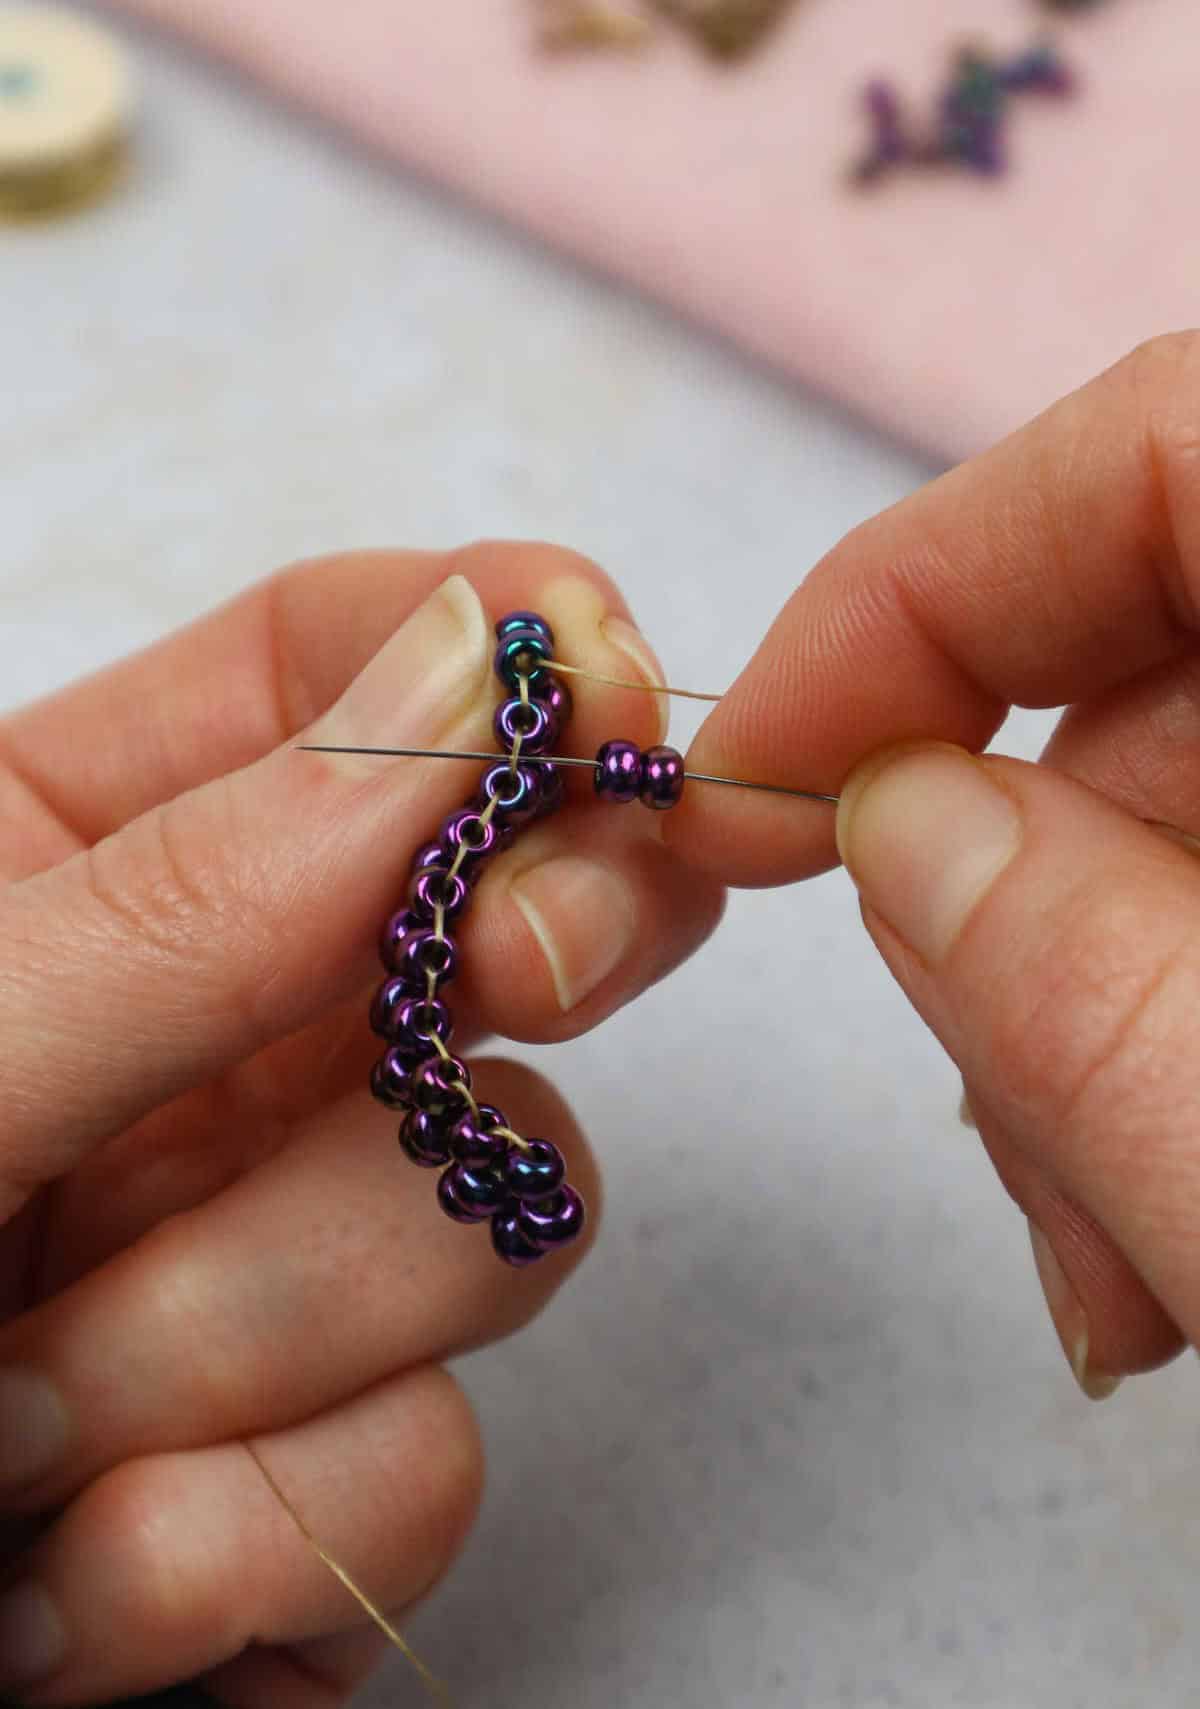
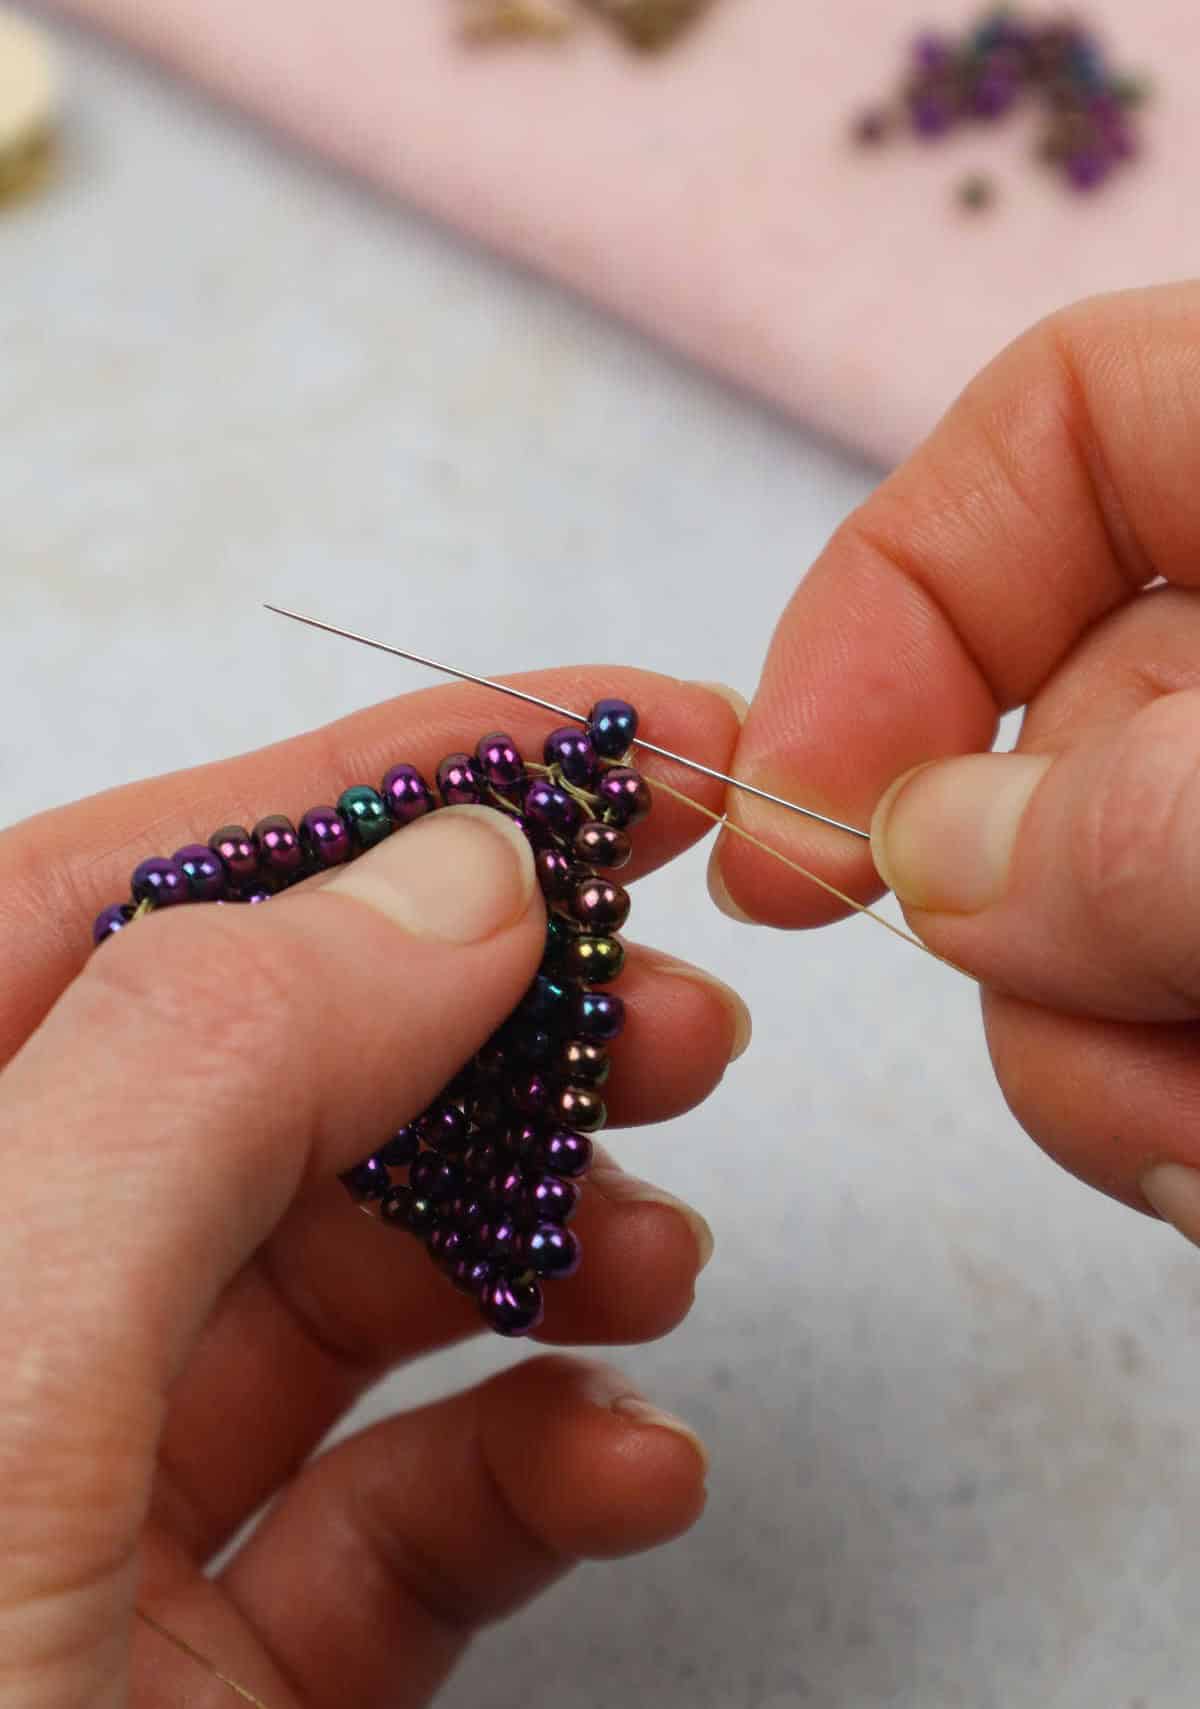
When examining the intricate design of beaded structures, it’s crucial to recognize that our focus isn’t on the initial thread connection, but rather the subsequent one. Specifically, we’re aiming to insert two new beads by working from beneath the latticework, effectively creating a bridge for these new additions.
Step 9
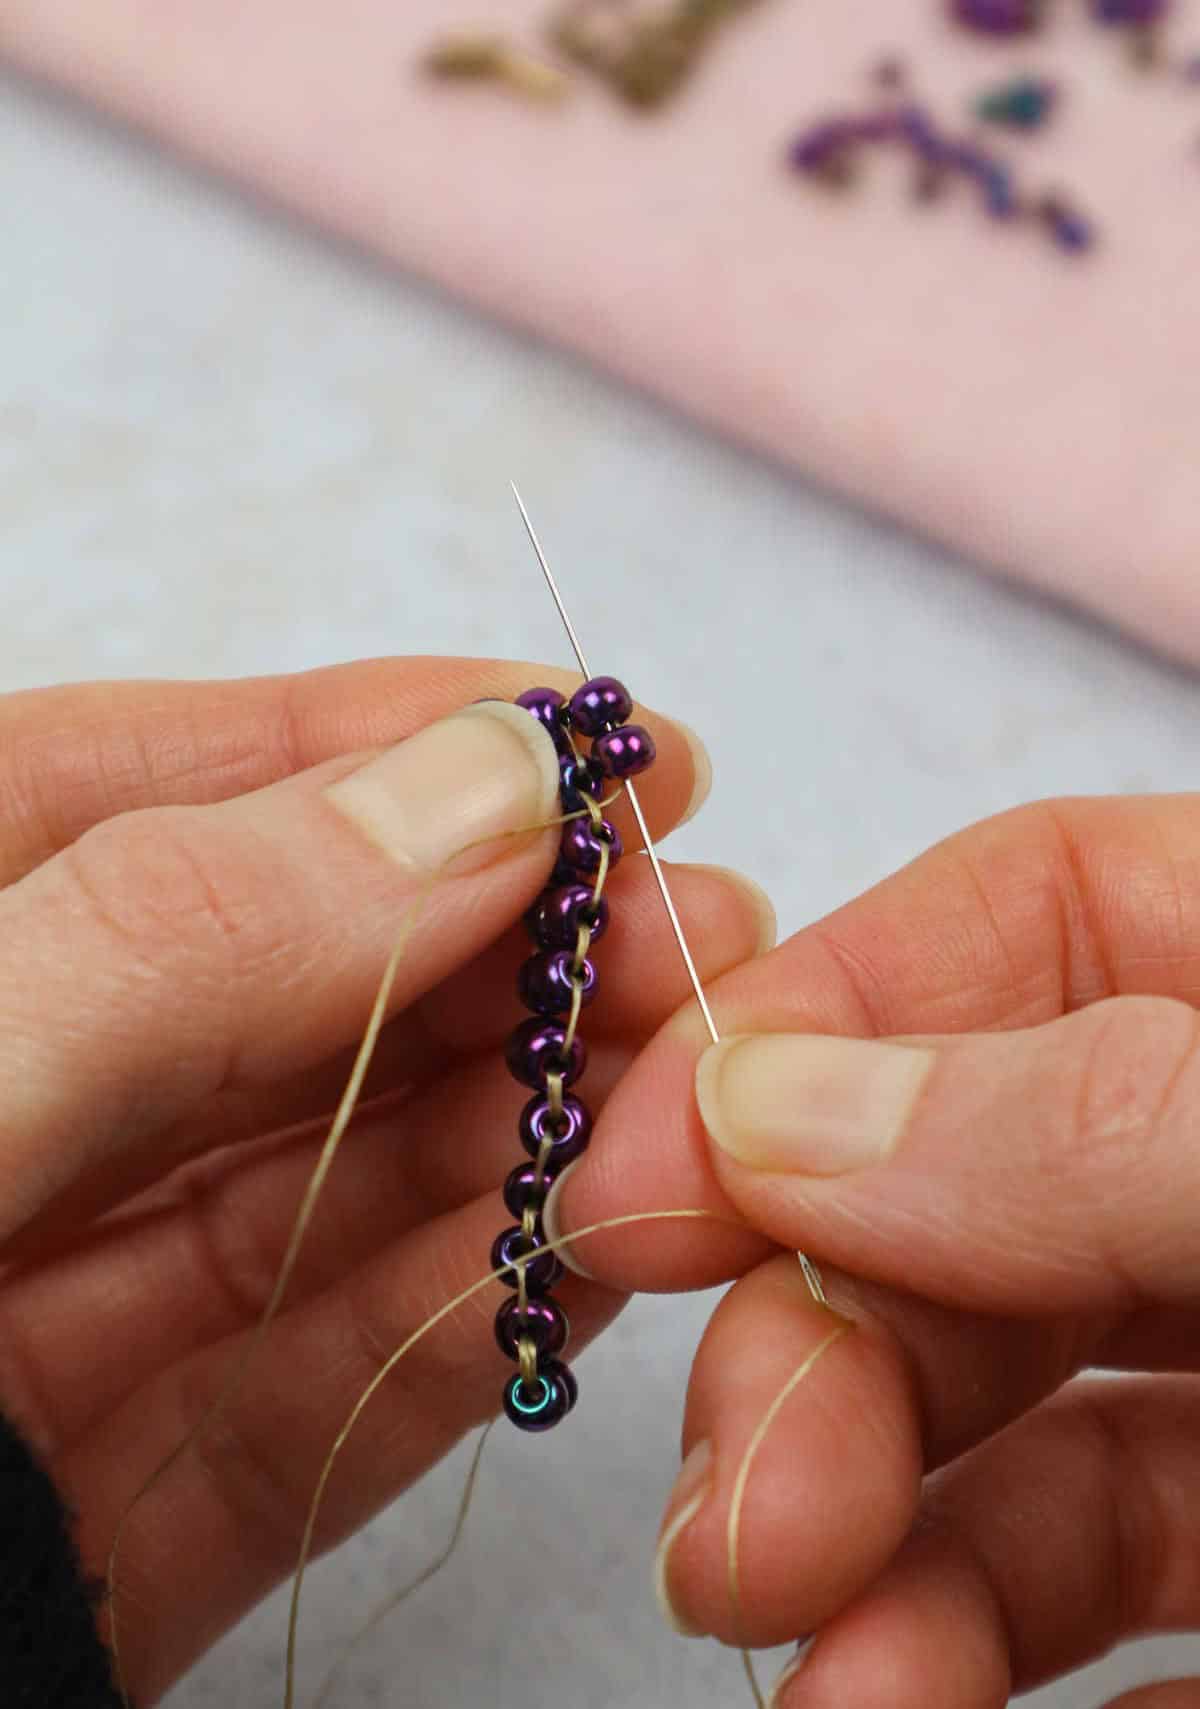
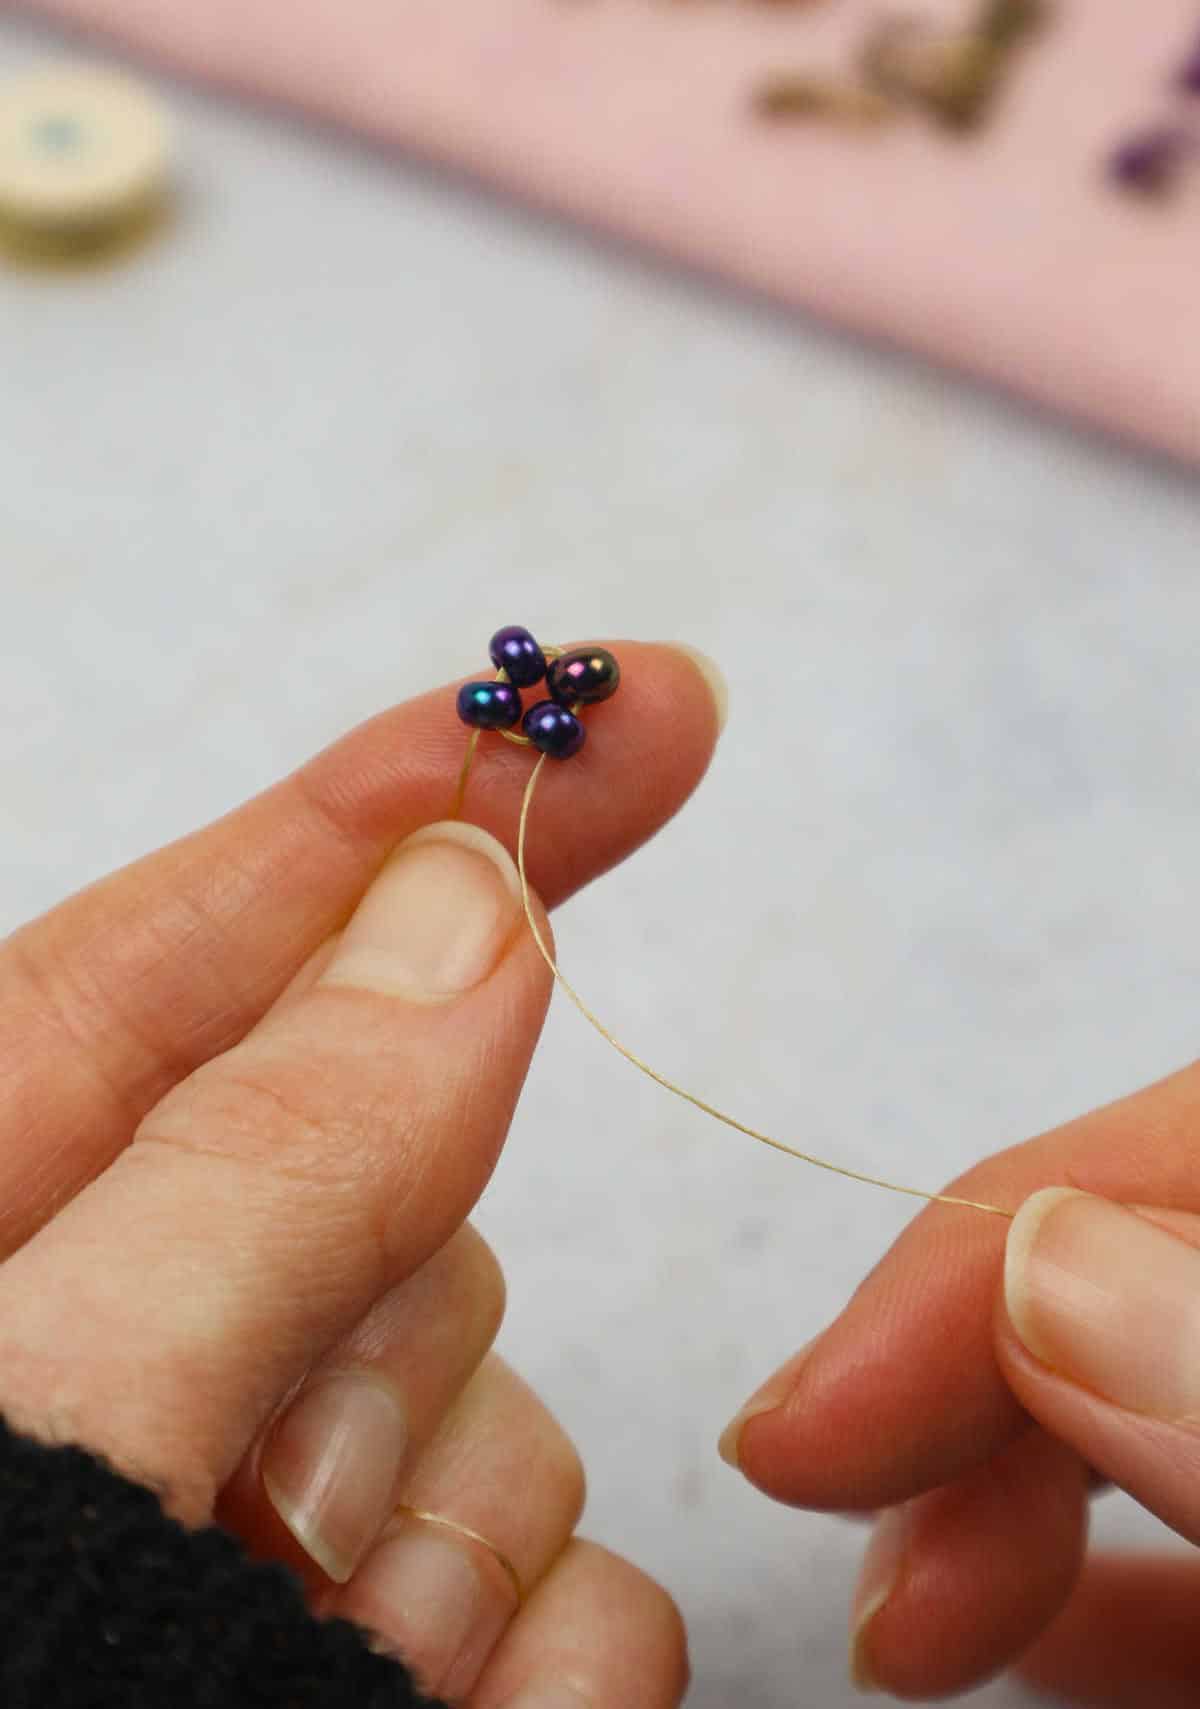
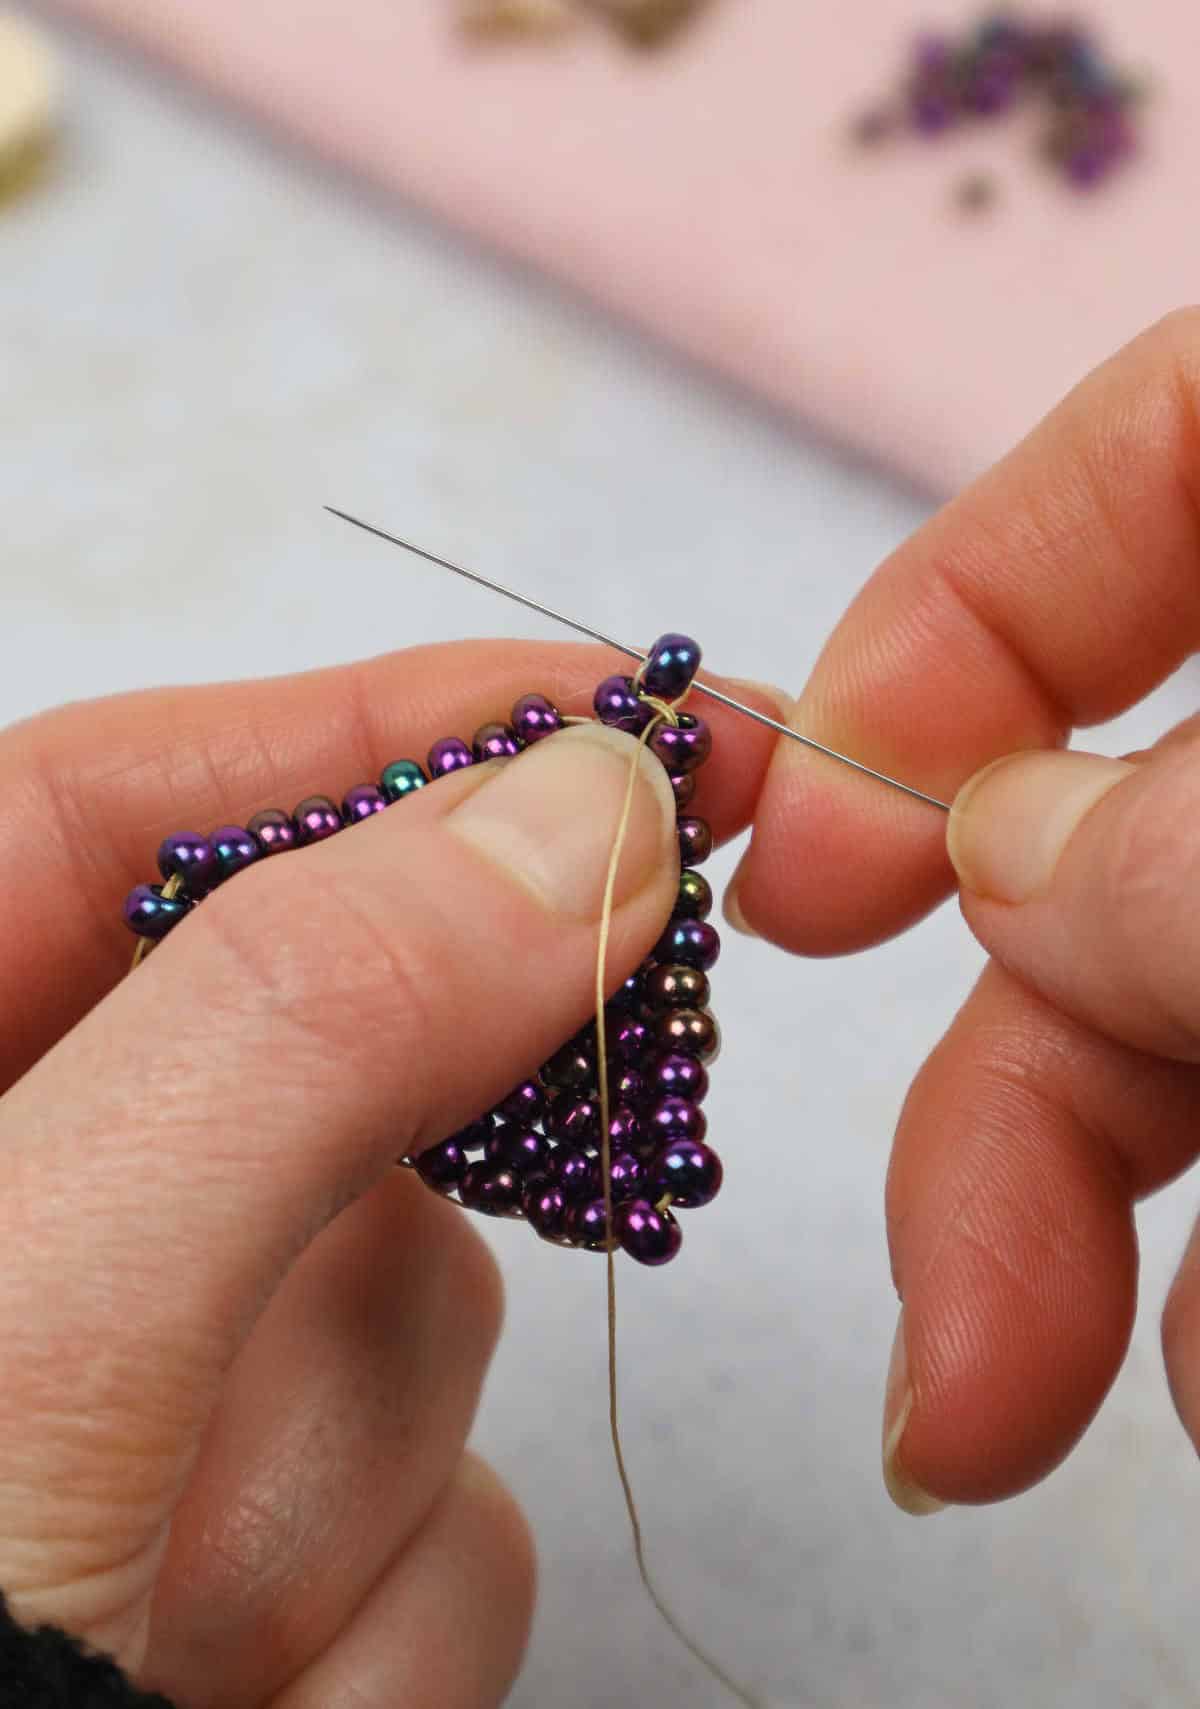
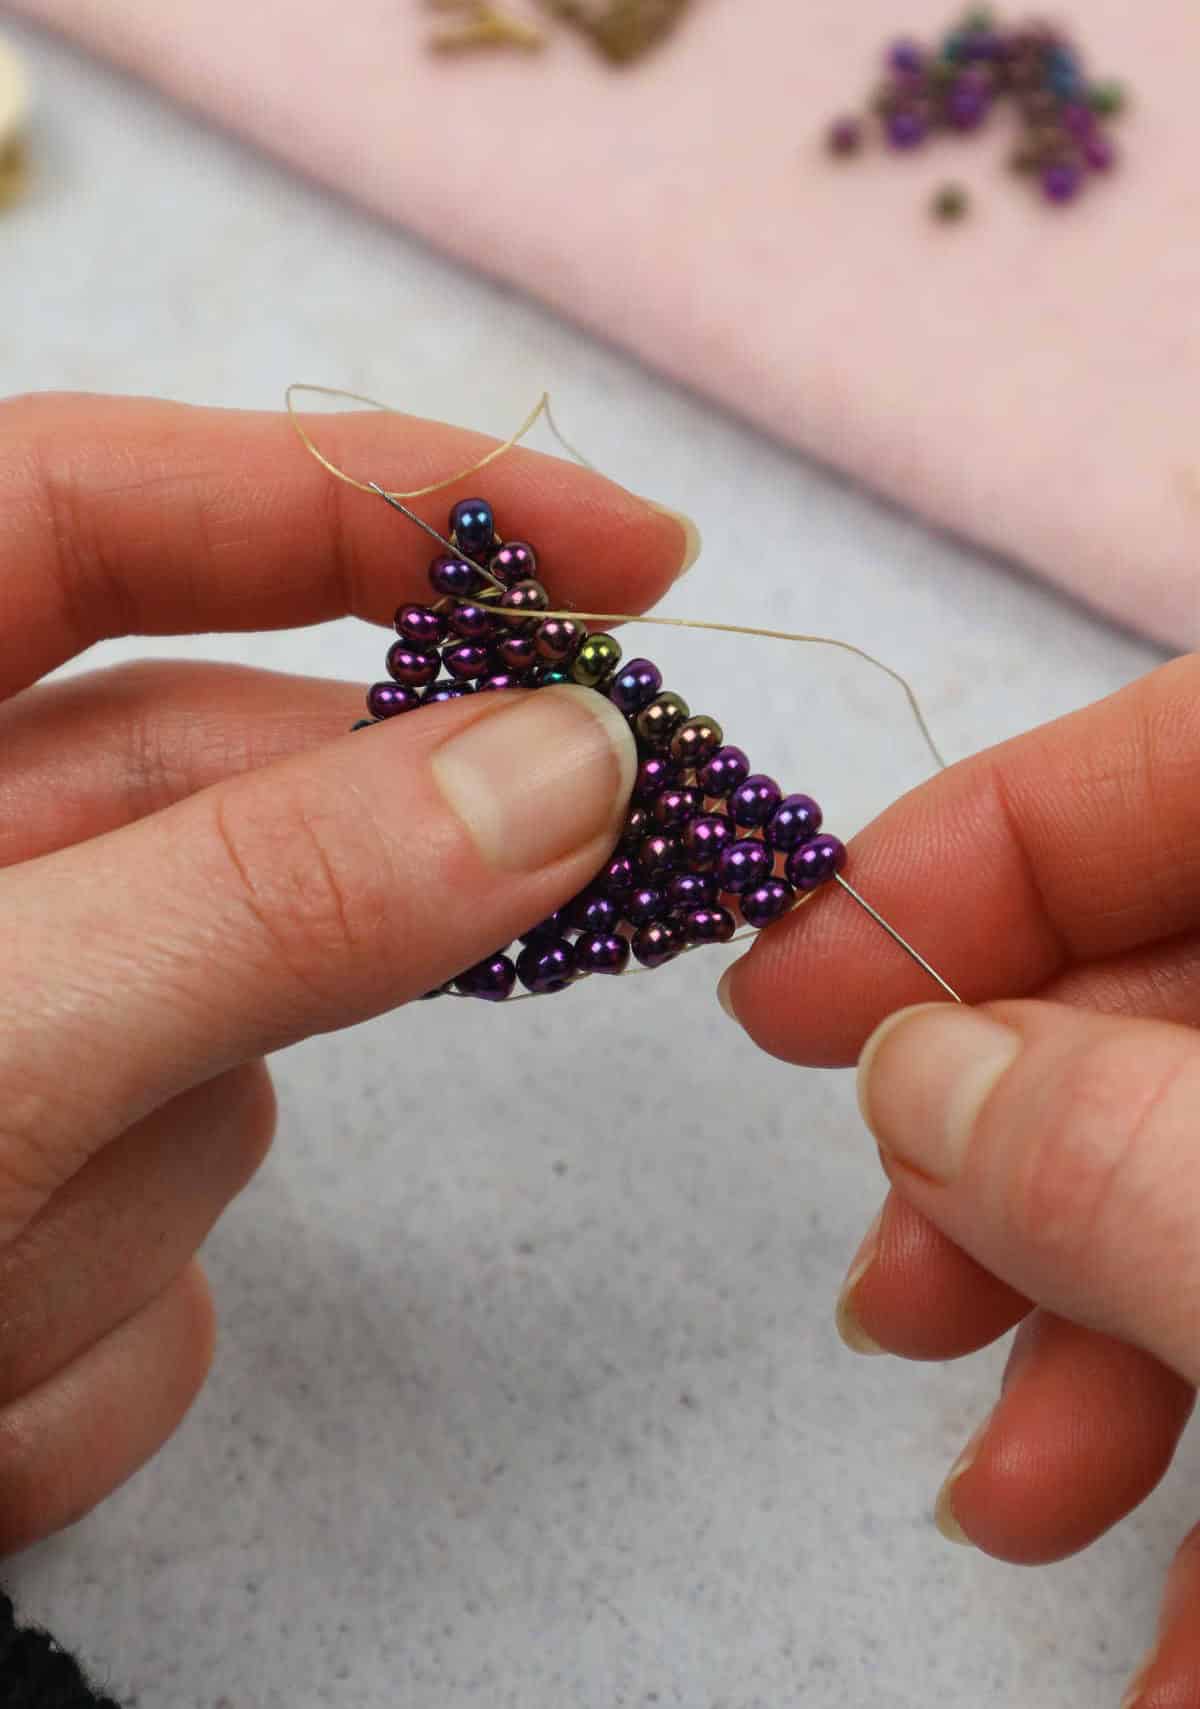
As the foundation of our earring design takes shape, we’ll focus on threading multiple rows from underneath to create the distinctive diamond pattern. This involves connecting individual strands to form a cohesive whole. Next, we’ll thread right through both beads, securing them to the rest of the network. To achieve a sleek and balanced look, it’s essential to pull each strand tight, working carefully to ensure all the beads lay flat against one another.
Step 10
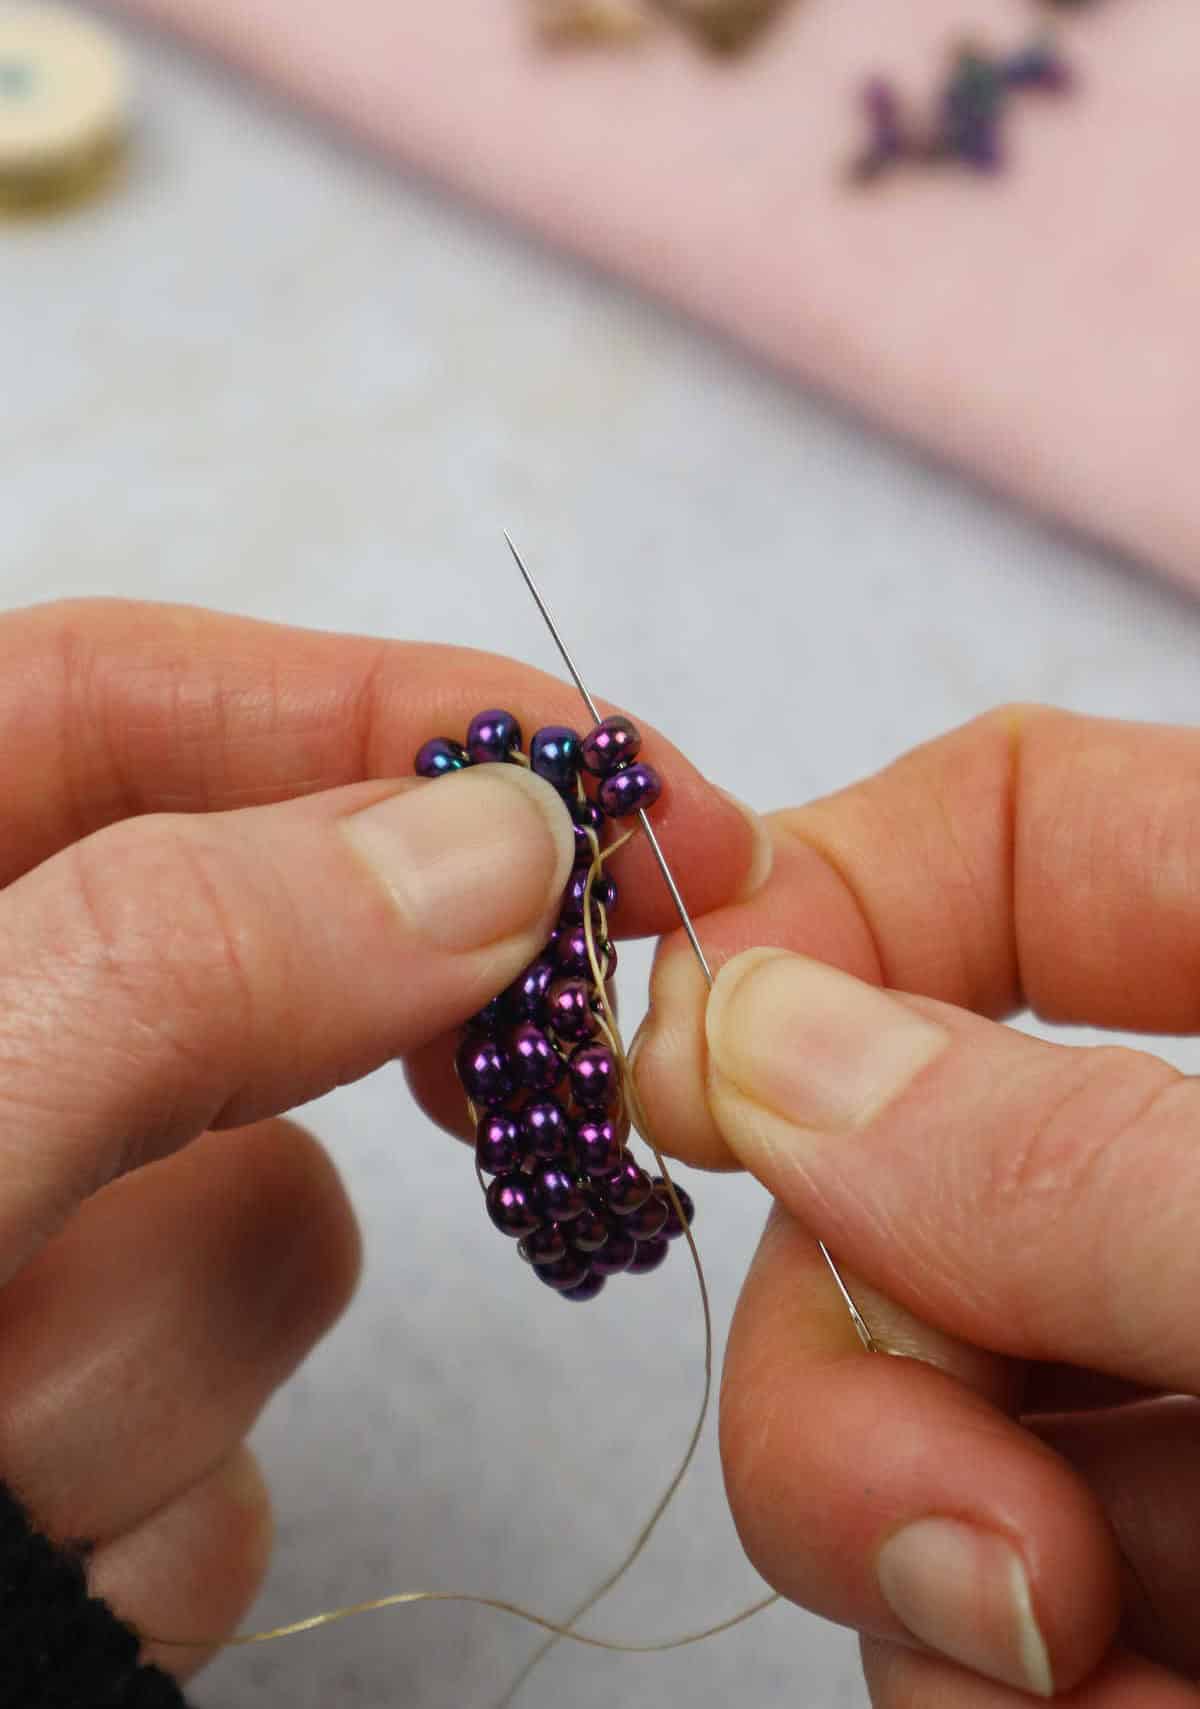
As you continue the weaving motion with the needle, focus on creating a flower-like shape by repeating the process until you achieve the desired form. With each successive pass, refine the shape and make any necessary adjustments to ensure your earrings are symmetrical and visually appealing.
Step 11
As you navigate through the bridge, make a deliberate effort to backtrack and reposition the bead alongside its companions. This simple yet precise adjustment ensures that the bead is now situated in harmony with the rest of the collection.
Step 12
To continue the beading process, repeat the same steps for each subsequent bead, but this time, skip the first gap and start the threading from the second bead.
Step 13
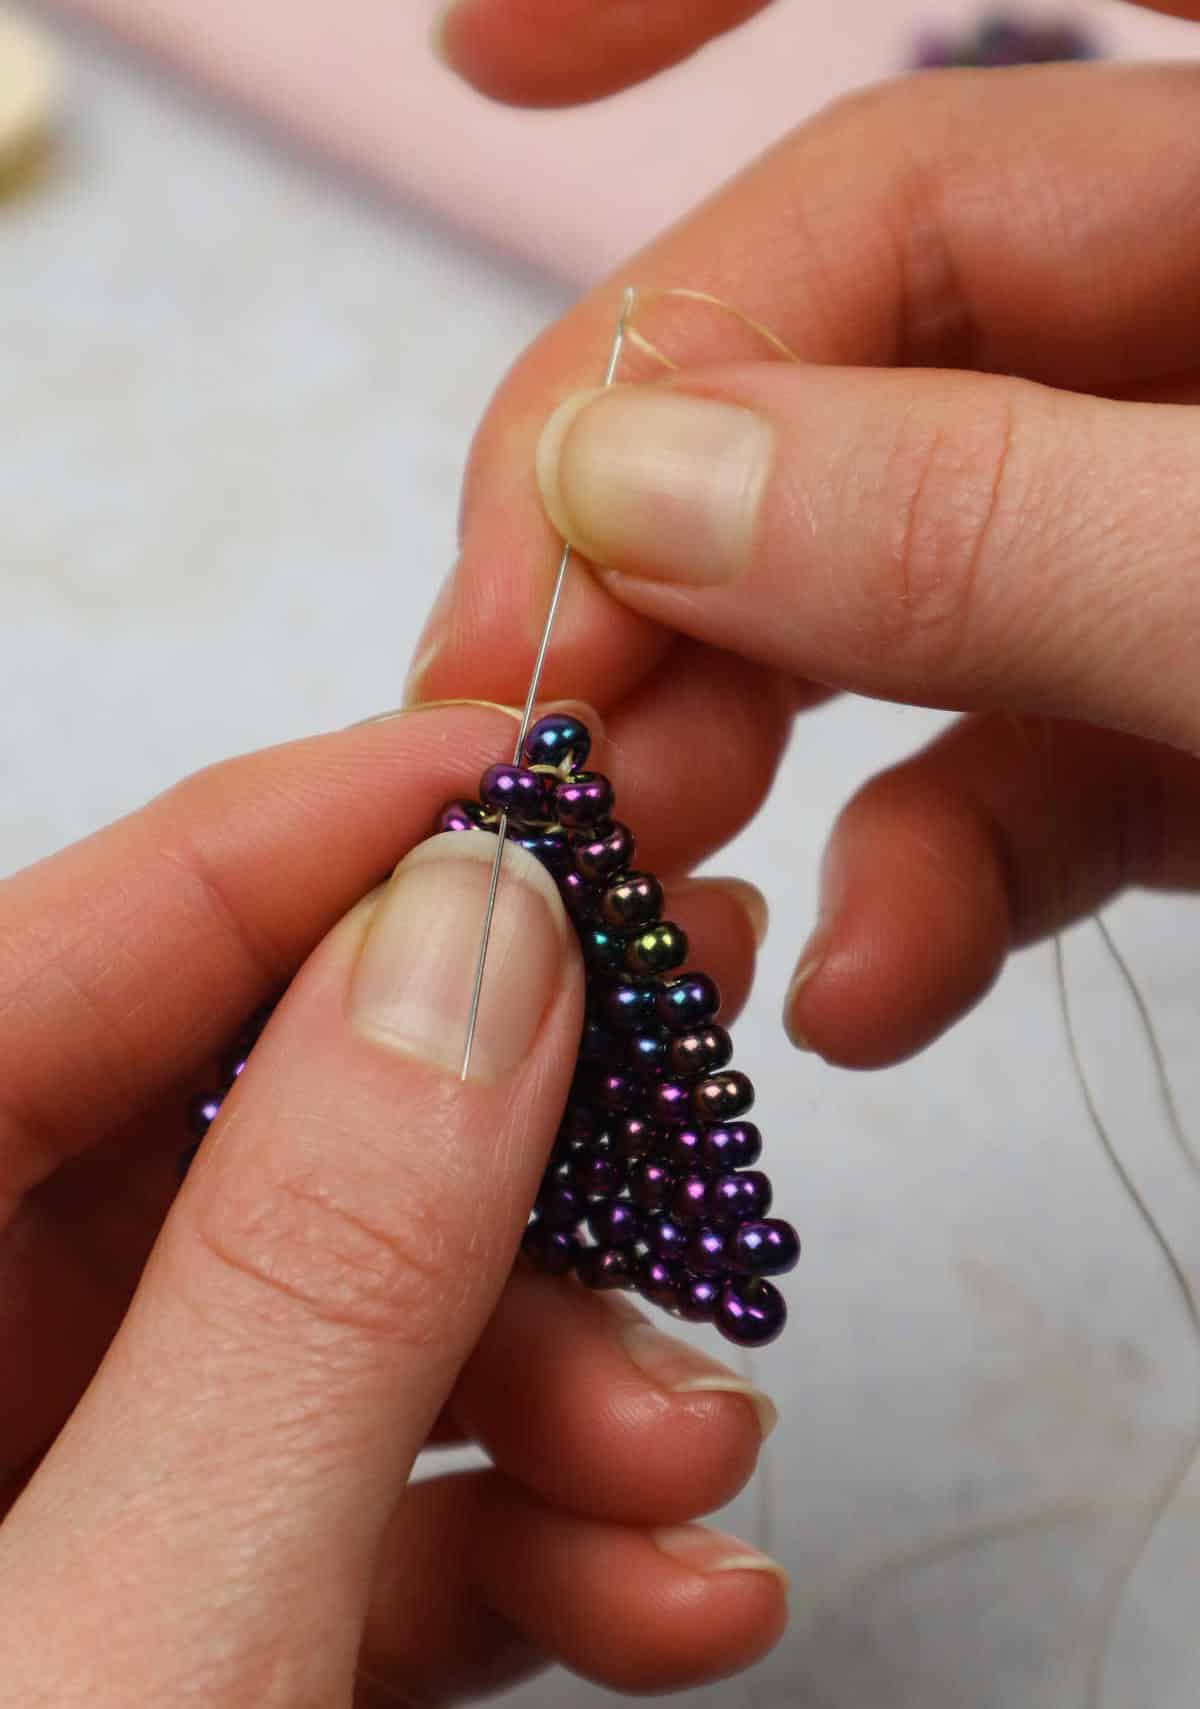
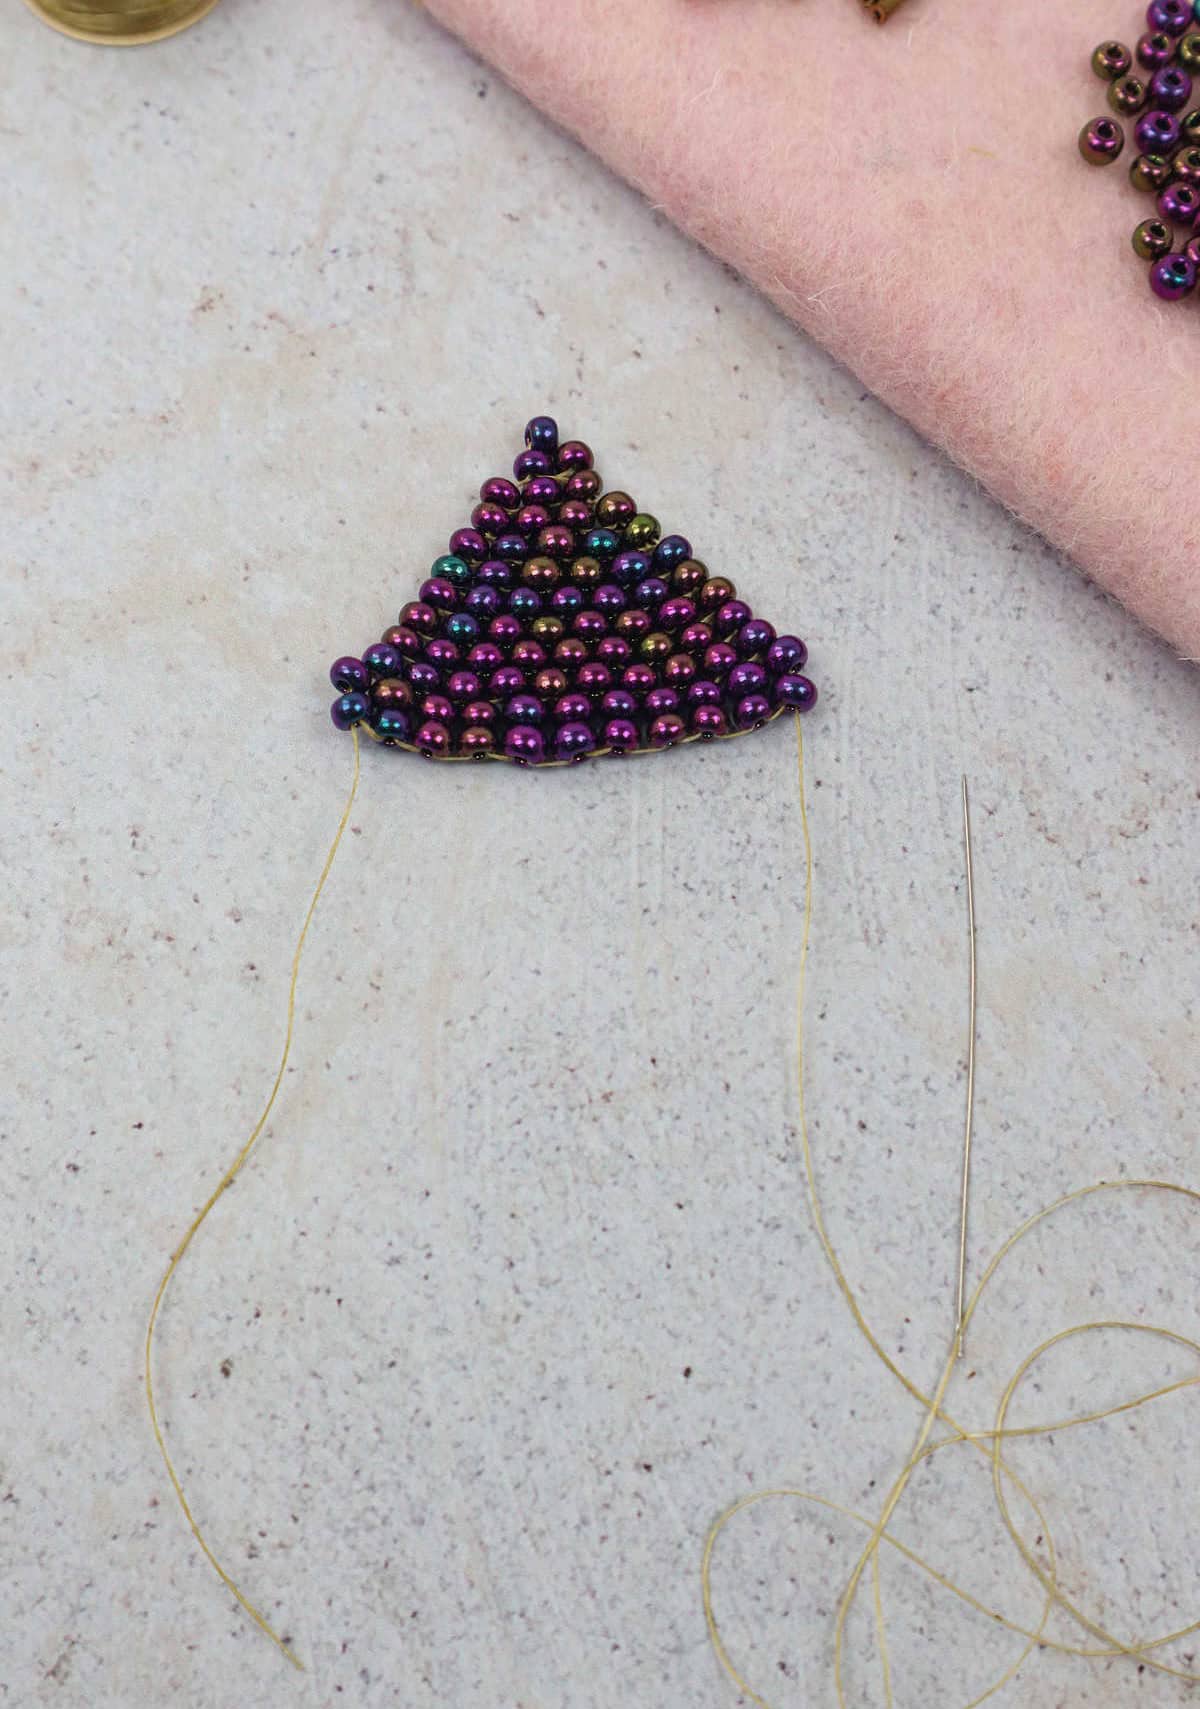
As you construct the design, gradually extend its dimensions while maintaining a sloping edge that converges towards the bottom, ultimately resembling the silhouette of an equilateral triangle.
Step 14
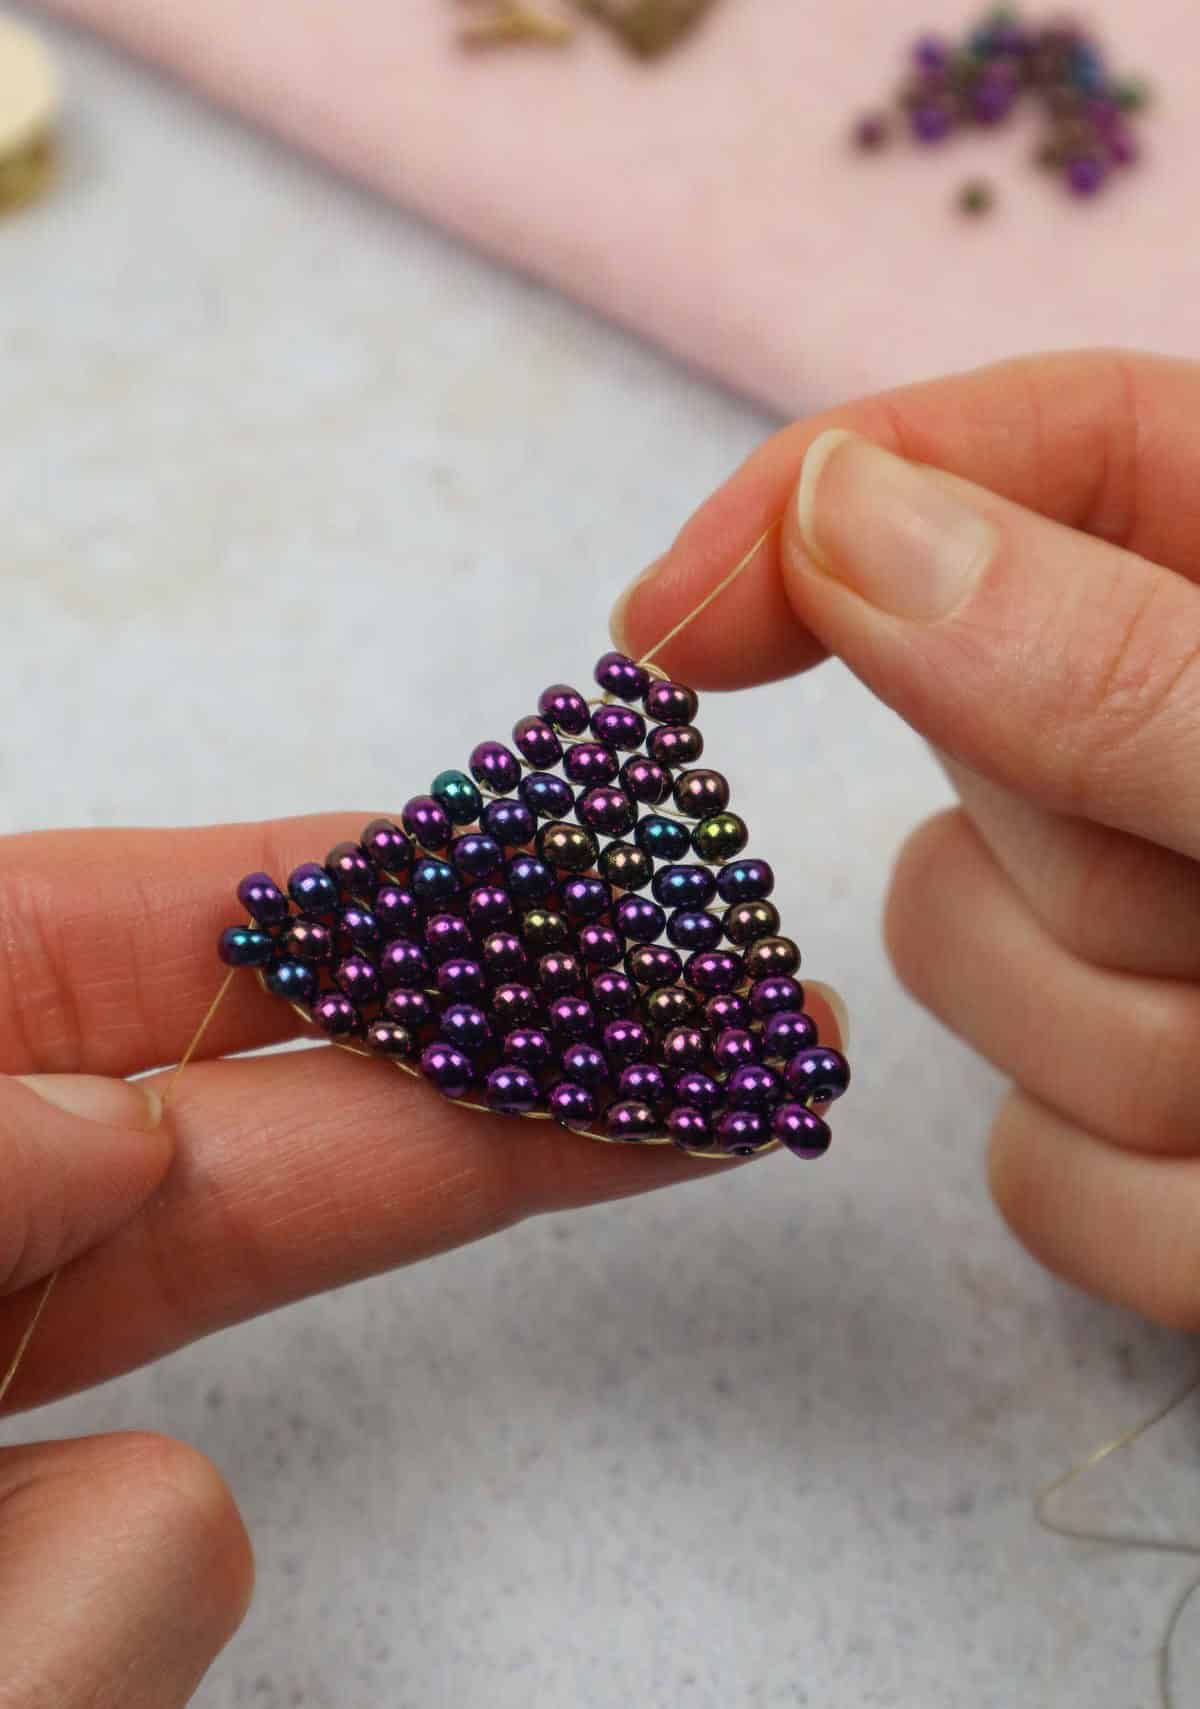
As you work on creating each bead, focus on one at a time until you’ve reached the apex. The tapered shape of the triangles will continue to unfold towards the top. It’s essential to maintain good weaving habits by threading your needle into an empty bead hole and avoiding any backtracking or tangling, lest you risk unthreading your work. Take this opportunity to witness the first triangle take shape as it begins to form.
Step 15
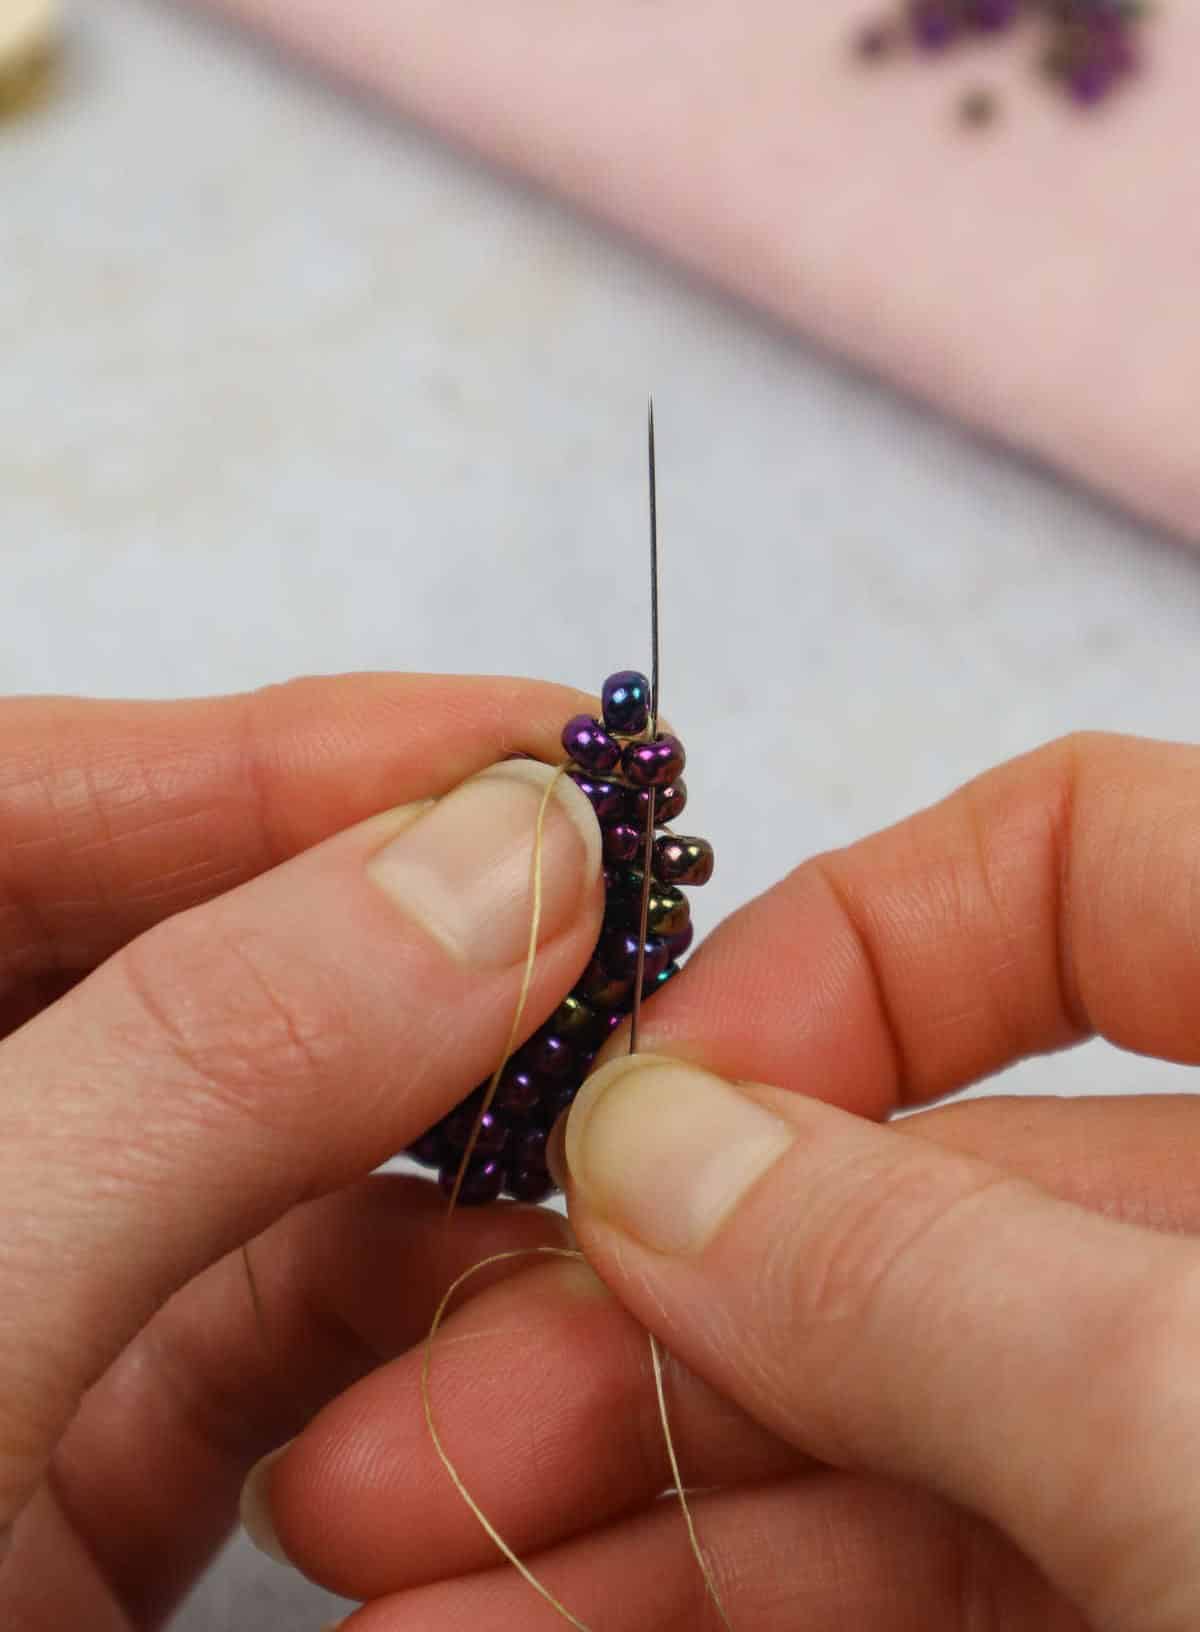
As you bring your first earring design to life, don’t neglect to add the final touches. Start by securing the bead at the apex of the triangle with a neat and tidy loop that connects seamlessly to the surrounding beads. This will not only complete the look but also ensure your earrings remain secure and comfortable to wear.
Step 16
As you delve deeper into the top beads, make sure to secure them in place below the first one. This sets the stage for the next step: securing the top bead and preparing it for the jump ring that will be fastened into the interior of the design. A crucial aspect is ensuring the integrity of the triangle shape is maintained throughout this process. The continuity of securing these beads is essential to achieving a polished look.
When reviewing your work, take a moment to examine the tails of each bead and note which side is longer, as this will be an important consideration in the next stages of your project.
Step 17
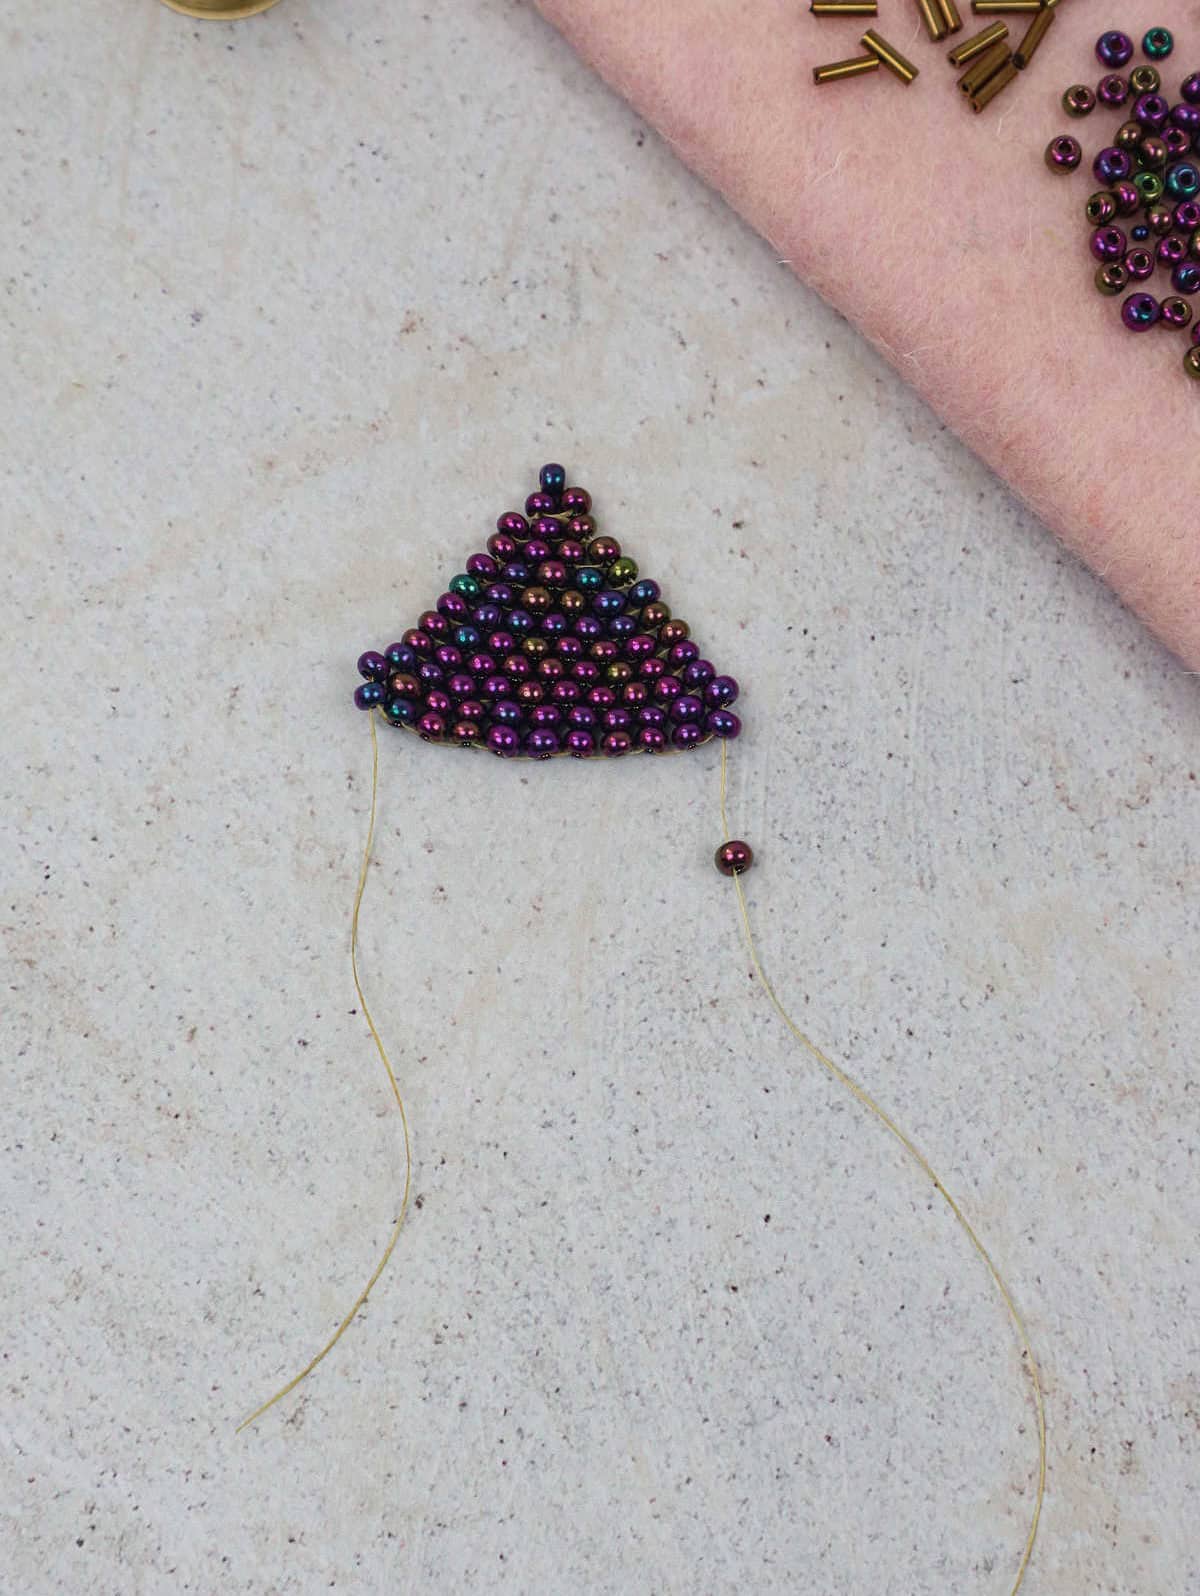
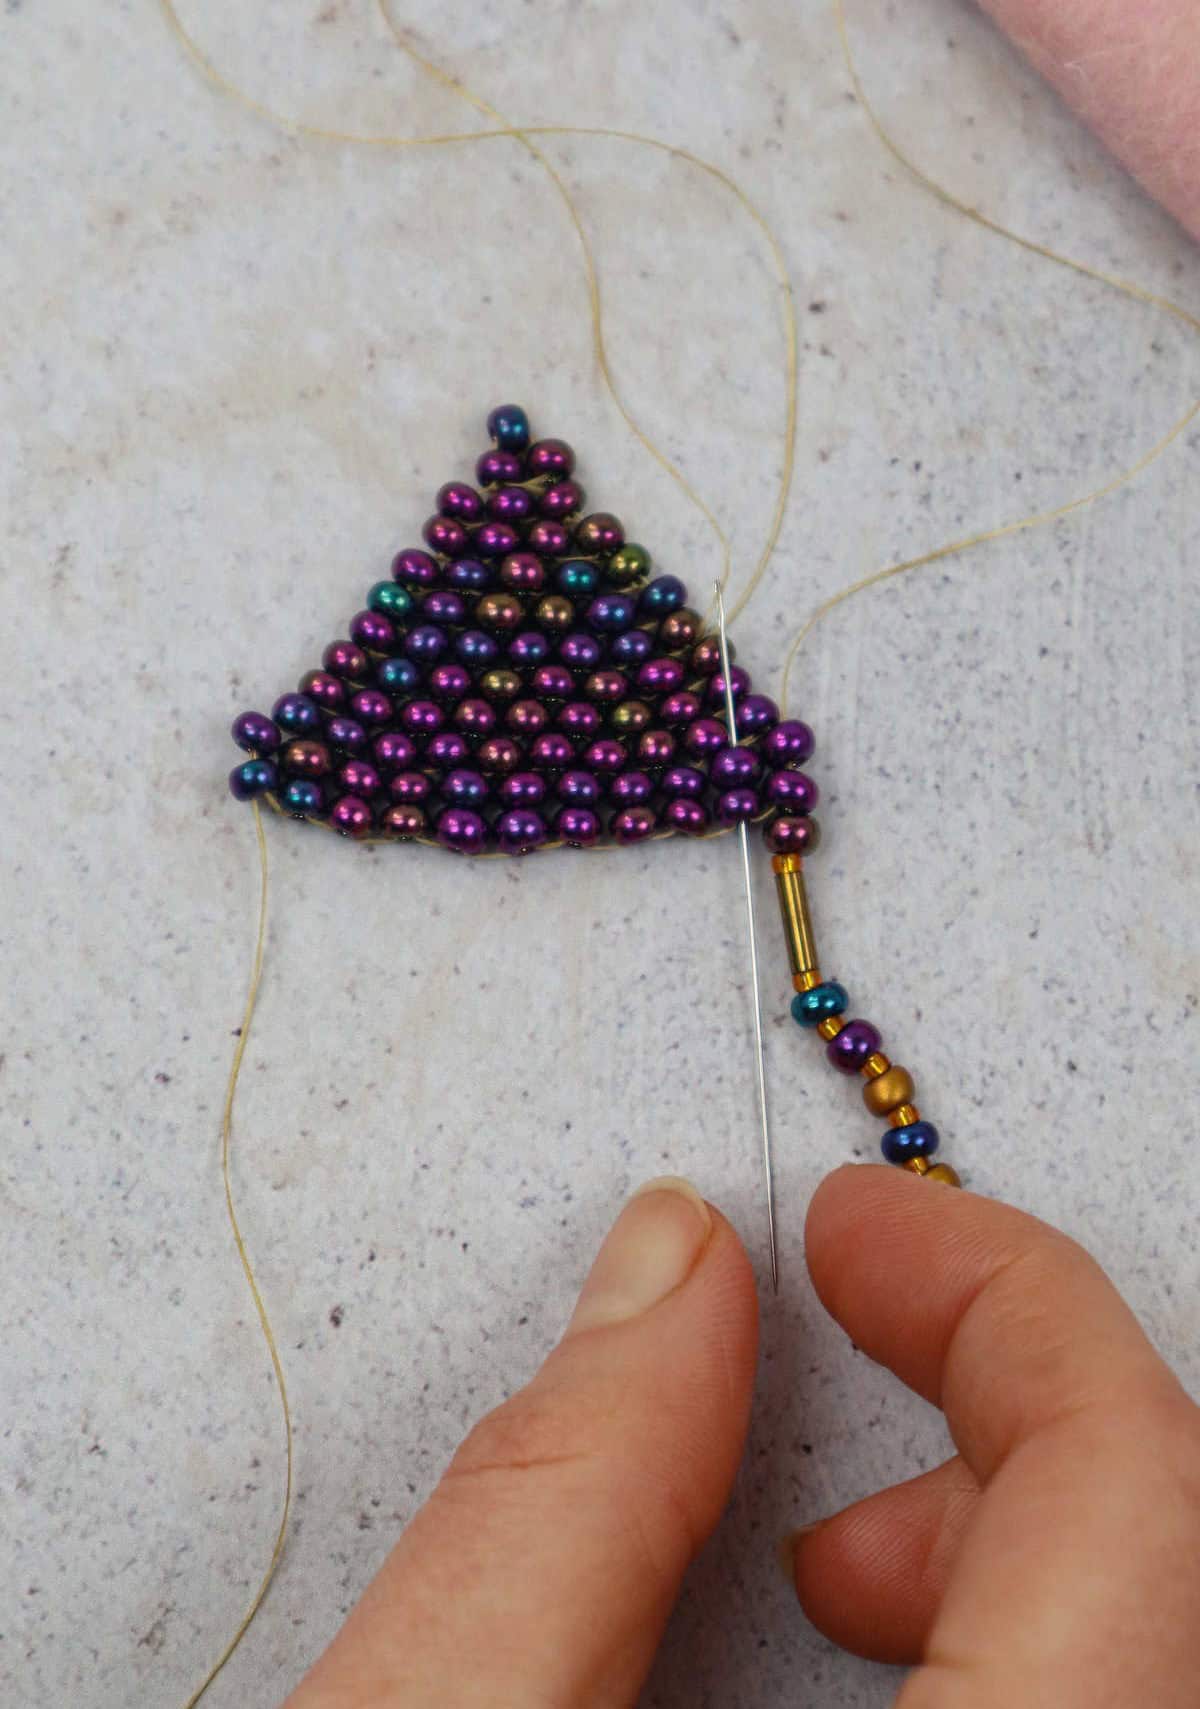
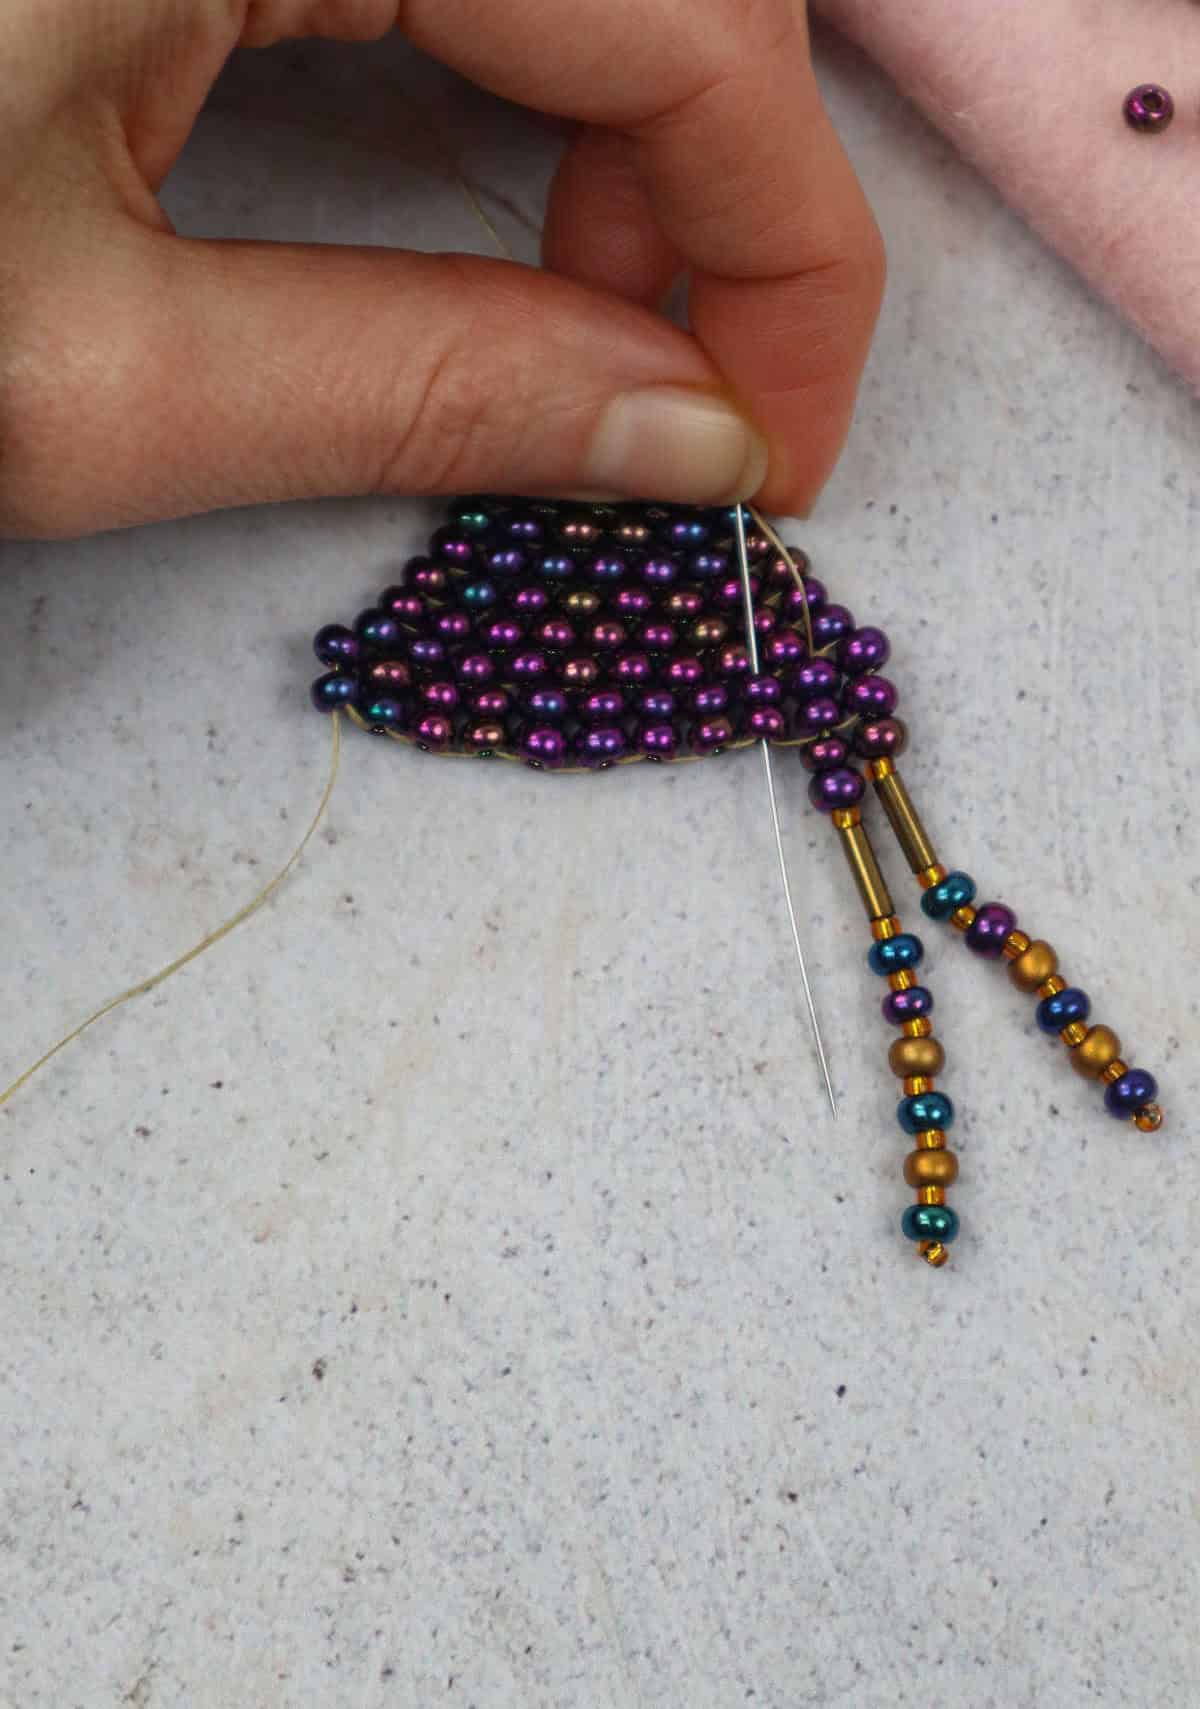
With the triangular shape now complete, our attention turns to the fringe on the earrings. This is where your creativity can truly shine – the amount and style of fringe you choose are entirely up to you. Whether you opt for a delicate, understated design or something more bold and eye-catching, the possibilities are endless.
Step 18
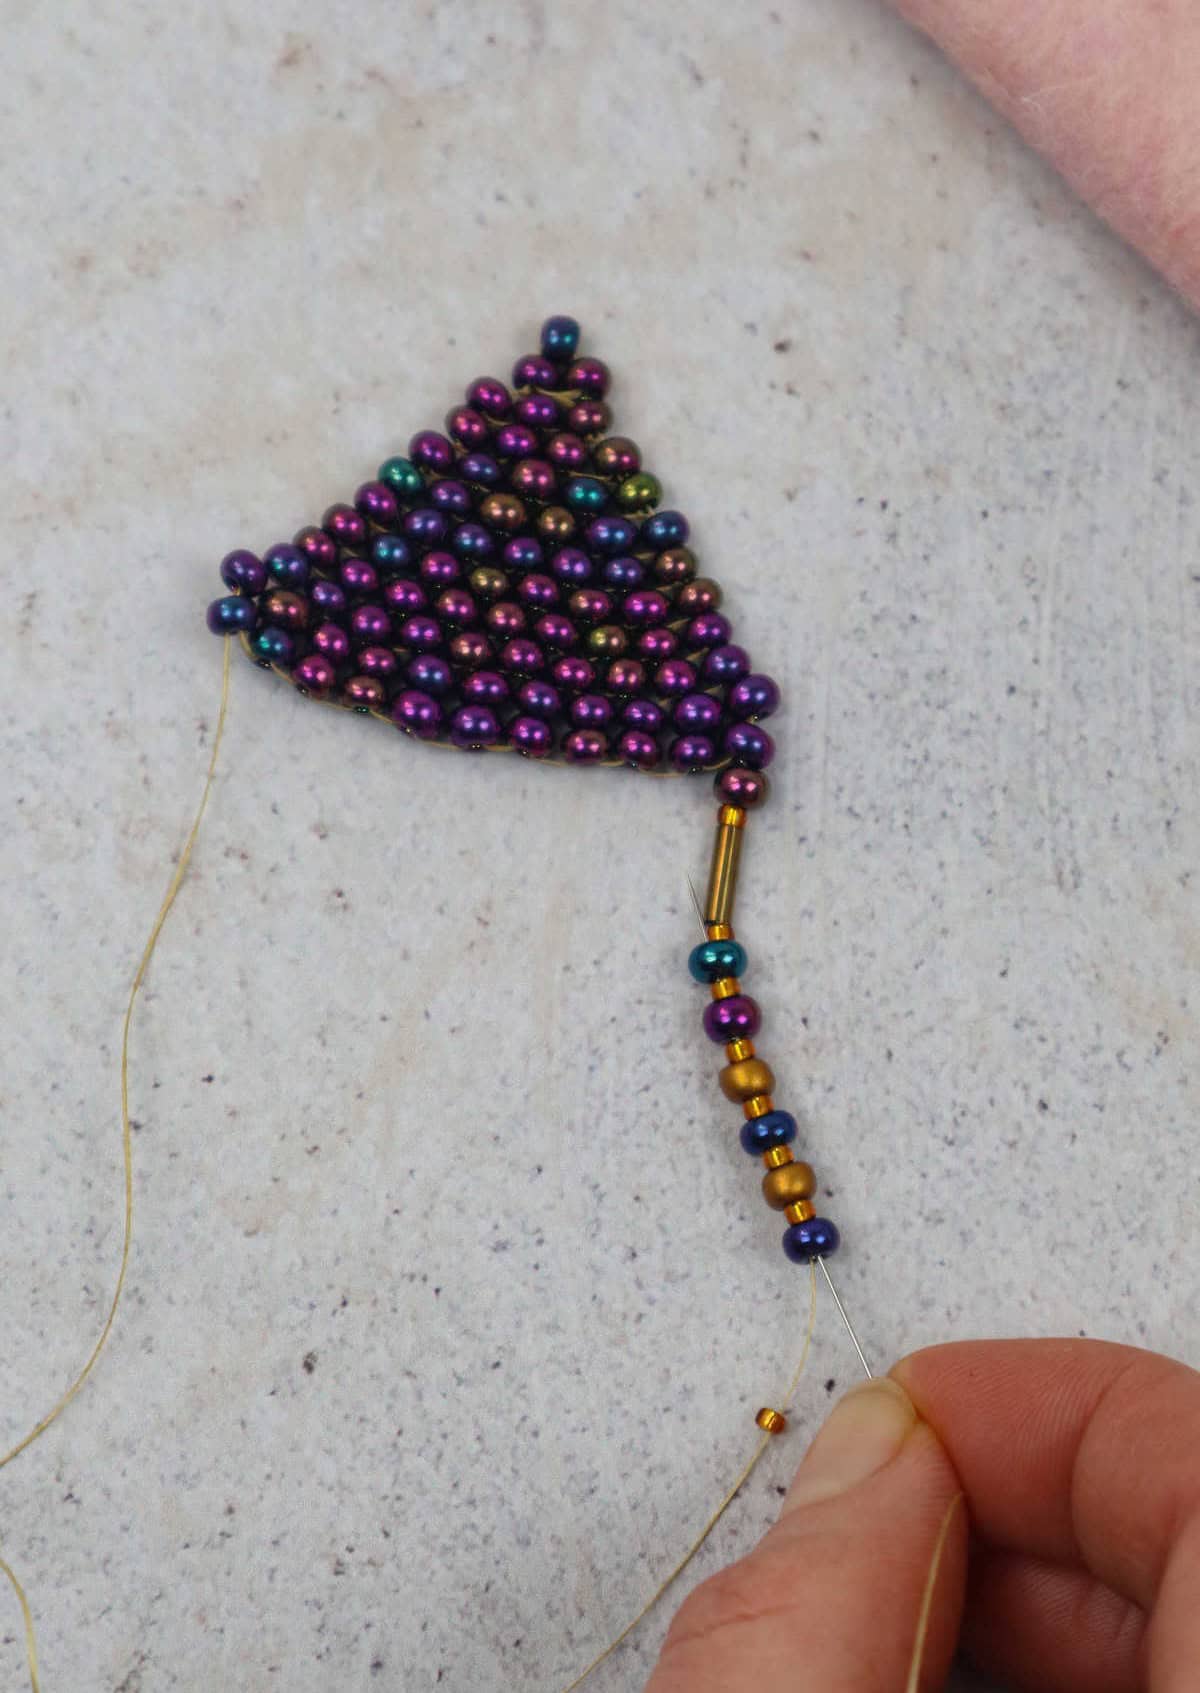
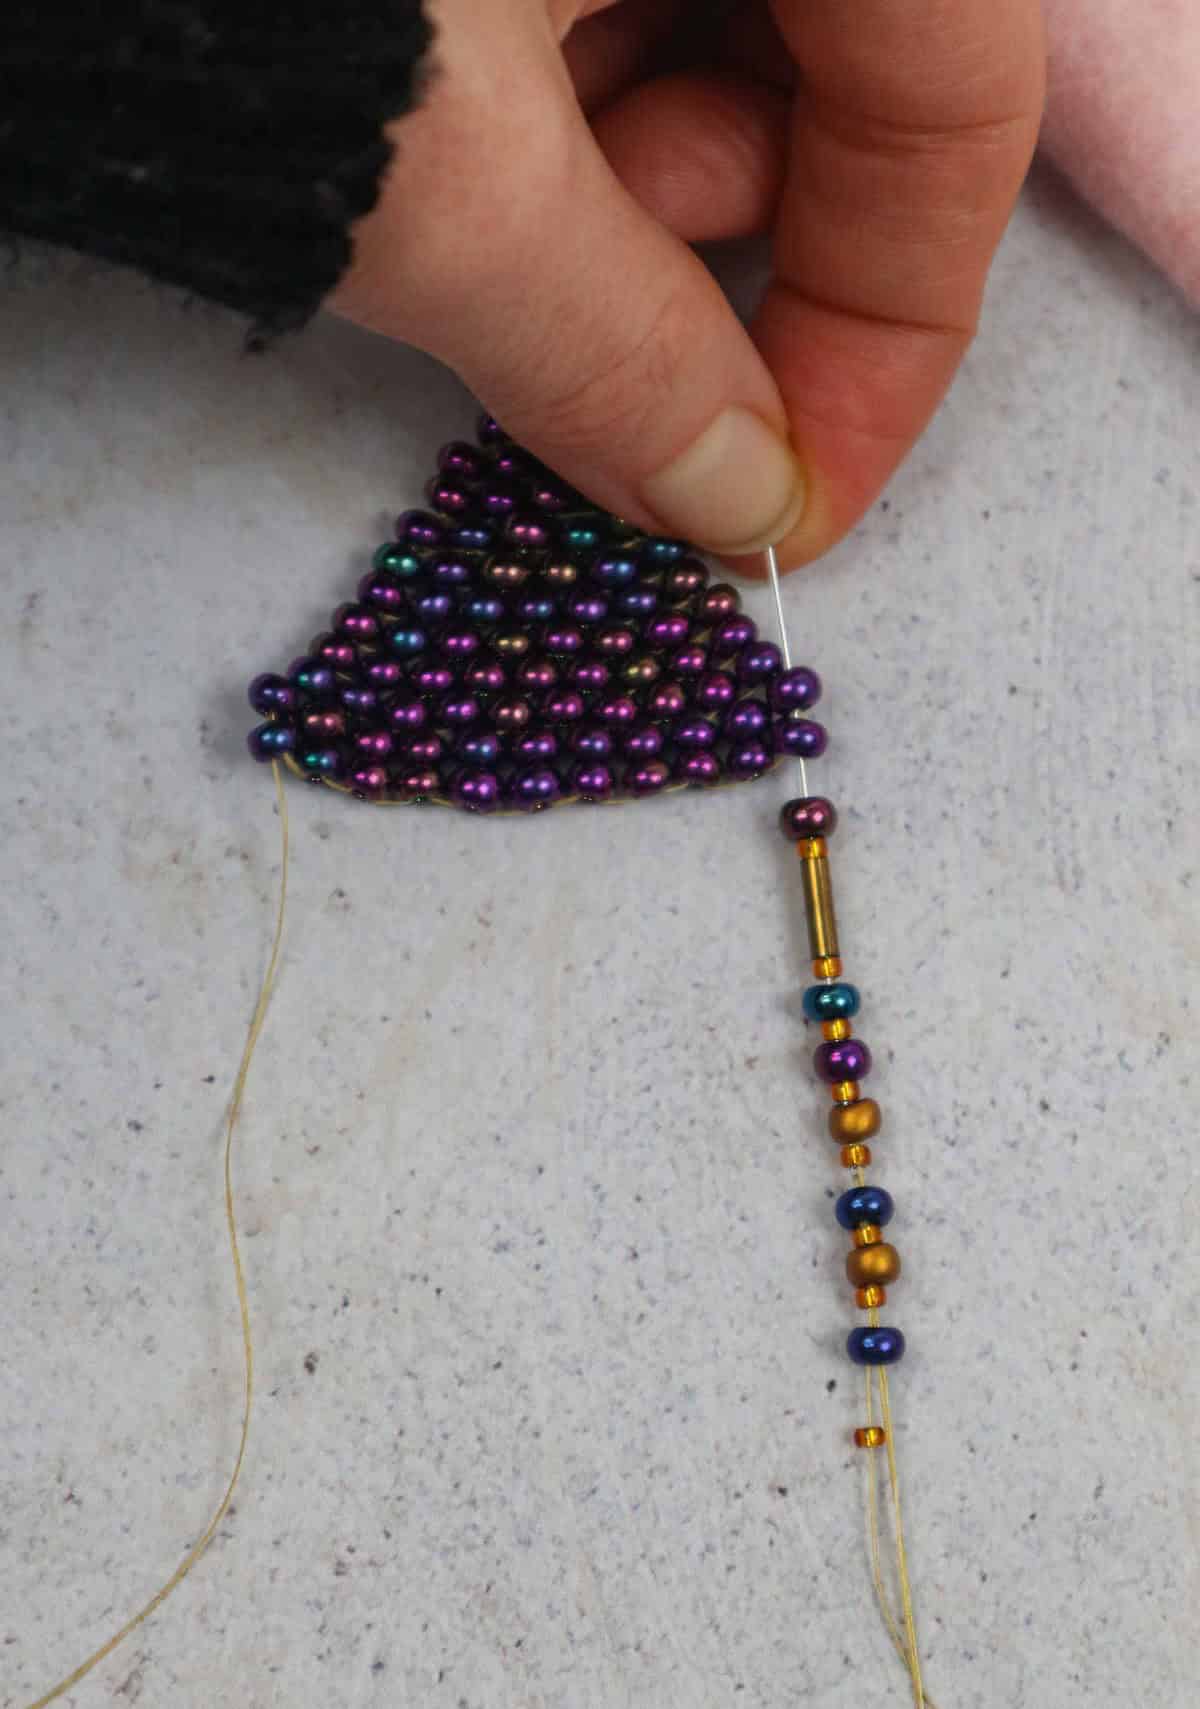
As you finish each line of fringe, bring your needle back up through every bead except the bottom one. This process involves threading up through the fringe, where you’ll encounter the two lowest beads on the strand. Thread your needle through these beads and gently pull the thread upwards and outwards to secure the fringe in place.
Step 19
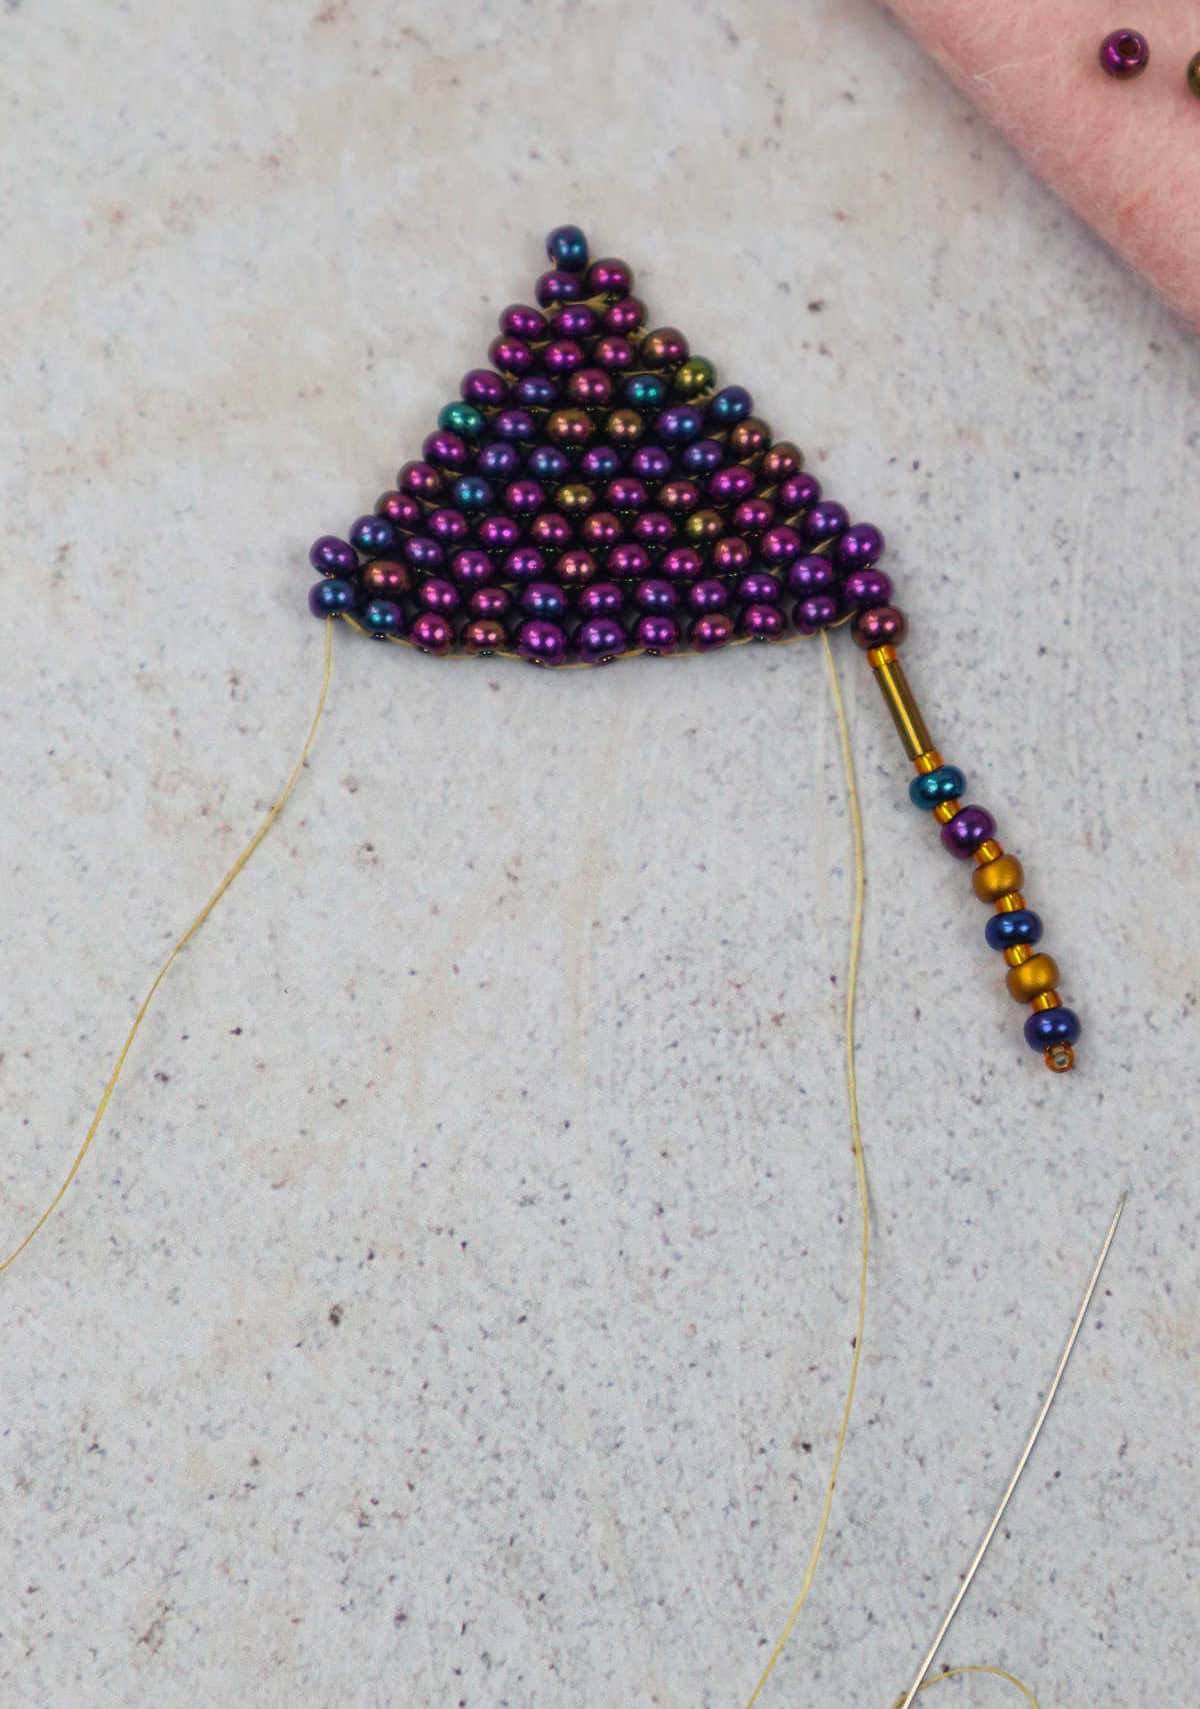
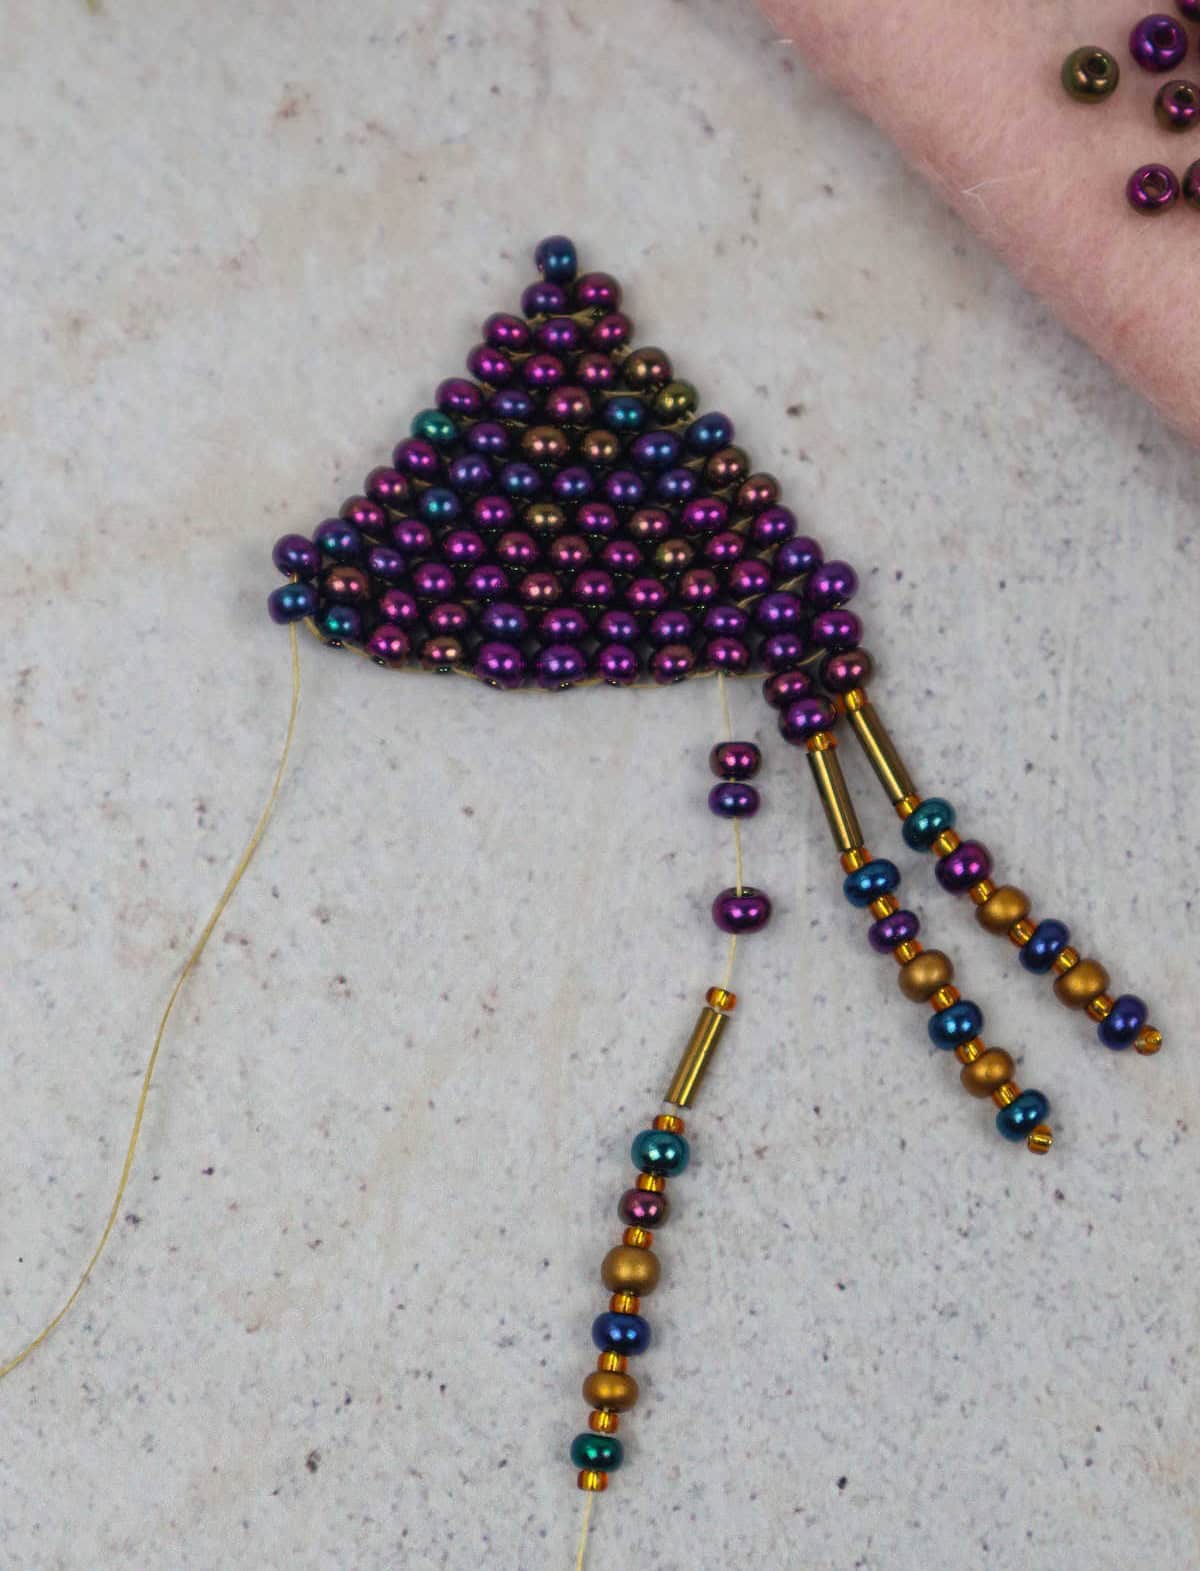
As you complete each step, it’s time to move on to the next phase. First, take the needle and gently guide it through a small opening near the top of the first fringe section. This will create space for the next layer of fringes. Repeat this process until you’ve reached the desired length. Once you’ve got the momentum going, it’s time to work on the next fringe line.
To do this, pull the thread downward through the next bead in the ladder, which will automatically form the foundation for your new fringe line.
Step 20
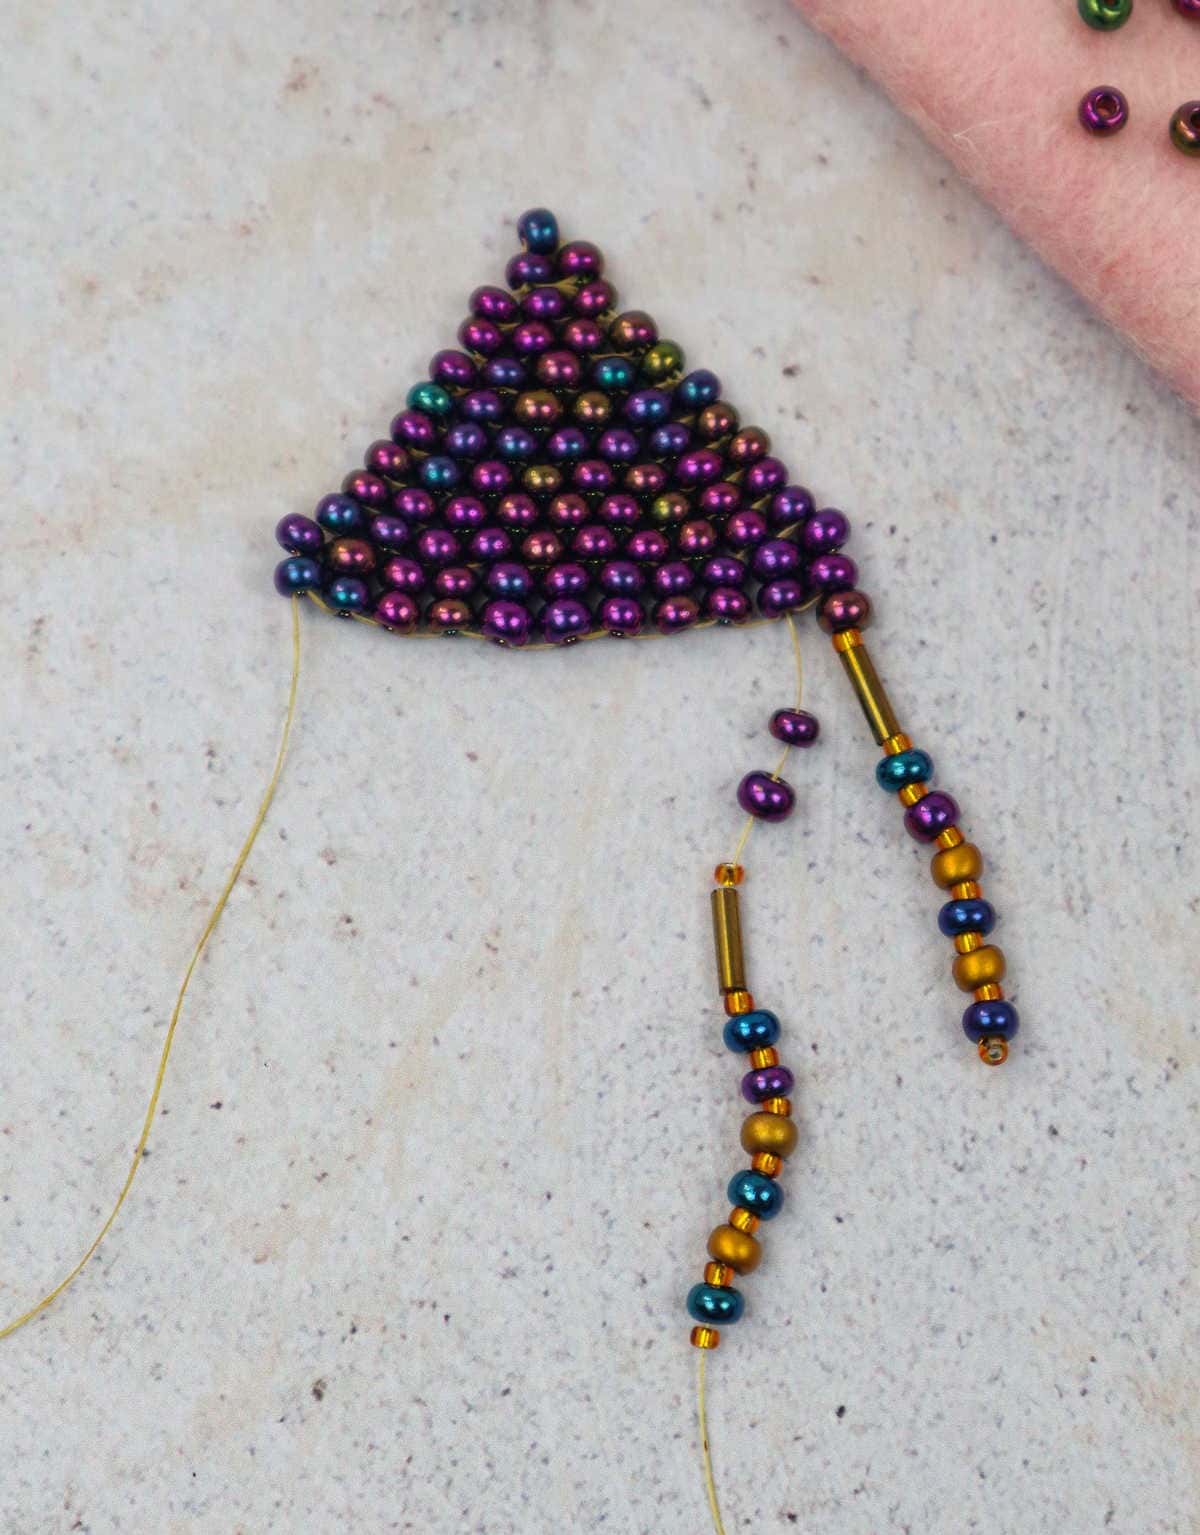
To complete the knot, repeat the sequence of threading and stringing. Begin by passing the string under the second line, then continue this process until you’ve crossed over the entire length. As you work, take care not to thread your bottom bead, instead, pass the string up through the two beads that form the ladder. Once you’ve reached the top, thread back down through one of the beads to create the next line in the knot.
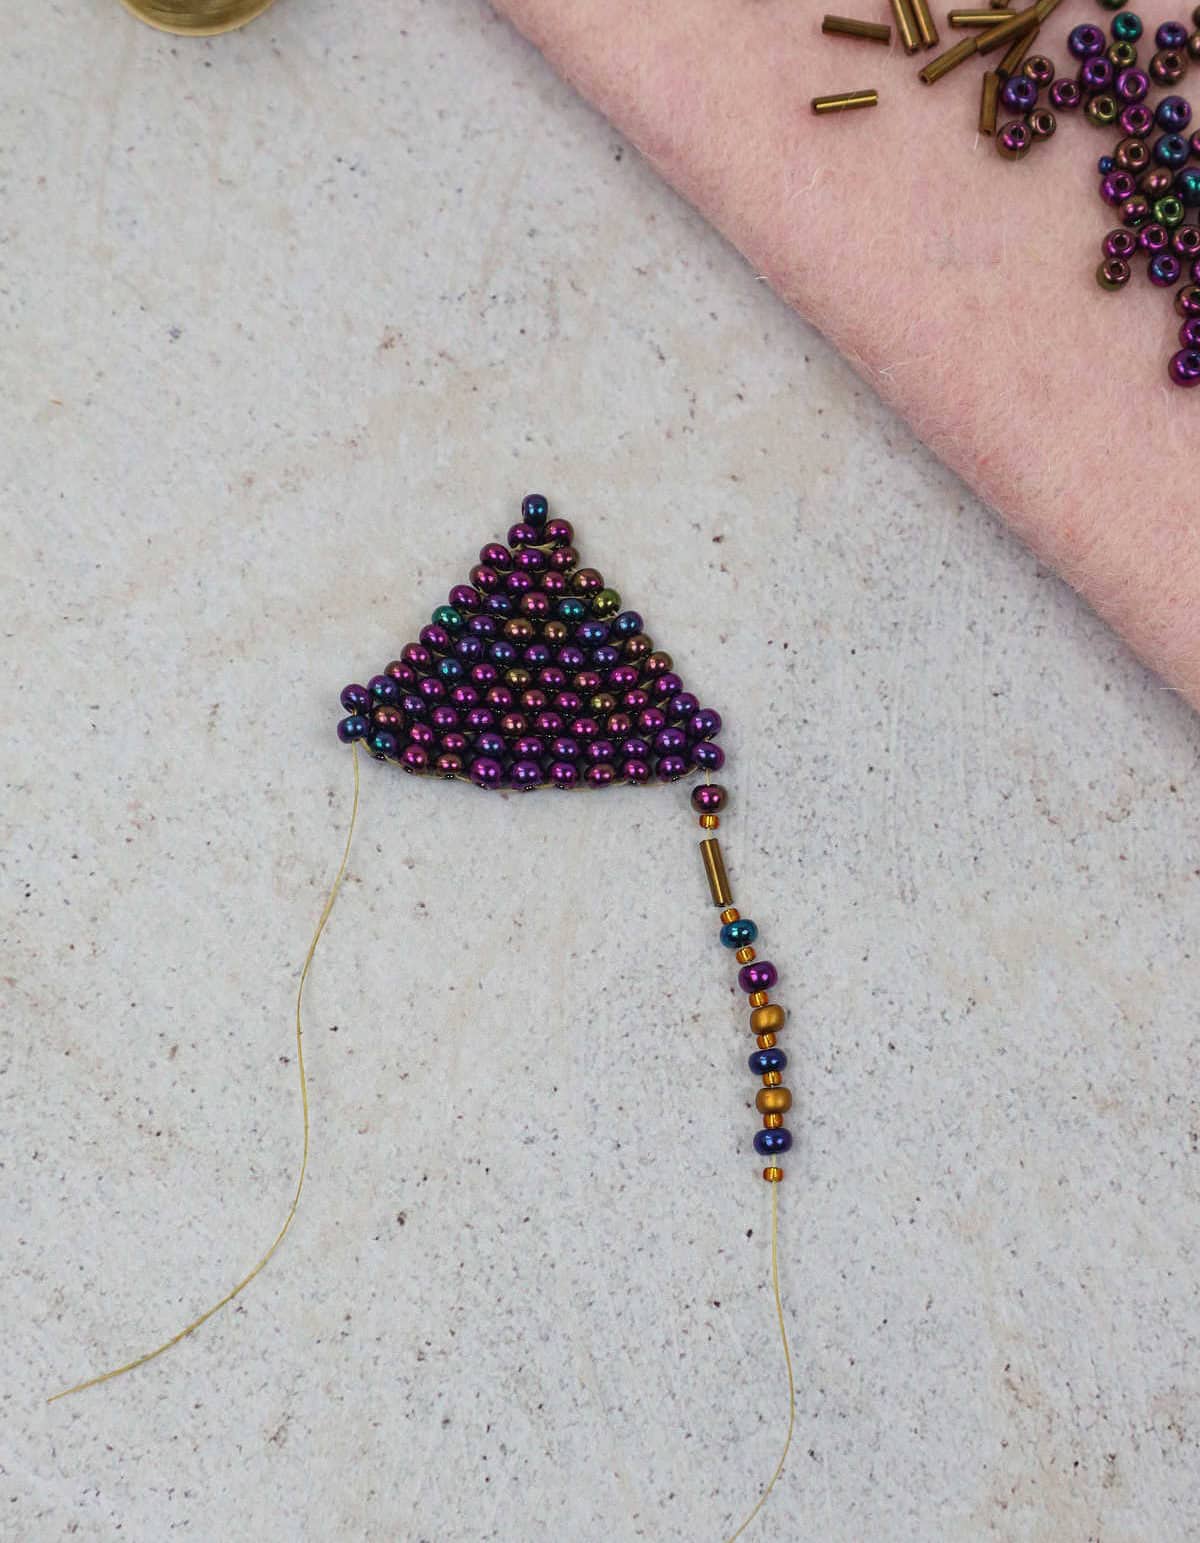
Step 21
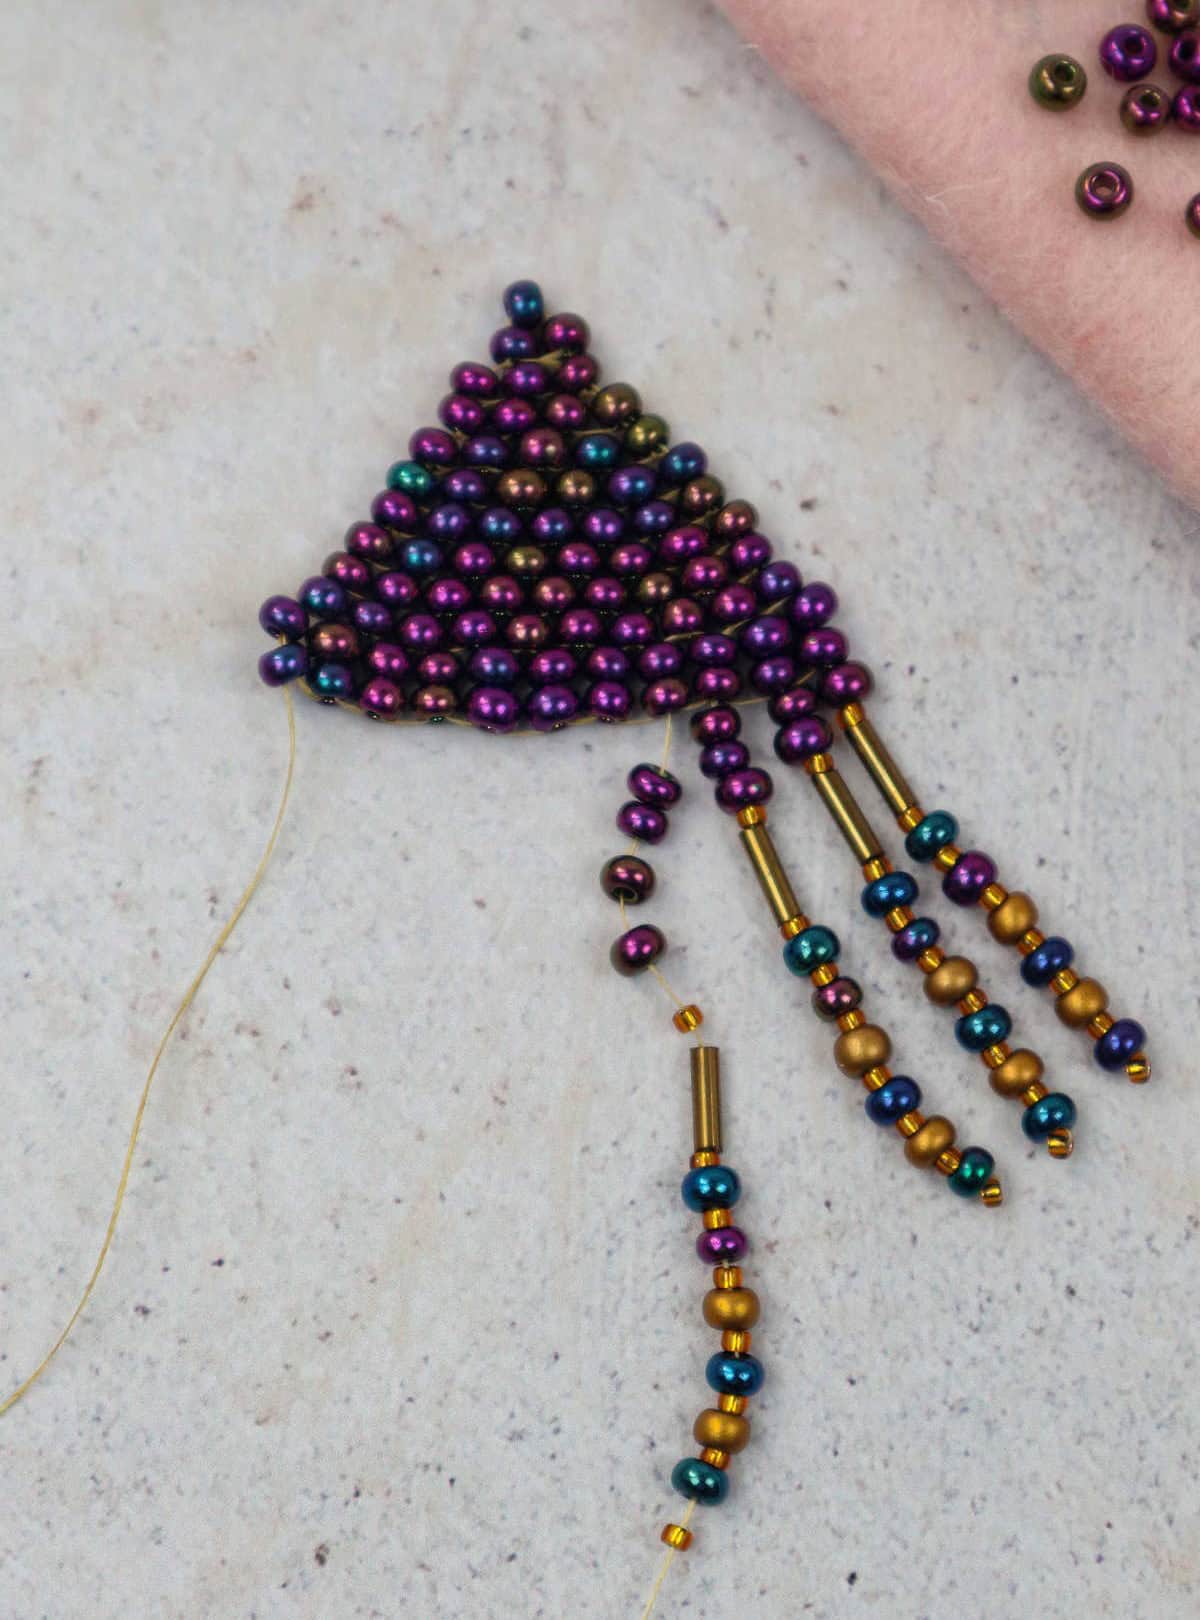
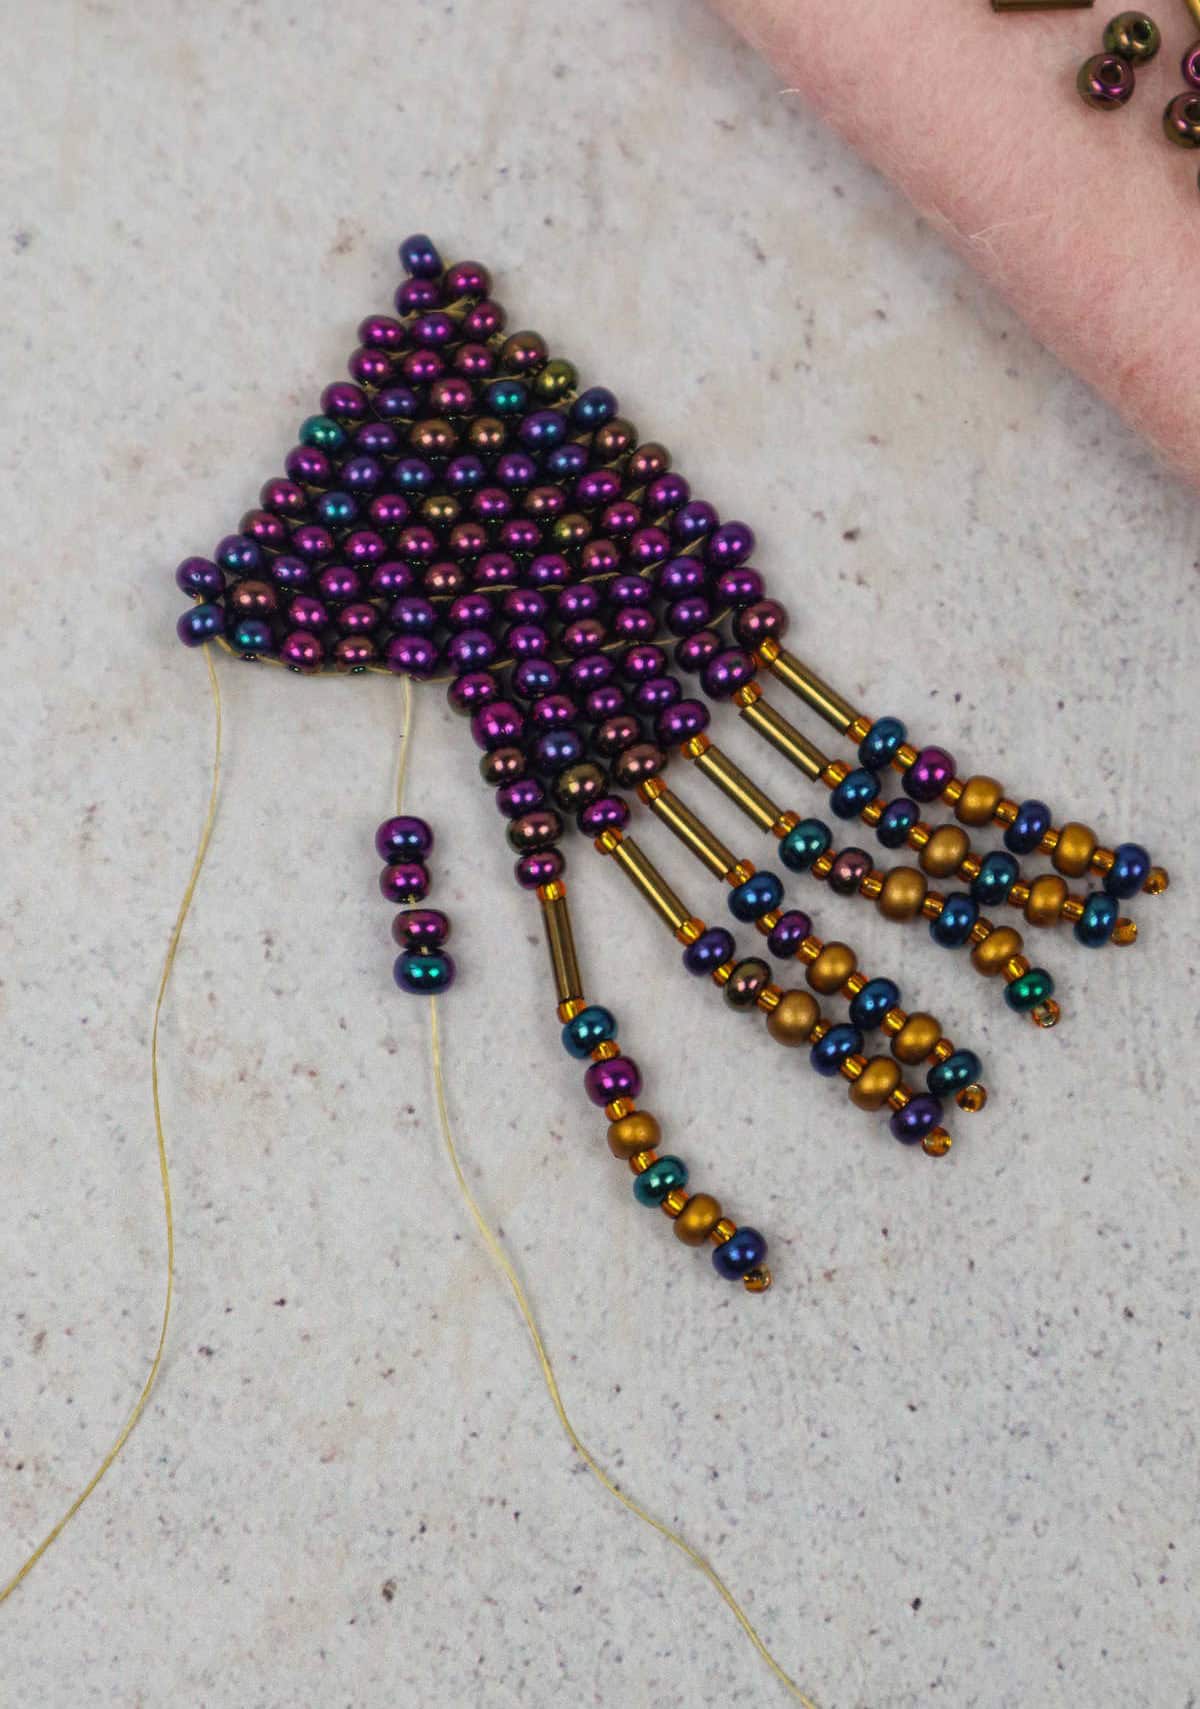
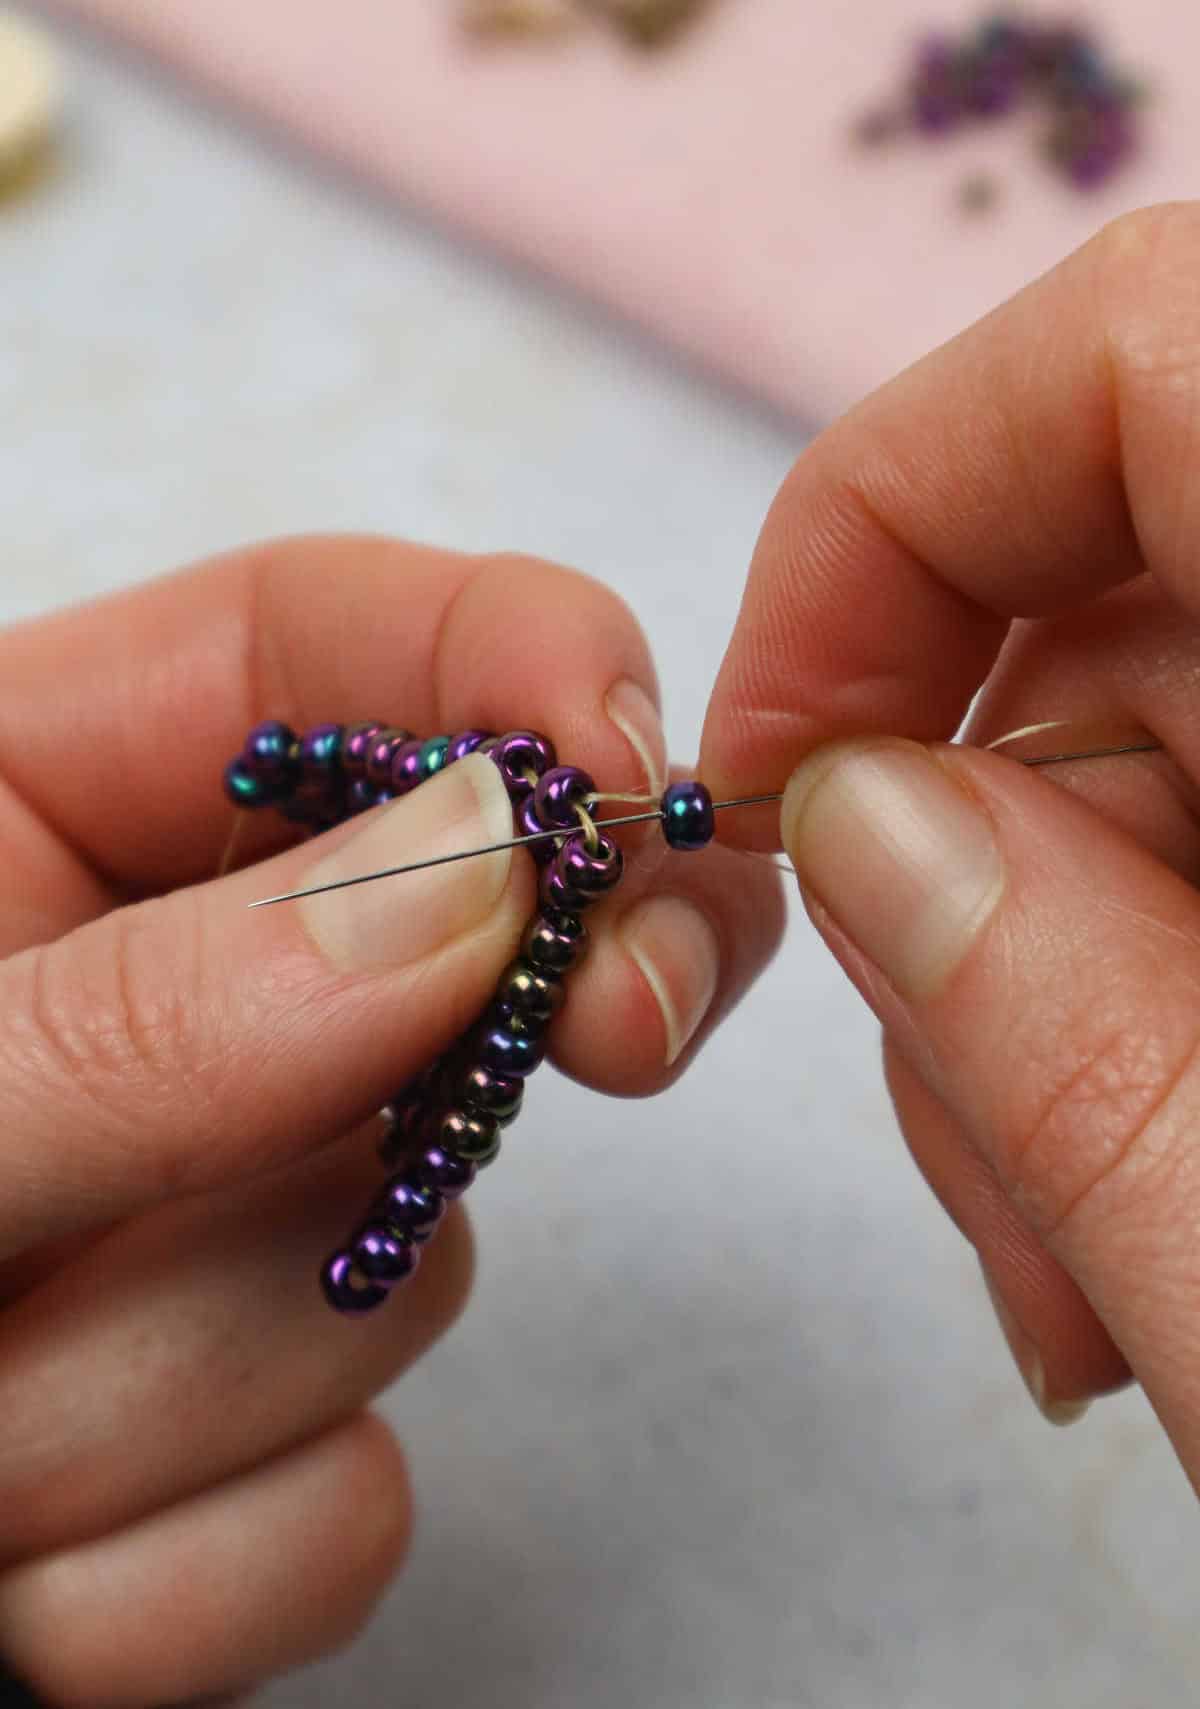
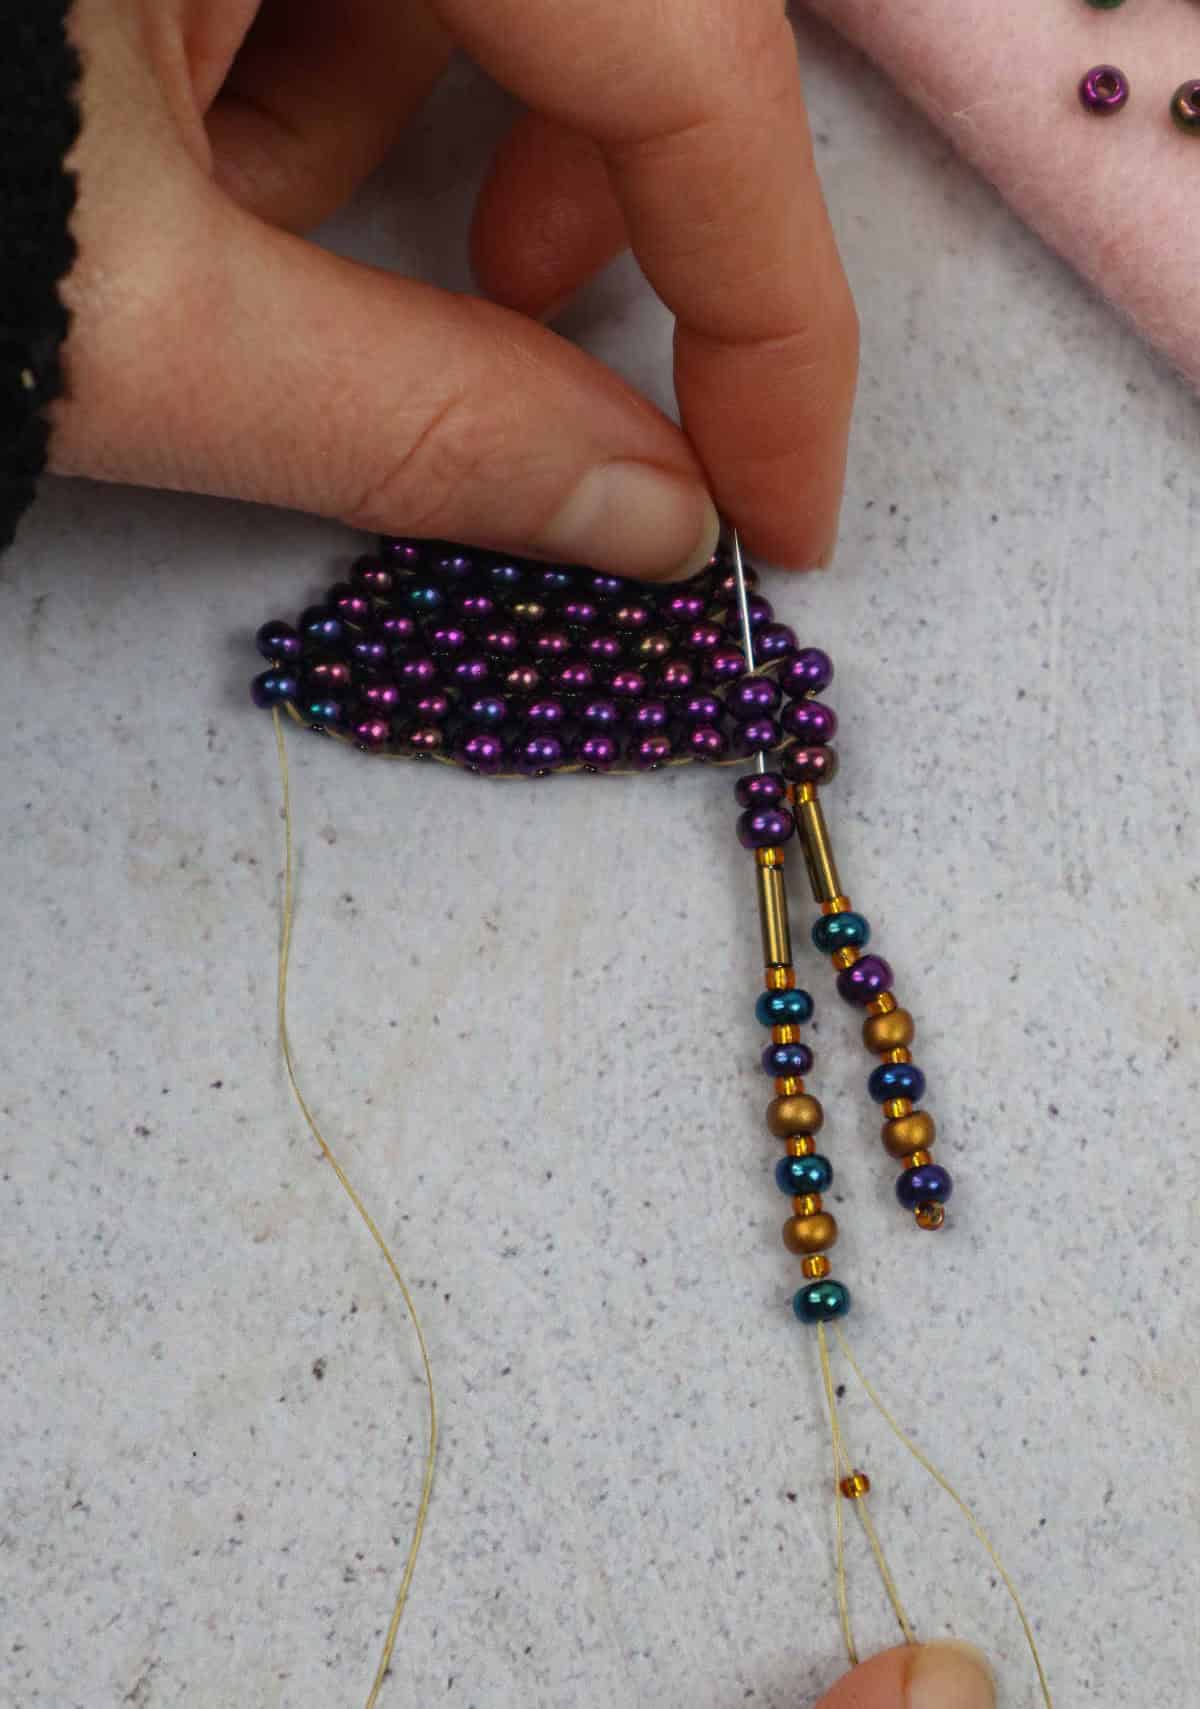
As I add more beads to the fringe, it will start to take on a triangular shape. To achieve this, I’ll begin by adding two purple beads at the starting point and keep the core of the design consistent. As the fringe grows towards the center, each strand will become slightly longer than the previous one, with the middle strand being the longest. I’ll continue threading beads, gradually increasing the length of my thread as needed.
Once I’ve reached the center, I’ll start to shorten the fringe again, working my way back to the left side.
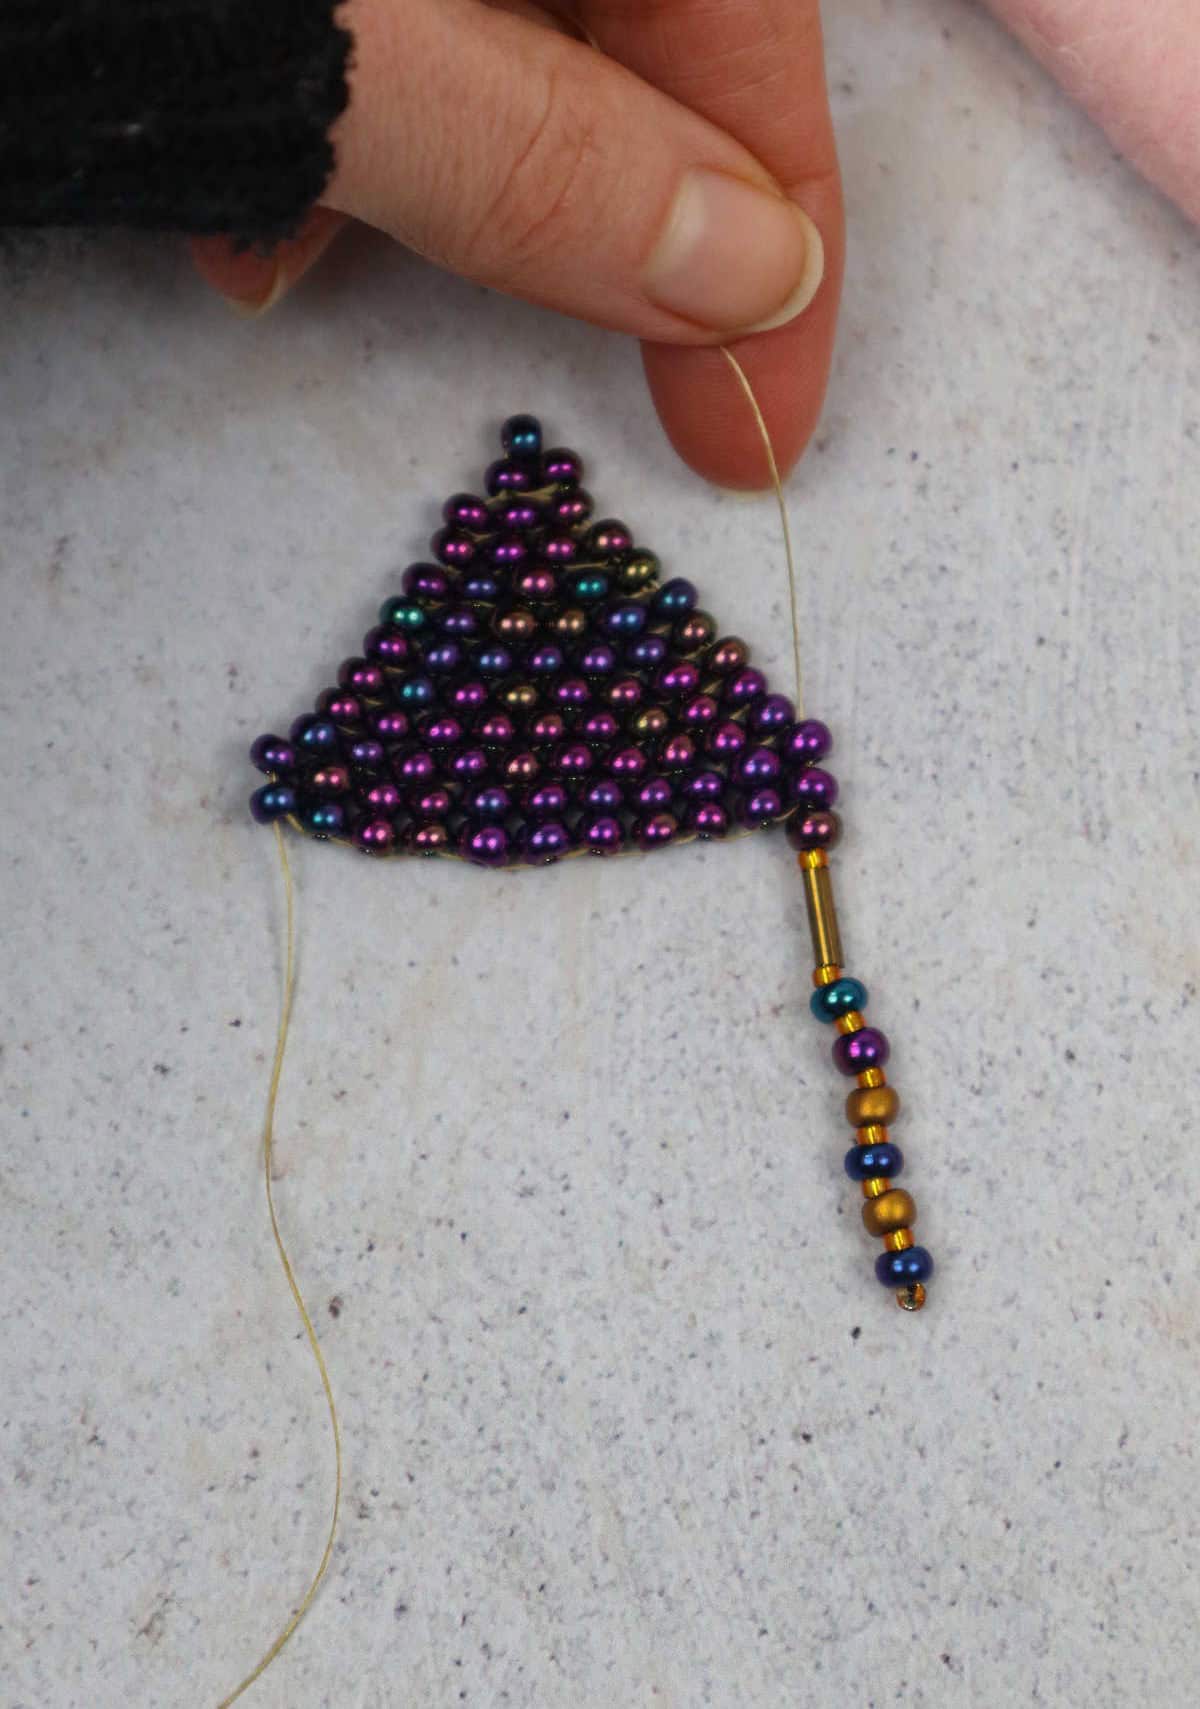
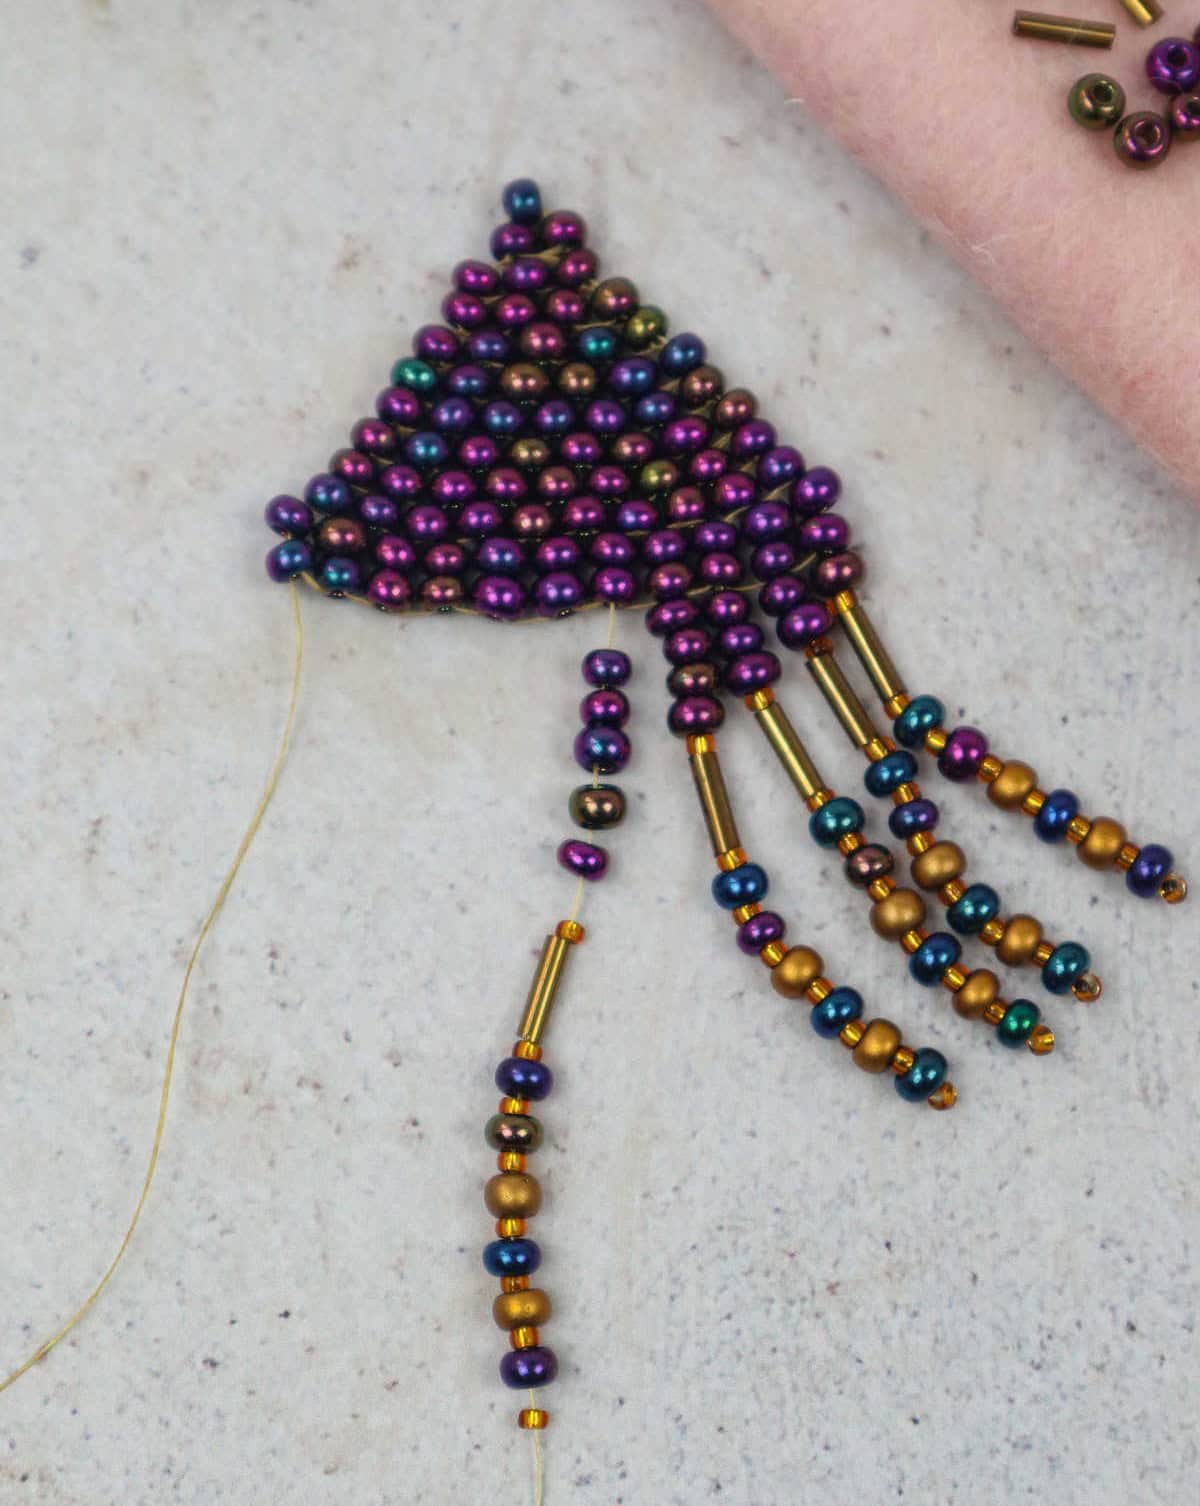
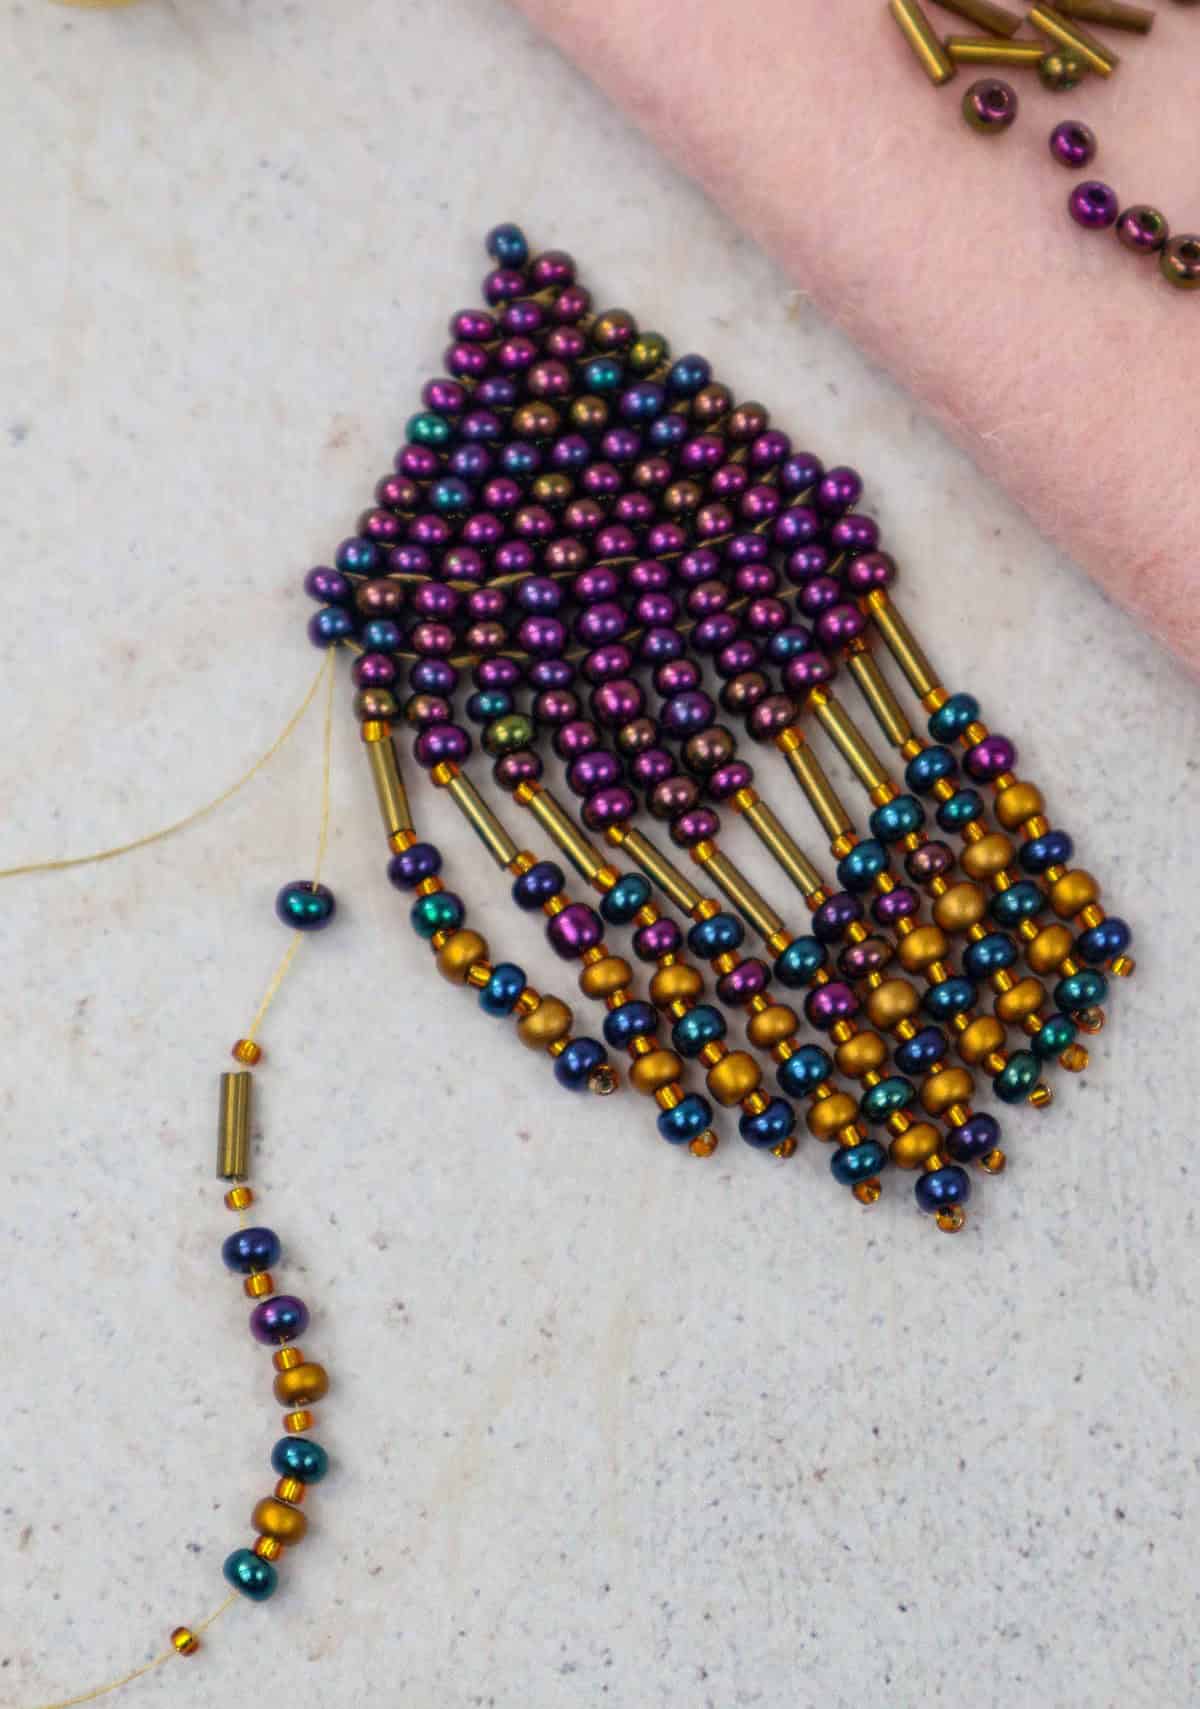
Step 22
To complete the fringe, start by threading the needle back up the line, but stop just before the bottom bead. Then, pass the needle through the two beads on the ladder and work your way back down again. Repeat this process one or two more times, depending on the desired length of the fringe. Once you’ve achieved the desired effect, knot the tail to secure it in place, then gently pull it into the earring to create a neat and tidy finish.
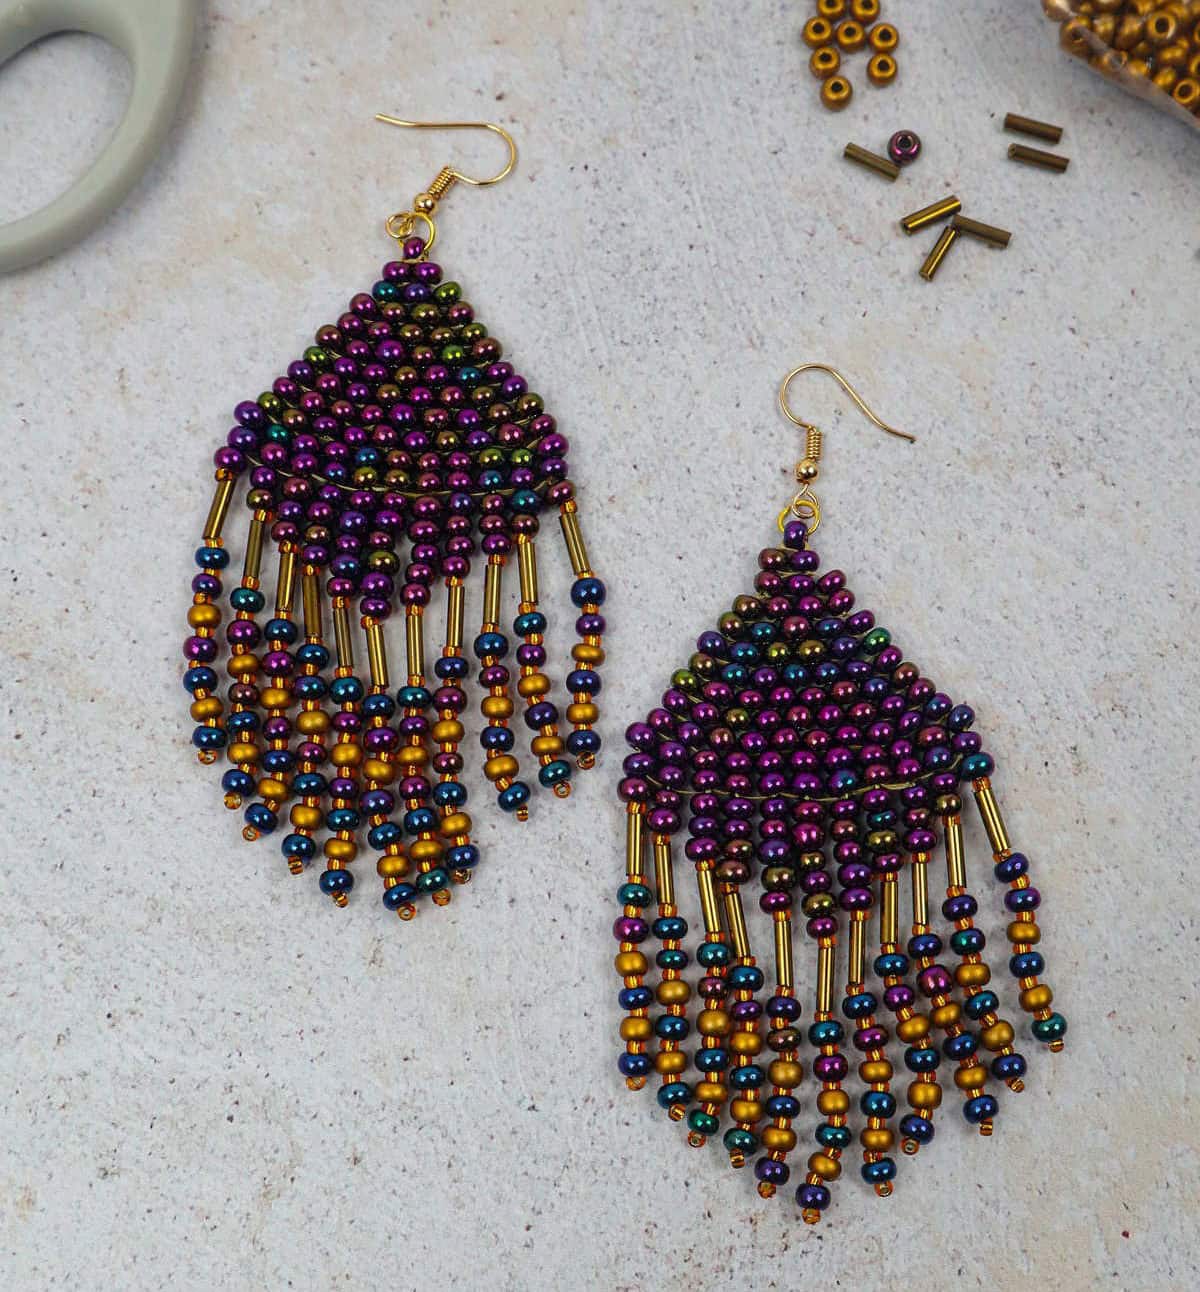
Step 23
Once you’ve ensured a secure seal, it’s time to prepare the earrings for wear. Gently use your lighter to carefully burn off the excess material at the end of each earring, taking care not to damage any other part of the design. Once this step is complete, follow the instructions provided with the hardware to successfully attach it to your newly transformed earrings.
More DIY Accessories for You!
Get creative with these 8 DIY jewelry and accessory tutorials that will have you rocking unique, handmade pieces in no time. From bohemian-inspired macrame leaf earrings to upcycled t-shirt headbands, and even wire rings crafted from everyday materials, our collection of projects has something for every skill level and style.
Whether you’re a seasoned crafter or just looking for a fun weekend activity, these DIY ideas will inspire you to repurpose, reimagine, and create your own statement pieces.