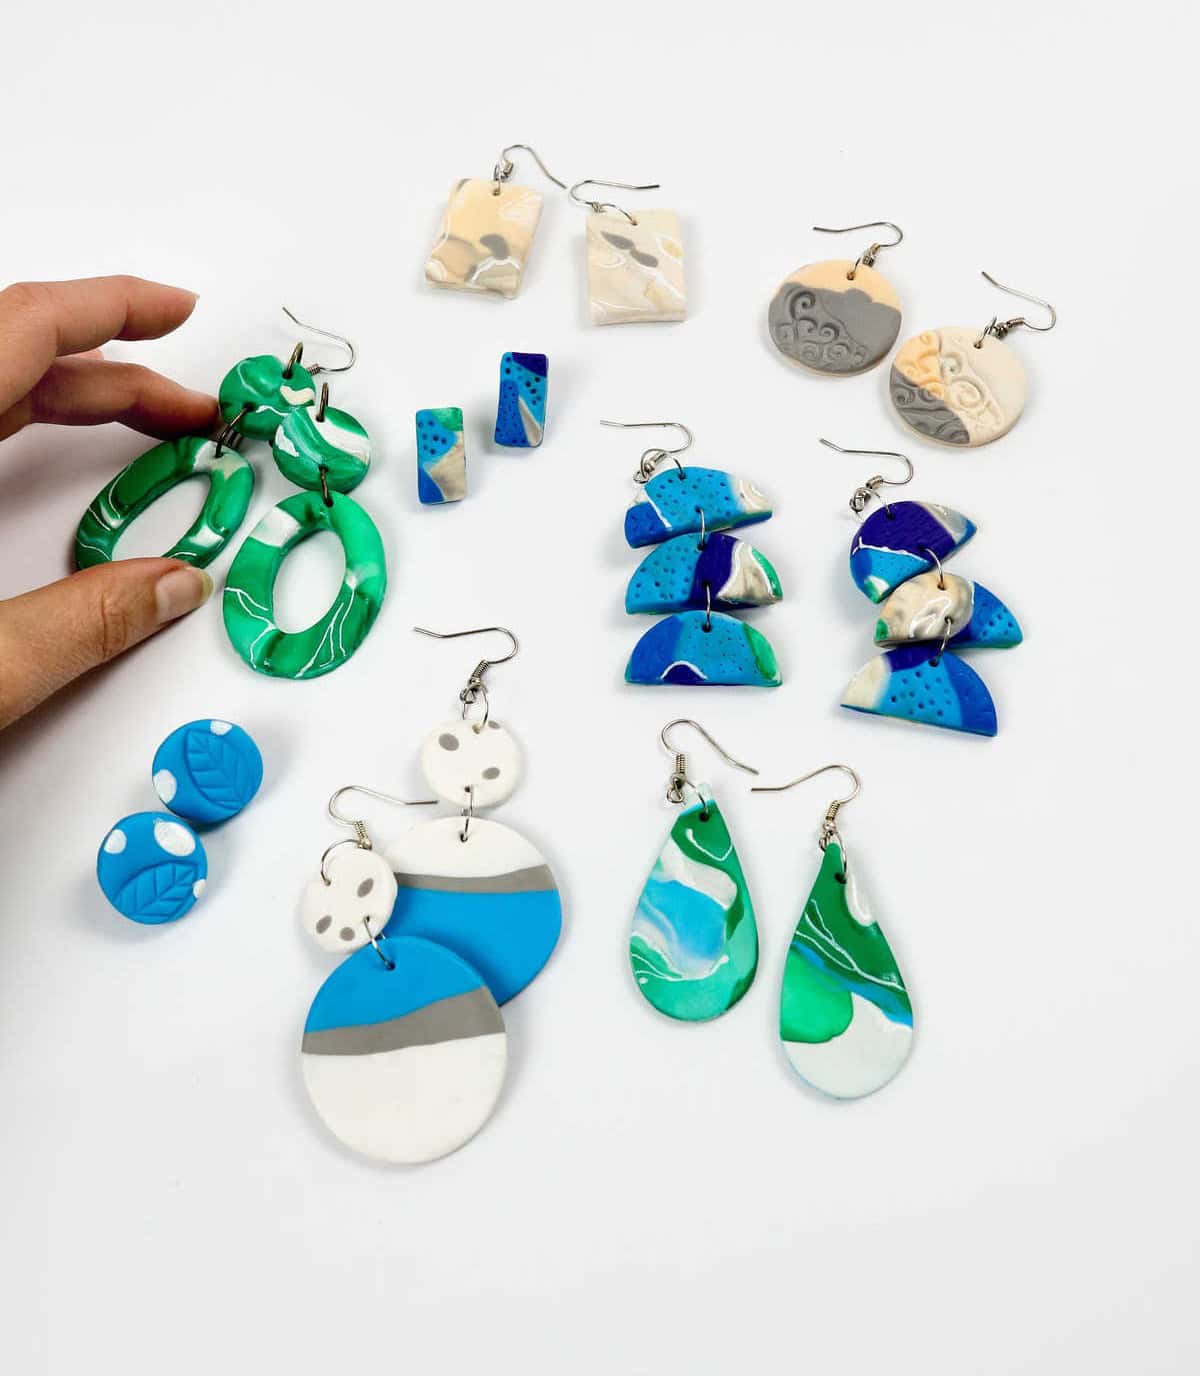
Discover the joy of crafting your own unique polymer clay earrings! I’m excited to share six diverse designs to spark inspiration for your next jewelry project.
Let’s be honest, it’s hard to resist the temptation of adding to our earring collections. However, frequent purchases can quickly add up and put a dent in our wallets.
Rather than cutting back on new acquisitions or constantly buying more, why not try a more sustainable and budget-friendly approach?
Making your own DIY earrings is an excellent way to create personalized pieces without breaking the bank.
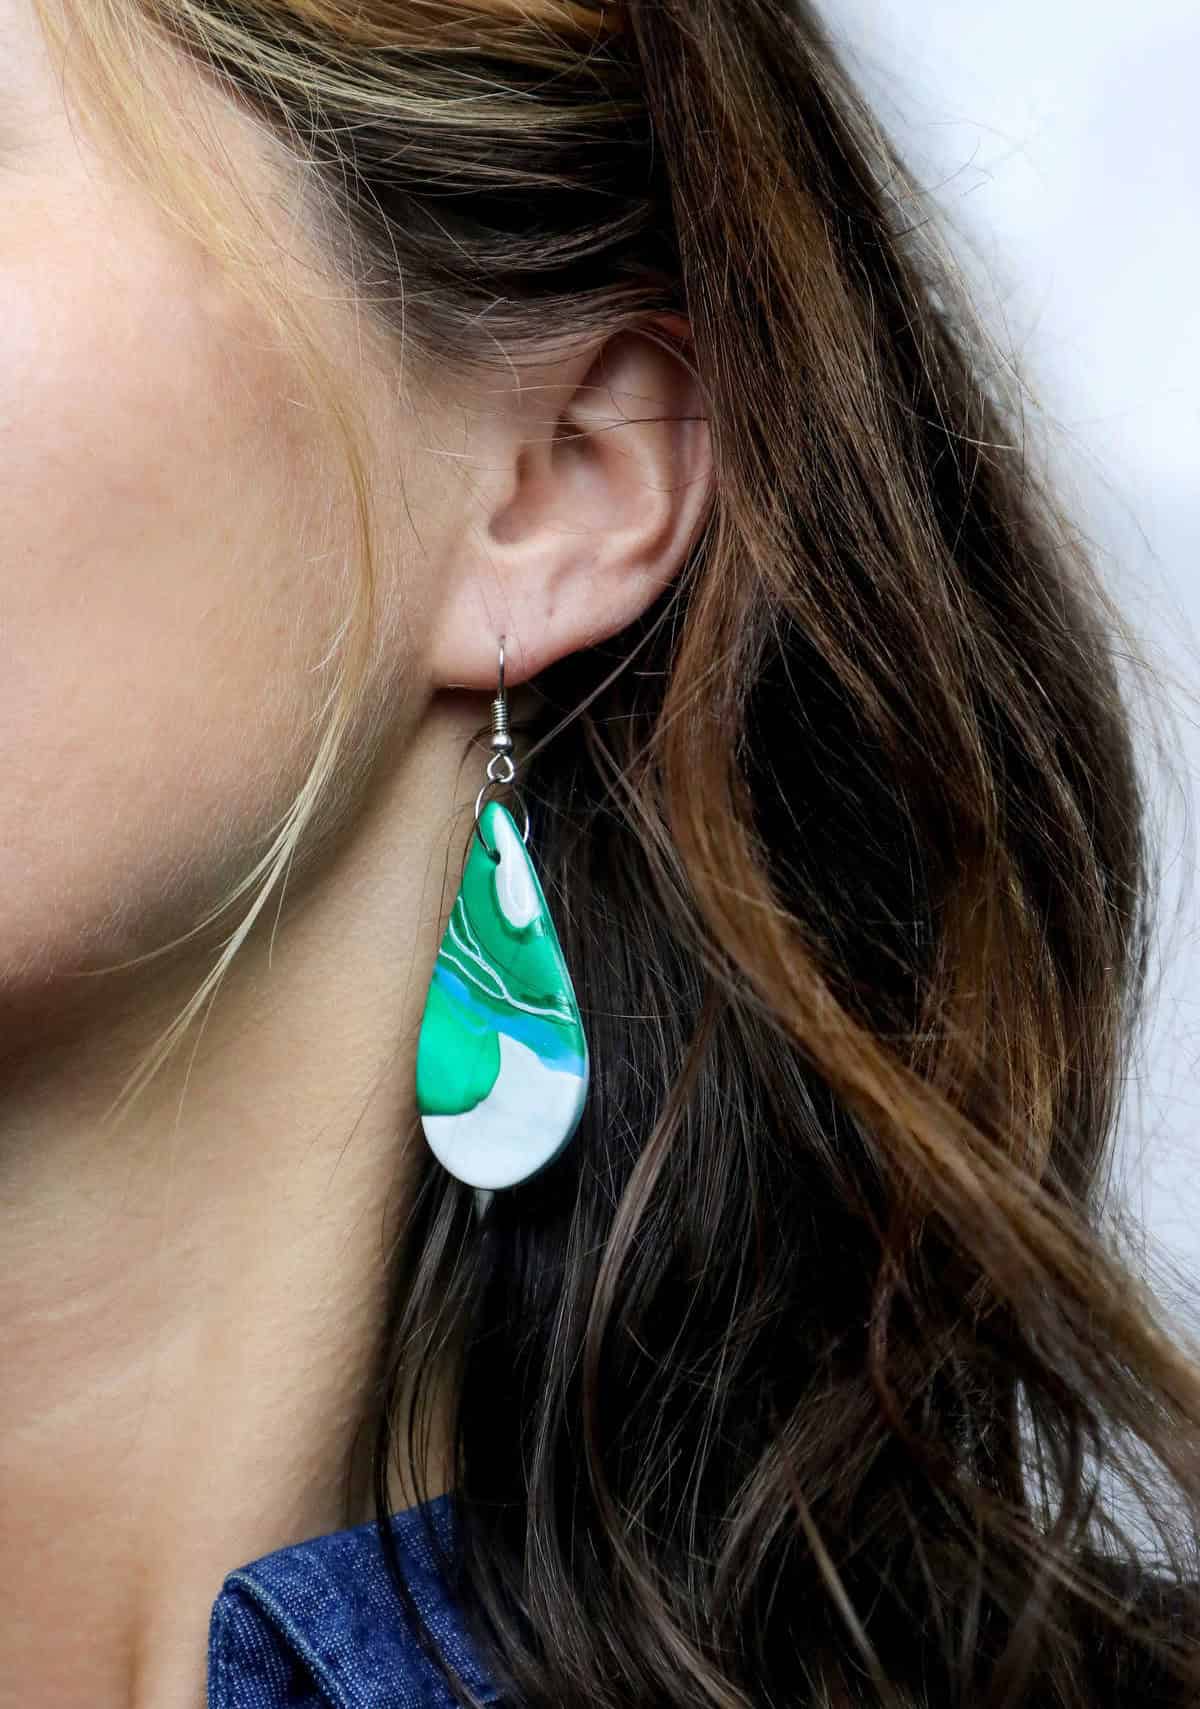
Take a closer look at these stunning polymer clay creations. Not only are they visually appealing, but they’re also surprisingly easy to make once you master the technique. Let’s dive in and get creative!
Supplies and Tools You’ll Need
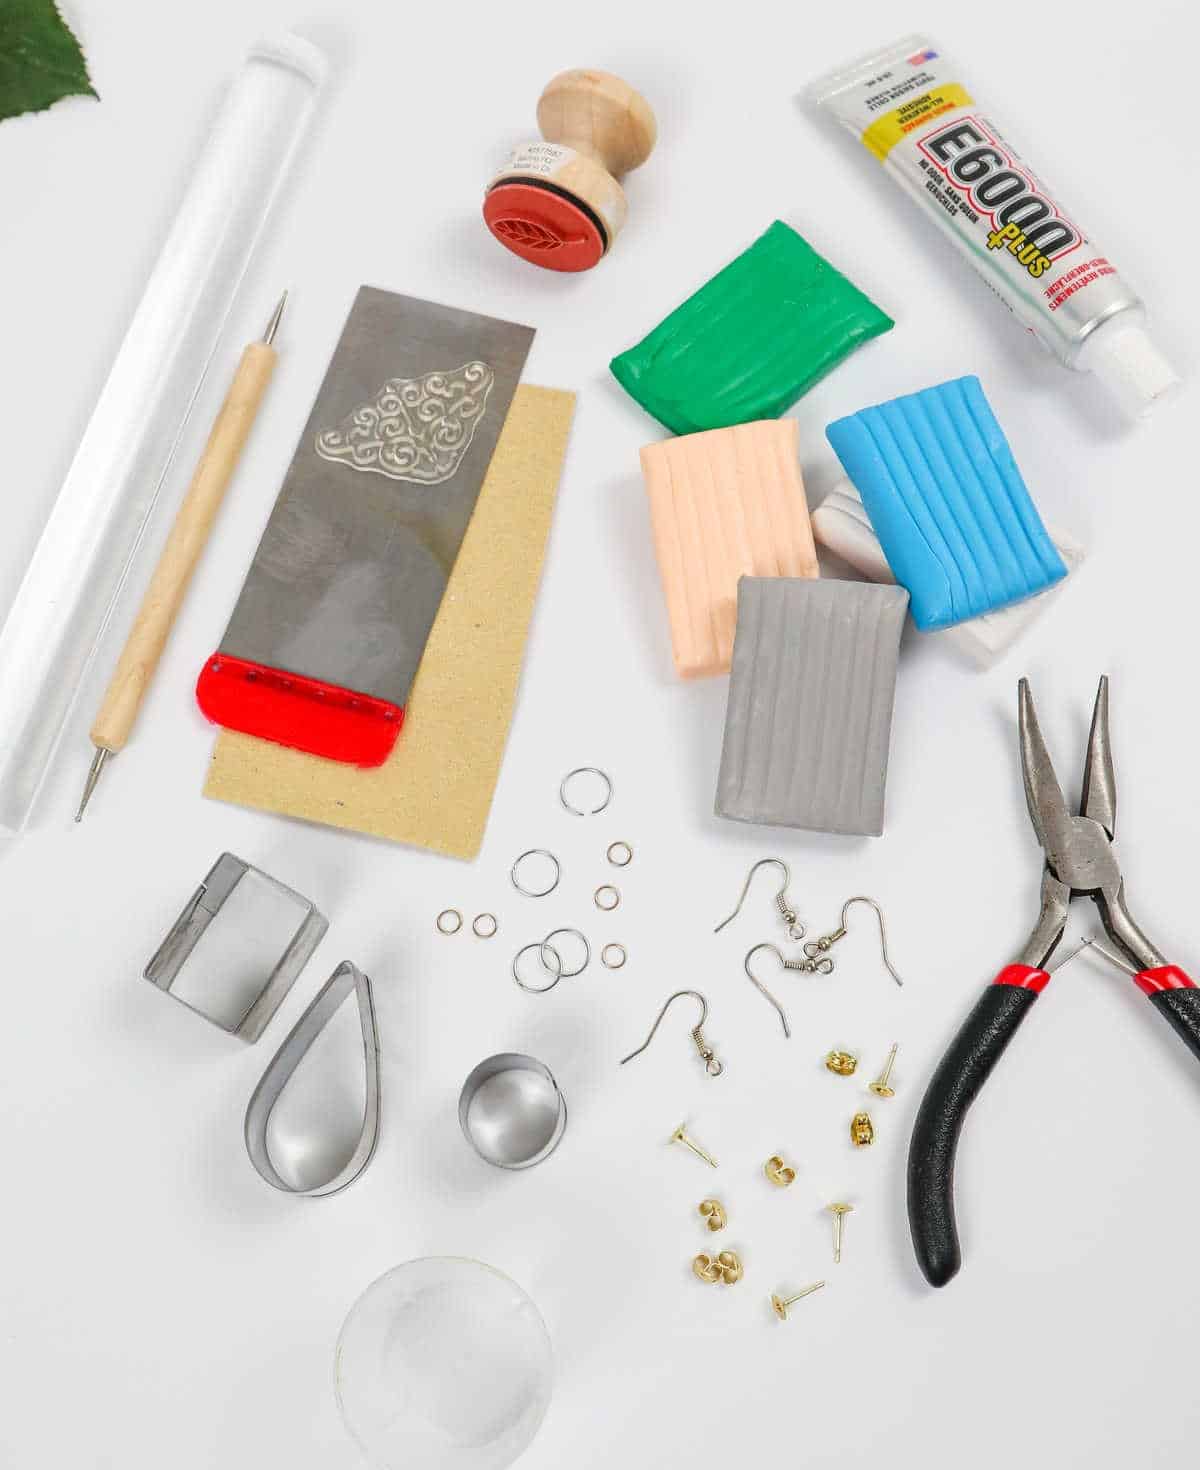
To bring your DIY project to life, you’ll need a diverse array of supplies. Here’s a comprehensive rundown of the essential items required:* The star of the show: polymer clay, which will form the foundation of your creation.* A selection of cookie cutters in various shapes and sizes to add some visual interest to your design.* Fine sandpaper is crucial for smoothing out any imperfections or rough edges.* For precision cutting, you’ll need a filling knife (or any other suitable cutting tool).
* Add some finesse with a dotting pen, perfect for creating intricate details.* A rolling pin will come in handy for shaping and molding your polymer clay creations.* Rubber stamps can be used to add textures or patterns to your design.* Jump rings and earring hooks will help you create wearable art pieces that are both functional and stylish.* Earrings posts and backs ensure a secure fit, and can be customized with various shapes and sizes.
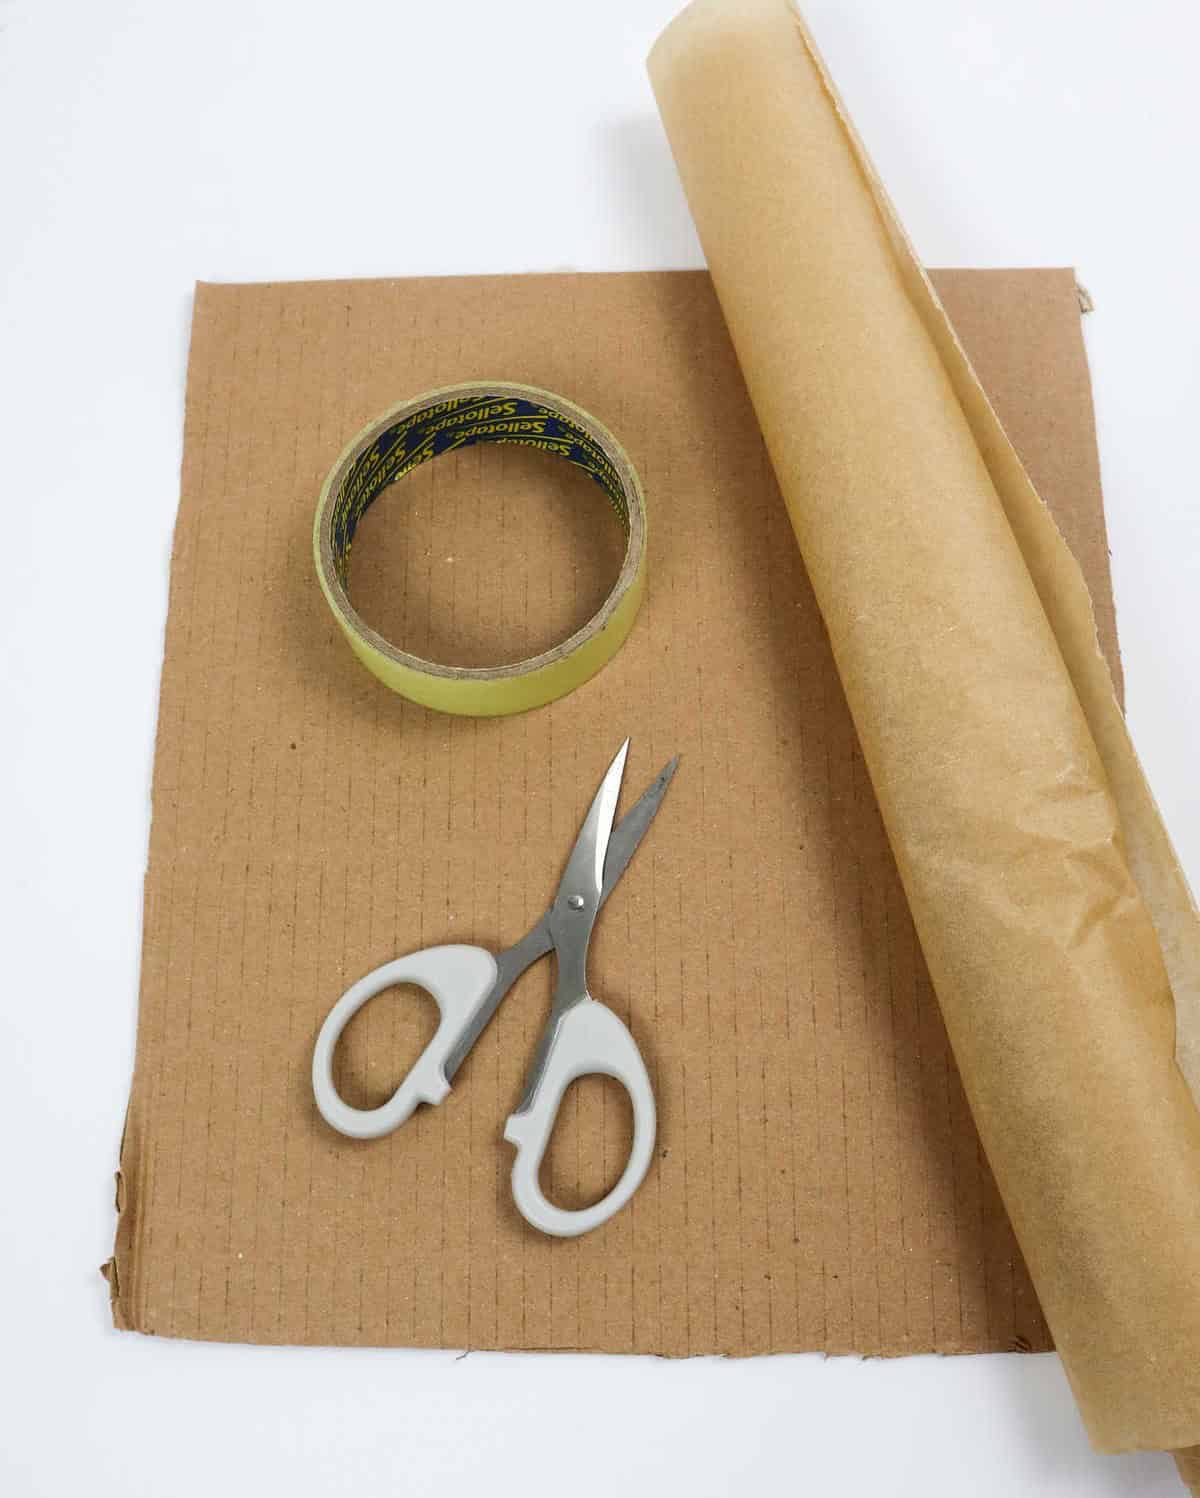
* Pliers provide the necessary grip and control for making precise adjustments.* To bond your creations together or attach other components, you’ll need a reliable adhesive like glue E6000.* A sturdy cardboard piece serves as a base for your work surface, while parchment paper and sellotape help keep things organized and tidy. And of course, no DIY project is complete without the trusty scissors to cut through any necessary materials.
How to Make Polymer Clay Earrings
As you’re ready to dive into the task at hand, it’s essential to ensure your workspace is primed for productivity. This means clearing any clutter or distractions, and setting up your tools and materials in a way that promotes efficiency.
Step 1

To ensure a smooth and safe cutting experience with your sharp blade, it’s essential to prepare your workspace properly. Start by covering your work surface with a layer of cardboard, which will help prevent any damage or scratches. To add an extra layer of protection, place a sheet of parchment paper on top of the cardboard and secure it with tape. This simple setup will keep your workspace tidy and safe as you work with the polymer clay.
Step 2
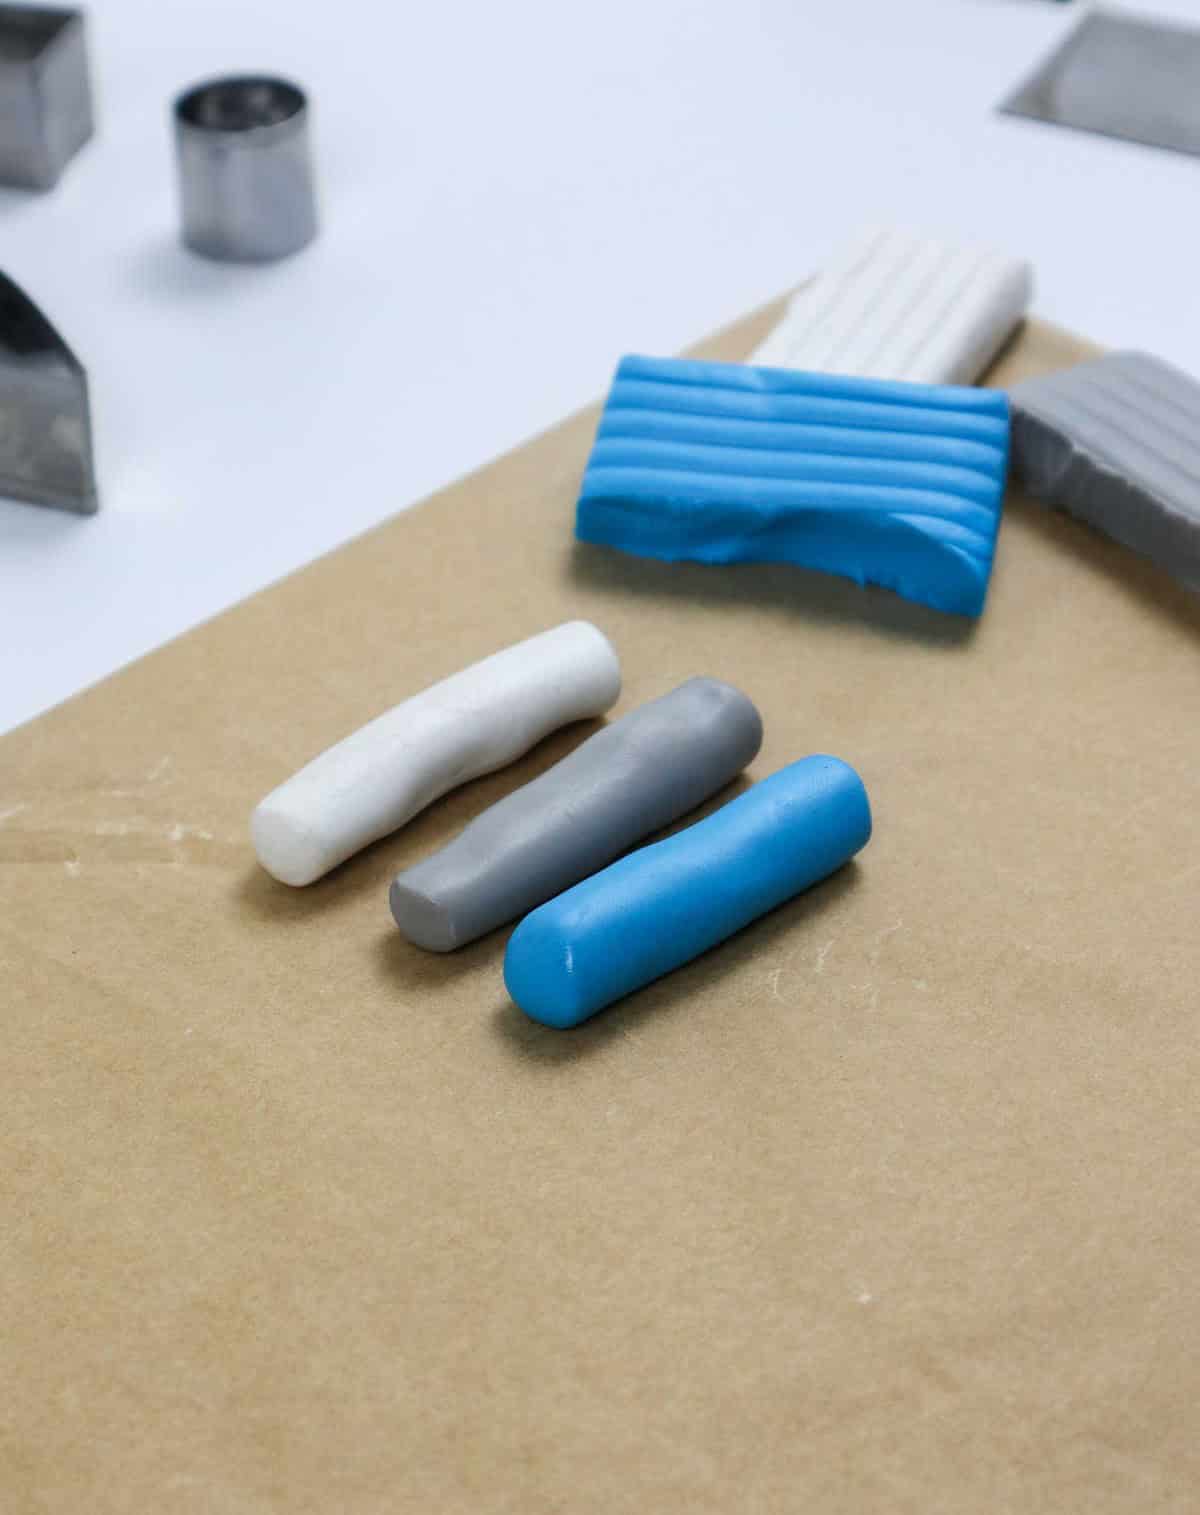
To create a unique and personalized pair of clay earrings, start by selecting the various colors you’d like to feature. Then, divide a portion of clay from each chosen color into its own individual segment. This will allow you to shape and mold each section separately before assembling them together to form your final design.
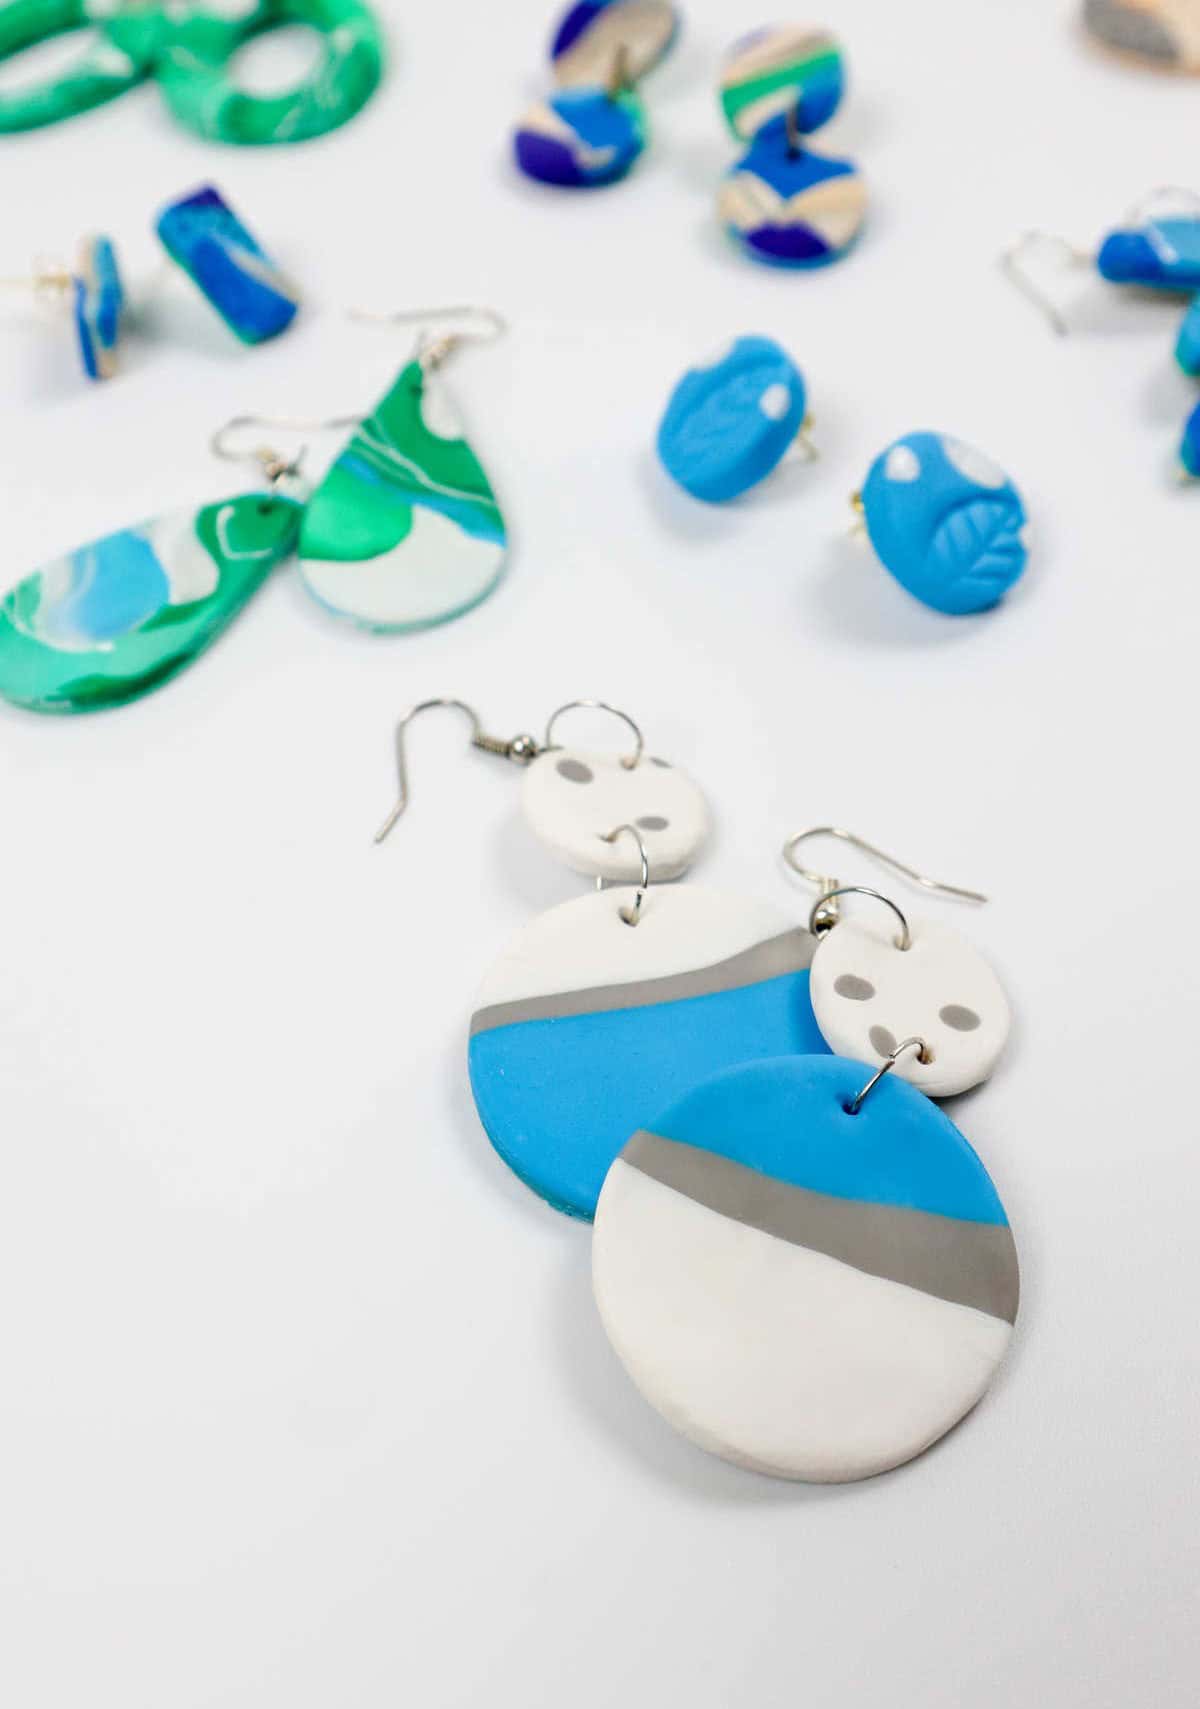
Design 1
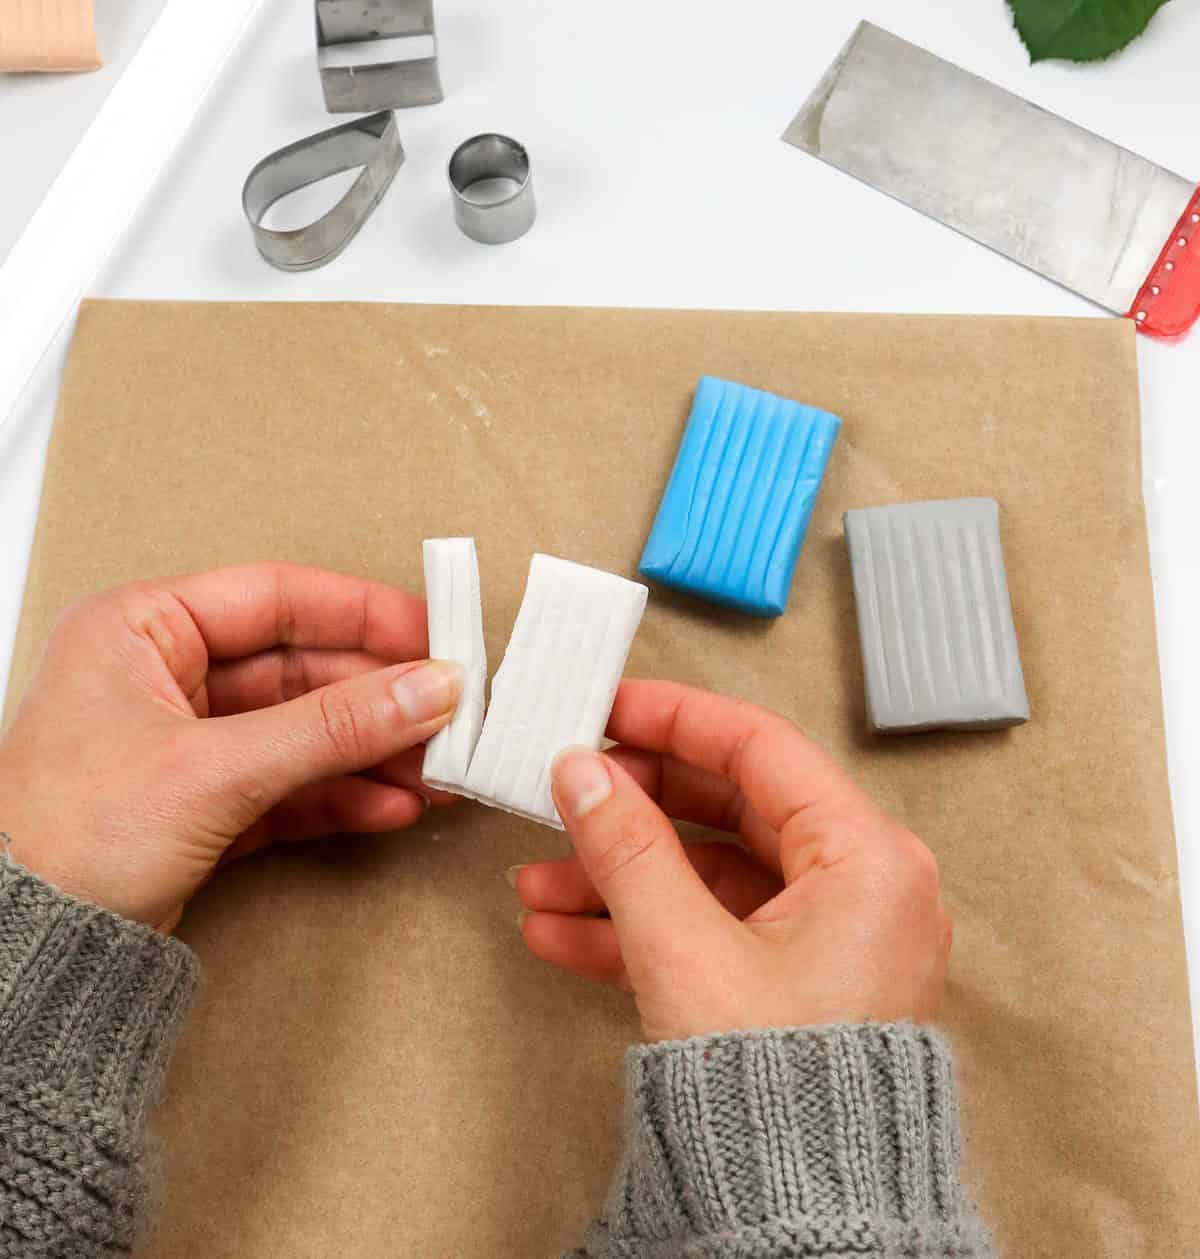
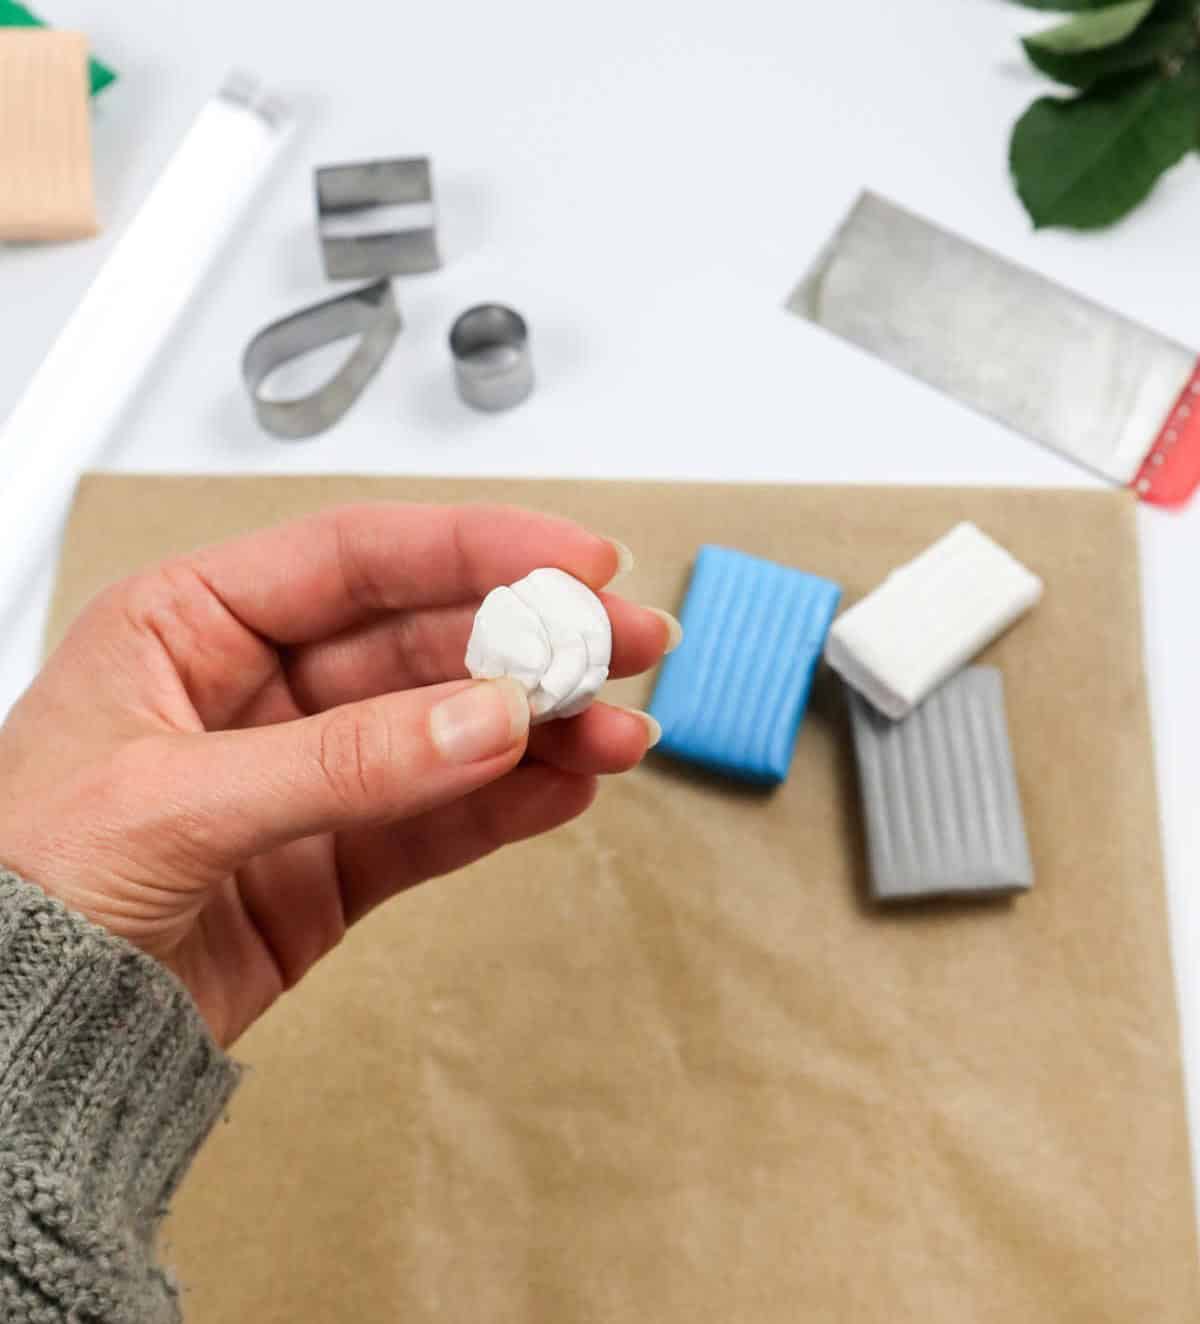
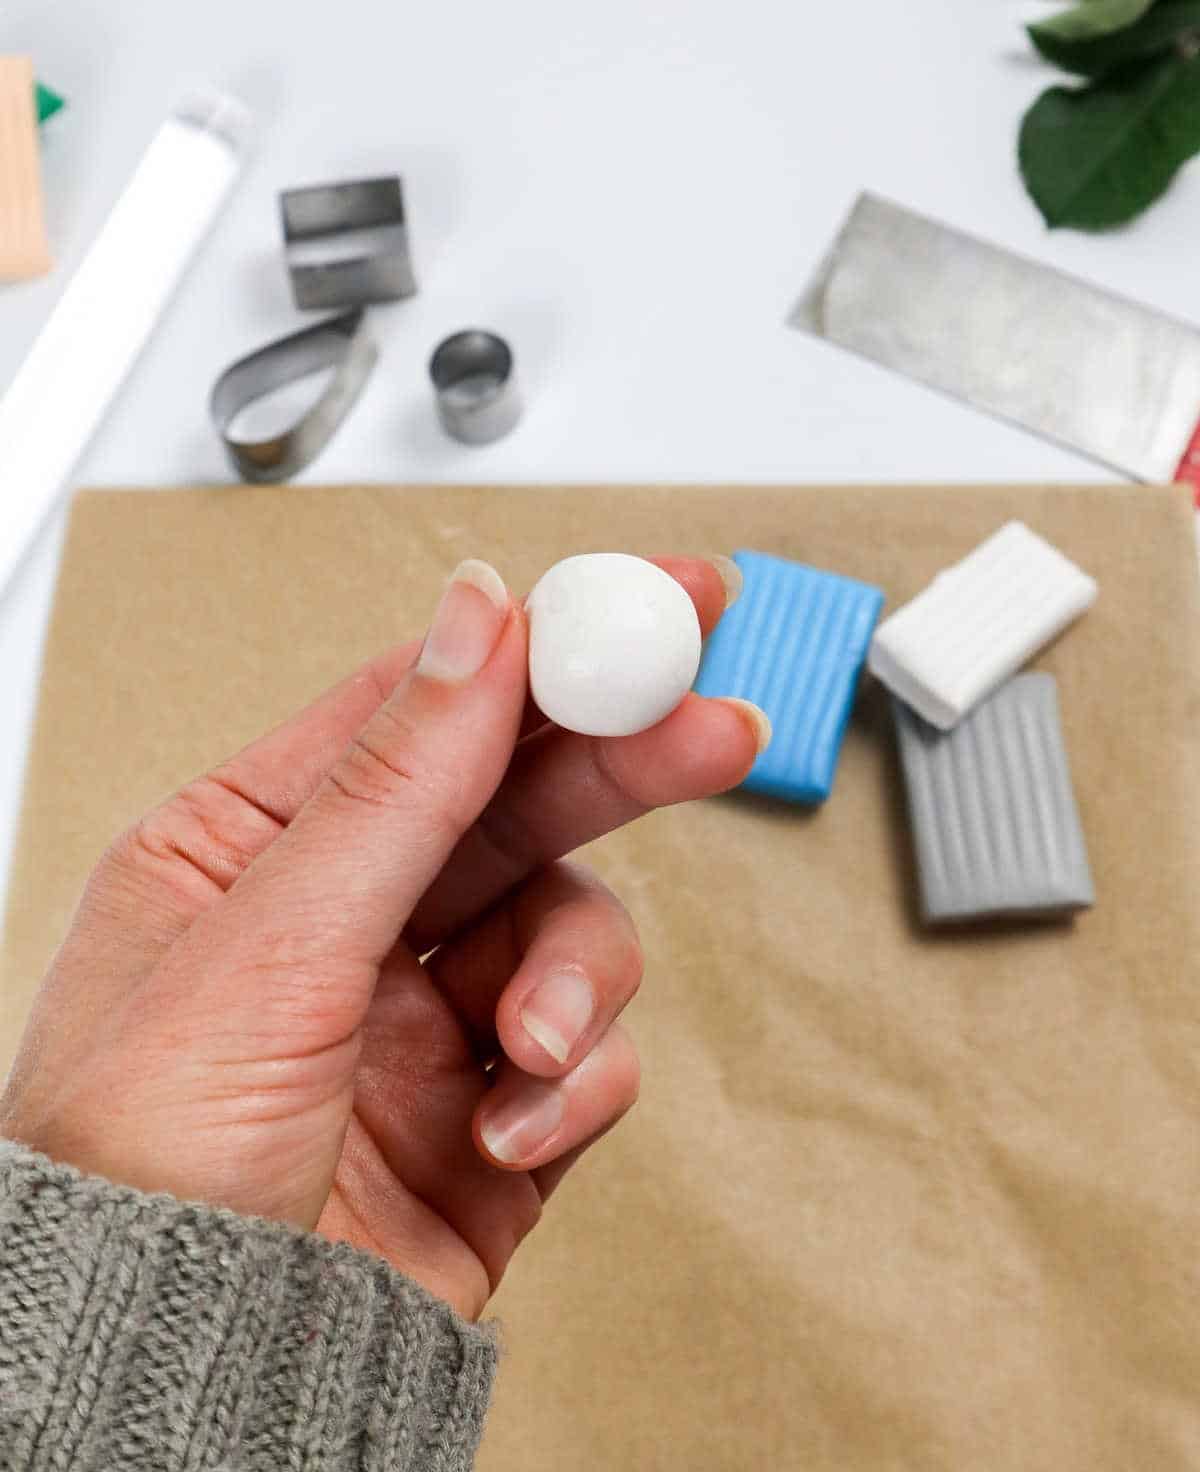
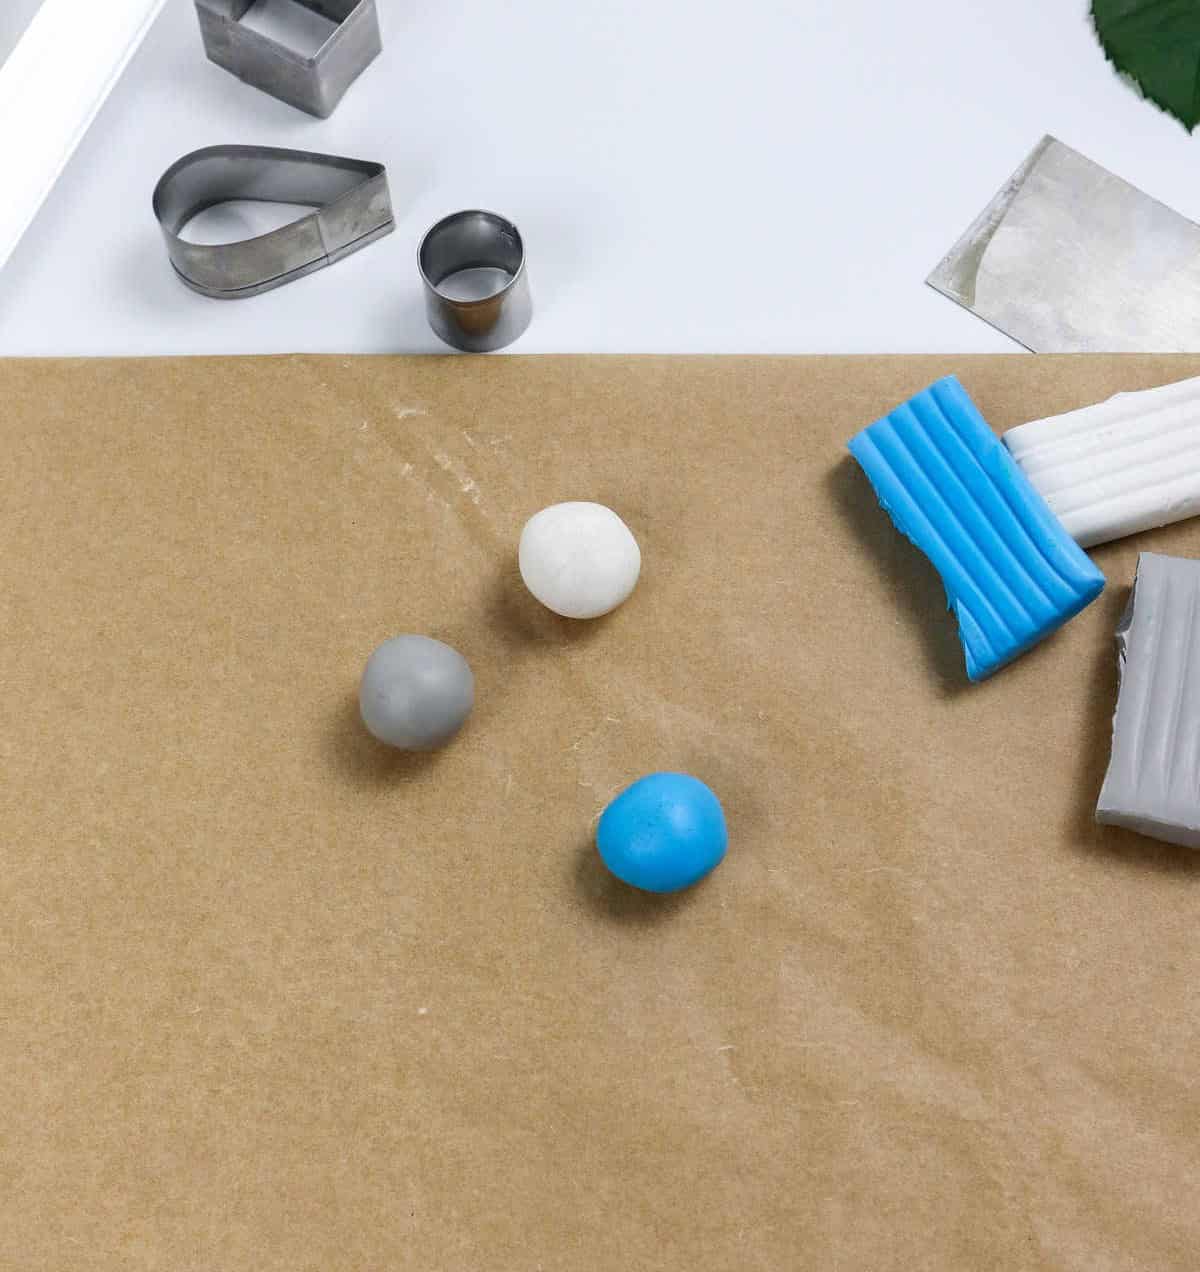
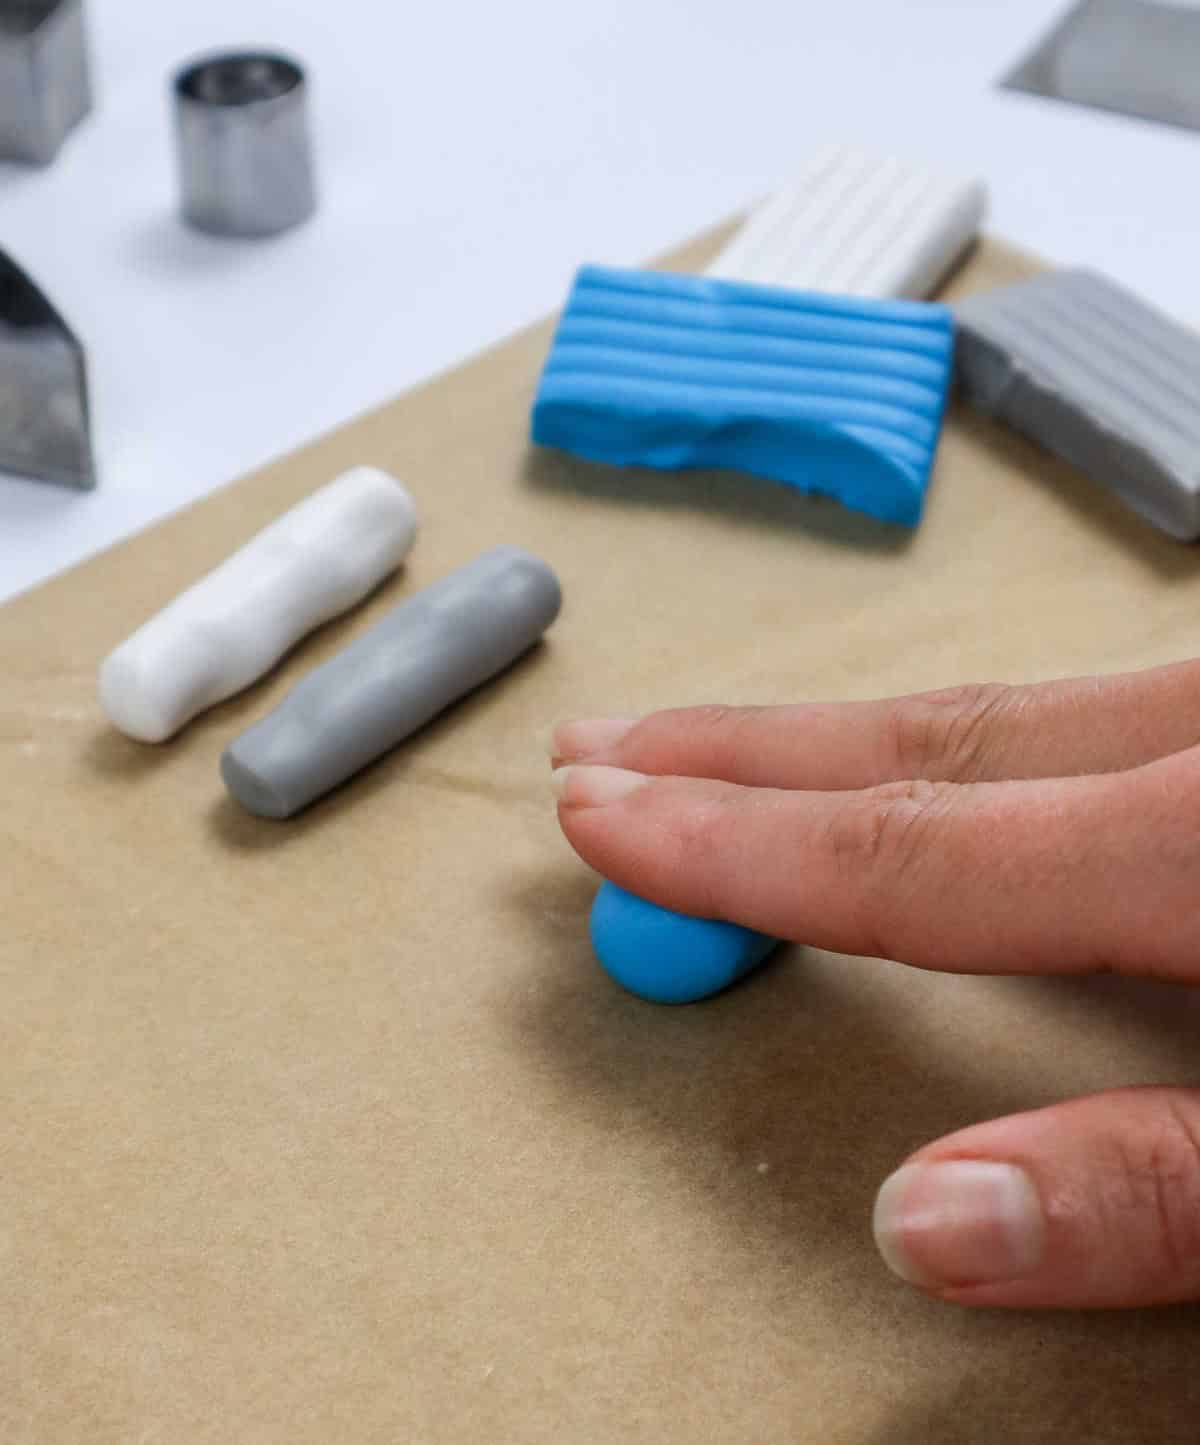
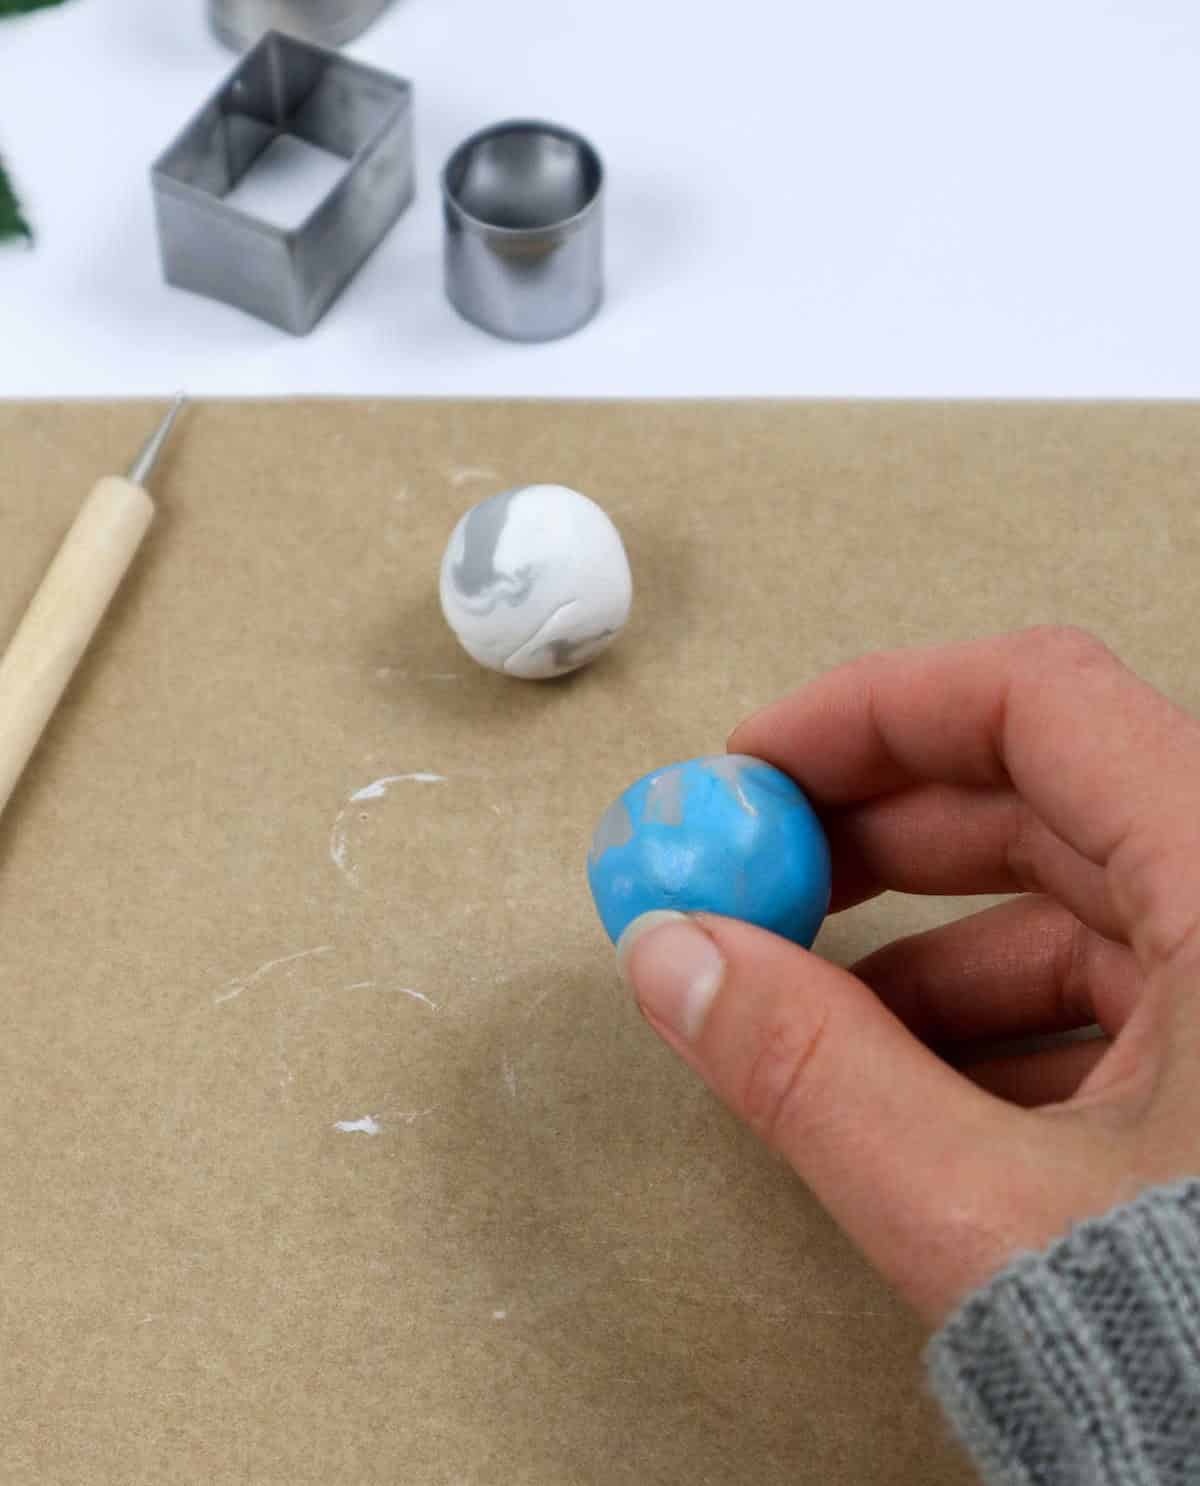
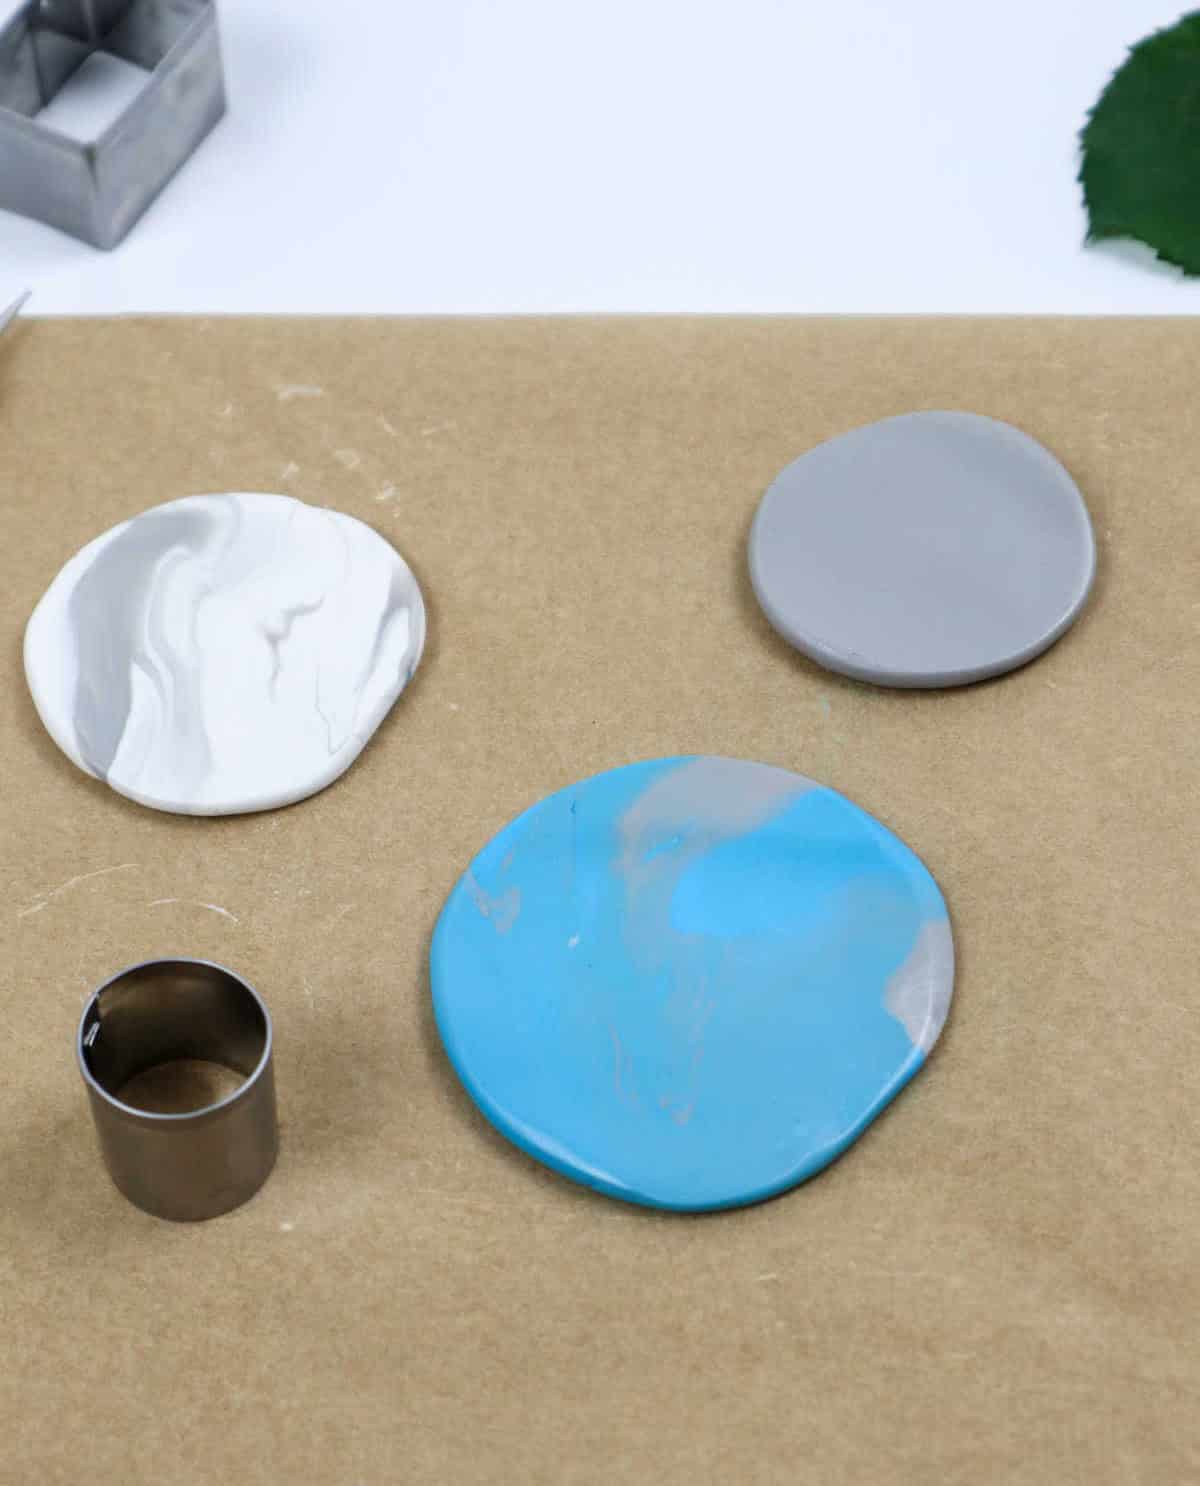
Gently warm the clay by rolling it between your fingers and palms, gradually softening and stretching it. Aim for a consistency that’s firm yet pliable, avoiding an overly squishy texture. Once you’ve achieved the desired softness, form the clay into a ball, which should resemble a rounded, smooth shape. To achieve uniformity, repeat this process with each color of clay to create a harmonious palette.
Step 3
Step 4

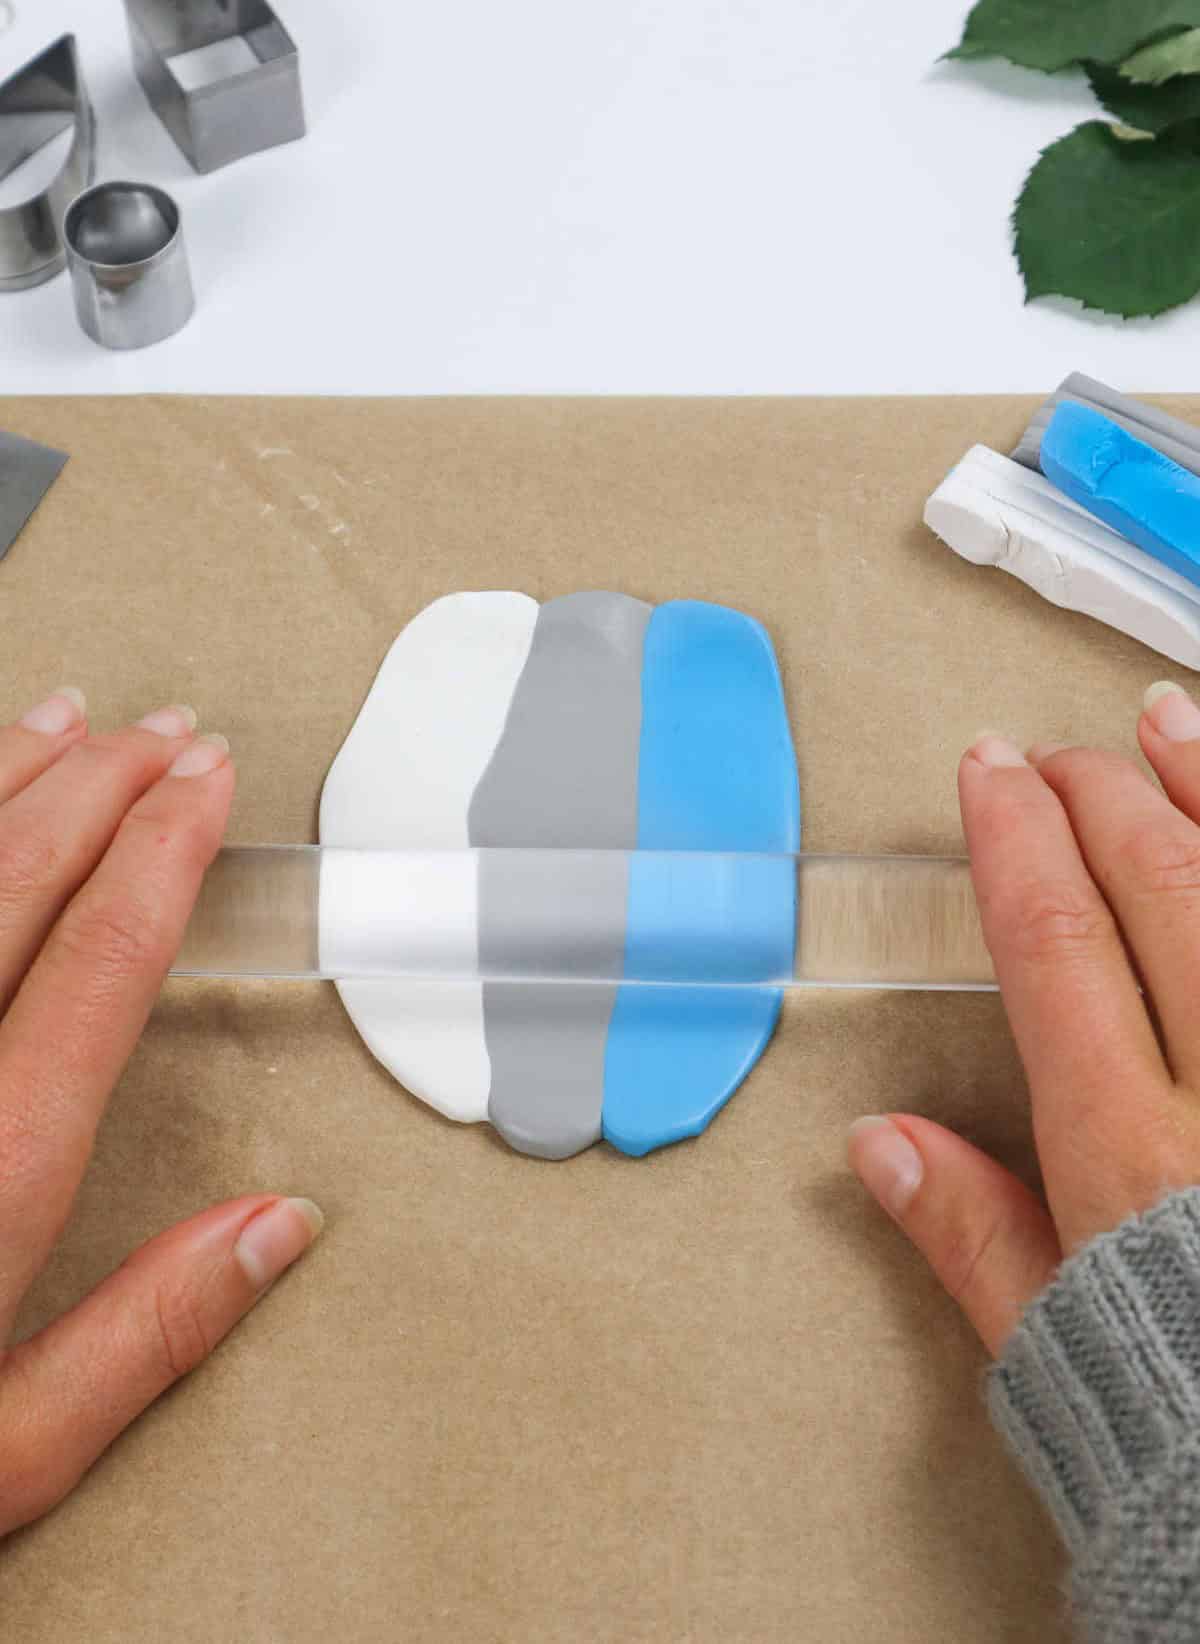
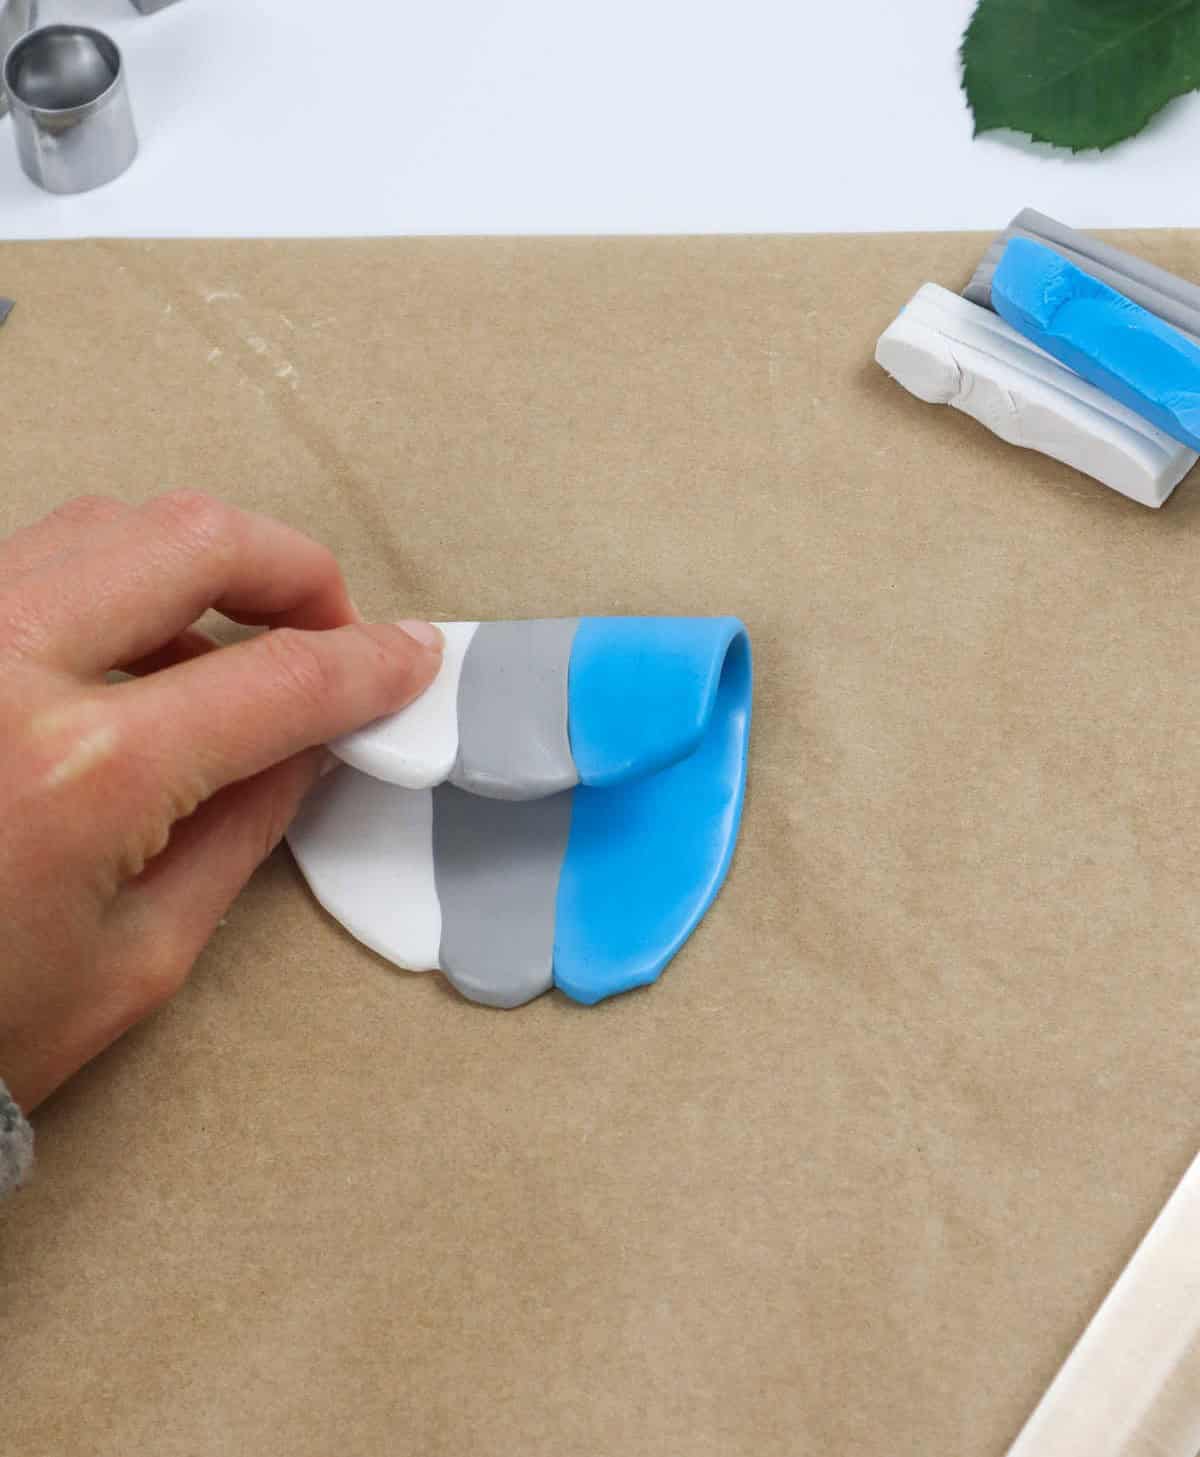
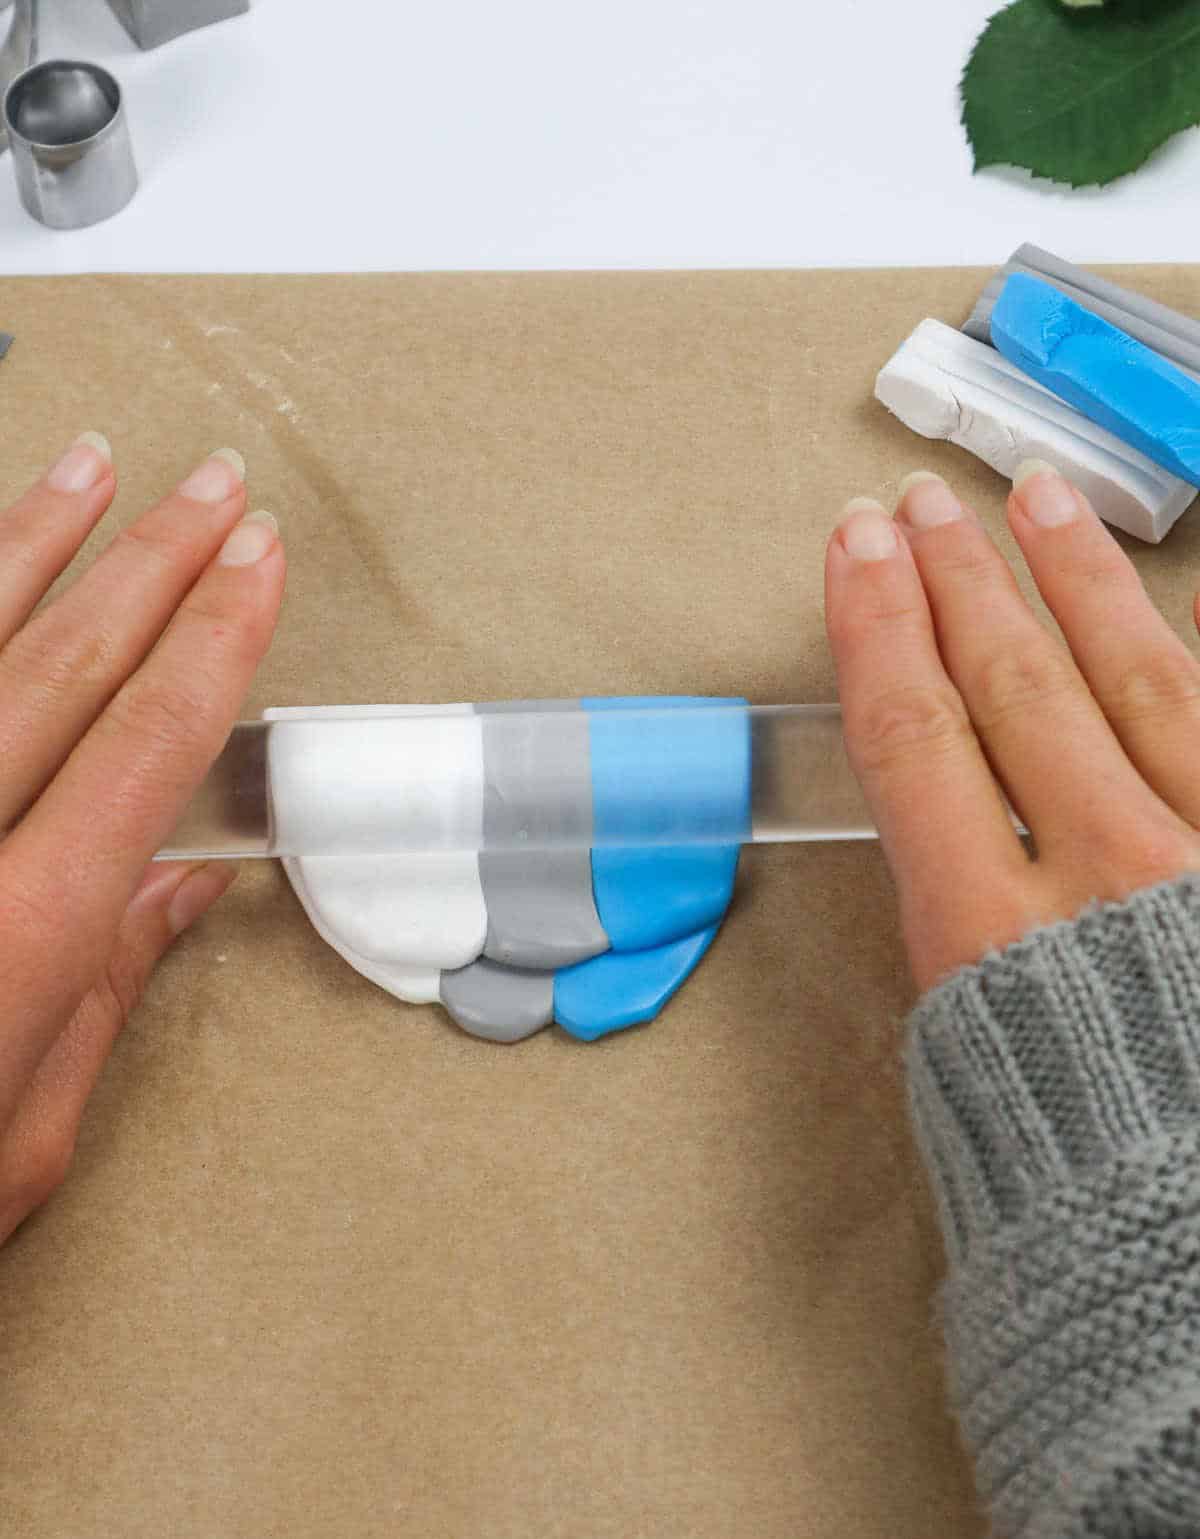
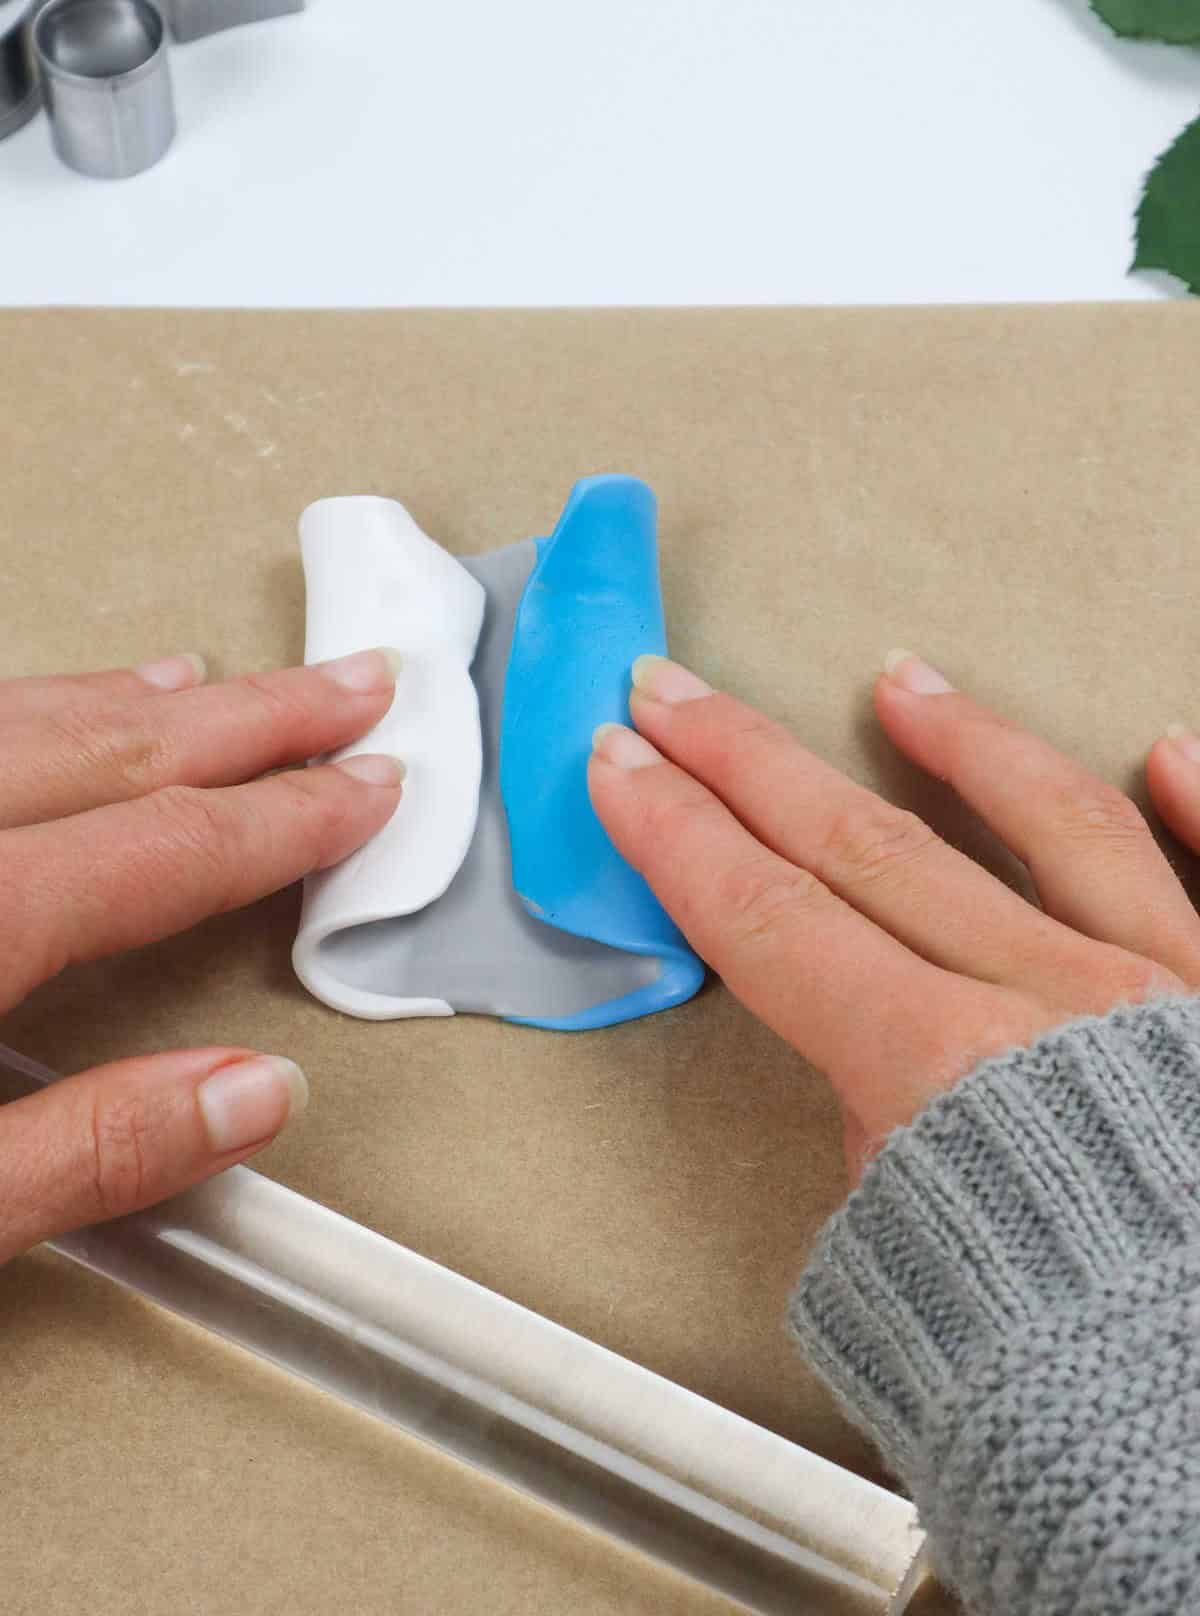
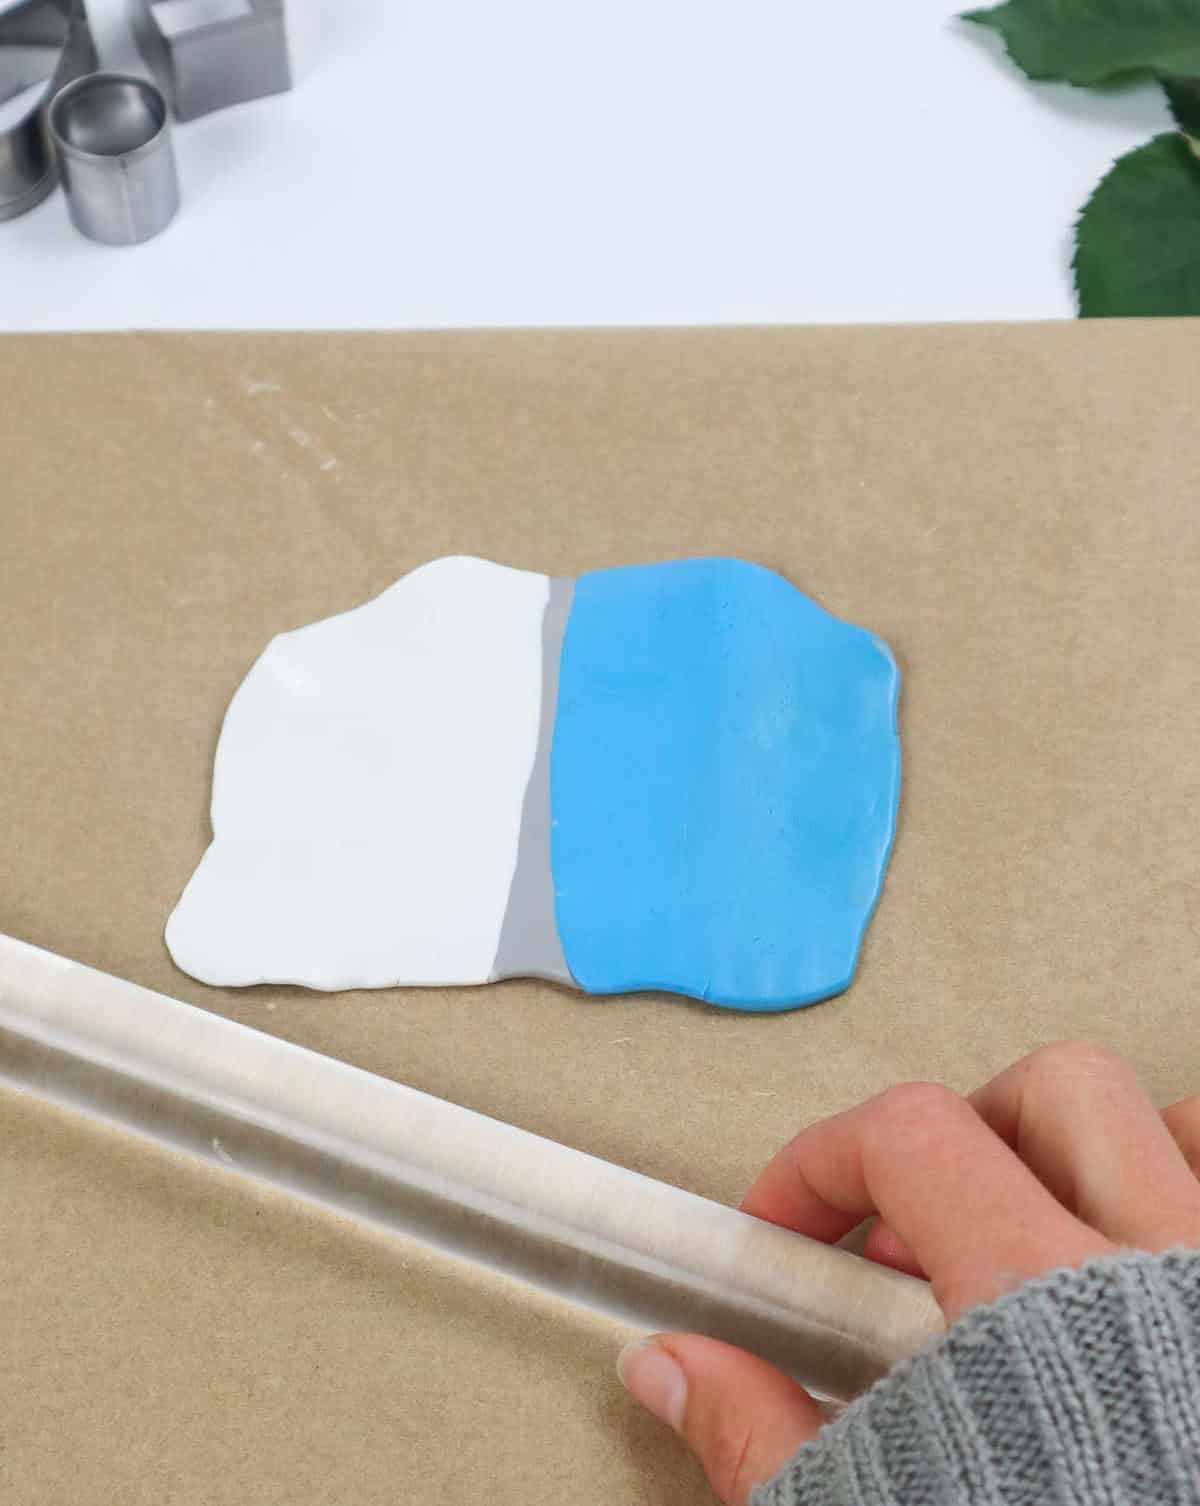
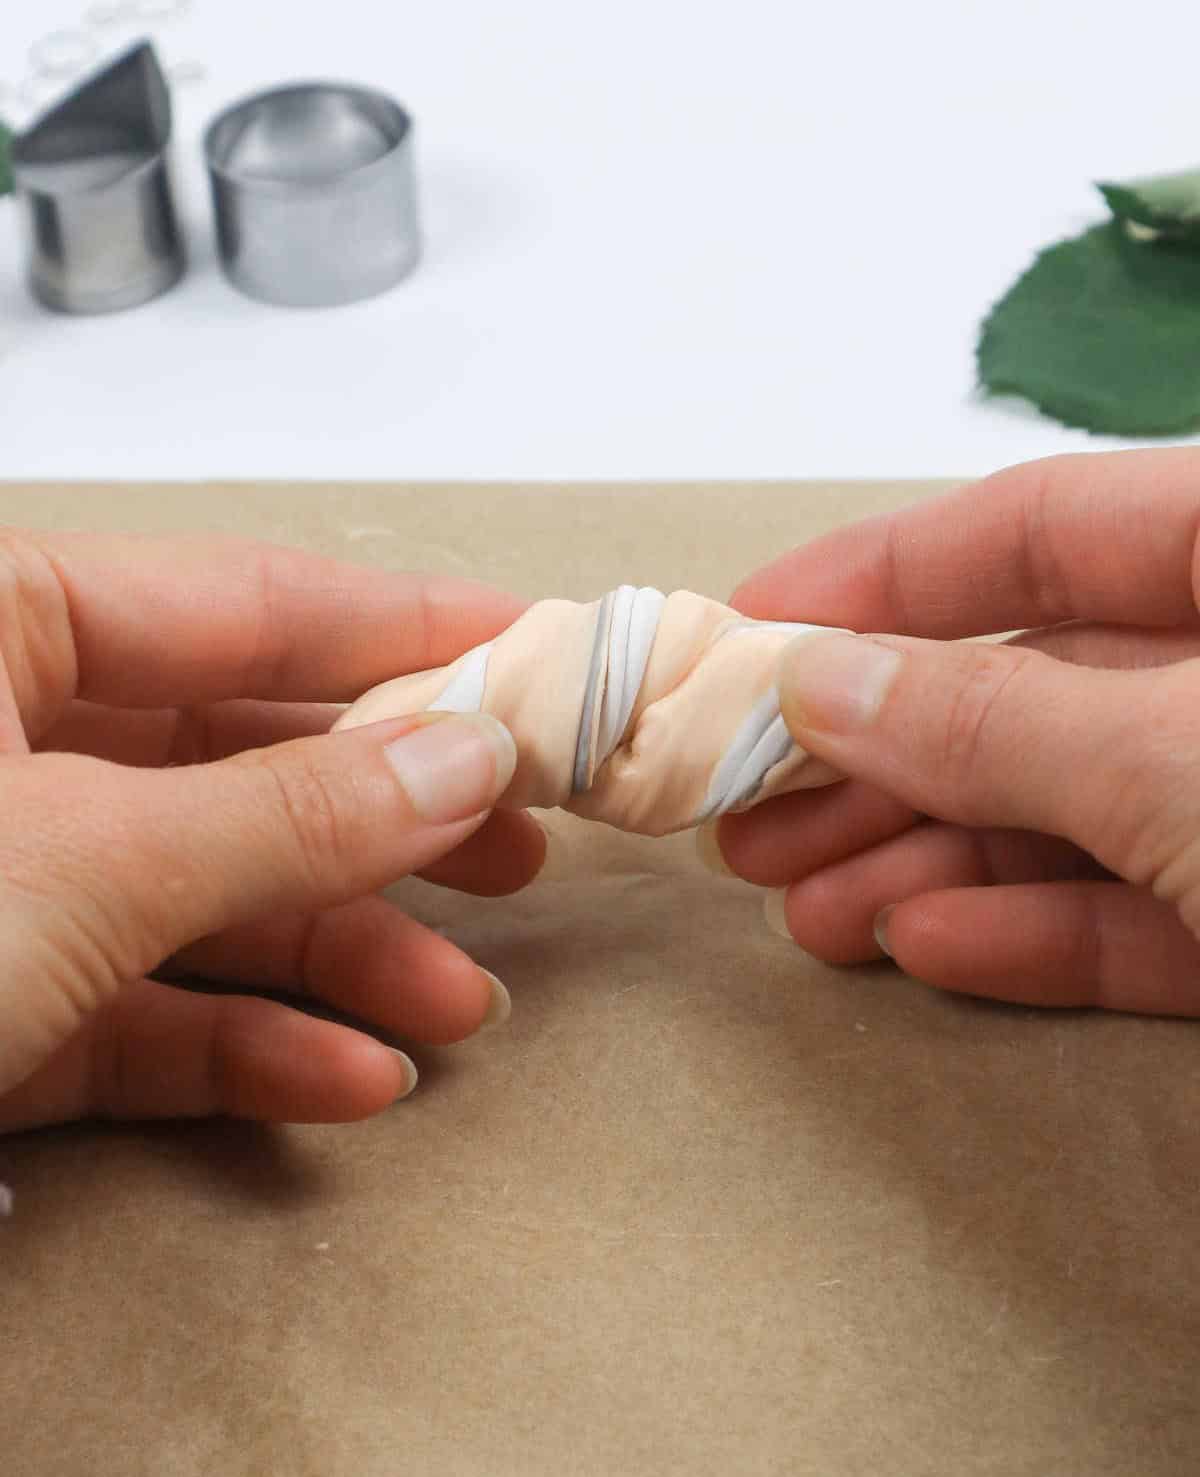
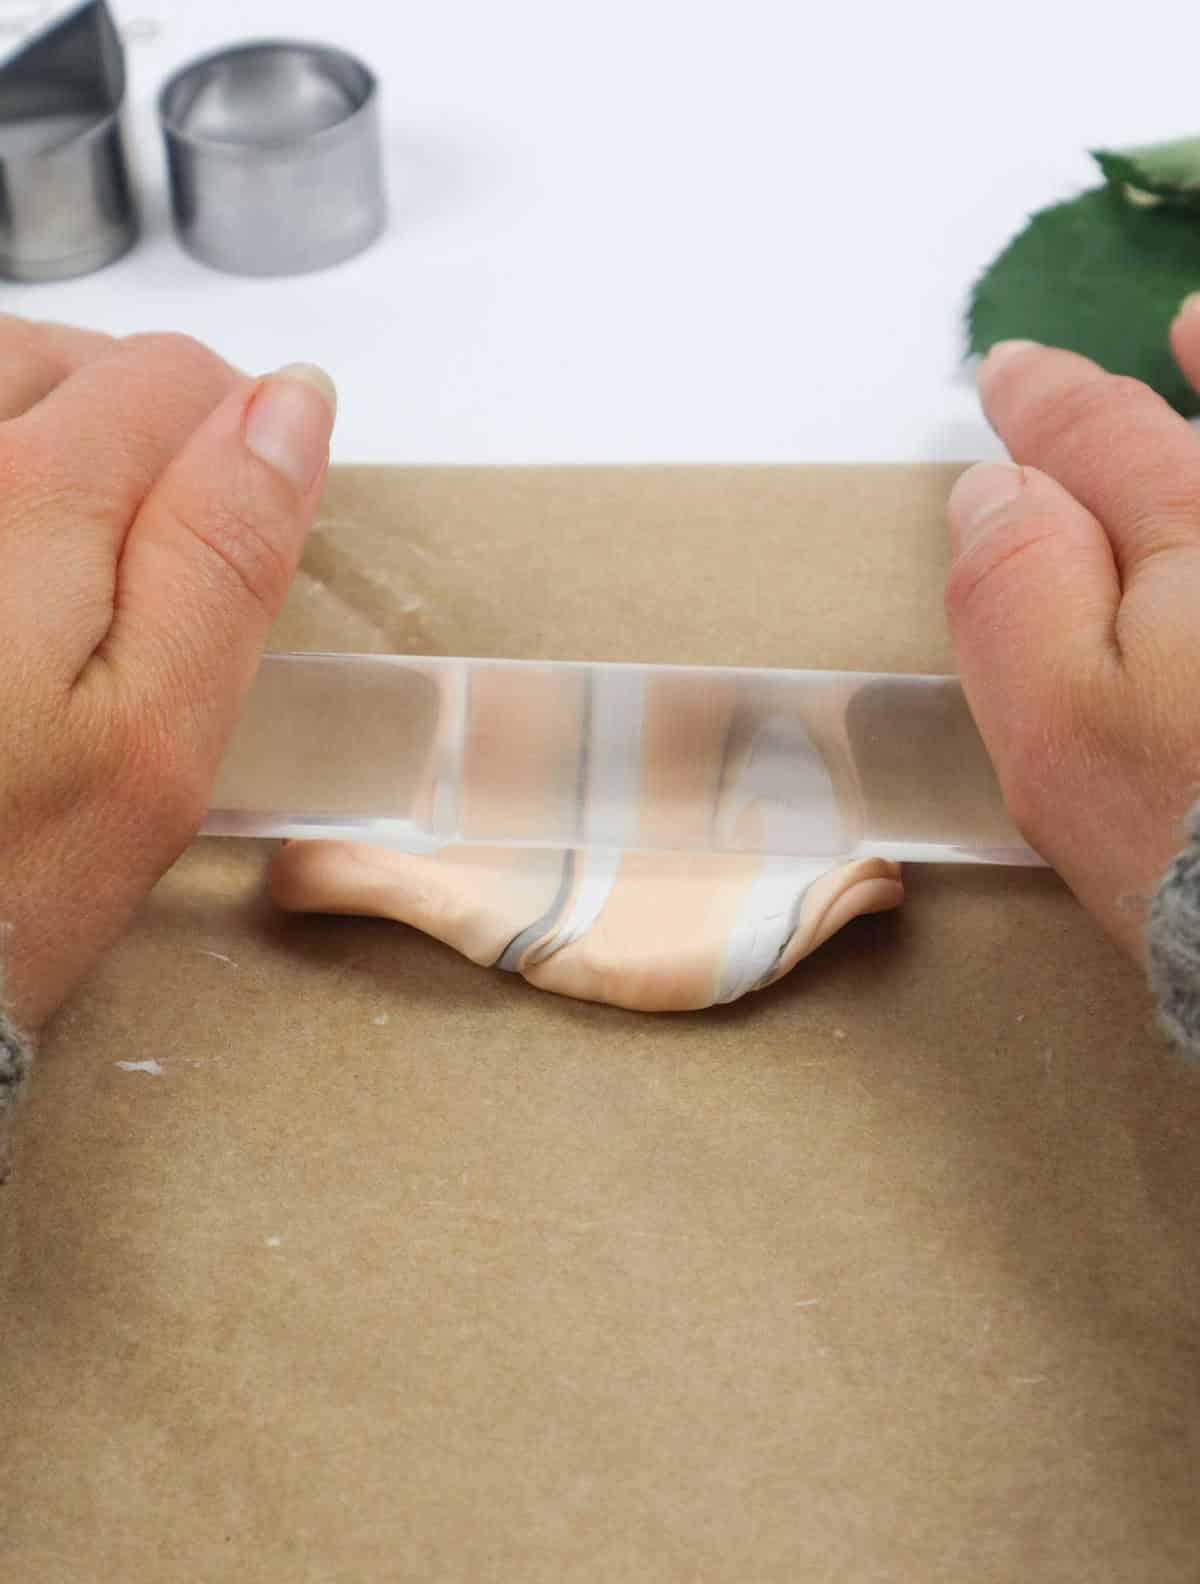
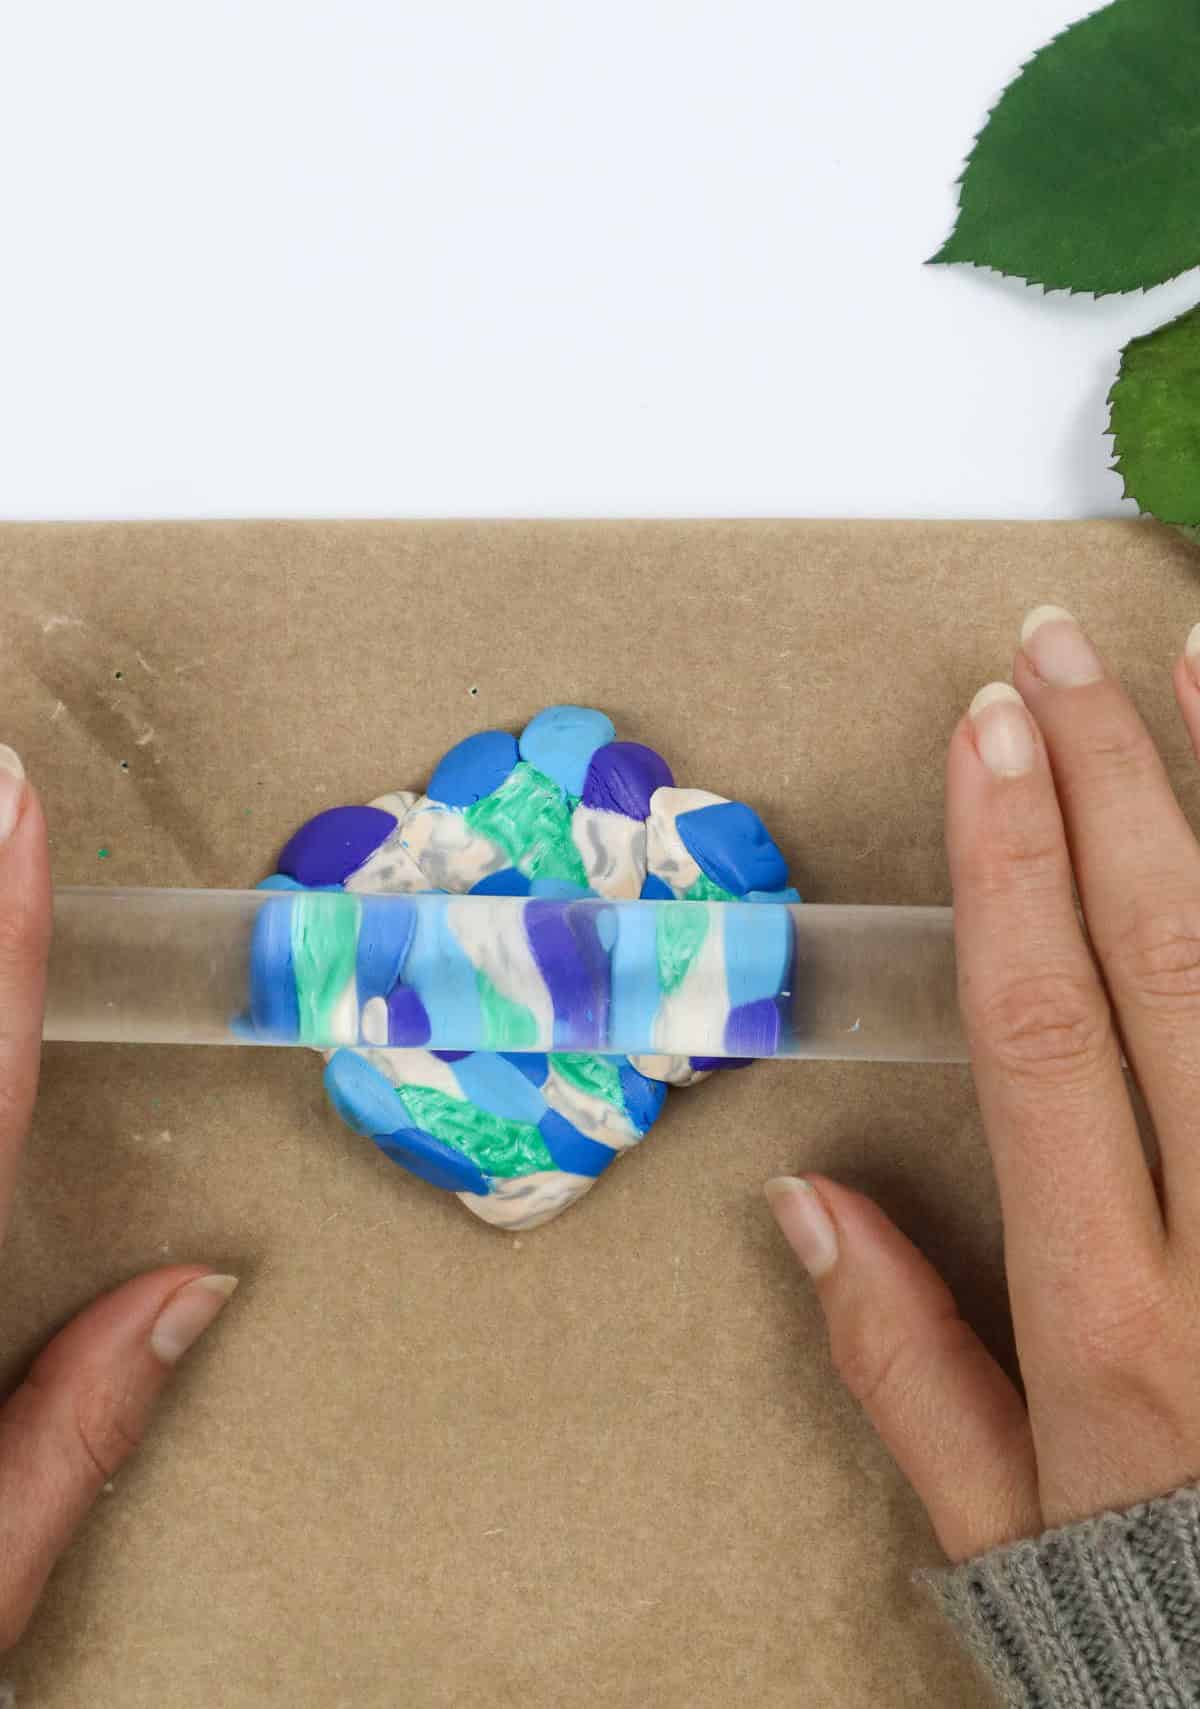
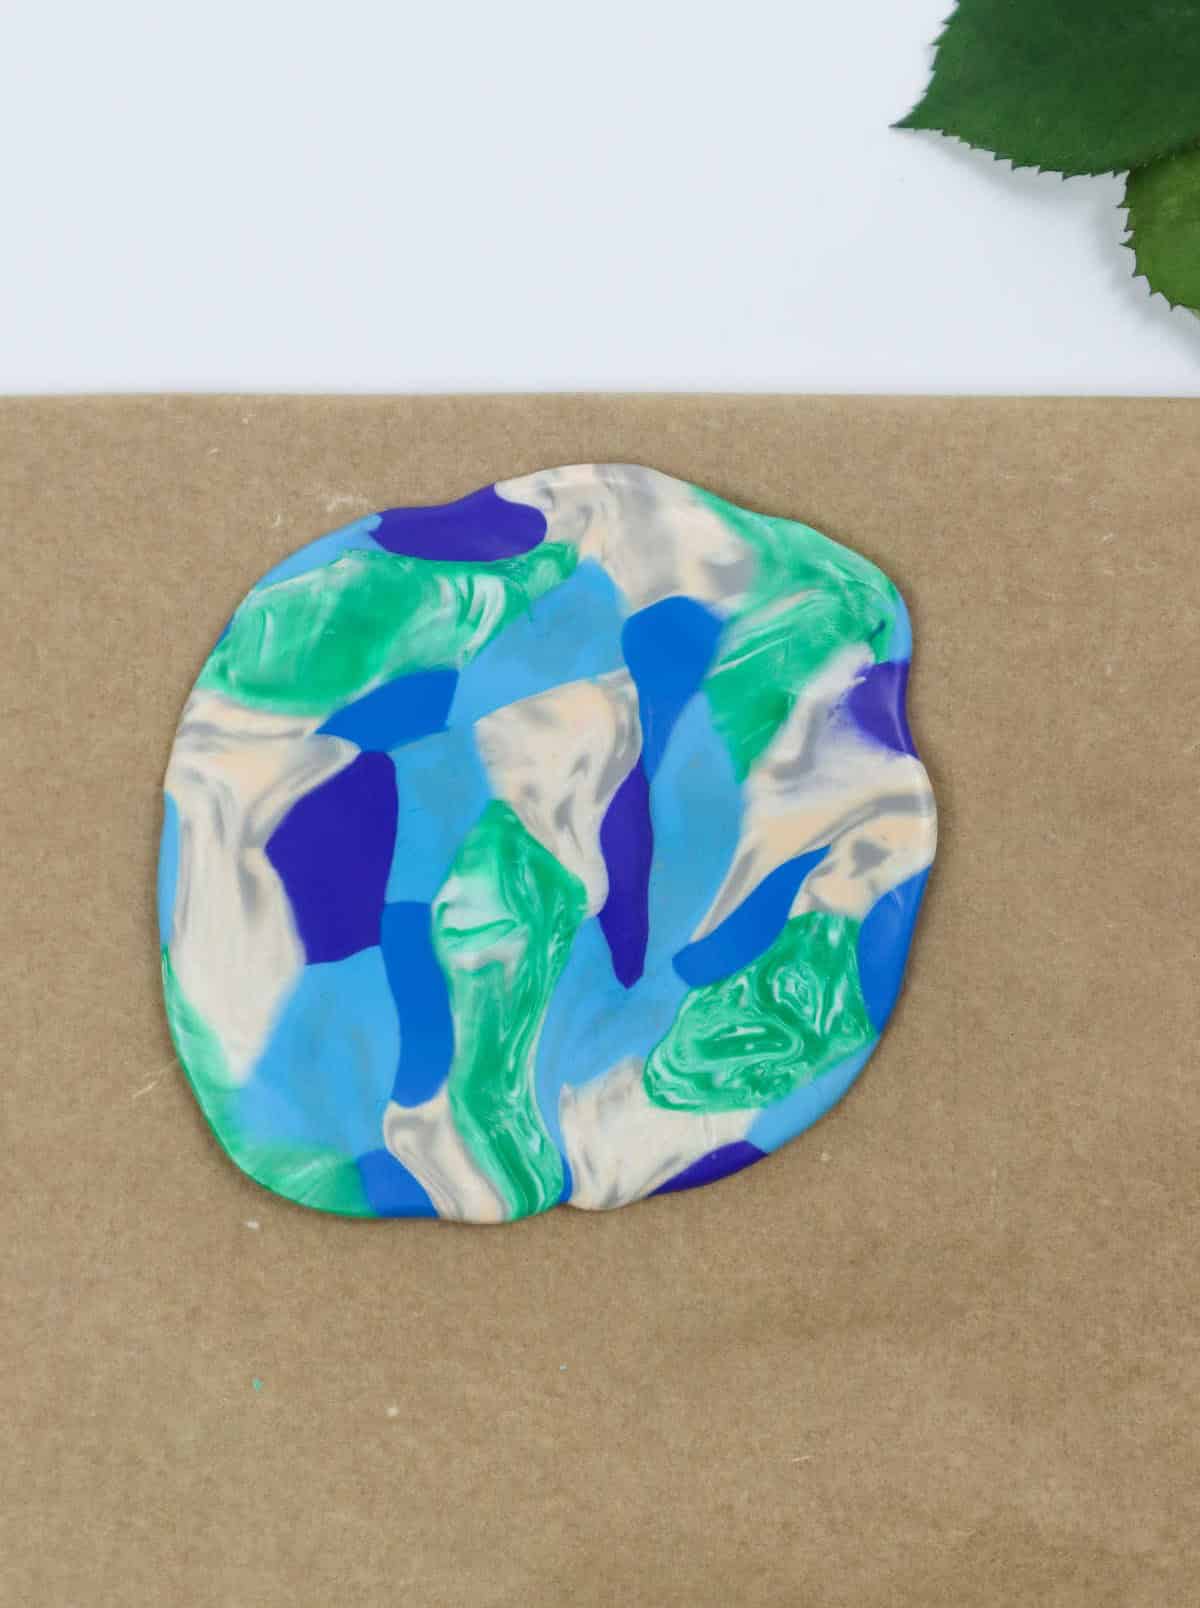
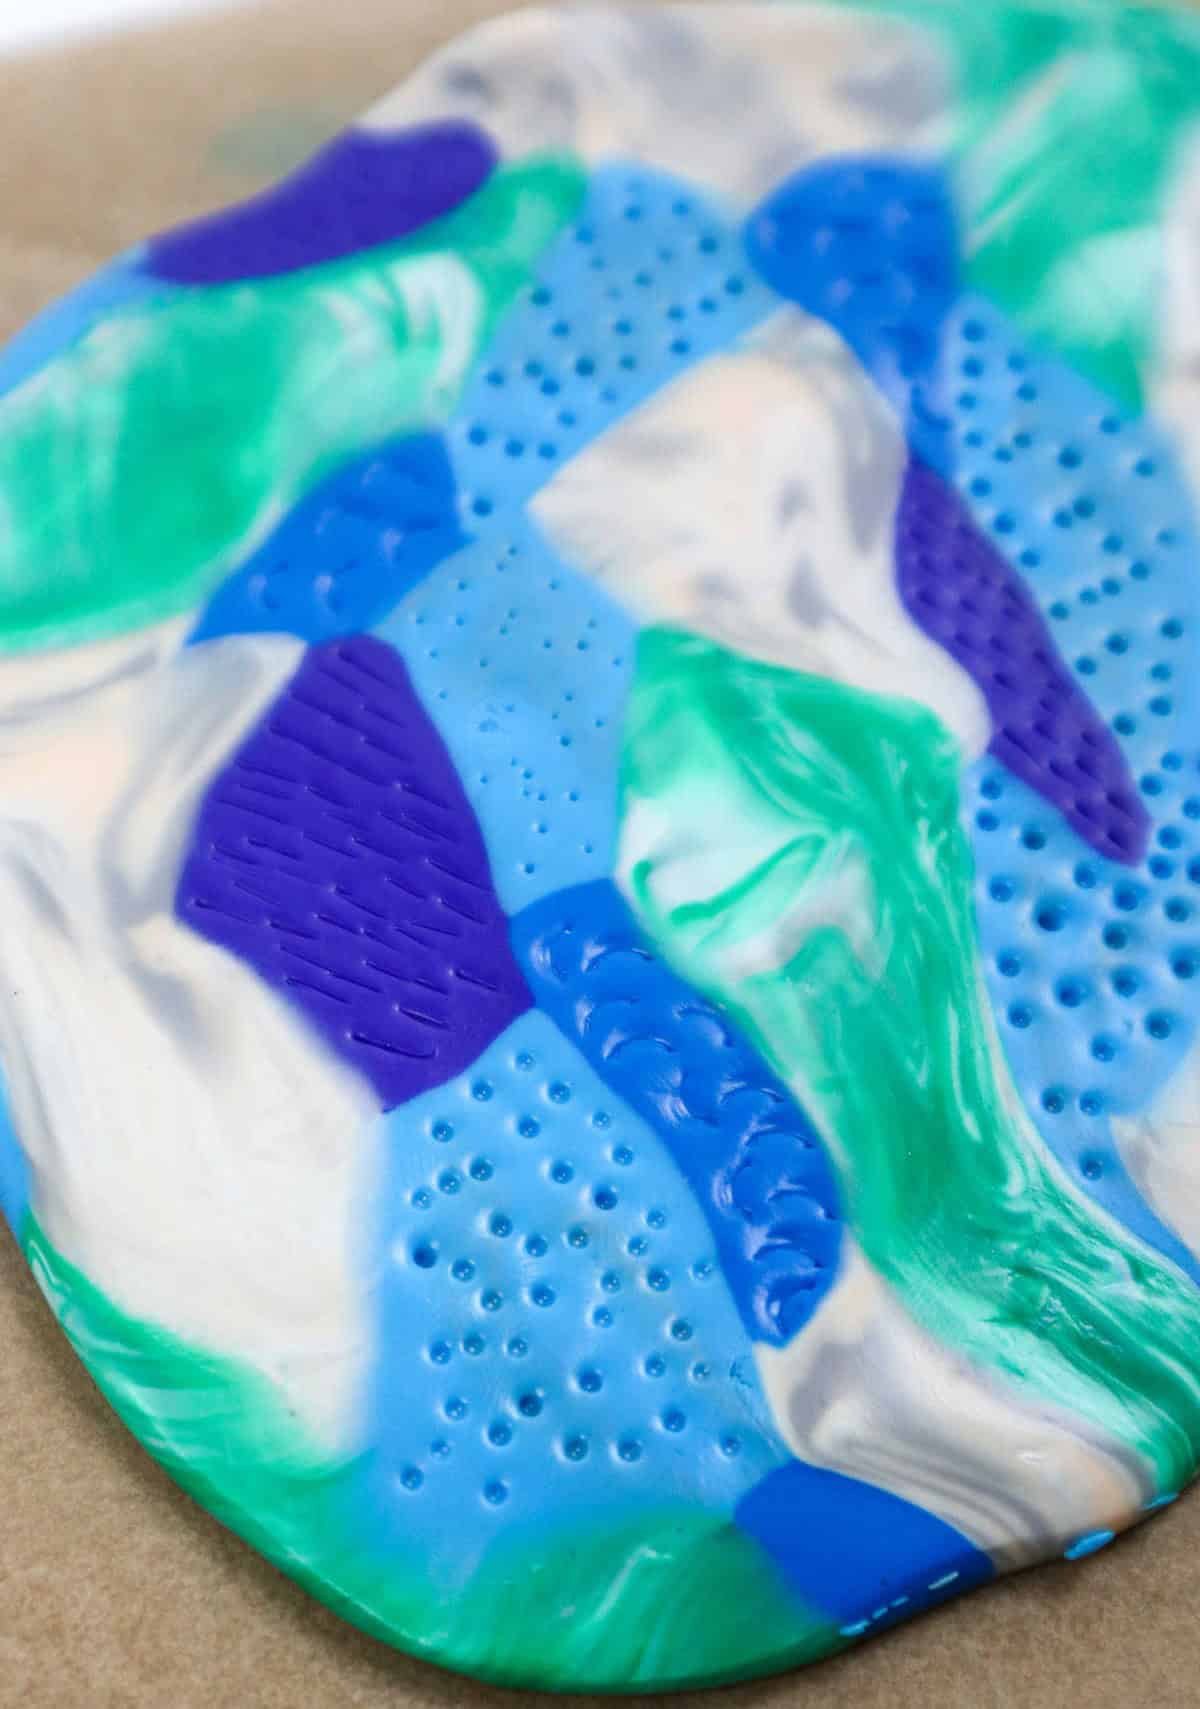
Once you have the different clay rolls lined up, begin the process of merging them together by carefully rolling them flat in an alternating pattern. As you roll, be sure to blend the colors evenly by twisting and folding the clay repeatedly. Continue this process until your clay reaches a thickness of approximately 5mm.
Step 5
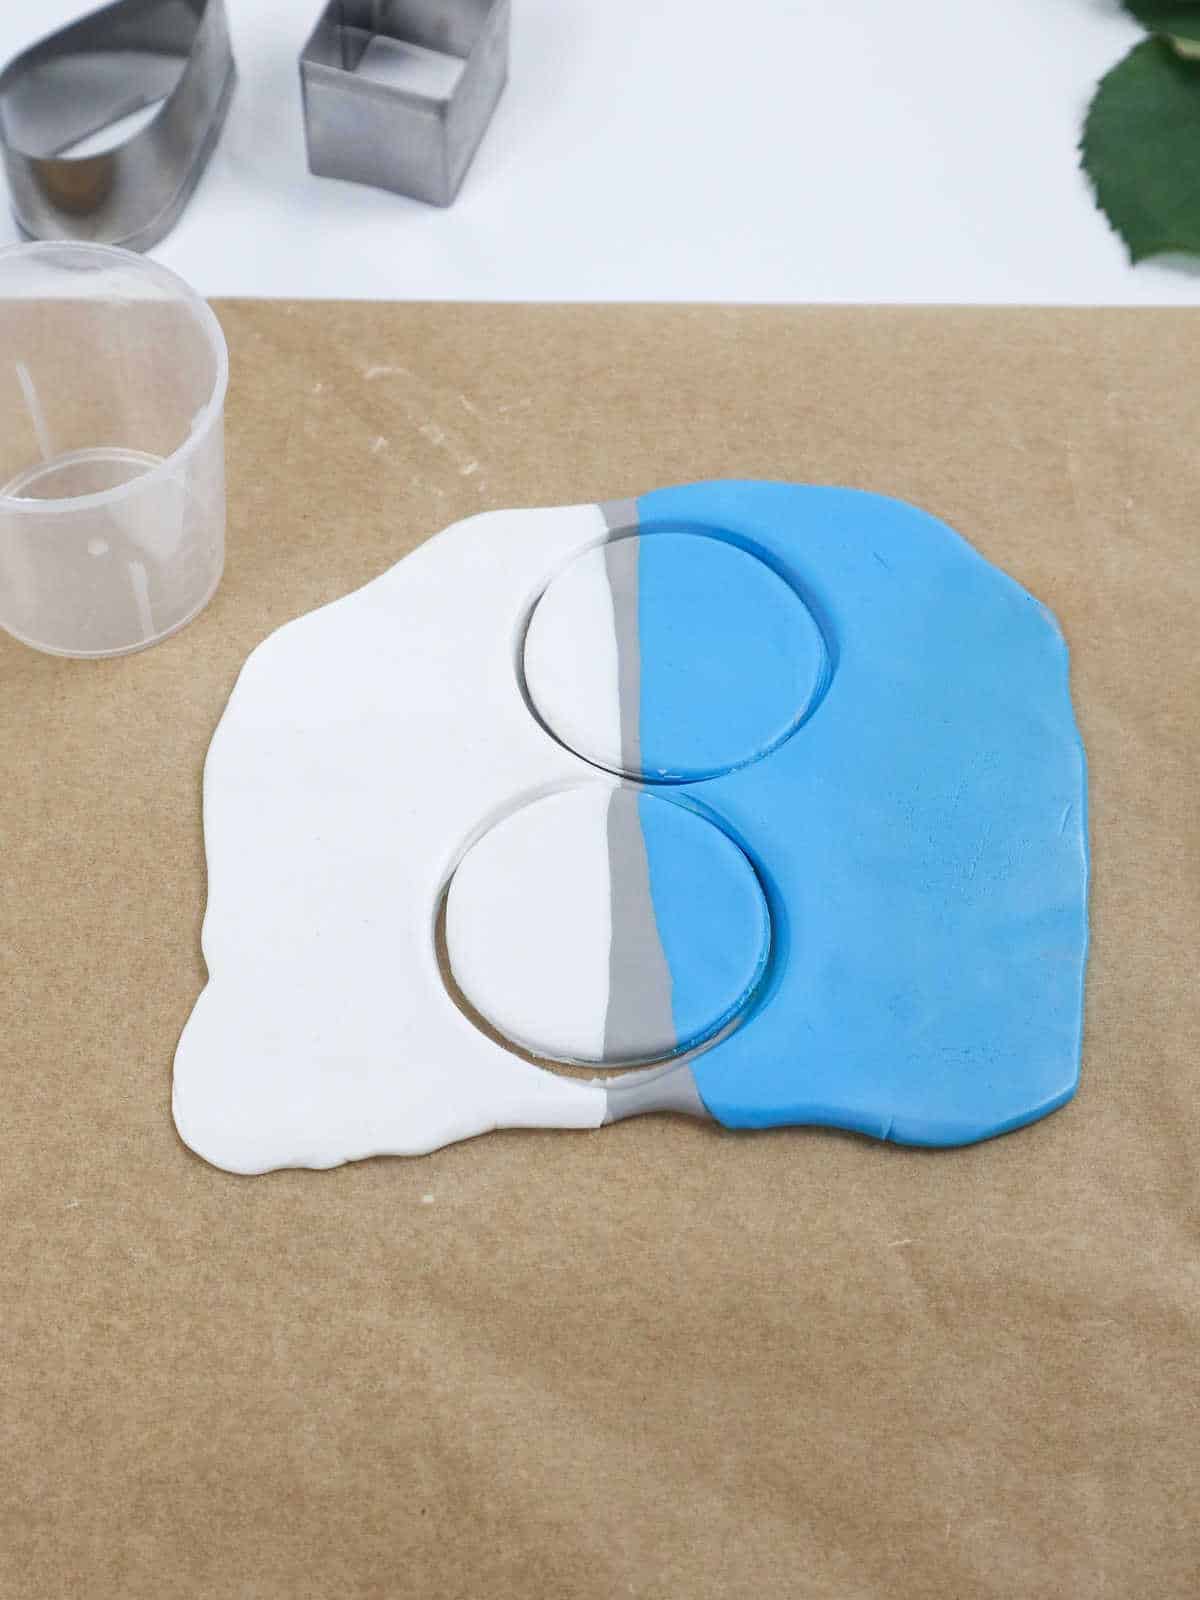
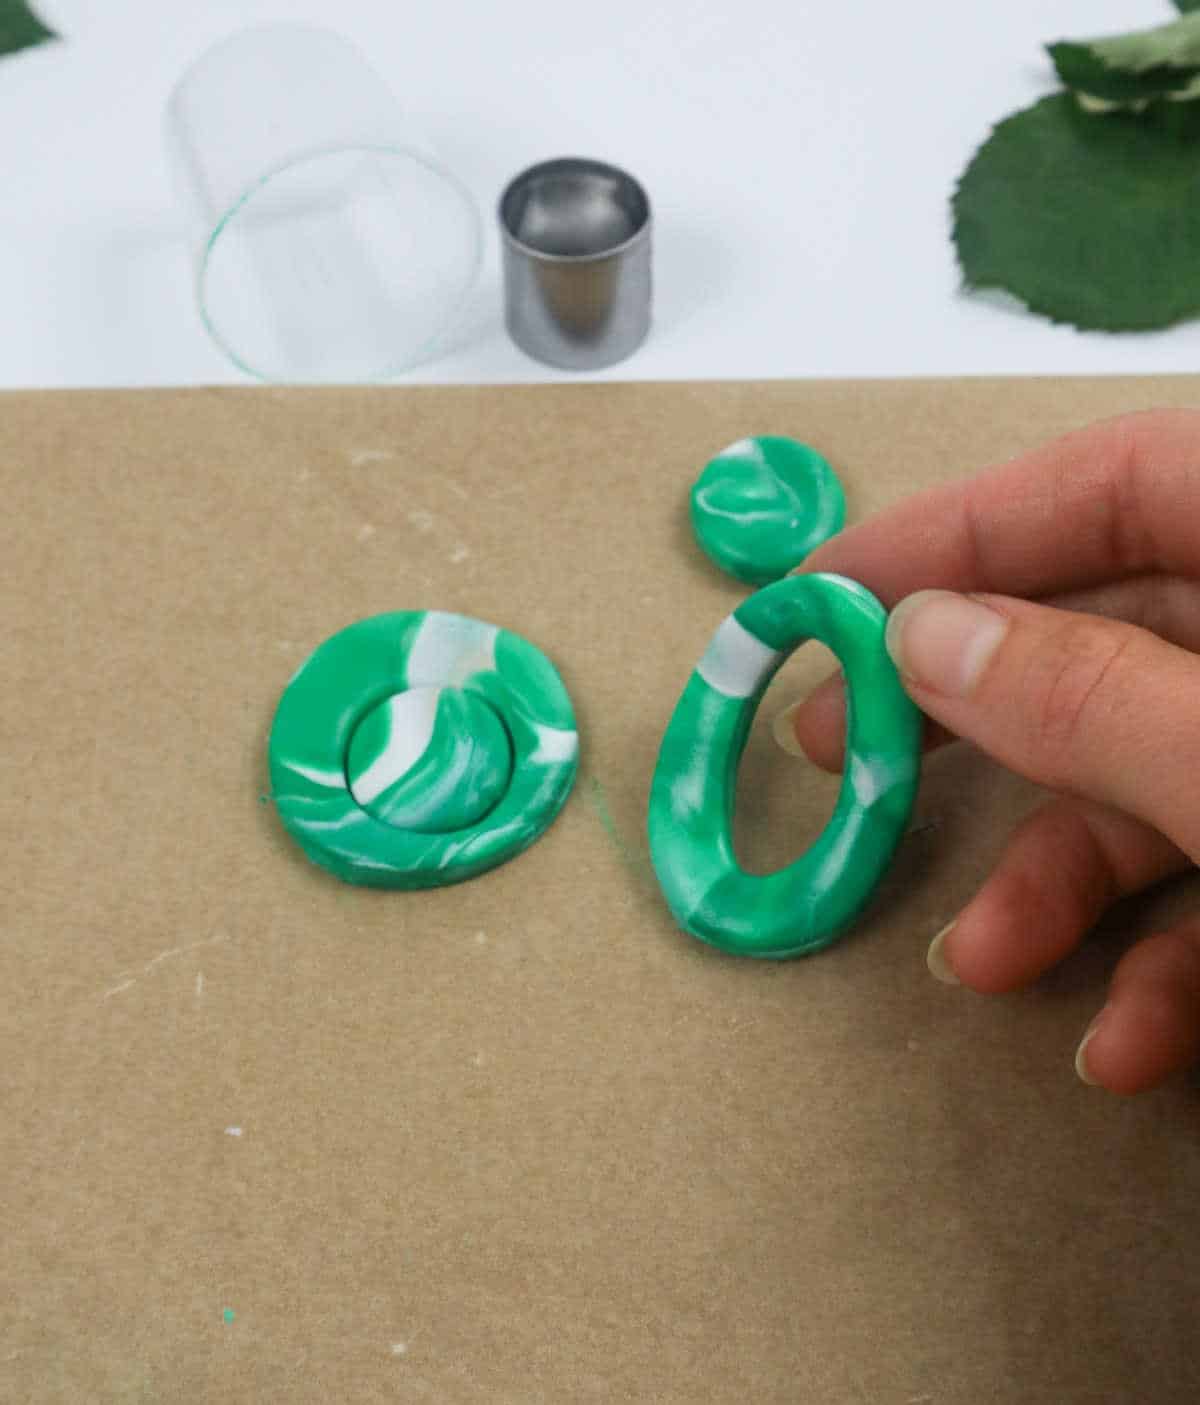
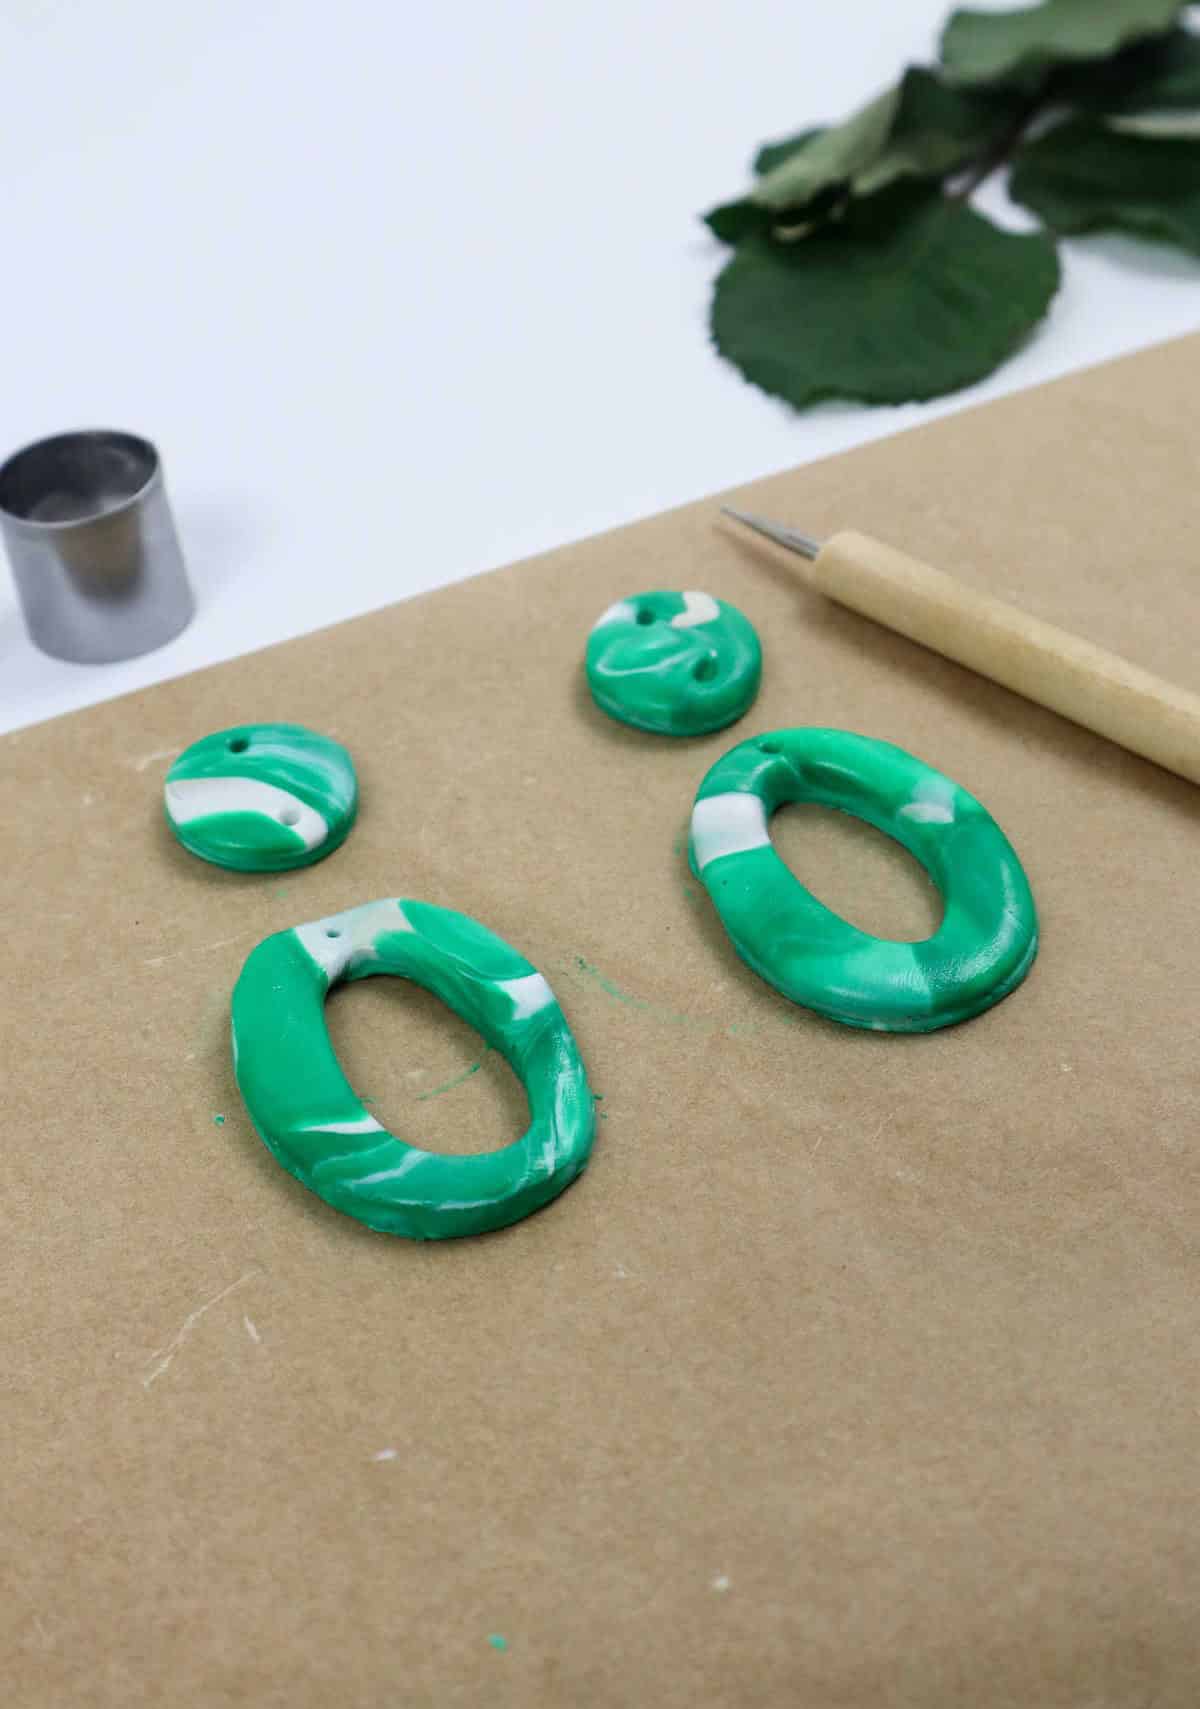
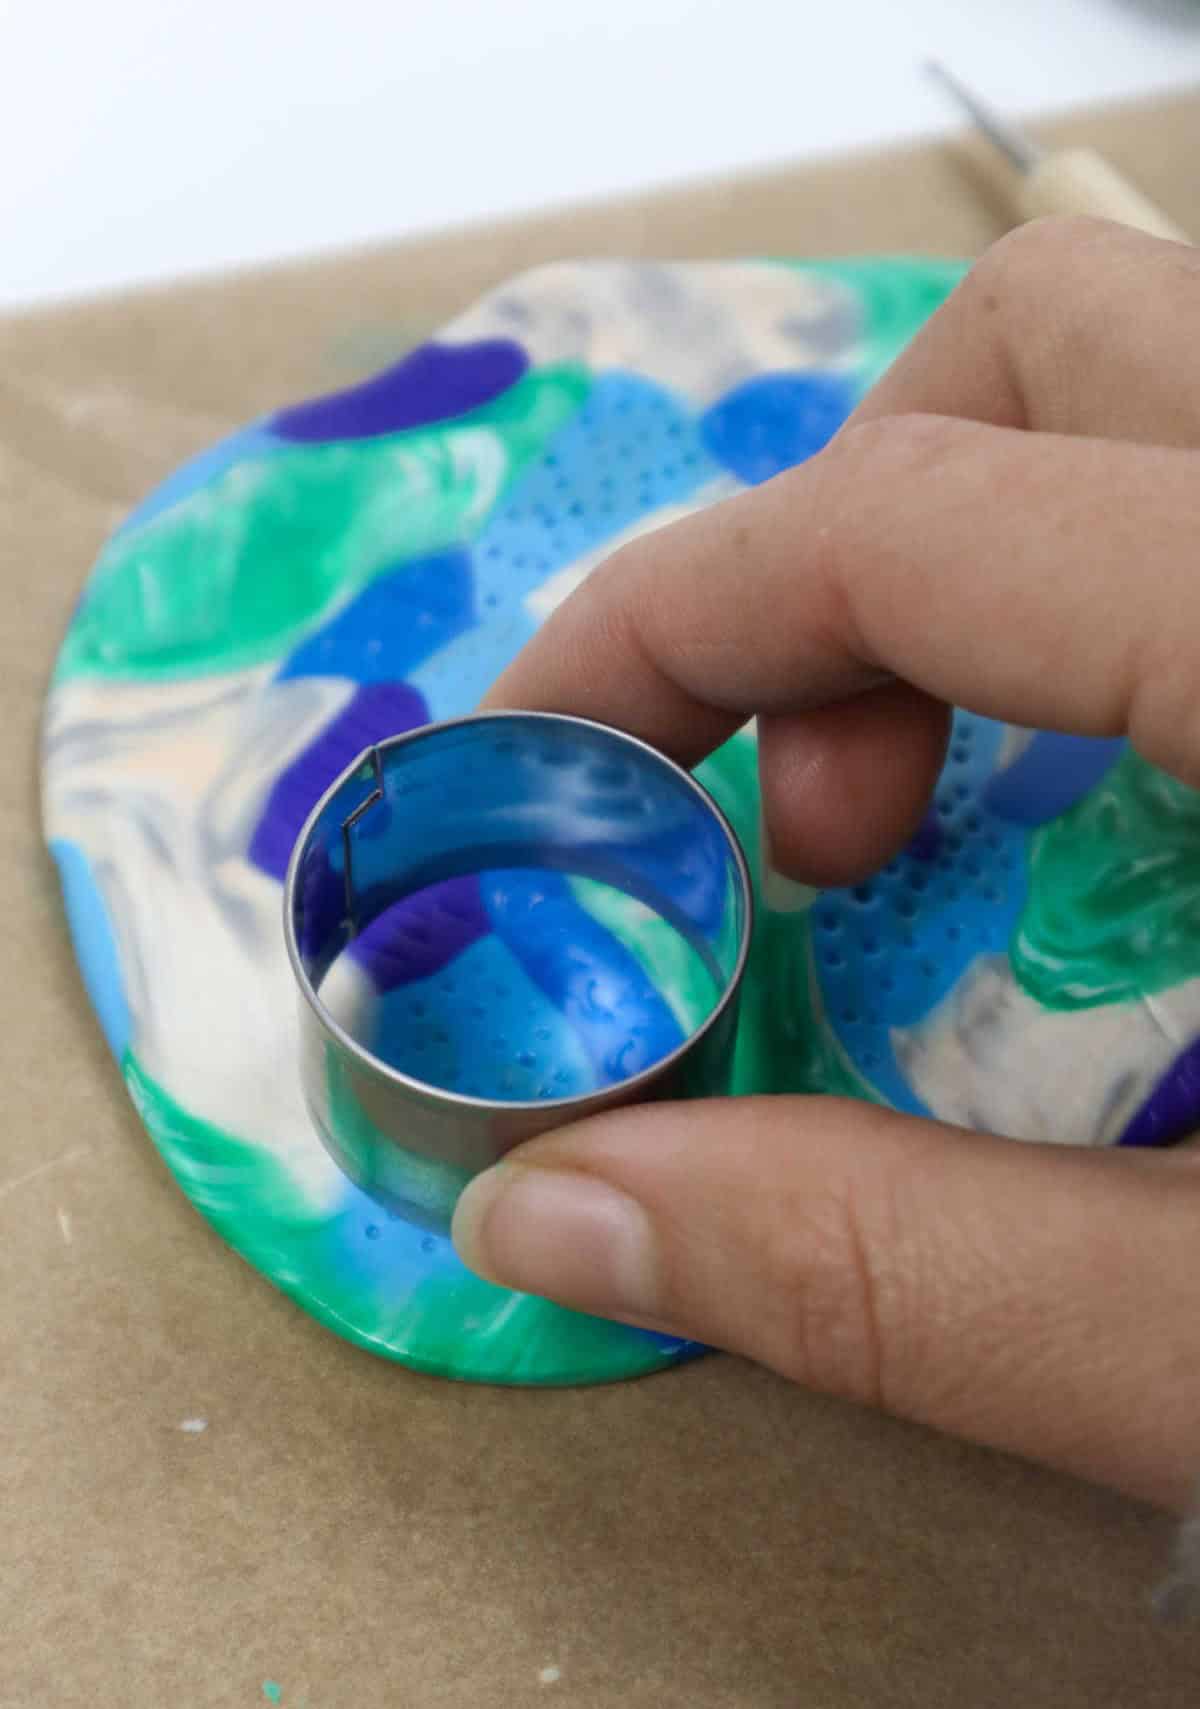
Once you’re satisfied with the marbled effect of the colored clay, it’s time to give it its final form. Take out your cookie cutters and use them to press shapes into the clay. In our example, we’ll be using a circle cutter to create uniform circles.
Design 2
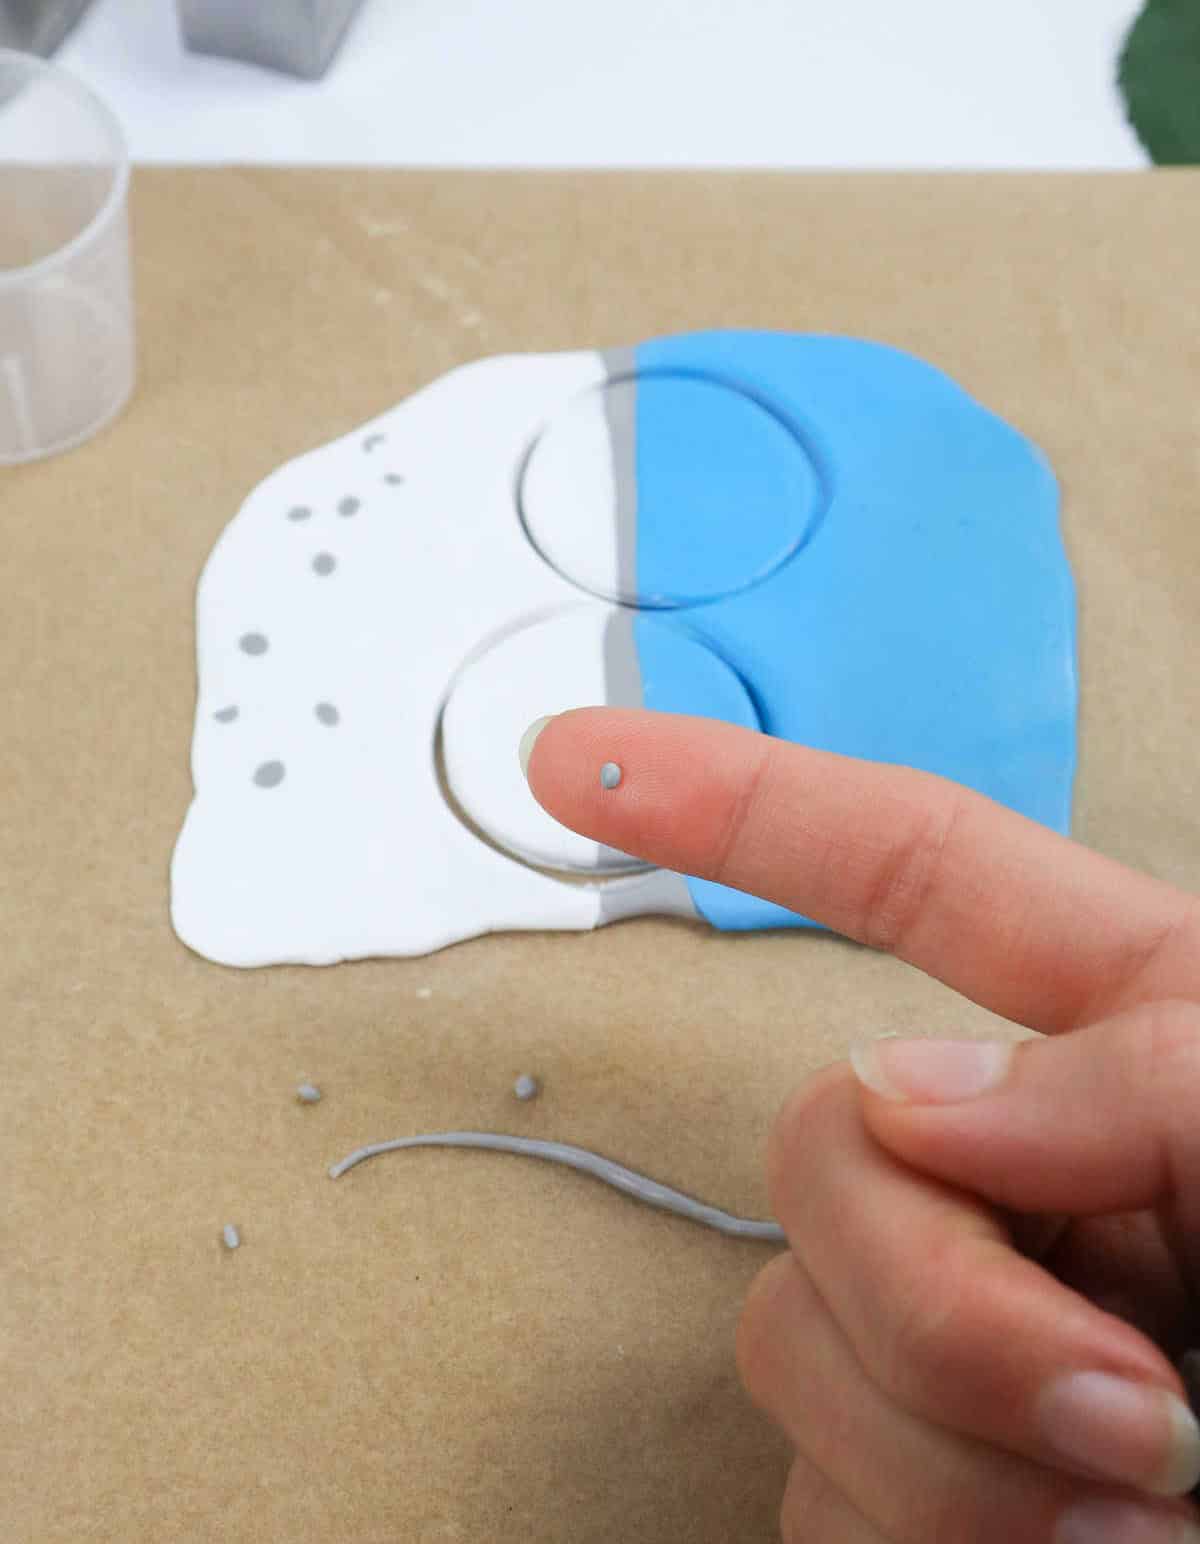
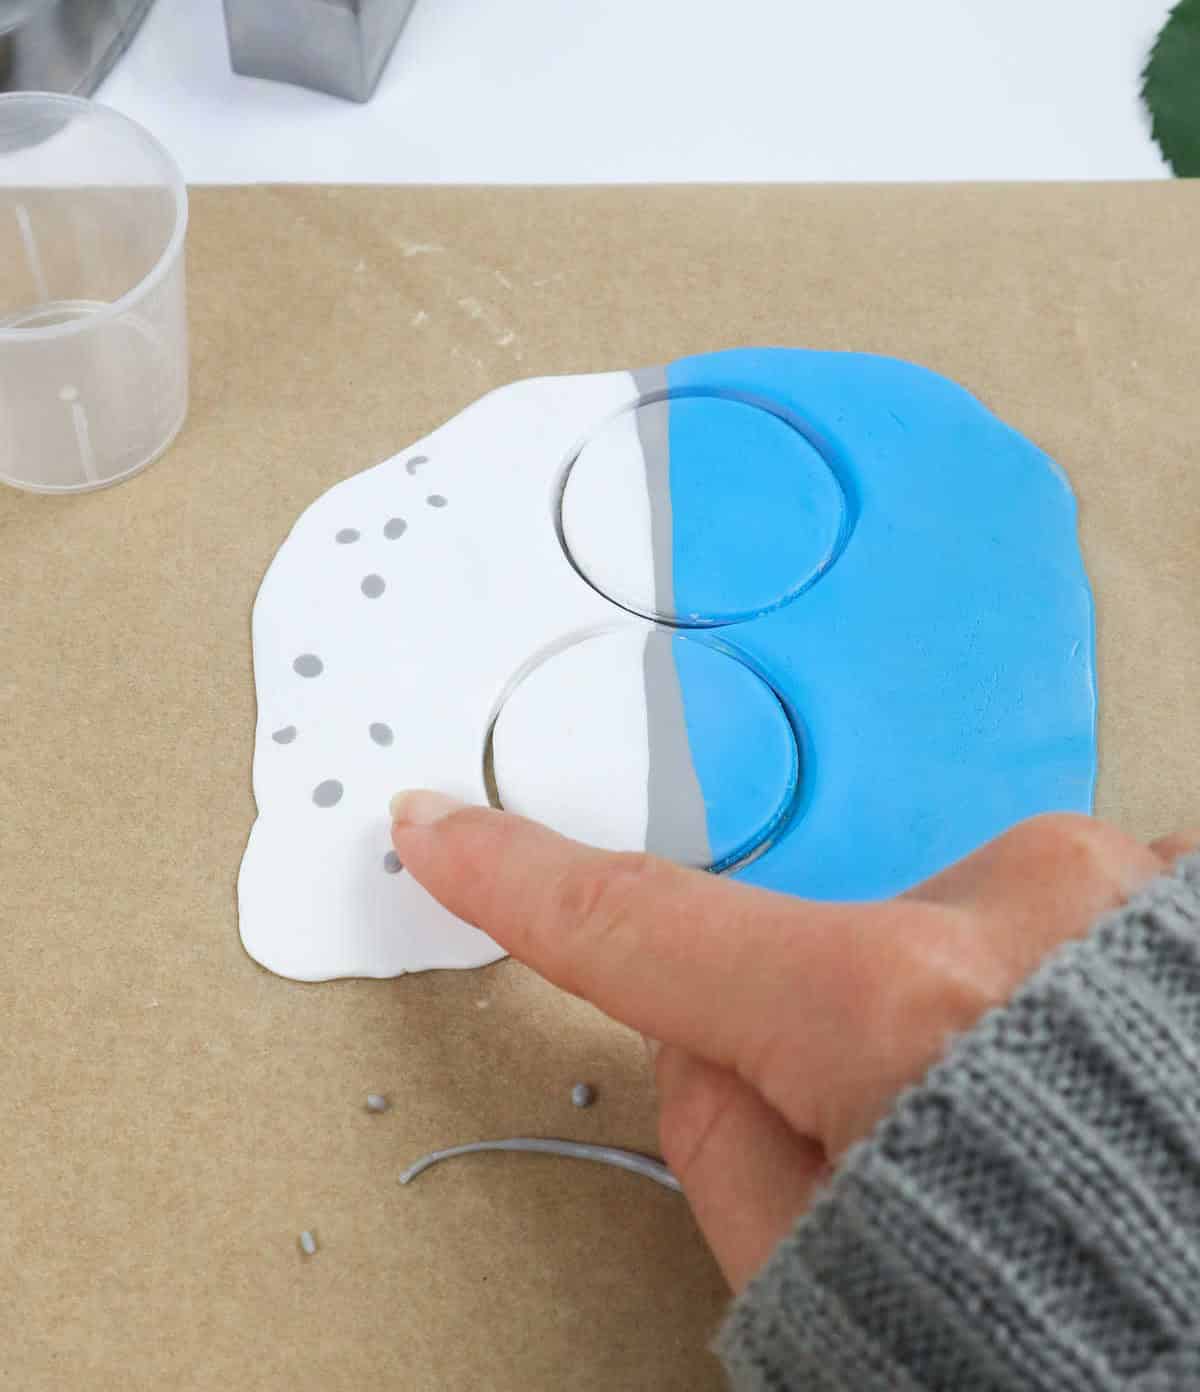
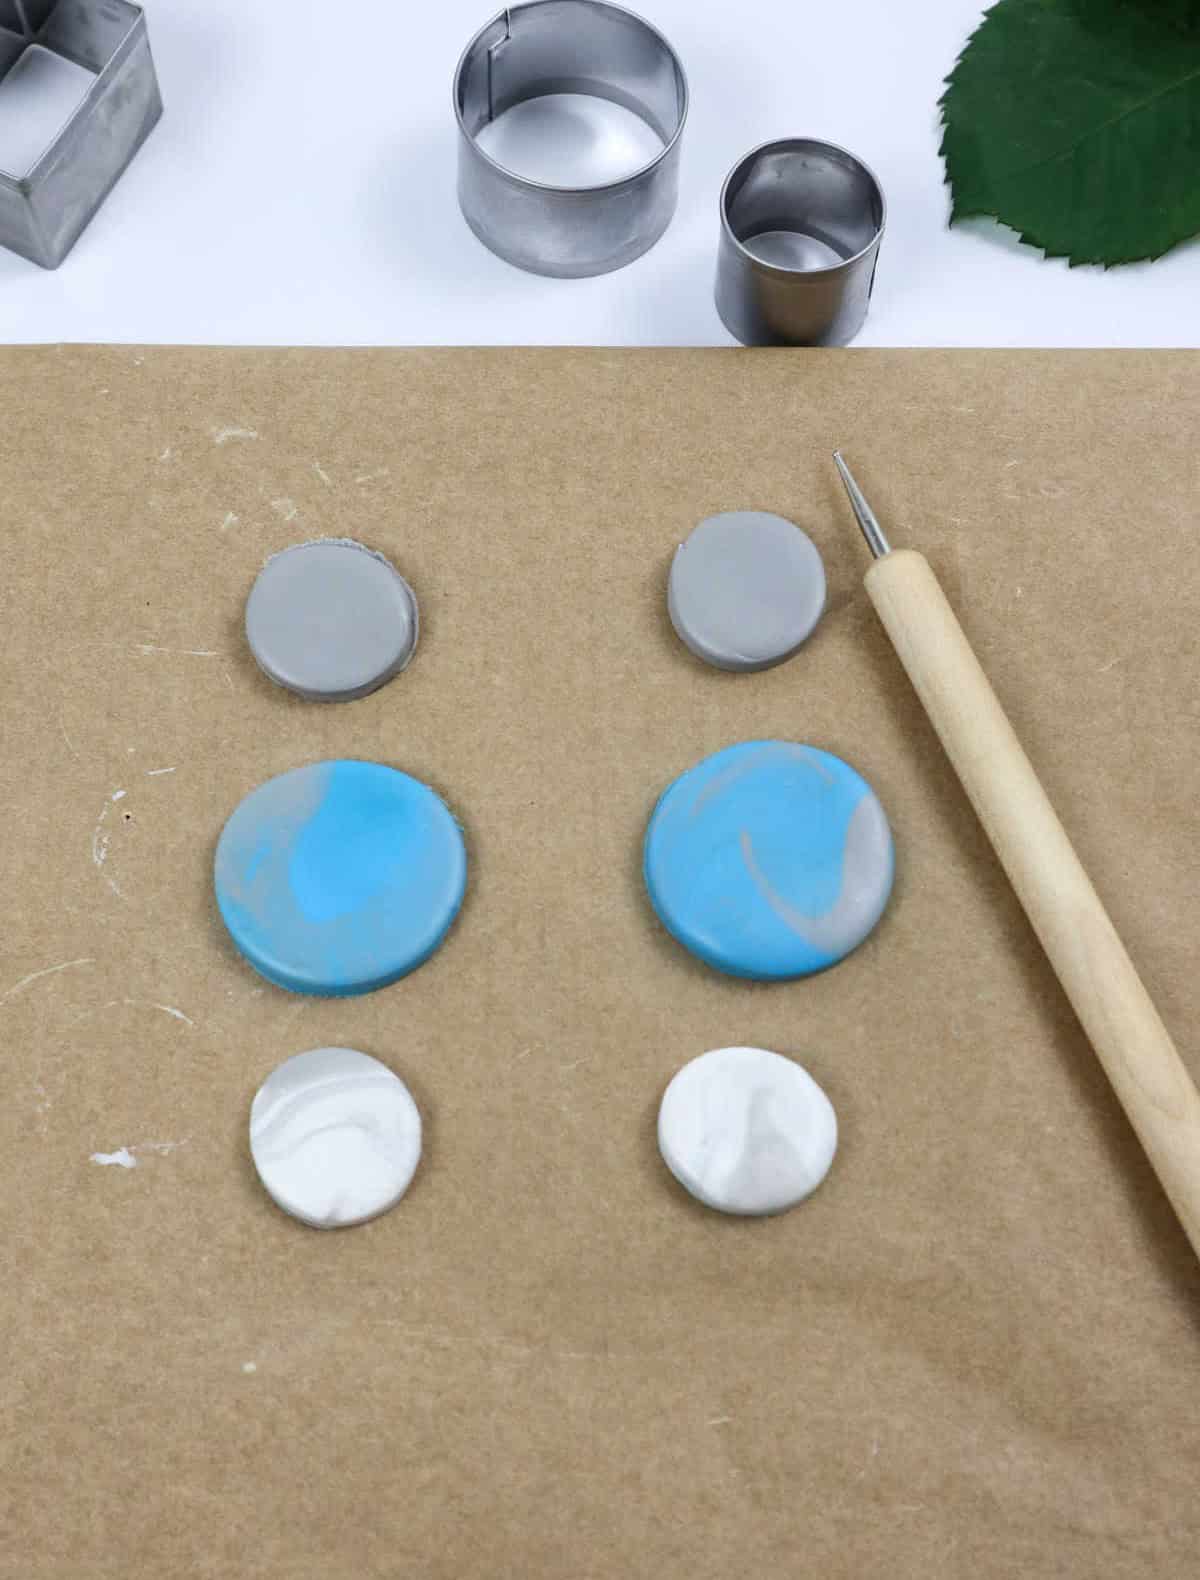
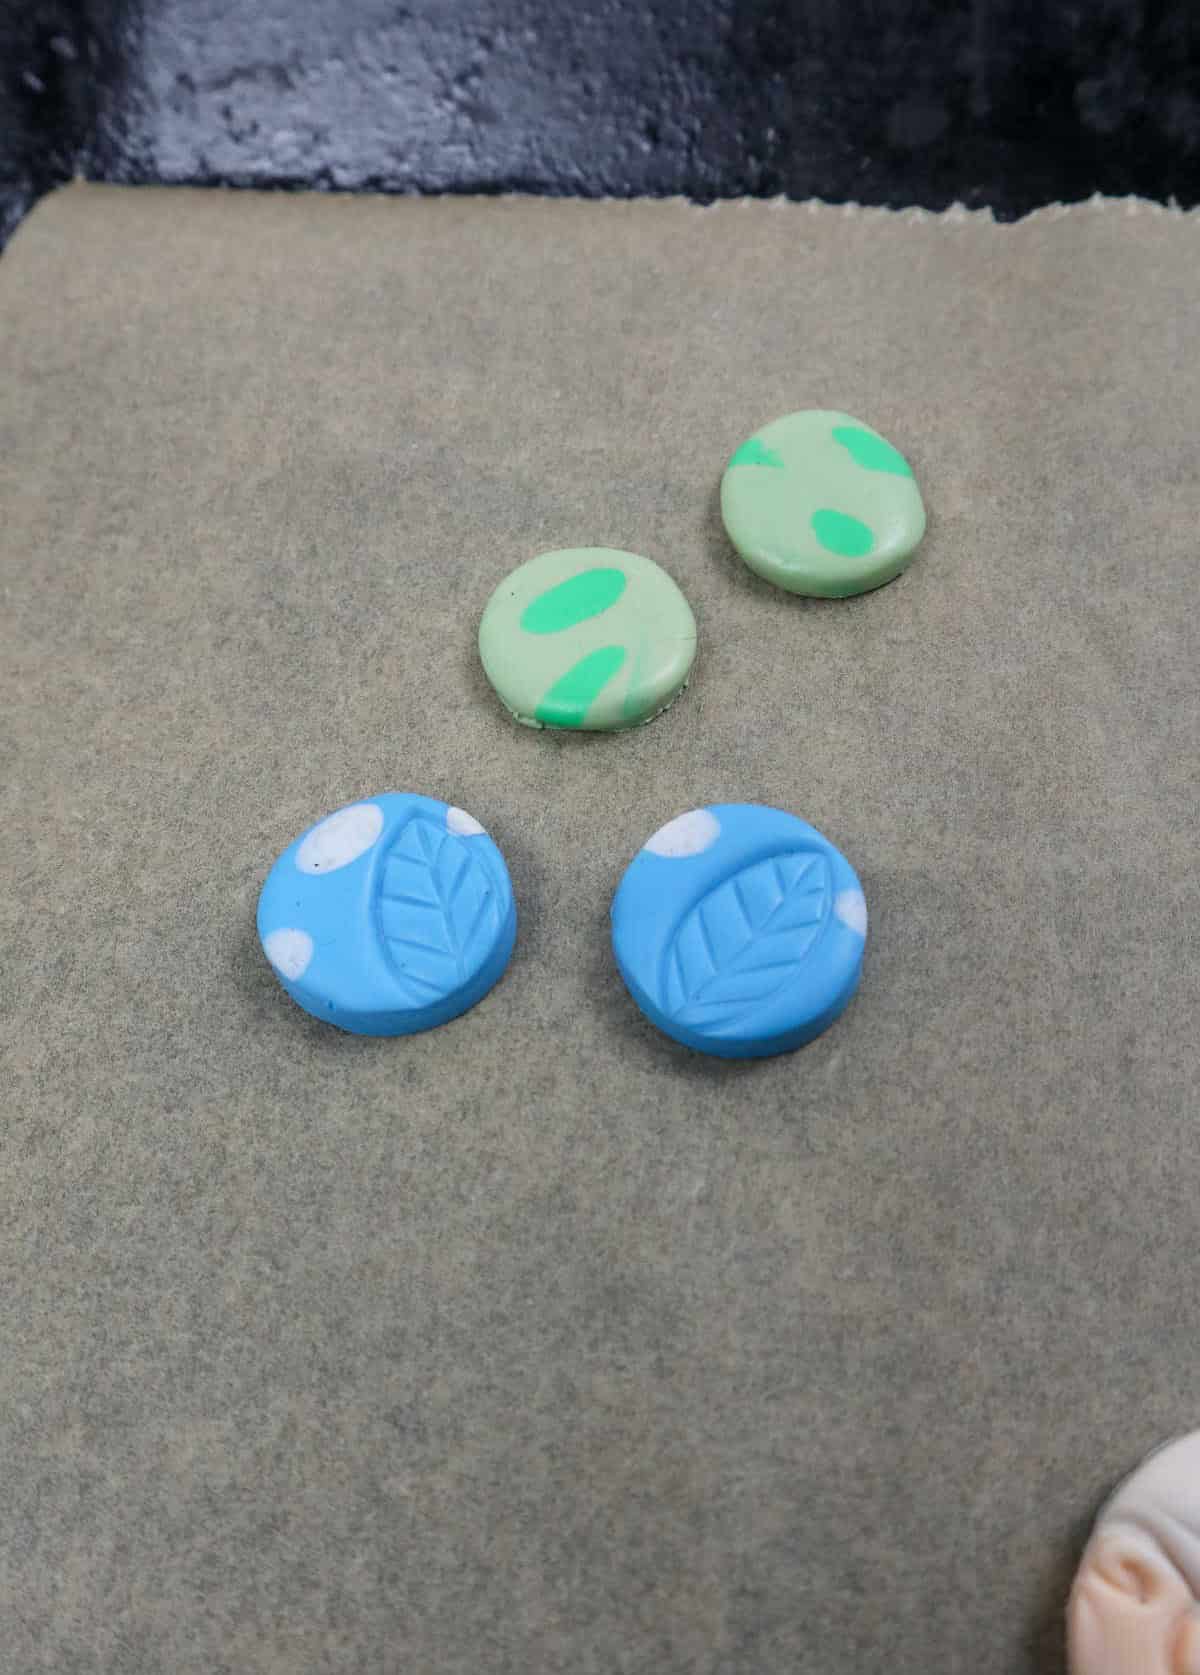
You can create multiple pairs by using the remaining clay. Simply pinch off small amounts in your desired colors and roll them into tiny dots. Press these dots onto the flattened clay to give it a speckled effect. Once you’re happy with the design, grab another cookie cutter and cut out two more pieces for an additional pair of earrings. Feel free to stick with the same round shape or experiment with different designs to add some variety.
Step 6
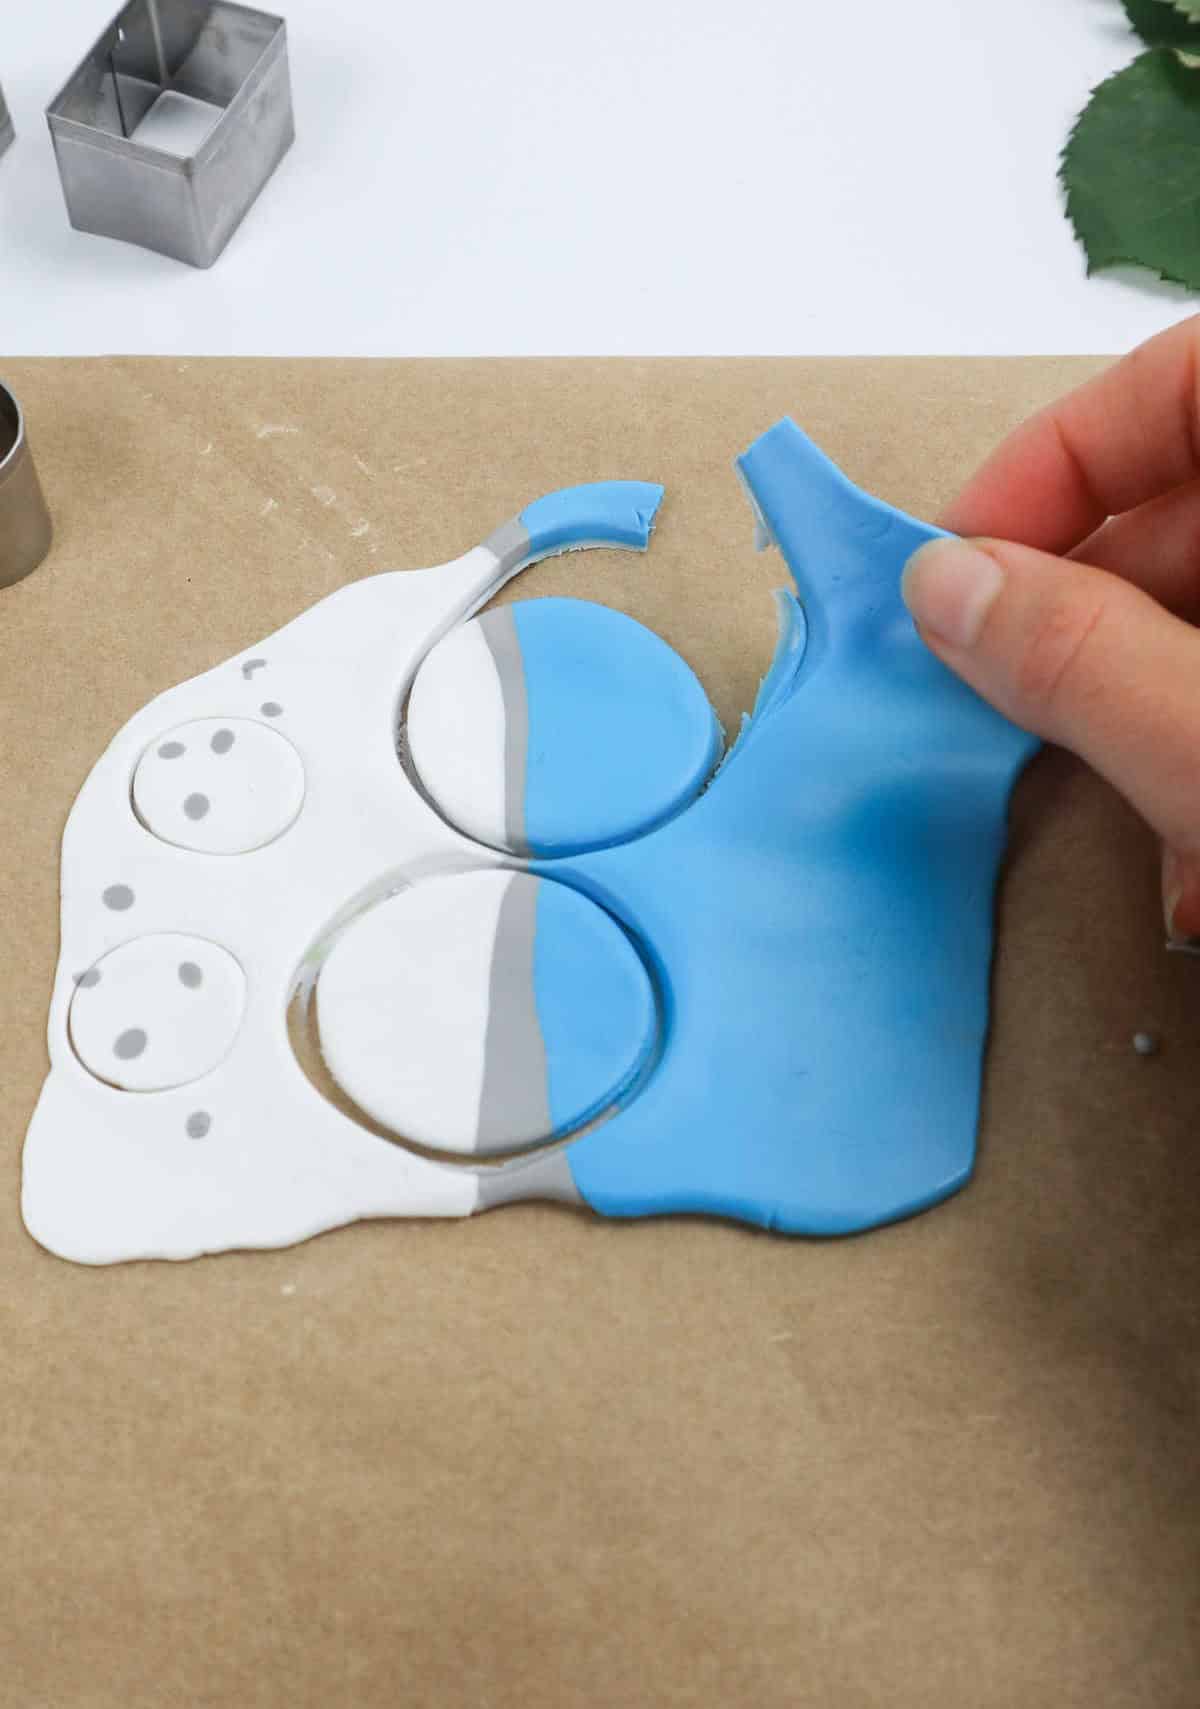
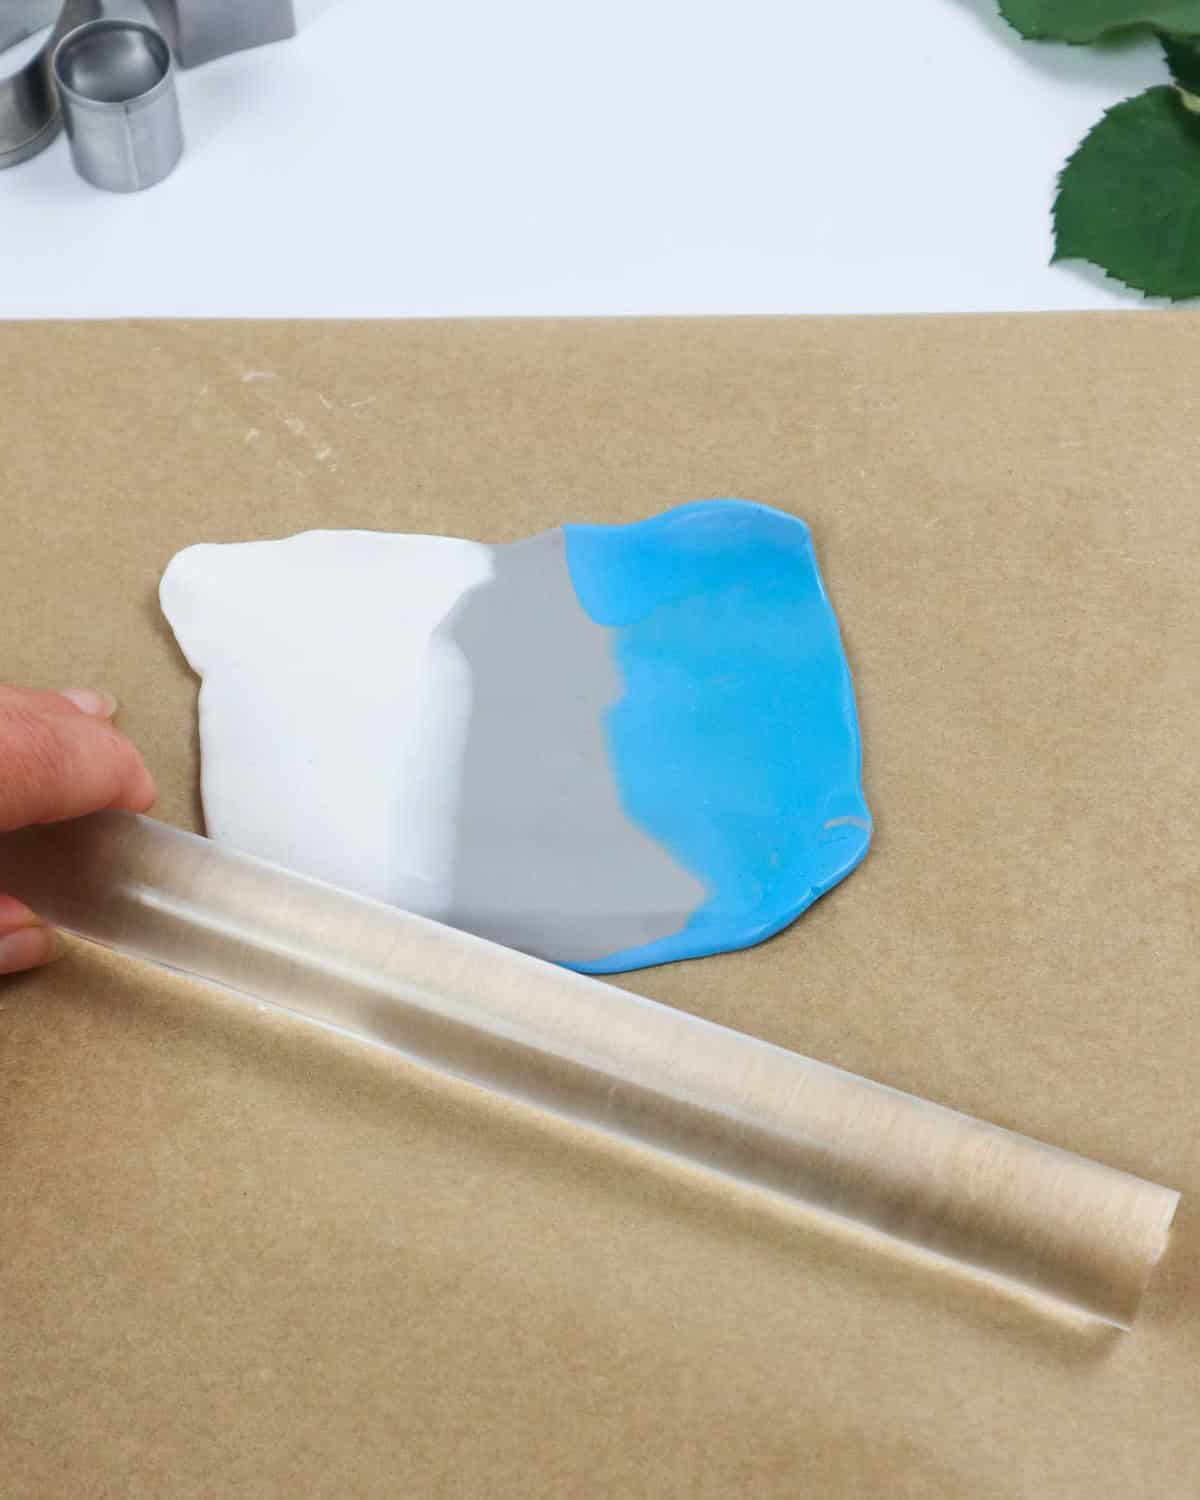
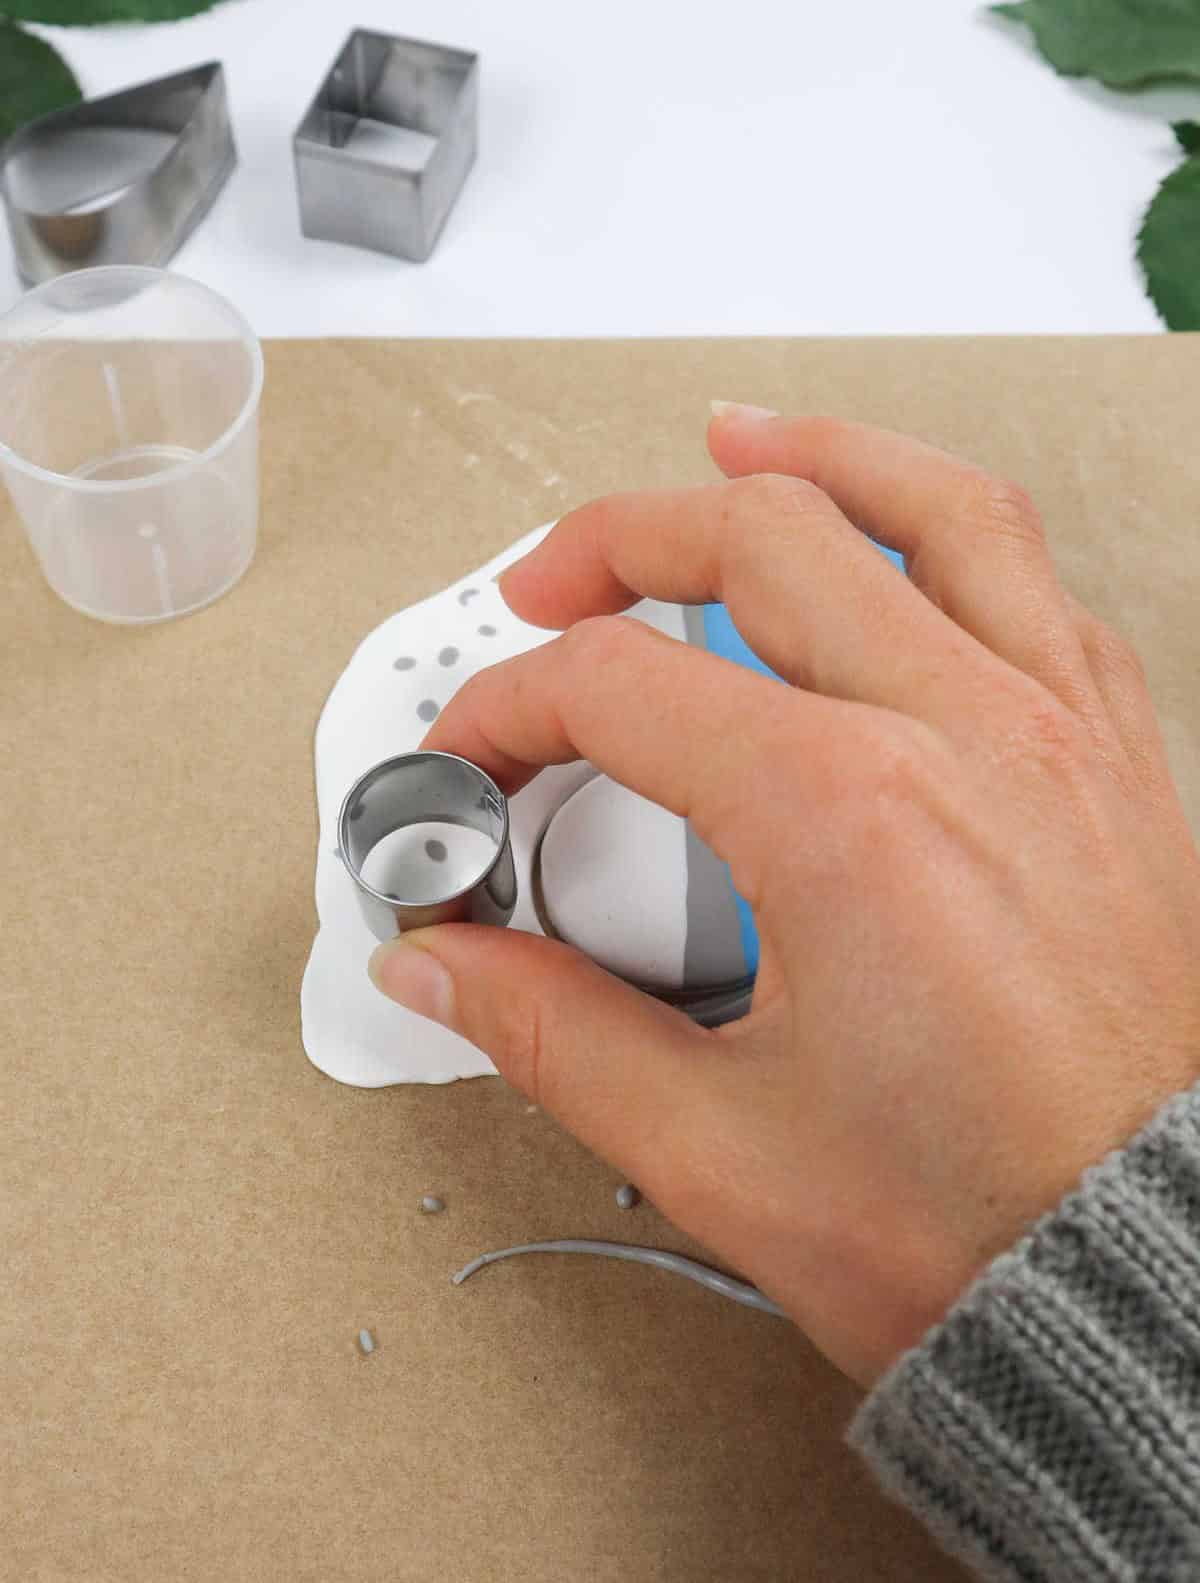
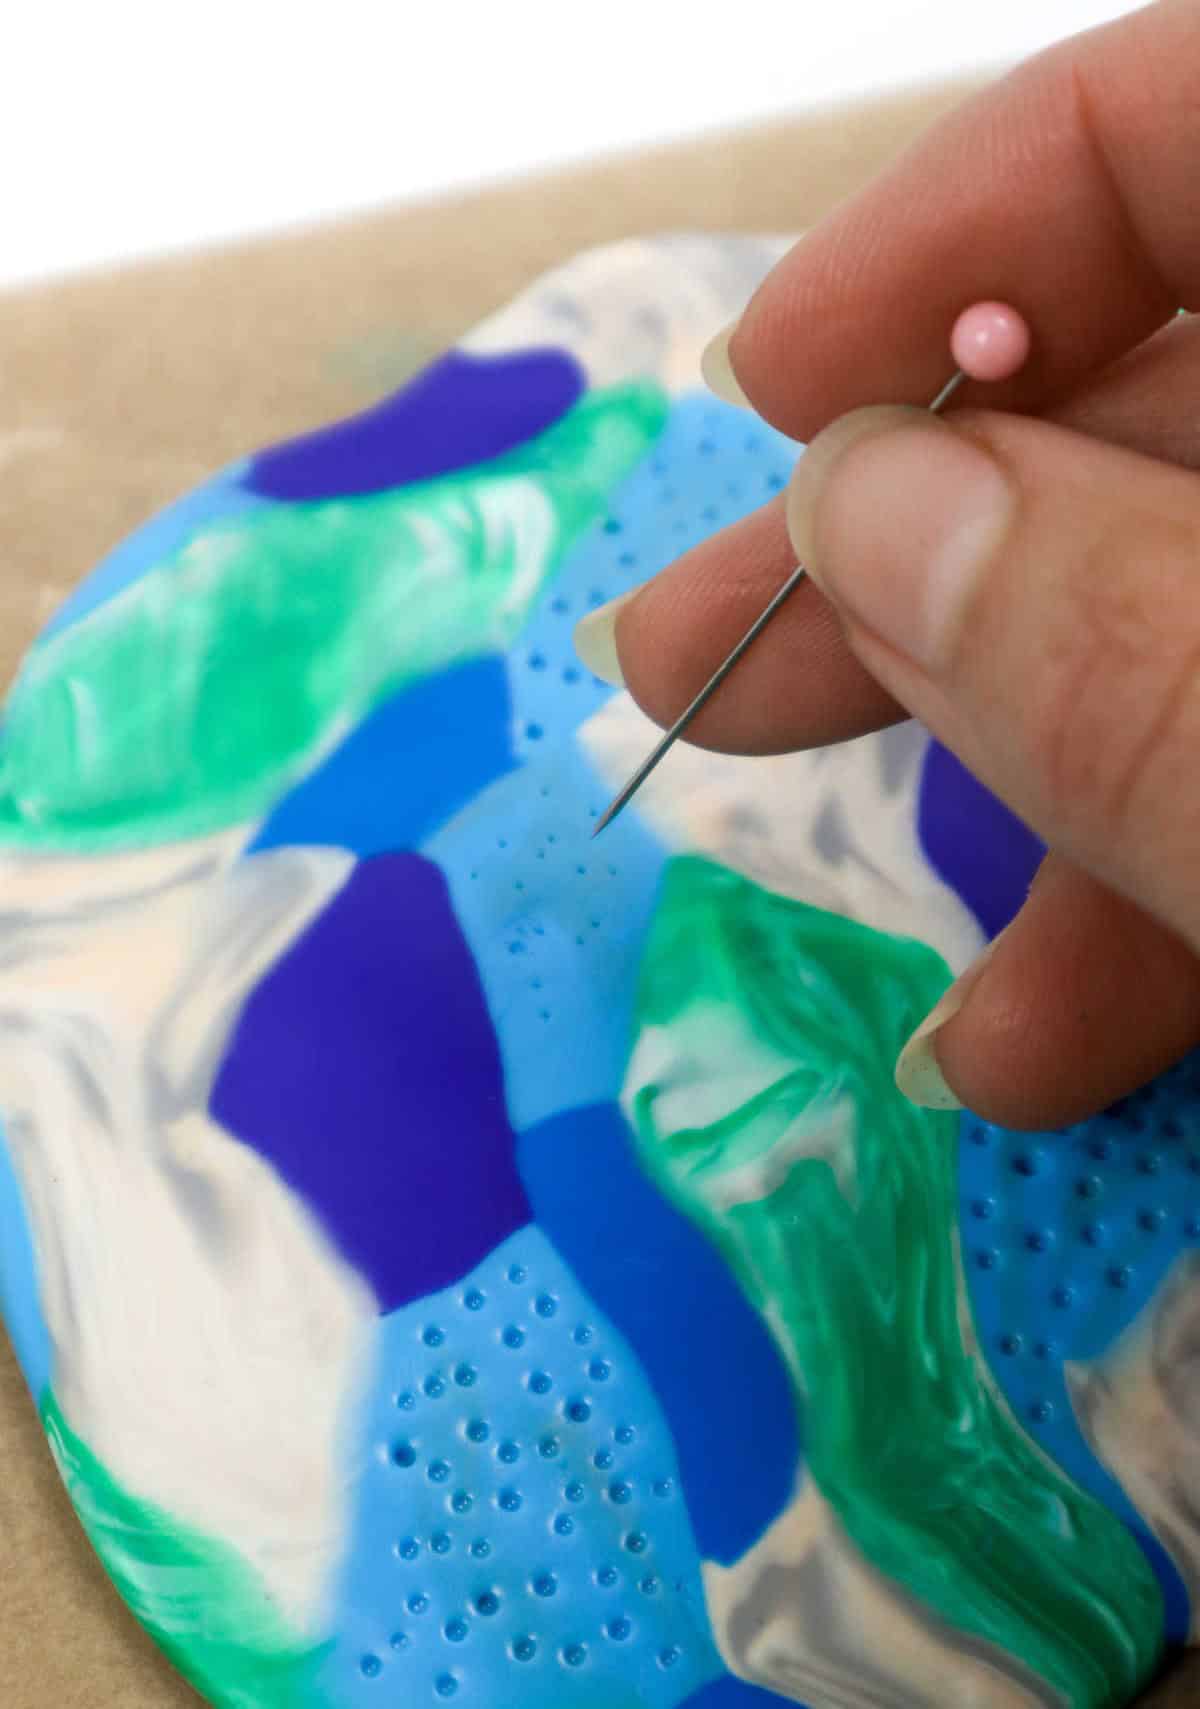
As you refine your clay shapes, be mindful of removing excess clay carefully to avoid damaging the desired forms. Set aside any discarded clay for future creative endeavors, where it can be repurposed into new projects. To efficiently remove stray clay particles and fine shavings, consider employing a cutter, toothpick, or pin as a precision tool.
Step 7
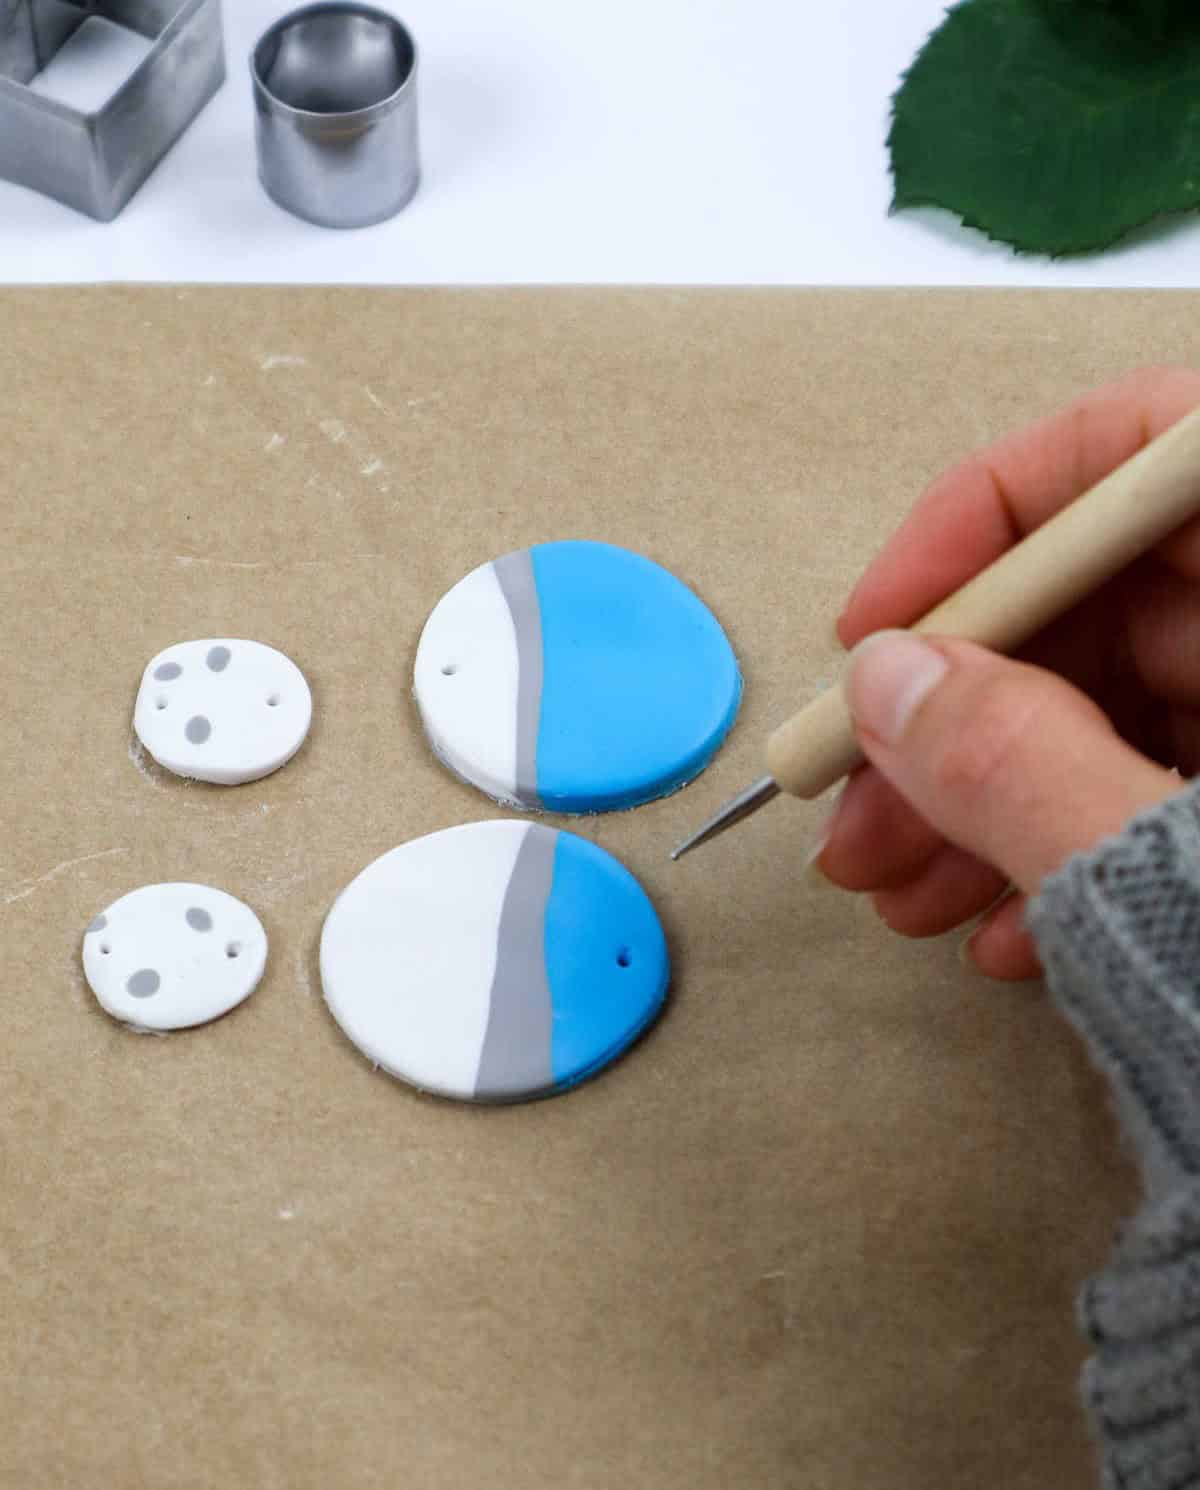
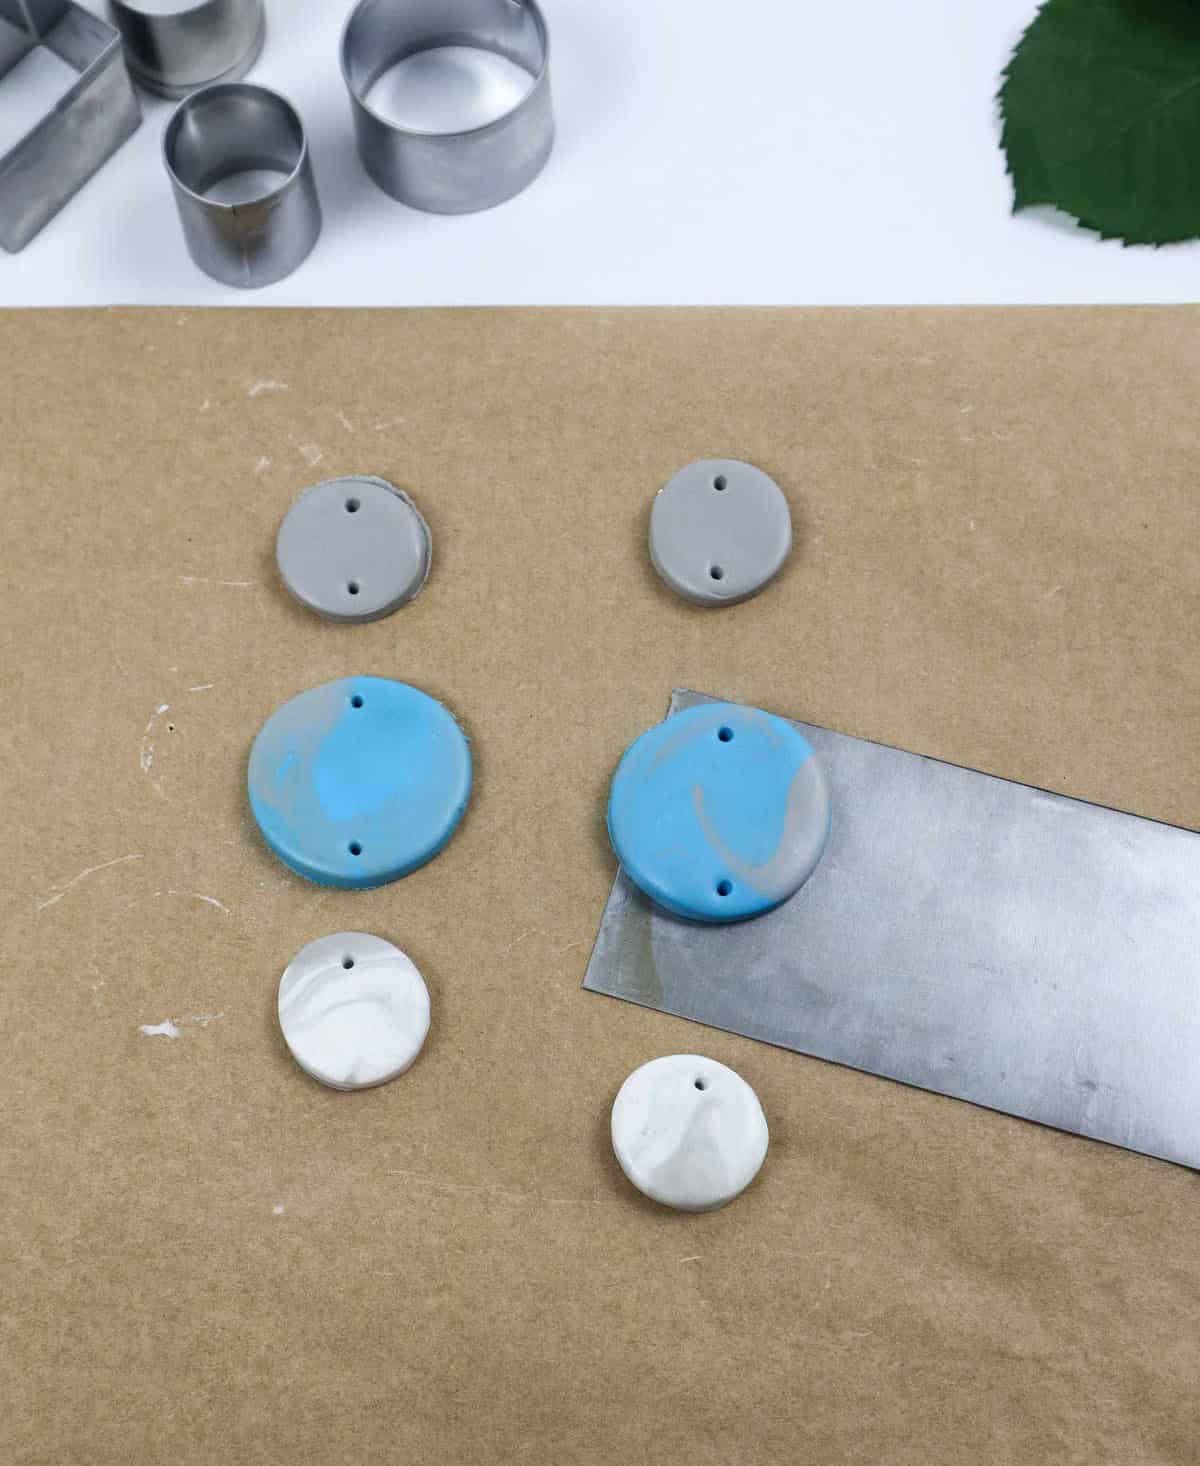
To begin the process of attaching earring hooks to your clay jewelry, start by using your craft cutter to gently create a small opening in the upper region of the area where you wish to insert the hooks. Be precise and controlled as you make this initial incision to ensure that it is even and not too large for the hook’s base.
Step 8
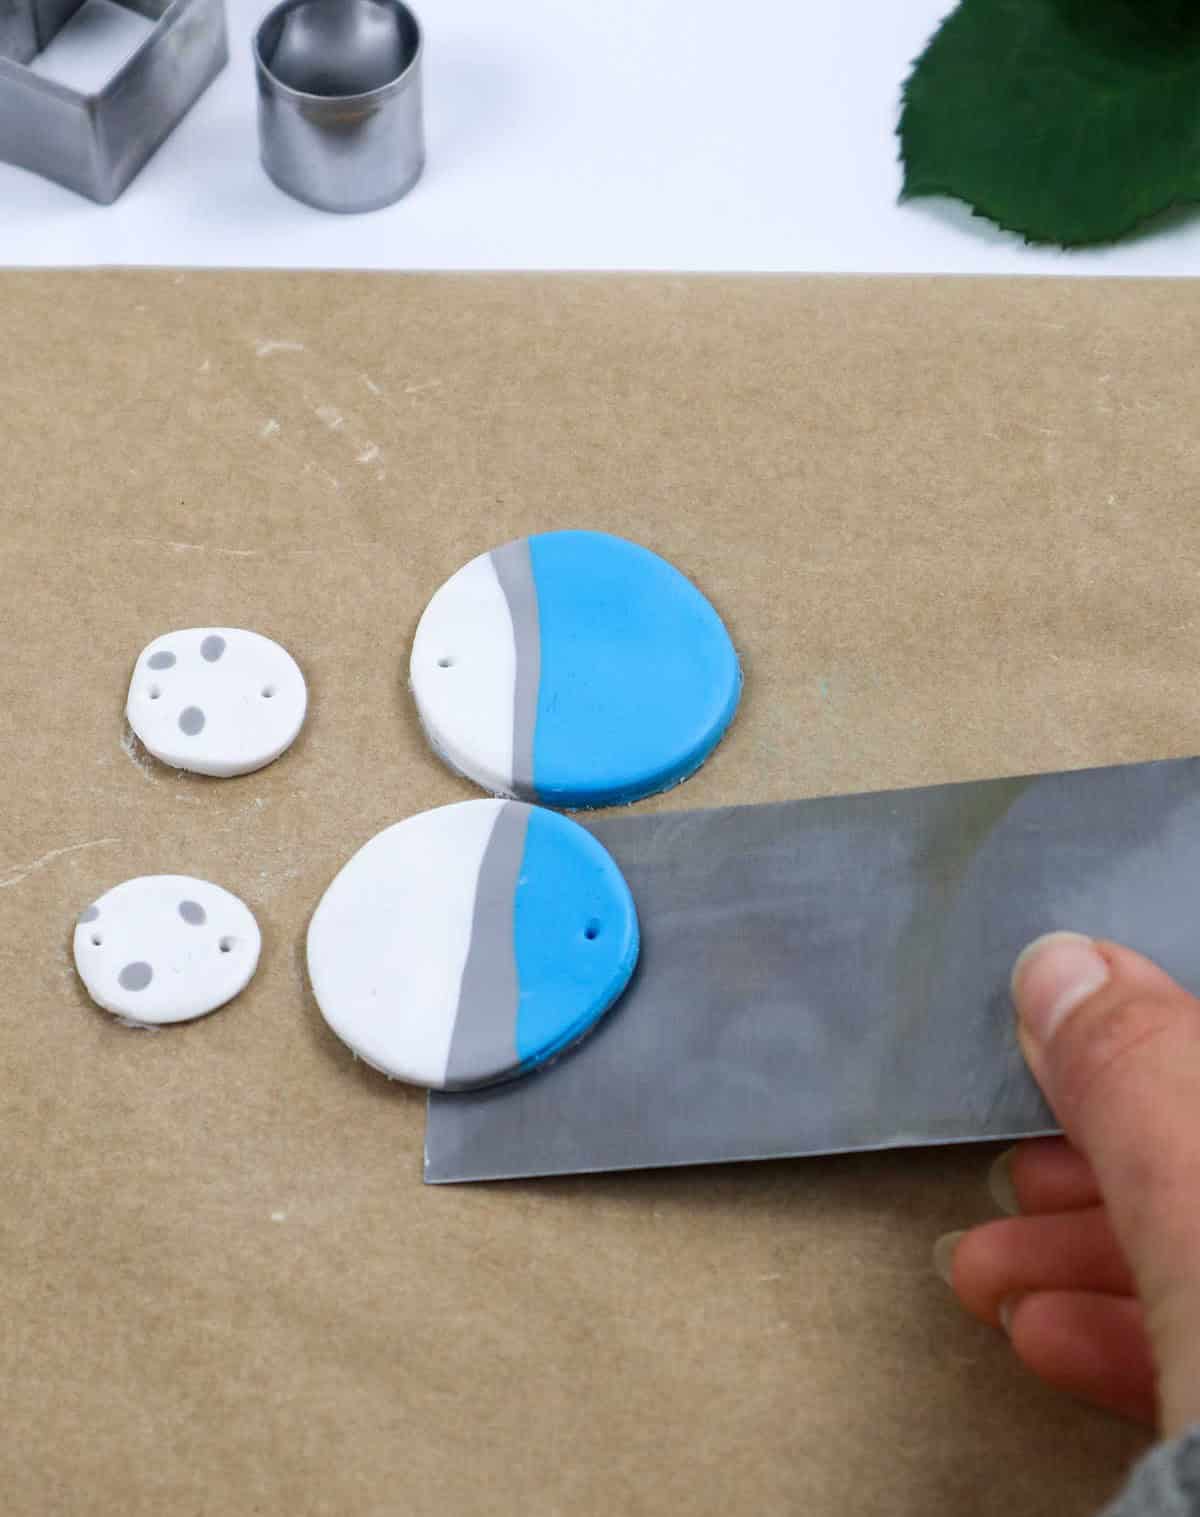
To safely remove your freshly crafted clay earrings from the parchment paper, utilize a flat blade or a scraper with precision and care. As you gently pull the earrings away from the paper, exercise caution to prevent compromising the intricate textures or shapes you’ve carefully created.
Design 3
As you revisit the extra clay set aside earlier, take this opportunity to divide it into smaller portions by rolling them out separately. Next, place each portion onto parchment paper and flatten them, much like you did during the initial process. Once the clay is even and smooth, move on to creating additional pairs of earrings using your trusty cookie cutters.
With the earring design complete, use the cutter to create holes for the hooks before carefully peeling away any excess clay using a blade or scrape tool.
Step 9
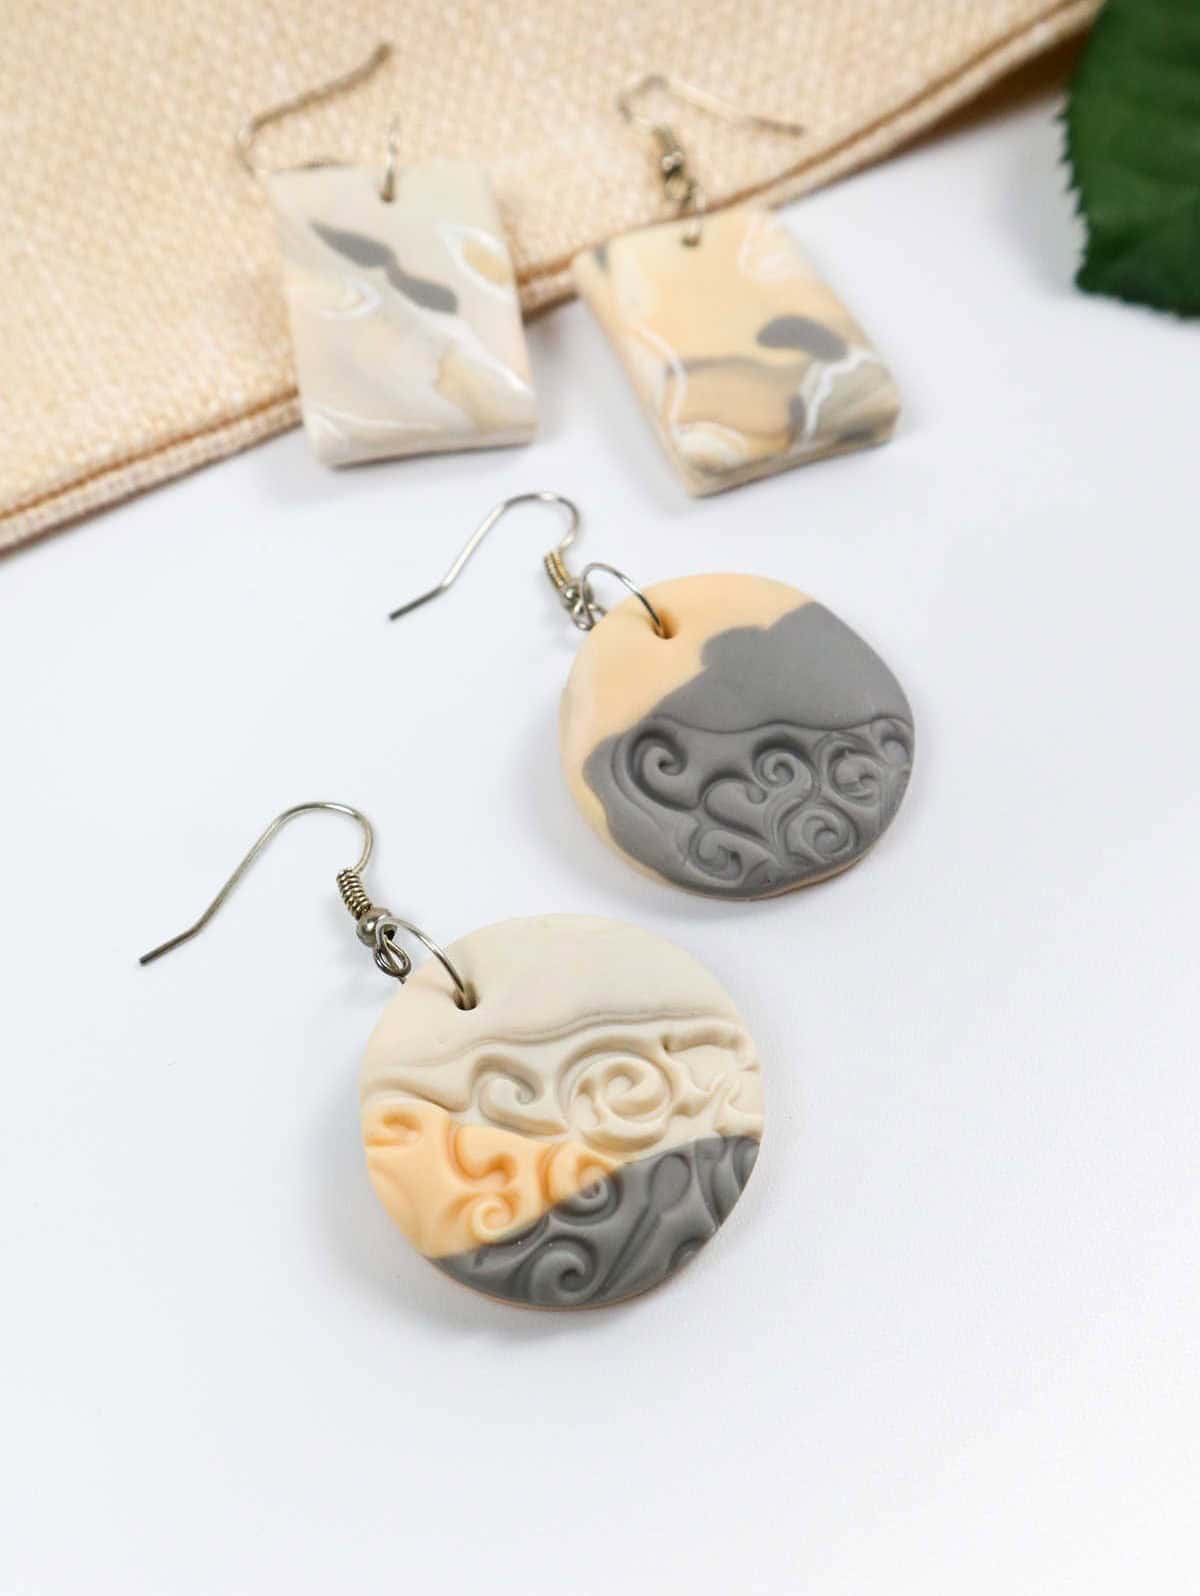
Design 4
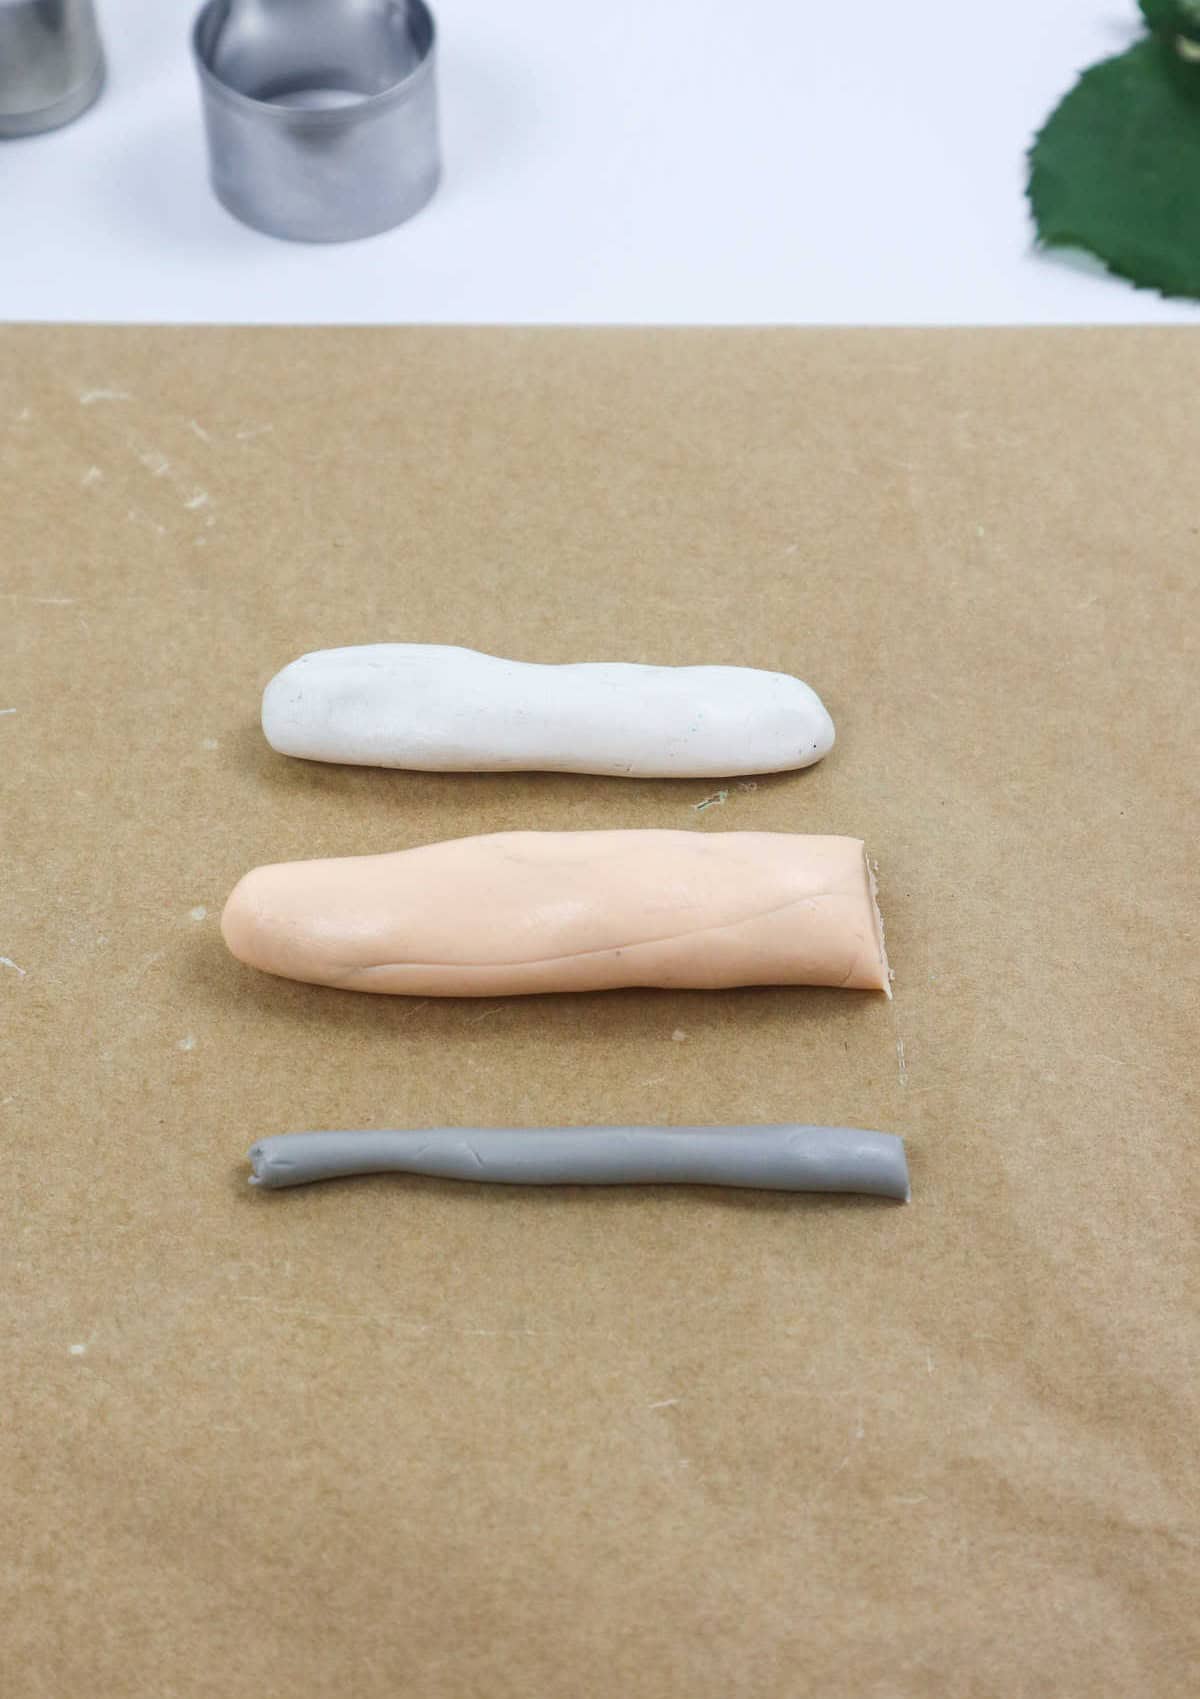
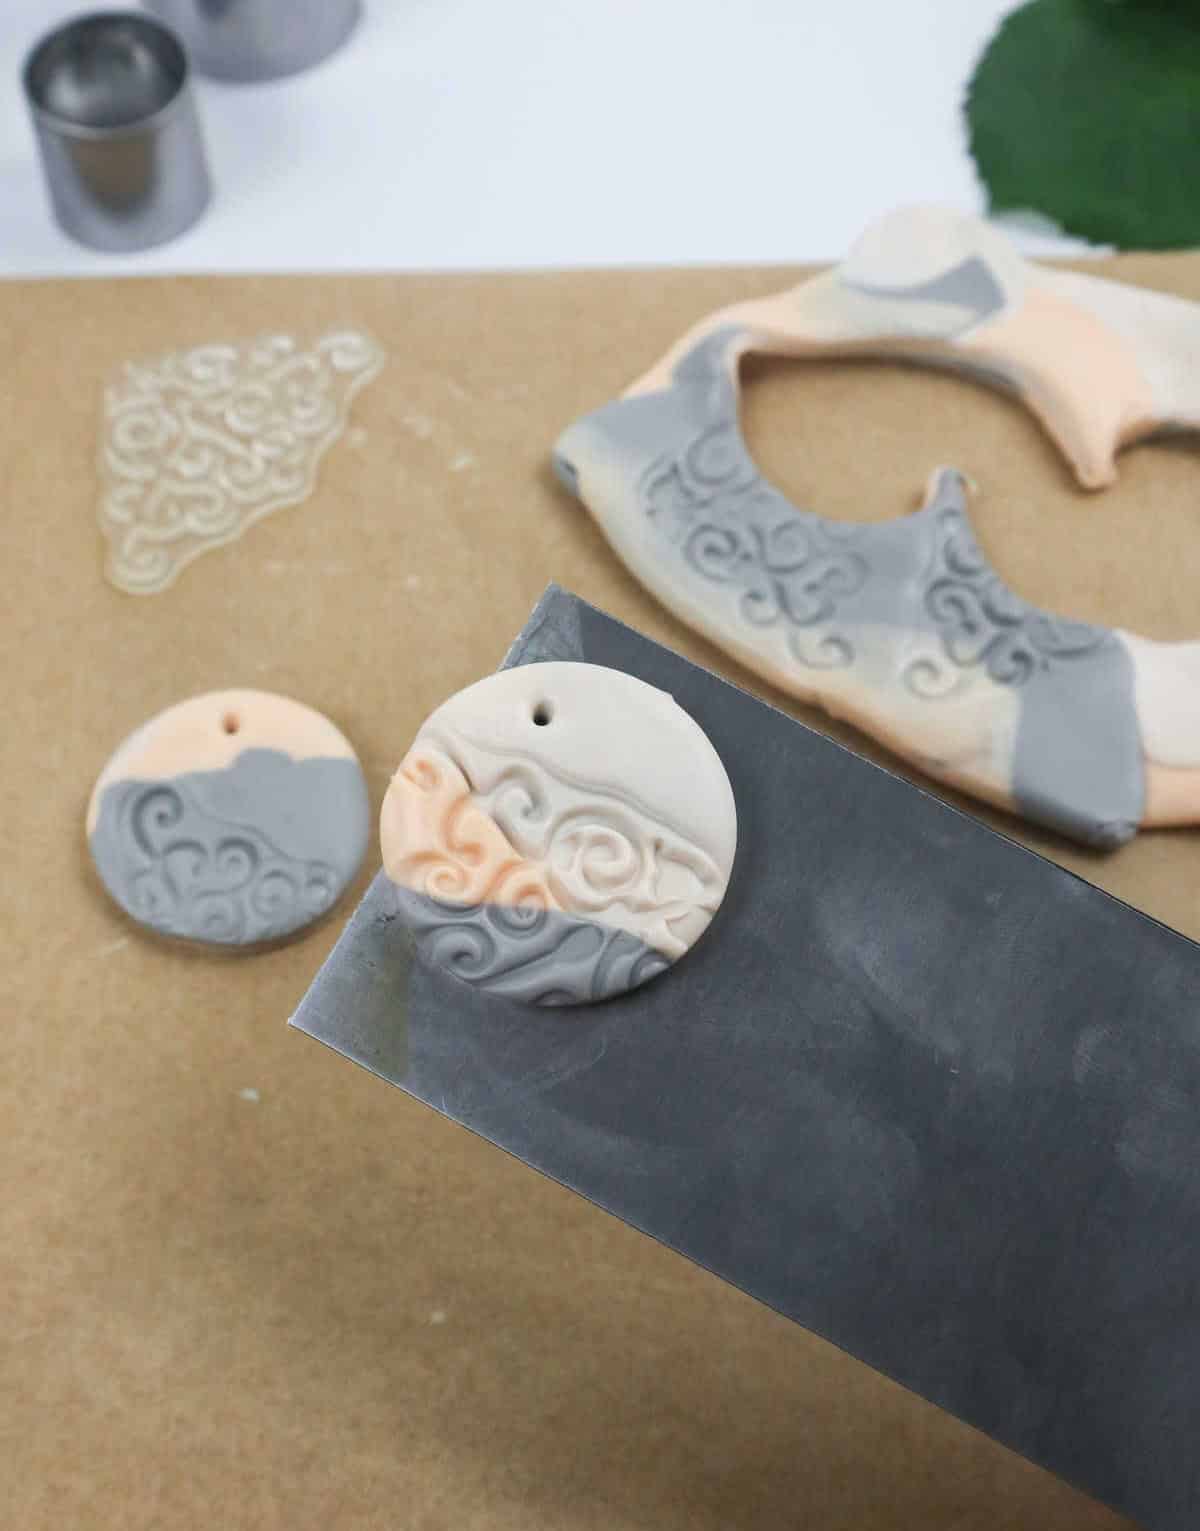
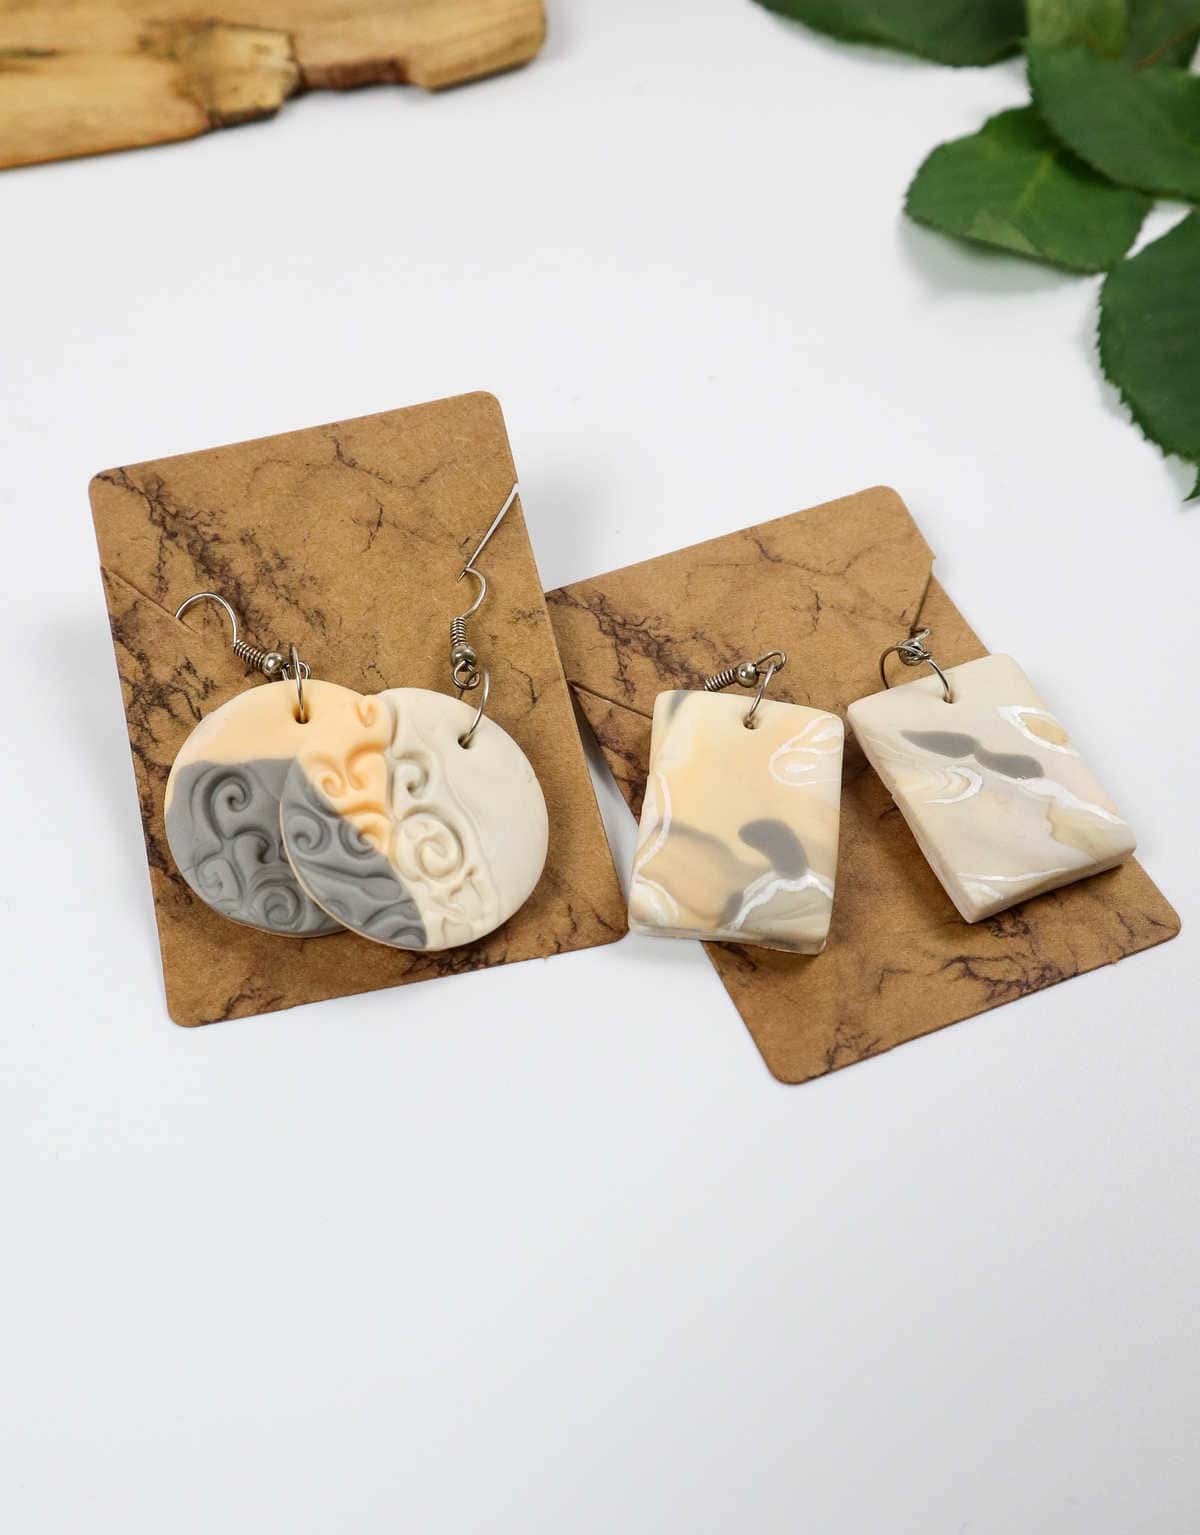
Get creative with your clay experimentation! Combine different colors like white, grey, and peach in various ways. Roll, twist, and flatten the clay to create unique swirling patterns and designs. The best part? It’s completely freestyle, making each piece one-of-a-kind. If you’re feeling extra artistic, use stencils to add intricate details, such as filigree patterns or delicate swirls, giving your earrings an extra layer of sophistication.
Design 5
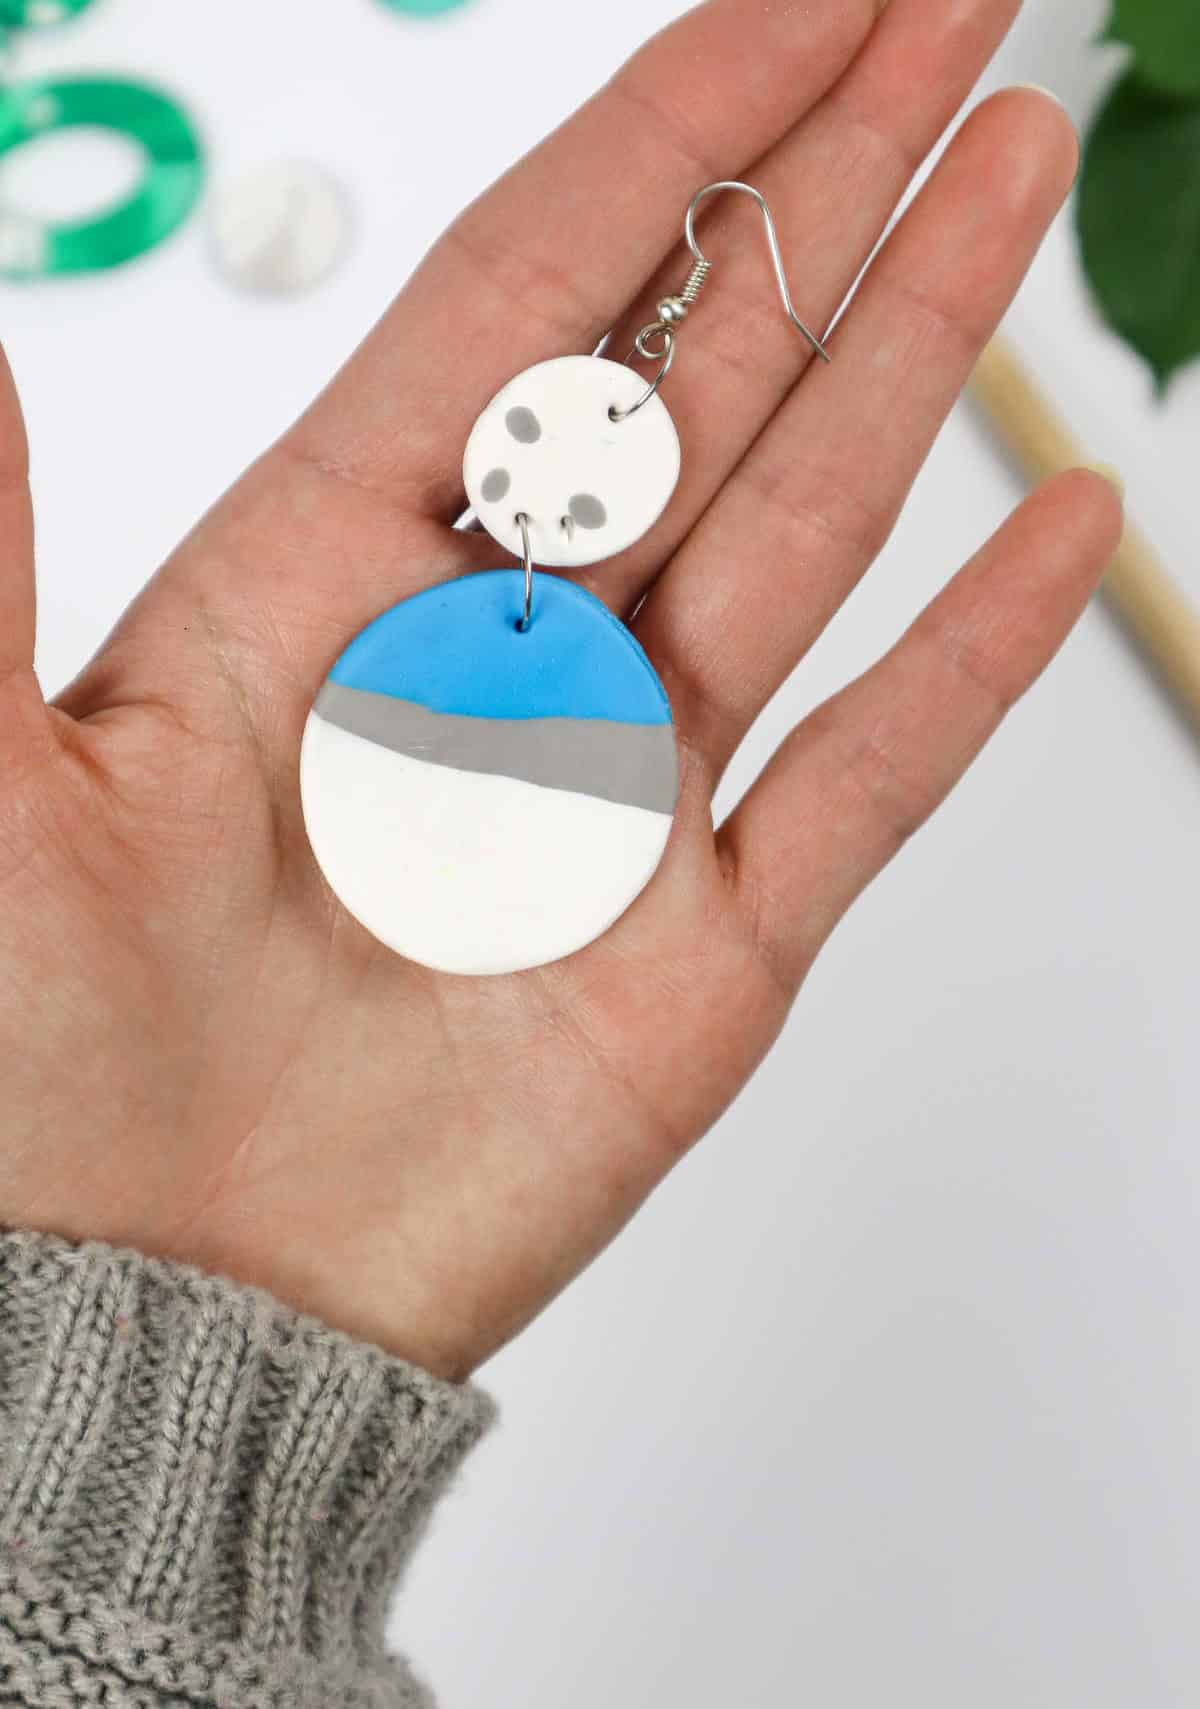
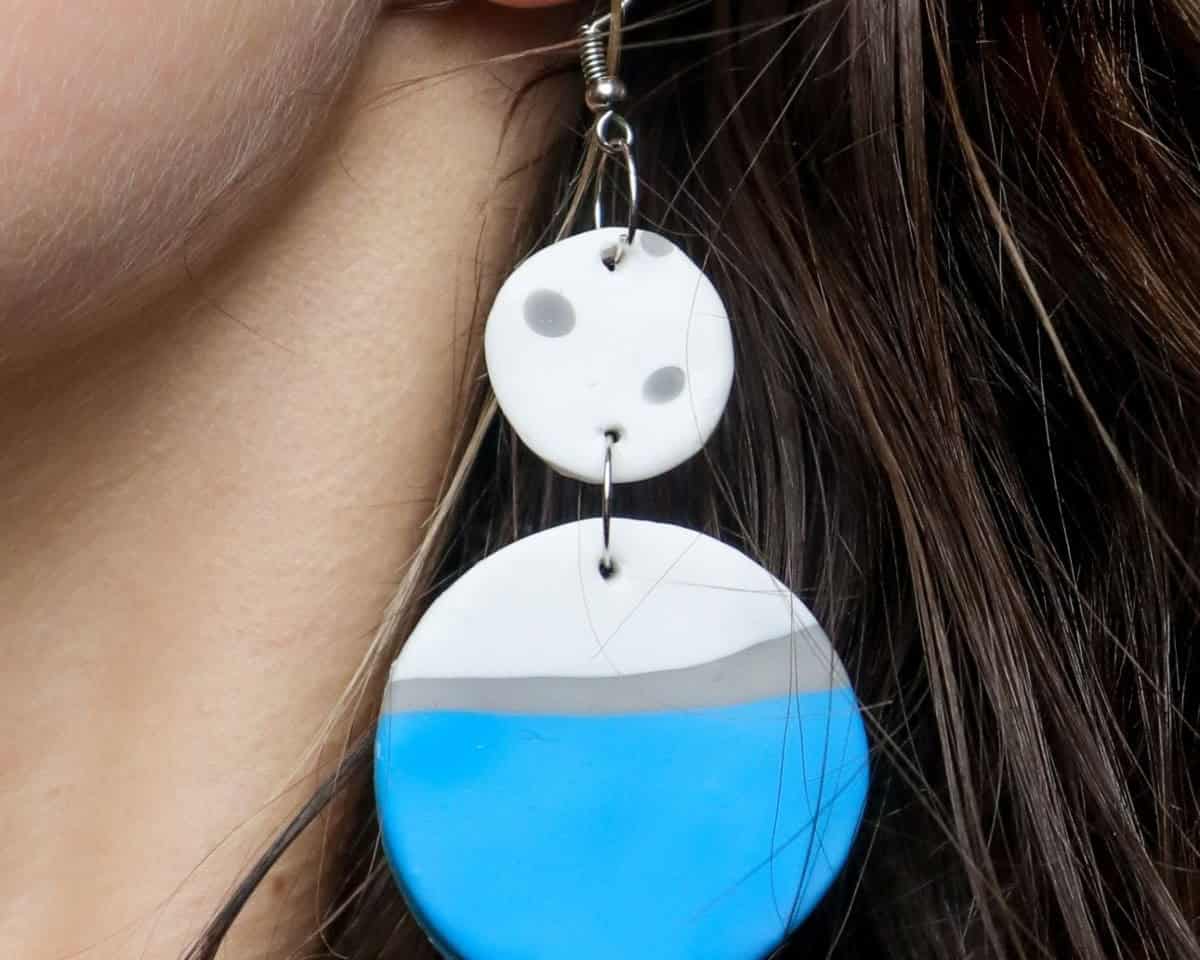
Why not take your creativity further? Consider crafting a two-piece earring set that adds an extra layer of elegance. The design you see below features a small stud-like component at the top, accompanied by a beautiful oval drop. To bring this idea to life, simply create holes in the clay where you’ll attach the hooks to secure the earrings, and then connect the oval piece to the bottom of the circle on top. It’s as easy as that!
Design 6
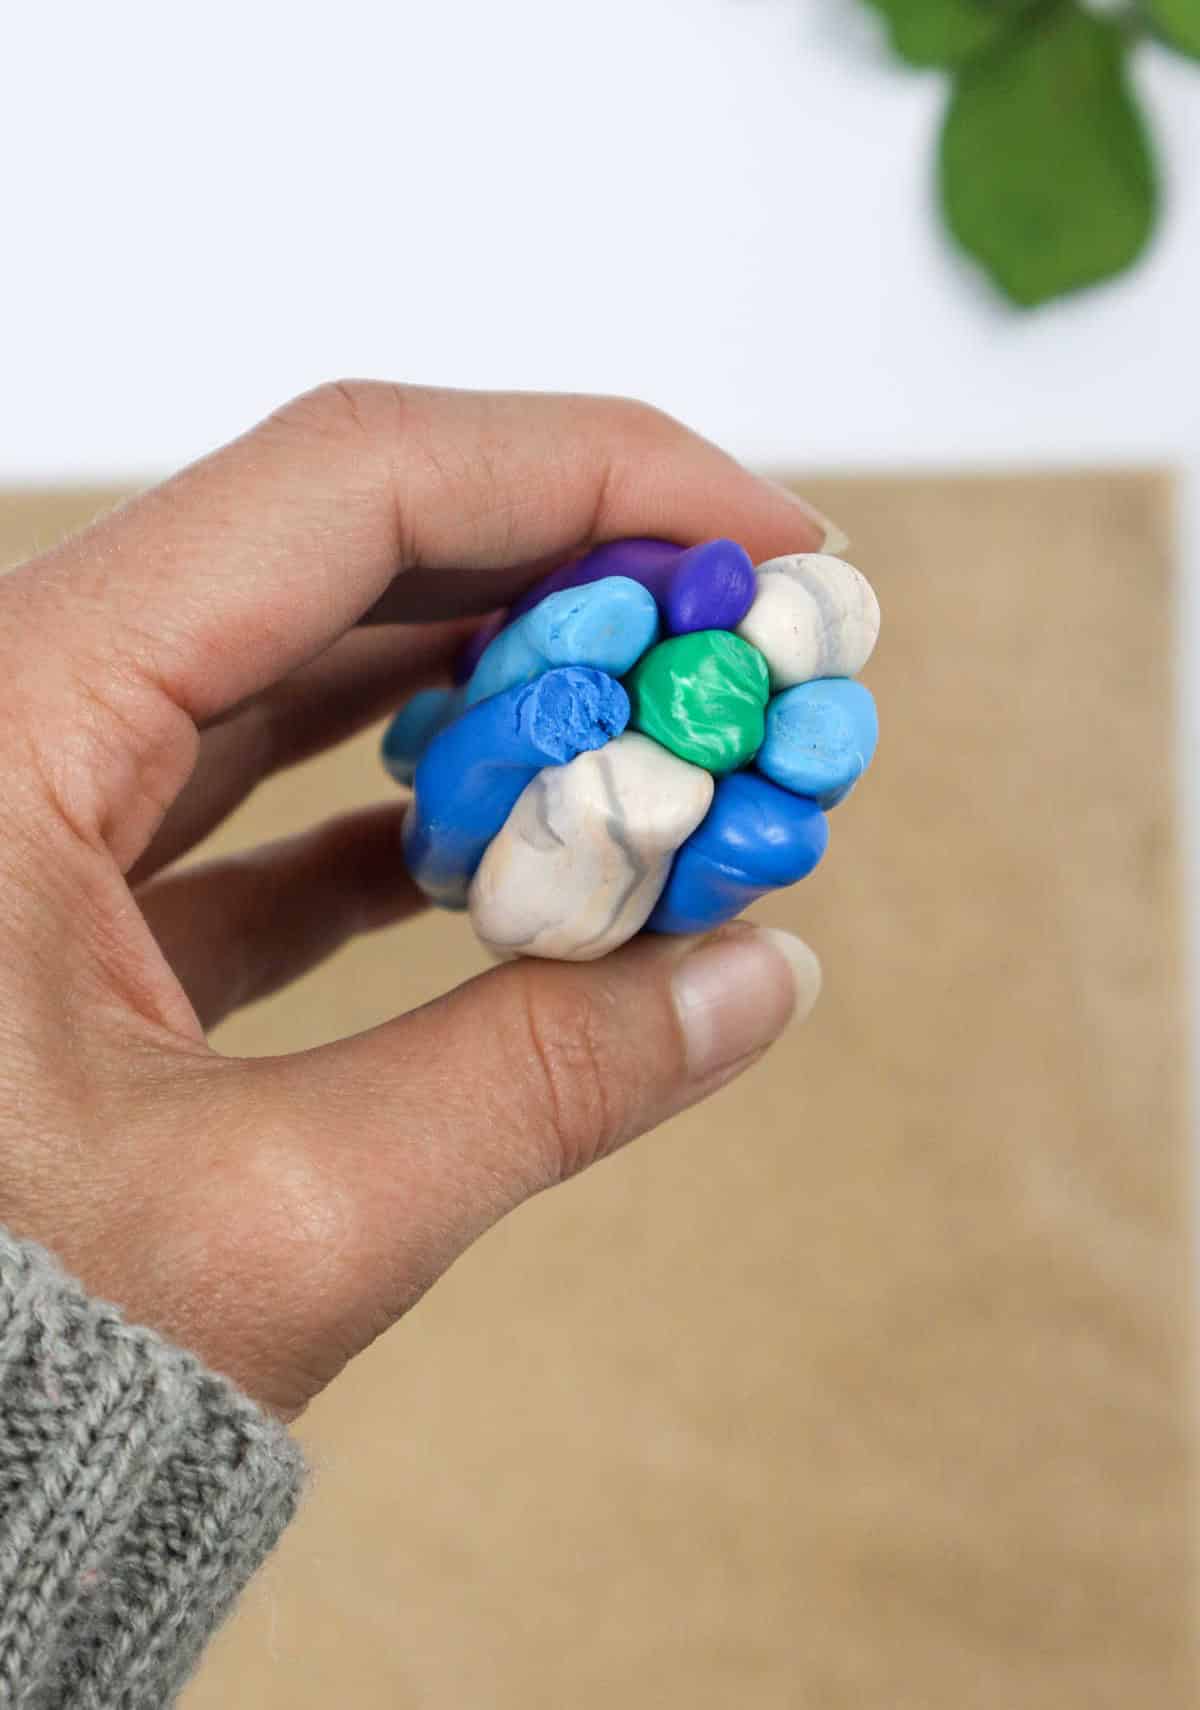
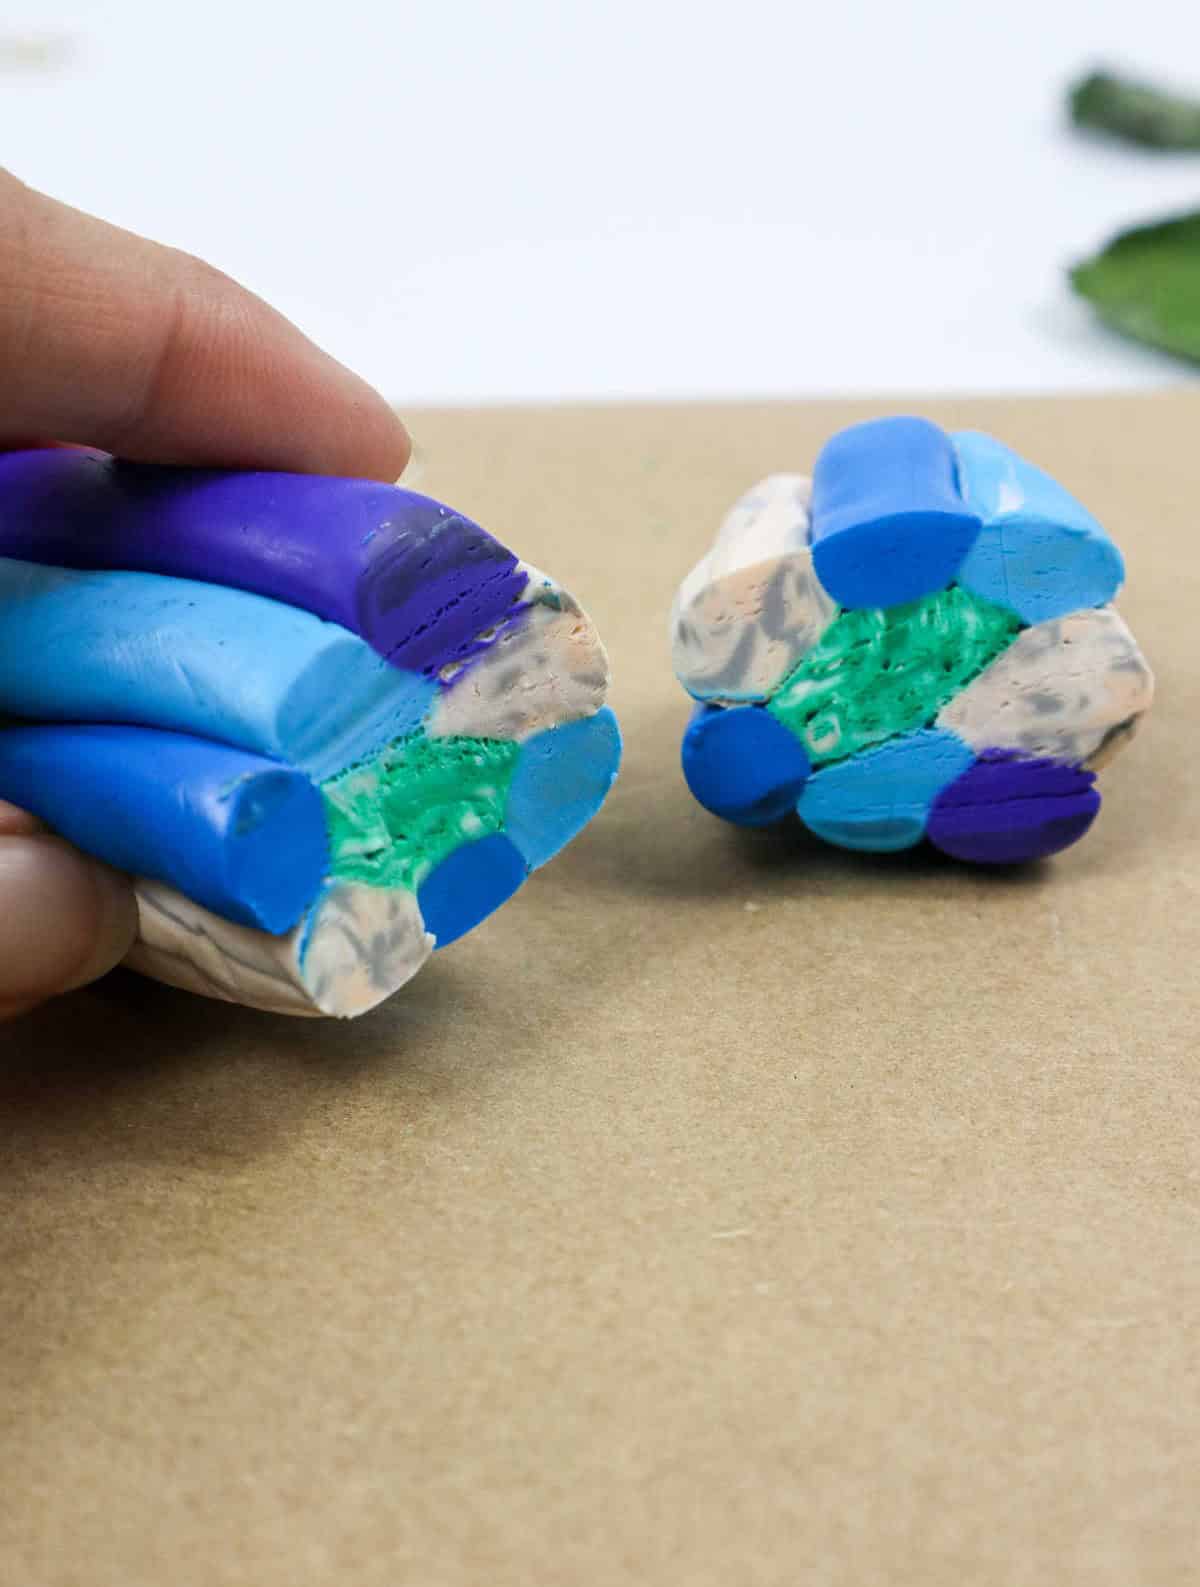
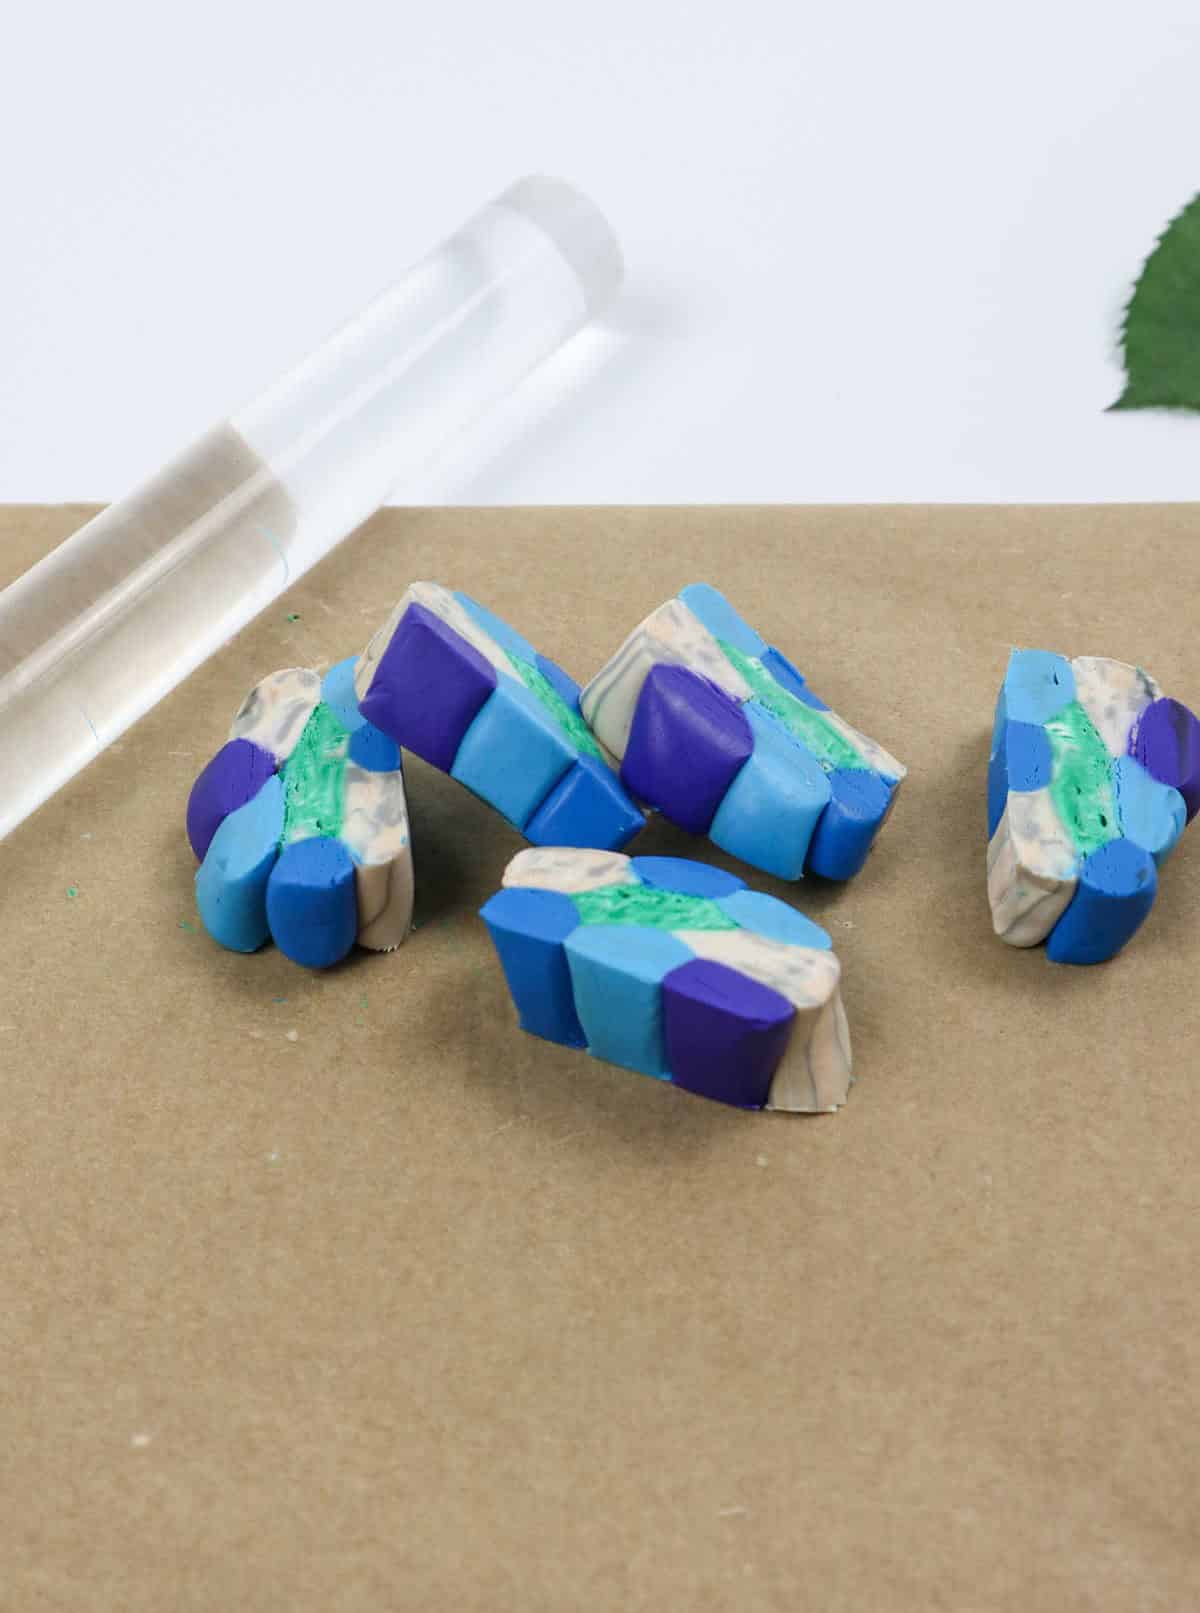
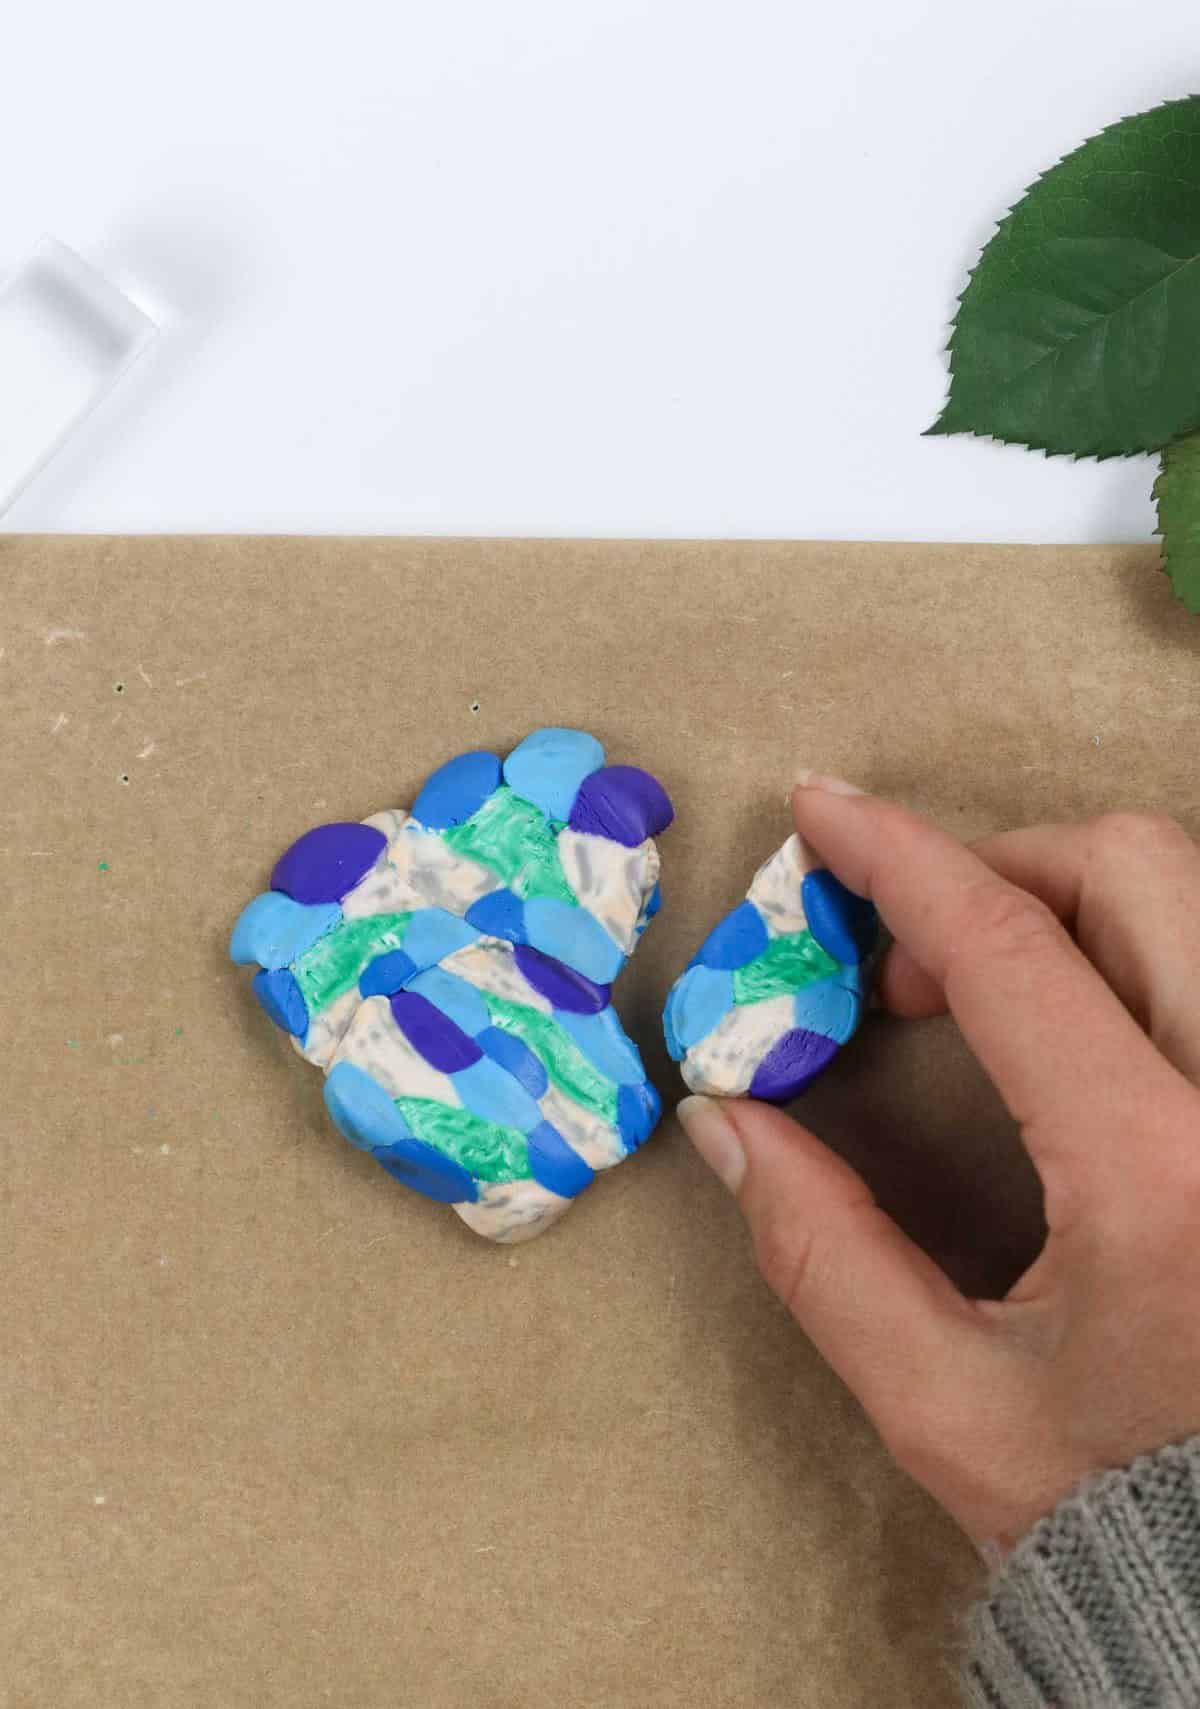

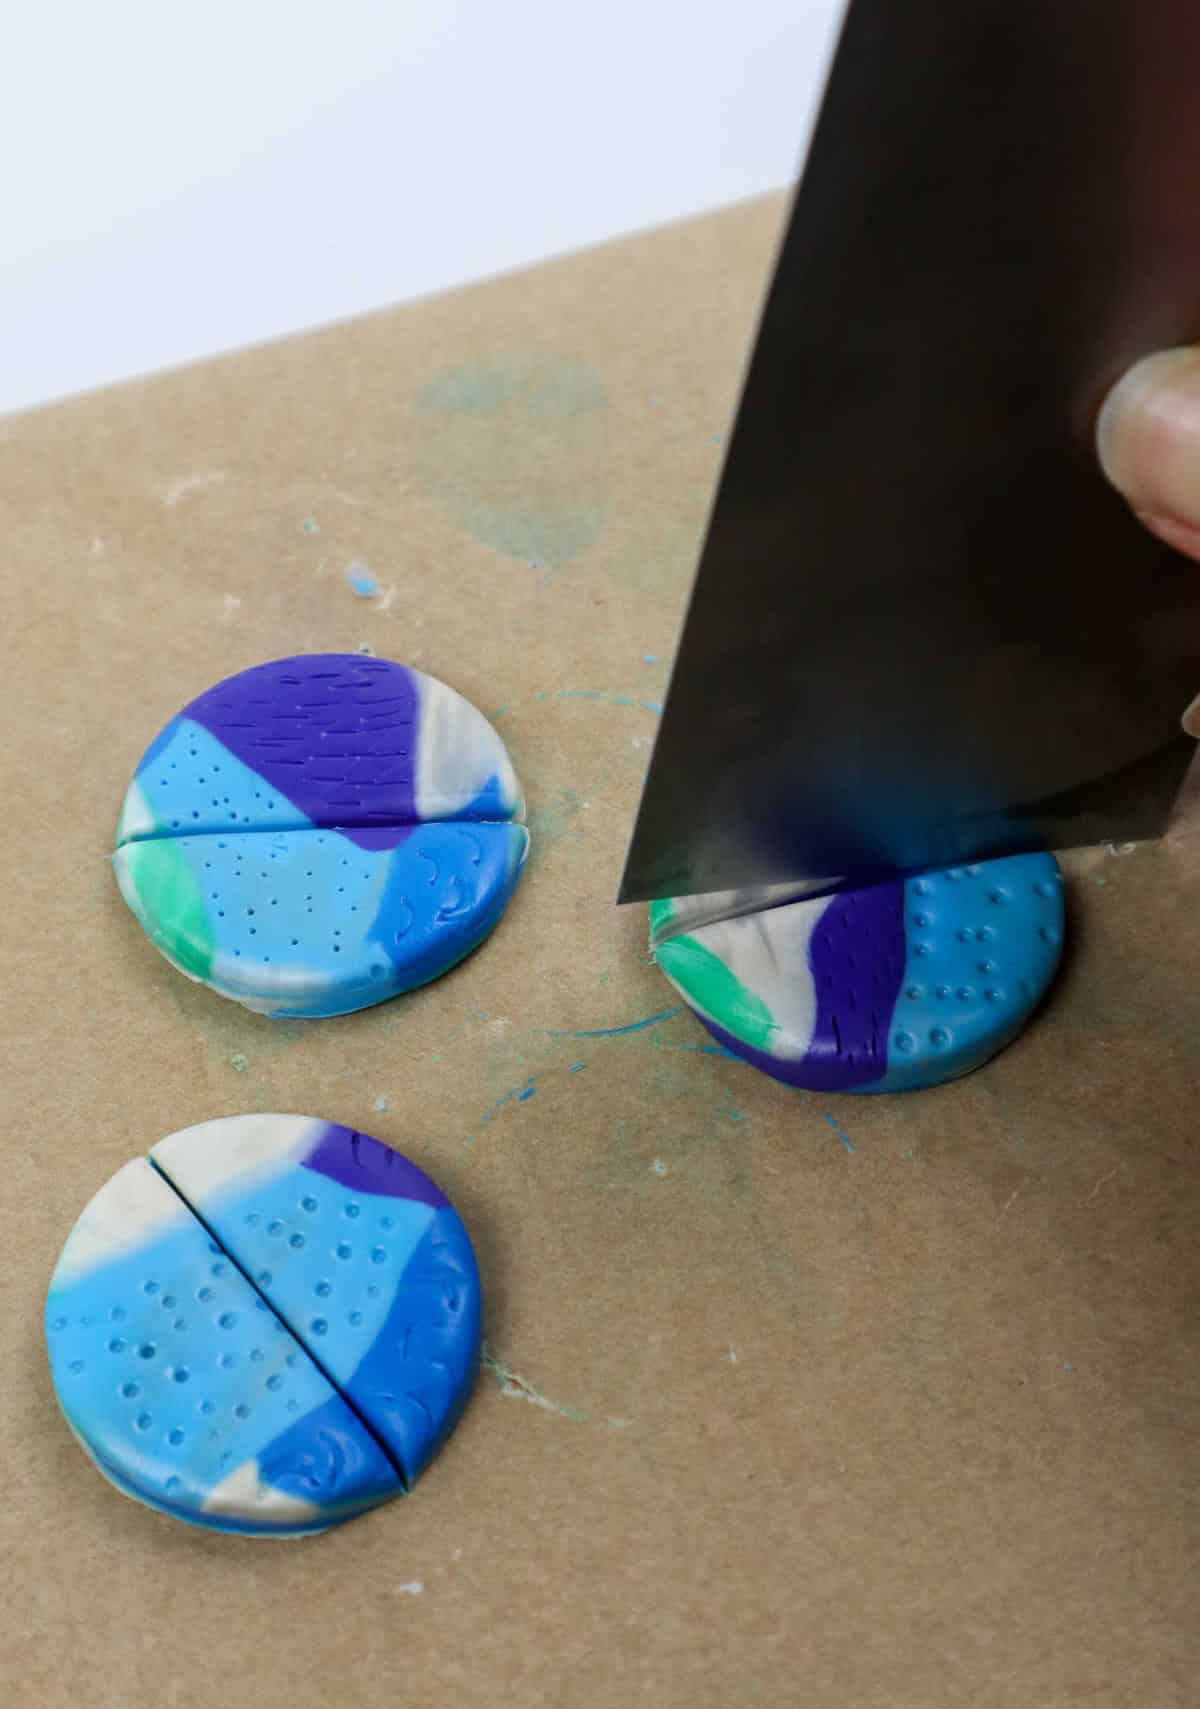
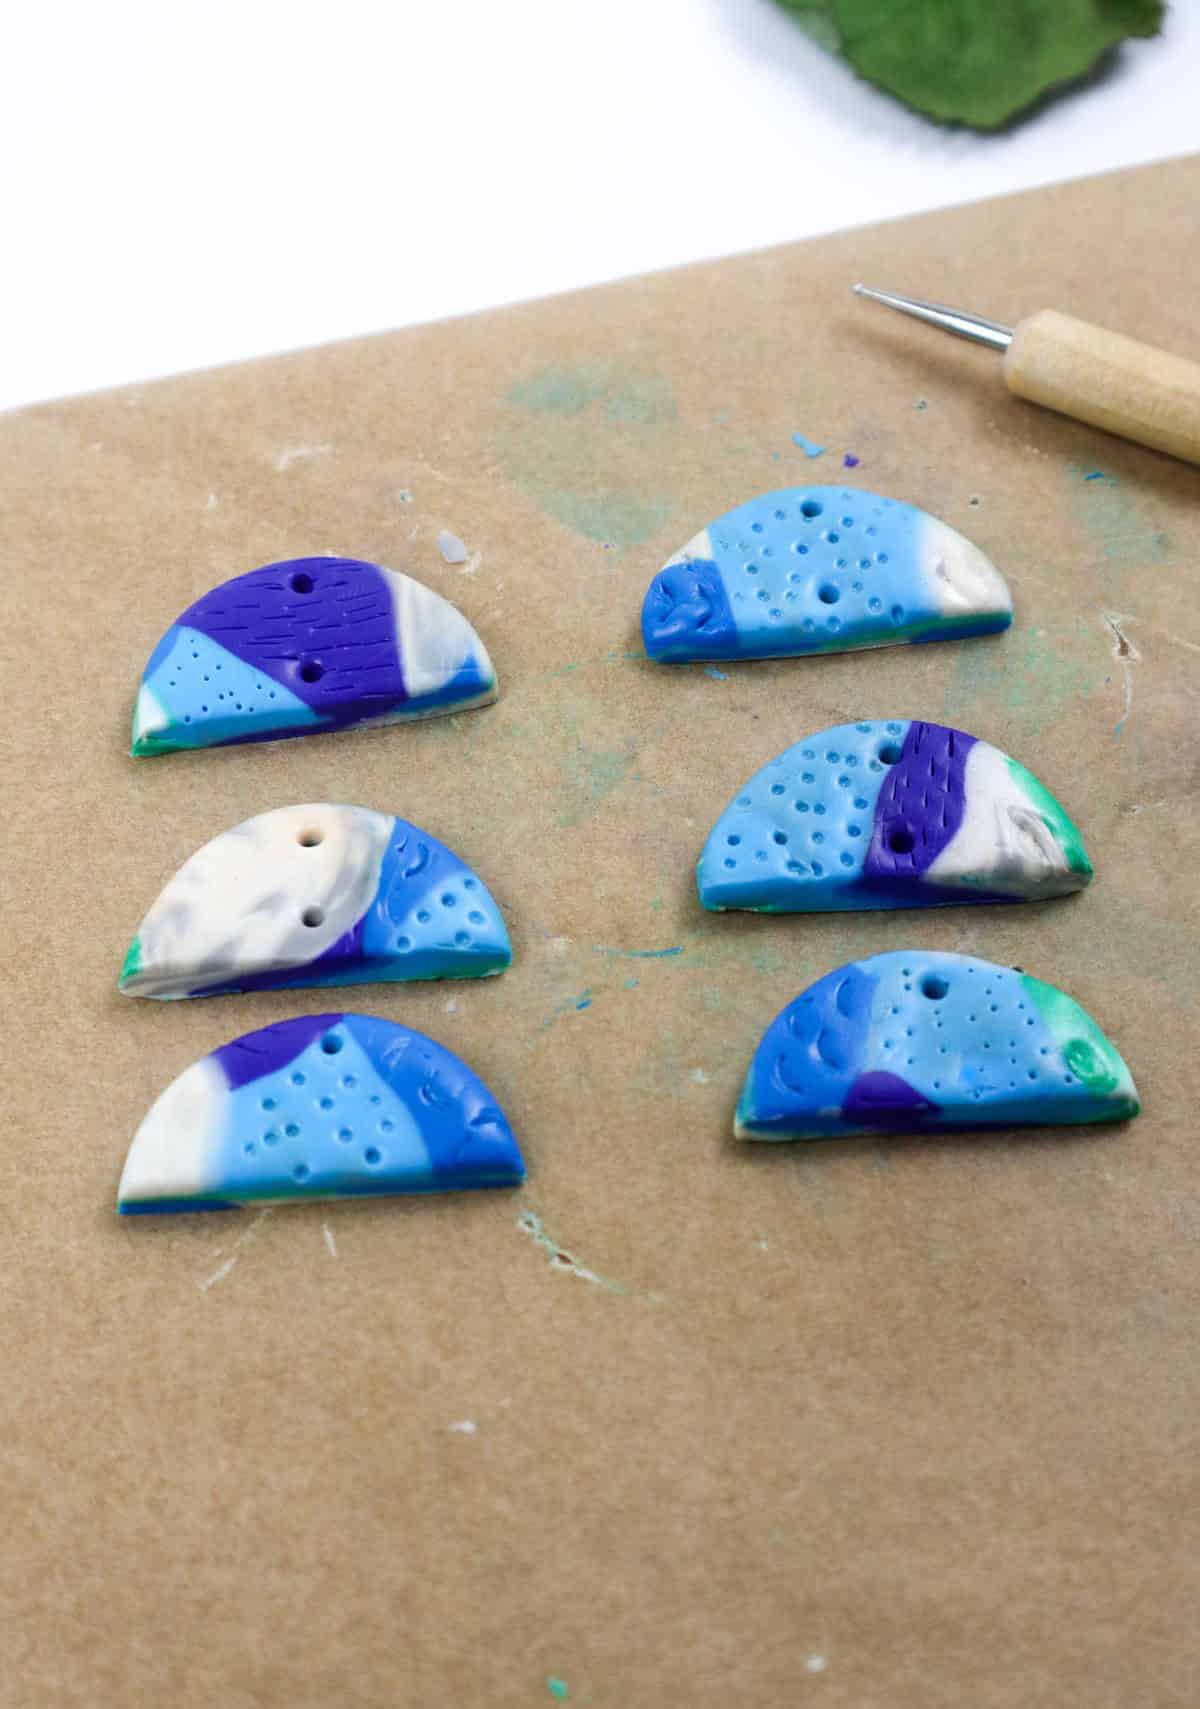
Get ready to unleash your creativity as we experiment with a unique pattern that combines vibrant colors and tactile texture. To achieve this look, start by cutting your clay into 1/2-inch thick slices, aiming for three to five pieces depending on the original cylinder’s length. Once you have your slices prepared, arrange them side by side and press them together before rolling the entire piece into a flat, funky sheet.
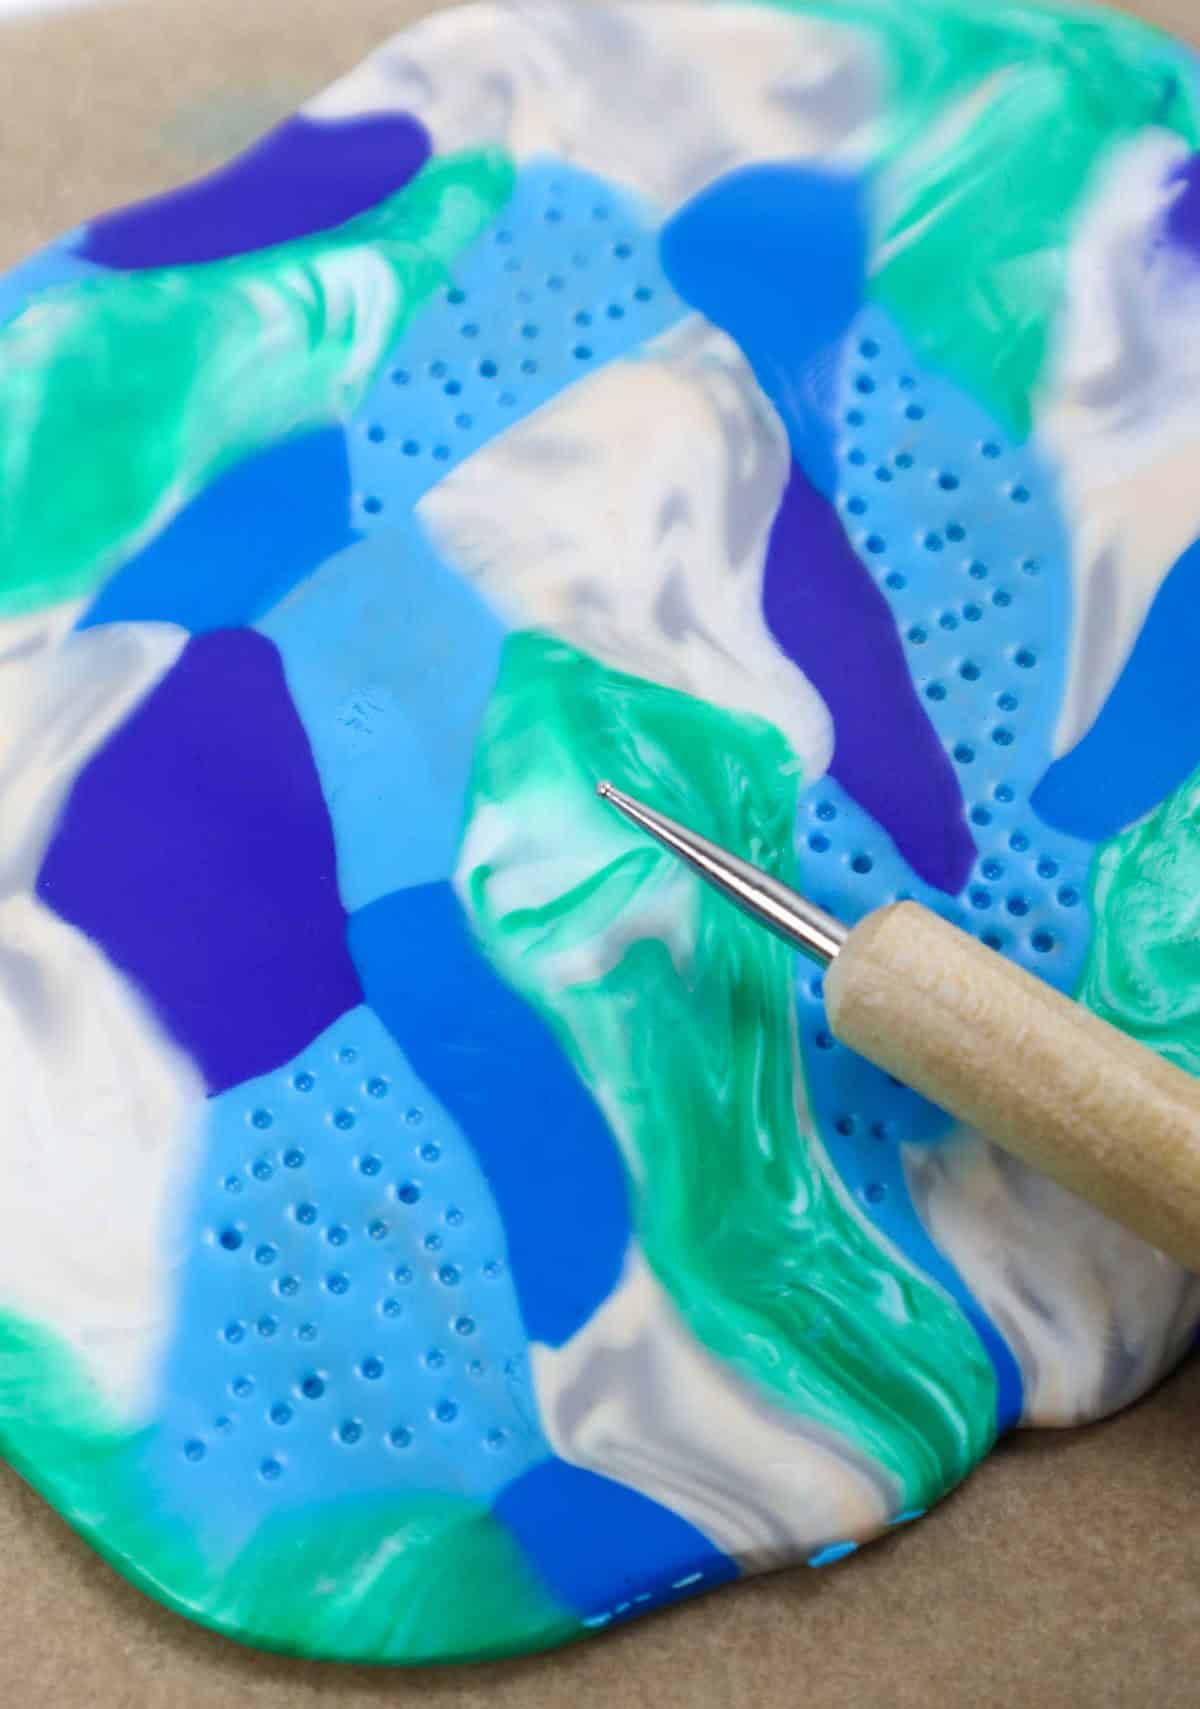
To add an extra layer of visual interest, use a craft tool or even a toothpick to create small holes throughout the clay. As you do this, take note of the beautiful marbling that’s already present – these little holes will amplify its effect, giving your final piece a rich, textured appearance. Want to take it up a notch? Grab a scoring tool and score lines along the clay in various color swatches. This added dimension will give your design an extra burst of visual excitement.
Finally, once you’re satisfied with your pattern, use your favorite cookie cutter or cut the clay into semi-circles, just like we’ve done here.
Step 10
As your earring collection takes shape, it’s now time to transfer each pair to a designated area for organization and storage. A baking tray lined with parchment paper serves as the perfect makeshift workstation, allowing you to efficiently arrange and separate each unique design.
Step 11
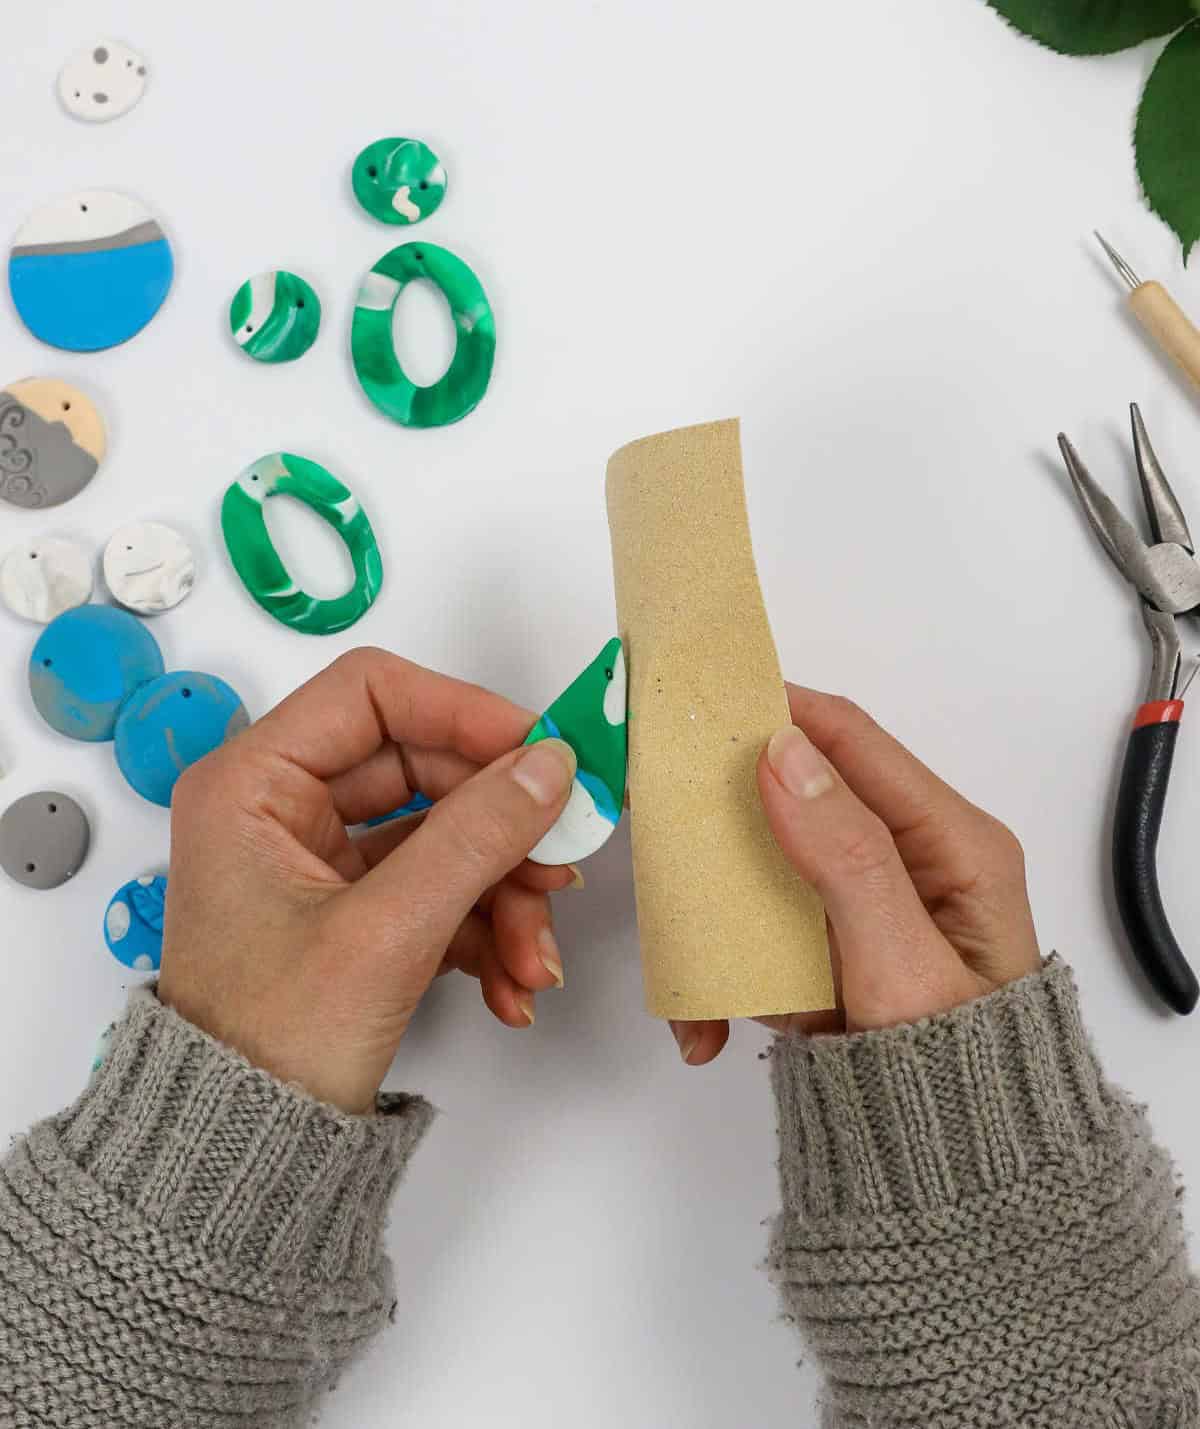
Once your earring designs are complete, it’s time to refine their appearance. A quick application of sandpaper is sufficient to gently smooth out any rough edges that may have formed during the cutting process. Additionally, this technique allows for the removal of excess clay residue that can remain after shaping and cutting your earrings.
Step 12
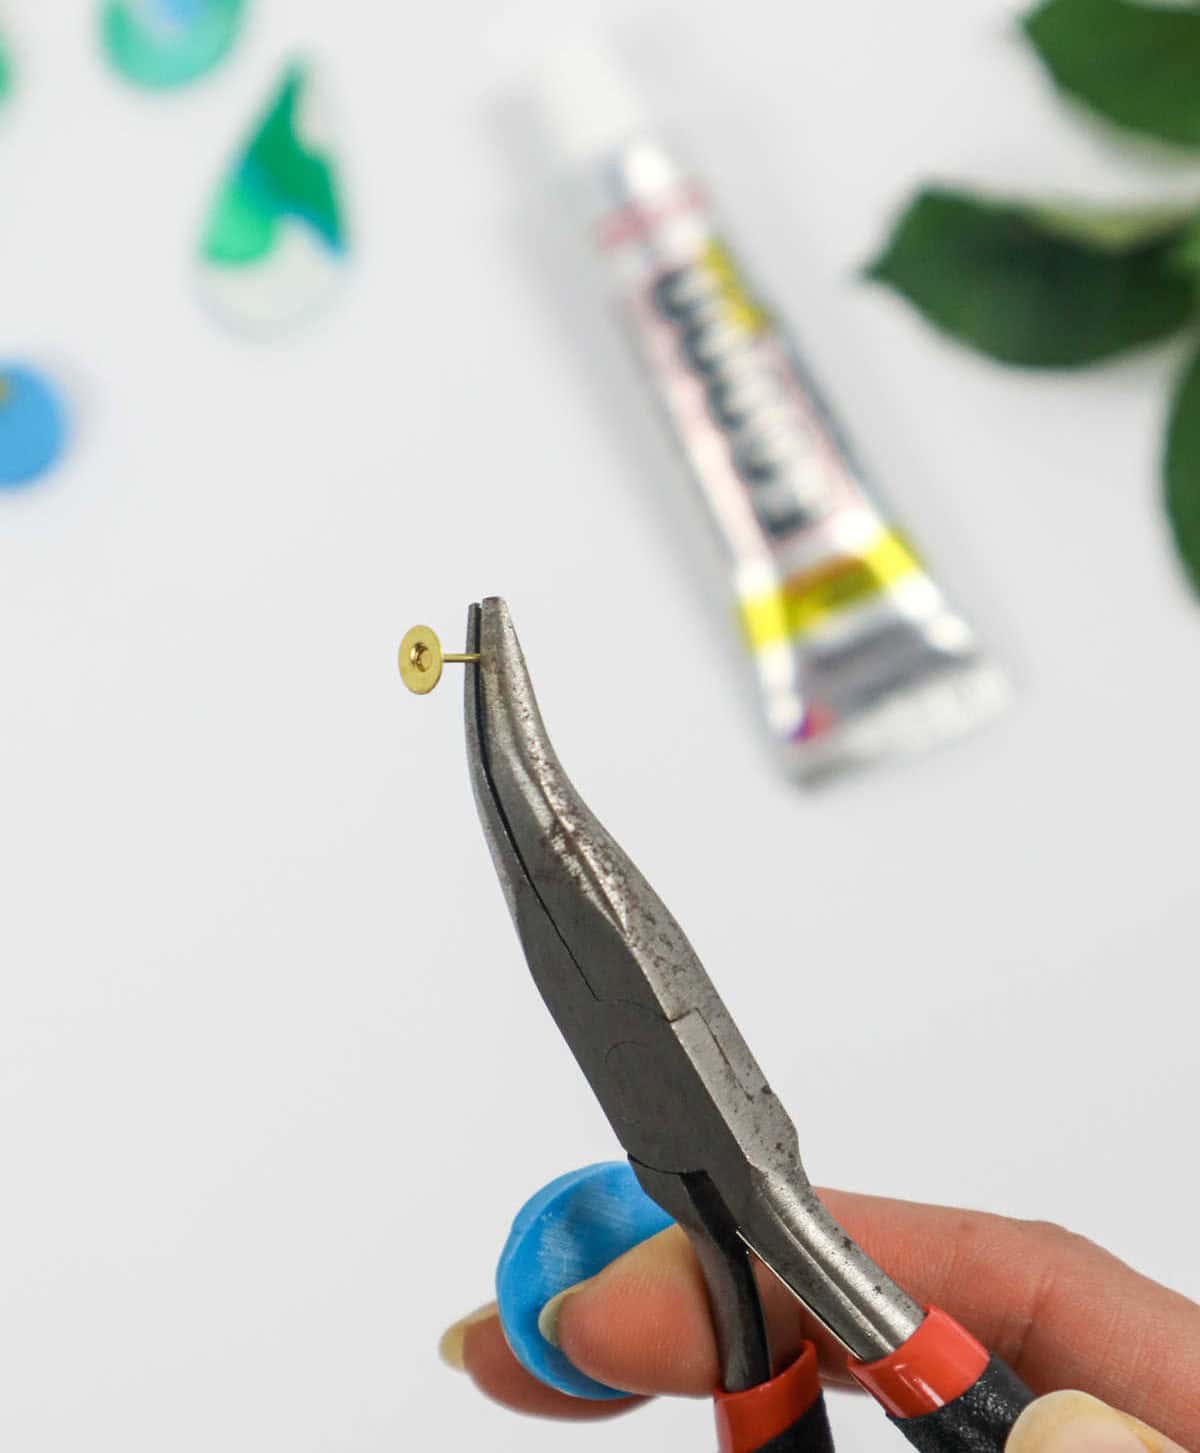
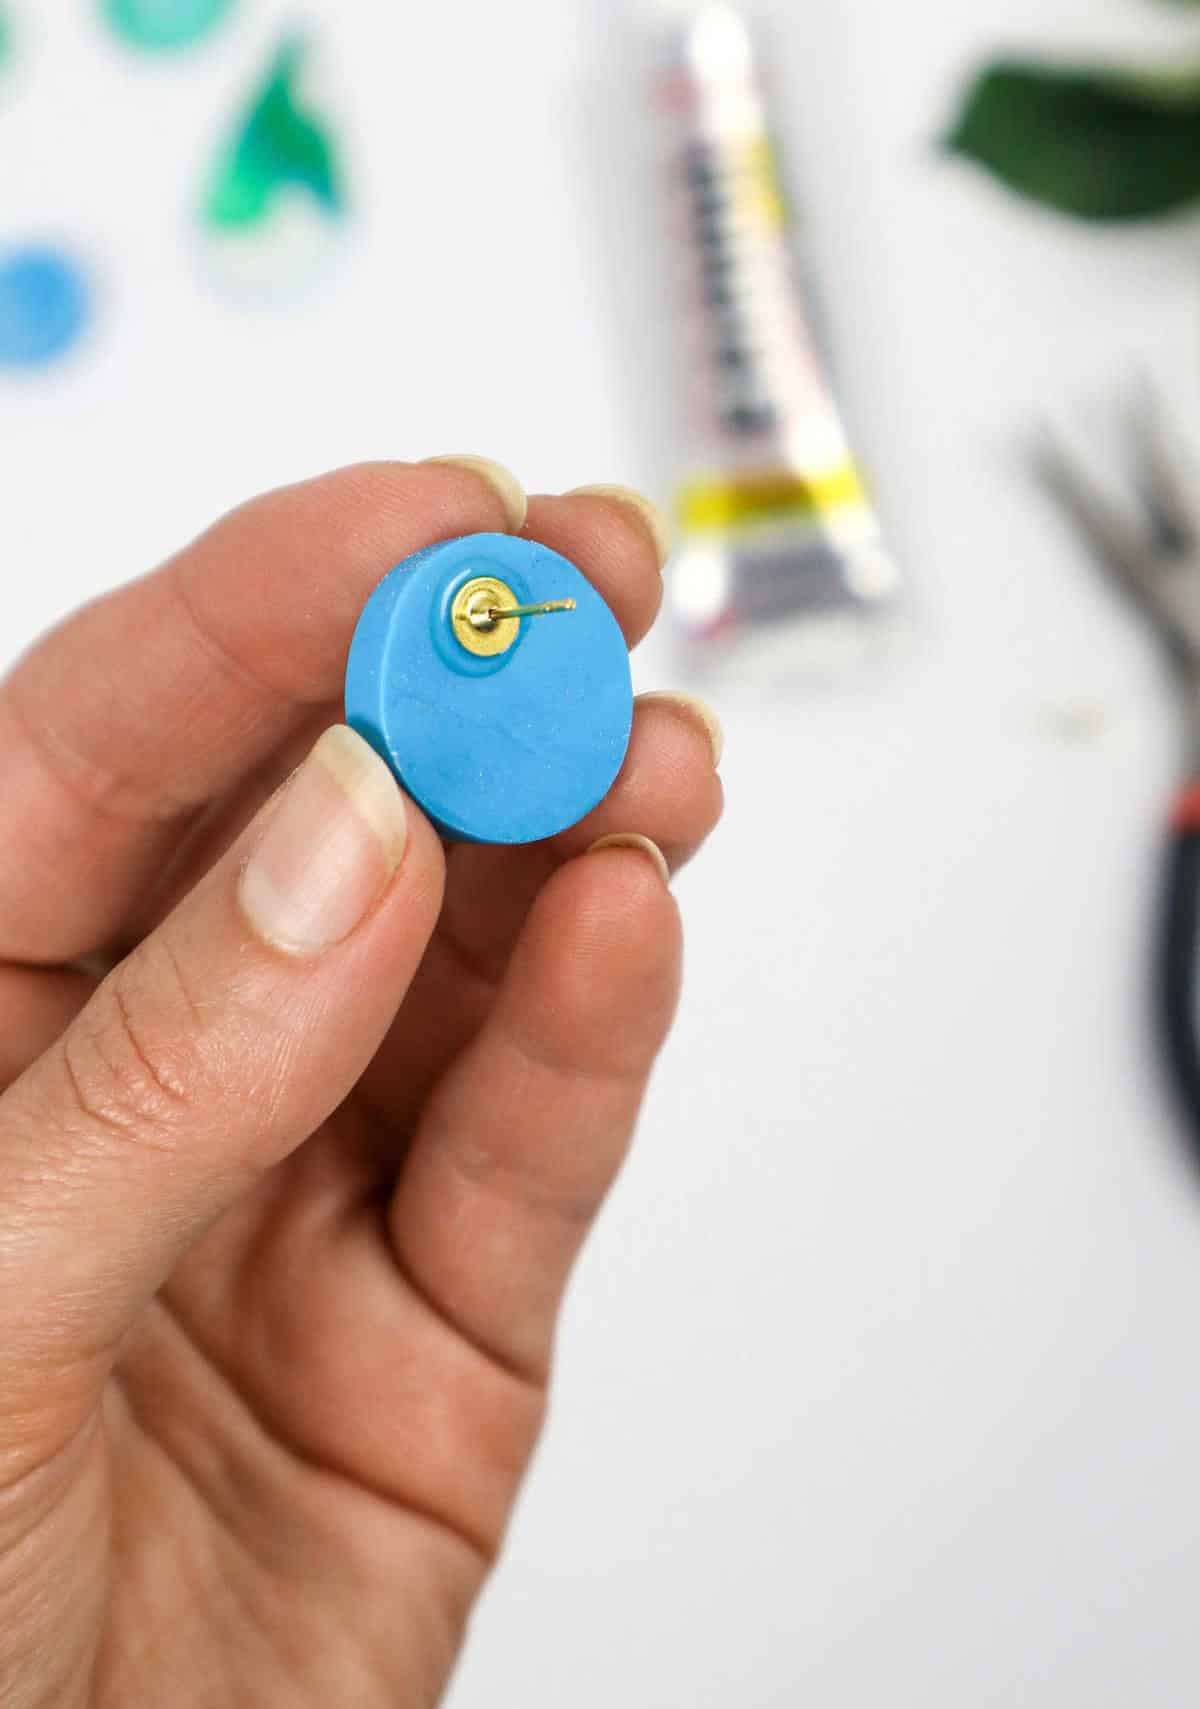

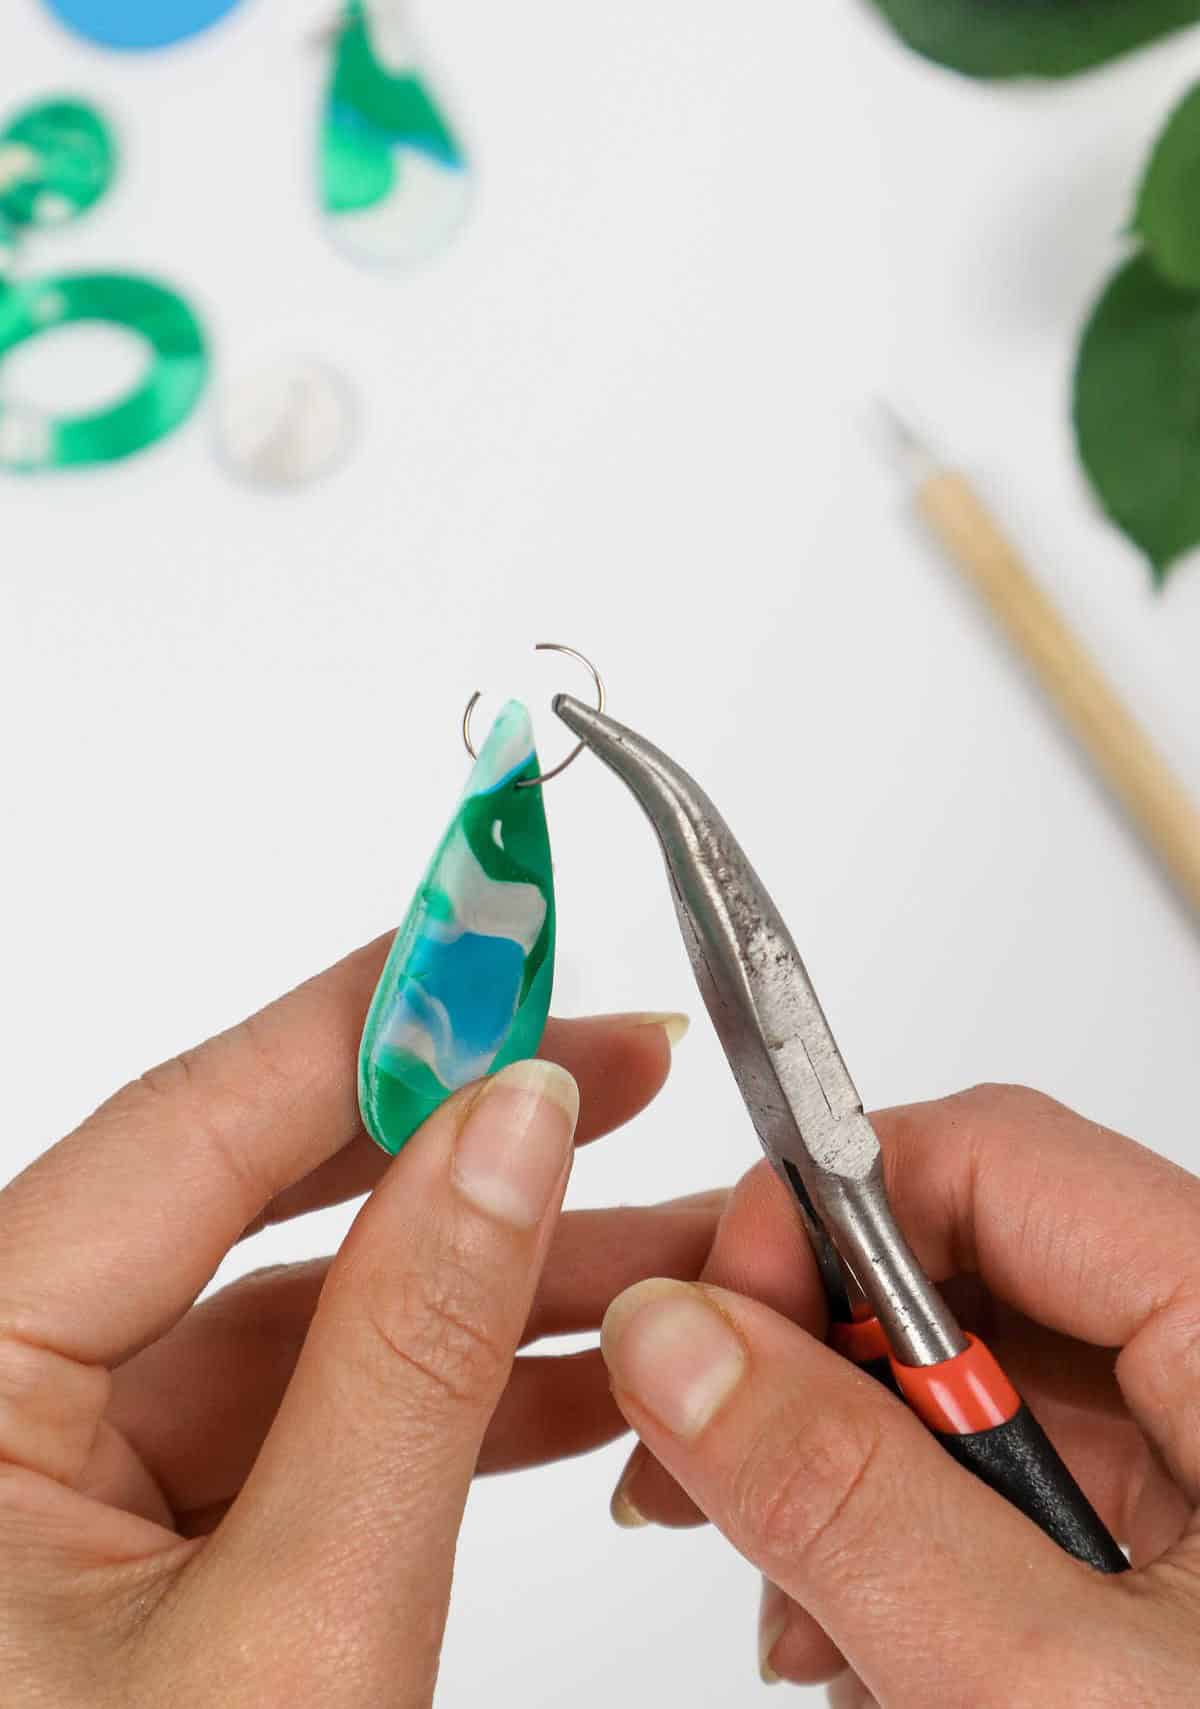
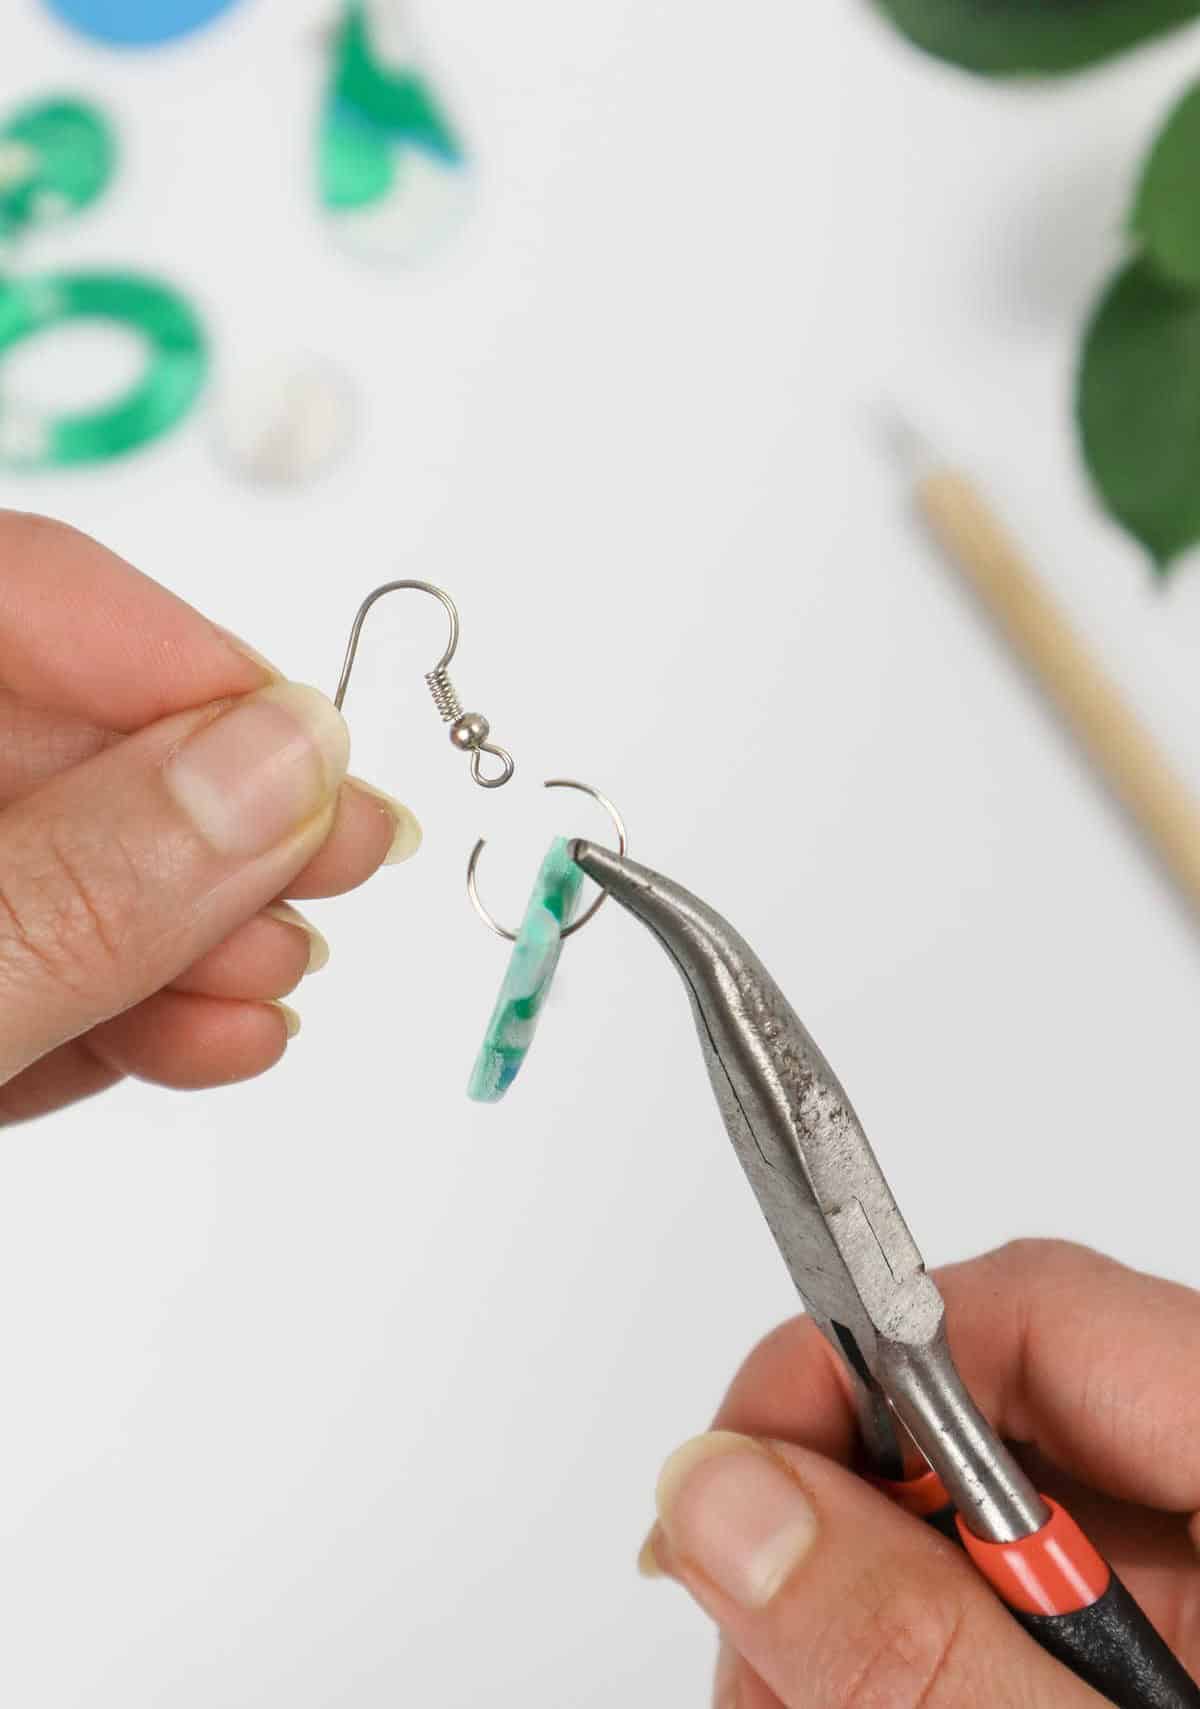
To transform your earrings into studs, employ a pair of pliers to secure the earring studs to the back of the earrings with a suitable adhesive. This technique is specifically designed for earrings that haven’t been pierced and would instead be converted into studs. Conversely, those earrings that have undergone piercing can be converted into regular earrings by attaching hooks and jump rings using a pair of pliers.
Once you’ve completed these steps, your DIY polymer clay earrings are ready to adorn your ears or make thoughtful gifts, don’t you agree?
How Do You Seal Polymer Clay Earrings?
To ensure your polymer clay earrings remain vibrant and protected, sealing them after creation is crucial. This step serves a dual purpose: it guards against scratches and cuts on the surface while also imparting a stunning finish. Following sandpapering, your earring can be used as is, with the added benefit that polymer clay retains its original colors even when baked – no fading or discoloration. However, to maintain the integrity of the surface, protection is still necessary.
To achieve this, you can opt for either a glossy or matte finish varnish spray. While acrylic clay is sometimes employed, it may not provide the same level of durability as desired.
Other Craft Ideas for You
In the realm of creative pursuits, there exists a plethora of unique and captivating crafts that can be explored. These include wood crafting, which involves shaping and molding wooden materials to create functional or decorative pieces. Resin crafting is another art form that has gained popularity in recent years, with artisans creating intricate designs and patterns using resin as their medium.
Additionally, cute crafts for girls are a great way to foster creativity and self-expression among young females. These can range from simple sewing projects to more complex paper crafting techniques. Furthermore, DIY rings have become increasingly popular, with individuals experimenting with different materials and techniques to create one-of-a-kind jewelry pieces.
The world of macrame earrings is another fascinating area, where enthusiasts use knotting and cord-making skills to craft unique and stylish accessories.
How Long Should I Bake Polymer Clay Earrings?
When it comes to baking polymer earrings, temperature and time are crucial factors to consider. If the temperature is too low, the polymer won’t fuse properly, while an excessively high temperature can cause burning. Similarly, the amount of baking time is also vital – if you don’t bake long enough, the clay may not set and will crumble, but baking for too long can result in cracking. For this specific project, I recommend a 30-minute bake at 230F (110C).
To ensure the best results, always check the packaging instructions for the type of clay you’re using to confirm the recommended baking setting. Furthermore, don’t forget to preheat your oven before getting started – it’s an important step that can make all the difference.
How Thick Should My Polymer Clay Earrings Be?
When crafting clay earrings, a crucial consideration is the thickness of the material. As a general guideline, it’s best to aim for a thickness of around 5mm. If the clay is too thin, it may be prone to snapping or becoming brittle, rendering the earring ineffective. On the other hand, if the clay is too thick, it may struggle to bake properly, resulting in an unwieldy and heavy design that can cause discomfort when worn.
How to Make Polymer Clay Earrings (Step-by-Step)
Create your own unique pieces of jewelry with the versatility of polymer clay. This DIY project is perfect for adults and teens looking to craft something special, whether it’s a gift for loved ones or a personal accessory. With just 10 minutes of preparation, you can spend the next hour and 20 minutes crafting a beautiful piece of jewelry that reflects your personal style.
Equipment
To ensure uninterrupted work, it’s crucial to have the right tools at hand. In addition to the standard writing utensils like a dotting pen and filling knife (or any cutting blade), you’ll also need some specialized equipment. For instance, having a set of rubber stamps on hand can be incredibly useful for adding subtle details to your designs. Cookie cutters may seem out of place in this list, but they can actually serve as makeshift jigs or molds for creating unique shapes and textures.
Fine sandpaper is essential for smoothing out rough edges or removing unwanted residue, while pliers can come in handy for bending or shaping small metal pieces. A rolling pin is another versatile tool that can be used to flatten or shape materials like clay or dough. And of course, a cardboard piece or parchment paper can provide a clean and stable surface for working on smaller projects.
Finally, having some sellotape (or masking tape) and scissors on hand can help you secure and trim your work as needed. By keeping these tools within easy reach, you’ll be well-equipped to tackle any project that comes your way – and prevent your screen from going dark in the process.
Materials
To create stunning earrings, you’ll need a few essential materials. First and foremost, you’ll require polymer clay, which provides the foundation for your earring design. Next, jump rings serve as the connector between the earring hook and the post or back. Speaking of hooks, these are typically made from metal or another sturdy material to ensure they can withstand daily wear. Earrings posts and backs, also known as findings, complete the setup by providing a secure fit for your earrings.
Finally, a strong adhesive like E6000 glue helps bond all the components together, ensuring your creations remain secure and intact.
Instructions
To embark on this creative project, gather all necessary materials and prepare your workspace by lining a sheet of cardboard with parchment paper and securing it in place. Next, select the various colors of clay you wish to use and portion out the required amount. Warm your hands to smoothen each piece of clay, then roll them into cylinders before assembling them into a flat sheet approximately 5mm thick.
Alternate between folding, twisting, and rolling the clay to achieve the desired pattern or effect. Feel free to experiment with different colors by lining up rolls of varying hues, cutting off half-inch pieces, and combining them into a single sheet. Additionally, you can embellish your clay with designs, such as speckling it with tiny dots, pressing stencils for intricate patterns, and using craft tools to create textures like holes or scored lines.
The possibilities are endless when it comes to combining colors, textures, and designs. Once satisfied with the appearance of your clay, utilize cookie cutters in various shapes to create unique earring forms. You can also fashion two-piece earrings with danglers or opt for studs instead. Remove excess clay, allowing you to reuse any scraps to craft more earrings. Don’t forget to puncture holes in each earring for jump hooks later.
Transfer the finished earrings to a baking tray lined with parchment paper and preheat your oven according to the package instructions. Bake the earrings for approximately 30 minutes at 230F (110C) before covering them with aluminum foil to prevent cracking. Once cooled, gently scrub off any excess clay shavings using sandpaper and smooth out the earrings. To set the clay, apply a clear glossy or matte-finish varnish specifically designed for polymer clay.
Finally, attach the hooks or studs to complete your earrings.