Discover two creative methods for making friendship bracelets that are perfect for teens and adults seeking a fun DIY project. The art of crafting these accessories evokes memories of carefree summer days spent creating unique keepsakes. I fondly recall scouring for innovative materials like shoelaces, thread, or paracord to make my own bracelets. Among the many techniques I experimented with, embroidery floss remains an enduring favorite.
Building upon this classic design, let’s elevate it by incorporating a charming pendant or medallion.
Watch on Youtube: How to Make Friendship Bracelets
Supplies and Tools You’ll Need

To embark on this engaging project, gather the following essential materials:
• A chopping board to serve as your workspace
• Embroidery threads in a variety of colors and textures to add creative flair
• Scissors for precise cutting and shaping
• A ruler to measure and mark your design with precision
• A bulldog clip to keep your work organized and tidy
• Buttons to add an extra layer of dimension and interest
How to Make Friendship Bracelets
Both methods for creating these unique accessories yield distinct results. The three-strand or three-string technique allows for a more classic approach, while the four-strand method offers a bit more complexity and visual interest. Let’s take a closer look at each approach.
How to Make a 3 String Friendship Bracelet?
Step 1
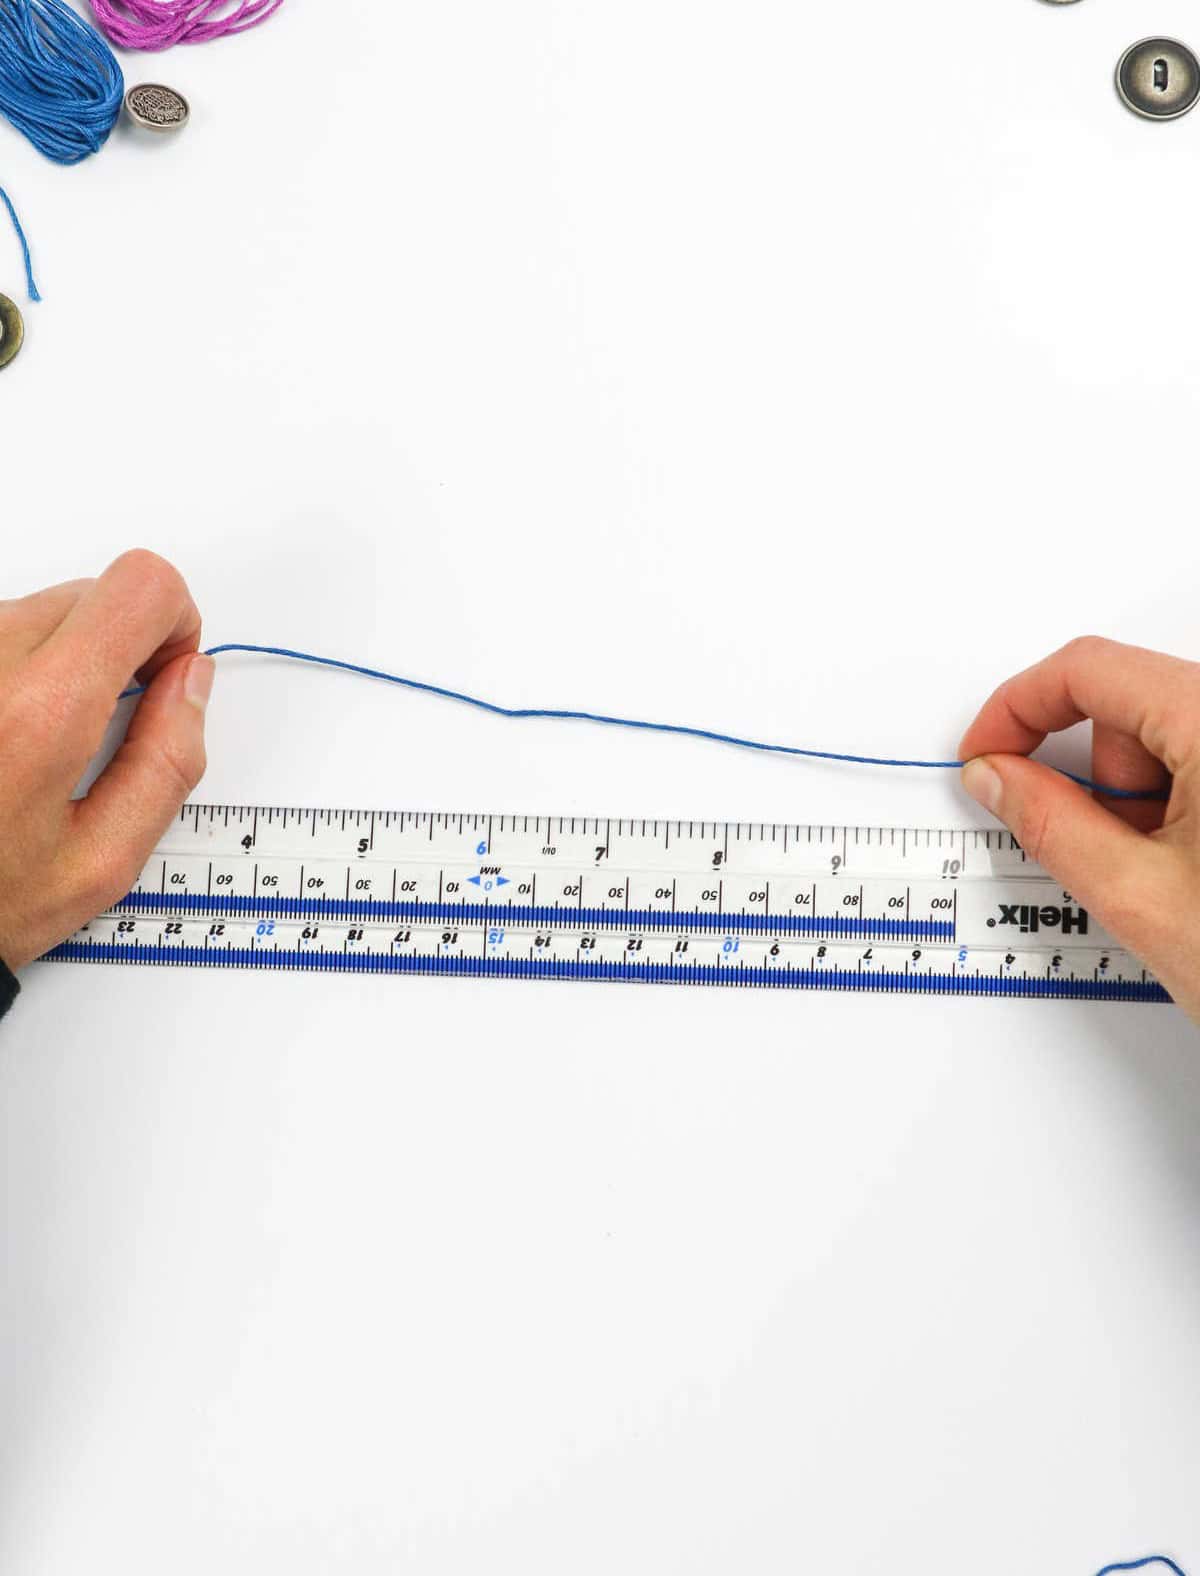
To initiate the embroidery process, begin by measuring and cutting three lengths of cord, each measuring a precise 45 inches. The choice is yours as to whether you opt for a single uniform color or experiment with different hues, adding an extra layer of creativity to your project.
Step 2
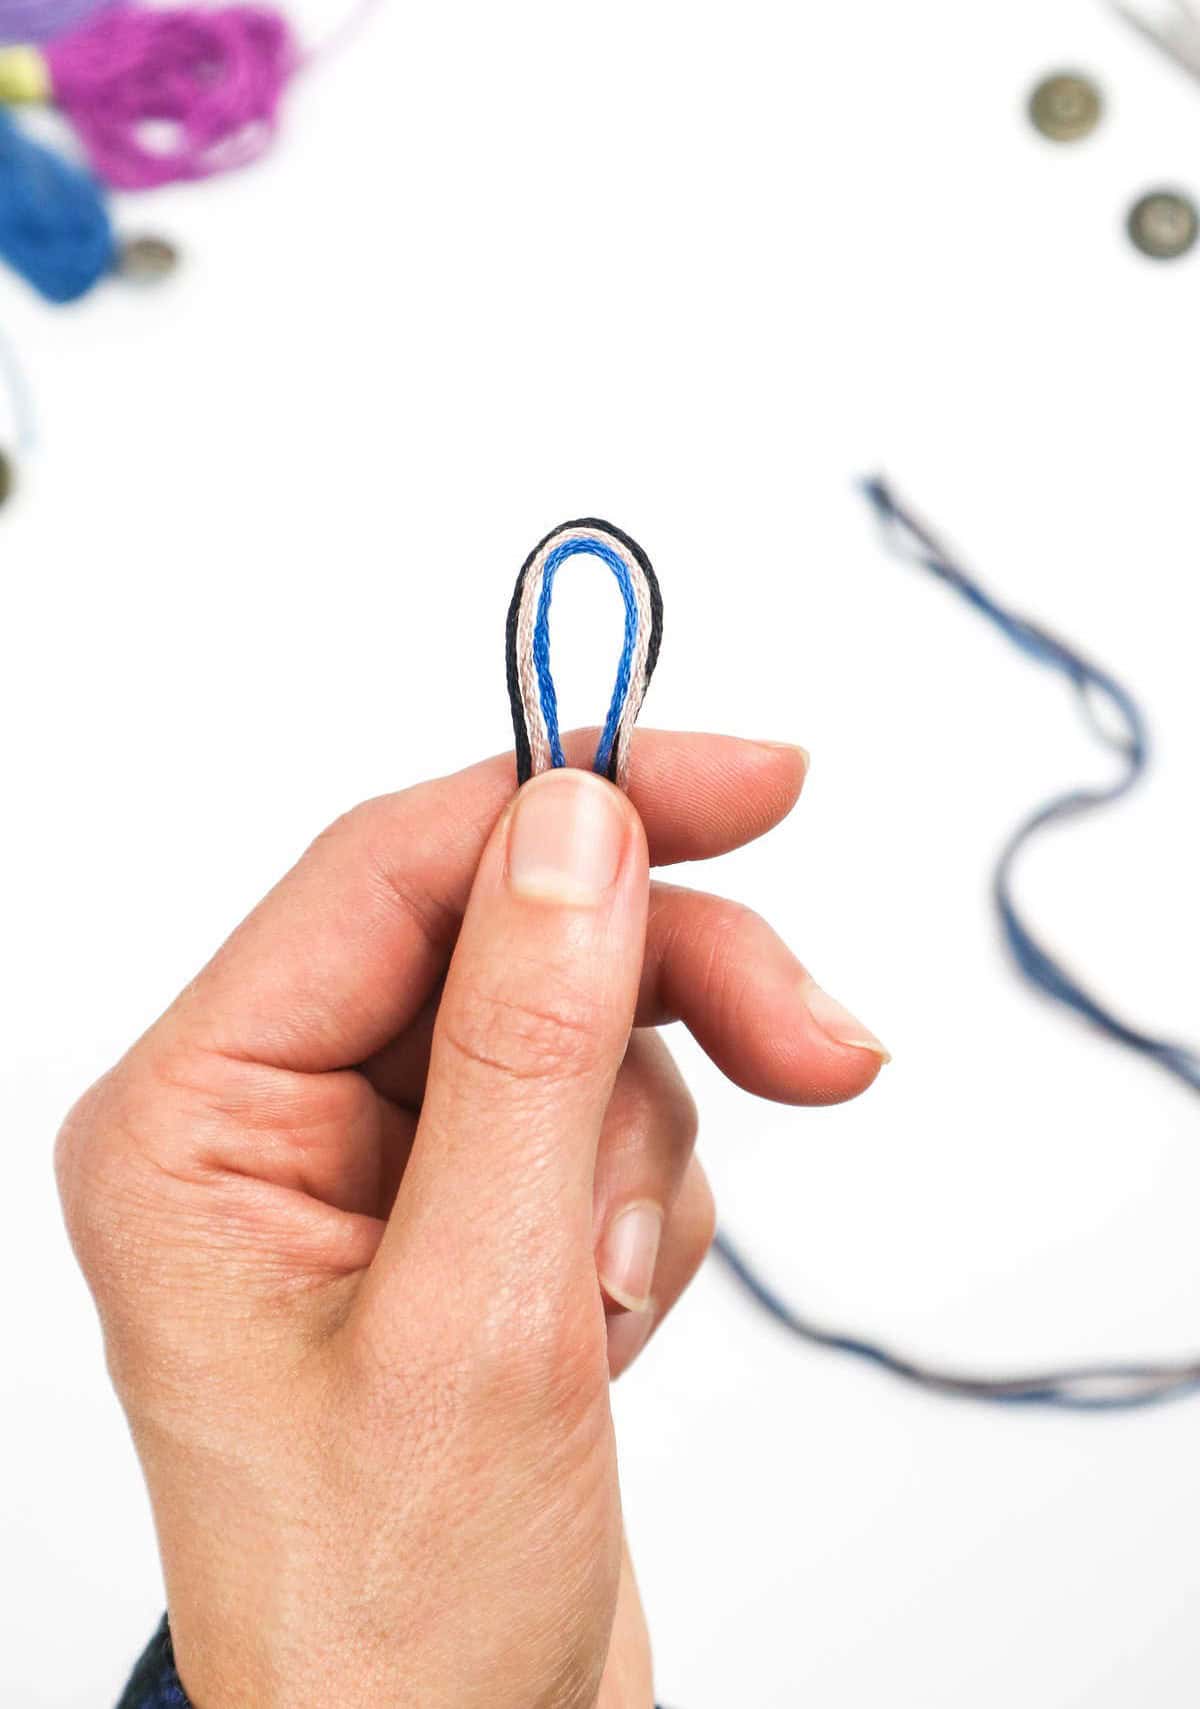
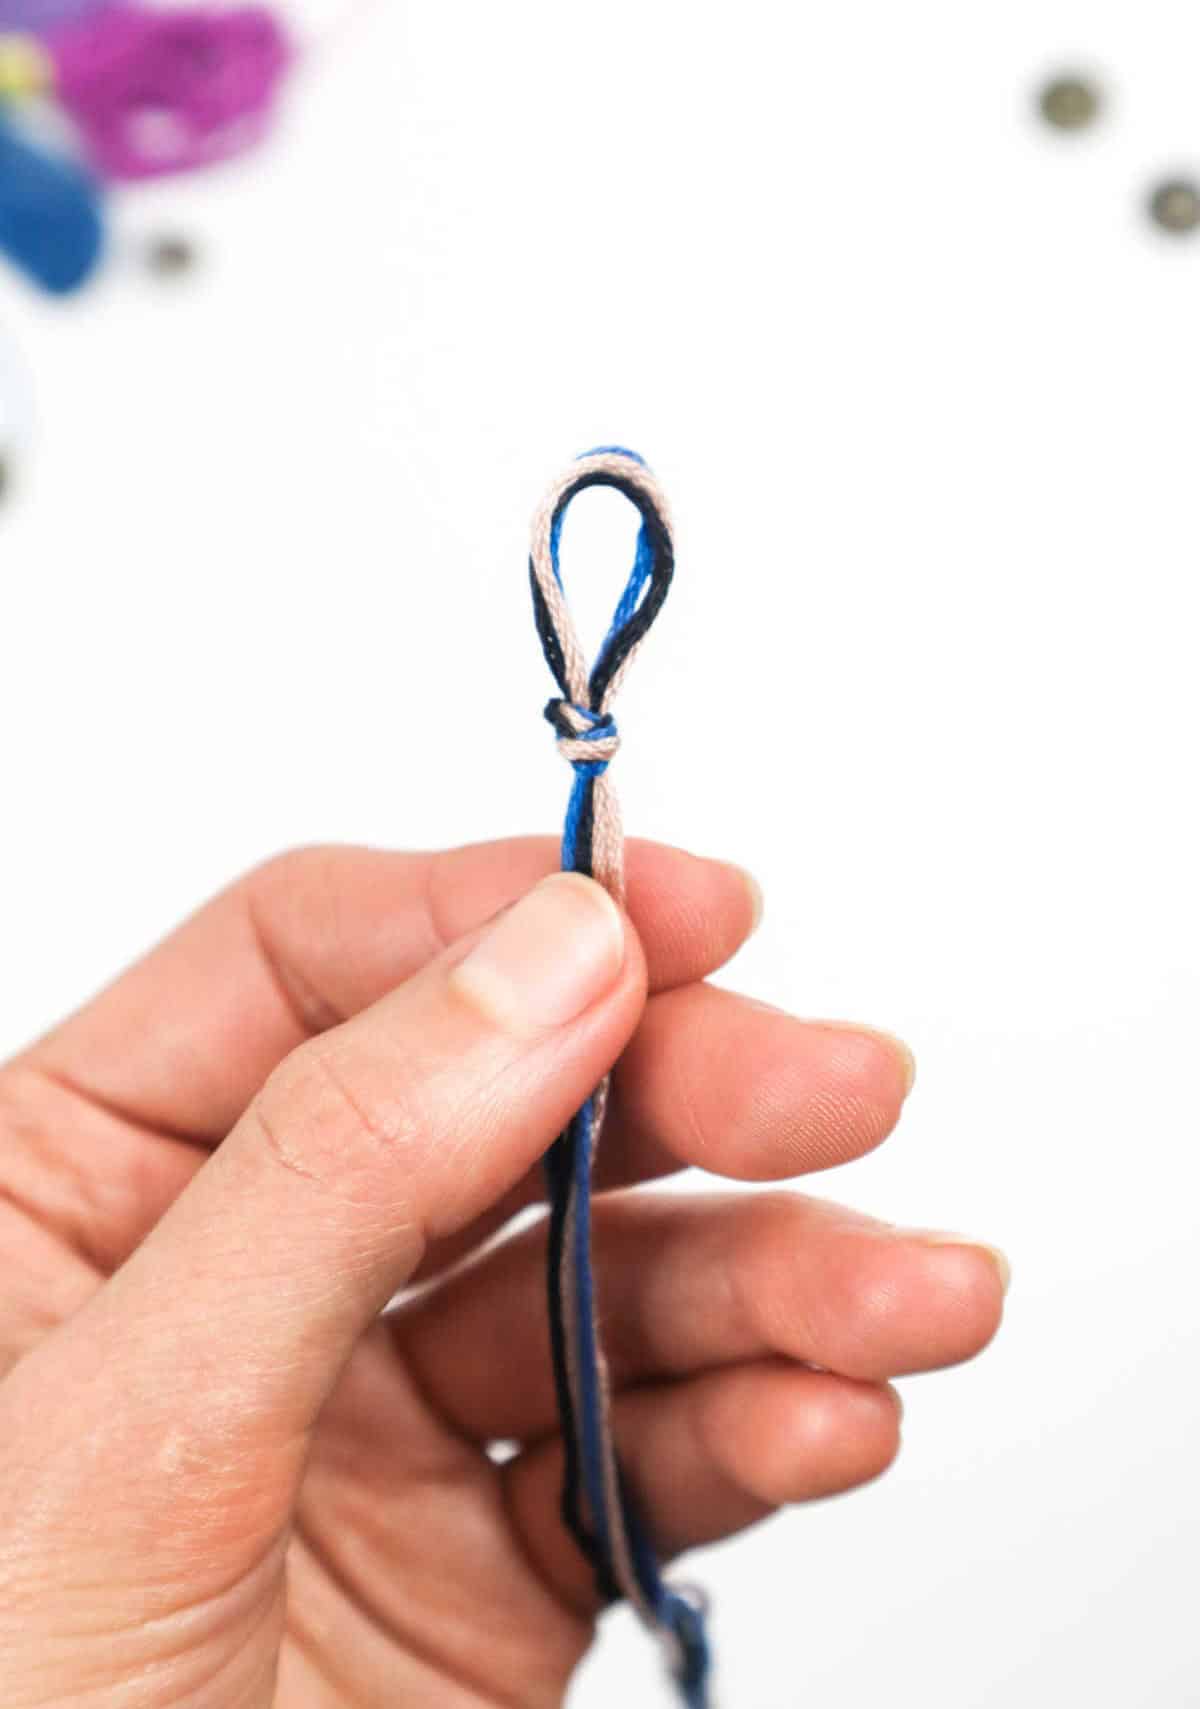
To create the foundation of your bow tie, start by folding the three cords in half and forming a loop at the top. The key is to get the fold precise, so take a moment to ensure the edges are aligned neatly. Once you’re satisfied with the loop’s shape, move on to the next step. Make a regular knot at the top of the loop, positioning it about half an inch from the folded edge.
As you tighten the knot, visualize your finished bow tie taking shape – a sturdy base that will support the rest of the design.
Step 3
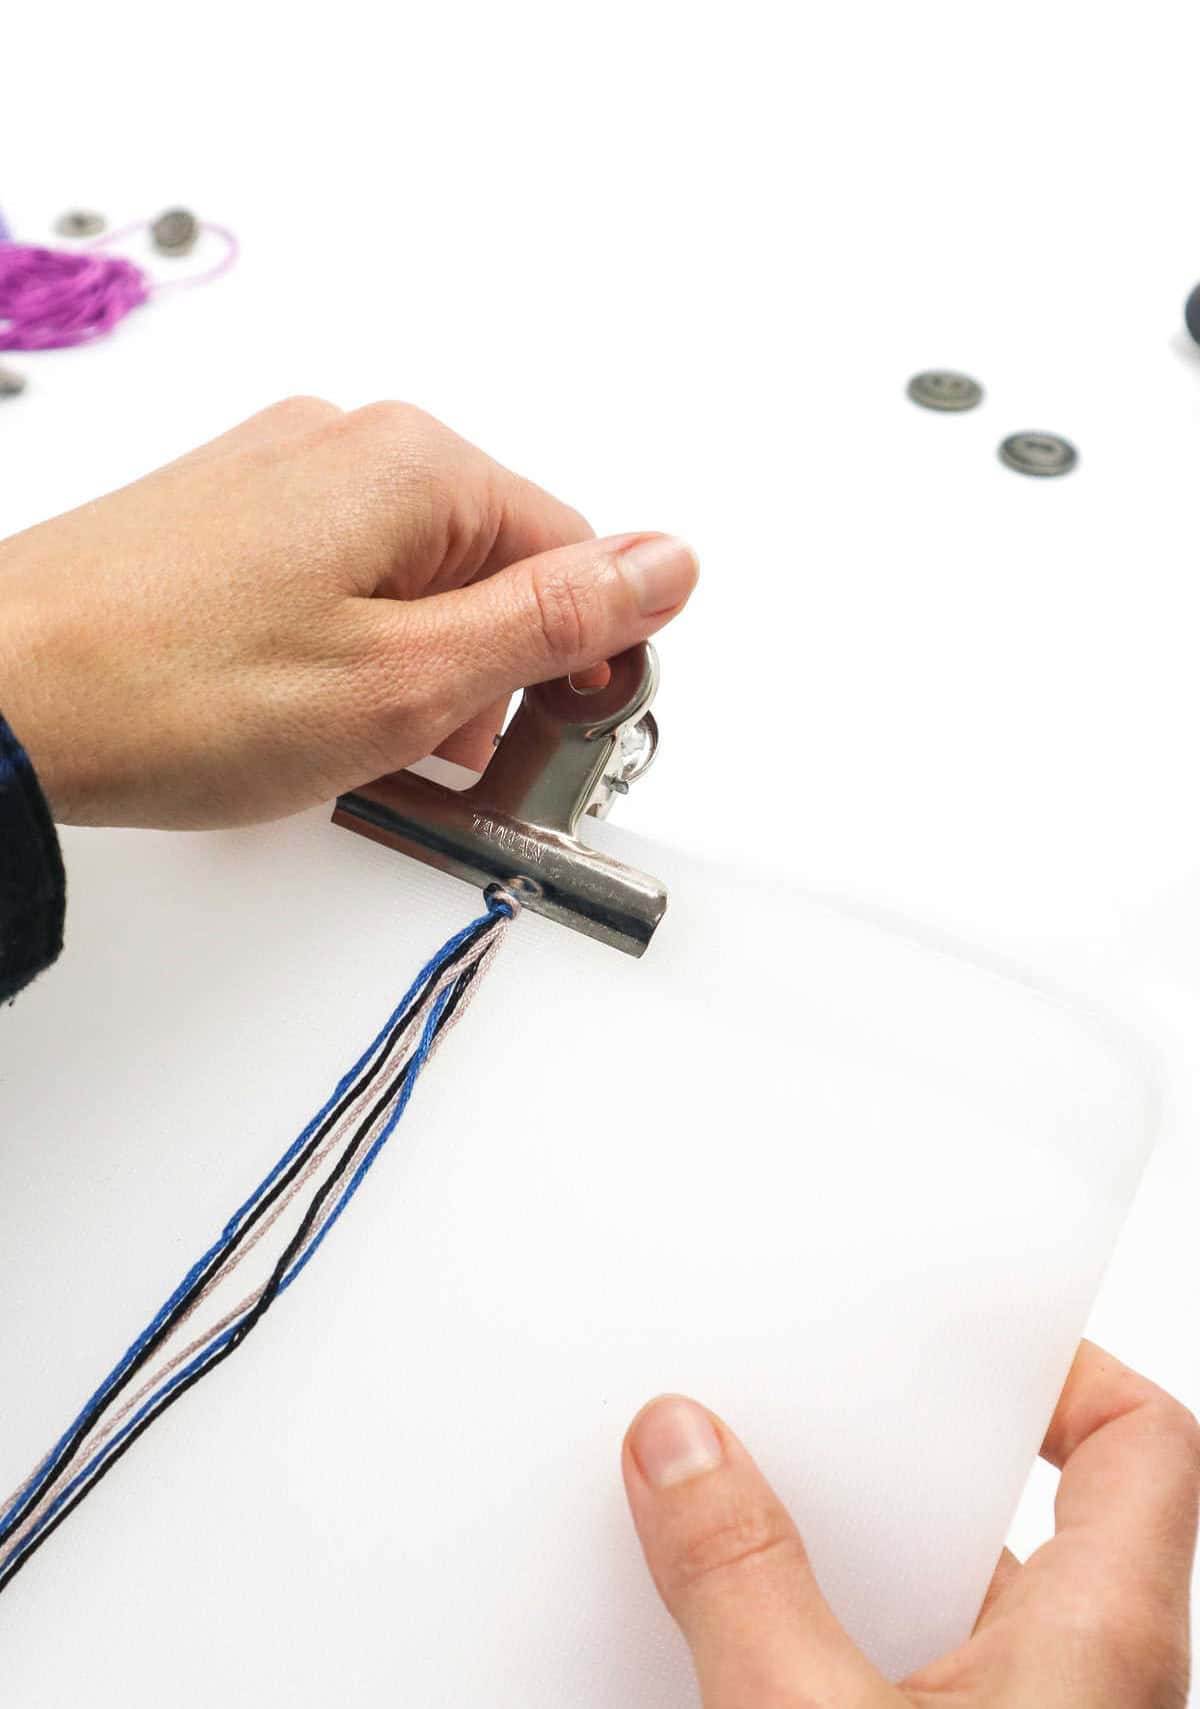
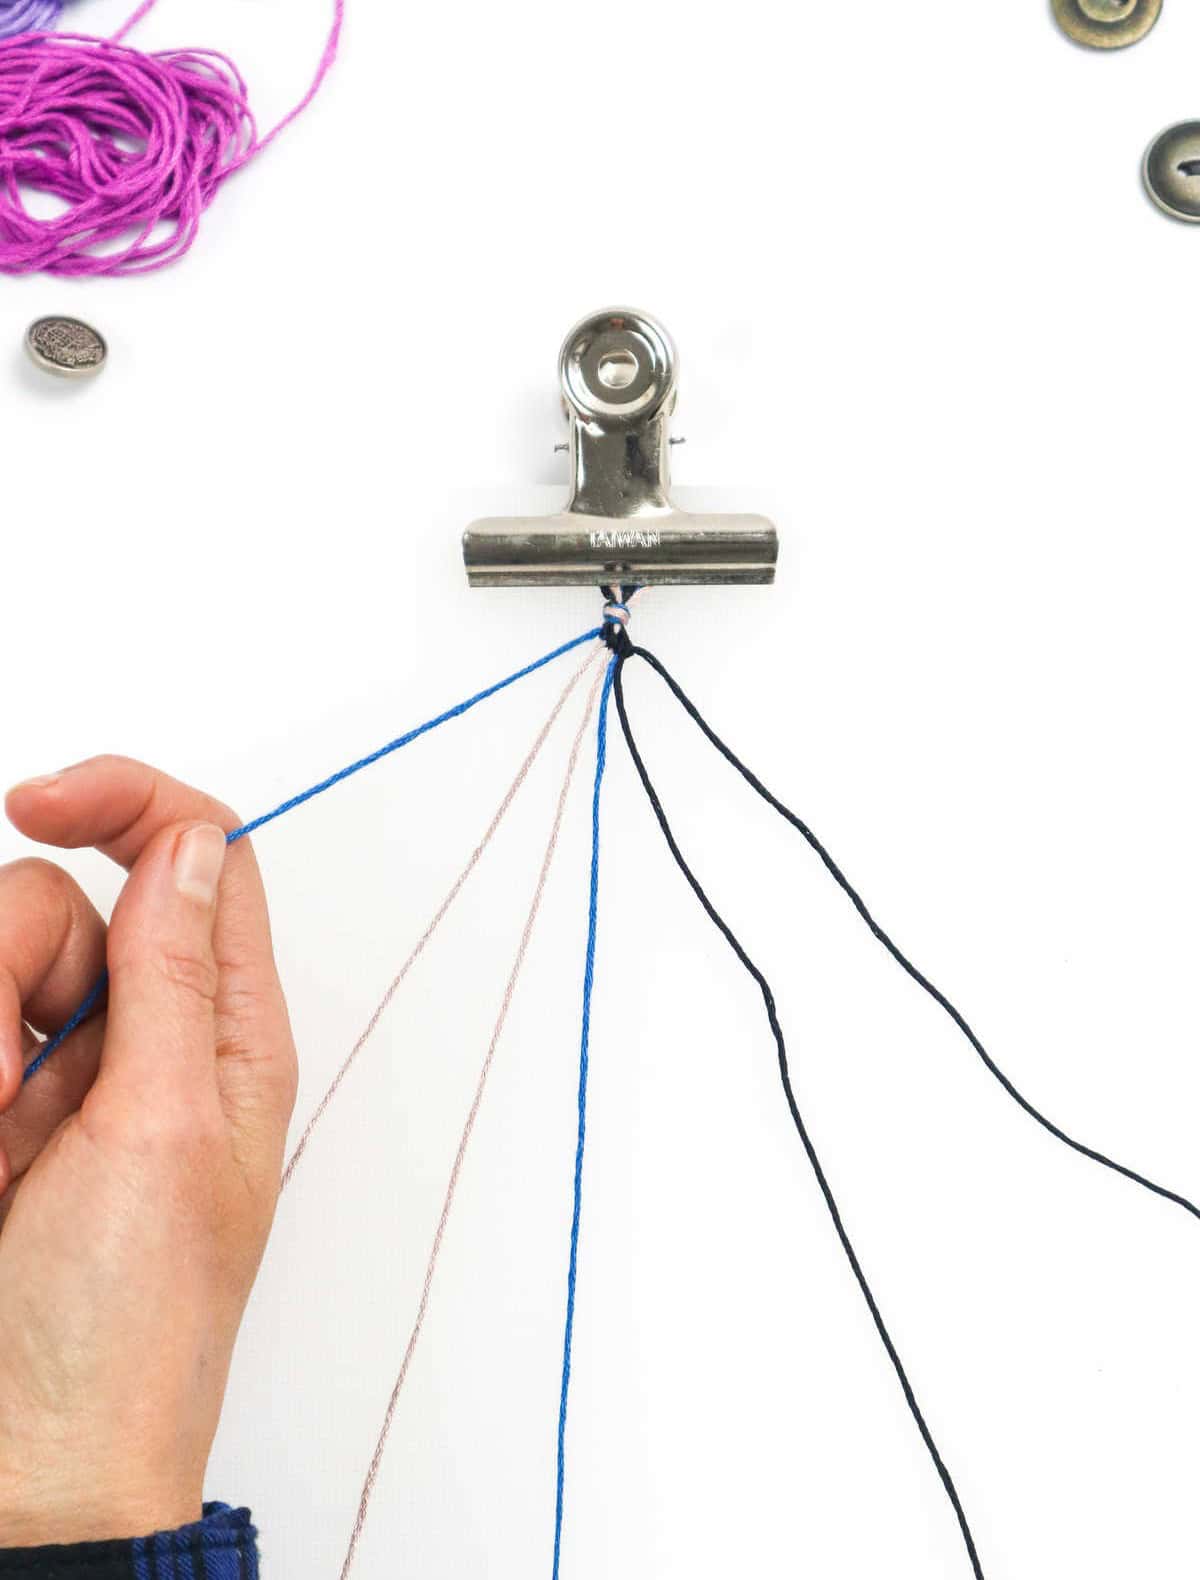
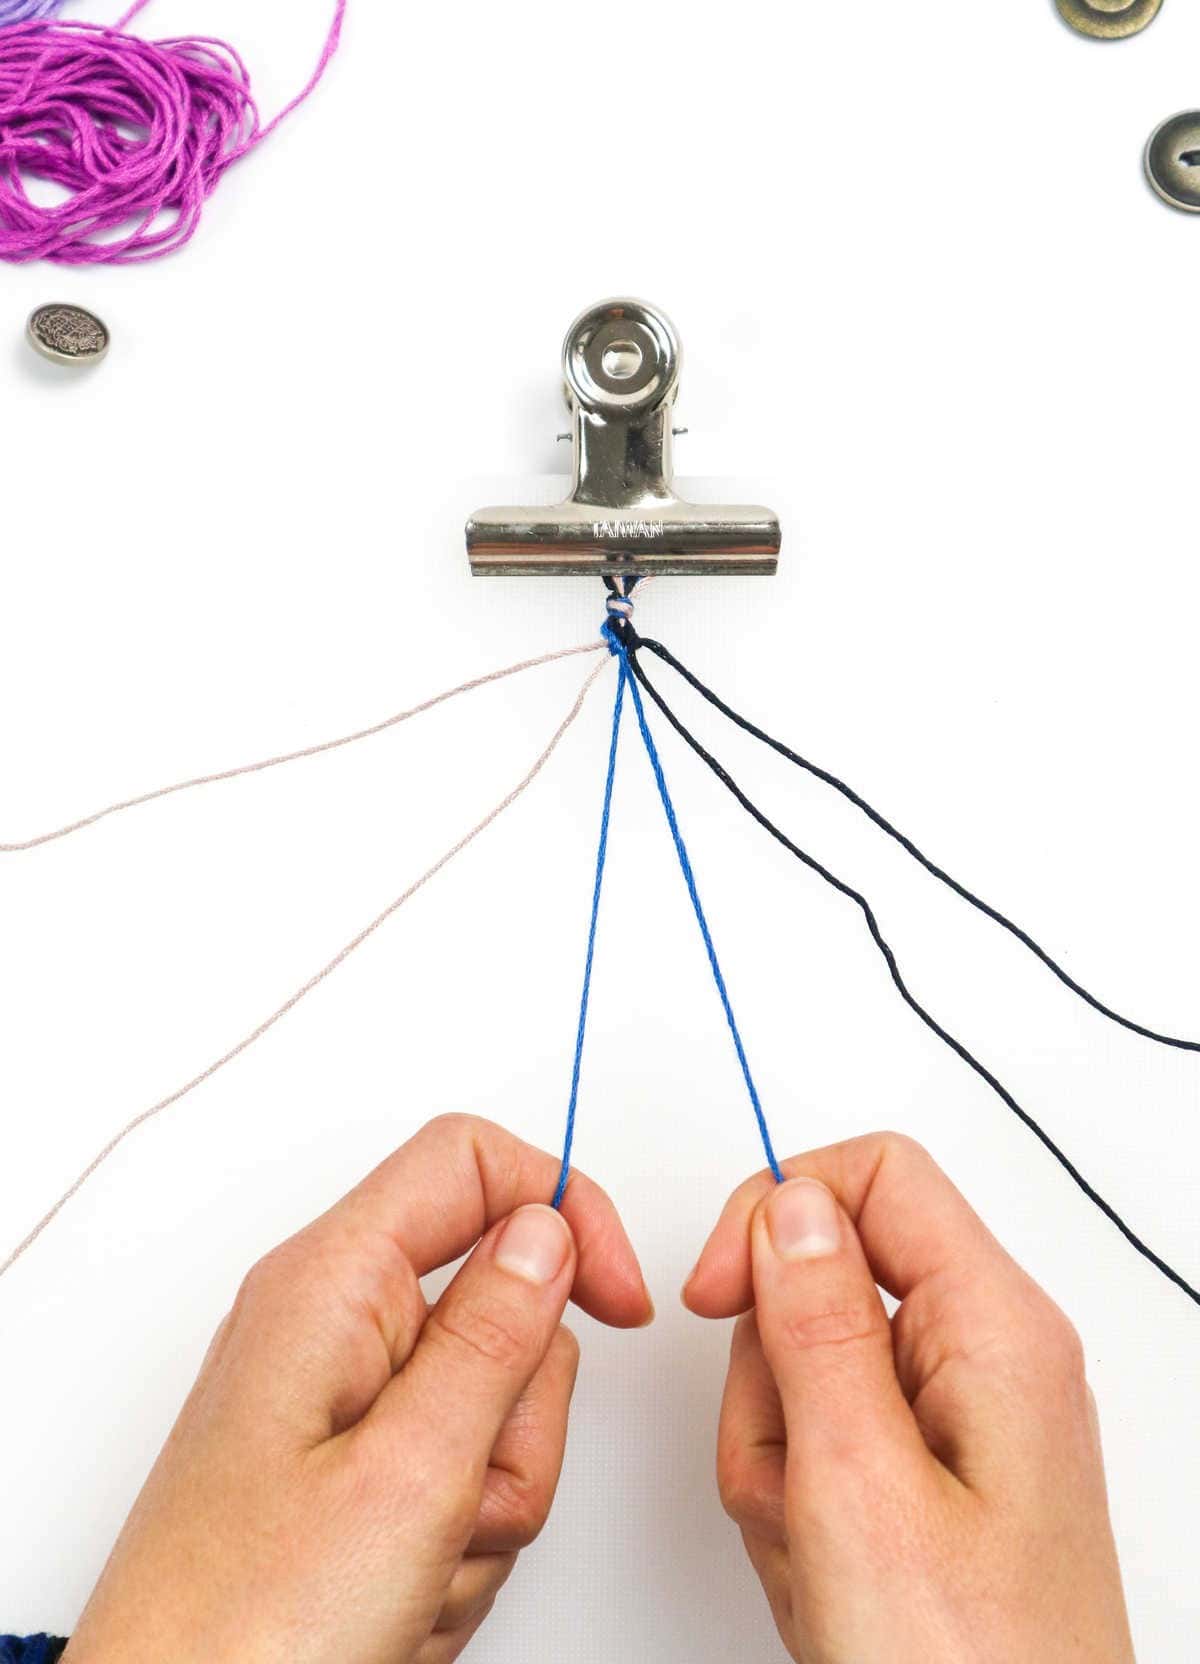
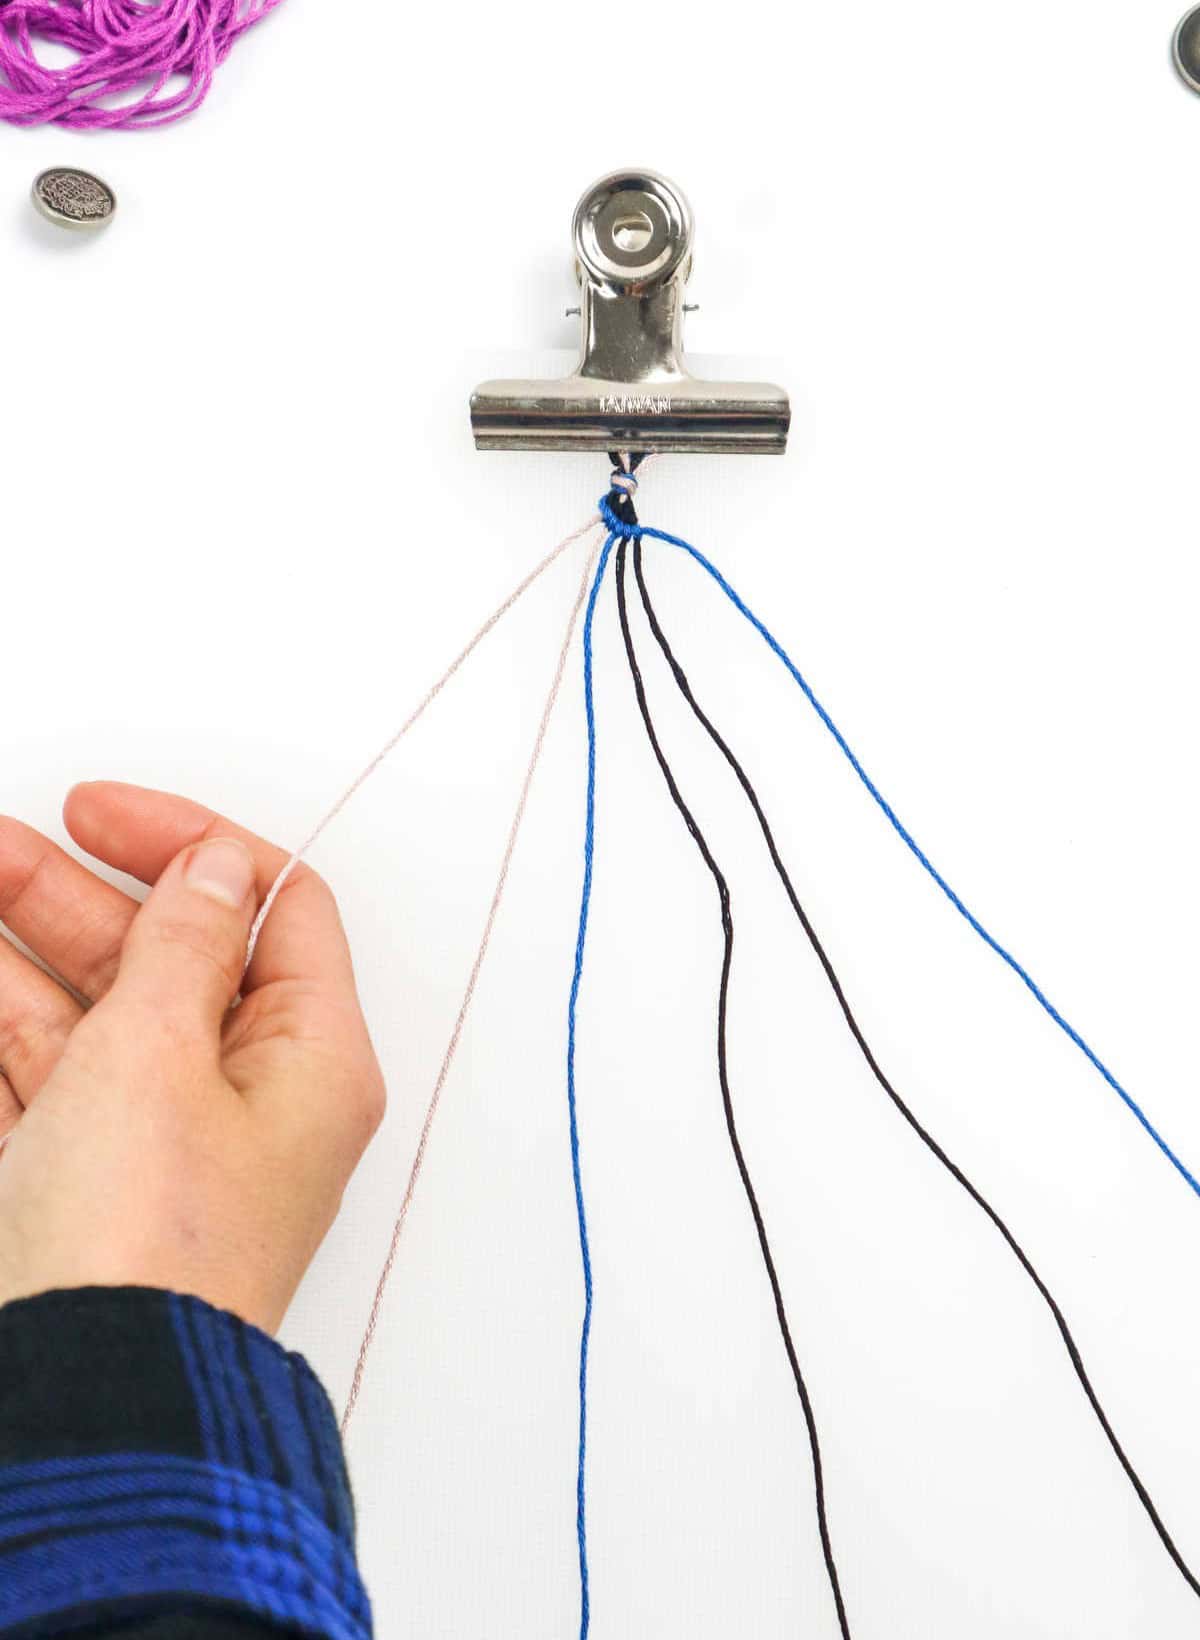
As nostalgic memories resurface, recall the humble exam pad from your school days. Take one and locate the metal clip at the top. Next, meticulously secure the threads by clipping them just above the knot, ensuring a snug hold on the cord.
Step 4
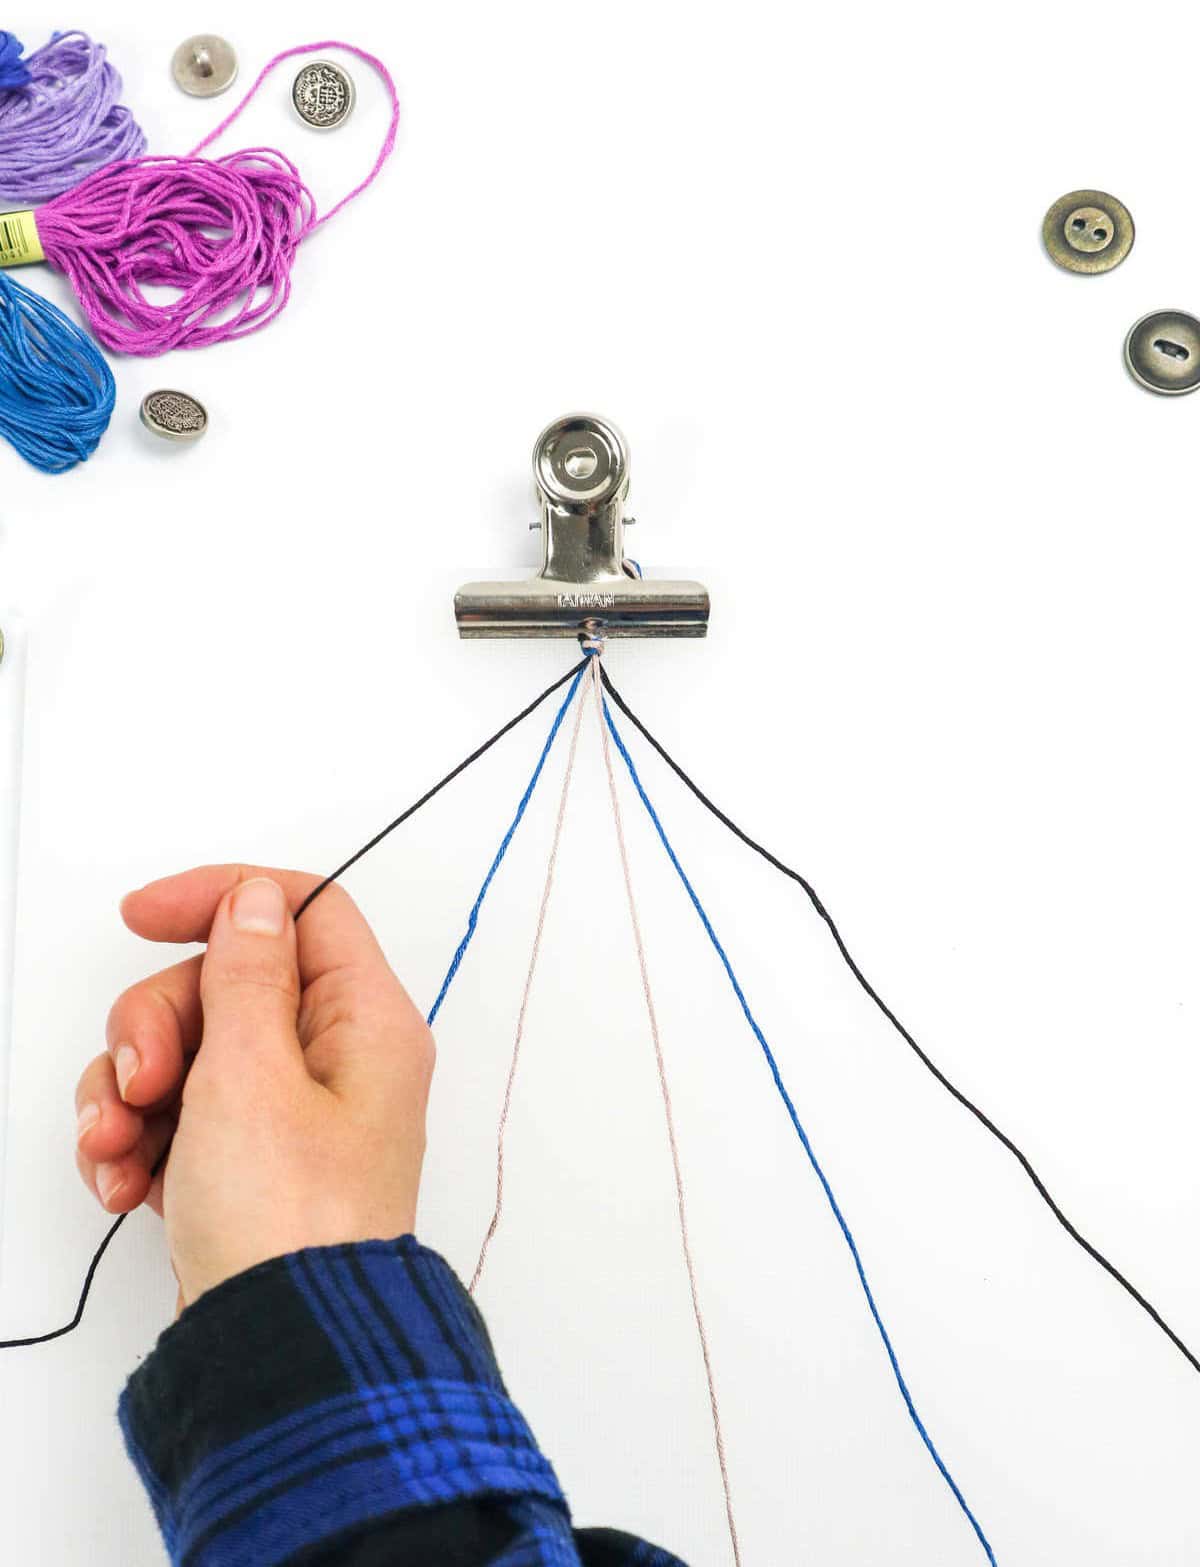
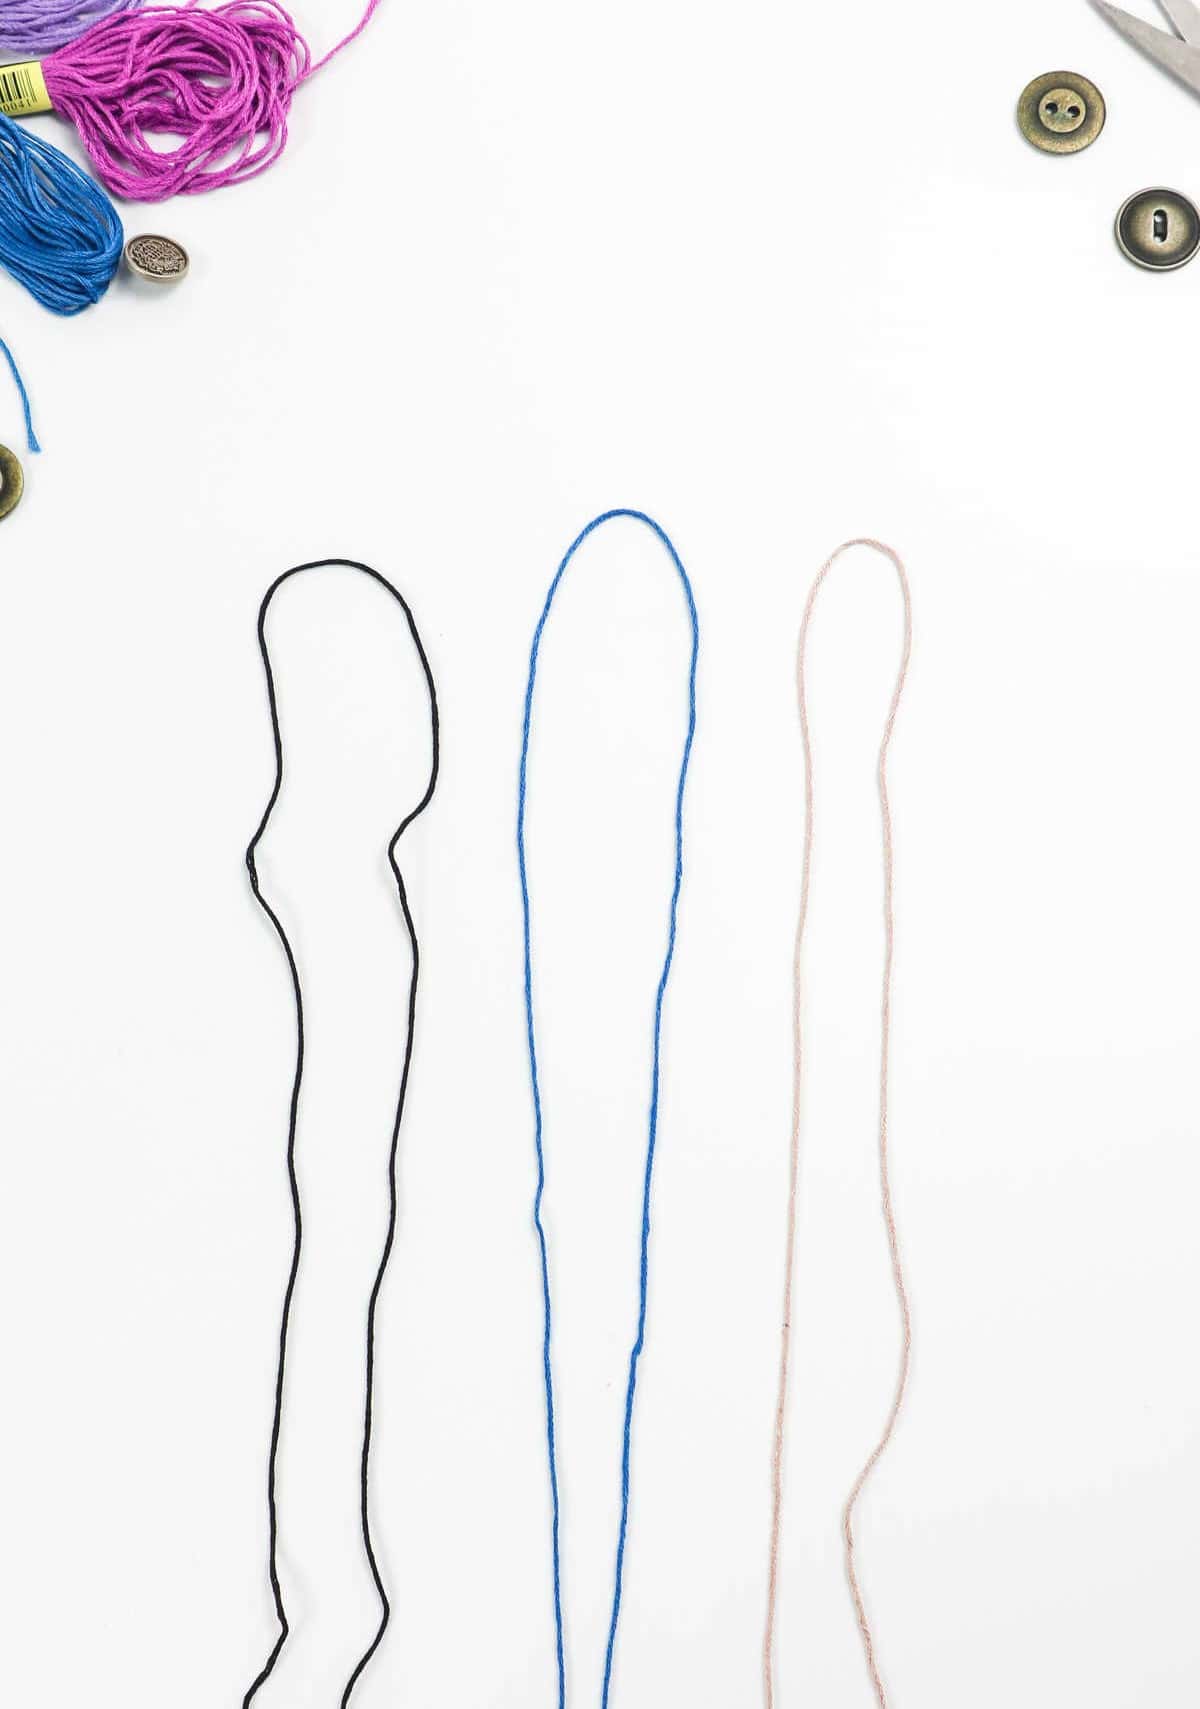
Carefully unfold each of the six cords, paying attention to any color-coded differences you may have employed. To create a harmonious arrangement, arrange the cords in an alternating pattern from left to right, with three on one side and two on the other, then repeat this sequence for a total of 1-2-3, 2-1-3.
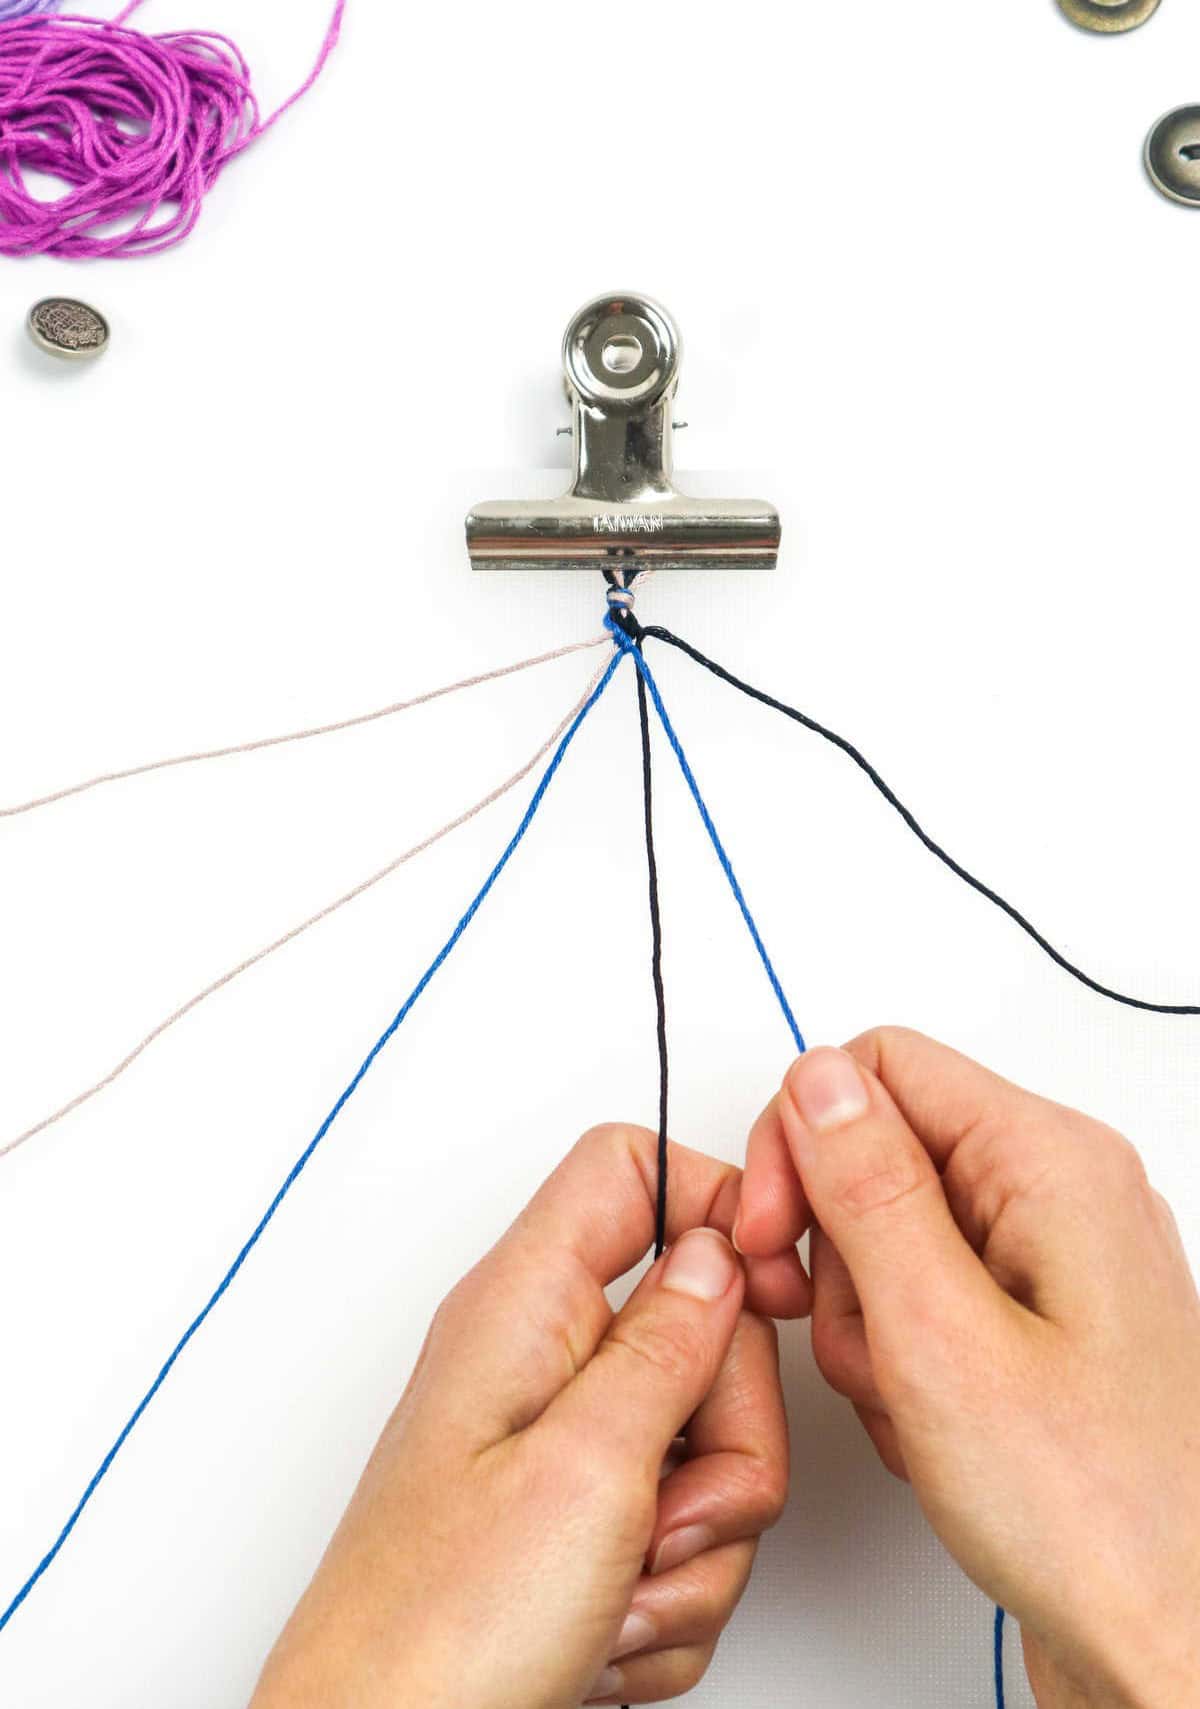
Step 5
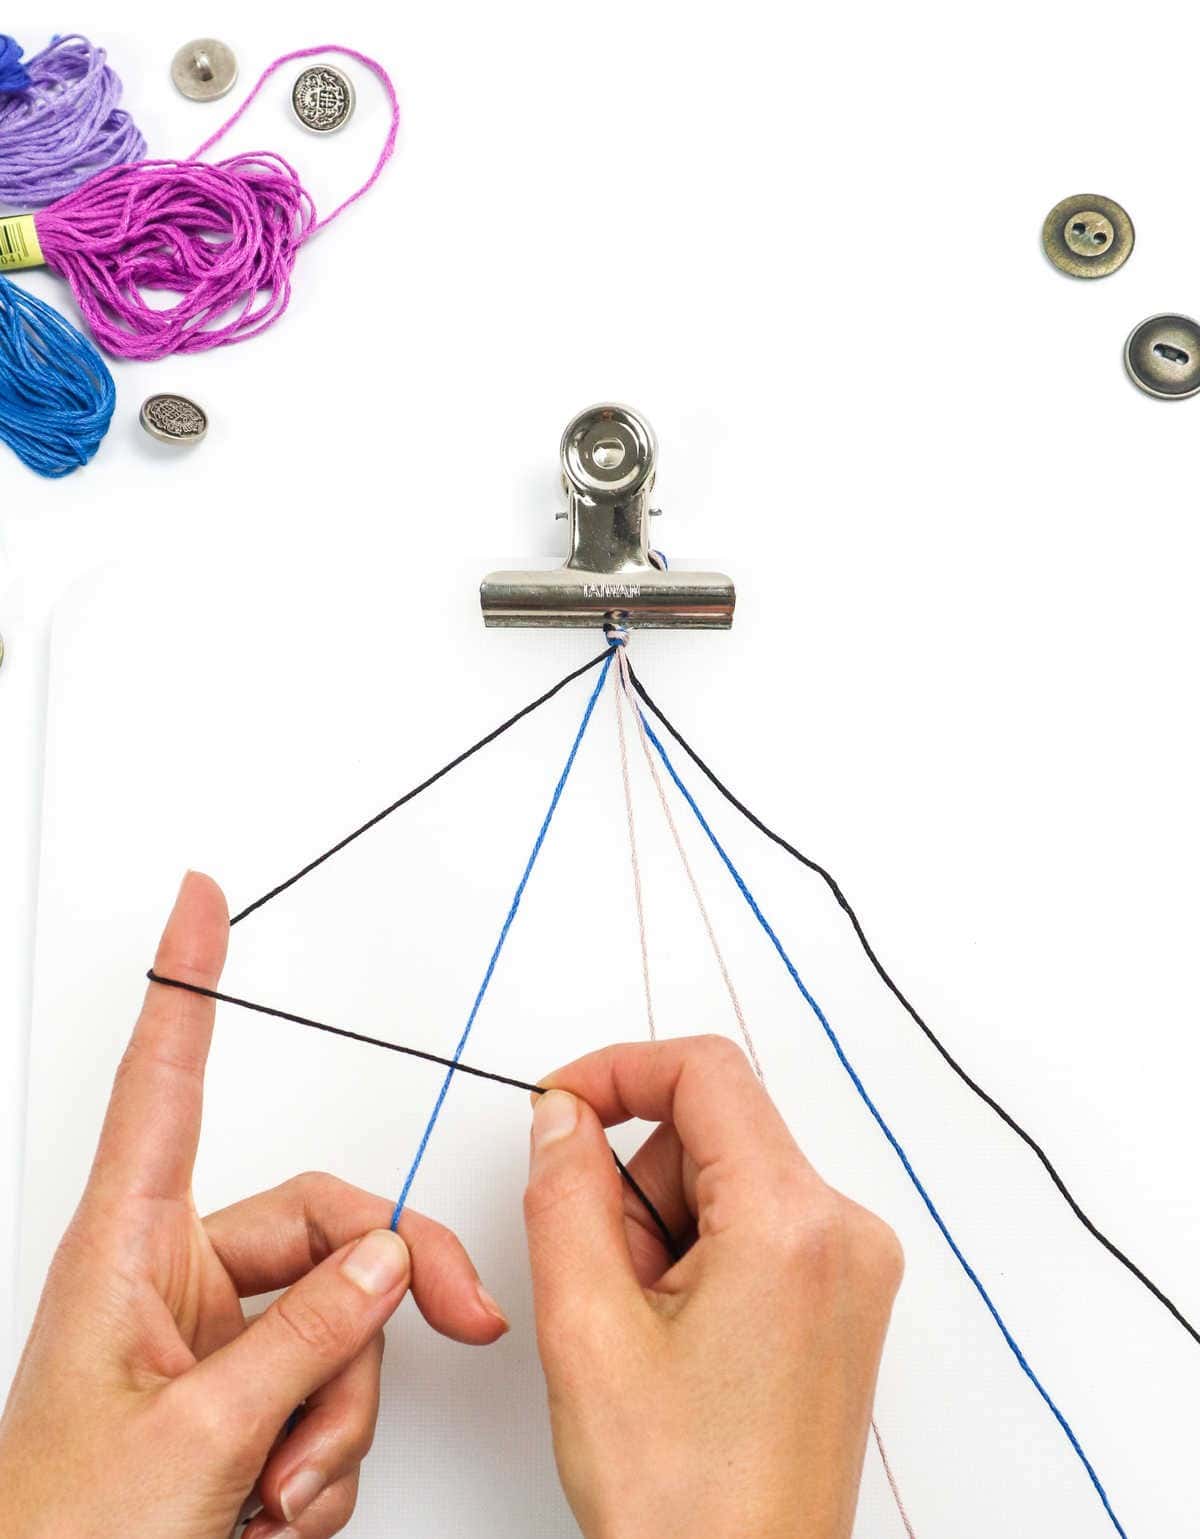
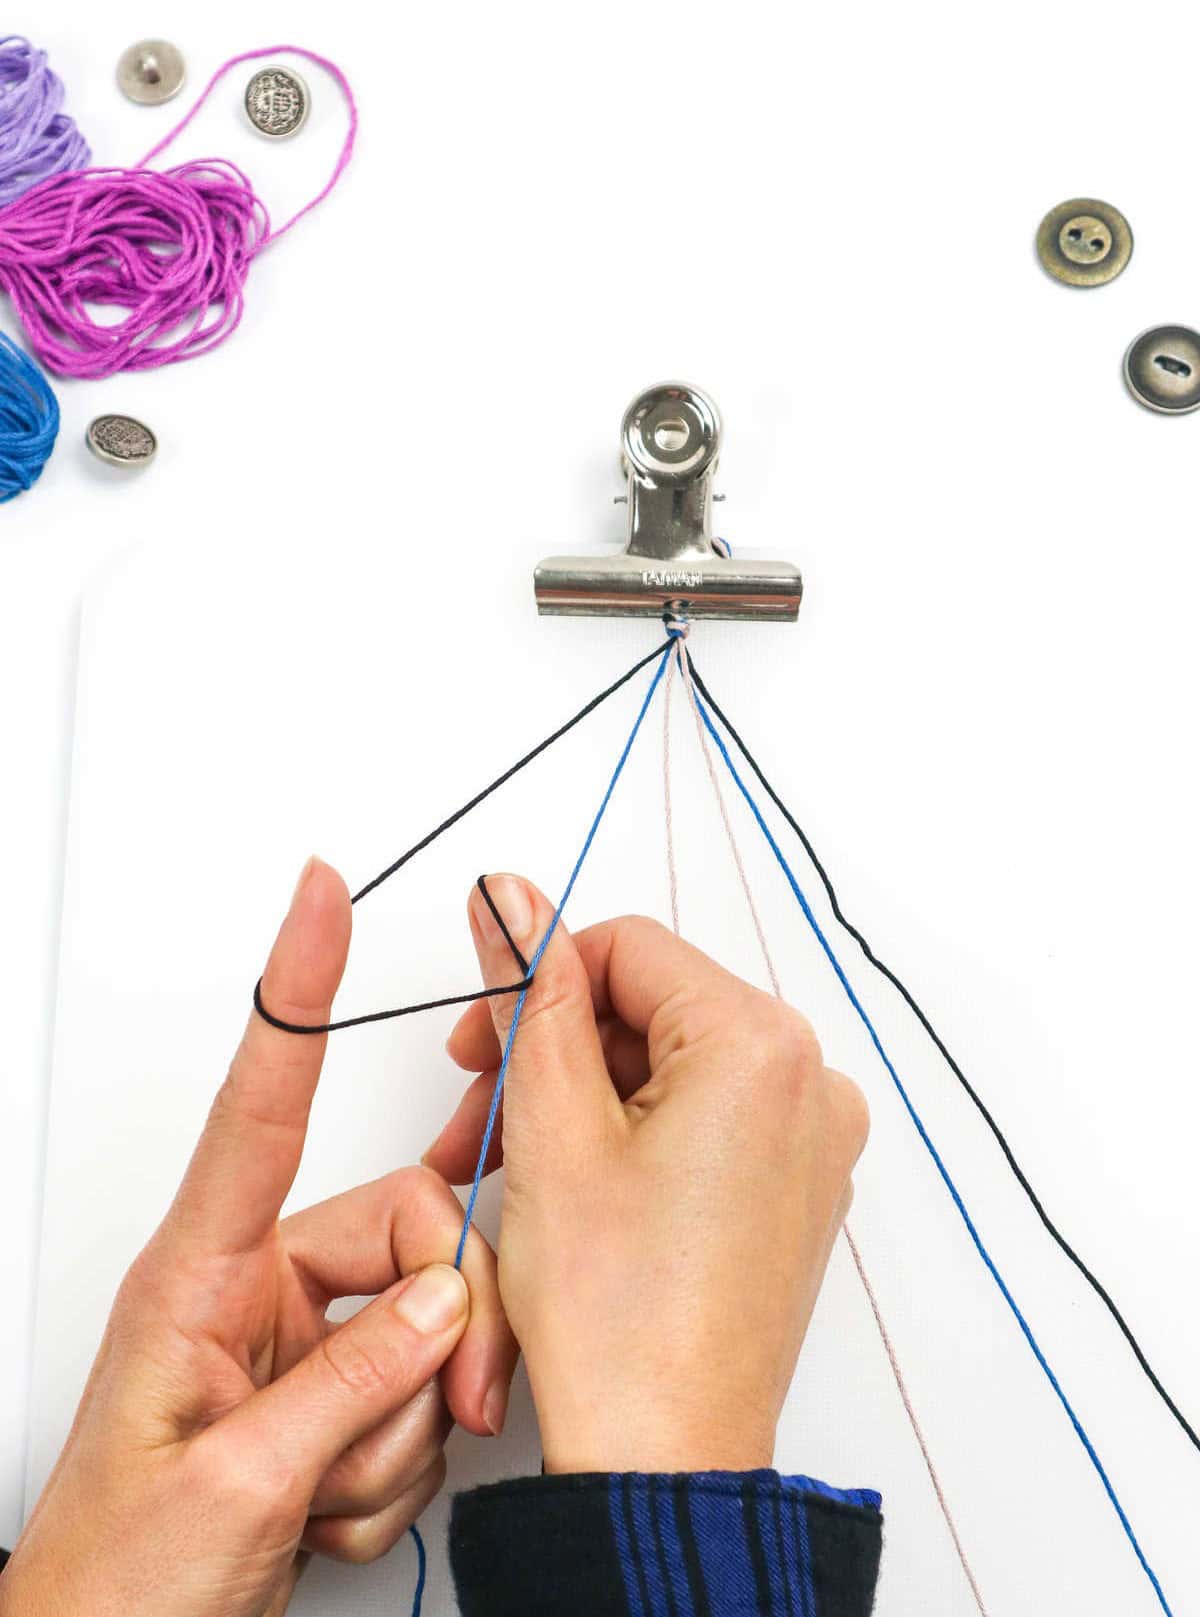
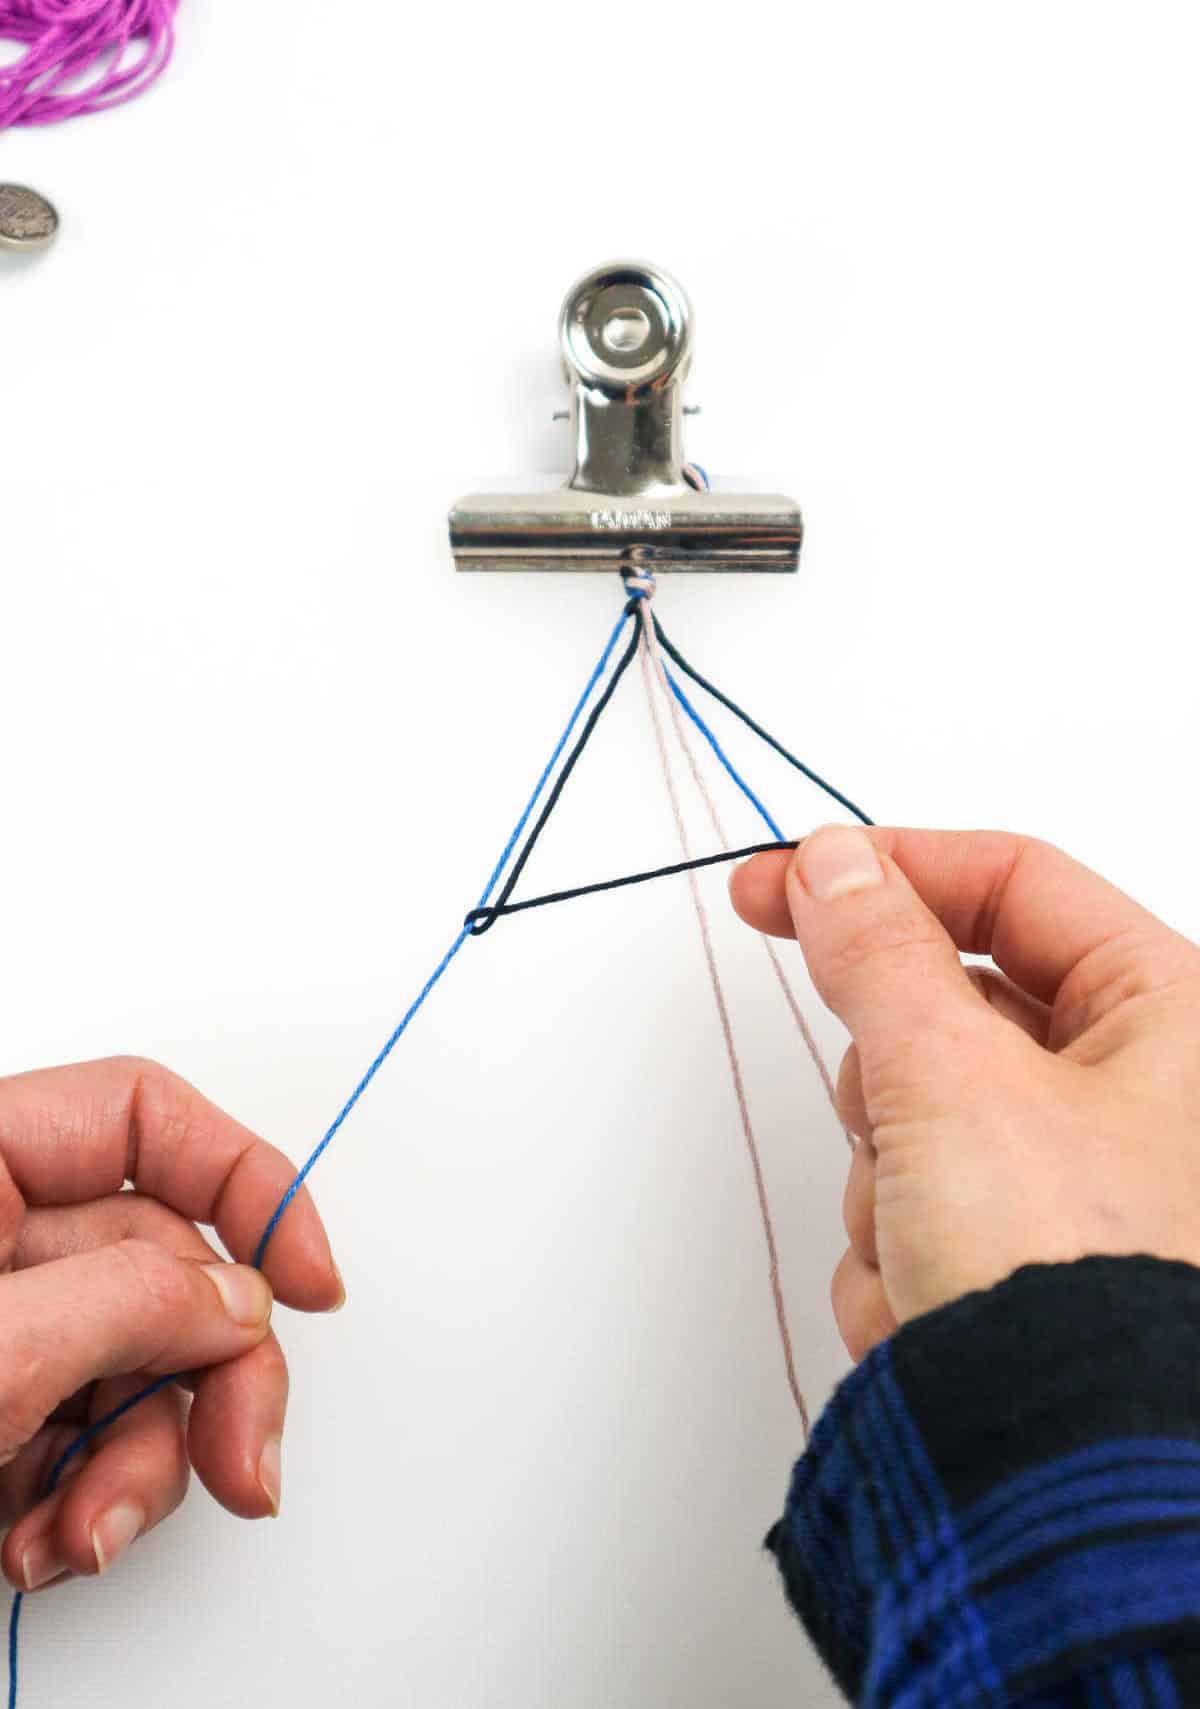
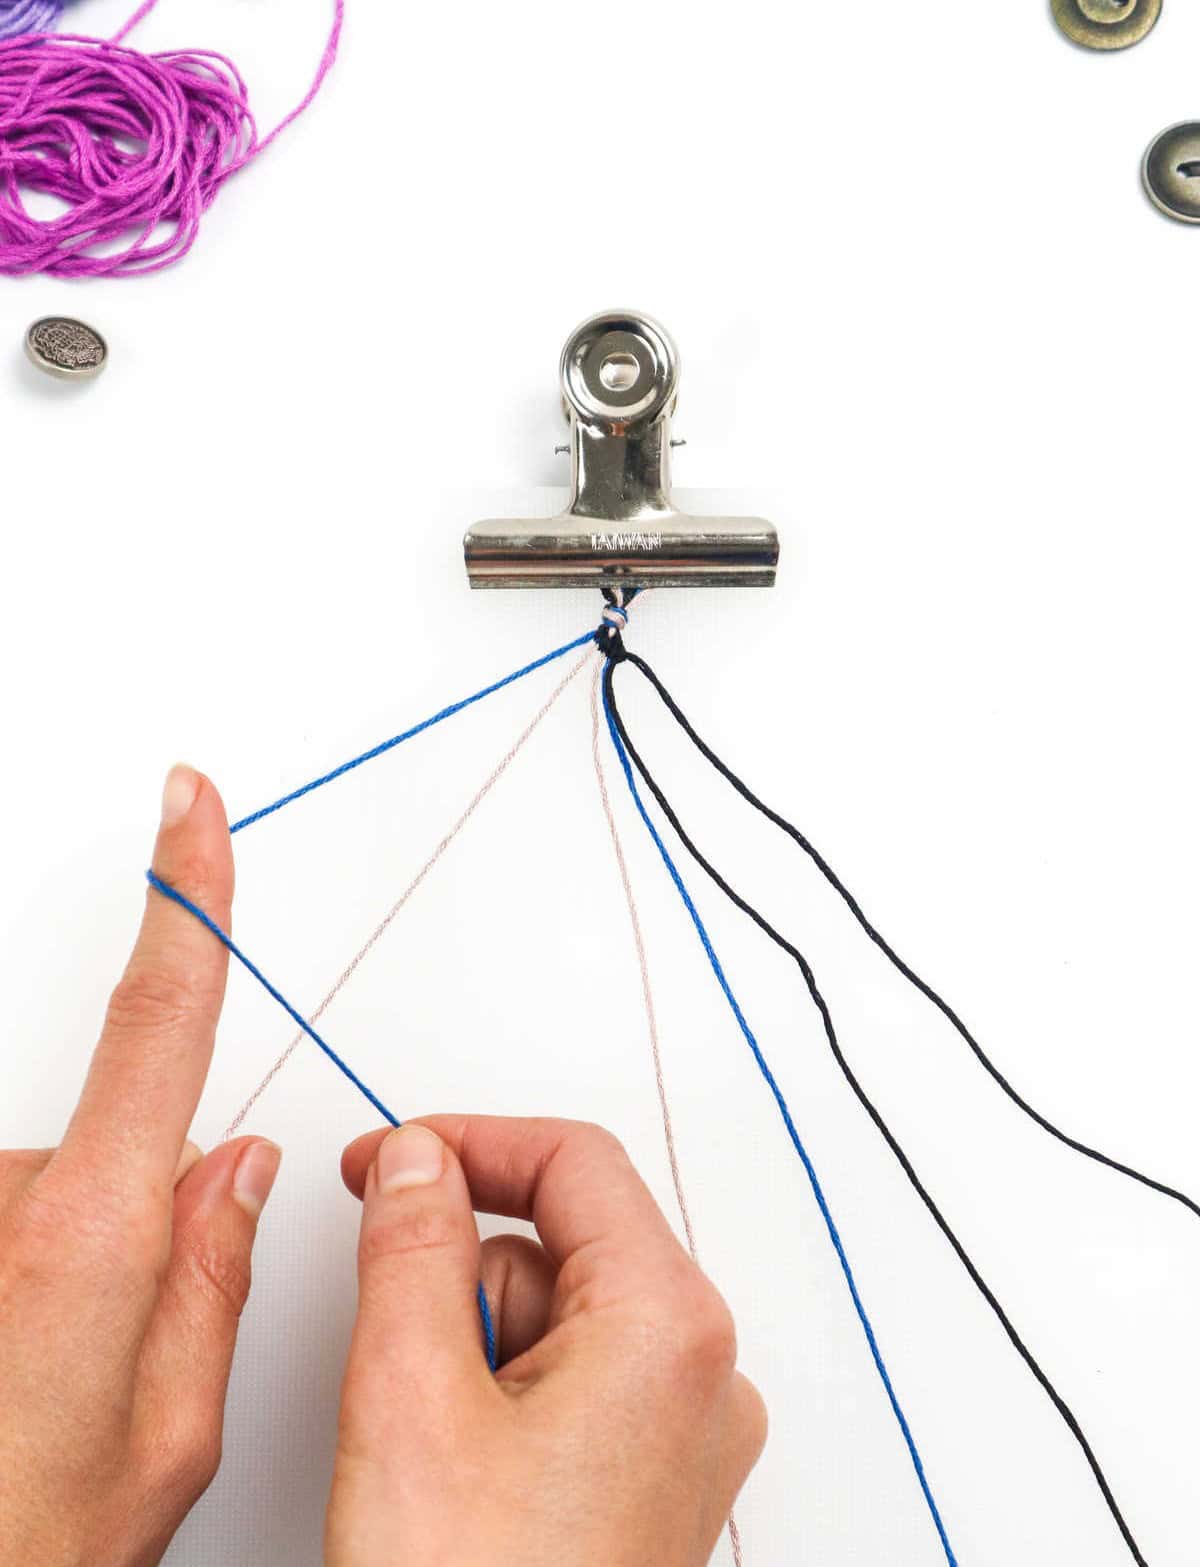
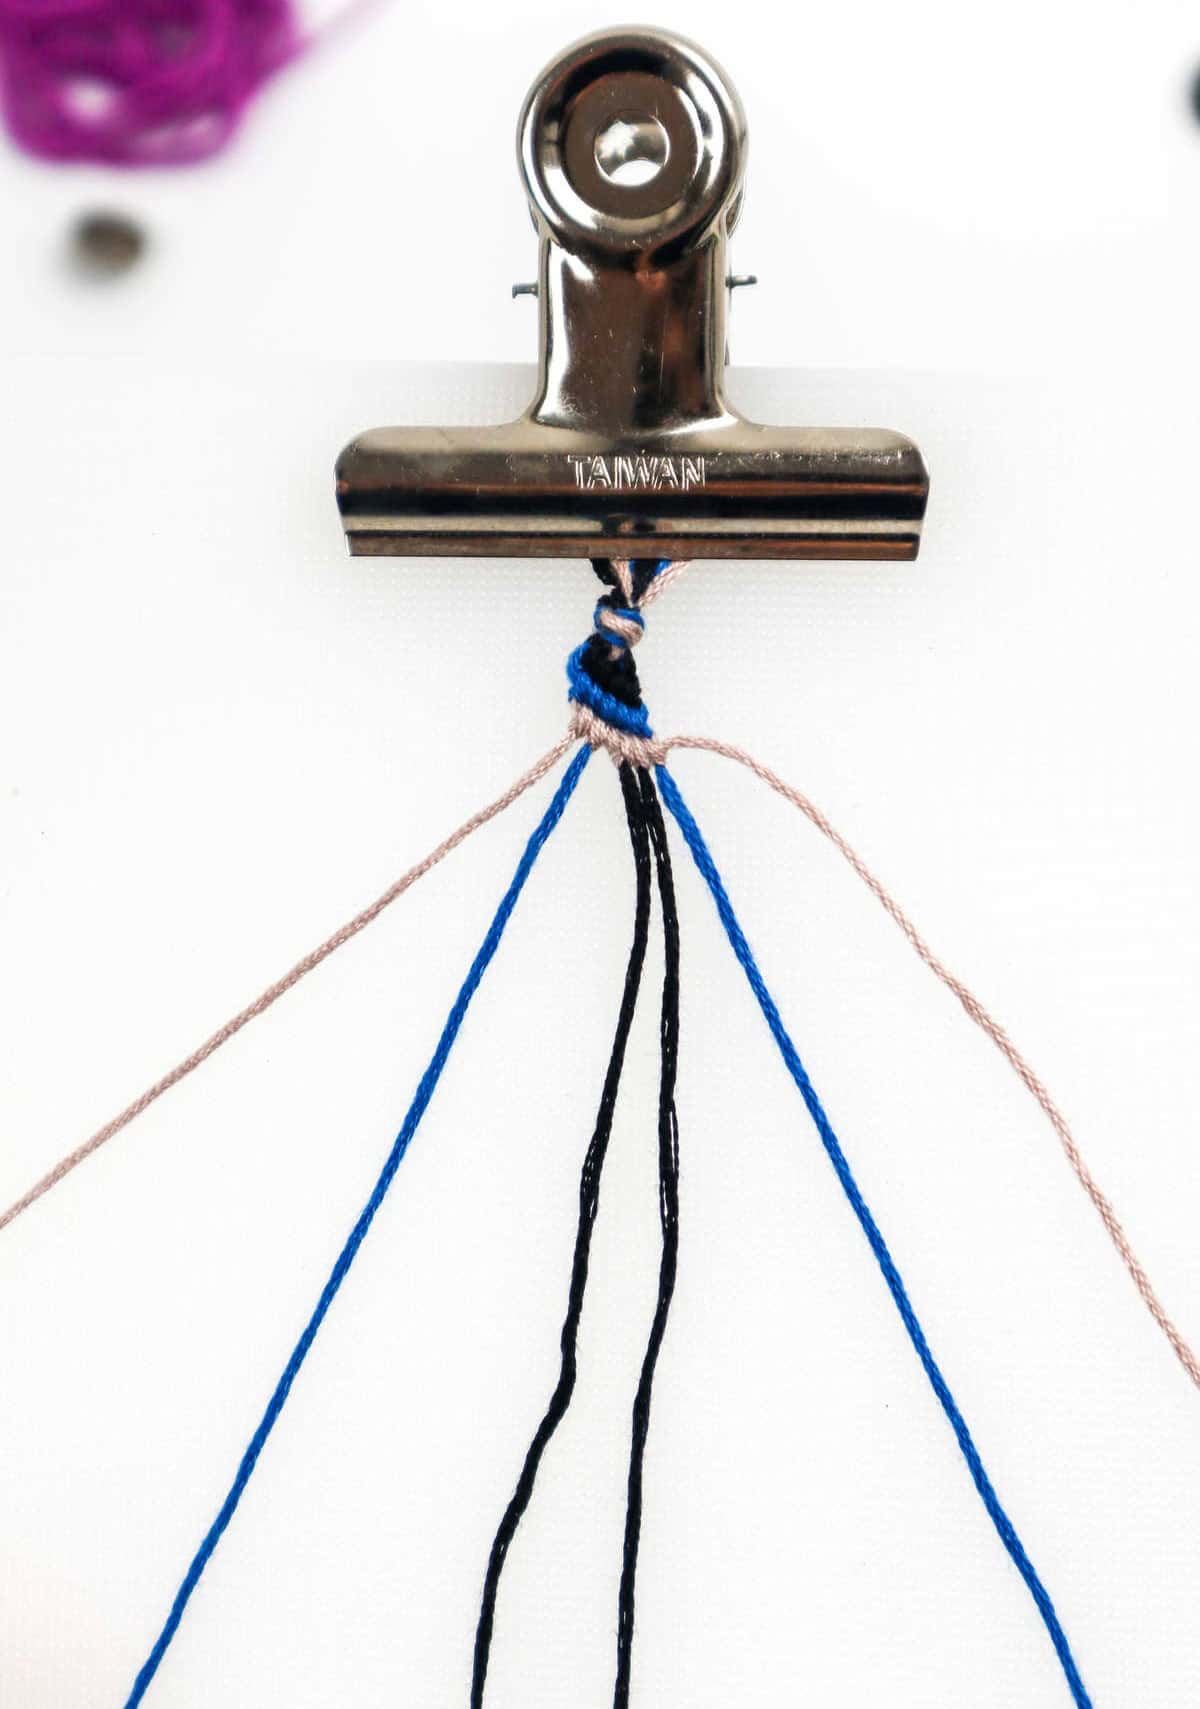
To start, identify the first cord on the left and utilize it as your leading cord for this row. Next, draw it over the second cord and form a 4-shaped loop, mirroring the visual representation provided. Subsequently, thread the first cord underneath the second cord and through the formed loop. Utilizing your forefinger can aid in holding the loop in position while guiding the cord through. Once the first cord is passed through the loop, tighten it to secure the knot.
Then, pull the cord – along with the newly formed knot – up towards the main knot situated at the top. Observe that the leading cord has now replaced the second cord. To complete the process, simply replicate this knot using the leading cord and progress across the remaining five cords.
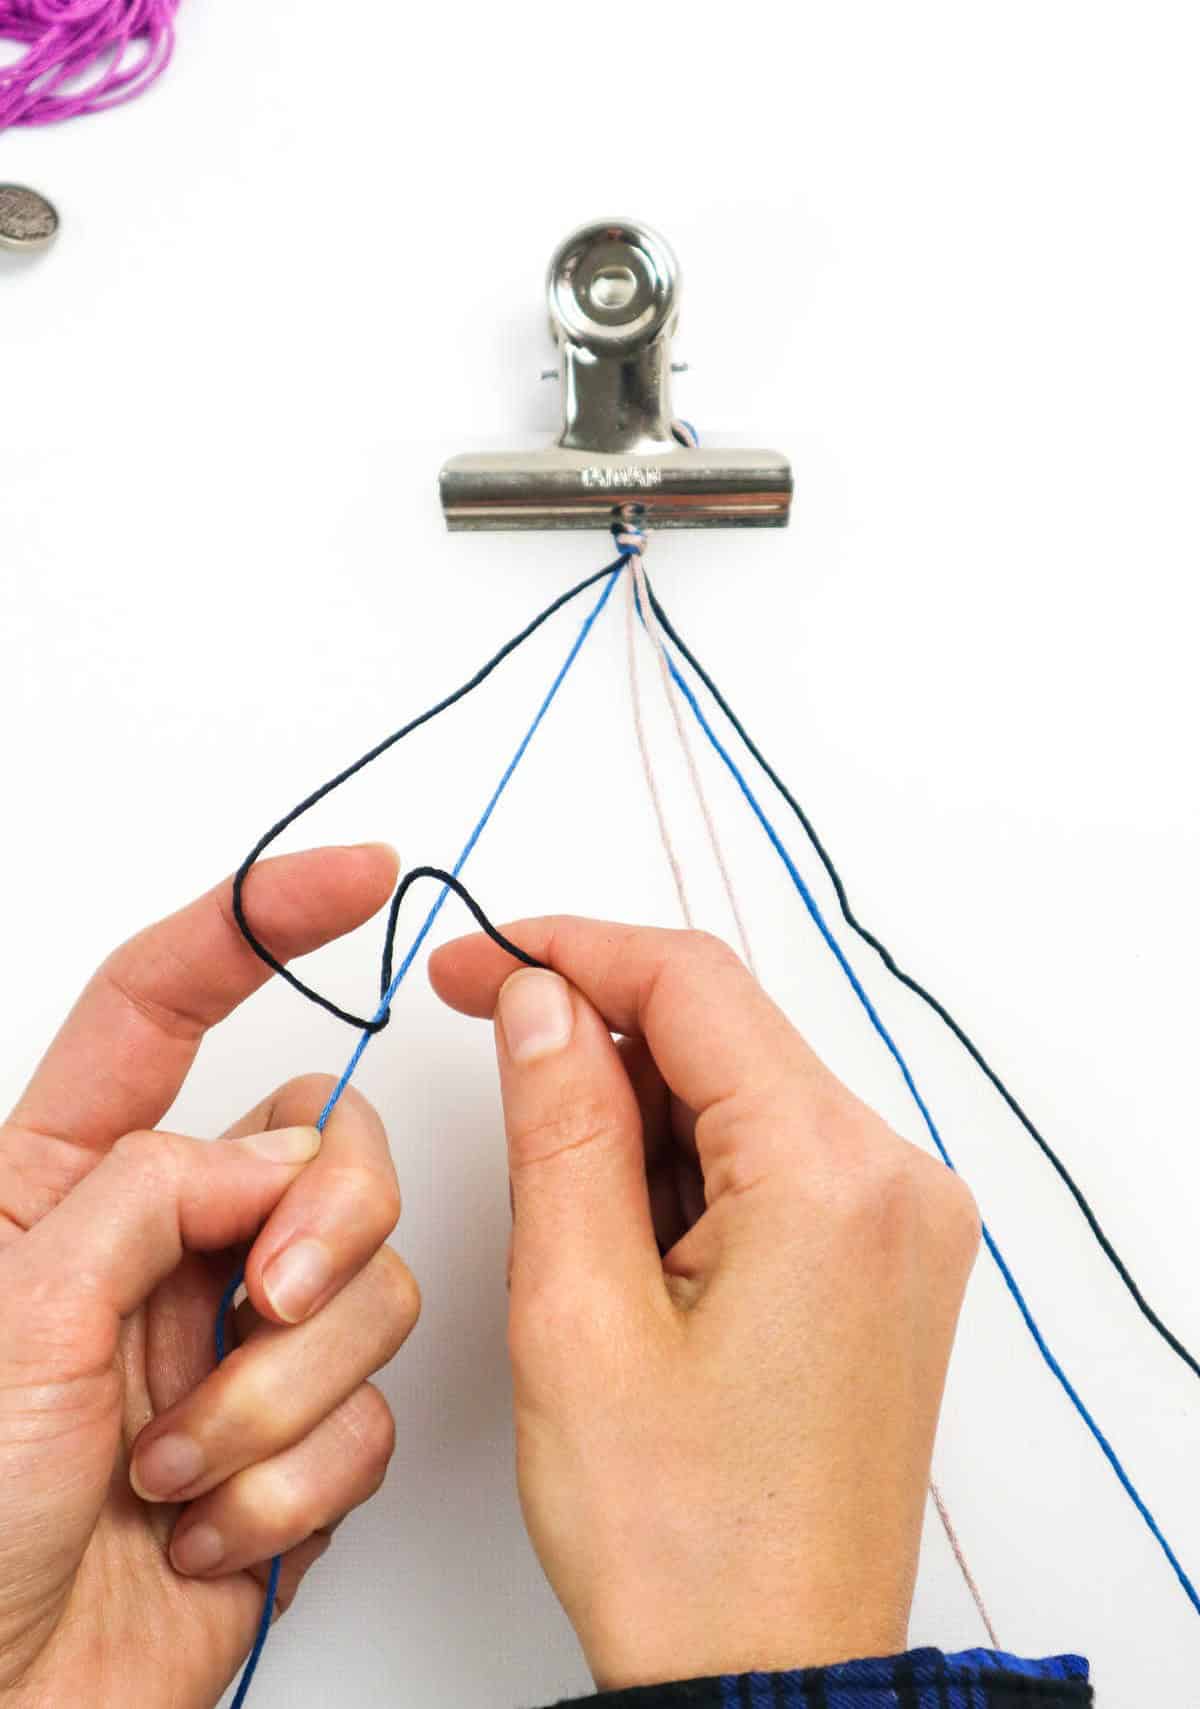
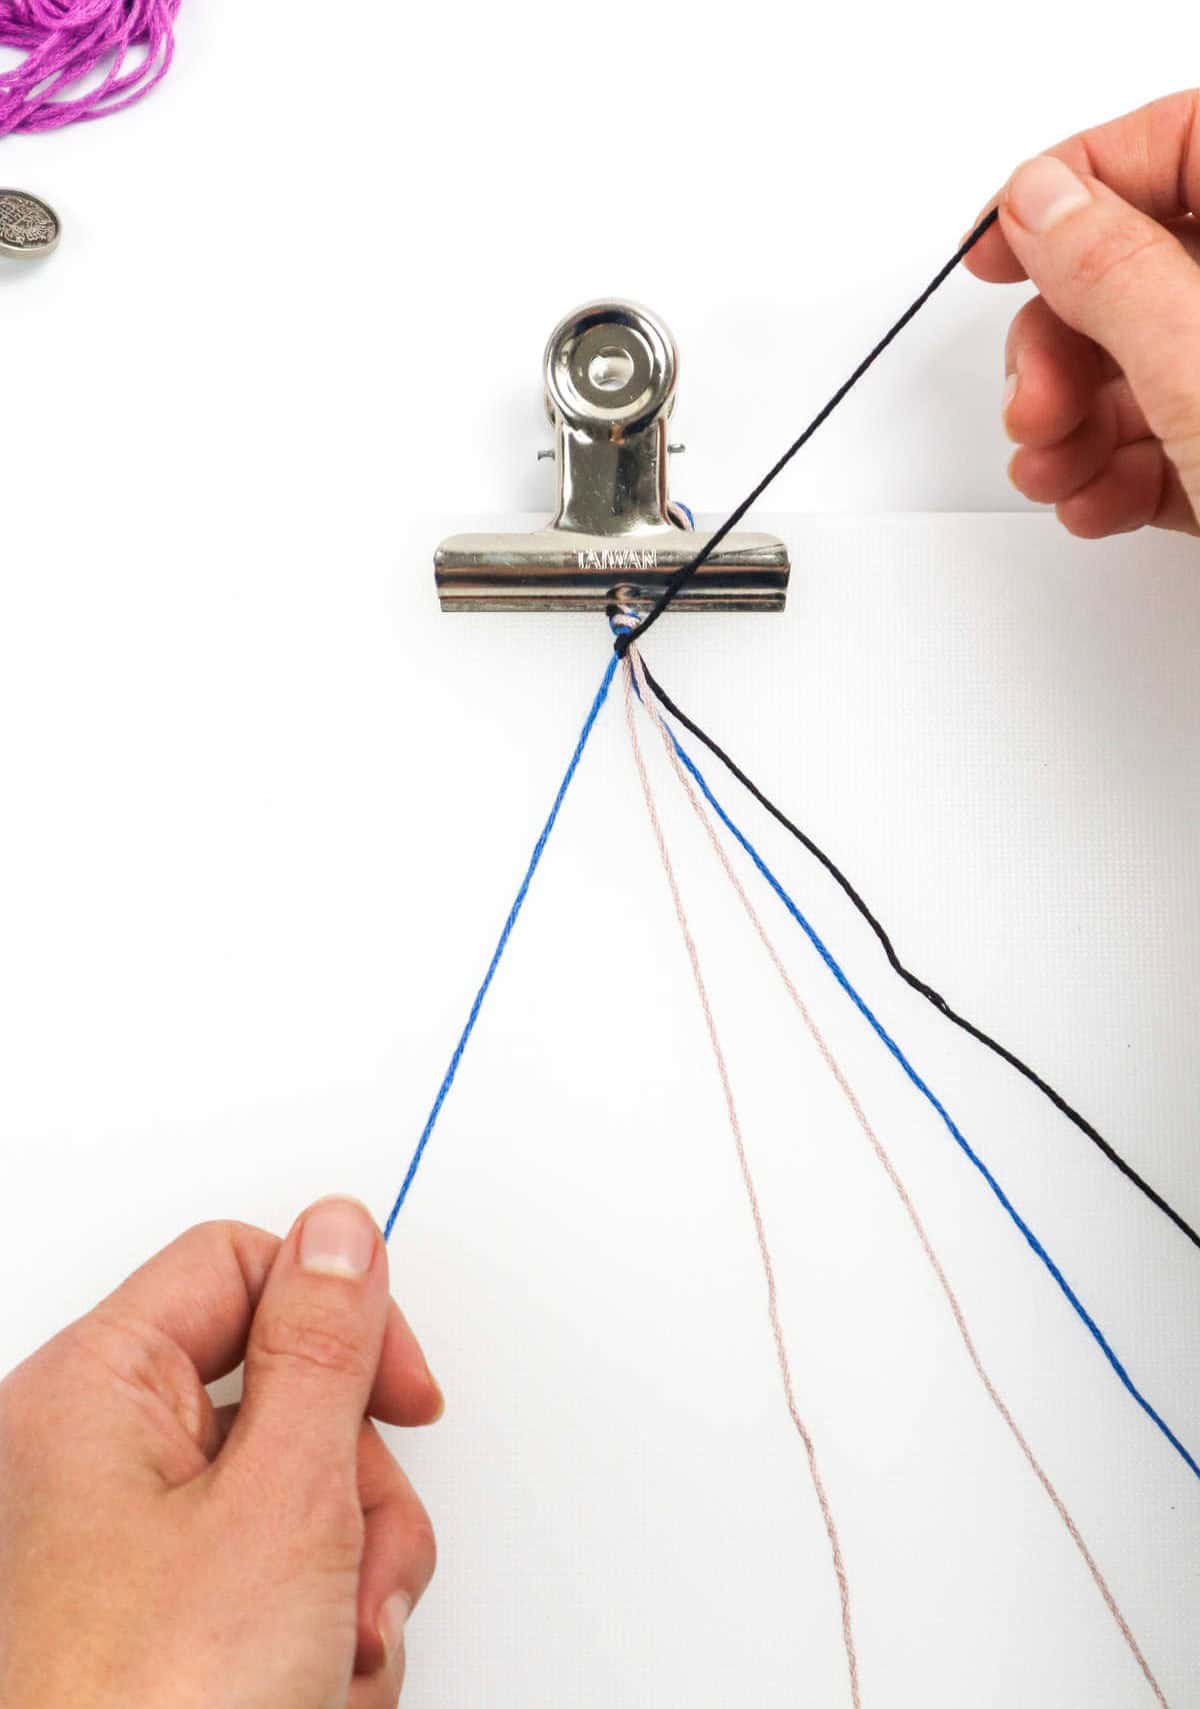
Step 6


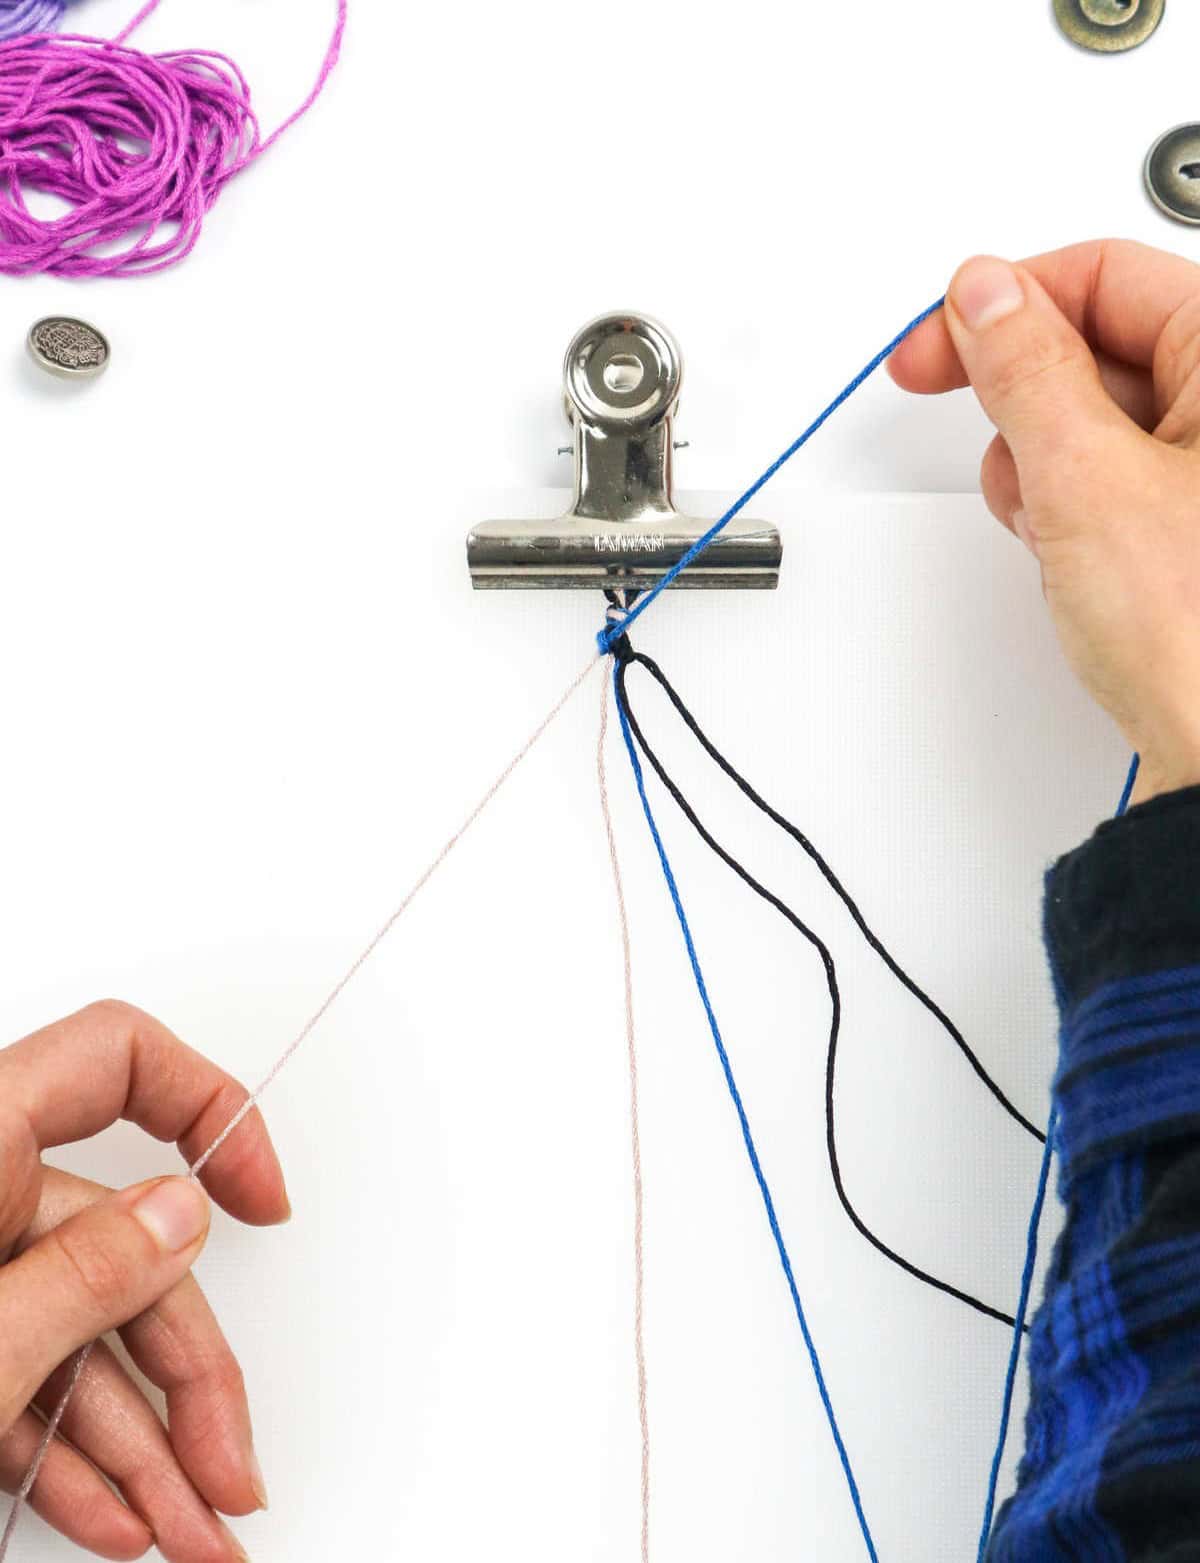
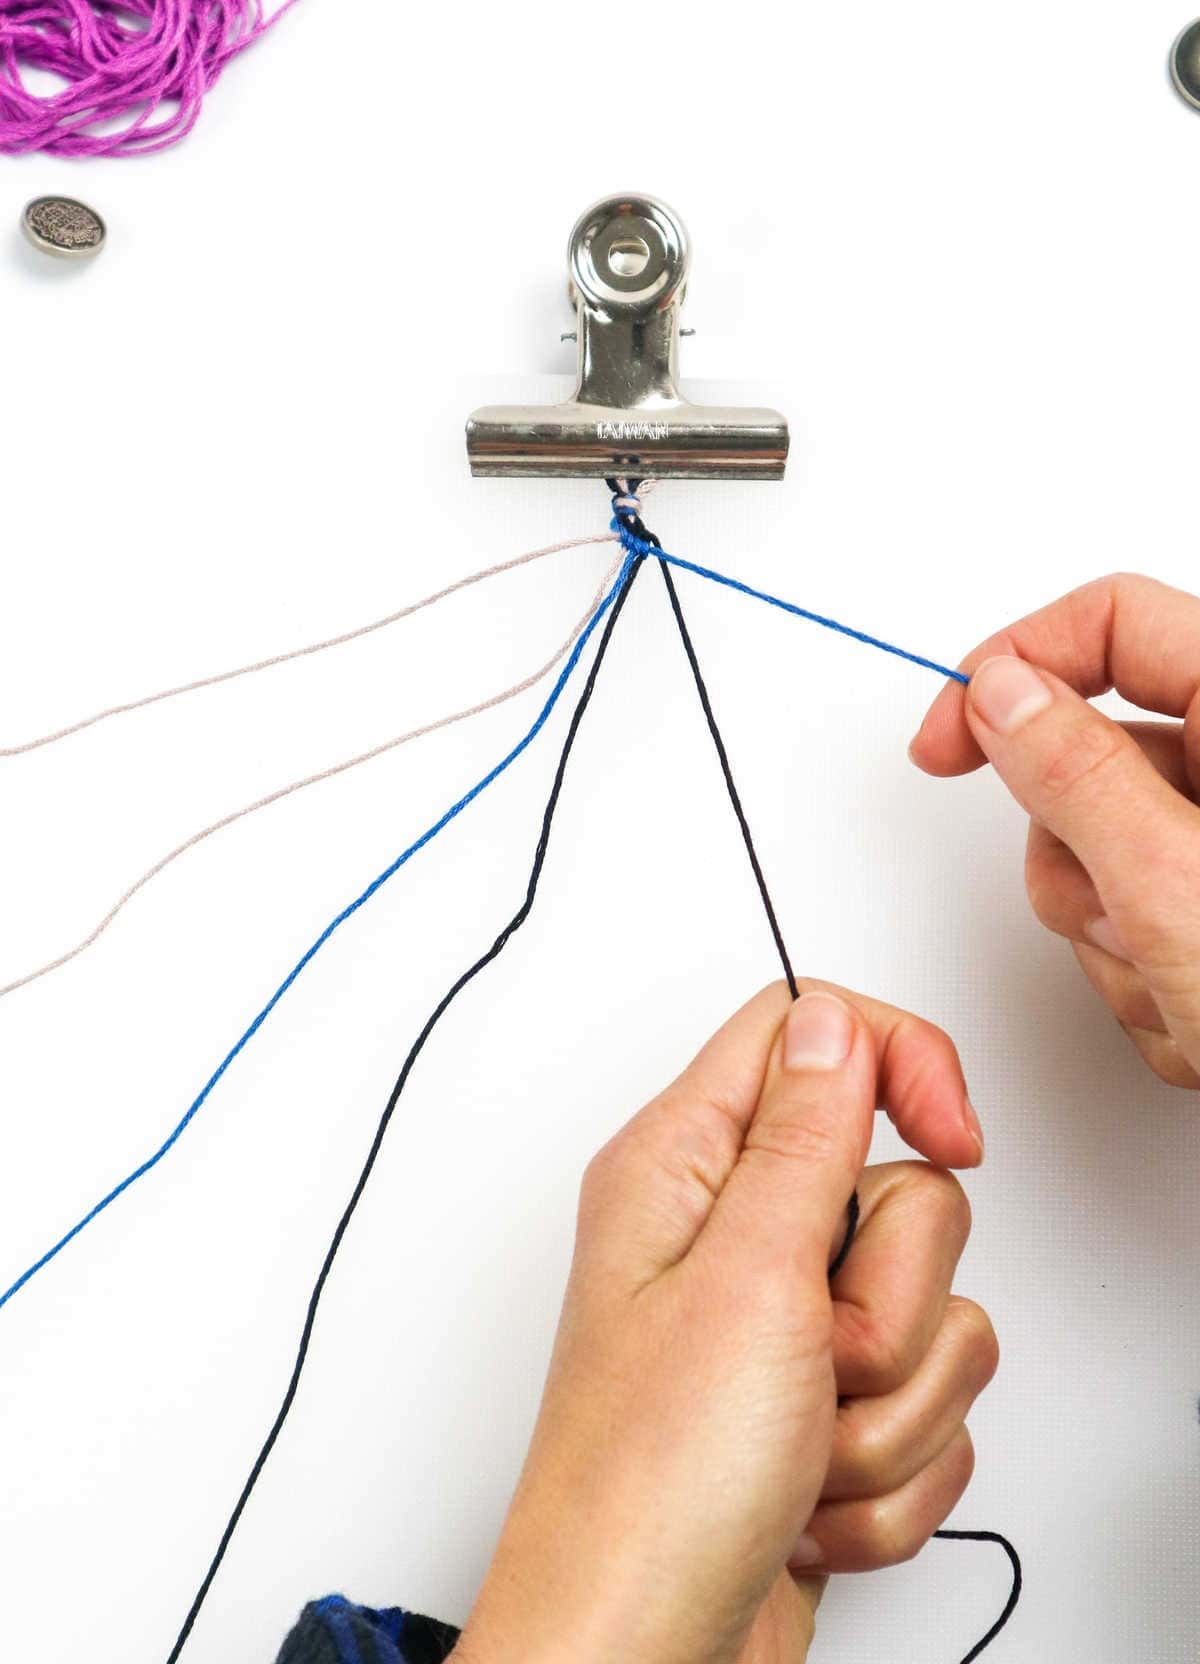
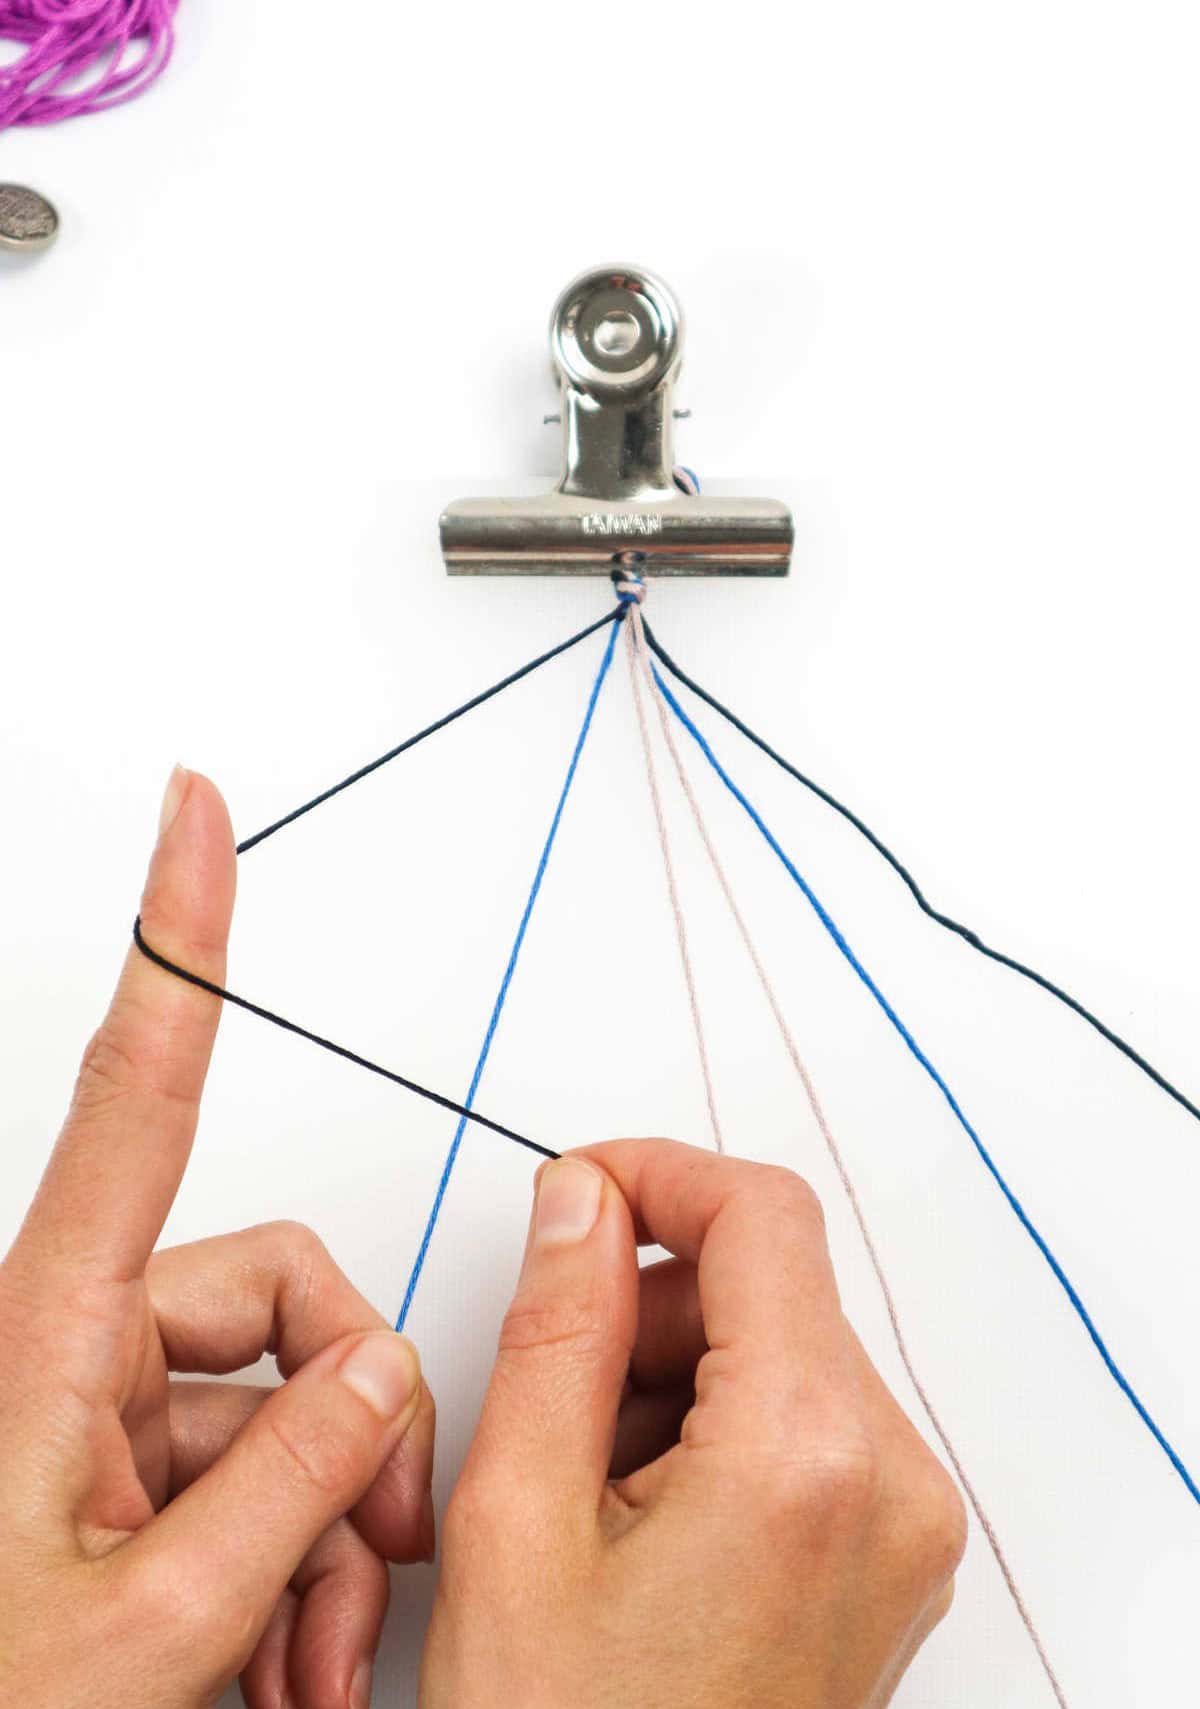
To complete the design, revisit the initial loop on the left. Recall that it previously served as the second cord. Now, utilize it as the leading cord to create a new set of knots from side to side, directly underneath the row you established earlier.
Familiarize yourself with the process. Start by forming a loop using the leading cord.
Next, use your index finger to secure the loop while gently pulling it over the second cord, beneath it, and then through the loop, carefully drawing the knot upwards. Duplicate this action for each subsequent cord, progressing from left to right.
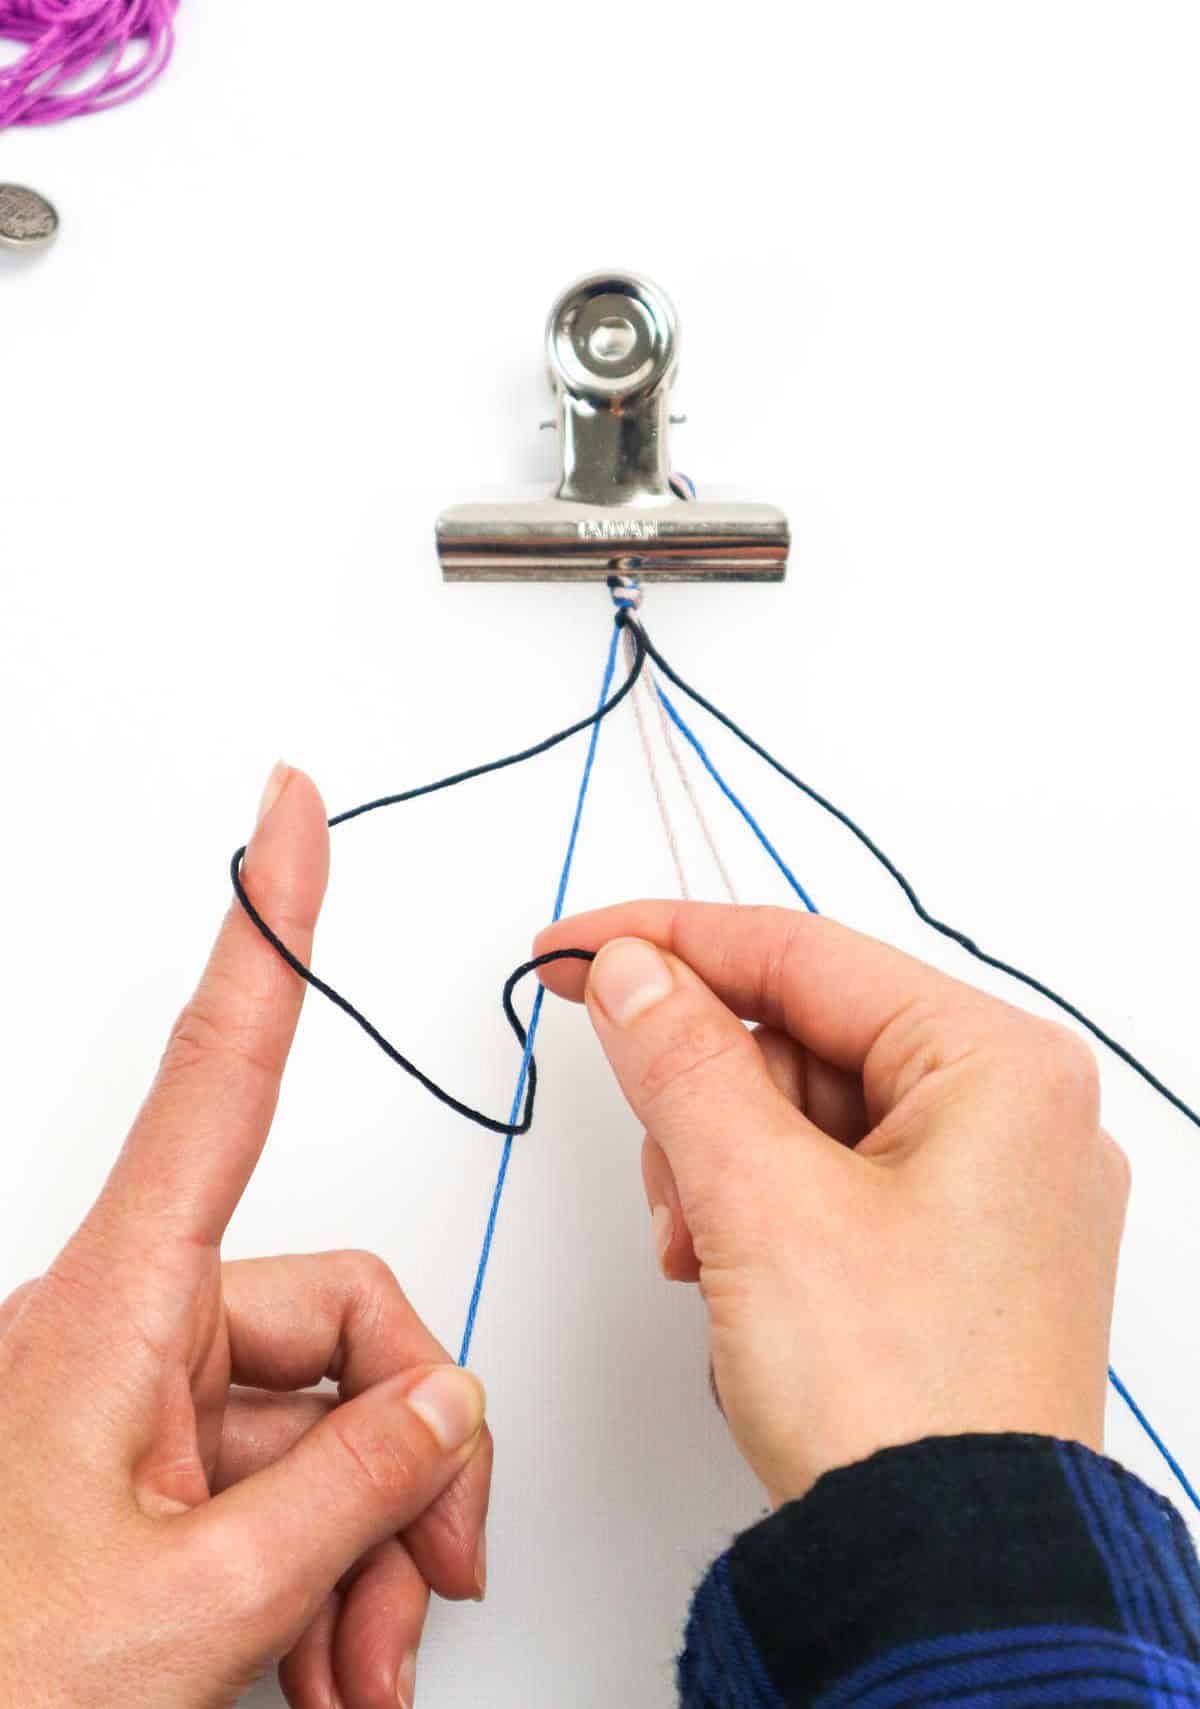
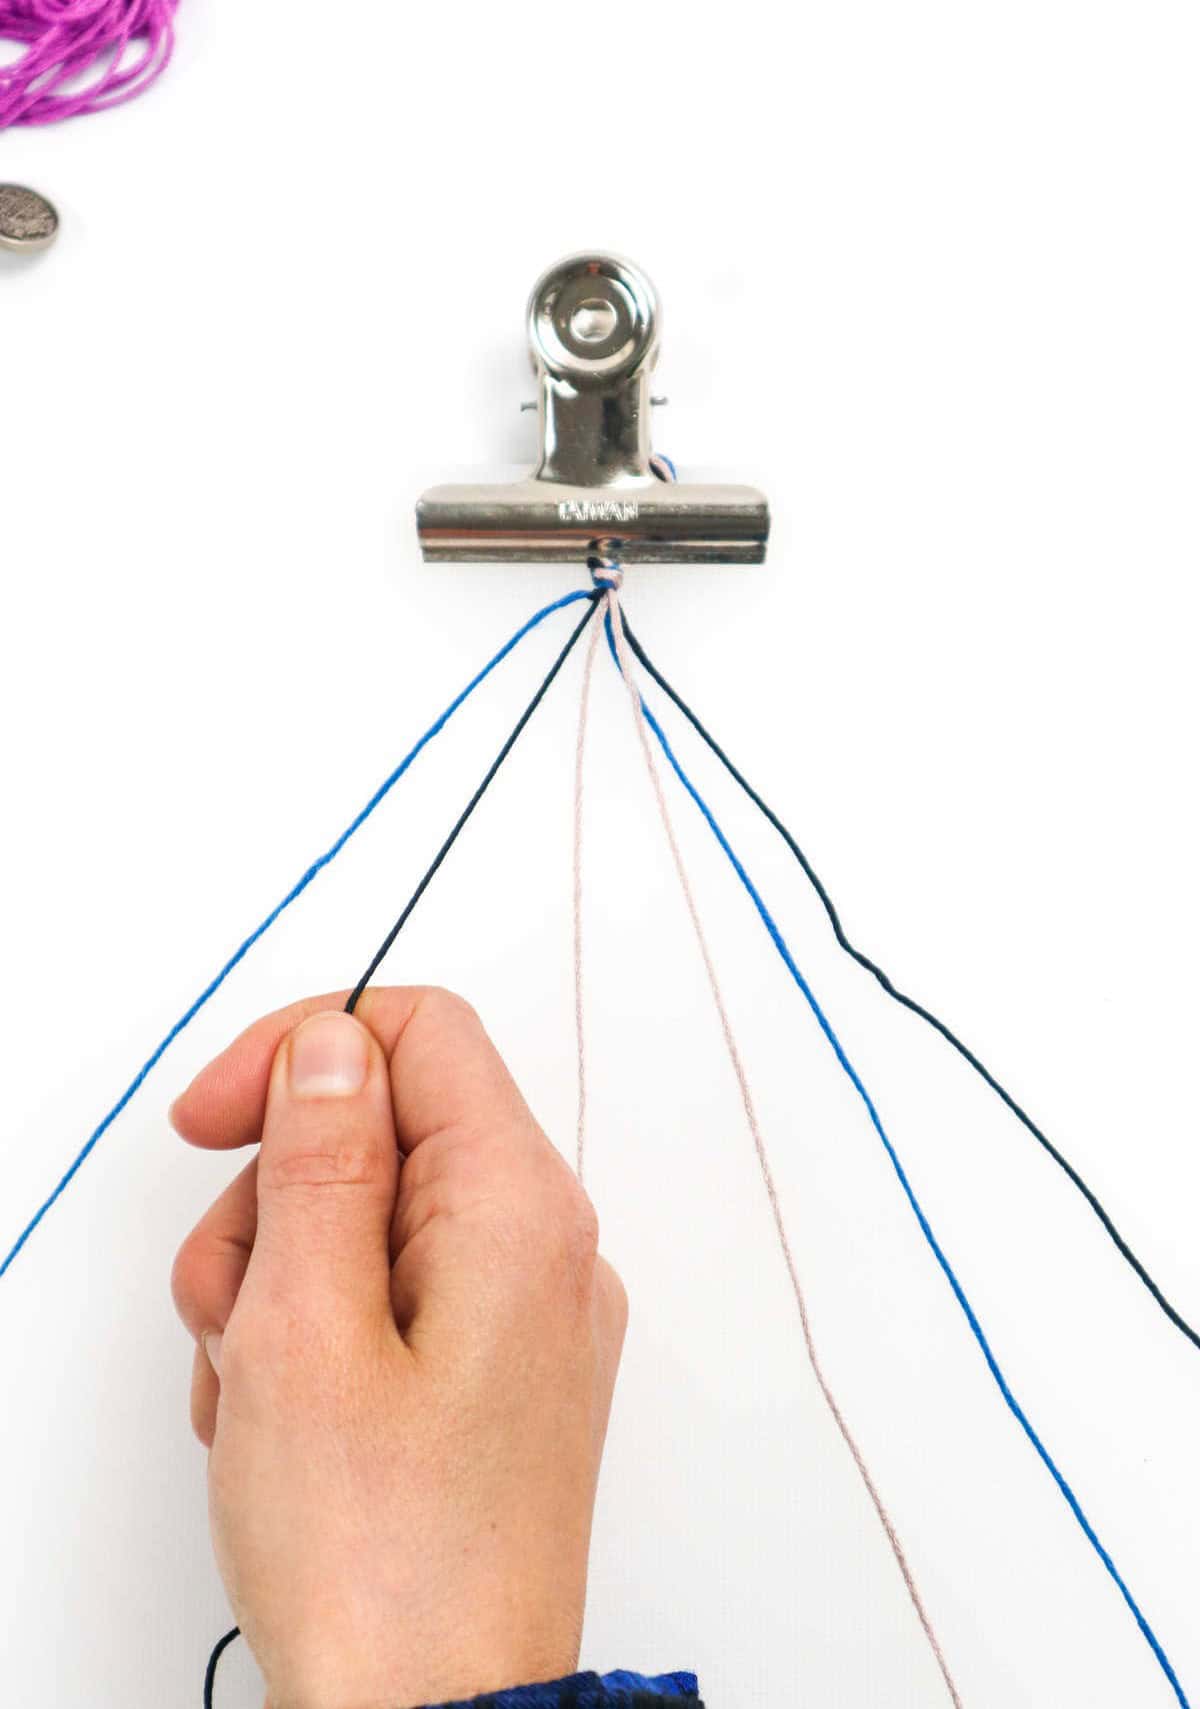
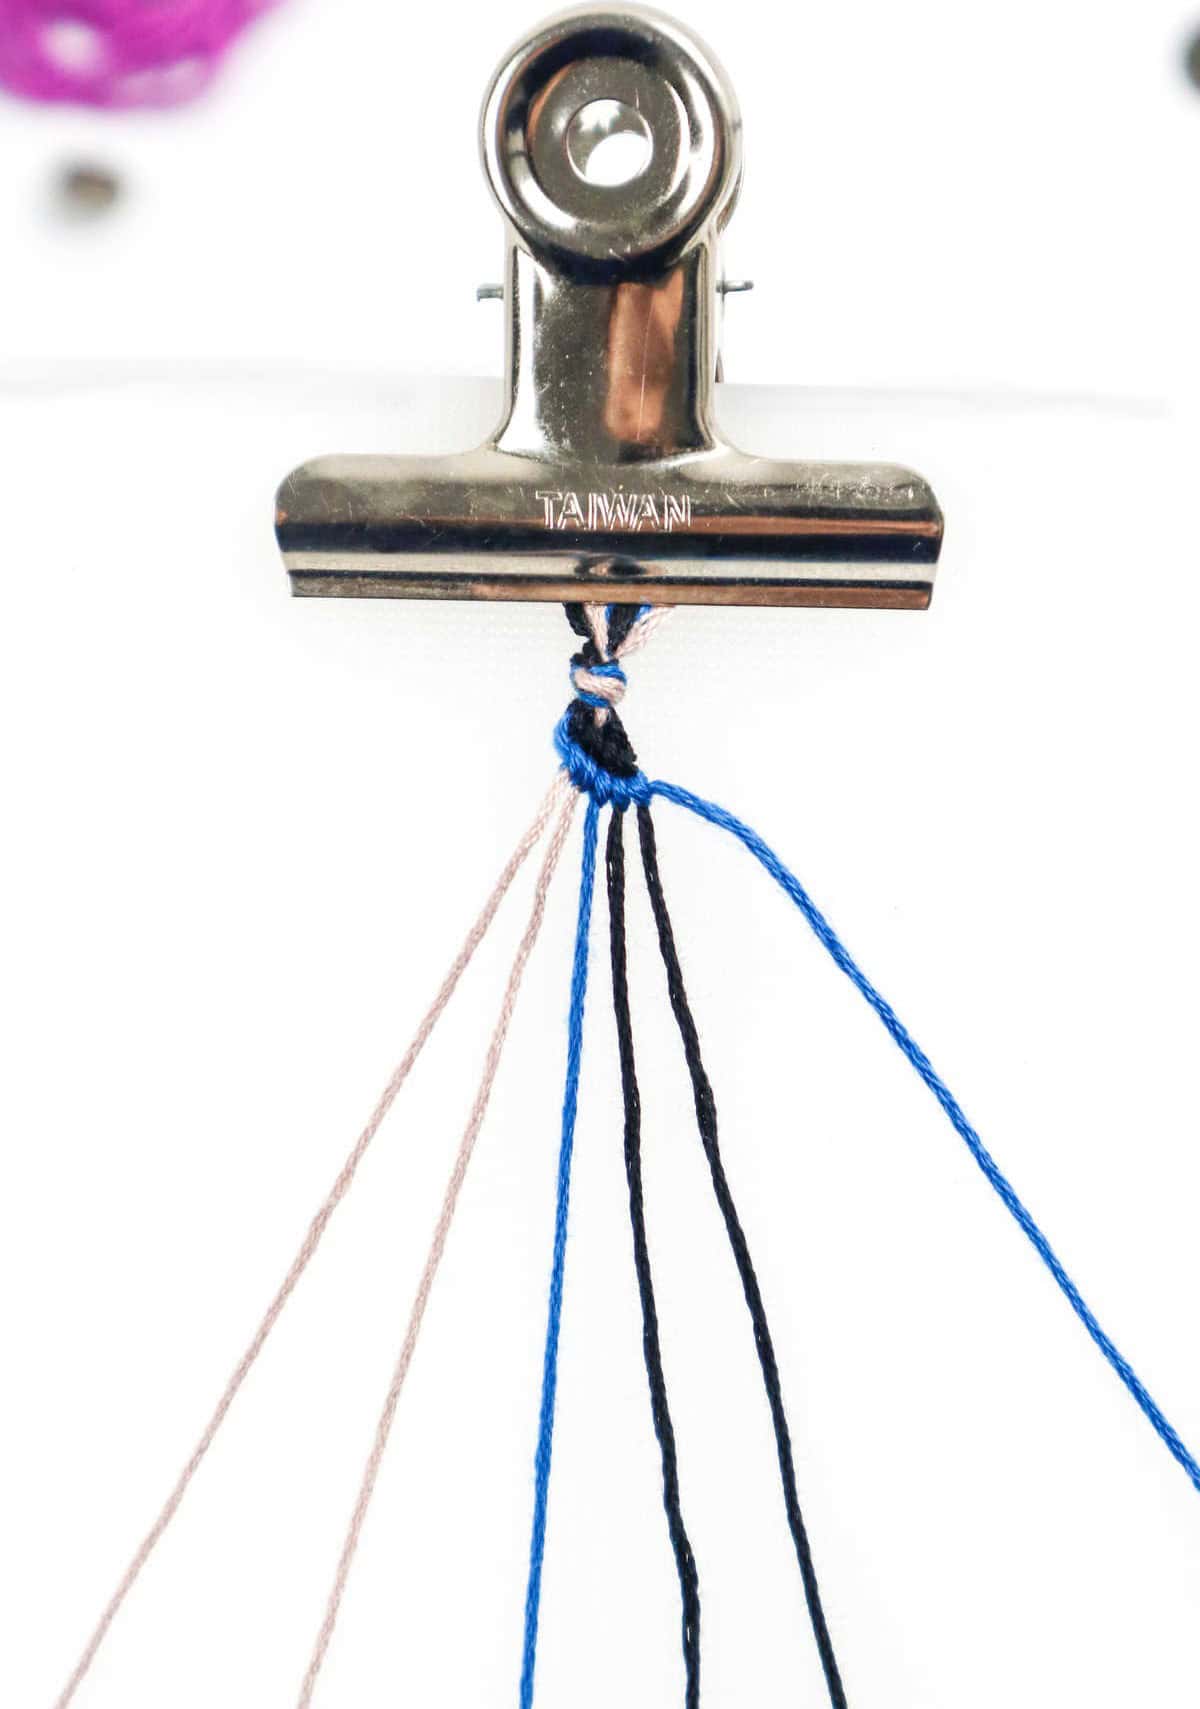
Step 7
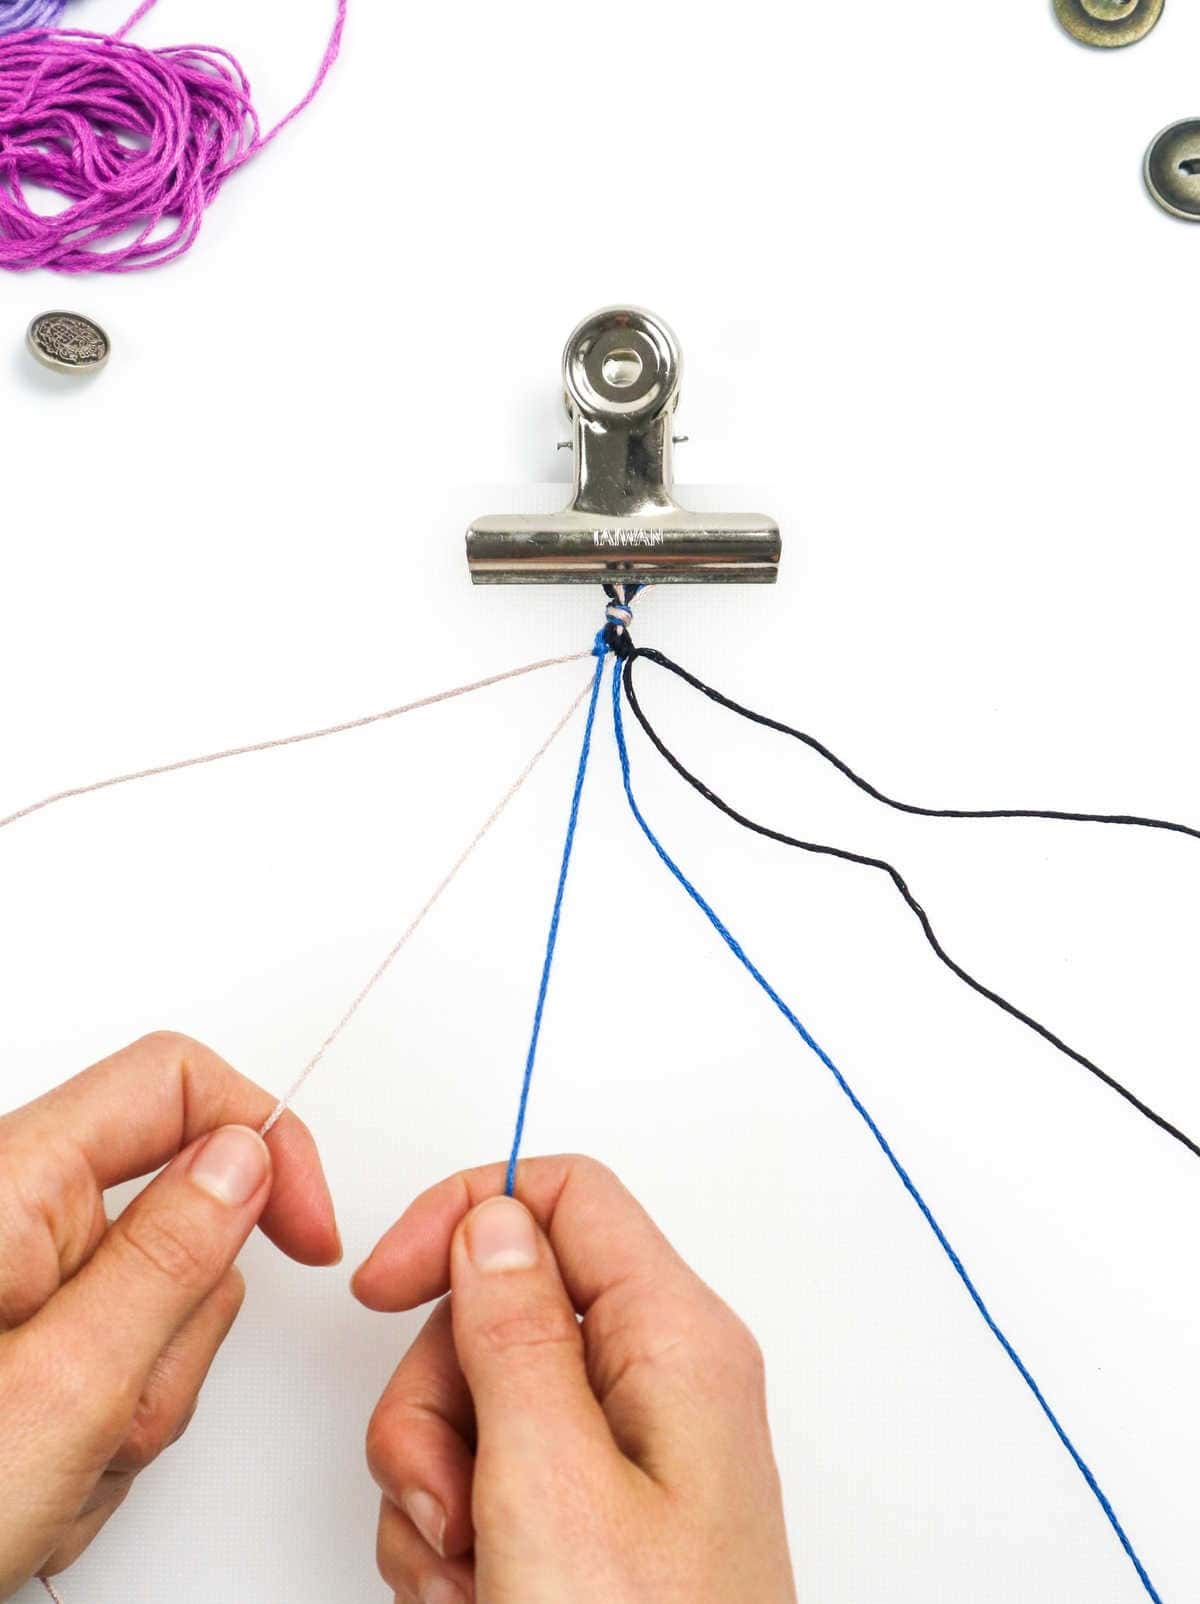
To continue the macrame pattern, revisit the third cord and secure it in place. Then, create a series of interconnected knots along each of the five cords, allowing them to harmonize and form a cohesive design.
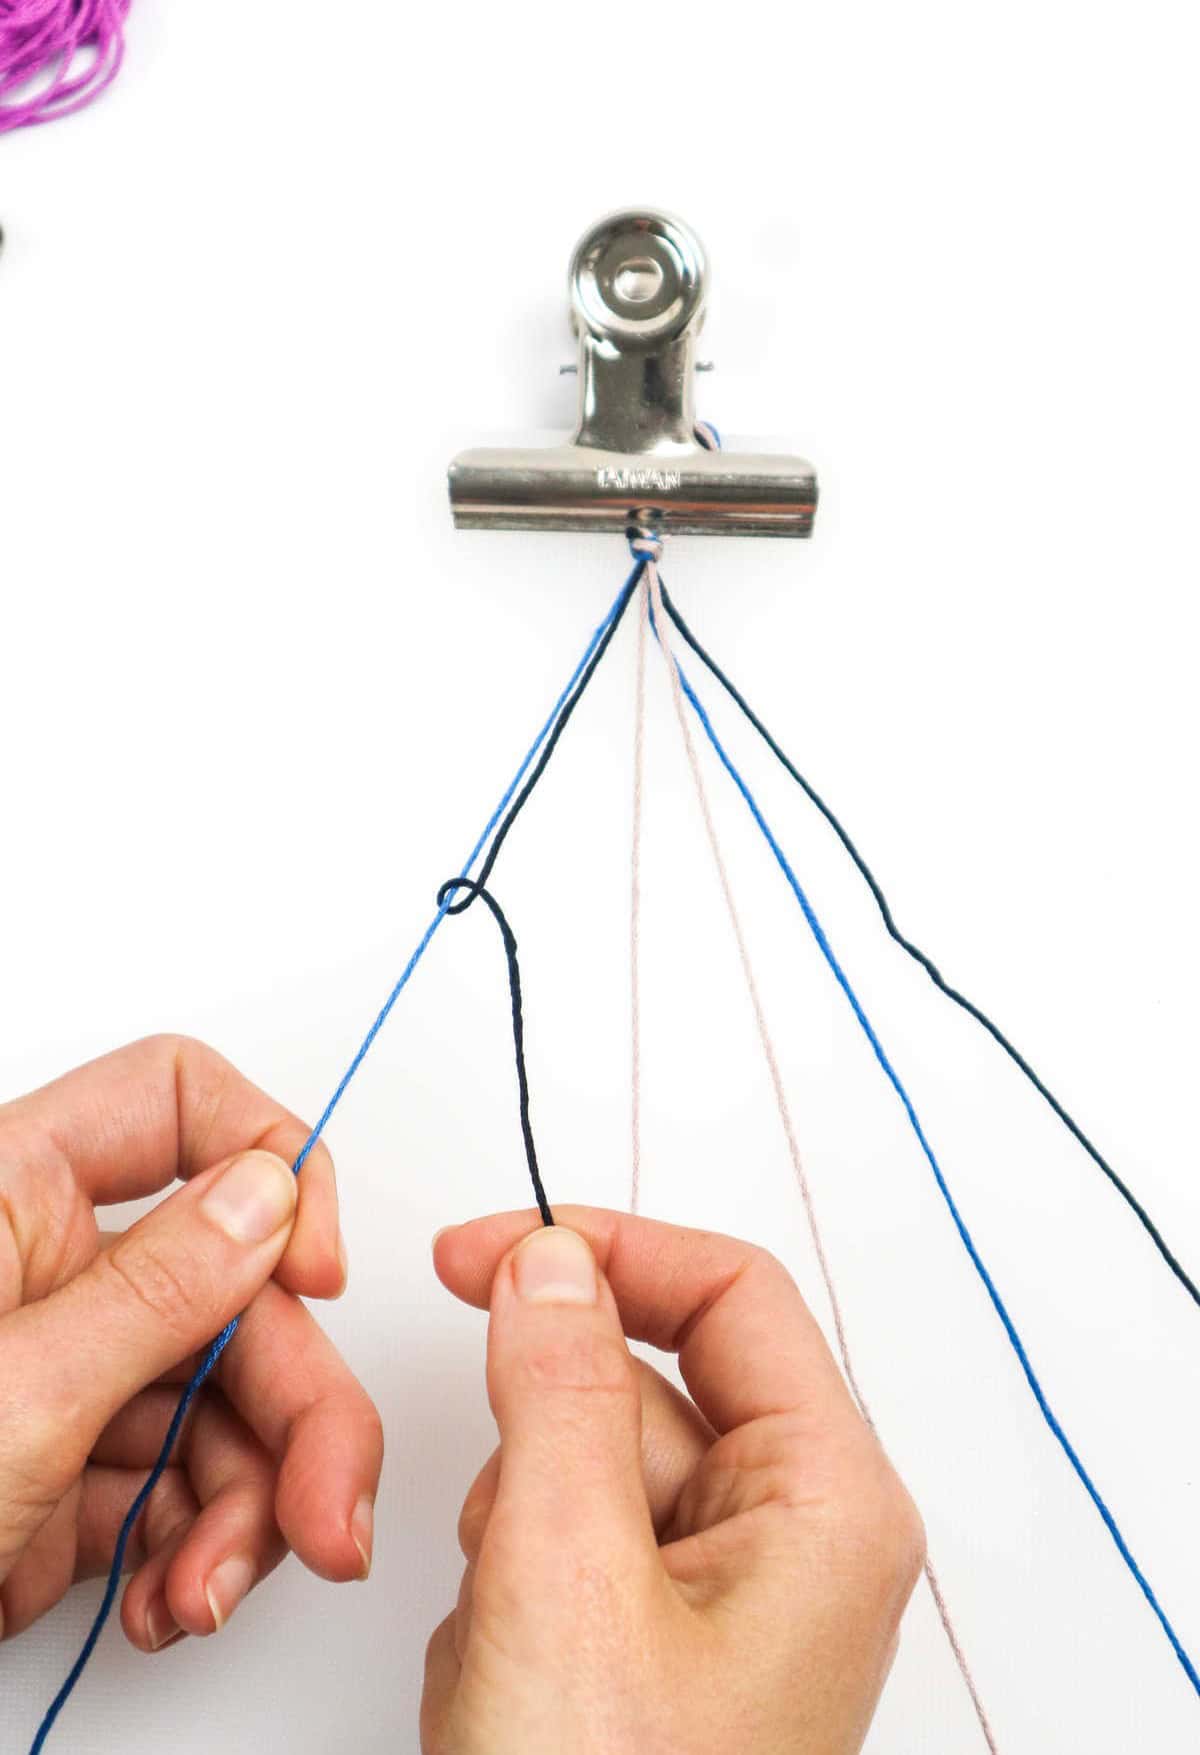
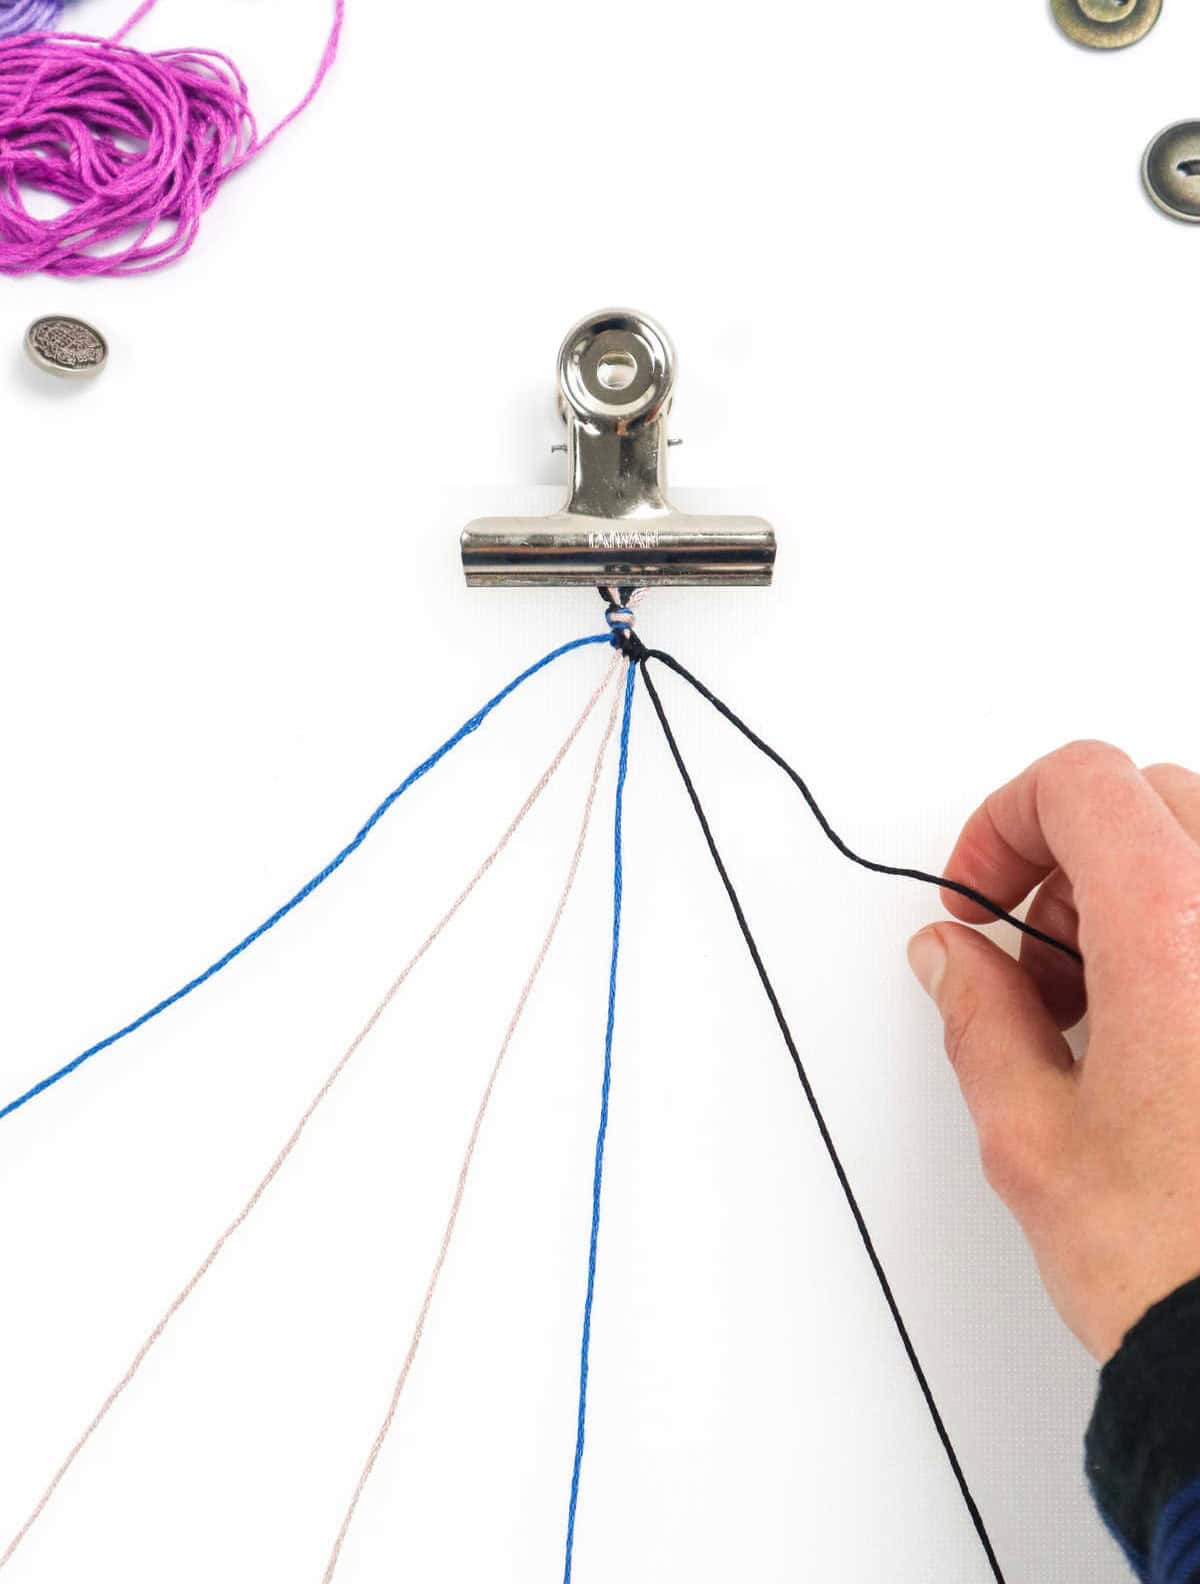
Step 8
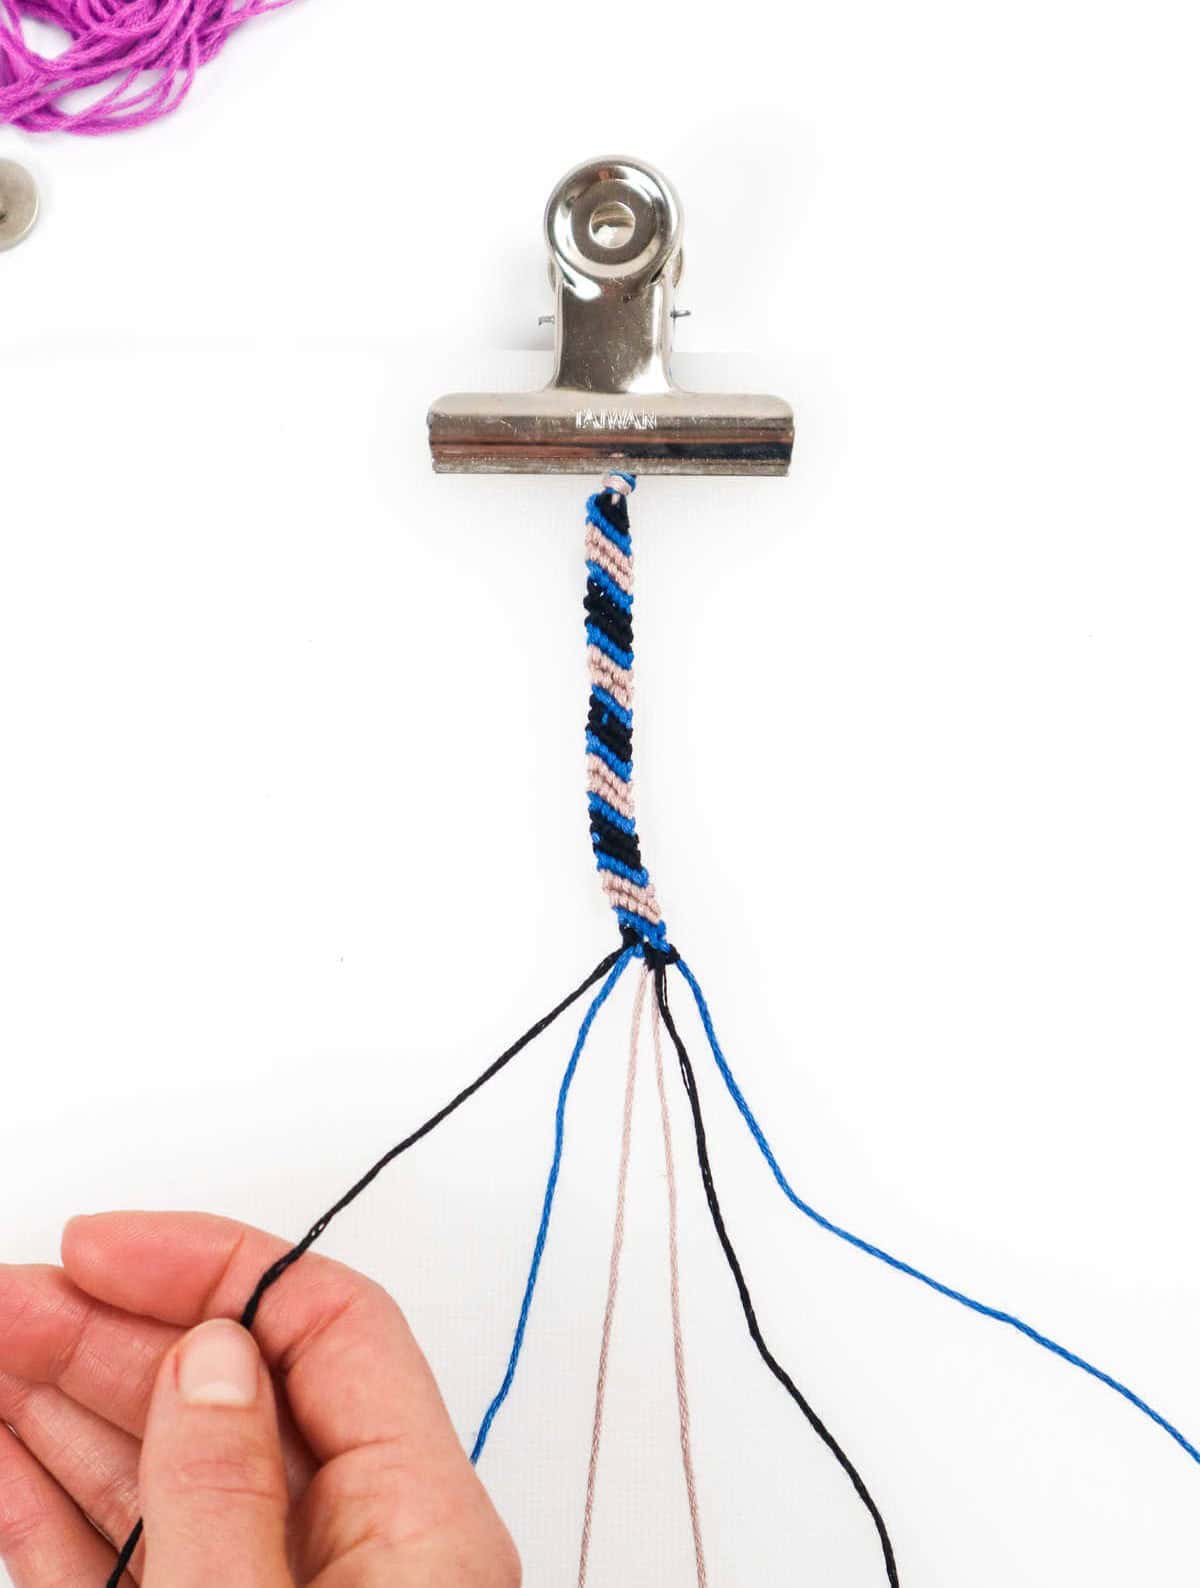
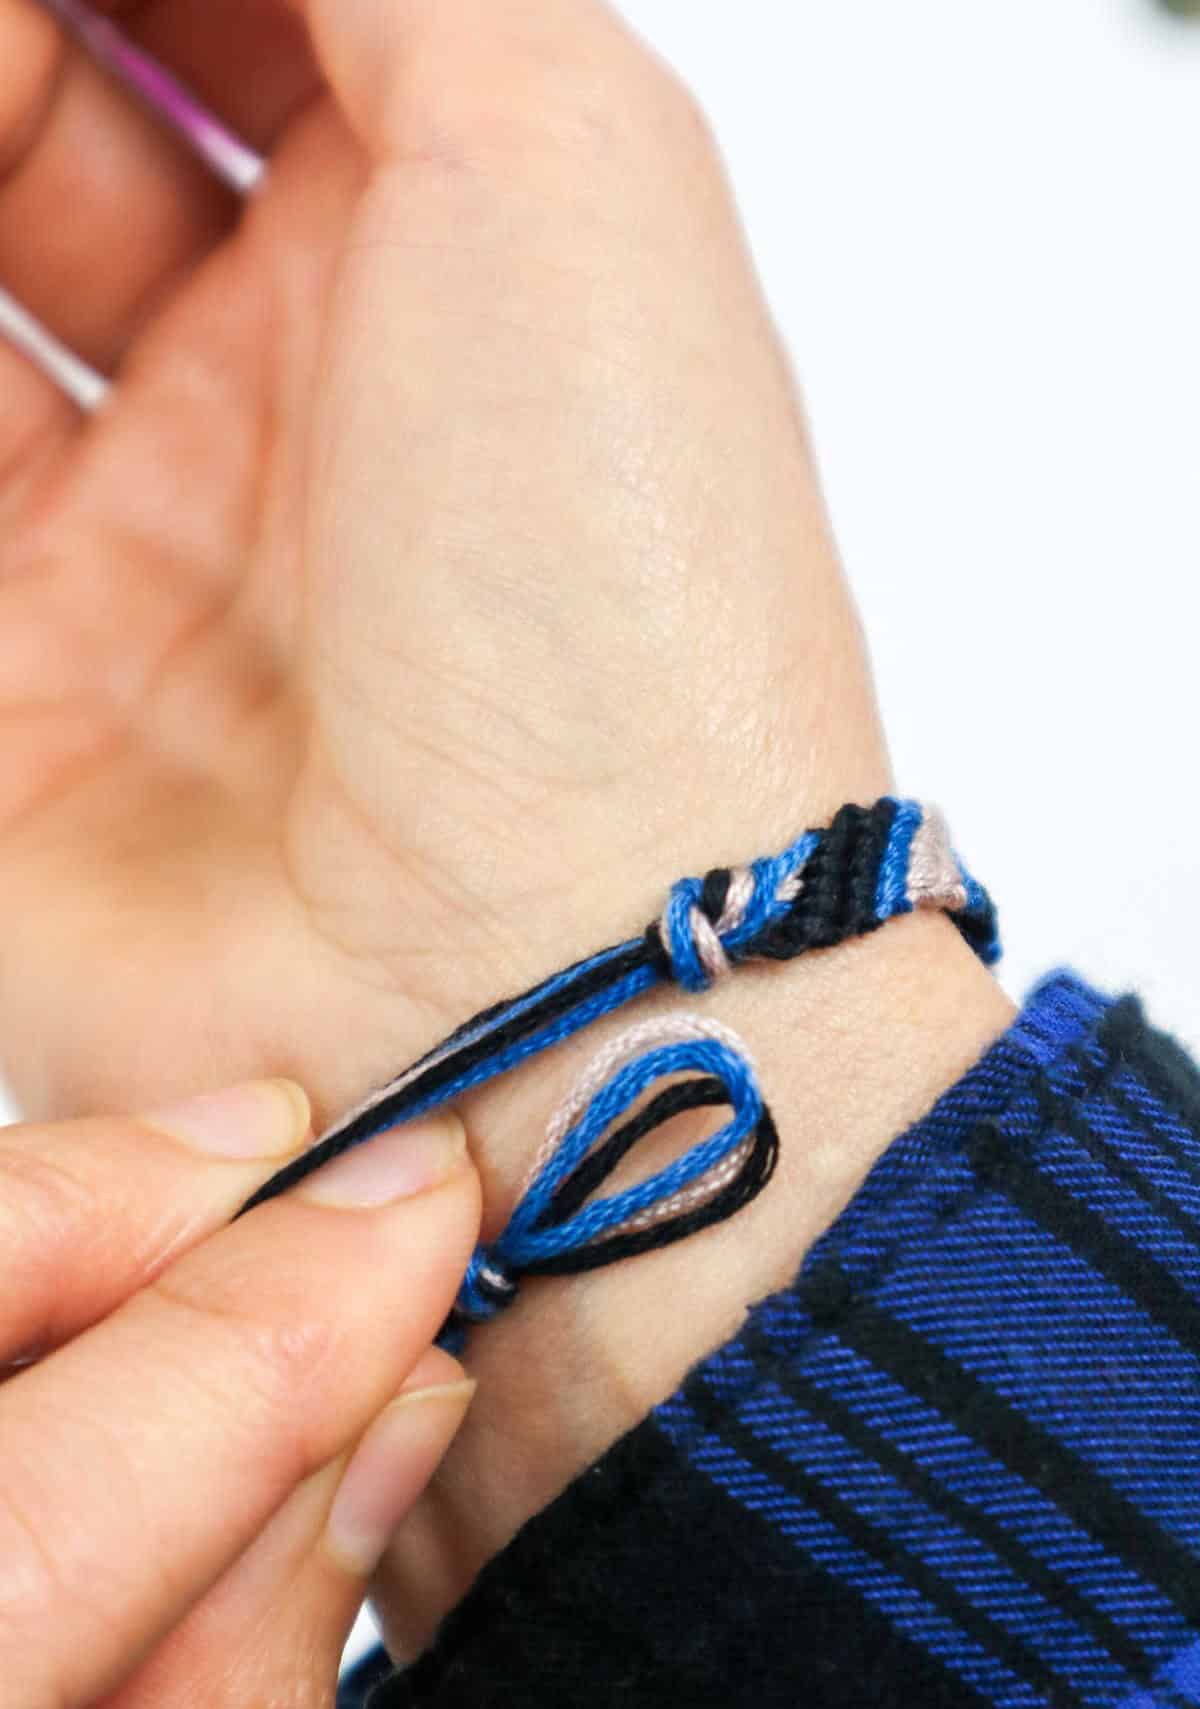
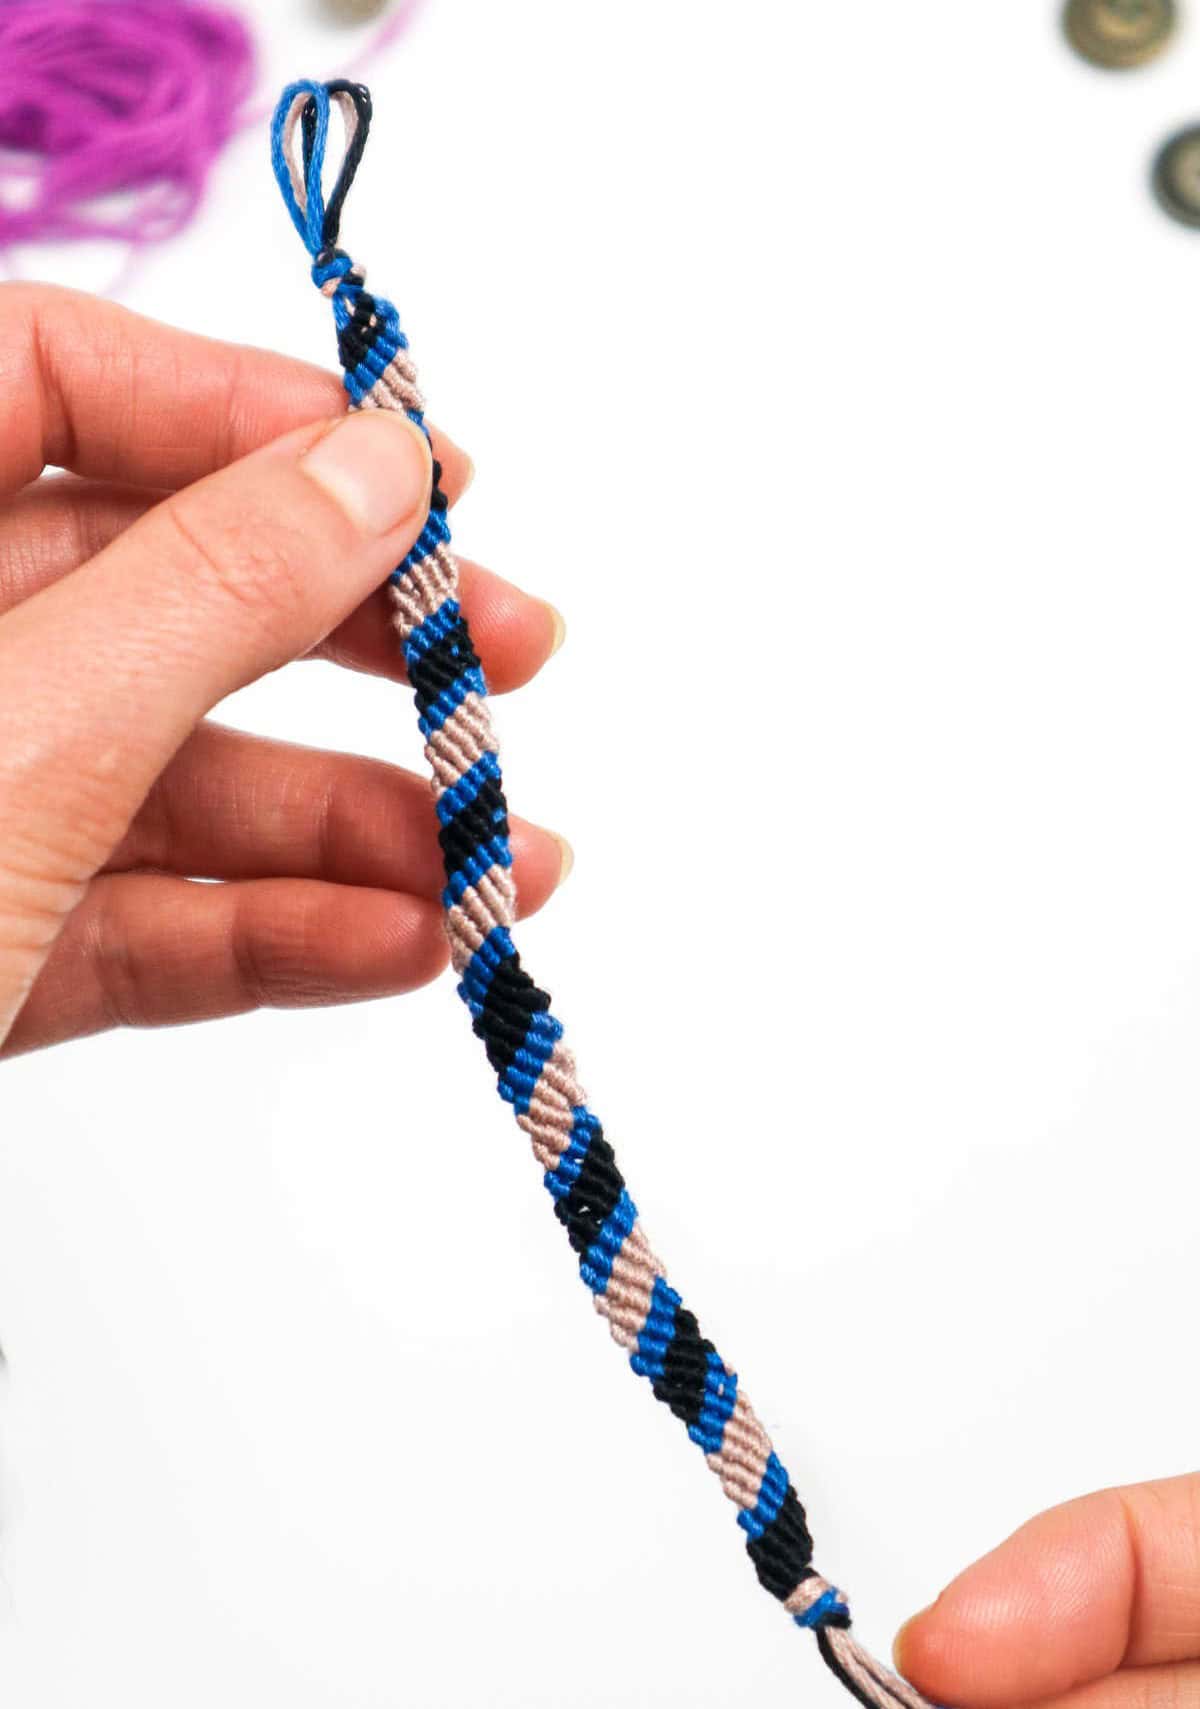
As you continue to create your bracelet, maintain a consistent rhythm by tying 6 knots per row. If you prefer, you can also alternate between two different colors by repeating a row. Don’t be afraid to experiment and try new things as you work your way down the length. To determine the ideal length for your bracelet, simply wrap it around your wrist. When you’re ready to finish, secure the end with a single knot that incorporates all 6 cords.
Gently tug on the threads until the knot settles comfortably just below the final row.
Step 9
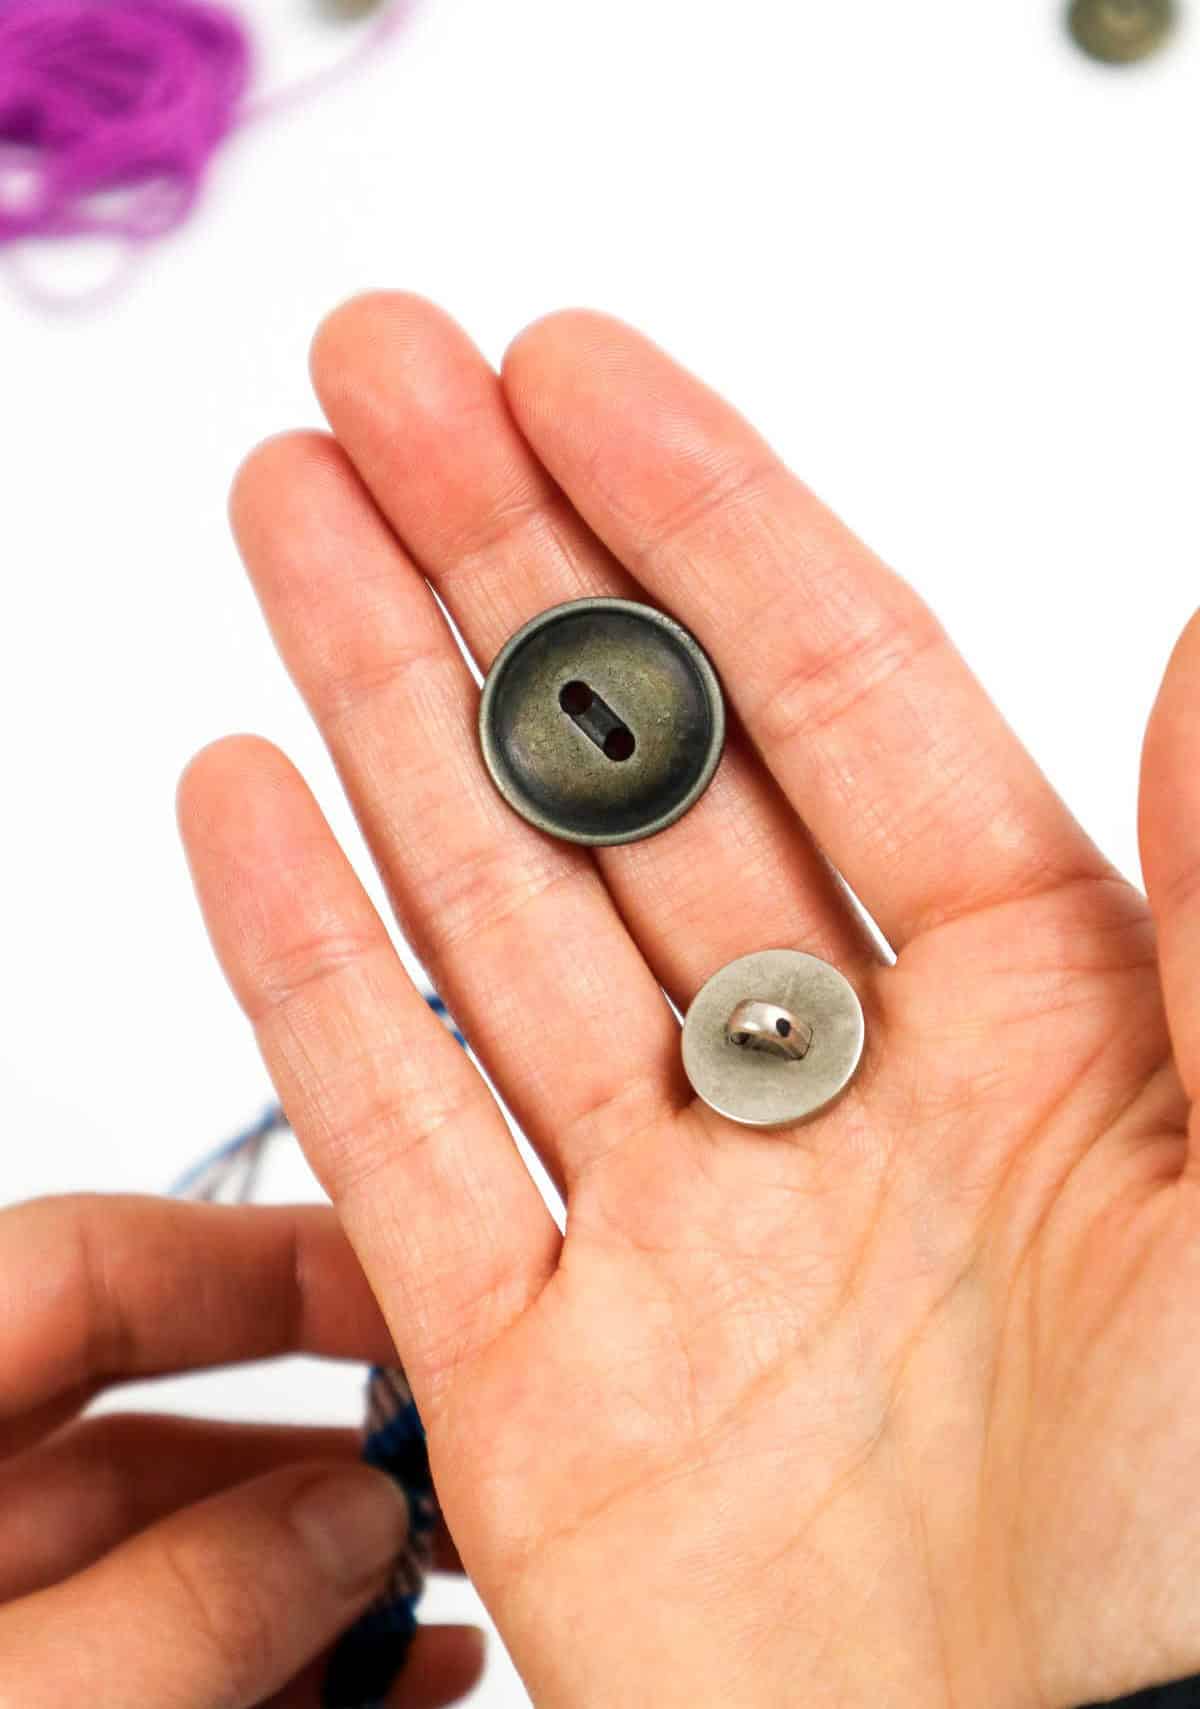
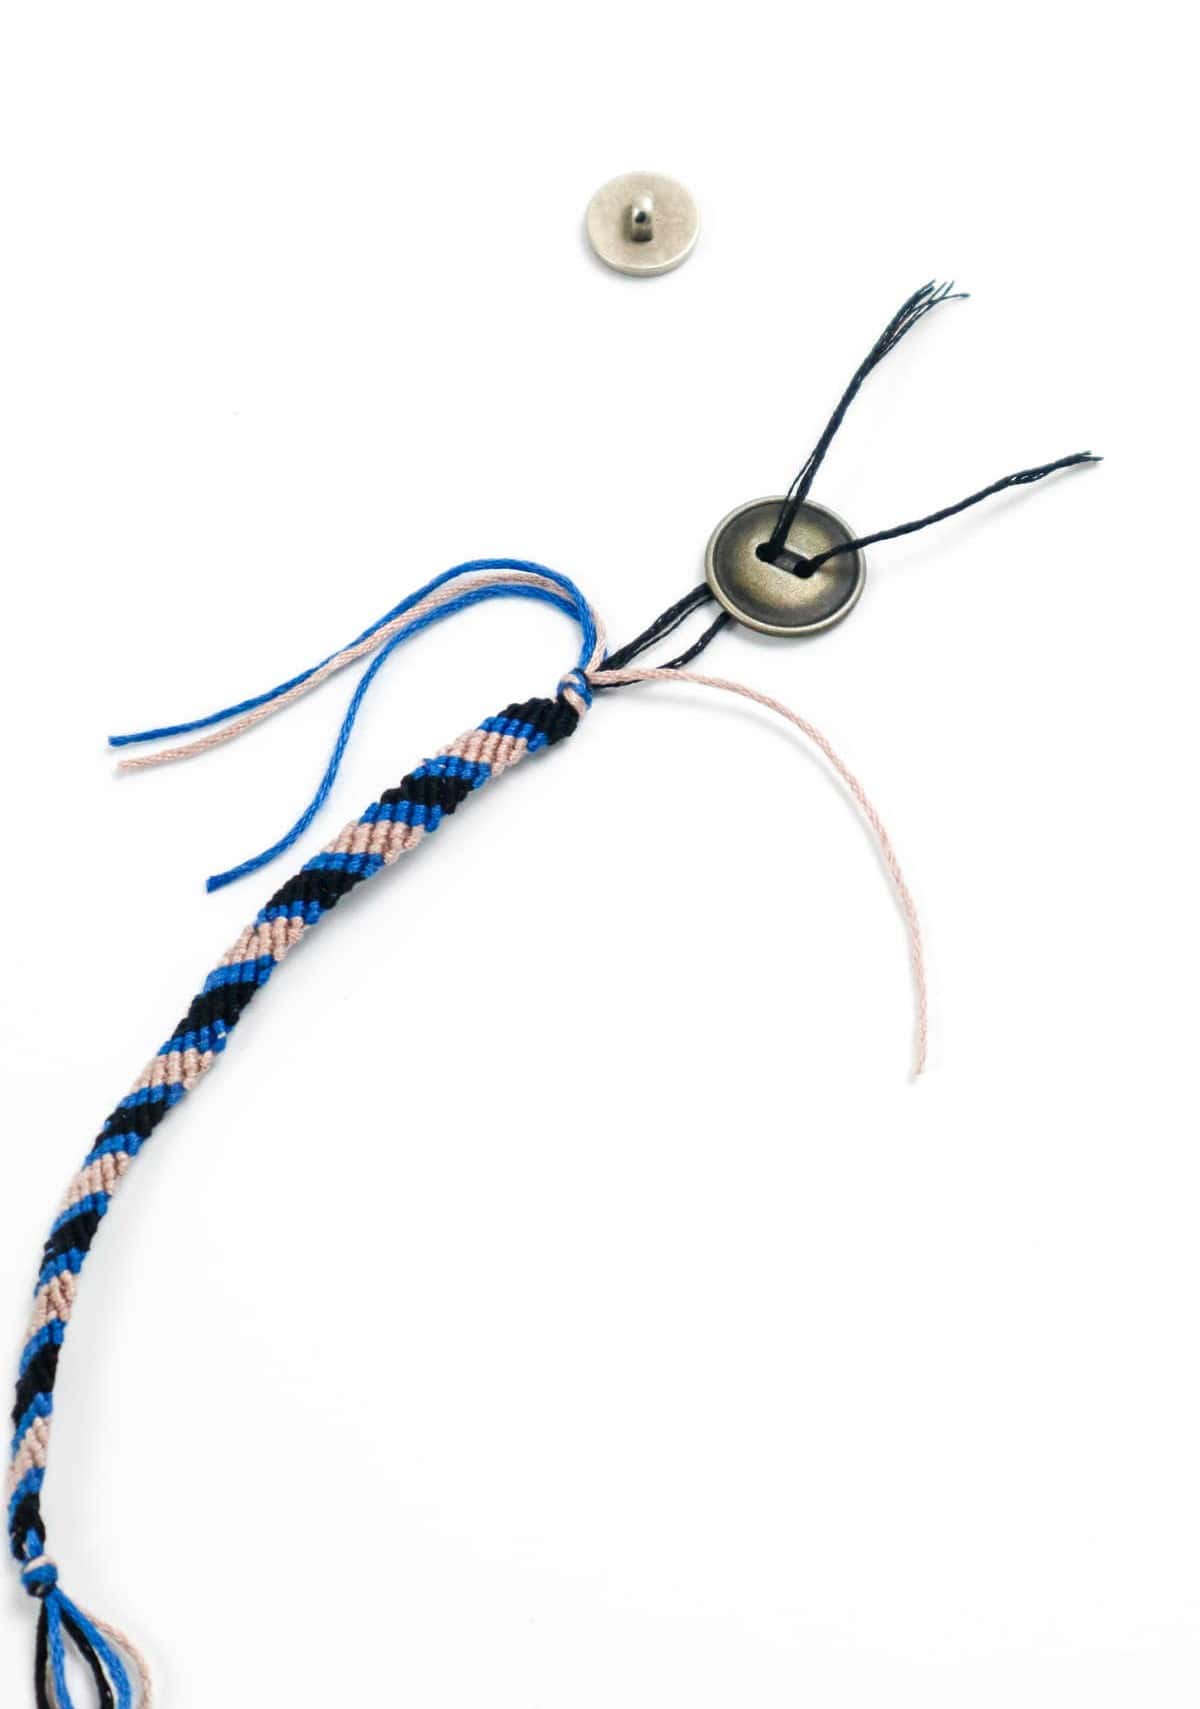
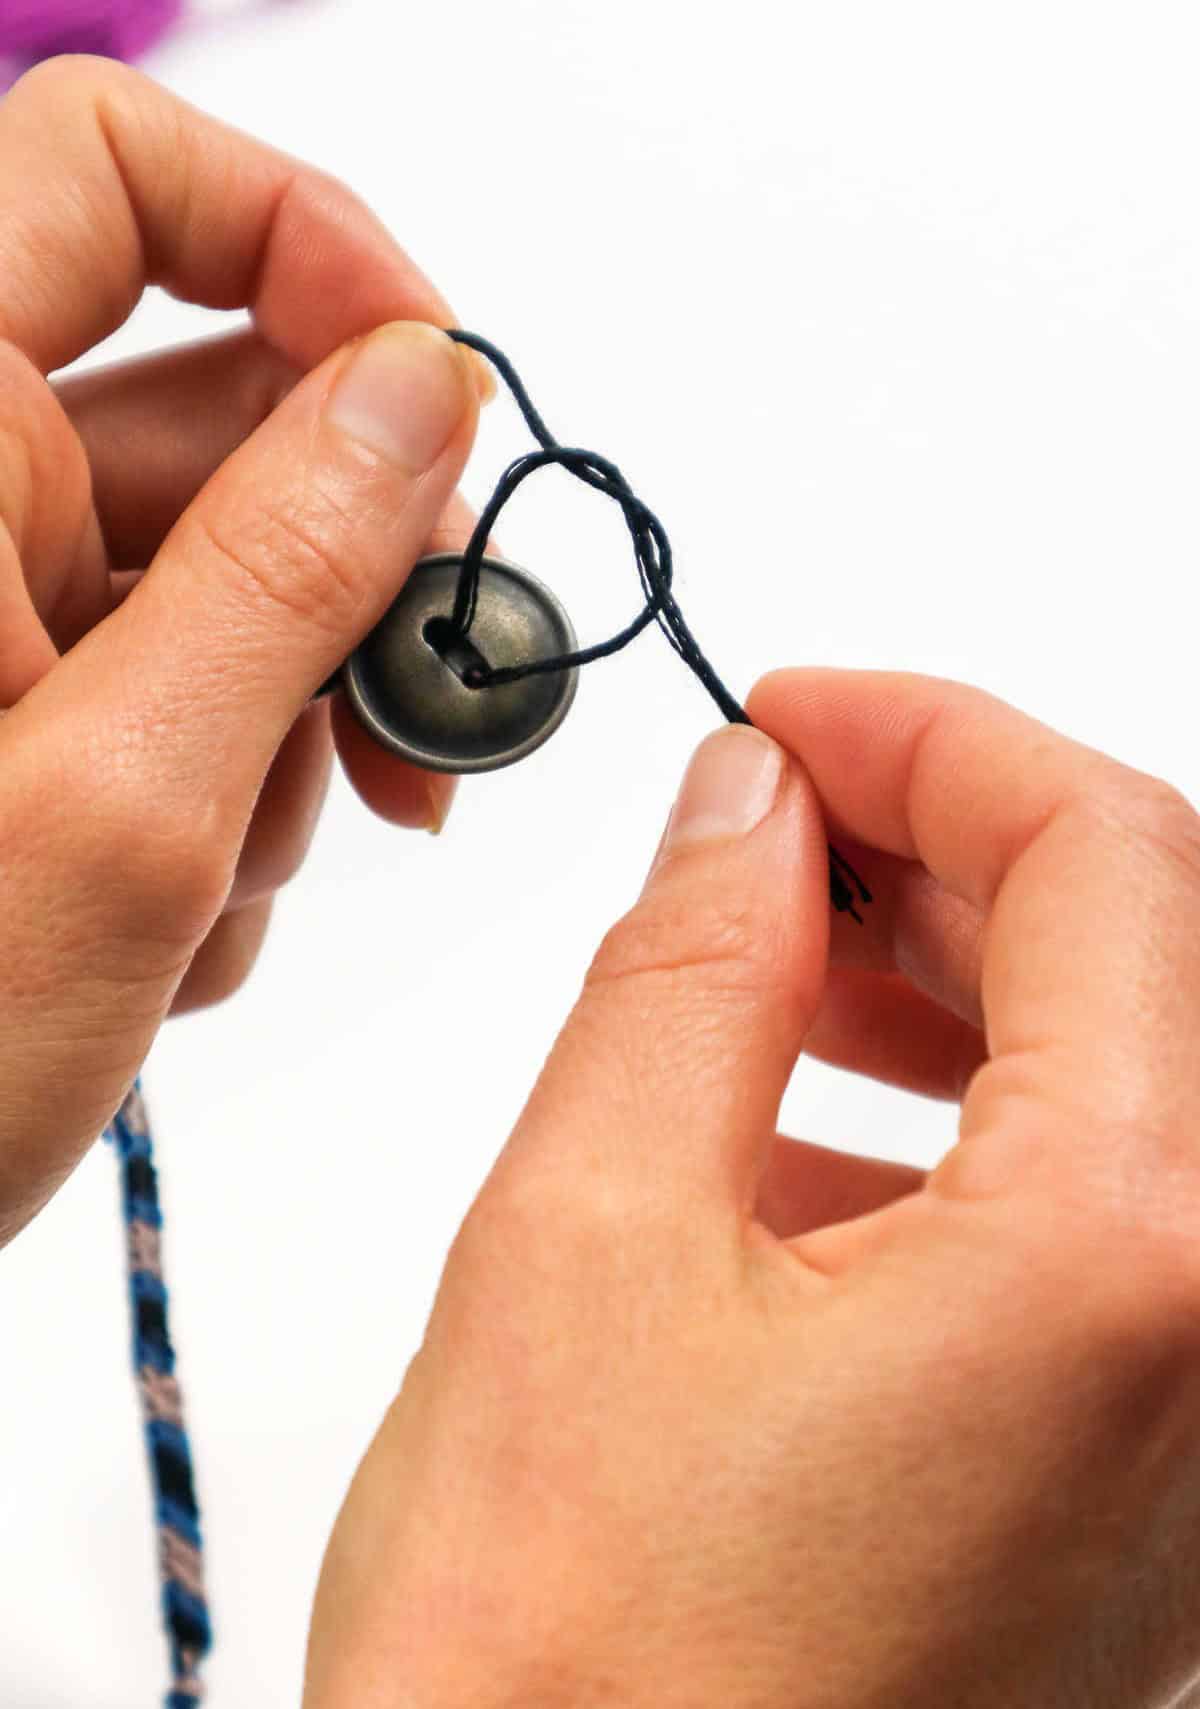
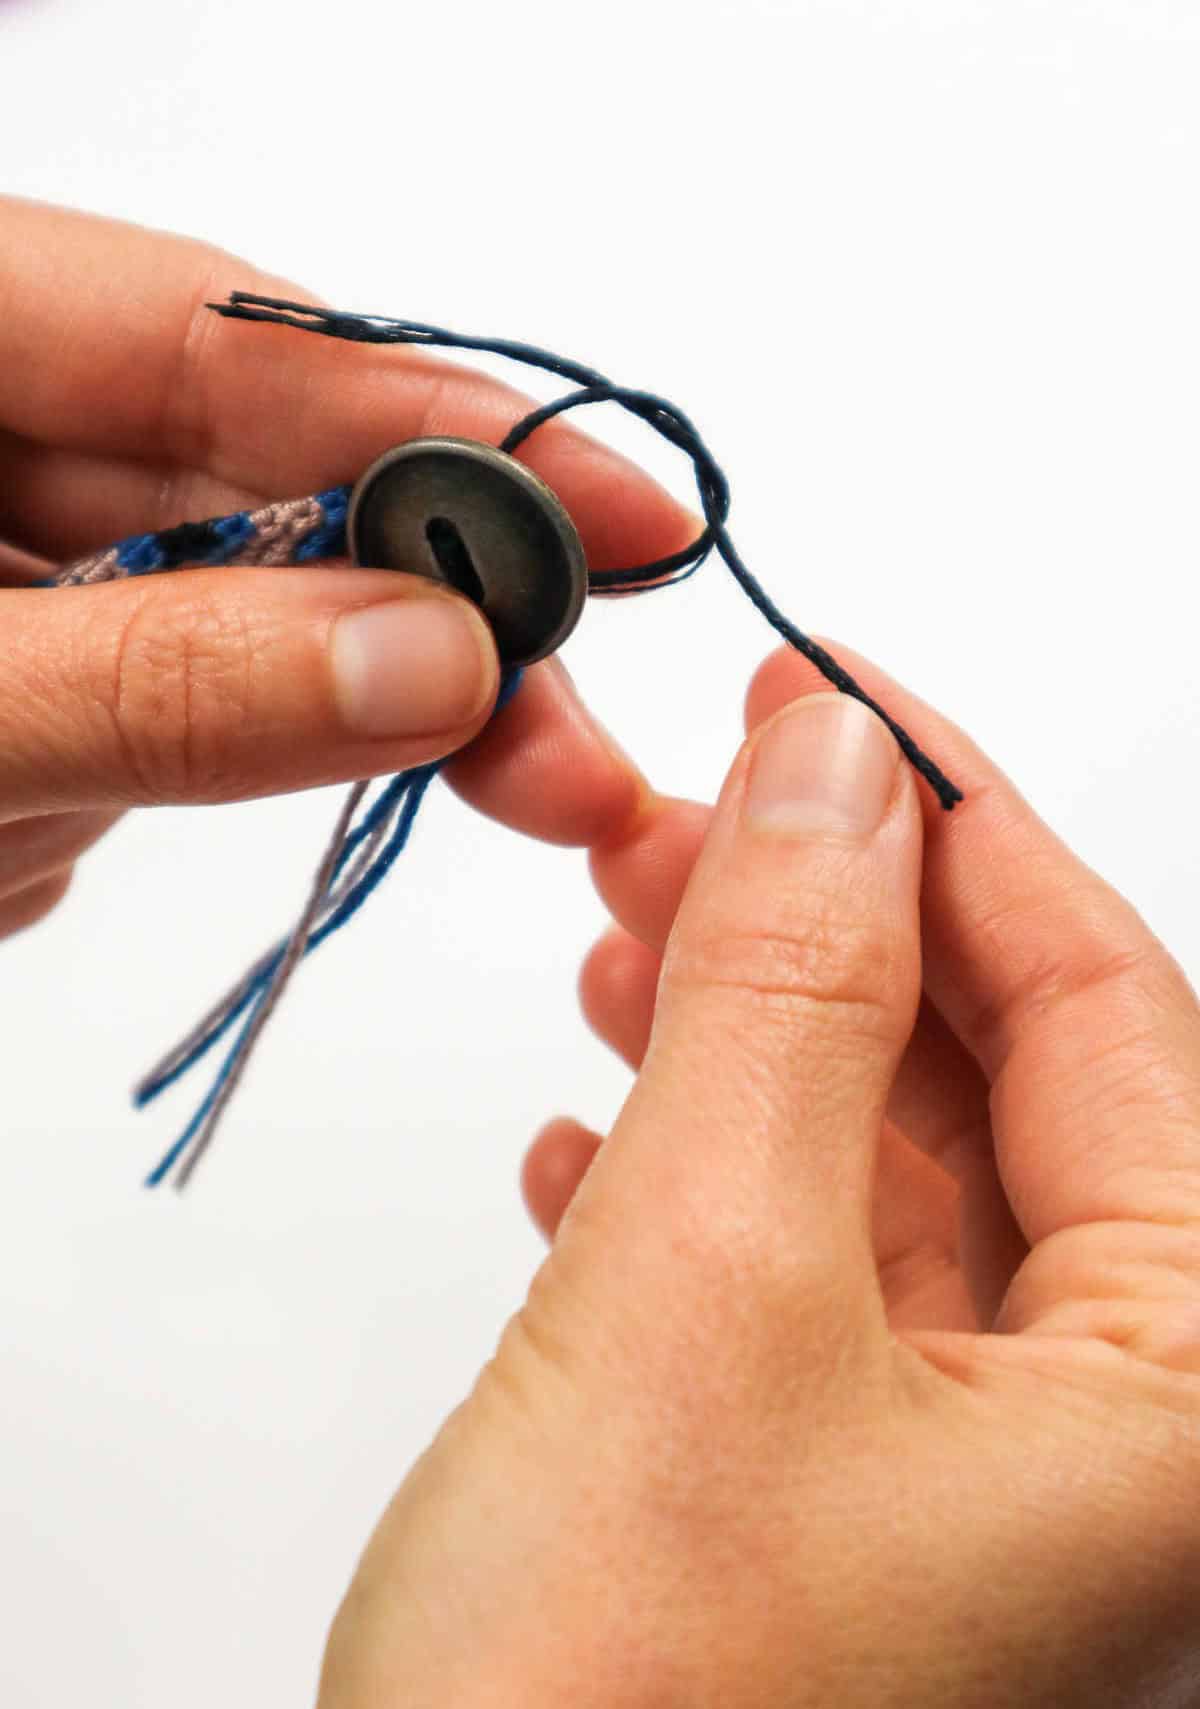
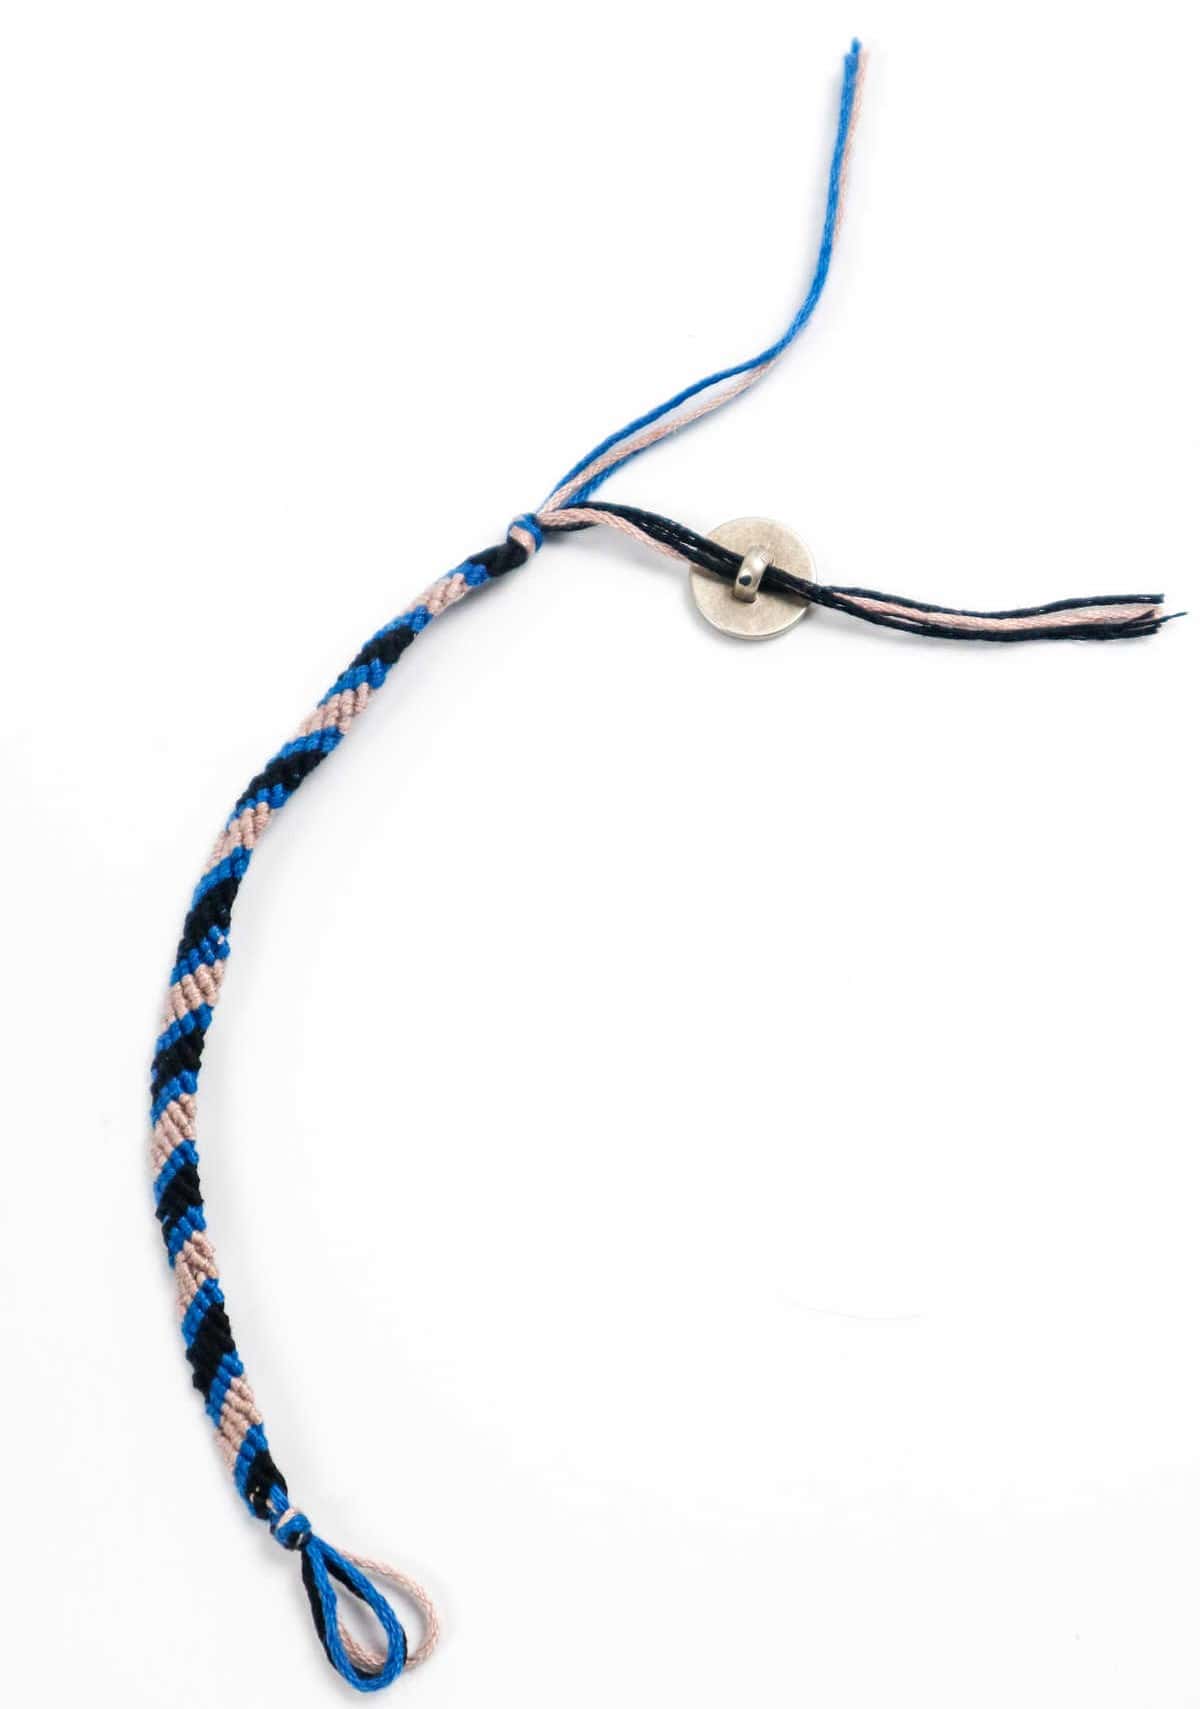
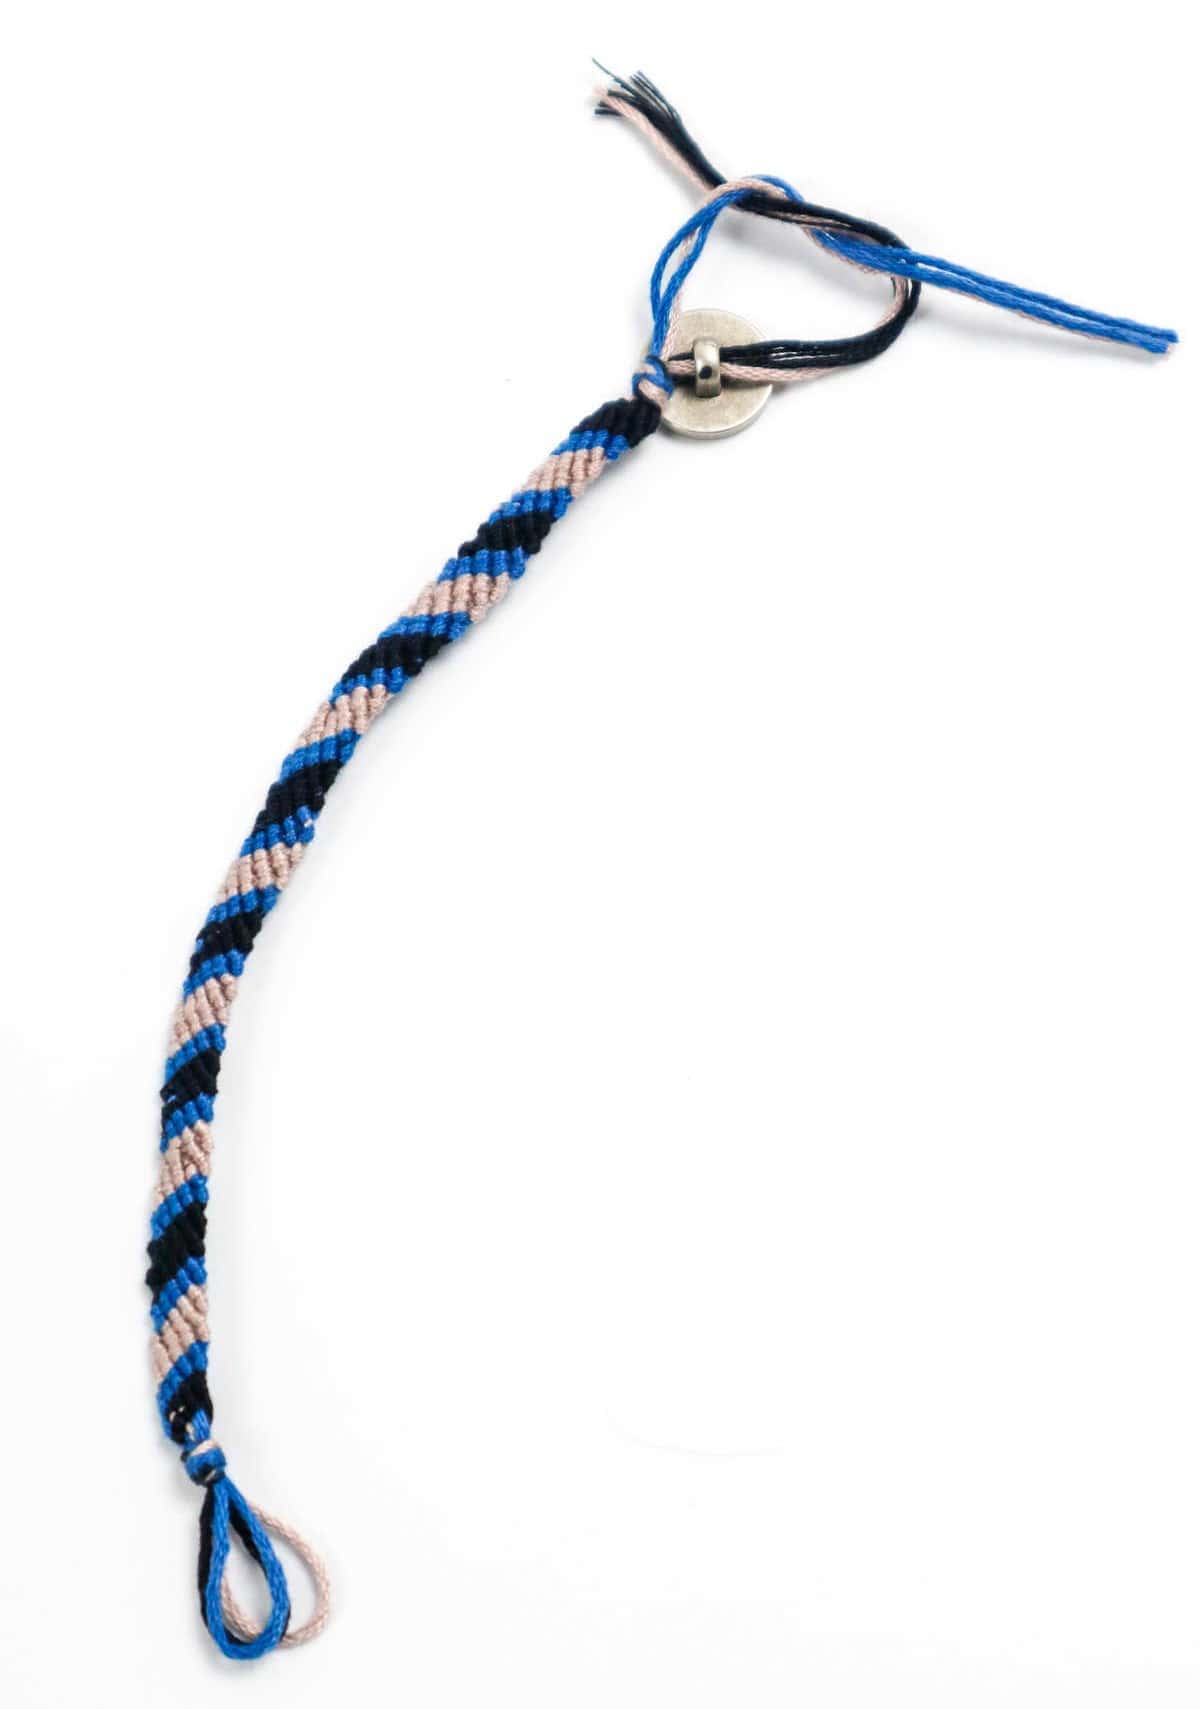
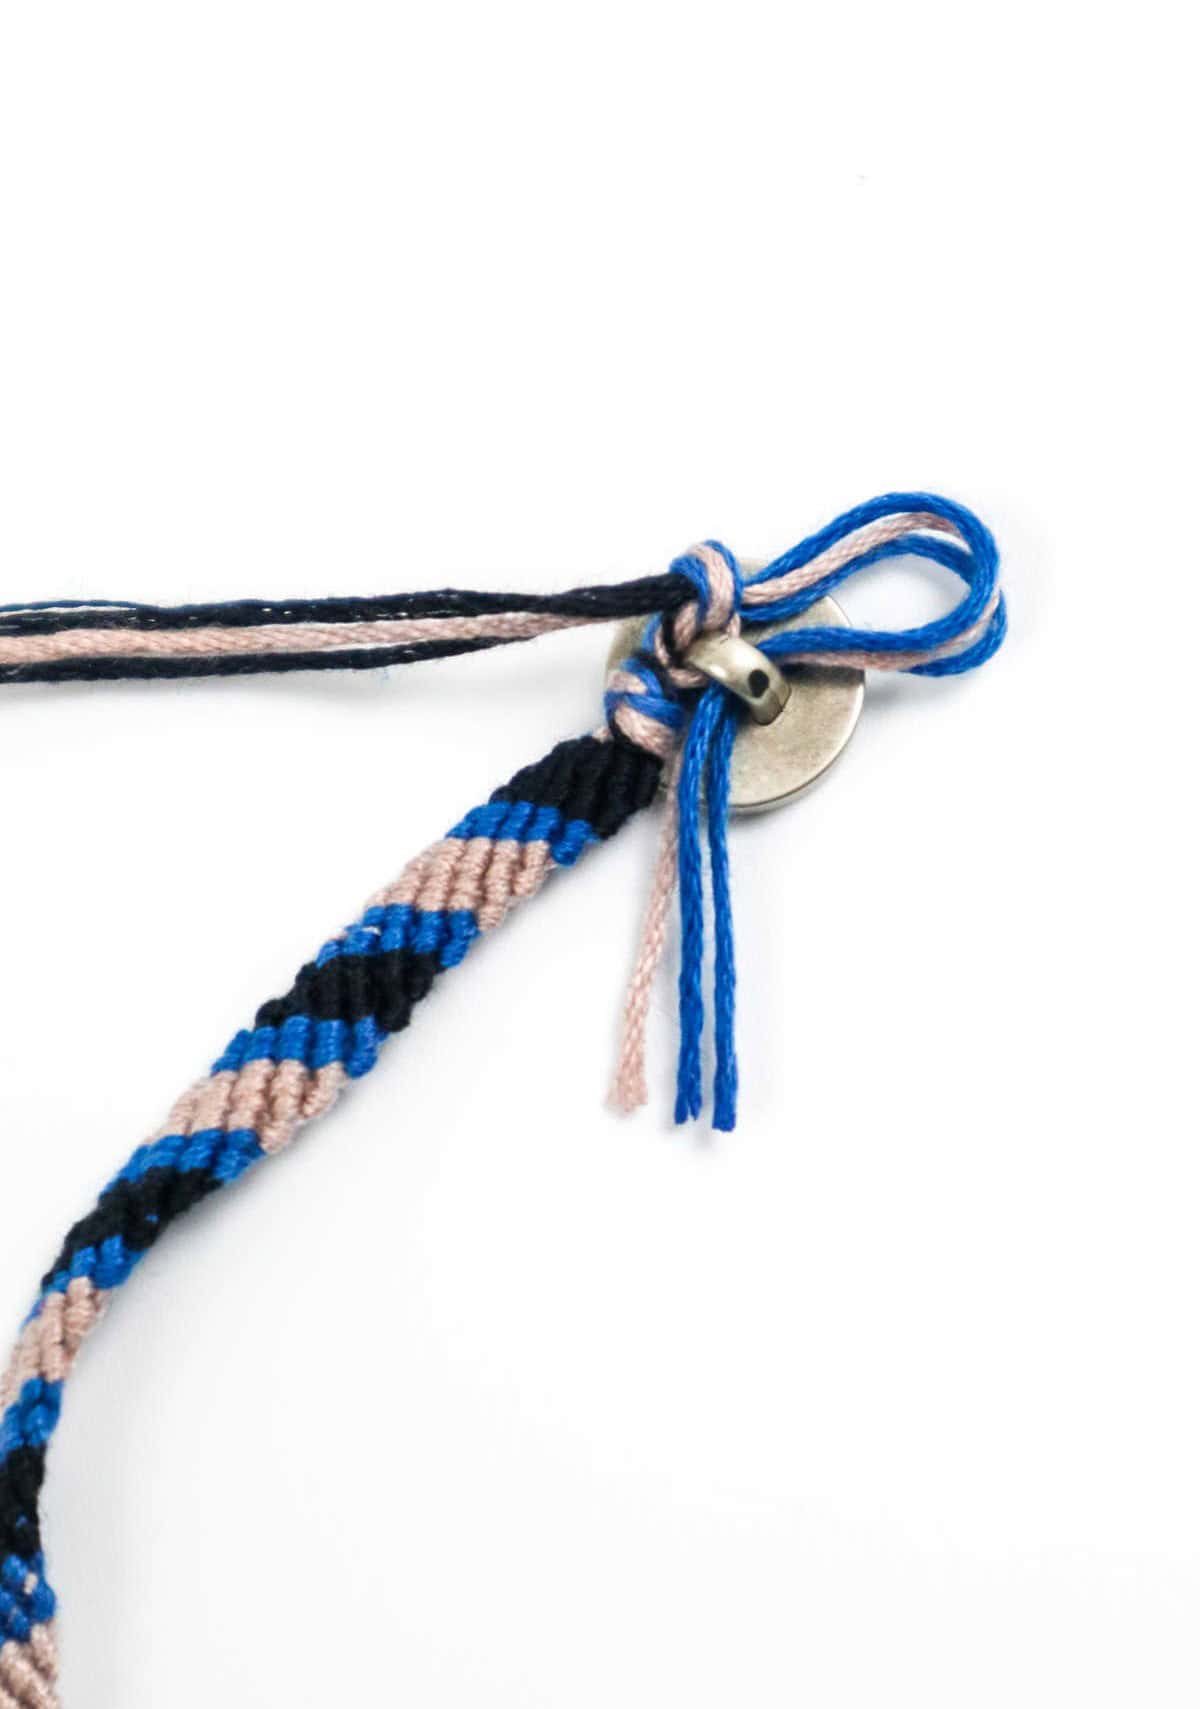
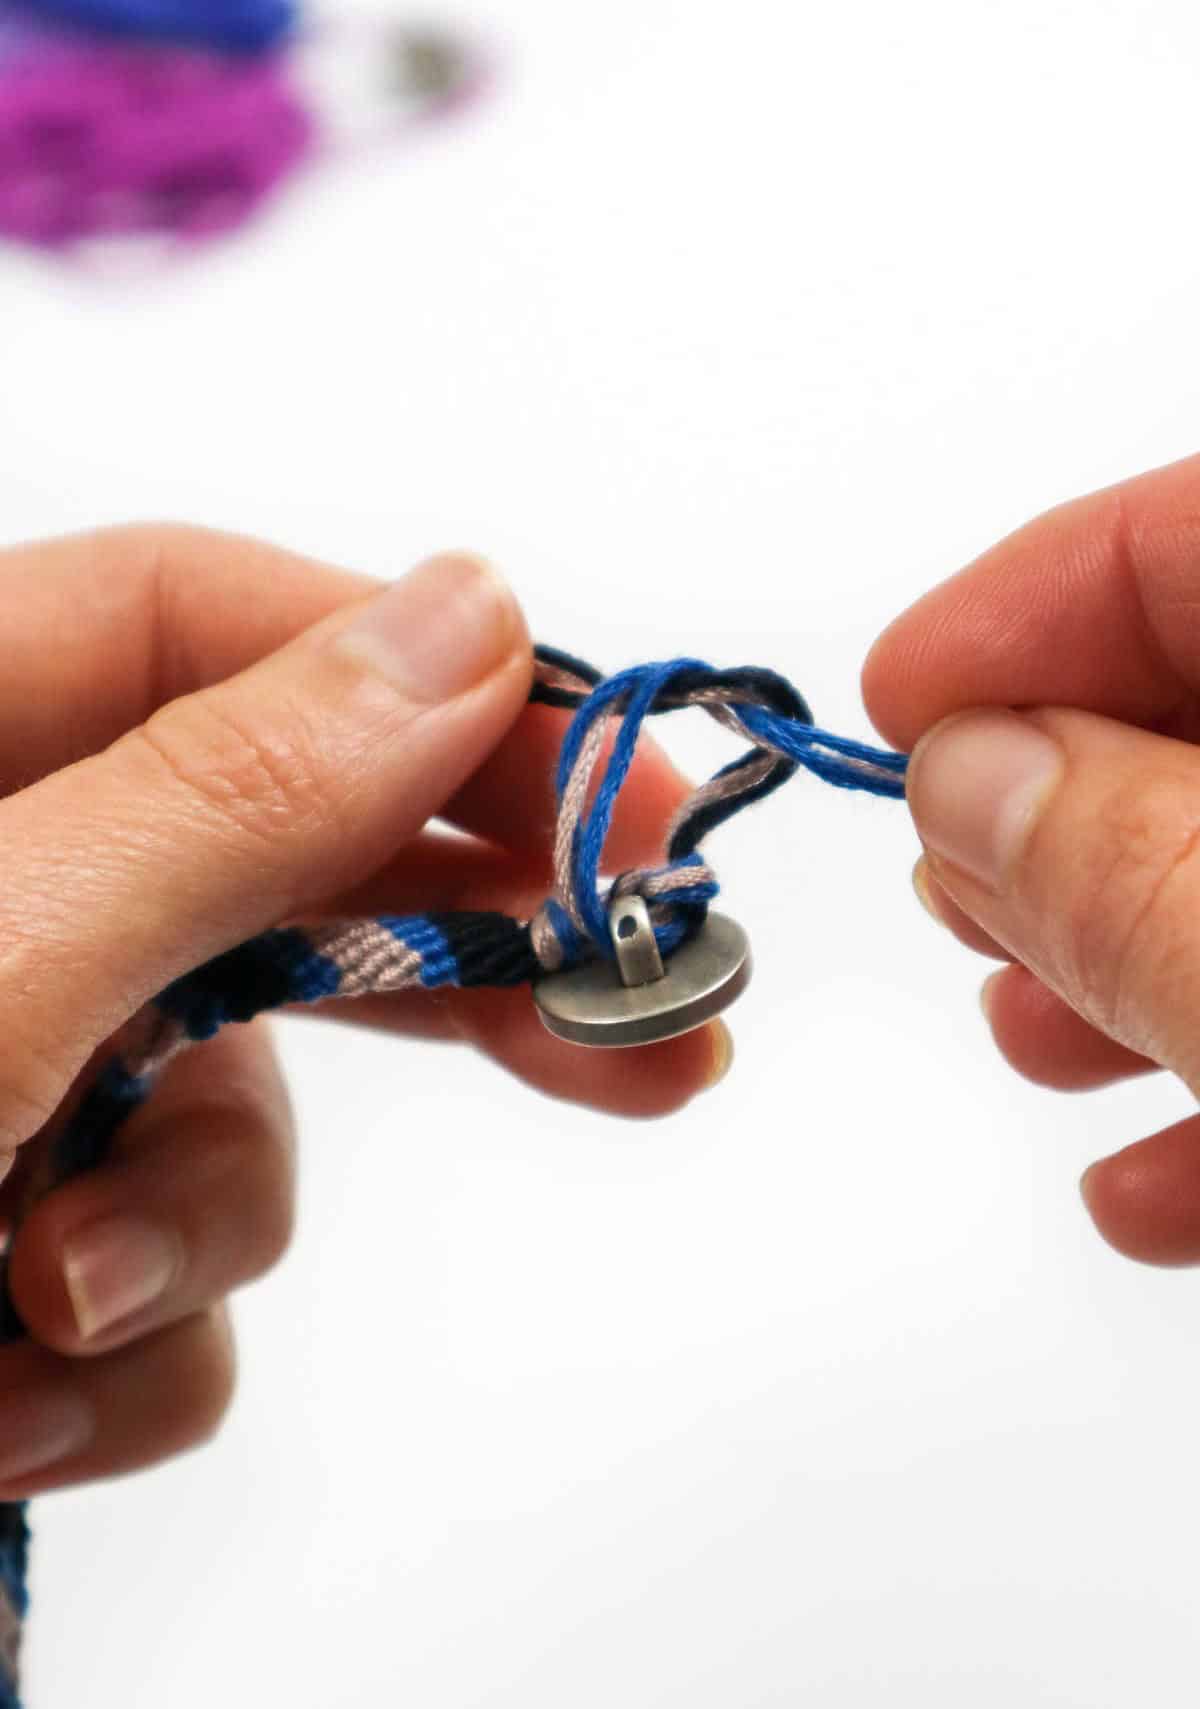
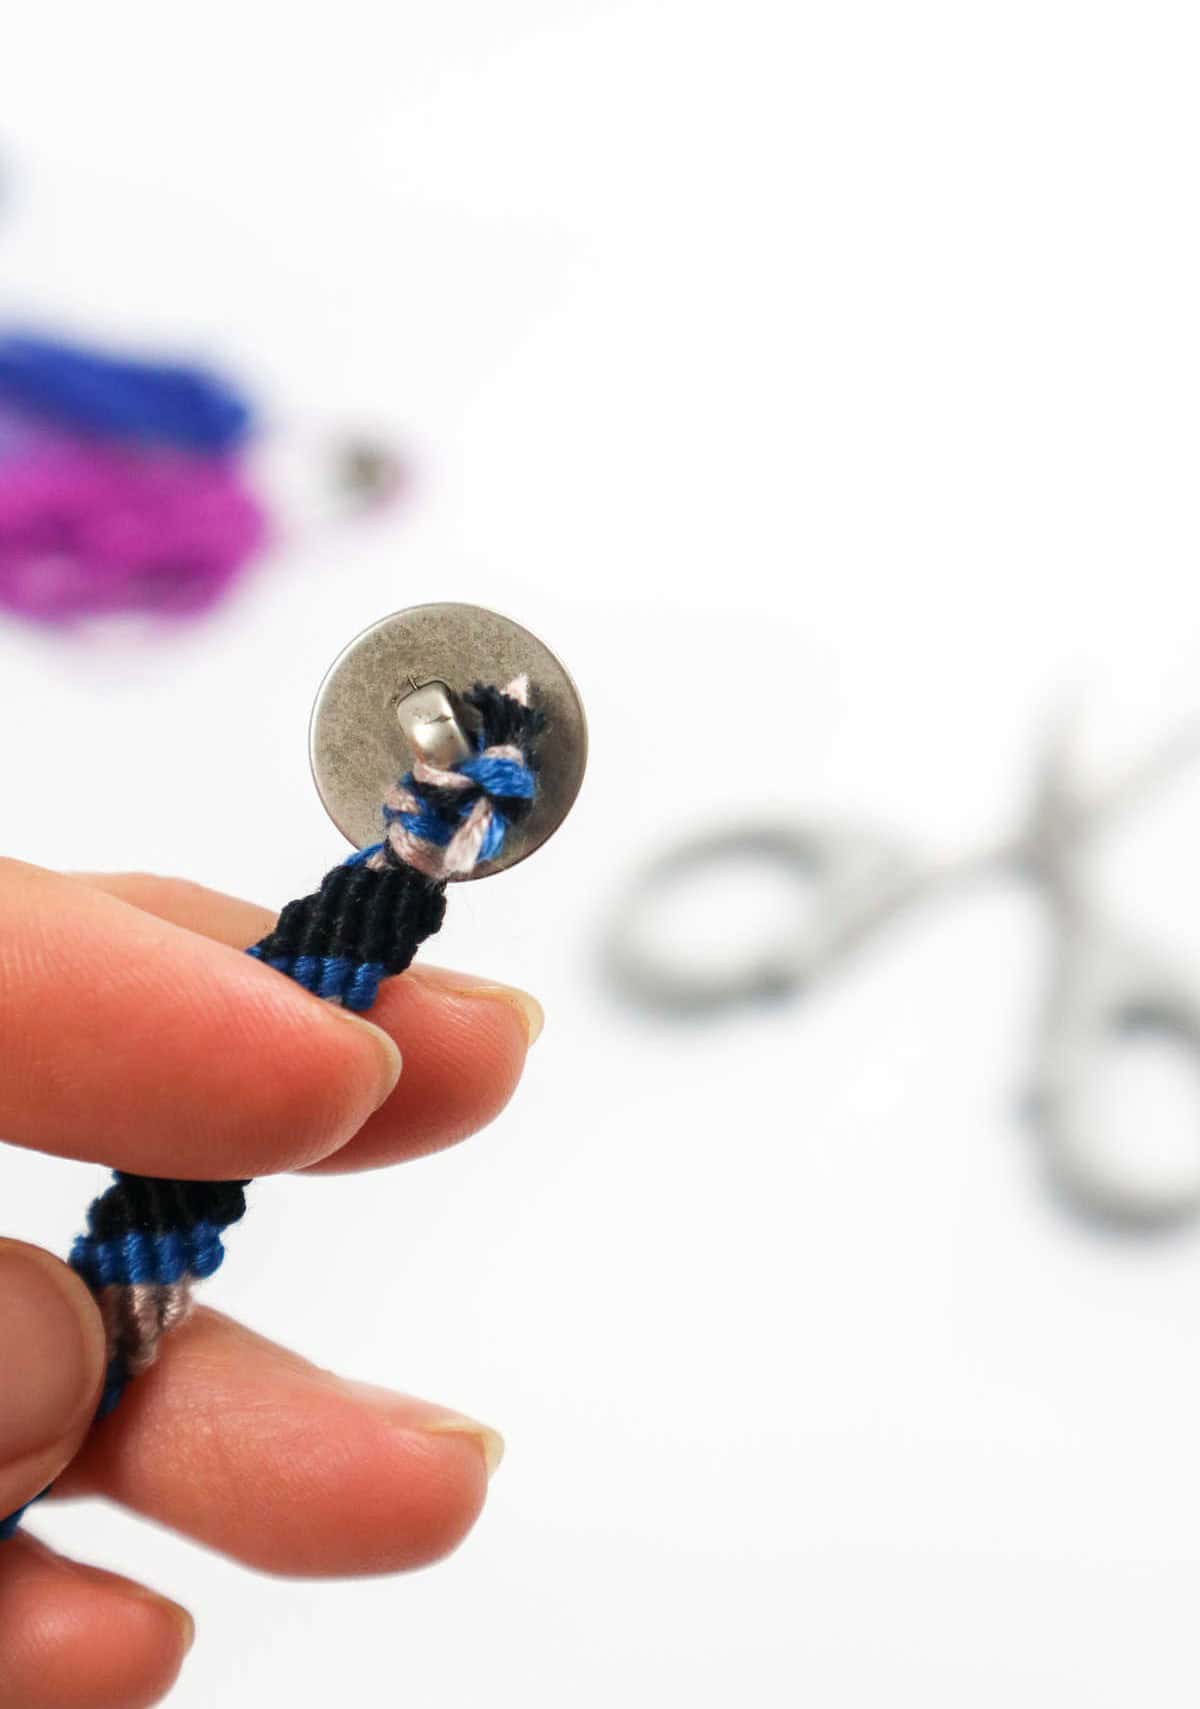
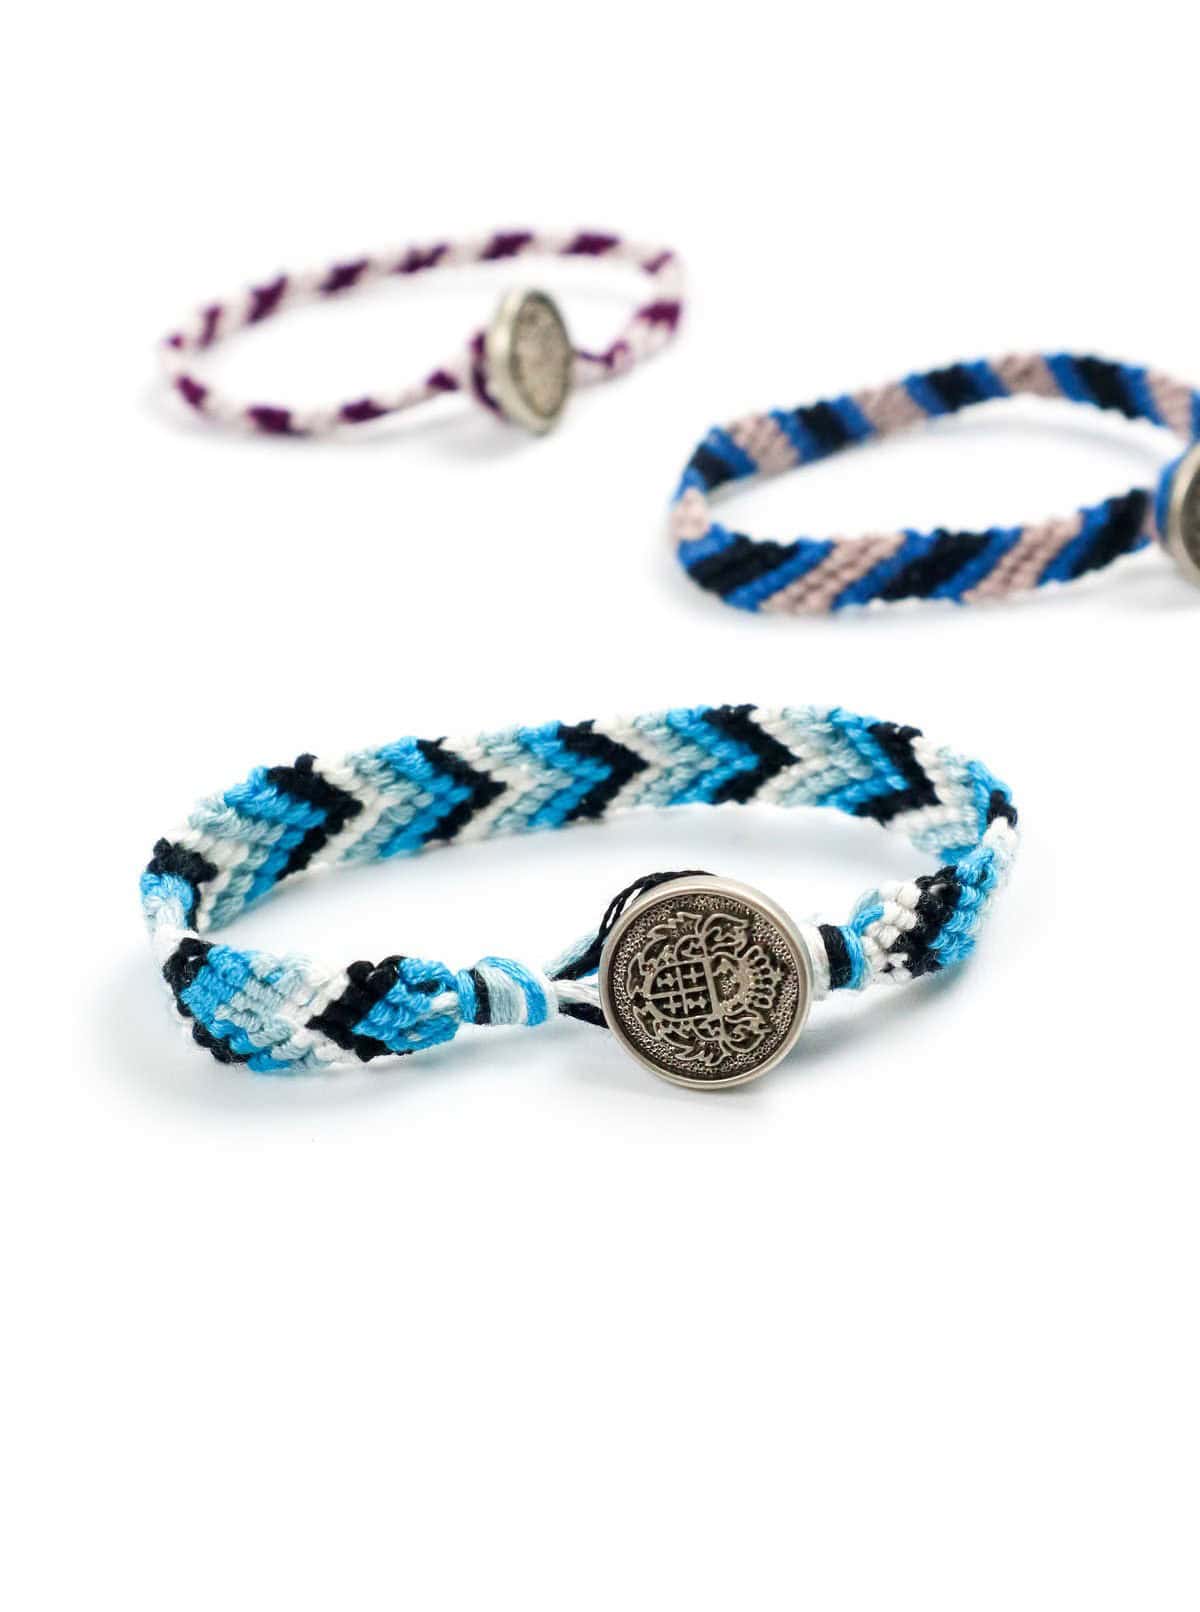
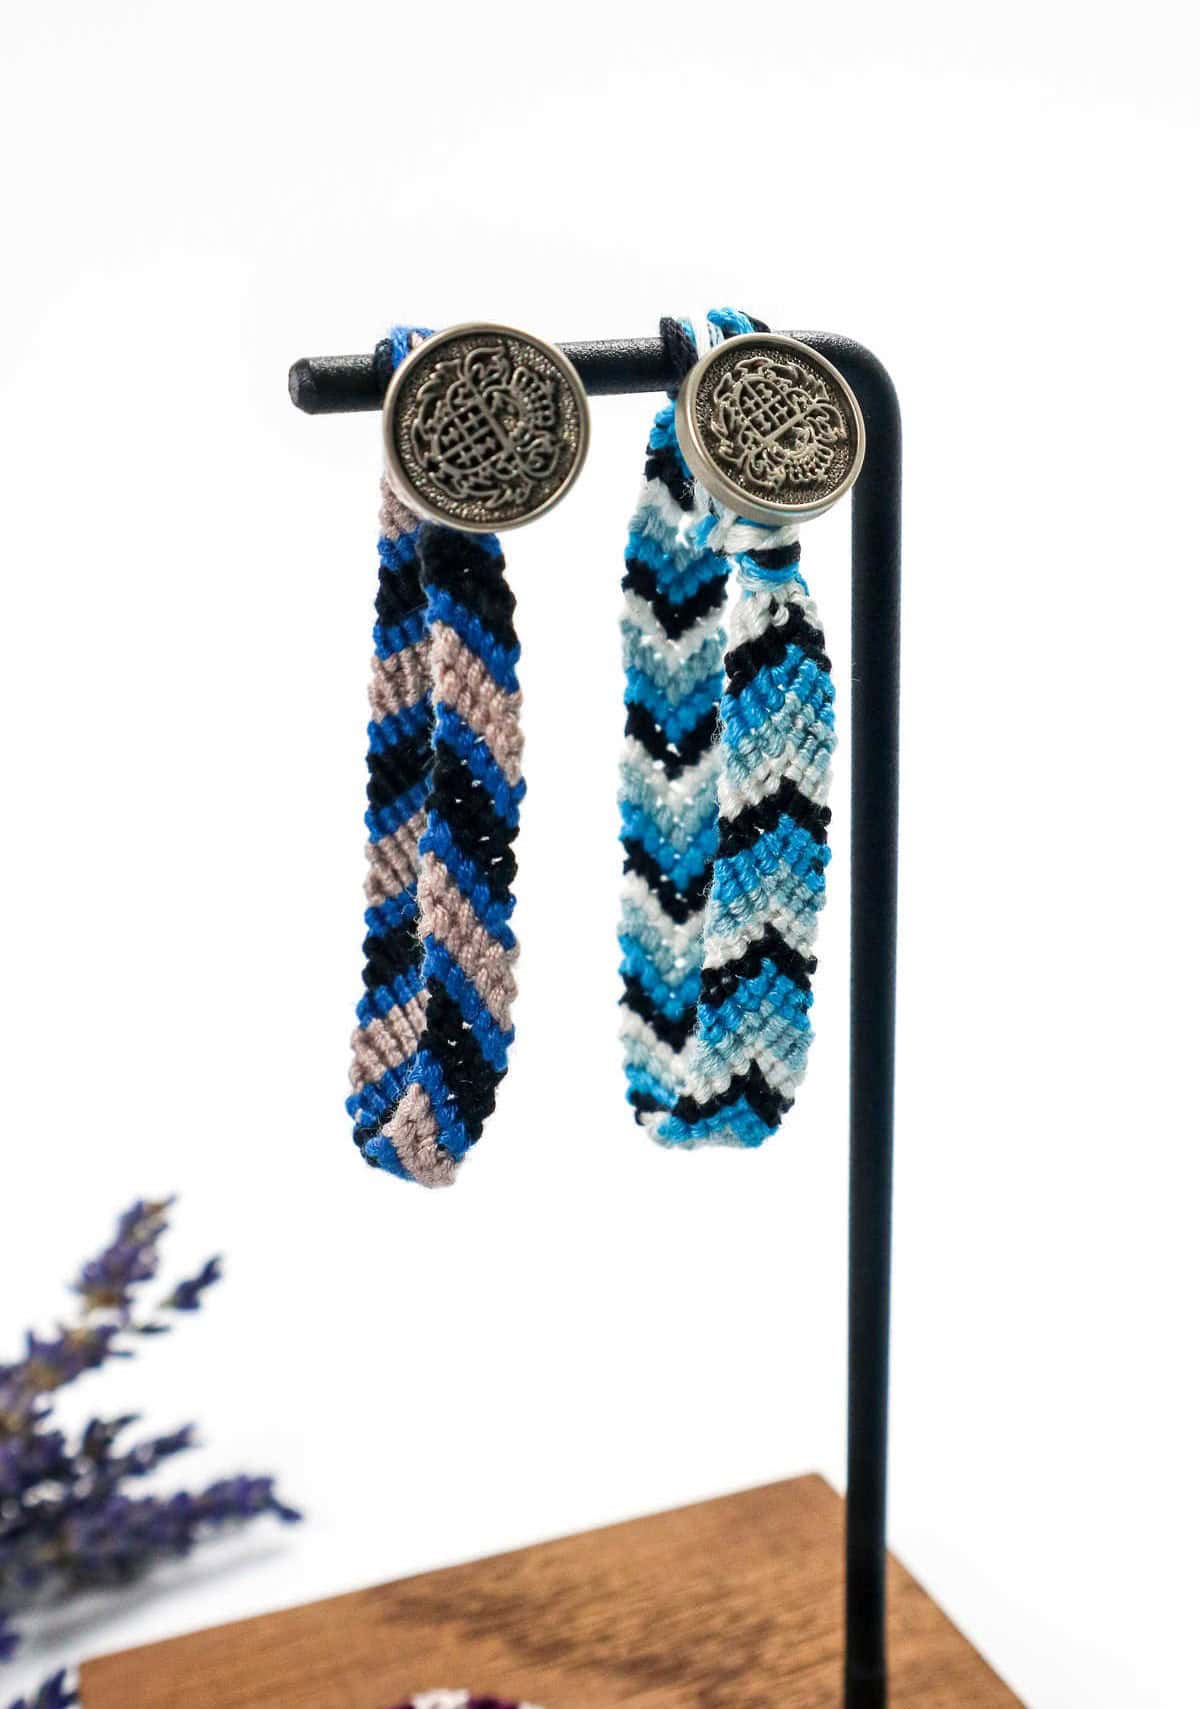
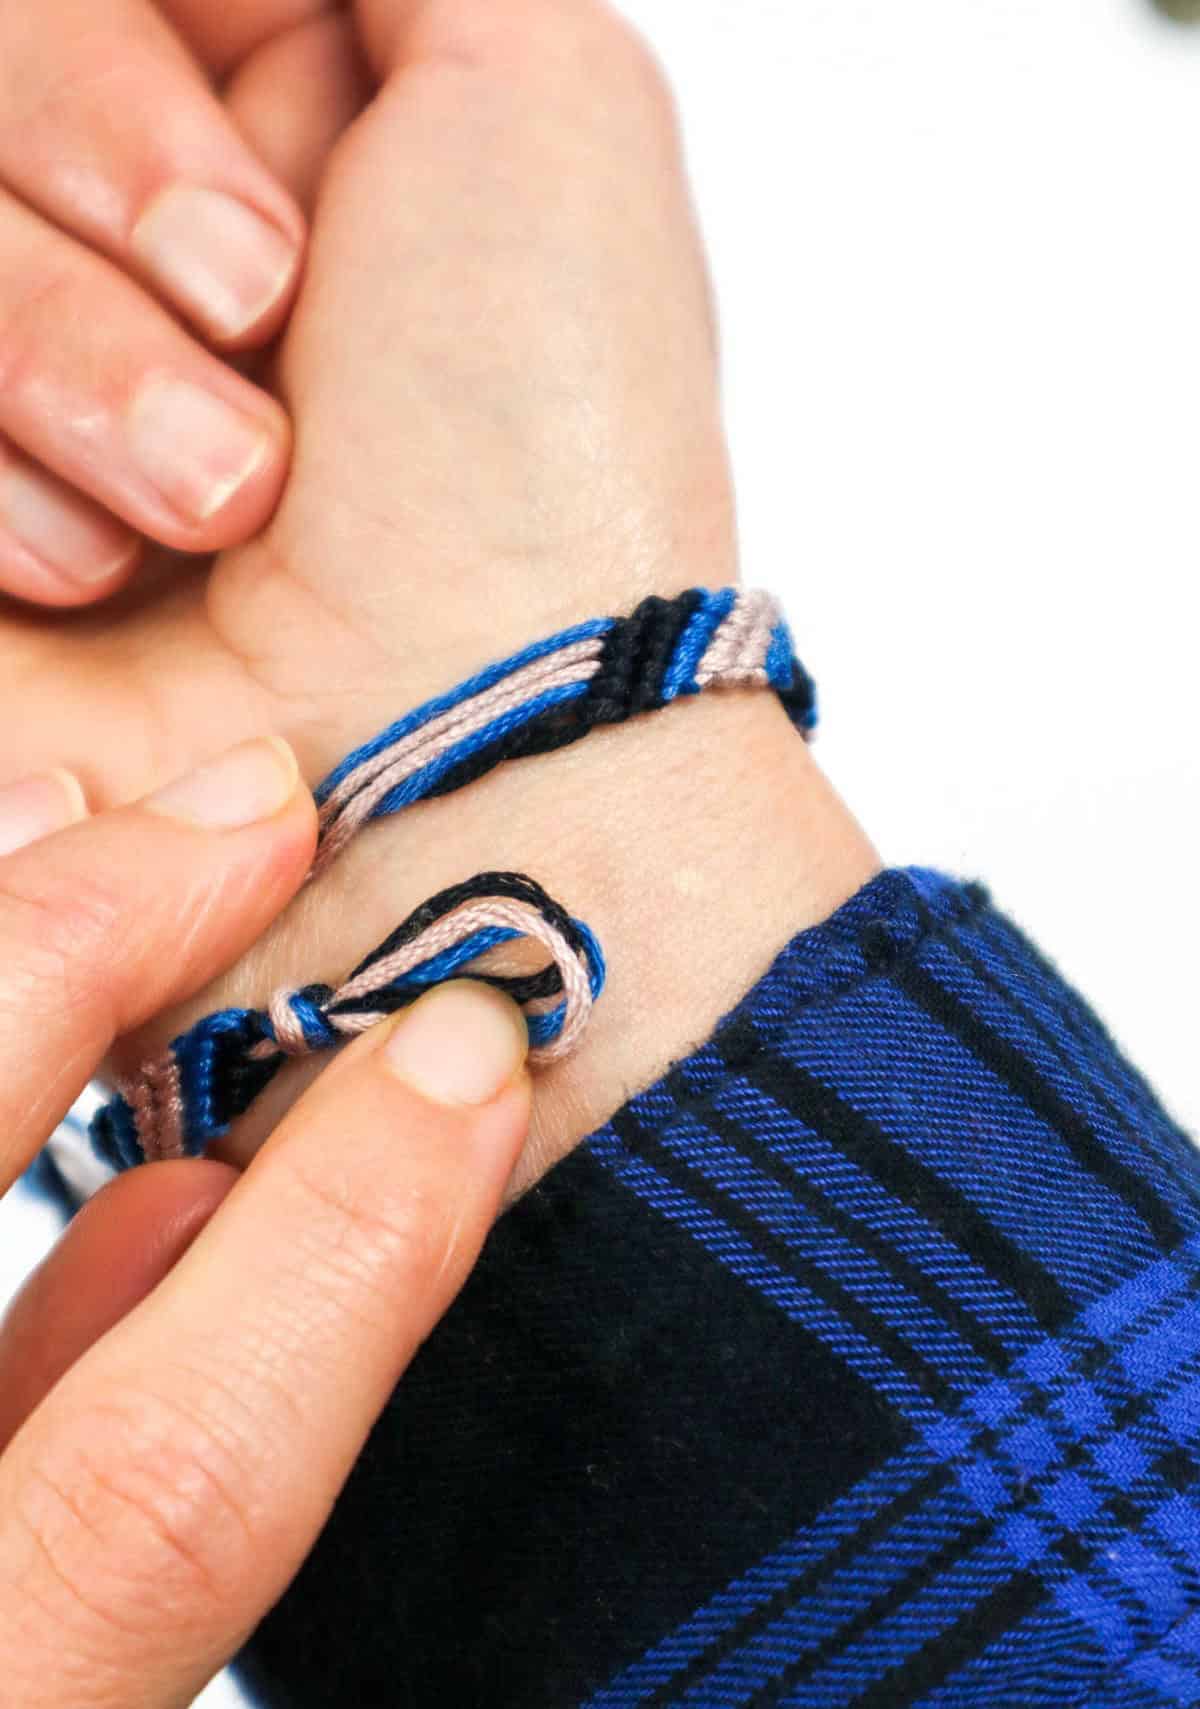
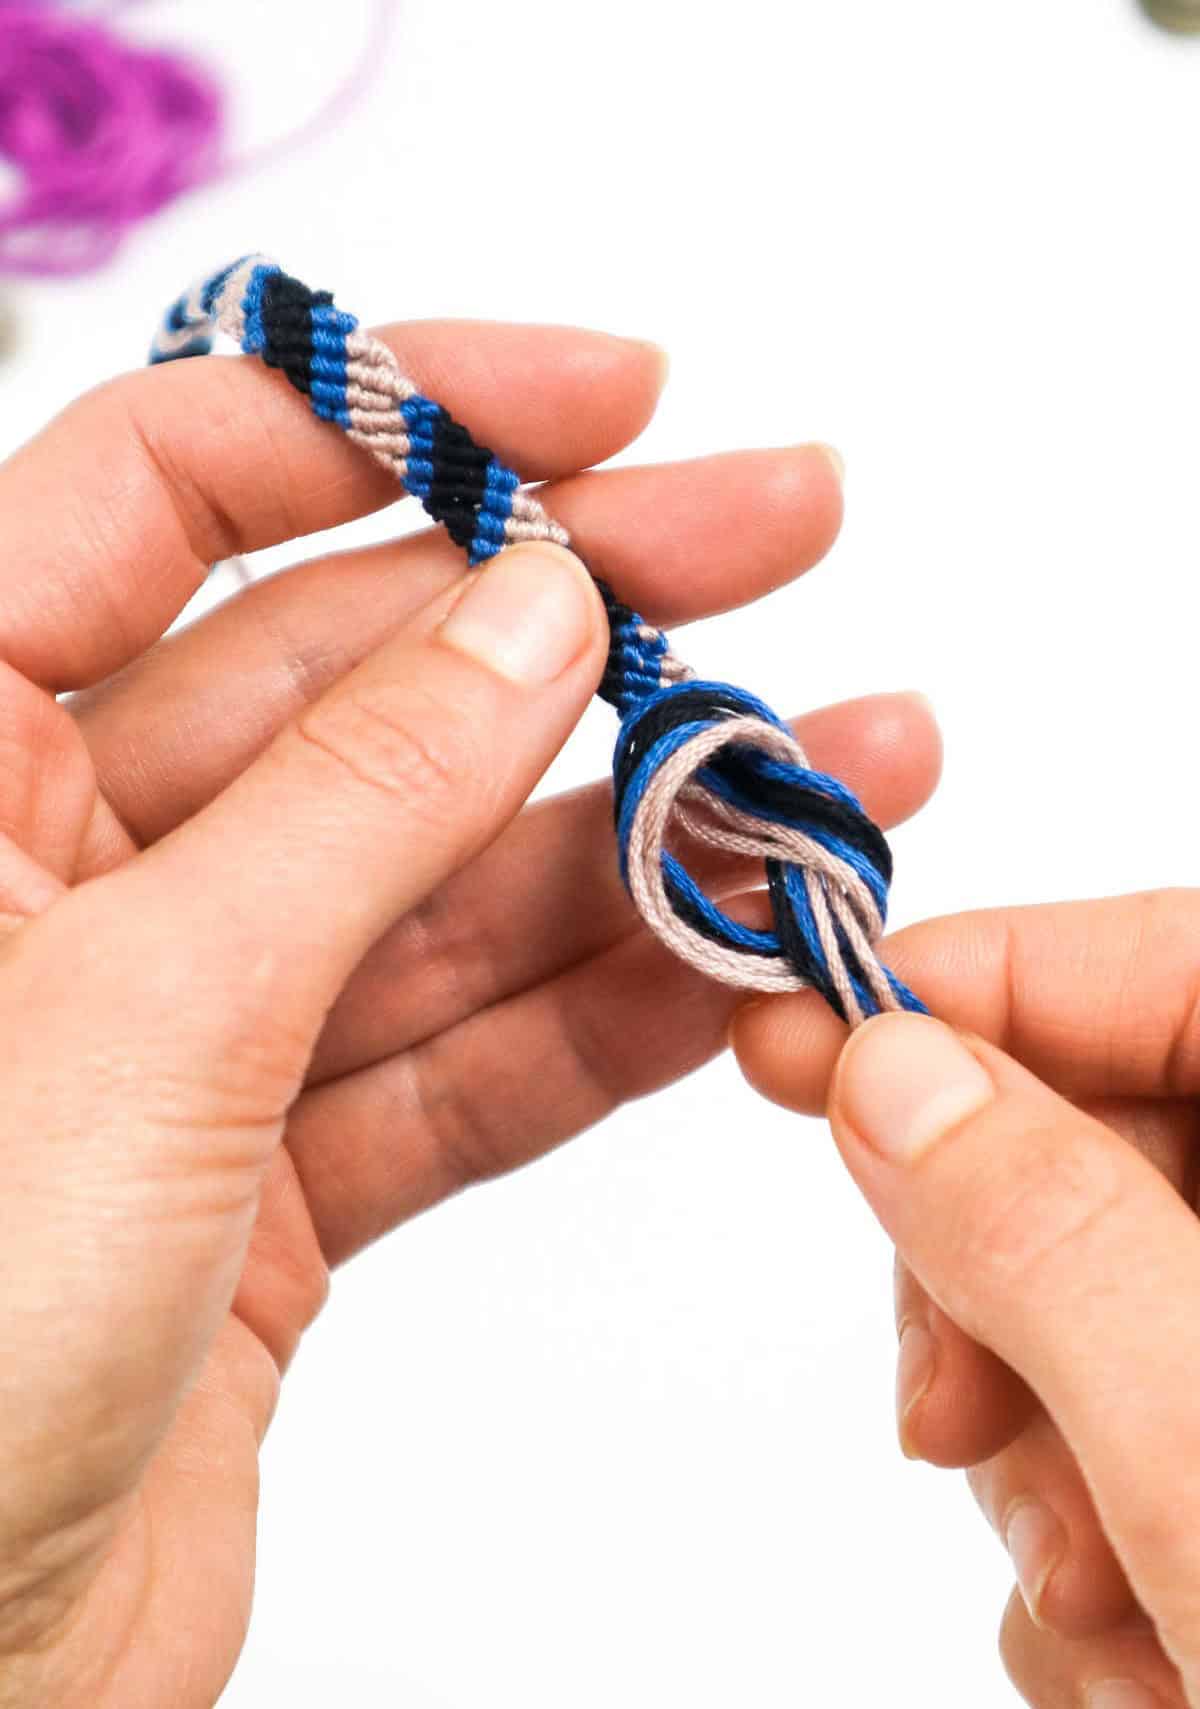
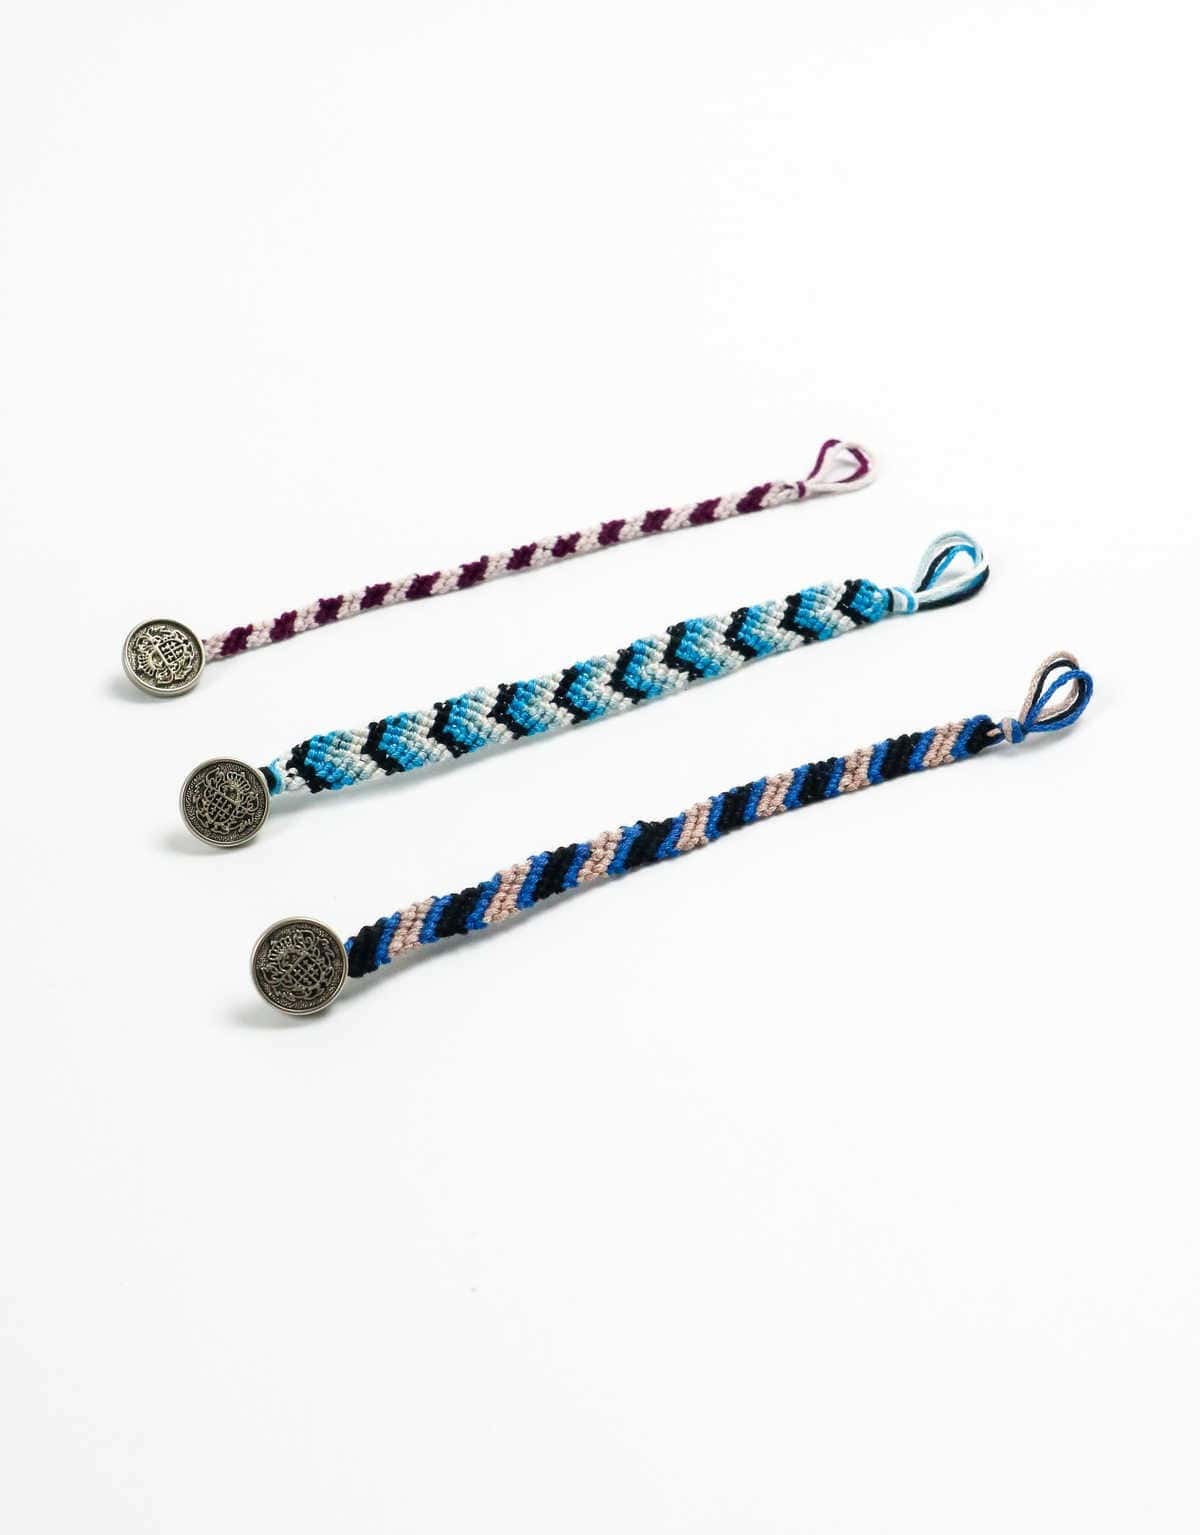
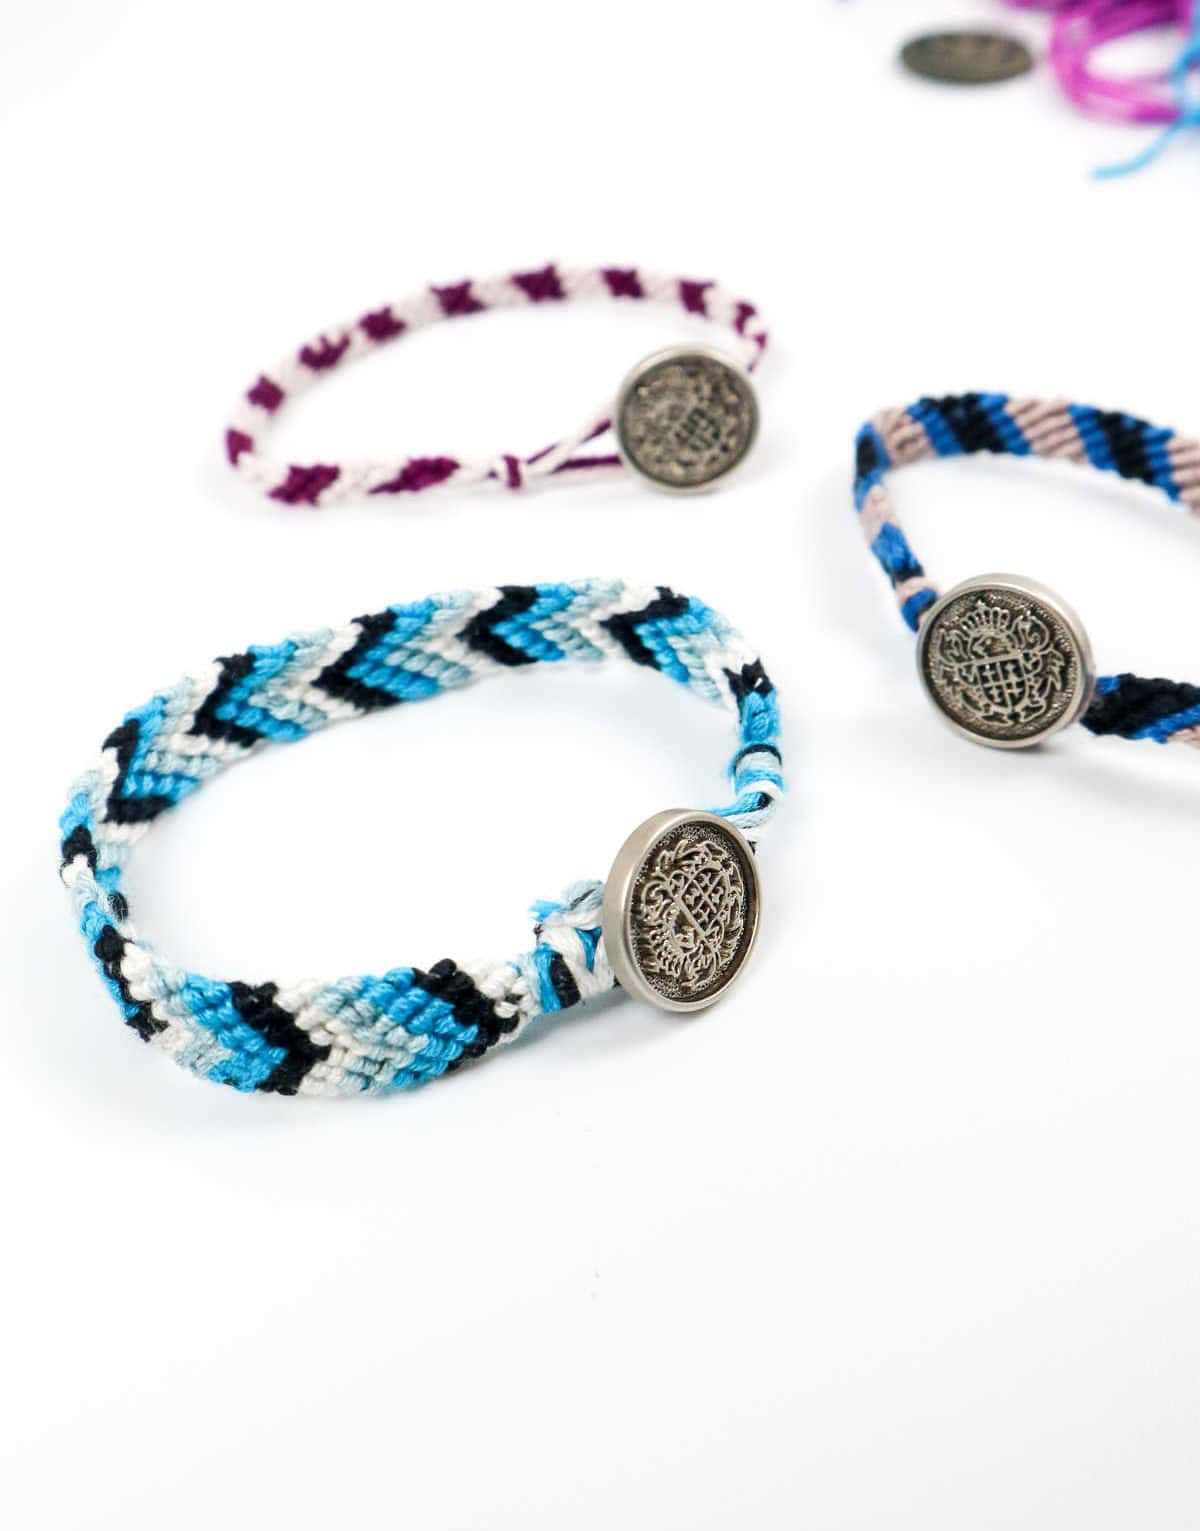
To elevate your bracelet’s style, consider adding charms, beads, or buttons. For a more personalized look, start by accessorizing with a button. Begin by pulling the button through two cords, following the same process as shown. Once secure, create a knot to prevent it from coming loose. If your button features a small handle, thread three strands through and tie a knot to keep it in place.
Finally, return the strands to their original loop and tighten another knot to ensure the button remains securely fastened.
How to Make a 4 String Bracelet

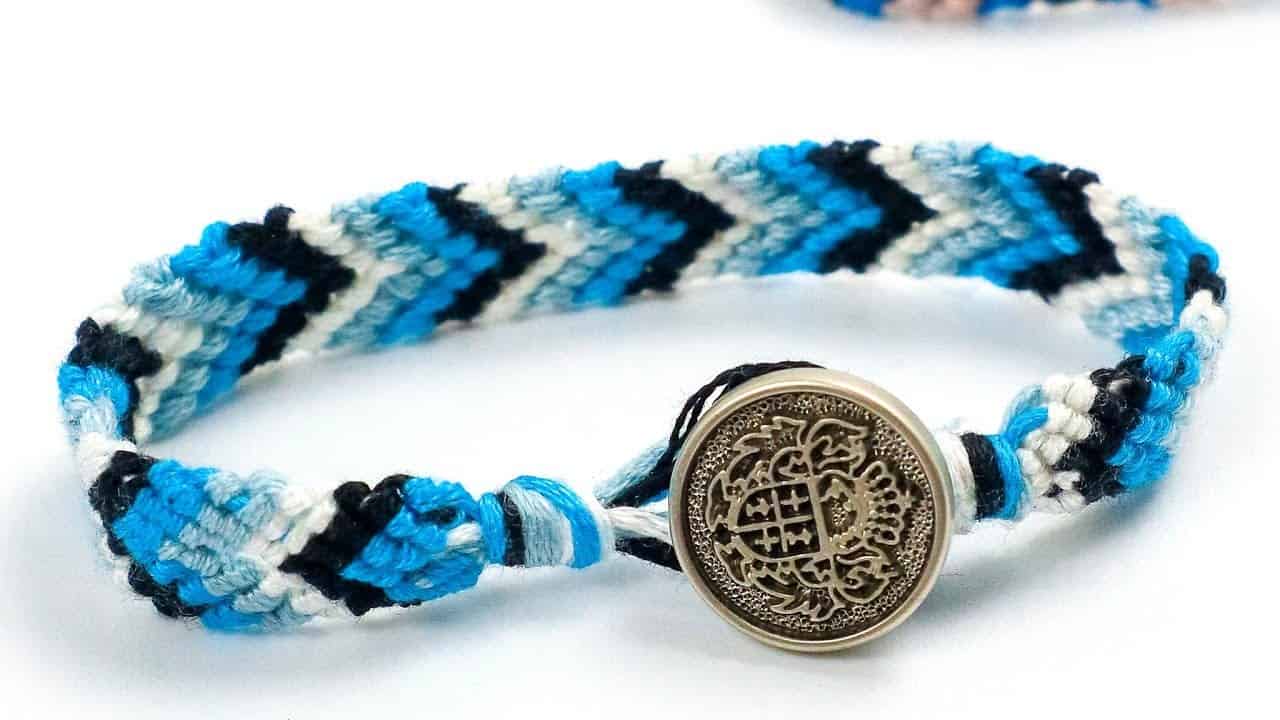
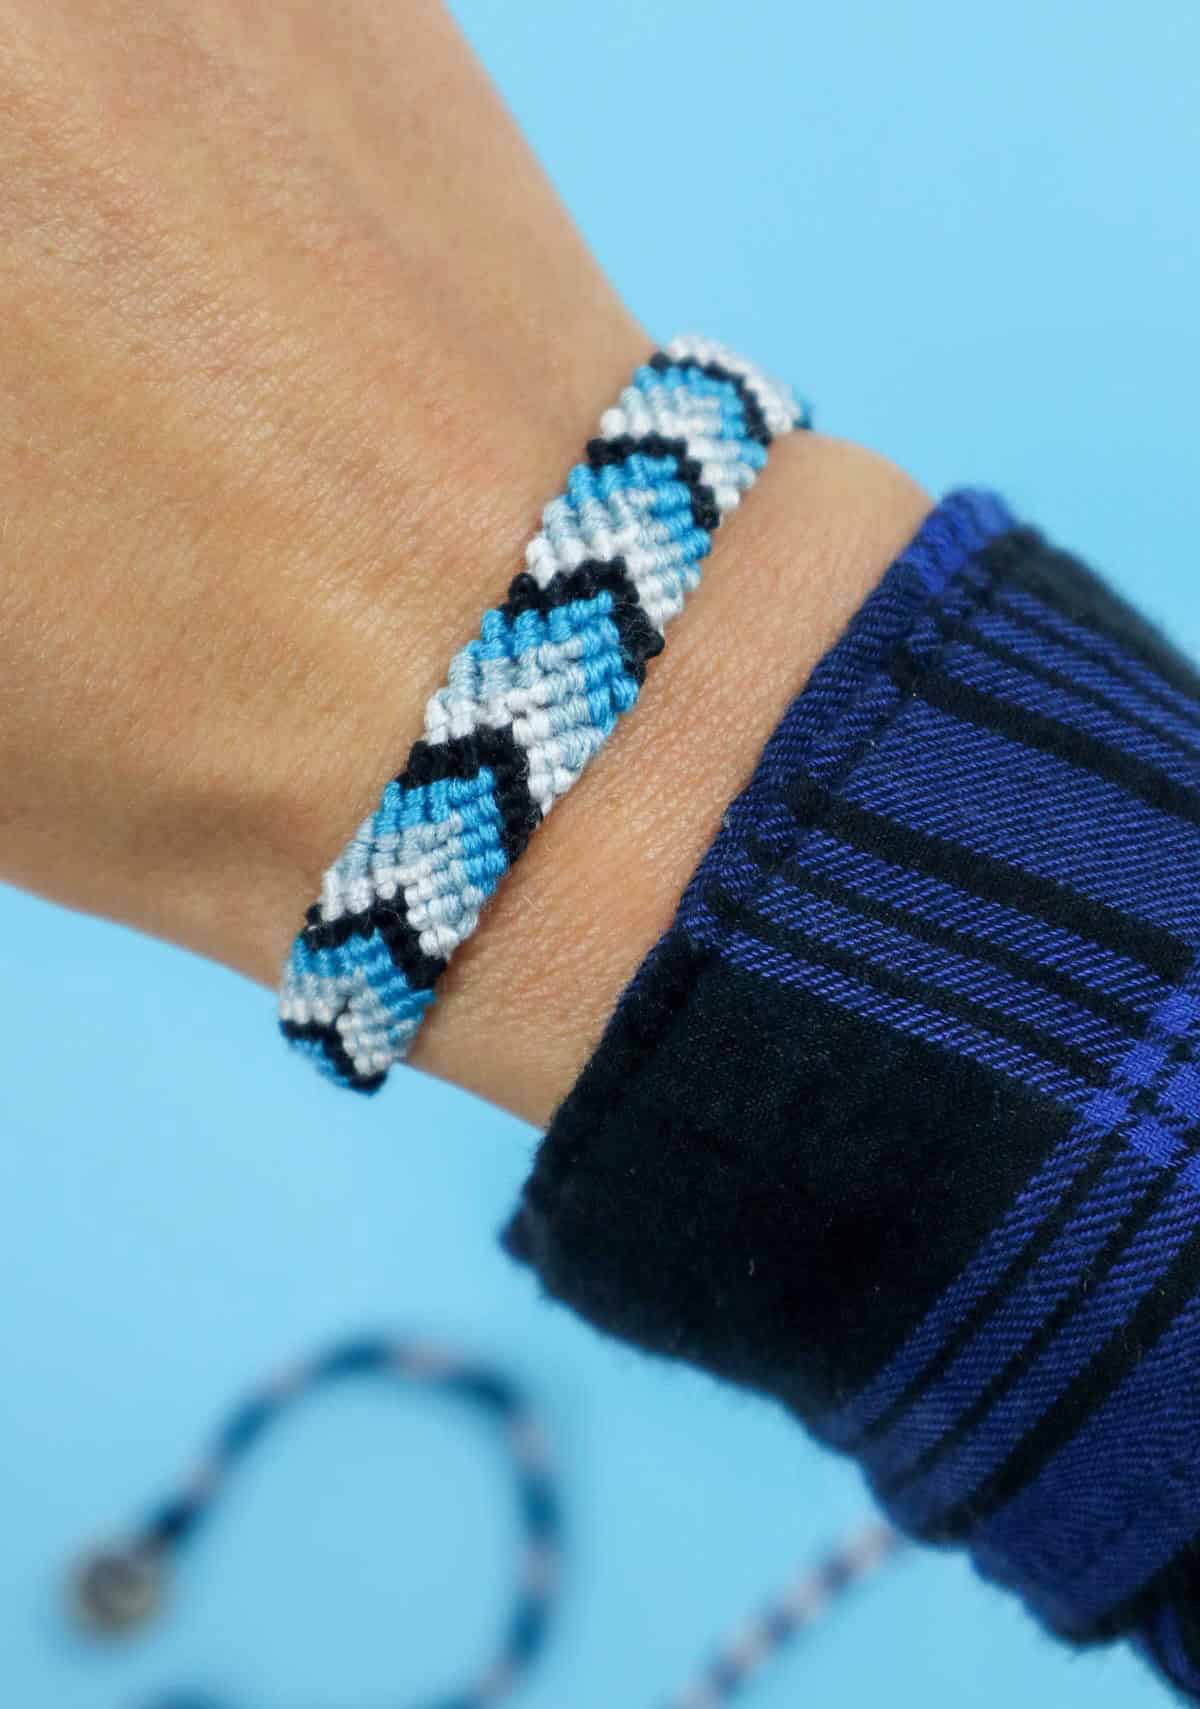
As you’ve mastered the art of creating a three-strand knot, you’re now ready to tackle the slightly more complex 4-strand knot. Take note of the distinctive V-shape pattern that runs along this beautiful bracelet’s length. By studying its design, you’ll be able to replicate it with ease and add another layer of intricacy to your jewelry-making skills.
Step 1
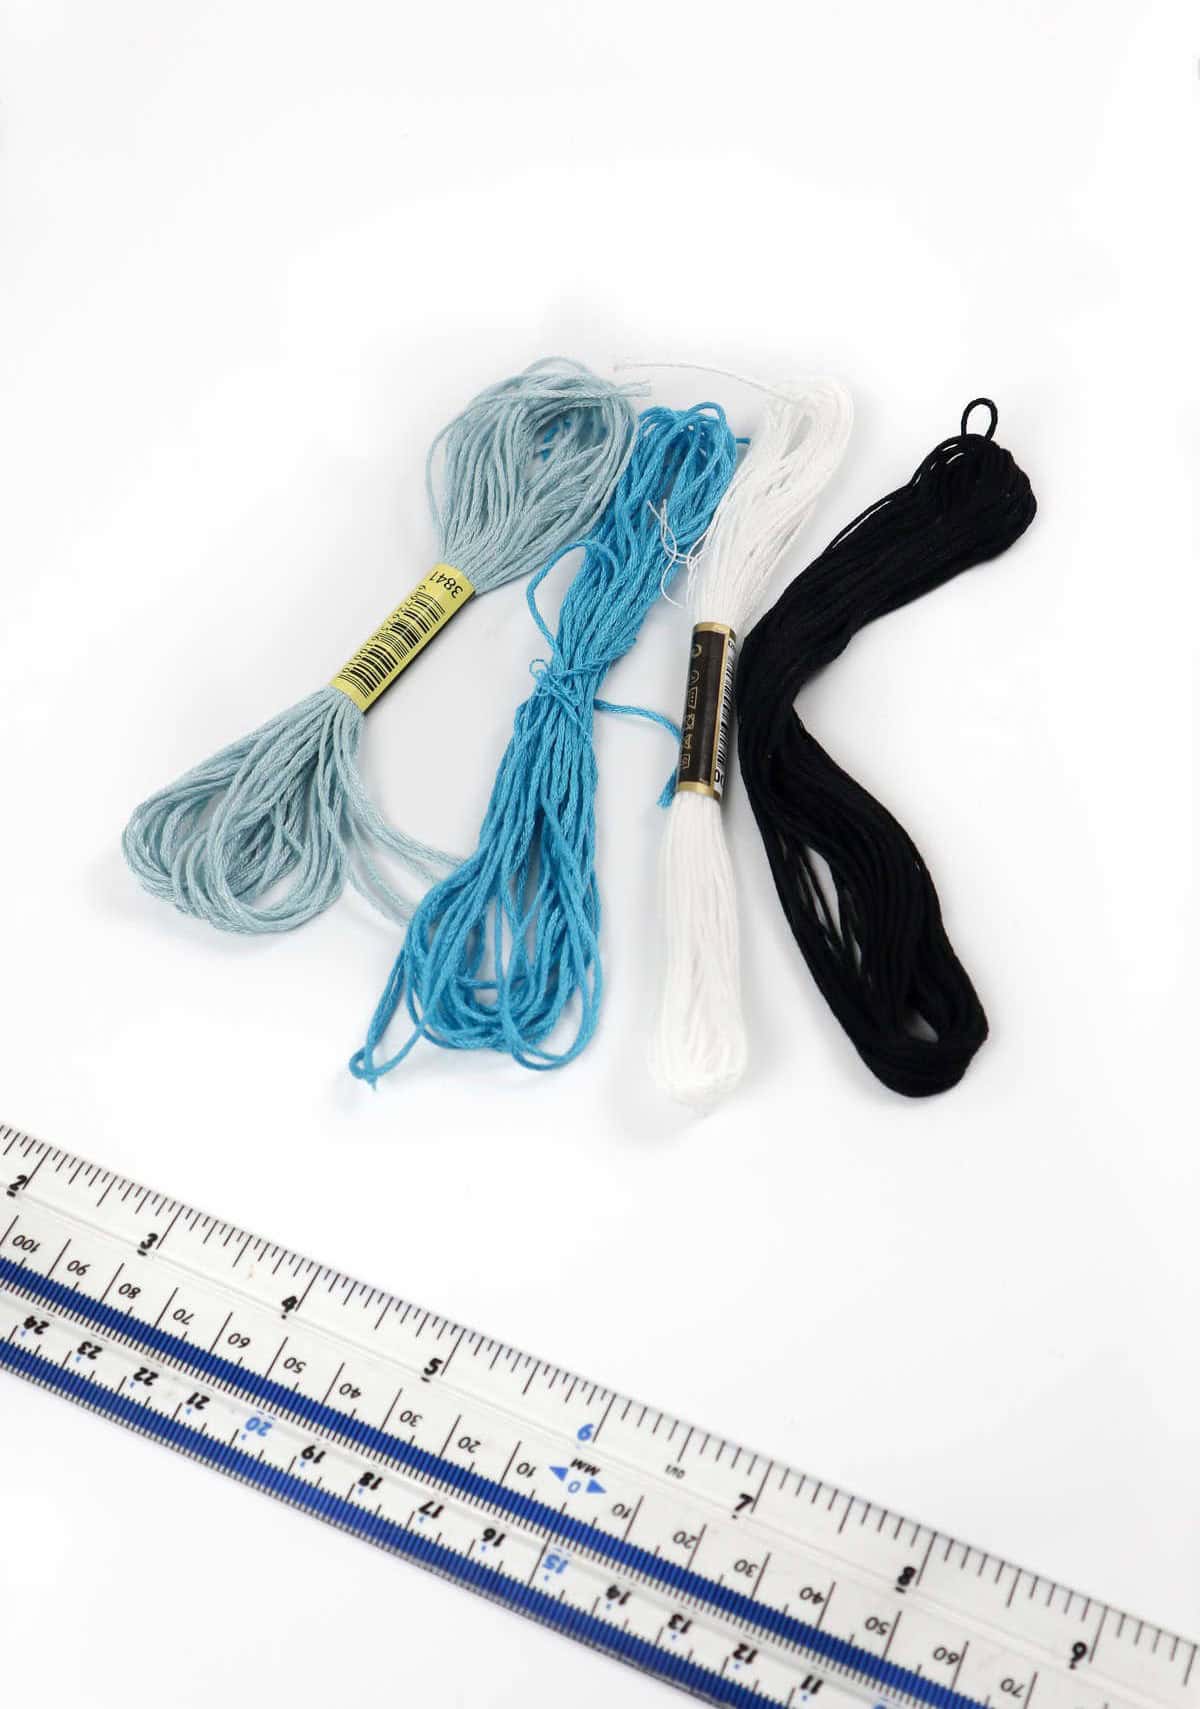
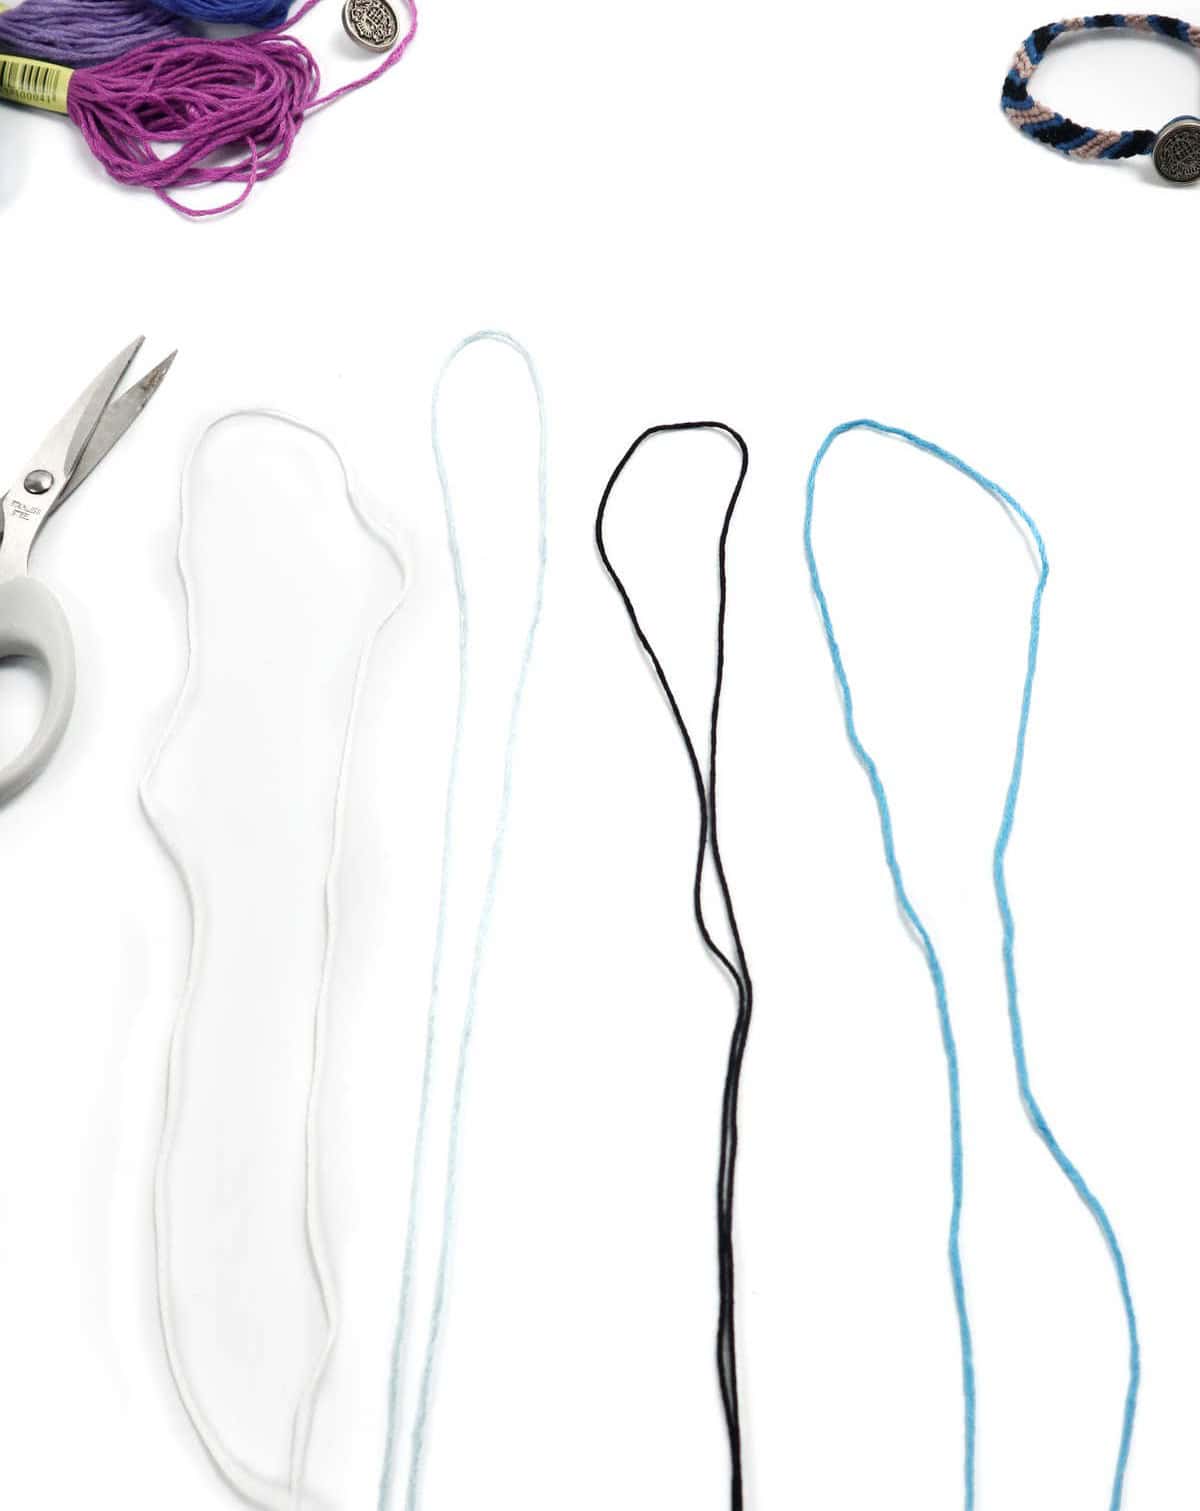
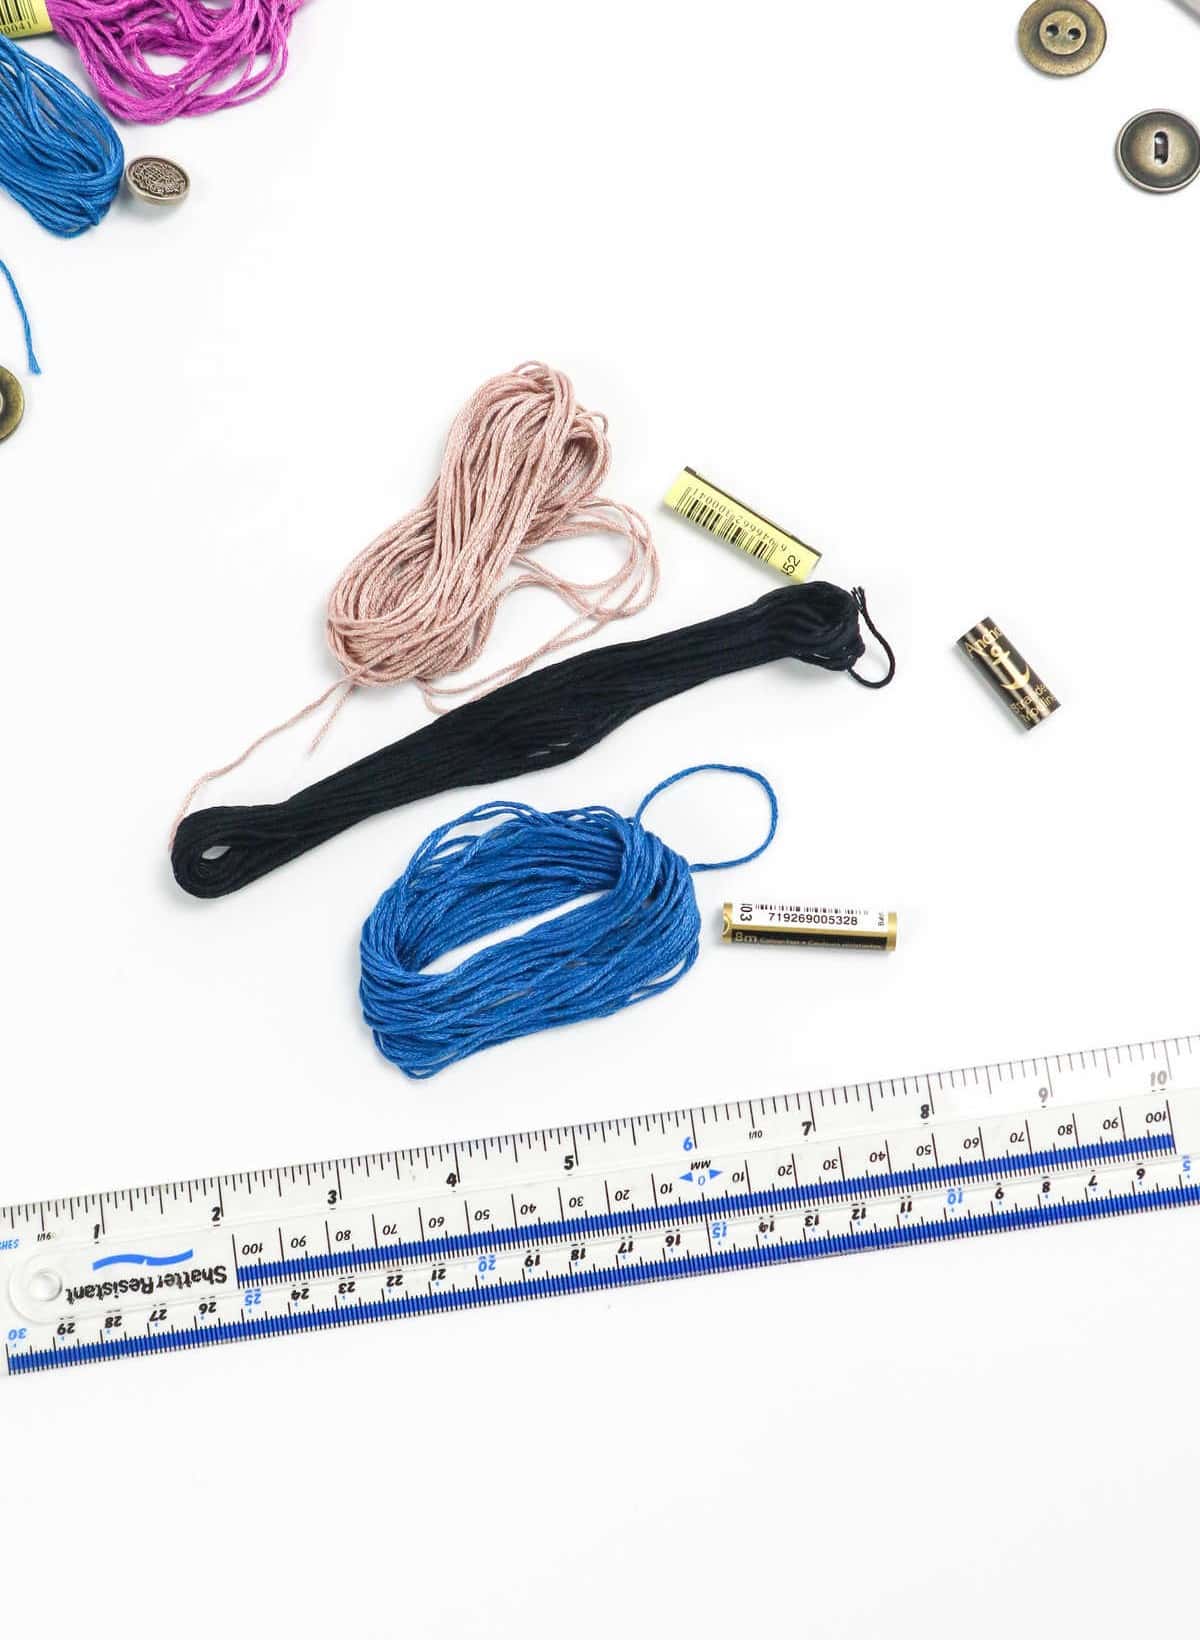
Gather your diverse collection of embroidery floss, including black, blue, grey, and white hues, as depicted in the following illustration. Next, carefully trim each strand to a uniform length of 60 inches, ensuring consistency throughout.
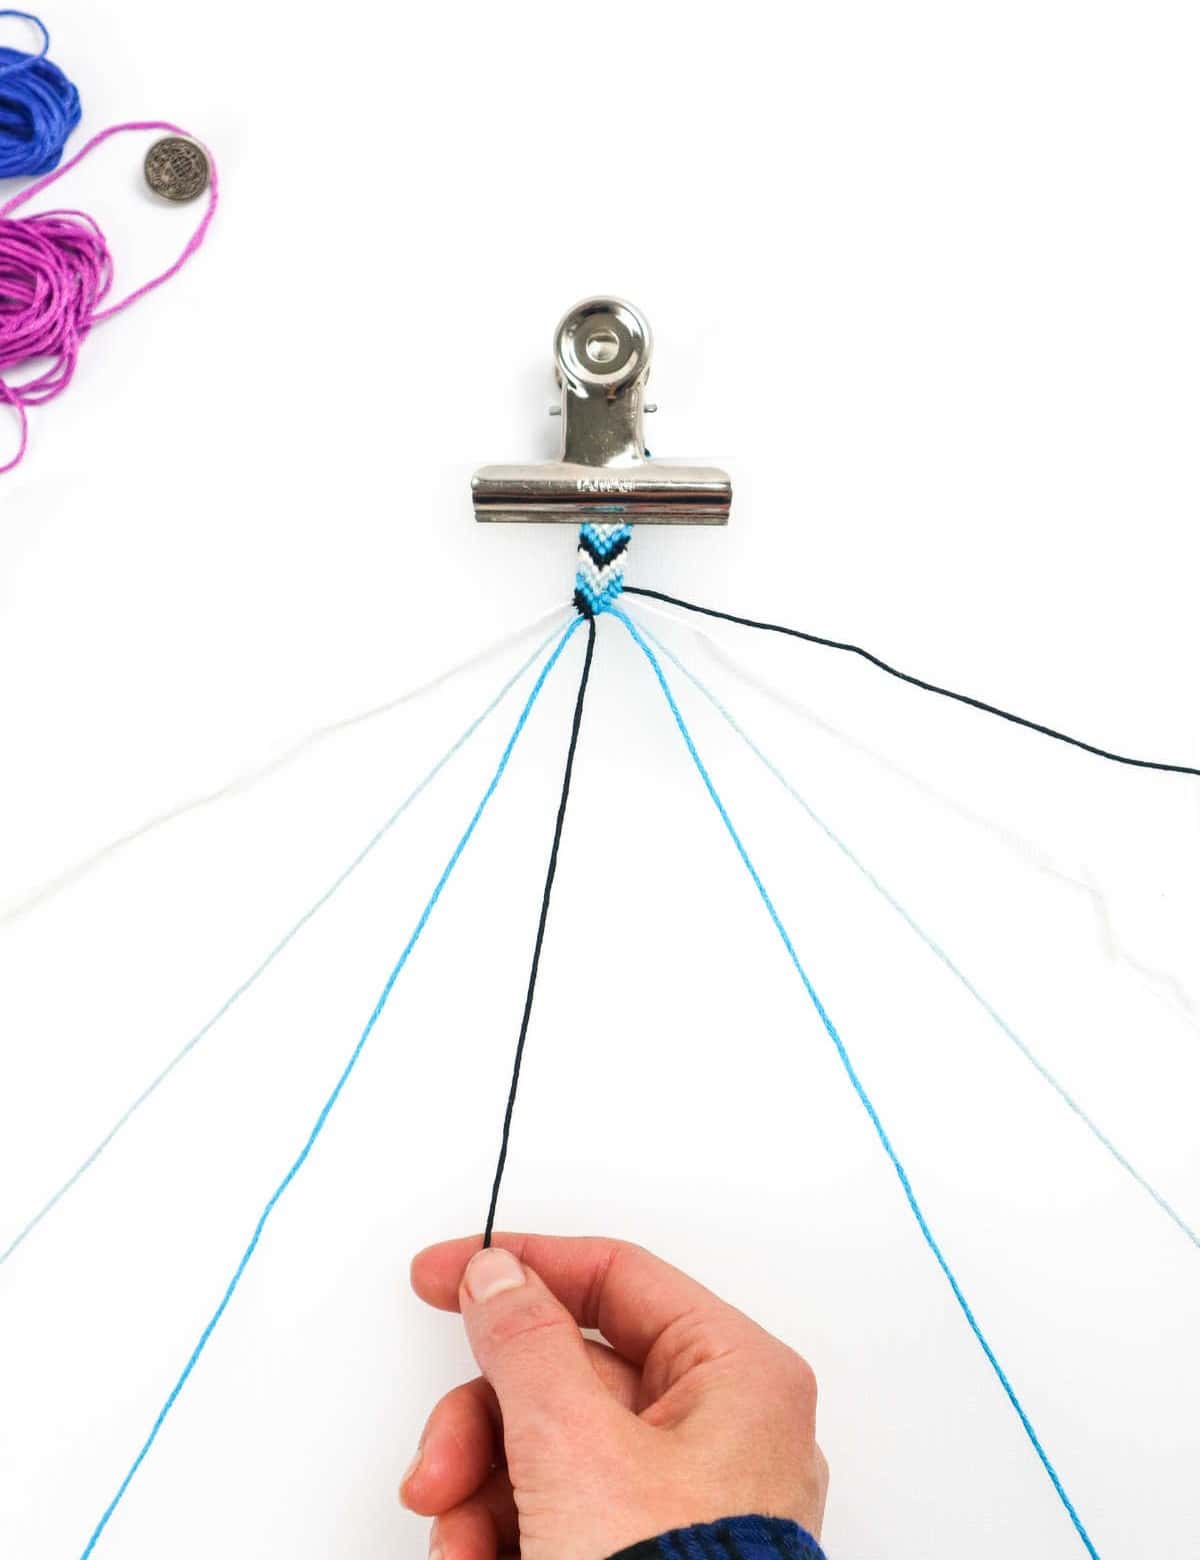
Step 2
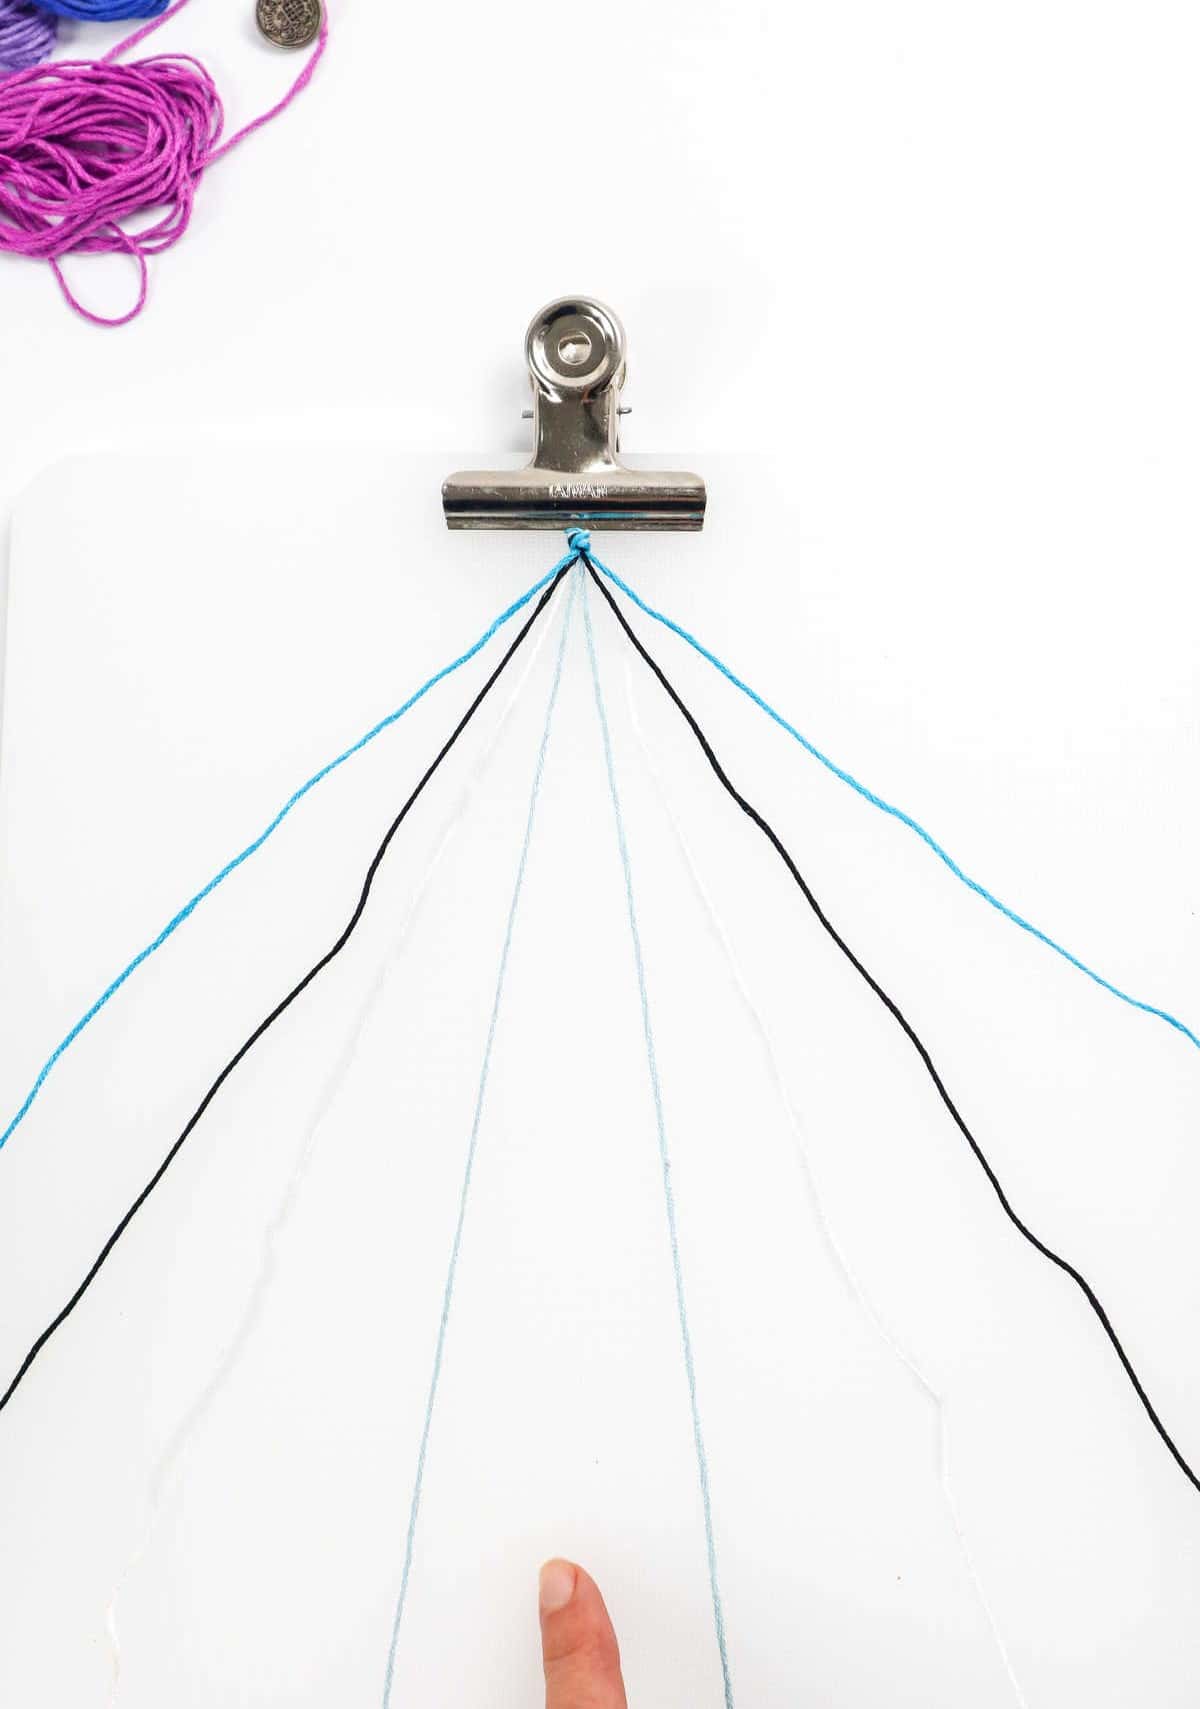
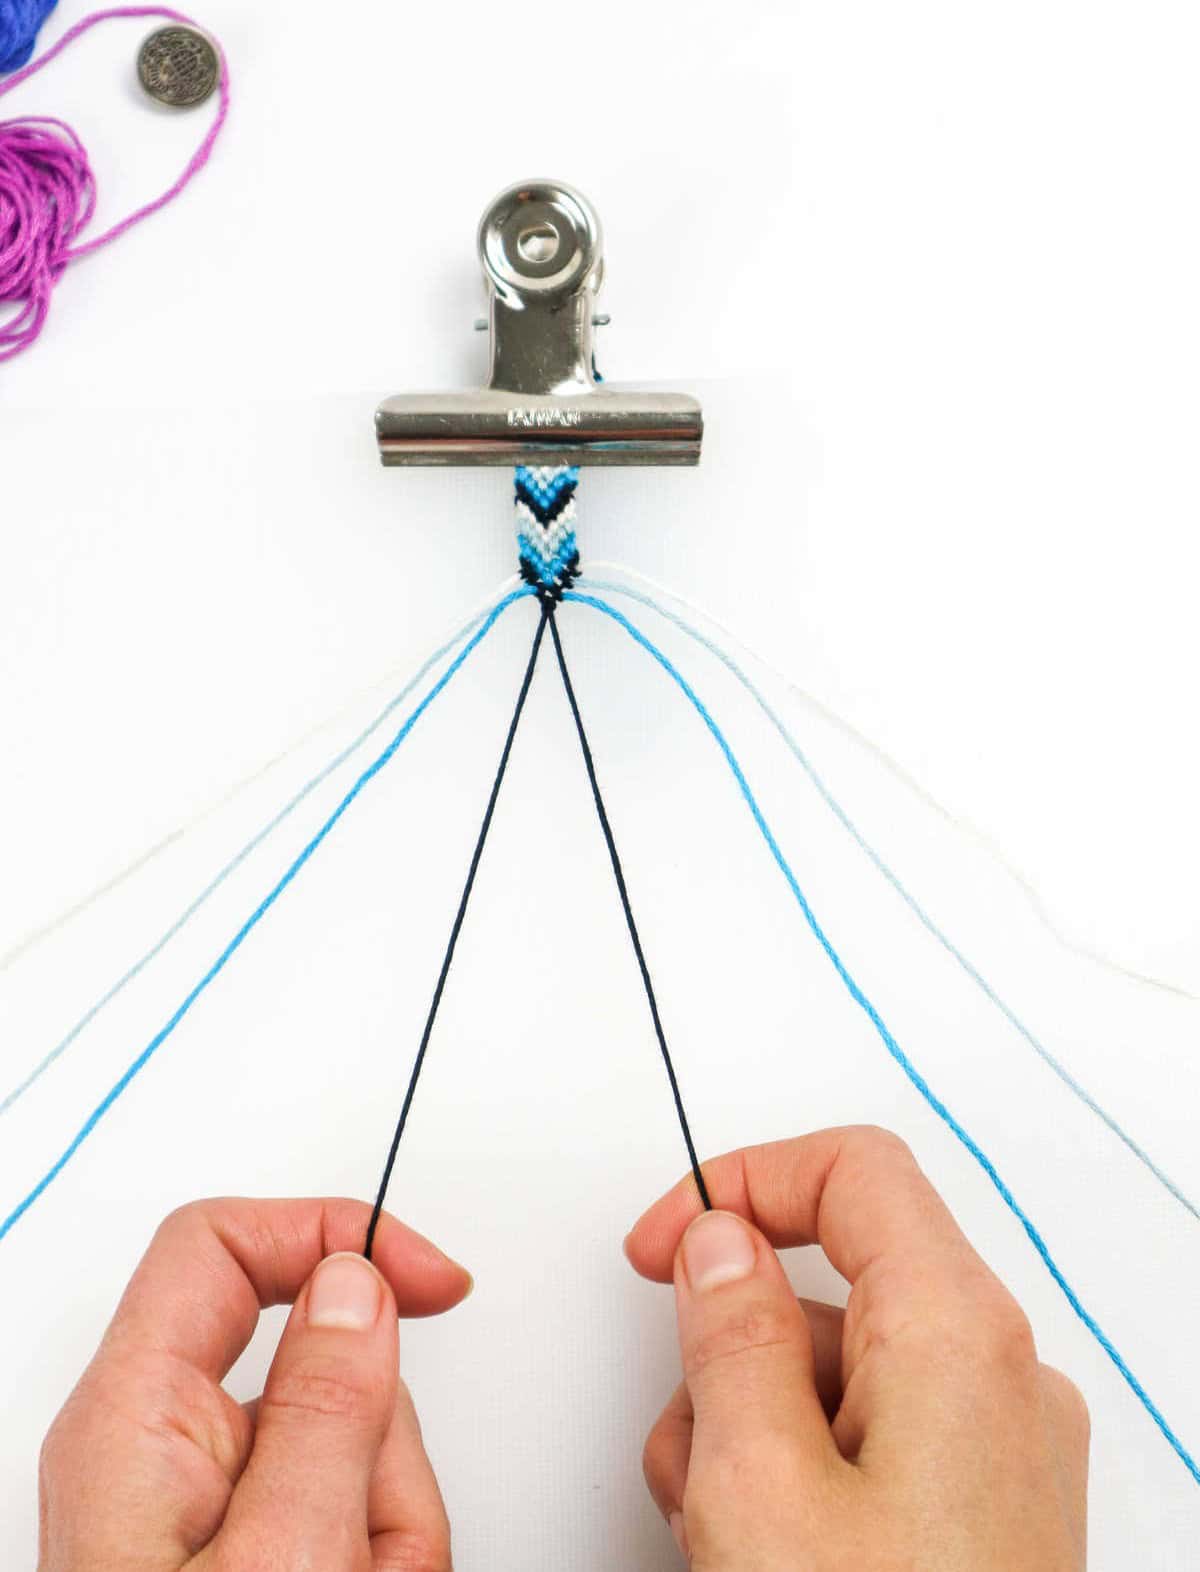
To complete the looped knot, start by securing the ends of the cords in place using your clipboard. Next, divide the eight threads into two equal groups, with the colors mirrored on either side. To achieve this, arrange the blue-black-grey-white and white-grey-blue pairs on the left and right sides respectively.
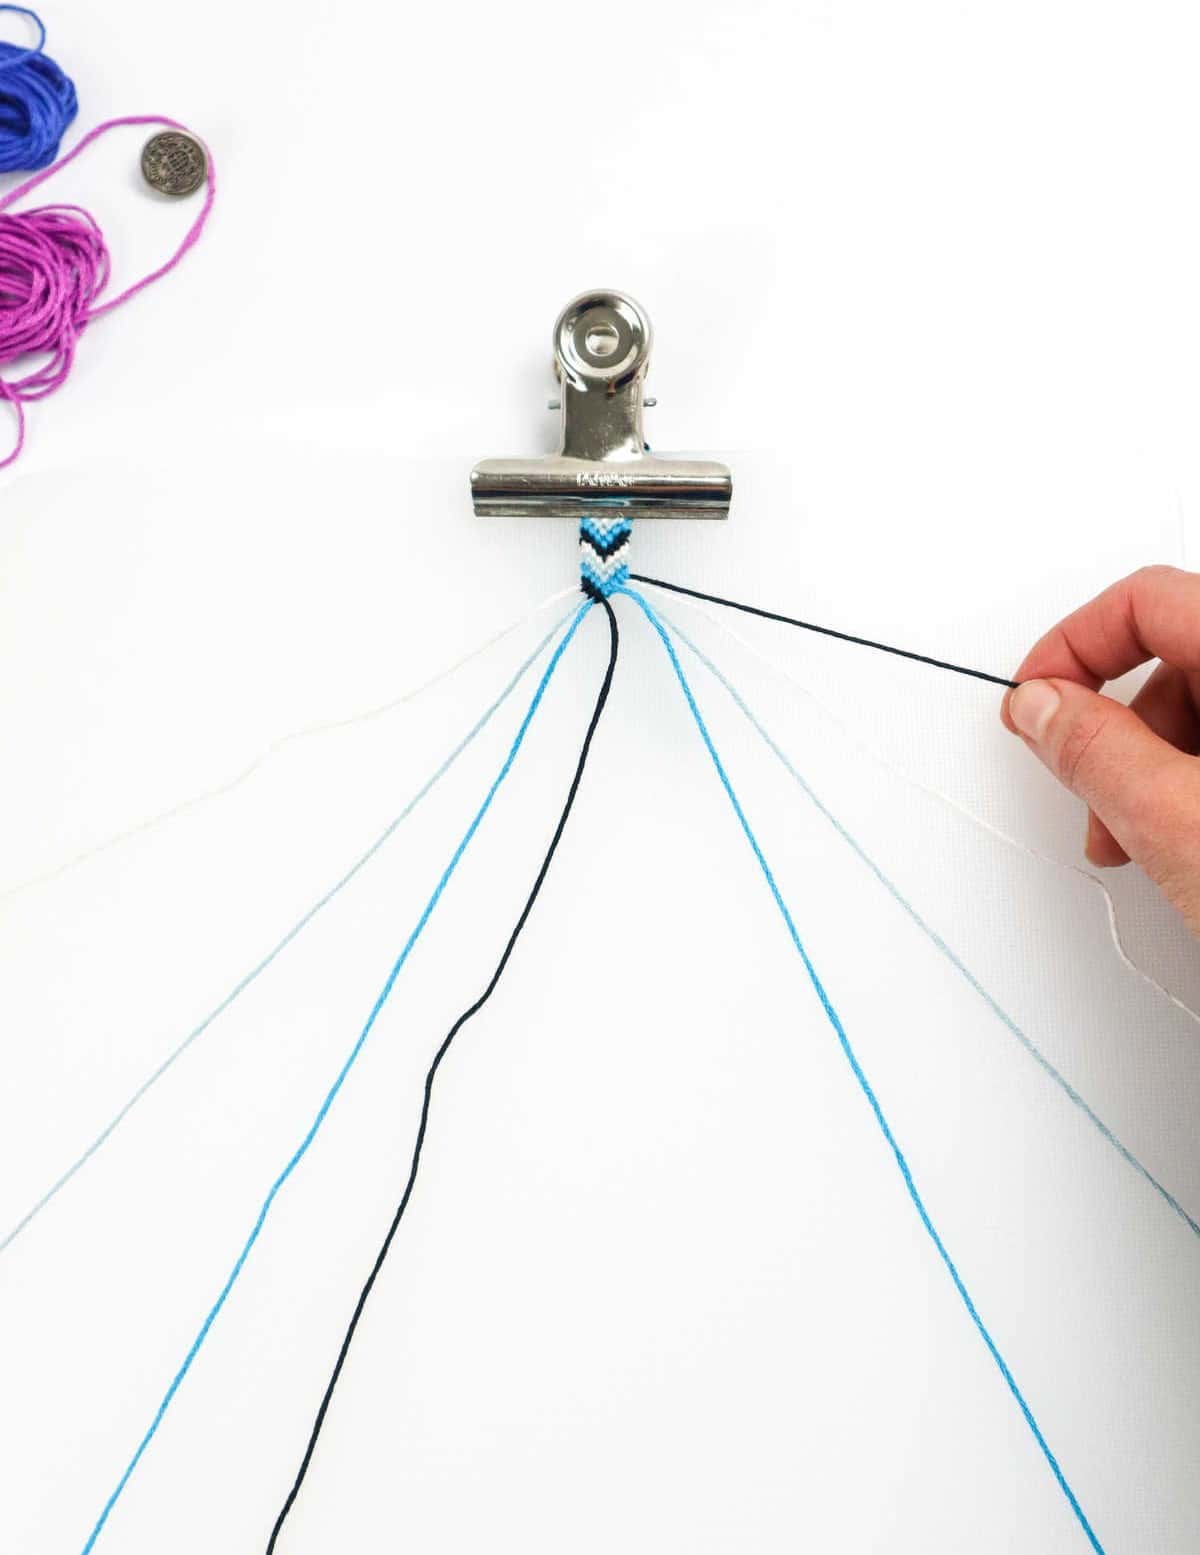
Step 3
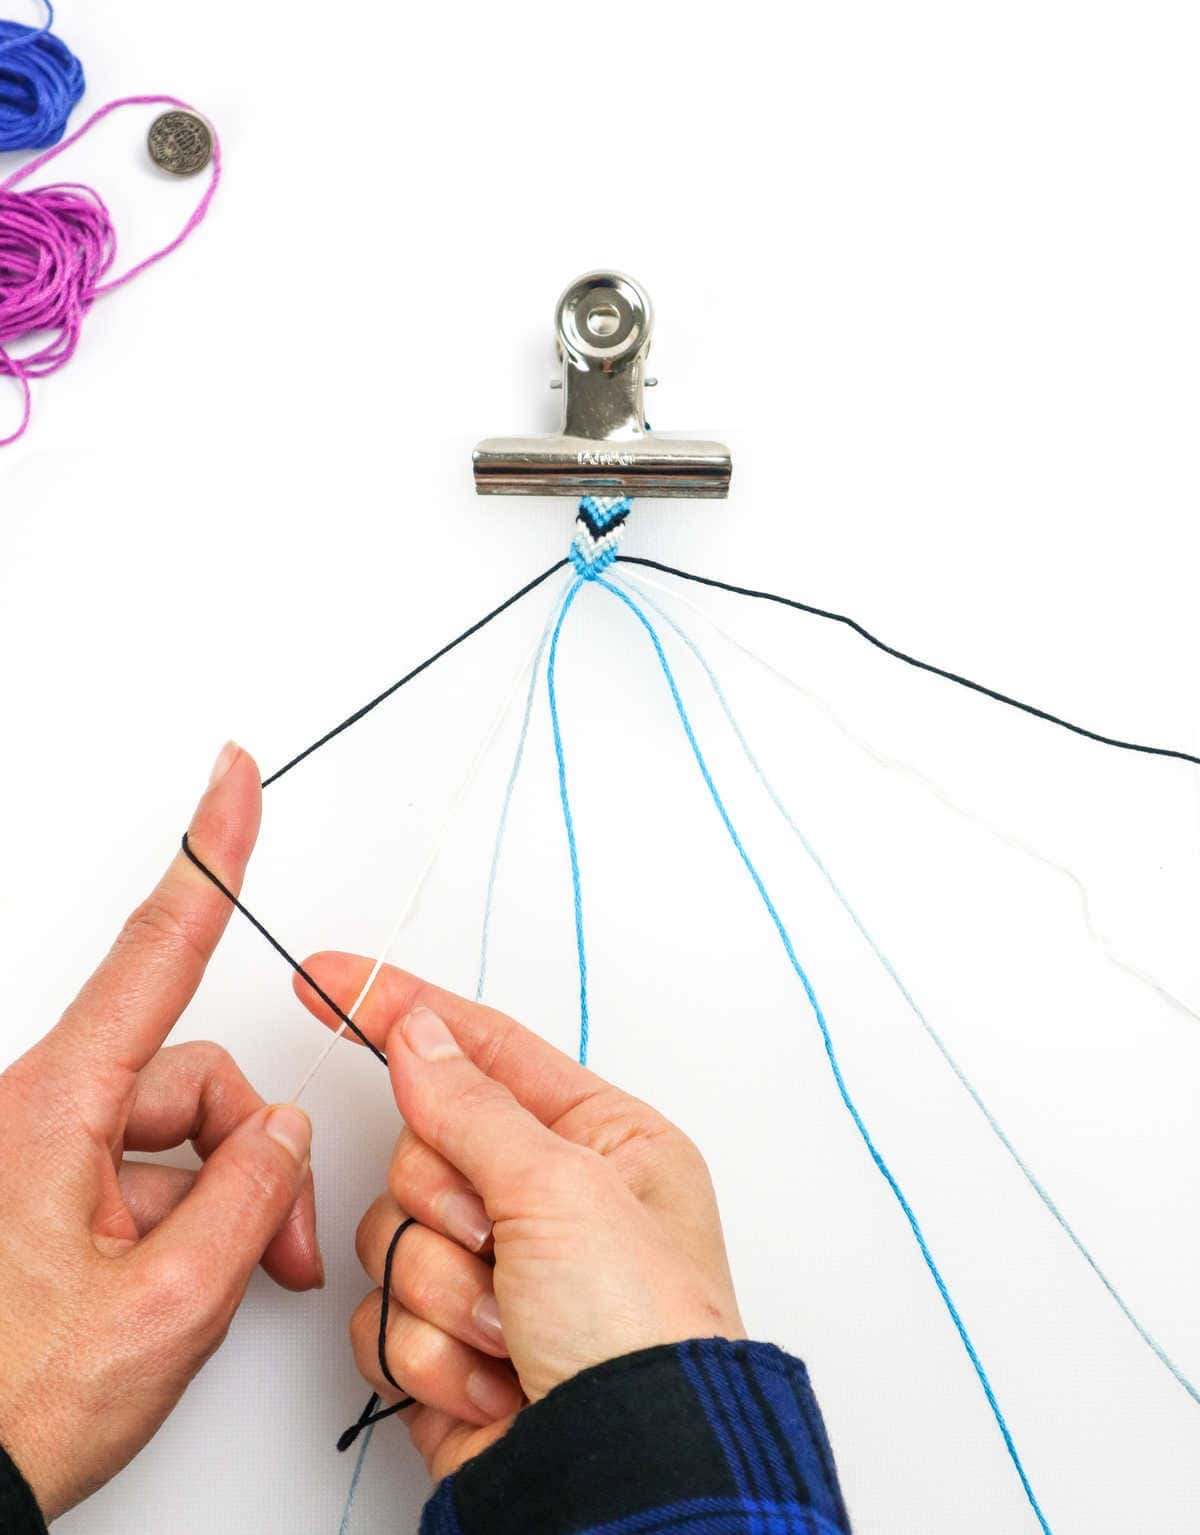
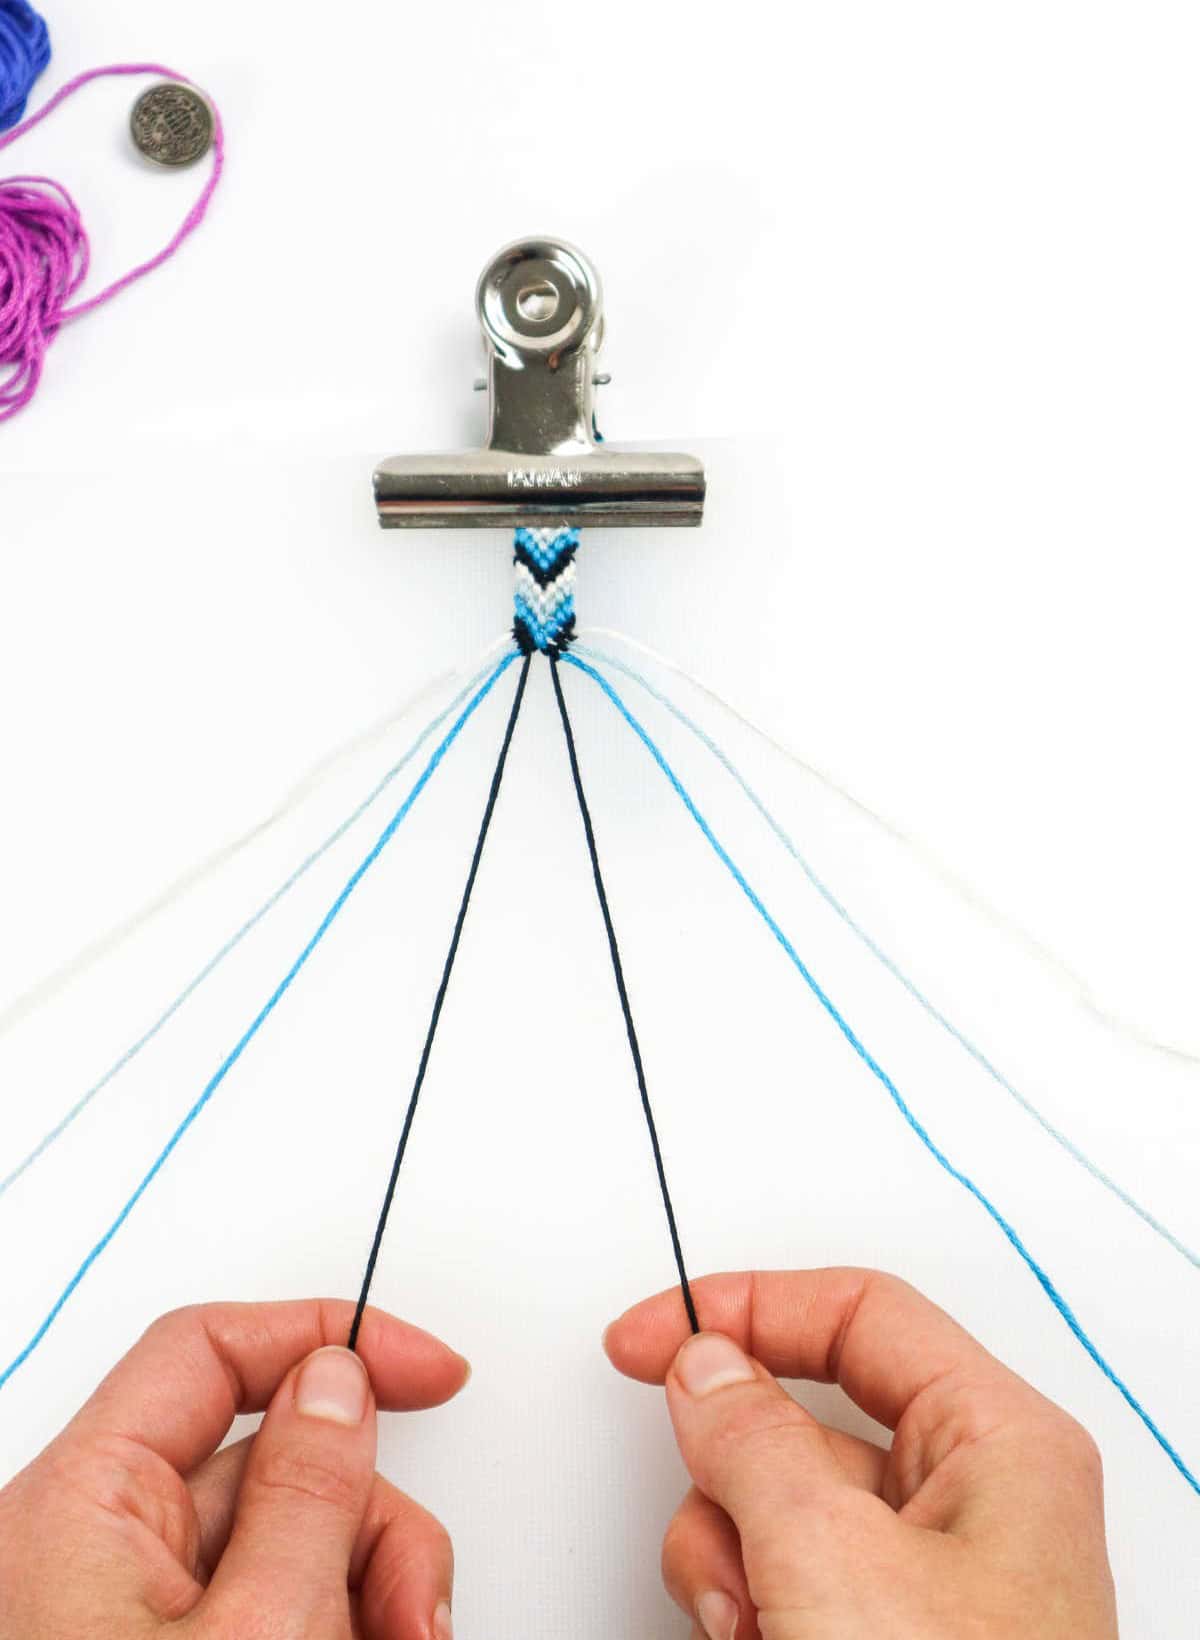
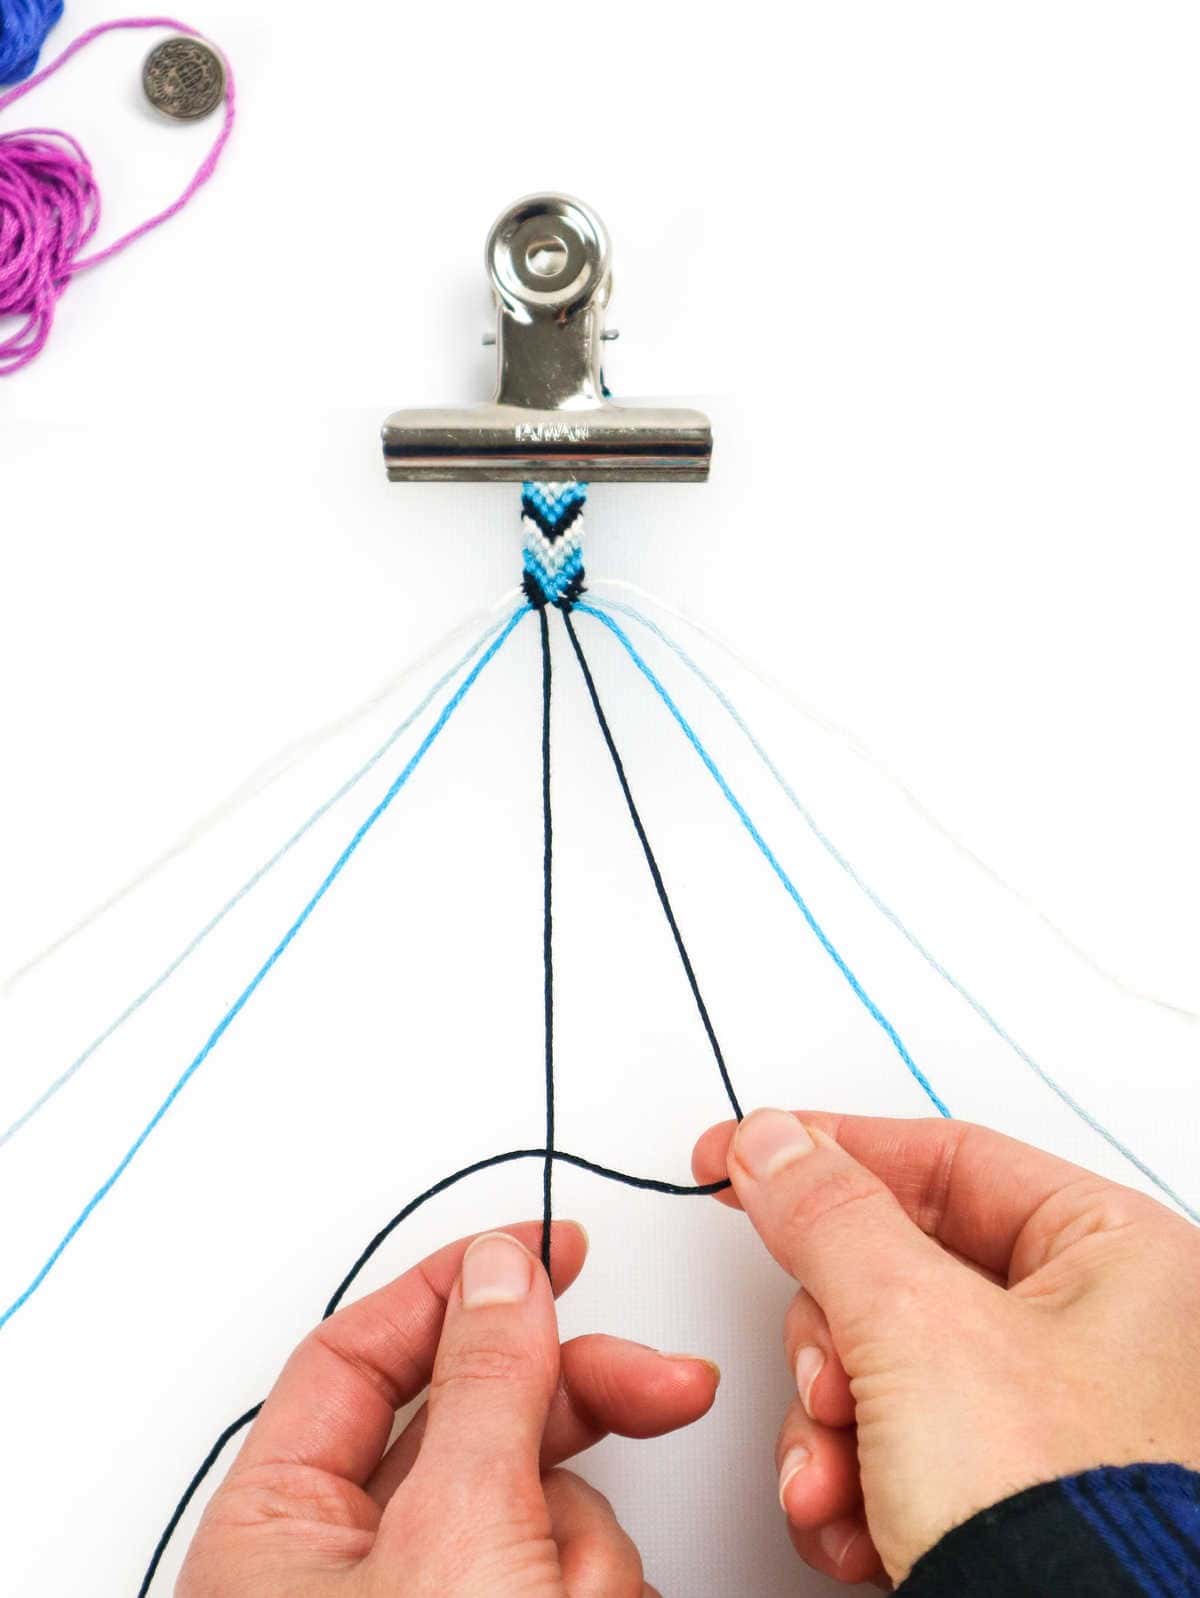
To continue creating the rope design, recall the method employed earlier for forming rows of knots. Begin by grasping the exterior knot on the left side, then create three consecutive knots along the row until you reach the midpoint.
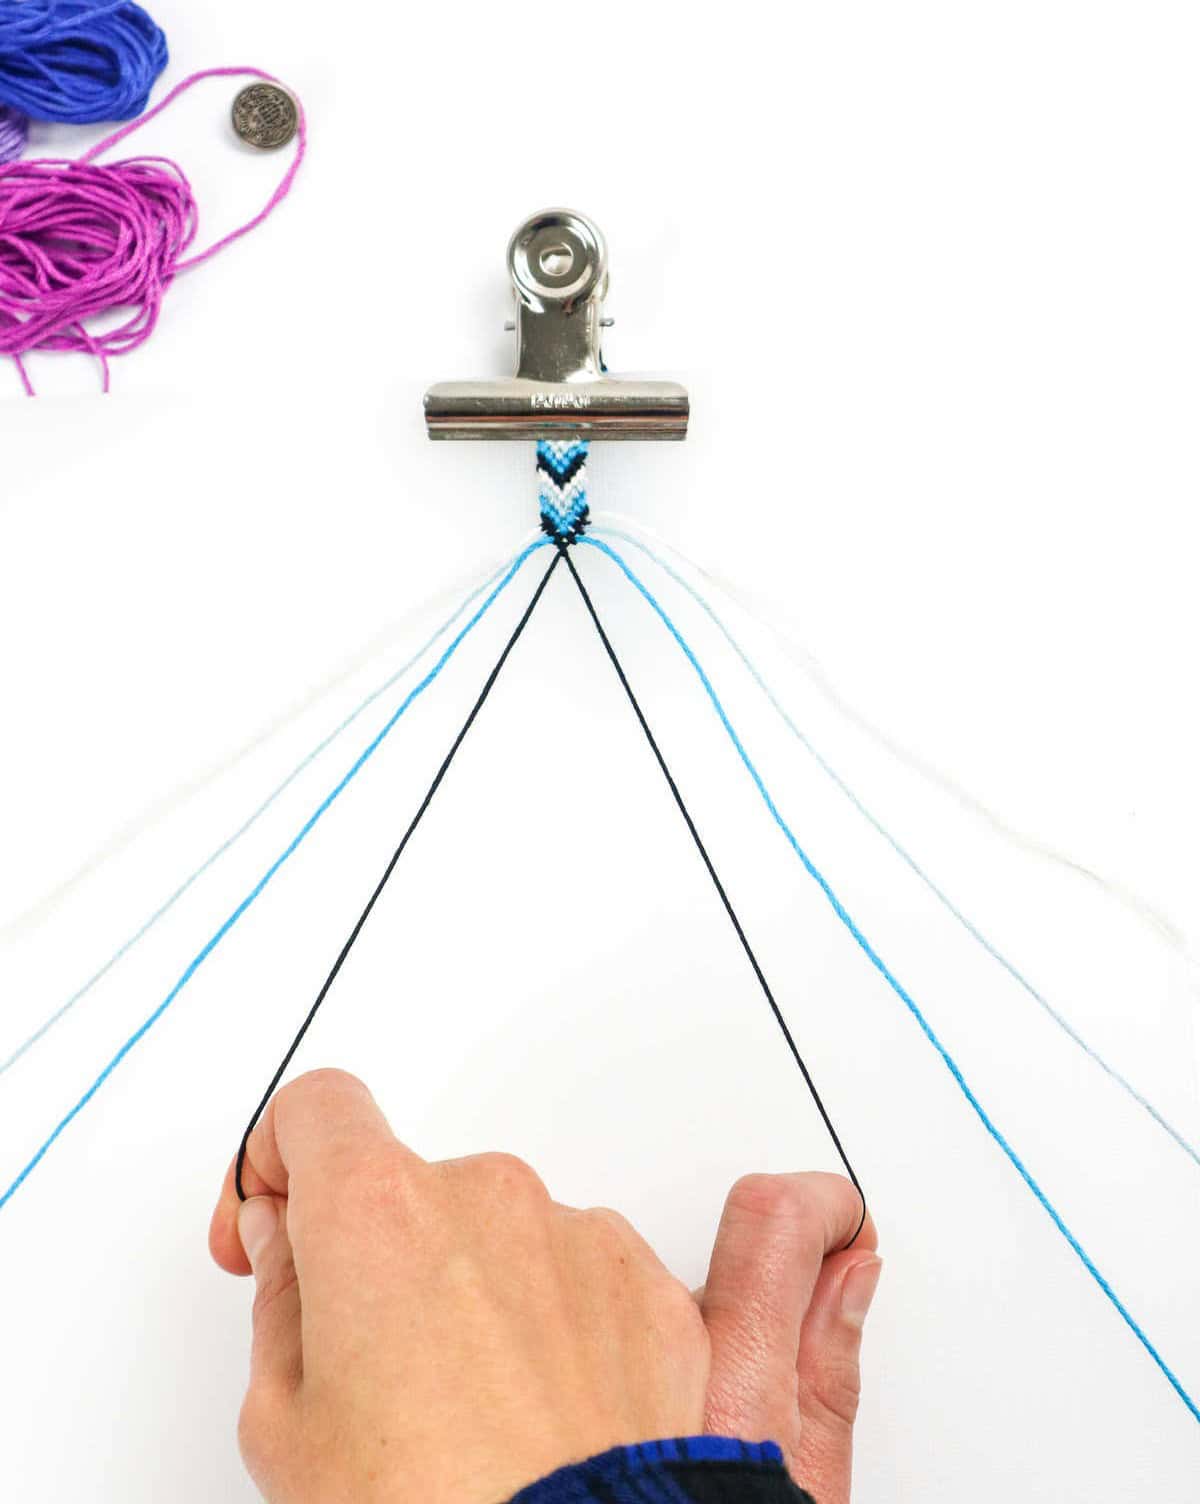
Step 4
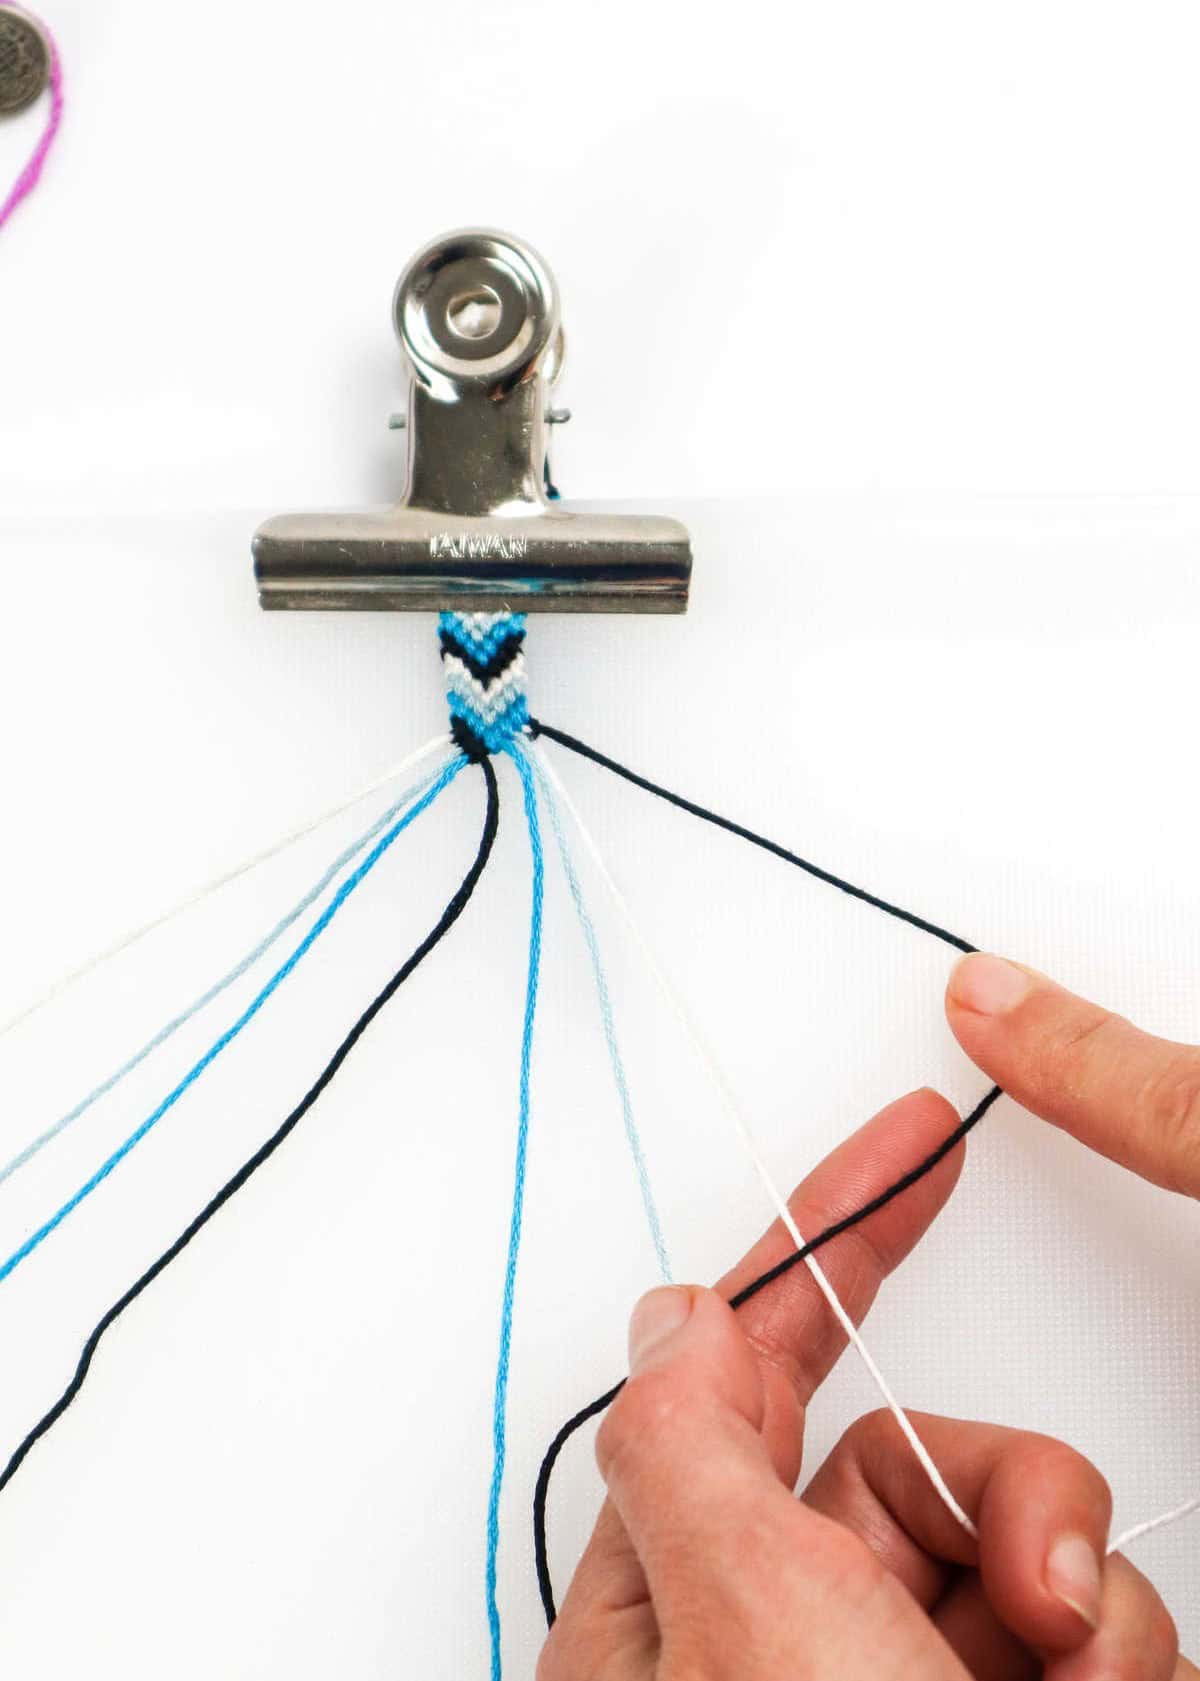
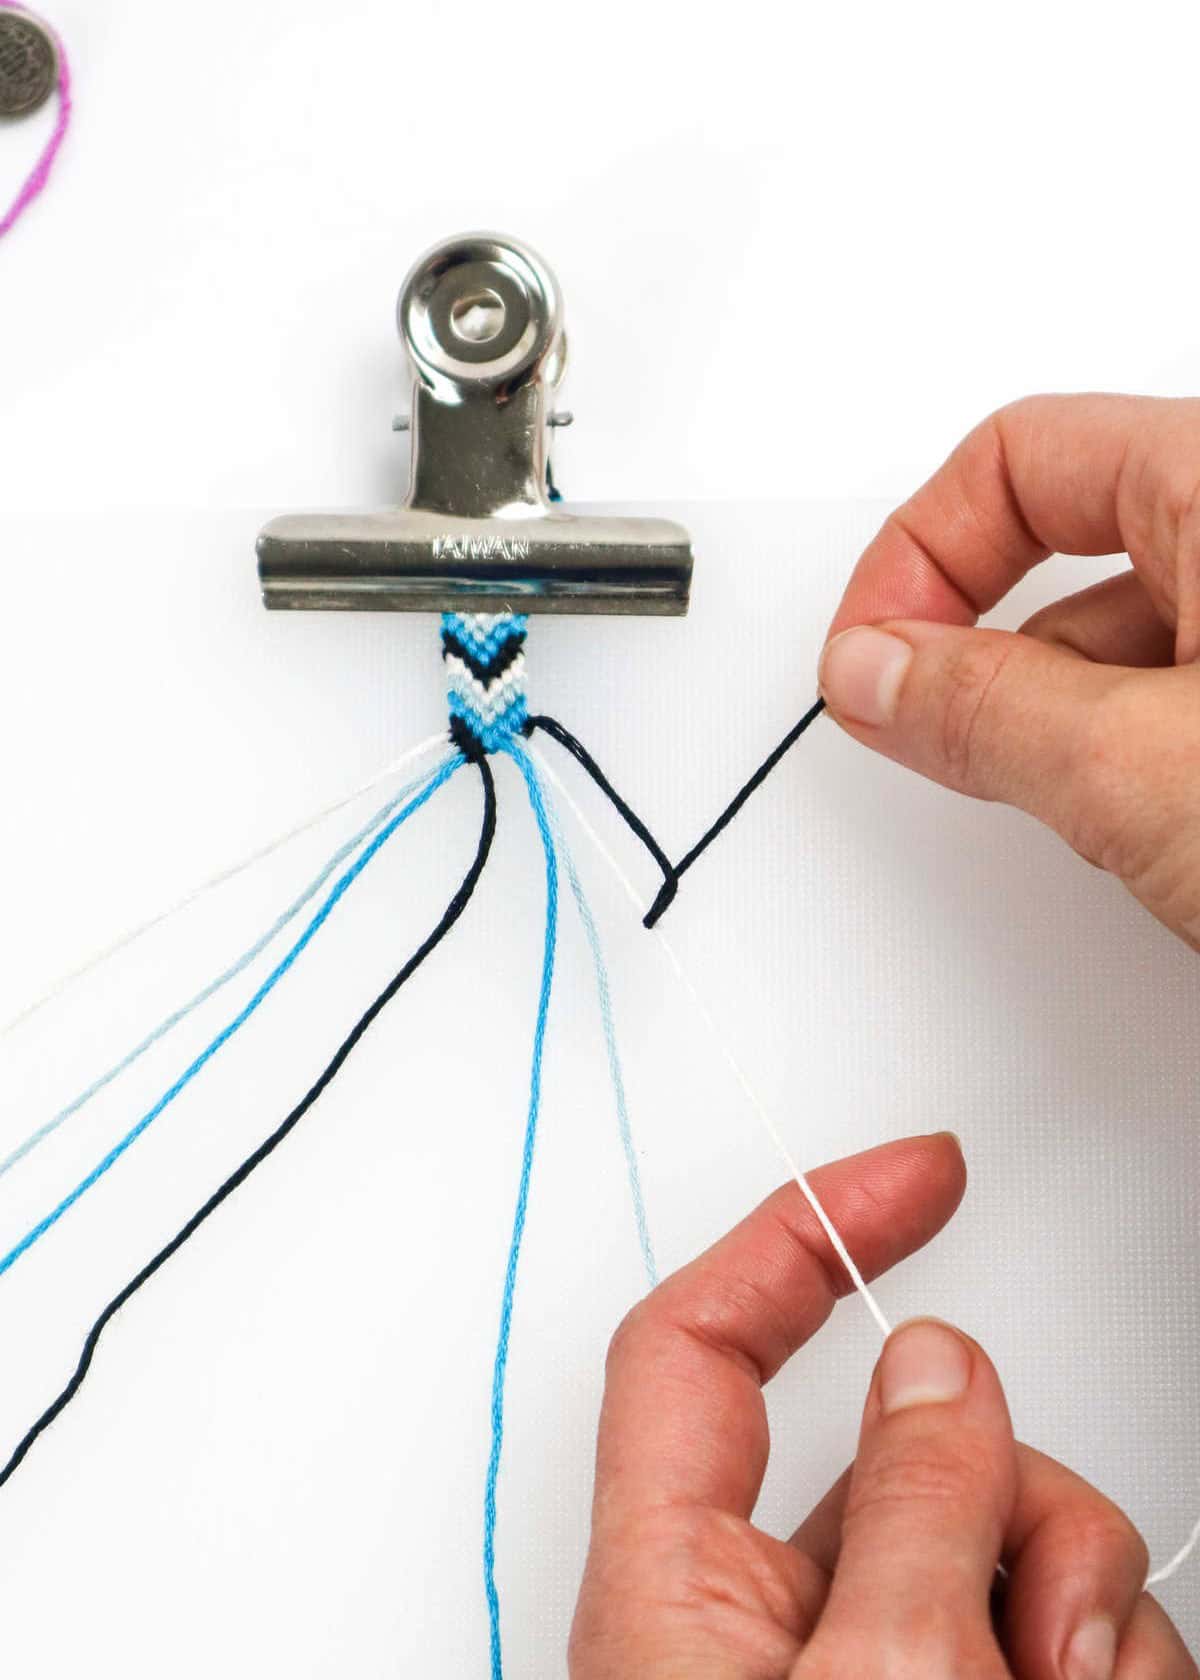
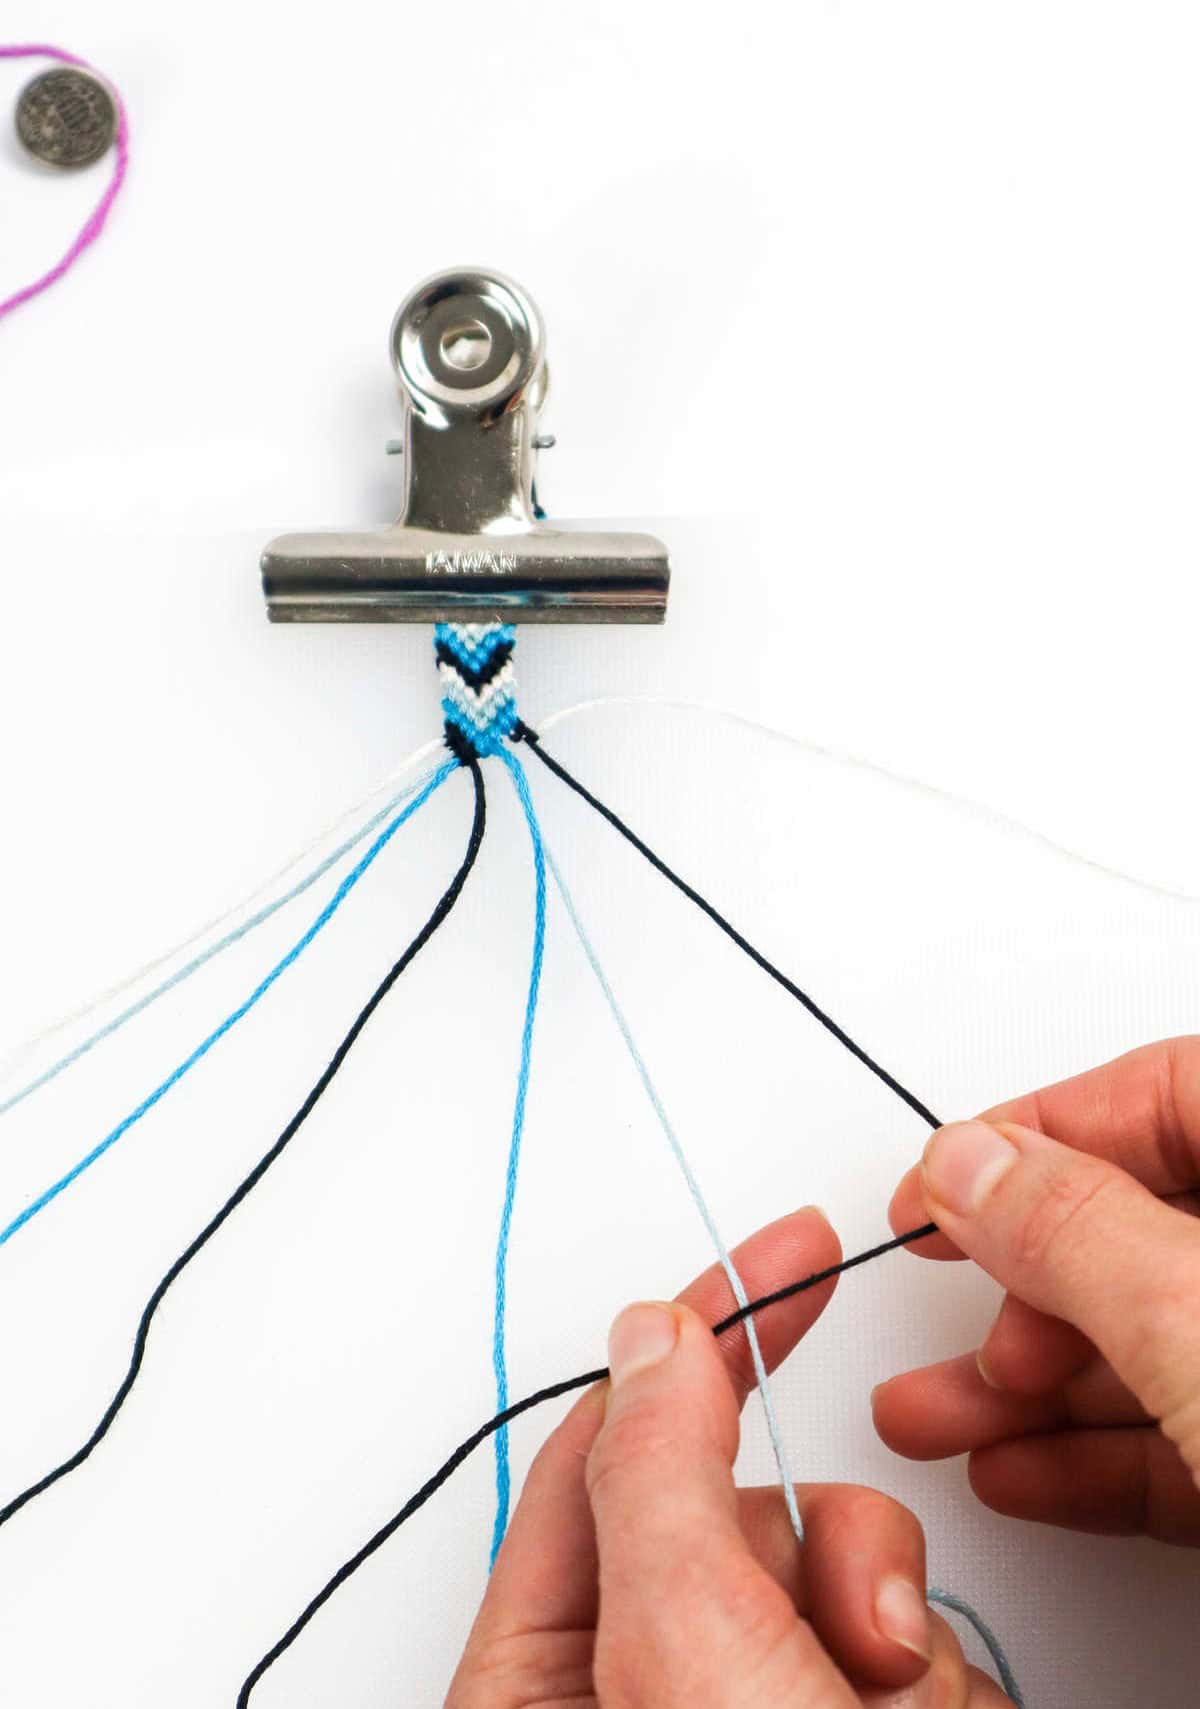
To proceed, start by moving to the right side and selecting the first cord. Next, create a loop by pulling the leading cord over the second one. Hold the loop in place using your finger and then pass the cord under the latter and through the loop. Continue this process down to the middle, just as you did with the cords on the left. For added complexity, consider looping the leading cord around the remaining cords twice, allowing for two rows of knots.
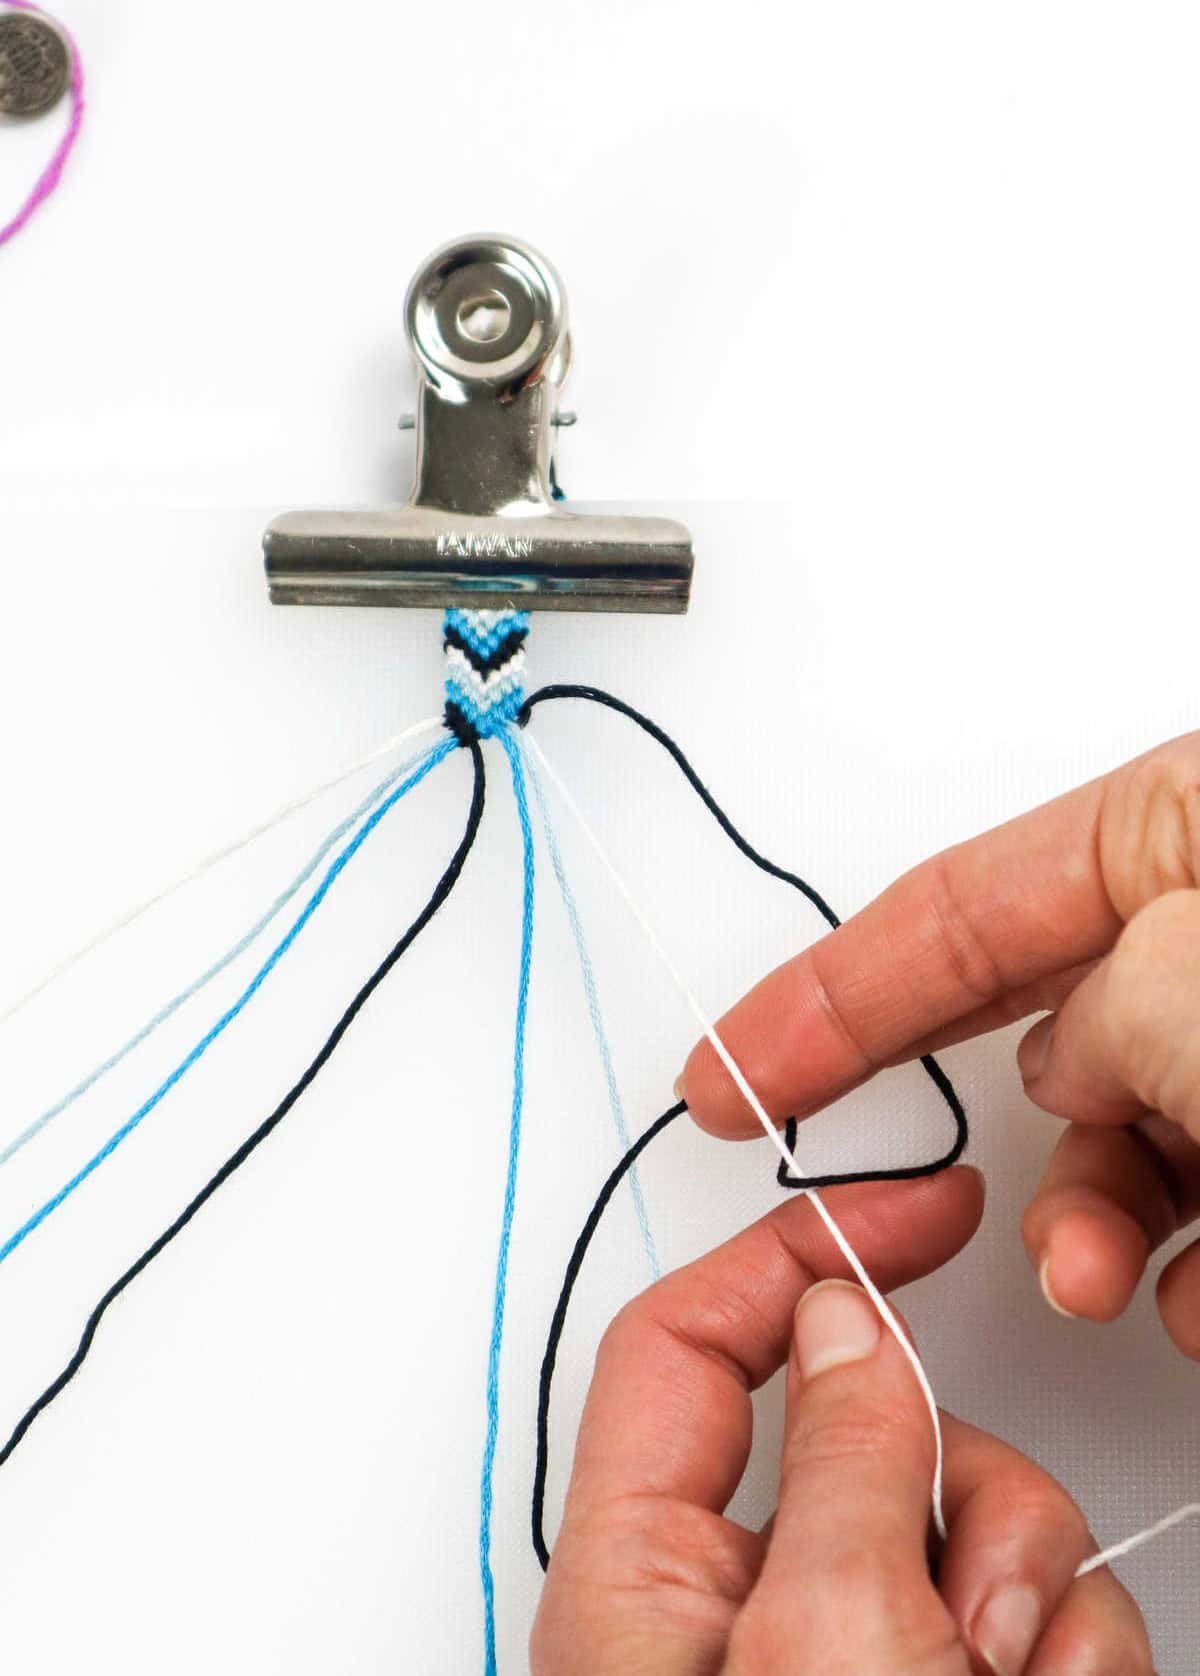
Step 5
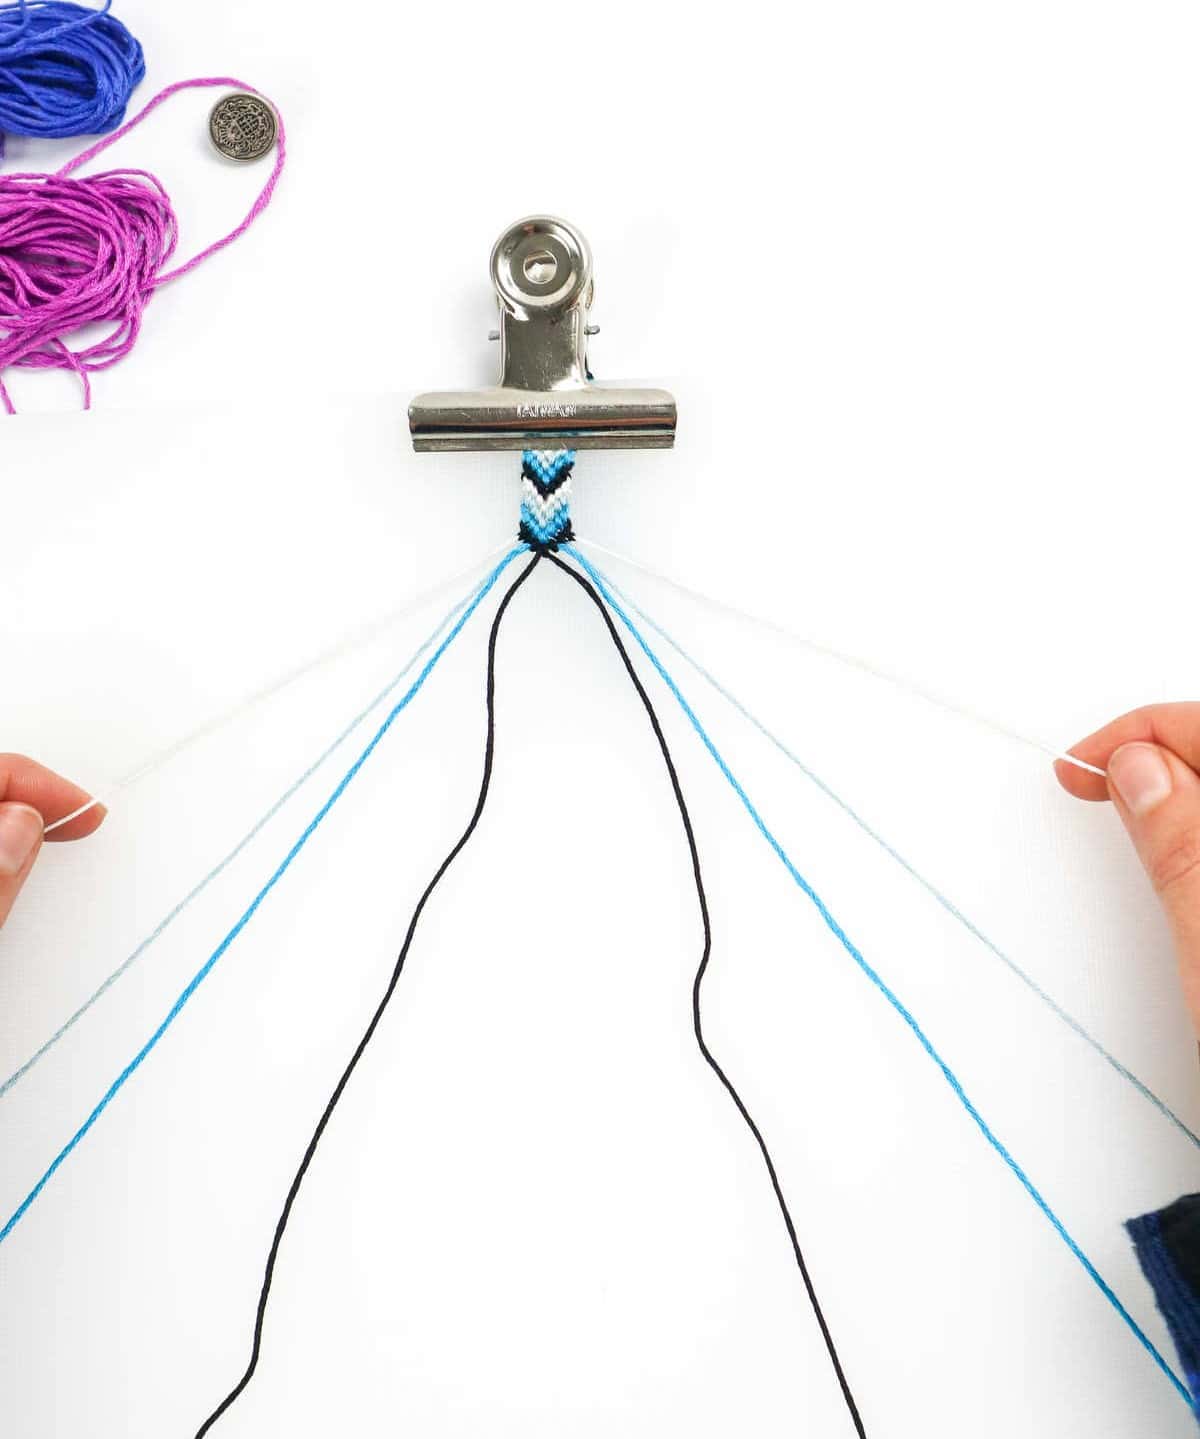
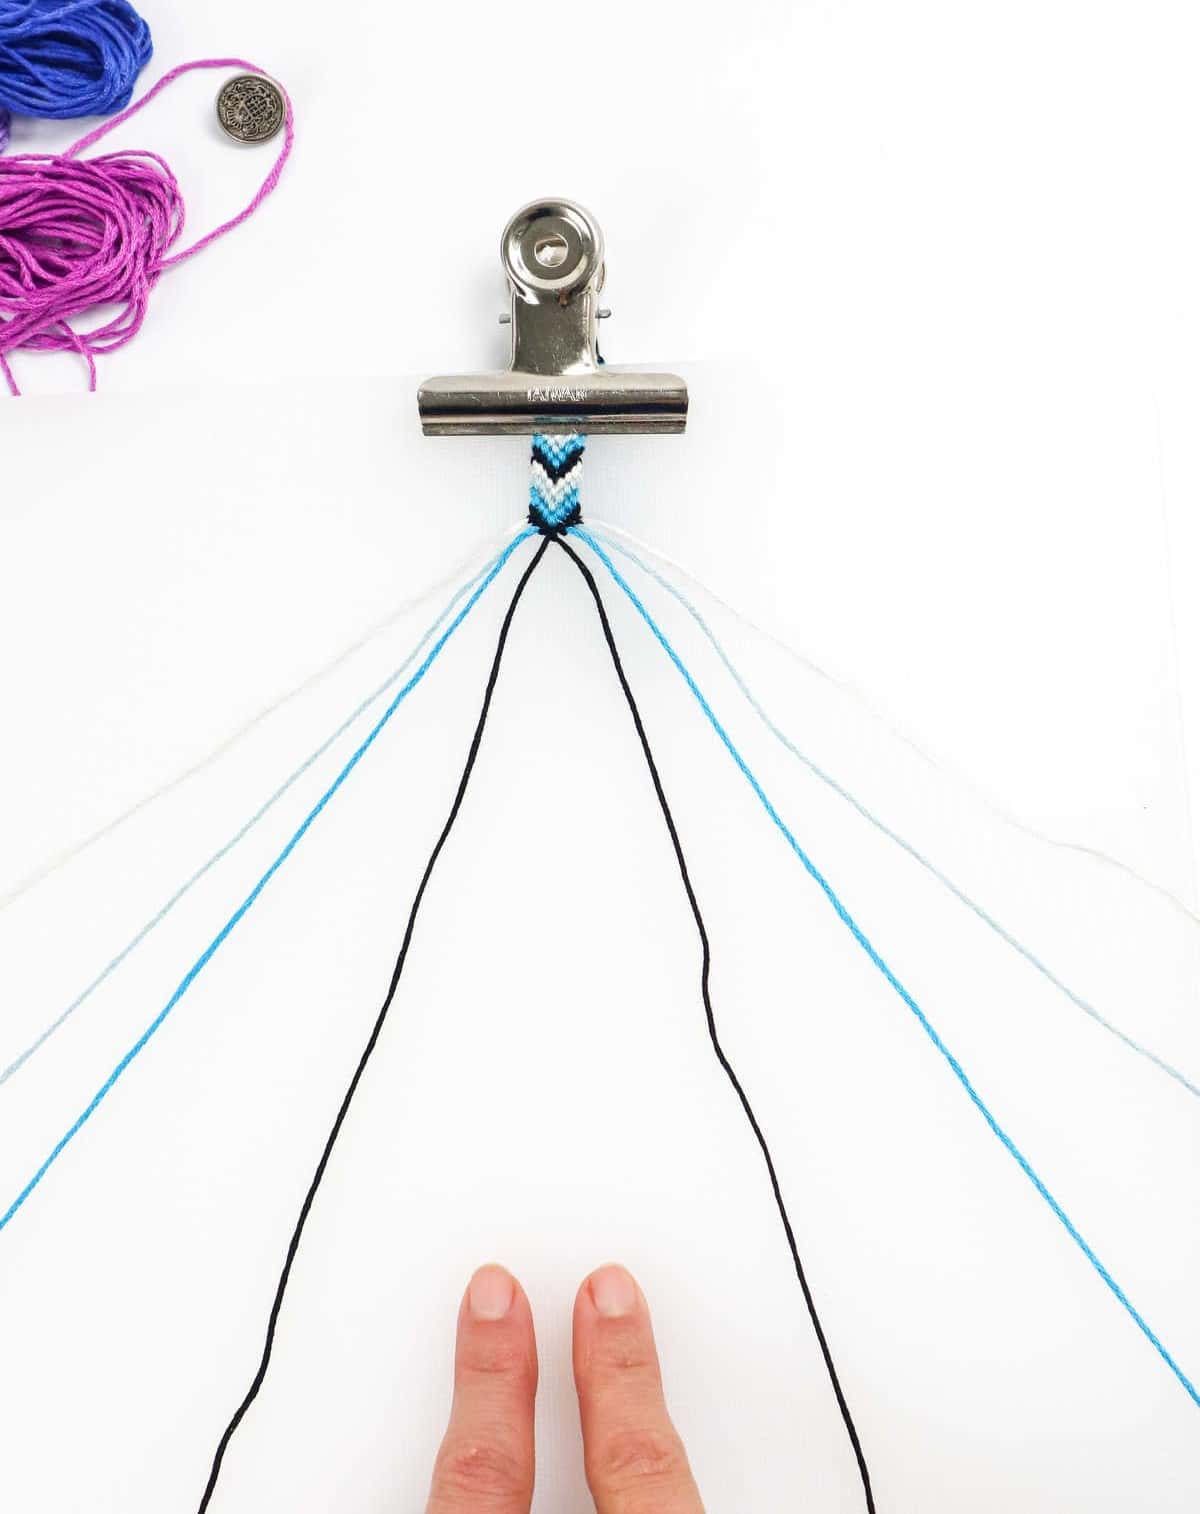
As you guide your cords towards the center of the design, you’ll eventually create a V-shaped pattern. To conclude this section, simply use the right cord as the leading cord and wrap it around the left cord twice. This will result in mirrored patterns on both sides, forming a beautiful V-configuration of knots. Once complete, proceed with finishing the remainder of the bracelet and consider adding any embellishments if desired.
With your final touches in place, admire the end result – your friendship bracelets are now stunningly finished!
How to Flatten Curled Friendship Bracelets?
When your friendship bracelets develop a natural curl due to their narrow width and limited rows, there’s no need to worry. One effective way to restore their original shape is by using water. Simply dampen your fingertips with water and gently pat the bracelet, allowing the droplets to settle on the threads. Next, place the bracelet between two paper towels and apply gentle pressure with a heavy book as it dries. Alternatively, you can employ a flat iron or straightener to relax the fibers.
To avoid damaging the threads, place a thin towel over the bracelet before running an iron over it, ensuring a smooth and controlled process.
What to Do if I Run Out of String?
When encountering a mid-project thread shortage, don’t panic! Simply acquire another strand of matching color and seamlessly integrate it into your DIY work. To do this, slip the new string in place, ensuring a smooth continuation of your knots. Alternatively, you can opt to blend the short cord as you progress with the project or remove it later, effectively eliminating any visual disruption.
Other Crafts You Might Like

Get creative with these 5 easy DIY projects that are perfect for crafty beginners. From making a bohemian-inspired macrame keychain to creating stylish polymer clay earrings, there’s something for everyone. Add some flair to your outfit with a handmade scrunchie or get creative with yarn and make a unique bracelet out of shoelaces.
If you’re looking for more ideas, explore our archives for inspiration: 37 yarn projects that will impress, 47 scrap fabric projects to upcycle, and 37 crafts to make and sell. And don’t forget about DIY earrings – we have 37 different designs to spark your creativity!
How to Make Friendship Bracelets
Discover the joy of handmade accessories with this easy-to-make DIY friendship bracelet project. In just 40 minutes, you’ll have a unique and thoughtful token of friendship to share with your loved ones. This fun and accessible craft is perfect for anyone looking to express their creativity and connect with others through meaningful gifts.
Equipment
To avoid the annoyance of a suddenly darkened screen, you’ll want to consider arming yourself with some everyday tools. Think beyond just your standard issue office supplies and incorporate items like a trusty chopping board, reliable scissors, or a precision ruler into your sleep prevention arsenal. And if you’re feeling extra adventurous, why not try using a bulldog clip to keep everything in order? It’s all about being prepared for whatever the night may bring.
Materials
Instructions
To create your own unique bracelets, gather all the necessary supplies. There are two methods to make a statement piece: the 3-strand and 4-strand techniques. For the 3-strand method, cut three cords of varying colors, each measuring 45 inches in length. Fold each cord in half to form a loop, then bring the six loops together to create a knot approximately half an inch from the top. Secure the knots with clips on a clipboard and arrange the cords so that the left side mirrors the right.
Take the first cord on the left – the leading cord – and pull it over the second cord to form another loop. Hold this in place with your forefinger and bring the leading cord under the second, then through the loop. Pull the knot up and secure it just below the previous one. Repeat this process for a total of five knots across the row. To add additional rows, you can loop the leading cord around the cords twice to create two subsequent rows simultaneously.
Once you’re satisfied with the length, pull all six strands together to form a single knot, then tighten to secure the ends. You may also choose to attach a button at this point. To do so, separate the six cords into two sets of three each and pass three strands through the button loop. Use the remaining three to create a double knot that secures the button in place. For the 4-strand method, cut four cords, each measuring 60 inches in length.
Create the initial looped knot and secure it to your clipboard. Arrange the cords so that those on the left side mirror the right. Follow the same technique of looping and knotting as before, using a leading cord from both sides. First, work three knots down the middle with the first cord on the left as the leading cord. Next, use the first cord on the right to create a reverse 4-shaped loop and proceed to knot the cords all the way down to the middle.
You’ll find that both leading cords meet in the middle, leaving you to connect them by using the right cord as the leading cord and making another knot. You can also choose to repeat this process twice to create consecutive rows of the same color. Once you’re satisfied with the length, fasten off with a single knot. Feel free to add buttons or charms to personalize your 4-strand bracelet.