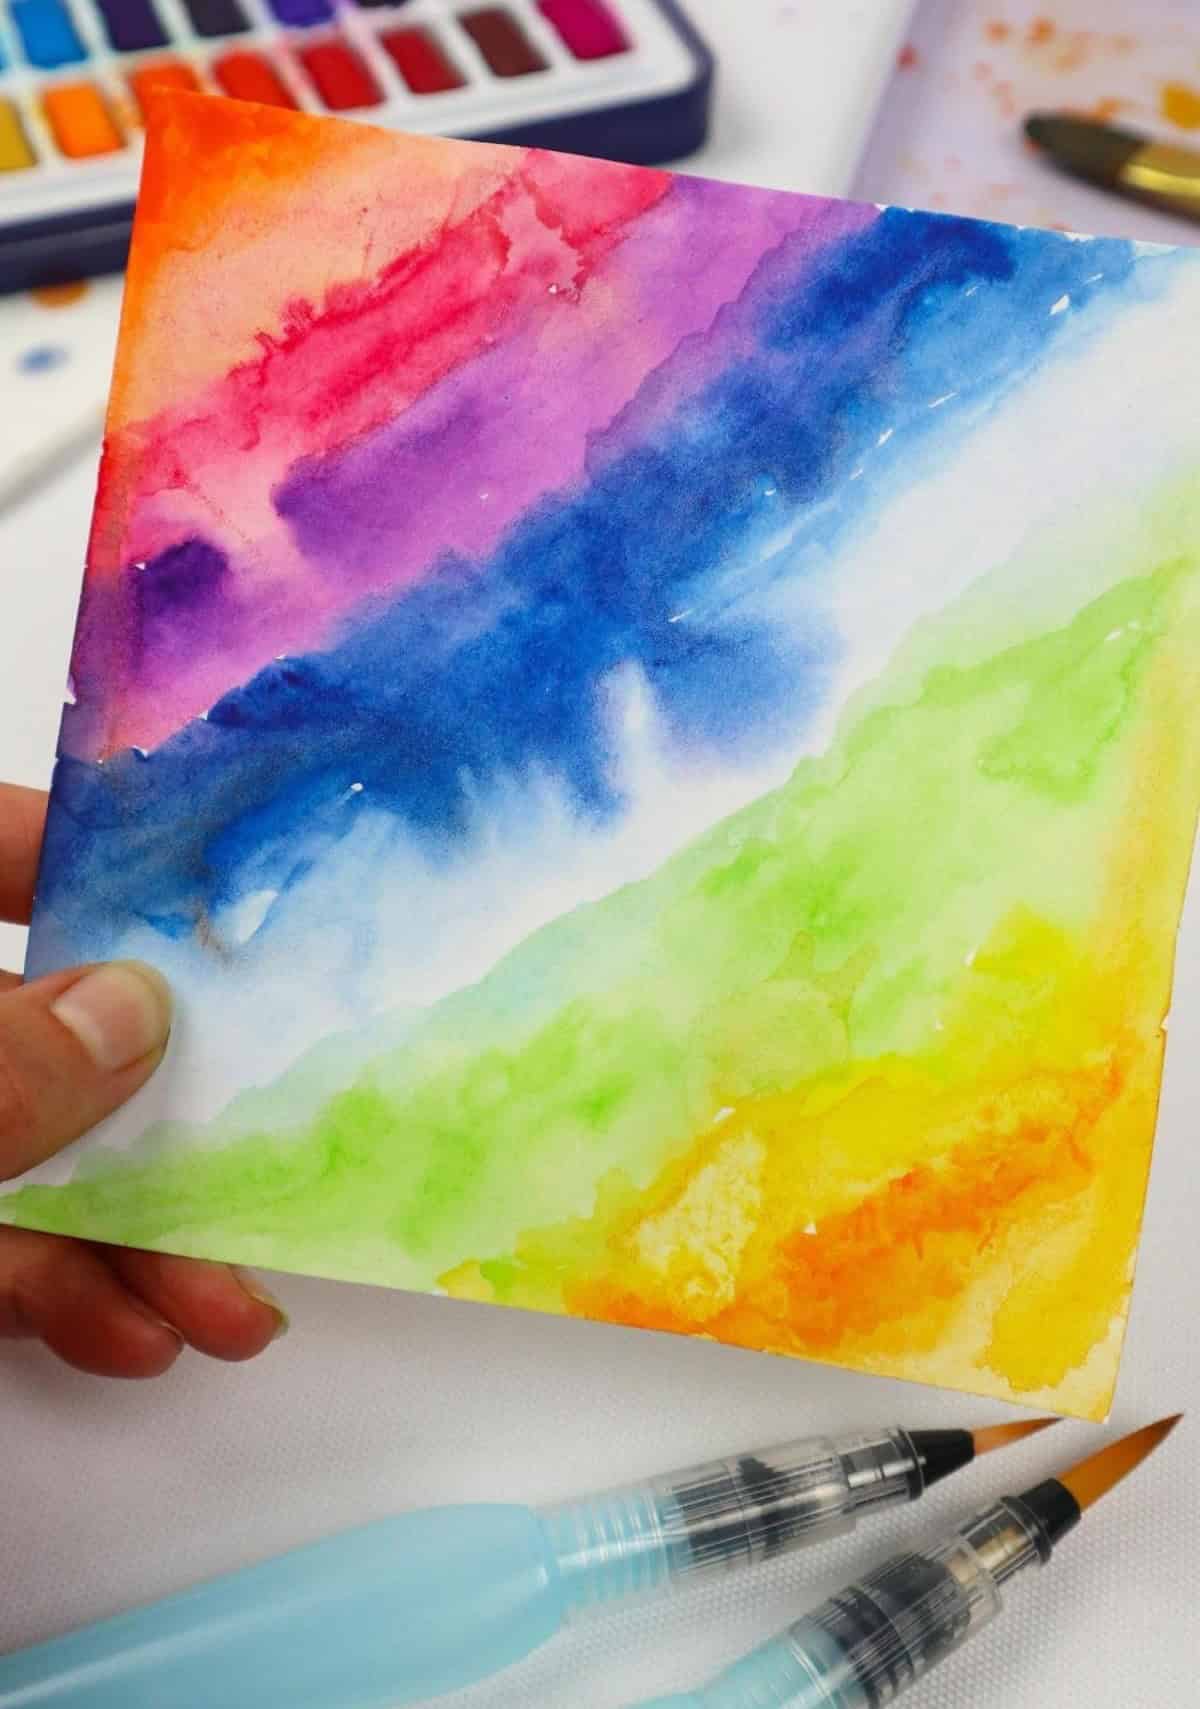
Embarking on a watercolor journey? Fear not, as these beginner-friendly tips will have you creating like a pro in no time! With these ten essential hacks, you’ll be well on your way to elevating your skills and producing stunning works of art. From mastering unique textures to utilizing clever tools and tricks, we’ve got everything covered. So, dive right in and get creative! And for an added boost, be sure to check out our accompanying YouTube video, 10 Watercolor Hacks for Beginners.
Let us know how these tips work out for you, and don’t hesitate to reach out if you need a little extra guidance along the way.
Reduce Masking Tape Stickiness
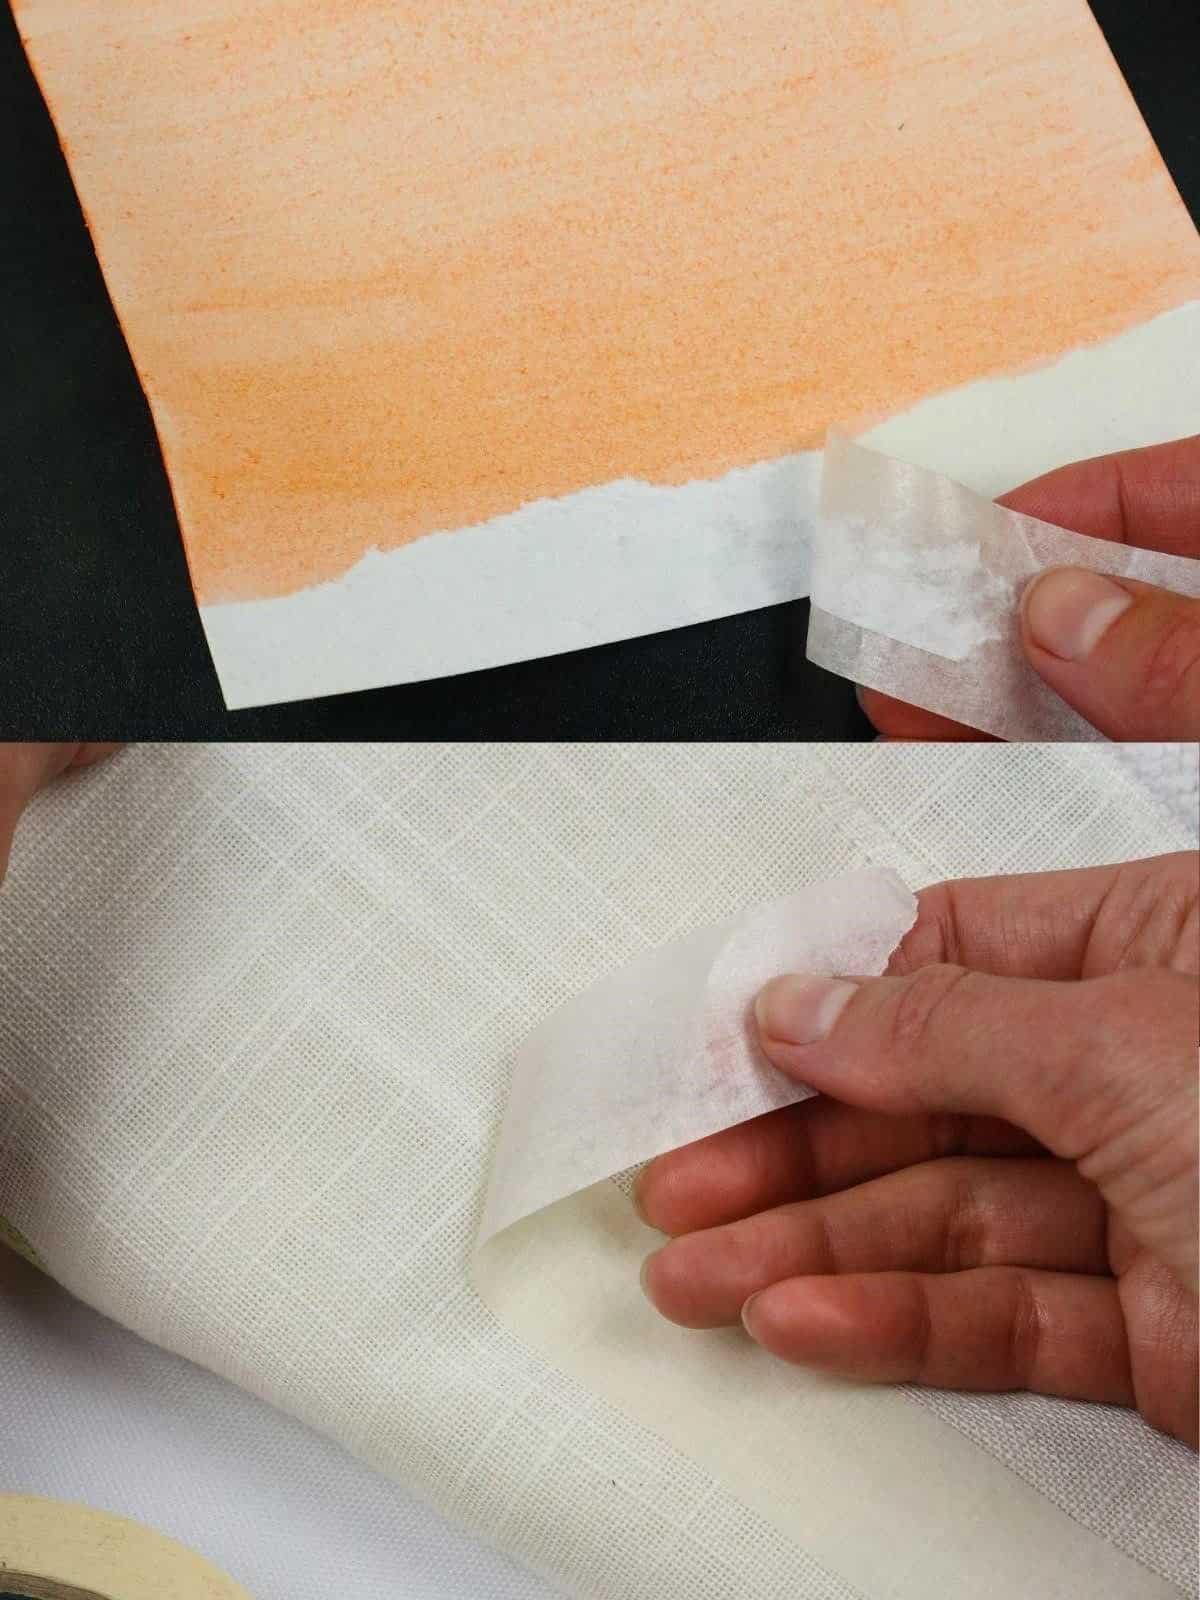
Say goodbye to the frustration of ruining your watercolor masterpieces with stubborn masking tape. A simple trick can save your future artworks from this common pitfall. To make it work, you’ll need a trimmed piece of tape and some lightweight fabric that won’t pull away too much stickiness. Start by placing the fabric in front of you, then position the tape, sticky side down, on top of the textile.
Next, bounce the tape off and back onto the fabric several times, maintaining contact with both sides until it reaches your desired level of adhesion. Once you’re happy with the stickiness, apply the tape to your blank page and begin painting. Just remember not to overdo it, as you still want the tape to hold down your artwork effectively.
Use a Clipboard Instead of a Fancy Hardboard
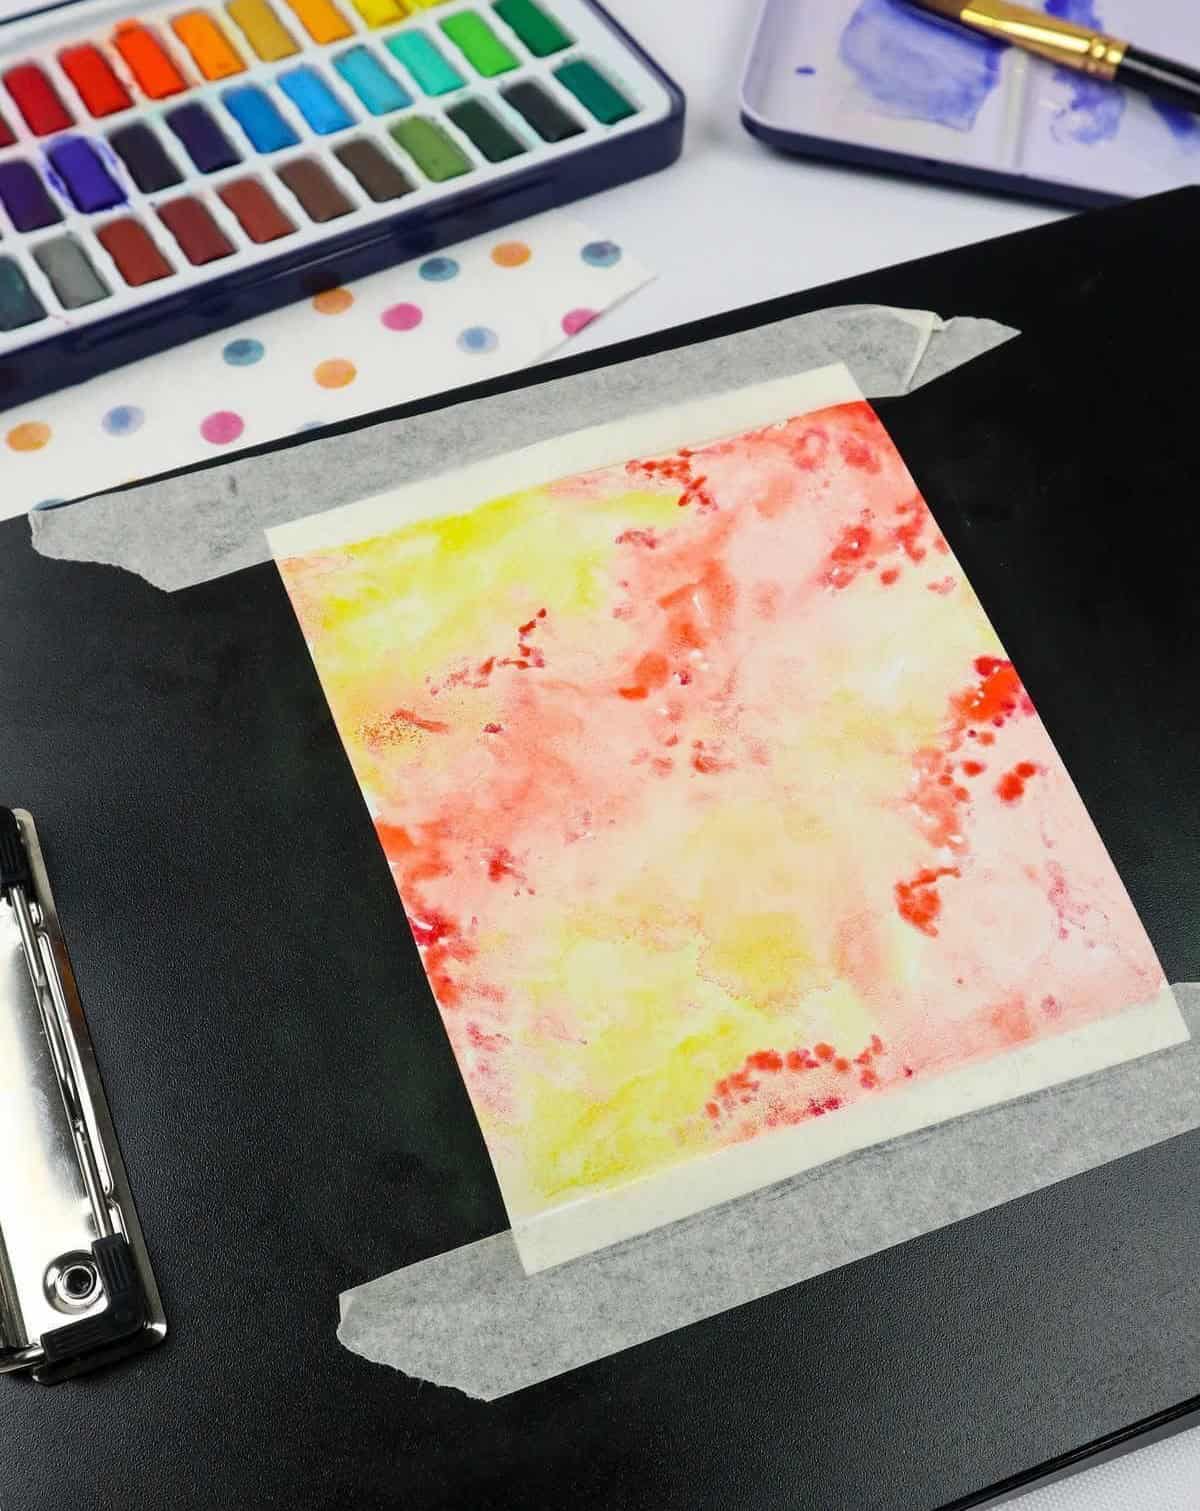
When it comes to painting as a hobby, it’s easy to let expenses add up quickly. However, there are ways to innovate and save without sacrificing quality. One such hack is using a clipboard as a substitute for a traditional hardboard. By employing the de-sticking technique, you can set up your workstation and get creative. Not only do clipboards often prove easier to clean after a painting session, but some models also feature a designated area for resting a paintbrush on the clip.
This simple trick can help make your artistic pursuits more enjoyable and budget-friendly.
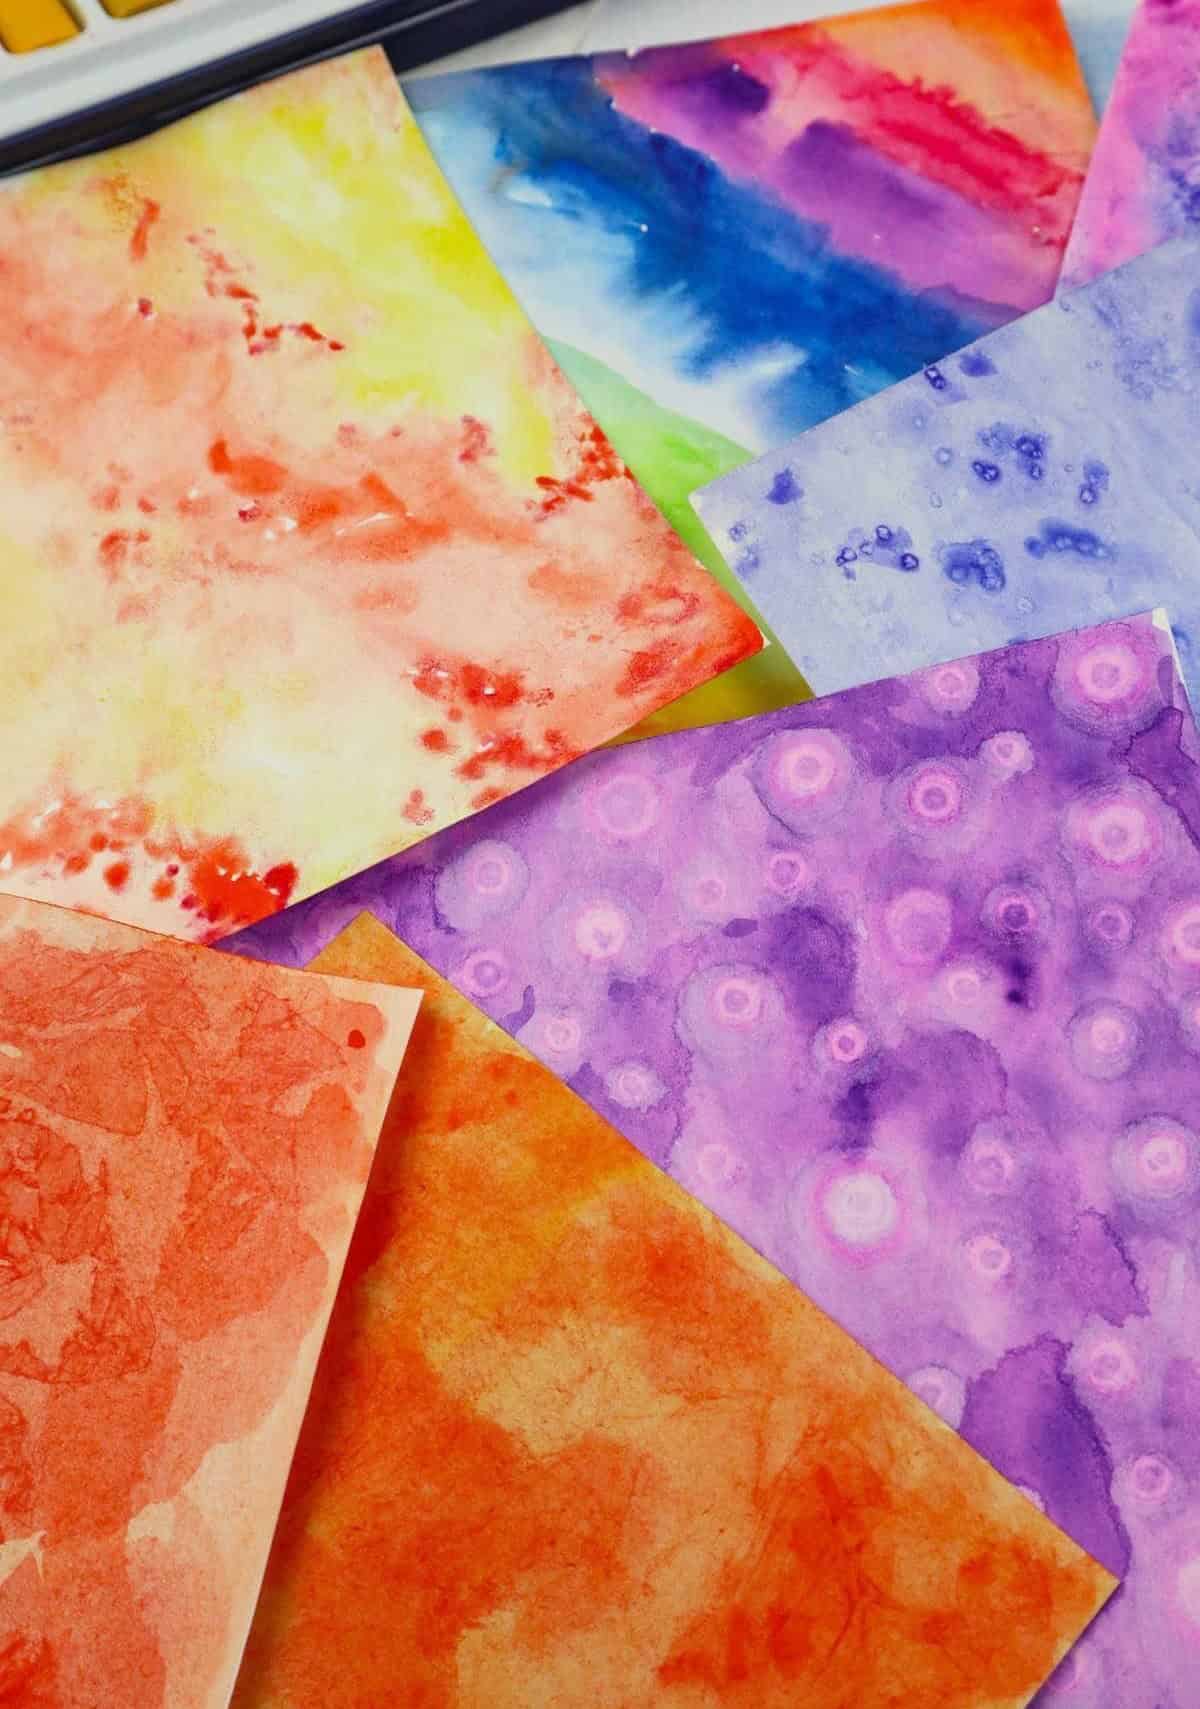
Use Salt to Create Texture and Patterns
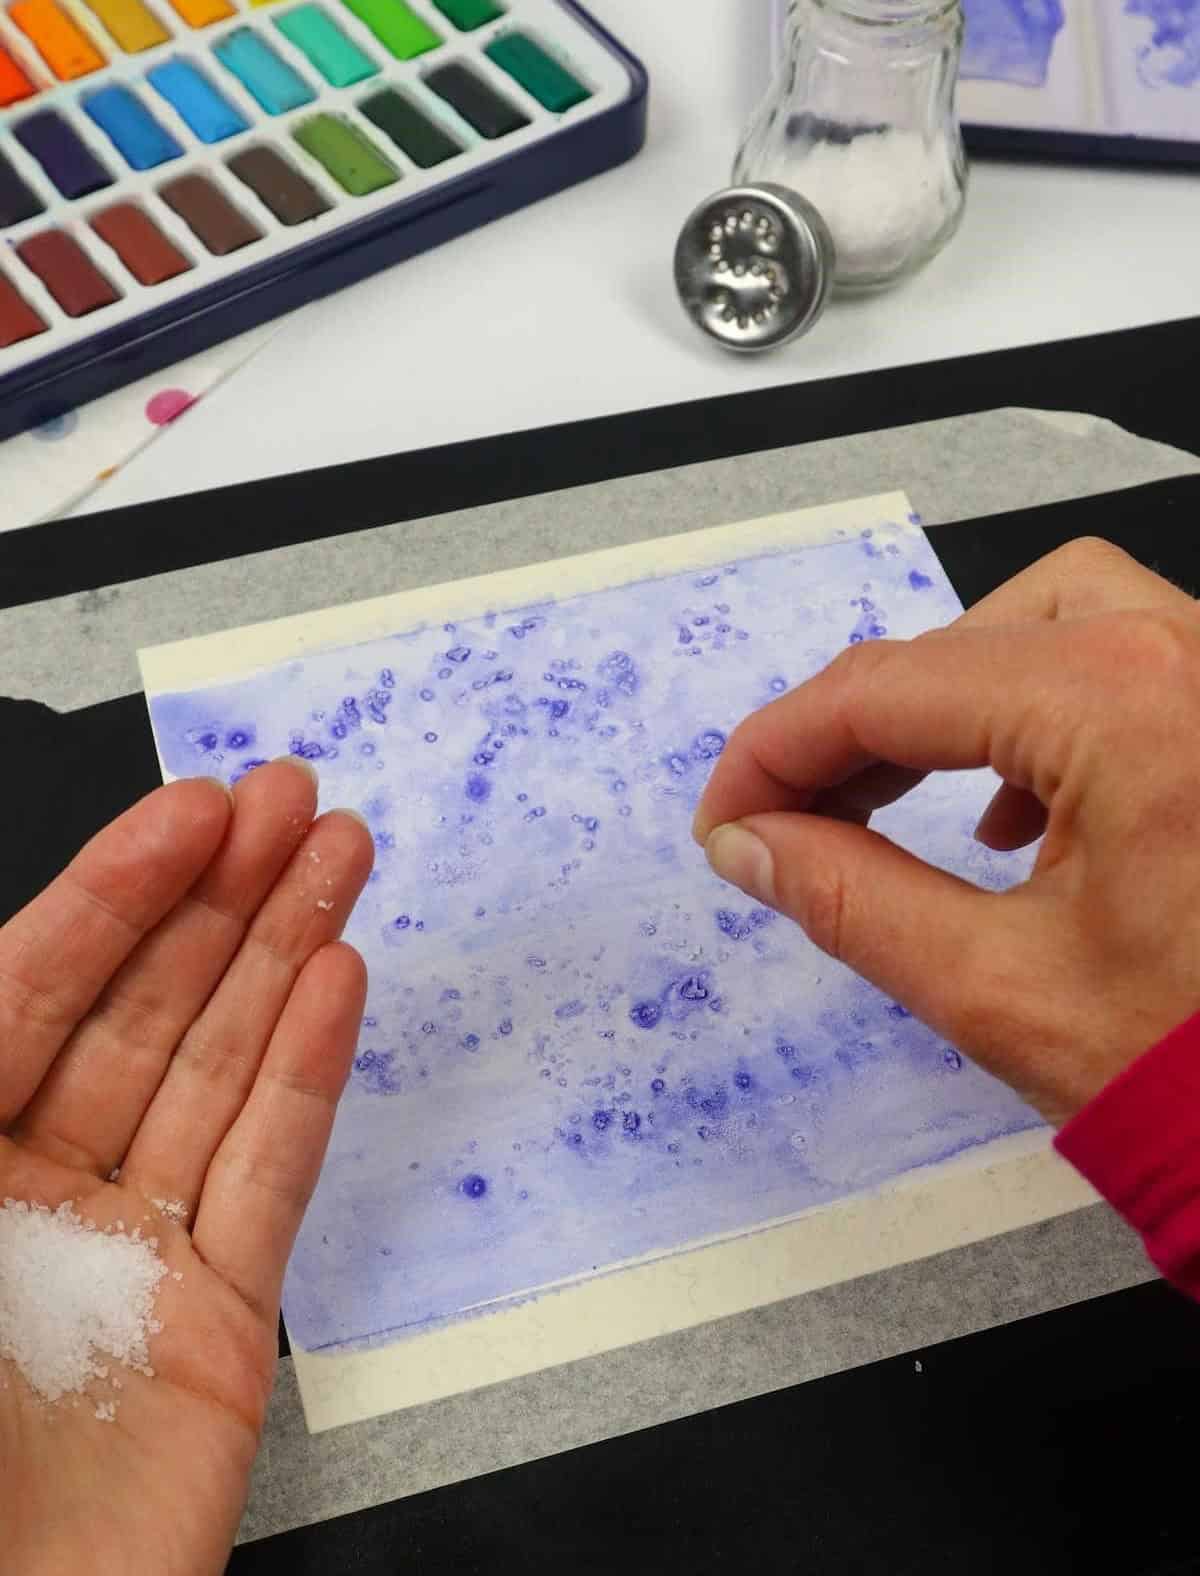
As you create your art, consider incorporating salt as a unique element to add texture and depth. This technique requires timing, as it only works when the paint is still wet. Try experimenting with salt on an entire project or just a specific section, following your instincts to see what develops. With practice, you’ll discover how this method can enhance your artistic style. Simply sprinkle salt onto any area of the painting that feels right to you, then continue as usual.
Once complete, let the piece sit with the salt still in place before gently brushing it away when dry. Don’t be afraid to explore the possibilities with salt and watercolors – you might be surprised at the beautiful results! In my video, I used a mixture of salt and water on a blank canvas, then added dots of watercolor paint. Be sure to check it out for inspiration. If you’re new to painting or looking for more ideas, take a look at our beginner-friendly canvas painting tutorials.
Speed Up Drying with a Heat Gun
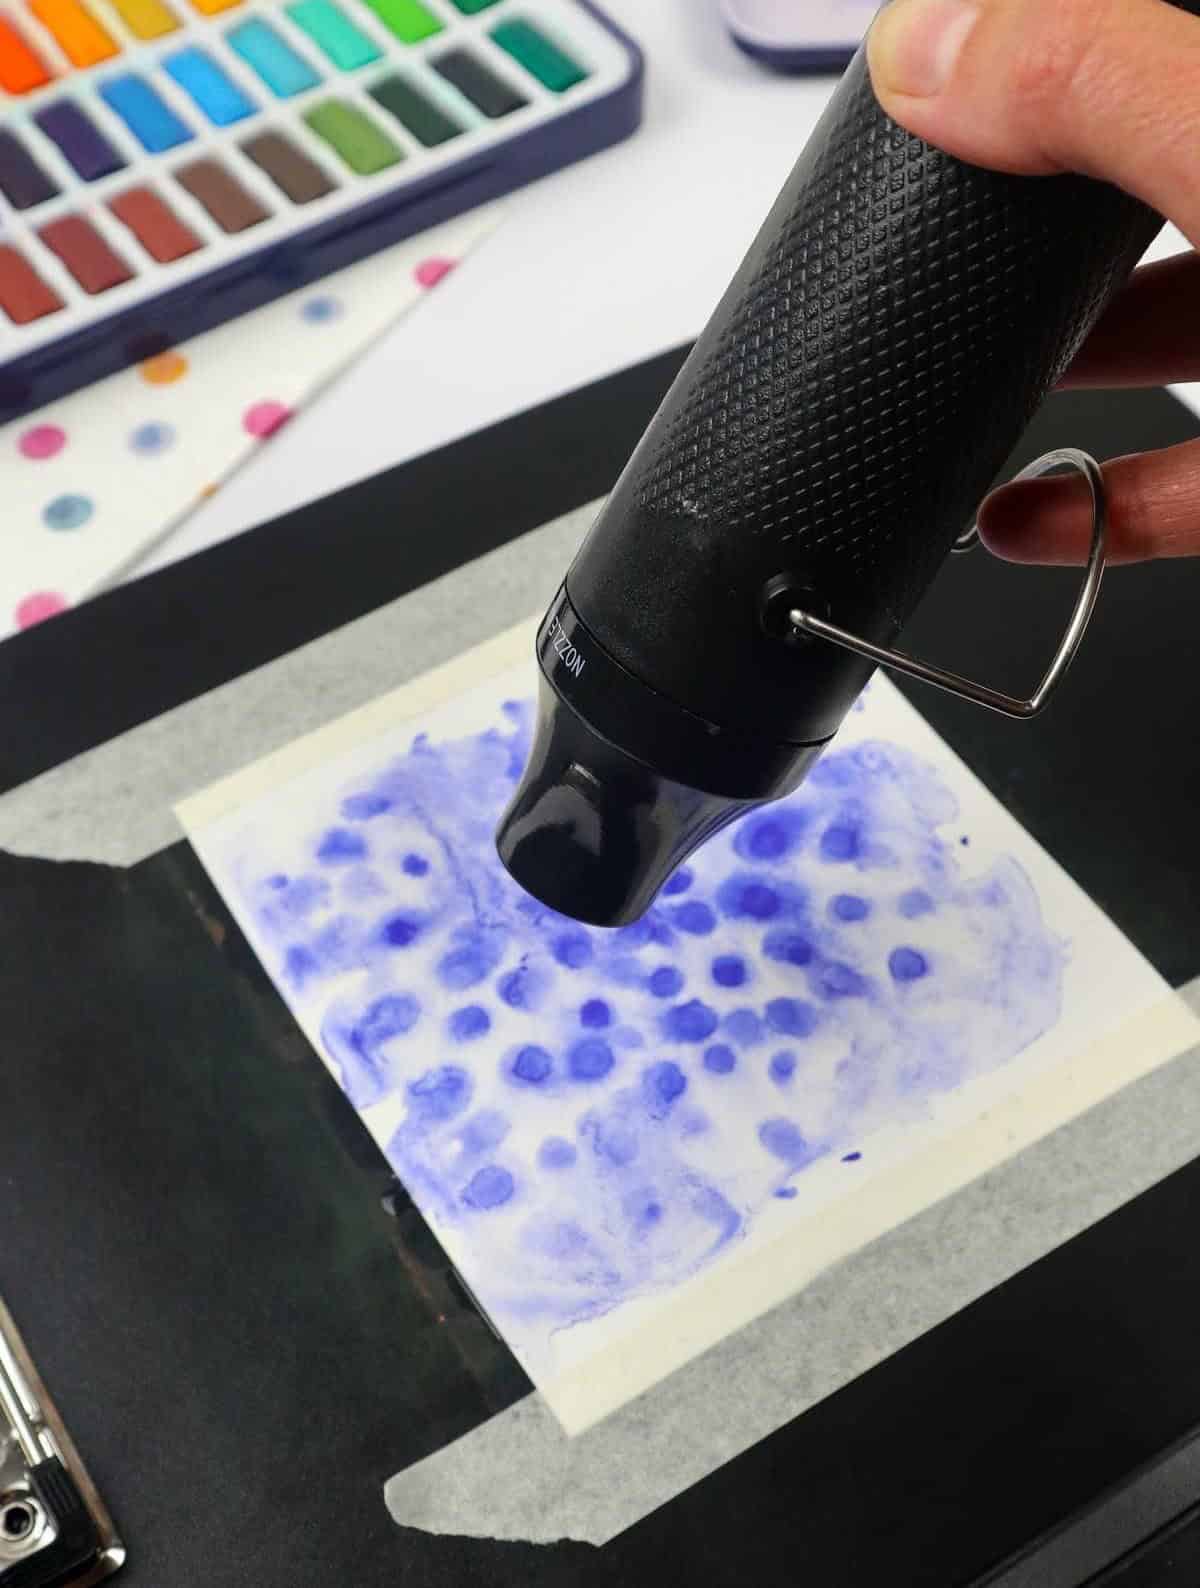
Need a little boost to speed up your painting’s drying process? Consider using a heat gun, but be cautious not to scorch your artwork. To achieve even heating, gently move the device while maintaining a safe distance from your piece. The drying time will depend on the size of your creation, but once you’ve mastered this technique, it can be quite meditative. If you’re looking for more painting inspiration, check out these delightful flower painting ideas.
Create Patterns with Rice

For a unique textured or patterned effect similar to salt, try using rice on your paint project. To achieve this look, ensure the paint is still wet when you apply the rice. Then, add the rice to your design wherever you’d like it to settle and dry. Once the desired texture has formed, let the mixture sit until it’s completely dry. Finally, gently brush away the rice to reveal your finished artwork, showcasing a one-of-a-kind design.
Get Creative with Cling Film
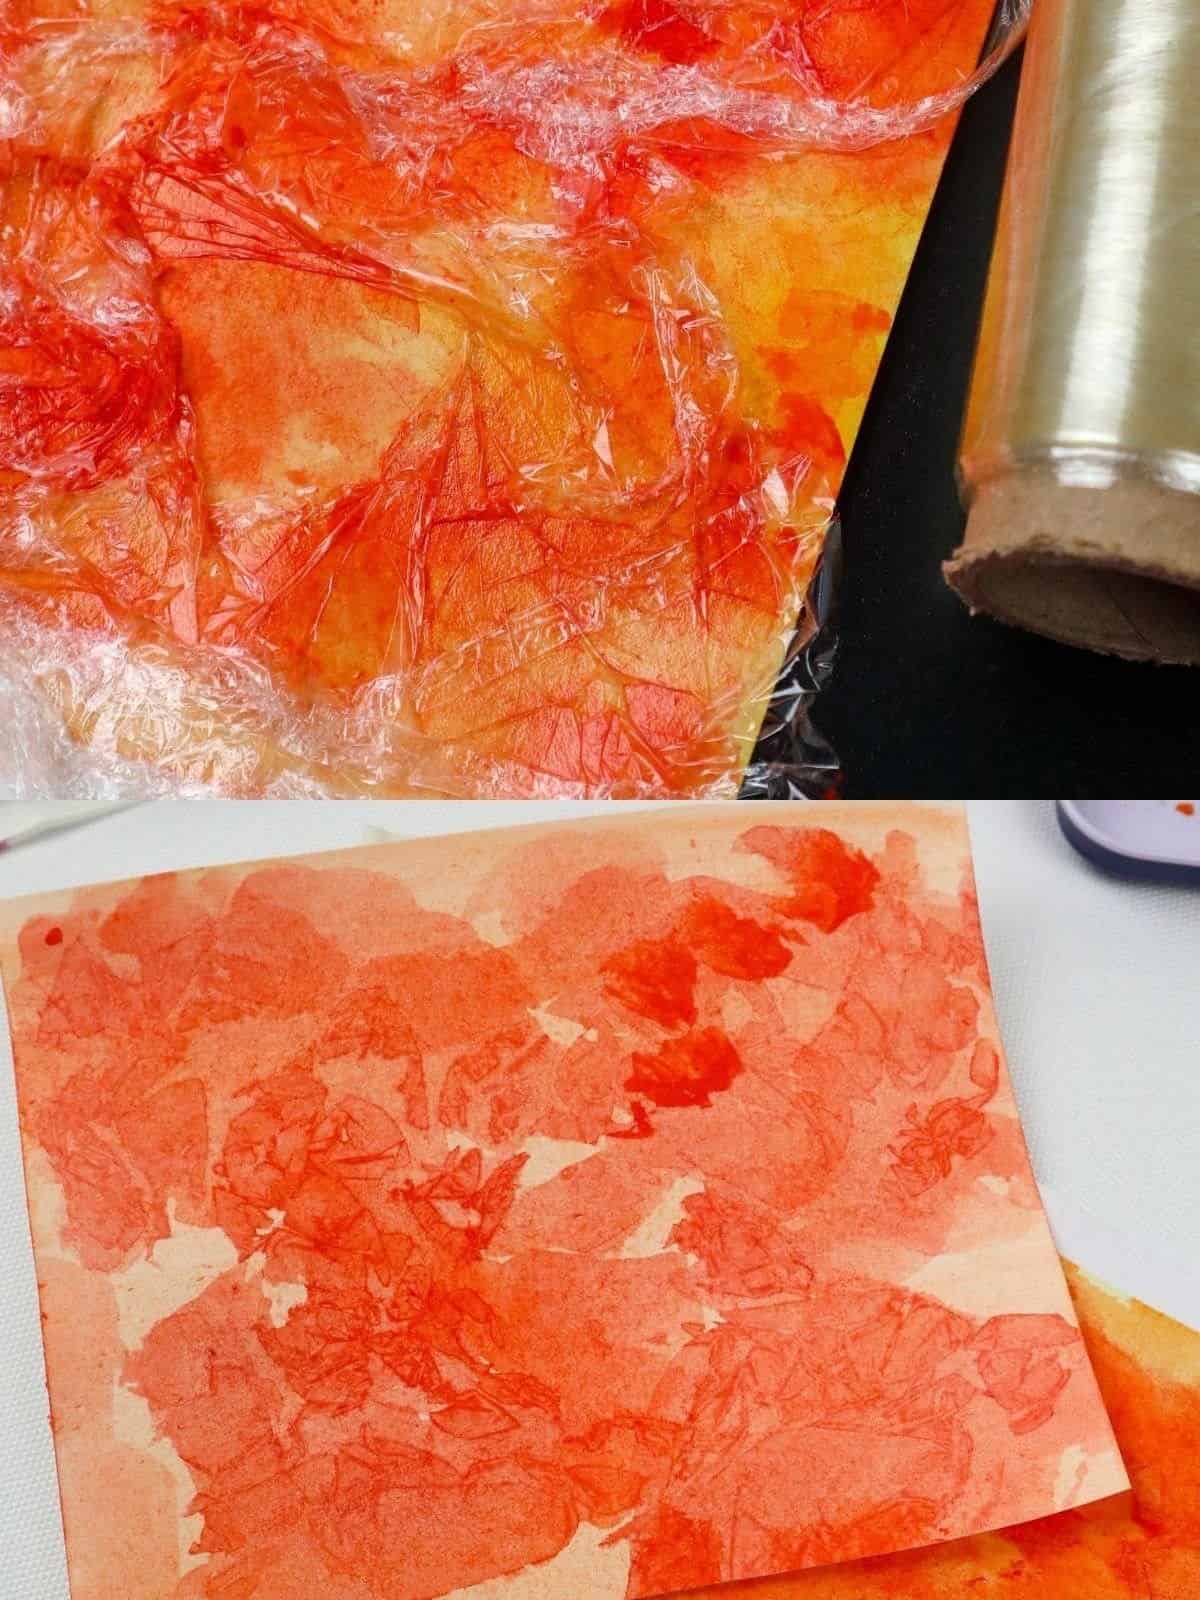
When seeking to add a unique textured element to your artwork, try incorporating saran wrap into your creative process. To achieve this, simply integrate the saran wrap into your regular painting routine. Once you’ve reached a section where texture would be beneficial, tear off the desired amount of wrap and manipulate it to fit your artistic vision. It’s essential not to remove the saran wrap once it’s been applied, as this will allow it to fully dry and adhere to the painting surface.
When removing the dried wrap, do so carefully to avoid disturbing the surrounding paint or artwork.
Dot Your Painting with Alcohol
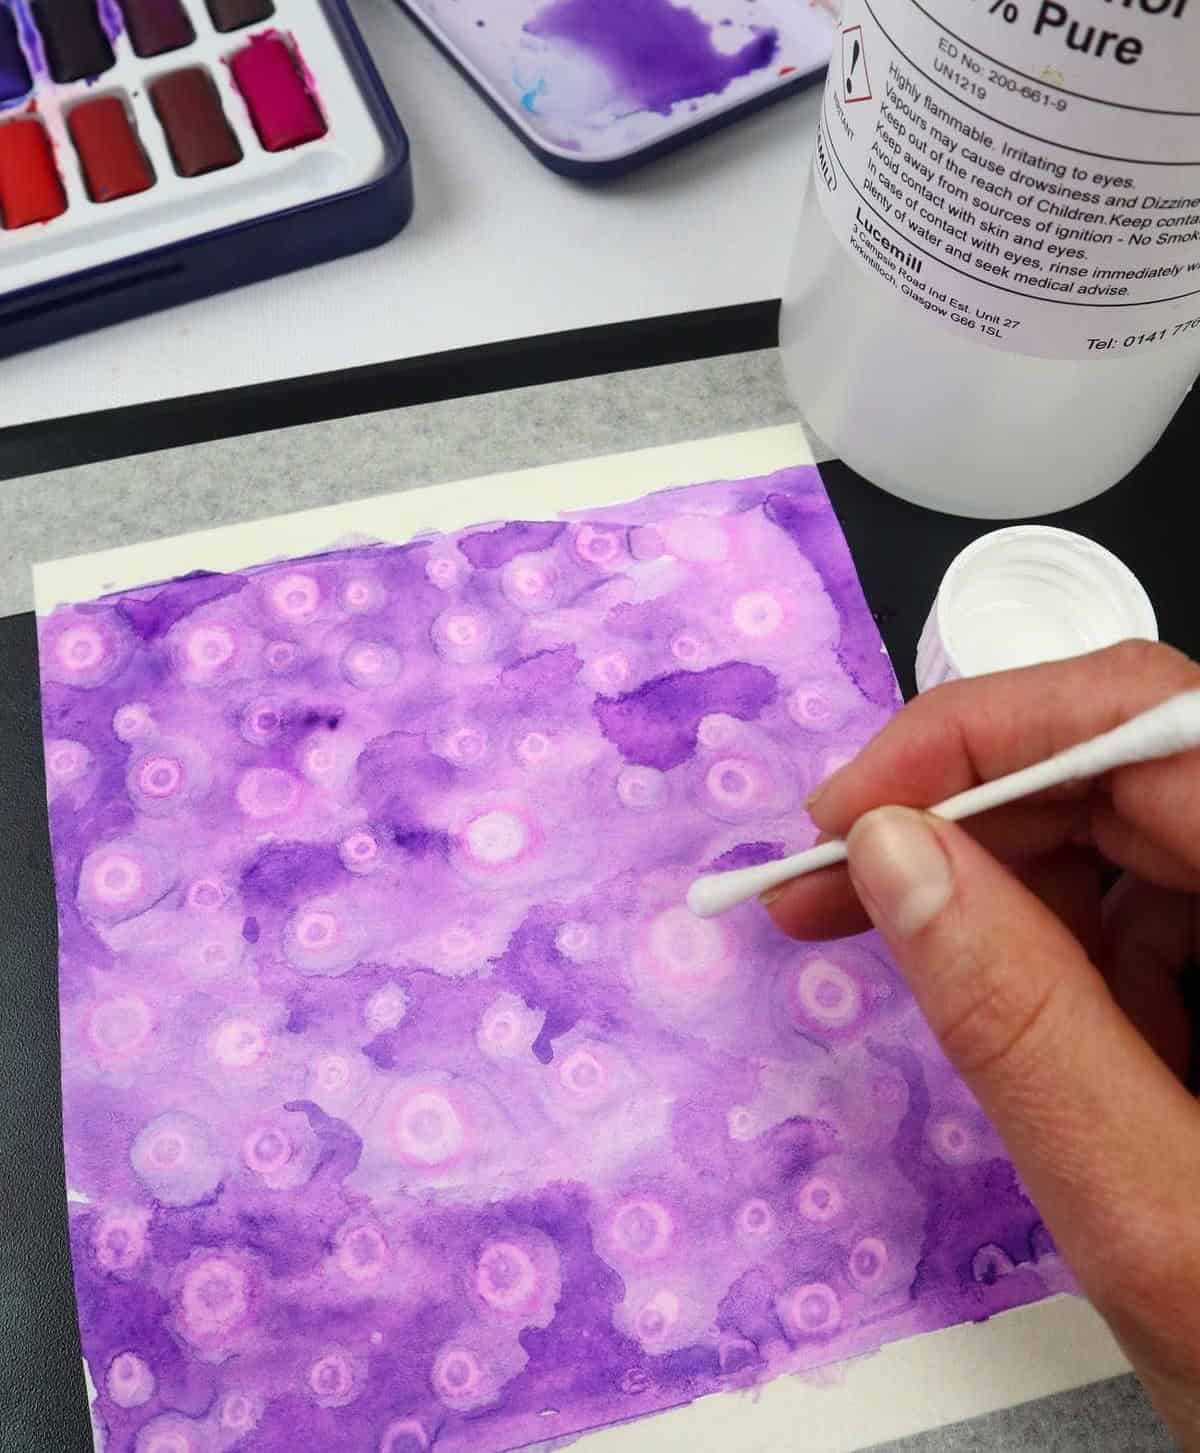
When exploring the versatility of isopropyl alcohol, its impact on watercolors should not be overlooked. A small amount, roughly equivalent to a capful, can lead to impressive results without overwhelming the medium. To achieve this, I employed a q-tip to carefully dot in the video onto my project. However, feel free to experiment with alternative tools such as disposable straws, paper clips, or paintbrush tips – just be sure to thoroughly clean them afterwards.
The possibilities are vast when playing around with isopropyl alcohol and watercolors. Try adjusting the ratio of alcohol to watercolor to unlock a world of creative opportunities. And if you’re interested in exploring more resin-related fun, I encourage you to check out our collection of resin craft ideas for inspiration.
Flatten the Paper with an Iron

When drying your artistic endeavors, you may notice that some of the pieces have become warped. To restore them to their original shape, simply iron them flat. Be cautious when doing so, as certain materials can be damaged easily. To ensure a safe and successful process, gather your supplies: an iron, the artwork itself, a drop cloth or equivalent, and a washcloth or towel large enough to cover your piece without restriction. Working one piece at a time is also recommended.
Begin by placing your first artwork on the drop cloth, followed by a layer of towel. This ‘sandwich’ configuration will protect your art from any accidental heat exposure during ironing. Apply gentle pressure with the iron, as you don’t need to apply excessive heat to these delicate materials. Once your artwork is smooth and flat again, consider framing it using the DIY rock photo holders outlined in this blog post.
Use Dishwashing Liquid to Create Bubbles
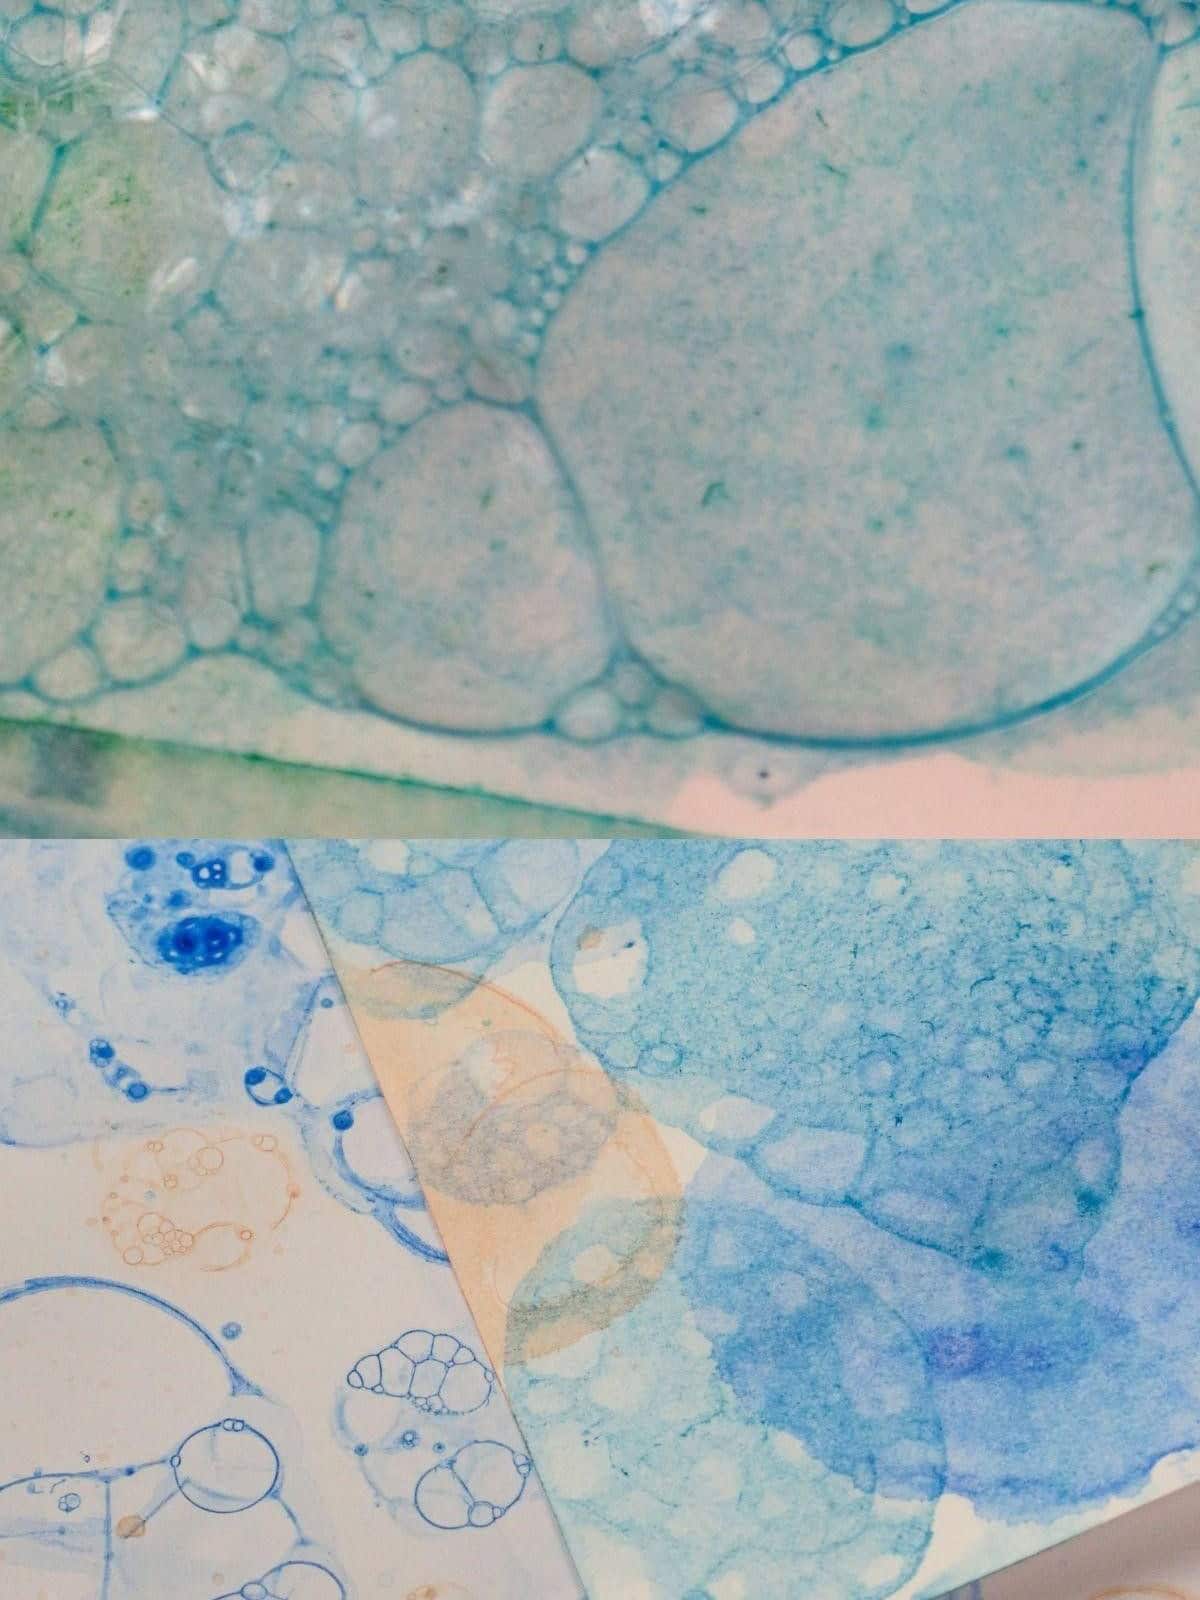
Transform a seemingly simple activity into an engaging art experience by combining watercolor, dish soap, and blowing bubbles! Begin by mixing a little watercolor with water in a cup, then add some dish soap to the solution and stir well. Next, blow bubbles into the mixture until they overflow from the container. Use these bubbly creations as ‘stamps’ on your paper, repeating the process until you’ve achieved the desired effect.
Paint with Water Brush Pens

Water brush pens are a delight to work with. The subtle variation in clean-up that comes from having water inside the pen is a game-changer. With these tools, you can experiment with water dispersion on the page by squeezing the ink near the natural reservoir at the tip of the pen. This allows for better control over pigmentation, as the amount of water used can greatly impact the vibrancy of the color.
The possibilities are endless with these brush sets, making them a must-try for anyone looking to expand their creative horizons. If you’ve enjoyed this exploration of artistic techniques, be sure to check out our collection of easy paintings for beginners for even more inspiration.