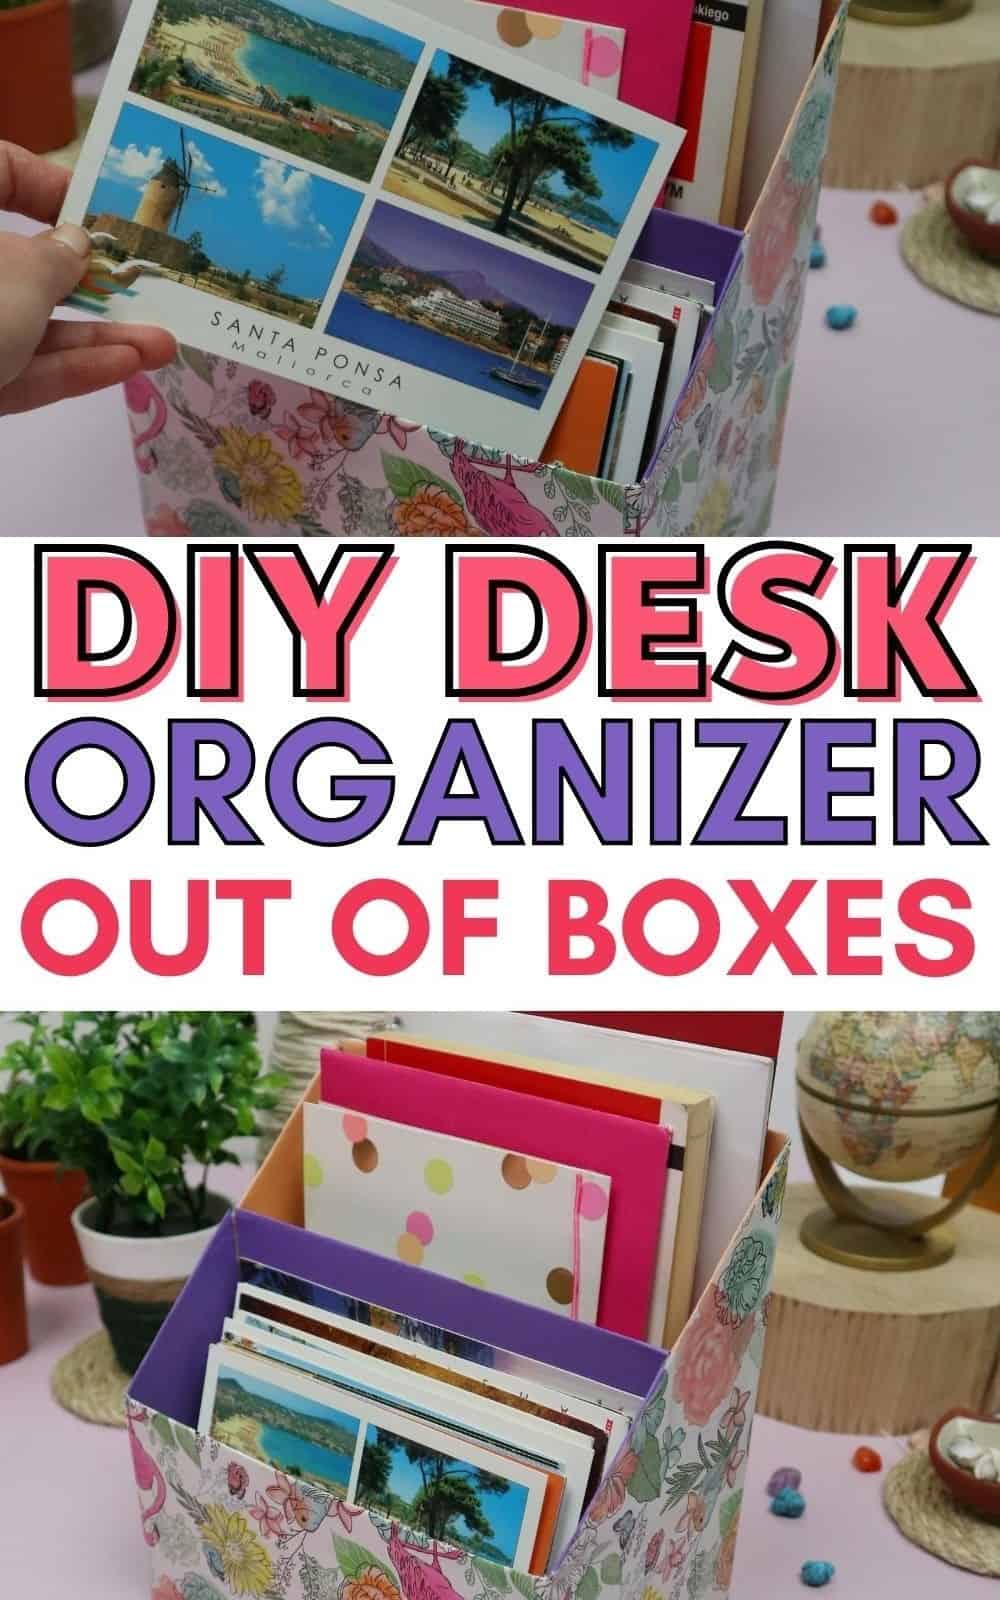
Transforming cereal boxes into functional desk organizers is an excellent way to engage in sustainable crafting. This comprehensive tutorial guides you through the process of creating a practical and visually appealing DIY desk organizer from scratch. Set aside some time in front of Netflix, and you’ll have this project completed in no time.
The key aspect to focus on here is the incorporation of color.
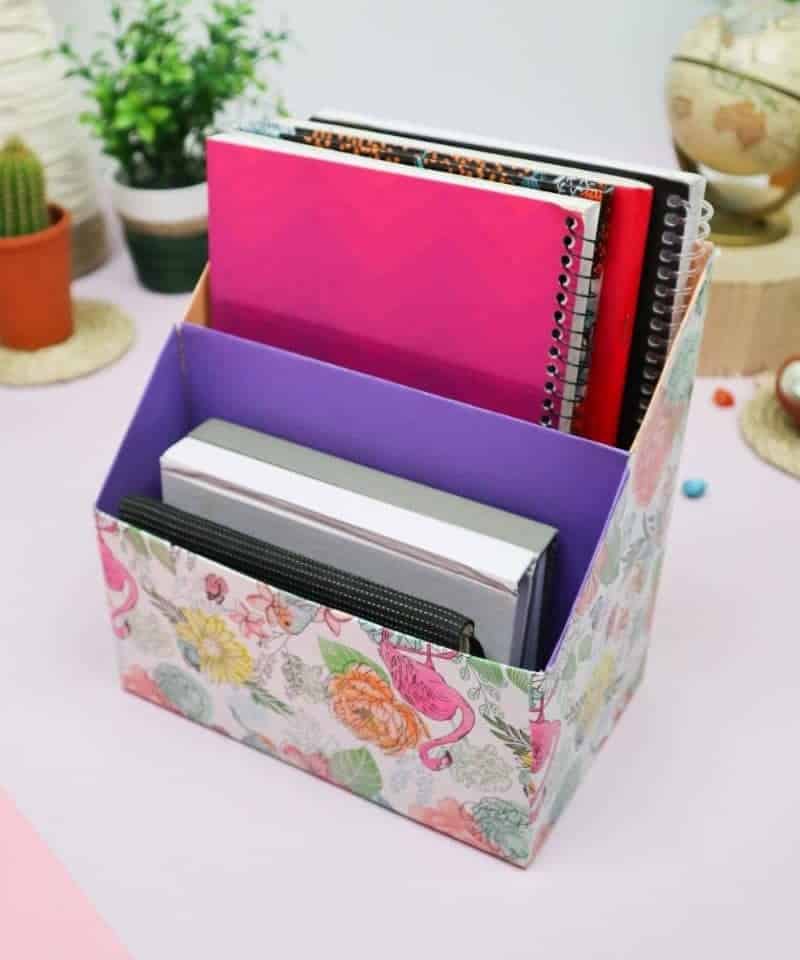
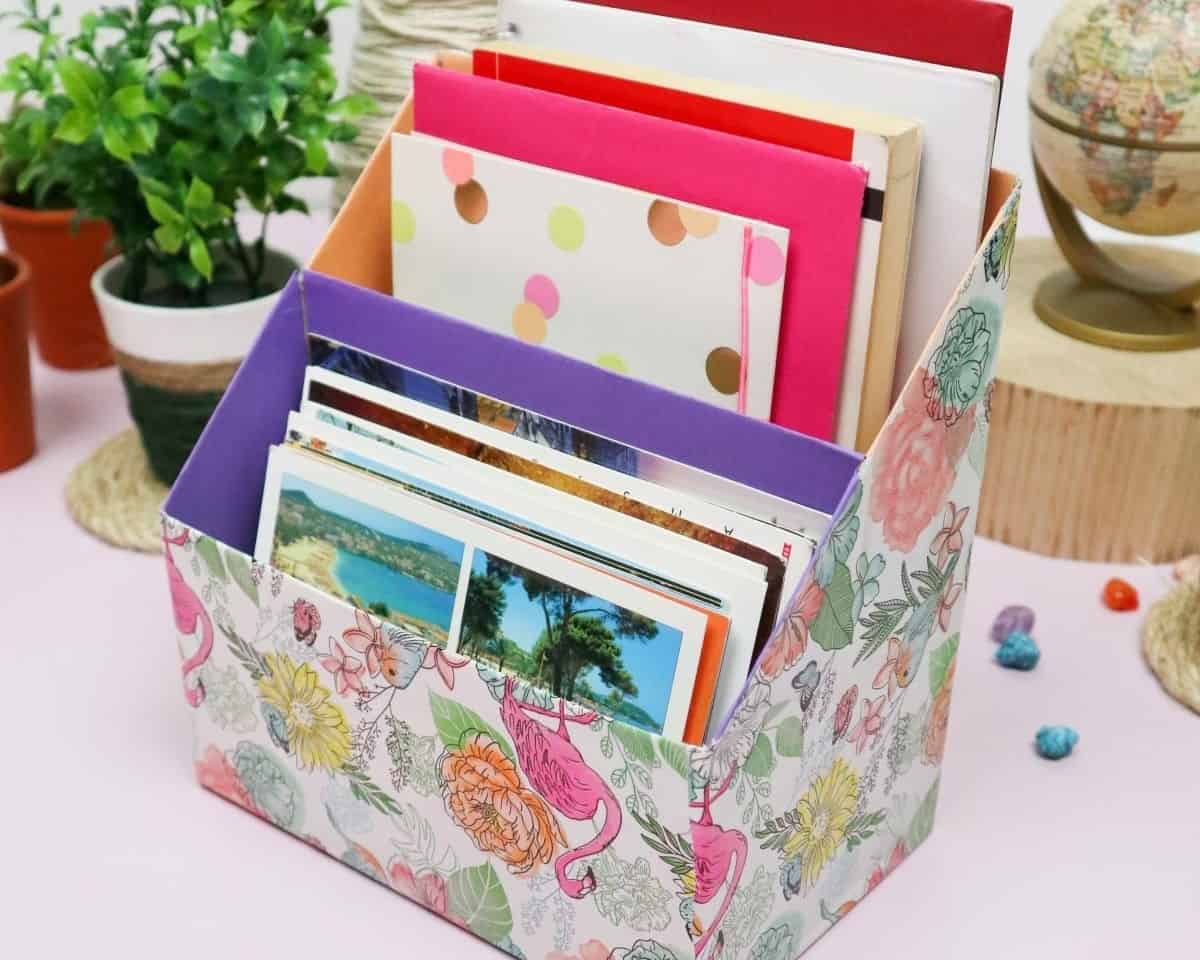
I opted for a stunning wrapping paper with a bright hue for the exterior and vibrant contrasting colors for the interior, resulting in an organizer that not only serves its purpose but also adds a touch of elegance to your space.
This organizer can be effortlessly placed on a desk or nightstand, effectively tidying up your area. The best part? It won’t dent your wallet. So, let’s dive into the process of creating this marvelous organizer.
What You’ll Need to Make the Organizer
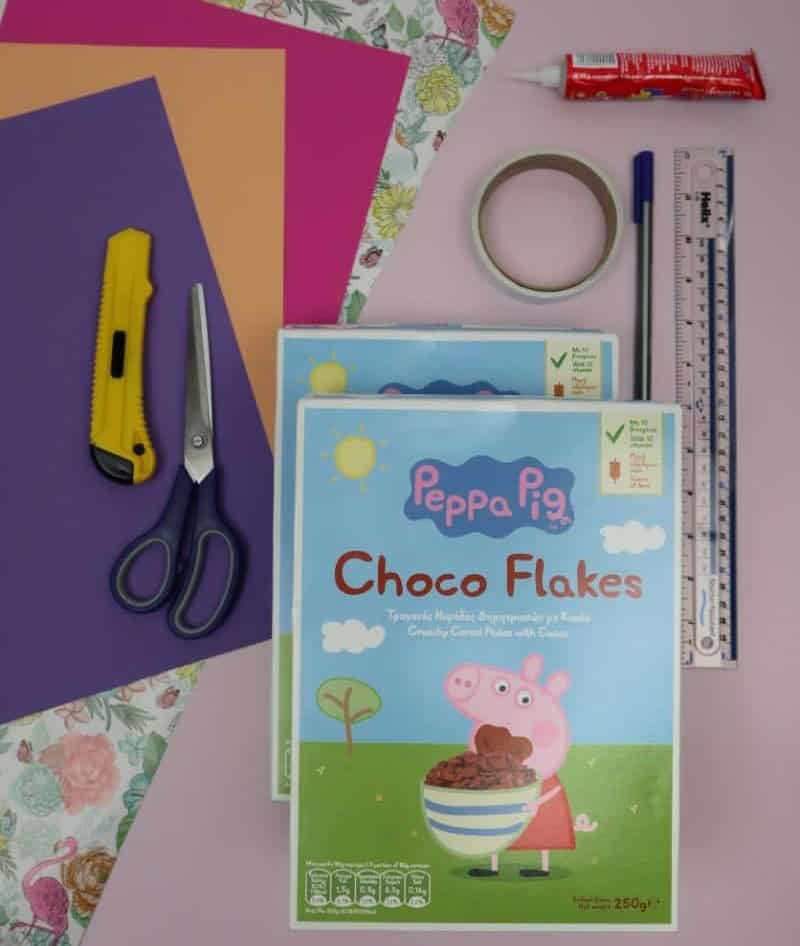
To create a visually appealing and functional school supply kit, you’ll need the following essential items: two sturdy cereal boxes to serve as the base and outer casing of your kit. You’ll also require a variety of colorful papers for decorating and organizing your supplies. Additionally, wrapping paper can be used to add an extra layer of protection and visual appeal to your kit’s contents.
For binding and securing your materials together, you’ll need double-sided tape, glue, scissors, and a retractable knife with a sturdy ruler to ensure accurate measurements. Finally, don’t forget a pen for labeling and jotting down important notes.
How to Make This DIY Organizer
To upcycle your cereal boxes into a functional desk organizer, follow this easy-to-follow guide. This creative hack not only saves you money but also boosts your office’s storage capacity. With these simple steps, you’ll be able to transform your discarded cereal containers into a practical and visually appealing storage solution for your workspace.
Step 1
Before diving into the creative process, it’s essential to gather all necessary materials. For this project, you’ll need a reliable adhesive to bring your ideas to life. Glue and double-sided tape are both viable options, each with its own unique characteristics. While glue requires time to dry, double-sided tape offers a quick-drying solution that I find particularly convenient.
Step 2
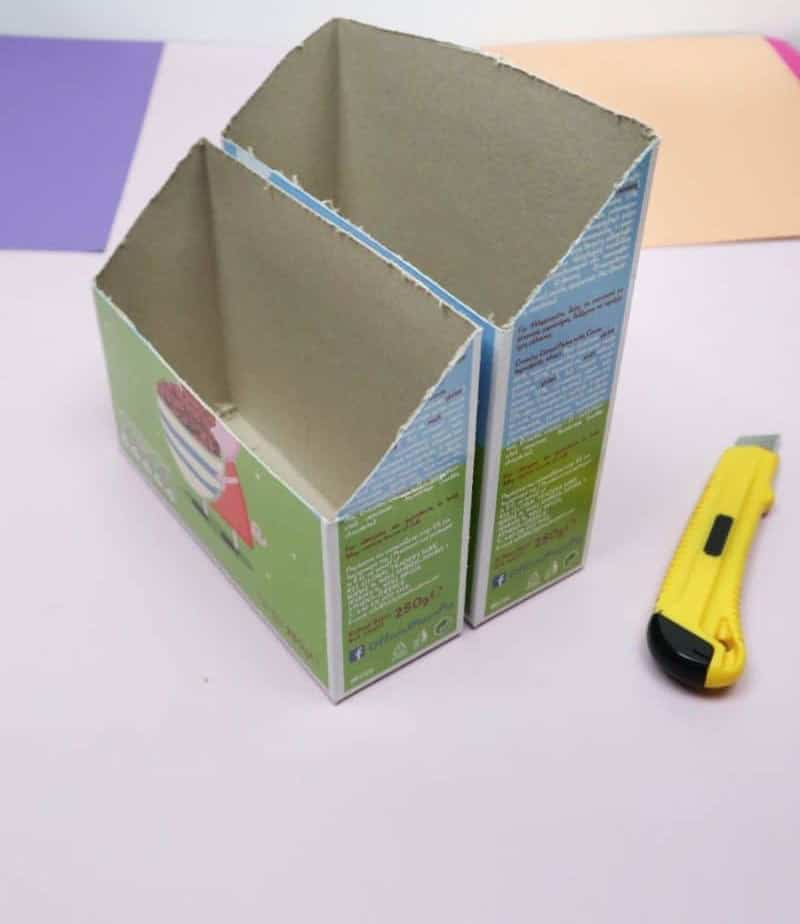
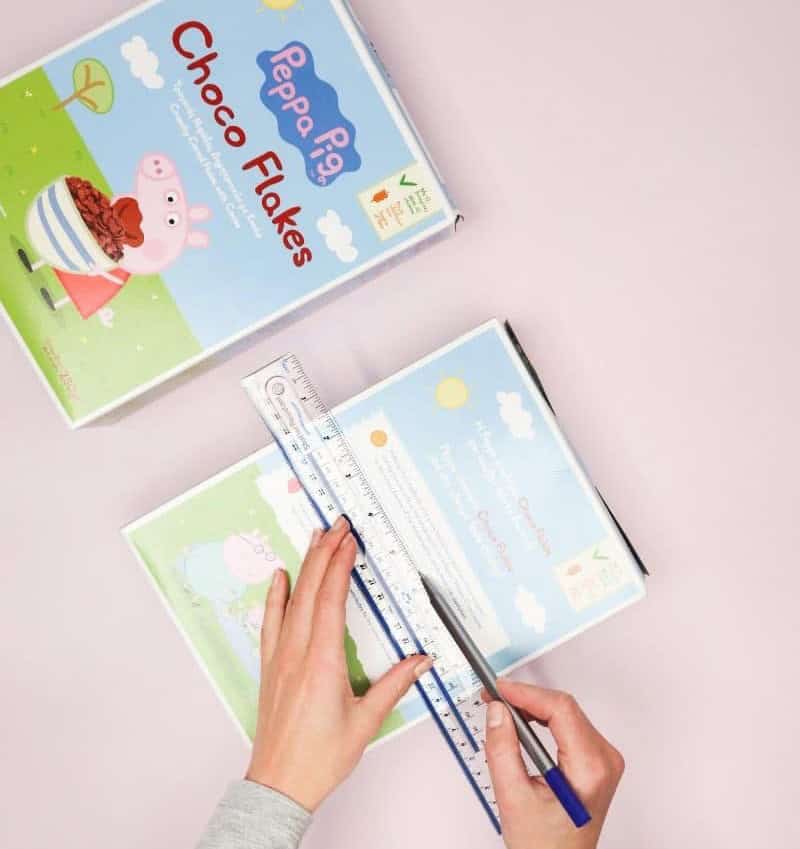
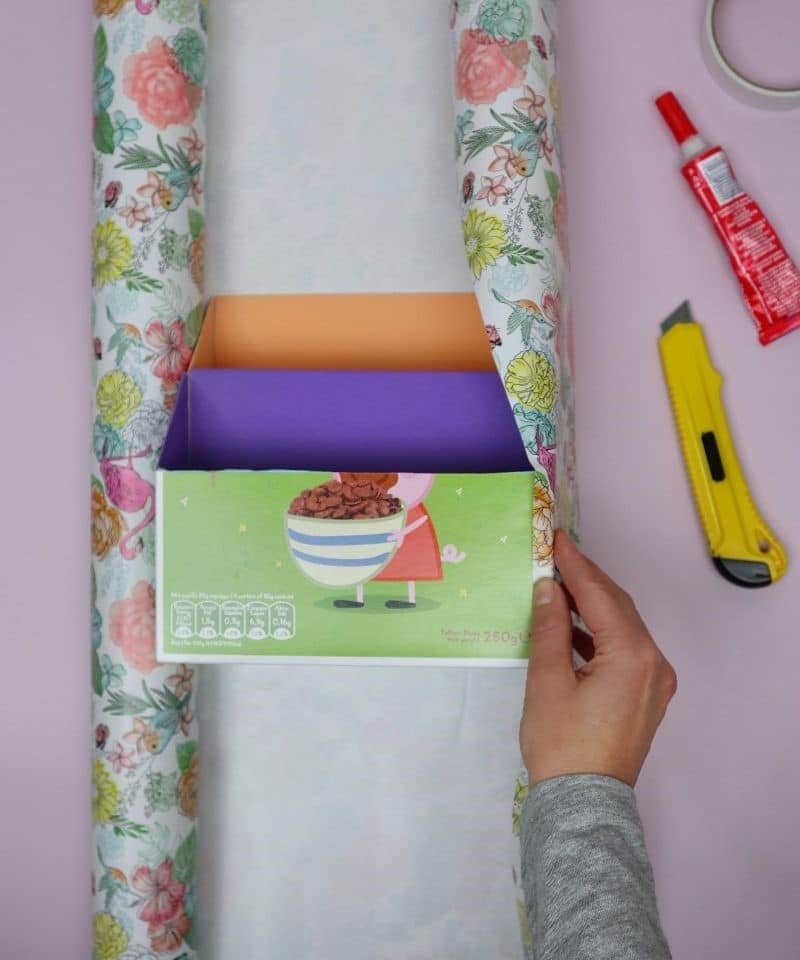
To initiate the process, measure and mark the cut lines on each cereal box with precision. The height of the back of the smaller box should be equal to the front of the larger box, as depicted in the following illustration. Next, draw a horizontal line along the top edge of the smaller box’s back and a shorter line along the bottom edge of the larger box’s front. Then, connect these lines with a diagonal cut along the side of each box using either a craft knife or scissors.
Once marked, carefully cut along the lines to create the desired shape.
Step 3

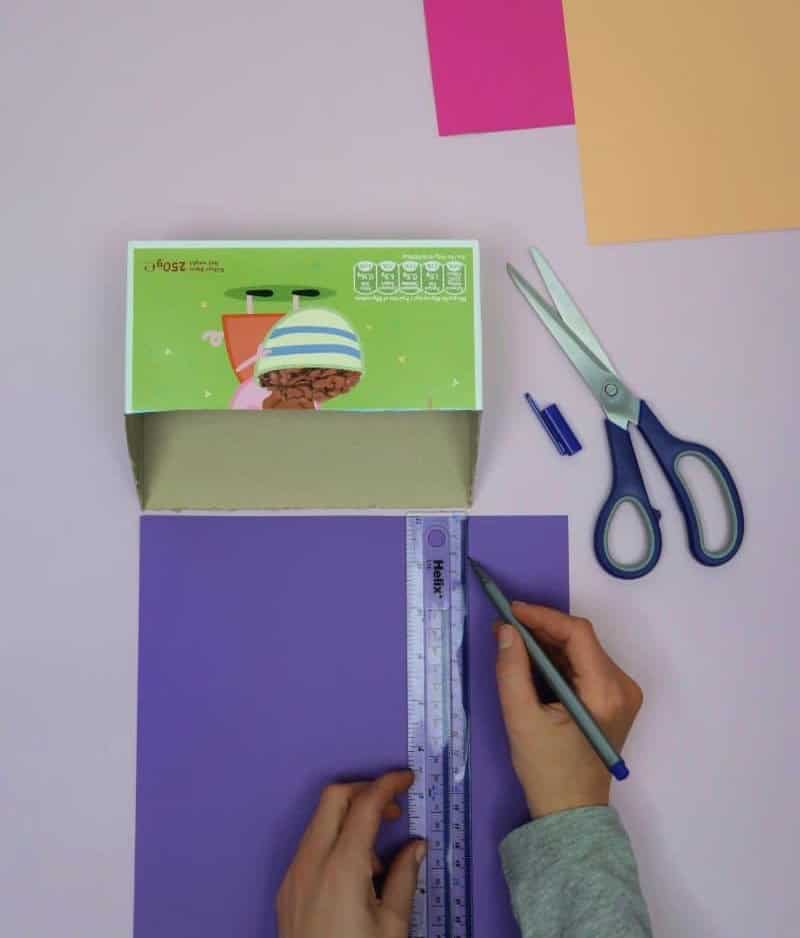
Transform your boxes by decorating their interior panels! Measure out each panel on your colored cardstock, cut it out, and attach it using double-sided tape or glue. For best results, apply a moderate amount of adhesive, as excessive application can cause the paper to become soggy and difficult to work with.
Step 4
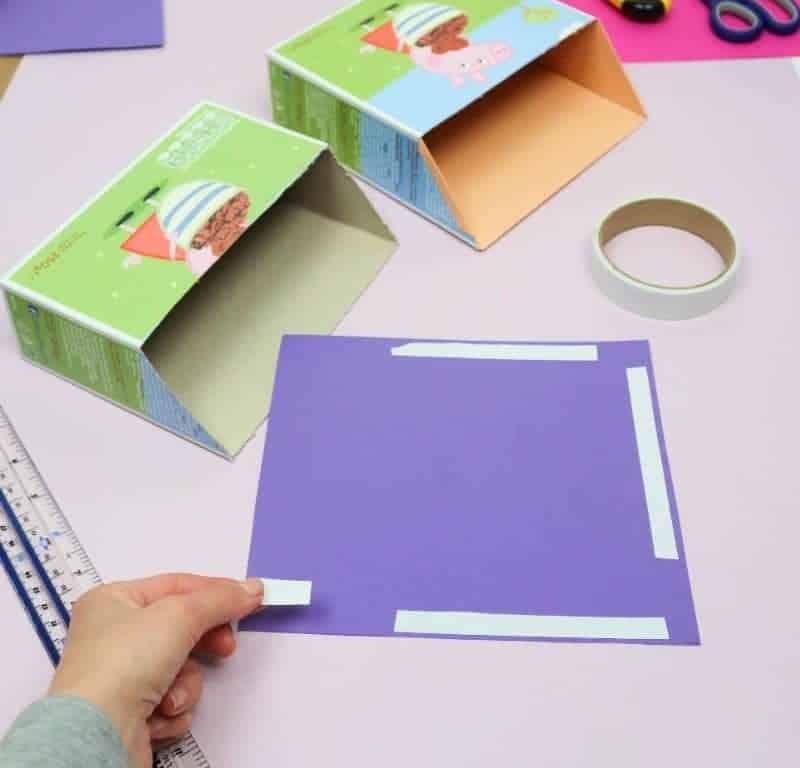
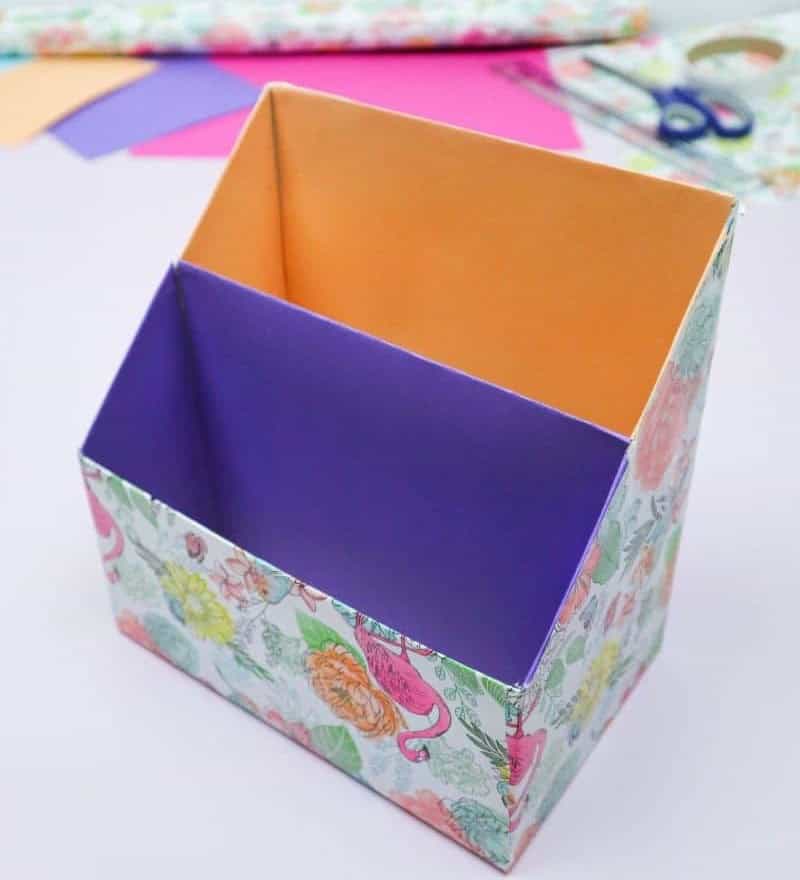
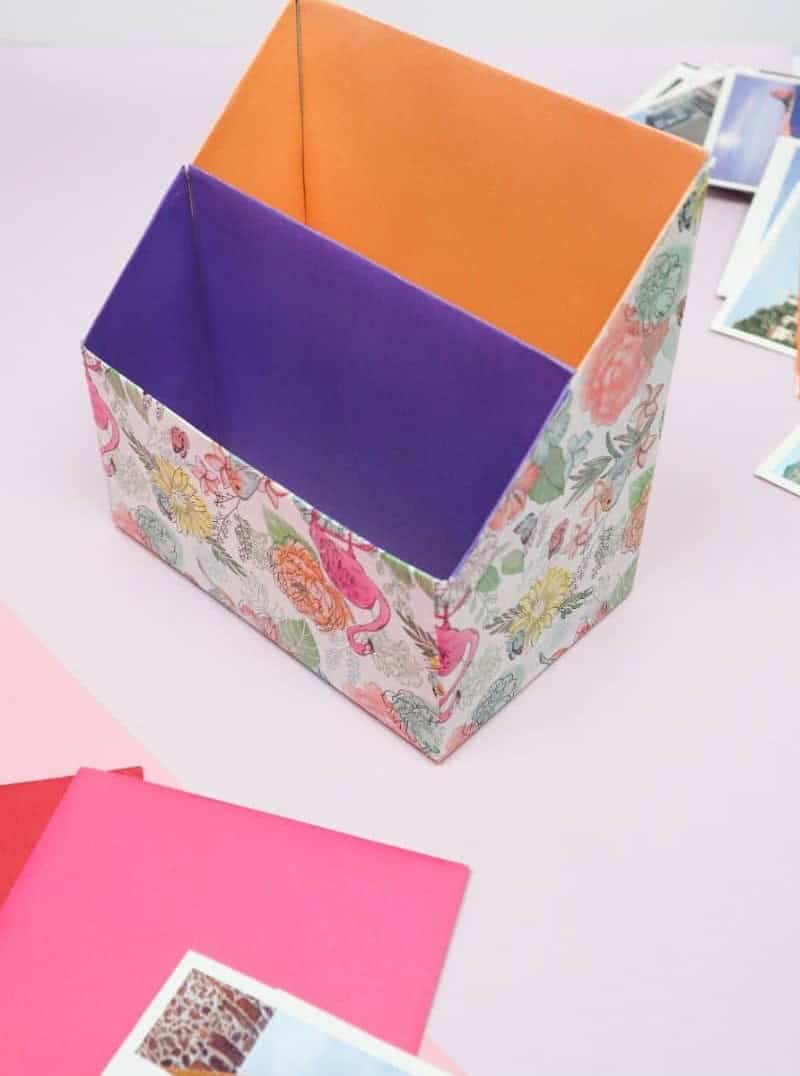
To create visual harmony, use a contrasting color to line your second box in the exact same way as you did for the first one. I opted for purple and orange, which complement each other beautifully. This technique is especially effective when you choose colors that are directly opposite each other on the color wheel. By doing so, you’ll add an intriguing element to your organizer design.
Step 5
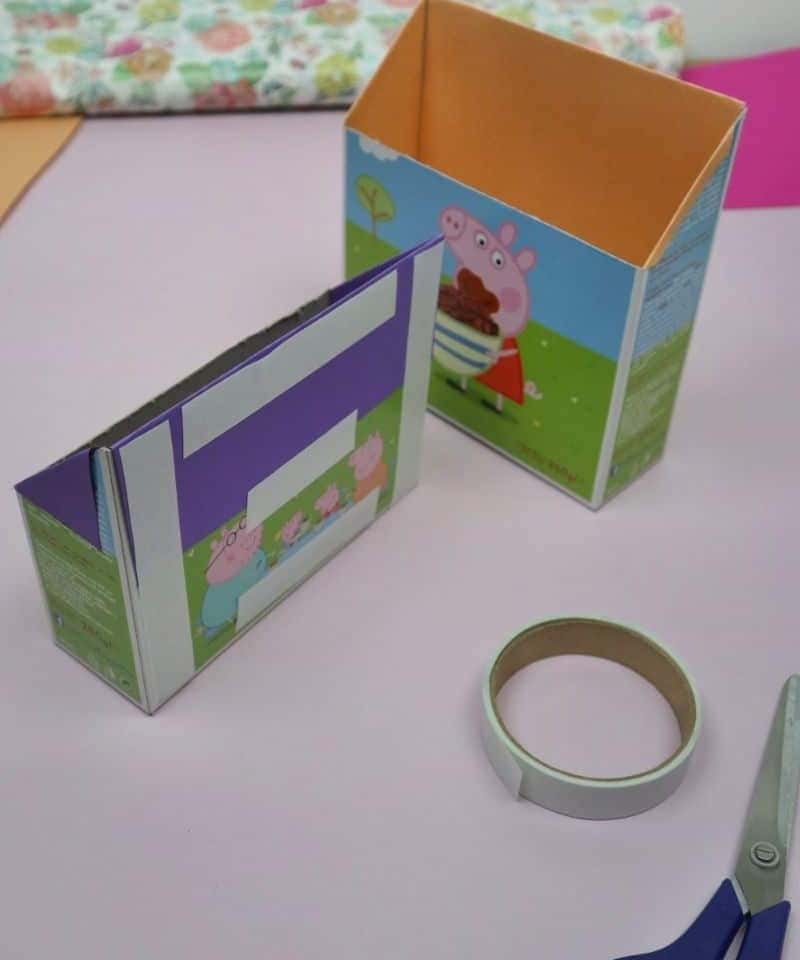
To craft the organizer’s outer shell, start by preparing the attachment surface on the small box. Apply a thin layer of adhesive or tape to the back of the small box, ensuring it’s evenly coated and ready for bonding. Next, align the small box with the front edge of the larger box and gently press them together, making sure they’re secure and won’t come apart easily.
Step 6
Now that the organizational shape is in place, it’s time to put everything together seamlessly. If you’re a skilled gift wrapper, this stage should be a piece of cake for you.
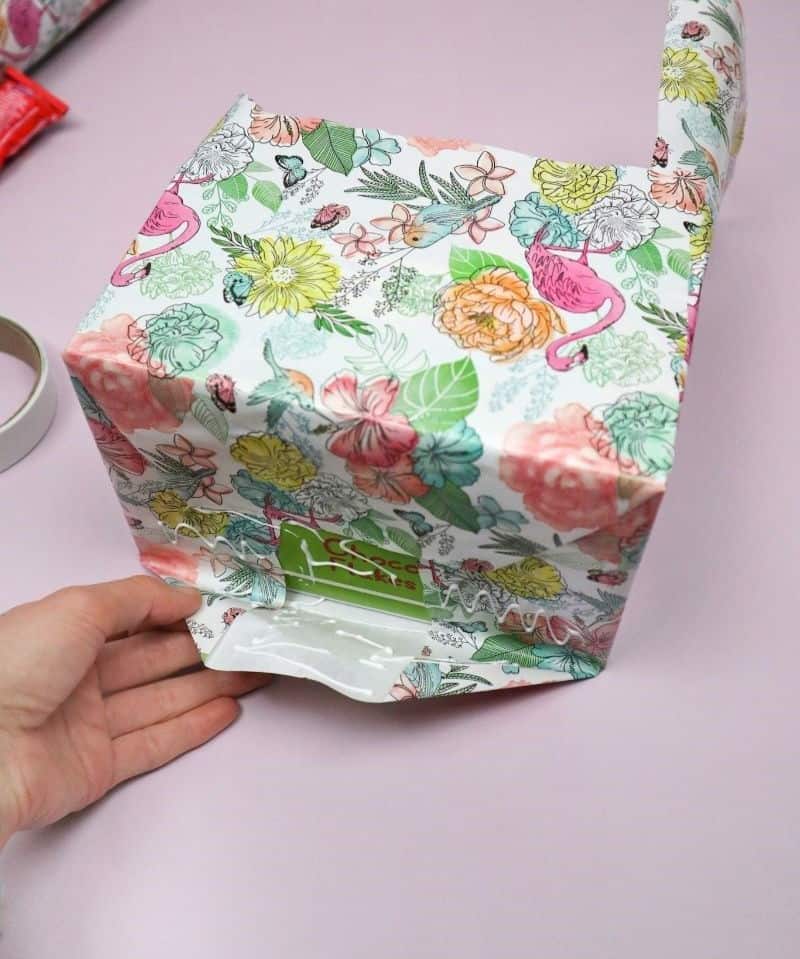
Begin by laying the wrapped organizer back onto the paper, then carefully roll it over to cover the entire surface.
Once each of the large panels is fully covered, fold the bottom of the organizer into an envelope shape to secure the wrapping paper in place.
Step 7
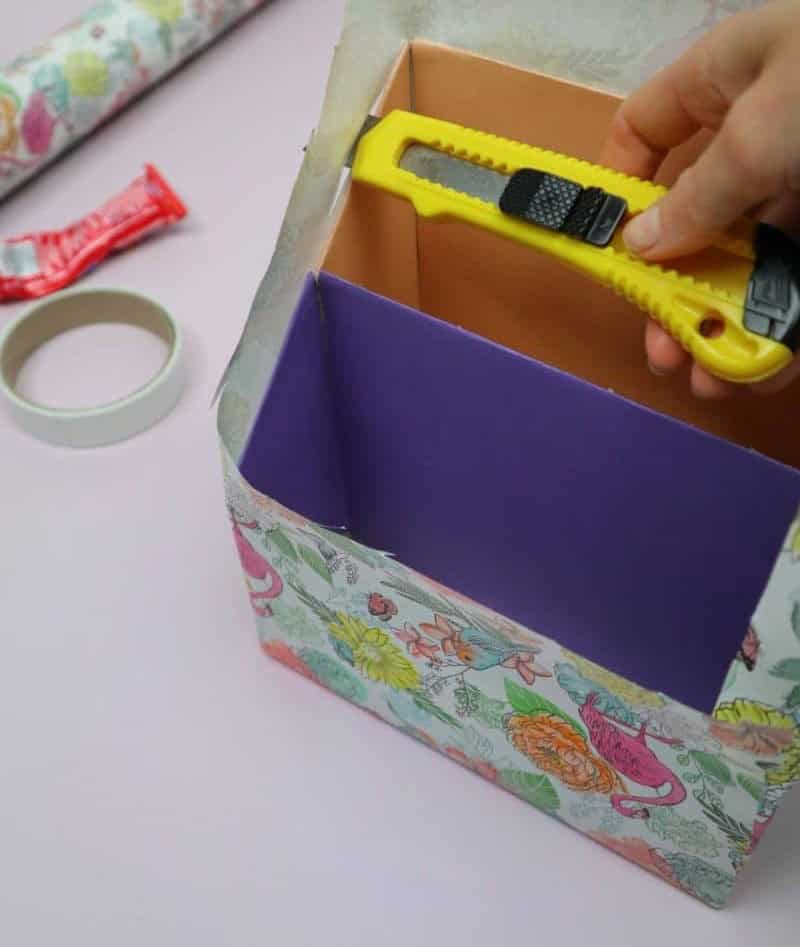
To complete the wrapping process, first address the excess paper protruding from the top of the package. A smooth finish can be achieved by carefully cutting away this surplus material. Although you won’t be able to tuck the top under the box’s rim for added security, it’s essential to ensure that your wrapping paper is properly aligned along the edges. To accomplish this, utilize a sharp craft knife to neatly trim any excess paper, resulting in a crisp, professional-looking edge.
Step 8
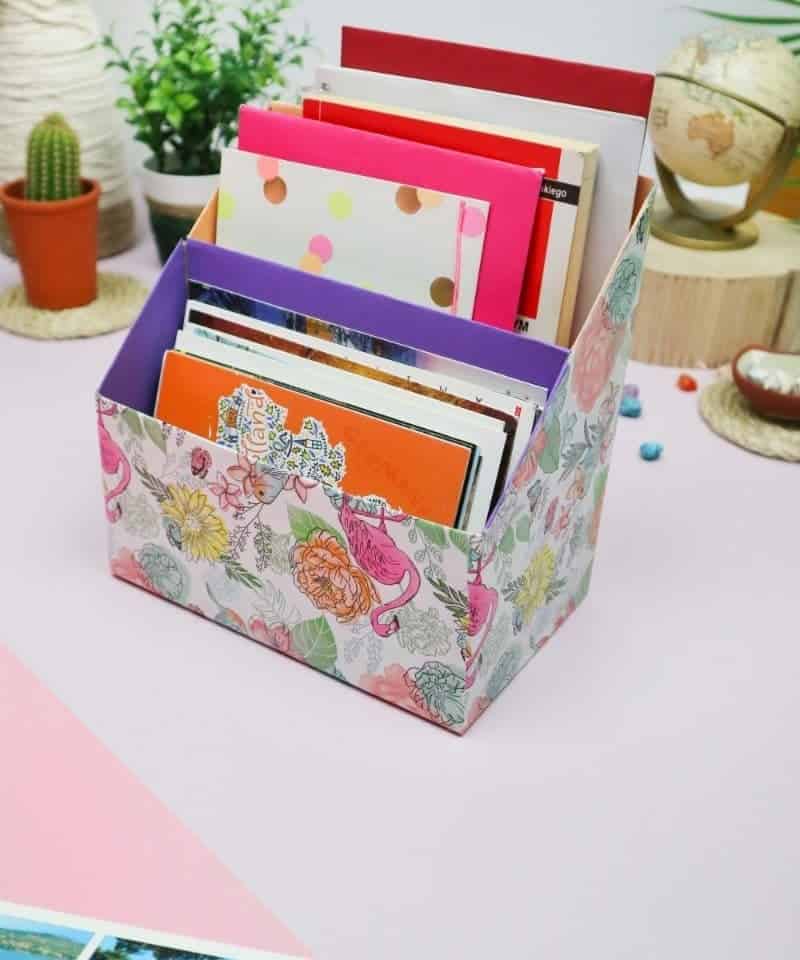
With your DIY project now complete, you’ll be left with a stunning organizer that’s just begging to be filled with all sorts of treasures. I’m thoroughly impressed by how effortlessly this creation can be made on a budget and in a matter of hours. Imagine being able to transform a cluttered workspace into a tidy oasis without breaking the bank or sacrificing too much time. That’s exactly what you’ll achieve when you bring your organizer project to life.
What Can You Store in This Cereal Box Organizer?

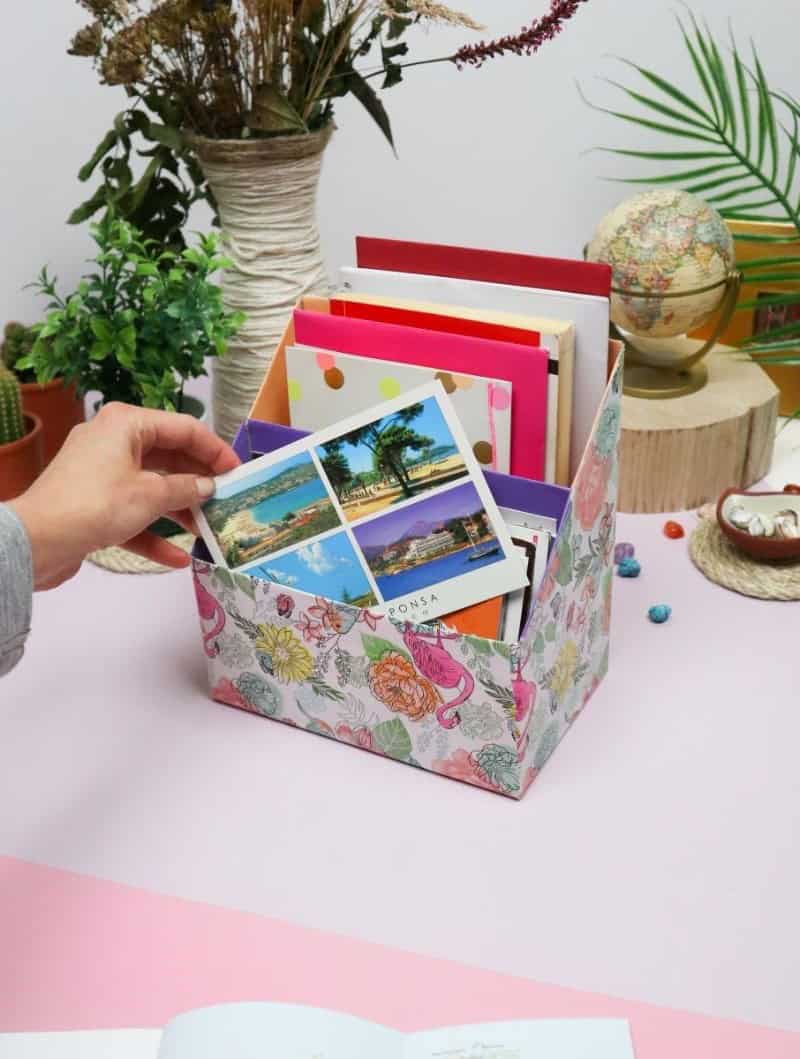
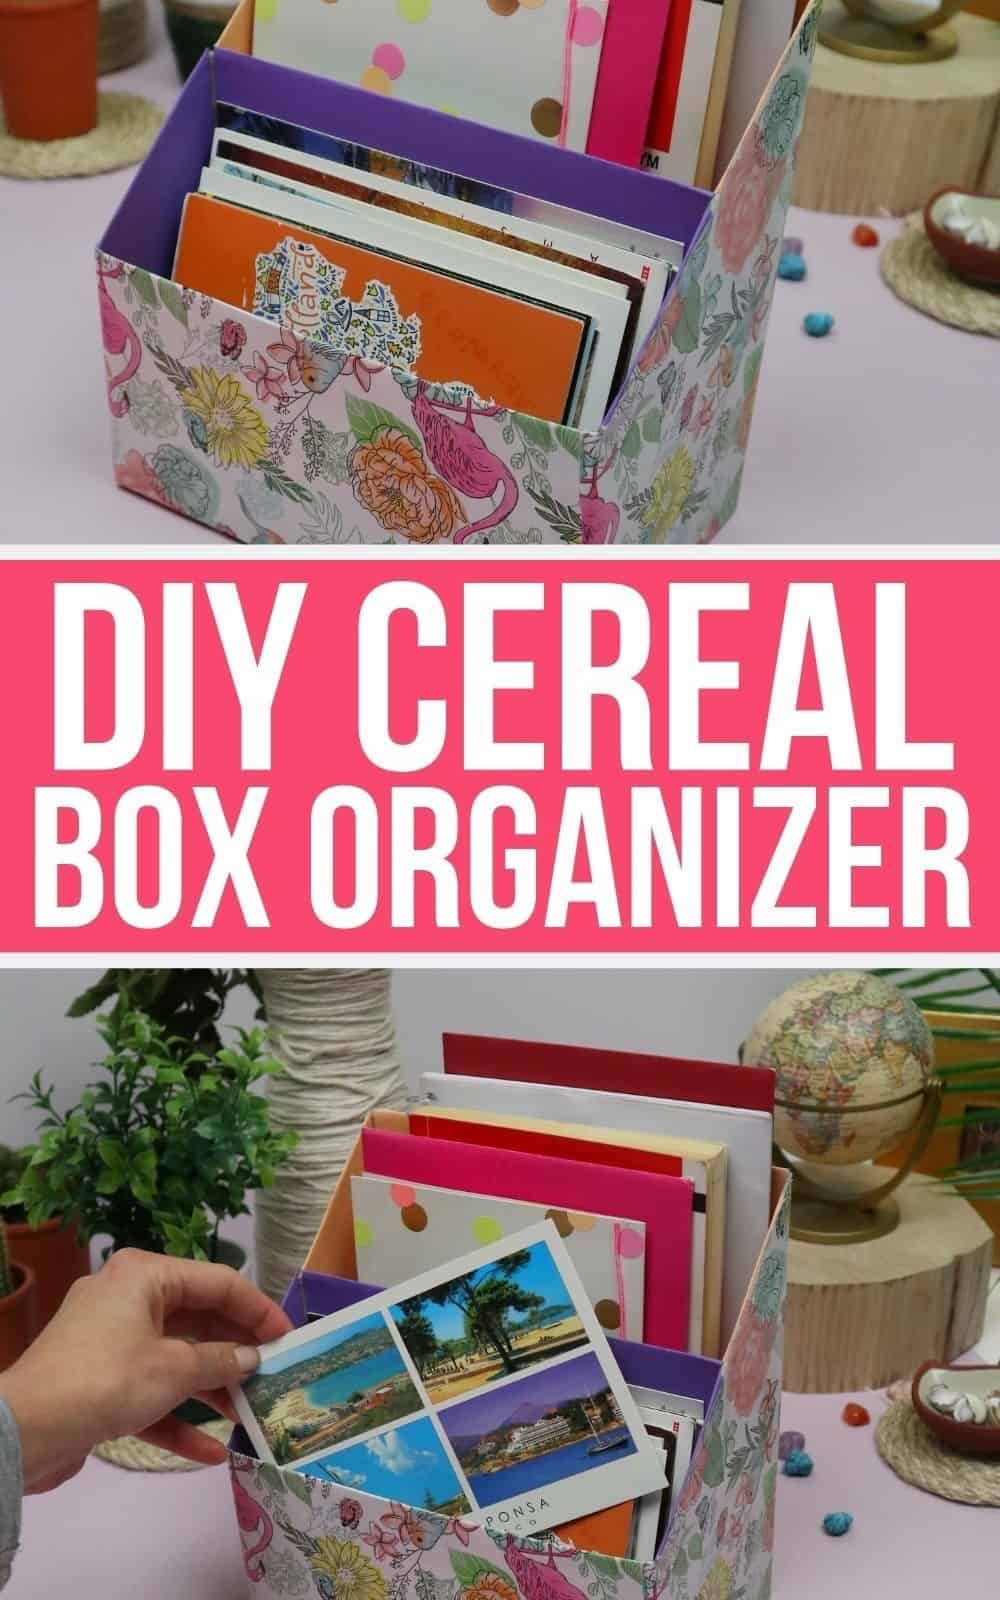
Say goodbye to cluttered desks and hello to organization with the cereal box organizer! This dynamic desk accessory isn’t just for storing cereal boxes, it’s a versatile storage solution that can keep everything from personal stationery to precious memories in one place. Imagine being able to quickly find the notebook you need, or having all your holiday cards and photos organized and easily accessible.
With this colorful organizer, you’ll be able to corral bills and mail, ensuring you never miss a payment again. And with its compact design, it won’t take up too much space on your desk.
You Might Also Like
For those on a budget, storage solutions don’t have to break the bank. In fact, some of the most creative and effective ideas can be found at just $1 per unit – that’s right, we’re talking about Dollar Tree storage ideas! From DIY drawer dividers crafted from cardboard to rope baskets made from discarded box materials, there are plenty of ingenious ways to organize small items without spending a fortune.
And if you’re looking for more inspiration, take a look at our collection of 15 creative ways to organize tiny treasures, or explore the world of small bedroom organizing ideas that can be implemented on a shoestring budget. For those who work from home or have a dedicated craft room, consider upcycling materials like cereal boxes into functional desk organizers – it’s amazing what you can create with a little creativity and some scraps!
And if you’re in need of even more organization inspiration, we’ve got you covered with 47 ideas to get your space ship-shape.
Who Can Make This Organizer?
Organization is a skill that can be developed by anyone, regardless of age or background. What’s more, it’s an excellent way to bond with family members while teaching valuable lessons about cleanliness and responsibility. When working with younger individuals, it’s essential to exercise caution when handling sharp tools, as this may require adult supervision.
In such cases, adults should take on the task of cutting and trimming, allowing children to focus on wrapping and other creative aspects of the project.
DIY Desk Organizer Out of Cereal Boxes
Combine functionality with eco-friendliness by creating a remarkable cereal box organizer that requires mere minutes and pennies. This innovative recycled project is perfect for decluttering any office space, and its simplicity makes it accessible to anyone. To create this stunning piece, you’ll need a mere 35 minutes of your time.
Equipment
When it comes to crafting, a well-stocked station is essential. A variety of tools can make all the difference in your creative process. From adhesive essentials like double-sided tape and glue, to precision instruments like scissors and retractable knives, having the right equipment at your fingertips is crucial. Even something as simple as a ruler or pen can be a vital component in bringing your ideas to life.
But what about when you’re in the midst of a creative flow and don’t want to lose momentum? That’s where the second part of our crafting equation comes in – preventing sleep! By taking steps to ensure your screen stays lit, you’ll be able to keep working without interruption.
Materials 1x2x3x
To get started, you’ll need a few basic materials. You’ll require two sturdy cereal boxes, which will serve as the foundation for your craft project. Additionally, you’ll need some colorful paper to add visual appeal and wrapping paper to give your finished product a professional-looking finish.
Instructions
Begin by setting up a cozy crafting session in front of Netflix. Start by measuring the dimensions of each cereal box, aiming to create both small and large boxes with smooth diagonal lines formed by the sides. Ensure the back of the smaller box is aligned with the front of the larger one for a seamless finish. Next, cut panels of colored cardstock to line the interior of the boxes, choosing contrasting colors for added visual interest.
When using glue, be cautious not to saturate the paper, which may cause it to sag; instead, opt for tape and apply it evenly along both edges and the interior for a crisp finish. Once your boxes are prepared, wrap them in your chosen wrapping paper, folding any excess under the bottom of the box like you would with a gift. To achieve smooth lines, trim any excess material off the top of the box using scissors or a craft knife.
Finally, place your finished organizer on a flat surface and marvel at how it effortlessly keeps clutter at bay.