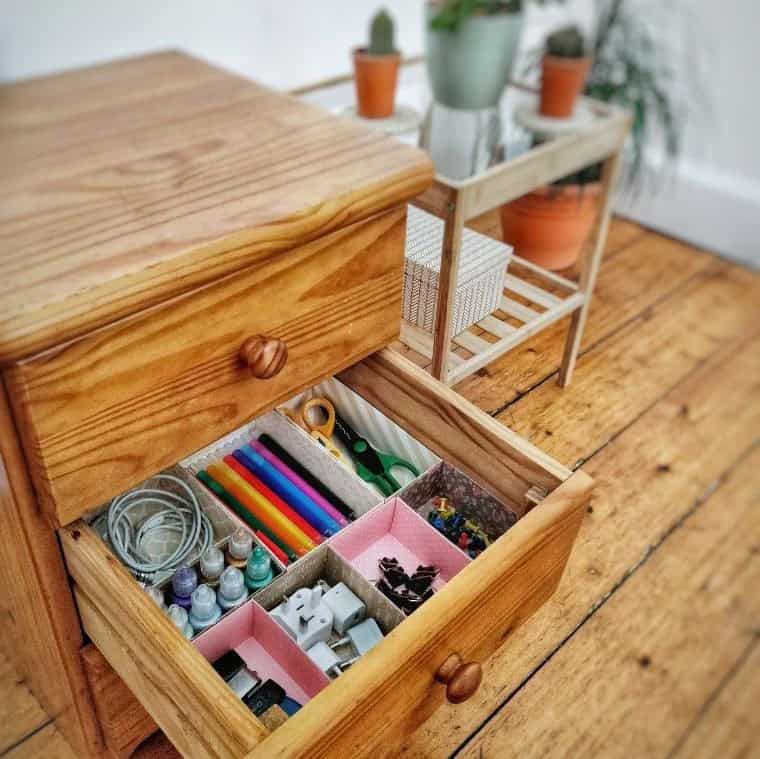
While an unorganized drawer may seem harmless at first, it can quickly become a source of frustration and wasted time. The constant search for misplaced items can be overwhelming, making the drawer feel like a useless space. However, with the help of DIY drawer dividers, you can transform your cluttered drawers into tidy and functional spaces without breaking the bank. By using everyday crafting supplies, you can create custom storage solutions that keep your office decluttered and organized.
In this post, I’ll show you how to make easy DIY drawer dividers out of cardboard and share my own experience with organizing my office space.
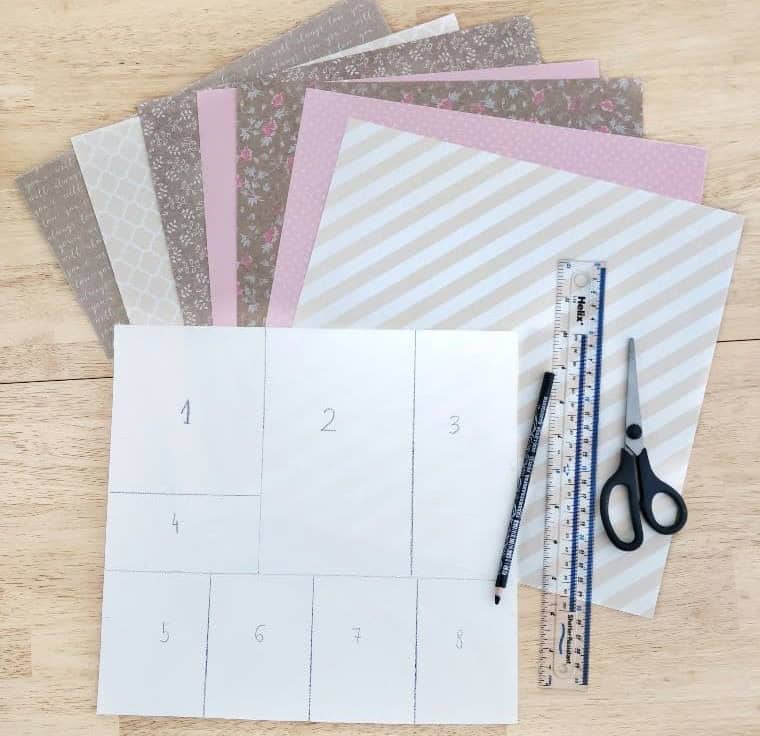
What You’ll Need for Dividers
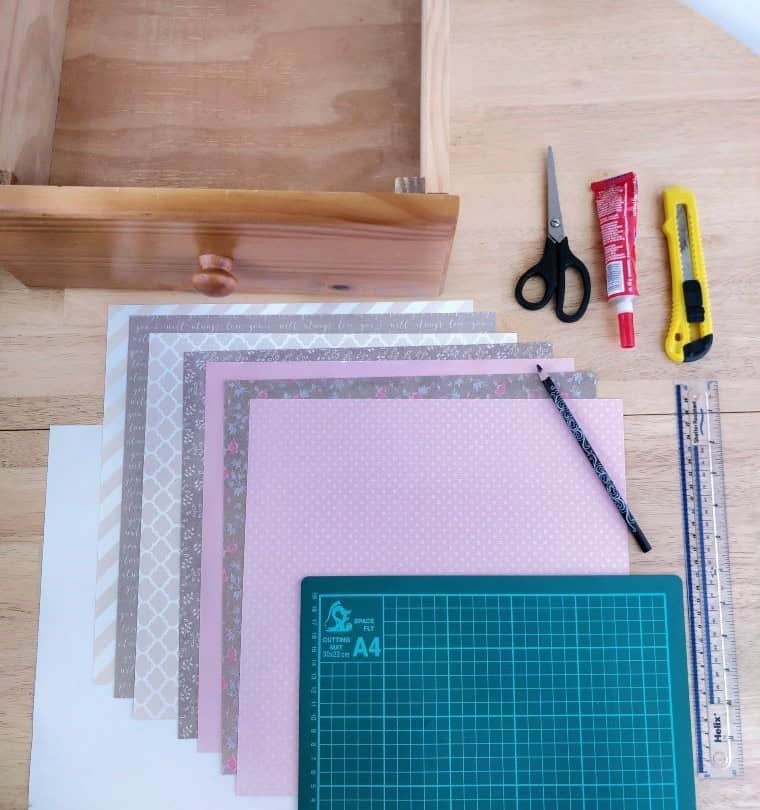
To create a stunning DIY project, you’ll need the following essential materials: cardstock with a unique pattern and a weight of 200 grams per square meter (12 inches by 12 inches in size). You’ll also require a strong adhesive like glue to hold everything together. For precision cutting, bring along a pencil for marking, scissors for general trimming, and a craft knife for more intricate cuts. A sturdy A4 cutting mat will provide a safe and controlled environment for your crafting endeavors.
STEP 1
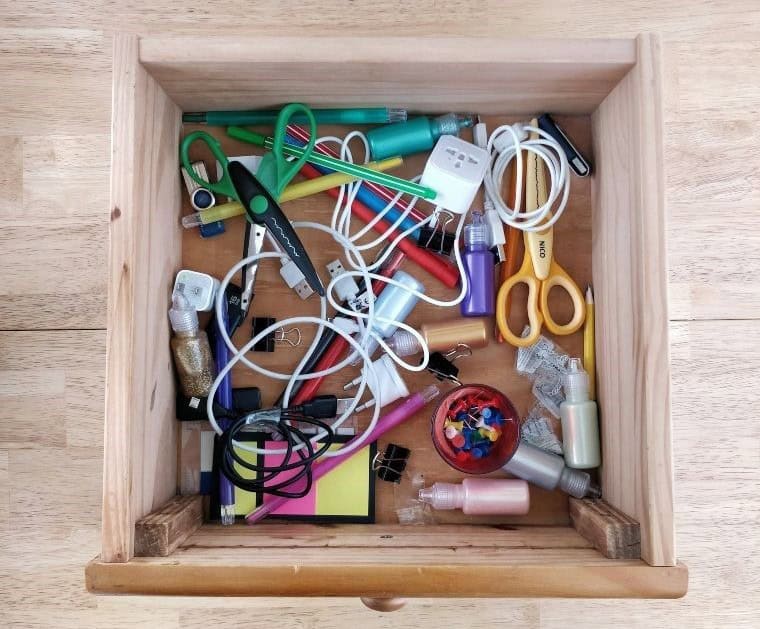
To initiate the organization process, begin by removing the drawer from the shelf and carefully pouring out its contents onto a flat surface. This initial step allows you to assess what’s currently stored in the drawer and prepares the way for a more methodical sorting and categorization process.
STEP 2
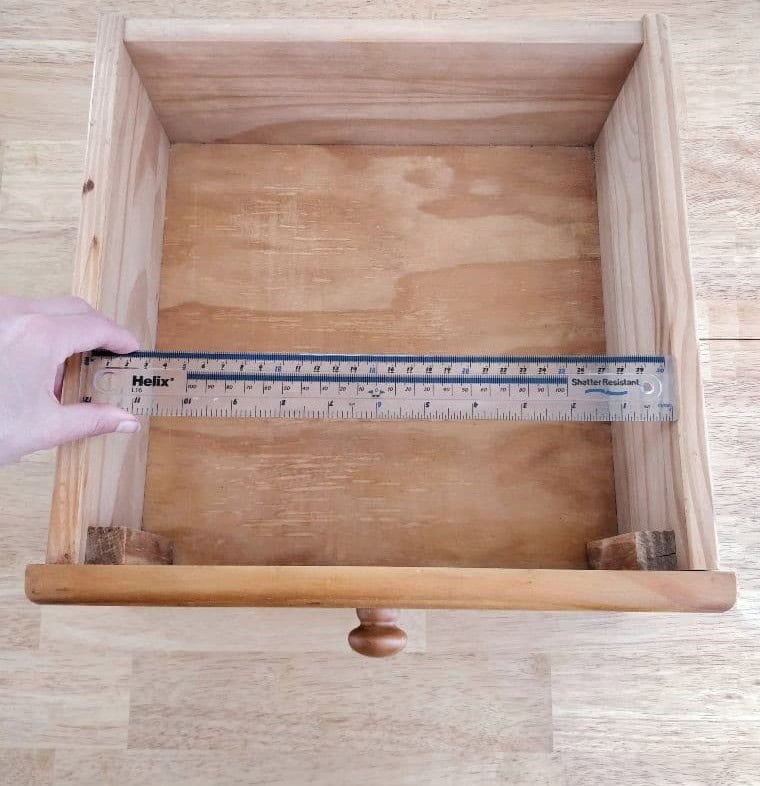
To create the foundation of your DIY drawer organizer, start by measuring the interior dimensions of the drawer using a ruler. This crucial measurement will serve as the guide for cutting your cardstock base to precise proportions.
STEP 3

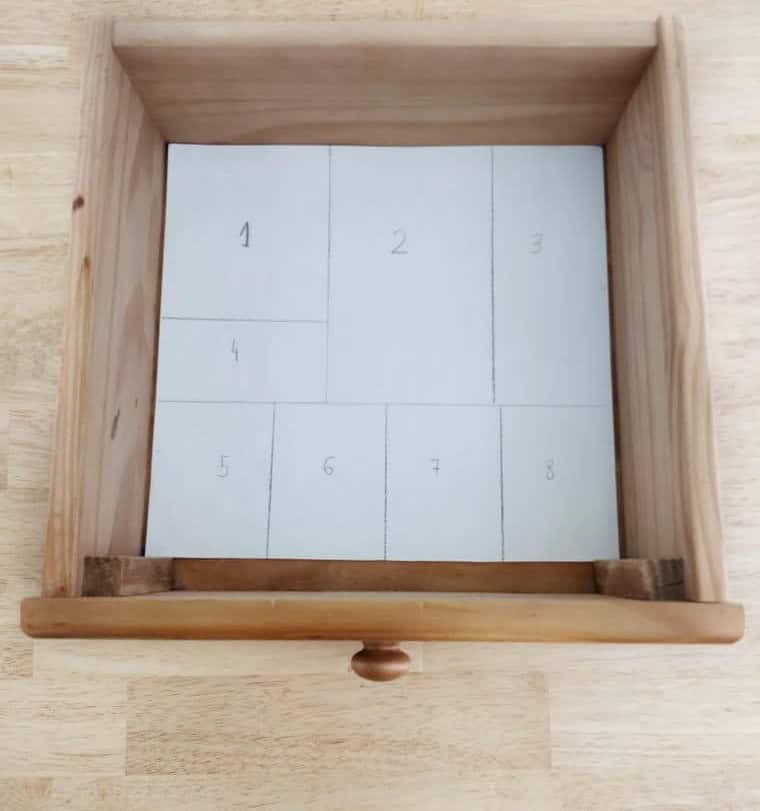
Position the cutting mat on your work surface and place the base card stock beneath it. Next, gather all contents from the drawer and arrange them on top of the card stock in a way that makes sense for their future organization. Take advantage of the cutting mat’s visual cues to help separate items into distinct categories.
Once you’re satisfied with your invisible compartment setup, use a pencil to lightly sketch out the boundaries of each section, relying once again on the cutting mat as a reference point.
STEP 4
To solidify your foundation, temporarily set aside any content or ideas you’ve gathered so far. This will enable you to refine and clarify the initial framework or outline you created earlier. As you work through this process, use a ruler or other straightedge tool to ensure that all lines are perfectly aligned and symmetrical.
Once you’re satisfied with the overall shape of your foundation, take the time to number each individual section, providing a clear and organized structure for your ideas to follow.
STEP 5
Verify your initial measurements by placing the base cardstock back onto the drawer, allowing yourself to get a preliminary sense of how the compartments will appear within. This step offers an opportunity to refine your understanding of the final product before proceeding.
STEP 6
When satisfied with the overall dimensions and organization of your travel organizer’s compartments, it’s time to bring out the customized dividers. Begin by gathering all the cardstock designs intended for each section. Start by selecting a preferred design for compartment one, setting the tone for the rest of the customization process.
STEP 7
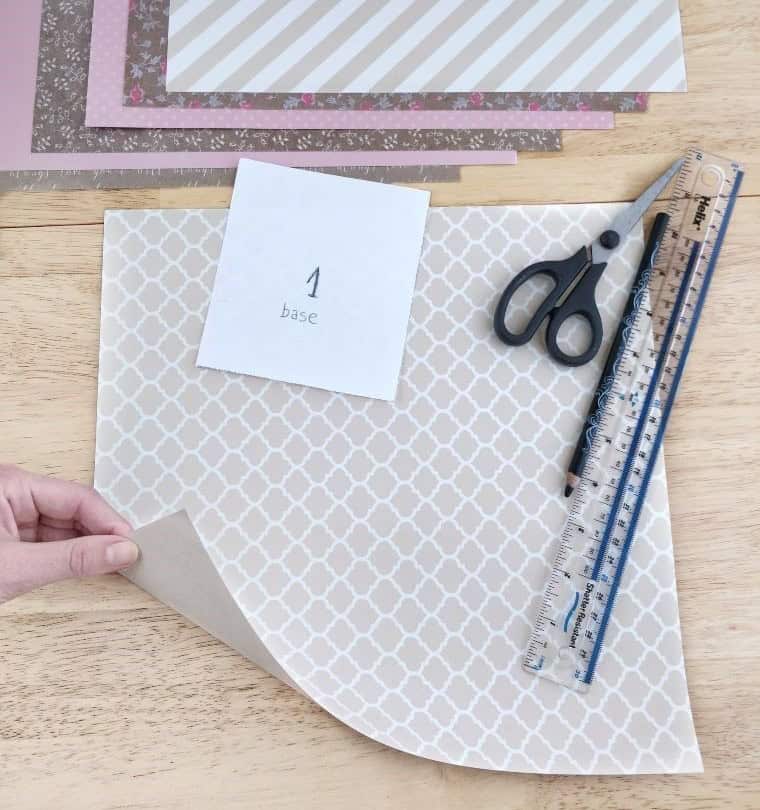
Carefully cut out the first compartment from your cardstock, taking care not to compromise the integrity of the surrounding areas or risk damaging the other predefined spaces within. A deliberate and calculated approach will ensure a precise separation, allowing you to move on to the next step with confidence.
STEP 8
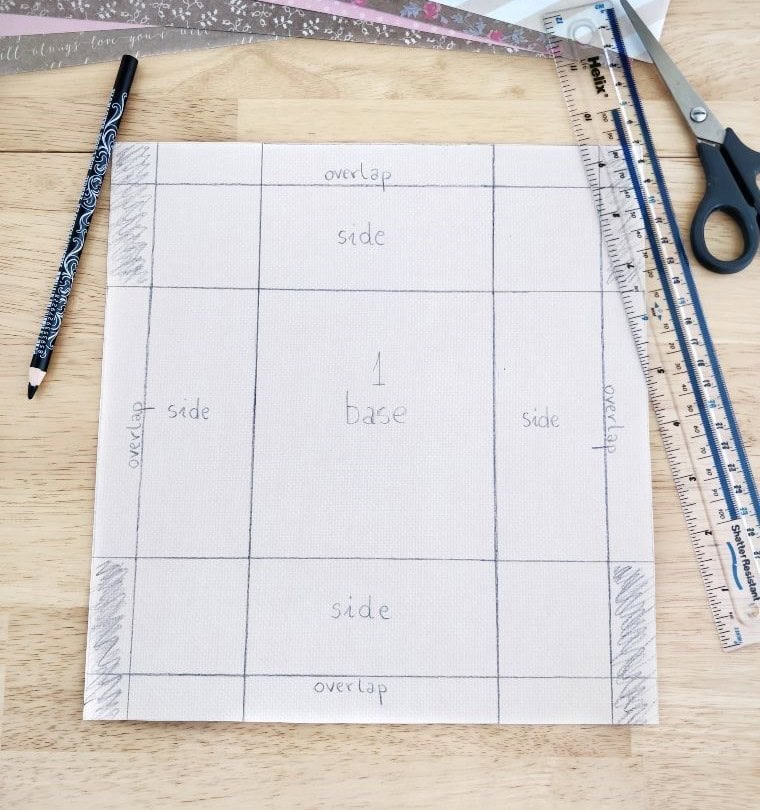
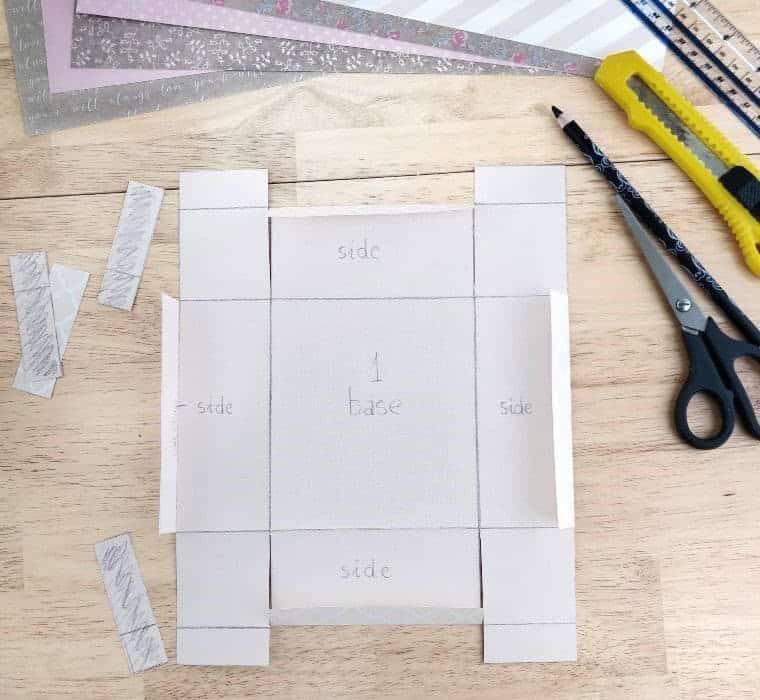
Start by preparing the first compartment’s card stock with its plain side facing up. Place the cut-out piece in the middle and lightly sketch a rough outline around it with a pencil. This will serve as the foundation for your divider. Next, use a ruler to create a 2mm buffer zone around the outline on all sides. This adjustment ensures that all compartments fit snugly when assembled.
Finally, determine the desired height of your divider and measure it onto the card stock, carefully outlining the following dimensions: overlap-side-base-side-base-overlap, as illustrated in the accompanying photo.
STEP 9
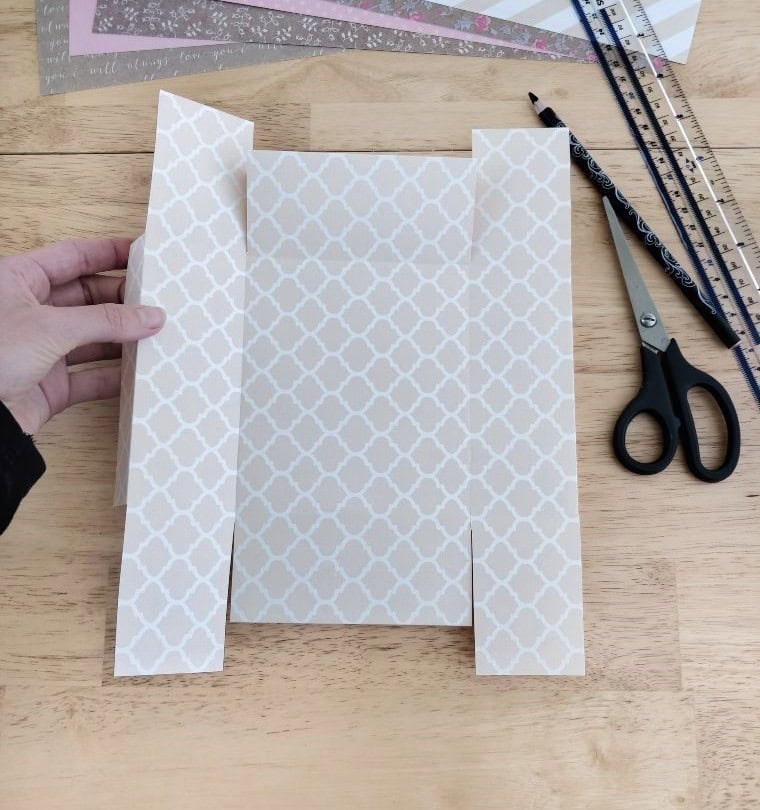
To optimize the fit and appearance, carefully remove any excess material from around the areas where the overlapping pieces meet. This will ensure a seamless joint and prevent any unwanted bulk or sagging. As you trim away the extraneous material, be sure to follow the natural curves of the design to maintain its original shape and aesthetic.
STEP 10
To create a crisp, clean finish, carefully fold each overlap inward by about 1/8 inch on all four sides of your divider. Make sure to tuck the edges neatly under the main panel, ensuring a snug and even fit.
STEP 11
As you approach the next step in the creative process, turn your attention to the reverse side of the cardstock. The moment of truth arrives as the intricately designed pattern begins to emerge, a visual representation of the possibilities waiting to be explored.
STEP 12
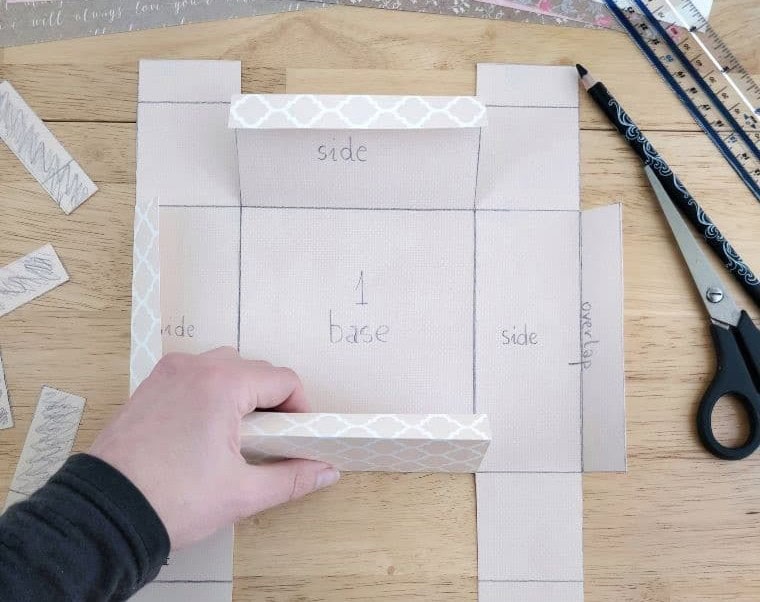
To construct your custom divider, start by folding the edges of the material upwards, carefully aligning them with the guidelines you’ve created. This will help you achieve a precise and even fold that adds a professional touch to your design.
STEP 13
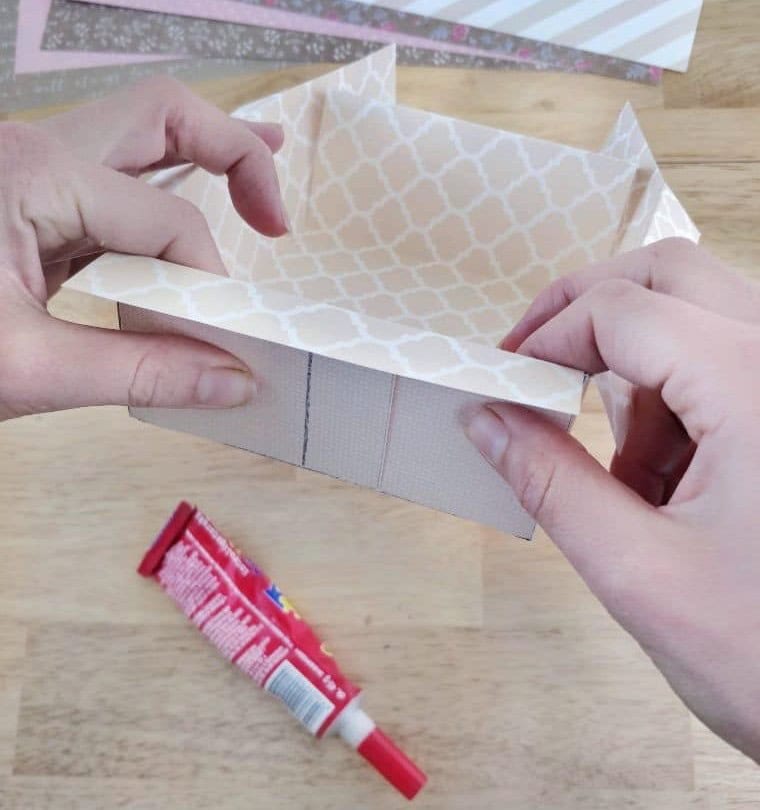
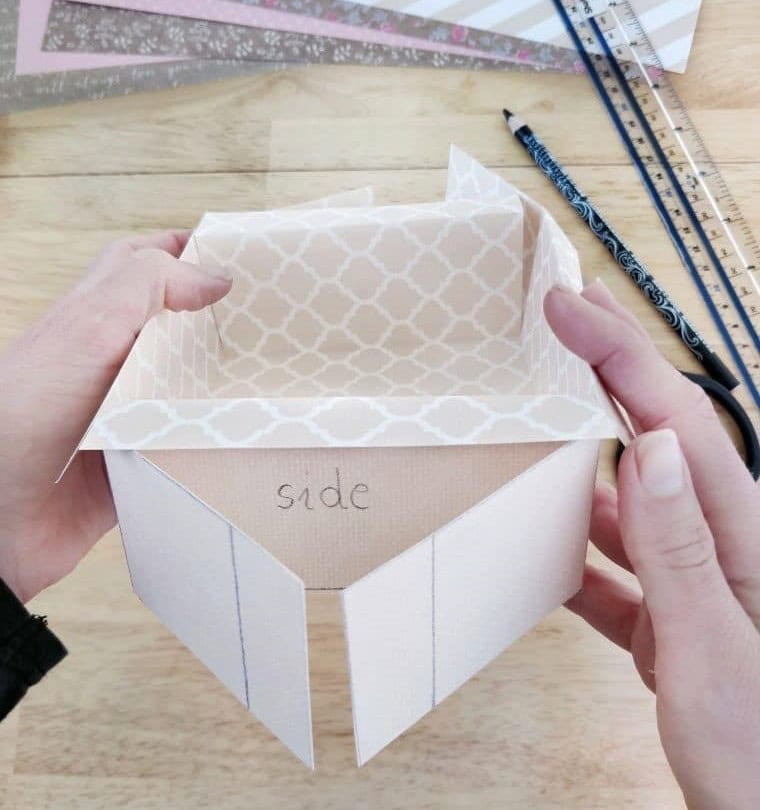
Once you’ve assembled the divider, you’ll be left with a few stray flaps that need to be tidied up. To do this, carefully fold these excess pieces onto themselves, creating a neat little package. Secure everything in place using a generous amount of glue, making sure that your folds are crisp and your edges are aligned.
STEP 14
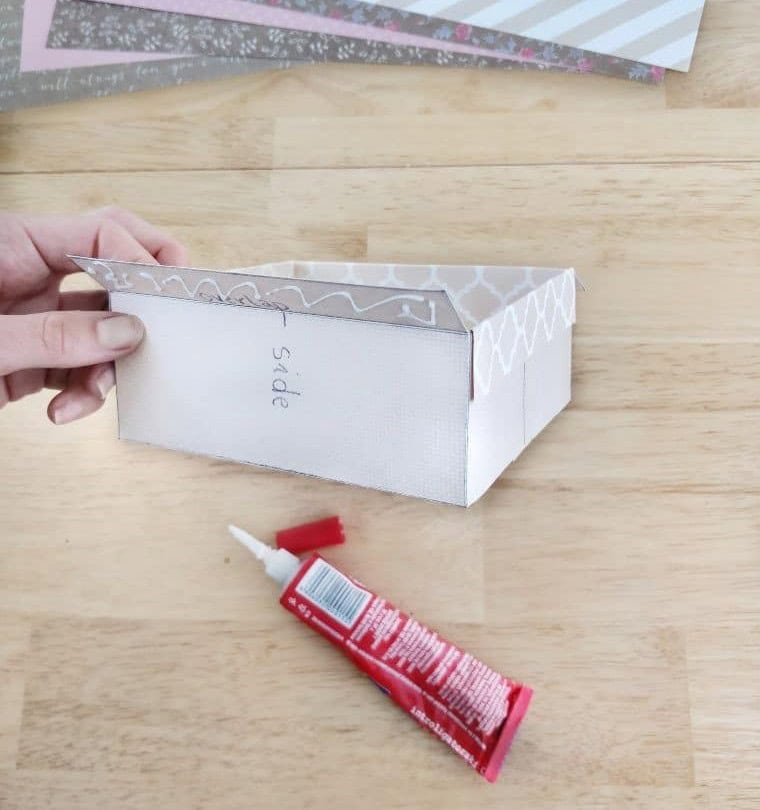
To secure the seam, apply a dab of glue to the overlapping area and carefully fold it downwards, ensuring a strong bond between the two sections. As you do so, apply gentle yet firm pressure to guarantee a sturdy attachment to the divider.
STEP 15
To ensure seamless execution, it’s crucial to apply the same procedure to every overlap you encounter. Simply follow the same sequence of actions outlined in steps 1-15, dedicating equal attention and effort to each subsequent divider. By doing so, you’ll maintain consistency throughout your project, guaranteeing a polished and professional outcome.
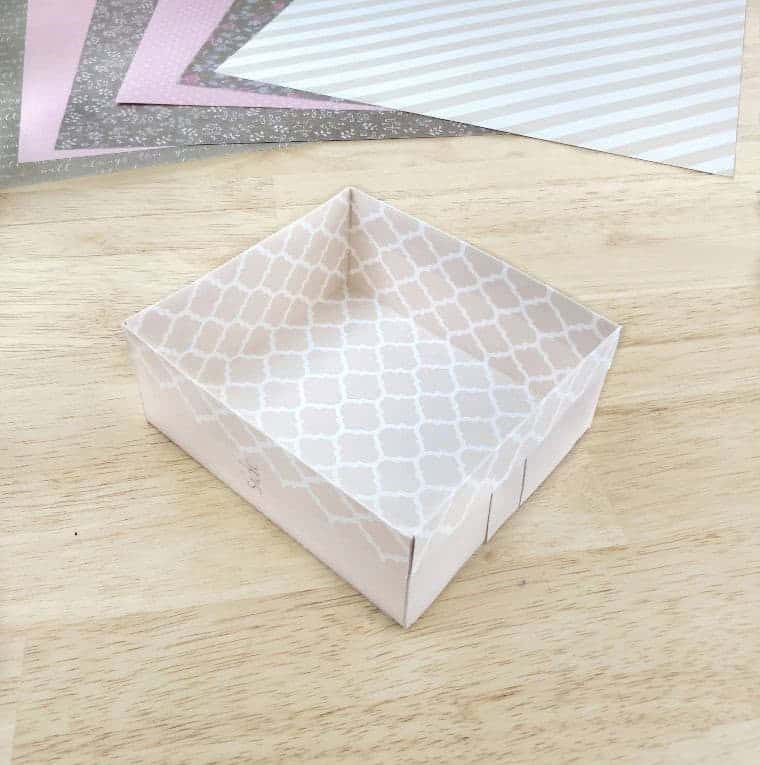
STEP 16
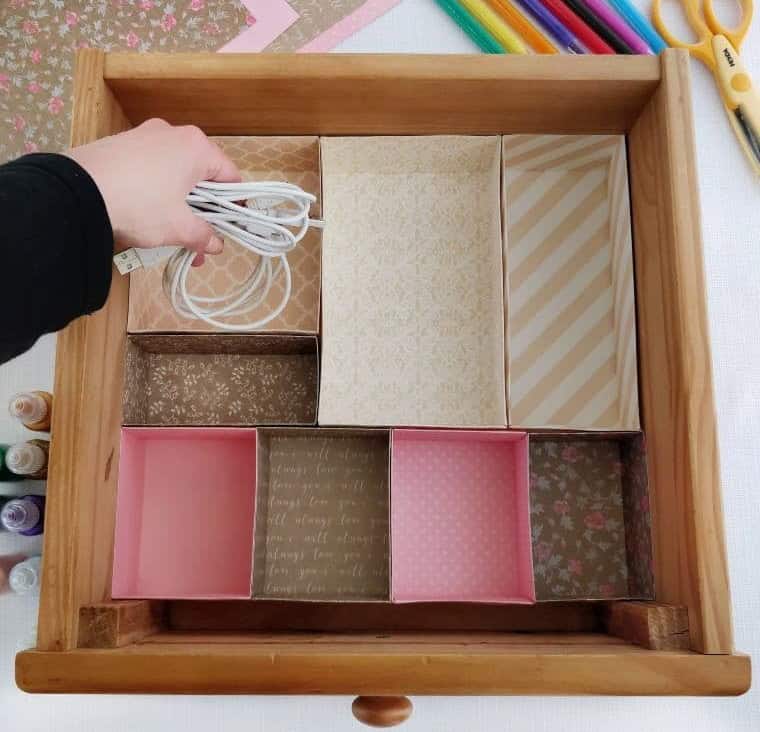
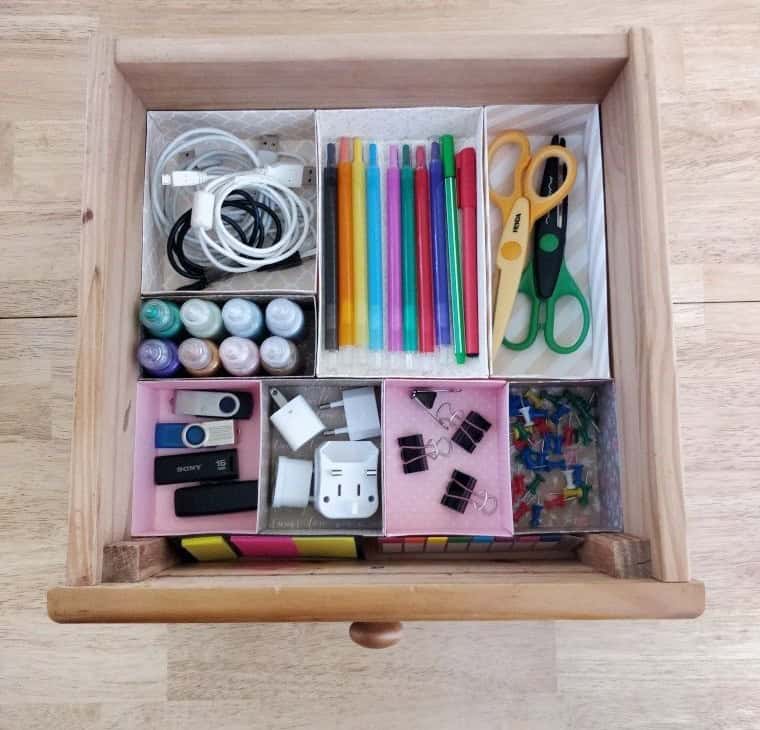
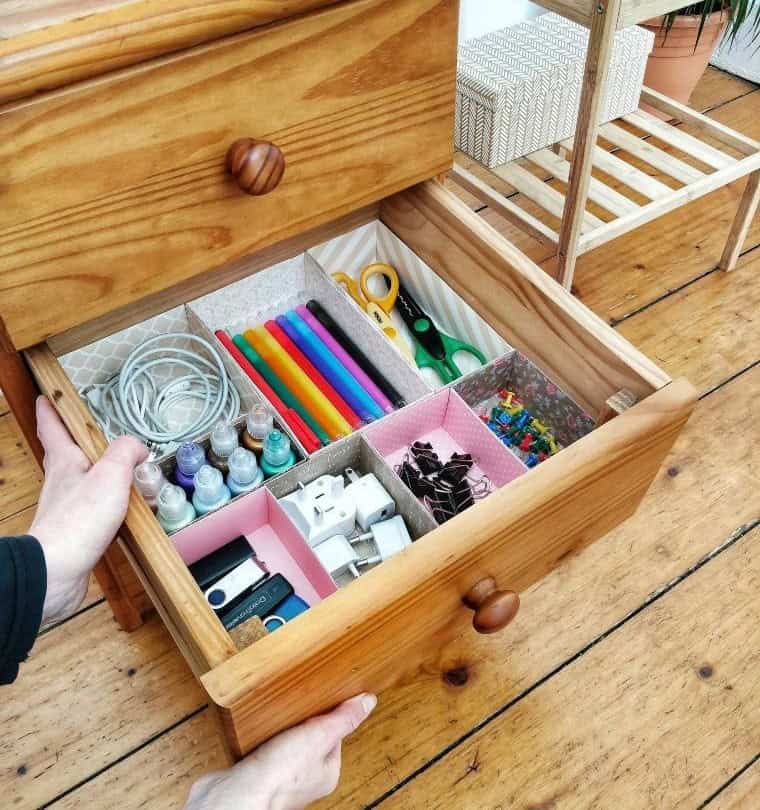
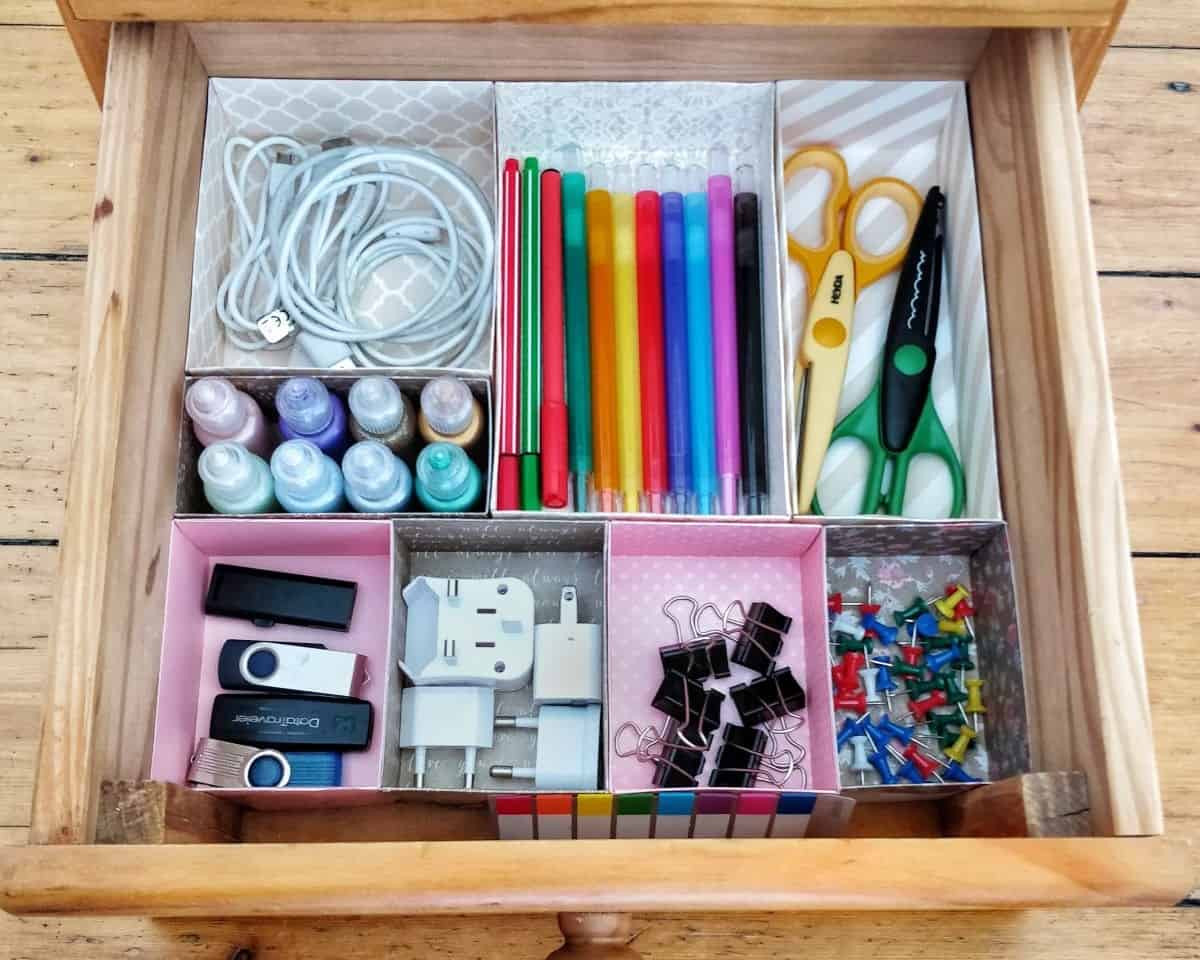
As you complete the drawer layout, carefully arrange your contents within each compartment. Once everything is neatly in its place, admire the result – a clutter-free and visually appealing space! This milestone marks the end of step one in our organizational journey. Next, apply these same steps to the remaining drawers at home, knowing that this effort will bring harmony to your daily routine and those around you.
Moreover, this project presents an excellent opportunity to engage with your kids, fostering a sense of organization and creative exploration within them.
Other Organizing Ideas You Might Like
Transform your workspace with a clever DIY rope organizer. By utilizing a simple yet effective design, you can create a functional and stylish solution to keep your desk tidy. A must-have among the 15 desk organization ideas that will help you regain control over your work area. This ingenious hack is just one of the many creative solutions featured in our collection of 15 dollar store organizing hacks.
If you’re looking for more inspiration, explore our comprehensive guides on 25 craft room ideas and 41 storage ideas for small spaces, all designed to help you maximize your workspace’s potential.
DIY Drawer Dividers Out of Cardboard
Transforming discarded cardboard into a functional organizer can be a creative solution to tidy up your office space without breaking the bank. With just 2 hours of active time and a total effort of 2 hours, you can create a budget-friendly storage solution for your drawers. The best part? It’s an eco-friendly way to reuse and recycle materials that would otherwise end up in the trash. So, gather your cardboard scraps, scissors, glue, and let your creativity shine!
Equipment
To ensure uninterrupted workflow, it’s essential to prevent your screen from dimming or turning off. To achieve this, consider using tools like Pencil, Scissors, and Craft knives for manual tasks that don’t require a digital interface. Meanwhile, place an A4 cutting mat nearby to provide a dedicated surface for your creative endeavors. By minimizing the need for screen time, you’ll be able to focus on your work without interruptions.
Materials
Instructions
To create a drawer divider, start by preparing the necessary materials. Remove one drawer’s contents and measure its interior dimensions on plain card stock. Cut out the card stock according to these measurements, then reassemble the drawer’s contents and arrange them on the card stock as desired. Using a cutting mat as a guide, sketch a rough outline of the contents with a pencil. Remove the contents from the card stock and straighten the outline using a ruler.
Number each compartment, place the cardstock back in the drawer for a final check, then remove it to create the individual dividers. Begin by cutting out divider number one, choosing a design or patterned side of the card stock. Draw a rough outline of the cut-out piece on the non-patterned side. Use a ruler to refine the outline, leaving 2mm of extra space around each edge. Define the ‘sides’ of the divider according to your preferred height using the overlap-side-base-side-overlap pattern.
Cut off excess sides along the overlaps, then fold them inwards. Flip the card stock to reveal the patterned surface and fold along the remaining lines to create the box. Secure all sides and overlaps with glue. Repeat these steps for each divider or compartment until you’ve completed dividers for all your home’s drawers. Redoing this project multiple times will save your family hours of rummaging through clutter, allowing you to enjoy a more organized living space.