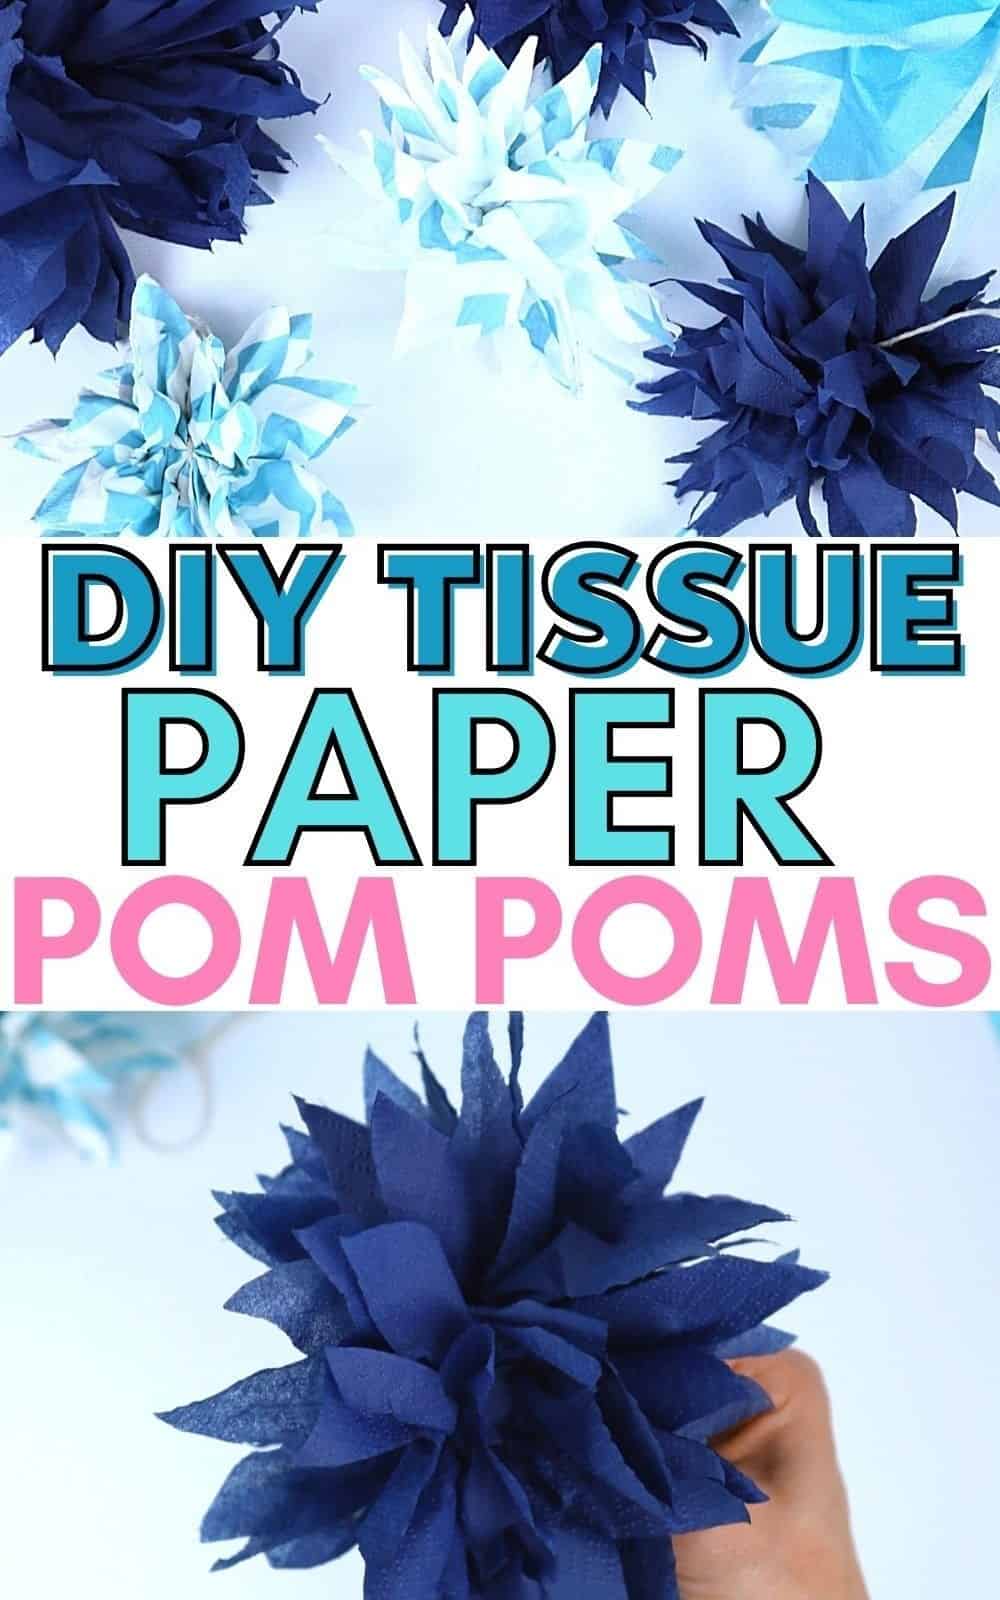
Transforming your space with a touch of whimsy has never been easier or more affordable. Paper pom poms are a simple yet stunning decoration that anyone can create. In this tutorial, I’ll guide you through the step-by-step process of crafting these lovely tissue paper decorations.
Whether you’re embracing the cozy atmosphere of winter or seeking to inject some freshness into your decor, these charming pom poms will transport you to a world of elegance and sophistication.
Suspended from any spot, they’ll add an air of refinement reminiscent of a high-end home design magazine spread.
Their soft, feathery texture and ethereal silhouette make them the perfect solution for brightening up that dull corner that’s been begging for attention.
A Great Craft for Teens, Kids, and Even Adults
Bring the whole family into the creative fold with this delightful paper pom-pom project. With its broad appeal, everyone from tiny tykes to teenagers can participate and bond over the fun of crafting together. Set up a cozy atmosphere in your dining room, grab some tissue paper and yarn, and get ready for an afternoon of quality time spent making memories and decorations alike.
Let the creative juices flow as you work alongside loved ones, discovering the joy of collaboration and the magic that happens when artistry meets family bonding.
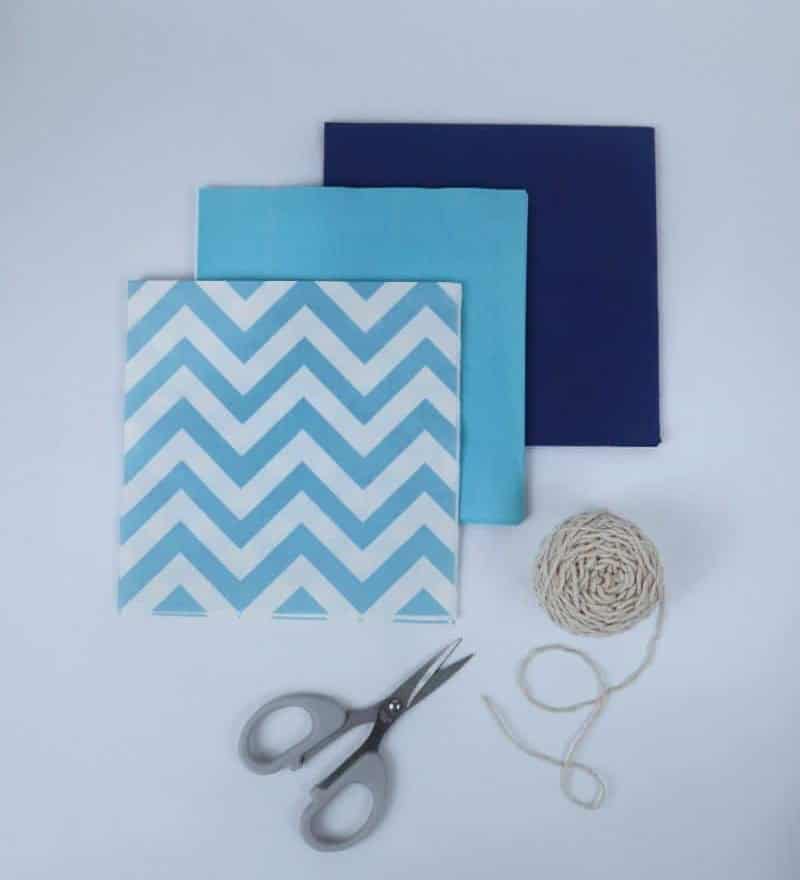
Supplies You’ll Need for 3 Pom Poms
How To Make Tissue Paper Pom Poms
To achieve stunning results, simply follow the subsequent steps with precision and patience, and you’ll soon find yourself surrounded by an array of gorgeous pom poms.
Step 1
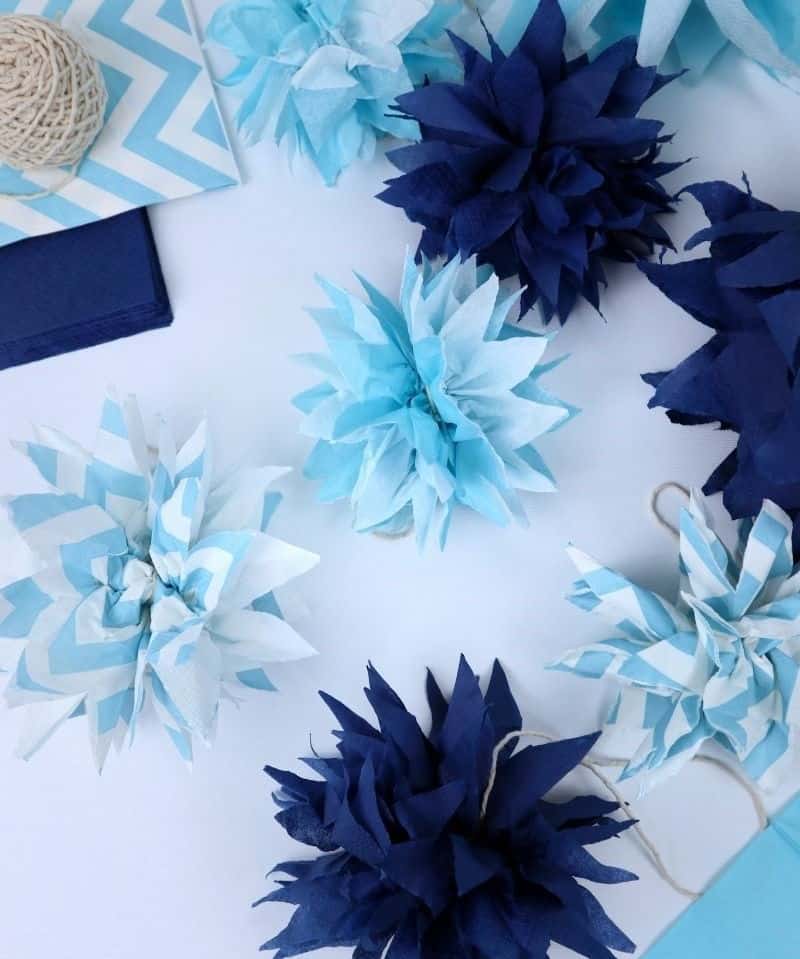
To embark on this creative endeavor, start by gathering your essential materials. For my project, I selected a trio of tissue papers featuring distinct designs: two with solid hues and one with a patterned design, all within the same blue color family. This thoughtful selection will enable you to create a visually appealing arrangement when displayed together.
Step 2
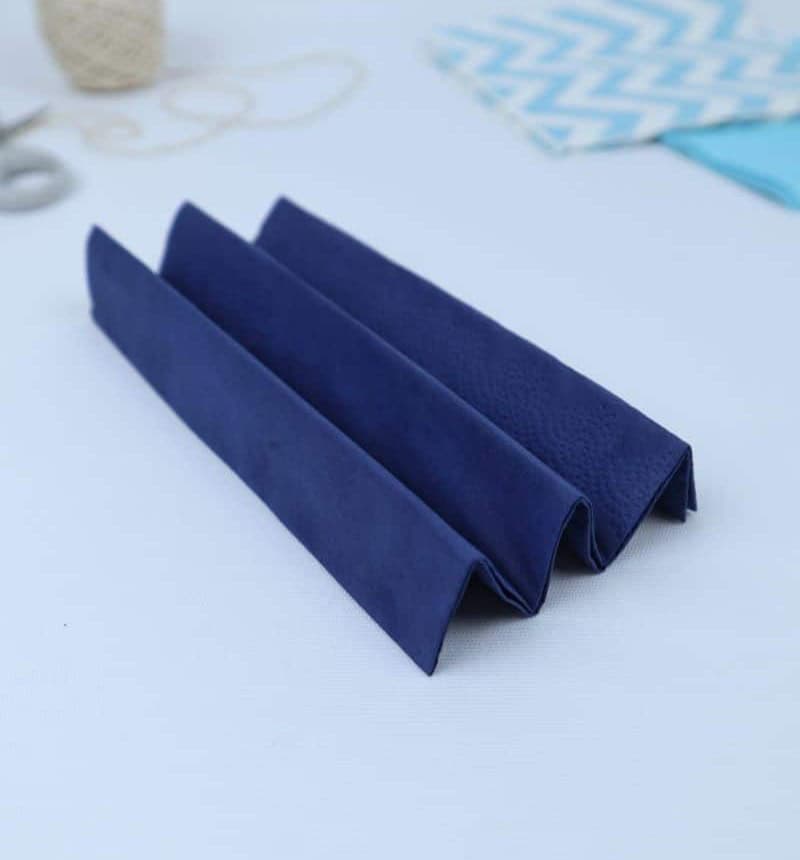
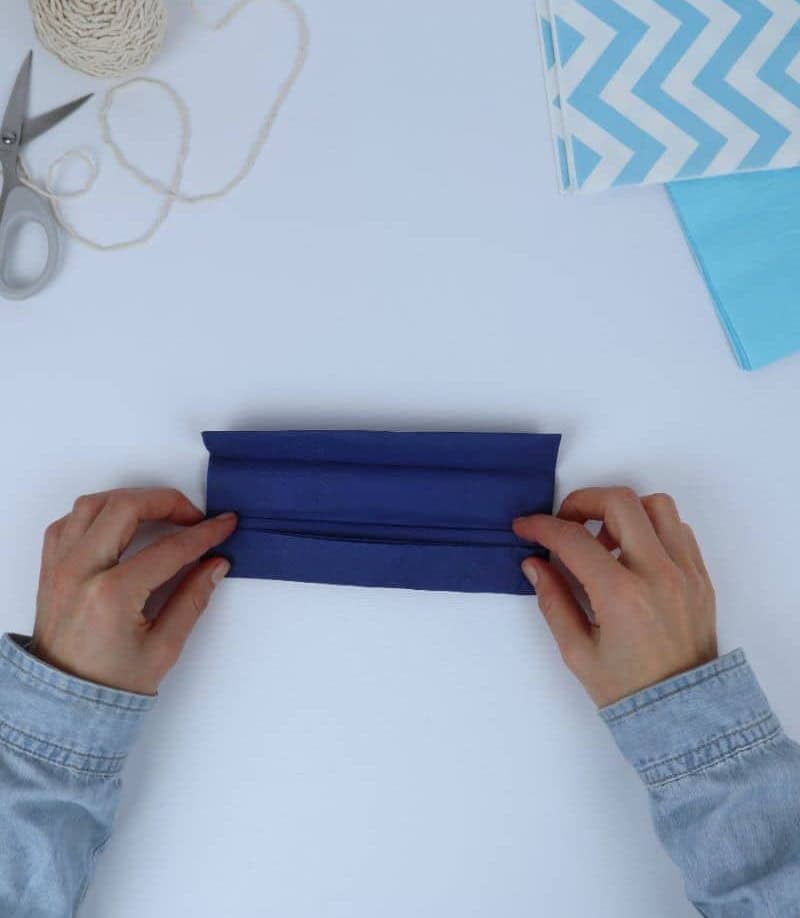
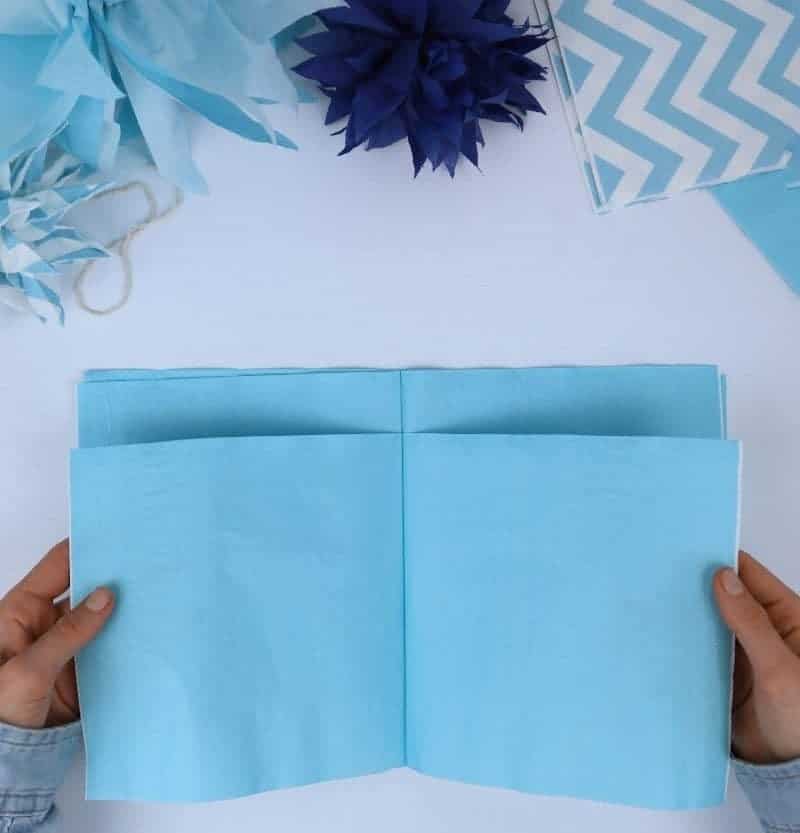
To create a unique textured effect, start by folding a square of tissue paper into a series of accordion-like pleats. Begin by folding one edge inward, creating a 12-inch to 15-inch segment, depending on the size of your original square. Next, fold this newly created edge inward again, repeating the same motion and creating another similarly-sized segment. Continue this process, alternating sides with each fold, until you achieve a corrugated shape with a series of interconnected pleats.
Step 3
When it comes time to prepare your yarn for hanging, start by cutting an adequate length. The ideal size will depend on how you plan to display your finished pom-poms. Consider the space where they’ll be displayed and factor in any potential adjustments or twists you might need to make during the assembly process. For my own project, I opted for a piece of yarn roughly the same length as my forearm.
While it’s better to have a little extra than not enough, this approach ensures that your pom-poms will hang evenly and securely.
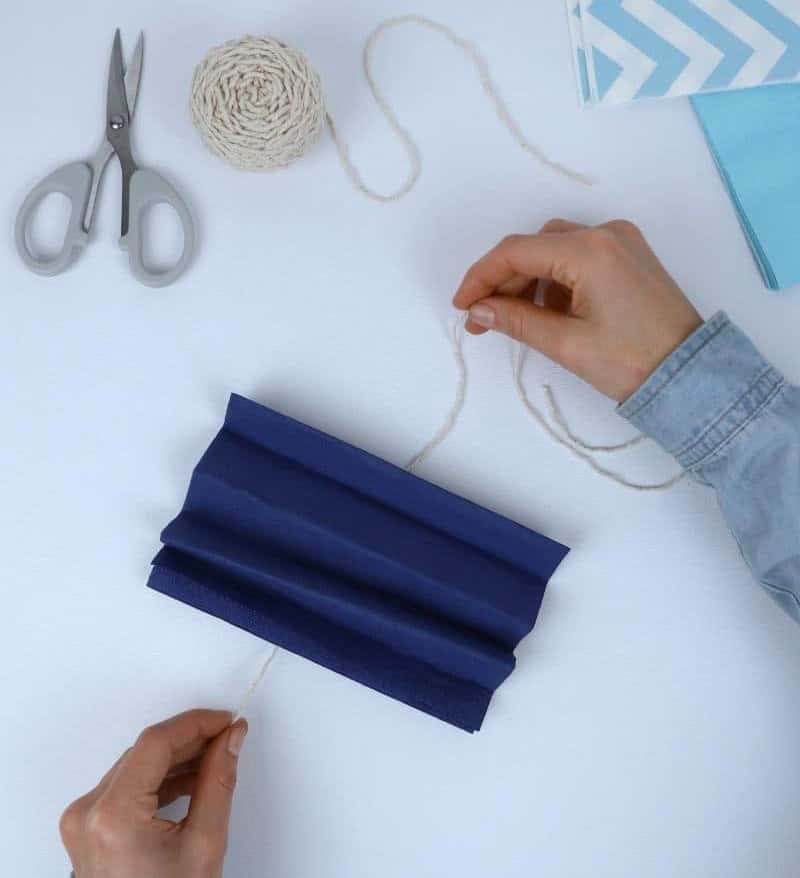
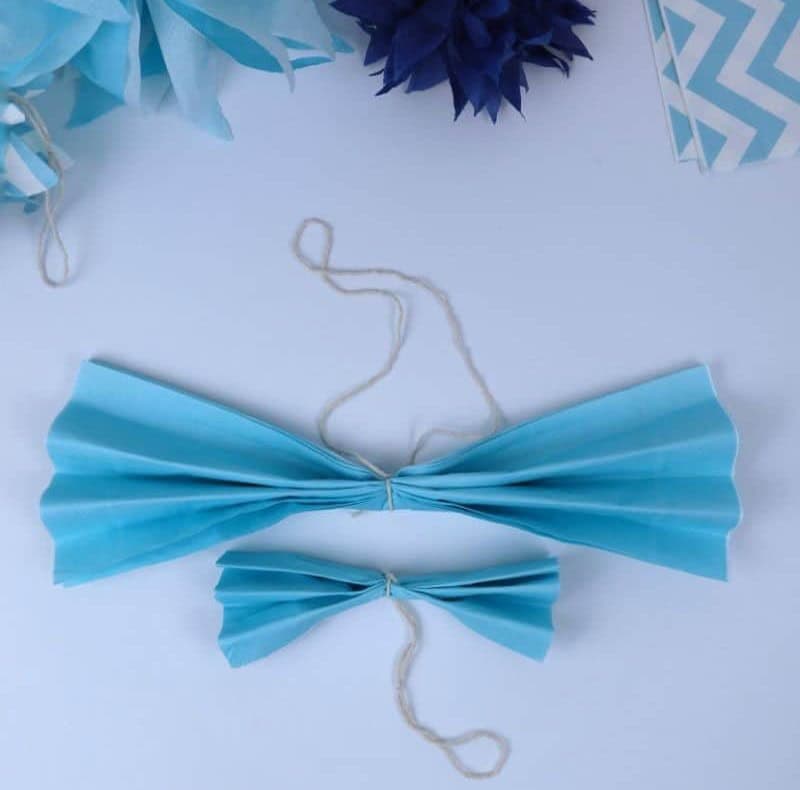
Step 4
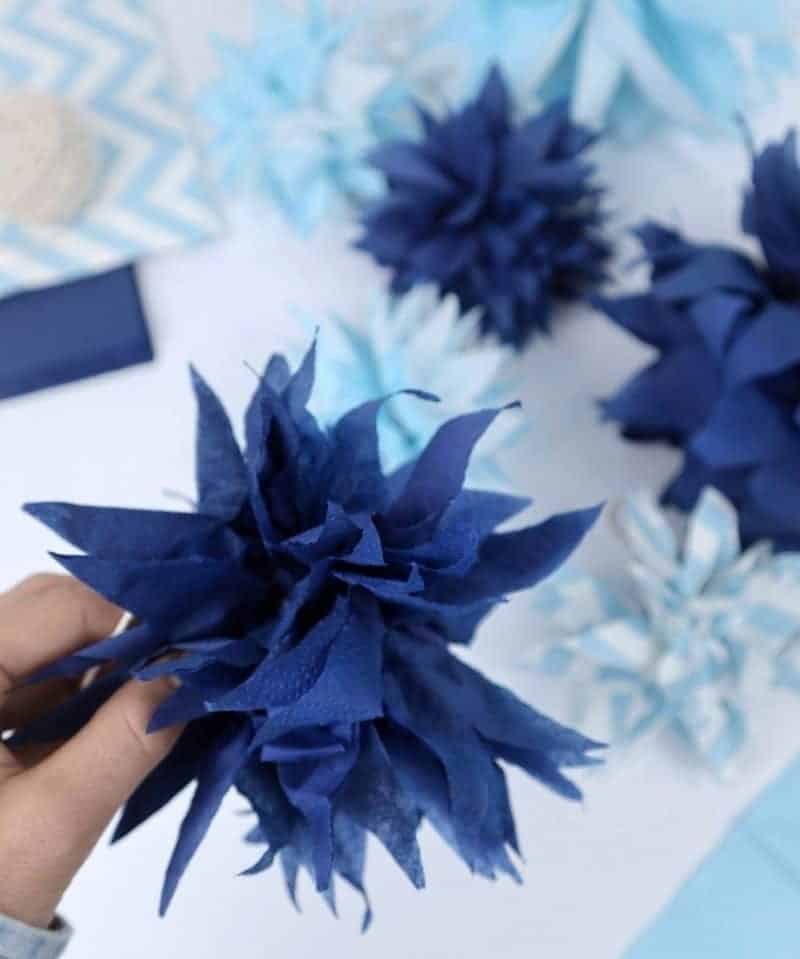
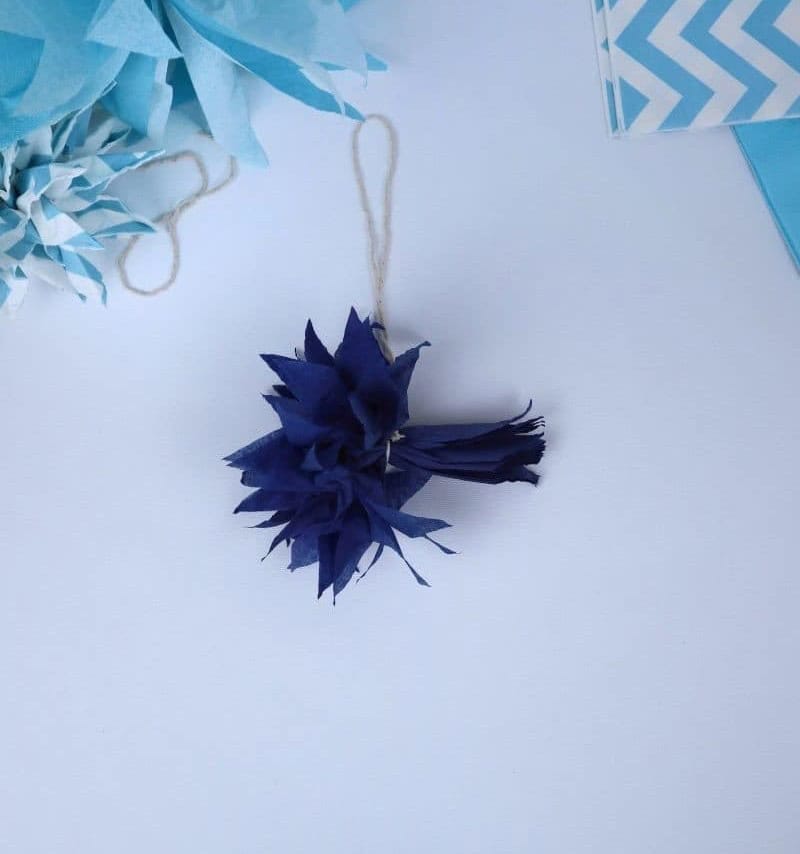
To secure the delicate folds of your tissue paper, take the yarn and wrap it snugly around the midpoint, applying gentle pressure as you twist and tie it off. As you complete this step, allow the ends of the tissue to naturally splay outward, creating a soft, organic shape.
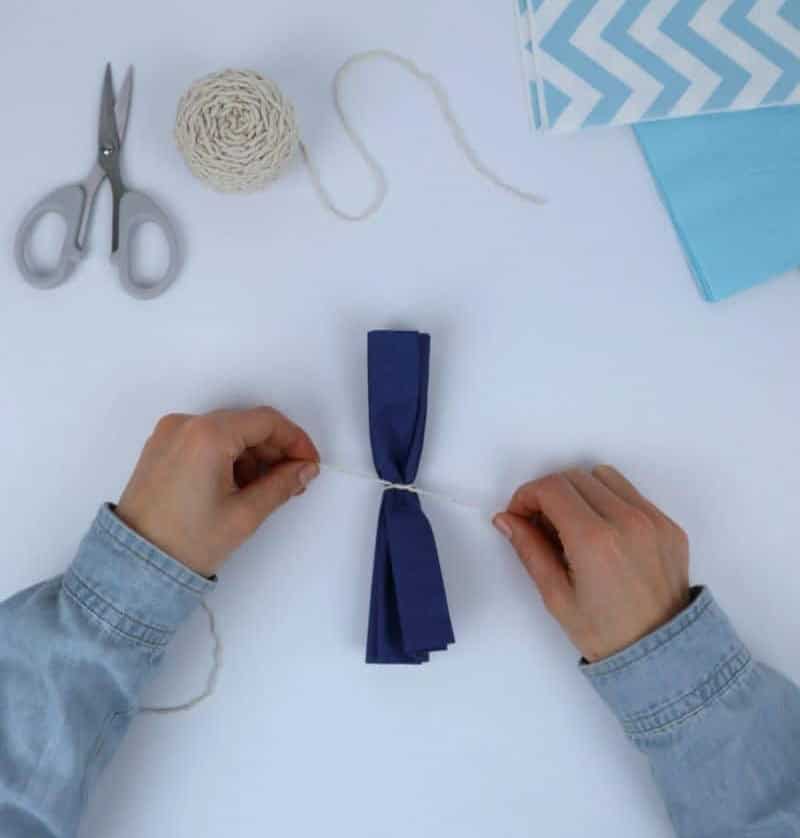
Step 5
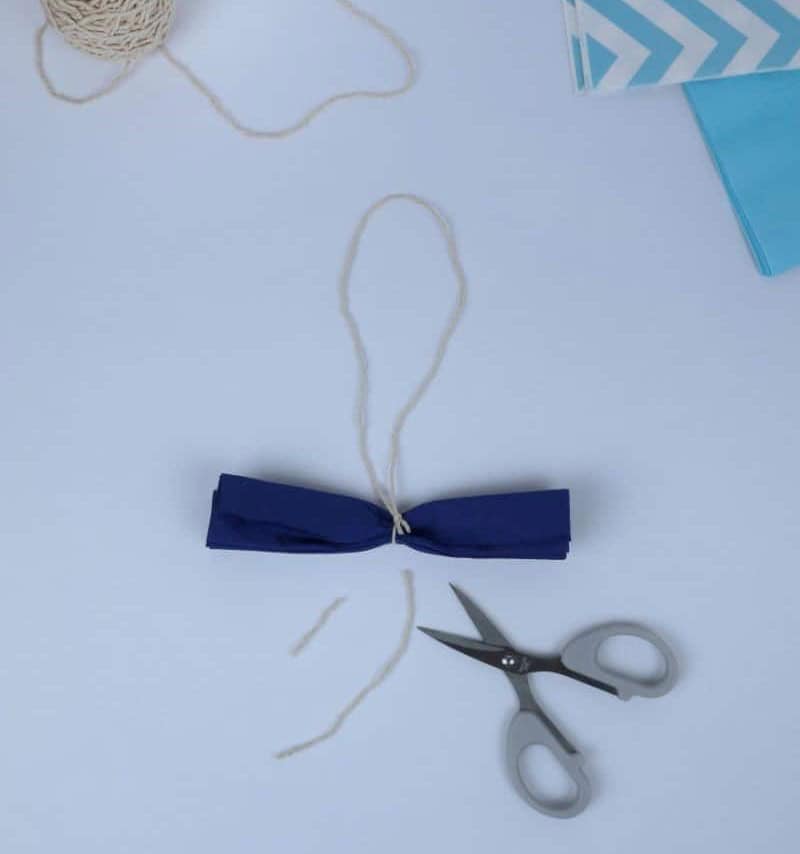
When completing your yarn craft project, it’s essential to trim the excess material at the end. To do this, carefully slice off the shorter portion of the yarn, reserving the remaining length for potential future use. If you’re not planning to suspend the finished product or attach any additional embellishments, you can safely cut both ends of the yarn, leaving only the knot that holds everything in place.
Step 6
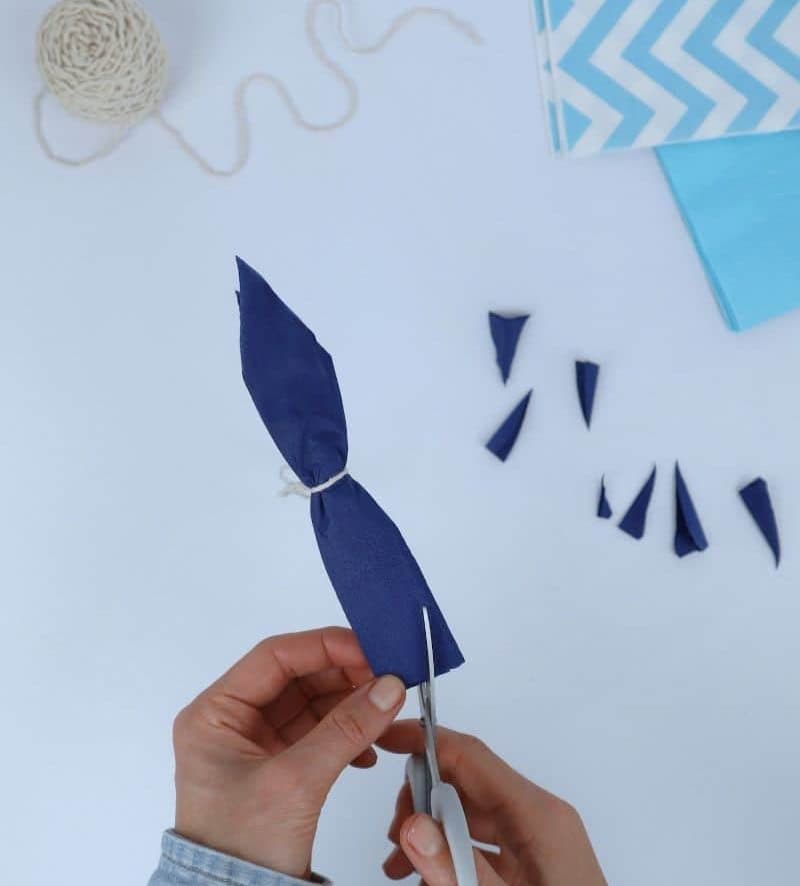
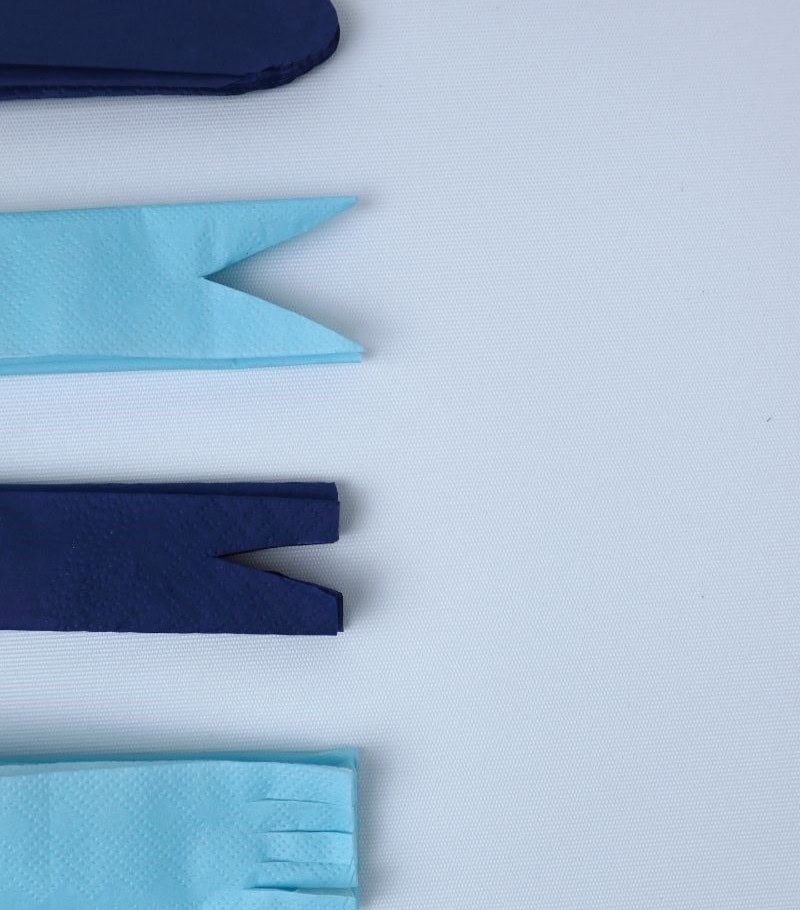
As we get creative with our tissue paper pom poms, it’s time to add a touch of personality! Take out your scissors and start trimming the ends of those bundles. Go ahead, let your imagination run wild – cut them into shapes that reflect your unique style or try some new and interesting designs.
Once you’ve flared out those edges, the shapes will take on a whole new level of dimensionality. So don’t be afraid to experiment and try different techniques!
If you need some inspiration, I’ve included four different ways to trim the ends below. Feel free to mix and match or use them as is – after all, that’s what makes DIY projects so much fun!
Step 7
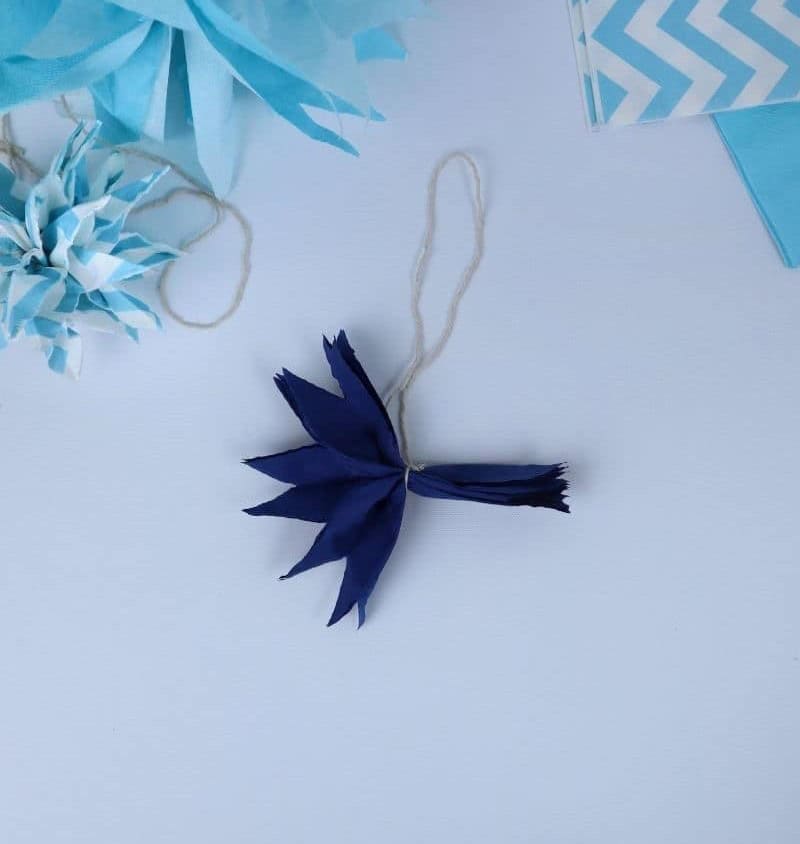
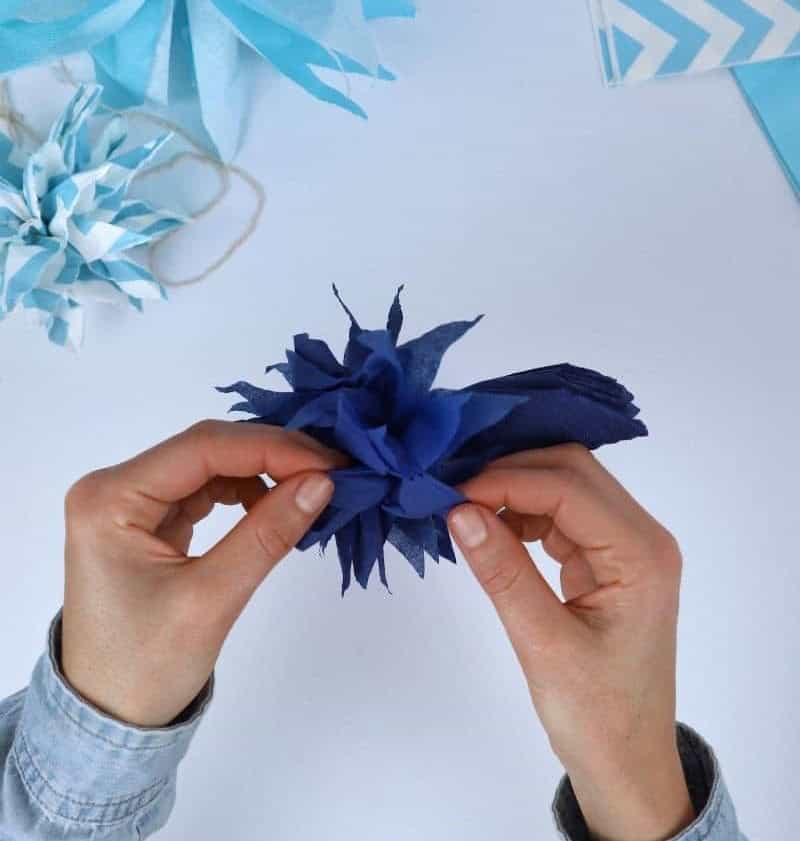
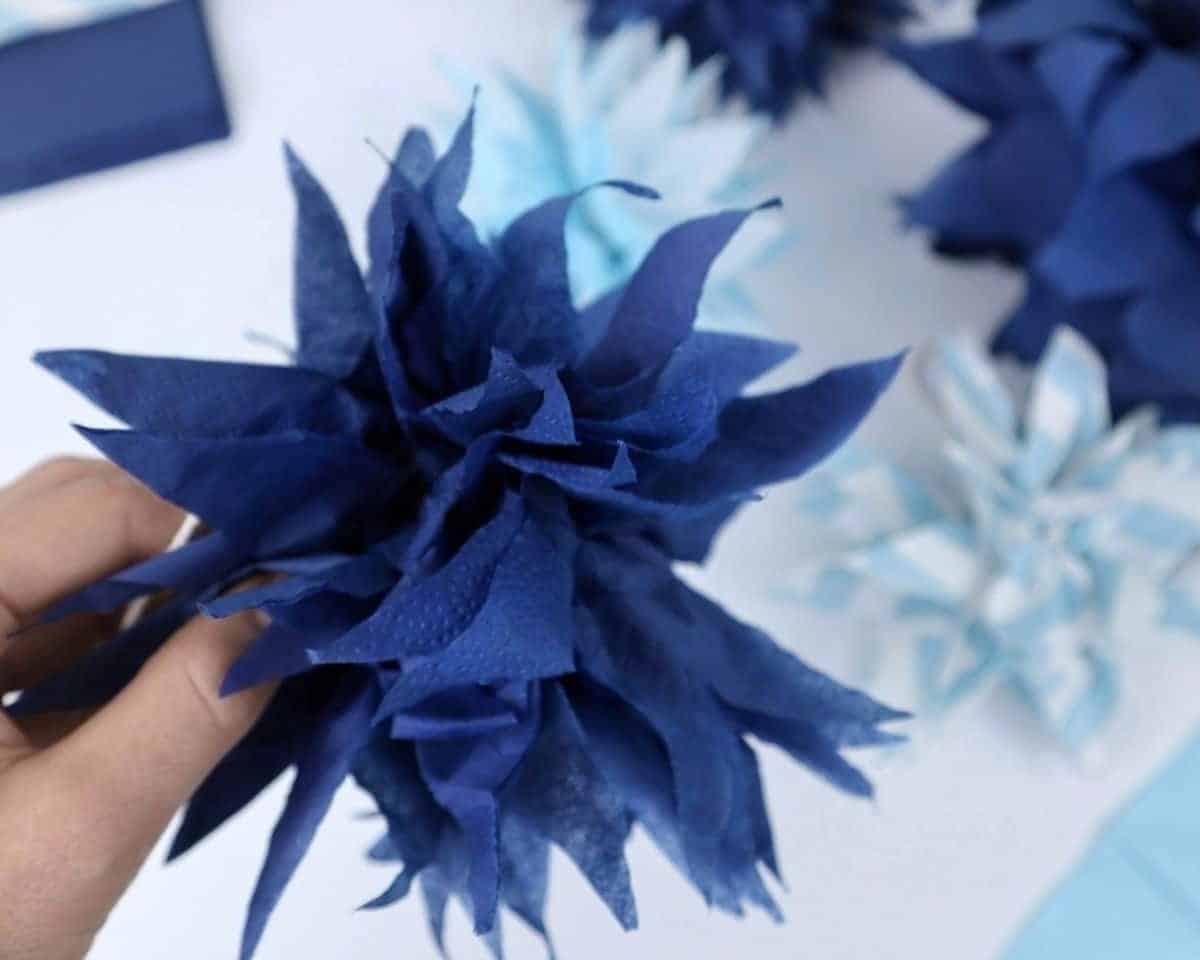
To add fluffiness to our pom-poms, let’s first unfurl the ‘fan’ shape created by the folds. Begin on one side, as illustrated below. Next, gently separate each sheet of tissue paper from the others, allowing the unique shape of each sheet to contribute to the signature feathered appearance we’re after.
Step 8
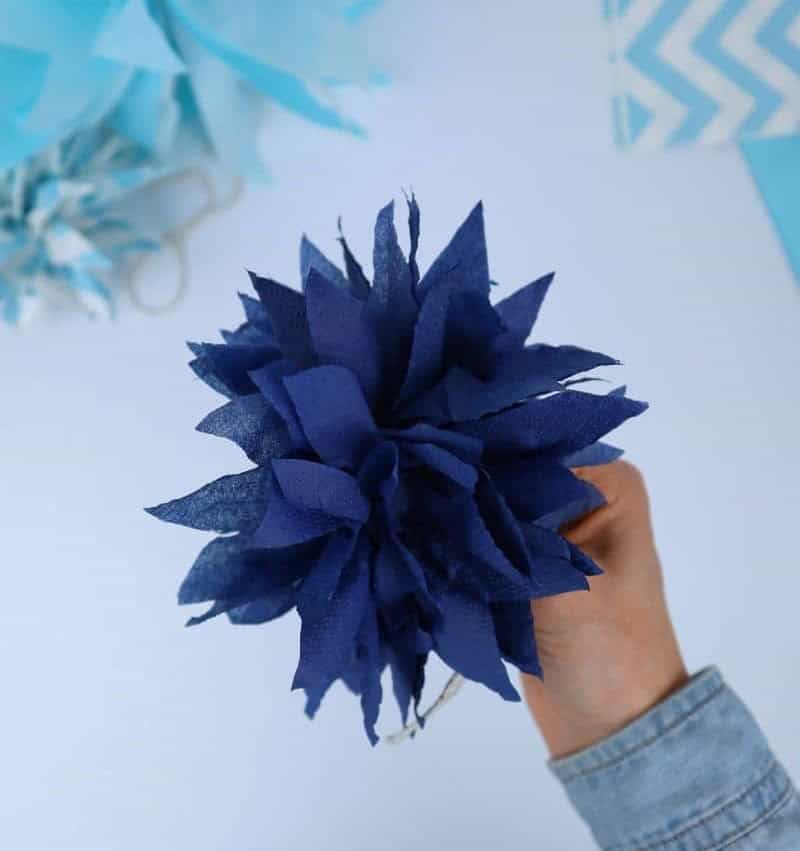
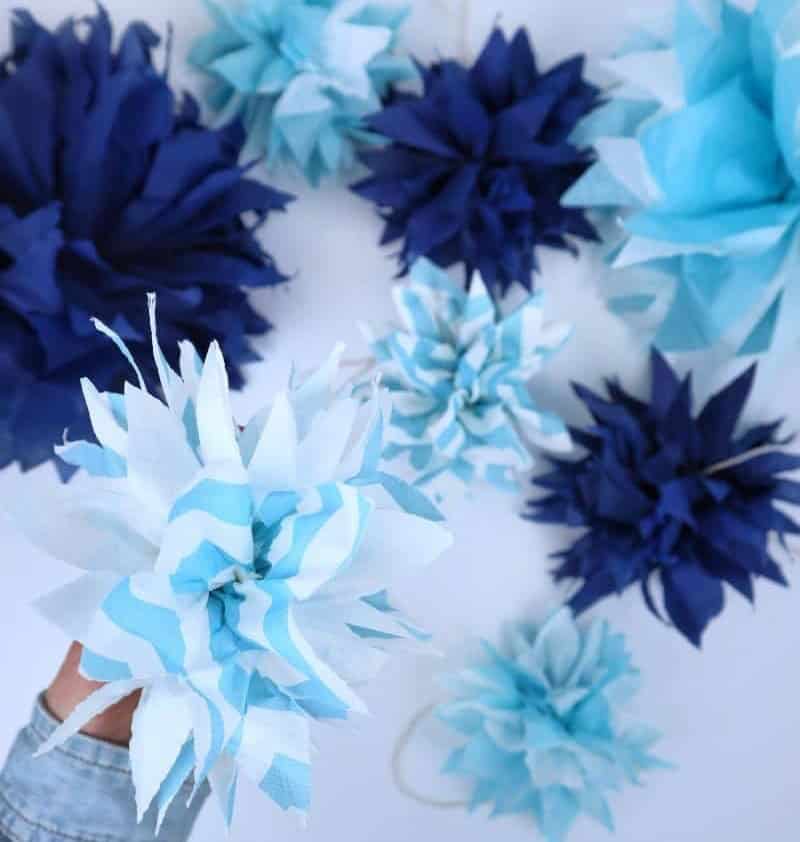
As you near completion of one half, shift your focus to the other, aiming to achieve a harmonious balance between the two. The objective is to create a symmetrical, spherical form, reminiscent of a fluffy pom-pom. By mirroring the volume and proportions of the first side, you’ll ultimately craft a cohesive, well-rounded shape.
How to Make a Paper Pom Pom of a Different Size?
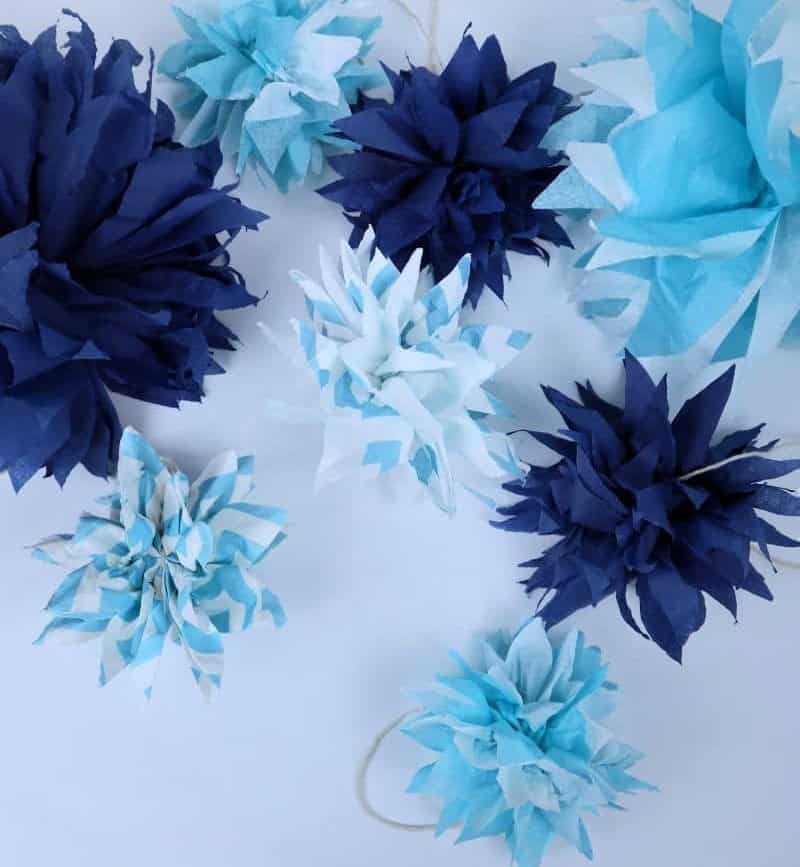
To add visual interest, experiment with varying pom-pom sizes by layering tissue paper to create a desired thickness. This approach allows for a greater volume of decorations, giving you more freedom to be creative. Alternatively, try creating smaller pom-poms by selectively removing layers, offering endless possibilities for customization.
How to Use Pom Poms for Decorating
Don’t worry if you’re stuck for ideas on how to use these versatile decorations – I’m here to help. With their endless possibilities, you can easily customize them to fit your unique style and needs.
To take your décor to new heights, consider the following creative ways to incorporate these pom poms:
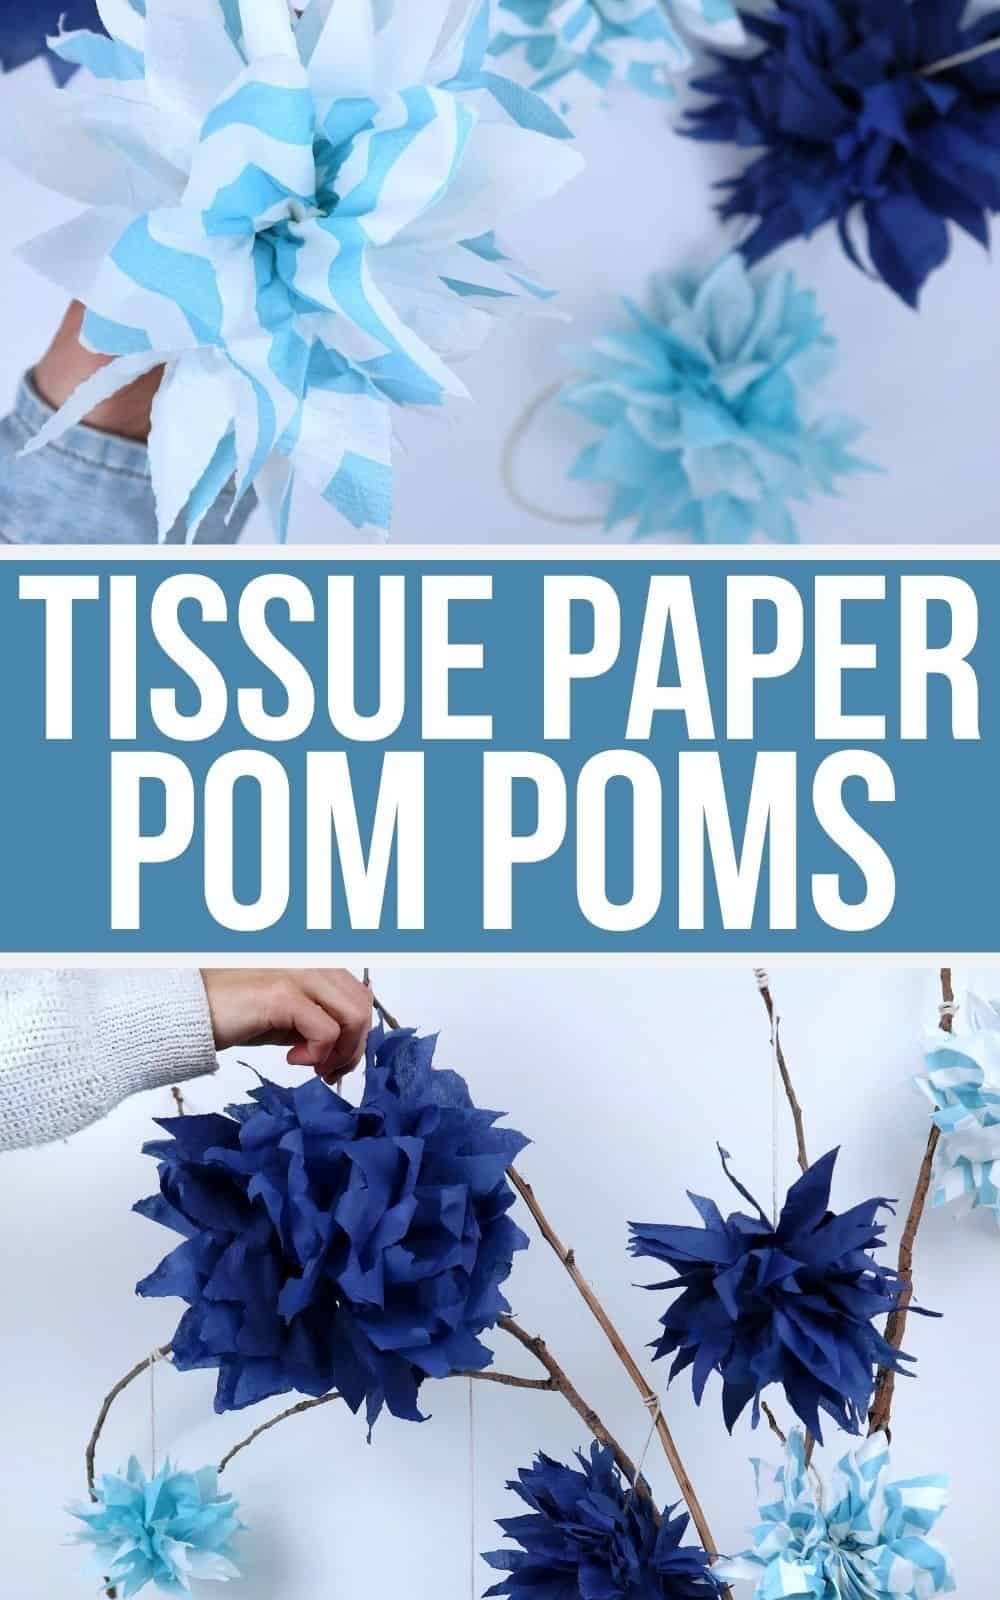
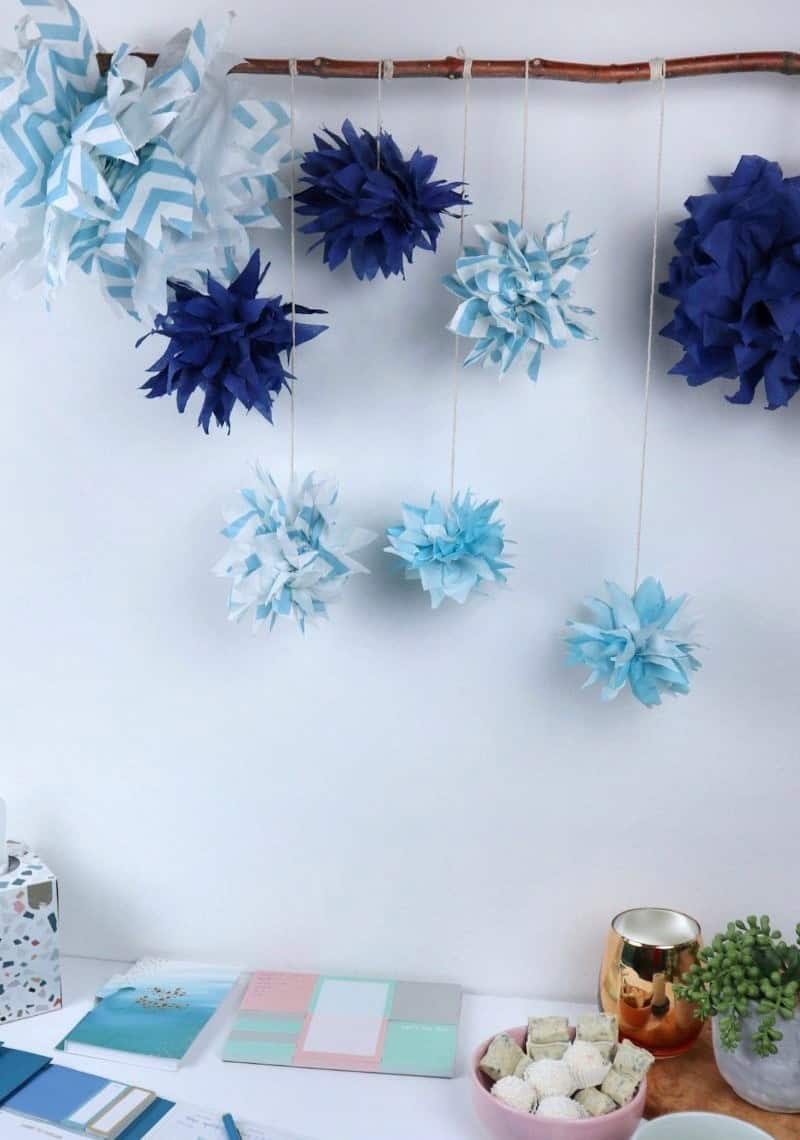
Transform a vase by hanging the pom poms from tree branches, adding a whimsical touch to any room.
Alternatively, stick them onto faux stems and arrange them like flowers – not only will they never wilt, but you might just challenge yourself to find such blooms in nature.
Create a stunning centerpiece by filling a glass pillar vase with small pom poms in harmonious colors. This unique arrangement is sure to turn heads.
So, do you have an idea I haven’t mentioned yet? Feel free to share your creative uses for these decorations in the comments below!
Other DIY Decorations We Love
Transform your space with creative and budget-friendly DIY projects. From holding cherished rock collections to crafting unique decorative items, these innovative ideas will inspire you to get crafty. Start by creating a personalized photo holder using rocks and display your favorite memories. Next, upcycle paper plates into beautiful woven bowls that add a touch of elegance to any table setting.
For a more party-oriented vibe, explore the numerous decorating ideas available at the dollar store, where you can find everything from decorative accents to functional items like coasters made from rope. Alternatively, turn old bottle caps into candles for a warm and cozy ambiance. And when it’s time to throw a party, discover how the same dollar store can provide all the essentials for a memorable celebration.
Finally, get creative with 37 unique tissue paper crafts that will add a pop of color and whimsy to your daily life.
How to Make Tissue Paper Pom Poms
Looking for a fun and inclusive family activity that can be enjoyed by all ages? Perhaps you’re searching for a unique decorative piece to add some flair to a dull corner. Whatever the case, these beautiful tissue paper pom poms are just what you need! Not only do they provide endless creative possibilities, but they’re also surprisingly easy to make. With just 20 minutes of your time, you can create a stunning decoration perfect for any occasion.
Equipment
To ensure you can stay focused and productive, it’s essential to prevent your screen from dimming or turning off. Scissors might seem like an unusual tool in this context, but bear with us for a moment. The point is that just as scissors help you cut through distractions, a simple tweak to your device settings can help you stay on track.
By adjusting the auto-lock feature on your computer or mobile phone, you can keep your screen lit and avoid the frustration of having to restart your workflow every time it dims.
Materials 1x2x3x
Instructions
Start by taking a quarter-folded tissue paper and manipulate it into a fan fold by carrying the edge forward and backward to create a corrugated effect. Next, cut a piece of yarn to the desired length of your pom-pom, plus an extra few inches. Tie this around the middle of the tissue paper in a secure knot, leaving a shorter end. Trim this off with scissors. Using the same scissors, shape the ends of the tissue bundle into any design you prefer – think geometric patterns or playful shapes.
Finally, fan out both ends of the tissue bundle to achieve that signature pom-pom look. With these simple steps, you can create multiple variations in size, color and length to customize your decoration for any room in your home.