Create your own magnetic organizer to keep small items, beauty products, and other essentials tidy and easily accessible. If the constant search for misplaced things like keys, spare change, or makeup is driving you crazy, it’s time to take control. While the ‘dump-and-surf’ approach might seem like a quick fix, a DIY magnetic organizer offers a more satisfying solution. By mounting the container, you’ll be able to visualize what’s inside without having to rummage through a cluttered space.
Imagine being able to whip up this sleek and organized system with just a few readily available materials. It’s all about embracing creativity and taking the initiative to streamline your daily routine.
Supplies for the Organizer

To bring your DIY magnetic organizer to life, gather the following essential materials: a stainless steel baking tray or metal cookie tray, scissors for cutting and shaping, decorative paper in thin sheets, strong magnets, a ruler for precise measurements, a pencil for planning, a hot glue gun for bonding, Mod Podge for sealing, and a painting brush for detailed work.
How to Make a Magnetic Organizer
To create this DIY magnetic organizer, you might be surprised at how little you actually need. A key component is a high-quality stainless steel serving tray or baking tray. If your chosen tray happens to feature stainless-steel handles, even better! With these simple yet essential elements in place, you’re ready to get started.
Step 1
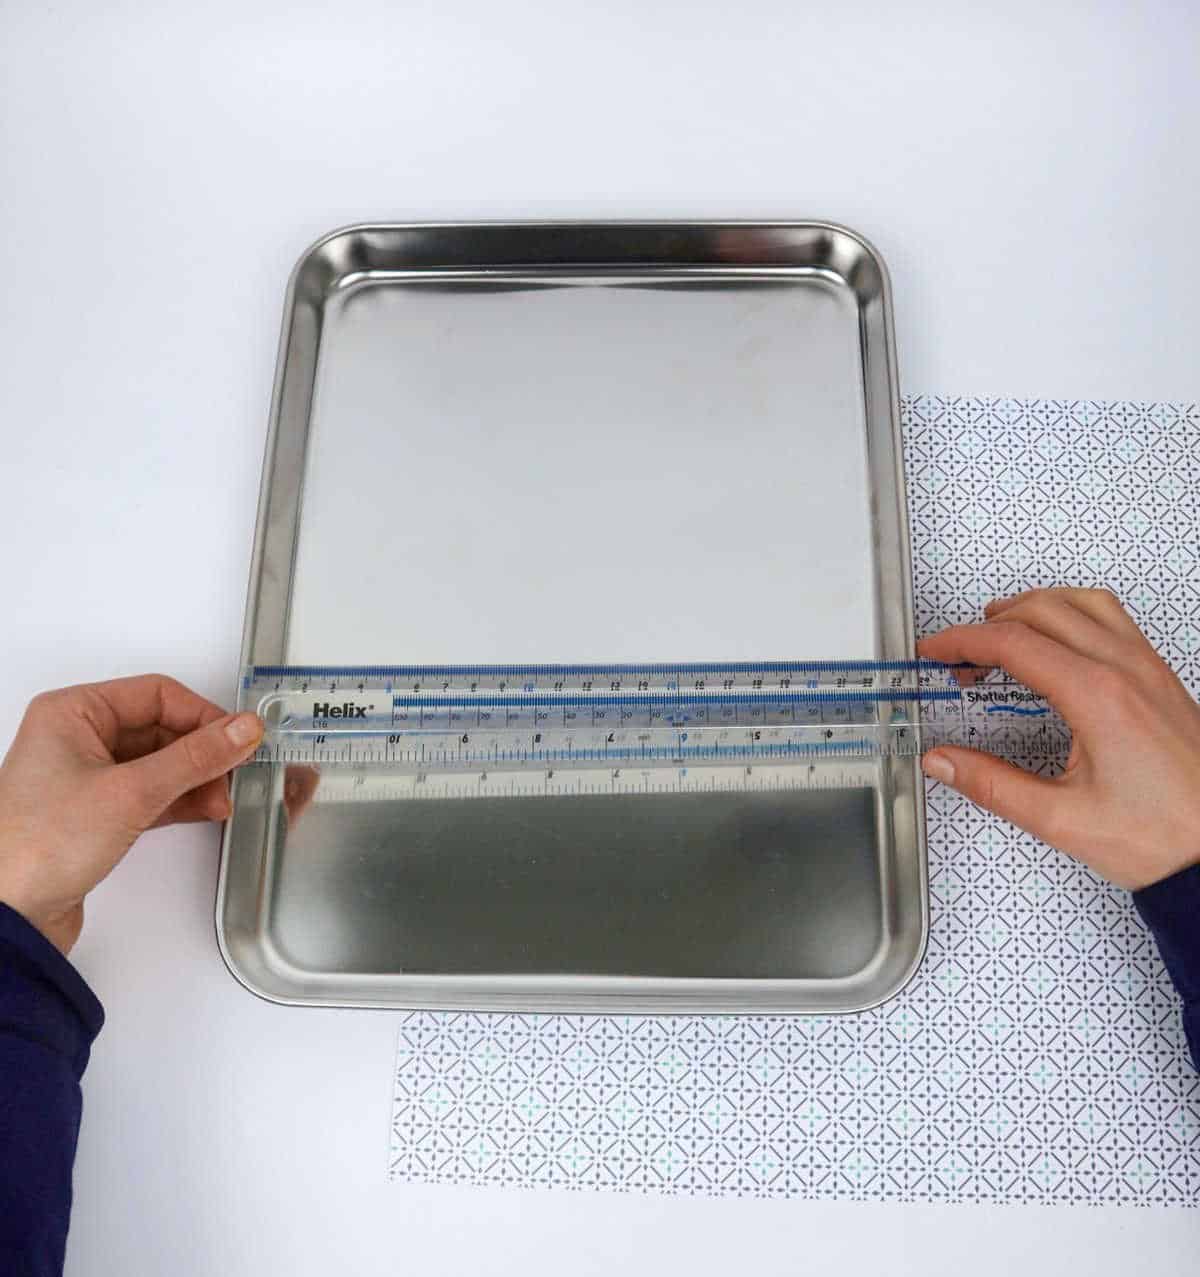
To accurately capture the dimensions of the tray, employ a reliable measuring tool such as a ruler or a flexible measuring tape. Start by meticulously recording the lengths, heights, and widths of the tray, taking note of any subtle variations that may be present.
Step 2
Next, bring out your decorative paper and create a rough sketch of the design’s dimensions using the precise measurements you’ve recorded. Start by lightly drawing the boundaries of your desired pattern or shape with a pencil or marker.
Step 3
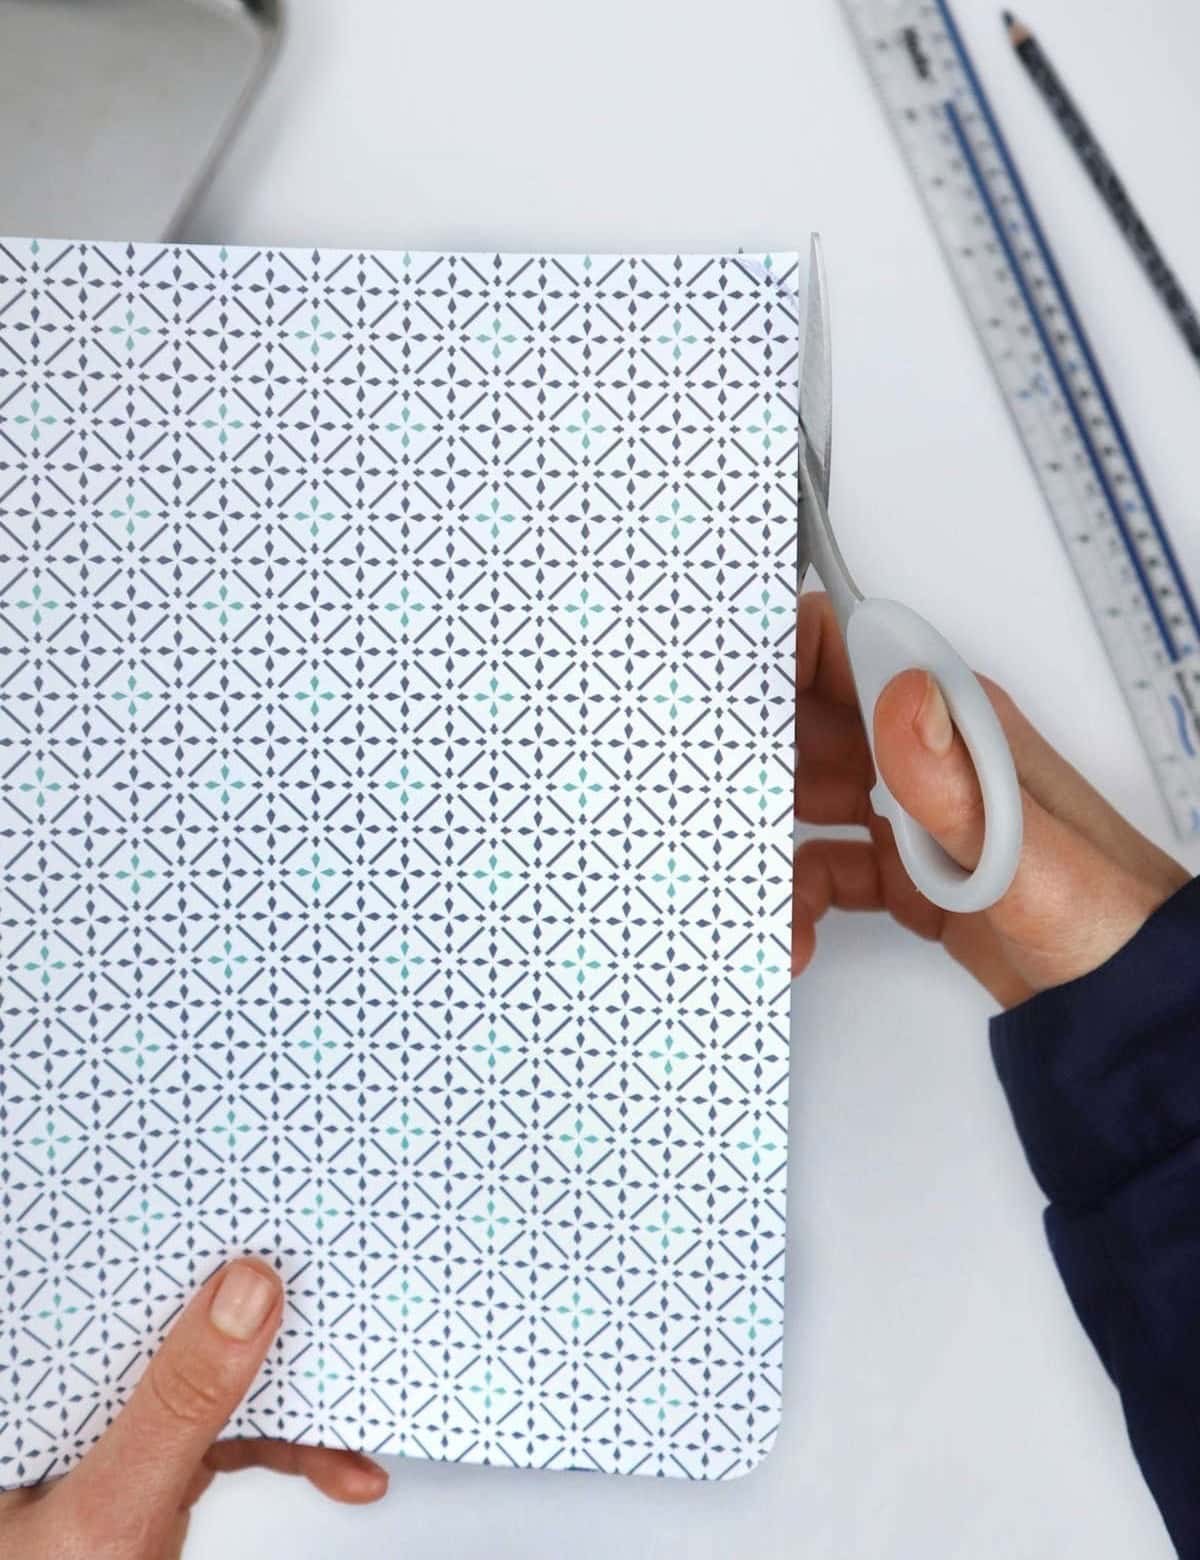
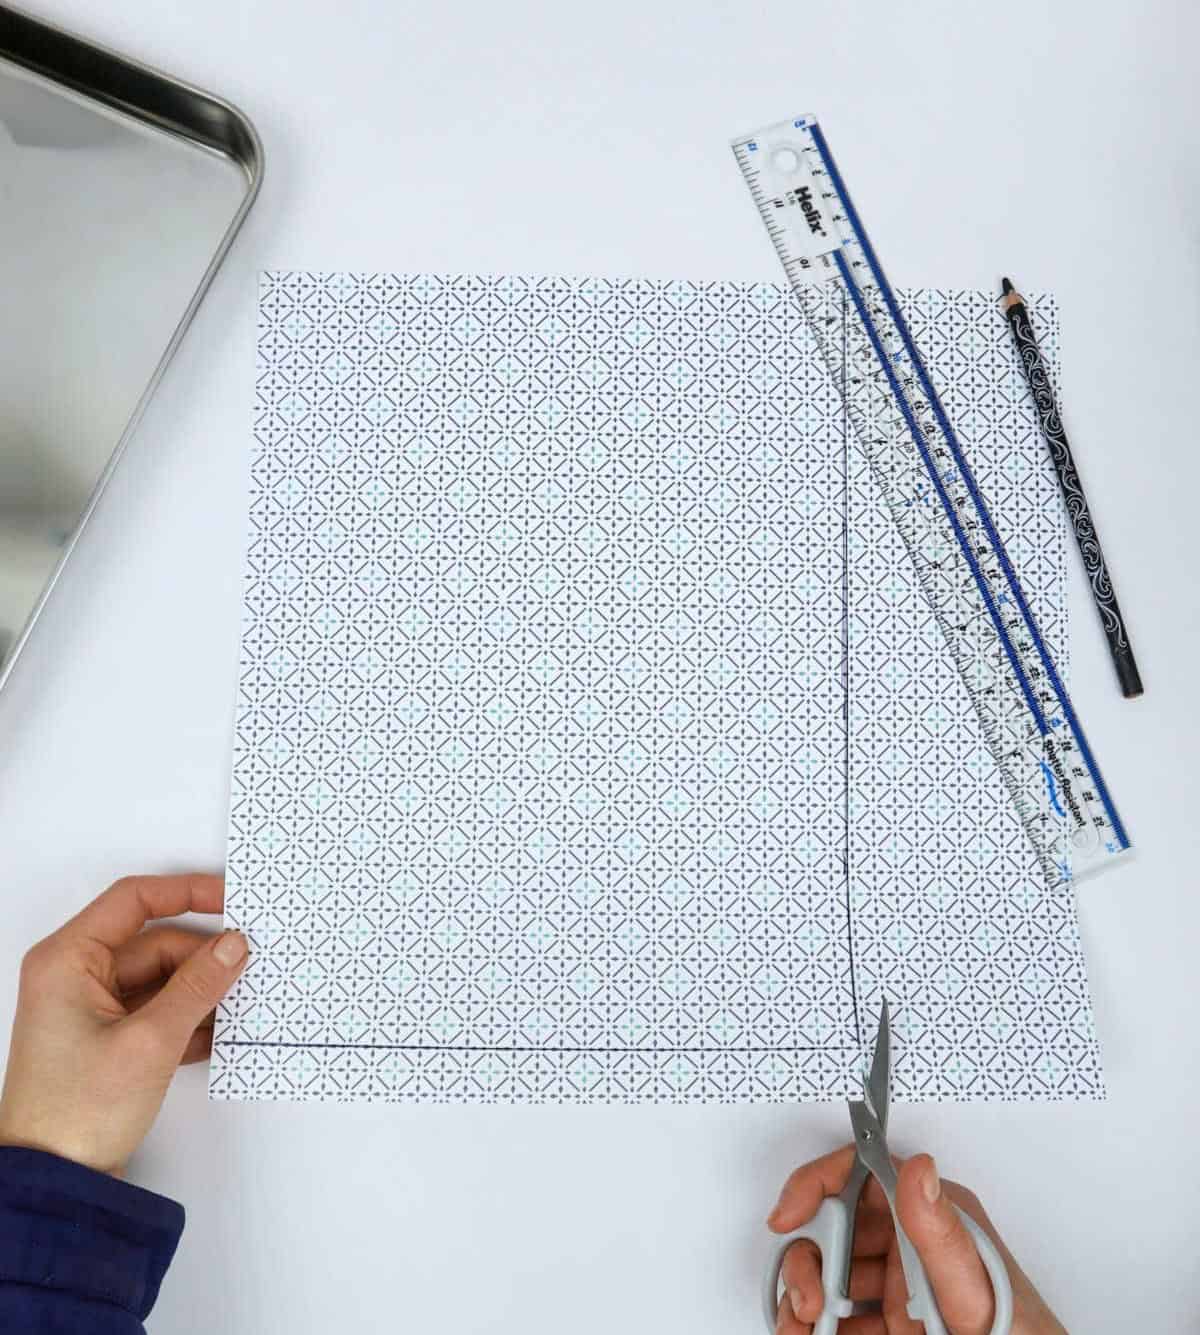
To prepare your decorative paper for use, simply trim it to the desired size using scissors or a craft knife. Measure and cut out the required dimensions with precision, ensuring that the edges are clean and even.
Step 4
As you near the final stages of preparing your paper for the tray, take a moment to inspect how it fits onto the surface. You may notice that the edges or corners are slightly off-kilter, requiring a minor trim to ensure a snug and even fit.
Step 5

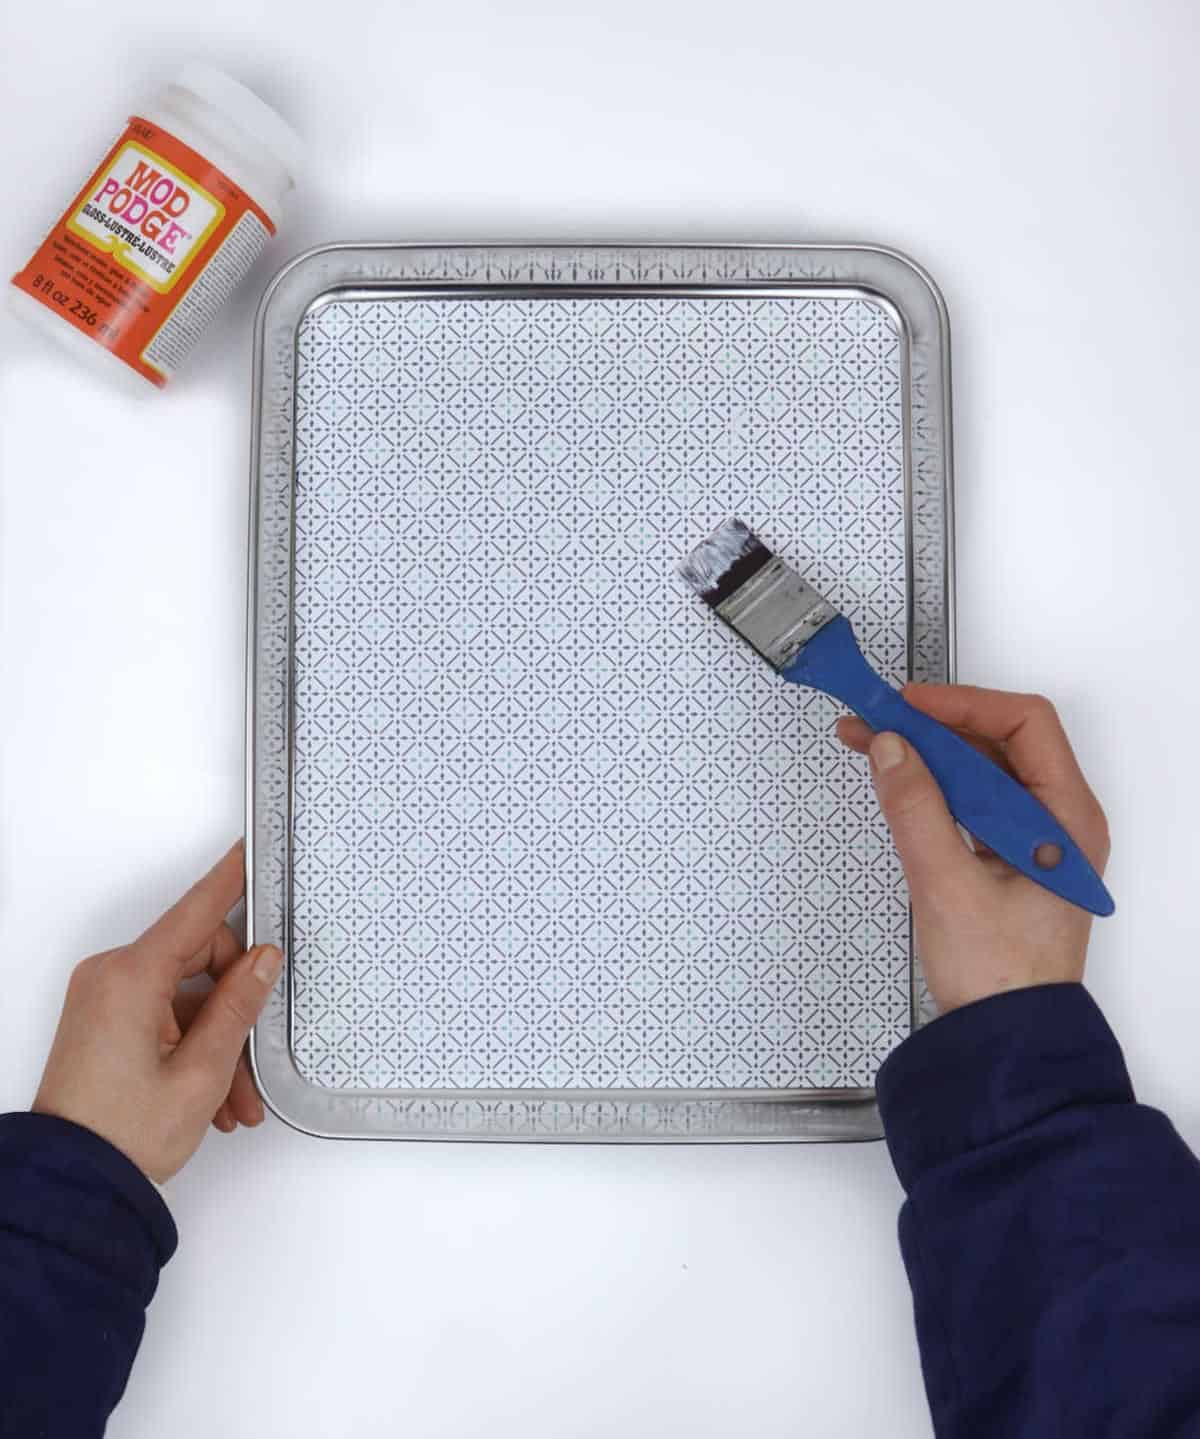
To begin the adhesive process, take your trusty flathead brush and carefully apply a thin layer of either craft glue or Modge Podge directly onto the stainless-steel tray’s surface. Ensure that you thoroughly cover the entire area, exercising particular caution when reaching the corners to avoid any excess glue from seeping into these delicate spaces.
Step 6
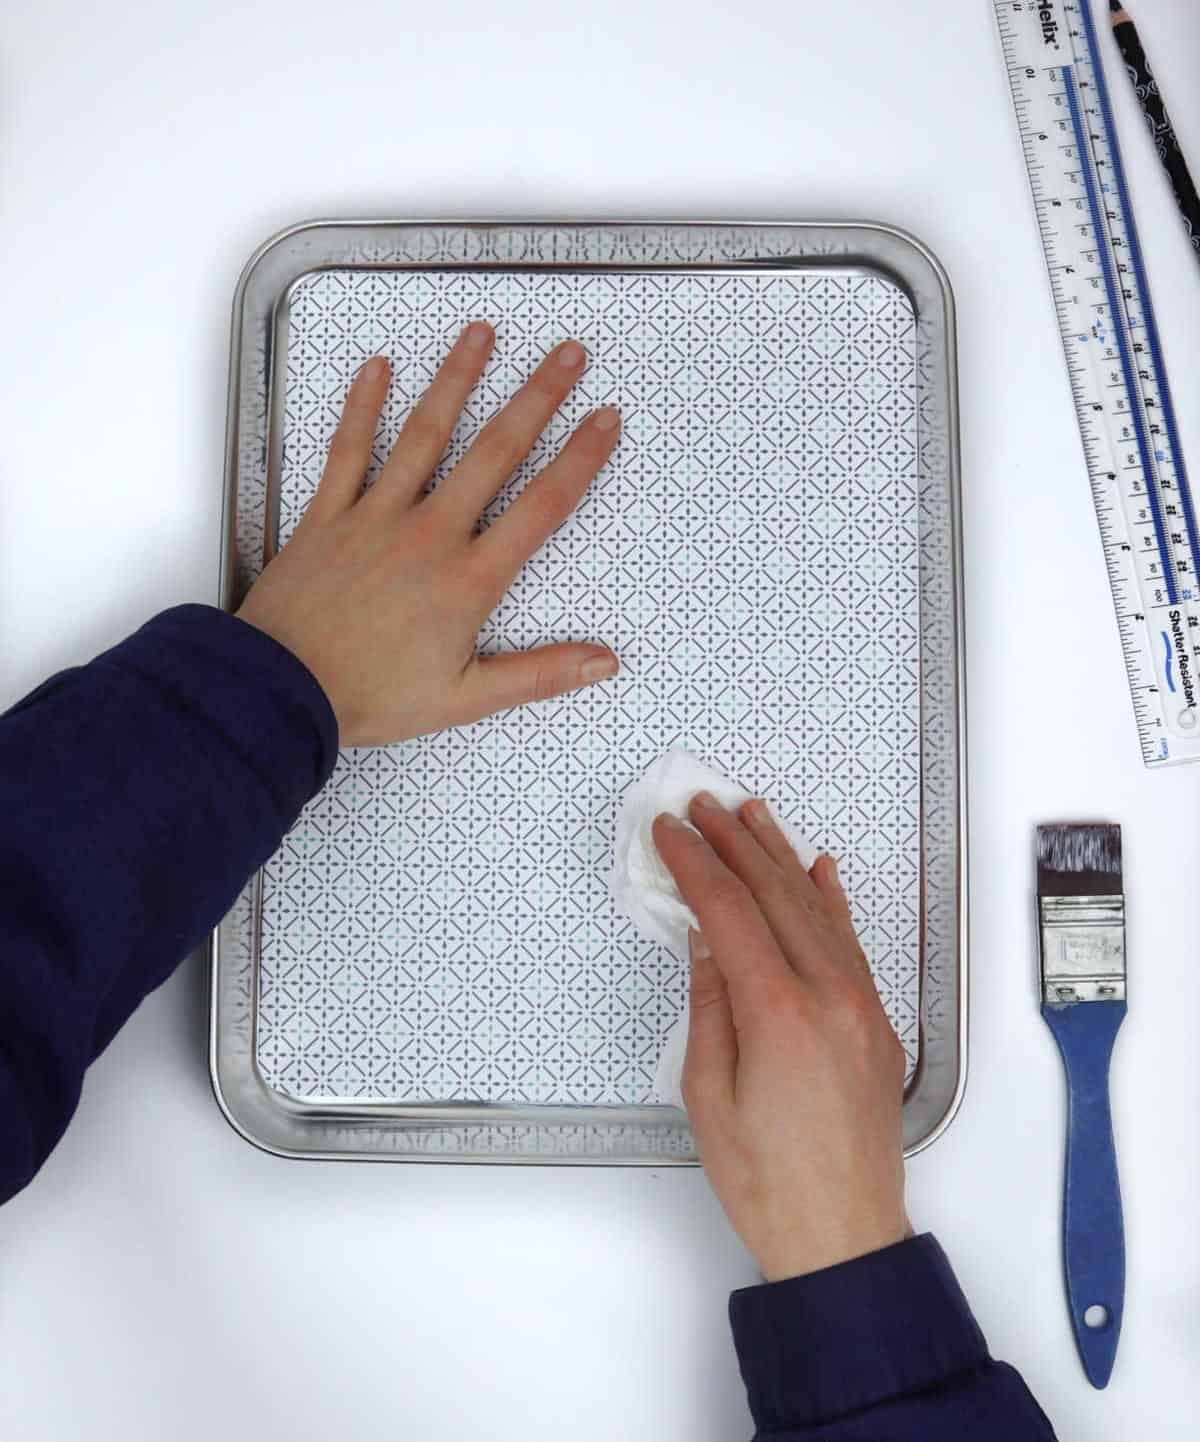
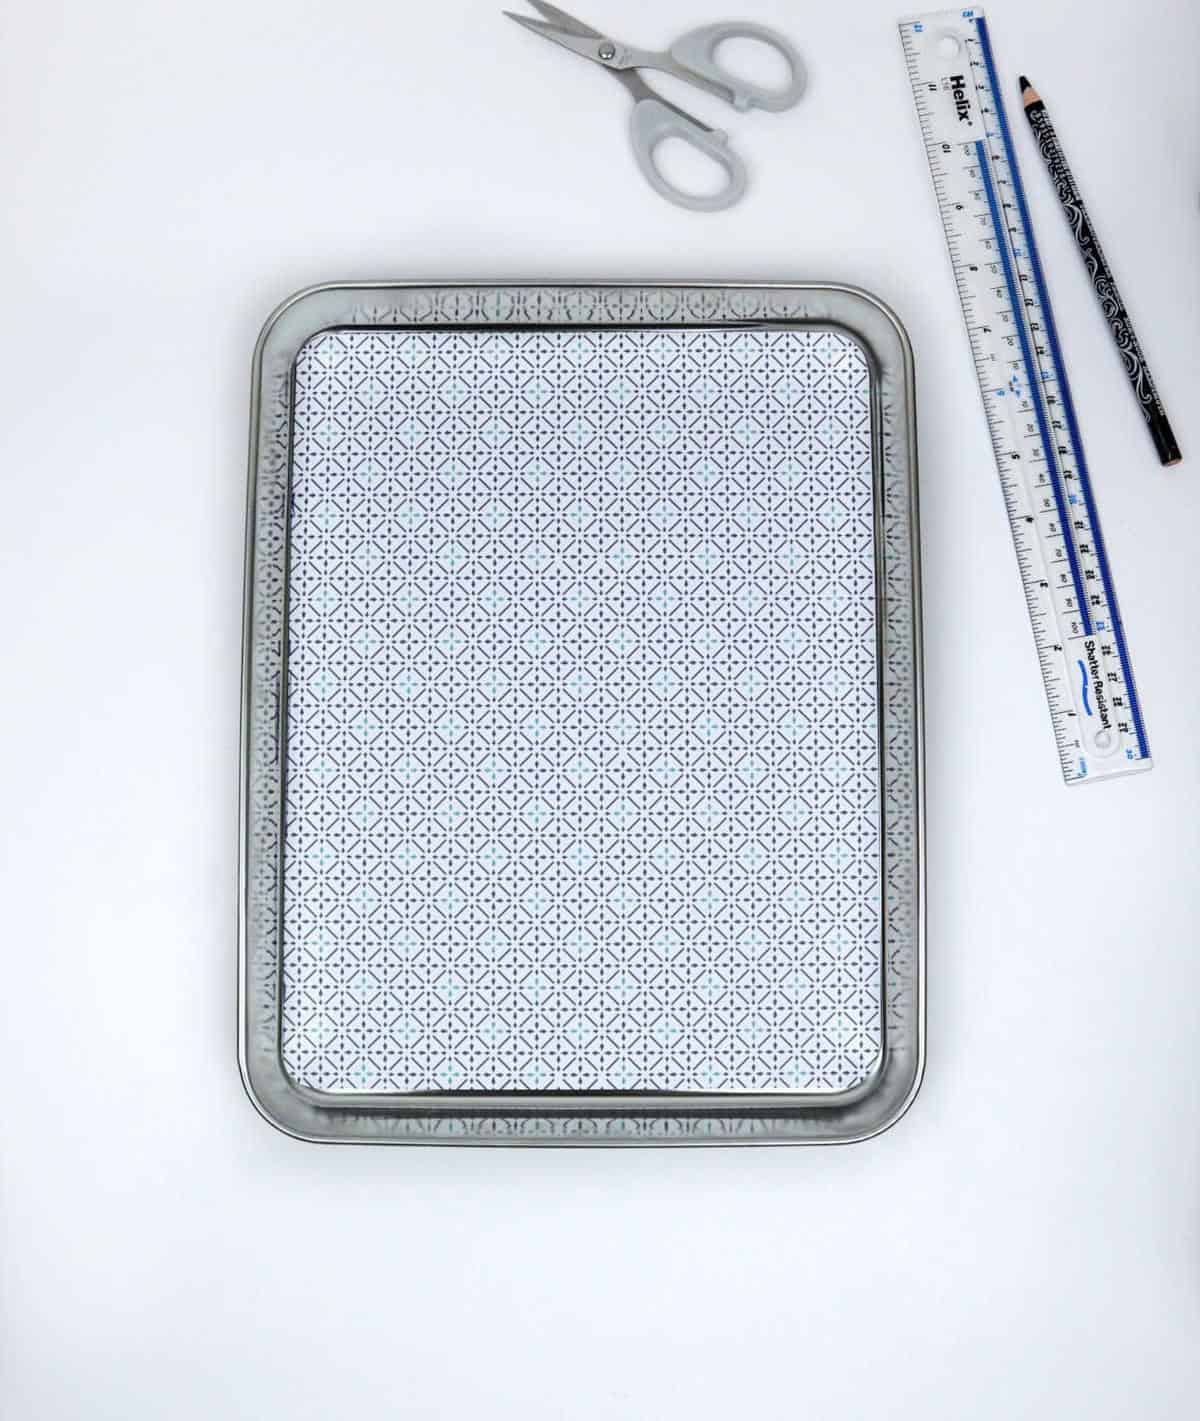
To secure the decorative paper, carefully position it over the tray and press it firmly into place. For a crisp finish, utilize a soft cloth to gently smooth out any wrinkles or creases that may develop.
Step 7
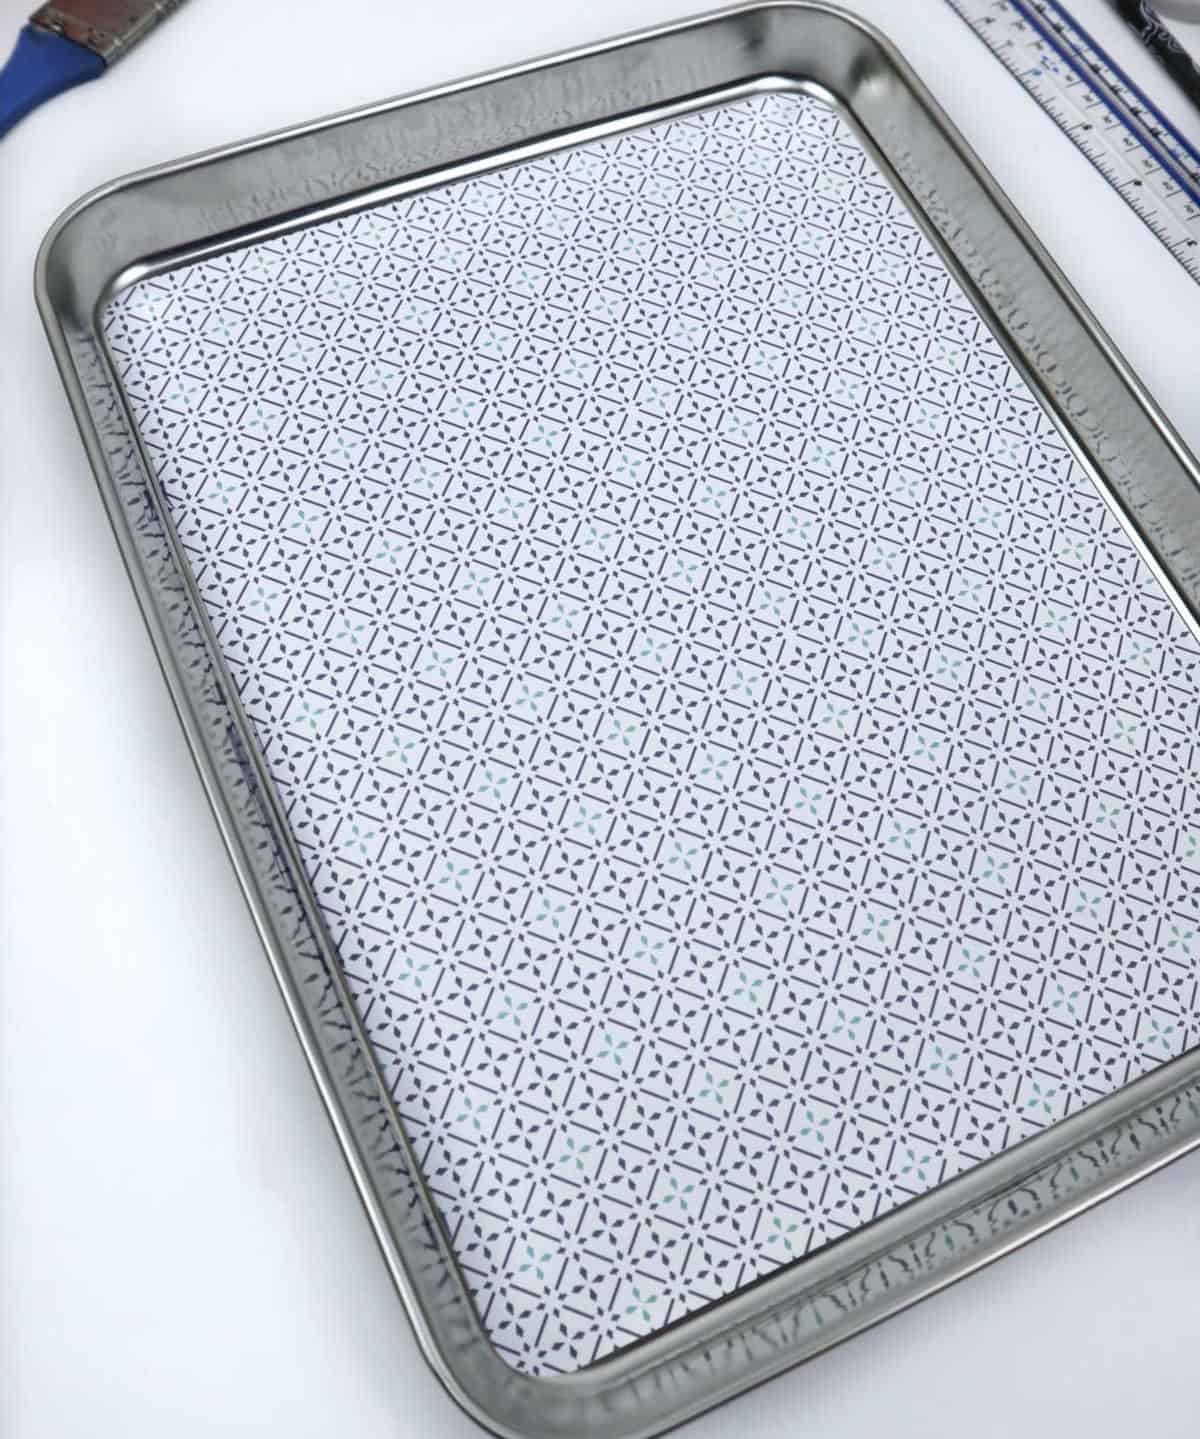
Once you’re satisfied with the attachment of the paper, let it sit for a brief moment before adding another layer of Mod Podge. To avoid creating a soggy mess, use only the absolute minimum amount of adhesive necessary. Allow this additional layer to fully dry before proceeding.
Step 8
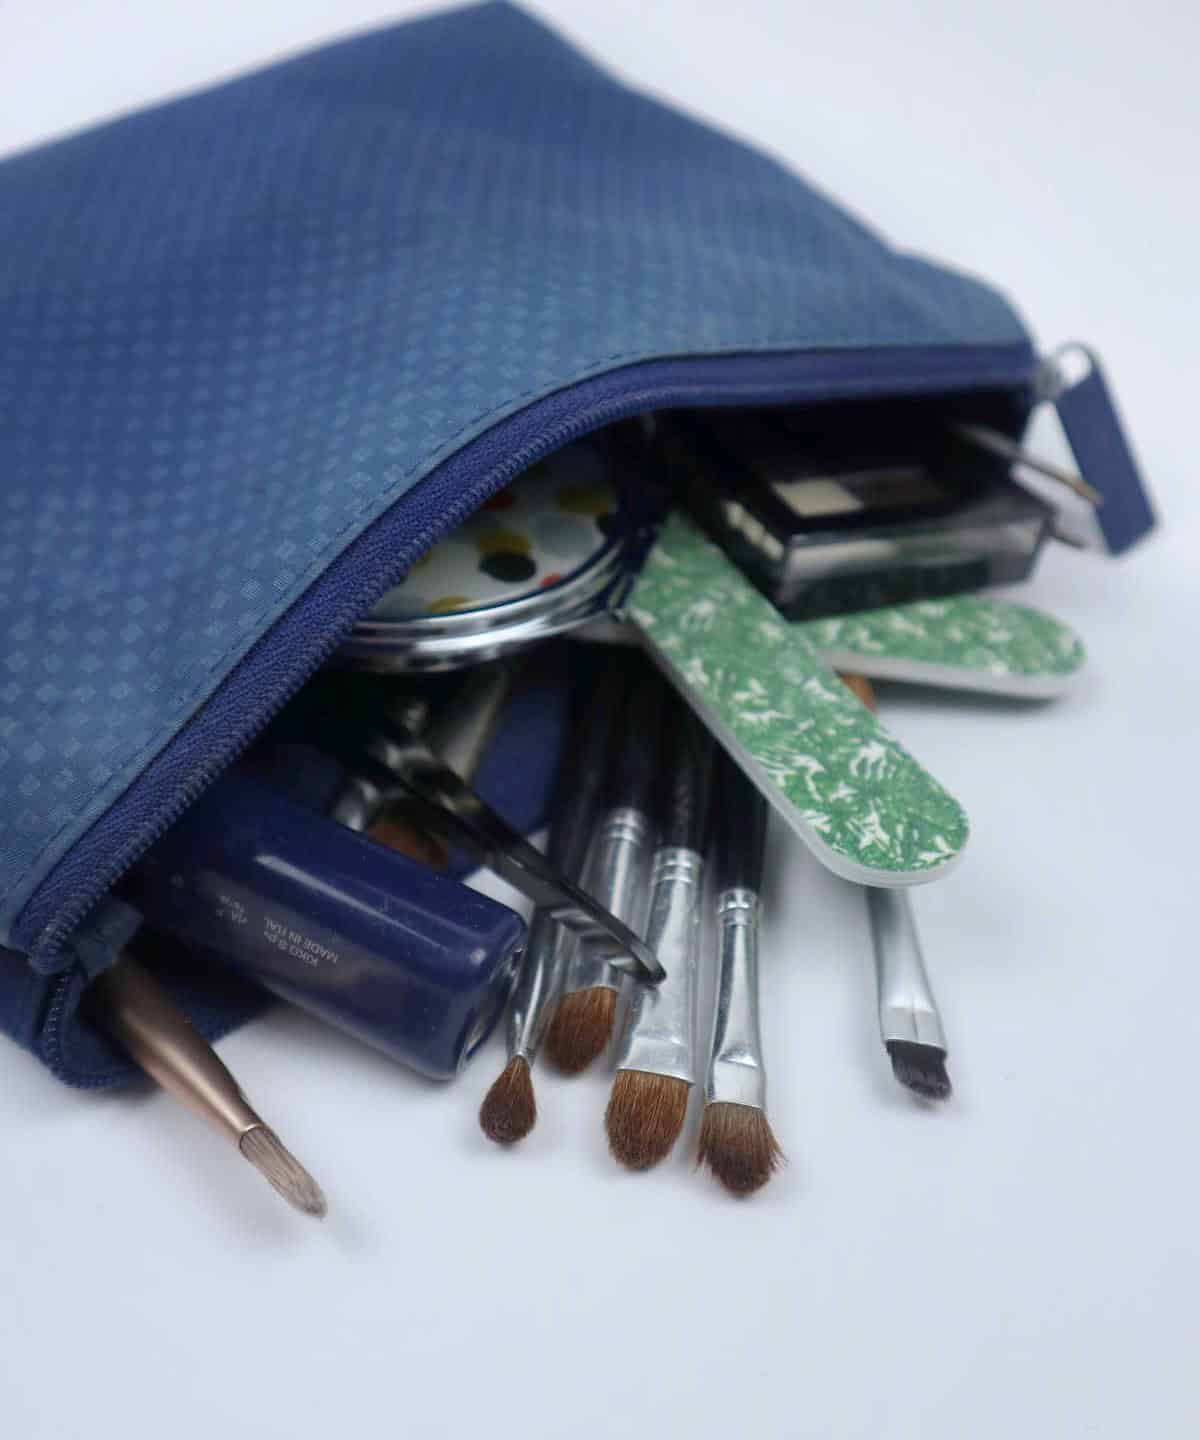
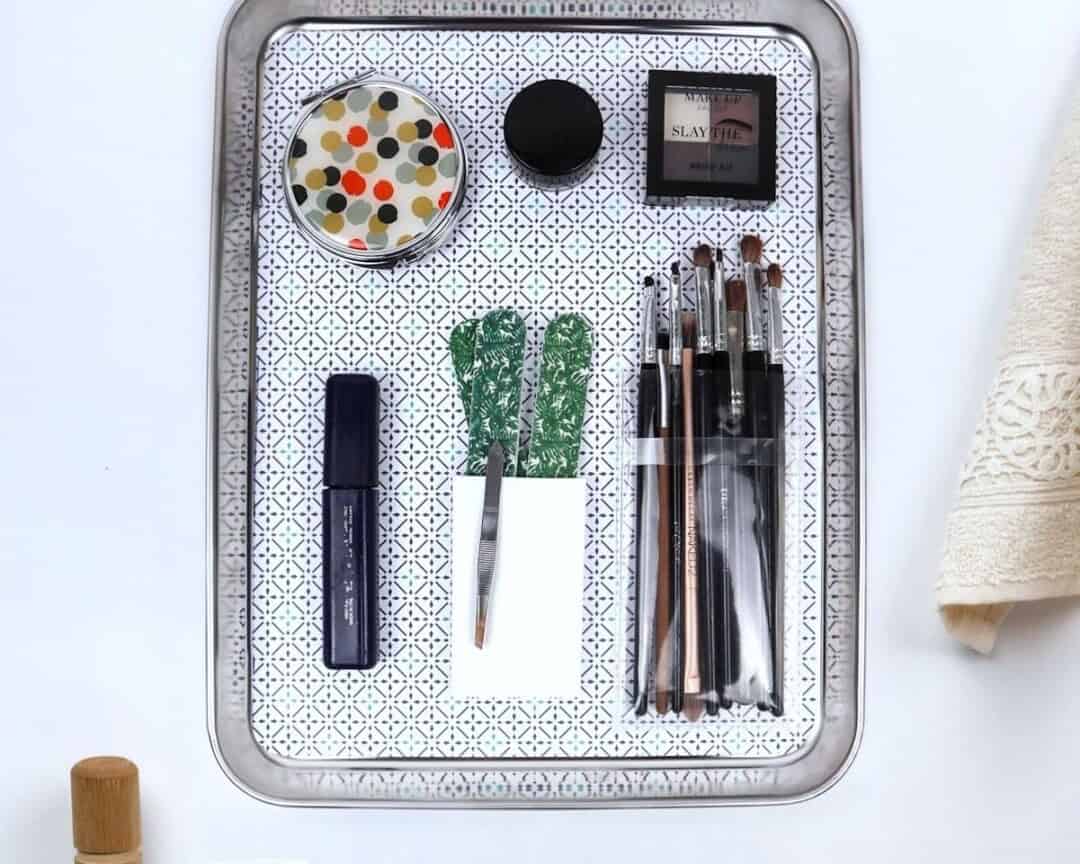
As you work on this organizational task that involves utilizing a magnet tray for your makeup, start by selecting the cosmetics you intend to store within it.
Step 9
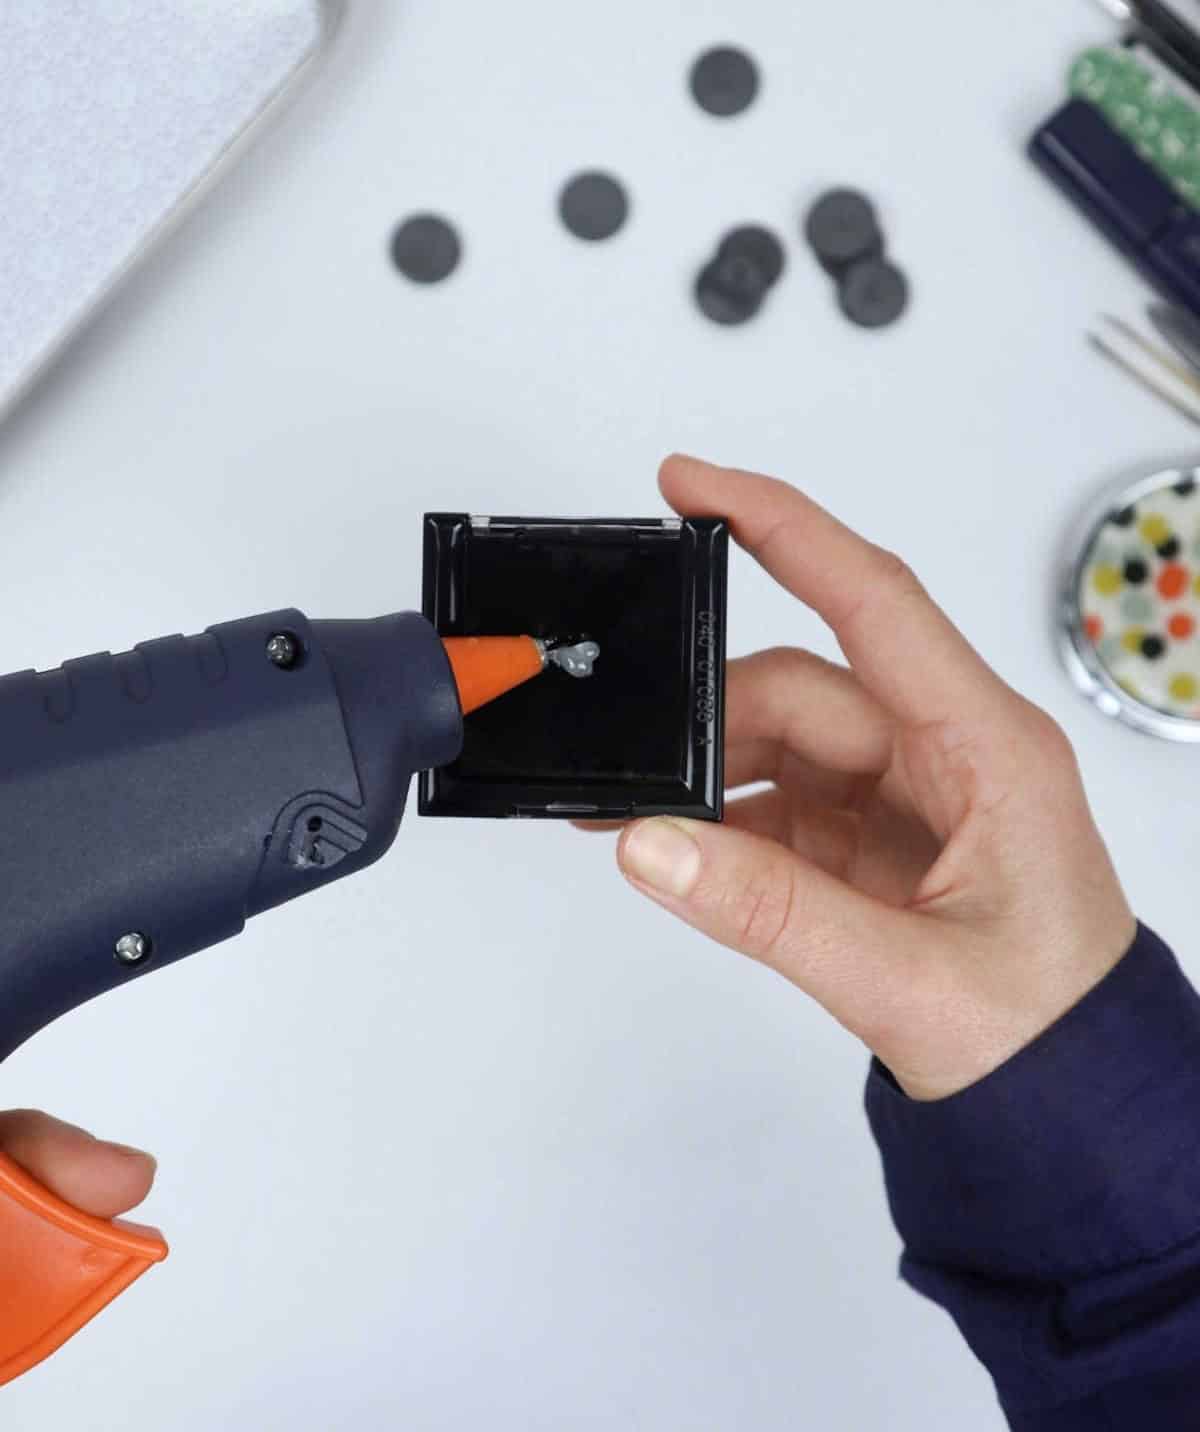
To attach your cosmetics compact, mascara, or rouge to a surface or storage container, simply preheat your trusty hot glue gun. Then, carefully apply a small amount of the molten adhesive to the rear of the cosmetic item. This will provide a strong and lasting bond, keeping your makeup essentials organized and within reach.
Step 10
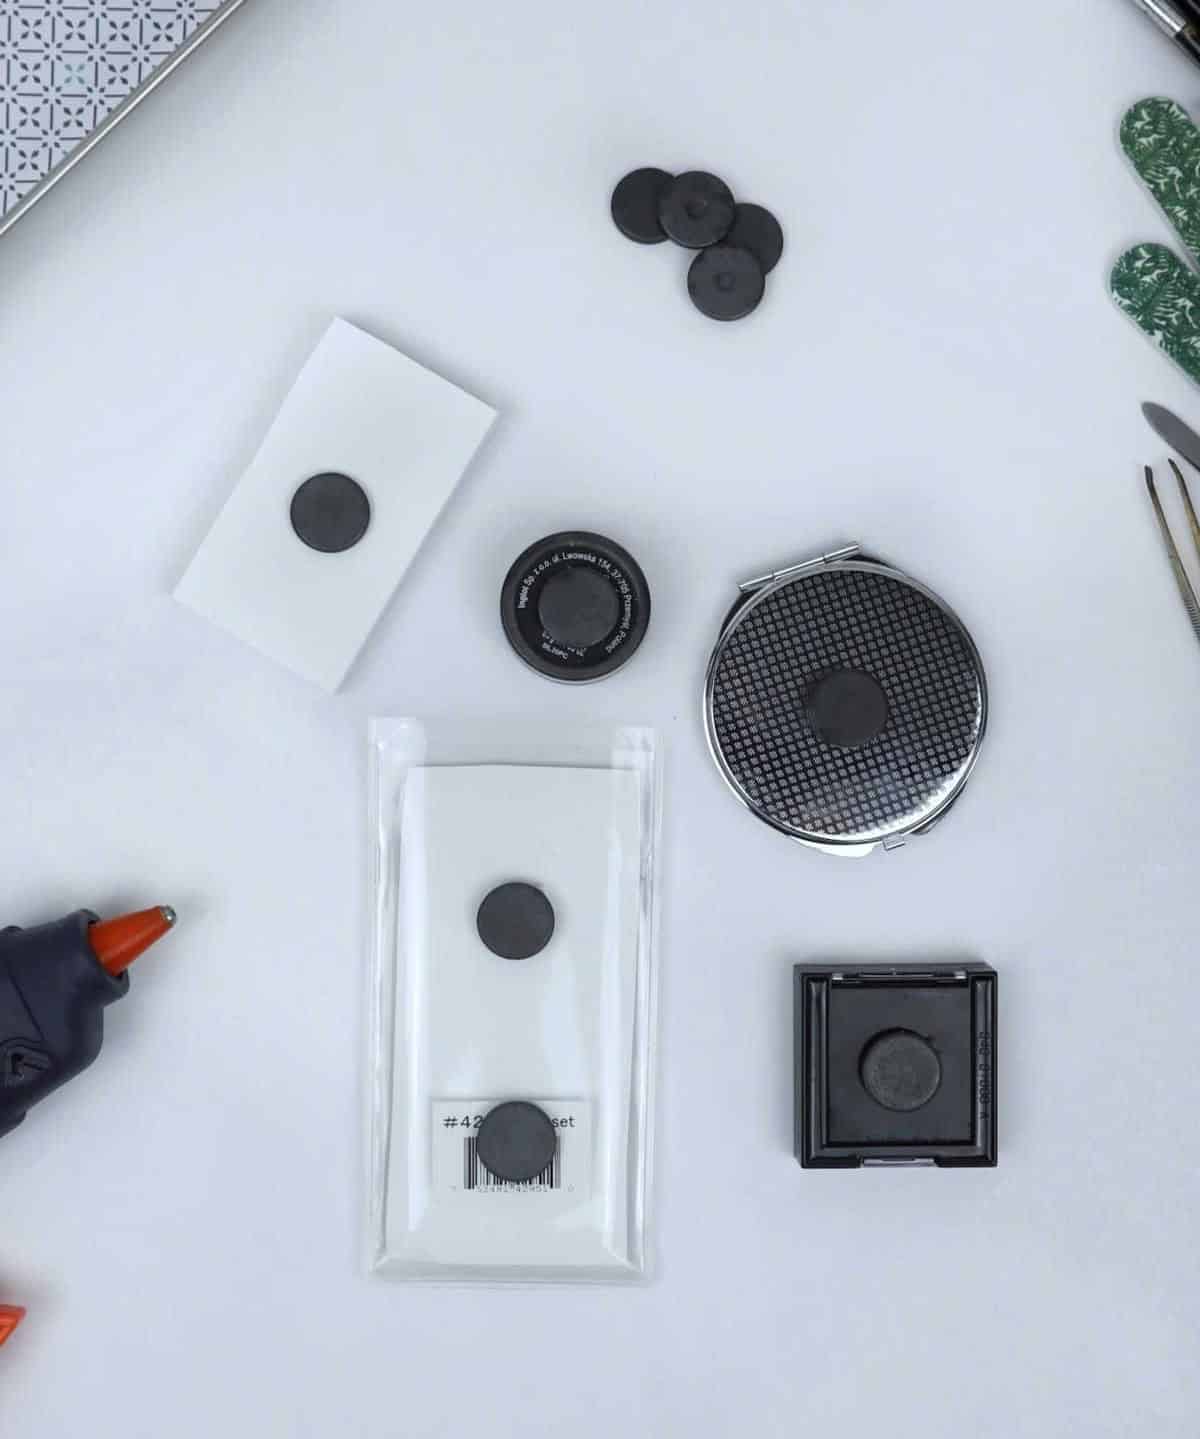
To complete the process, first attach the small magnetic button to the rear of the cosmetic containers. Then, using a hot glue gun, securely fasten all the products together. Once they are fixed, add magnets to each container, ensuring a strong bond between them.
Step 11
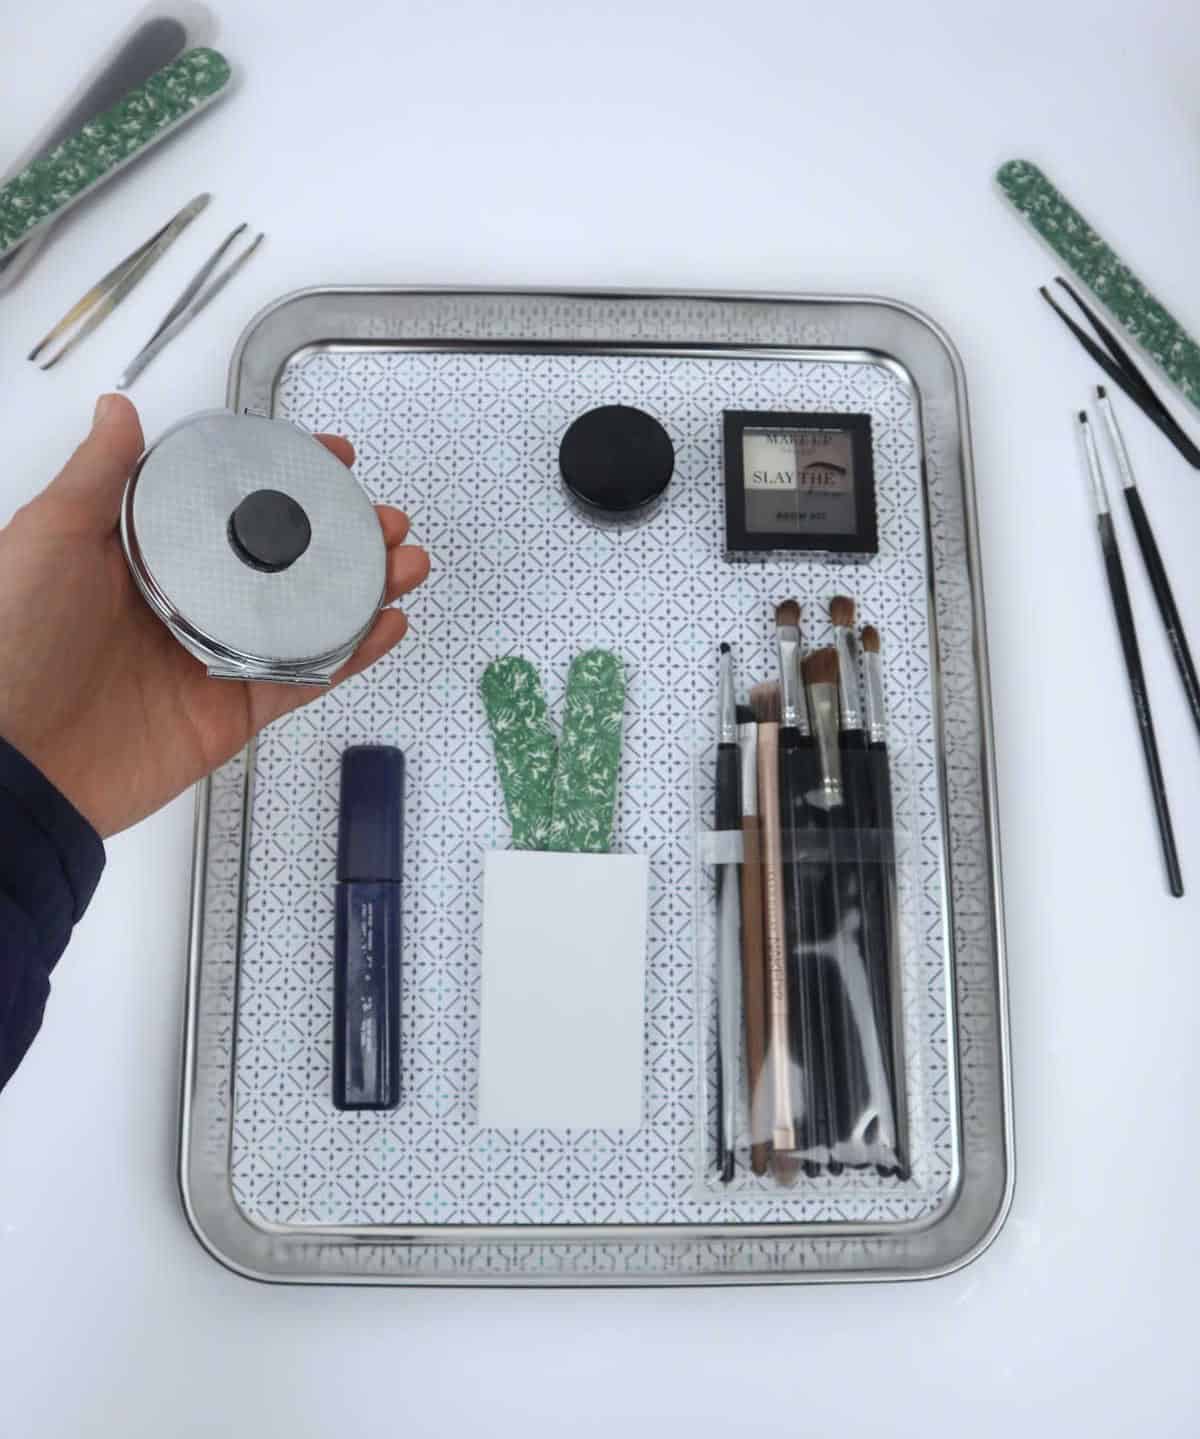
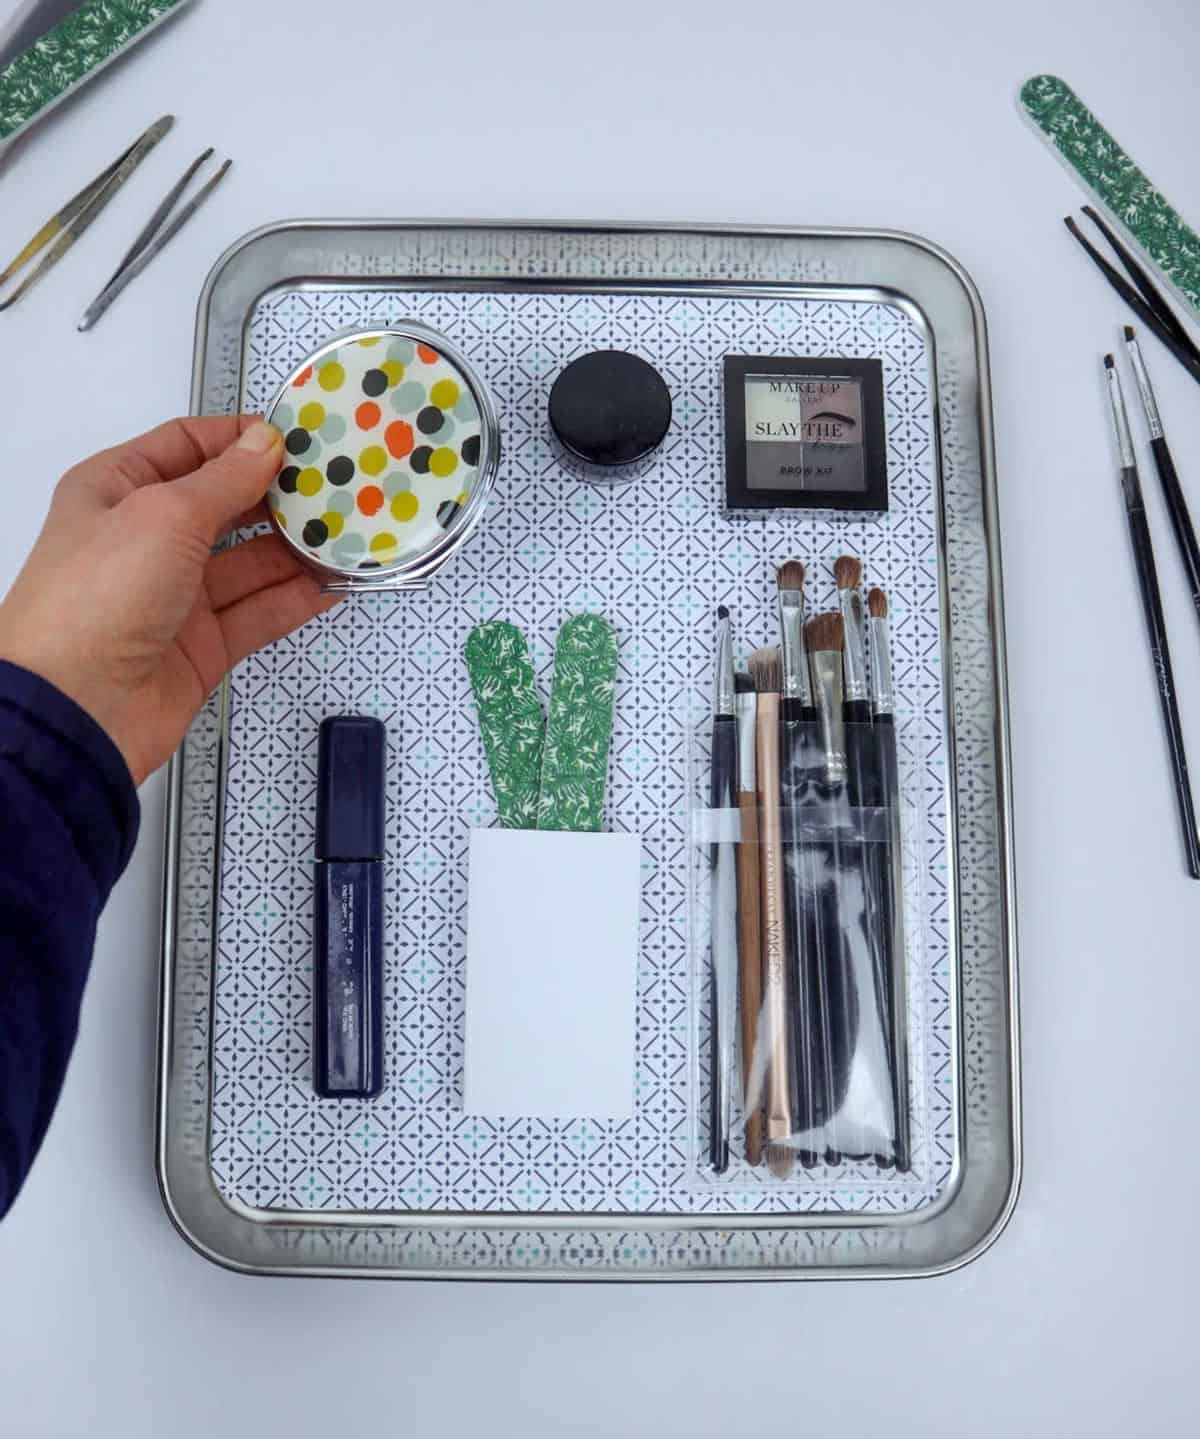
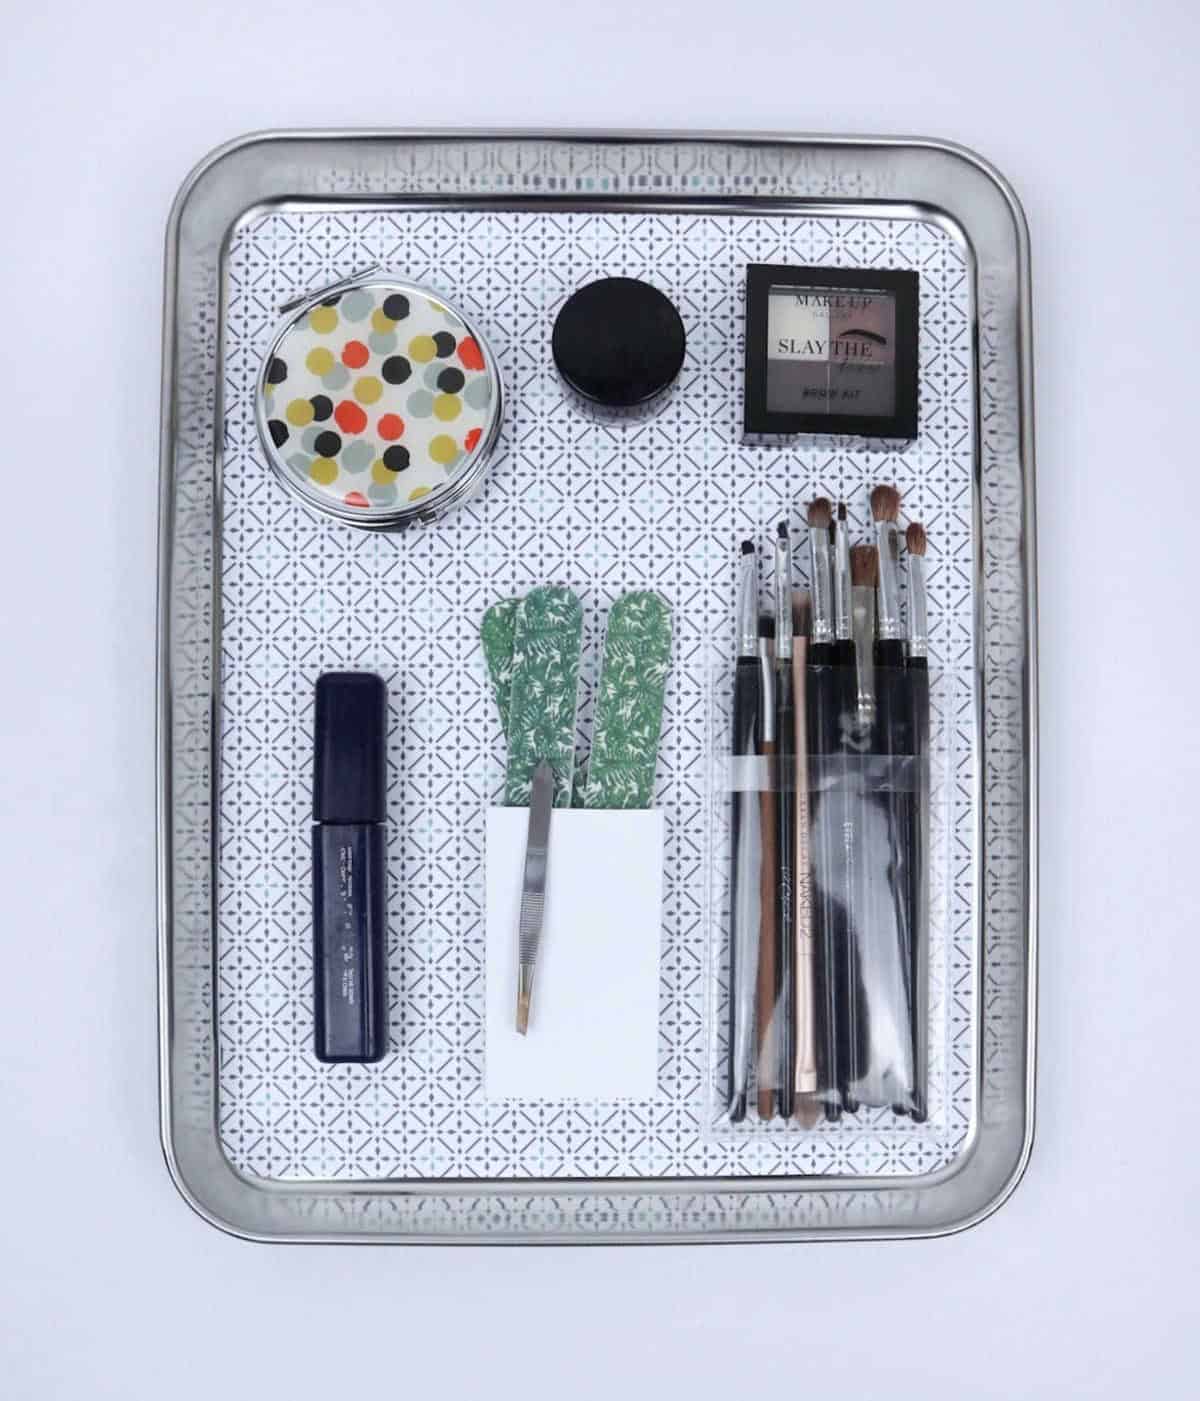

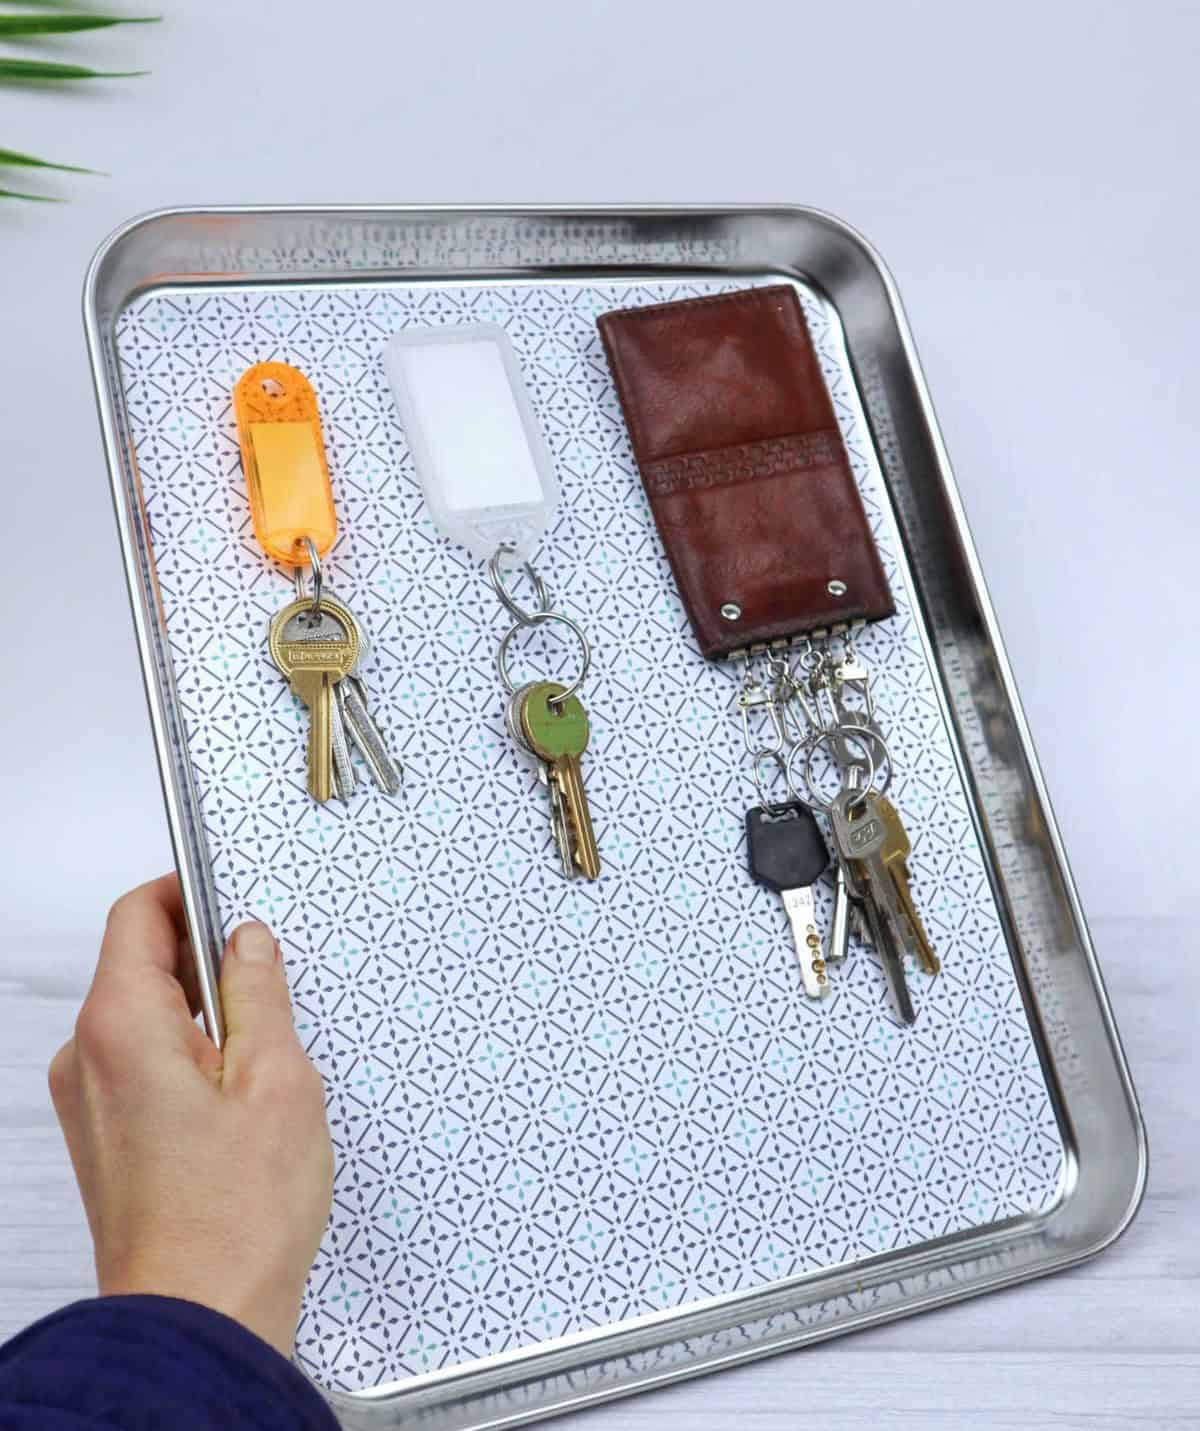
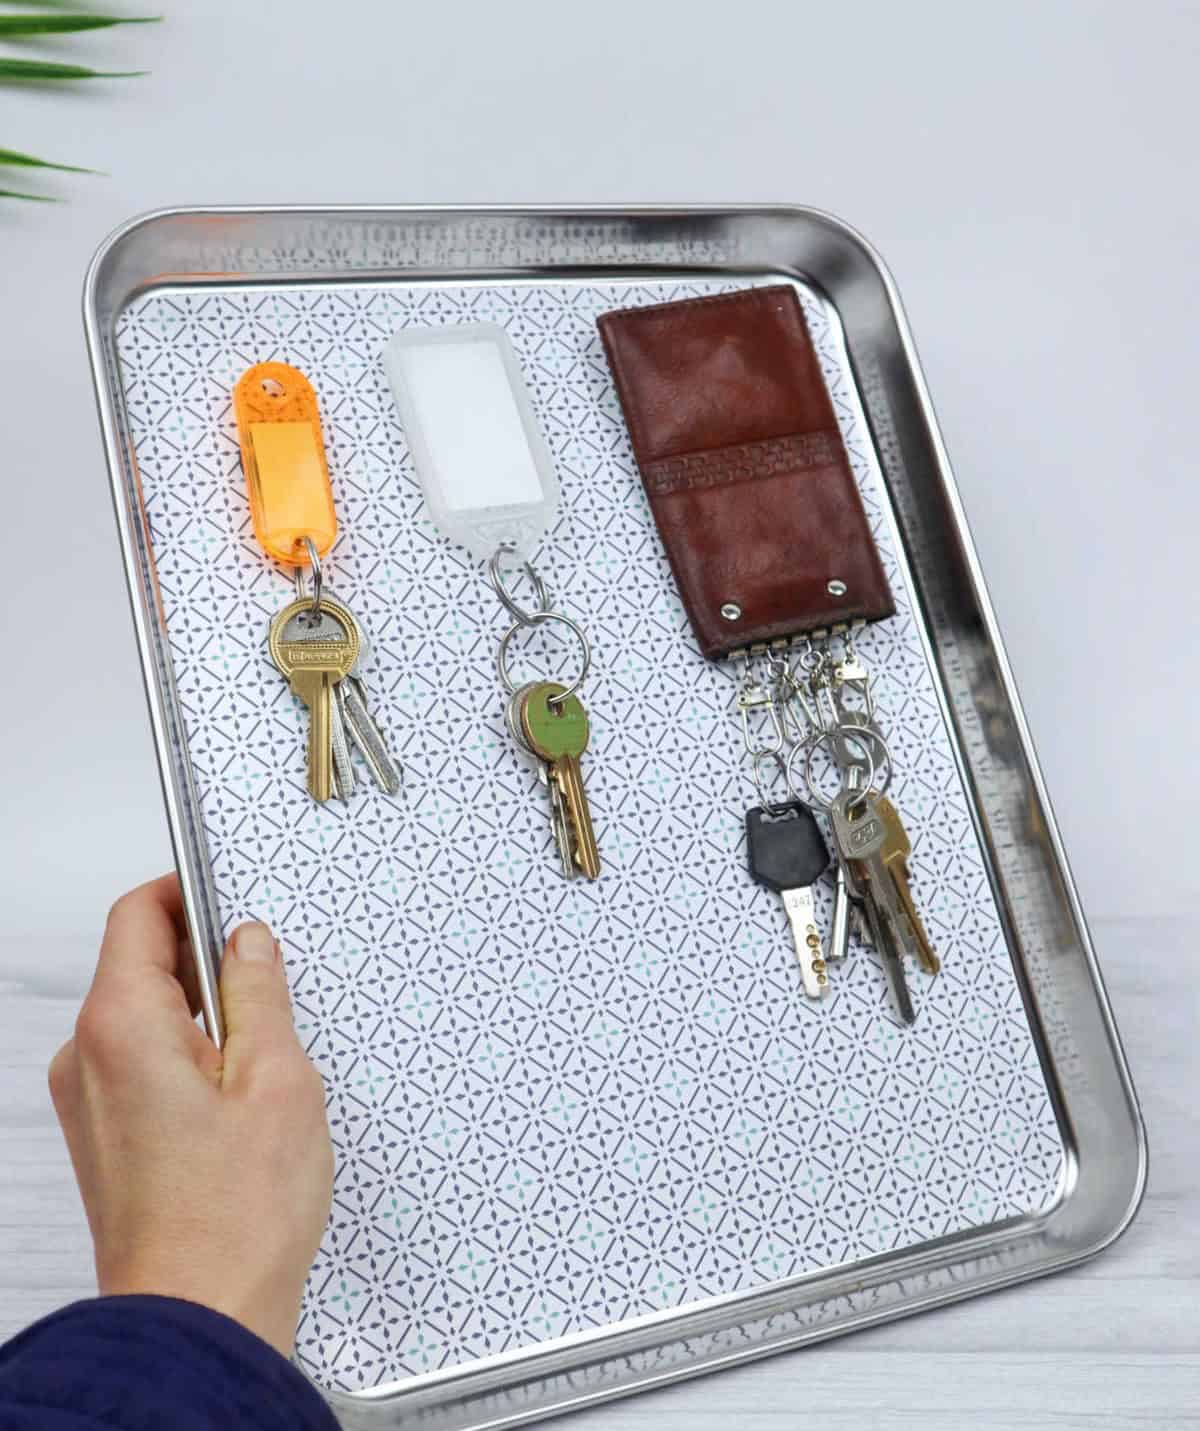
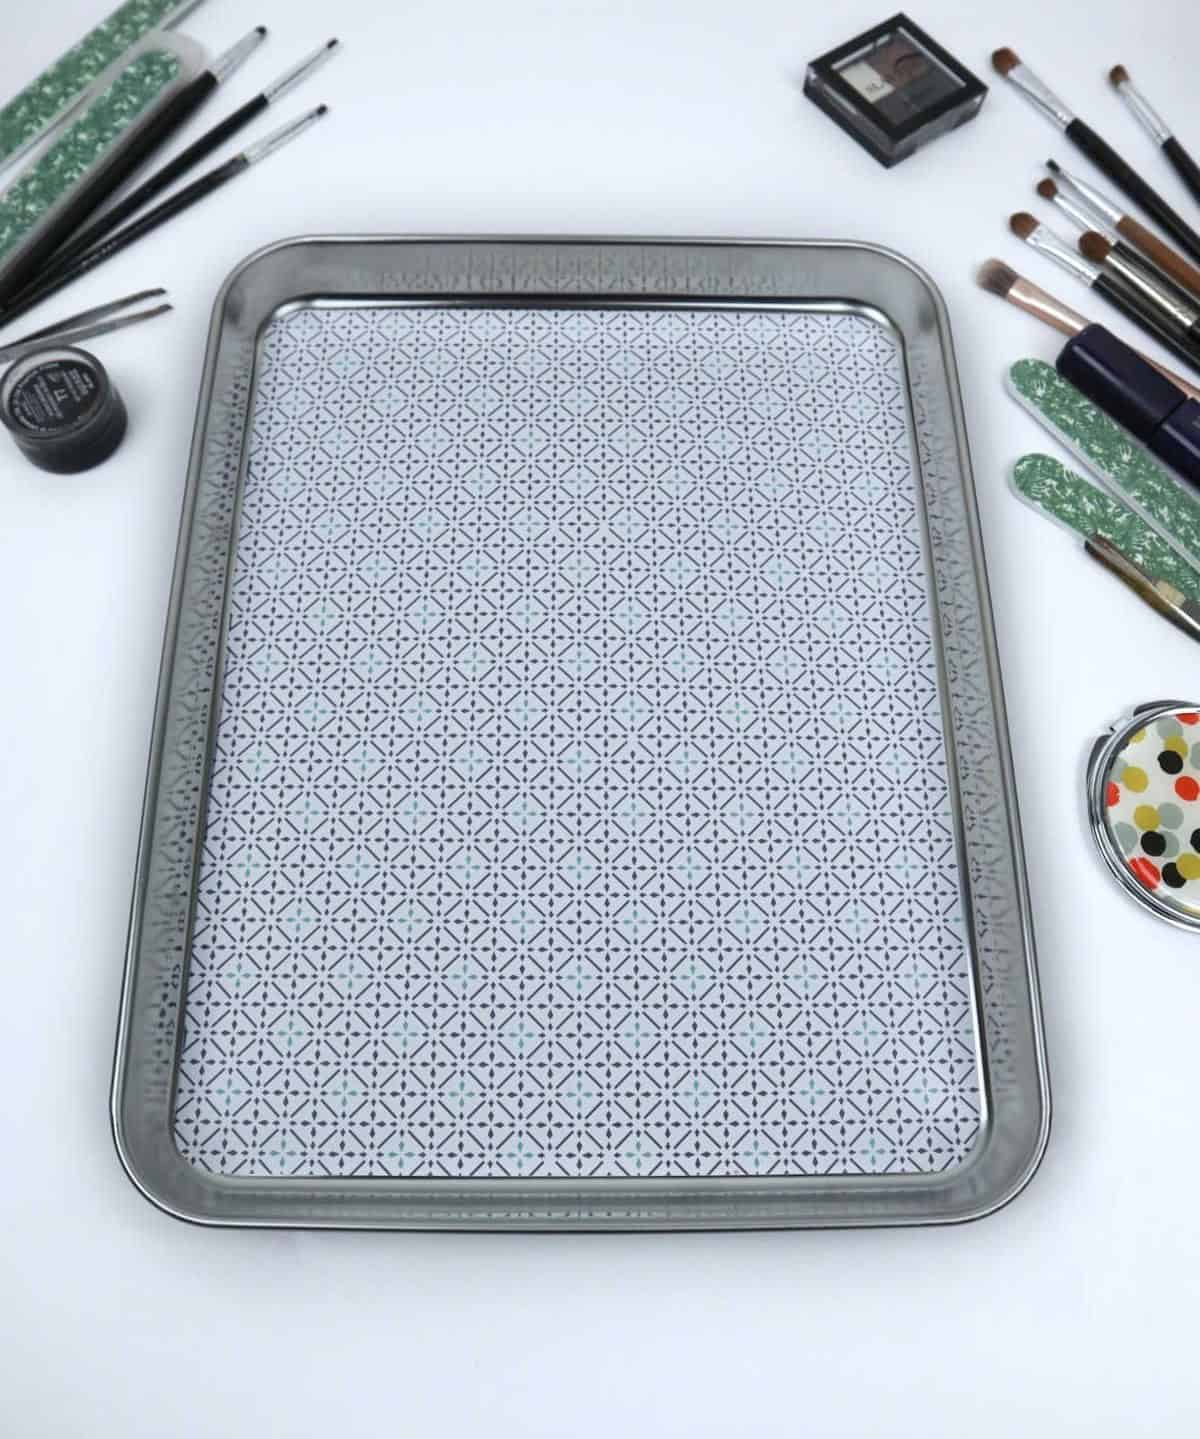
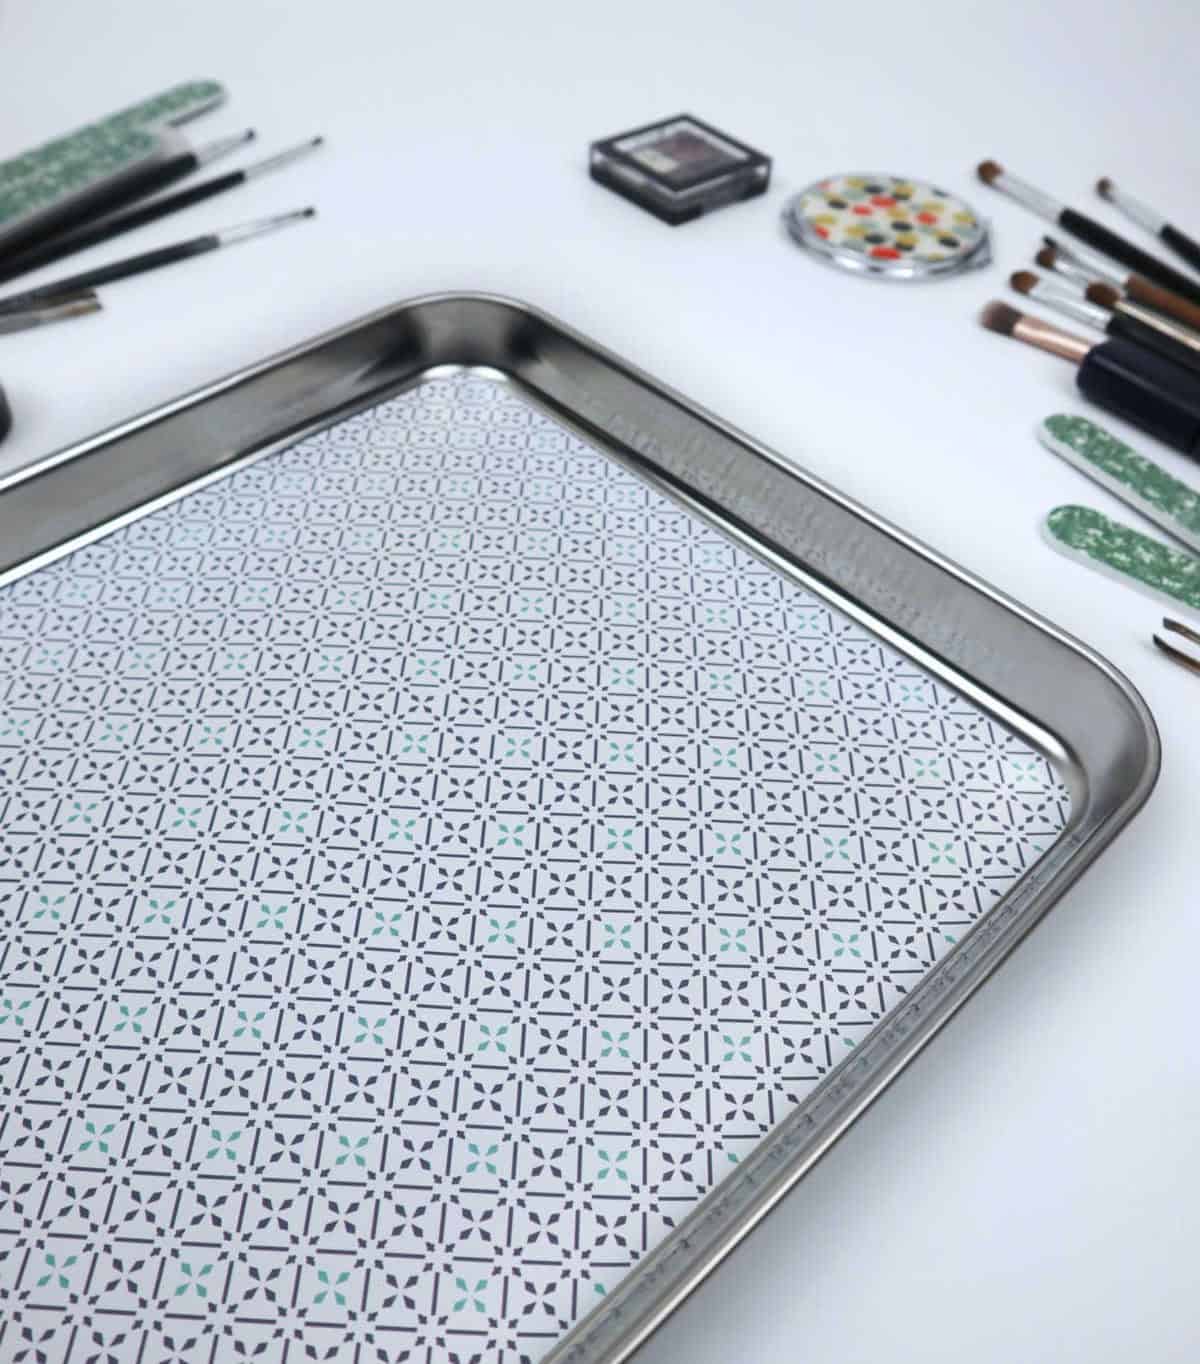
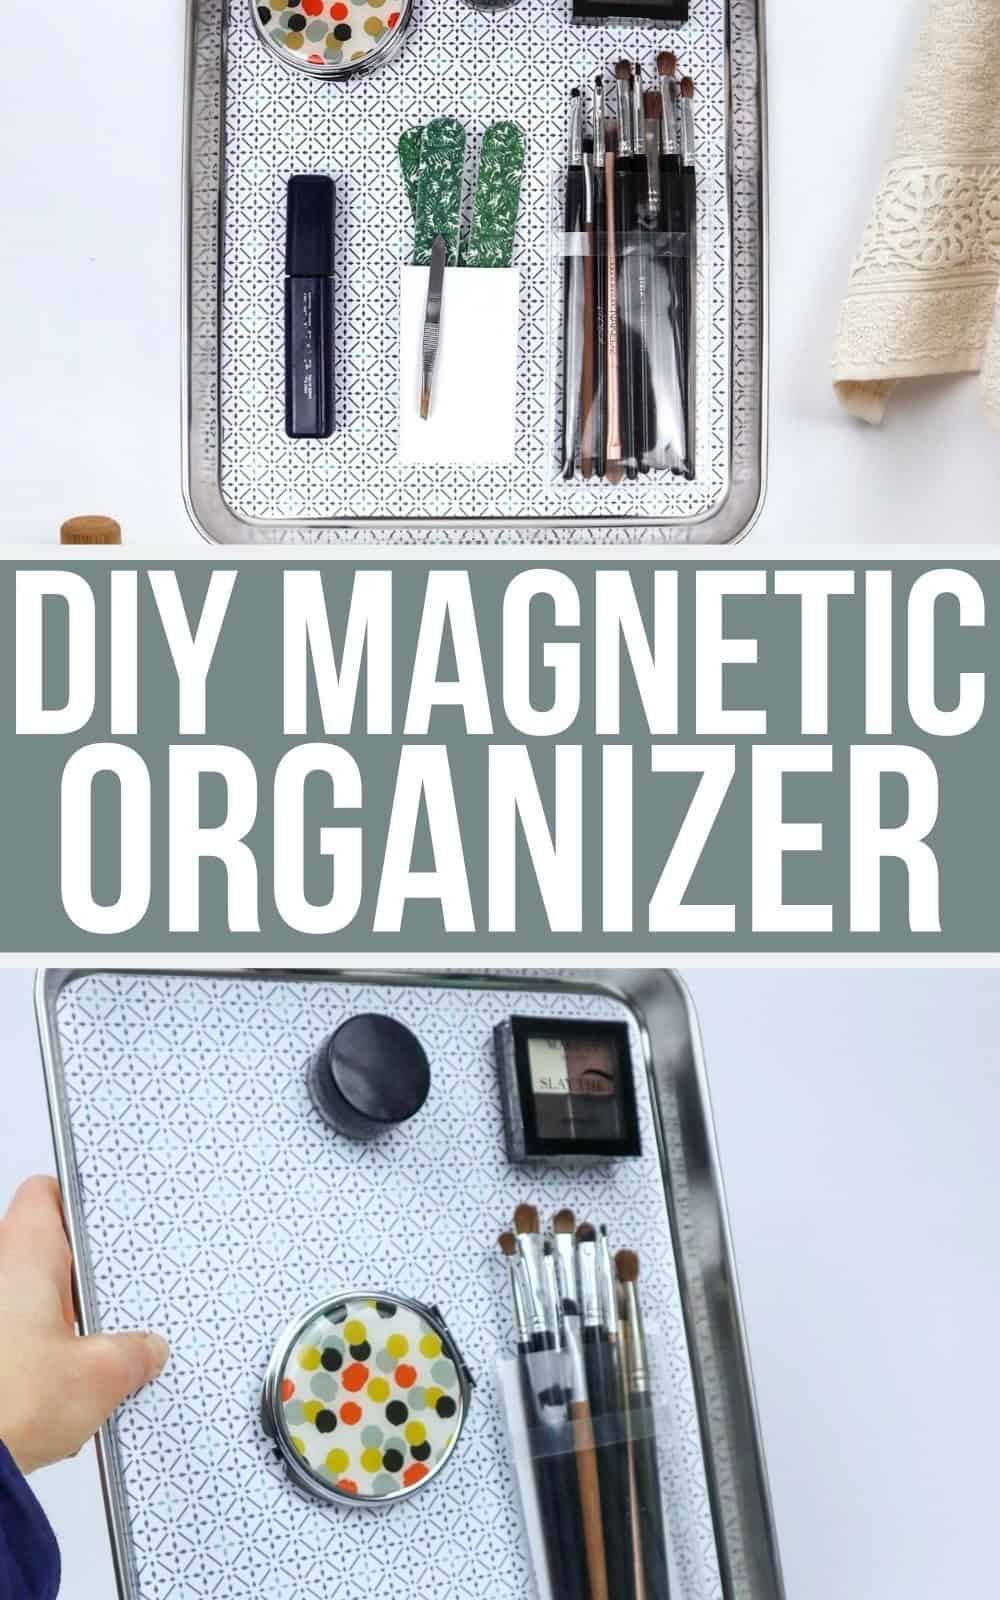
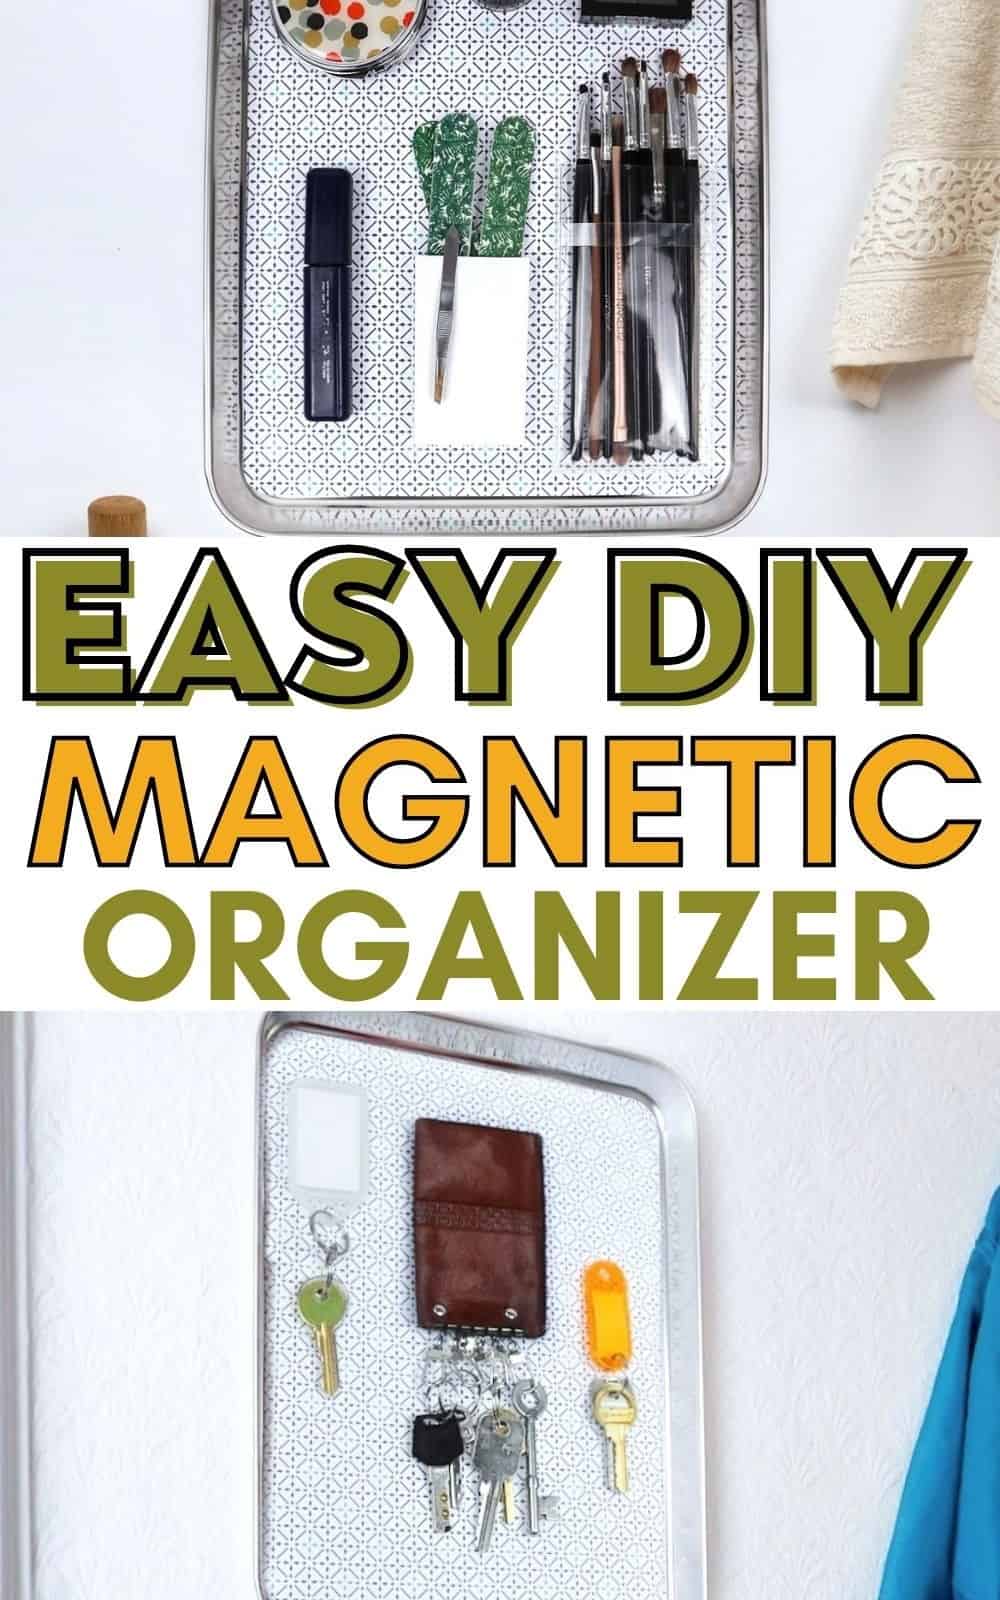
With ease, you can now effortlessly organize your cosmetics with this innovative solution. Simply place the magnets onto the tray, and listen as they click into place, securely held by the metal’s attraction. The result is a visually stunning display that also keeps your space clutter-free. For added convenience, hang the tray on the wall or mount it to serve as a desk stand.
If you’re looking for more creative ways to keep your beauty products in check, explore these 13 genius ideas and discover new inspiration.
Other Organization Ideas
Transform your space with these 47 innovative organization tips! From creative DIY projects like hanging organizers and drawer dividers, to budget-friendly solutions like Dollar Tree storage ideas, you’ll find inspiration for organizing every corner of your home or office. Plus, explore clever ways to organize small items, craft supplies, and even your workspace itself.
DIY Magnetic Organizer
Transform the chaos of your workspace by creating your very own magnetic organizer. This DIY project is perfect for anyone looking to tame their makeup collection or keep their office supplies in check. With just a small time commitment of 20 minutes, you’ll be enjoying the benefits of a clutter-free zone in no time.
Equipment
To avoid distractions, it’s crucial to create an environment that fosters focus and productivity. One simple yet effective way to do this is by utilizing the power of visual cues. Take note of the items on the list – scissors, ruler, pencil, and painting brush. These everyday objects may seem unrelated to sleep, but they share a common thread: each one serves as a tangible reminder that can help you stay engaged and awake.
Similarly, you can prevent your screen from going dark by adjusting your device’s settings or using an app designed to keep your display lit for extended periods.
Materials
To create a unique and functional magnetic board, you’ll need a few essential materials. Start with a stainless steel baking tray or a metal cookie tray as the base, providing a sturdy surface for your design. Next, select decorative paper that’s thin and lightweight to avoid overwhelming the overall aesthetic. For added visual interest, incorporate magnets into your design to create a functional display area.
To secure these components in place, you’ll need a hot glue gun and Mod Podge, which will provide a strong yet flexible bond.
Instructions
To begin, set up your workspace and gather the necessary supplies. Start by measuring the dimensions of your stainless-steel tray, taking note of its exact size. Cut out a piece of decorative paper to match those measurements, ensuring a precise fit. Next, apply an even layer of Mod Podge to the tray using a flathead paintbrush, covering the entire surface. Carefully place the cut-out paper over the Mod Podge, smoothing out any wrinkles or air pockets that may form.
Allow the adhesive to dry completely before adding additional layers. Once dry, add another coat of Mod Podge to secure the paper in place. With your tray now prepared, move on to attaching the magnetic makeup holder. Begin by applying a small amount of hot glue to the back of your cosmetics container and pressing the magnetic pellets into the adhesive until they are securely attached. Hold the pellets in place for a few moments to ensure they set properly.
Finally, attach the magnet to the tray and you’re done – your DIY project is complete!