As the new school year approaches, why not take a moment to elevate your journaling experience with a handmade journal cover? This fun and creative project is perfect for teens, adults, and kids alike. Unlike store-bought journals, which often lack the perfect blend of size, color, and pattern to suit your style, creating your own DIY journal cover allows you to tailor every aspect to your liking.
If you possess artistic flair and a steady hand for drawing, doodling, or painting, then this project is sure to bring out your inner creative genius.
Supplies for a Journal Cover
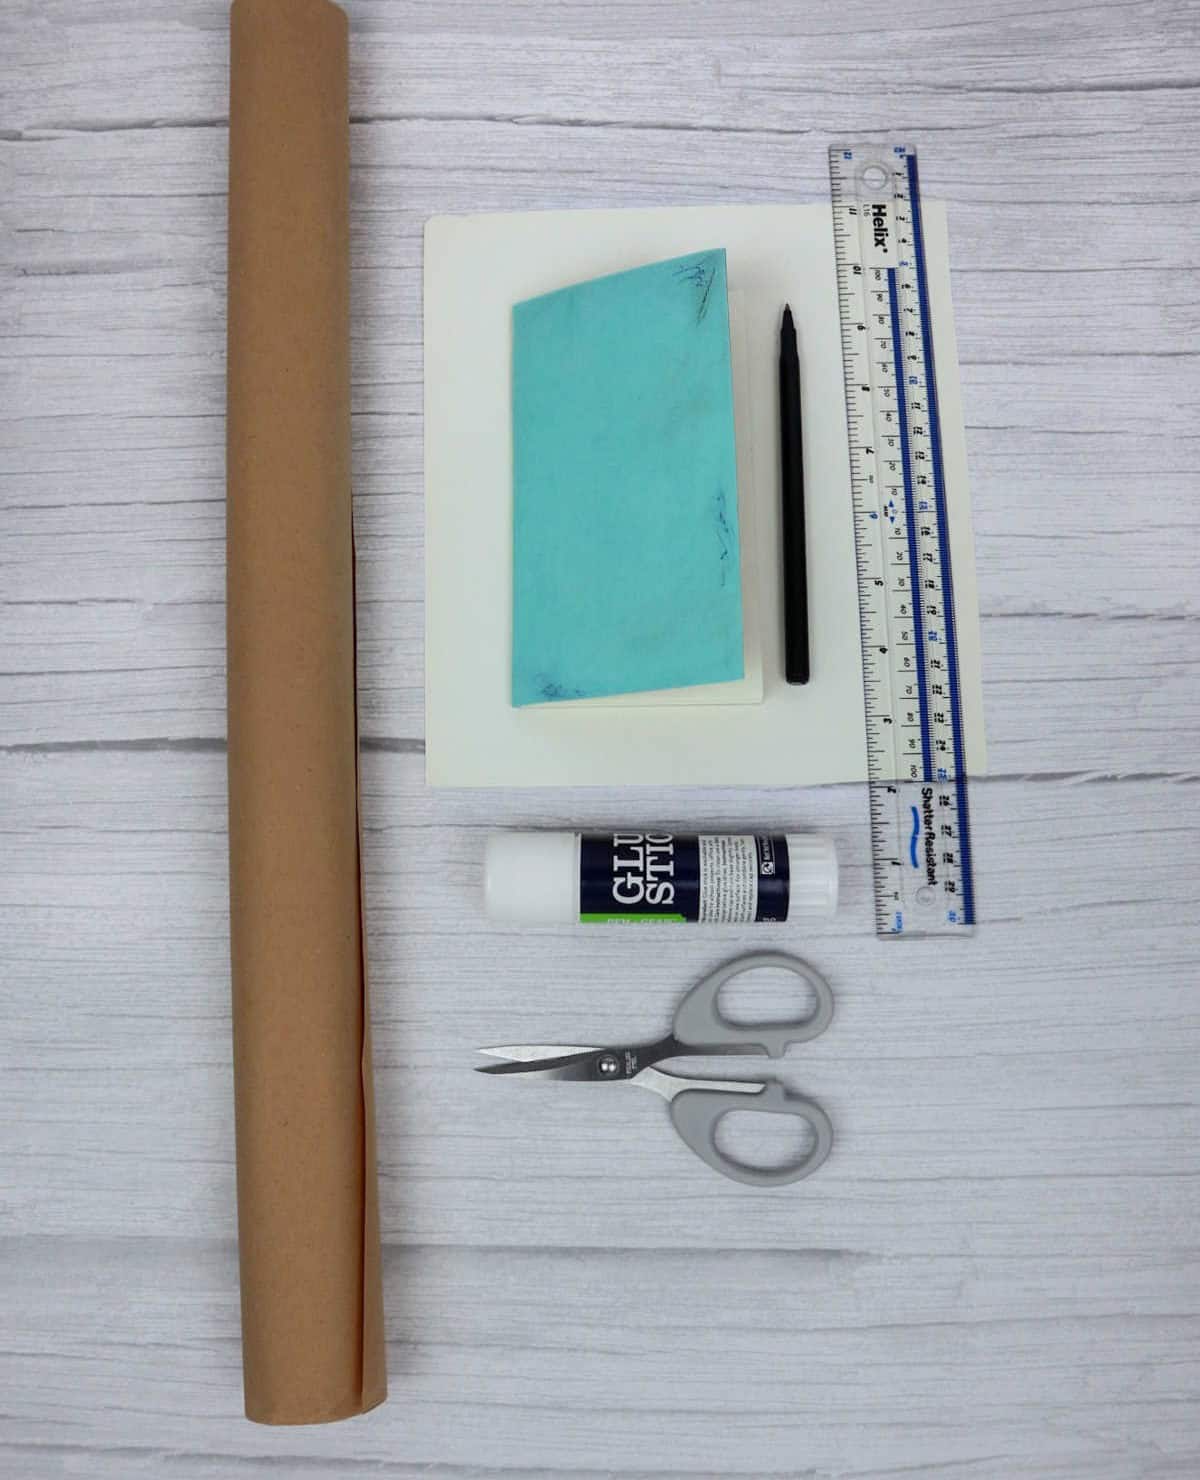
To begin, assemble the following essential materials: Kraft paper, an old notebook, a simple sheet of paper, a pen, a ruler, a glue stick, and a pair of scissors. Having these items at your disposal will enable you to commence work on this project with ease.
How to Make DIY Journal Cover
To create this stunning cover, follow these simple steps: First, gather your materials – a piece of cardstock or thick paper, scissors, glue, and any embellishments you’d like to add. Next, cut out the basic shape of your cover from the cardstock or paper. Don’t worry too much about perfection at this stage, as we’ll be refining it later. Once you have your shape cut out, start adding any additional elements you want – whether that’s a title, a logo, or some decorative designs.
You can use glue to attach these items, or get creative with other adhesives like tape or staples. Finally, once all your embellishments are in place, take a step back and evaluate the overall design. Make any necessary adjustments until you’re happy with the final result.
Step 1
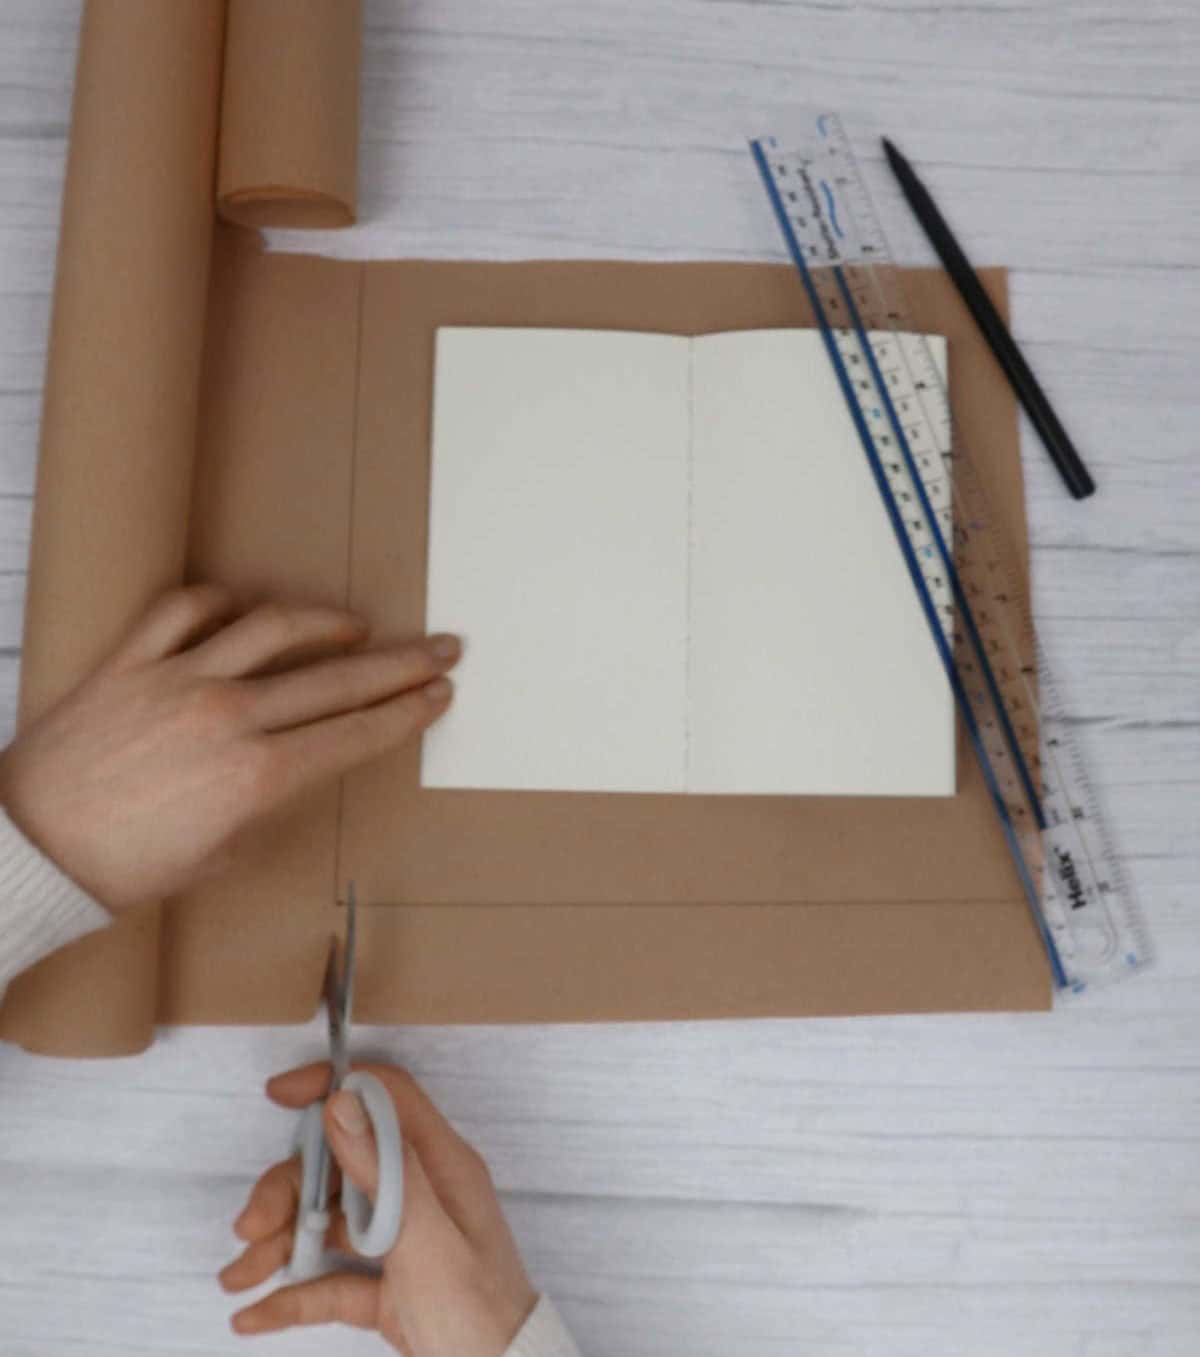
When creating your own custom journal, you’re given a blank canvas to express yourself creatively. With this freedom comes the opportunity to tailor-make the cover to your liking. To begin, place your notebook on a flat surface and position it open, ensuring you have enough room to mark its dimensions. This step is crucial in determining the precise measurements for your custom cover.
As you lay out the craft paper of your choice, make sure to leave at least an inch of excess around the notebook’s edges before cutting away any excess material.
Step 2
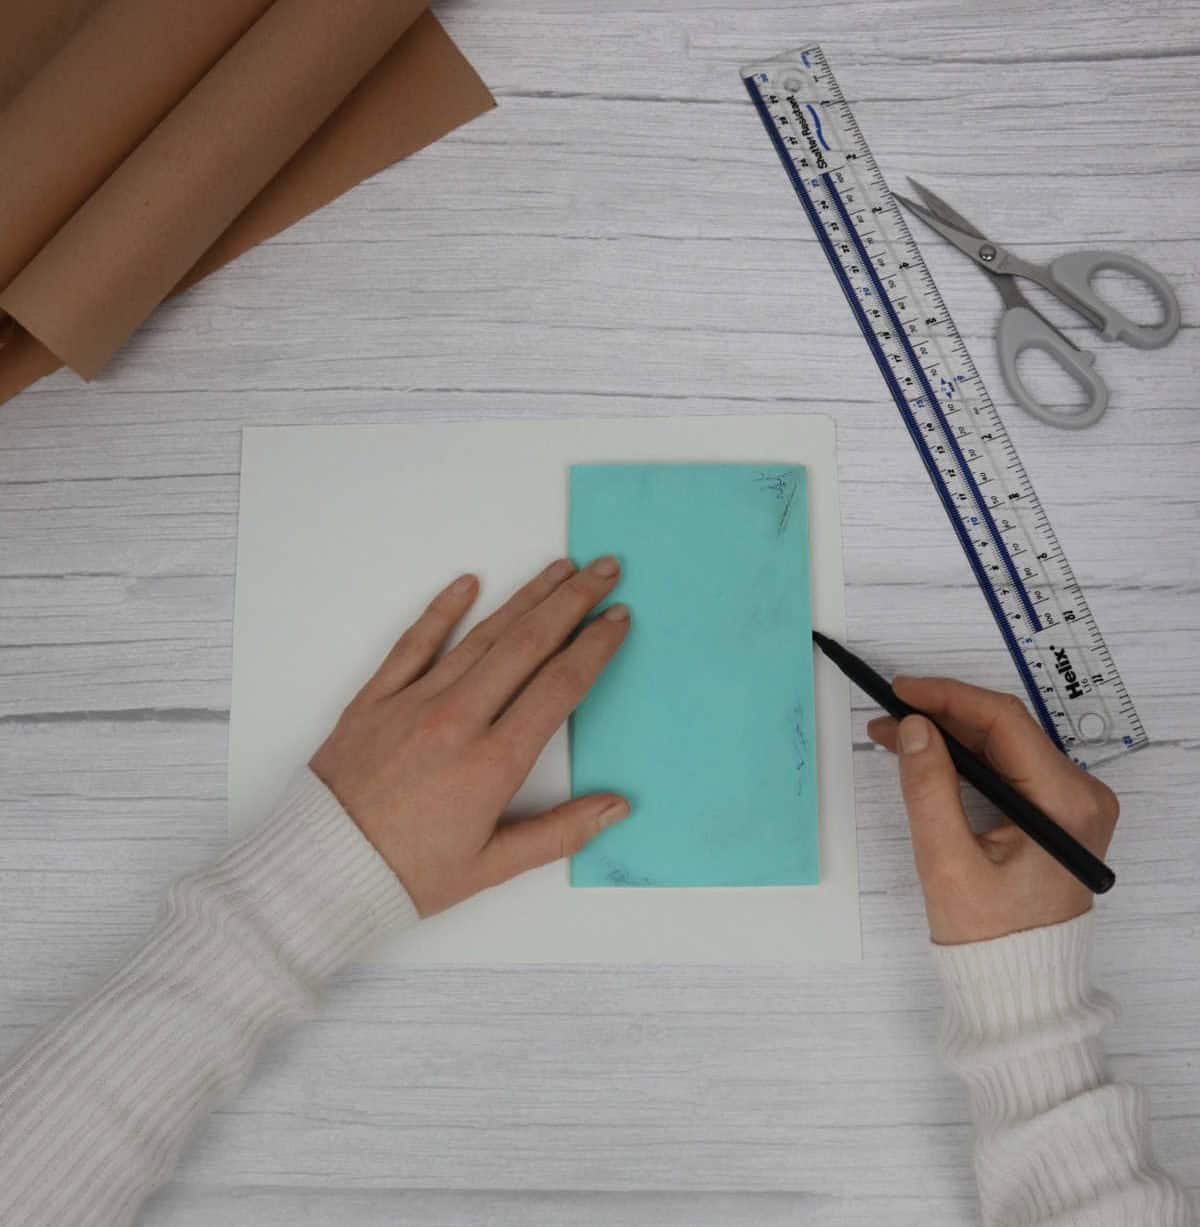
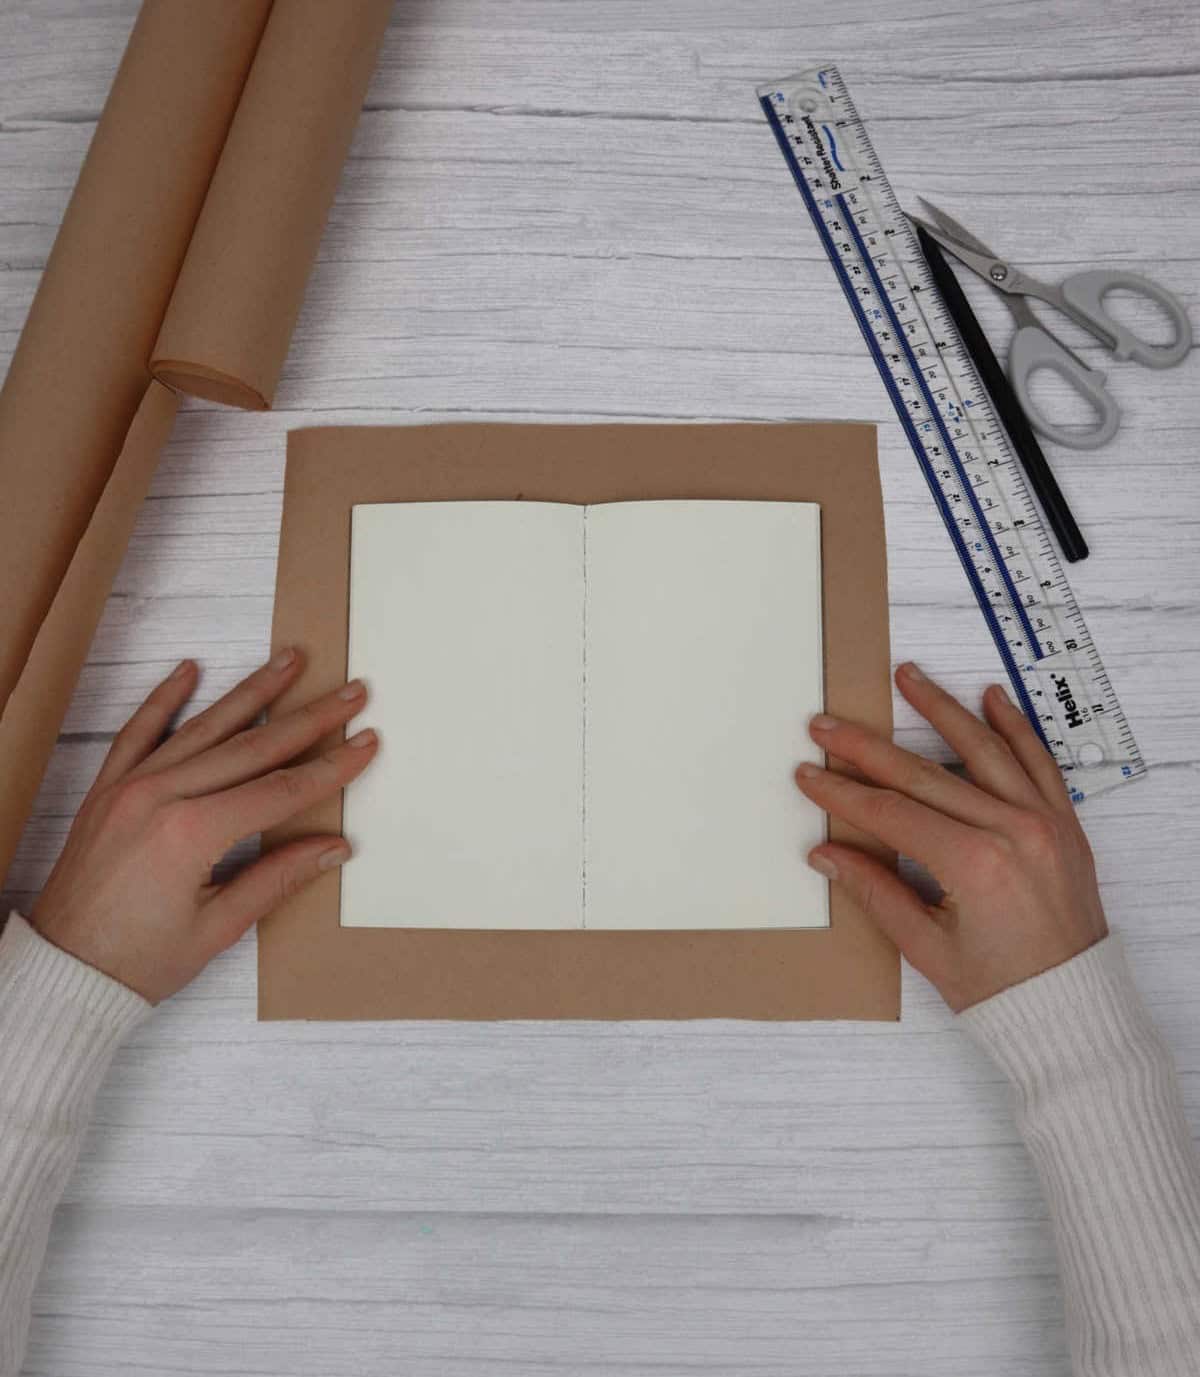
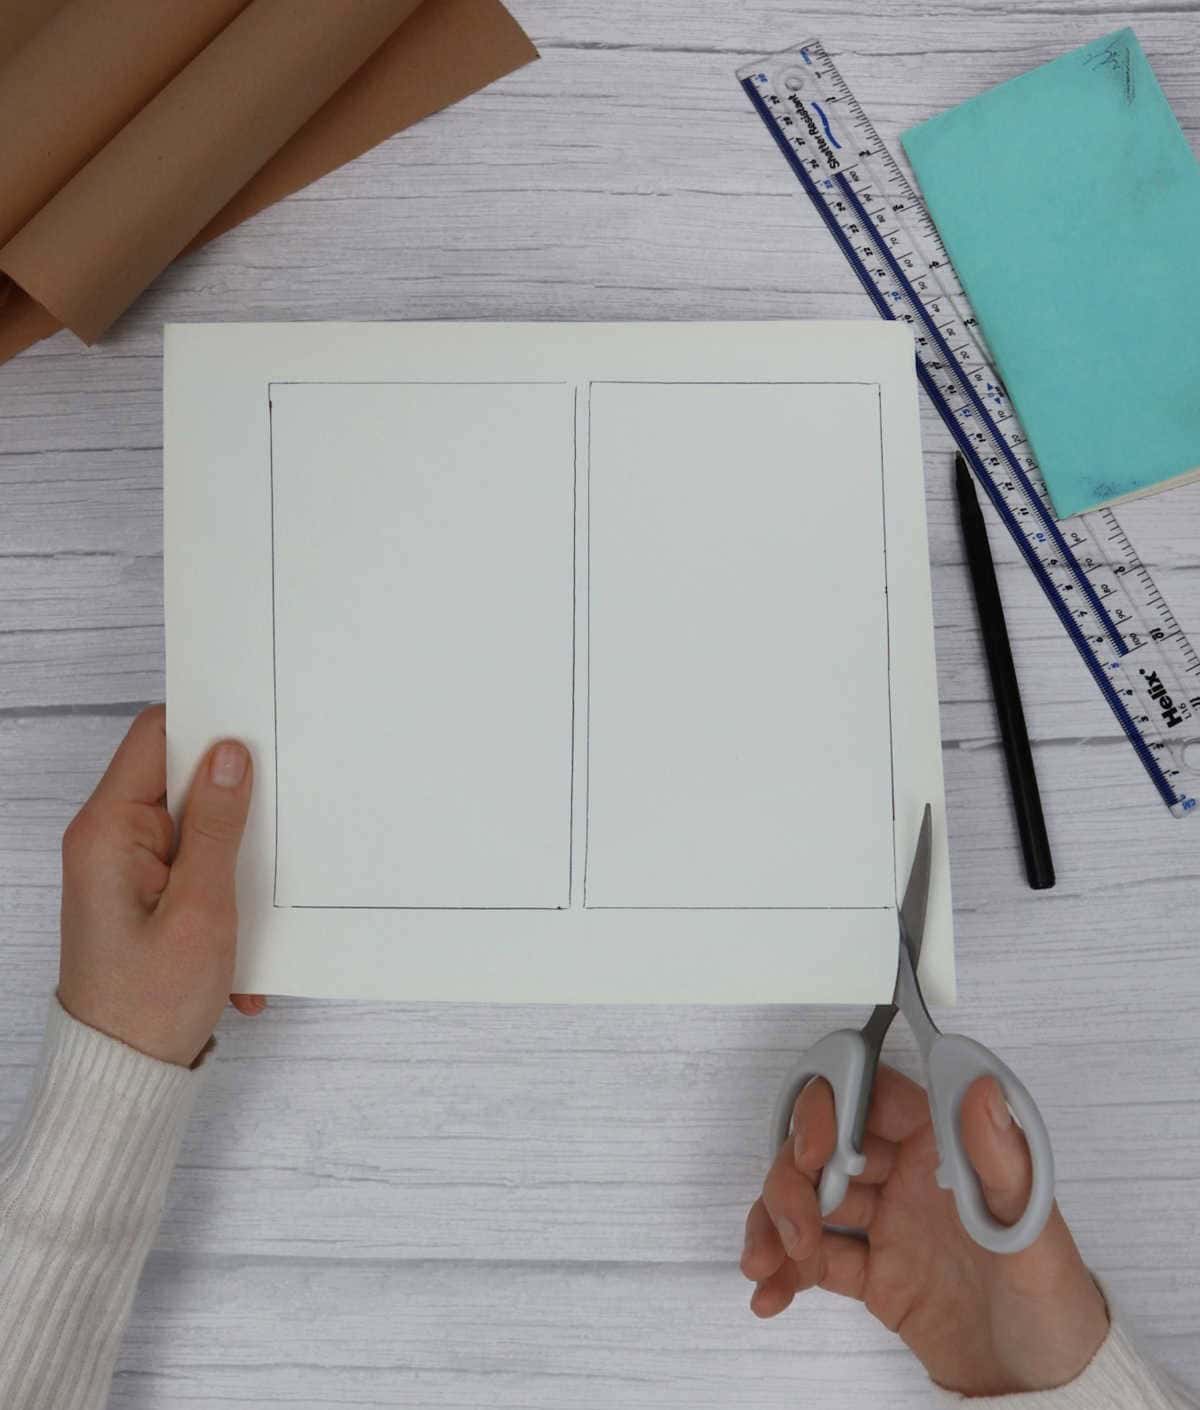
Position a plain sheet of decorative paper and gently place your notebook, with its pages closed, in the center. Ensure that the notebook’s spine remains aligned as you draw an outline around it, taking care not to disturb this crucial detail. Once complete, repeat the process on the opposite side of the paper, creating two identical rectangles.
Step 3
Step 4
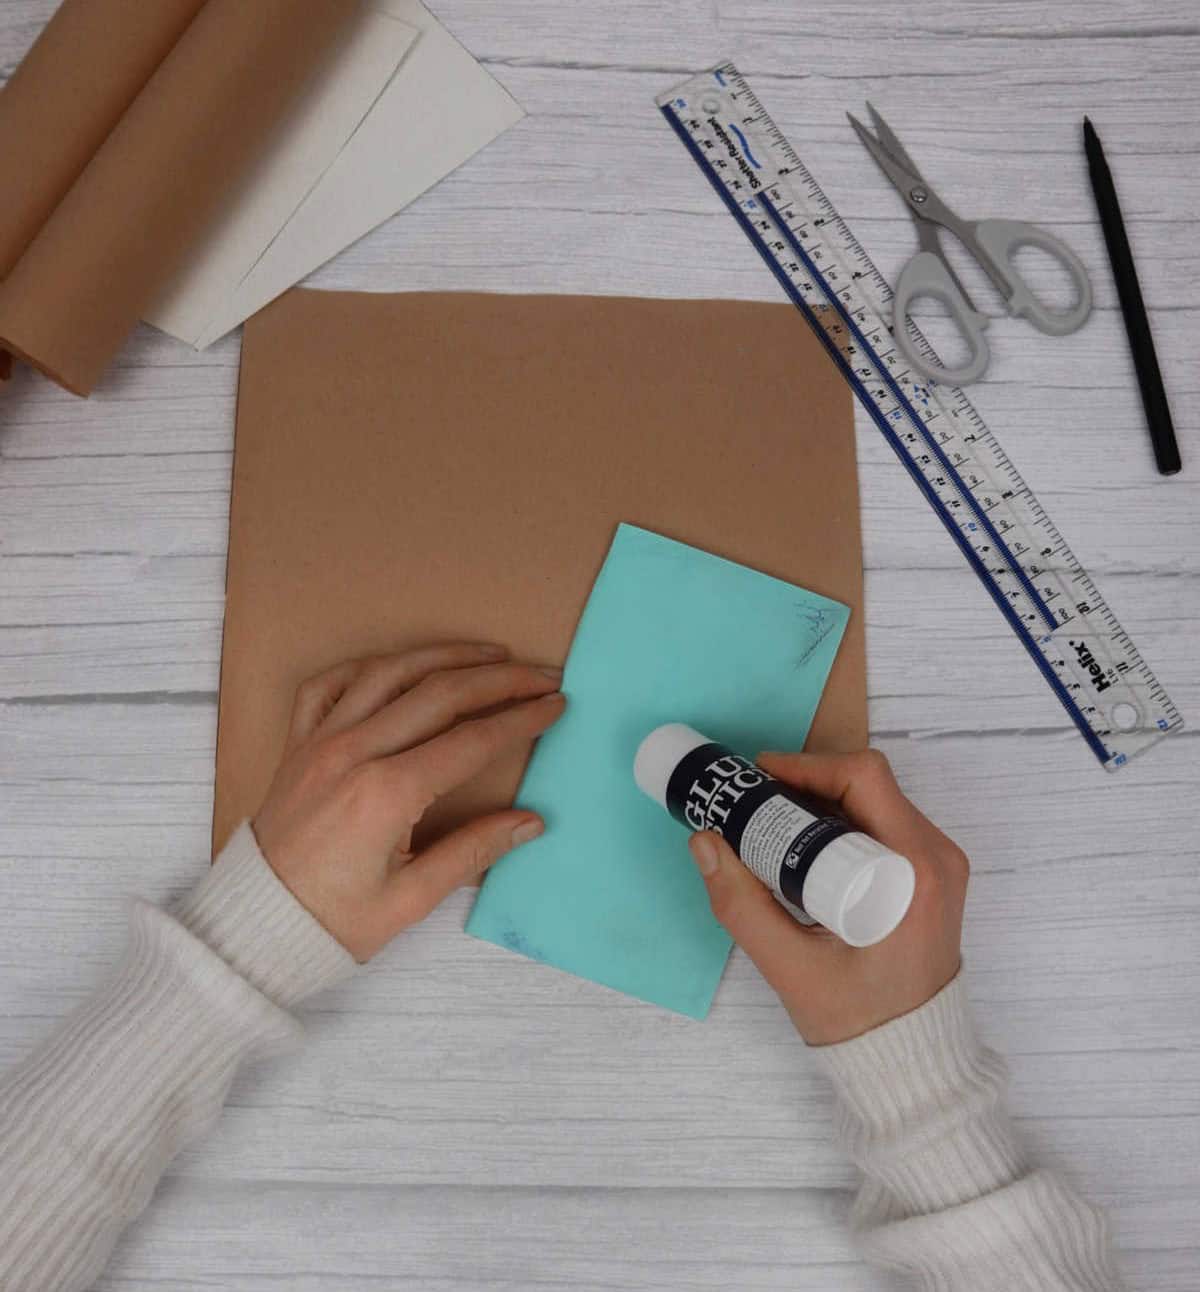
To proceed, carefully apply a thin layer of liquid adhesive to both the back and front covers of the notebook. Subsequently, position the notebook with the adhesive side facing downwards onto the kraft paper, ensuring precise alignment before applying gentle yet firm pressure to secure it firmly in its place.
Step 5
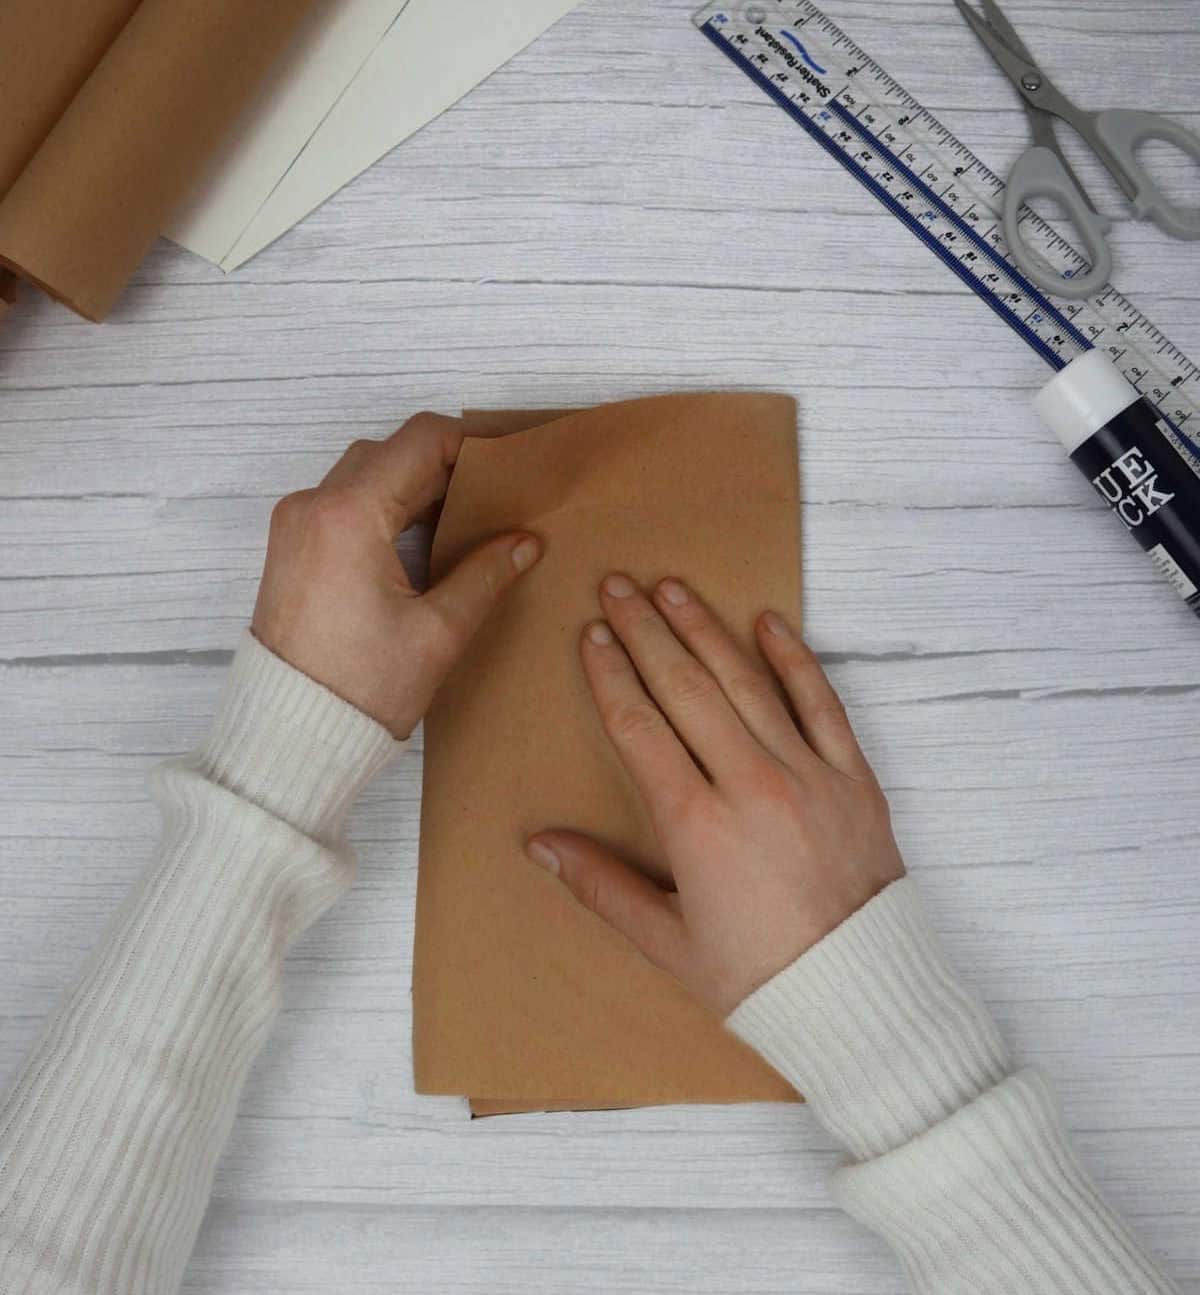
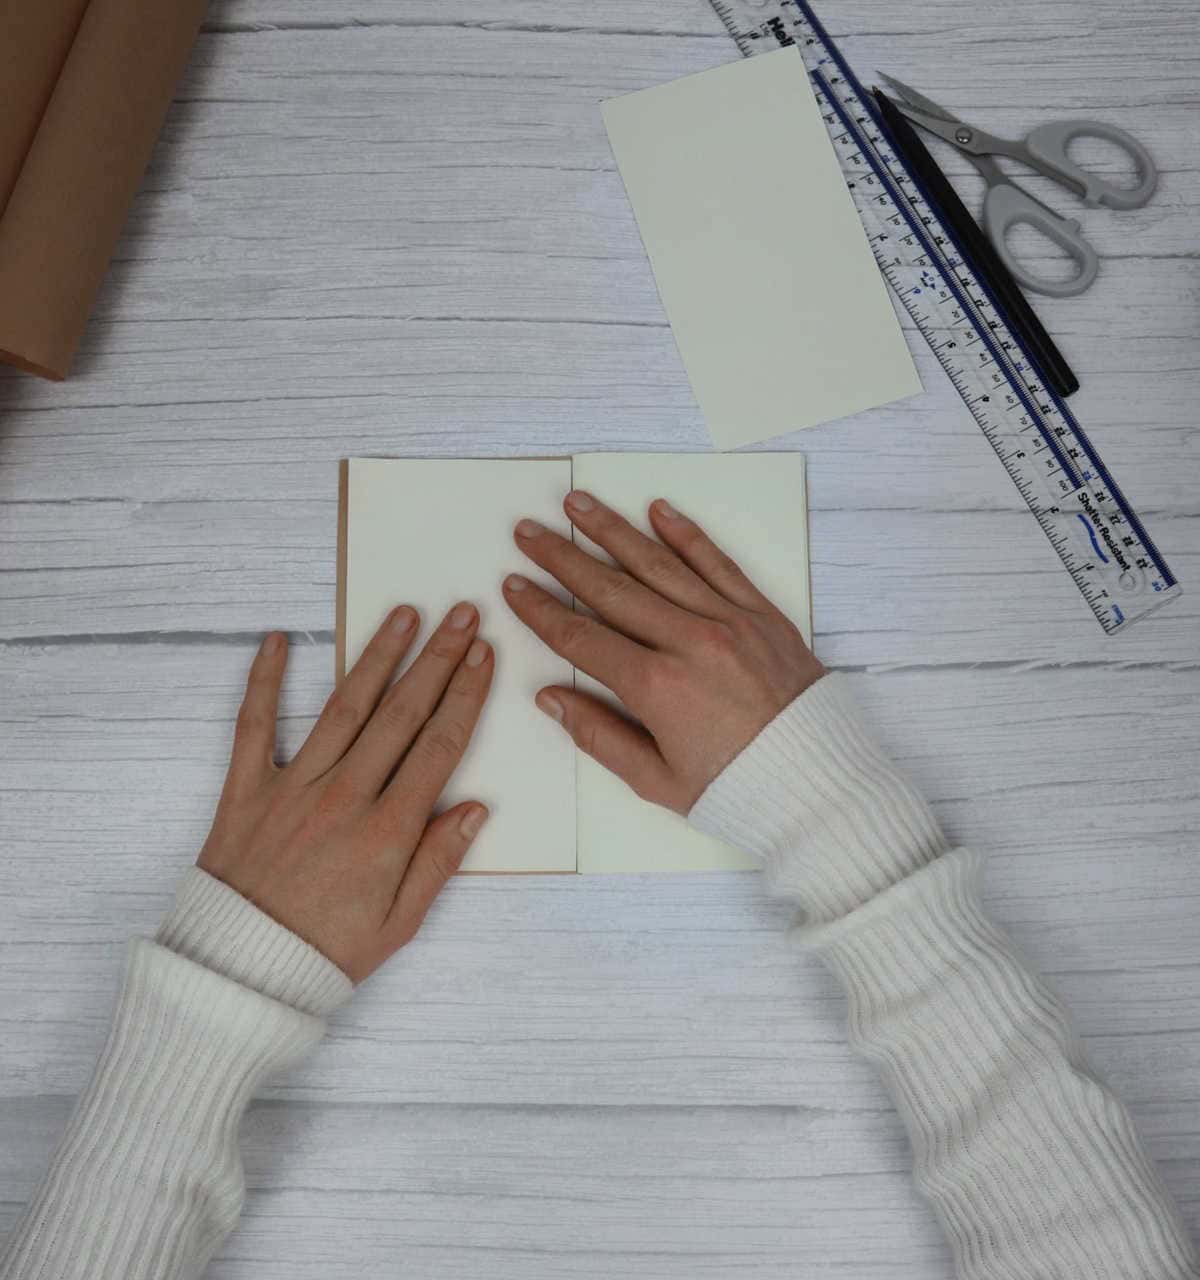
With the notebook securely closed, take a moment to carefully fold the cover along its spine. This deliberate movement allows the craft paper to naturally crease and develop a crisp fold, effectively securing the book’s contents within.
Step 6
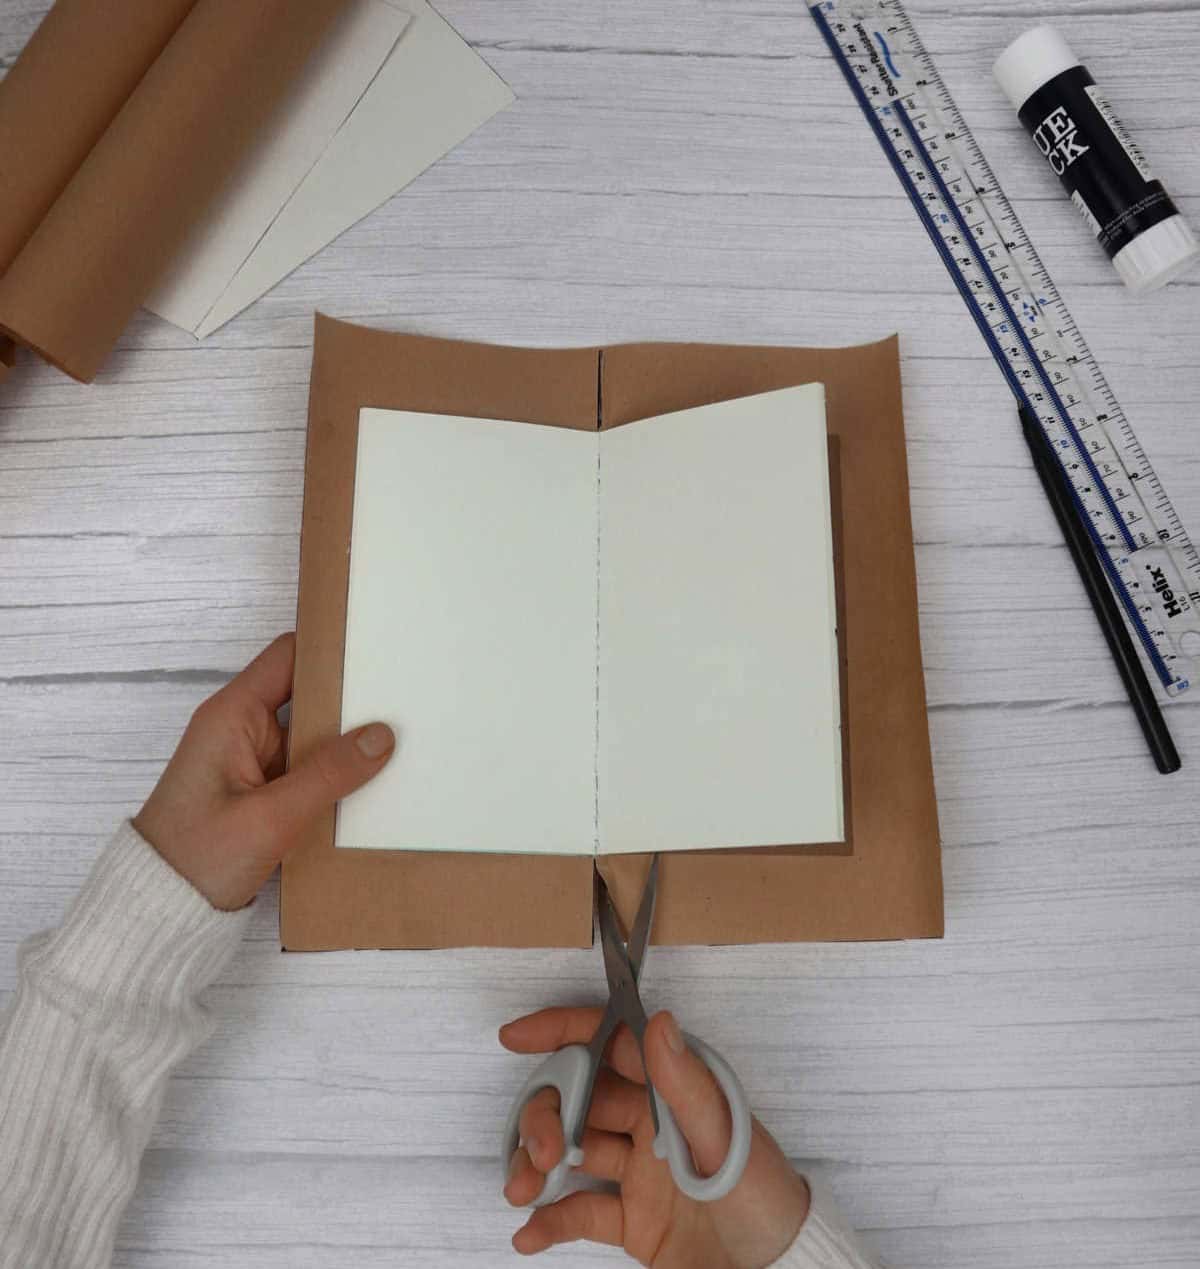
While the concept may be familiar from wrapping notebooks for school projects, the process is remarkably similar. To begin, grab a pair of scissors and carefully cut a straight line up from the bottom edge of the notebook to the top. Be mindful not to stray off course, as it’s easy to inadvertently slice into the notebook itself. Repeat this incision on the opposite side to complete the preparation for the next step.
Step 7
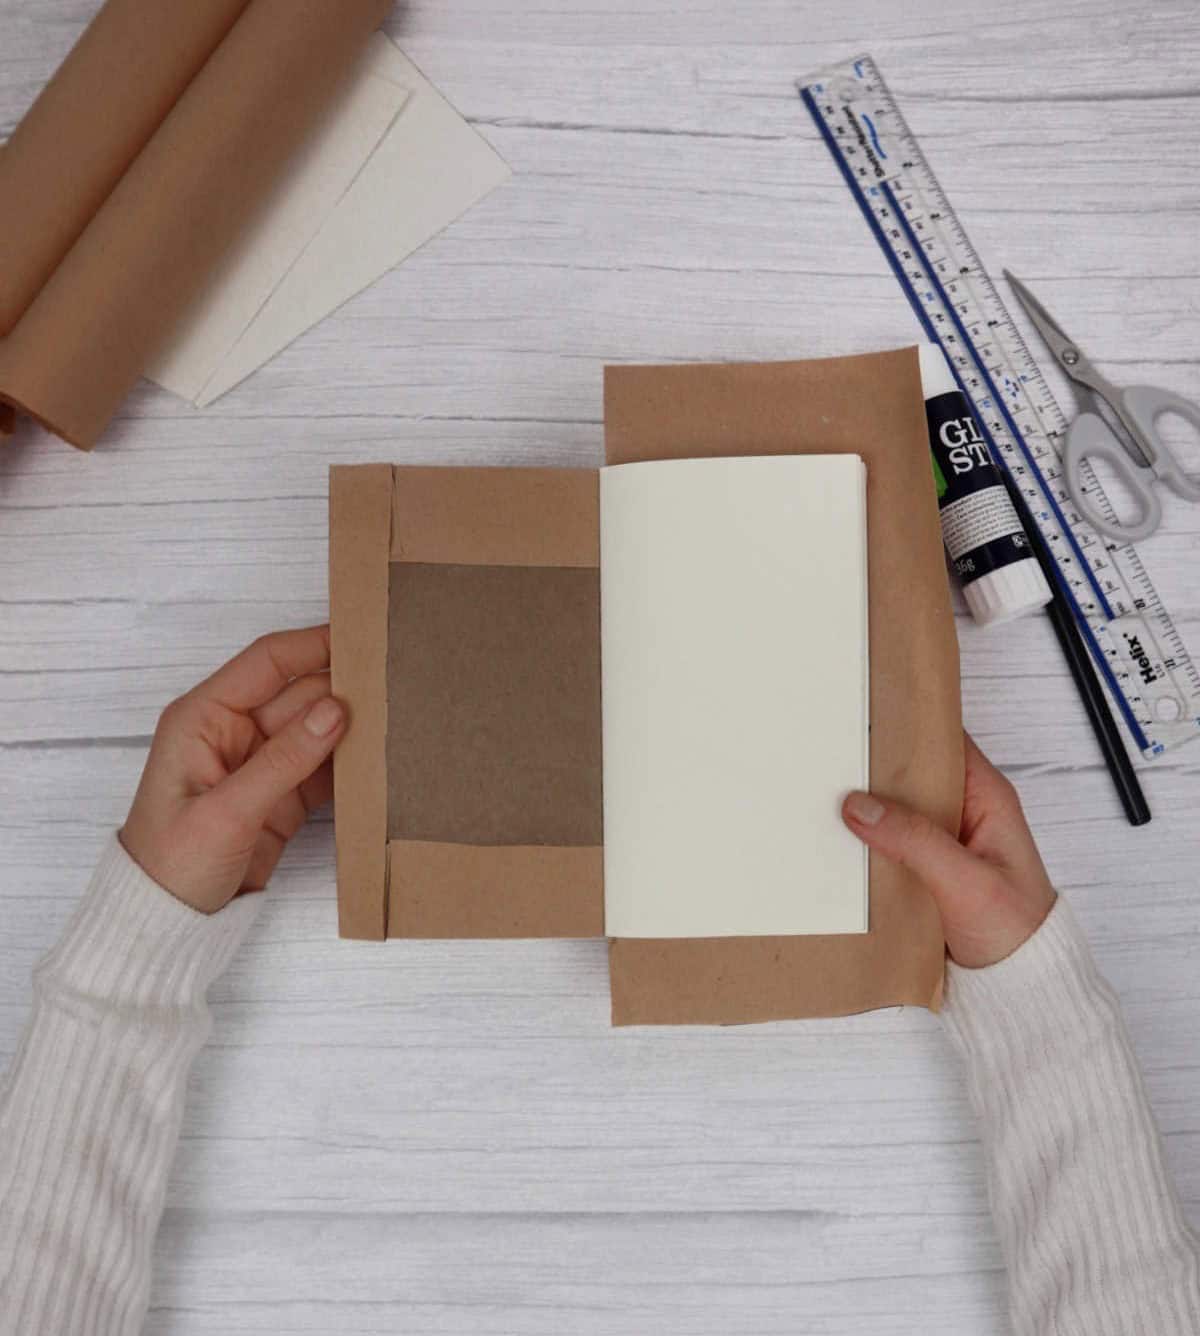
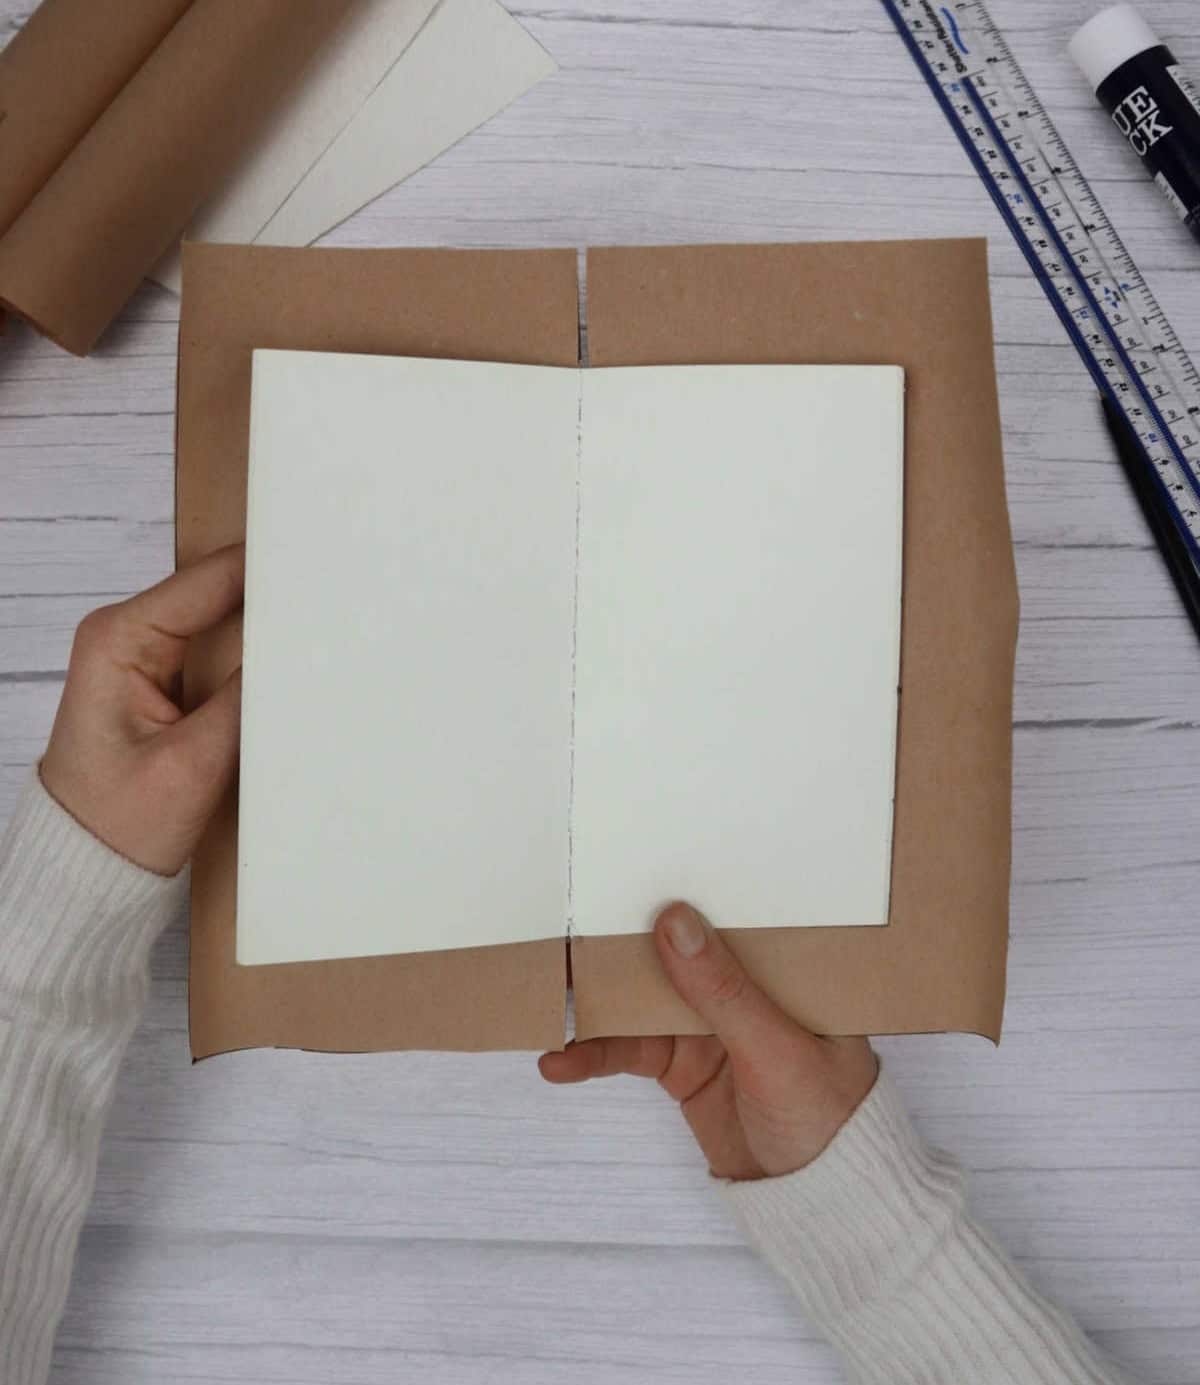
To add a professional touch to your notebook’s cover, apply a thin layer of adhesive along all edges of the craft paper. This will allow you to fold the edges inward and securely attach them to the cover. Ensure that the folds are crisp and creaseless to prevent wrinkles from forming or the cover from becoming loose. Follow this process for one side, taking note of the final result (illustrated above). Repeat the same procedure on the opposite side to complete the notebook’s cover.
Step 8
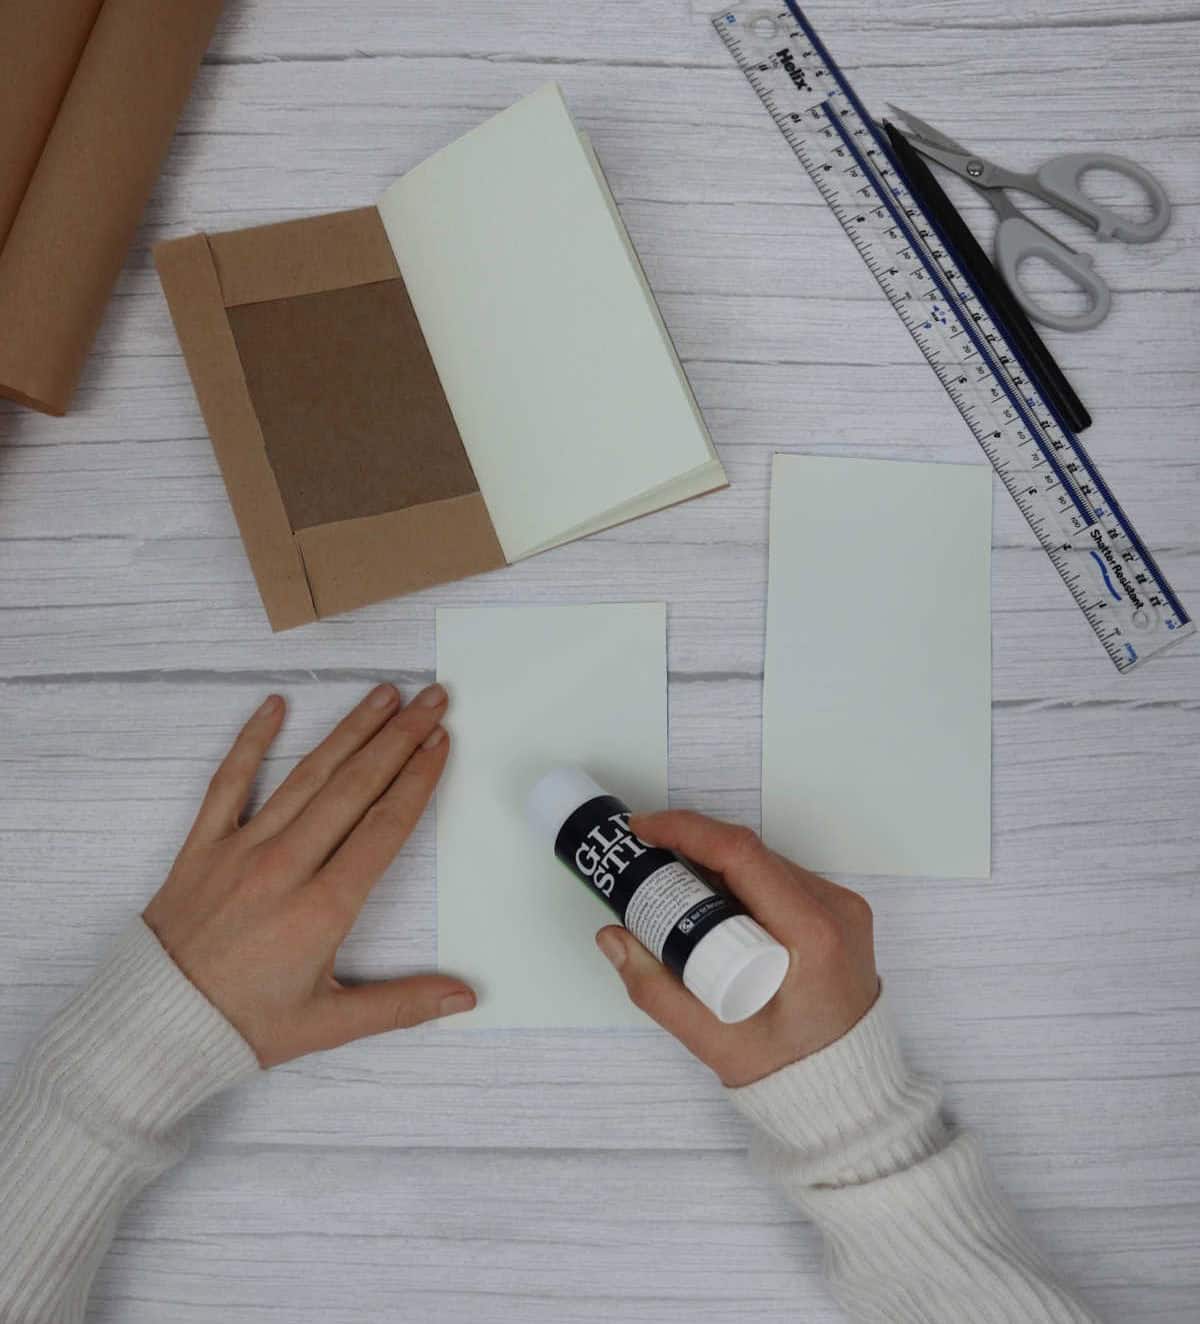
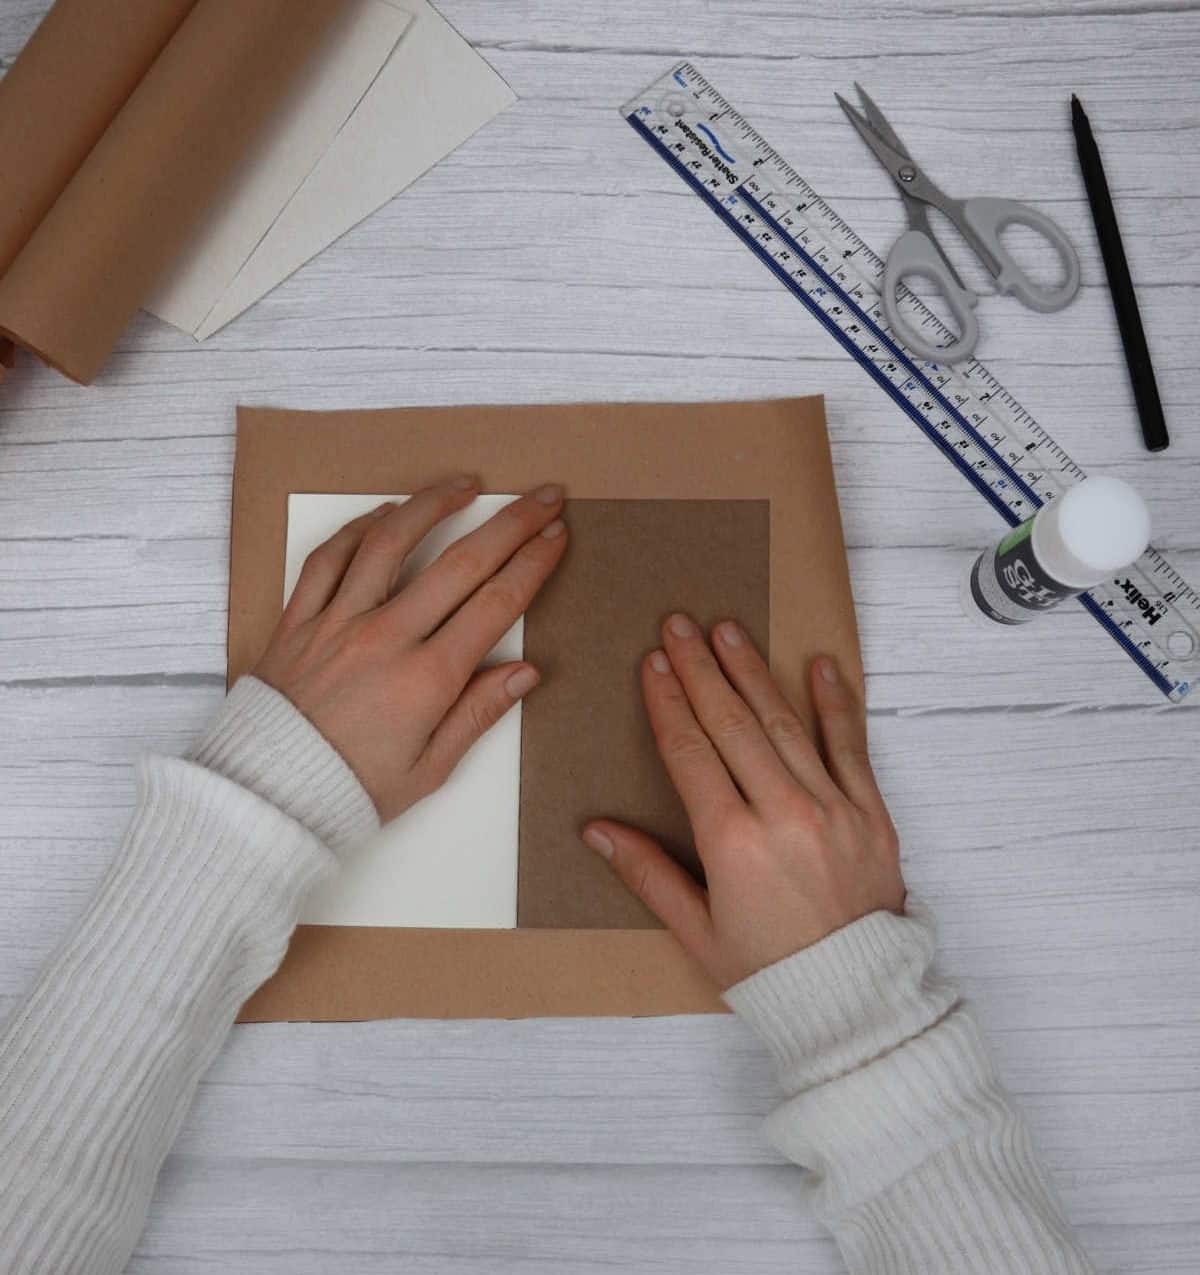
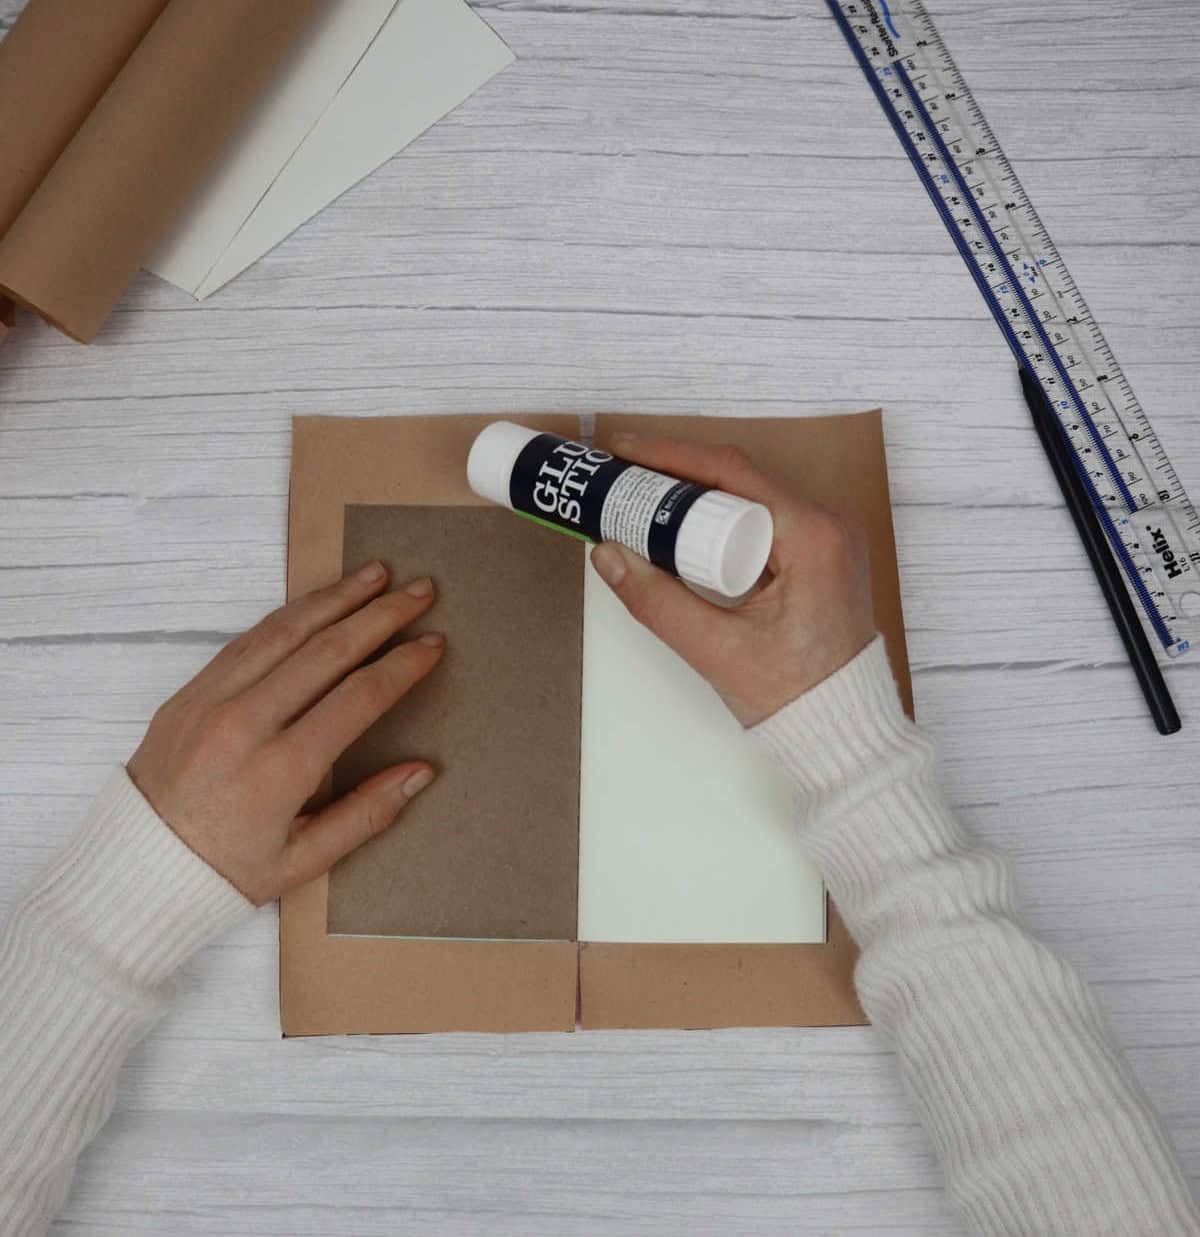
As you recall setting aside those two plain rectangles earlier, now’s the perfect time to put them to good use. If the folded cover of your notebook doesn’t quite meet your expectations, don’t worry – a simple fix is just around the corner. All that’s required is to apply a small amount of glue to one side and carefully adhere it to the notebook’s cover. This will not only conceal any unsightly folds but also smooth out the flap of the craft paper.
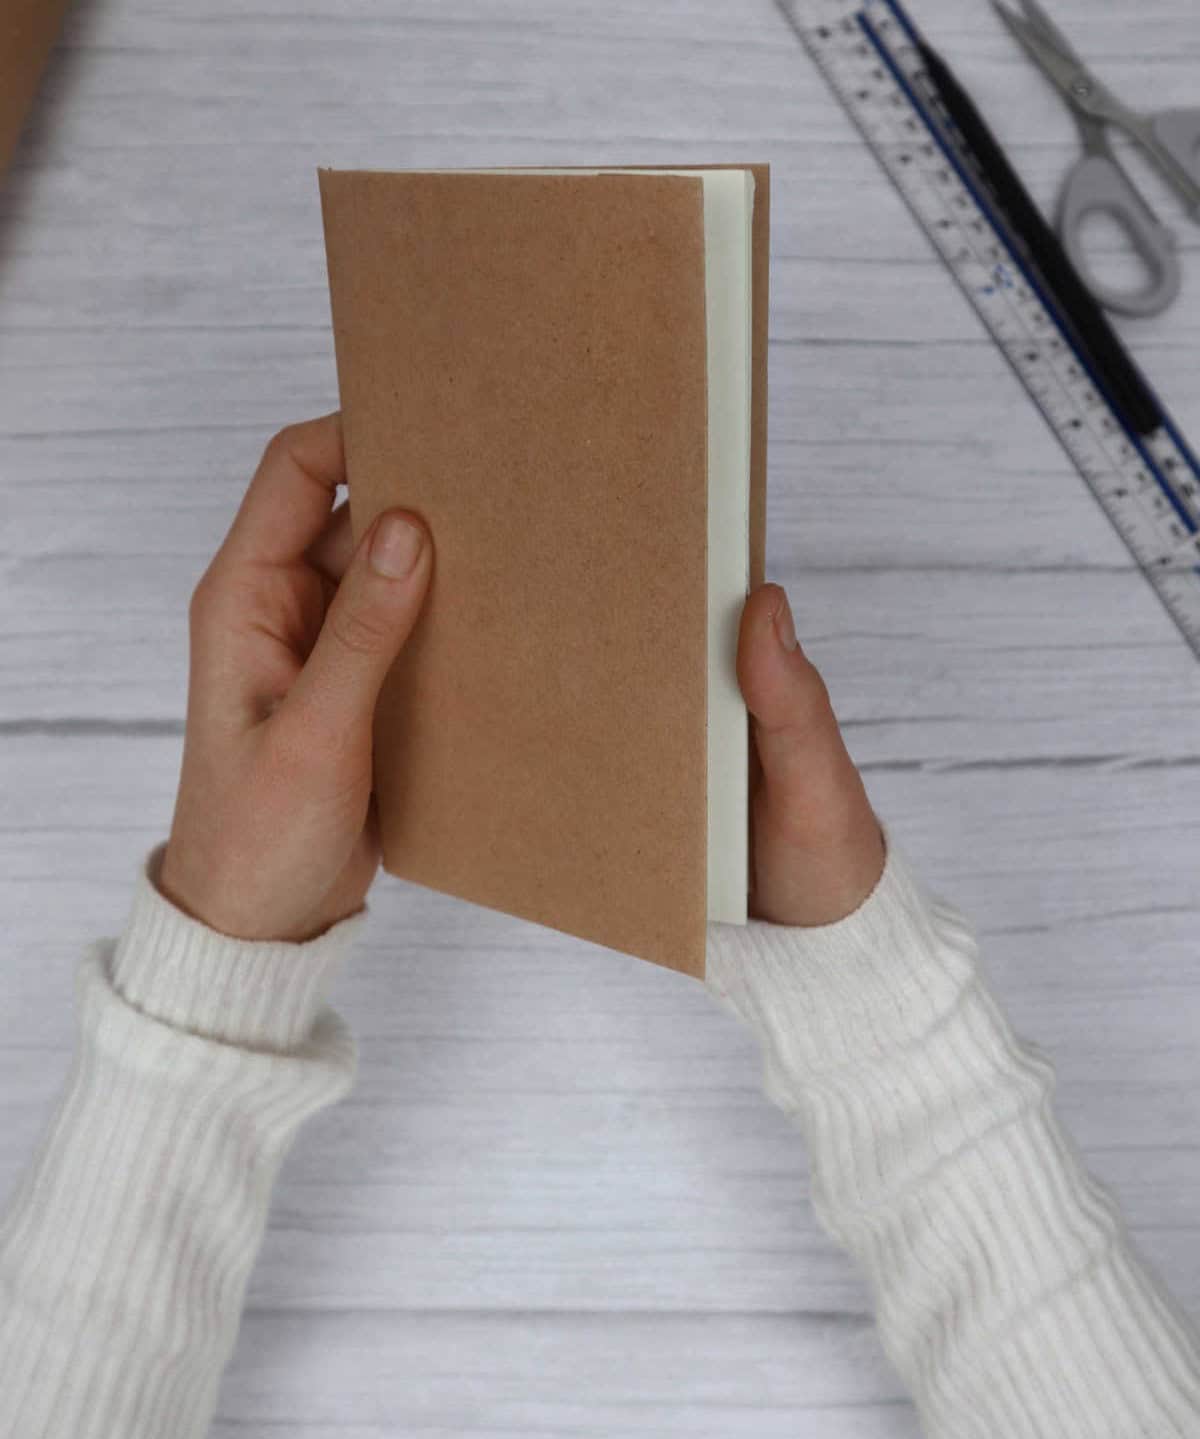
Once you’ve covered both sides, your notebook will be looking sleek and refined in no time. Feel free to get creative with your choice of color or pattern – the possibilities are endless. Whether you prefer a bold hue or a unique design, the end result will be a one-of-a-kind notebook that reflects your personal style.
Tools for Decorating the Notebook
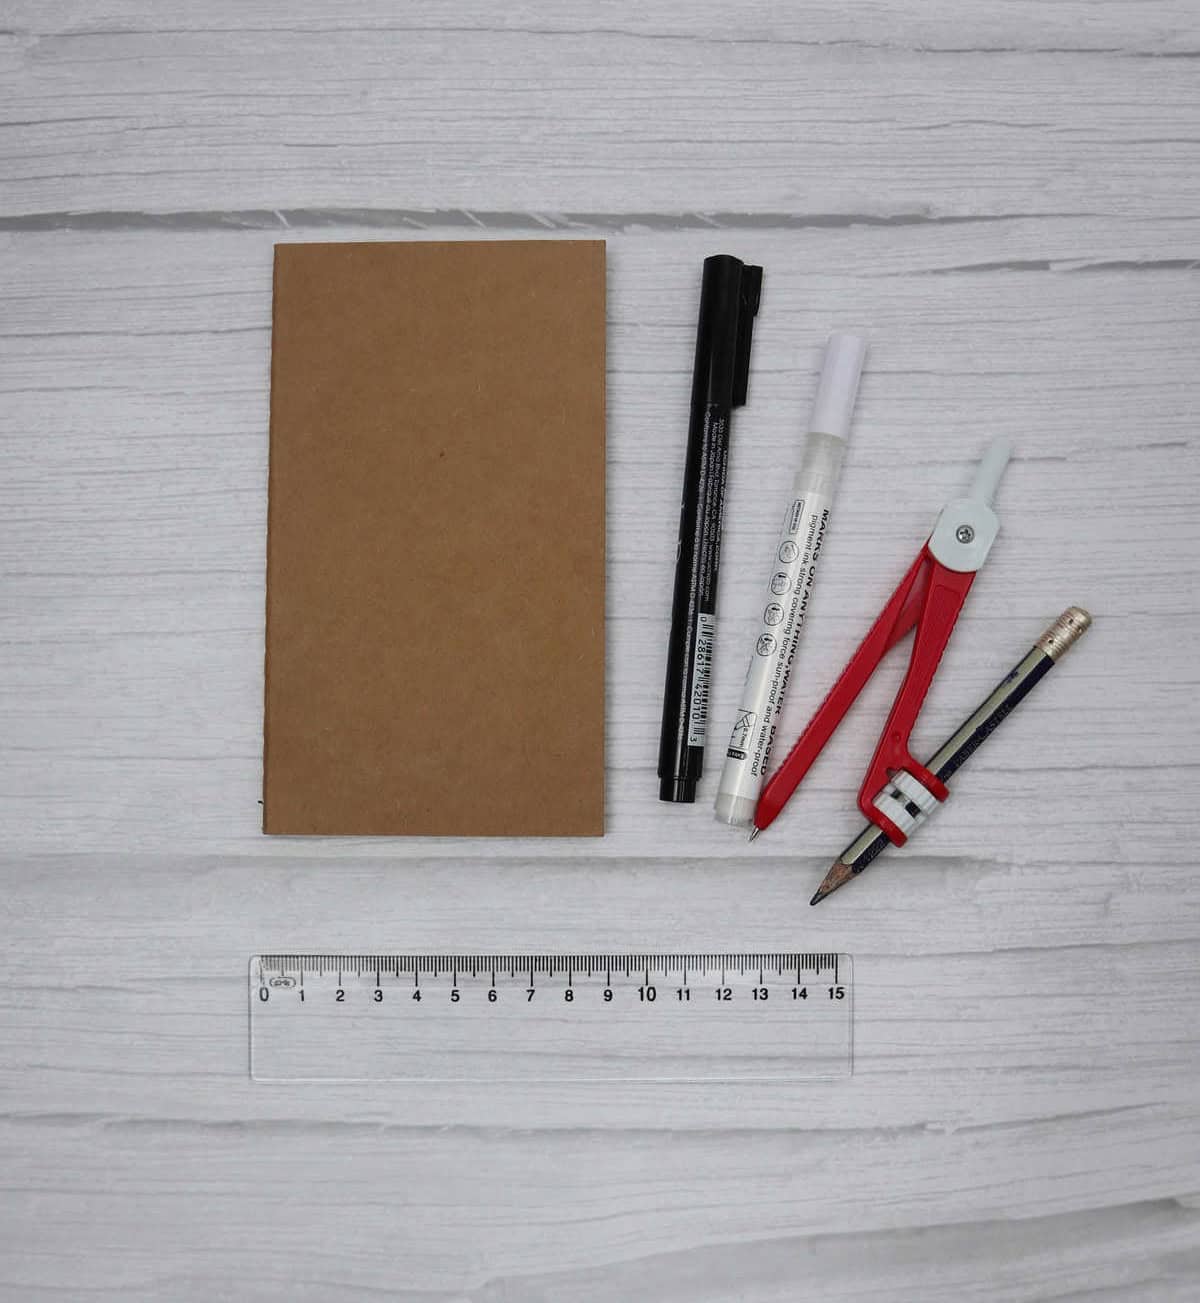
To elevate the design of your DIY journal, you’ll need to gather a few essential supplies. These will help bring your creative vision to life and make your journal cover truly unique. A ruler is an obvious must-have for any crafting project, allowing you to draw straight lines with precision. You’ll also need some permanent markers in various colors to add pops of color and personality to your design.
For added depth and dimension, consider incorporating a compass with a pencil, which will enable you to create intricate shapes and patterns. With these tools at your disposal, the possibilities are endless!
Step 1
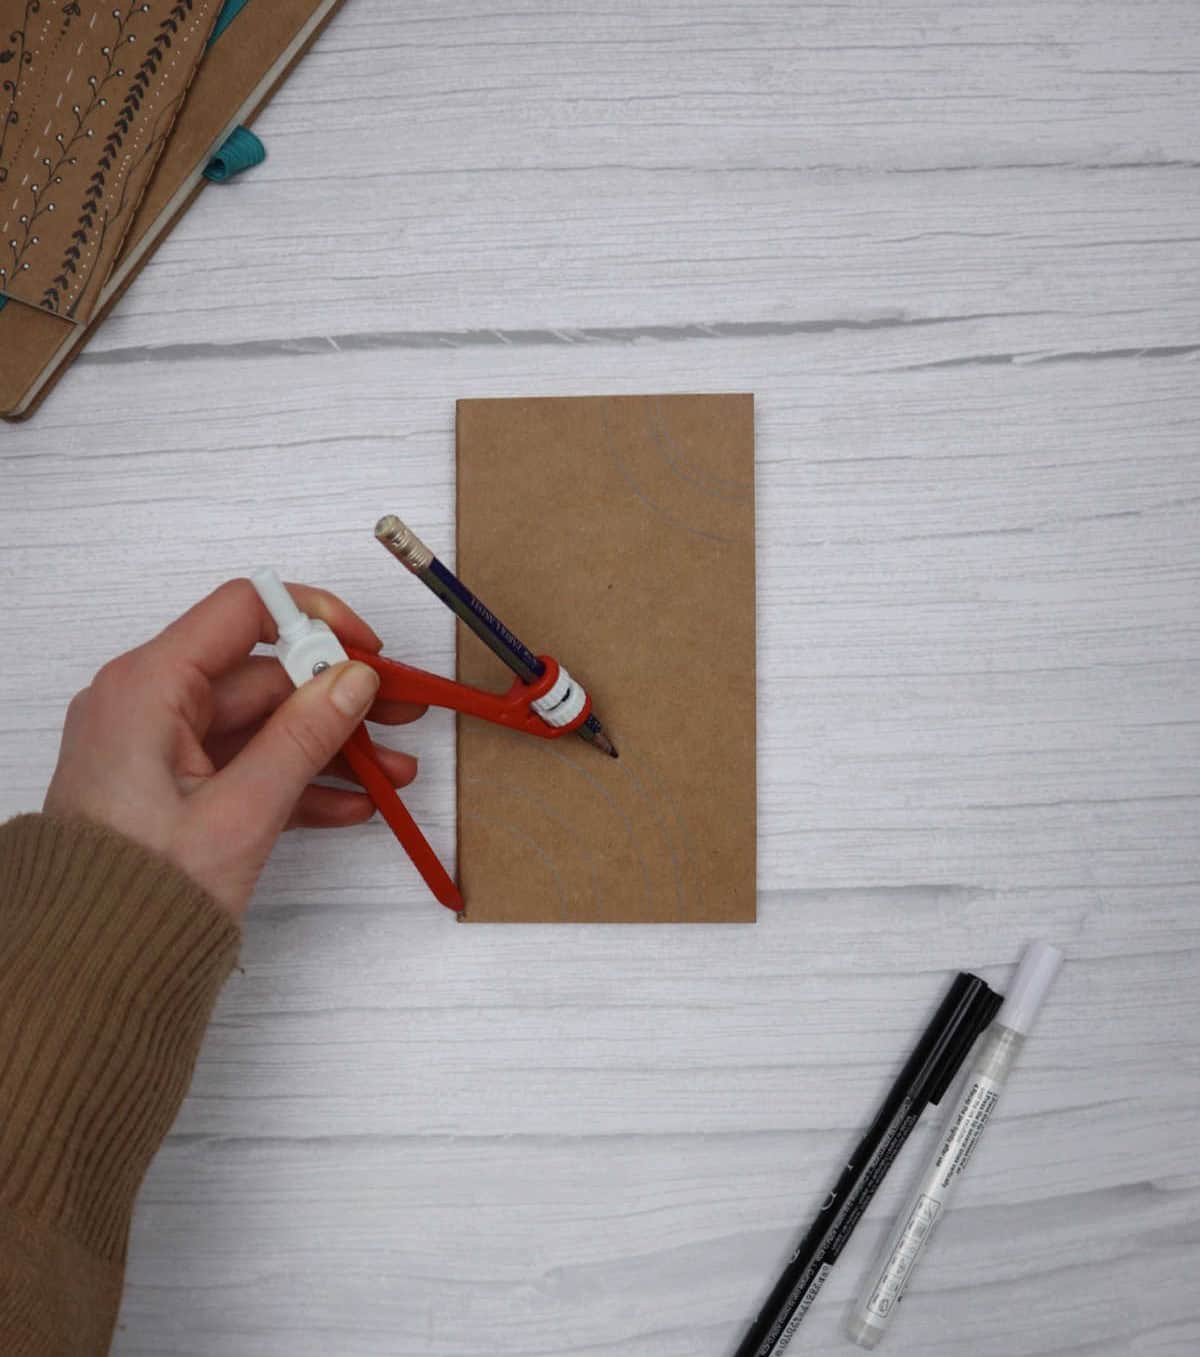
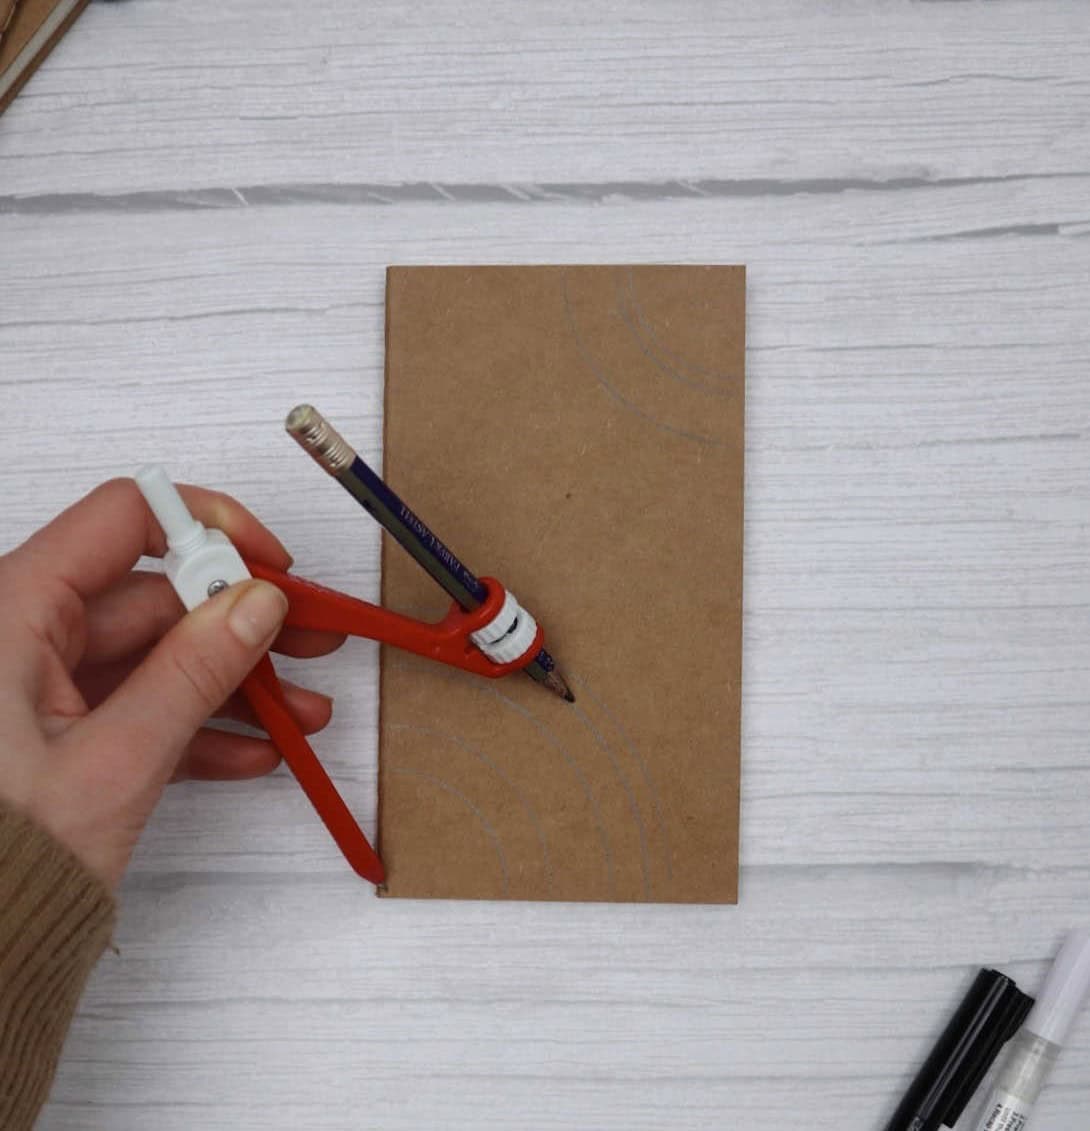
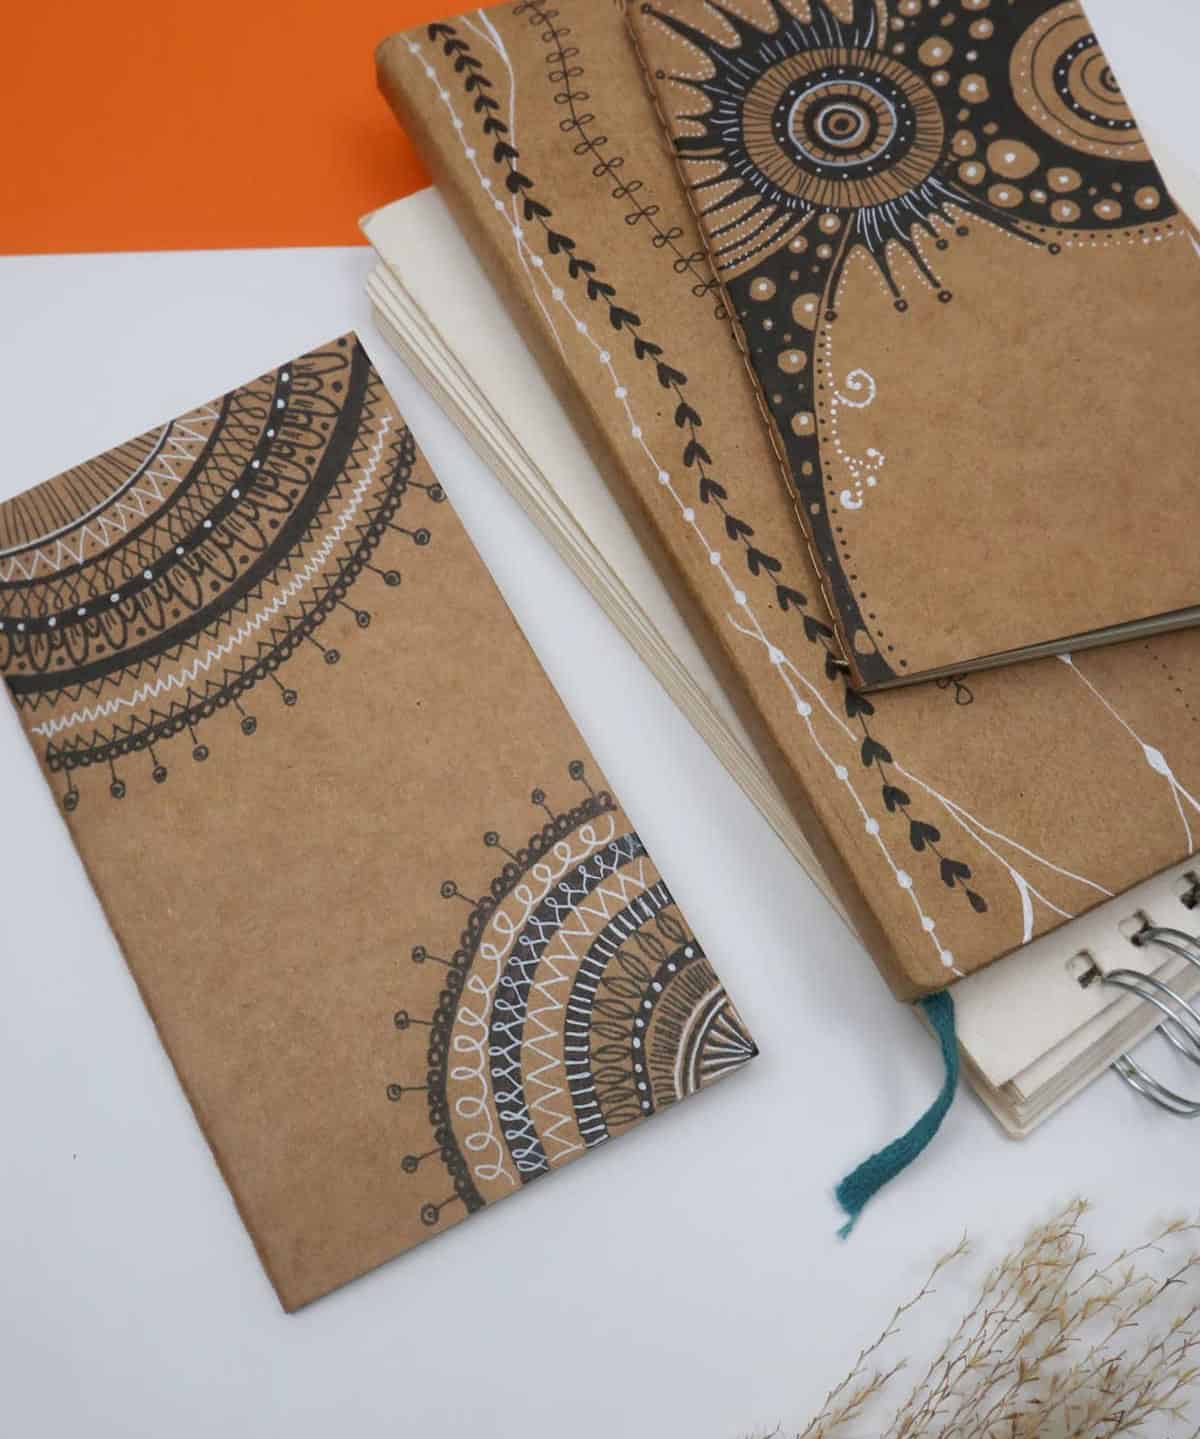
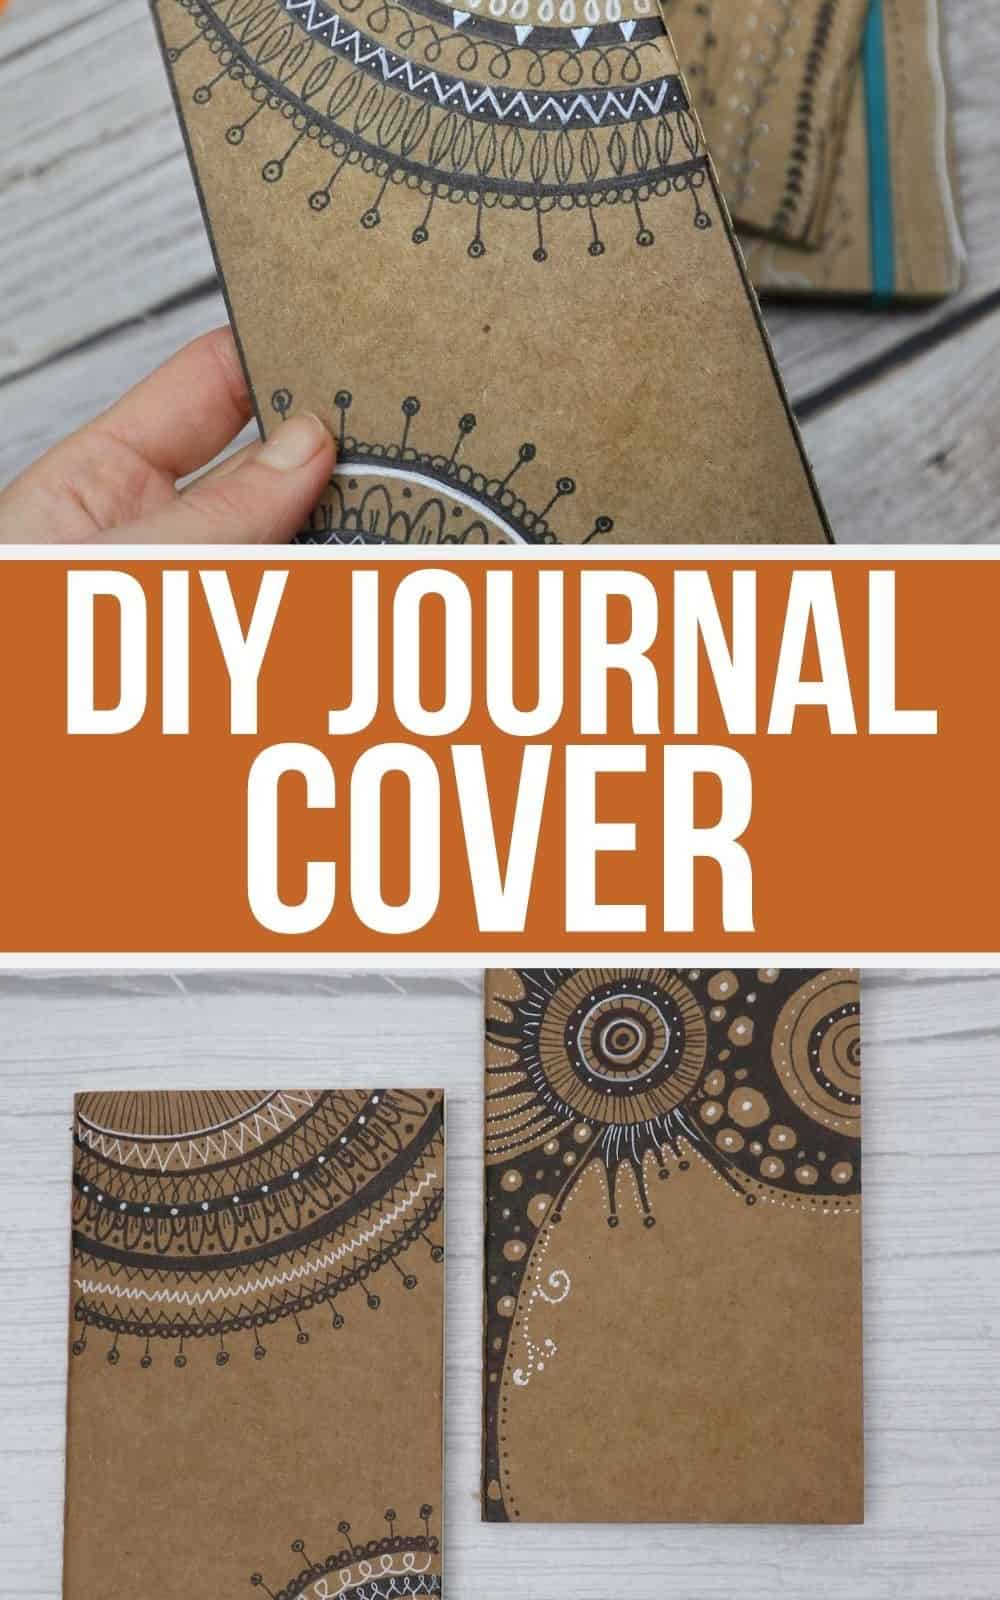
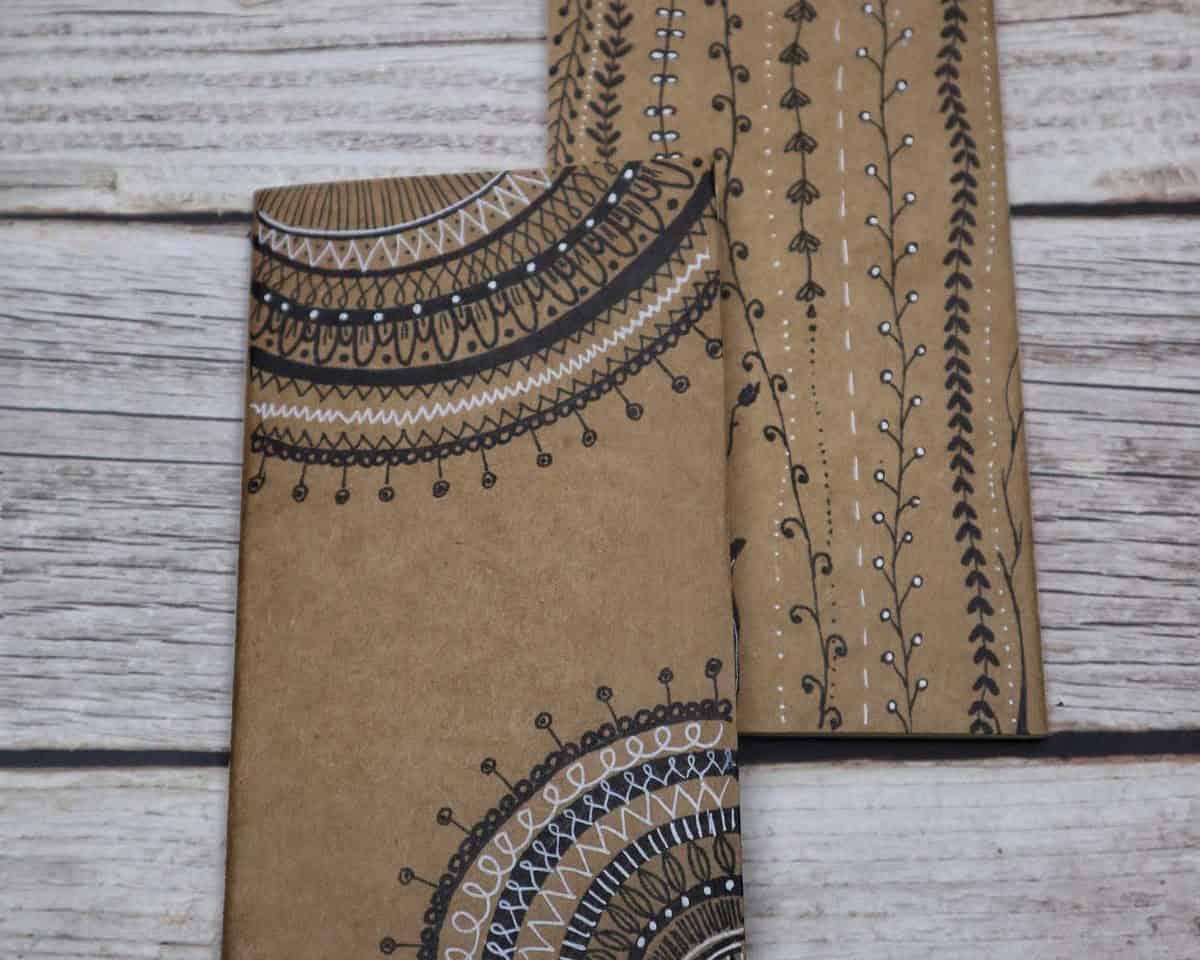
By combining mandala designs with zentangle-inspired doodles, this project offers a unique blend of styles. To achieve this look, simply use a mix of black and white markers – white, in particular, can add a nice contrast and make your design stand out even more. Begin by using your compass to draw the outline of your design according to your desired specifications.
Step 2
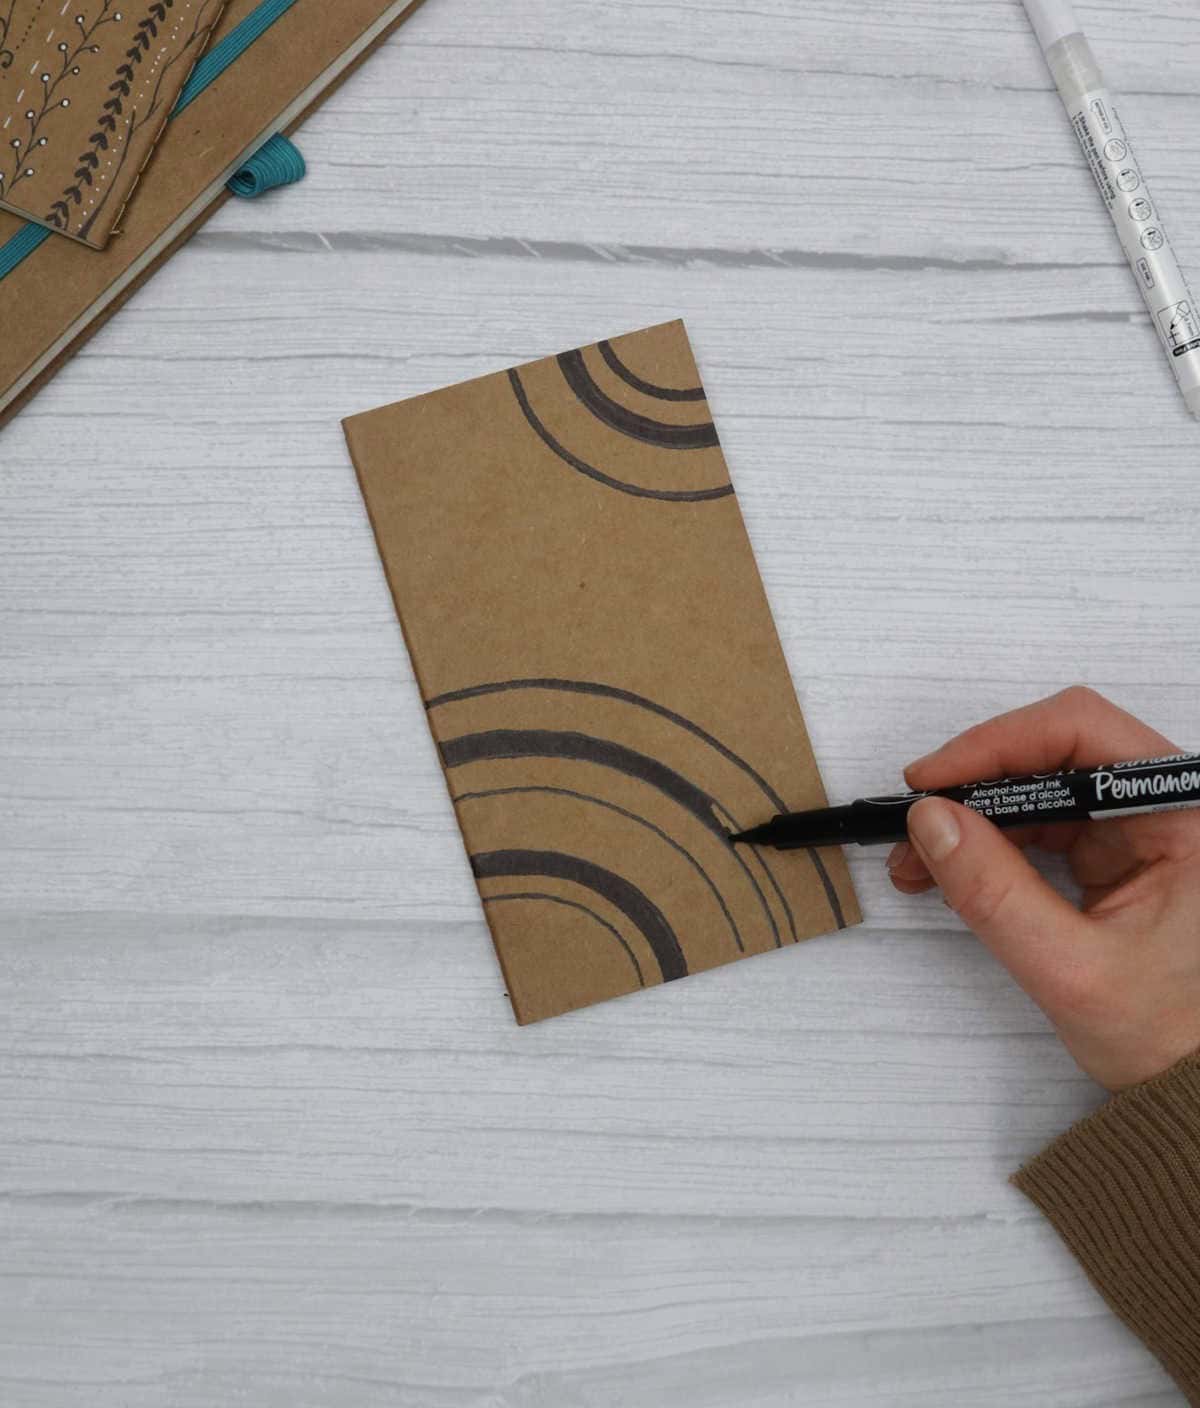

Transform the design of your DIY journal by filling in the space with black, white, or colored markers. For inspiration, browse through Pinterest’s vast collection of creative ideas. Alternatively, explore these 31 paper crafts for adults and make use of any leftover craft paper for your next project. With a beautifully designed cover, you’ll have a unique and personalized journal that can be used as a diary, tracker, or in countless other ways – the possibilities are truly endless!
Other Crafts You Might Like

In the realm of creative pursuits, there’s no shortage of innovative ideas that cater to both children and adults alike. From traditional crafts like making paper envelopes and bookmarks, to more modern projects such as crafting with paper plates or creating picture frames, there’s a world of possibilities waiting to be explored. For young girls looking to express their artistic side, 37 unique craft ideas can provide hours of entertainment.
Meanwhile, for teenagers seeking to tap into their creative potential, 20 exciting projects await. And let’s not forget about the adults who want to get in on the fun – a plethora of crafts designed specifically with them in mind are just a hop, skip, and jump away.
DIY Journal Cover
With just a few simple materials and 20 minutes of your time, you can transform plain journals into unique and eye-catching masterpieces. Say hello to the world of DIY journal covers! At CraftsyHacks.com, we’re passionate about sharing creative ways to give new life to old things. In this case, we’ll show you how to turn a basic journal into a one-of-a-kind work of art that reflects your personal style. So, grab some paper craft supplies and let’s get started!
Equipment
To ensure uninterrupted work, it’s essential to have the right tools at hand. For instance, having a reliable glue stick like PenGlue, as well as permanent markers, scissors, and a ruler, can greatly facilitate your creative process. Additionally, incorporating a compass with a pencil allows for precise and accurate measurements, ensuring that your projects turn out exactly as you envisioned them.
Meanwhile, preventing your screen from going dark is crucial to avoiding distractions and staying focused. By keeping these essentials within reach, you’ll be well-equipped to tackle even the most demanding tasks without interruption.
Materials
When it comes to jotting down ideas or recording notes, many people reach for familiar tools like Kraft paper, old notebooks, and plain pieces of paper. While these options can be effective, they often lack a certain je ne sais quoi – a unique quality that sets them apart from the ordinary.
Instructions
To kick off your DIY journal project, start by preparing your materials. Begin by cutting out a rectangular shape from craft paper, leaving about an inch of border around all four sides for later use. Set it aside for now. Next, grab some plain craft paper and measure the cover of the closed notebook. Cut two identical rectangles to fit the cover, setting them aside as well. Place the notebook over the brown craft paper once more, securing both surfaces together.
Using scissors, cut a central line along the top and bottom edges of the paper, stopping just short of where the spine begins. Then, fold the edges inward, wrapping your journal like a school notebook, and secure them in place along the inside of the notebook – be mindful not to stick the pages together. Once you’ve completed this step, set aside the wrapped cover.
Next, adhere the two rectangles you prepared earlier over the folded edge of the cover, effectively covering any unsightly creases and adding a polished finish to your DIY journal’s cover. The final step is to unleash your creativity and design the cover. Let your imagination run wild as you bring this unique piece of art to life.