Transforming young minds through creative expression is a joy, and what better way to do so than by engaging preschoolers in delightful animal art projects? These interactive activities are designed to foster drawing skills while sparking imagination and creativity. With a diverse range of creature crafts featuring beloved animals, there’s something for every little animal lover!
Whether you’re looking for inspiration or seeking new ideas to share with your own mini-artists, I invite you to explore these engaging and fun activities.
Ladybug Craft
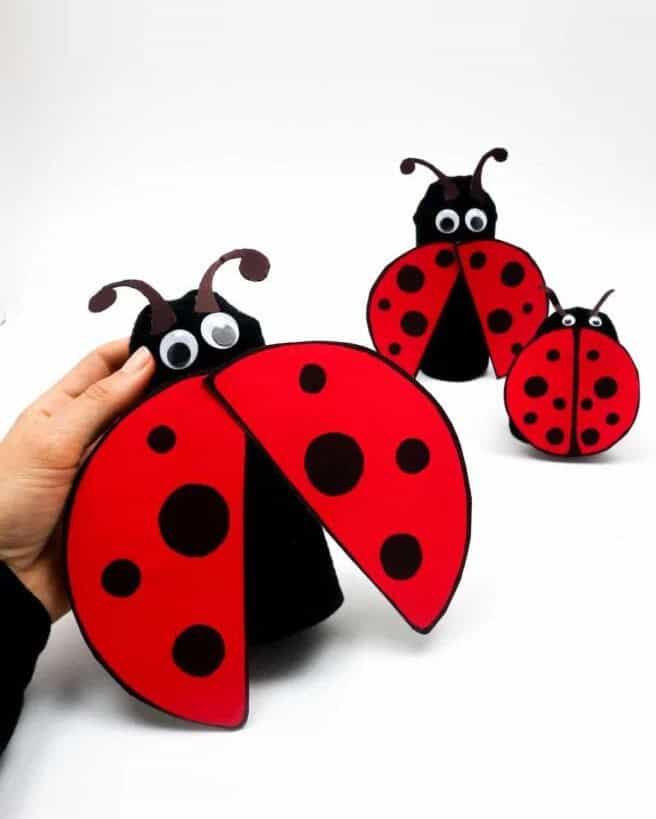
Gather a collection of materials, including toilet paper rolls, red construction paper (for added durability), a black marker, scissors, hot glue, and an old pair of black socks. Don’t forget the googly eyes and a compass or large-rimmed glass to shape the wings. Begin by slipping one sock into the toe of the other, then slide the combination over the tube while your little ones decorate the paper with polka dots. Once complete, use a chosen utensil to create a circular shape.
Cut out the wings and attach them using hot glue, followed by adding the googly eyes and allowing the adhesive to dry. This engaging project is suitable for kids of all ages, including older children who will appreciate the creative process.
Paper Plate Piggie
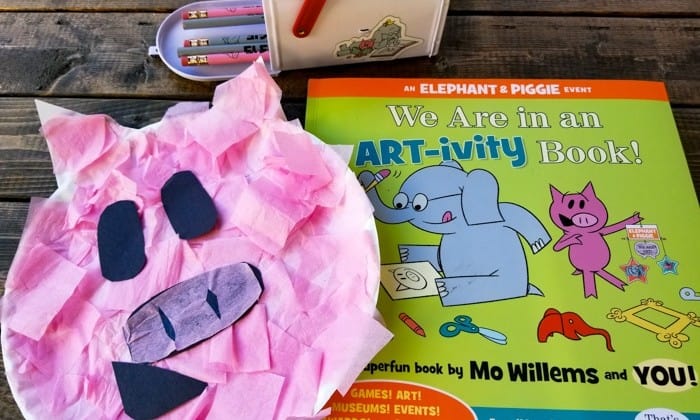
Transforming everyday objects into adorable animal friends is a delightful endeavor that can be enjoyed by children of all ages. One such creation that never fails to bring a smile is the humble pig plate craft. To get started, gather an assortment of materials including pink tissue paper, black construction paper, paper plates, glue, and scissors.
As you guide your preschooler through this fun and engaging activity, they’ll have the opportunity to hone their fine motor skills by cutting squares of tissue paper while you work on bringing the pig’s facial features to life. Once all the elements are in place, it’s time to assemble our porcine friend and admire the fruits of our labor!
Fish Craft
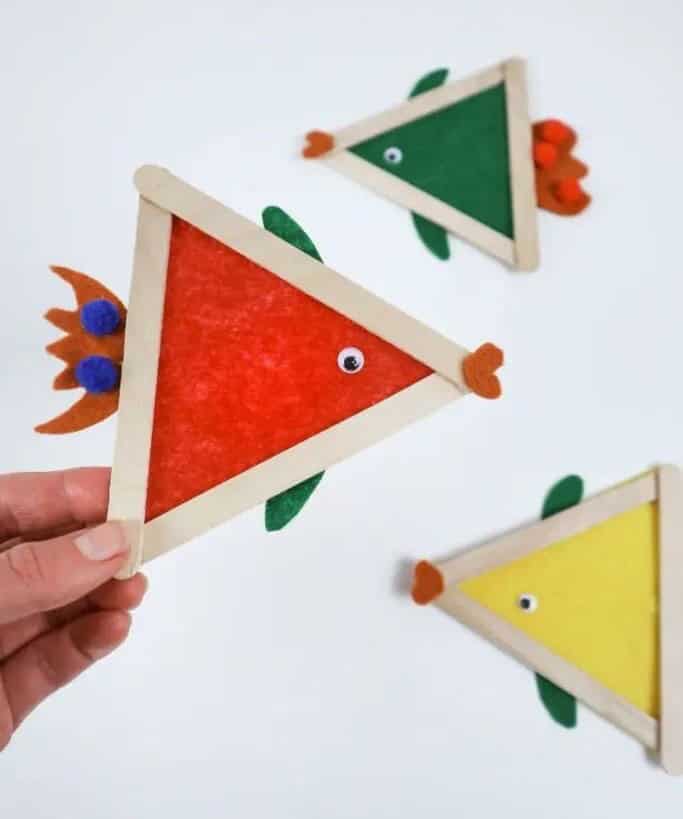
A classic blog post favorite is our ‘Complete Fish Craft’ tutorial, which has been delighting readers for some time now. To recreate this engaging project at home, you’ll need just three simple materials: felt squares, popsicle sticks, and googly eyes. This activity not only makes for a fun and creative experience but also lends itself well to educational purposes, such as exploring the life cycle of a fish, following step-by-step instructions, and more.
Paper Plate Lion Craft
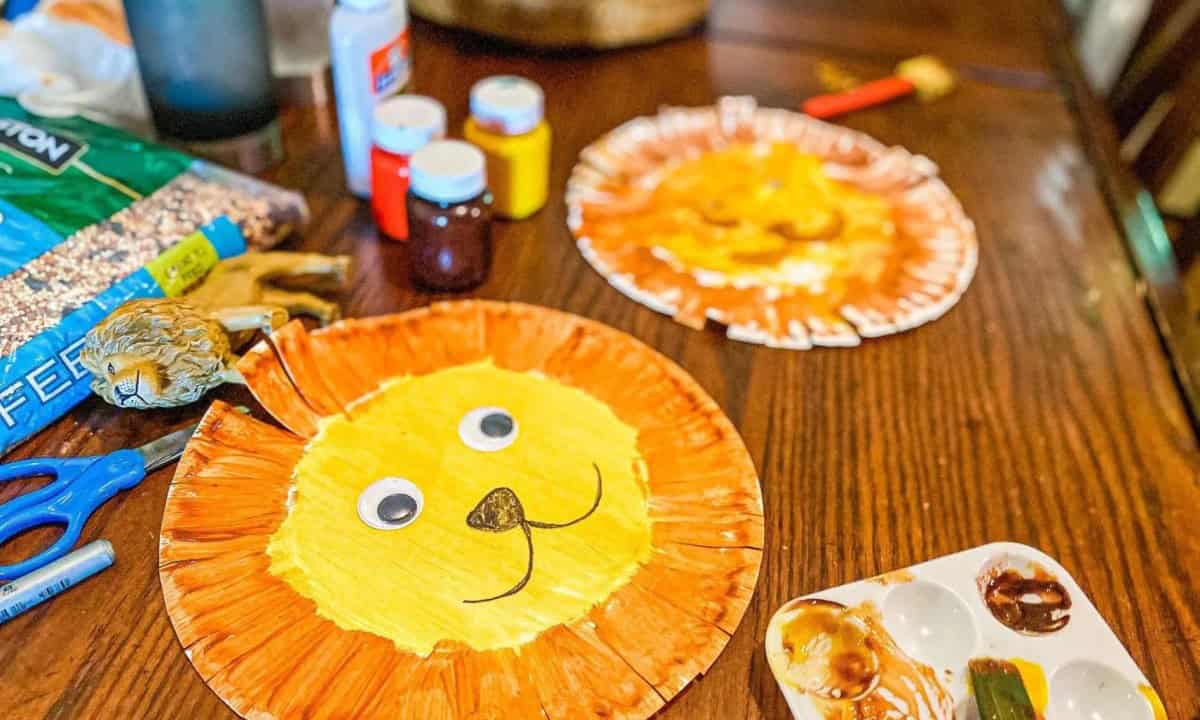
Replace traditional pig plates with a roaring good time using watercolors! Paint your lion plate’s outer bumpy surface a light brown and inner circle a vibrant yellow. Once dry, add googly eyes and draw on a nose and mouth. This unique craft project combines art and imagination, allowing kids to unleash their creativity. With just a few simple materials like paper plates, black crayons, and watercolors, you can create a fun and quirky zoo animal plate that’s sure to delight your little ones.
Fingerprint Glass Magnets
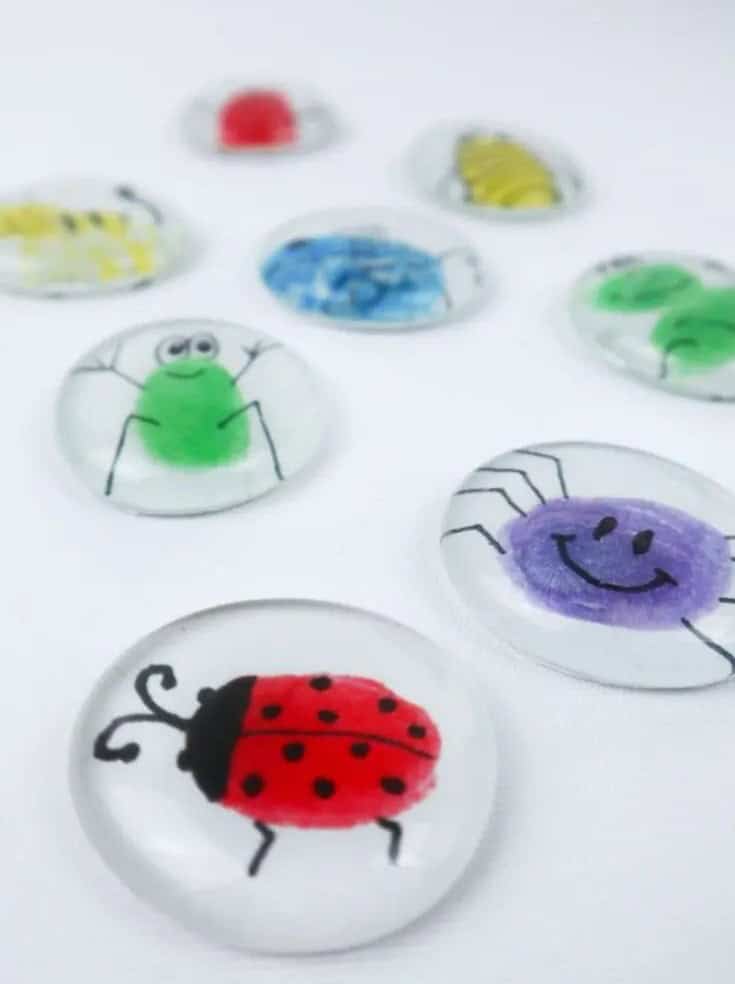
We’ve had a blast with our glass magnets project, which involves a multi-step process that’s perfect for kids of all ages. It starts with creating fingerprint art using little hands and their favorite ink pads – we swear by this set. Once the prints are dry, it’s time to get creative! Use a high-quality pen to add some animation, making sure not to smudge the artwork. Next, apply an even coat of mod podge to the gem base and carefully place it onto the image.
When the glue is fully dry, you’ll know because it turns clear – and that’s when the magic happens. This fun craft is a hit with kids, and we’re confident your little ones will love making their own glass magnets.
Patriotic Eagle Craft
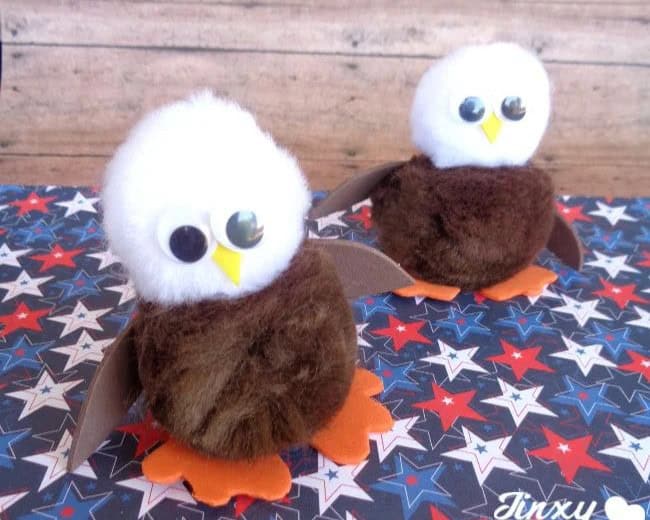
This adorable eagle craft is an excellent way to engage little ones in creative play while developing their fine motor skills. To make it safer for children, consider using a reliable craft glue, but feel free to opt for a hot glue gun if you’re comfortable with its use. Begin by cutting out the necessary body parts from orange, brown, and yellow foam sheets.
Once these components are prepared, assemble the craft by attaching a brown pom-pom to the feet, followed by a white pompom on top of the brown one, and finally add the yellow beak, googly eyes, and brown wings. With a few simple steps, you’ll have created a charming eagle that’s sure to delight!
Fish Printable Bookmarks
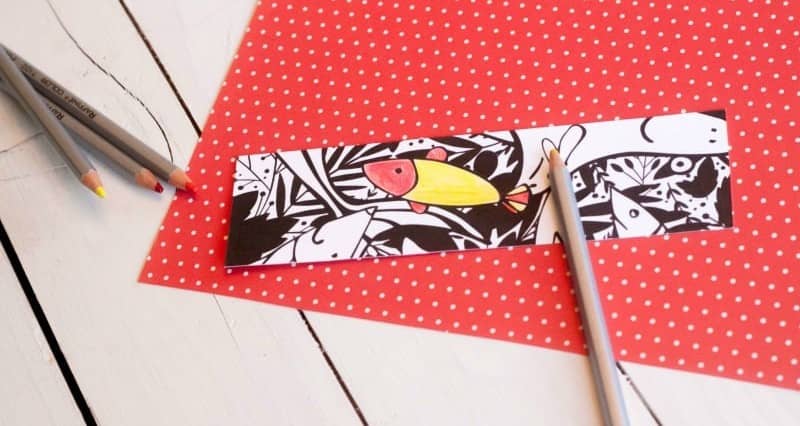
Transform your learning experience with a touch of creativity! For a low-key project, consider printing out fish bookmarks and letting kids color them. This activity is great for fostering their artistic side while also promoting fun learning. If you’re looking to make it more durable or add an extra layer of sophistication, laminate the printable template once complete.
You could even take it to the next level by punching a hole at the top and adding a tassel for a truly unique and memorable experience.
Handprint Chicken Art
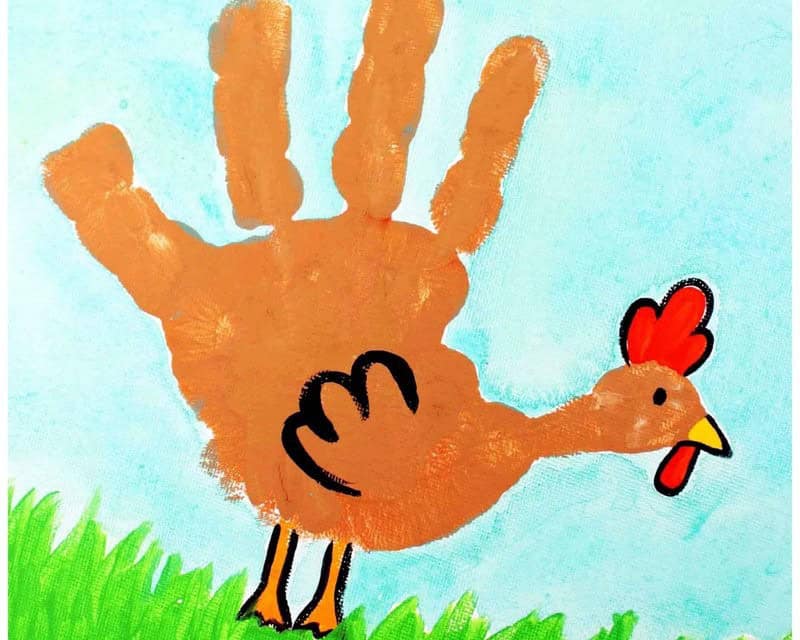
For younger kids, creating handprint animals is an excellent way to engage their senses and develop their artistic skills. One of the simplest yet most enjoyable projects is painting a chicken! To get started, paint your child’s hand brown and have them place it on the page (you can use a pre-colored or blank sheet). Once the paint is dry, let their creativity shine by adding details like eyes, mouth, and gizzard. Finally, outline the features with black to bring the chicken to life.
Painted Bumble Bee
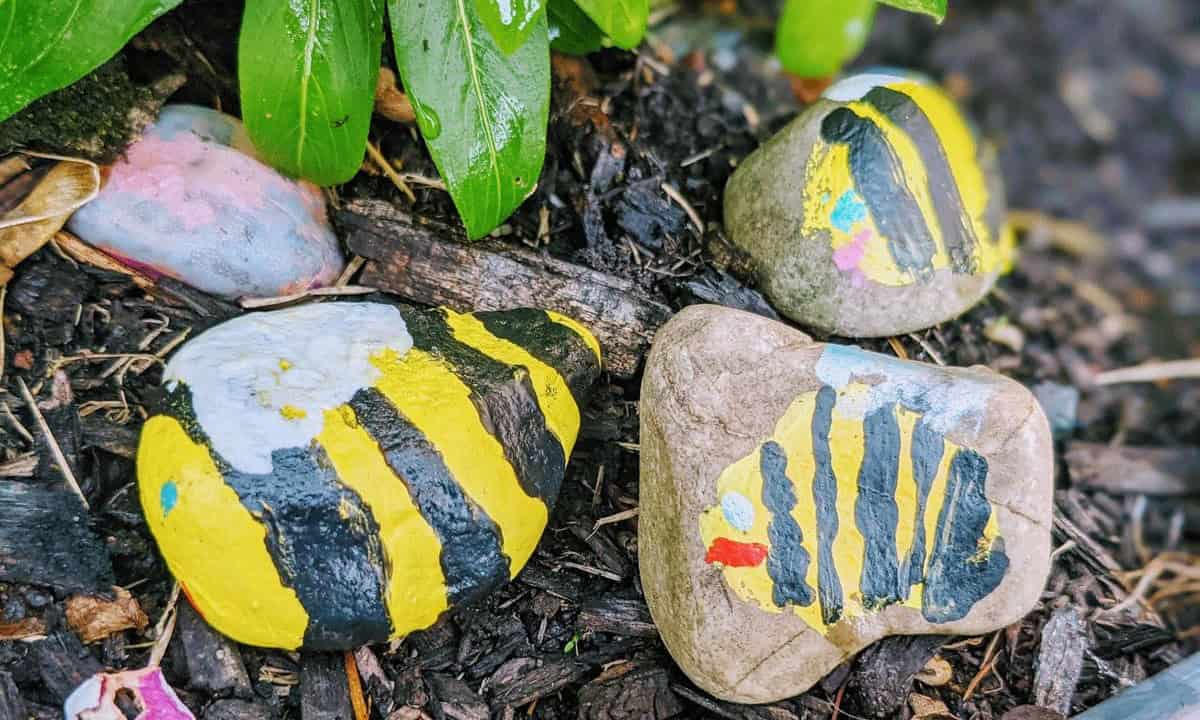
Painting bumble bees can be a fun and creative way to teach children about their importance in our lives. A simple yet effective approach is to paint them on rocks and place them in the garden, allowing your kids to visualize the role they play in plant growth. To ensure the paintings withstand the outdoors, grab acrylic paints, Mod Podge, and a weatherproof spray.
As you create these miniature masterpieces together, take the opportunity to explain to your little ones how bees contribute to our plants’ health and well-being. Once complete, place the painted rocks near living plants or in garden beds, transforming an art project into a valuable lesson plan.
Owl Paper Bag Puppet
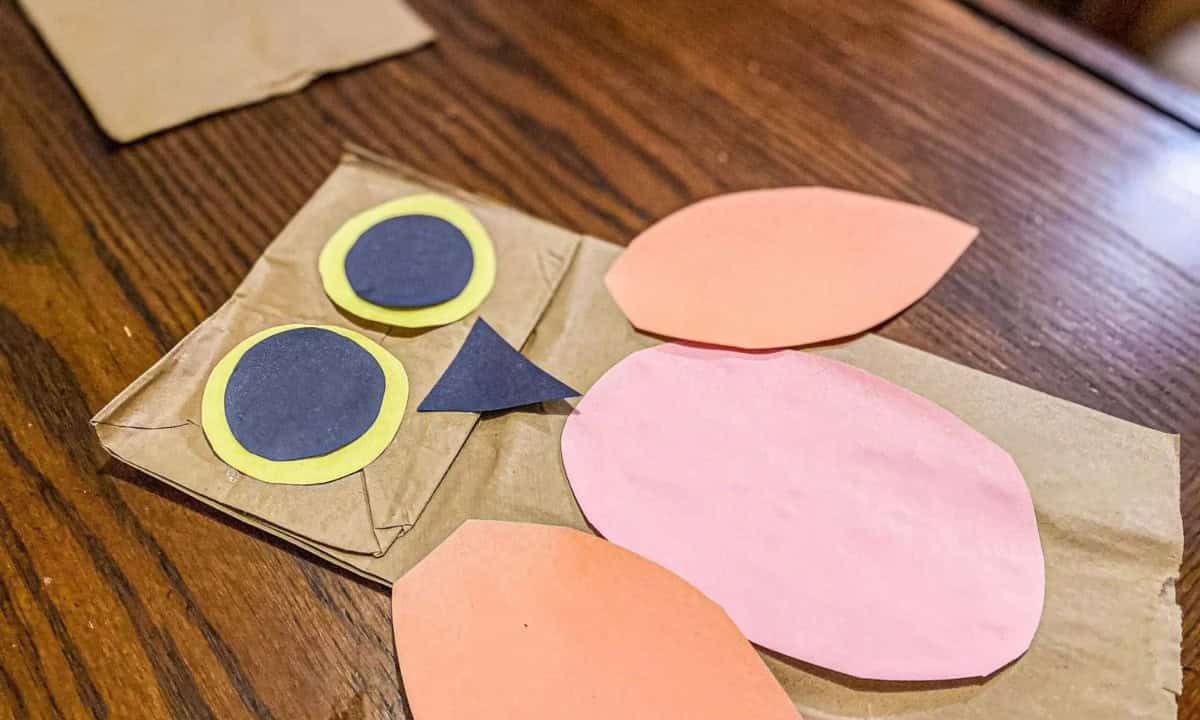
Paper bag activities offer a delightful creative outlet for children, reminiscent of paper plate projects. To create these engaging animal puppets, you’ll need glue, scissors, and black construction paper as the foundation. The remaining colors can be chosen by the artist’s preference. This project not only fosters creativity but also serves as an excellent shape activity for kids.
To bring this craft to life, gather four circles – two slightly smaller and another pair slightly larger than the first, a triangle for the nose, an oval for the belly, and two almond-shaped wings. Assemble all the pieces along the bottom of the paper bag’s side to complete the puppet. Your little ones will surely enjoy these fun crafts designed specifically for 3-year-olds.
Paper Mache Dino Bank
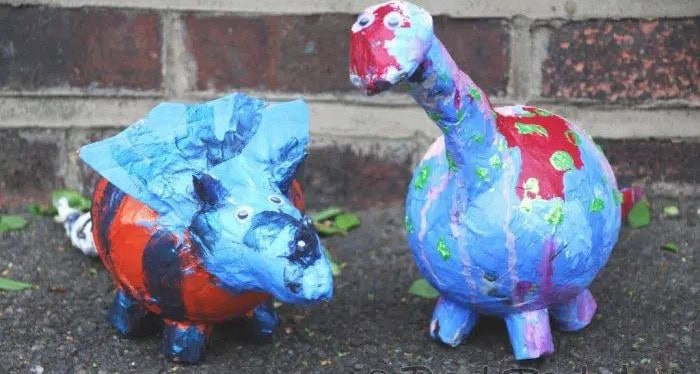
Create your very own dinosaur using everyday materials! For those who prefer a DIY approach, you can construct the dino yourself by combining balloons, paper mache (made from 1 part flour mixed with 2 parts water), and newspaper. The balloon serves as the base for the body, while the newspaper is used to shape the other body parts after several trials and errors. Once the construction is complete, have the kids assist you in applying strips of paper mache to the body.
After everything has dried, it’s time for the kids to unleash their creativity by painting to their hearts’ content. Once the paint is dry, simply cut a small slot and trap door, pop the balloon, and voila! The dino is ready to be removed and admired.
Natural Art Animal Pictures
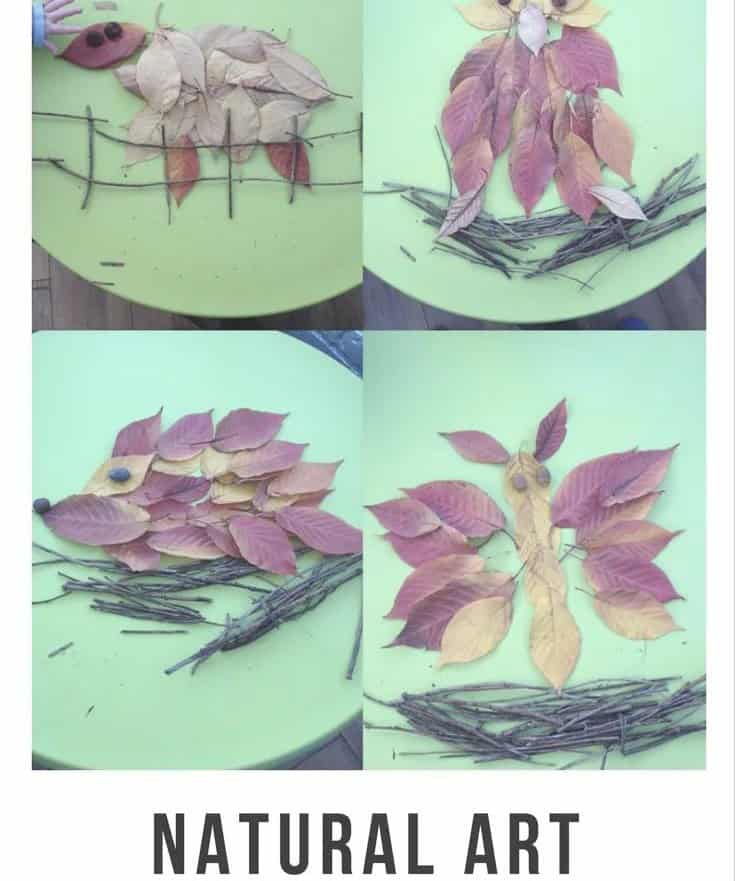
Begin by embarking on a nature walk, carefully gathering any seasonal items that can withstand the creative process. Once you’ve collected your finds, use them to create a visually striking composition. If some of your pieces are particularly delicate, secure them to a sturdy base, such as a piece of paper or cardboard, to prevent damage during the gluing process.
Seashell Craft Dog Magnet
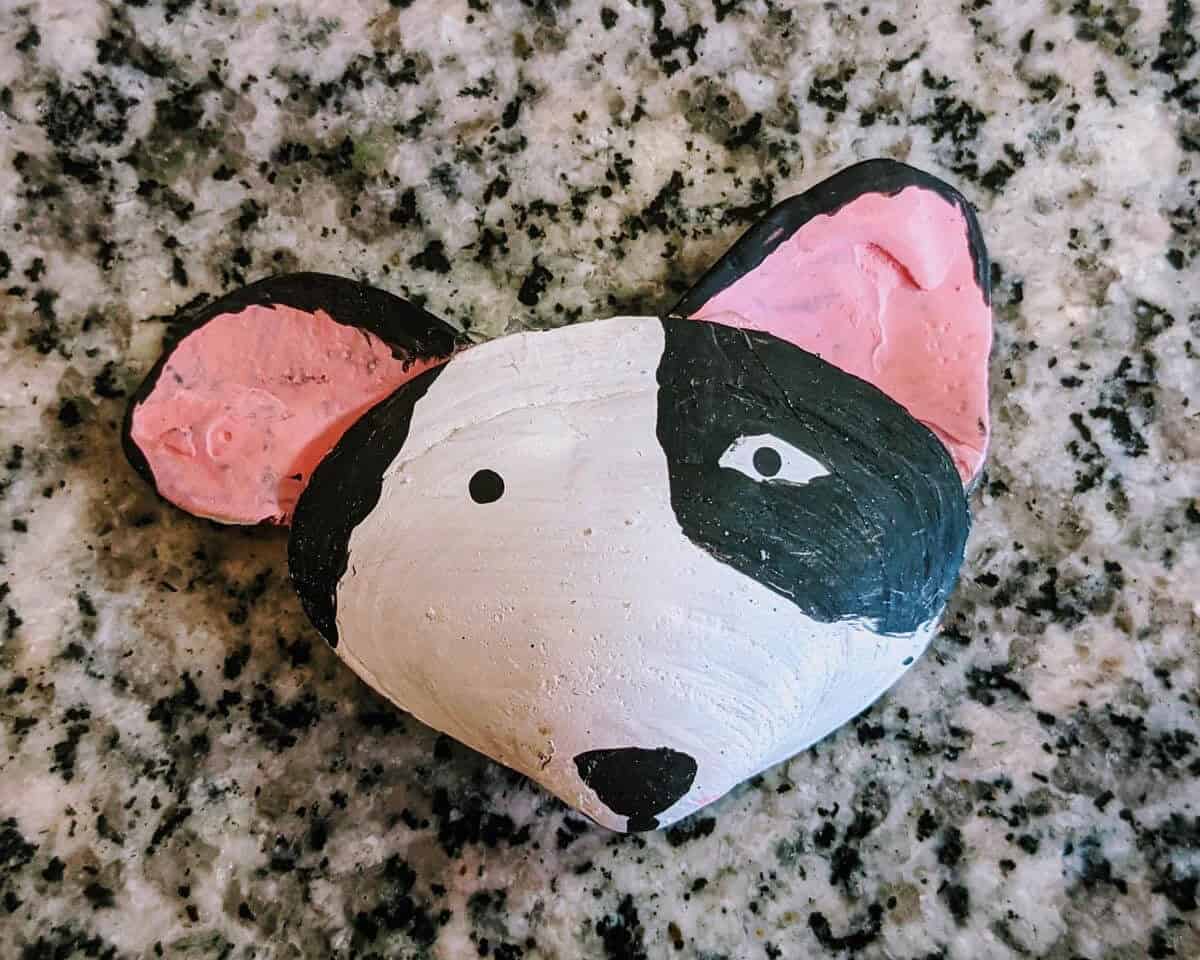
When working on this project, it’s essential to safeguard the surface you’ll be working on as we’ll be using paint and hot glue. To achieve the desired look, opt for clam shells for the face and oyster shells for the ears. The lighter in weight, the better, as this will ensure a smooth finish. Paint the exterior of the shell with your chosen dog breed, then coordinate the color by painting the oyster shells and attaching them to the face using hot glue.
On the inside or back of each shell, apply a strong magnet via hot glue and allow it to dry completely before proceeding.
Paper Bag Cat Puppet
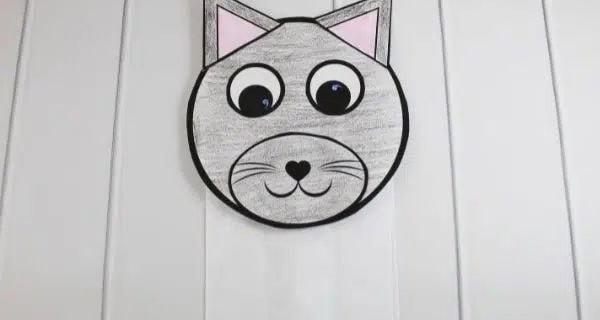
Create an adorable cat-themed bag by embellishing its exterior. Start by finding or crafting the cat’s facial features: eyes (circles), ears (triangles), and a nose (heart). Glue these elements onto the bottom of the bag, allowing them to dry completely. Once set, have your child add whiskers with markers or colored pencils and feel free to color any other details they’d like to bring their feline friend to life.
Cardboard Dinosaur Feet
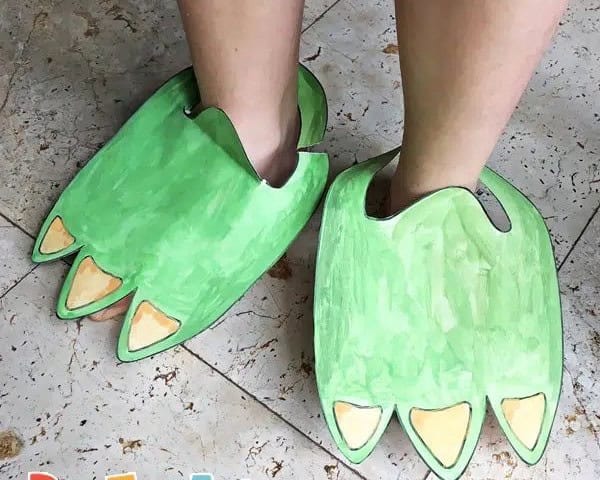
Get creative with this interactive dino feet project! To start, gather materials like cardstock or cardboard, hot glue, a writing utensil, scissors, paint, and any additional elements you’d like to use for scales or designs. Begin by tracing around the small dinosaur’s feet, paying attention to their length rather than width to ensure they don’t slip while in motion. Create a base with enough space for flexibility when your little one is ‘roaming’ around.
Next, draw another set of foot tracings, then paint and let dry before assembling everything together using hot glue. Finally, cut out the foot space to complete the project.
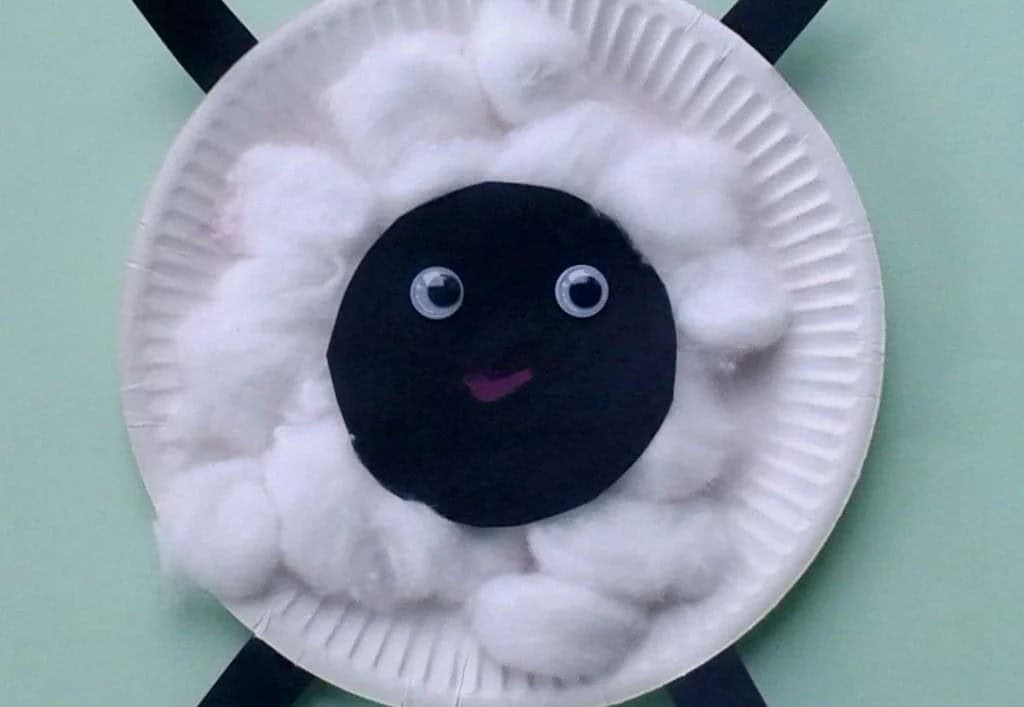
Paper Plate Polar Bear
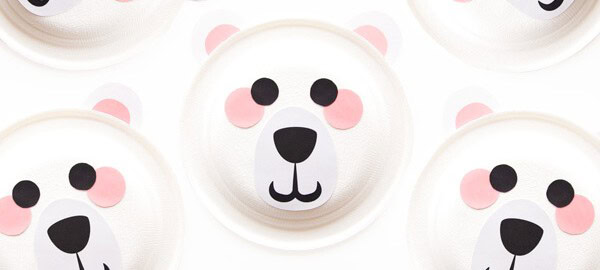
As winter approaches, it’s time to get creative with a paper plate polar bear craft. On a quiet day, this project is perfect for unwinding and expressing your artistic side. Gather pink, white, and black construction paper, glue, scissors, and a paper plate. Start by cutting out two circles from the pink paper for the cheeks and two circles from the black paper for the eyes.
You’ll also need a small black circle for the nose, tiny black triangles for the inner ears, and a small white triangle for each ear. Finally, cut a rounded oval shape from the black paper to create the snout. With these pieces in place, you’re ready to bring your polar bear to life.
Ladybug Templates
Ladybugs are often considered a favorite among both children and adults alike. When it comes to teaching kids about the fascinating world of insects and their life cycles, having engaging visual aids can make a significant difference in keeping young minds interested. One effective way to do so is by printing out educational materials such as this page, which can be used as a valuable learning tool for exploring the natural world with your little ones.
Toilet Paper Roll Cat Craft
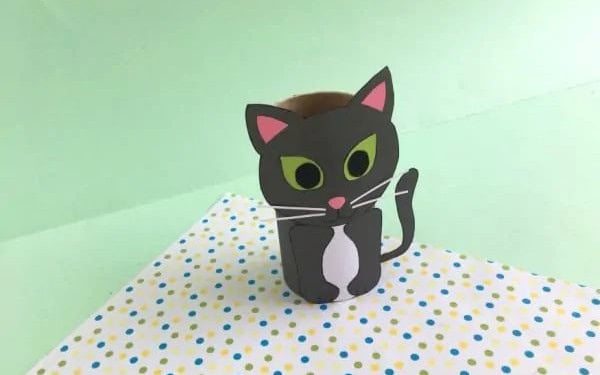
Creating adorable cat TP rolls is a breeze! You’ll need construction paper, scissors, crayons, glue, and googly eyes to get started. If you’re using darker paper, consider using markers or cutting details from another color paper to achieve the desired contrast. Begin by wrapping the tube in your chosen color and drawing an oval for the head and two triangles for the ears. Add facial features and attach all components before assembling them onto the tube.
For an added touch, grab a pipe cleaner and attach it to the backside as a tail.
Winnie the Pooh Craft
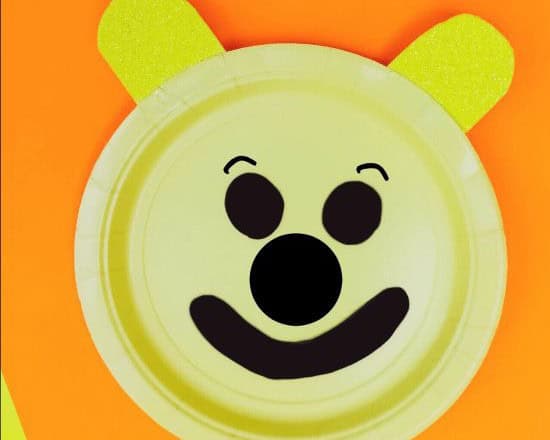
Create a whimsical Winnie the Pooh mask for your child by preparing a yellow paper plate or coloring one yellow. Next, cut two ears from yellow construction paper and attach them to the back of the plate. Alternatively, you can craft Pooh’s facial features using black construction paper or draw them on with a black crayon or marker. The result will be an adorable and easy-to-make mask that your little one is sure to love.
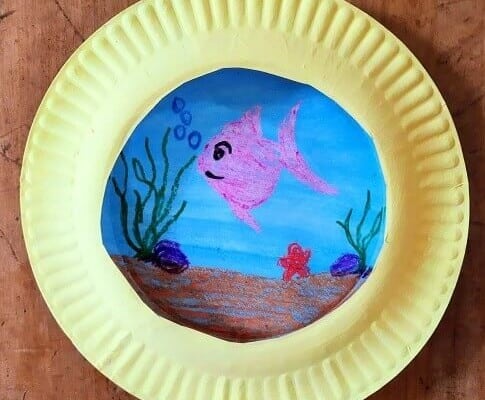
Paper Plate Fish
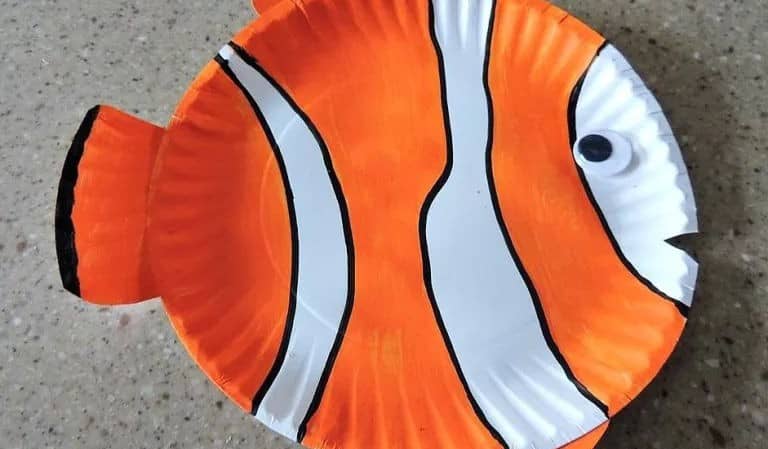
For a fin-tastic twist on traditional plates, consider crafting a fish-inspired masterpiece! Encourage your young artists to draw inspiration from beloved characters like Nemo or Dory, letting their creativity shine by coloring the plate however they please. To bring the design to life, add a playful googly eye and a small triangular mouth underneath it. Then, use the same color scheme as the chosen fish to create a fin and tail, adding an extra layer of realism to the plate’s underwater theme.
Snake Craft
The adaptability of this craft is truly one of its most appealing aspects! With a vast array of options at your fingertips, you can tailor it to suit your unique style and preferences. For instance, select from an assortment of colored papers and incorporate an assortment of shiny objects to create the scales on your snake – a perfect opportunity to hone those fine motor skills.
To begin, draw a meandering line that can be as long or as short as you like, followed by another mirrored line that connects at the ends, forming the head and tail of your reptilian friend. The cutting process is where things get really exciting – carefully cut out the snake shape from the paper to bring it to life.
Finally, take it to the next level by adding some personality with googly eyes, nostrils, and a tongue crafted from construction paper.
Top it all off with those sparkly scales, and you’ll have a truly unique and engaging creation.
Handprint Bunny Easter Craft

Bring an extra touch of whimsy to Easter with this adorable hand-printed bunny cut-out. Measuring just the right size, this special keepsake is perfect for making memories with your little ones. To create it, simply paint a piece of board white, then let your child’s creativity shine by stamping their painted hand onto the bunny. The end result is a charming speckled bunny that will become a treasured family heirloom to be enjoyed for many Easters to come.
If your kids loved this craft, they might also enjoy exploring these other fun and interactive handprint crafts!
Safari Animal Coloring Pages
When exploring different biomes with your child, consider introducing them to the fascinating creatures that inhabit the African savannah. Two exciting pages are available for download – one featuring animals that thrive in the grasslands and another showcasing the amazing species that call the forest home. Print out these pages and get ready to embark on a thrilling adventure!
Potato Stamp Butterfly Art
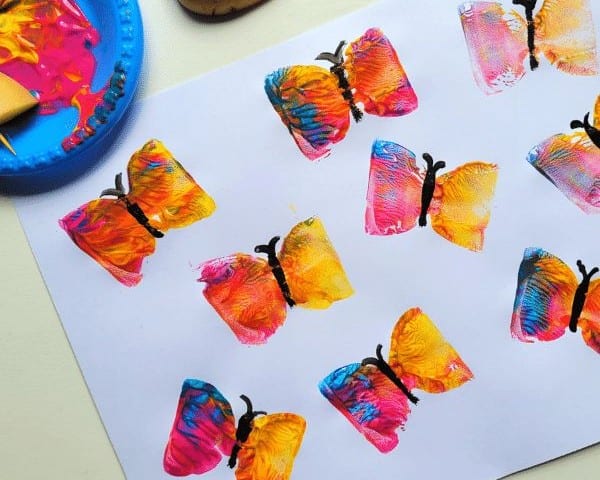
Unleashing creativity with printing art projects is an absolute delight! What makes these projects truly special is the uniqueness that comes from experimenting with different shapes and textures. For this particular project, small potatoes are ideal. Cut each potato in half lengthwise and widthwise to create a canvas for your artwork. Combine washable paints and toothpicks to add an extra layer of interest. Start by taking two-quarters of the potato and gently pat them dry.
Then, place the potato halves end-to-end to form the silhouette of a butterfly. Next, mix together a few paint colors on a plate, dip the potato butterfly firmly into the paint, and then transfer it onto your page.
Frog Toilet Paper Roll Craft
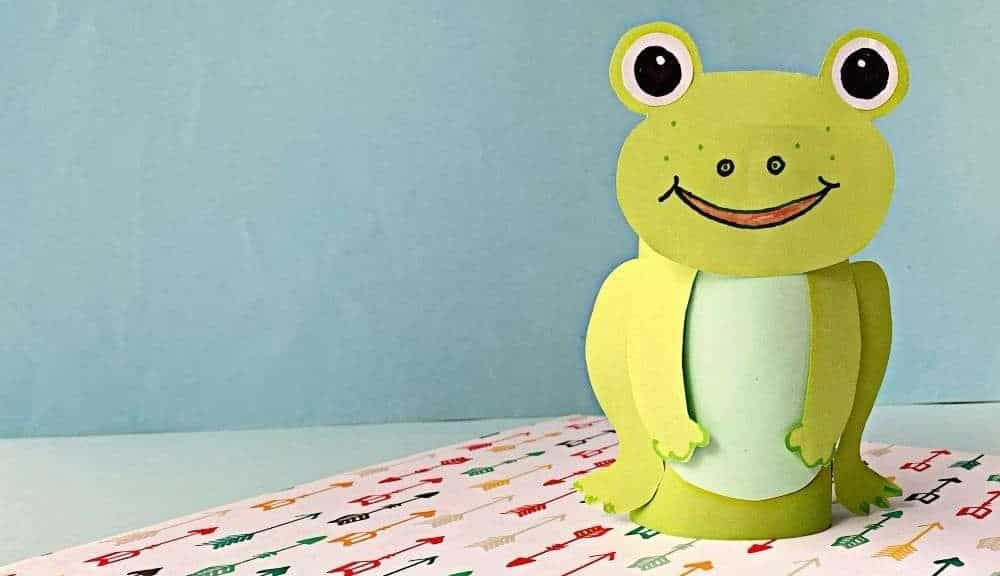
To bring your amphibian friend to life, gather a few essential crafting materials: a toilet paper roll, construction paper, glue, scissors, and vibrant markers. Start by sketching an oval-shaped rectangle for the body, accompanied by two circular features that will serve as the frog’s eyes. Add some personality to the face by incorporating other design elements you fancy.
Once the facial features are in place, it’s time to get creative with the rest of the amphibian’s anatomy.
Cut out the legs, arms, and belly from a contrasting color, then use your trusty glue to attach these components to the tube. With every snip and stick, your frog friend is taking shape!
Pig Paper Bag Puppet
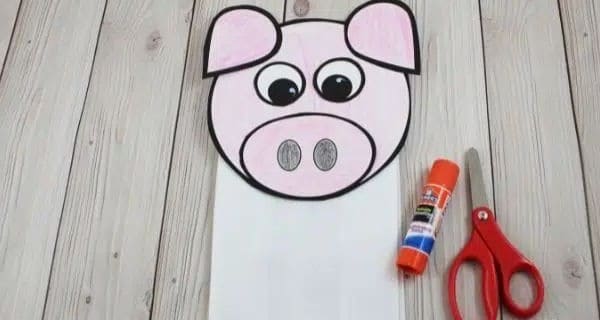
Transform an ordinary bag into a delightful treat holder with a cute pig design! Start by creating your own template online or get creative with pink construction paper, white for the eyes, scissors, glue, and colorful crayons or markers. Once you’ve added some personality to the pig’s face, attach its ears to the bottom of the bag, followed by a tail on the opposite side if you’re feeling extra playful.
Old Macdonald Farm Animal Crafts
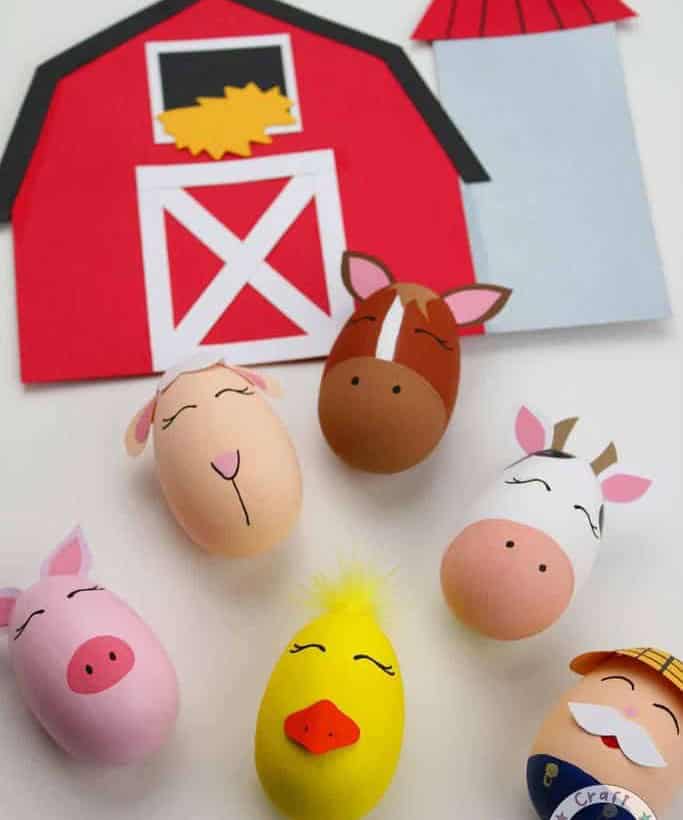
Get ready to unleash your child’s creativity with this delightful craft project! Perfect as a fun activity or a thoughtful gift, it’s an excellent way to encourage artistic expression and imagination. To get started, gather the following materials: wooden eggs, acrylic paint, paintbrushes, paint pens, and permanent markers. Let your little ones’ artistic vision come alive by having them draw characters onto the eggs. Once dry, they can add more details using paint or markers.
For an extra touch of whimsy, feel free to incorporate construction paper for ears or other embellishments. To ensure the artwork remains protected over time, consider applying a layer of mod podge for added durability.
Paper Plate Caterpillars
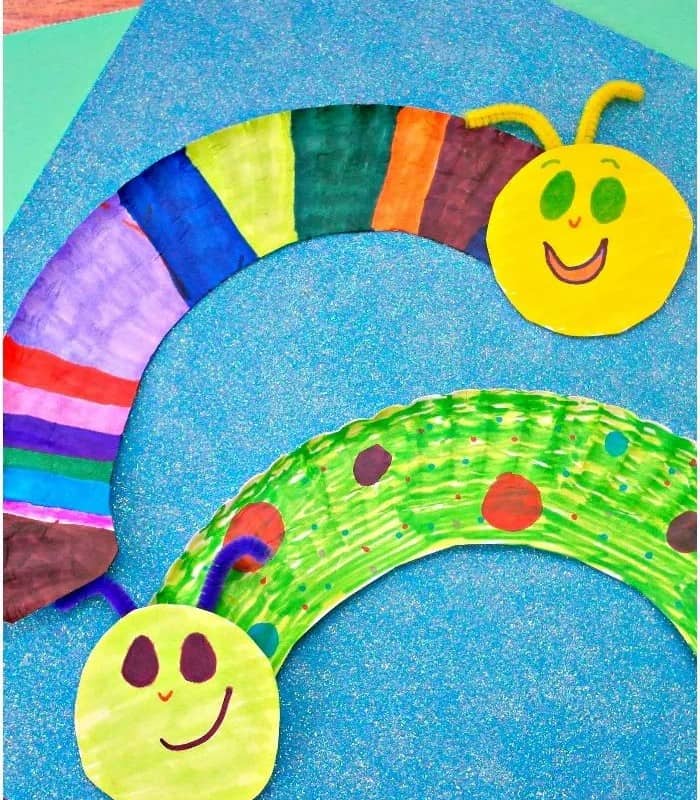
To create this delightful craft, start by cutting a paper plate in half along its curved edge. Next, take the inner portion of the plate and use it to cut out a circular shape that will serve as the head. Once you’ve cut out the head, set it aside for now. Then, draw, color, and decorate the face and body, taking care to add any final details before moving on.
After the decorations are complete and dry, use pipe cleaners to attach the head back onto the plate’s body, bringing your creation to life.
Finger Puppet Origami Bird
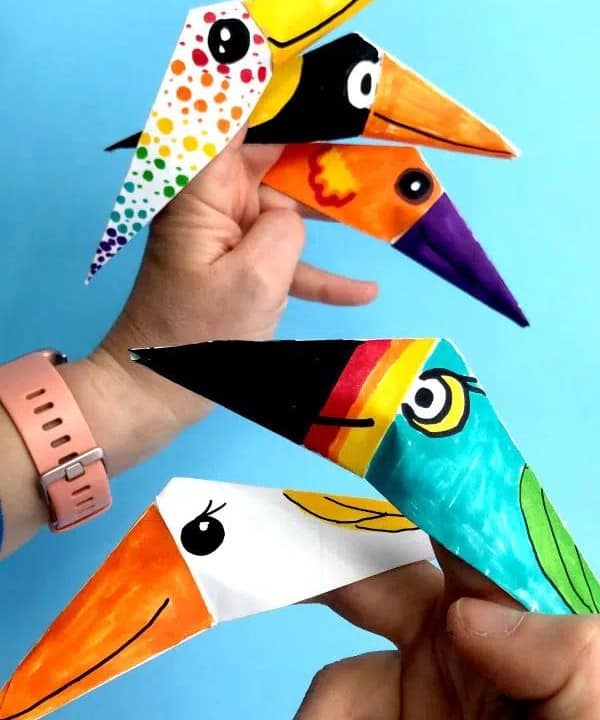
To create this origami bird, start by preparing a square sheet of paper or cutting one out from any other paper. Begin by folding the paper in half to form a triangle, then reopen it. Next, fold one side towards the center, and repeat with the other side, creating an asymmetrical overlap.
With both sides folded inward, create a small square at the bottom of the paper by folding the edges up. Then, fold the entire piece in half to form another triangle.
Look for the longest edge and fold it in half against itself, creating a crease at the smaller end of the line.
At this crease, fold the larger part of the triangle downward at a 90-degree angle, then tuck the overhanging portion up and behind to create space for your finger. Finally, take the remaining small tip of the triangle and tuck it into the middle line. If done correctly, you should now have a prepared base ready for decorating.
Bee Printable
Why not combine this printable with the rock painting activity we previously mentioned? It’s a great way to encourage creativity and imagination in your child. Alternatively, if they have a fascination with bees, printing out a few pages and coloring them together can be a wonderful bonding experience.
Tape Resist Clown Fish
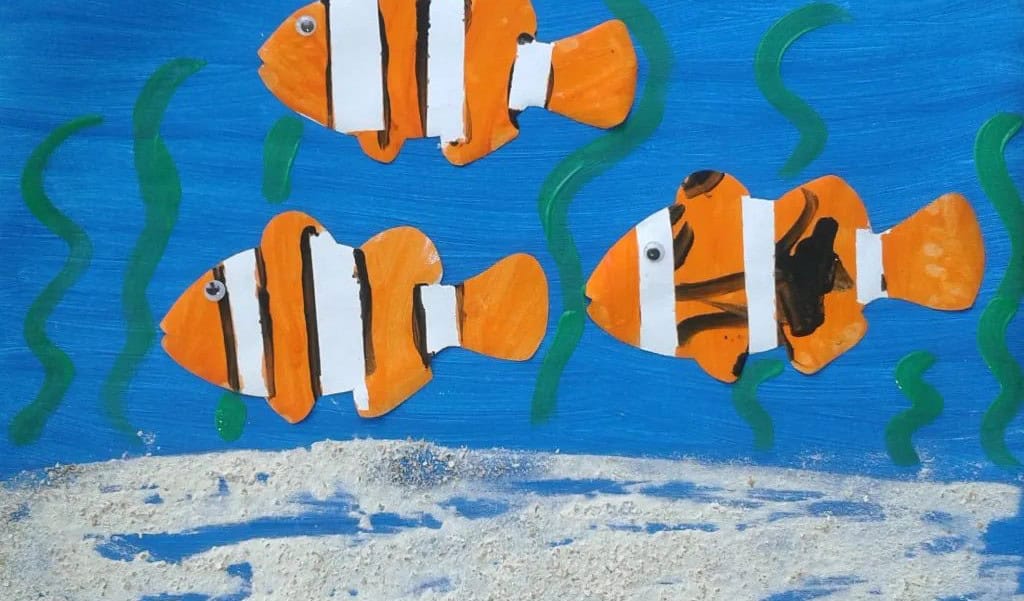
To create this visually appealing project, begin by cutting out a fish shape from paper or cardstock. Next, use adhesive tape to create a body outline on the fish, ensuring it’s even and symmetrical. Once complete, hand over the project to your child and let their creativity shine by painting the entire fish any color they desire. Allow the paint to dry completely before removing the tape to reveal the negative space.
Finally, add a playful googly eye and cut out a small triangle for the mouth to bring the fish to life.
Dinosaur Coloring Pages
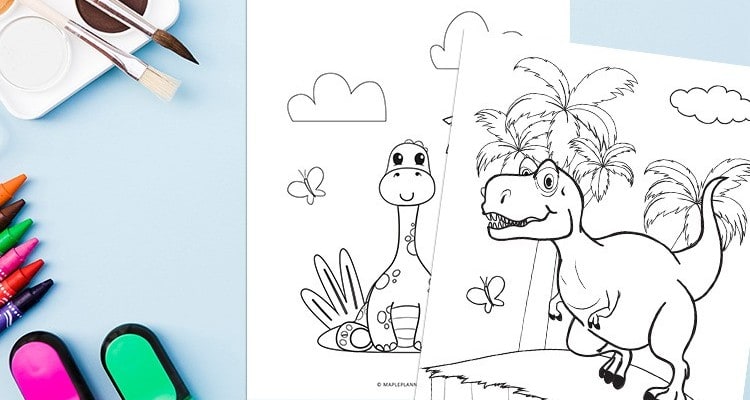
This online treasure trove is a go-to destination for an array of complimentary resources and printable materials that cater to the interests of budding paleontologists. Specifically, we’re huge fans of their extensive collection of dino-themed printables, which are not only visually appealing but also sure to delight any young enthusiast with a passion for prehistoric creatures.
Watercolour Butterfly Craft

To create these whimsical butterflies, you’ll need just three simple materials: clothespins, coffee filters, and washable markers. Begin by unleashing your child’s creativity and coloring the filters with vibrant hues. Once they’re dry, use water to achieve a beautiful watercolor effect – simply spritz and let it dry completely.
While the filters are drying, have your child add some personality to the clothespins by coloring them black.
When the filters are ready, it’s time to bring the butterflies to life! Pinch the center of each filter, then gently work it into the opening of the pin and fluff out the ‘wings’ to give your butterfly its signature shape.
Paper Plate Baby Farm Animals
Gather your farm friends or pick a few favorites to bring this craft to life! To create a miniature version of these lovable animals, start by cutting out a smaller circle as the core of the plate. Fill in the details around this central figure with various features like ears, eyes, and limbs. You can choose from adorable baby pigs, cows, sheep, chicks, or even more farm favorites. Add playful touches like googly eyes, smiling faces, and movable limbs to bring these little critters to life!
Funny Bunny Craft
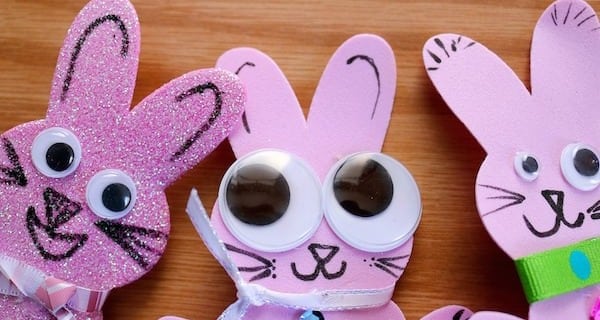
Gather a variety of creative materials to bring your bunny-making experience to life. This can include goofy foam bunnies, popsicle sticks, googly eyes, and any other fun add-ons that you and your child would enjoy using. To give your bunnies some personality, draw silly faces on the foam bodies, then attach the googly eyes and any additional accessories using glue.
Once the glue is fully dry, secure the popsicle stick to the back of each bunny using more glue, and get ready to have a hopping good time with these adorable creations!
Aquarium Craft
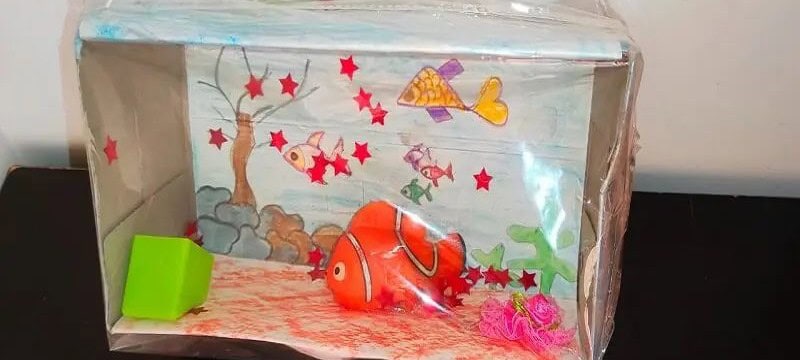
Transform a simple tissue box into an interactive storytelling experience reminiscent of a diorama. Have your child create a colorful background by coloring a page, then incorporate their favorite characters or objects to bring the scene to life. Once they’re satisfied with their masterpiece, seal the top of the box using saran wrap and secure it with a rubber band, staple, or any other creative fastening method that works for you.
Walrus Arctic Animal Craft
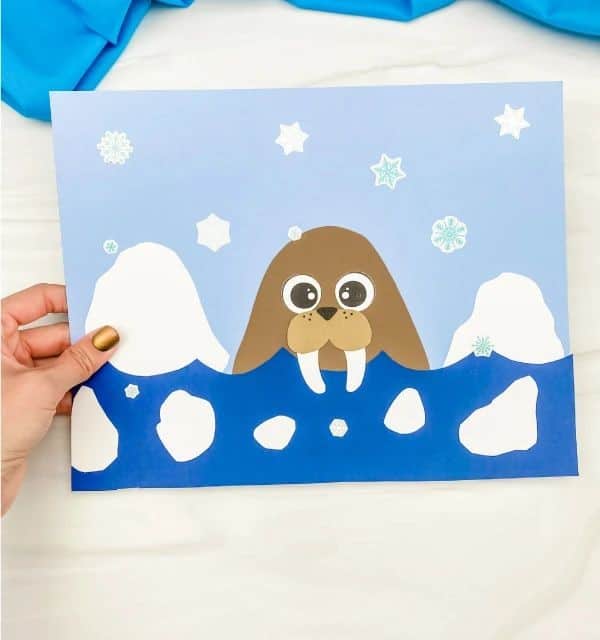
As winter approaches, why not create a fun and engaging craft project with your little ones? For this activity, you’ll need some essential supplies like brown, dark blue, white, and black paper. You can use these to cut out the walrus and water components yourself, then let your child’s creativity shine by assembling the scene. Begin by applying a base of dark blue paper to represent the winter waters, followed by the walrus itself.
Finally, add some snowflake stickers to complete the wintery landscape.
Farm Animal Sticks
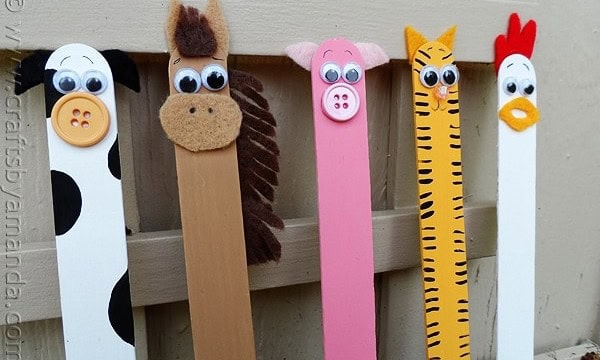
Trade in farm animal crafts for something fresh – stick puppets! Gather jumbo popsicle sticks, paint, brushes, googly eyes, and a paint marker. Let your child’s imagination run wild as they bring the animals to life with color. You may need to lend a hand with the fine details, but encourage their creativity by using buttons or other small items to add texture and personality to each puppet.
Handprint Cow

For a fun and easy animal craft, try creating handprint versions with your child. Start by using different colored papers to create a cow. Begin by tracing your child’s hand onto white paper, then cut out black spots for the body. Cut a rounded triangle for the head of the cow and attach it to the body. Use brown paper to make the nose, yellow or pink for the horns, pink for the inner ears, and white for the outer ears.
Assemble the cow and let everything dry before adding a tail and the details of the face.
Paper Plate Whale
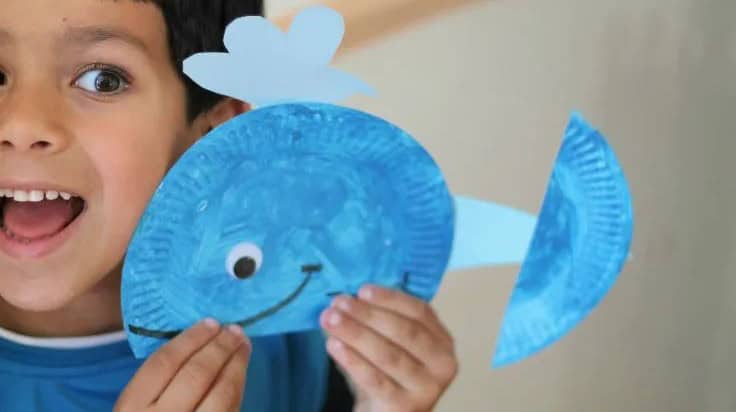
To create this whimsical plate craft, start by colouring the entire plate blue. Add a smile and a googly eye roughly halfway down the plate to give it some personality. Next, trim the bottom of the plate off at the smile line, creating the tail fin for your underwater creature. Then, attach an active blowhole (water spout) at the top of the head and add a small piece of blue construction paper for the tail section.
Finally, secure the bottom part of the plate to create a sturdy fin that completes your ocean-inspired design.
Foam Cup Farm Animals
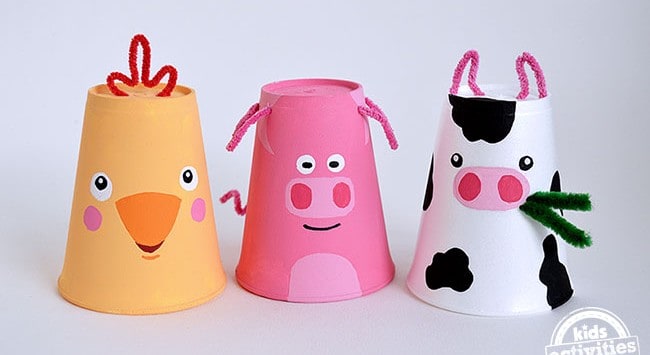
To bring this art project to life, start by gathering your materials: foam cups and pipe cleaners. Begin by selecting the animal or animals you’d like to feature in your design and paint the cup with a coordinating color. Allow the paint to dry completely before moving on to the next step. Once it’s dry, return to your masterpiece and add the finer details that will give your creation personality. Use the pipe cleaners to create ears, tails, and other distinctive features for your animal.
Beluga Whale Toilet Paper Roll Craft
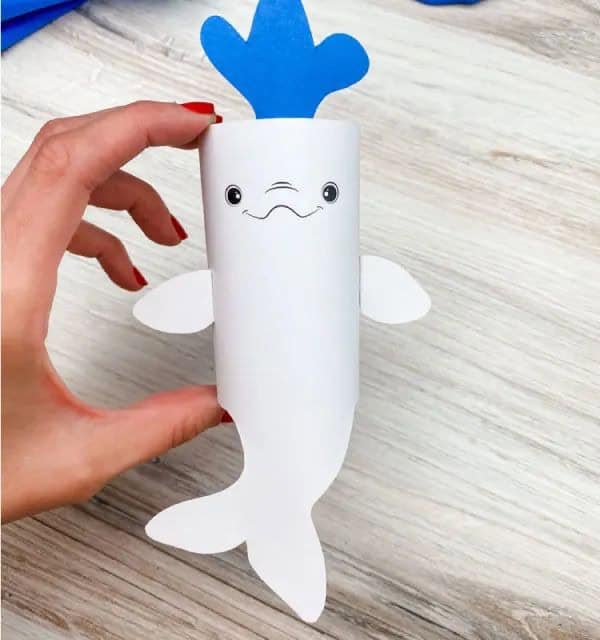
To initiate the creation process, start by painting your tube white and allowing it to dry completely. Next, use a cutting tool to carefully excise the outline of a whitetail, as well as the fins and some blue water that will protrude from the top of the tube. Once all components are dry, utilize an adhesive to secure each piece in place, followed by the addition of the whale’s facial features through drawing.
Shark Headband
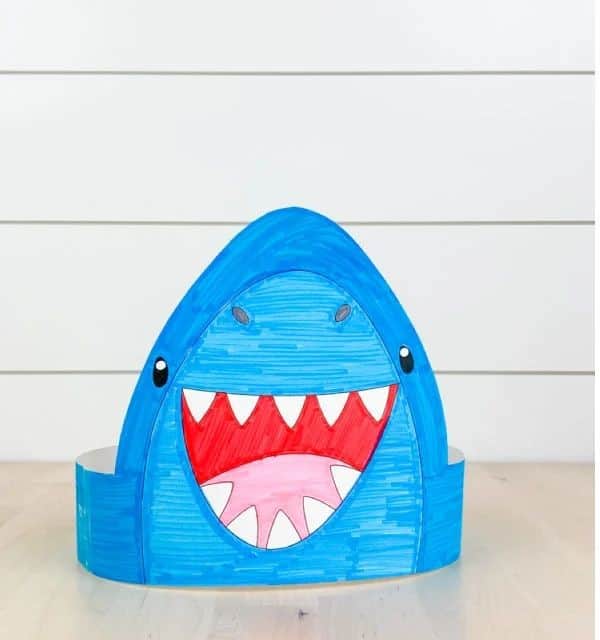
To get started with this fun craft project, you’ll need a few simple supplies: an almond-shaped piece of construction paper and a band that’s big enough to fit around your child’s head. To add some extra flair, you can have them color in their shark or use a free template from the internet. Once they’ve finished decorating, it’s time to assemble the project.
Simply staple the shark onto the band, then measure how the band fits around your child’s head and attach it while the band is off their head.
Recycled Plastic Egg Whale Craft
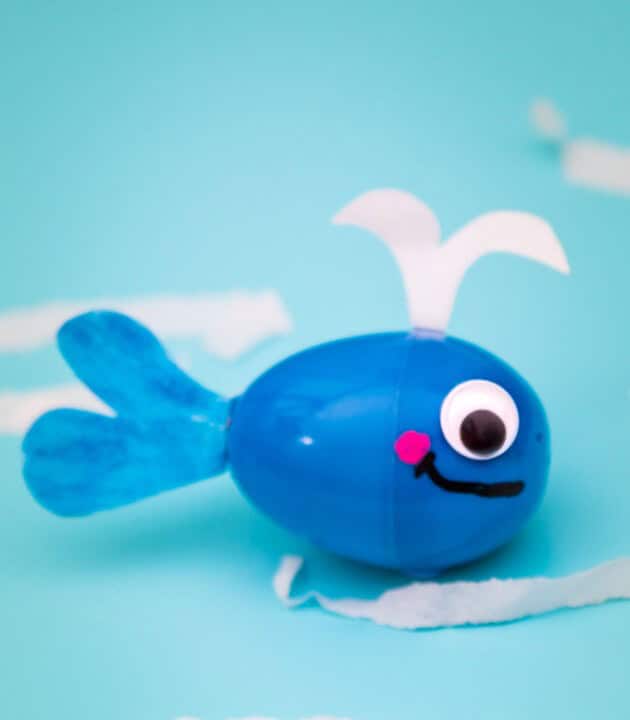
Transform those stale plastic Easter eggs into whimsical sea creatures! Simply attach a googly eye to give your egg a playful gaze. Next, add some personality with a hand-drawn smile and cut out a tail and water spout from construction paper or felt. Secure these embellishments onto the whale using glue, tape, or staples, and watch as your old plastic eggs come to life as adorable sea creatures.
Seashell Fish Craft
Transform your shell collection into an adorable and unique craft piece by giving it some personality. Start by painting the back of each shell, adding a pop of color to make them stand out. Once dry, take the smaller shells and attach them to the larger ones using a strong adhesive like glue. For an added touch of whimsy, add googly eyes to bring your creation to life.
This project is perfect for anyone looking to breathe new life into their shell collection or simply wanting to create something fun and quirky.
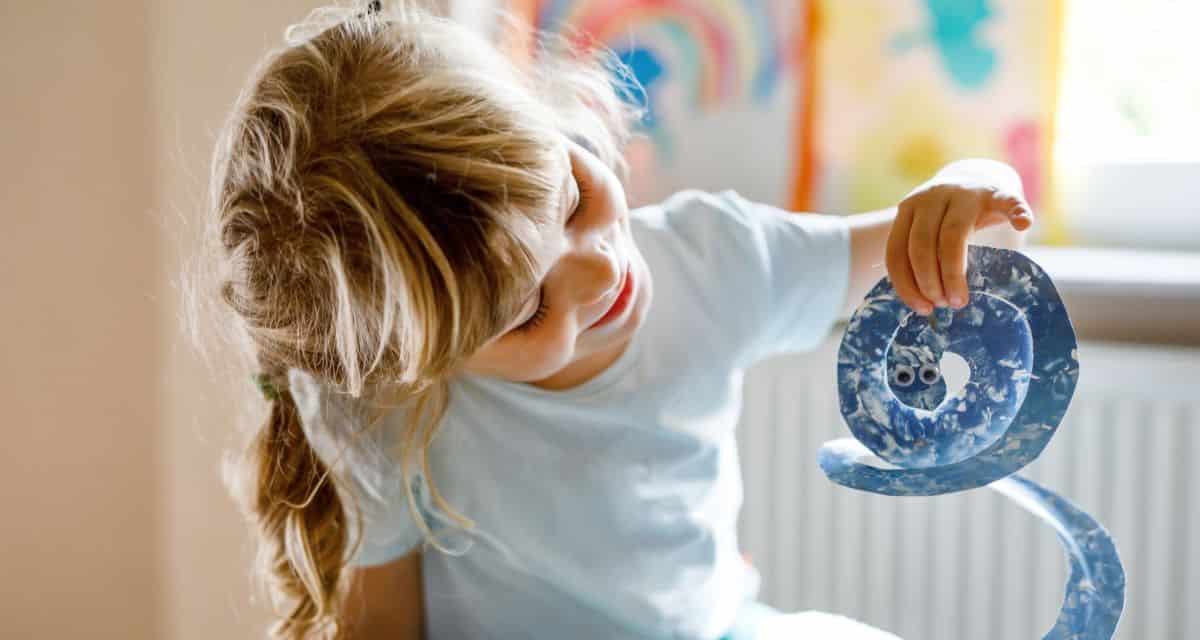
Coffee Filter Watercolour Fish

Create a whimsical design by combining art and engineering. Using markers, add vibrant hues to the filter, then spritz it with water to blend the colors together. Once dry, manipulate one side into a tail shape and secure it with a pipe cleaner. Finally, attach a googly eye to bring your creation to life.
Slinky Dog Craft
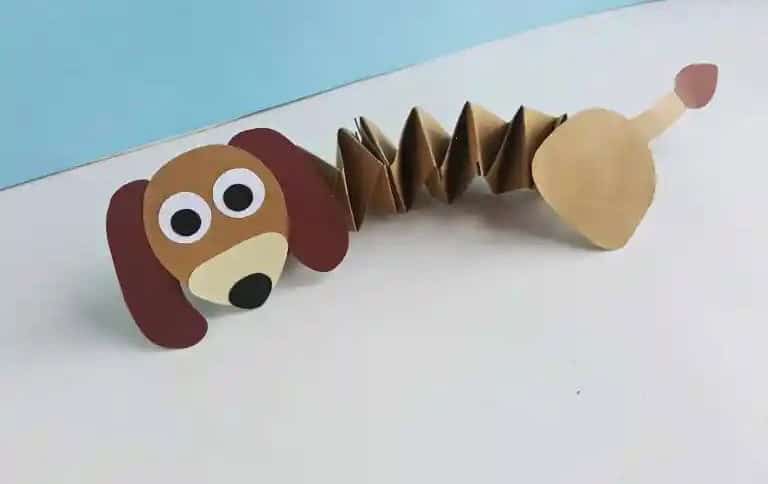
To bring your papier-mâché dog to life, start by creating its individual components. Cut out the head, tail, and bottom (or bum) from your paper mixture. Next, create a sturdy base for the head and body by gluing two 1-inch strips of paper together at a 90-degree angle. Use an accordion fold to give this structure some flexibility. Once you’re happy with the shape, attach one end to the head piece and the other end to the bum, securing them firmly in place.
Monkey Cardboard Tube Craft
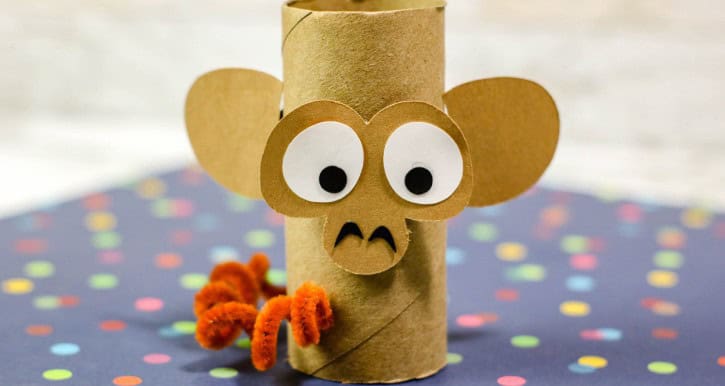
Transforming a plain cardboard tube into a whimsical creature requires some creative embellishments. Begin by cutting out ear shapes from brown paper, taking care to create a natural curve that will fit comfortably onto the tube. Next, cut out a nose shape and attach it to the top of the tube using your chosen adhesive. The ears should be placed on either side of the nose, adding a playful touch to your creation.
To give your creature some extra personality, glue on a pair of googly eyes that seem to stare into the distance with mischief in their gaze. Finally, use a marker or pen to add any remaining details – perhaps a few strands of yarn for hair or a smile that hints at its playful nature.
Toilet Roll Farm Animal Crafts
Get creative by choosing the type of animal you want to bring to life! Gather your crafting supplies, including construction paper, googly eyes, yarn, and any other materials you’ll need to add fine details. Before you start gluing everything together, take some time to draw or color any pieces that require a bit more finesse.
Paper Plate Puffin
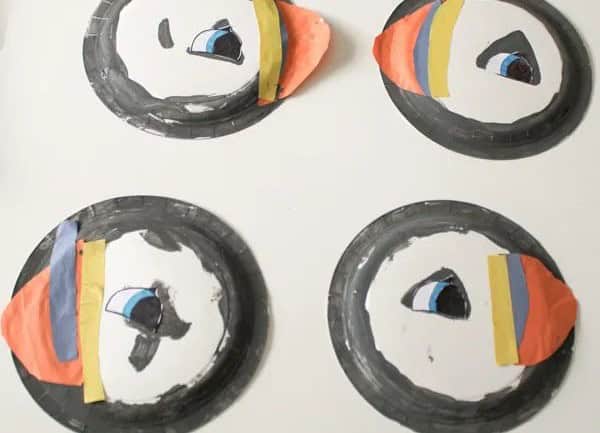
To get started with this creative project, gather essential materials such as orange, blue, and yellow paper, a paper plate, and some markers. Begin by coloring the outer ring on the backside of the plate with black ink, allowing for a striking contrast. Next, cut out an orange triangle to serve as the beak and pair it with a strip of blue and yellow for the nose. Secure these elements in place using your preferred adhesive method.
Finally, add the finishing touch by drawing the eye and allow everything to dry completely before displaying your unique piece.
Paper Plate Submarine Craft
To create an interactive and imaginative experience for your child, start by having them color an underwater scene on one paper plate while you cut out the middle of a second plate. Once the coloring is complete, set the plates aside and have your little one paint the second plate a bright yellow hue. Next, staple the two plates together, forming a unique submarine window view that showcases their colorful ocean creation.
If you’re looking for more ways to foster creativity in your kids, consider exploring these simple yet engaging drawing ideas designed specifically for young minds.