As children transition from childhood to adolescence, it can be challenging to find engaging activities that cater to their unique interests and developmental needs. That’s why I’ve curated a list of fun and creative crafts specifically designed for 12-year-olds. These projects not only tap into their imagination but also provide a sense of accomplishment and self-expression.
With this collection, you’ll find a mix of traditional and modern crafts that blend the innocence of childhood with the creativity and experimentation characteristic of pre-teen years.
DIY Leaf Candle Holder
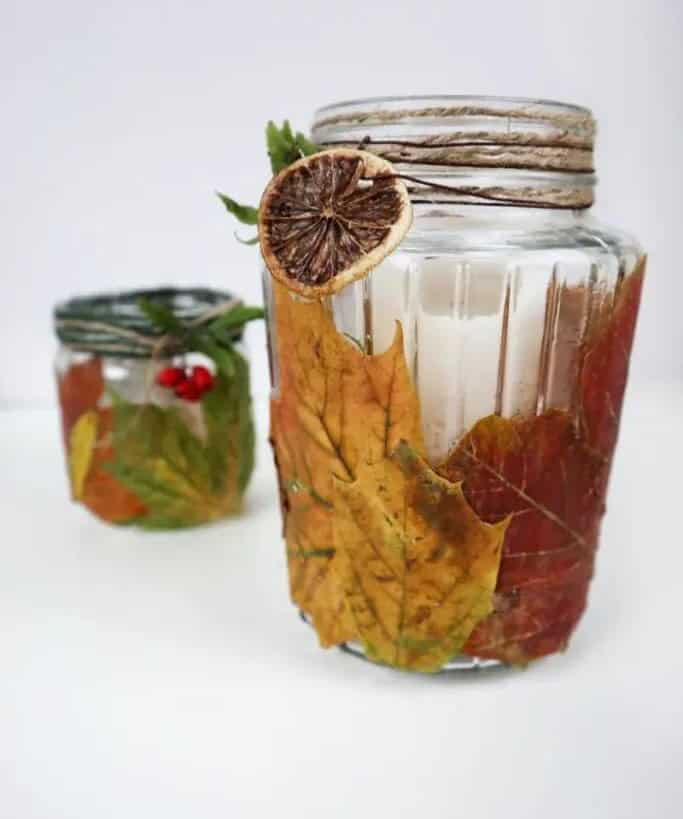
Give your older children an outdoor adventure to remember by trying out this easy DIY project. The best part is that it requires minimal materials, including a jar, workable leaves (real or synthetic), Mod Podge, and some decorative twine or embellishments. Have them arrange the leaves flat against the surface, making sure they can still easily adjust their design if needed. Once they’re happy with the layout, add a light layer of glue to secure everything in place.
Finally, let their creativity shine by adding twine, beads, or other decorative elements. With these fun and interactive DIY crafts, kids of all ages will be thrilled with the end result.
Felt Koala
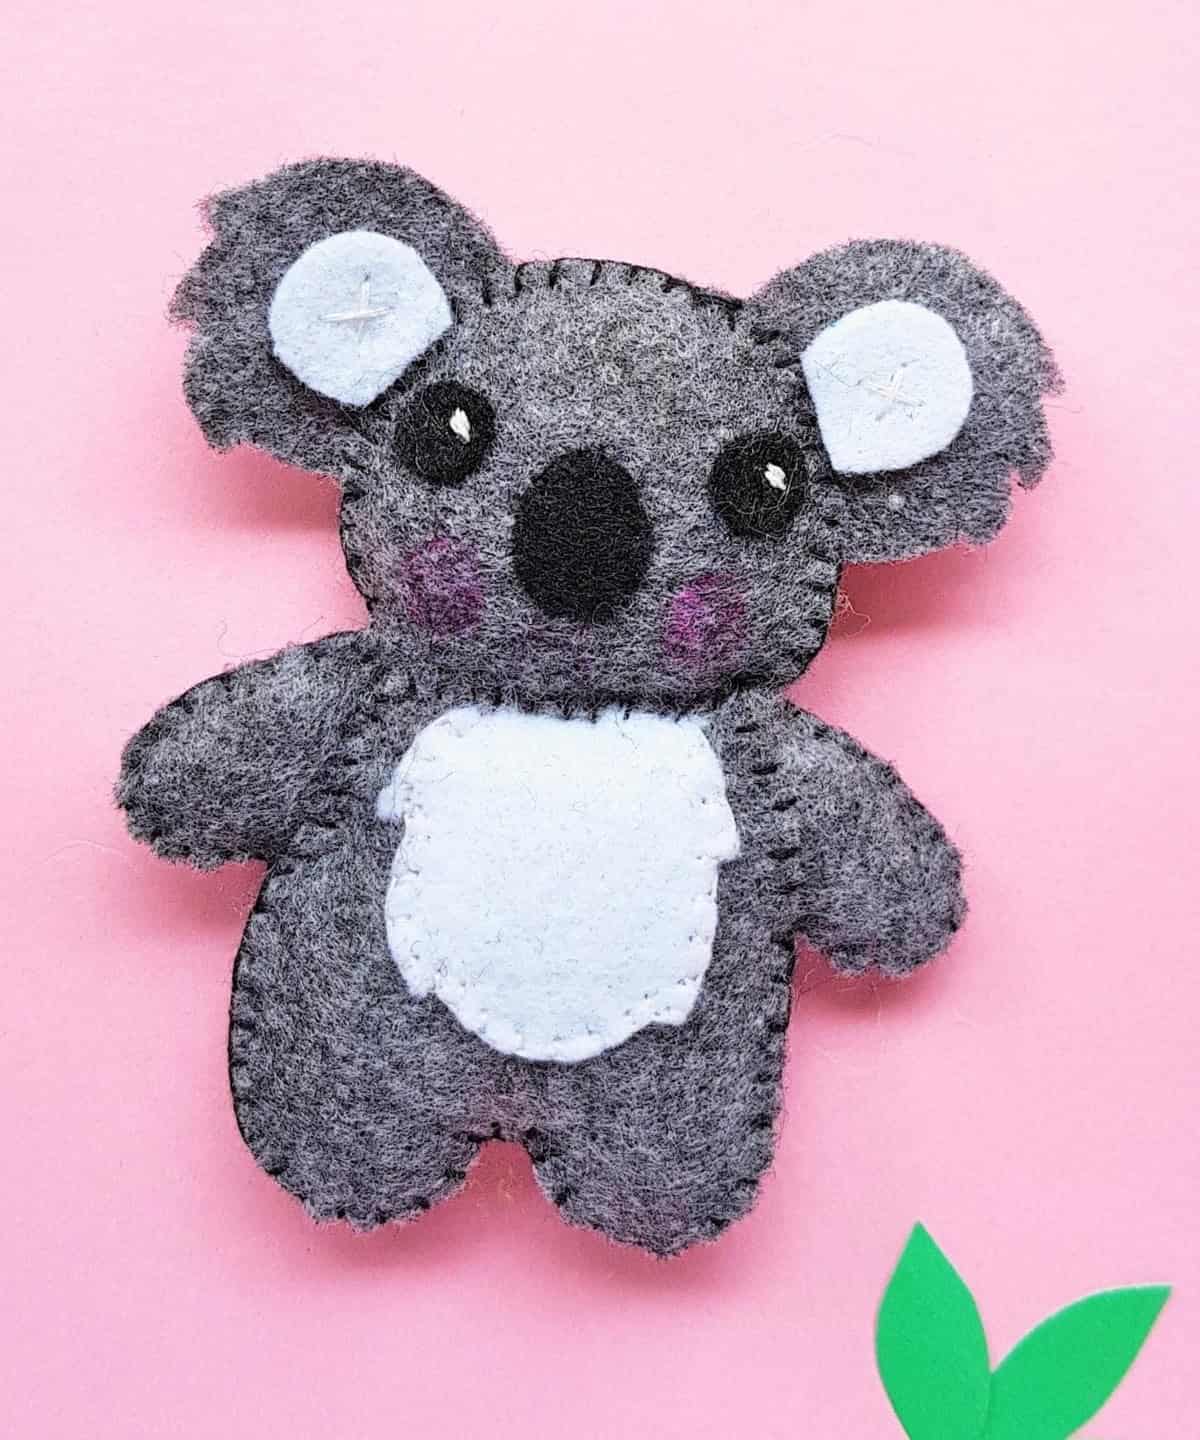
To bring this creative project to life, you’ll need a few essential materials: this pattern, felt fabric in gray, black, and white hues, as well as black and white thread, cotton, scissors, a pencil or fabric marker, and a needle. Start by tracing the pattern onto the felt using the companion pieces, ensuring accurate placement for each piece. Next, add the desired detailing to each part before beginning construction of the bear.
Be sure to leave small openings at the hands for stuffing purposes. Once the arms are properly stuffed, cover them with the belly piece, leaving a small space to allow for further stuffing before securing it shut. Repeat this process for the head, taking care to ensure all parts get securely sewn.
Macrame Keychain
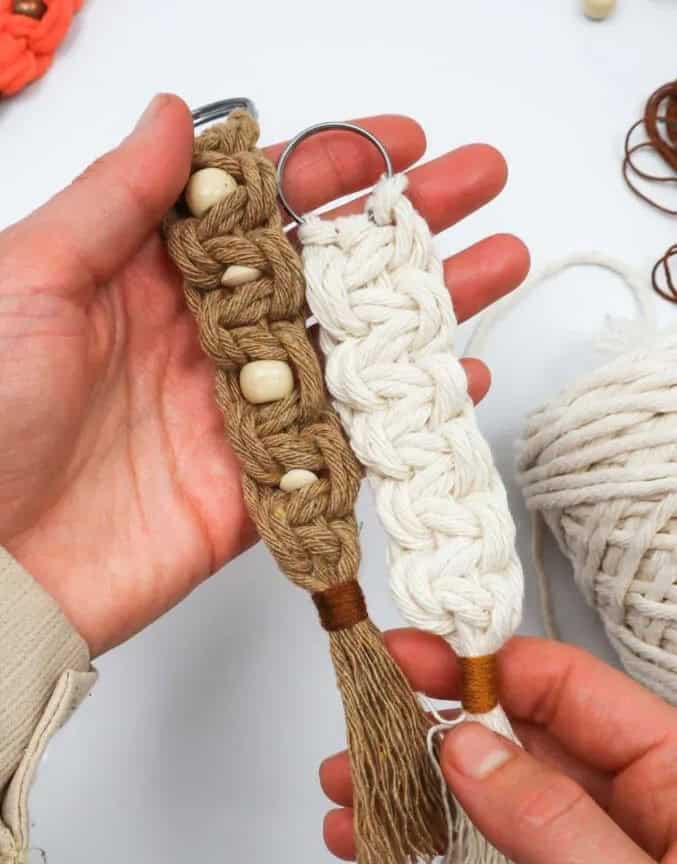
To create these simple yet charming keychains, you’ll need a few basic supplies: a key ring, three to four millimeter single twist cotton cords in various colors, some tape, scissors, beads, and embroidery thread. For a comprehensive guide on how to make them, refer to my full tutorial, which includes a video walkthrough. To begin, cut three strands of cord and then secure each one around the key ring using a square knot. Once you’ve got the knots in place, it’s time to start braiding!
After completing each specific plait, add a bead to give your keychain some extra flair. Finally, use the embroidery floss to secure the tail of the keychain and voila! You’ve got a delightful little trinket that the whole family can enjoy. From rainy day activities for kids to a fun hobby for adults, these yarn crafts are perfect for people of all ages.
Painted Fairy Houses
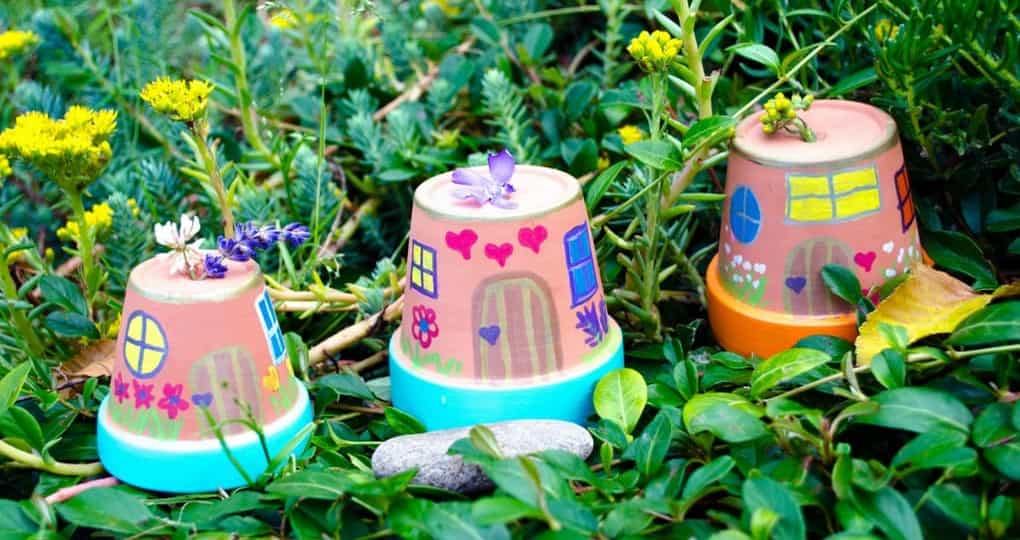
Add a touch of whimsy to your garden with a fun and engaging project that’s perfect for families! Building fairy houses is an easy and enjoyable activity that can be done with kids or younger siblings. Gather a few simple supplies, including small terracotta pots, paint pens or weather-resistant paint, brushes, and mod podge. Let the creativity shine by letting the little artists at it with the paints and glue.
Once the paint has dried, have them apply a good layer of glue to seal in their masterpieces before placing the enchanted houses in their new home – your garden!
Paracord Bracelet
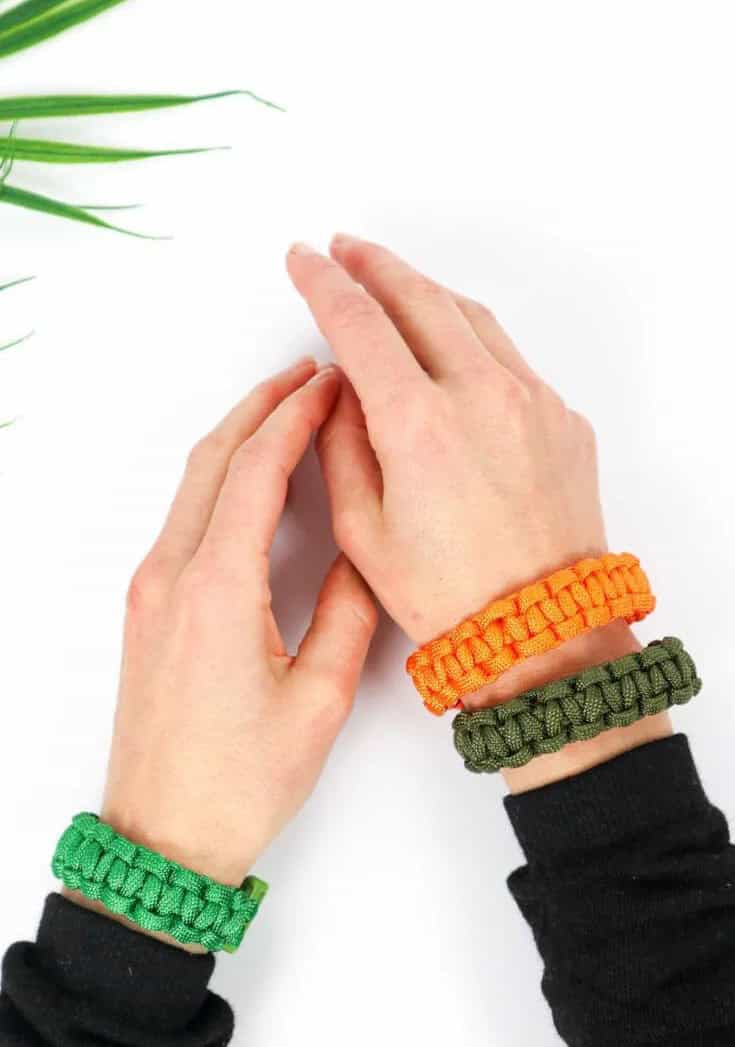
When it comes to creative expression, we’re big fans of paracord. One of our favorite ways to use it is by crafting unique jewelry pieces, like these versatile bracelets that offer a stylish alternative to traditional macrame designs. To get started, you’ll need a few simple supplies: a fastener of your choice (like the one pictured) and some high-quality paracord. For a comprehensive guide on how to create these statement pieces, be sure to check out our step-by-step tutorial.
The key to success lies in securing the cord to the fastener at both the beginning and end of the process – this ensures that your finished product will be sturdy and long-lasting.
Geometric Holder
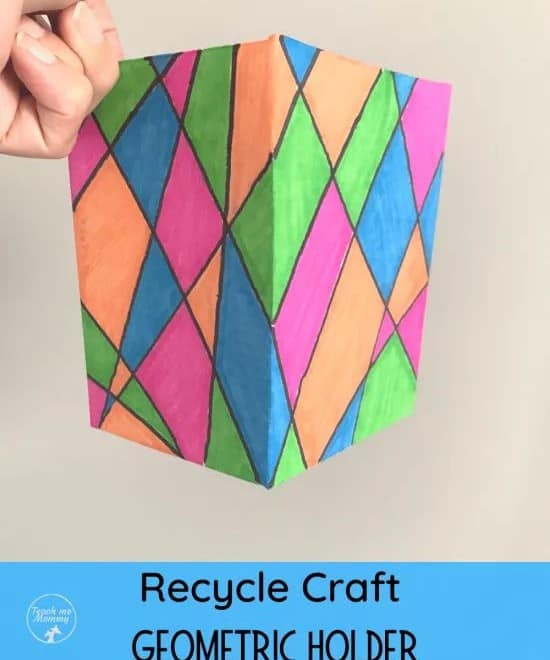
When faced with a clutter of boxes, consider enlisting the help of your kids. Encourage them to get creative and turn one into a free-standing holder for their favorite items. Depending on the box’s shape and size, it may require some manipulation to create a functional storage space. Suggest they repurpose the container to hold small objects like hair ties, writing utensils, or even building blocks.
Provide them with basic art supplies like rulers, pencils, and markers to let their imagination run wild and design their own unique holder.
Tissue Paper Flowers
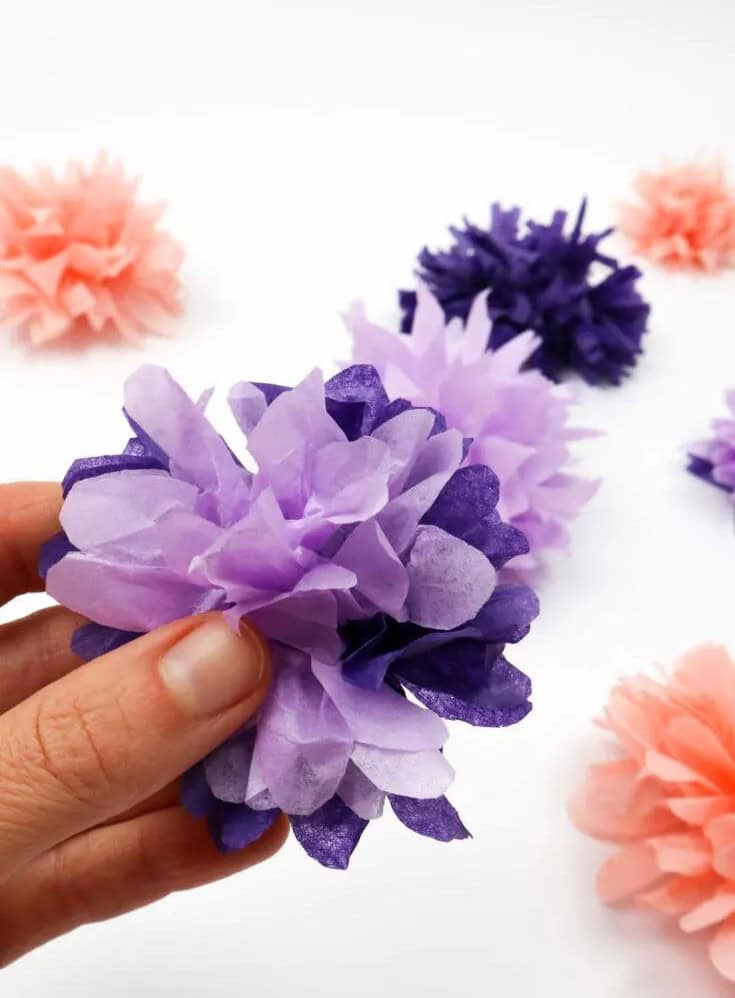
Creating a simple yet beautiful tissue paper flower is a straightforward process that requires just a few basic materials. In addition to the tissue paper itself, you’ll also need some string, scissors, and perhaps a few sheets of tissue paper (six for smaller flowers or eight for larger ones).
To start, gather your chosen tissue colours and stack them on top of one another, aligning them evenly both horizontally and vertically.
Once they’re all stacked up, it’s time to accordion fold the paper in a horizontal direction.
With all the sheets folded, place a piece of string in the middle of the pile and knot it securely. This will serve as the base of your flower. Finally, use scissors to trim the edges of the tissue paper to resemble delicate petals, then fluff them out to give your flower some extra texture and dimension.
Geometric Painted Flower Pots
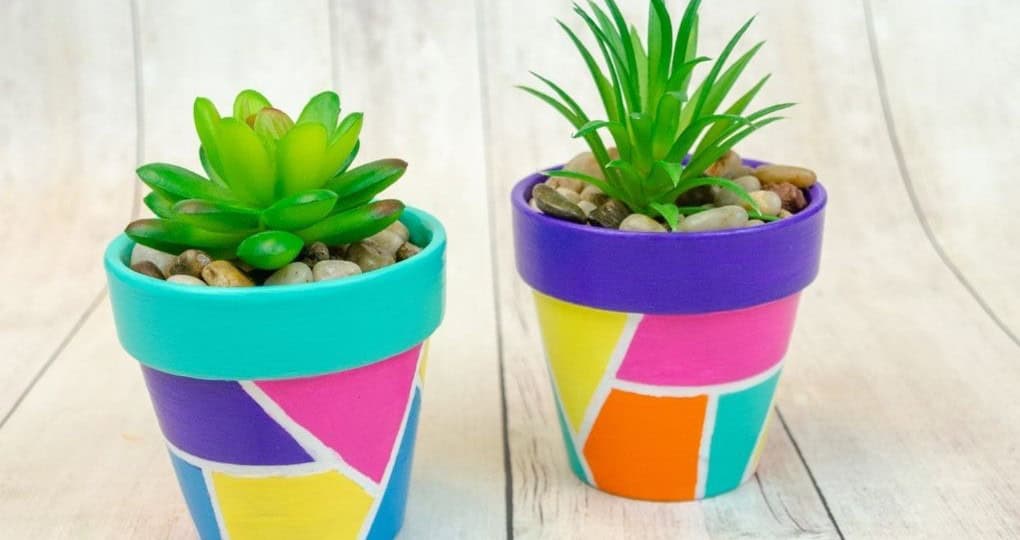
This outdoor planter shares a similar spirit with its geometric holder counterpart. To create this unique piece, you’ll need some terra cotta pots, thinner washi tape, acrylic paint, acrylic gesso, Mod Podge, and paintbrushes. Begin by applying two layers of gesso to the pot and allowing it to dry completely. Next, add angular strips of washi tape at strategic points on the pot where they intersect, creating a visually appealing design.
Once you’re satisfied with your tape placement, paint the pot as desired and let it dry again. Finally, carefully remove the tape, touch up any stray bits if needed, or apply a coat of Mod Podge to seal the design and let it dry before displaying your finished piece.
Paper Flowers
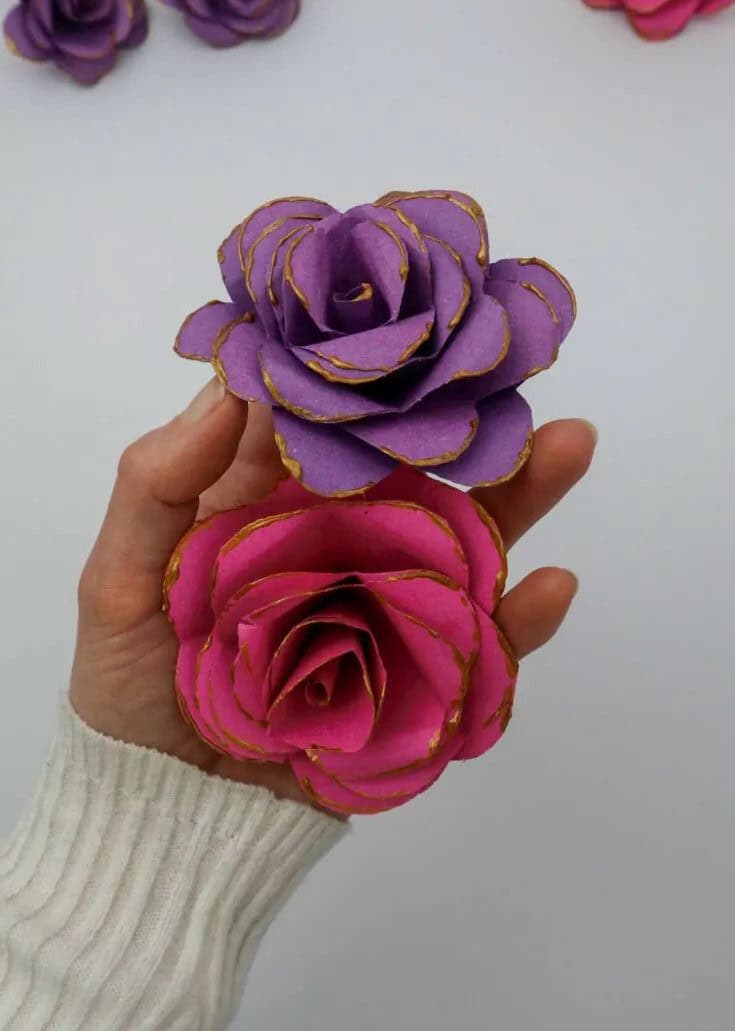
Get creative with repurposing leftover paper by transforming it into a beautiful flower craft. To make this unique decoration, you’ll need glue, scissors, and various paper types. For an added touch of elegance, consider using glitter glue to add some extra sparkle. Begin by cutting out the center of your paper, then build your flower petals outward, securing each layer with a dab of glue as you go along.
Straw Tote Bag
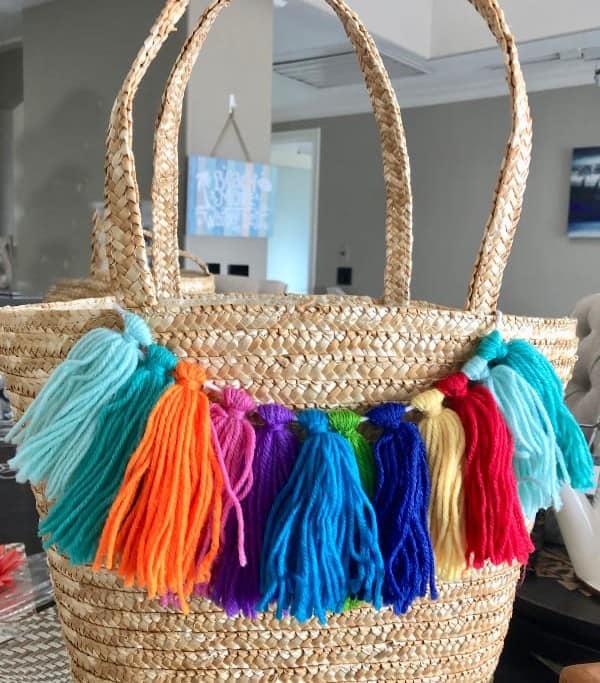
Transforming an ordinary tote into a unique piece of art can be a thrilling experience. The beauty lies in adding a touch of personality to the plain bag by attaching an accessory that resonates with your style. To achieve this, simply select a favorite embellishment and secure it to the bag using hot glue, allowing you to get creative with the placement.
If you’ve enjoyed this straw bag makeover, you might also appreciate our DIY tote bag tutorial made from repurposed shirts, offering another opportunity to unleash your inner craftsperson.
Name Painting
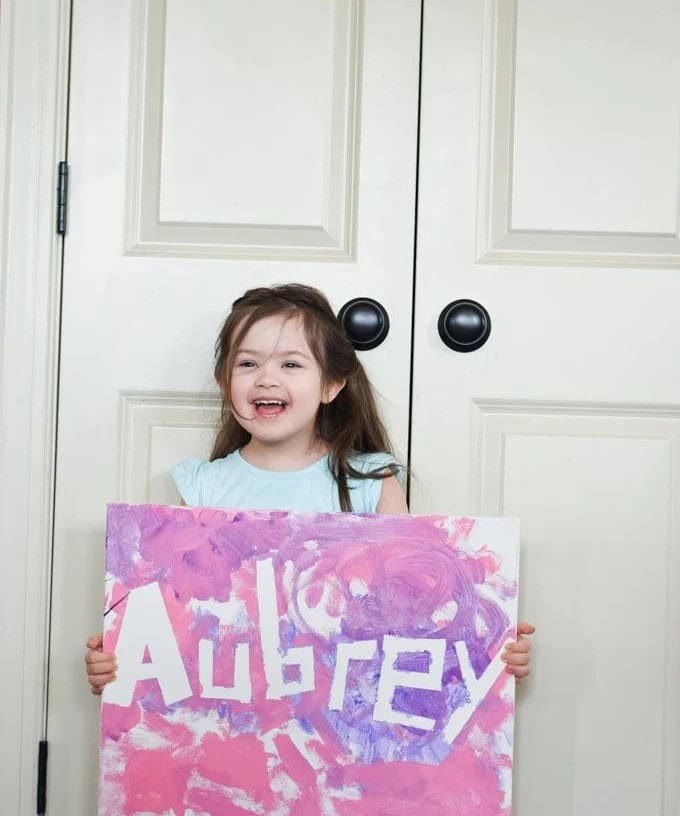
Feel free to unleash your creativity and add a personal touch with this unique activity! To get started, gather painter’s tape, paint, and a surface to work on (such as canvas, cardstock, or construction paper). Begin by using the tape to spell out the person’s name in bold strokes. Don’t worry too much about precision – the imperfections will add character to the final result. Next, apply a coat of paint over the top of the taped letters, and let it dry completely.
Once dry, gently peel off the tape to reveal the name in reverse, creating a striking visual effect that’s perfect for cards, wall hangings, or any other creative project.
Friendship Bracelets
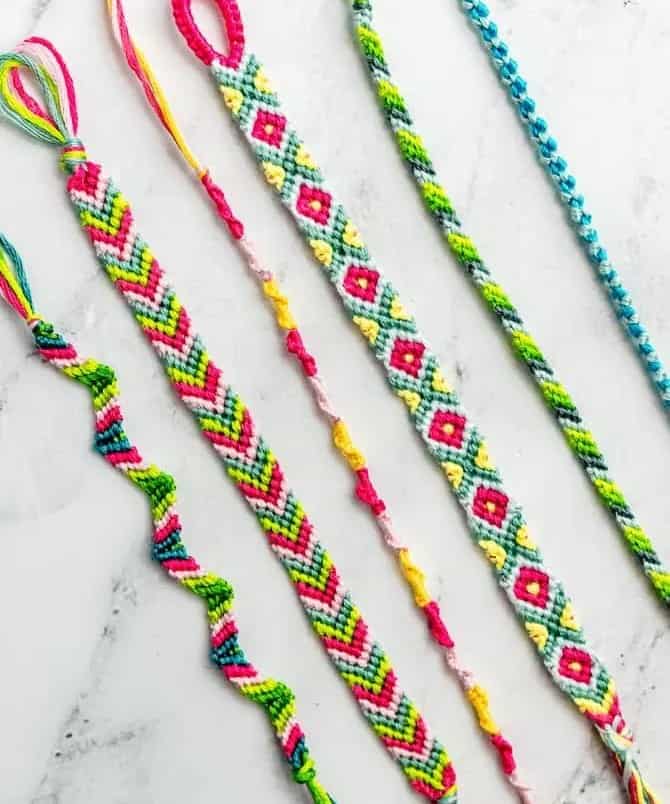
For those who share my generation, this DIY endeavour will likely be a familiar and enjoyable activity. To get started, you’ll need some basic supplies: embroidery thread, tape, scissors, and something to secure your bracelet. If you’re feeling adventurous, I suggest diving in and experimenting with different braiding styles until you find one that suits your taste. Alternatively, take a quick trip online and explore the various YouTube tutorials on braiding to get a feel for what works best.
Origami Unicorn Corner Bookmark
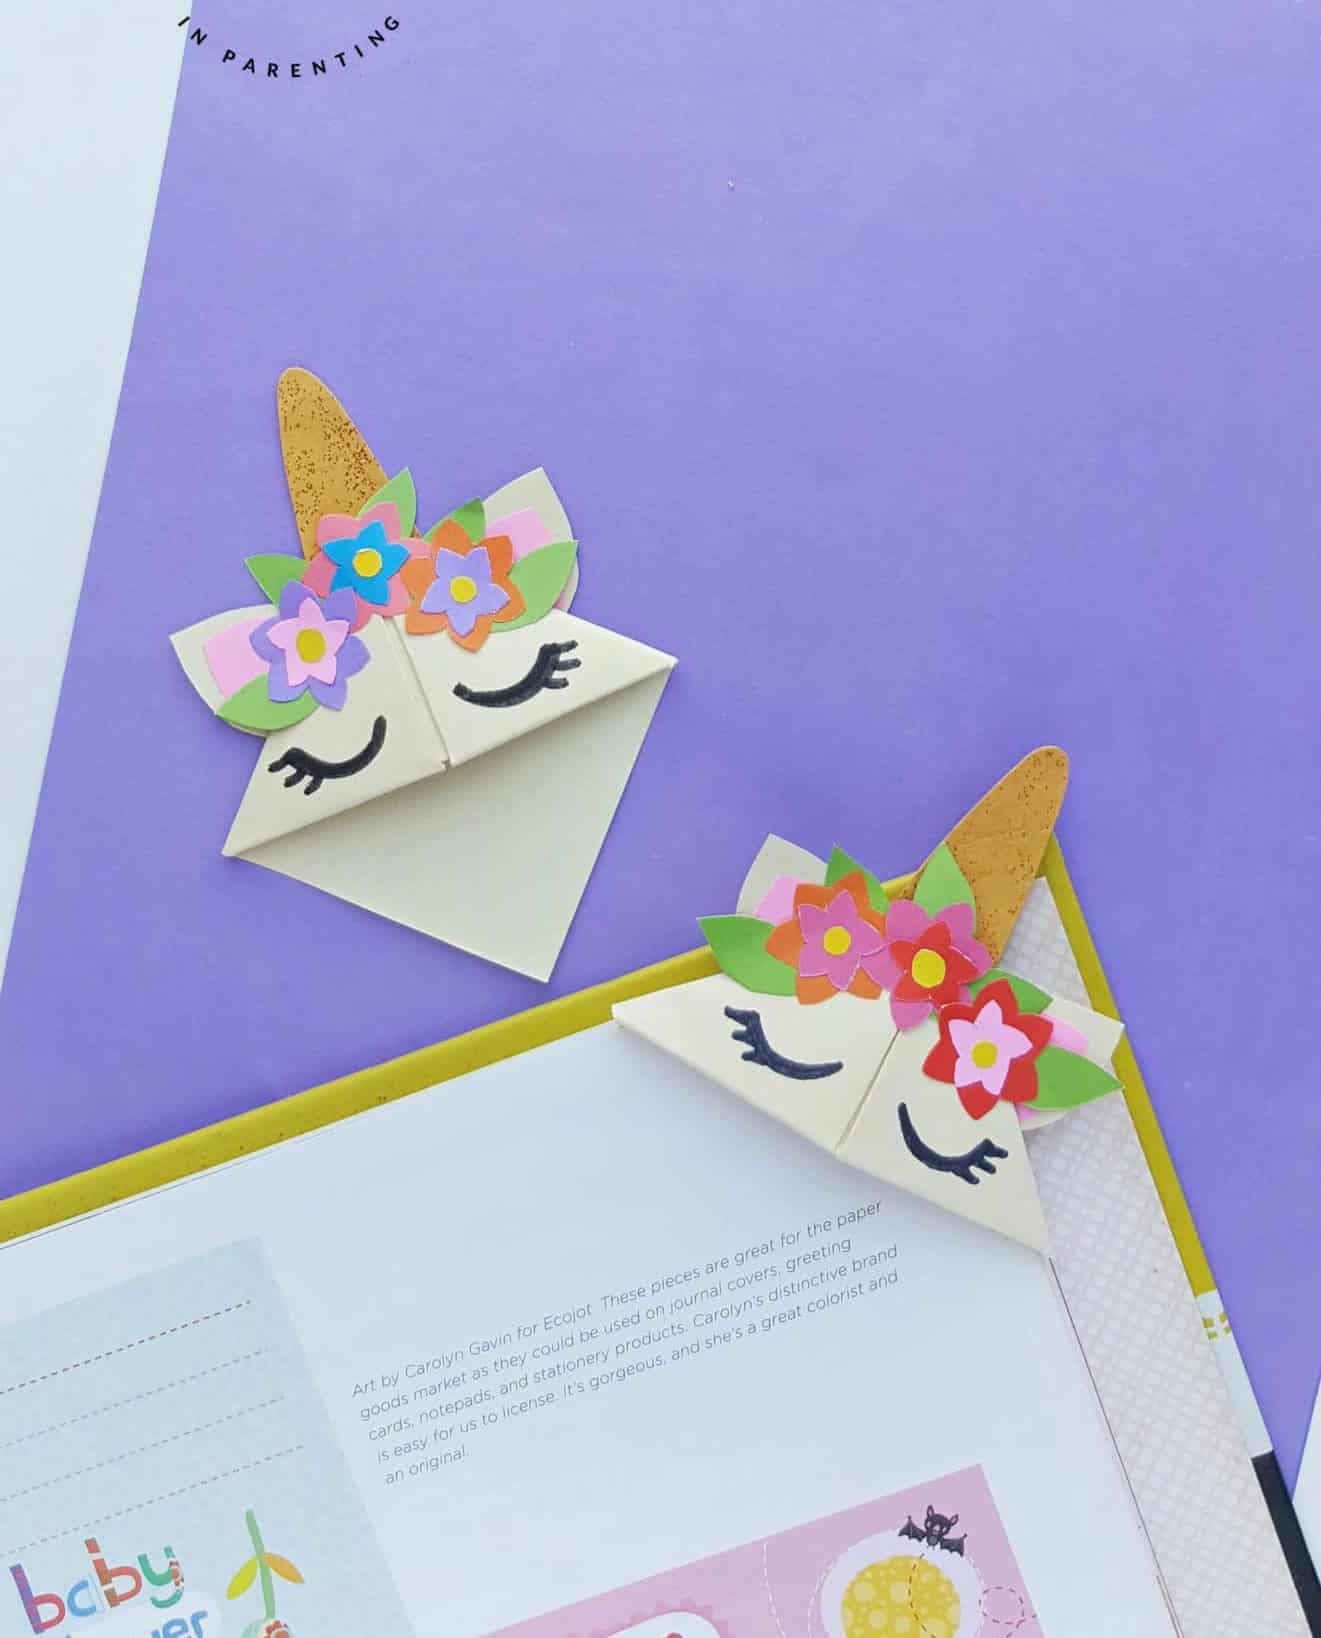
Begin by folding your square sheet of paper diagonally to create a triangle shape, reminiscent of a taco. Next, fold one of the middle points down slightly beyond the bottom edge, allowing it to peek out ever so slightly. This initial fold sets the stage for the rest of the bookmark’s design. Following this, take the right half of the triangle and fold it inward toward the midline, repeating the process on the left side.
As you complete these folds, you should start to notice two tails emerging – these will eventually form the pocketed portion of your marker. To finish the design, tuck both tails inward and under, allowing them to nestle into place and create a sturdy foundation for any embellishments you might like to add. From here, let your imagination run wild – decorate your bookmark with stickers, cut-out pieces, or any other whimsical touches that bring you joy.
Felt Flower Bookmark
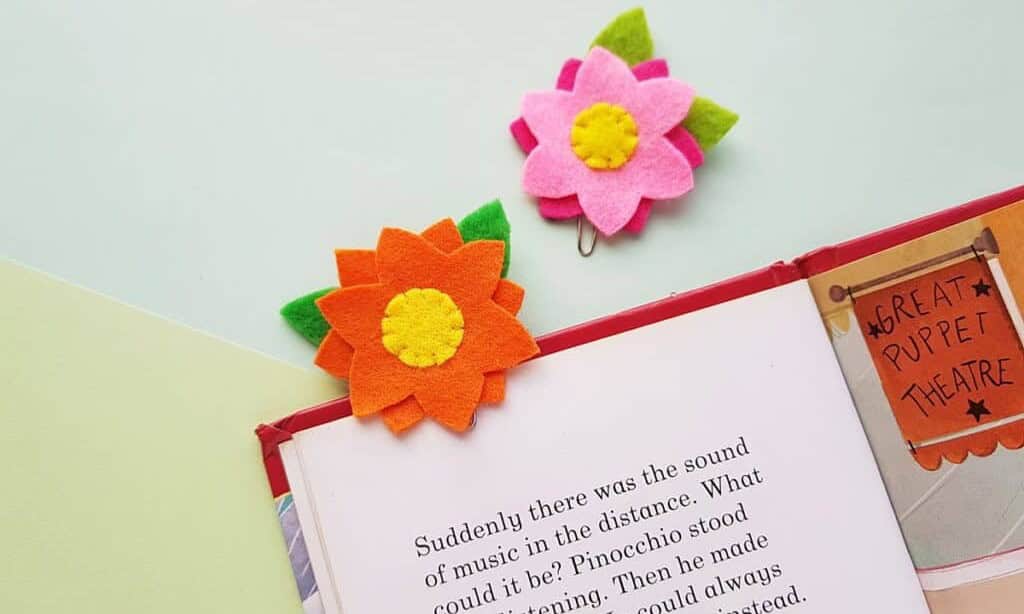
Transform your love for reading into a thoughtful gift with DIY felt flower bookmarks. With just a few simple materials like colorful felt scraps, thread, needle, glue (hot or craft), pencil, scissors, and a paperclip, you can create a charming token of appreciation for any bookworm. Start by sketching the flower design onto your felt and then cut it out carefully. Next, sew the individual parts together to form the bloom, before attaching it to the clip using your chosen adhesive.
Allow the glue to dry completely before presenting your gift. This sweet gesture is sure to bring a smile to any avid reader’s face.
Mason Jar Aquarium
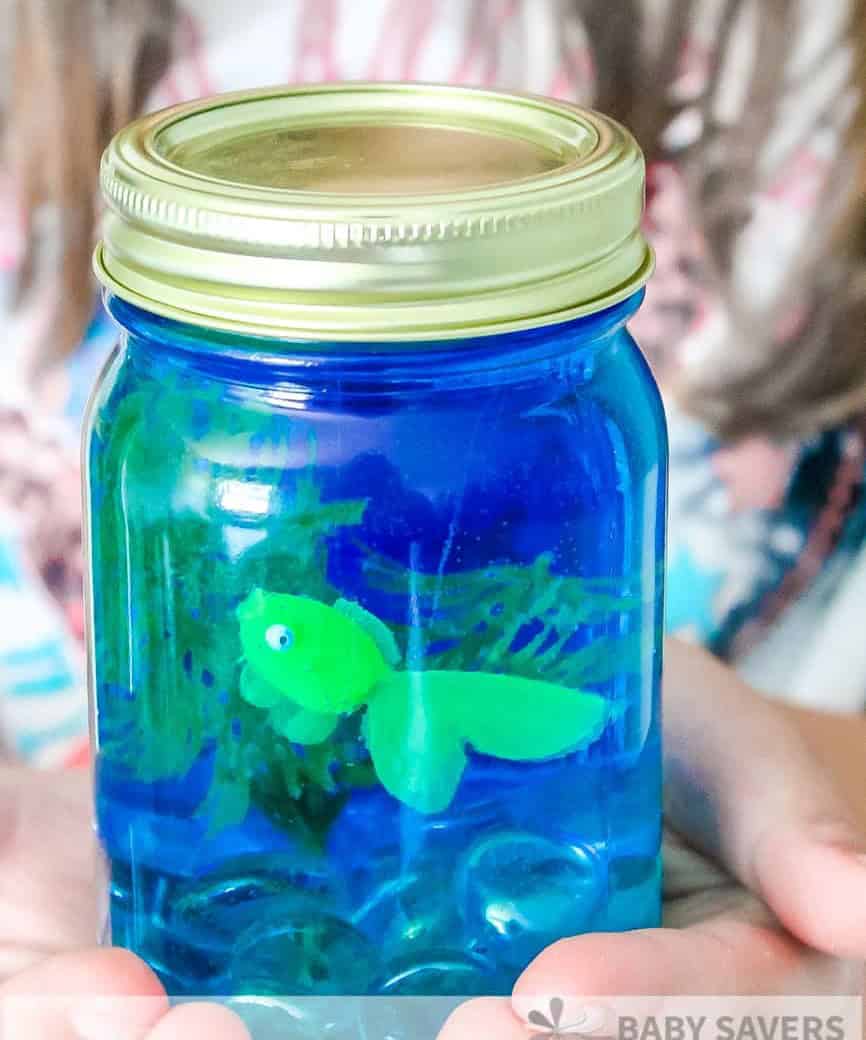
Imagine a mesmerizing underwater scene contained within a glass vessel, akin to a snow globe, but instead, it’s submerged in an aquatic wonderland! To create this enchanting craft, gather the following materials: a mason jar with a secure-sealing lid, aquarium flooring (comprising pebbles, rocks, and other natural elements), blue-hued water, artificial plants that thrive underwater, small toy fish, hot glue, and glue sticks.
Begin by applying a thin layer of adhesive to the bottom of the jar, followed by the addition of plant life and decorative rocks. Next, carefully place your aquatic inhabitants, such as toy fish, into their new environment. Finally, secure the lid in place using hot glue to preserve the underwater world within.
Rainbow Earrings
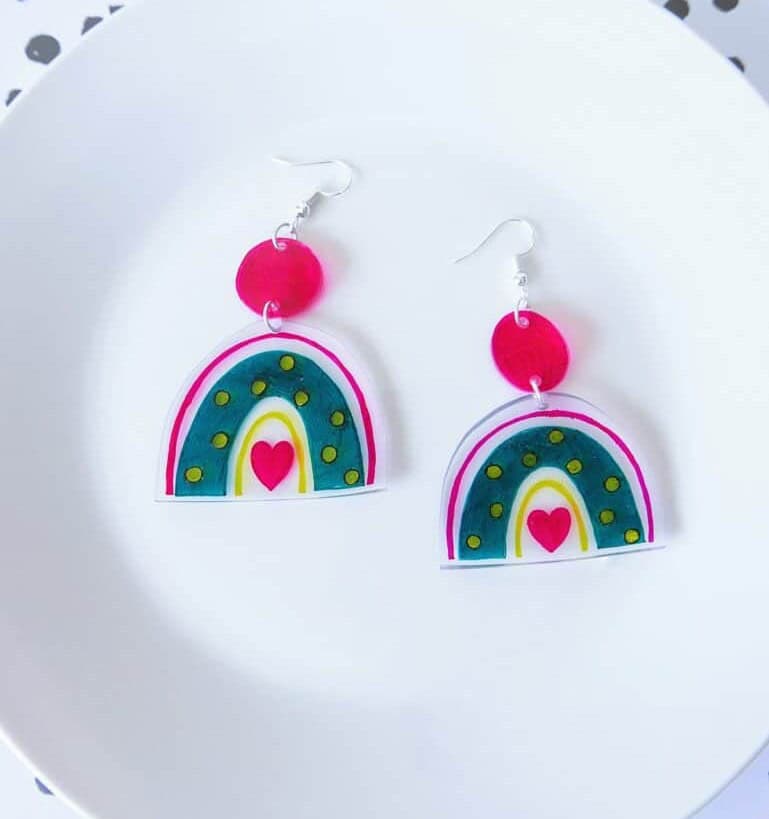
Crafting with Shrinky Dinks is a delightful activity that allows you to unleash your creativity while creating unique pieces of jewelry. To get started, simply draw your design – whether it’s a vibrant rainbow or a personalized message – onto the shrinky dink material and follow the instructions provided on the packaging. Once your masterpiece has cooled, gather some earring hardware and pliers, then assemble everything to create a beautiful piece of jewelry.
If you’re passionate about DIY jewelry, be sure to explore our collection of innovative necklace ideas for inspiration.
Tie Dye
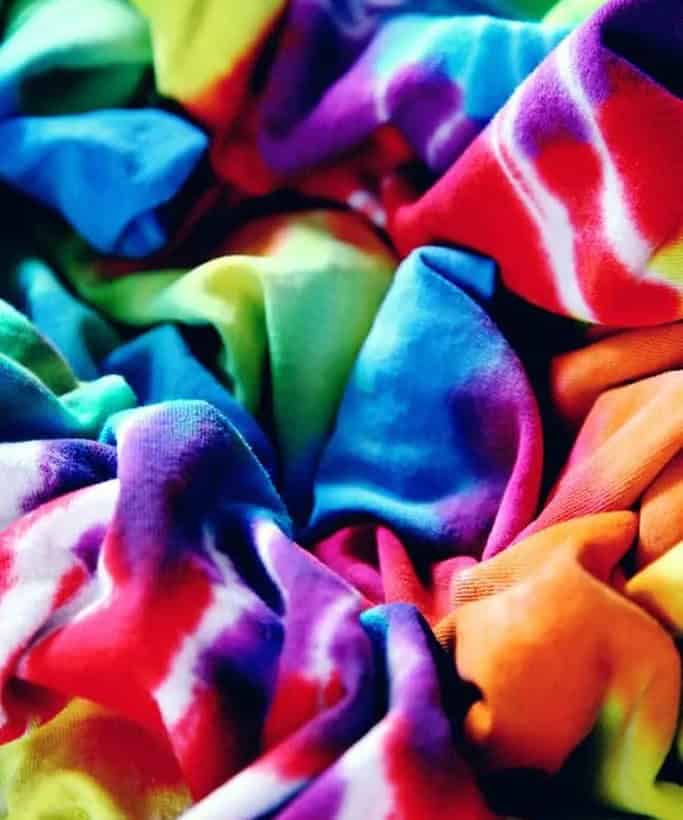
Many of us from my generation have experienced the thrill of tie-dye at some point. Why not pass on the fun to the next generation? With numerous easy tutorials available today, it’s a great opportunity to bond with your child and create something unique together. Before getting started, decide on what you’d like to tie-dye and the method you’re interested in trying out. I’ve been eyeing ice-dying as a fun activity for after the holidays.
This fun project is not only a great way to spend quality time with your kid but also yields a one-of-a-kind tie-dye shirt that you’ll both cherish.
Macrame Rainbow Charm
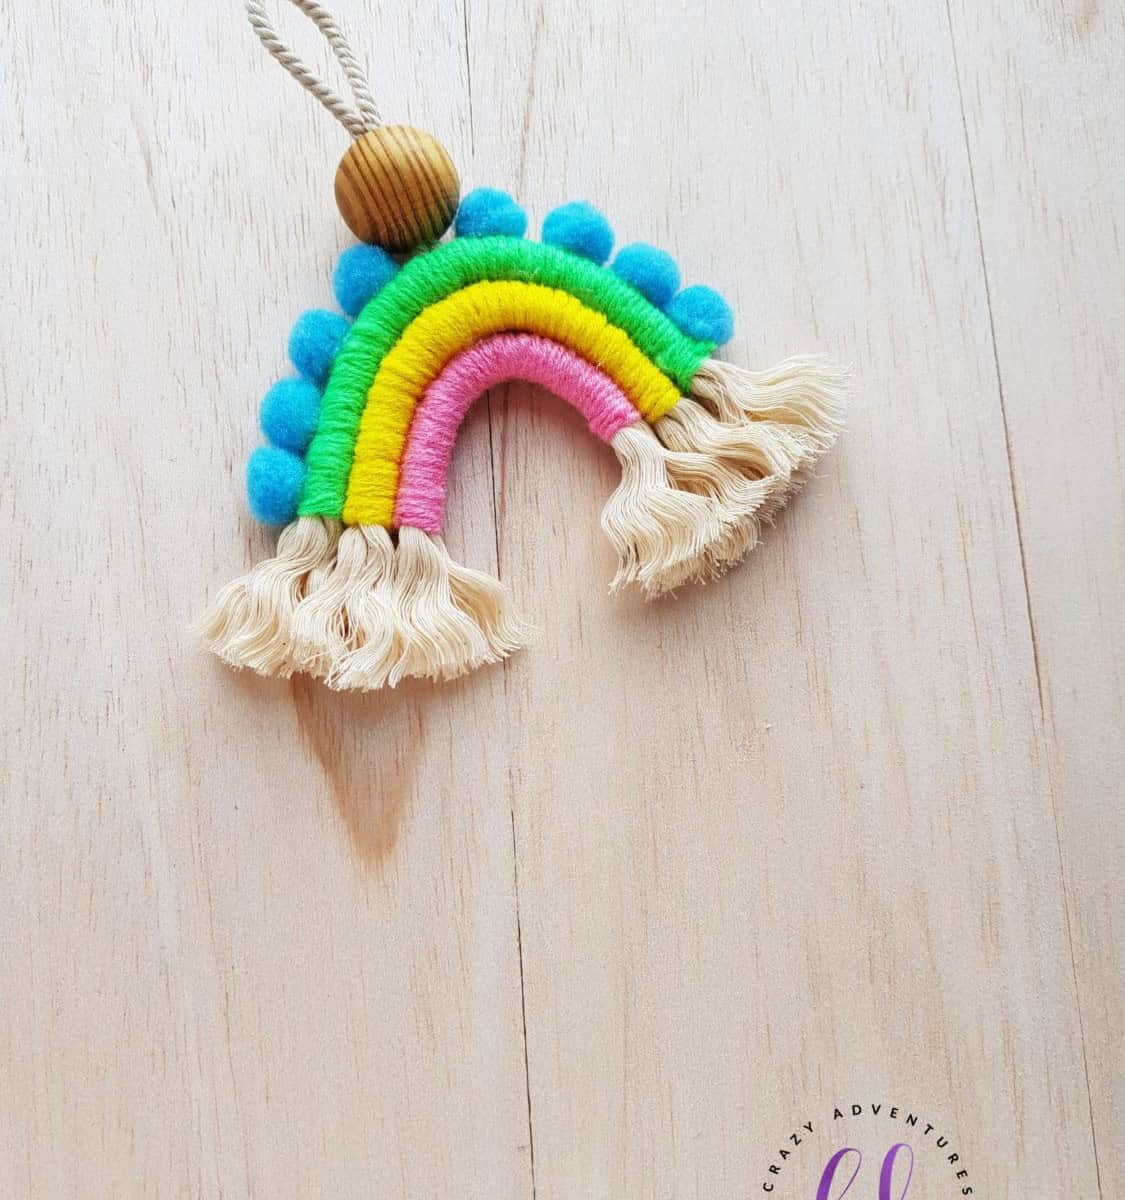
To create your unique macrame masterpiece, gather the following materials: three colors of thread, rope pieces, a thinner rope, and any desired embellishments. You’ll also need hot glue for assembly. Begin by wrapping each thicker rope with different yarn, creating a vibrant rainbow effect. Secure the ends to the back using hot glue. Once all the yarn is in place, assemble the pieces together to form your colorful masterpiece.
Before attaching the top piece, add a smaller rope to create a tie that allows you to hang your creation on a wall. Embellish the knotted area with any desired decorations. Ready to elevate your macrame skills? Explore this [macrame bracelet] for inspiration and take your crafting abilities to the next level!
Slime
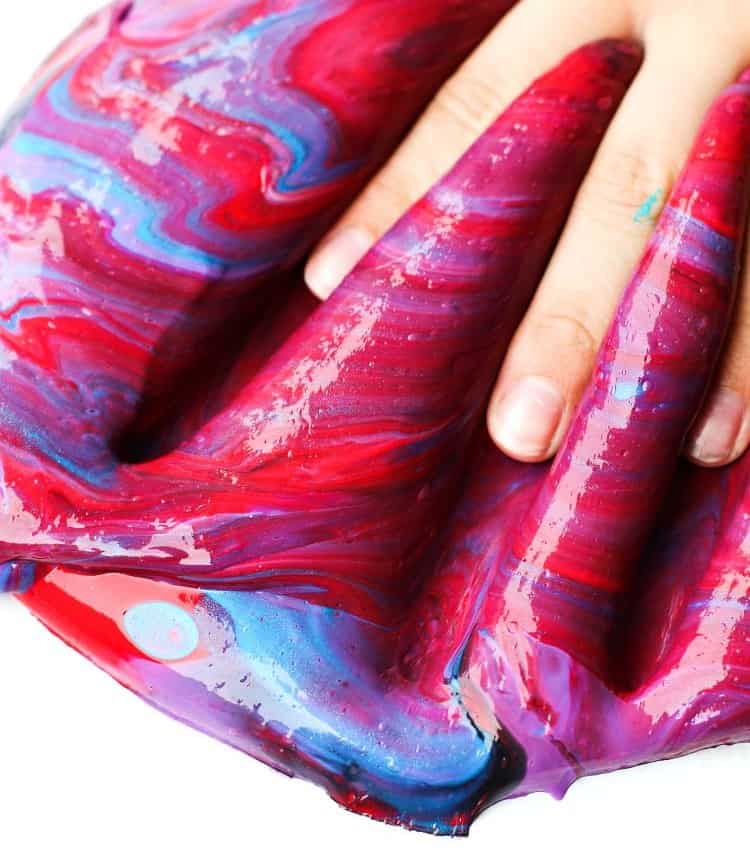
For many kids who’ve grown up surrounded by slime, it’s only natural that they develop a lifelong affection for playing with this squishy substance. If you’re new to the world of slime-making or simply looking to create your own unique recipe, we recommend starting with a basic formula. This typically involves combining 8 ounces of glue with a smaller amount of liquid starch – roughly ¼ or ⅓ cup will do. You can also add a splash of acrylic paint to give your slime some extra flair and color.
Simply mix all the ingredients together using a suitable utensil, and you’re ready to start playing!
Marbled Nail Polish Mugs
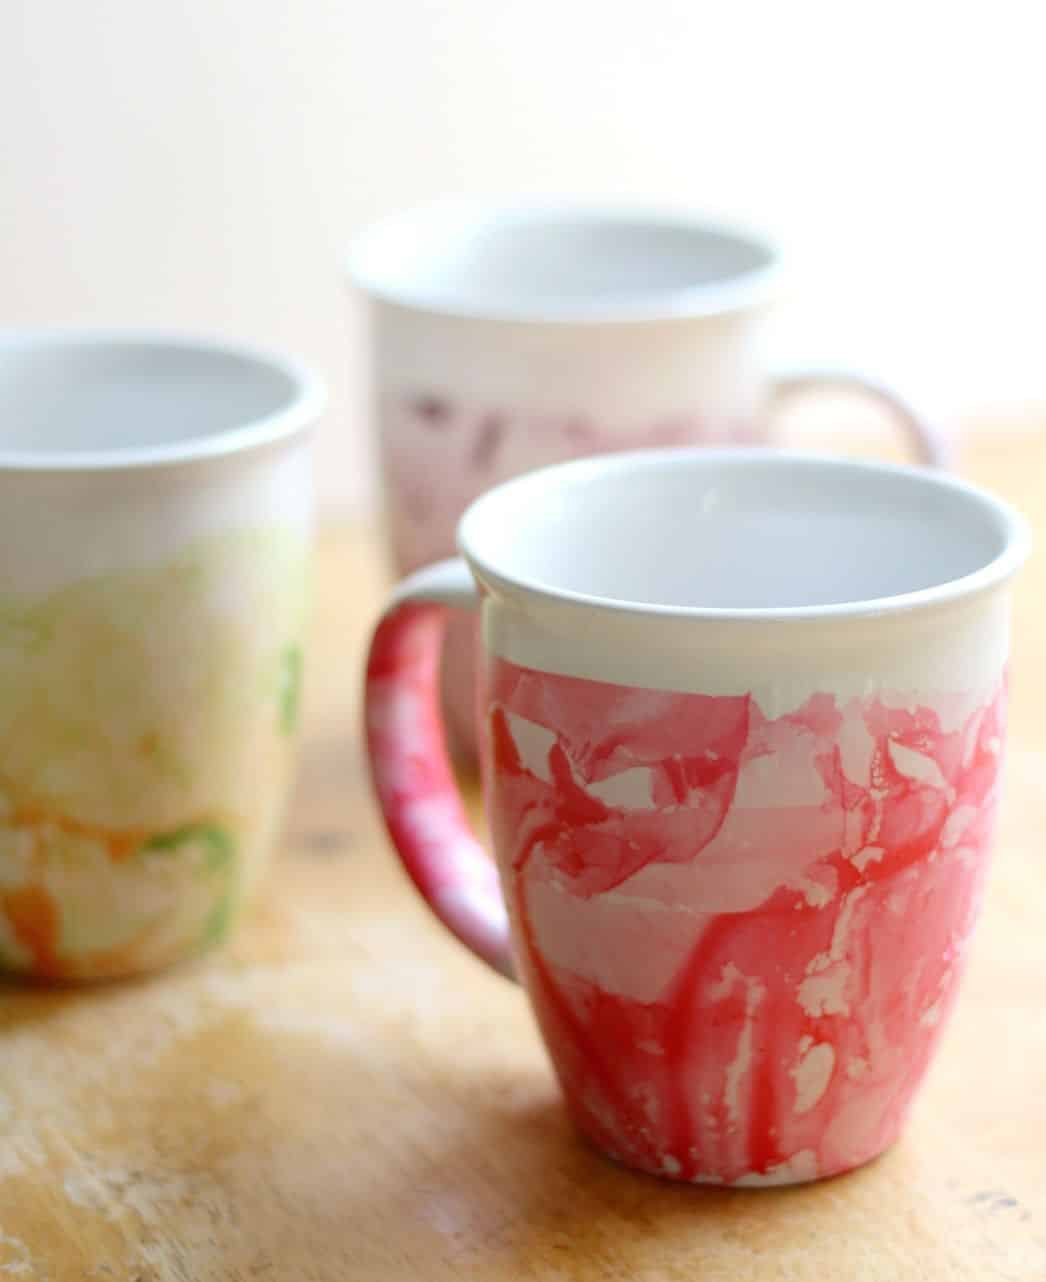
Transform leftover nail polishes into one-of-a-kind ceramic mugs without compromising their dishwasher safety. A simple yet creative approach involves combining darker shades for a unique aesthetic. Start by filling a bowl with water, taking care not to overfill it as the mugs will eventually get submerged. Next, introduce one or multiple colours of polish into the liquid, being mindful to leave a small border around the rim clean.
The dipping process is all about experimentation – quickly submerge the mug in whichever design you envision, and don’t worry if things get messy; a trusty nail polish remover is always nearby. Once the mugs have dried completely, inverted on a towel, they’re ready for use.
DIY Charm Bracelet
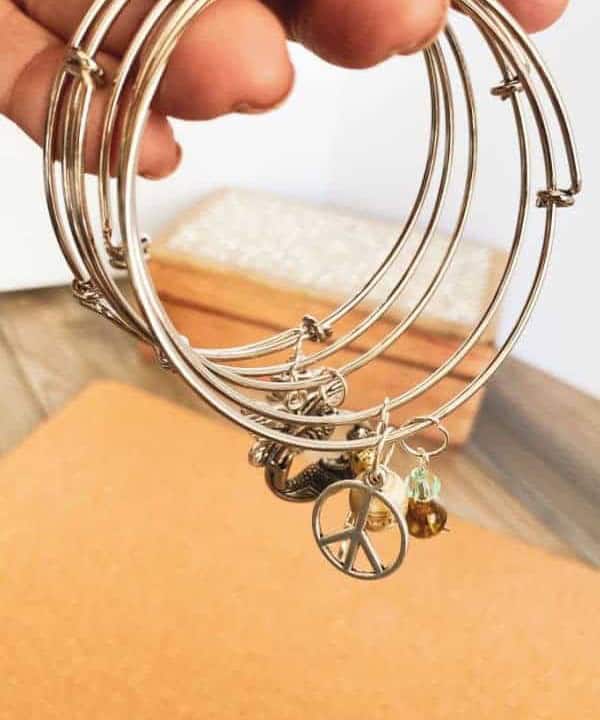
What sets these apart as truly exceptional gifts is their personal touch. To create something truly one-of-a-kind, consider pairing this bracelet-making kit with a visit to your local craft store to select from an array of charms that reflect the recipient’s interests or personality.
Mermaid Hair Clip

To create this unique accessory, start by crafting a simple fishtail template – just the flippers are necessary. Begin by tracing the design onto blue foam, which will serve as the foundation of your project. Secure the foam to a hair clip using glue, taking care to ensure a strong bond. Next, add cool-toned sequins to the flippers, using glue to attach them and a chopstick to aid in aligning them precisely. Allow everything to dry completely before proceeding with the next step.
Once the glue has fully dried, attach the foam to the hair clip, ensuring it is securely fastened. Finally, allow the entire assembly to sit for at least 24 hours before handling or wearing.
Word String Art
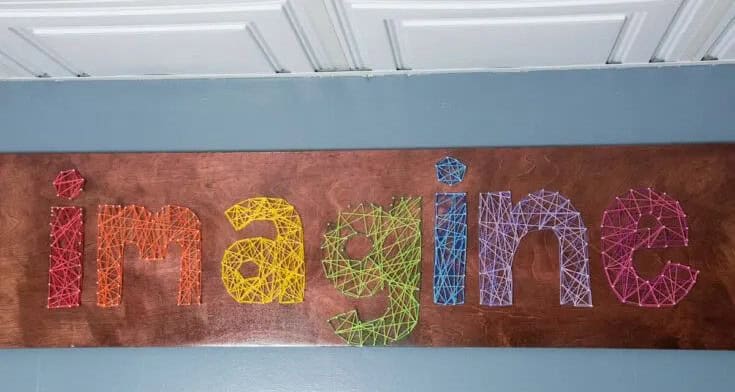
Transform a piece of crafting wood into a charming decorative piece or thoughtful gift by combining it with nails and embroidery string. Begin by planning out a word in bubble letters – the unique, rounded shape will add visual interest to your design. Once you have your word drafted out, use the corresponding nails to hammer it onto the board.
Next, thread an initial knot from one of the pins, then crisscross each letter with different colored strings, finally securing the end with a knot when finished. The result is a one-of-a-kind piece that’s sure to bring a smile.
Clay Fish
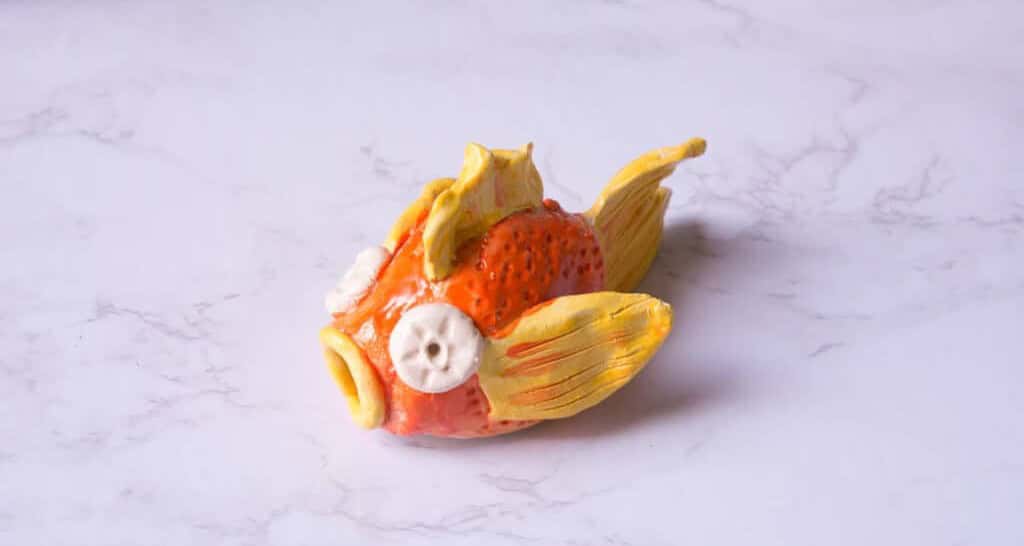
I stumbled upon this exceptional air dry clay through a friend’s recommendation, and my family has developed a strong affinity for it. To get started, you’ll require a few additional materials: water, scoring tools designed specifically for this type of clay, acrylic paint or glazes to add a pop of color, and a dedicated workspace that is suitable for working with air dry clay.
Once you have these essentials in place, let your child’s creativity shine by having them craft any fish-inspired design they desire! For the more intricate details, encourage them to use the scoring tools to fine-tune their creation. Additionally, water can be used to gently smooth out any bumps or imperfections that may arise during the process.
Coaster Emoji
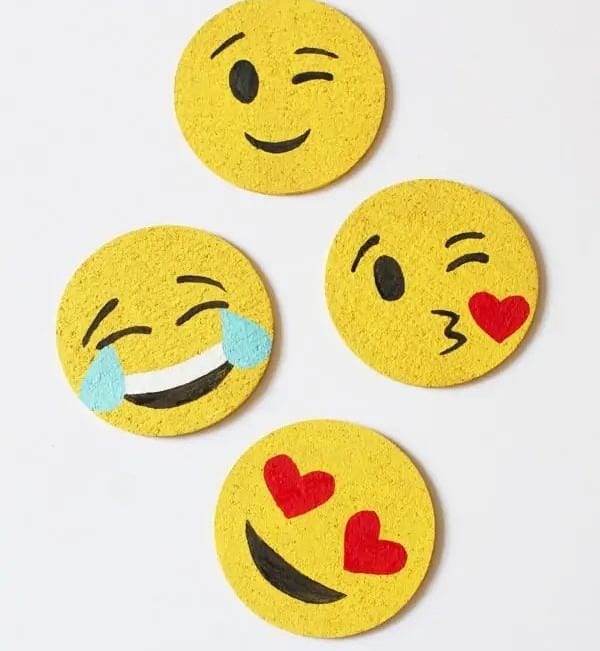
To begin, gather a set of blank coasters. I recommend using cork ones, as they work exceptionally well for this project. Next, size and print your favorite emojis to fit the coasters. Once you’ve done that, paint the entire set yellow and create your face templates by cutting out the eyes, face, tongue, and other features to reveal the negative space. As you wait for everything to dry, prepare each coaster with a unique face design.
Paint in the details, let them dry again, and finally, seal them with a layer of mod podge to protect your handiwork. If you enjoy this craft, you may also appreciate creating a resin keychain.
Melted Crayon Art
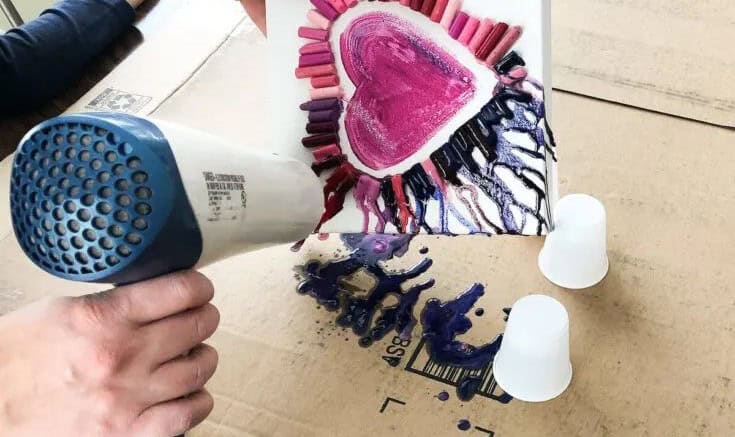
Get creative with your child by embarking on this unique project. Gather materials such as canvas, peeled crayons, Elmer’s glue, acrylic paints, and a blow dryer. First, have your child design their concept, then add any additional elements using paint and let it dry completely. Next, apply the crayons to the canvas, allowing them to set before moving on to the final step.
Once all elements are dry, have your child use the blow dryer to manipulate the crayons, creating a textured look that adds depth and visual interest to their artwork.
Pressed Flower Bookmark
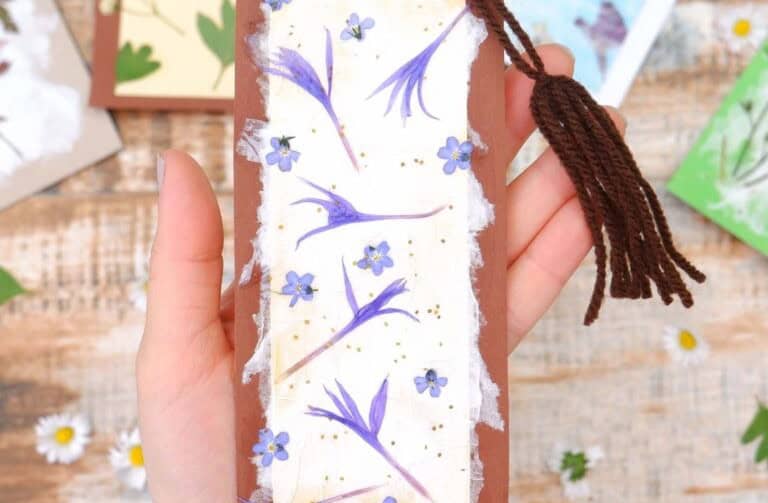
For a project that requires patience, this DIY craft activity is perfect for little hands. The end result is well worth the longer timeline, as it’s a beautiful way to preserve memories. Start by preparing your flowers for pressing. Trim any stems and place them between two sheets of parchment paper in the desired arrangement on a plate or other flat surface. Next, gather some books and use one as a press, placing the parchment-wrapped flowers inside.
Top with the remaining stack of books and let it sit for about a week to allow the flowers to dry. While your flowers are drying, create the bookmarks by cutting out shapes from old cereal or pasta boxes. Each shape should have two pieces glued back to back, forming a sturdy base. Punch a small hole at the top of each bookmark, ready for a tassel or ribbon. Once your flowers are completely dry, use a brush to apply a small amount of glue to the back of each bloom and attach it to the bookmark.
Allow the glue to set before adding a final touch with a tassel or ribbon in the punched hole.
Paper Plate Rainbow
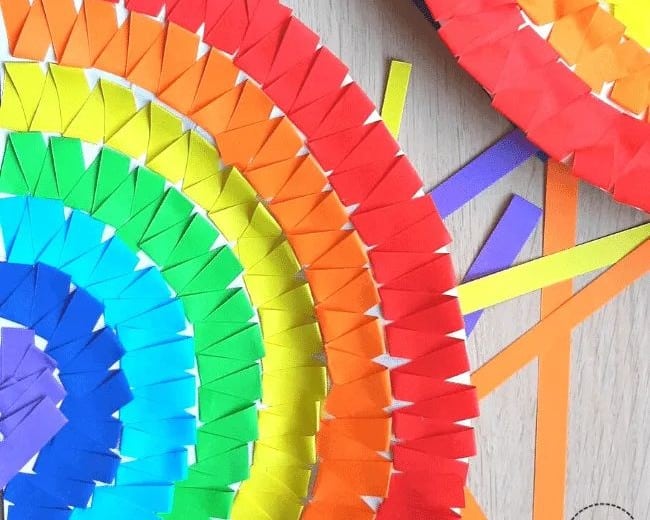
Elevate the classic paper plate craft by introducing a vibrant rainbow twist! When your little ones are looking for a fun activity, try this engaging project that’s sure to bring out their creativity. To get started, you’ll need half of a paper plate, construction paper in a range of colours, glue, and scissors. Have them arrange the colours in a classic rainbow pattern or opt for a gradient effect instead.
This flexibility will allow your mini-me’s to experiment with different designs and make it a truly unique experience. The twist comes when you have them cut out long strips from the construction paper, rather than small pieces. Folding these strips into an arched shape will give your project a beautiful texture. Finally, glue the accordion-style strips onto the plate in the correct order, creating a stunning rainbow effect that’s sure to impress.
Paper Lotus Flower
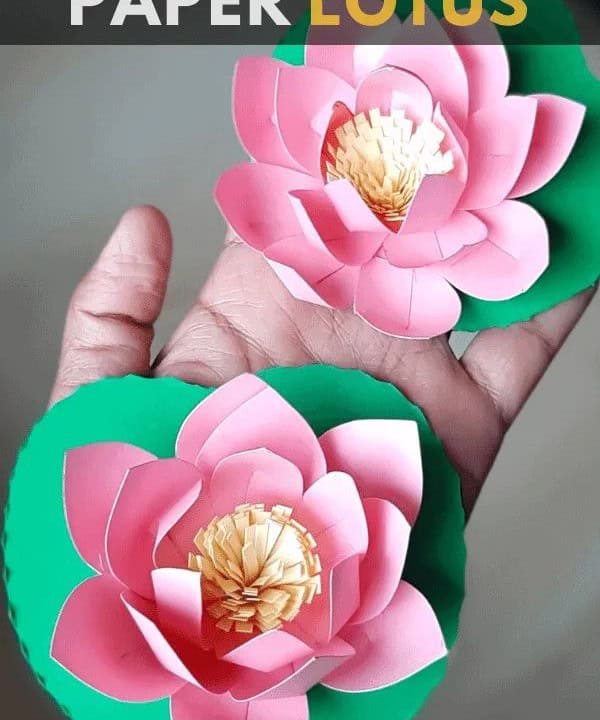
Create a stunning paper lotus flower to brighten up any room. With just a handful of materials – thick cardstock or construction paper, glue, scissors, and a template – you can craft this beautiful piece. Start by tracing the unique petals on a separate sheet of paper, then cut them out, leaving a line in the middle for folding. This will give your flower depth when completed. To begin, roll up yellow strips to create the inner part of the flower. Secure with glue and let it set.
Next, trace and cut out the remaining flower petals. One by one, attach these petals to each other using glue, gradually building the full lotus. Finally, add some green leaves, cut them out, and attach the finished flower to its new foliage. With these simple steps, you’ll have a beautiful summer craft that’s sure to impress.
DIY Mouse Pad
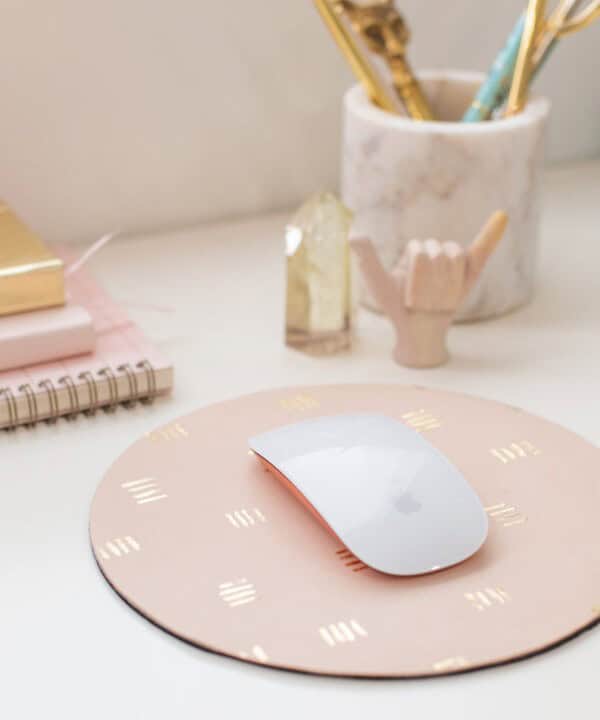
Transforming a blank canvas into a one-of-a-kind masterpiece, creating a DIY mouse pad has never been more accessible! Gather the following essentials: a blank mouse pad, faux leather, a fine paintbrush, mod podge, gold leaf, E6000 adhesive, scissors, and a pen. By tracing the mousepad’s shape, cutting out the material, and gluing the two layers together, you’ll be well on your way to designing your very own personalized mousepad.
The beauty of this project lies in its simplicity – all it requires is a dash of creativity to bring your vision to life.