When it comes to keeping a three-year-old occupied, few things compare to the magic of crafting. Not only does it foster creativity and independent play, but it also provides a valuable learning experience. By engaging your child in various textures, colors, and shapes, you’re helping them develop important skills like fine motor control. And let’s not forget the hours of entertainment it can provide – a win-win for parents and kids alike!
Here are 41 fun and creative crafts perfect for three-year-olds to enjoy alongside you.
Fingerprint Glass Magnets
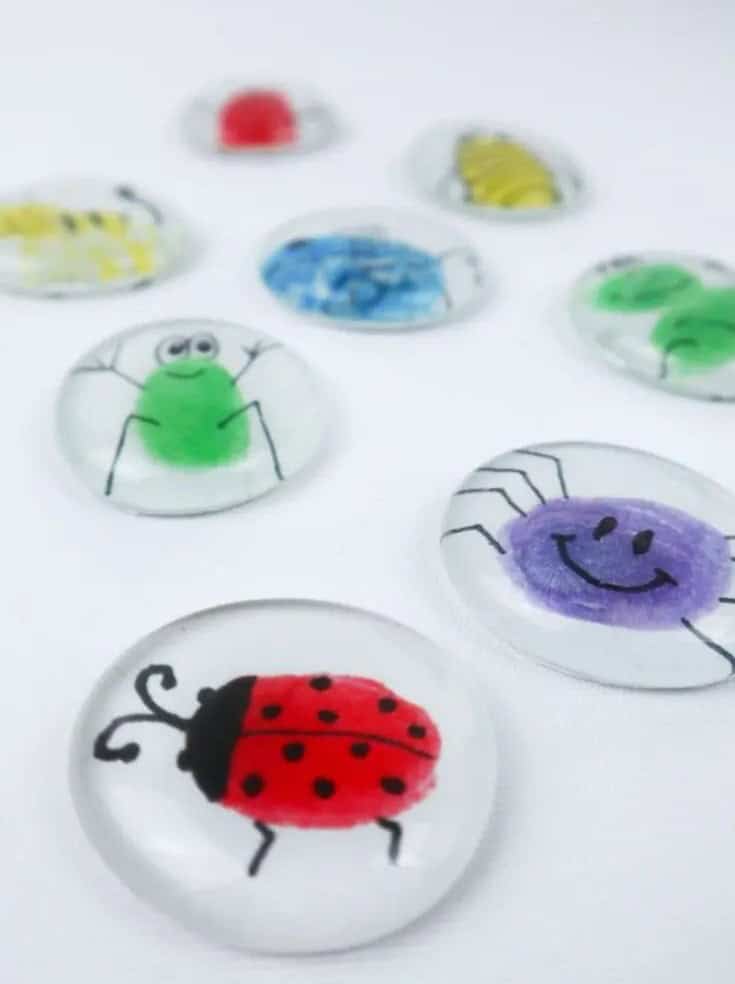
Want to preserve those adorable kids’ art creations on the fridge without overwhelming the space? Try Fingerprint Glass Magnets! This clever hack not only keeps the artwork intact but also makes for a wonderful way to reminisce about their early years. To create these mini masterpieces, you’ll need magnets and large glass cabochons, along with some other basic supplies.
If you’re new to DIY endeavors or just want to get started quickly, consider ordering your cabochons from a reliable online retailer.
Rainbow Craft

While young children naturally grasp colors alongside ABCs, introducing different hues requires selecting the right materials. Many preschool educators begin with a classic rainbow, making it an ideal starting point for a color teaching lesson. To create this engaging project, gather marshmallows, cardboard, a black marker, and glue. For added appeal, consider incorporating food coloring to make the art more vibrant.
Begin by cutting out your cardboard in an arch shape and drawing the iconic rainbow lines. Then, assist your toddler in placing one colored marshmallow at a time between the lines. This activity requires minimal supervision, allowing for a fun and creative learning experience.
Fish Craft
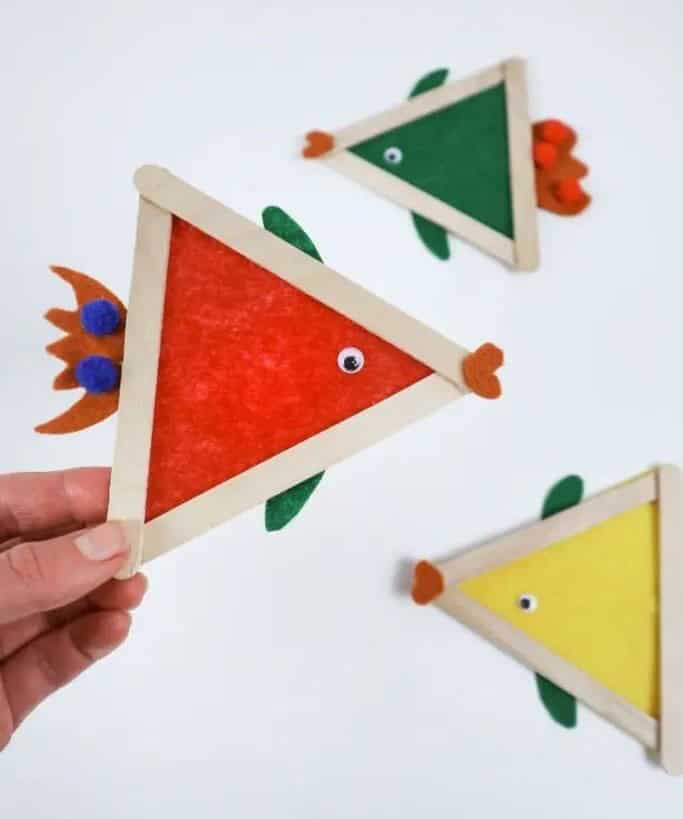
Transforming a DIY craft project into an educational experience for kids is a great way to introduce them to the wonders of the underwater world. For instance, creating a fish art project can be an engaging and interactive method to teach children about aquatic life, including what they eat, how they breathe, and their habitats. This project is surprisingly simple and can be adapted for both classroom and home use.
To get started, you’ll need some basic supplies: popsicle sticks, felt sheets in a variety of colors, and a glue stick. Begin by forming a triangular base with the popsicle sticks, then cut out a corresponding shape from the felt and attach it using the crafts glue. You can add details like fins, tails, mouths, and gills to give your fish some personality. If you don’t have felt available, you can substitute colored paper sheets – simply purchase them online.
Tissue Paper Apple
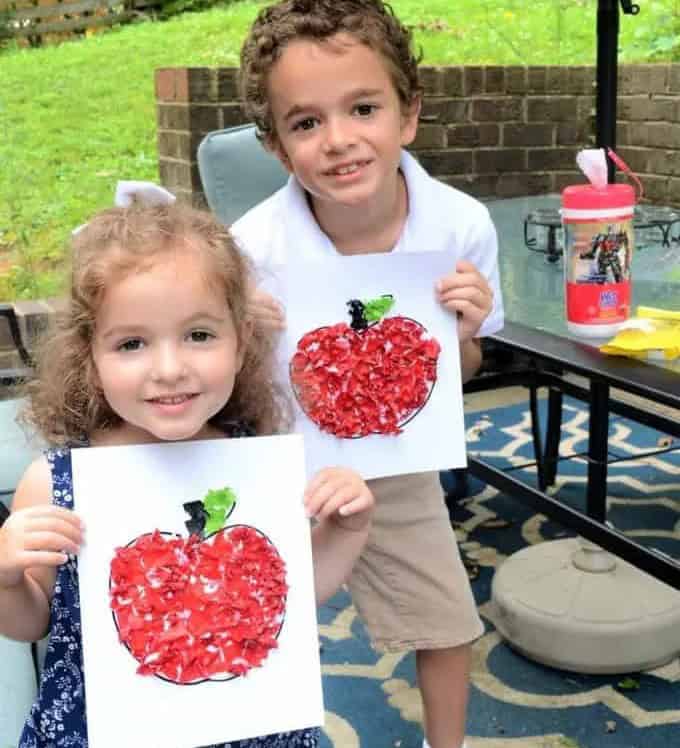
Tissue paper crafts are an affordable and creative outlet for many reasons. One of the primary benefits is that a single roll of tissue can be used to create a wide range of projects, making them an excellent value for families on a budget. With this medium, you can craft almost anything, from simple decorations to intricate designs. To start, let’s explore the process of creating an apple using tissue paper.
You can either opt for pre-colored sheets or involve your toddlers in the painting process. For a mess-free experience, we recommend using pre-colored tissue paper. Simply cut the tissue into small pieces and help your little one glue them onto a pre-drawn apple template. With this craft, you’ll not only be exploring the world of tissue paper creations but also spending quality time with your family.
Salt Dough
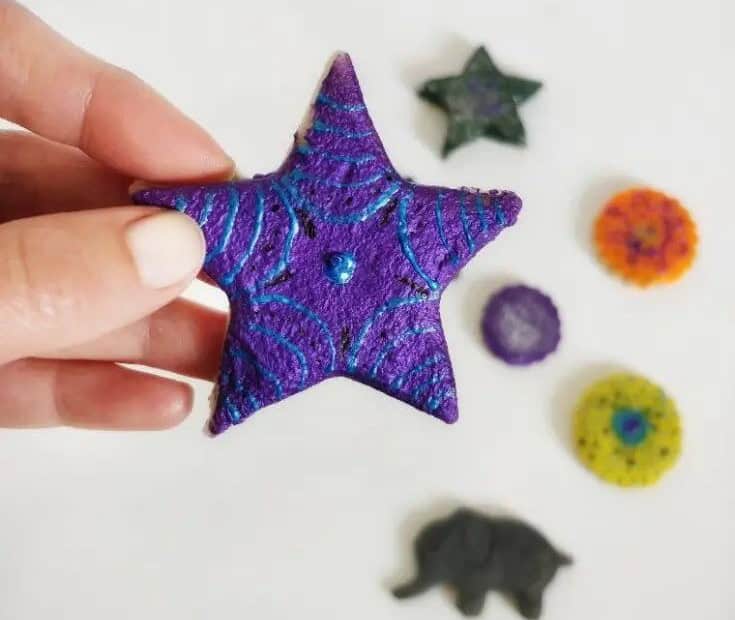
Salt dough is a fantastic medium for kids’ creative endeavors. With its versatility, you can craft a wide range of projects, from ornaments to trinkets that toddlers adore. To create the dough itself, you’ll need three primary ingredients: salt, flour, and water. For an added layer of fun and visual appeal, consider incorporating acrylic paint into the mix. You can find a vast array of colors online or in local art supply stores.
Once you’ve prepared the dough, it’s time to bring out your toolkit! A few essential items will help bring your creations to life: baking sheets for shaping and drying, rolling pins for texturing and smoothing, and cookie cutters for cutting out unique shapes. Invest in a set of these tools, and you’ll be all set to create more masterpieces as the DIY project bug bites you.
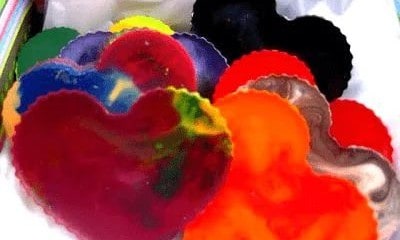
Sun Catcher
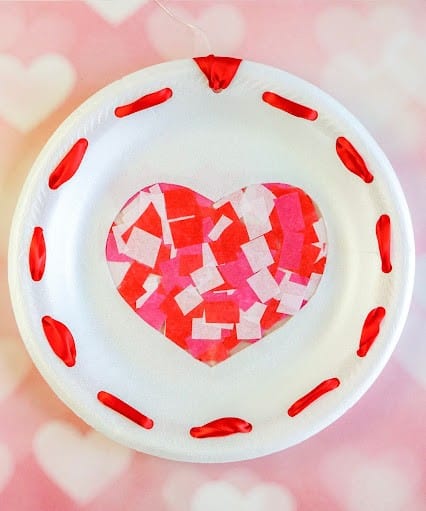
Transforming a simple afternoon into a creative masterpiece, suncatchers are an ideal craft for young children. As the sun shines through, the vibrant colors will mesmerize and delight. To create these charming decorations, gather three essential materials: styrofoam plates, contact paper, and tissues. If you don’t have contact paper readily available, online retailers can provide a convenient solution. Begin by cutting a heart-shaped hole in each plate.
Next, adhere the contact paper over the heart’s outline, ensuring it covers the area where the tissue will be placed. Then, arrange the colorful tissue to form the shape of a heart, adjusting its density as desired. Once satisfied with your design, secure the tissue in place by applying another layer of contact paper.
Pasta Easter Egg Craft
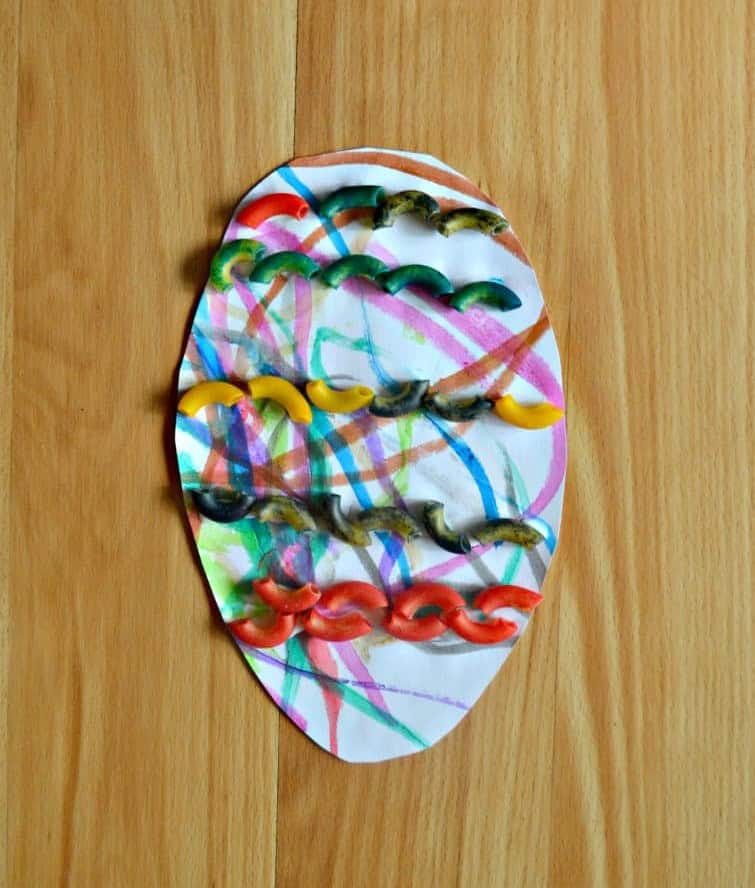
While Easter-themed crafts can be a delight, there’s no reason why the fun has to stop at Easter. This pasta egg craft is a great way to keep the creativity flowing all year round, especially for kids missing the traditional Easter egg experience. The best part? You likely have most of the necessary supplies right in your home already. If construction paper is running low, you can easily stock up on white sheets from [insert link here].
With your materials at hand, get started by drawing an egg shape onto the construction paper. Then, provide your kids with glue and a variety of painted pasta pieces, letting them experiment with different patterns and designs to create their unique masterpieces.
Penguin Craft
Create a delightful winter-themed craft with your kids by making Penguins! This low-maintenance activity requires just a few simple supplies, including colored paper, cotton balls, and glue. To get started, download the penguin template and have your little ones cut out the various body parts. Once all the pieces are prepared, let them assemble the penguin one step at a time by sticking each part together.
Finally, add some fluffy fun by having them glue cotton balls onto the white portion and then place the white piece over the black body of the penguin. This charming craft is perfect for a cozy winter evening, and you can find more inspiring ideas on our penguin crafts page.
Melted Crayon Art
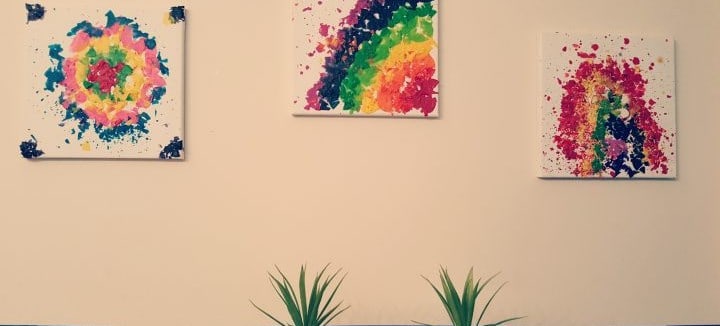
Toddlers thrive on hands-on activities that allow them to take ownership of their creative process. This project is a perfect example, as it’s entirely self-contained and requires no adult intervention once started.
A gentle nudge can go a long way in helping your toddler refine the crayons into a neat pile of colorful shavings. Once you’ve achieved this, the artistic possibilities are endless.
You have two options to encourage creativity: either let your child create freely or draw a template for them to fill with the melted crayon shavings.
The best part? Watching their artwork melt in the sun! Take turns with your toddler every five minutes to check on the progress and marvel at how it’s transformed. This engaging activity is perfect for keeping little ones occupied while you tackle household chores.
Colour Wheel
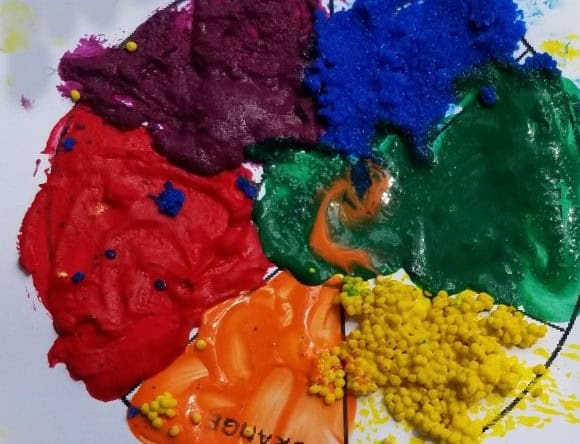
Imagine a traditional color wheel, but with an exciting twist that brings texture to the table. This engaging activity is perfect for teachers or parents looking to educate and entertain their little ones. By incorporating different materials into paint bowls, we’re not only teaching kids about colors, but also introducing them to various textures through play.
To make this happen, you’ll need six colors, six bowls, and an assortment of materials like rice, flour, couscous, or even sand to add a tactile element to the experience. As your base, use a blank color wheel template to create a visually appealing representation of the colors and textures.
Heart Printed Paper Bags
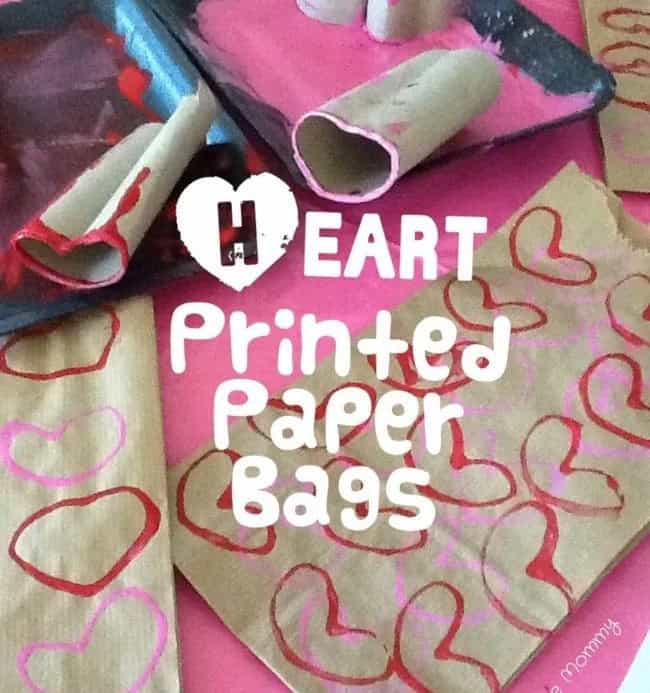
When it comes to teaching kids about frugality, why not start with something as simple yet fun as painting? Next time you’re rummaging through household items, see if you have any brown paper bags lying around. If not, a quick online order from here can provide the necessary supplies for this engaging craft project. You can use these bags later for creative gift wrapping solutions. Take some empty toilet paper rolls and manipulate them into heart shapes.
Dip these heart-shaped templates in paint and then stamp them onto your brown paper bag. This interactive activity is sure to delight your kids and spark their creativity, all while promoting a sense of resourcefulness and frugality.
Magnet Craft
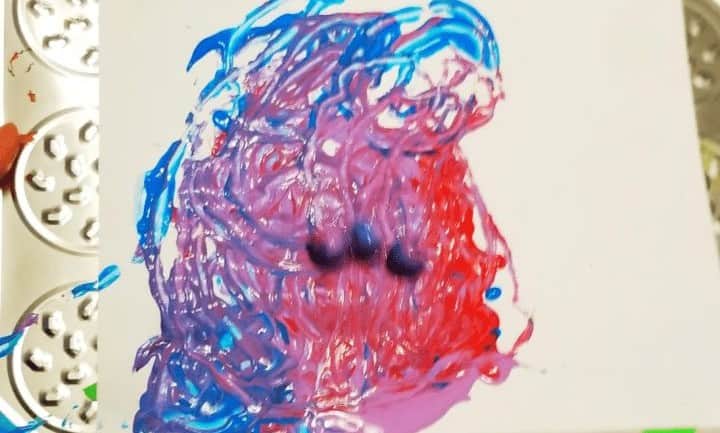
Combine painting with magnets for a captivating evening of creative play and STEM learning. By exploring the magnetic force together, you can help your kids develop a deeper understanding of science principles while fostering their artistic side.
To get started, gather two magnets and some paint. On a foil or tin tray, secure a piece of paper with tape and add small blobs of paint. Place the first magnet in the paint, then carefully slide the second one under the tray.
As the second magnet pulls the first around, a unique art form will begin to take shape. This engaging activity not only encourages color mixing exploration but also provides an opportunity to discuss the underlying science behind magnets and their effects. With this fun and interactive experience, your kids are sure to gain valuable insights into both art and science.
Spring Lamb Craft
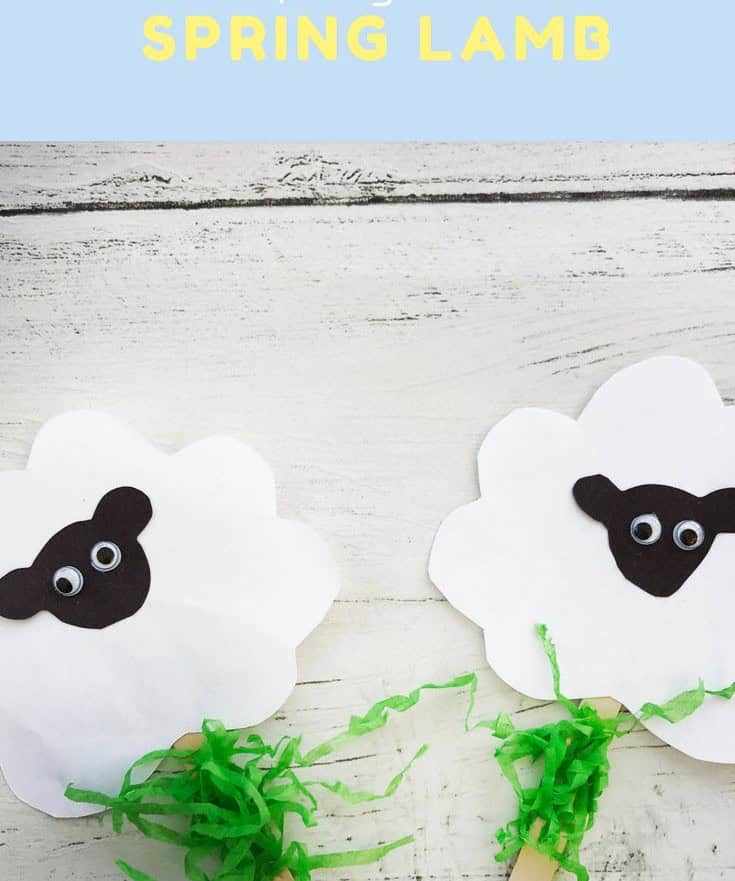
When it comes to crafts projects, I’m always on the lookout for ideas that are easy to execute with young kids. One such project is this adorable sheep craft that’s perfect for little ones. The best part? It requires minimal prep work from you, as all the pieces can be pre-cut in advance.
To get started, simply glue on some googly eyes (or order a pack if you don’t have them already) and let the kids take over. They’ll love adding these fun features to their sheep’s face.
Once the eyes are in place, it’s time to assemble the rest of the lamb.
Stick the pre-cut body onto a popsicle stick and add some green tissue or grass for a finishing touch. And just like that, your popsicle lamb is ready to roam the farm! You can create an entire menagerie of animals using this same technique, making it a great way to encourage imaginative play and storytelling.
Carrot
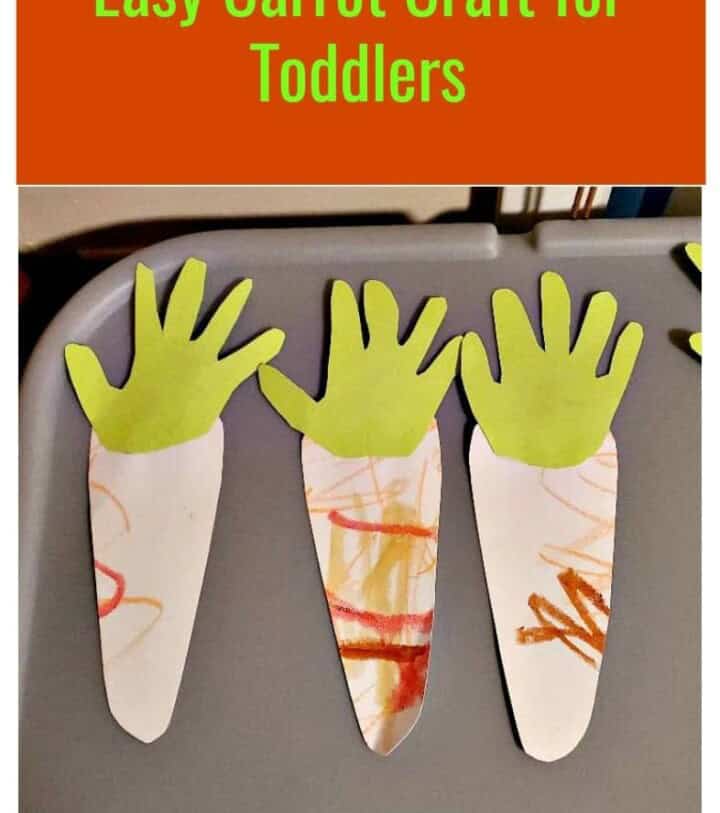
Handprint crafts bring out the creative side in me, and this easy-to-make carrot design is no exception. What’s more, it’s a wonderful way to capture a special moment with your little one. All you need is some red and green construction paper, and of course, a tiny but mighty toddler by your side. The process begins by tracing the outline of your child’s hand onto the green paper, setting it aside for later use. Next, cut out the shape of a carrot from the red paper – simplicity itself!
Finally, glue the green handprint to the red carrot, and voila! Your carrot handprint craft is complete. The end result is not only an adorable keepsake but also a heartwarming reminder of the special moments shared with your child.
Comet Craft Activity

If you’re looking for a fun and engaging craft that requires minimal materials but still holds your little ones’ attention, we’ve got just the thing – the Comet Craft Activity! This activity is so easy to set up that even the most novice crafter (or parent) can let their kids take charge and create without any fuss.
All you need are a few simple elements: pre-cut foil sheets and colorful crepe paper strips.
To get started, place a couple of strips in the middle of the foil paper, then crumple the paper into a ball, trapping the strips inside. The best part? You can use any leftover foil from your pantry or opt for convenient pre-cut sheets to save time – perfect for busy parents with multiple little helpers!
Spoon Puppet
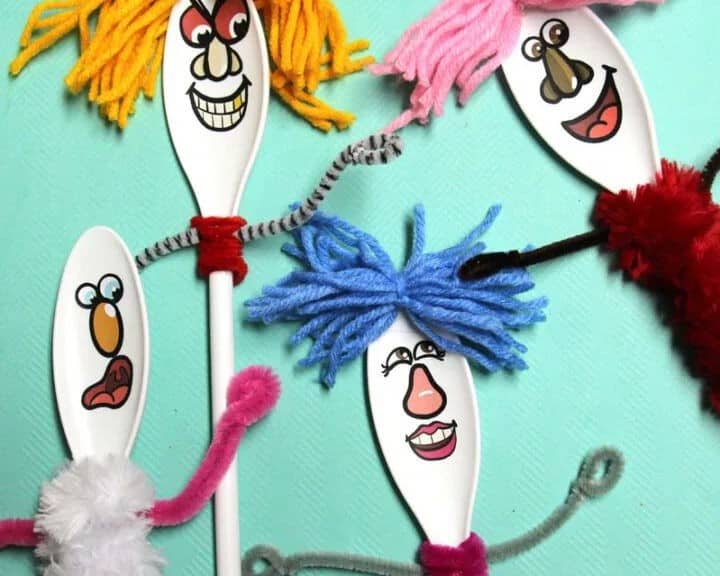
Create enchanting spoon puppets with your little ones using just a few simple materials. With a Sharpie, face stickers, and some spoons, you’ll have everything needed to bring their imaginative puppet shows to life. You can even jazz things up by adding yarn and pom-poms for extra detail. As the masterminds behind these creations, let your kids name their new puppets and stage an unforgettable show. This activity is so engaging, it’s sure to keep them entertained for hours on end.
Explore more fun projects that inspire creativity in kids here.
Paper Plate Whale
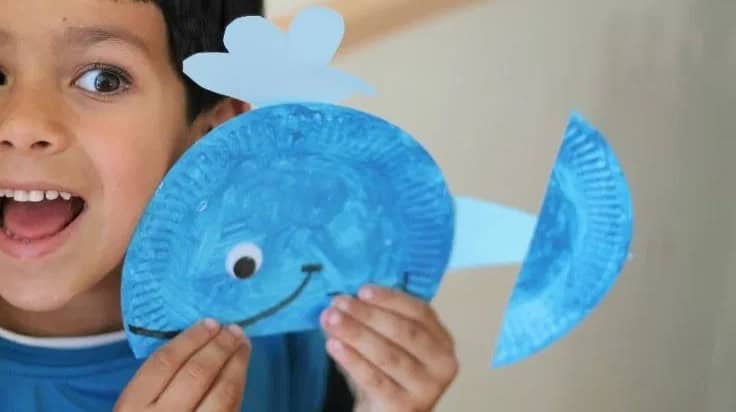
Paper plate crafting is an innovative way to engage your little ones in creative activities without breaking the bank or requiring extensive supervision. The best part? Your toddlers can work independently, fostering their sense of autonomy and self-expression. With just one pack of paper plates, you can unleash a world of possibilities for imaginative play. To create a majestic Blue Whale using paper plates, start by painting the plate a calming blue hue.
Allow it to dry completely before cutting out the ‘button’ shape for the tail. Supplement this with spare blue paper to create a realistic depiction of water flowing from the whale’s blowhole. Embellish your masterpiece with googly eyes and a touch of creativity using a black marker. The simplicity of this craft is what makes it so appealing – any child can participate, regardless of their age or skill level.
So why not gather the necessary materials and get started on your paper plate crafting journey today? With a little imagination and some basic supplies, you’ll be amazed at what you and your tiny tots can create!
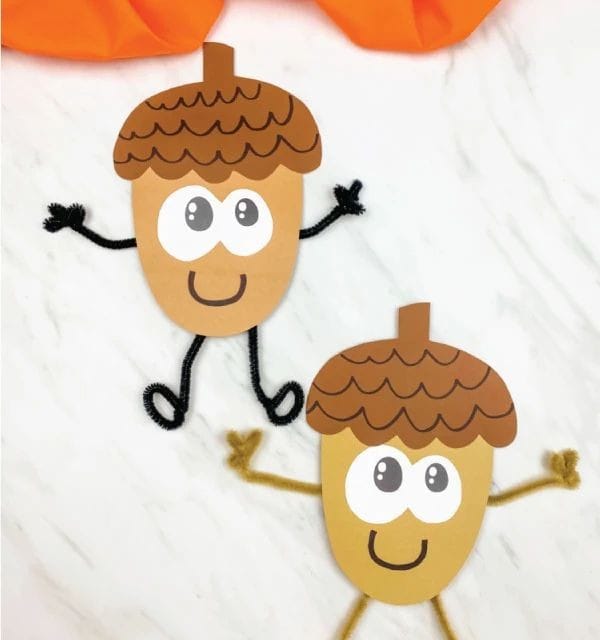
Acorn
Snow Globe
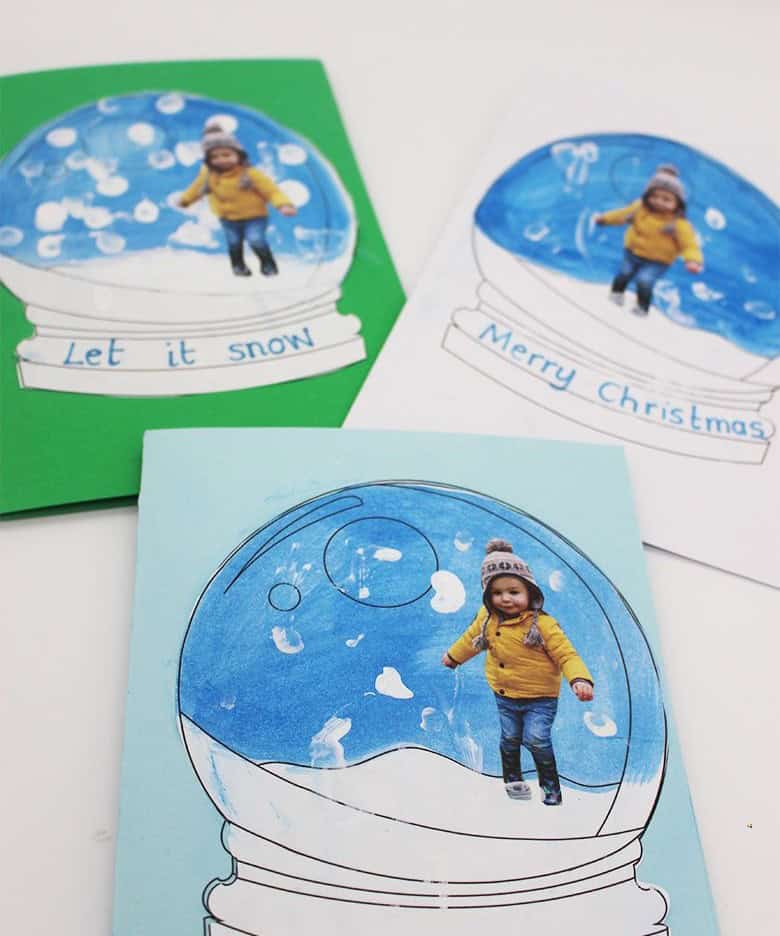
Boredom is a common affliction when it comes to sending out annual Christmas cards. To shake things up, we’ve introduced a DIY twist to our holiday tradition. Our Snow Globe creation has become an instant favorite among family and friends alike.
To get started, simply download the template provided and grab some essential materials – including printed photos of your little ones to serve as the card’s centerpiece.
With paint, Q-tips, and a dash of creativity, bring your globe to life by adding snowy details. As a test run, create one sample card before letting the kids take over and have fun with the rest.
This activity is an excellent way to spend quality time together during the Christmas season, making it a cherished family tradition that’s sure to be passed down through generations.
Monster
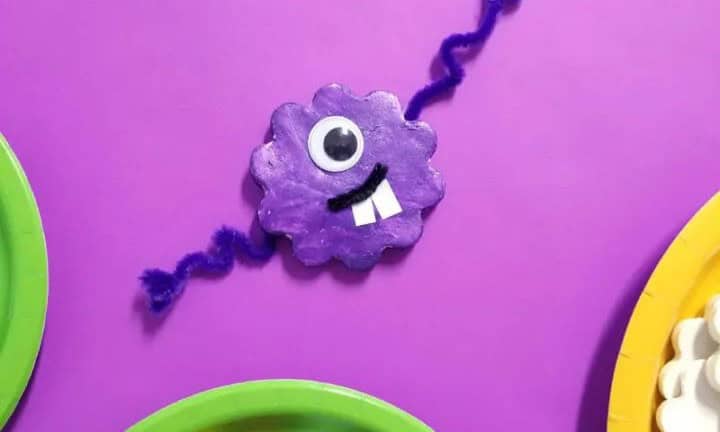
Crafting monster magnets offers a unique combination of fun and creativity, making it an excellent activity for birthdays or classrooms. While not as budget-friendly as some other projects, this one-time endeavor is still worth considering. To bring out the best in this painting project, opt for paint sticks instead of conventional paints. These sticks provide long-lasting results, justifying the initial investment.
If you’re planning to tackle this with a small group at home, consider purchasing a starter pack containing 12 colors. You can order your paint sticks here. Before diving into the crafting process, be sure to prepare, shape, and dry the dough beforehand. This activity can also be expanded into a two-day project by allowing the monster’s base to dry completely before adding final details through painting.
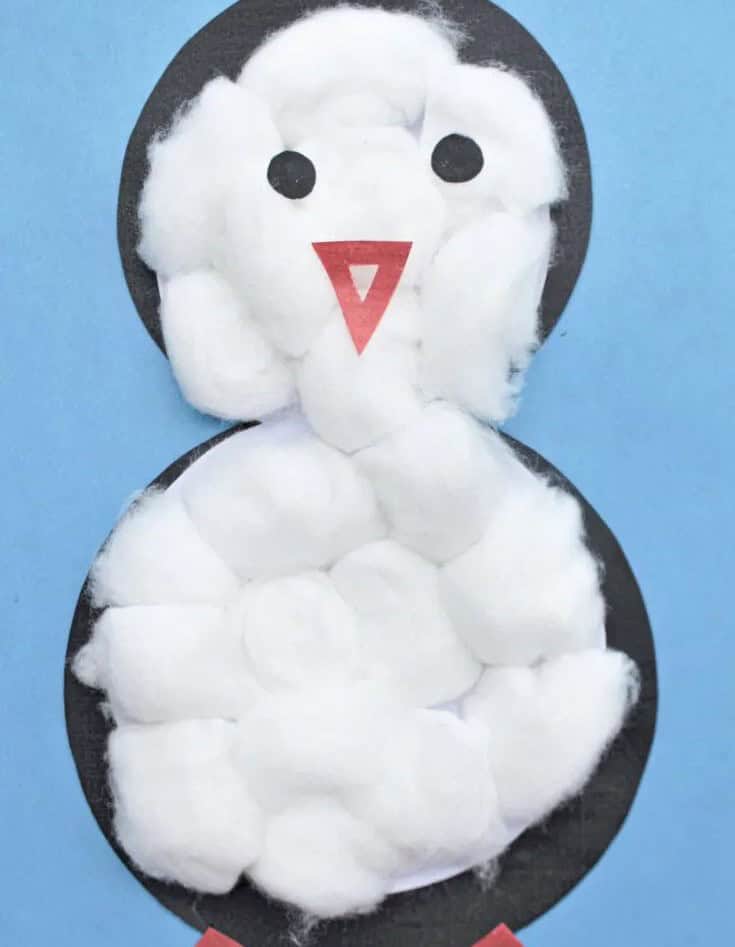
Cotton Ball Penguin
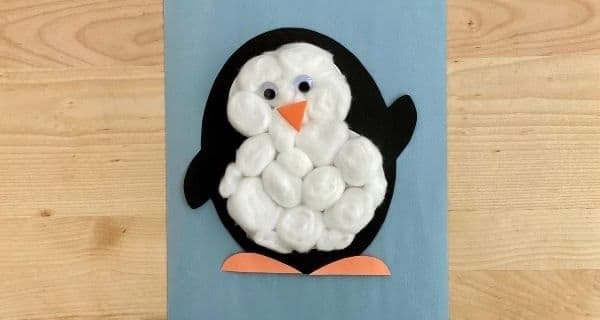
It’s no surprise that kids are instantly smitten with penguins – after all, they’re the ultimate symbols of adorableness! And what’s not to love about creating crafts that feature these flightless friends? This particular penguin craft is a delightfully simple and fun activity that can be enjoyed on a cozy winter afternoon with your little ones. The best part?
It requires only a few basic supplies: a stash of cotton balls, some black and orange construction paper, and a pair of googly eyes to give your penguin its signature charm.
Watercolour Seashells
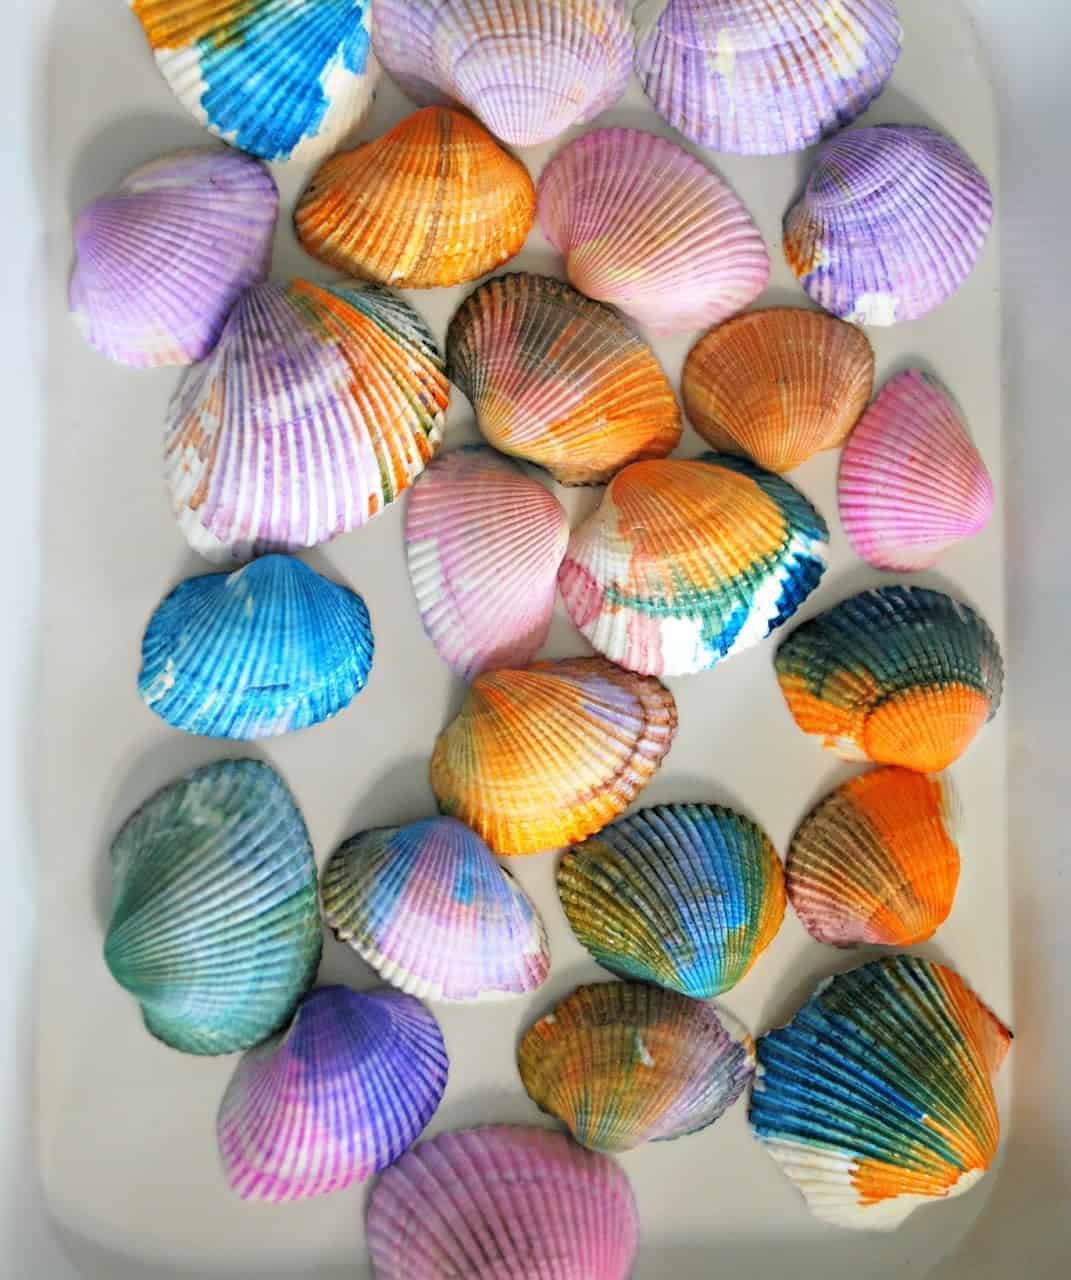
Seashell watercolor activities offer a multitude of benefits for young minds. Not only do they introduce children to the concept of recycling, but they also provide an excellent opportunity to develop fine motor skills through creative expression. Additionally, this activity offers a unique way to teach color mixing principles in a hands-on manner.
While any type of paint can be used on seashells, watercolor paints are particularly well-suited for this activity, as they allow children to explore and experiment with free-form brushstrokes. The number of colors used is entirely up to personal preference, making this activity highly adaptable and enjoyable for kids of all ages. To get started, gather a few simple supplies: clean seashells (which can be easily sourced from a beach trip or ordered online) and watercolor paints.
For added fun and ease, consider dressing your children in old t-shirts or smocks to protect their clothing from any unexpected paint spills or splatters.
Playdough
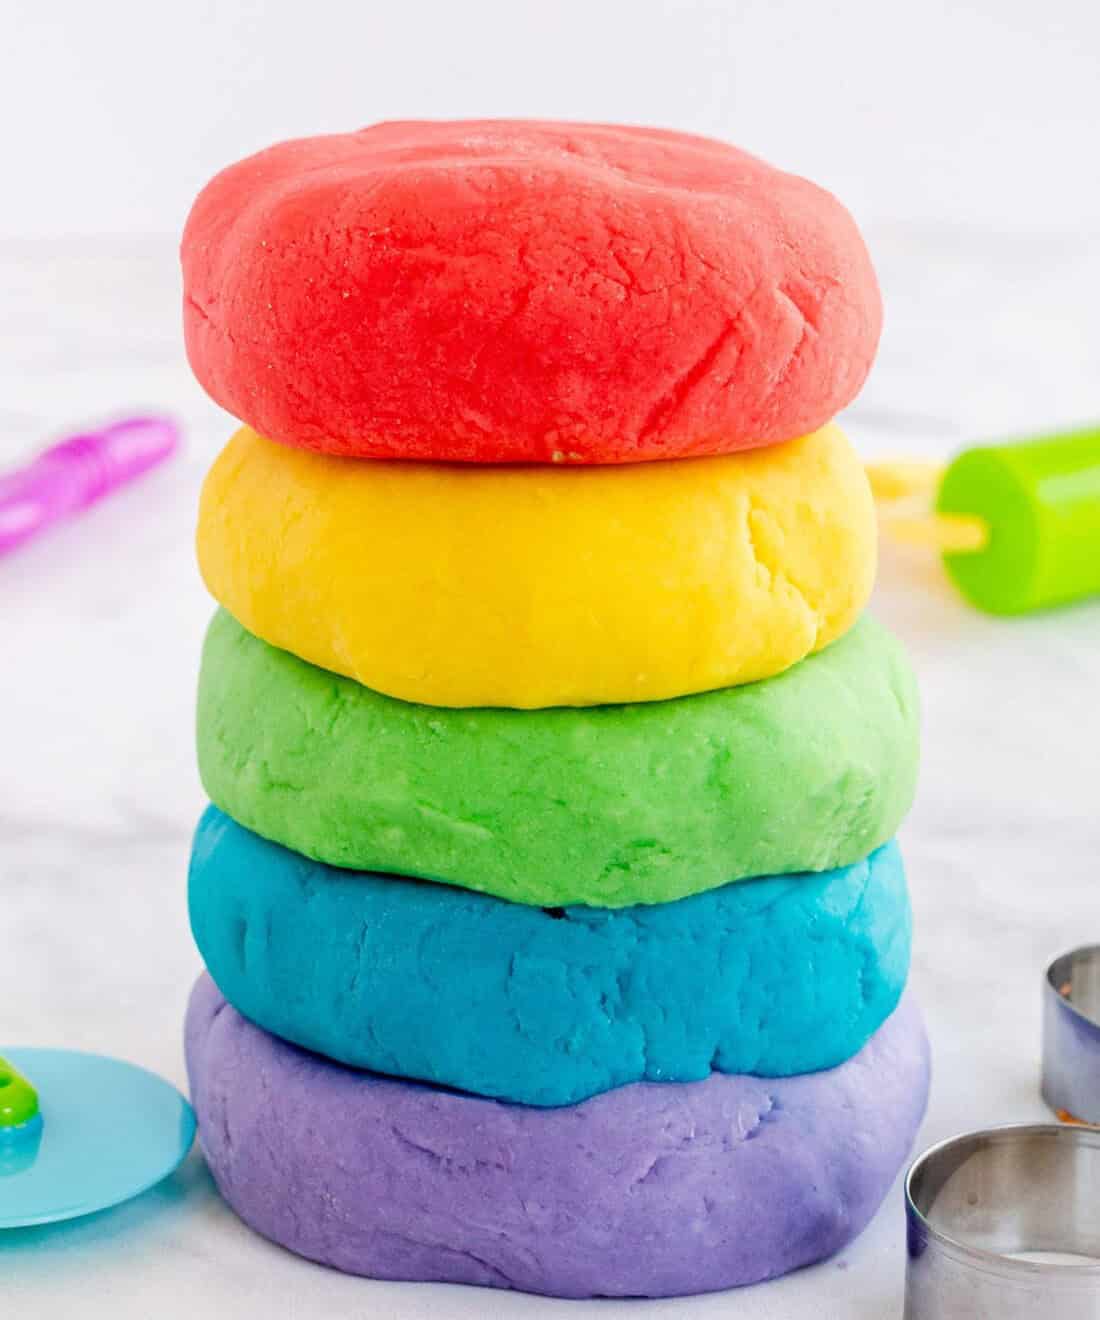
Innovative playdough creations are just a few minutes away, thanks to its rapid preparation time under 10 minutes. This means you can provide your little ones with an immersive sensory experience that fosters imaginative play for hours on end.
What’s more, this homemade playdough requires only six ingredients, allowing it to be a self-sufficient activity supply that won’t break the bank. For busy moms of toddlers, this is undoubtedly a game-changer.
The beauty of making your own playdough lies in its simplicity – you can source all the necessary components from within your home. The star ingredient is cream of tartar, which ensures the dough remains soft and pliable, encouraging kids to engage in endless creative endeavors.
To take it to the next level, simply add a splash of food coloring for a vibrant hue. You can order high-quality colorants [here](insert link).
Smush Paintings
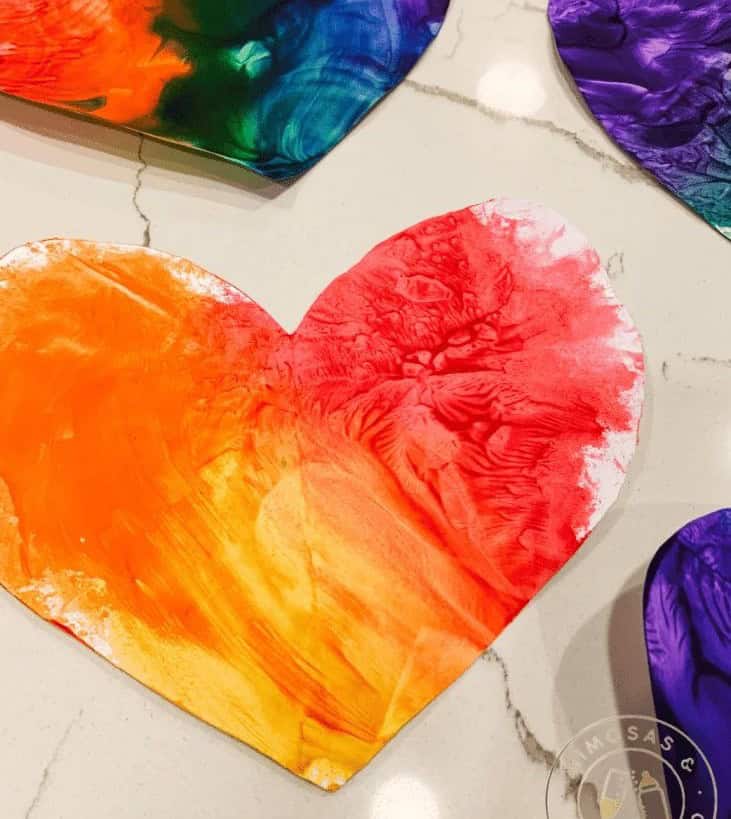
Leave traditional painting worries behind and indulge in a mess-free smush painting experience with your kids! Not only will they have a blast creating their masterpieces, but you can also relax and enjoy the process alongside them. This versatile activity is perfect for various holidays and themes – from hearts for Valentine’s Day to Christmas trees or rainbows for St. Patrick’s Day. To get started, simply gather cardstock, paint, and ziplock bags (available here).
Once you have your supplies, add the cardstock to the bag, pour in some paint, and let your little ones unleash their creativity by smushing the bag. When they’re done, carefully remove the cardstock paper and let it dry – voila! Your kids’ artwork is ready to be admired.
Frog Headband
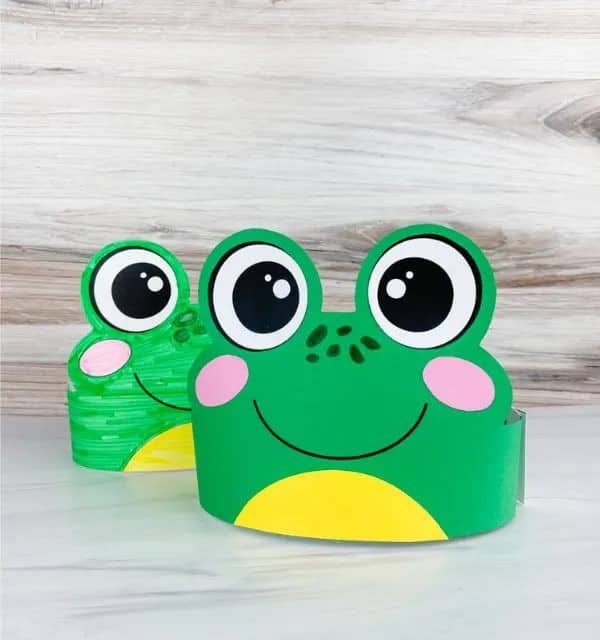
Planning an animal-themed birthday party for your little one? Why not add a touch of amphibian fun with DIY frog headbands! With just green cardstock and a template, you can whip up these cute accessories in no time. The best part is that this design serves as the perfect inspiration to create other animal headbands, offering endless creative possibilities. To make your frog headband, simply cut out the necessary pieces from the cardstock, glue the details into place, and voila!
Your headband will be ready to hop onto the scene in under 10 minutes. And for a comfortable fit, consider pairing it with a pack of headband extenders that can accommodate all ages.
Splat Painting
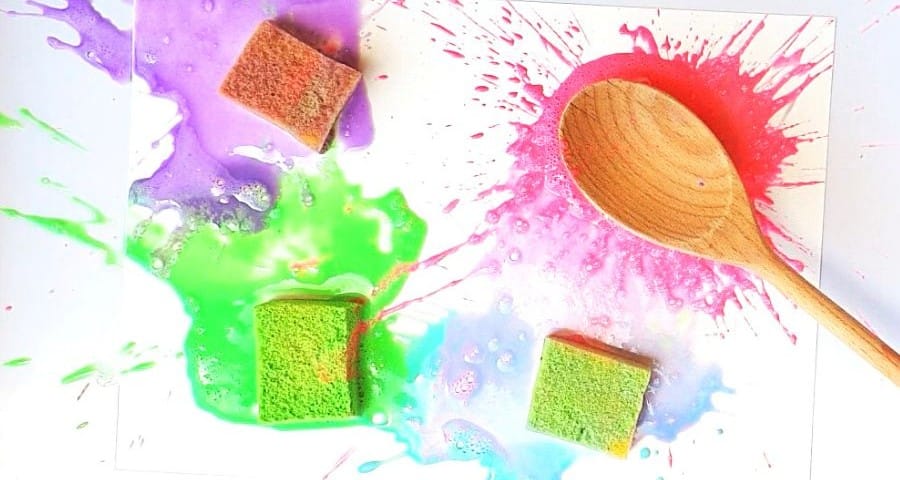
Splat painting is an exciting activity for children that can quickly become a weekend staple. The more they experience it, the more enthusiastic they’ll be about doing it again. It’s ideal to conduct this activity outdoors, as you wouldn’t want paint splatters ruining your home decor. To get started, you’ll need acrylic paint and sponges.
Cutting the sponges into smaller pieces will provide kids with a greater variety of tools to work with.
Place the paint-soaked sponges on white cardstock paper and let children use wooden spoons to create their masterpieces. Before long, you’ll have two or more impressive artworks to display.
Potato Stamp Art
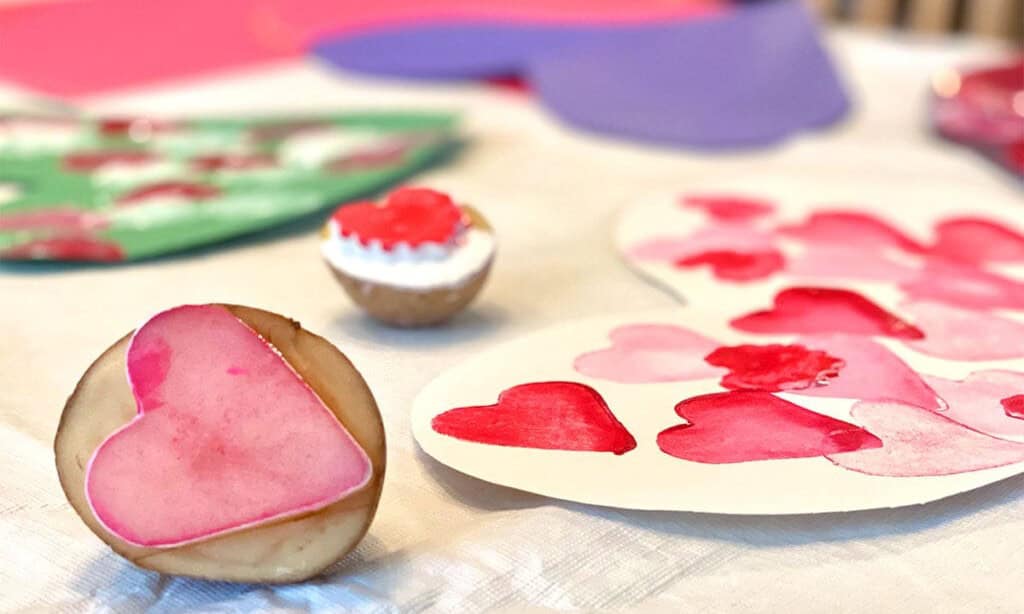
While it’s frustrating when children lose small toys, including stamps, there’s a fun solution to this problem. Instead of constantly buying new stamps, why not create your own using everyday items? One clever idea is to use potatoes as stampers. This activity requires just two simple ingredients: cookie cutters and paint. Give your kids the potato stamps and let them unleash their creativity, knowing that these unique tools will be safe from being lost or misplaced.
Plus, you can reuse the metal cookie cutters for other activities, making this a cost-effective and eco-friendly solution.
Paper Plate Dinosaur
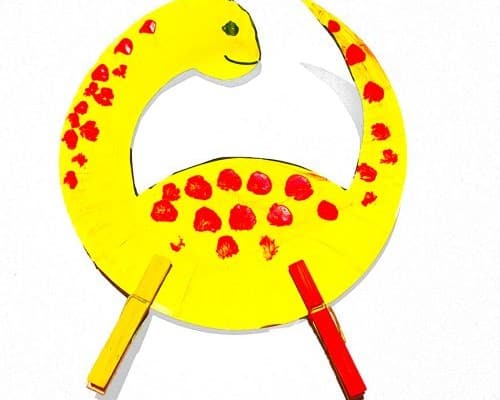
Transforming ordinary paper plates into extraordinary learning experiences, this dinosaur-themed activity is a must-try! With a pack of paper plates readily available or easily ordered online, you’re just a few steps away from teaching your little ones essential skills like numbers, colors, and matching. To get started, have your kids paint wooden clothespins – a perfect opportunity to practice their artistic skills.
Once dry, cut the shape into legs for your dinosaur and let your creativity shine by adding dots to count or using multiple colors to match. This engaging activity is sure to delight both you and your mini-me’s. For more inspiration on paper crafts for kids, be sure to check out these ideas!
Q Tip Skeleton

Embracing the intersection of science and creativity, we’ve crafted an engaging activity that lets kids learn about the human skeletal system through a fun Q-tip skeleton project. By following our simple steps, you can help your little ones develop a deeper understanding of anatomy while having a blast. To get started, gather essential materials: dark-colored Cardstock, glue, and Q-Tips (you can opt for white Q-tips from [link] to create a more realistic skeleton).
Assemble the Q-Tips according to the bone structure of a human skeleton, allowing your child to develop their problem-solving skills and creativity. This activity’s appeal extends far beyond biology – it’s an excellent way to encourage kids’ curiosity, spatial awareness, and critical thinking.
Marble Apple Painting
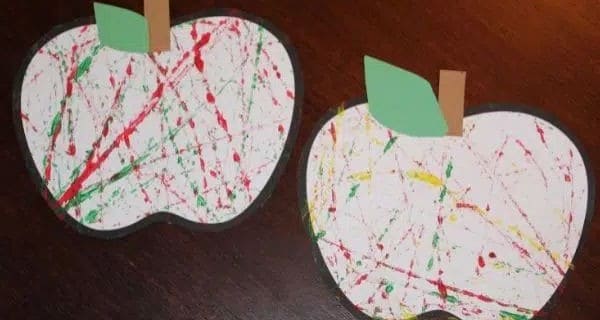
While traditional painting methods can be enjoyable, using marbles to create a masterpiece on an apple is an innovative and entertaining way to explore art with your kids. For this project, you’ll need a large apple printout, a flat box or deep tray (an old cereal box works well), and washable paints – Crayola’s offering is a great choice. Simply roll the marbles in paint, then let your little ones use them to create patterns on the apple by rolling them up and down or side to side.
As they get more comfortable with this unique technique, you’ll be amazed at the artistic masterpieces that emerge. Not only will your kids have fun, but they’ll also develop their fine motor skills and creativity.
Paper Tube Binoculars
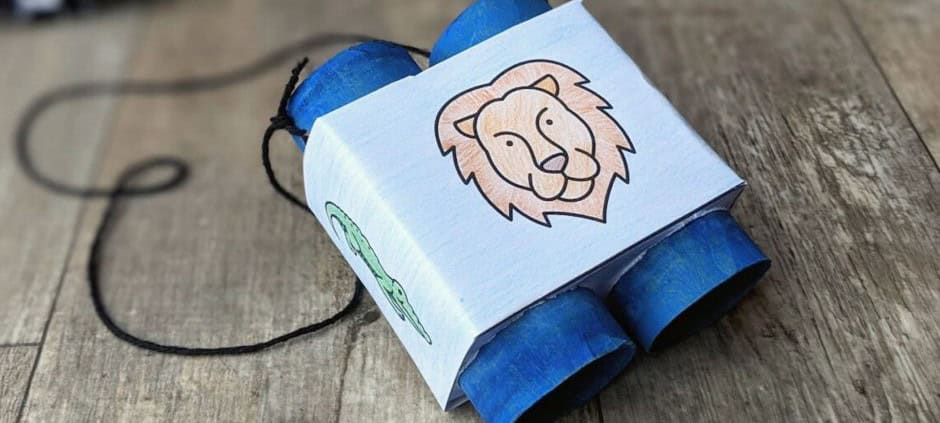
Discovering the fun in toilet paper roll binoculars is a game-changer! If you’re someone who thinks these empty rolls are useless, think again. Transforming them into makeshift binoculars is an activity that’s just as enjoyable as playing with the finished product itself. All it takes to get started is downloading and printing out a template on cardstock paper, then following the simple instructions for folding and cutting.
With the holes cut out for the rolls, simply insert each one and glue everything together. Trust me when I say this – your kids will be thrilled playing safari or bird watching with these animal binoculars. Who knows? You might just unleash their inner explorer!
DIY Crayons
Are you tired of having leftover crayons collecting dust? Turn them into brand new ones with this fun DIY project! Grab some old crayons, silicone molds – and if you’re feeling extra crafty, cute heart-shaped molds like the ones found here – and get ready to melt. Start by sorting your crayon stash and adding them to the molds. Then, pop them in the oven to let the heat do its magic.
As the crayons settle, you’ll be left with a set of vibrant, newly-molded crayons perfect for little hands to color with. This project is not only a great way to breathe new life into old supplies, but it’s also an excellent opportunity to teach kids about states of matter and how solids can transform into liquids through heat.
Zoo Animals
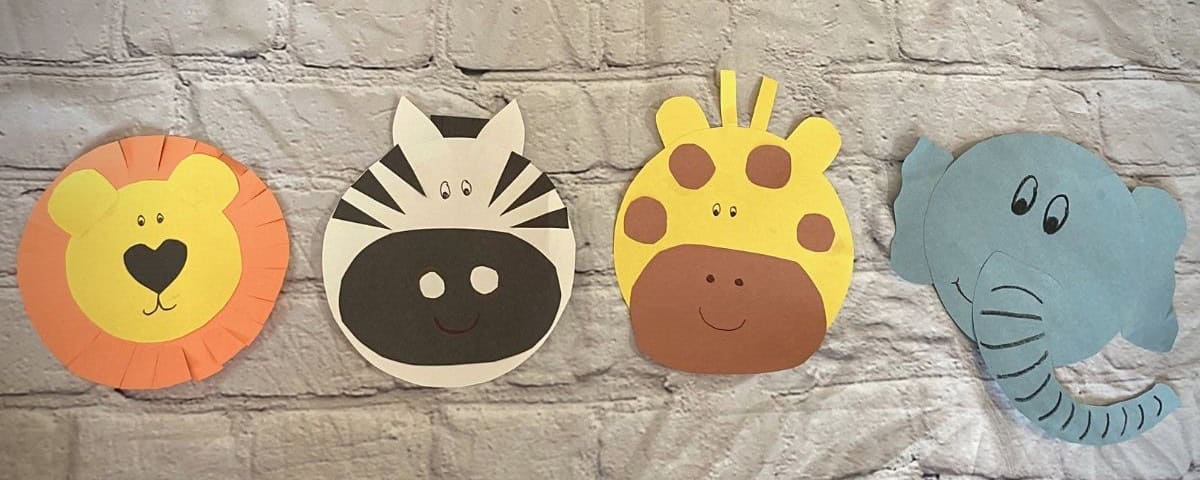
If your little one has been buzzing with excitement since the last zoo adventure, this creative activity is sure to delight! Create zoo animals using colored construction paper and spend quality time with your kids. This fun project is suitable for both preschoolers and toddlers. To make it even easier, cut out the shapes and details beforehand. Then, work together with your child to glue them in place.
You can find a wide range of colorful construction papers online or at your local craft store.
Bumble Bee
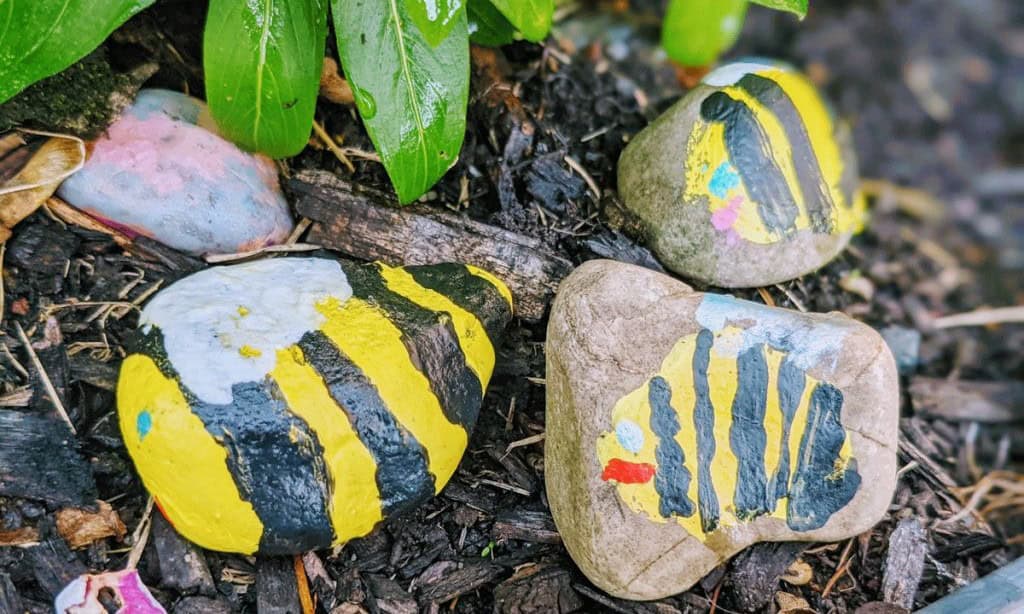
Rock painting has always been a delightful activity for me, especially when sharing it with my little ones. Creating unique and thoughtful gifts for family members like aunts, uncles, and teachers is a great way to bond with them. To get started, you’ll need some smooth rocks as the base, along with yellow and black paint. A good quality sealer is also essential, which can be easily sourced online or at your local craft store.
Once you’ve got all these materials in place, simply paint your desired design onto the rock – for instance, a cute bee – and let it dry completely. After that, apply the sealer to protect the artwork and ensure the paperweight remains intact over time.
Rock painting
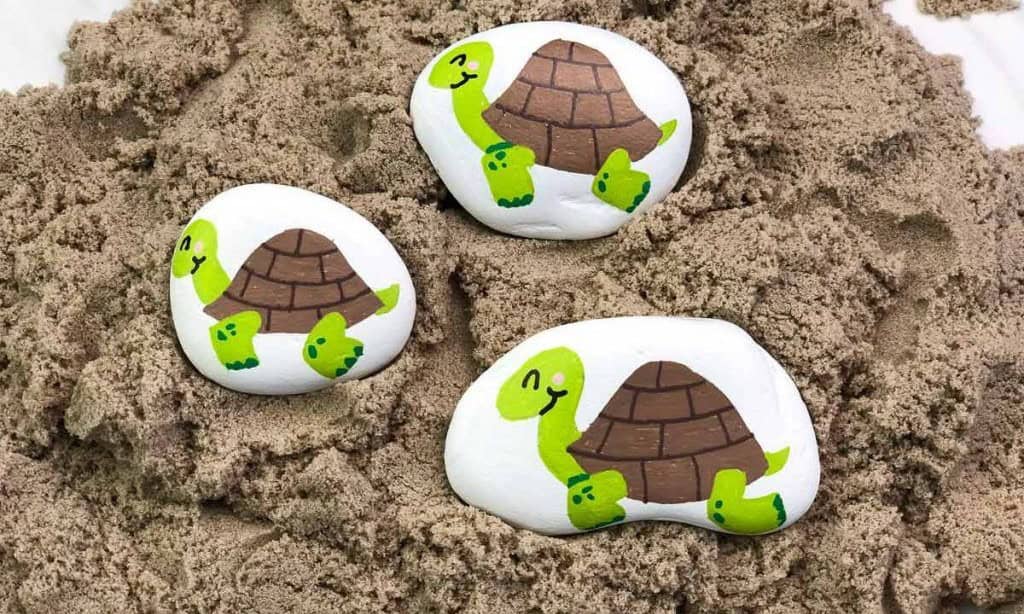
Just as bees gather inspiration from the world around them to create something beautiful, you can find motivation in various forms to decorate your rocks. Whether it’s a favorite hobby or a unique stone type, let your creativity shine! We’re particularly fond of smooth river stones – not only do they provide a wonderful canvas for kids to express themselves, but they also offer a tactile experience that encourages imagination and exploration.
You can find these versatile stones here and unleash your inner artist. Who knows? You might just create something so stunning that you’ll want to display it proudly as a paperweight! This activity is not only perfect for family fun days but also makes for an excellent birthday celebration idea. For more inspiration, check out our collection of rock painting ideas here.
Water Balloon Painting
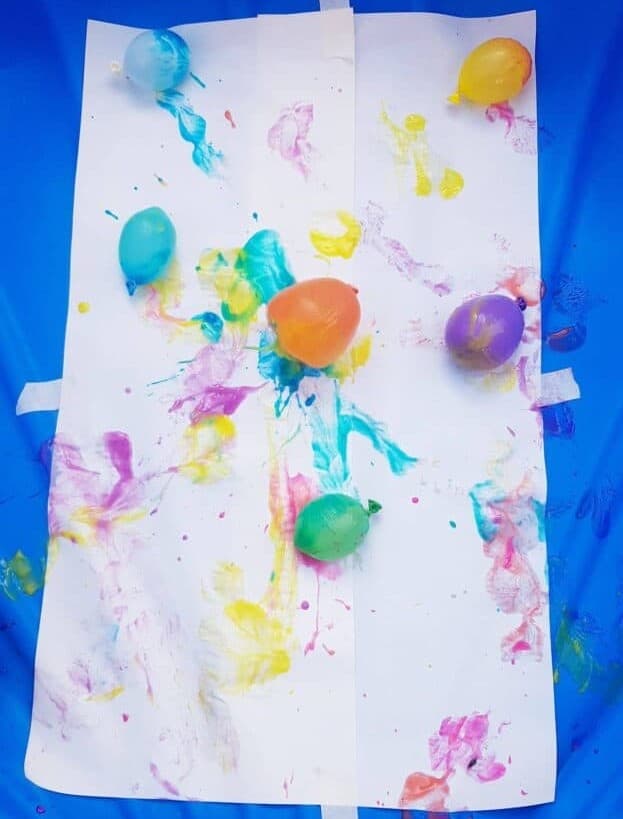
Transform a classic summer day into an artistic adventure with water balloons! This fun and engaging sensory activity combines the excitement of water play with the joy of creating art. Gather a pack of balloons in your preferred size, some vibrant paints, and a muffin tray to get started. Dip each balloon in paint, then use it as a brush to bring your paper to life. As you work, encourage your little ones to be gentle, as popping a balloon can ruin the masterpiece and require a fresh start.
This interactive activity not only develops fine motor skills but also fosters concentration and creativity. With this unique approach, you’ll create memories that will last long after the paint has dried.
Walrus
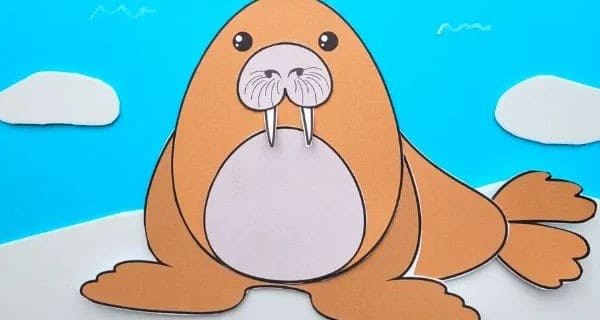
When summertime arrives, parents often find themselves searching for ways to keep their kiddos engaged and learning. Cut and paste crafts are an excellent solution – not only do they provide a fun and creative outlet for kids, but they also offer opportunities to teach valuable lessons and promote educational growth. One such craft is the walrus cut and paste activity. This project serves as a wonderful way to introduce children to the fascinating world of walruses and their natural habitats.
To get started, simply download the provided template, have your little ones help you cut out the shapes, and then assist them in pasting the pieces onto a blank sheet of paper. For older kids, this activity can be adapted to challenge their problem-solving skills by providing them with individual pieces and asking them to figure out how each part fits into the larger picture. This hands-on approach not only fosters creativity but also helps develop important critical thinking abilities.
Paper Plate Watermelon
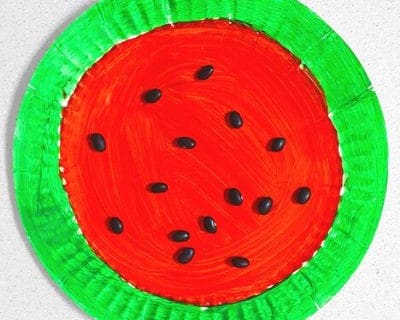
In the world of paper plate crafts, we’re diving back into the fun with a refreshing twist: creating a watermelon masterpiece! Our home has seen a plethora of creative and entertaining projects, fostering imagination and self-expression. This unique art form not only brings joy but also encourages youngsters to express themselves freely.
To embark on this delightful craft adventure, gather your essential supplies: a stash of paper plates, green and red paint, and dried black beans (you can find them online). Once you have these creative catalysts at the ready, let the artistic process unfold. After the paint dries on your watermelon, attach the seeds to complete your masterpiece. I’m confident that your young artists will relish showcasing their finished watermelons at school or in a family gathering setting.
Alphabet Puppets
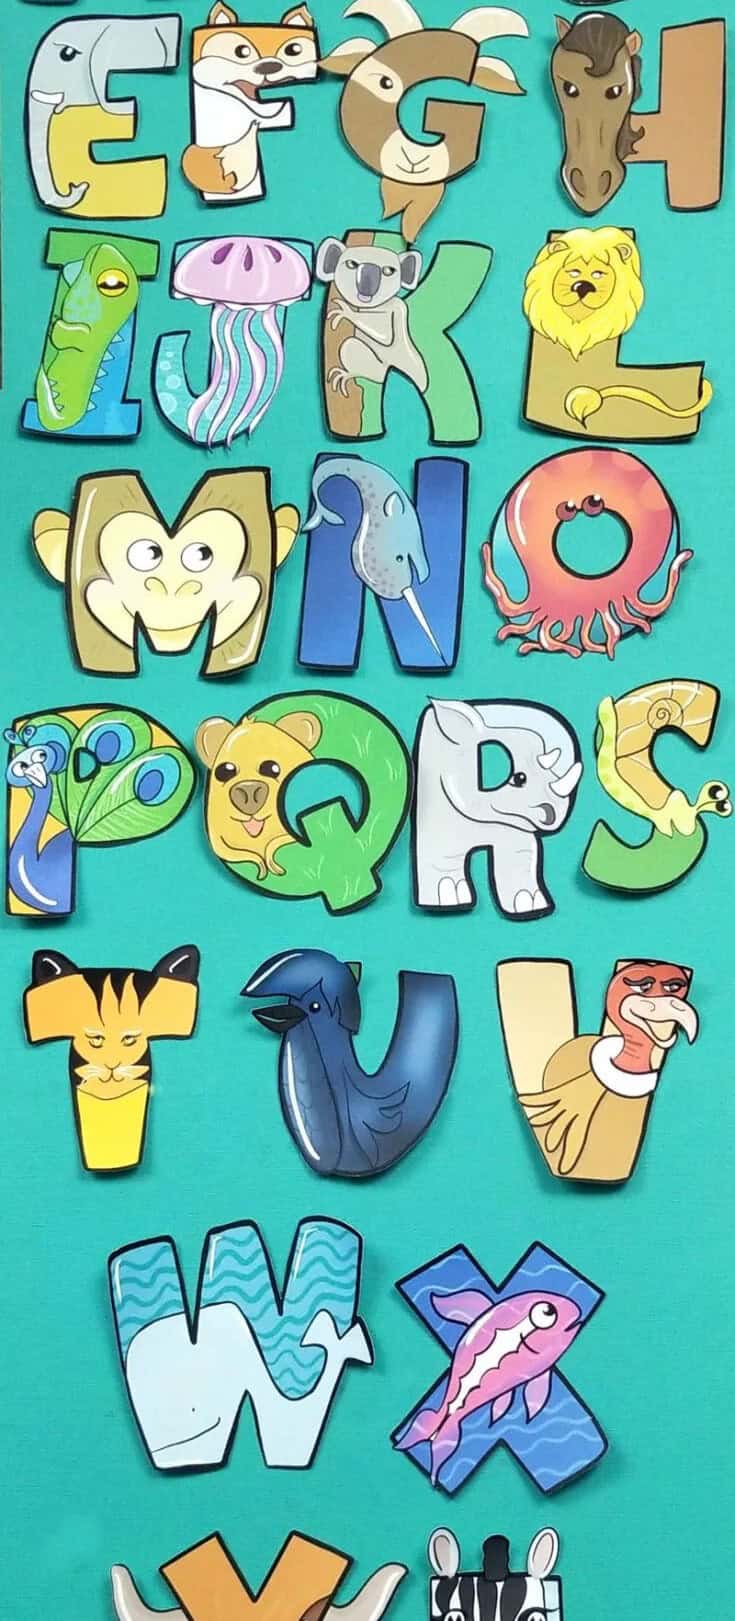
To bring learning to life, combine ABCs with a fun and engaging craft activity that incorporates Alphabet puppets. One effective way to do this is by creating letter series with these adorable characters. To begin, print and paint your puppets, then attach them to jumbo craft sticks for a neat and visually appealing display. Alternatively, you can source the sticks online or at your local craft store if you don’t have them on hand.
This simple yet creative approach will make learning ABCs an enjoyable experience for your kids.
Under the Sea Shape
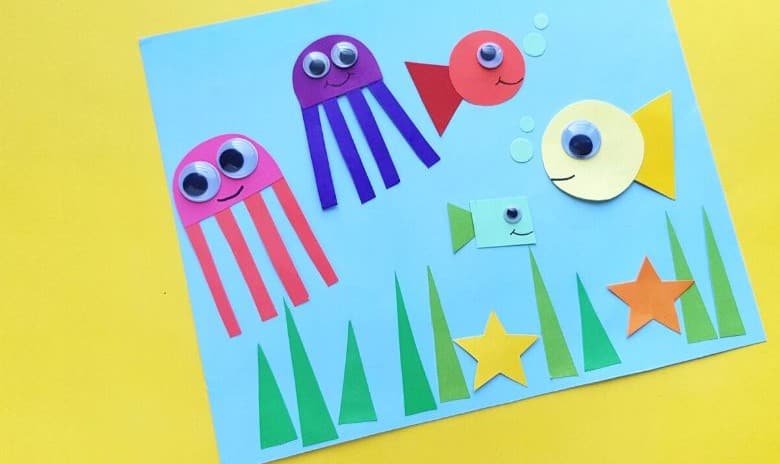
When it comes to teaching kids about shapes, there’s no shortage of creative ways to do so. One such approach is an under-the-sea shapes craft that’s both engaging and educational. And what better way to start than with a lesson on the sun? By combining scissors, colored construction paper, and glue, you can create a fun and interactive experience for your child to learn about basic shapes.
To get started, simply cut out all the necessary shapes and lay them out before your kid.
Then, work together to identify each shape and bring it to life through the craft process.
Clownfish
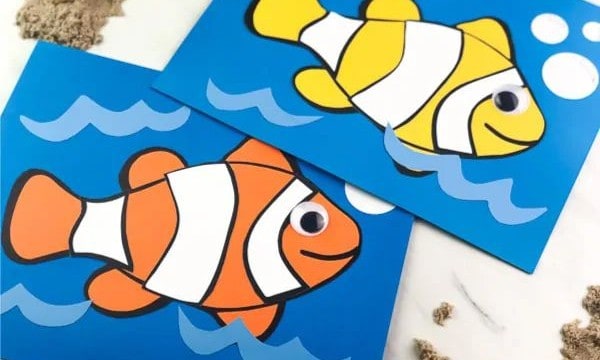
If you’ve introduced your little ones to Nemo’s lovable clownfish friend, then it’s time to get creative with this fun craft project. Even if you haven’t explored the underwater world of Finding Nemo yet, now is a great opportunity for some quality movie time and hands-on crafting with your toddler.
To bring this colorful character to life, gather the following materials: colored card stock, googly eyes, and glue. We recommend Elmer’s School glue, available online [here](link).
Using a clownfish template, cut out all the parts and stick them onto blue construction paper. The final step is to let your child name their new pet and proudly display it in their room.
DIY projects like this one not only provide an entertaining experience but also offer numerous benefits for young children. They foster independent play, self-expression, and creativity, while also helping to develop focus and fine motor skills through arts and crafts.