Make reading a fun experience for kids by crafting DIY bookmarks with them! Not only do they encourage engagement with the reading material, but they also provide an opportunity to bond and create lasting memories. As a parent, getting your child hooked on reading is one of the ultimate goals. However, it can be challenging if they find books dull. Worry not, as there’s a simple solution: make DIY bookmarks together!
These colorful creations not only motivate kids to pick up their favorite books but also serve as a creative outlet for quality time spent with them. To get started, simply gather some basic materials like colored paper and popsicle sticks. As you create these bookmarks, you’ll be creating memories that will last a lifetime – literally! The handprint feature is an added bonus, allowing you to treasure the moment when they were younger.
Supplies You’ll Need for These Bookmarks
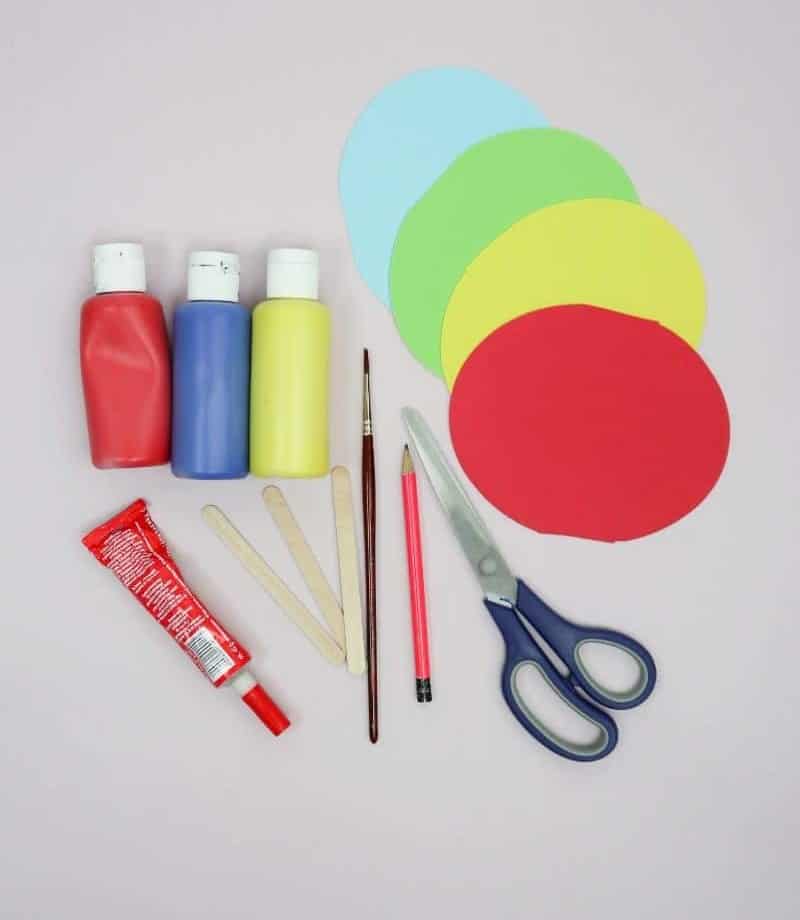
When it comes to unleashing your creativity, having the right tools can make all the difference. A vibrant and colorful palette of papers, scissors that can cut through even the toughest materials, a trusty pencil for sketching out ideas, and wooden sticks that provide a natural texture for crafting are just the starting point. Add to this mix paints of choice, glues that hold everything together, and paintbrushes that allow you to bring your artistic vision to life.
How to Make Bookmarks for Kids
To create these unique bookmarks, follow along with this comprehensive guide that will walk you through each step of the process, from preparation to completion. With these simple instructions, you’ll be able to craft your own set of personalized bookmarks in no time.
Step 1
Before diving into the creative process, prepare your workspace by collecting all necessary supplies. While I employed glue to assemble these bookmarks, feel free to switch to double-sided tape for a clutter-free crafting experience. It’s also essential to have non-toxic paint readily available for use. For my project, I selected poster paint due to its versatility – it often comes in large packs with a diverse range of colors, making it an ideal choice for kids and adults alike.
Plus, the cleanup process is remarkably straightforward.
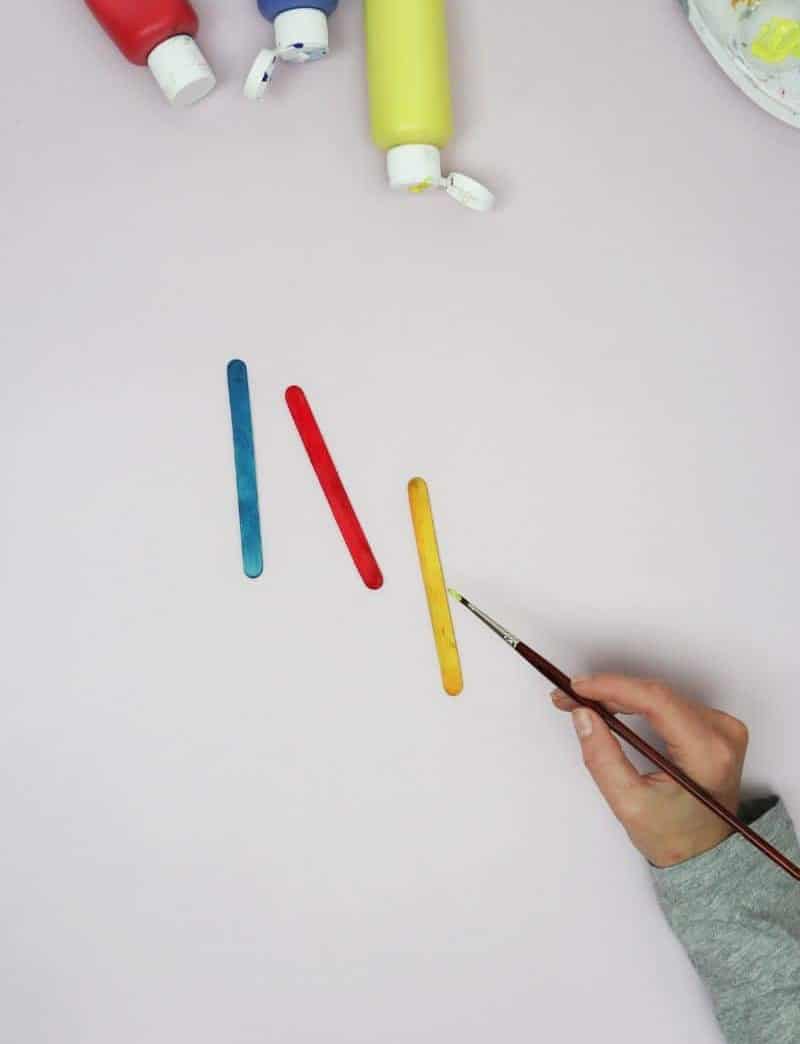
Step 2
Get creative with your kids by setting up a fun outdoor painting session! Let them unleash their artistic side by painting popsicle sticks with vibrant colors. The great outdoors provides the perfect canvas for their masterpieces, so set them up outside to get messy and have a blast. Once they’re done, let the sunshine help dry their artwork before displaying it proudly.
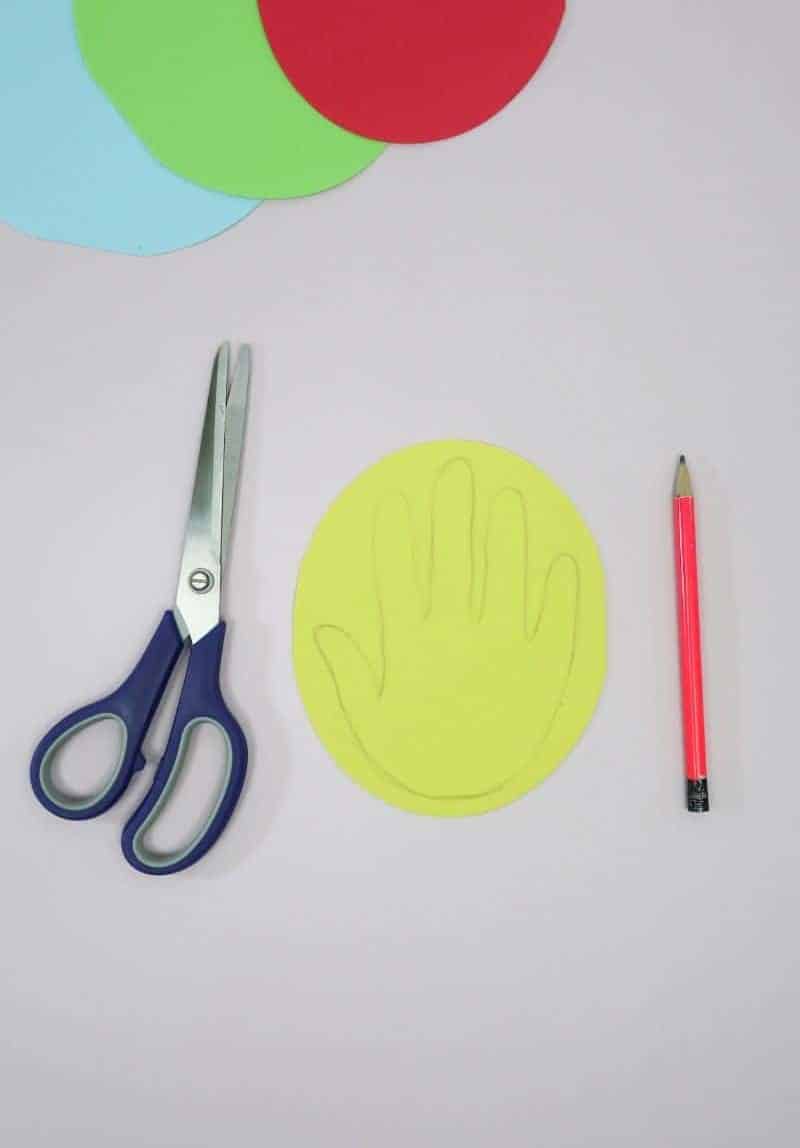
Step 3
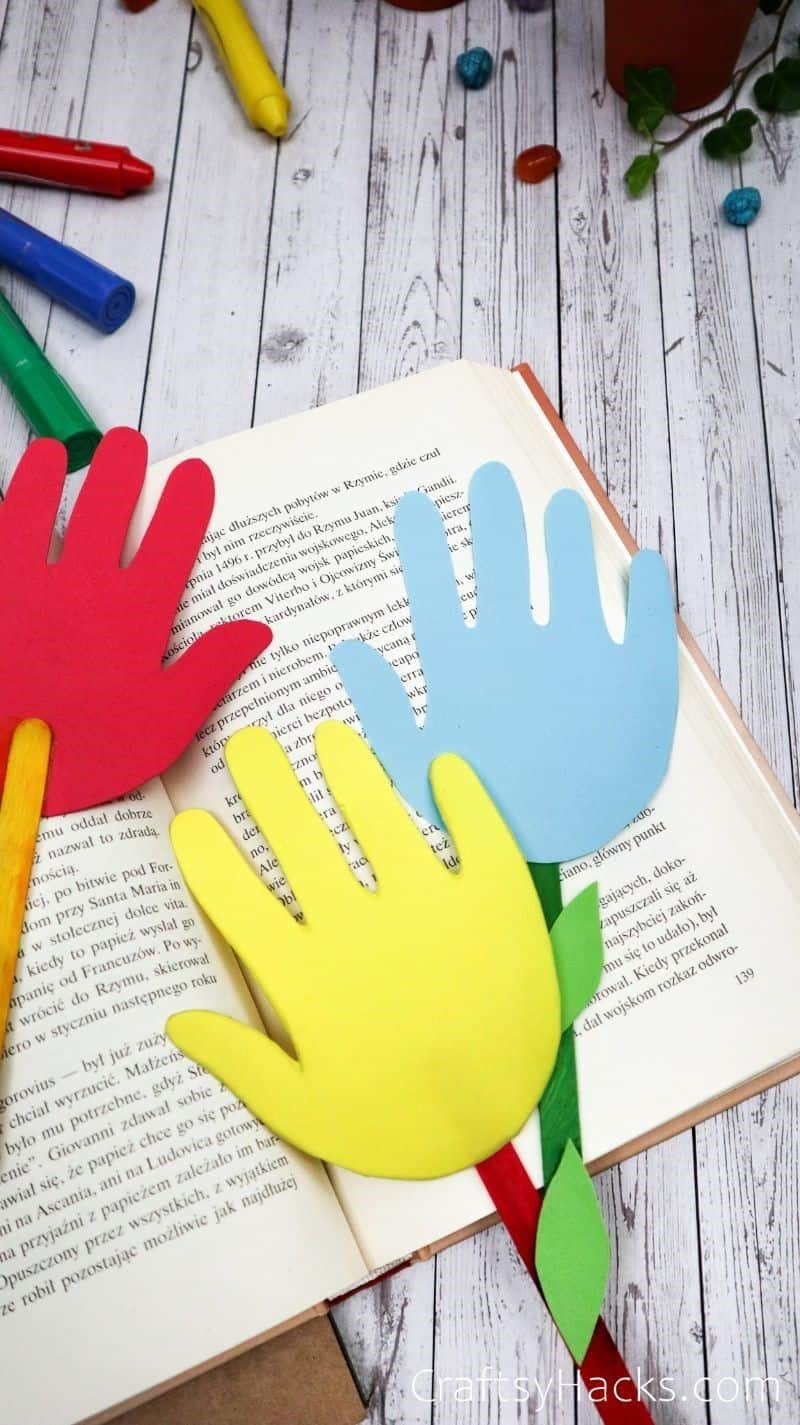
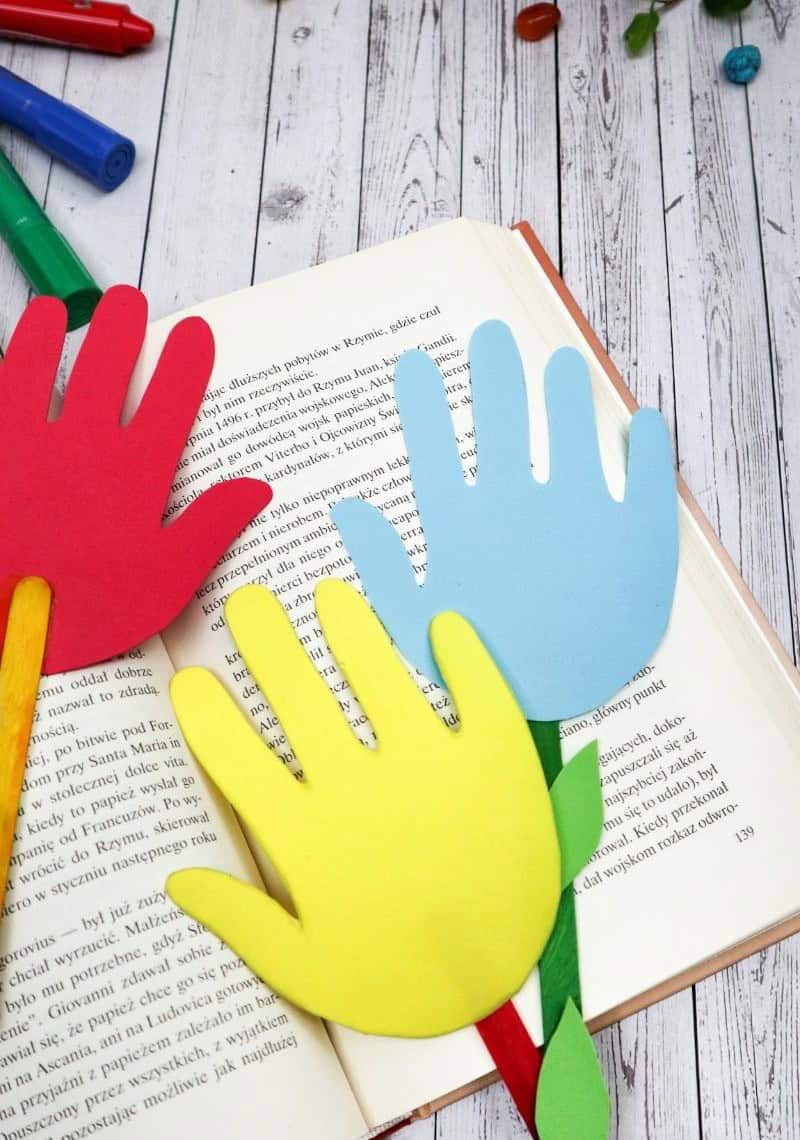
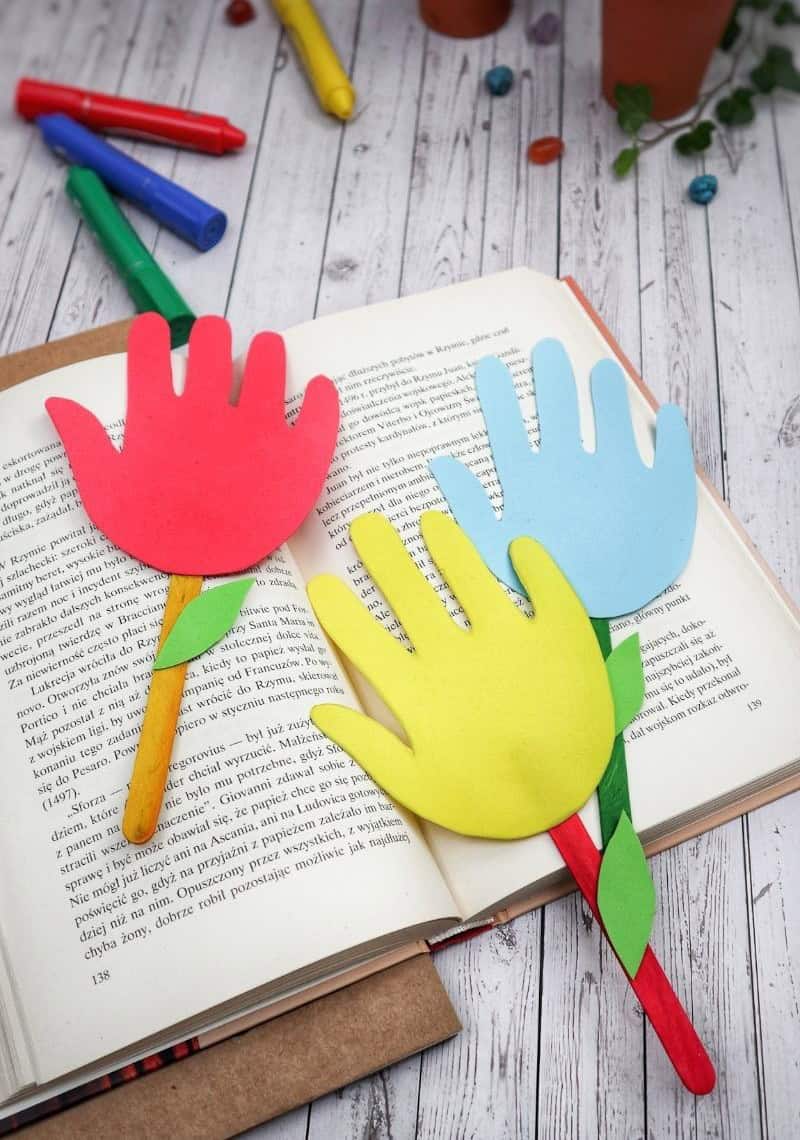
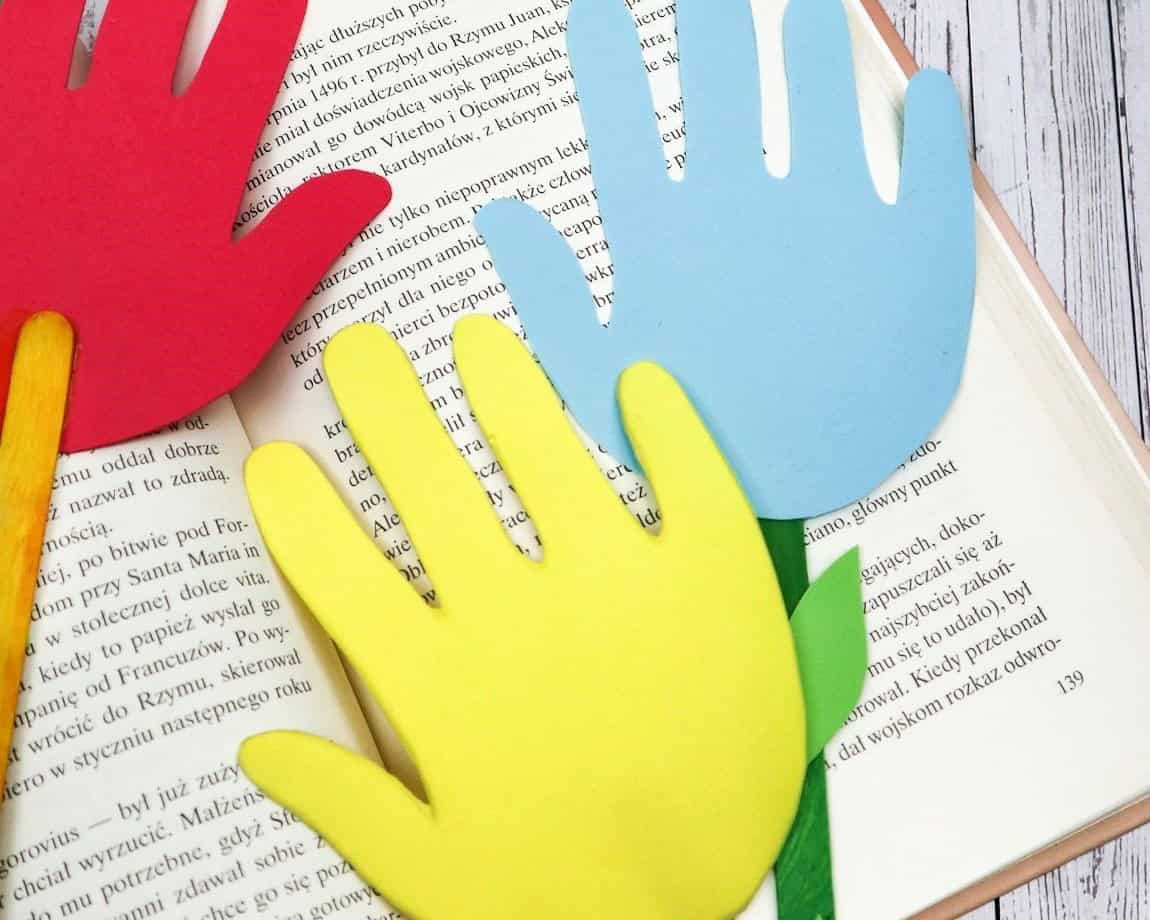
To immortalize cherished moments, let’s get creative! Instead of relying on templates, try using your little ones’ hands as a unique canvas. Begin by having them place their palm on a colored paper circle. Then, take a pencil and delicately outline the natural curves of their hand. While precision isn’t crucial at this stage, aim for capturing the overall shape and essence of their tiny hands.
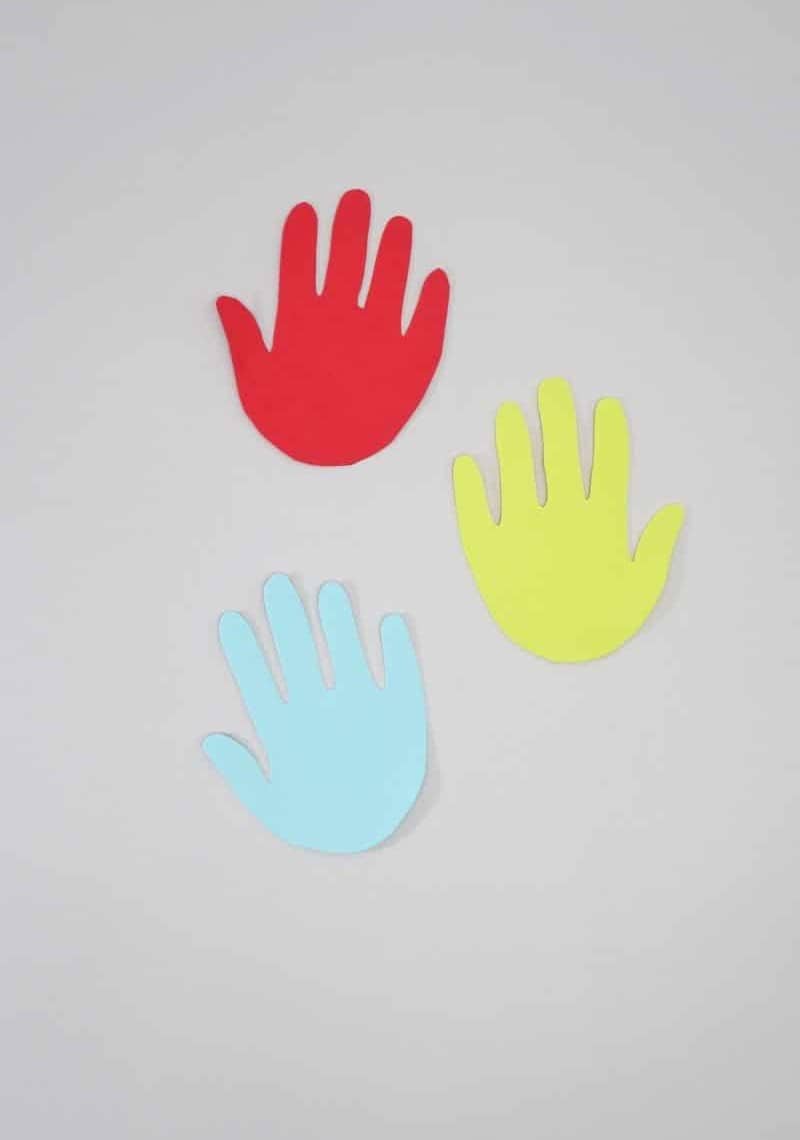
Step 4
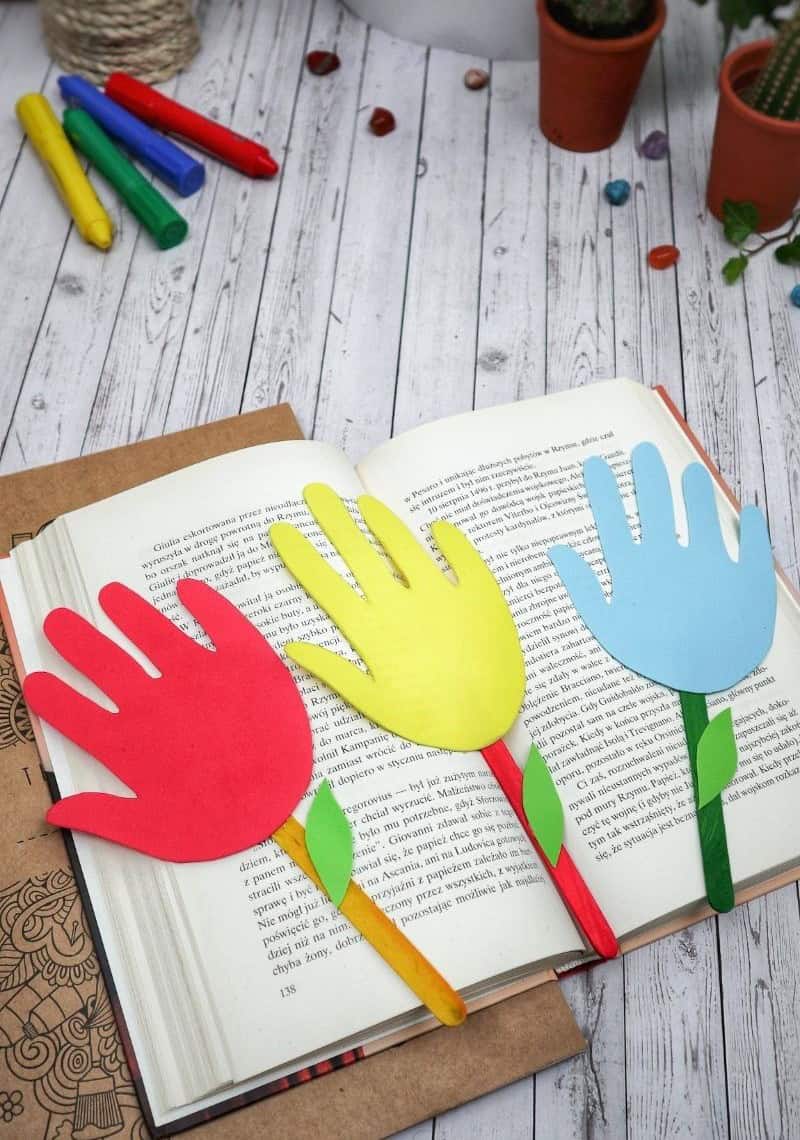
Unleash your creativity and craft as many unique bookmarks as you desire! The key is to maintain a 1:1 ratio of hands to popsicle sticks, but don’t be afraid to get inventive by gluing two hands back-to-back to create a one-of-a-kind double-sided bookmark. The most important thing is to have fun with the process and let your imagination run wild!
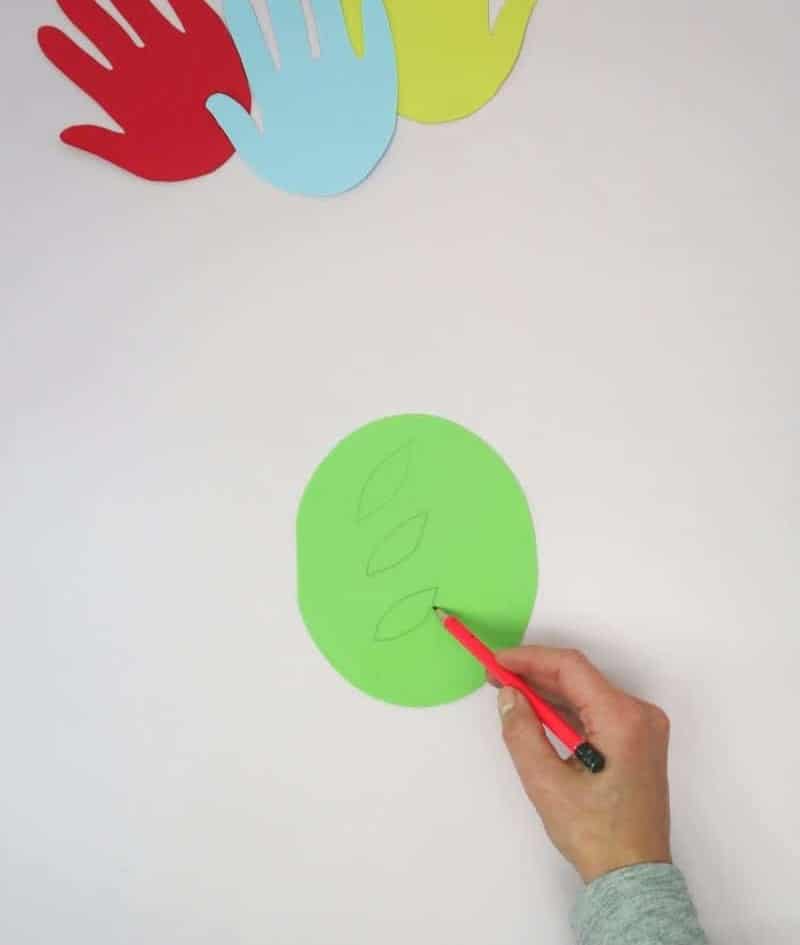
Step 5
When it comes time to add leaves to your hand tree miniatures, you’ll want to start by drawing or having your kids draw leaves on green construction paper. Once the leaves are drawn, use scissors to carefully cut them out. For a more realistic look, you can use templates as a guide. Alternatively, simply sketching the basic shape of a leaf can also produce great results.
Step 6
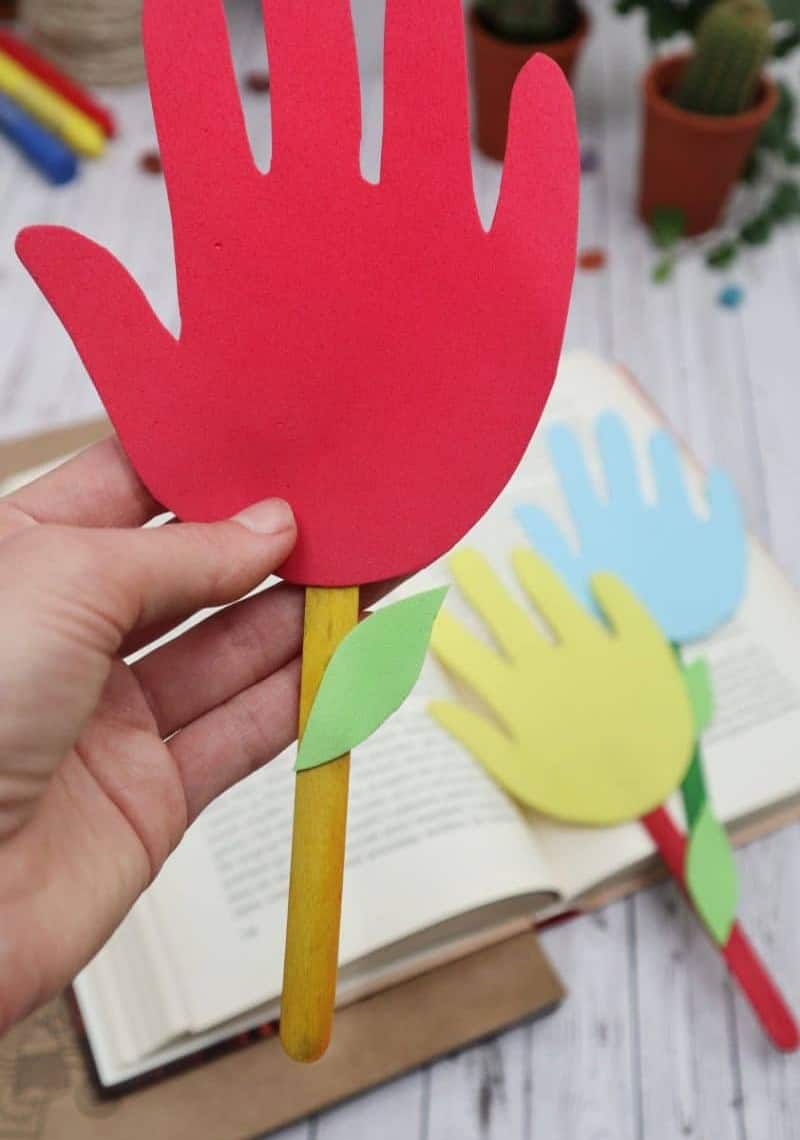
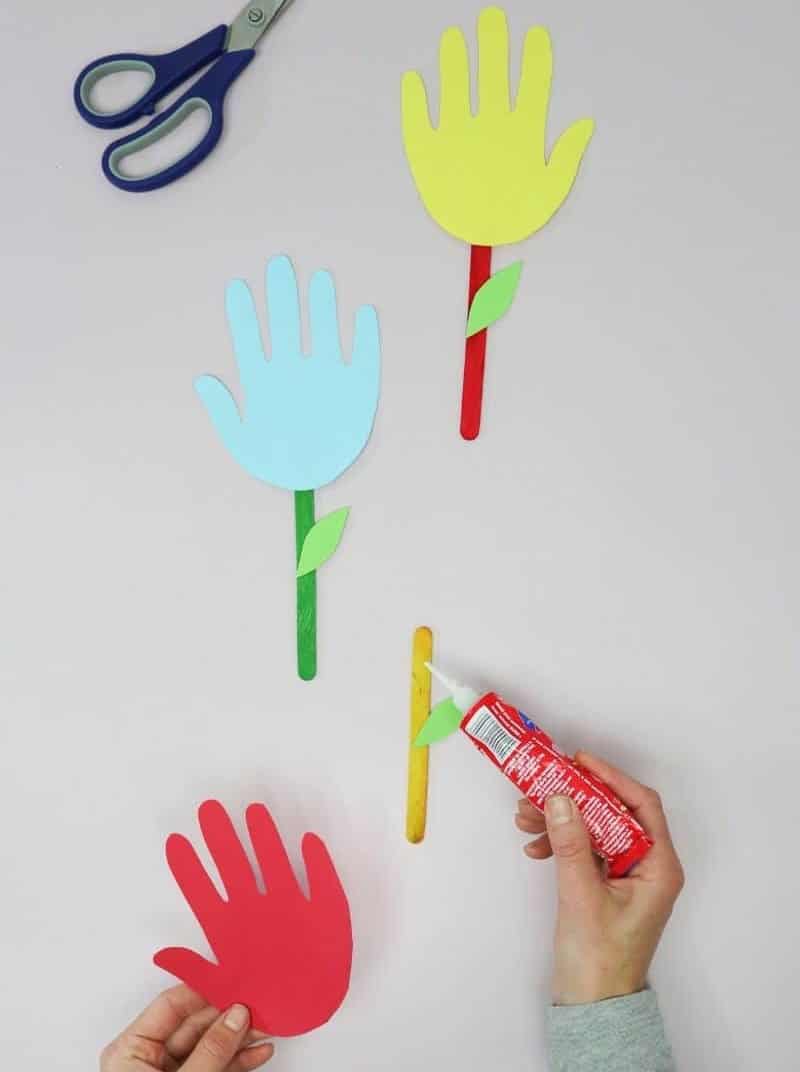
To complete our DIY bookmarks, we’ll bring all the elements together using a reliable adhesive method. For me, a quick-drying tube of glue worked well to bond the paper to the popsicle stick; however, you can also opt for adhesive tape or a hot glue gun if preferred. Begin by attaching the hand shape to the top of your popsicle stick. Next, position one or more leaves near the middle of the bookmark, and you’re ready to go!
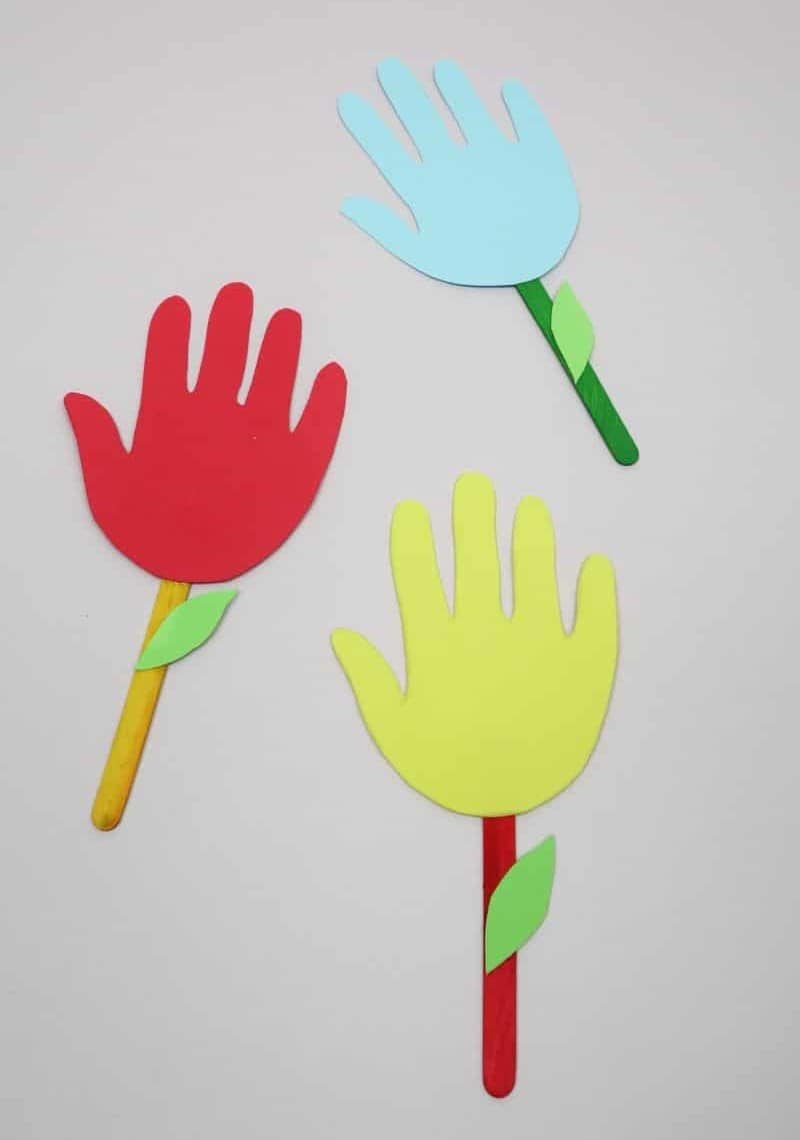
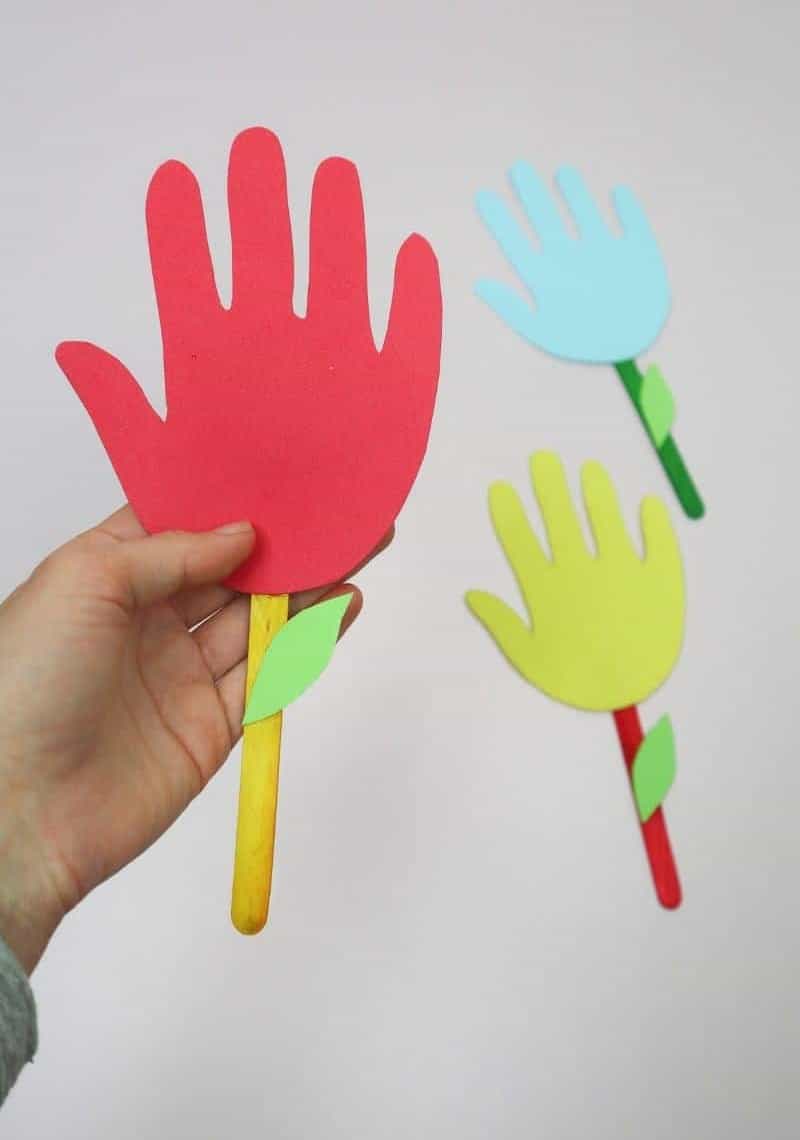
These handmade bookmarks are incredibly simple to assemble and possess an undeniable charm upon completion. Their ease of construction and cute appearance make them an ideal kid-friendly craft project. If you’re working with very young children, consider cutting out the shapes for them and focusing solely on the assembly stage for a fun family crafting experience.
What Kind of Paper is Used for Bookmarks?
When it comes to creating successful bookmarks, the choice of paper is crucial. Thin or flimsy paper won’t provide enough stability for the bookmark to remain upright between book pages. That’s why I prefer using cardstock or similar materials, which offer a sturdy foundation that will withstand the test of time. For added visual appeal, consider selecting colored paper – you can even cut out multiple shapes and reassemble them for a colorful, block-print design.
Other Crafts for Kids
For crafty parents and kids alike, there’s a wealth of creative possibilities that cater specifically to little ones’ fascinations with the natural world. A quick scan of available options reveals an array of delightful projects centered around ladybugs, mermaids, bees, unicorns, and even spiders! Whether you’re looking for something to occupy tiny hands on a rainy day or seeking inspiration for a special occasion, this diverse range of crafts promises to delight bug-loving youngsters.
Meanwhile, those with a penchant for paper and texture might appreciate the world of rock painting ideas, while DIY enthusiasts will find plenty of projects waiting to be tackled.
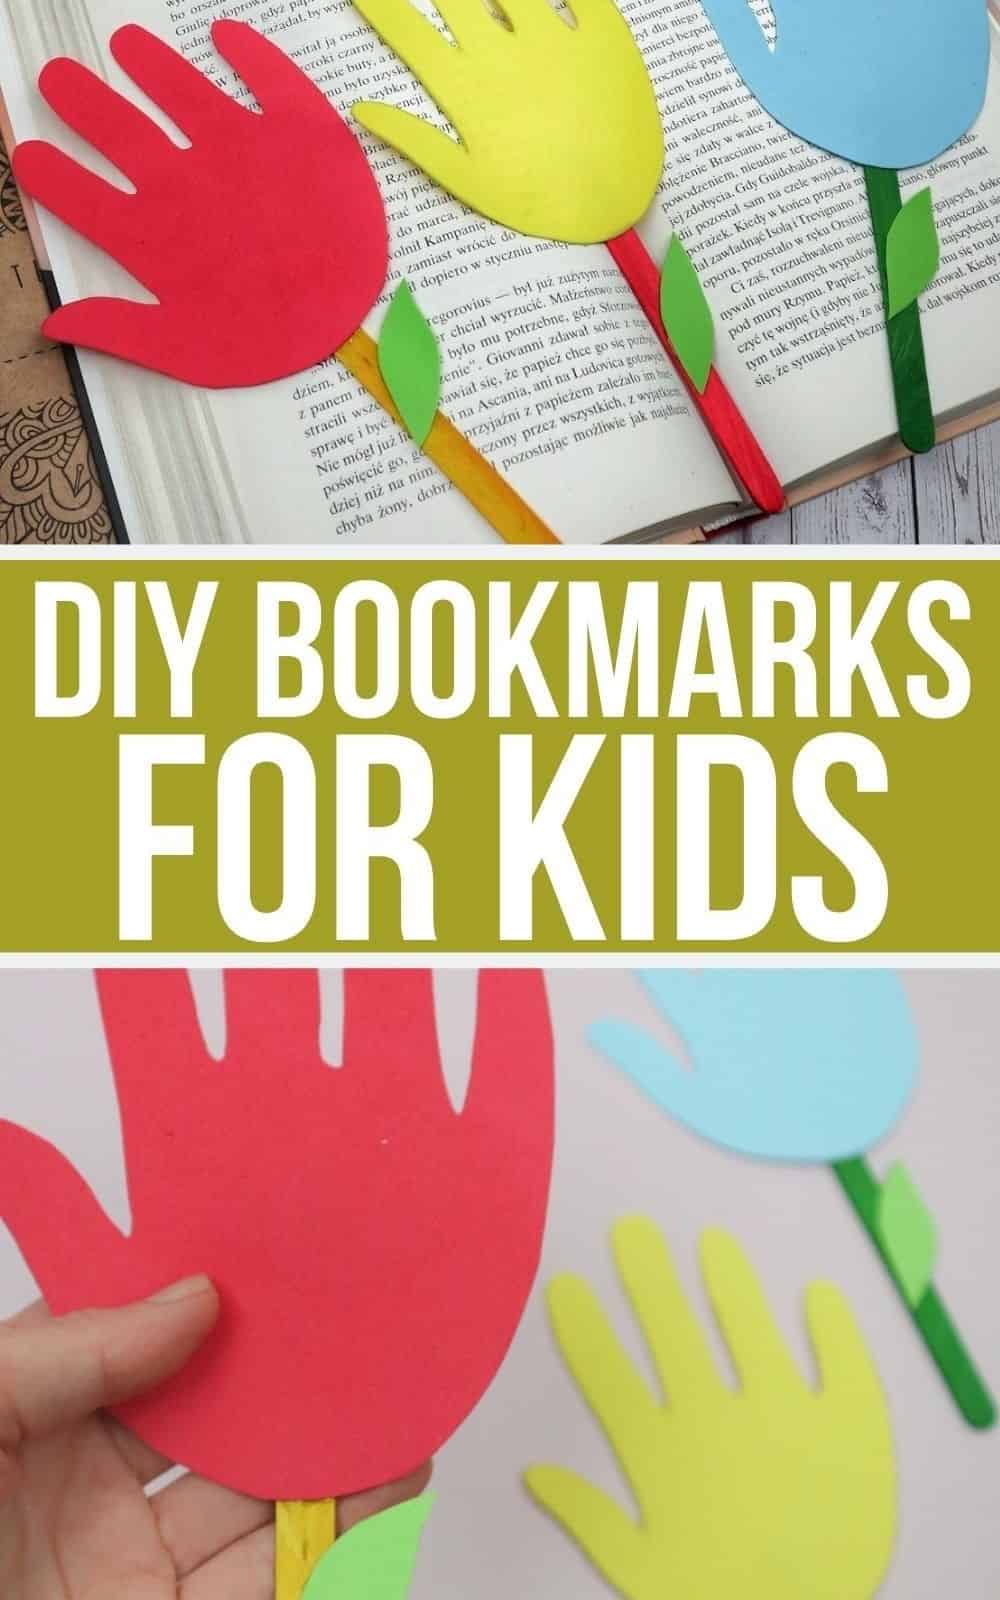
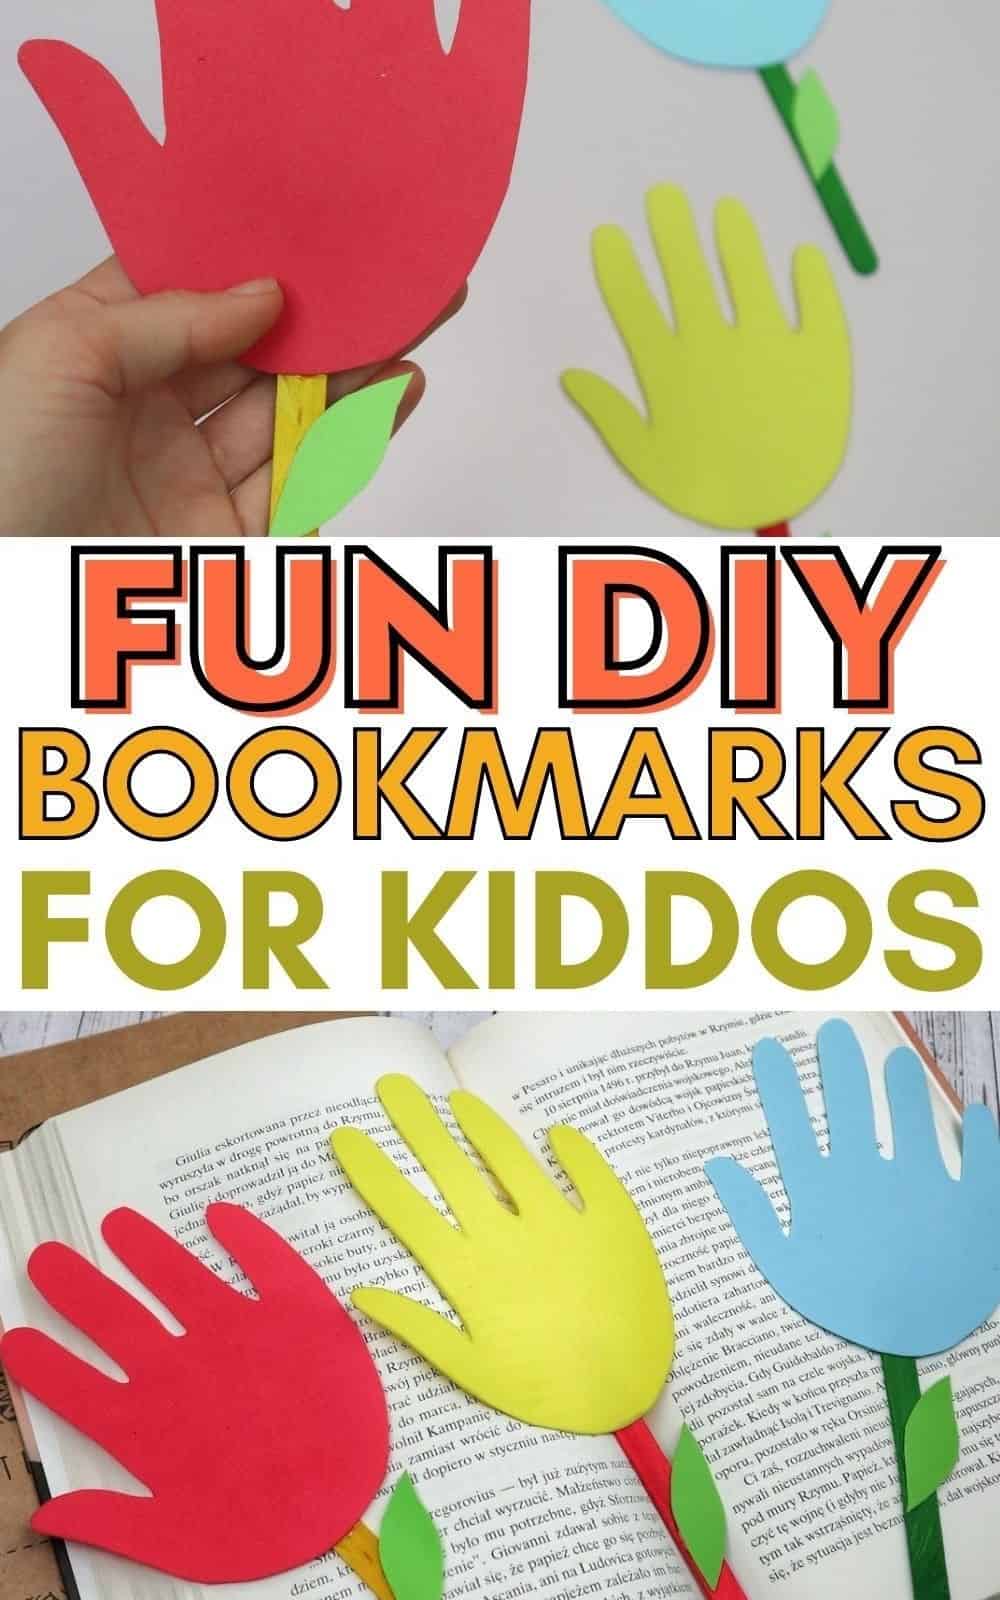
DIY Bookmarks for Kids
These DIY hand bookmarks are an enjoyable and educational craft for kids. With a total crafting time of just 20 minutes, you can create these personalized book marks with your little ones. Not only will they have fun making them, but it’s also a great way to encourage learning and creativity.
Equipment
To maintain uninterrupted workflow, it’s essential to find ways to keep your digital devices awake. One simple yet effective method is to adjust the display settings on your computer or mobile device. By doing so, you can prevent the screen from automatically turning off when not in use. This may seem like a minor consideration, but trust us – it can make a significant difference in your productivity and overall experience.
Materials
Instructions
To get started, gather all your materials and supplies. If you’re working with young children, consider simplifying the process by having them assemble the components while you handle the cutting. Cover your workspace with newspaper, then paint the popsicle sticks in a color of your choice. Allow them to dry completely. Next, create a hand template on colored paper using your own hand or a digital guide. Cutting out the hand shape is the next step.
Draw a few leaves on green-colored paper and cut them out as well. Once you have all the components prepared, it’s time to assemble the bookmarks. You can use either hot glue or tube glue for this process (I opted for tube glue). For added convenience, adhesive tape can also be used to minimize mess. Begin by attaching the hand cutouts to the top of the popsicle sticks, then adorn the stem with the leaves you’ve prepared. And that’s it!
You now have a set of charming hand bookmarks ready to inspire your children to develop a love for reading.