Transforming discarded bottle caps into vibrant DIY candles is the perfect way to infuse your home with a touch of brightness and sustainability! By repurposing these humble materials, you can create a unique decorative piece that not only reduces waste but also adds a pop of color to any room. The process is simple and fun, making it an excellent activity for crafty individuals and families alike.
As we strive to reduce our environmental footprint, DIY enthusiasts are constantly seeking innovative ways to reuse and recycle. And what better way to do so than by transforming old bottle caps into delightful candles? With a few basic supplies and some creative flair, you can turn those often discarded materials into charming decorative accents that bring warmth and light to your space.
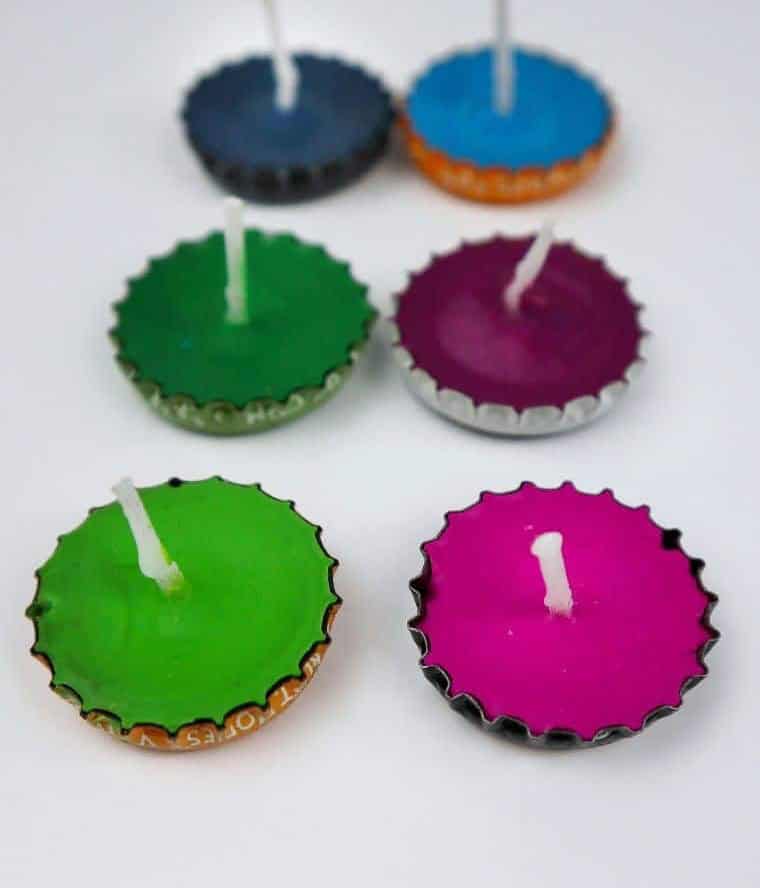
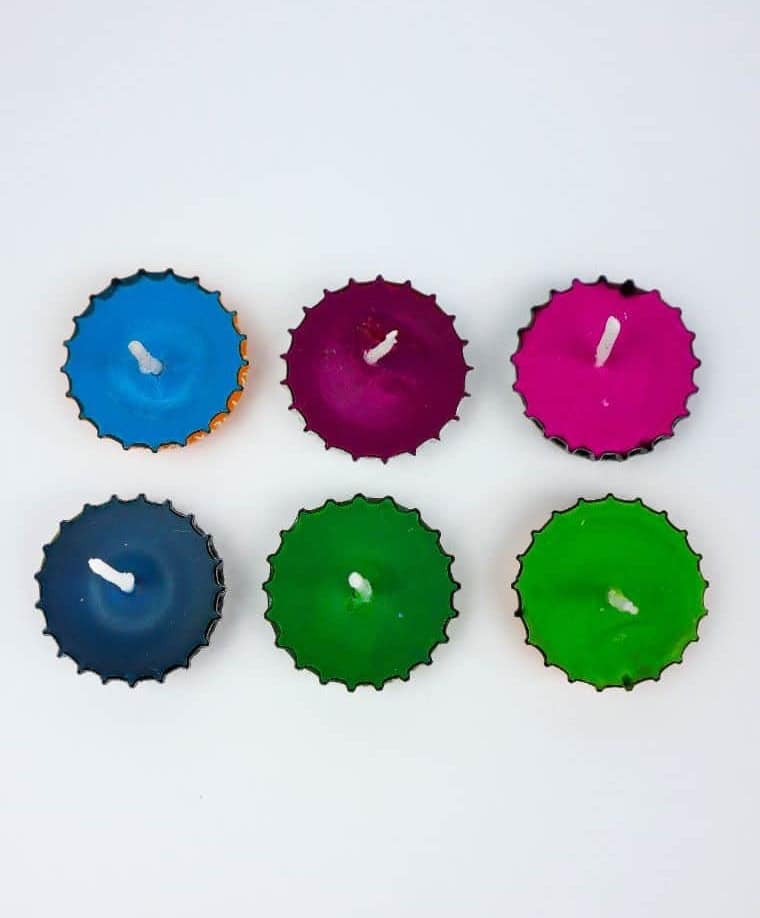
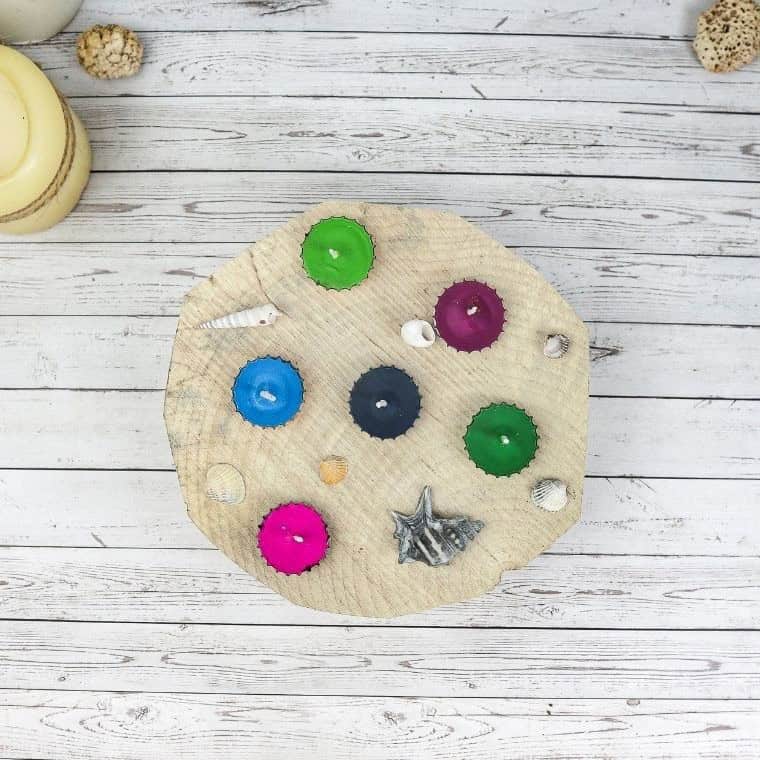
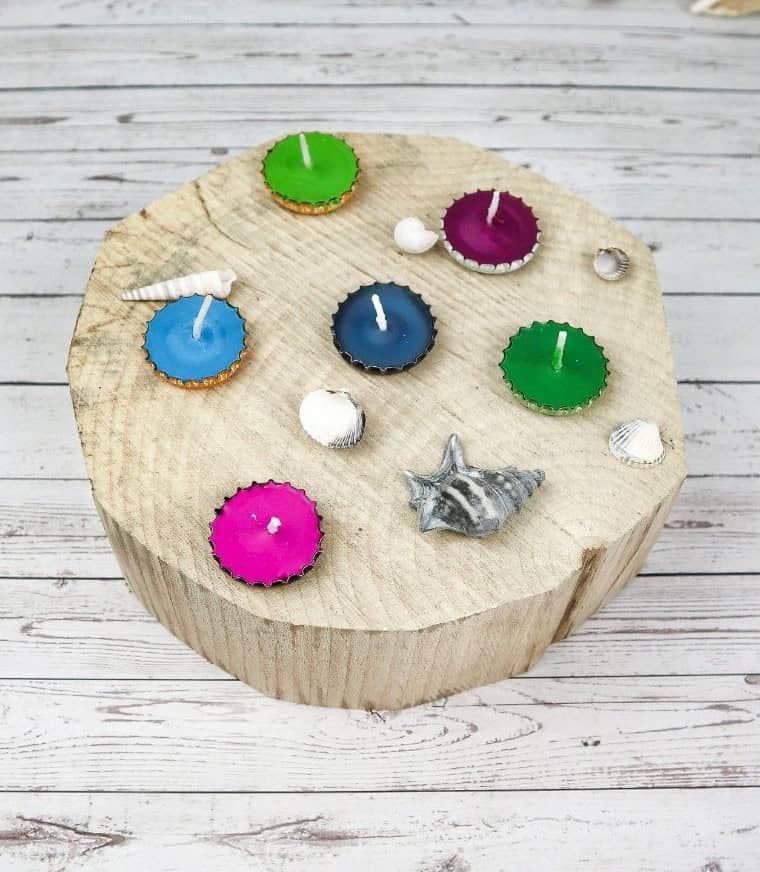
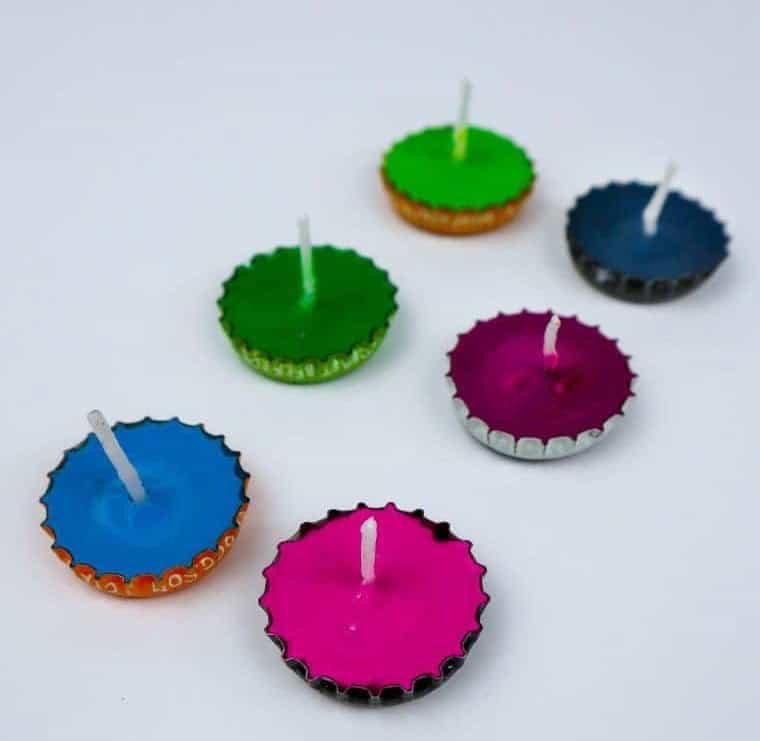
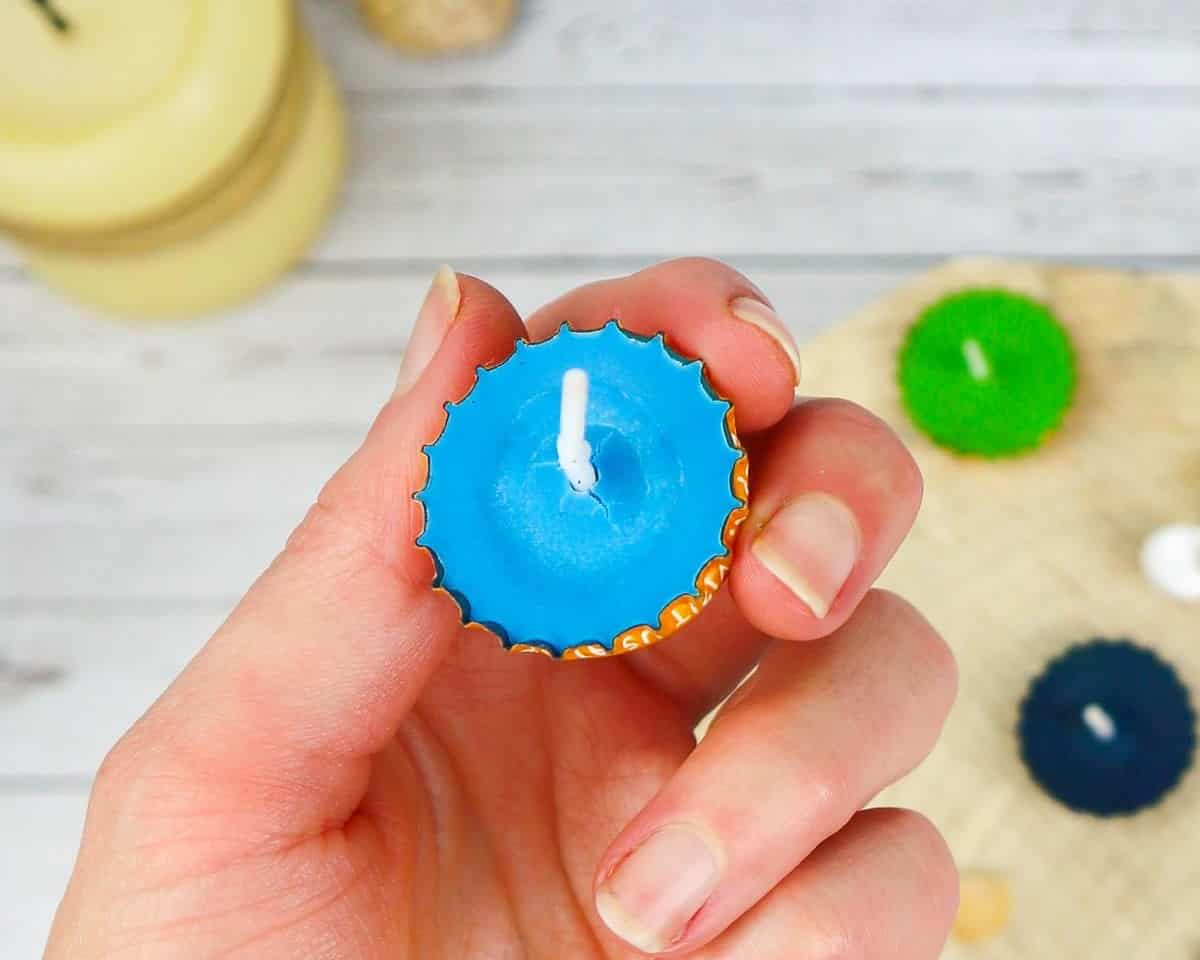
The resulting candles are almost too beautiful to burn – almost!
They’re the perfect way to add a splash of color and whimsy to any room, making them an excellent addition to your home’s décor. So why not give it a try and join the movement towards sustainability through DIY craftiness?
What You’ll Need
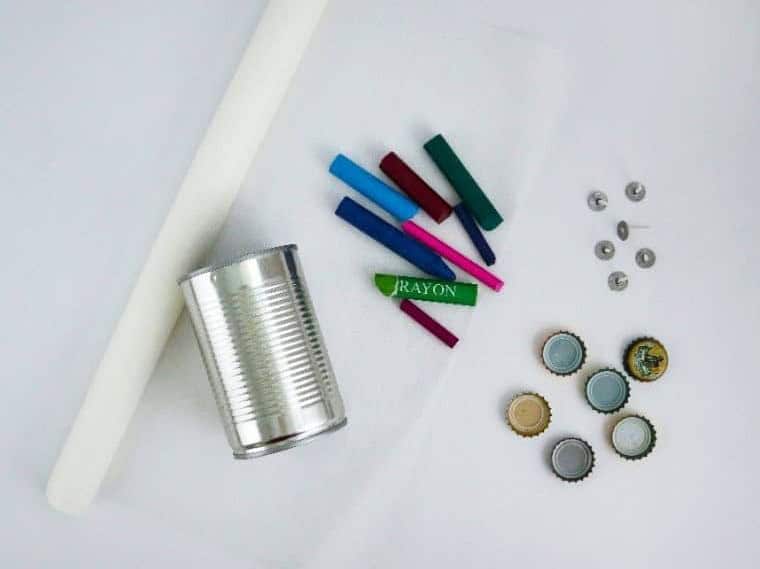
The treasure trove of creative reuse, often overlooked but full of potential, lies within the realm of everyday household items. Unassuming trinkets like old bottle caps, worn crayons, and discarded empty soup cans may seem like mere trash, but with a little imagination, they can be transformed into unique works of art or functional objects. Even humble items like pre-waxed wicks, saucepans, and more can find new life in the hands of an innovative thinker.
How to Make Bottle Cap Candles
As the lights go out, bring them back on with a dash of creativity! Discover the simple steps to craft adorable candles that will brighten up any room.
Step One
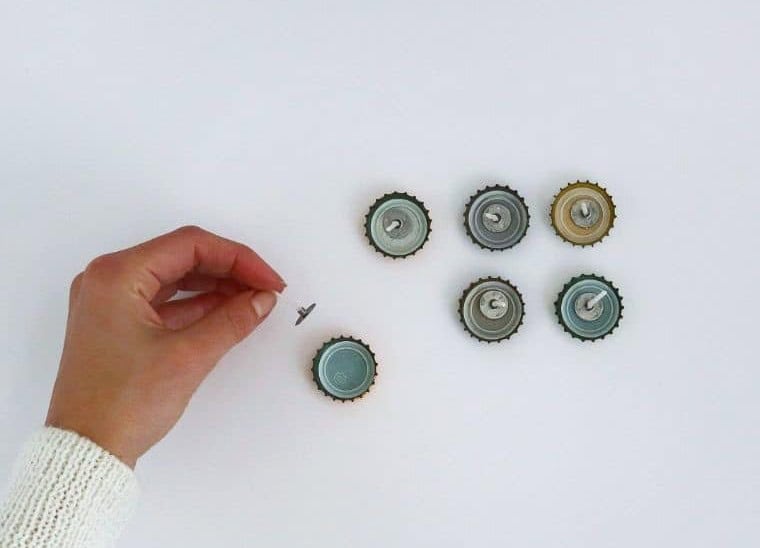
To initiate the process, gather all your bottle caps and carefully insert a pre-waxed wick into each one. If you’re unable to locate tealight-sized wicks, you can easily adapt by trimming full-sized wicks down to the optimal length required for this project.
Step Two
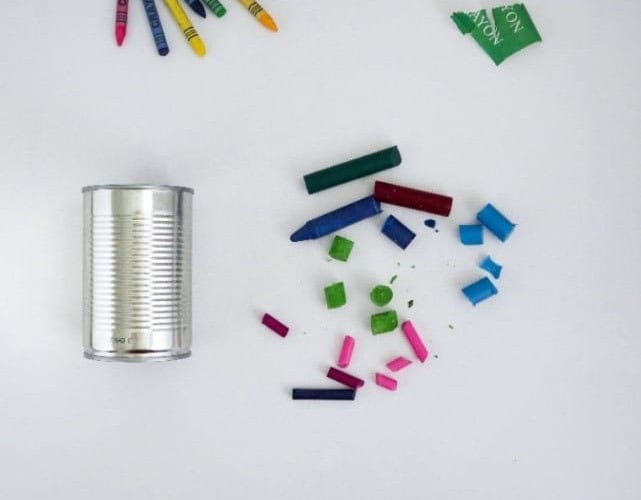
Unleash your creativity and select a vibrant array of crayon colors that will bring your candle’s wax to life! This is an opportunity to experiment with unique blends, swirling patterns, or bold gradient effects. The possibilities are endless!To ensure smooth melting, take the time to crush up those crayons into fine particles. While not entirely necessary, this step can significantly speed up the melting process and leave you with a beautifully uniform candle.
Step Three
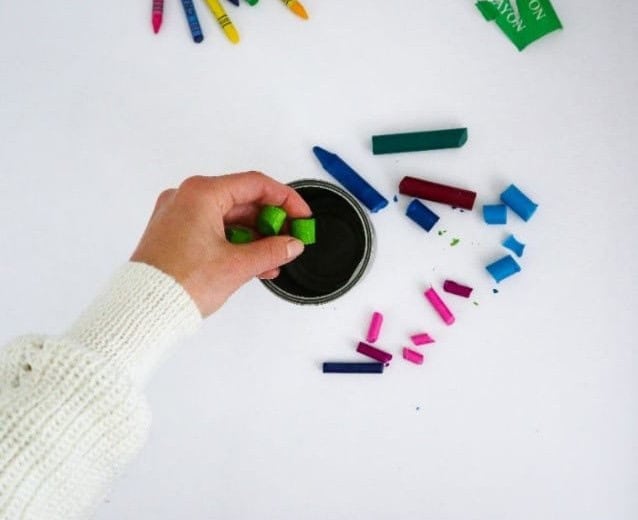
To initiate the process, carefully place the crushed crayons within a metal soup can, ensuring it’s a sturdy container that can withstand high temperatures without compromising its structural integrity. If you don’t have a metal can, glass or ceramic alternatives are viable options, though keep in mind they may not be as heat-resistant.
Step Four
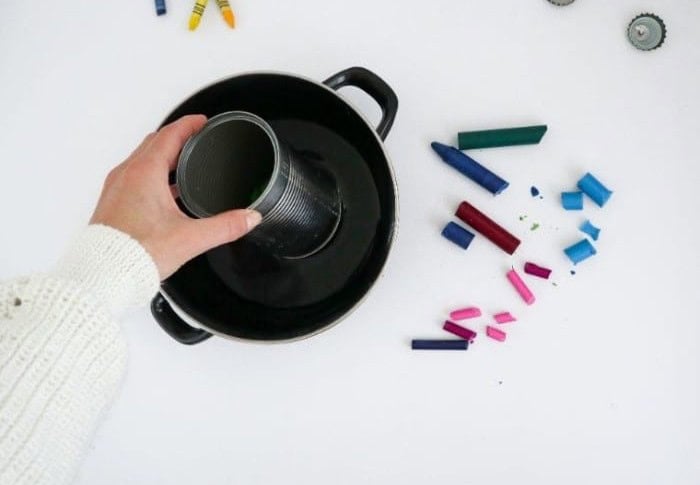
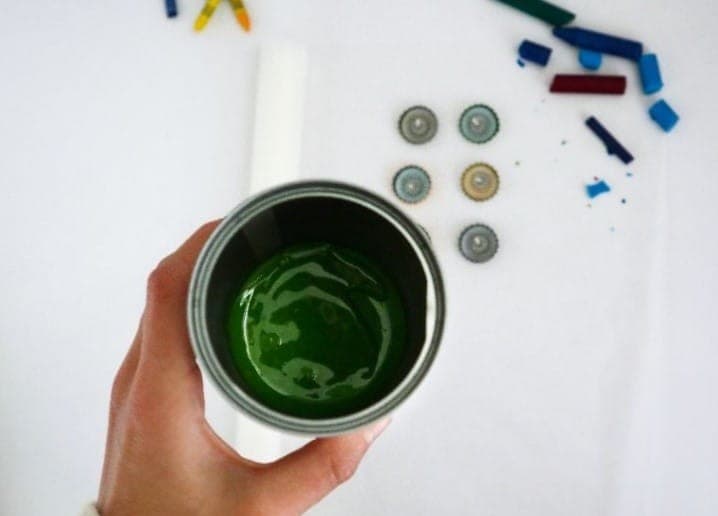
To begin the process of melting crayons, start by filling a saucepan with about a quarter of its capacity with water. Bring the water almost to a simmer before gently placing a metal can into the pan. This setup mimics a double boiler, allowing the heat from the water to melt the crayons without directly applying heat to them.
The use of a metal can instead of a traditional saucepan offers the added benefit of easy disposal – simply throw away the can when you’re done, rather than having to clean and store a saucepan.
Step Five
To begin the process, carefully melt each crayon color individually until they reach a fully liquid state. It’s essential to maintain the integrity of each hue by using separate containers or washing the container thoroughly between colors. A simple and effective method is to use hot water to dissolve any remaining wax, ensuring a clean slate for the next color.
Step Six
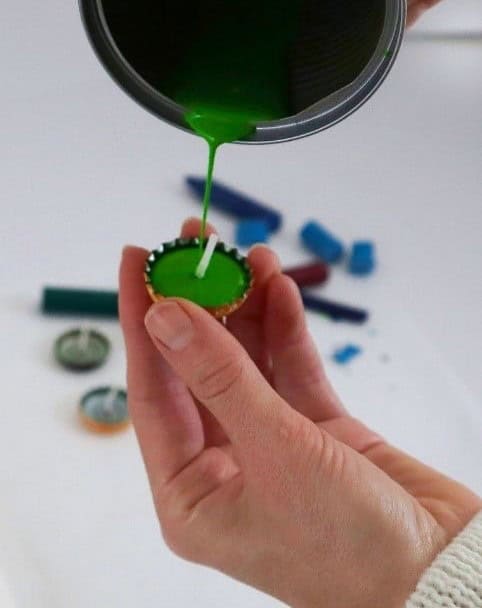
When working with hot wax, it’s crucial to strike a balance between speed and precision. On one hand, you need to move quickly to prevent the wax from cooling too slowly and solidifying before you can shape it. On the other hand, you must be careful not to let the wax come into contact with your skin, as it can cause burns. The added challenge when working with crayon wax is its tendency to cool rapidly!
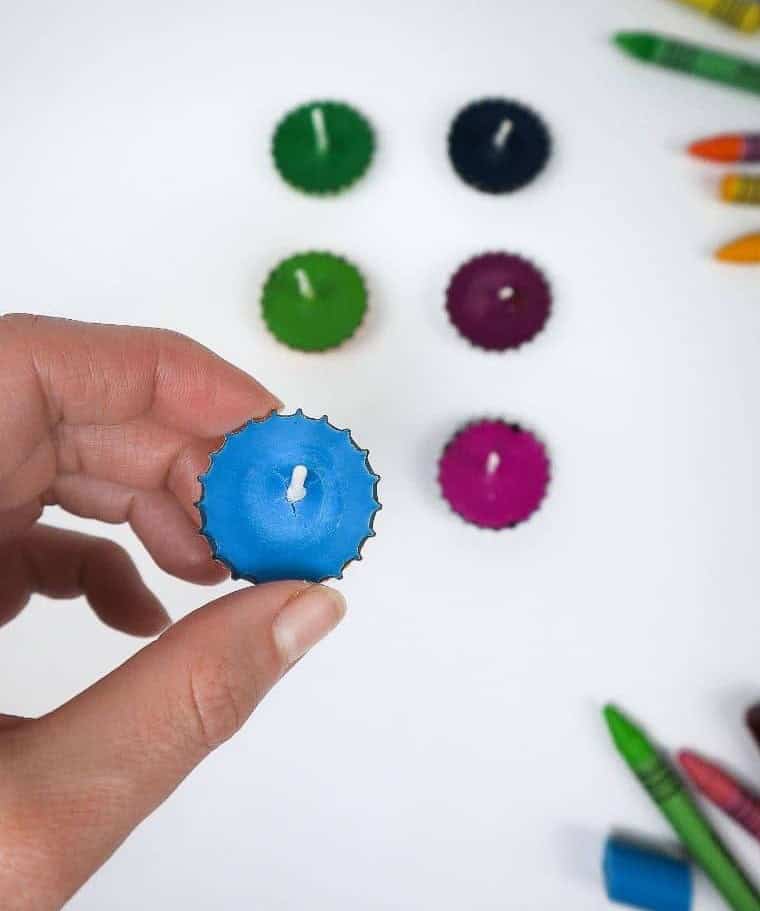
To ensure a smooth and controlled process, gently lift one of our bottle caps, ensuring the wick is properly aligned. Then, pour the wax into the cap or onto a sheet of baking paper, if you prefer, to form the candle. This approach not only helps contain any mess but also allows for a more deliberate and accurate application.
Step Seven
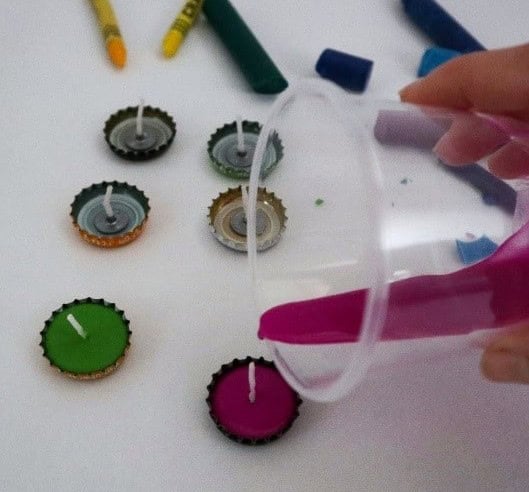
As you work through each color, ensure you’re melting and pouring one by one to prevent the wax from drying out while you wait. To elevate the appearance of these candles, consider spraying the bottle caps with a thin layer of gold paint before starting the process. This subtle touch adds a charming rustic flair that’s sure to impress. With your creations complete, feel free to make batches and distribute them as thoughtful gifts or enjoy having them throughout your home.
How to Make a Scented Bottle Cap Candle?


When it comes to scented candles, essential oils are a must-have. Whether you’re a fan of classic lavender or bold peppermint, these oils can help you create unique and inviting fragrances for your home. Here’s a list of some popular scents you might want to try: Lavender, Tea tree, Vanilla, Peppermint, Rosemary, Frankincense, Orange and sweet almond. And the best part? You can mix and match these smells in any combination that suits your taste.
Want to create a personalized scent for someone special or capture the essence of a particular memory? Go ahead, get creative! When it comes time to add the oils to your melted wax, remember that a little goes a long way. Just one drop of essential oil is usually enough to give your candle a strong and consistent fragrance. After adding the oil, simply mix the wax well to distribute the scent evenly throughout the candle.
Then, you can proceed with the rest of the candle-making process as usual.
Other Crafts You Can Make
For crafty enthusiasts and beginners alike, there’s nothing quite like the thrill of creating something from scratch. Here, we’ve curated a selection of DIY projects that are perfect for making at home. From elegant rock photo holders to delicate macrame leaf earrings, our roundup of 20 fun crafts for all ages offers inspiration galore.
For those looking to create something truly special, try your hand at weaving a bowl with yarns or crafting salt dough ornaments that will be treasured for years to come. And don’t forget the young crafters in your life – we’ve also got 20 projects designed specifically for teenagers and kids alike.
DIY Bottle Cap Candles
Create unique DIY candles from upcycled bottle caps, a fun and practical craft perfect for decorating your home. In just 27 minutes, you can transform discarded materials into beautiful, functional pieces. Begin by preparing the materials in under two minutes, then spend 15 minutes actively crafting the candle holders. Finally, allow the wax to set for 10 minutes before enjoying your finished project.
Equipment
When using a saucepan, you may want to consider taking steps to prevent it from falling asleep on you. In this context, ‘sleep’ refers to the screen’s tendency to dim or turn off due to inactivity. To avoid this issue, try keeping your screen active by regularly interacting with it, such as checking notifications or scrolling through a webpage. This should keep your screen at its usual brightness level and prevent it from going dark unexpectedly.
Materials
When it comes to crafting unique and creative DIY projects, you don’t always need expensive or specialized materials. In fact, some of the most interesting and effective results can be achieved by repurposing everyday items that would otherwise end up in the trash. Consider using crayons with their labels removed – a simple but thoughtful touch for any craft project. Similarly, pre-waxed tealight candle wicks can add a subtle yet elegant finish to your creations.
Old bottle caps can also be used to create colorful accents or even functional components in your DIY projects. For an added sensory dimension, consider incorporating essential oils into your work. Finally, old metal soup cans can be transformed into quirky containers or decorative elements, adding texture and interest to your finished pieces.
Instructions
Begin by preparing your workspace and gathering all necessary supplies. Start by heating some water in a saucepan, filling it only about a quarter of the way to prevent any water from contaminating the wax. As the water heats up, take this opportunity to prepare your bottle caps for their transformation into candles. Place a single wick in each cap, securing them with hot glue if desired. Next, move on to melting your crayons, but first crush them into smaller pieces to ensure they melt evenly.
To avoid overheating and burning the wax, melt the crayons in an old soup can placed in the warm water. This slow-and-low approach will yield a smooth, consistent melt. If you’re looking to add some extra fragrance to your candles, now’s the time to introduce a single drop of essential oil – remember, a little goes a long way! Once your wax is fully melted and fragranced (if desired), pour it into the prepared bottle caps, taking care not to spill any on your workspace.
You can set up a makeshift workstation by pouring the wax onto baking paper for added protection against messes. Allow the wax to solidify completely before lighting your newly minted candles, and voilà – you’re officially a candlemaker!