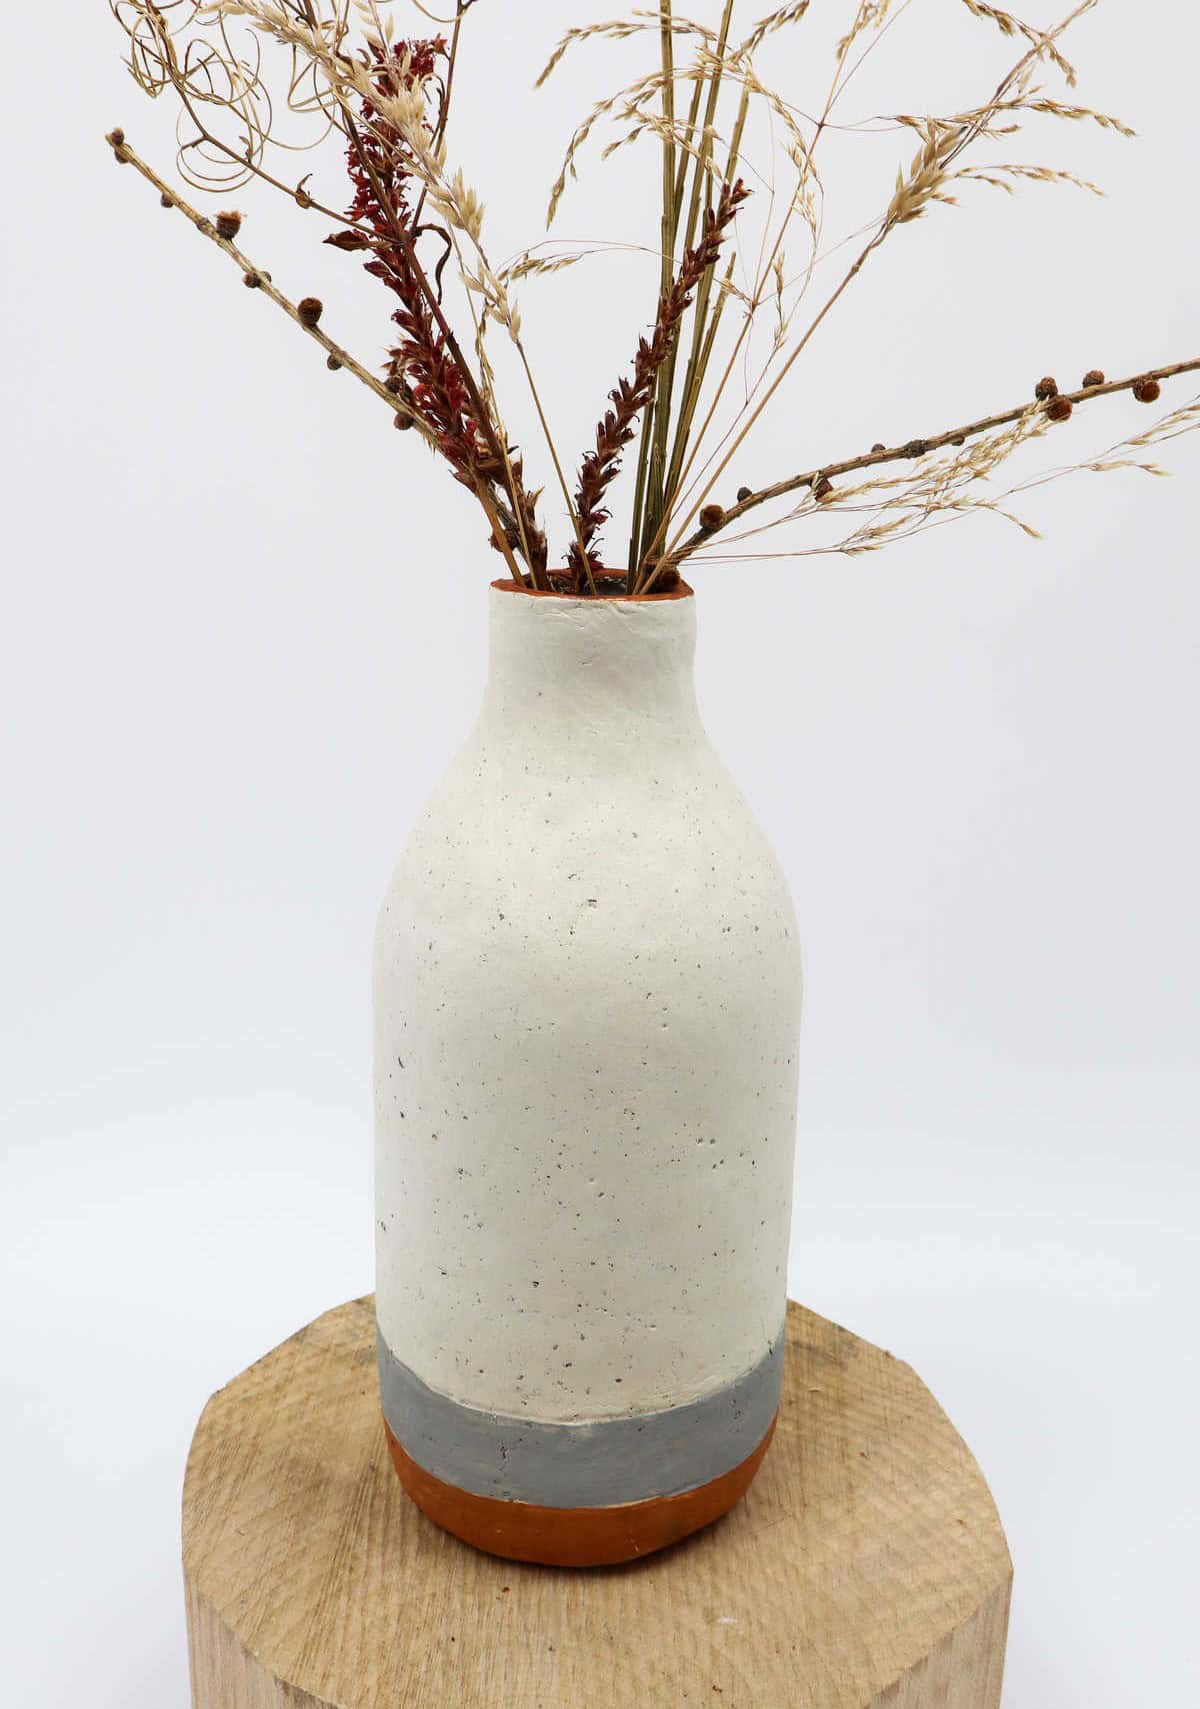
Transforming glass bottles into unique vases is an excellent way to upcycle and add a creative touch to your home. This DIY project is perfect for adults and teens alike, offering a relatively easy introduction to working with air-drying clay. The best part? You’ll be left with a stunning piece that can be used as a flower vase, centerpiece, or decorative item – perfect for any room in the house.
Not only will this upcycled vase bring elegance to your space, but it will also give you the satisfaction of having created something entirely by yourself. So why not get creative and turn those old bottles into a beautiful piece that’s truly one-of-a-kind?
Supplies and Tools for this Bottle Vase
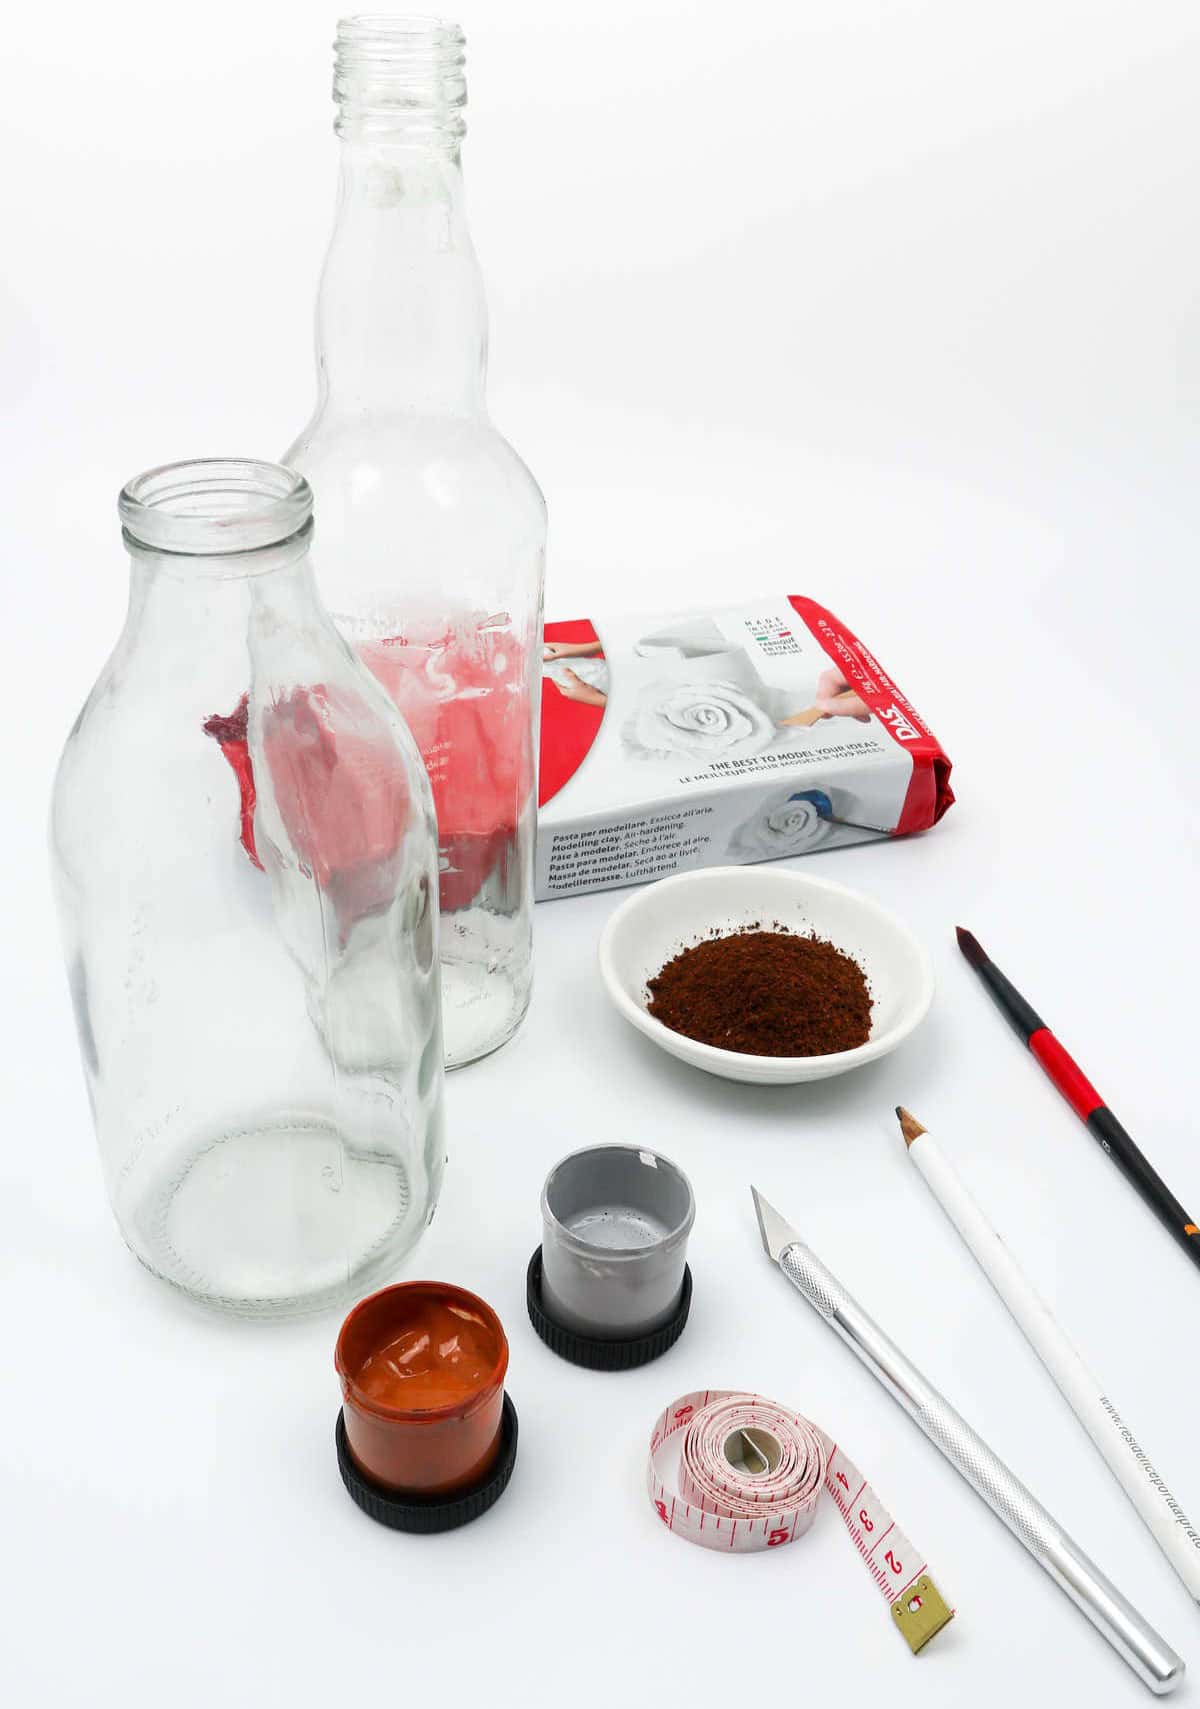
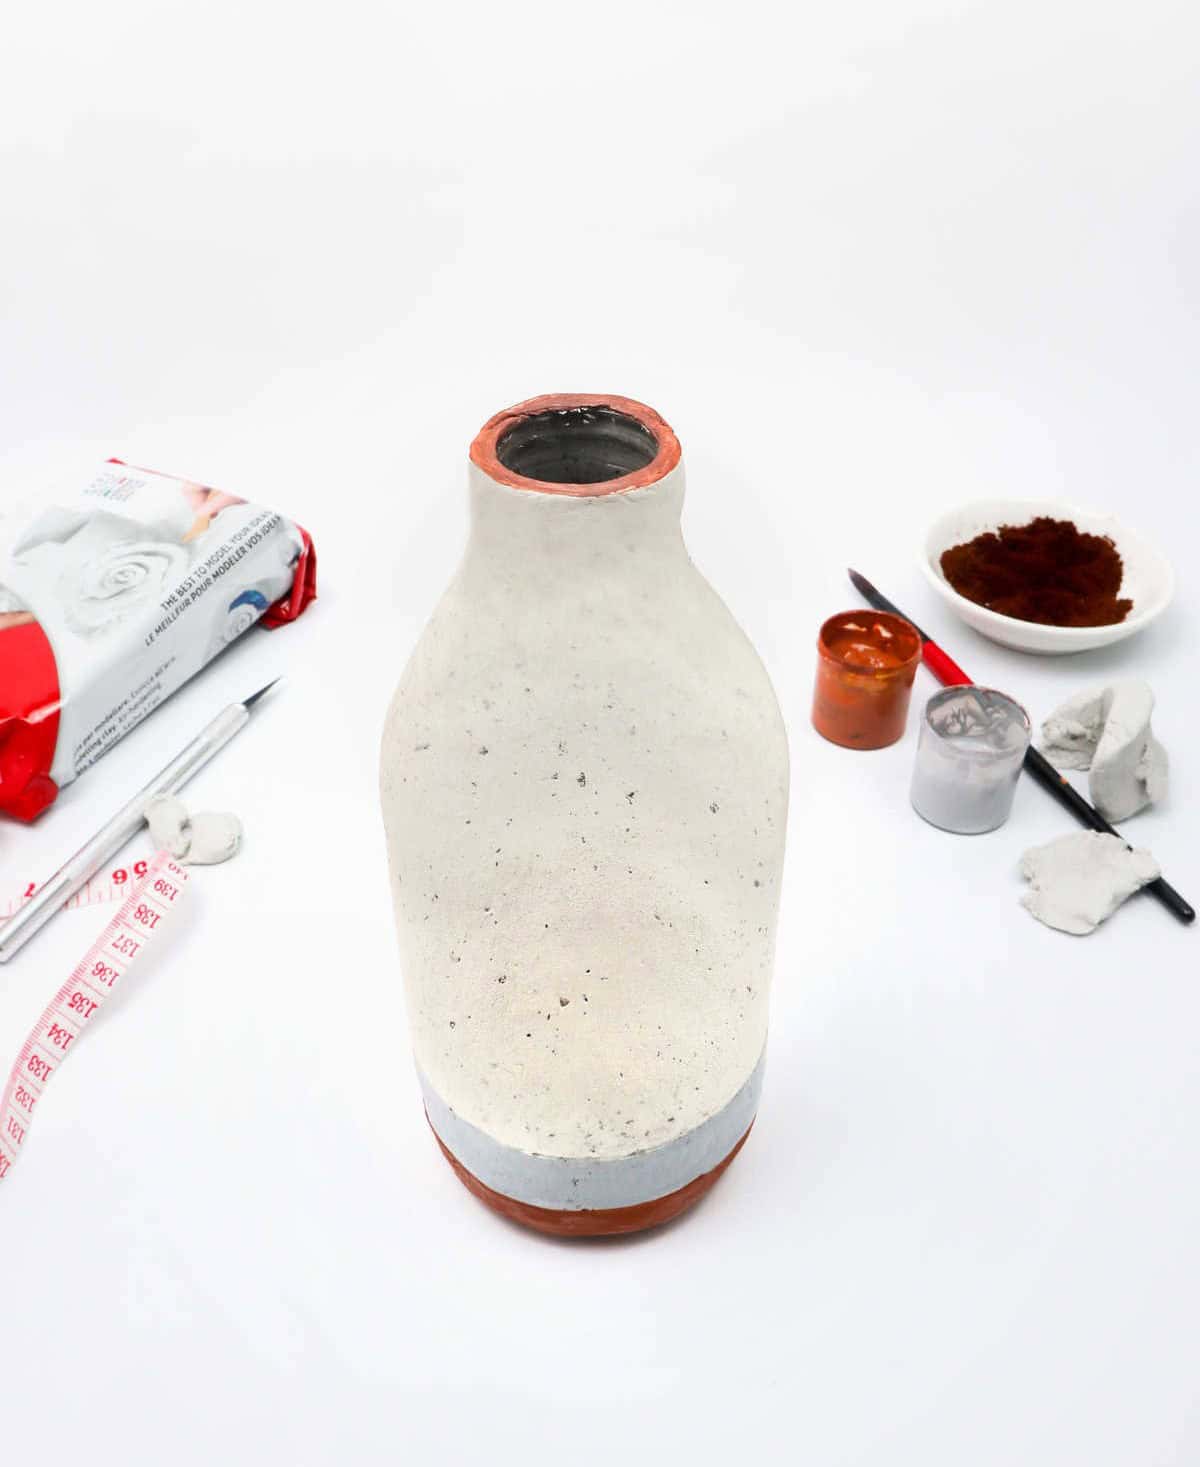
To embark on this DIY adventure, gather the following essential supplies: a glass bottle, which will serve as the foundation of your project. You’ll also need a rolling pin or an additional glass bottle to help shape the air drying clay. For added texture, incorporate ground coffee into your design. To ensure precise measurements and cuts, have a tape measure and precision knife at your disposal. A pencil will come in handy for sketching out your ideas before bringing them to life.
Finally, prepare for creative expression by having acrylic paints in grey and brown hues ready to use with a paintbrush.
Watch: DIY Clay Vase
For those who prefer visual learning, we also offer a step-by-step video guide that accompanies this tutorial. You’re welcome to follow along and learn at your own pace.
How Do You Make a Bottle Vase?
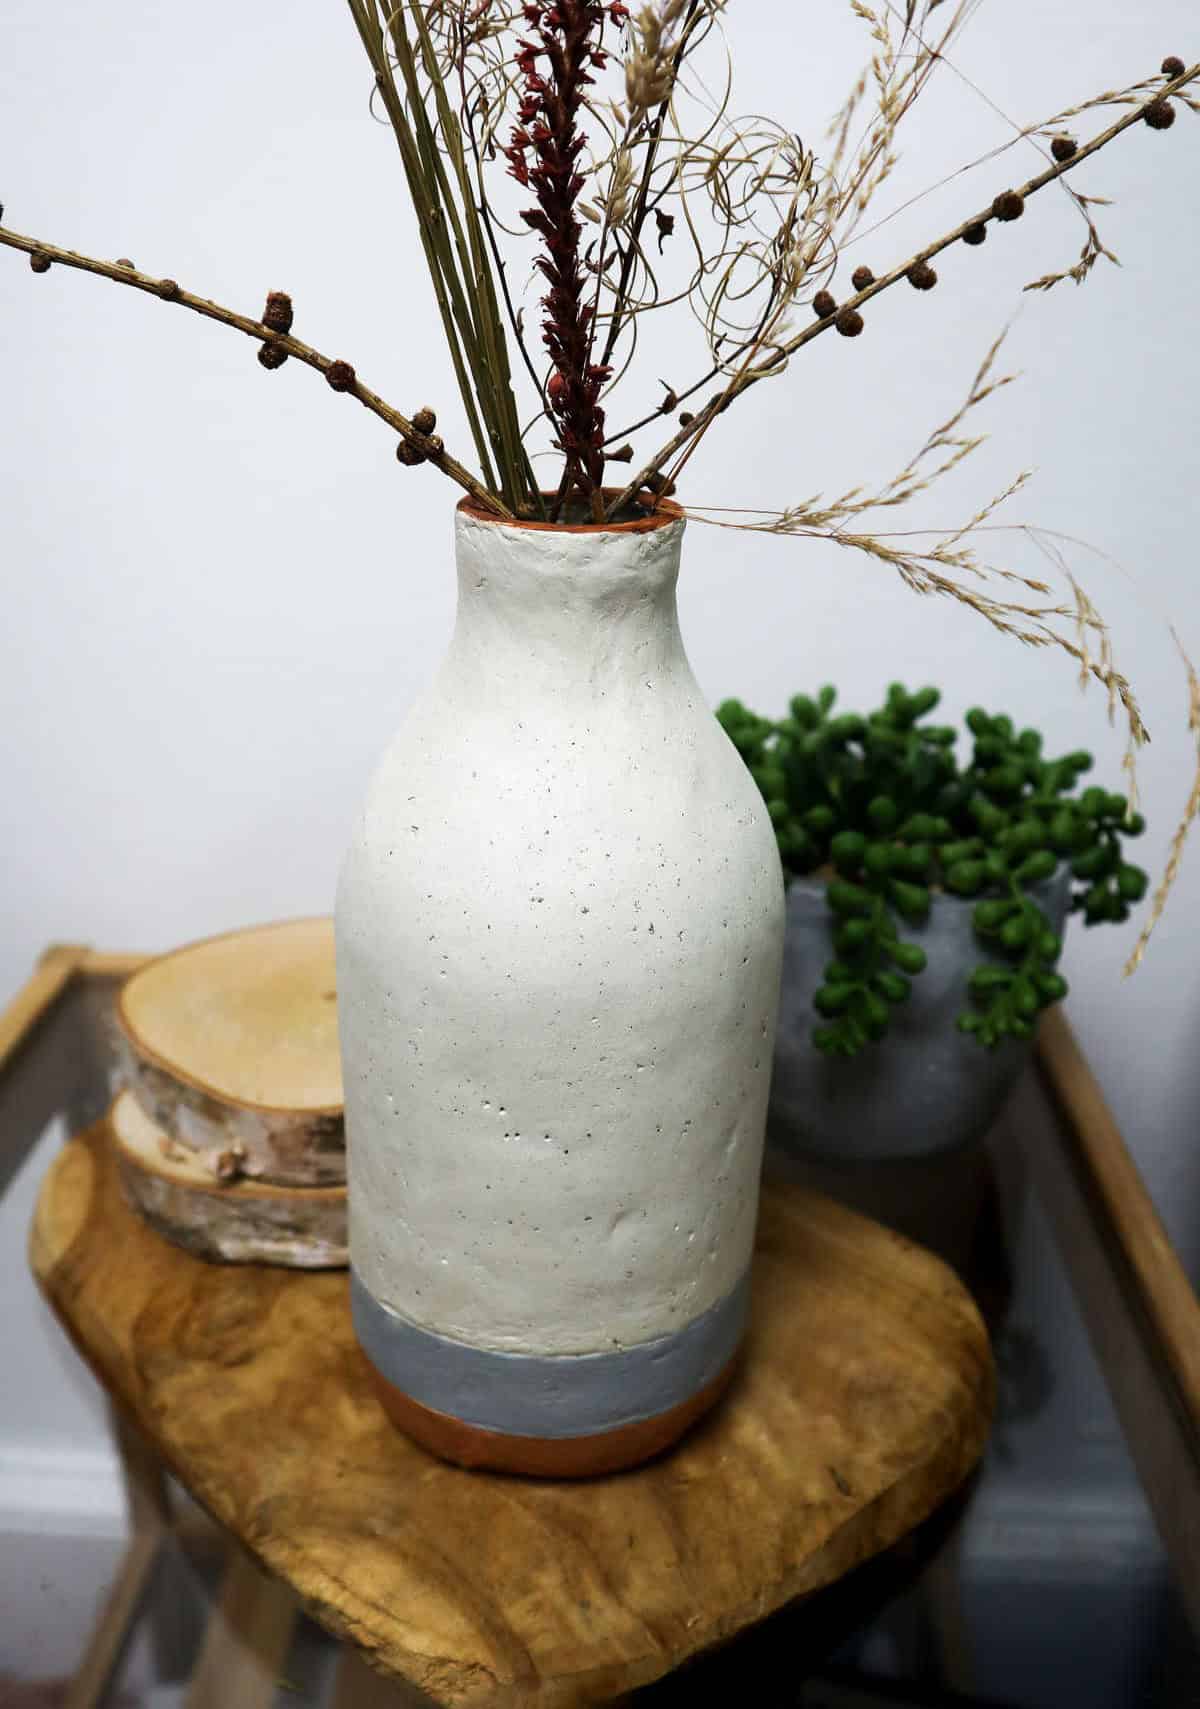
Transforming a ordinary glass bottle into a unique and rustic vase is just a matter of air-drying clay. This simple technique can elevate your wine bottles into stunning works of art. If you’re intrigued by the process, let’s dive in and explore how to achieve that charming earthy speckled effect on the clay, turning your wine bottles into extraordinary crafts.
Step 1

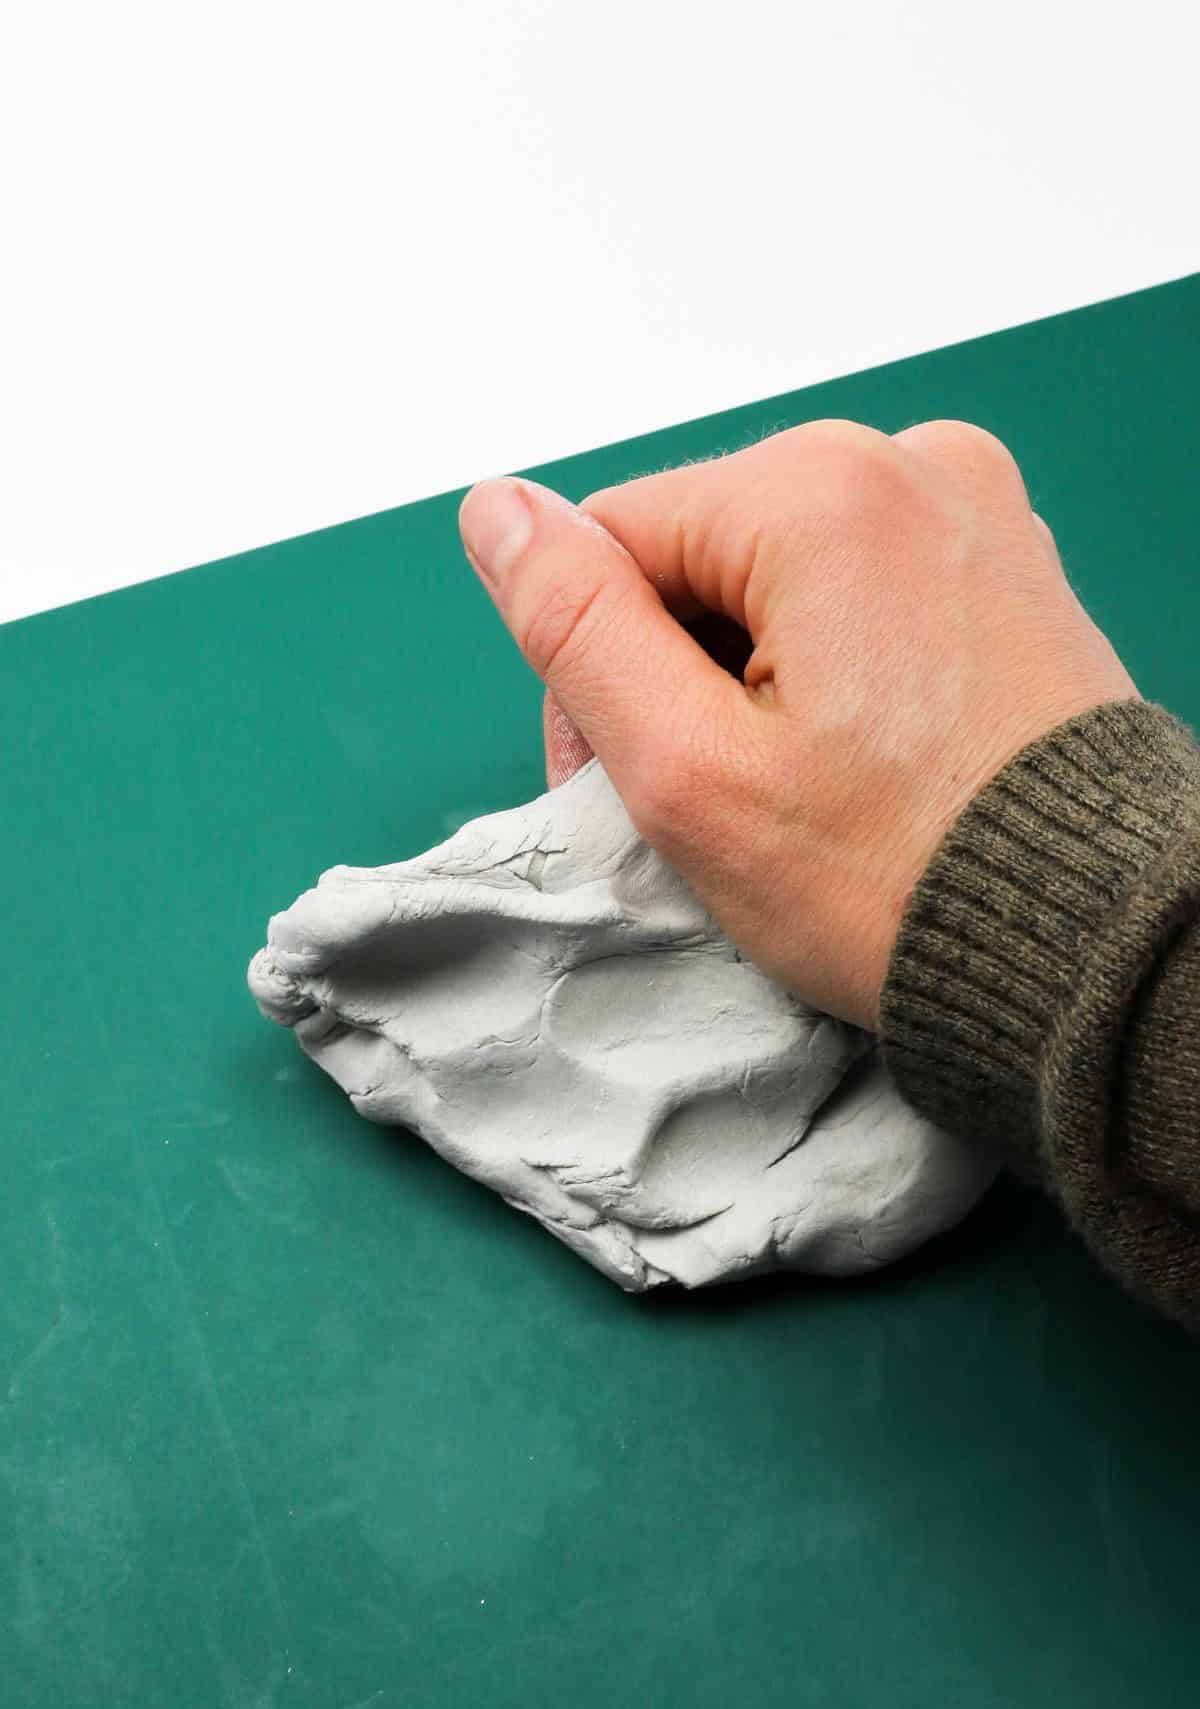
To begin with, take a portion of the air-dry clay and seal away the remainder in an airtight container to maintain its freshness. Next, employ the palms of your hands to knead the extracted portion until it is free from lumps, smooth, and supple. To ensure a tidy workspace, utilize a rolling mat strategically placed over your work surface.
Step 2
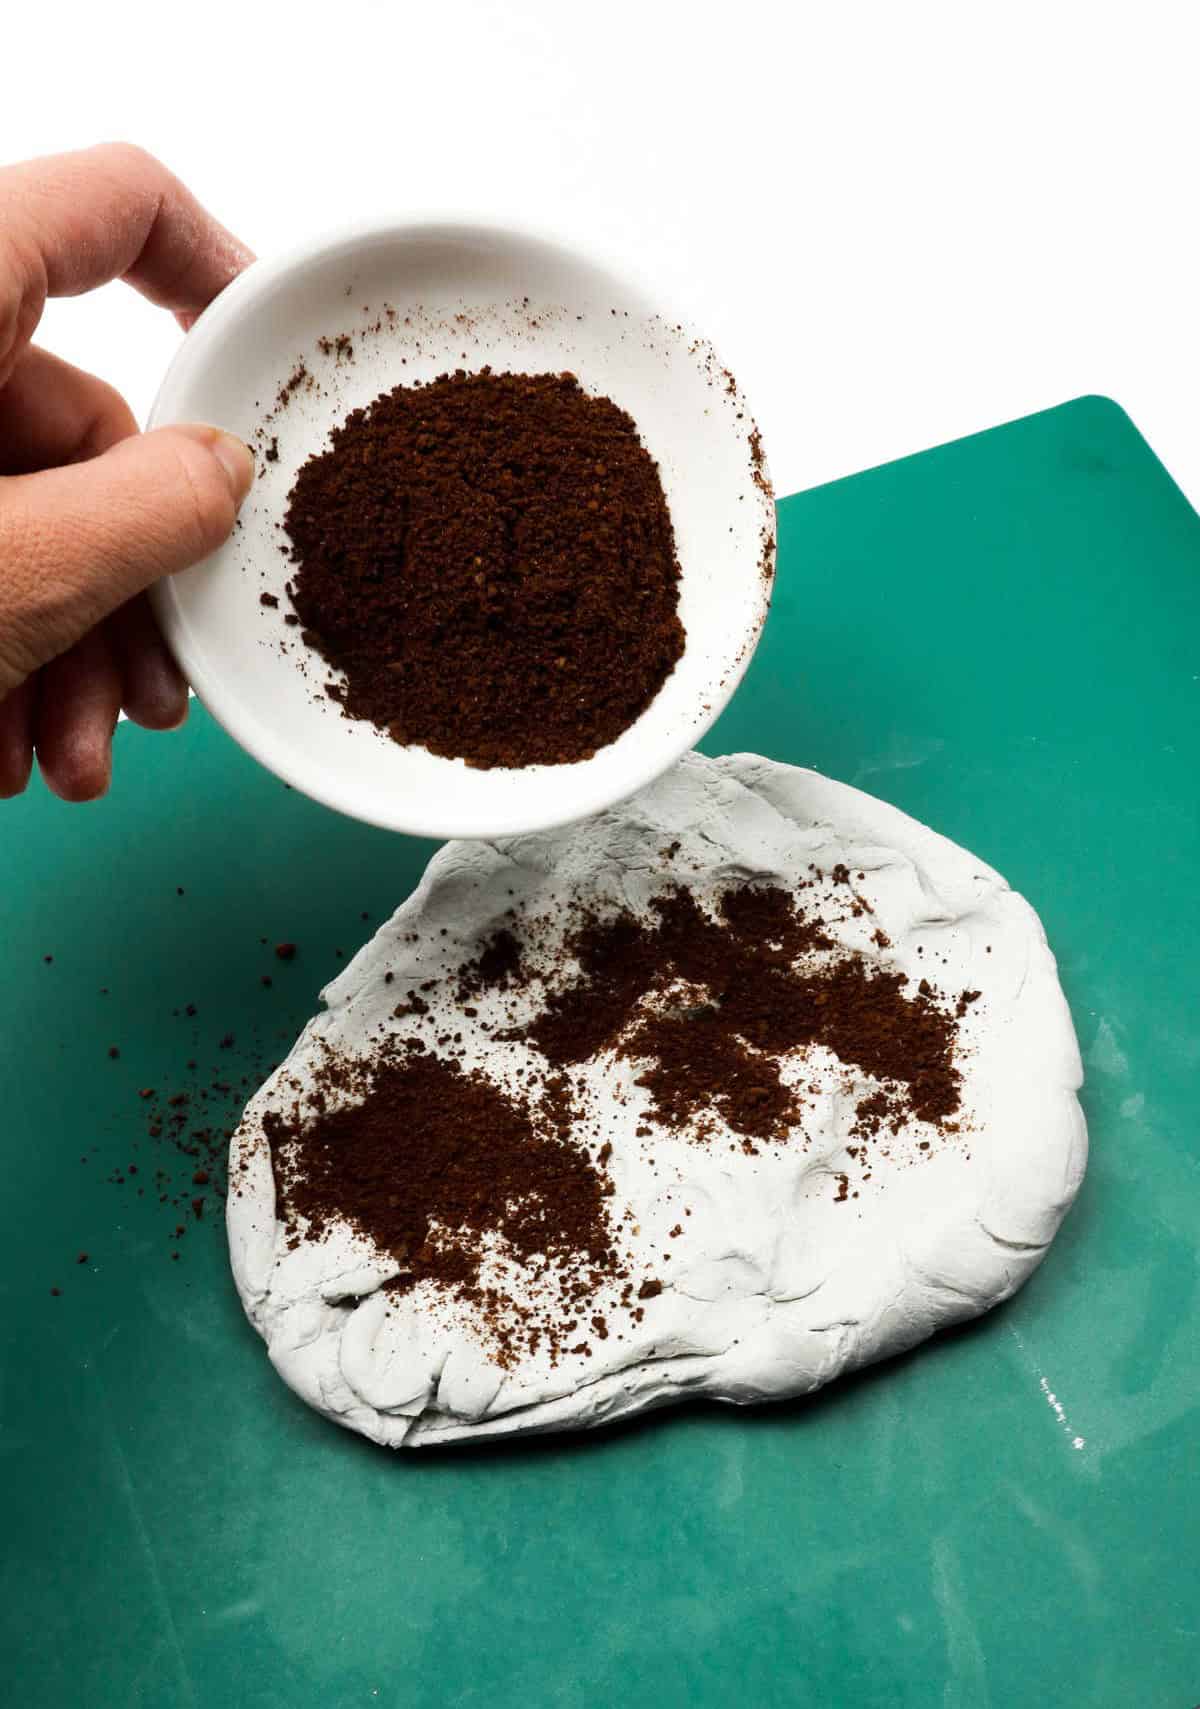
To create that signature speckled appearance in your dough, you’ll need to add a dash of coarsely ground coffee. Yes, you read that right – coffee! Simply sprinkle about a cup’s worth over the kneaded dough, and watch as the mixture transforms into a visually appealing, coffee-speckled treat.
Step 3
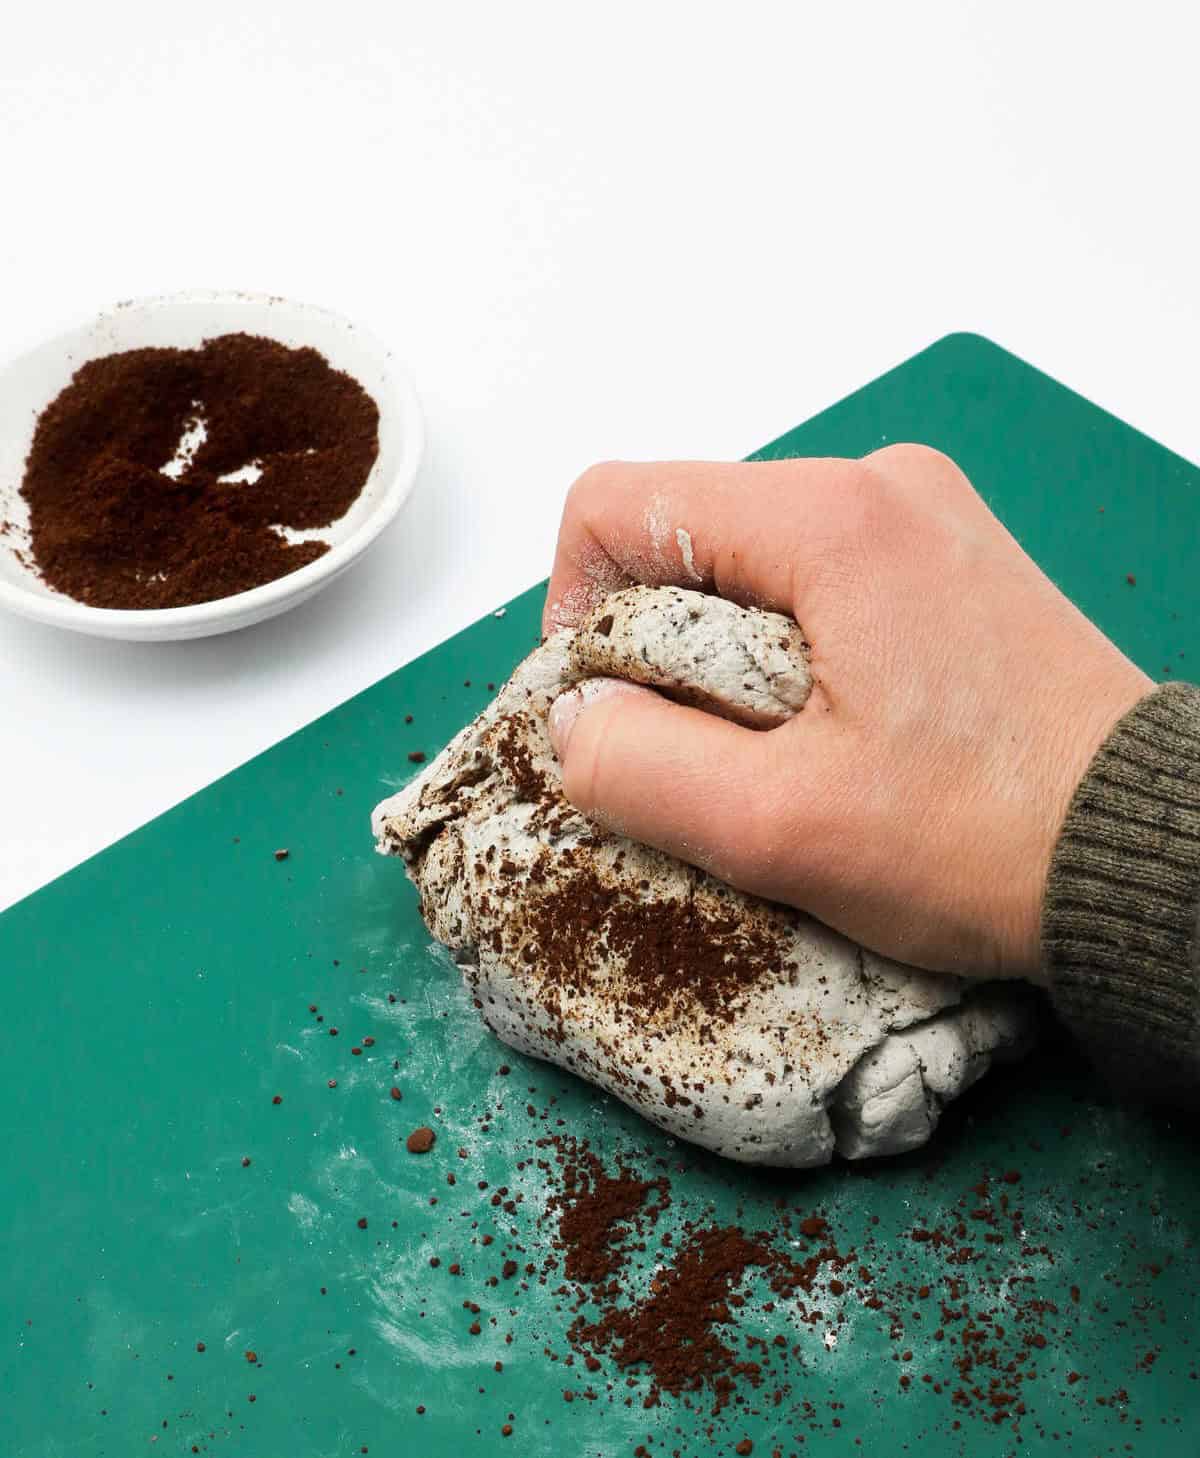

Gently incorporate the coffee grounds into the clay mixture, working it in thoroughly through a process of gentle kneading until the grounds are fully integrated and there is no visible residual material. It’s essential to maintain a keen eye for any clumping or uneven distribution, taking care to break down any such formations as you work.
Step 4
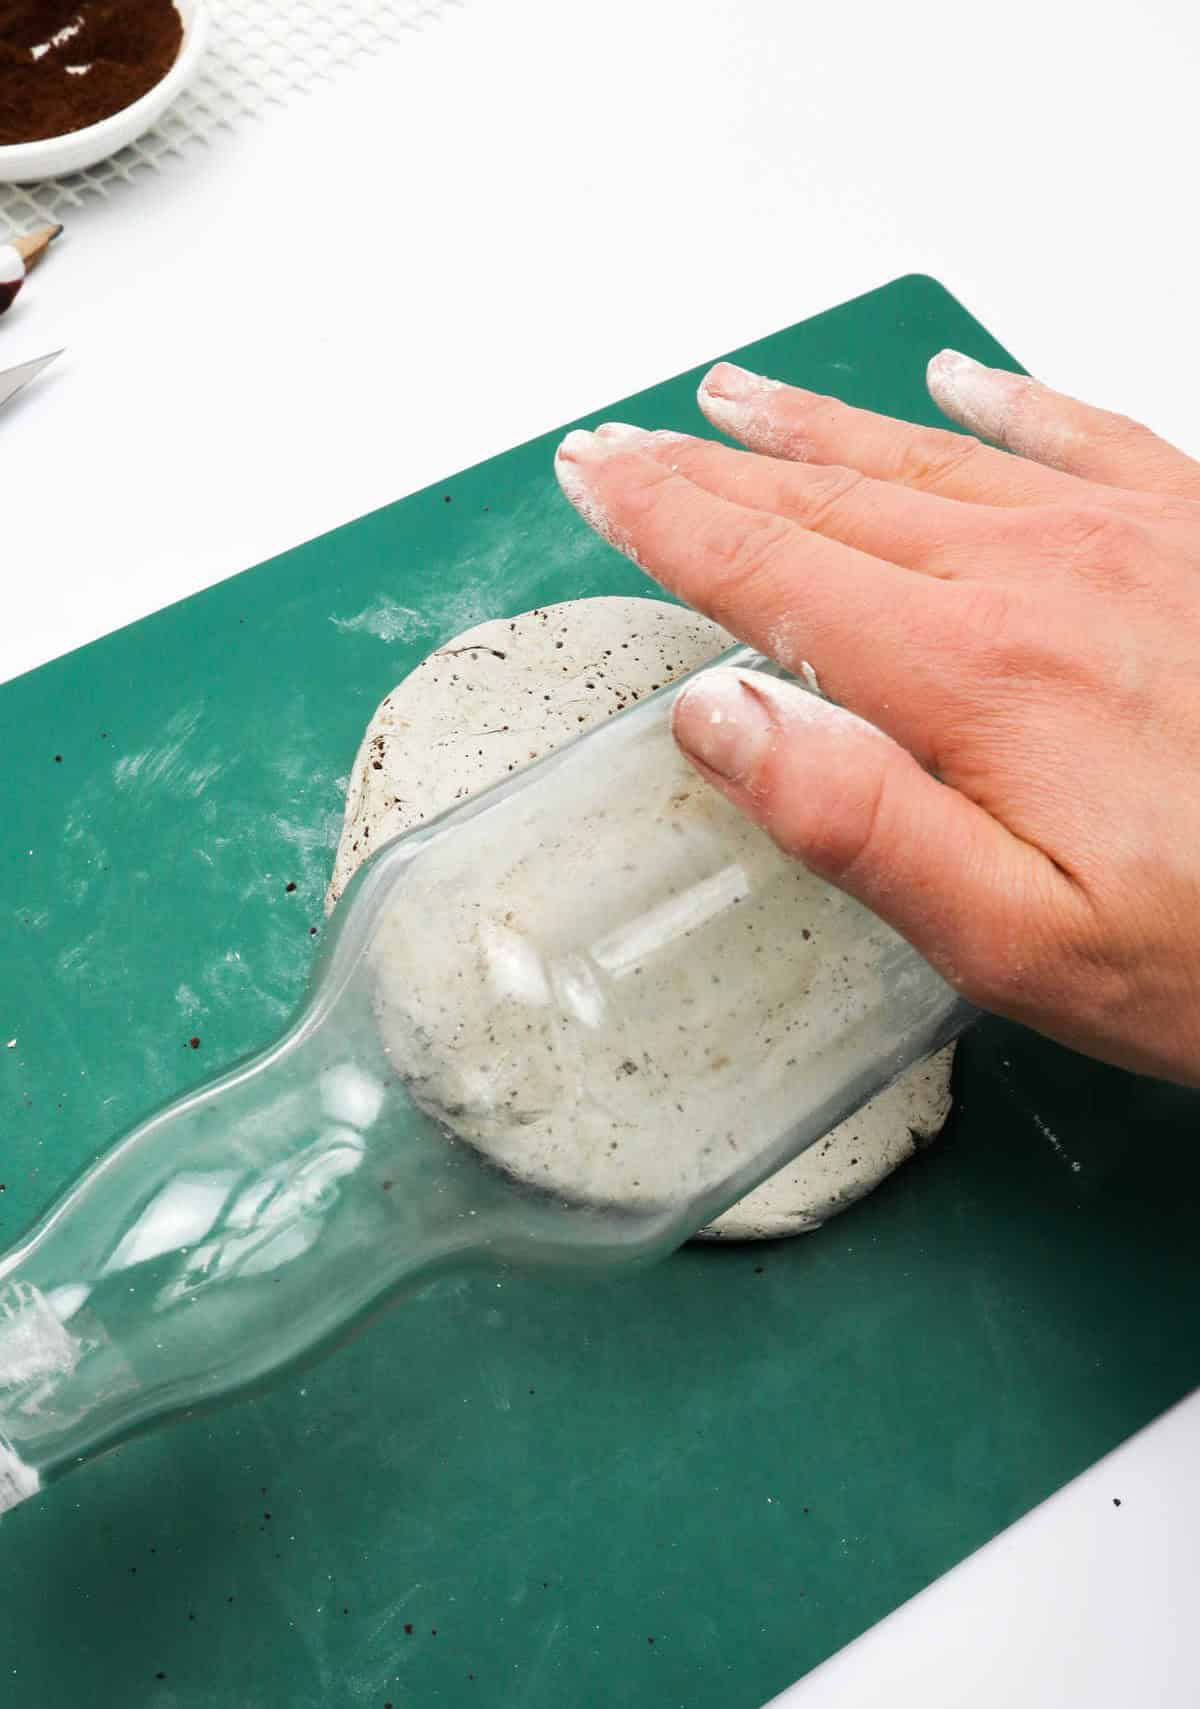
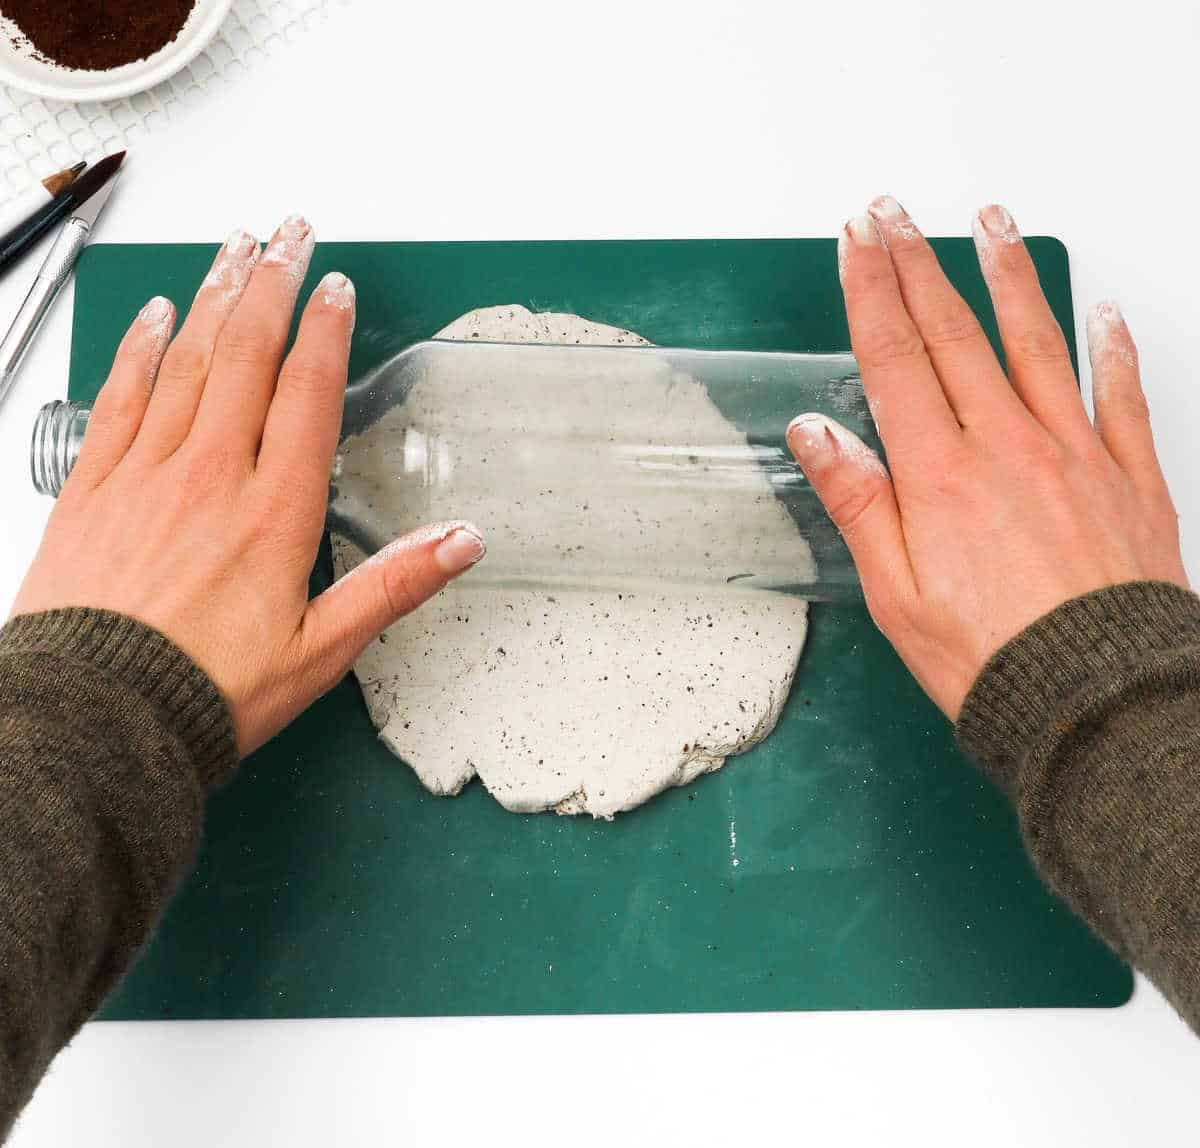
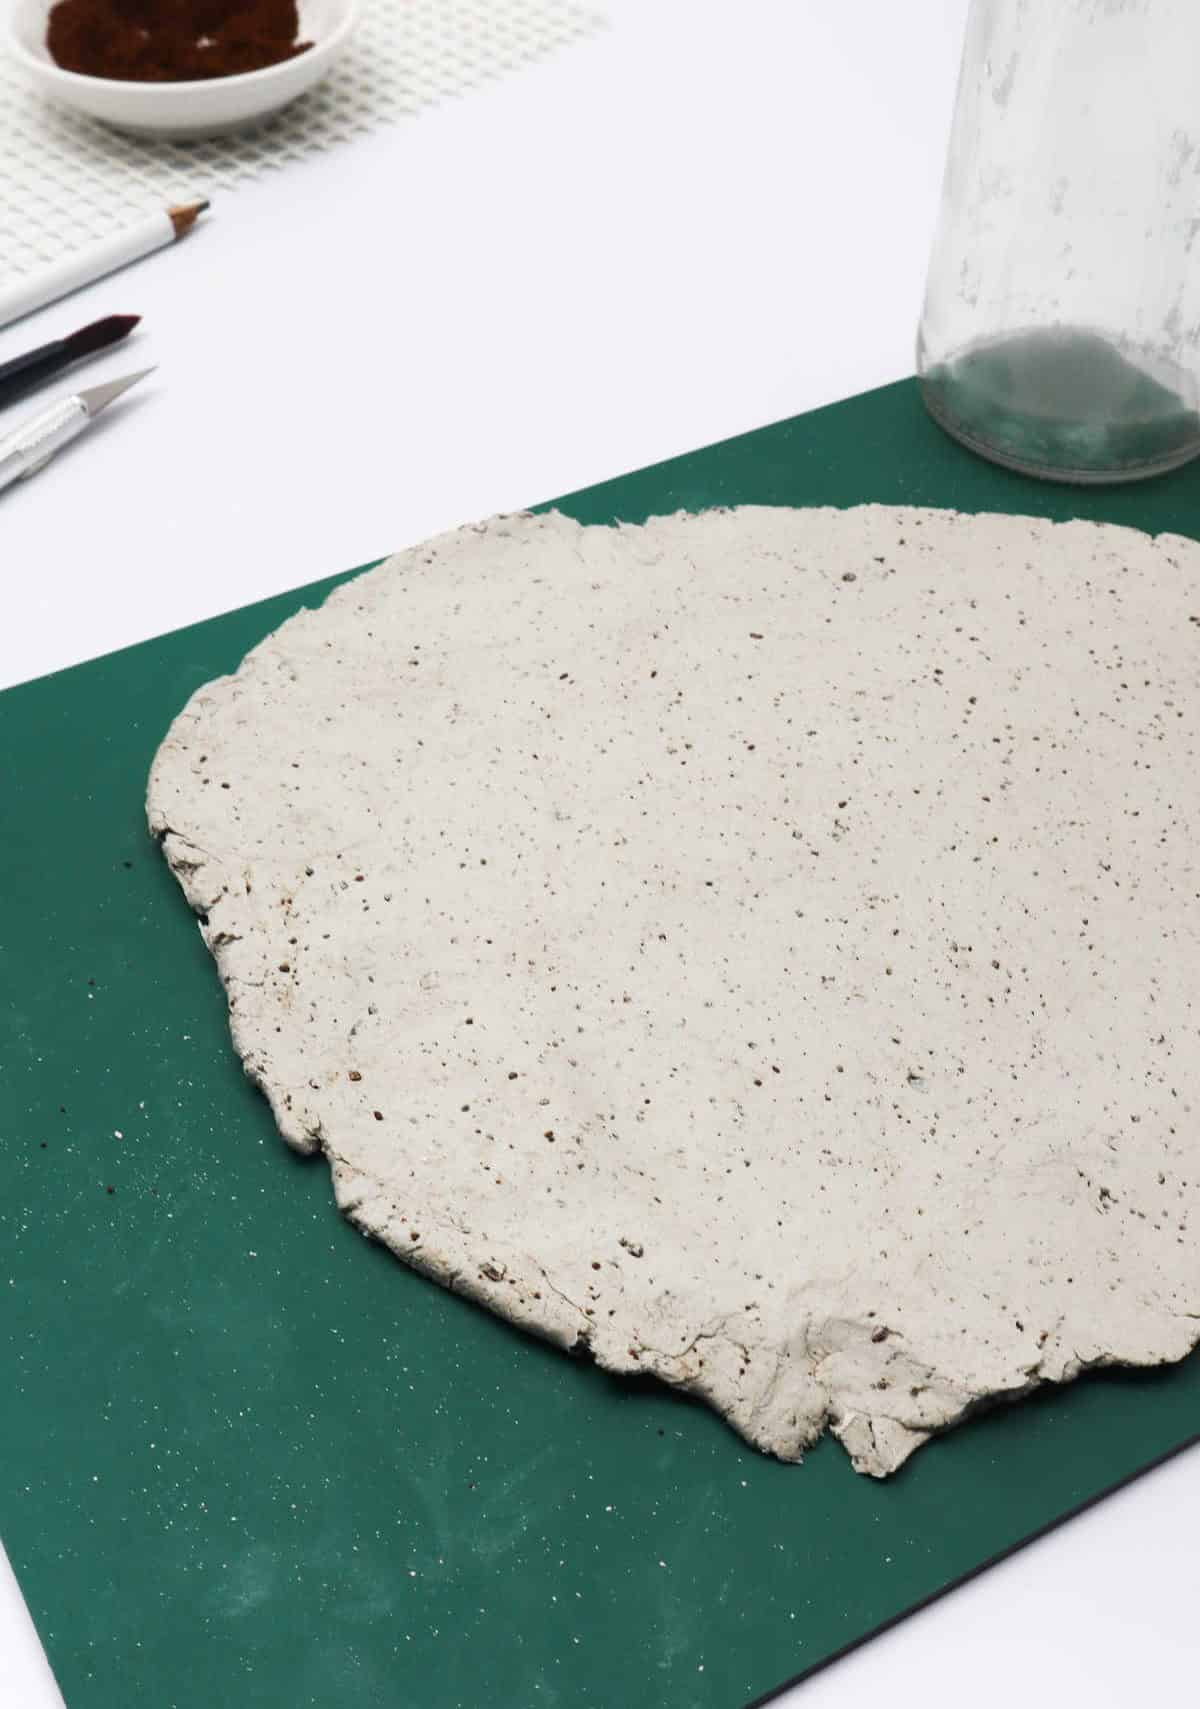
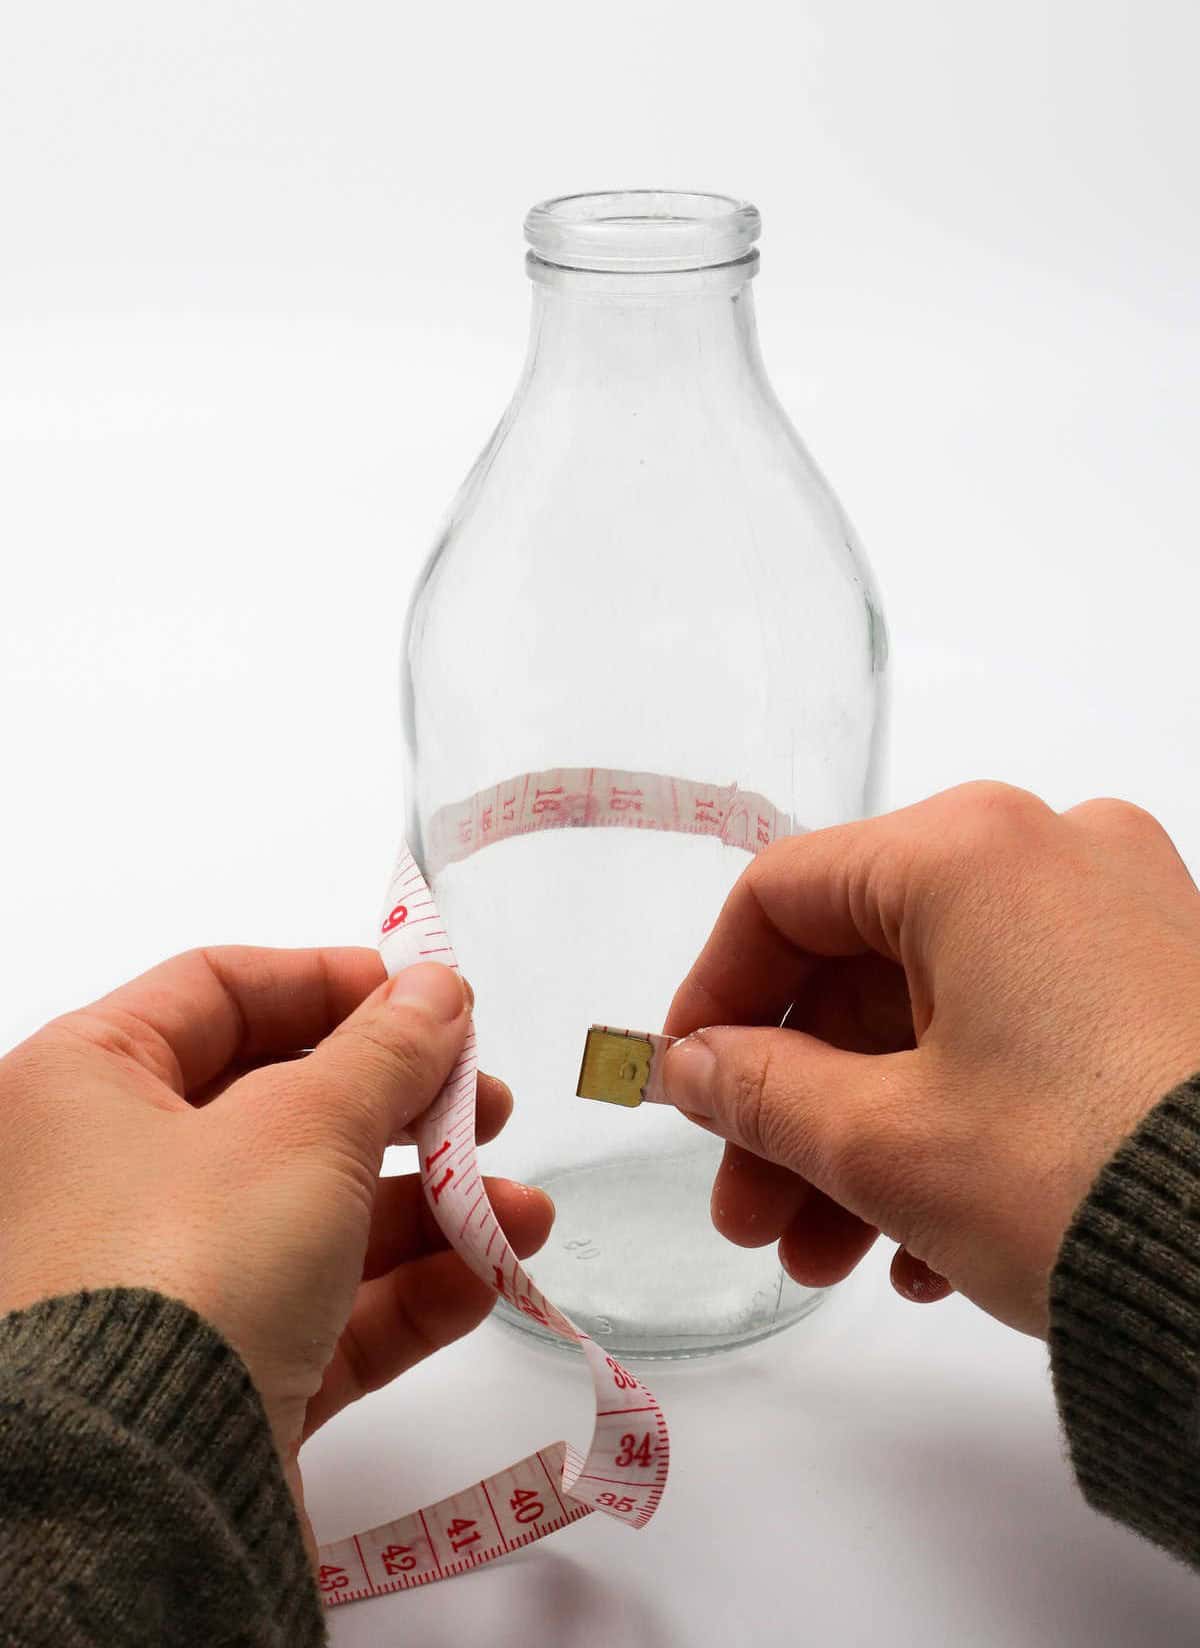
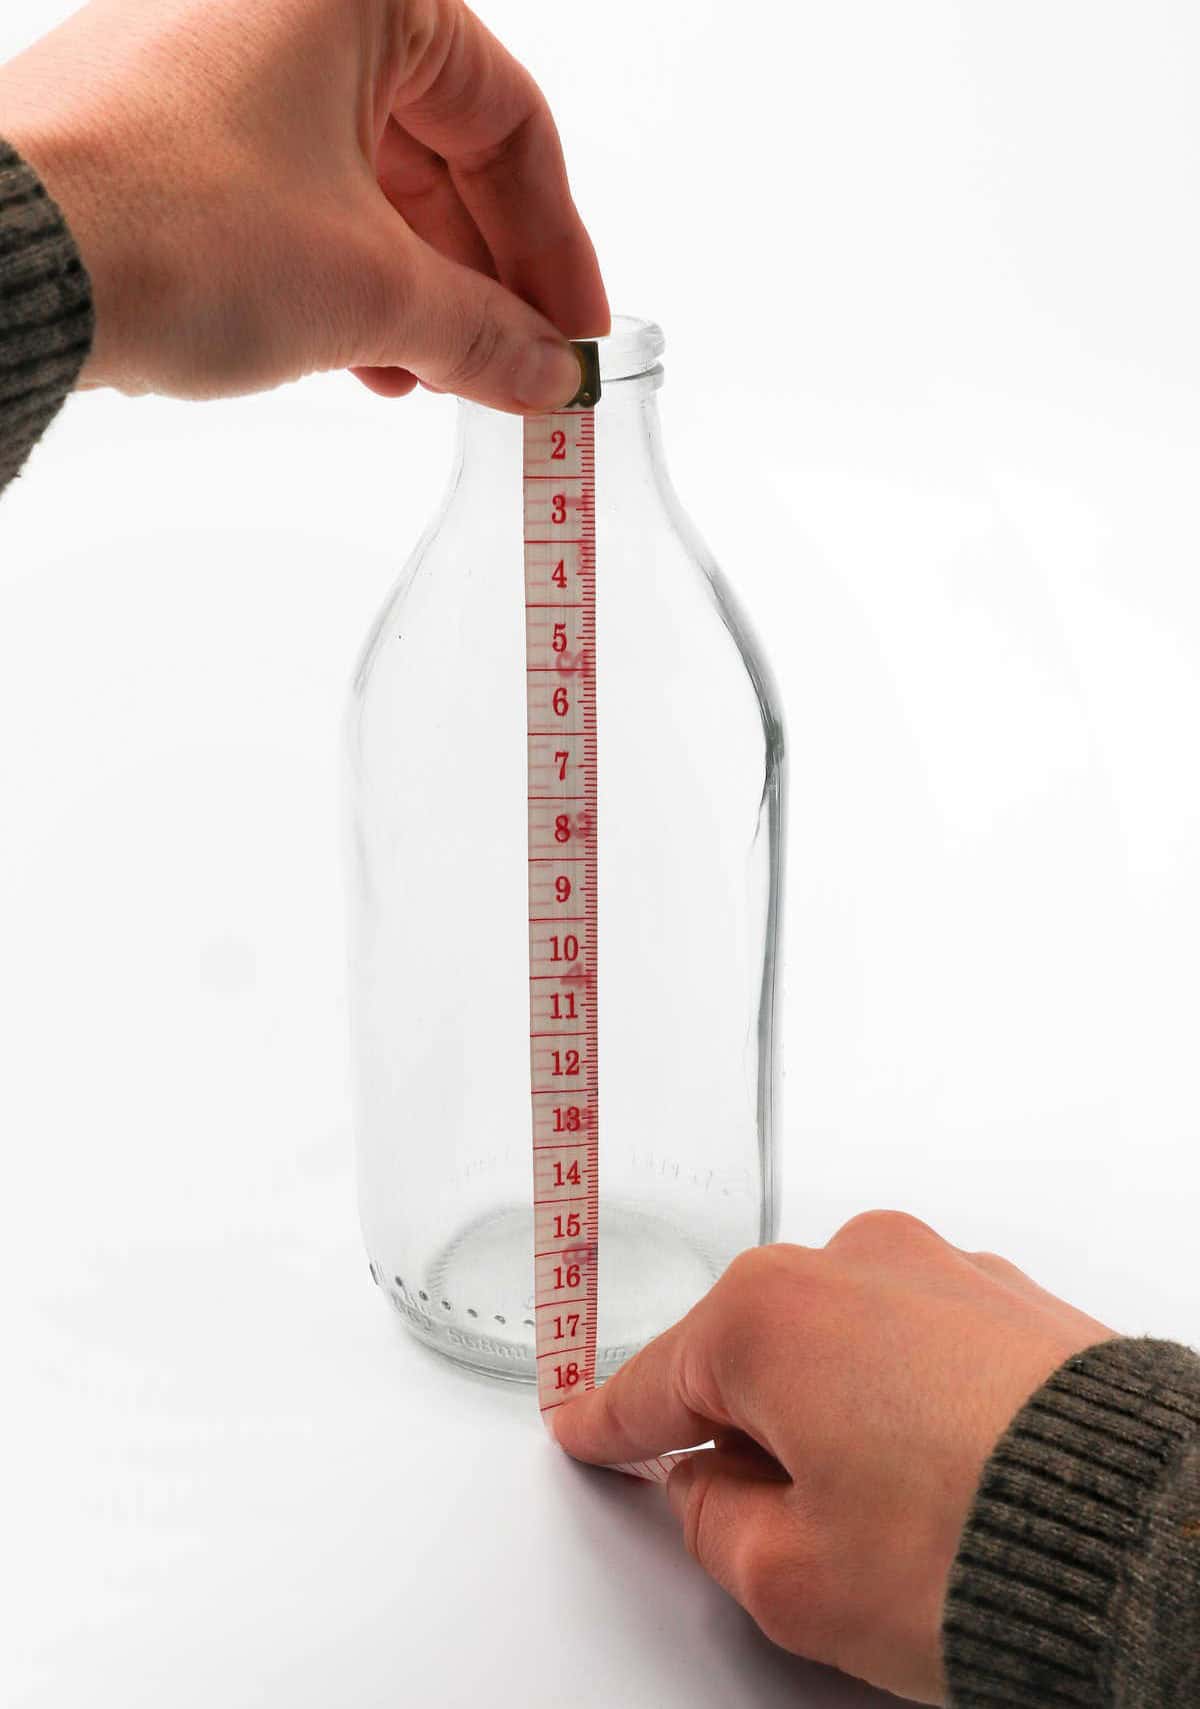
To shape the clay into a suitable covering for your bottle, start by preparing a flat surface using a rolling pin or a glass bottle. Aim for a thickness that’s not too thin nor too thick. Measure the dimensions of your chosen bottle, noting its height and circumference. Then, consider the clay you’ve rolled out – will it be sufficient to cover the entire surface?
Step 5
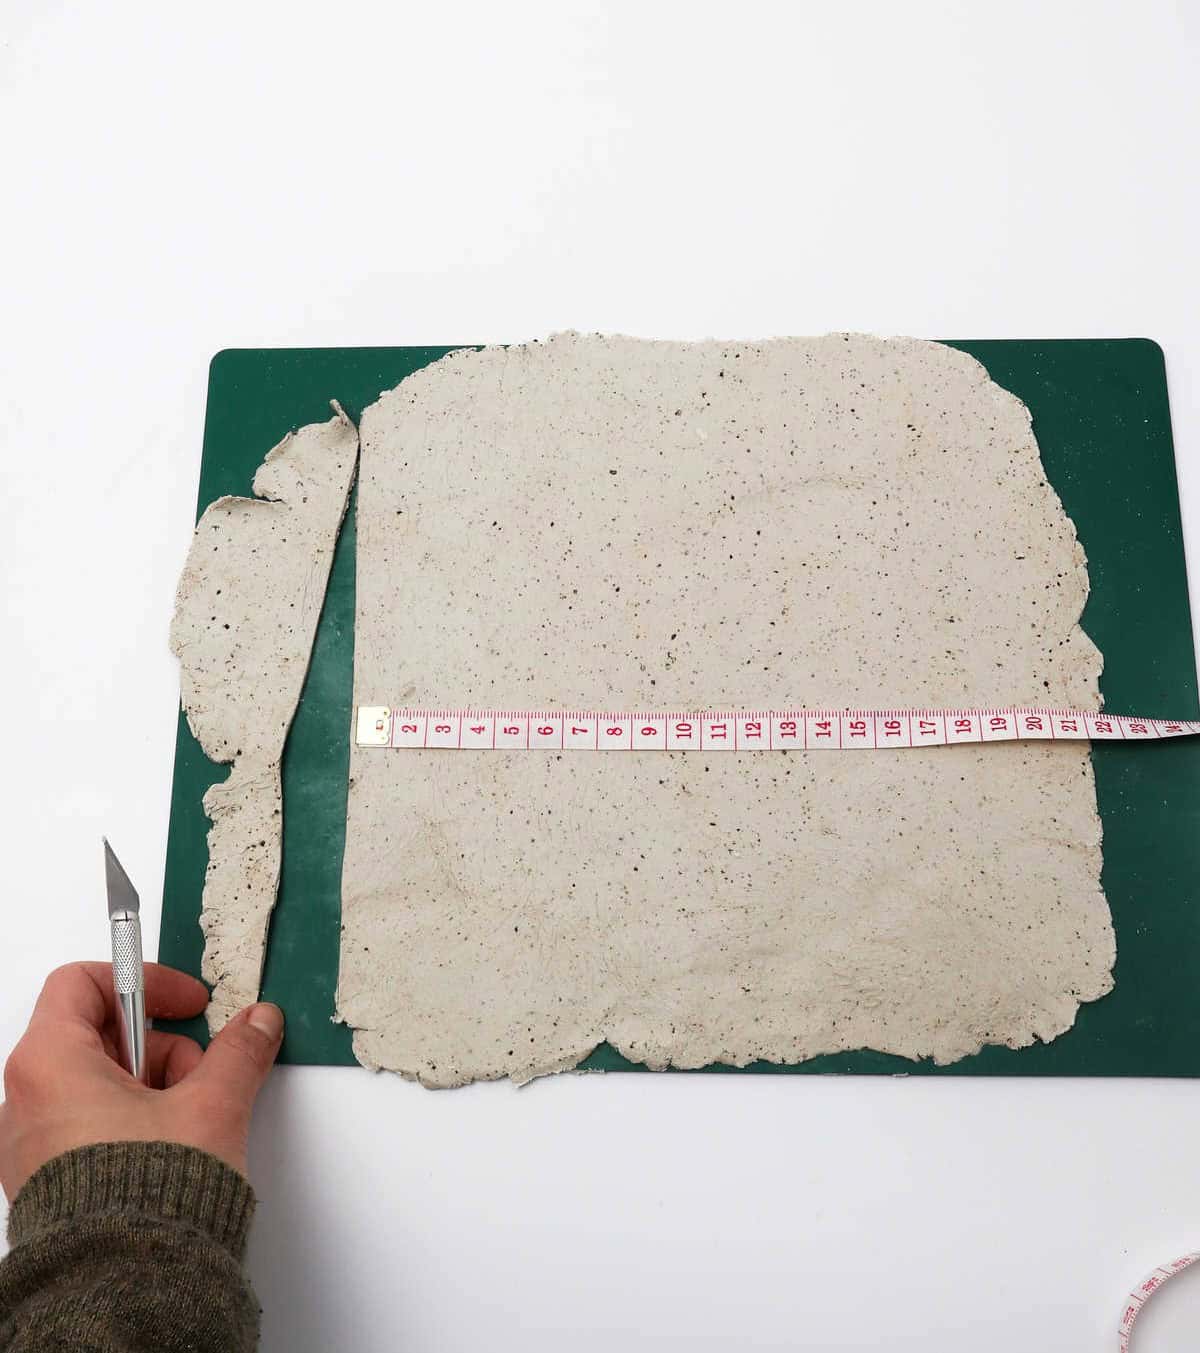
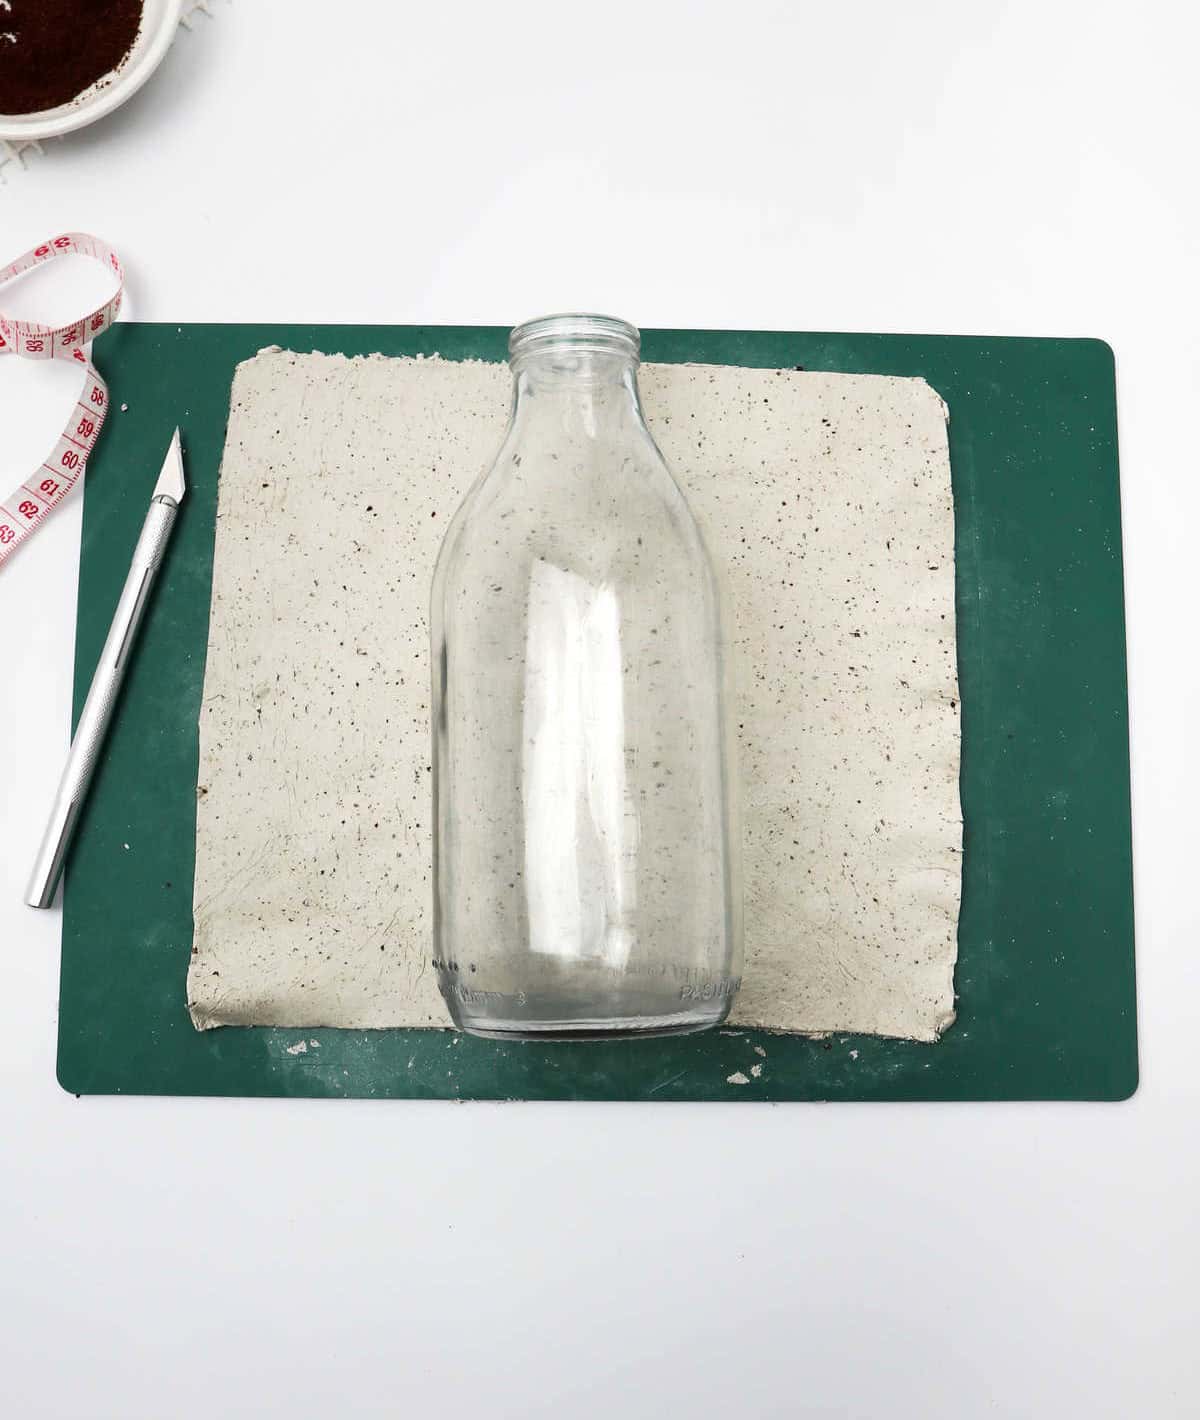
Using the measurements you’ve taken, carefully cut out a piece of clay using a craft knife. Ensure your cuts are precise and accurate, as this will affect the overall fit of the clay around the bottle. Once you’ve cut the desired shape, remove any excess clay and set it aside for potential reuse later on. To prevent drying out, cover the excess clay tightly with plastic wrap or a damp cloth. Next, place the bottle over the newly cut clay to verify its size and ensure a proper fit.
Step 6
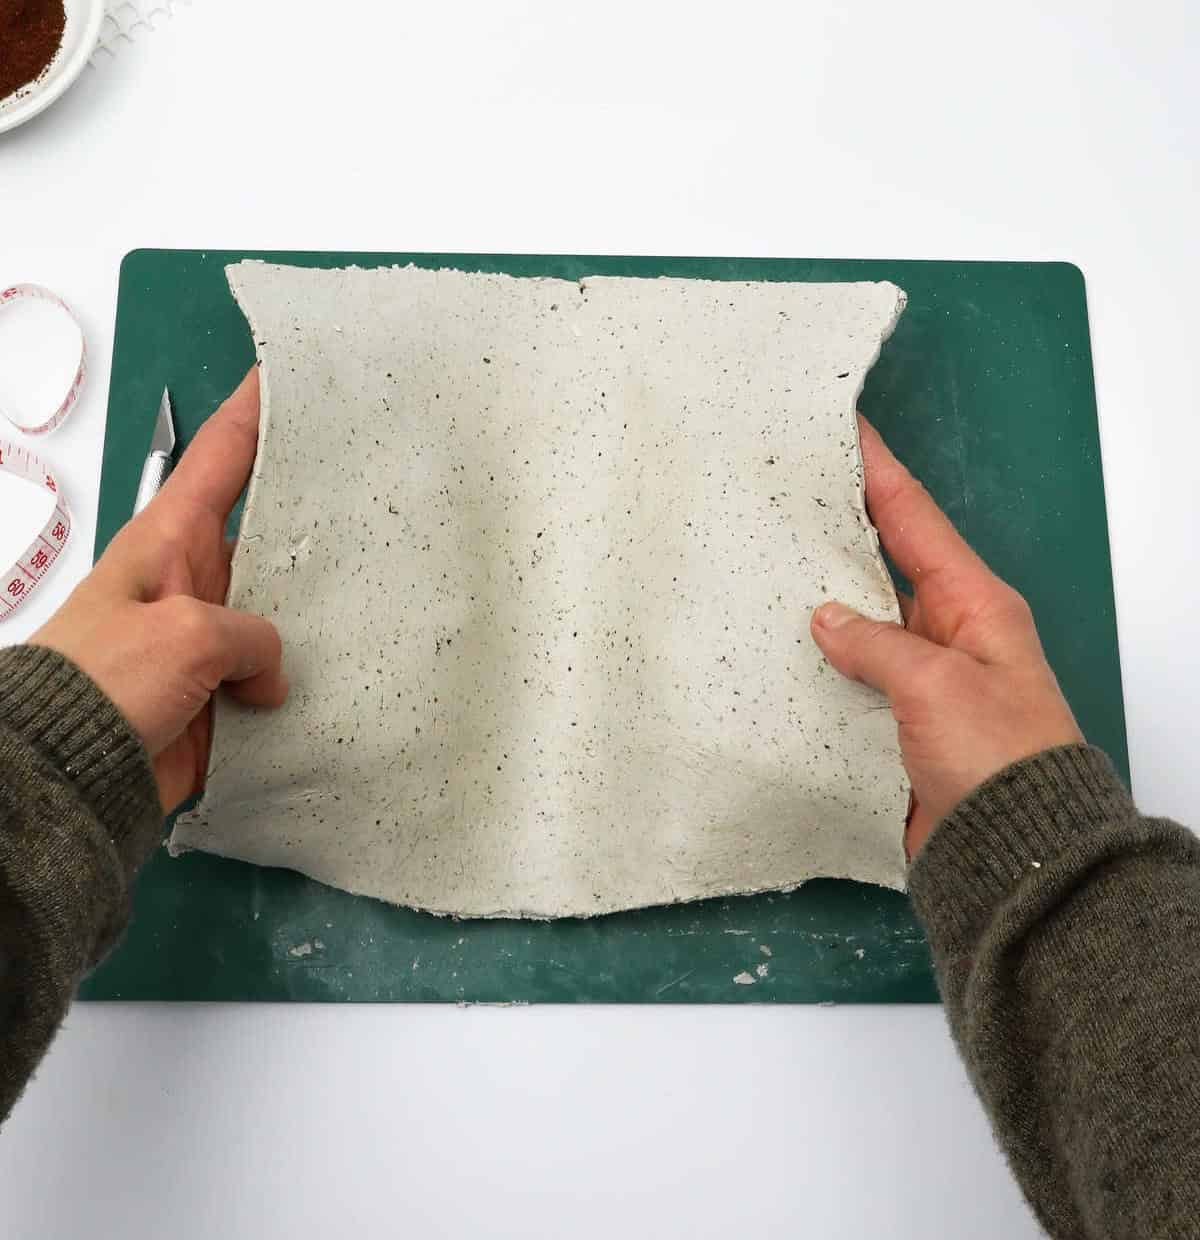
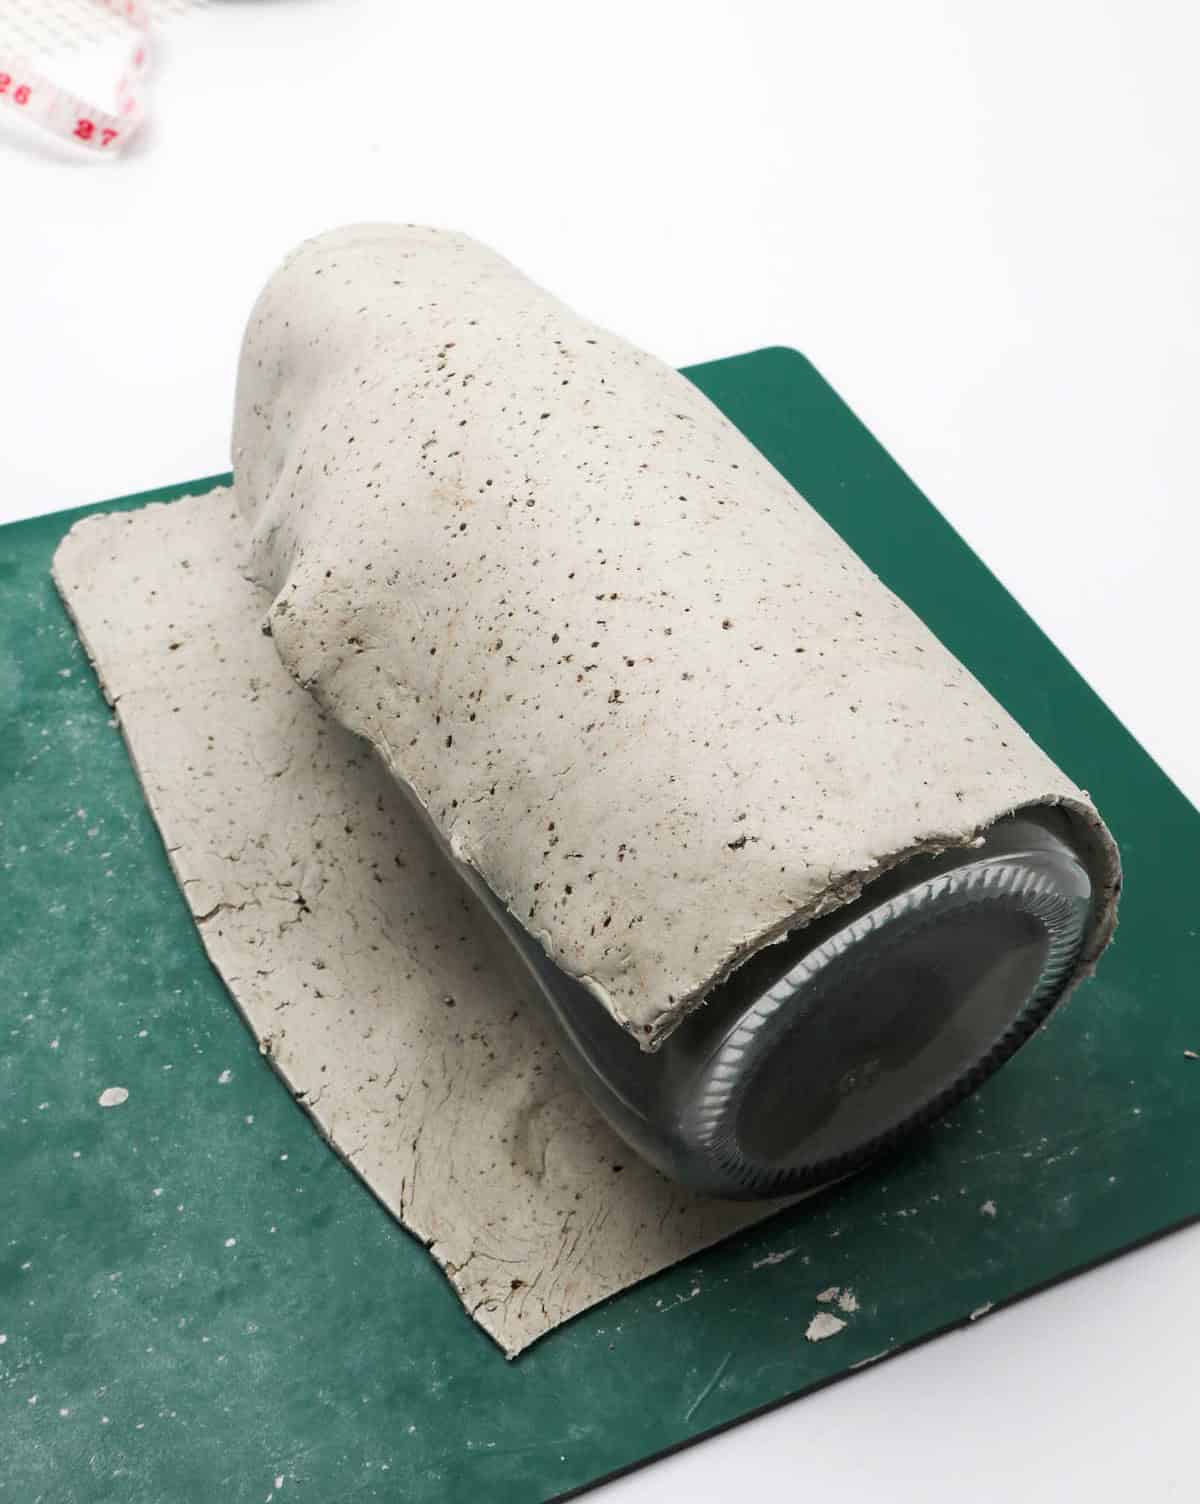
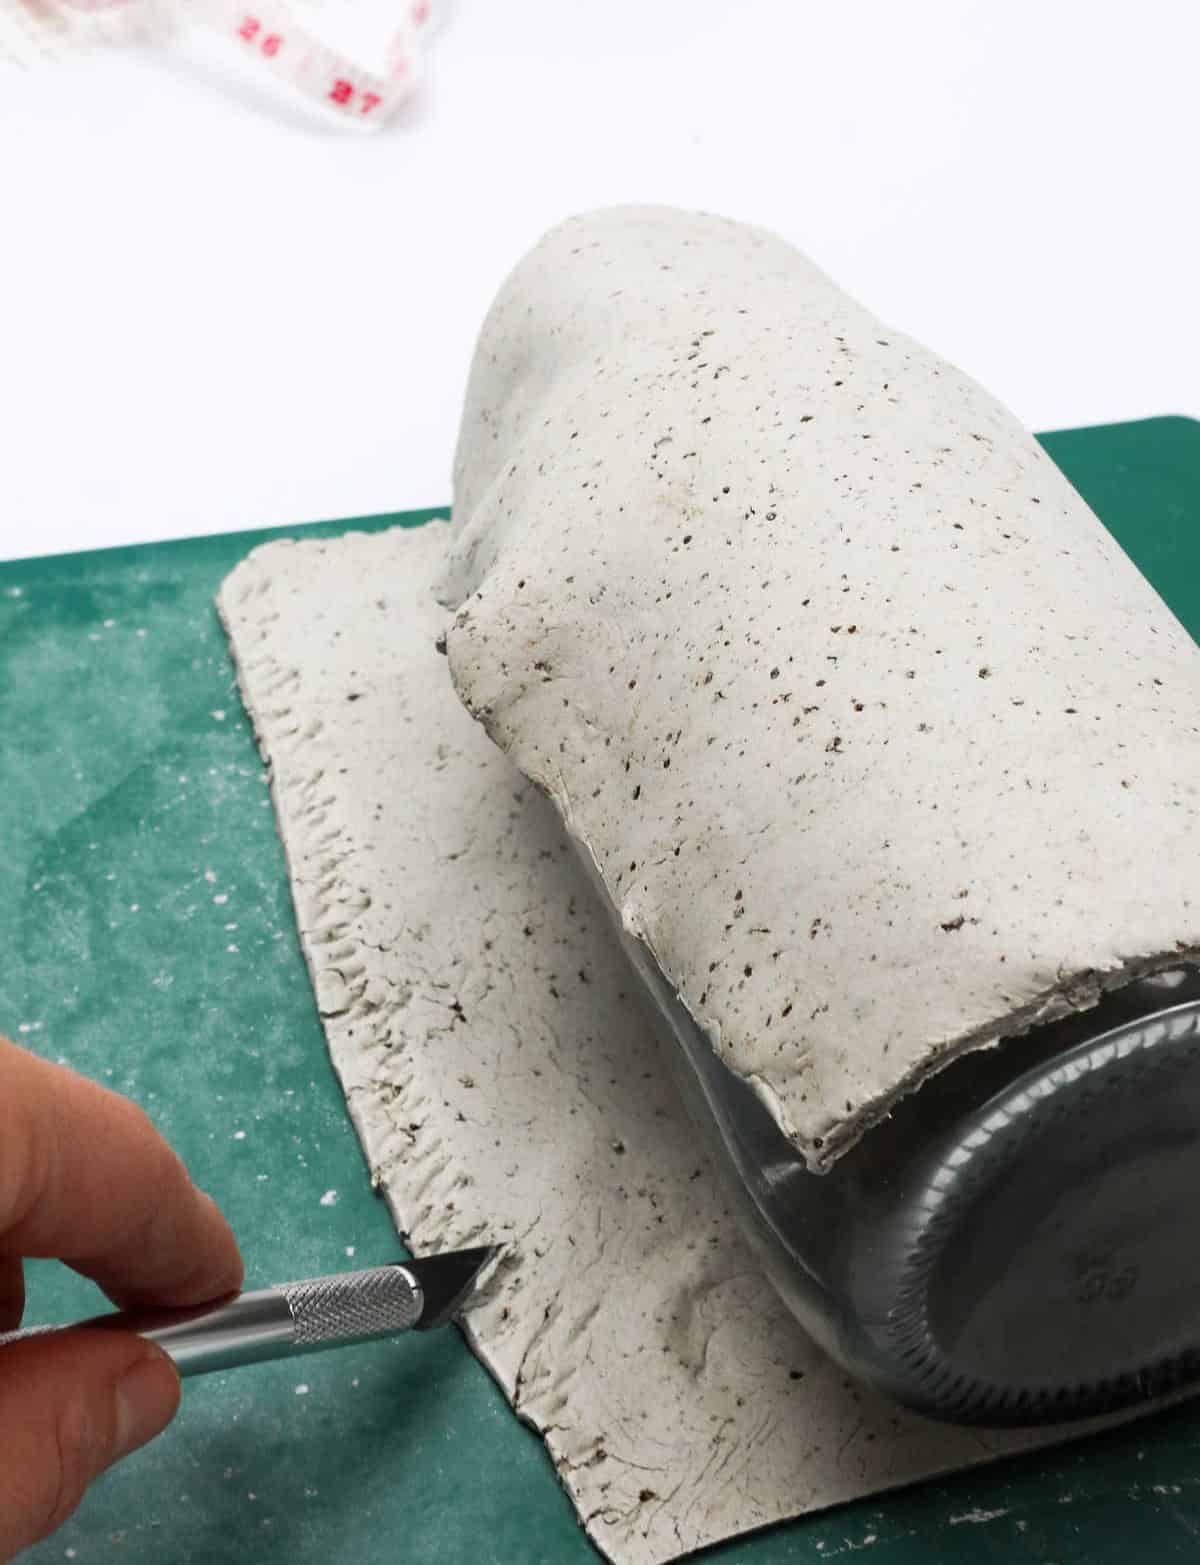
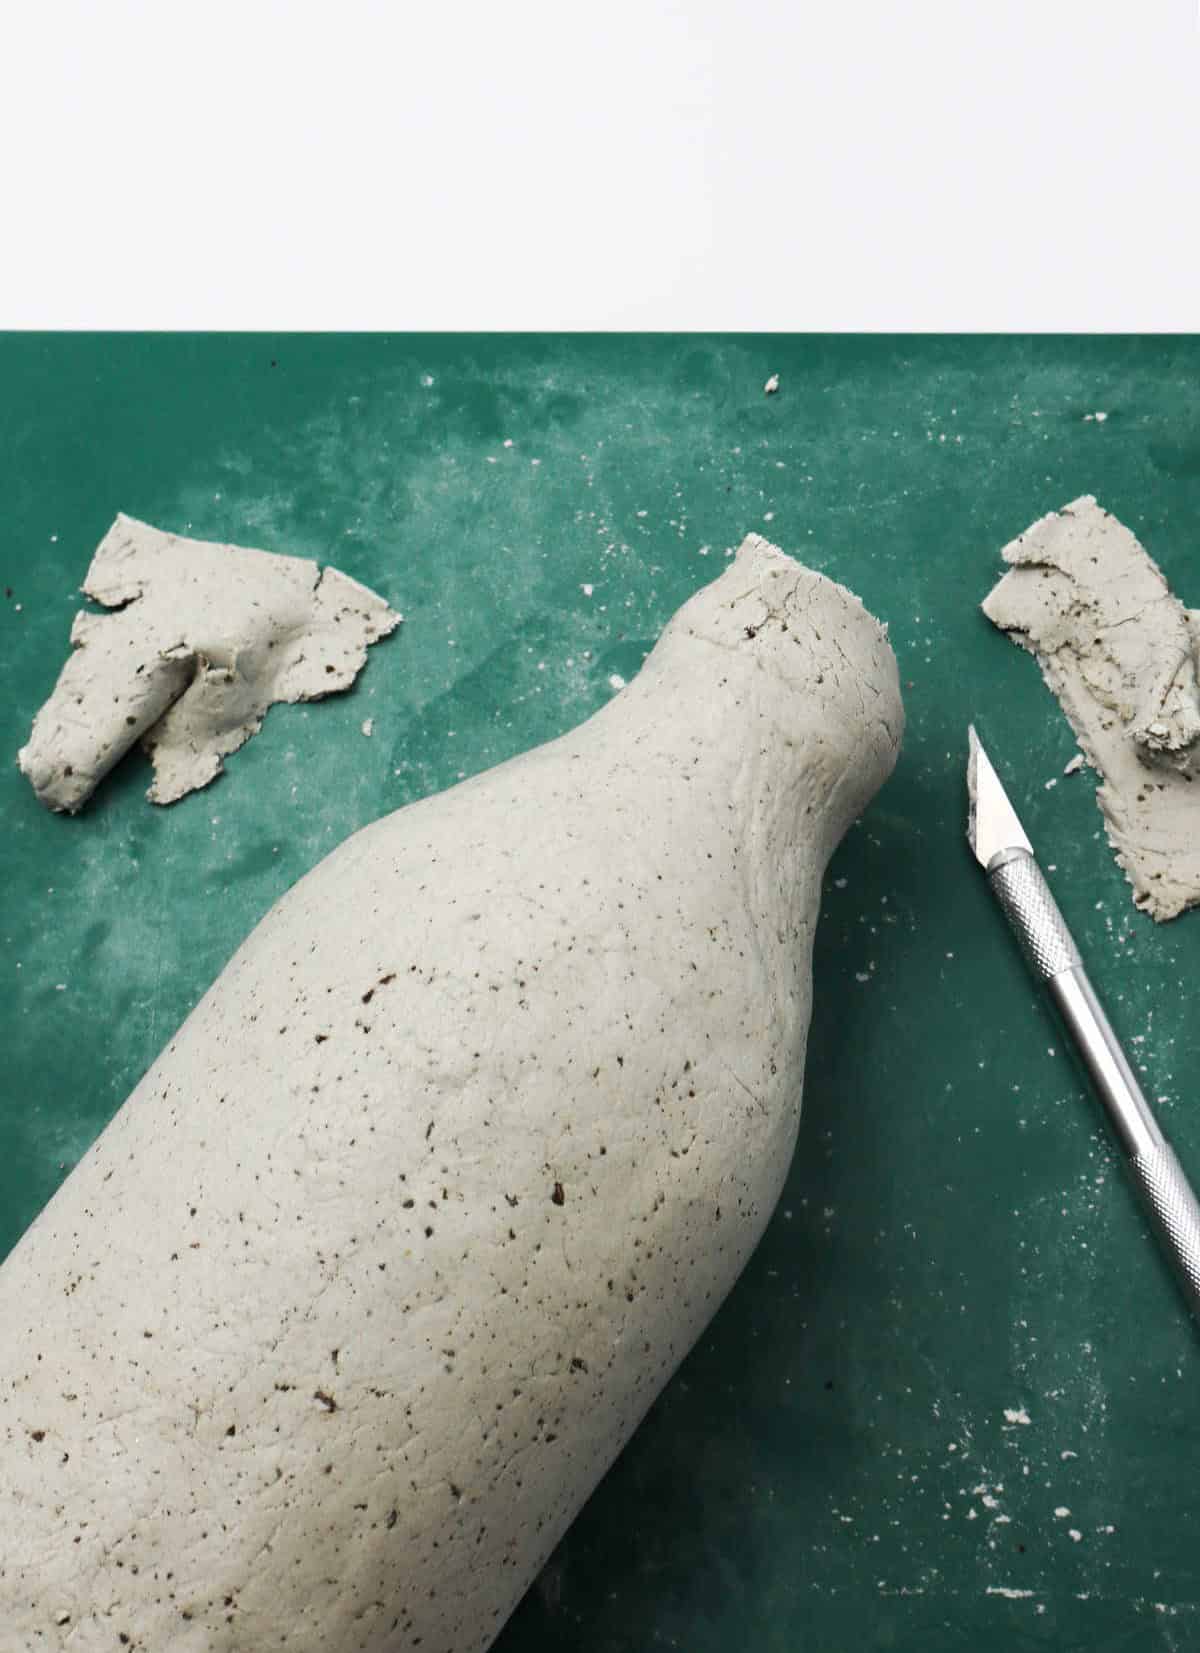
Now it’s time to shape the clay around the bottle. Position the clay sheet flat on a stable surface, ensuring a smooth fit over the container. The process is analogous to working with fondant and cake; maintain vigilance for any signs of folds, wrinkles, or cracks that may develop. As you roll the bottle, carefully guide the clay sheet to ensure a seamless coverage.
Next, use your craft knife to create a few shallow notches along one edge of the clay sheet.
This strategic cut will facilitate a more secure bond when connecting the ends, making it an essential step in the process.
Step 7
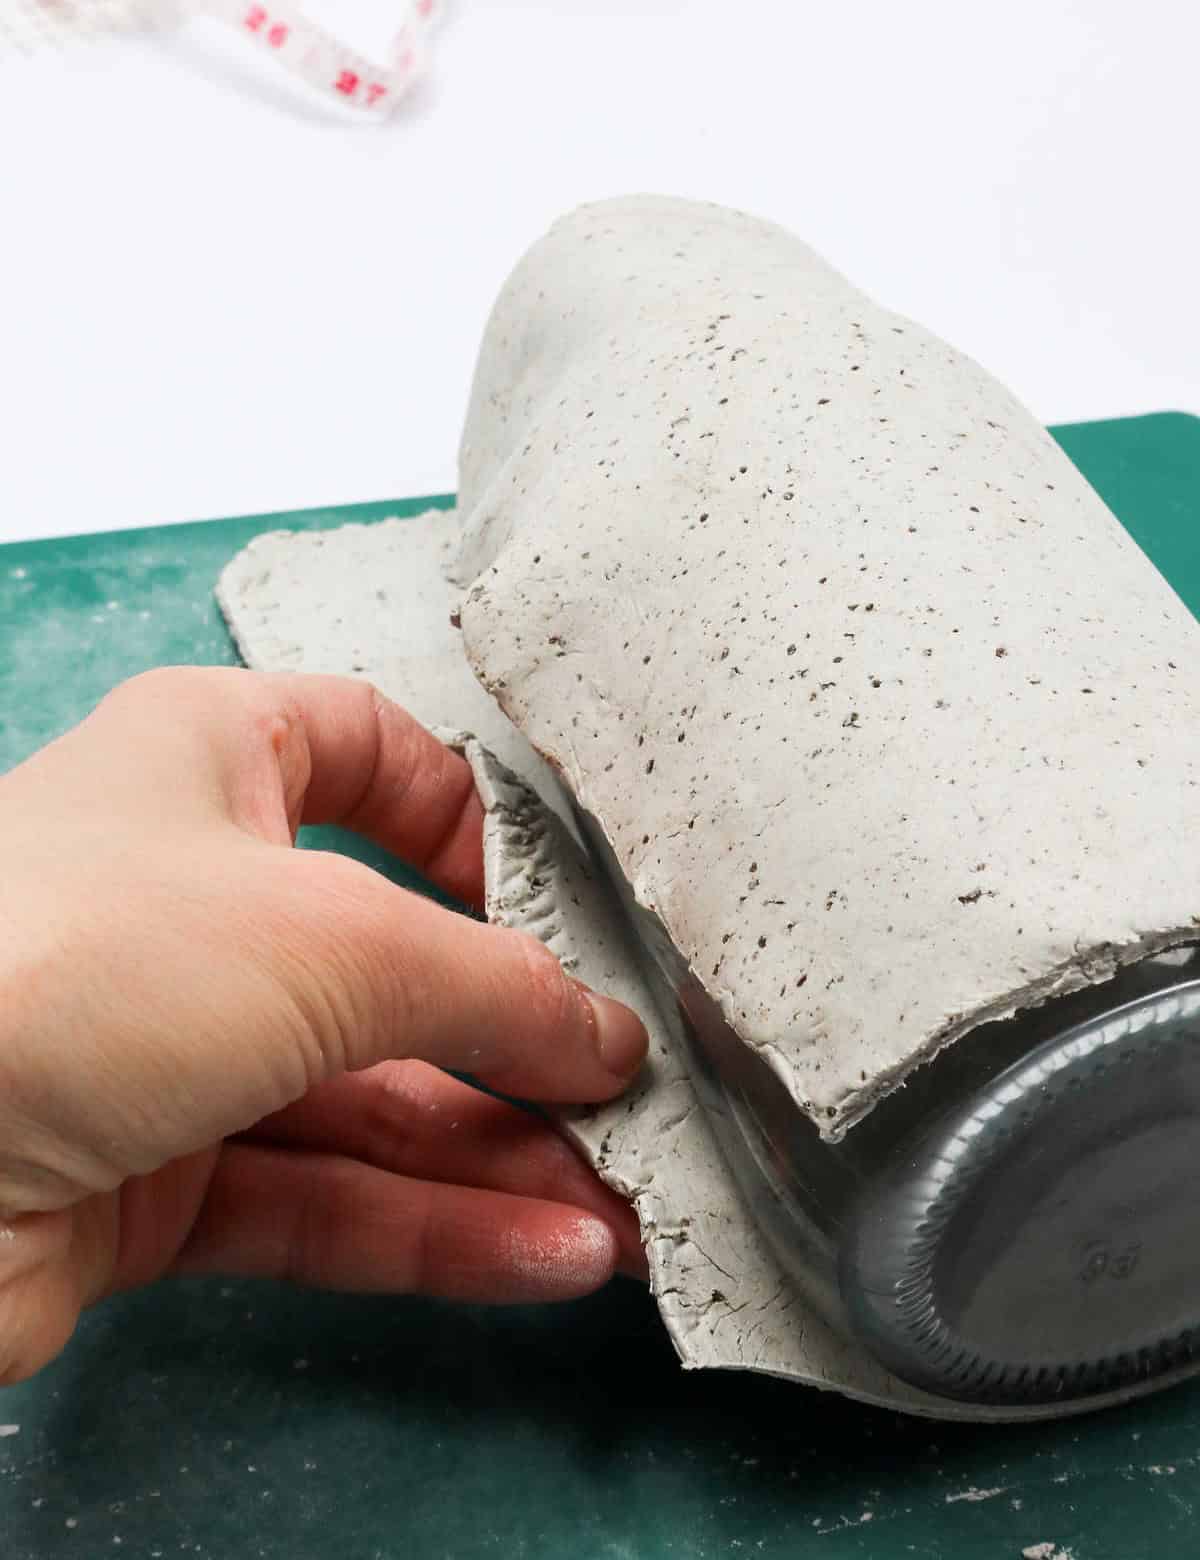
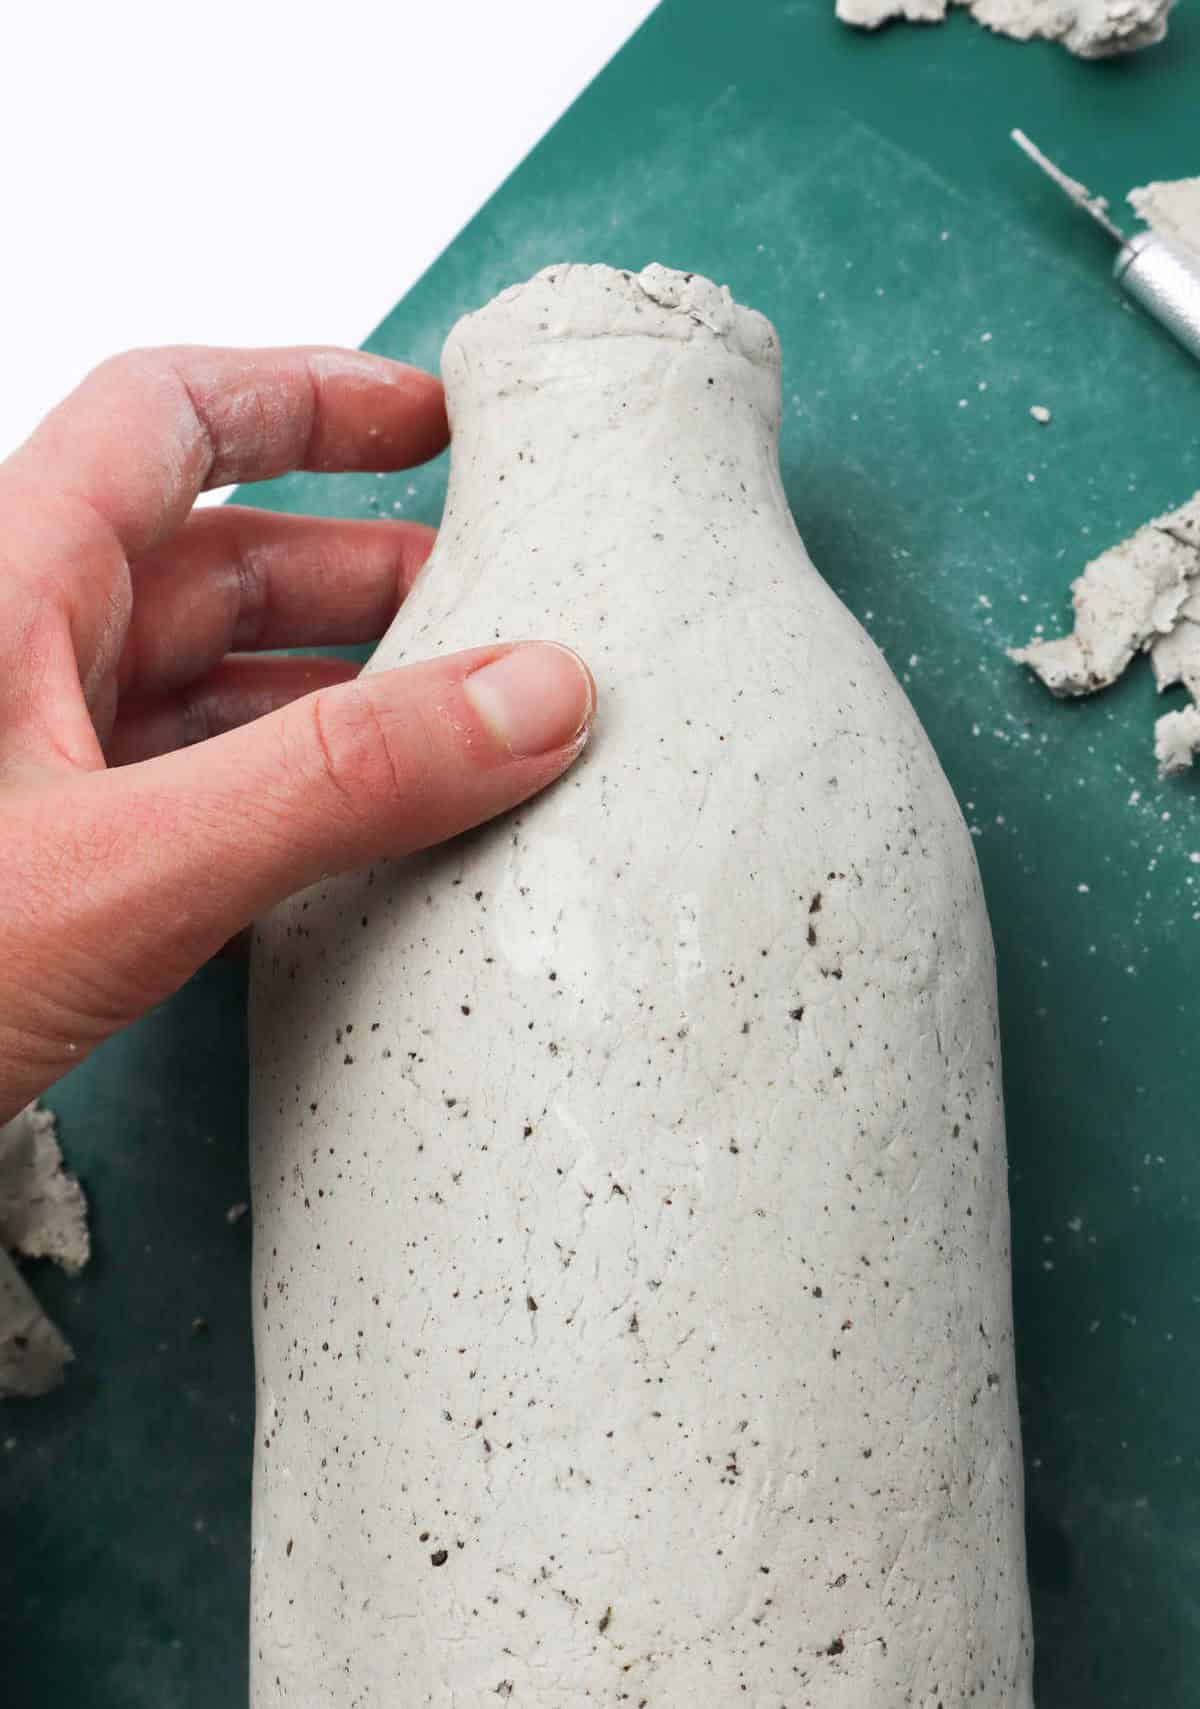
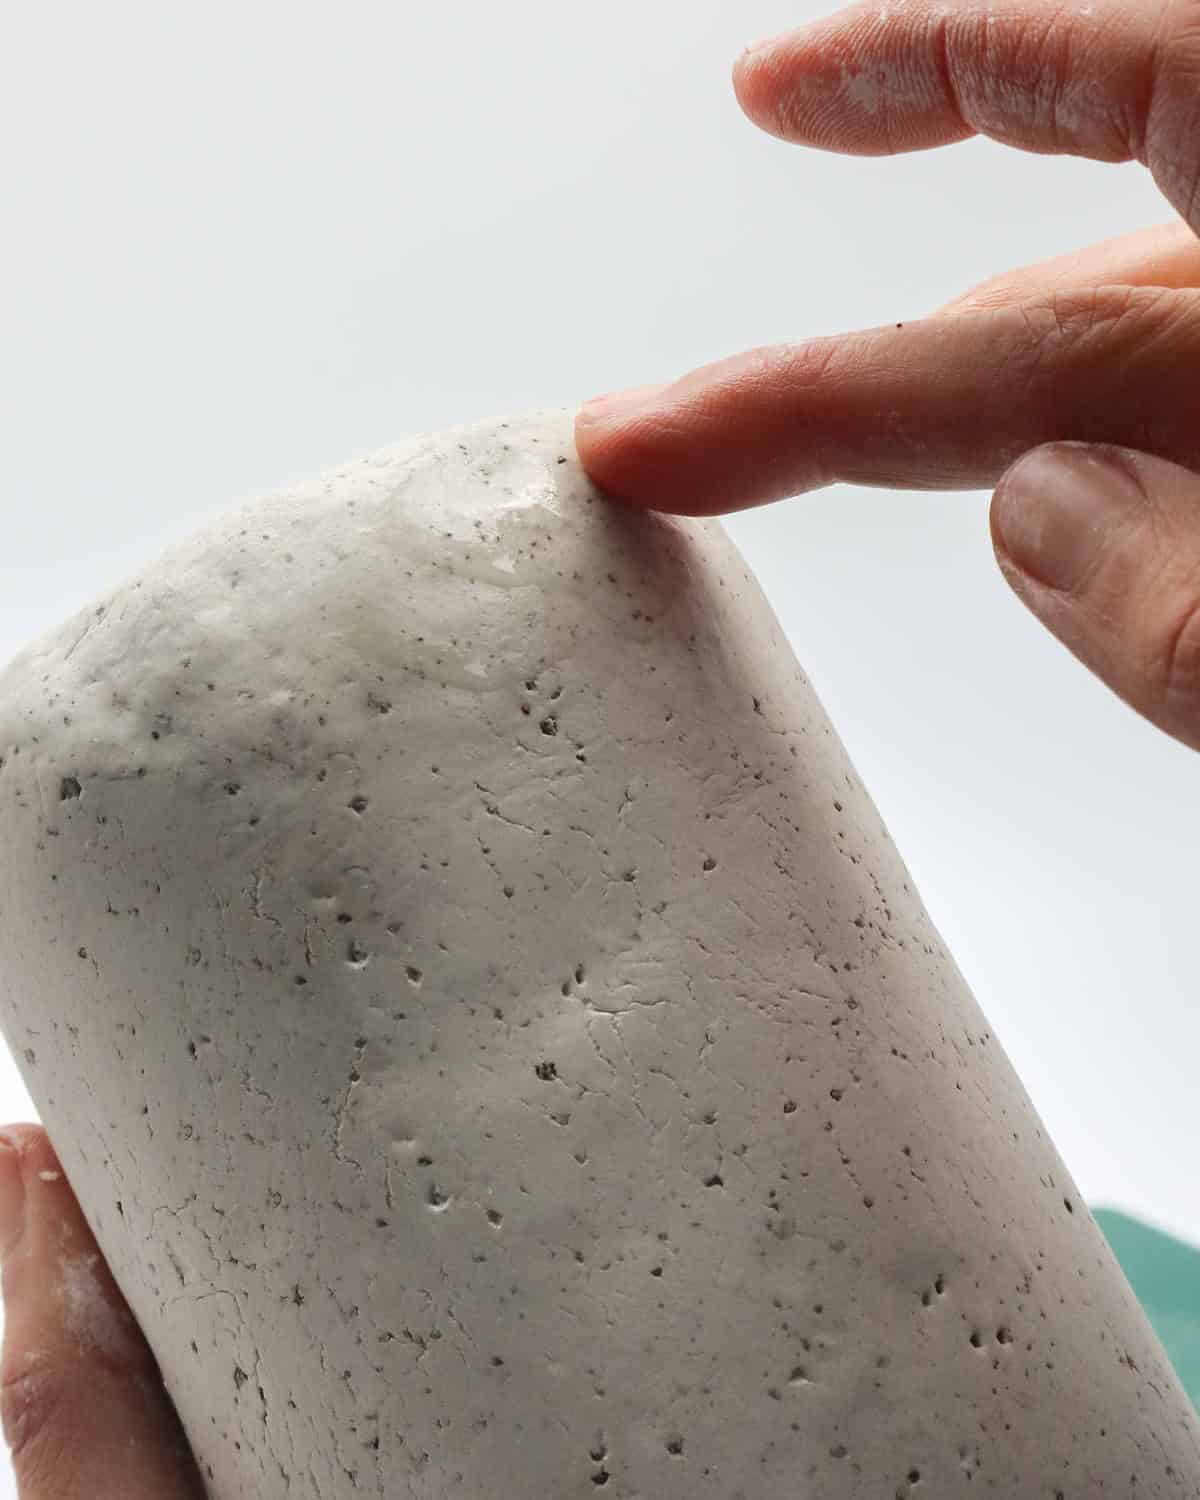
To seamlessly join the two sides of the clay, bring the side with notches up and press it gently against the other side. As you do this, use your fingers to blend the edges together, ensuring a smooth transition. If any imperfections or cracks arise, simply dip your finger in water and add a small amount to smoothen out the surface.
The key is to maintain a consistent texture throughout, so take care not to introduce any visible lines or demarcations that might give away where you joined the two ends together.
Step 8

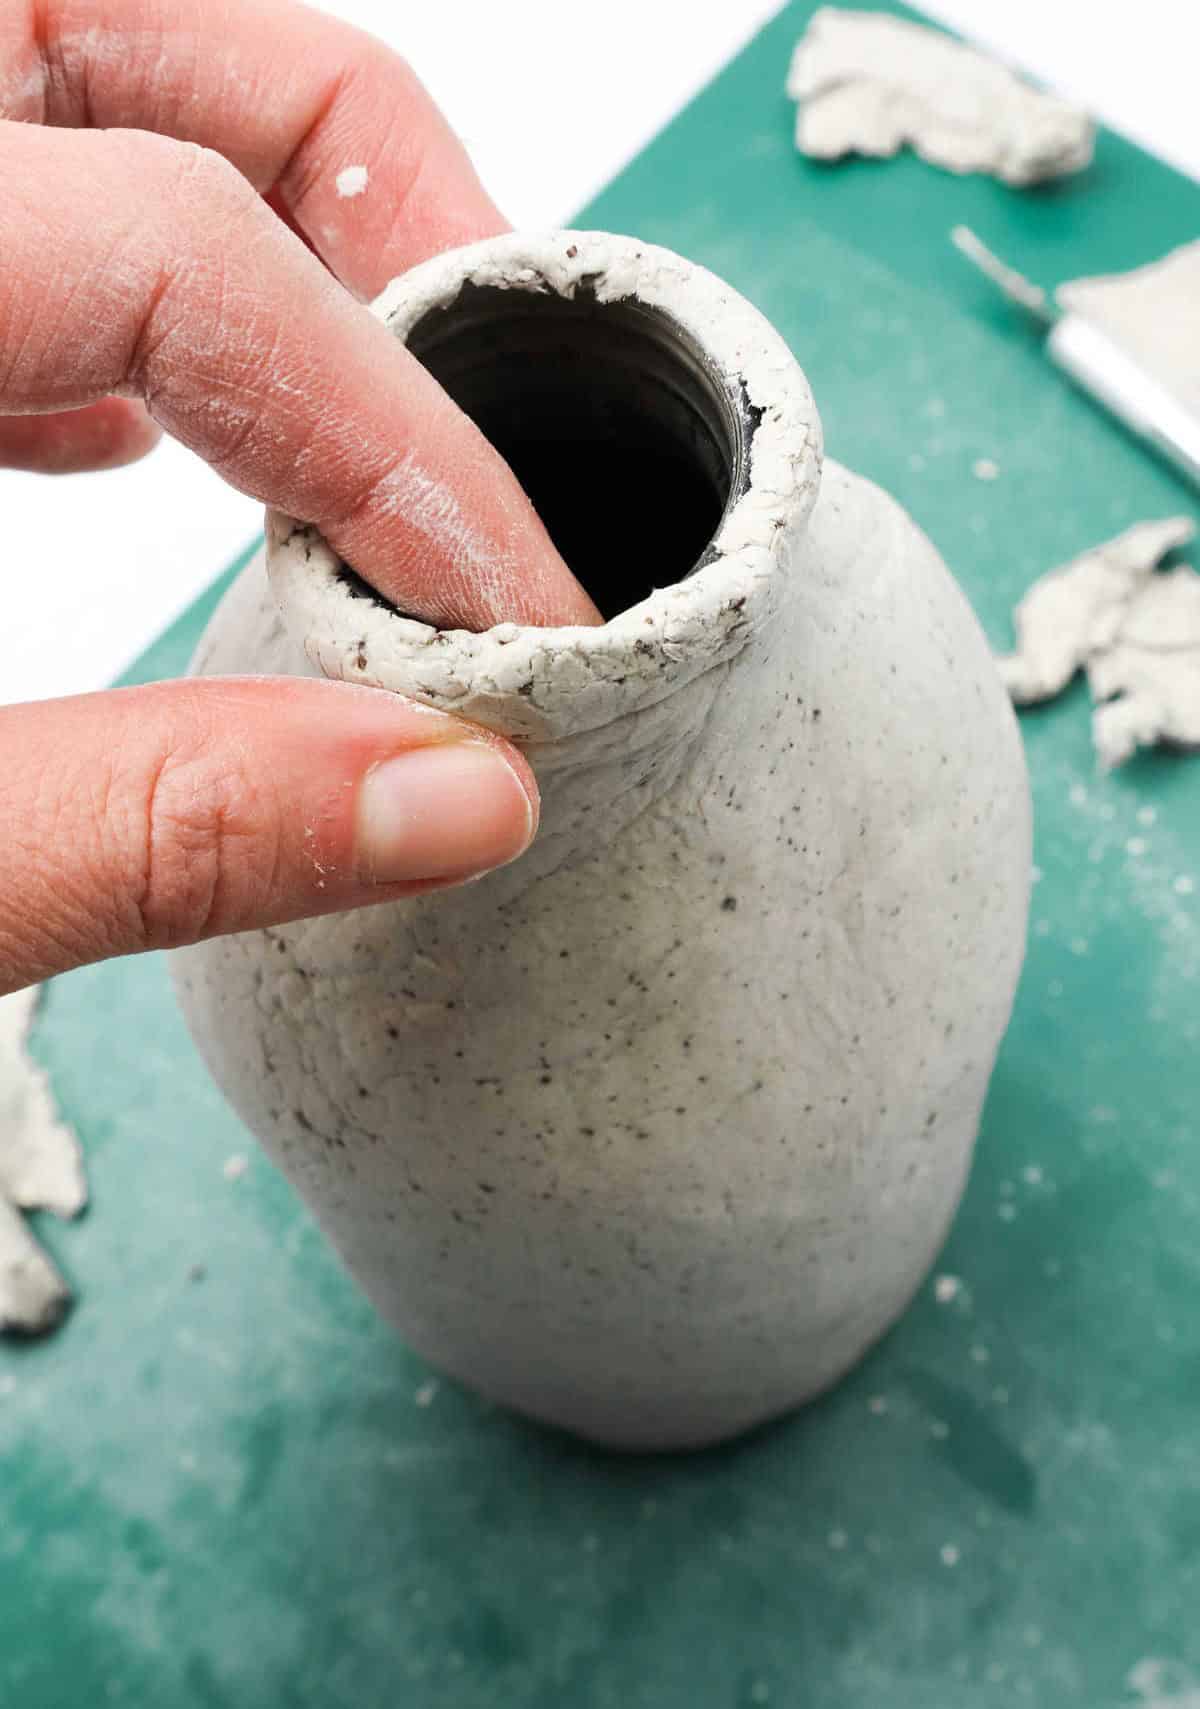
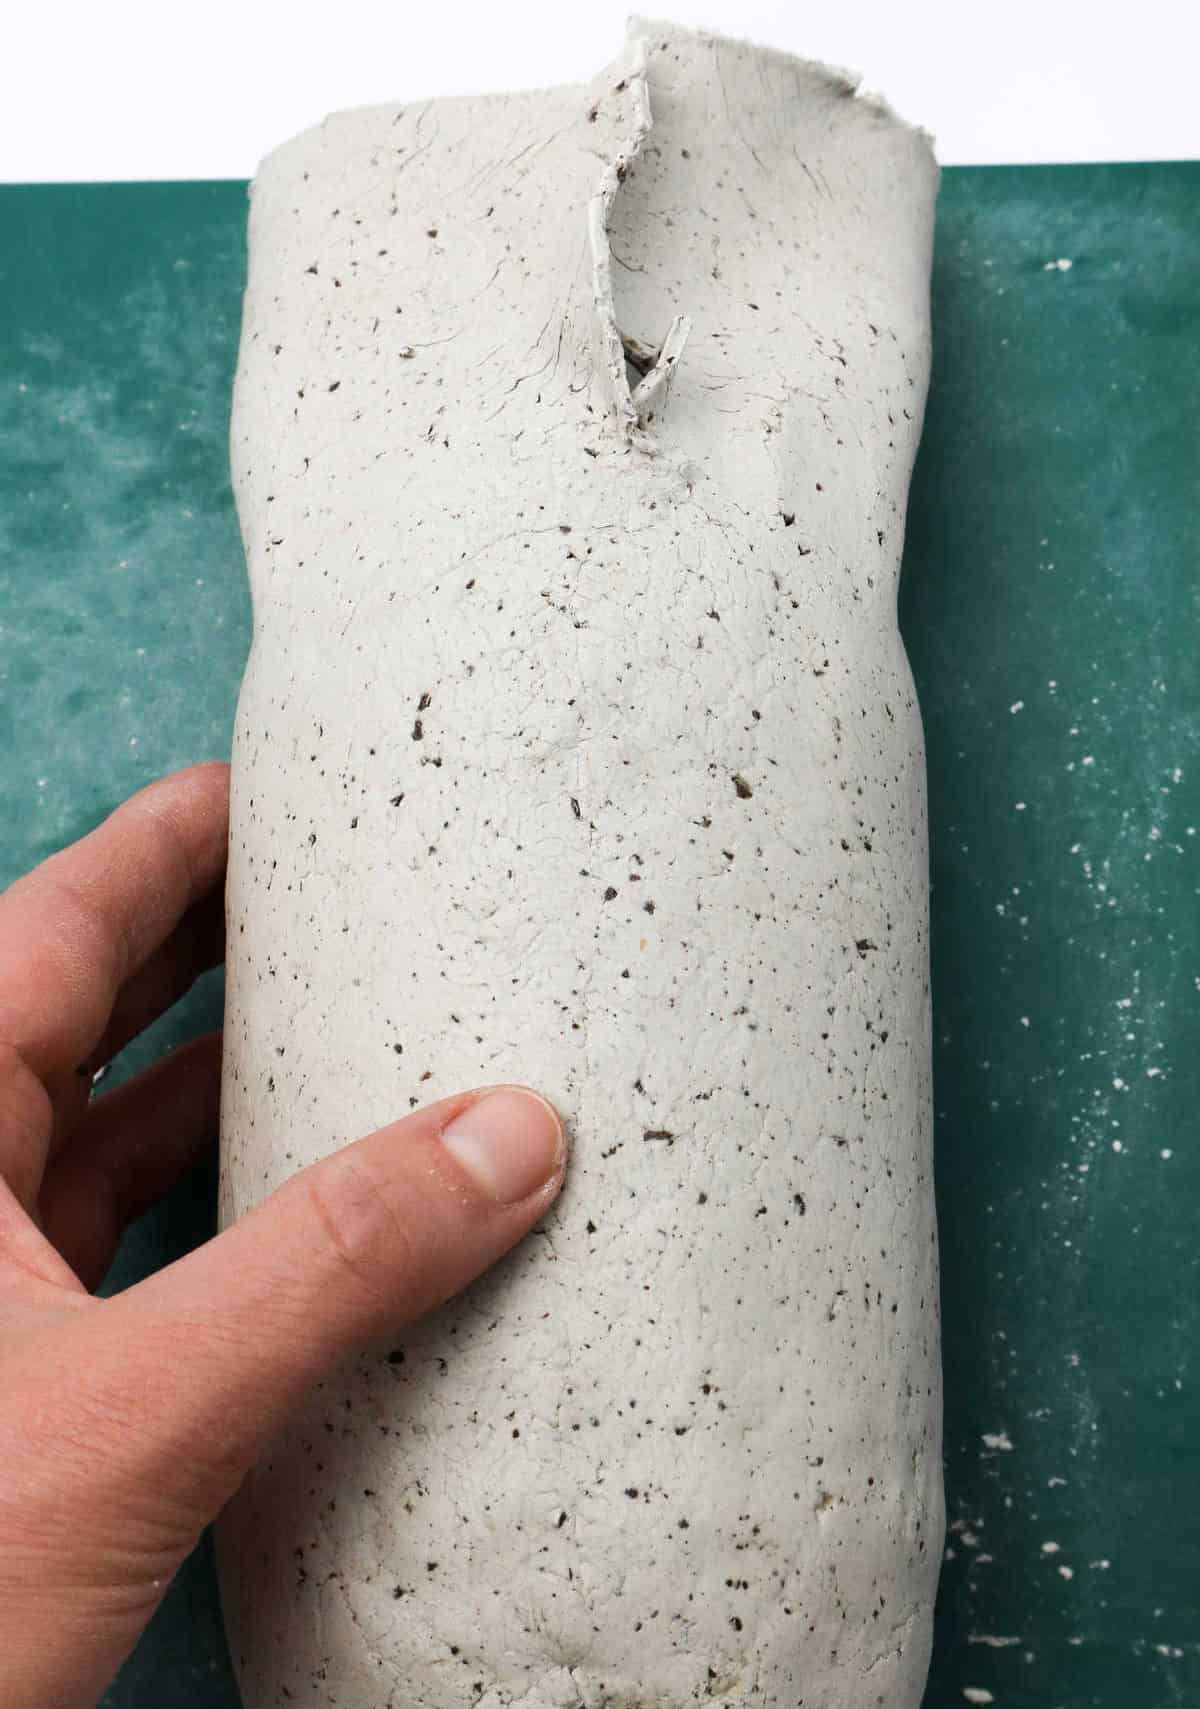
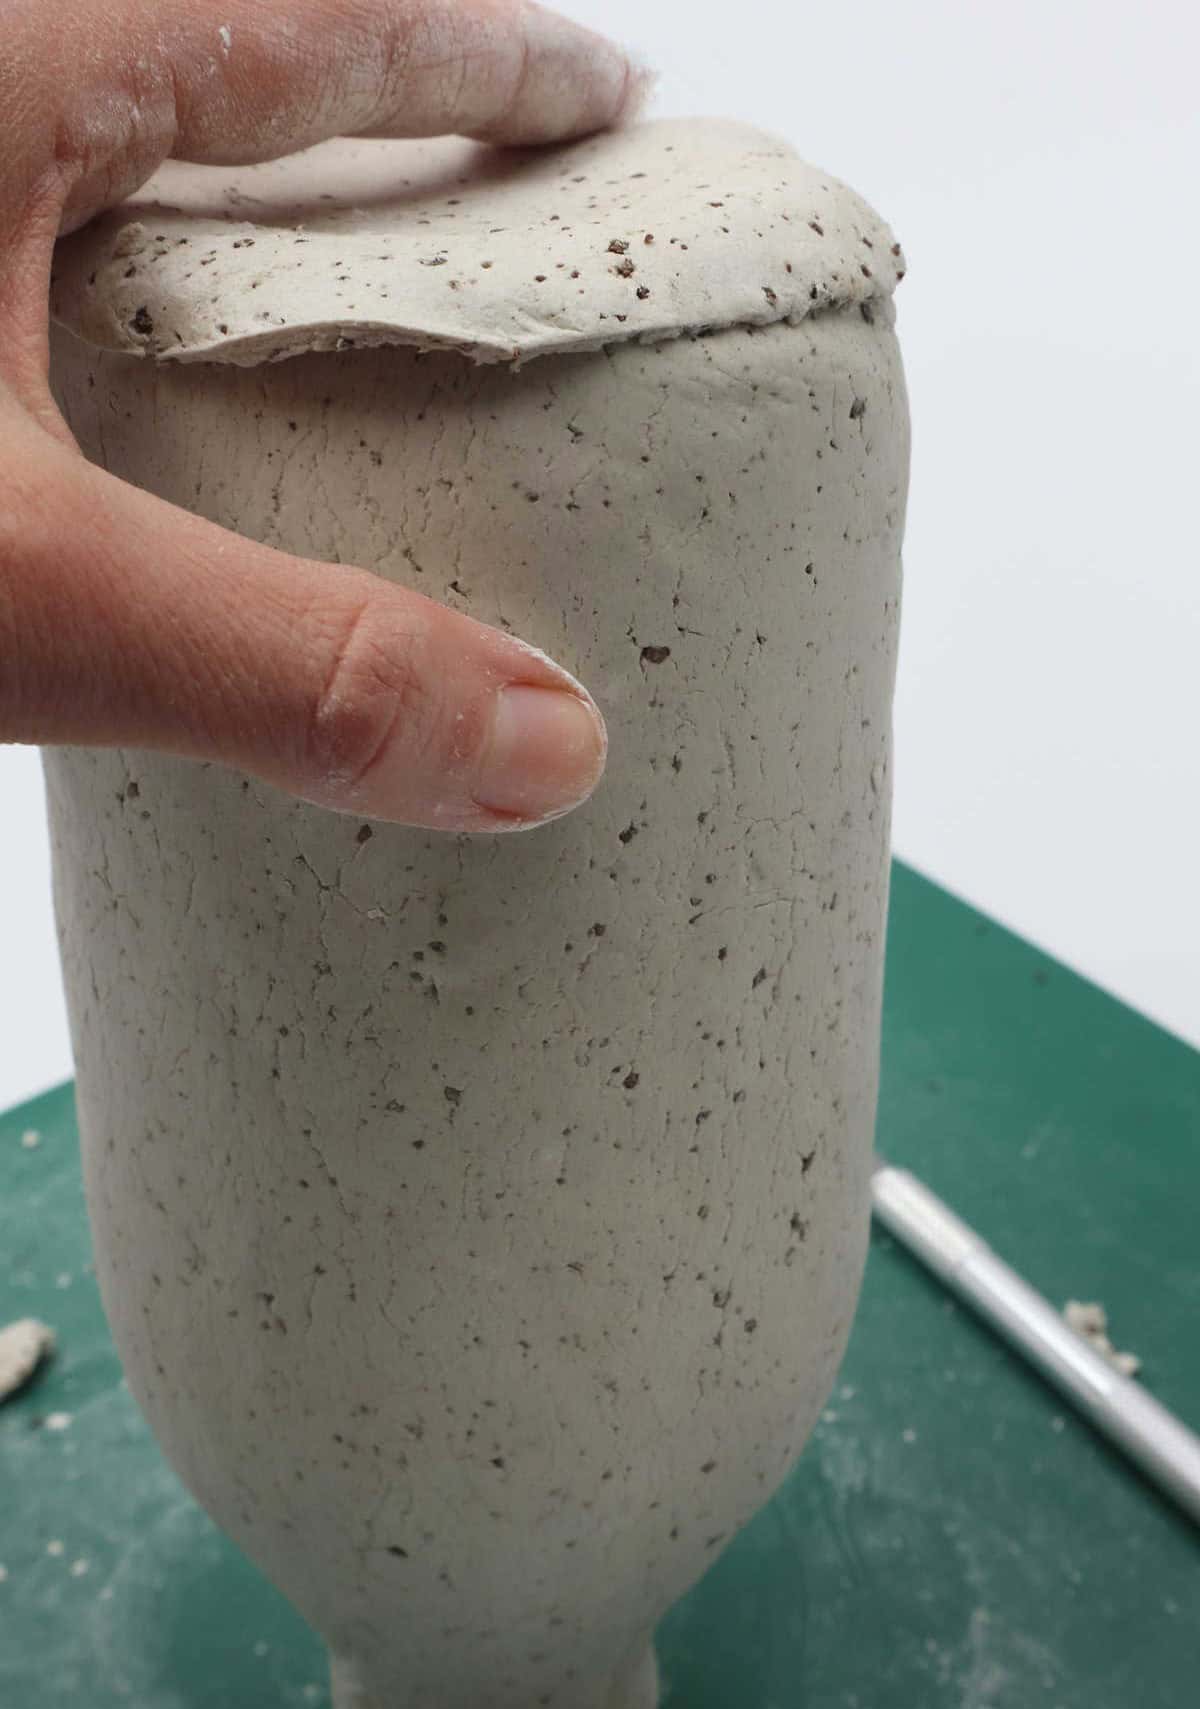
As you shape the clay to cover the neck and mouth of the bottle, remember that this part requires a bit more finesse. To ensure a seamless blend between the two sides, use your thumb to mold the clay onto the curved neck, taking care not to leave any air pockets or unevenness.
In addition to blending the sides, you’ll also need to cover the rim of the mouth with a thin layer of clay.
While it’s okay if this area isn’t perfectly even, try to smooth out any bumps or ridges as much as possible using your fingers or a damp cloth.
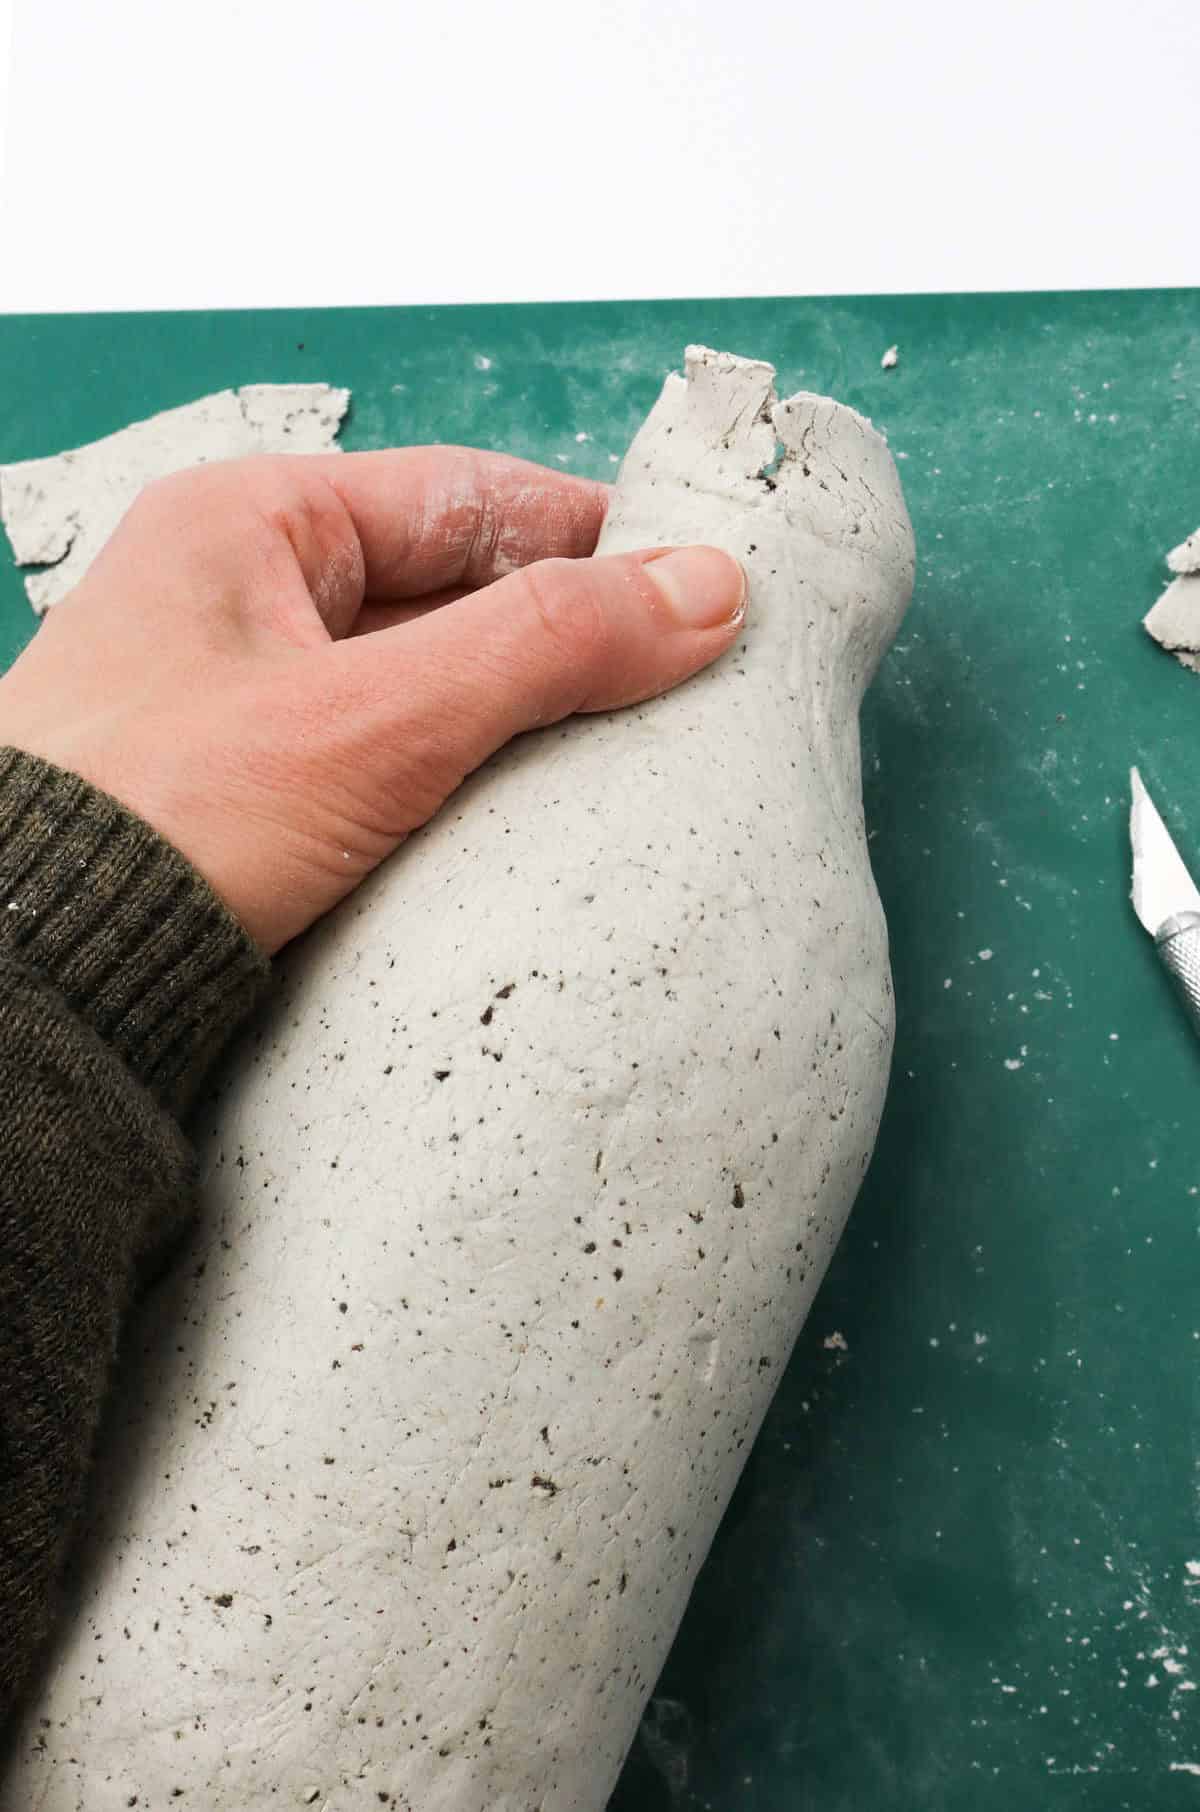
If you’re not entirely happy with the results, don’t worry – you can always use a craft knife to trim away any excess clay and refine the shape. This is particularly useful for smoothing out the area around the rim, where even the slightest imperfection can be noticeable.
When you’ve finished shaping the neck and mouth, your clay-covered bottle should have a clean, polished appearance that’s free from major flaws.
Step 9
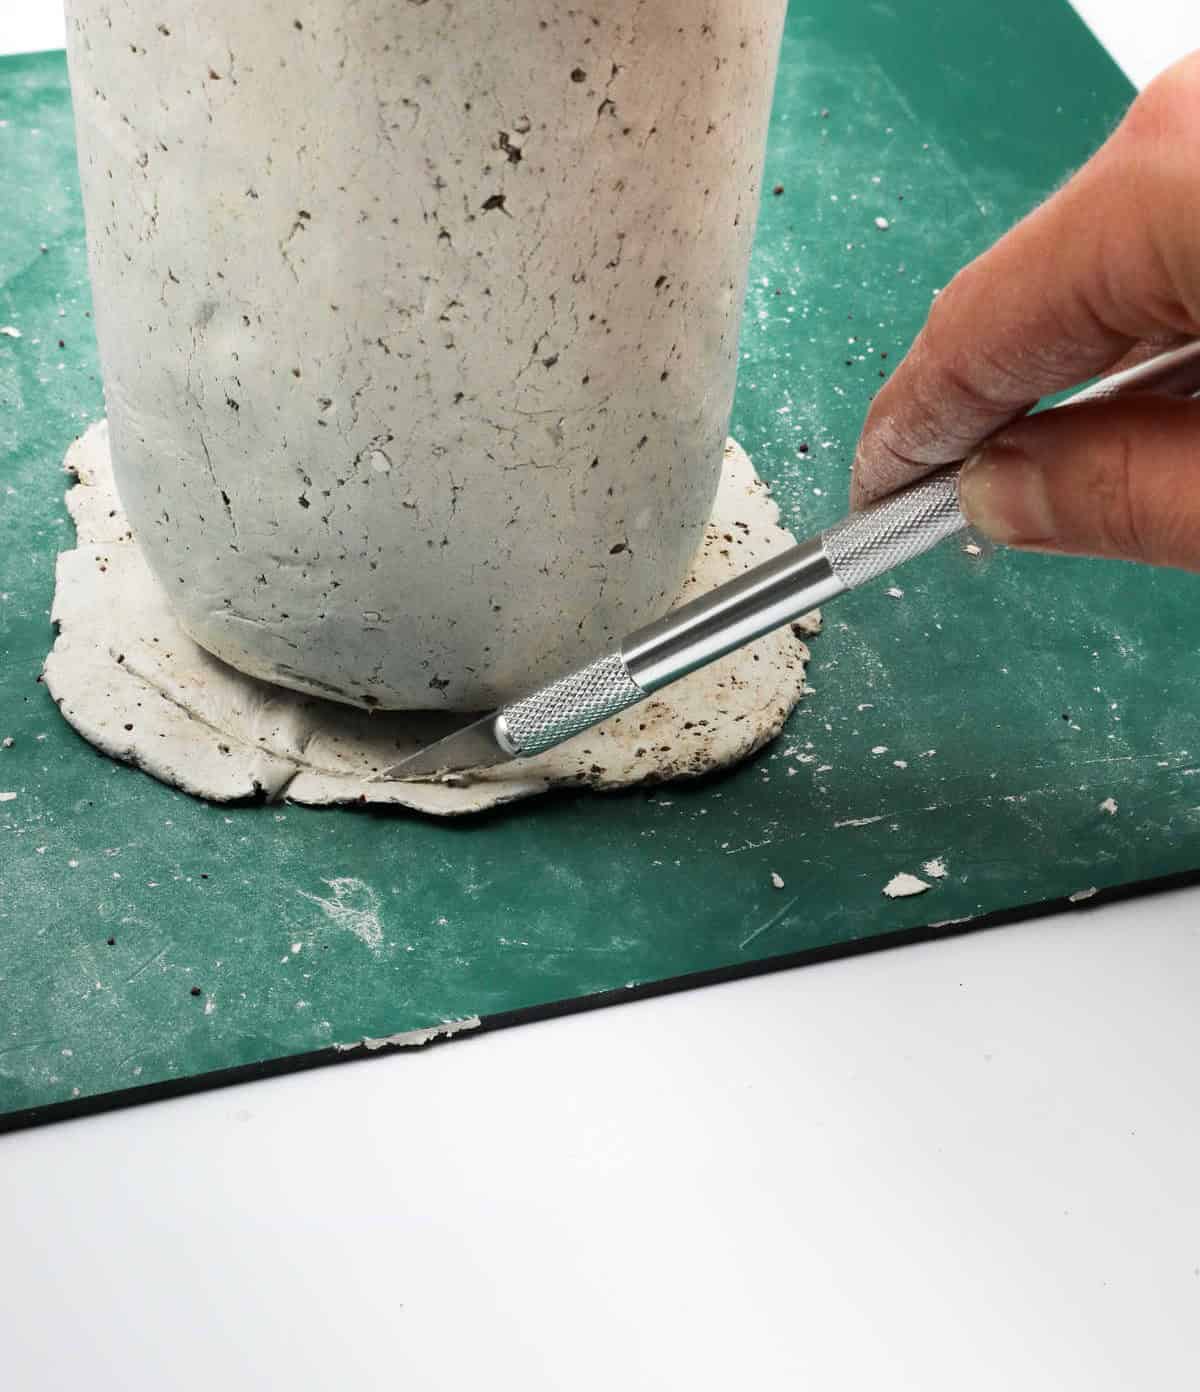
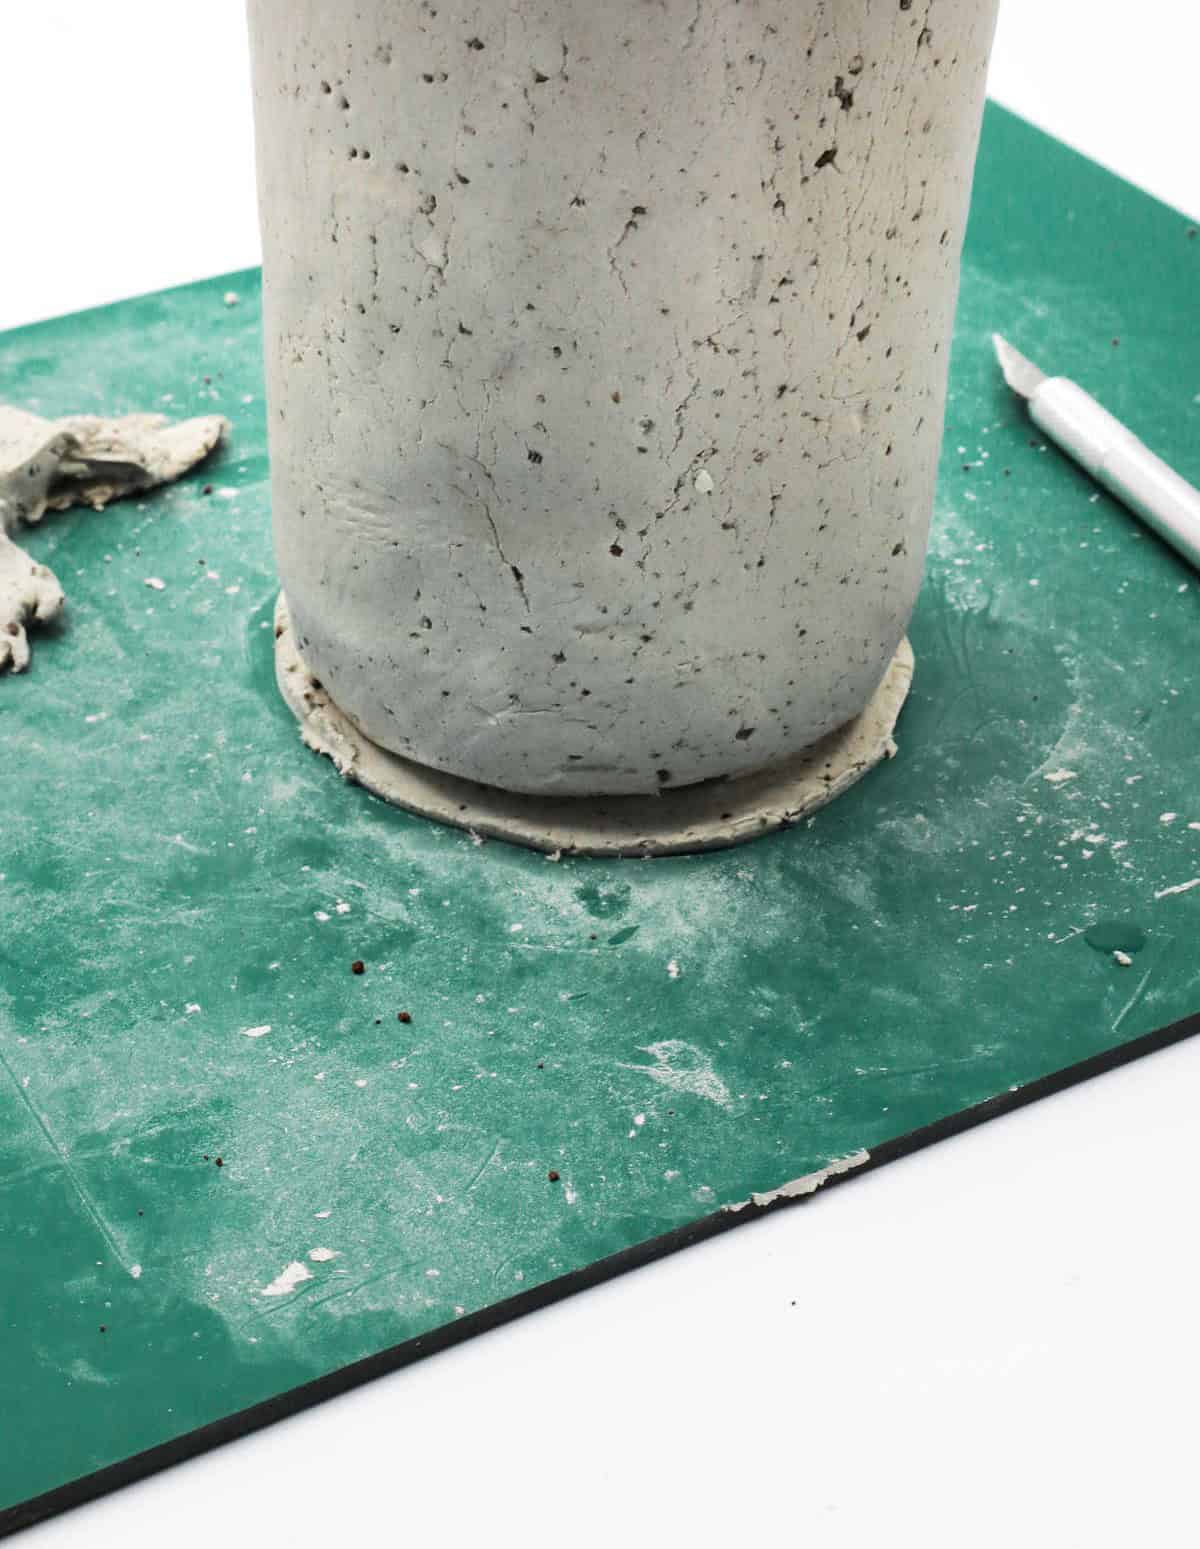
To shape the remaining clay into the perfect sealant for your bottle, begin by rolling it out evenly on a surface. Next, position the bottle over the clay, ensuring it’s centered and secure. Using your craft knife, carefully trim the excess clay around the bottle’s rim, leaving just enough to form a seamless bond.
Once you’ve achieved a smooth circumference, flip the bottle upright and balance it at its mouth.
Gently press the bottom component of clay into place, allowing it to meld seamlessly with the surrounding clay.
To eliminate any imperfections and create a flawless finish, feel free to add a small droplet of water. This will not only fill in any microscopic cracks but also help camouflage any potential lines or crevices.
Step 10

As you await the drying process, remember that patience is key. Allowing the clay to fully dry out will take approximately 48 to 72 hours, so it’s essential to resist the urge to rush ahead. Instead, focus on giving the material the time it needs to harden completely, ensuring a strong foundation for the next steps in your creative process.
Step 11
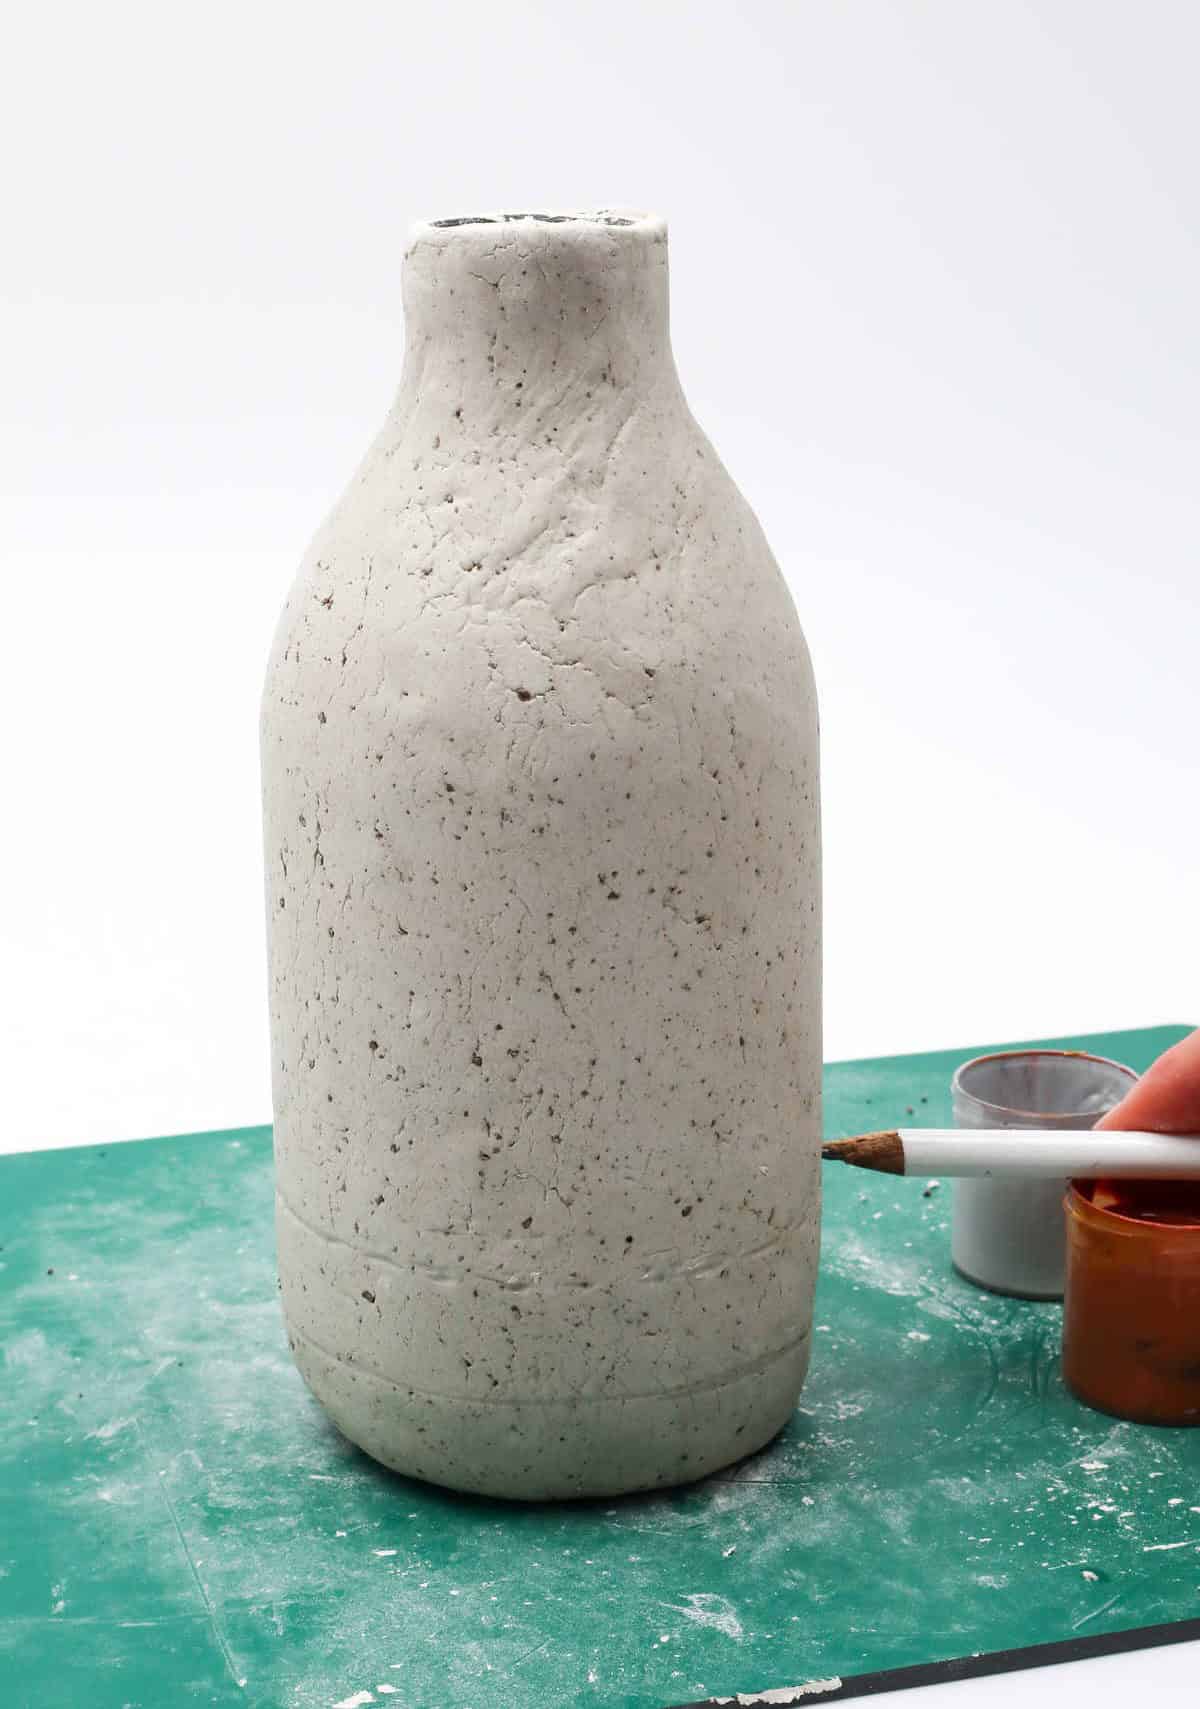
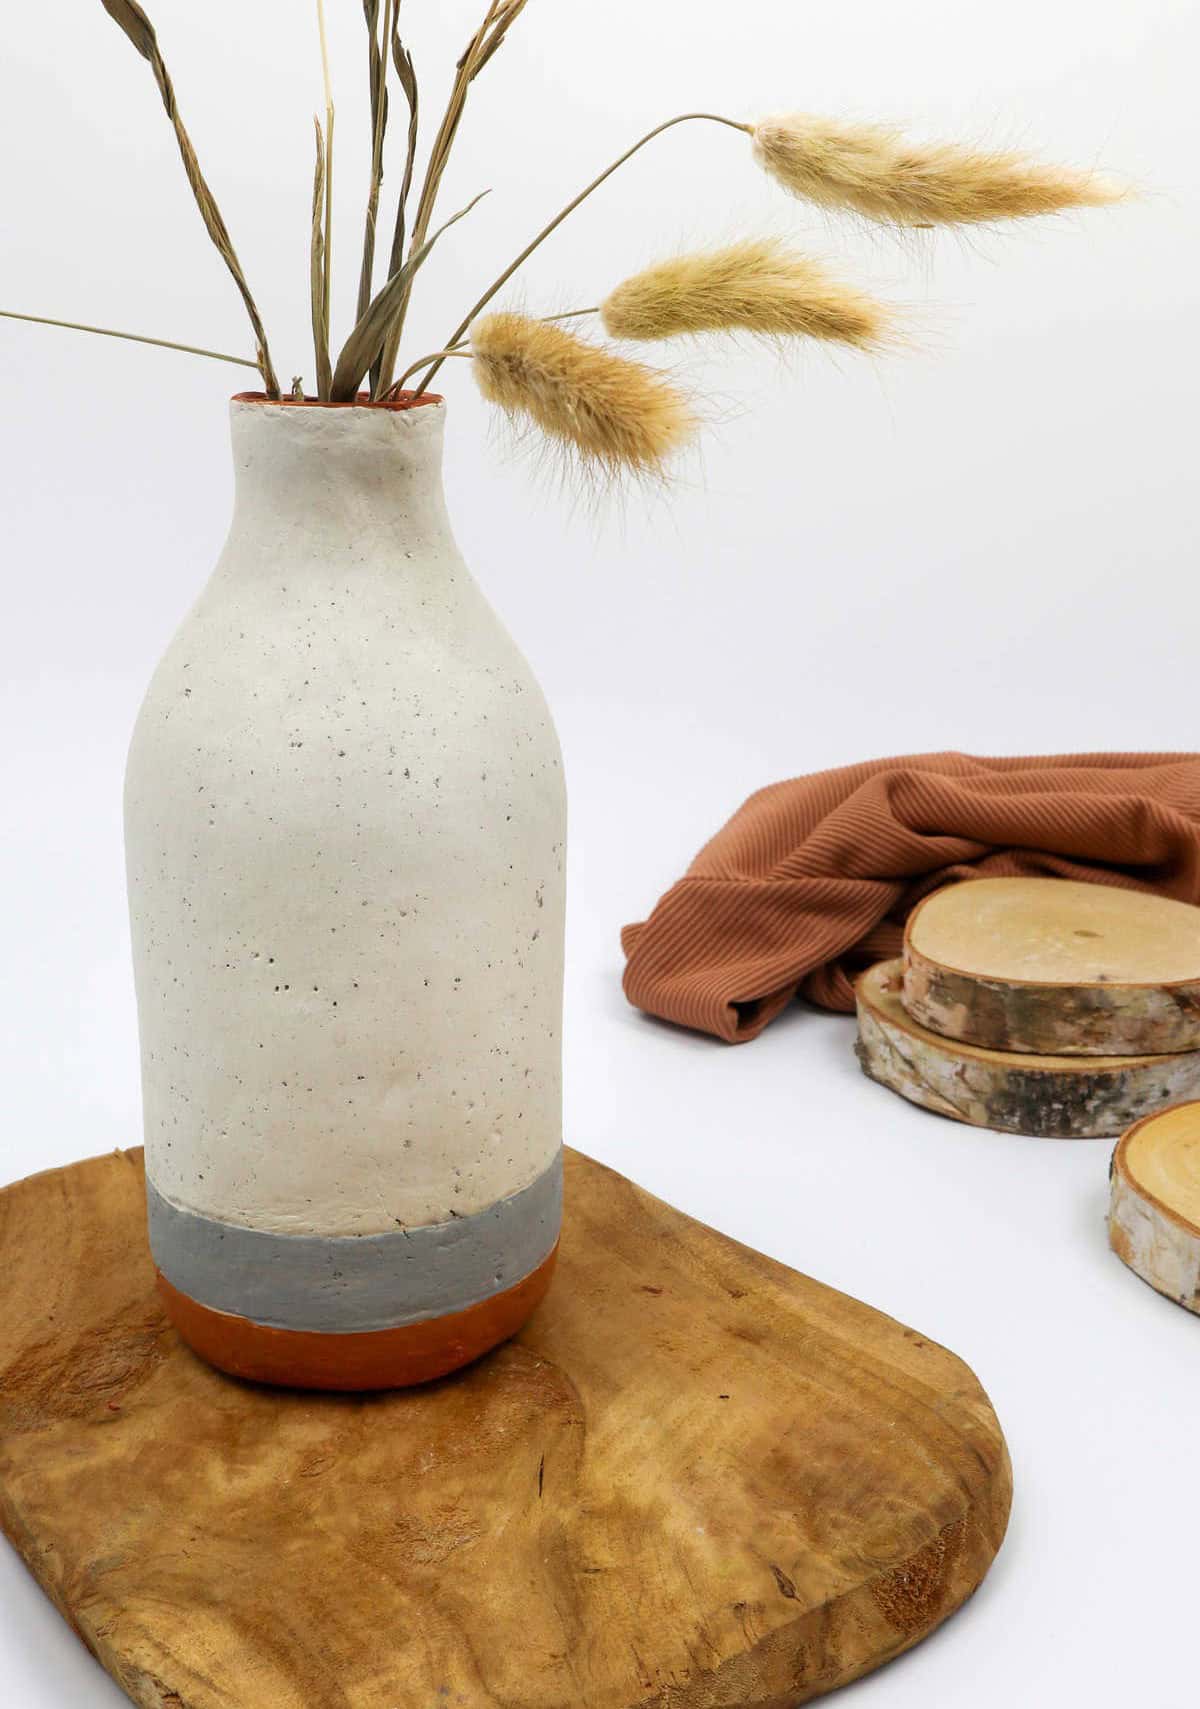
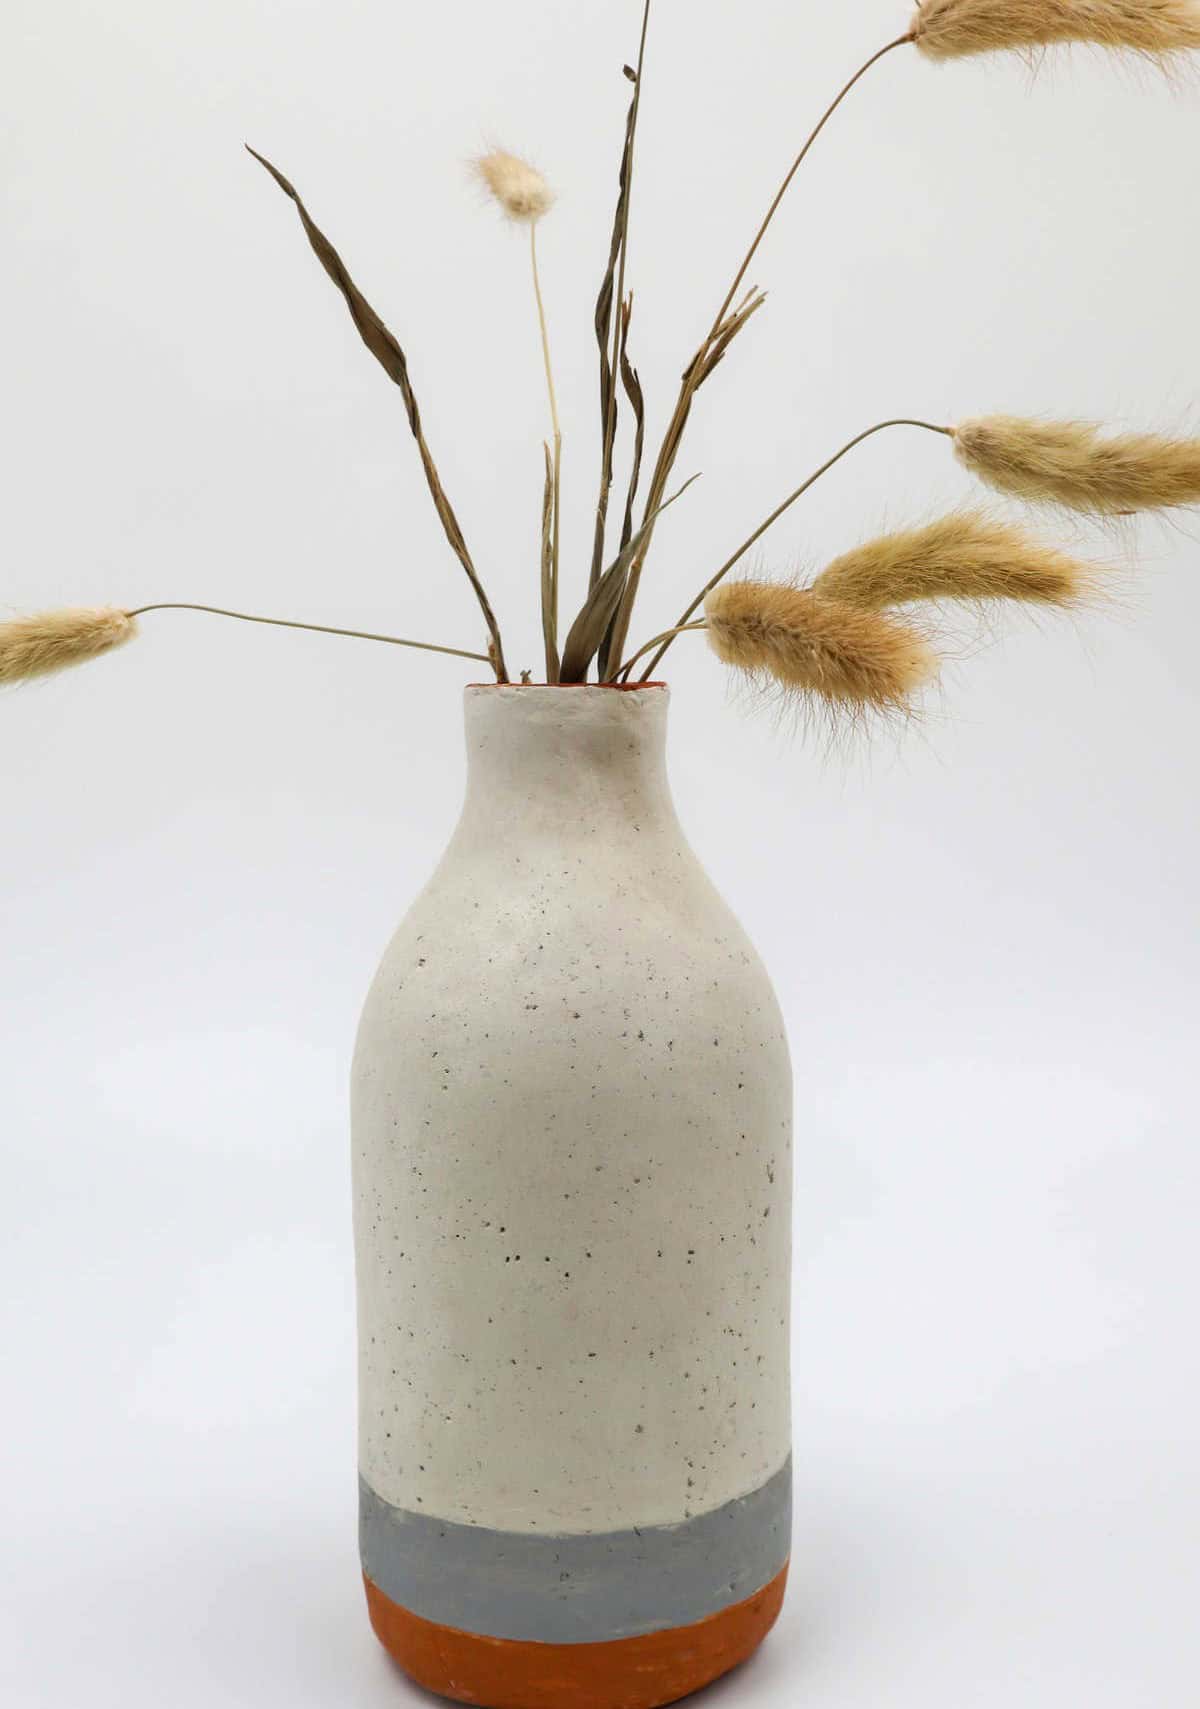
When your glaze has fully dried, it’s time to get creative with painting! To achieve a smooth and consistent finish, start by sketching two parallel lines along the lower portion of the bottle using a pencil. A helpful trick is to hold the pencil steady on the clay while rotating the bottle to ensure the lines are evenly spaced.
Step 12
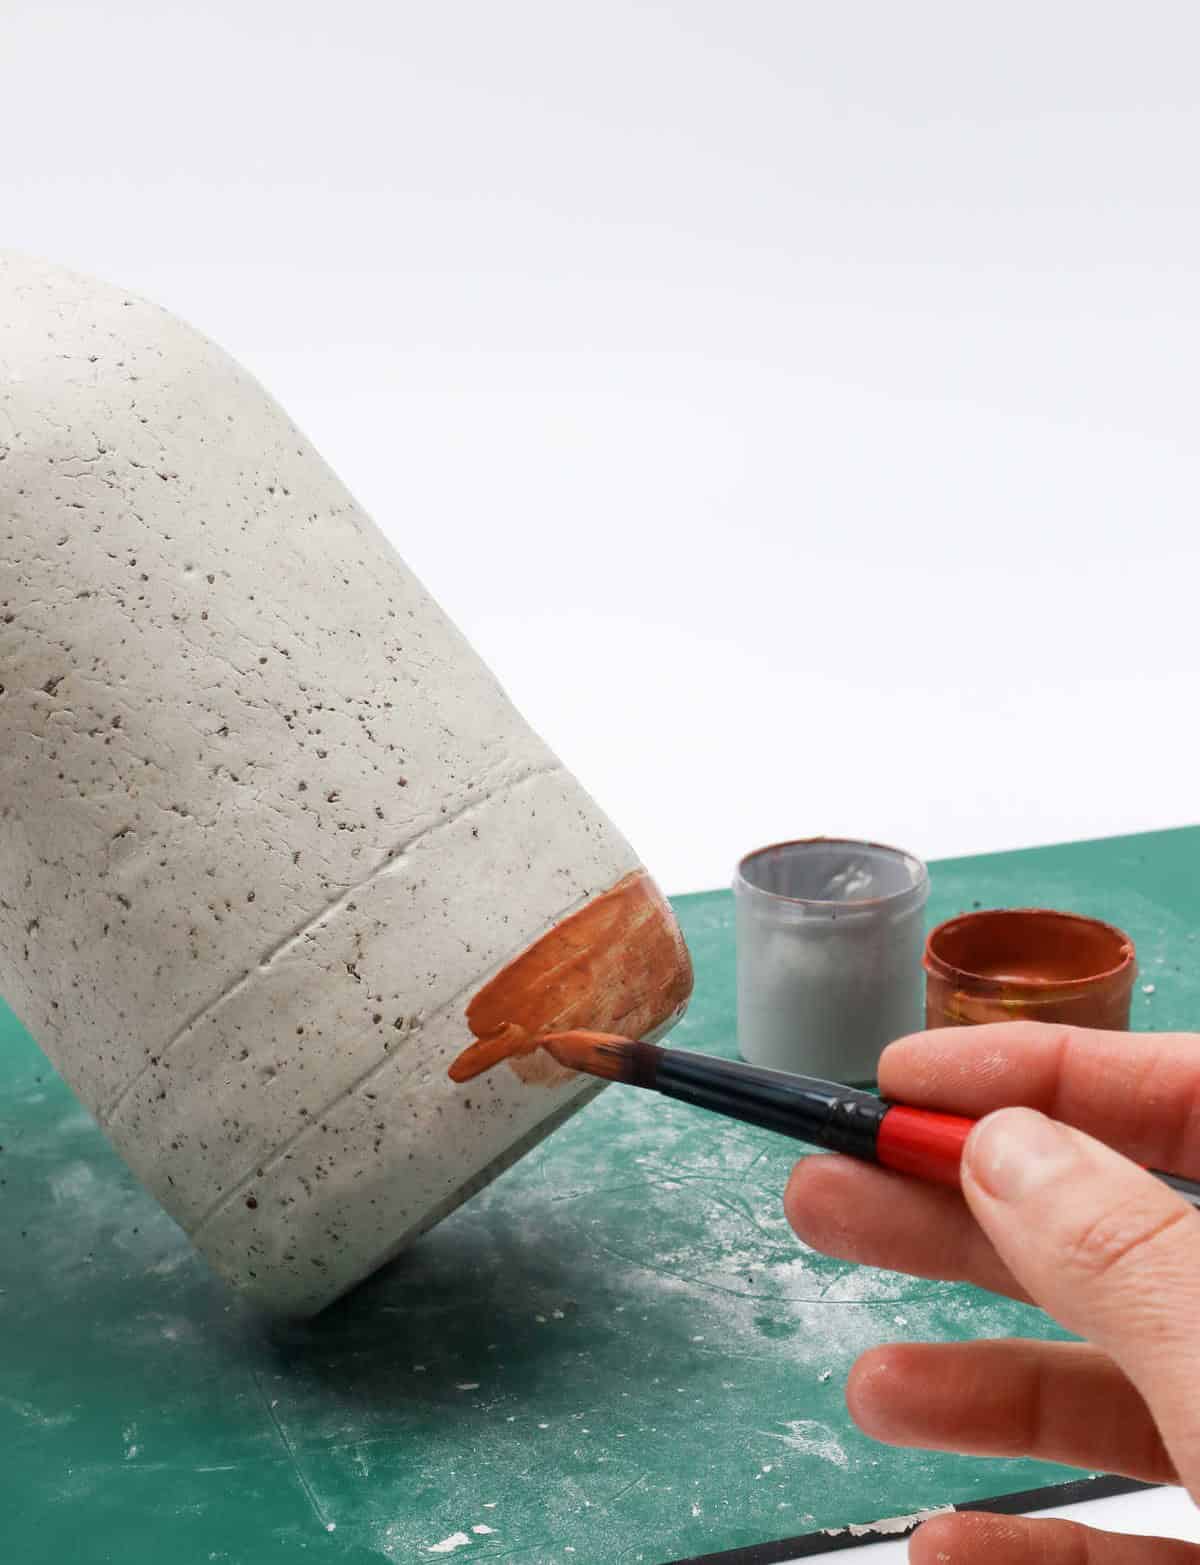

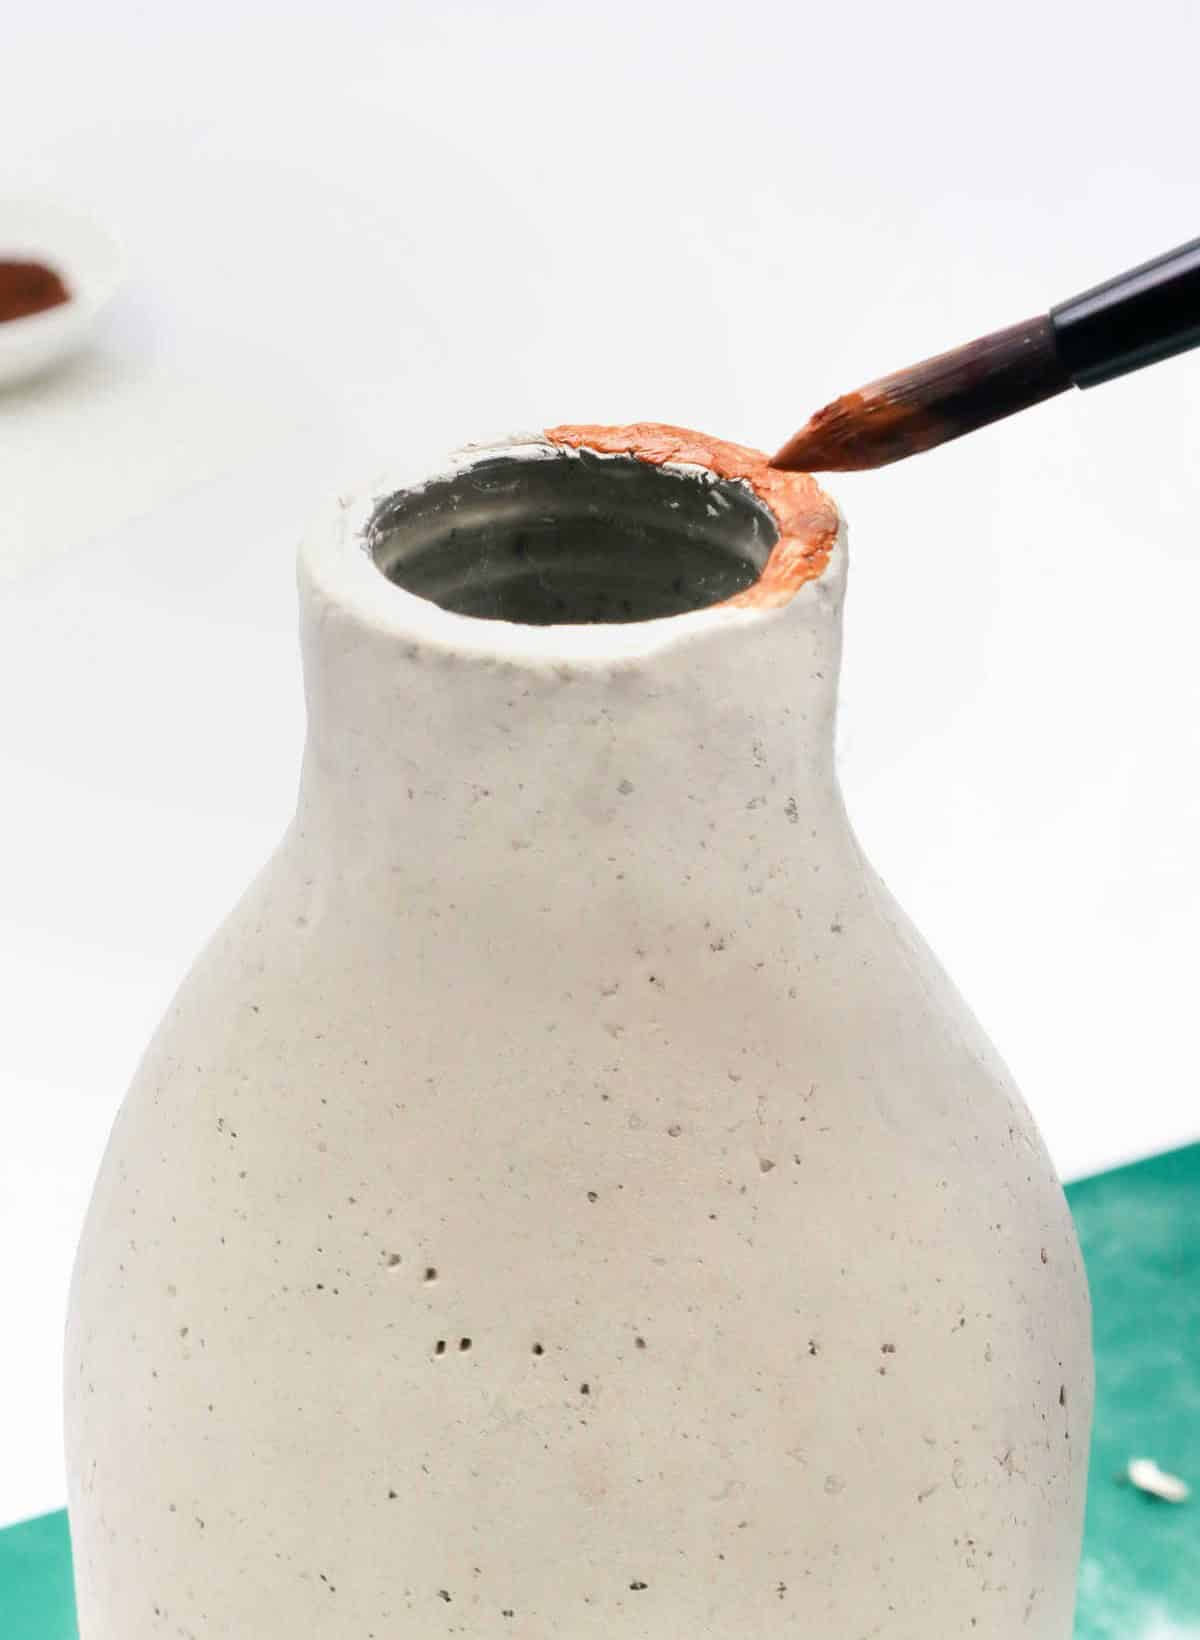
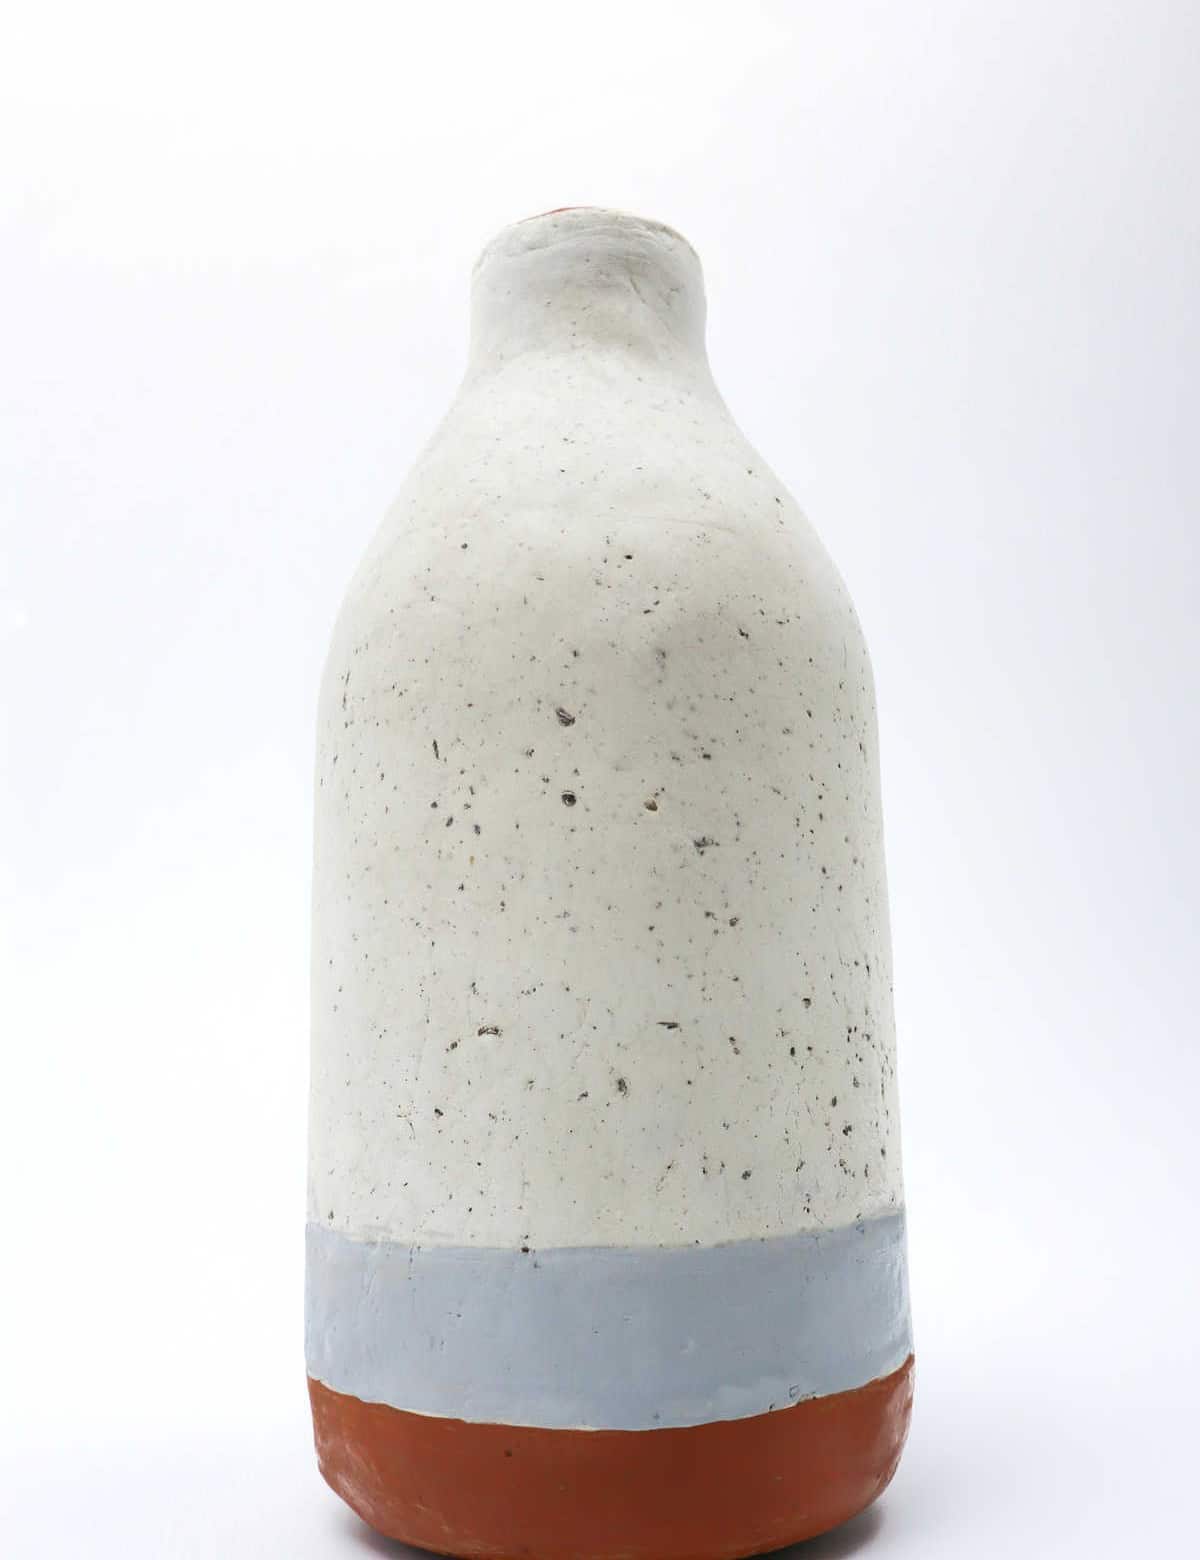


Get creative with your paints and brushes! Feel free to give your bottle a unique makeover by applying as many coats as you like. Just remember to let each layer dry completely before adding the next. You can also add some personality to the rim of the bottle, if that’s your style. Once you’ve achieved the desired look, allow the paint to fully dry to ensure a smooth finish. Next, consider giving your masterpiece a protective layer with sealant.
If you’re aiming for a matte finish, don’t worry about applying a glossy coat – just let it be. However, I do recommend using a matte sealant to safeguard the surface. With that, your DIY bottle vase is ready to shine!
How Can I Decorate My Vase?
Unleash your creativity and give your vase a personalized touch! If you’re stuck for ideas, here are a few unconventional approaches: Firstly, experiment with texture by using an embosser, stamp, or other imprinting tools – think leaves, ball chains, or even flowers. The resulting design will be unique, allowing you to add color and flair with paint. Next, don’t underestimate the power of embellishments, ornaments, or trinkets.
These can be used to create a visually appealing pattern on your vase. Alternatively, consider turning your vase into a canvas by drawing over it – the possibilities are endless! And finally, why not add some sparkle to your design with glitter? This adds an extra layer of visual interest and can really make your vase stand out.
Other Crafts You Might Like Making
Transforming everyday items into unique creations is a hallmark of the creative spirit. Take, for instance, upcycled tin cans. These humble containers can be repurposed to create beautiful scented candles. By combining basic crafting skills with some imagination, you can turn your home into a cozy haven filled with the warm glow and inviting aromas of homemade candles.
But that’s not all – this same creative energy can also be harnessed to craft items for yourself or others, such as thoughtful gifts or personalized accessories. If you’re looking for inspiration, there are numerous crafts for men, women, and everyone in between, from the simple to the intricate, waiting to be explored. Whether you’re a seasoned crafter or just starting out, this array of creative outlets is sure to spark your imagination and set your hands moving with excitement.
Among the many possibilities, DIY dollar tree vases offer an affordable and easy way to add a touch of elegance to any room, while projects like leaf candle holders and yarn-wrapped glass vases provide endless opportunities for customization and self-expression.
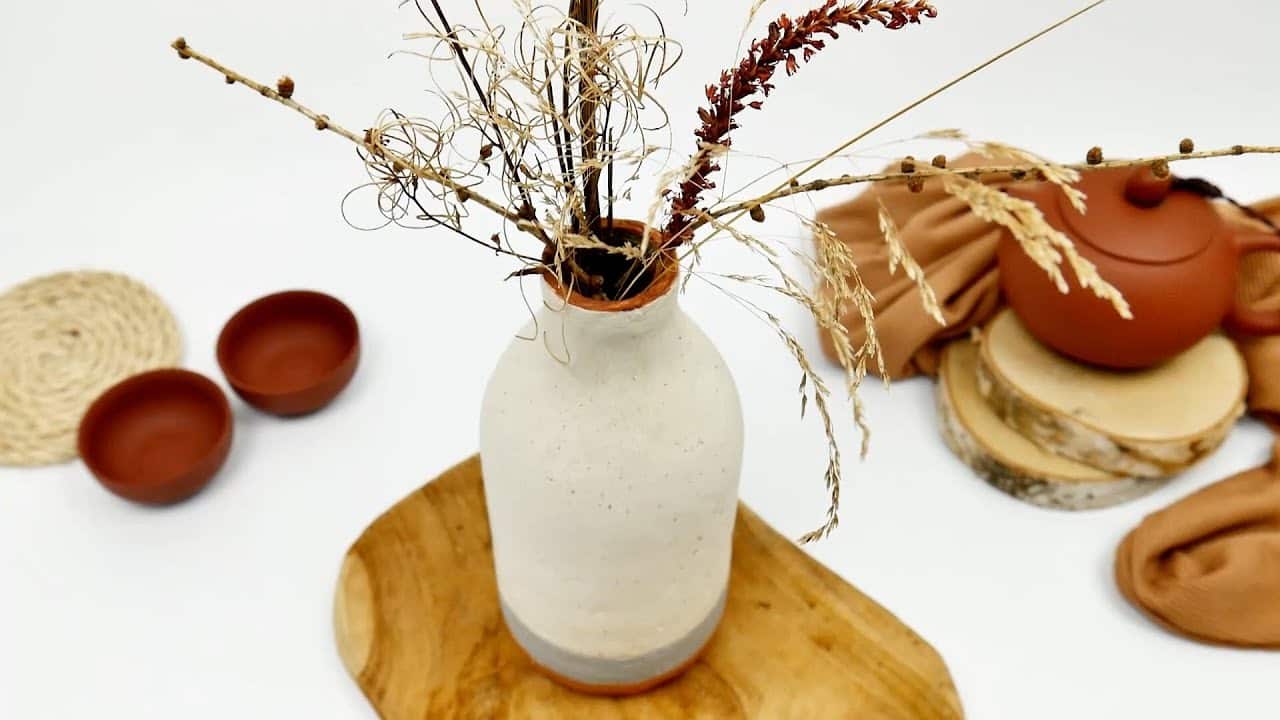
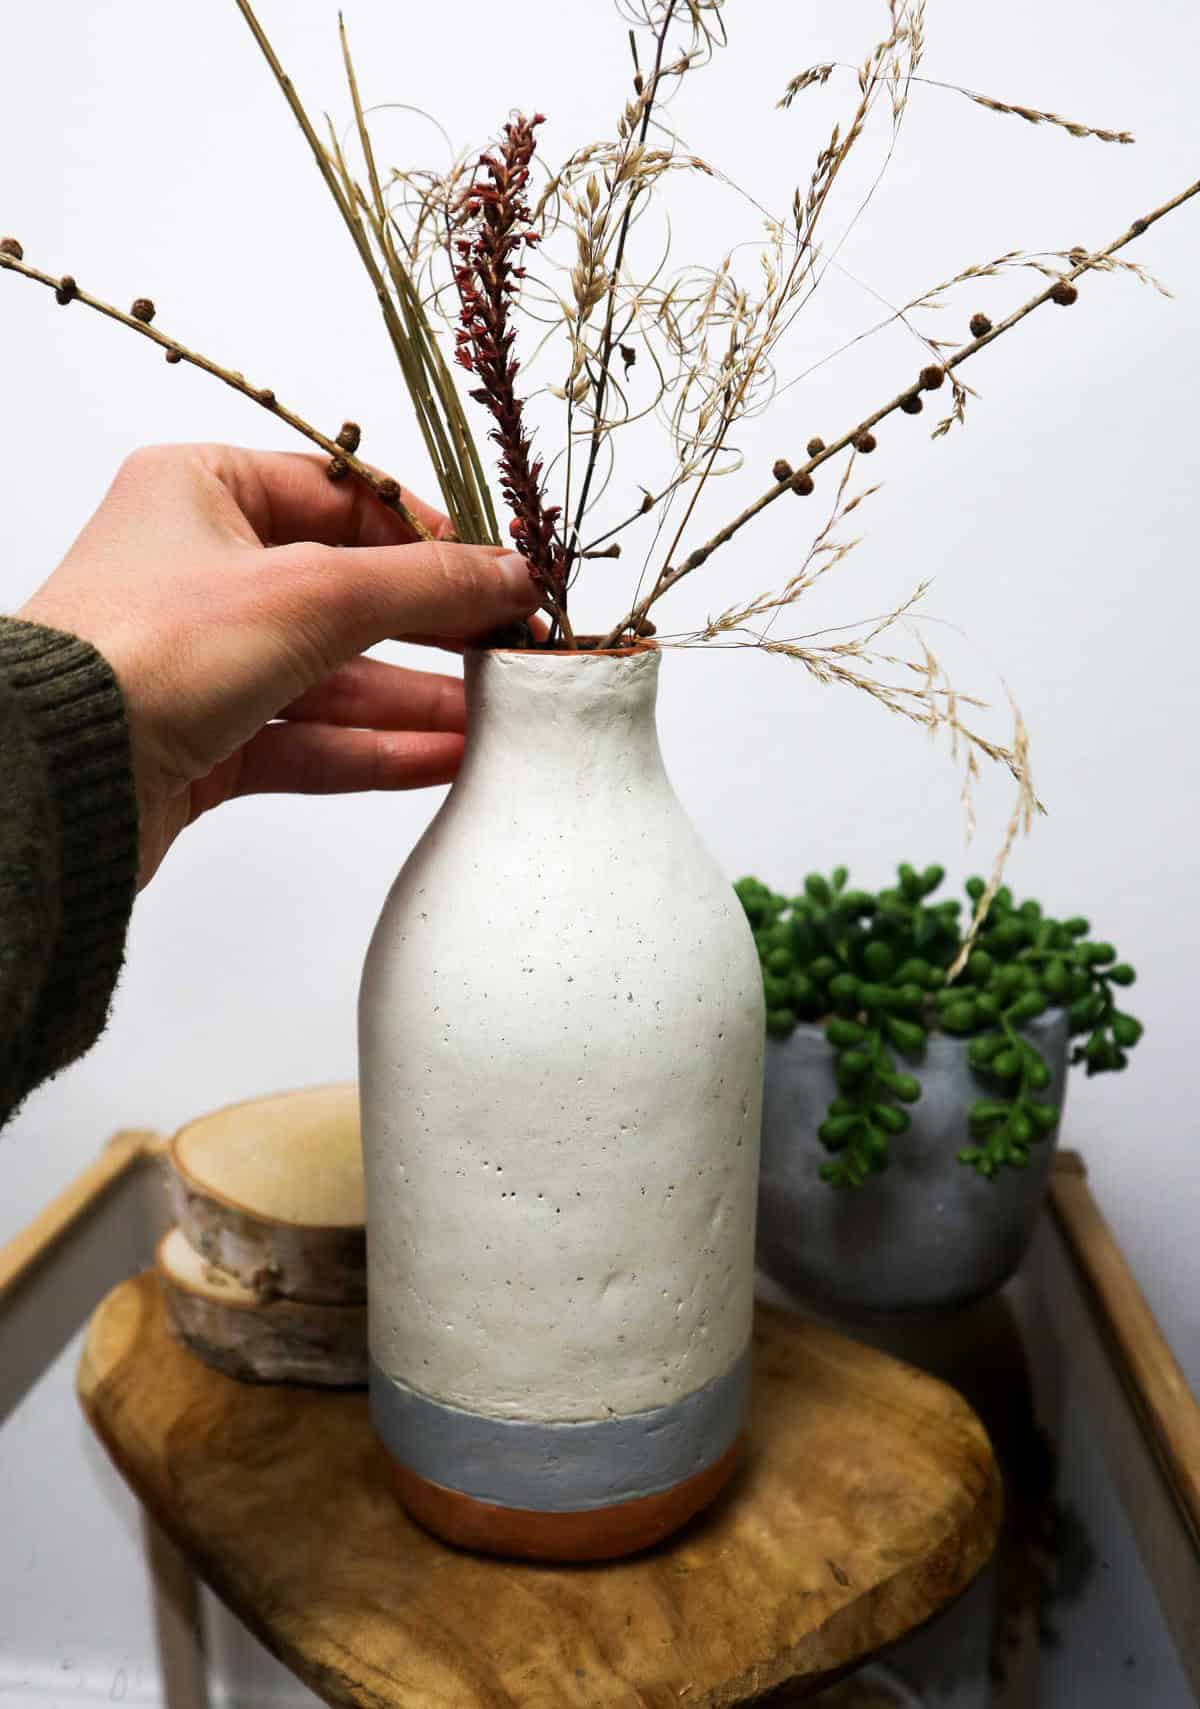
How Do I Display the Vase?
When deciding where to display your vase, consider the following ideas. Start by placing it in a prominent spot at the entrance of your home, such as on a shelf or in a wall inlet, so you can appreciate its beauty as soon as you walk in. If the vase is large enough, you can use it to add height and visual interest to a room by placing it on the floor. Alternatively, pair it with some modern art or decor that complements its style.
For a more intimate setting, try placing the vase in a corner or nook on your kitchen counter or island. You could also use it to elevate the space above your kitchen cabinets, creating a unique and eye-catching display. Finally, consider using the vase as a centerpiece for your dining table, filled with fresh flowers or greenery, to add warmth and personality to your meals.
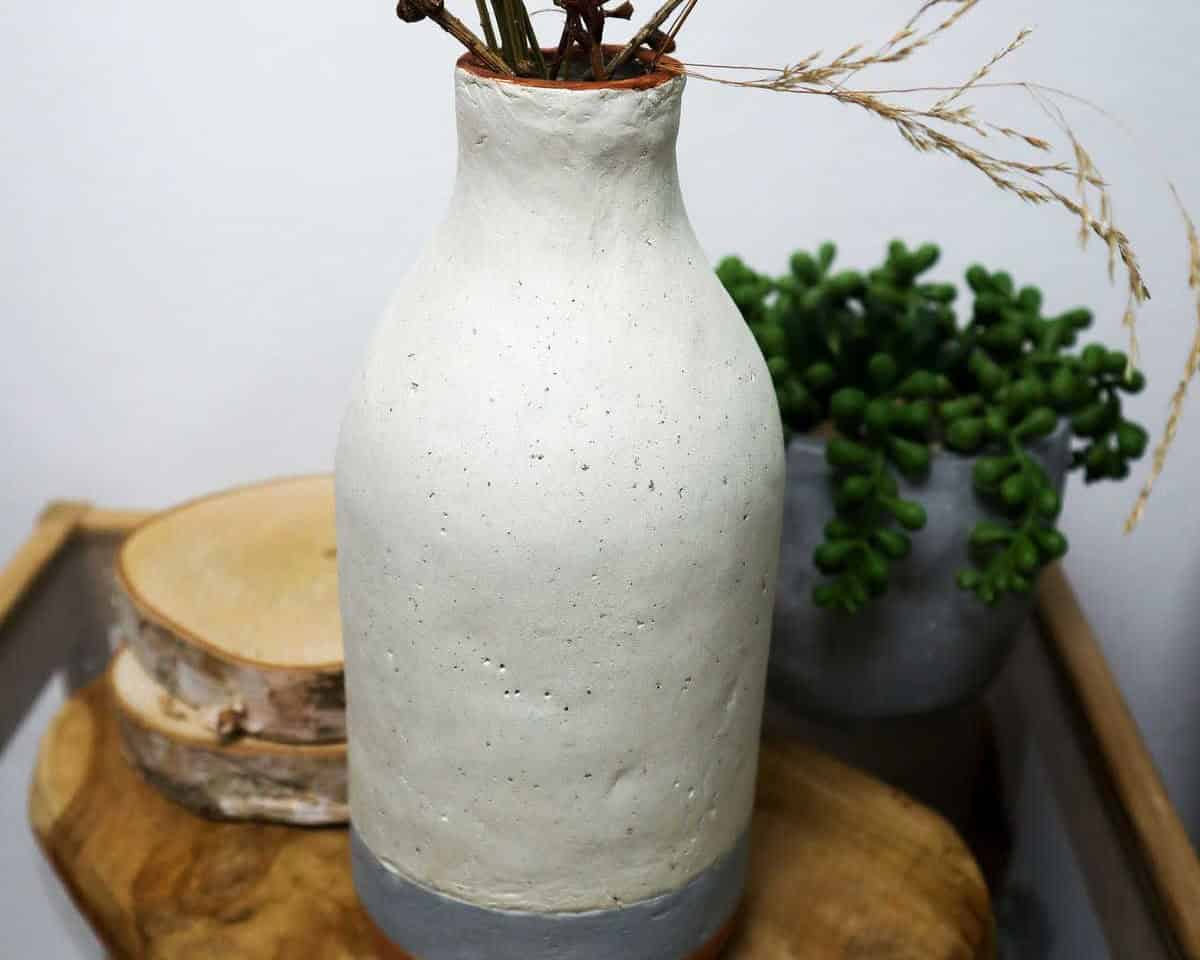
DIY Bottle Vase (Step-by-Step Tutorial)
Create your own DIY bottle vase with ease and beauty. This budget-friendly upcycling project is perfect for anyone looking to add a personal touch to their home decor. With just an hour’s time, you can transform an ordinary bottle into an extraordinary decorative piece that showcases your creativity and resourcefulness.
Equipment
To ensure uninterrupted creativity, keep the following essentials within arm’s reach: a trusty rolling pin or an alternative glass vessel, a tape measure for precision, a sharp precision knife to shape and trim, a pencil for jotting down ideas, and a paintbrush to bring your artistic vision to life. With these tools at hand, you can prevent distractions and keep your screen from going dark, allowing you to focus on bringing your unique perspective to the digital canvas.
Materials
A visually striking combination that can add texture and depth to any room, the harmonious union of glass bottles, air-drying clay, ground coffee beans, and acrylic paints in shades of grey and brown can be a great way to incorporate natural elements into your home decor. The transparent glass bottles can be used as vases or decorative accents, while the air-drying clay can be molded into unique shapes or forms.
The earthy aroma of ground coffee beans can add a cozy ambiance to any space, and the soft, muted tones of grey and brown acrylic paints can provide a soothing background for your decor.
Instructions
To embark on this creative project, begin by gathering all necessary supplies. Next, cut a portion of the clay and promptly repack the remaining portion in an air-tight container. Using your hands, knead the clay to remove any lumps and achieve a soft, pliable texture. At this point, you can choose whether or not to speckle your clay; if so, add a cup of ground coffee powder and knead it evenly into the clay.
Subsequently, use a rolling pin or bottle to roll out the clay on a flat surface, ensuring that you measure the dimensions accurately to accommodate the desired size. Measure the glass bottle to be used, and based on those measurements, cut out a clay sheet using a craft knife, setting aside excess clay for future use. Place the glass bottle over the sheet to check its size, then carefully position the sheet over the bottle and roll it around to ensure complete coverage.
Next, make notches down one end of the sheet using your craft knife, facilitating a seamless blend of both ends when joined. Blend the two ends together using your fingers, smoothening out any lines or cracks that may appear. You can use a small amount of water to smooth over any imperfections. As you work on the neck and mouth of the bottle, shape the clay to conform to its curves, using a drop of water to smoothen the surface.
Additionally, cover the rim with clay, using your craft knife to trim away excess material and even out the edge. To create the ‘bottom’ of the bottle, flatten the set-aside clay using a rolling pin, then place the bottom of the bottle over it and cut the clay around the bottle’s shape. Flip the bottle over onto your work surface, blending the clay into its bottom and sides as you go; use water to smoothen out any cracks that may appear.
Allow the clay to dry for 48-72 hours before decorating or applying a clear matte or glossy-finish sealant once the project is complete. Finally, once the sealant has dried, your DIY bottle vase is ready for use.