
Transform empty cereal boxes into a functional cabinet organizer that maximizes storage in your kitchen or under the sink. If you’re tired of cluttered spaces and disorganized areas, this DIY hack is the perfect solution. As someone who values tidy living spaces, I was fed up with the mess beneath my kitchen sink. With no shelves to speak of, the space was a prime candidate for upcycling. That’s when I stumbled upon an innovative way to repurpose old cereal boxes into a hanging shelf.
This project is incredibly easy, budget-friendly, and quick to complete. With just a few simple materials – including cardstock, adhesive strips, and those trusty cereal boxes – you can create a practical storage solution that will keep your supplies organized and out of the way.
Supplies for the Organizer

To craft a comprehensive desk organizer, you’ll need to gather the following essential materials: thick wrapping paper or paper for the exterior, separate paper for the interior compartment, two cereal boxes, double-sided tape, self-adhesive Velcro strips, glue, a ruler, a pencil, and a cutter. These items will serve as the foundation for your DIY project, allowing you to create a functional and visually appealing organizer that suits your workspace needs.
How to Make an Organizer
Step 1
Begin by collecting all necessary materials. While uniformity in cereal box sizes is ideal, don’t worry if you only have smaller ones on hand – they’ll suffice for the front compartment.
Step 2
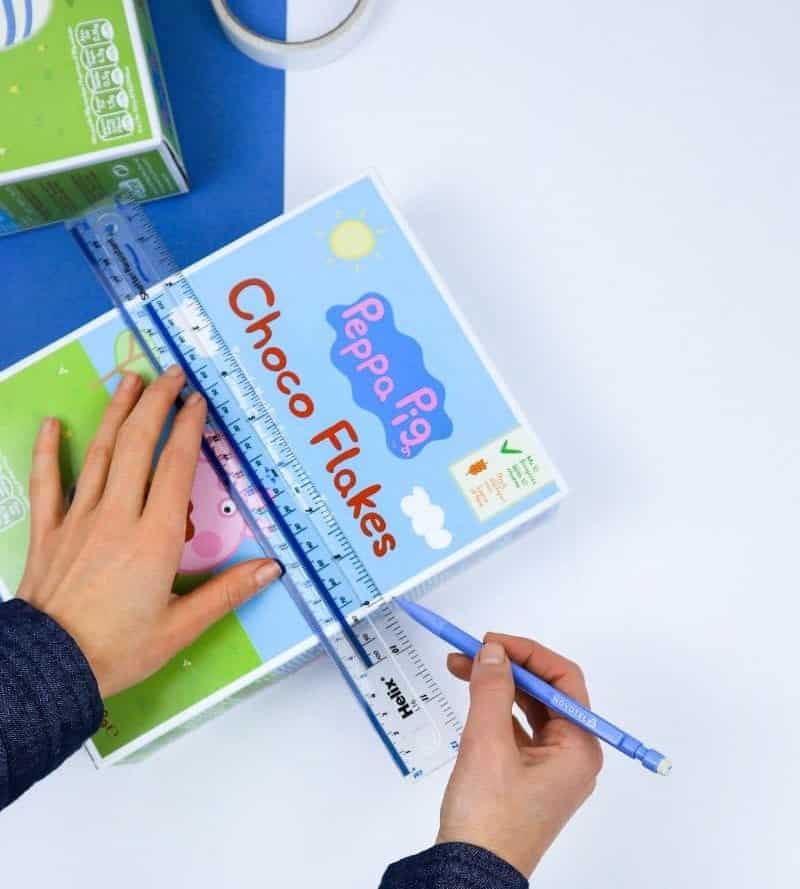
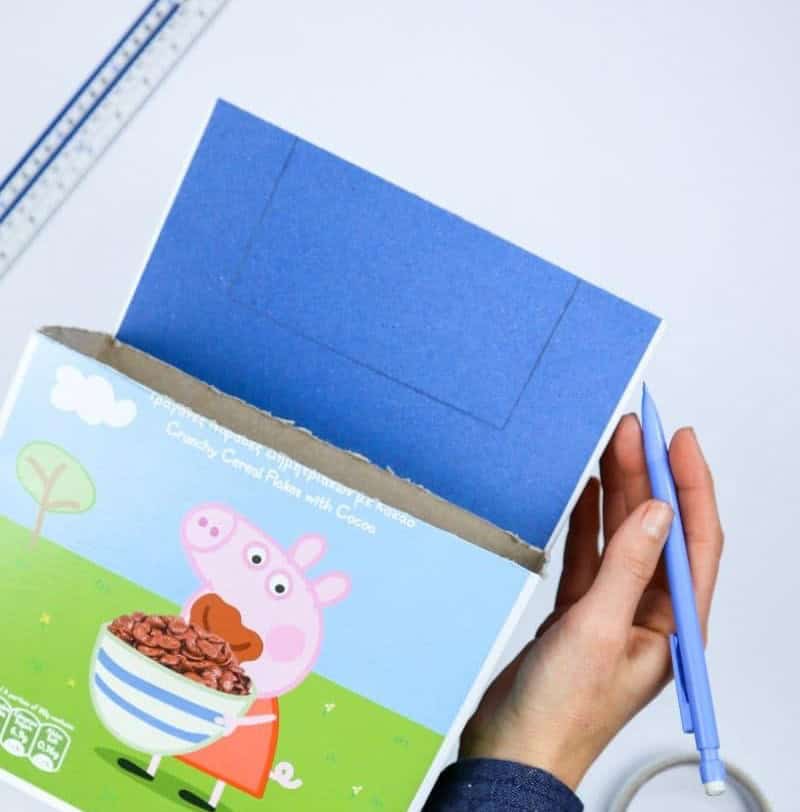
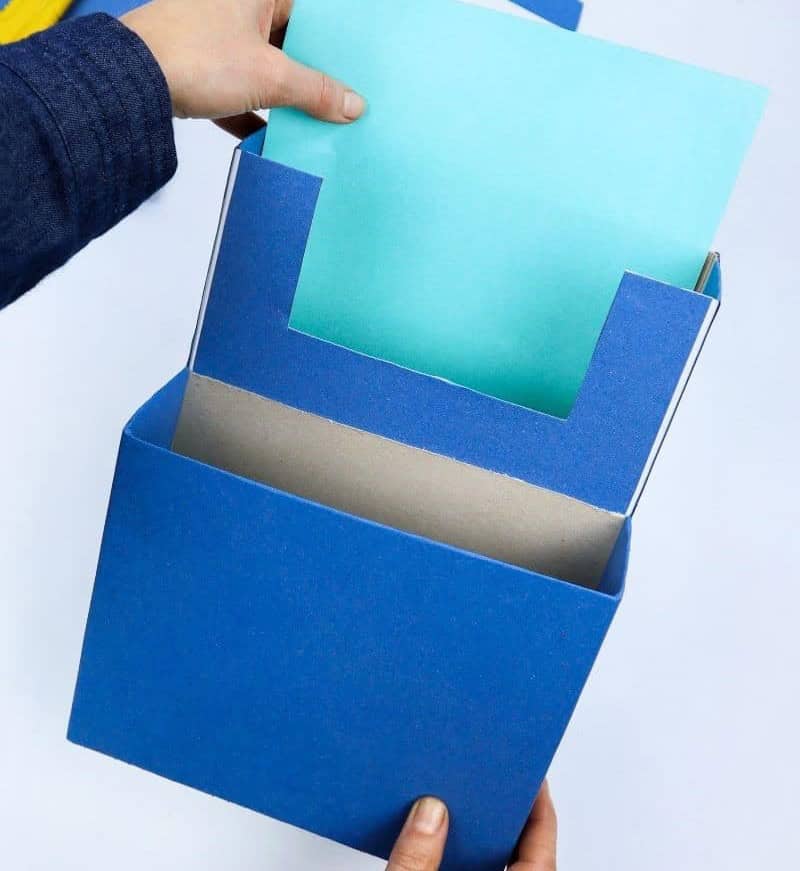
To create the foundation of your DIY cereal box organizer, begin by drawing a straight line along the length of the first cereal box using a pencil and ruler. This line will serve as the front slot of your organizer. You can position it at any point on the box, but I found that placing it roughly halfway up provided a good starting point. Feel free to adjust the size of your slot to suit your needs.
Step 3
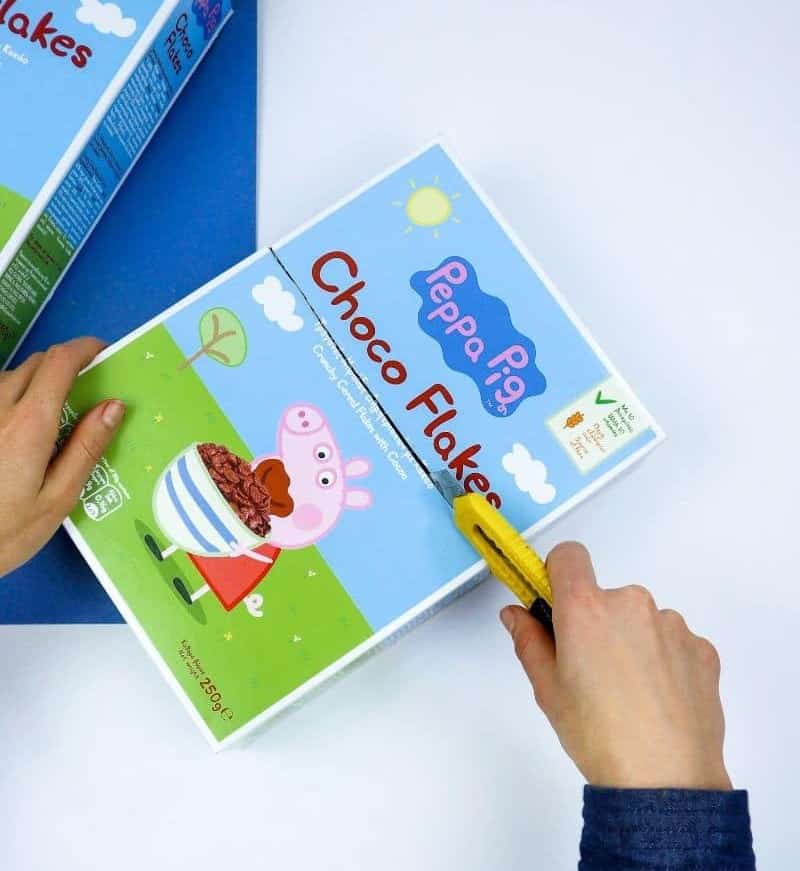
To liberate the inner contents of your cereal box, begin by carefully cutting along each of its four sides using your craft knife or scissors. When working with a craft knife, it’s often easier to maintain precise and straight cuts, whereas scissors may leave a slightly more rugged edge. Either tool will yield similar results, so choose the one that feels most comfortable in your hands.
Step 4
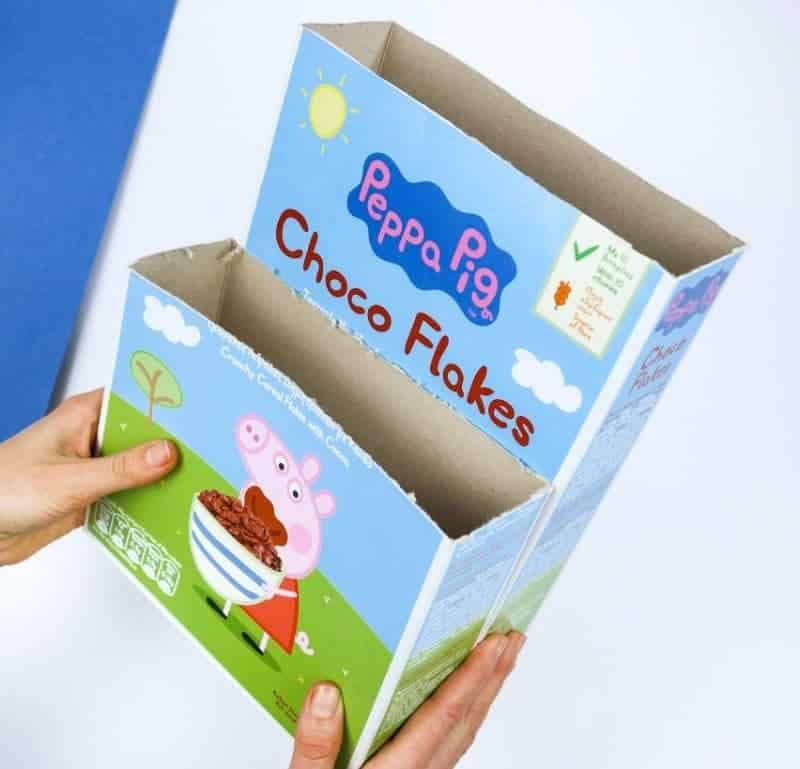
Create a duplicate cereal box design, but with a notable difference: this one will be taller than its counterpart. To achieve this, refer to the provided illustration for guidance on the desired height increase.
Step 5
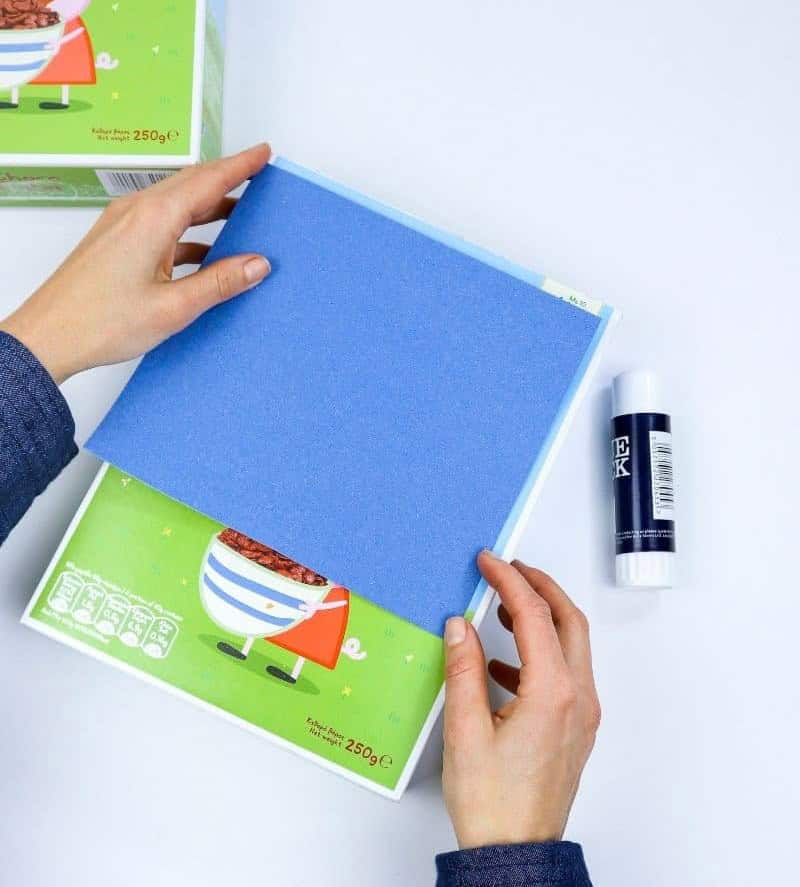
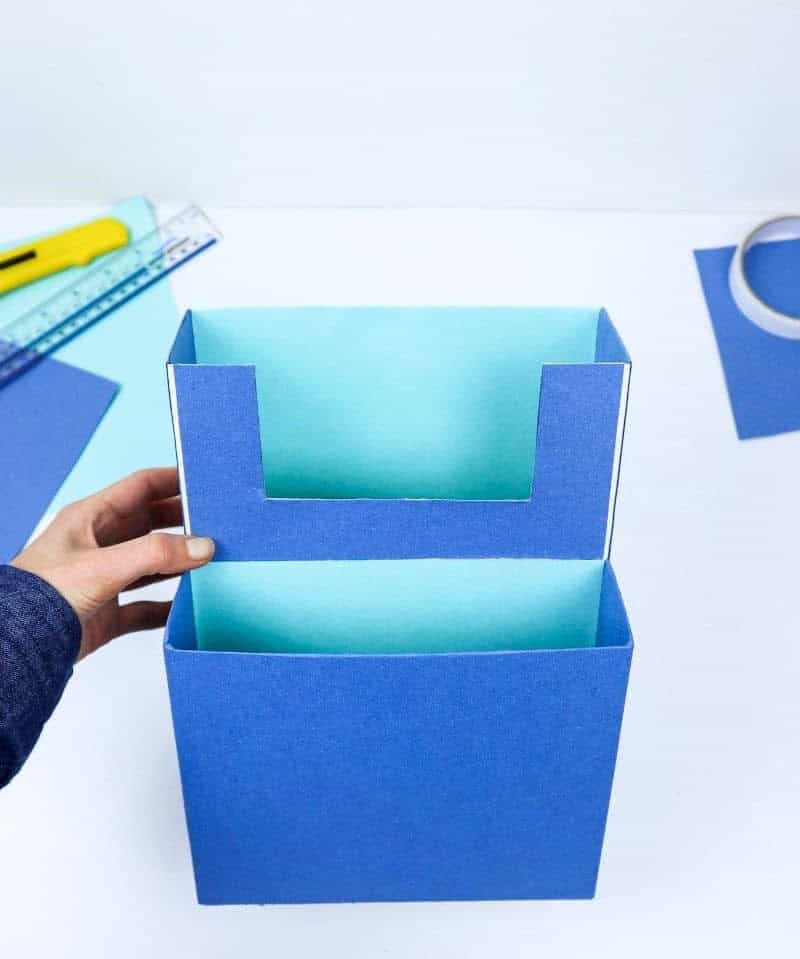
It’s time to add some personal flair to your organizer! I opted for a soothing blue hue, but feel free to get creative and choose any color that resonates with you. To begin, cut a strip of construction paper roughly the same width as the taller box. You don’t have to cover the entire surface – simply cut it long enough to reach behind where the smaller box will be situated. Secure the paper in place using your preferred adhesive.
Step 6
To secure the smaller box in place, we’ll employ adhesive strips. For a precise installation, it’s a good idea to lightly sketch the position of the box’s top edge beforehand, serving as a guide to prevent accidental overextension.
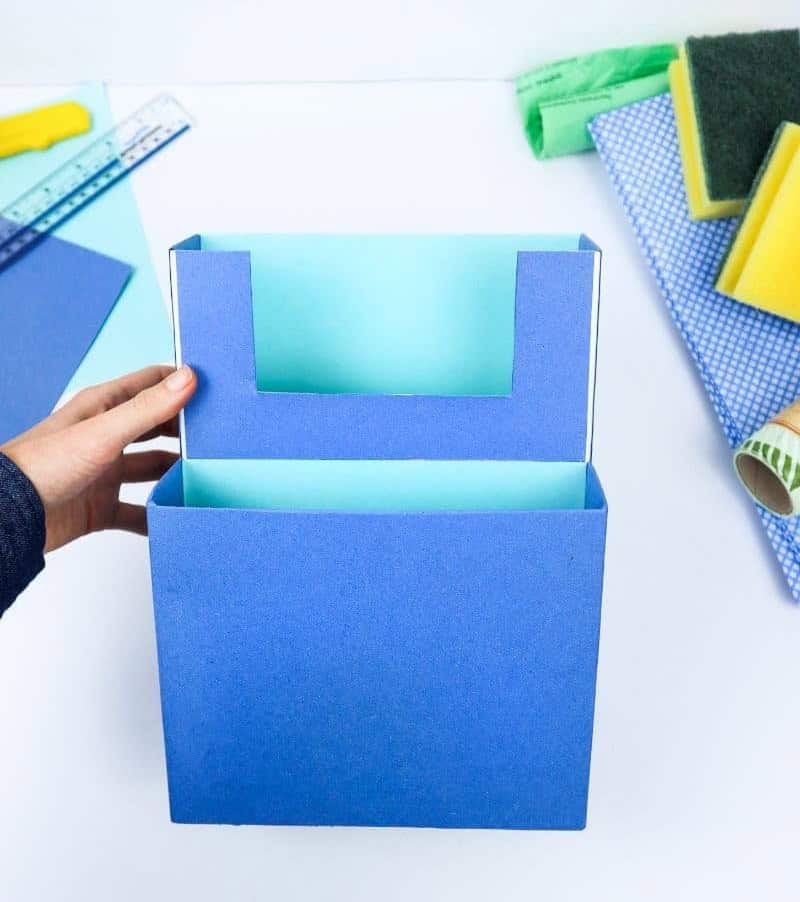
Step 7
As you prepare to assemble the small box, precision is key. To achieve a seamless finish, carefully align the edges of the box with one another, ensuring that they meet at precise points. This attention to detail will result in a cohesive and tidy organizer that appears as a single, unified piece.
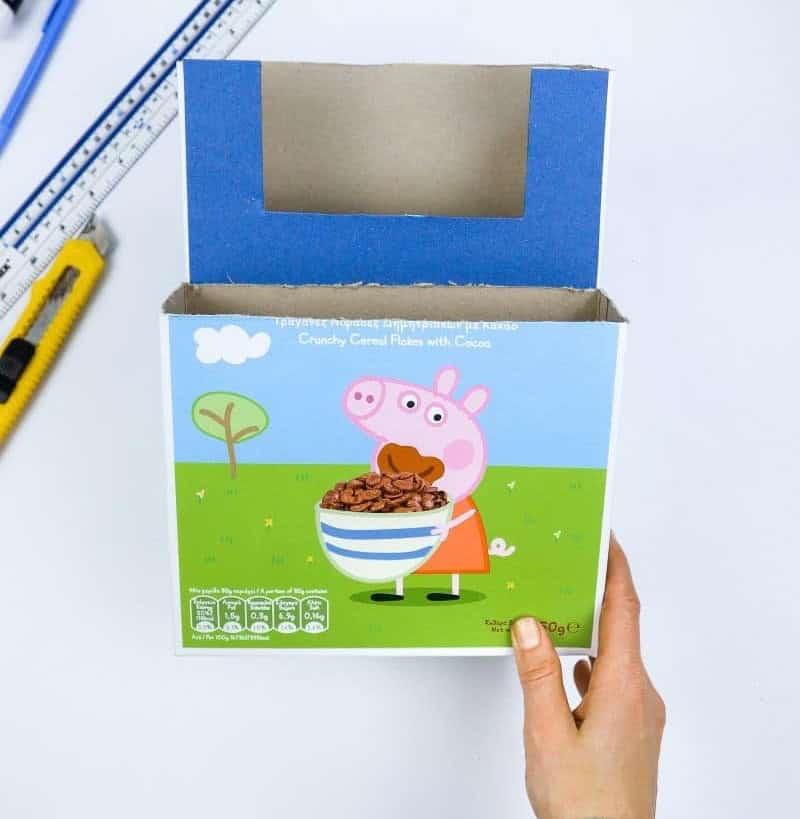
Step 8
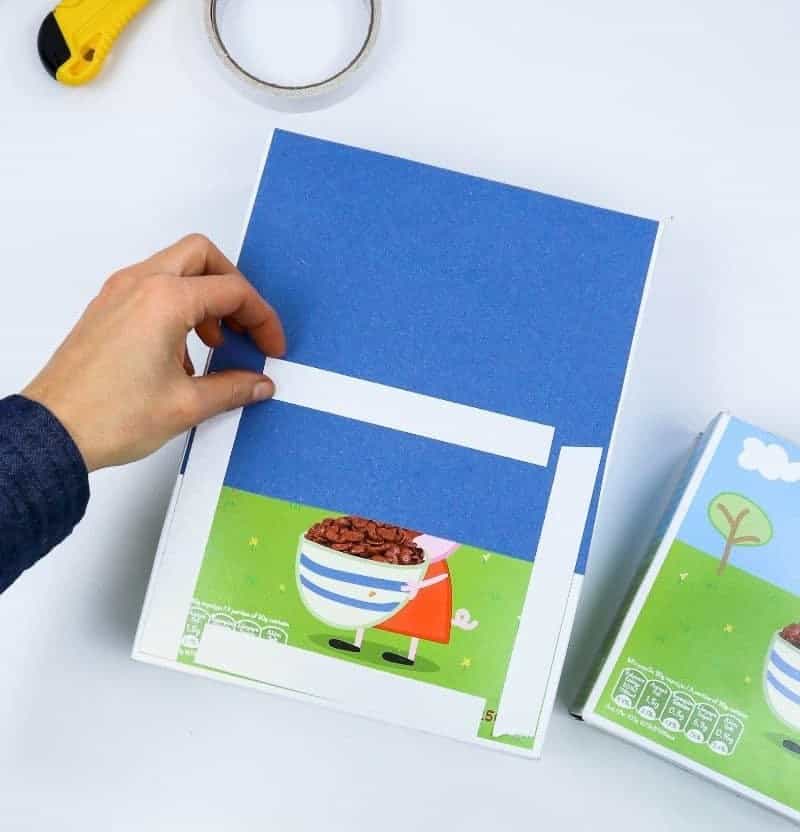
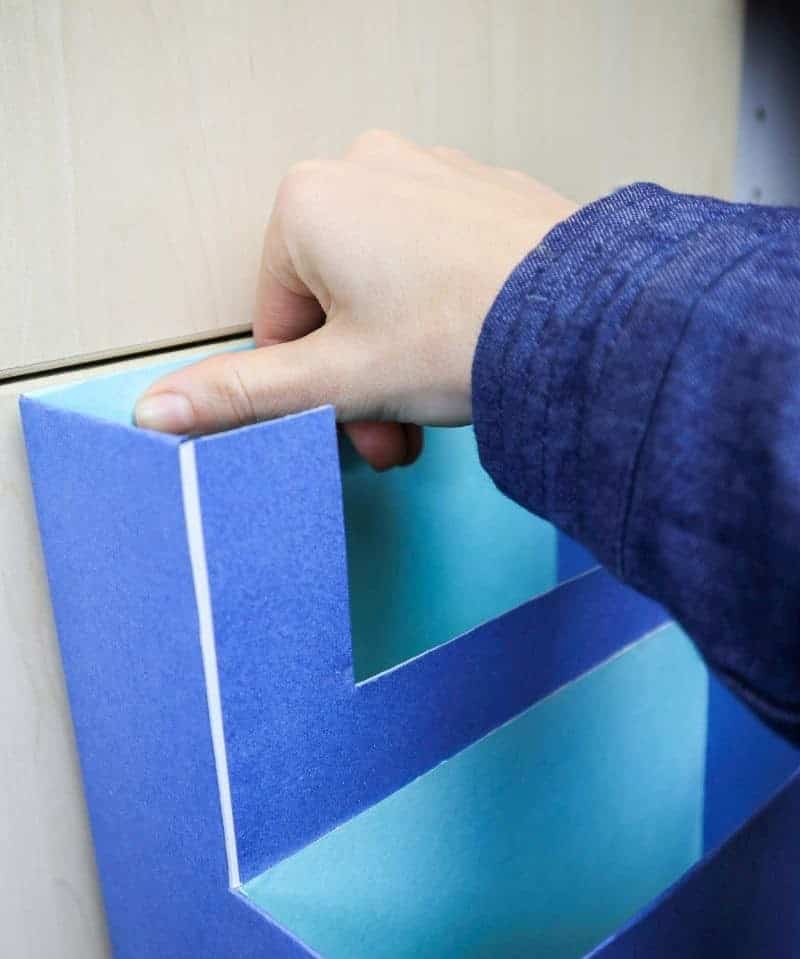
To create a notch, begin by sketching a rectangular boundary around the top of the box. Be mindful of maintaining consistent edge lengths, as this will help you achieve a precise and clean finish. For my project, I positioned the rectangle approximately 1.5 inches from each side except for the top, ensuring that the edges would be evenly spaced.
Step 9

As you prepare to transform your rectangular box into a unique piece of art, take out your trusty craft knife and carefully cut along the designated lines. For those who feel comfortable wielding their blade, consider adding a rounded corner touch for a refined finish. With precision and patience, your work should resemble the following:
Step 10
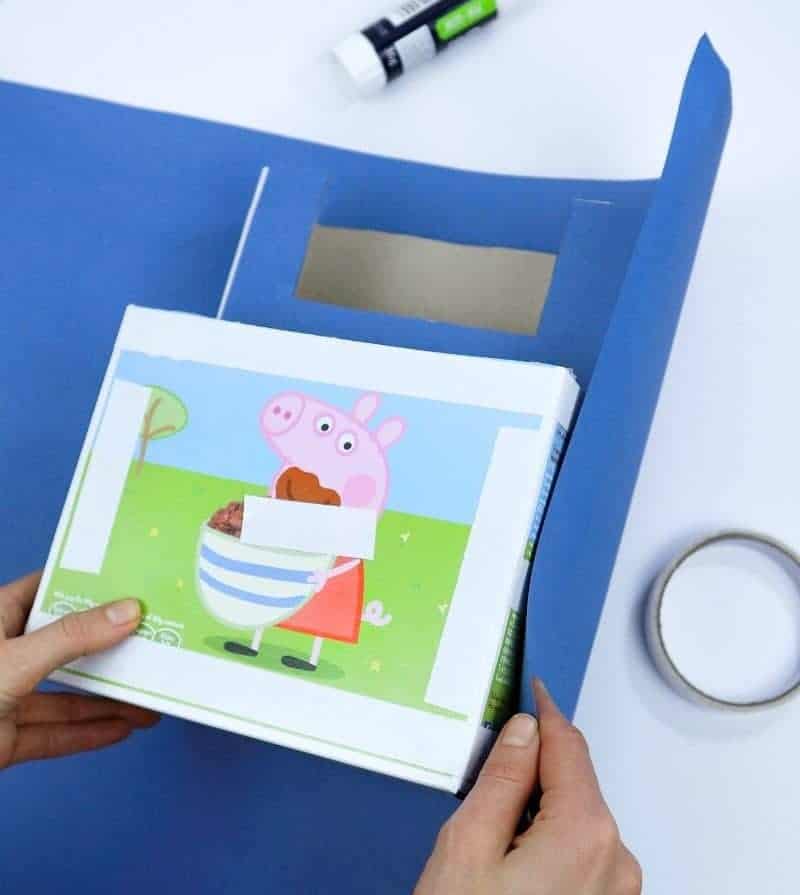
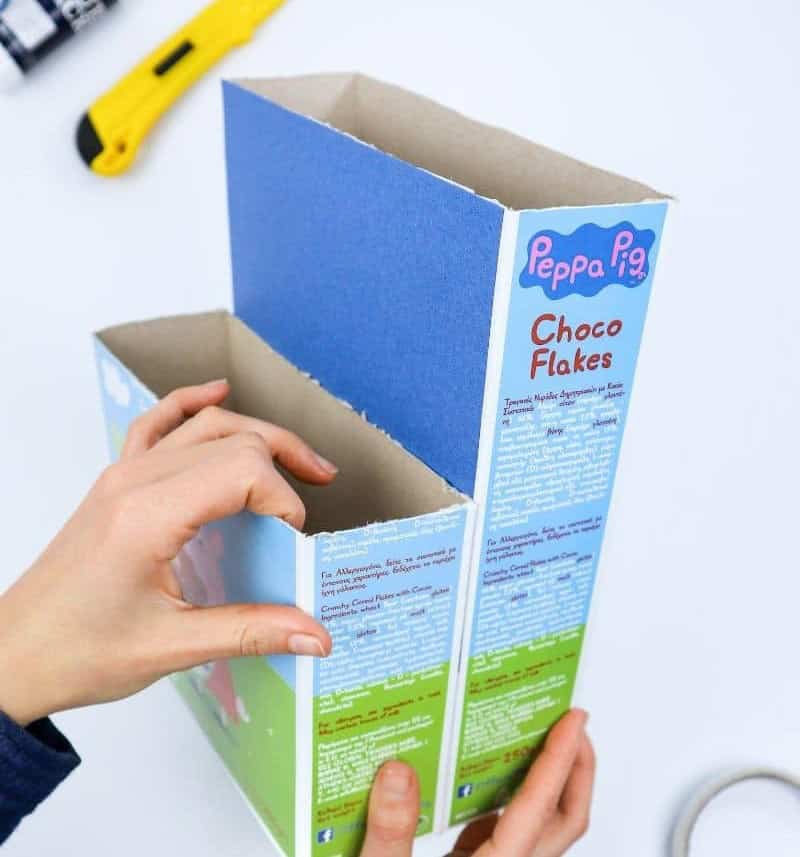
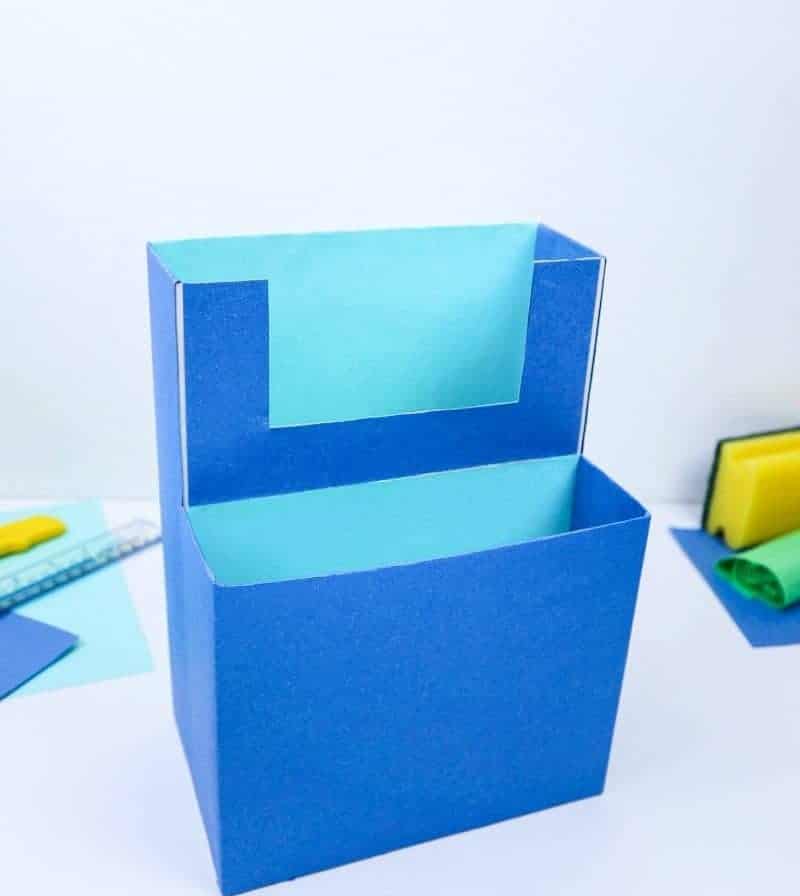
To complete the process, we’ll cover the smaller box with another layer of blue paper, identical to the initial covering. To ensure a smooth finish, I employed adhesive tape once more, which helps keep the edges of the piece flat and prevents any wrinkles from forming. Alternatively, you can use a single sheet of paper to wrap around the box or cut individual panels to glue on one by one – the choice is yours. I opted for the former approach.
The backside of the box isn’t crucial at this stage, so don’t worry too much about it. With these steps, you should now have a cohesive and neatly covered box.
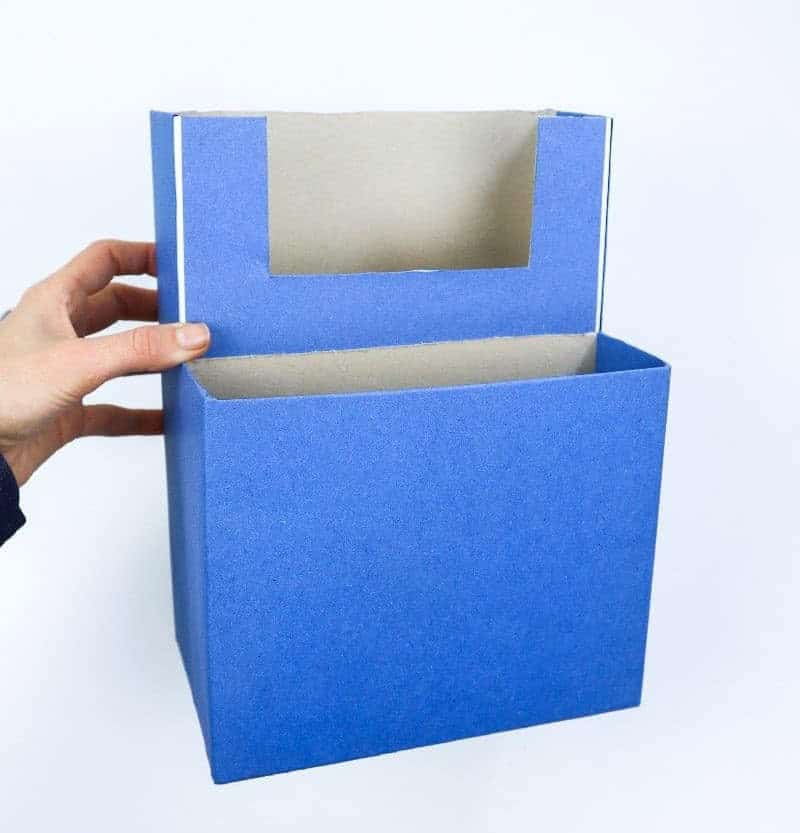
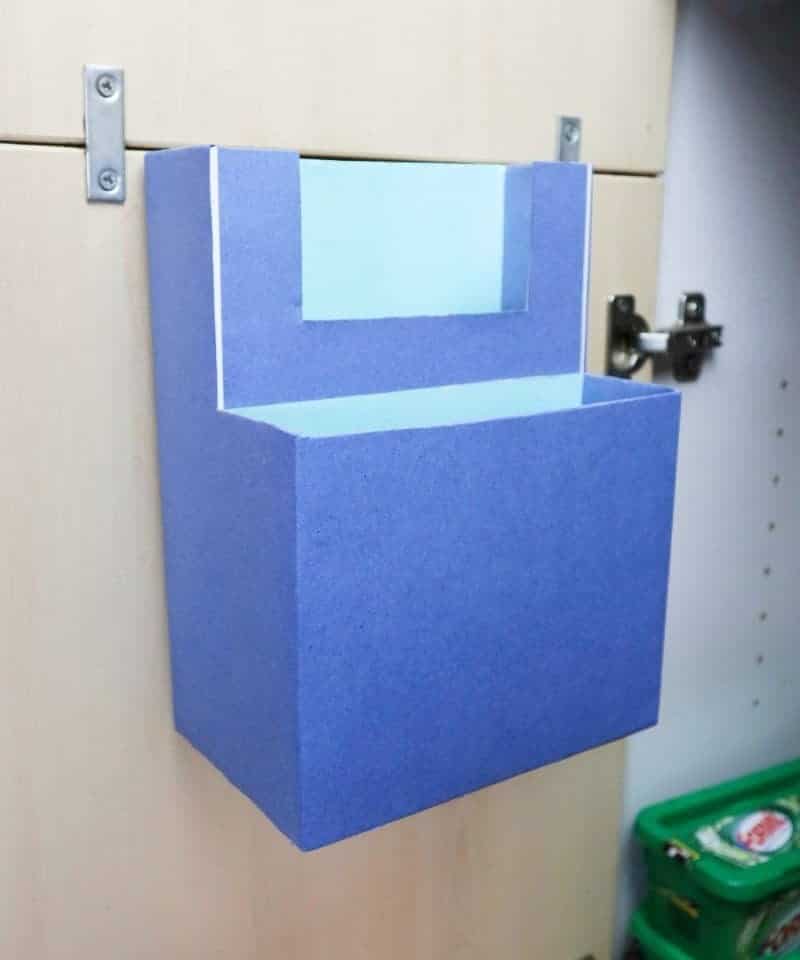
Step 11
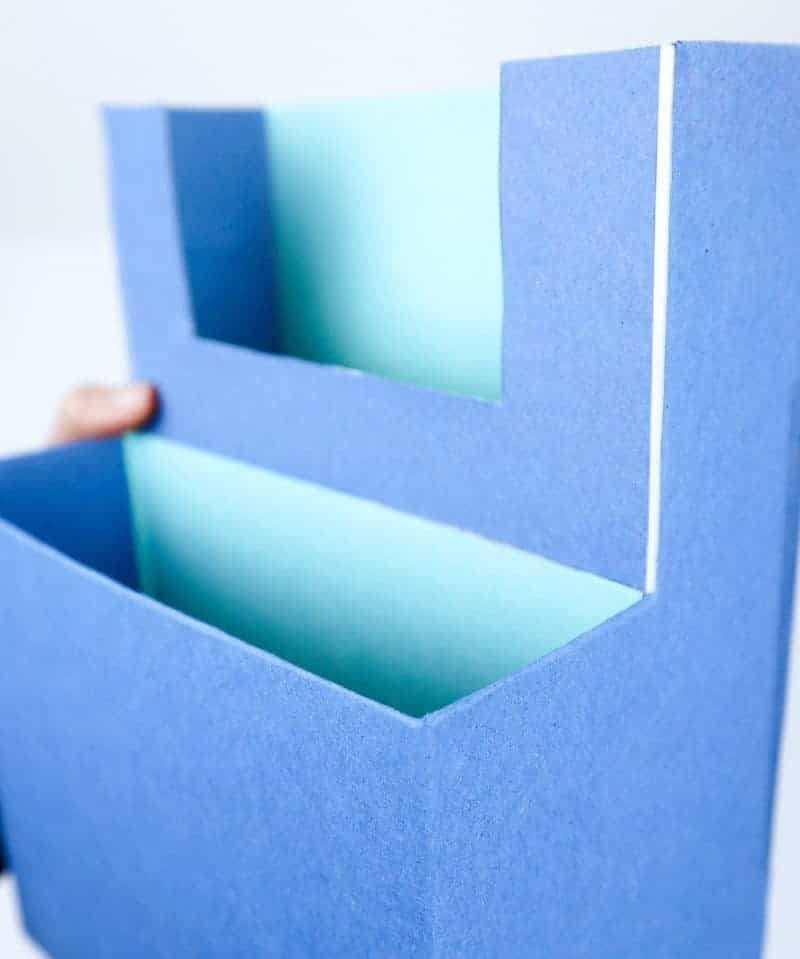
To complete the makeover, let’s turn our attention to the inside of the fabric segments. While it may not be as visually striking as the outer layers, lining the interior with a contrasting or lighter shade of paper is an essential step in creating a cohesive and polished final product. Simply apply a strip of tape along the edges to secure the paper in place.
Step 12
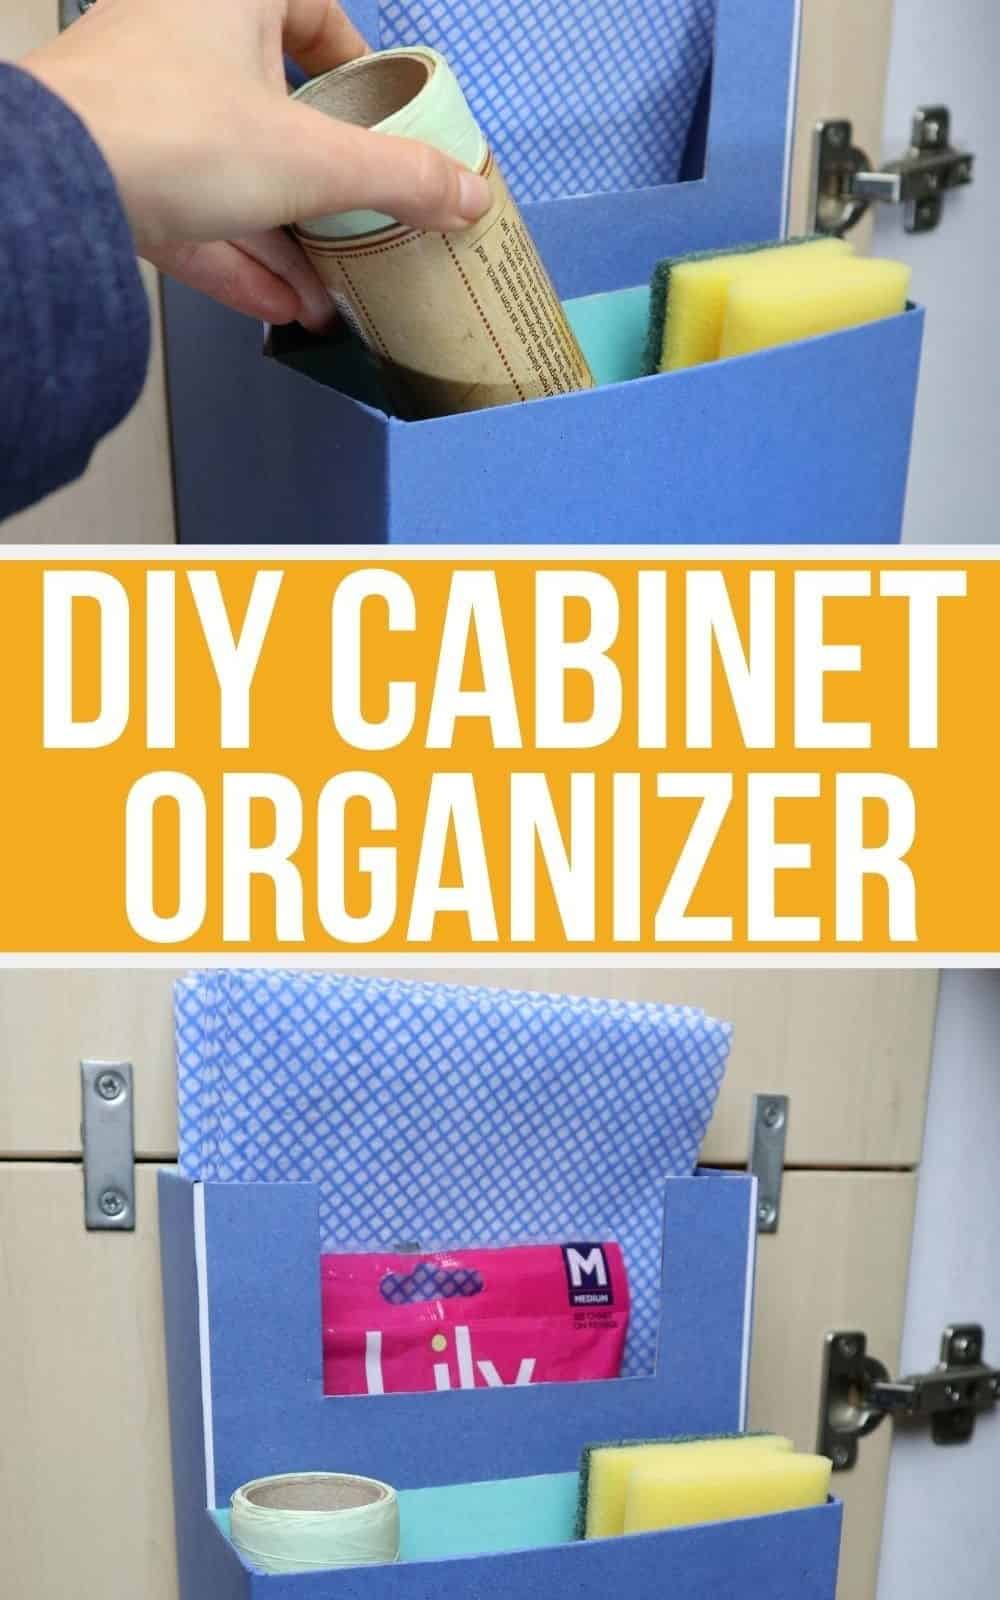
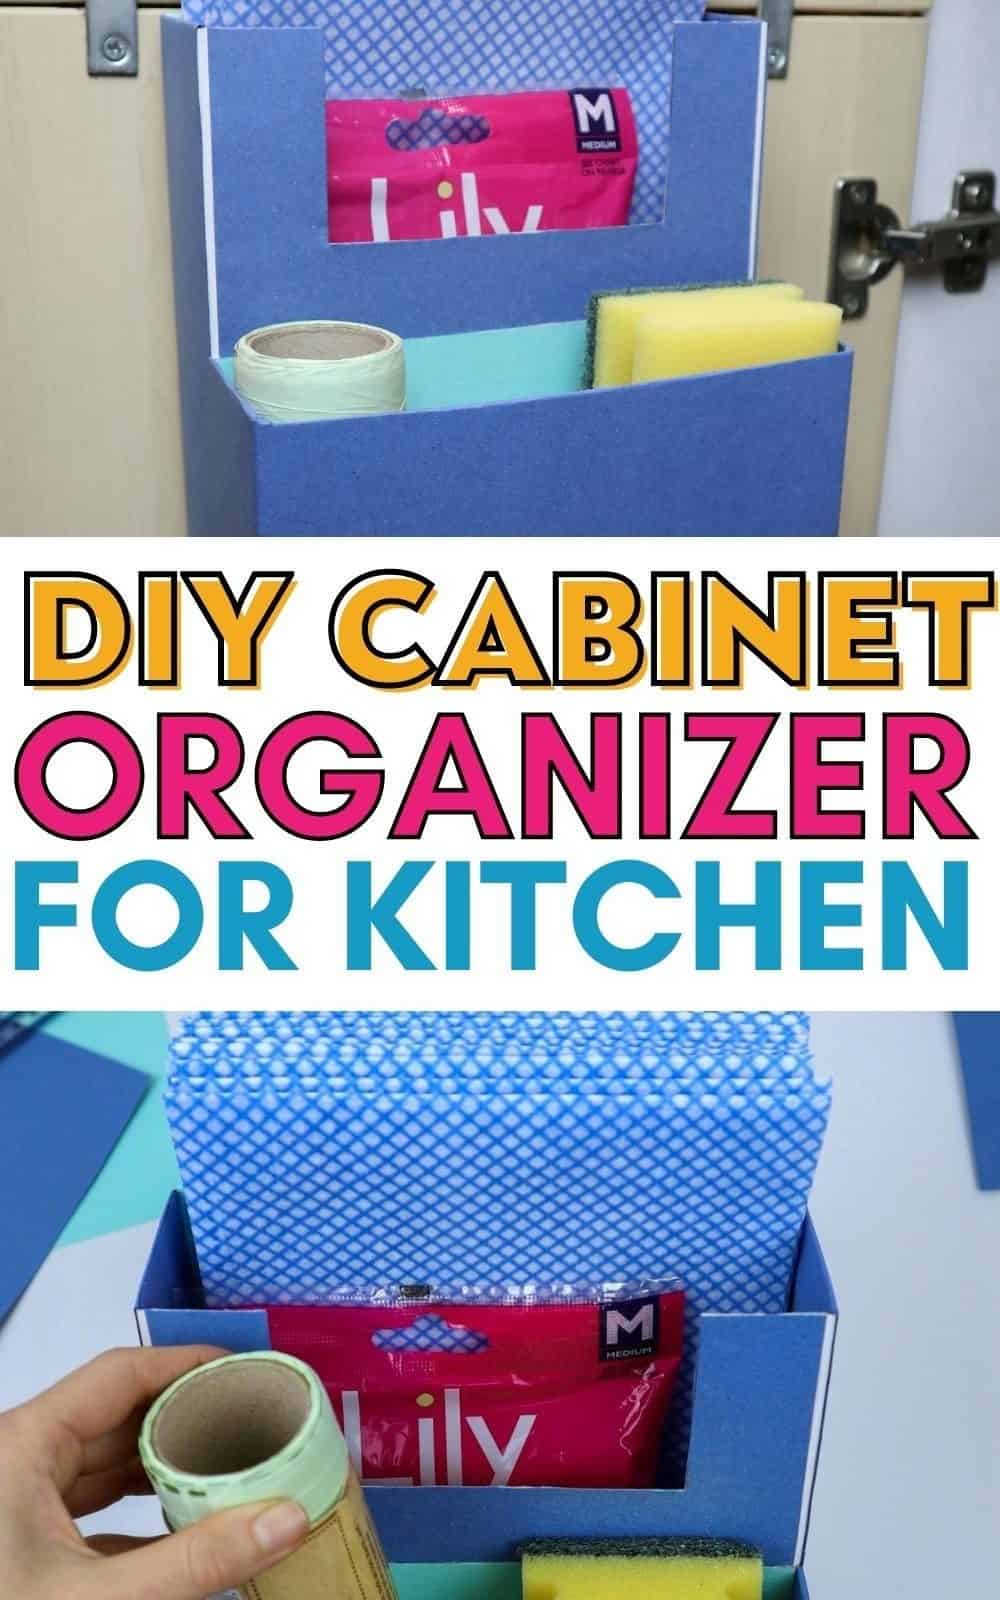
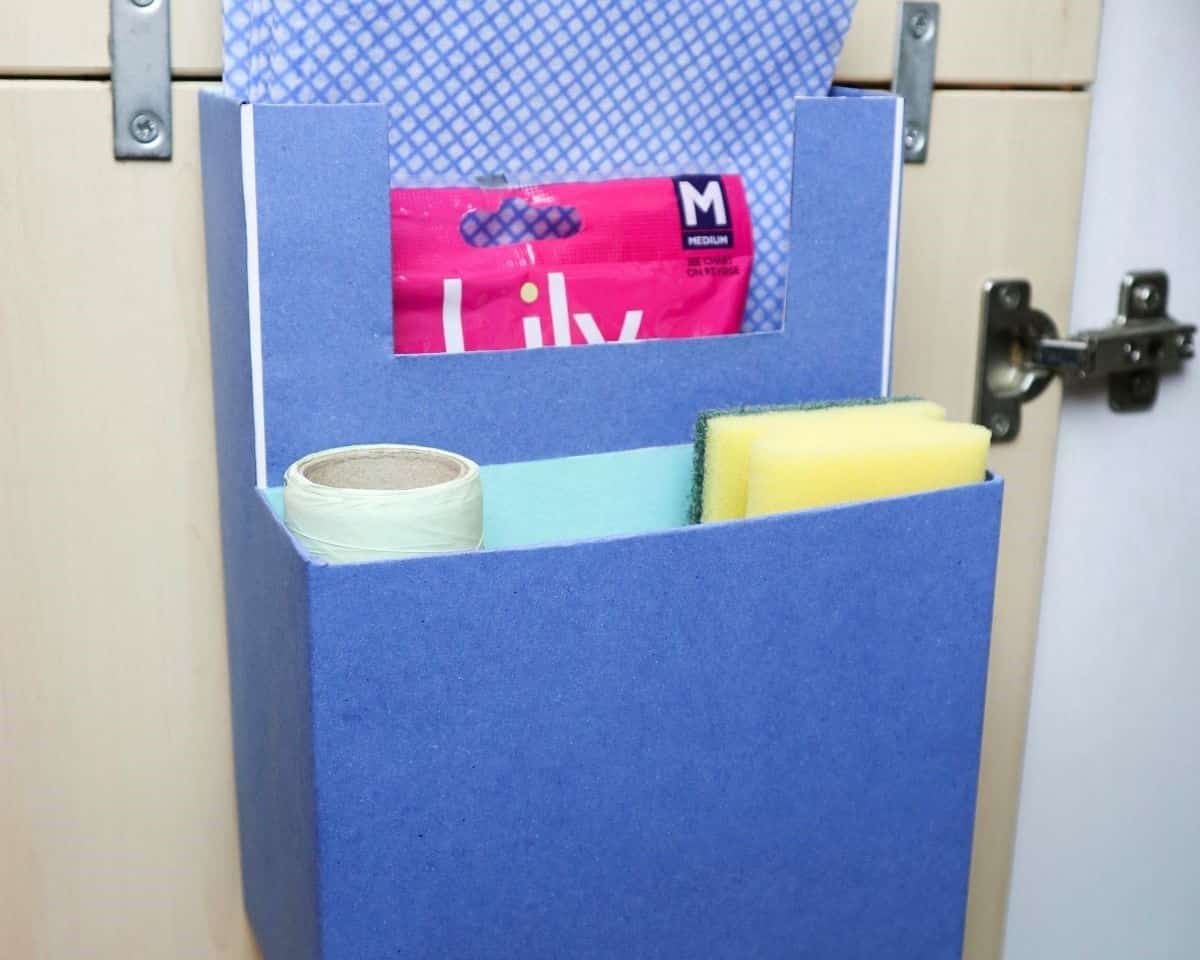
With your organizer taking shape, the final step is to integrate it into your kitchen cabinet’s design. Mounting it securely will ensure your utensils and tools are neatly stored, keeping your countertops clutter-free and making cooking a more enjoyable experience.
Step 13
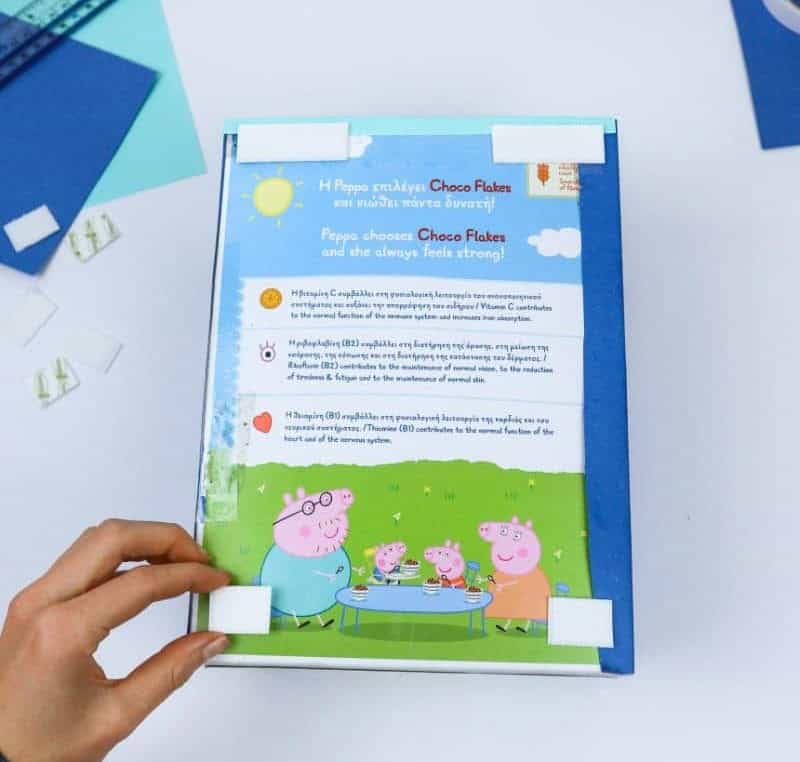
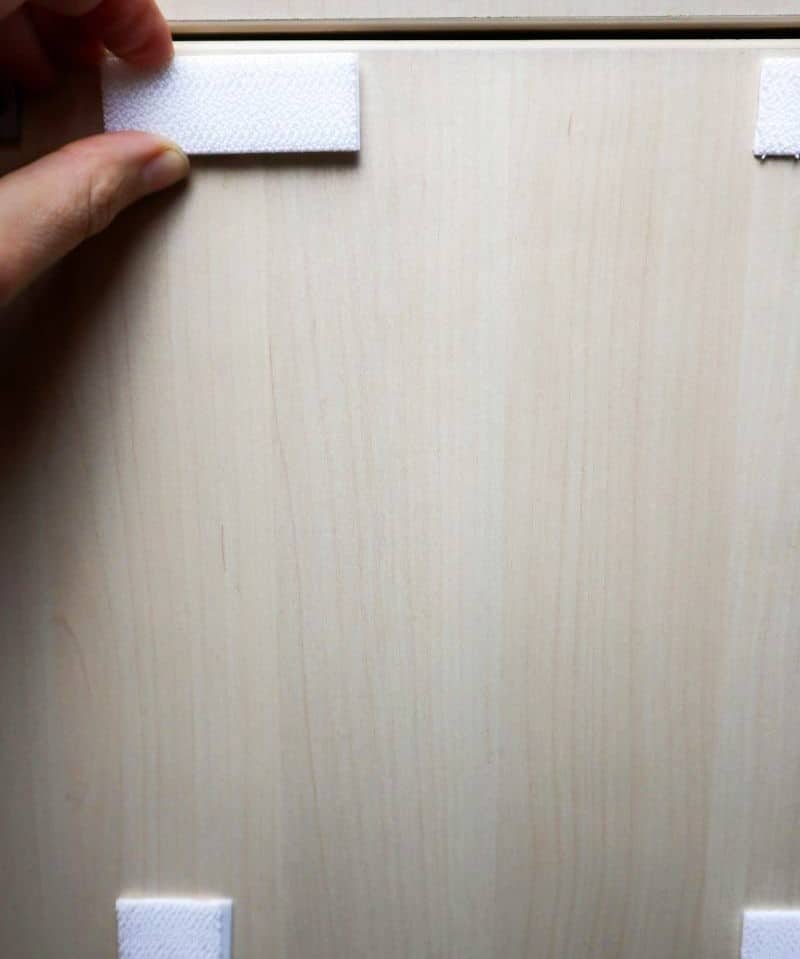
To ensure a secure and level installation, I employed Velcro mounting strips to affix my organizer to the door. For added peace of mind, take a moment to lightly sketch the outline of your organizer onto the door using a pencil. This subtle mark will serve as a visual guide for precisely positioning the mounting strips.
Step 14
Discover the ultimate solution to optimize your kitchen’s limited space – a bespoke kitchen organizer designed to tackle even the most challenging storage issues.
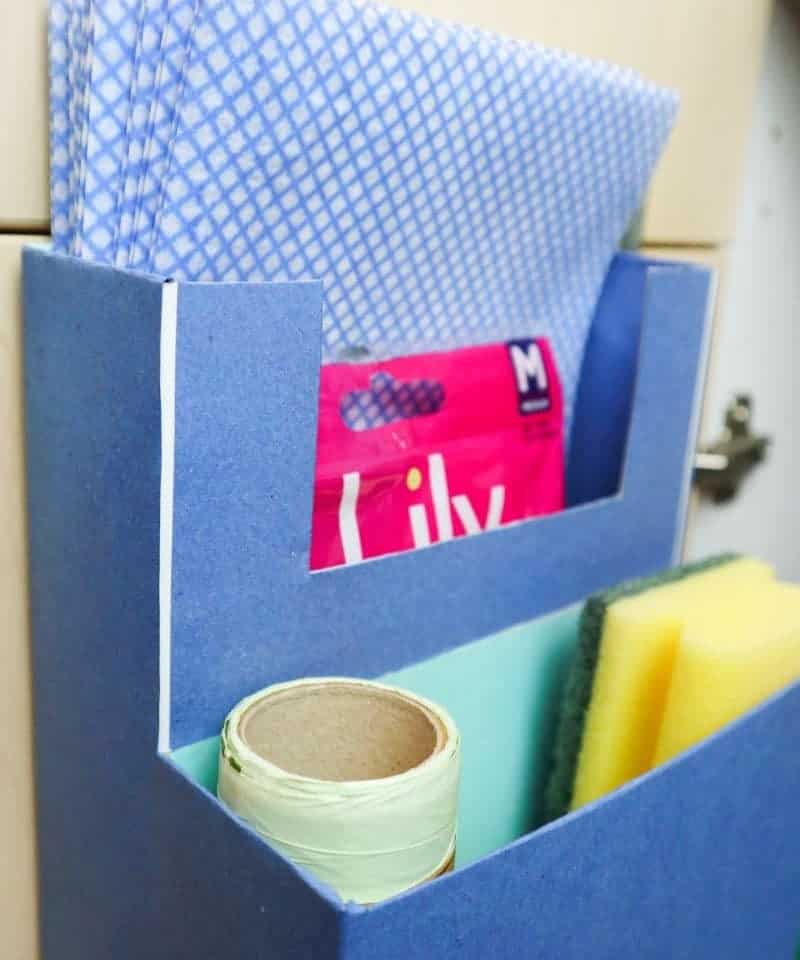
What to Store in This Under Sink Organizer?
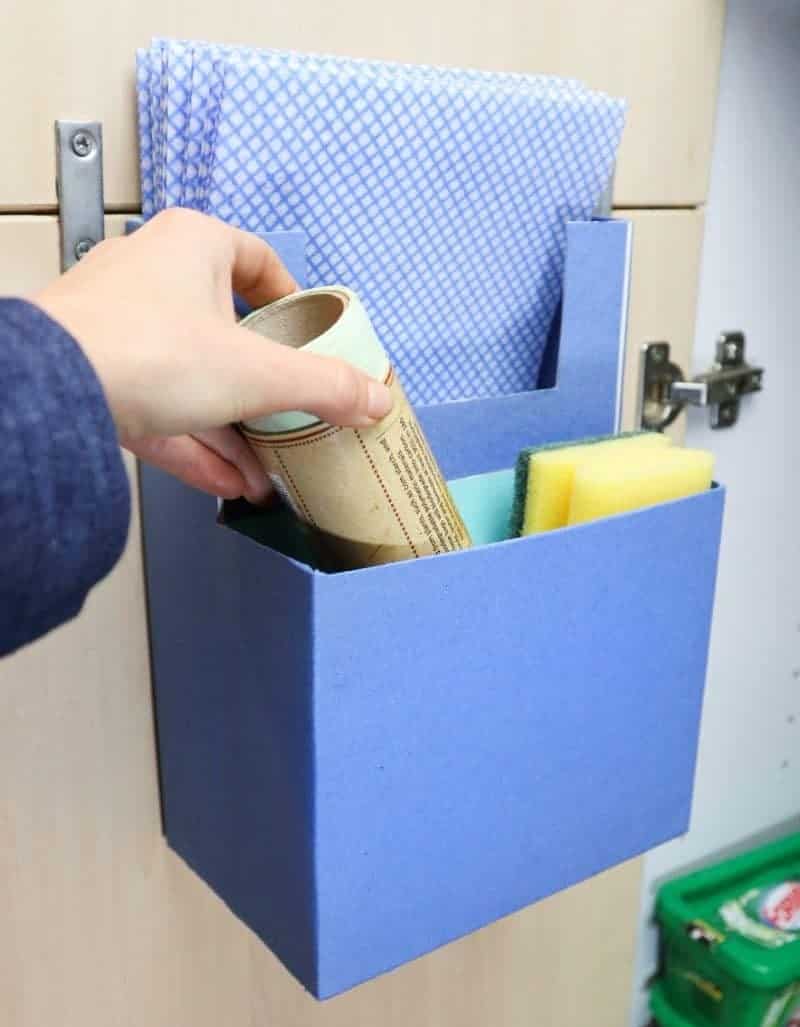
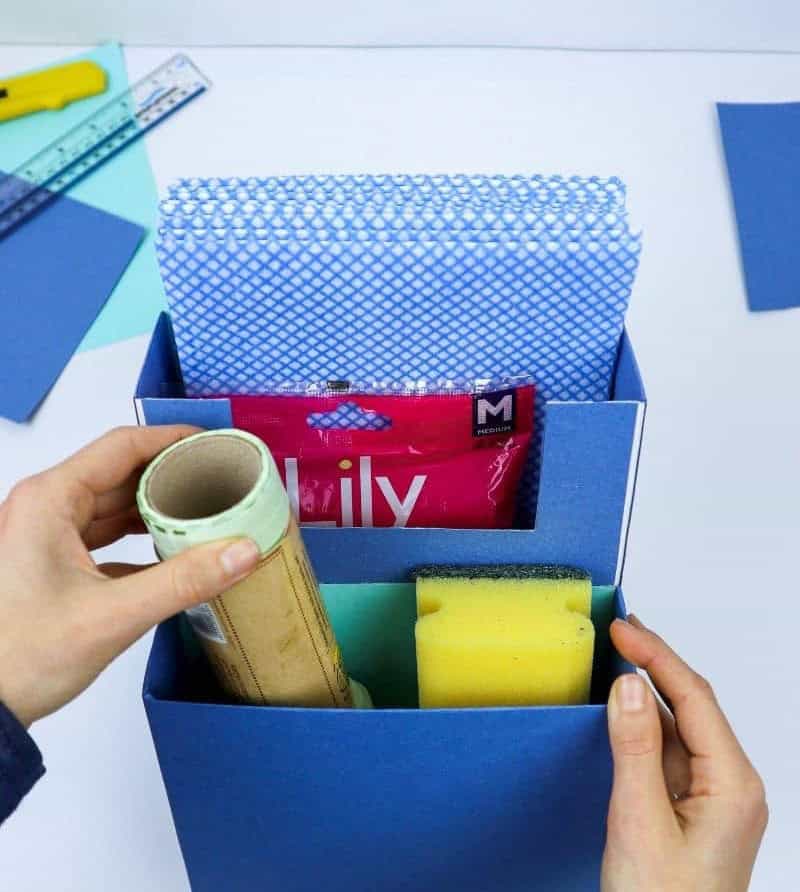
This versatile organizer is designed for storing smaller items that require a designated spot. Its compartments accommodate everything from sponges and dishrags to garbage bags and scrub brushes. For a pantry setup, it’s ideal for housing lighter items like canned goods or spices. Alternatively, you can attach it to your fridge for a convenient spot to corral mail, bills, or other paper clutter.
A note of caution: be sure to only store dry objects within the organizer to prevent damage and extend its lifespan.
Organize Kitchen Cabinet Without Shelves
Decluttering beneath your kitchen sink doesn’t require a hefty price tag or significant renovation. In fact, you can easily create additional storage using old boxes, transforming them into multi-functional organizers for various items. This hack not only saves money but also breathes new life into under-used space. When storing heavier objects, ensure a secure hold by using more adhesive strips or opting for a stronger mounting medium.
With your newfound organization skills, you’ll no longer have to rummage through cluttered chaos to find that last clean dishrag or cringe at the thought of opening the cabinet door. Instead, enjoy the satisfaction of having your kitchen space under control, free from unnecessary stress and mess.
Other DIY Organizers
Transform your home and workspace with these creative and budget-friendly organization ideas! Start by creating DIY drawer dividers to keep your belongings tidy. For a more extensive makeover, try 15 dollar store hacks that will have you organized in no time. Add some functionality to your desk with a DIY magazine organizer, perfect for keeping track of important documents or storing reading materials.
If you’re looking for even more inspiration, explore 20 practical storage ideas that can be applied to any room in the house. And for those kitchen essentials, discover 20 dollar store organizing tips that will make meal prep and cleanup a breeze.
DIY Cabinet Organizer for Kitchen
Transforming old cardboard boxes into a DIY cabinet organizer for your kitchen is an ingenious way to boost storage space while reducing waste. With just 5 minutes of prep time and 30 minutes of active work, you can create a functional solution that’s perfect for maximizing the use of your cabinets.
To get started, allocate 35 minutes in total to complete this project.
The end result is a single cabinet organizer that will make a significant impact on your kitchen’s organization and efficiency.
Equipment
To ensure uninterrupted work or entertainment, it’s essential to have the right tools at your disposal. The humble office supplies like double-sided tape, glue, velcro self-adhesive strips, ruler, and pencil are just as crucial as any high-tech gadget. And when you’re working on a project that demands attention, preventing your screen from going dark is crucial too.
Materials 1x2x3x
To create a unique and functional organizer, you’ll need to gather some essential materials. First, you’ll require a sturdy base material – thick paper or wrapping paper works well. Additionally, you’ll need a separate piece of paper for the interior lining. Finally, two cereal boxes will serve as the primary structure for your organizer. These simple components can be combined and repurposed to create a one-of-a-kind storage solution that suits your specific needs.
Instructions
Start by preparing your materials. Cut both cereal boxes to form an open-top shape, with one shorter than the other. Next, cover the top of the taller box with your chosen paper using glue, creating a seamless bond. Then, use adhesive tape to attach the small box to the larger one, ensuring a secure fit. To add visual interest and create a sense of depth, carefully draw and cut out a rectangular window in the taller box.
Finish by covering the majority of the box (excluding the back) with your primary color paper, using adhesive tape once again. For added contrast, line the interior back of the boxes with a secondary color. Finally, secure the organizer using Velcro strips, allowing for easy disassembly and reassembly as needed. With these simple steps, you’ll have a functional and effective organizational solution that’s quick to set up and budget-friendly.