Ever considered crafting your own dreamcatcher? These whimsical decorations not only add a touch of coziness to your room but also serve as a symbol of protection against bad dreams. In their heyday, dreamcatchers were ubiquitous, adorning bedposts and dorm rooms alike. But have you ever stopped to consider the rich cultural significance behind these colorful talismans? Rooted in Native American literature and tradition, dreamcatchers are more than just decorative accessories.
They’re actually a powerful symbol of protection, designed to capture negative energy and allow positive dreams to pass through. By understanding the magic and meaning behind these mystical webs, you can create your very own dreamcatcher, weaving together a tapestry of symbolism and personal significance.
Watch: DIY Dream Catcher
If you prefer learning through visual aids, don’t worry – we’ve got you covered! You can easily skip reading this section and head straight to our comprehensive video tutorial, which breaks down each step in an engaging and easy-to-follow manner.
Supplies and Tools for the Dreamcatcher
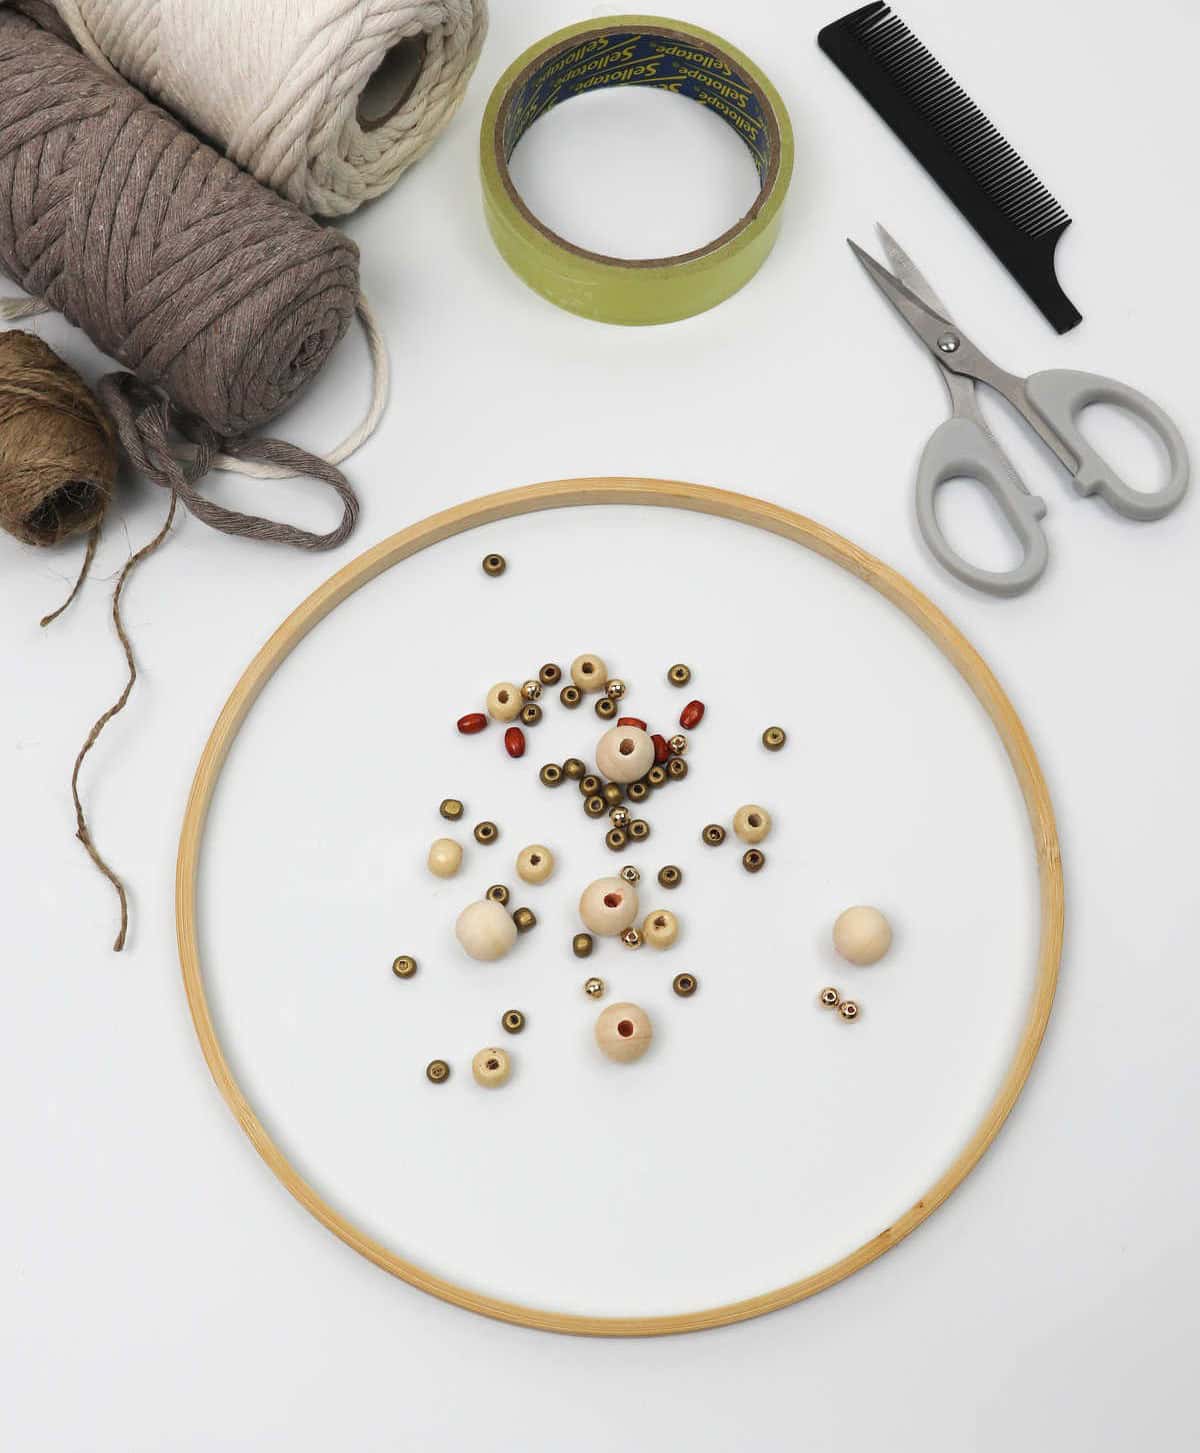
To embark on this project, you’ll need the following essential items: a wood hoop measuring 10 to 11 inches in diameter. Additionally, acquire 15-inch thick single twist cotton cord in two distinct colors – cream and cappuccino. A pair of scissors will also come in handy for trimming any excess material. Furthermore, you’ll require beads to add a decorative touch, as well as hair combs to secure the finished piece.
While not strictly necessary, having some tape on hand can be useful for temporary fixations, and jute twine may also prove helpful in certain situations.
How to Make a Dreamcatcher?
Get ready to create your very own dreamcatcher, a mesmerizing craft project that’s surprisingly easy to make. To help you achieve this, we’ve put together a simple, step-by-step guide that will walk you through every aspect of building your dreamcatcher from the ground up.
Step 1
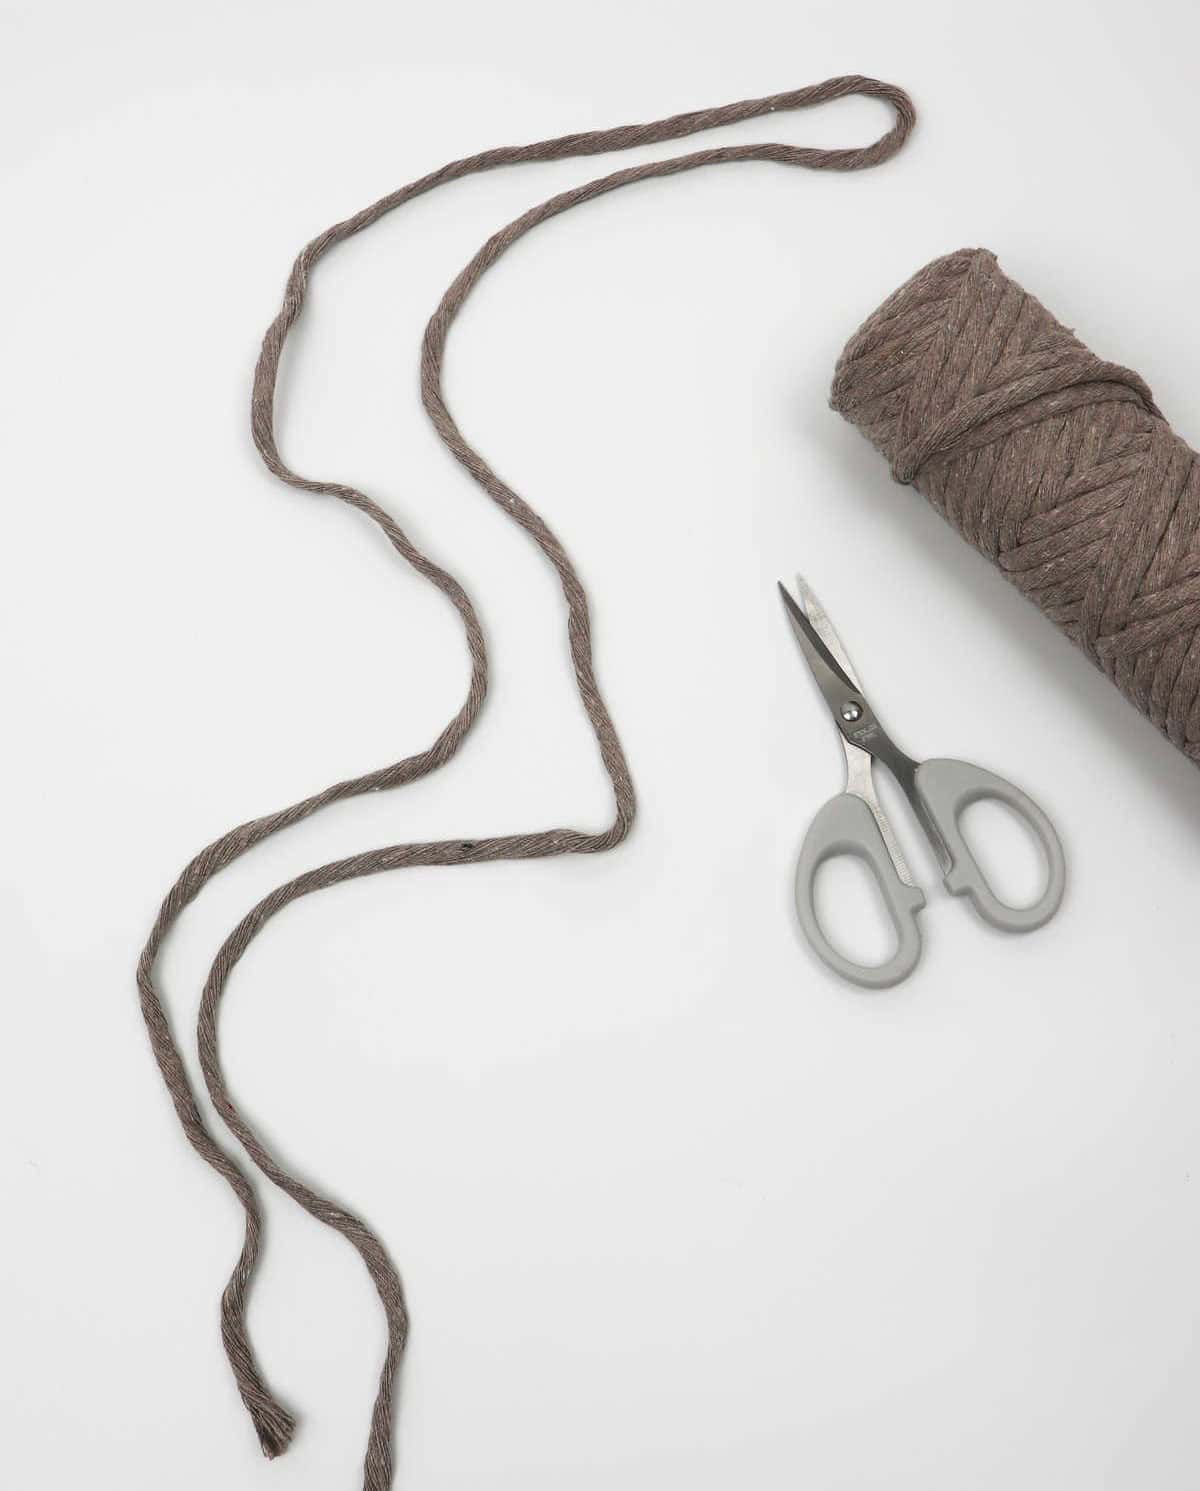
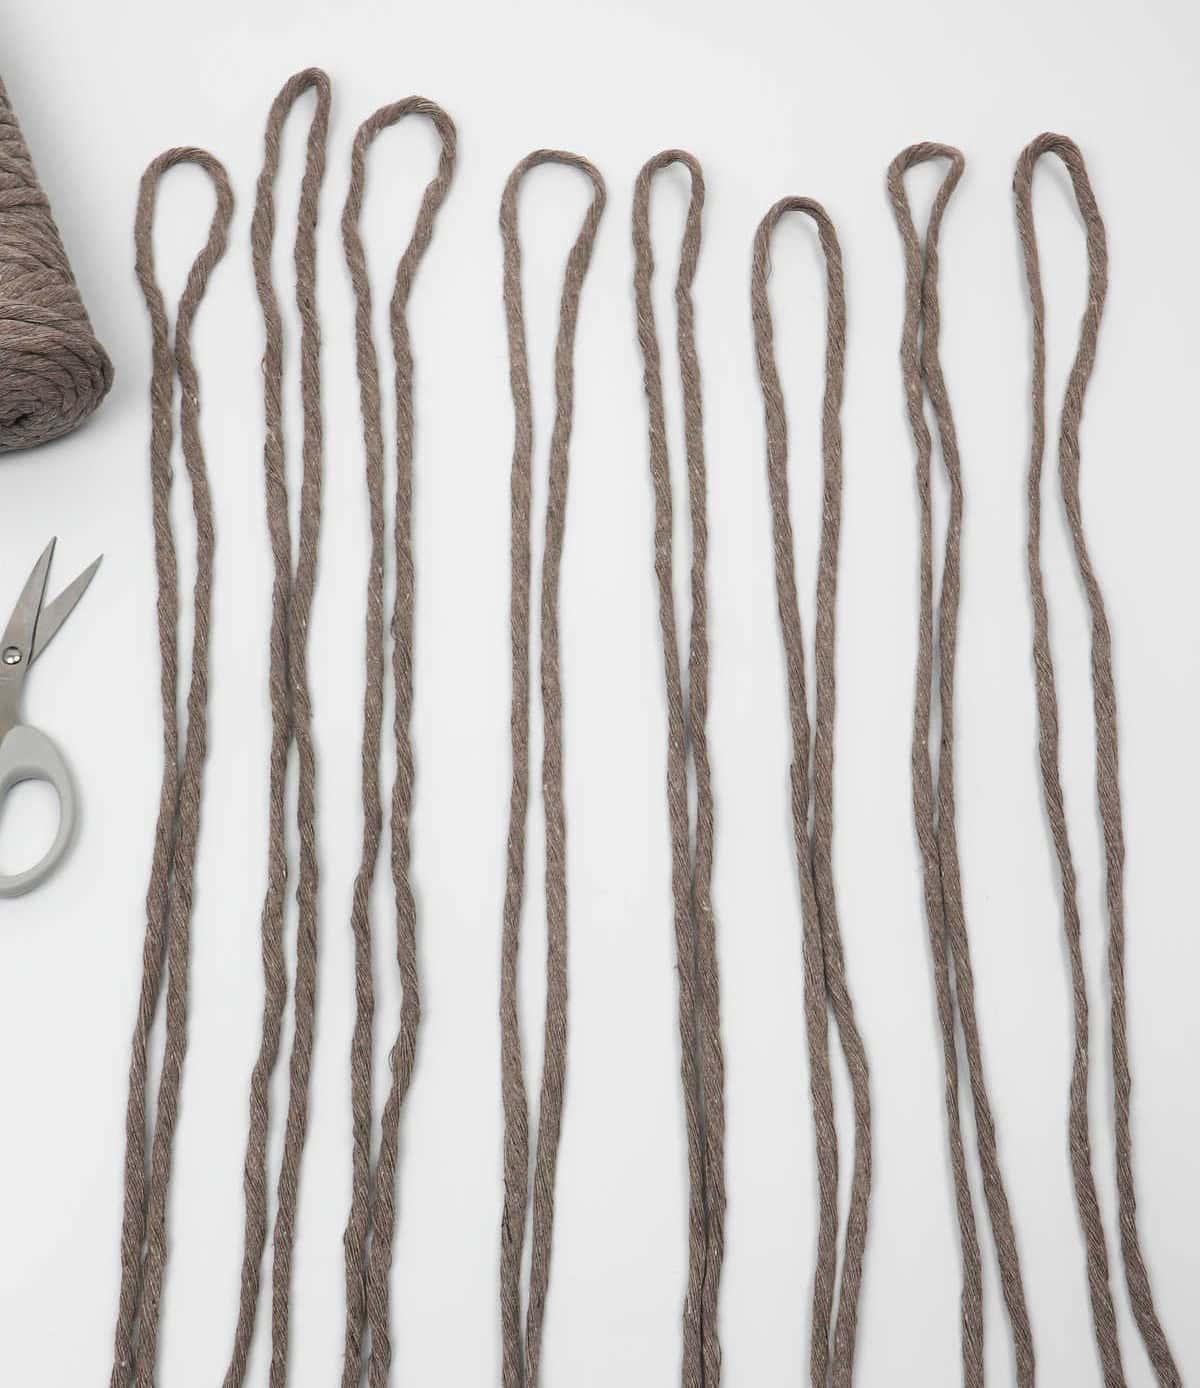
Begin by untangling the cord and measuring out approximately 60 inches. Cut this length using your scissors to create your initial string. For optimal results, you’ll need a total of eight strings, each with the same 60-inch measurement. Once prepared, lay them out in the desired arrangement.
Step 2
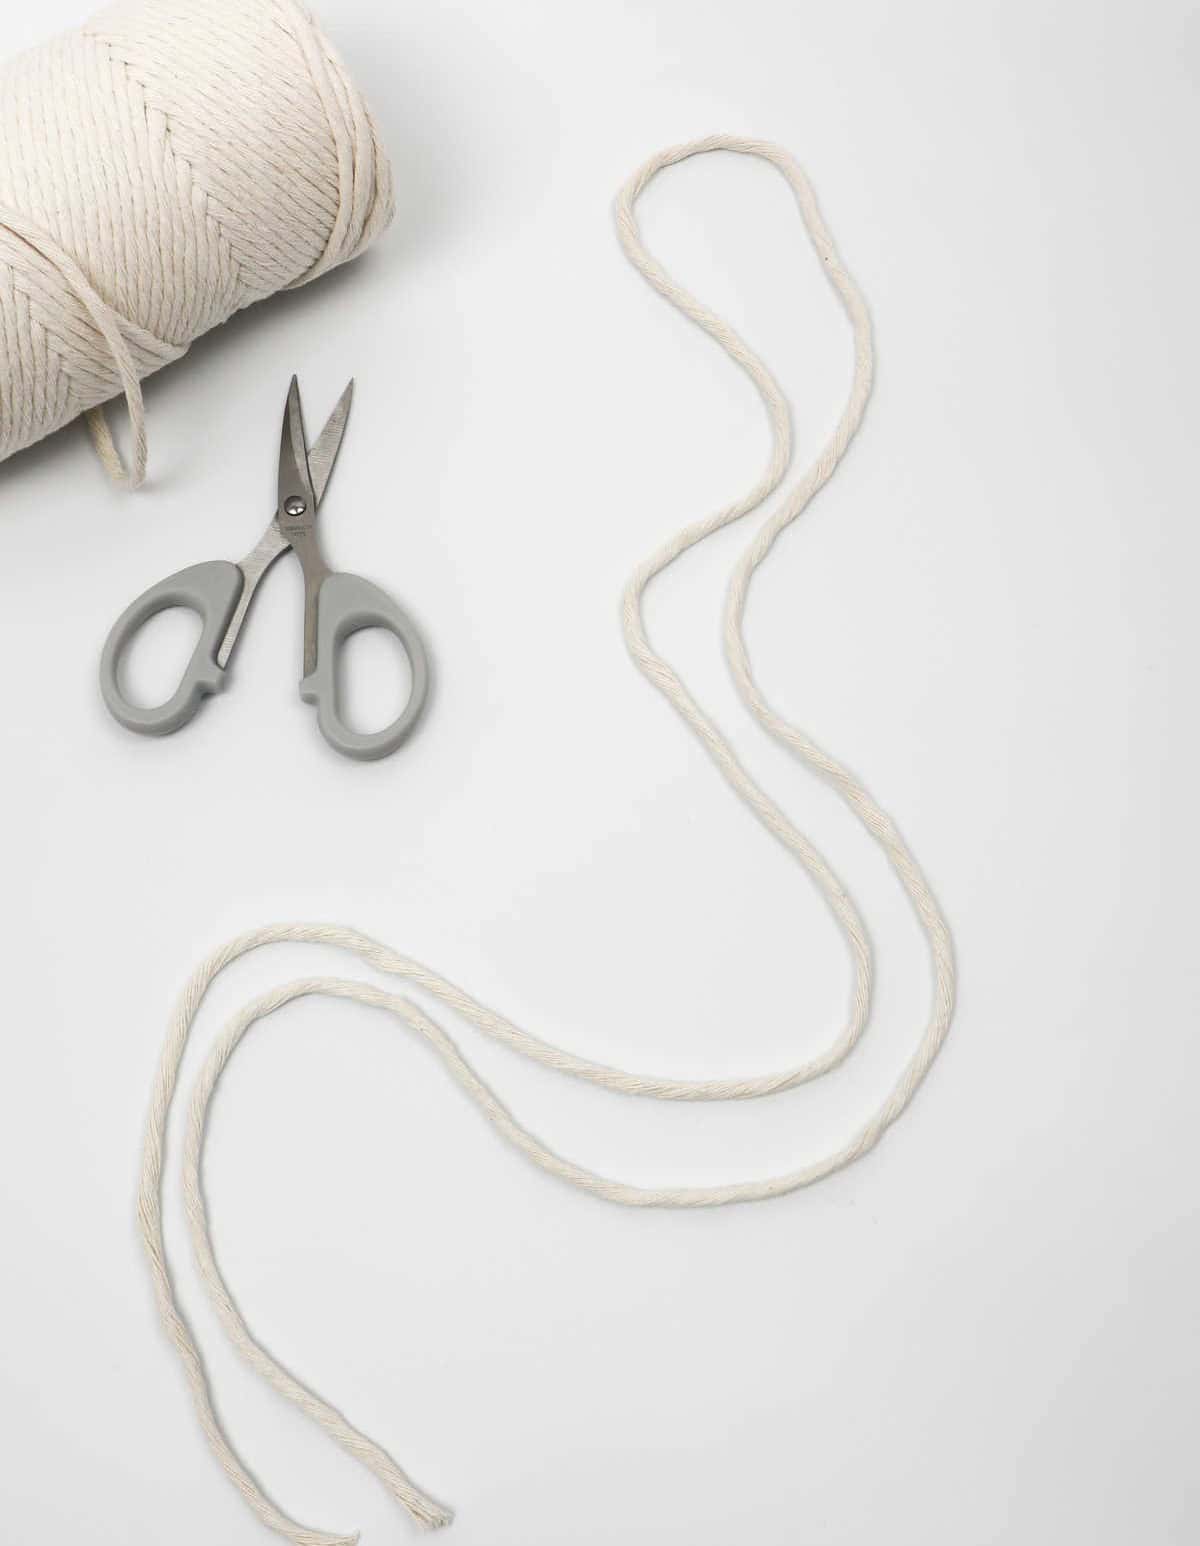
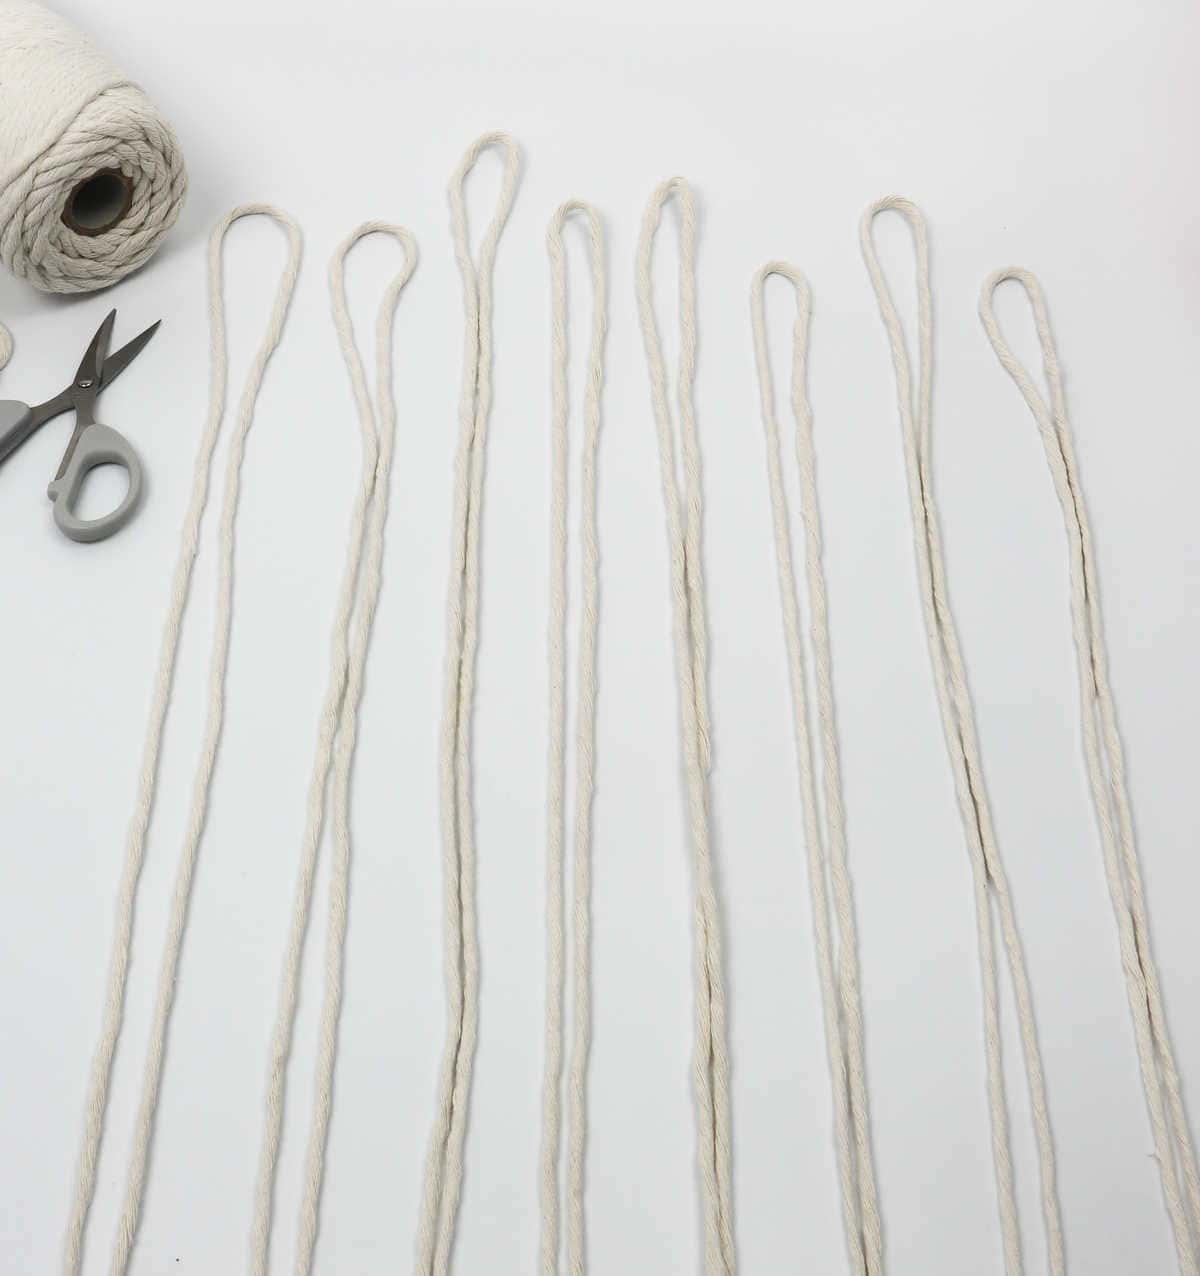
To ensure a seamless execution of the project, it’s crucial to iterate through the process for each distinct color of cord used. In this instance, this entails duplicating the procedure for the cappuccino-colored cords (eight in total) as well as the cream-colored ones (also eight).
Step 3
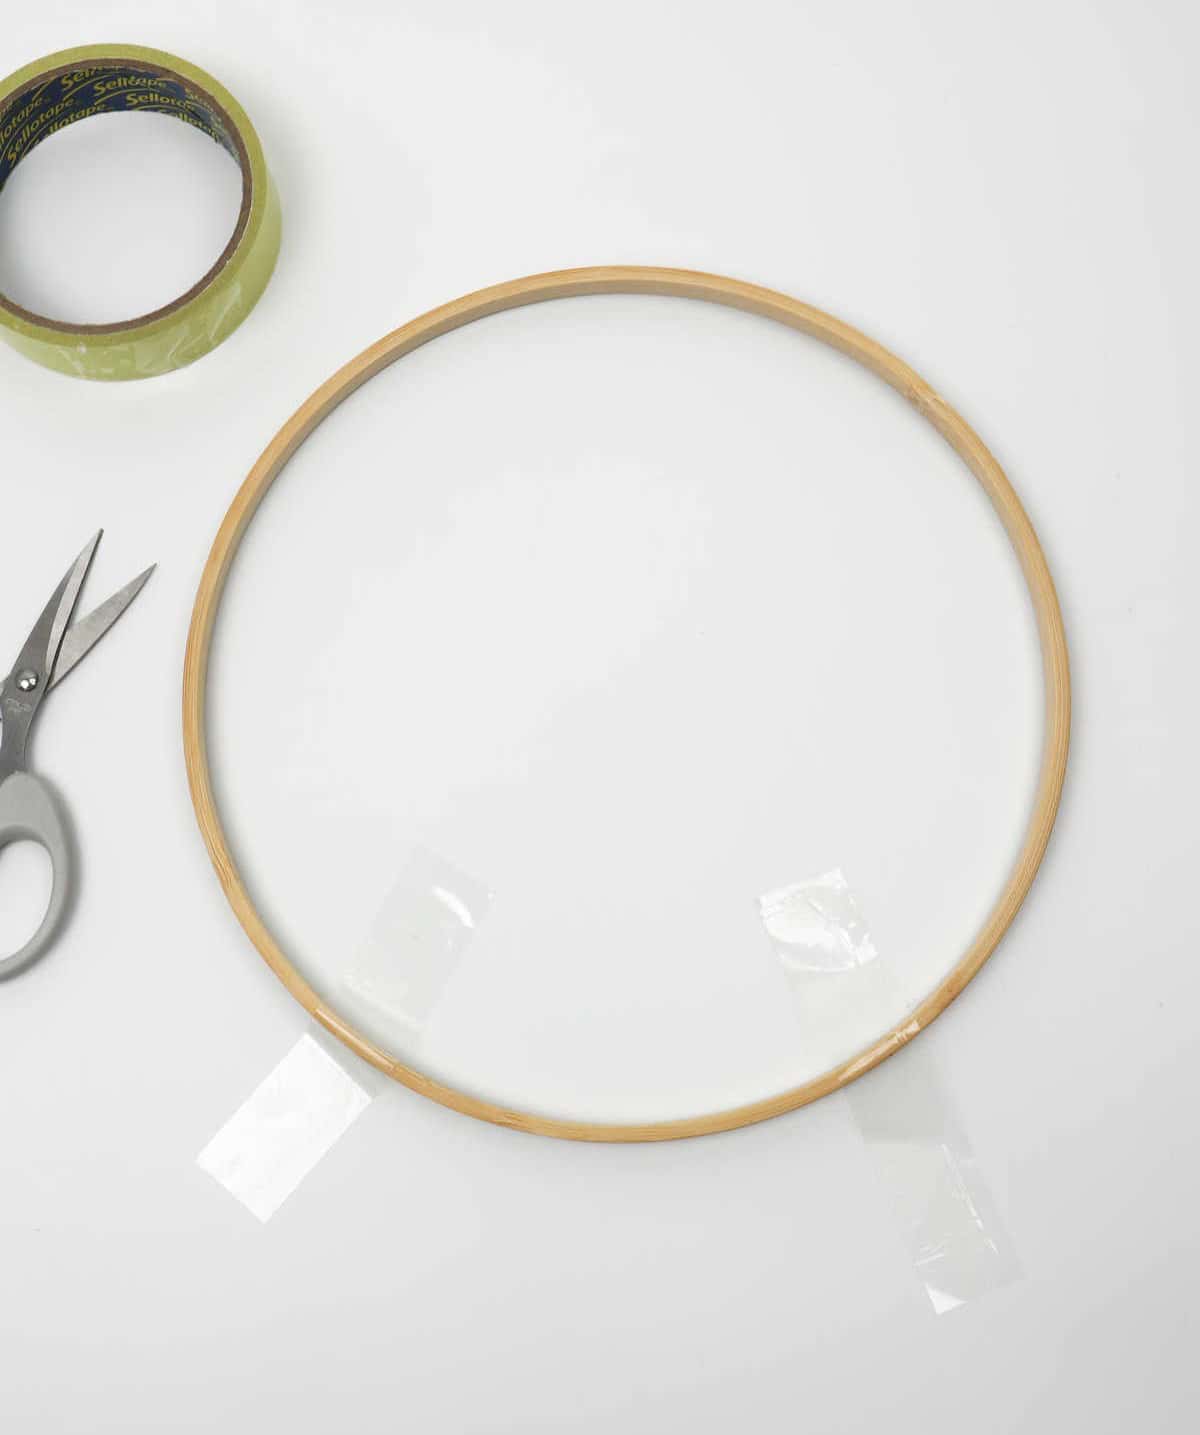
Secure your work station by positioning your hoop or ring on a stable surface and temporarily fastening it with tape. The added stability will prevent any unwanted movement during your creative process, allowing you to focus on crafting without distractions.
Step 4
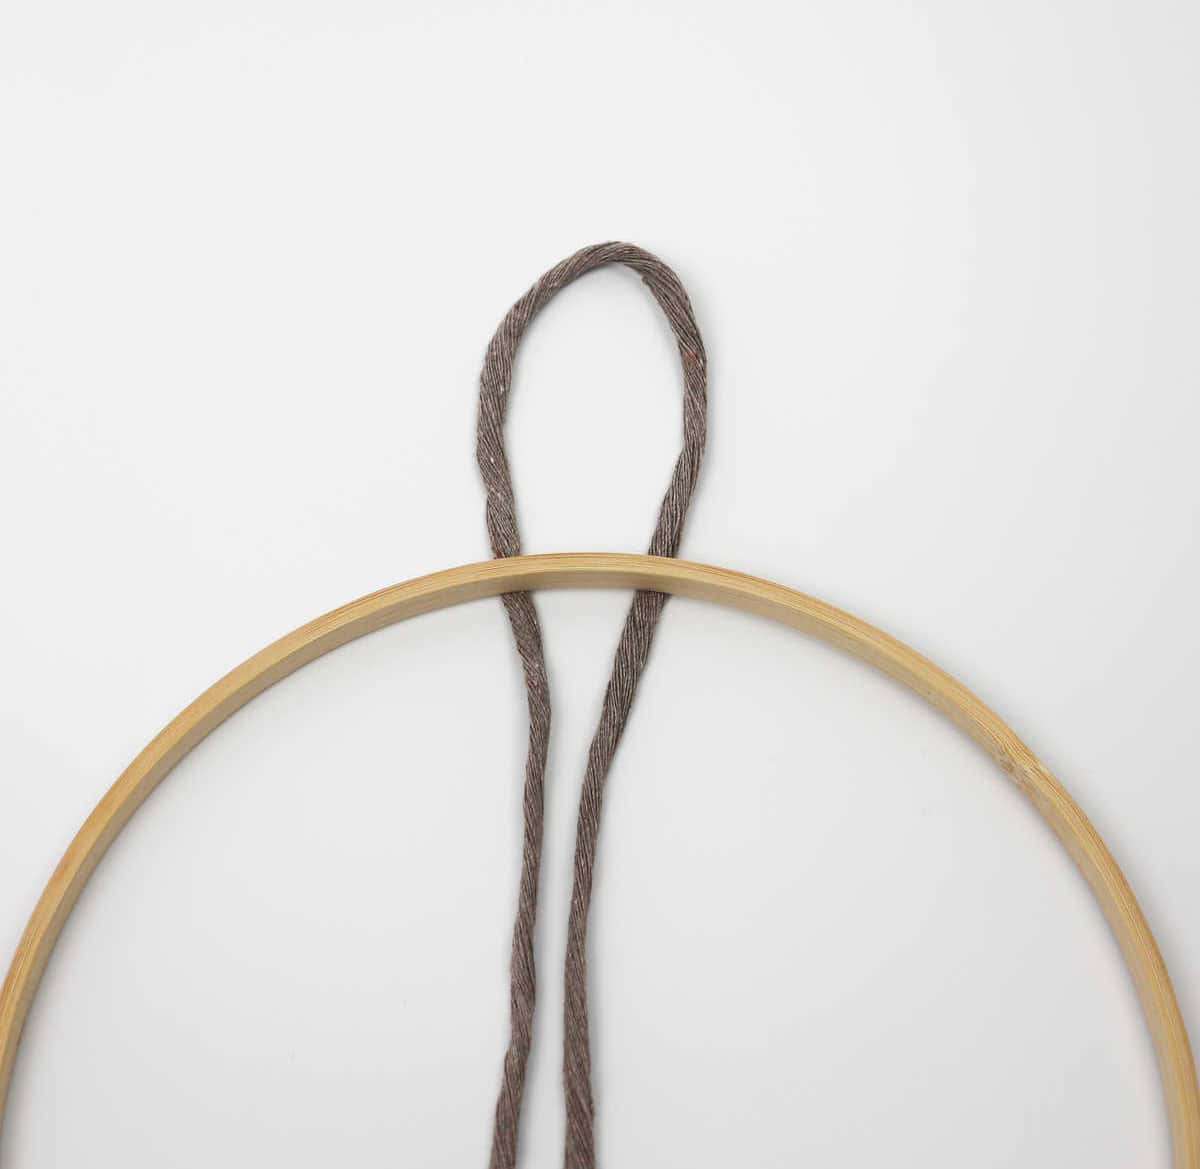
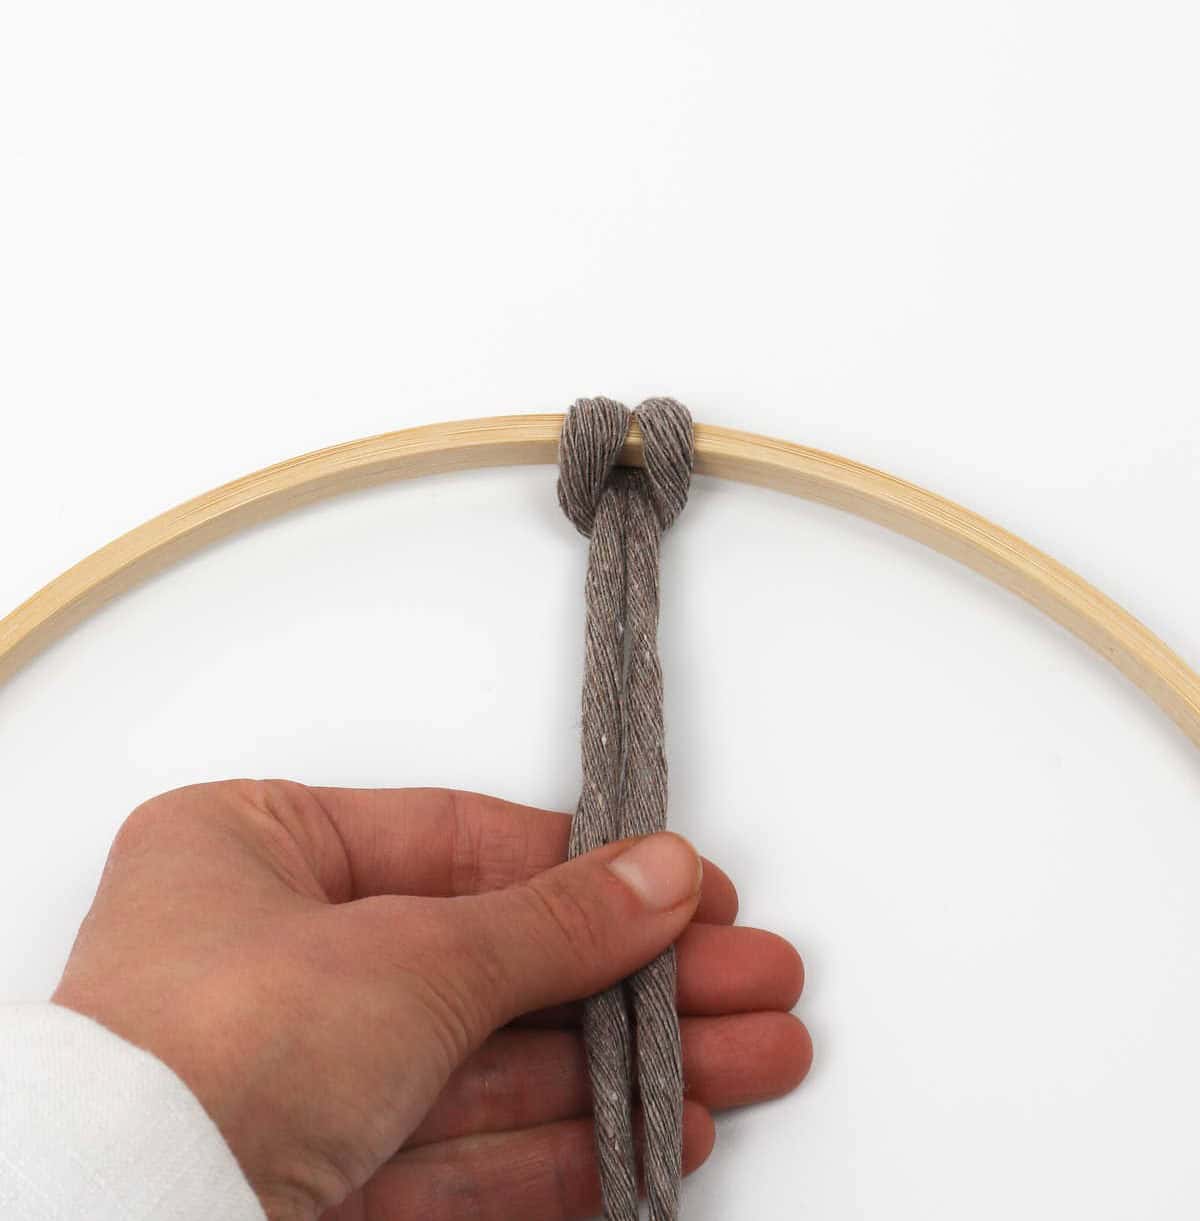
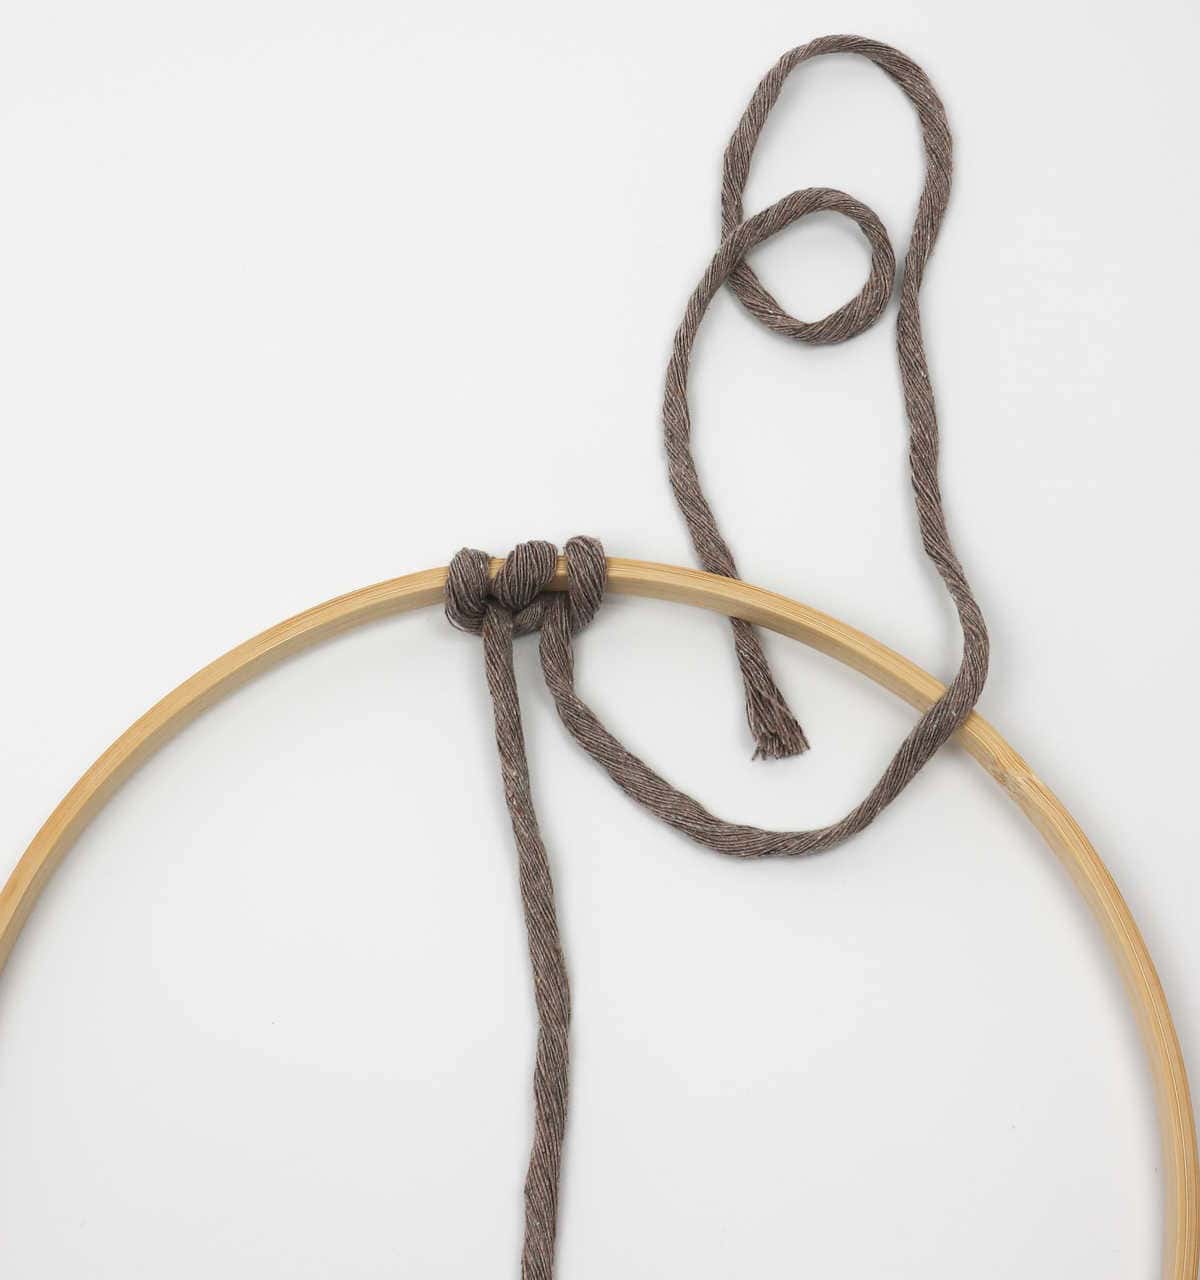
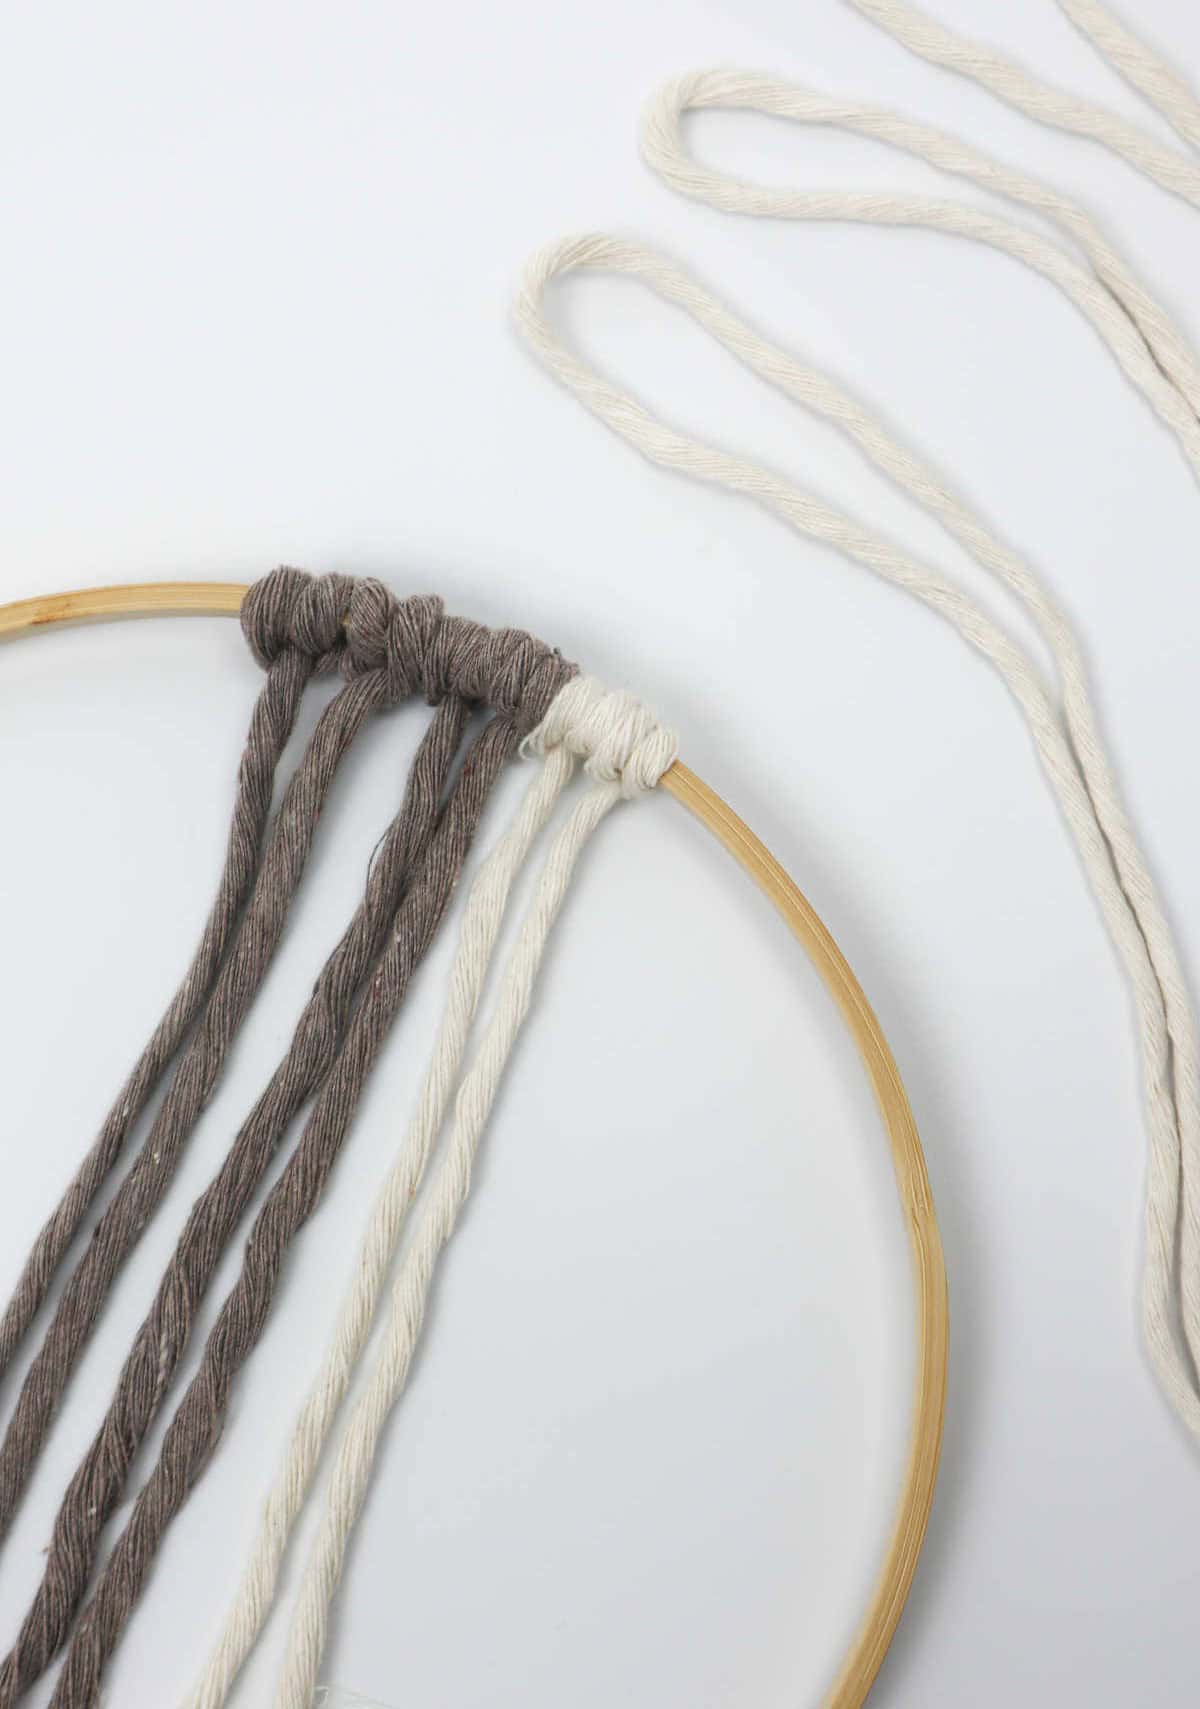
To begin creating the knothead knot, start by folding the cappuccino-colored cord in half and then bring it down and under the hoop. Next, take the folded loop and pass it over the top of the hoop, allowing it to overlap with the two loose ends. From here, grasp both loose ends and draw them through the loop. Once they’re through, give the ends a firm tug to tighten the knot and create the knothead shape.
Step 5
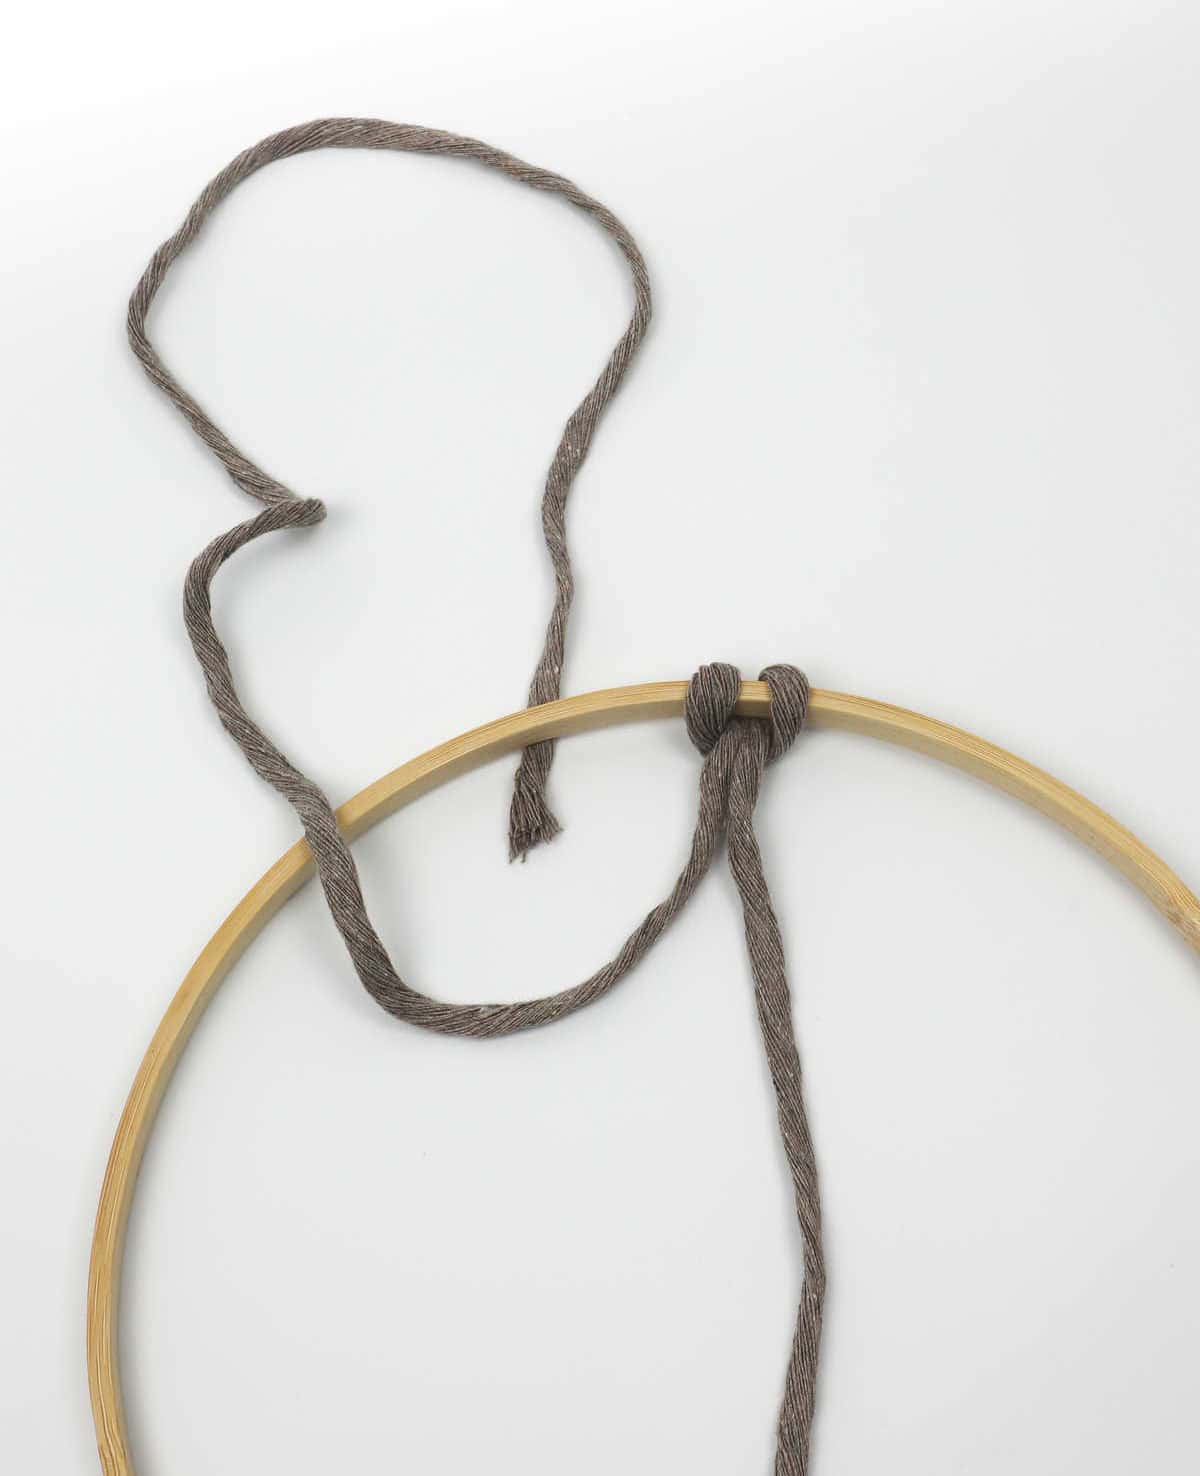
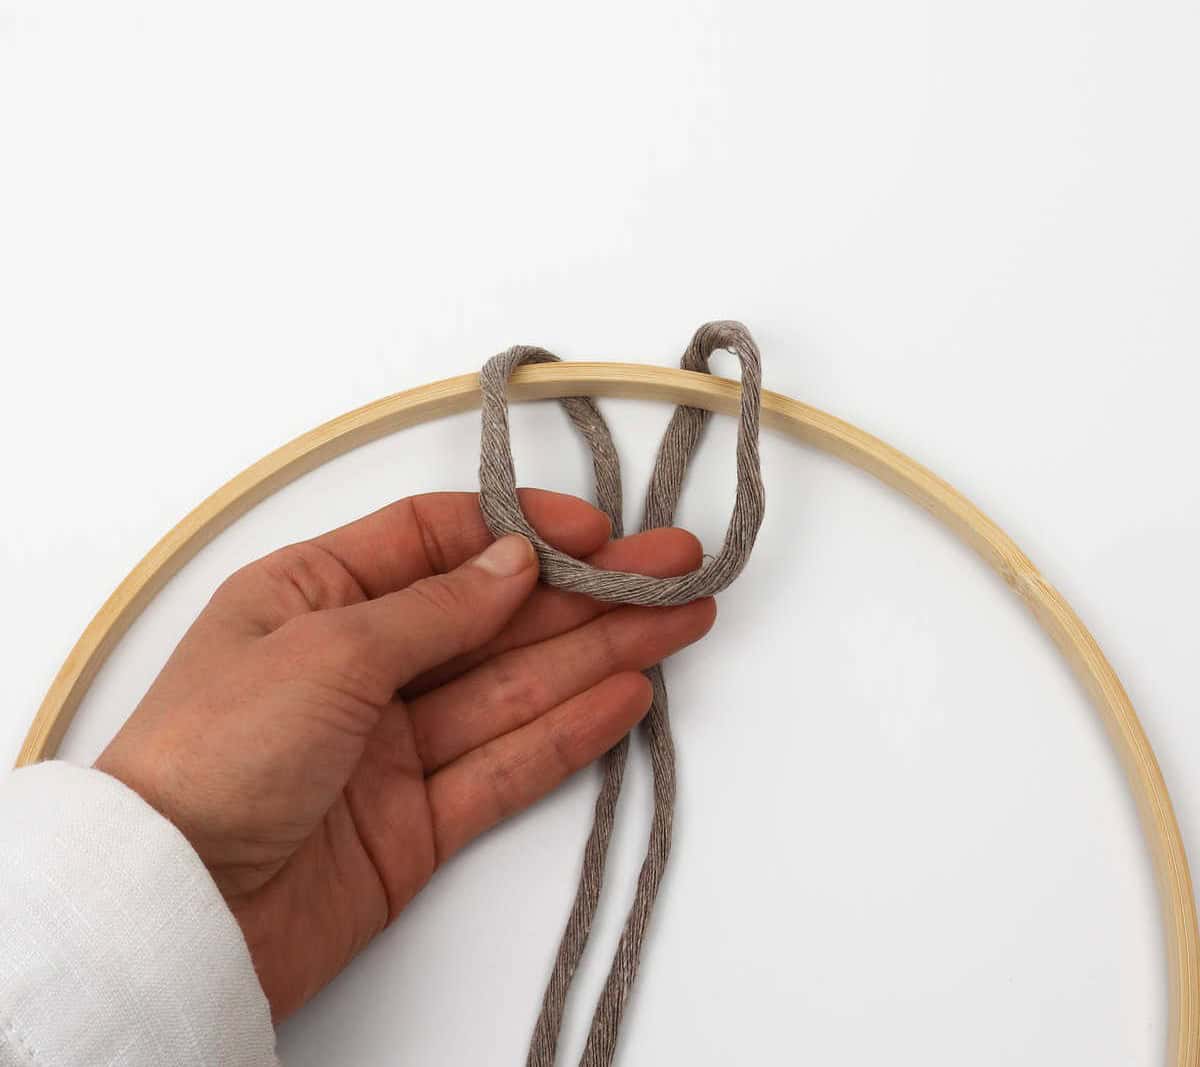
Before moving on to the next step, take a moment to complete the current task. With the previous knot still fresh in your mind, bring the remaining string over and under the hoop. As you guide it through, make sure it passes through the loop and then wraps around the original string. Once it’s in place, give the new knot a firm tug to secure it. You should now have two distinct knots on either side of each other, setting the stage for the next step in your creative process.
Step 6
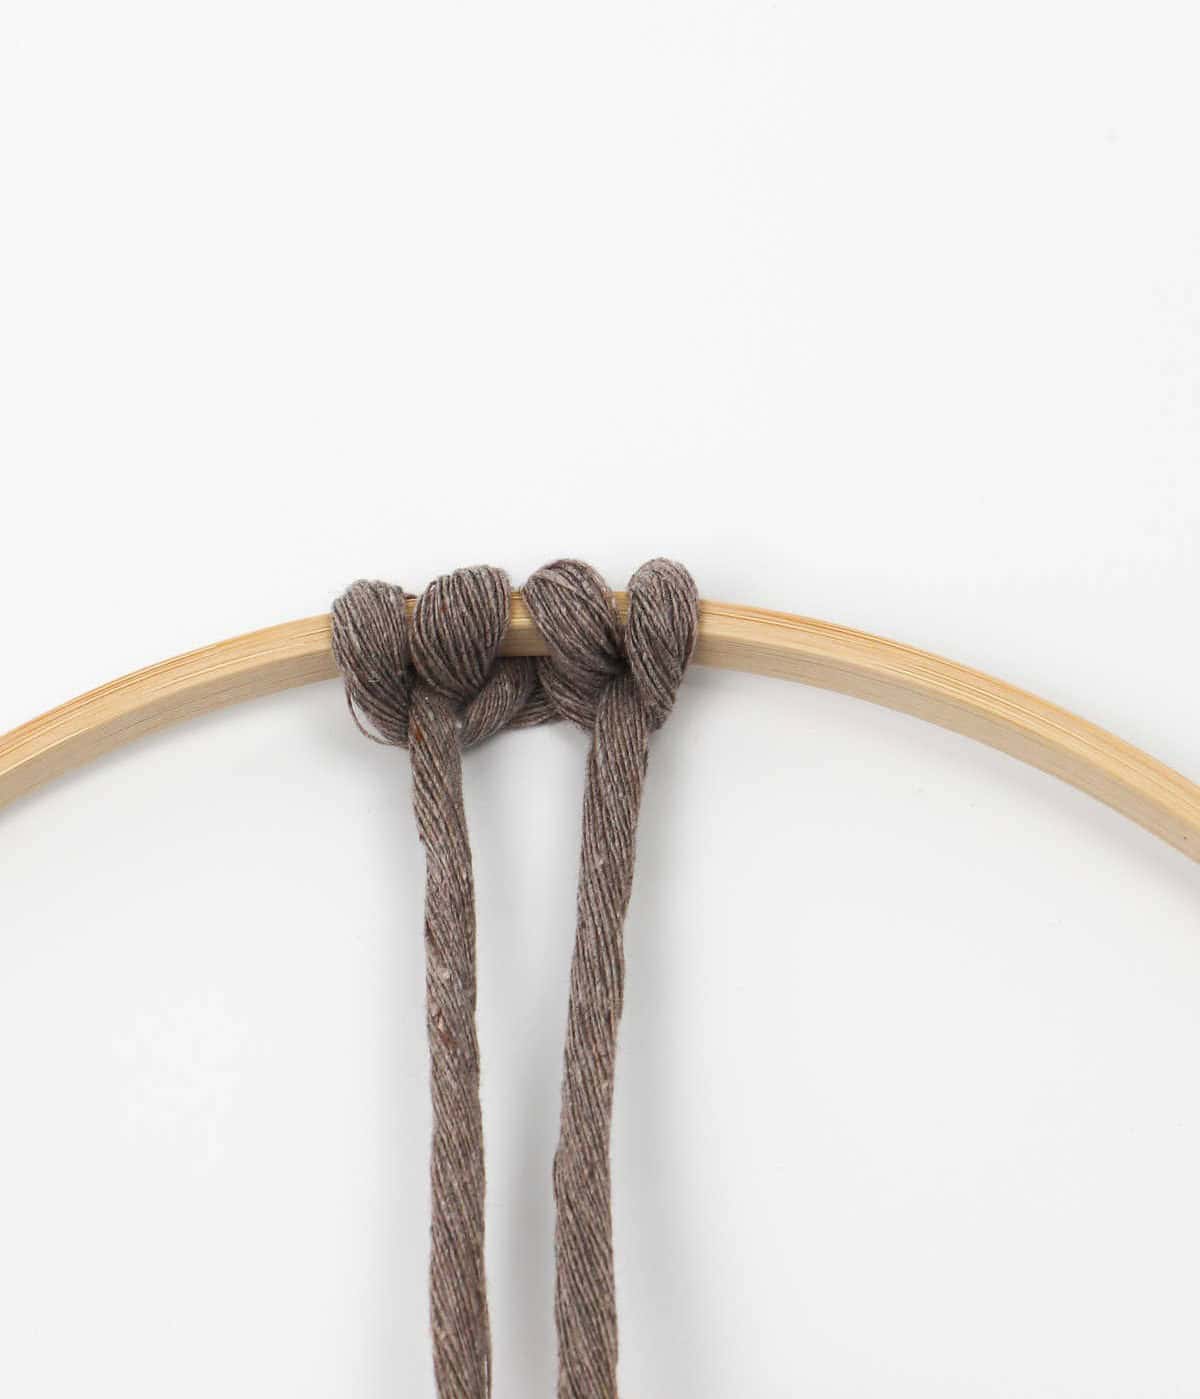
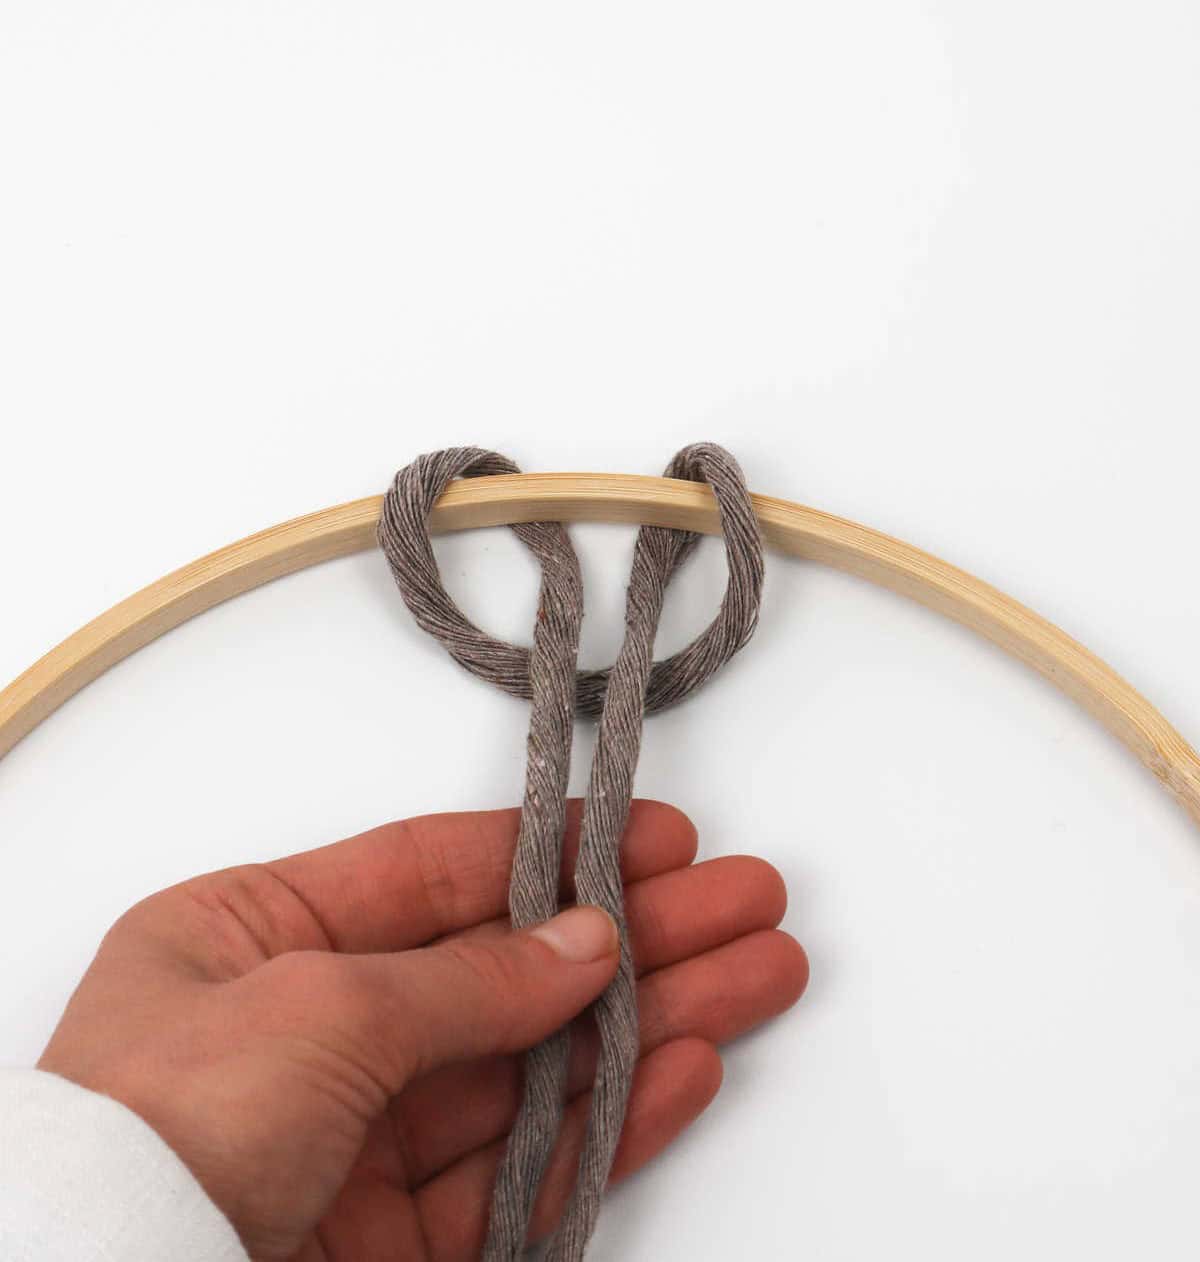
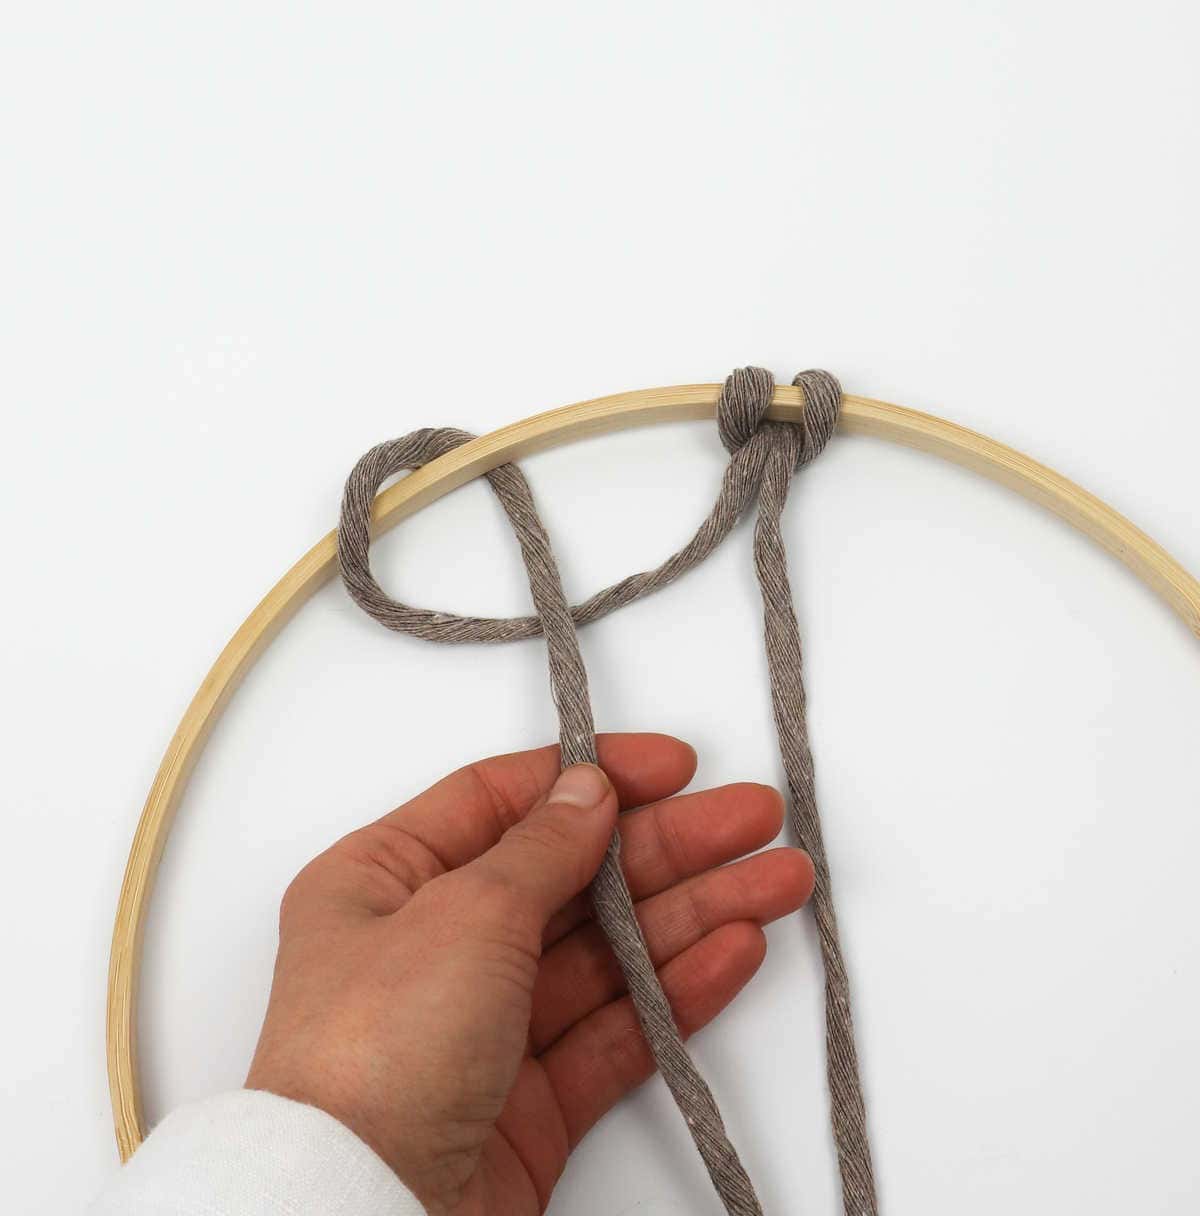
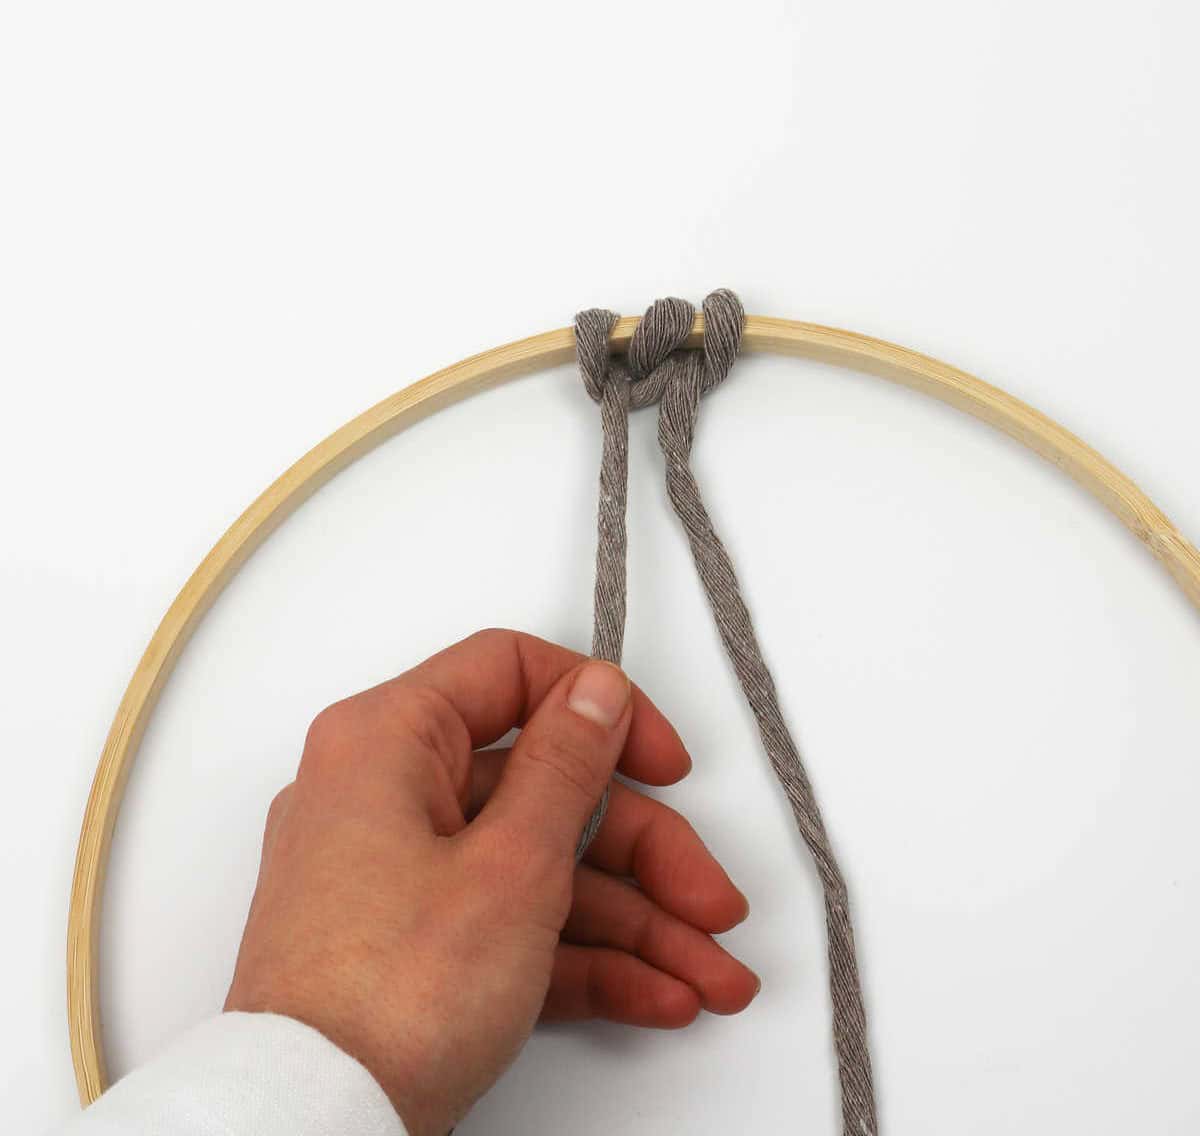
As you complete each knot, make sure to tug firmly on the end to secure it in place. This is especially important when working around the hoop, where loose knots can cause frustration. With this technique, you’ve effectively created a ‘set’ of knots using a single cord. Now, you’ll be repeating these steps with all 15 remaining cords.
Step 7
To create your next set of knotheads, consider either alternating between colors or adding an additional cappuccino-colored cord to maintain the pattern. As a reassurance, the cream-colored cord will be used in the subsequent step. By following these steps repeatedly, you’ll be able to craft multiple sets of knotheads.
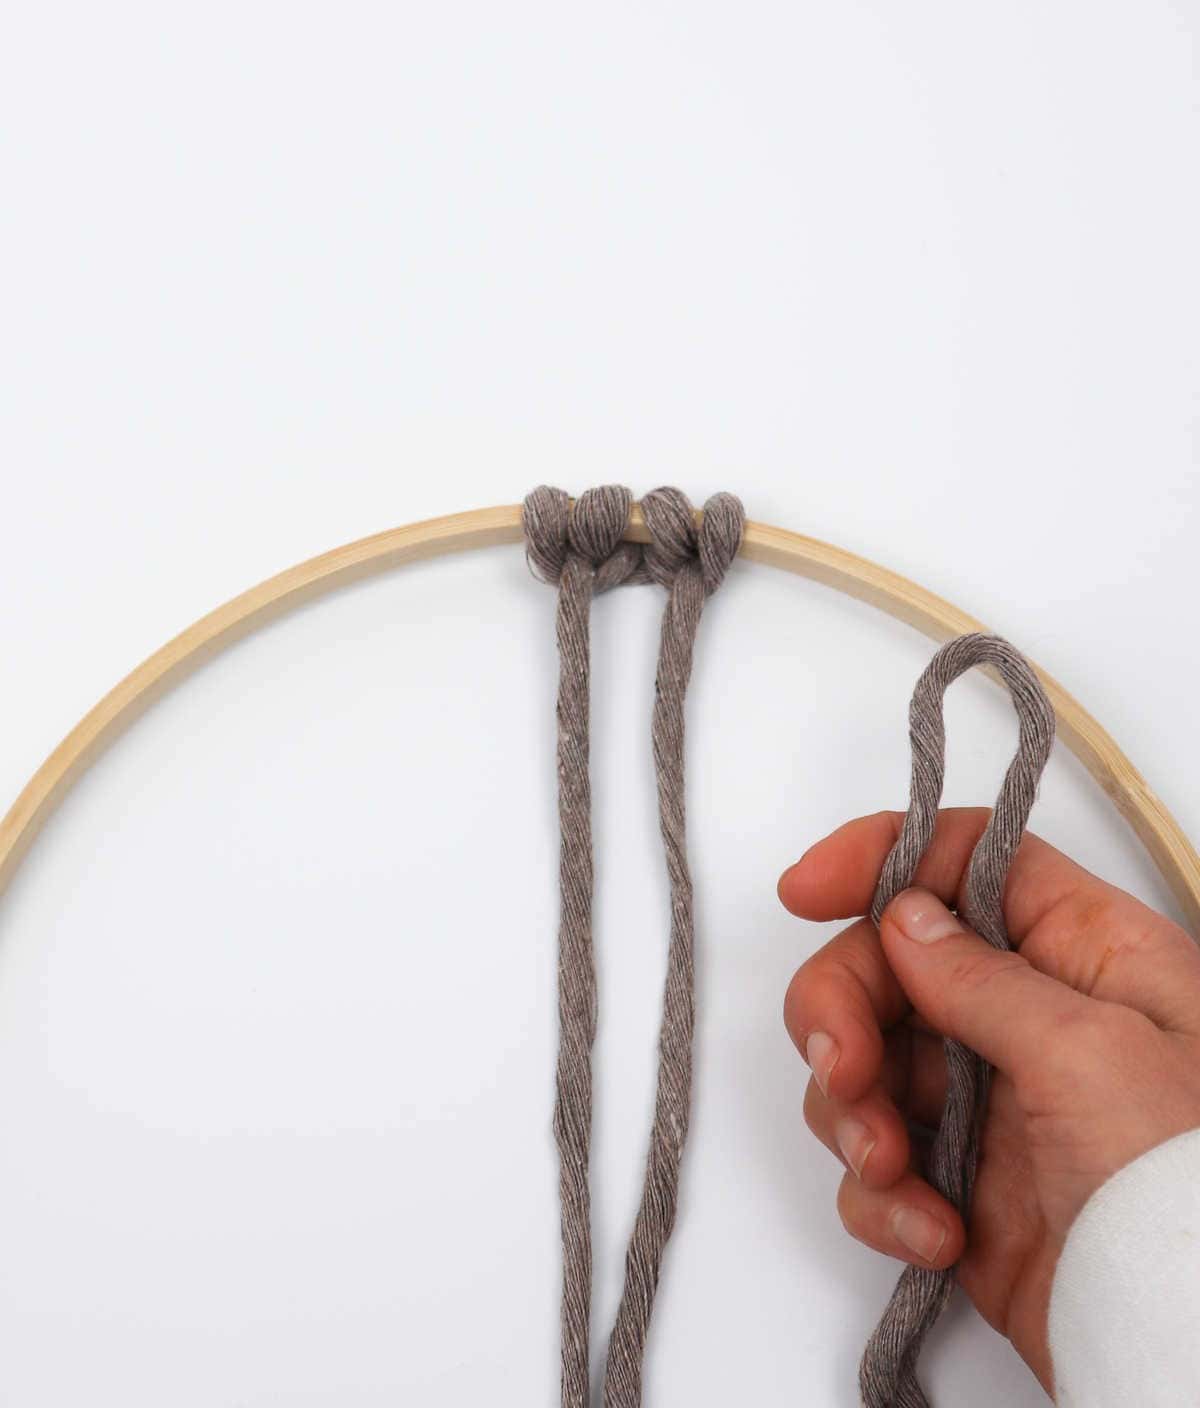
Step 8

Now that you have your materials ready, it’s time to bring them together. Take hold of your cream-colored cords and begin weaving them around the hoop, situated to the right of where you previously worked with the cappuccino cords. As you do this, take note that you’ve now combined two cappuccino cords with four cream-colored ones.
Step 9
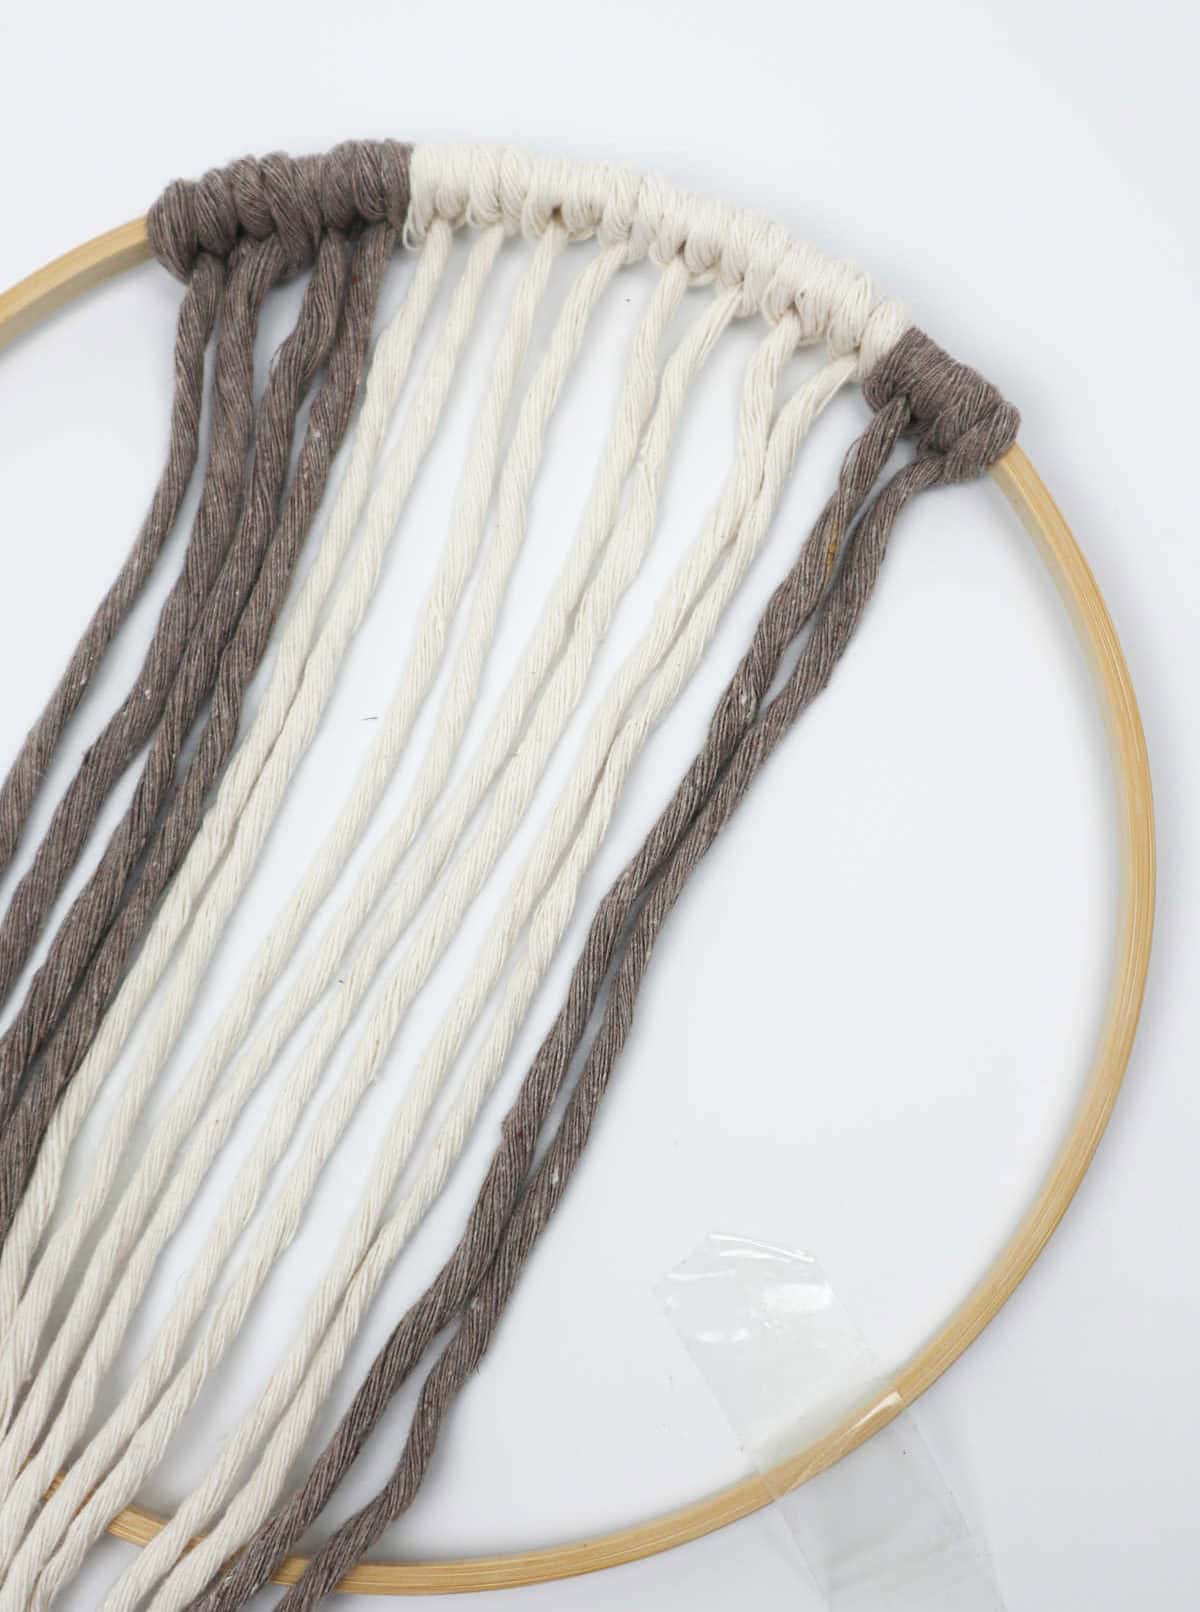
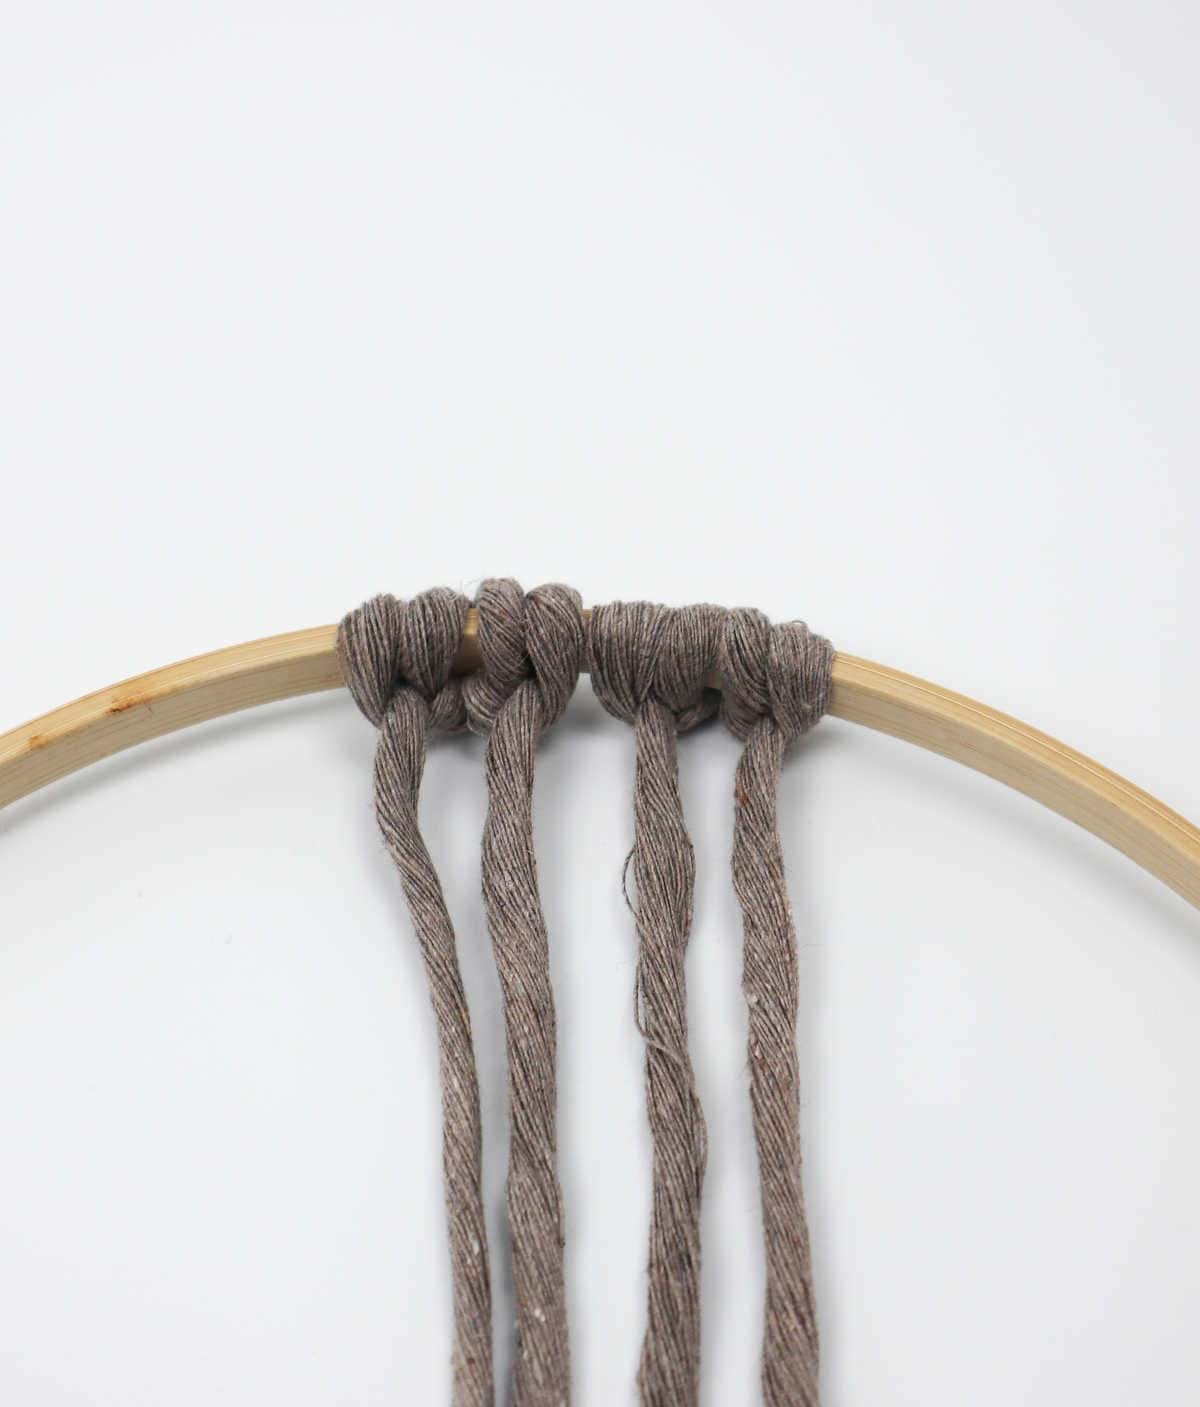
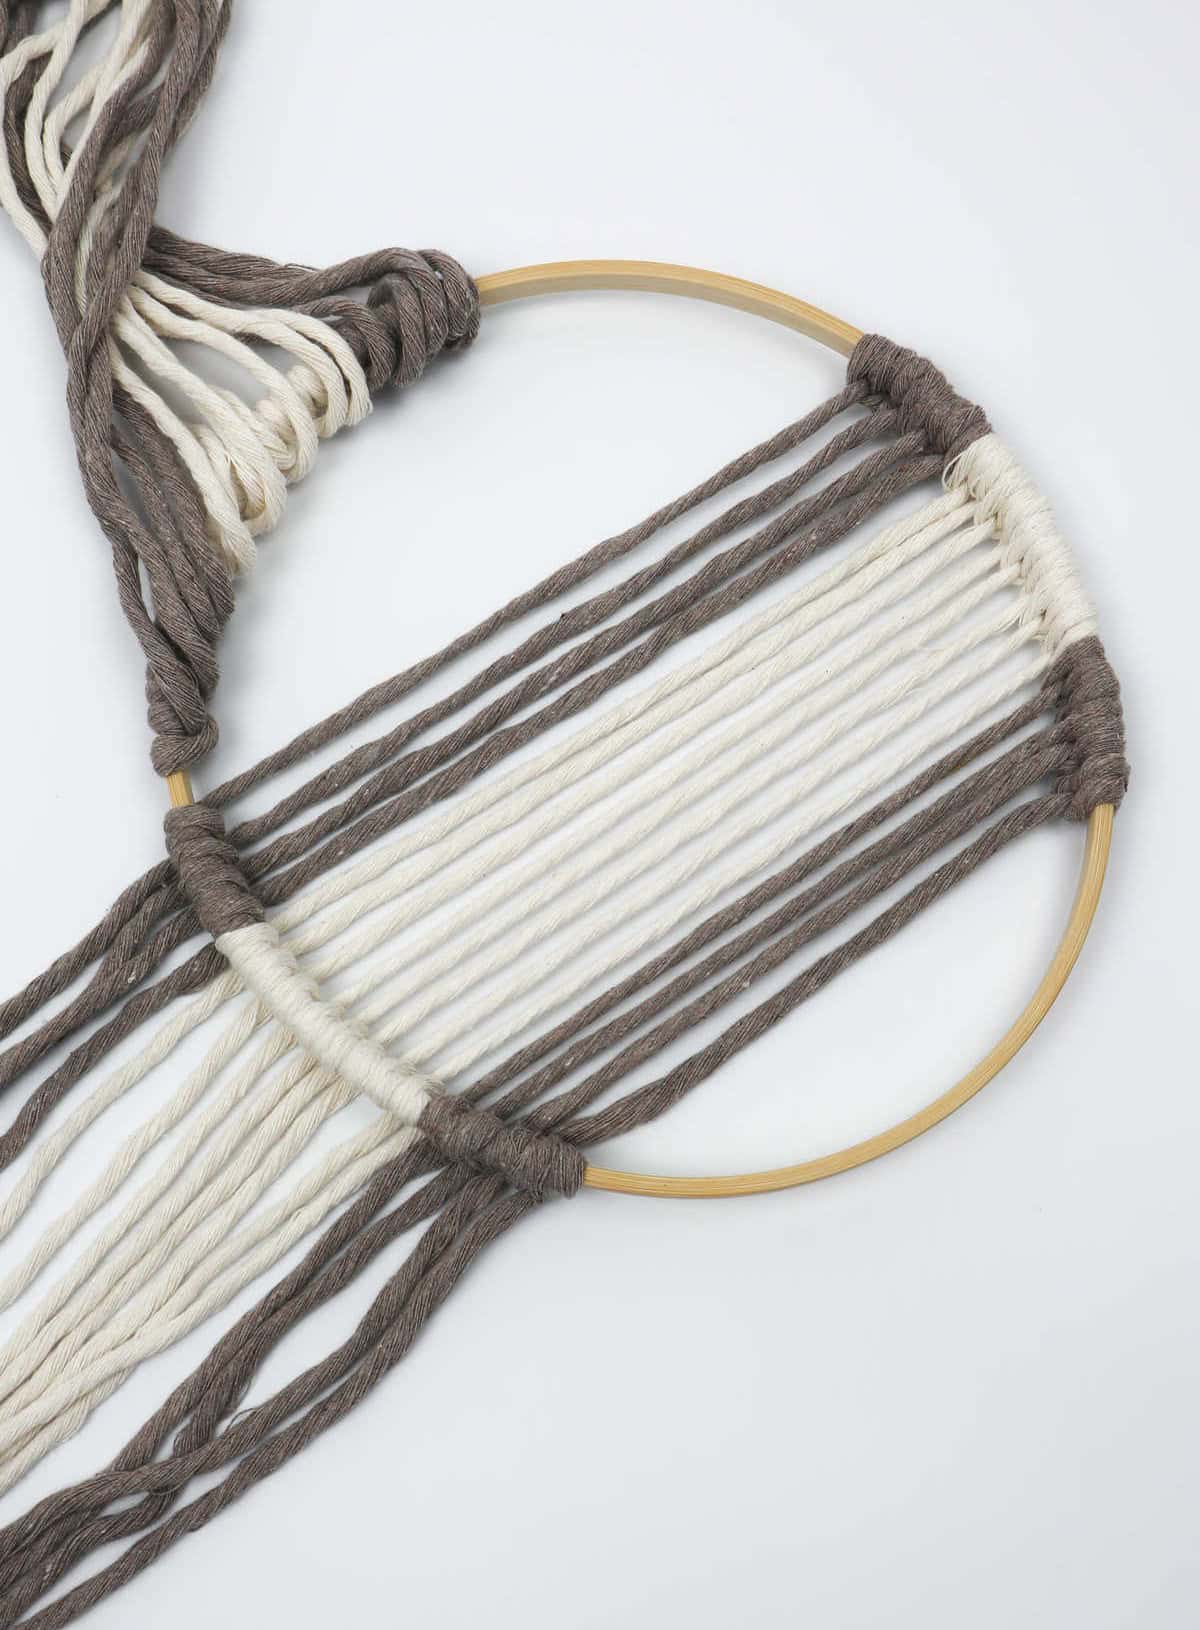
To complete your knot heads, let’s tackle the task of crafting two sets of cappuccino cords and four cream cords. The pattern should be as follows: 2x cappuccino cords, 4x cream cords, and finally, another 2x cappuccino cords. As you work through this process, take your time to ensure each string is meticulously placed under and through the hoop’s framework.
You’re aiming for a precise configuration that will result in the knot heads resting comfortably over the hoop, much like the illustration provided earlier. Once you’ve achieved this harmonious arrangement, you’ll have successfully transferred one set of knot heads to the ‘right’ side of the hoop. With this accomplishment under your belt, it’s time to shift your focus to the left side and tackle the next batch.
Step 10
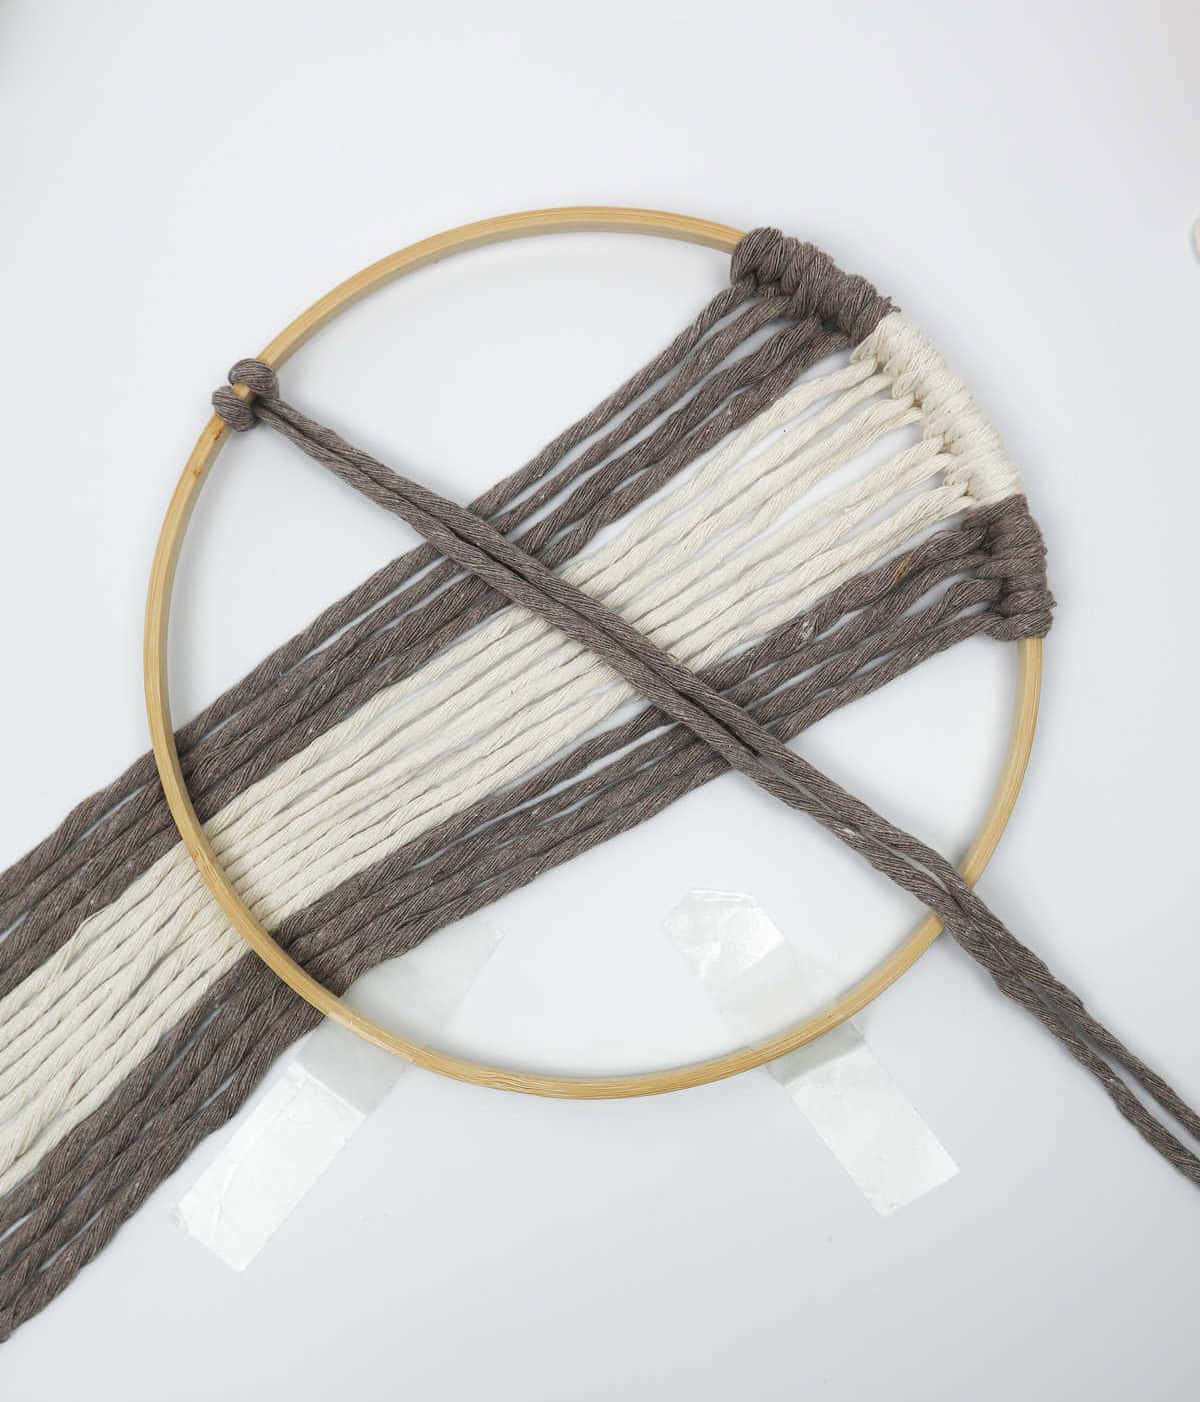
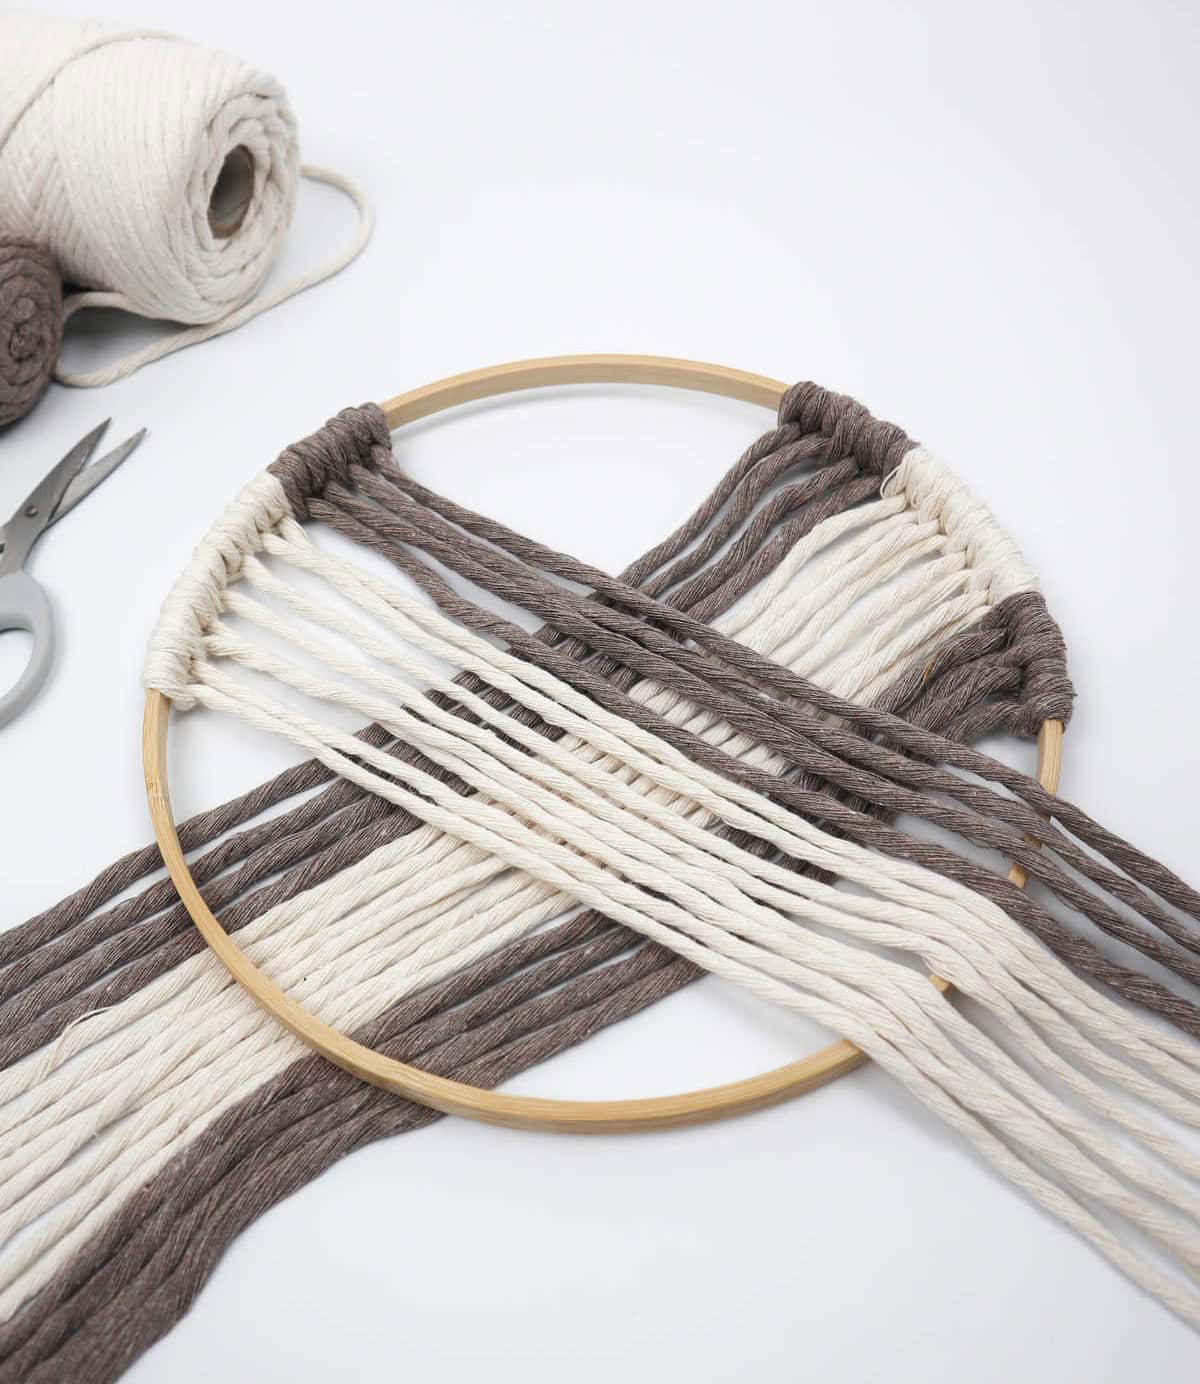
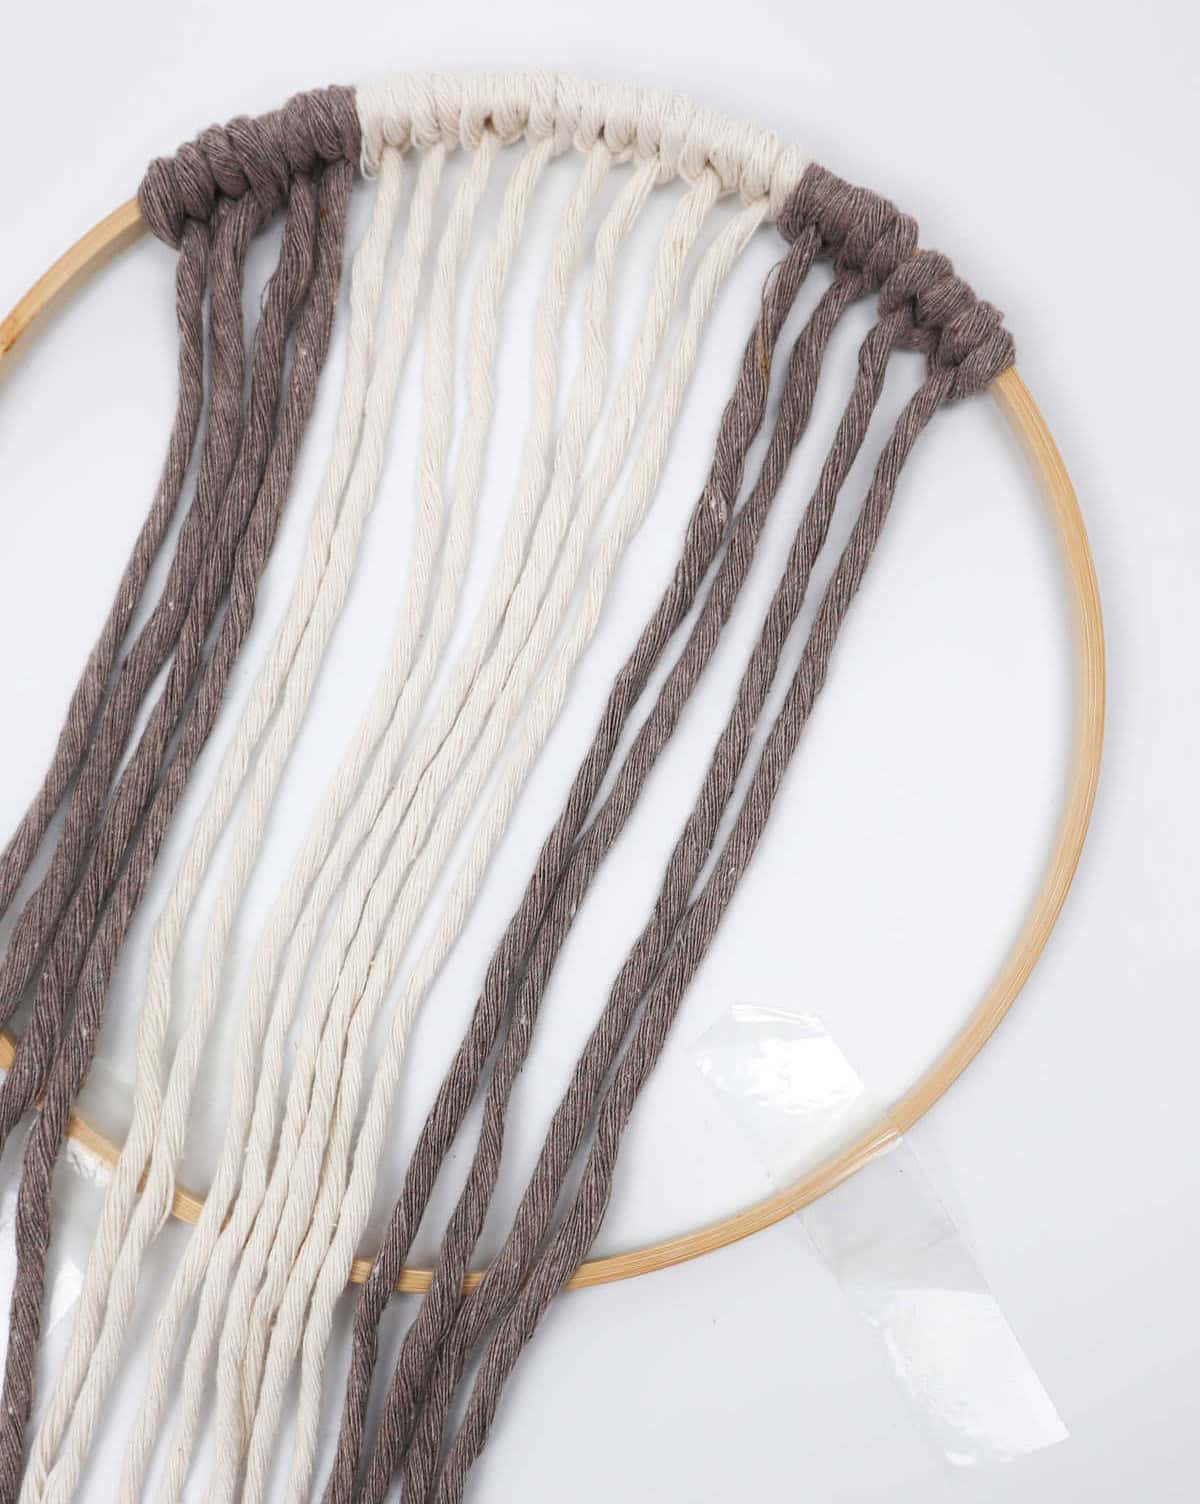
As you begin to craft your latest piece of macrame art, start by creating a foundation with your cappuccino-colored cord, working in a set of knot heads that mirror the previous side of the hoop. This time, replicate the same process on the opposite side, incorporating the knots into the hoop according to the same color scheme. To achieve the desired pattern, ensure you have 2x cappuccino cords, 4x cream-colored cords, and another 2x cappuccino cords in place.
Unlike the previous step where all the cords were gathered under the hoop, this time they will remain suspended above it, setting the stage for what’s to come.
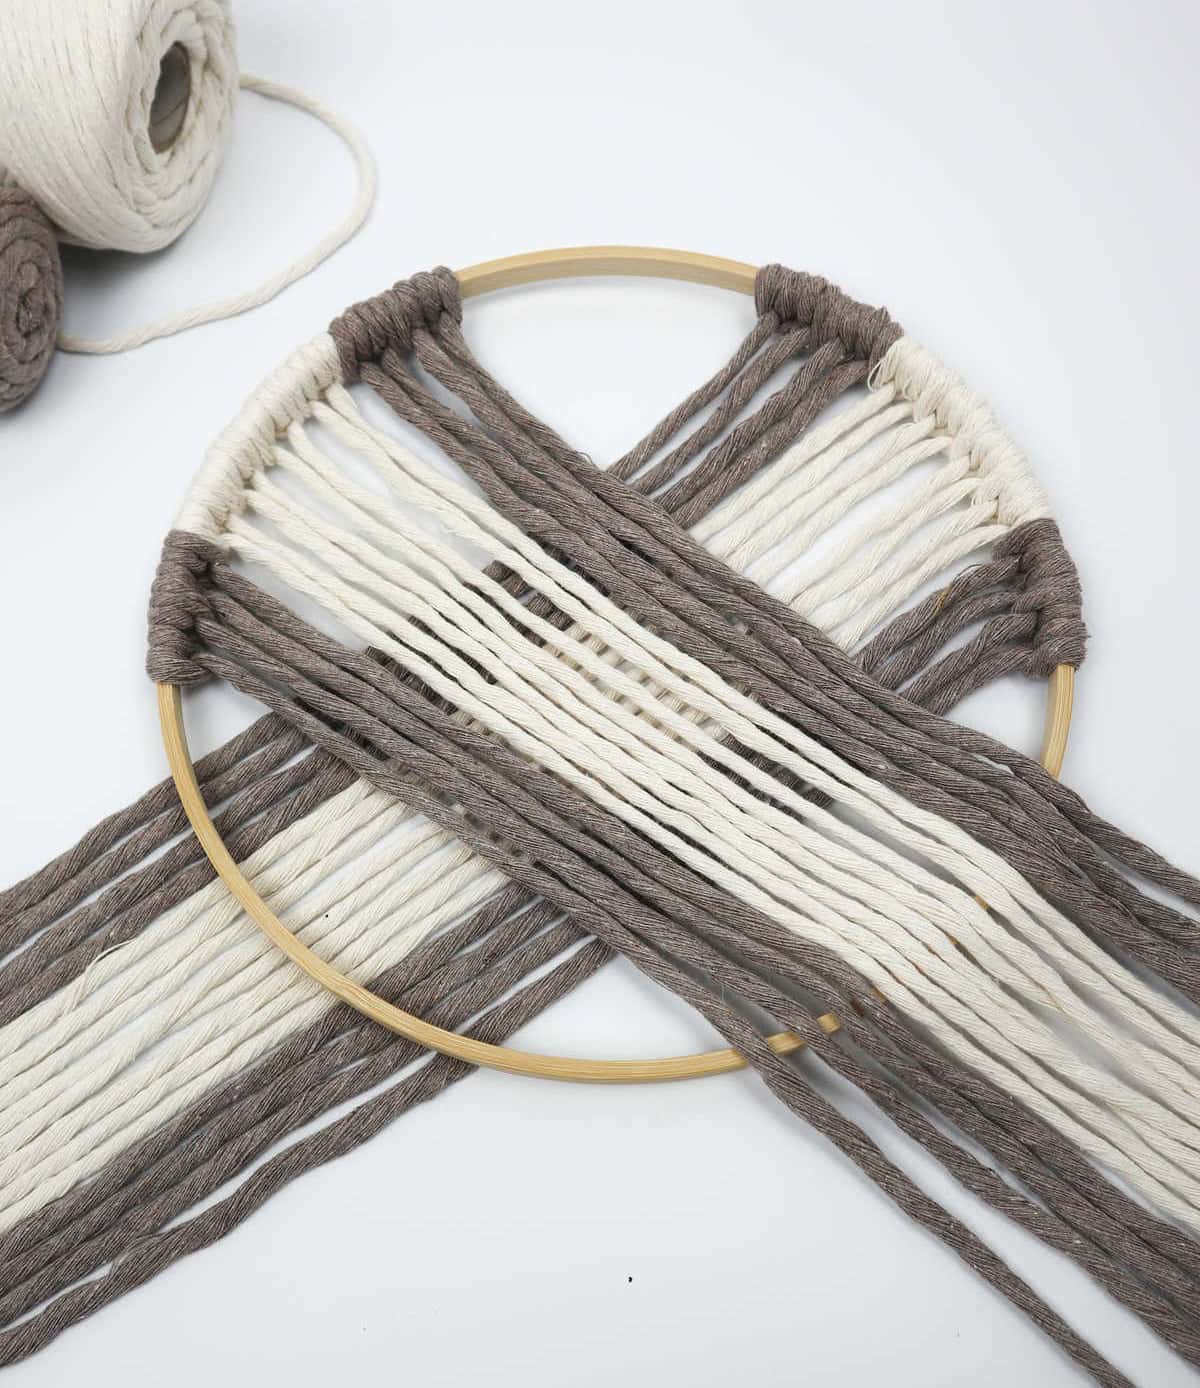
Step 11
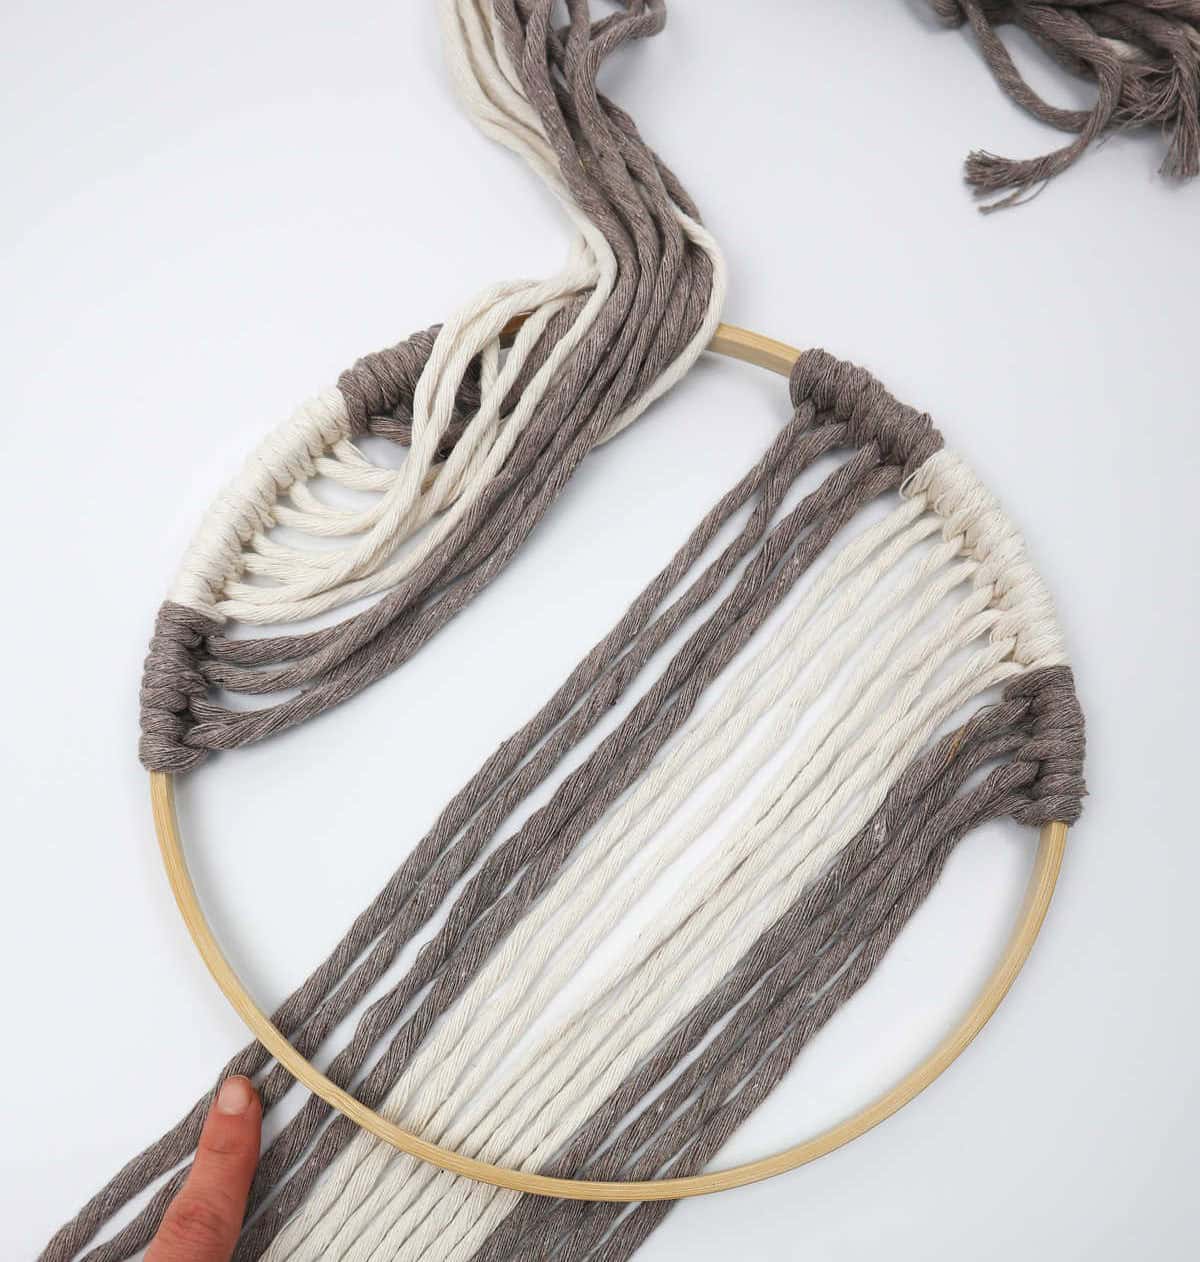
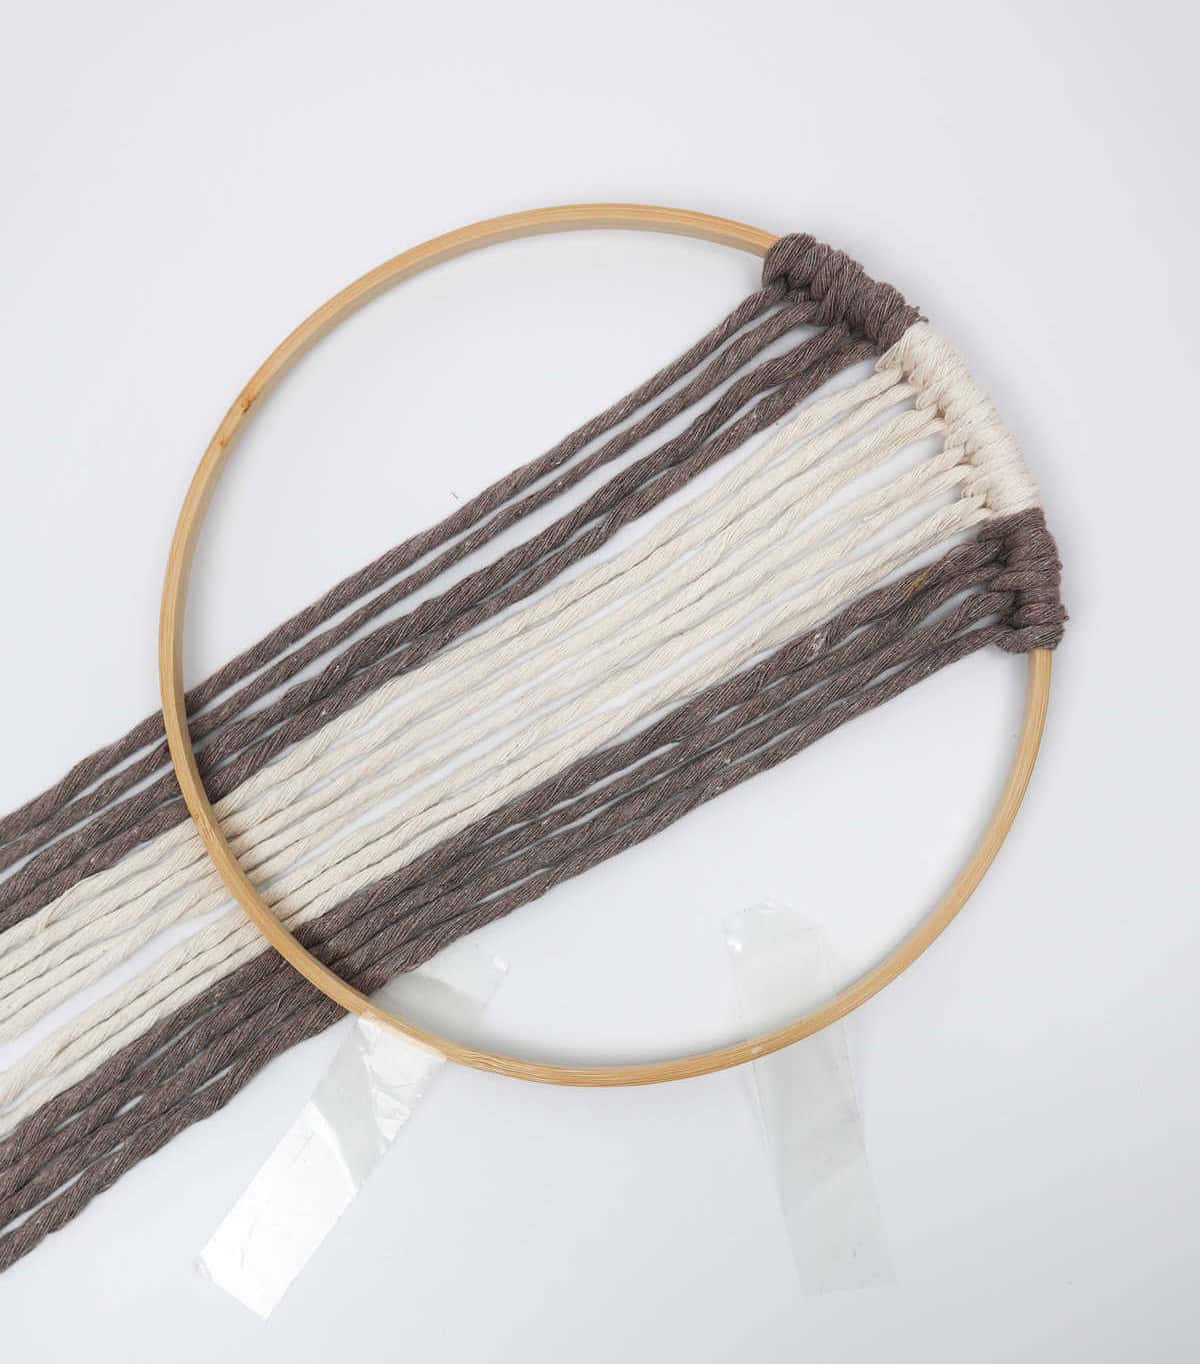
To ensure the strings don’t get tangled, take a deliberate approach when gathering their ends. Begin by collecting the strings on the ‘left’ side of the hoop, taking care not to knot them as you work. Once you’ve secured the left-hand strings, lay them aside in a way that provides clear access to the right side of the hoop.
Step 12

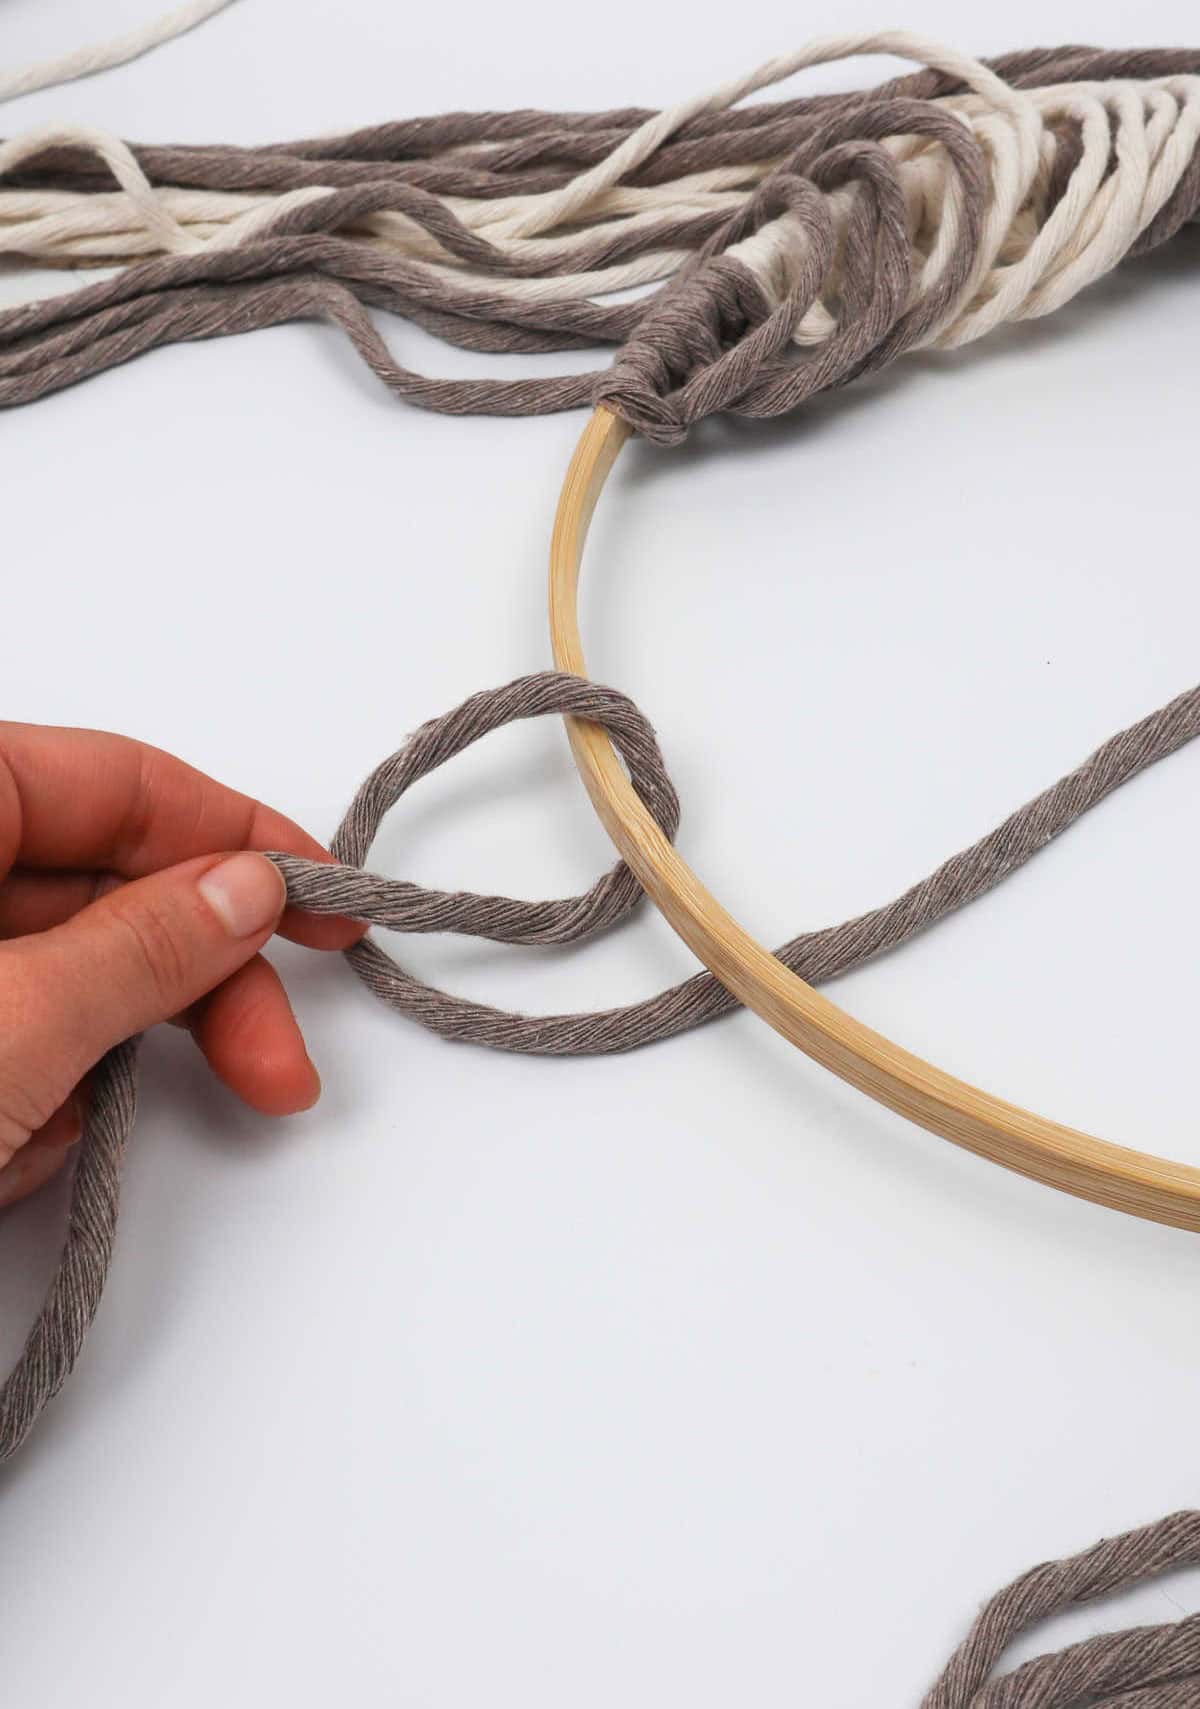
To complete the macrame piece, start by threading the first cappuccino cord over the hoop and then underneath it to form a loop. Ensure the end of the cord is positioned beneath the hoop, as illustrated. Next, take the cord’s end and pass it through the newly created loop. This will result in a half knot, marking the beginning of the diagonal pattern that will connect the top and bottom of the hoop.
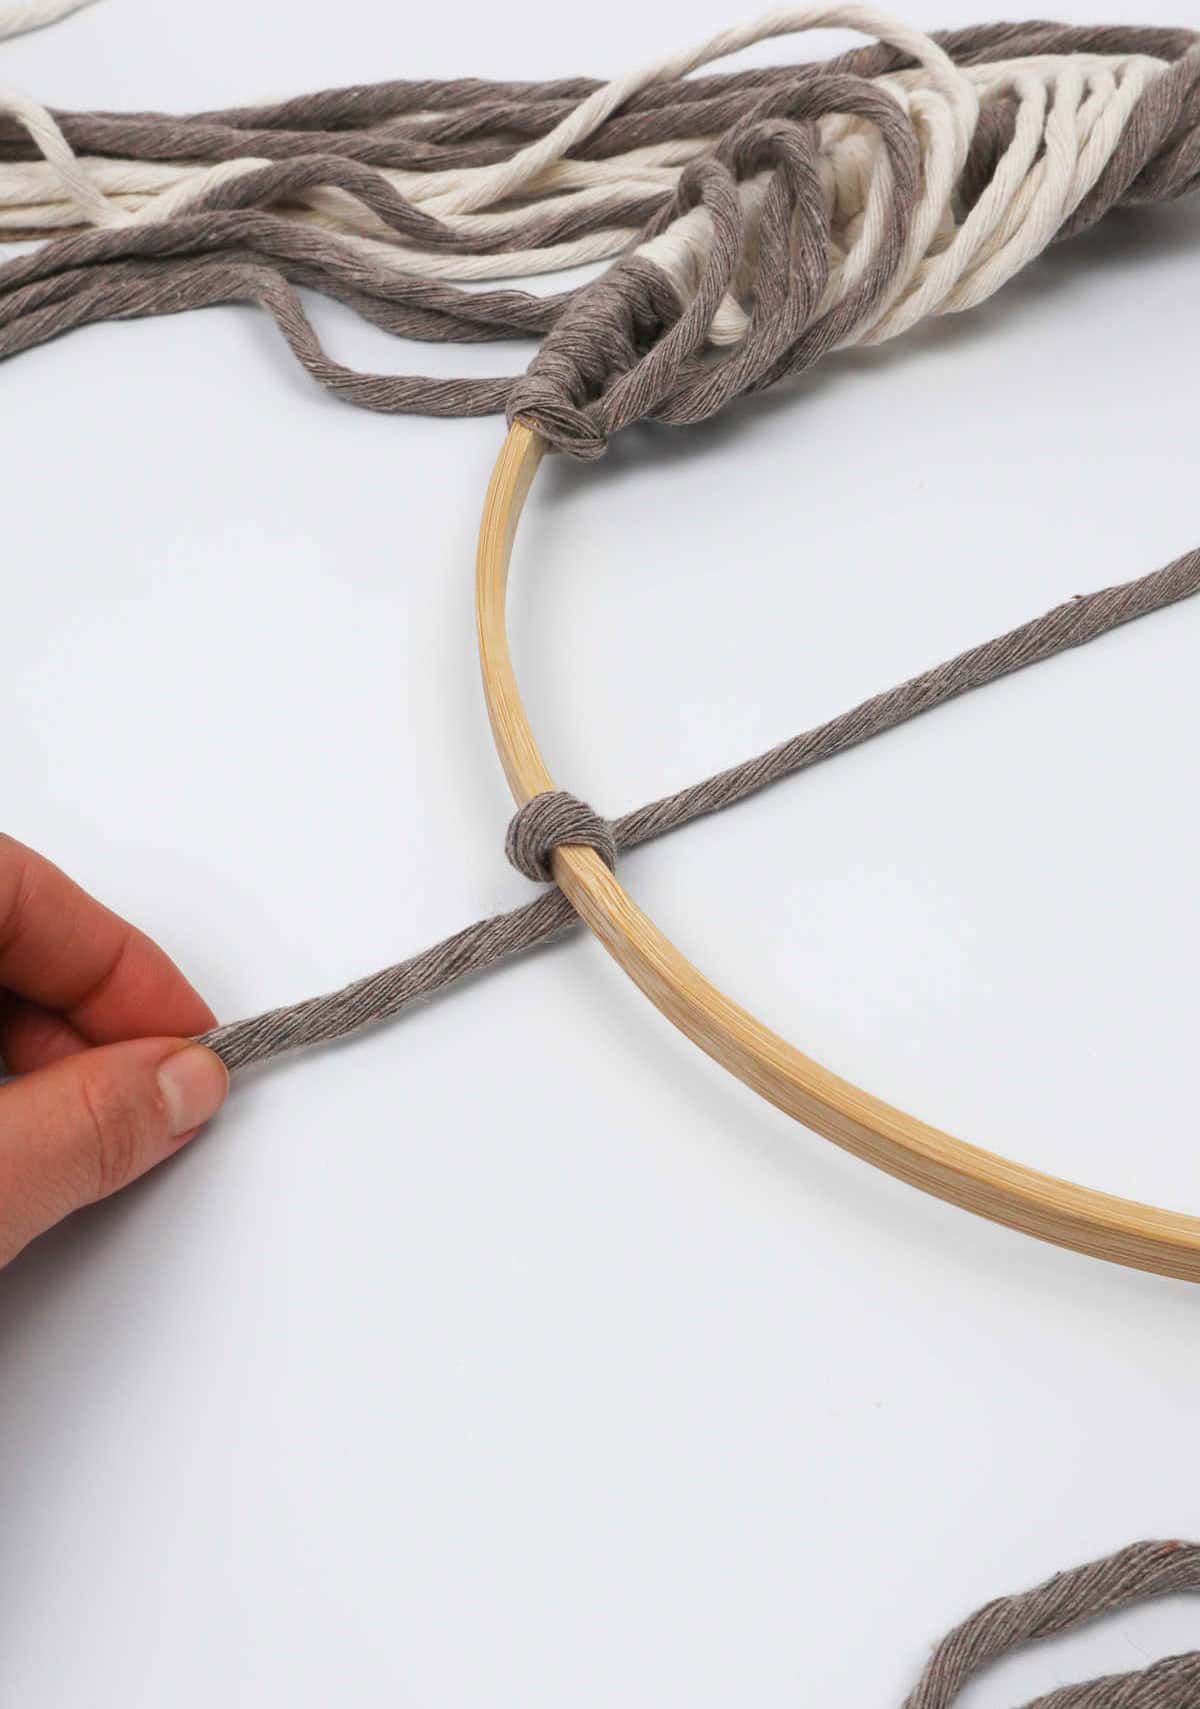
Step 13
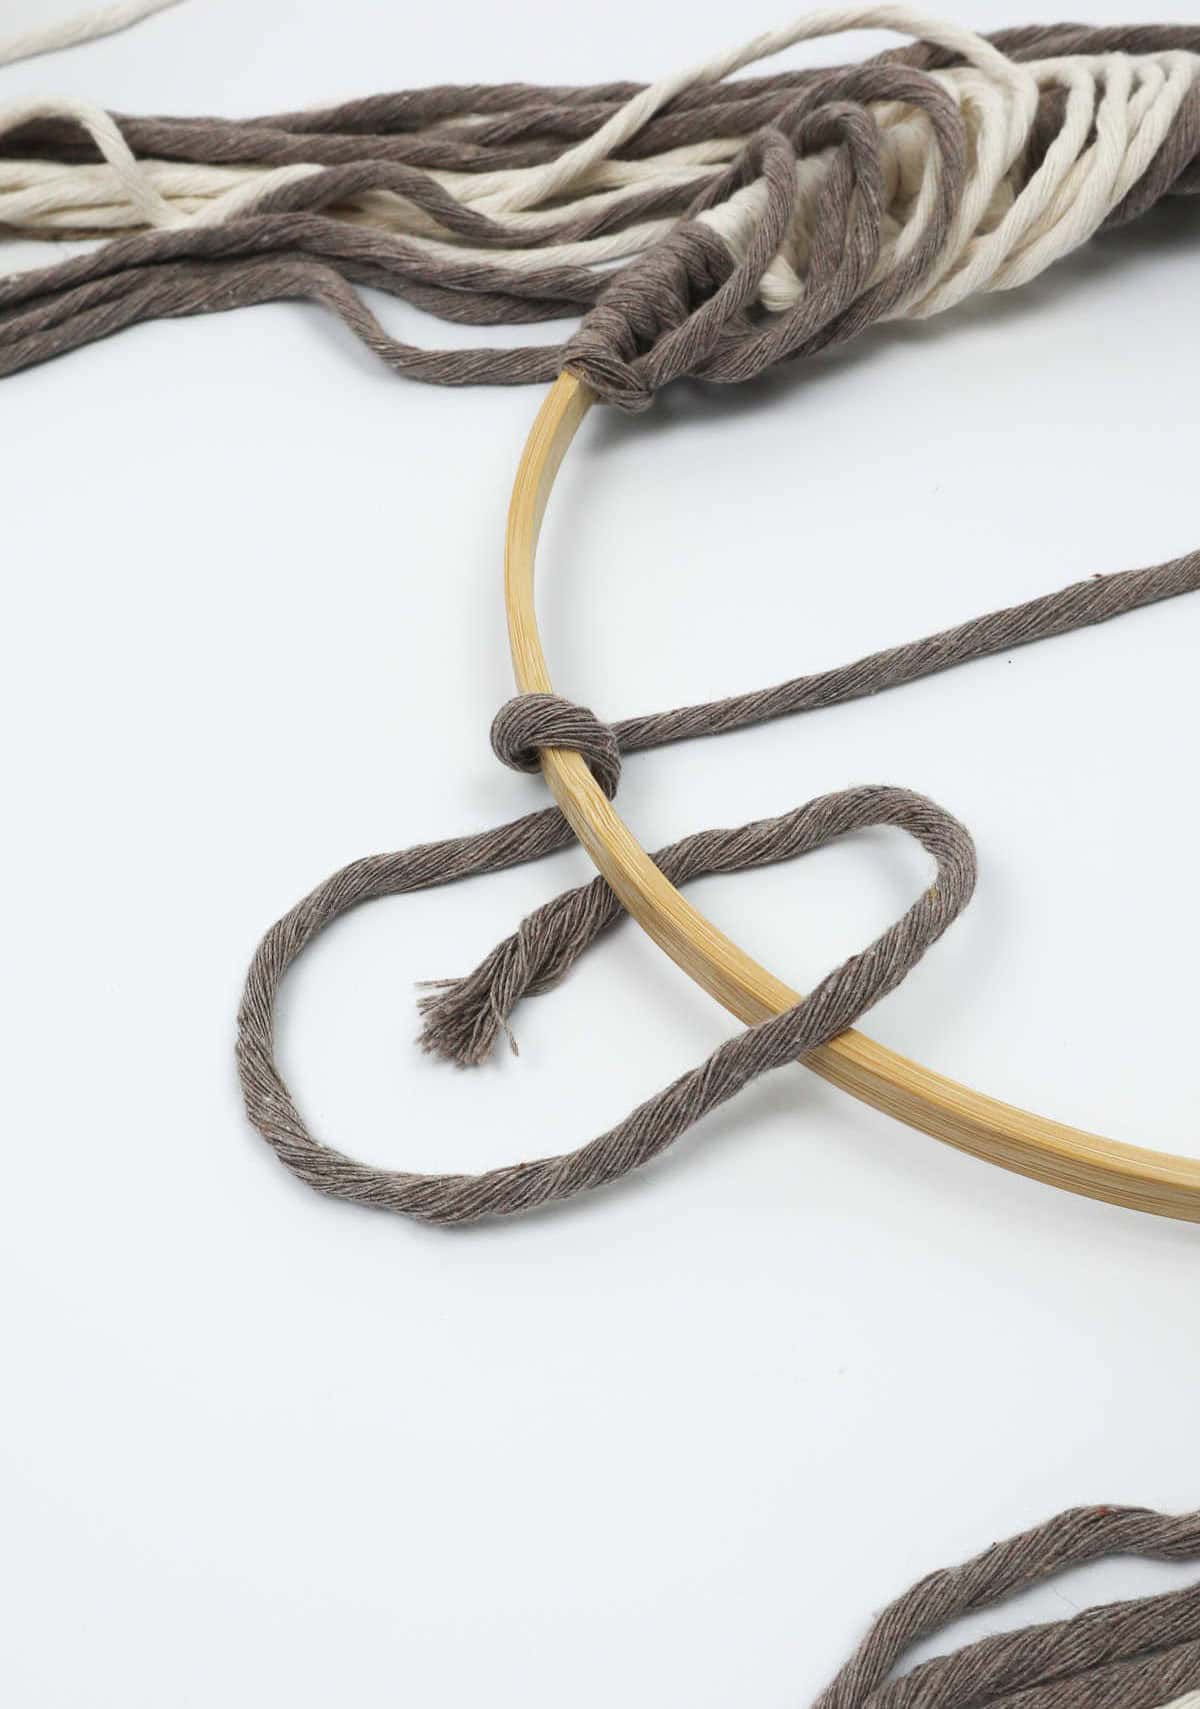
To create a fully formed knot, simply repeat the process: take the same piece of string and tie it around the midpoint of the previous half-knot, effectively securing both ends together. With this added layer of complexity, your knot should now be complete, with no loose ends or untied sections visible to the eye.
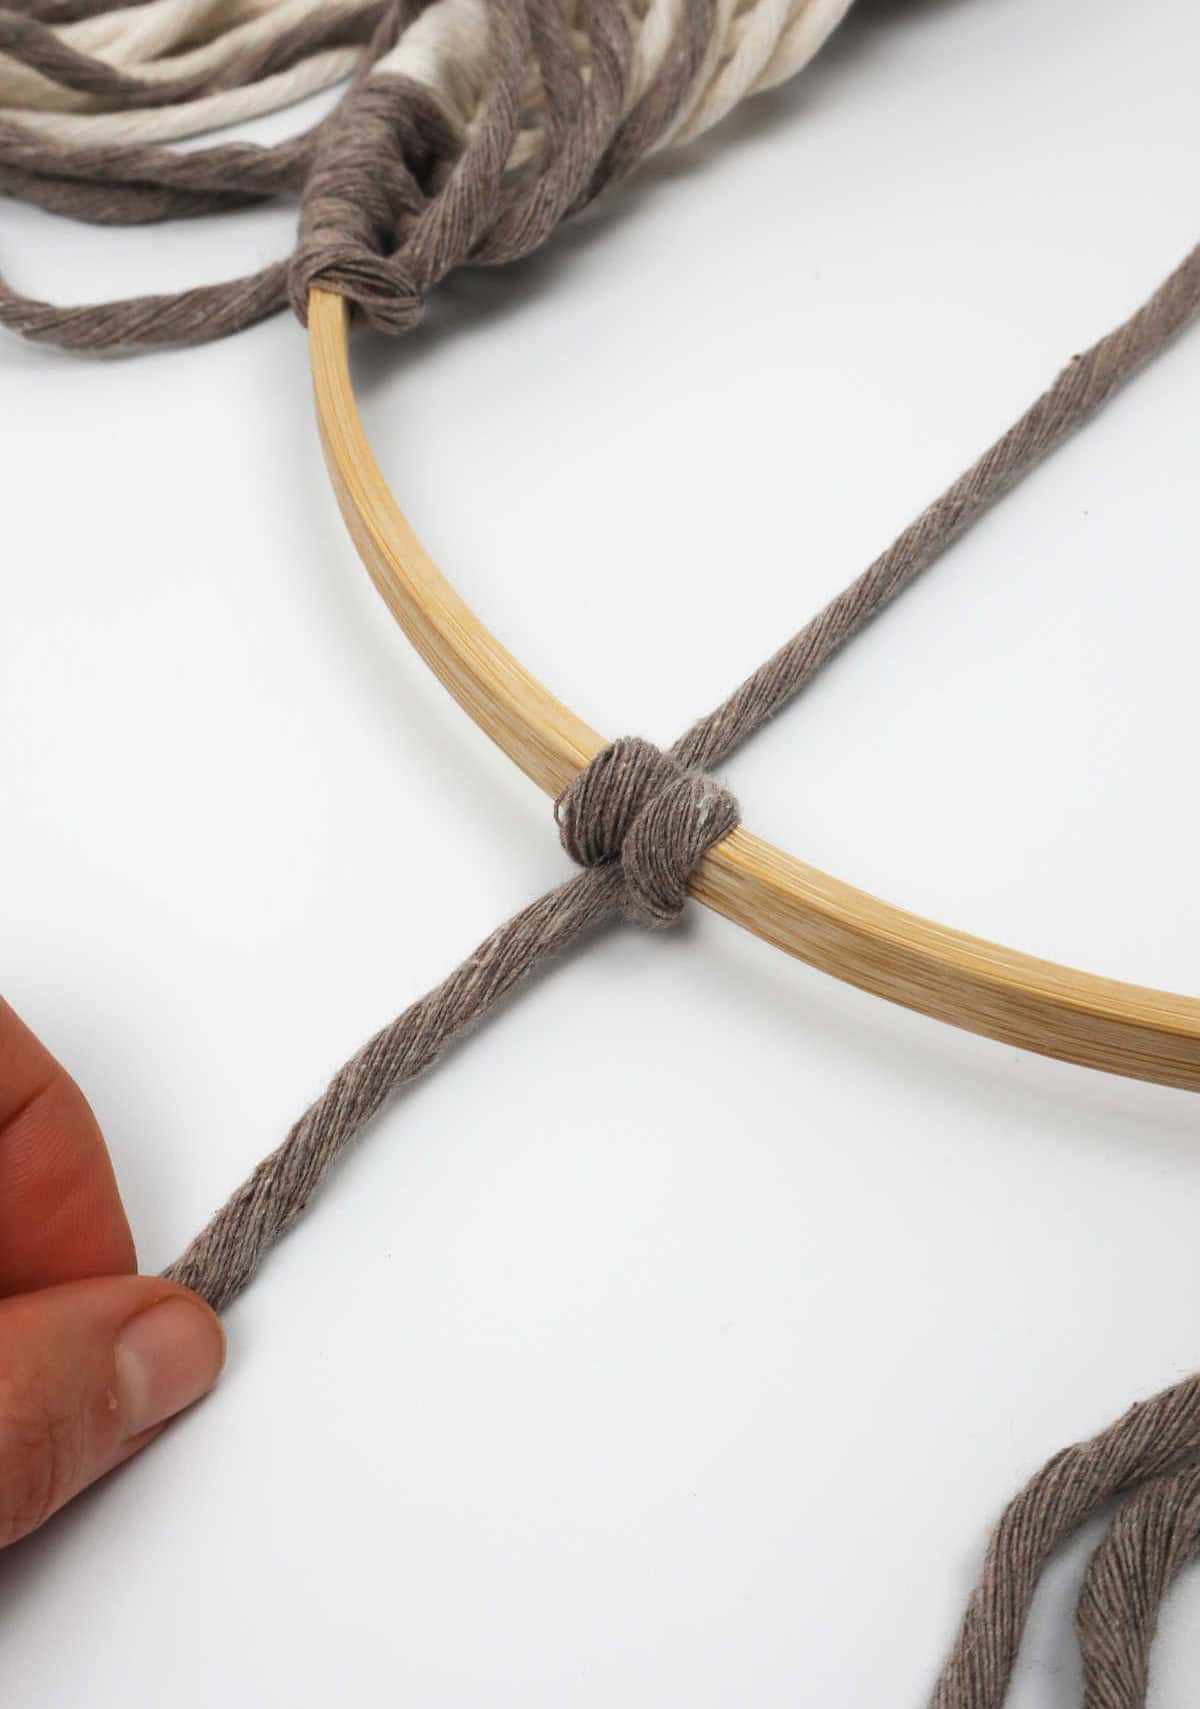
Step 14
To complete the macramé design, simply follow the pattern by repeating the process of taking a cappuccino-colored cord and creating a two-part knot using steps 12 and 13. Continue this sequence throughout, incorporating each cord into the intricate design until the desired length is achieved.
Step 15
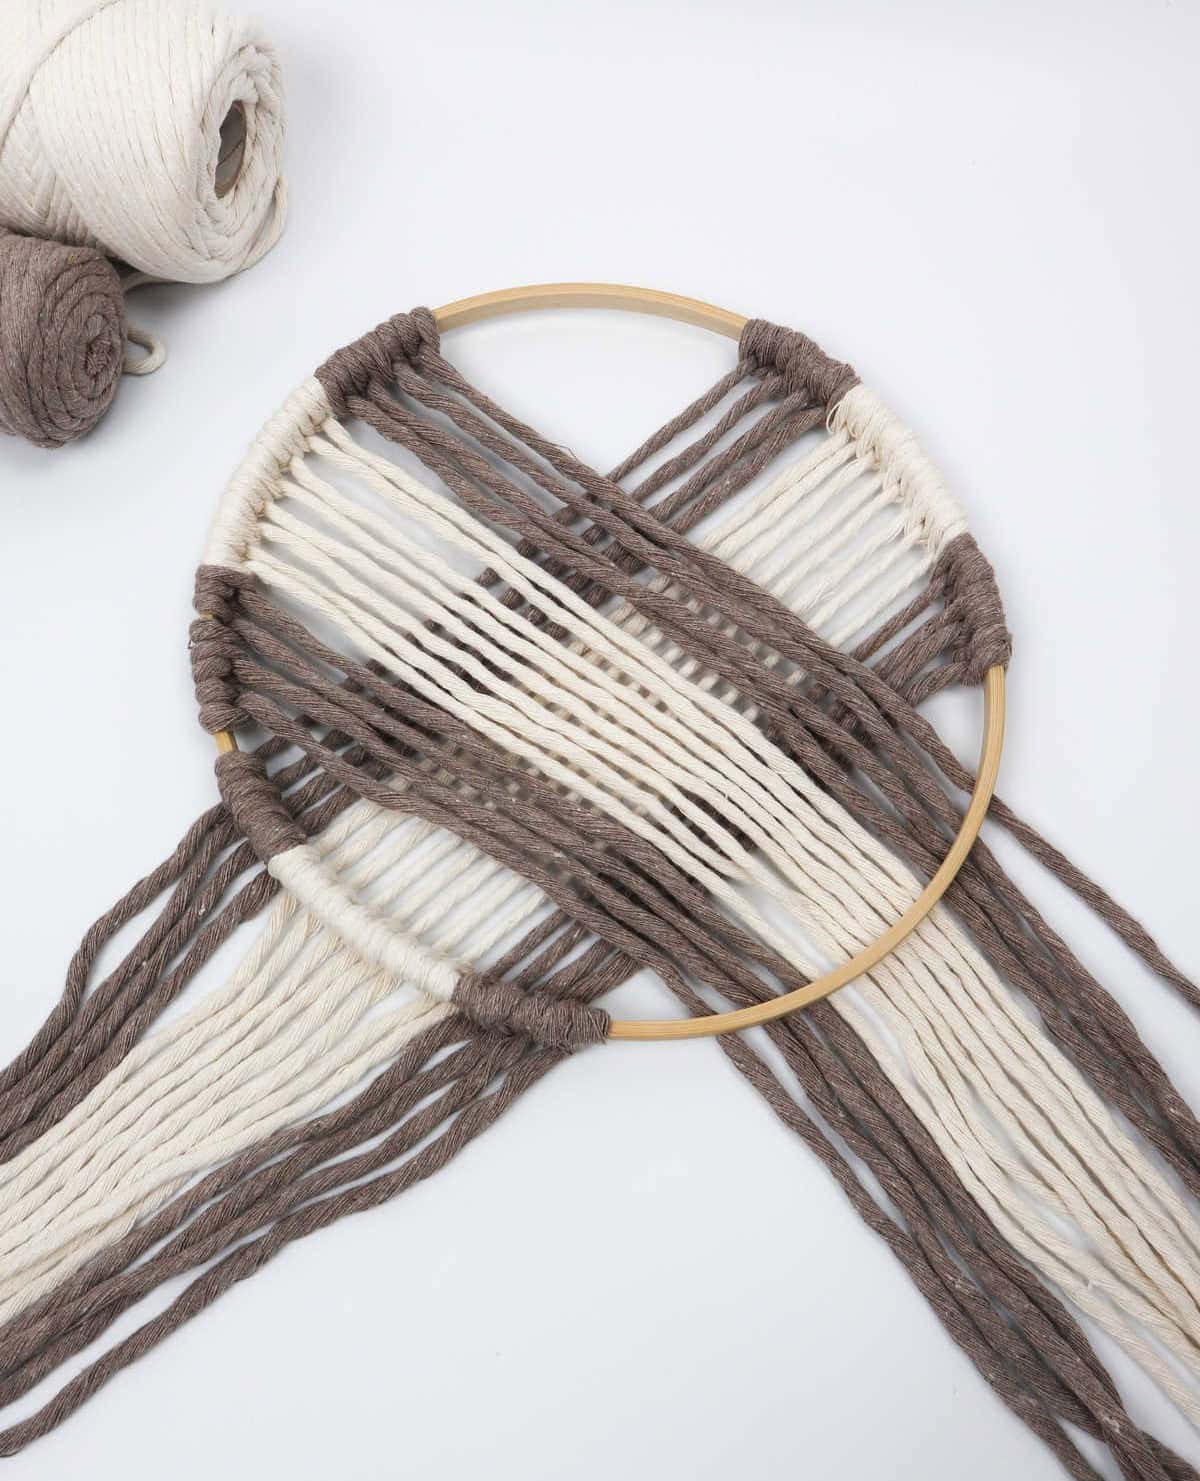
As you complete the cord manipulation on the right side of the hoop, you can proceed to the left side. To achieve this, it’s essential to meticulously gather and guide the remaining 16 strings towards the bottom-right corner of the hoop. Ensure that the hoop remains centered over the strings as you work.
Step 16
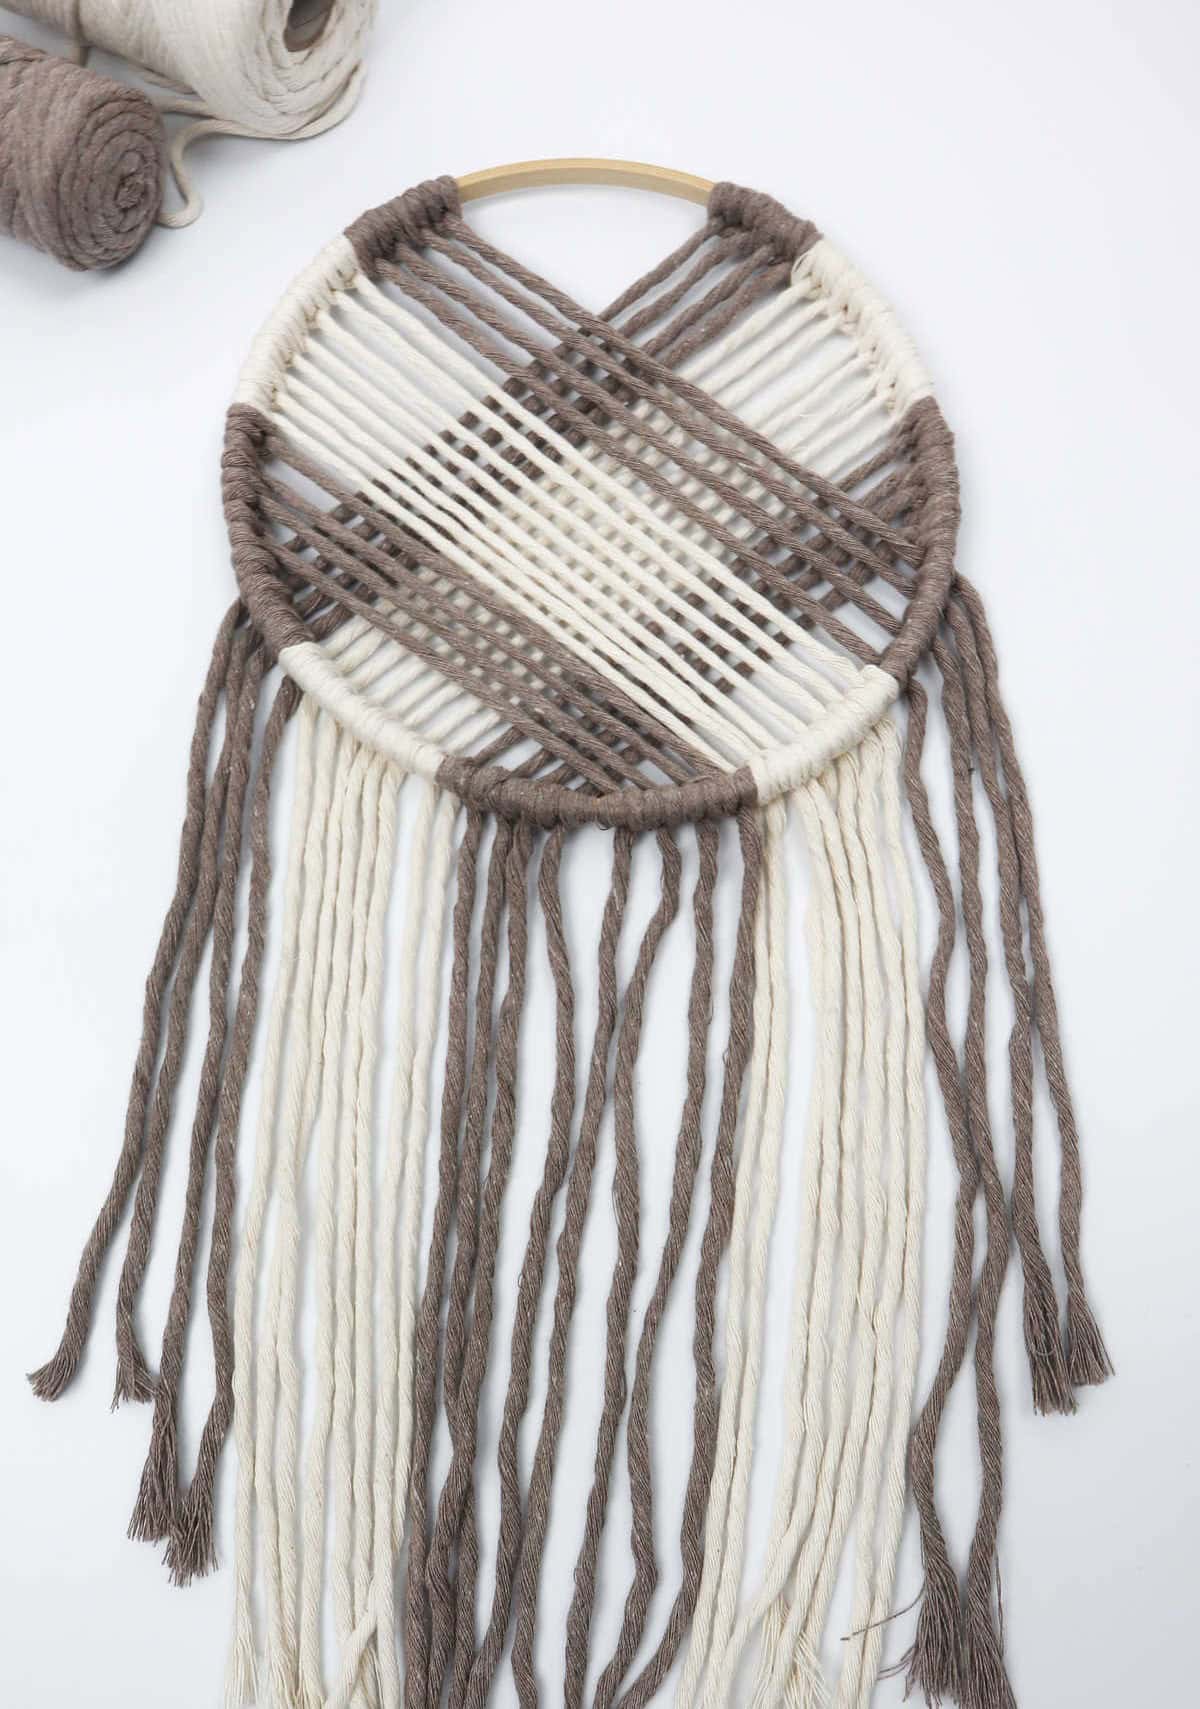
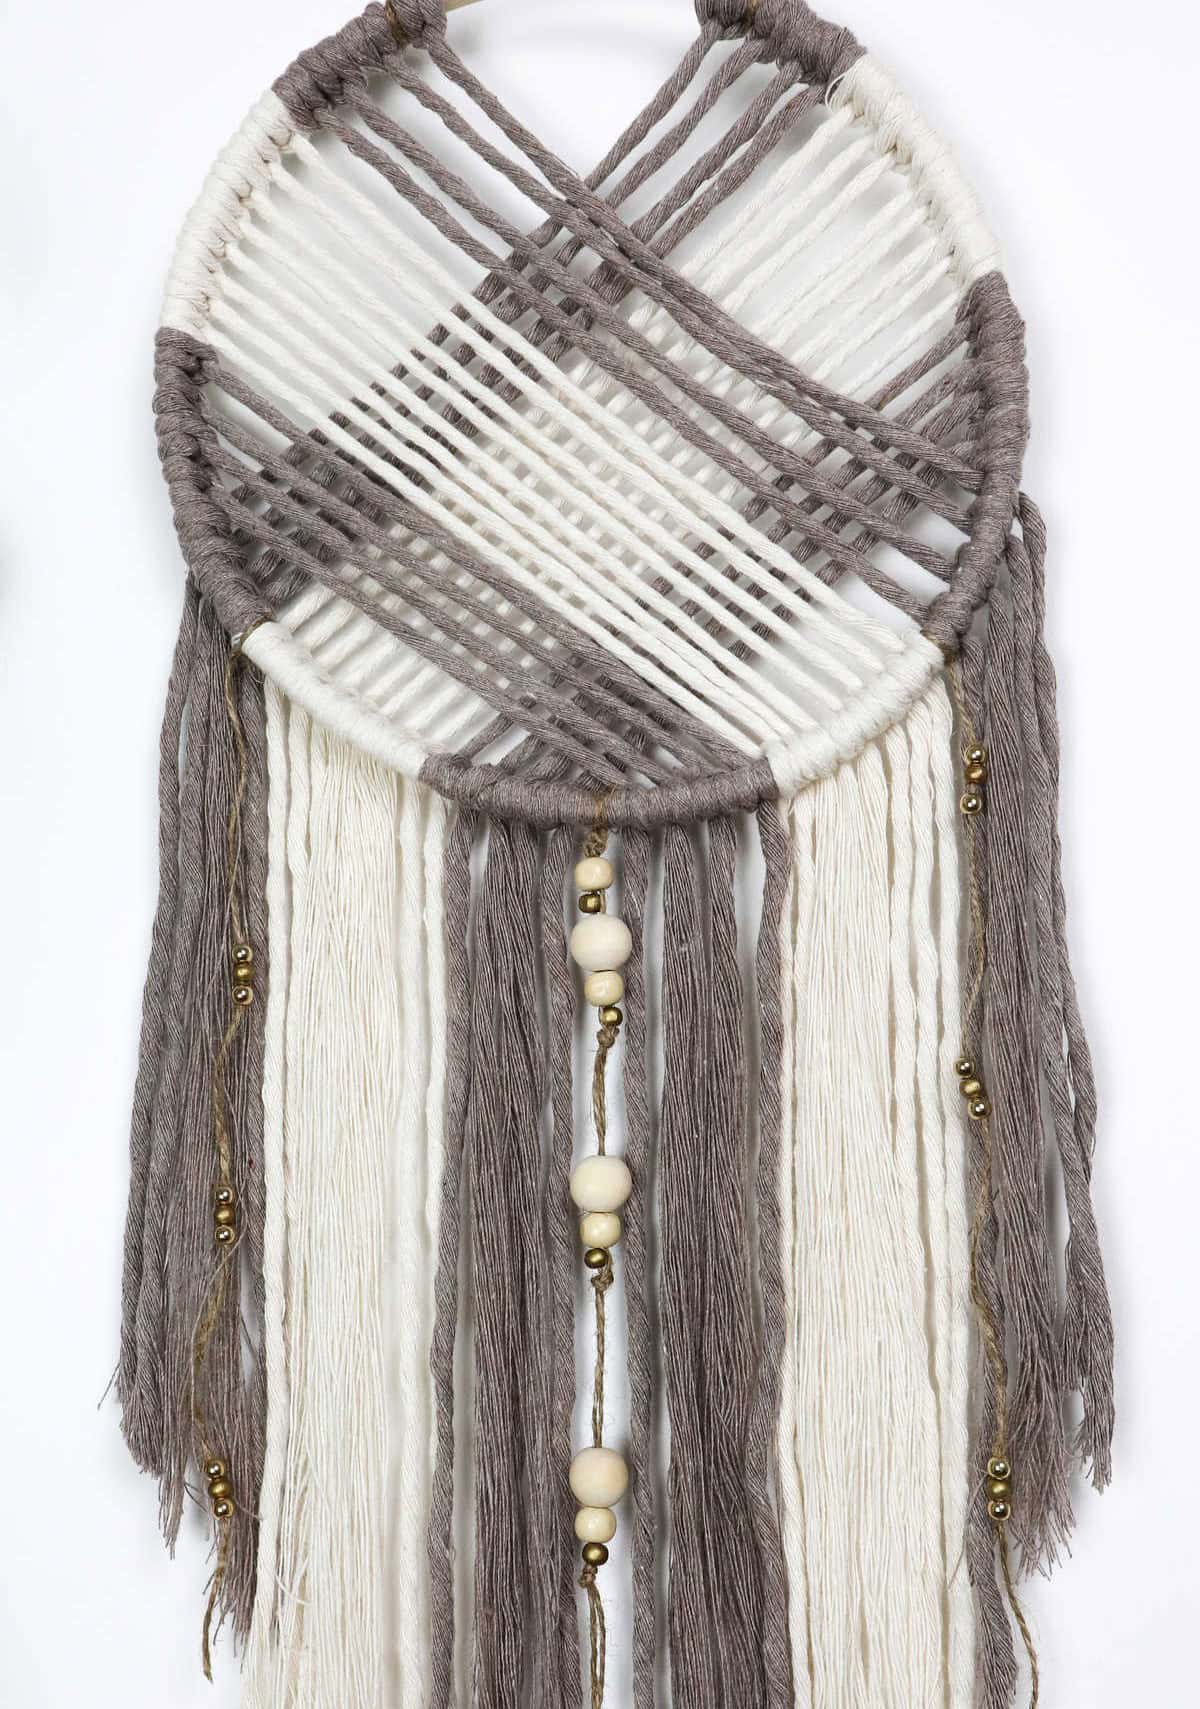
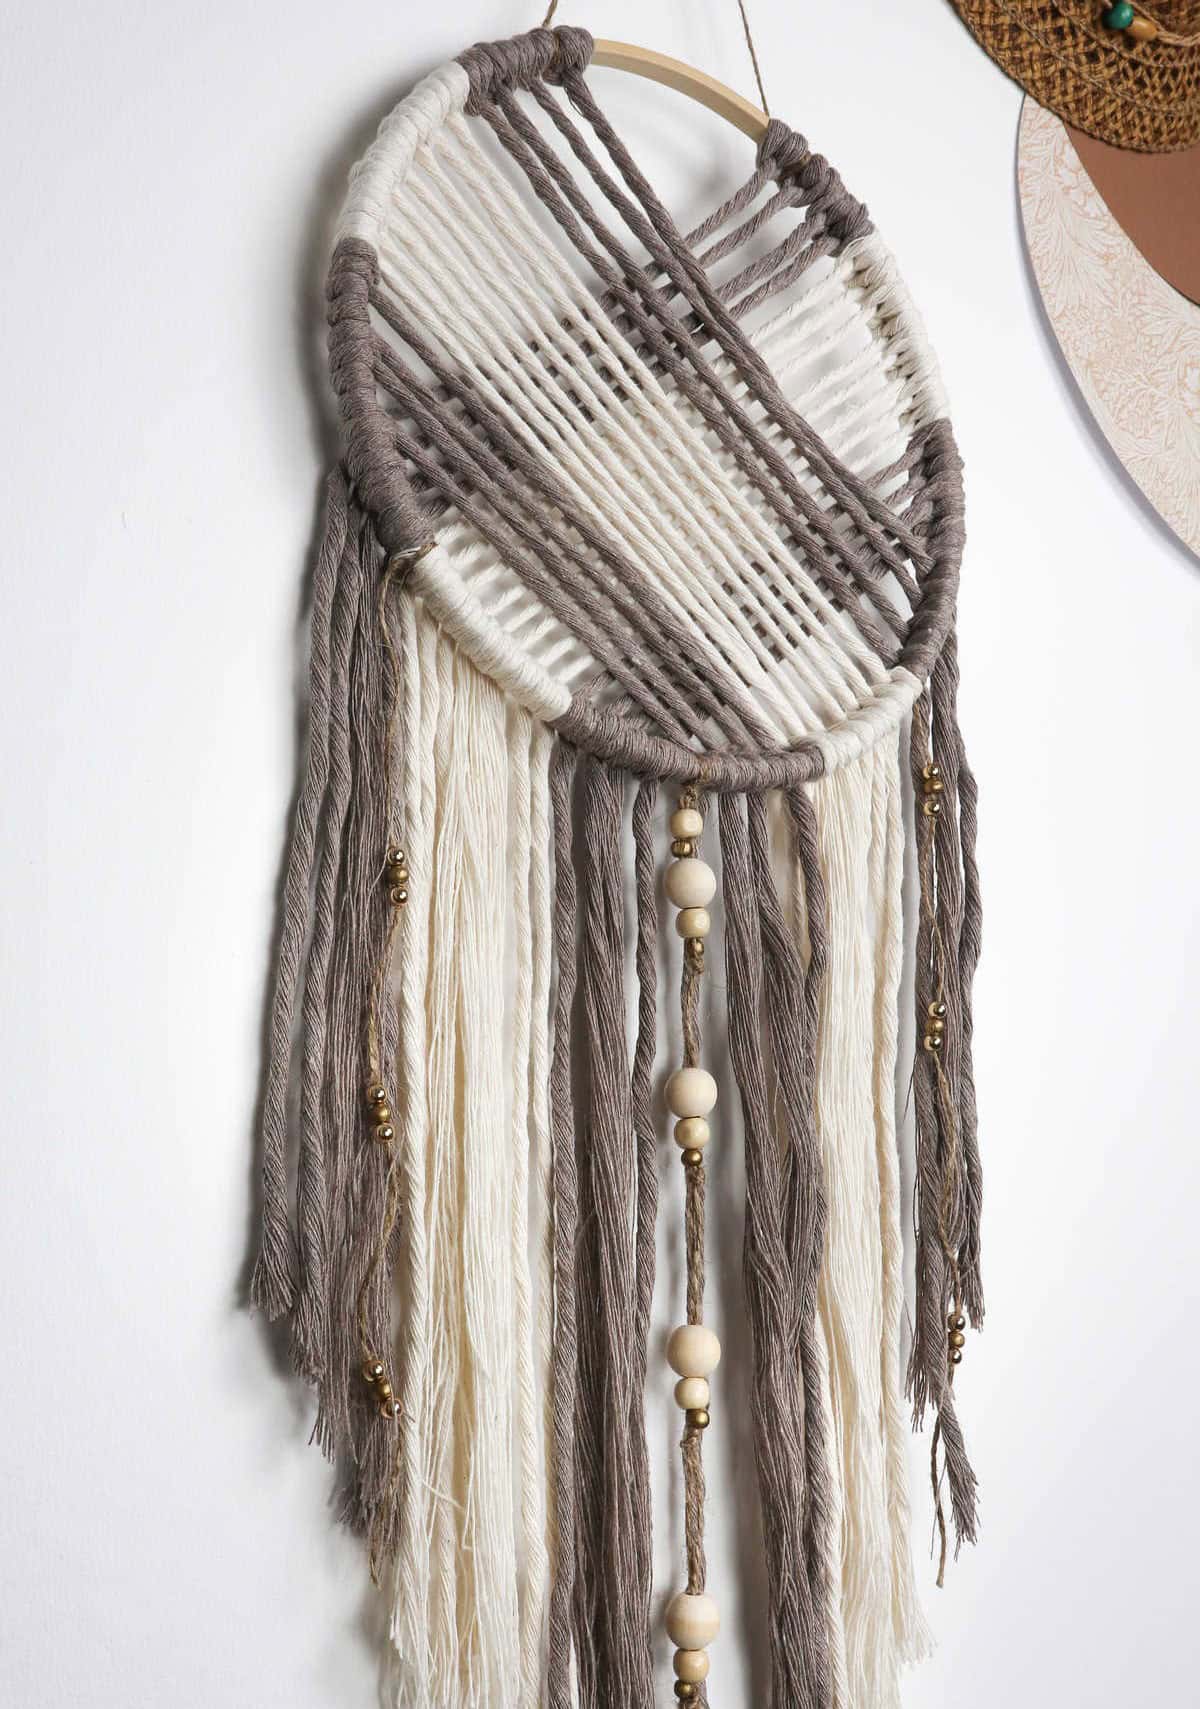
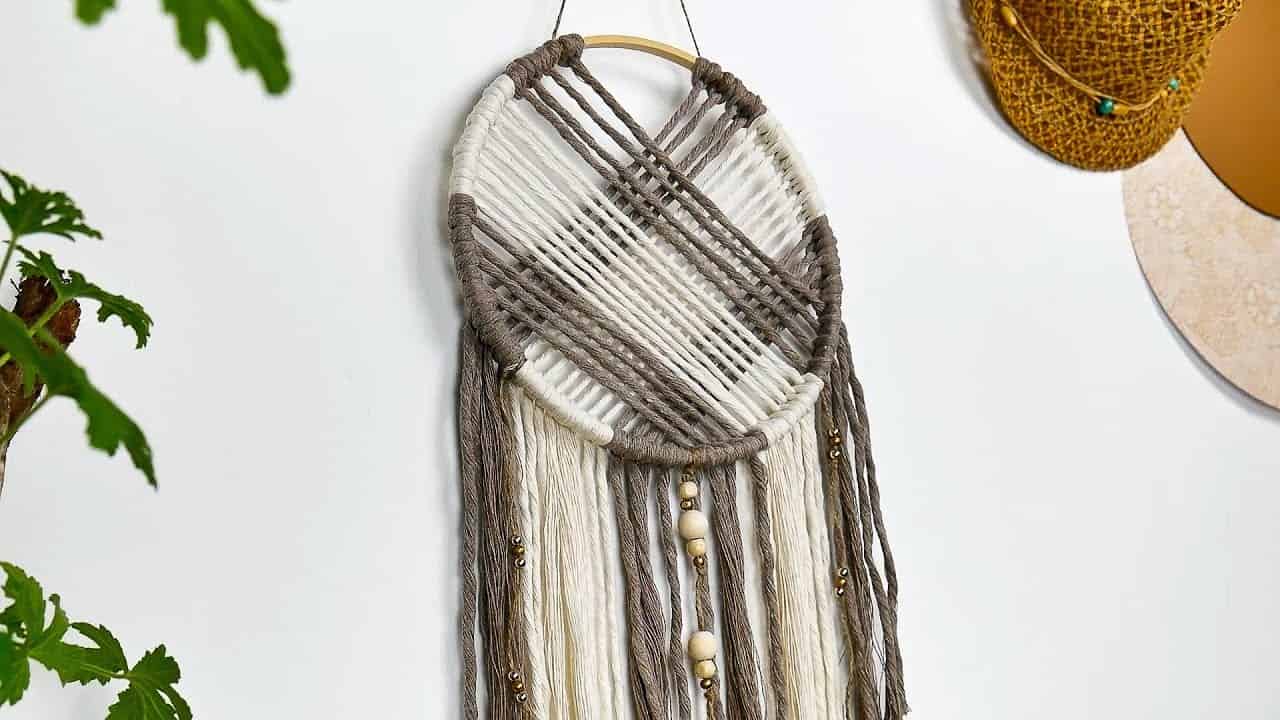
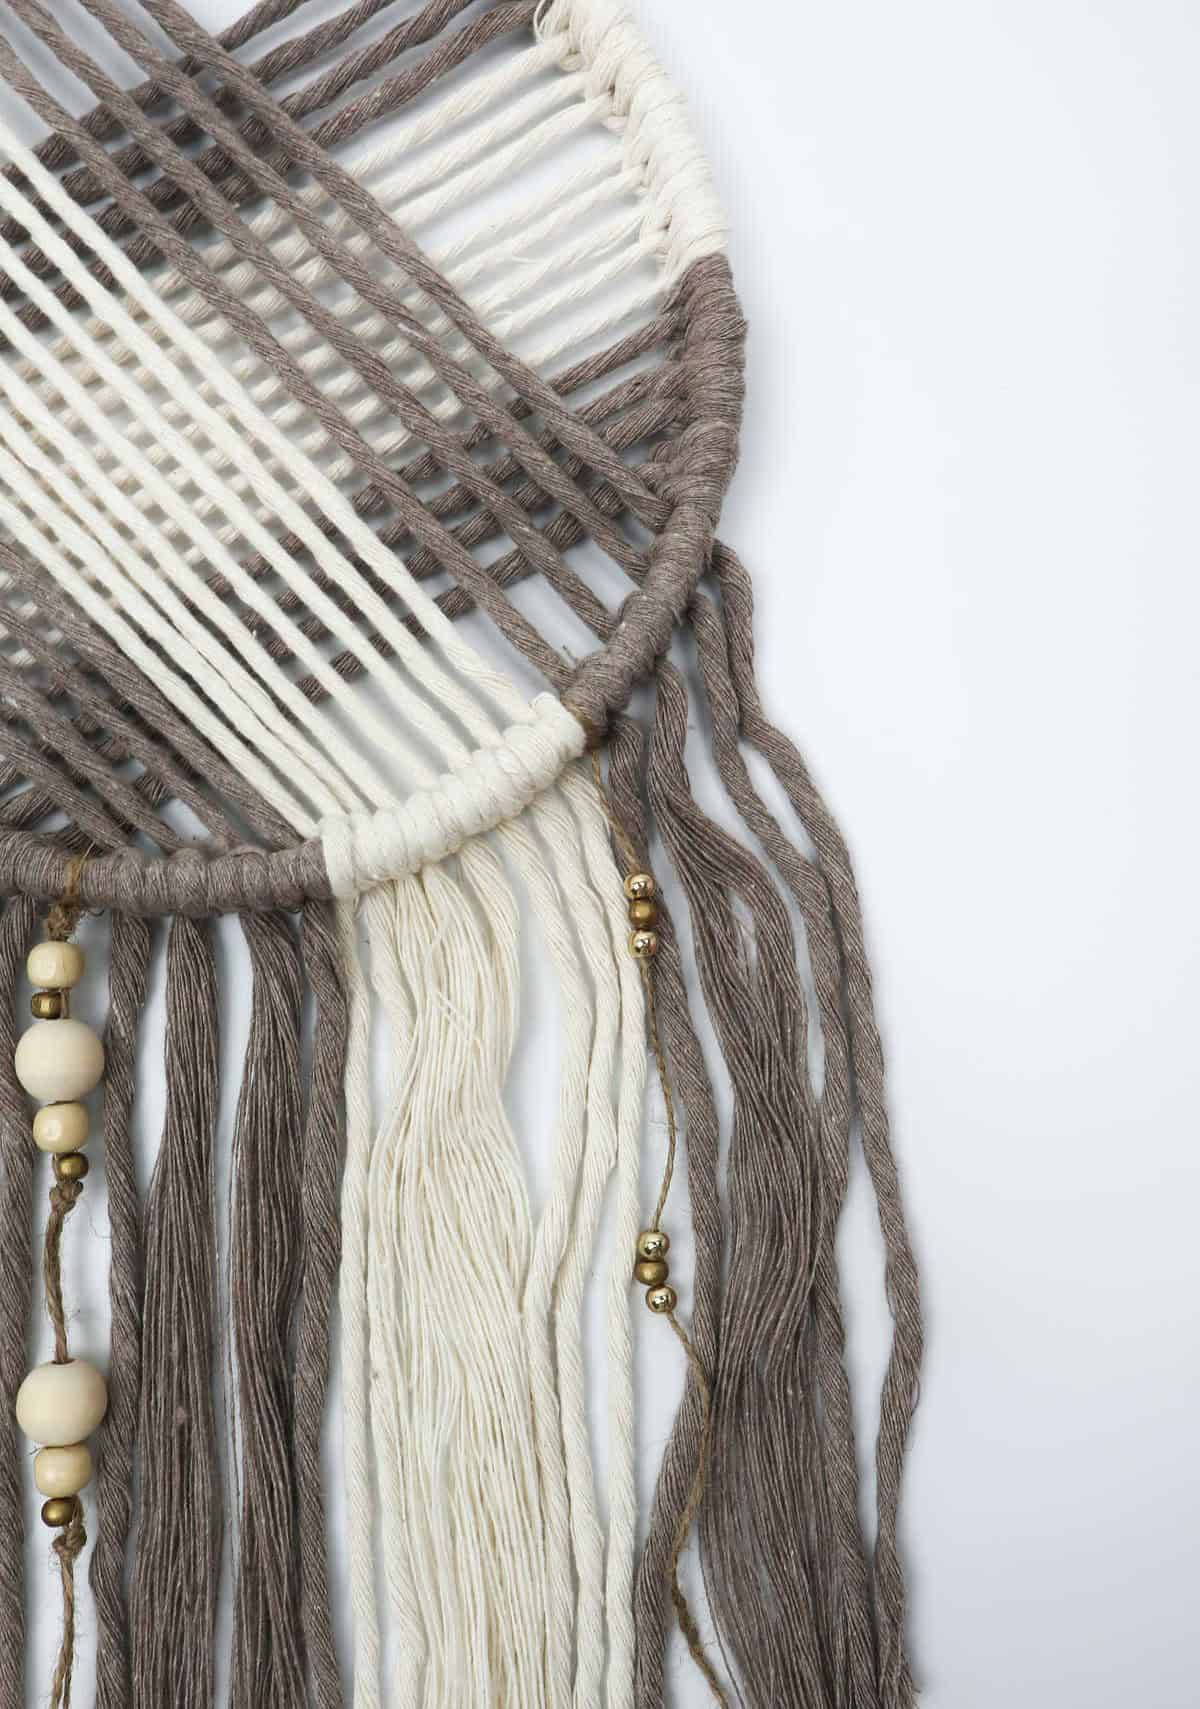
To complete your dream catcher, revisit steps 12 and 13 and meticulously work your threads into intricate knots at the bottom right corner. The finished product should resemble a whimsical, ethereal entity that seems almost otherworldly in its beauty.
As you arrange the cords dangling from the edges, pay close attention to maintaining a harmonious color scheme (specifically, allocate four cappuccino cords, eight cream cords, eight cappuccino cords, eight cream cords, and finally, four more cappuccino cords). This deliberate arrangement will imbue your dream catcher with an air of serenity and enchantment.
Step 17
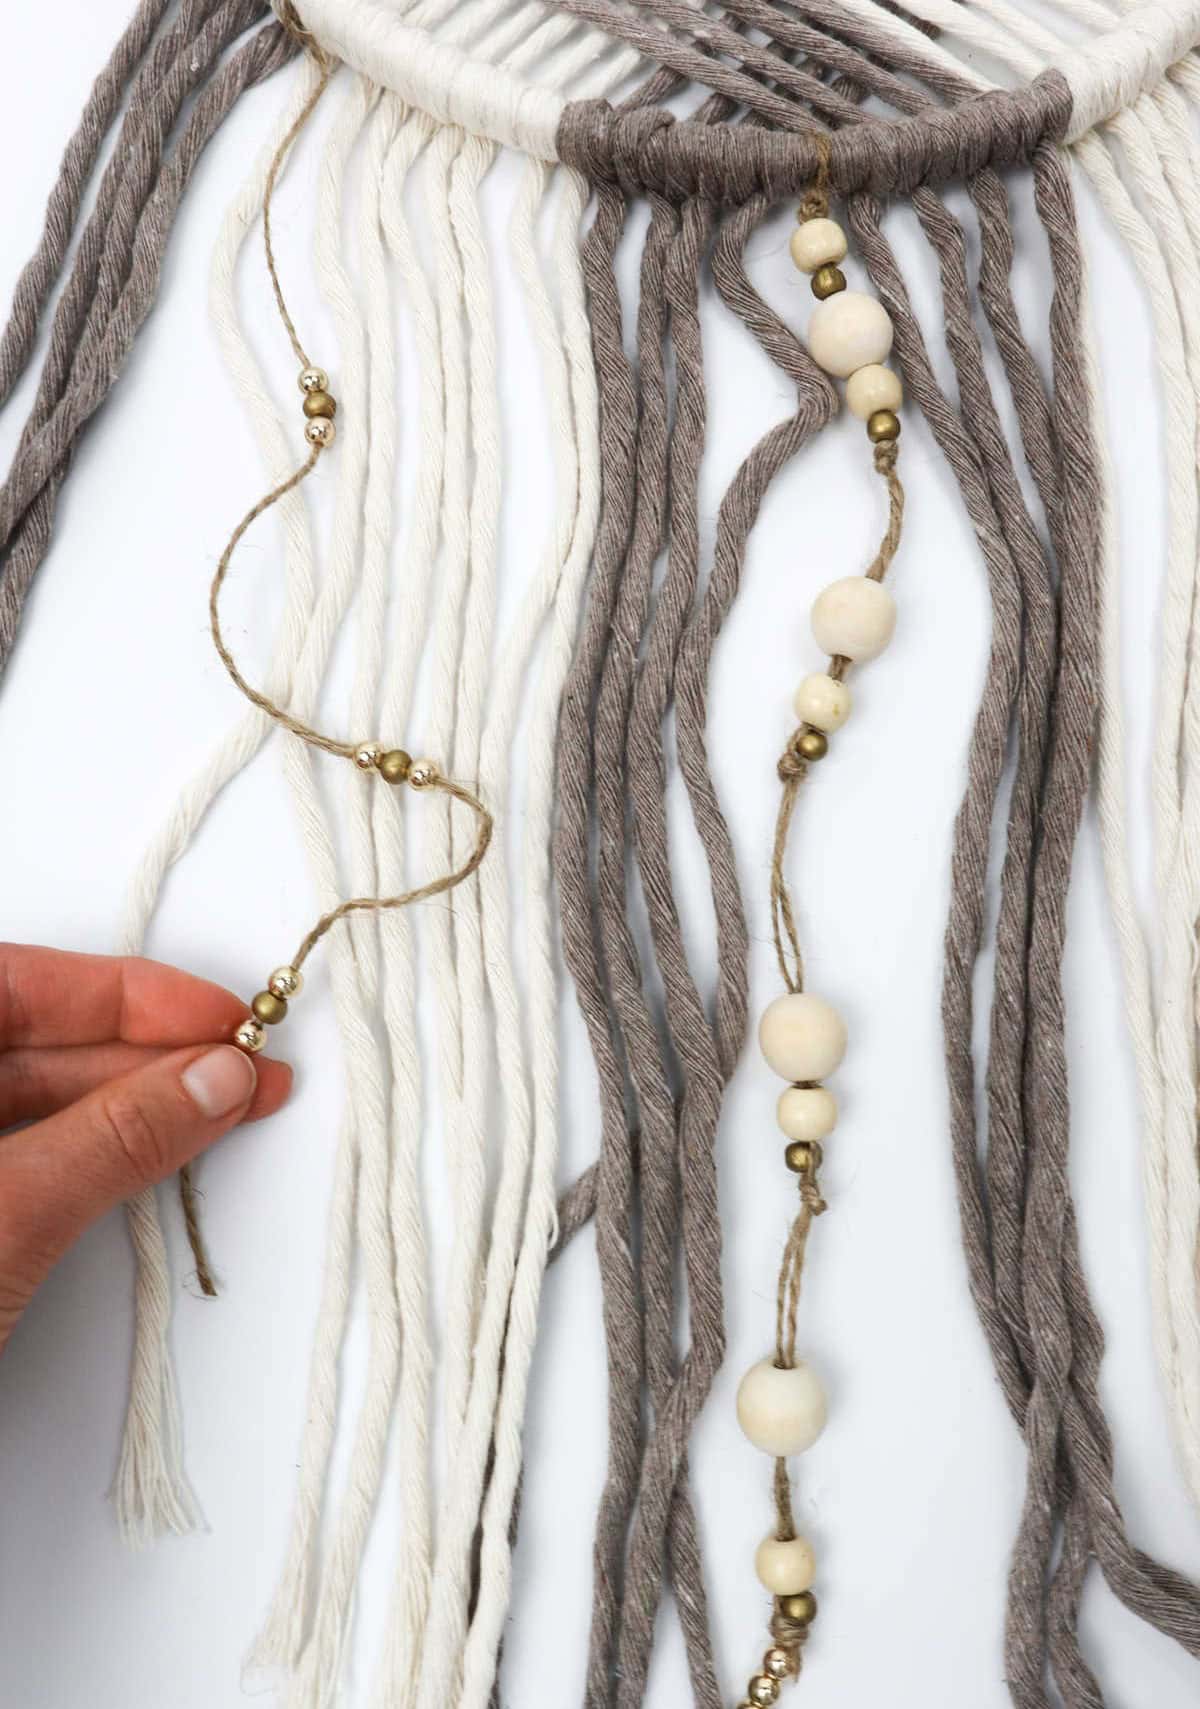
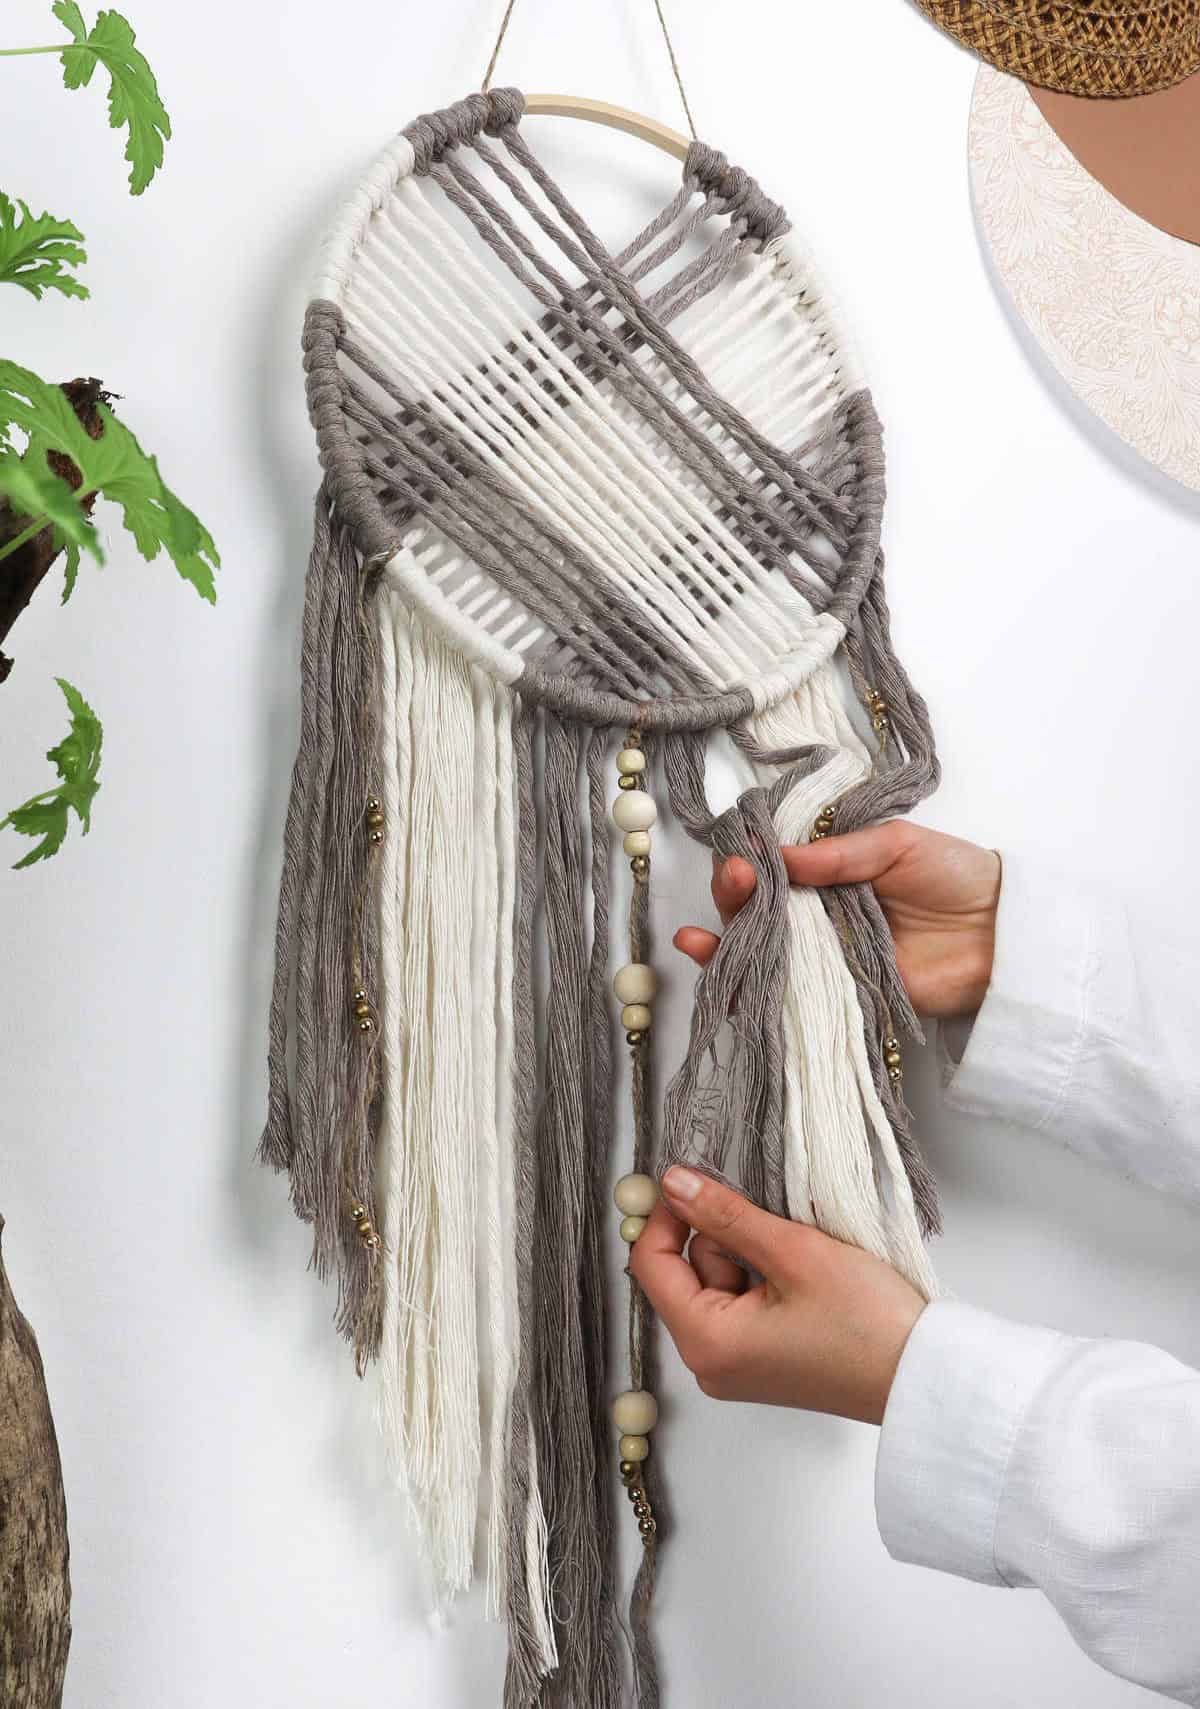
While adding beads to your dream catcher is purely optional, I’ve always found that it adds a touch of elegance and whimsy. To incorporate beads, start by threading them onto some jute twine, securing each one with knots to prevent them from falling off. Once you’ve strung the beads, tie the beaded twine between the cords of your dream catcher, allowing the beads to dangle down.
As you complete this step, take a moment to knot the top of the hoop into a loop, creating a sturdy point for hanging your finished piece.
Step 18
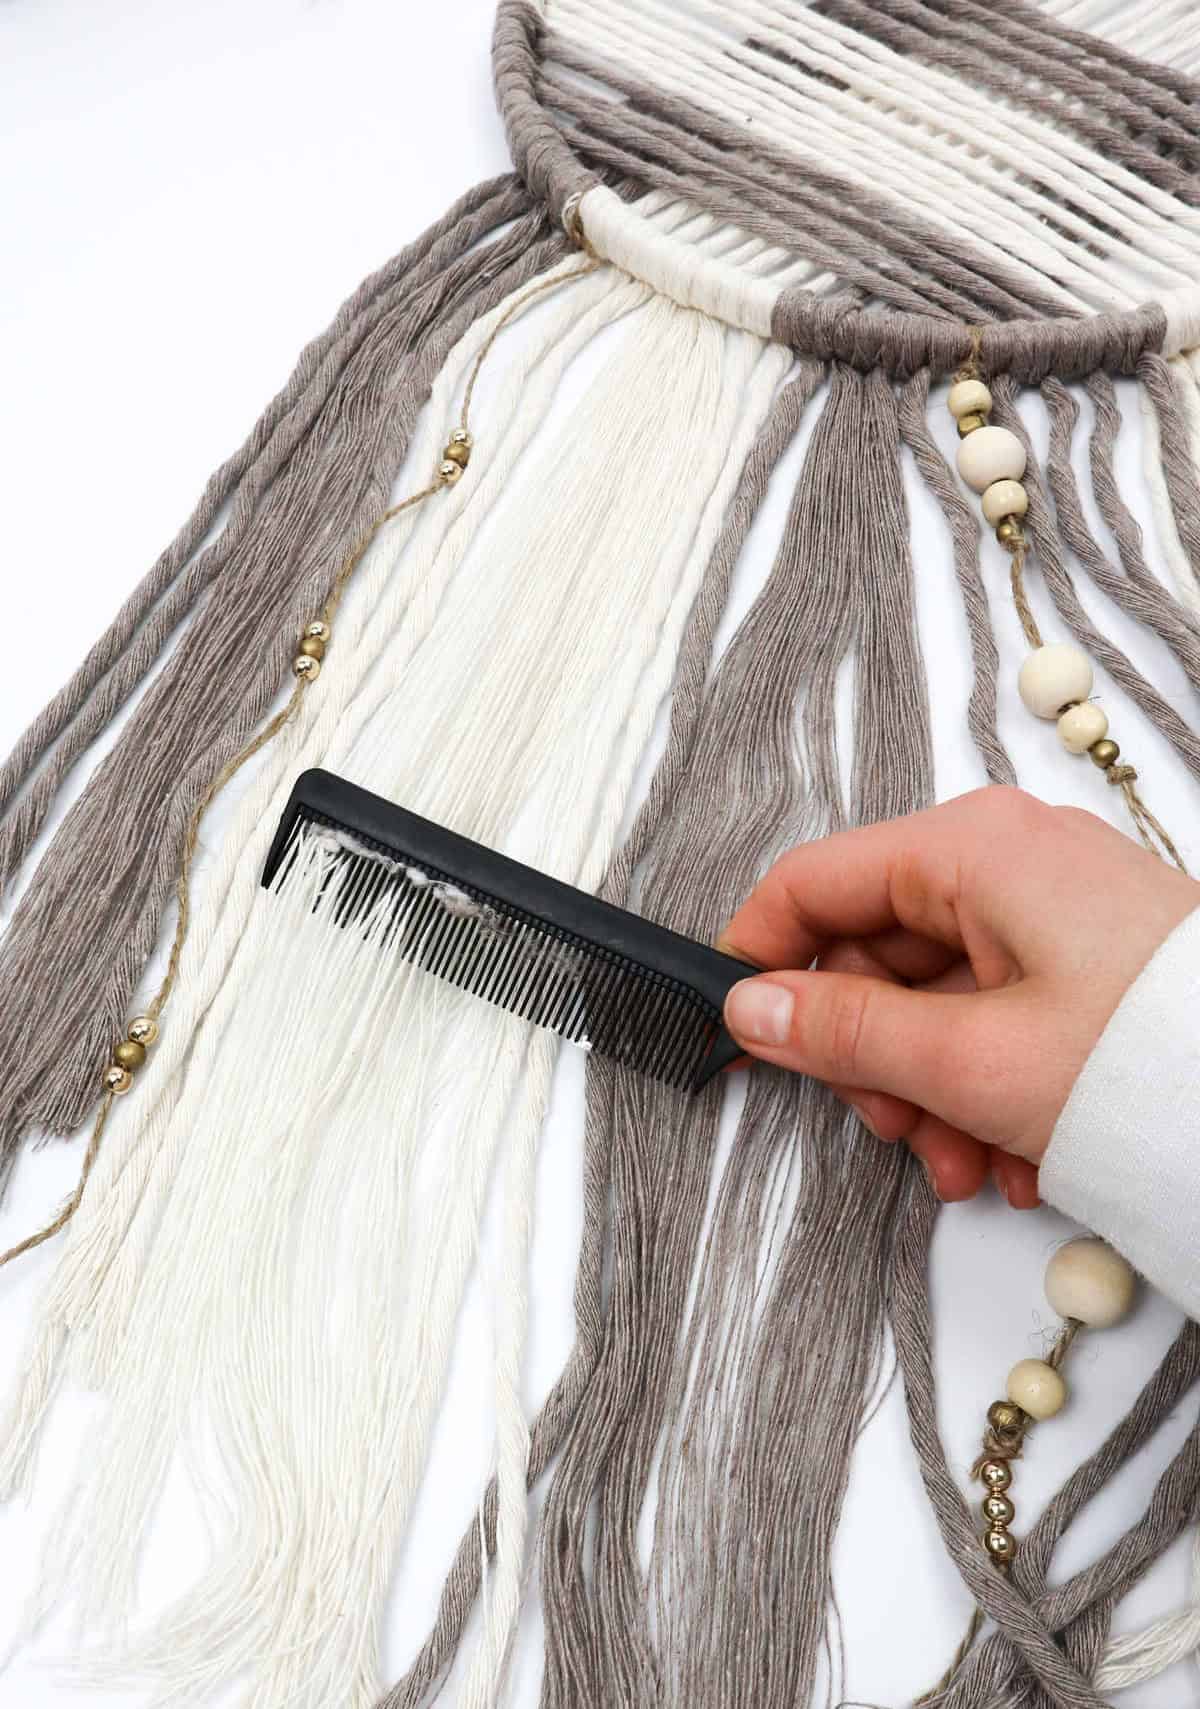

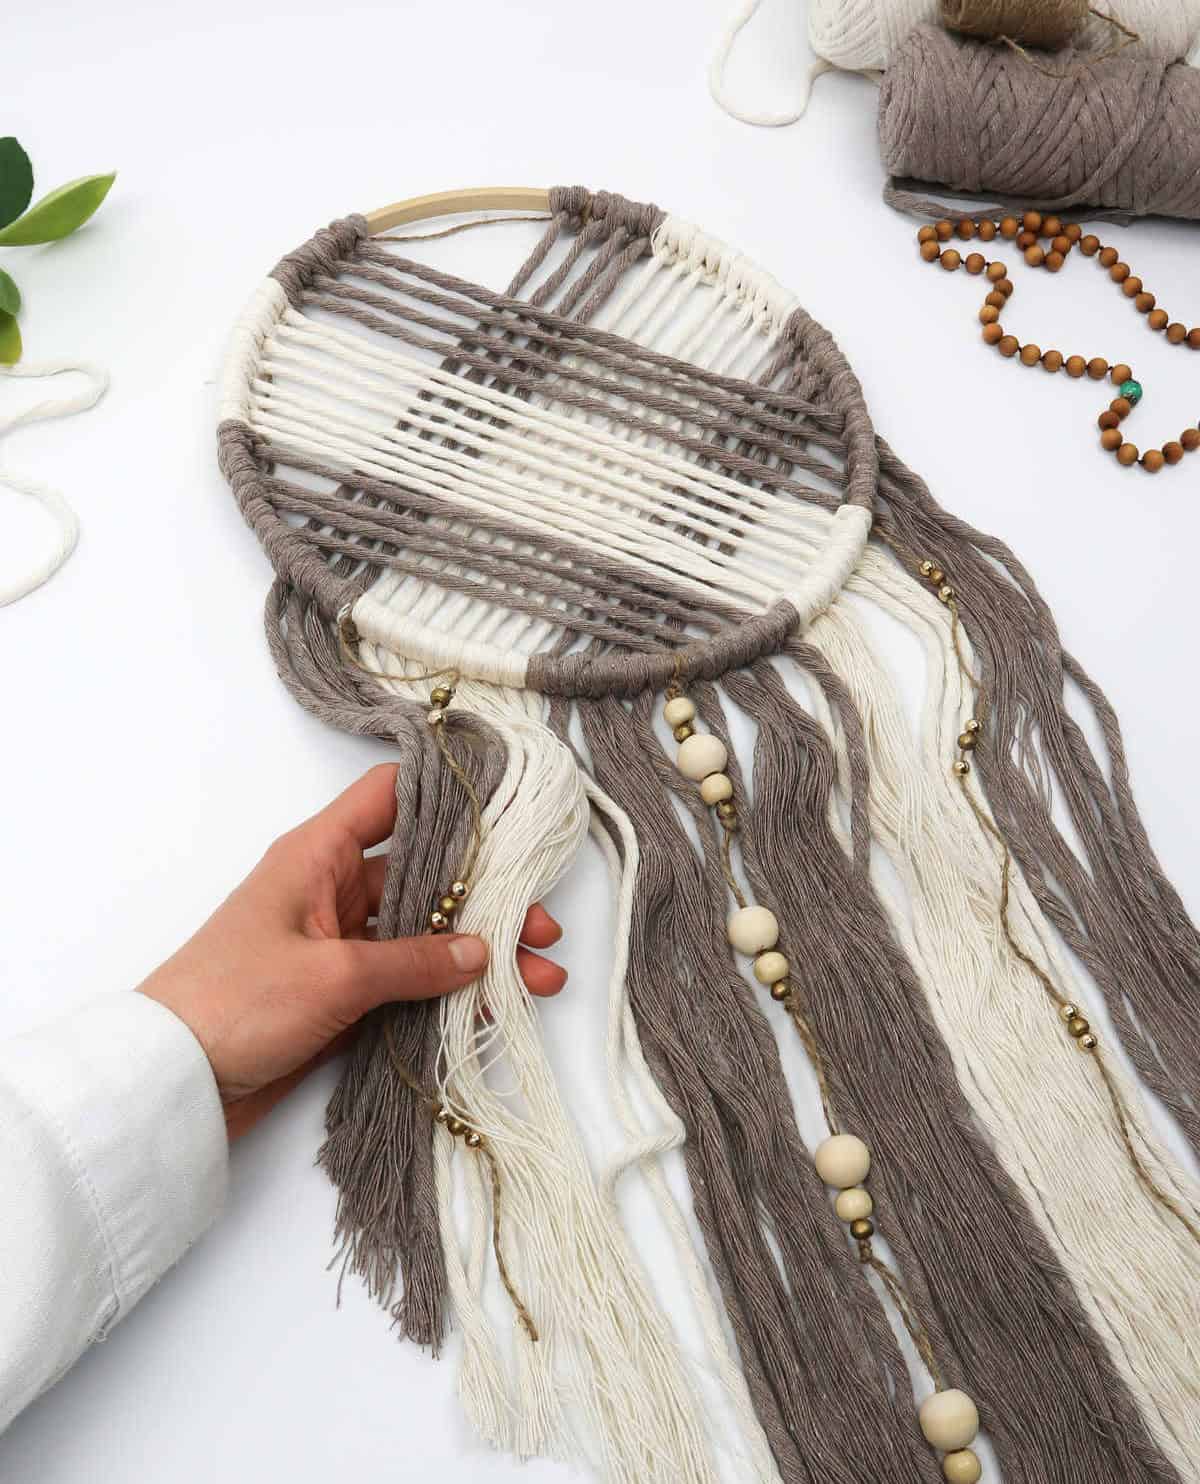
Before trimming the cords, consider one final step: combing them out. This optional process allows you to achieve either a textured or sleek appearance, depending on your personal preference. If you’re happy with the chunky, natural look of the cotton cords, feel free to leave them as is. Alternatively, gently combing them can result in a smooth finish that’s sure to please.
Step 19
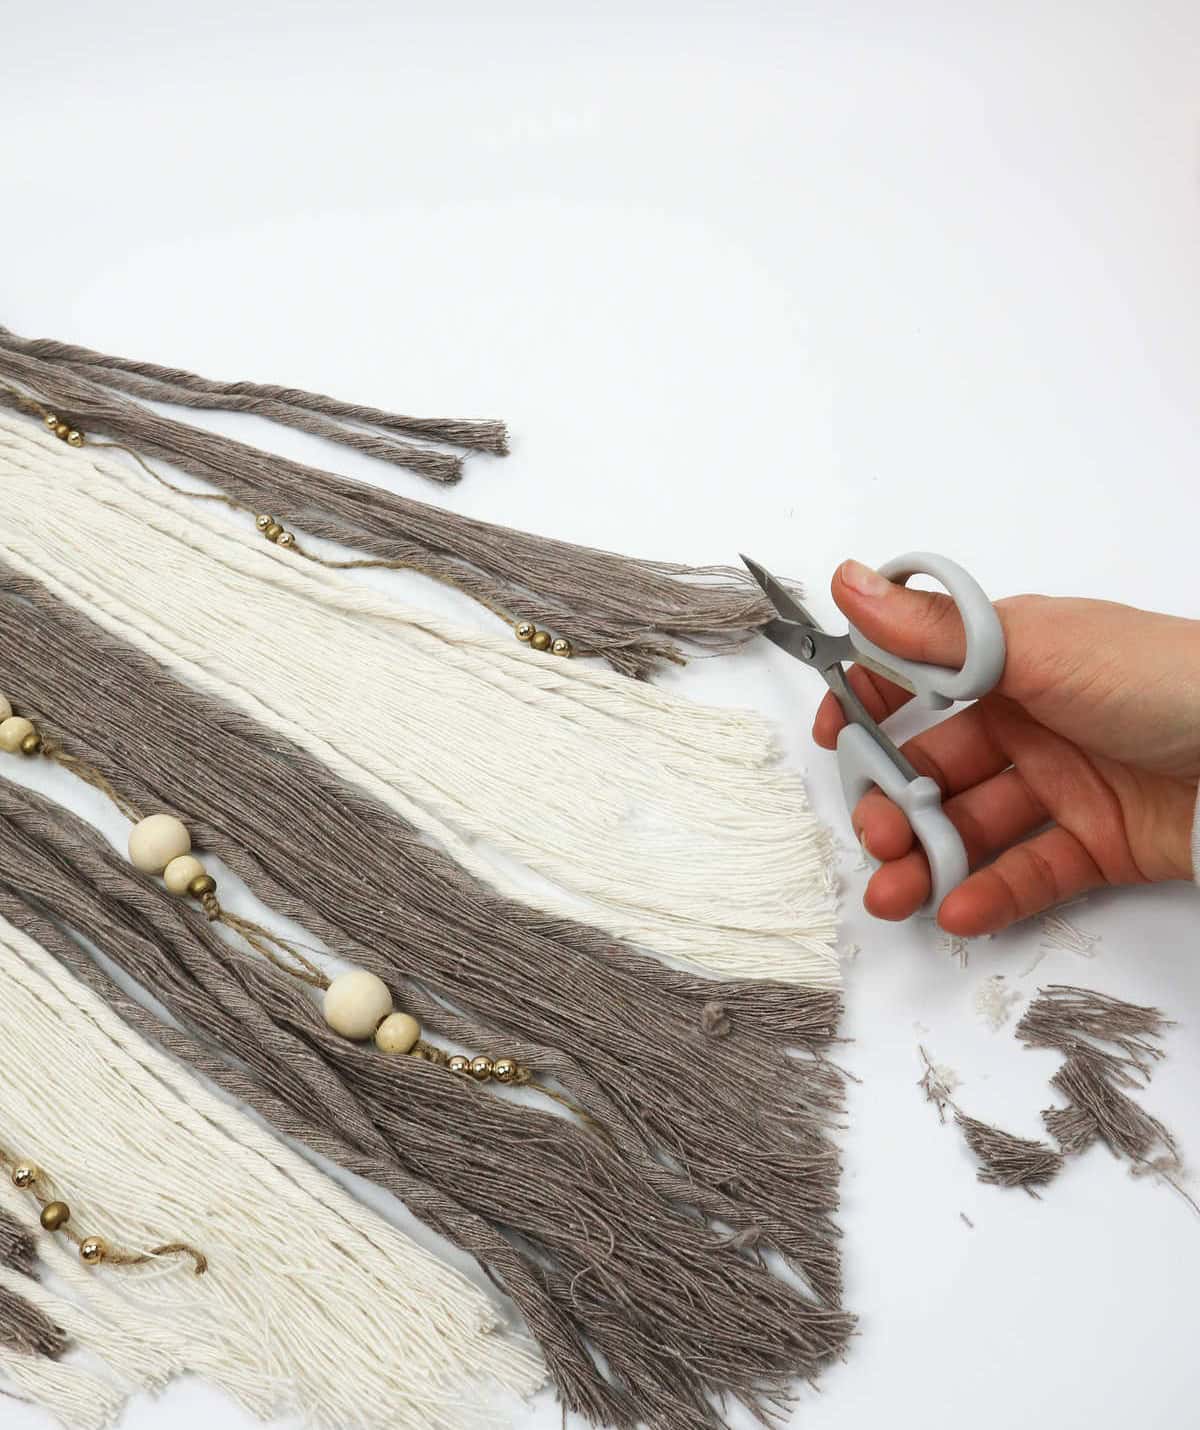
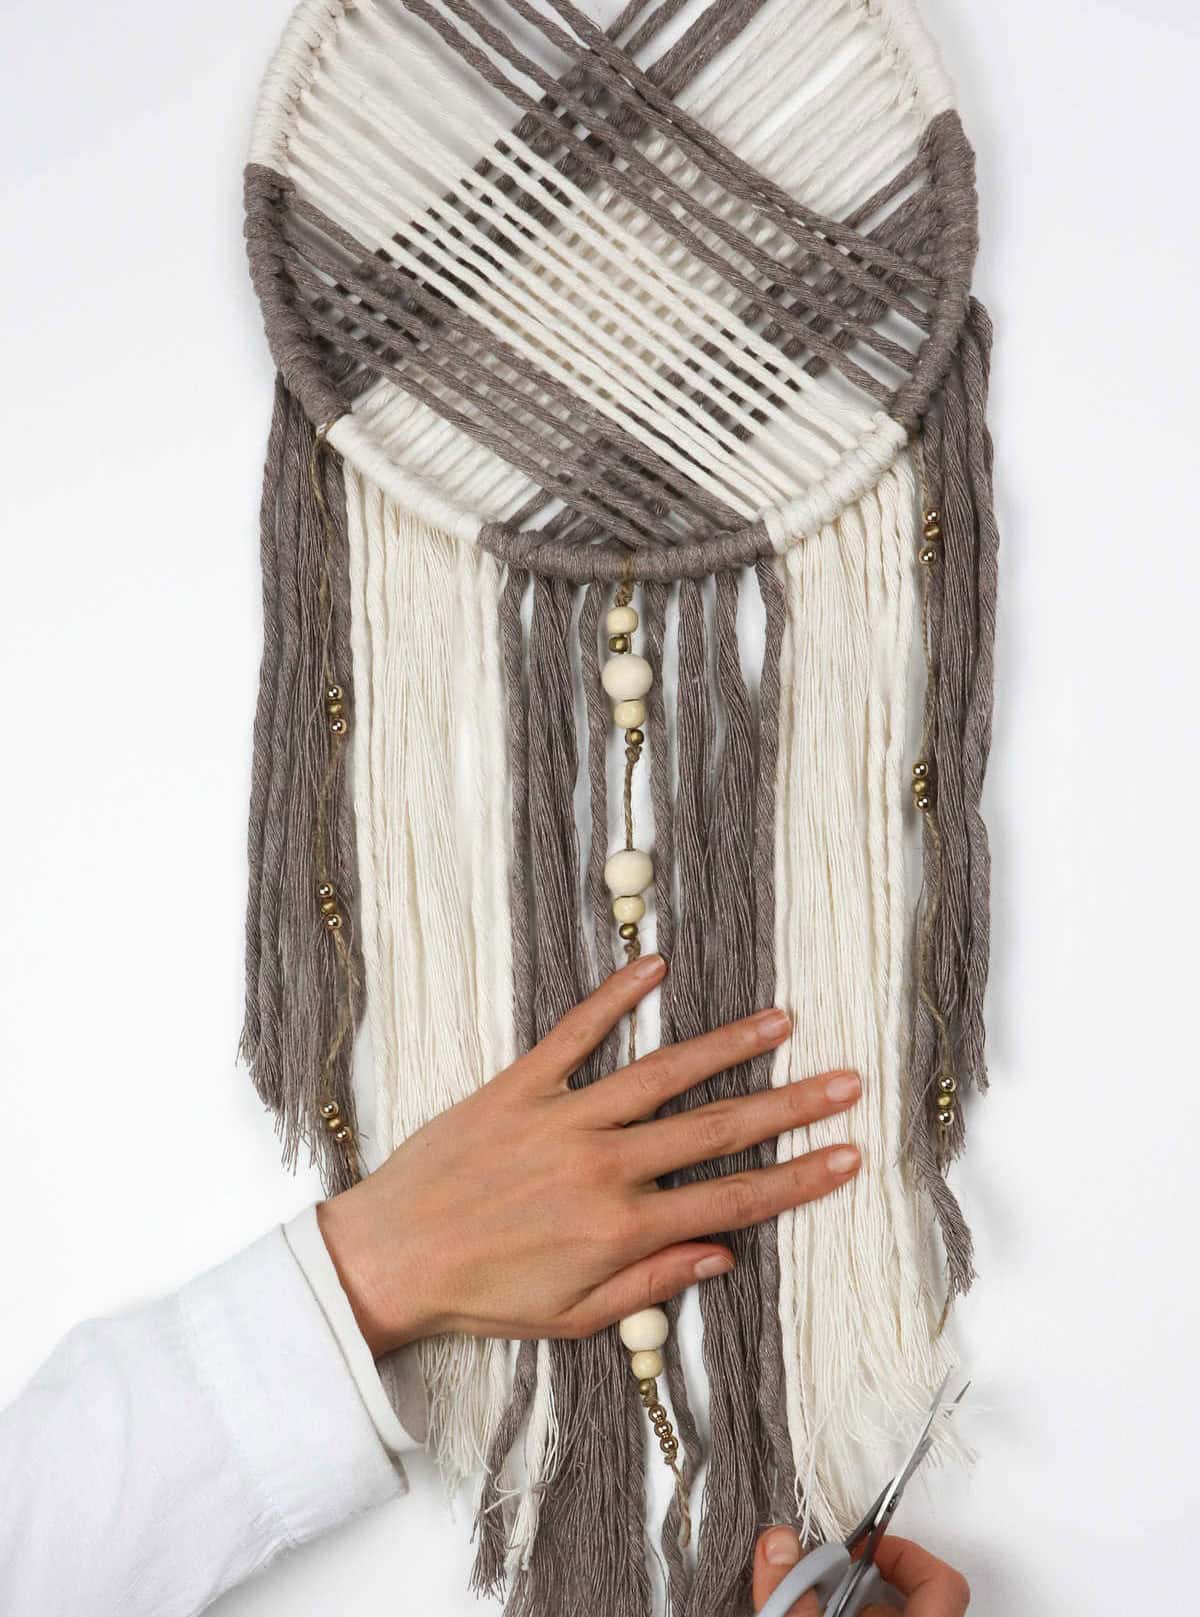
To refine the look of your hair extensions, begin by taking hold of a pair of scissors and meticulously trimming the tips. Consider creating a subtle tapering effect by gradually decreasing the length from the sides to the middle. As you work, make sure to smooth out any stray cords before proceeding with the trimming process. This will help ensure a neat and even finish.
How to Customize Your Dreamcatcher
Elevate your dreamcatcher game by incorporating personal touches. Consider experimenting with various hoop sizes or materials to give it a unique flair. Alternatively, utilize an array of colored jute twines to achieve the desired aesthetic. Take it up a notch by adding decorative elements like ribbons, feathers, beads, and gemstones. The possibilities are endless, allowing you to create a truly one-of-a-kind piece that reflects your personality.
Do Dreamcatchers Really Work?
The notion of dreamcatchers’ potency sparks curiosity, doesn’t it? It’s crucial to acknowledge that their effectiveness hinges on our collective faith. Do we genuinely believe they can sift through our subconscious, capturing the negative and allowing only the positive to seep in? If so, then yes, dreamcatchers do hold power. When we devote time and effort into crafting something from scratch – like this handmade dreamcatcher – its significance is amplified, don’t you agree?
Where Do You Hang a Dreamcatcher?
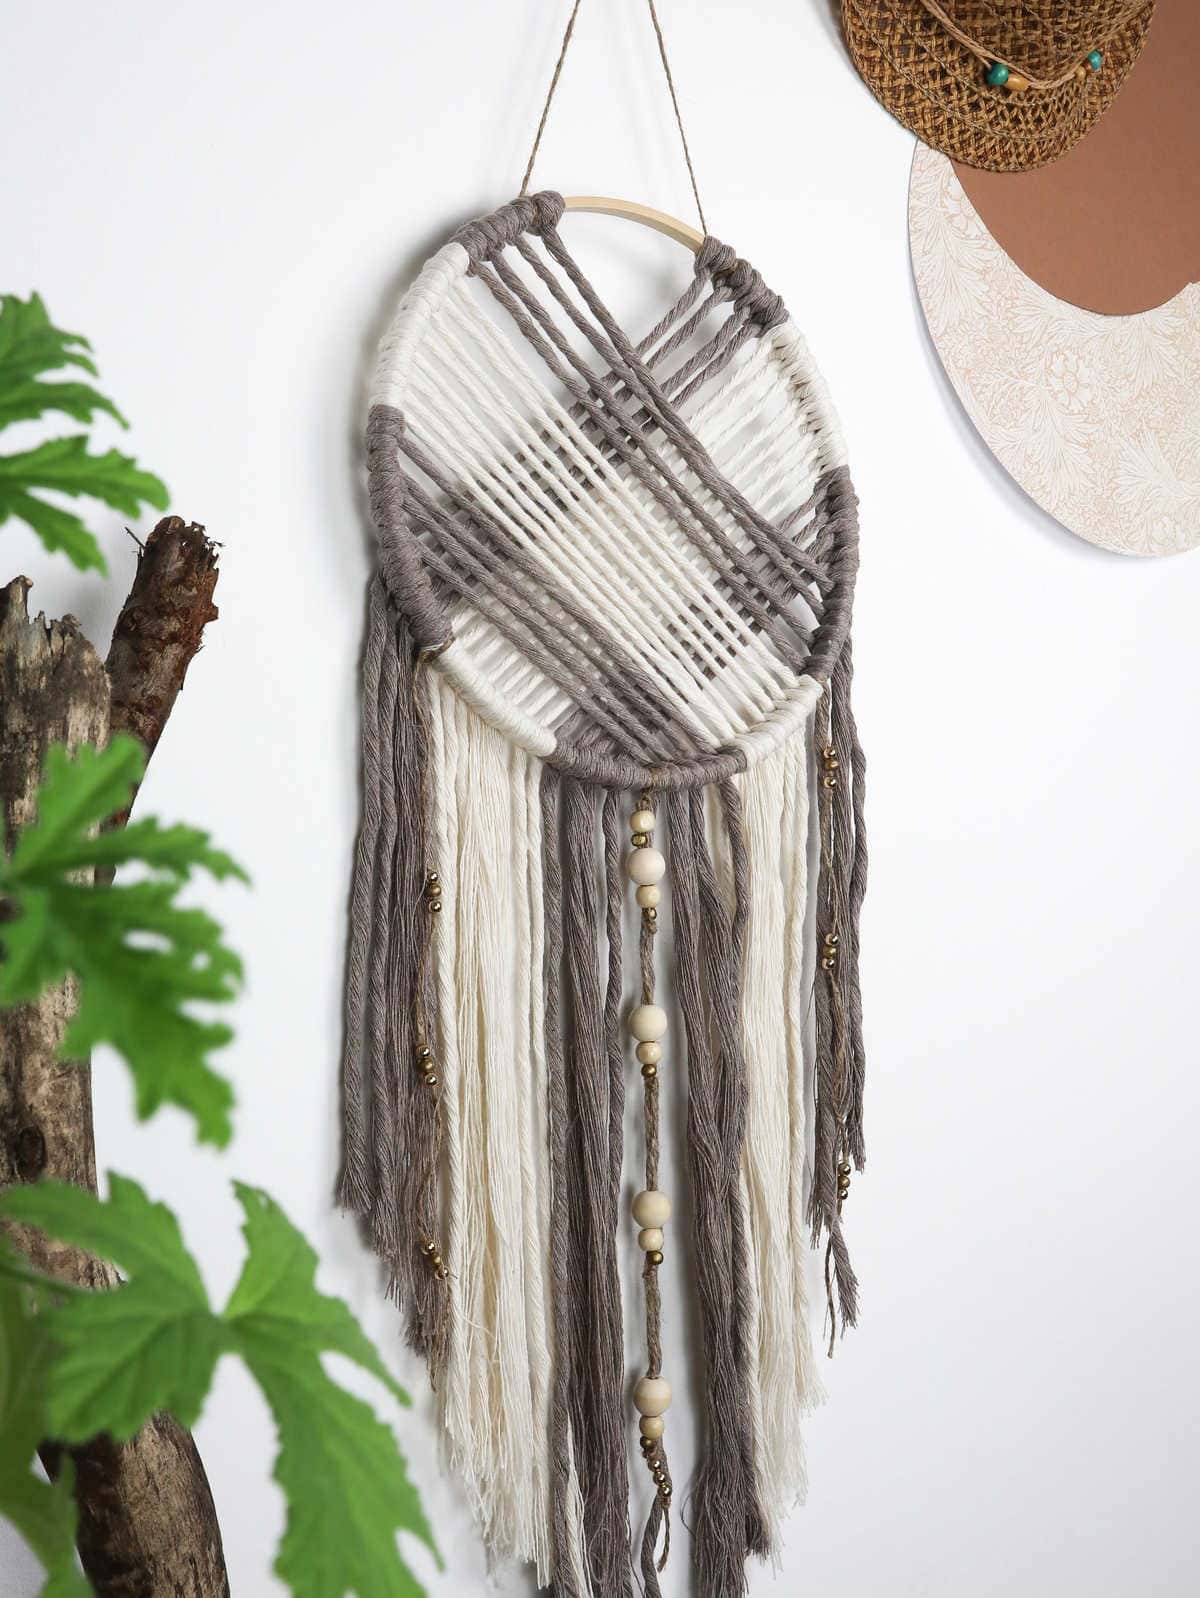
When it comes to deciding where to hang your dream catcher, the possibilities are endless. If you’re looking to add some artistic flair to your home decor, consider hanging it outside on your porch or deck, or as a wall hanging in a prominent spot inside. Alternatively, if you want to use your dream catcher as an accessory, you can easily attach it to your handbag, purse, or even the rearview mirror of your car.
If you’re looking to incorporate them into your daily life as a protective charm, there are several places to consider: your bedroom window (or any large window), your headboard, above a doorway, or even in your basement or attic – perfect for adding a touch of mystique to those often-forgotten spaces.
What Do the Colors on a Dreamcatcher Mean?
When selecting colors for your dreamcatcher, many people instinctively associate certain hues with symbolic meanings. Let’s explore some common color options and their corresponding interpretations:White represents the embodiment of purity, innocence, and goodness. It’s a popular choice among mothers creating dreamcatchers for their children, symbolizing protection and love. Black often carries connotations of mystery, power, or even negative associations like evil, grief, and death.
However, when used as a decorative element, black can add an air of sophistication to your dreamcatcher. Dark grey, with its stormy undertones, can represent ambiguity and the unknown. Blue is typically linked to stability, peace, faith, and piety, offering a calming influence on the human mind. Its serene quality makes it an excellent choice for those seeking balance in their lives. Red is synonymous with passion, love, and intense emotions.
In the context of a dreamcatcher, red represents courage and the willingness to take risks. When combined with orange and yellow, its fiery energy can be balanced by the warmth and joy these colors evoke.
Other Crafts You Might Love Making

Whether you’re a crafty enthusiast or just looking for some creative inspiration, there are countless ways to get started. For instance, why not try your hand at 47 different DIY projects that range from simple to complex? Or if yarn crafts are more your thing, we’ve got 37 unique yarn projects to explore.
Upcycling is another great way to breathe new life into old materials, and with 37 clever ideas for upcycled tin cans, you’ll be well on your way to reducing waste while making something truly special. If you’re looking for a specific project to get started with, our guide on how to make hair bows is easy to follow and requires just a few simple supplies.
But if you’re ready to take your crafting skills to the next level, consider trying your hand at 37 brilliant crafts that can be made and sold online or locally. And finally, don’t forget about DIY projects that are specifically designed for adults, with 47 unique crafts to choose from.
How to Make a Dreamcatcher (Step-by-Step)
Transform your space with the magic of a handmade dreamcatcher. This DIY project is perfect for adults and teens looking to create a unique decoration that captures the essence of good dreams and repels bad ones. The best part? It only takes an hour to complete. So, get ready to unleash your creativity and weave your own DIY dreamcatcher.
Equipment
When it comes to maintaining a healthy and stylish hair routine, many of us rely on a few trusty tools. Among these essentials are hair combs and scissors. While they may seem like simple accessories, they play a crucial role in keeping your locks looking their best. In this sense, using the right comb or pair of scissors can be a vital step in preventing sleepless nights – literally!
With our screens constantly lighting up and casting a blue glow, it’s no wonder that many of us struggle to wind down at night. By taking control of your hair care routine and using tools that work with you, rather than against you, you’ll be well on your way to getting the beauty sleep you deserve.
Materials
To craft a unique piece, you’ll need the following essential components: a wood hoop measuring 10-11 inches in diameter, a 0.15 inch thick single twist cotton cord available in cream and cappuccino hues. Additionally, you’ll require beads to add visual interest, as well as optional items like tape and jute twine for securing any loose ends.
Instructions
To create your dreamcatcher, begin by preparing your materials. Cut eight 60-inch pieces of colored cotton cord in each of the desired colors. Secure your hoop in place with tape to prevent it from shifting as you work. Start at the top left side of the hoop and attach the first cord, folding it in half and forming a loop under the hoop. Bring the loop over the hoop and pull both loose ends through, creating a knot by tugging firmly.
Repeat this process on the left side of the previous knot with the next piece of cord, then again on the right side. This will establish your initial pattern. Continue adding cords in alternating colors, ensuring that each end is either under or over the hoop as you work. Once you’ve completed the top half of the hoop, move to the opposite side and repeat the process. As you work, pay attention to your patterns, aiming for a sequence of 2 cappuccino, 4 cream, 2 cappuccino, and then repeating.
When both sides are complete, hang beads from jute twine below the dreamcatcher’s main body and attach a length of twine at the top for hanging. Finally, trim the ends to create a smooth finish or leave them as is. You can also comb the cords for a polished appearance.
Notes
Have you ever given this craft a try? If so, we’d love to hear about your experience. Share your thoughts in the comments section below! We’re all about creating a community here, which means engaging with our readers and responding to every single comment.