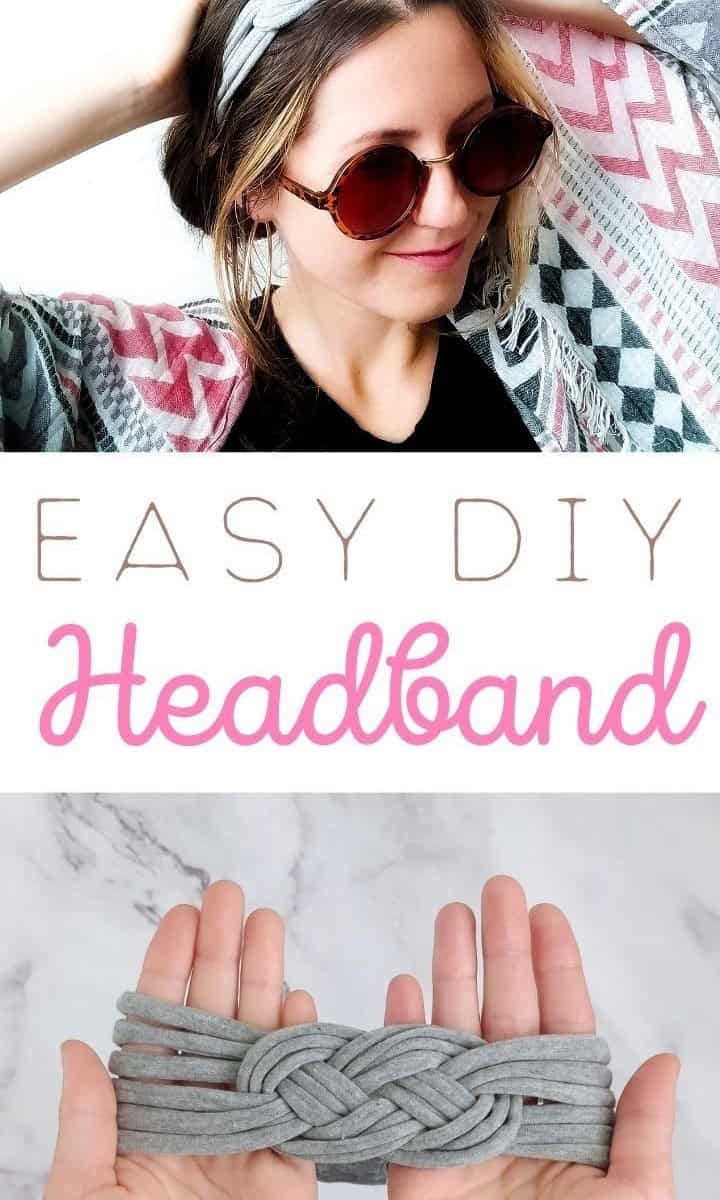

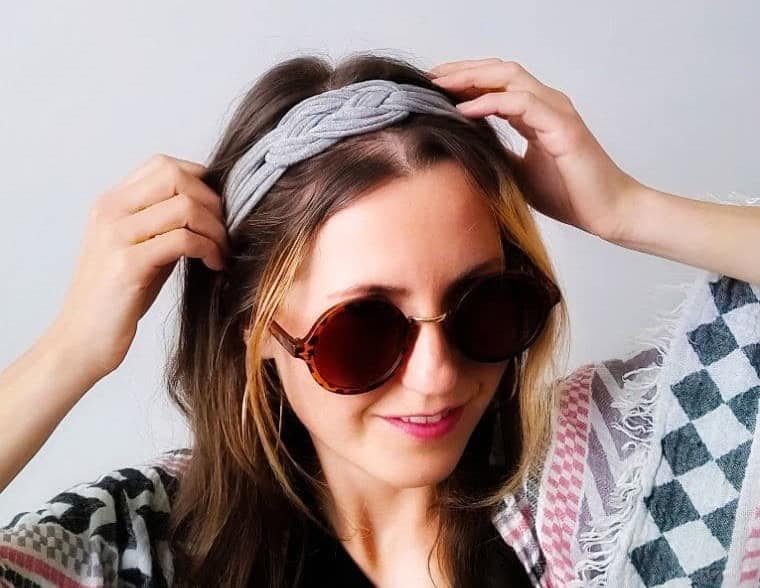
Transforming an old T-shirt into a stylish and sustainable headband has never been easier. This DIY project is perfect for those seeking a fashion fix without breaking the bank or harming the environment. The best part? It’s ridiculously simple to make, requiring only a few basic materials and some creative flair. Just grab that old T-shirt you’ve been meaning to repurpose and let’s get started!
What Kind of Fabric Do You Use to Make Headbands?
When selecting a material for your headband, consider its intended purpose. If you’re using it for fitness or athletic activities, look for a fabric that can absorb sweat effectively. On the other hand, if you’re making it as a fashion accessory, color and texture may be more crucial. I opted for grey in my project because of its versatility. Regardless of the use case, a stretchy fabric is essential. This allows you to create a snug fit around your head without compromising comfort.
T-shirt fabric is an excellent choice due to its inherent softness, stretchiness, and ease of manipulation, making it ideal for crafting a comfortable and functional headband.
Supplies You’ll Need
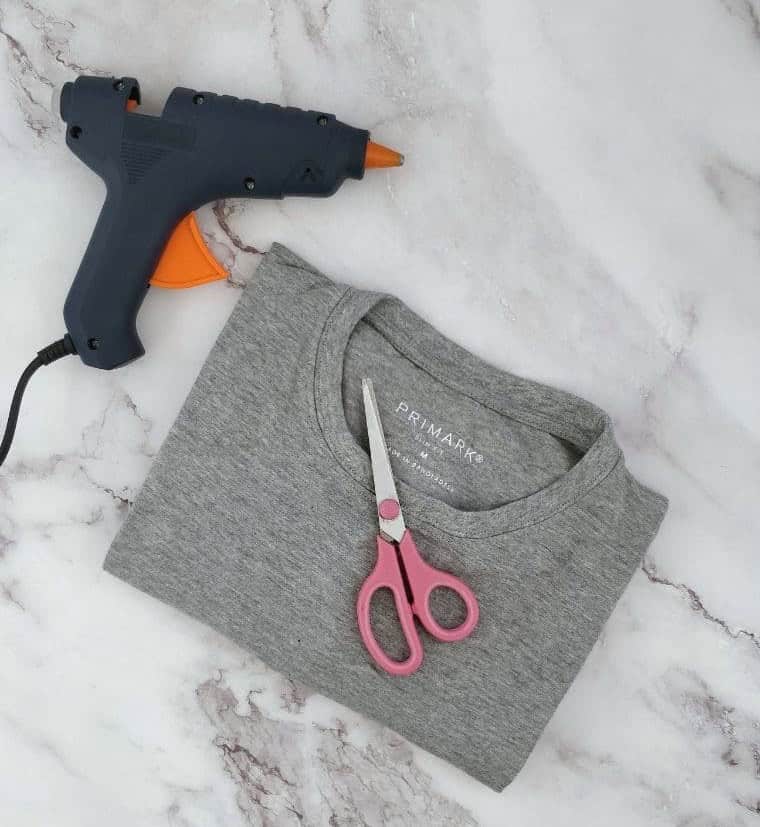
To create a unique and personalized headband, you’ll need just a few simple materials: an old t-shirt, a glue gun, and fabric scissors. While these tools are essential for bringing your design to life, the true keys to success lie in your patience and creativity. By embracing the process and having fun with it, you’ll be able to overcome any challenges that arise and end up with a truly one-of-a-kind headband.
How to Make This DIY Headband
Get cozy by setting up a comfortable workspace in your living room, complete with the essentials: a favorite show on Netflix, a satisfying snack, and ample room to spread out and create.
Step One
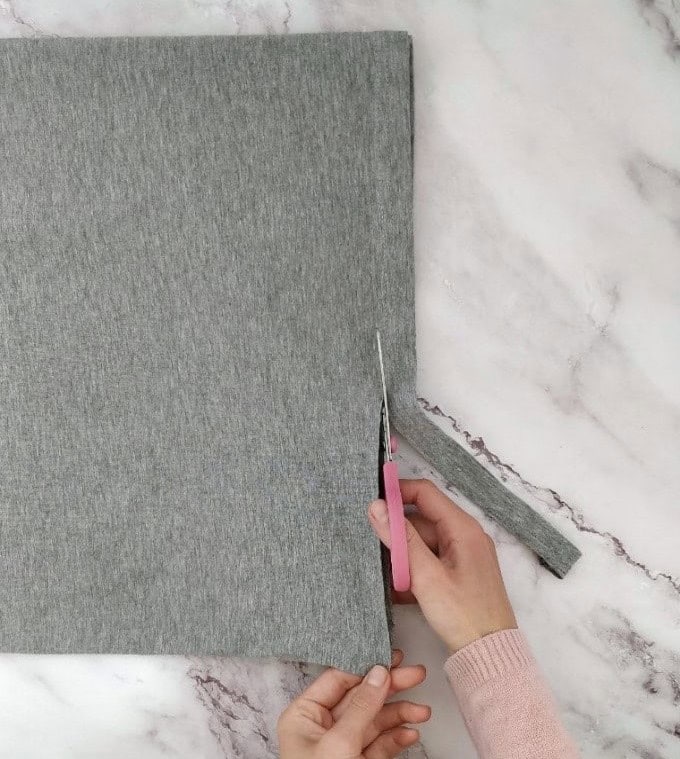
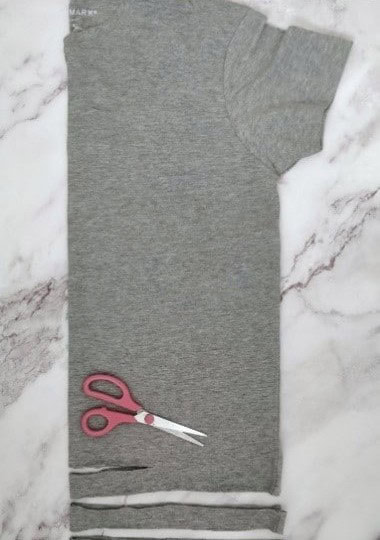
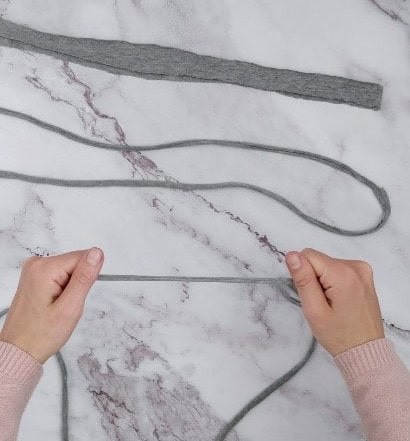
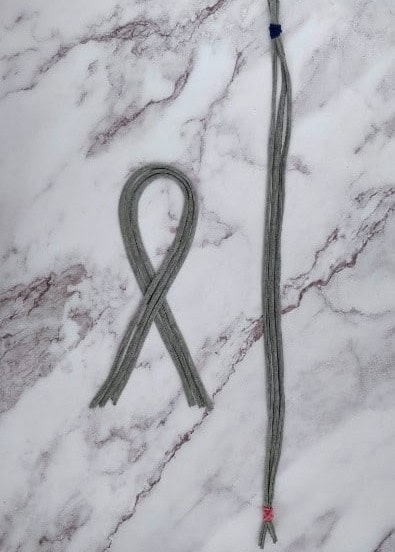
To begin crafting your headband, you’ll need the strips that comprise its foundation. Start by cutting three loops from the bottom of a size M or larger t-shirt, each approximately 2cm wide. Ensure that the front and back edges are cut evenly to maintain a balanced appearance. For added precision, fold the shirt in half along the center front, lay it flat, and proceed with your cuts, as depicted in the accompanying image.
Step Two
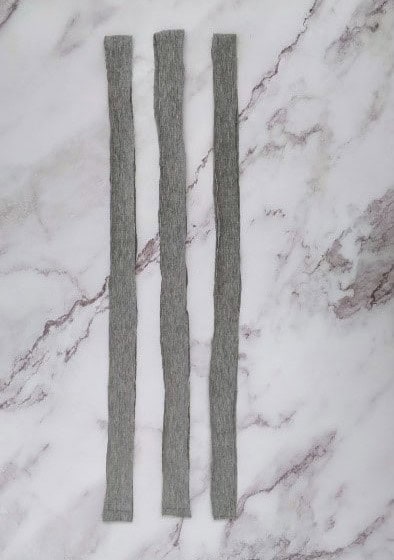
When working with your three pieces of fabric, each measuring 2cm in width, don’t worry if they’re not perfectly even – a little bit of variation is okay. If you do need to adjust their lengths, now’s the time to trim any excess material. Just keep in mind that we’ll be stretching them out later, so a small amount of unevenness won’t affect the overall outcome.
Step Three
To take your loops to the next level, begin by carefully manipulating each one. Start by dividing each loop into smaller segments and gently stretch them outwards. As you work, pay close attention to avoid overstretching, which can cause the material to roll inward. This is a natural process, so don’t worry if it happens – simply continue to stretch and adjust as needed.
Step Four
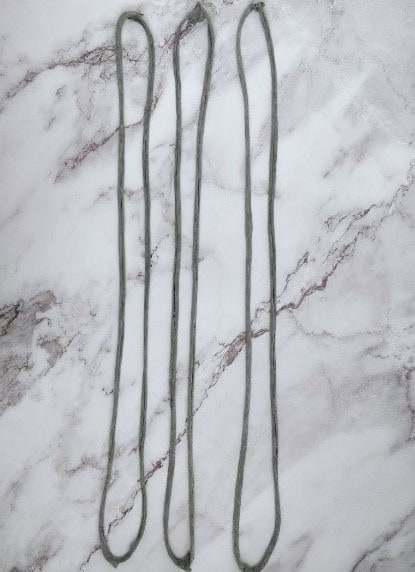
After completing Step Three, you should have three loops that are evenly spaced and similarly proportioned in terms of their length. To achieve this, take care to stretch each section uniformly, ensuring that it is consistent with the rest of the loop. Furthermore, strive for consistency among all three loops, aiming for identical widths.
Step Five
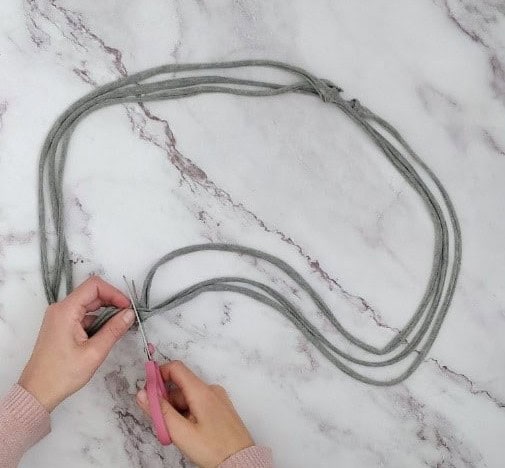
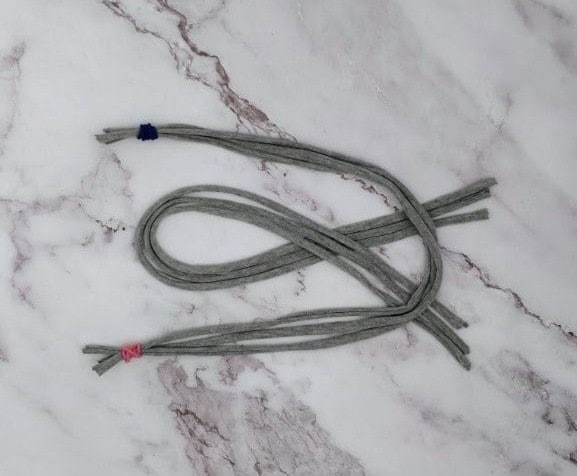
To convert these loops into a wearable string of t-shirts, we need to locate and cut through the edge seams that run along each garment’s edges. This process is crucial for transforming individual tops into a connected loop.
Step Six
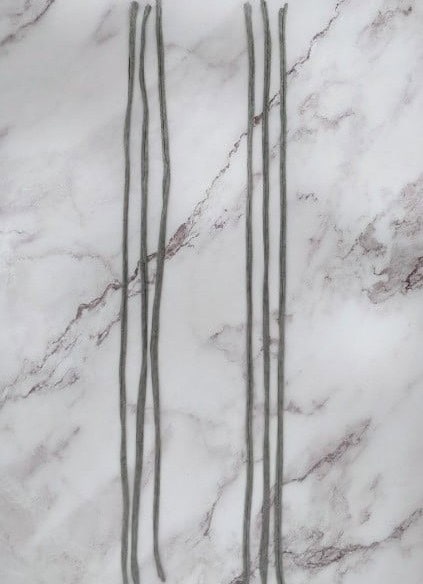
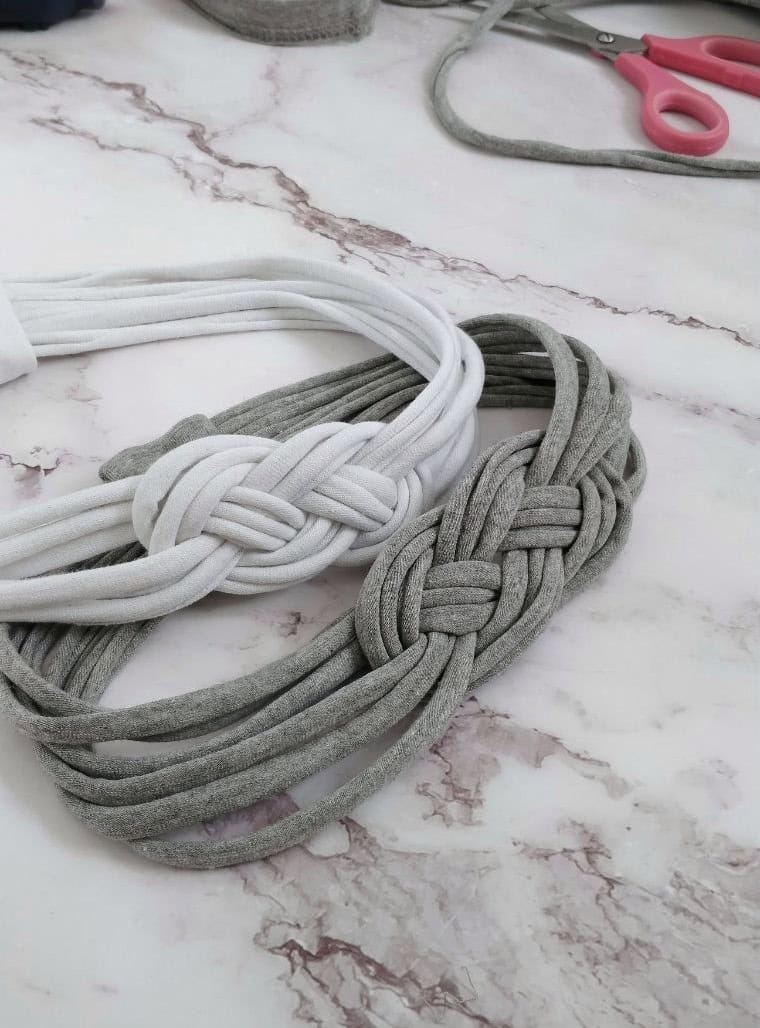
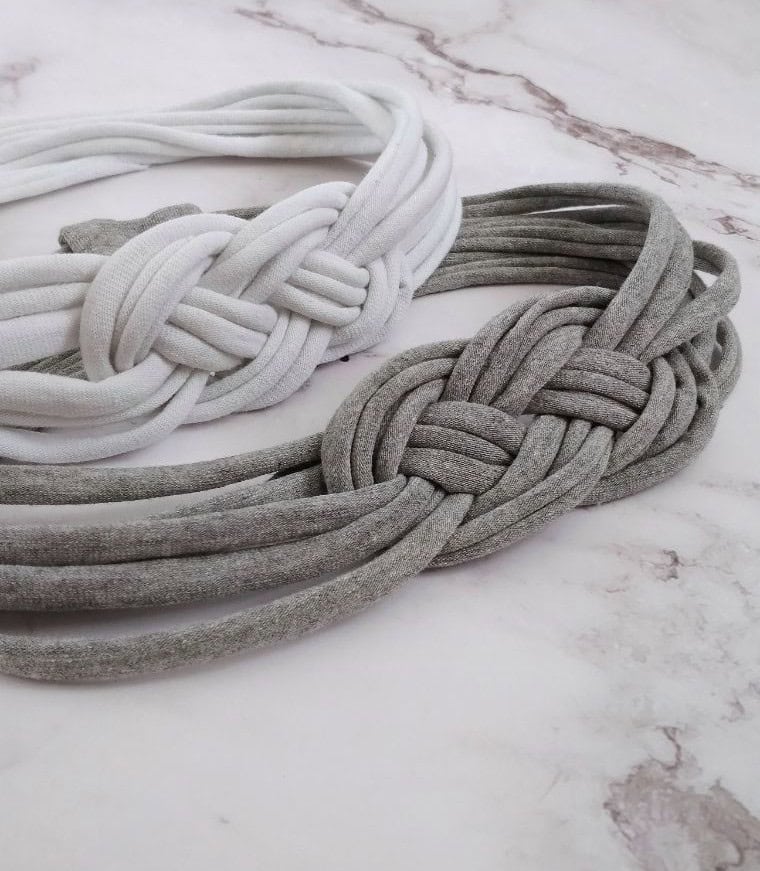
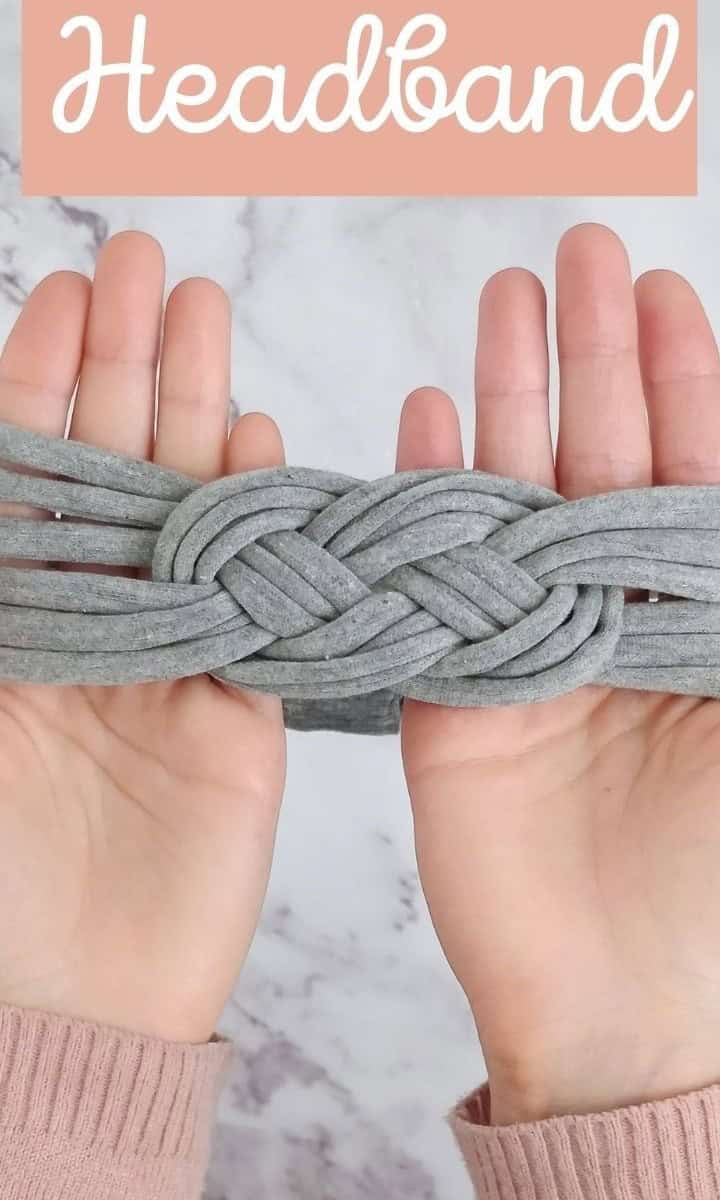
After combining the individual strands, you’ll be left with a set of six identical strings. Group them in threes to create the foundation for the larger patterns you’re about to craft.
Step Seven
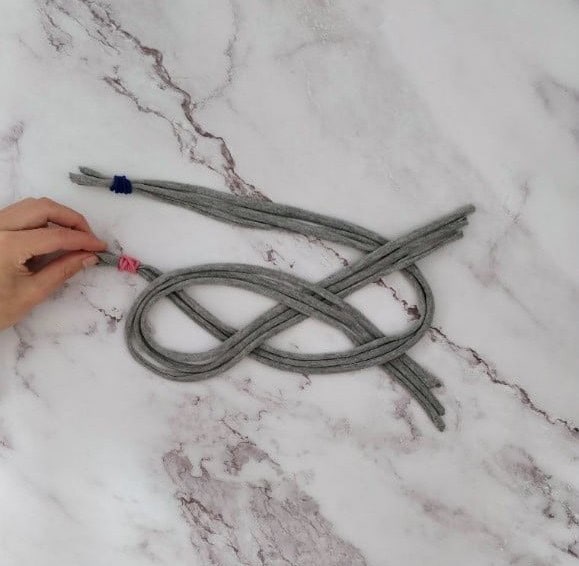
Let’s dive into the weaving process! To simplify this part, I’ll use two vibrant hair ties on the right-hand band to guide you through it. On the first group of three strings, create a straightforward ribbon shape with the right side crossing over the left. This will give you a fish-like silhouette facing upwards. Once you’ve achieved this, secure the ends of the second group using two hair ties.
This technique makes it easier to weave and can also serve as a visual aid if you’re using different colored bands.
Step Eight
To create the initial structure, place the fish on its side with the head positioned towards the left. Next, take the second band and lay it over the tail section, forming a U-shape. Ensure the top of the U points in the same direction as the head, ensuring a uniform orientation.
Step Nine

As you prepare to work with your fish, take hold of its upper tail section and gently guide it into a flat position, resting it securely on your workspace.
Step Ten
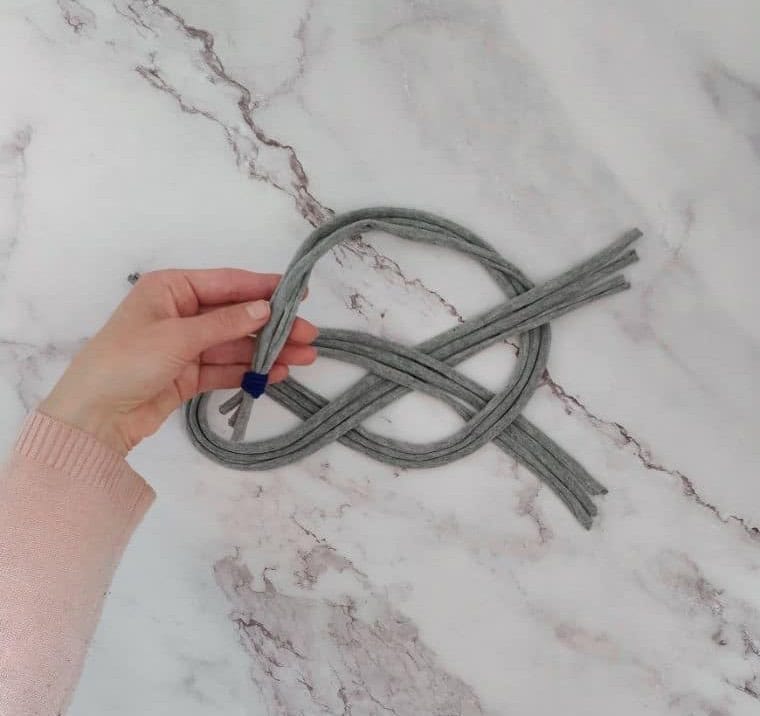
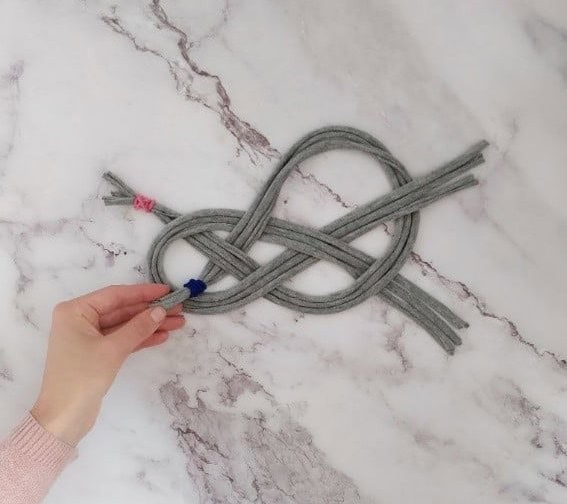
To complete the first step in this intricate process, begin by manipulating the pink terminus of the U-shaped wire into position beneath the fish’s head. From here, move to the blue extremity, skillfully intertwining it over the topmost portion of the fish’s cranium and subsequently guiding it under the awaiting pink segment.
Step Eleven
Step Twelve
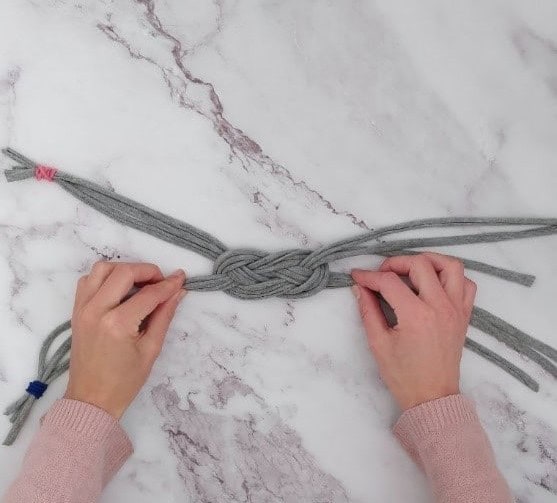
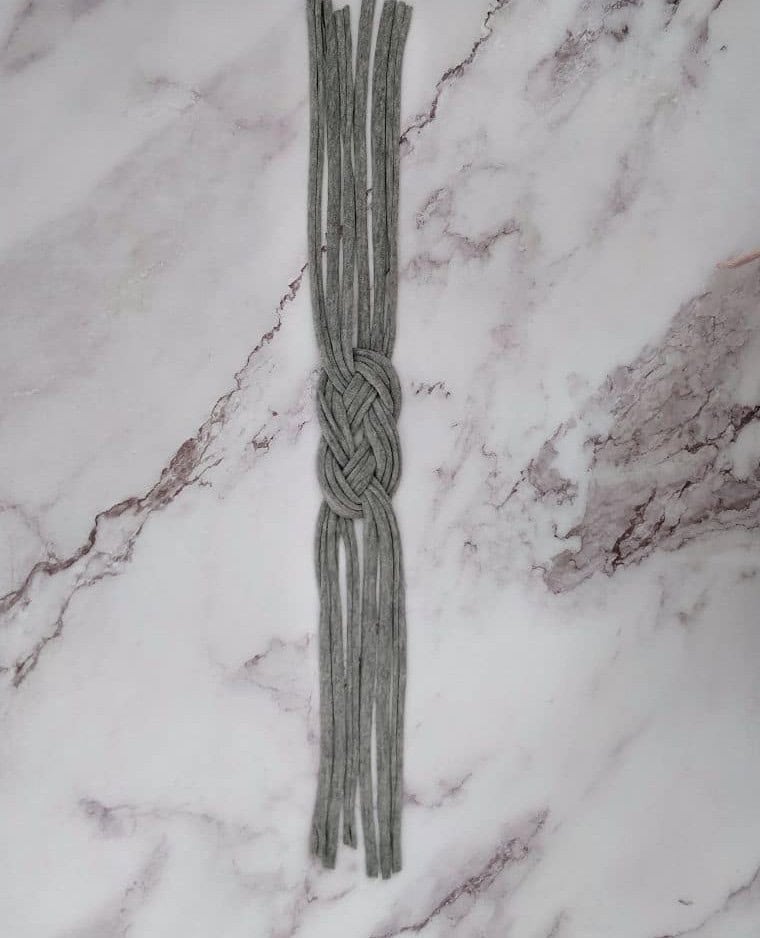
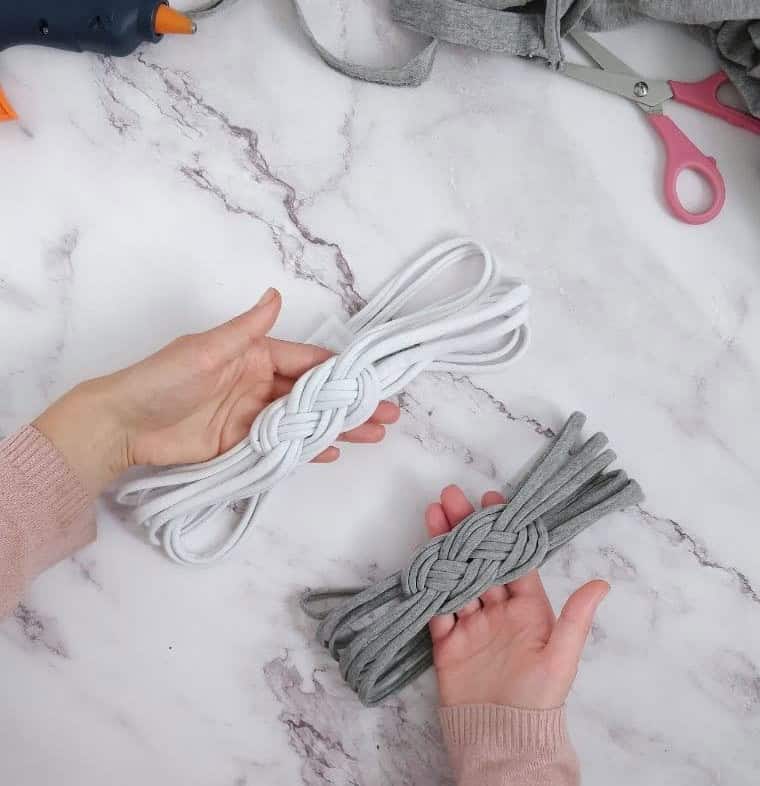
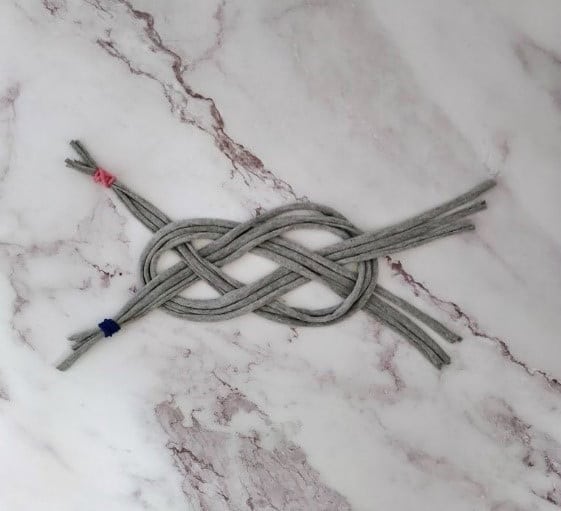
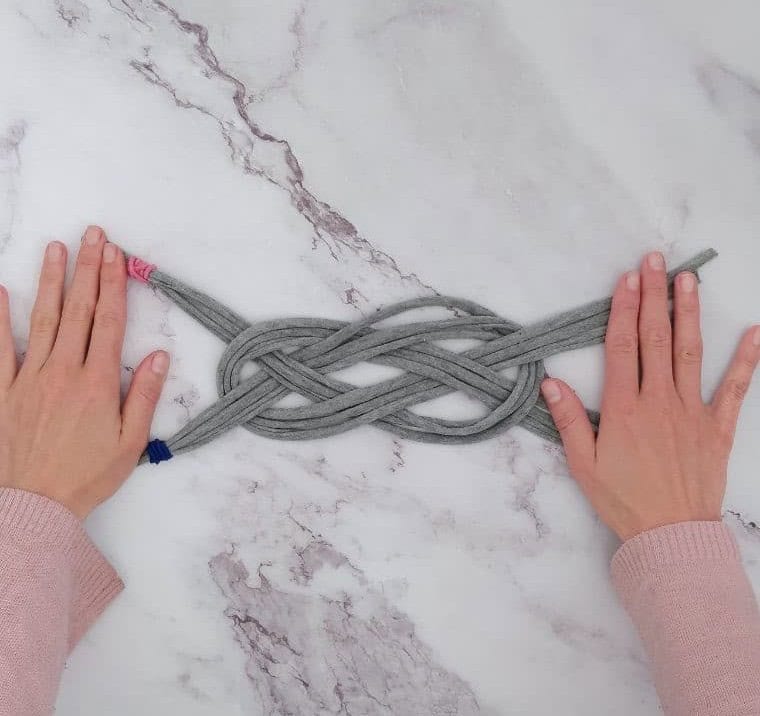
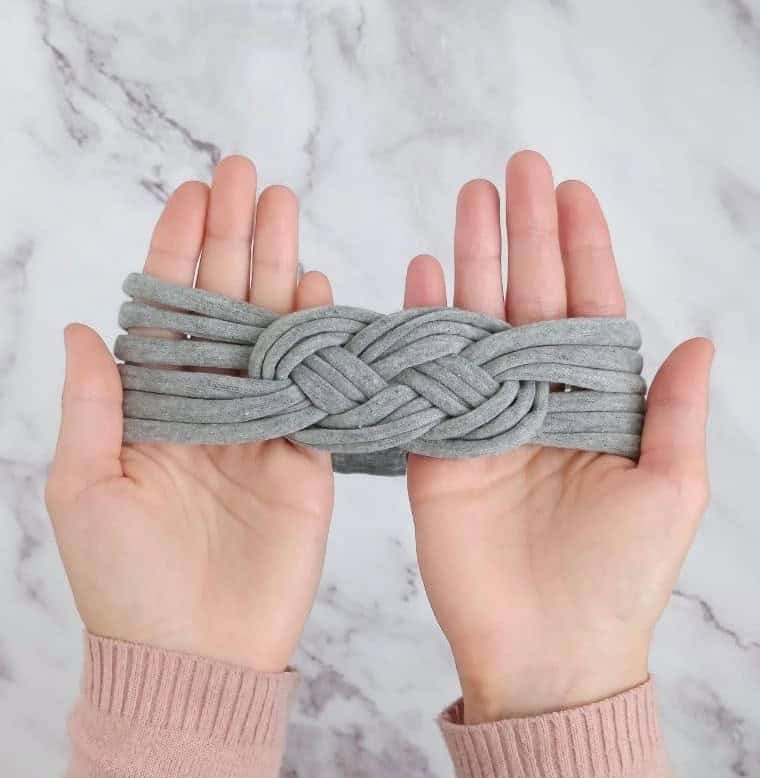
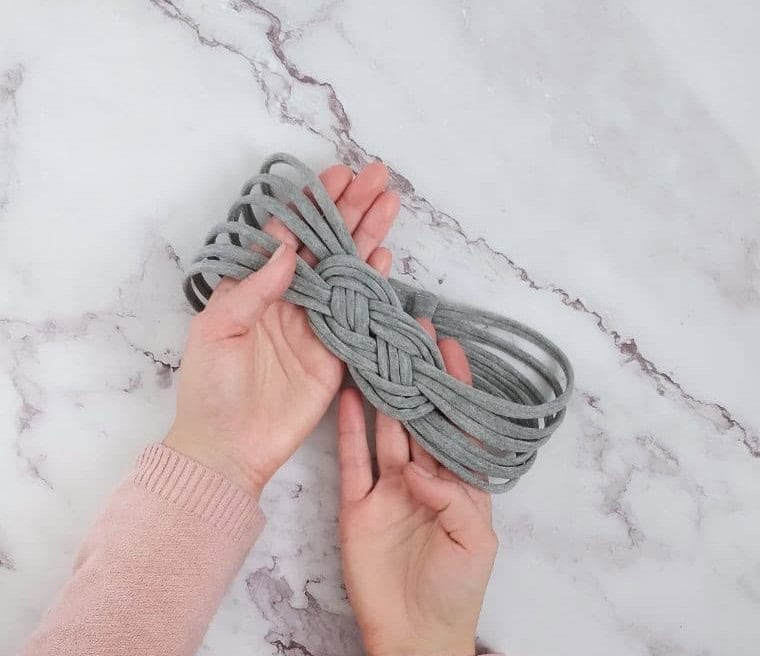
As you maintain the weave flat on your work surface, apply a consistent pull to each end to achieve the desired tightness. Visualize the fibers coming together in a single cohesive unit as you gradually introduce pressure. Crucial to this process is ensuring an even pull across all sides, with the goal of achieving uniform end lengths. For those new to this technique, it may be helpful to proceed slowly and deliberately, allowing for adjustments as needed.
Step Thirteen
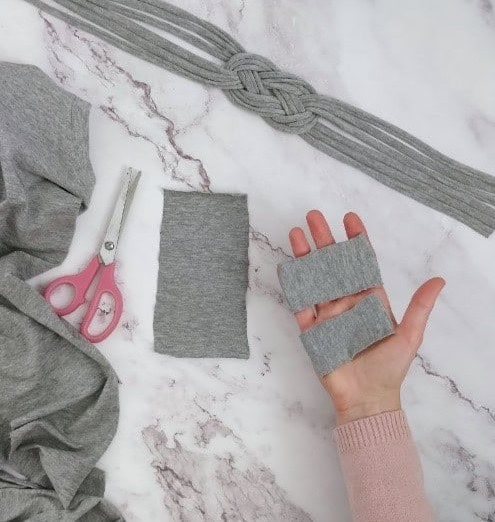
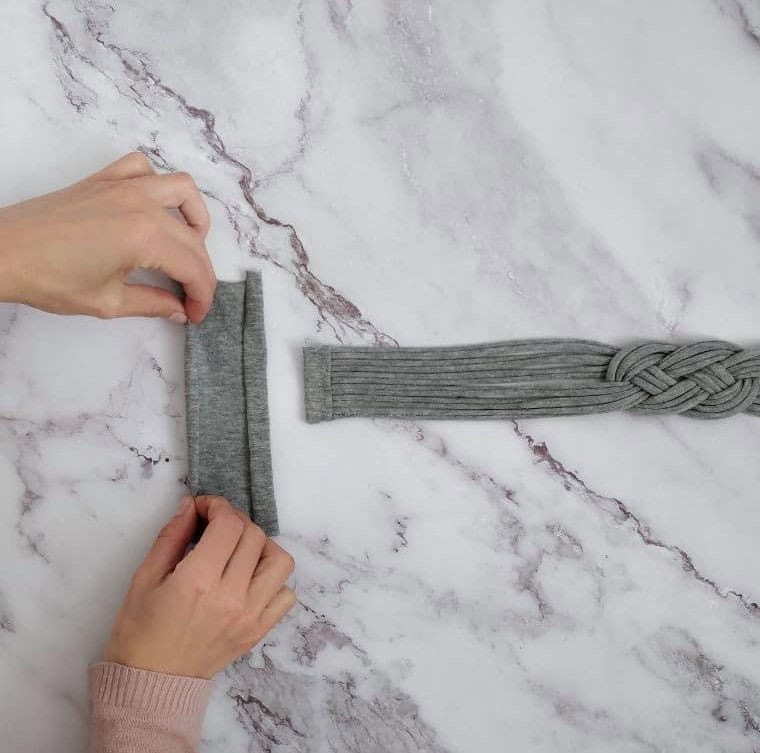
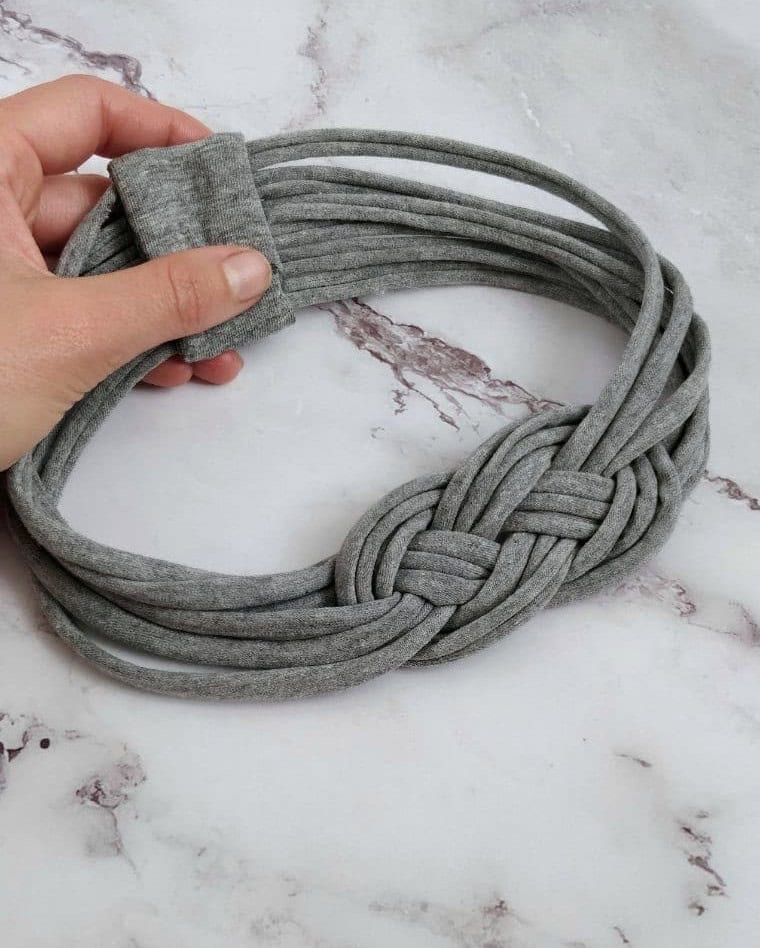
To create the necessary components for the project, take out your fabric scissors and cut three more sections from the t-shirt. Two of these pieces should be smaller, measuring approximately 1.6 inches by 2.4 inches, while the larger one should be around 2.8 inches by 3.9 inches. These will serve as the foundation for the ends.
Step Fourteen
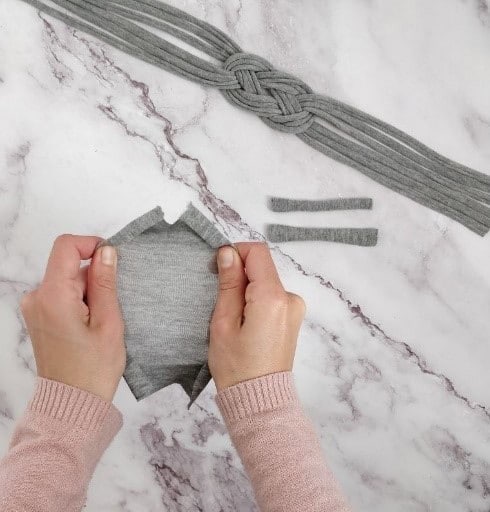
As you stretch your freshly cut pieces, recall the process for the original bands. Pay attention to how they begin to take on a rolled shape – this is exactly the outcome we’re aiming for.
Step Fifteen
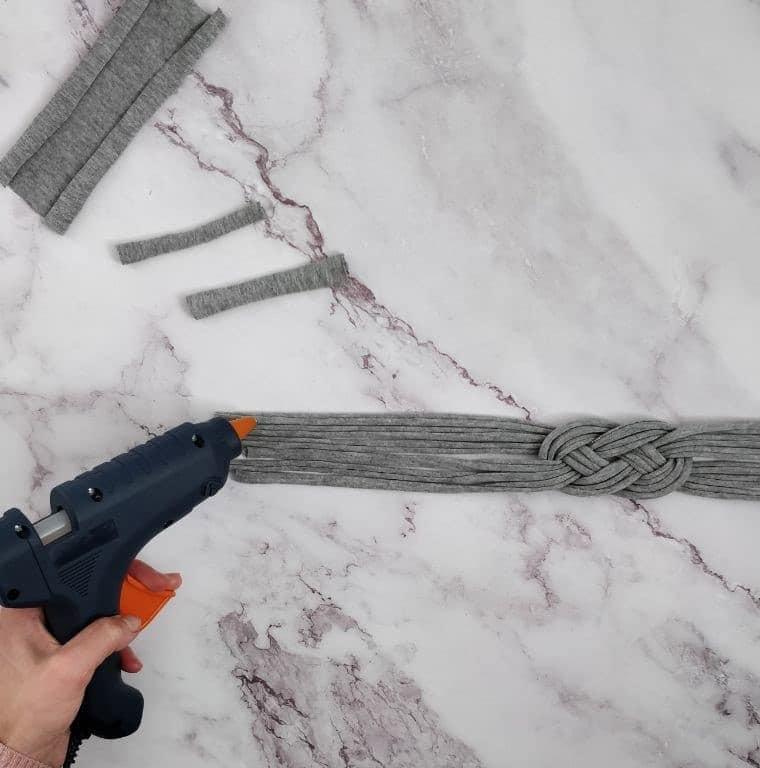
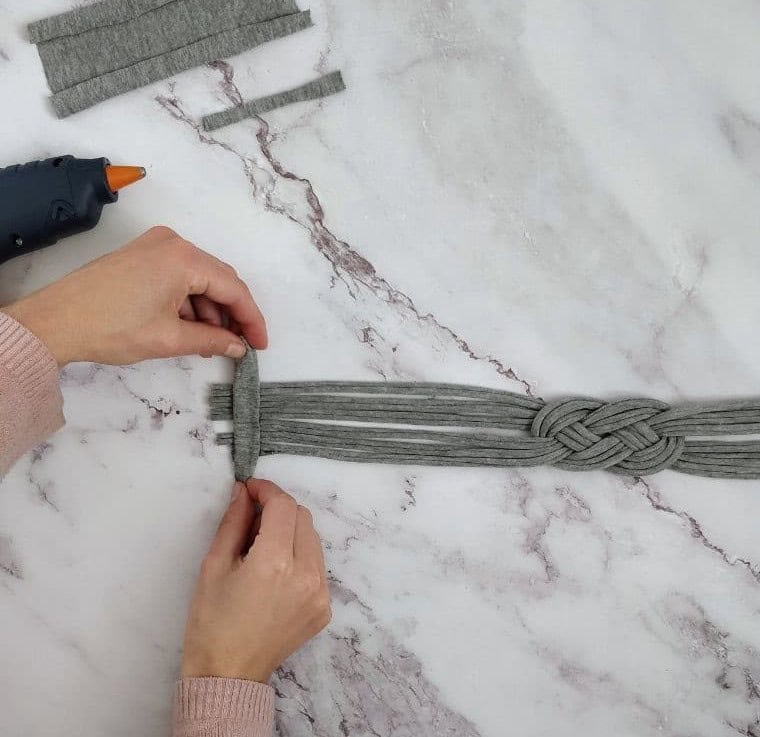
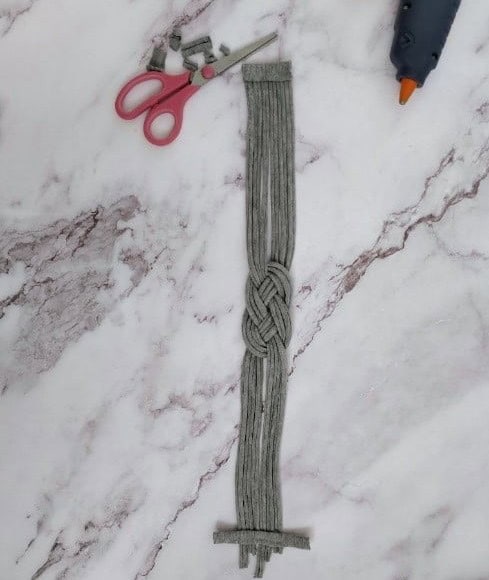
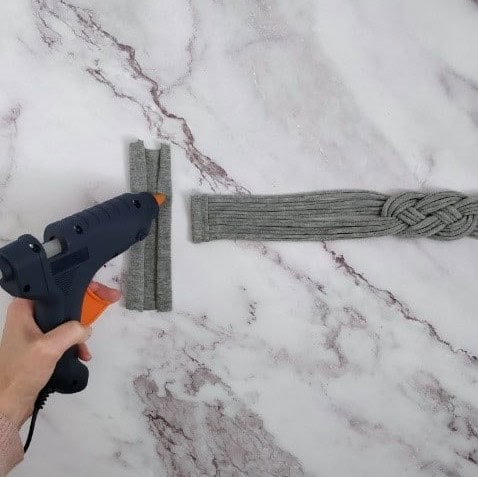
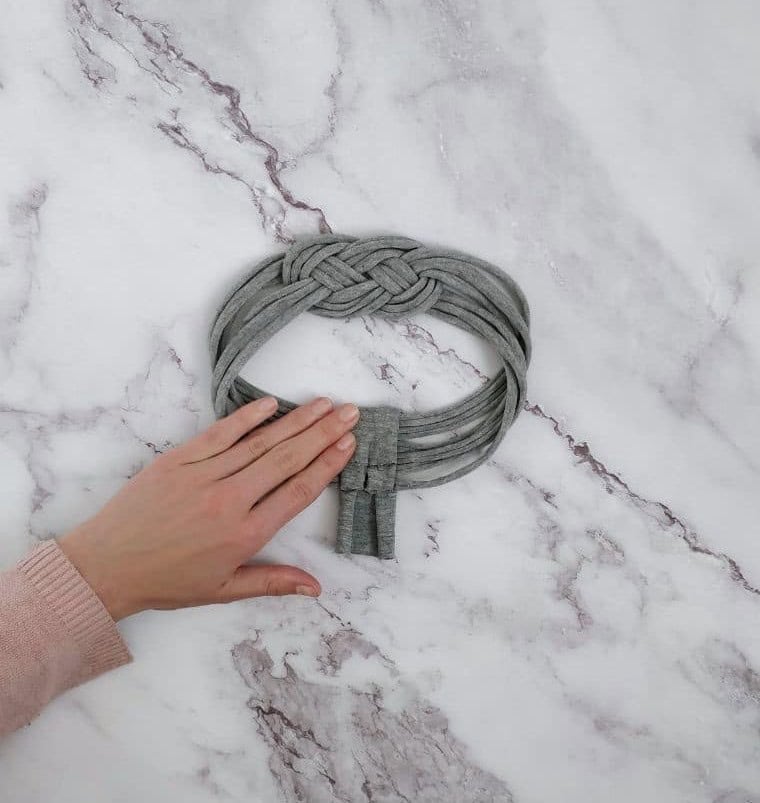
It’s time to bring your design together! Start by selecting the side of your hairband that you prefer. Although both sides should be identical, there might be a subtle difference that catches your eye. Place the preferred side face down on a flat surface, and get ready to apply some adhesive. Next, take one of the smaller pieces you’ve cut out and position it at a 90-degree angle to the band’s edge, with the rolled end facing downwards. Secure this piece in place using your glue gun.
Once set, trim any excess material from the edge. Repeat these steps on the opposite side using another small edging piece.
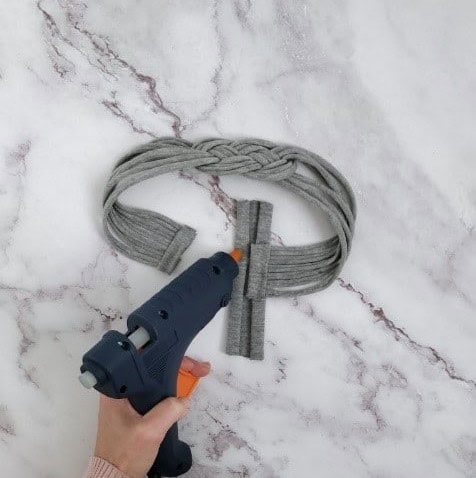
Step Sixteen
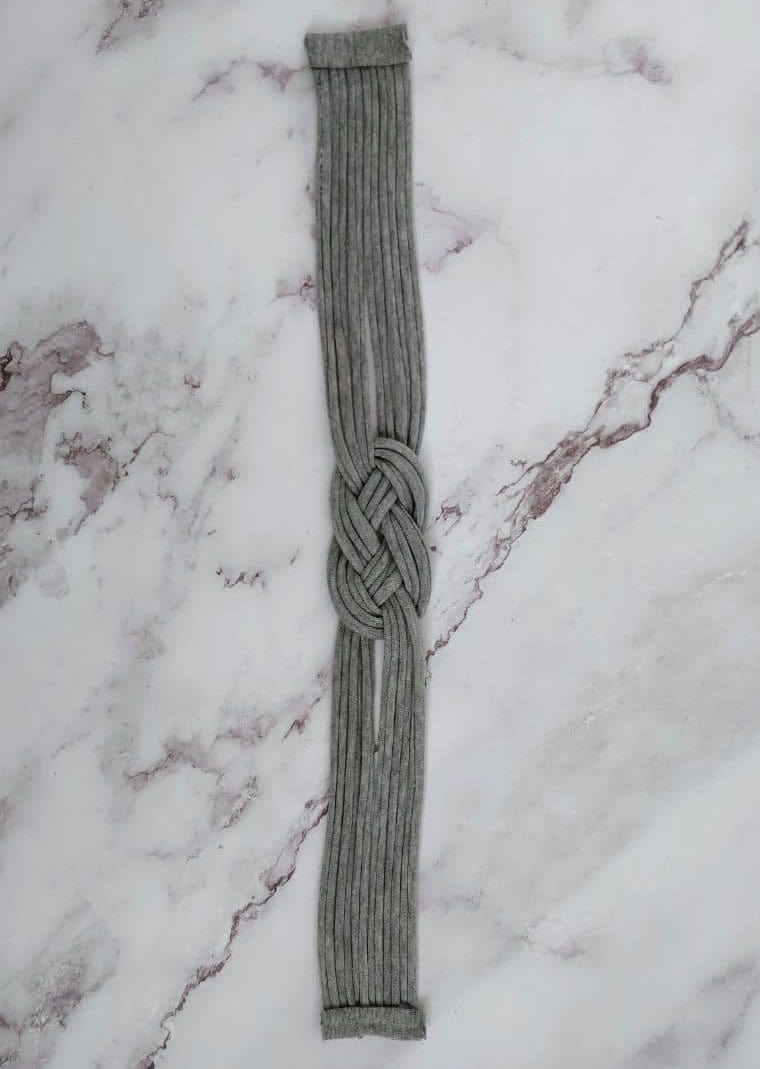
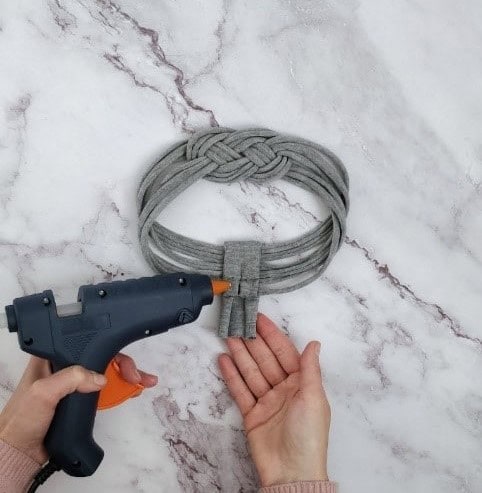
To create the desired shape, start by folding the larger component’s previously rolled edges inward to form a rectangular structure. Next, utilize your hot glue gun to securely fasten the band’s left extremity to the opposite edge of the rectangle, ensuring a strong and durable bond.
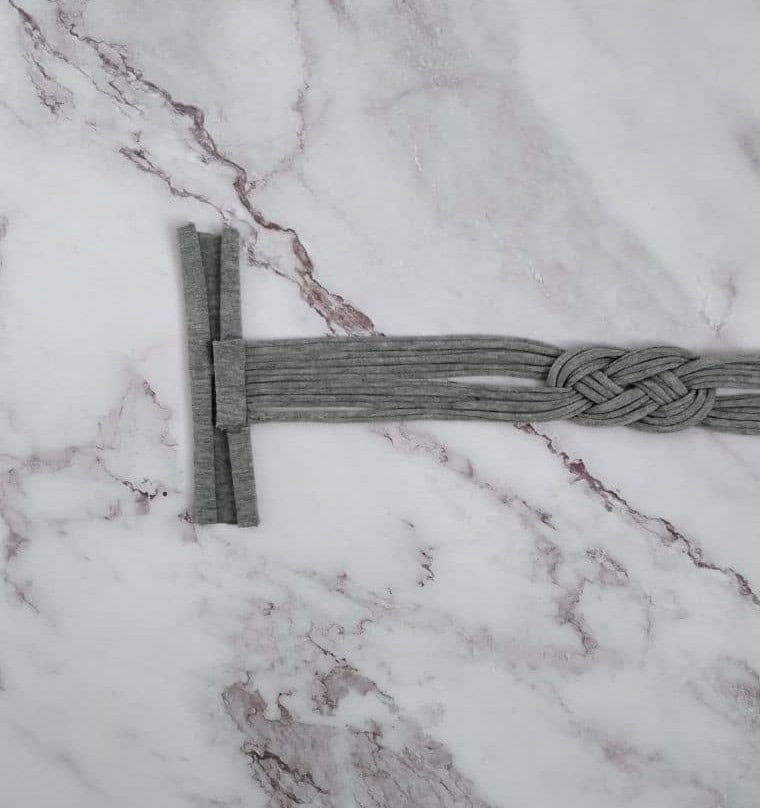
Step Seventeen
To finish the headband, bring the hairband around in a loop and position the outside of the weave facing towards you. Then, use your trusty glue gun to secure the remaining loose edge to the left edge of the rectangle. As you apply the adhesive, take note that you can adjust how far it’s applied to achieve the desired level of tightness or looseness. Before securing the headband in place, be sure to test its fit on your head and make any necessary adjustments for a comfortable and secure wear.
Step Eighteen
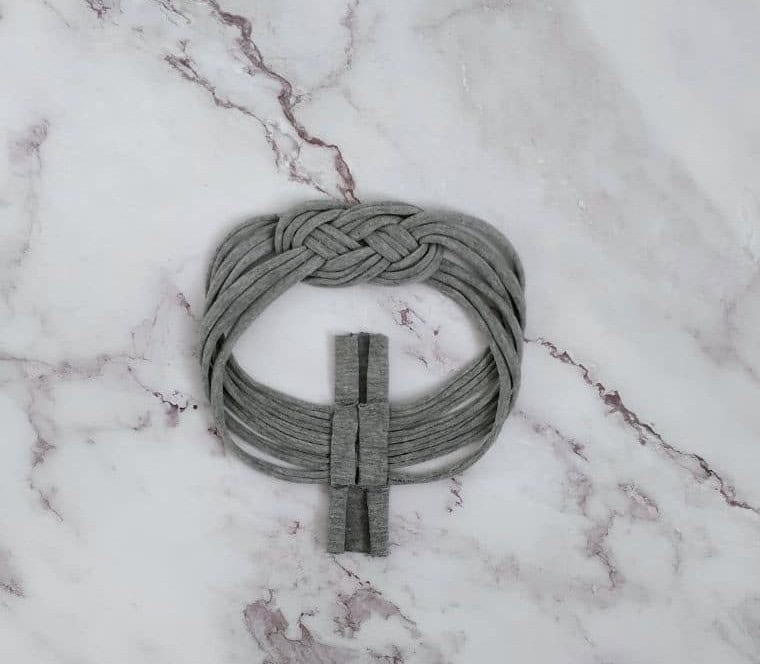


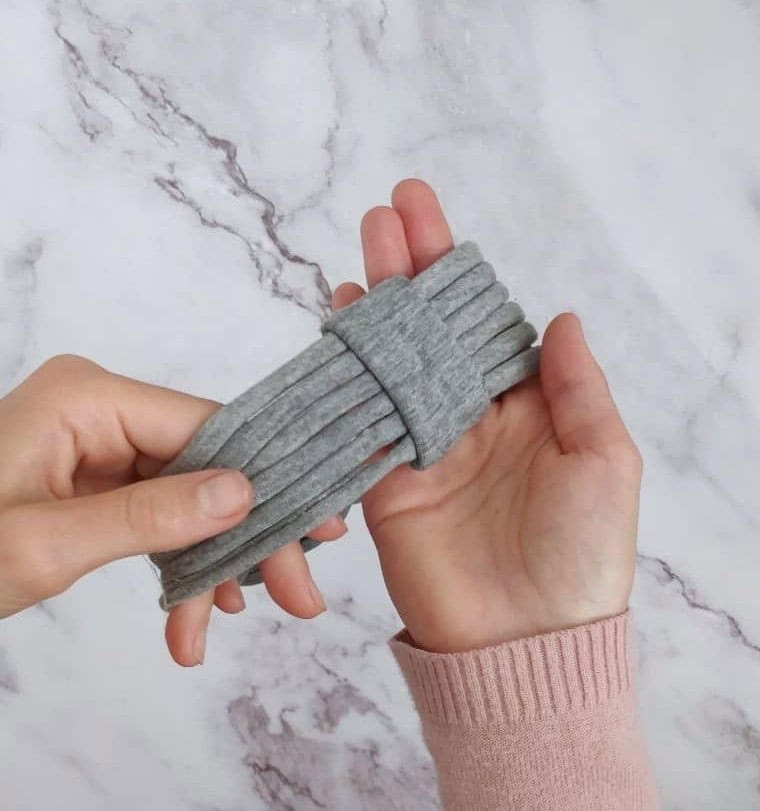
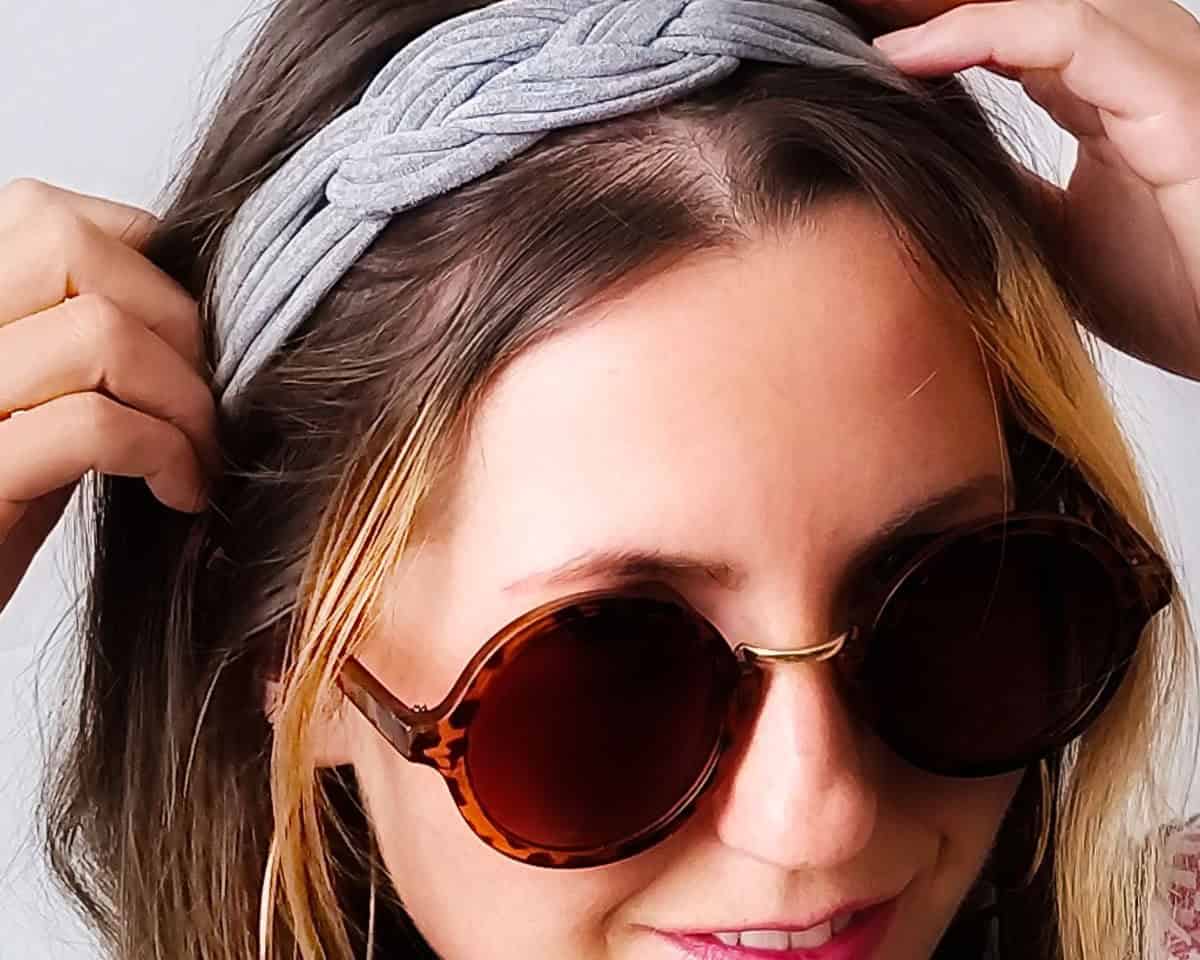
As the final touch, carefully fold the edges of the rectangle inward and secure them with a strong adhesive, such as hot glue or craft glue. This meticulous step will add a polished finish to your handmade headband, leaving you with a professional-looking accessory that’s perfect for everyday wear.
Other Crafts You Can Make

Transforming everyday items into unique masterpieces is what DIY crafts are all about. From the simplicity of yarn-wrapped vases to the intricate details of macrame earrings, there’s a project out there for everyone. If you’re looking for inspiration, here are some ideas to get you started: take a woven bowl and give it new life with yarns, upcycle old glass containers into beautiful decorative pieces, or try your hand at sewing projects that will keep you cozy on chilly days.
For the teens in your life, there are plenty of fun and creative projects to explore, from DIY jewelry-making to repurposing old t-shirts into stylish accessories. And if budget is a concern, don’t worry – there are countless ways to get crafty without breaking the bank. Whether it’s turning a dollar tree find into a work of art or transforming scraps of fabric into one-of-a-kind keepsakes, the possibilities are endless.
With so many creative outlets at your fingertips, what will you create today?
DIY Headband from an Old T-Shirt
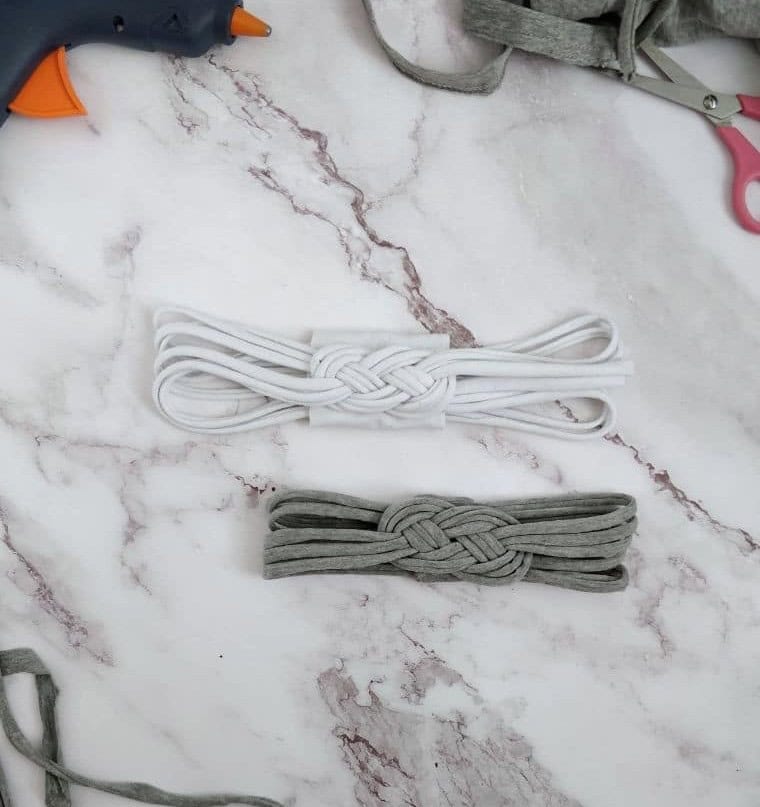
By crafting your own DIY headband from an old t-shirt, you can create a unique accessory and clothing item that’s perfect for both teens and adults. This project requires minimal prep time and only 20 minutes of active crafting time, making it a great way to upcycle old tees and reduce waste. With this simple tutorial, you’ll be able to create two stylish headbands in just 22 minutes total.
Equipment
To ensure a seamless crafting experience, it’s essential to have the right tools at your disposal. A hot glue gun and fabric scissors are two fundamental elements that will help you tackle various projects with ease. As you work on your creations, make sure your screen remains lit by adjusting your device settings or using a sleep-prevention app.
Materials 1x2x3x
Instructions
Transform an old t-shirt into a unique headband by repurposing its fabric. Begin by laying out the shirt flat and folding it in half lengthwise. Cut three strips of fabric from the bottom hem, each approximately 2cm wide. Stretch these strips out, starting at the side seams and working evenly around the entire perimeter. Cut the strips into six individual strings and divide them into two groups of three.
Use one group to create a cartoon fish shape by forming a loop and layering the right side over the left. Secure this shape using hair ties. Place the ‘fish’ on its side, with the head pointing left, then drape the second group of strings over it in a U-shape, ensuring the U points in the same direction as the fish’s head. Bring the top of the fish’s tail up and over the U, followed by the bottom end of the U-shape, which should now be under the fish’s head.
Take the top edge of the U-shape and bring it over the fish’s head, then under the bottom band of the U-shape. Pull all the ends to tighten the weave and create a distinctive pattern on the headband. Choose your preferred side and lay it face down on a surface. Cut three more fabric pieces from the t-shirt: two small ones (4cm x 6cm) and one larger piece (7cm x 10cm). Stretch these out as you did before. Glue the smaller pieces to either end of the headband, trimming excess for a smooth finish.
Fold the rolled edges of the larger piece inward to create a rectangle with the edges facing up. Next, glue the left side of the headband to the right side of the rectangle piece. Loop the other side of the band around and attach it to the remaining edge of the rectangle. Finally, fold the extra rectangle edges inward and secure them with your glue gun for a seamless join. Your one-of-a-kind headband is now complete.