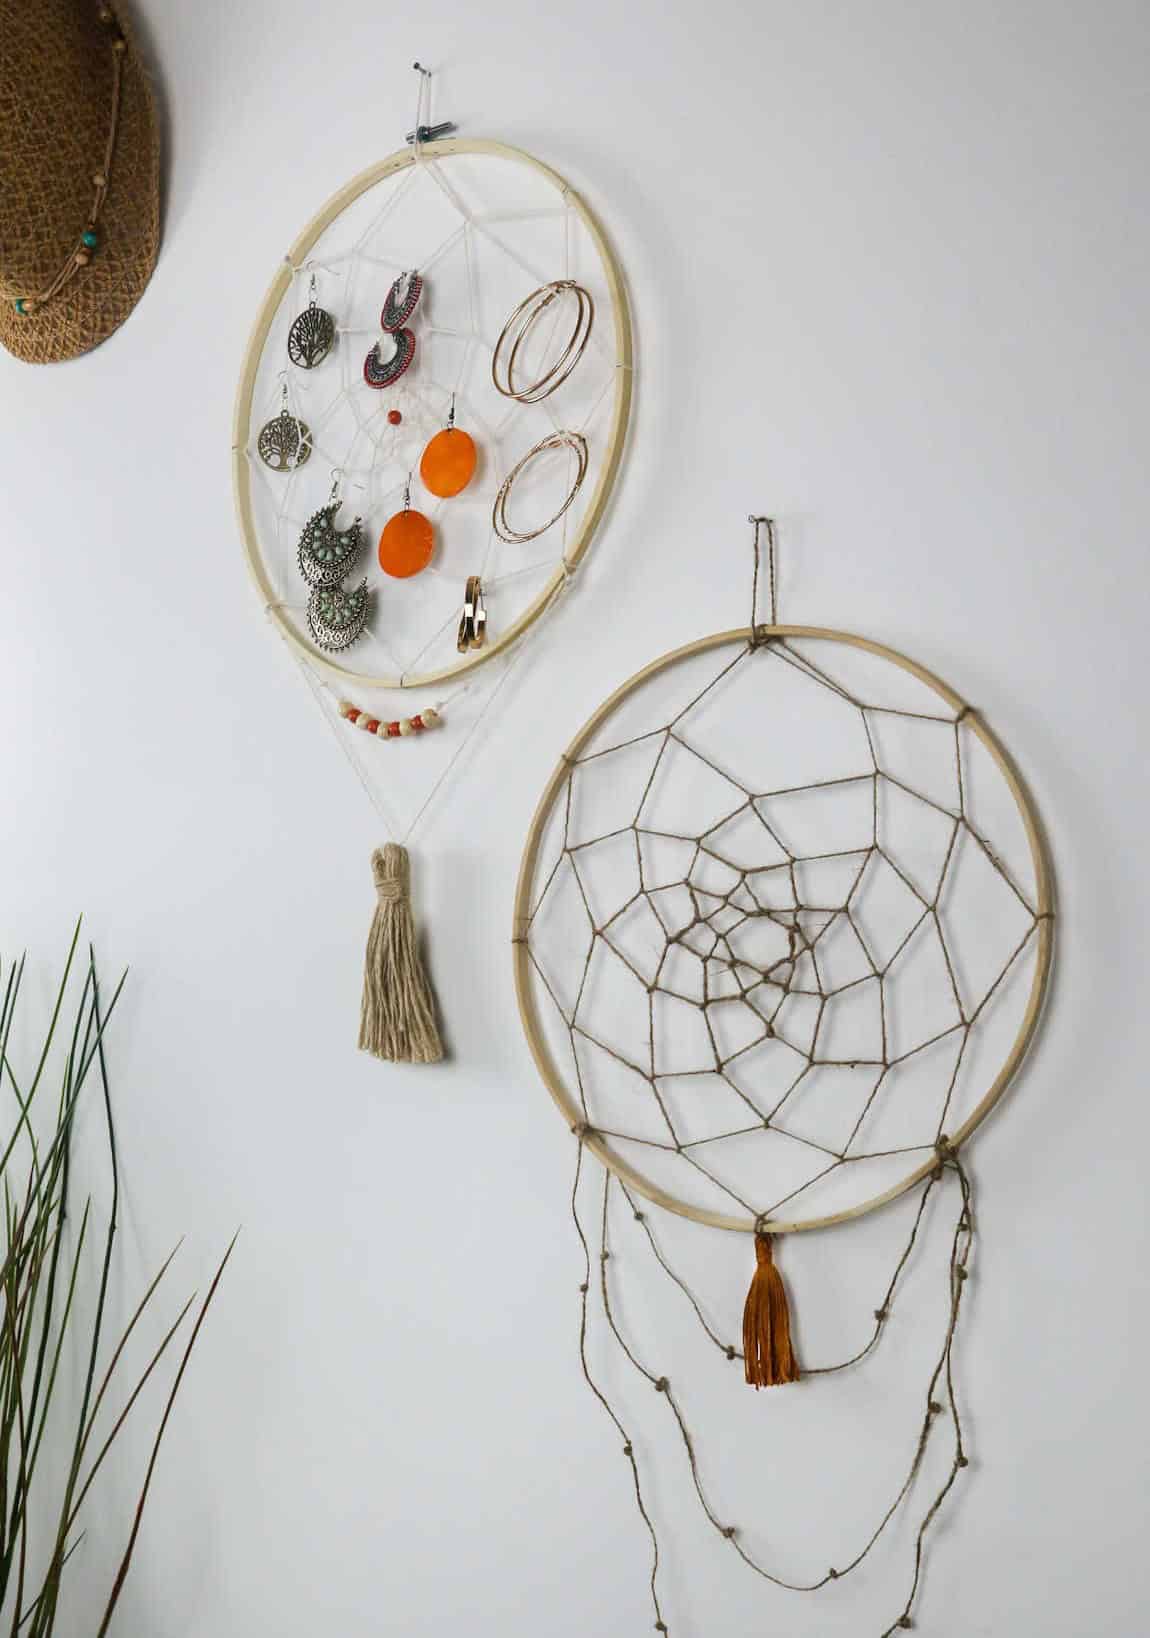
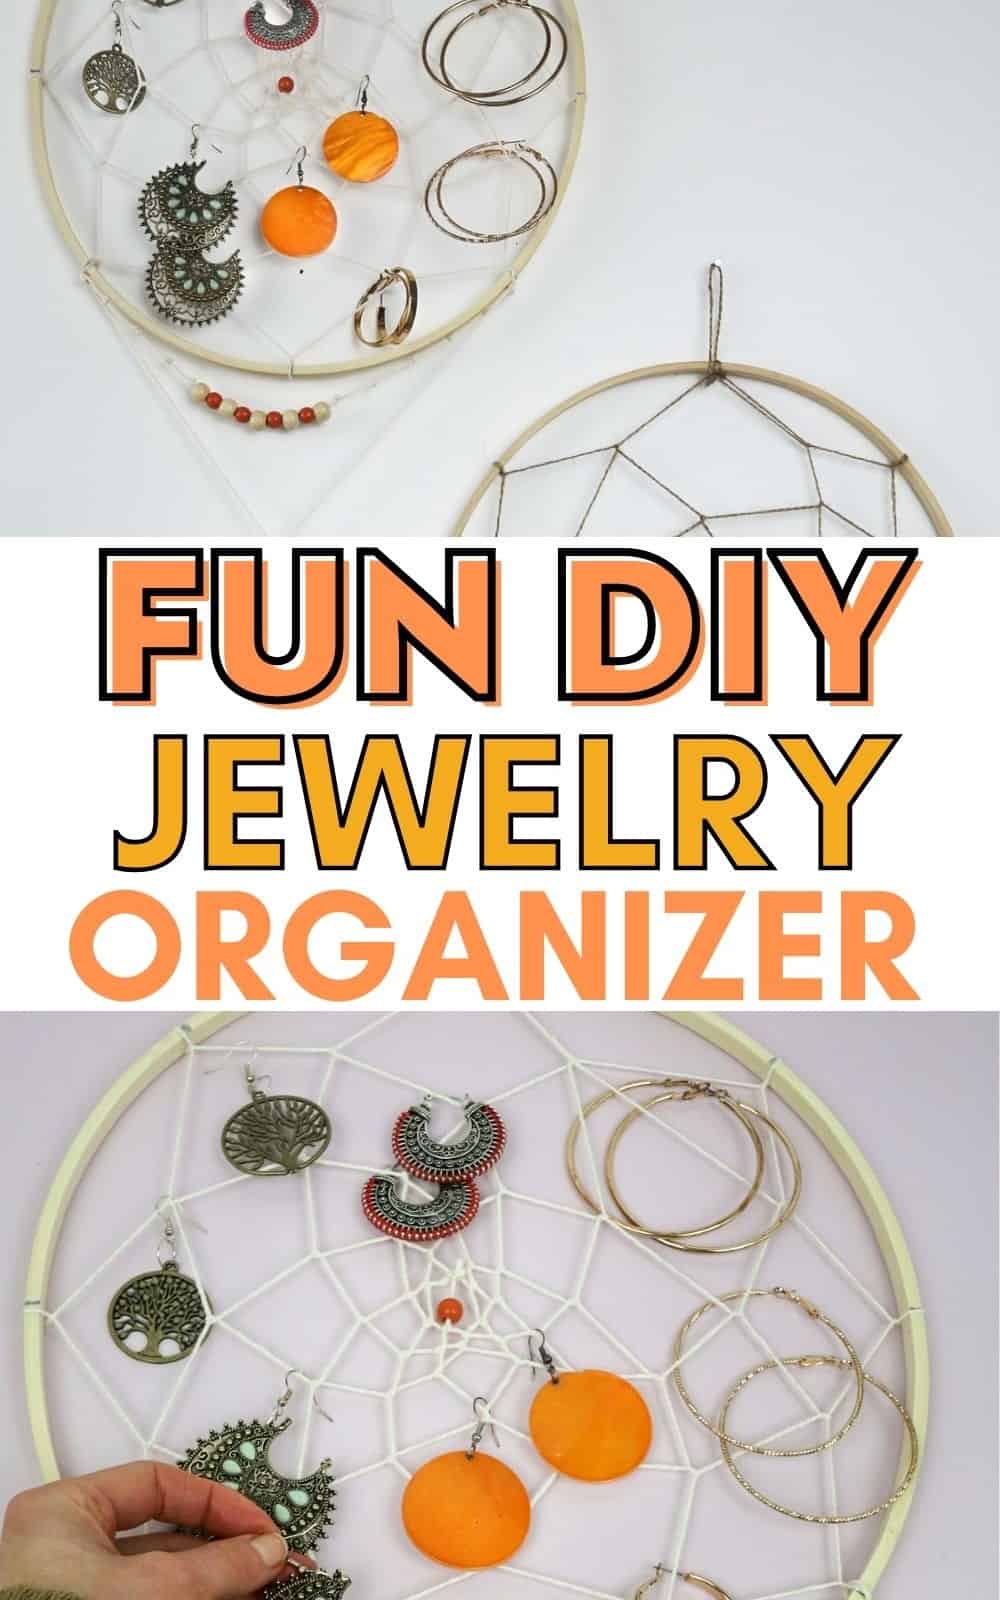
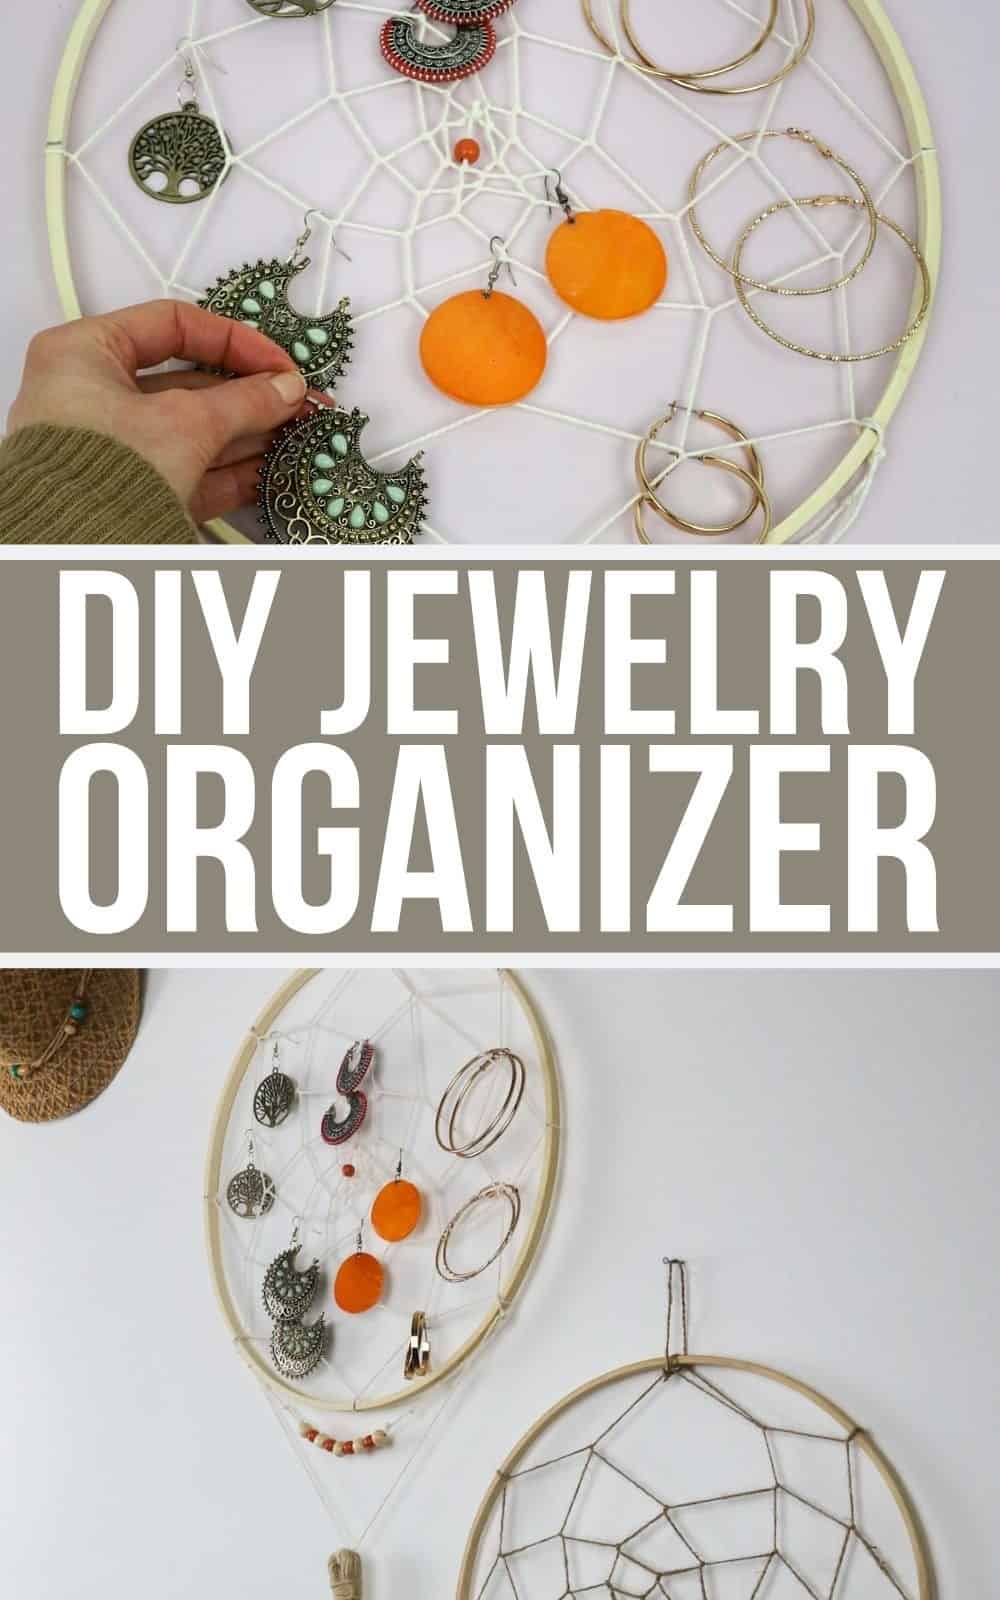
Transform your jewelry storage by creating a functional and stylish dreamcatcher organizer. This DIY project is an excellent way to declutter your space while embracing your creative side. Remember the days when dreamcatchers were all the rage? They added a touch of whimsy to any room, but now it’s time to give them a practical twist. Instead of catching dreams, why not use them to catch and organize your jewelry? It’s an innovative way to keep your accessories untangled and within reach.
The best part? This project is incredibly easy and requires minimal supplies. If you’re familiar with making traditional dreamcatchers, you’ll be well on your way to completing this task. And if not, don’t worry – I’ll guide you through the process step-by-step.
Supplies to Make the Organizer
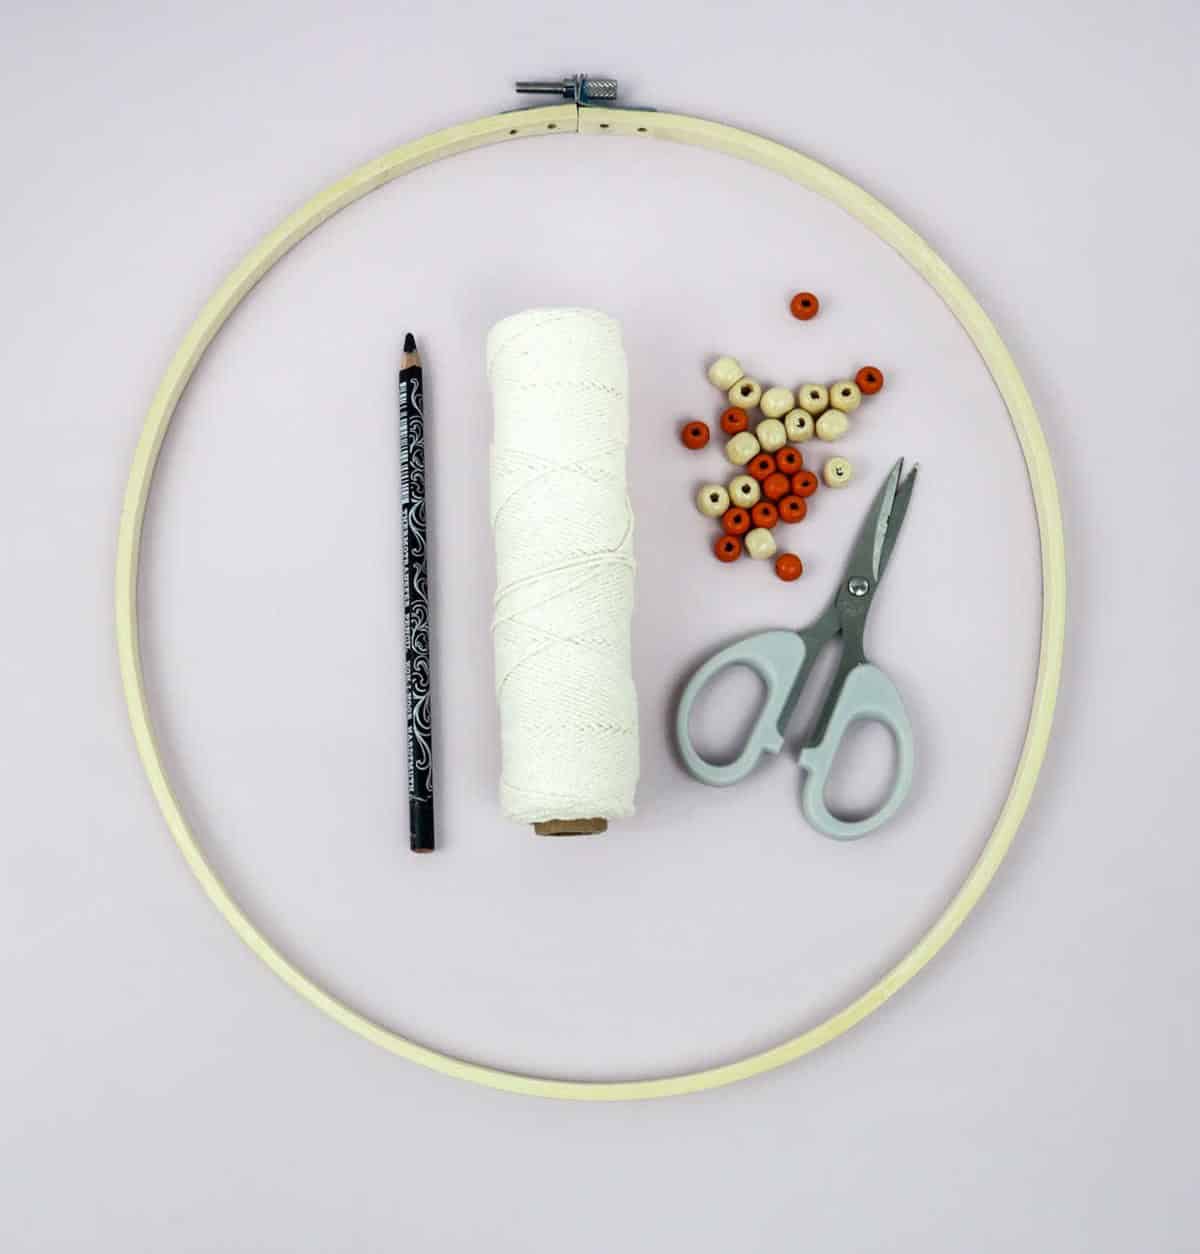
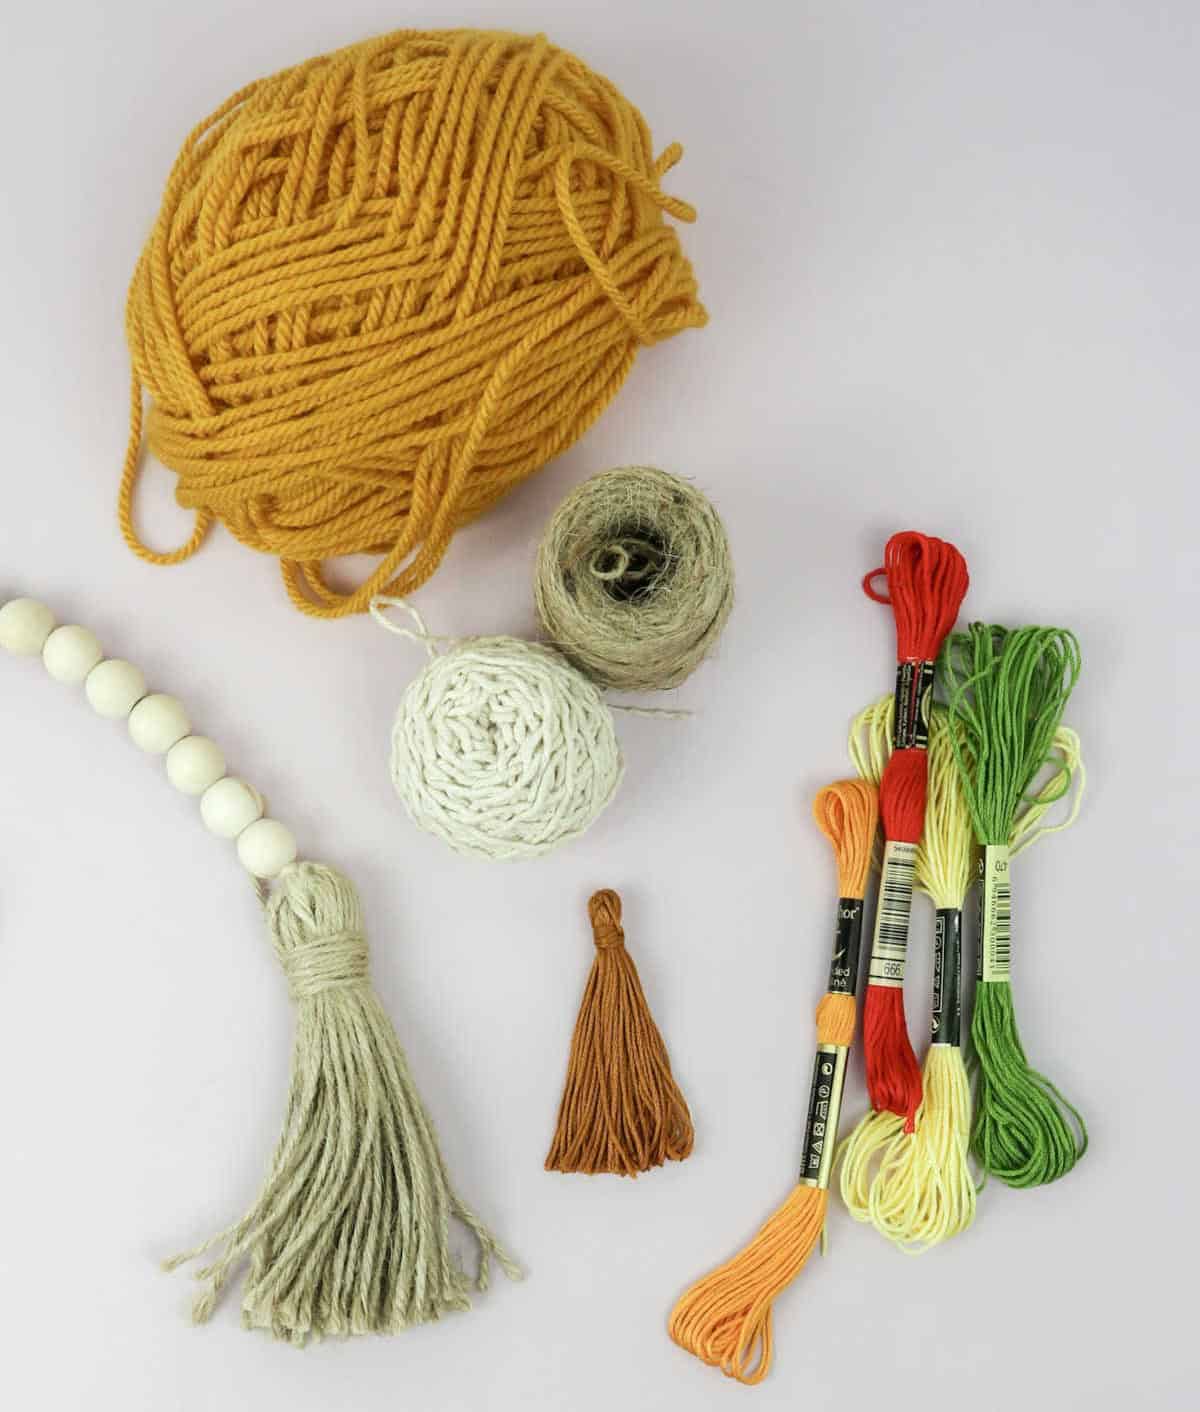
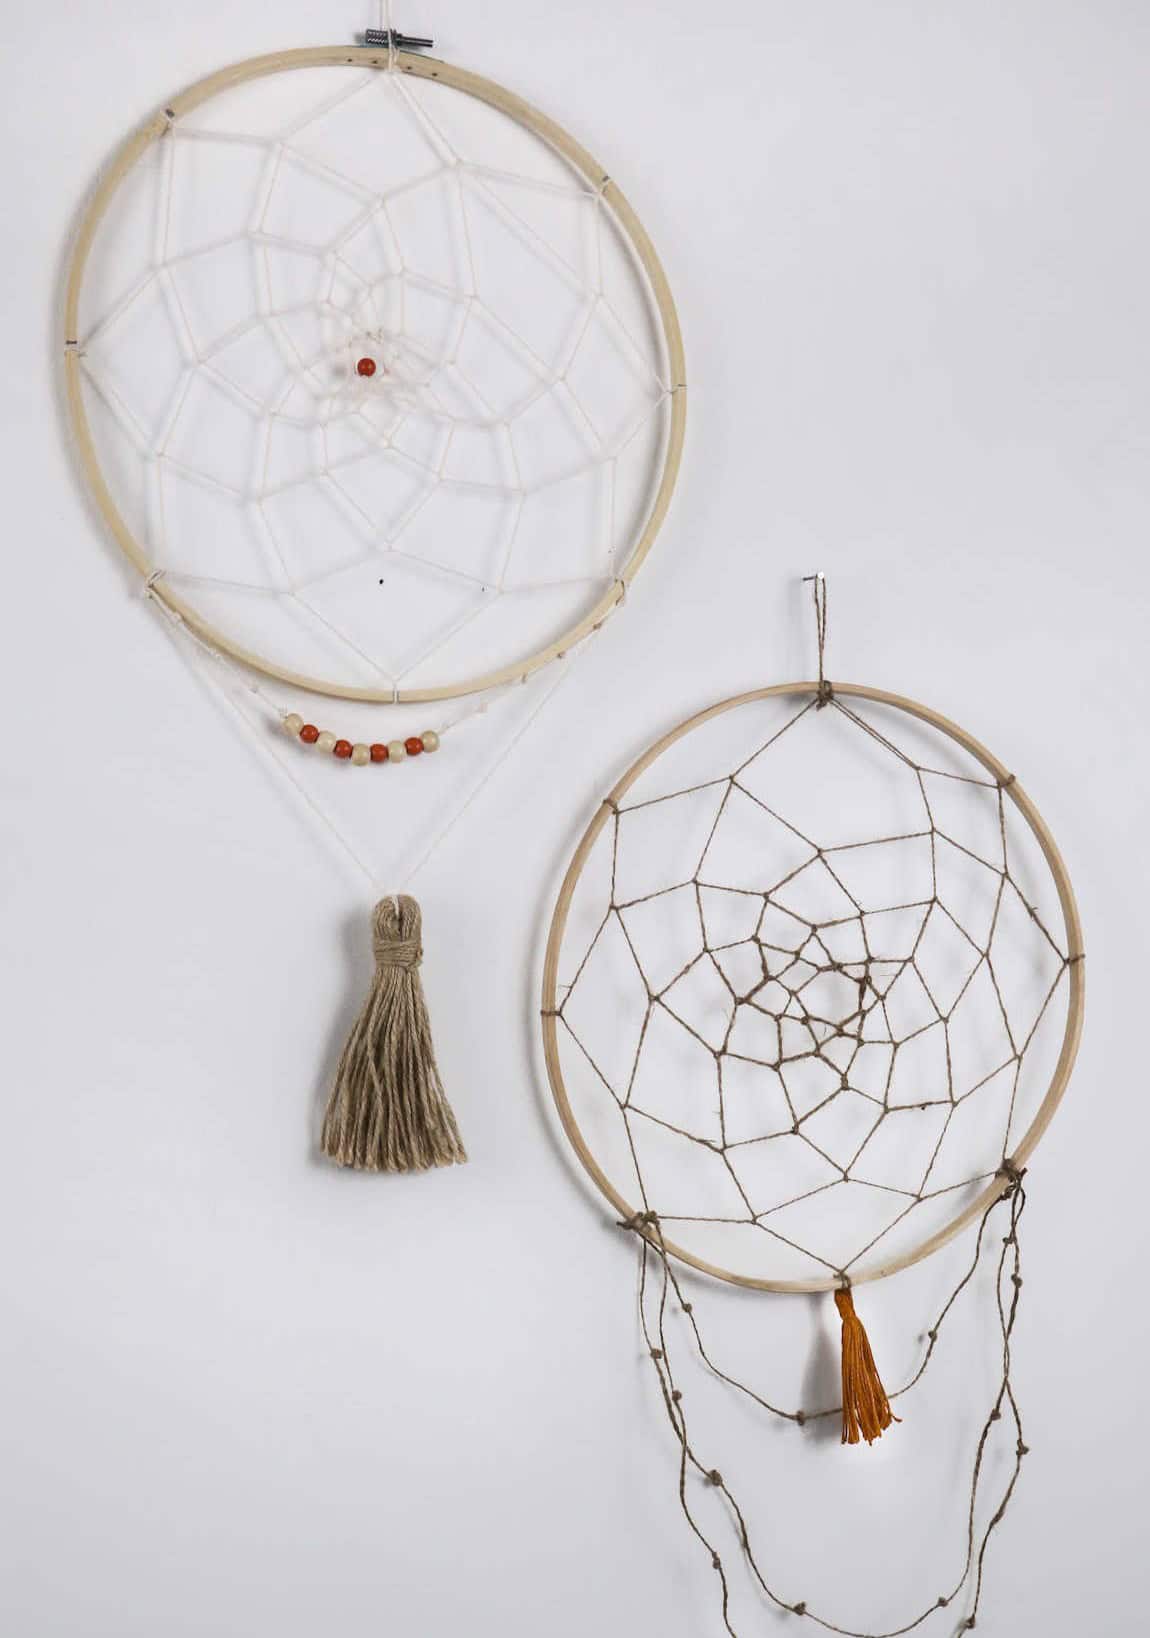
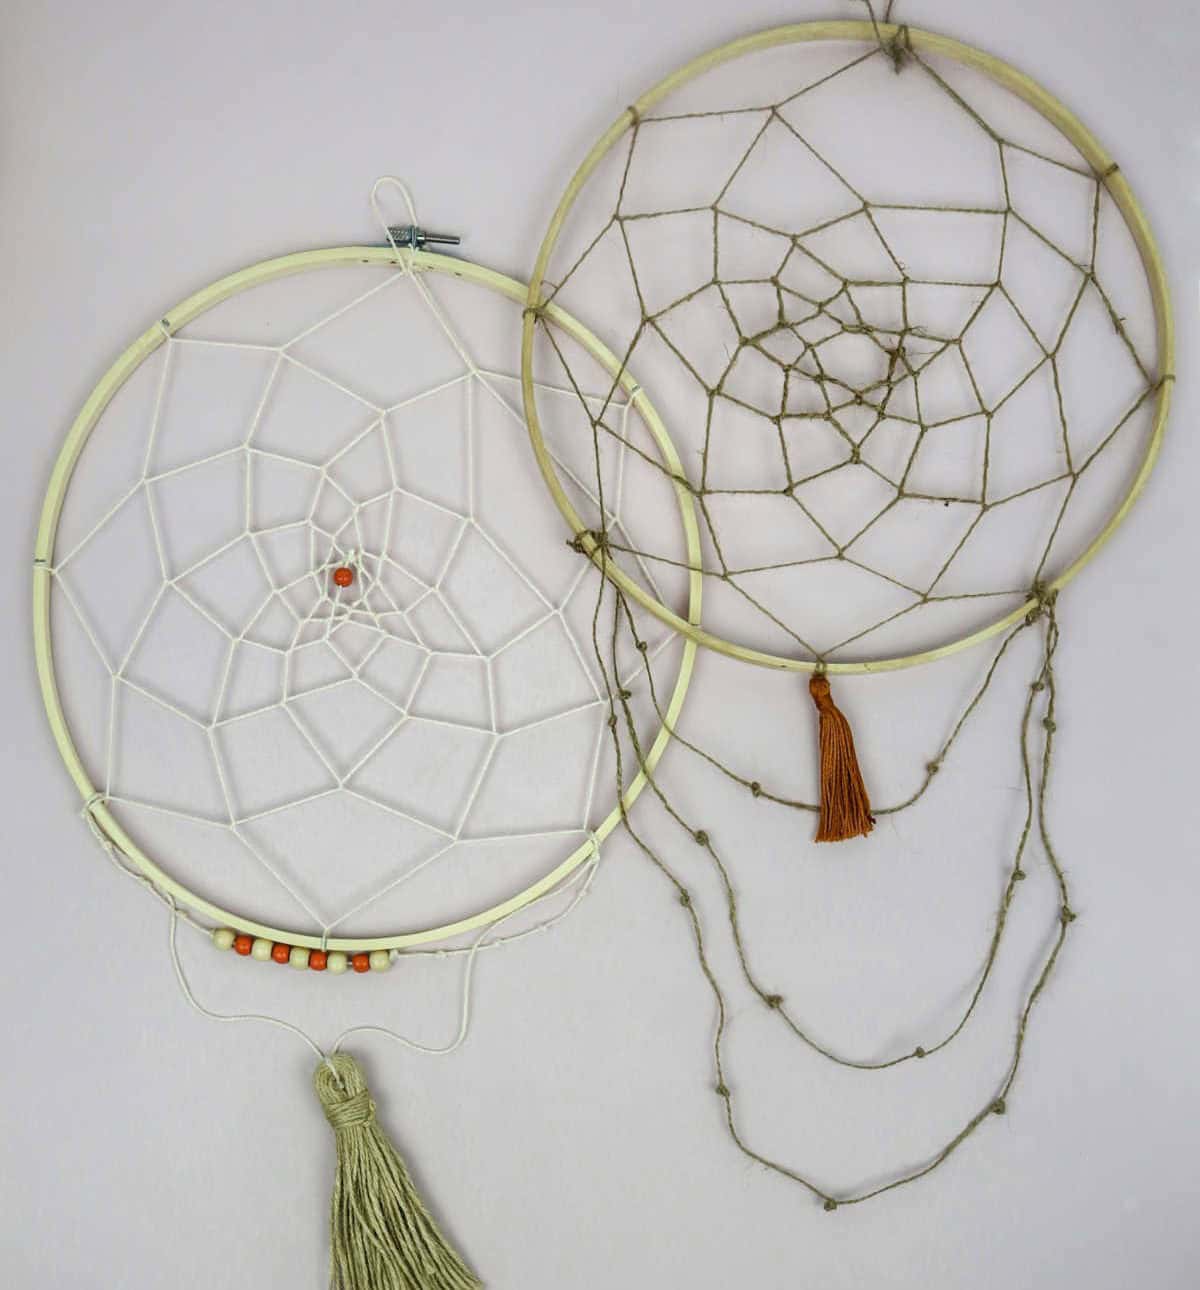
To get started on your DIY dreamcatcher project, gather the necessary supplies. You’ll need: an embroidery hoop, cotton string, scissors, and beads. If you’re feeling extra creative, consider adding tassels or strings to give your dreamcatcher some extra flair. Alternatively, feel free to embellish with beads, buttons, shells, or any other materials that catch your eye.
How to Make a Jewelry Organizer
When embarking on this jewelry organizer project, it’s essential to determine the size of your desired organizer. This decision will influence the choice of ring or frame you select. With a clear understanding of the dimensions you’re aiming for, you can then proceed with the project.
Step 1
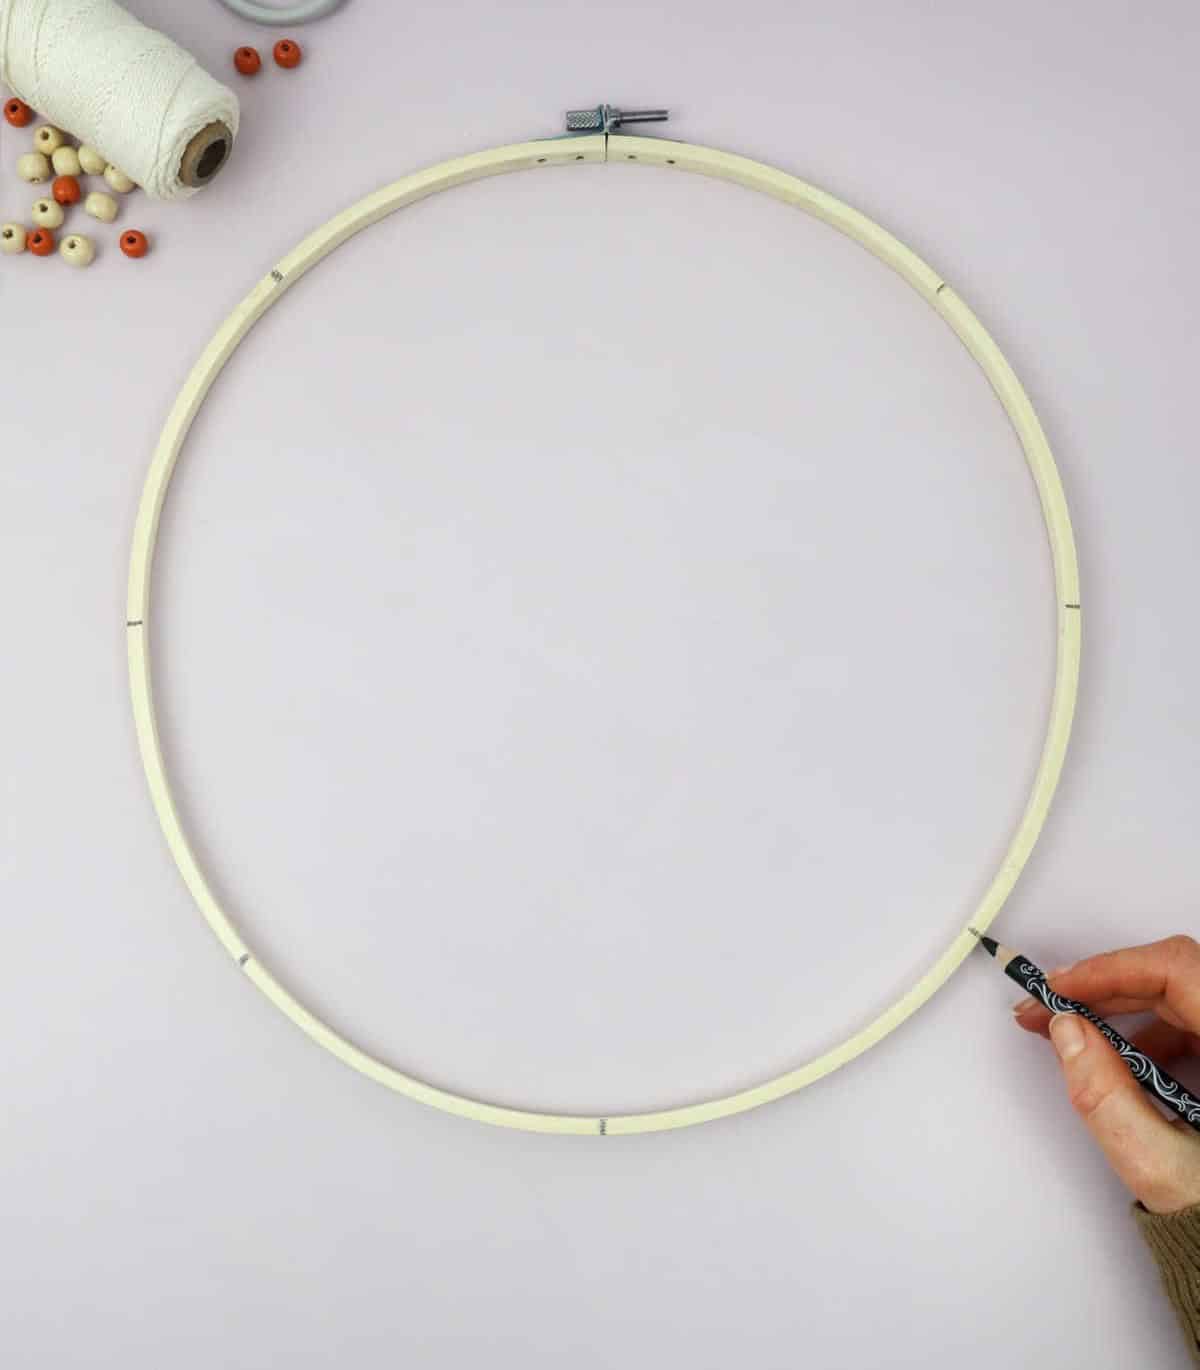
To create your dreamcatcher design, start by dividing the ring into smaller sections using a marker. You can divide it into as many parts as you like, resulting in unique patterns for every creation. For this specific pattern, we’ll be dividing the ring into eight equal parts. Begin by marking 3 o’clock, 6 o’clock, 9 o’clock and 12 o’clock positions on the ring. Then, draw a line connecting each of these points to create a series of equal sections.
Finally, add a central point to each section for added visual interest.
Step 2
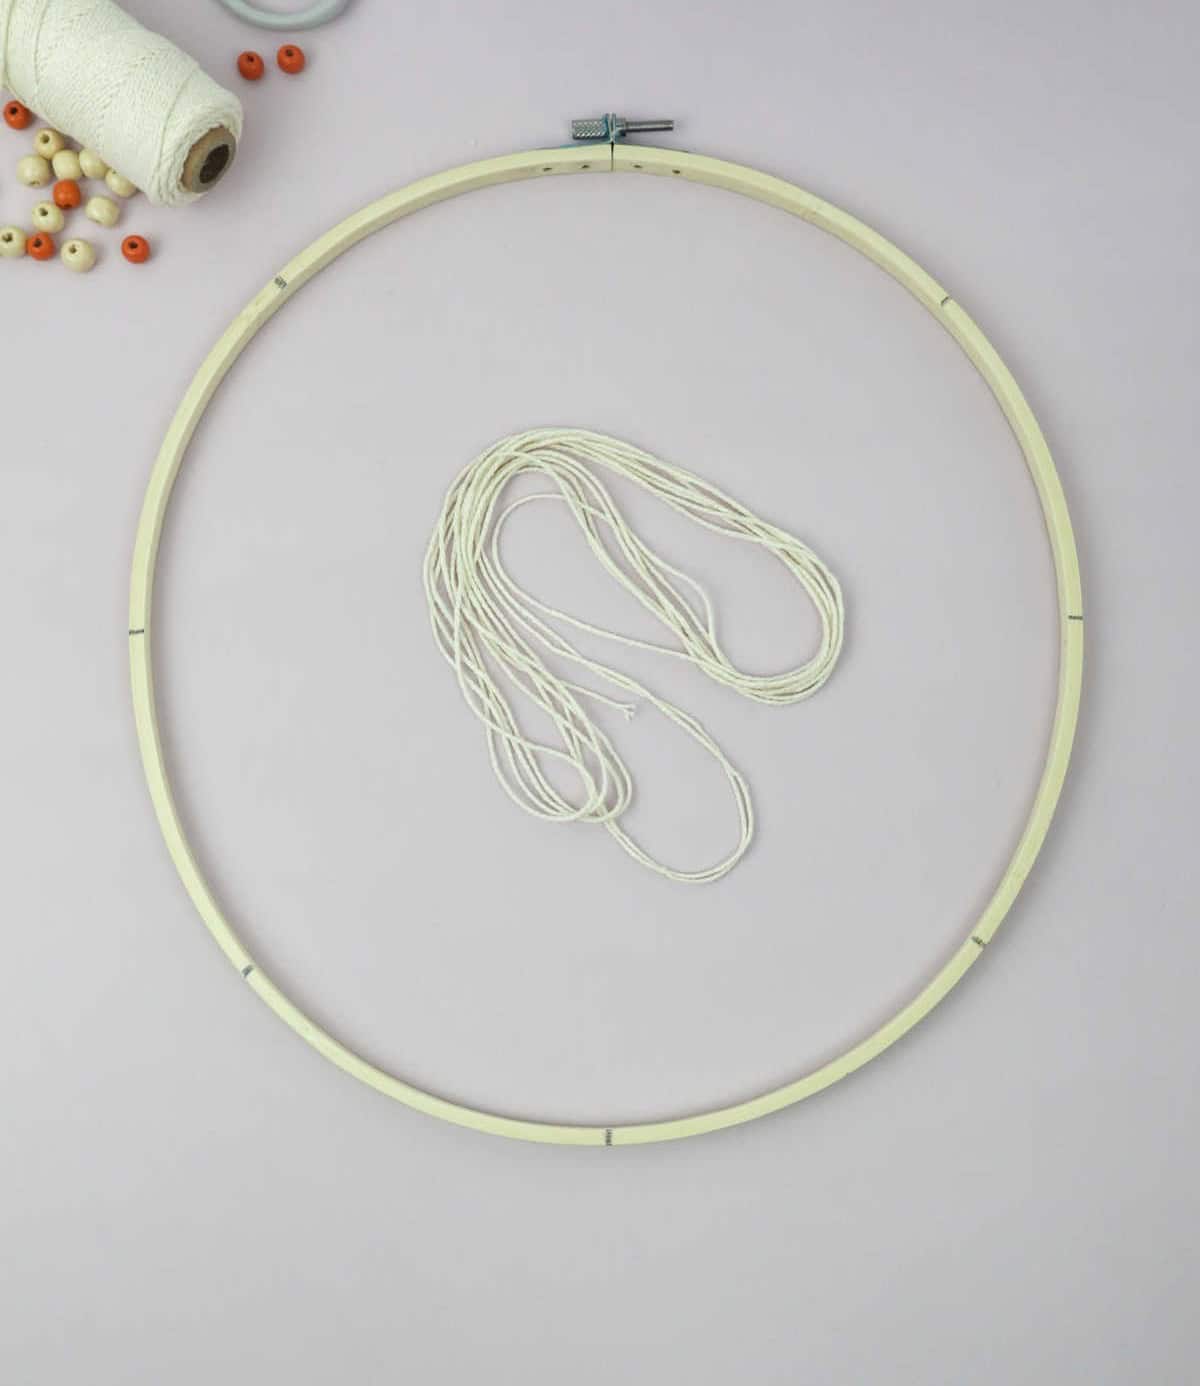
Selecting the perfect embroidery thread is an exciting step in bringing your design to life. You have the freedom to opt for understated options like neutral beige or classic black, which provide a timeless elegance. Alternatively, you can add a pop of personality with vibrant and bold colors that reflect your unique style.
Step 3
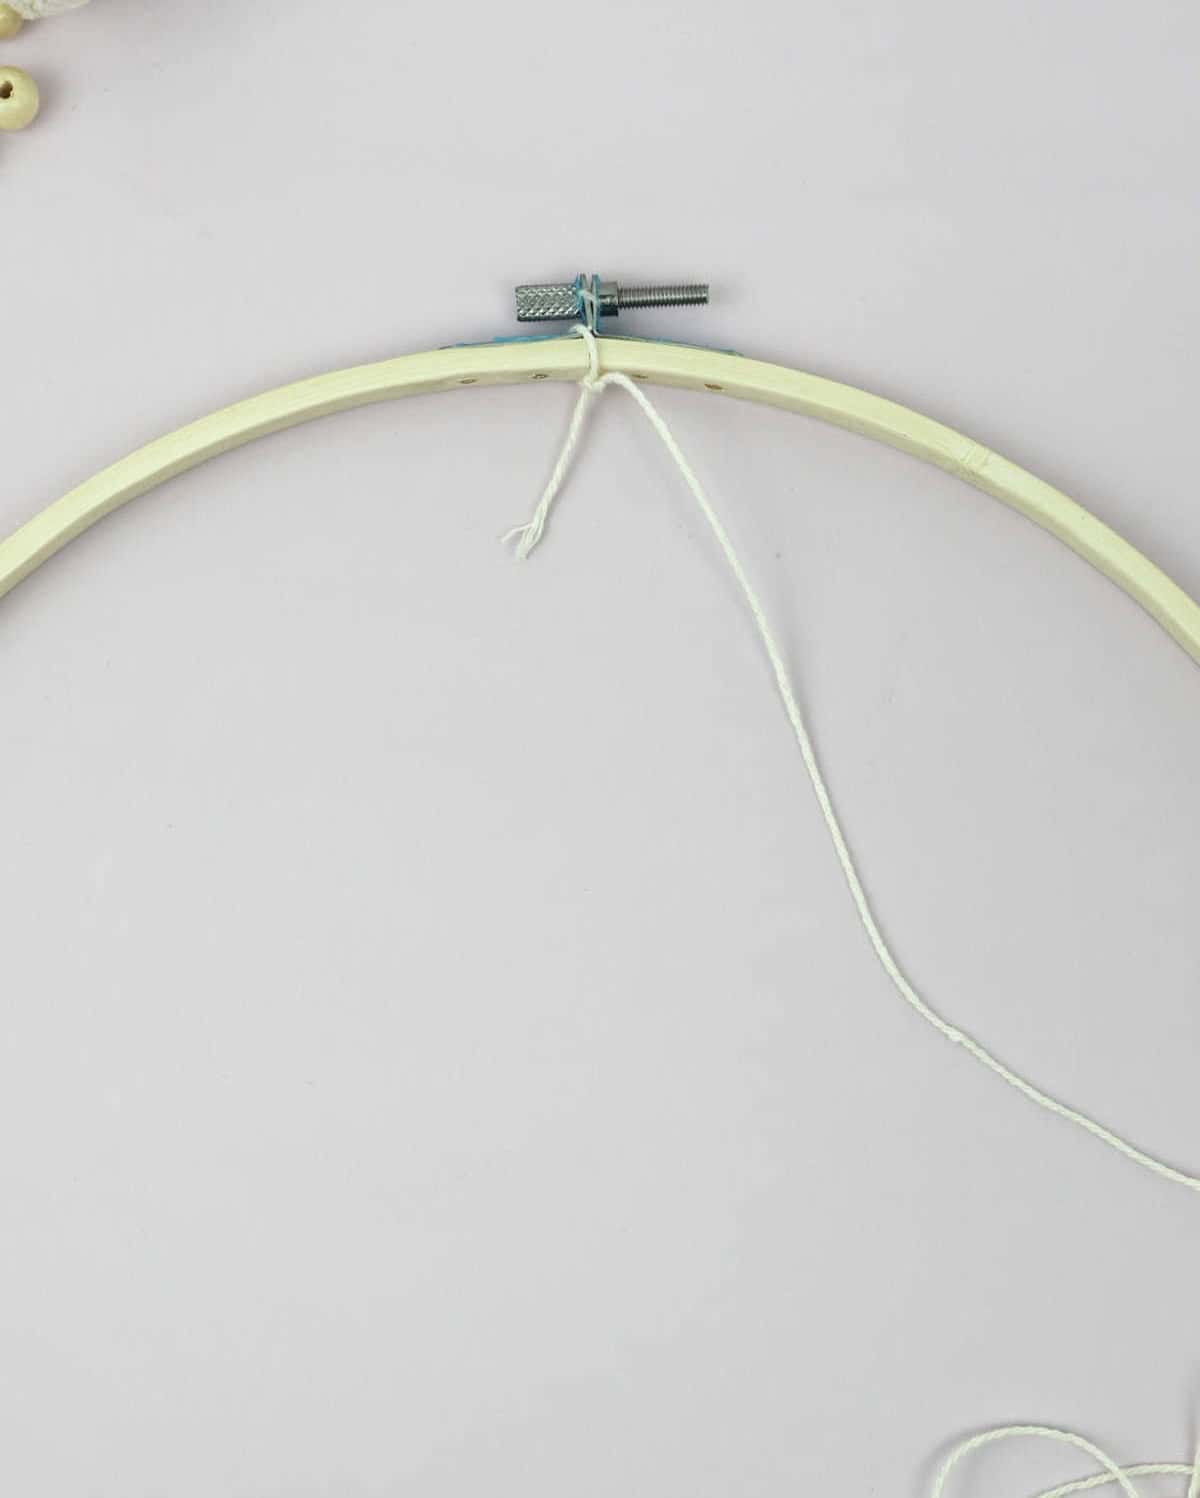
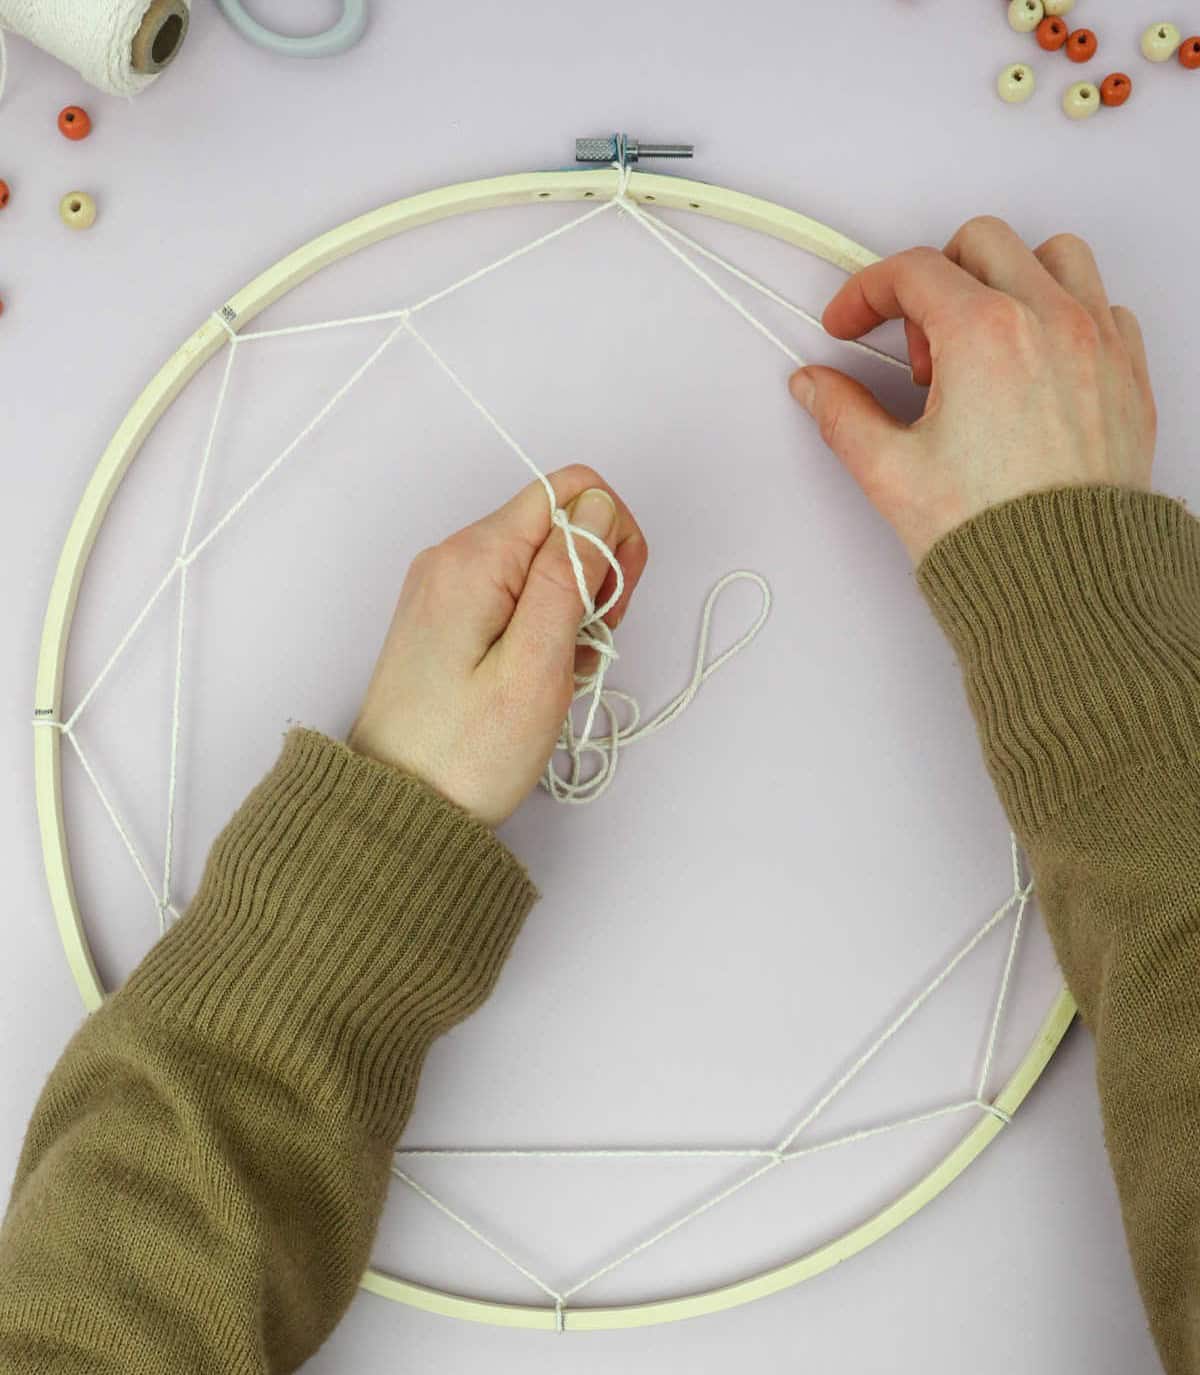
Begin by creating a simple knot at the 12 o’clock mark. This will serve as your foundation, so ensure it’s securely fastened and remains stationary. To facilitate this process, consider employing a minuscule amount of adhesive to temporarily hold the knot in place, thereby allowing for smoother thread manipulation.
Step 4


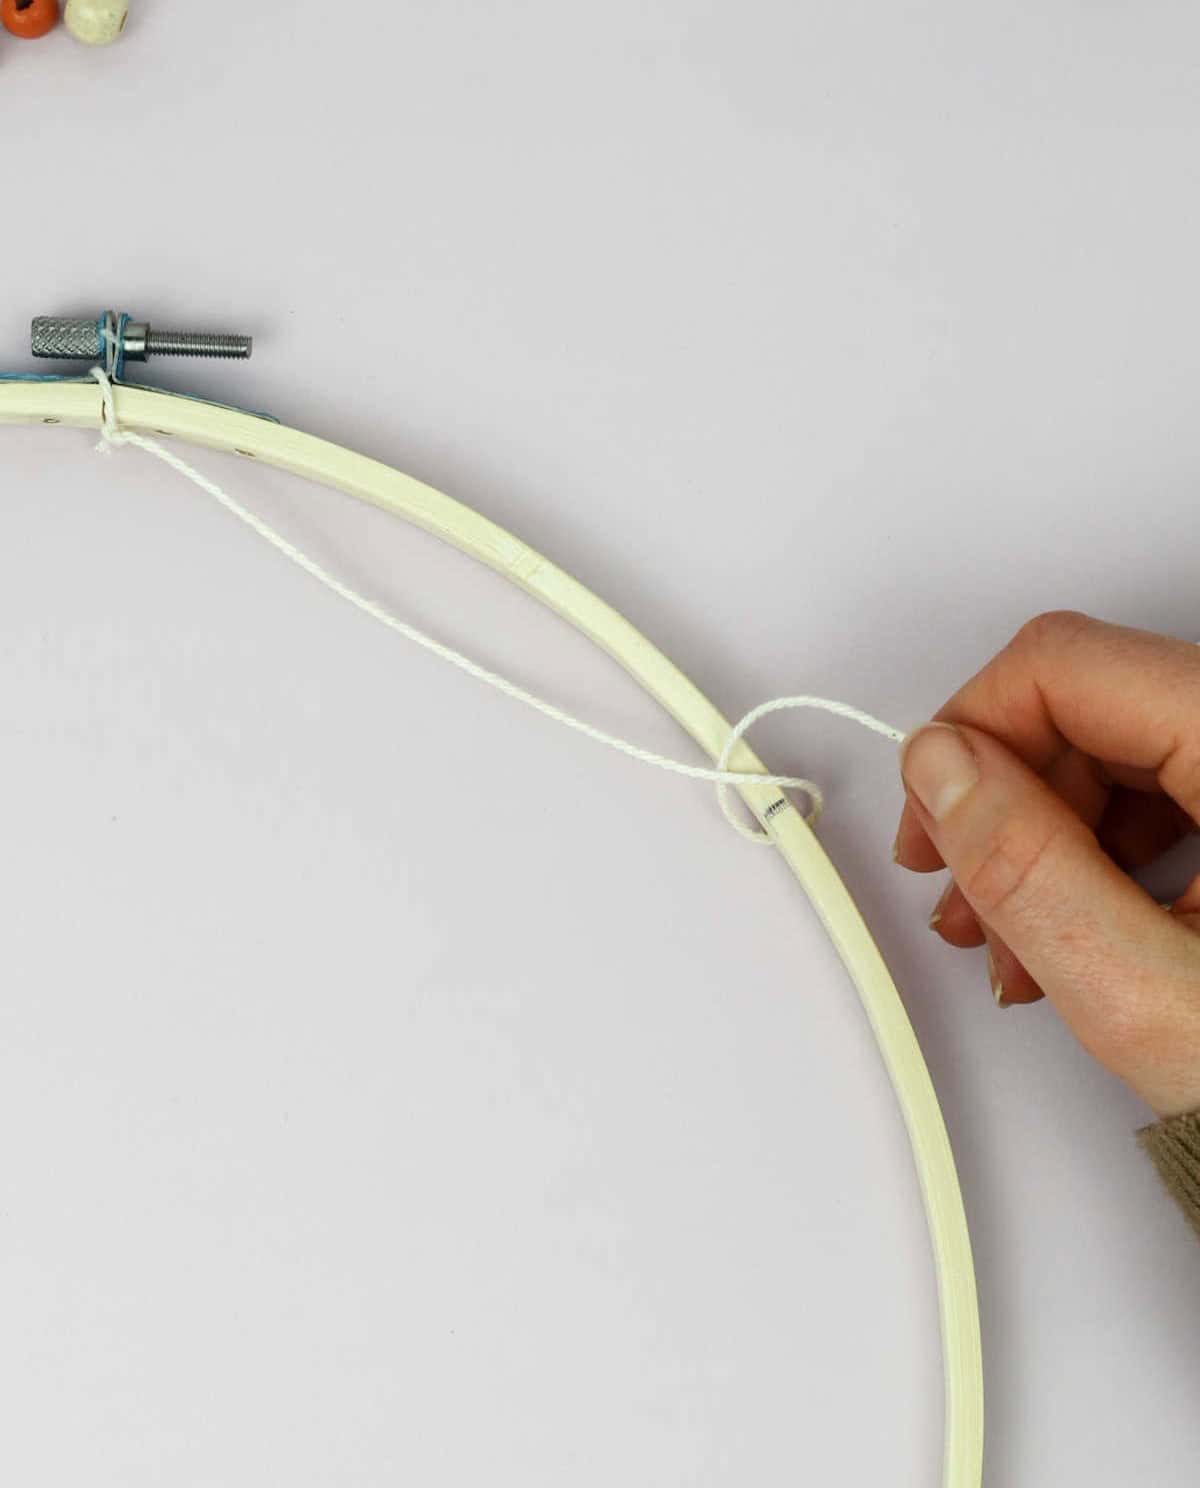
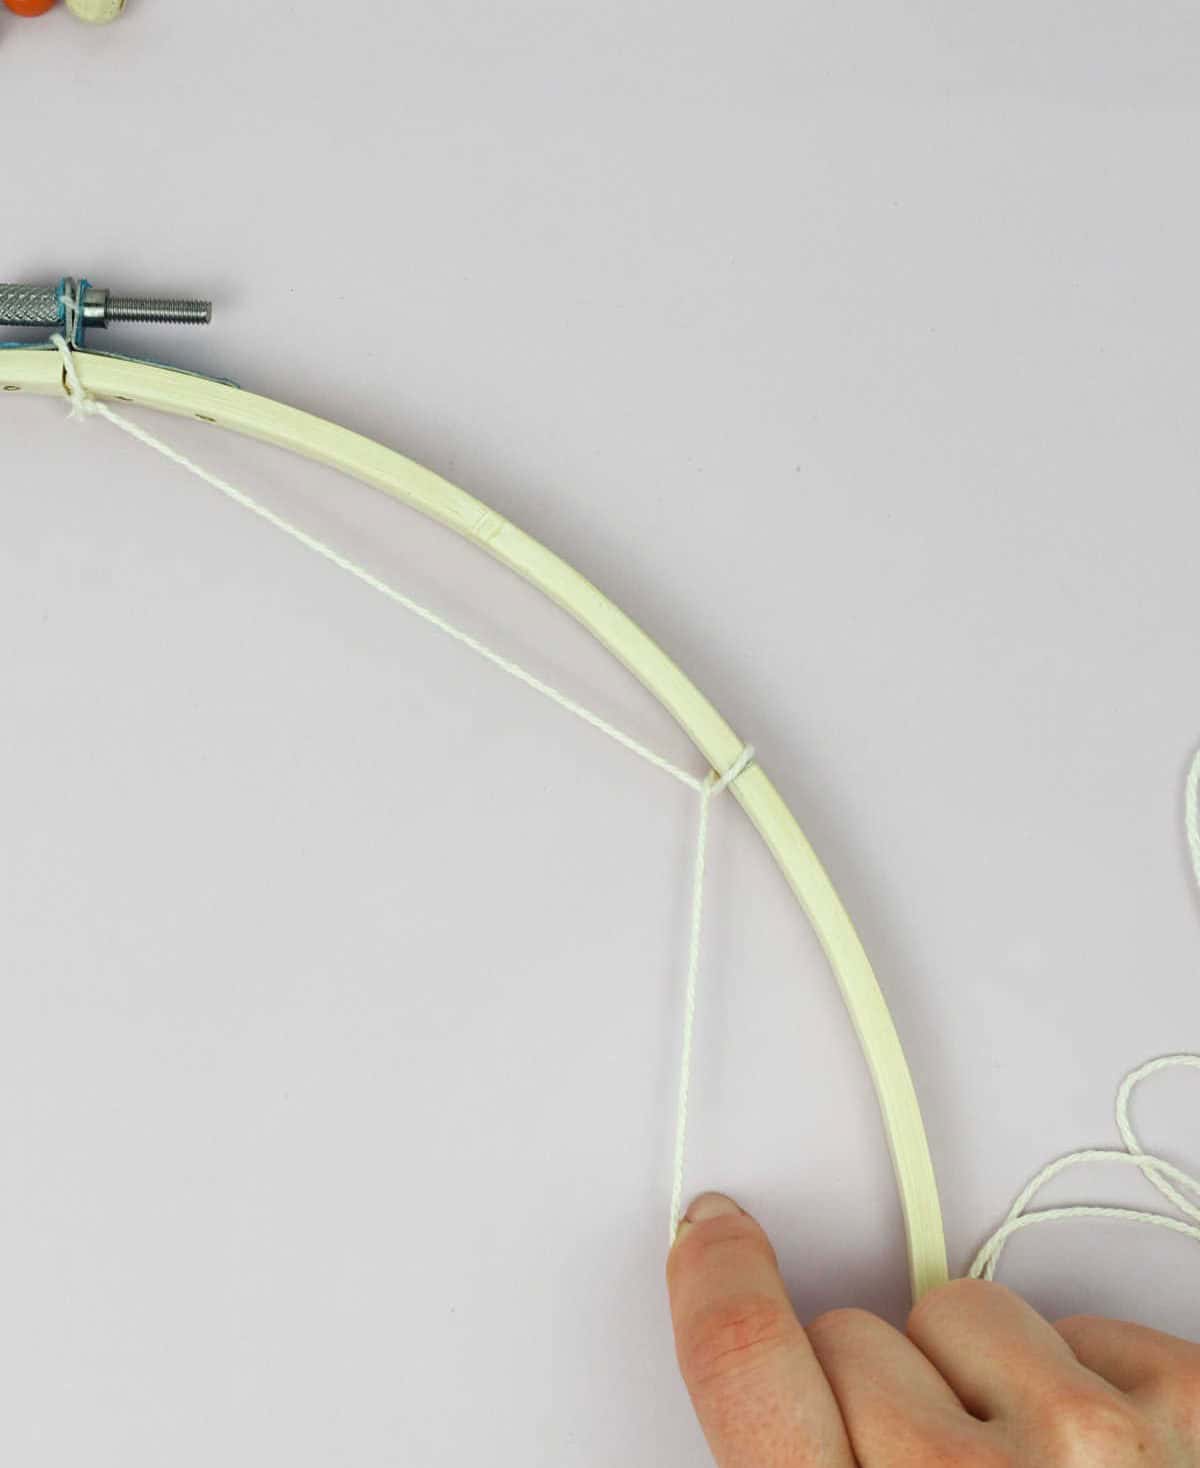
To proceed with the embroidery process, carefully draw out the thread to reach the subsequent pointer on your hoop or frame. Next, create a loop around the ring by wrapping the thread around it. For added stability, consider using one hand to gently hold the ring in position while you use your dominant hand to form the loop.
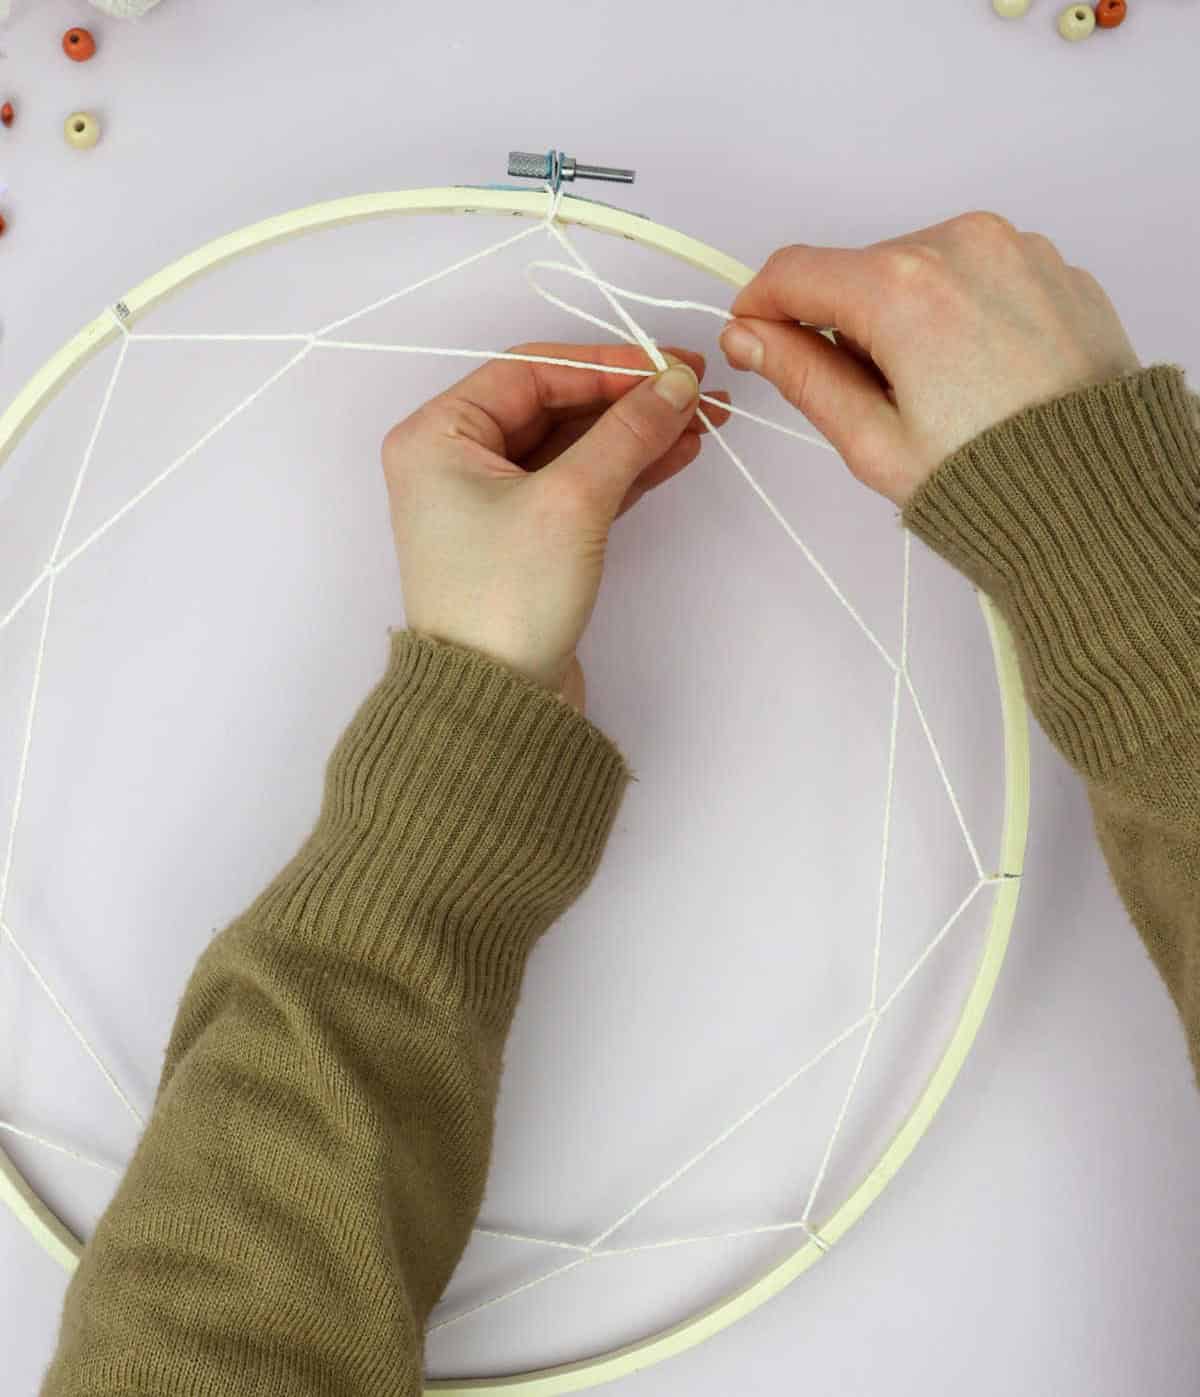
Step 5

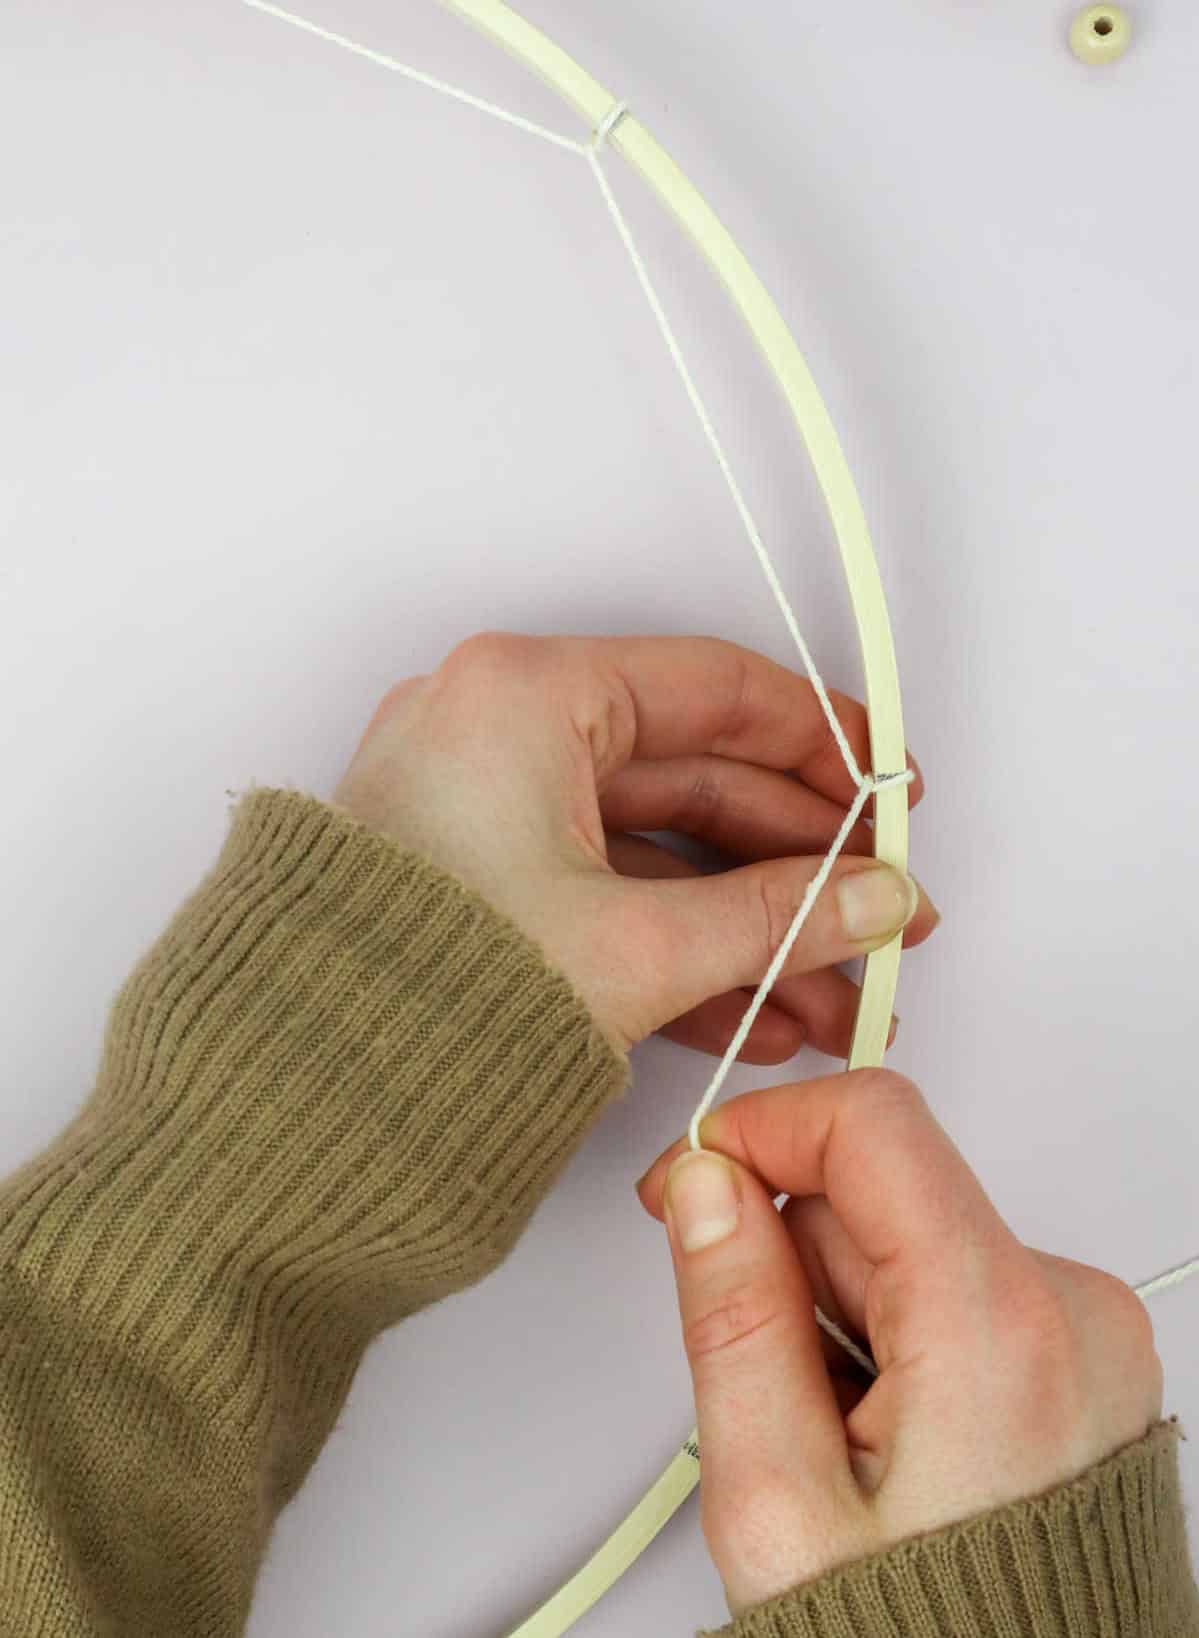
As you navigate the embroidery hoop, maintain a steady pace by looping the thread around each pointer, gradually forming a full circle. To achieve this, ensure the thread remains taut yet flexible, allowing for smooth movement without any slack or tangling.
Step 6

As you approach the 12 o’clock position again, carefully manipulate the thread to wrap it around the base of the ring, securing it in place. When you move on to the next stage, you’ll be working with the thread’s inner circumference, weaving it between the existing threads rather than the ring itself. To achieve a balanced and visually appealing pattern, strive for a centered loop that allows the design to radiate evenly from the center.
Step 7


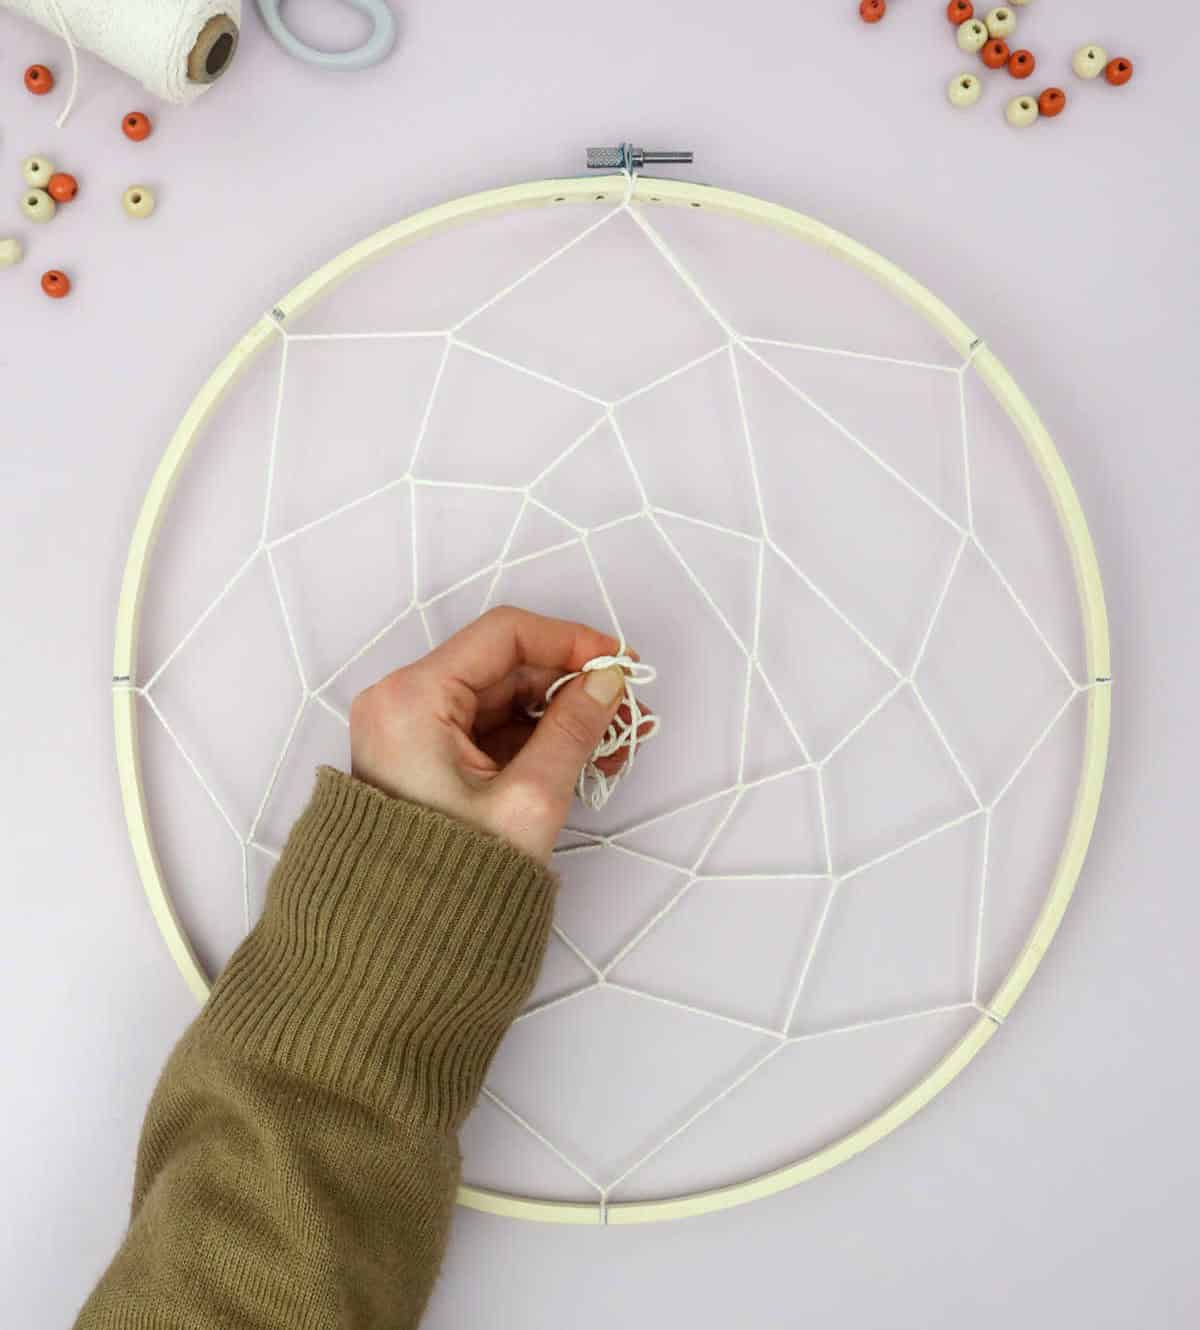
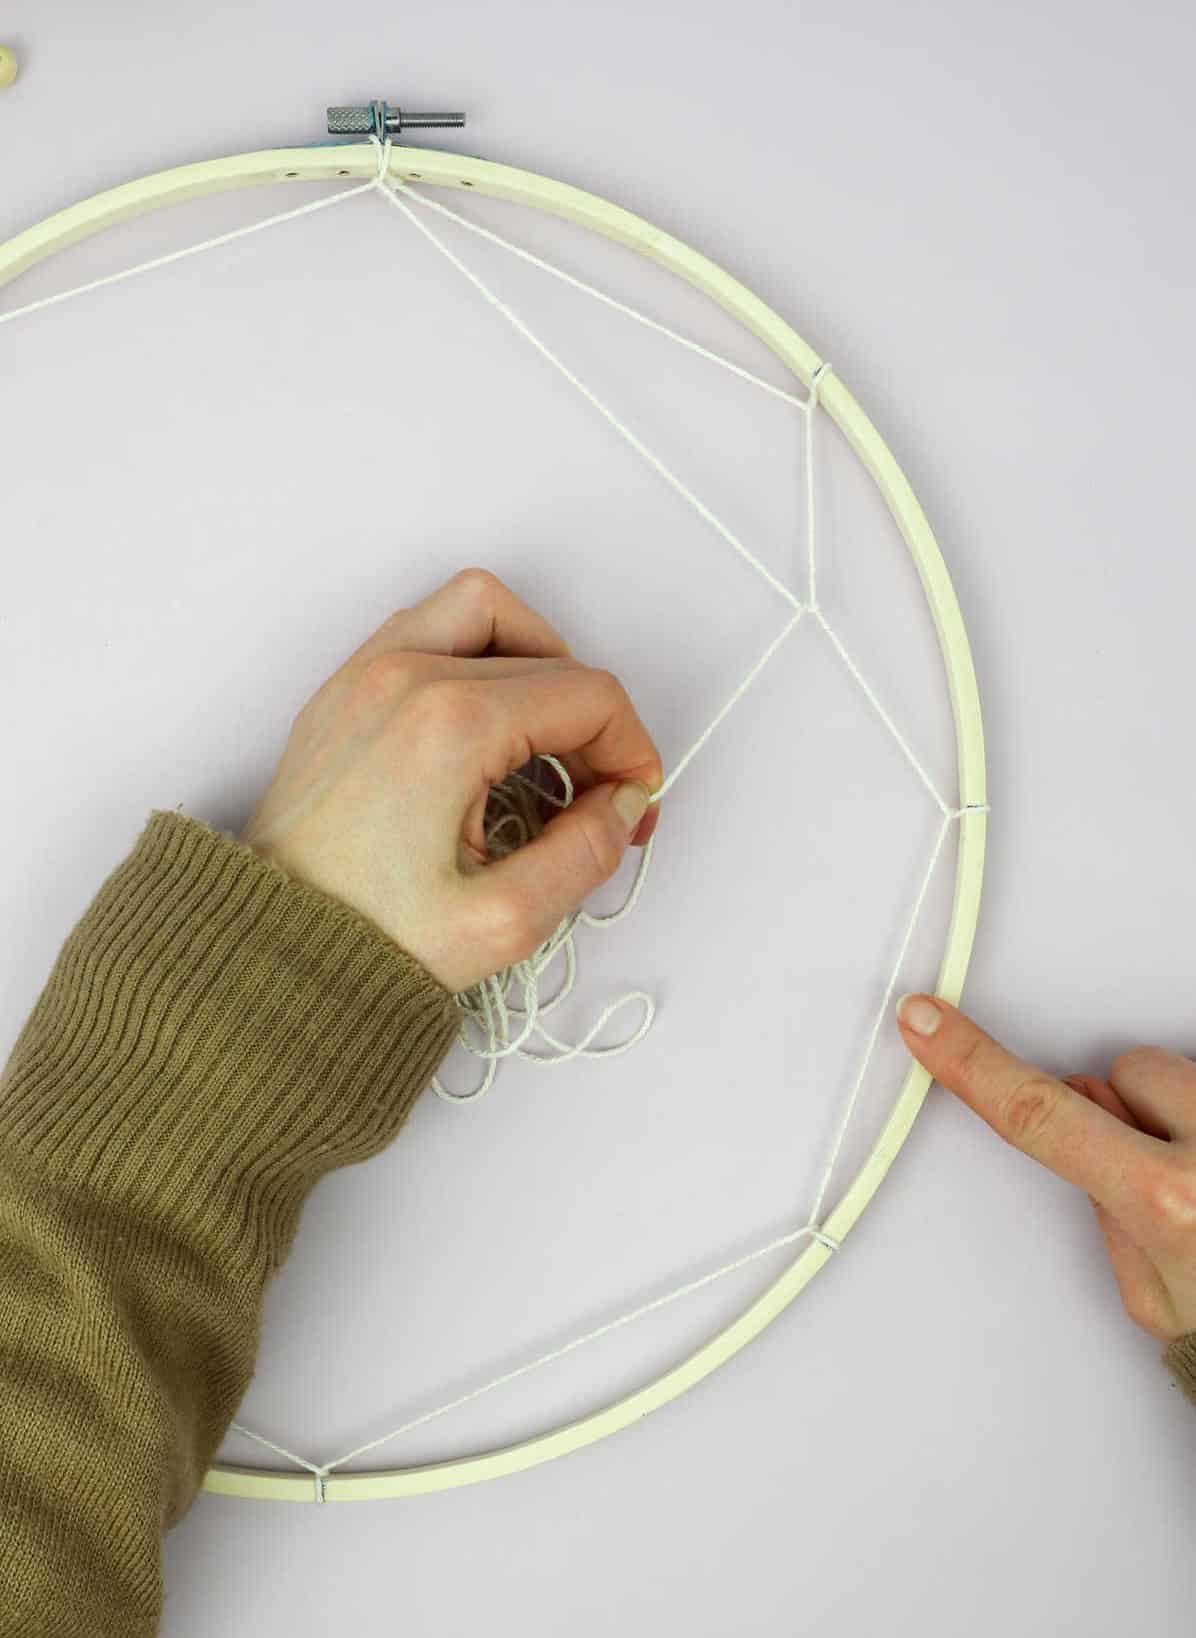
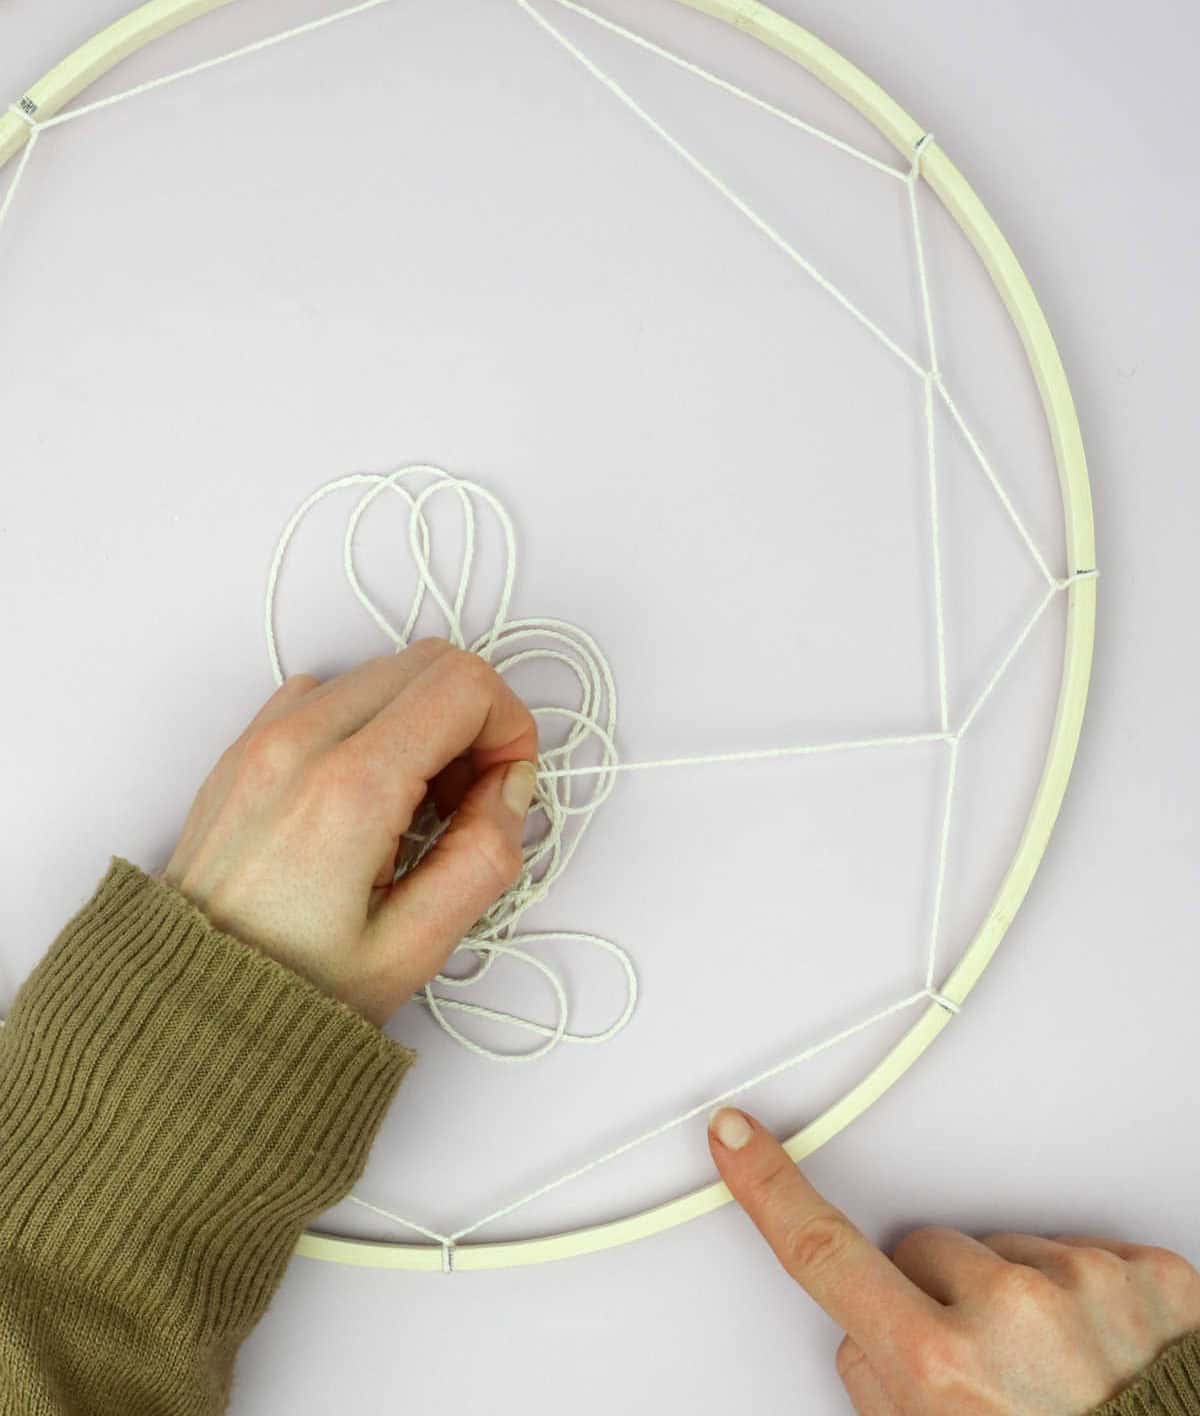
As you enter the third round of threading, maintain a consistent tension by keeping the thread in a steady loop. This is your opportunity to introduce a new hue if desired, but it’s equally effective to stick with the current shade and allow the stitches to develop a harmonious rapport.
Step 8
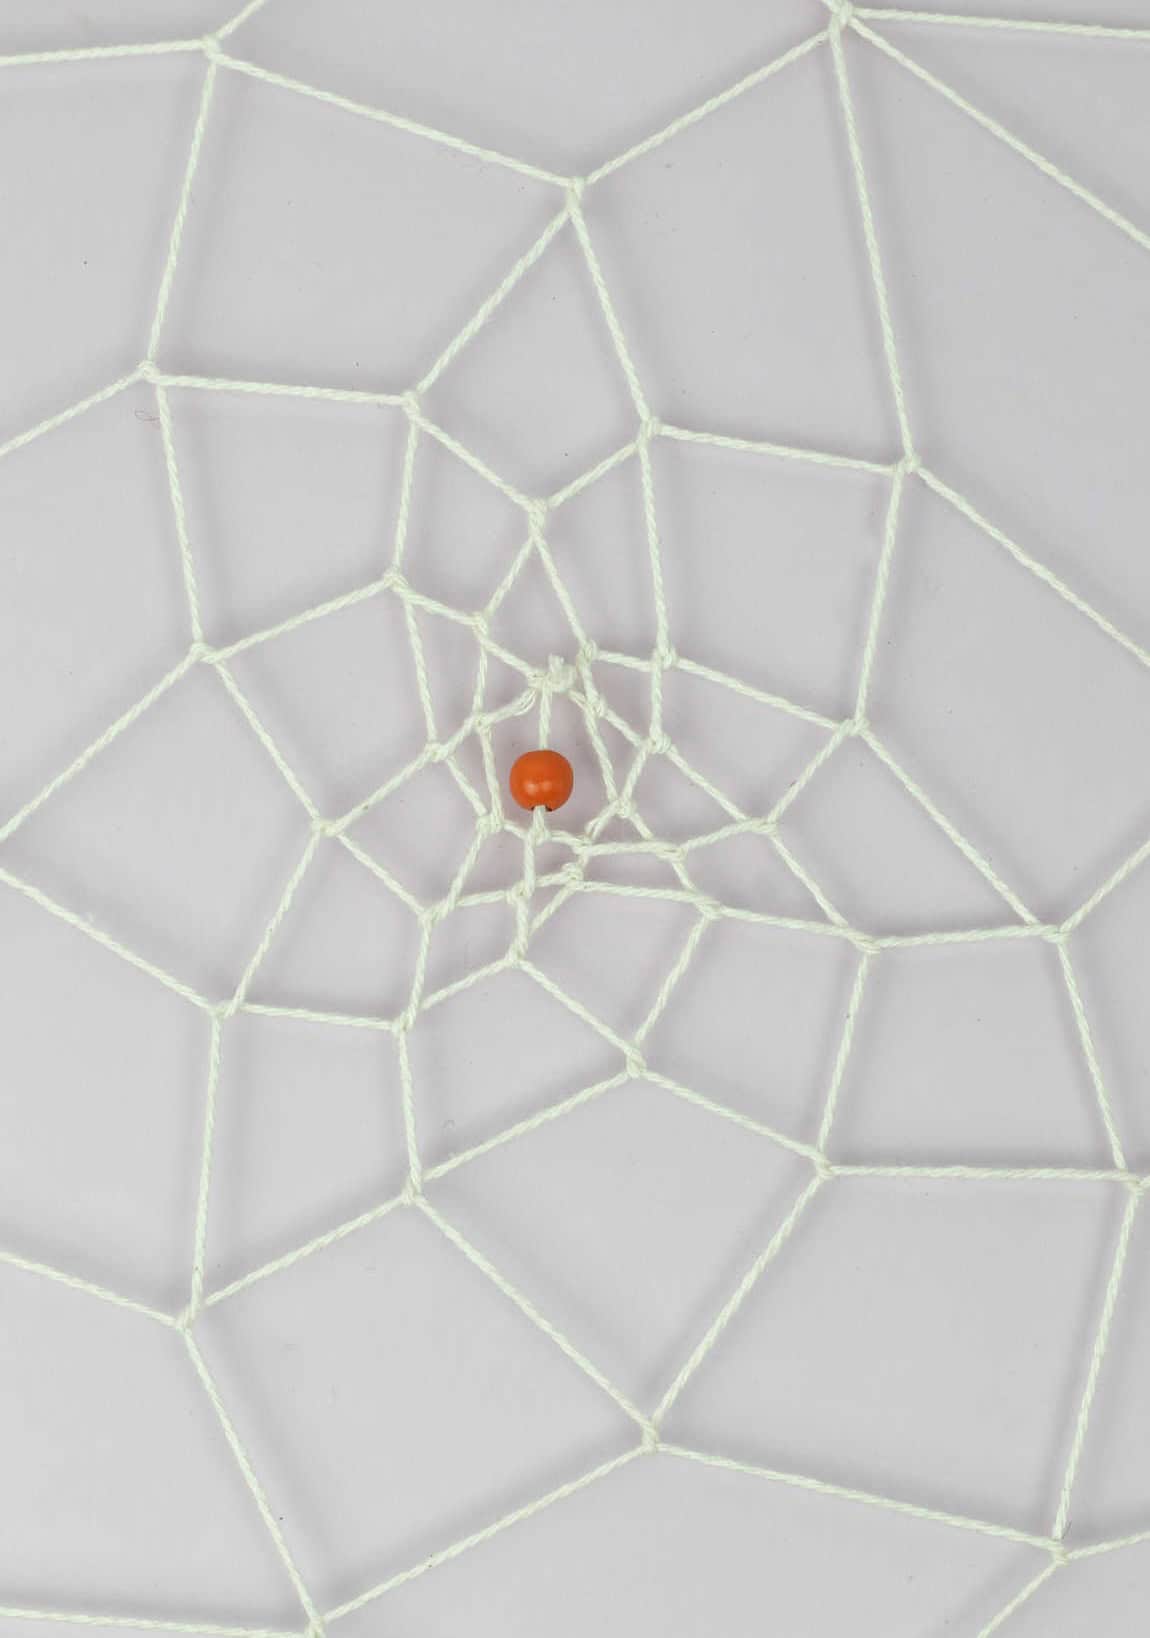
As the process of winding and looping the thread reaches its completion, a natural consequence is that the pattern begins to contract in size. Once you’ve reached the desired proximity to the central axis, it’s time to bring the thread to a close and secure it with a knot.
Step 9
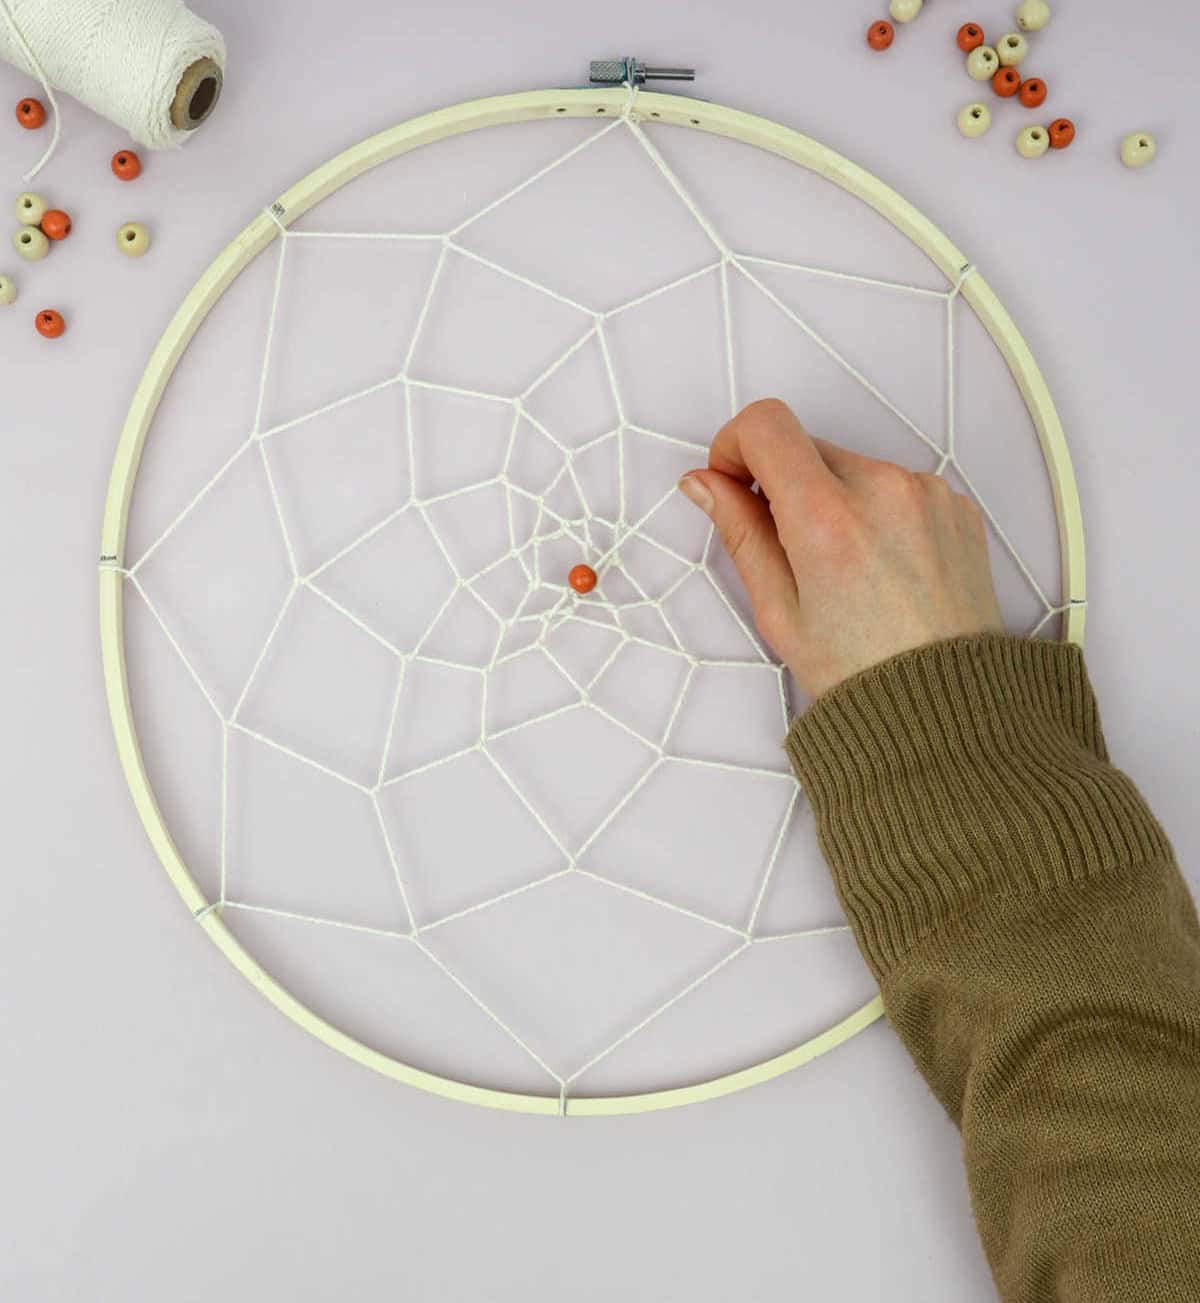
While not essential, inserting a bead immediately preceding the knot can significantly enhance the stability and security of the thread’s tie. This minor adjustment can make all the difference in ensuring your knot remains intact, giving you greater peace of mind as you work with your threads.
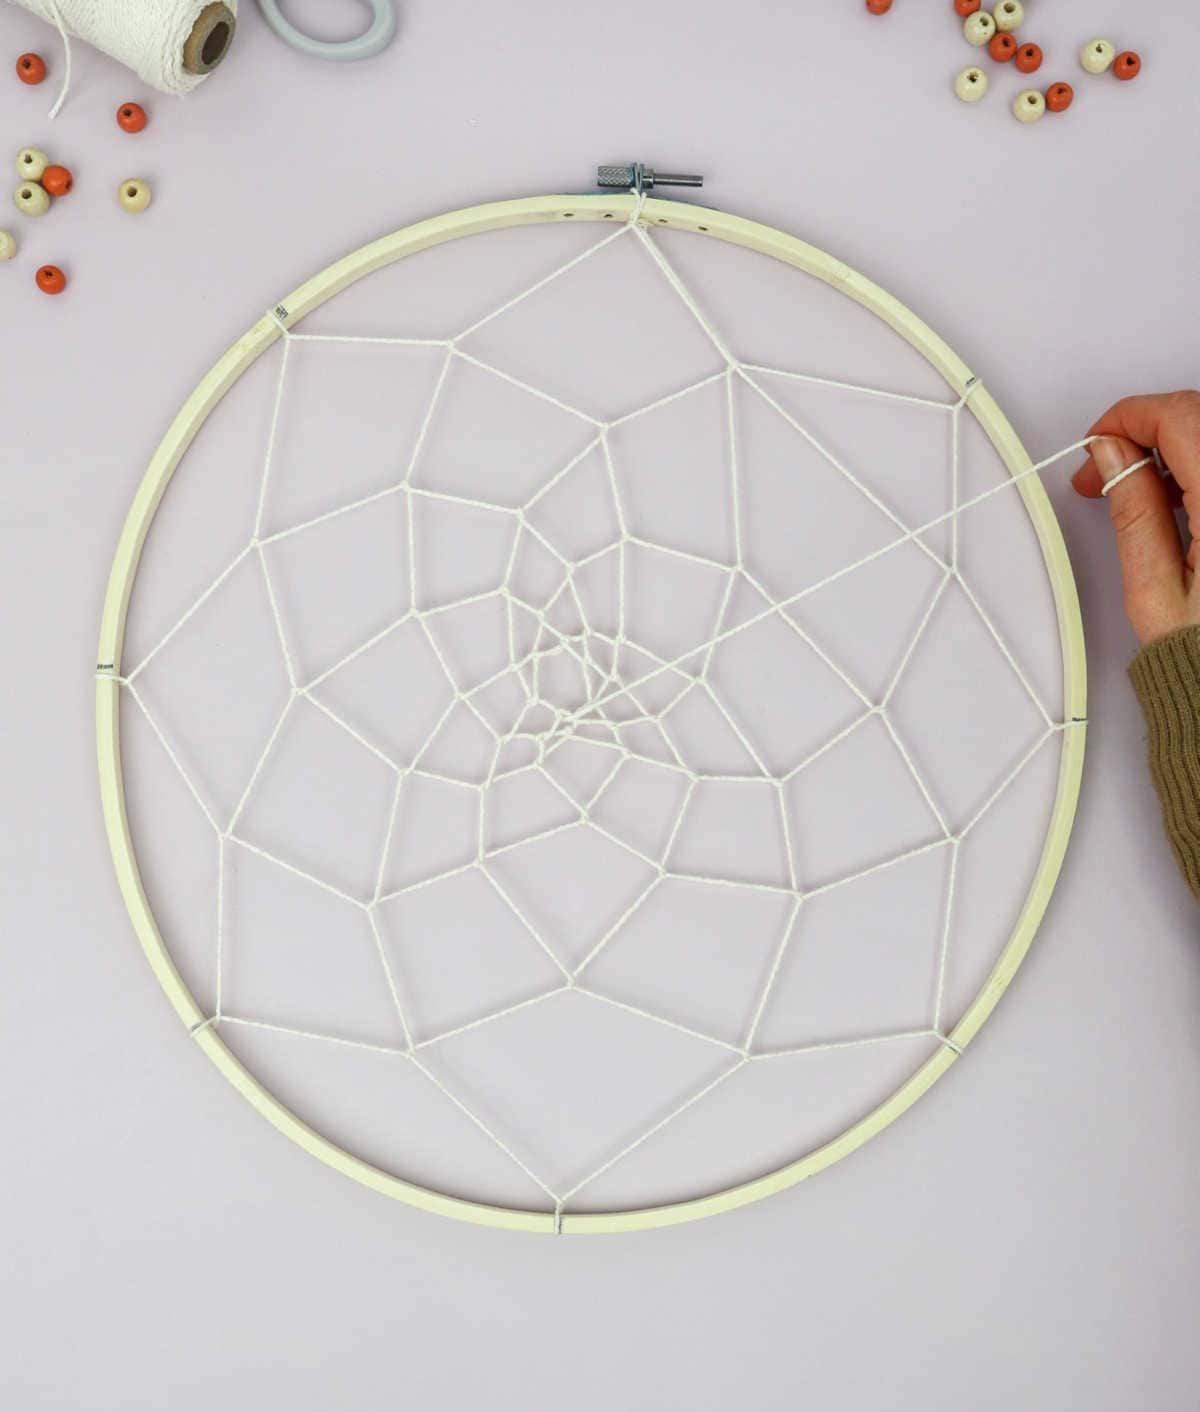
Step 10
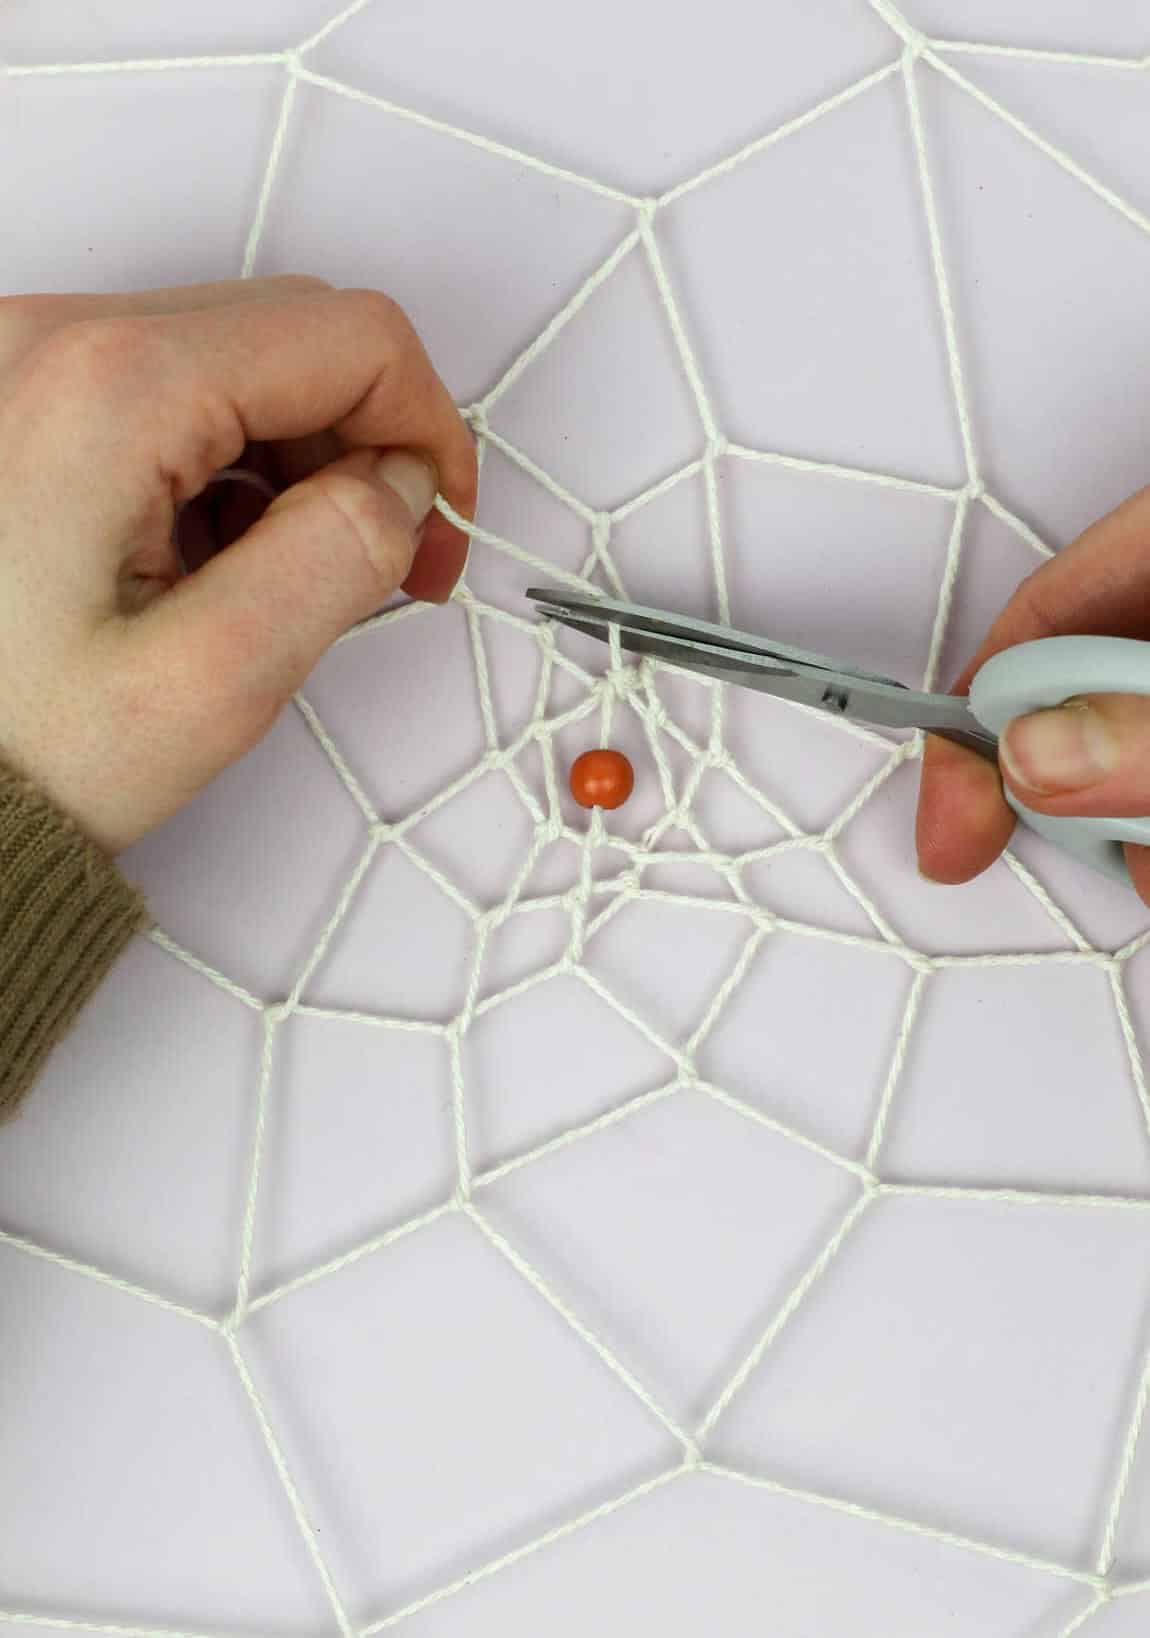
Once you’ve secured the end of the thread with a knot, you’re left with excess material that needs to be tidied away. One approach is to simply snip off any loose ends and tuck them into the bead, effectively concealing them from view. Alternatively, you can employ a small amount of clear adhesive to bond the stray thread to its neighboring counterpart, creating a seamless join.
Step 11

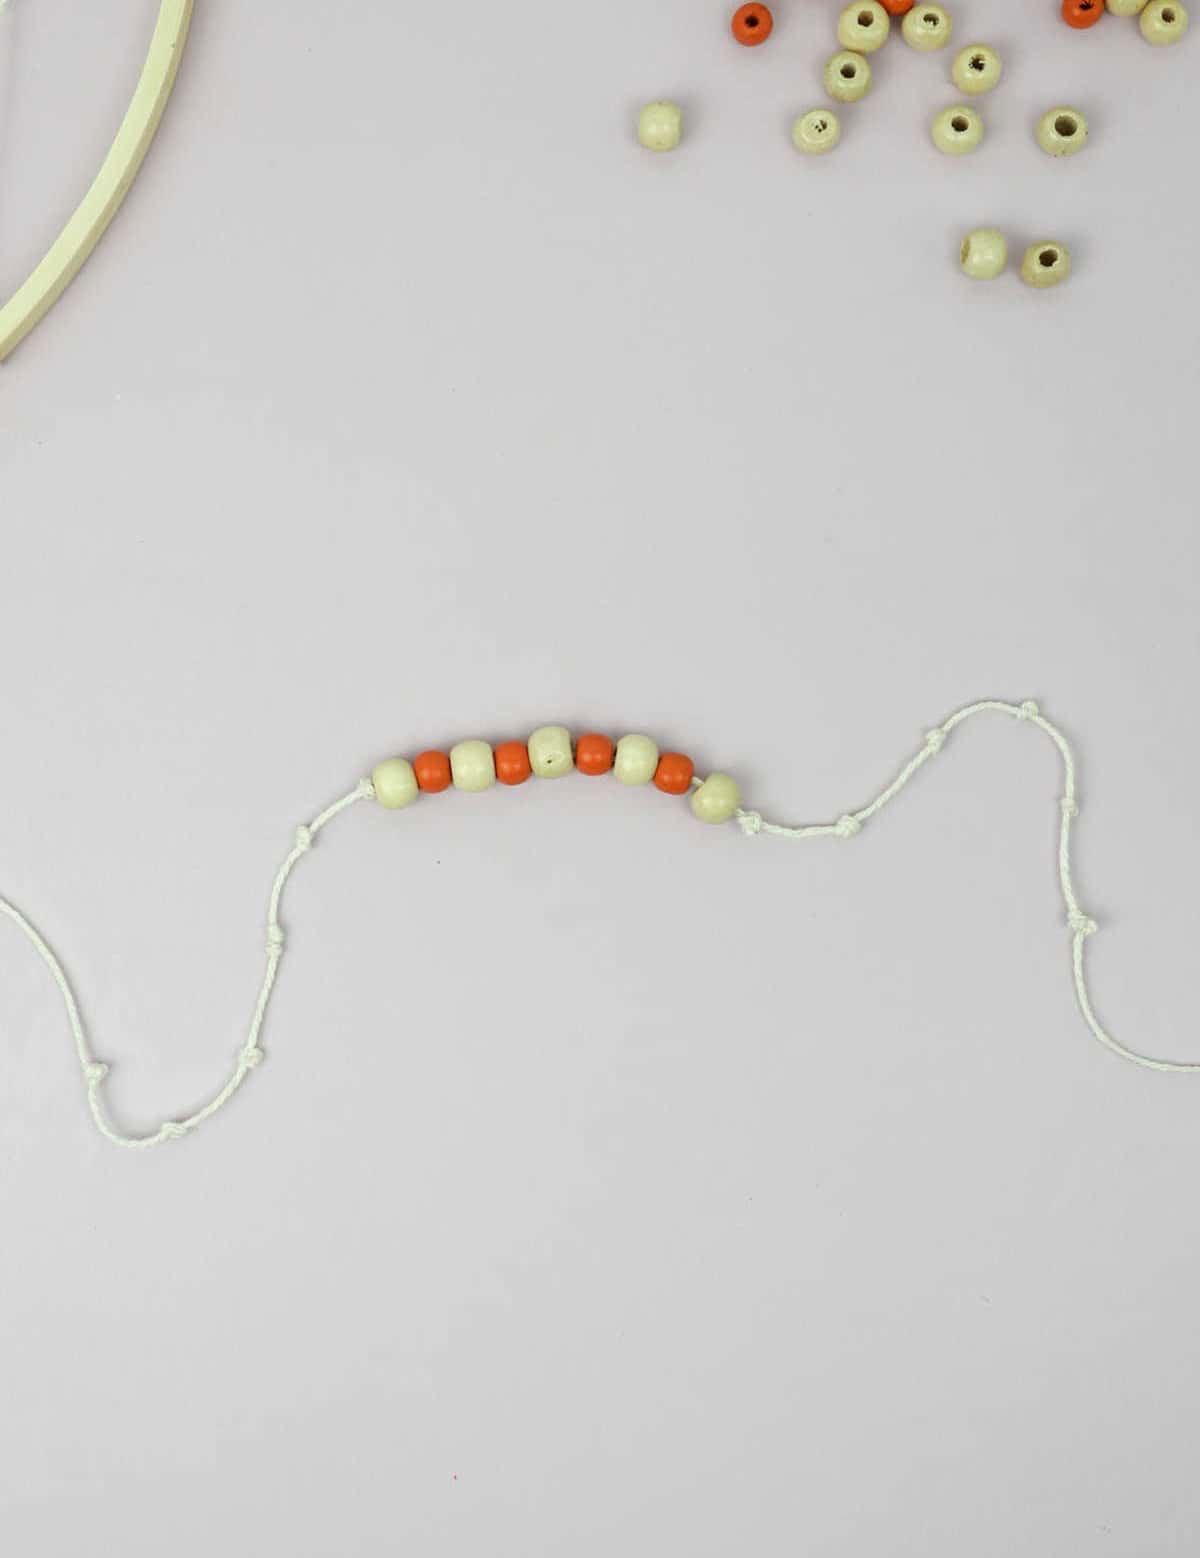
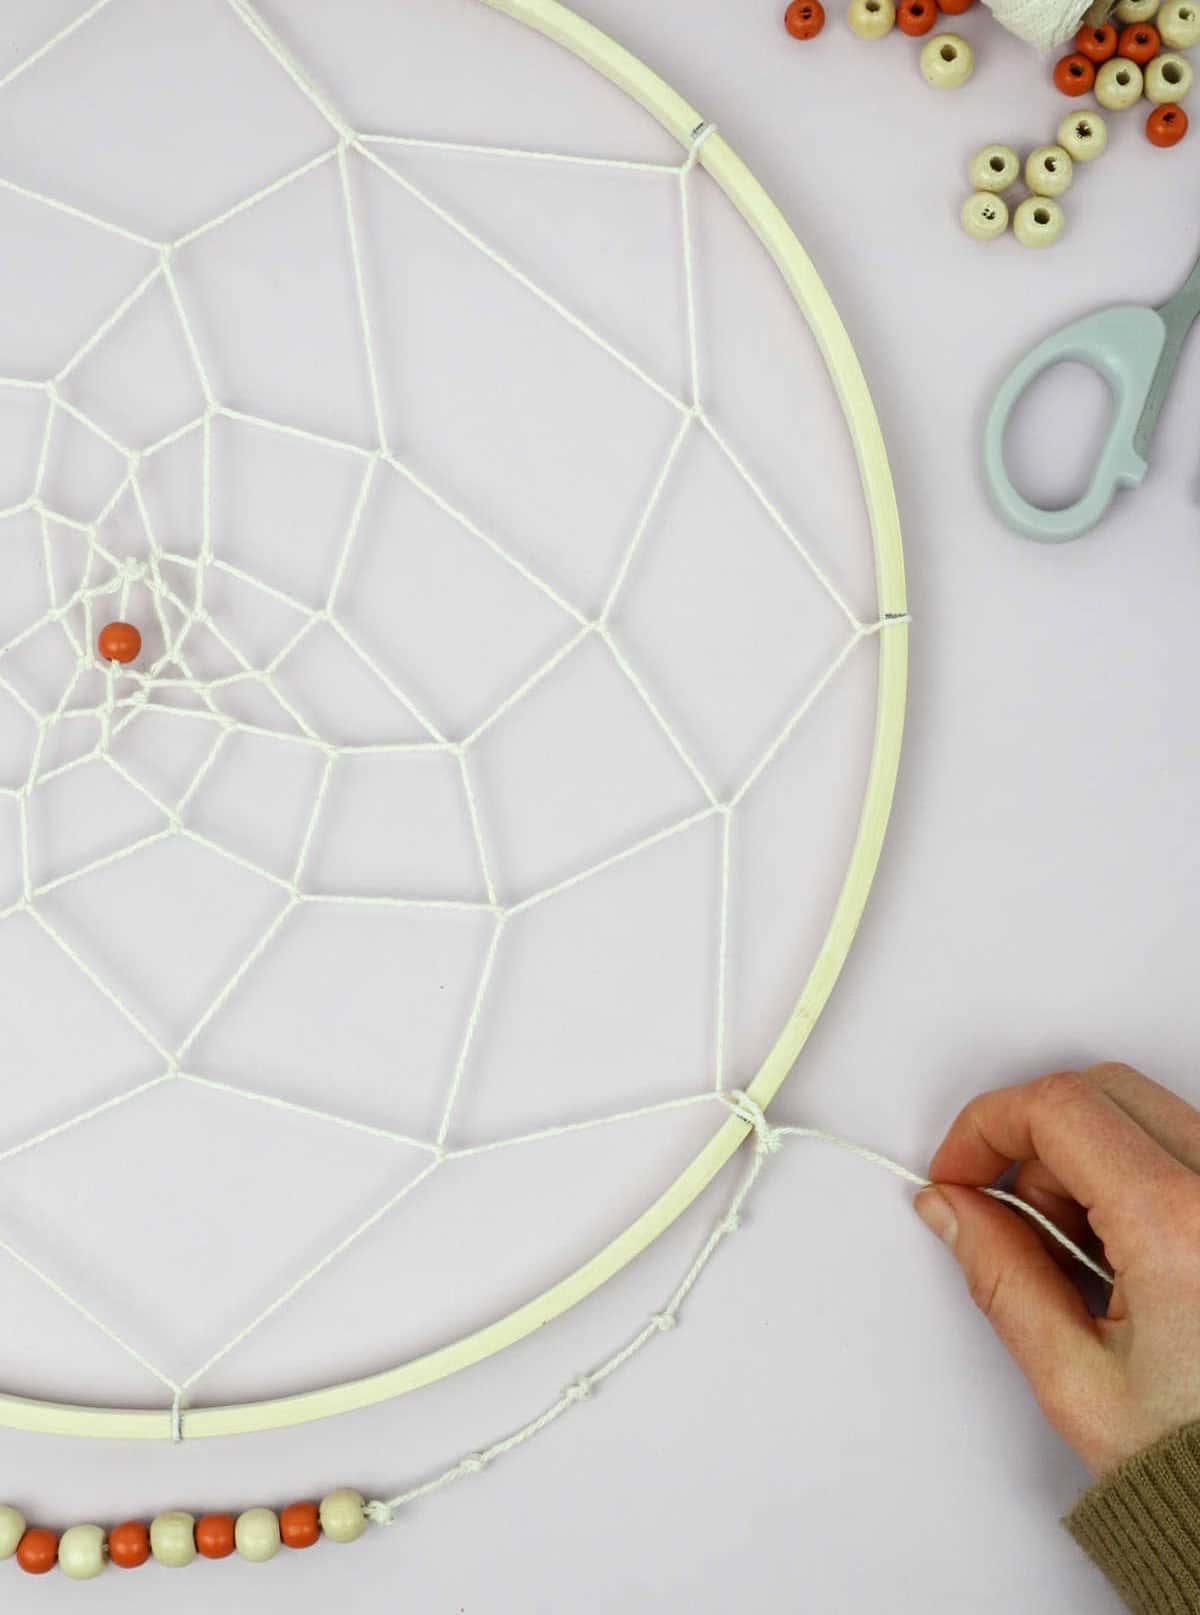
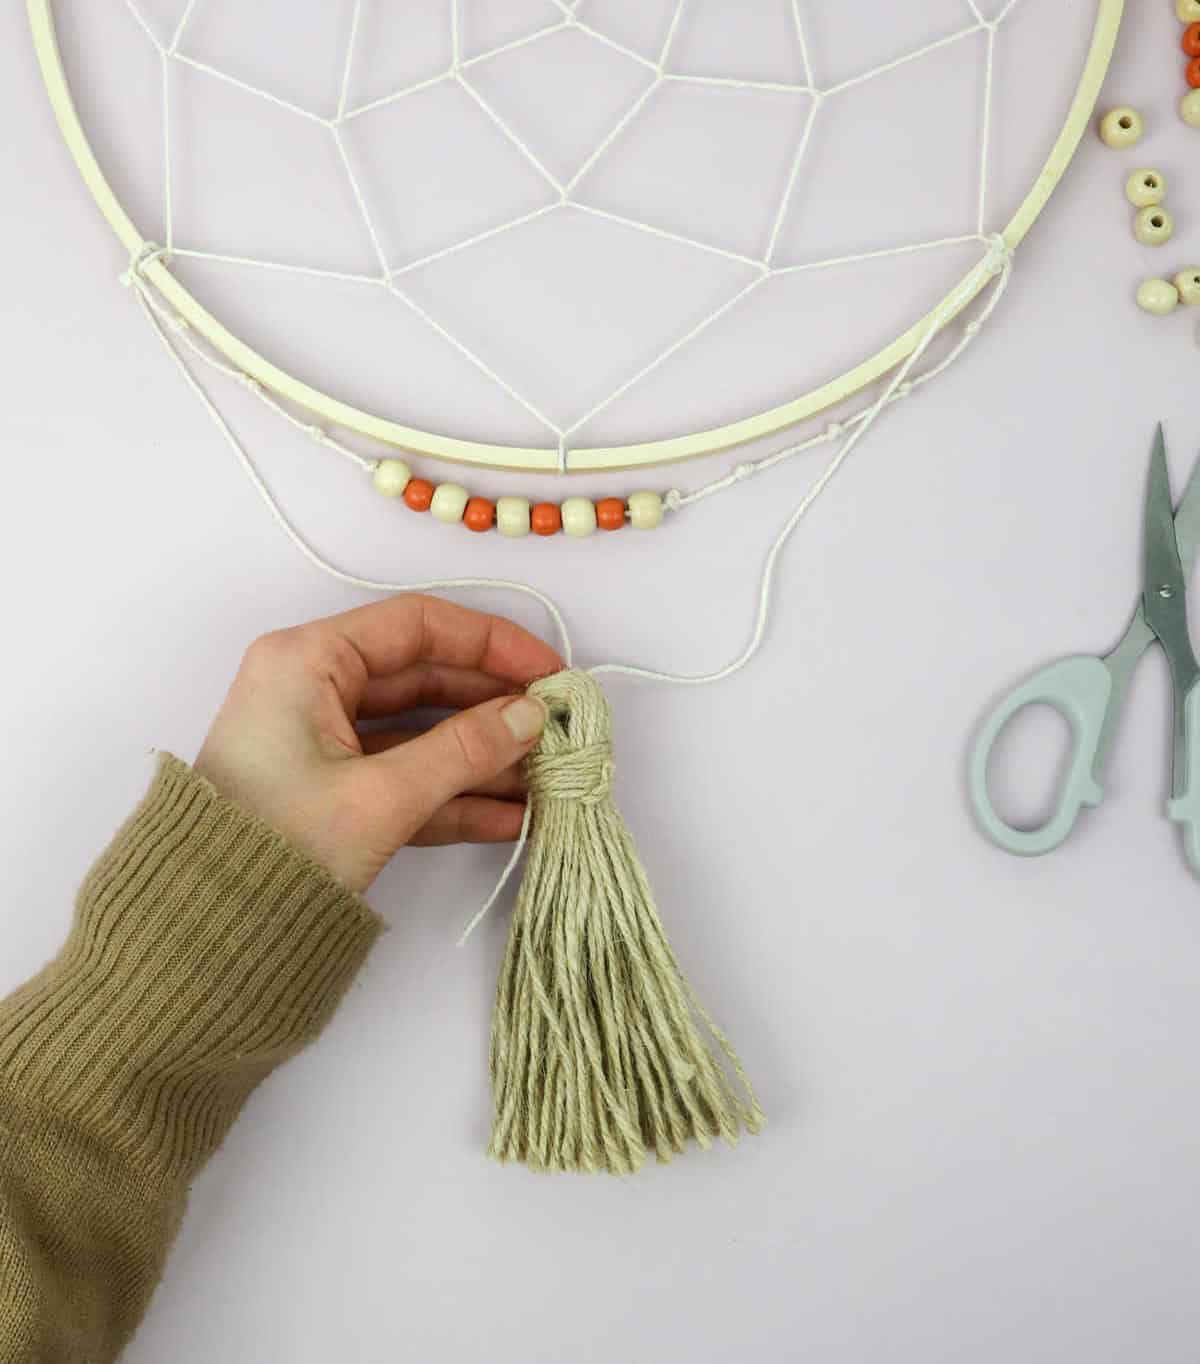
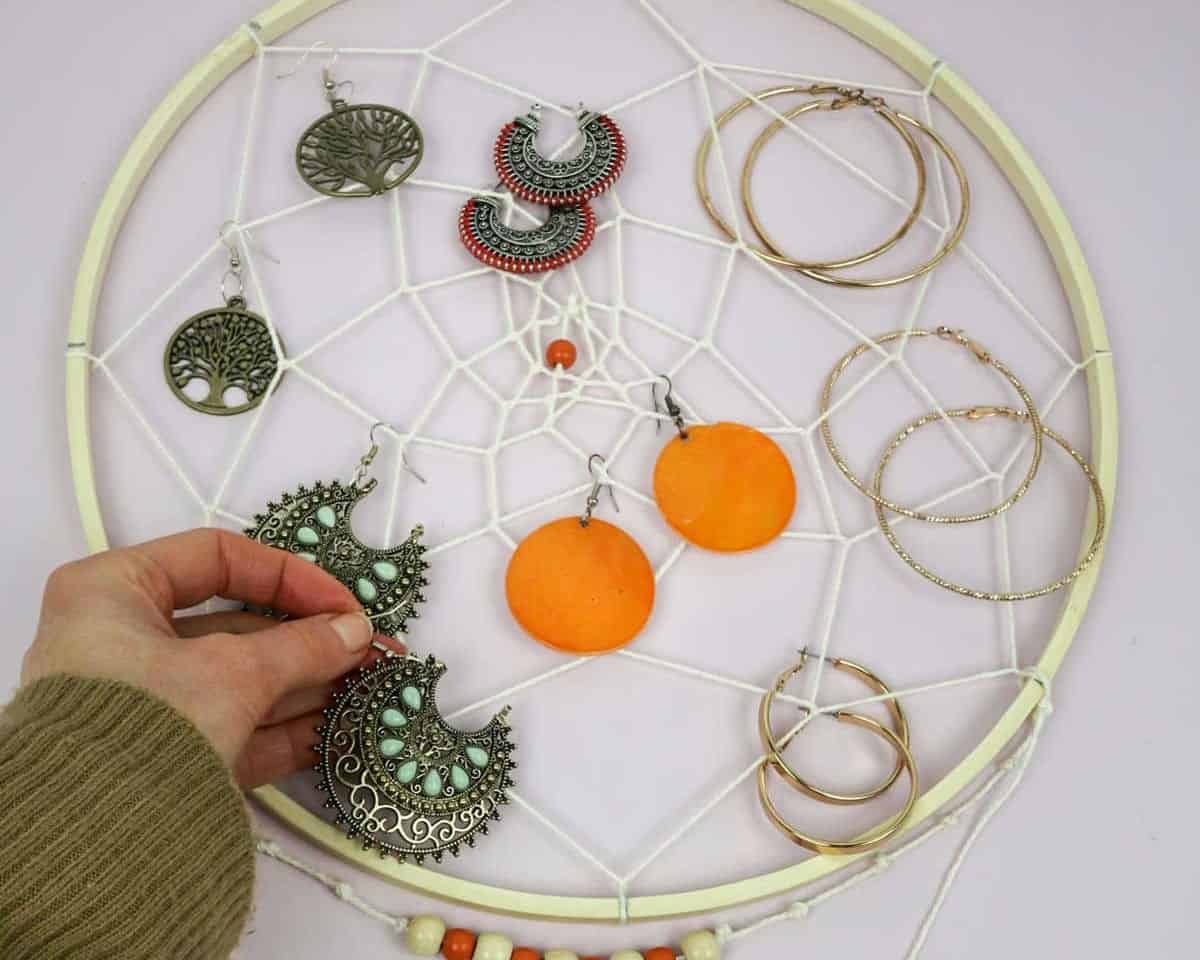
When incorporating tassels, beads, or string into your design, feel free to get creative and customize them as you see fit. To secure these embellishments in place, you’ll need to tie multiple knots along the thread. Make sure to tighten each knot securely to prevent any unwanted movement. Once you’ve added all the decorative elements you desire, take a moment to tidy up the ends by tying them to the frame with a sturdy knot.
Step 12
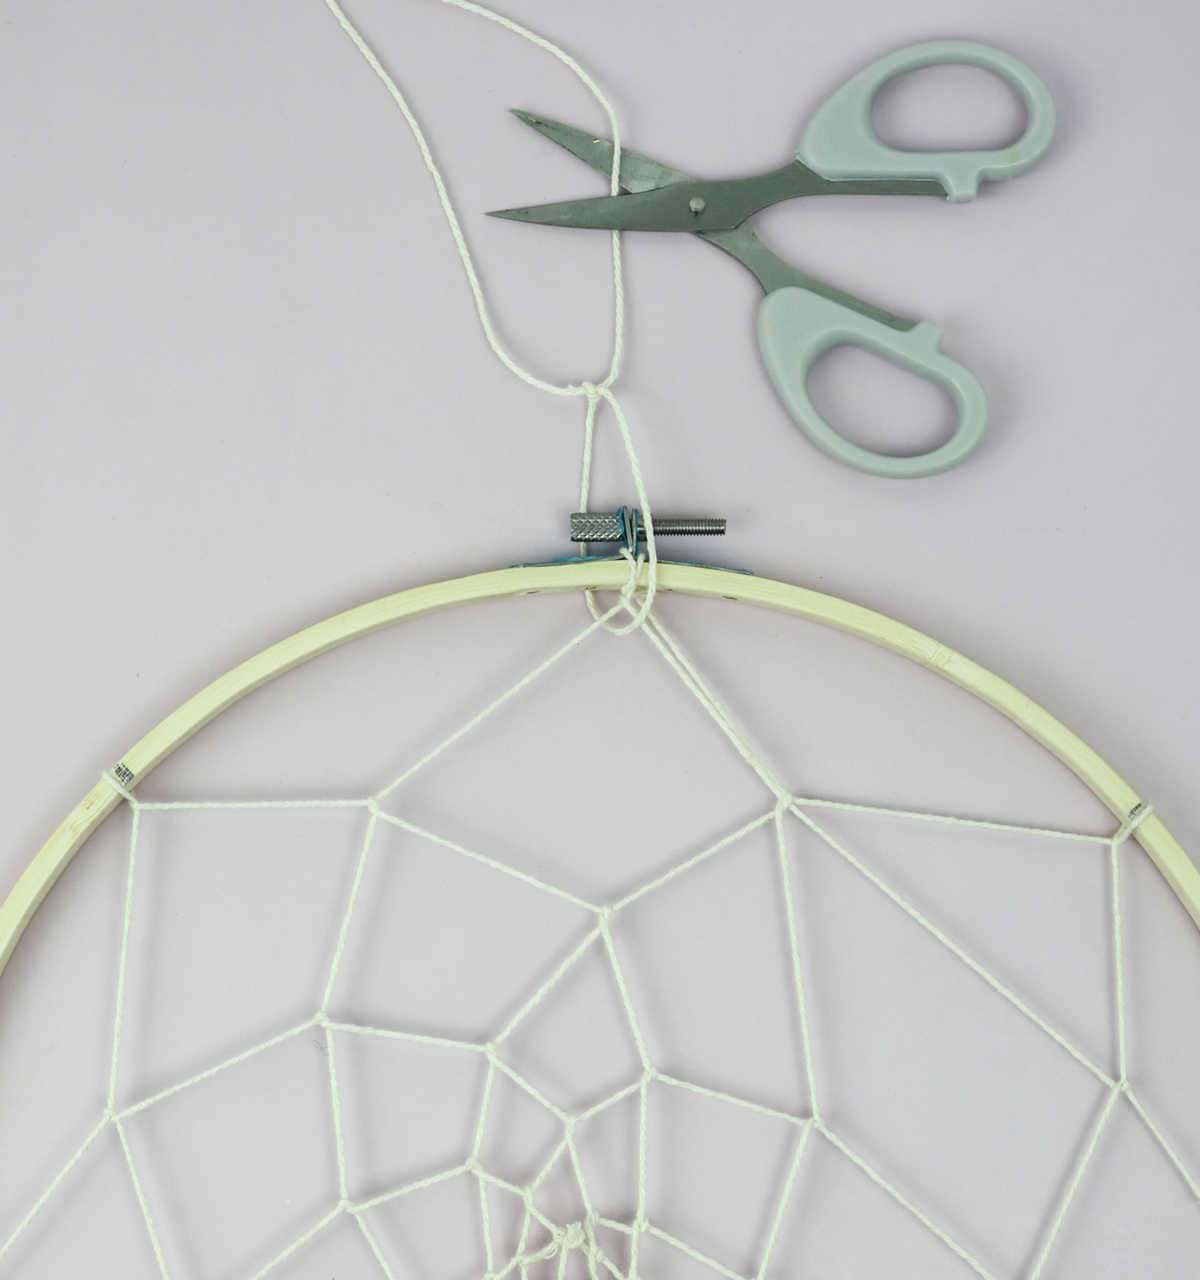
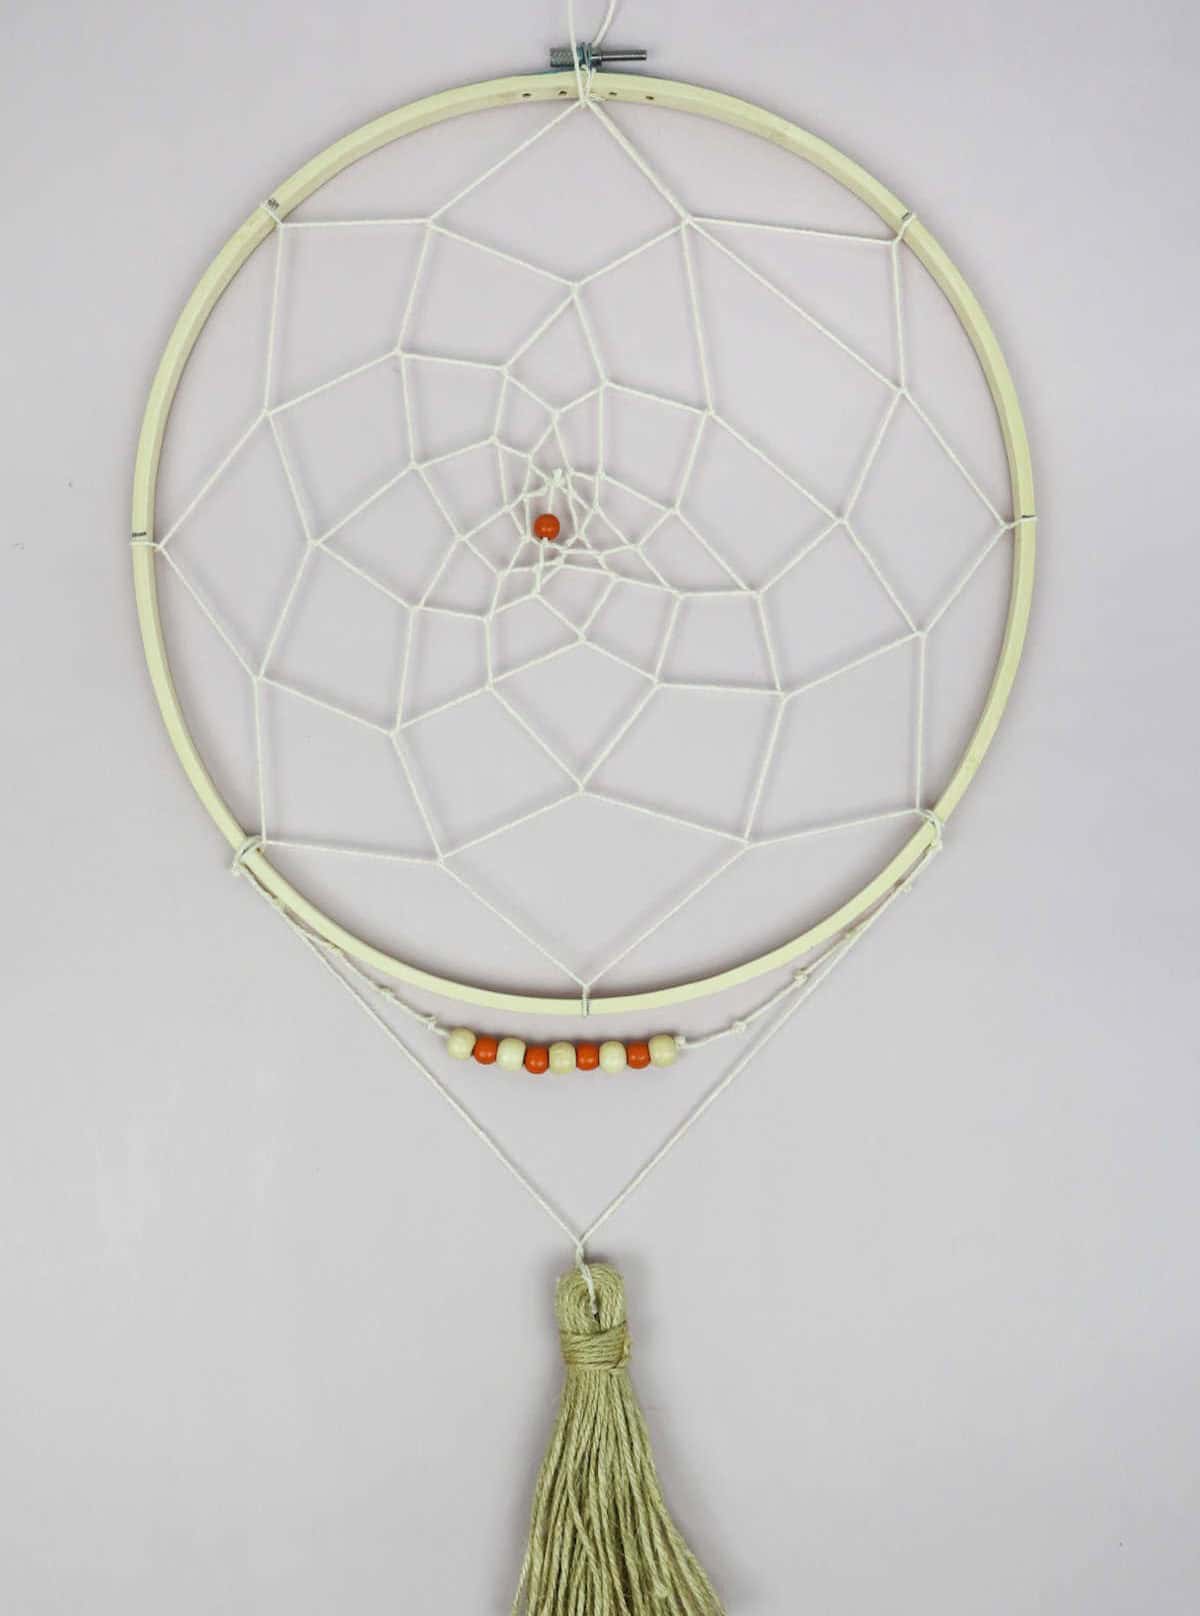
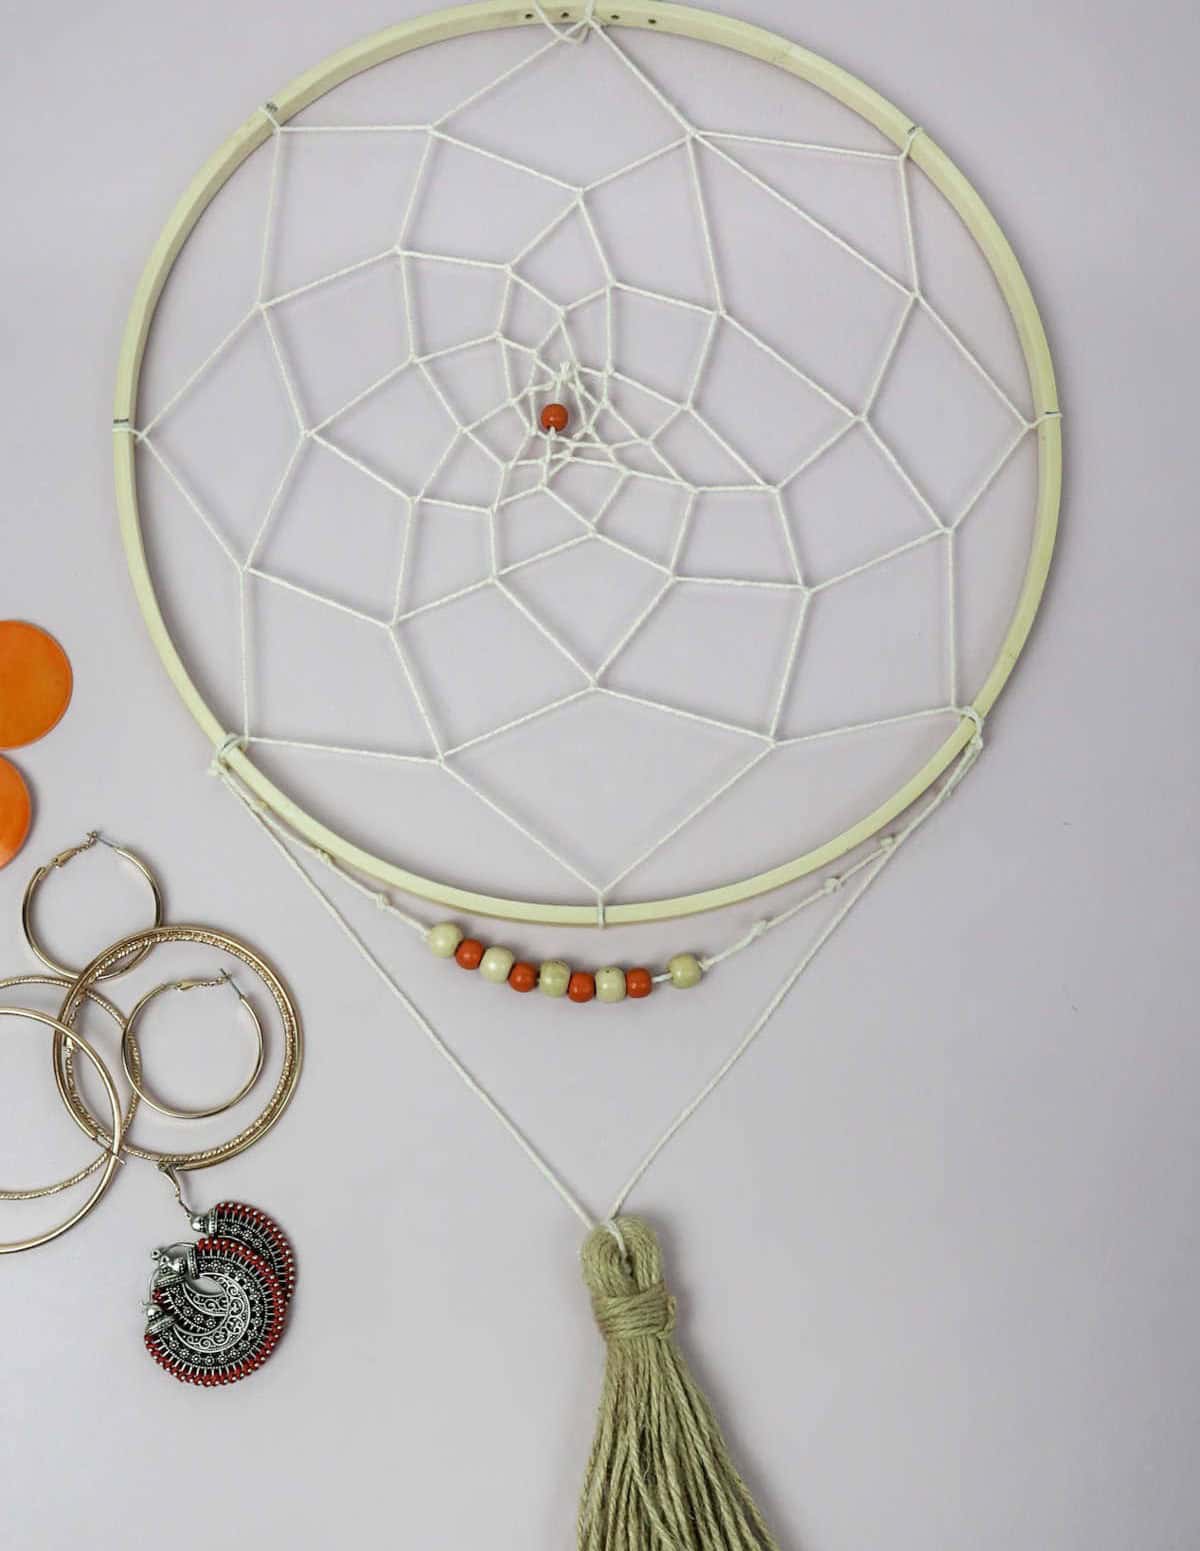
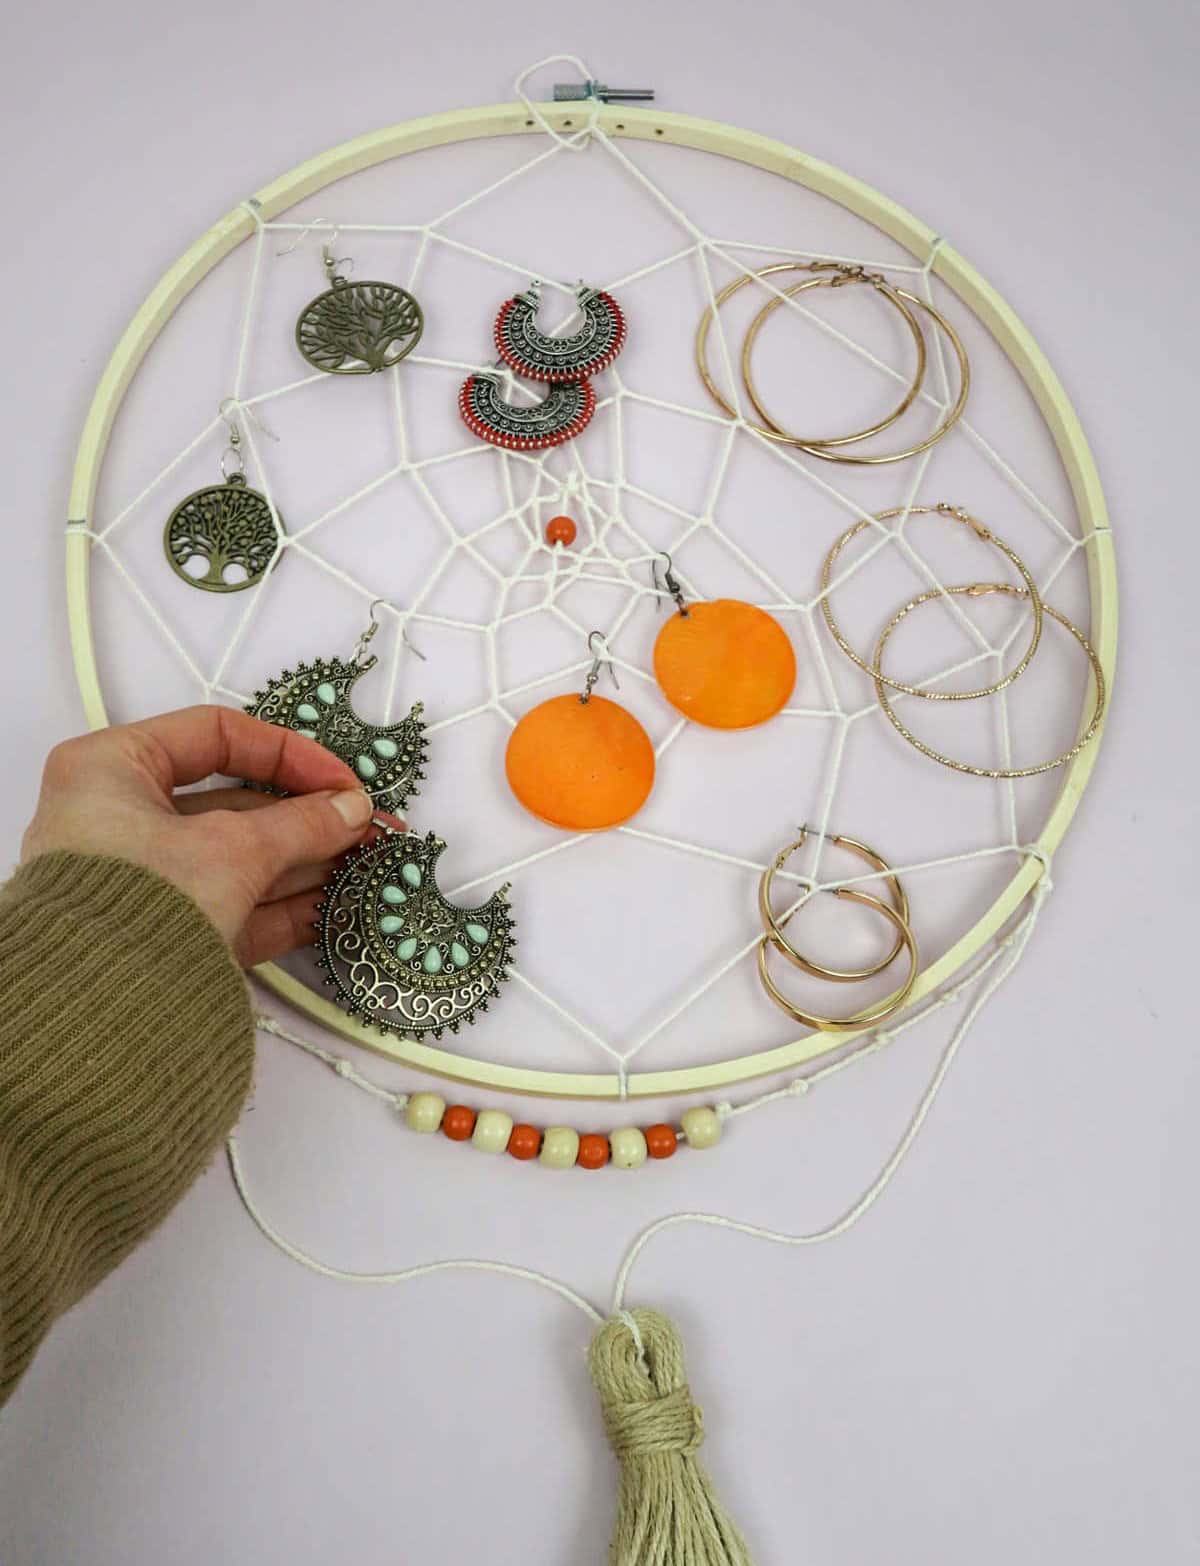
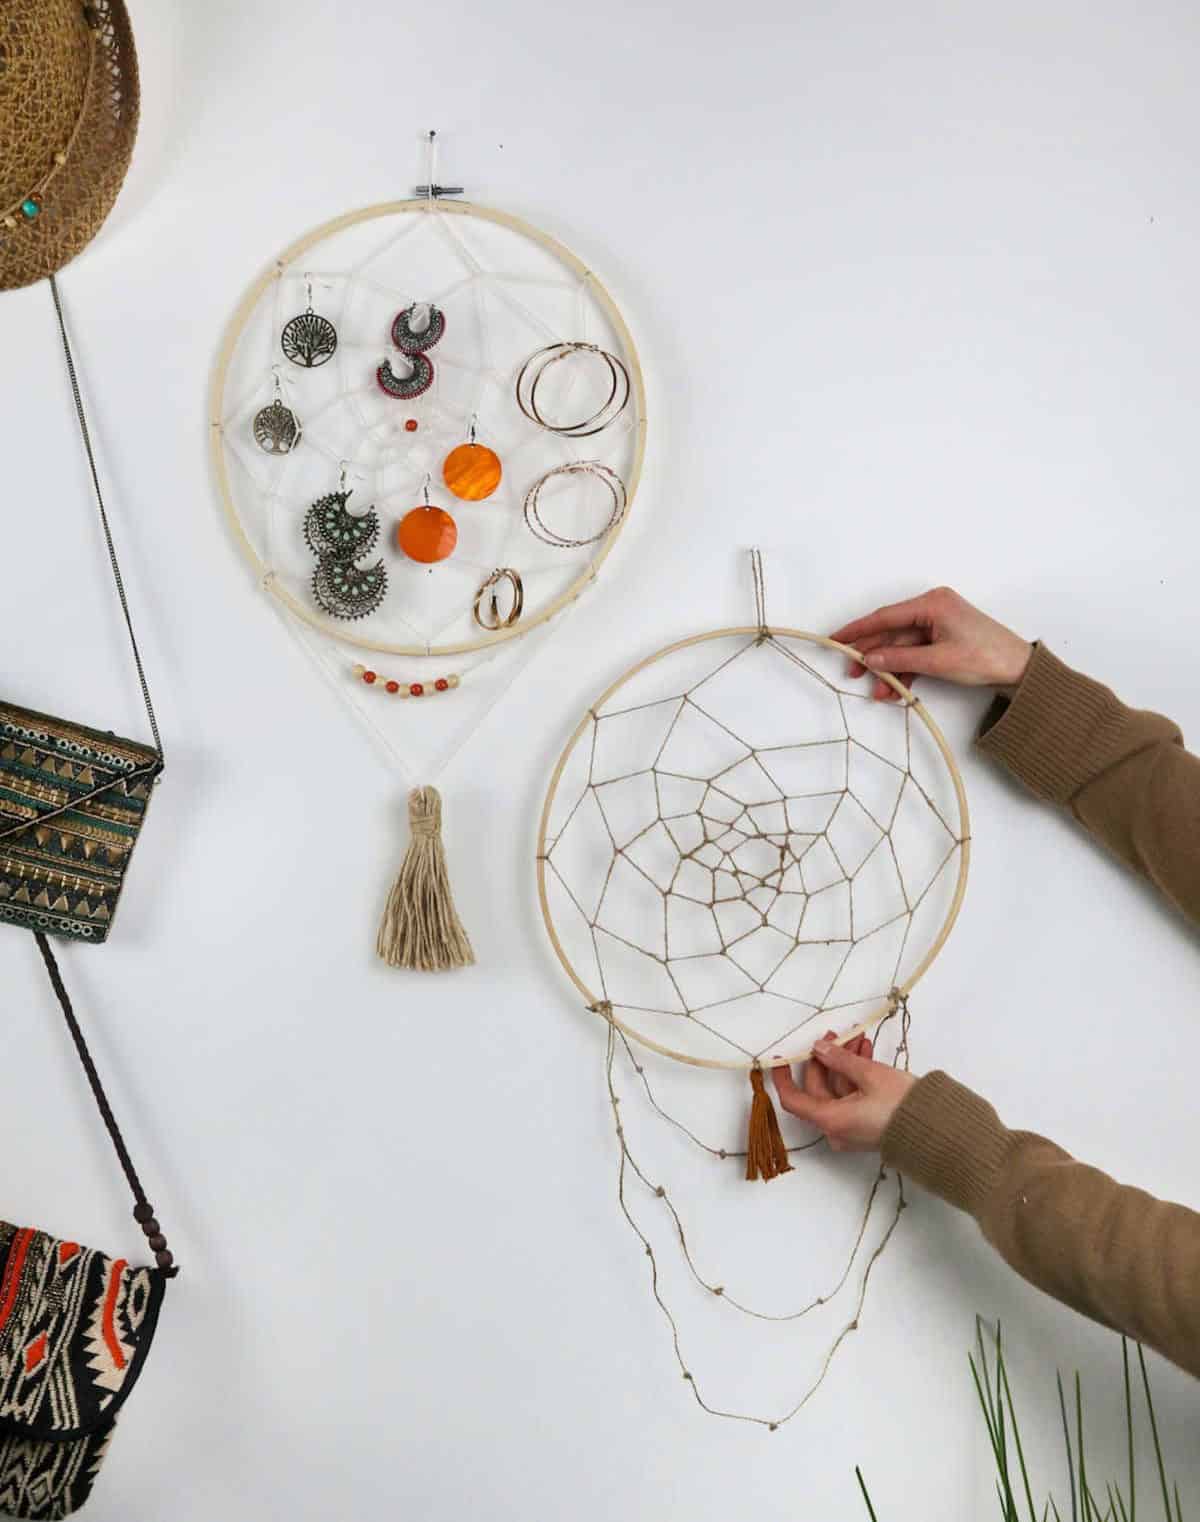
As you near the completion of your DIY jewelry organizer, one final step remains: creating a loop at 12 o’clock to serve as the attachment point for hanging your newly crafted piece on the wall. This is where you’ll secure the dream catcher slash jewelry organiser, allowing it to take its place on the wall and showcase your eclectic accessories with flair.
Other Organizers for You
For a more streamlined and efficient living space, incorporating organization ideas is crucial. One creative solution is utilizing a hanging organizer with pockets, allowing you to store small items like bags, accessories, or even cleaning supplies within easy reach. For those on a budget, repurposing Dollar Tree storage containers can also provide ample storage without breaking the bank.
Small bedrooms, in particular, can benefit from clever organization strategies, such as maximizing vertical space with shelves and hooks. A pegboard is another effective way to keep frequently used items organized and accessible. When working with limited square footage, finding ways to store small items efficiently becomes crucial. For instance, utilizing stackable containers or over-the-door storage can help declutter surfaces while keeping essentials within reach.
In the closet, consider implementing a categorization system, grouping similar items together for effortless retrieval. Ultimately, a well-organized bedroom is not only aesthetically pleasing but also promotes a sense of calm and relaxation.
DIY Jewelry Organizer
Get the most out of your jewelry collection by creating a personalized organizer using an embroidery hoop. This DIY project requires just 20 minutes of active time and is perfect for keeping your accessories neatly arranged. With its compact size and customizable design, this organizer is ideal for traveling or storing your favorite pieces in one place.
Equipment
To ensure uninterrupted work, you can prevent your computer’s screen from automatically turning off or dimming by adjusting the settings. A simple way to do this is to use a tool like ScissorsPencil, which allows you to keep your screen at its current brightness level without any interruptions. This feature is particularly useful when working on projects that require prolonged focus and attention.
Materials
Instructions
To create your DIY jewelry organizer, begin by preparing all necessary materials. Using a marker or pen, divide the ring or frame into eight equal sections. Then, tie a secure knot at the top of the ring with embroidery thread, ensuring it’s firmly in place. Start looping the thread over and around the ring, beginning from one end and working your way towards the center. Remember to pass each loop through the center of the previous round, maintaining even tension to prevent sagging or looseness.
Continue this process until you reach the central point. When ready to secure the final knot, consider adding a bead to keep it in place. If desired, tuck the ends into the bead or apply a small amount of adhesive to fasten off. From here, feel free to add decorative beads, danglers, or other embellishments as desired. Finally, create a loop at the top of the ring and use it to hang your dream catcher organizer on the wall.