Got a stash of jewelry collecting dust? Why not transform it into one-of-a-kind jewelry trays using air-drying clay? The process is both therapeutic and creative, allowing you to craft functional pieces that exude a certain je ne sais quoi.
There’s something undeniably charming about the tactile quality of clay, don’t you agree? It’s not just about creating something aesthetically pleasing; it’s also about the tactile experience of shaping and molding the material.
And the best part is, the end result is a unique piece that reflects your personal touch.
This project is perfect for those looking to monetize their creative skills or simply wanting to create something special for themselves or as a gift. The versatility of air-drying clay jewelry trays knows no bounds – use them as trinket dishes, serving bowls, or even as a quirky container for loose change or keys.
The beauty of this craft lies in its customizability; you can create entire sets tailored to your personal style or preferences. And the best part? They make for thoughtful gifts that are sure to impress. With the option to personalize them, you’ll be creating something truly special and one-of-a-kind.
Supplies and Tools You’ll Need
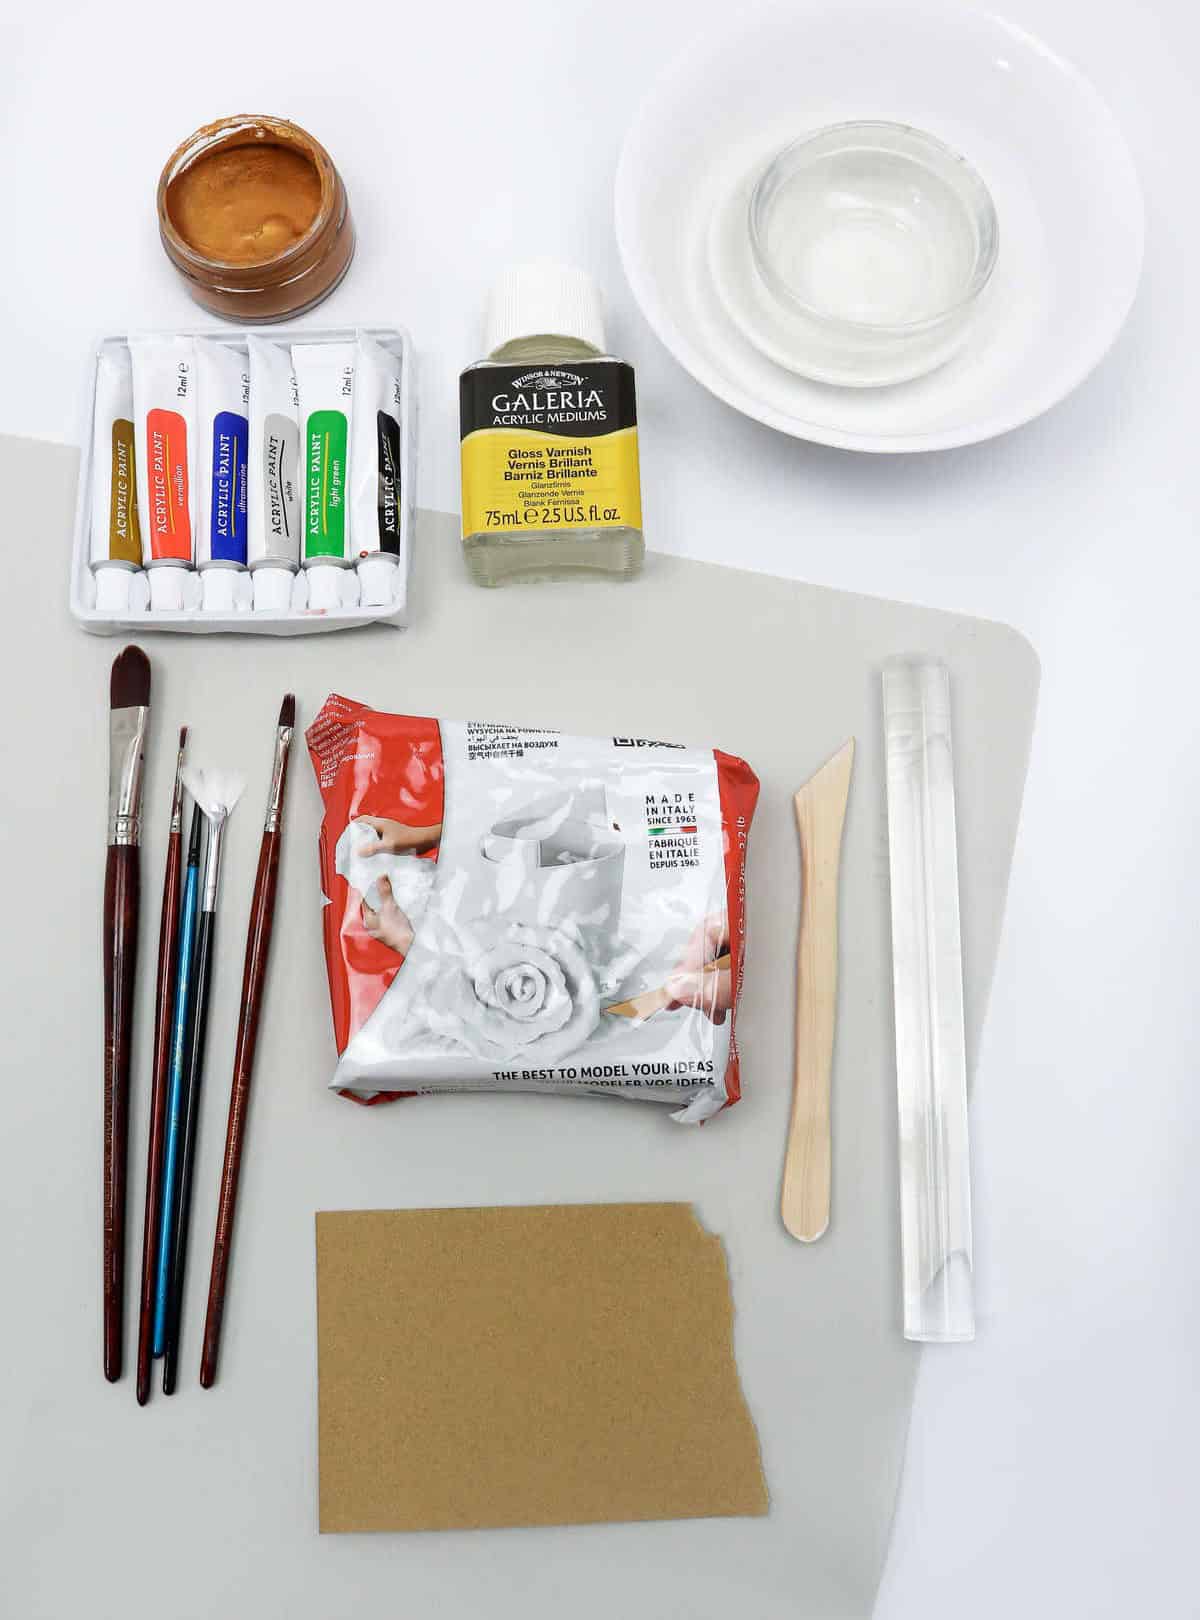
To begin creating your bowls, let’s first review the essential supplies needed. While there may be some optional items to add a touch of personal flair, don’t worry if you’re feeling overwhelmed by the list – most of these extras are purely decorative. In reality, you only need the fundamental materials to craft the bowl itself, and then it’s up to your creativity to decide how to embellish them.
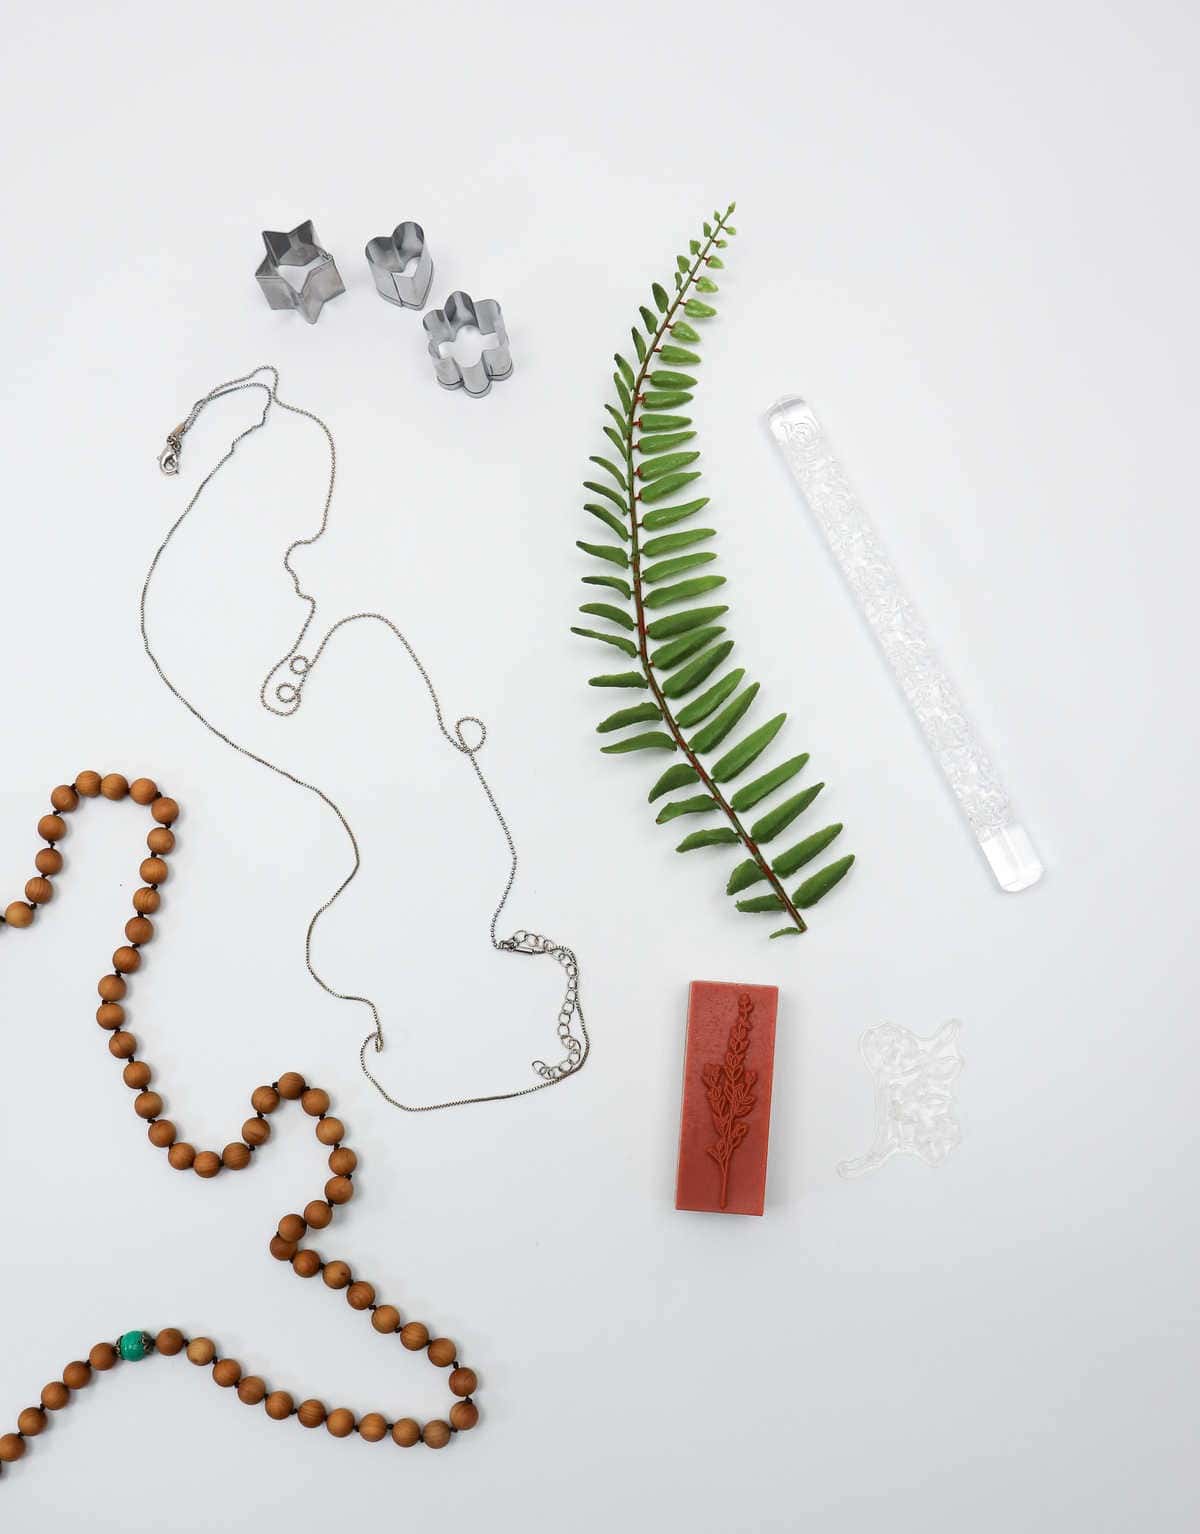
The basic supplies include: air drying clay, an acrylic roller (or a substitute), a nonstick placemat, various-sized bowls to use as molds, acrylic paints, paintbrushes, a craft knife, fine sandpaper, and optional items like acrylic gloss varnish, artificial leaves, ball chains or beaded chains, and embossing rolling pins – all of which can be used for added decoration. With these simple materials, you’re ready to start crafting your unique bowls.
Watch: DIY Jewelry Trays
For those who learn better through seeing, we’ve got a comprehensive video tutorial available – simply click over to see it in action!
How to Make Air Dry Clay Bowls
To create your very own clay bowls, follow this comprehensive guide that breaks down the process into manageable steps. From preparation to final touches, we’ll walk you through the entire process of crafting unique and functional pieces.
Step 1
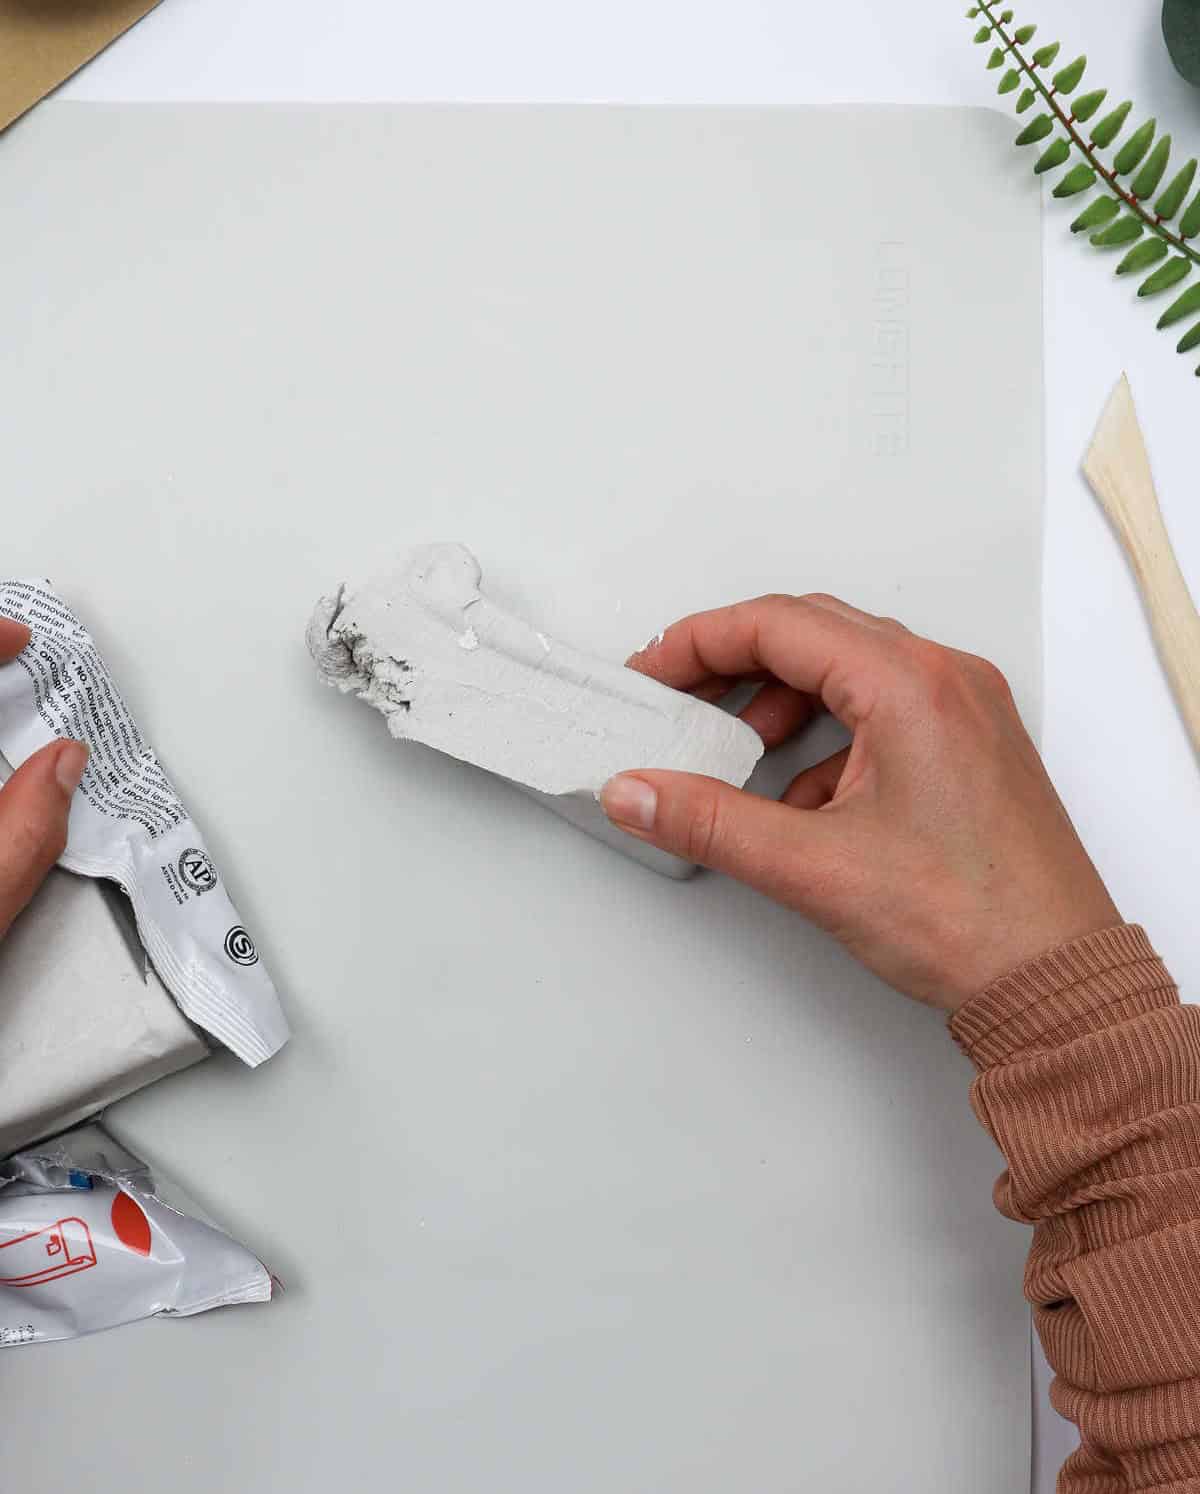
Now that we’ve prepared our workspace, it’s time to create the actual ceramic bowls. Begin by selecting a suitable portion of clay from your supply and gently setting aside the remaining material for later use. Make sure to repack the clay carefully to maintain its integrity and prevent any damage.
Step 2
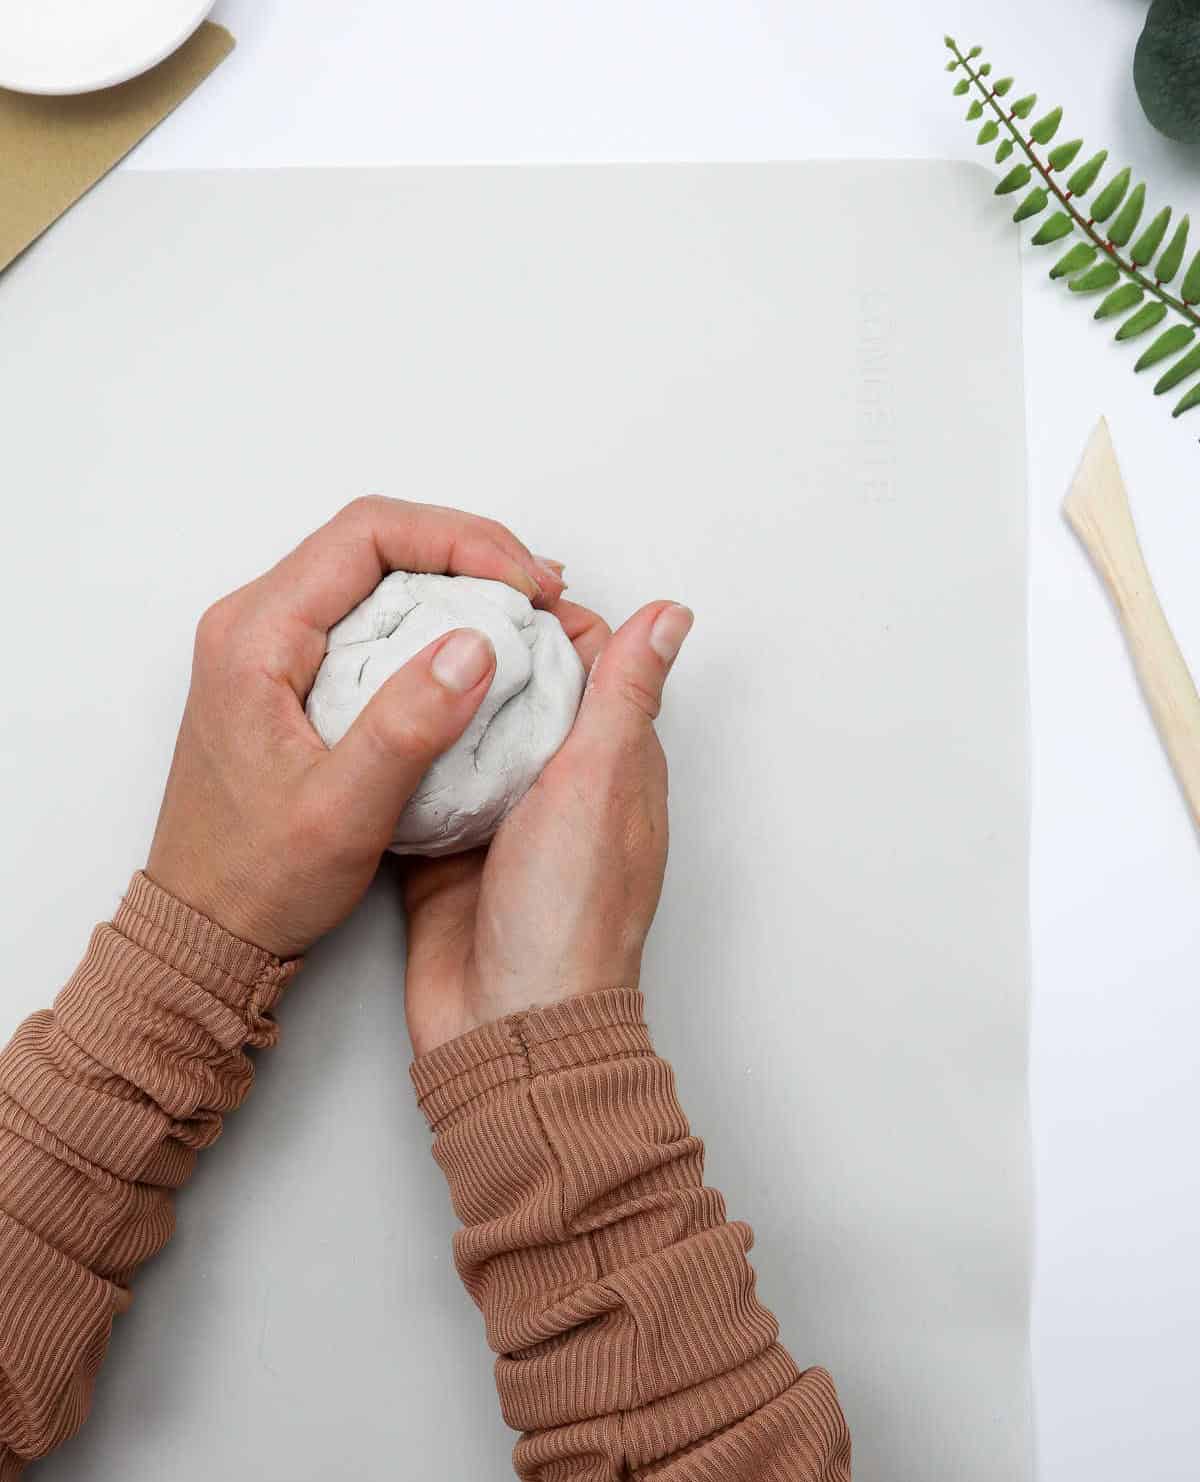
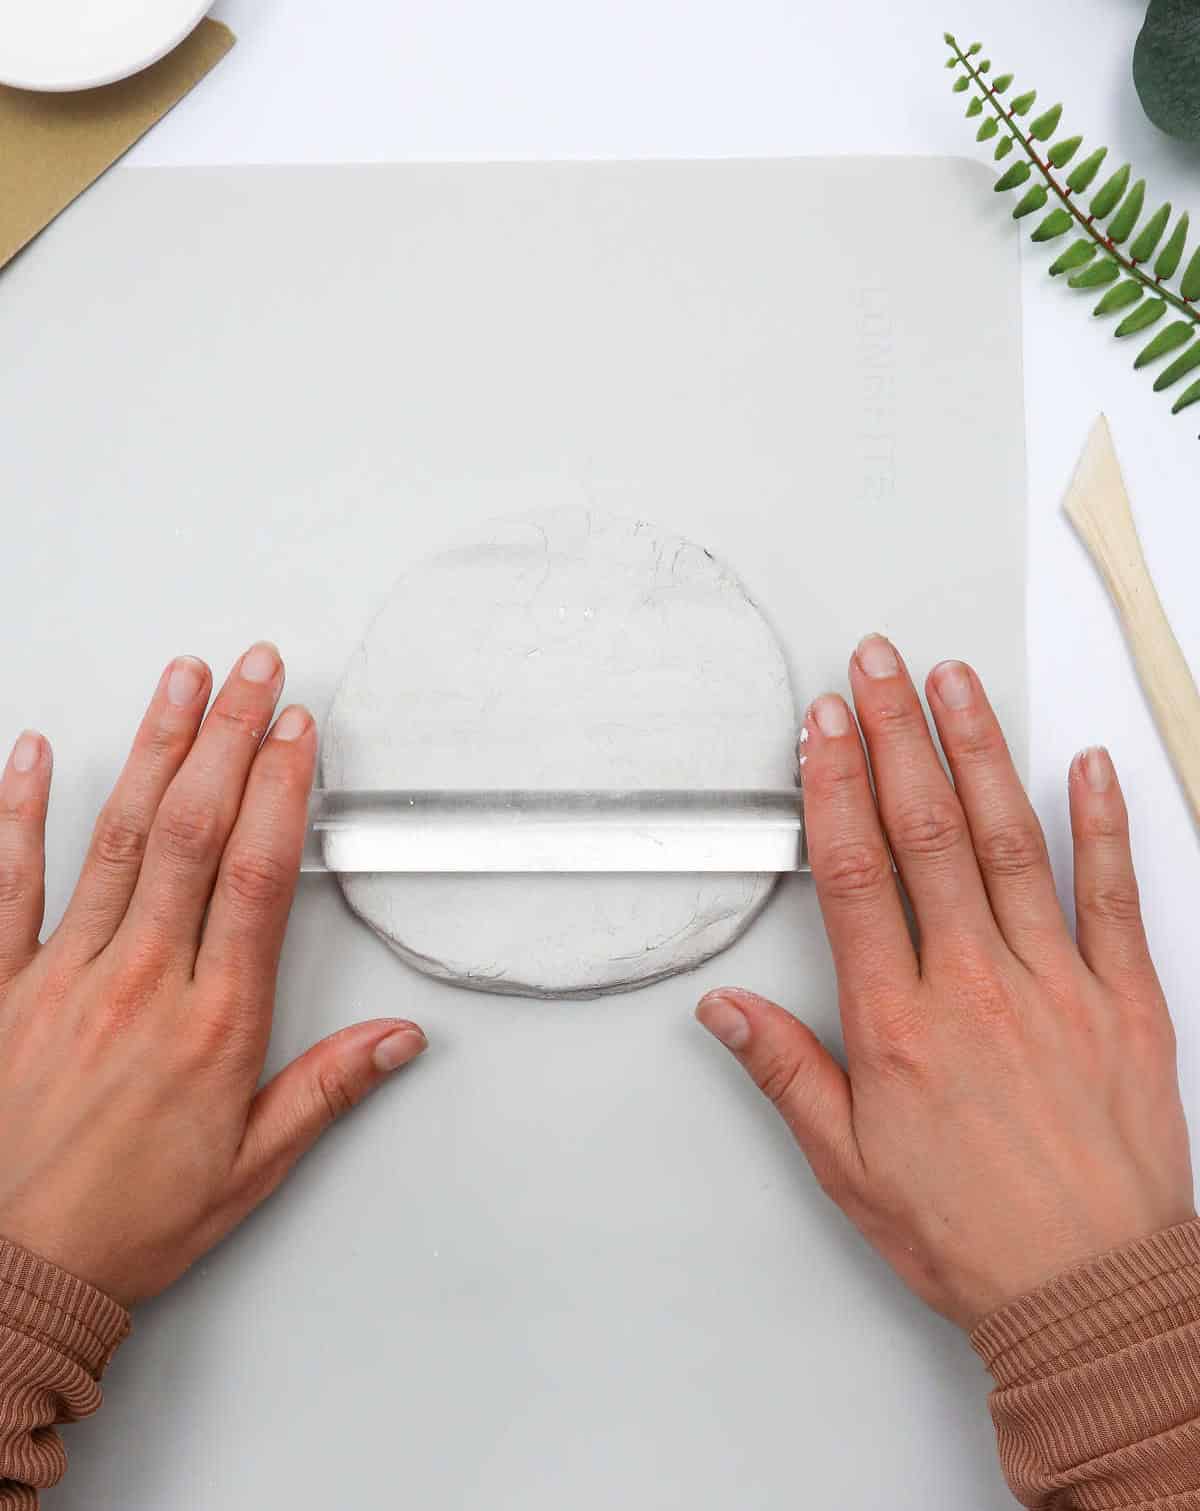
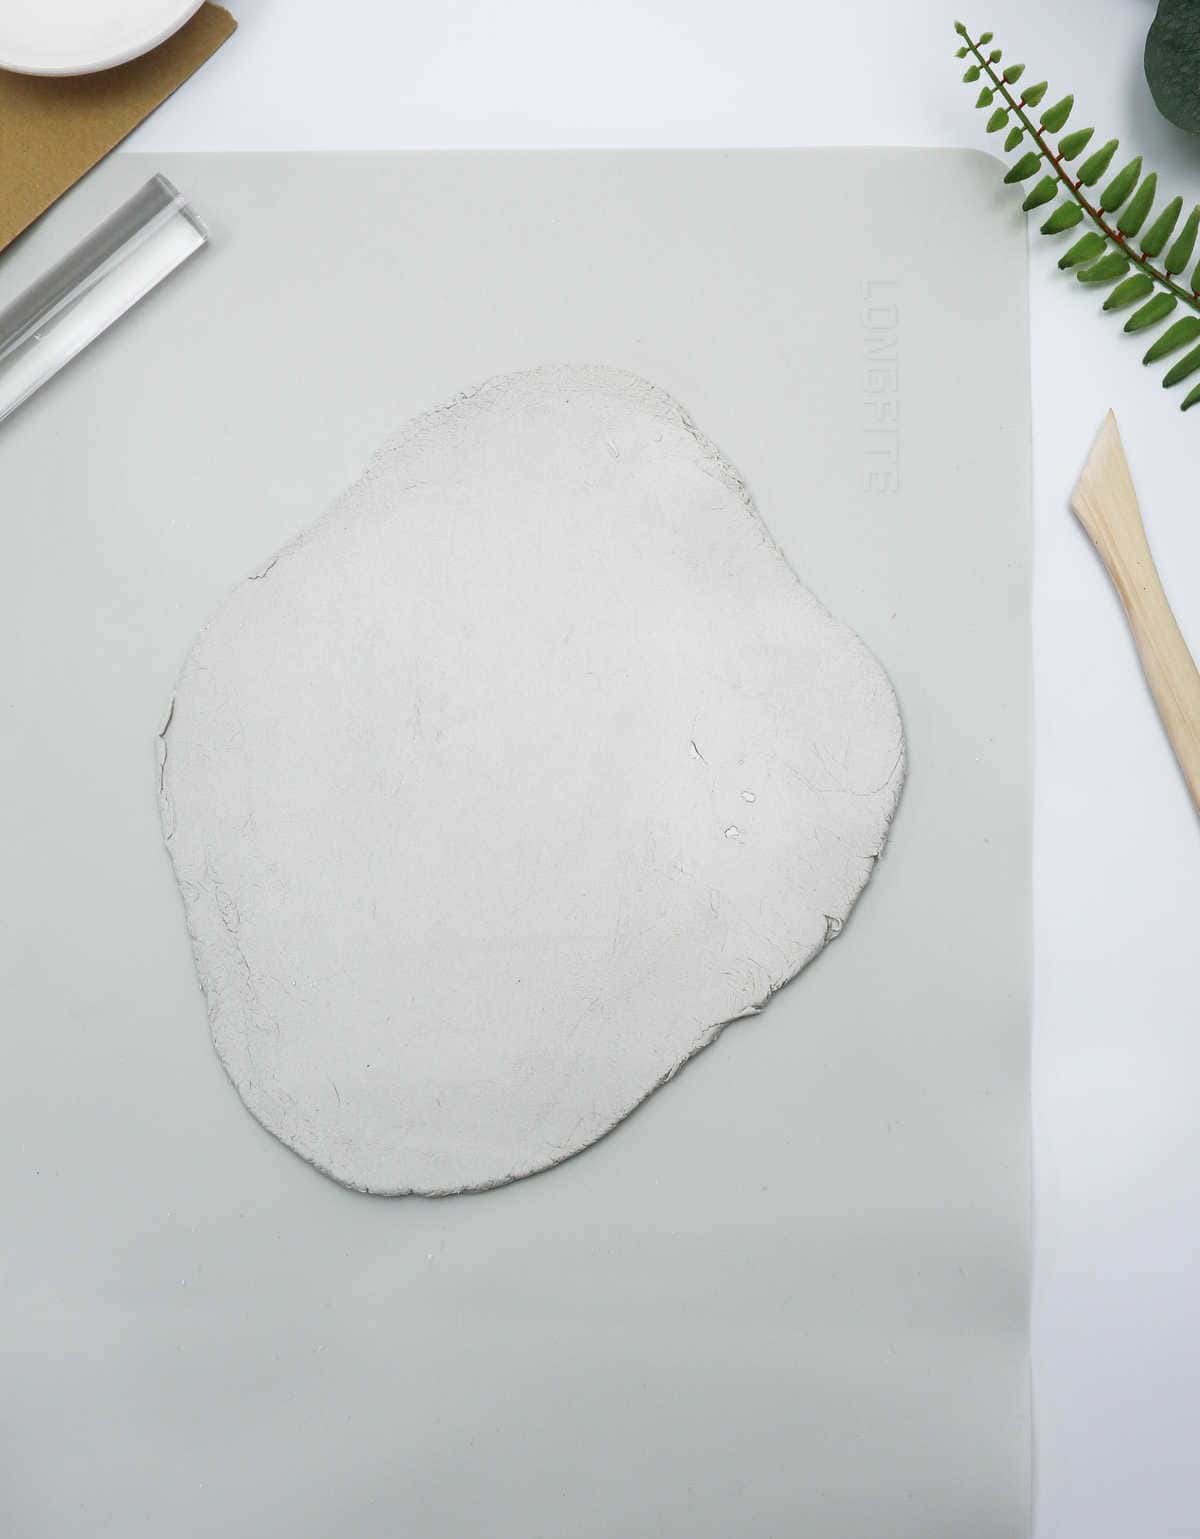
To work the clay into a usable state, employ the palms of your hands in a gentle kneading motion until the material becomes smooth, lump-free and malleable. This process will help loosen any air pockets or tightness that may be present within the clay. Once you’ve achieved the desired consistency, move on to rolling out the clay using either a traditional rolling pin or a glass bottle.
The key here is finding a happy medium in terms of thickness – you don’t want it so thin that it becomes prone to cracking as it dries, but nor do you want it too thick and slow-drying. As with many tasks, a bit of intuition and experience come into play when determining the optimal rolling-out thickness. As a general guideline, aim for a thickness of around 5mm – this should provide a good balance between drying time and overall structural integrity.
Step 3
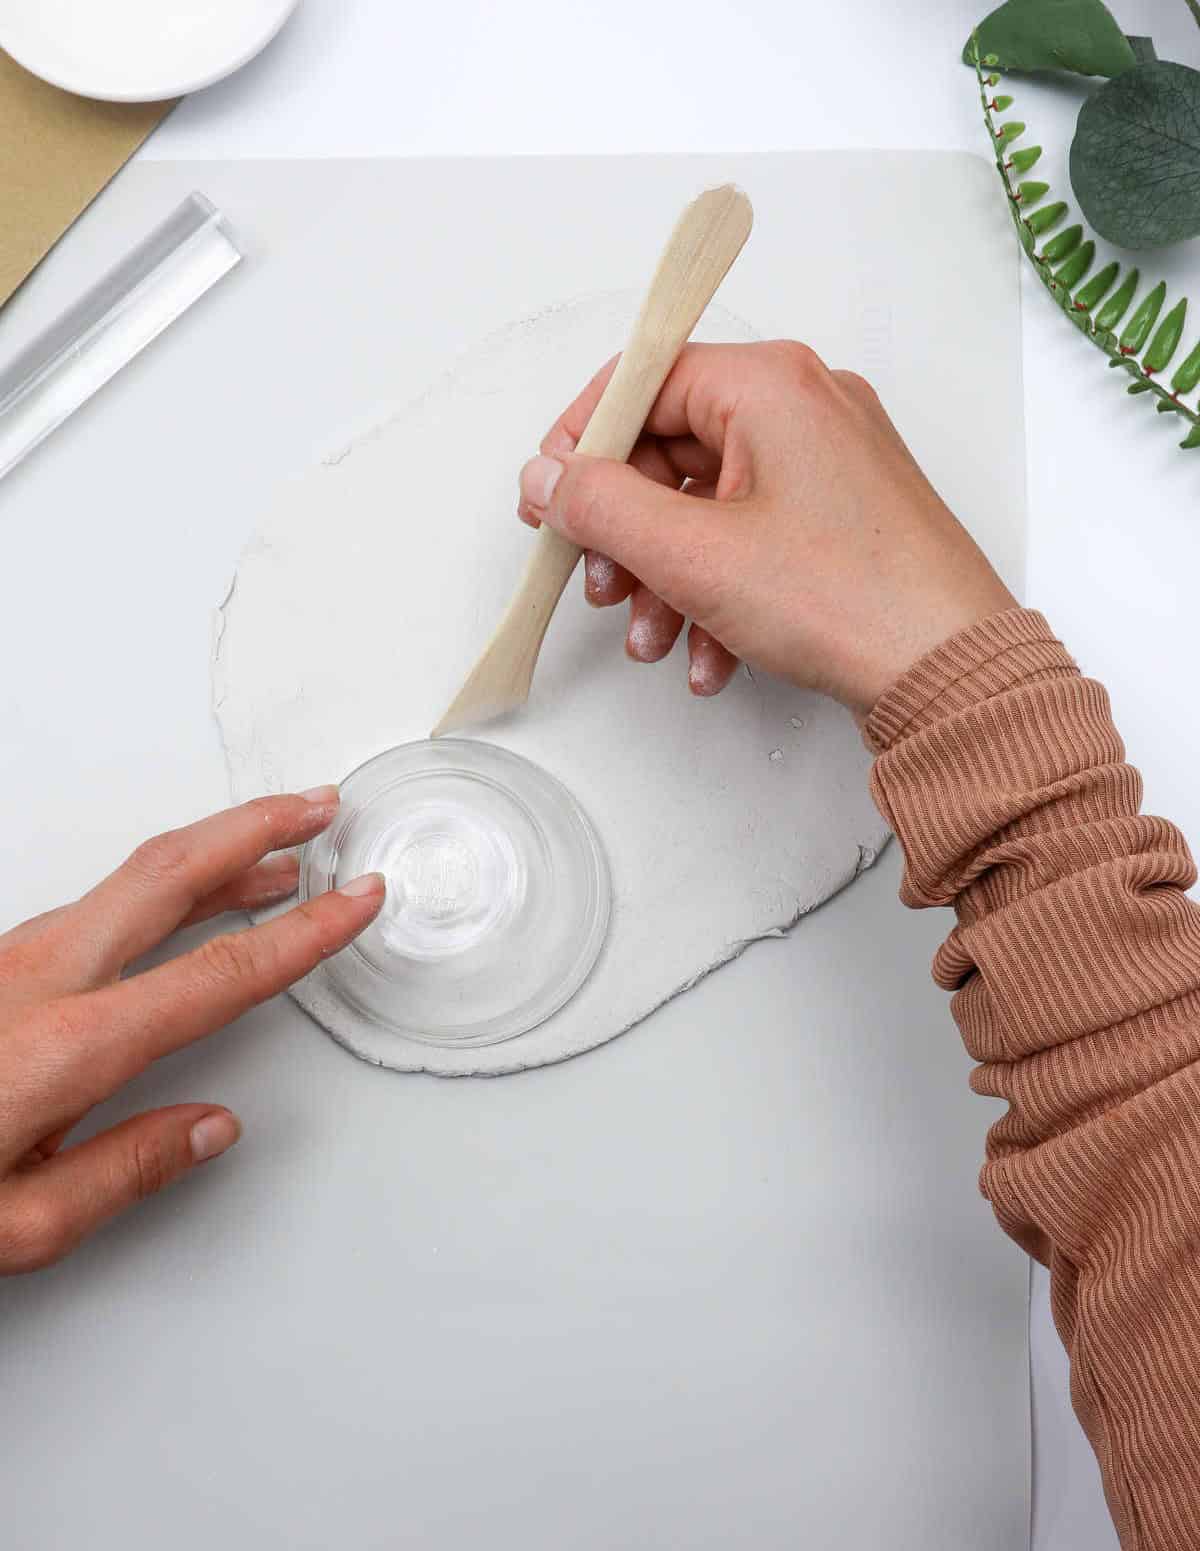
To begin shaping your creation, position a bowl over the clay and secure it in place with a craft knife or cutter. This bowl will serve as a mold, guiding the clay into its desired form. Once you’ve achieved the desired shape, gently remove any excess clay that’s protruding beyond the bowl’s rim. Set this excess clay aside for future use, as it can be reworked and incorporated into your project.
Step 4
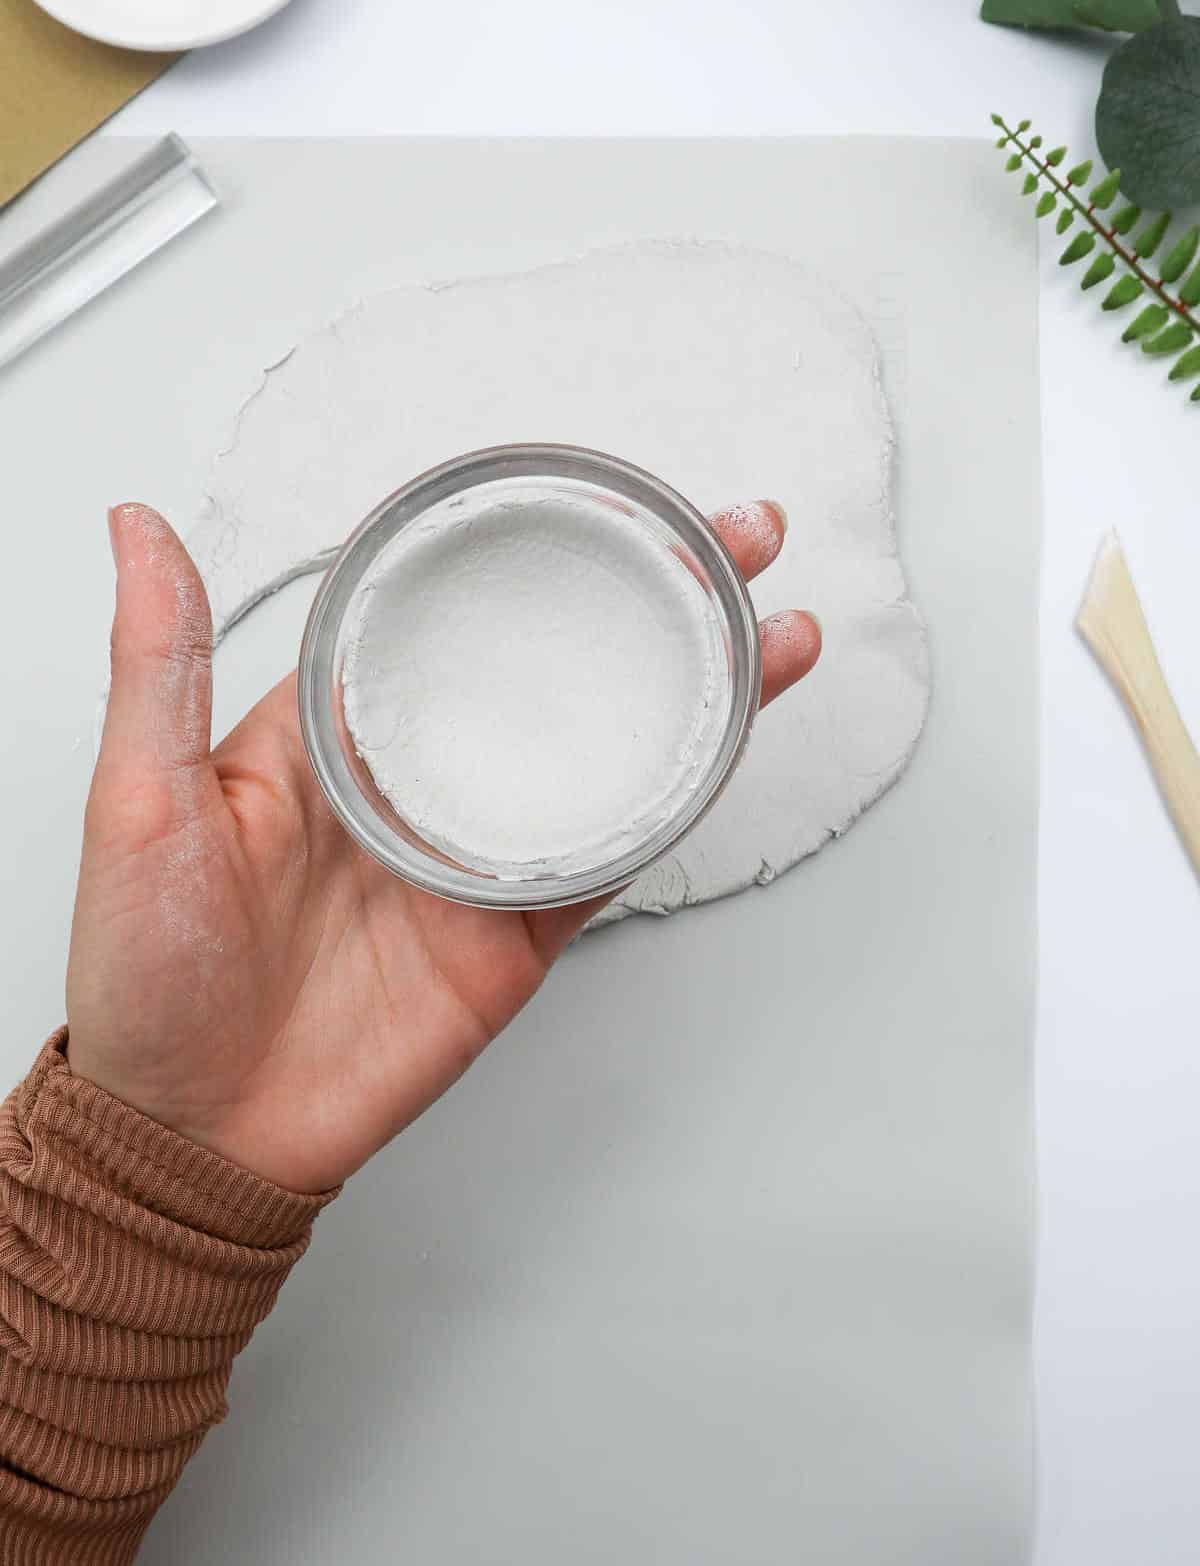
Gently place the clay within the bowl, applying a light pressure to flatten it without introducing unwanted fingerprints. It’s essential to maintain a delicate touch to prevent any imperfections from arising.To refine the edges and eliminate any cracks that may have formed during placement, moisten your finger with a single drop of water and smooth out the surface. Be cautious not to add too much moisture, as excessive hydration can cause the clay to become sticky and difficult to work with.
Step 5
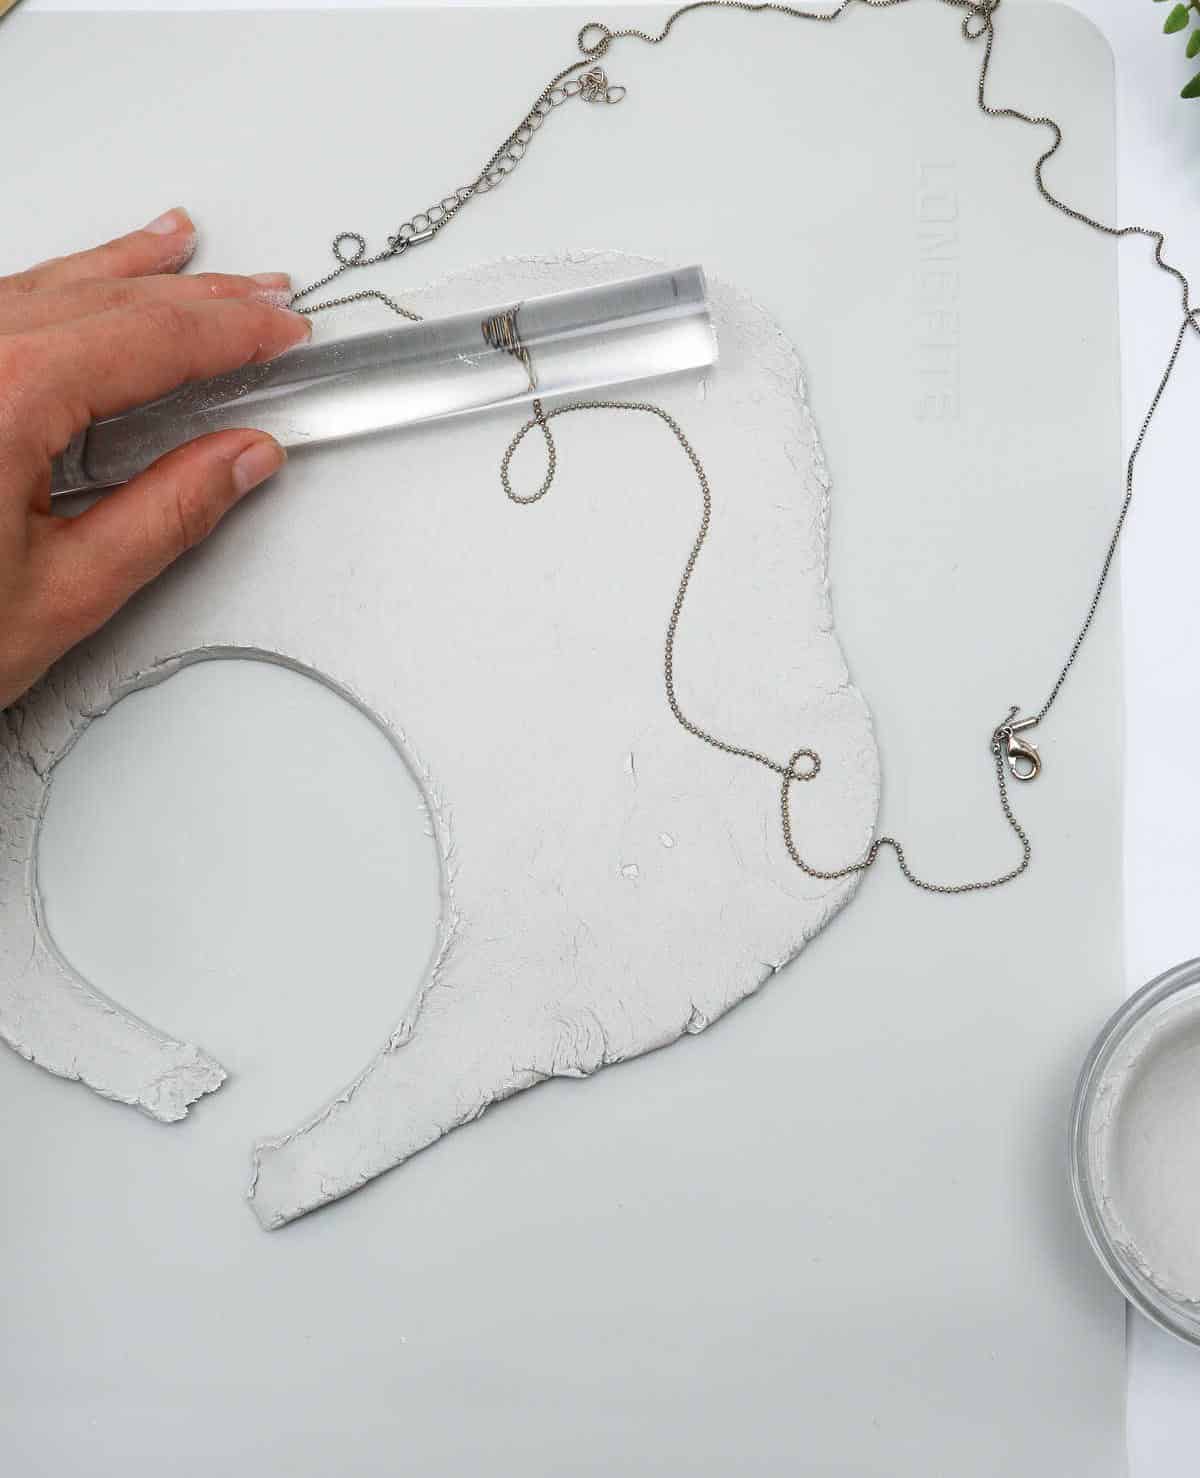
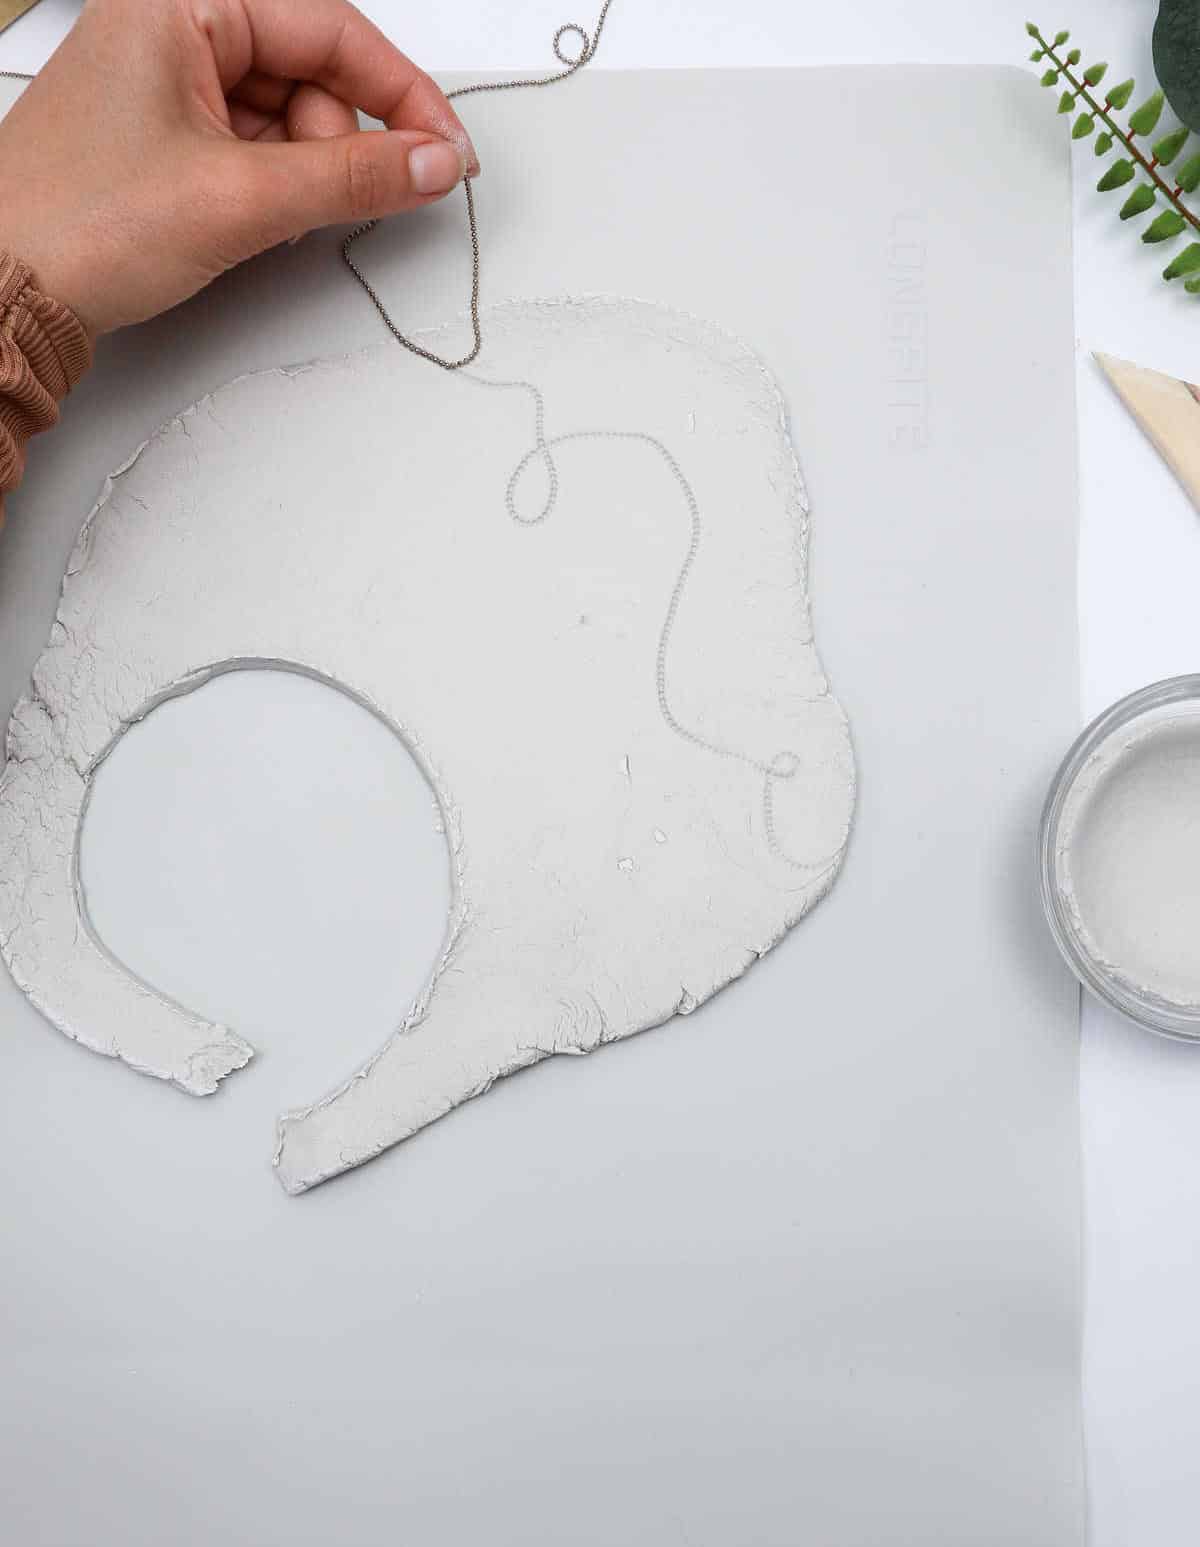
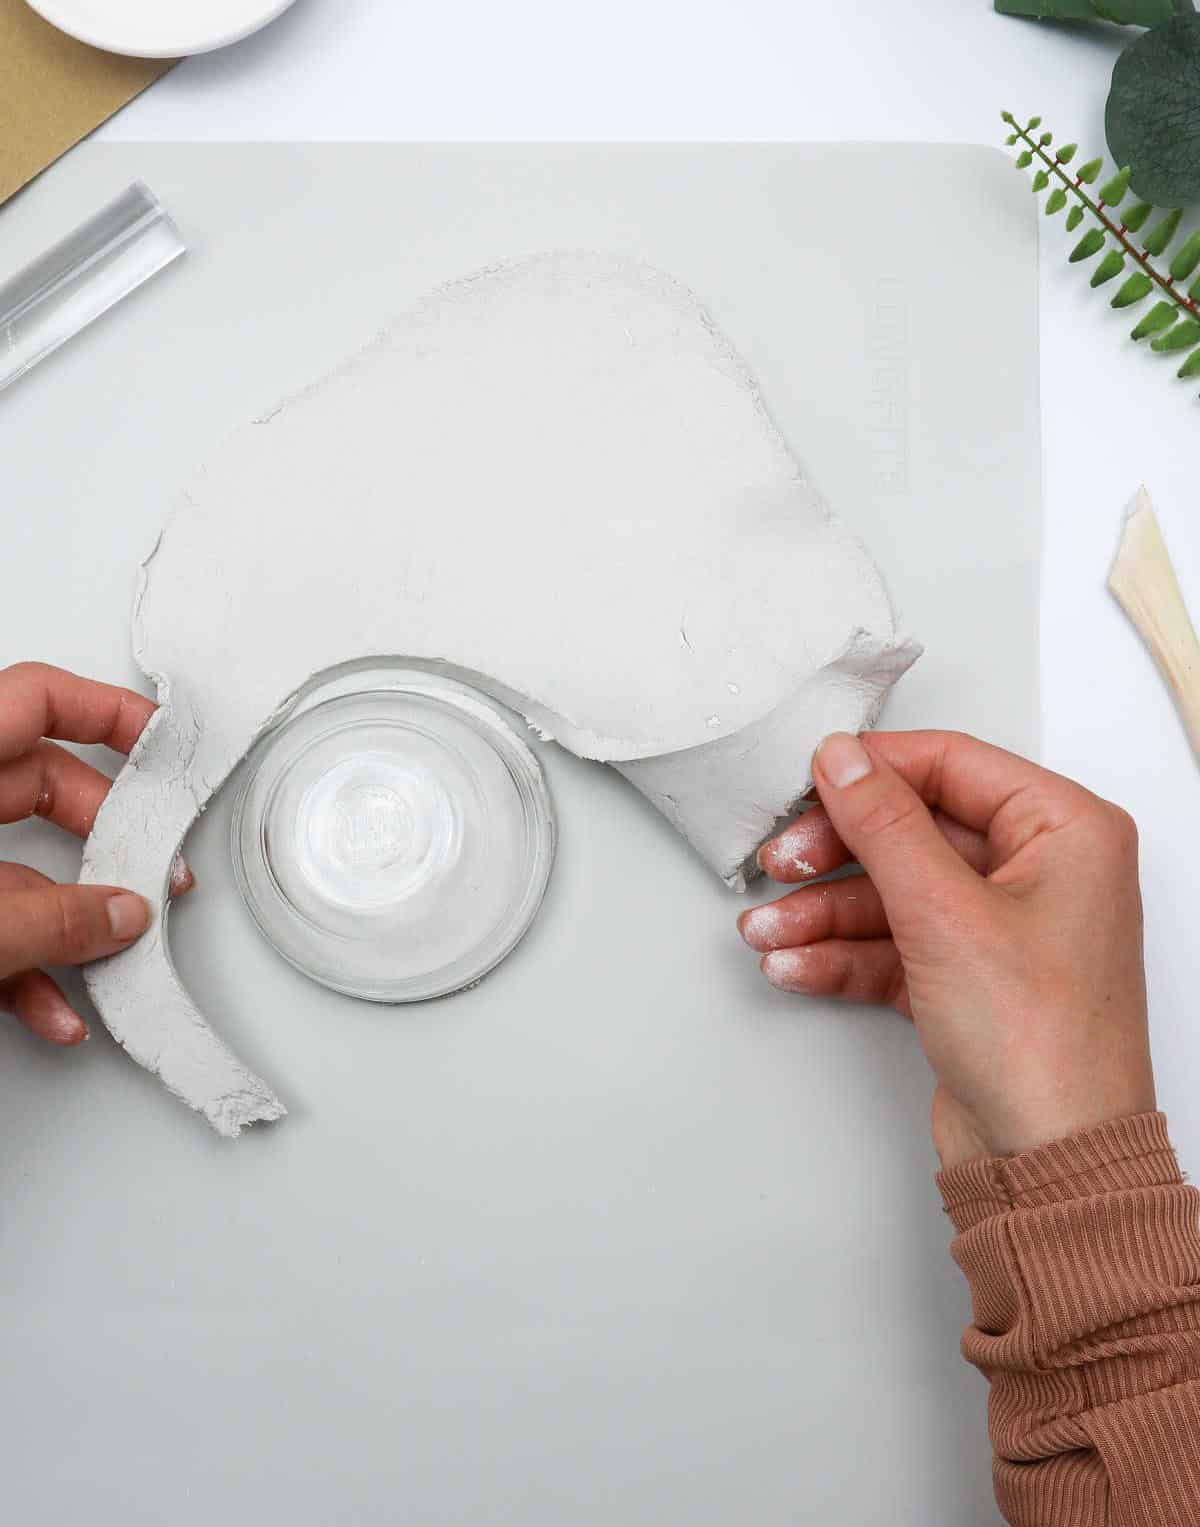
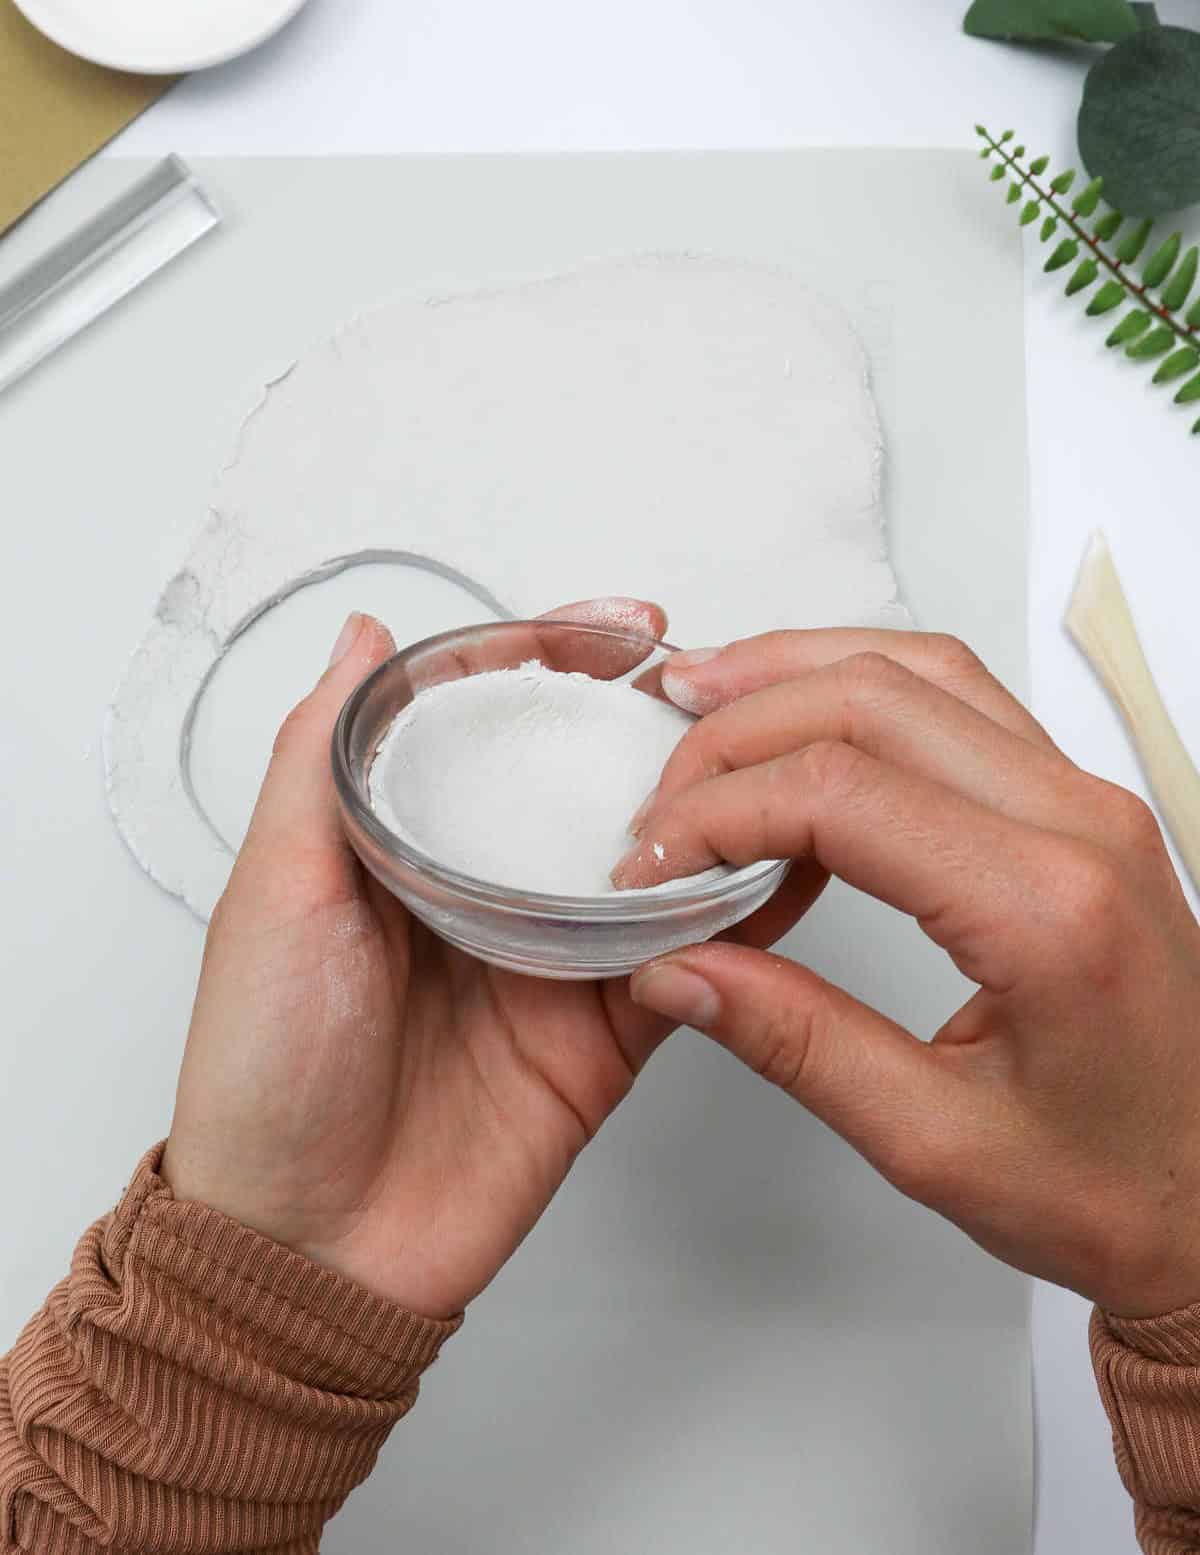
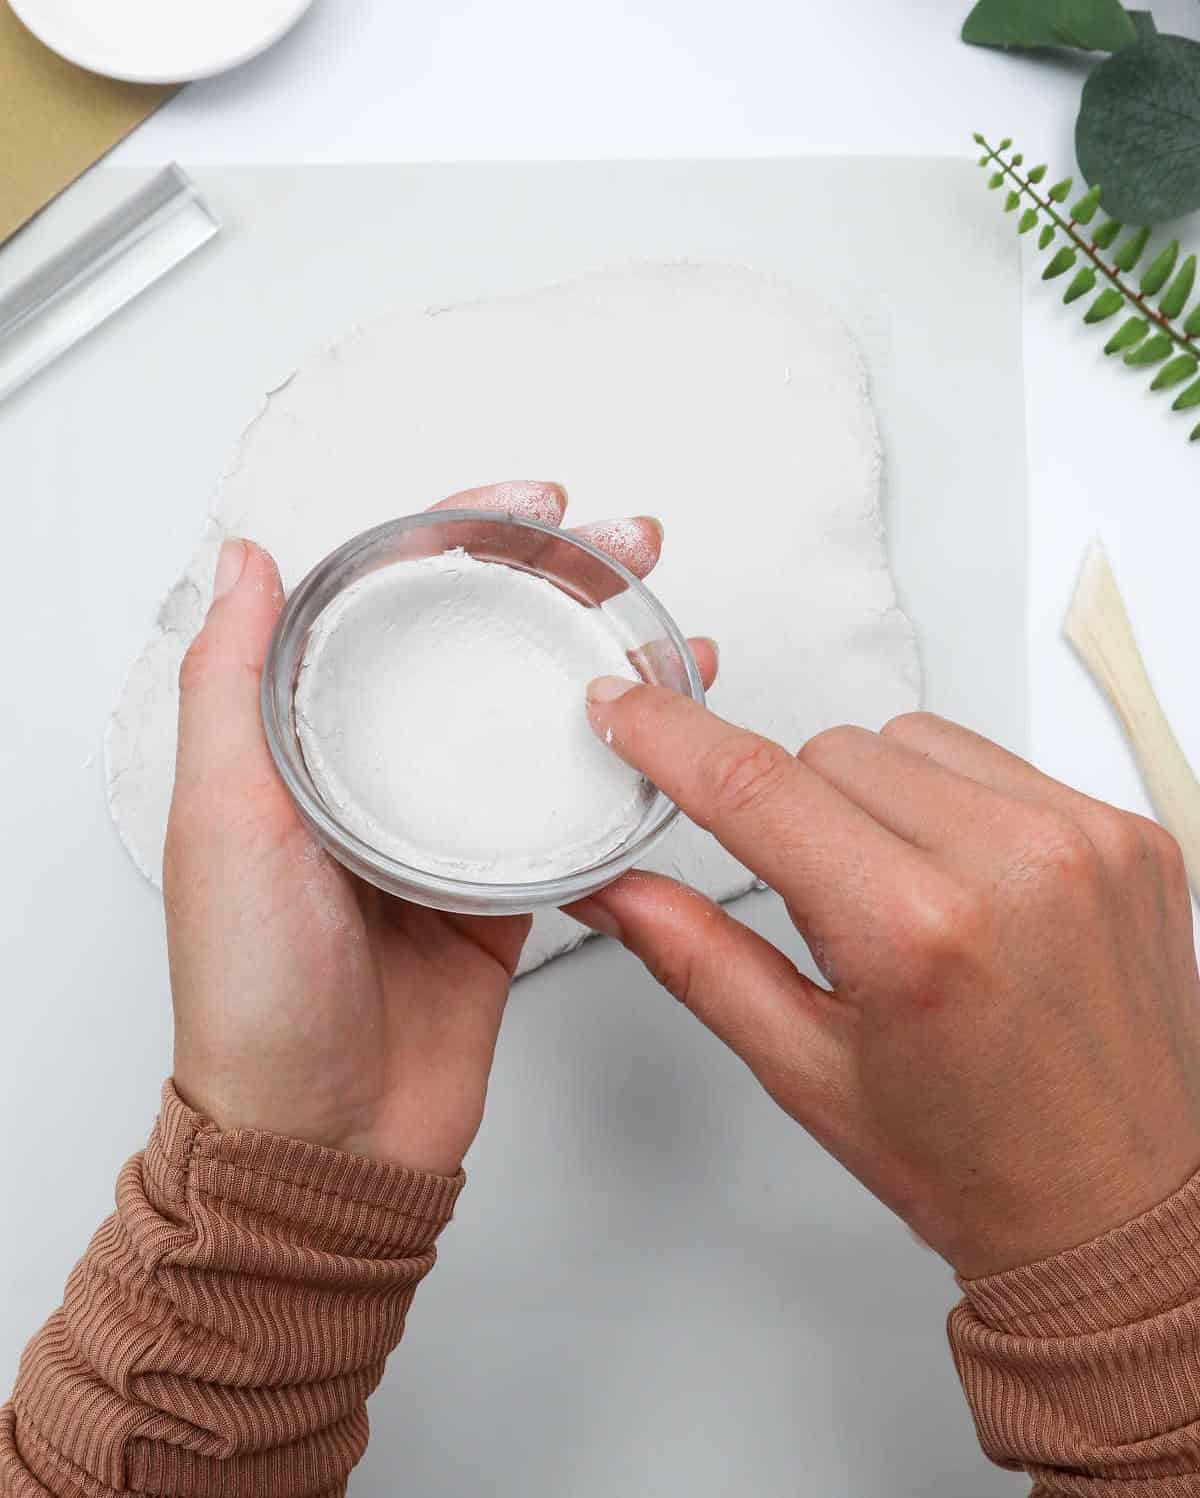
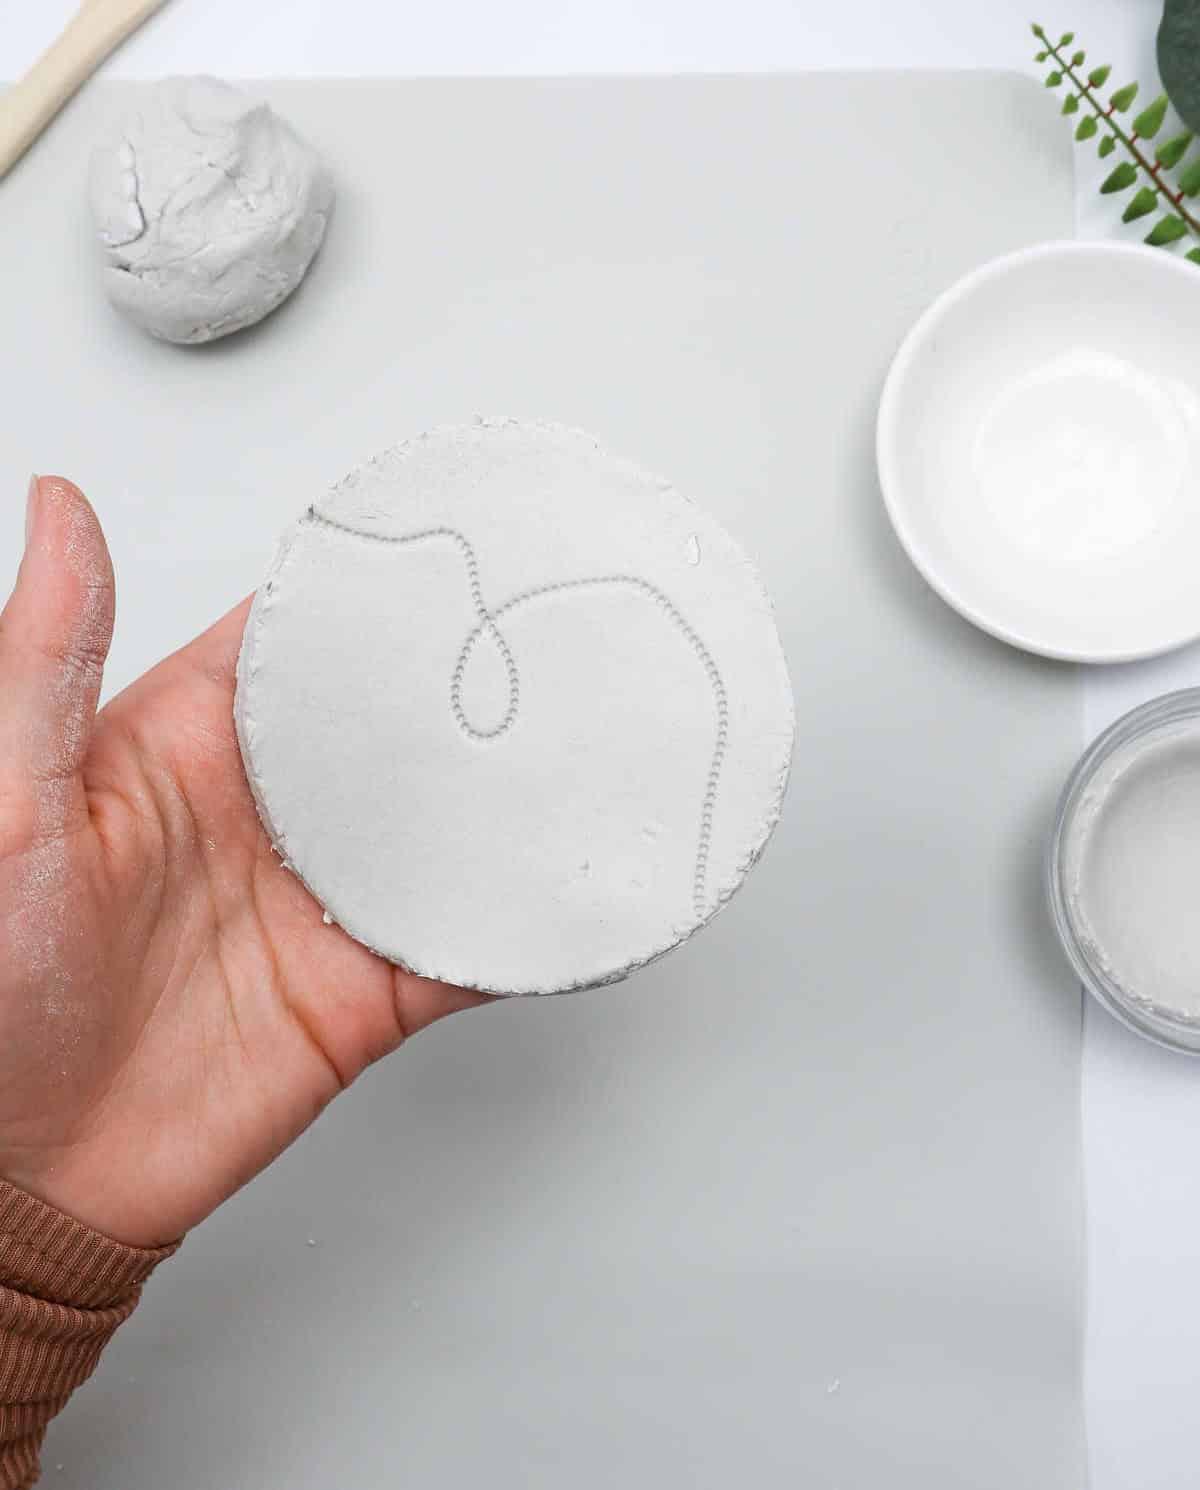
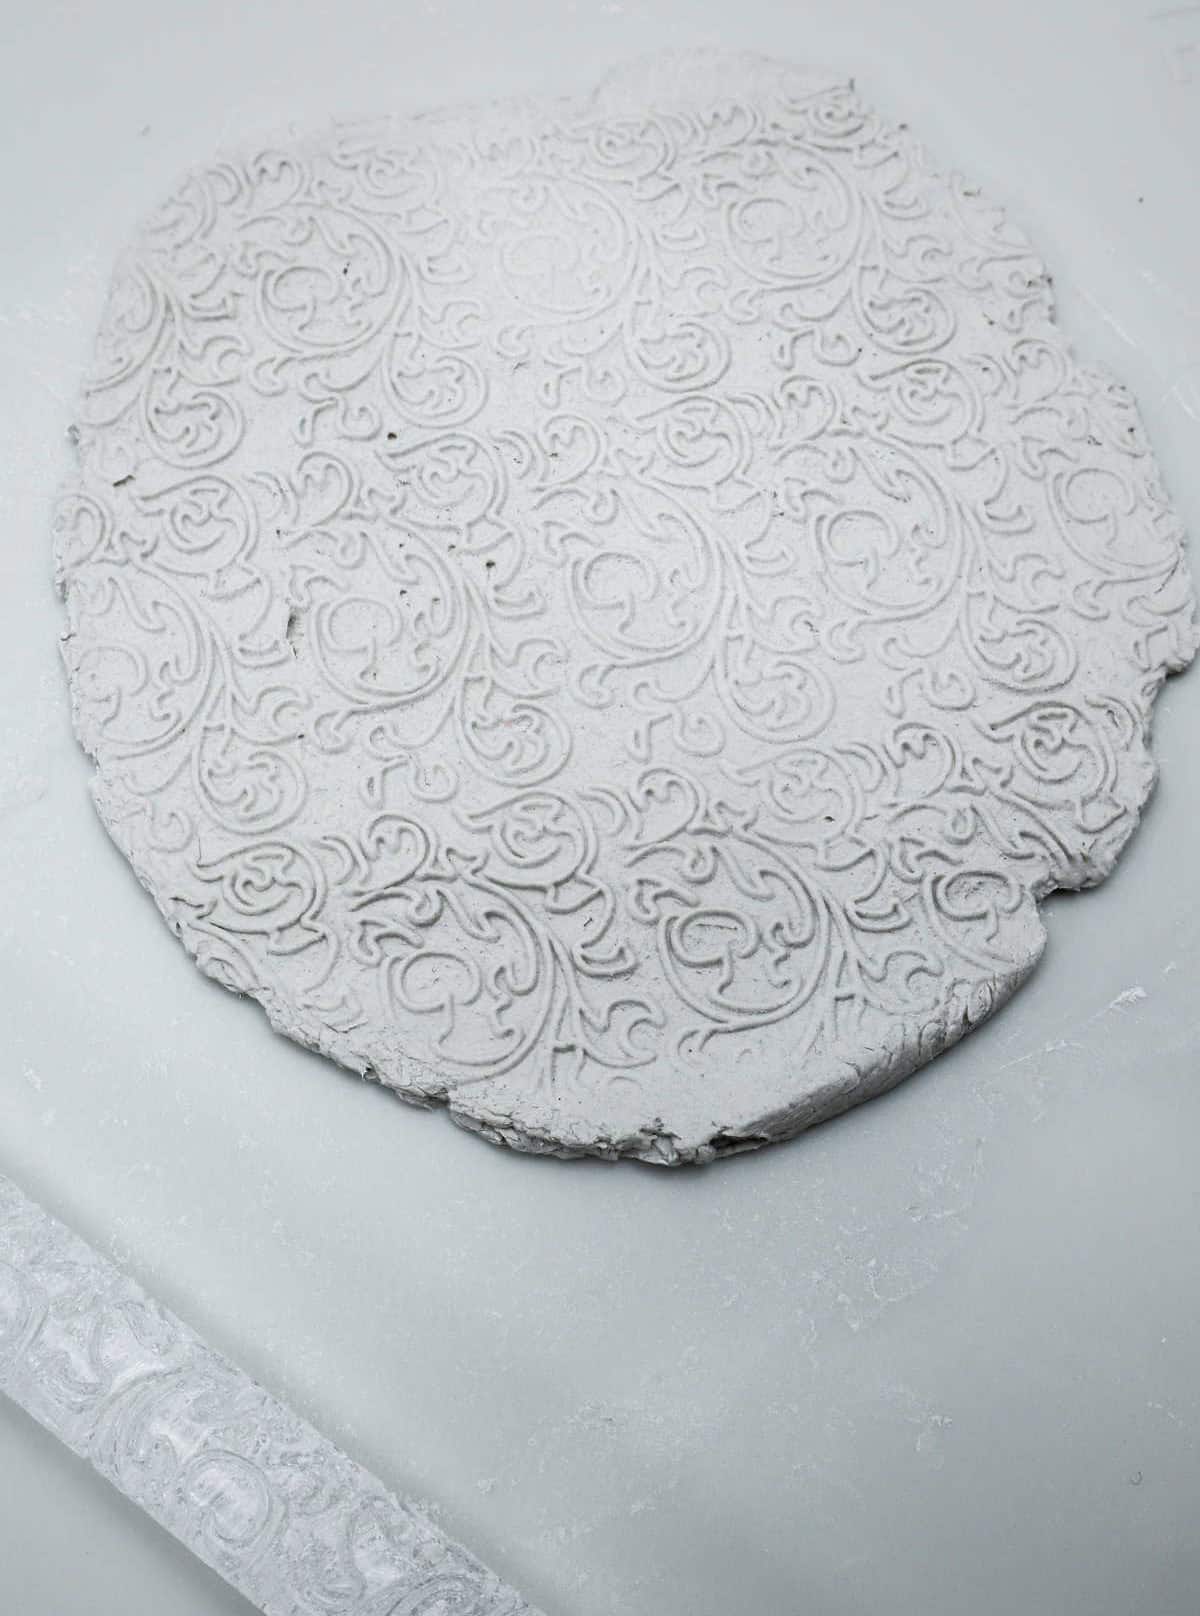
As you’ve learned to shape the clay into a bowl, let’s now explore the creative possibilities! To add some visual interest, grab a length of chain and use a rolling pin to press it down onto the set-aside clay. With gentle care, peel away the chain, revealing the unique pattern that has emerged. Observe how this simple process can transform the clay into a visually striking design.
Step 6
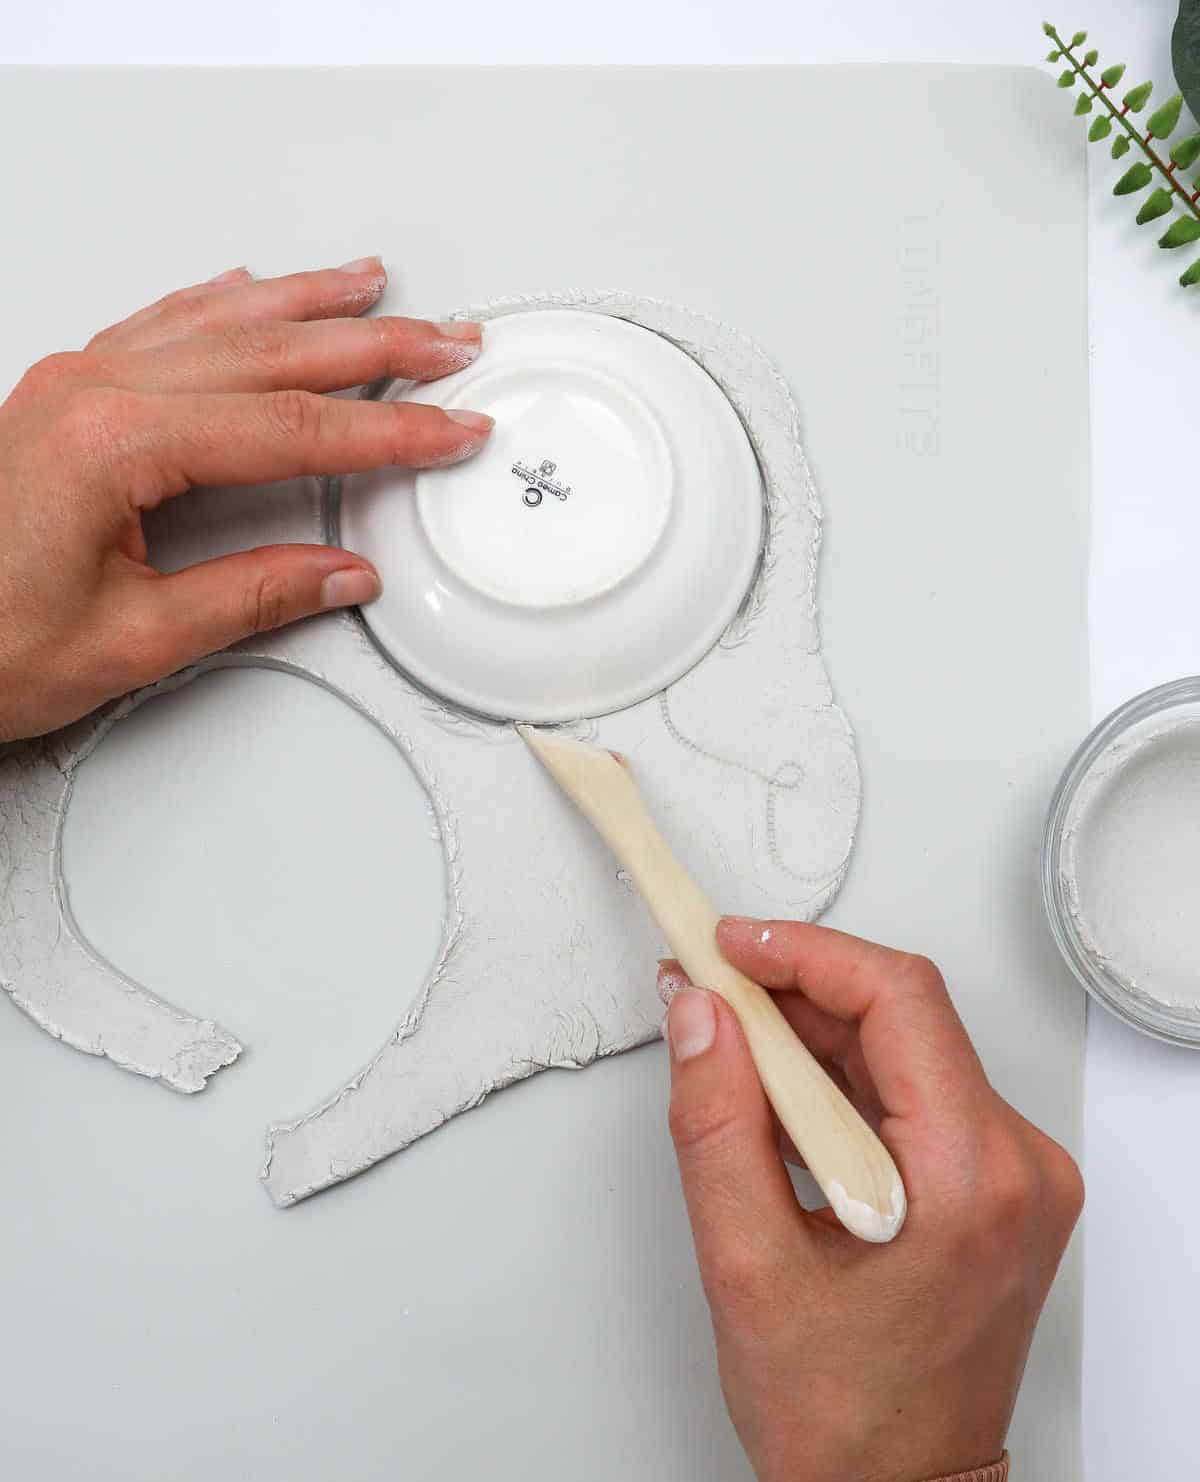
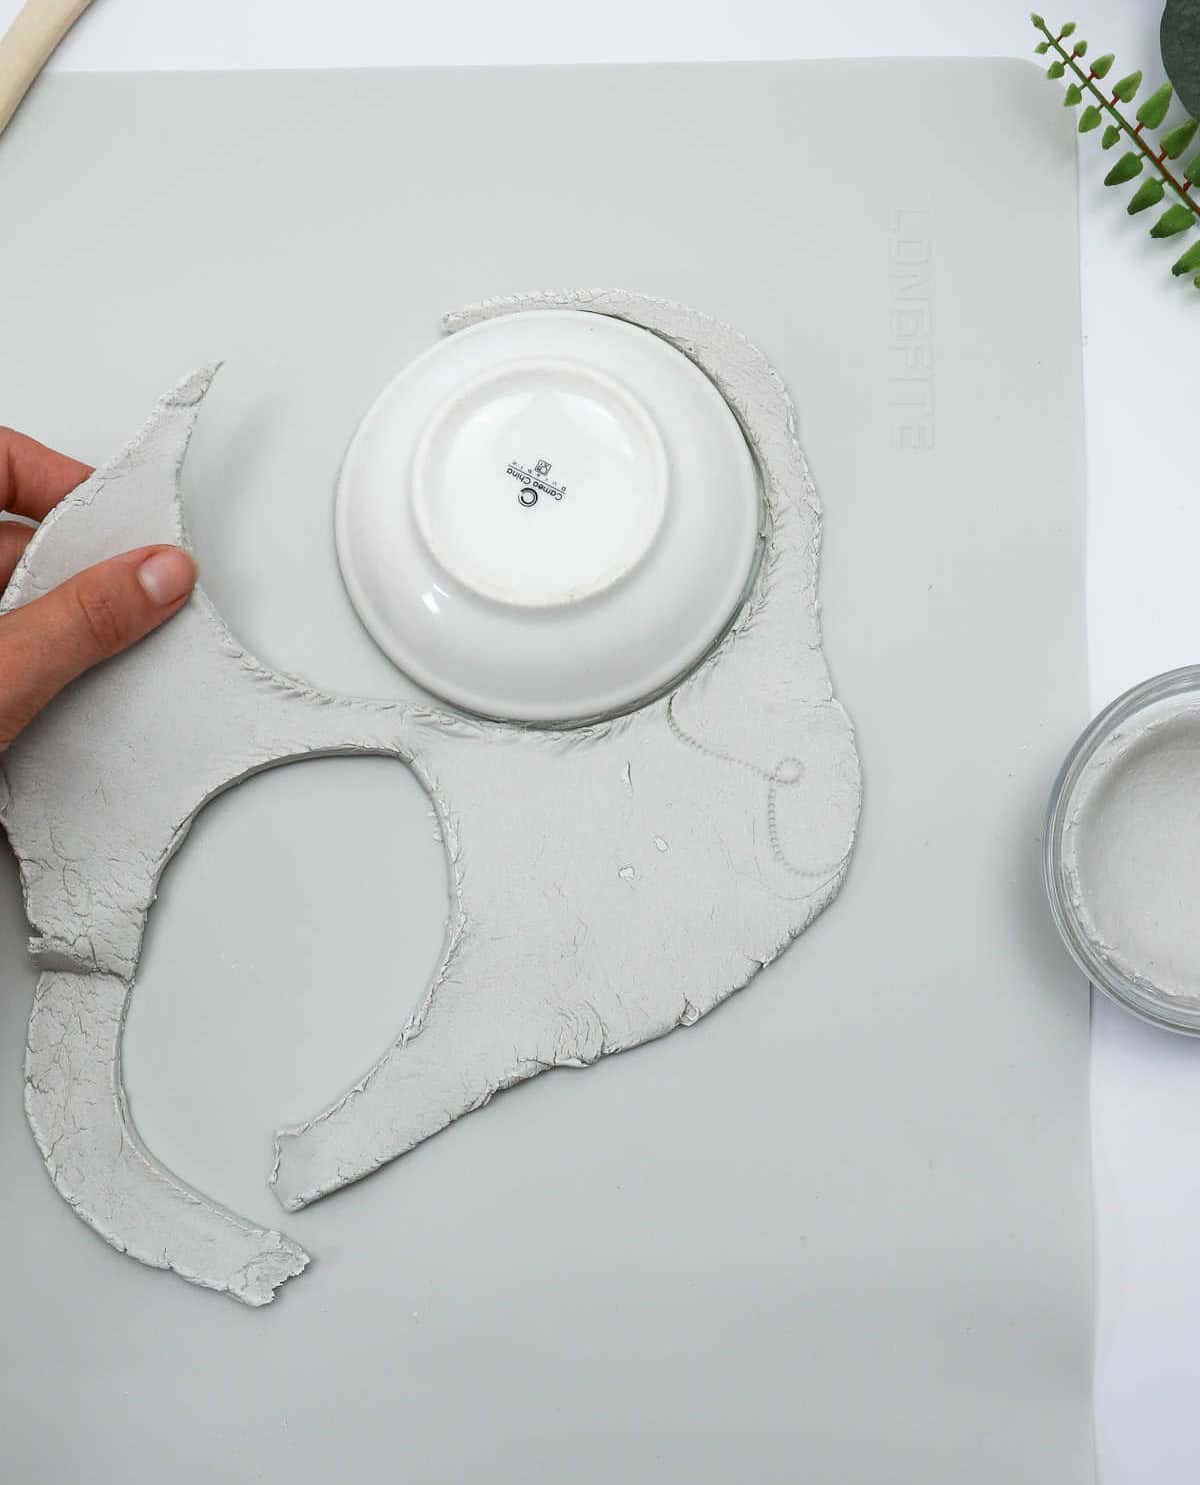

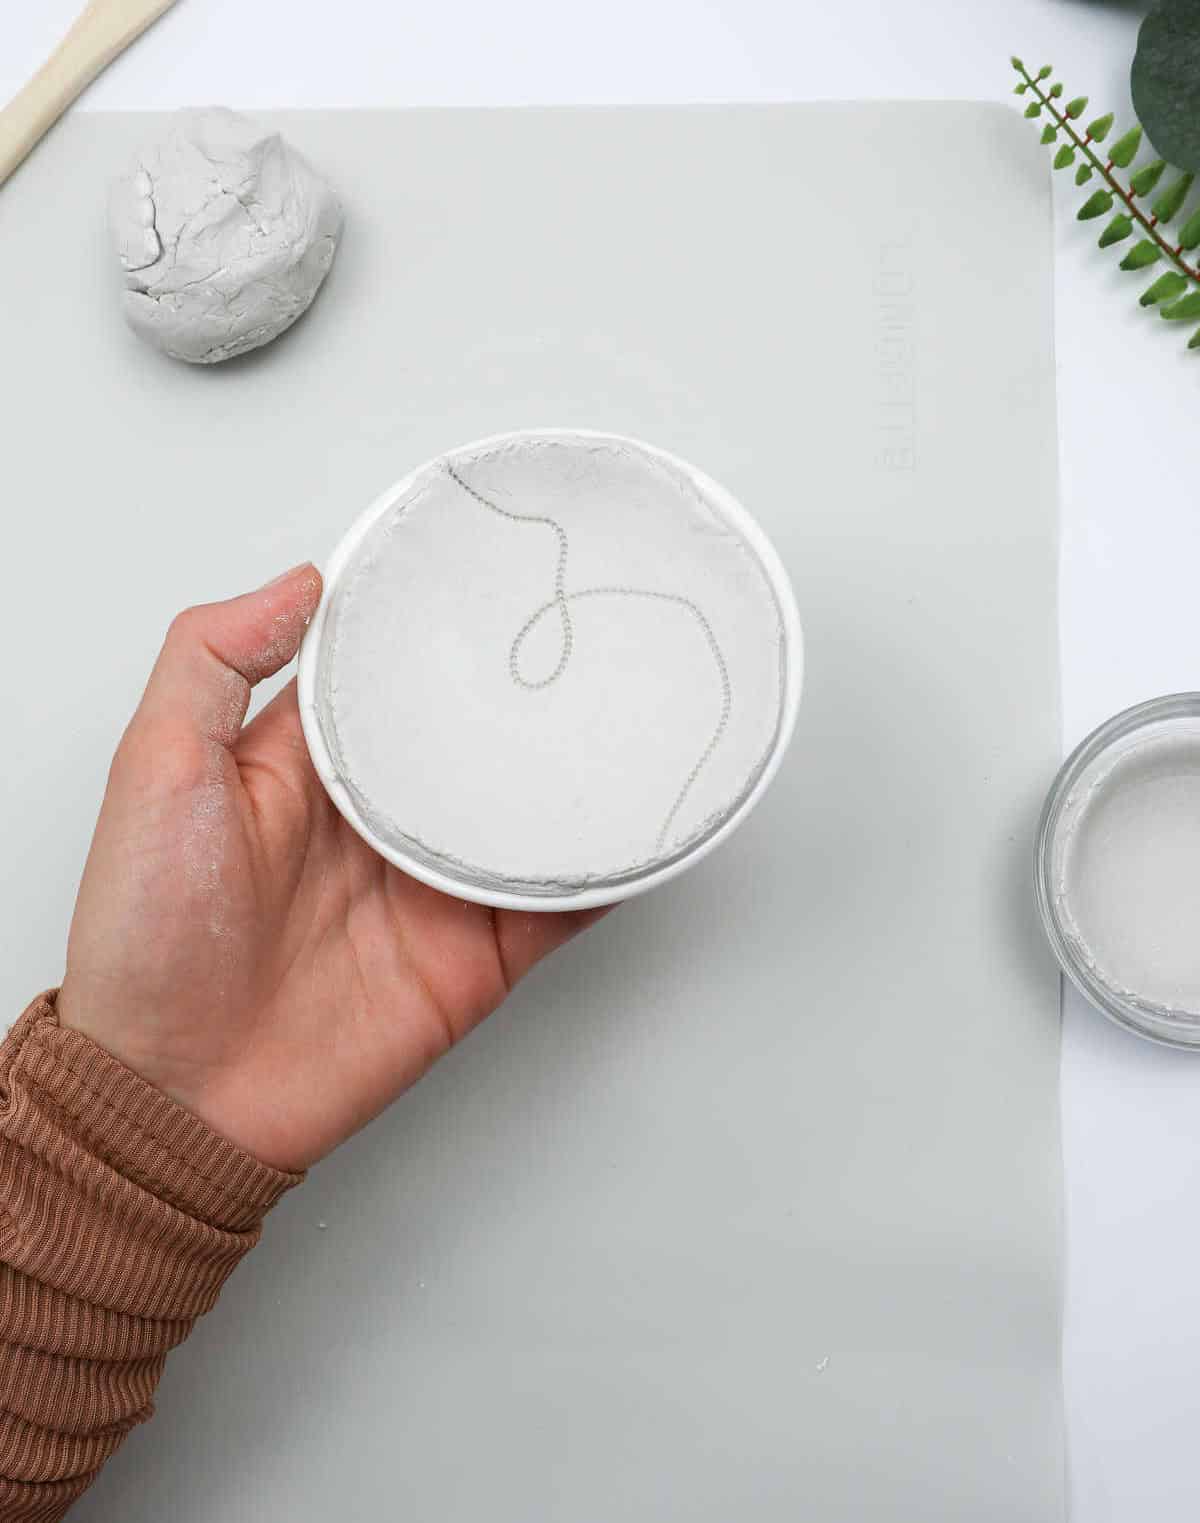
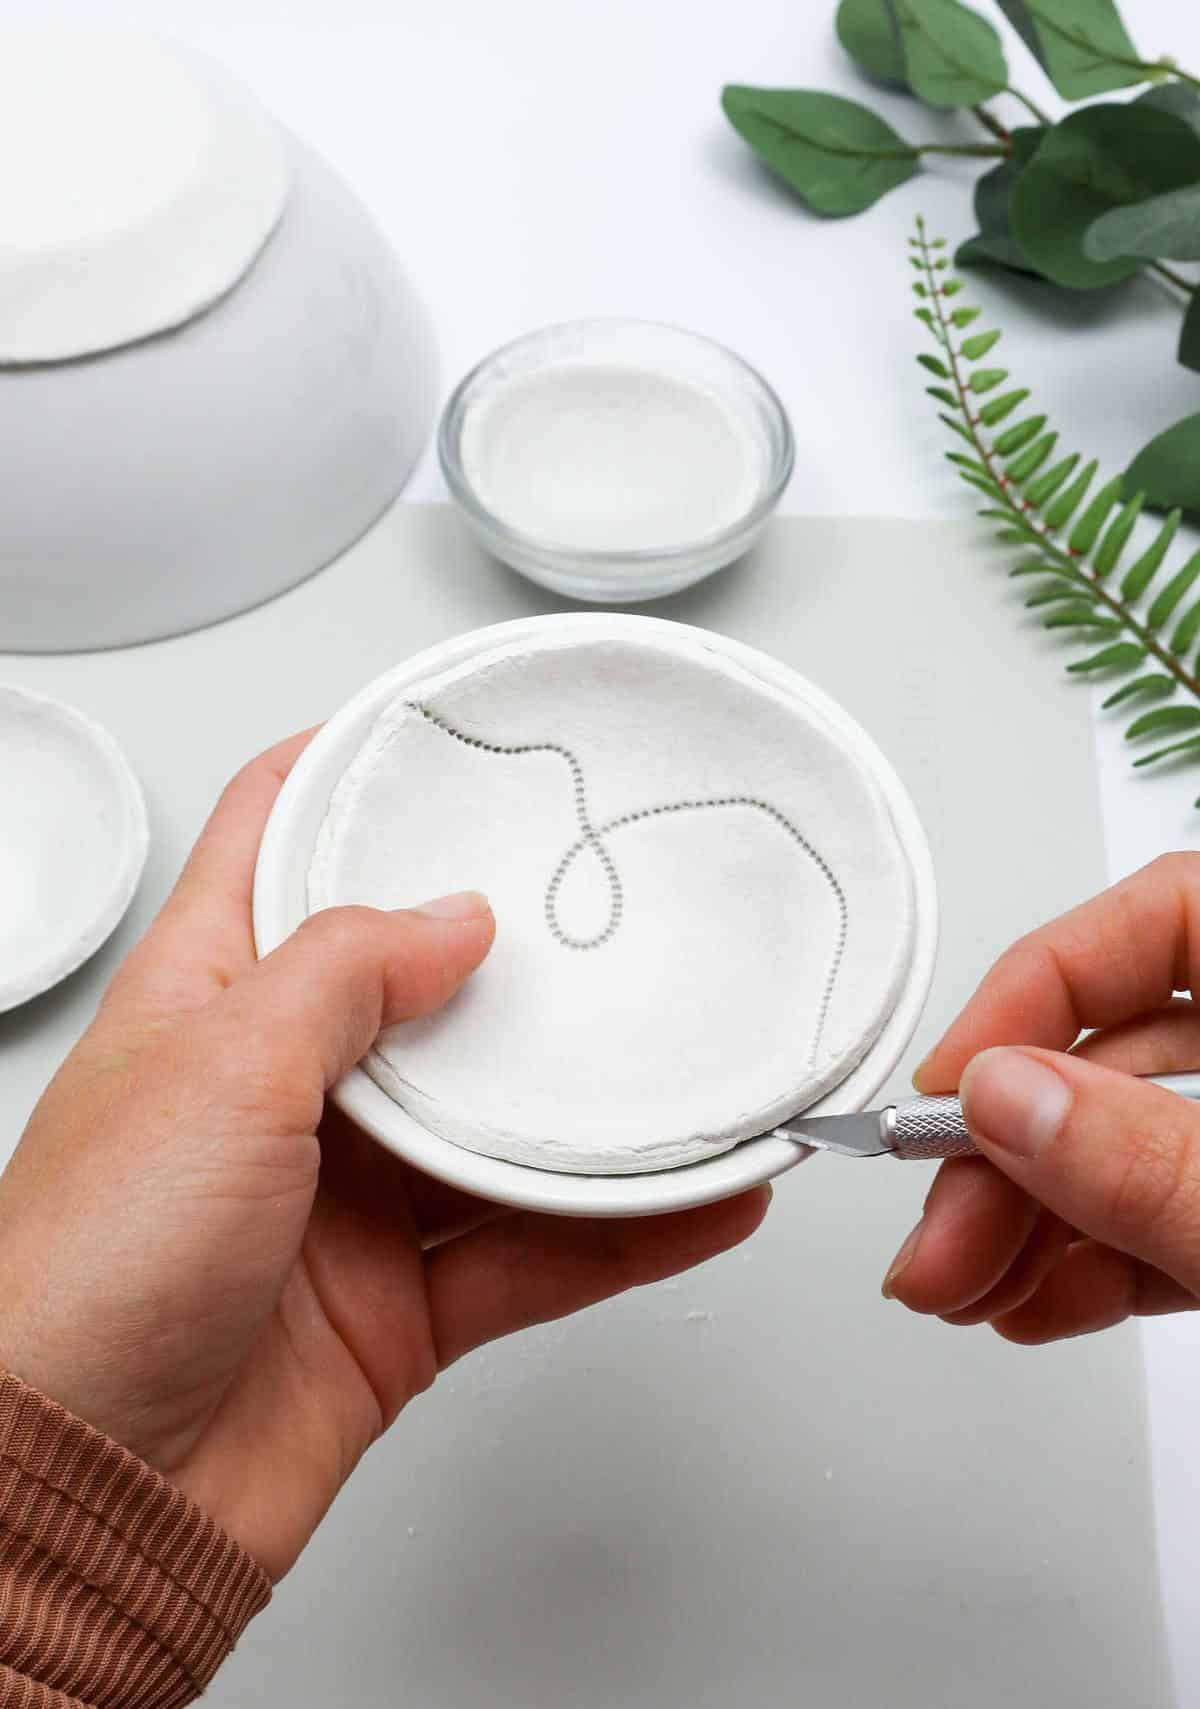
To create the desired shape, place another bowl upside down on top of the imprinted clay, aligning it with the original design. Next, employ a cutting tool to carefully remove excess clay from around the rim, following the same pattern as before.
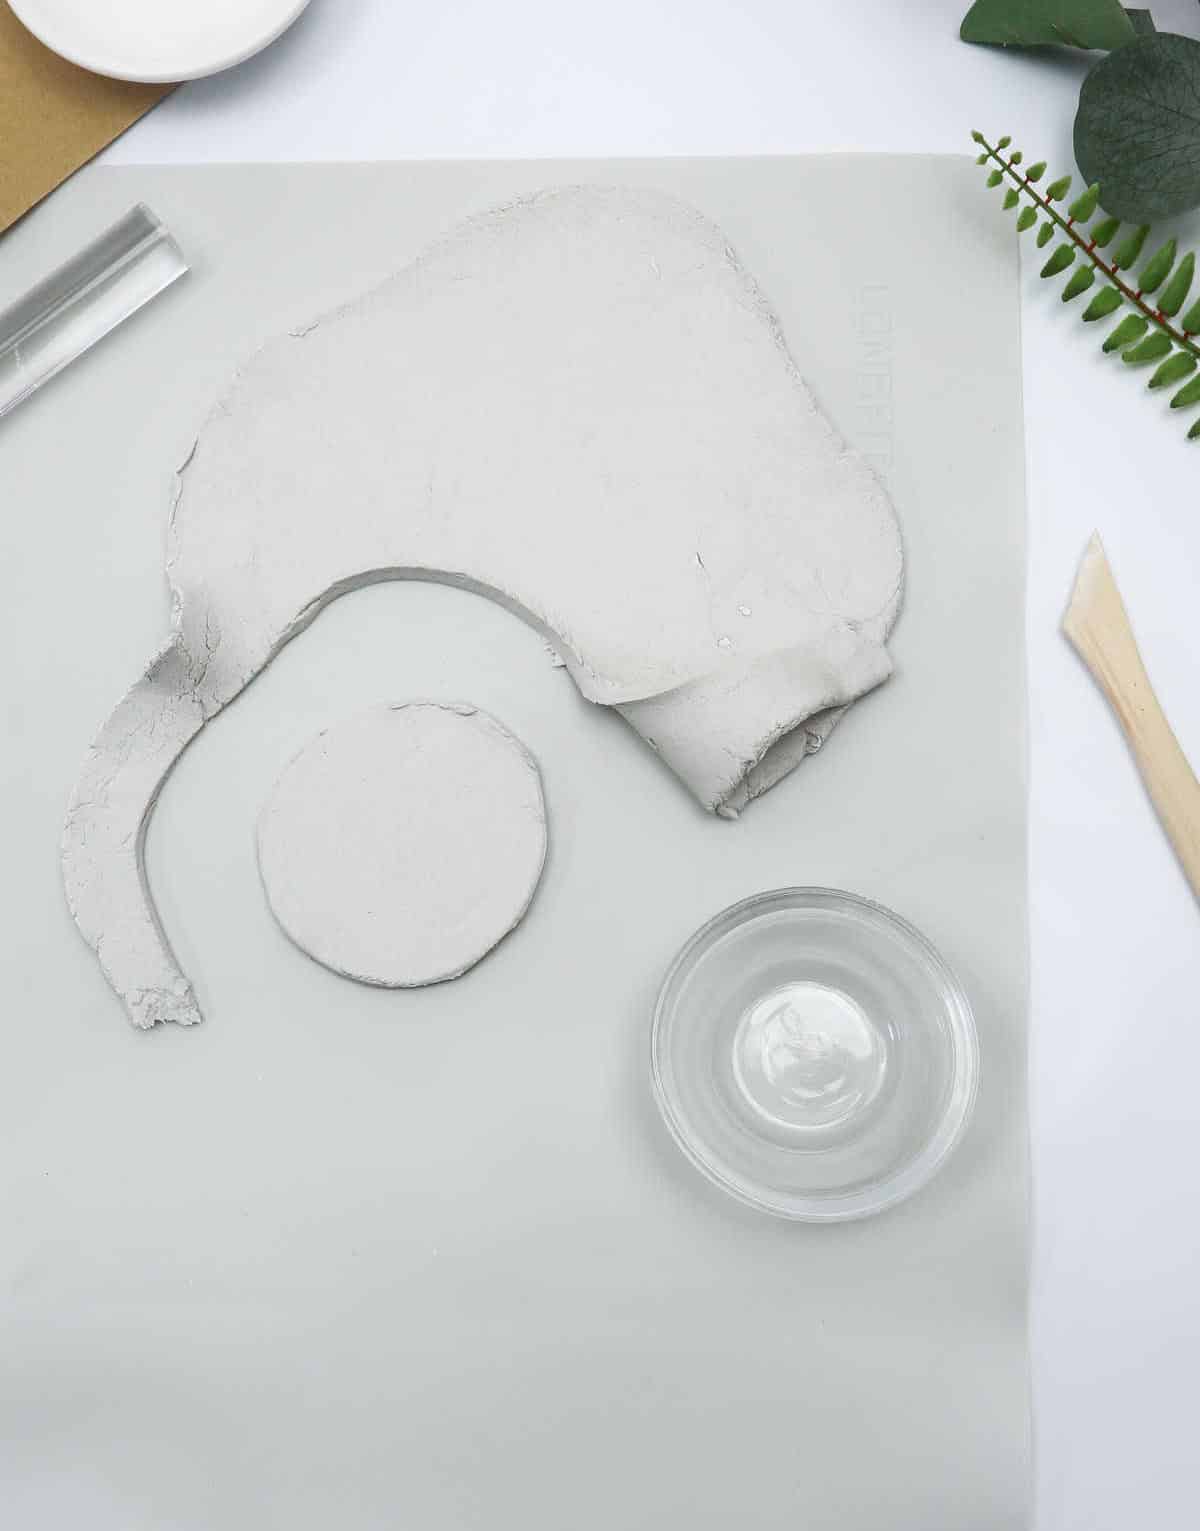
With the excess clay now removed, gently peel back the edges to separate them from the bowl. Then, use your fingers to meticulously smooth out any imperfections or cracks in the embossed design, taking care not to disrupt the original pattern.
For an added layer of protection and refinement, consider adding a small amount of water to help settle any minor fissures.
Step 7
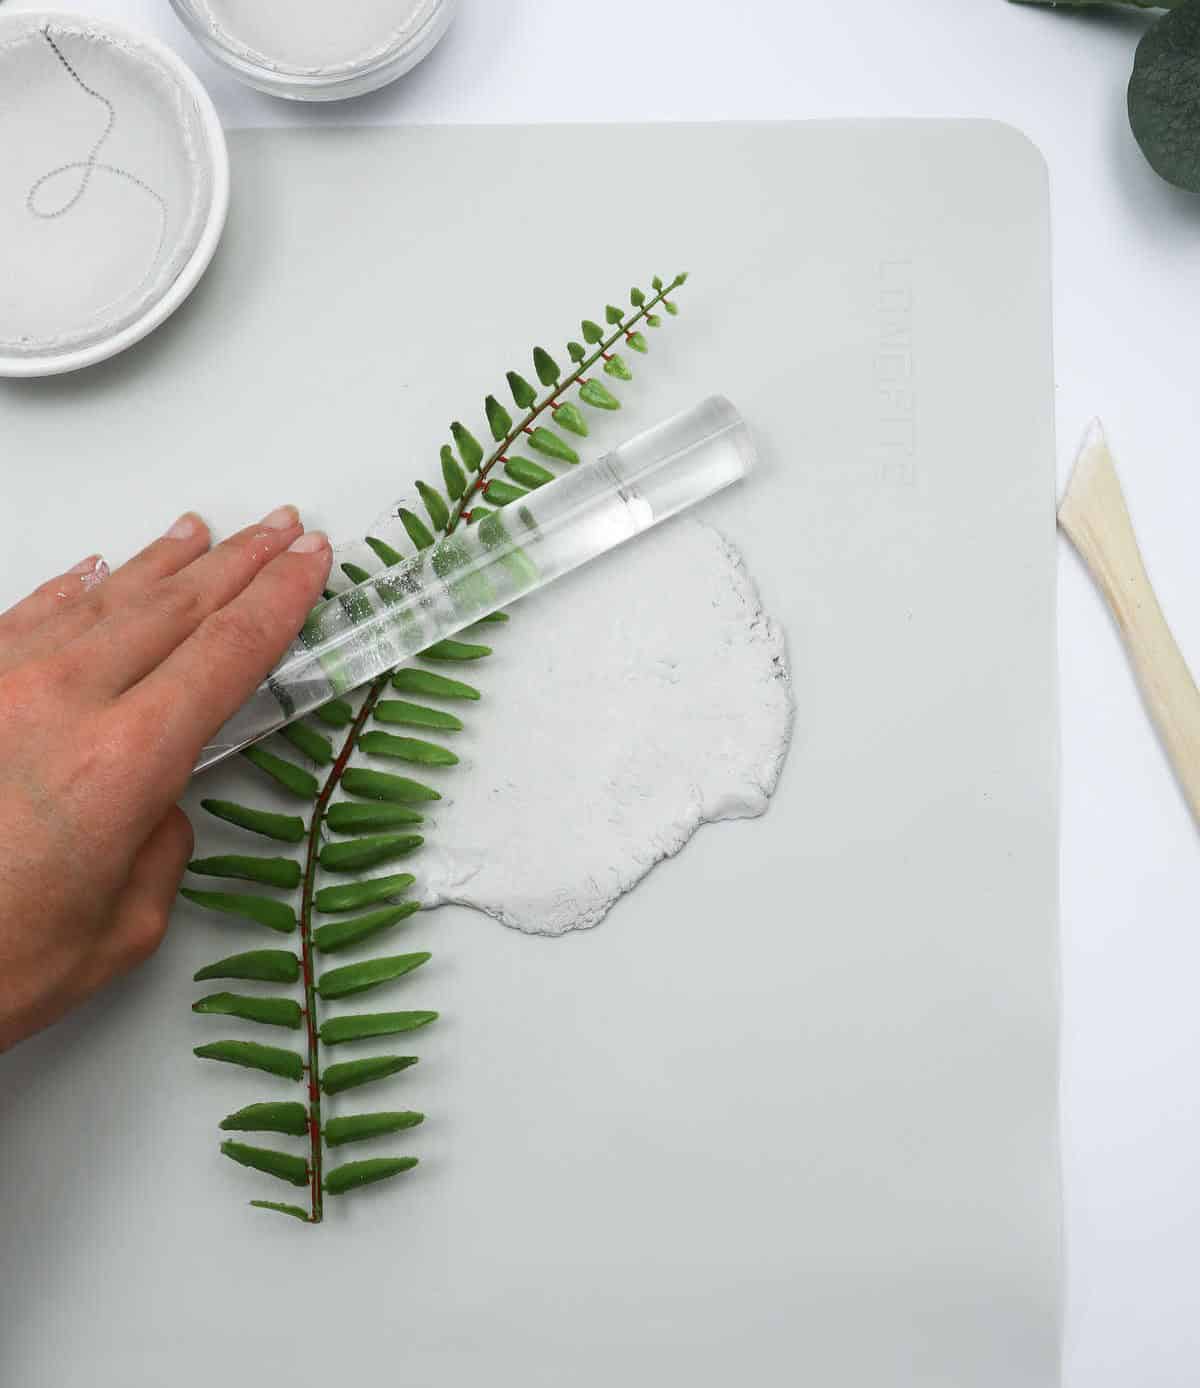
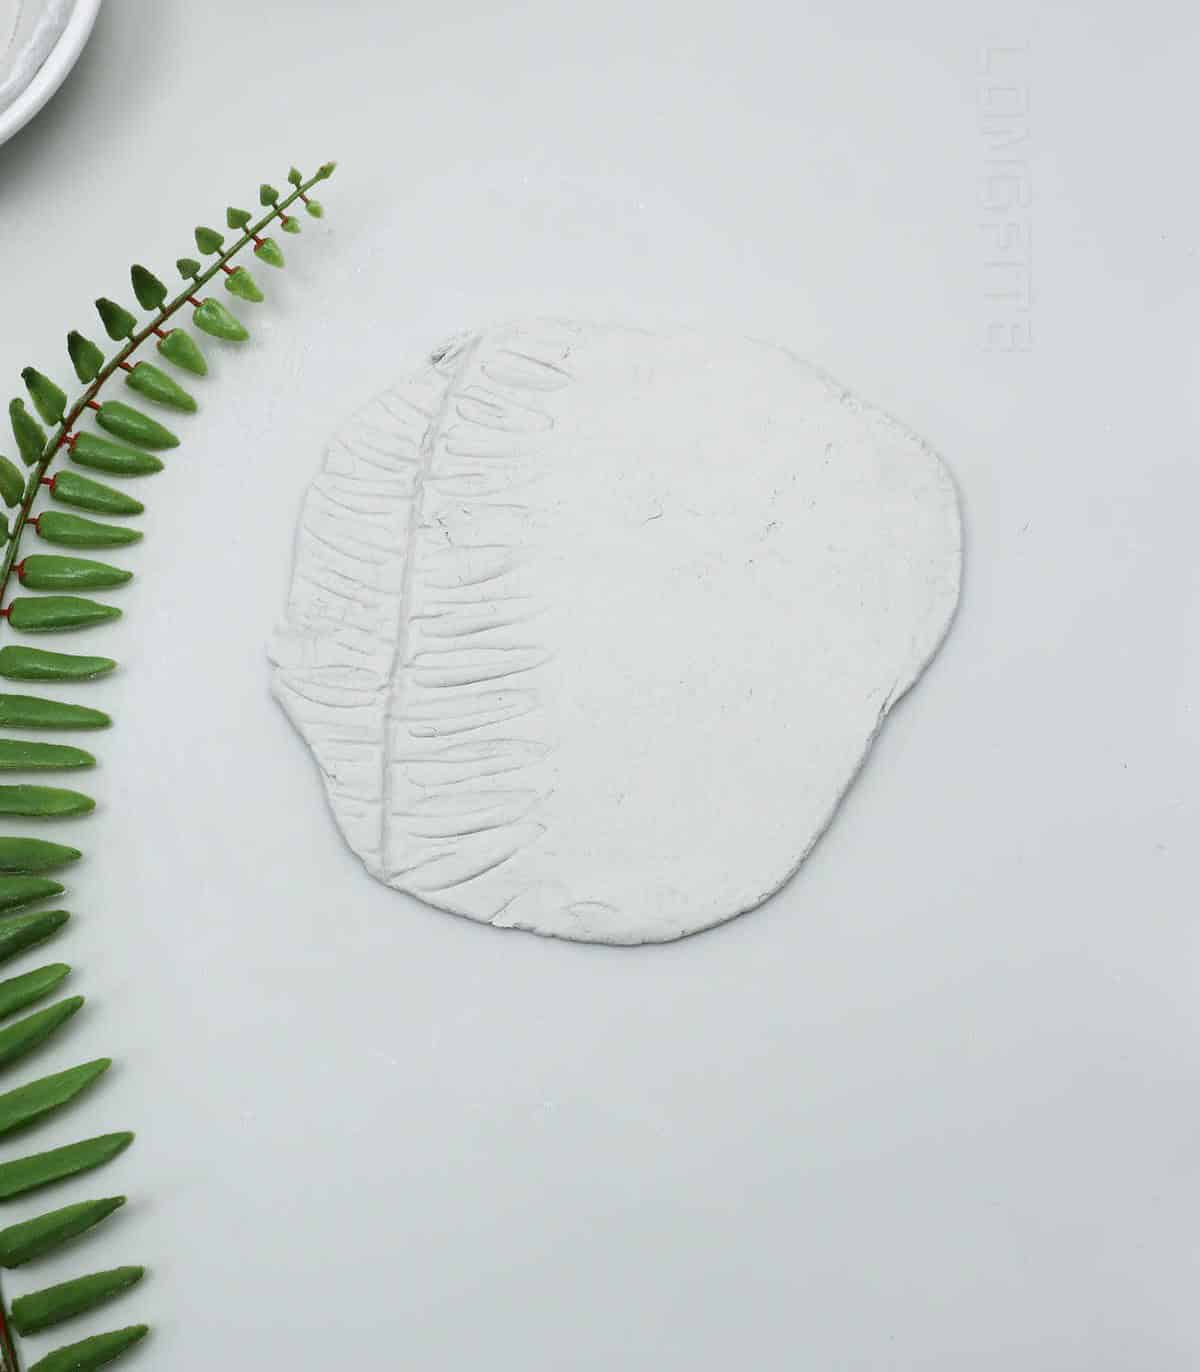
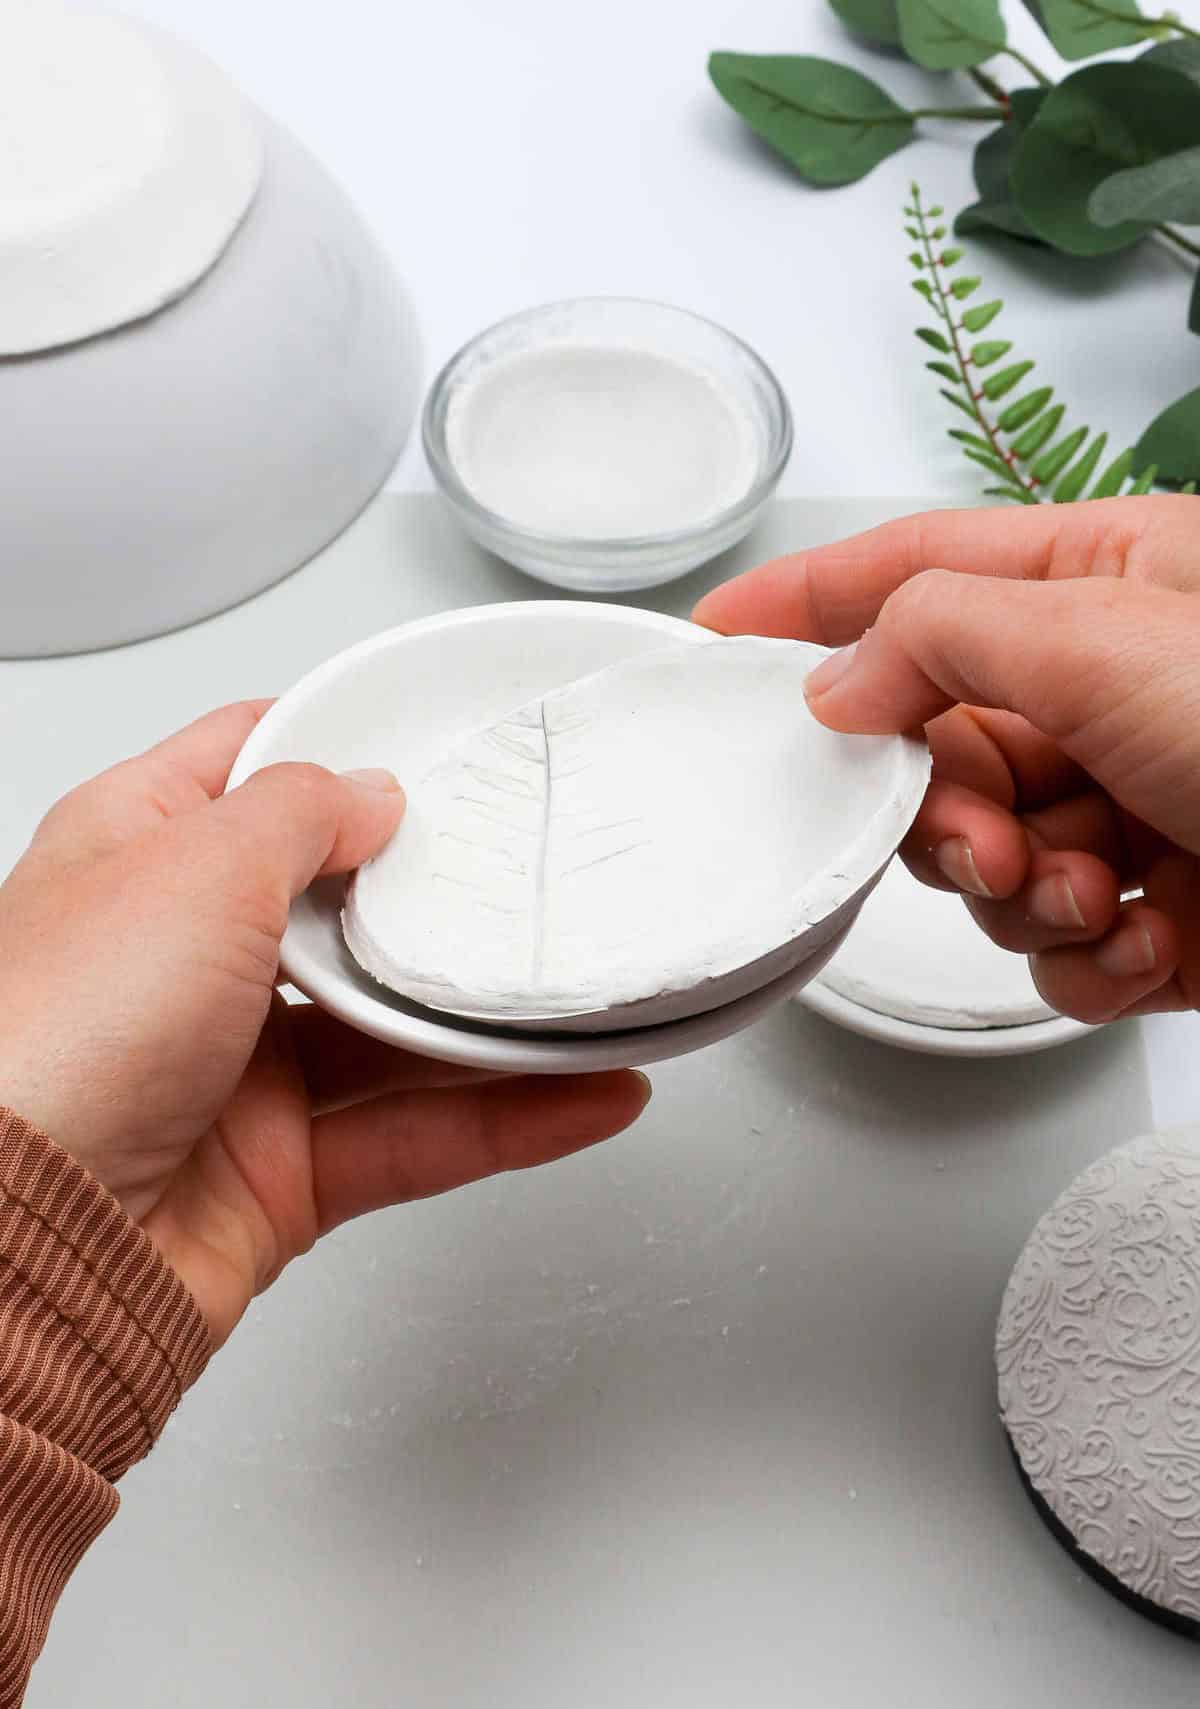
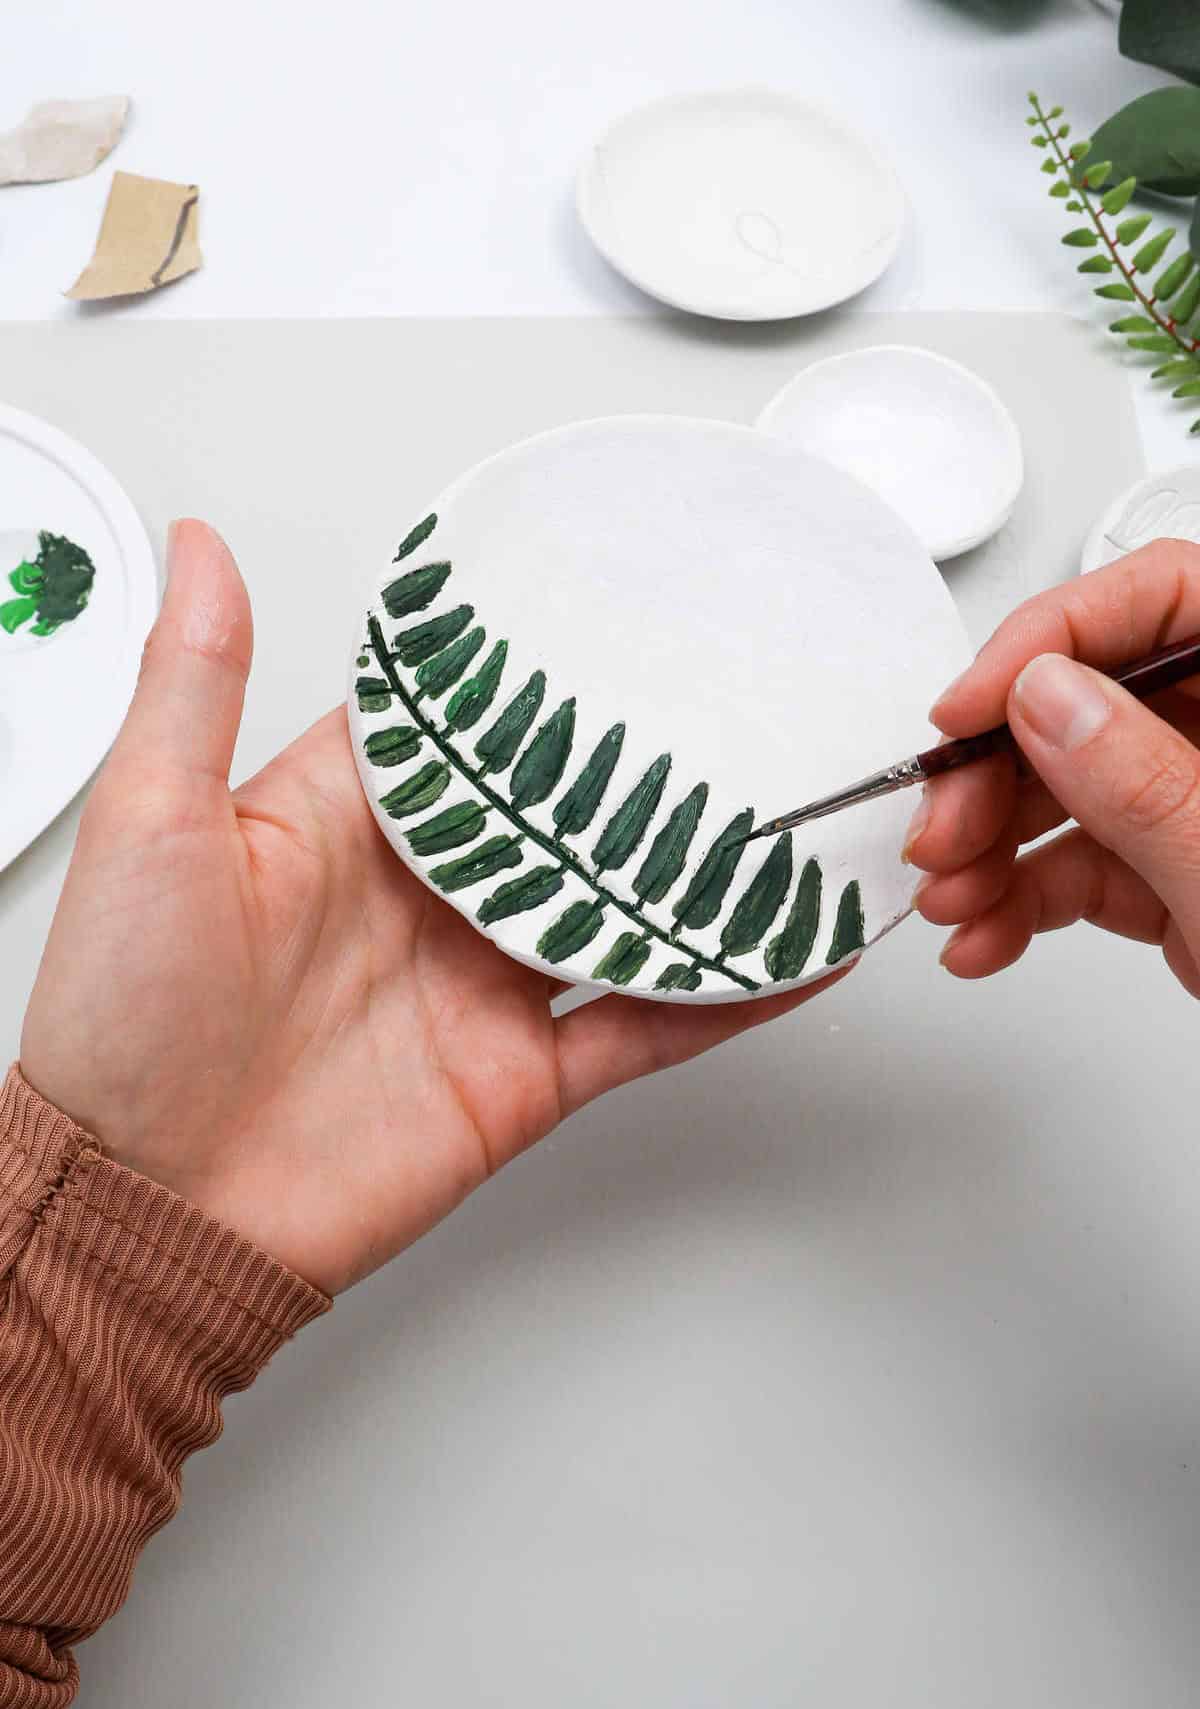
The third design is a timeless classic that requires just two simple materials: a branch with leaves and a rolling pin. To create this look, start by selecting a branch that catches your eye – perhaps one with vibrant green leaves or delicate white blooms. Next, gently press the leaf into the clay using your trusty rolling pin. Apply gentle pressure to ensure the leaf adheres smoothly to the surface of the clay.
When you carefully lift the leaf away from the clay, the resulting design should resemble a beautiful natural impression, like this.
Step 8
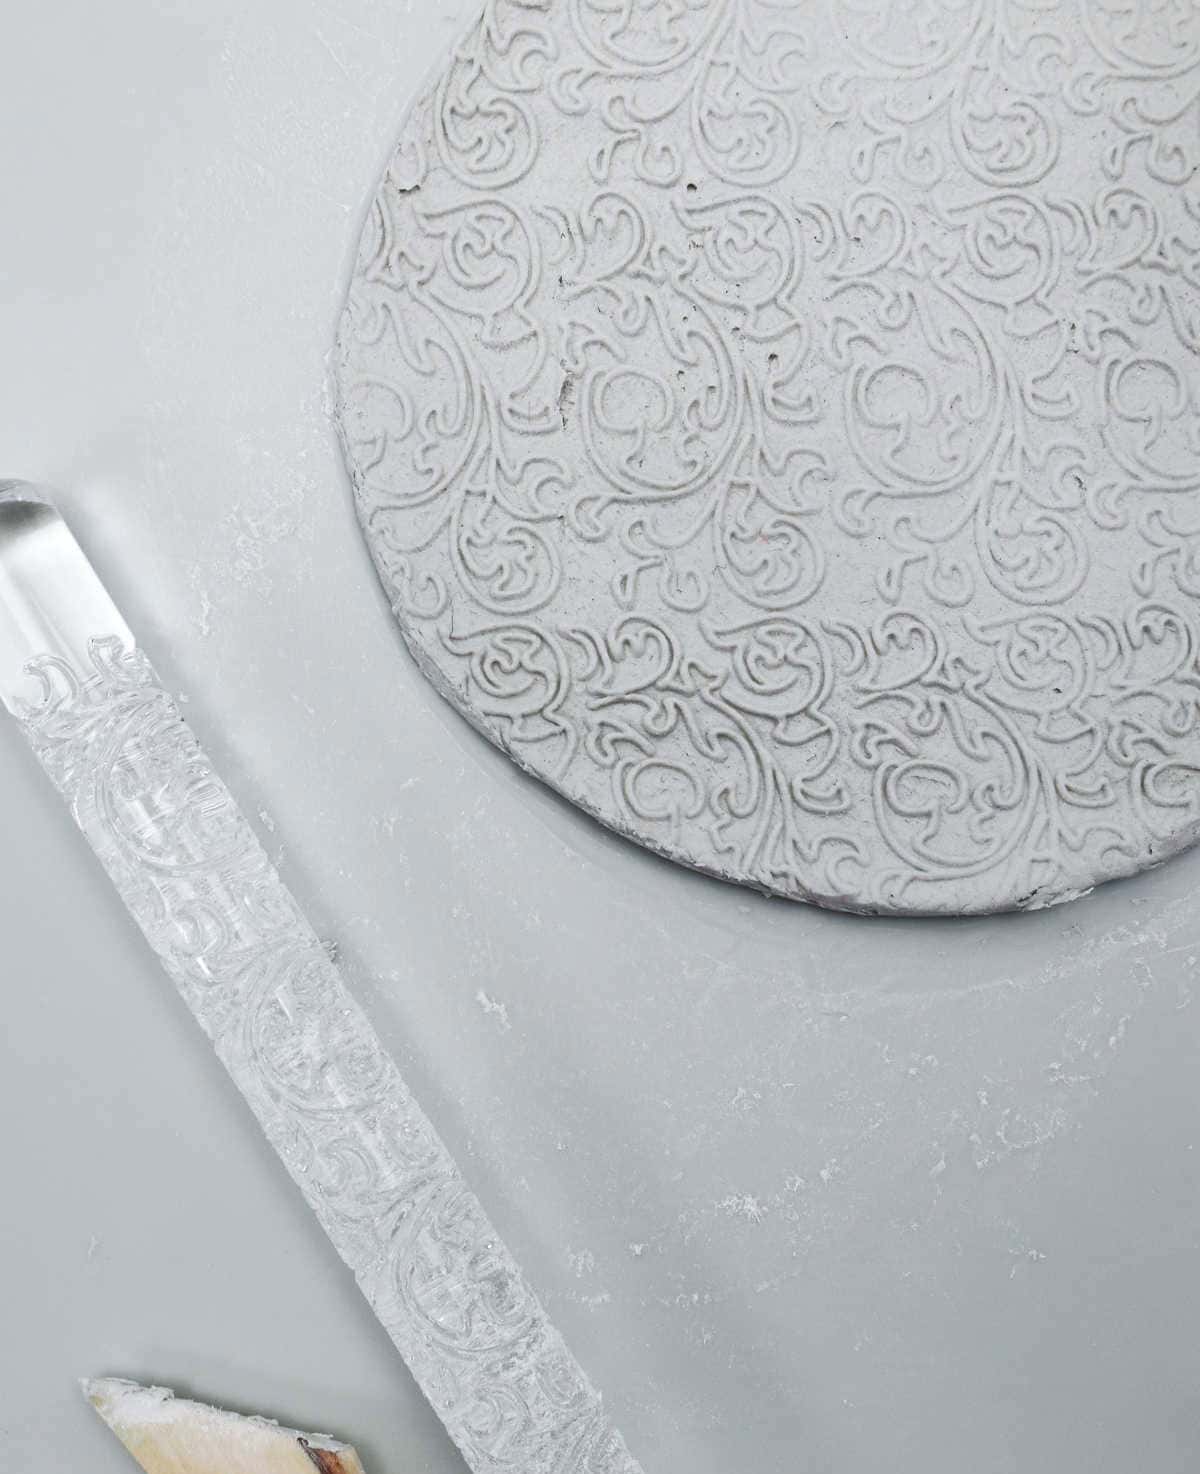
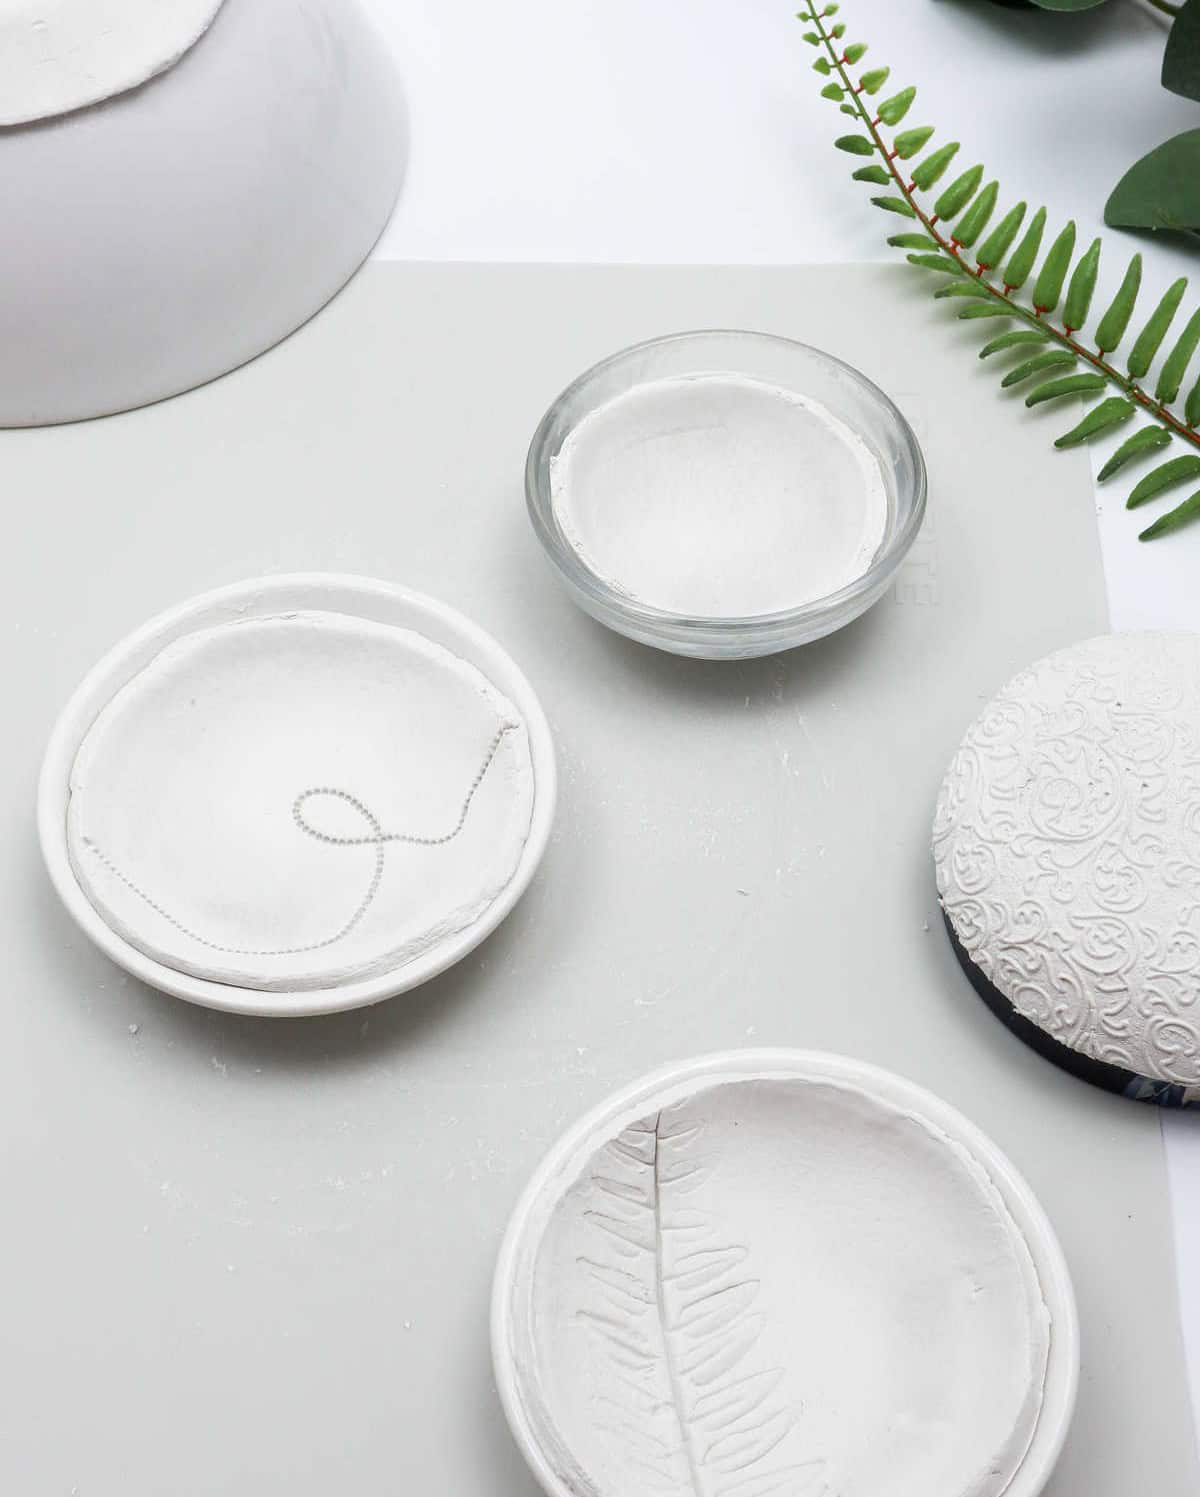
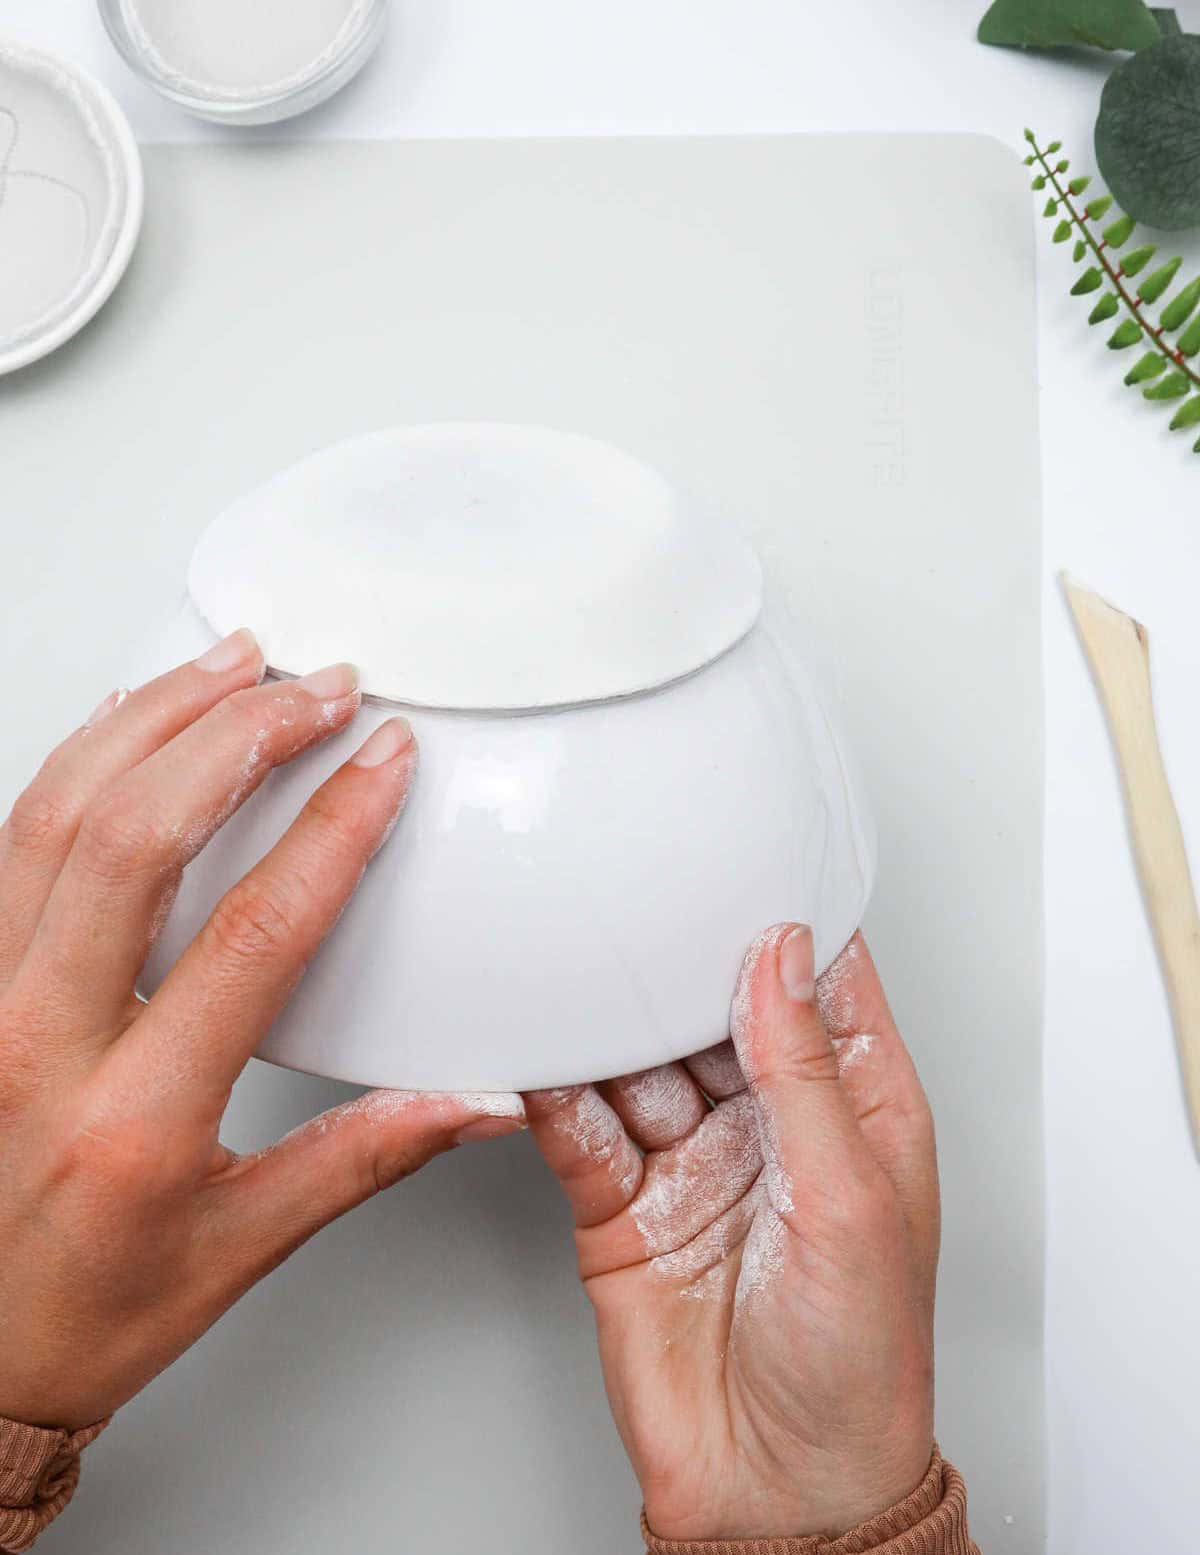
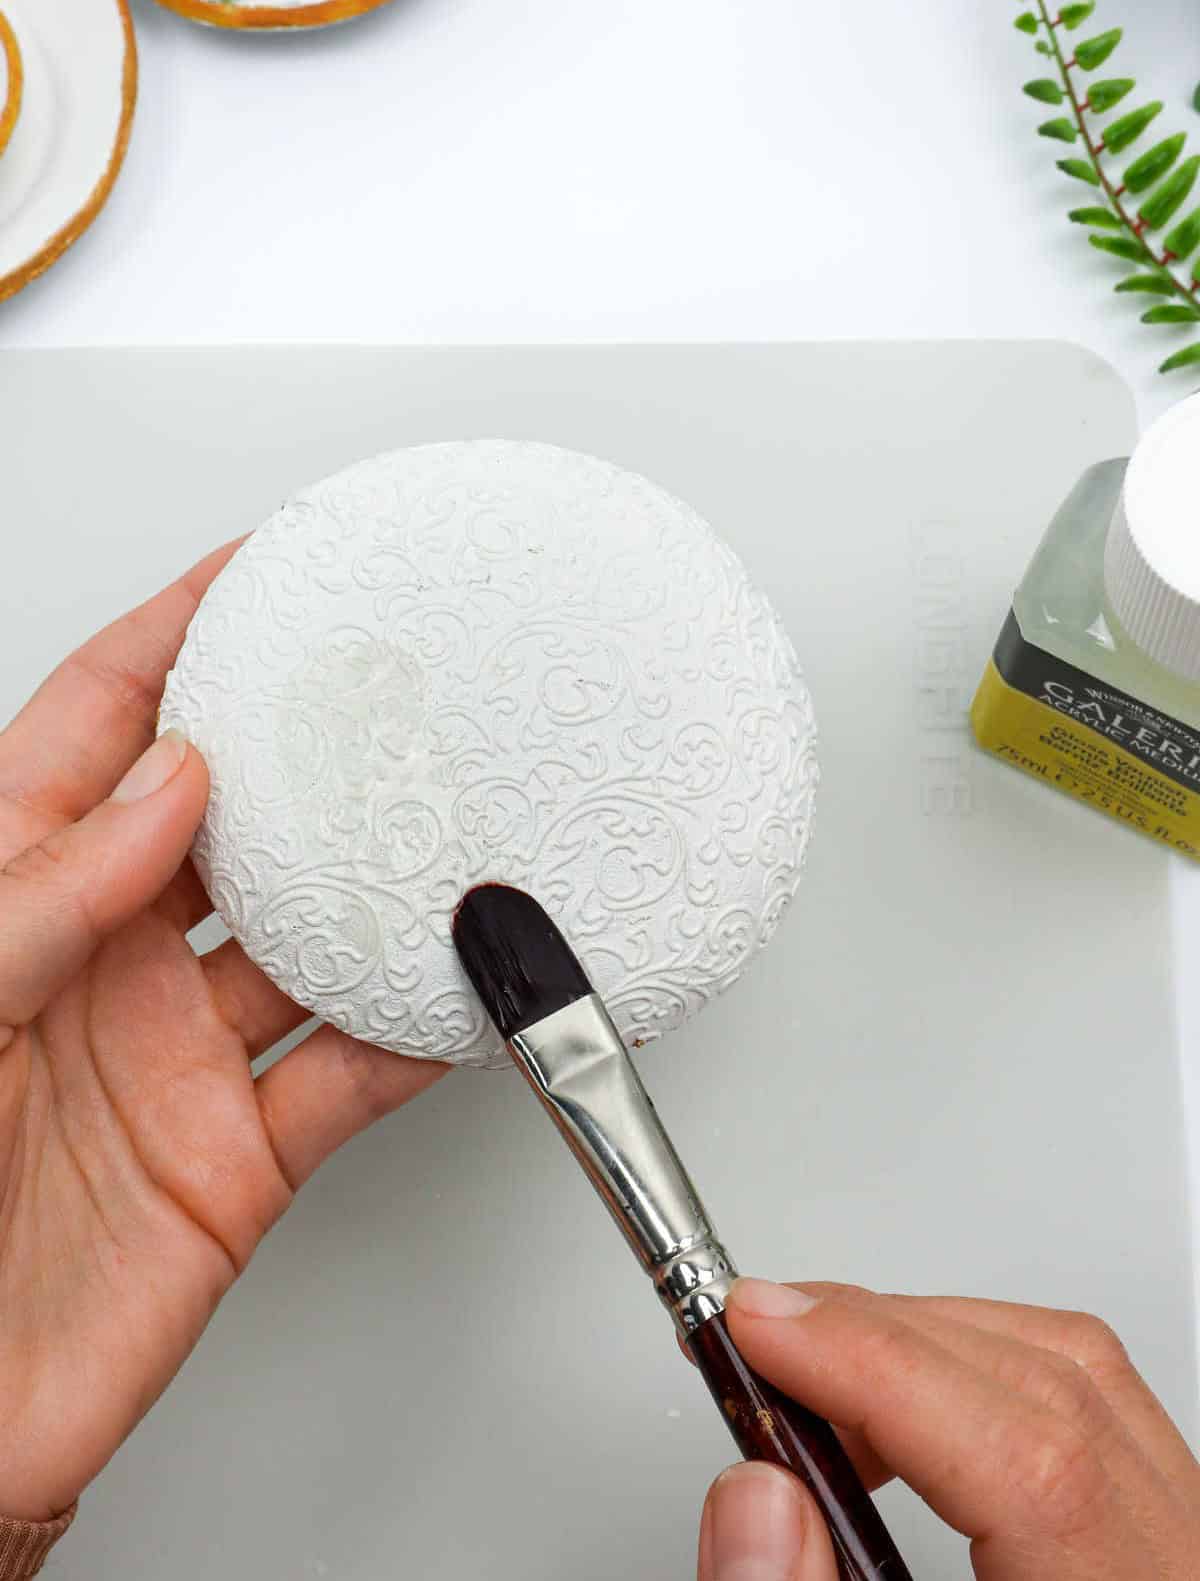
To further embellish your clay creation, utilize an embossing rolling pin or stamp to create intricate patterns by etching them onto the remaining clay. This technique allows for added visual interest and texture. Next, carefully place the clay over the underside of a bowl, moulding the edges into the sides as you do so. The result will be a cohesive, visually appealing piece that showcases your creativity.
Step 9
Once you’ve applied the final layer of clay, all that’s left is to let it dry. To ensure the process goes smoothly and without any issues, I recommend waiting at least 48 hours for larger pieces or smaller ones. This extended drying time will help prevent any cracks or damage from forming. As the clay begins to harden, you can gently lift it out of the bowl. If it’s not cooperating, don’t worry – simply use a sharp knife to carefully cut around the edges and release it.
With a bit of patience and care, you’ll have perfectly dried clay ready for the next step in your project.
Step 10
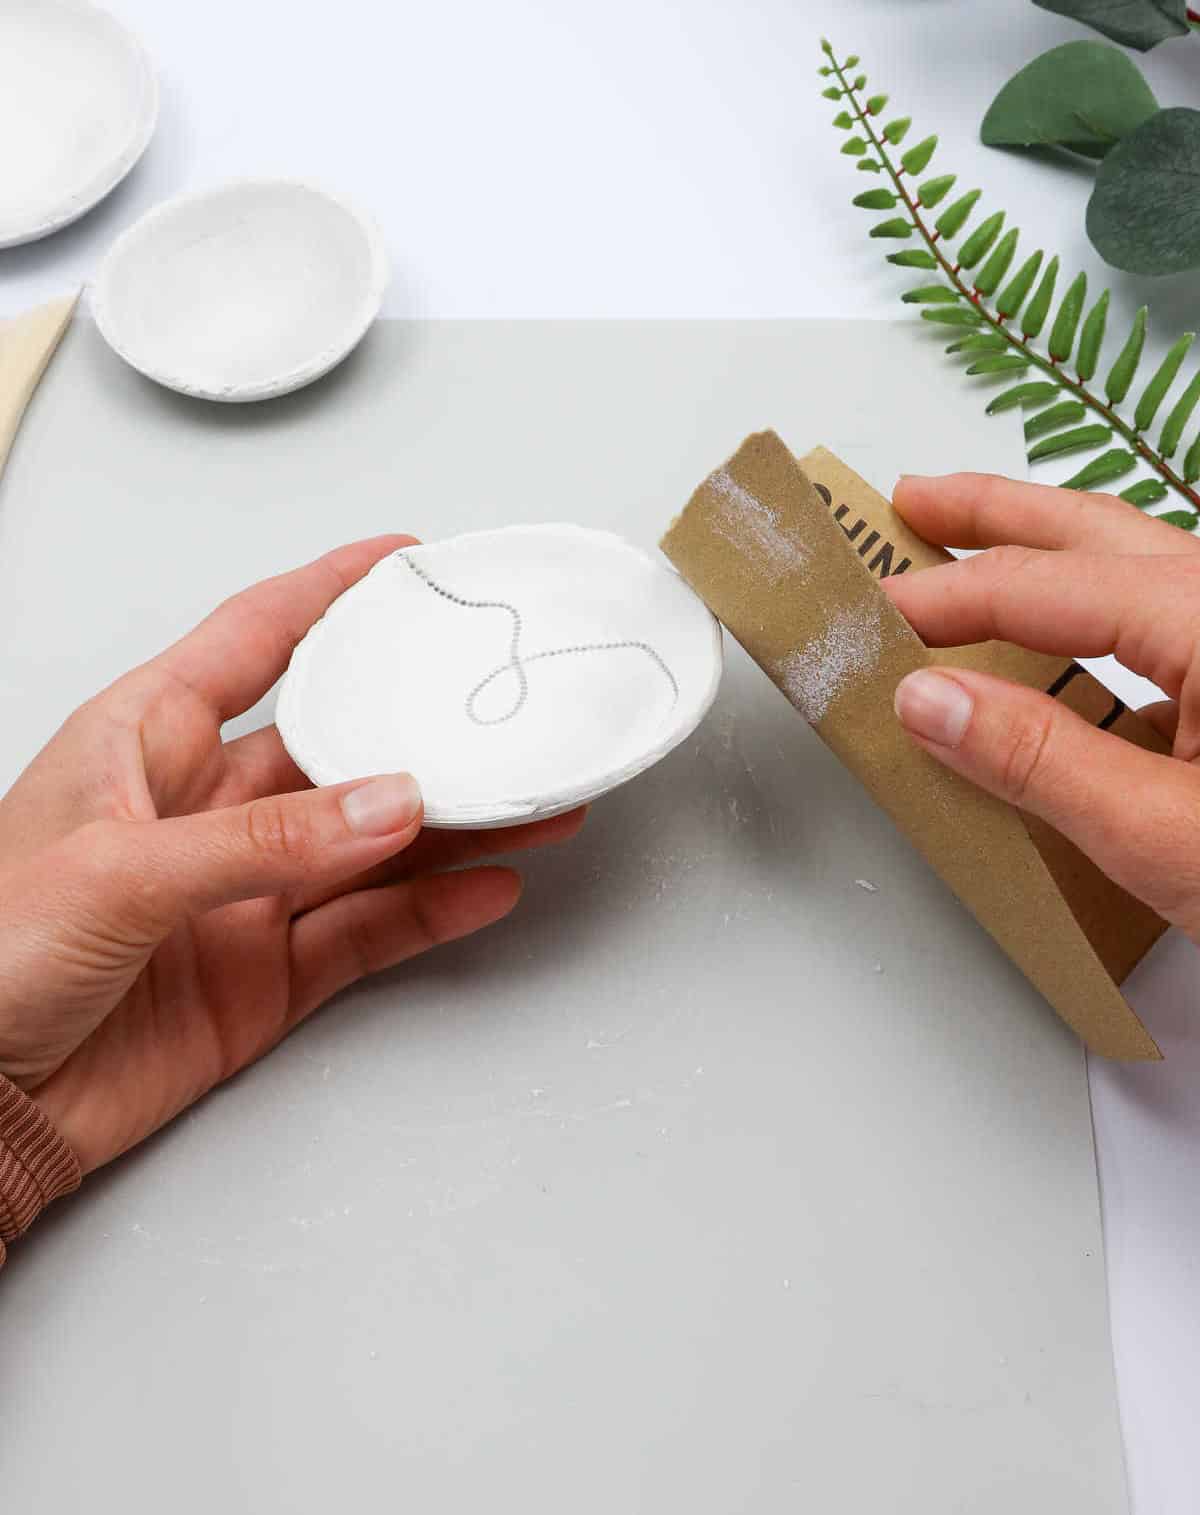
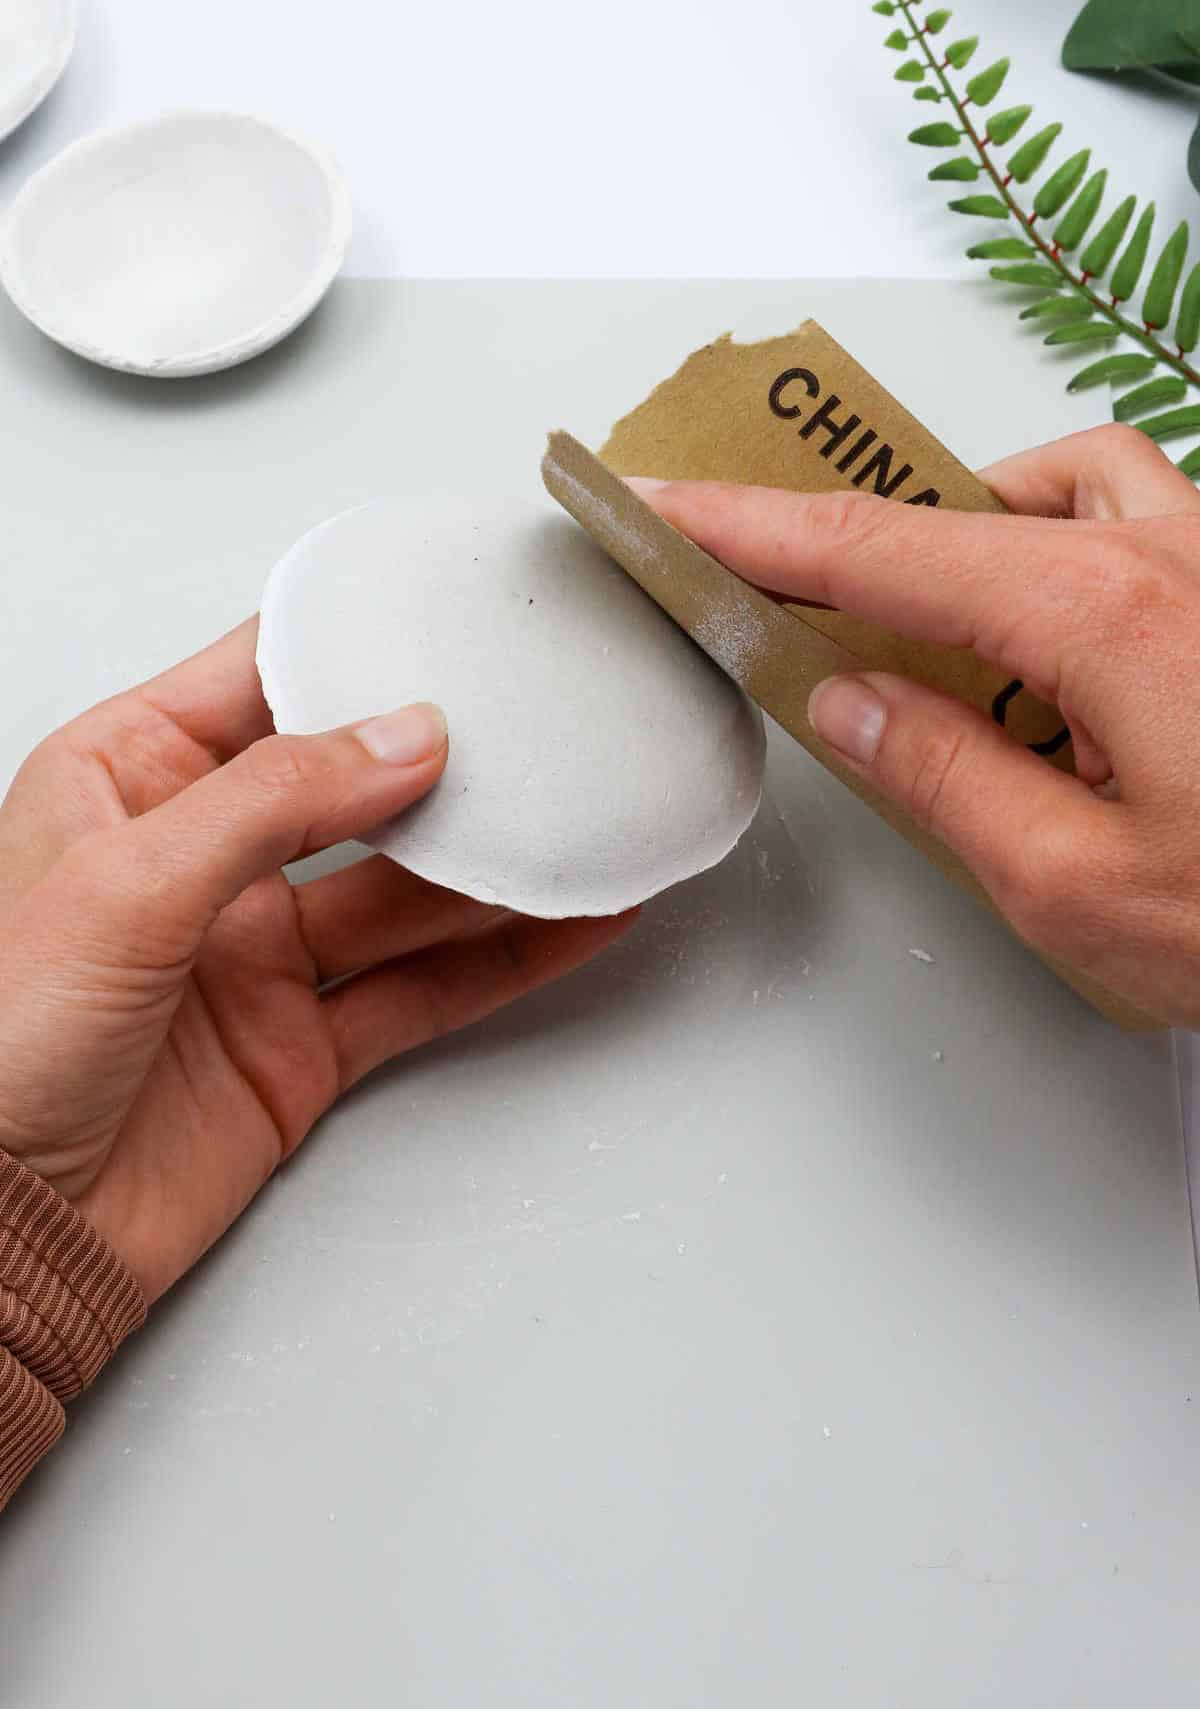
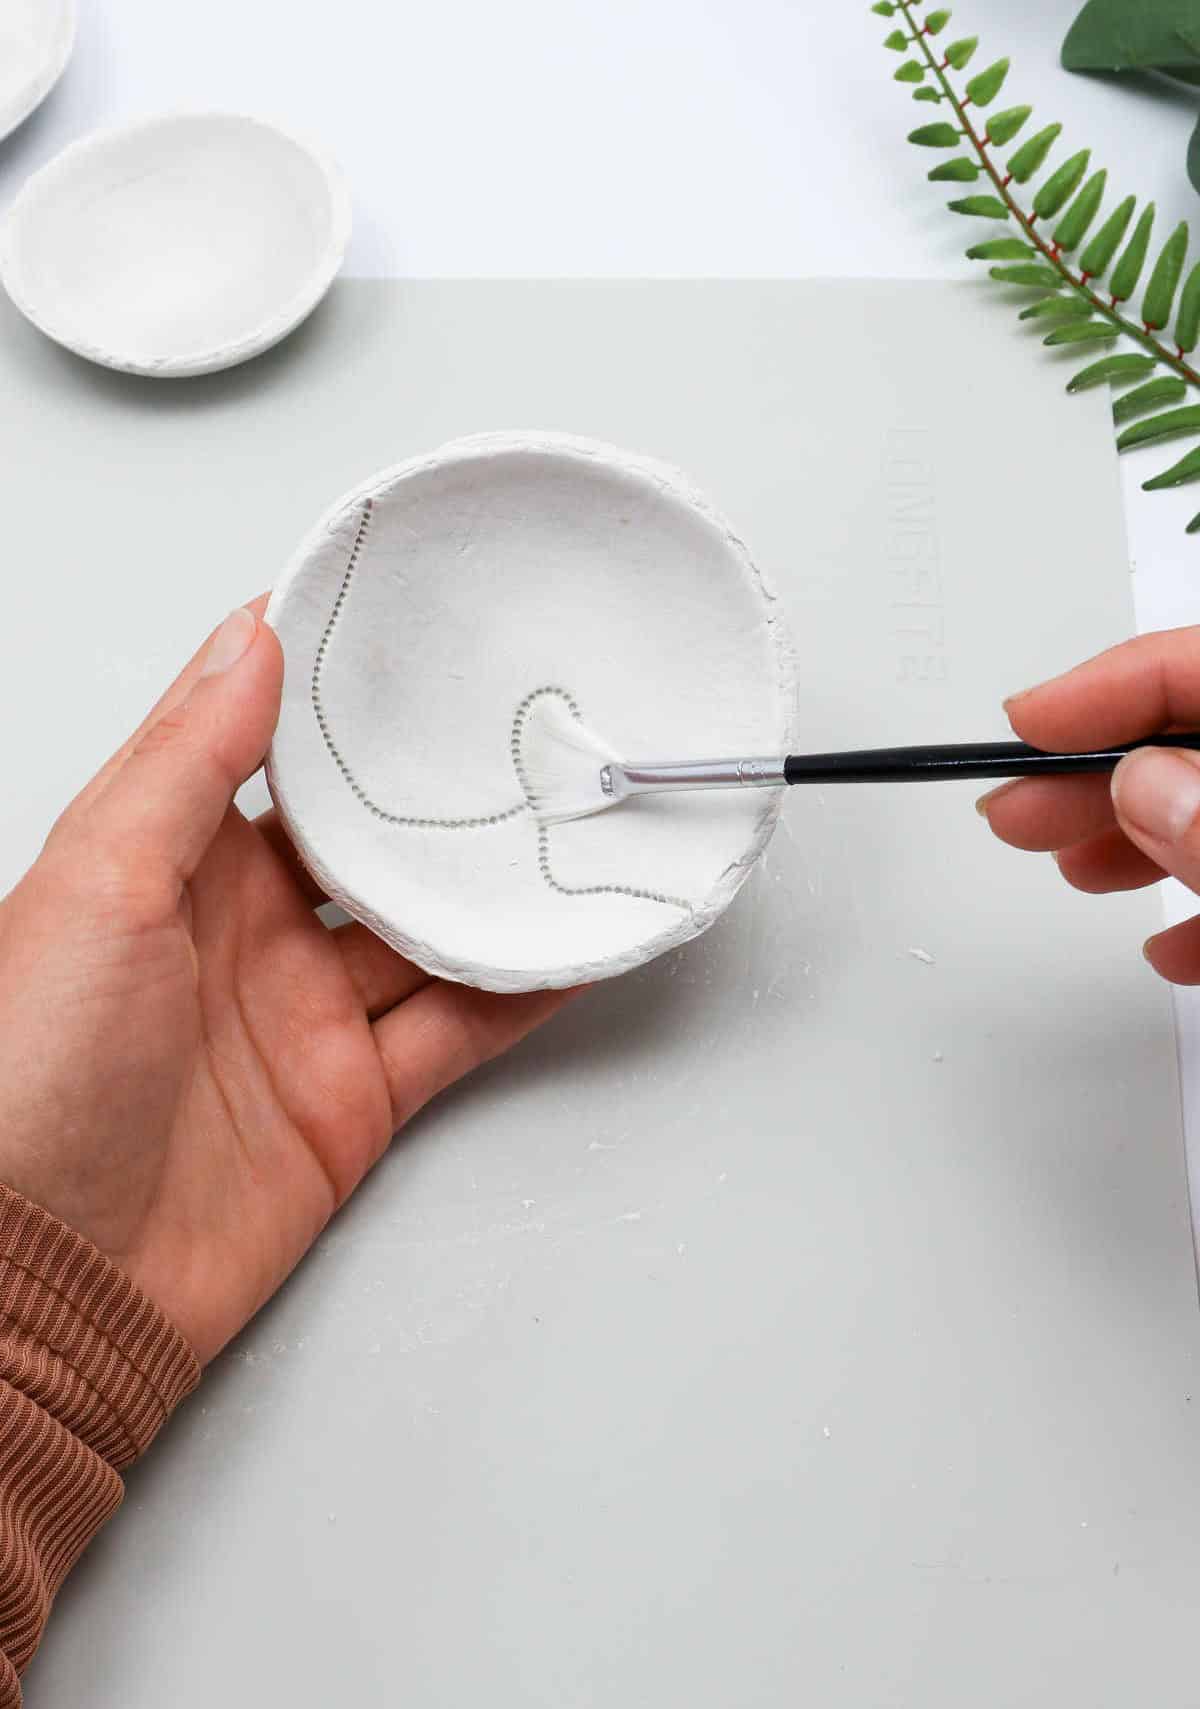
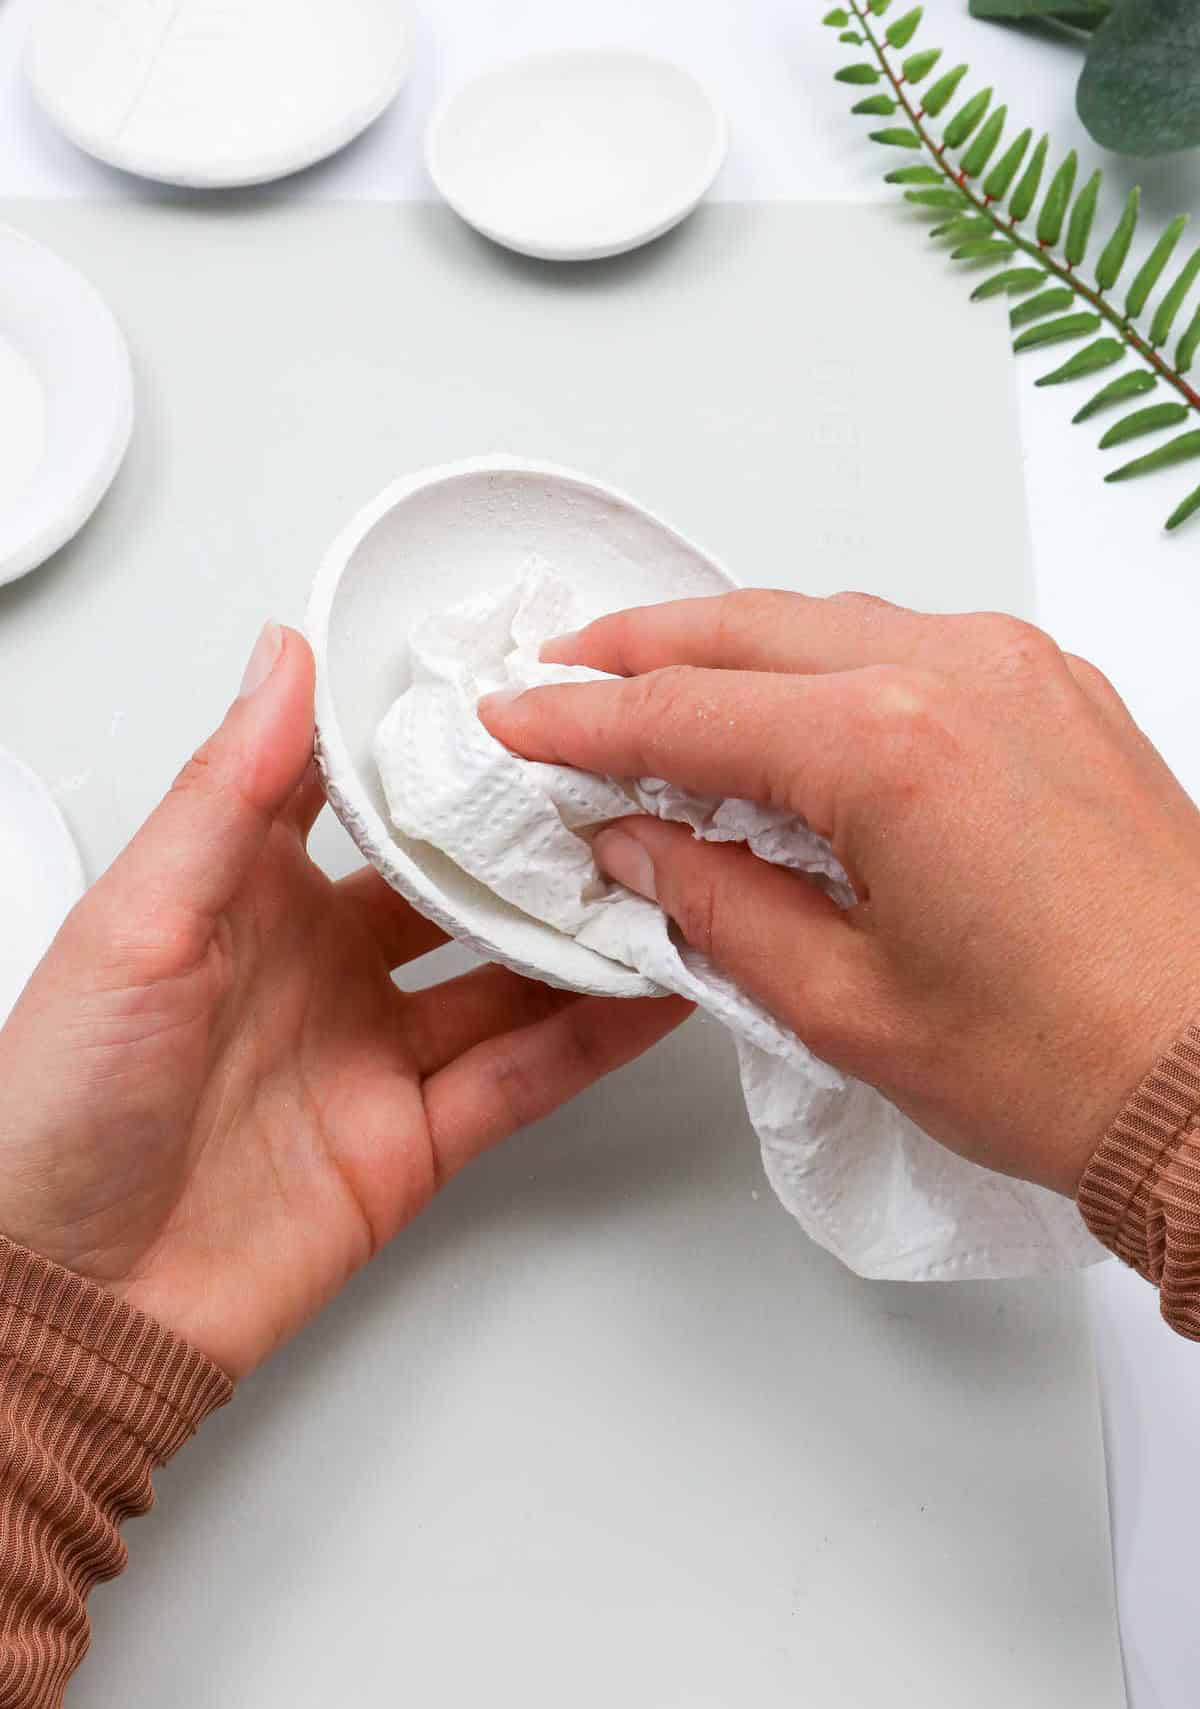
The true delight in ceramics lies in the sandpapering process, where imperfections are smoothed out and a perfect finish is achieved. To begin, take some sandpaper and carefully rub the sides and edges of the clay to eliminate any bumps or rough spots. Don’t forget to attend to the bottom of the bowl as well! Once you’ve smoothened everything out, use a fine-bristled brush to gently sweep away the powdered clay residue from the bowl’s surface.
When working with patterned pieces, be meticulous in your cleaning, as loose particles can settle into the prints if not properly removed. A paper towel can also come in handy for wiping off any stray debris.
Step 11
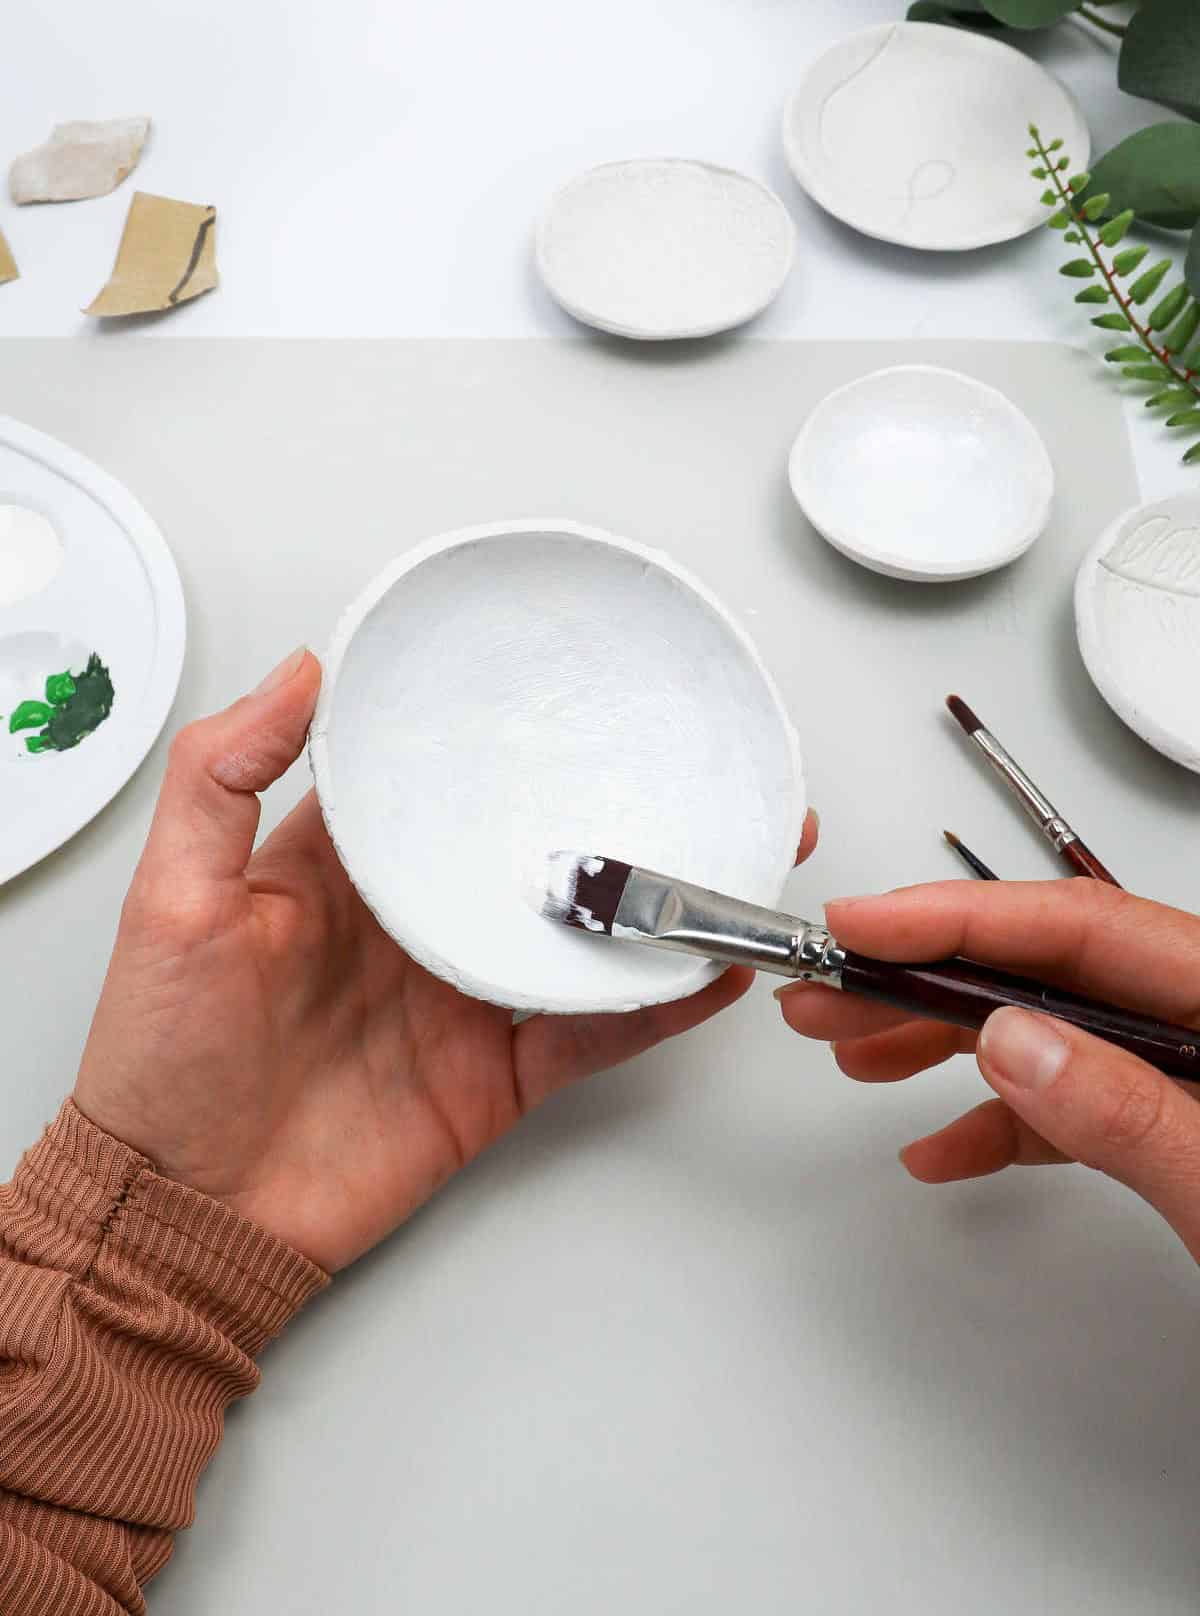
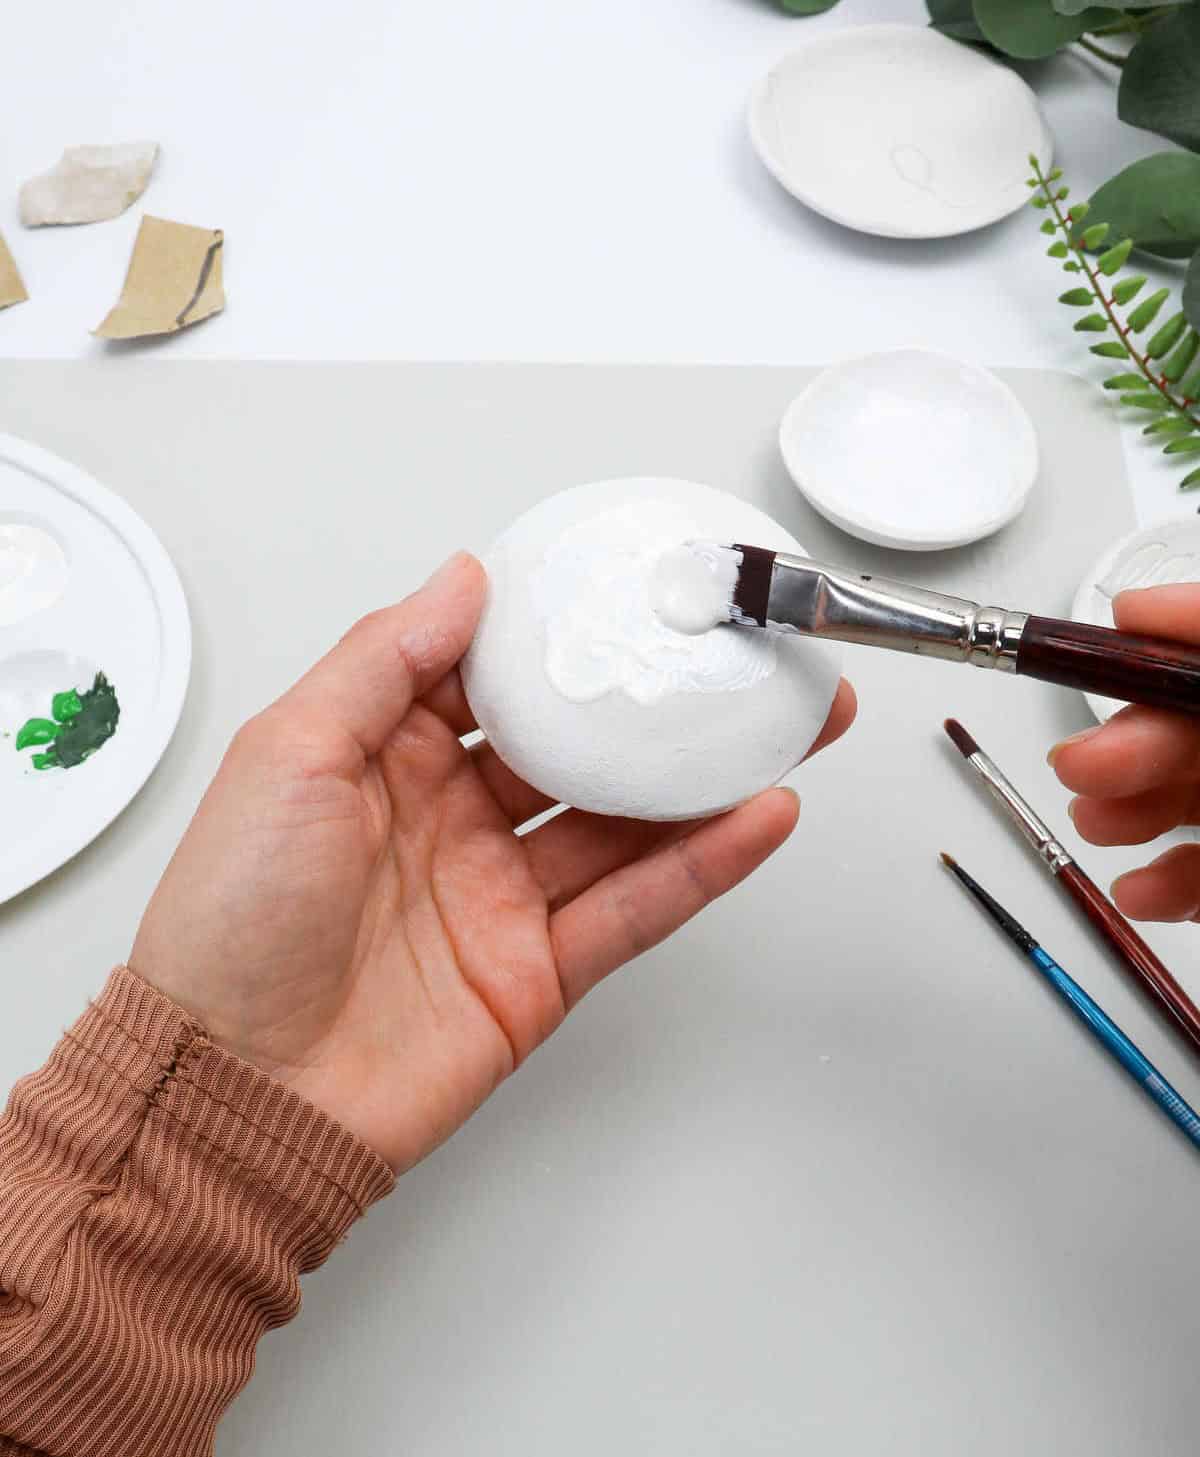
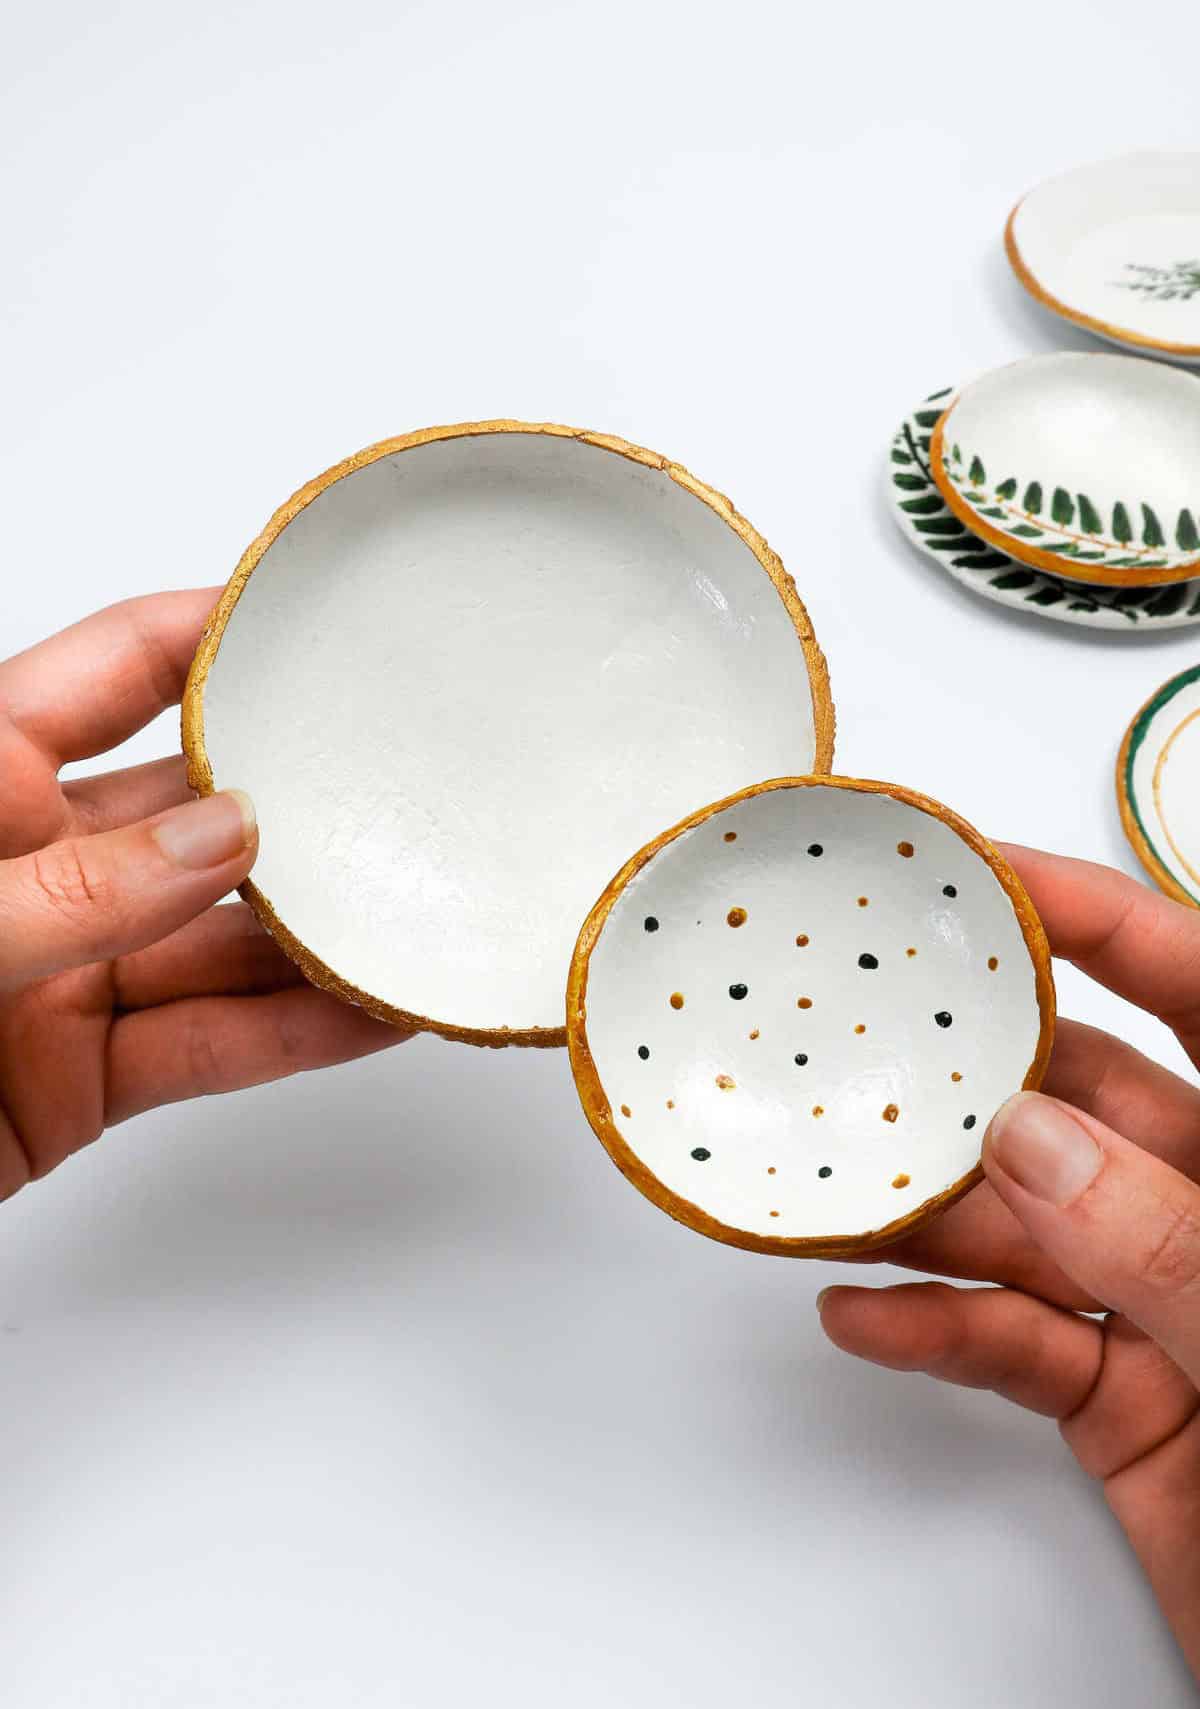
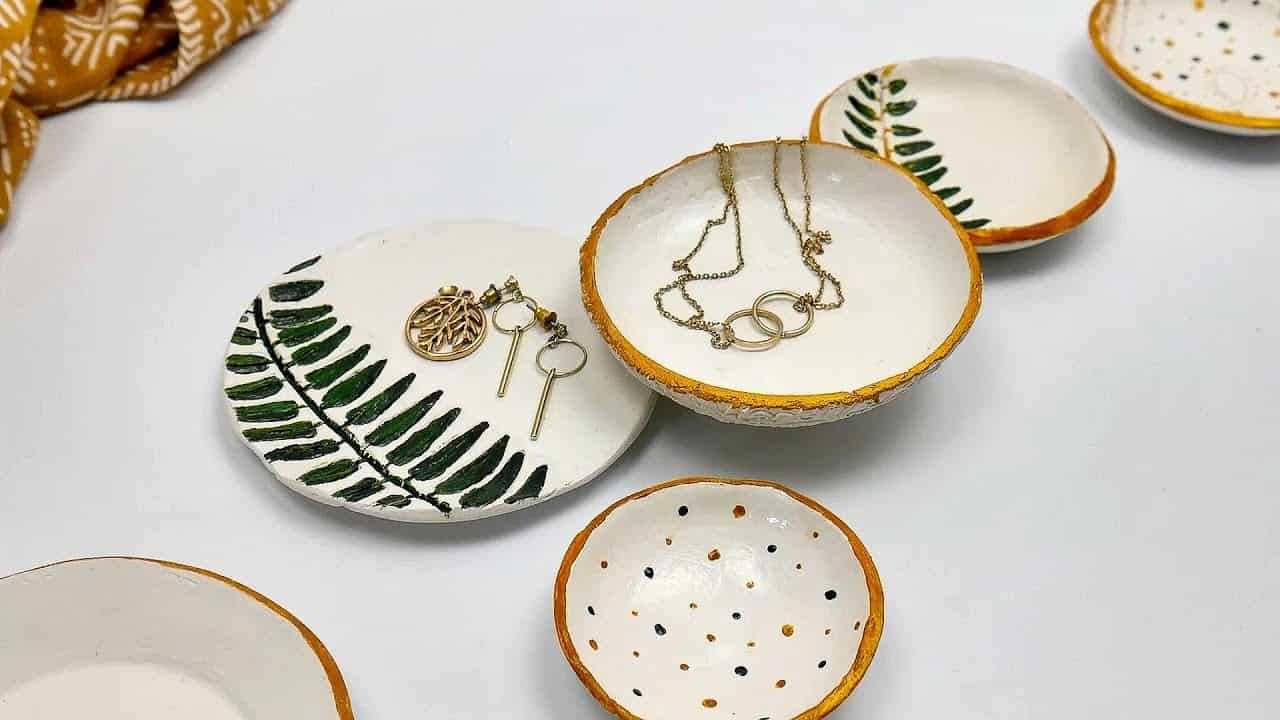
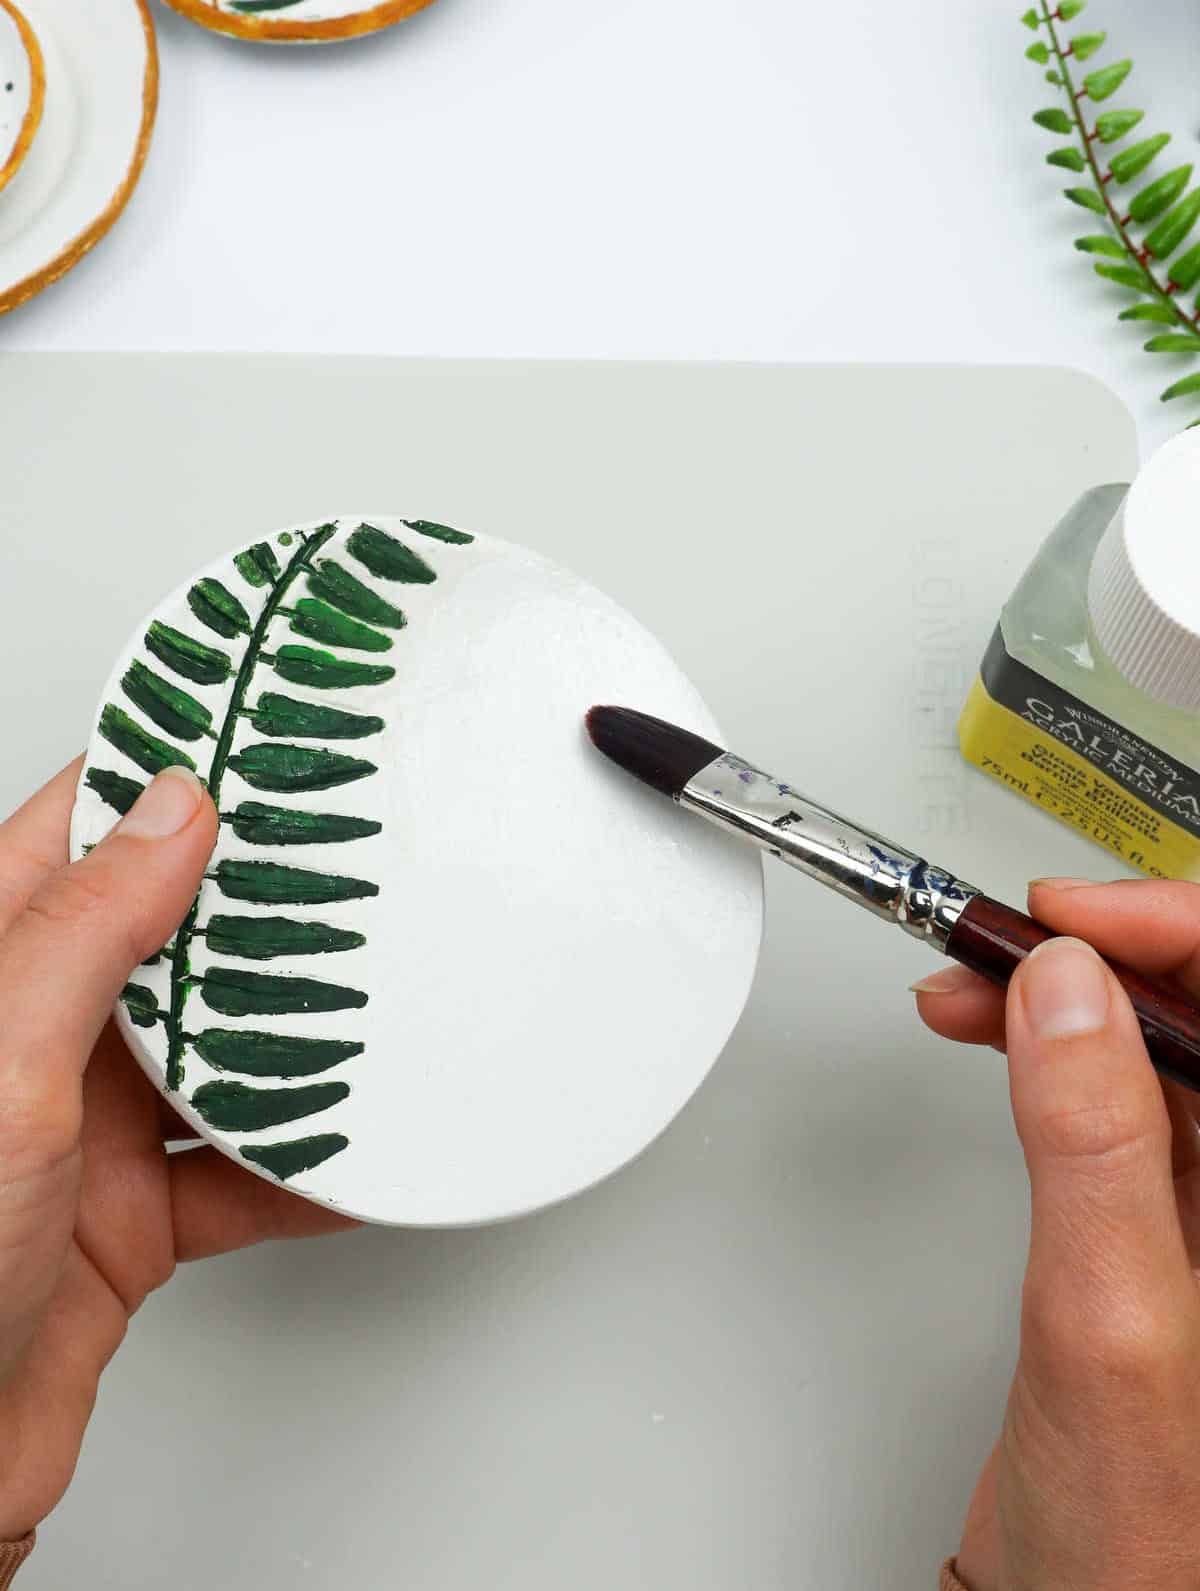
If you’re satisfied with the existing shabby-chic finish, your project is essentially complete. However, you can also enhance it by using acrylic paint.
To do this, apply two to three coats of paint, allowing each coat to dry before moving on to the next one. This will ensure a smooth and even finish.
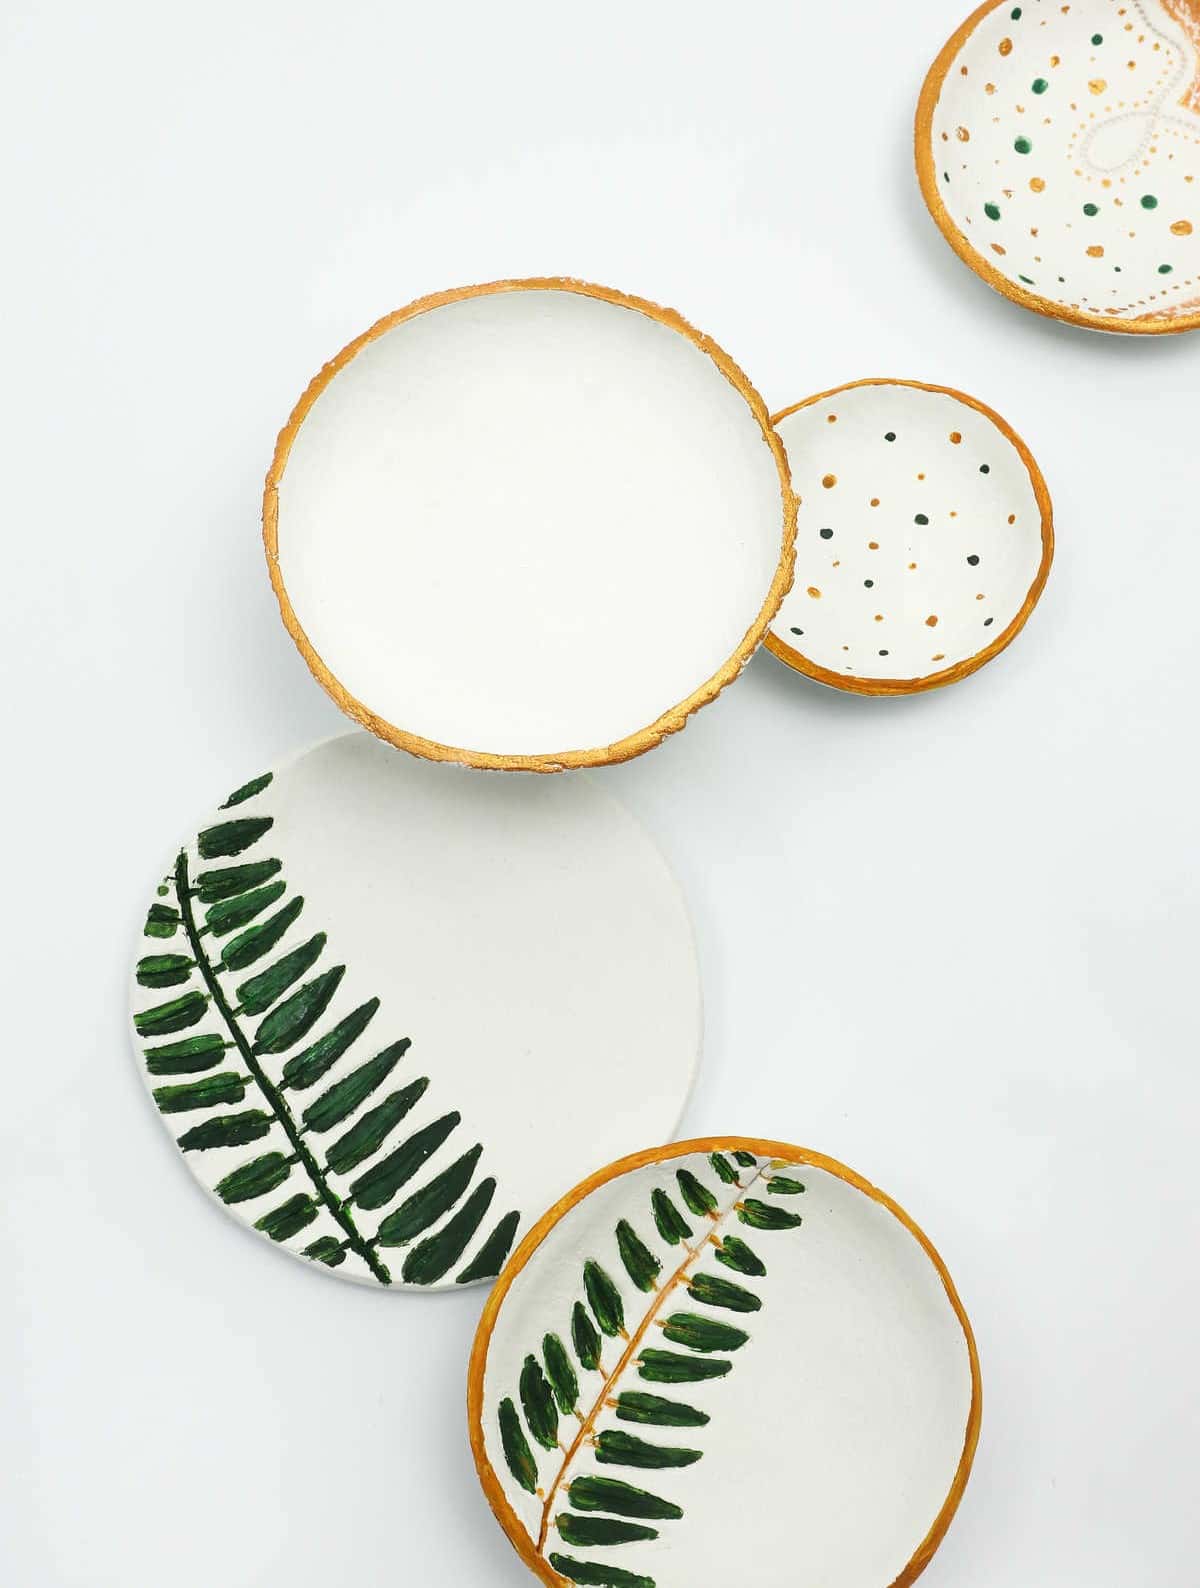
You may also choose to paint the bowl’s bottom and rim for an added touch of elegance. As shown in the example, painting these areas can greatly enhance the overall appearance of the piece.
When you reach the stage where you’ll be applying decal and etchings, feel free to paint over them with a base coat color that matches your original finish. Alternatively, if you’d like to add some extra flair, use a fine-tip brush to paint in any finer details.
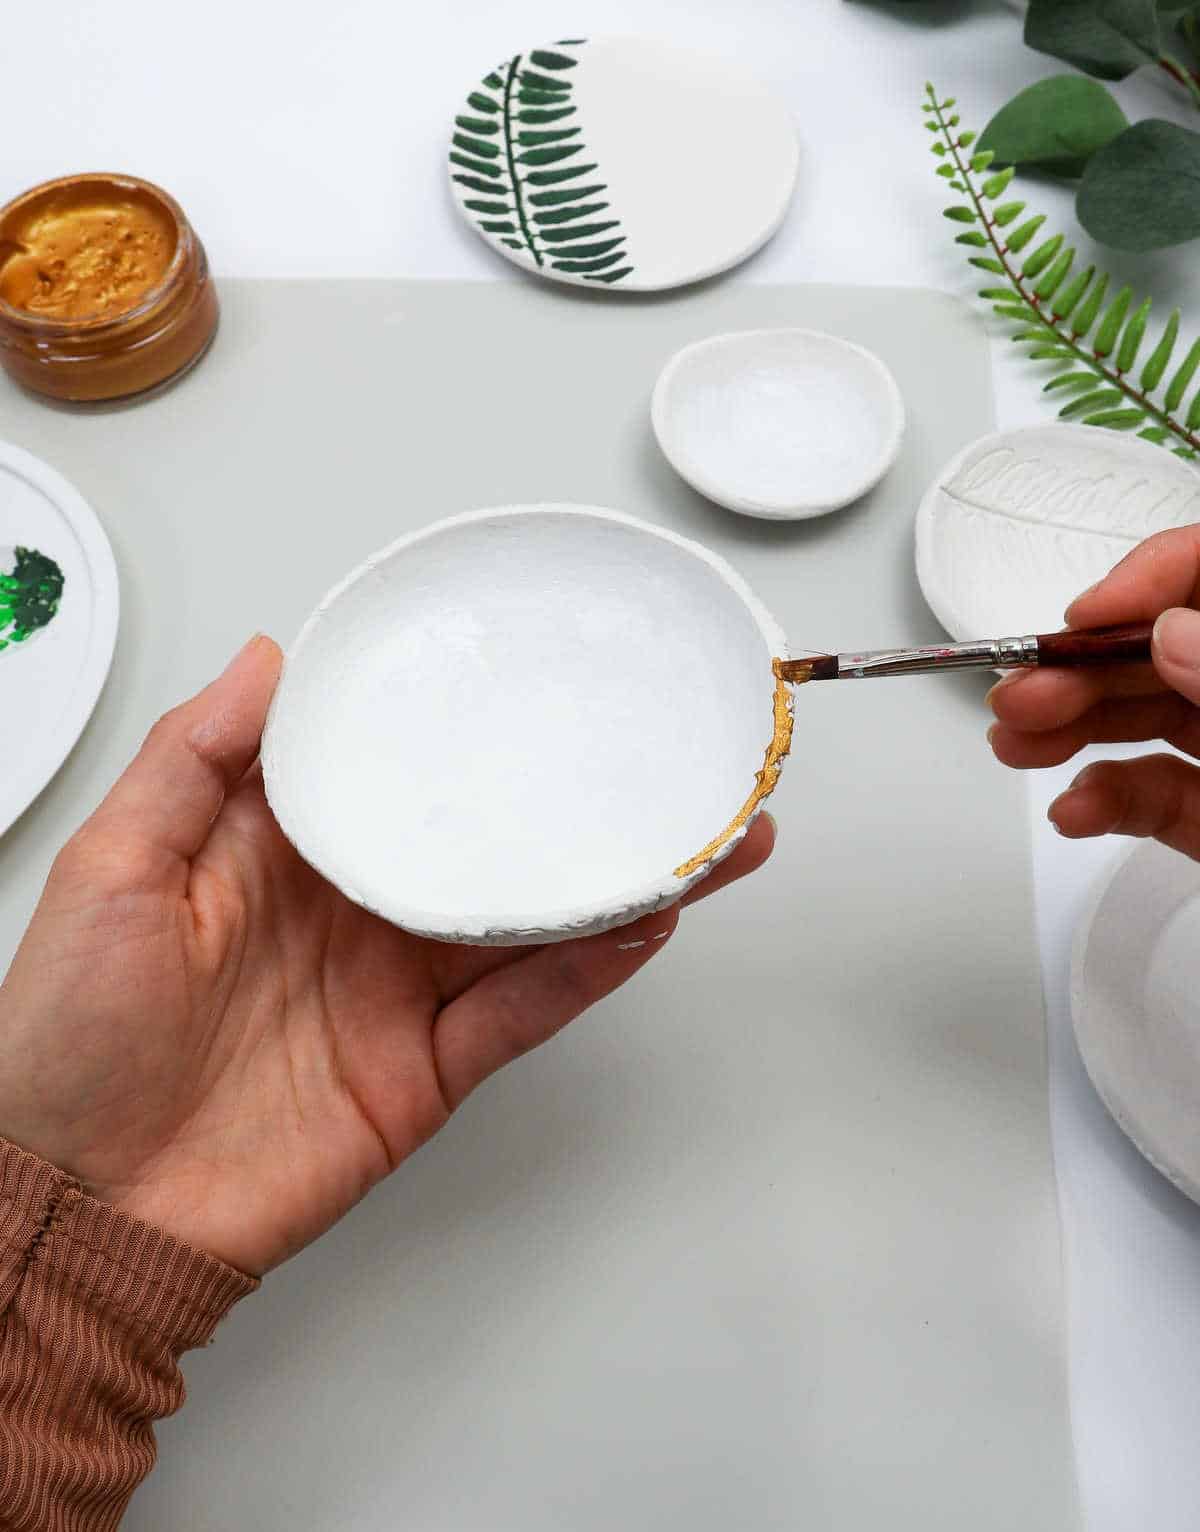
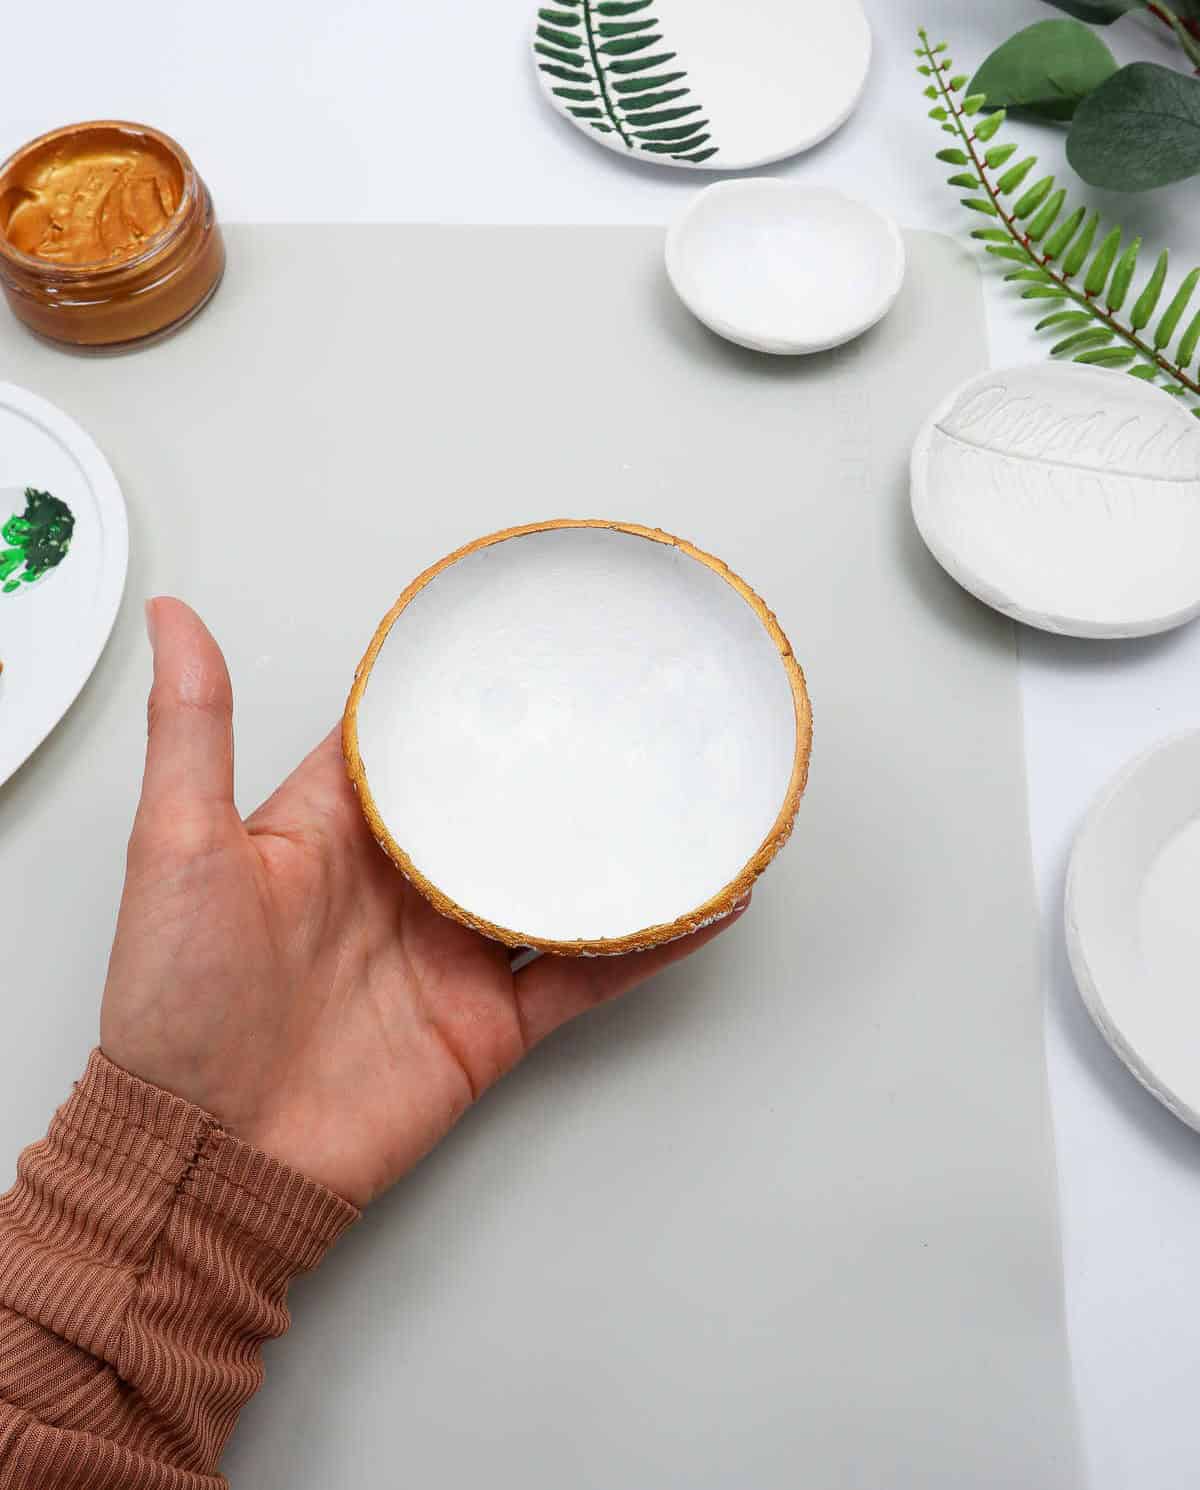
Adding a metallic hue to the rim can also greatly boost the bowl’s elegance and sophistication.
Step 12
To complete the project, apply a protective coat to safeguard your artwork. Utilize a flathead brush to generously cover the clay with a gloss or matte-finish varnish. Mod Podge is a well-liked option for sealing acrylic paint on clay mediums. Allow the sealant to perform its magic and let the bowls air dry completely. The result will be a stunning, high-gloss finish that showcases your artistic skills.
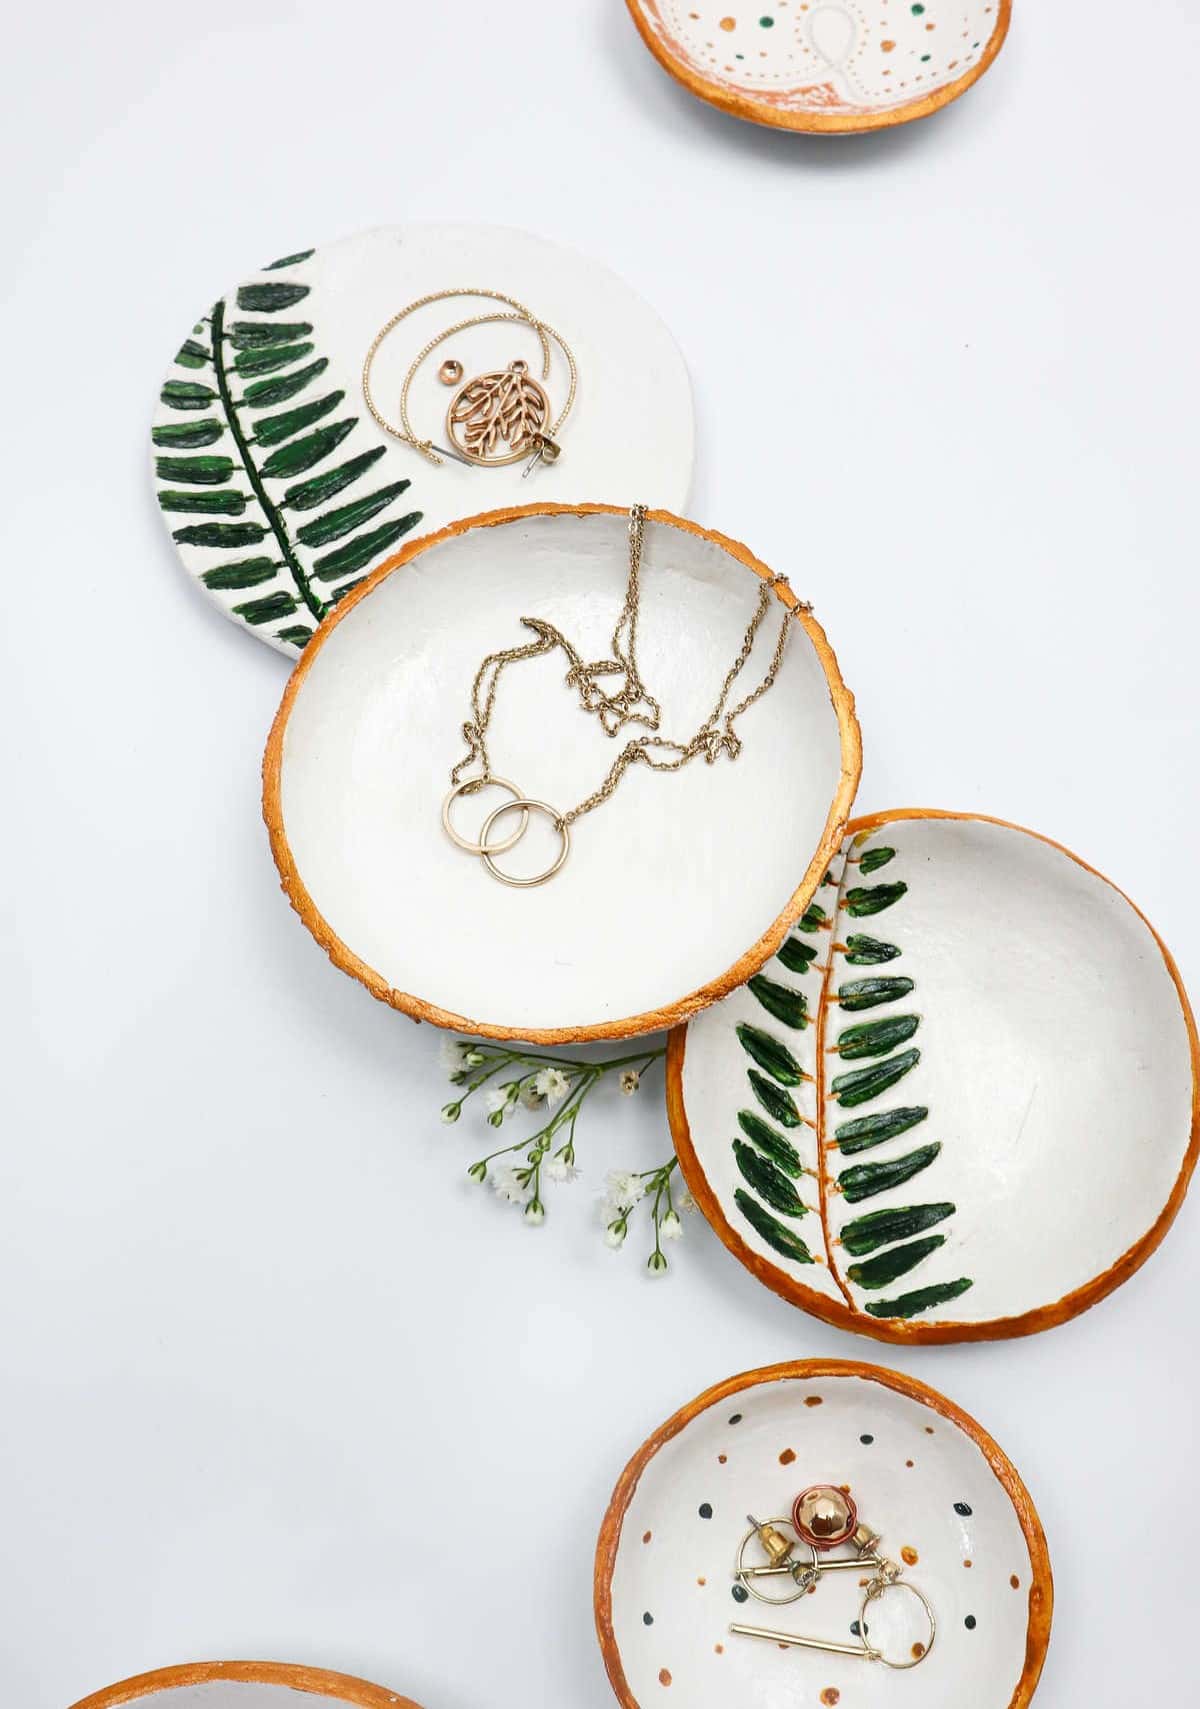
What You Can Use These Clay Bowls for?
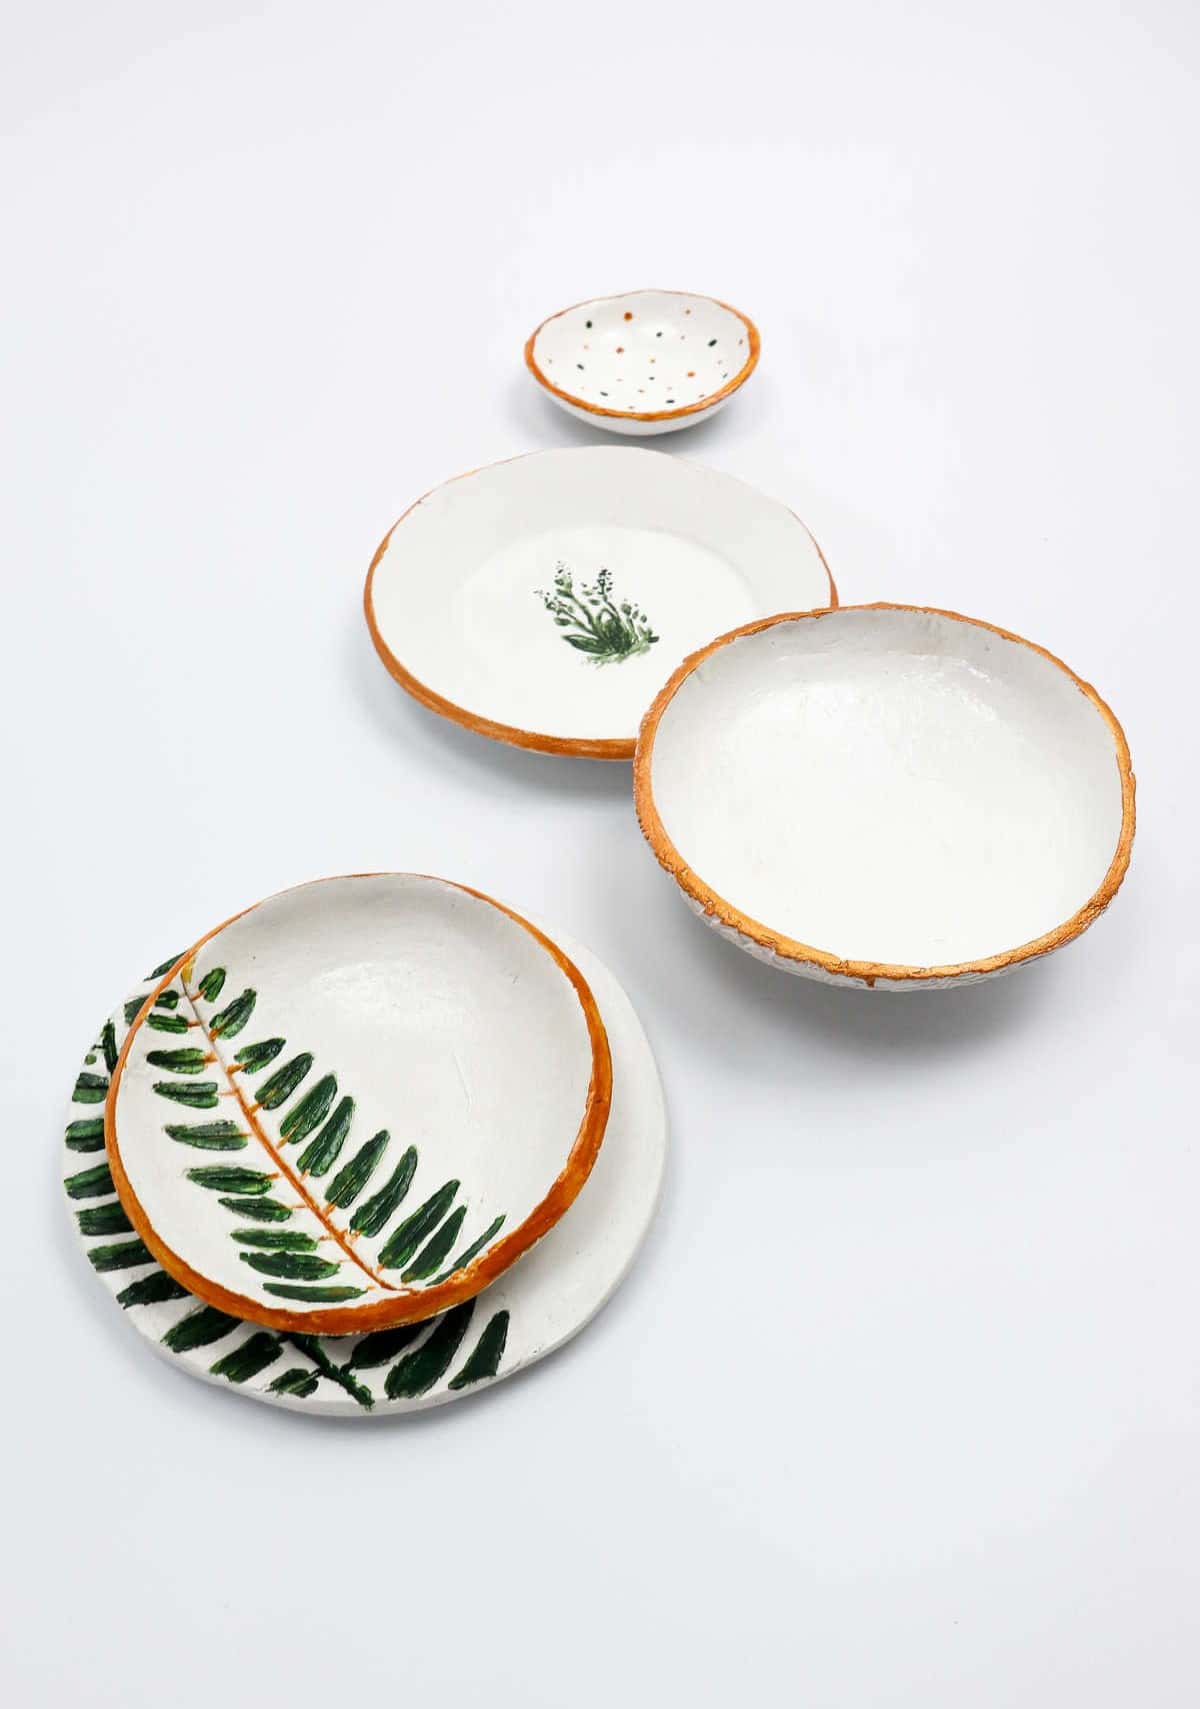
The versatility of these bowls is truly one of their greatest strengths. They can be used in a multitude of creative ways, transforming them from mere household items to functional works of art. With their adaptability comes endless possibilities for repurposing and reuse. Imagine using them as a trinket dish, a vessel to store your accessories, or a display bowl to showcase cherished mementos.
Alternatively, they can serve as a practical container for lemons, keys, loose change, and other small items. Even on their own, these bowls can make a beautiful decorative statement when placed on the mantel or coffee table.
Other Crafts You Might Like
Get ready to unleash your creativity with these 40+ exciting teen crafts, including fun projects for adults and girls. From classroom activities to candle-making and jewelry crafting, there’s something for everyone. Learn how to create beautiful macrame leaf earrings, DIY wire rings, or even a bracelet out of shoelaces. Whether you’re a crafty teenager looking for new hobbies or an adult seeking a creative outlet, this list has got you covered.
How to Make Air Dry Clay Bowls (DIY Jewelry Trays)
With ease, create stunning air-dry clay bowls that double as exquisite jewelry trays. This accessible craft is perfect for both teenagers and adults seeking a fun and creative outlet. The process requires minimal time investment, with an active preparation period of just 30 minutes, followed by a 30-minute drying phase, ultimately resulting in a beautiful piece ready to be treasured within one hour.
Equipment
To create a customized acrylic paint mold, you’ll need the following materials: an acrylic roller or a bottle that can serve as a substitute, nonstick placemats to prevent the acrylic from sticking, various-sized bowls to use as molds for different shapes and sizes, paintbrushes for applying the paint evenly, a craft knife for trimming any excess material, fine sandpaper for smoothening out rough edges, and ball chain or beaded chain (optional) for adding texture and embossing rolling pin (optional) for creating intricate designs.
Additionally, stamps can also be used to add unique patterns and details. To ensure uninterrupted worktime, make sure your screen remains lit by preventing it from going dark.
Materials
When it comes to crafting with natural-inspired elements, a few essential materials come into play. To create realistic and long-lasting designs, you’ll want to have air-drying clay at your disposal. This versatile medium allows for unique textures and shapes that can be molded and shaped to mimic the natural world. To add an extra layer of realism and protect your finished pieces, consider pairing your air-drying clay with acrylic paints.
These vibrant colors can help bring your designs to life and provide a rich depth. For added shine or protection, you may also want to incorporate acrylic gloss varnish into your process. Additionally, if you’re looking to add some organic flair, artificial leaves can be used as a decorative element or even incorporated into the design itself.
Instructions
To begin, gather all the necessary supplies and set them aside. Next, repack any excess clay into an air-tight container to maintain its freshness. Knead the clay until it reaches a smooth, pliable consistency, free of lumps. Then, use a rolling pin or glass bottle to roll out the clay to a thickness of about 5 mm on a flat surface. Place a bowl over the clay and carefully cut around the rim using a craft knife.
Peel away any excess clay and gently press the remaining portion into the bowl without applying too much pressure. If necessary, add a drop of water to smooth out any cracks or edges that may appear. For subsequent bowls, you can enhance your design by placing a leaf, ball chain, or other engraving over the clay first. Use a rolling pin to imprint the design and then gently pull it back.
Repeat the process of placing a bowl over the design, cutting around it, and smoothening the edges before allowing the clay to dry for 48 hours. Once hardened, the clay should detach easily from the bowls, but if not, use a sharp knife to cut around the rim. To finish, use sandpaper to smoothen the clay on all surfaces – the sides, under the bowl, the rim, and inside. Then, dust away any excess particles with a brush or paper towel.
Finally, paint and decorate your bowls as desired, adding finer details and designs as you see fit. To seal your work, apply a clear gloss or matte-finish sealant like Mod Podge or varnish, allowing it to dry completely before use. Alternatively, you can choose a more rustic-look finish by eschewing a sealant altogether.