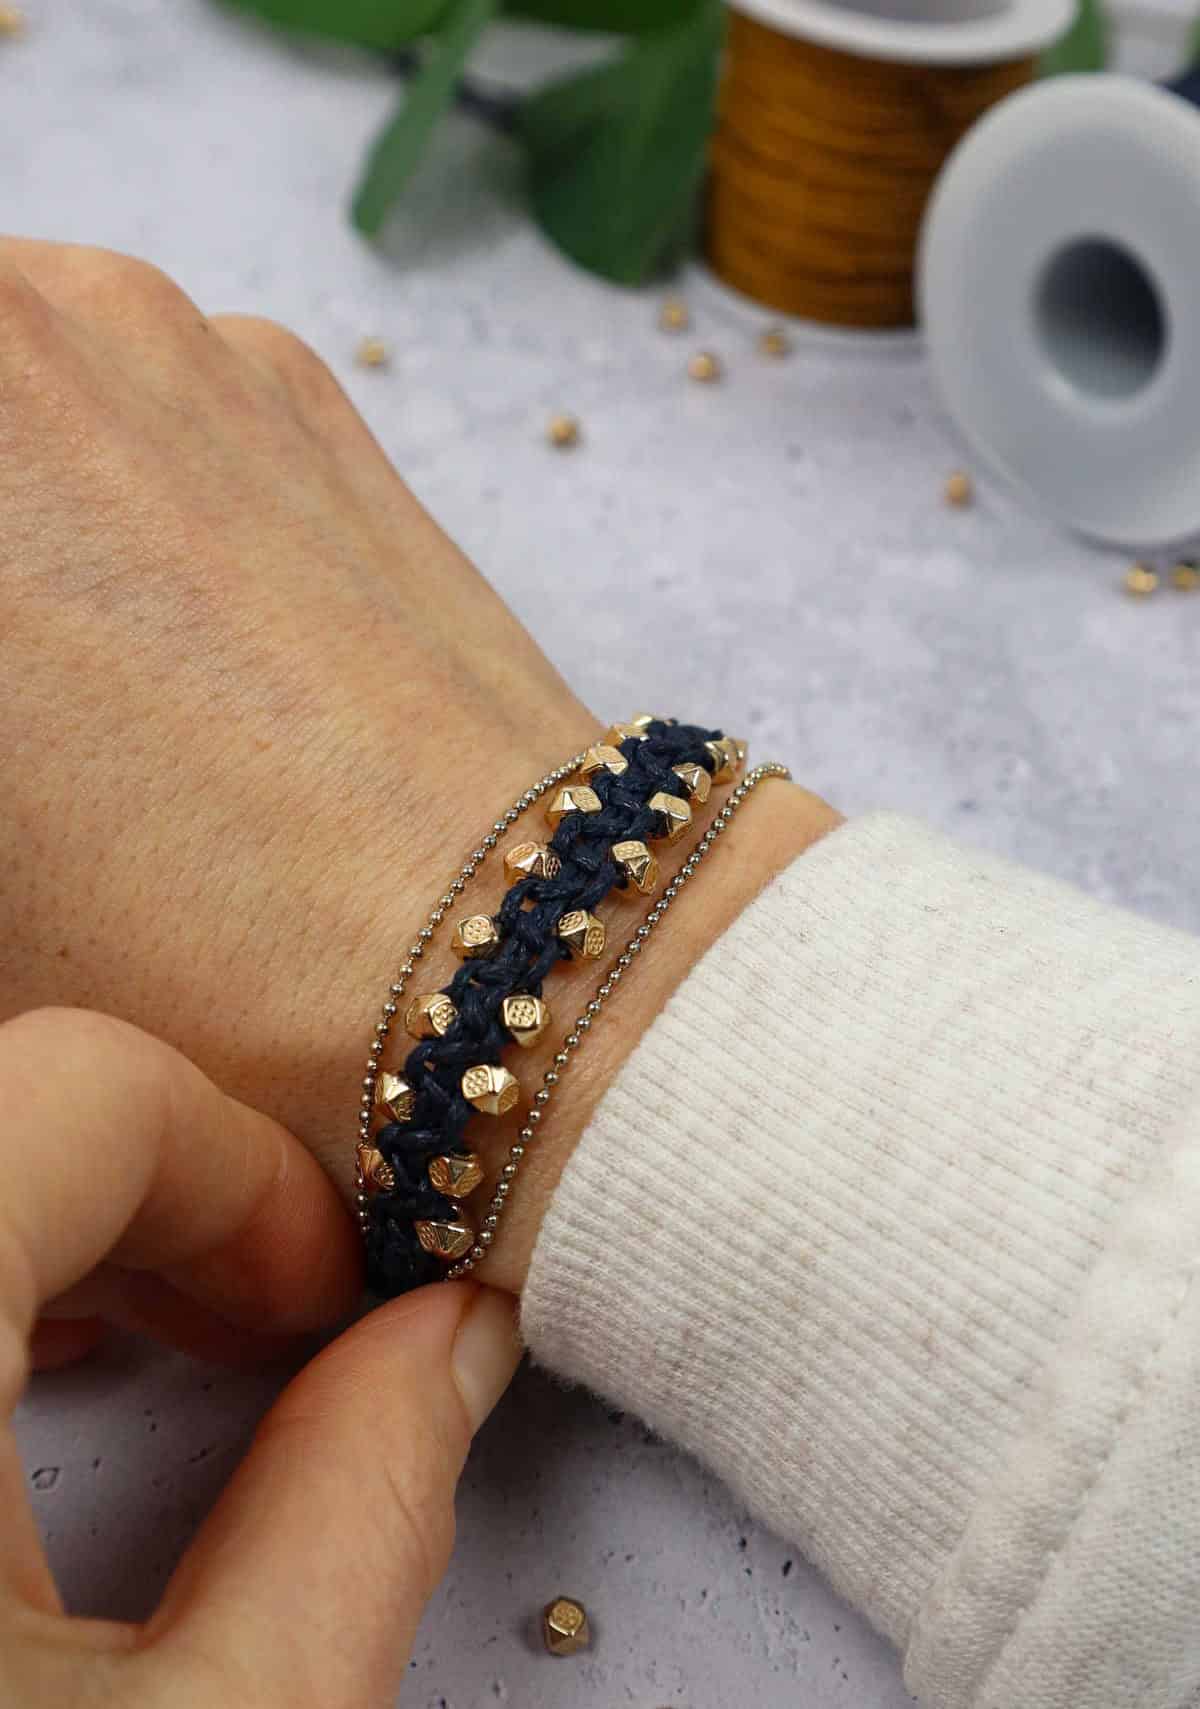
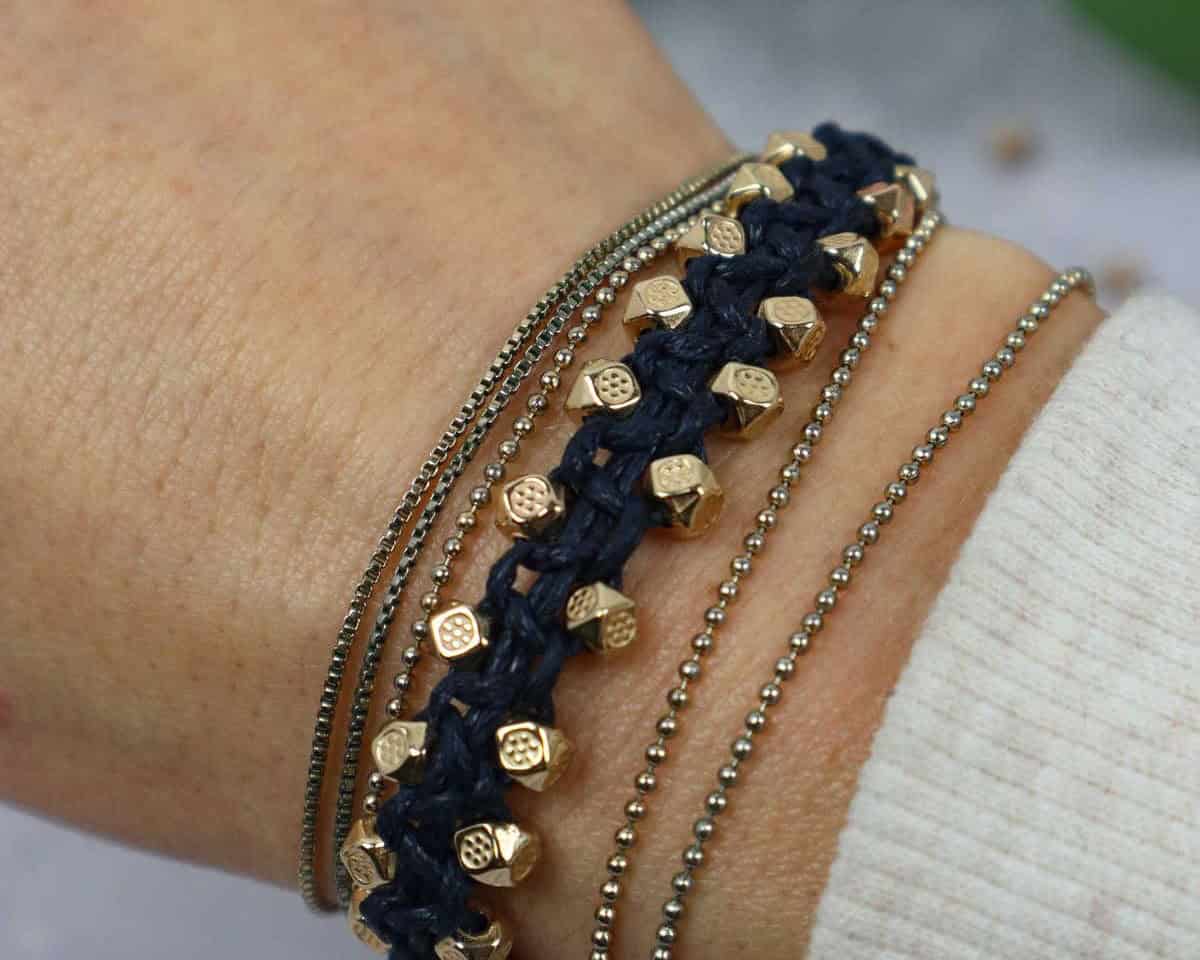
Looking for a fun and easy DIY project? Look no further than this simple macrame bracelet! As a beginner-friendly craft, it’s the perfect way to start your macrame journey. And who doesn’t love creating their own unique jewelry at home? With just a few basic materials, you can customize your design with beads, metal links, chains, and other embellishments. Plus, they make great party favors when made in advance. So why not get creative and give this DIY project a try?
Supplies You’ll Need
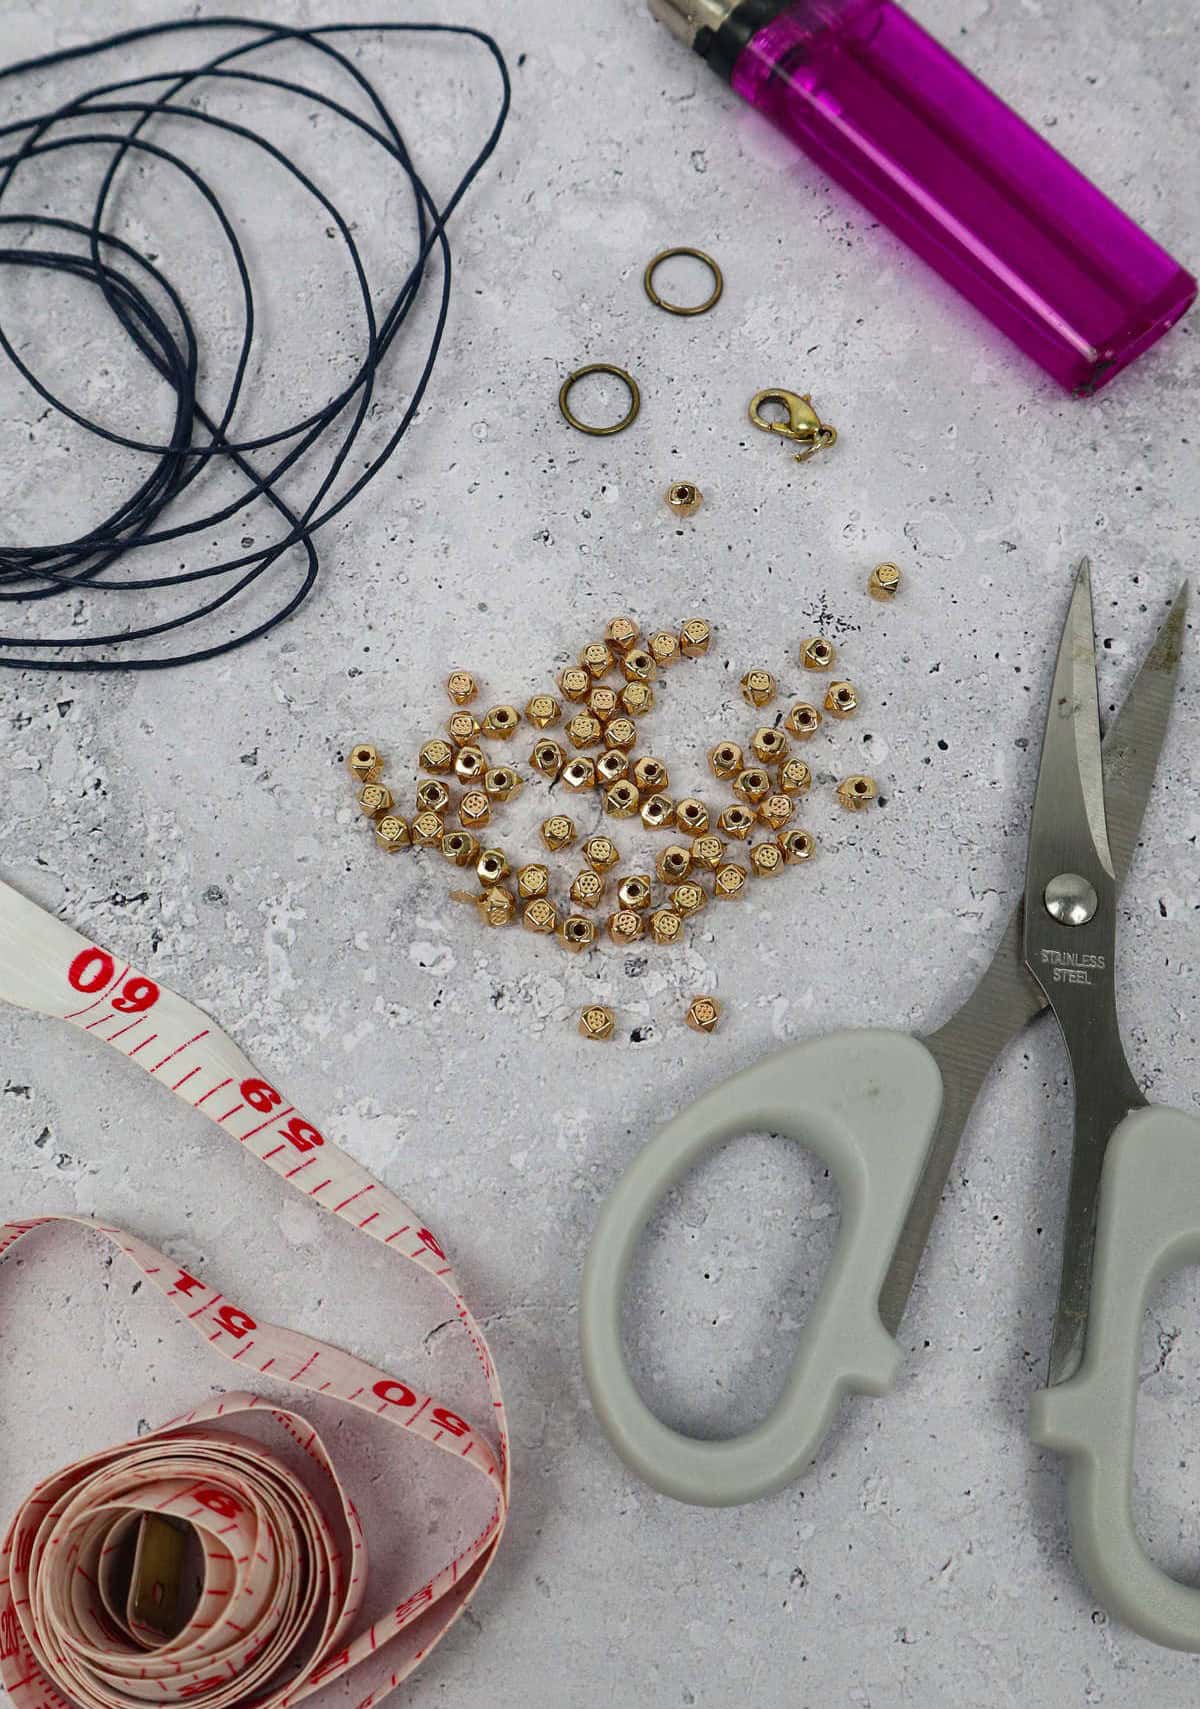
To begin, gather the following essential supplies: a 72-inch length of 0.8-millimeter nylon cord, a pair of scissors for trimming and shaping, a measuring tape to ensure accurate measurements, two lobster clasps to secure the ends, and another two jump rings with an internal diameter of 0.9 millimeters to connect the beads. Additionally, you’ll need some 3mm beads to add color and texture, as well as a lighter for any necessary heat-setting or shaping.
Finally, clear tape can be used to reinforce the knots if desired.
How to Make Macrame Bracelet
With your materials at the ready, it’s time to kick off the creative process. Begin by starting the construction of your bracelet, incorporating the beads, charms, and color cords that have caught your eye.
Step 1
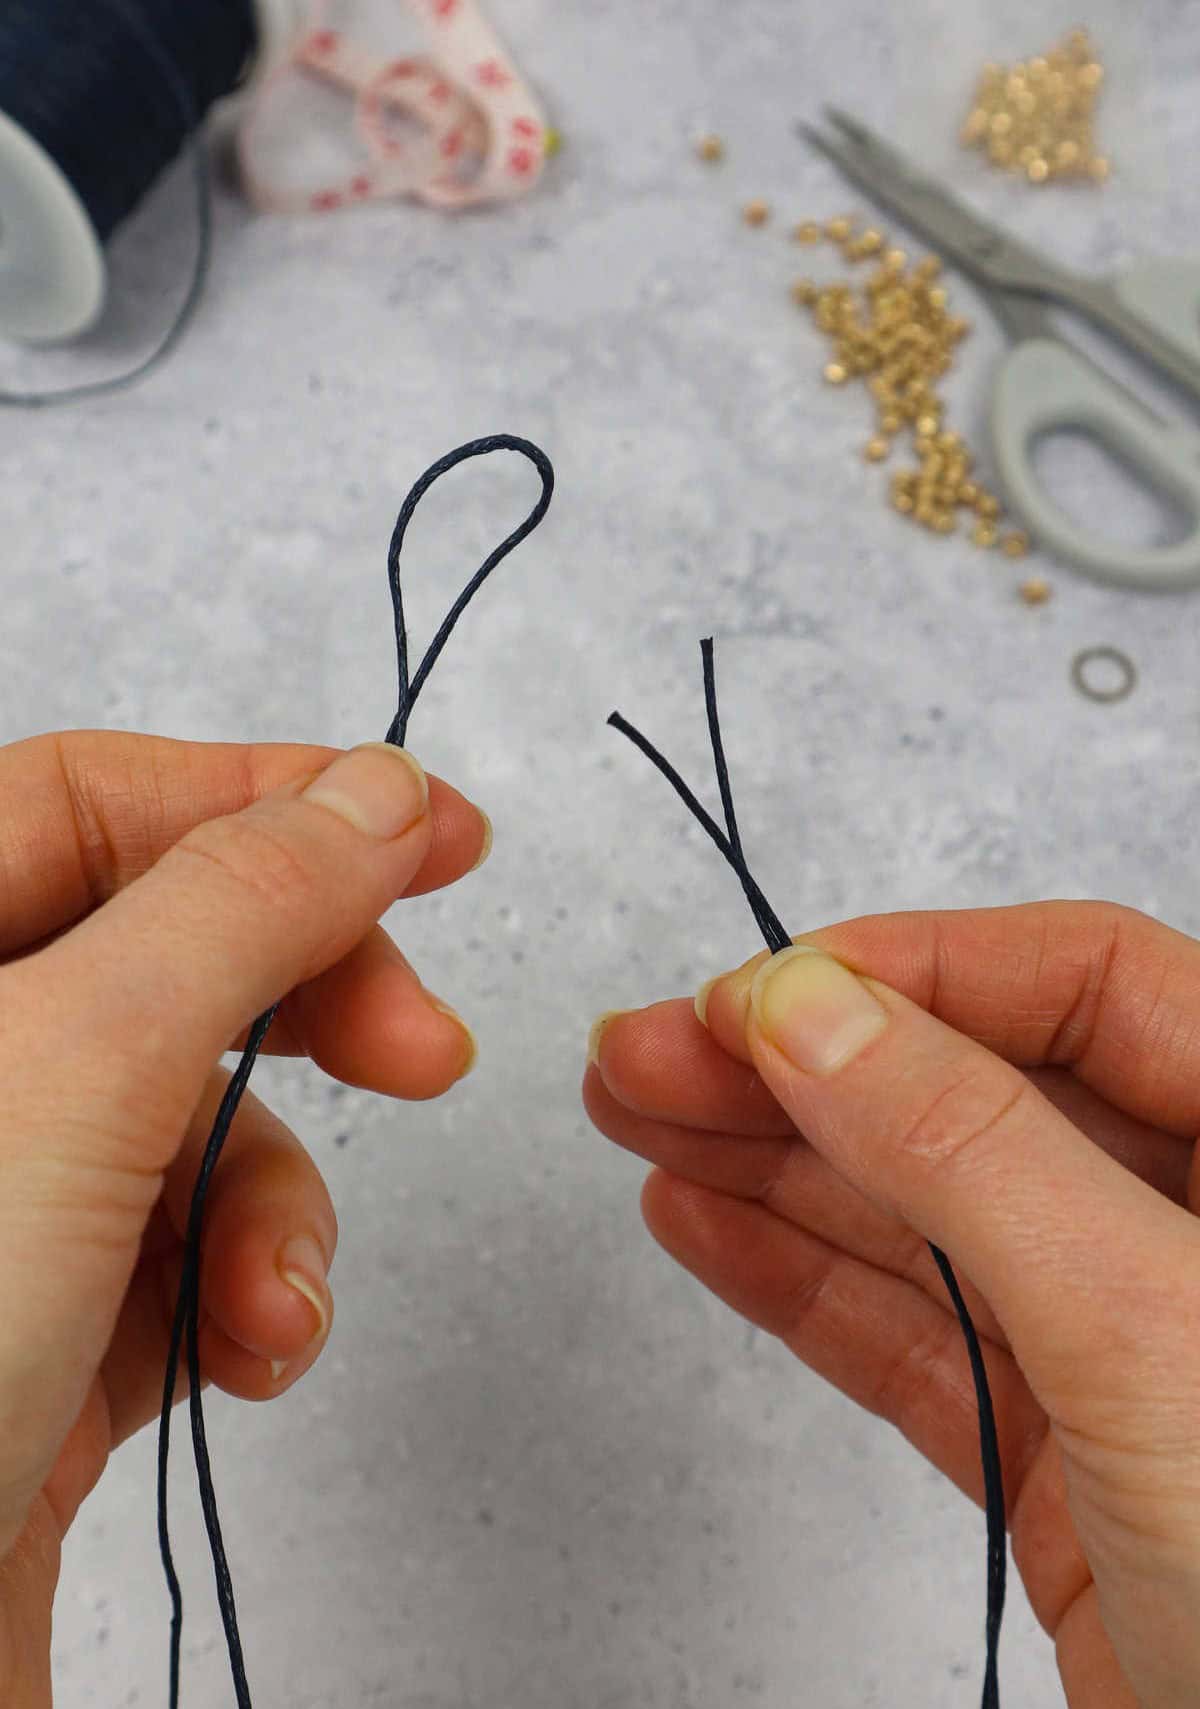
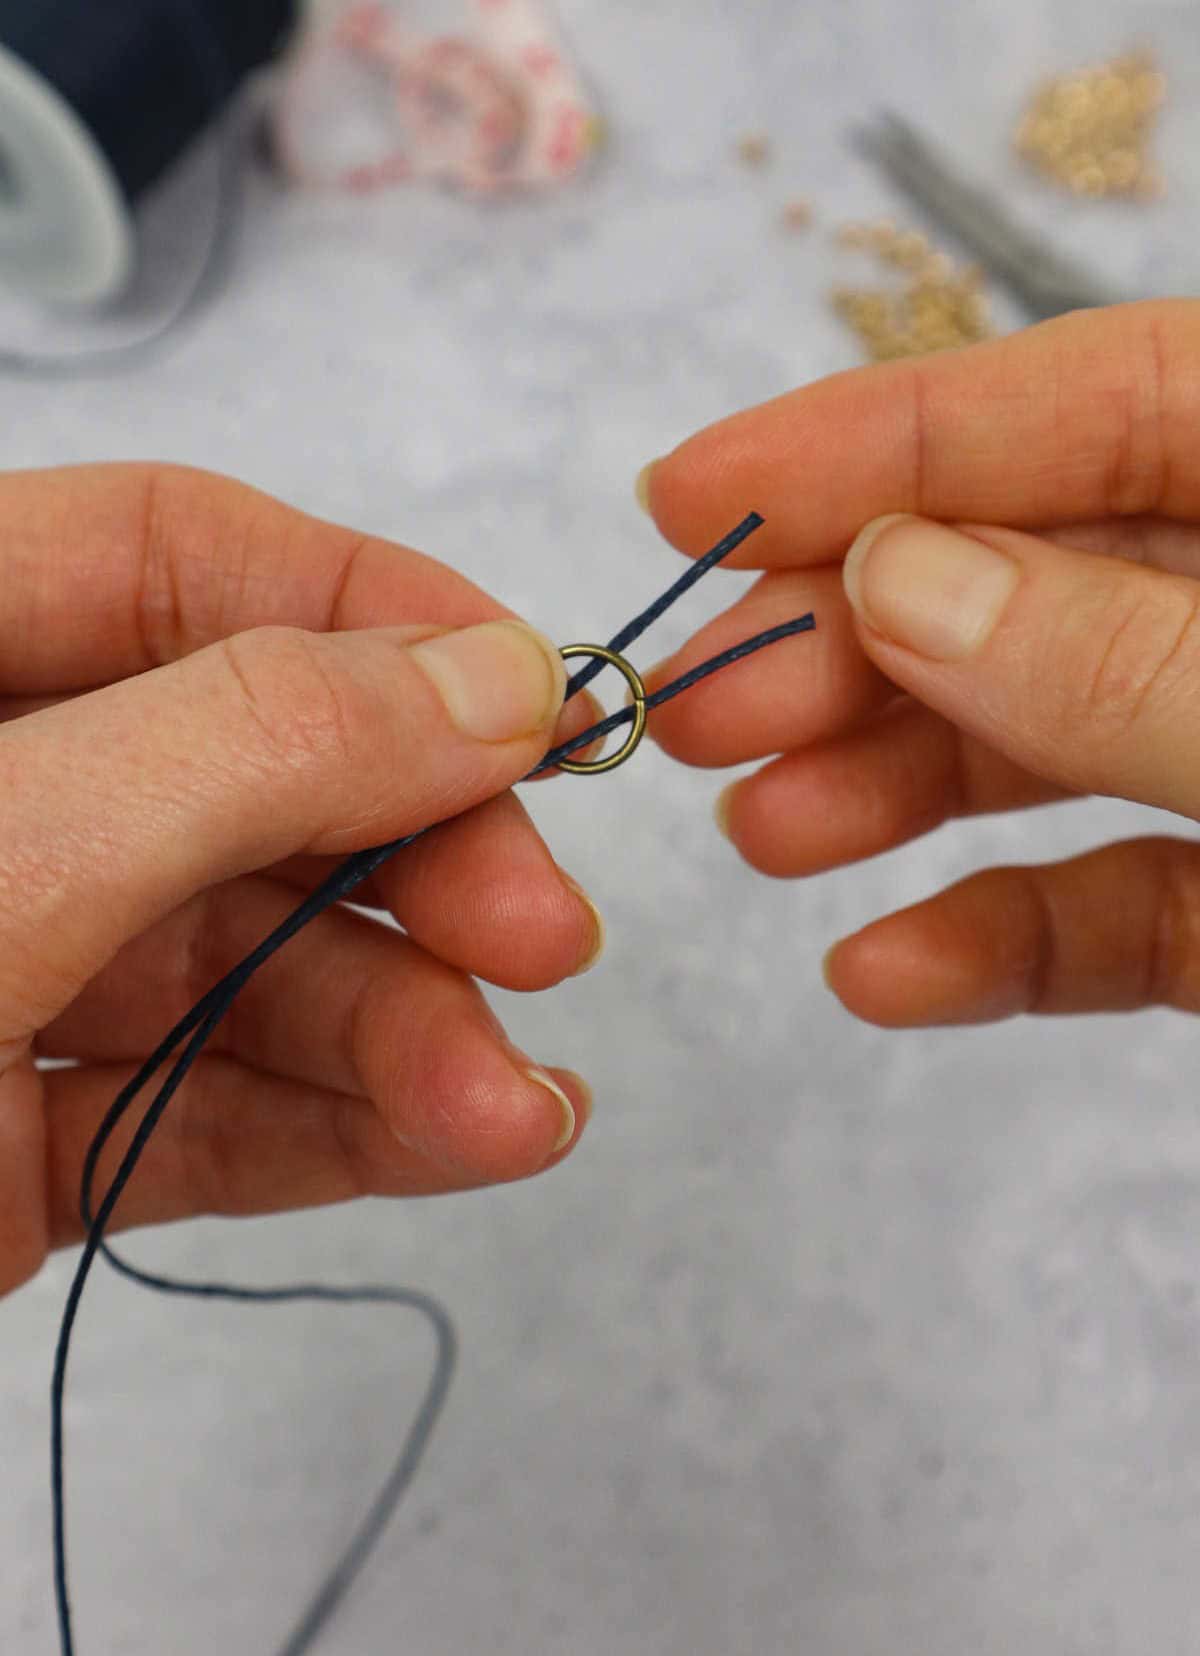
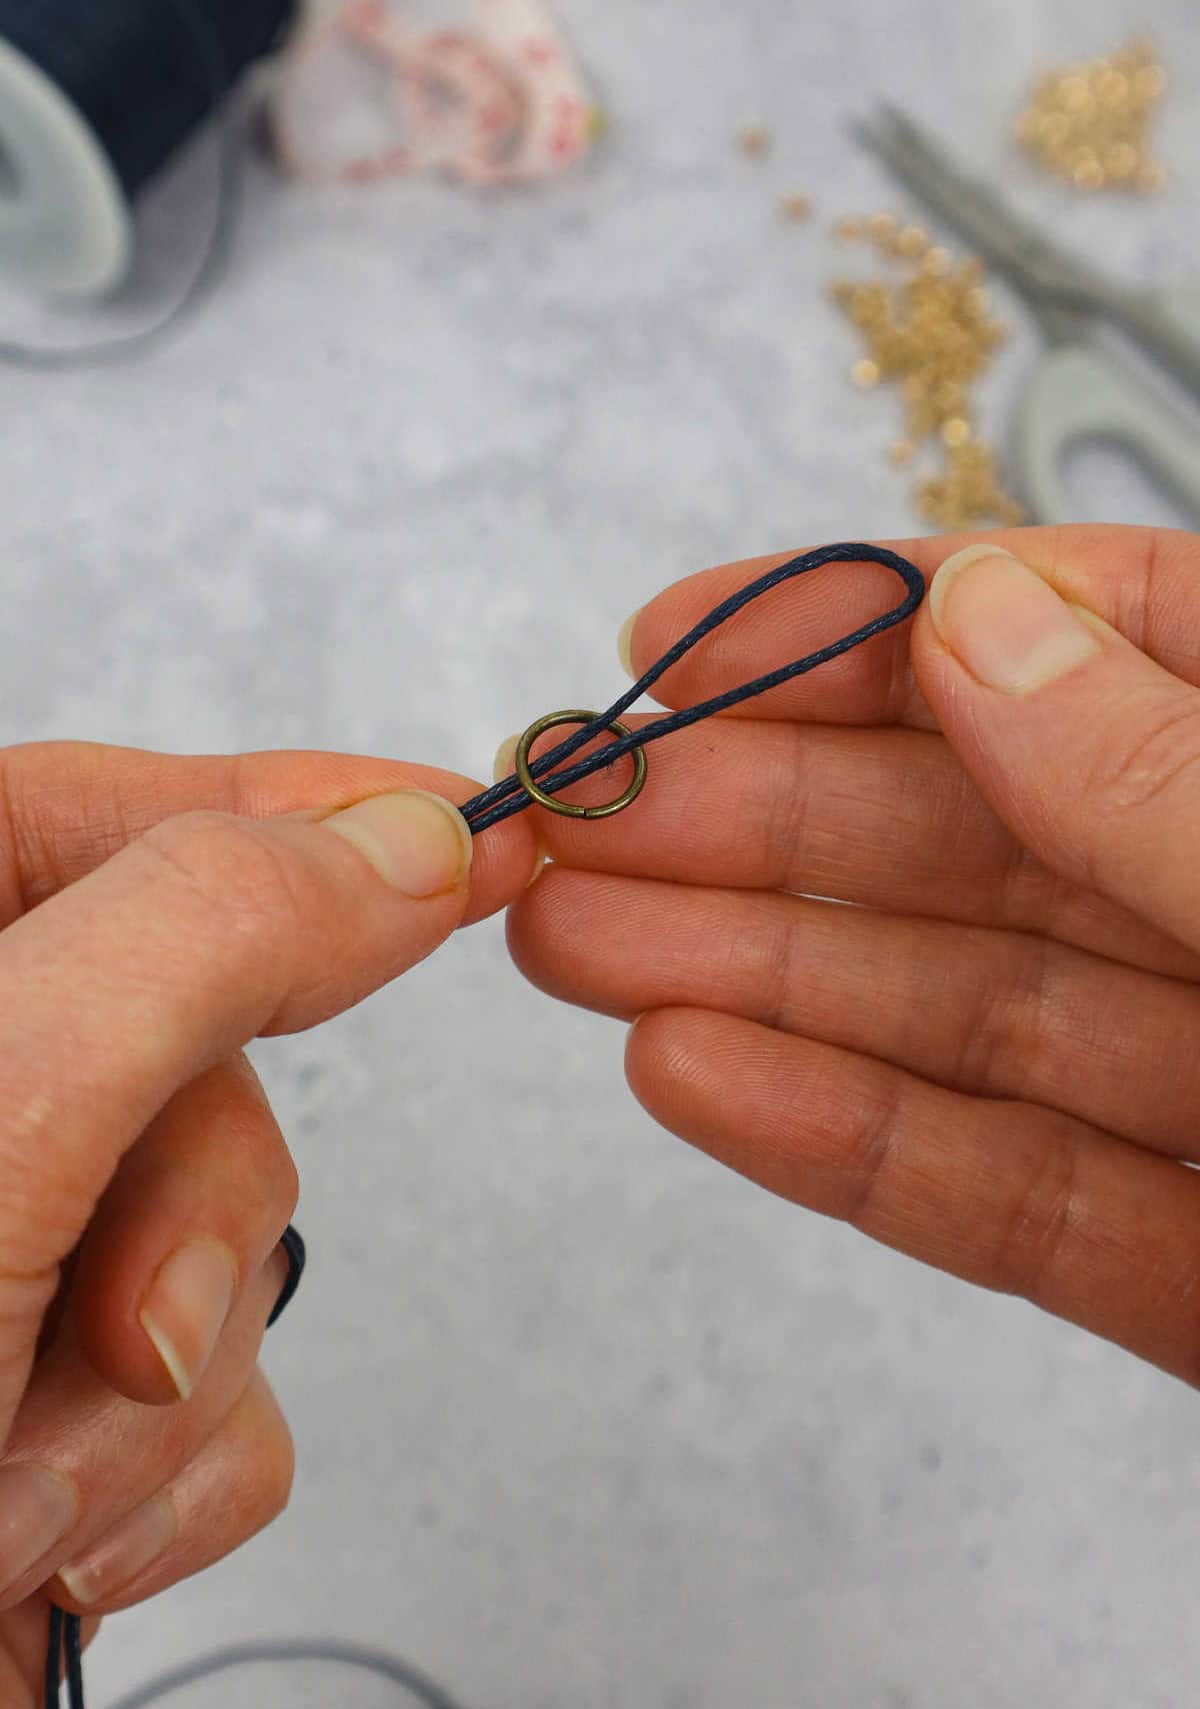
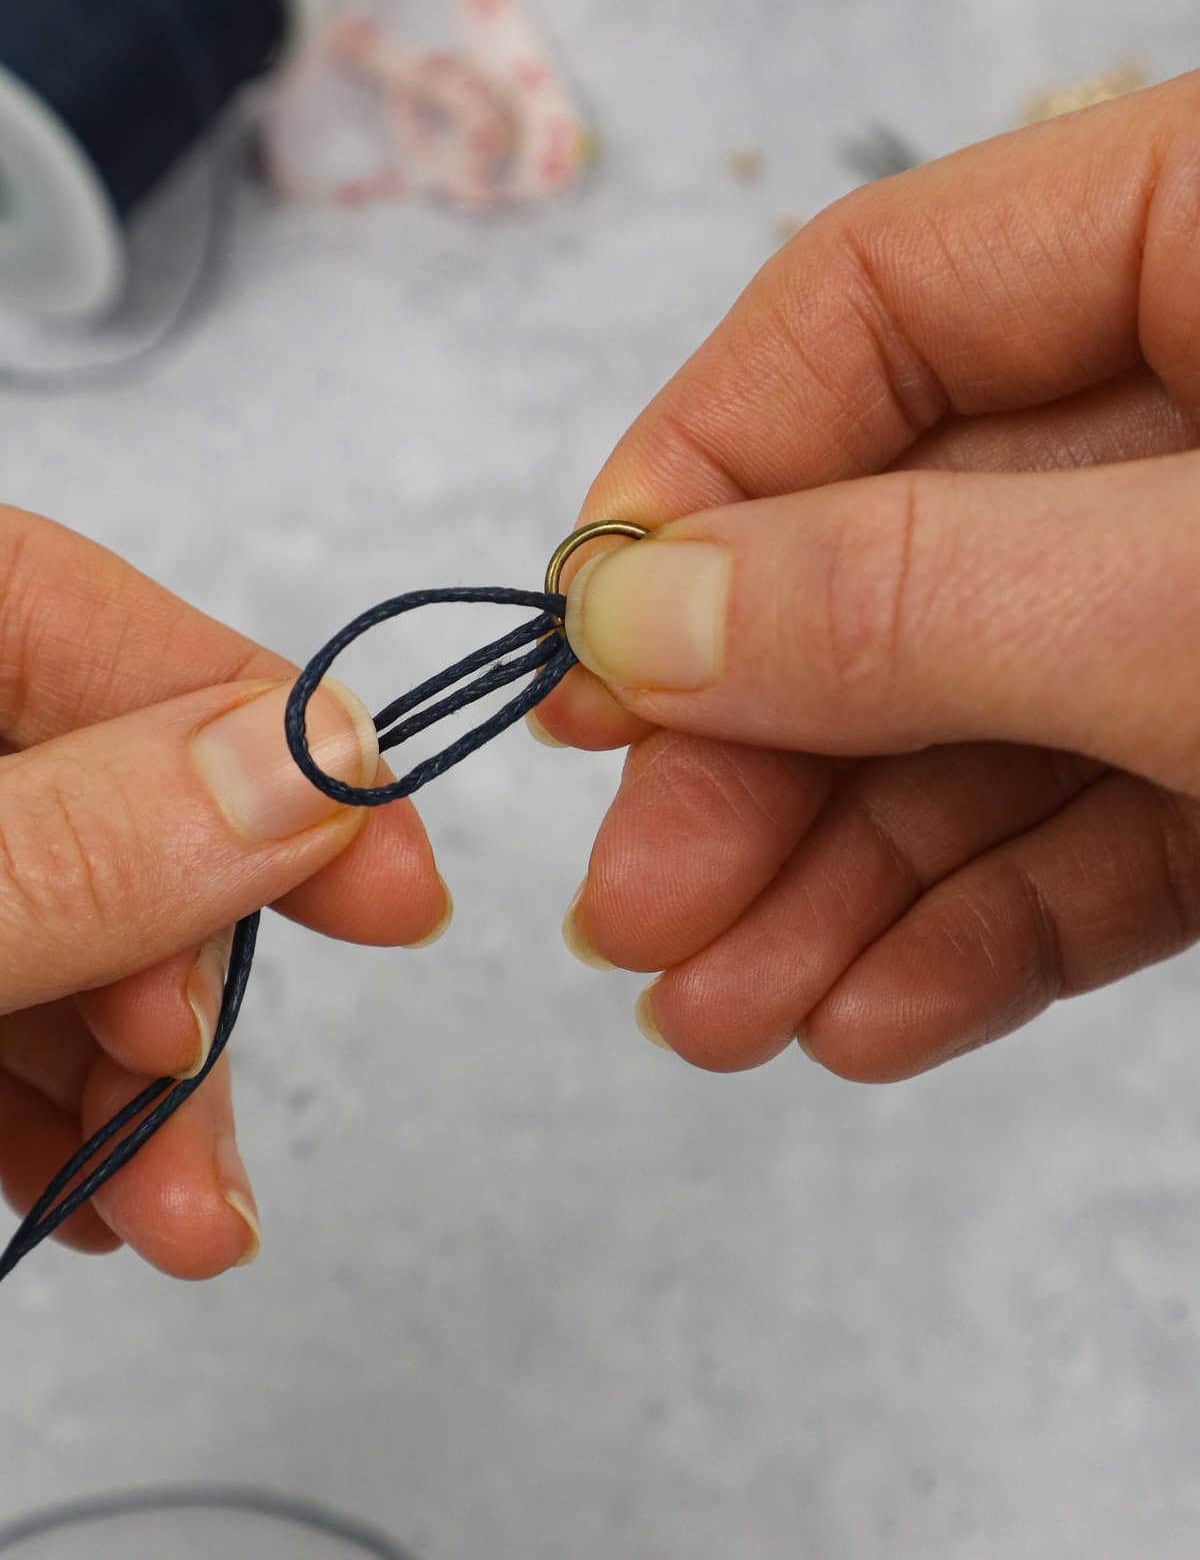
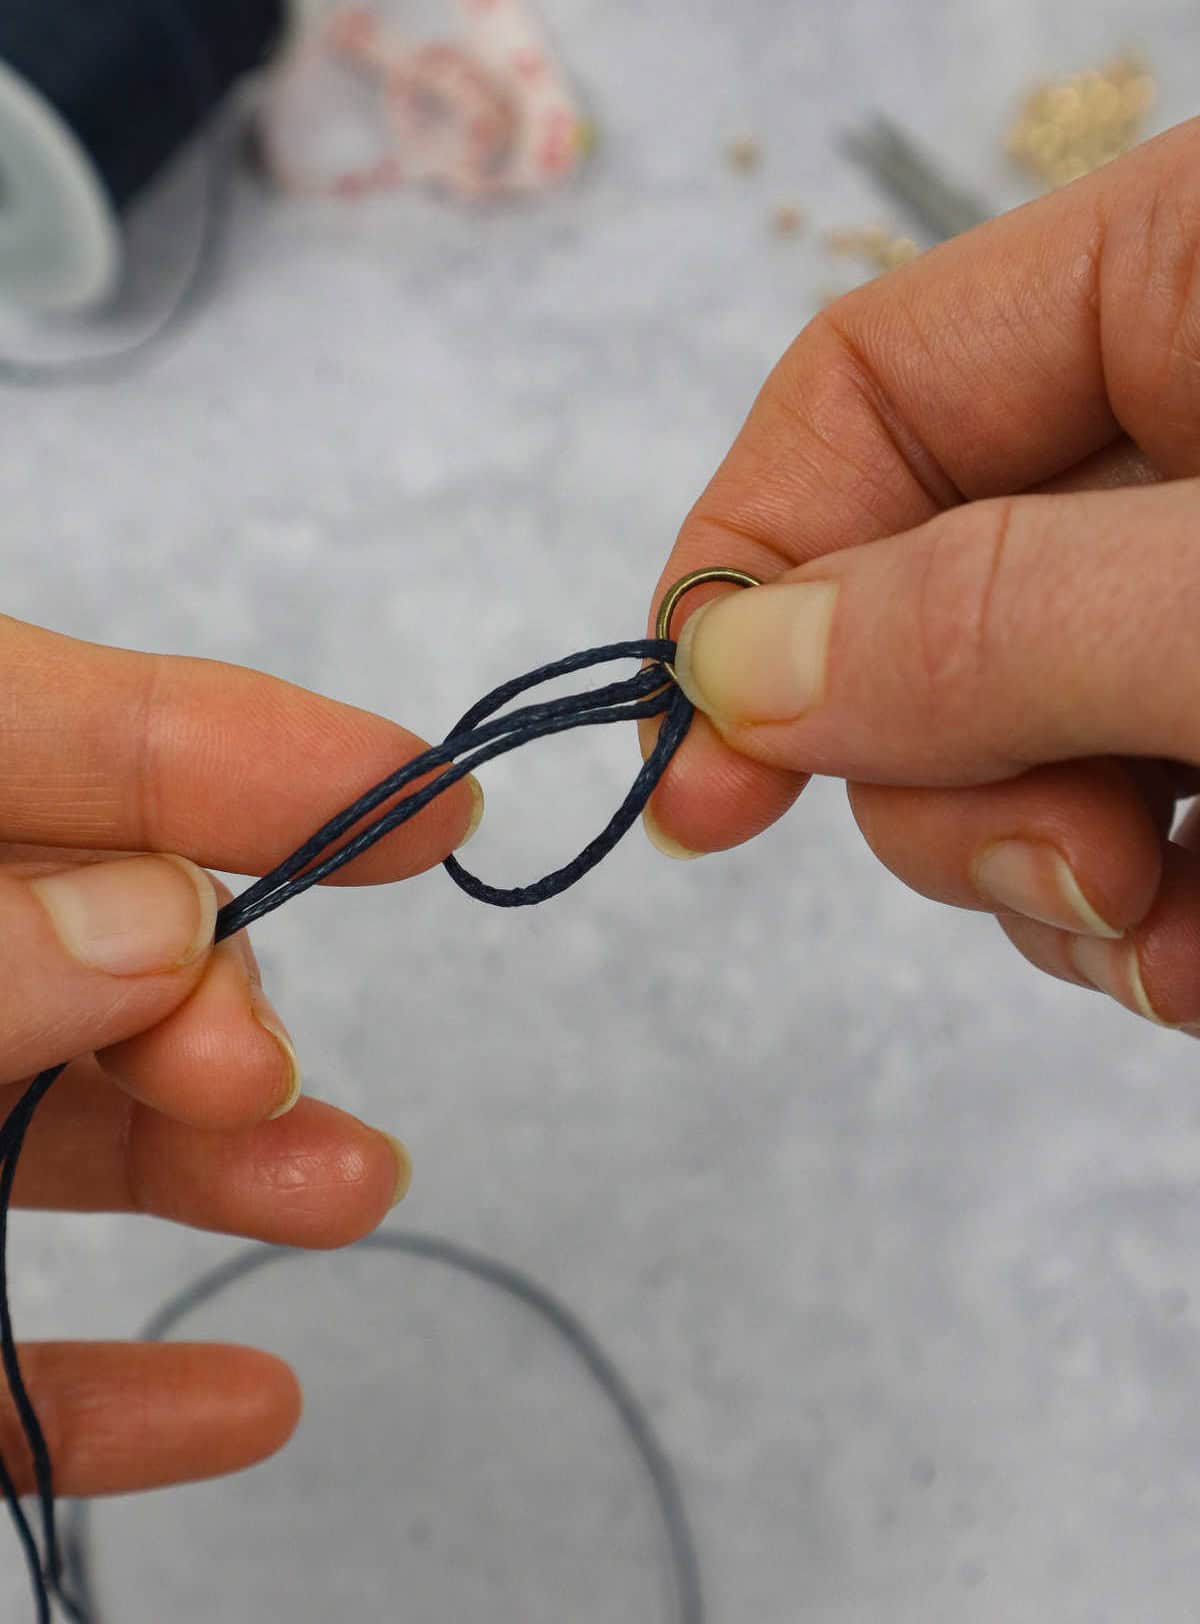
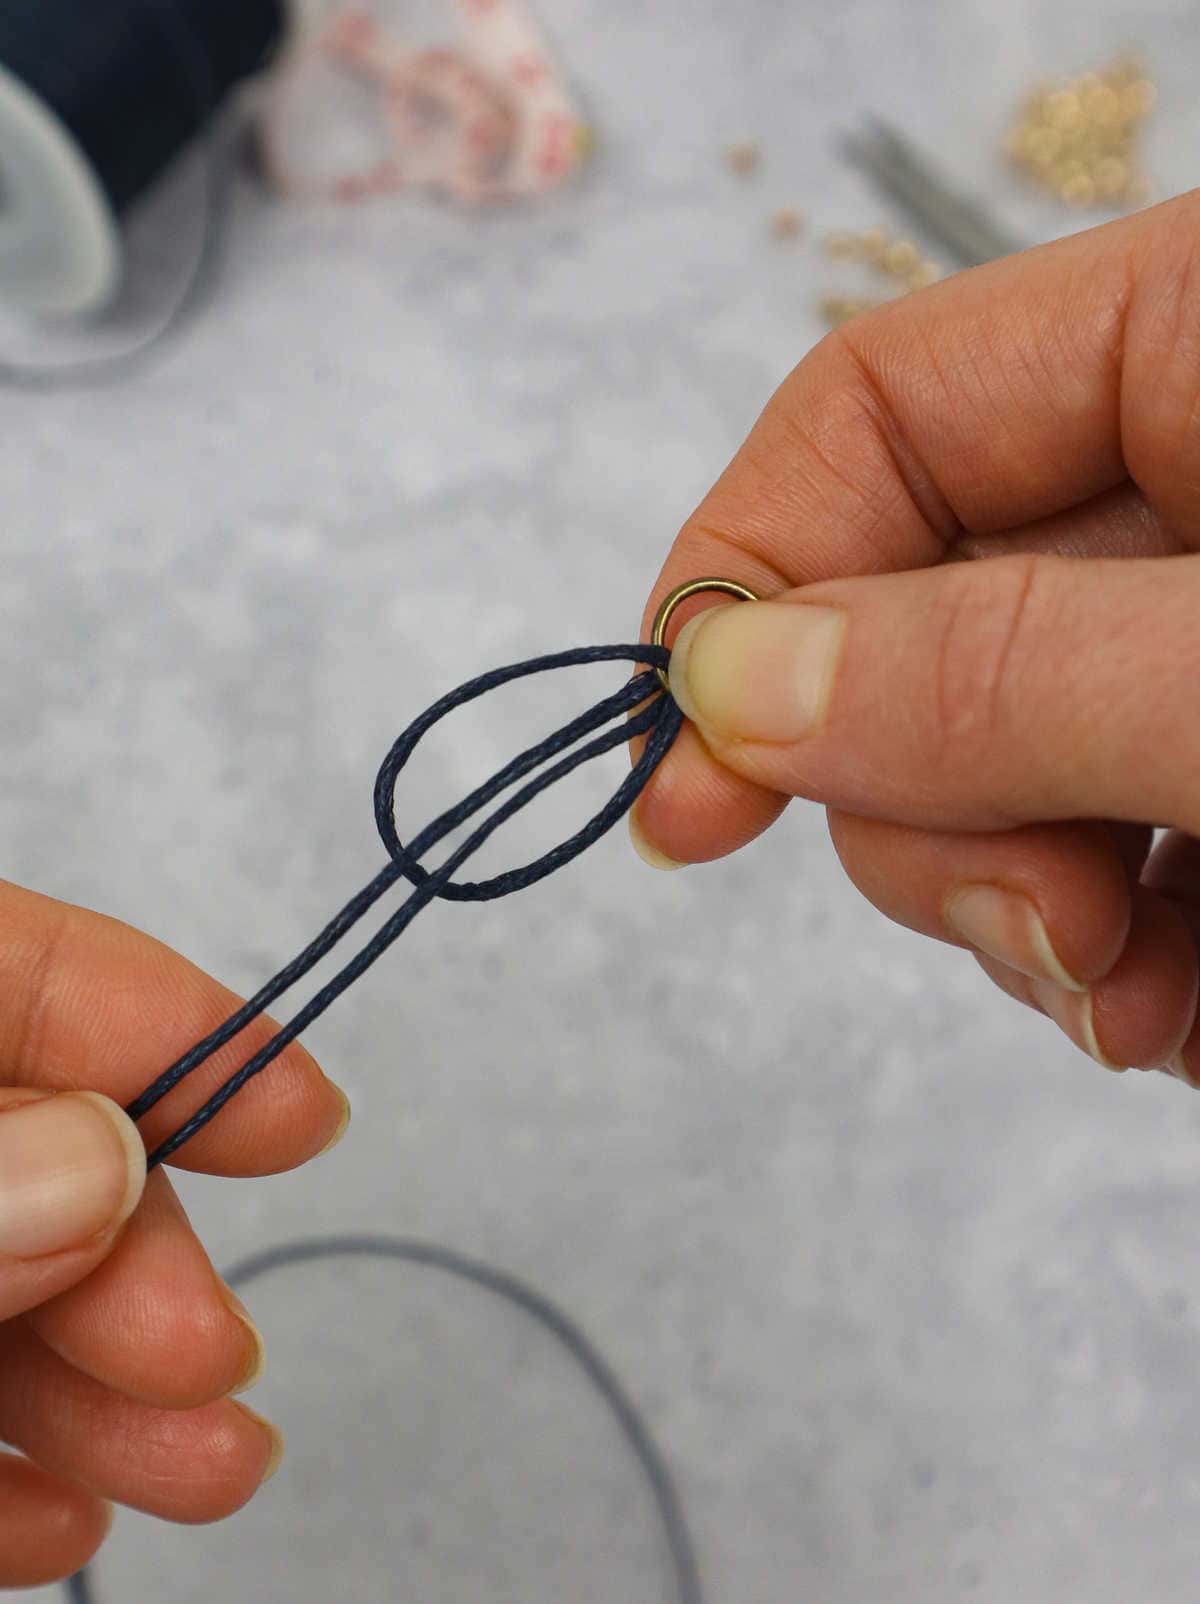
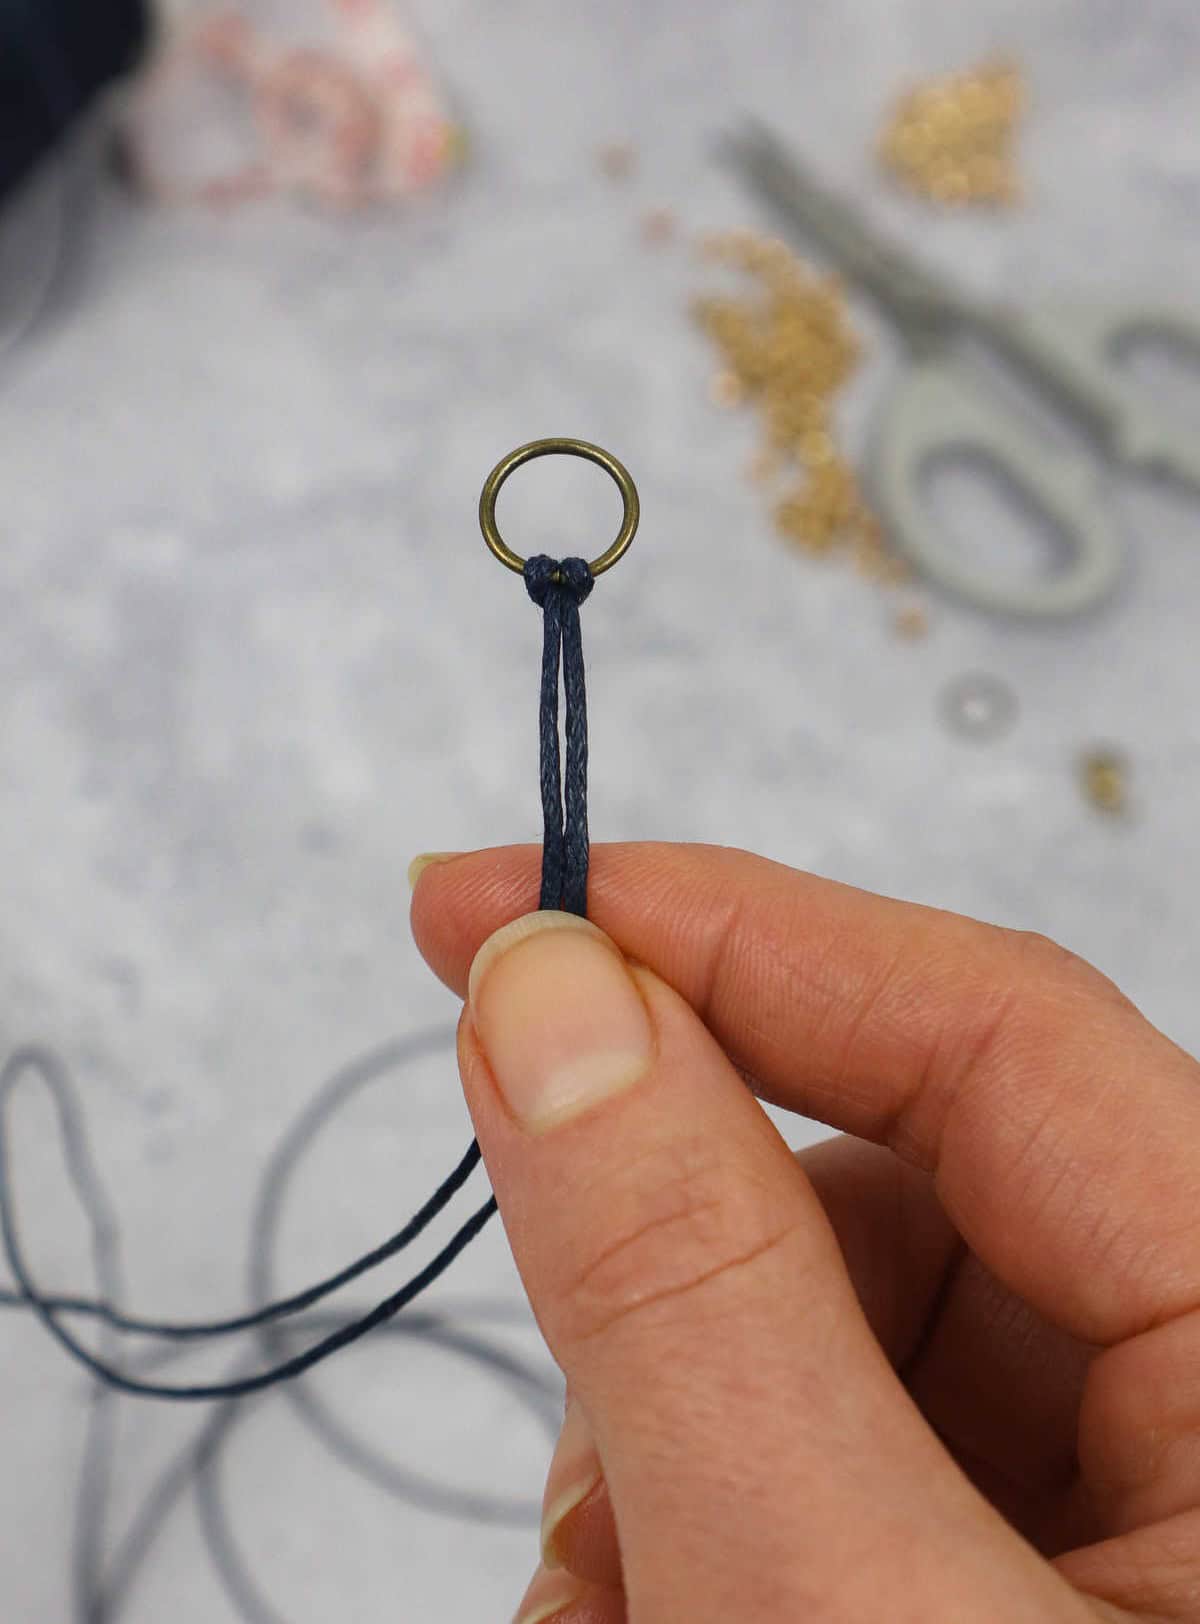
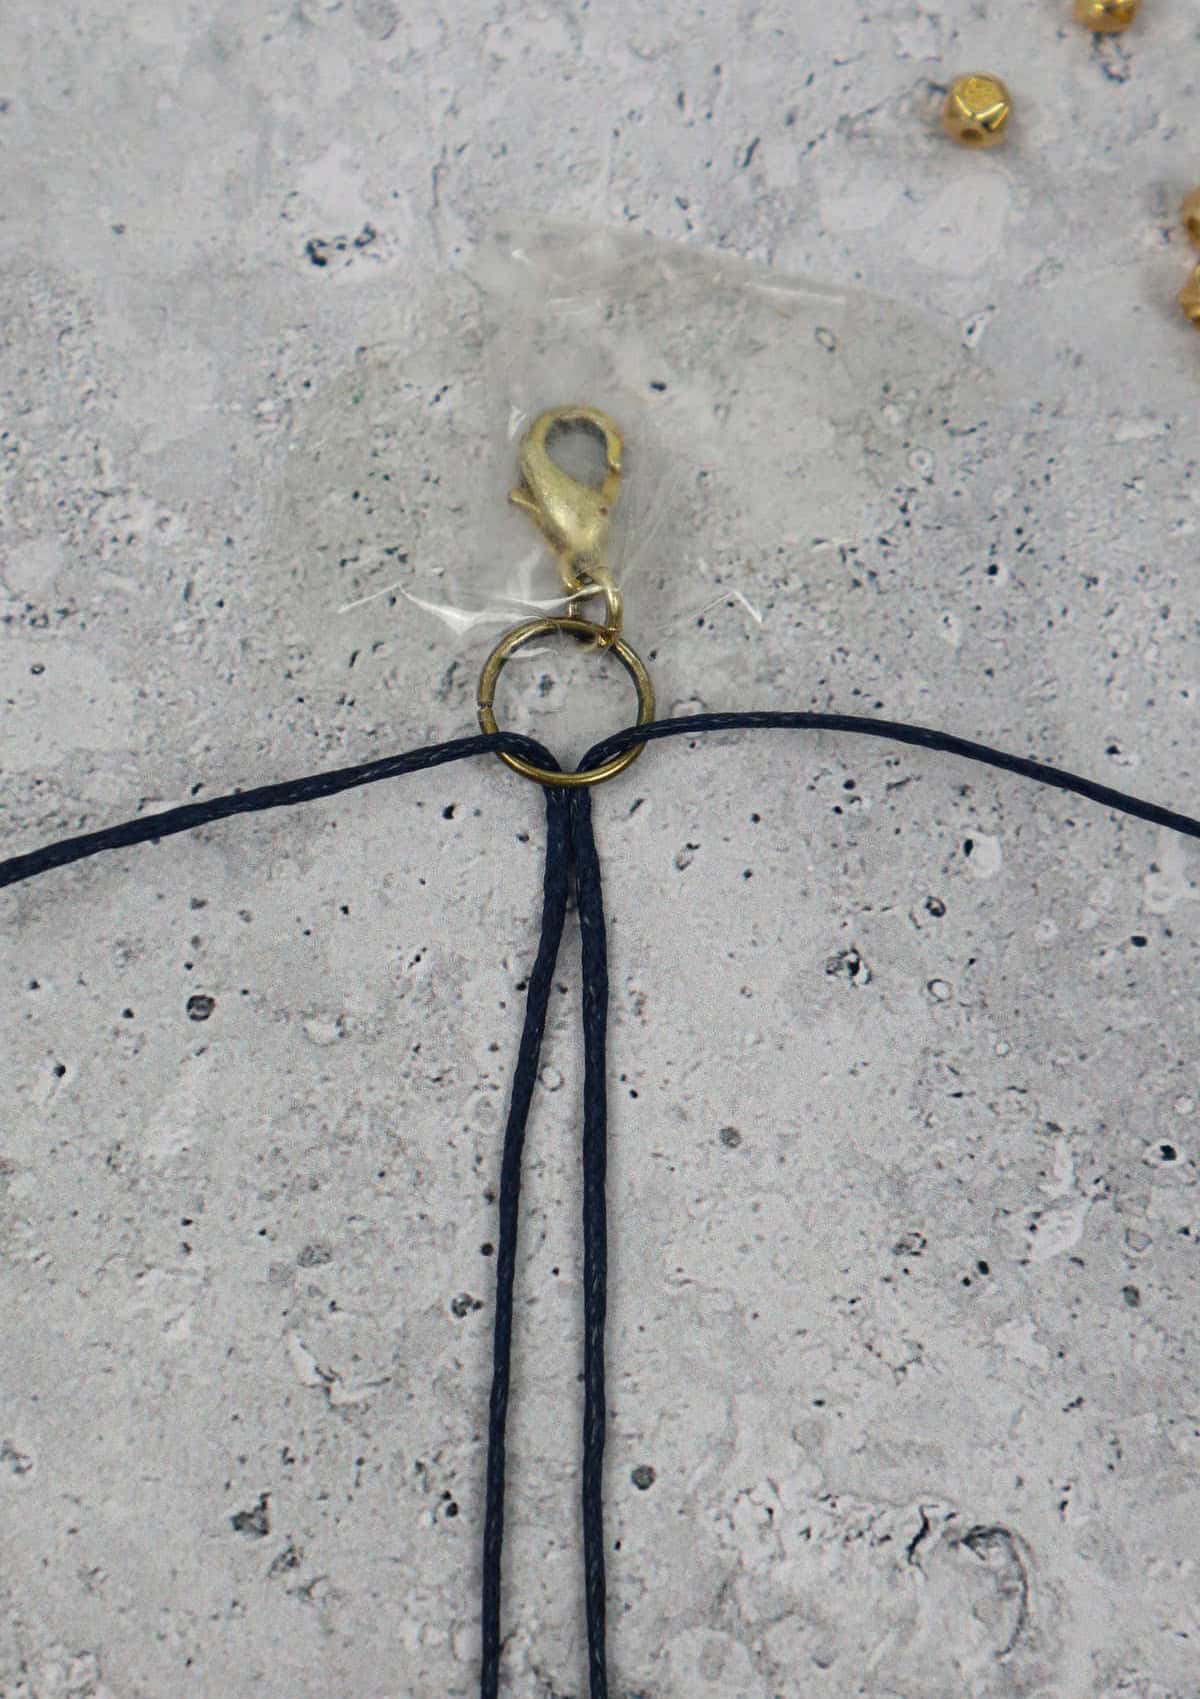
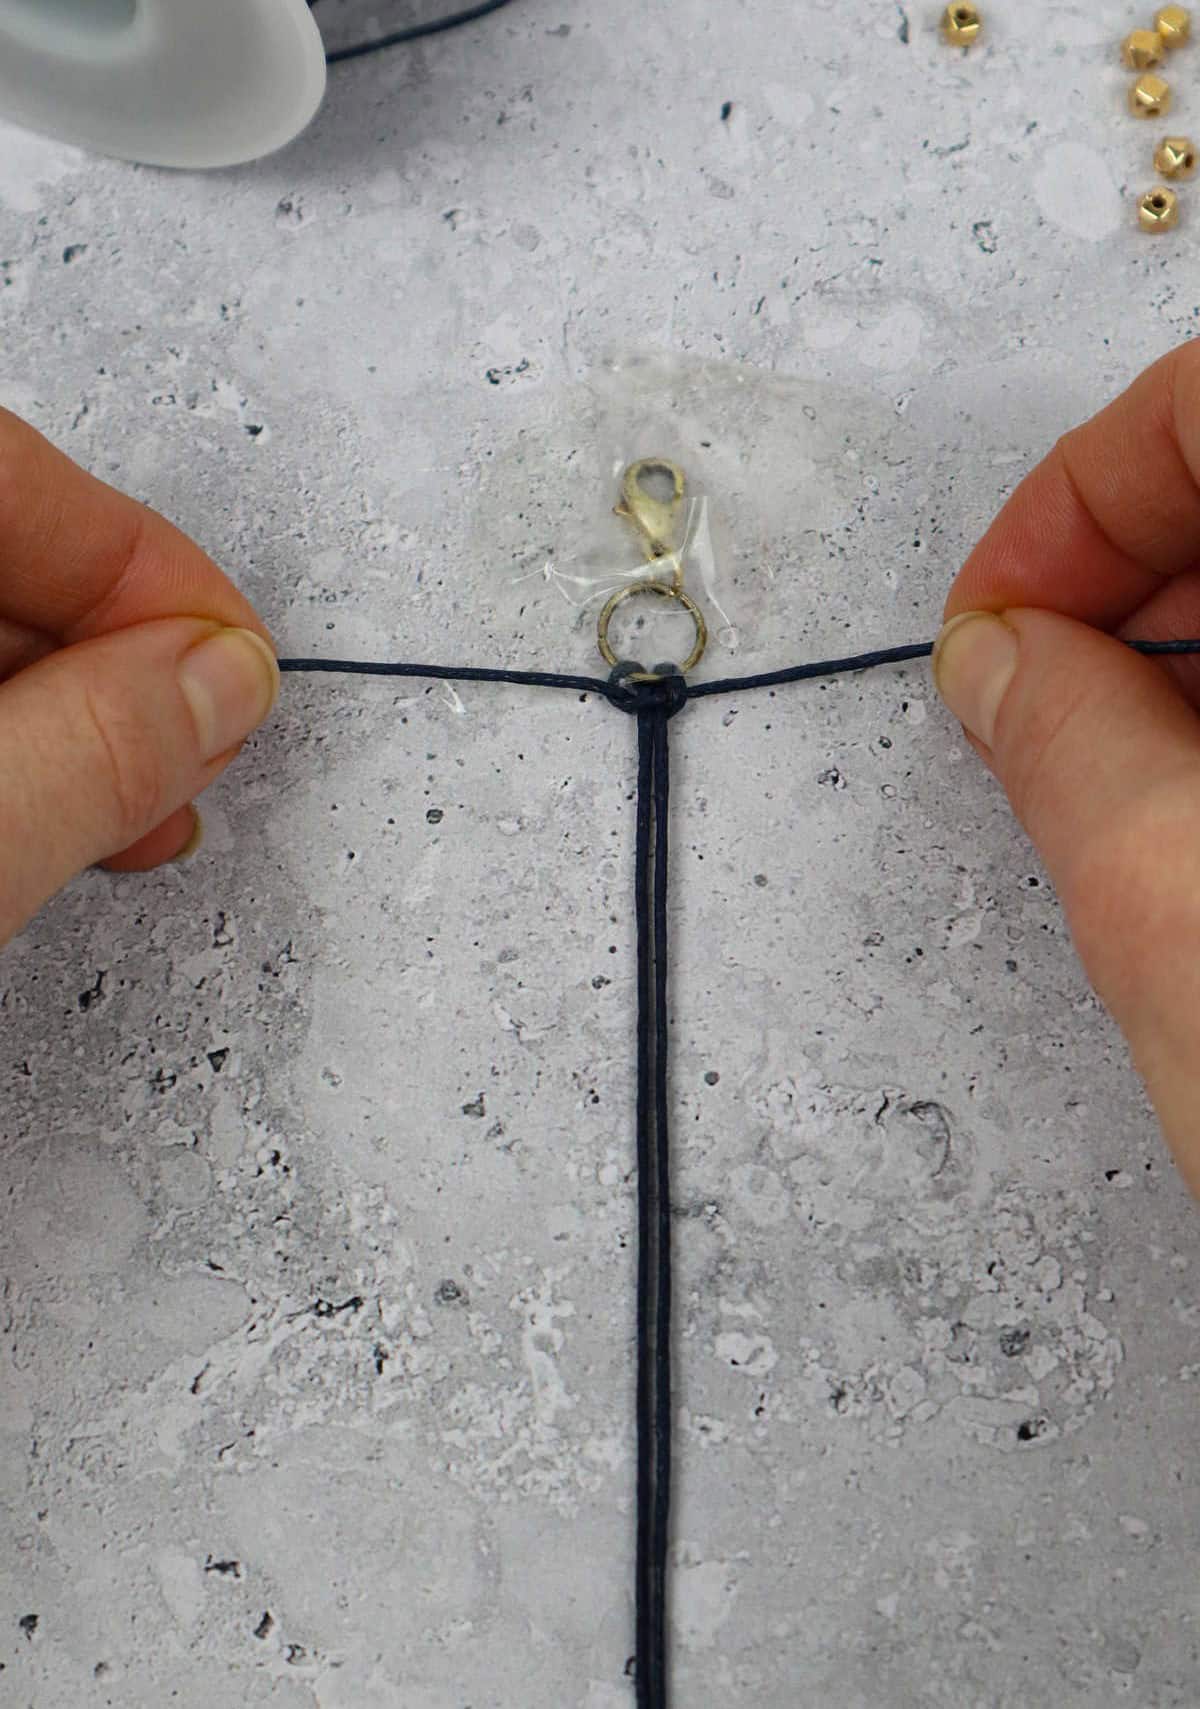
Begin by folding your nylon cord in half, resulting in a loop on one side and two ends on the other. Next, thread the two ends through a jump ring, pulling them all the way up so that the looped ends are contained within the ring. From here, bring the ends back into the loop to create a lark’s head knot, a familiar macrame technique for those in the know. The finished product should resemble a secure and tidy bundle.
Step 2
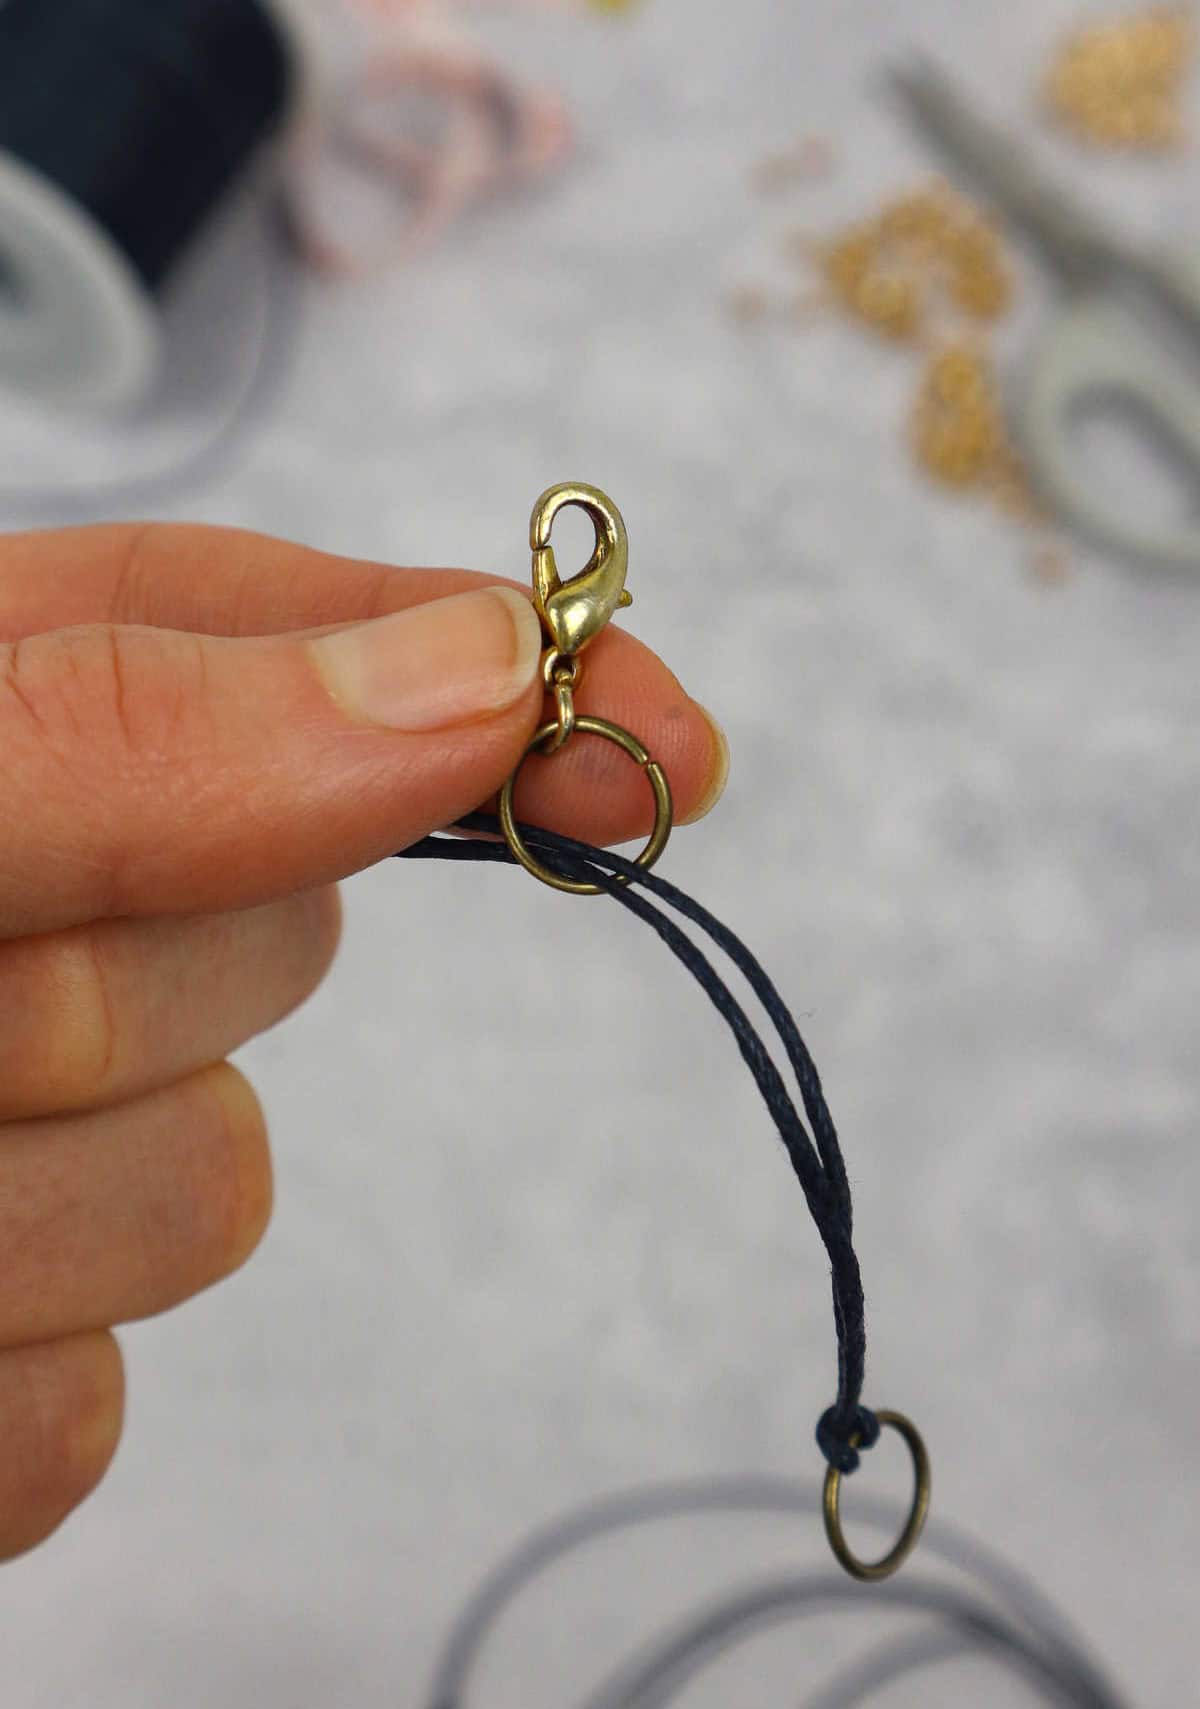
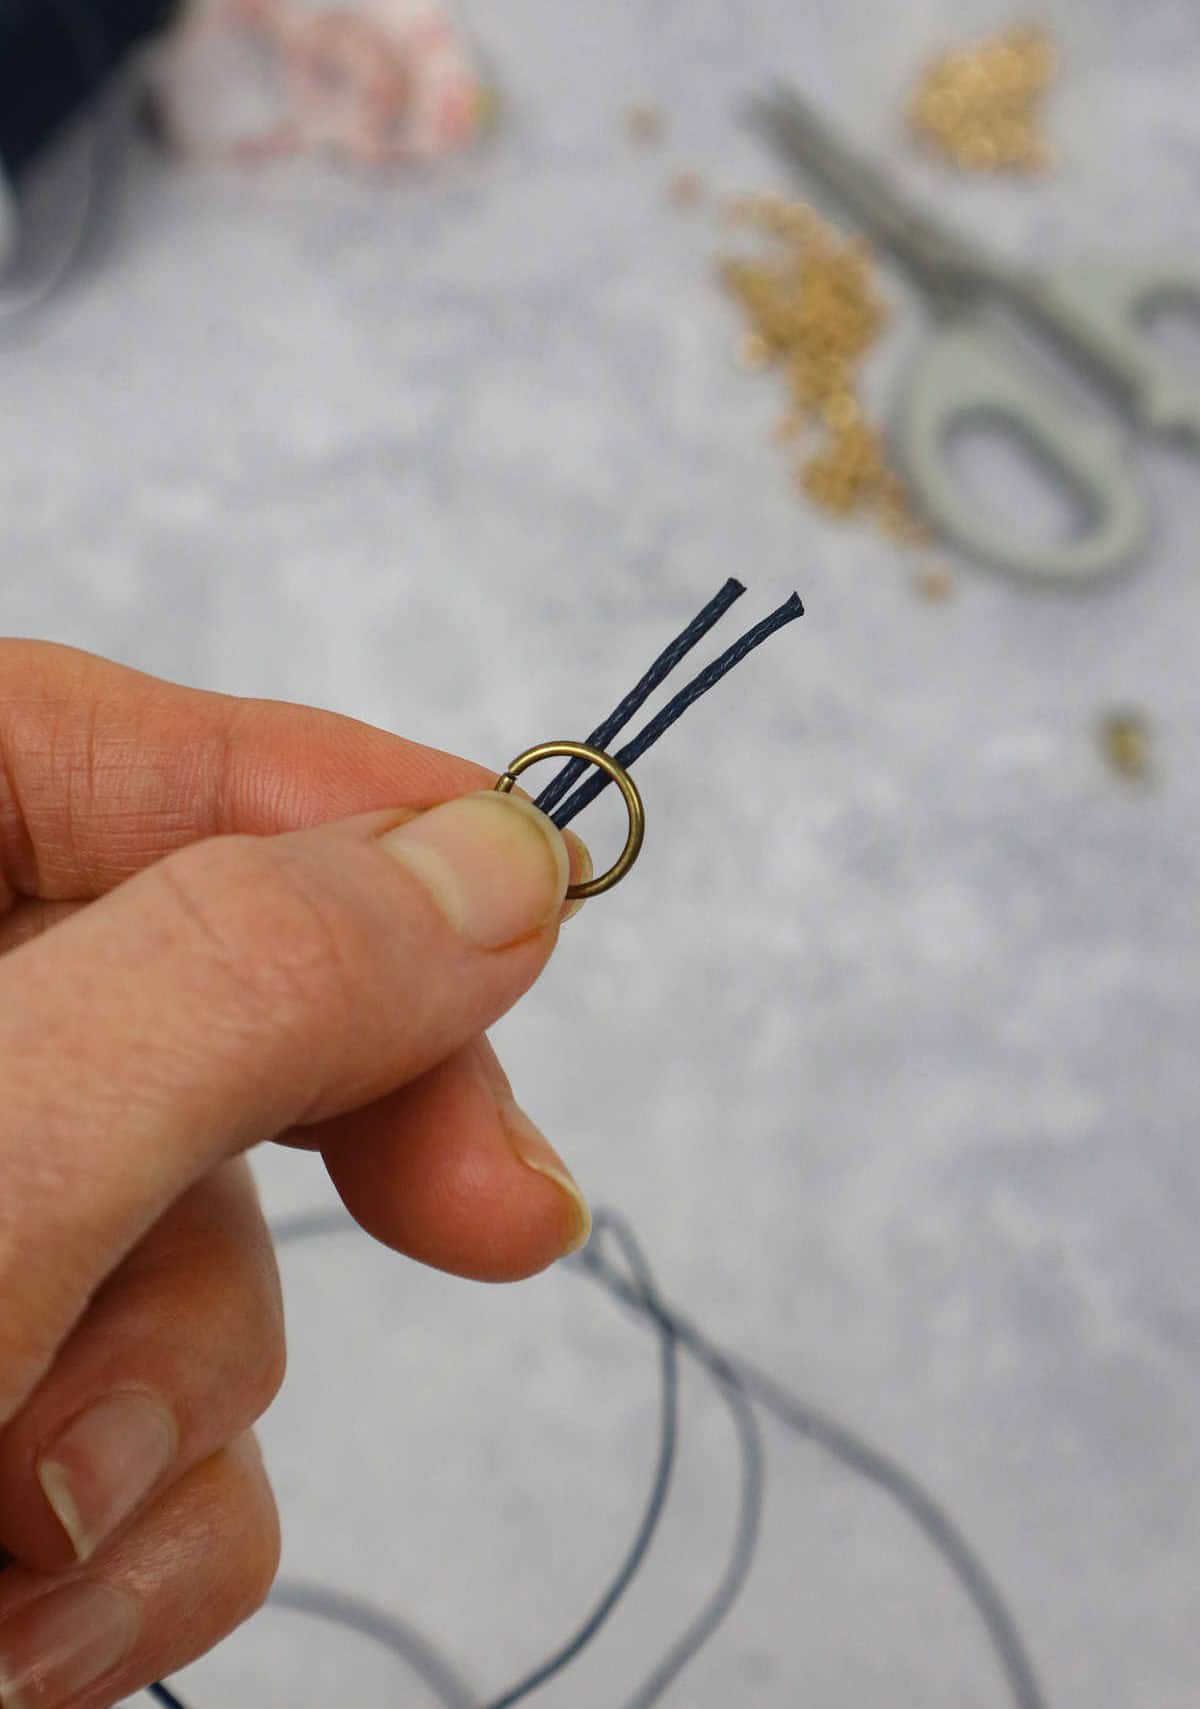
To secure the ends, you’ll need to pass them through a second jump ring. Make sure this jump ring is positioned in a way that it can hold the lobster claw clasp. If the clasp isn’t already attached, now’s the time to do so.
Step 3
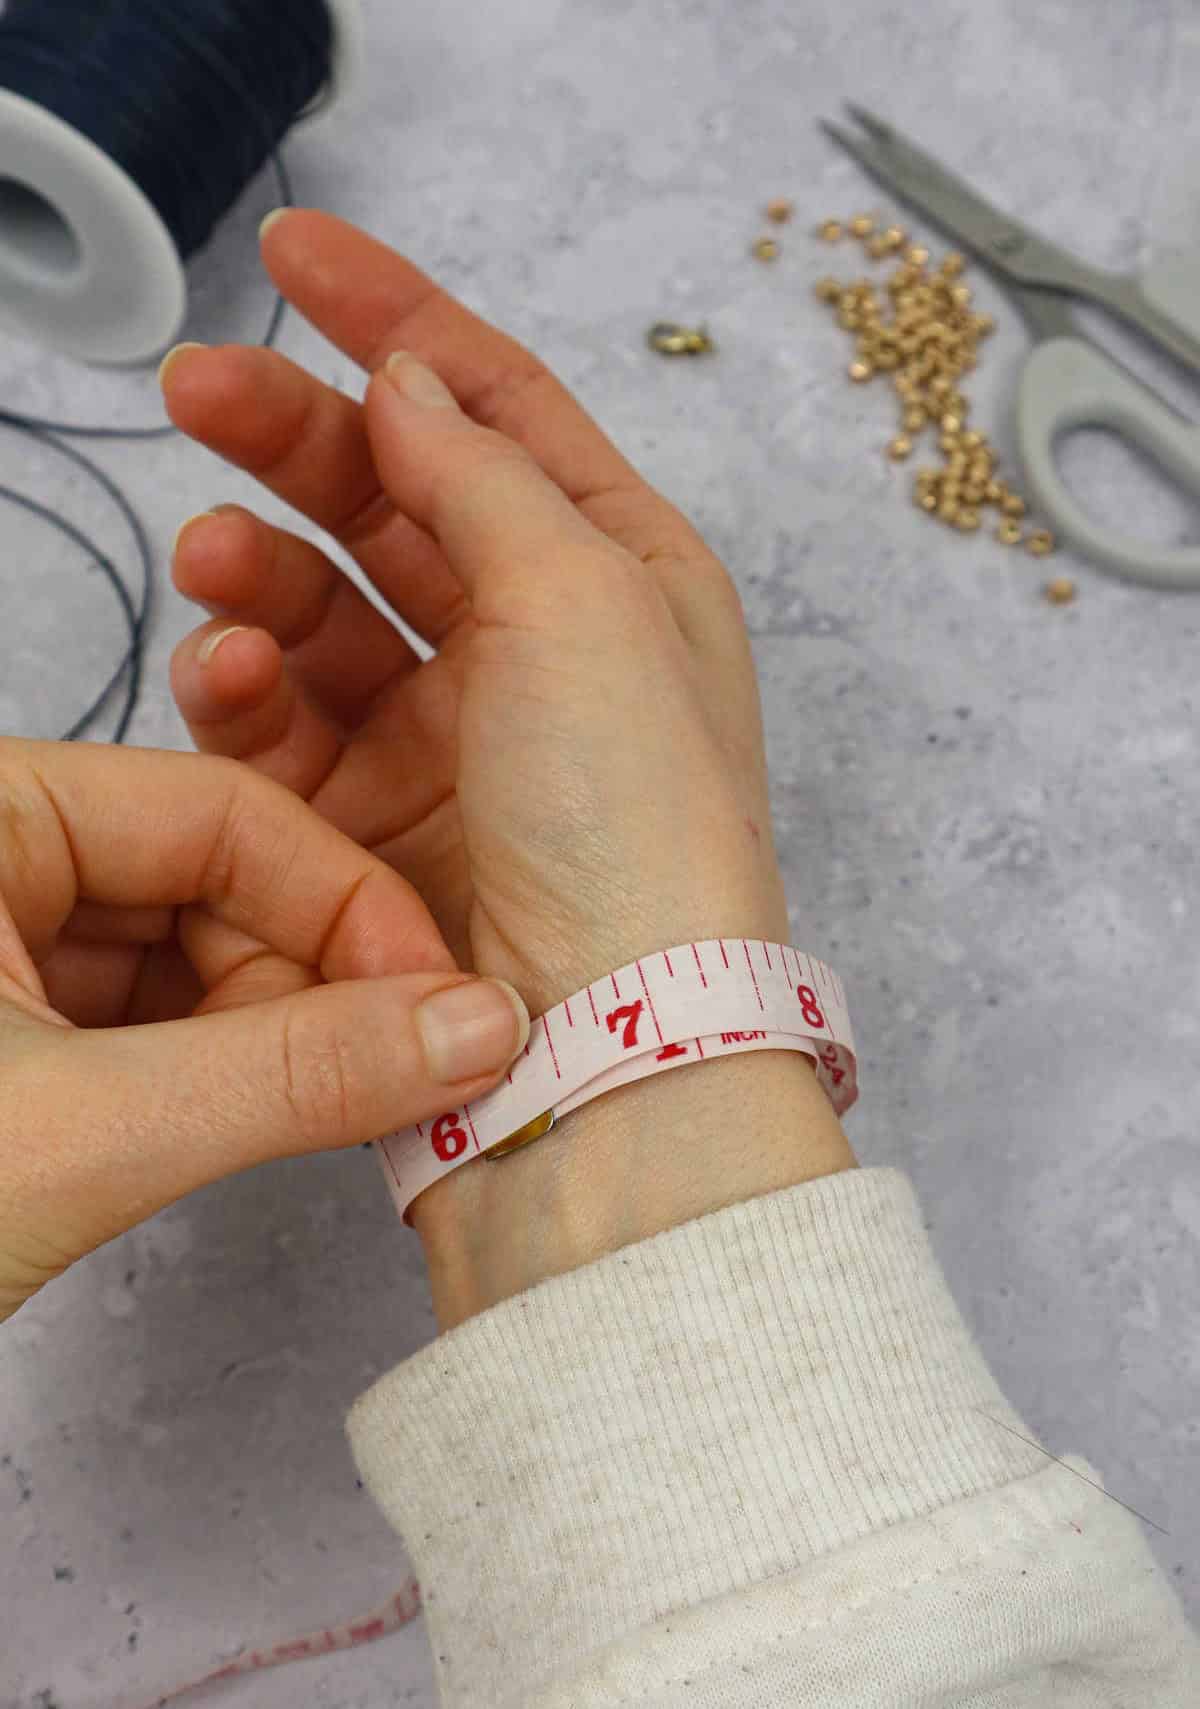
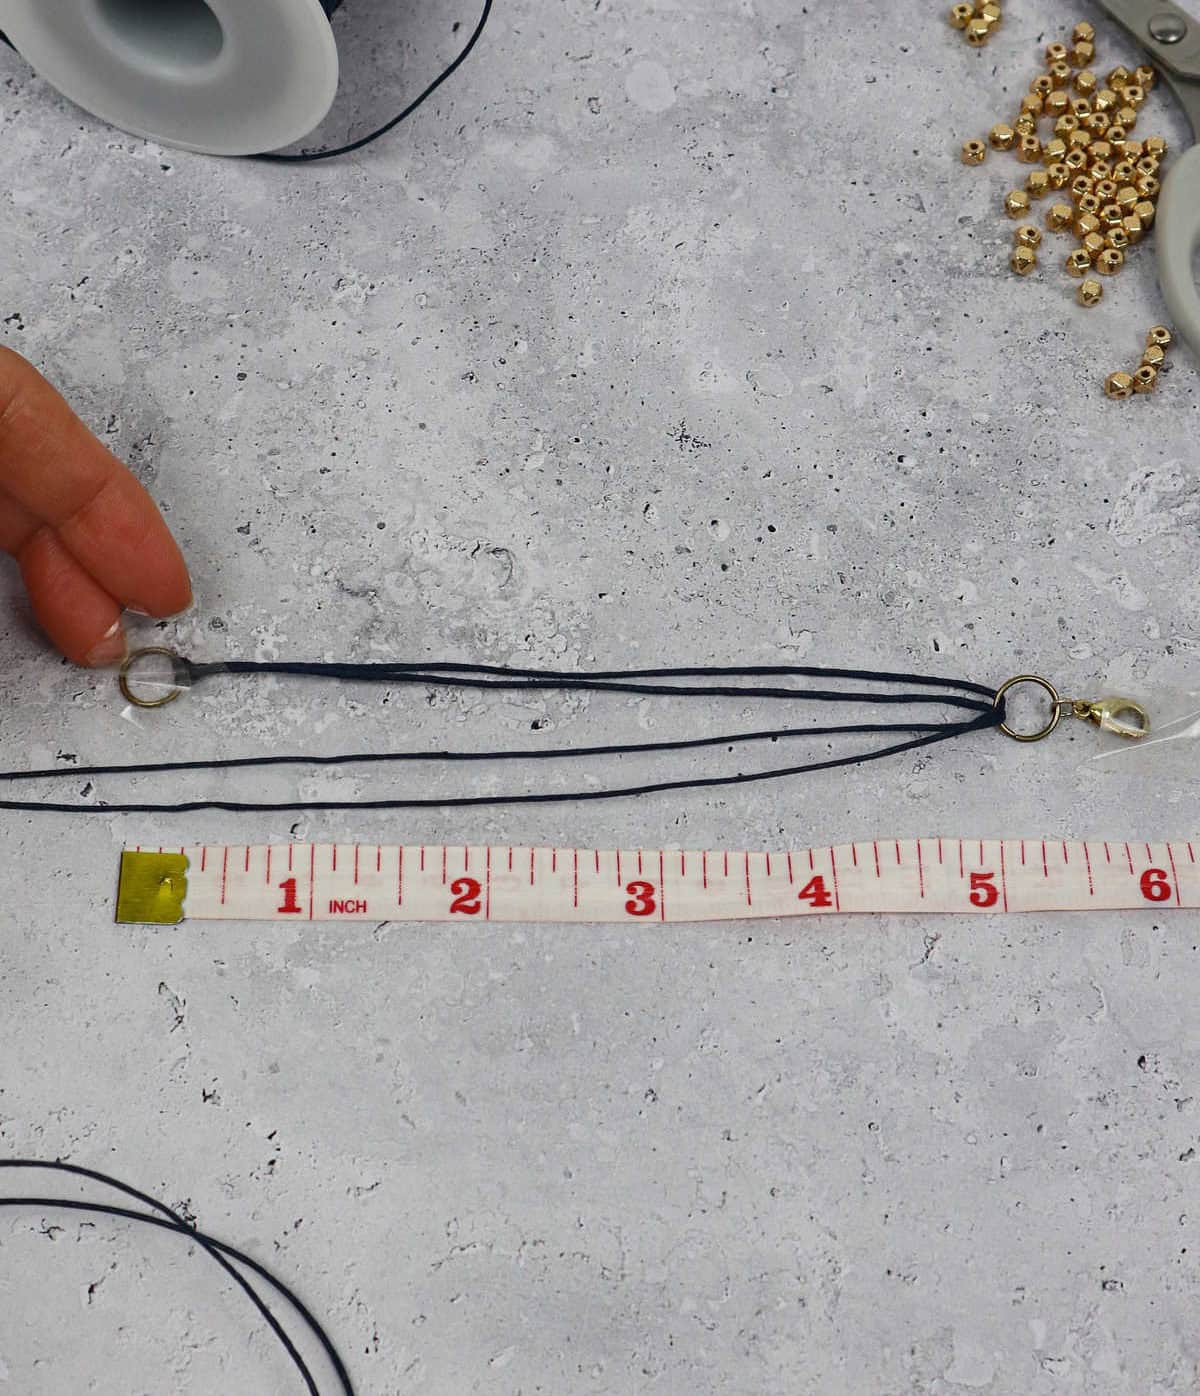
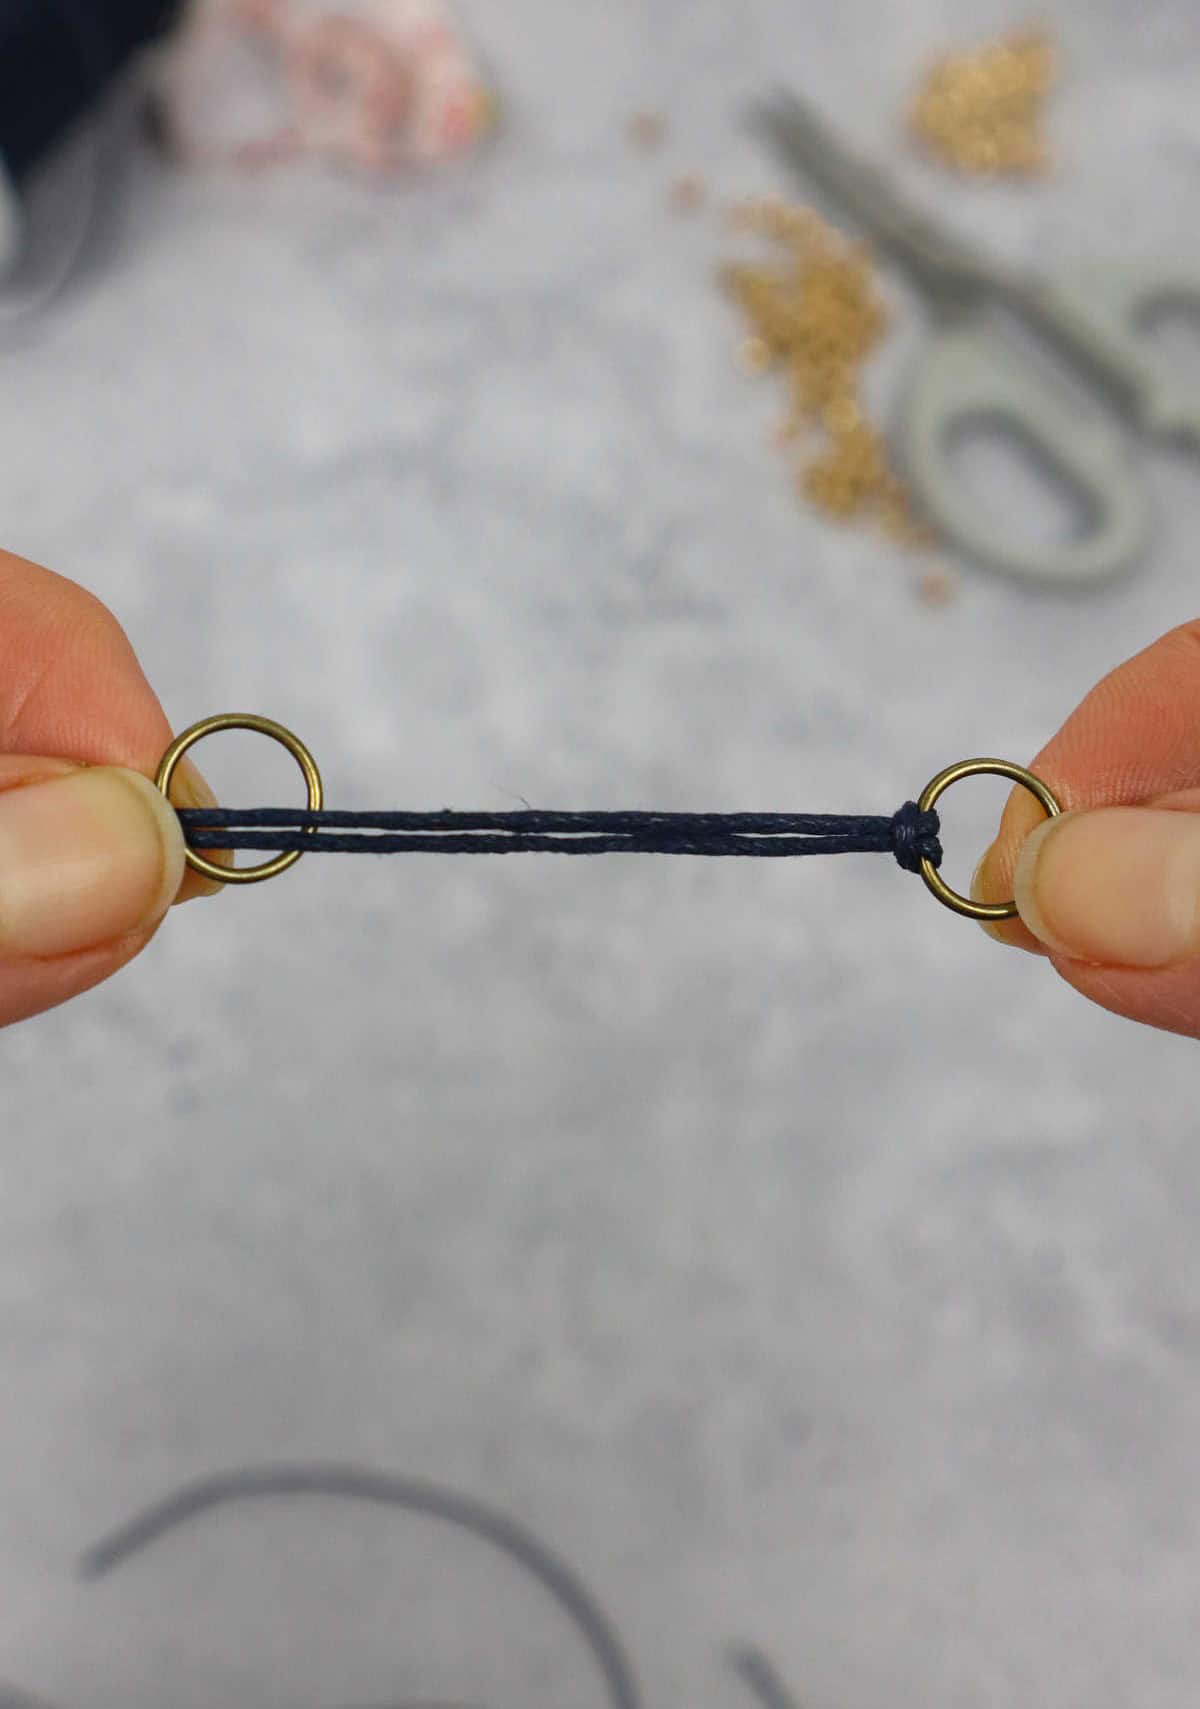
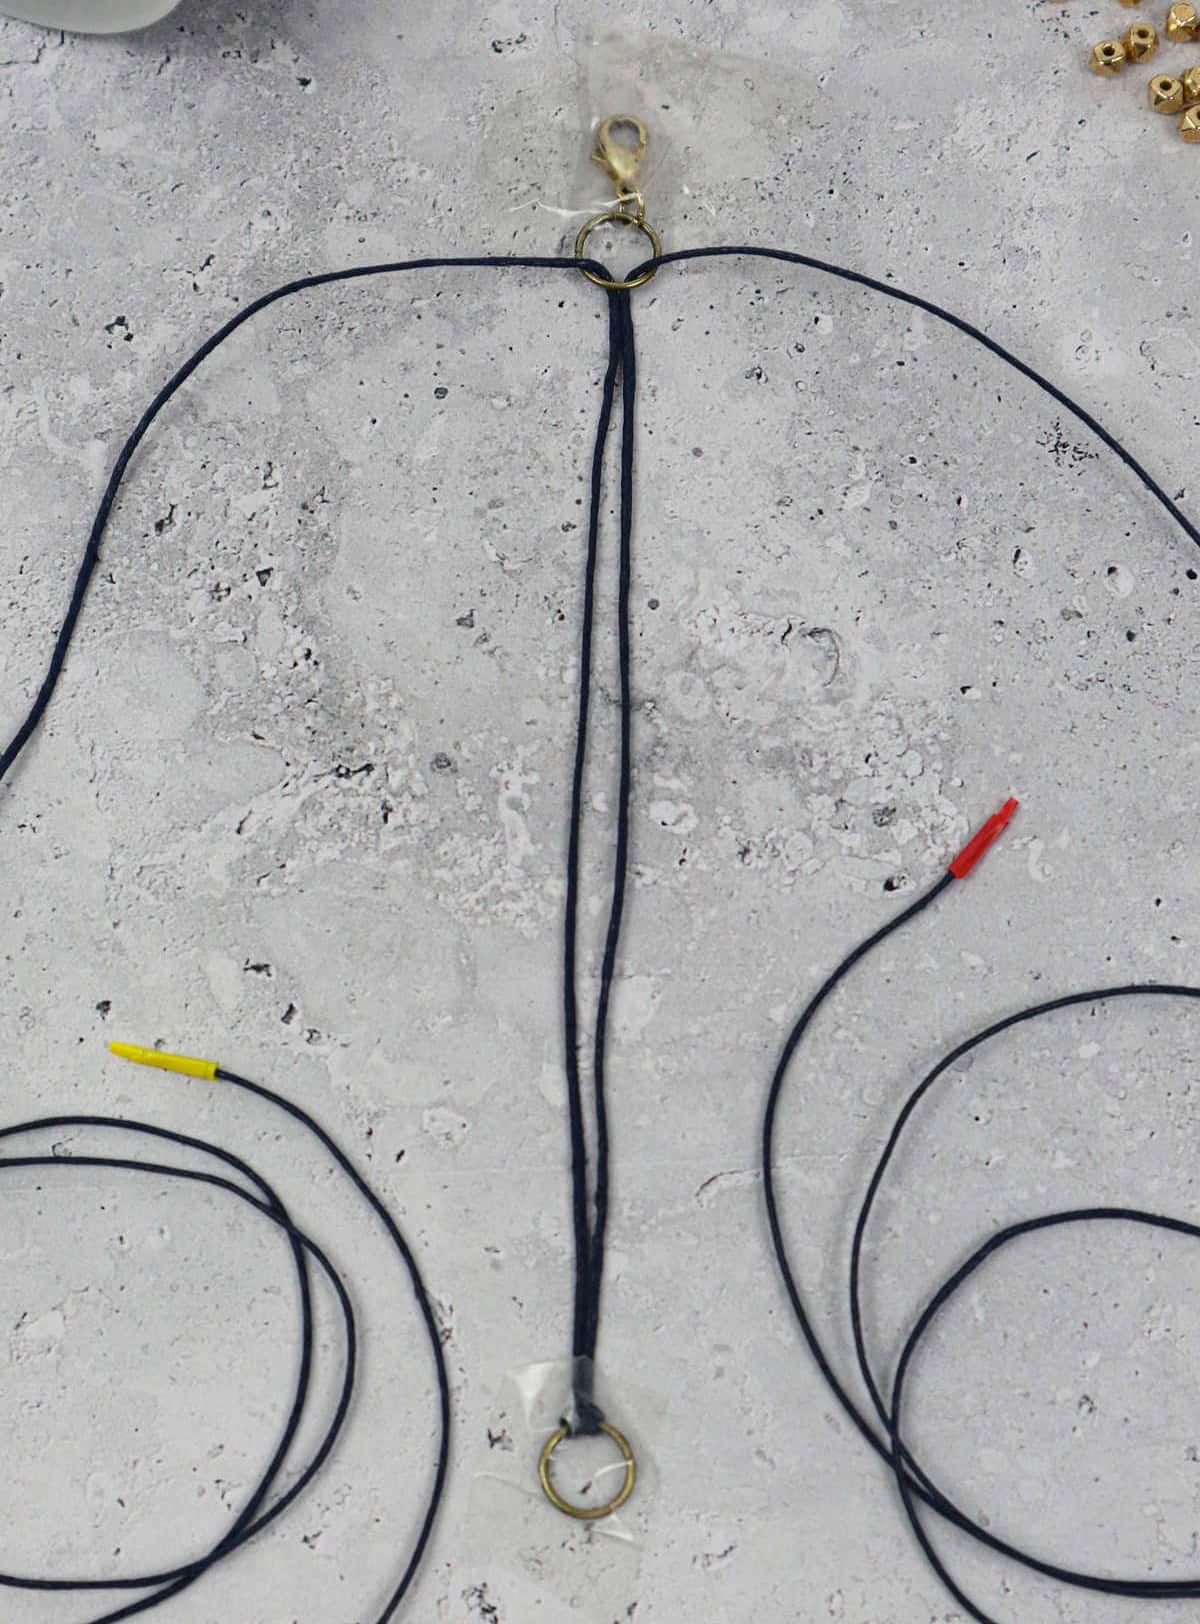
Measure your wrist carefully to ensure a comfortable fit for your future bracelet. To get an accurate measurement, grab your measuring tape and wrap it around your wrist without leaving any excess space or constriction. Record this length as you’ll need it later to determine the size of your finished piece.
Now that you have the length of your wrist, lay out two jump rings flat on a surface.
As you measured the width of your wrist, remember that the final bracelet will include the thickness of the jump rings. For example, if your measurement is 6 inches, your finished bracelet will be approximately 6 inches in length, including the jump rings.
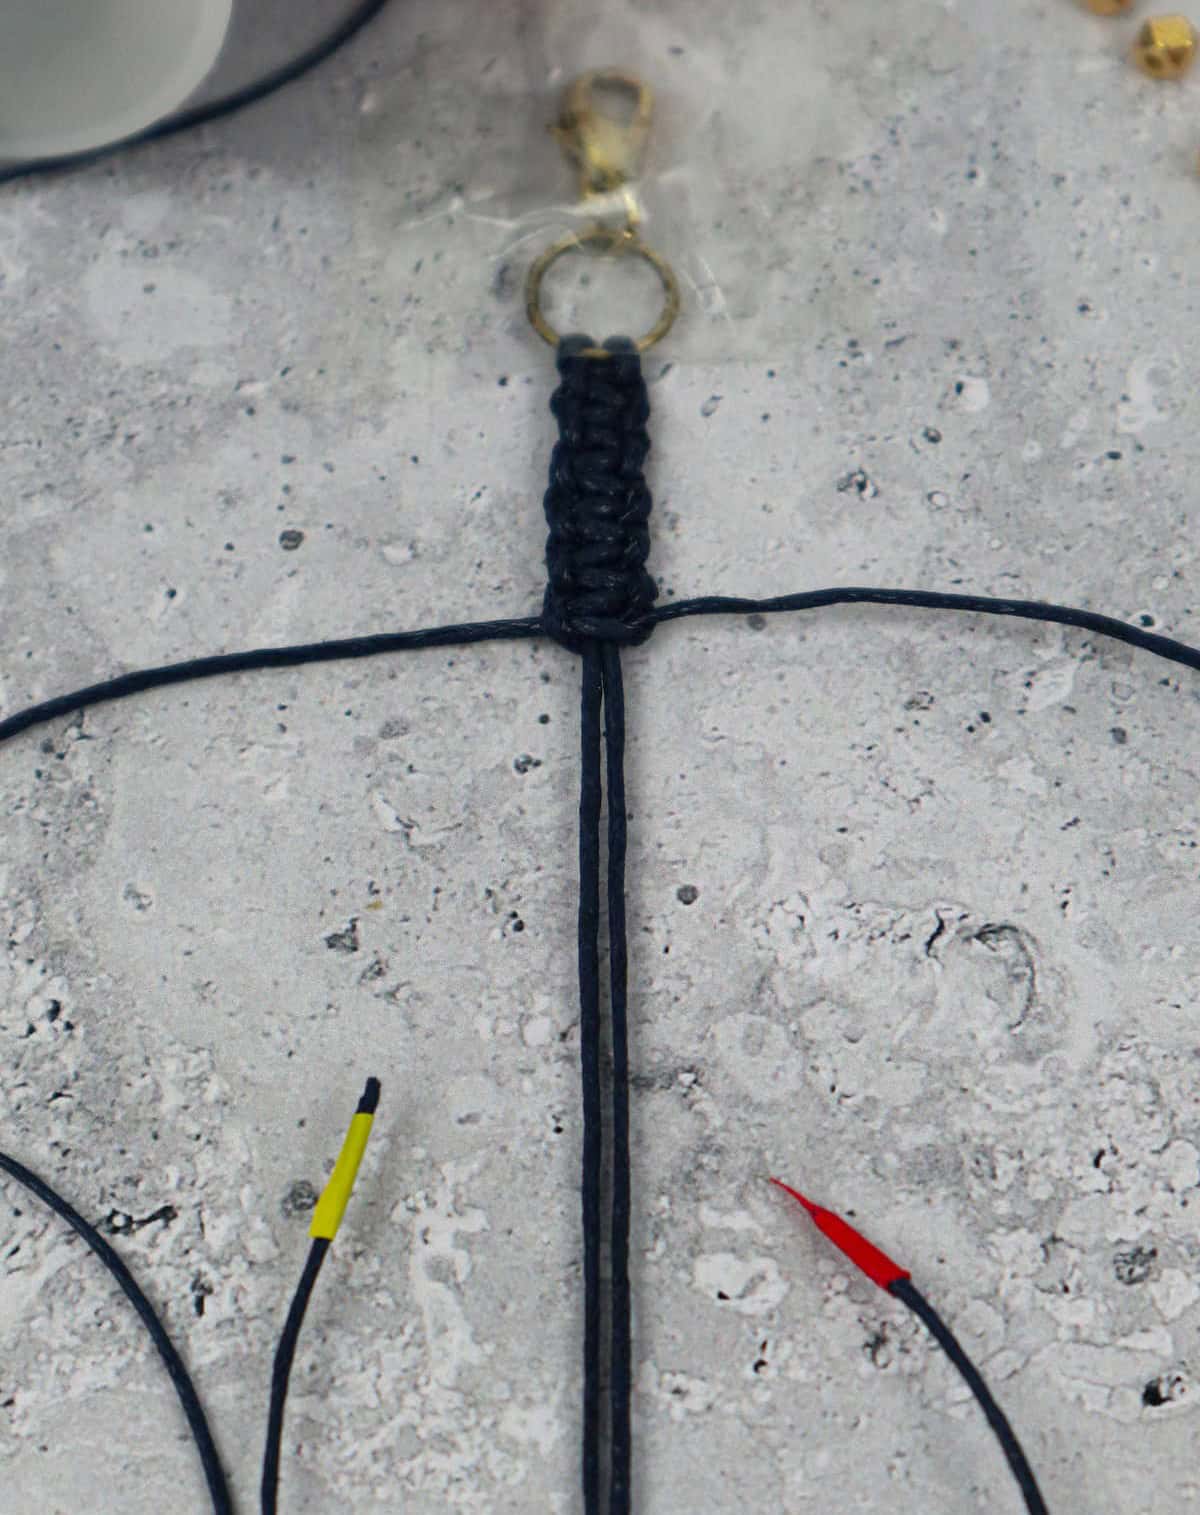
Step 4
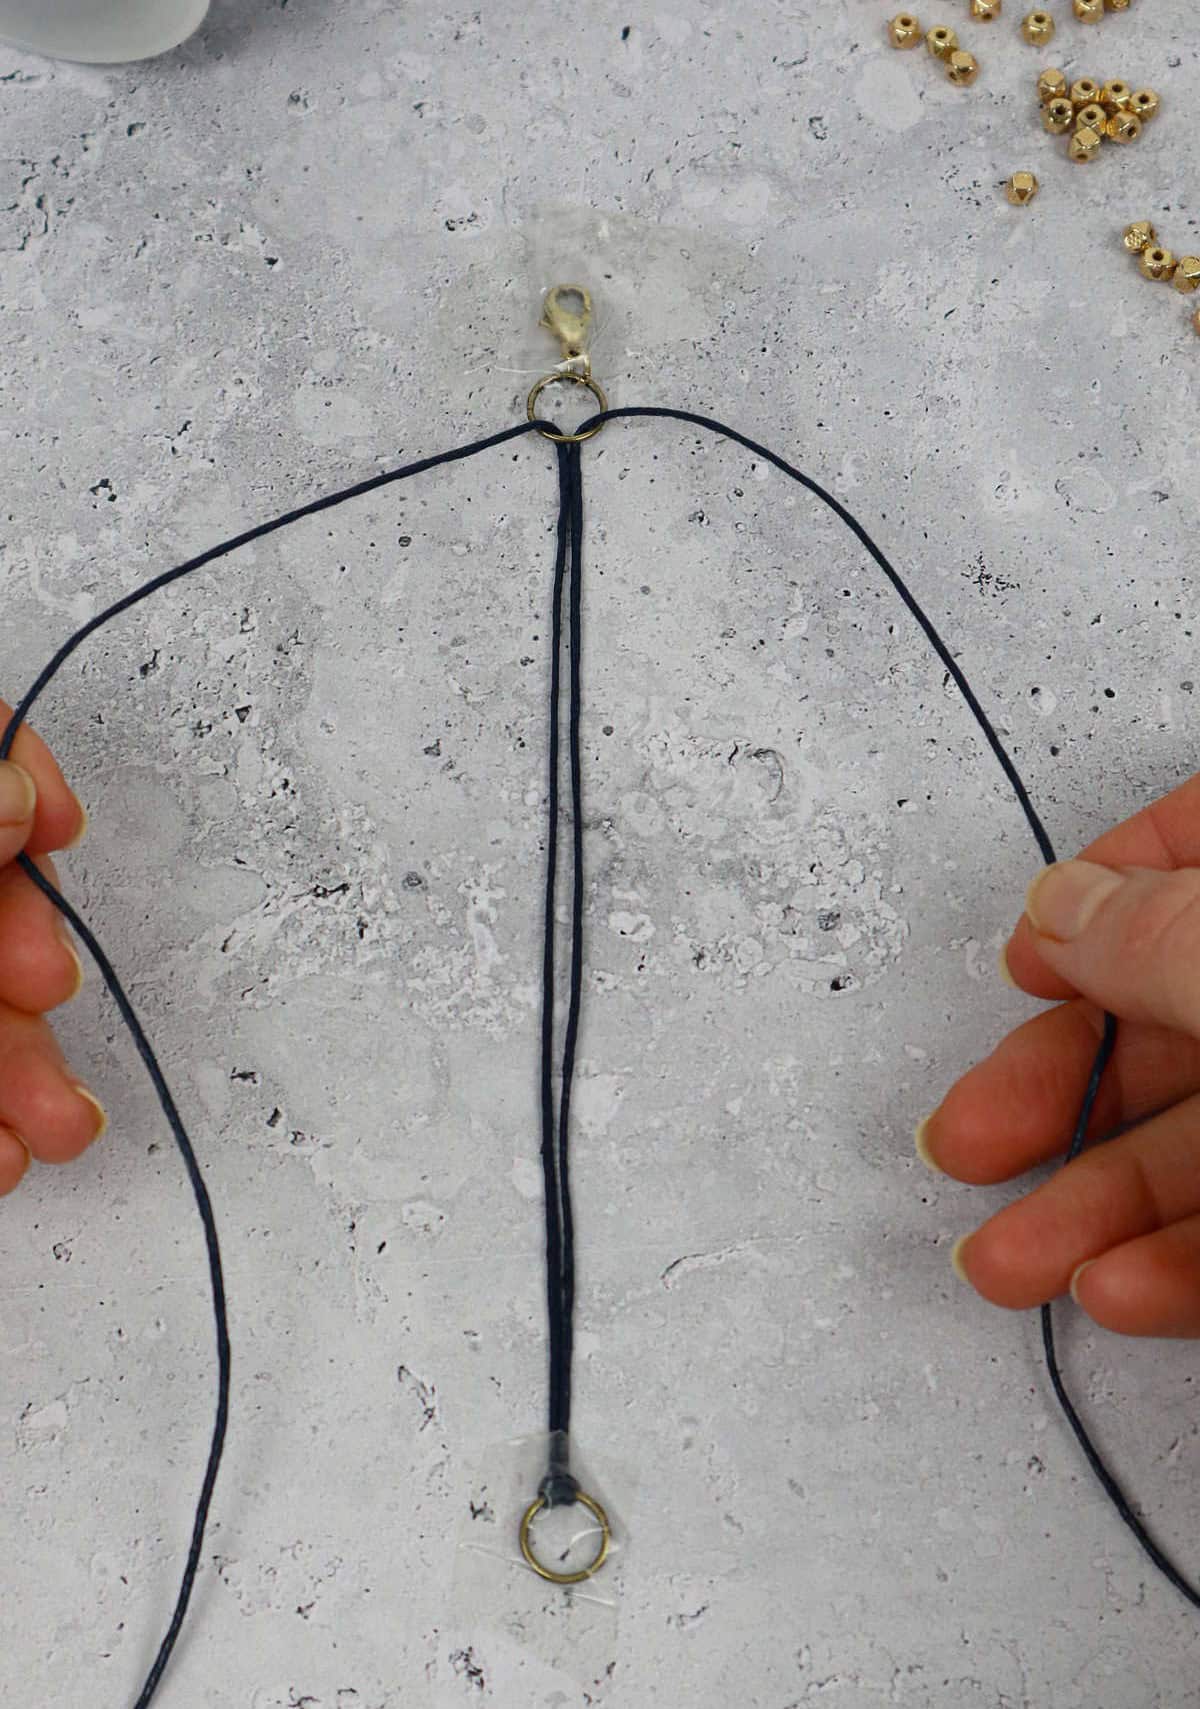
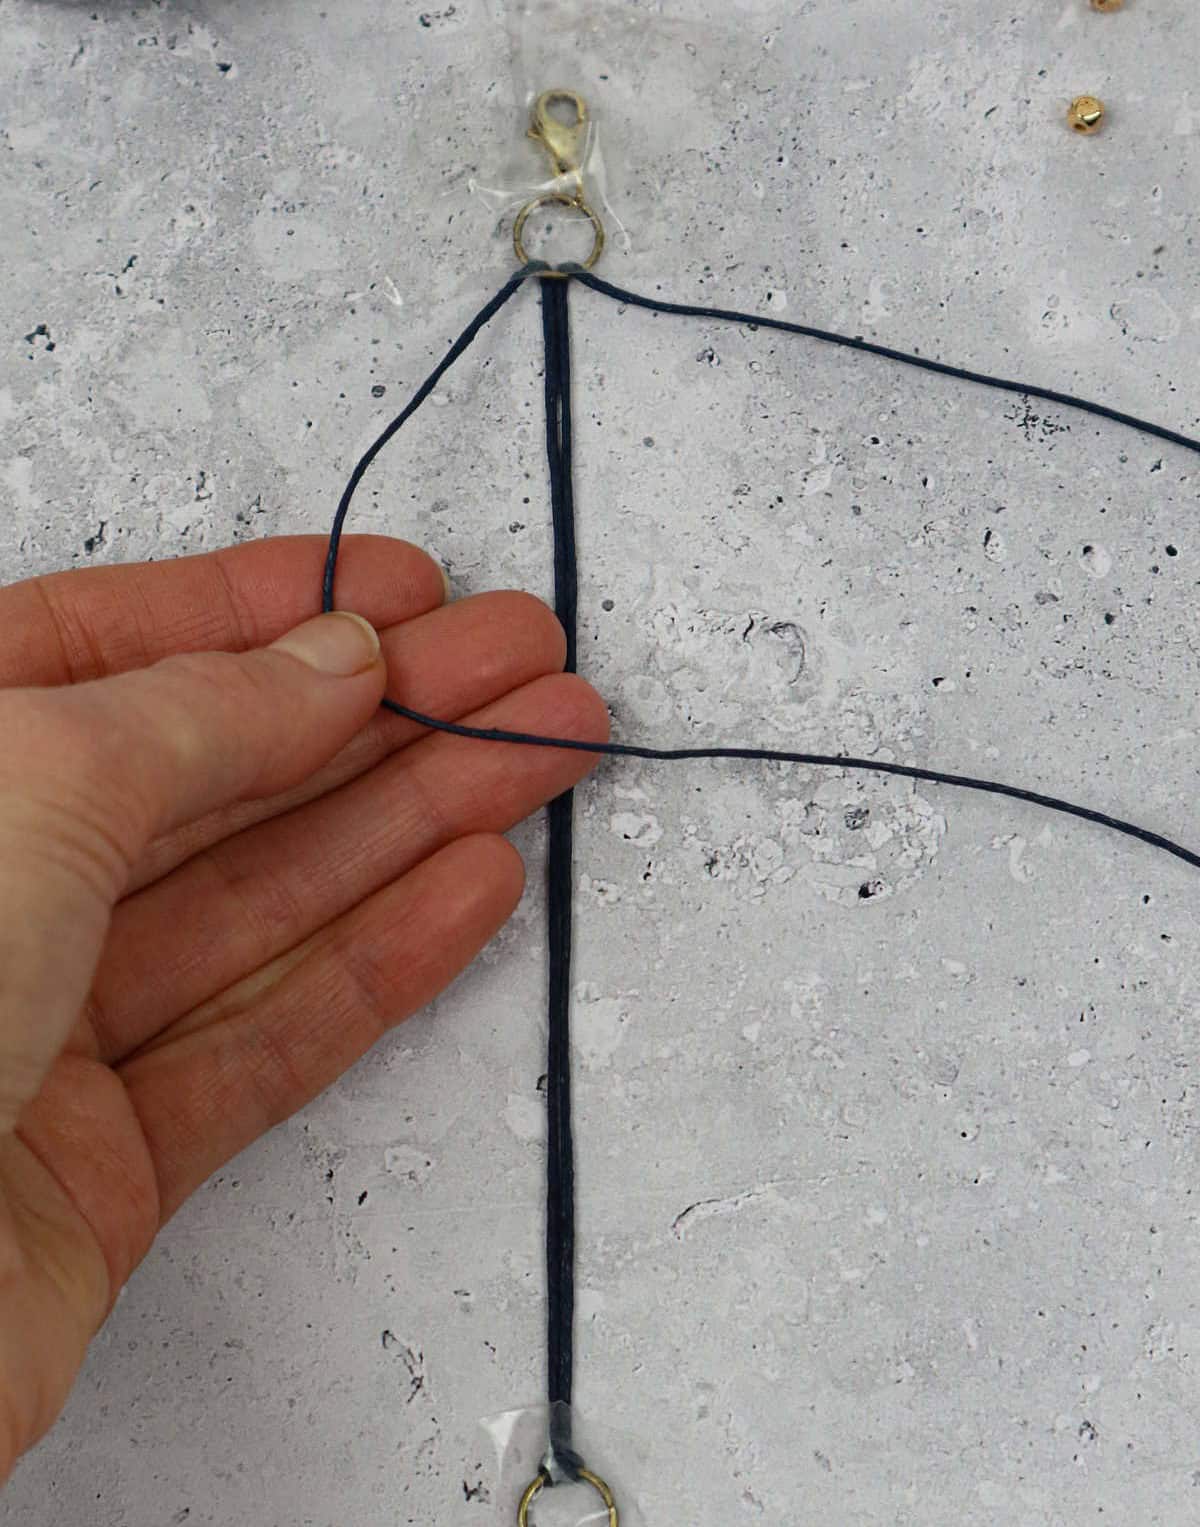
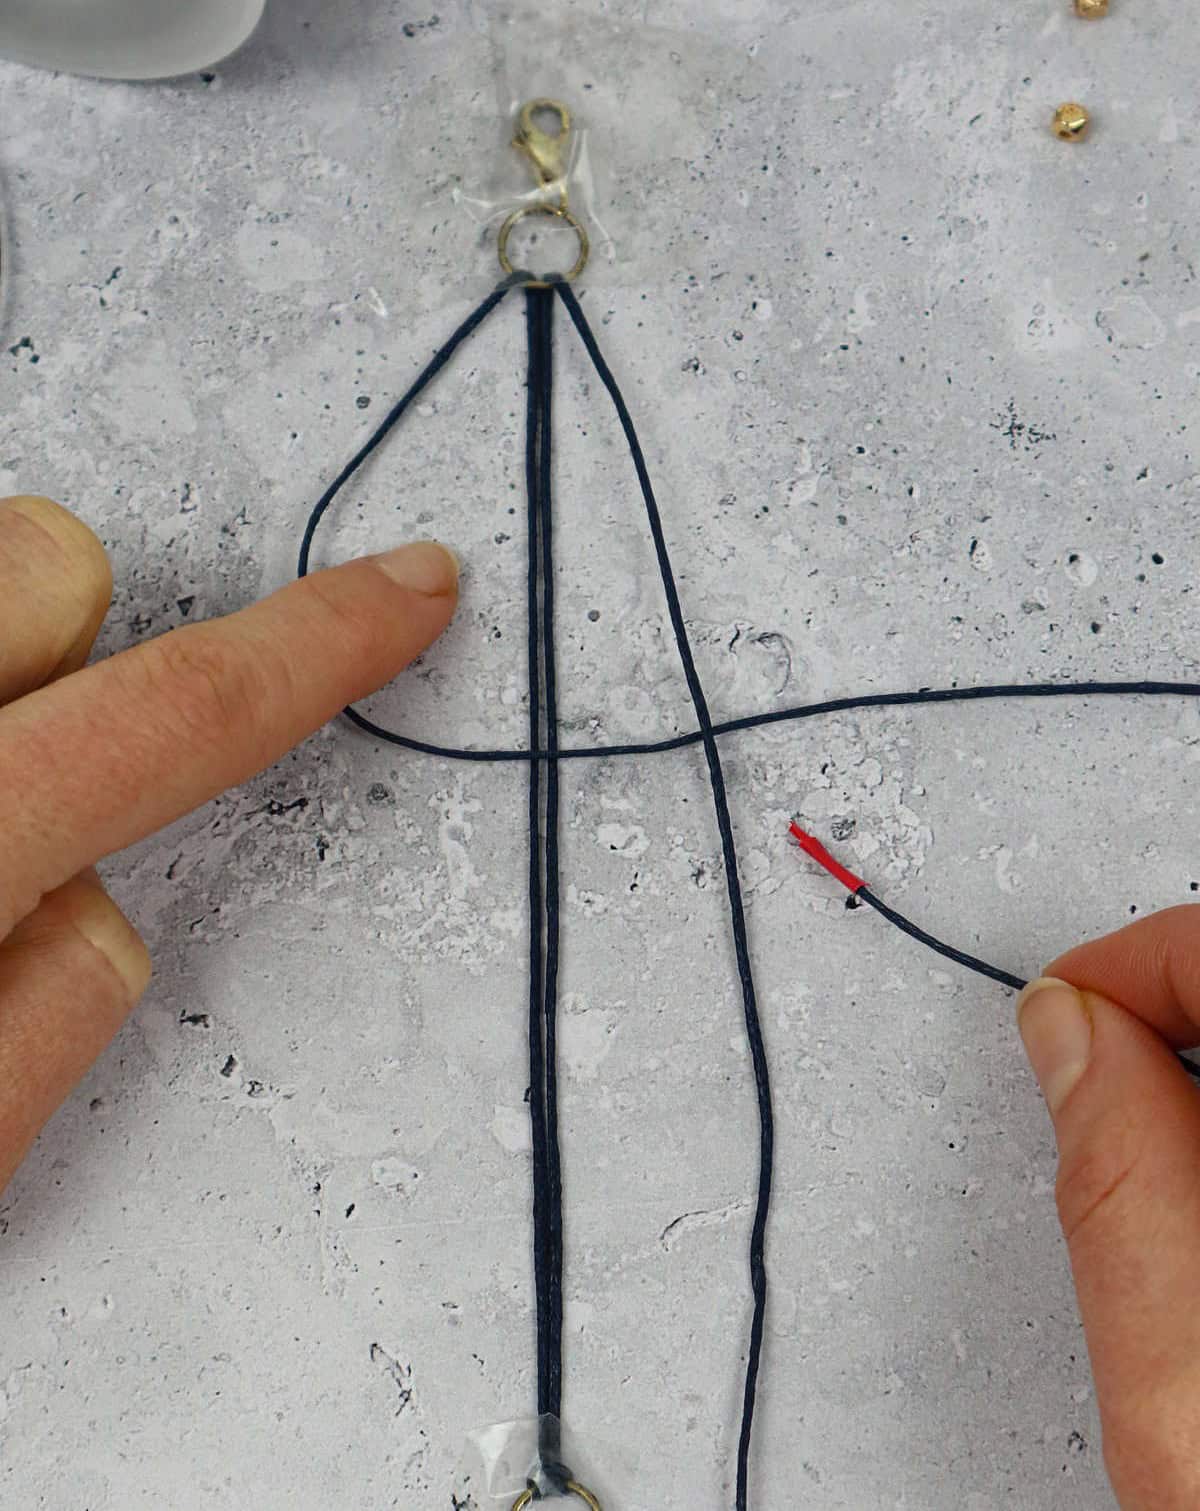
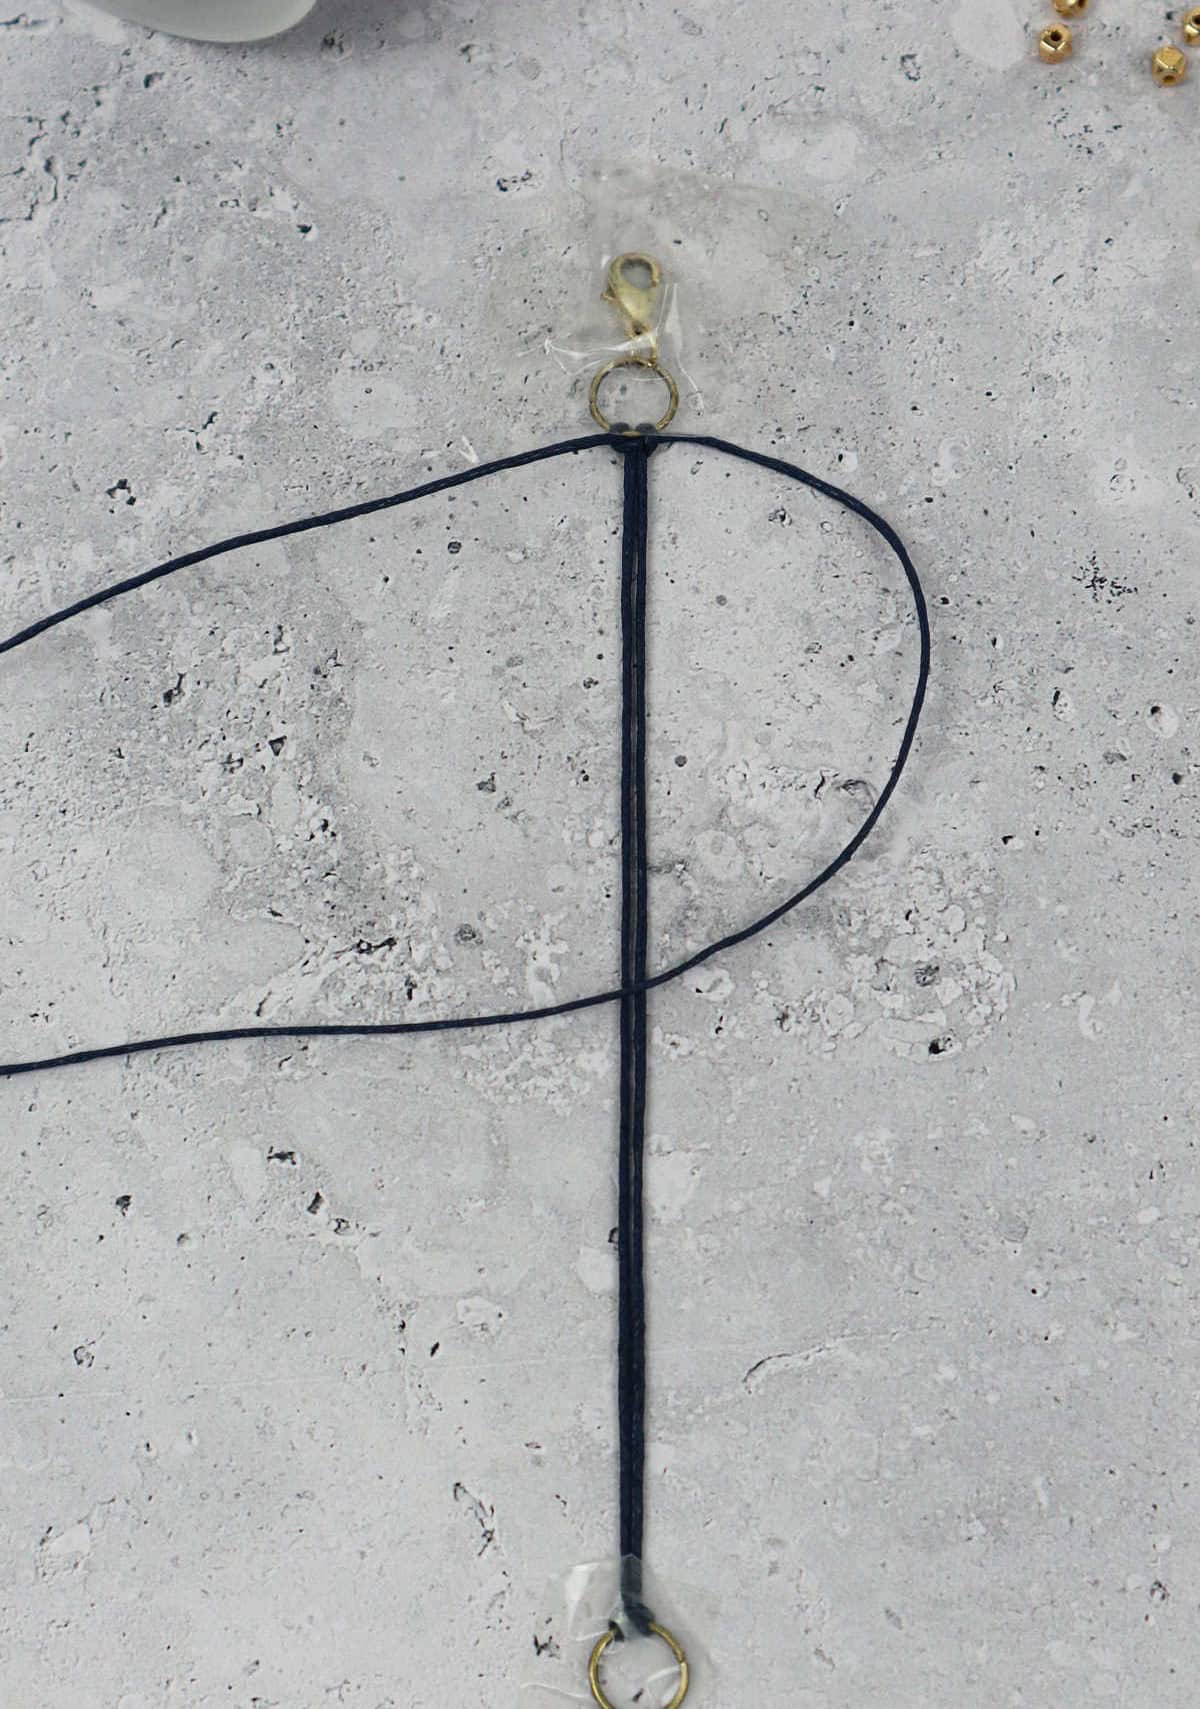


As you prepare to create a lobster claw, begin by securing it to your work surface using a small amount of tape. Ensure that the cords are properly aligned, with one on either side and two in the middle, as depicted below.
Next, form the foundation of your square knot by bringing the left cord over the central pair of cords, creating a 4-like shape.
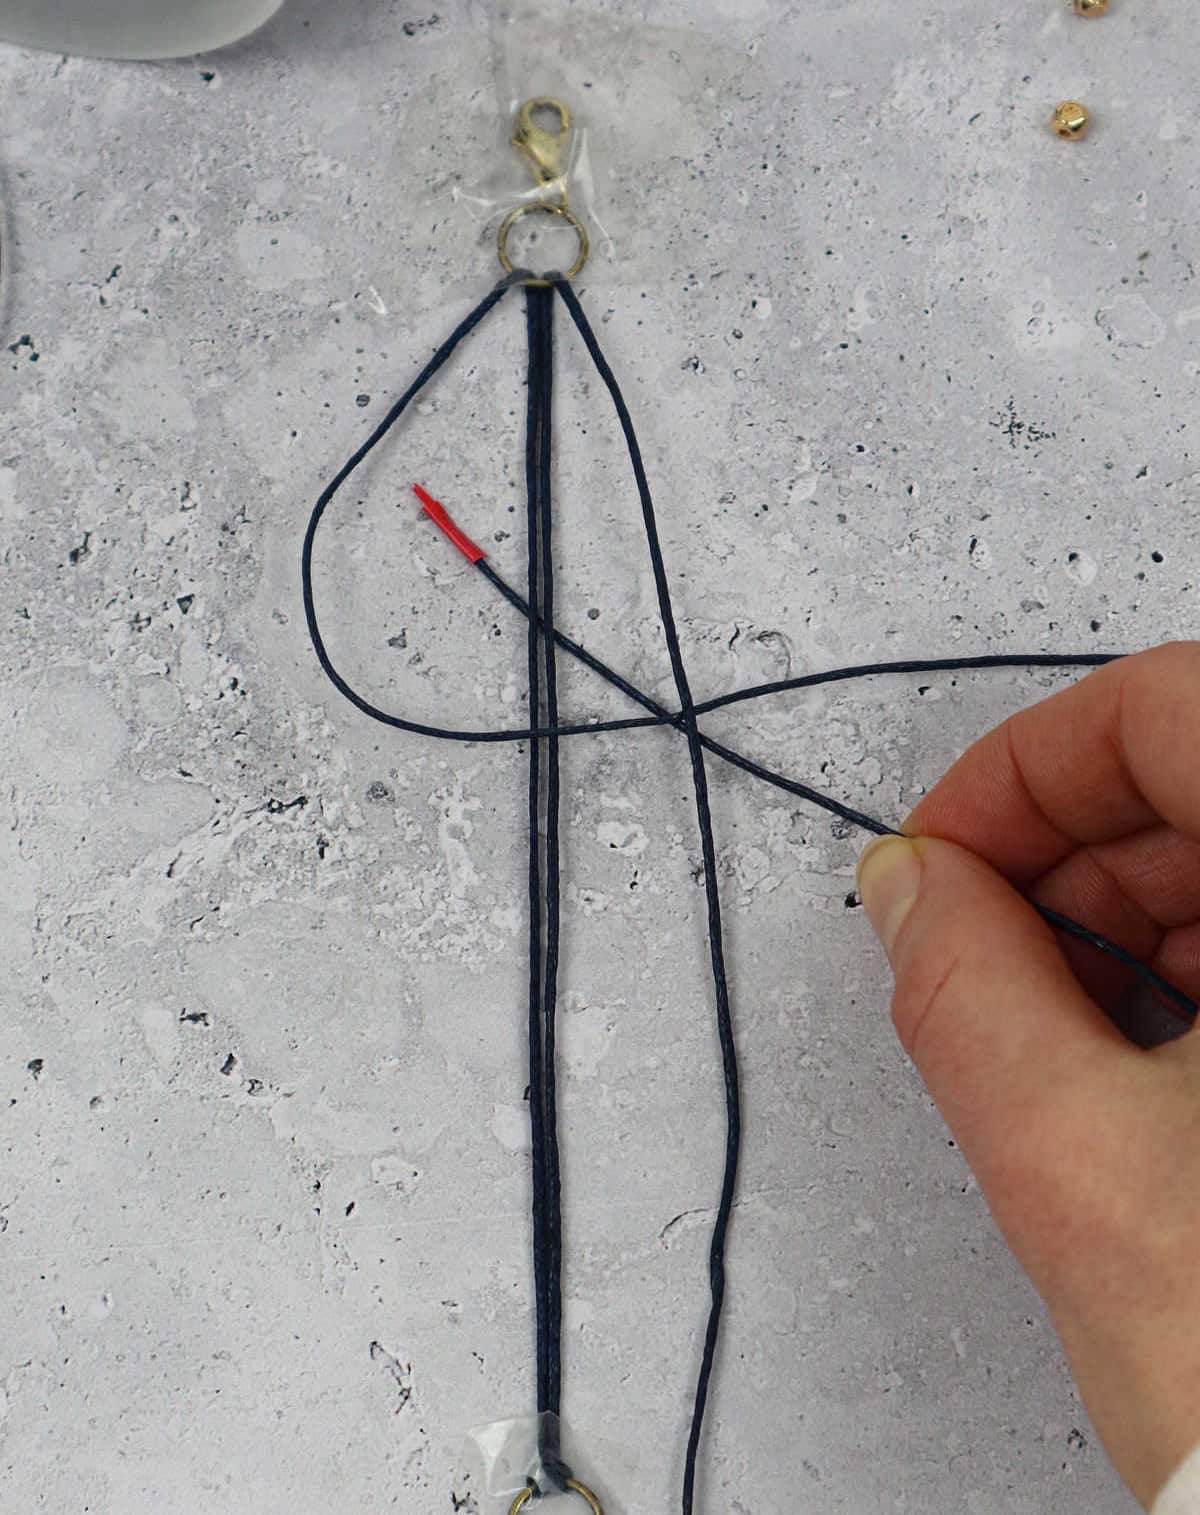
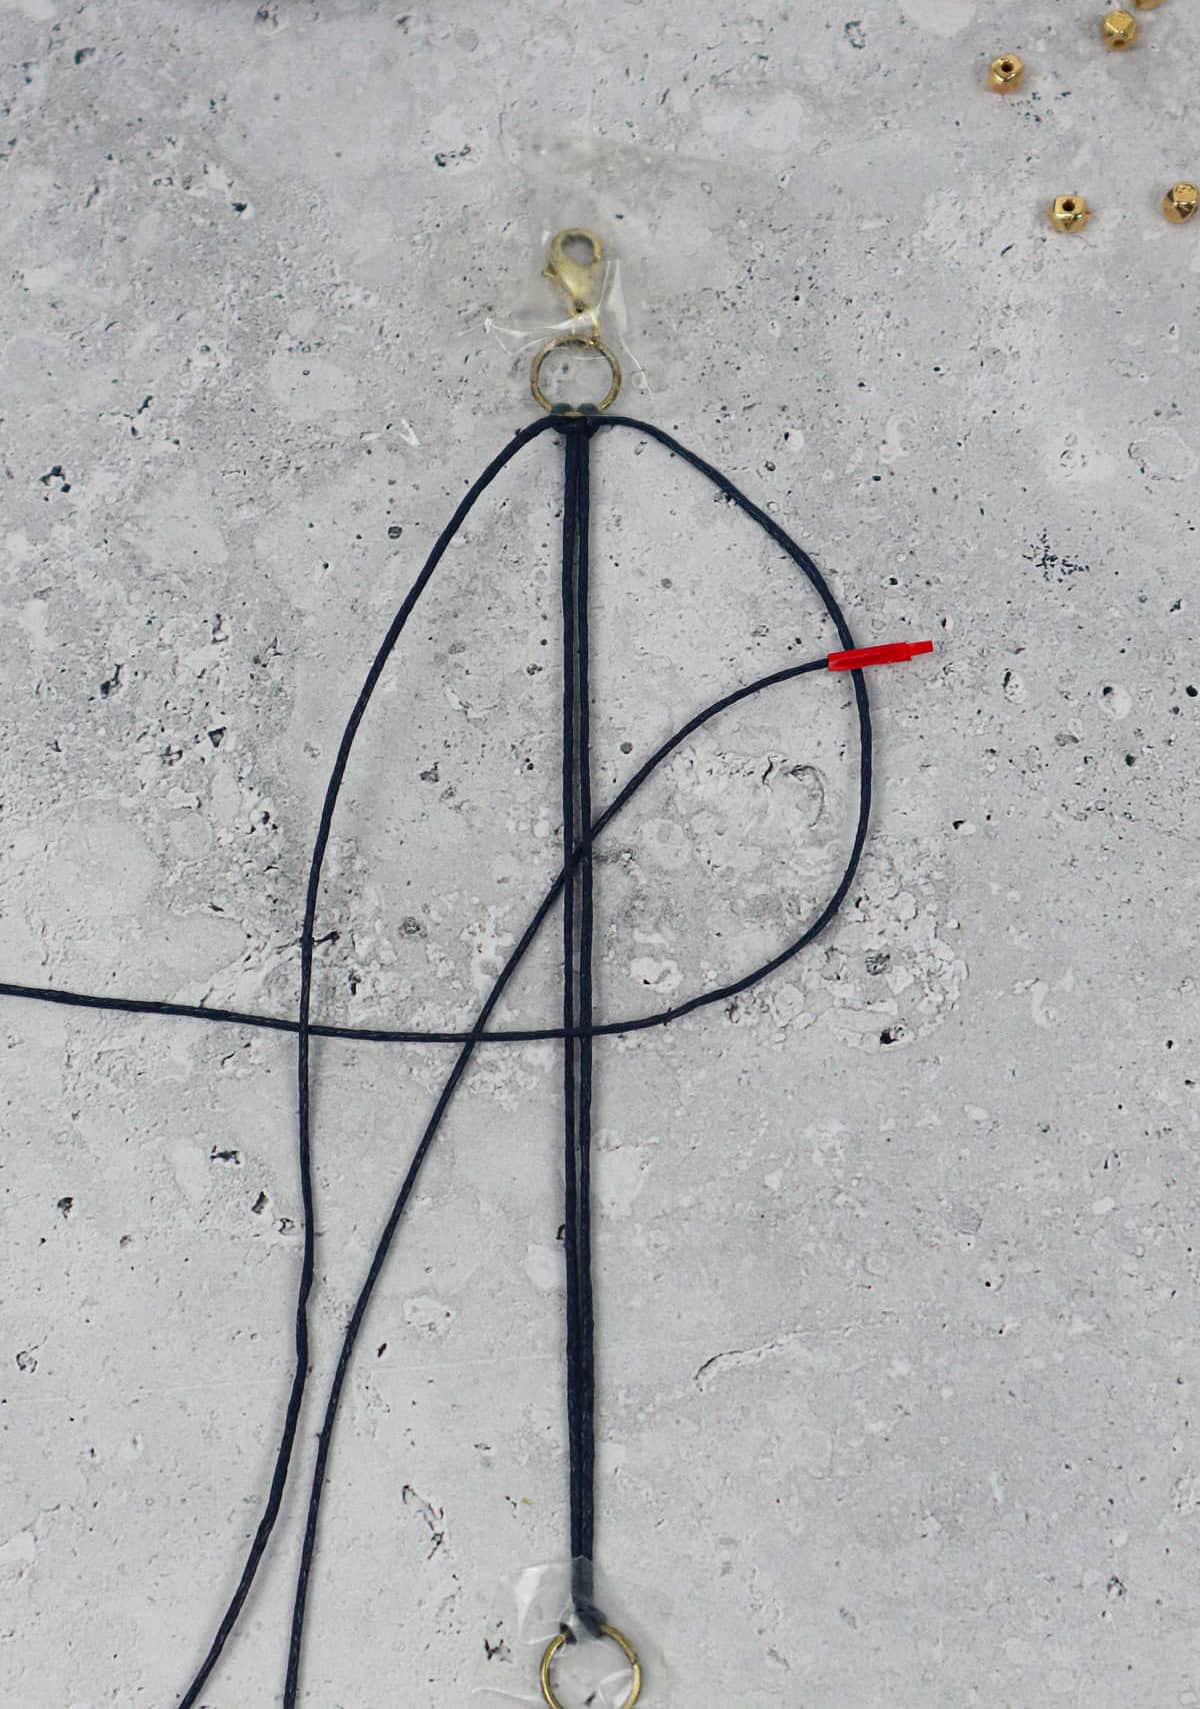
Subsequently, grasp the right cord and pass it over the left cord before slipping it underneath the central pair to pull it through the loop from below.
Don’t worry if this initial stage feels challenging – with practice, you’ll soon be effortlessly crafting intricate macrame designs!
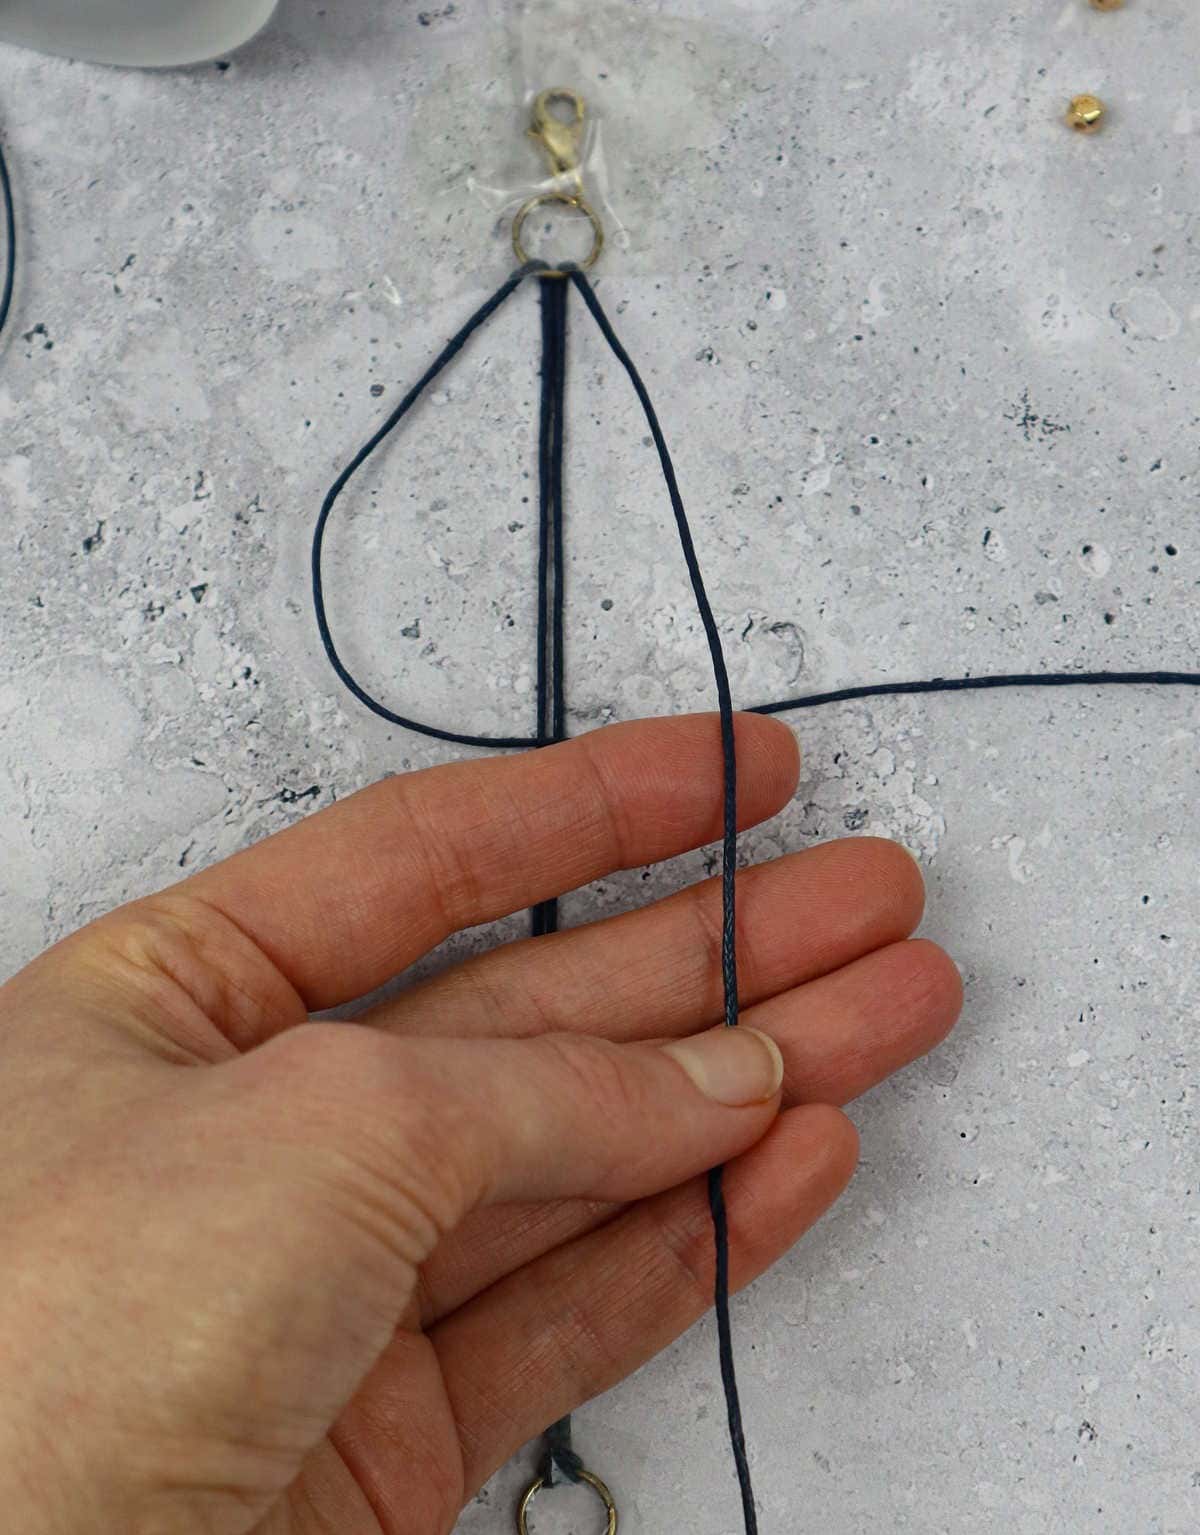
To finalize the first half of your square knot, gently tug both cord ends upwards to tighten the knot at its base.
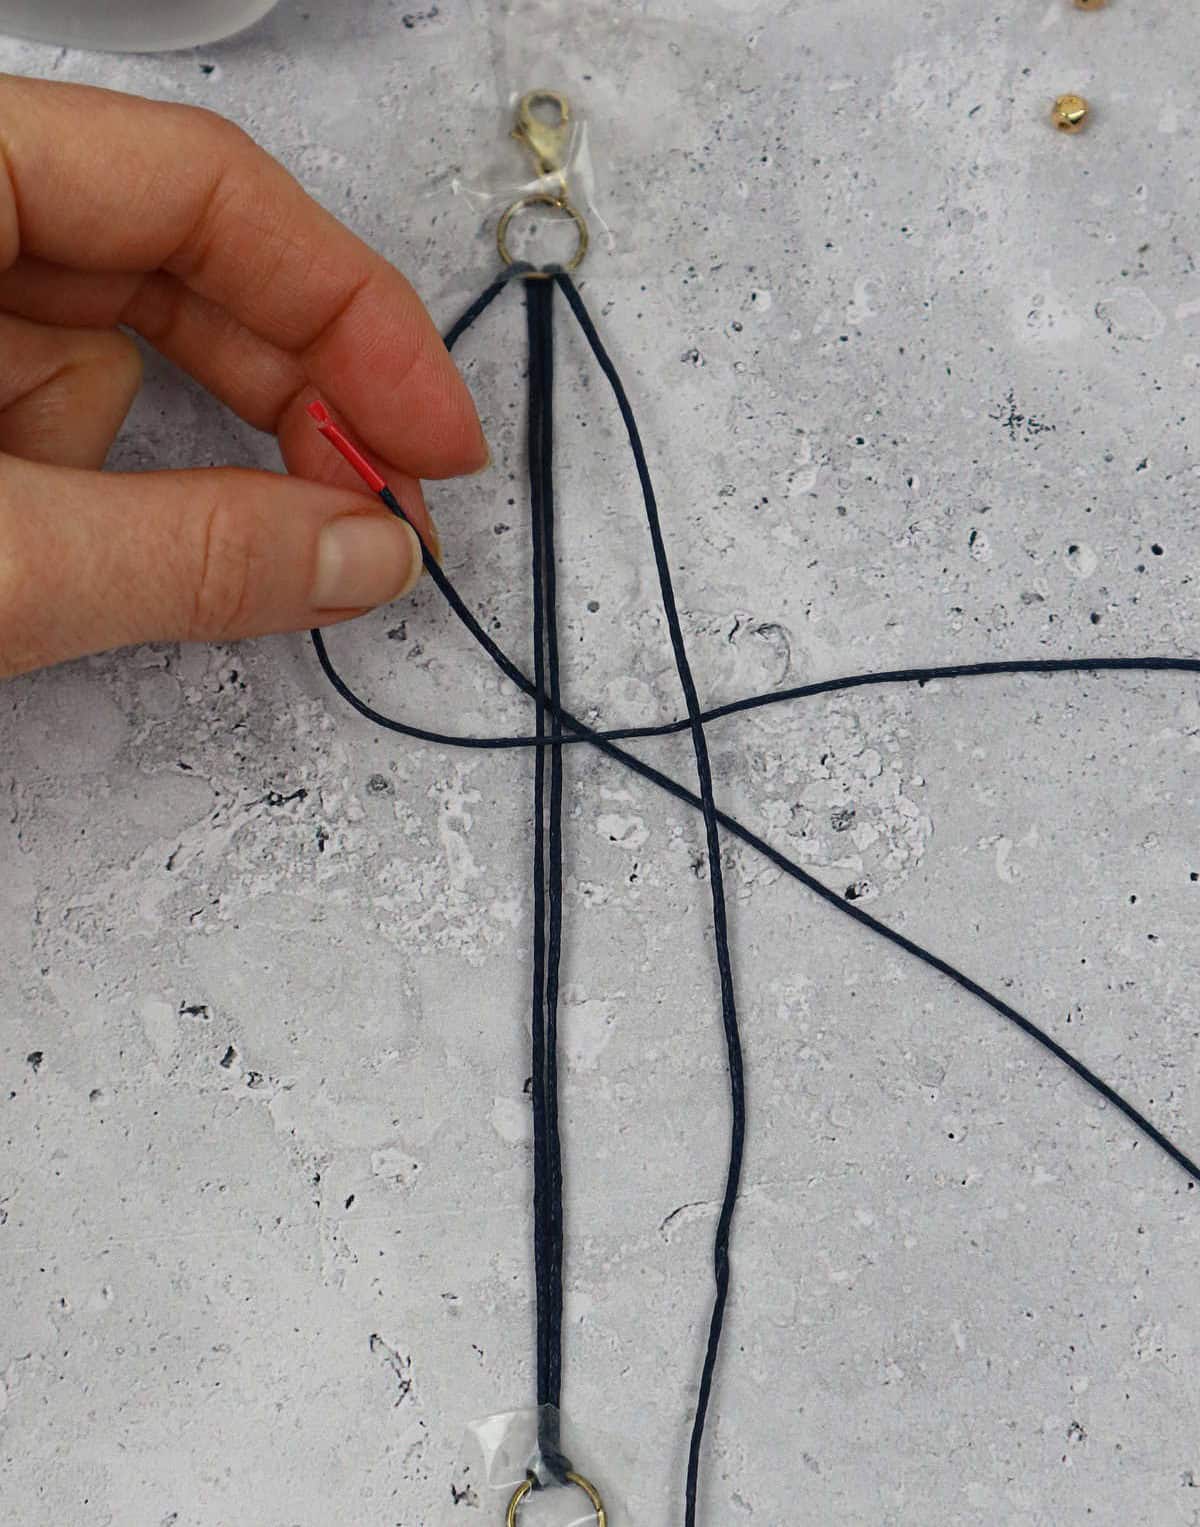
This marks only the beginning of your square knot, so let’s now complete the second half.
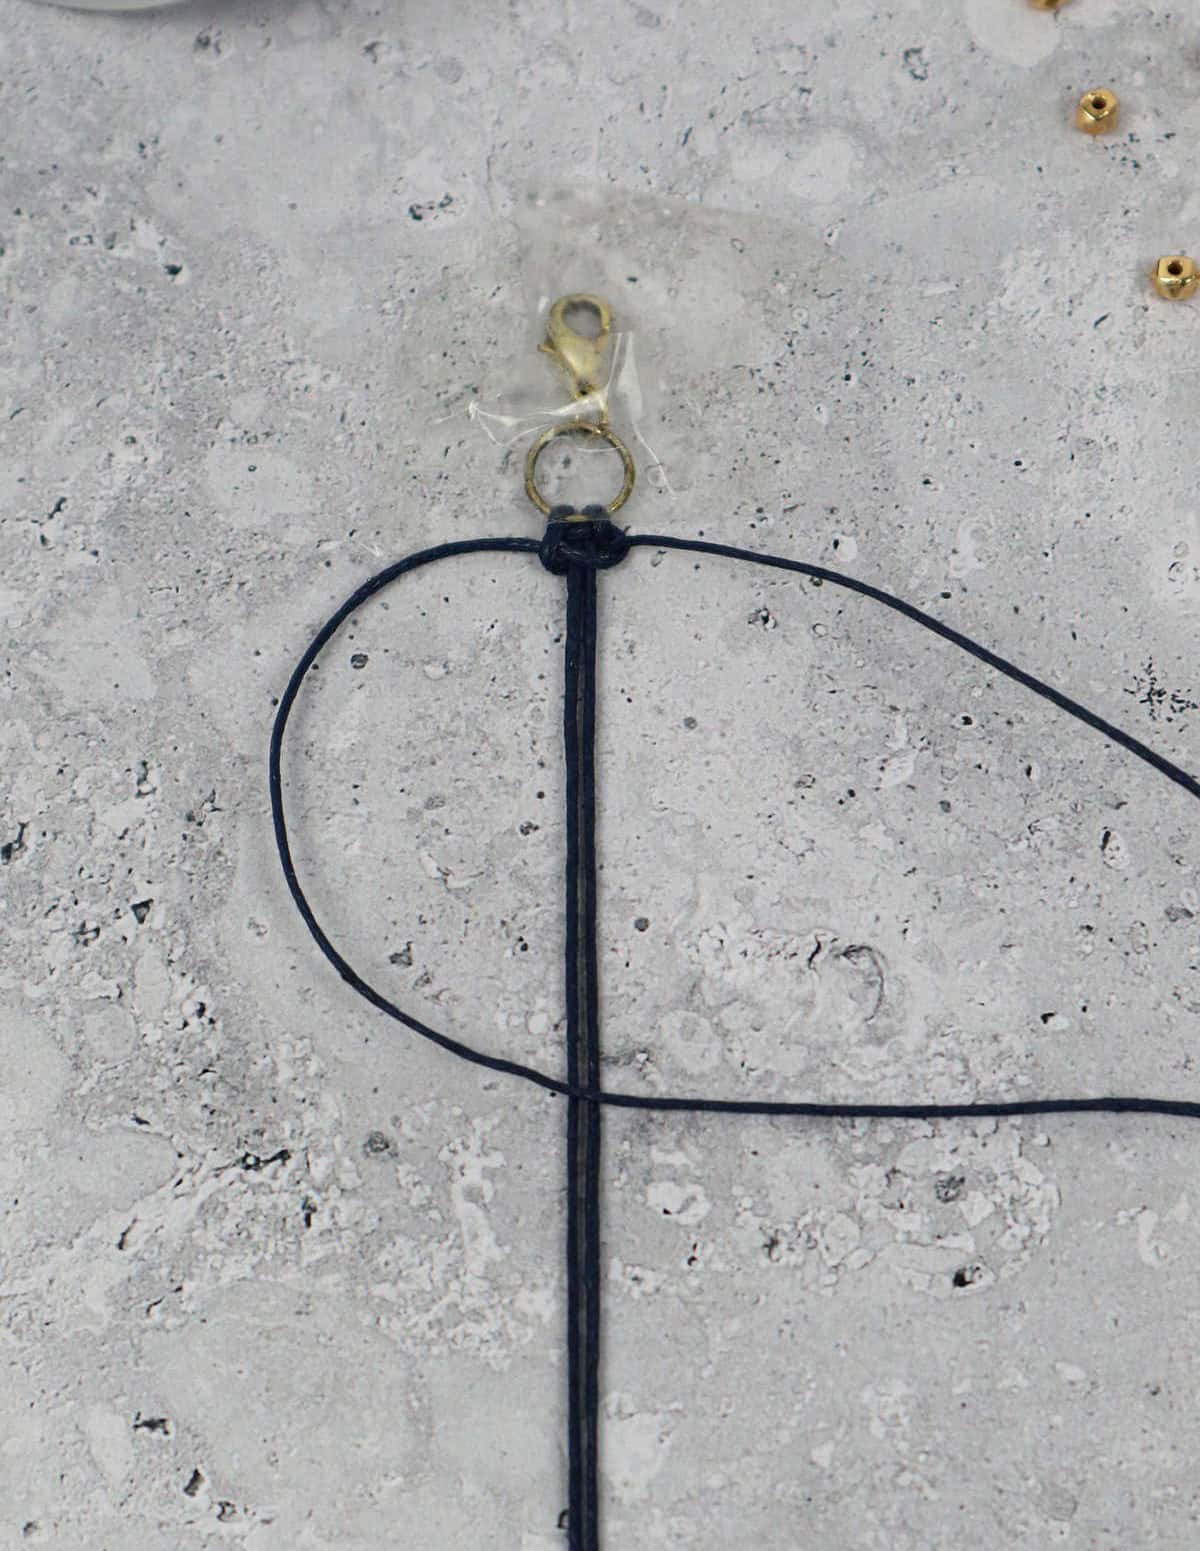
Begin by manipulating the right cord, guiding it over the central pair before bringing the left cord over the right as seen here.
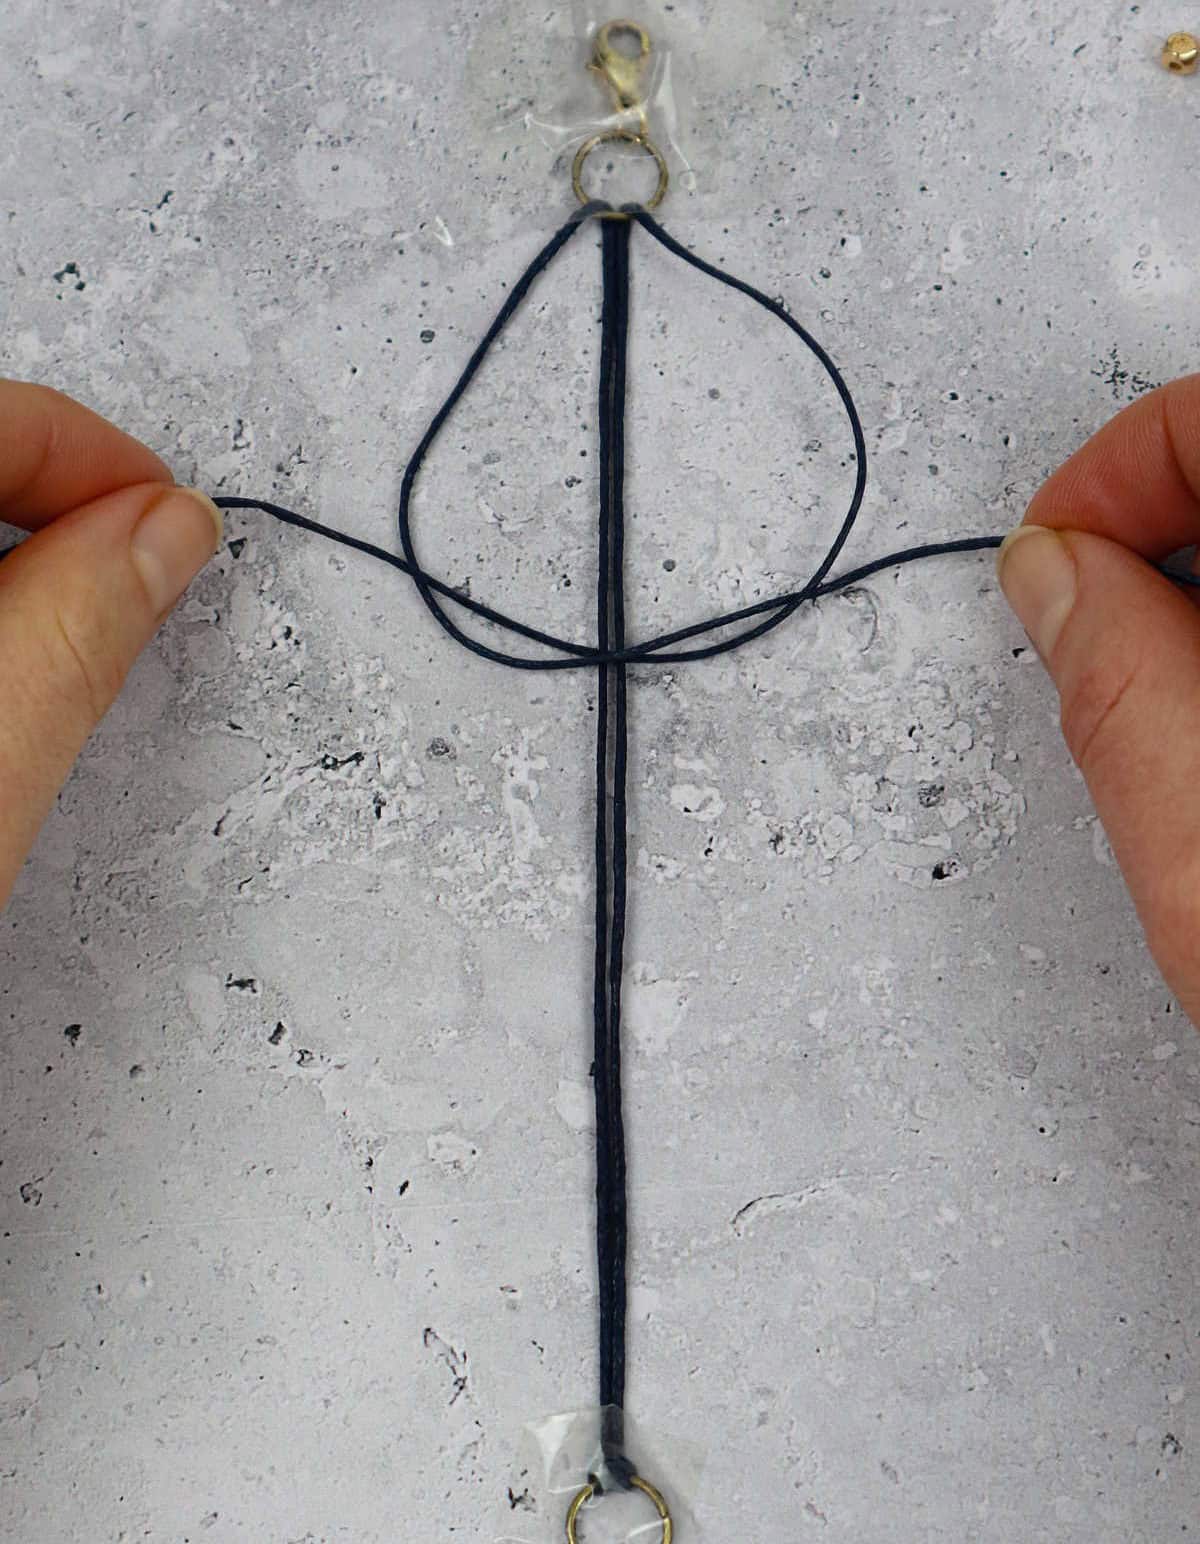
Next, pass the left cord under the central pair and through the loop from below on the right. Once again, tug both cord ends to secure the completed square knot.
Step 5
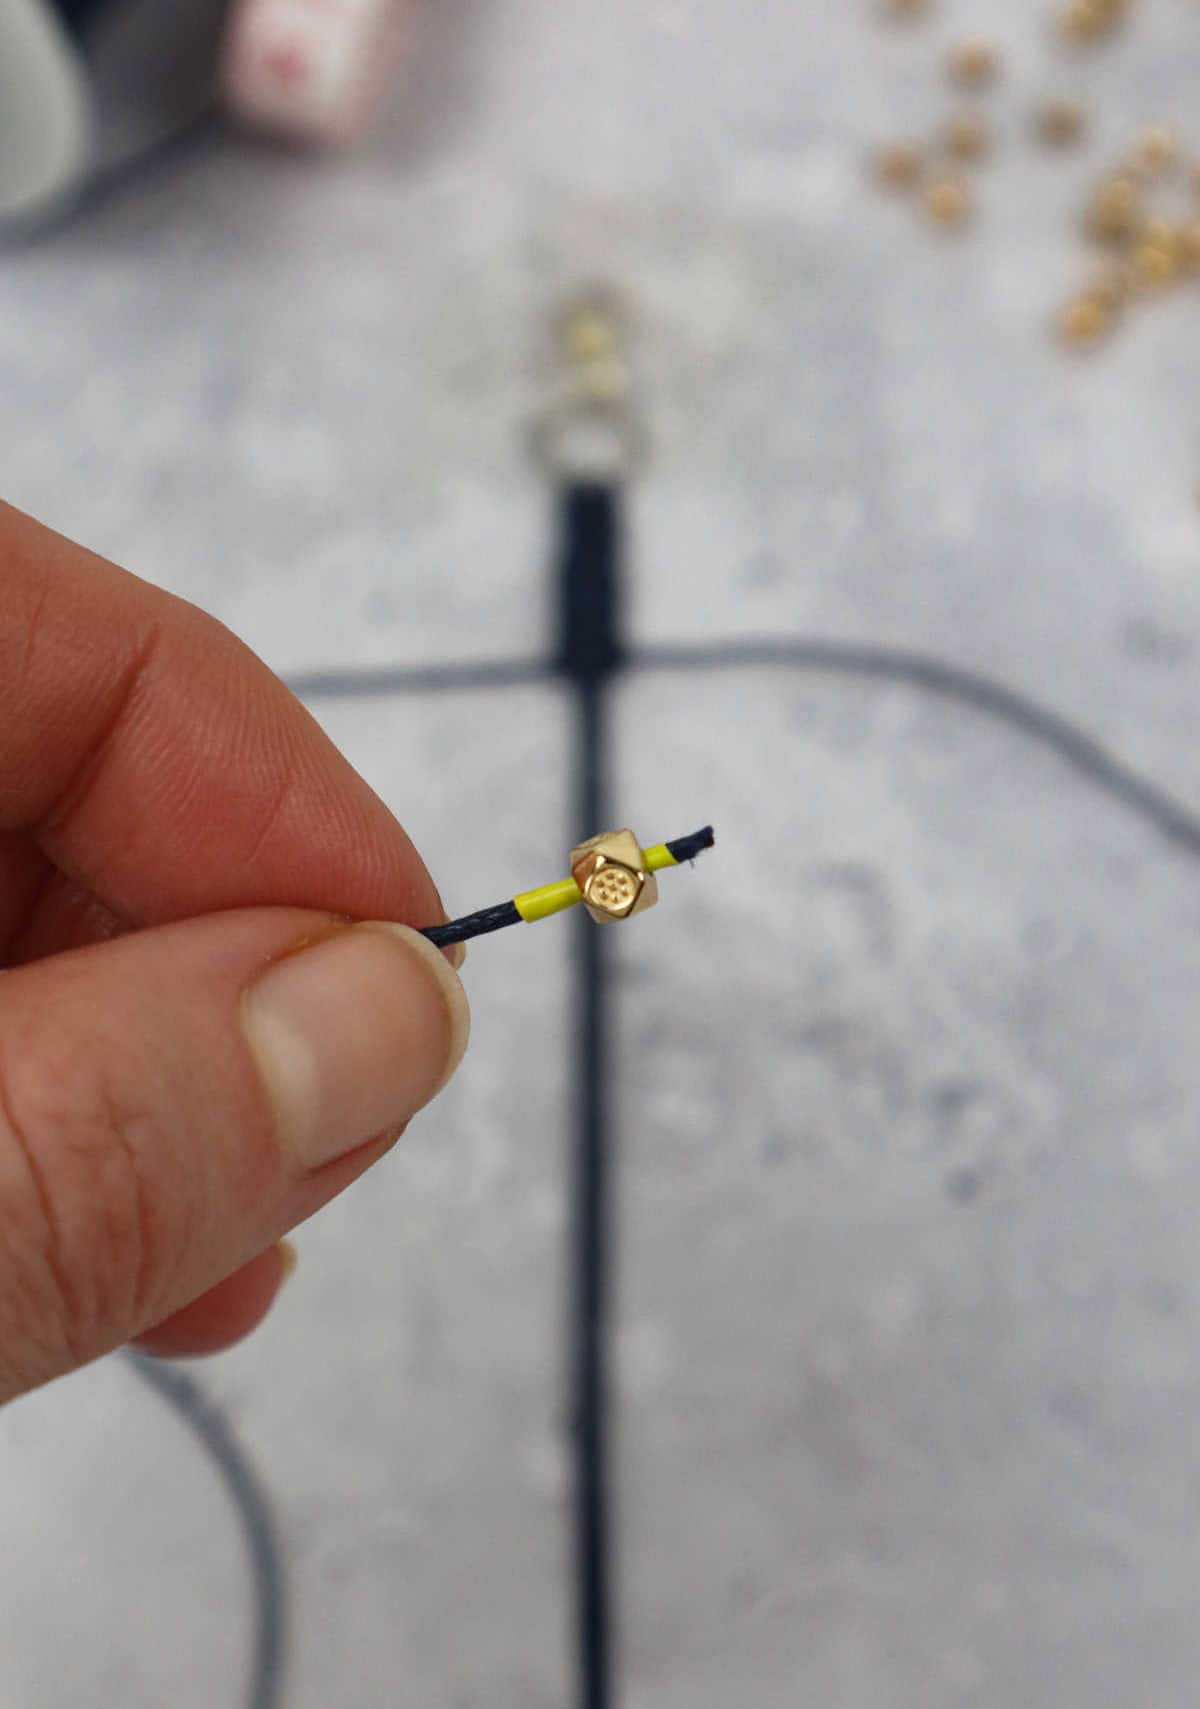
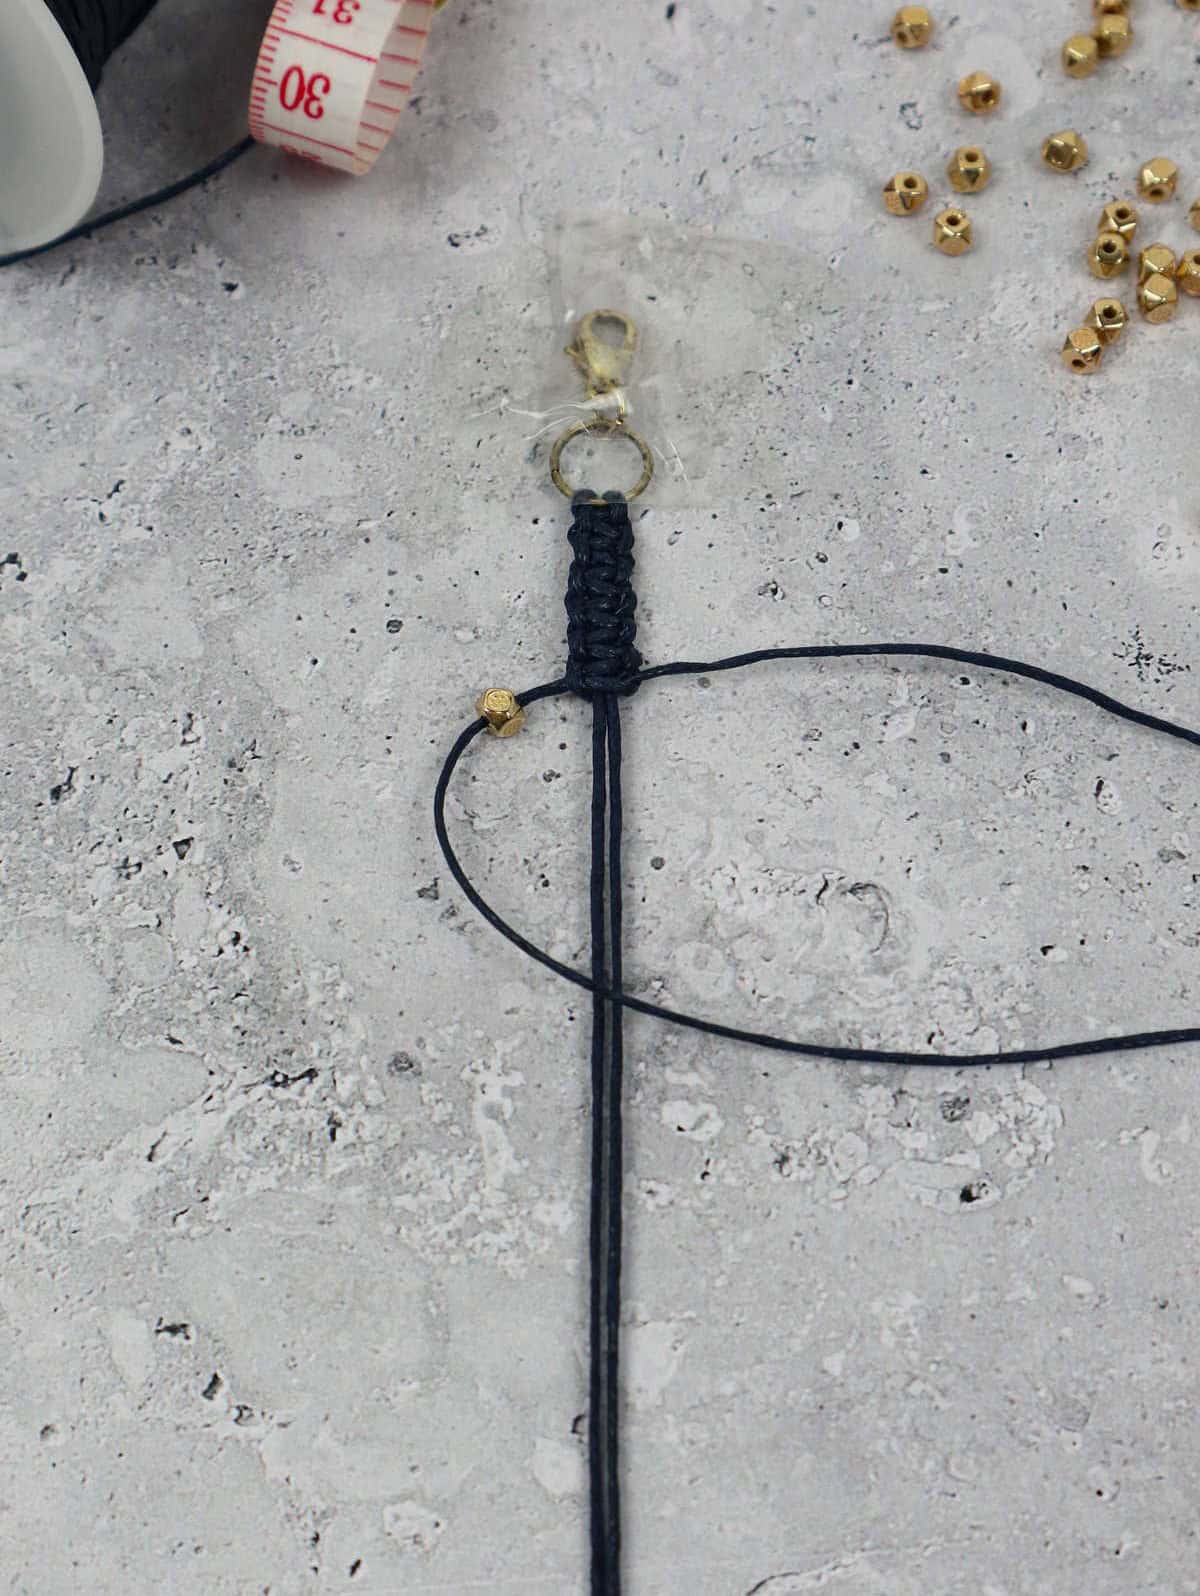
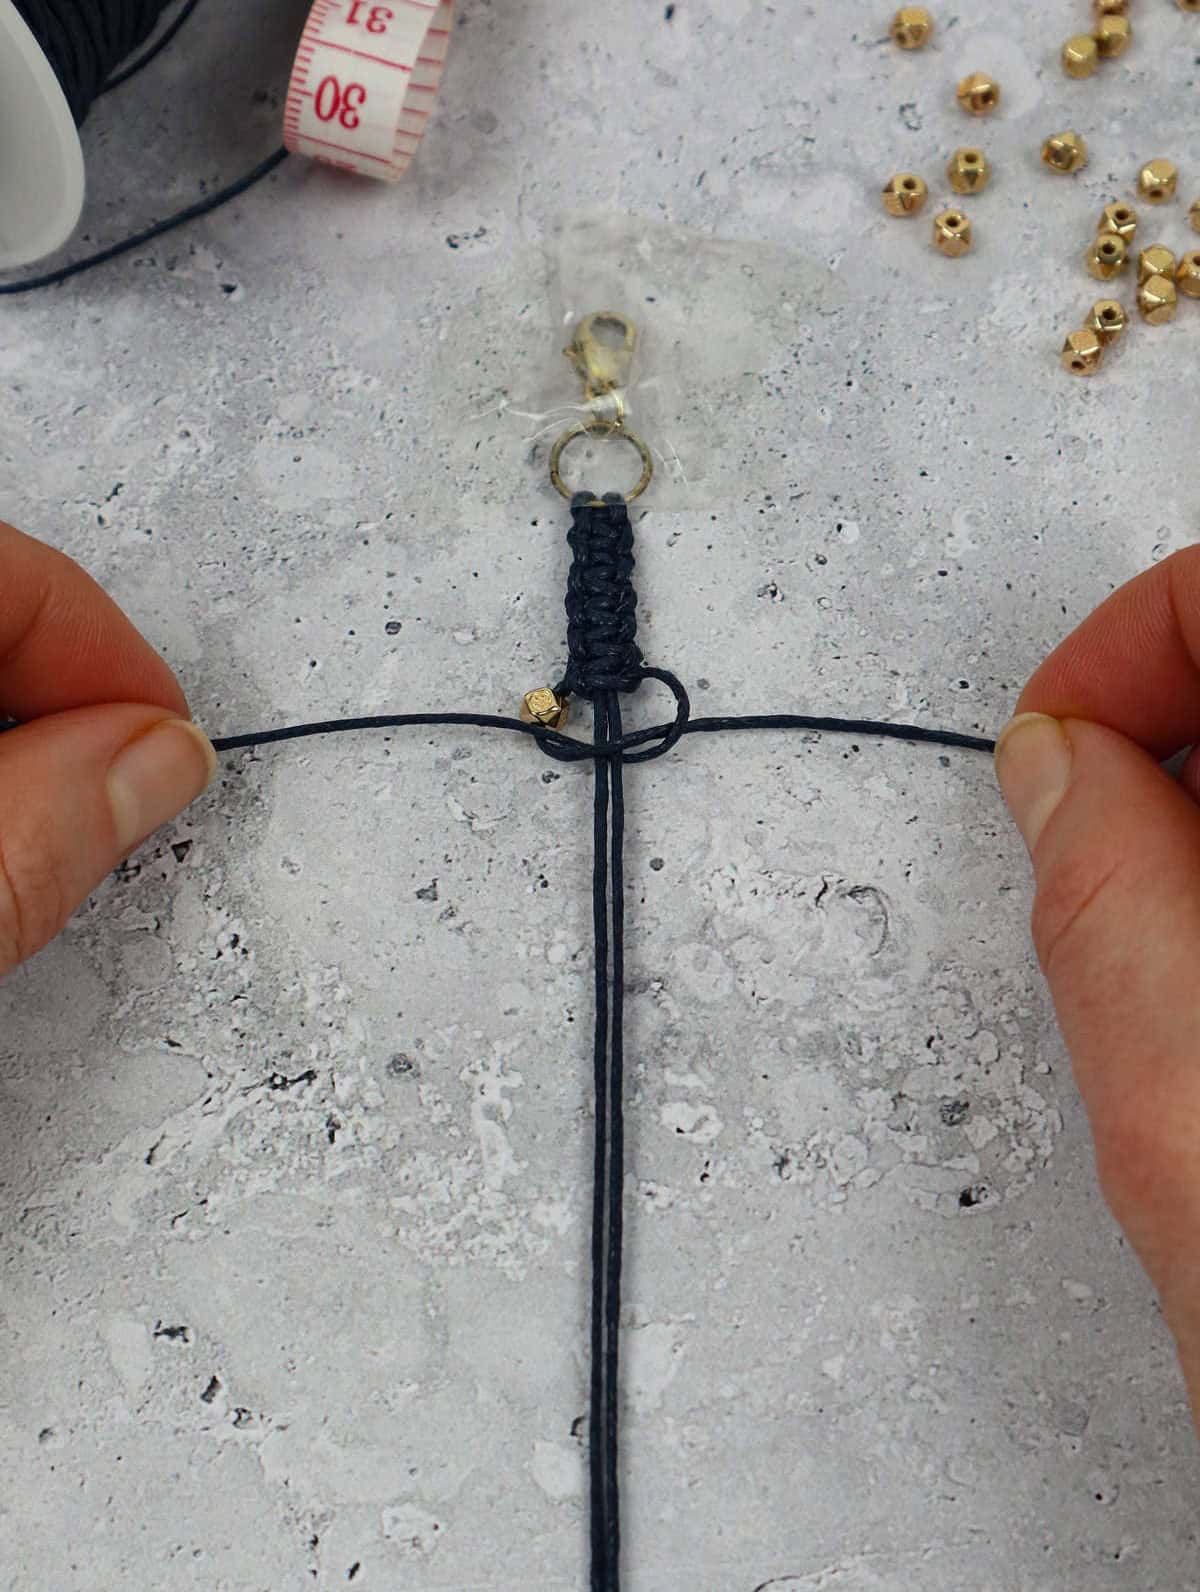
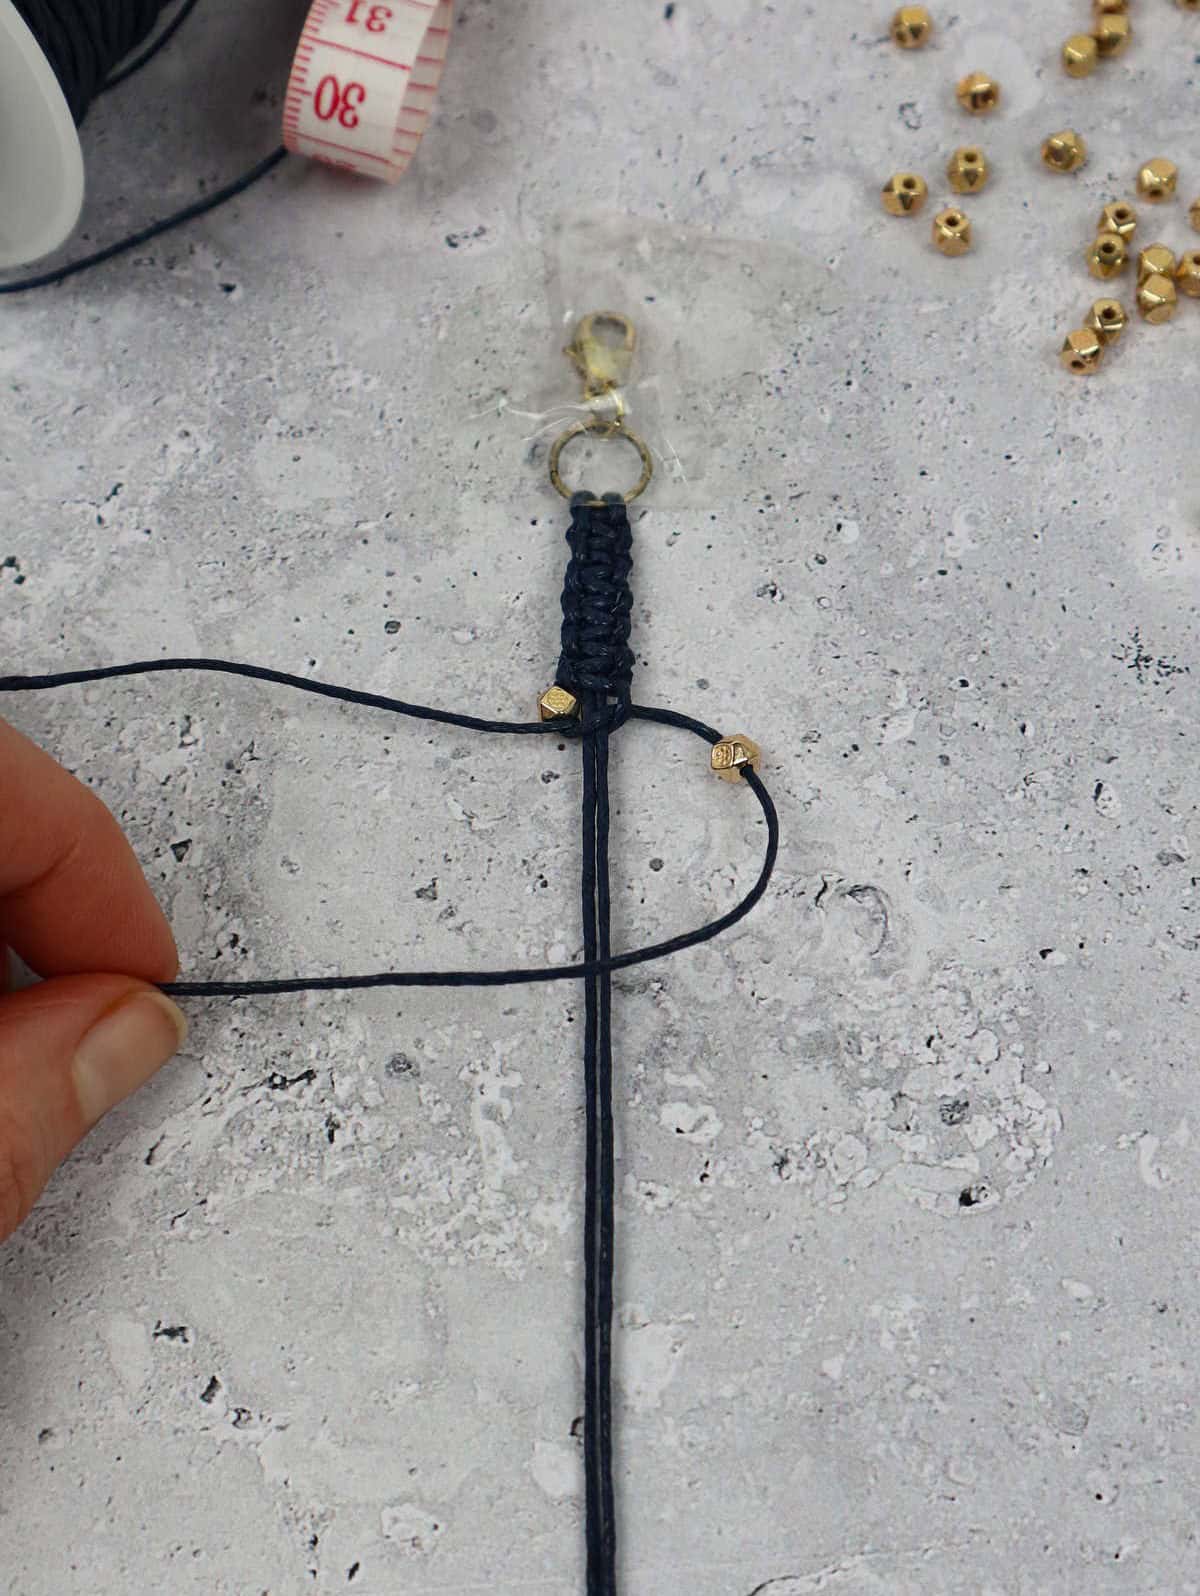
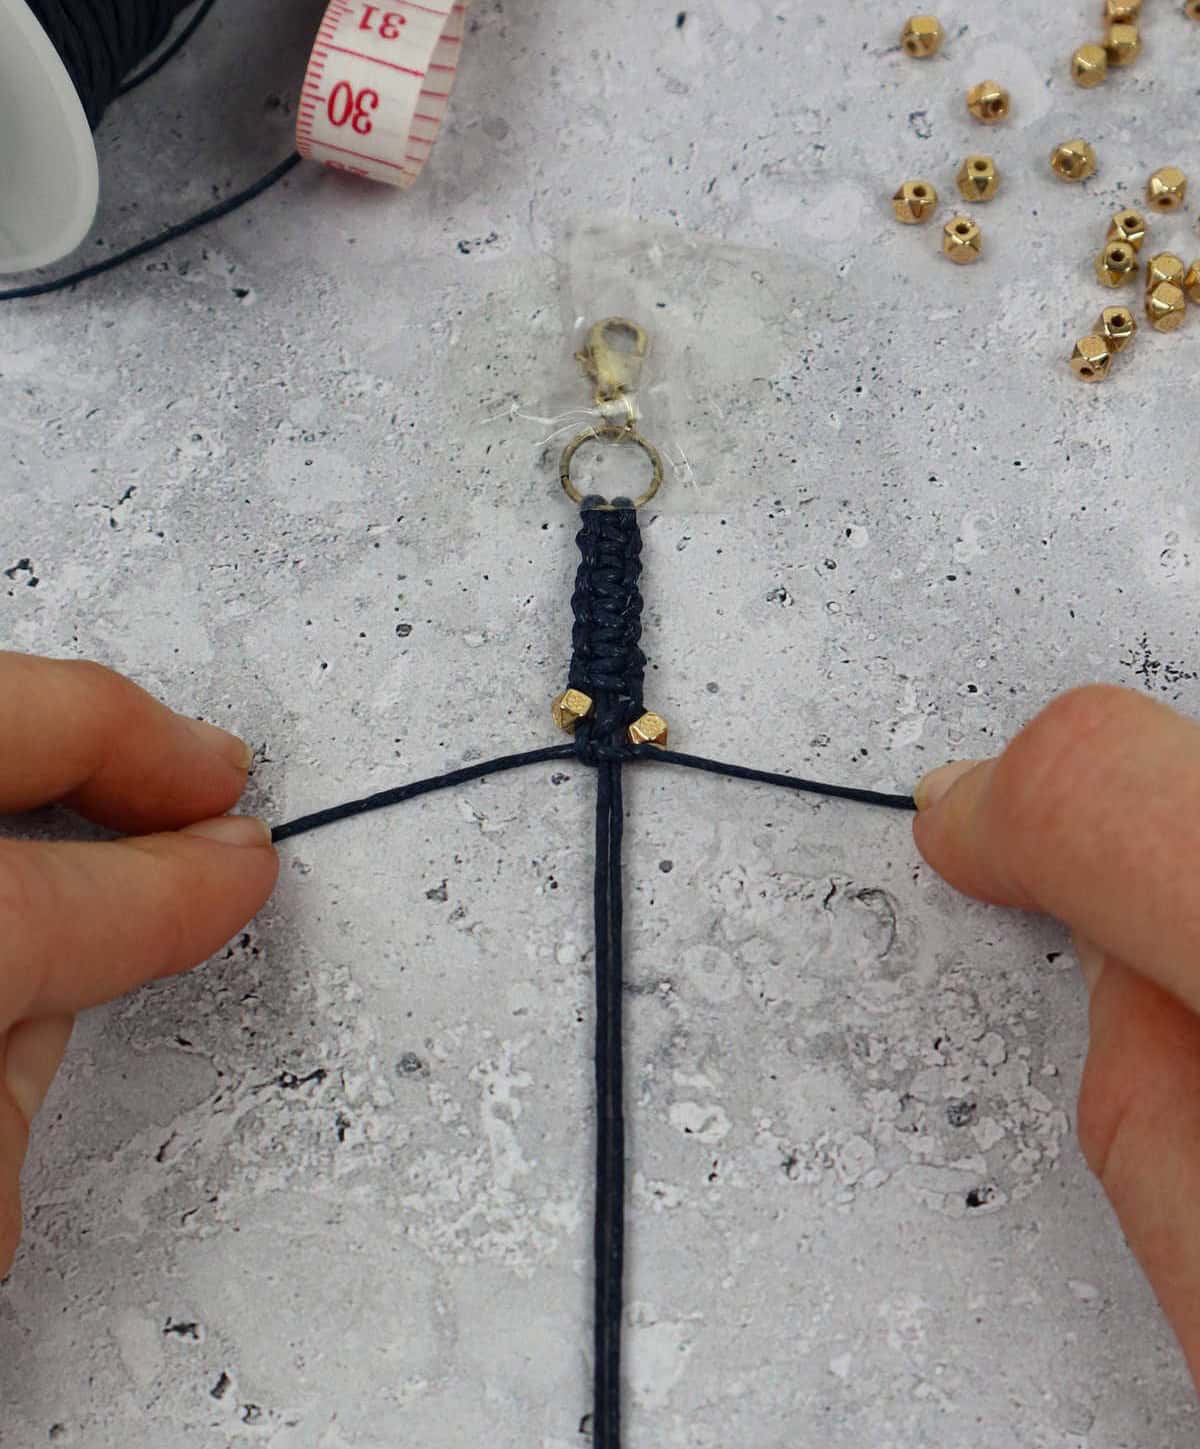

To add bulk to your bracelet, create a series of square knots along its length. If you’re including beads in your design, now is the ideal time to do so. To simplify the process, tape the cord ends together for easy threading. Once you’ve threaded a bead, secure it with the first half of a square knot on the left side and the second bead can be secured with the second half on the right. Continue this pattern all the way down the bracelet’s length, inserting beads as desired.
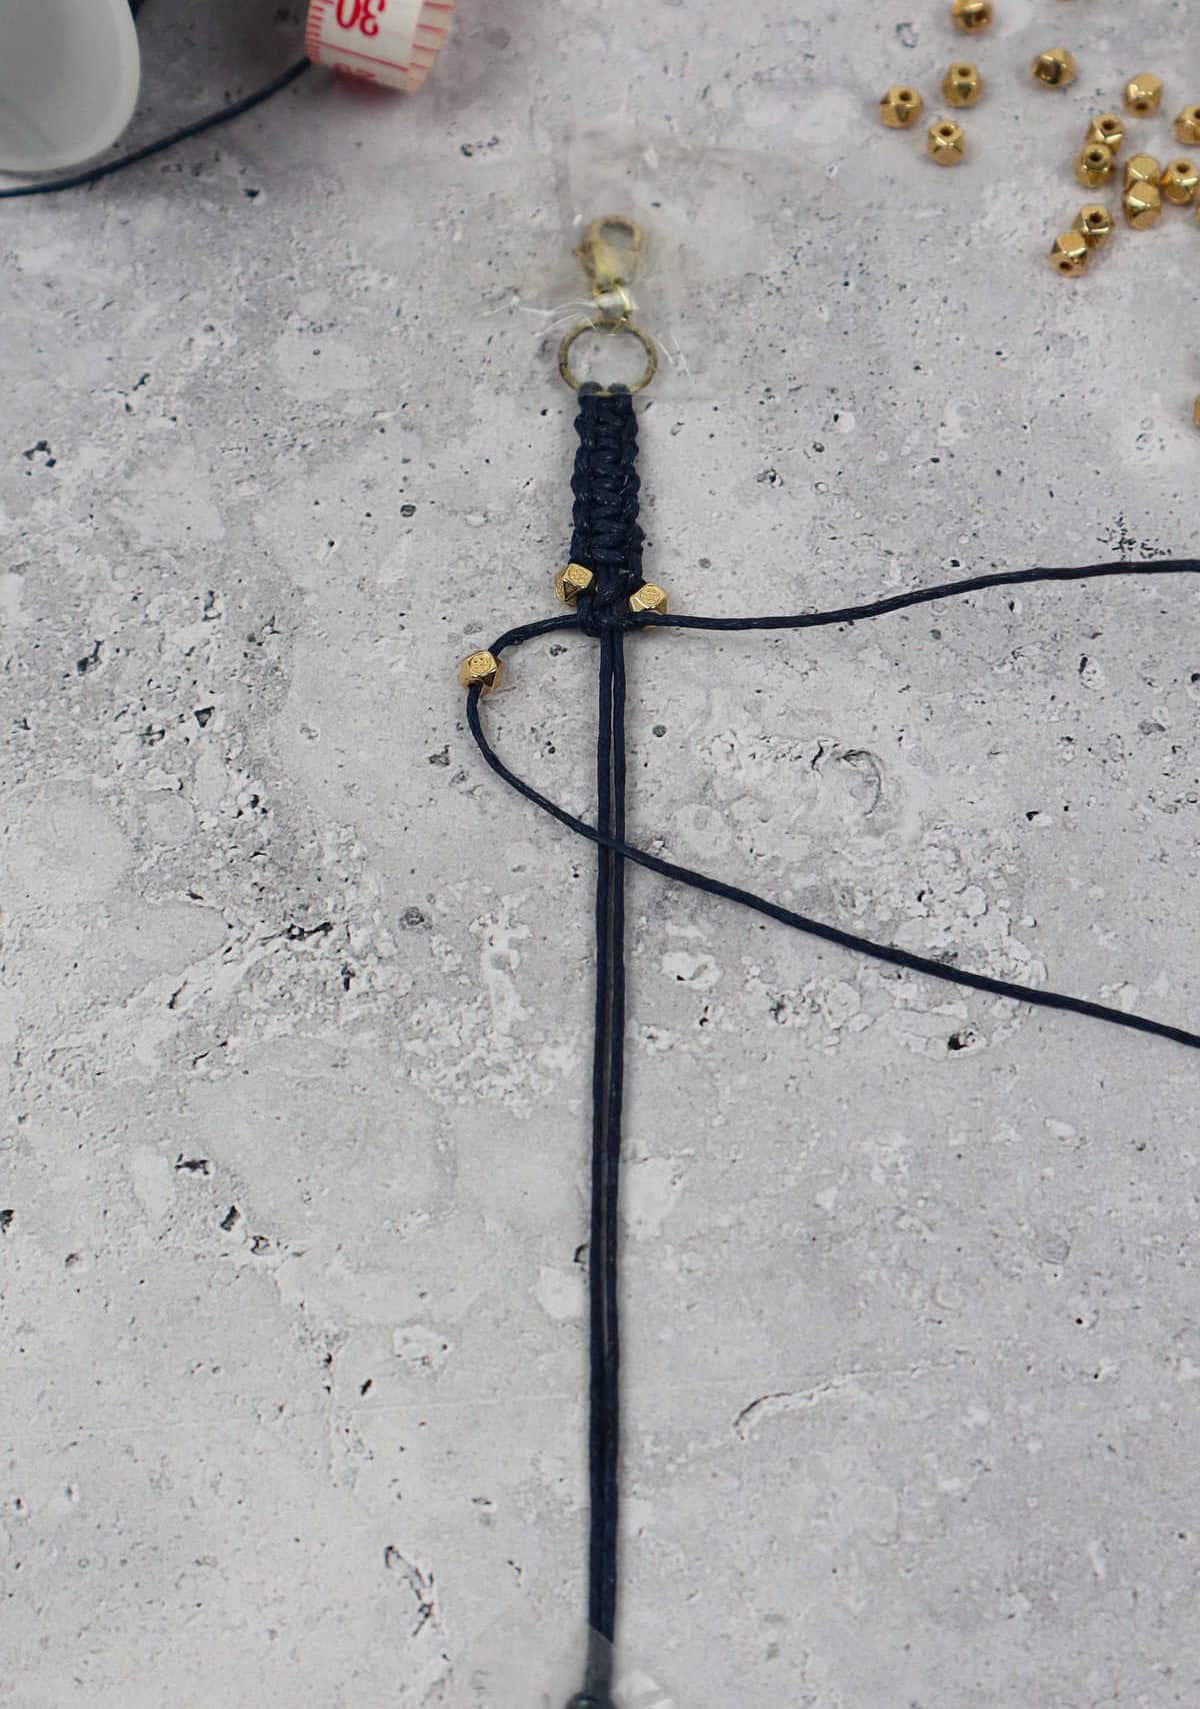
Step 6
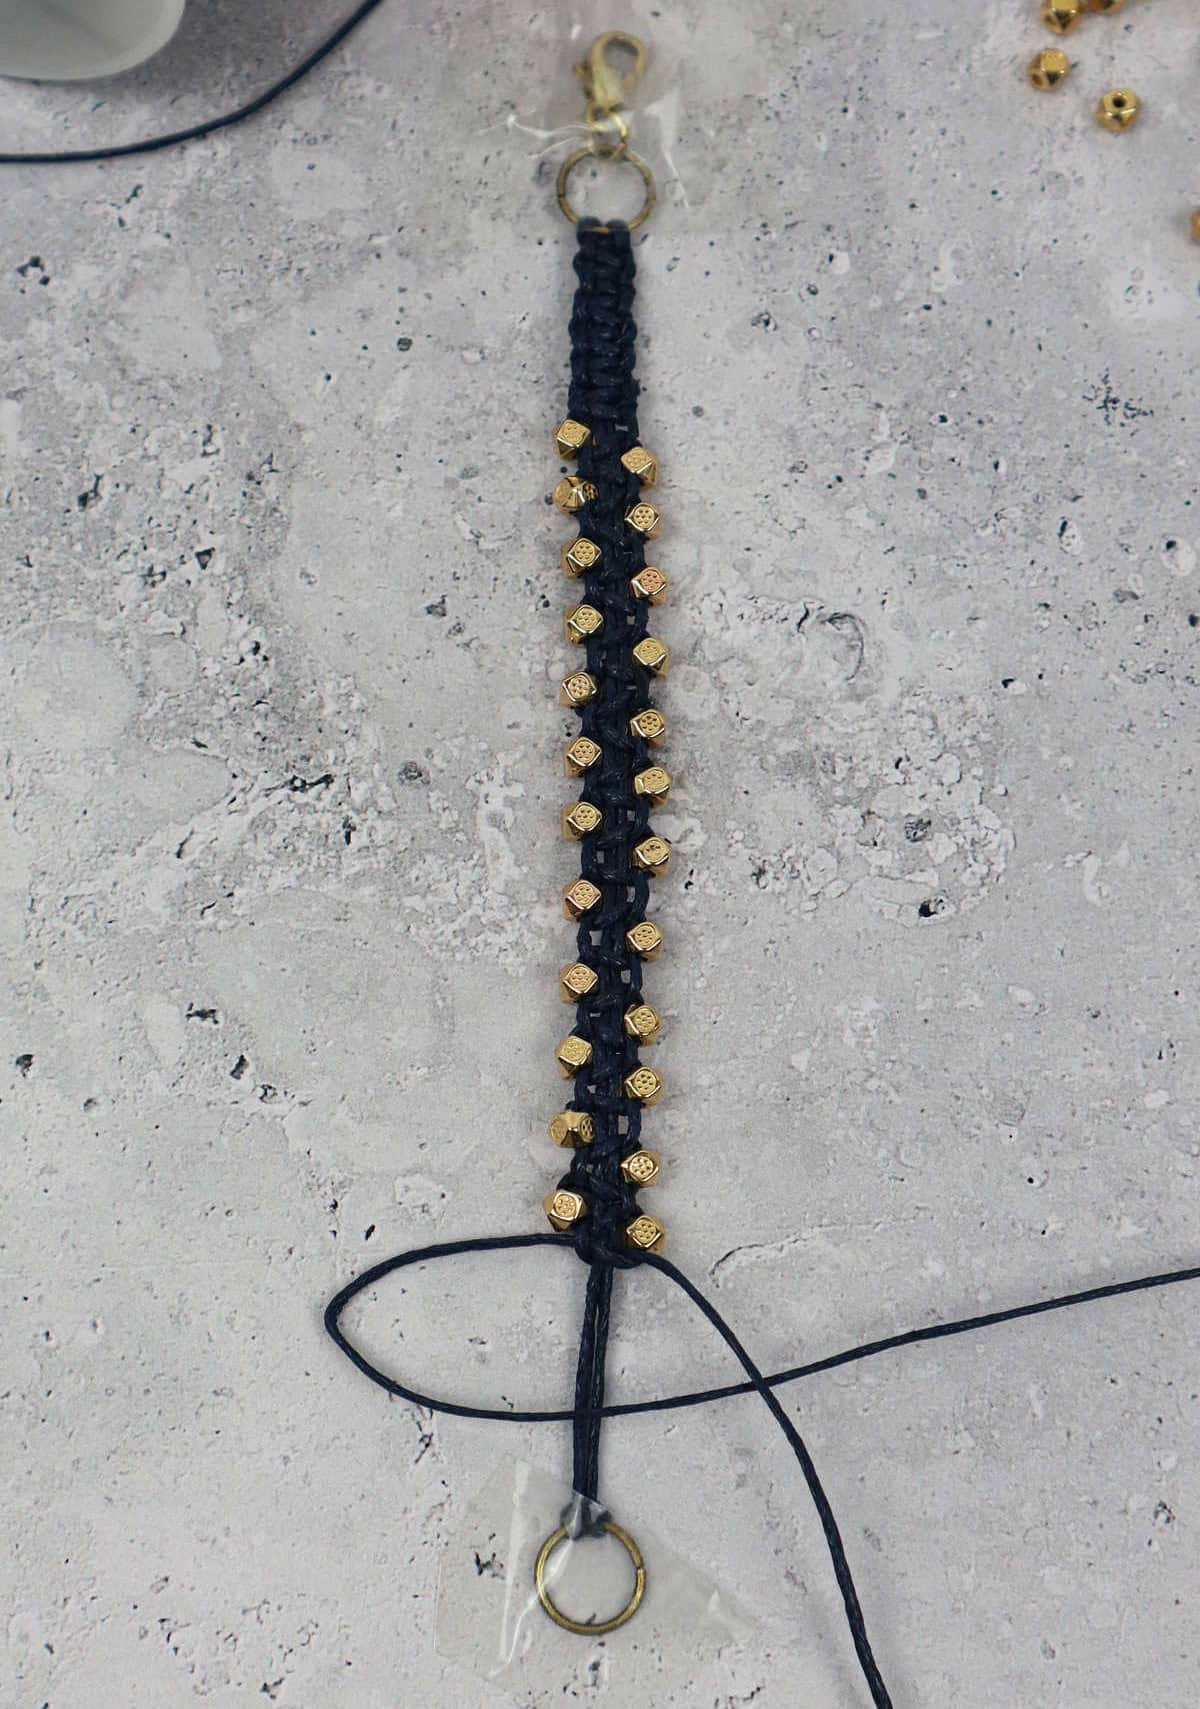
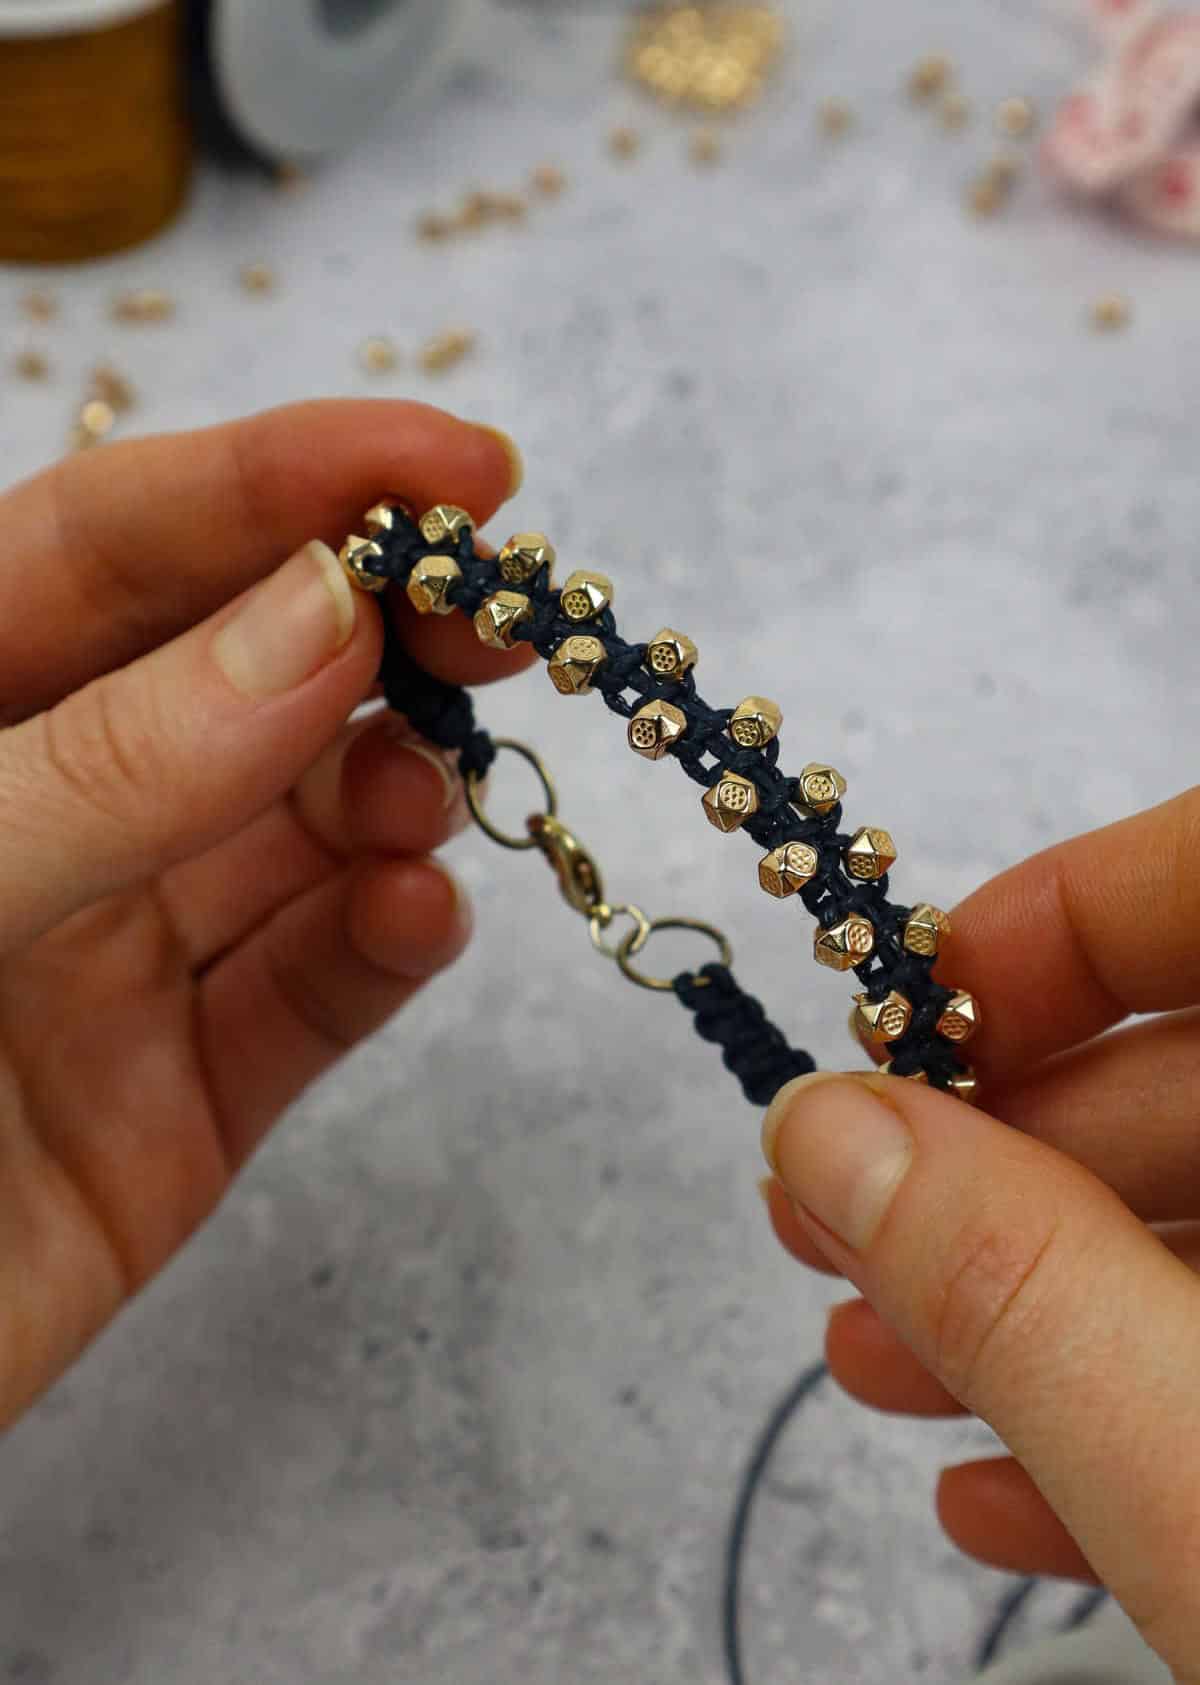
As with any craft project, it’s essential to maintain symmetry when creating a beaded bracelet. To achieve this balance, ensure you work an identical number of square knots on both ends before securing the final fastening. This meticulous approach will guarantee your design looks polished and well-executed.
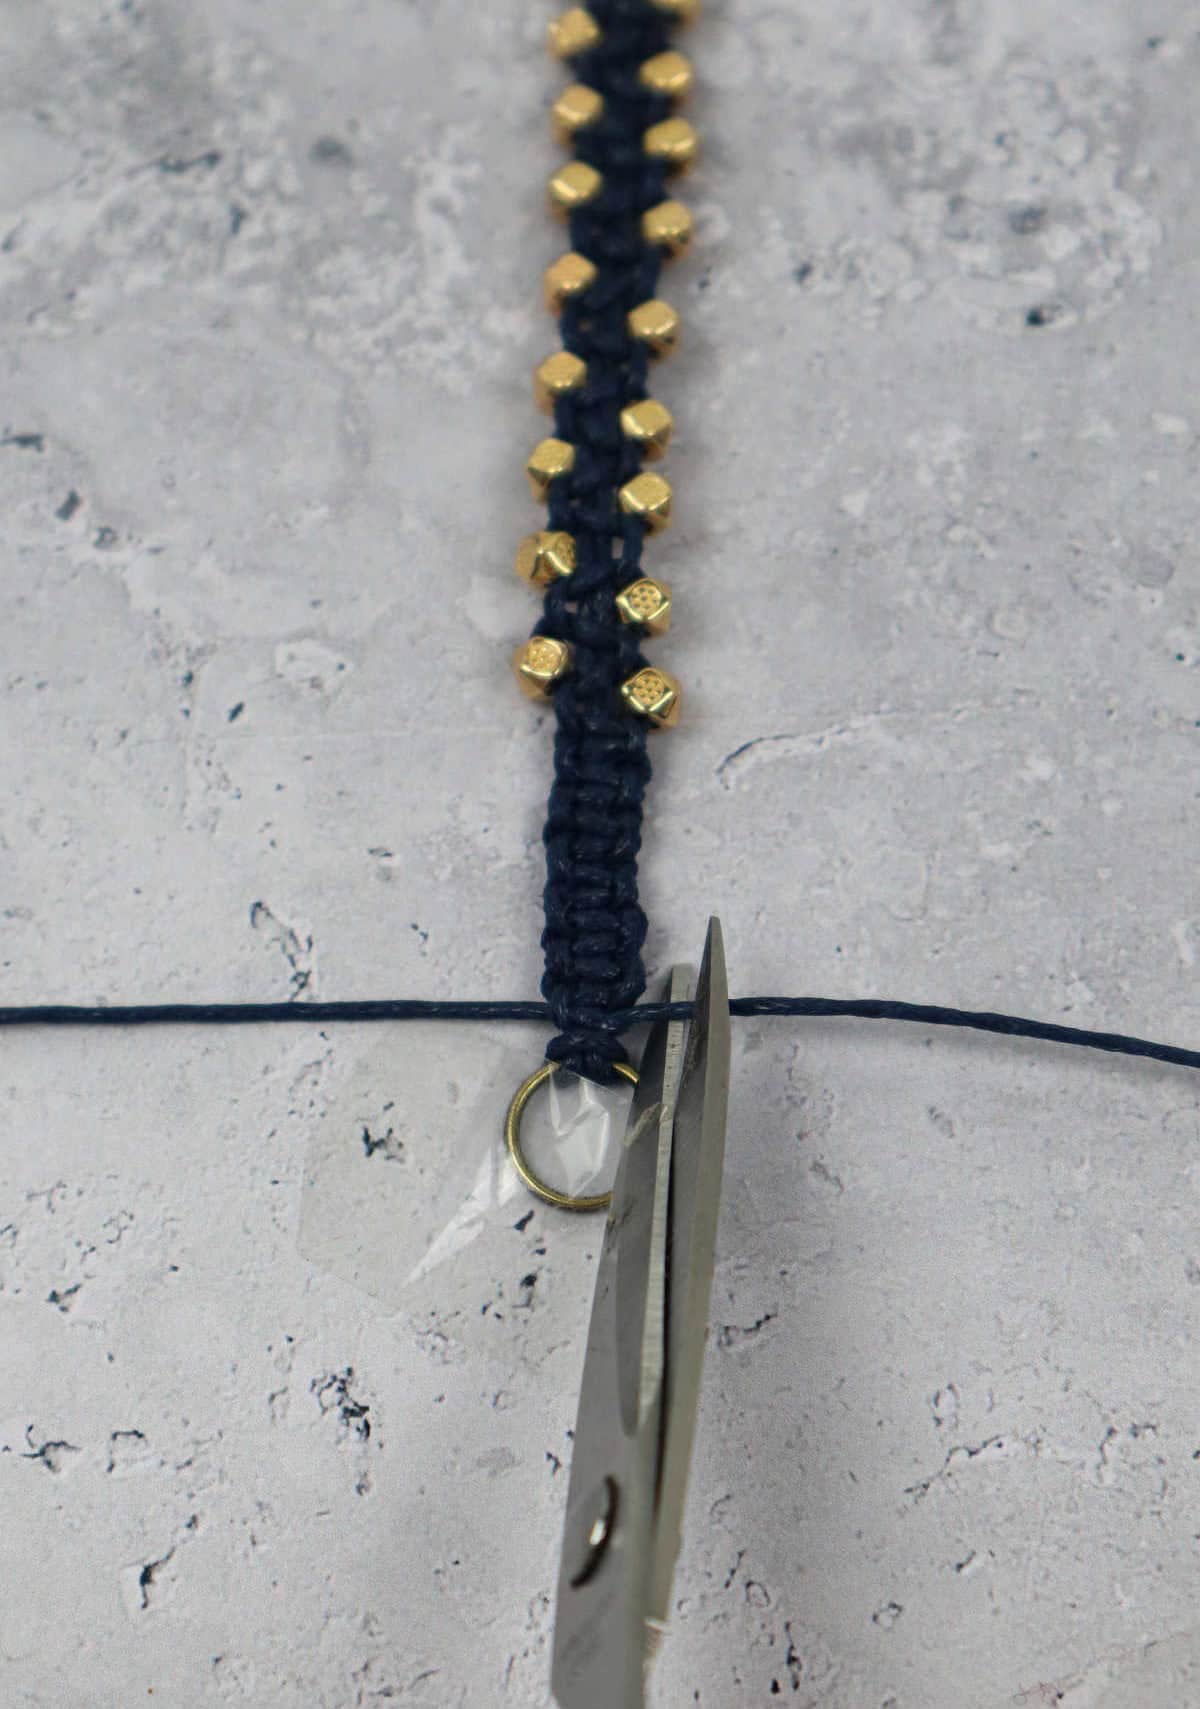
Proceed with crafting those knots, ultimately culminating at the opposite end where you’ll secure the last square knot atop the second JMP ring.
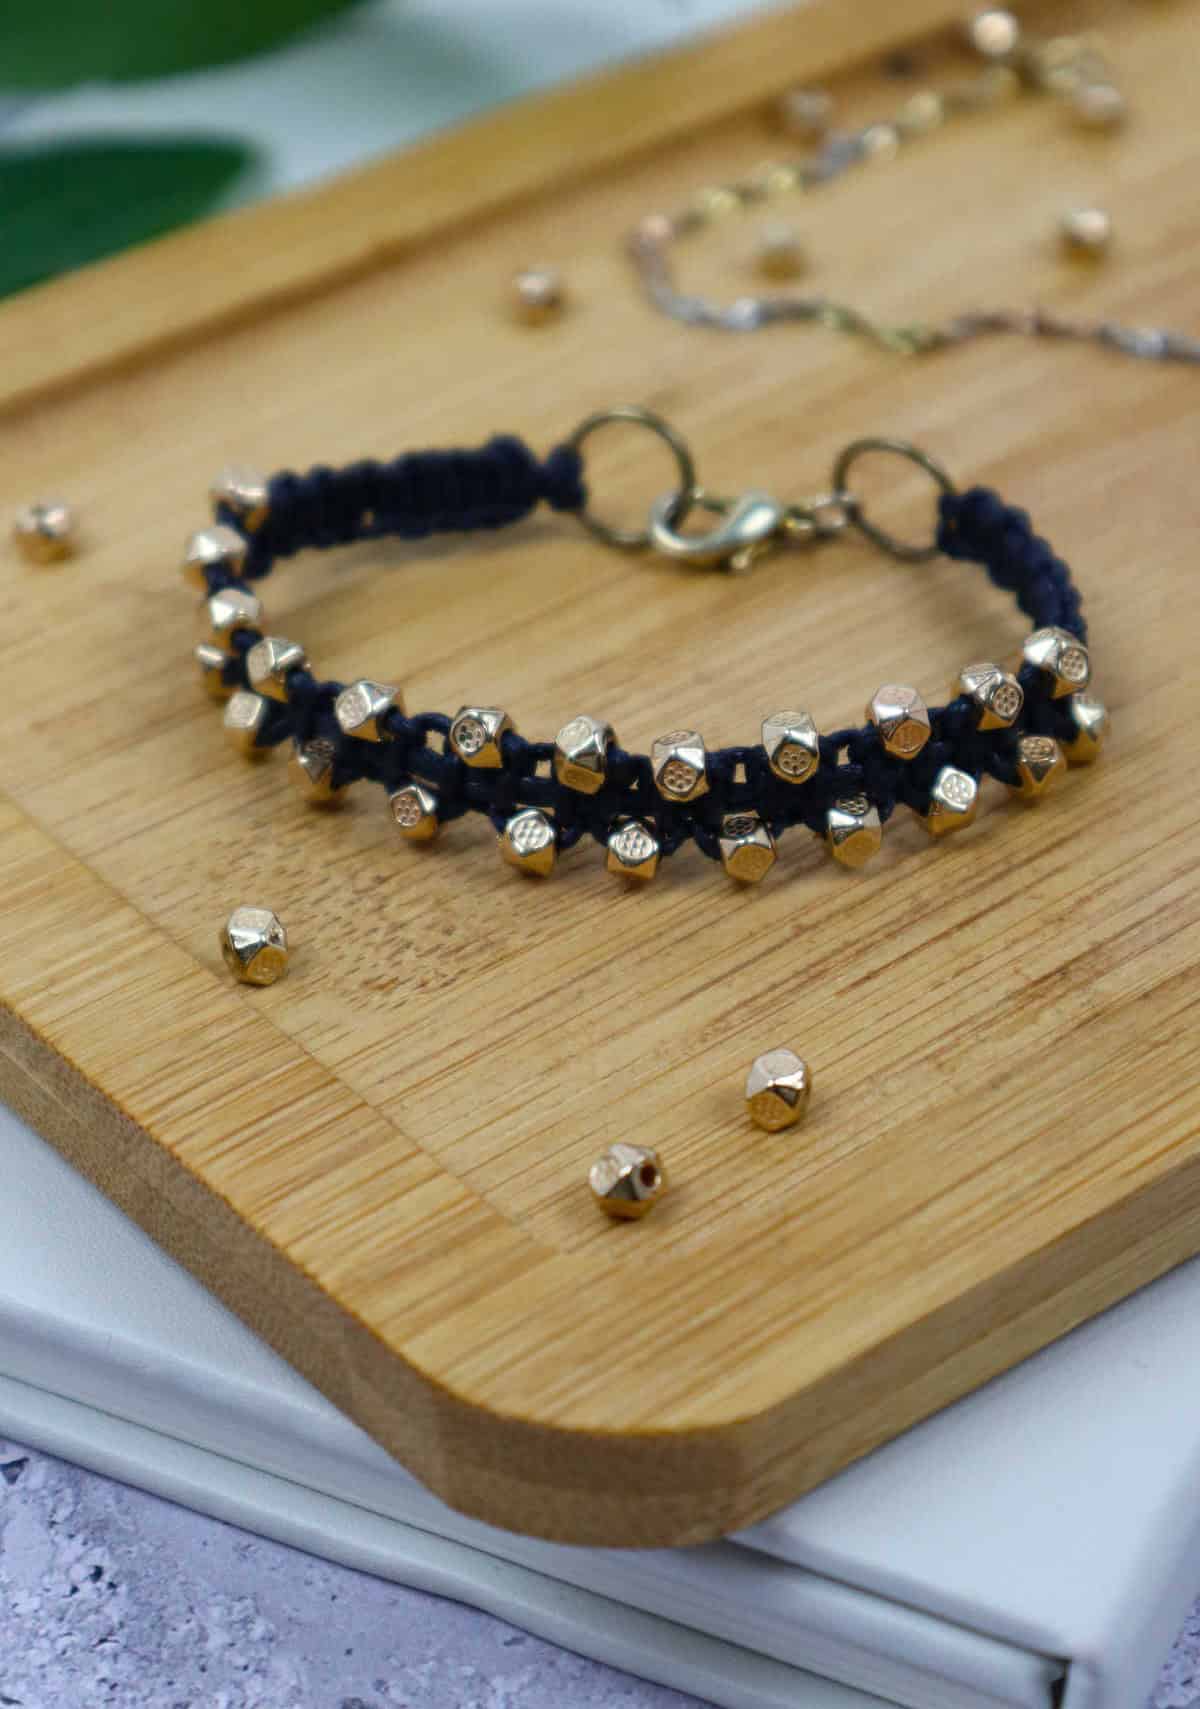
With this crucial step complete, you’re mere moments away from finishing your beaded masterpiece – all that remains is to snip off any lingering threads, and your beautiful piece will be ready for wear.
Step 7

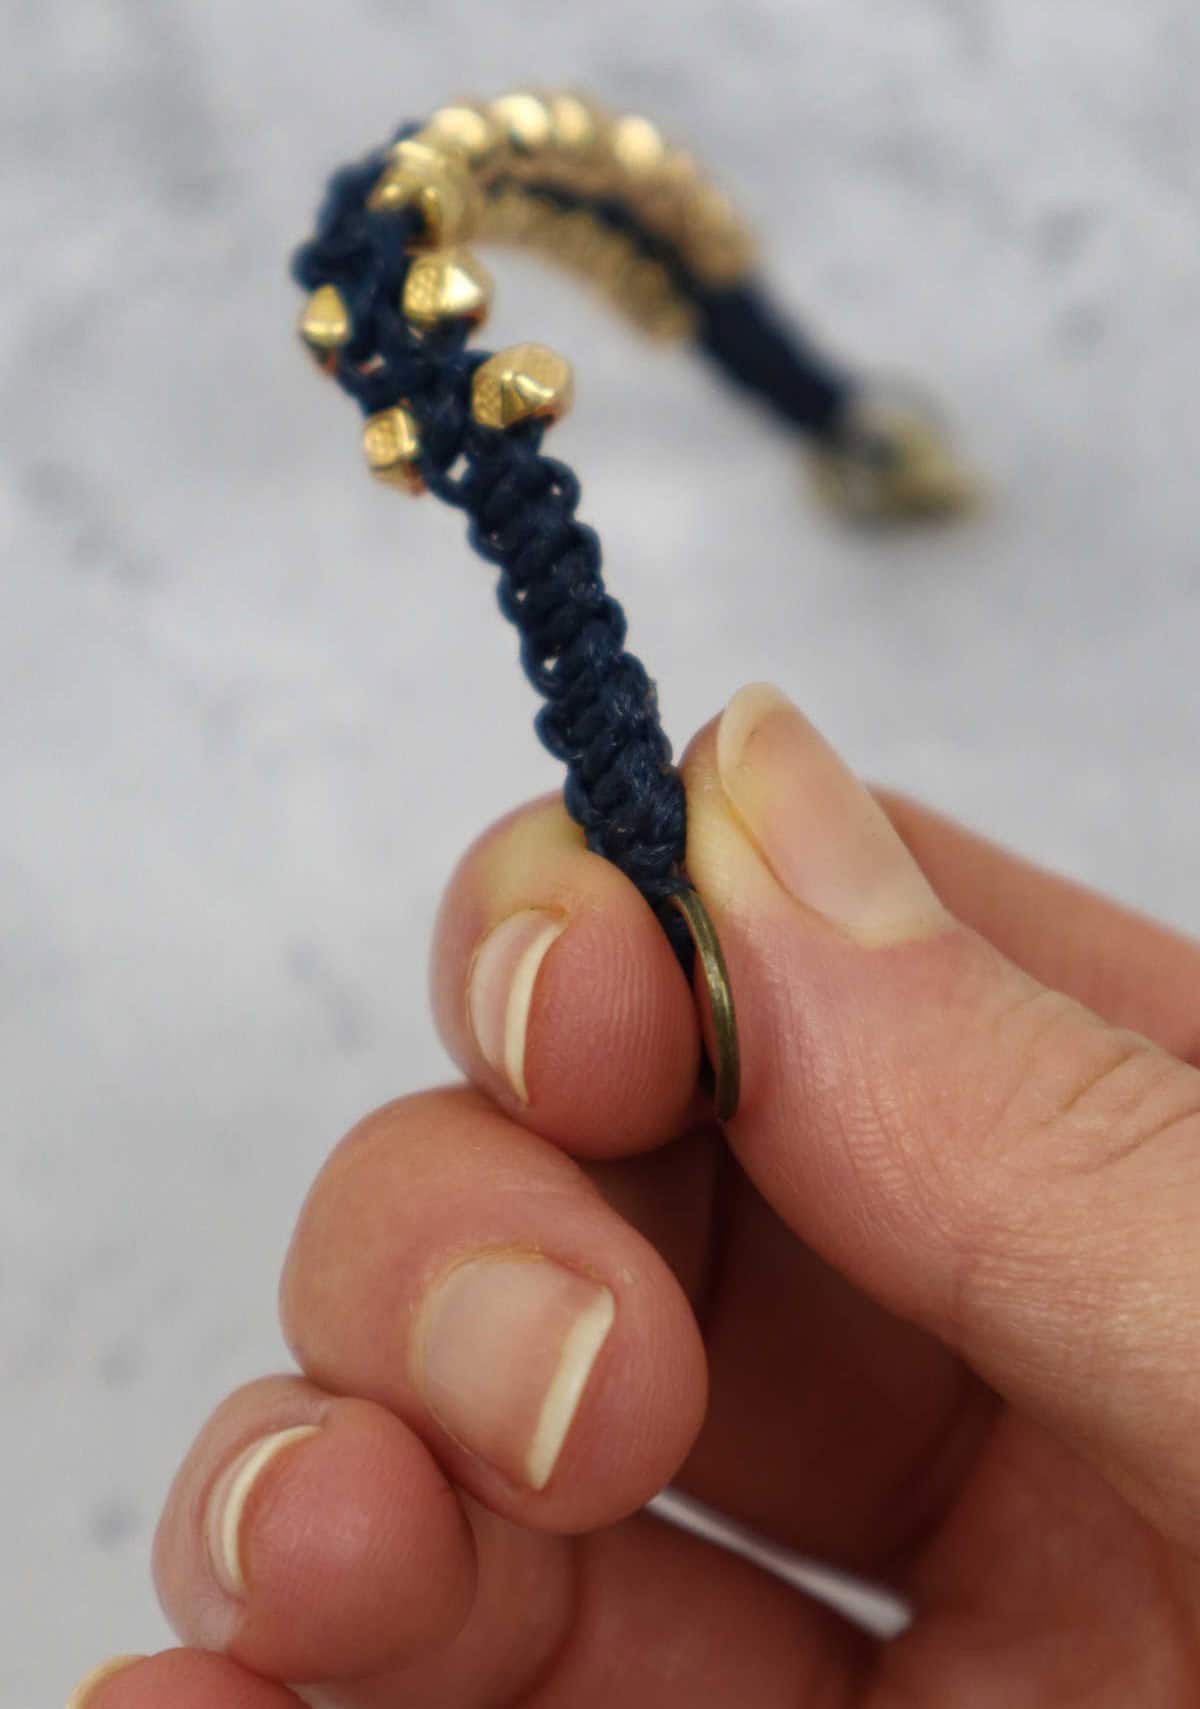
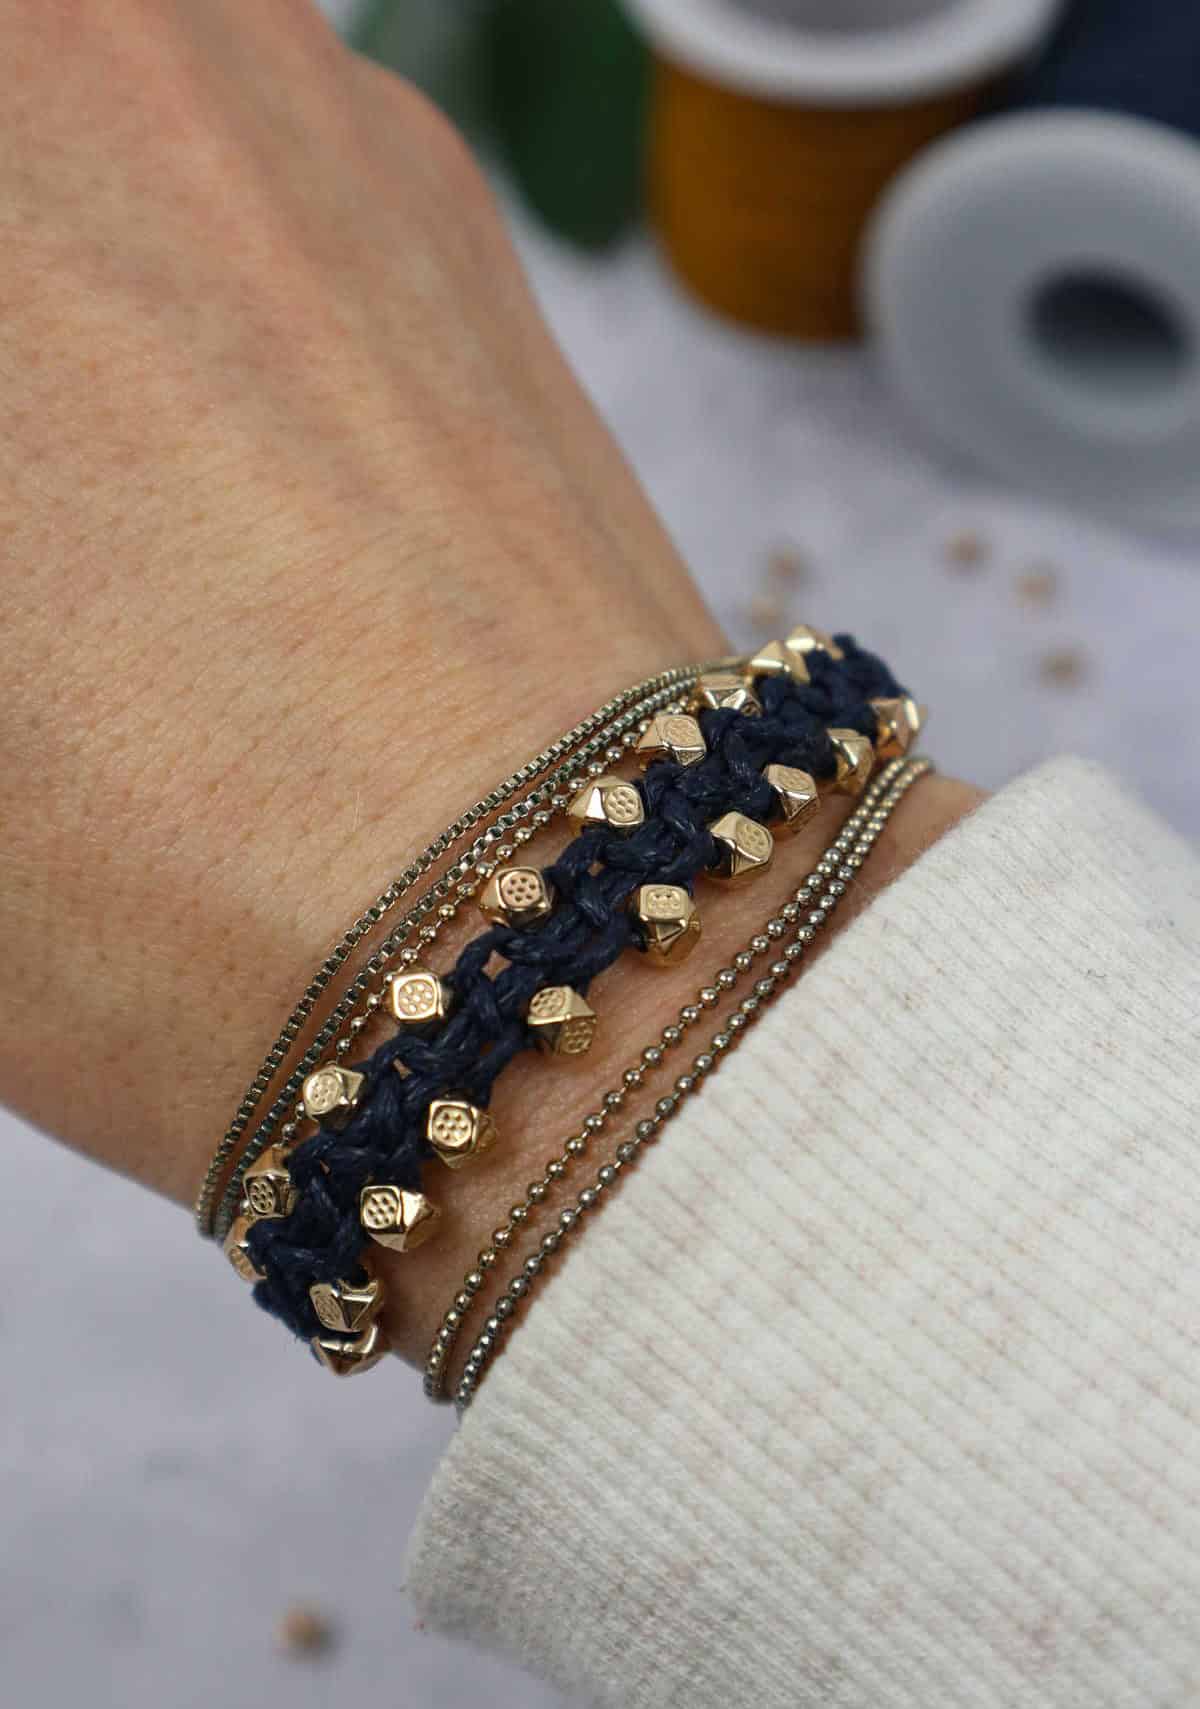
To prevent fraying at the cut ends, simply apply heat from a lighter to carefully melt and secure the cords. This straightforward step ensures a polished finish for your DIY project. Once complete, slide on the finished macrame bracelet, attach the clasp, and you’re all set! With these basic steps, you’ll have a stylish and unique piece to add to your jewelry collection.
Other Crafts You Might Enjoy Making
Get ready to unleash your creativity and transform ordinary objects into extraordinary pieces of art! Whether you’re a seasoned crafter or just looking for some inspiration, this collection of 51 amazing DIY projects is sure to delight. From statement necklaces made with beads and wire, to whimsical earrings crafted from buttons and thread, there’s something here for everyone.
Take the first step in creating your own unique accessories by exploring these five fantastic collections: 41 innovative necklace ideas that will take your style to the next level; 51 easy and impressive crafts featuring pom poms that are sure to bring a smile to anyone’s face; 51 incredible canvas painting ideas that showcase the power of art; 37 DIY earring projects that offer endless possibilities for customization; and finally, 27 stunning ring designs that will make you feel like royalty.
So go ahead, get creative, and turn your imagination into reality!
DIY Macrame Bracelet (Step-by-Step)
Start your macrame adventure with a delightful DIY bracelet that’s both easy to make and visually appealing. To get started, you’ll need about 5 minutes for preparation, followed by an active crafting time of 55 minutes. In total, this project will take approximately one hour to complete.
Equipment
To avoid the frustration that comes with a screen that’s gone dark in the middle of a crucial task, it’s essential to prevent sleep mode. One way to do this is by using simple tools like scissors, a measure tape, and a lighter. These seemingly unrelated items can help you stay awake and alert when working on your device. For instance, try using scissors to cut a piece of paper into small squares, which will keep your hands busy and engaged.
A measure tape can be used to measure the width or length of an object, providing a mental distraction from sleep mode. Meanwhile, a lighter can be used to ignite a small flame, releasing endorphins that help you stay focused. By incorporating these simple tools into your workflow, you’ll be able to prevent sleep mode and maintain your productivity.
Materials
To create your desired jewelry piece, you’ll need the following materials: a 72-inch length of nylon cord with a thickness of 0.8 millimeters. Additionally, you’ll require two lobster clasps and two jump rings, each measuring 0.9 millimeters in diameter. For added decoration, three millimeter beads can be used. Finally, clear tape may be needed to secure any loose ends or hold the jewelry together.
Instructions
Begin by preparing your materials according to the project requirements. Fold your nylon cord in half, creating a loop on one side and two end cords on the other. Feed the cord into the ring, then pull the looped side up and over the ring before pulling the end cords through. Tug gently to form a secure lark’s head knot around the base of the ring. Next, attach another jump ring to the ends of the cord and fit it with a lobster claw clasp.
Measure your wrist circumference and position the second jump ring at the desired length, ensuring that the bracelet will comfortably fit around your wrist. Secure the remaining end of the cord to your work surface using tape. Create a foundation of square knots starting from the base of the first jump ring. Then, thread your beads and charms onto the cord, working your way through to the other end.
Repeat this process up to the second jump ring, securing the knot with an additional set of square knots. Finally, trim any excess nylon cord and use a lighter to melt the ends, preventing fraying and securing the knot in place. Your macrame bracelet is now complete and ready to wear.