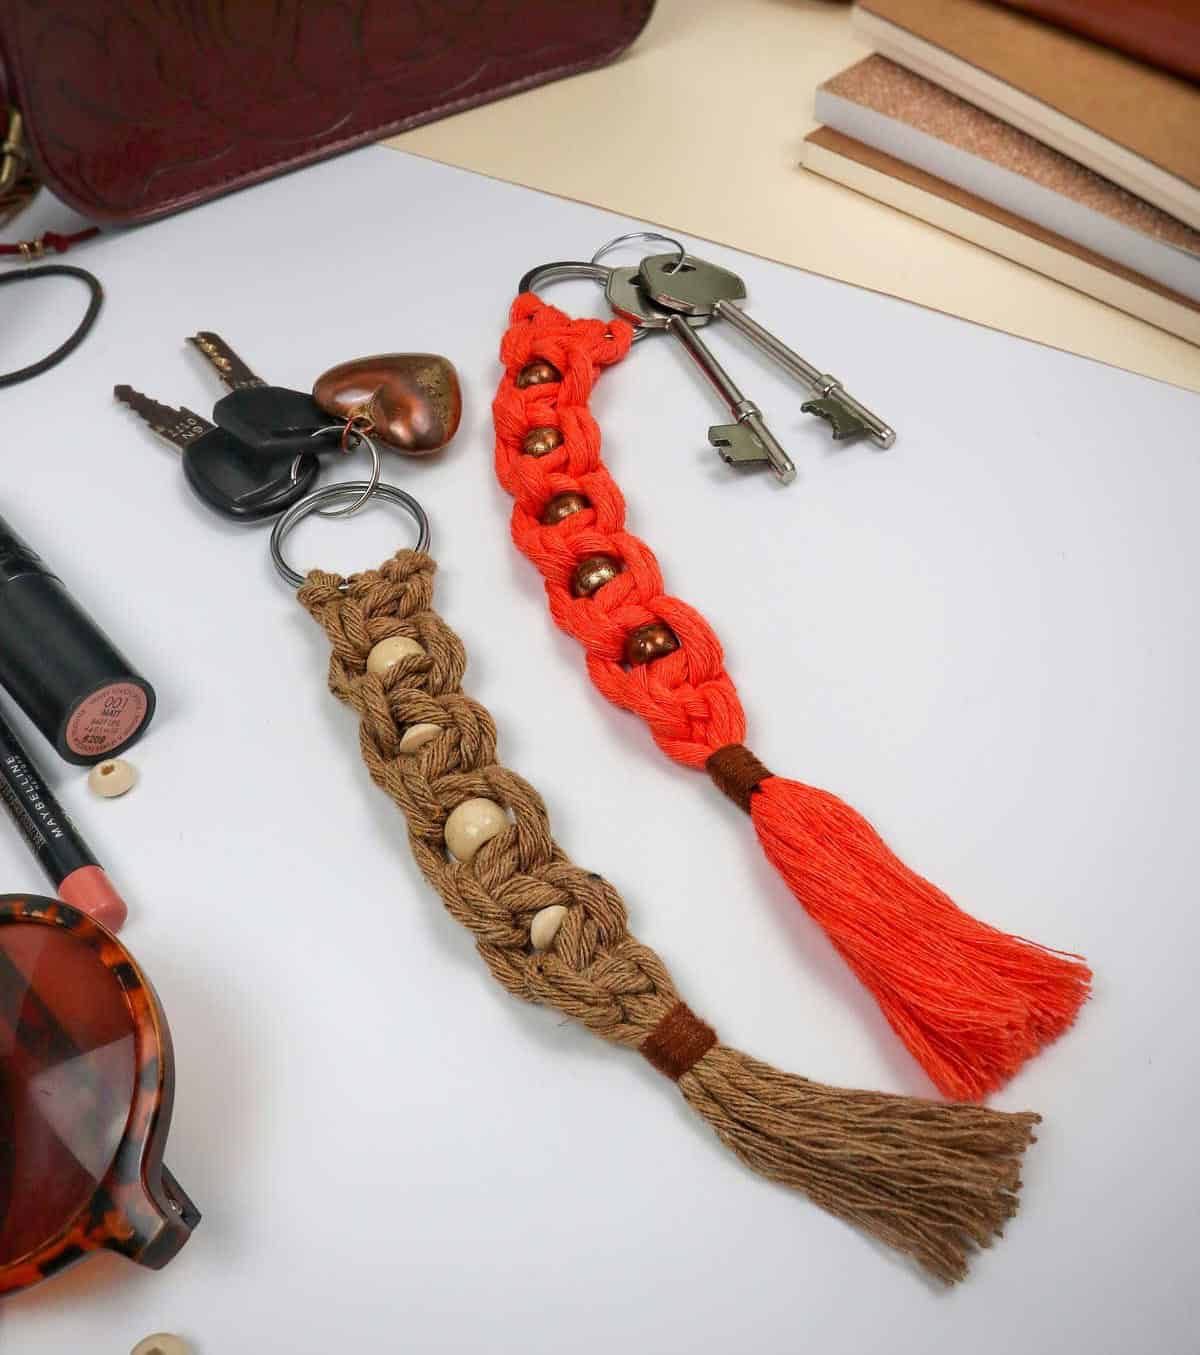
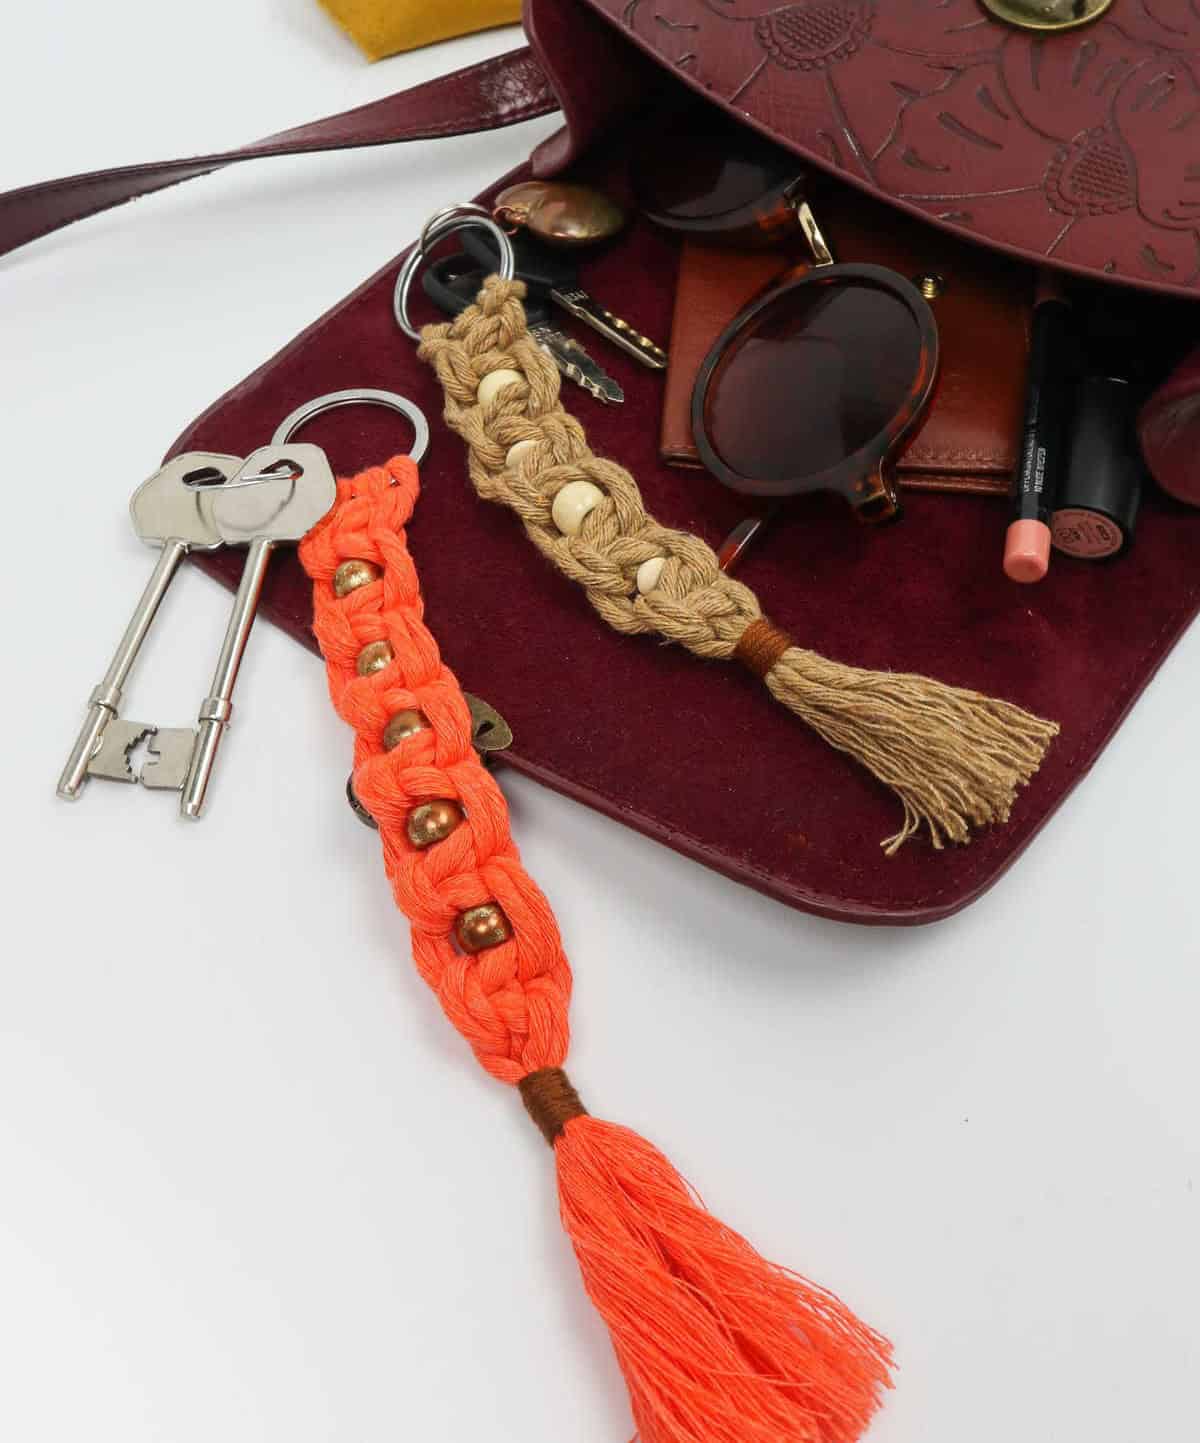
While beginners can find joy in creating this macrame keychain, it’s also a delightful gift idea for anyone on your list. In fact, we’ve all been there – overwhelmed with options when accessorizing our bags and keys with keychains. From the brief Scooby tie craze to embroidery floss hangings, trends come and go. Now, macrame has taken center stage, and its bohemian charm has captured our hearts.
The simplicity of this DIY project belies its versatility – even experts can appreciate the satisfaction of crafting a unique piece to adorn their keys.
Tools and Supplies You’ll Need
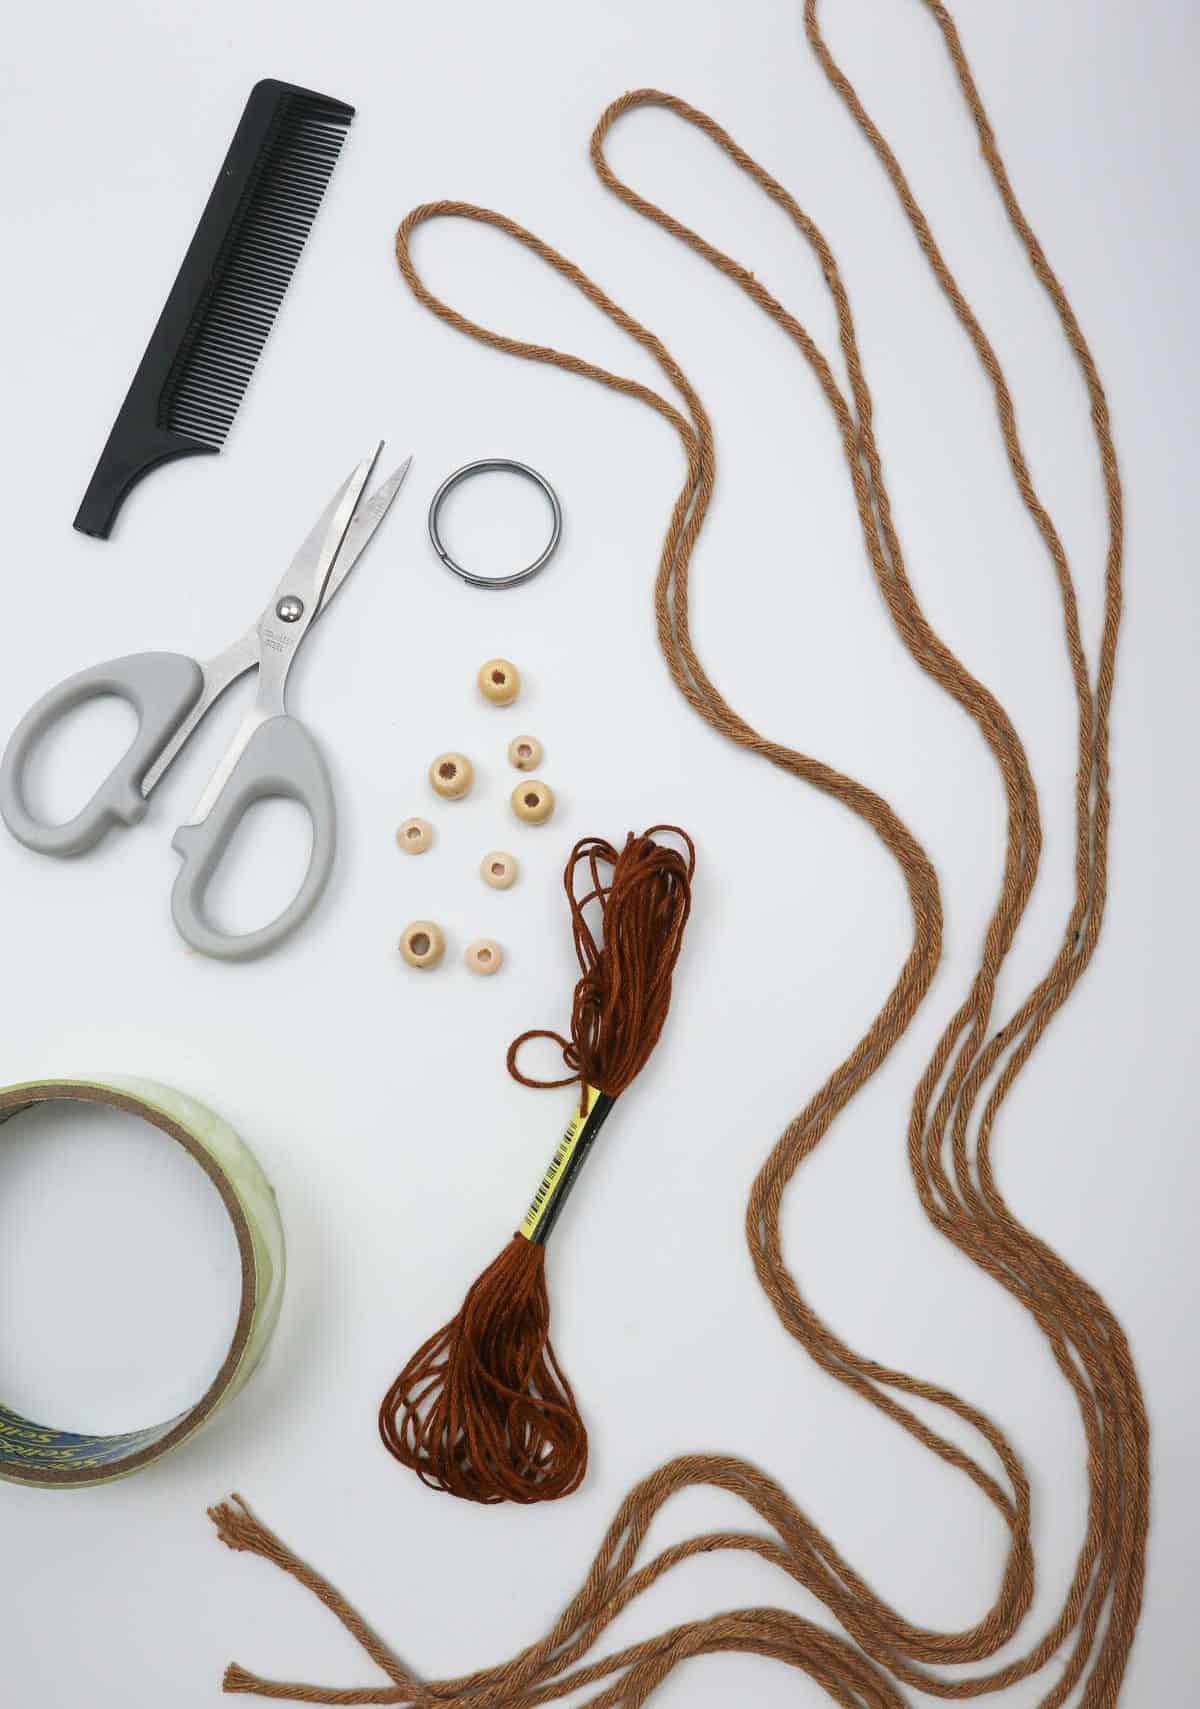
To begin, it’s essential to have the necessary materials on hand. You’ll need a few specific items to get started, including a key ring, three 4mm single twist cotton cords measuring 32 inches in length, Sellotape, scissors, beads, embroidery thread, and a hair comb.
How to Make a Macrame Keychain
To craft a functional and stylish keychain, follow this comprehensive guide that breaks down the process into manageable steps. From gathering necessary materials to finishing touches, we’ll cover every aspect of making a keychain.
Step 1
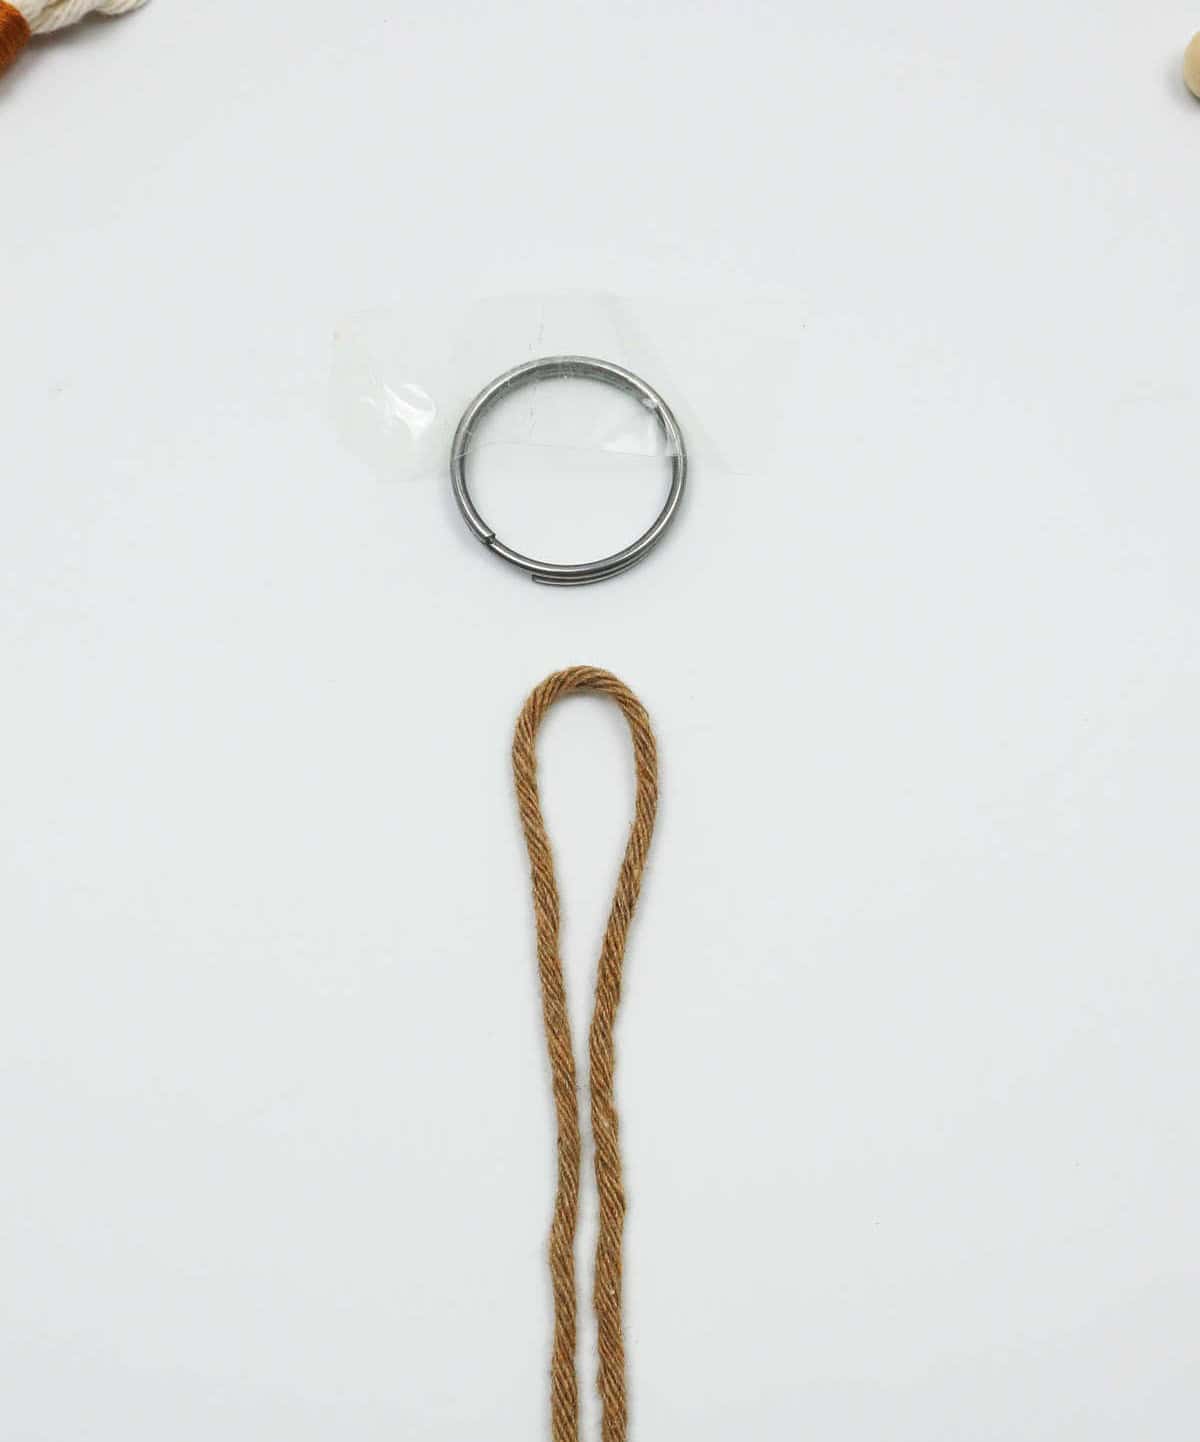
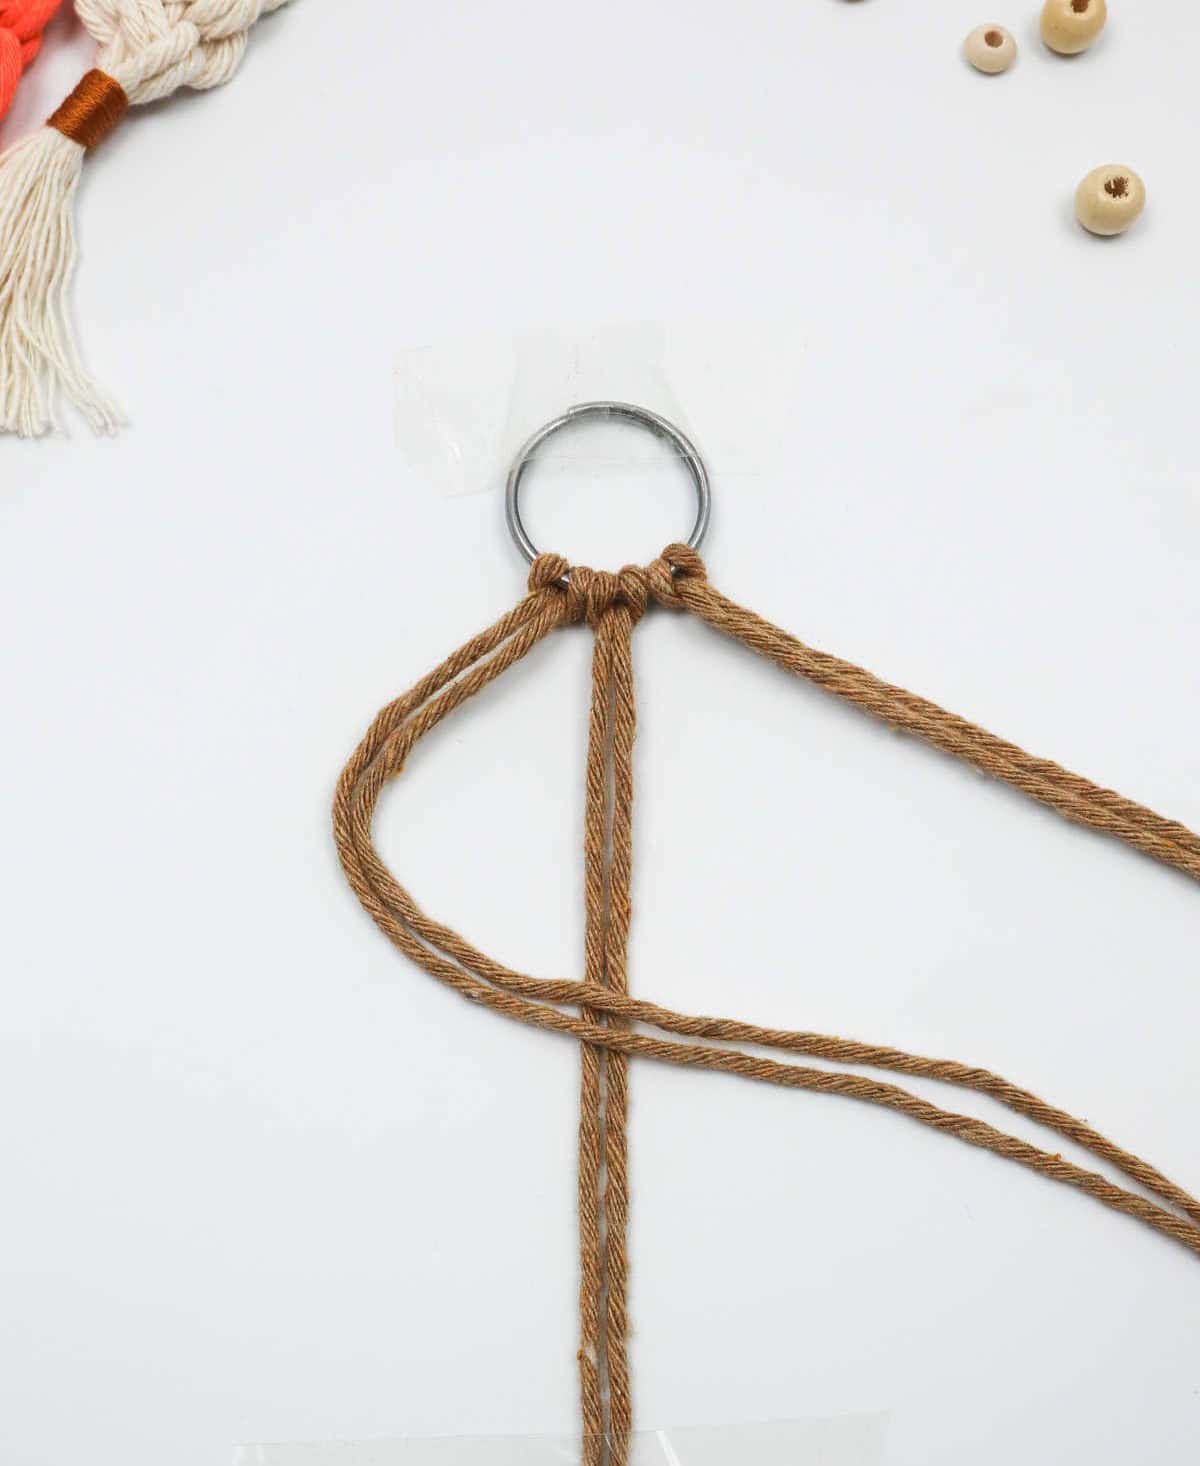
To streamline your DIY experience, consider fastening the keyring to your workspace using tape. This simple precaution ensures the ring remains stable throughout the project, allowing you to focus on the task at hand without interruptions from the ring’s tendency to shift. Next, take one of your cords and fold it in half, connecting the two ends. The resulting loop will have a similar shape to this example.
Step 2
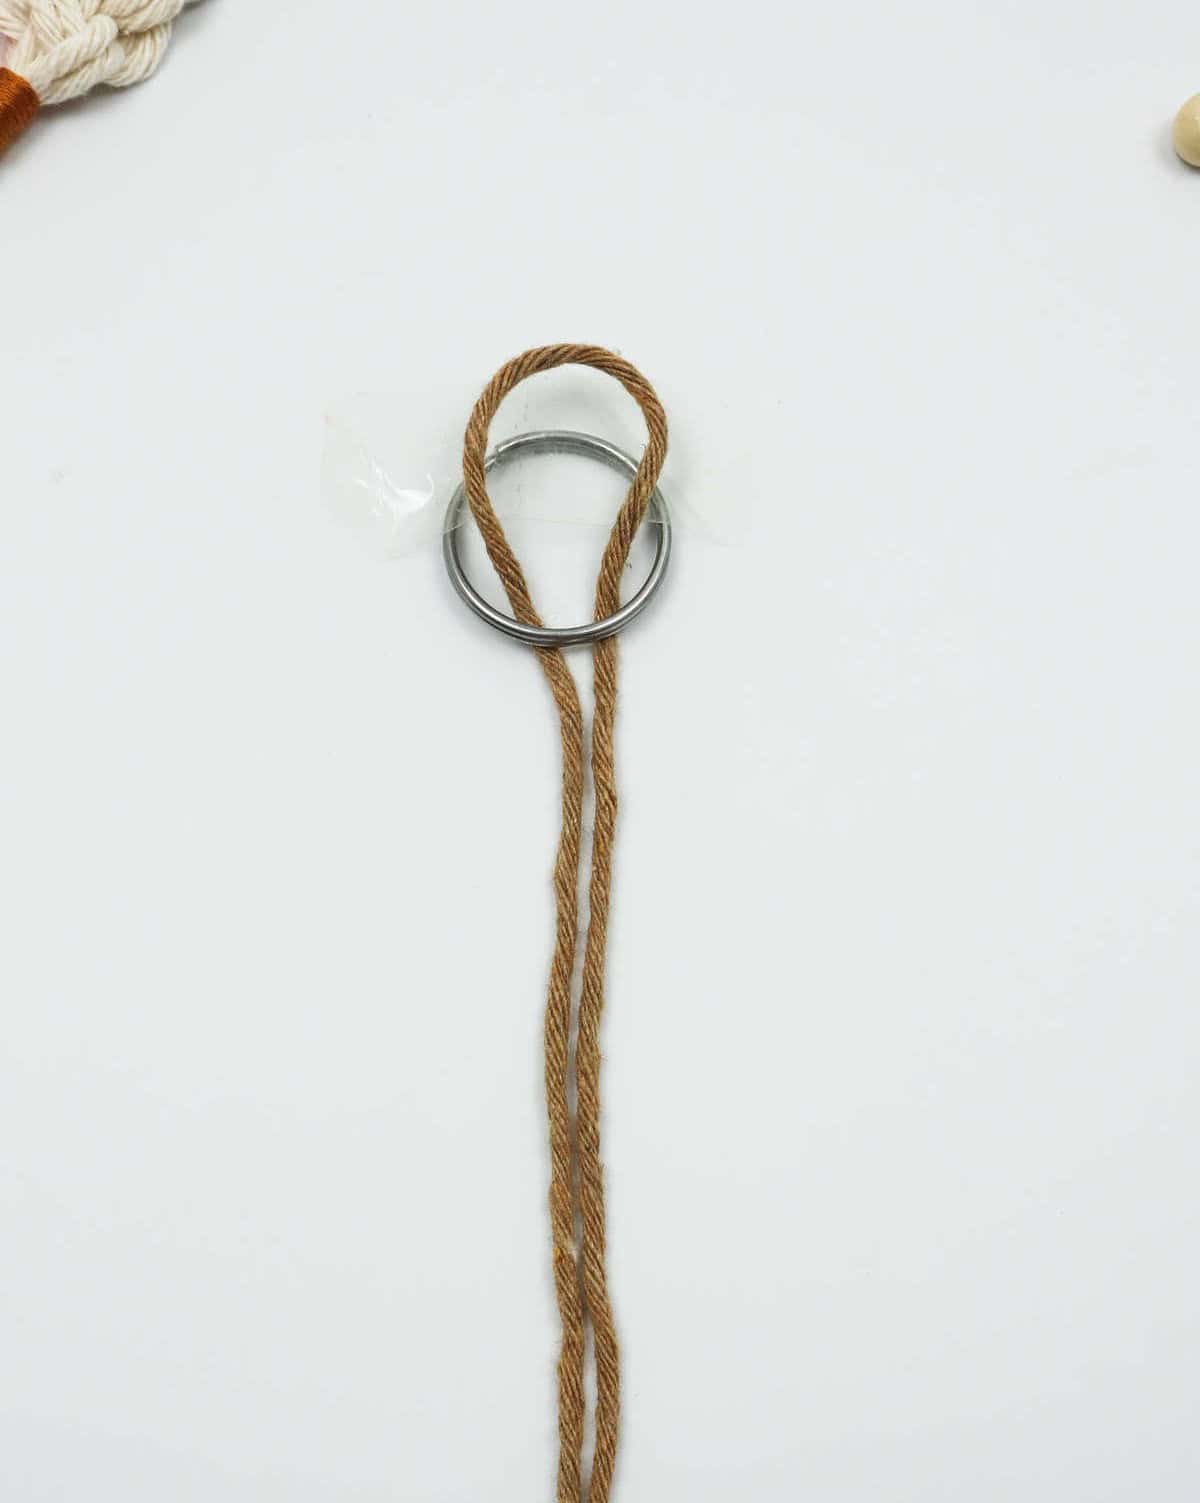
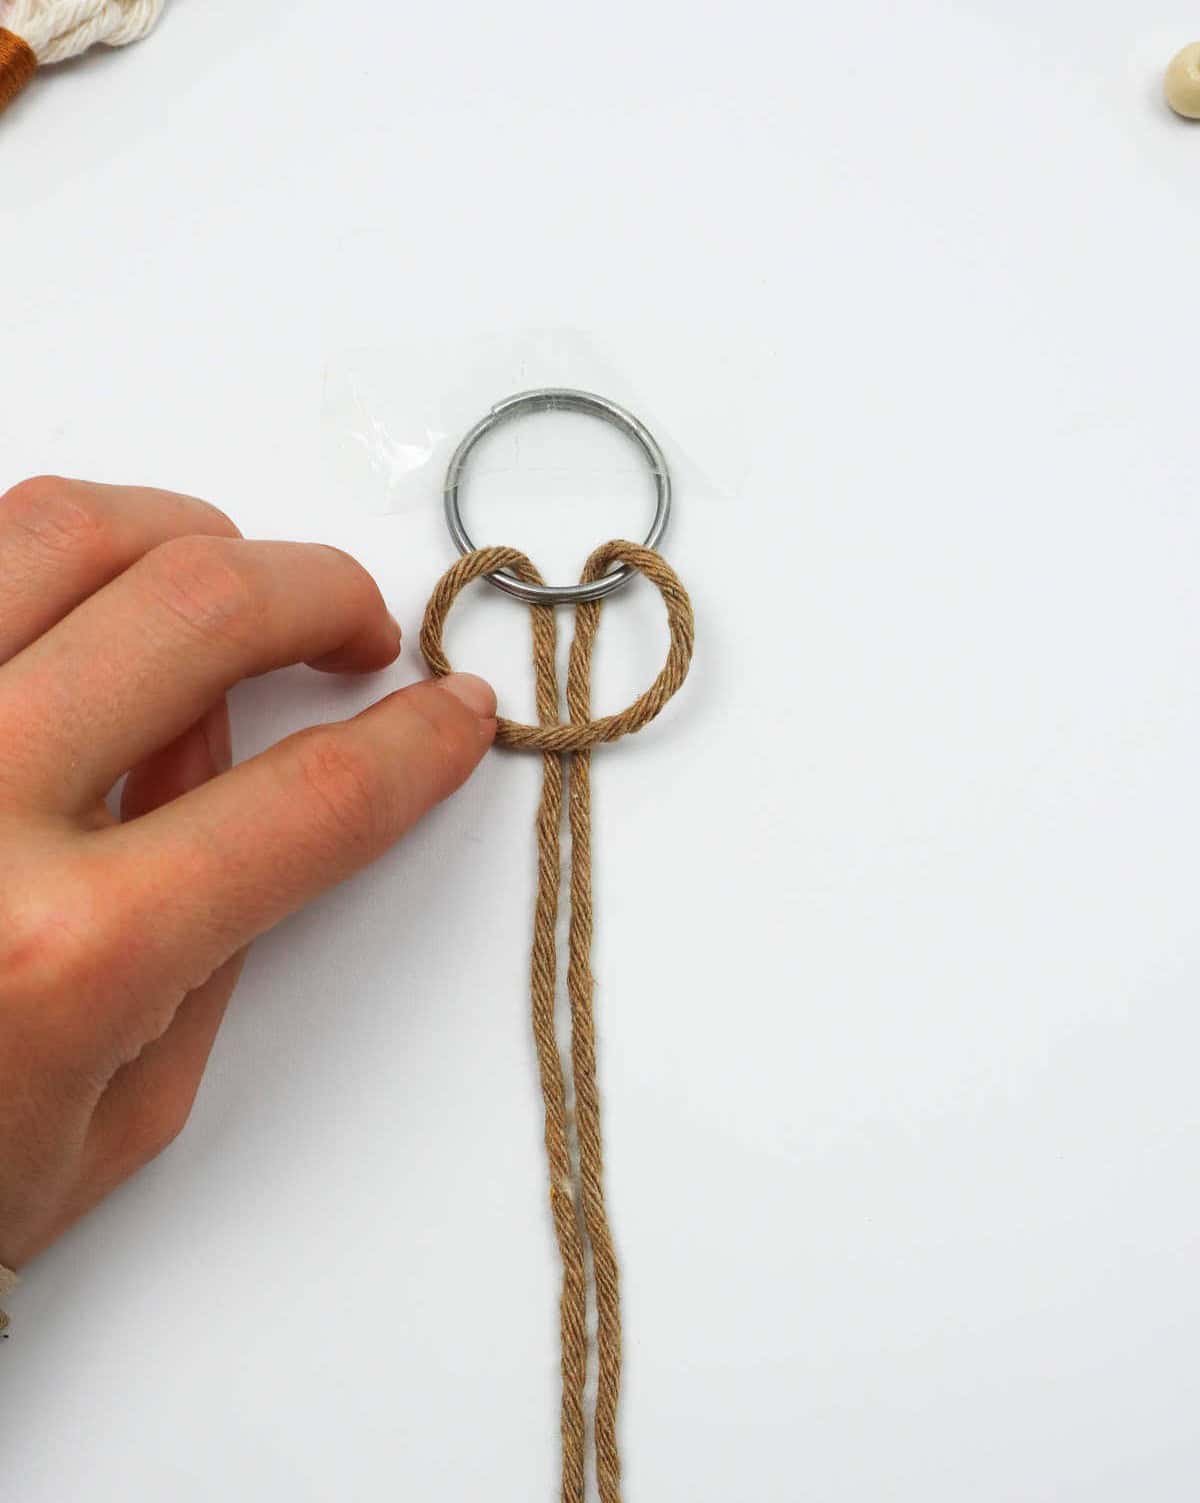

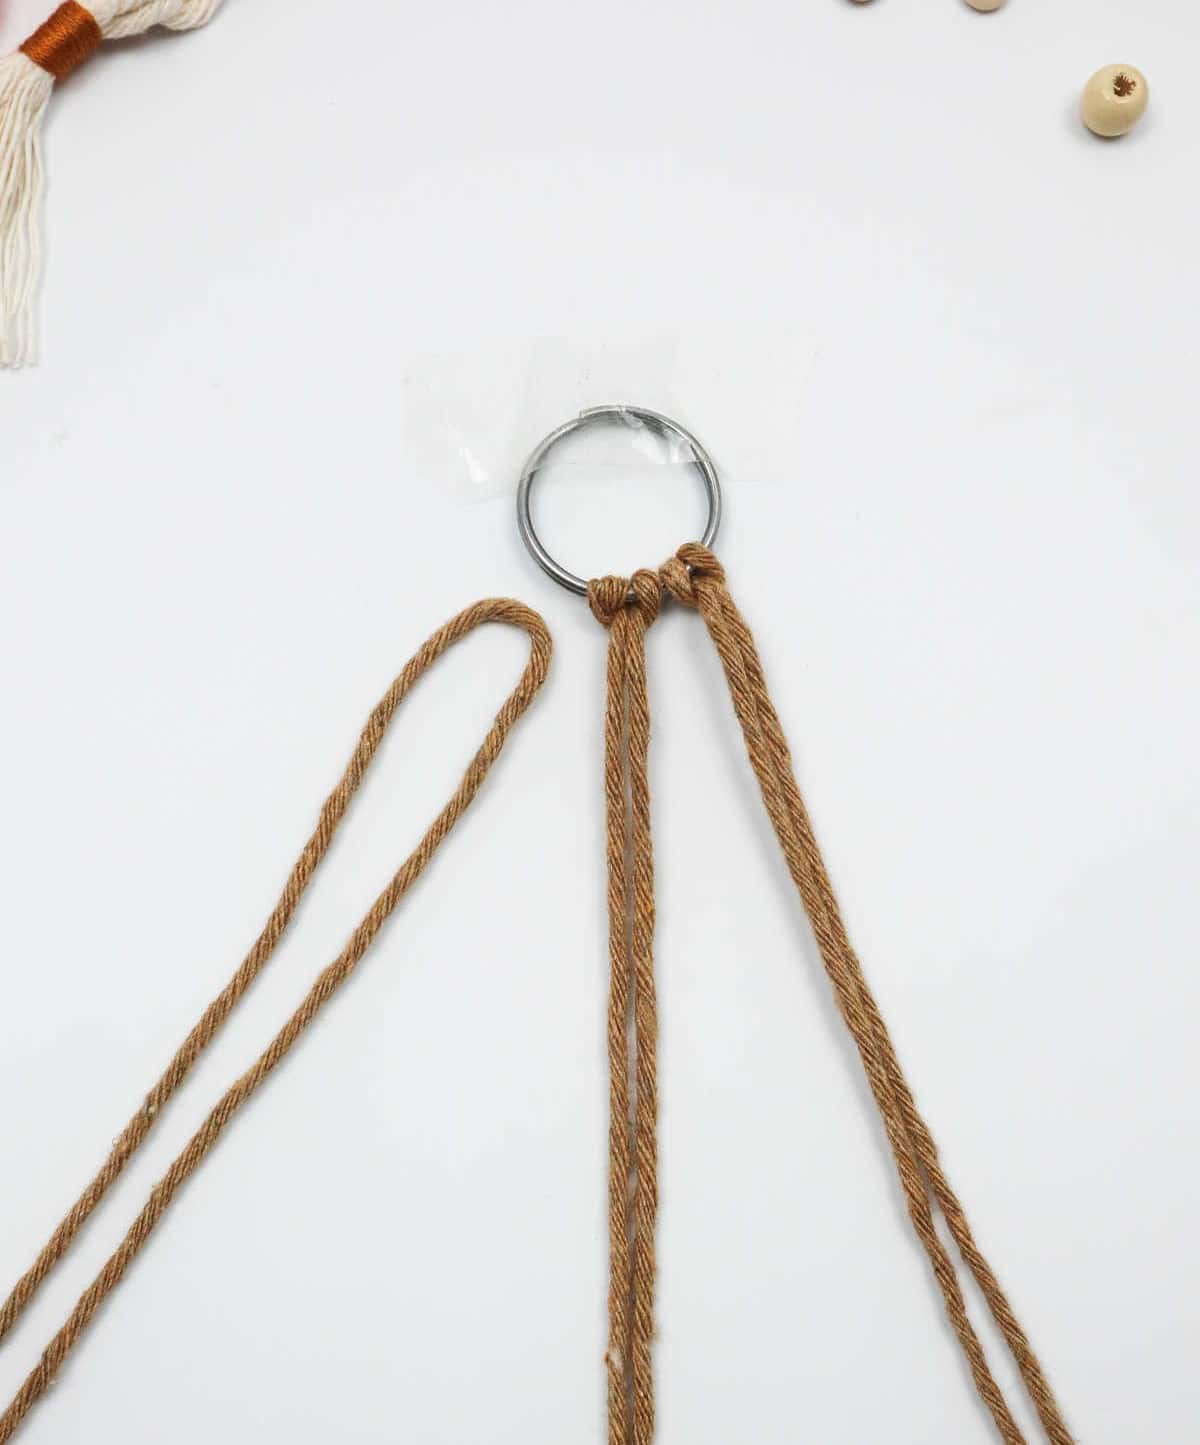
To create a lark’s head knot, begin by pulling the loop under then through the key ring. If you’re familiar with macrame knots, proceed with pulling both cords through the ring to form a classic lark’s head knot. For those new to macrame terminology, don’t worry! Instead, pull the loop down again and rest it over the metal, ensuring it’s secure. Next, insert your finger into the loop to gather the two end cords and gently coax them through the loop.
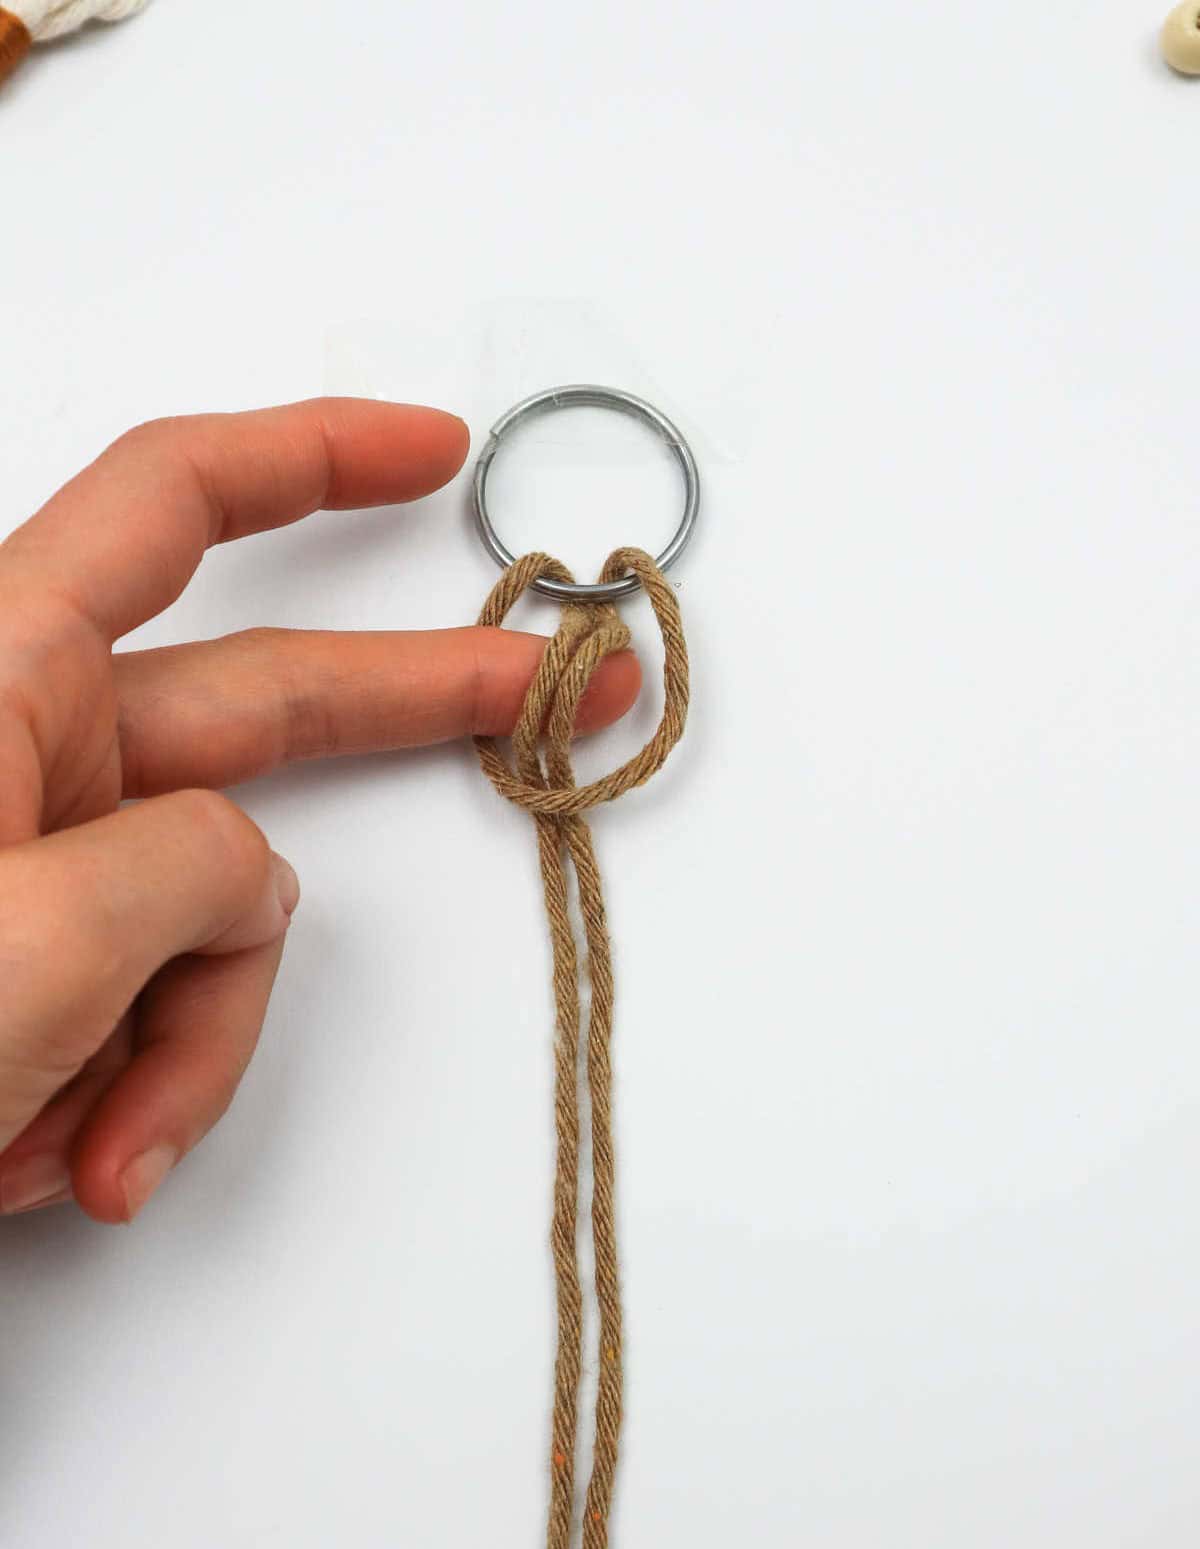
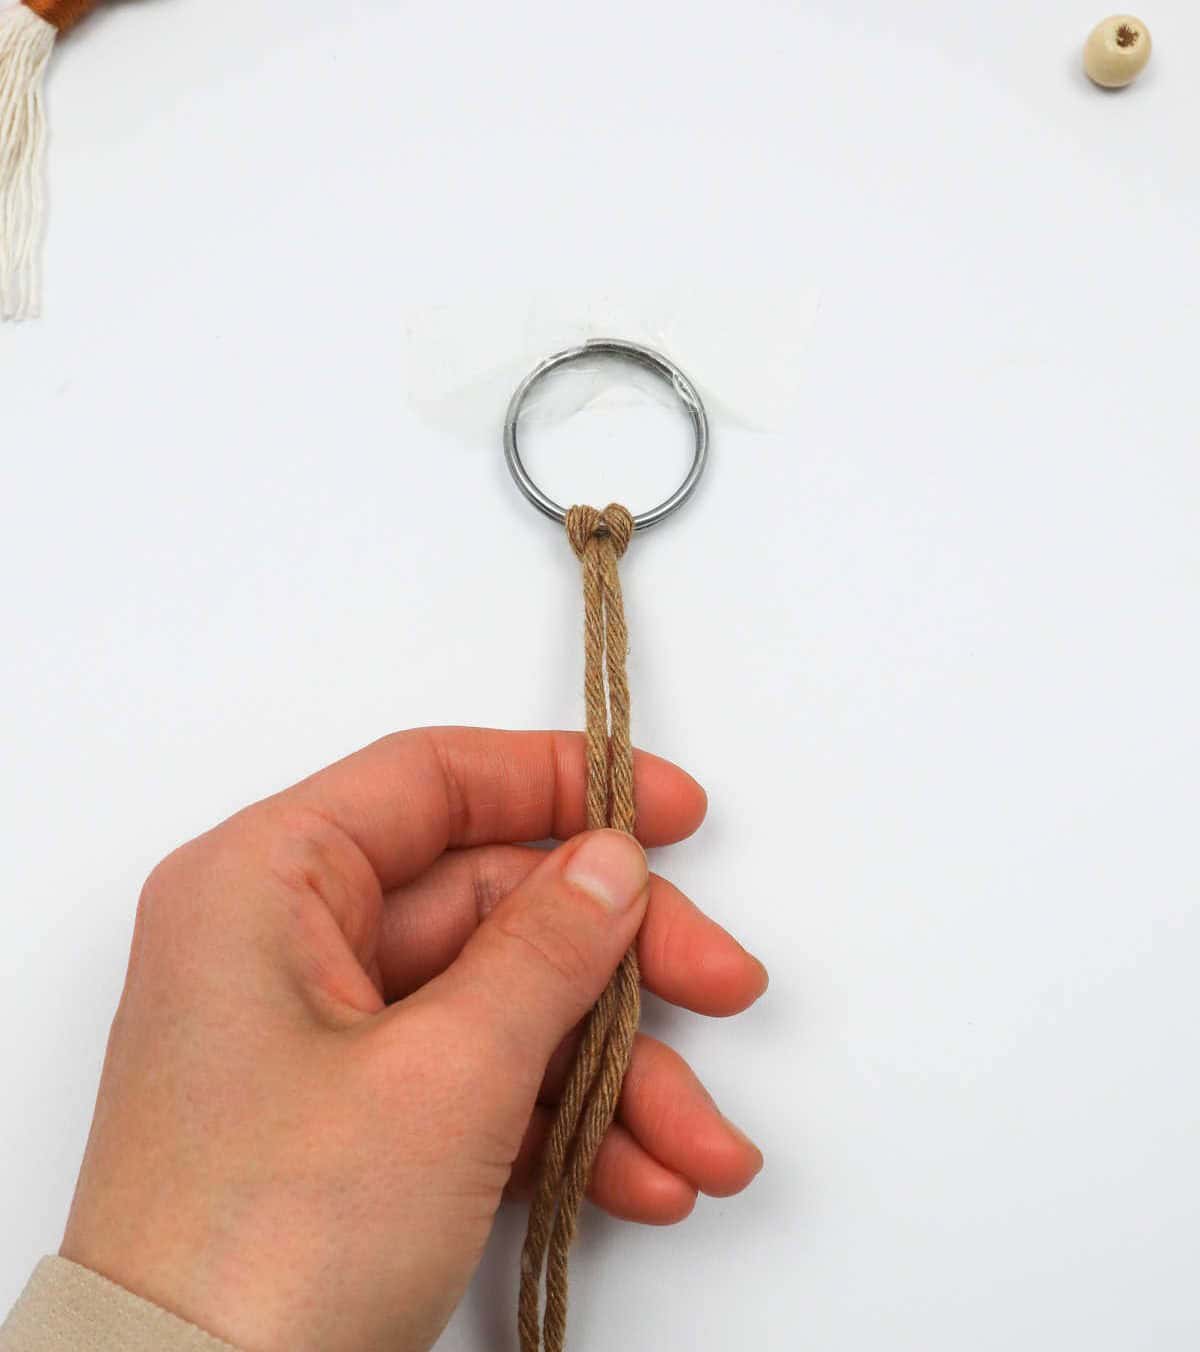
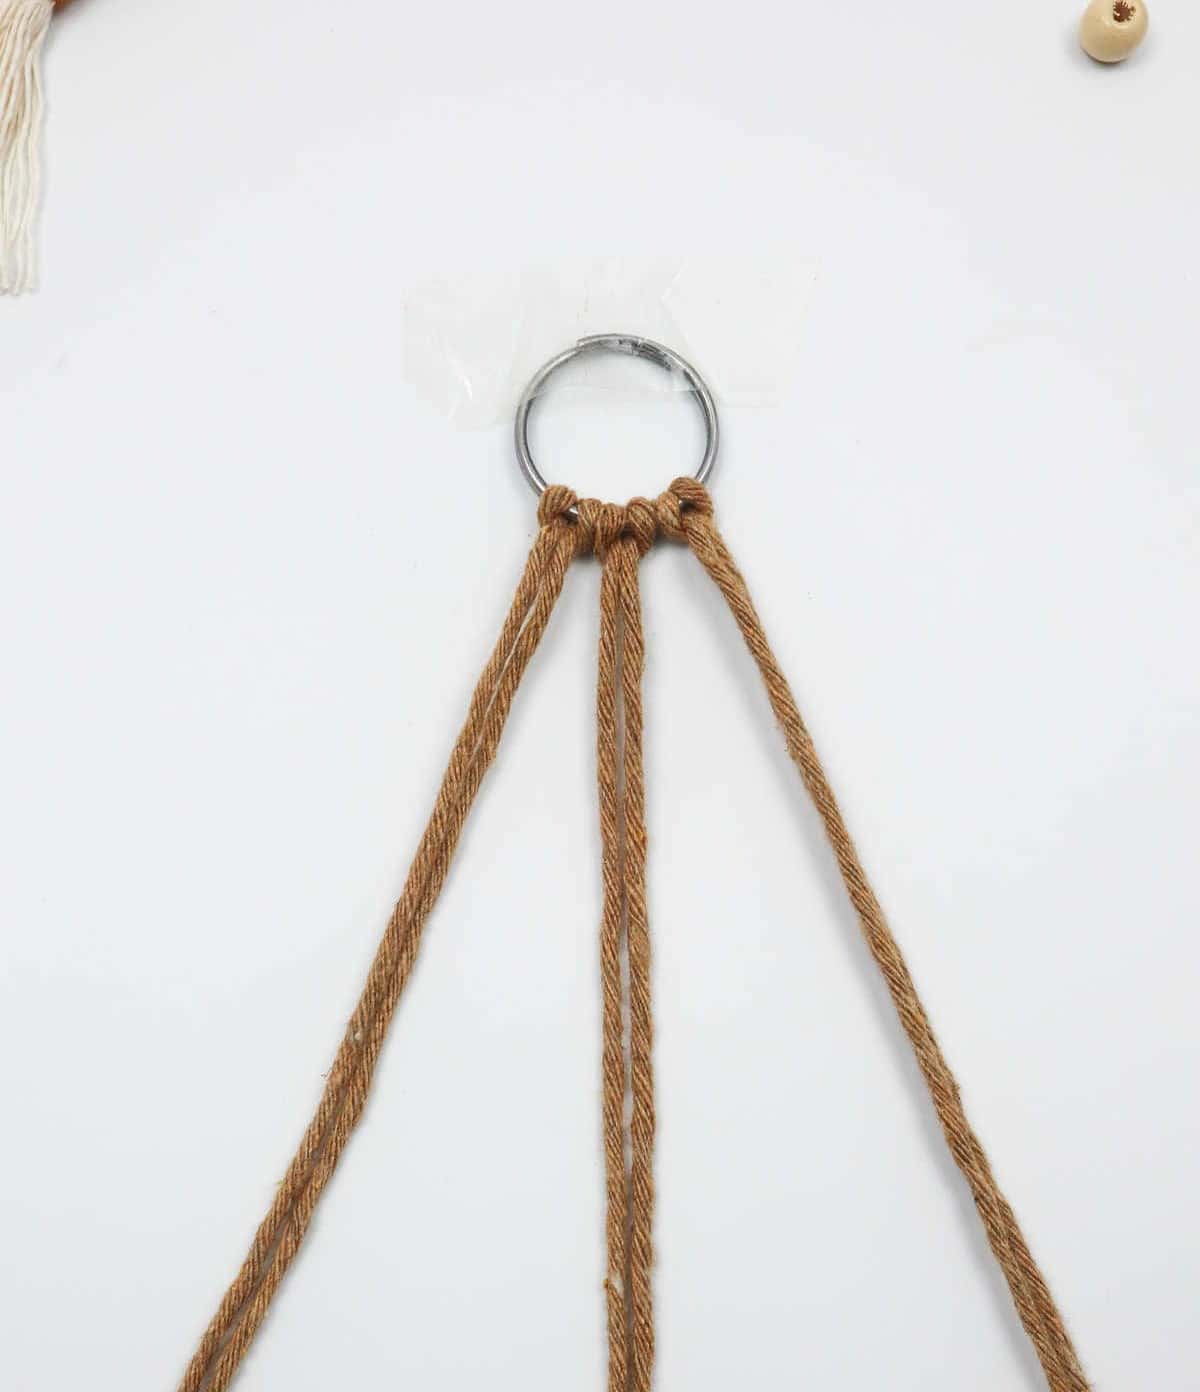
Pull the cords through and tug them slightly to tighten the knot around the ring. Voilà! You’ve successfully crafted your first lark’s head knot. Simply repeat this process with the remaining cords to be ready to start designing.
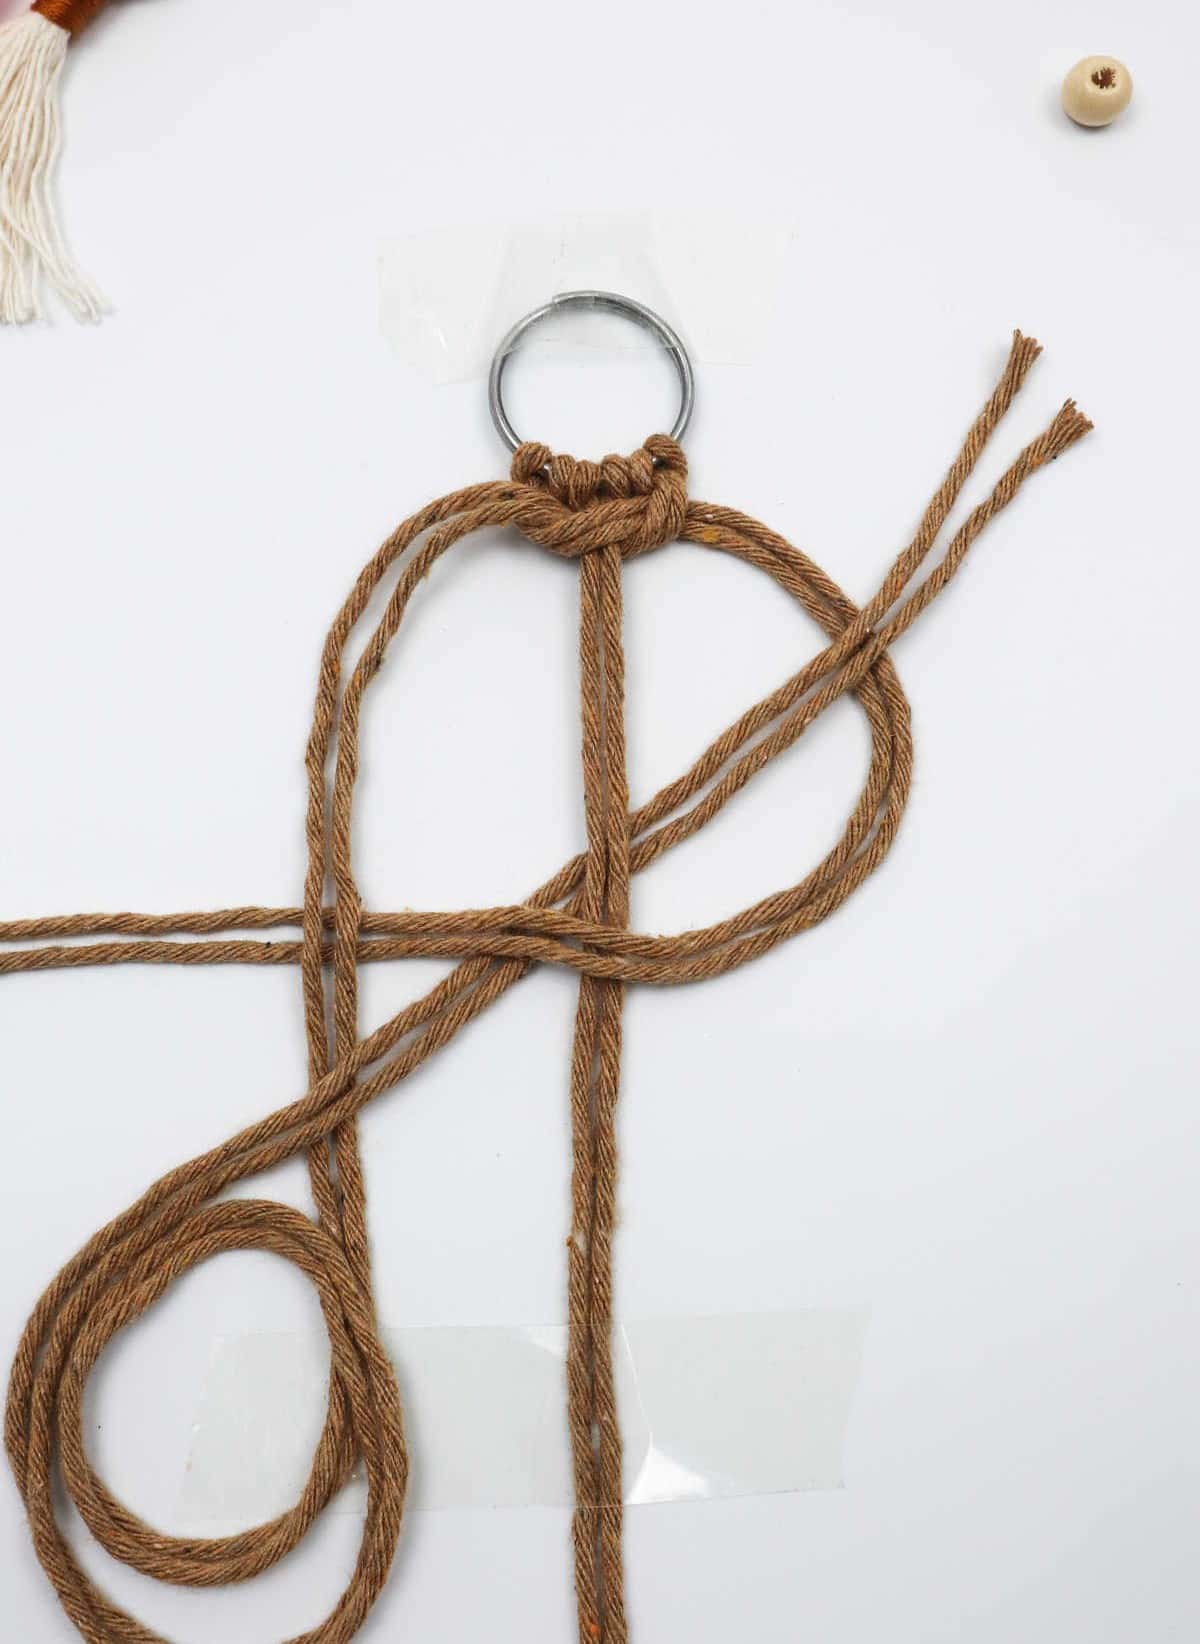
Step 3
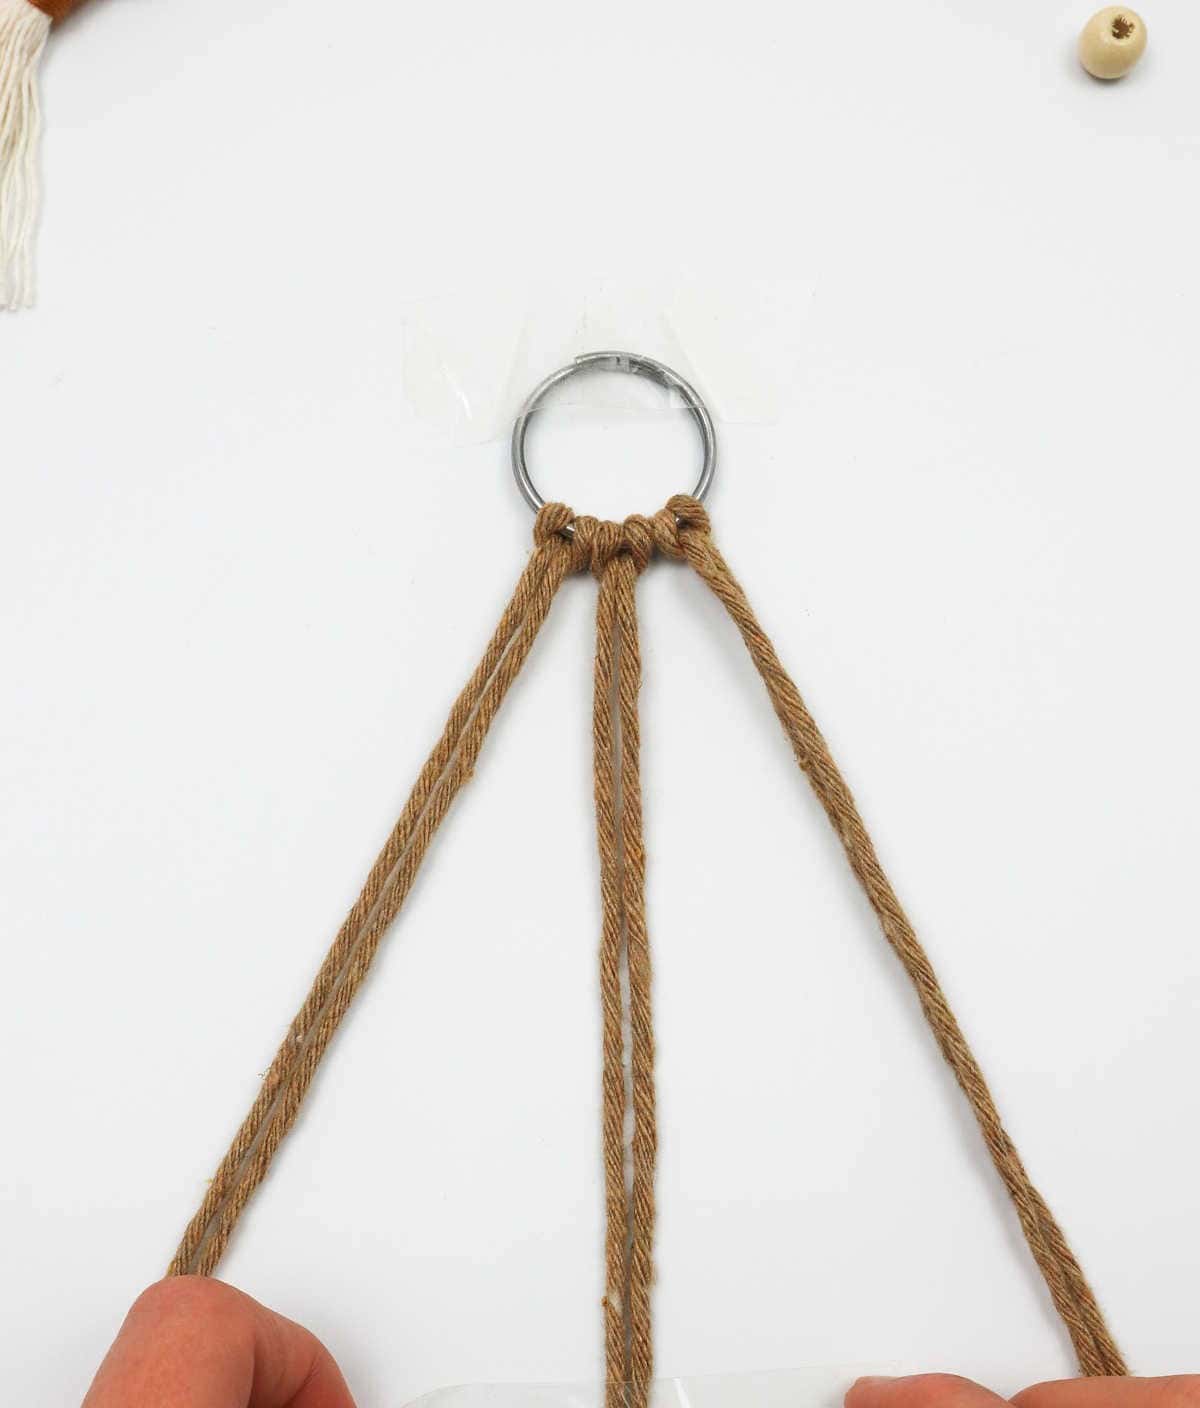
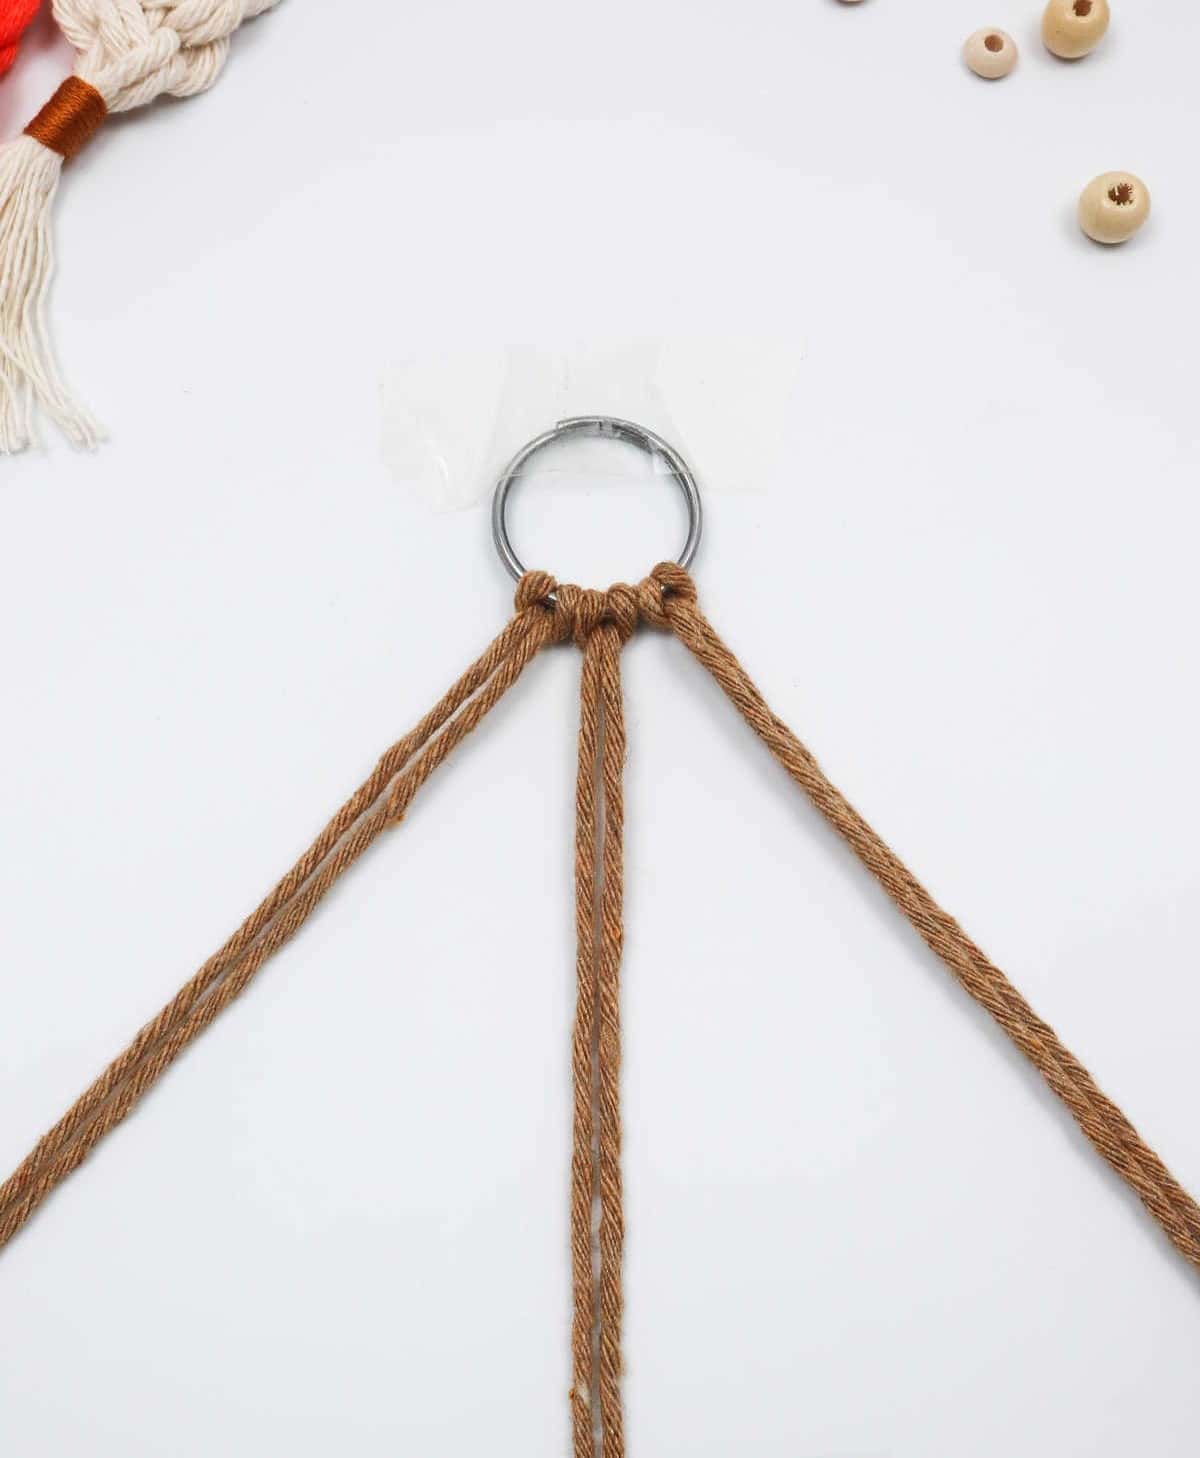
To streamline the process, consider dividing the six cords in half and securing the middle two sections to your workspace using a small amount of tape. This simple step can greatly enhance the knot-tying experience, allowing you to focus on the task at hand with greater ease.
Step 4
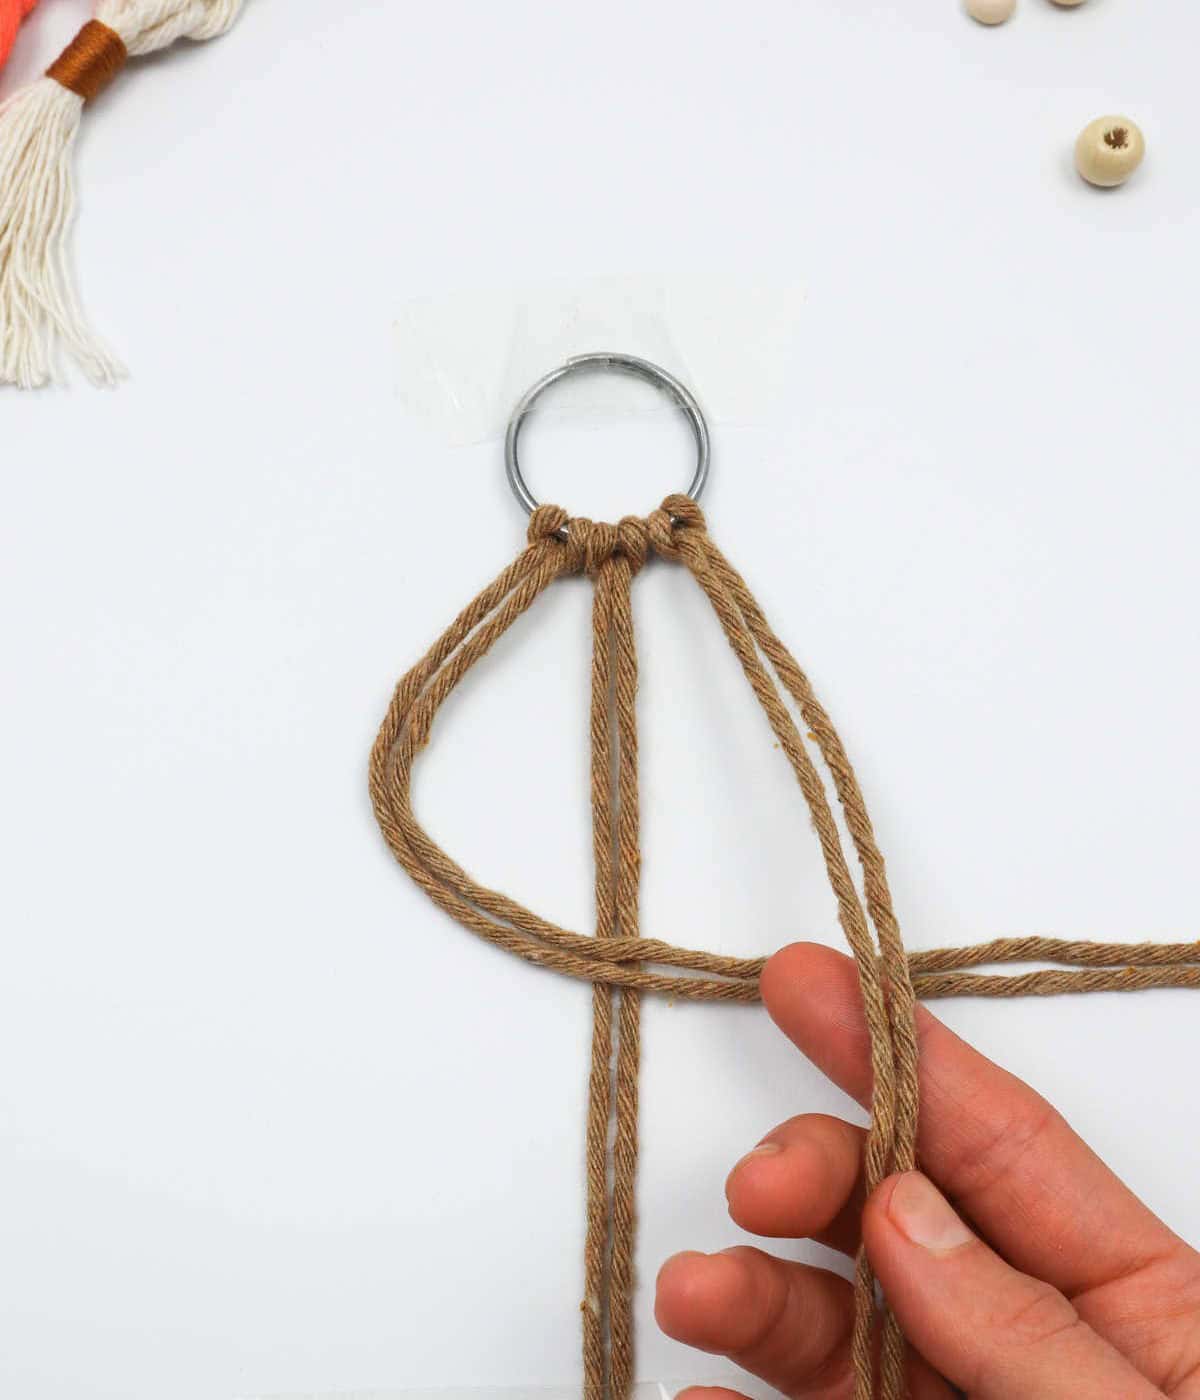
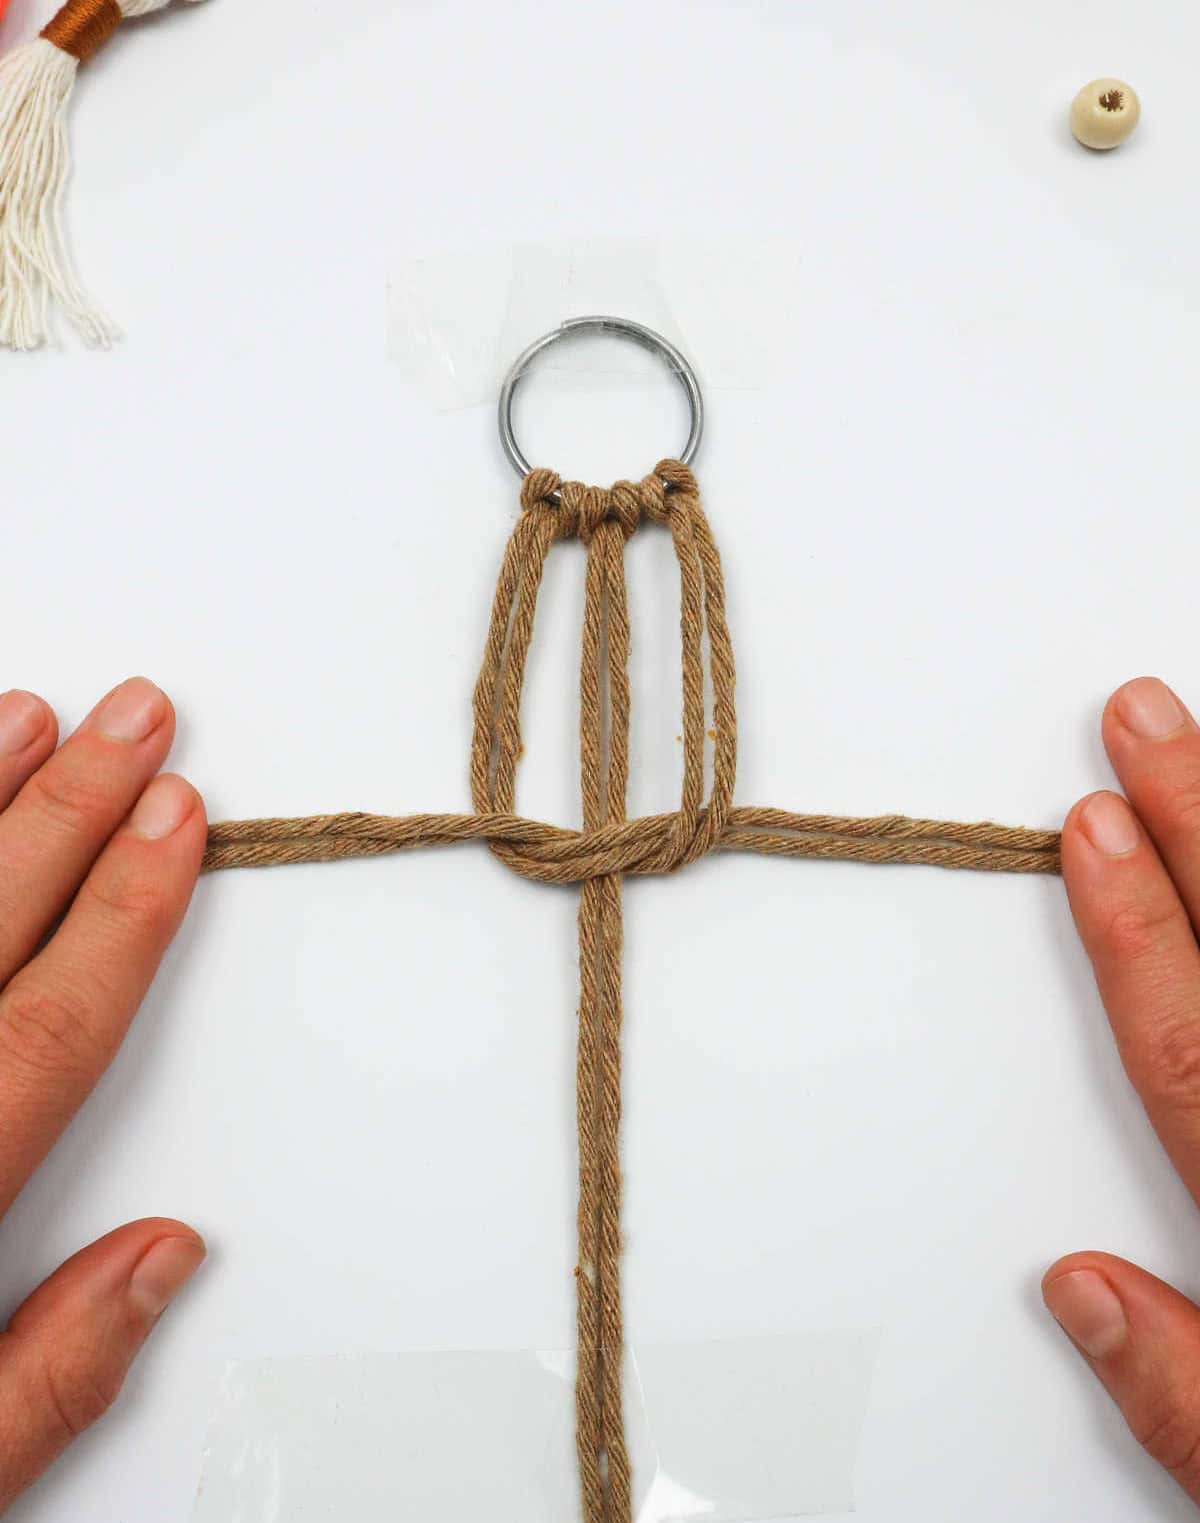
To create this intricate design, start by crafting a series of interconnected ‘square knots.’ Begin by gathering the two leftmost cords and looping them over the central strands, forming a shape resembling the numeral 4. Next, place the rightmost cords on top of those from the left, effectively crossing them over the center. Take note of where these cords intersect – this will be a crucial point in the knotting process.
Now, carefully guide the right cords under this crossover and through the loop you’ve created with the initial left cords. As you do so, gently pull the cord ends in opposite directions while simultaneously moving them towards the ring to form the first half of your square knot.
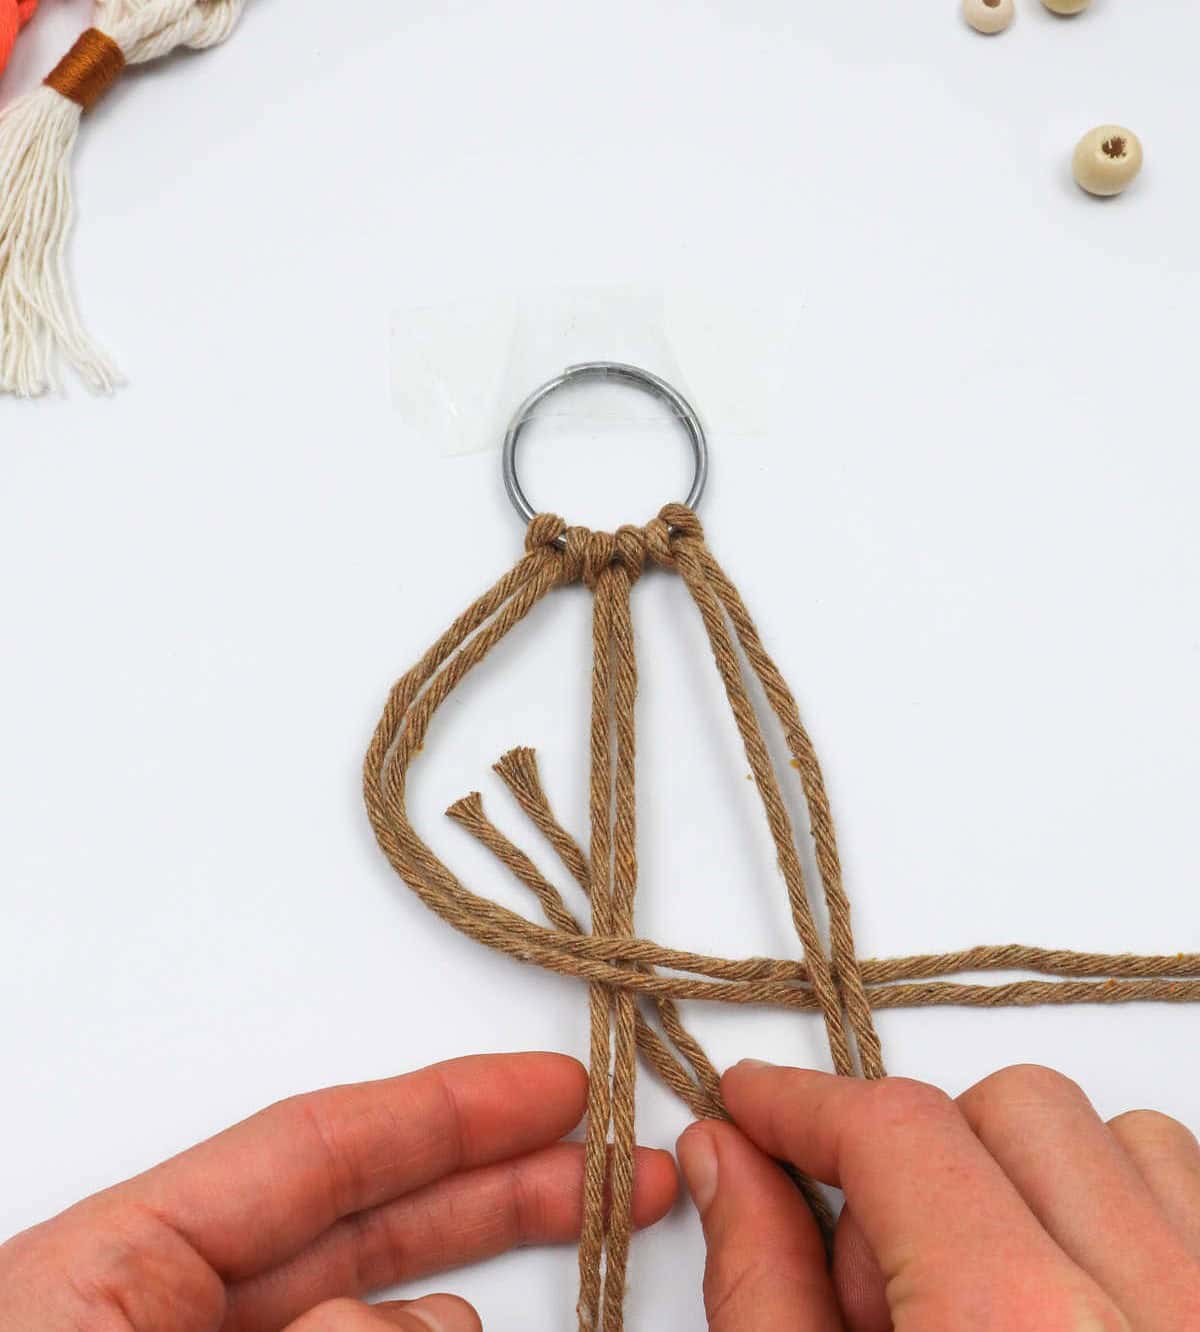
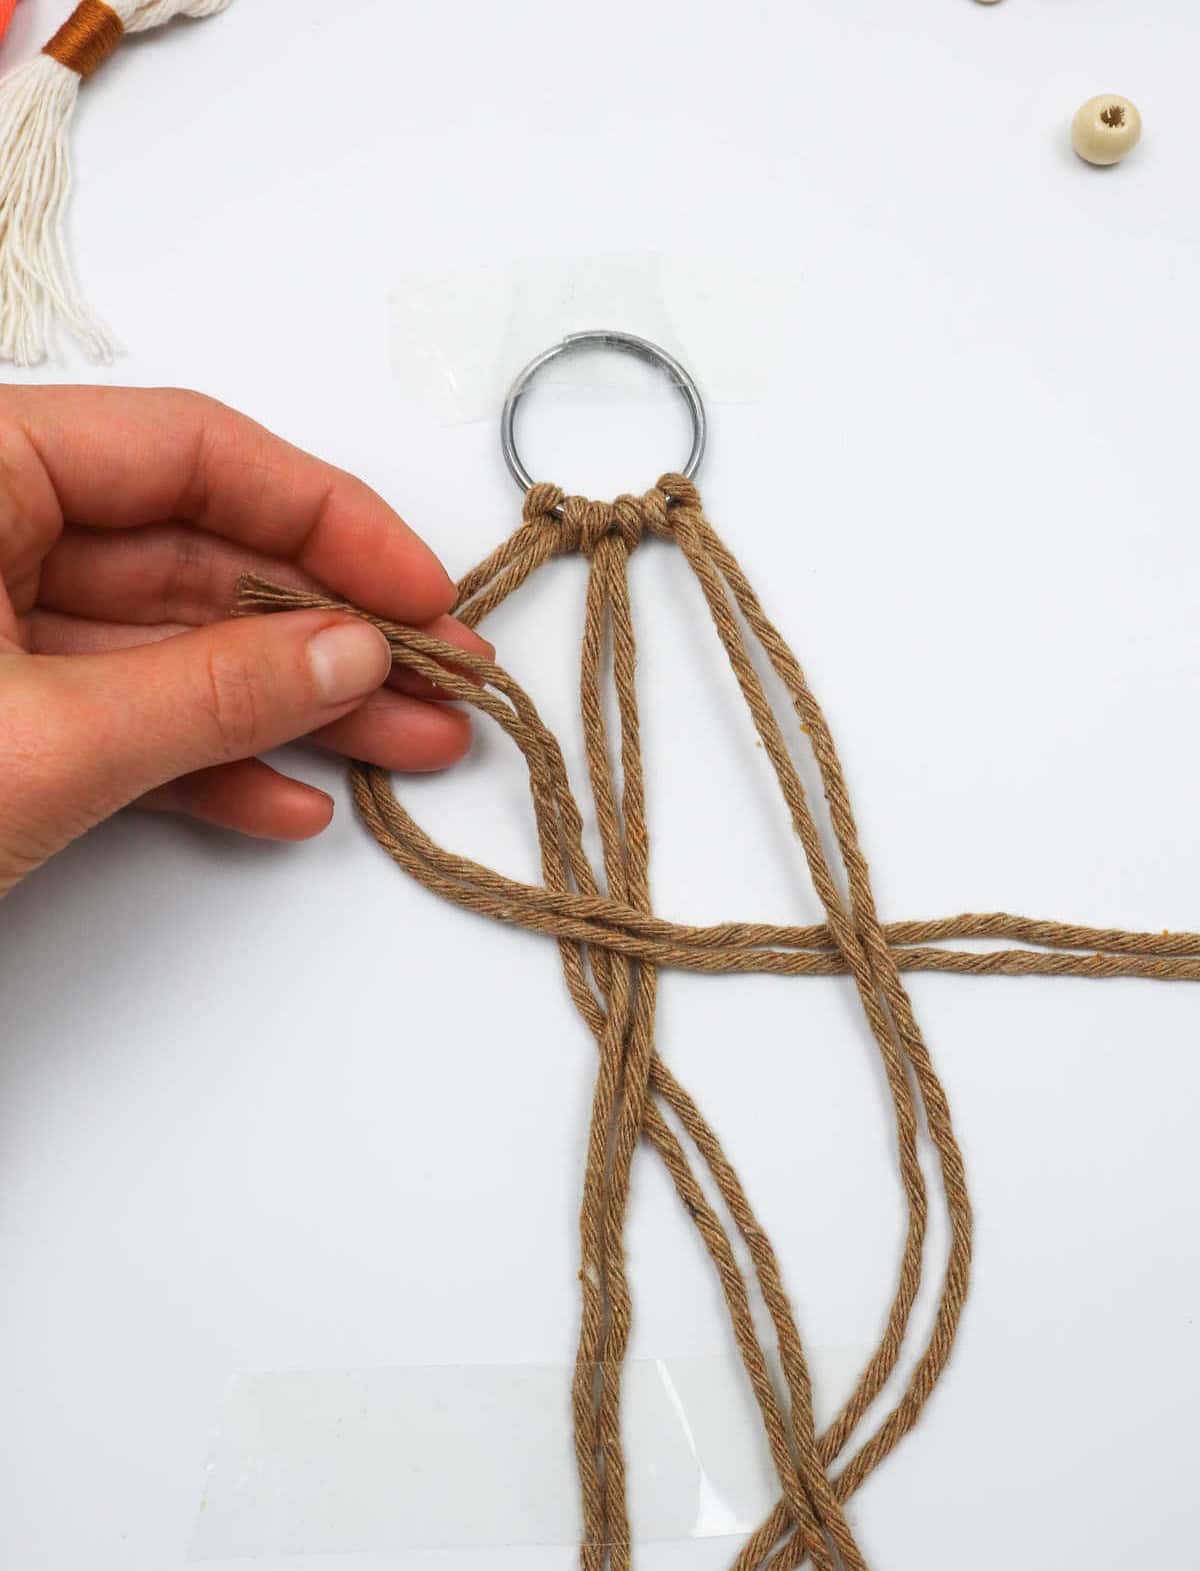
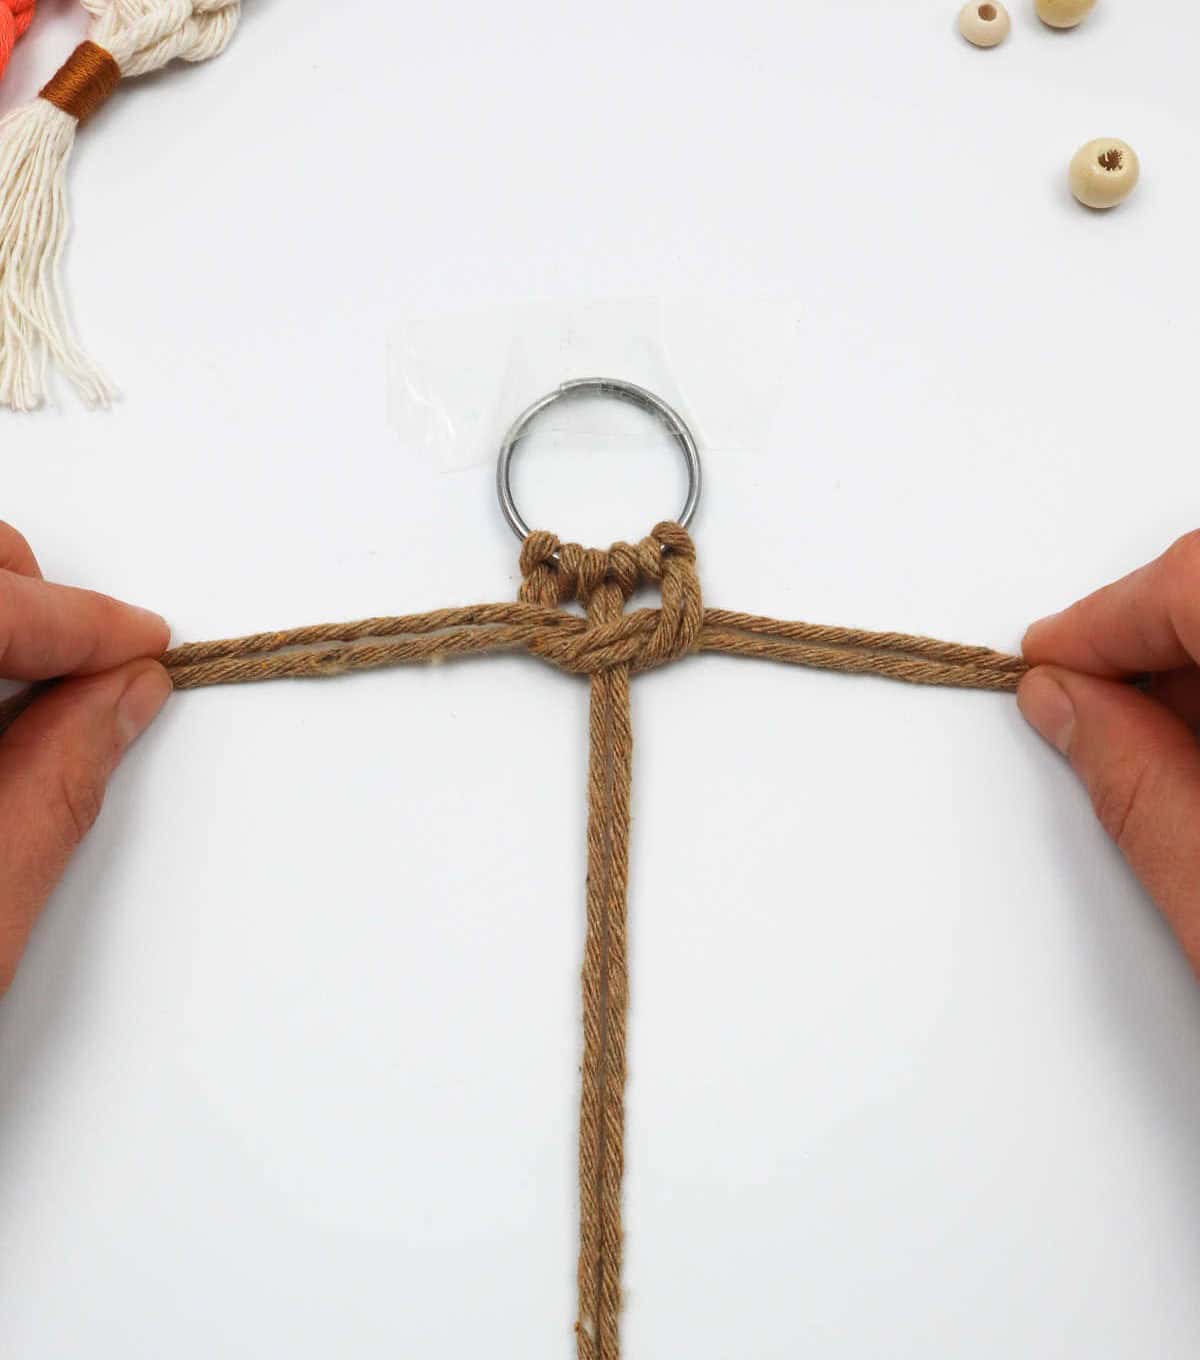
Step 5


To create the second part of the square knot, start by forming a loop with the cords on the right over the middle cords, just like before. Next, position the cords on the left so they’re overlapping the ones on the right. Then, pass the ends of the cord under and through the newly created loop. Gently pull the ends to tighten the knot, making sure it’s secure and snug against the first knot you made.
This second knot should be positioned just below the first one, with both knots working together in harmony to form a sturdy square knot.
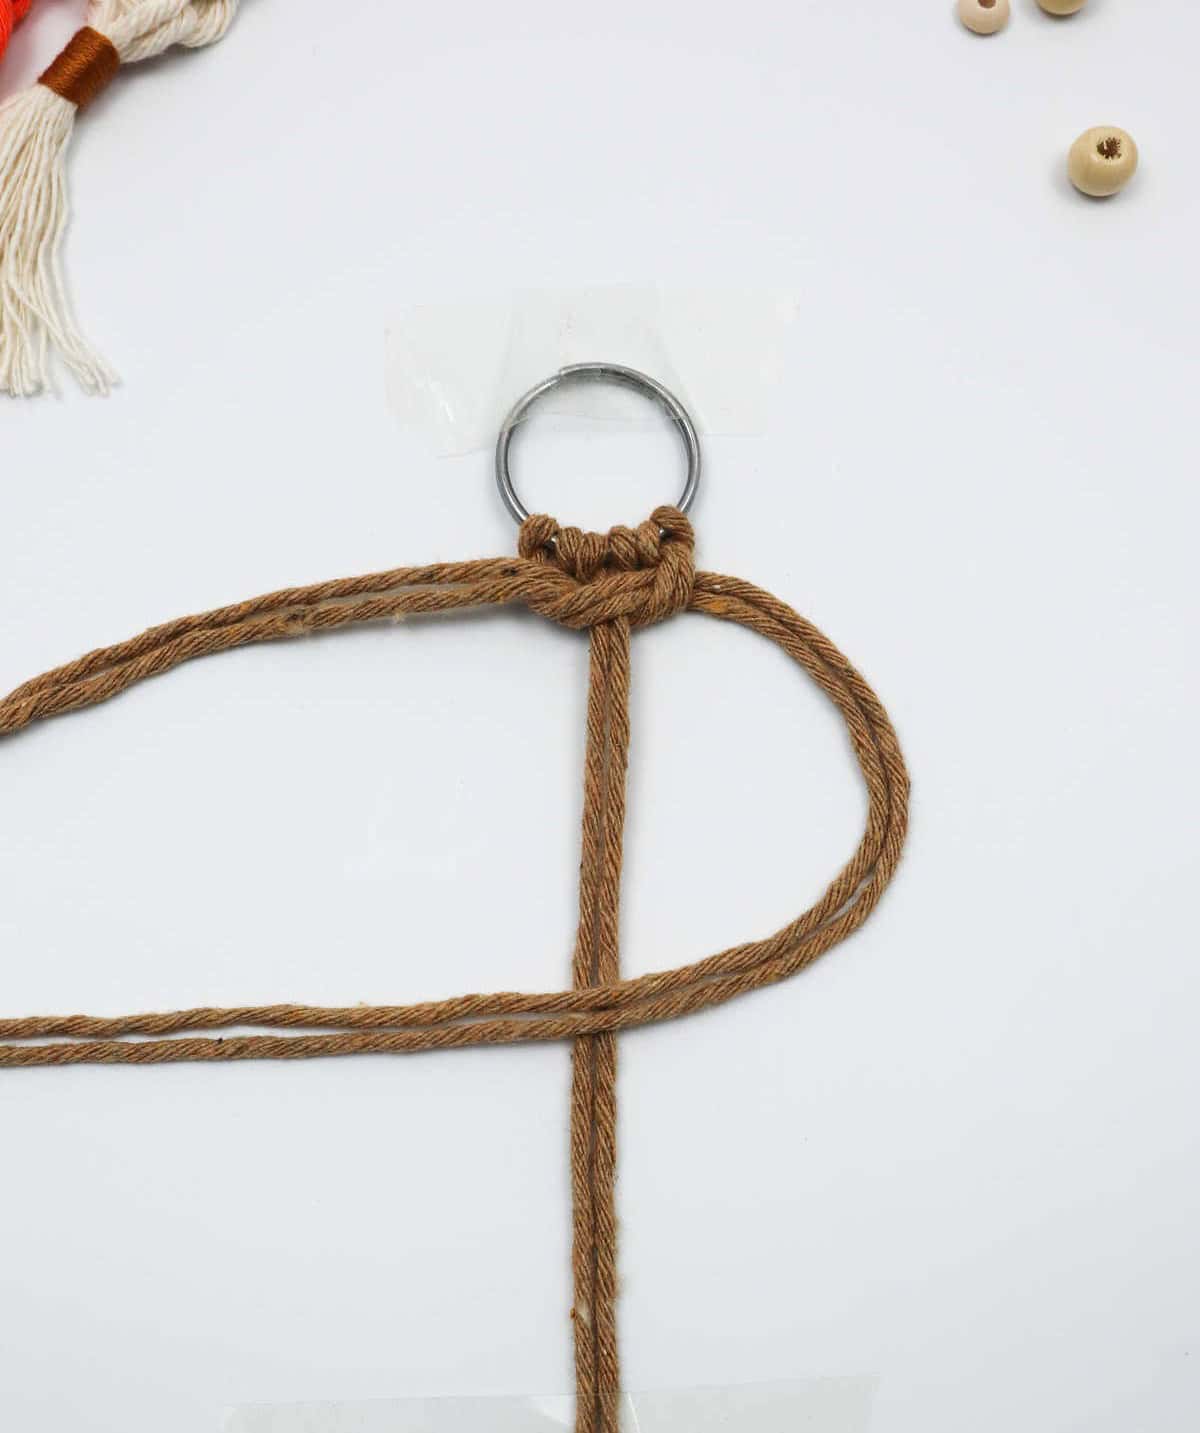
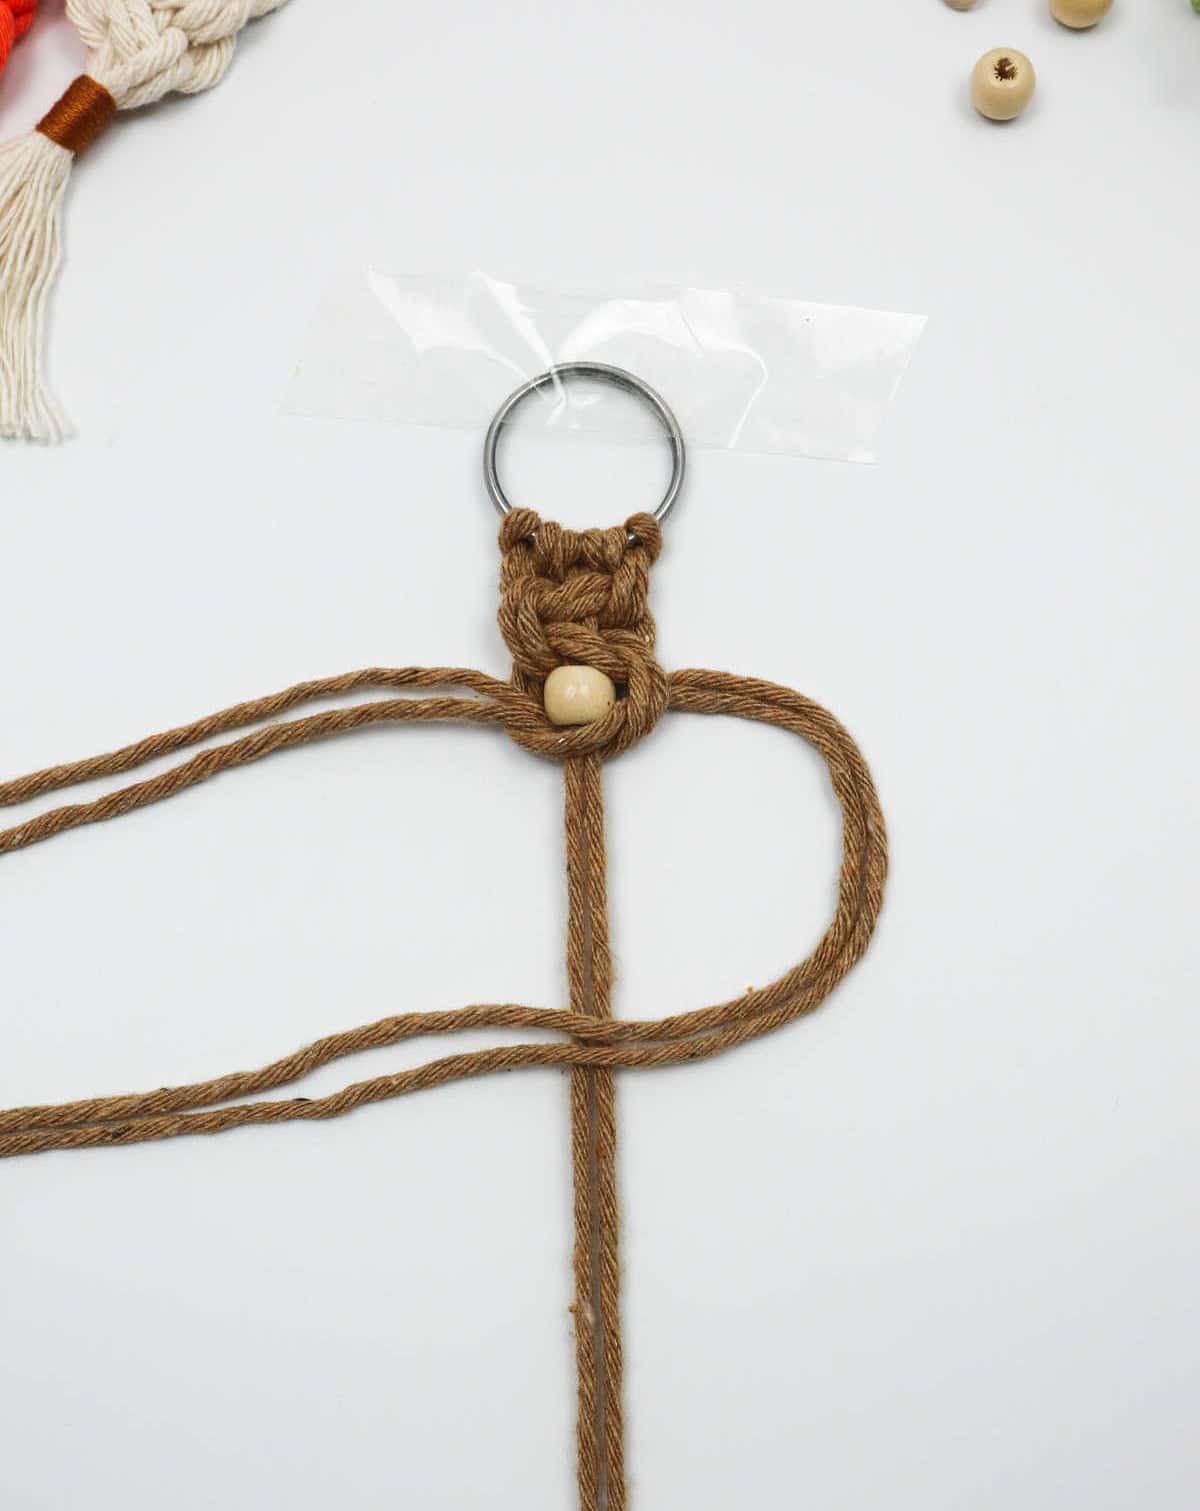
Step 6
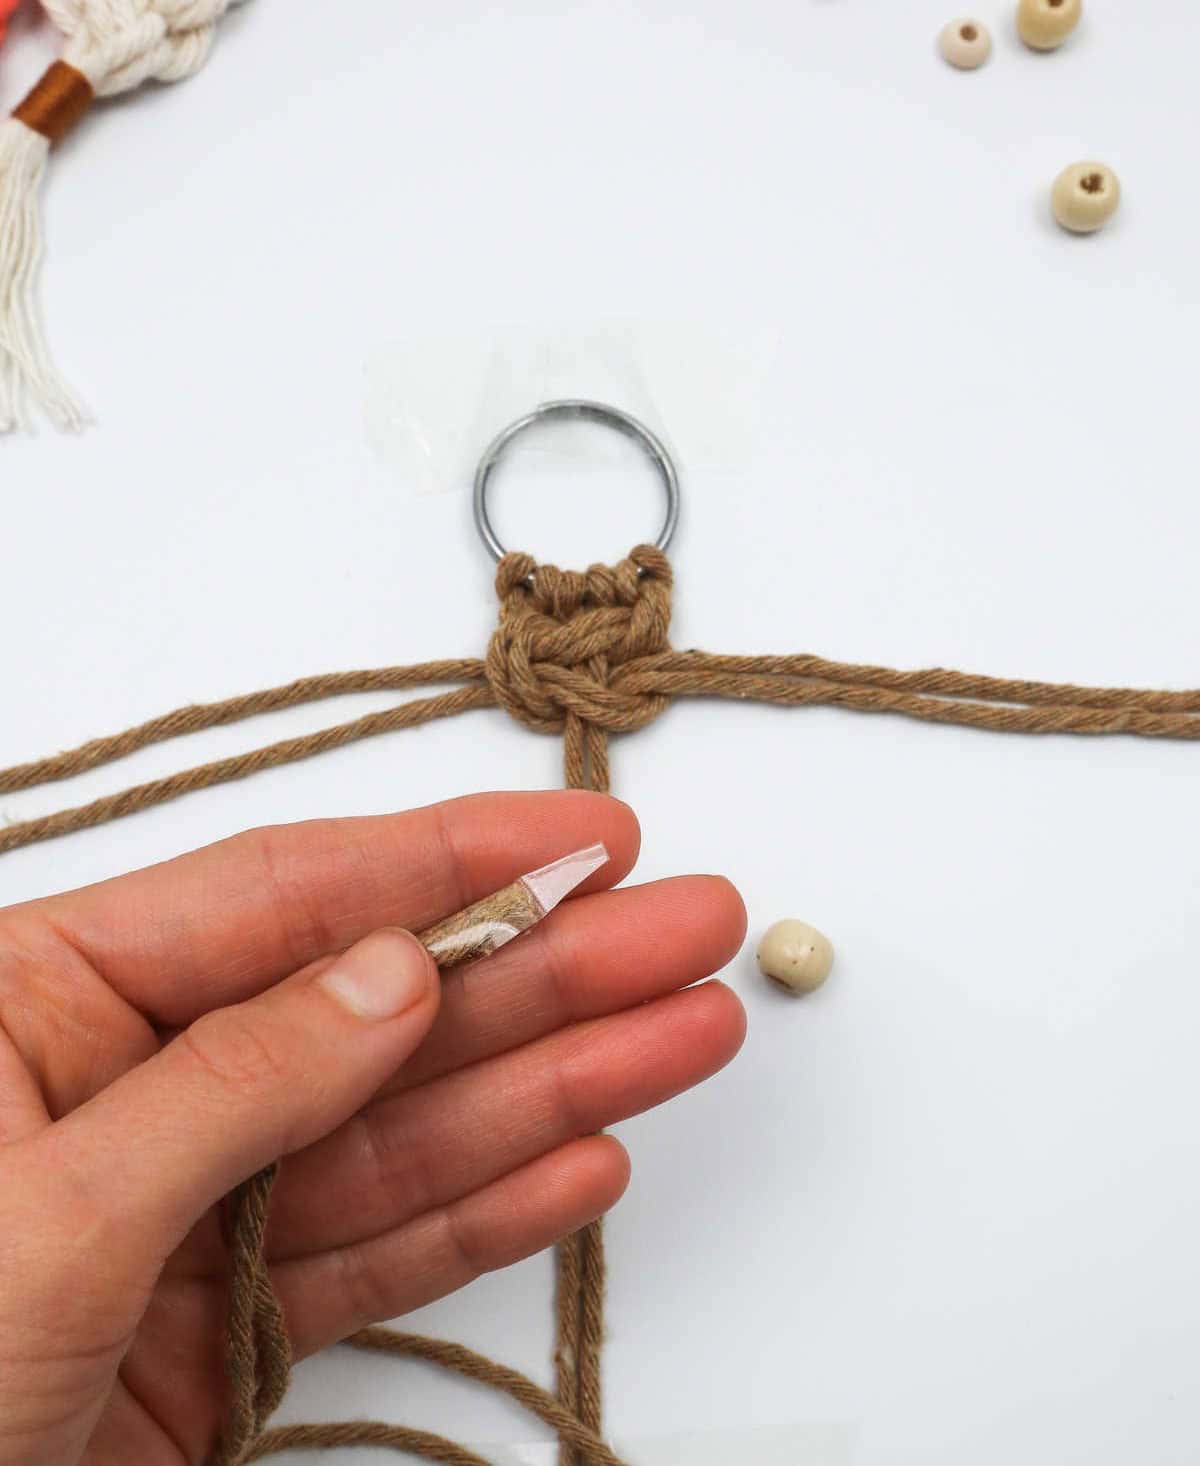
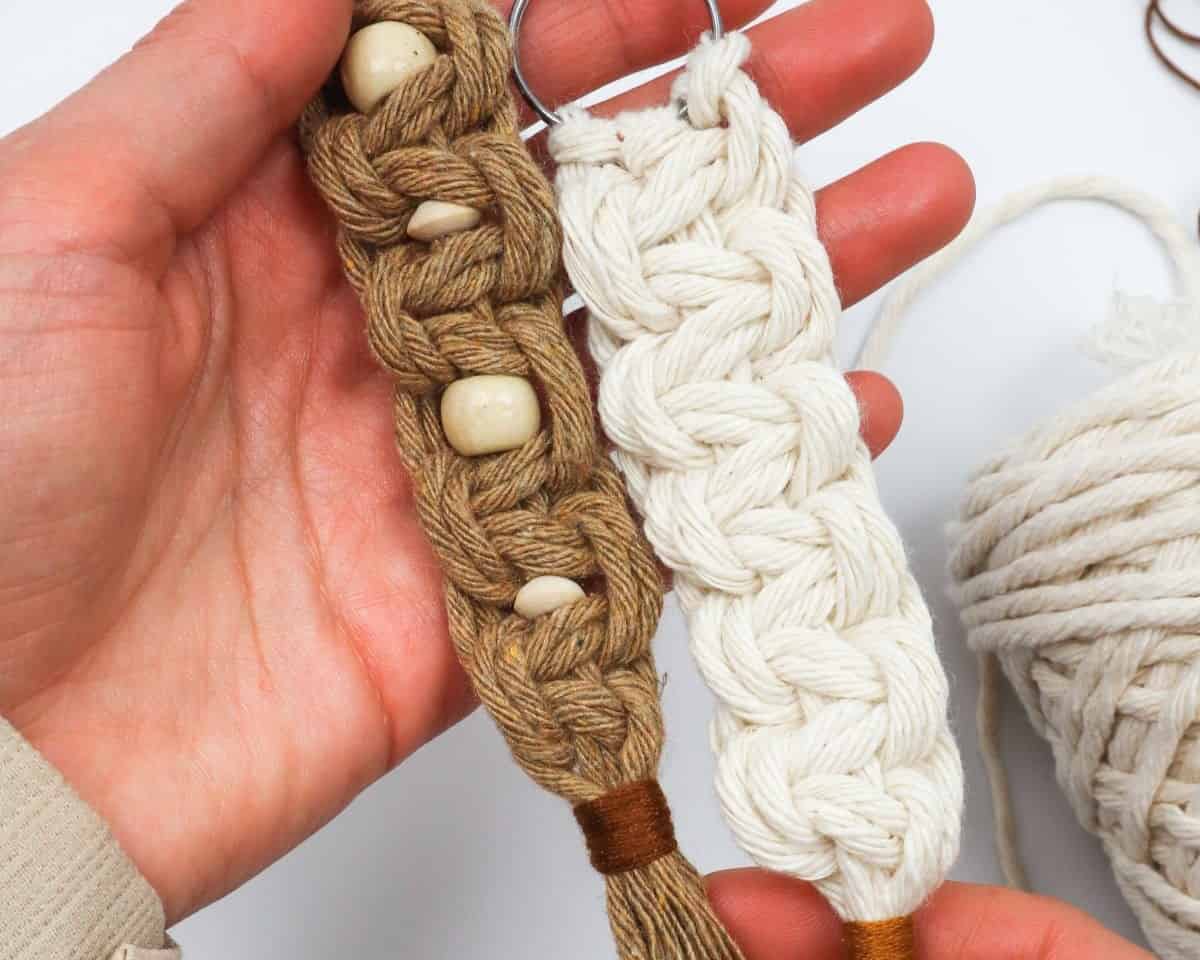
To add some flair to your keychain, let’s start by preparing a small bead for insertion. To do this, simply wrap the ends of the two middle cords with tape. This will create a smooth surface for inserting the bead through its hole. Once you’ve got the bead ready, pull it through and position it just below your first square knot, getting it as close to the top as possible.
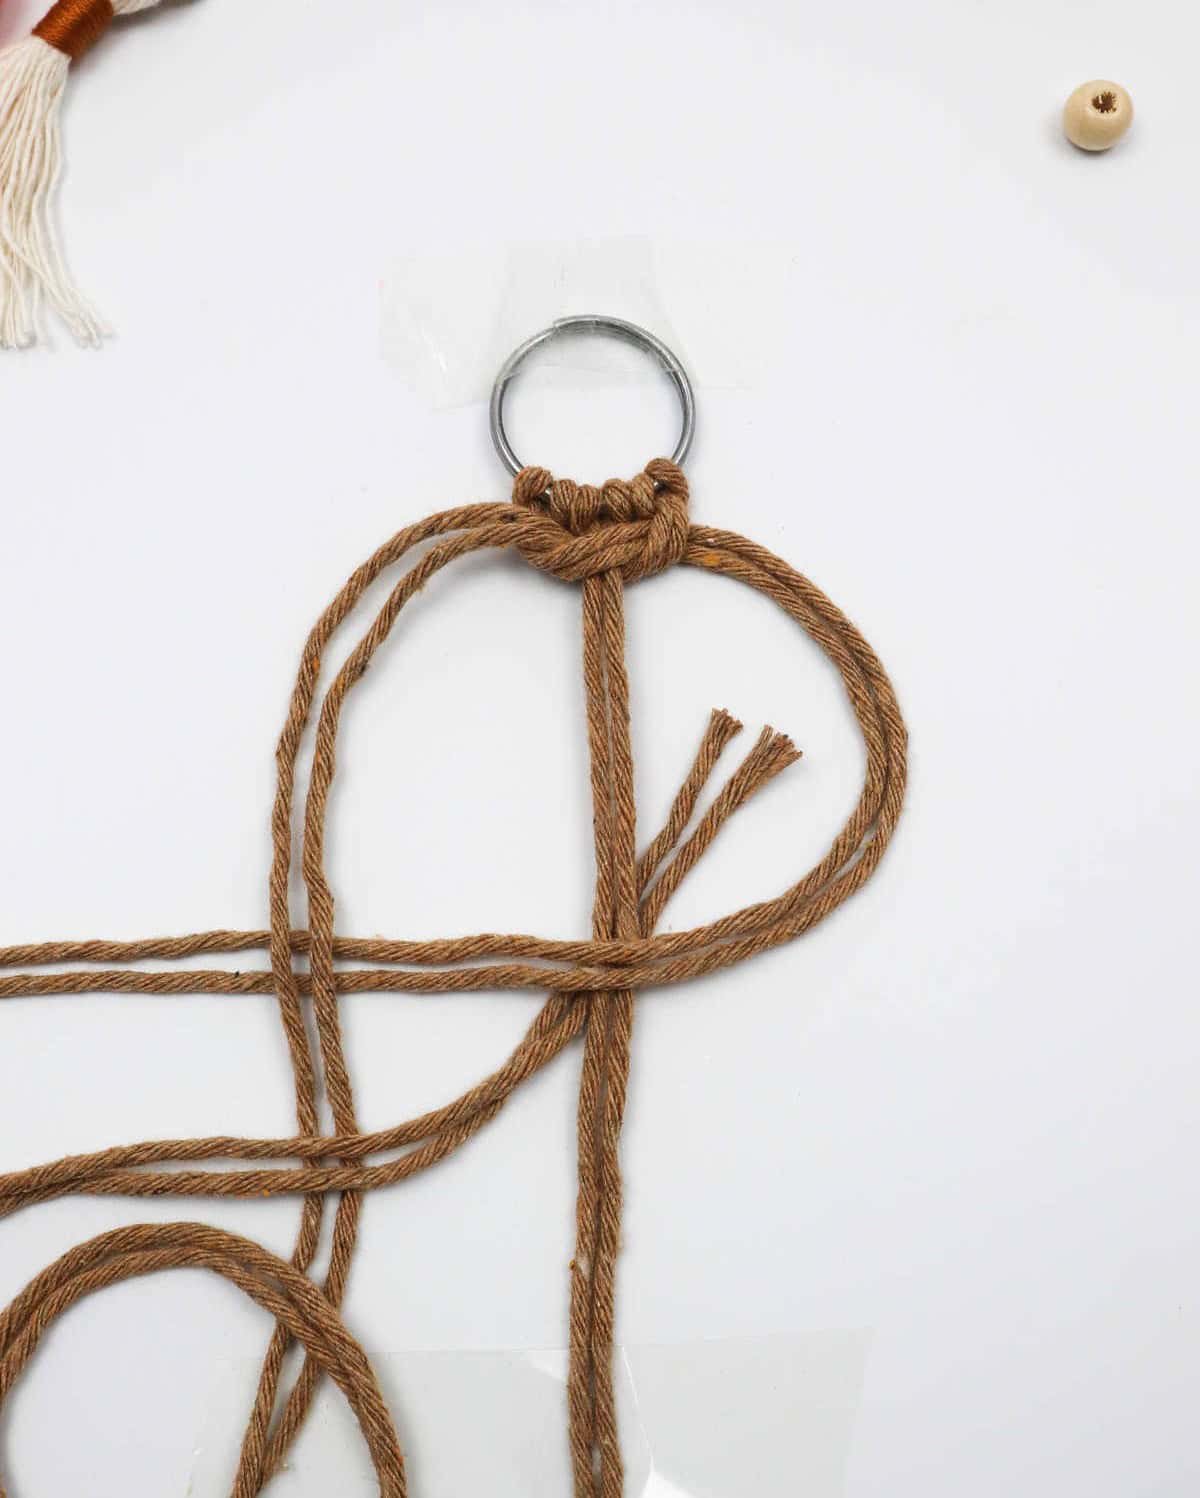
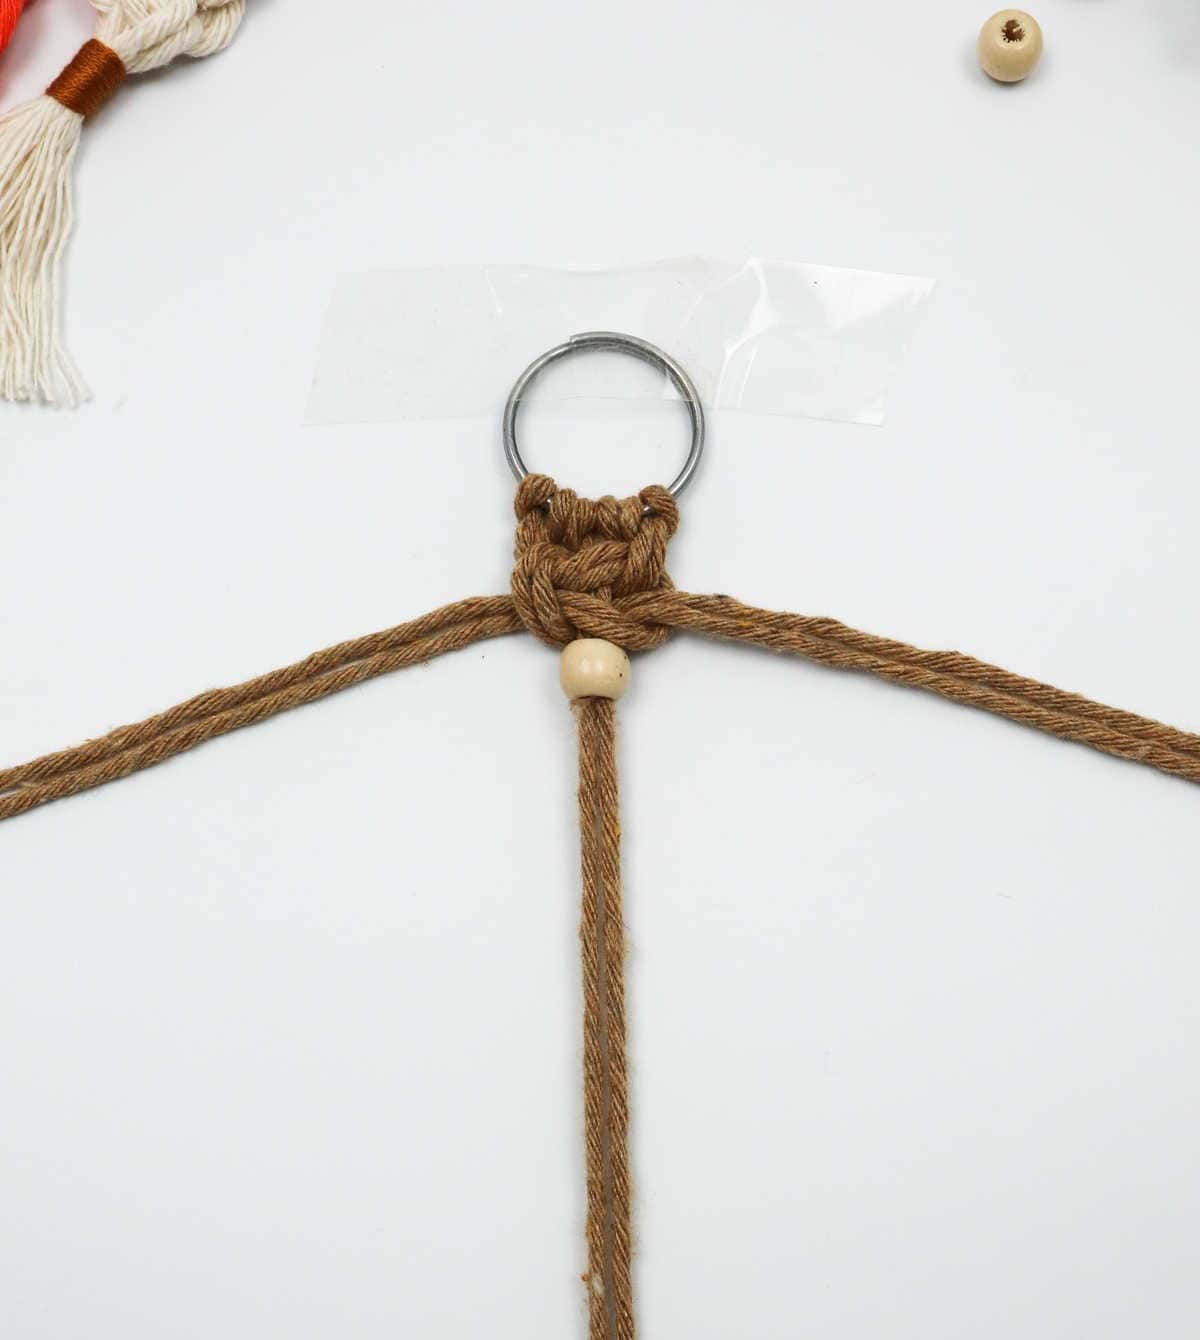
Step 7
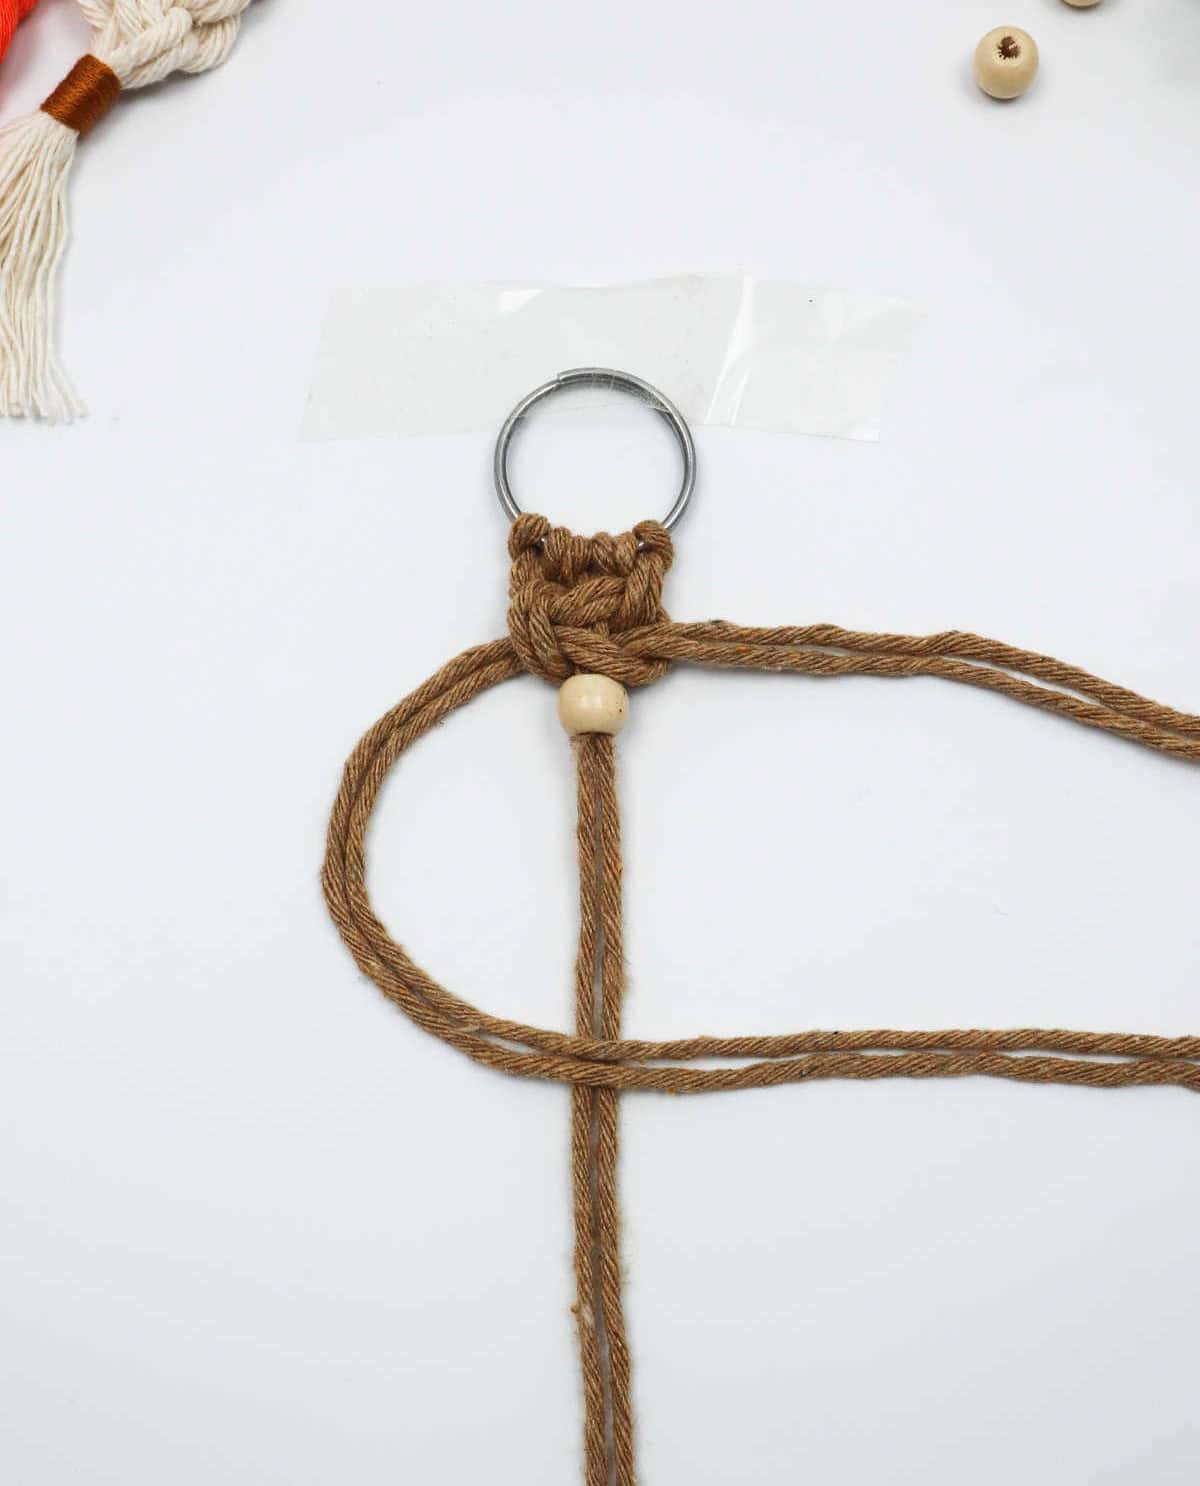
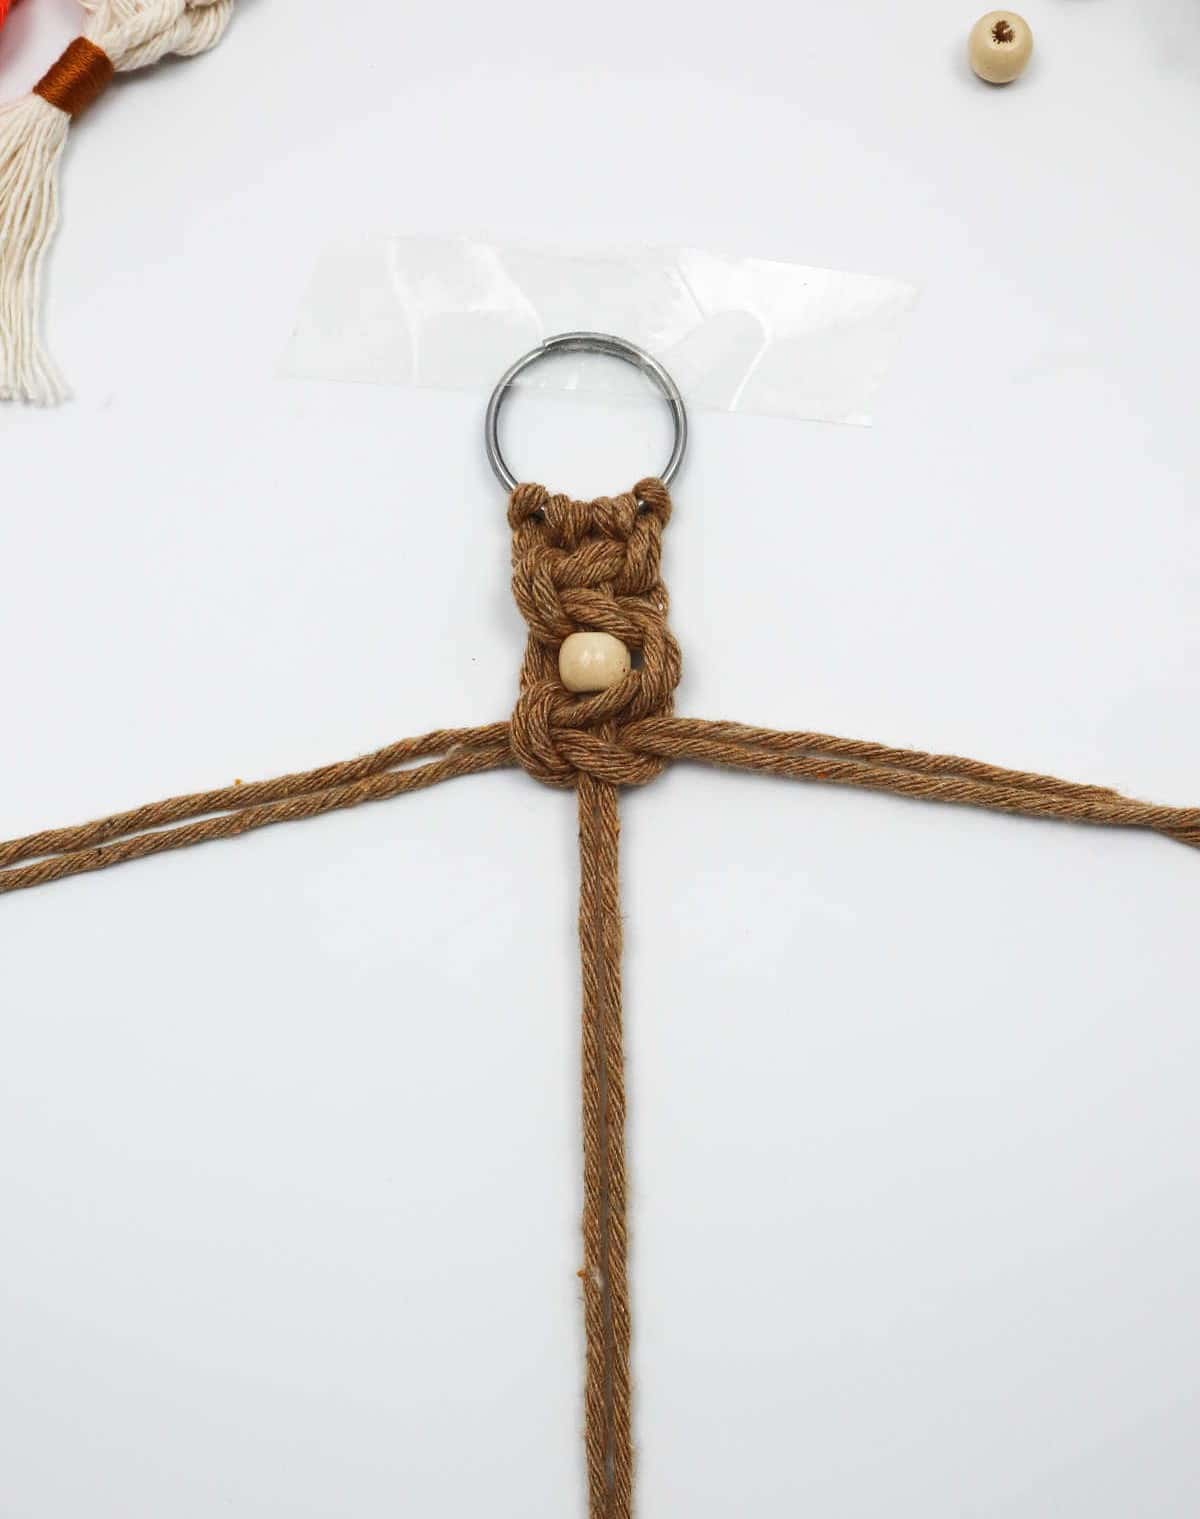
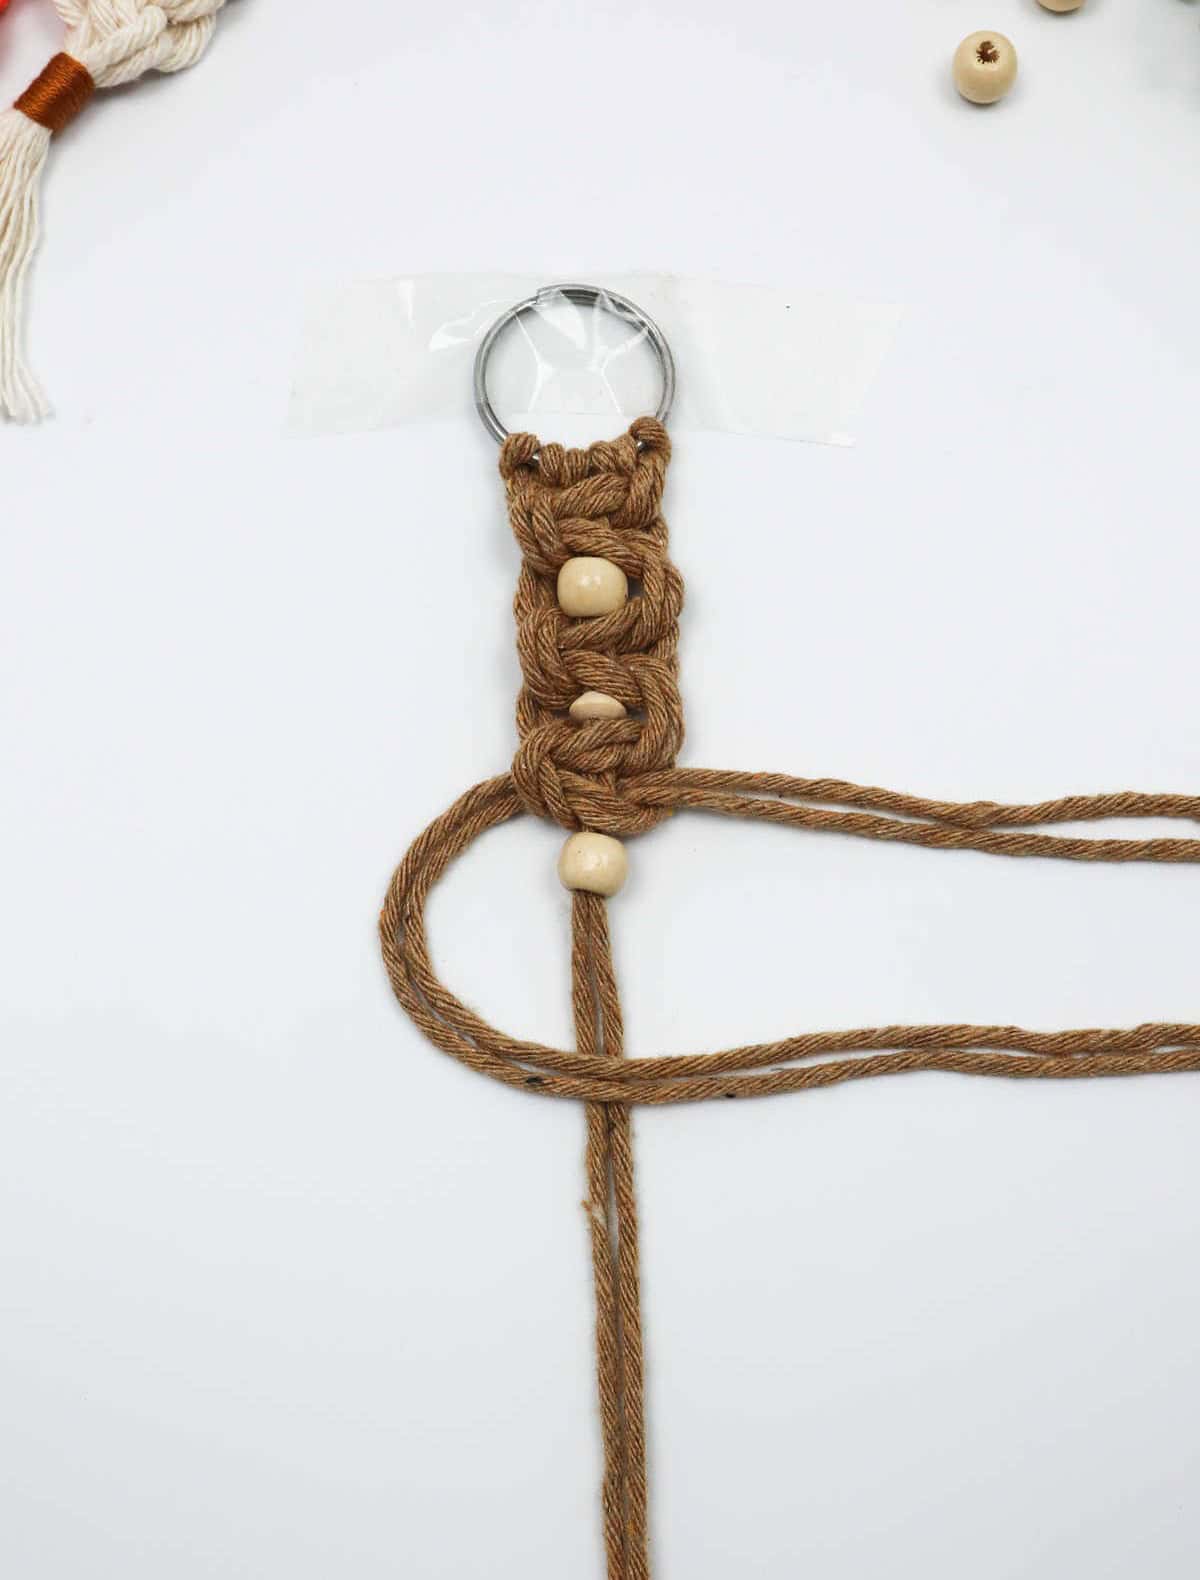
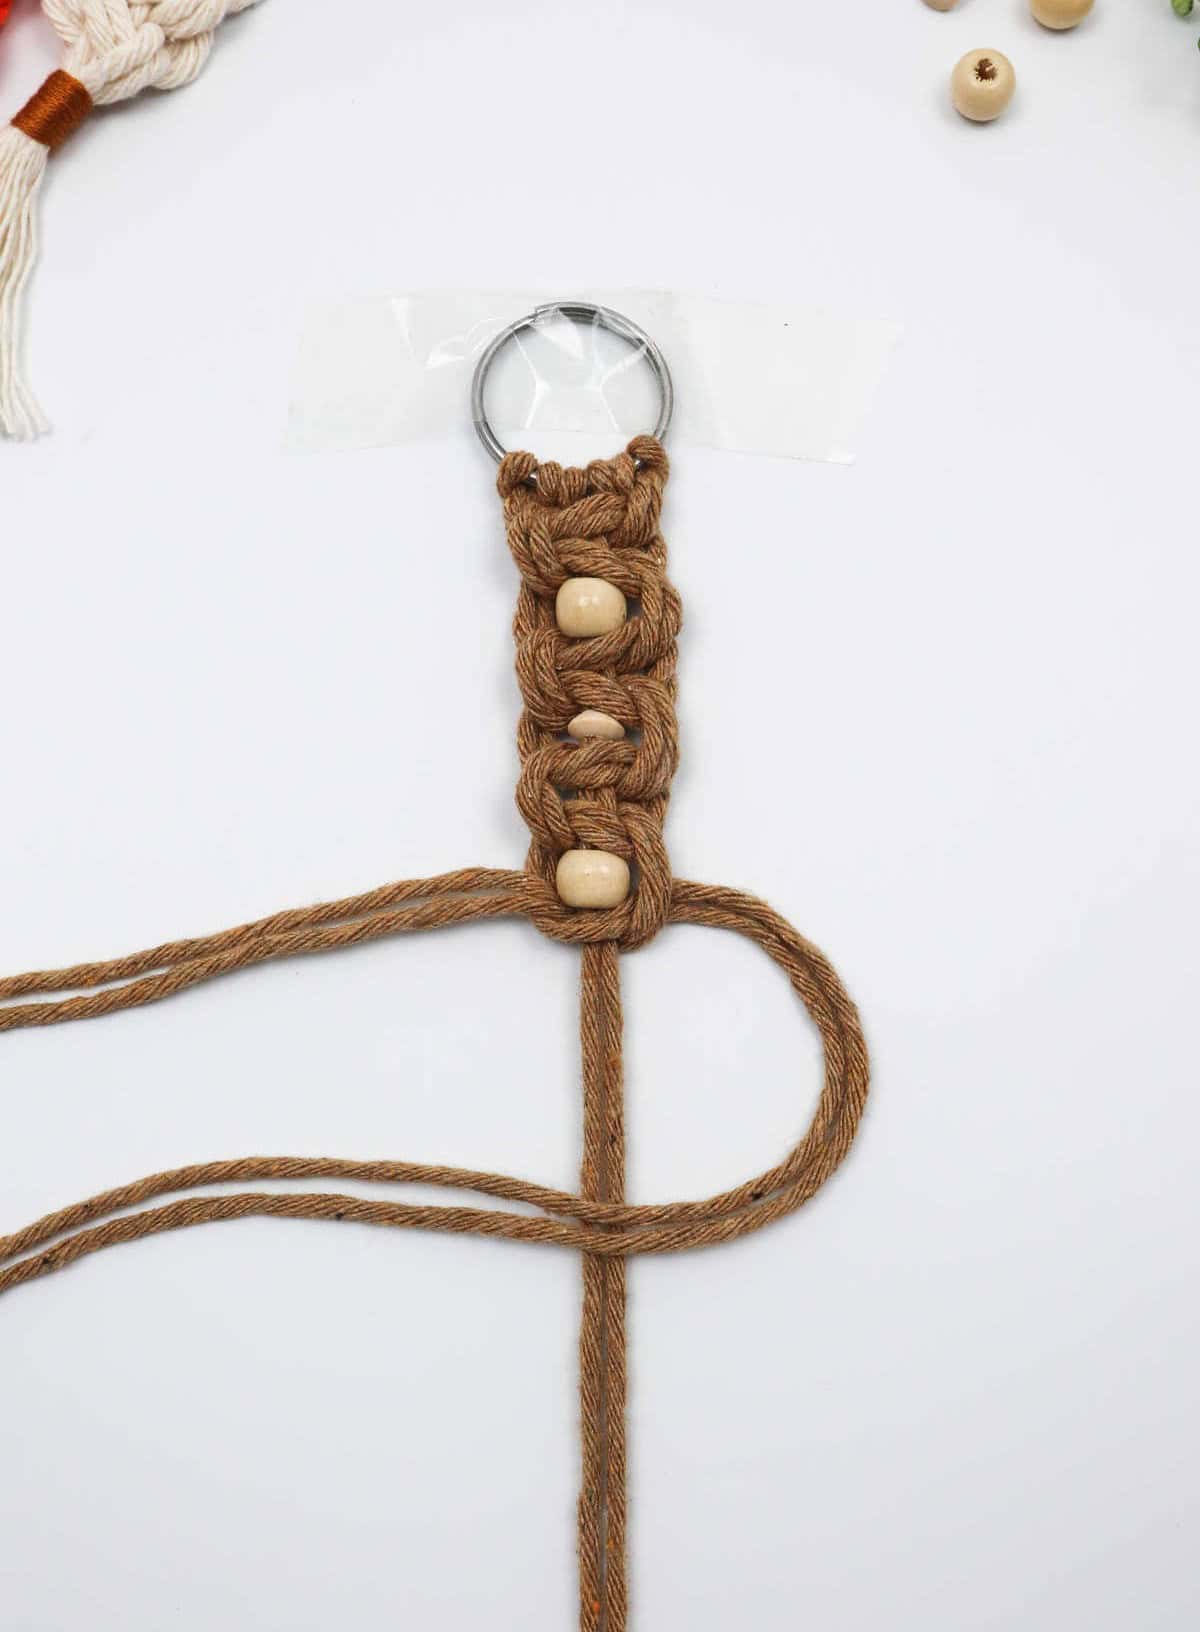
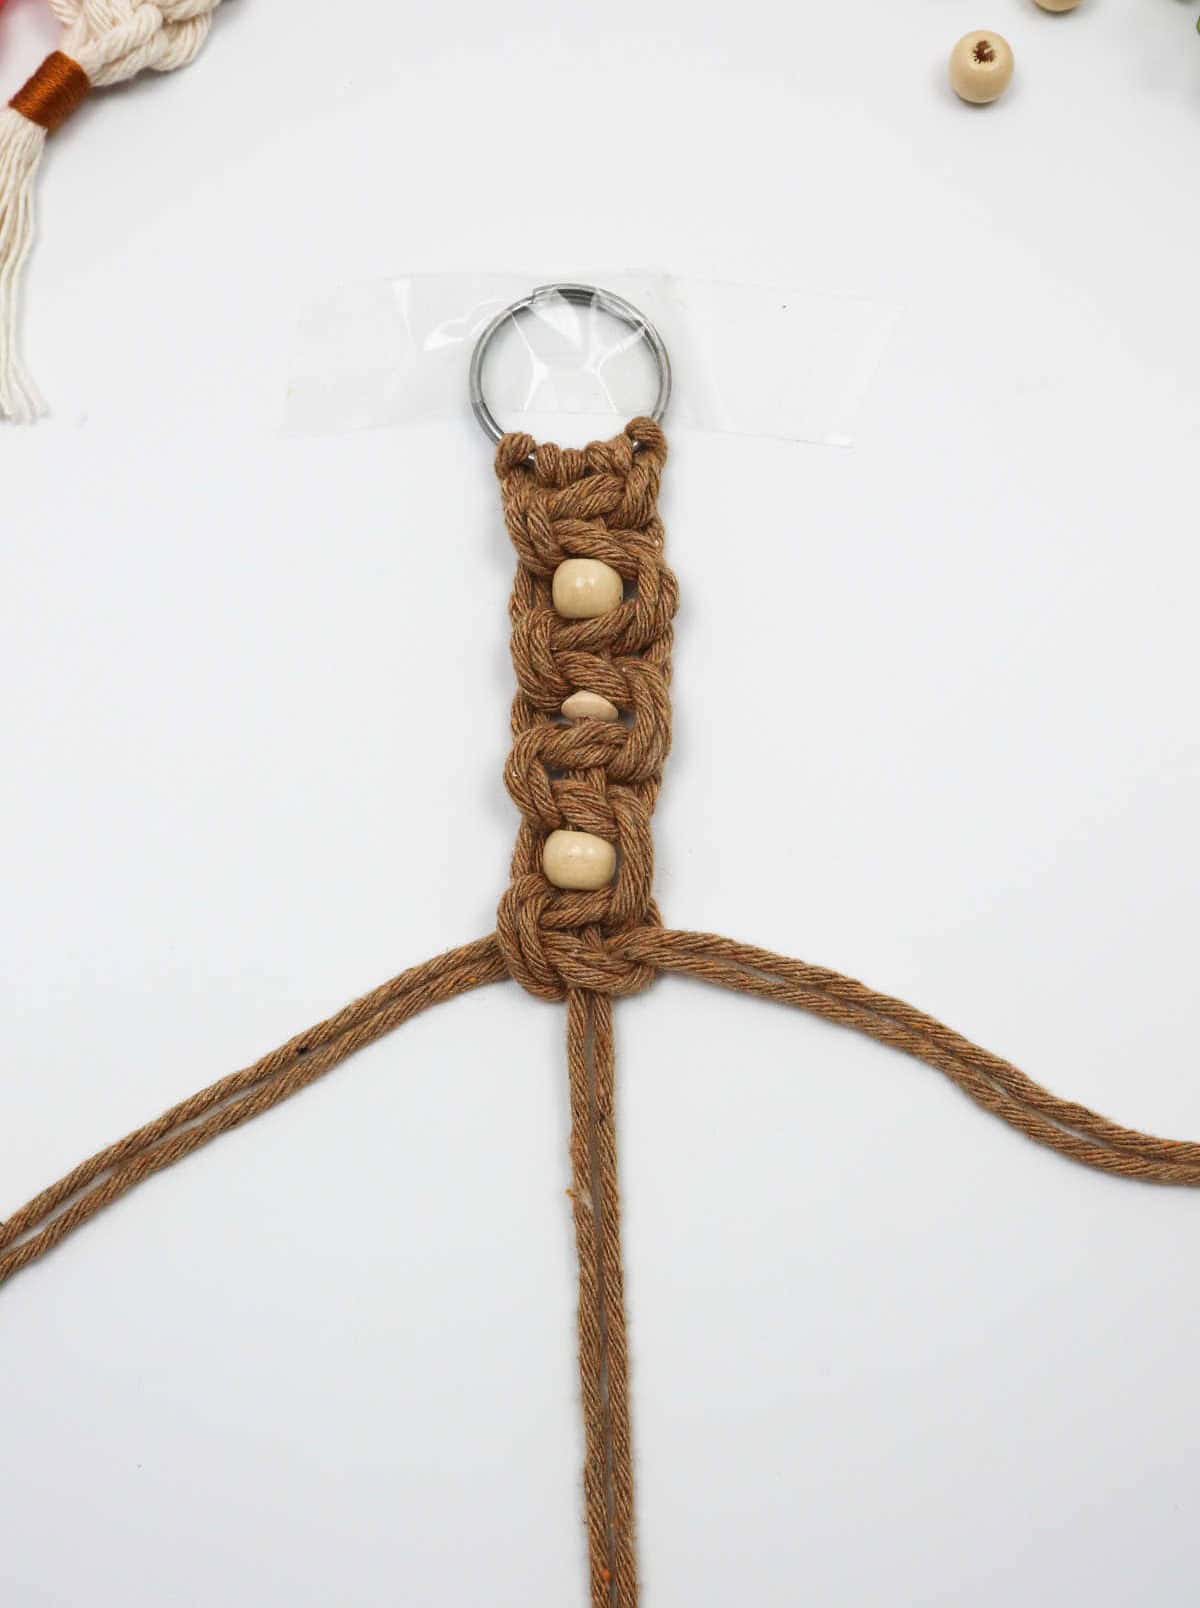
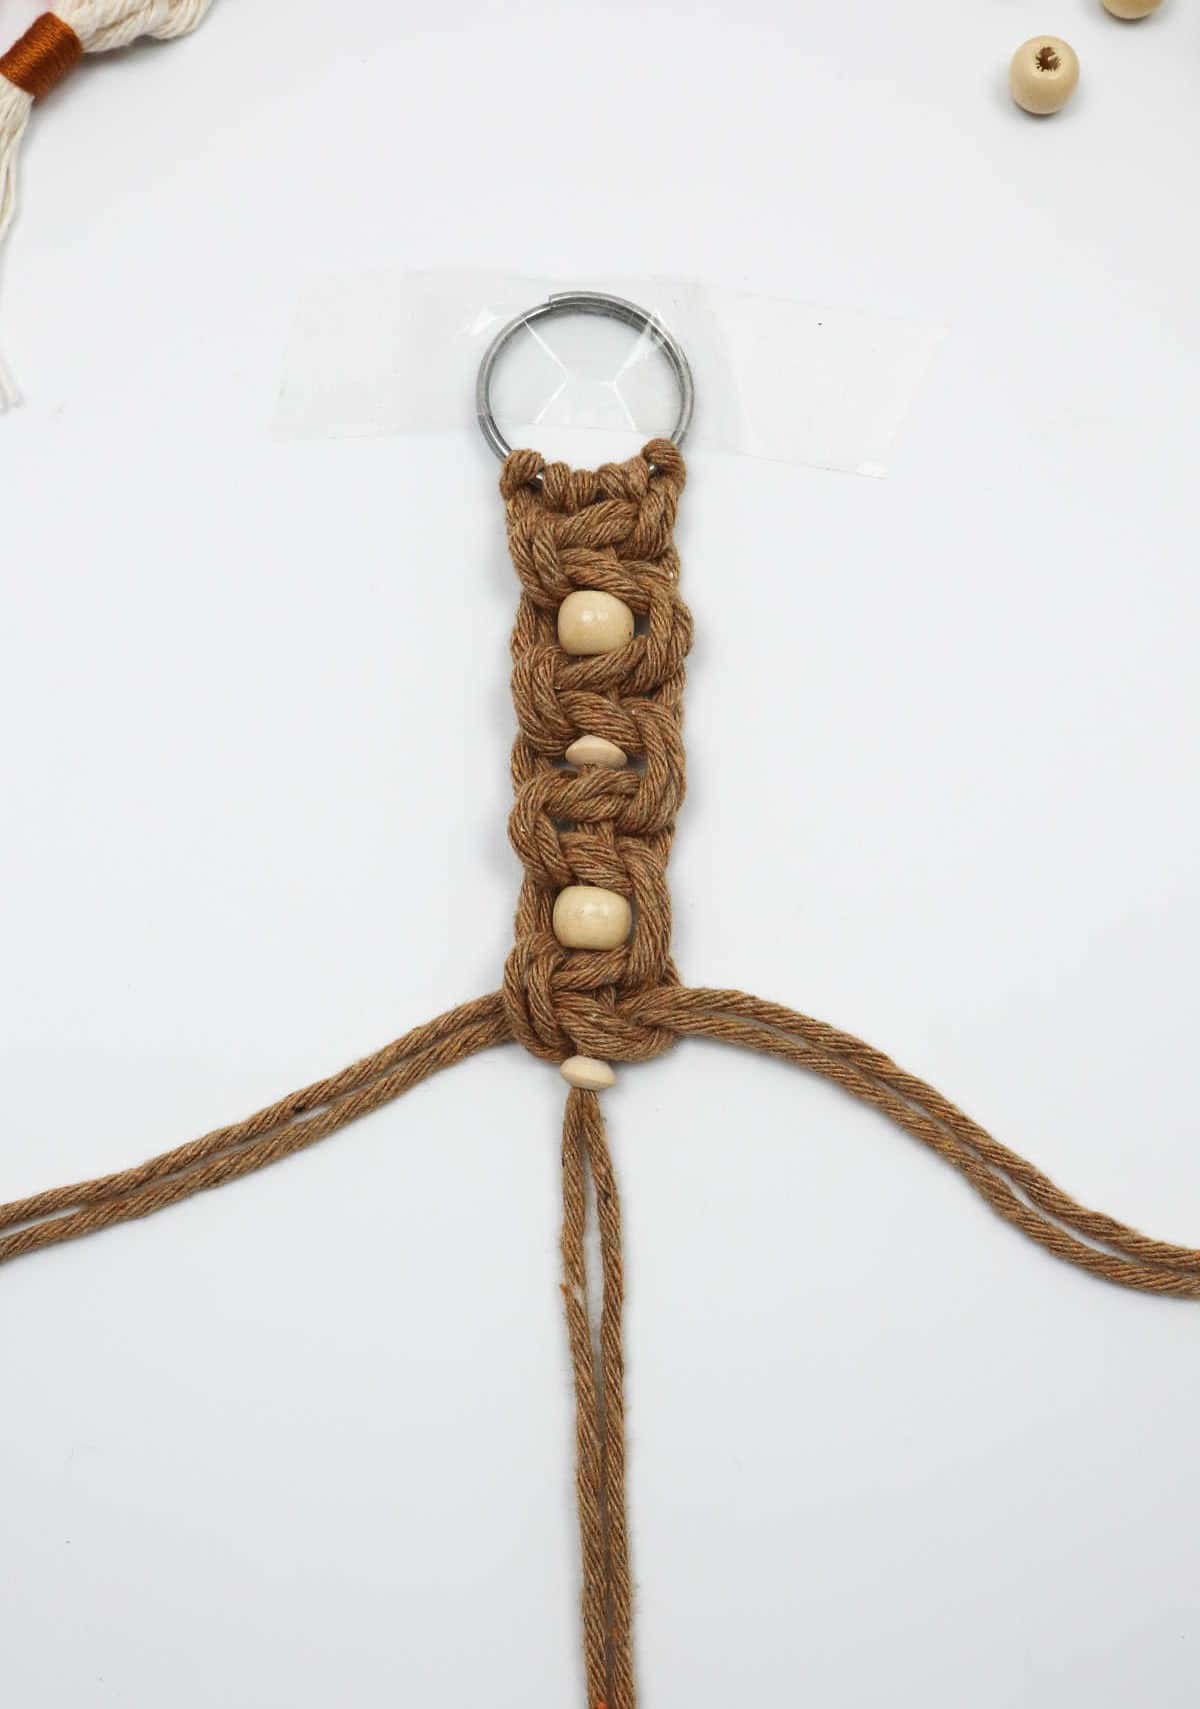
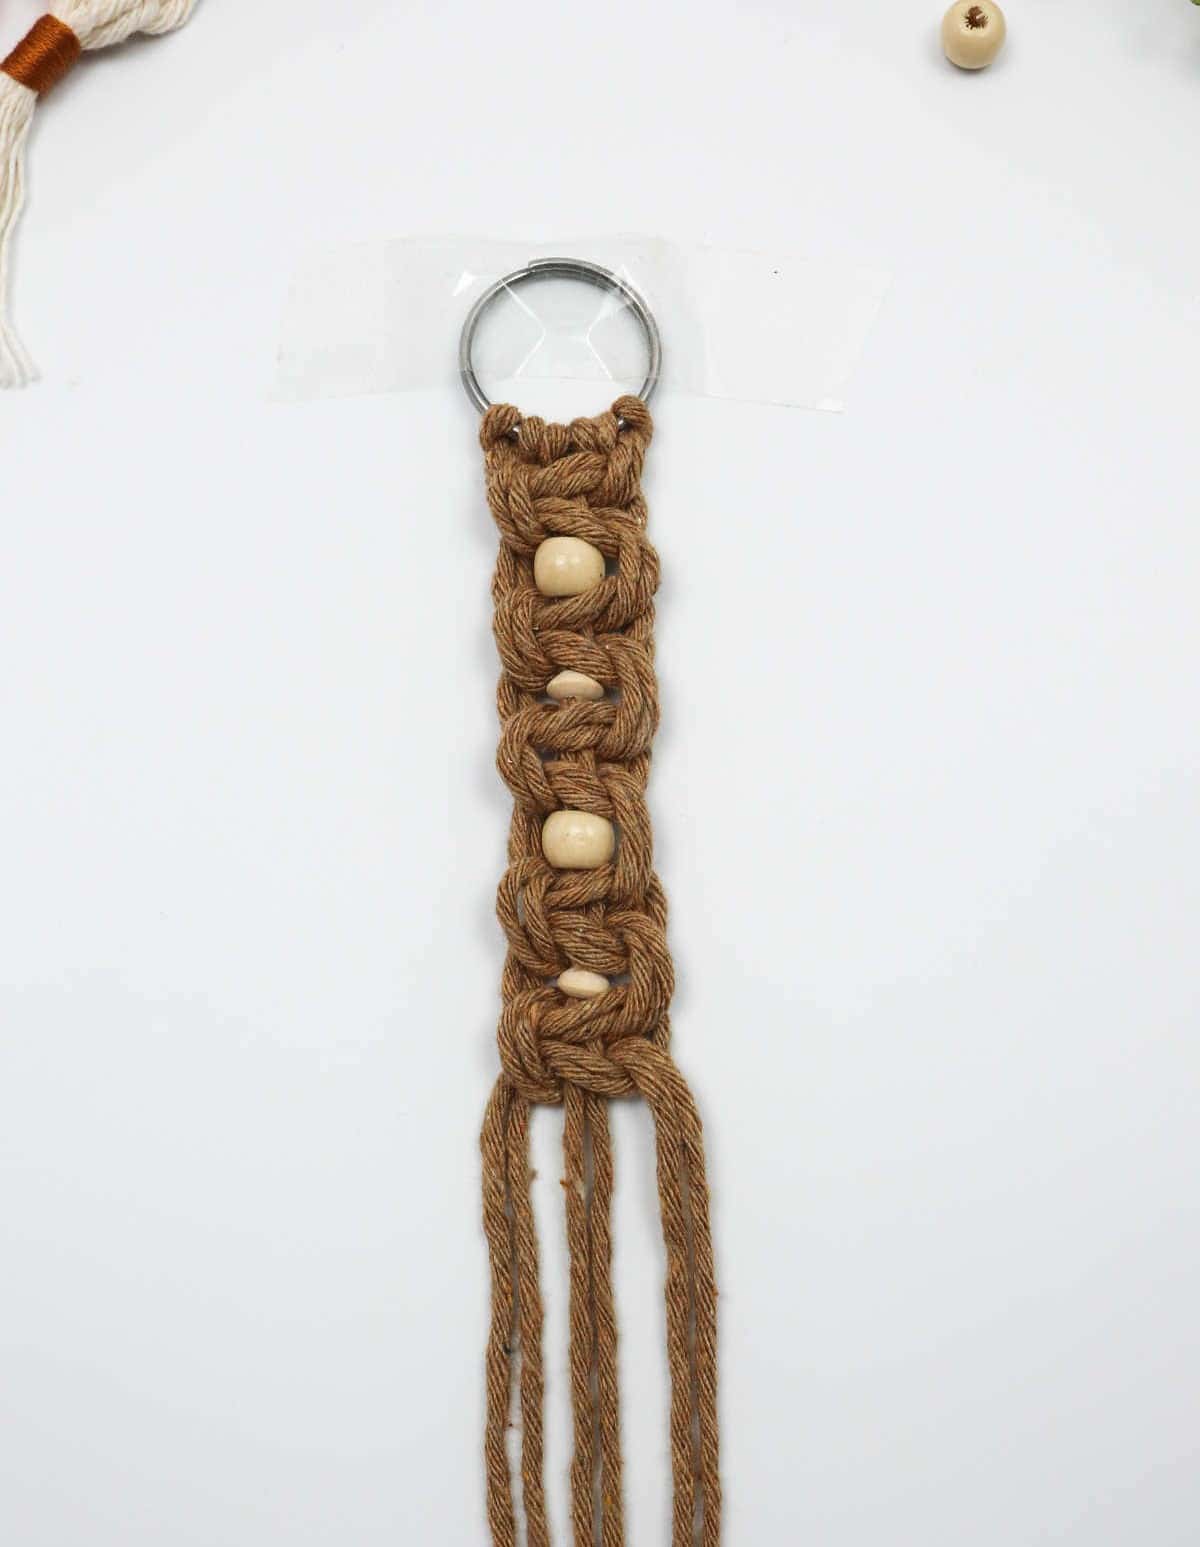
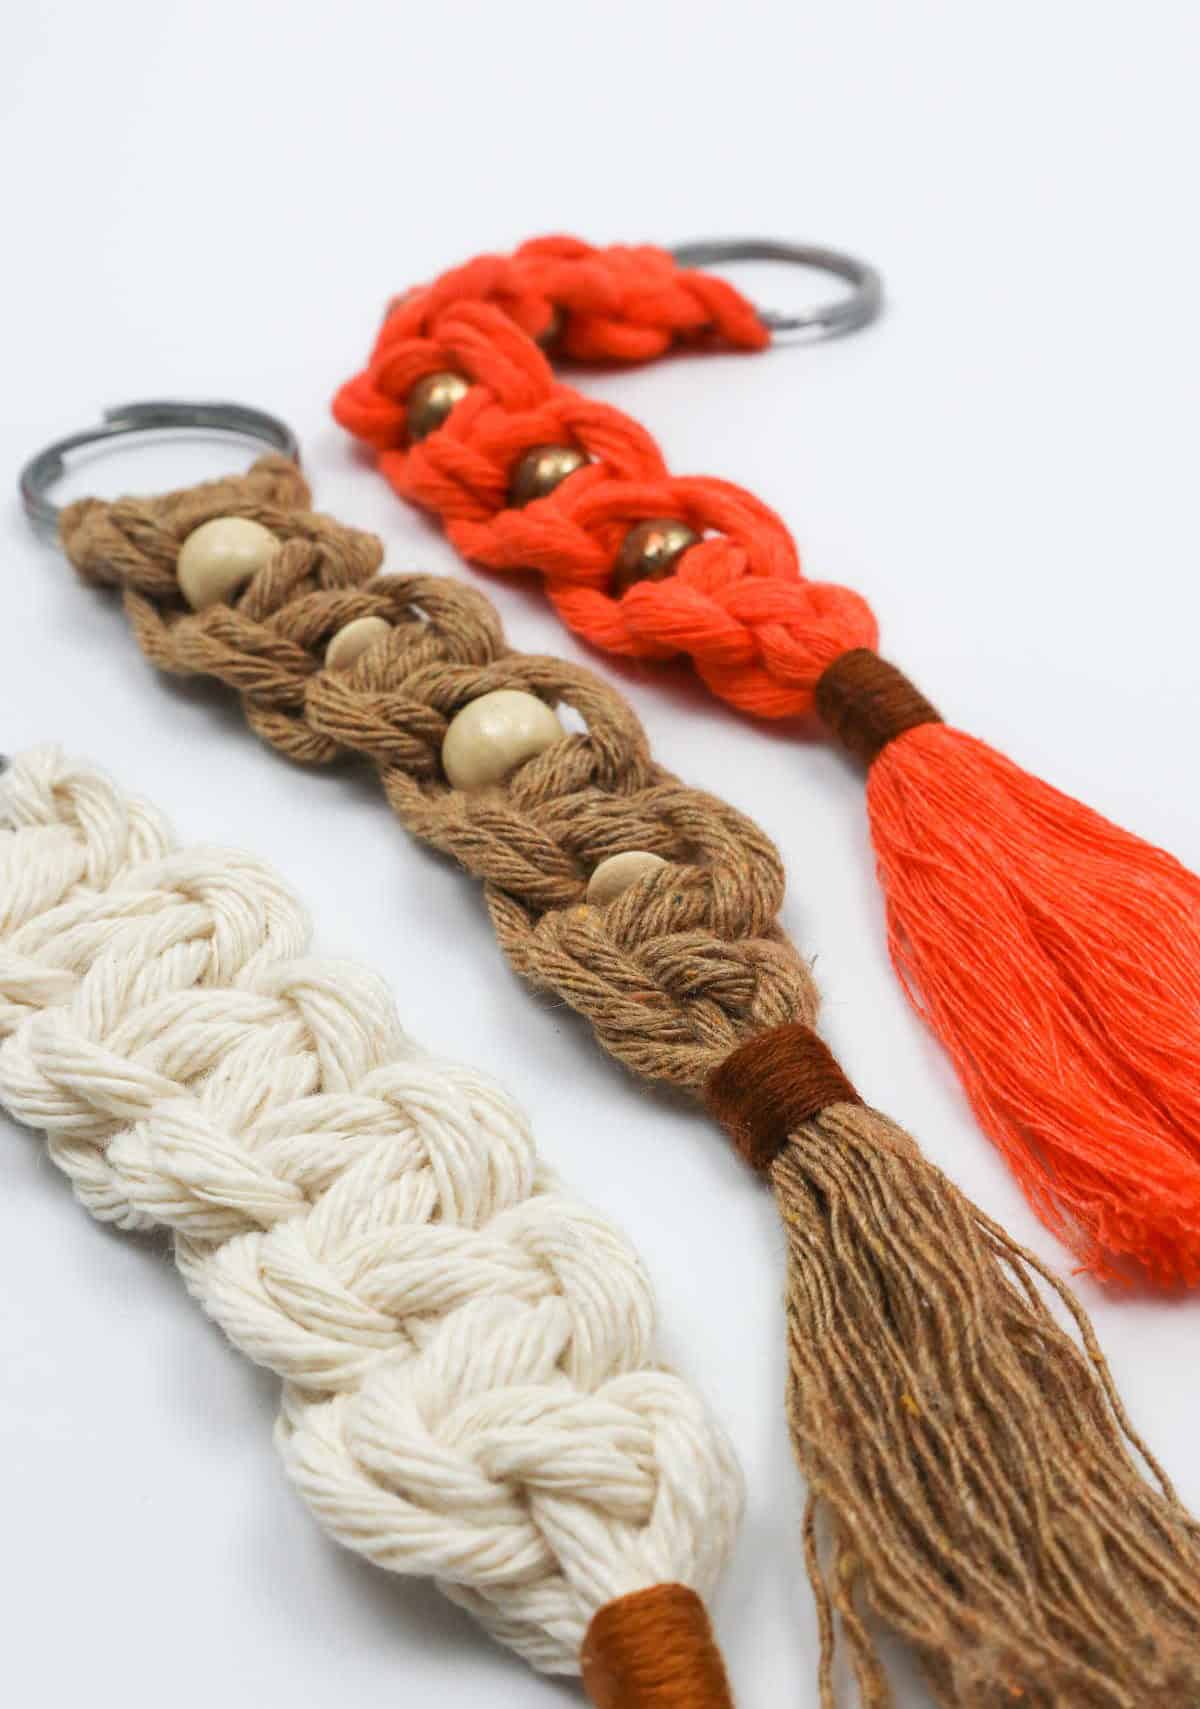
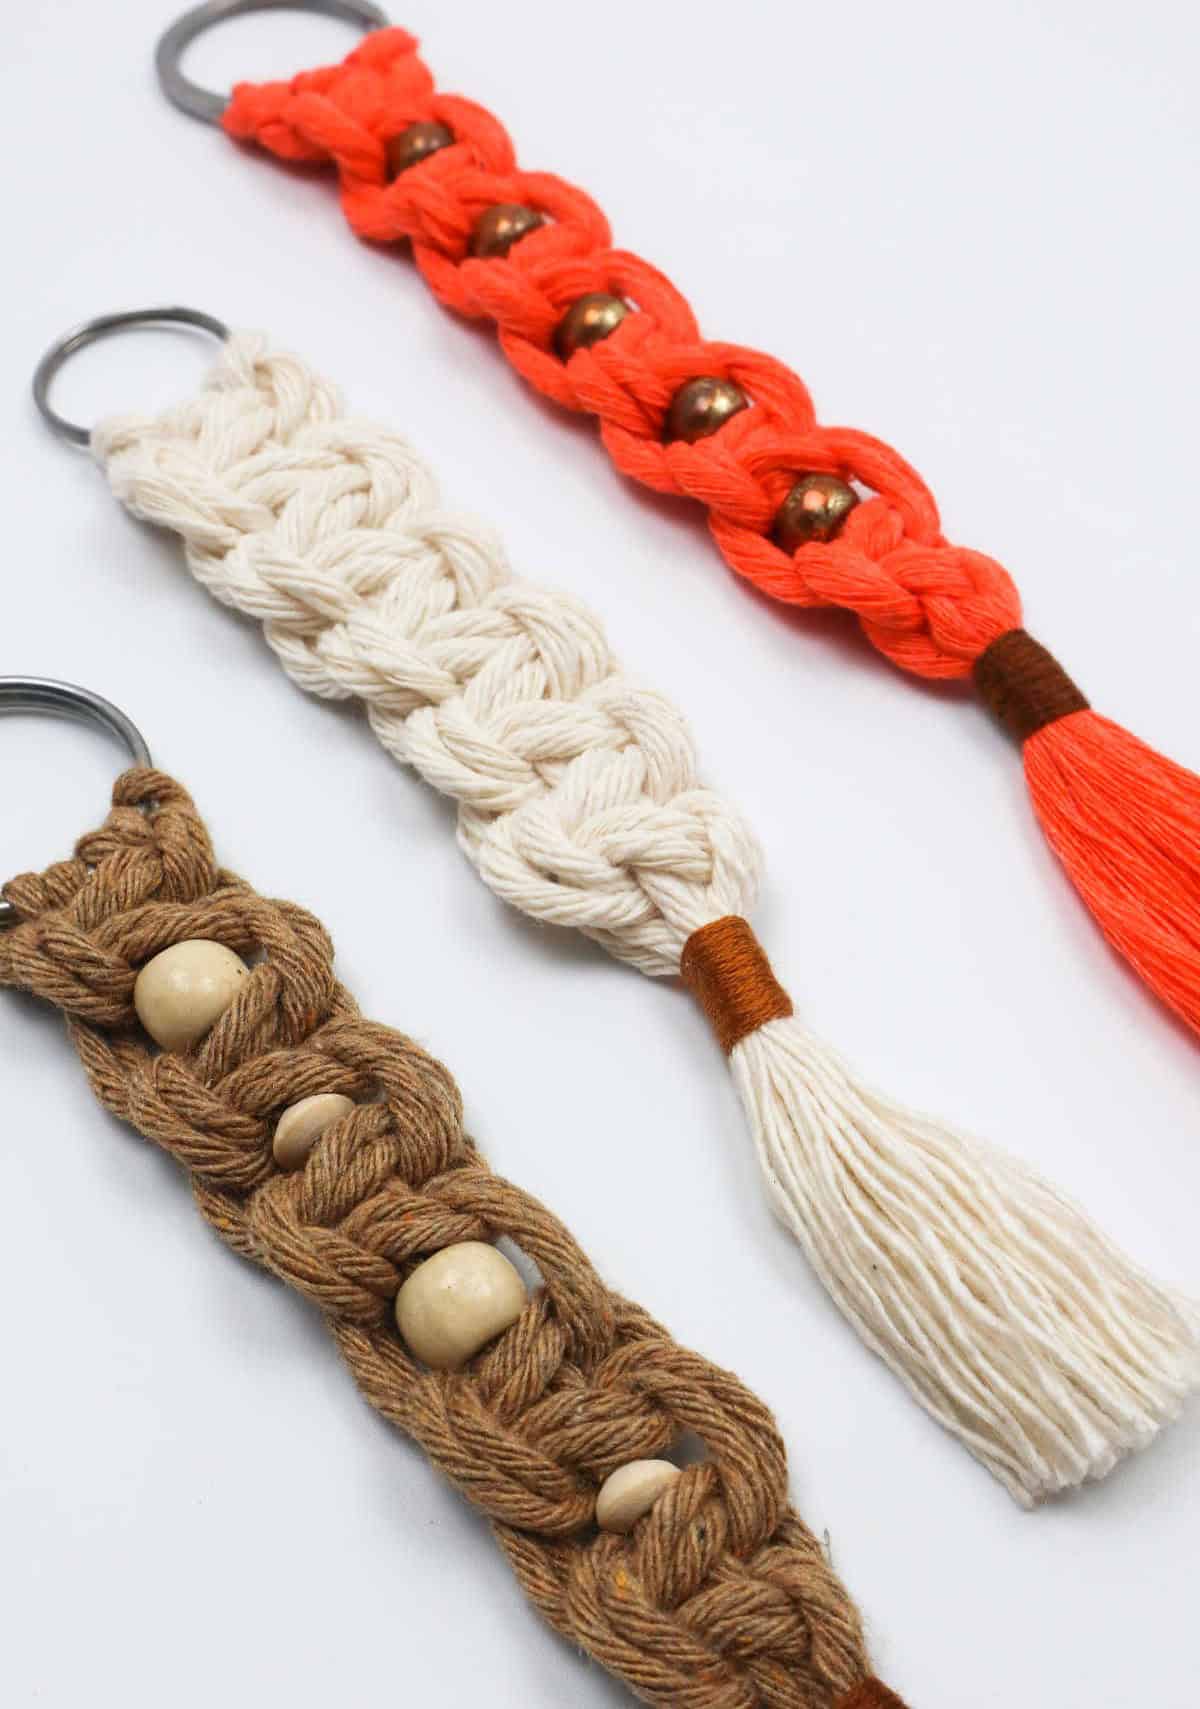
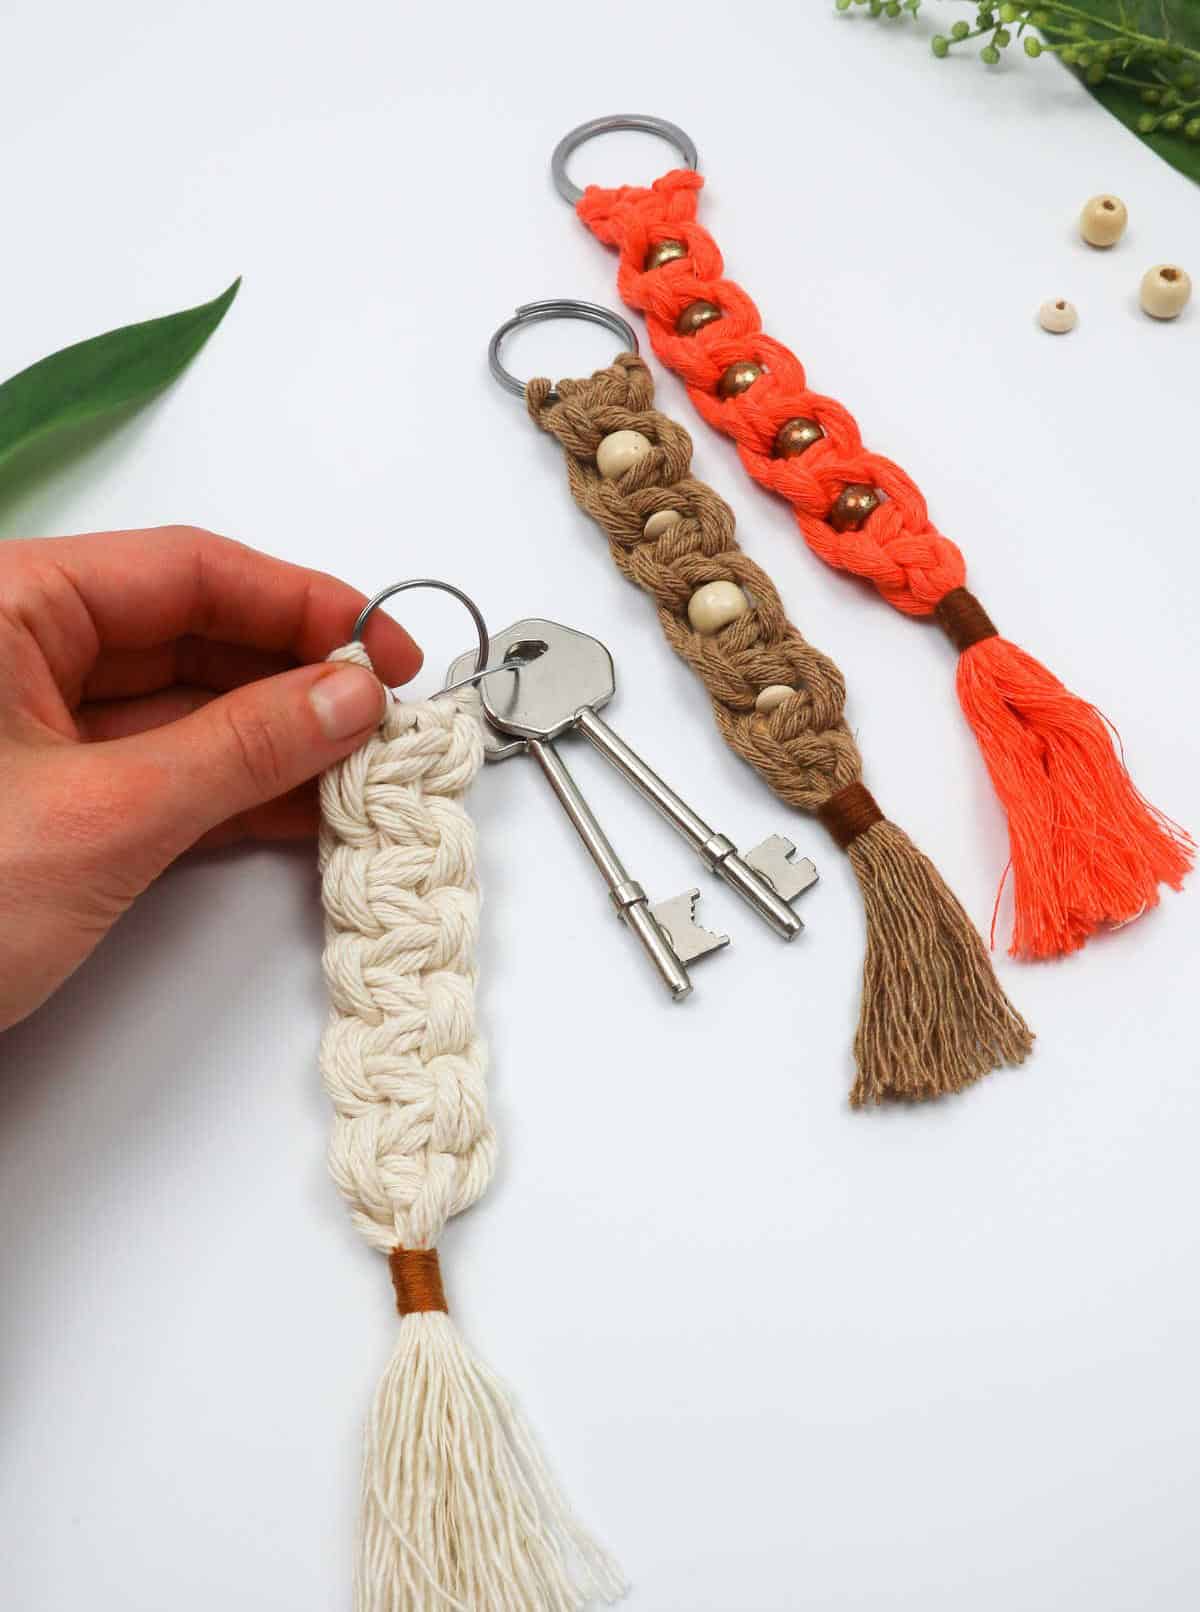
To secure the bead, create another square knot. Start by positioning the cords on the left, just like before. As your keychain takes shape, you’ll notice how adorable it’s becoming! The trick is to work your way down, inserting a bead after each square knot and finishing it off with another one. It’s a breeze once you get the hang of it. You should end up with five square knots, surrounded by four beads. If you’re pleased with the length, it’s time to complete the project.
Step 8
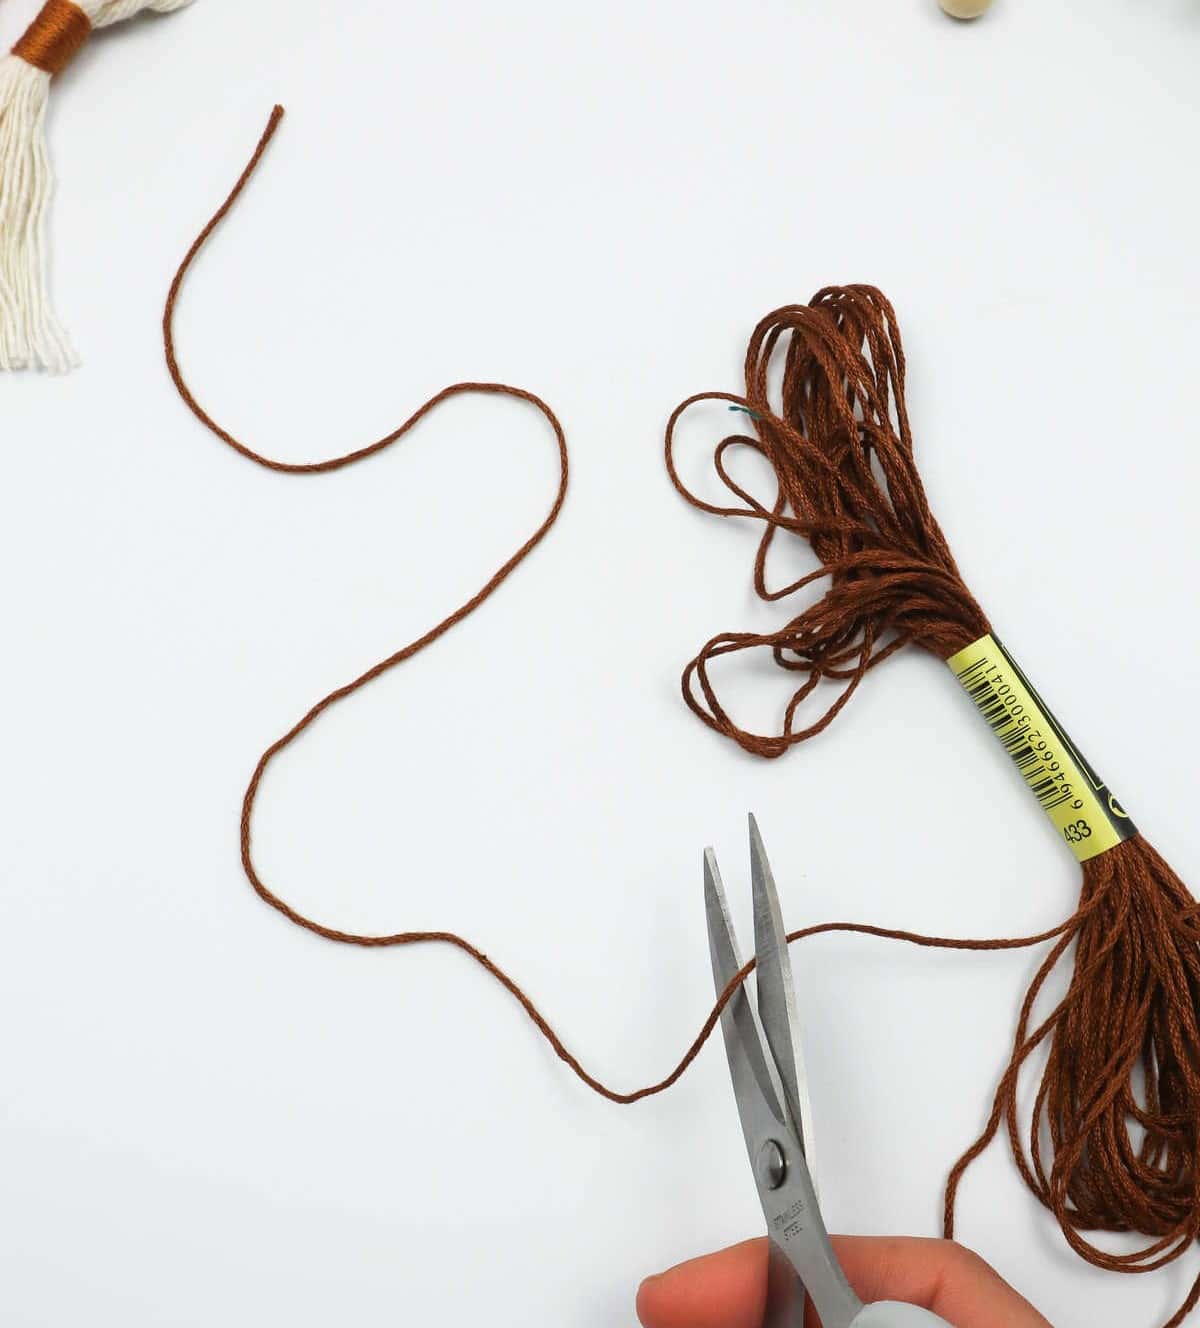
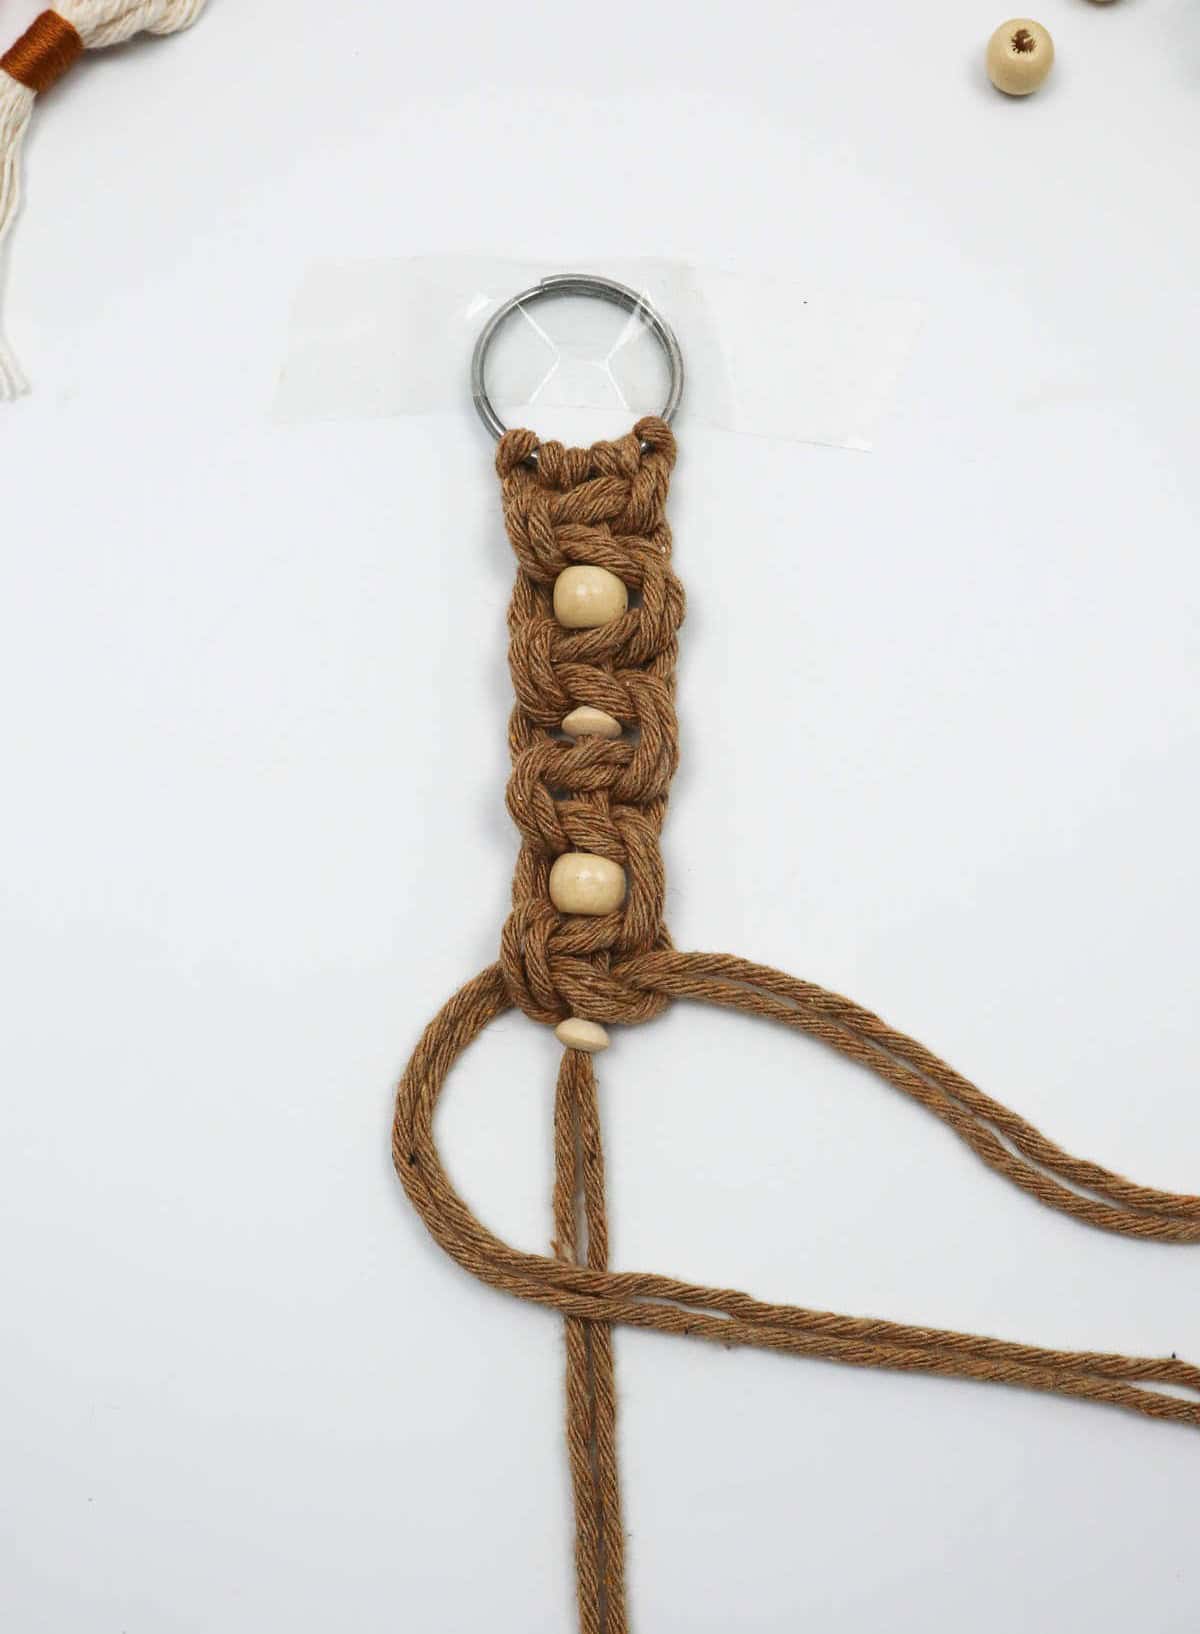
To begin crafting your embroidered design, start by cutting a portion of embroidery floss using a pair of scissors. You can opt to match the thread’s hue to that of your cotton cord, allowing for a harmonious blend of colors, or choose a bold, contrasting shade to add visual interest. This initial step sets the stage for your creative endeavor.
Step 9
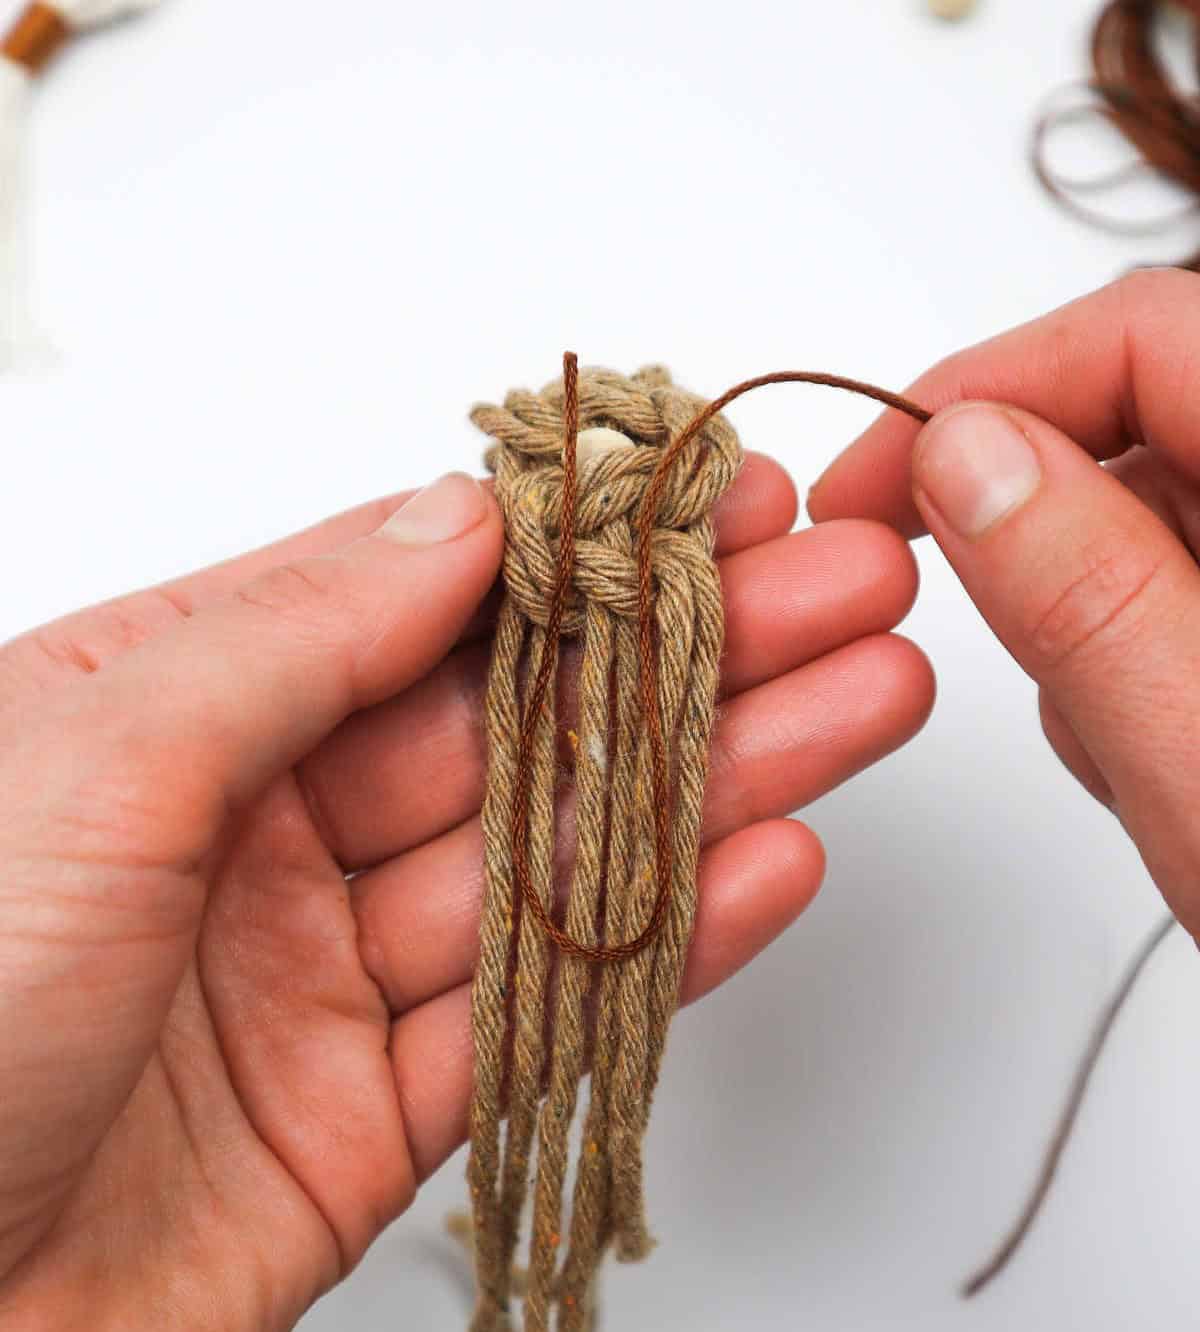
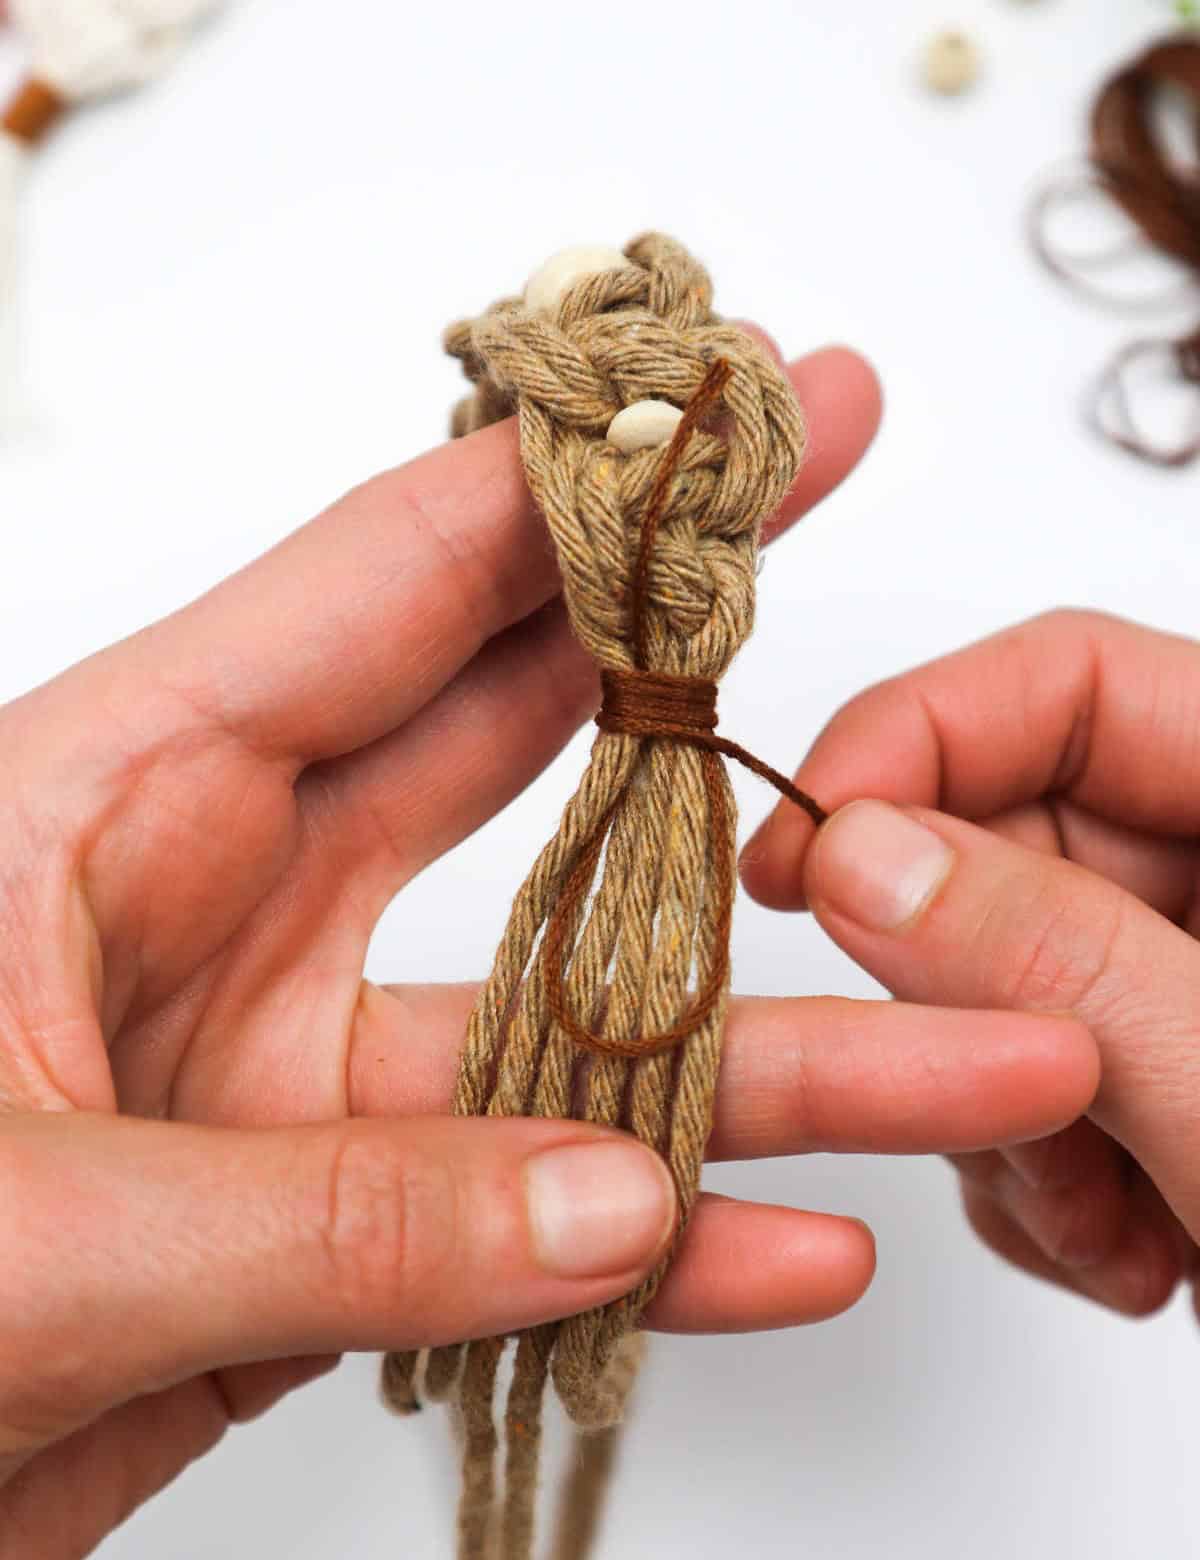
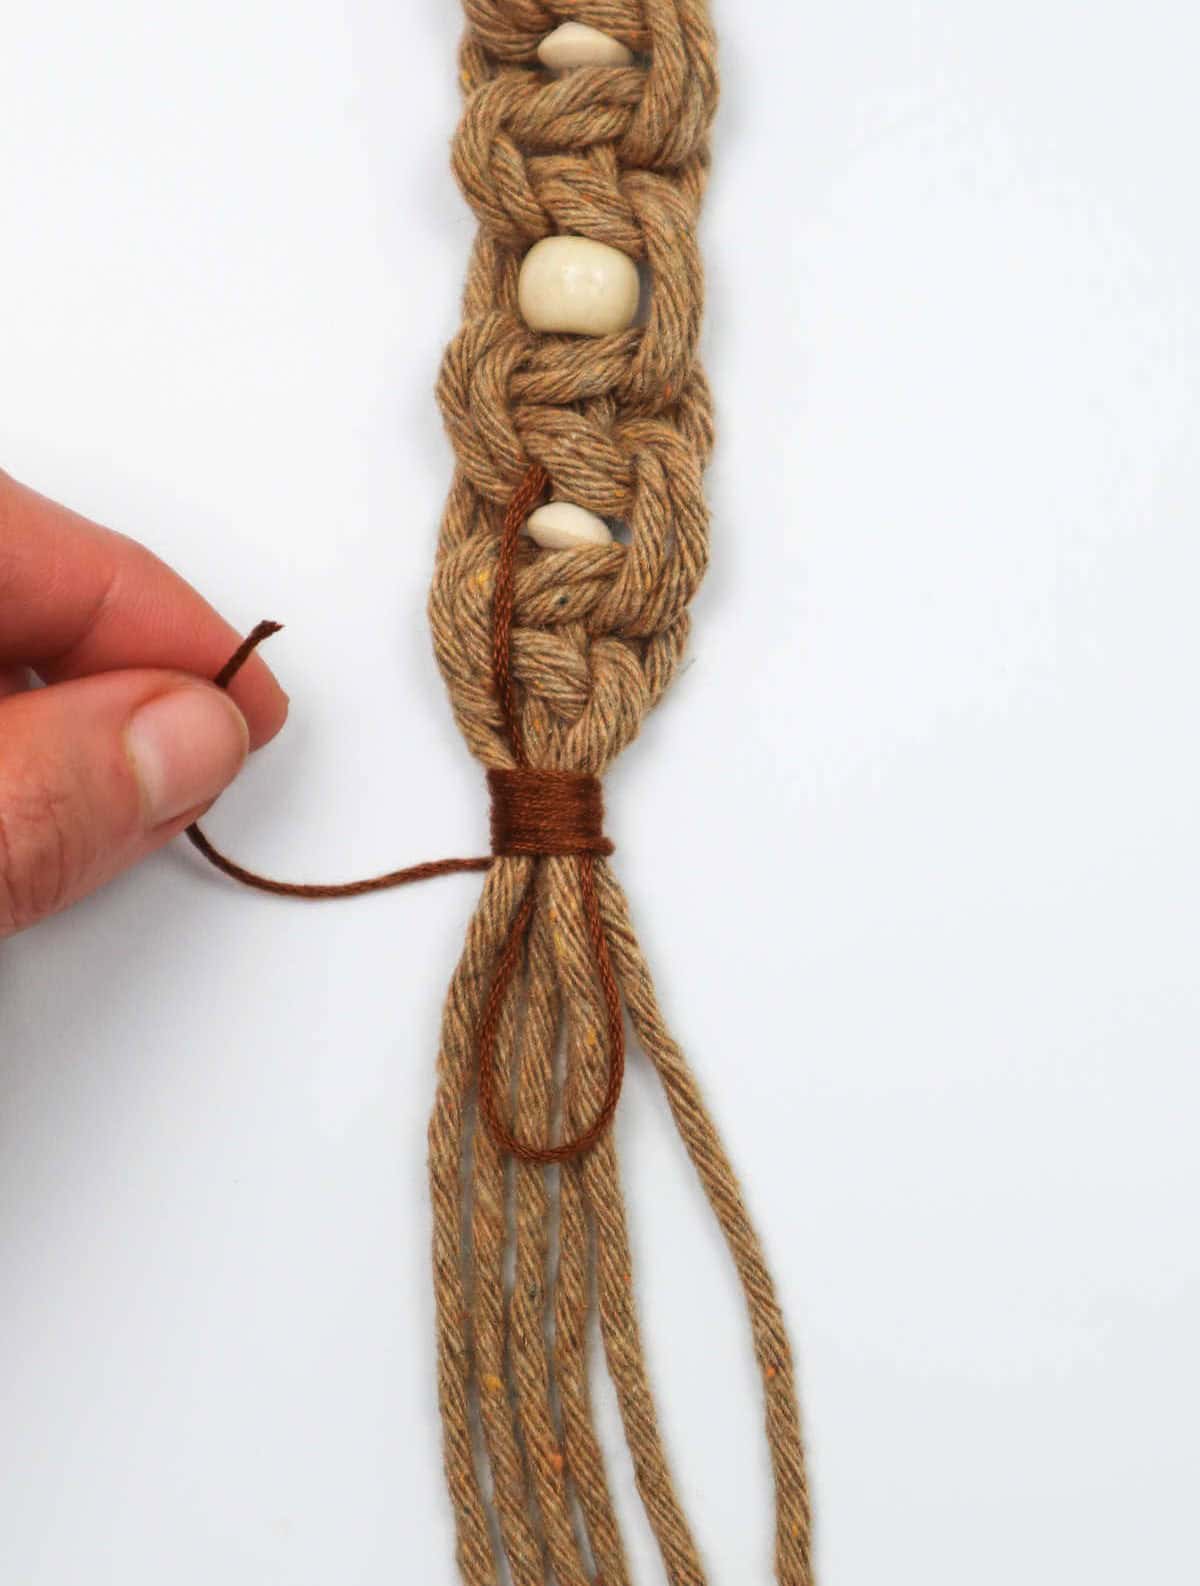
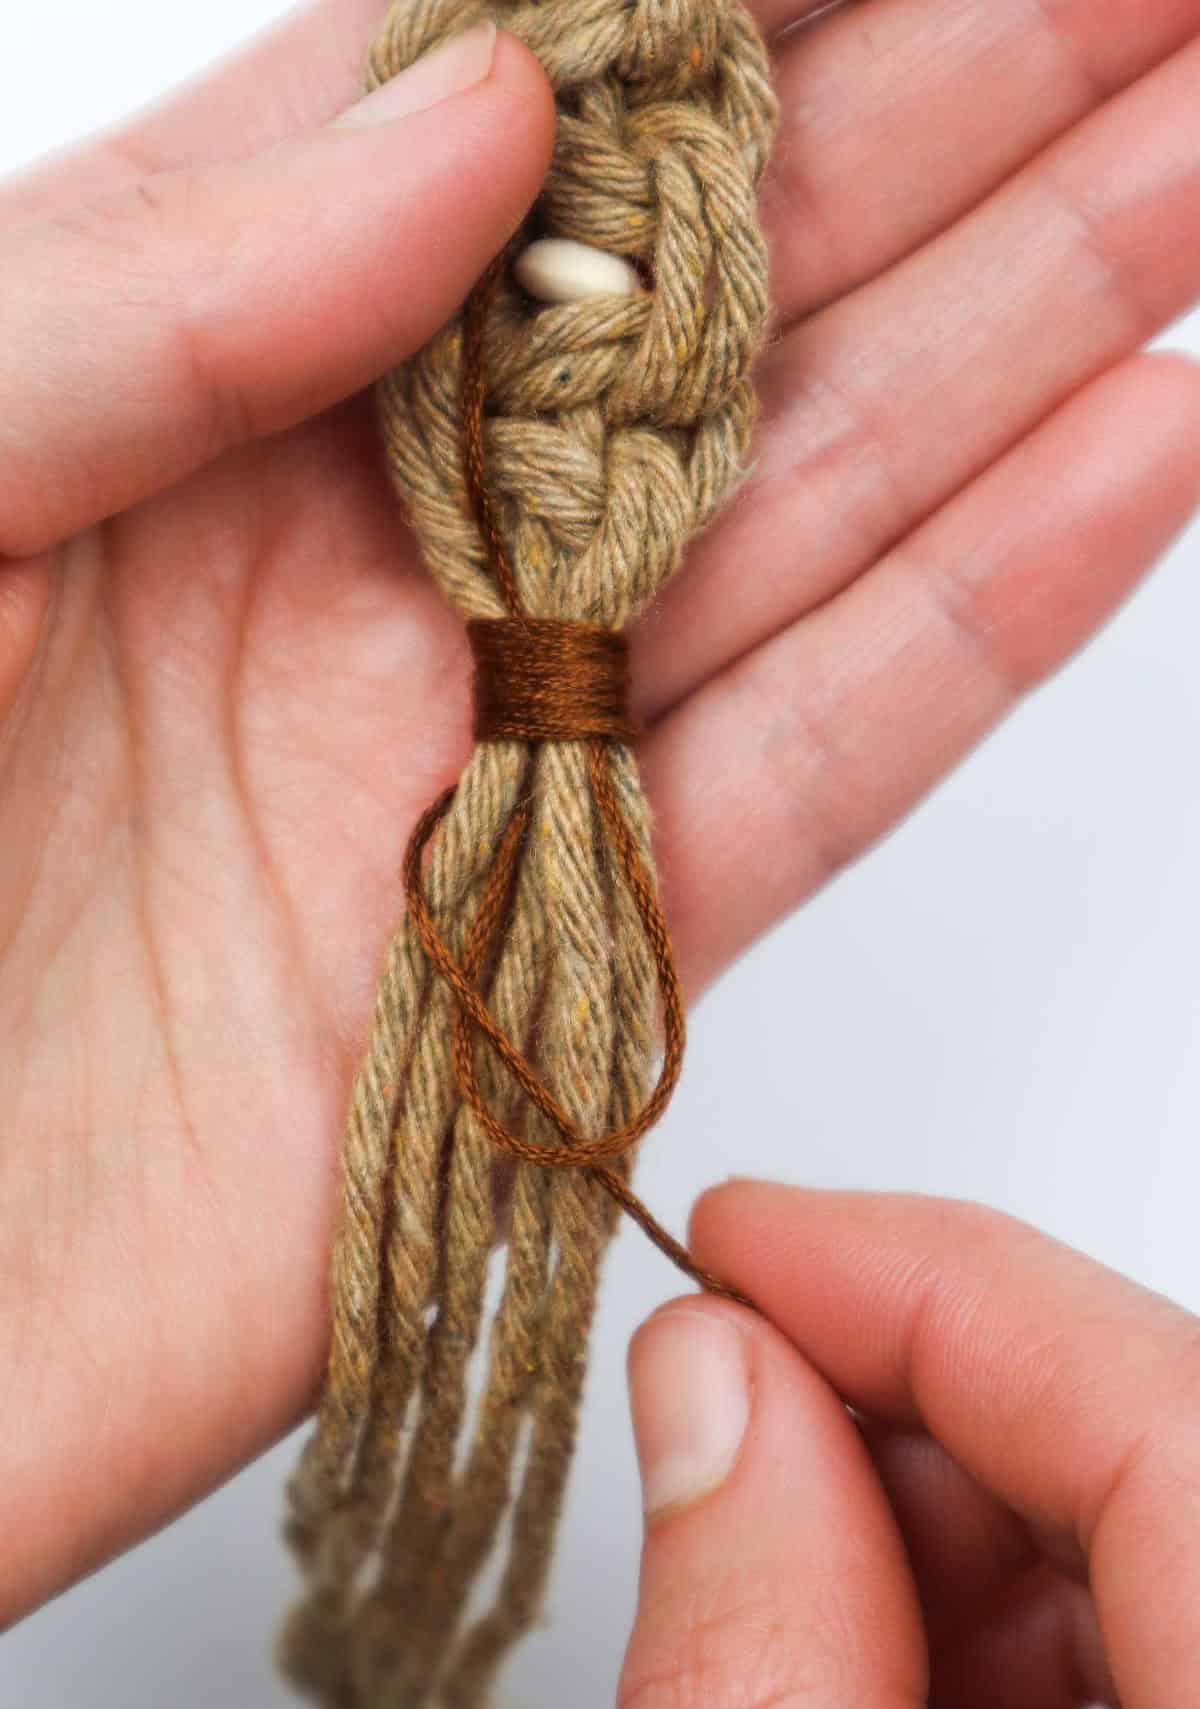
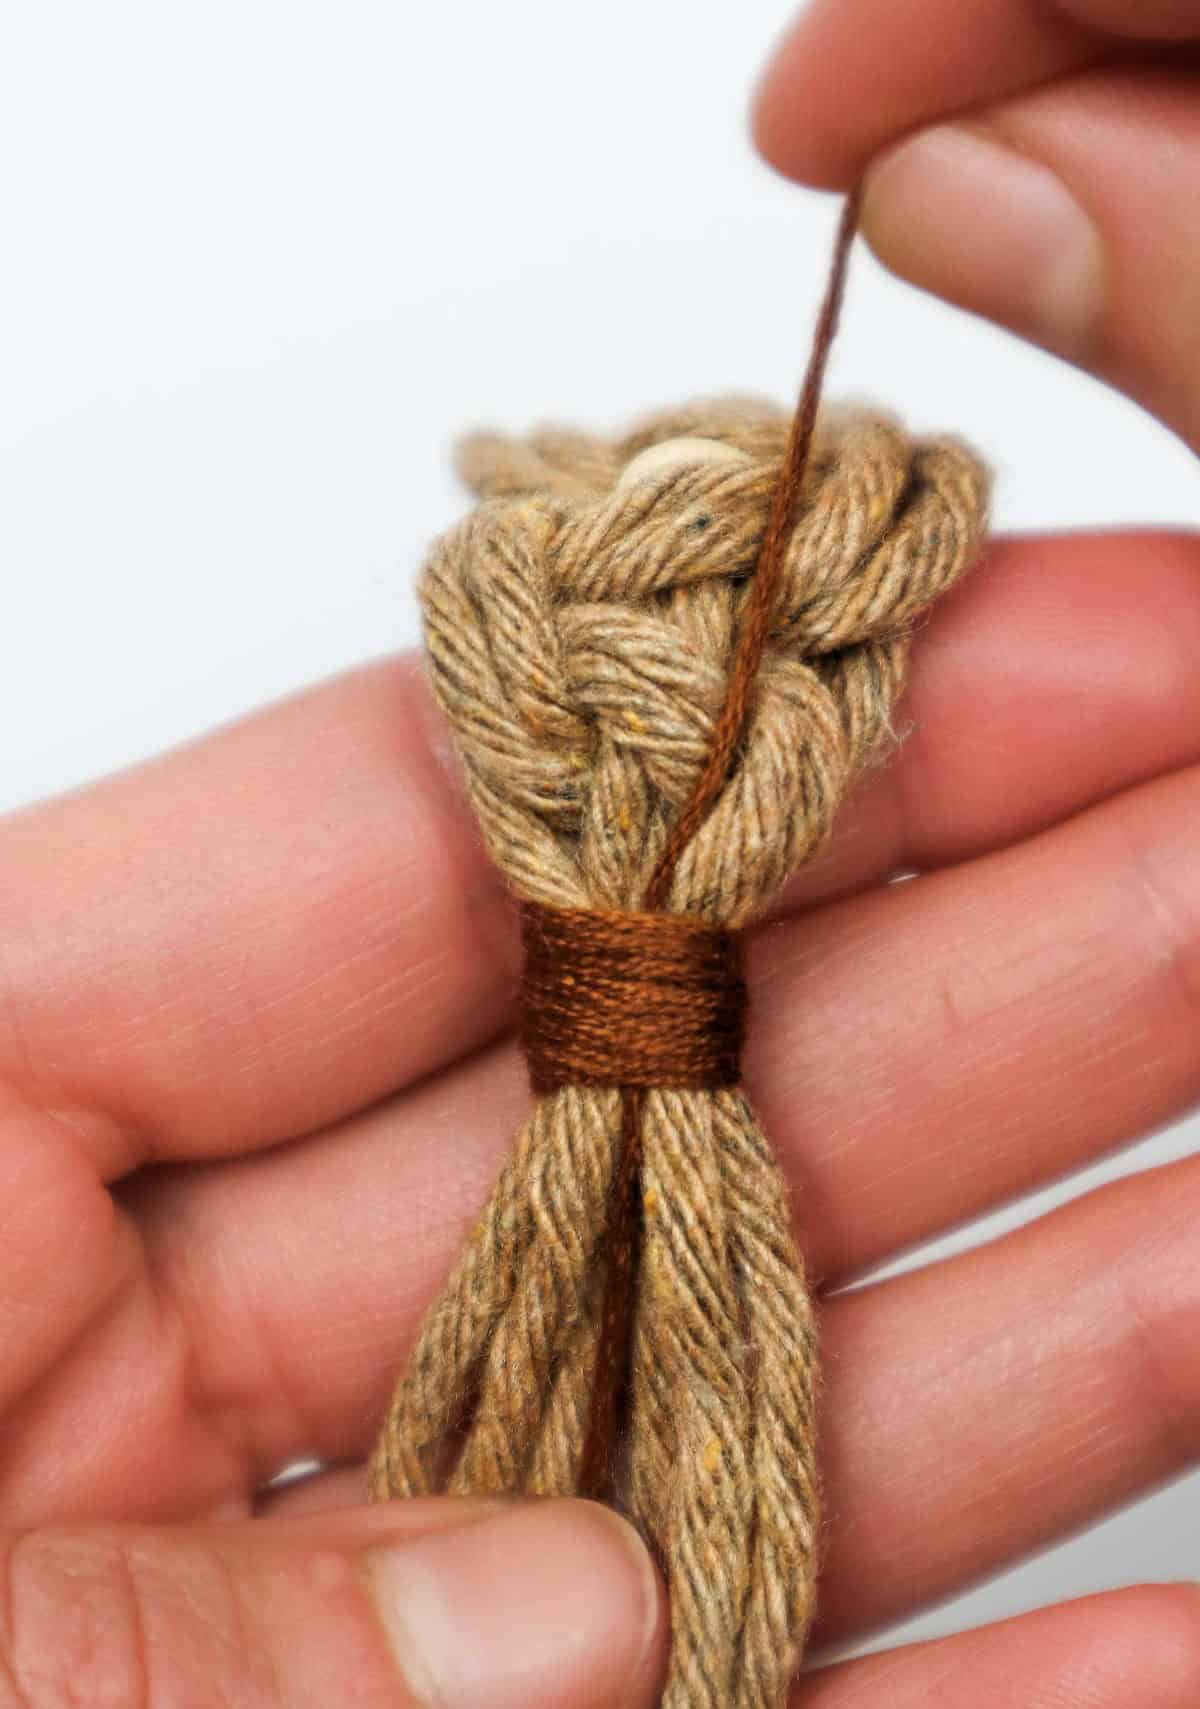
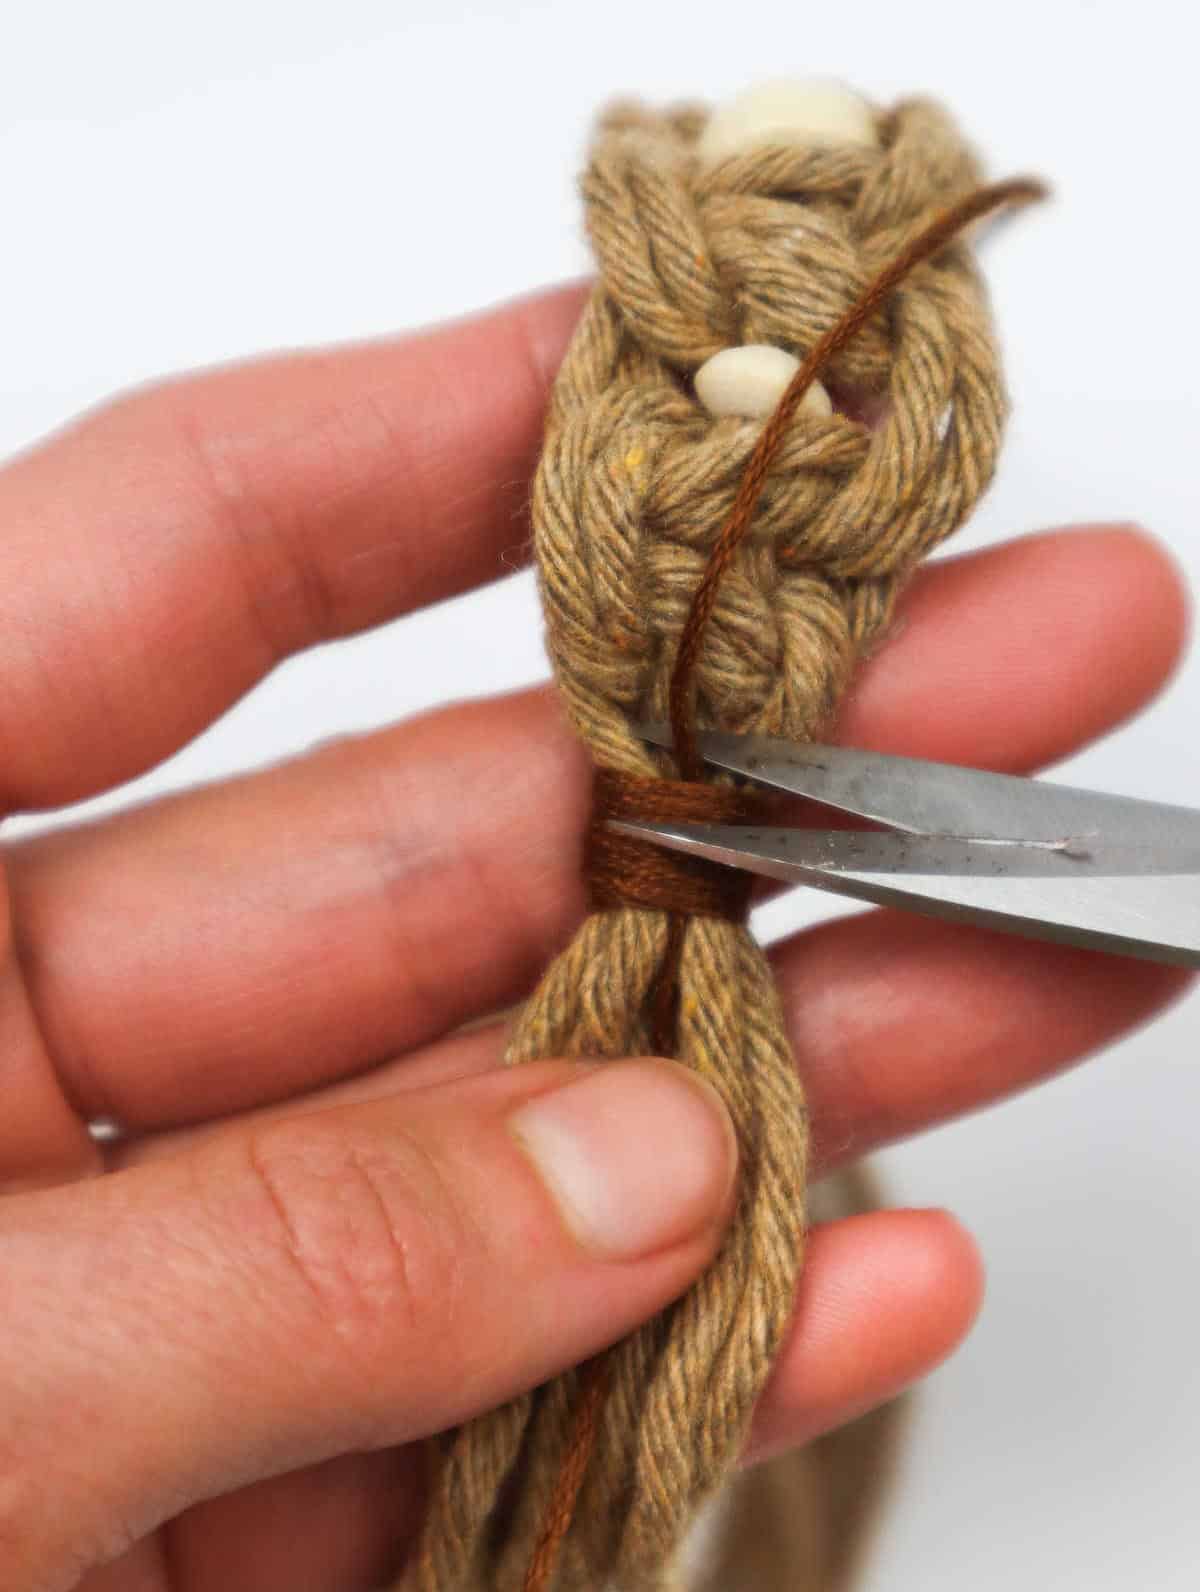
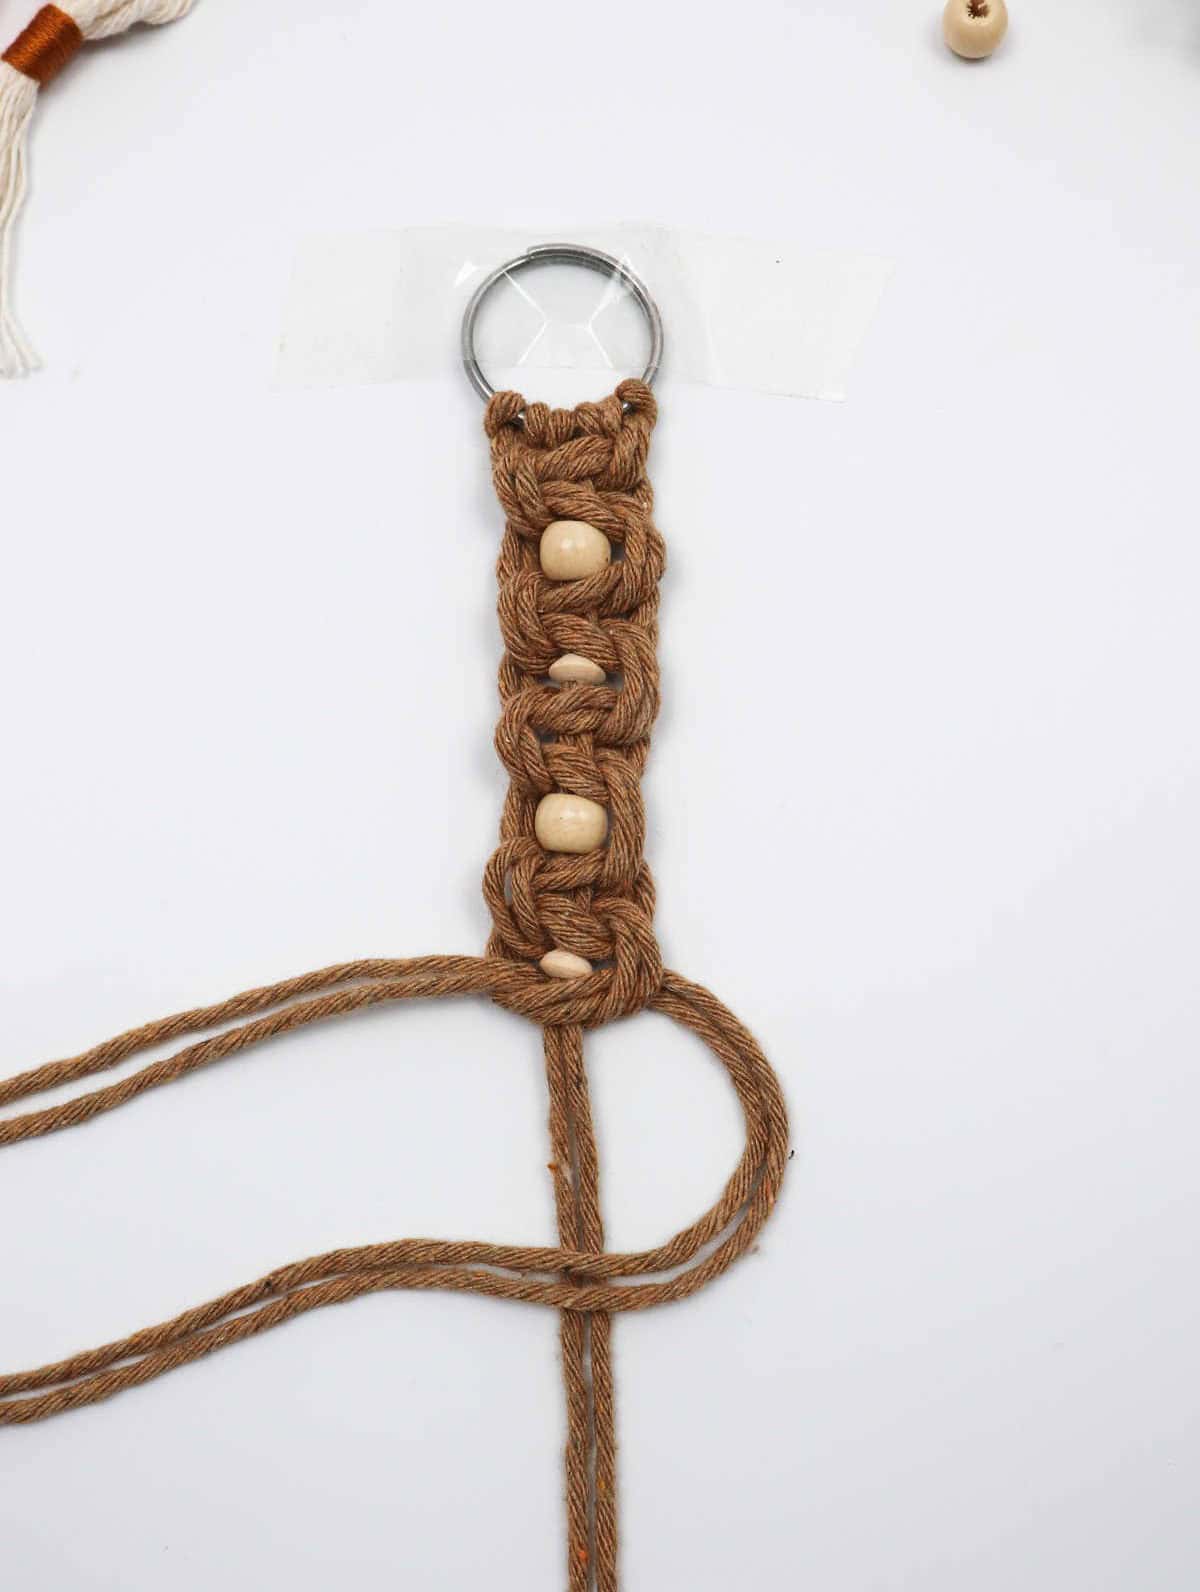
To complete the square knot, start by forming a U-like shape with one end of the thread over the cords. Hold the U shape in place and wrap the other end of the thread around the end of the last square knot, gathering all the cords together as you go. Continue to wrap the thread until you’re satisfied with the thickness. Next, pass the end of the cord through the U-loop. Then, take both ends and pull them in opposite directions to secure the wrapping in place. Finally, cut off the excess thread.
Step 10
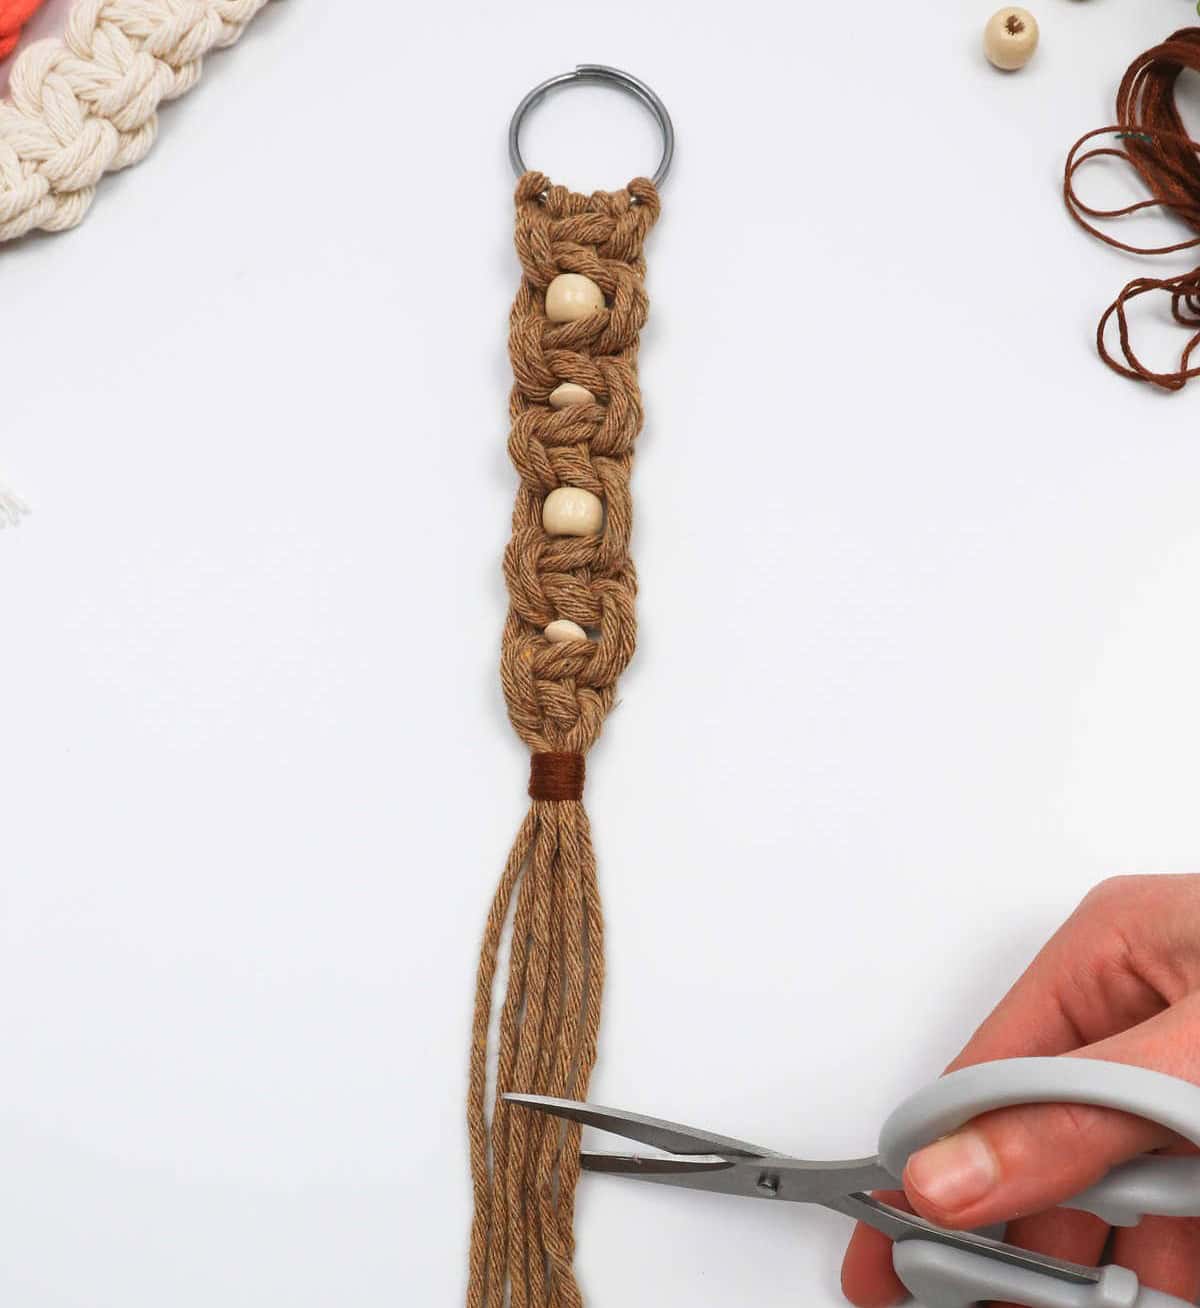
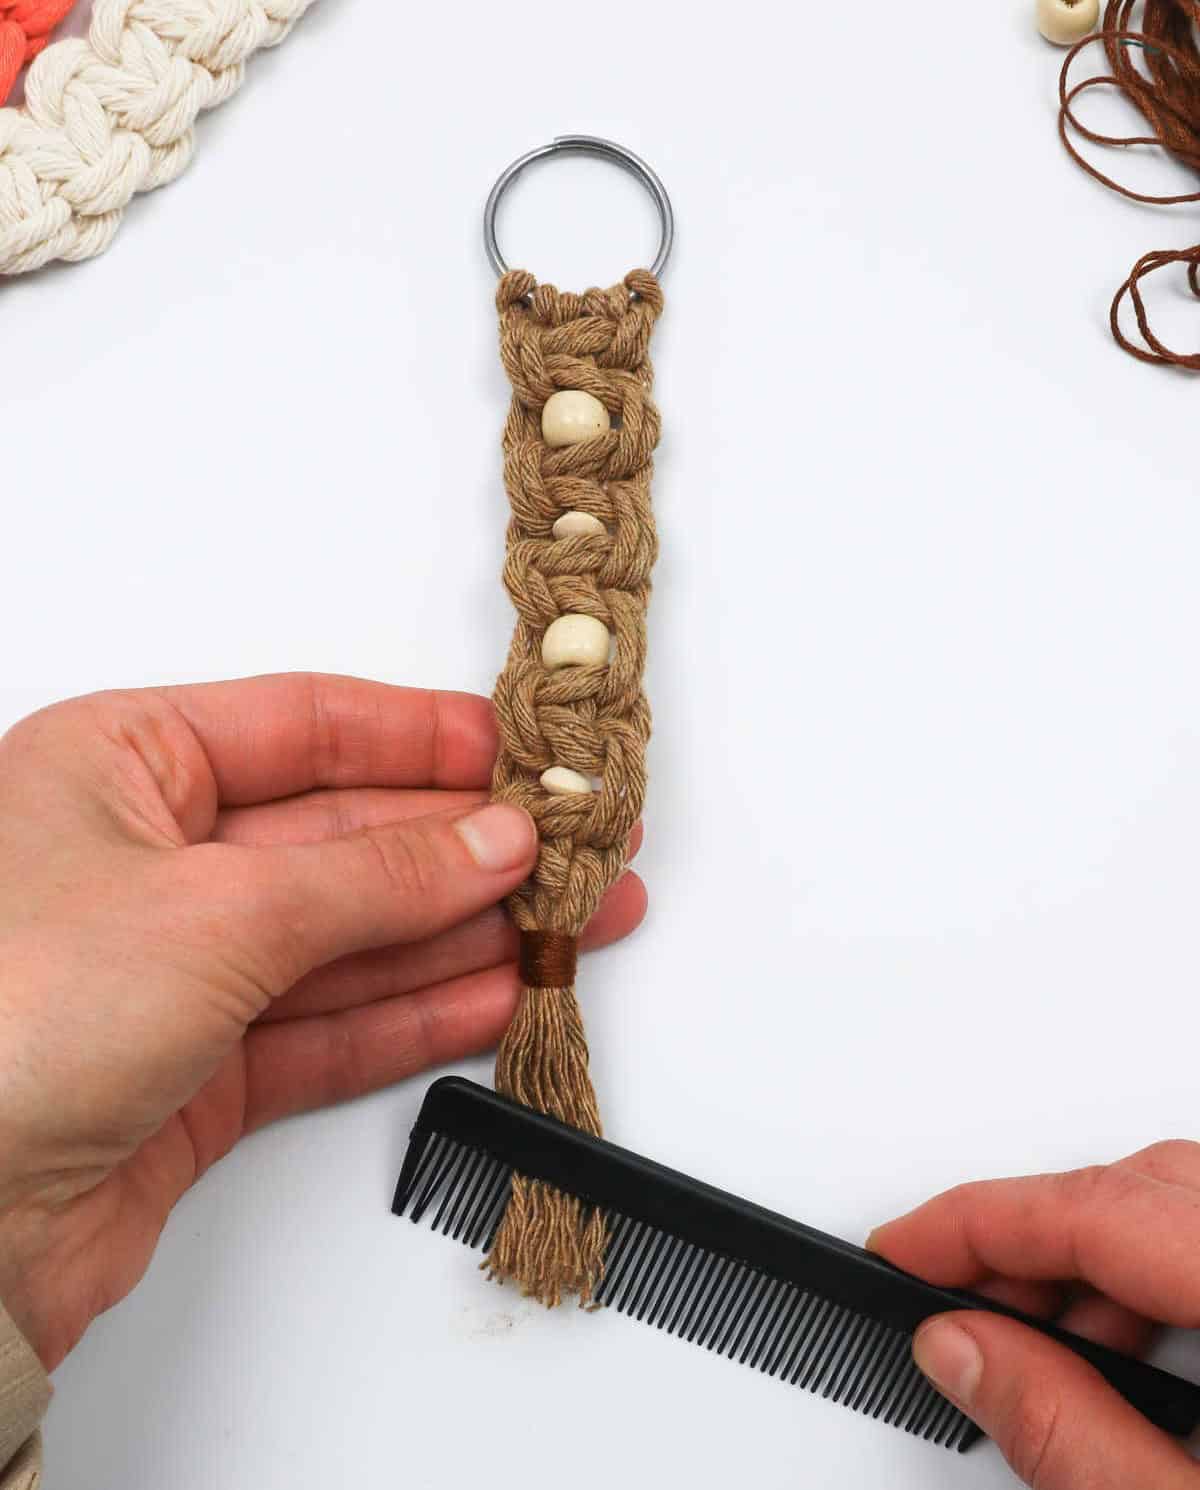
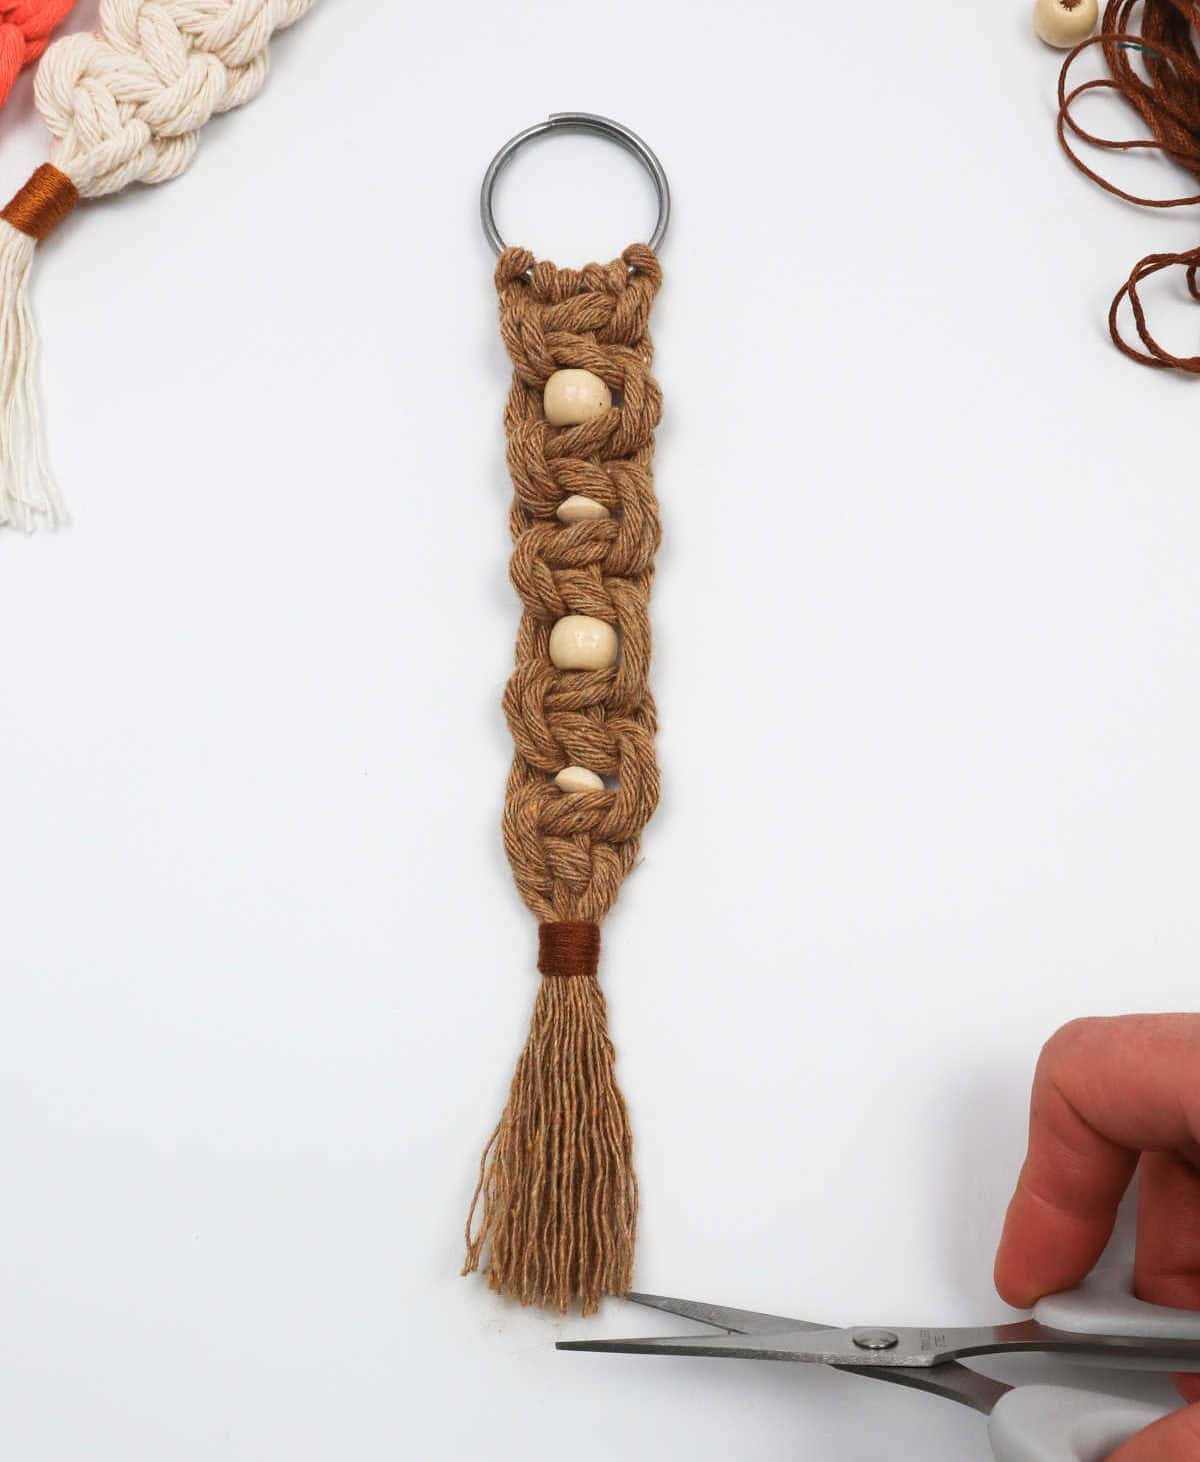
As you near the final stage, it’s essential to tidy up those cord ends. To achieve a seamless finish, trim them evenly and then pass a comb through to smooth out any remaining fibers. Repeat this process once more after brushing, ensuring all loose strands are eliminated. With that done, your macrame keychain is now complete!
Watch: How to Make Macrame Keychains

For those who prefer a more immersive learning experience, we’ve got you covered! Our comprehensive video tutorial is the perfect accompaniment to help solidify your understanding of the material. Simply click and watch to enhance your comprehension and retention.
What Kind of Cord is Used for Macrame Keychain?
While cotton cord remains the top pick for macrame enthusiasts due to its remarkable elasticity and cost-effectiveness, nylon and jute are also viable options. The type of cord construction can also greatly impact the overall result, with twisted, braided, and single strand cords each offering unique characteristics. Moreover, the size of the cord is equally important, as popular choices like 3mm-5mm cords strike a balance between control and finish.
How Long Does It Take to Make a Macrame Keychain?
While this macrame keychain project may initially require around 25-30 minutes from an absolute beginner, the good news is that as you gain confidence and skill, each subsequent creation will fly by in under 15 minutes. In fact, once you’ve mastered the basics, you’ll be amazed at how quickly you can whip up a new keychain.
Other Craft Ideas
For those looking to unleash their creativity, a wealth of exciting projects await. From the versatility of yarn, with 37 possible endeavors, to the refreshing world of back-to-school crafts that bring joy to both young and old (27 delightful ideas). In addition to these, one can craft a unique piece of jewelry using shoelaces, creating a DIY bracelet like no other. For those with a penchant for fabric, there are 47 inspiring projects to explore.
Furthermore, the realm of making and selling crafts offers an abundance of opportunities, with 37 creative ventures to get started with. And finally, the art of macrame has given rise to stunning earrings that exude elegance and sophistication. Meanwhile, adults can indulge in a plethora of projects designed specifically for them (47 exciting possibilities).
DIY Macrame Keychain
If you’re a beginner looking for an effortless introduction to the world of macrame, crafting a DIY macrame keychain is an excellent starting point. Not only will you gain hands-on experience with this versatile craft, but you’ll also end up with a functional and stylish accessory that’s perfect for everyday use. With just 30 minutes dedicated to the project, you can create one beautiful piece.
Equipment
To avoid those pesky screen timeouts, it’s essential to find a way to keep your device awake. One simple trick is to adjust your settings so that the screen won’t dim or turn off for a certain period of time. For instance, you can set your phone or tablet to stay lit up for 30 minutes or an hour, giving you ample time to wrap things up without worrying about your screen going dark on you. Just be sure to revisit this setting periodically to avoid burning through battery life.
Materials 1x2x3x
The essential components for this project include a key ring, three high-quality 4mm single twist cotton cords that measure 32 inches in length. Additionally, the necessary beads and embroidery thread are required to bring the design together.
Instructions
To begin crafting your macrame keychain, start by preparing your materials and cutting the cords to the desired length. Secure your work surface with a keyring and tape it down to prevent movement while working. Next, create a lark’s head knot by bending one cord in half, pulling the looped end under, through, and over the ring, then repeating the process with the other two cords.
Once you’ve secured all three cords, section them into three parts and tie off the middle cords to your work surface using tape. To create your first square knot, place the left cords over the middle ones to form a 4-shaped loop, pull the right cords over the left, bring them under both the left and middle cords, and then pull the ends through the loop. Tug on the ends to secure the first half of the knot.
Repeat this process with the right cords over the middle, bringing the left cords over the right and under the middle and right cords. This step is optional, but you can add a bead at this point by taping the ends of the two middle cords together and then pulling the bead through both. Secure the bead in place by placing another square knot underneath it, alternating between beads and knots as you work your way along the project until you reach the desired length.
To fasten off, cut a strip of embroidery thread and create a U-shaped loop with one end. Wrap the other end around the base of the last square knot and bunch all the cords together. Pull the end through the loop and tug in opposite directions to secure the knot, then snip off the excess thread. Finally, brush out any stray cords and trim them evenly. Your macrame keychain is now complete!