Are you ready to take your plant game to the next level? If so, crafting a macrame plant hanger is an excellent way to add some flair to your indoor space. This DIY project is perfect for adults and teens looking for a relaxing activity that yields a beautiful result. Macrame has taken the world by storm, and it’s easy to see why – its intricate patterns and textures are undeniably charming. So, why not bring this art form into your home?
A macrame plant hanger is the perfect way to add some visual interest to your plants. And the best part? You can hang them indoors or outdoors, making them a great addition to your porch or deck. All you need to get started is a hook and some basic materials – then let your creativity shine! With this project, you’ll be able to elevate your plant display game and add a touch of bohemian chic to any room.
Watch on Youtube: Macrame Plant Hanger
Supplies and Tools You’ll Need
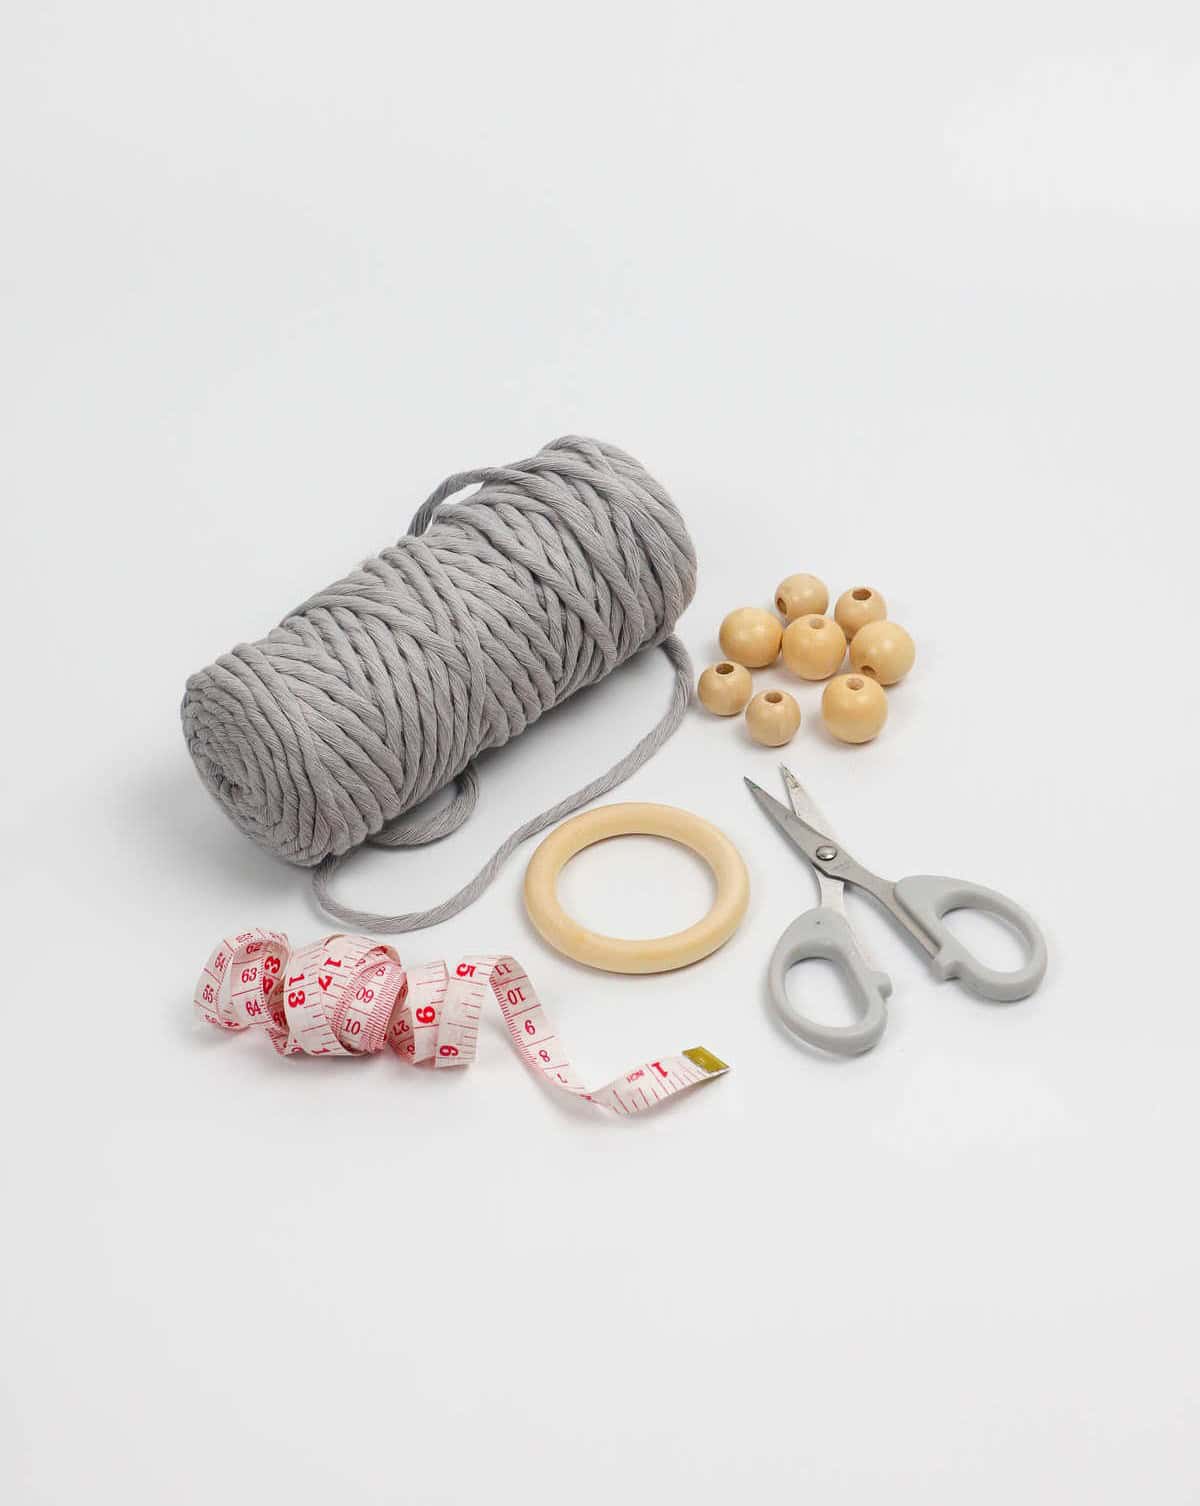
To successfully assemble your project, you’ll need to gather the following essential supplies and tools: a 3mm cotton cord, which will serve as the foundation of your creation. You’ll also require a pair of scissors for trimming and shaping the cord as needed. Additionally, a 2-inch wooden ring will provide the necessary base structure for your design. A tape measure will come in handy for measuring and adjusting the length of your project.
Finally, beads (if you choose to incorporate them) will add an extra layer of visual interest to your finished piece.
How to Make a Plant Hanger
When it comes to selecting the perfect macrame cord, you’re spoiled for choice. Not only do you have a vibrant array of colors to pick from, but you’ll also discover a range of thicknesses and textures to suit your creative vision. Braided, single strand, twisted – the options are endless, allowing you to experiment with different looks and feels in your macrame designs.
Step 1
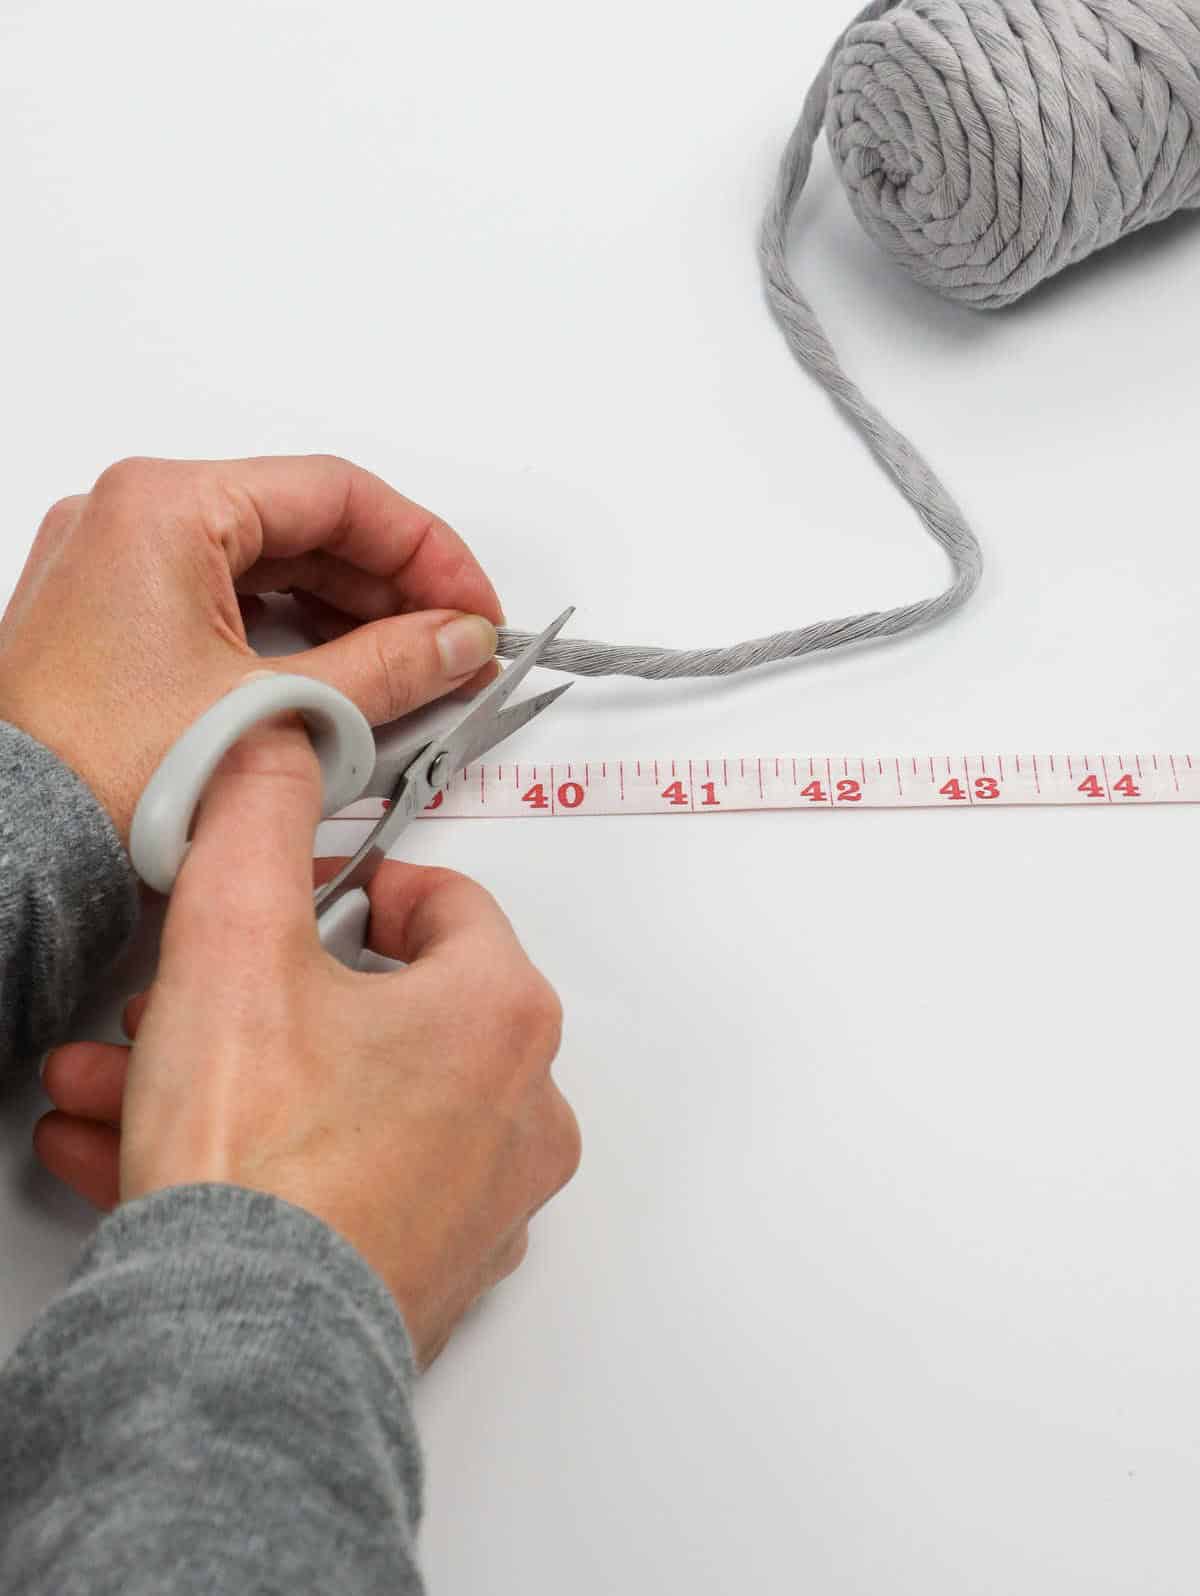
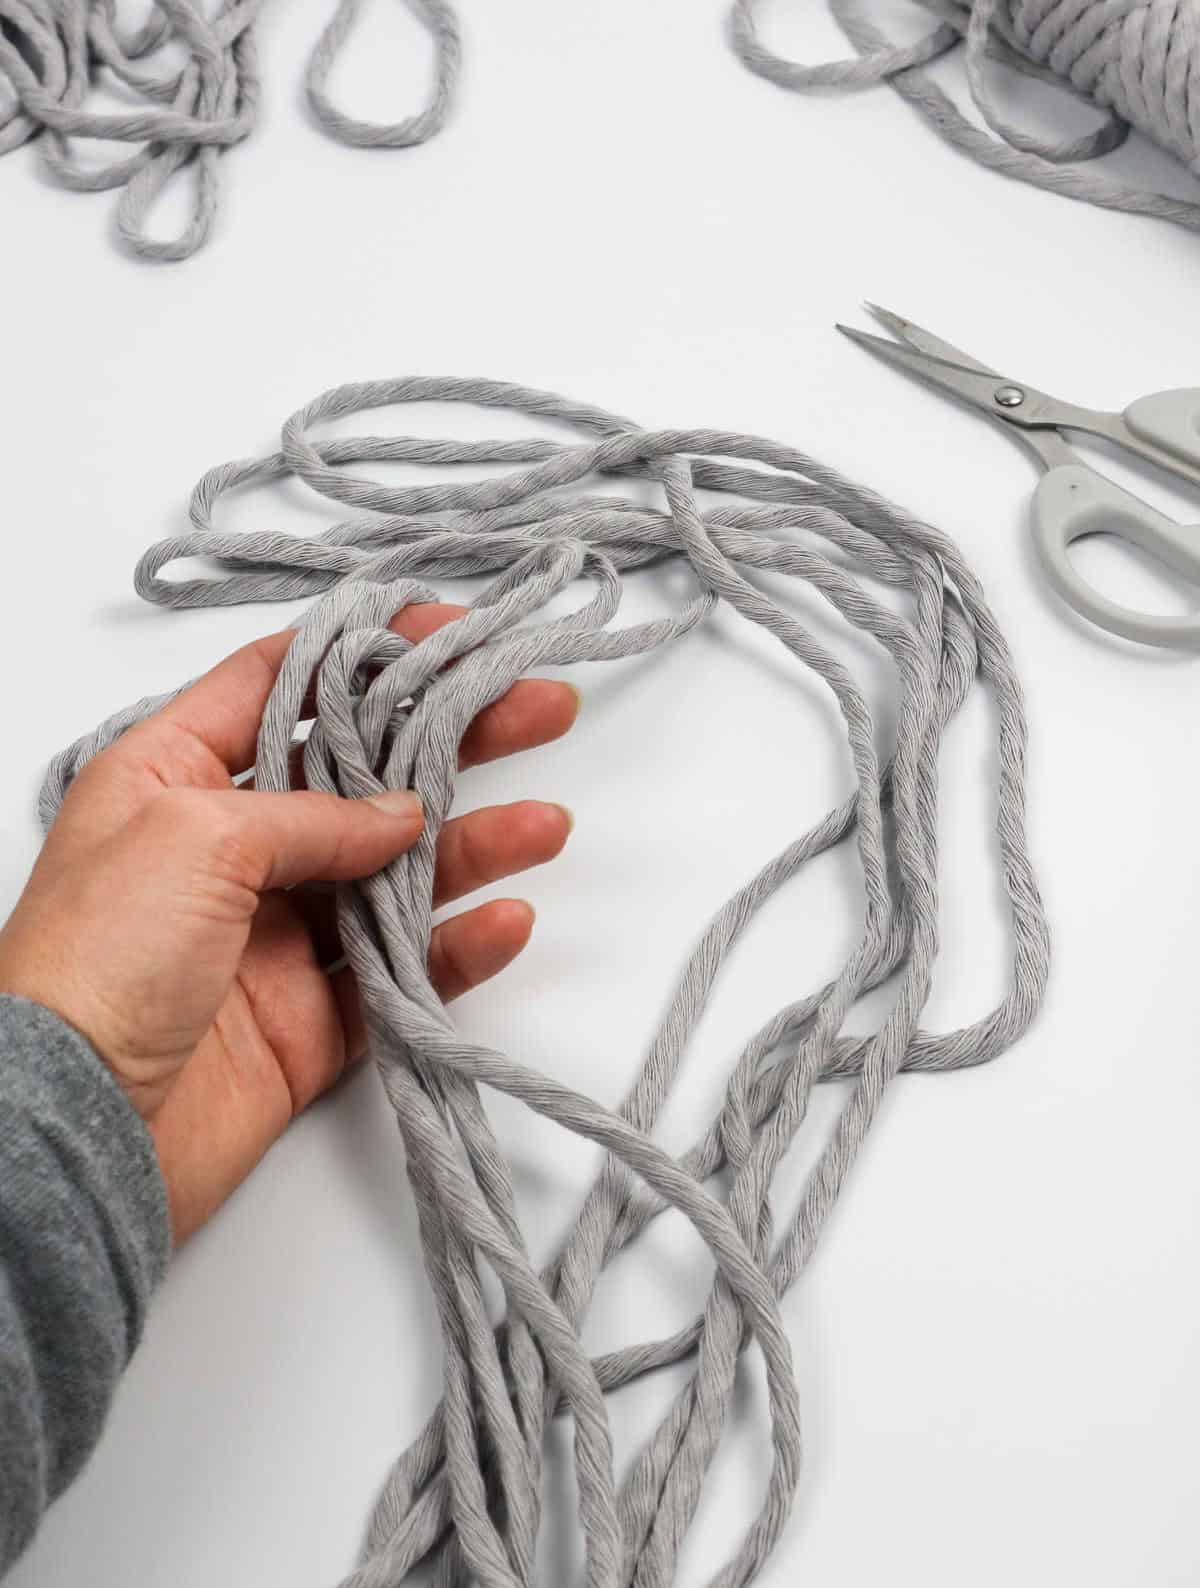
To initiate your macrame planter hanger project, it’s essential to prepare your cords by cutting them to the correct lengths. The required cord sizes will depend on the size of your planter or pot as well as your desired hanging height. In this specific instance, you’ll need eight cords measuring 14 feet (170 inches) and two shorter cords measuring 3.5 feet (40 inches). Make sure to accurately cut each cord according to these specifications.
Step 2
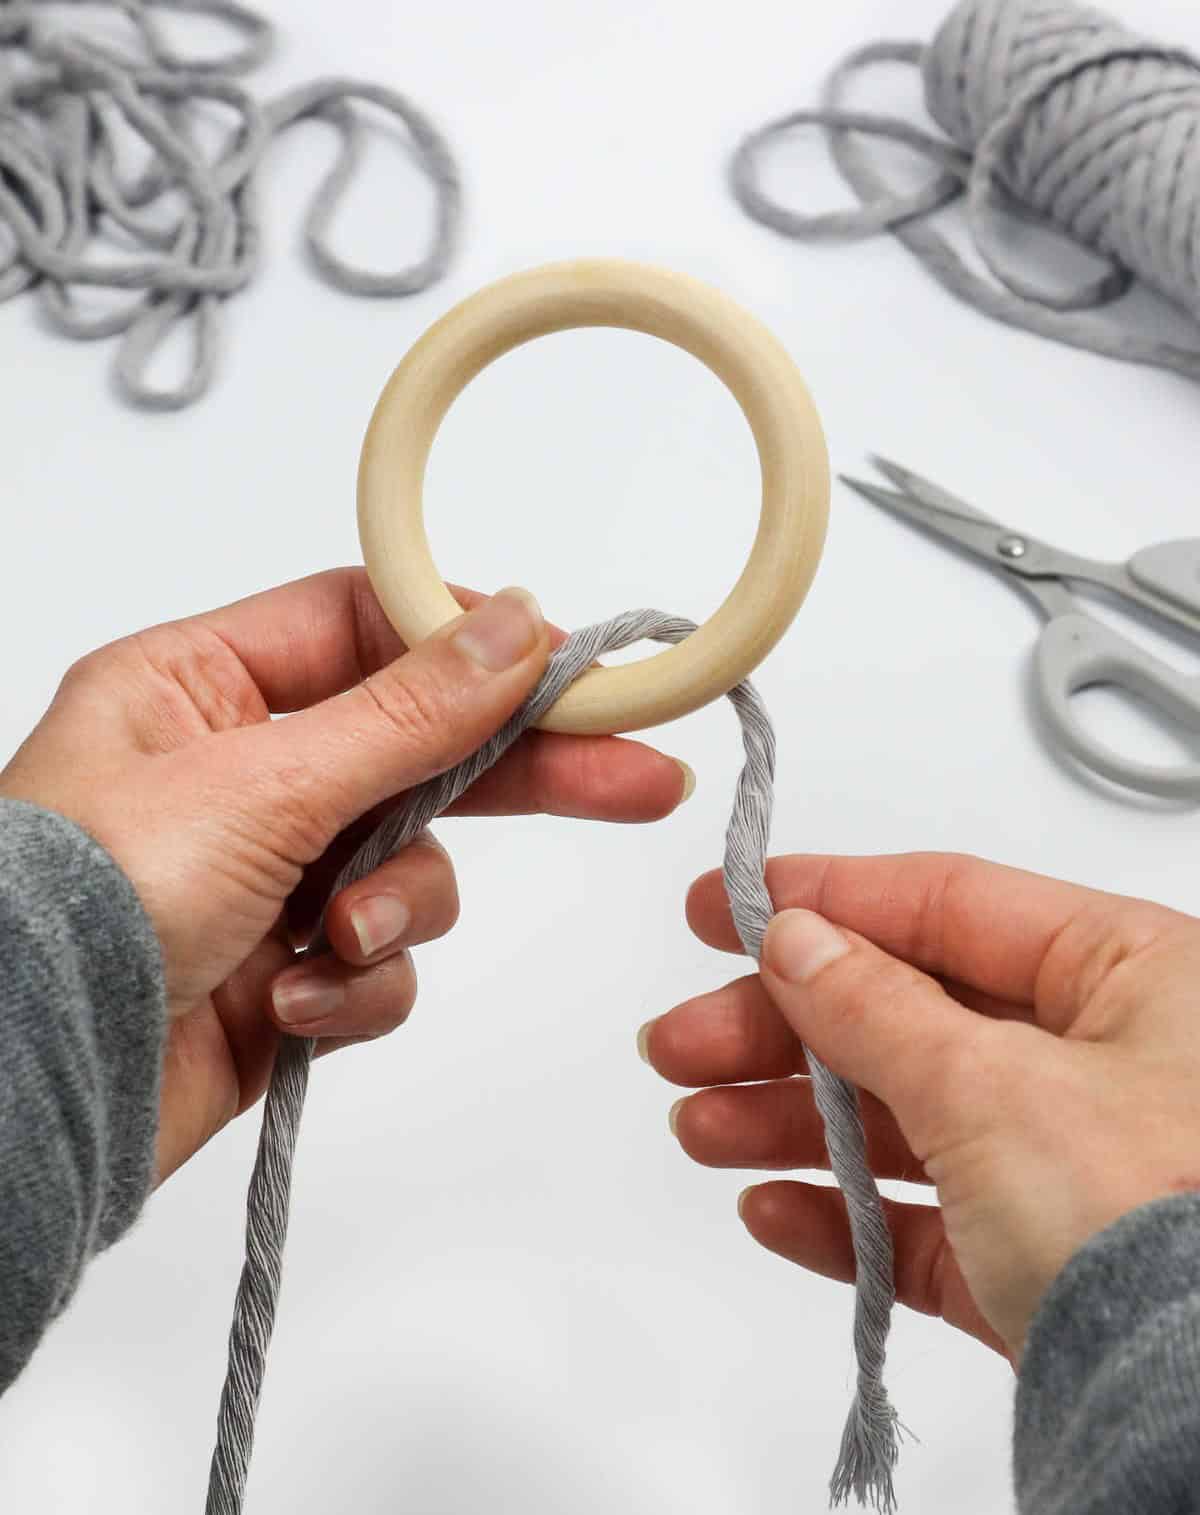

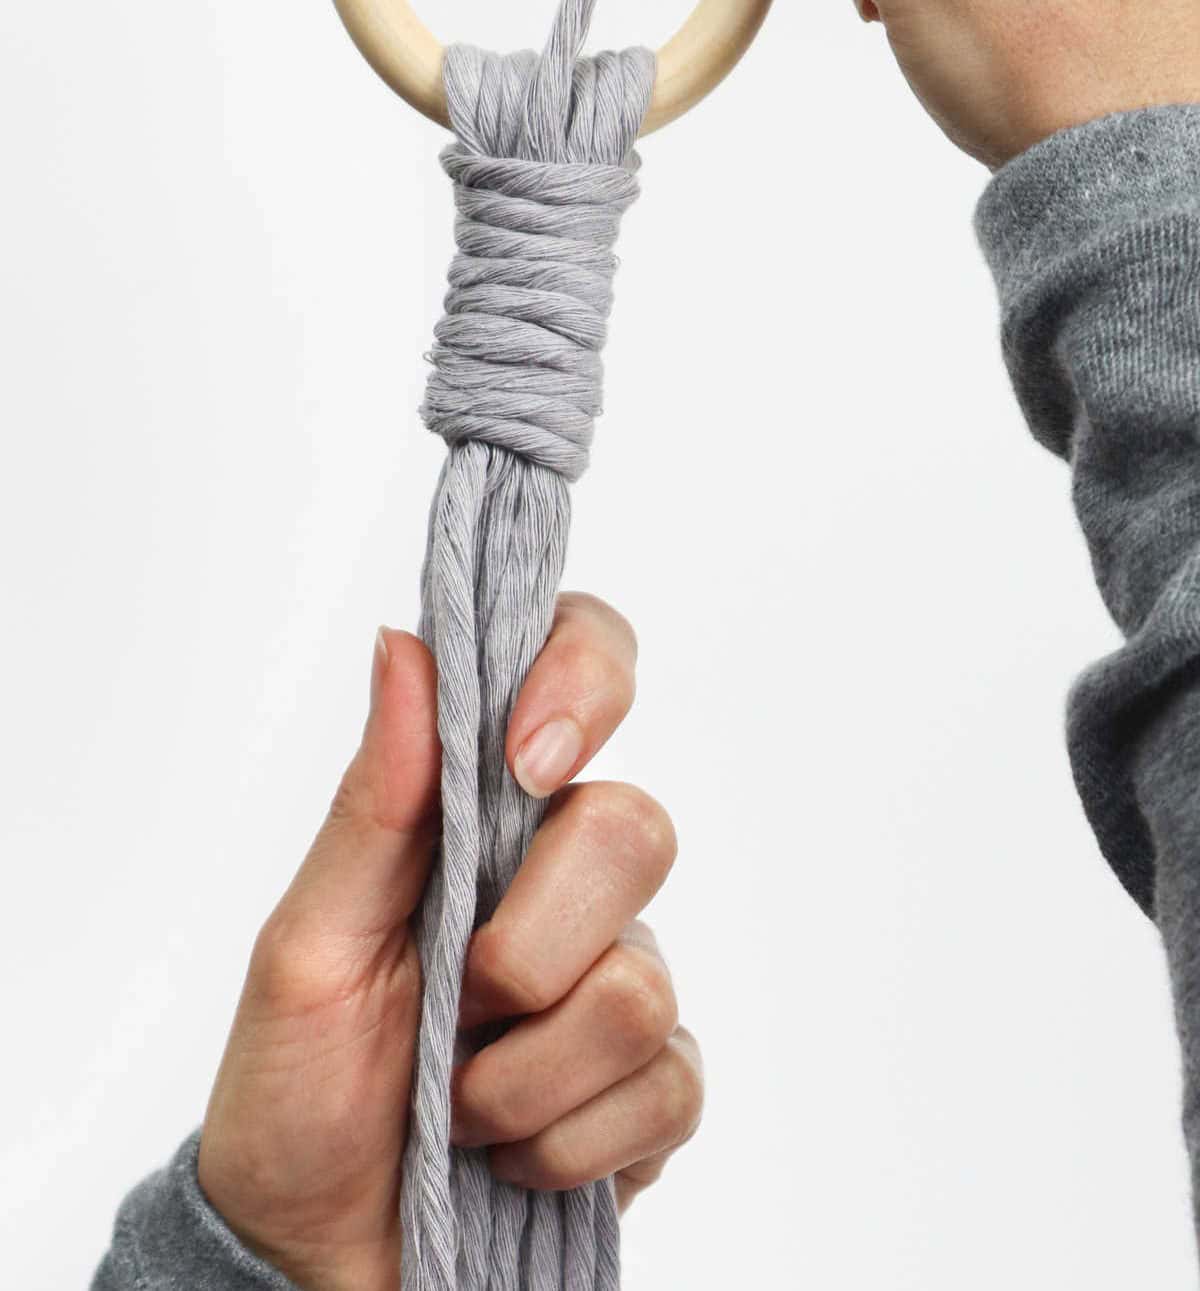
To proceed with the wooden ring, carefully thread the eight macrame cords through it, ensuring they dangle evenly on either side. This will result in a total of 16 strands. It’s crucial to maintain uniform alignment at both ends and prevent any cord overlaps within the ring.
Step 3
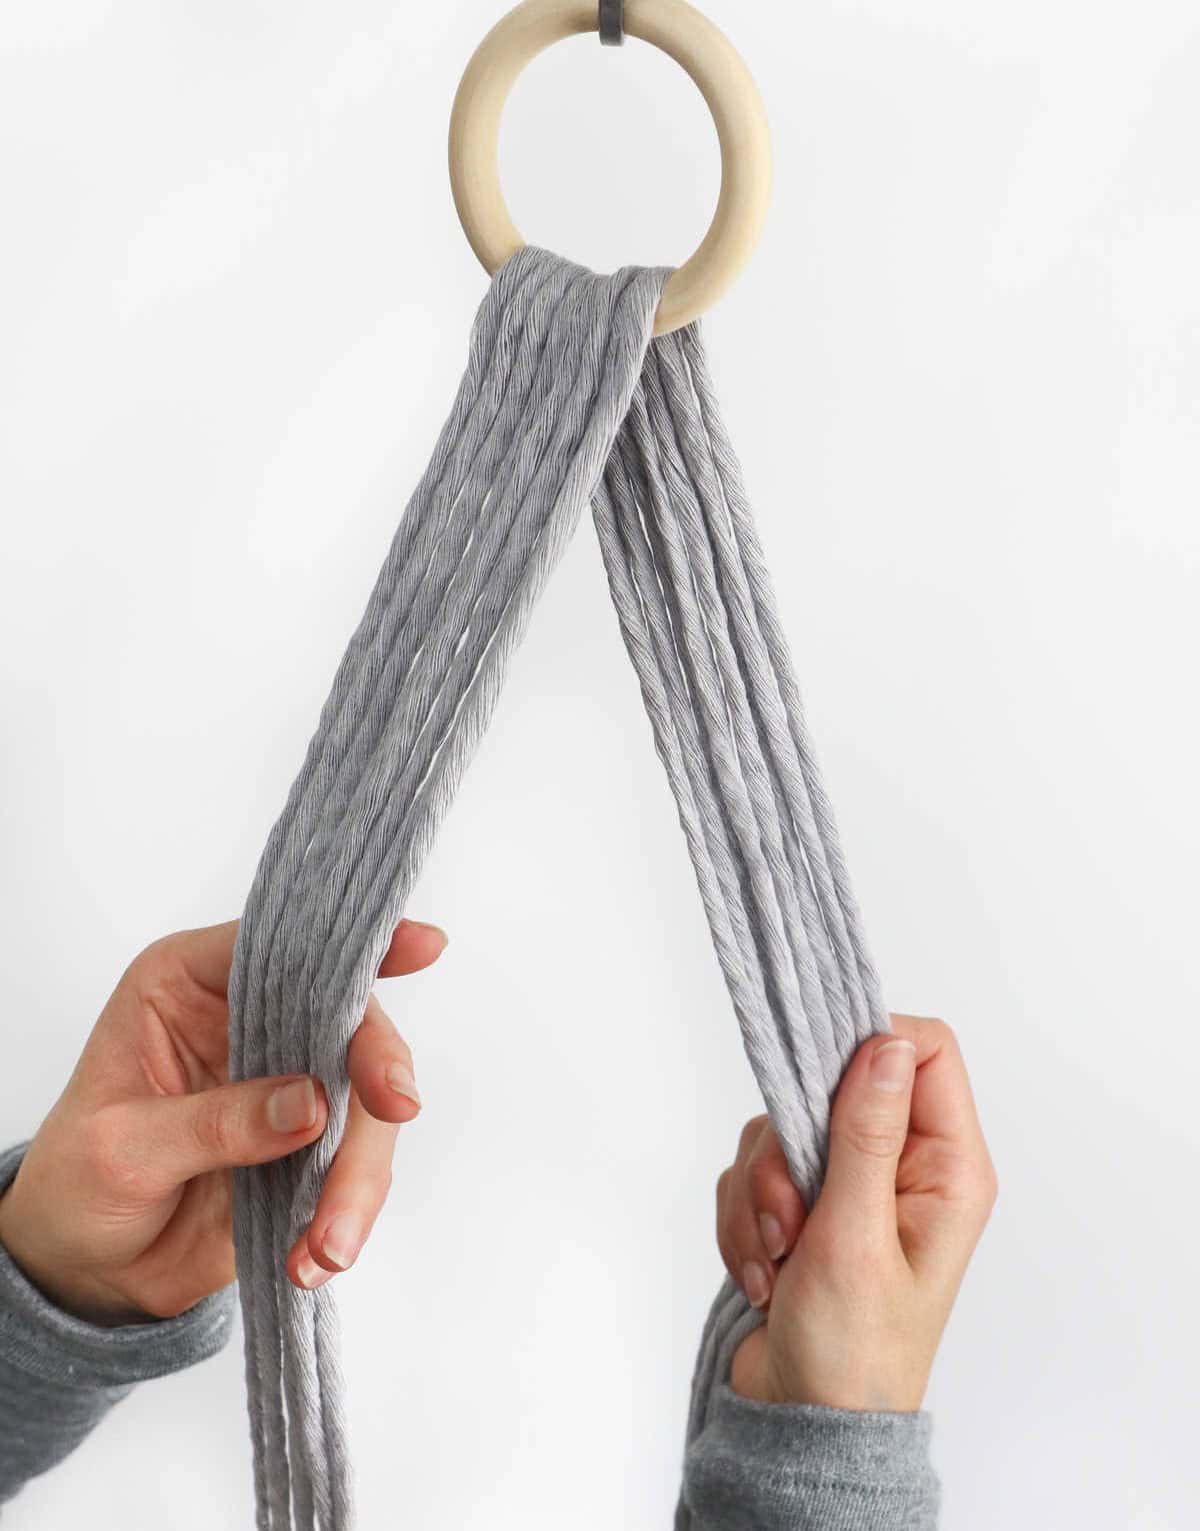
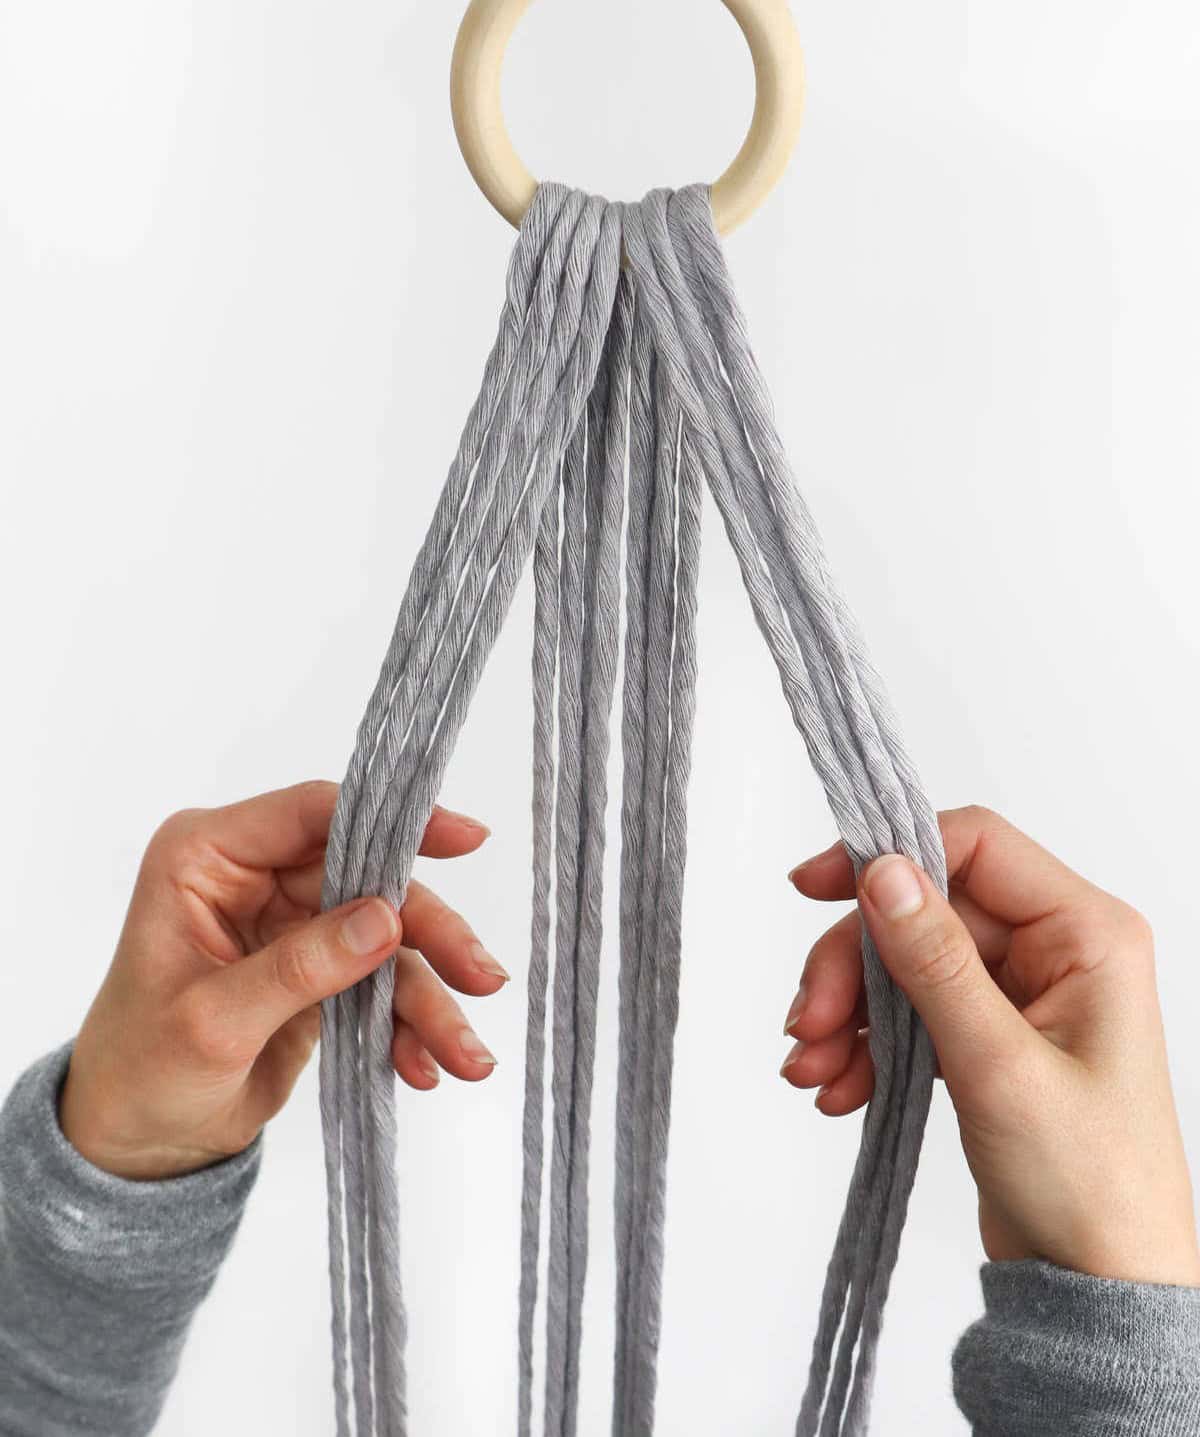
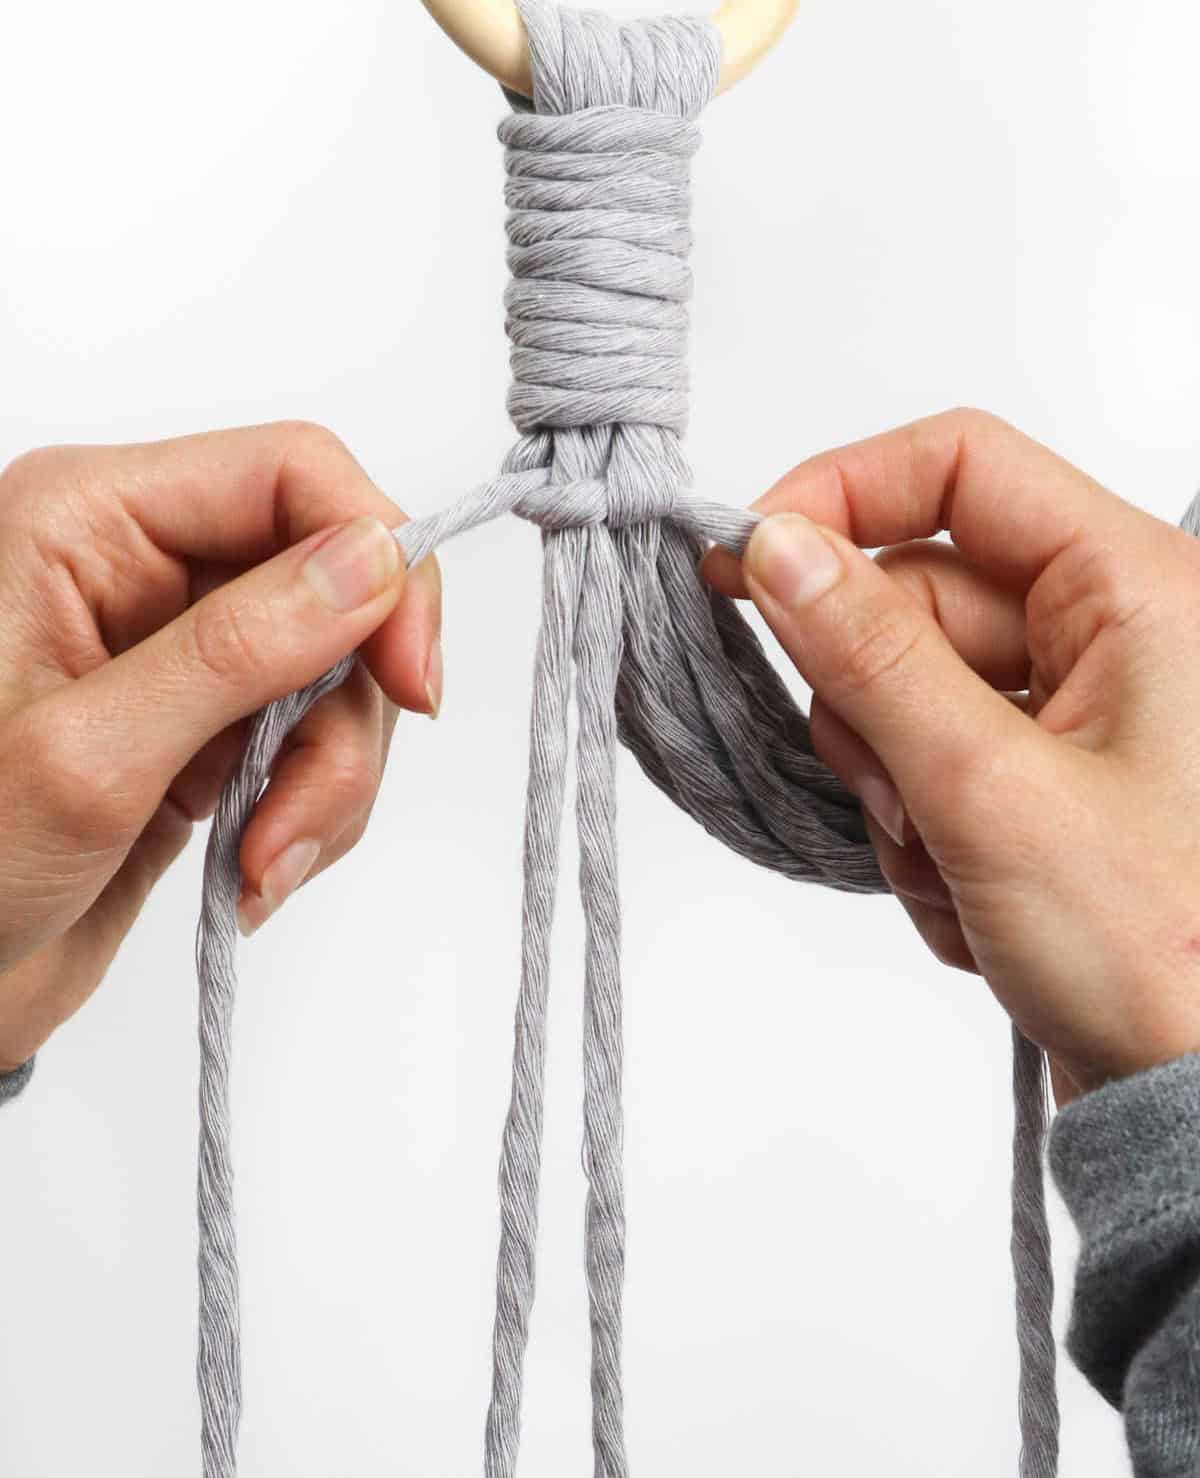
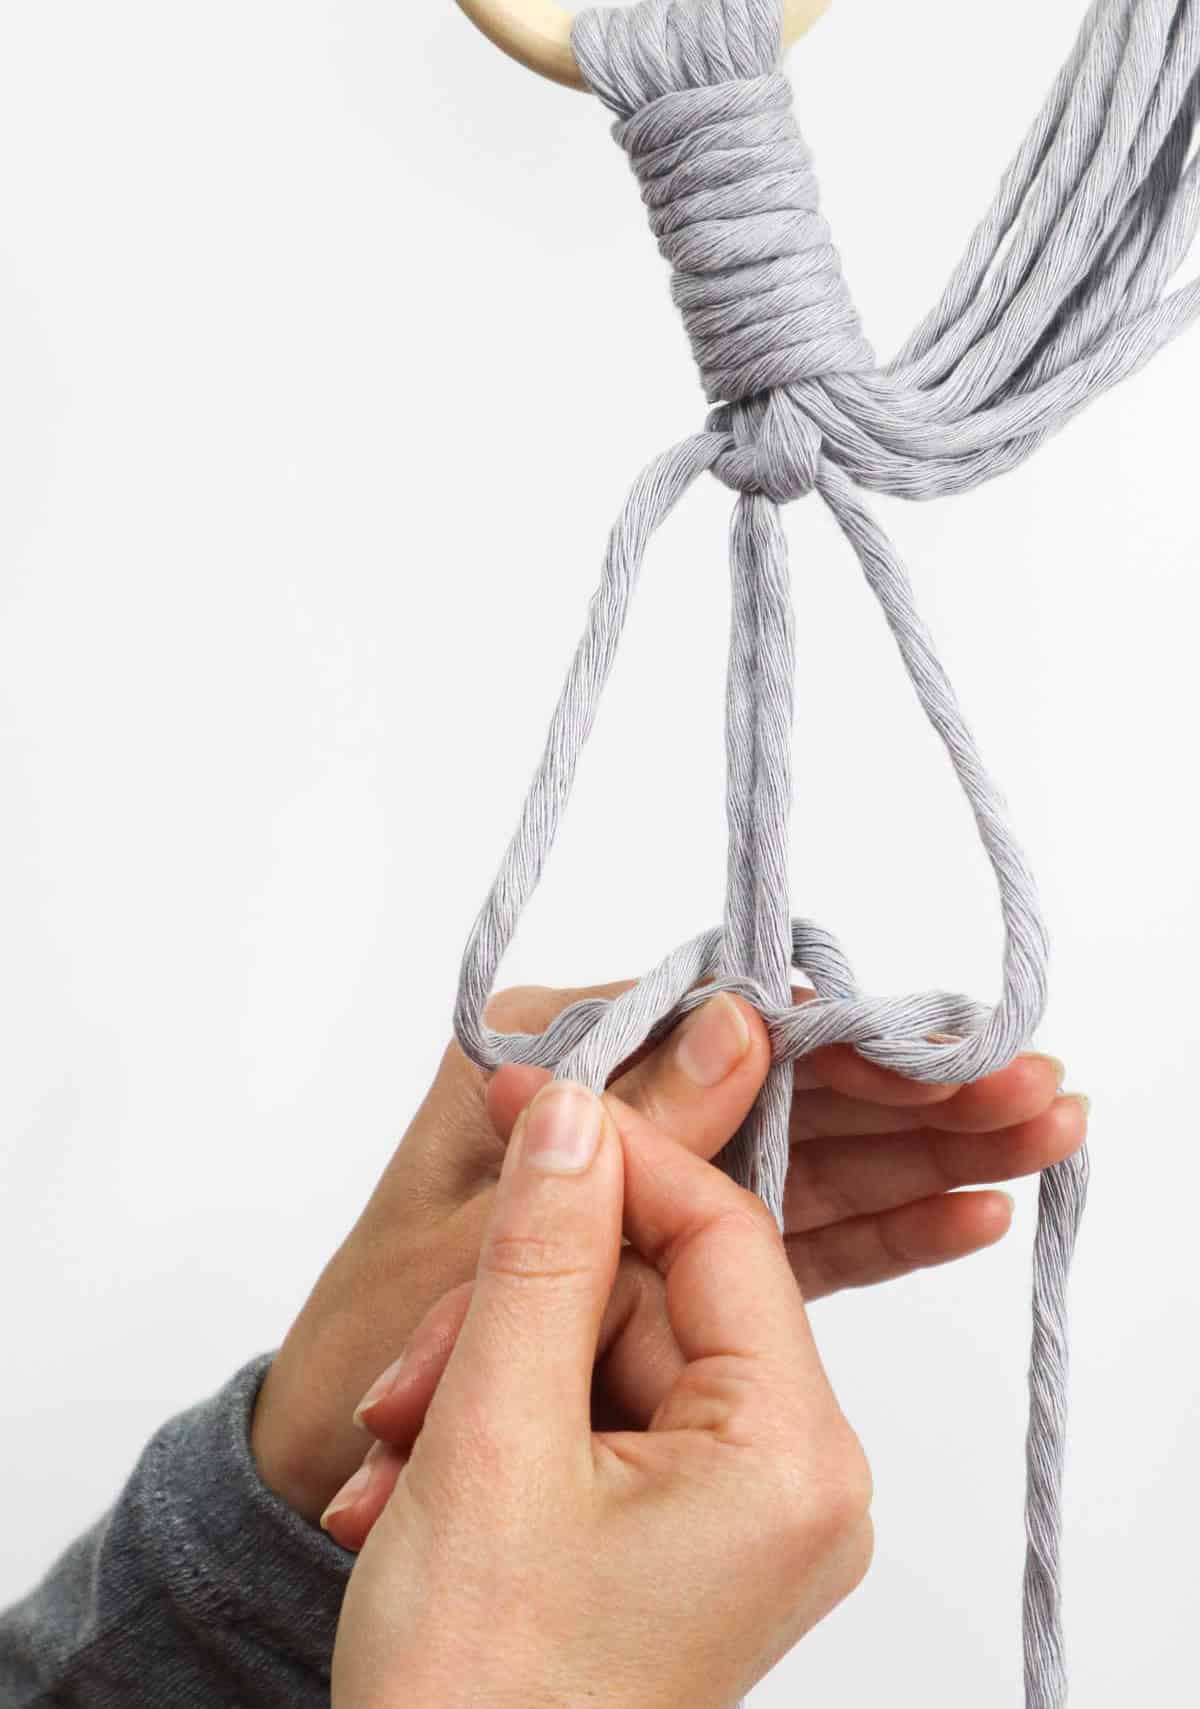
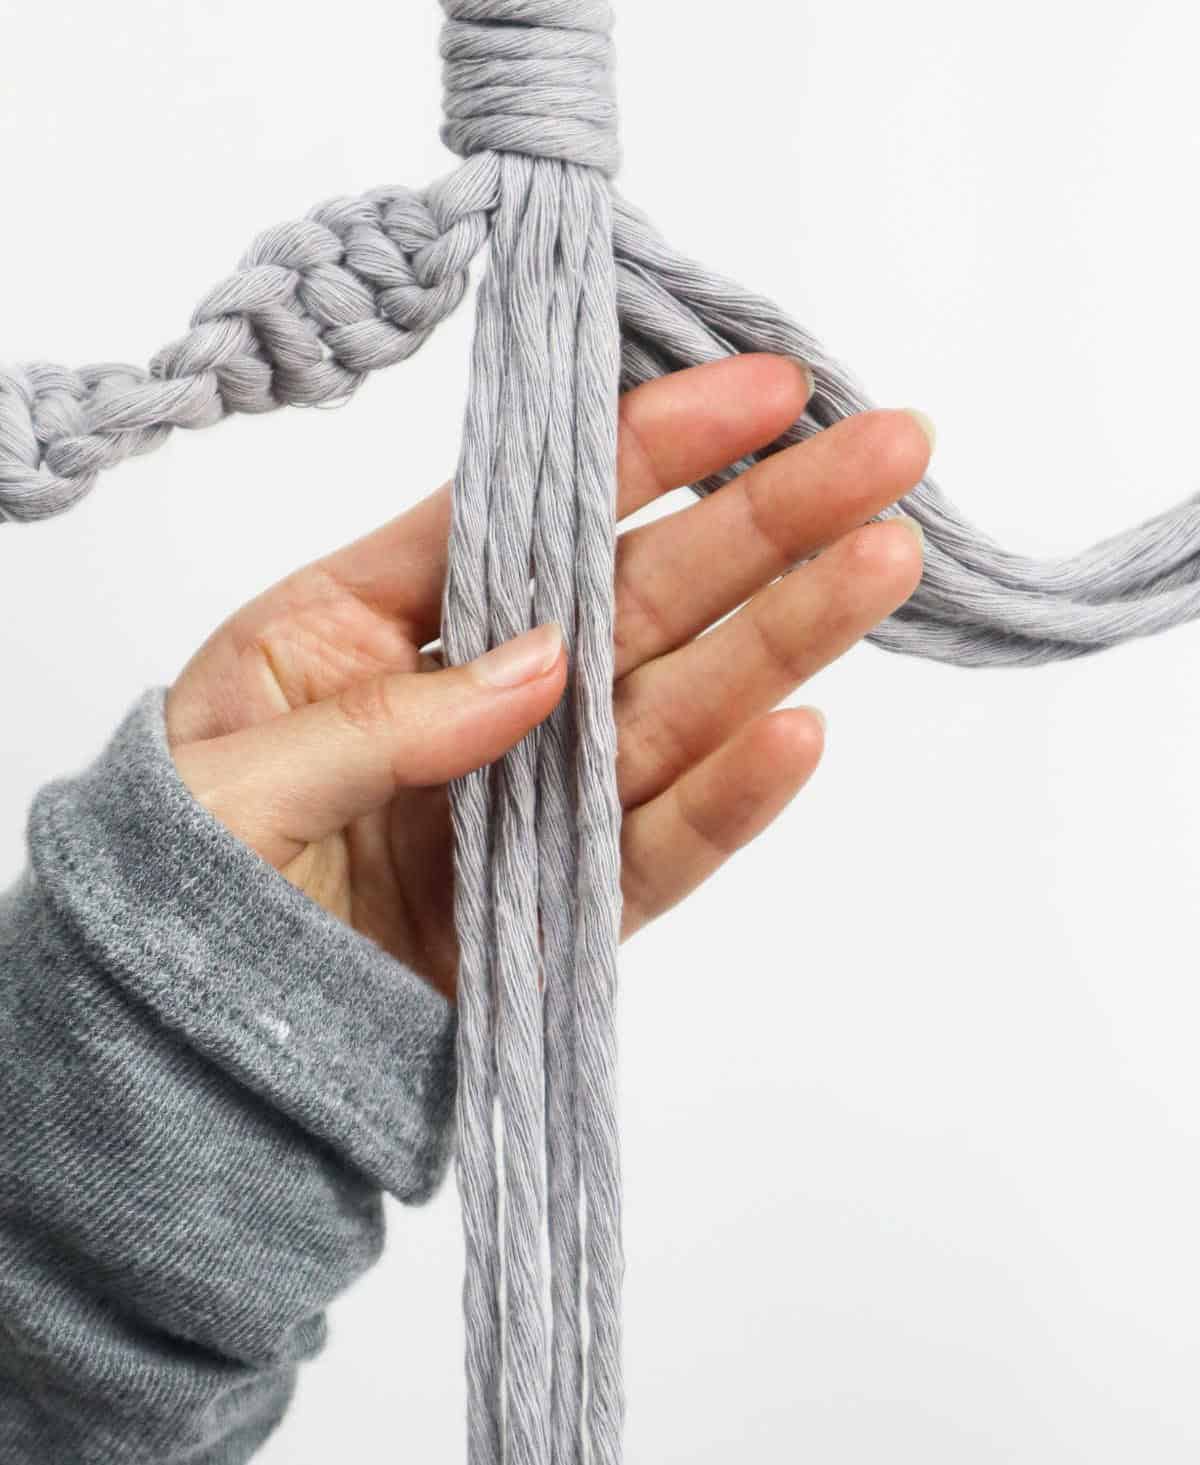
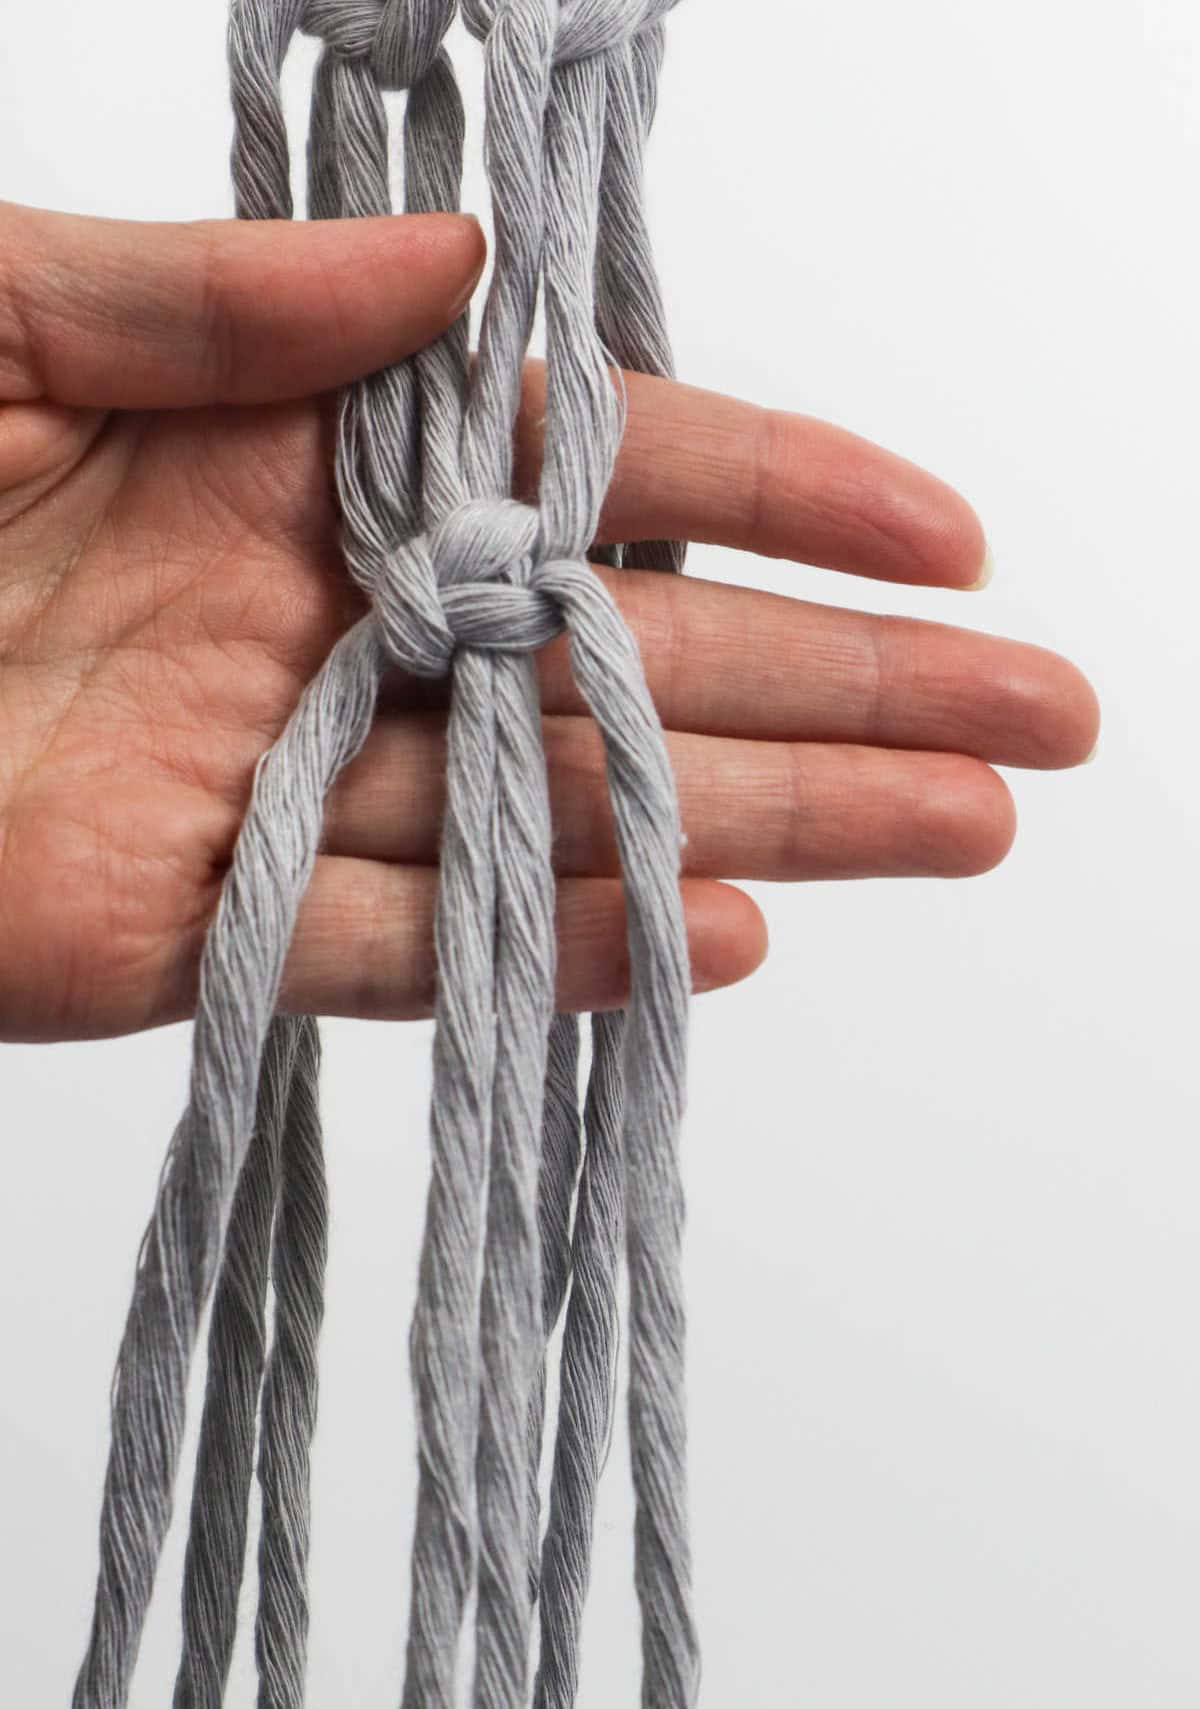
Unravel the tangled mass of eight cords per set, mirroring the diagram below. Next, segment the cords into four distinct sections, consisting of two frontal and two posterior portions, each containing four strands. This meticulous sorting process will prove invaluable as you approach the gathering knot, ensuring a seamless transition to the final stage.
Step 4


Step 5
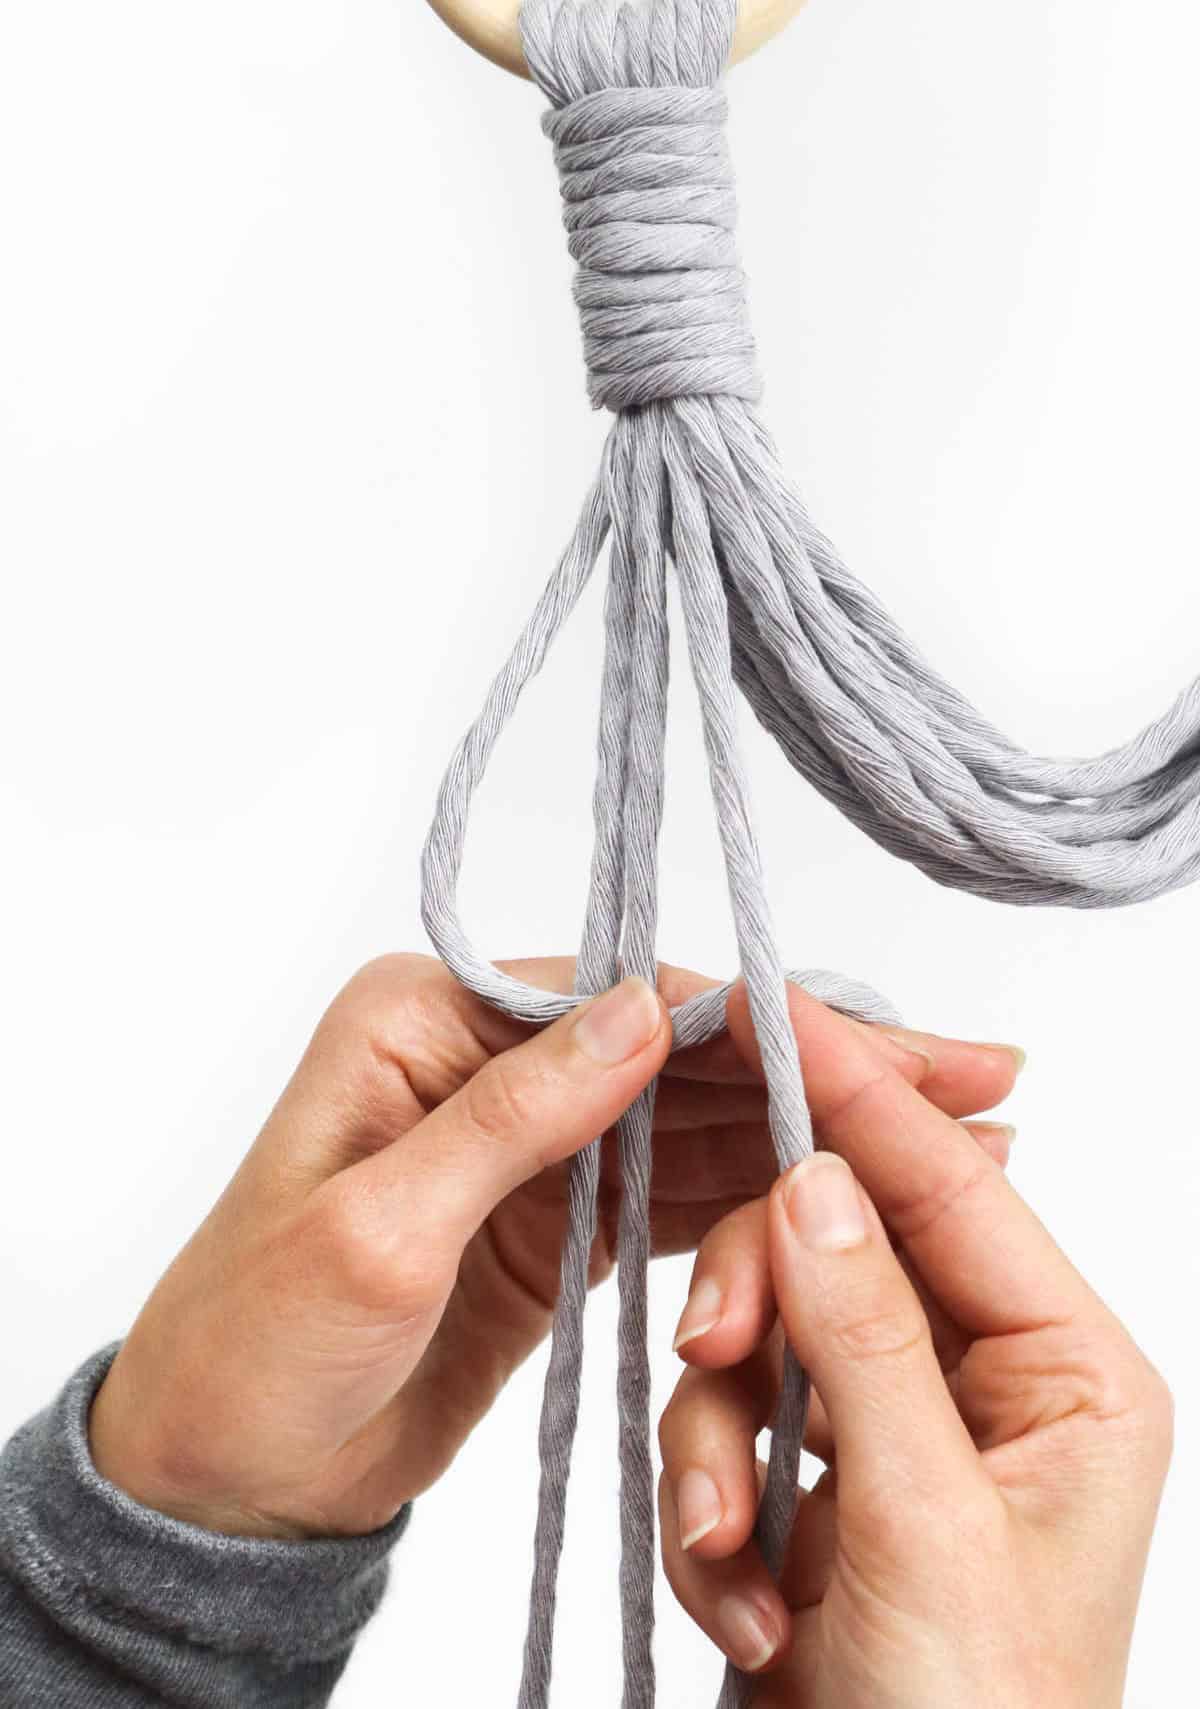
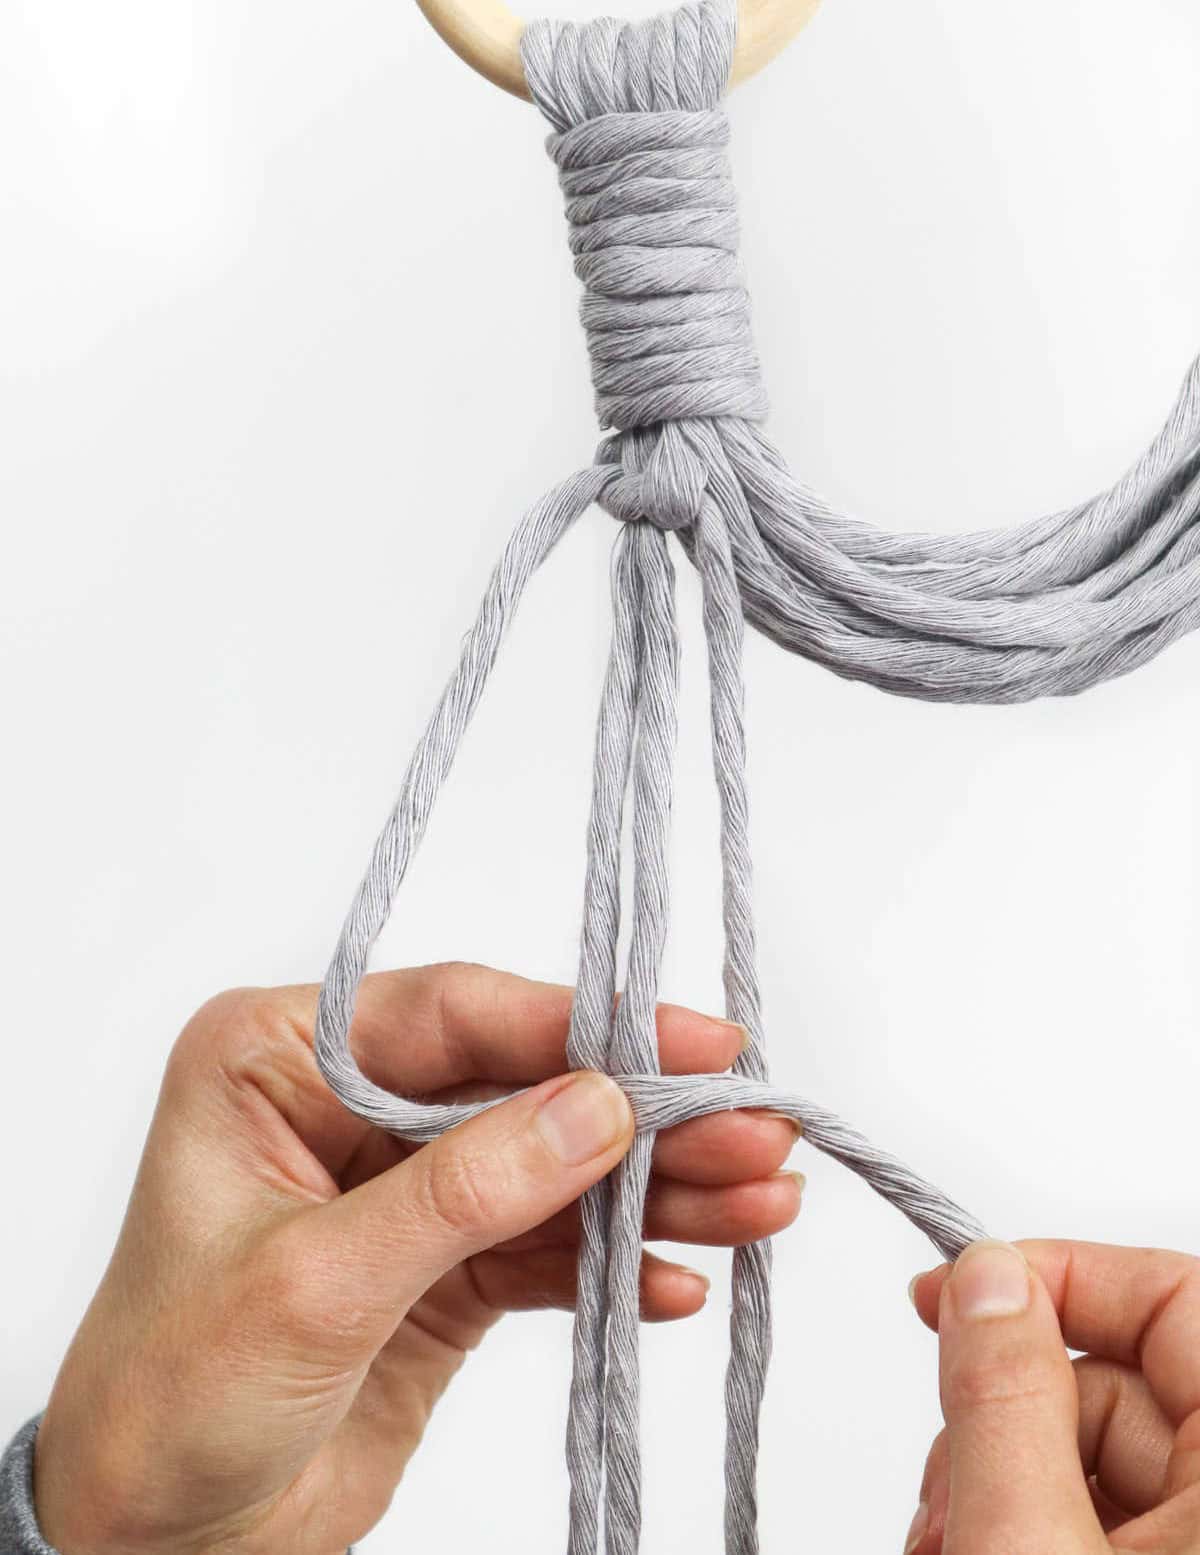
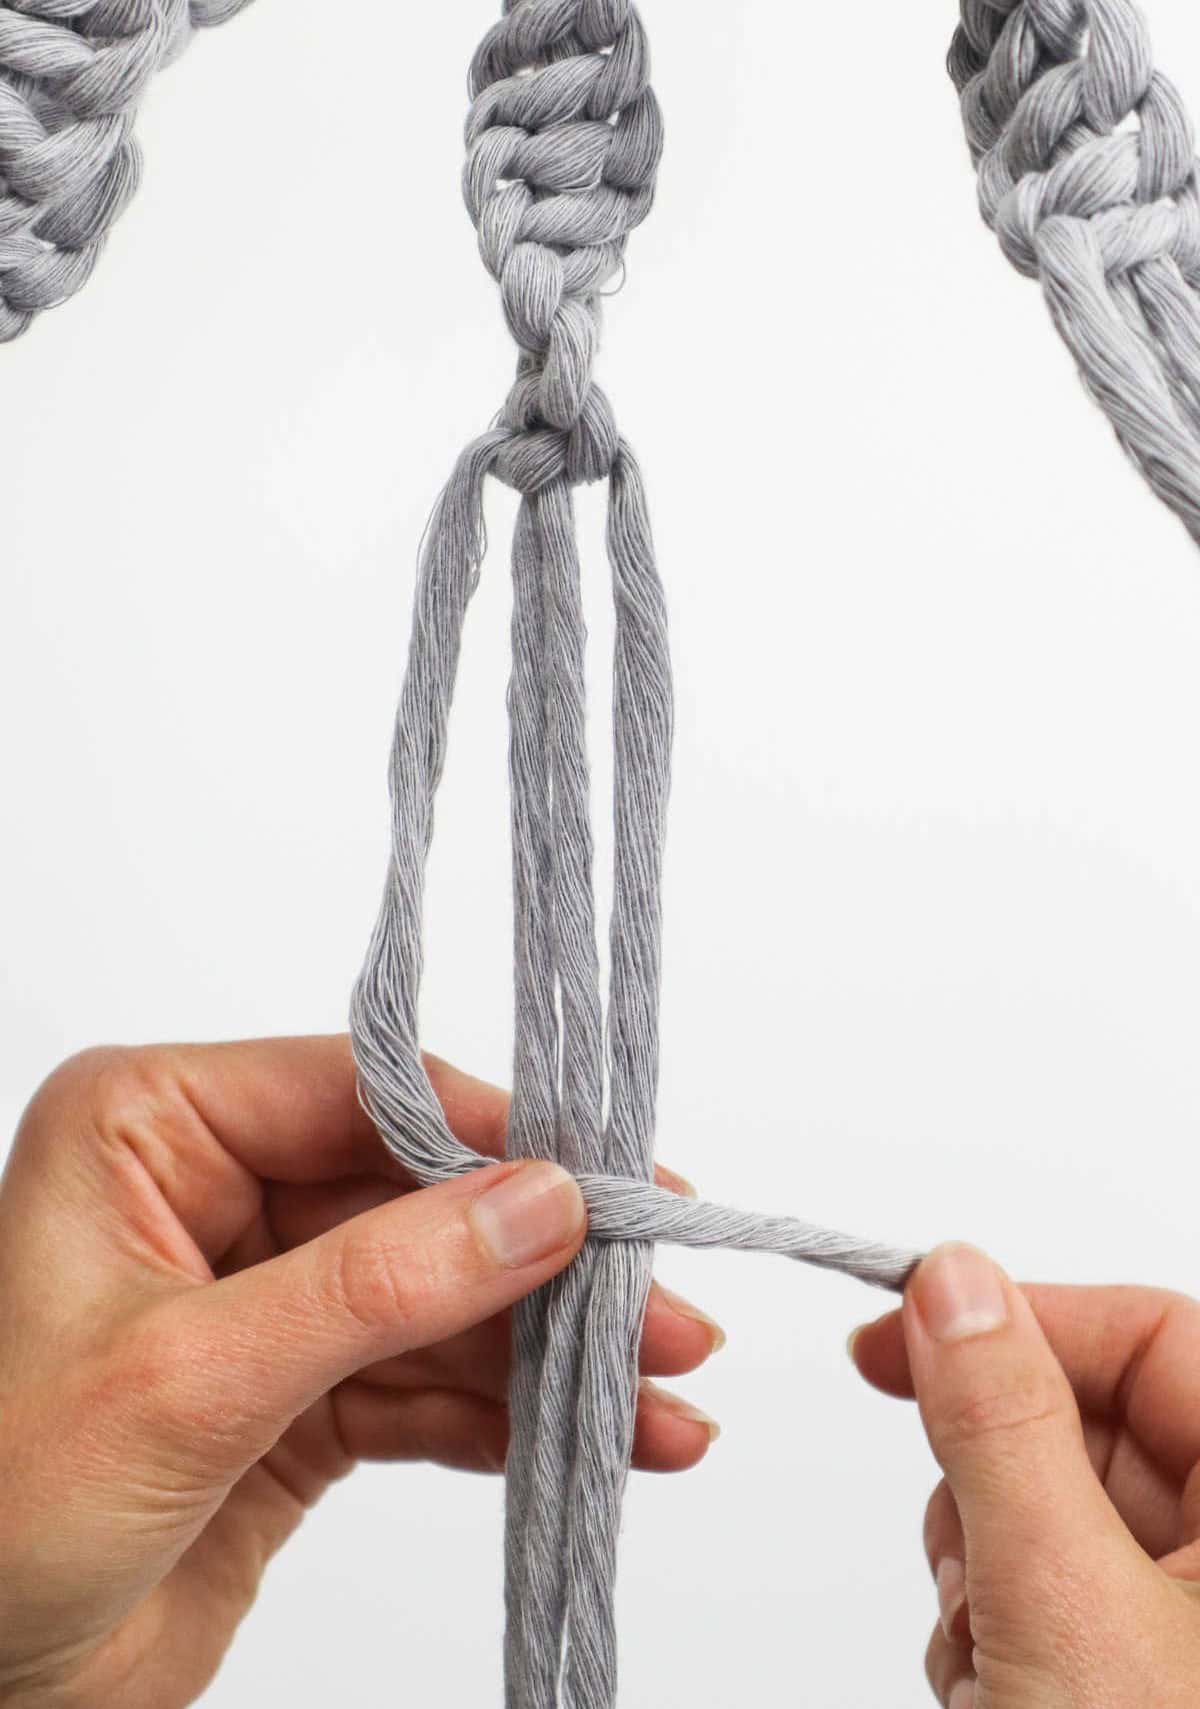
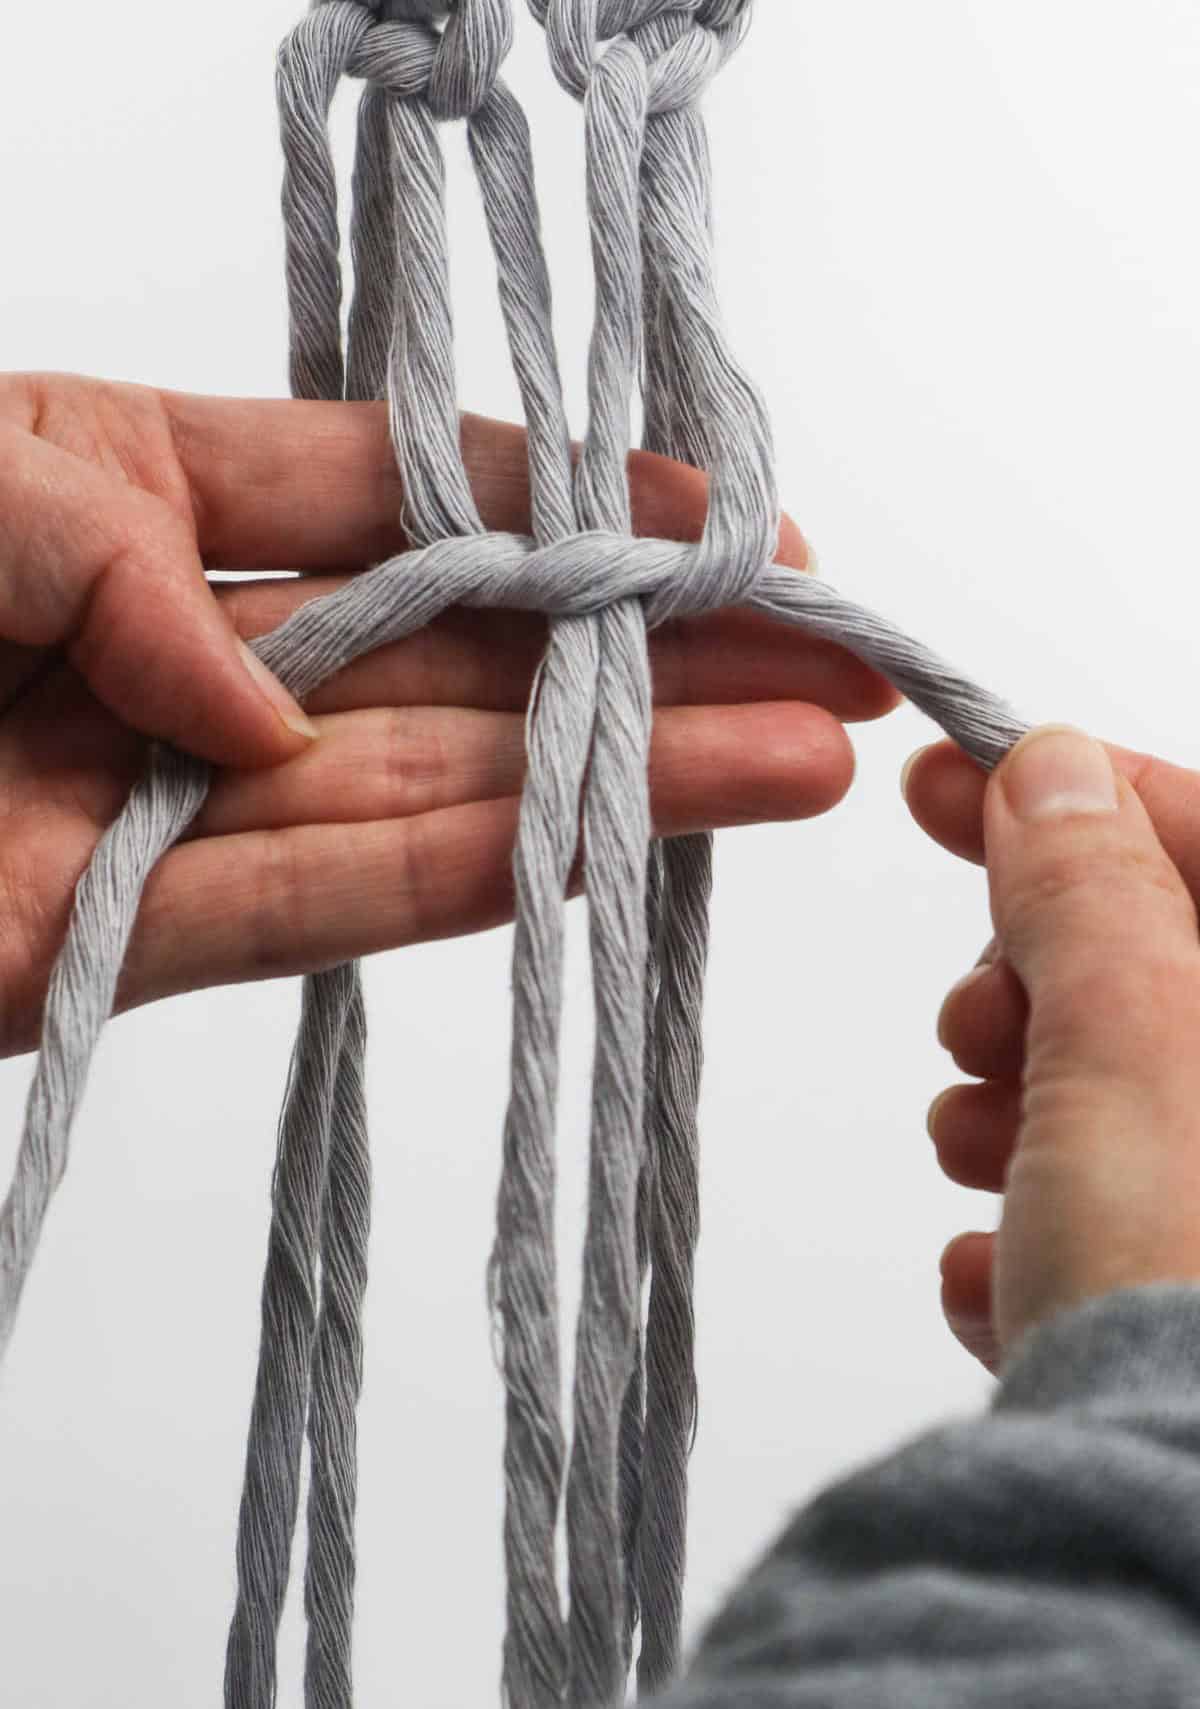
To create the spiral knots, begin by preparing four strands of material for a single section. Hold two central strands in place, as these will be the foundation for the upcoming construction process. Next, take one strand from the left and wrap it around the center to form a loop.
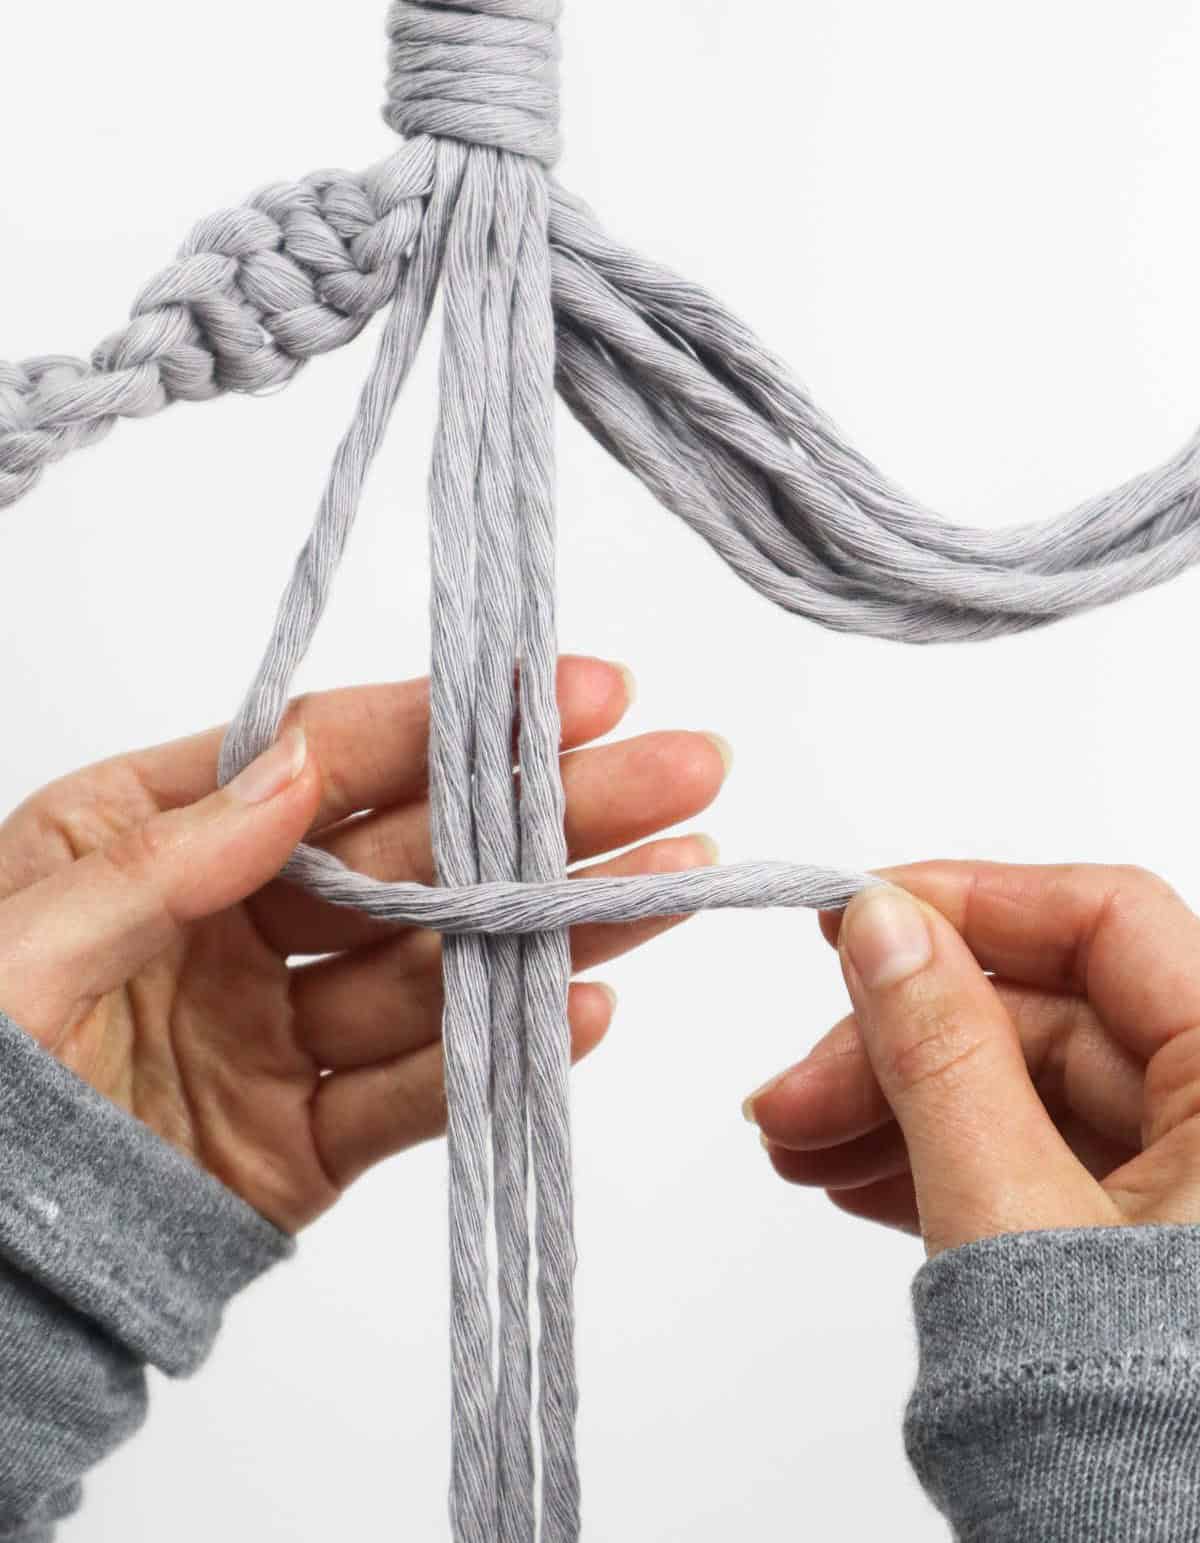
Subsequently, grab the right strand and pass it over the previously formed loop on the left side.
From there, guide the right strand under both central strands before threading it through the loop you created earlier.
Finally, pull both ends up and tighten the knot by tugging firmly to form the foundation of your design. With this initial knot in place, you’re ready to start building upon it.
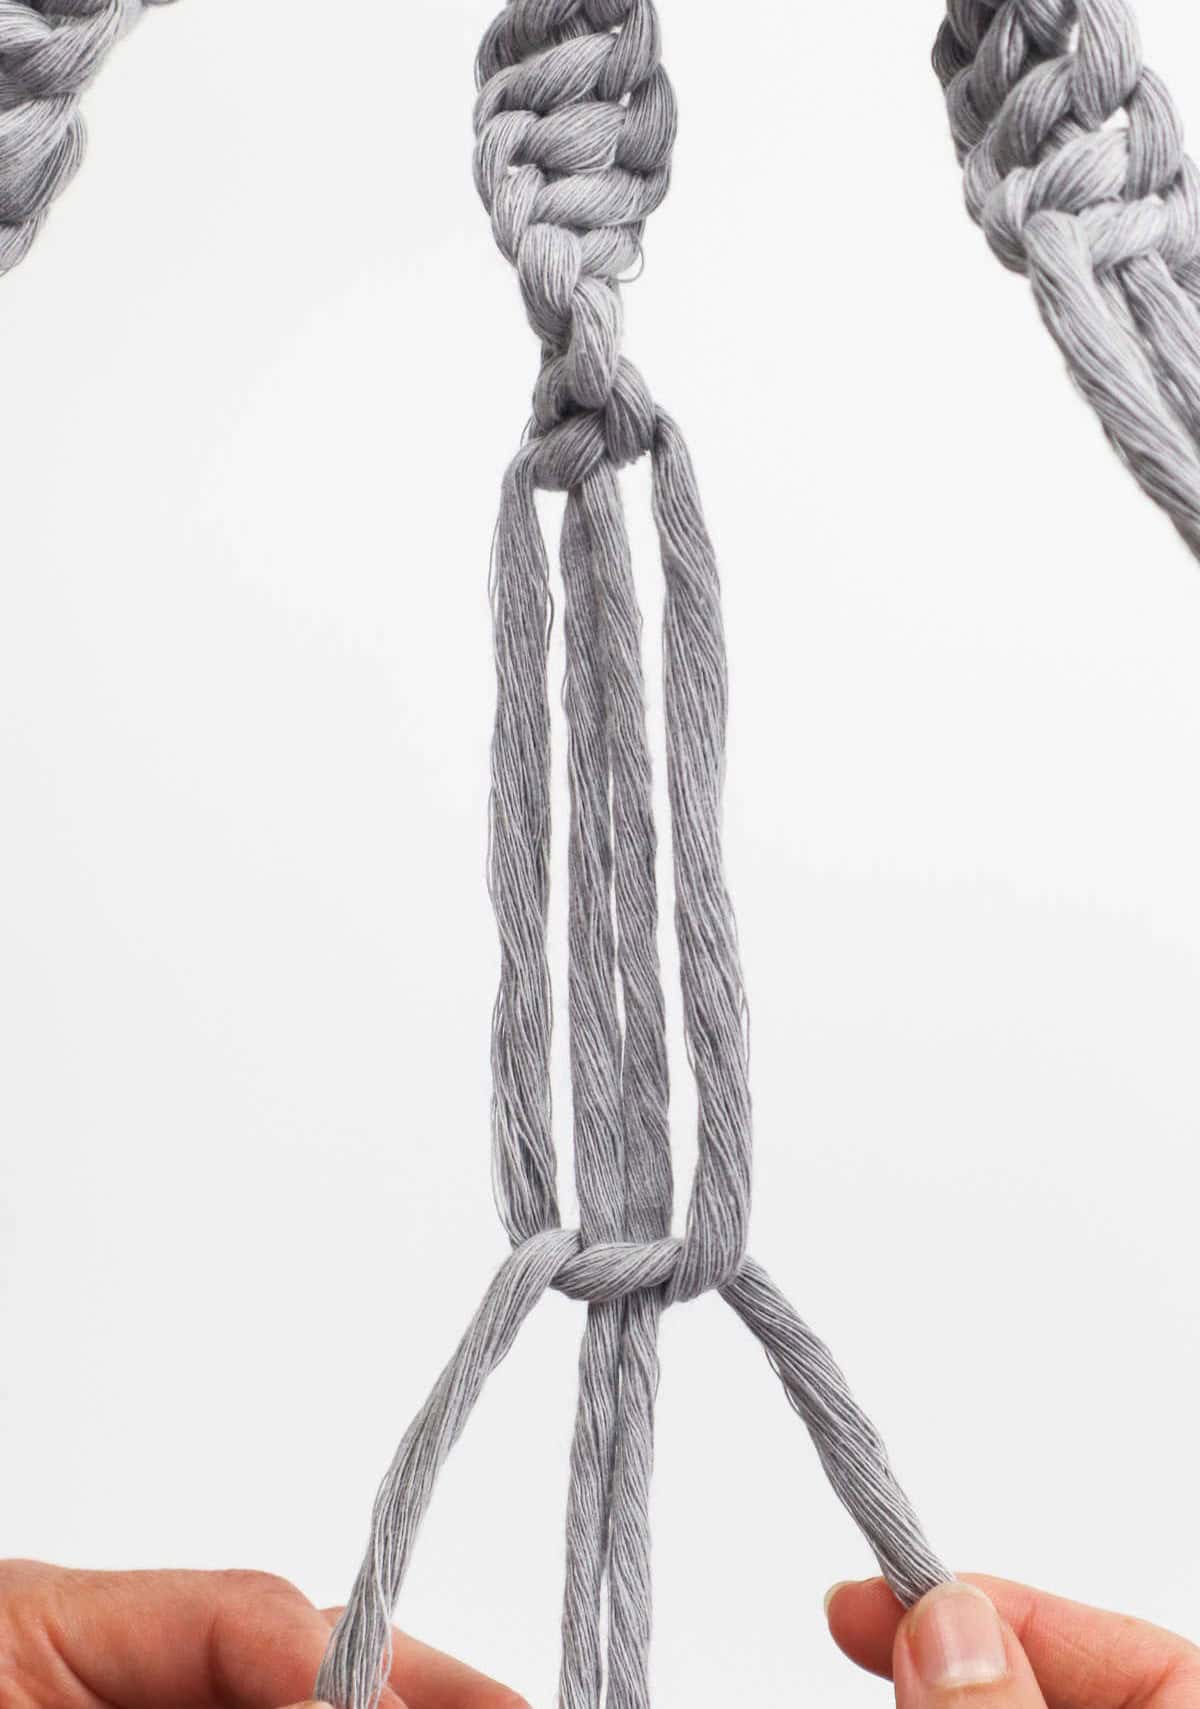
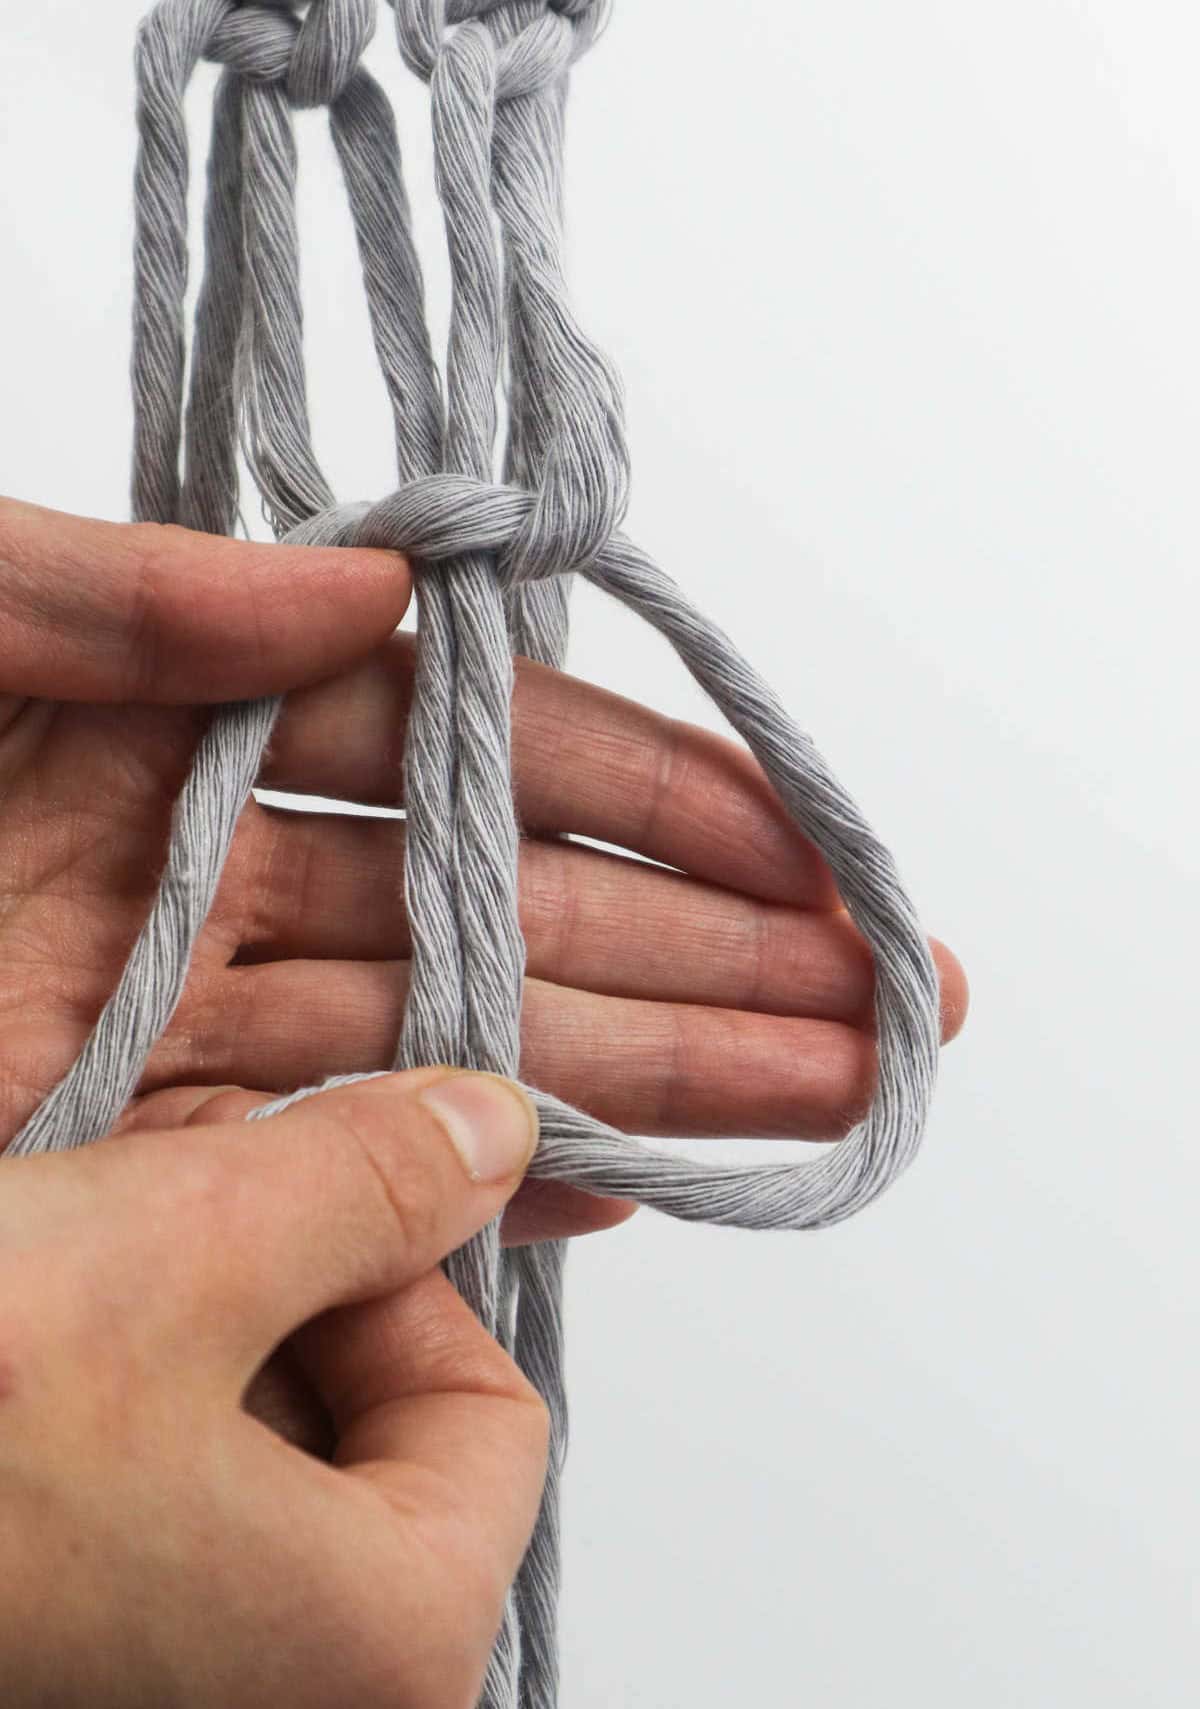
Step 6
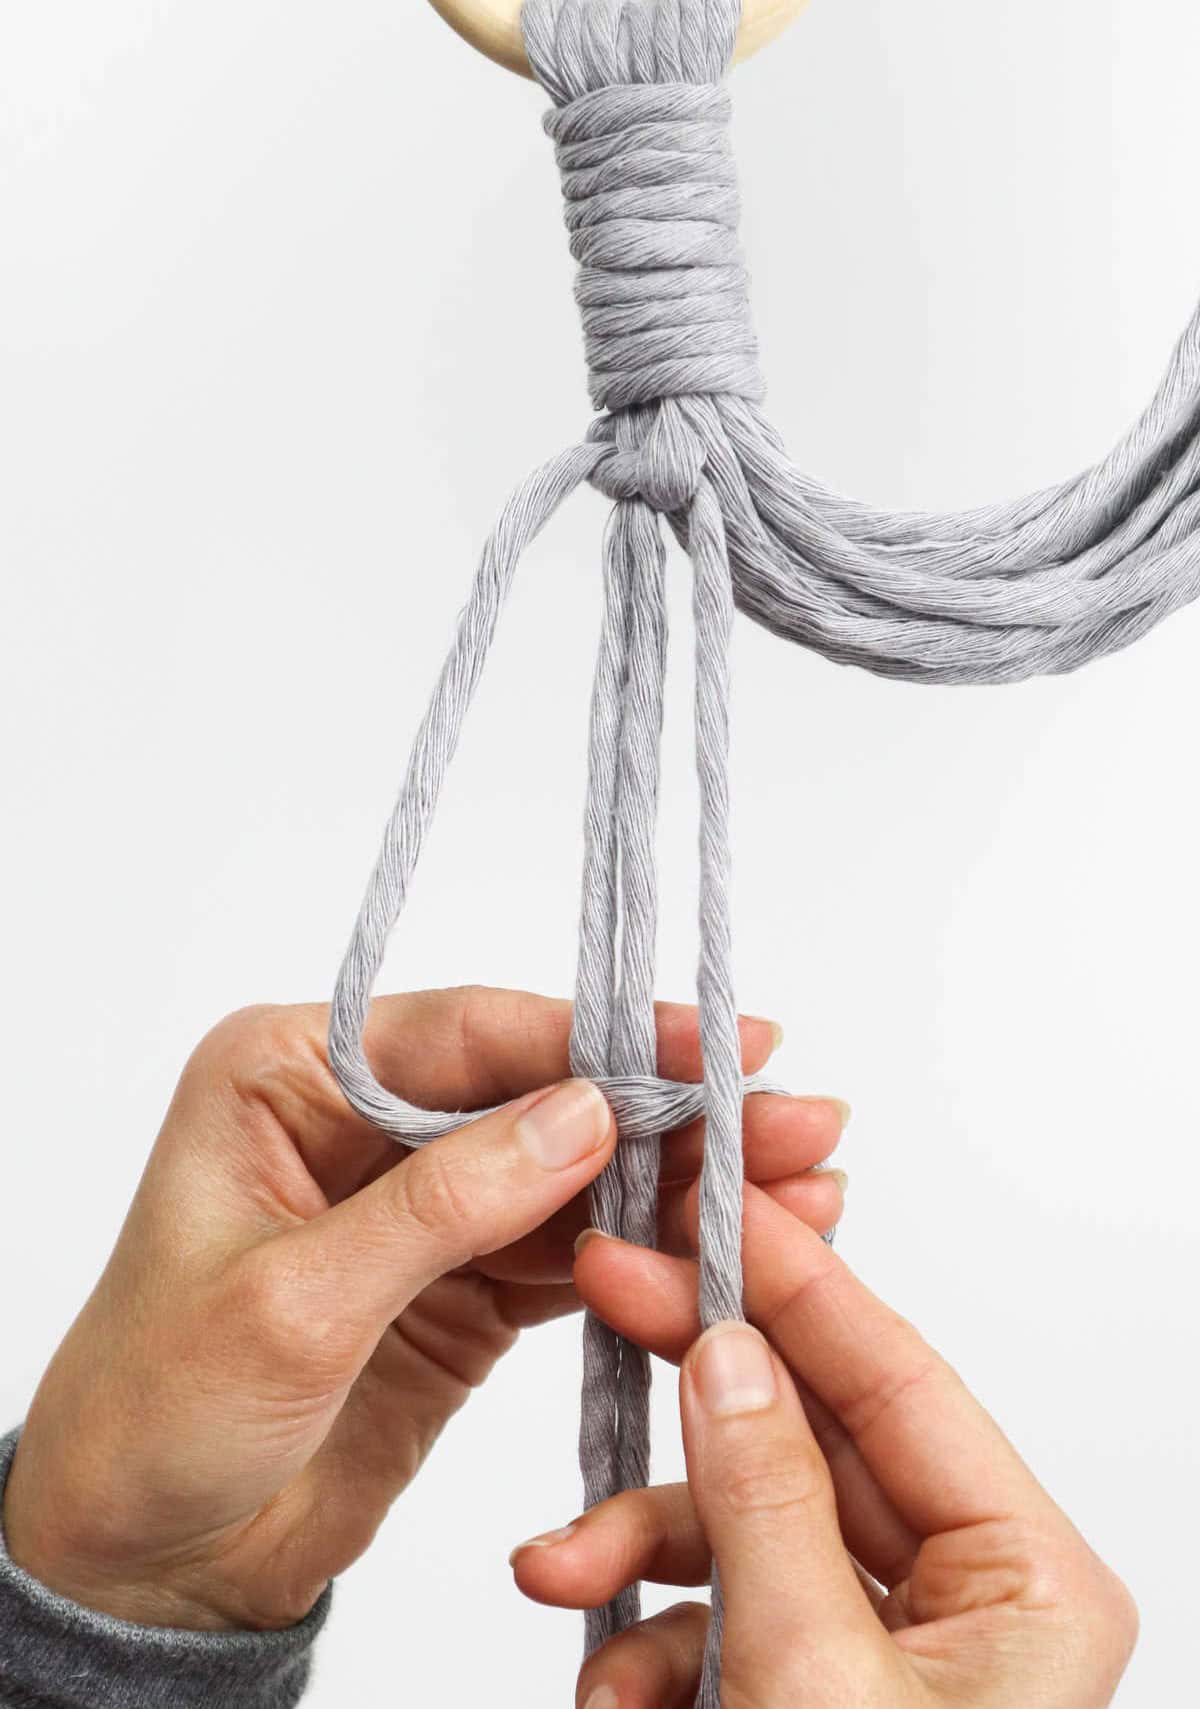

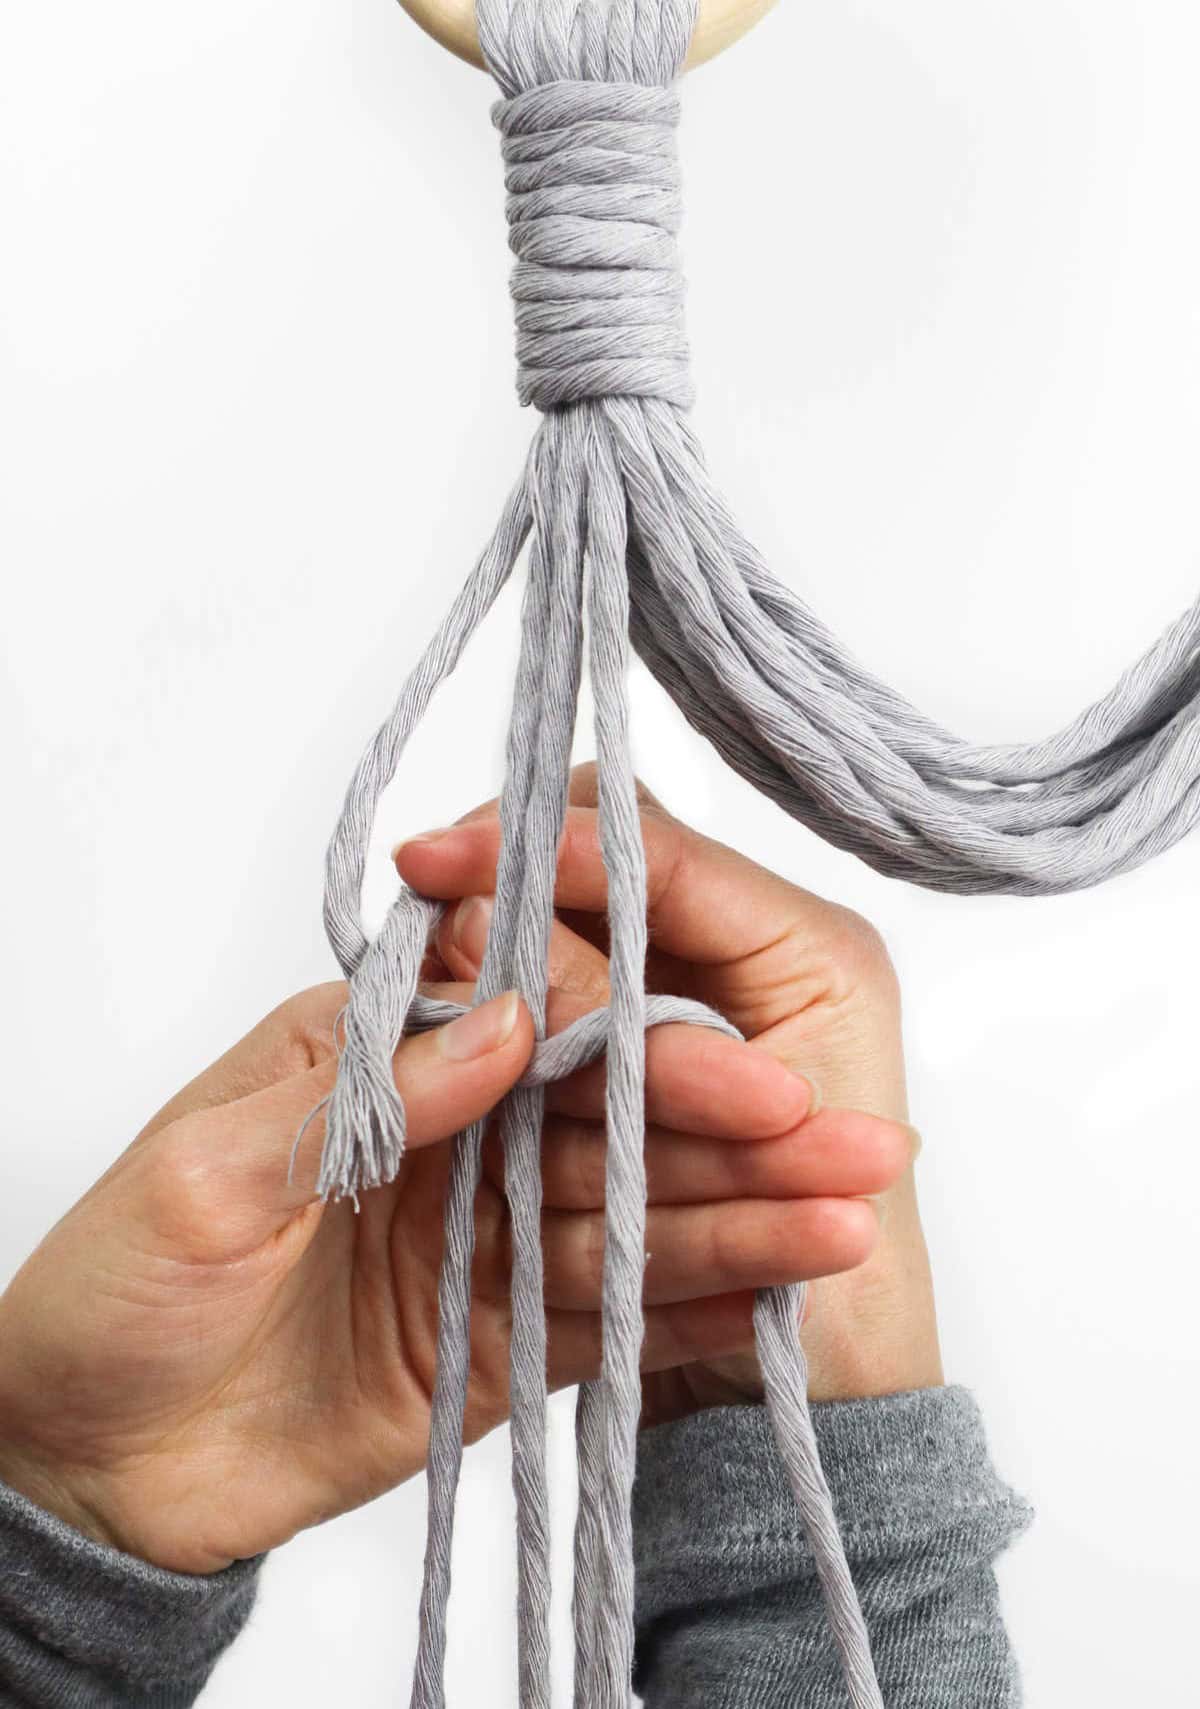
As you work your way along the cord, you’ll begin to notice a fascinating transformation taking place. The more you repeat the process of twisting and pulling, the more the individual strands seem to wrap around each other, creating a mesmerizing spiral pattern that adds depth and visual interest to the overall design.
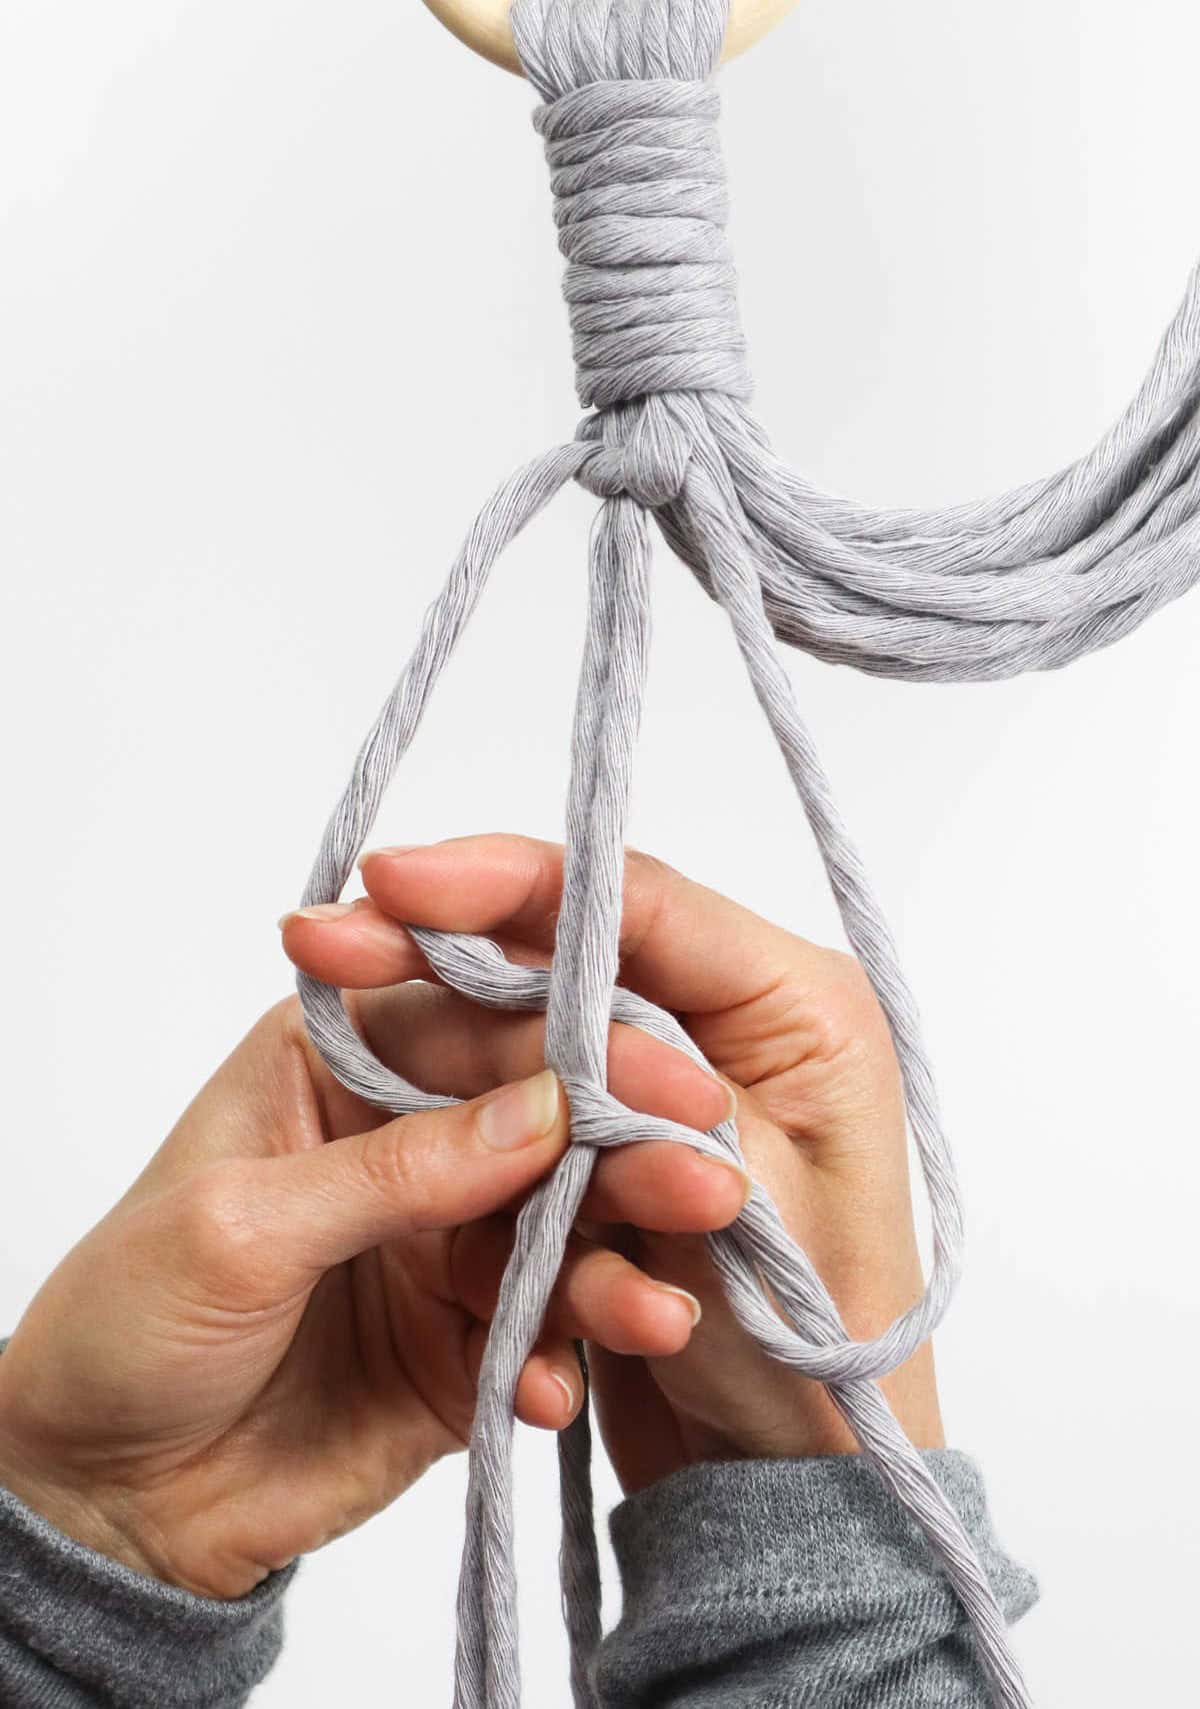
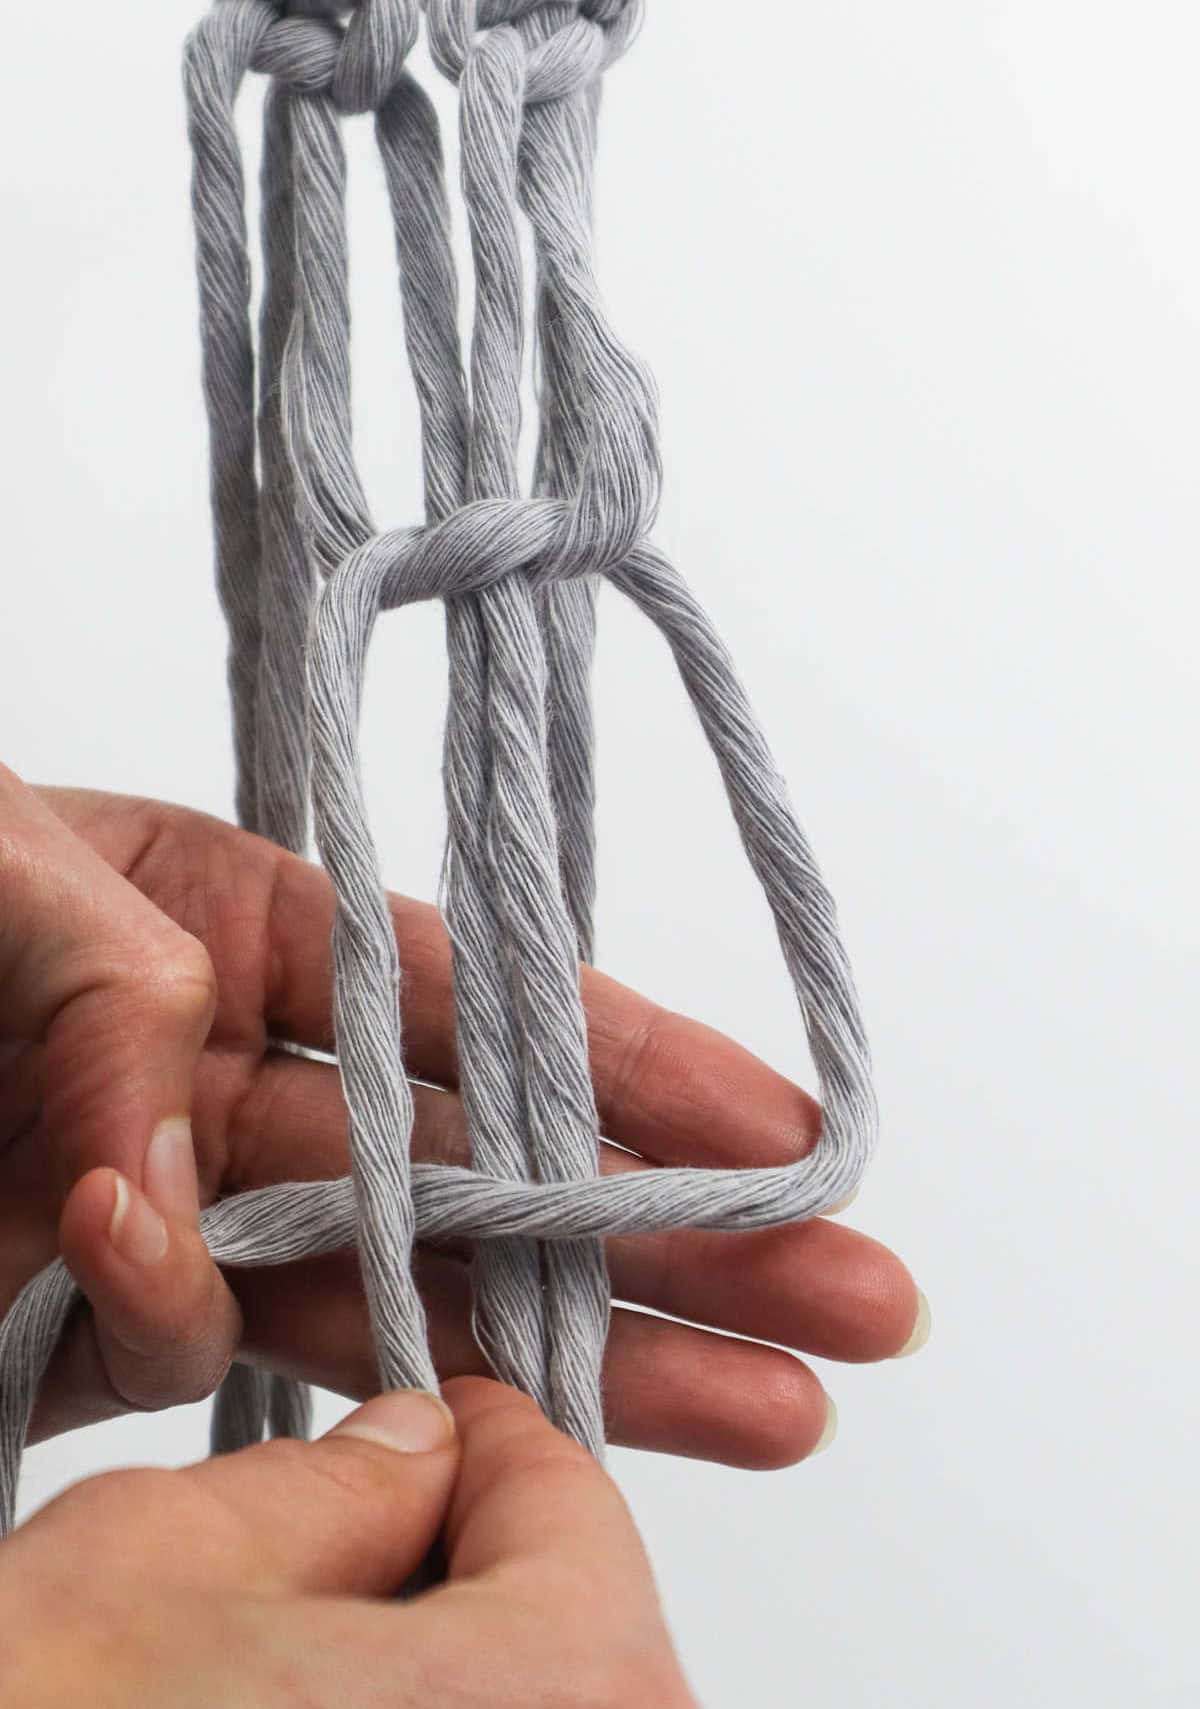
Step 7
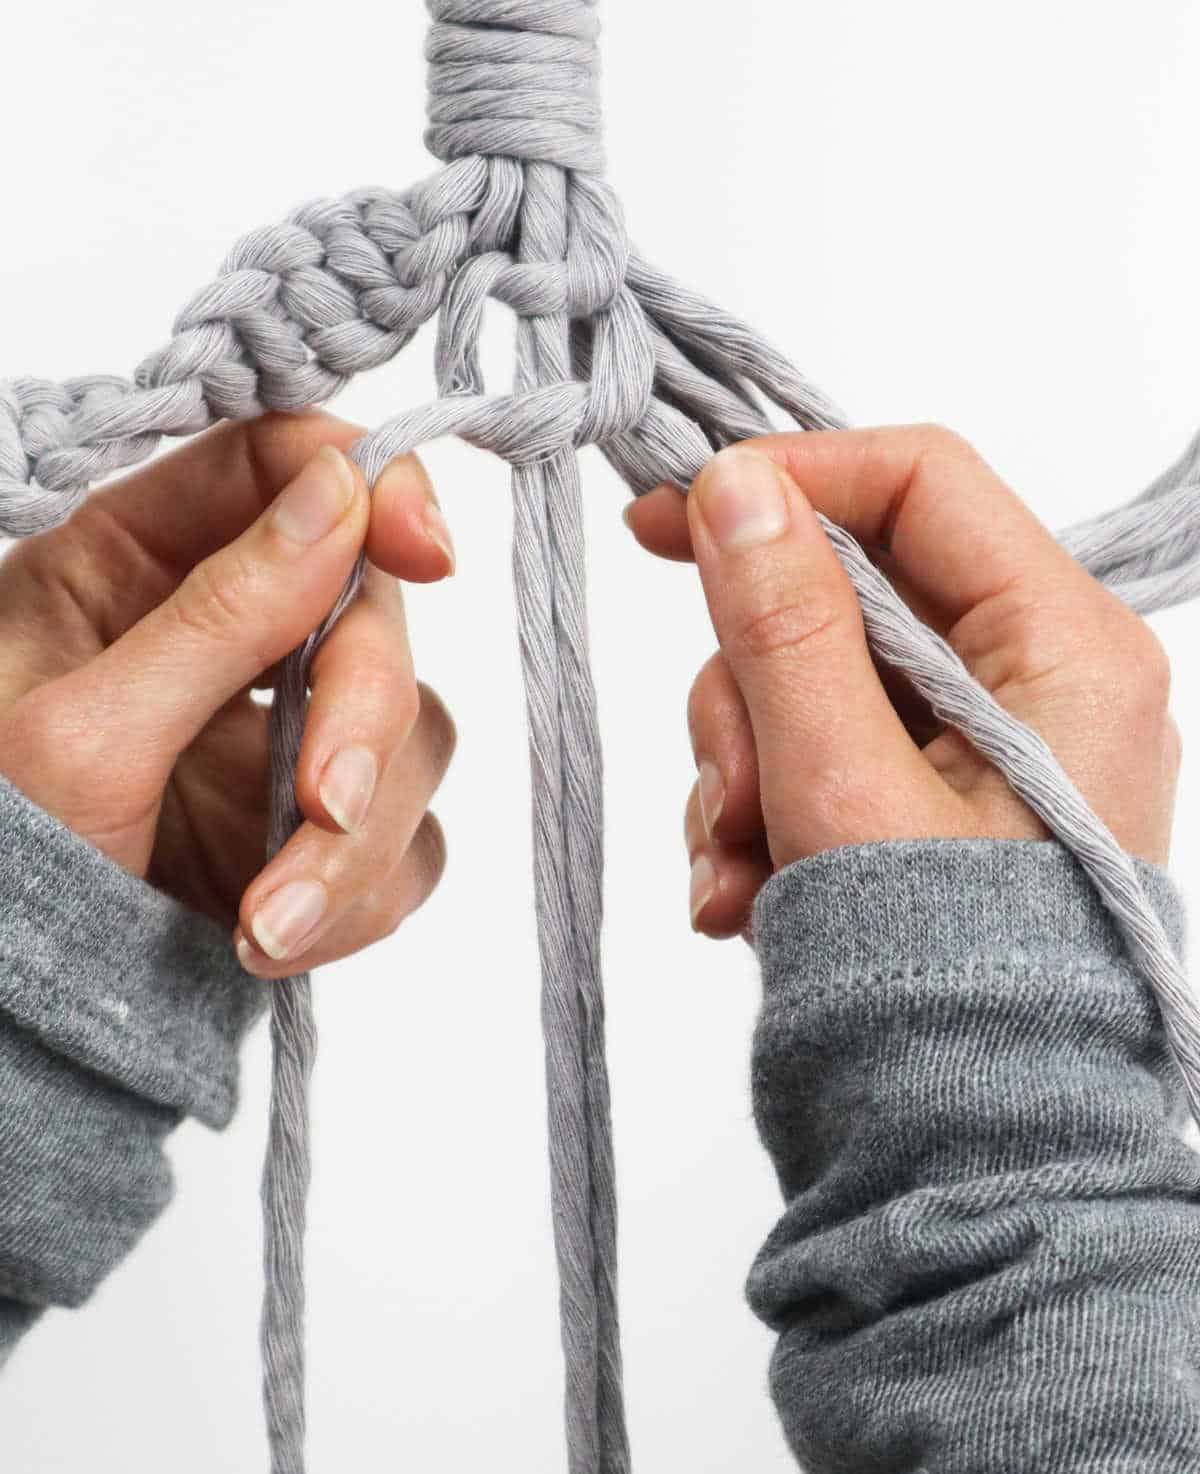
Now it’s time to add more complexity to your design by creating additional knots on a separate set of strands. Just like before, you’ll be twisting and turning the fibers together to form a sturdy foundation for your final product.
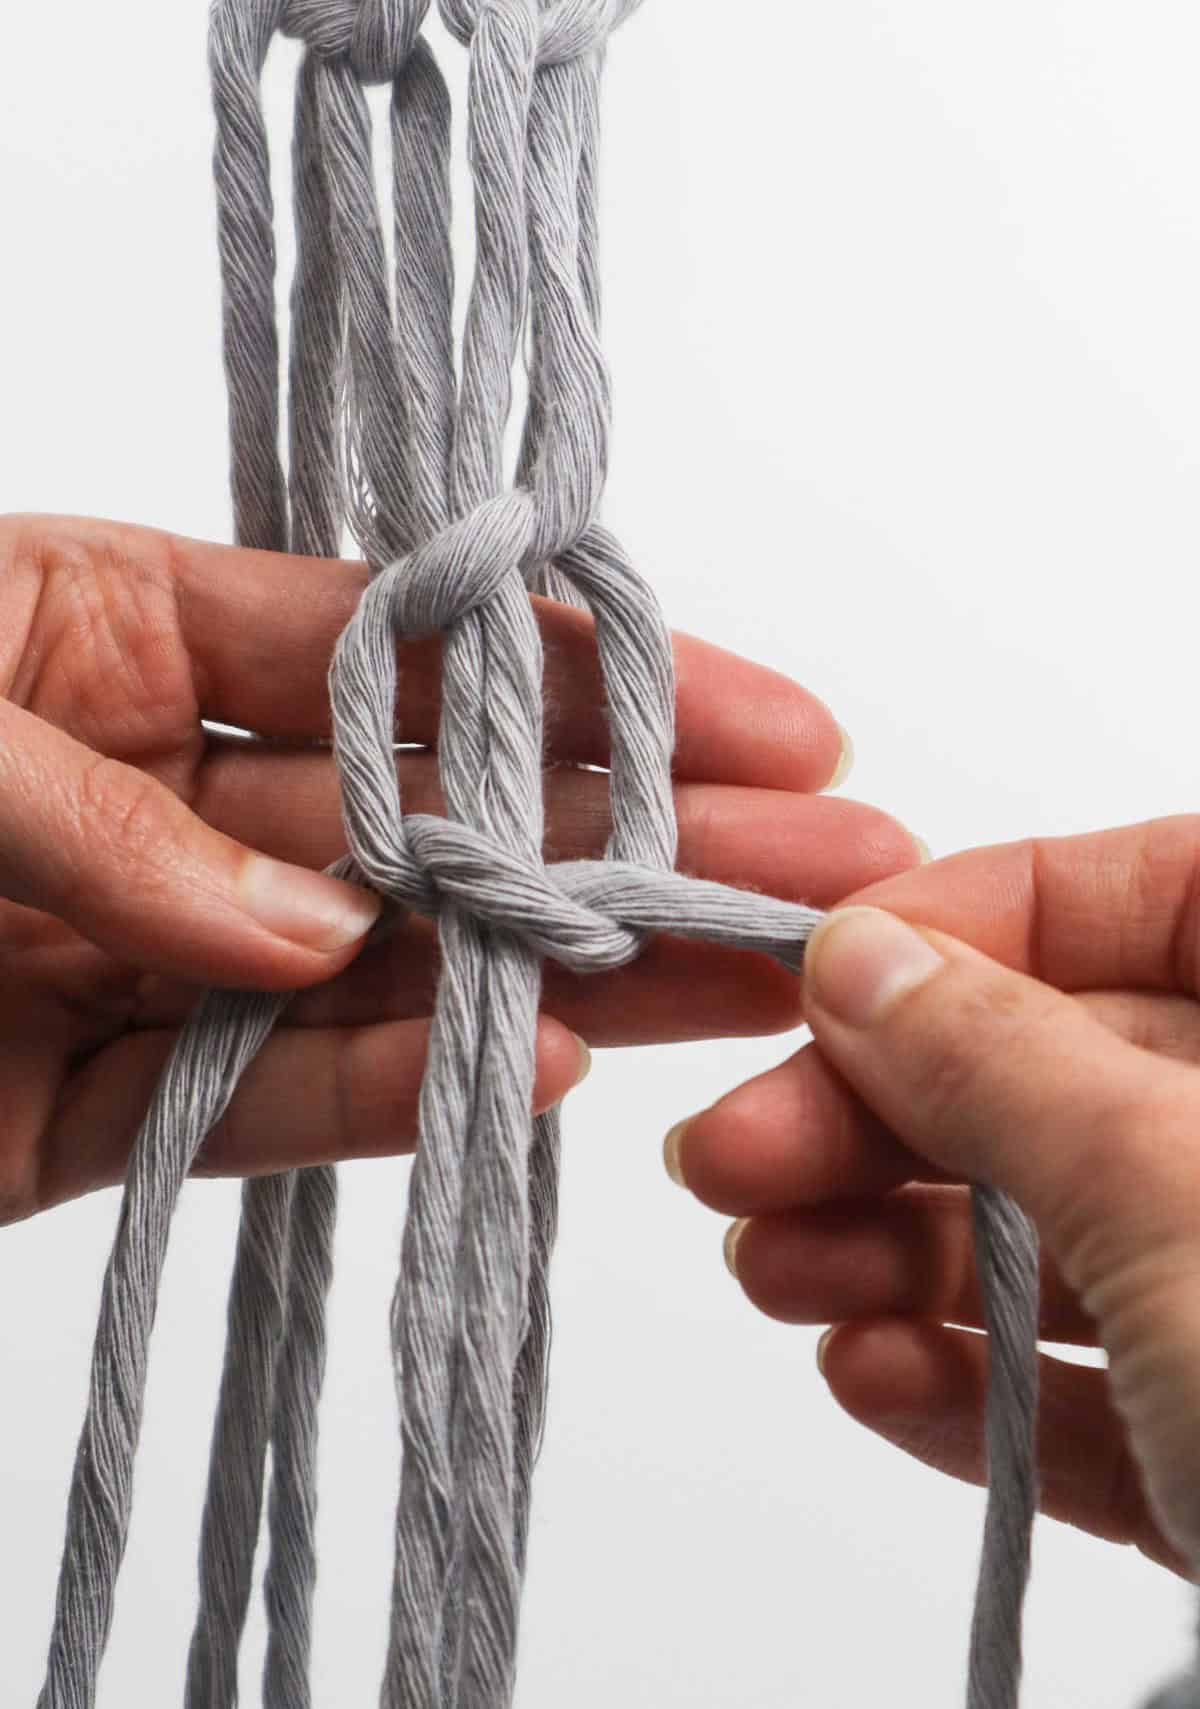
Step 8
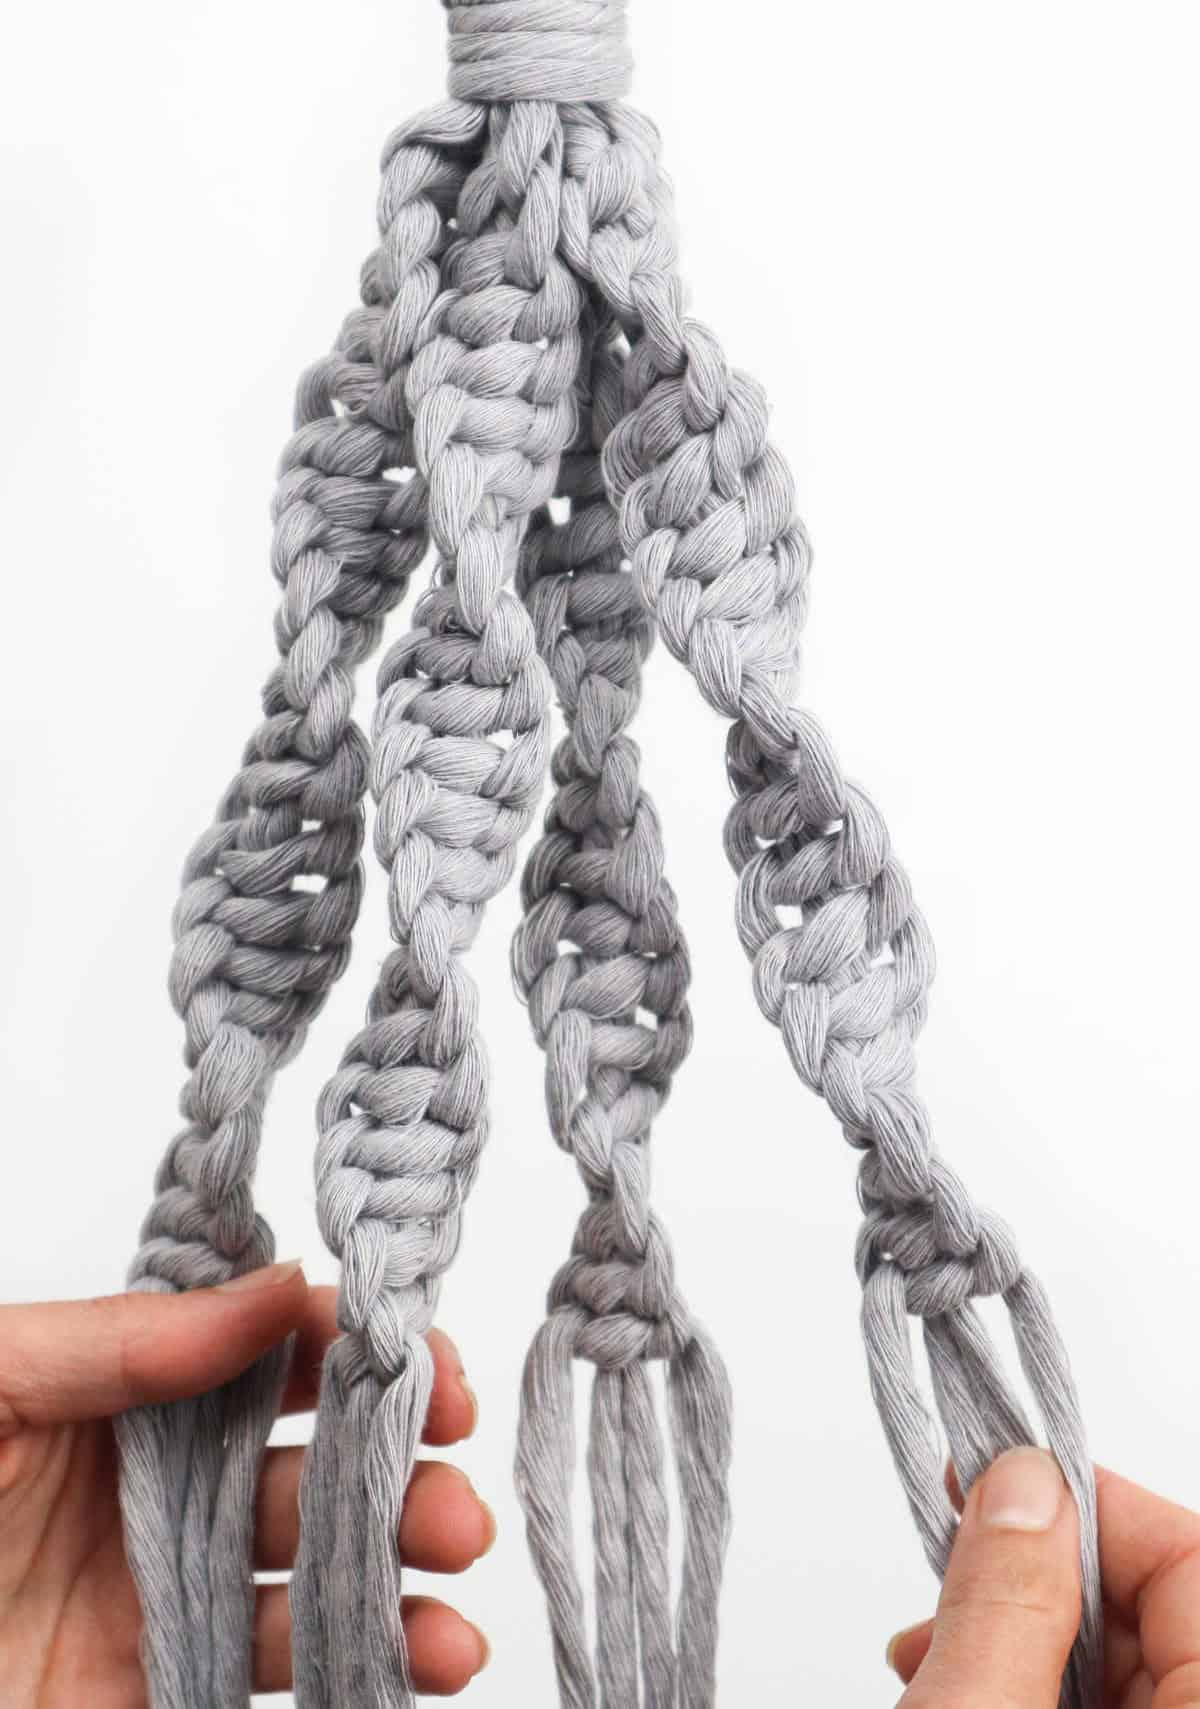
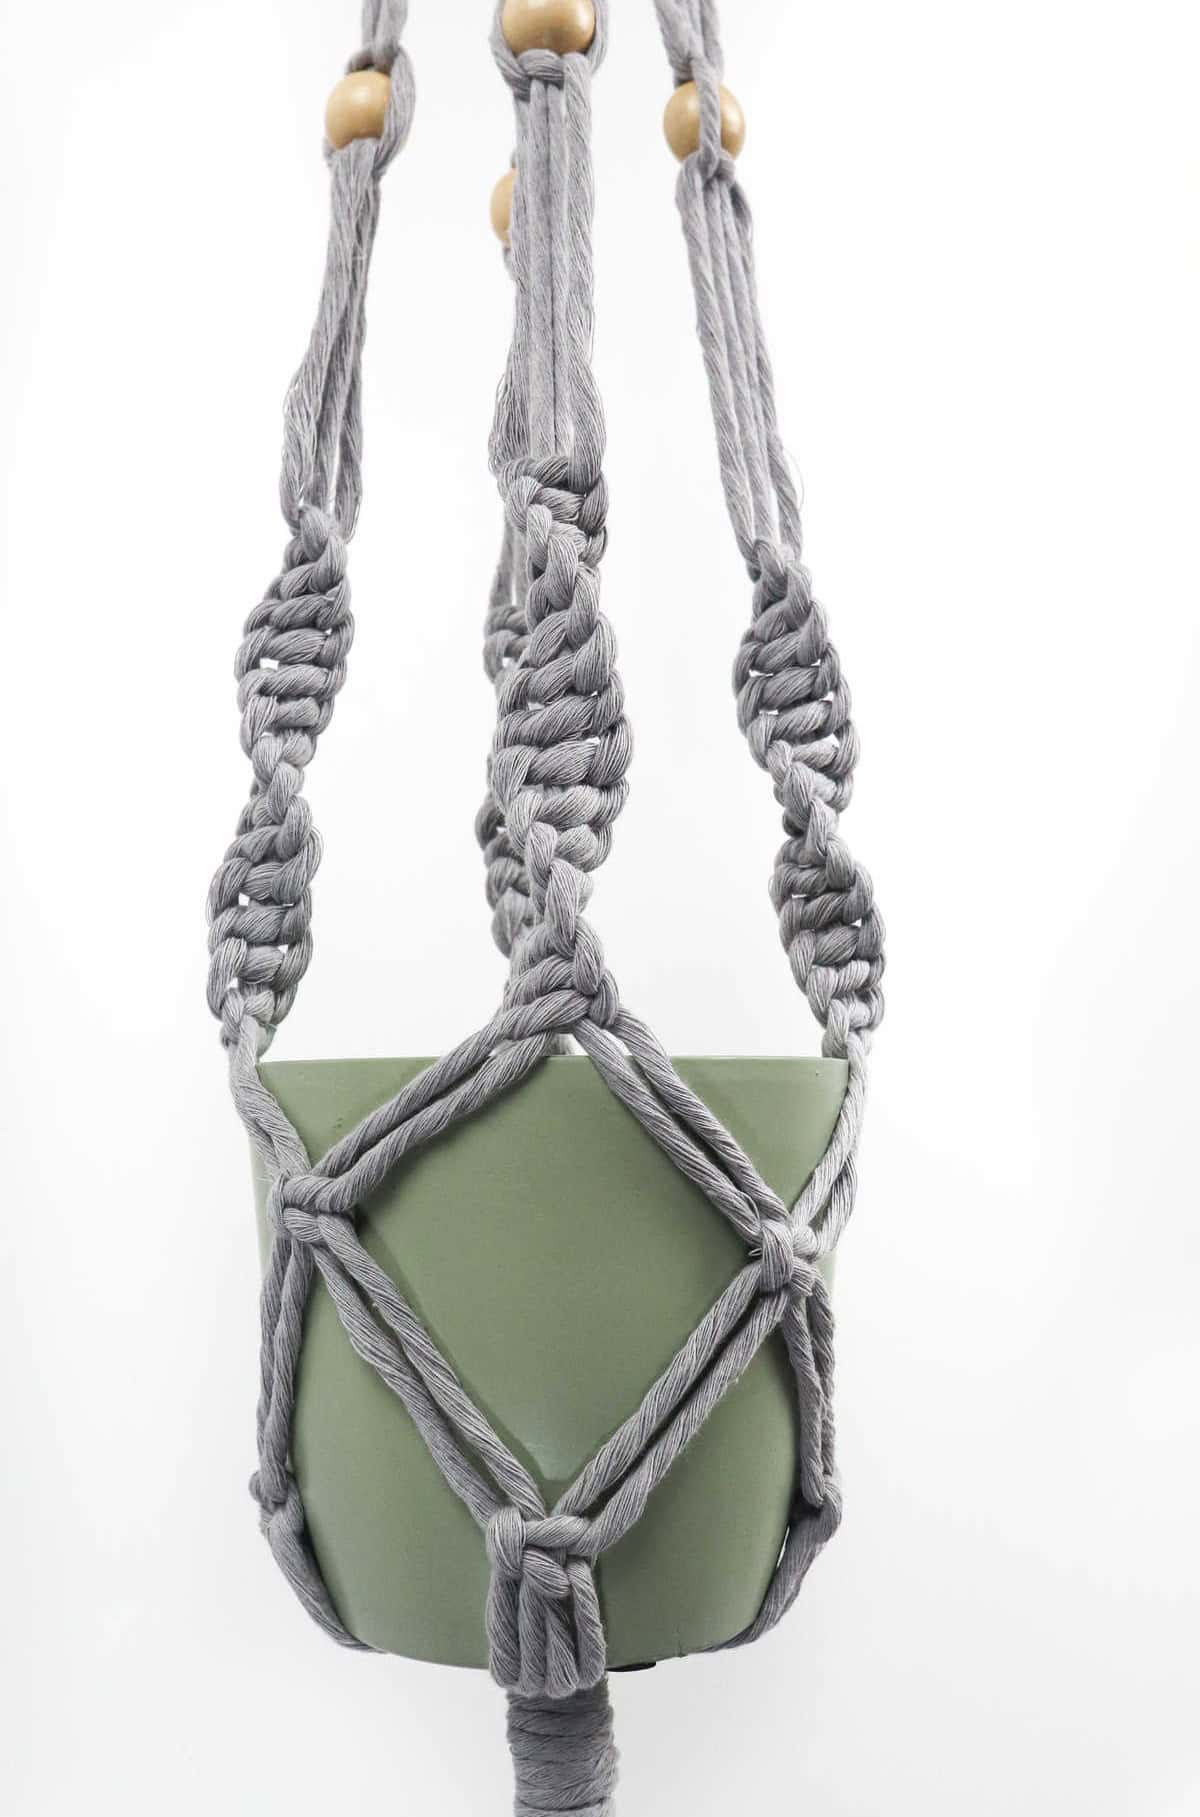
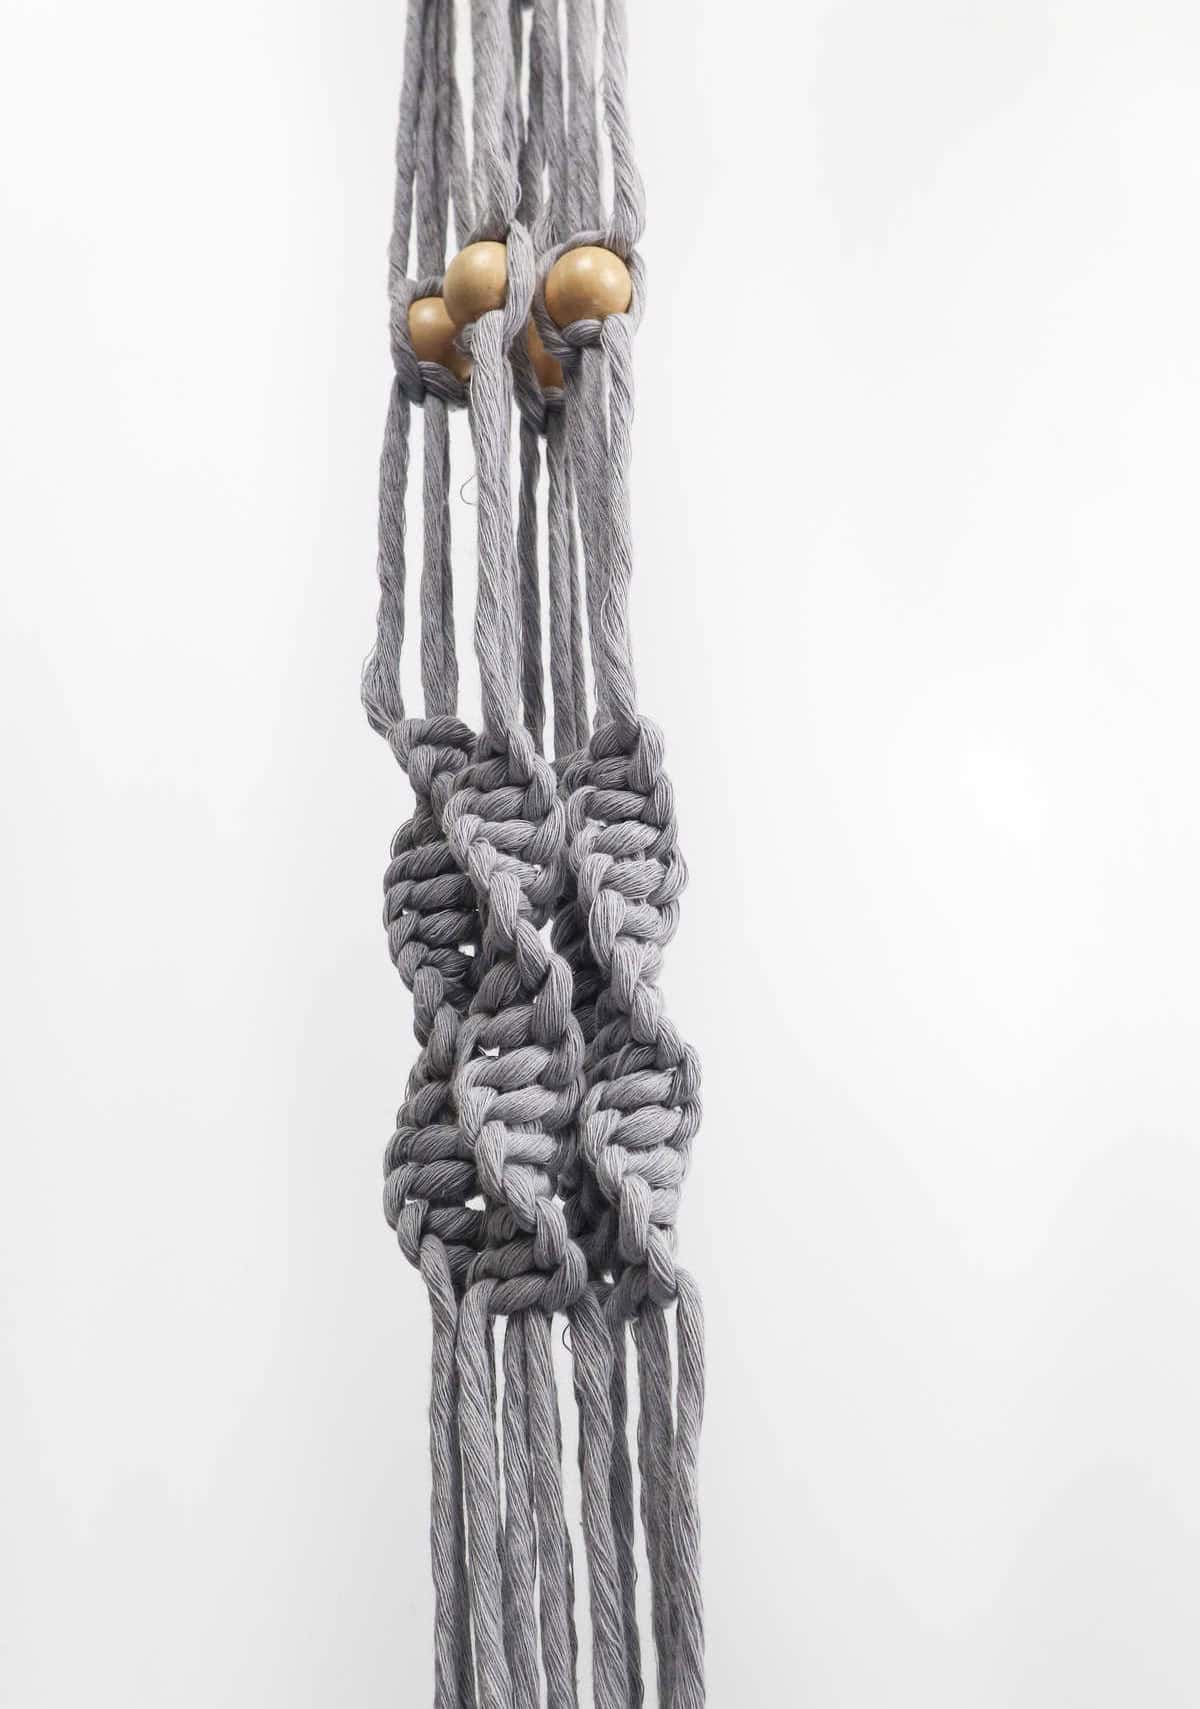
As you near the completion of your macrame hanger, take a step back and appreciate the fruits of your labor. The finished product should resemble a beautiful, intricate piece with a harmonious balance of spiraling knots throughout its four sections. To achieve this symmetrical look, ensure that each section features an identical number of knots, as any discrepancies can result in an unbalanced or even ‘askew’ appearance.
Step 9
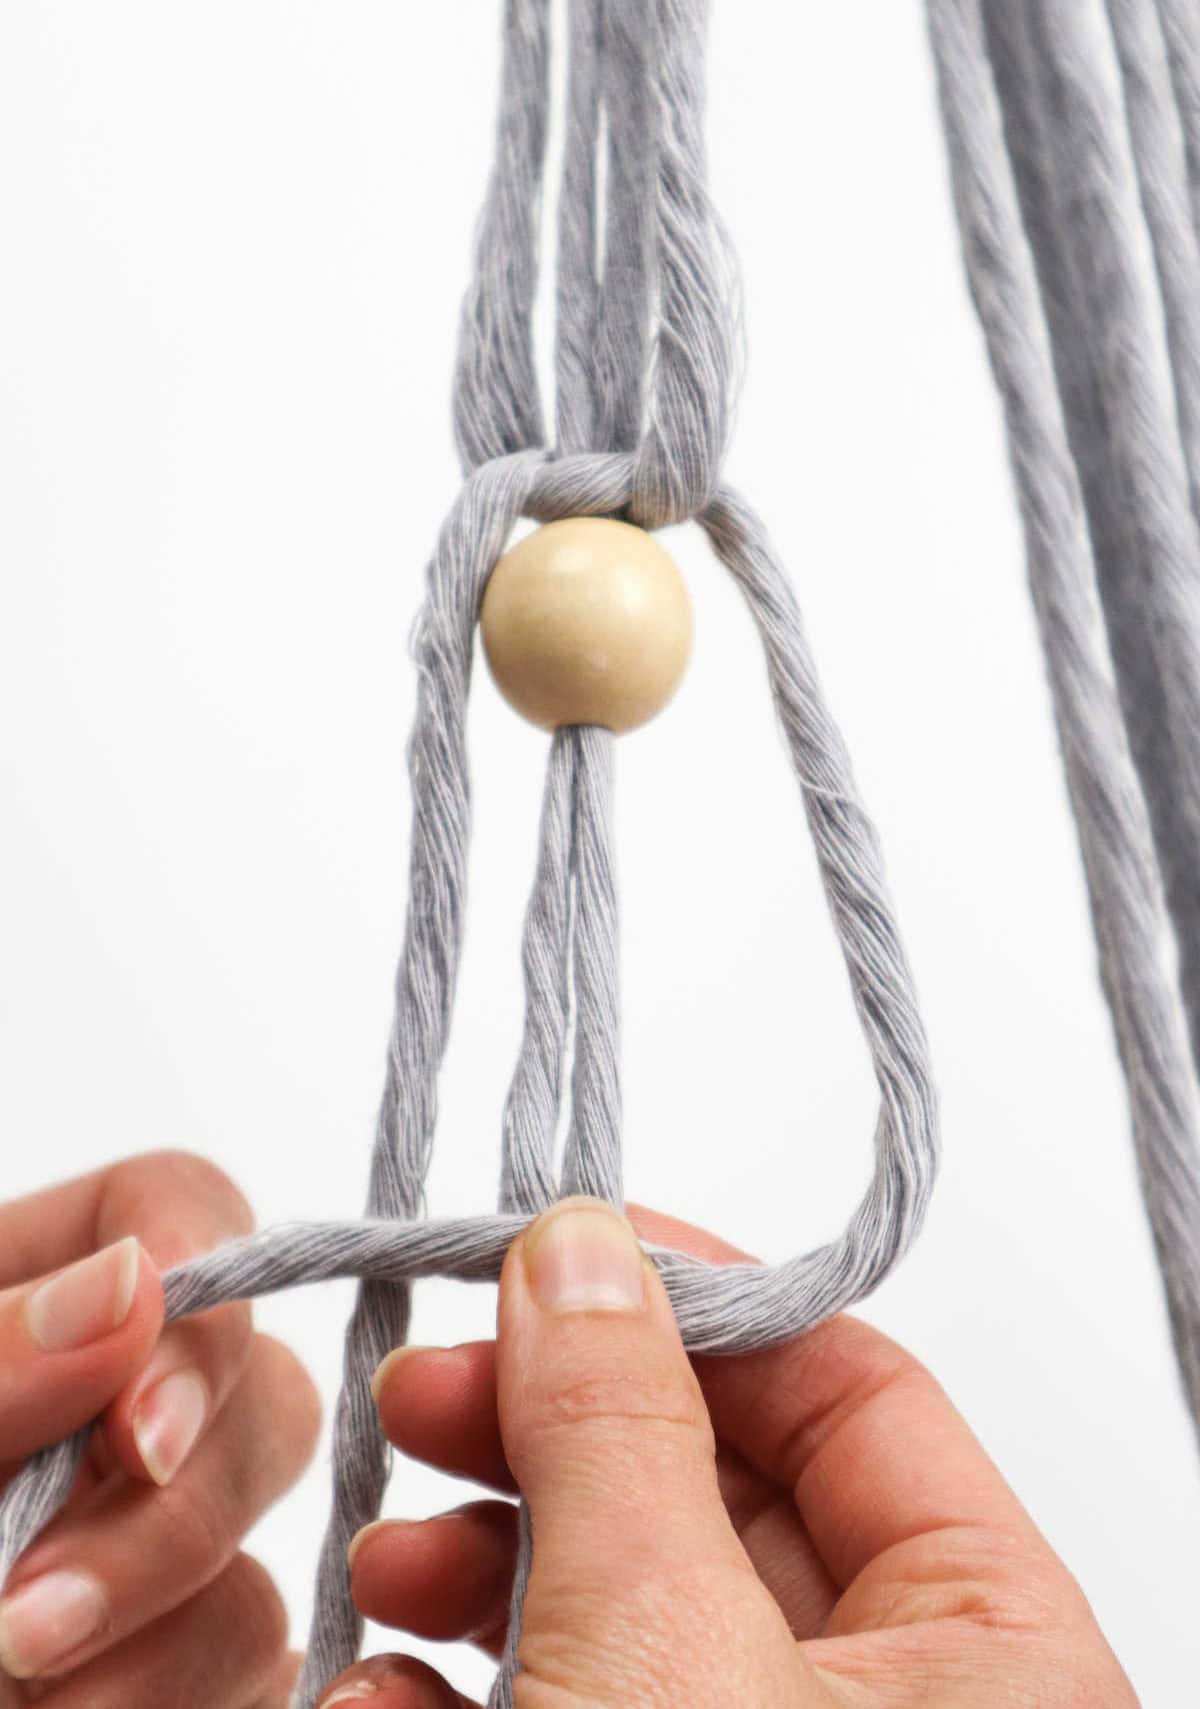
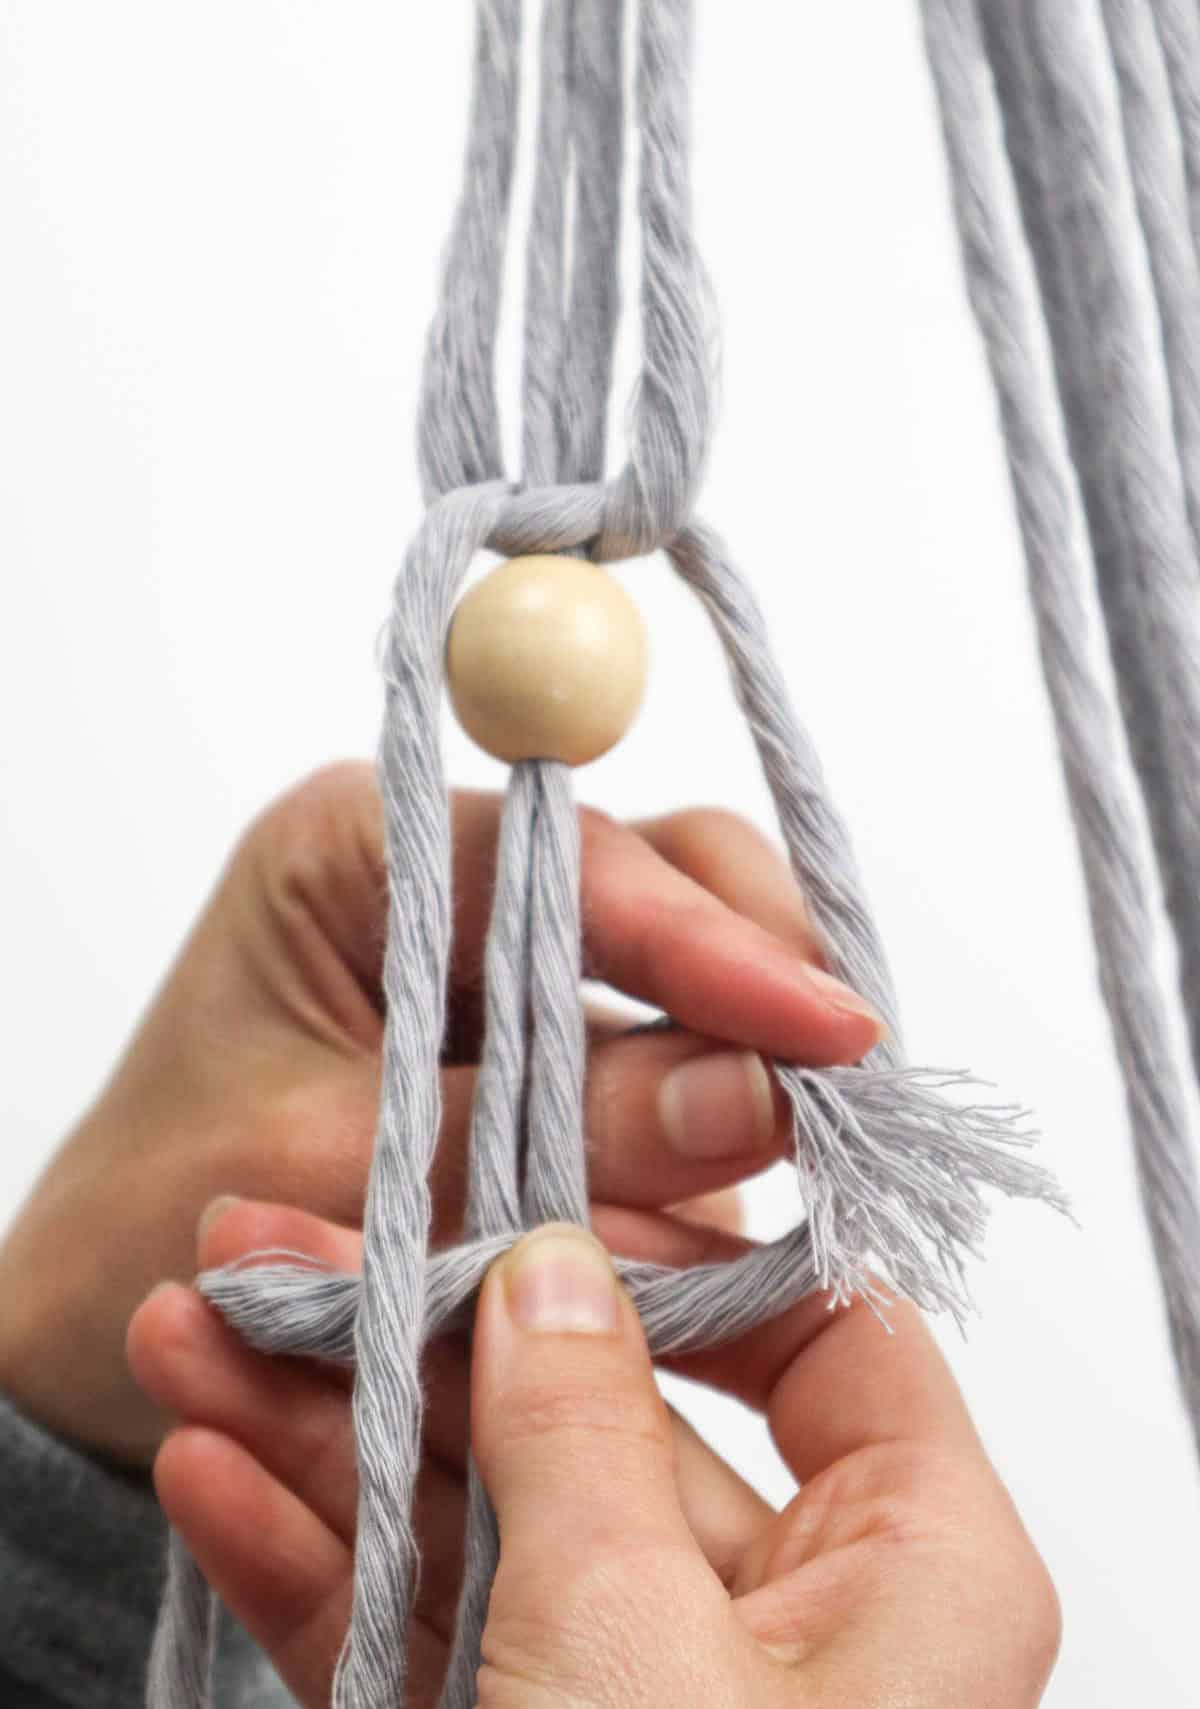


To take your cord creation to the next level, consider adding a bead – it’s an optional but engaging touch. To incorporate the bead, start by creating one half of a square knot with the left side of the cord, leaving around 2-3 inches of gap after your last spiral knot.
Next, grab a bead and thread the two middle strands through its hole. Pull the bead up so it sits just below that half-square knot. Then, take the right strand and complete the second half of the square knot.
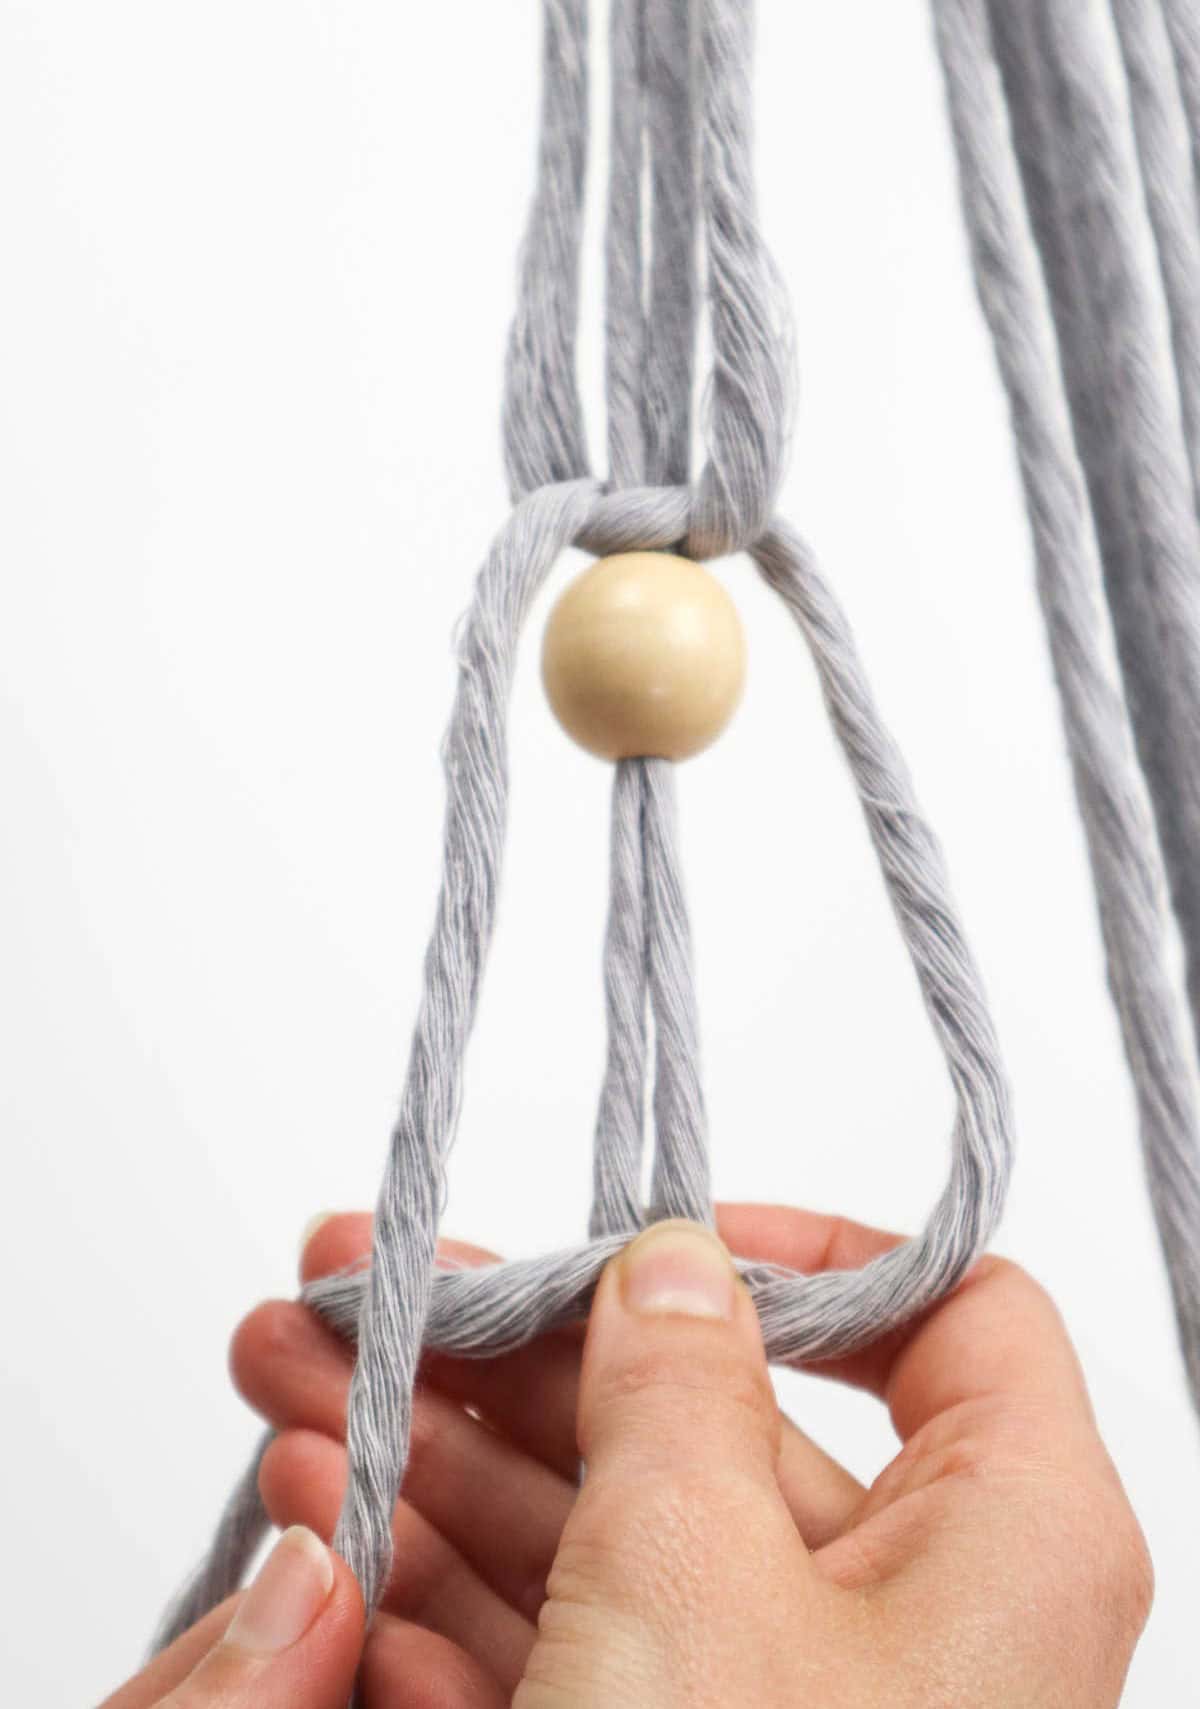
As you pull the right strand over the middle strands to form the loop, bring the left one over the right, under the middle strands, and then through the loop. Finally, tug both ends to secure the bead in place.
Repeat this process for all four sections, resulting in a total of four beads, as illustrated below. Ensure they are properly aligned.
Step 10
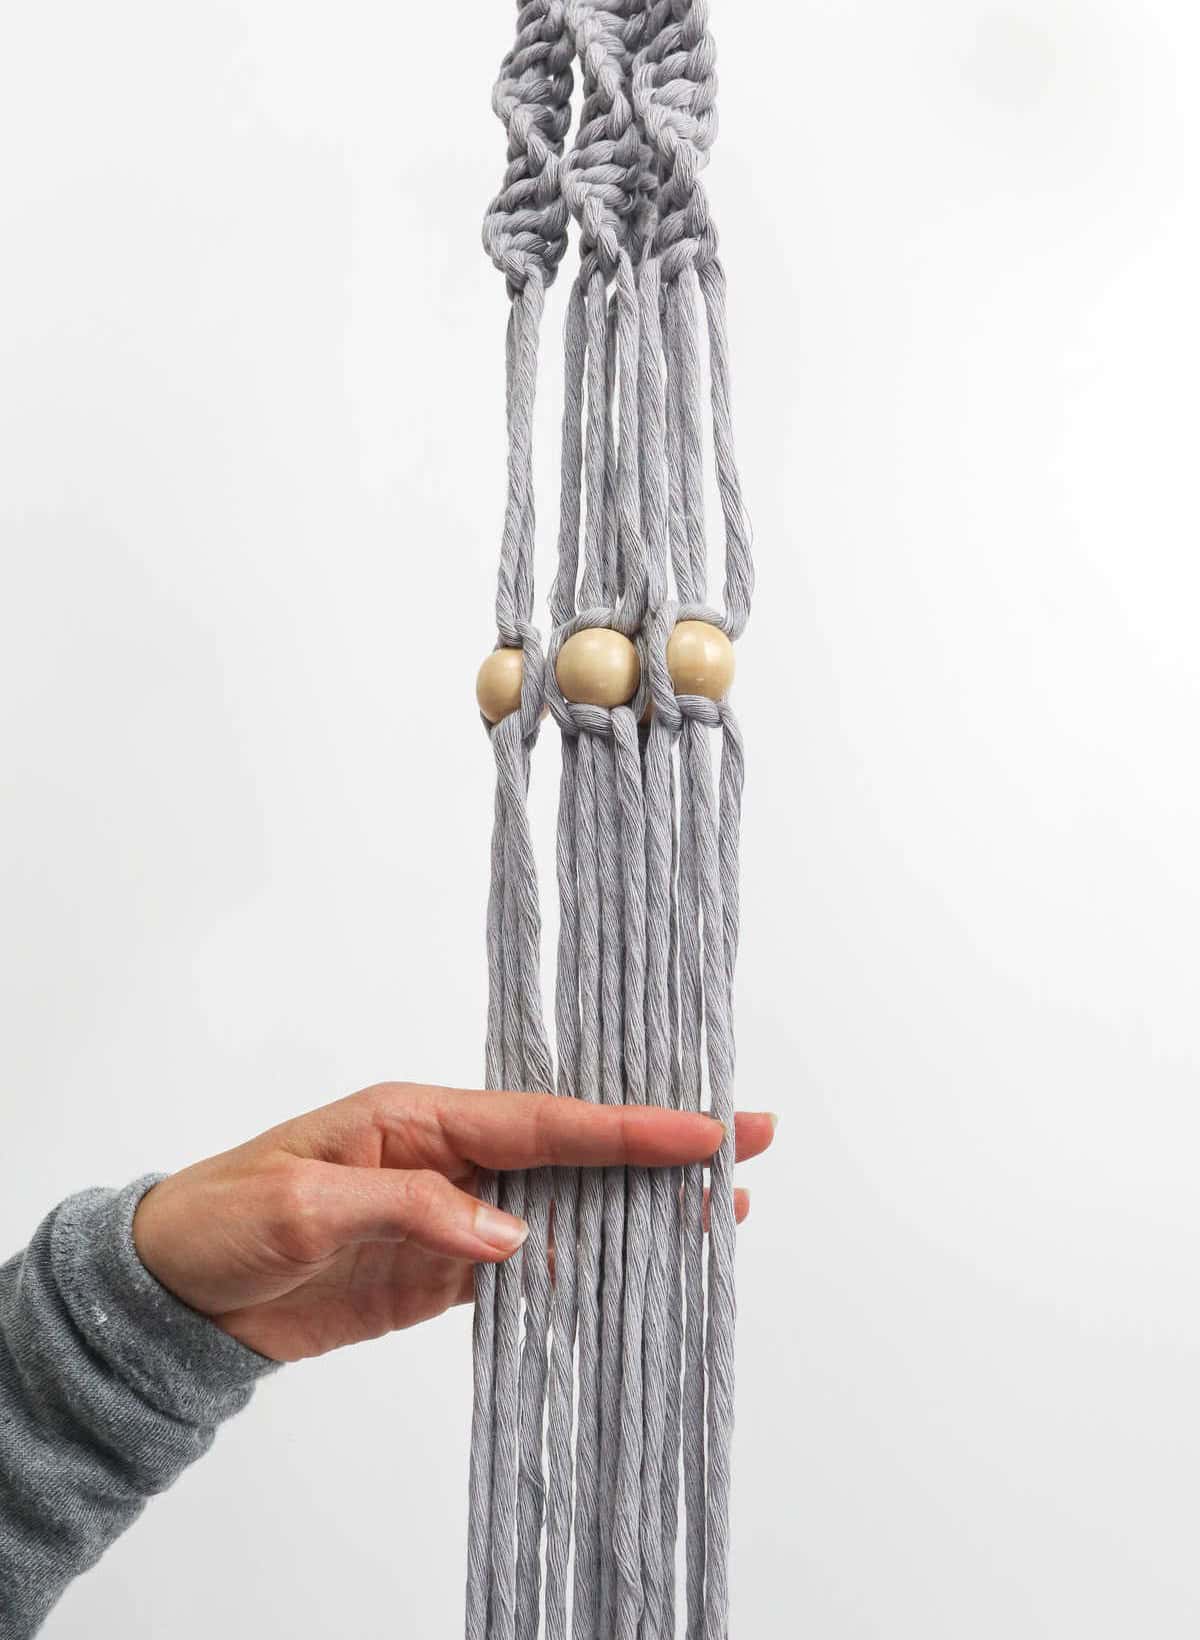
To further embellish each of the four sections, we’ll create another set of spiraling knots on the lower half. Before proceeding, leave a small gap of approximately 2 to 3 inches between the previous knotting and gather one section comprising four strands. Then, carefully weave the desired number of spiraling knots according to the provided instructions.
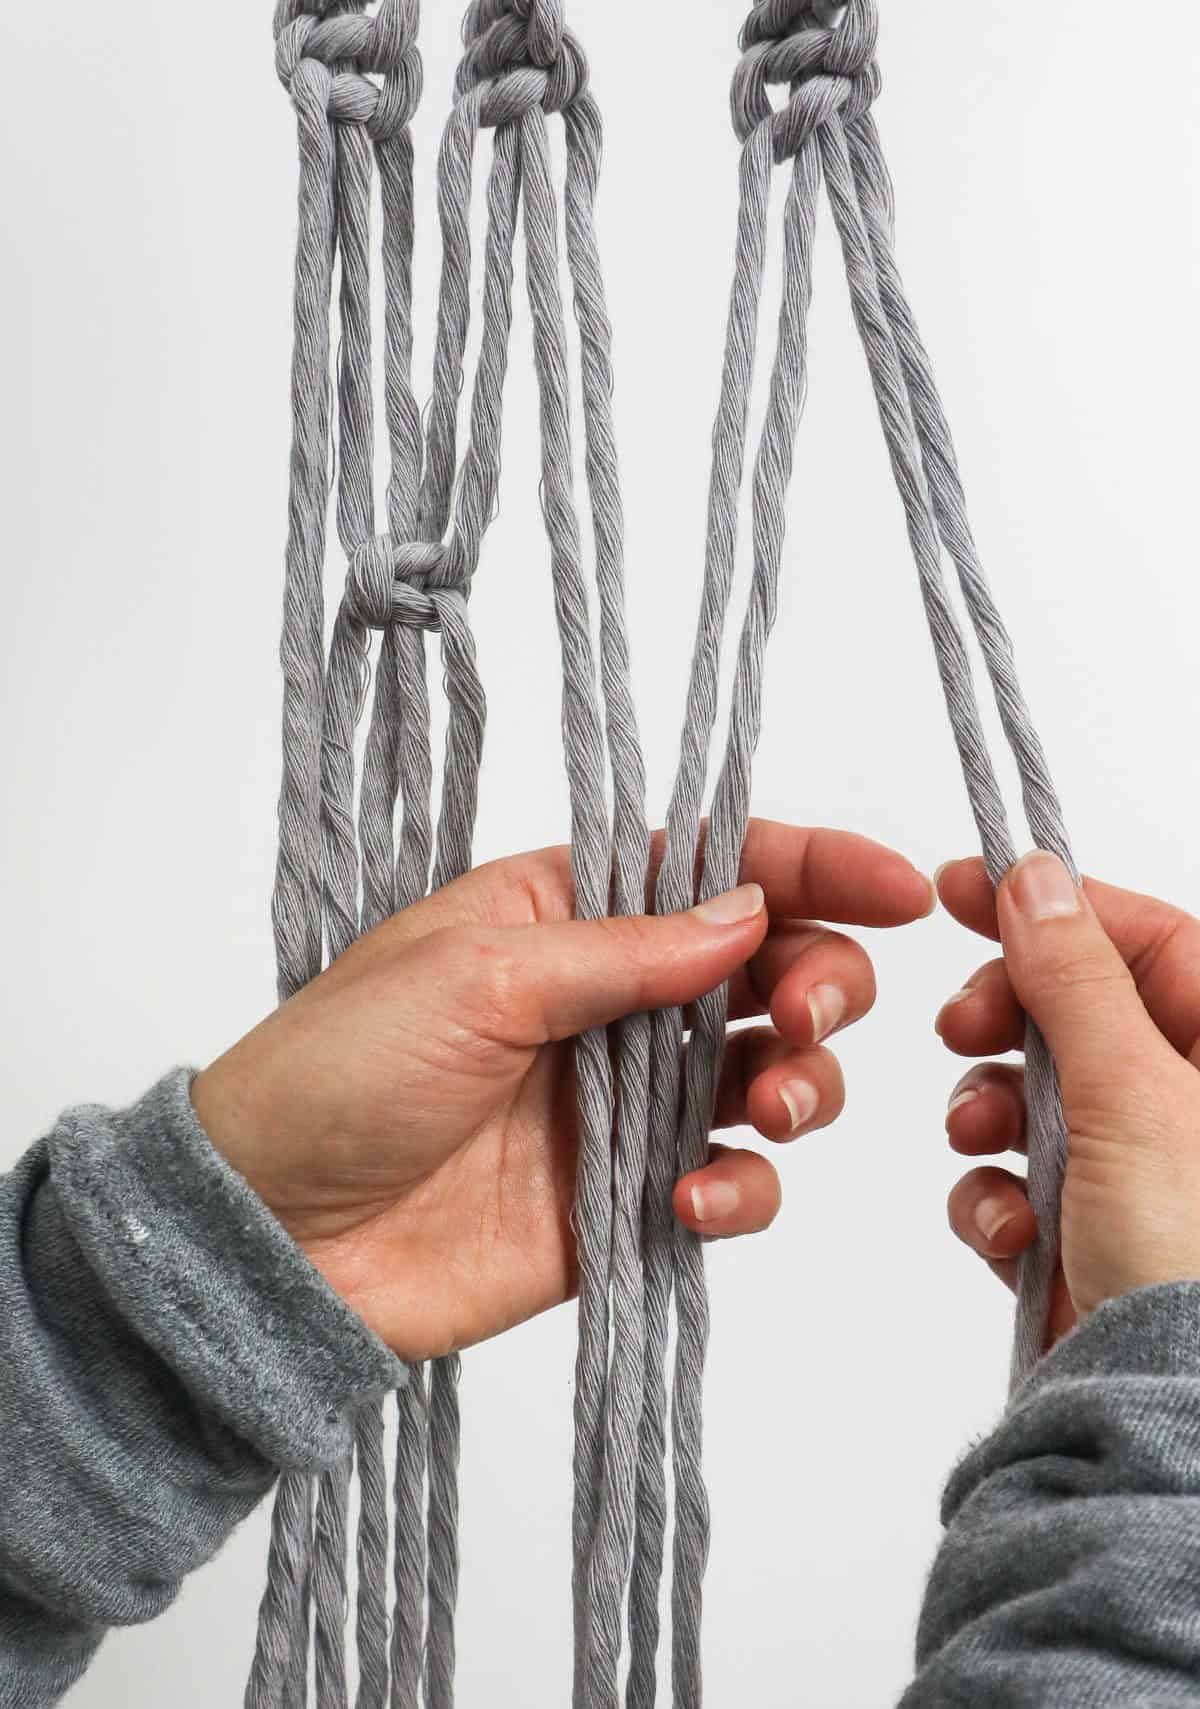
Step 11
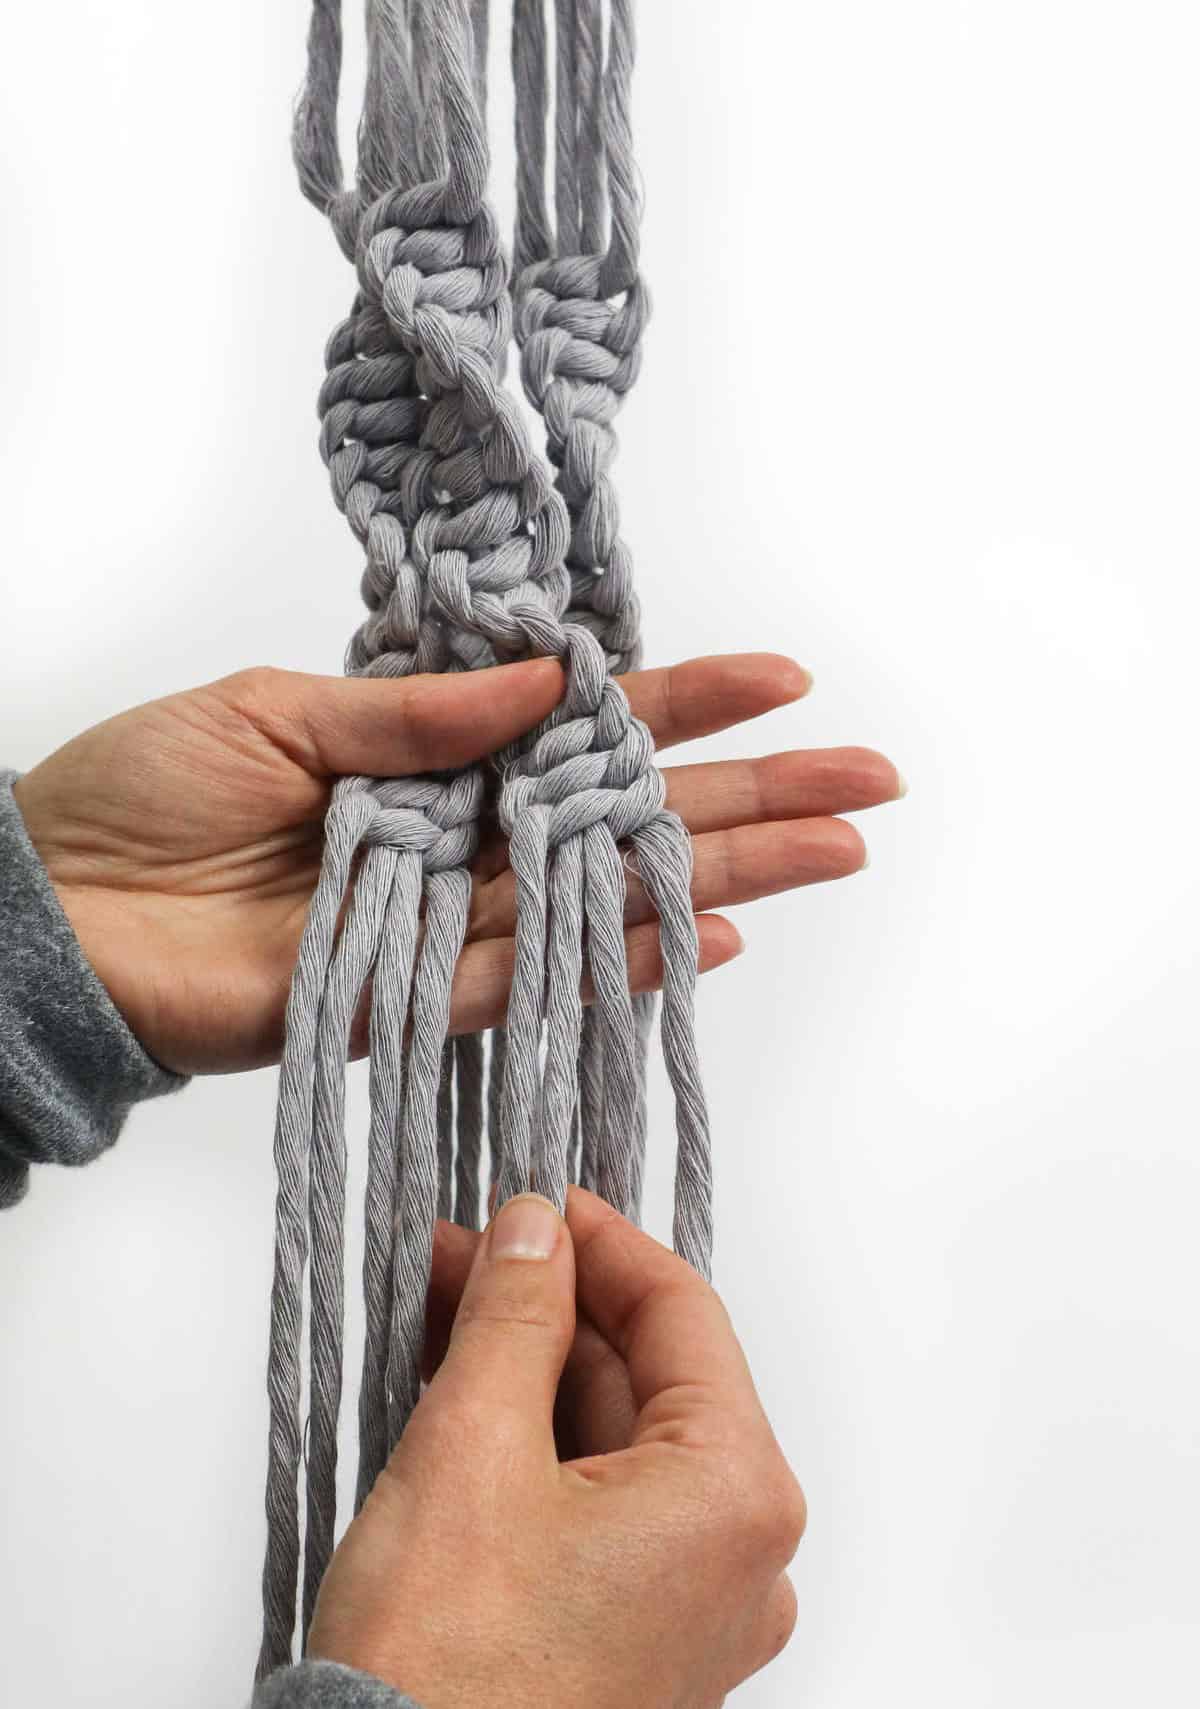
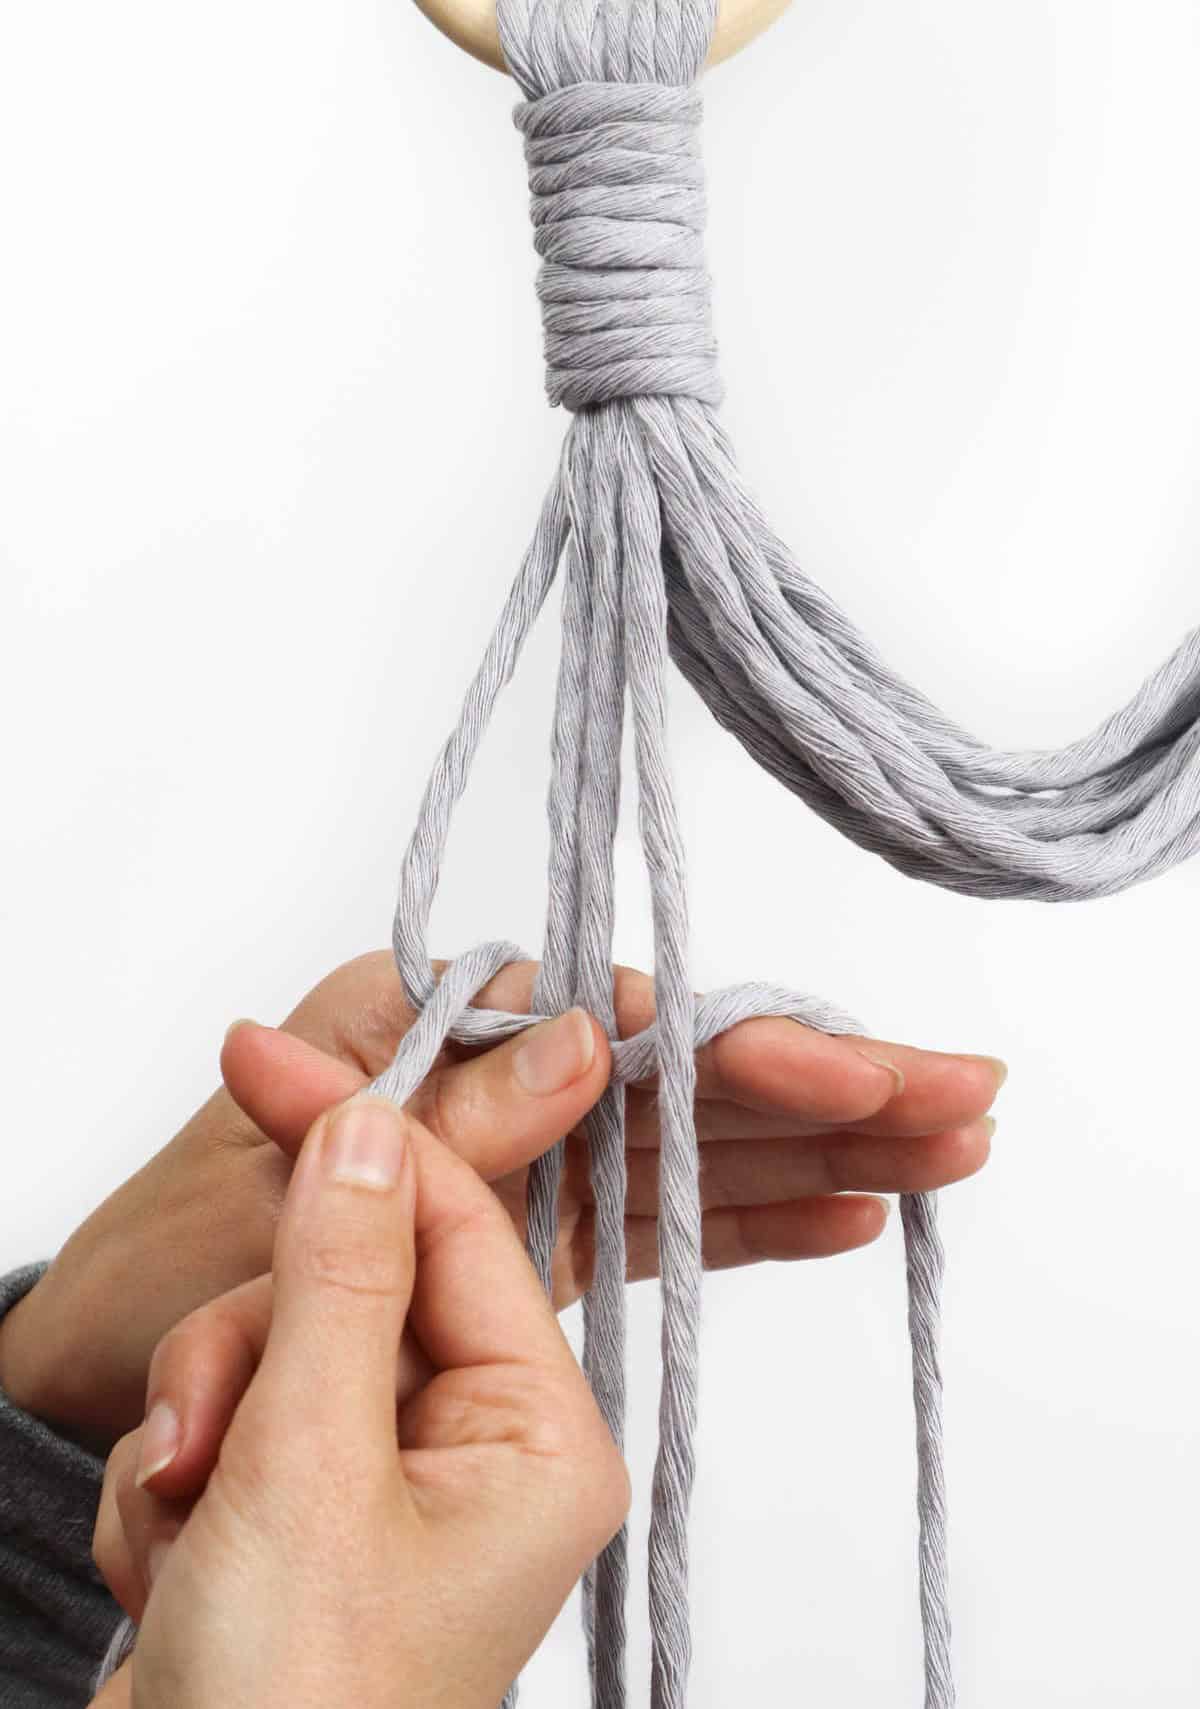
Divide the spiraling knots into four distinct sections by carefully separating the cords. You’ll be working with the central quartet of strands, which will require you to divide the cords so that each section has two strands on either side and one in the middle. Repeat this process for both sections A and B.
Step 12
To complete the first stage of the process, you’ll need to take the four central cords and tie them together using a square knot. This may require some practice to get the hang of it, but don’t worry if it takes a few attempts – with time, you’ll become more comfortable with this step.
Step 13

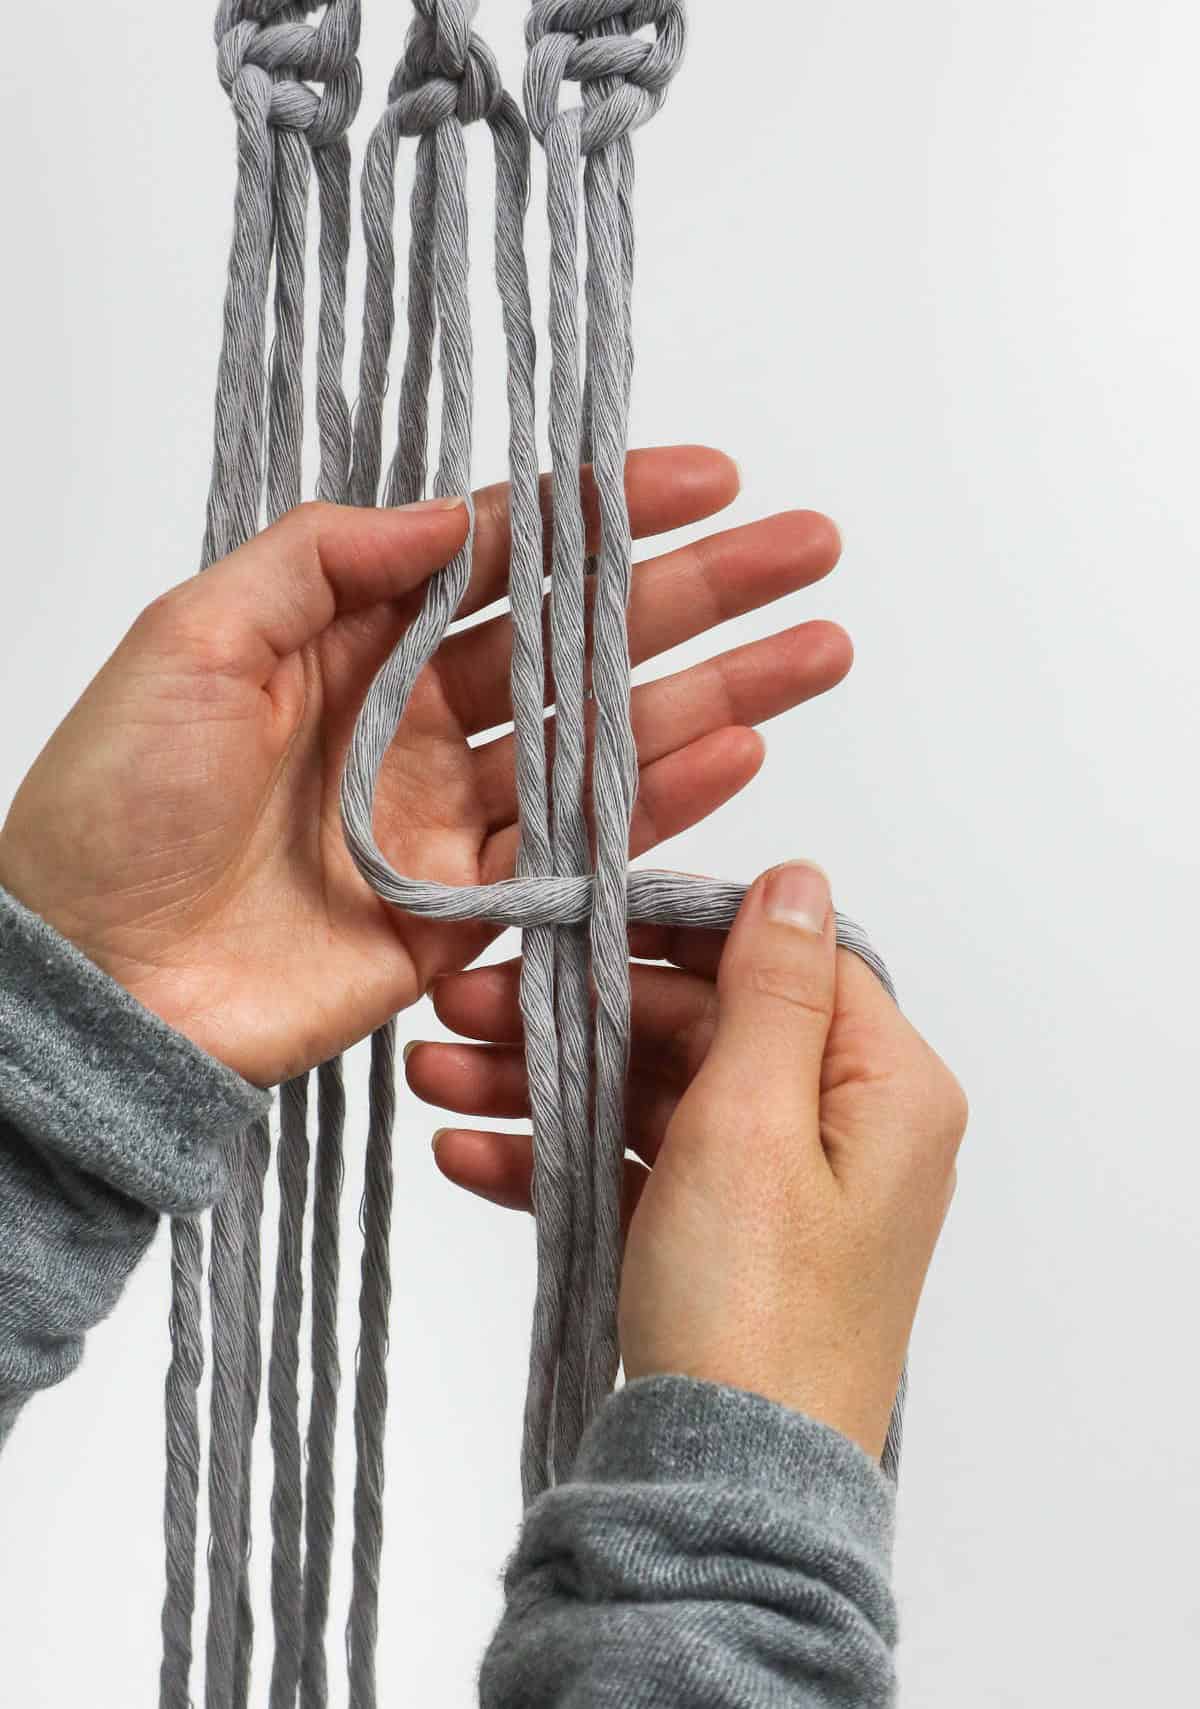
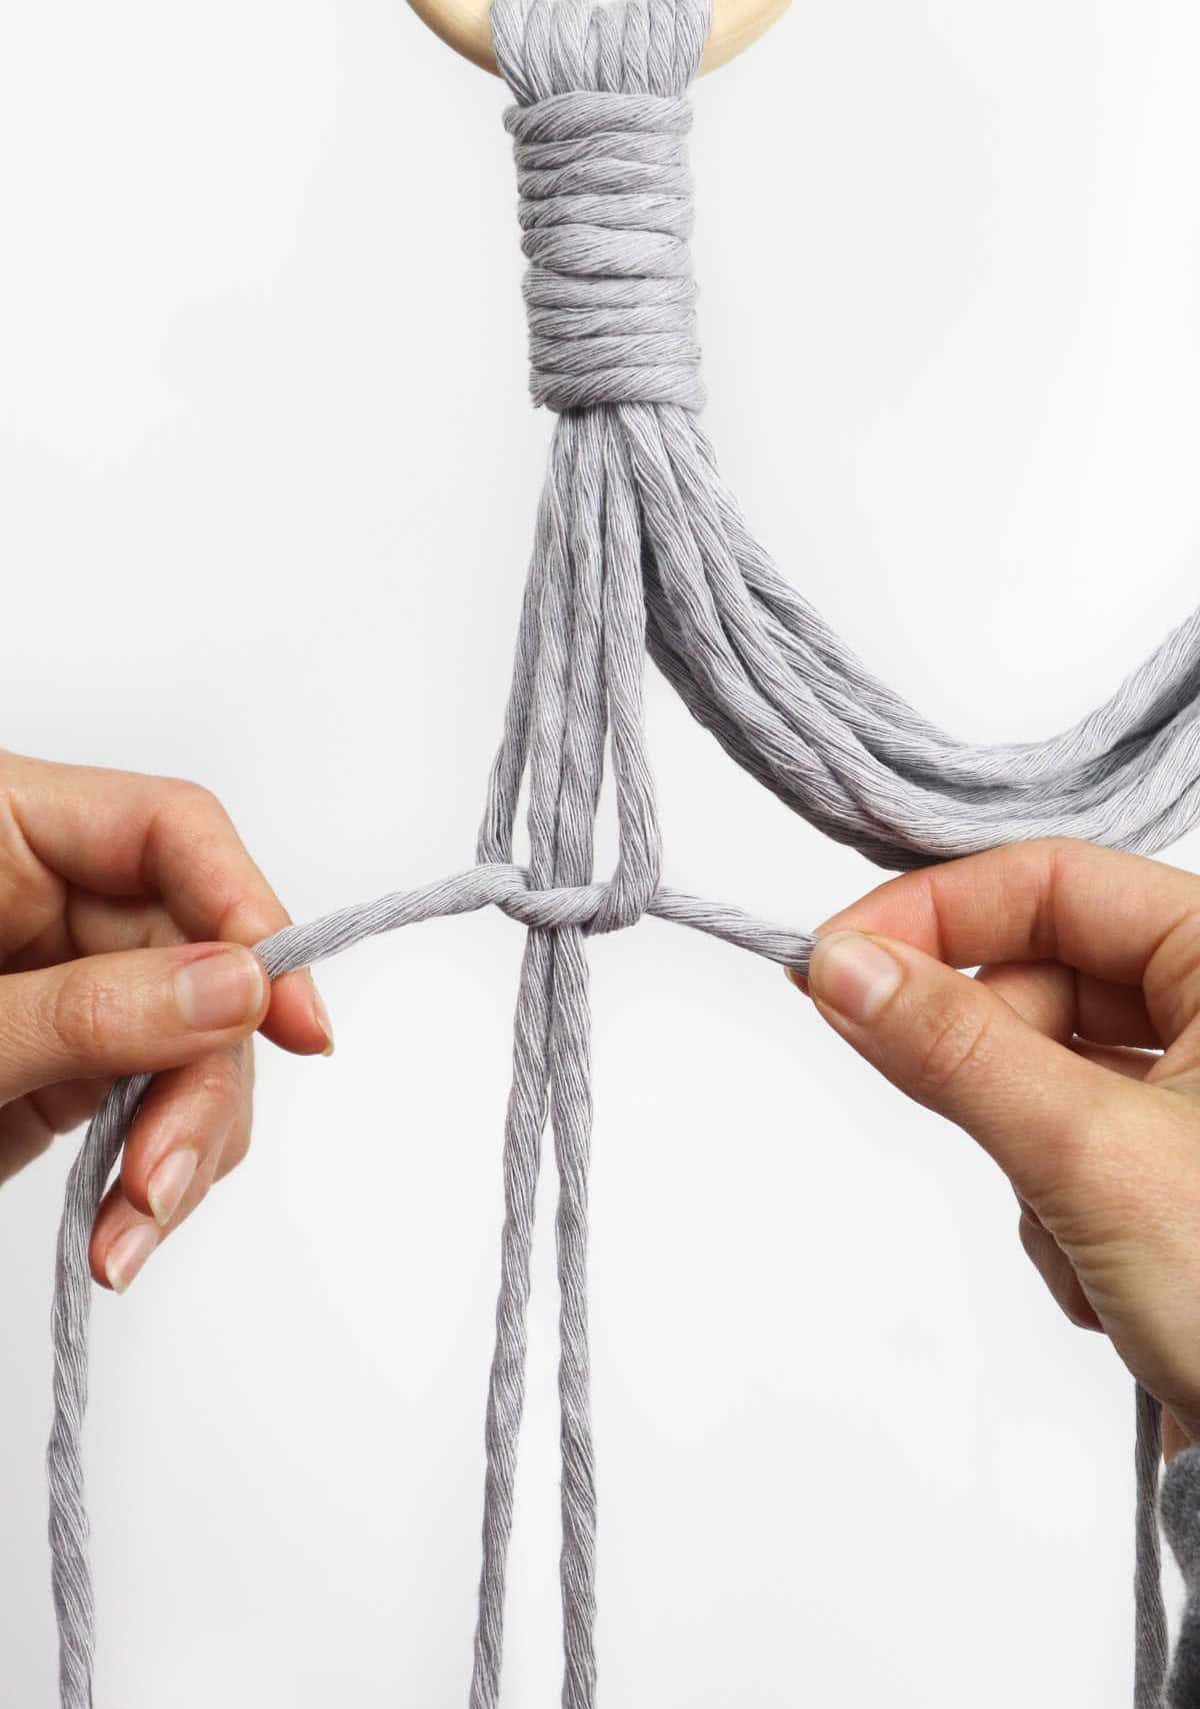
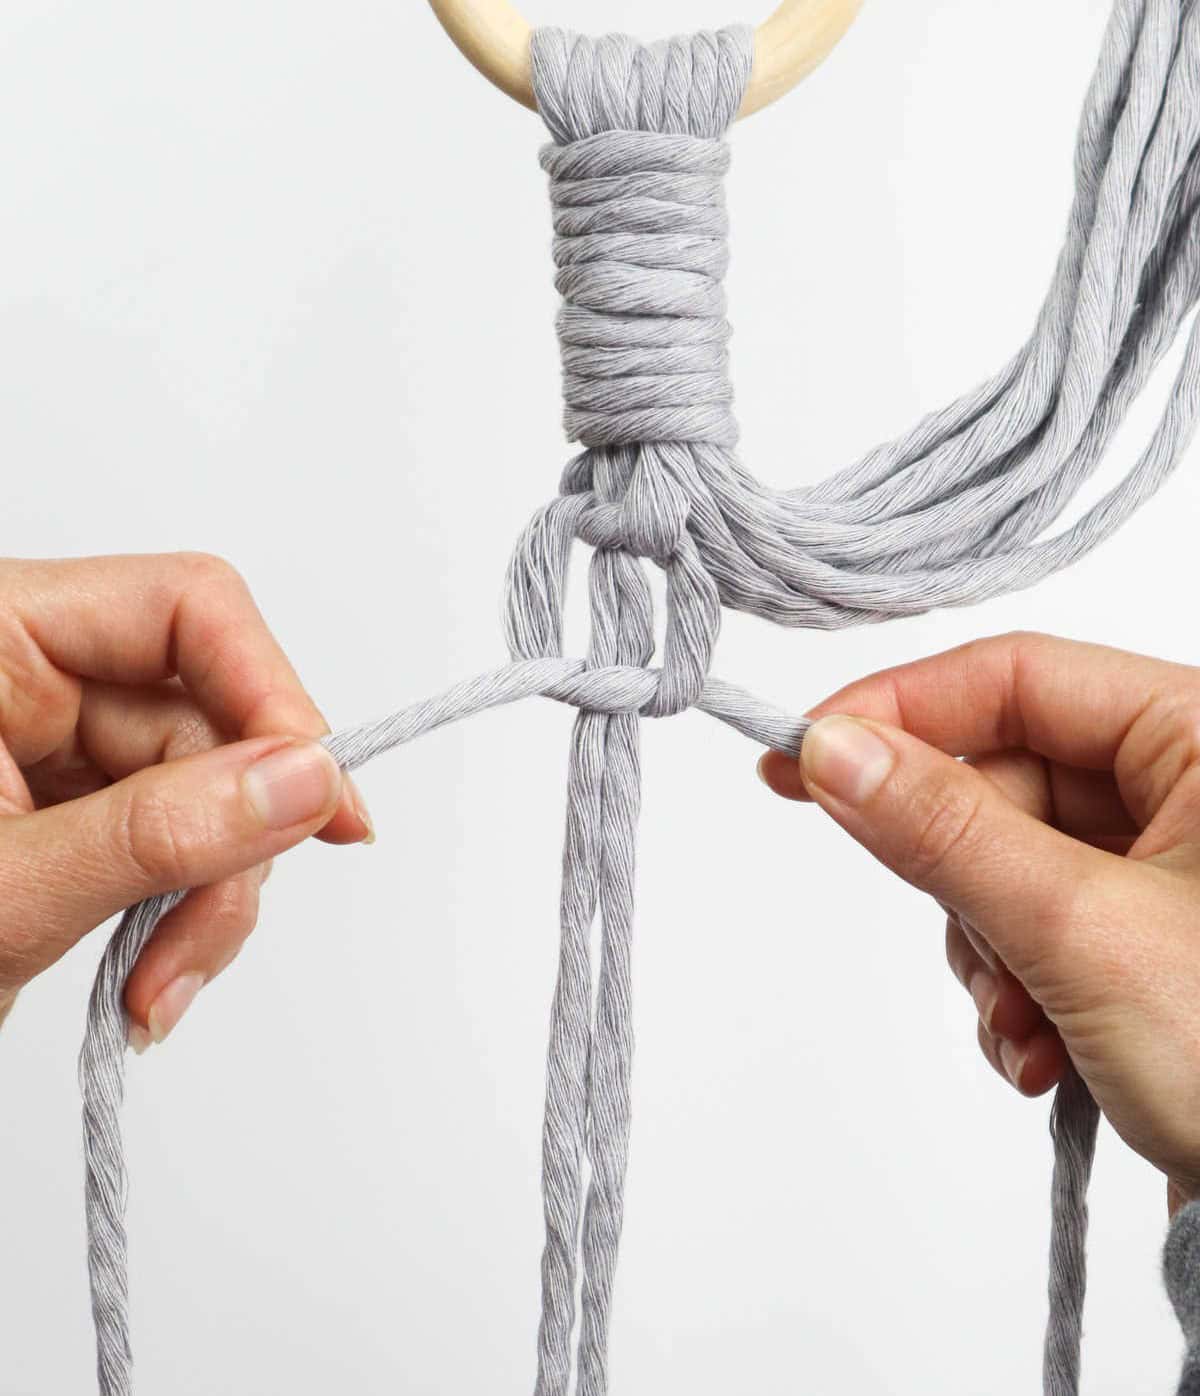
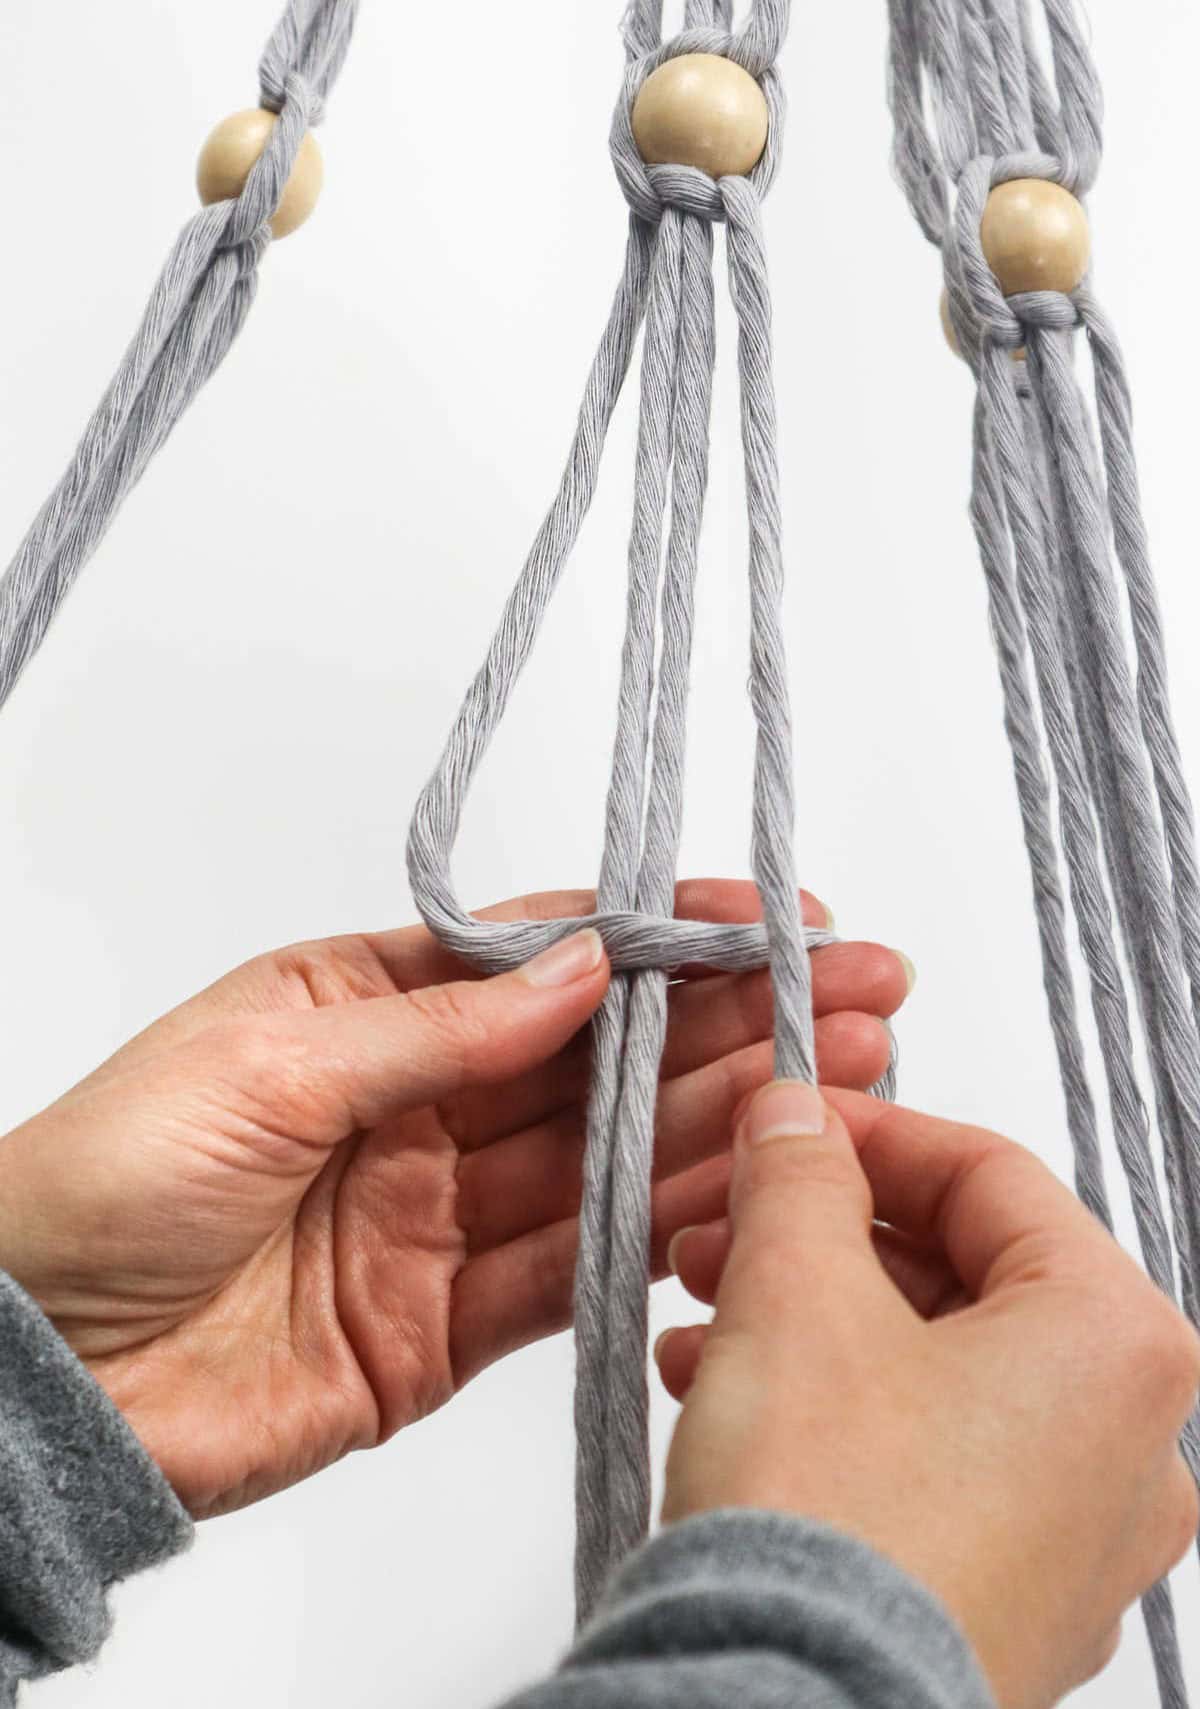
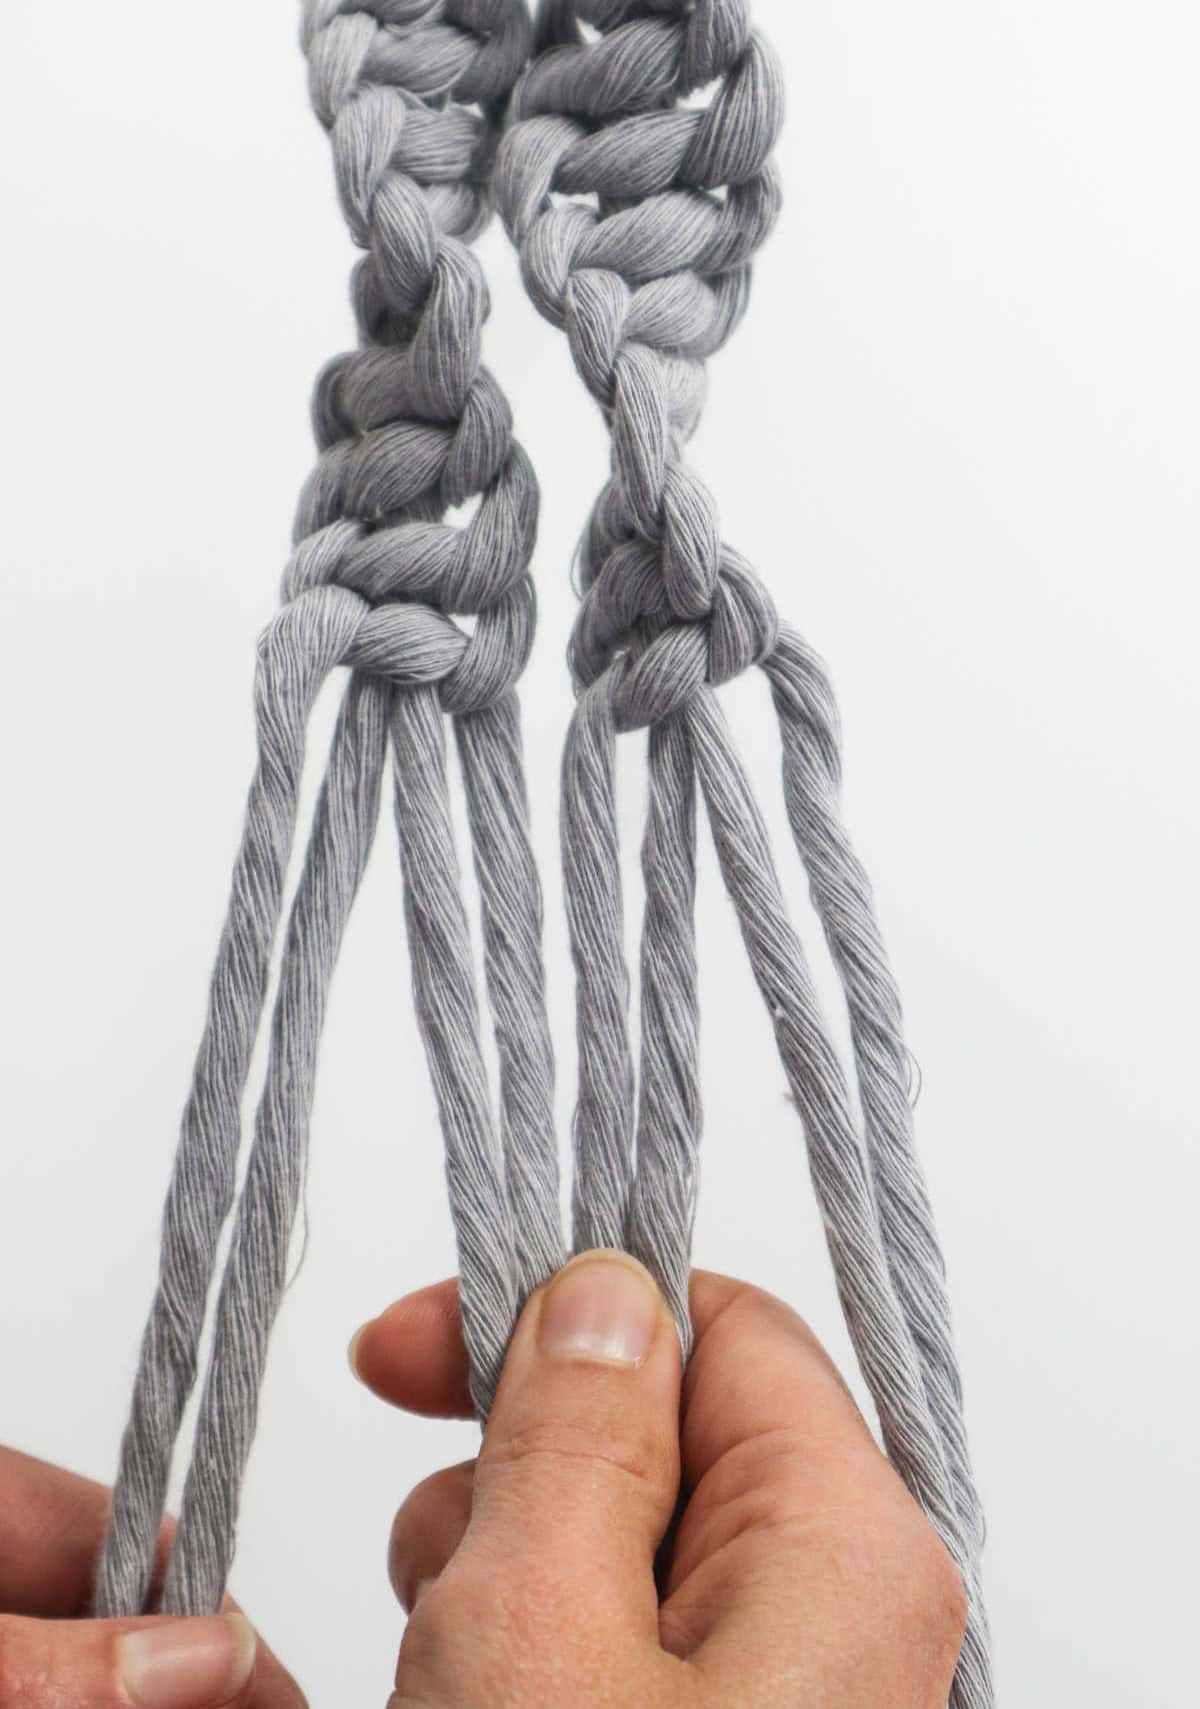
To proceed, you’ll need to bring together the two right-hand strands from the middle section. Next, retrieve the two left-hand strands that you set aside earlier from sections A and B. By combining these, you’ll end up with a total of four strands, which will form the foundation for your next square knot.
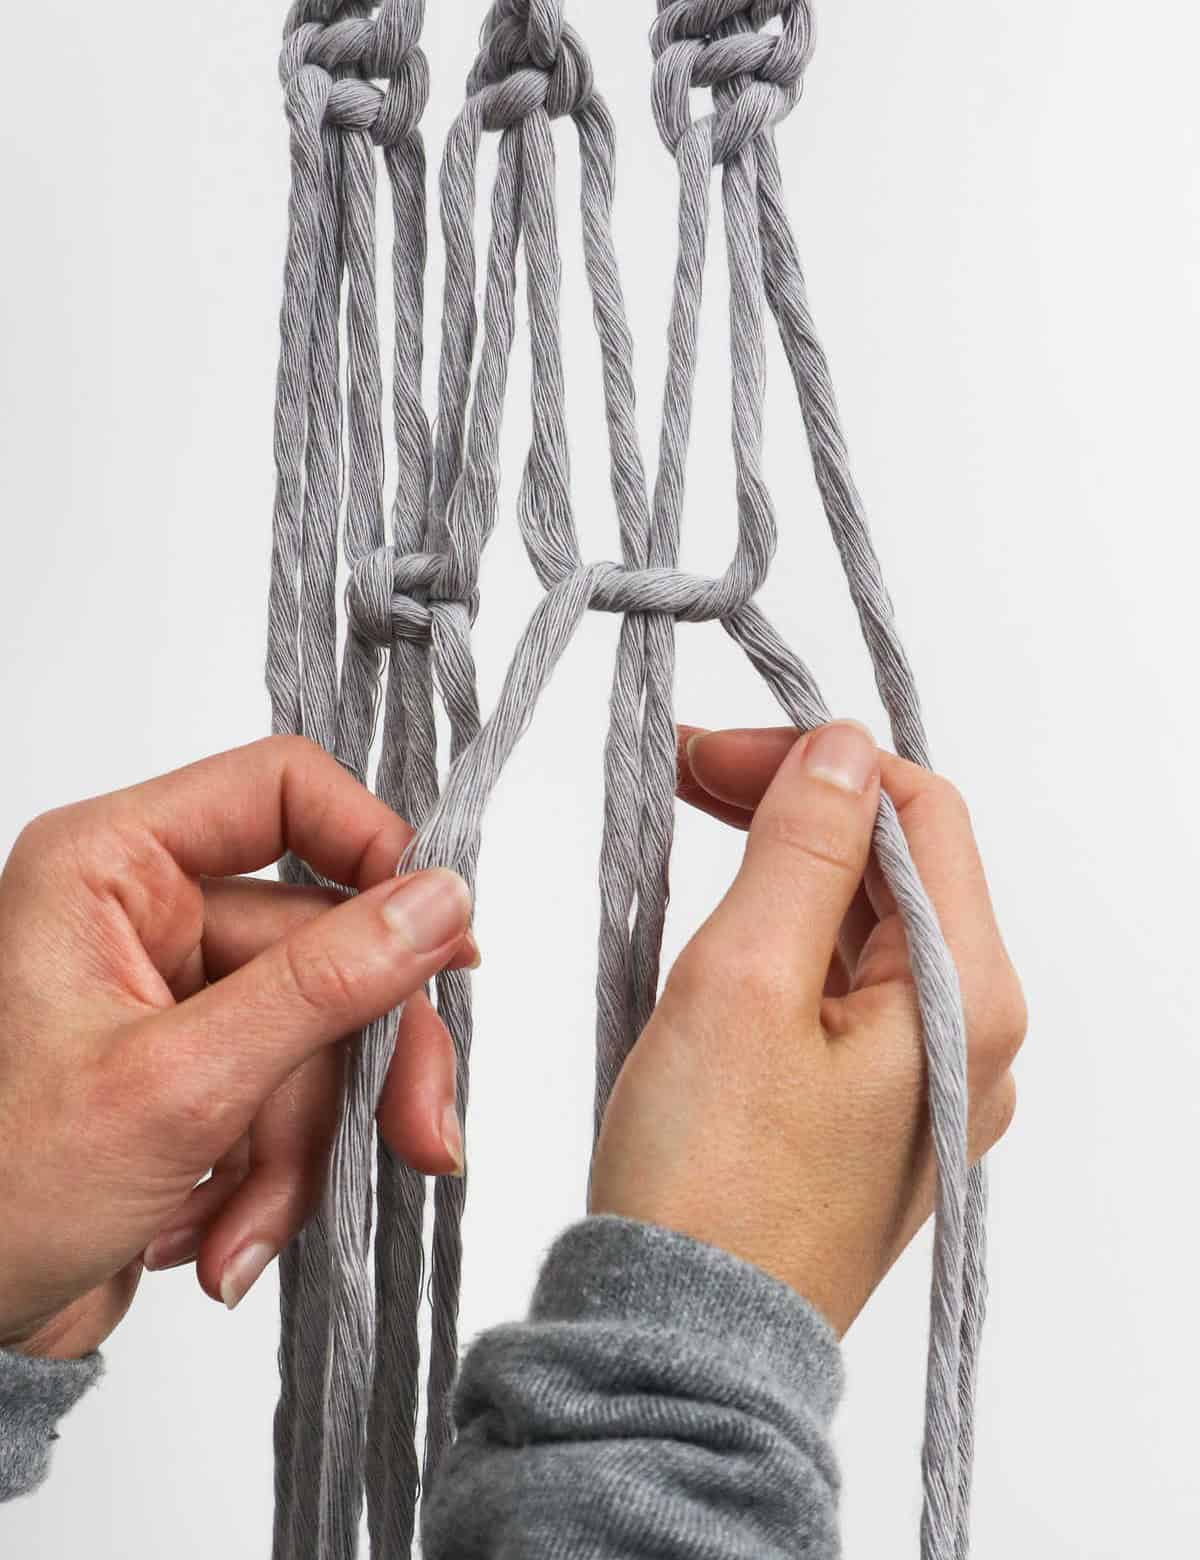
Step 14
To achieve the desired result, create a series of interconnected square knots by repeating the process four times, carefully ensuring each new knot is securely tied to its predecessor.
Step 15
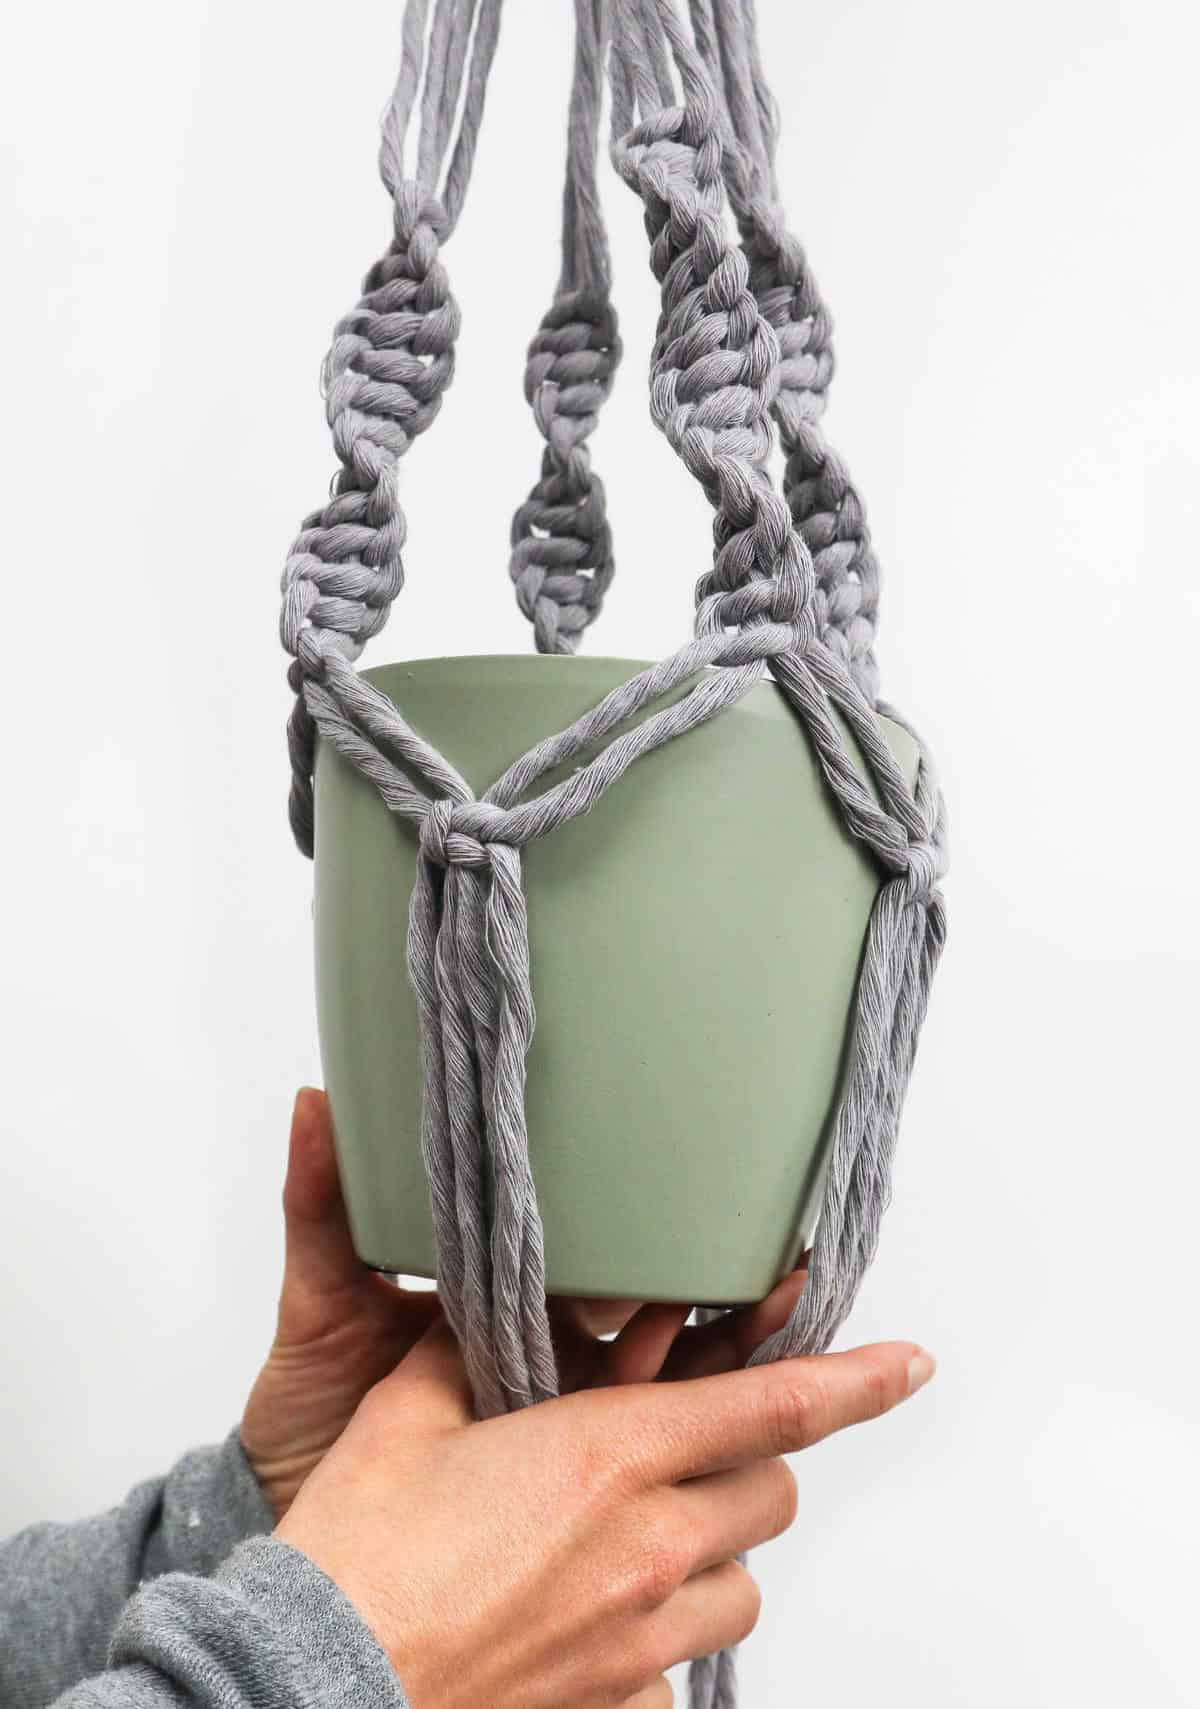
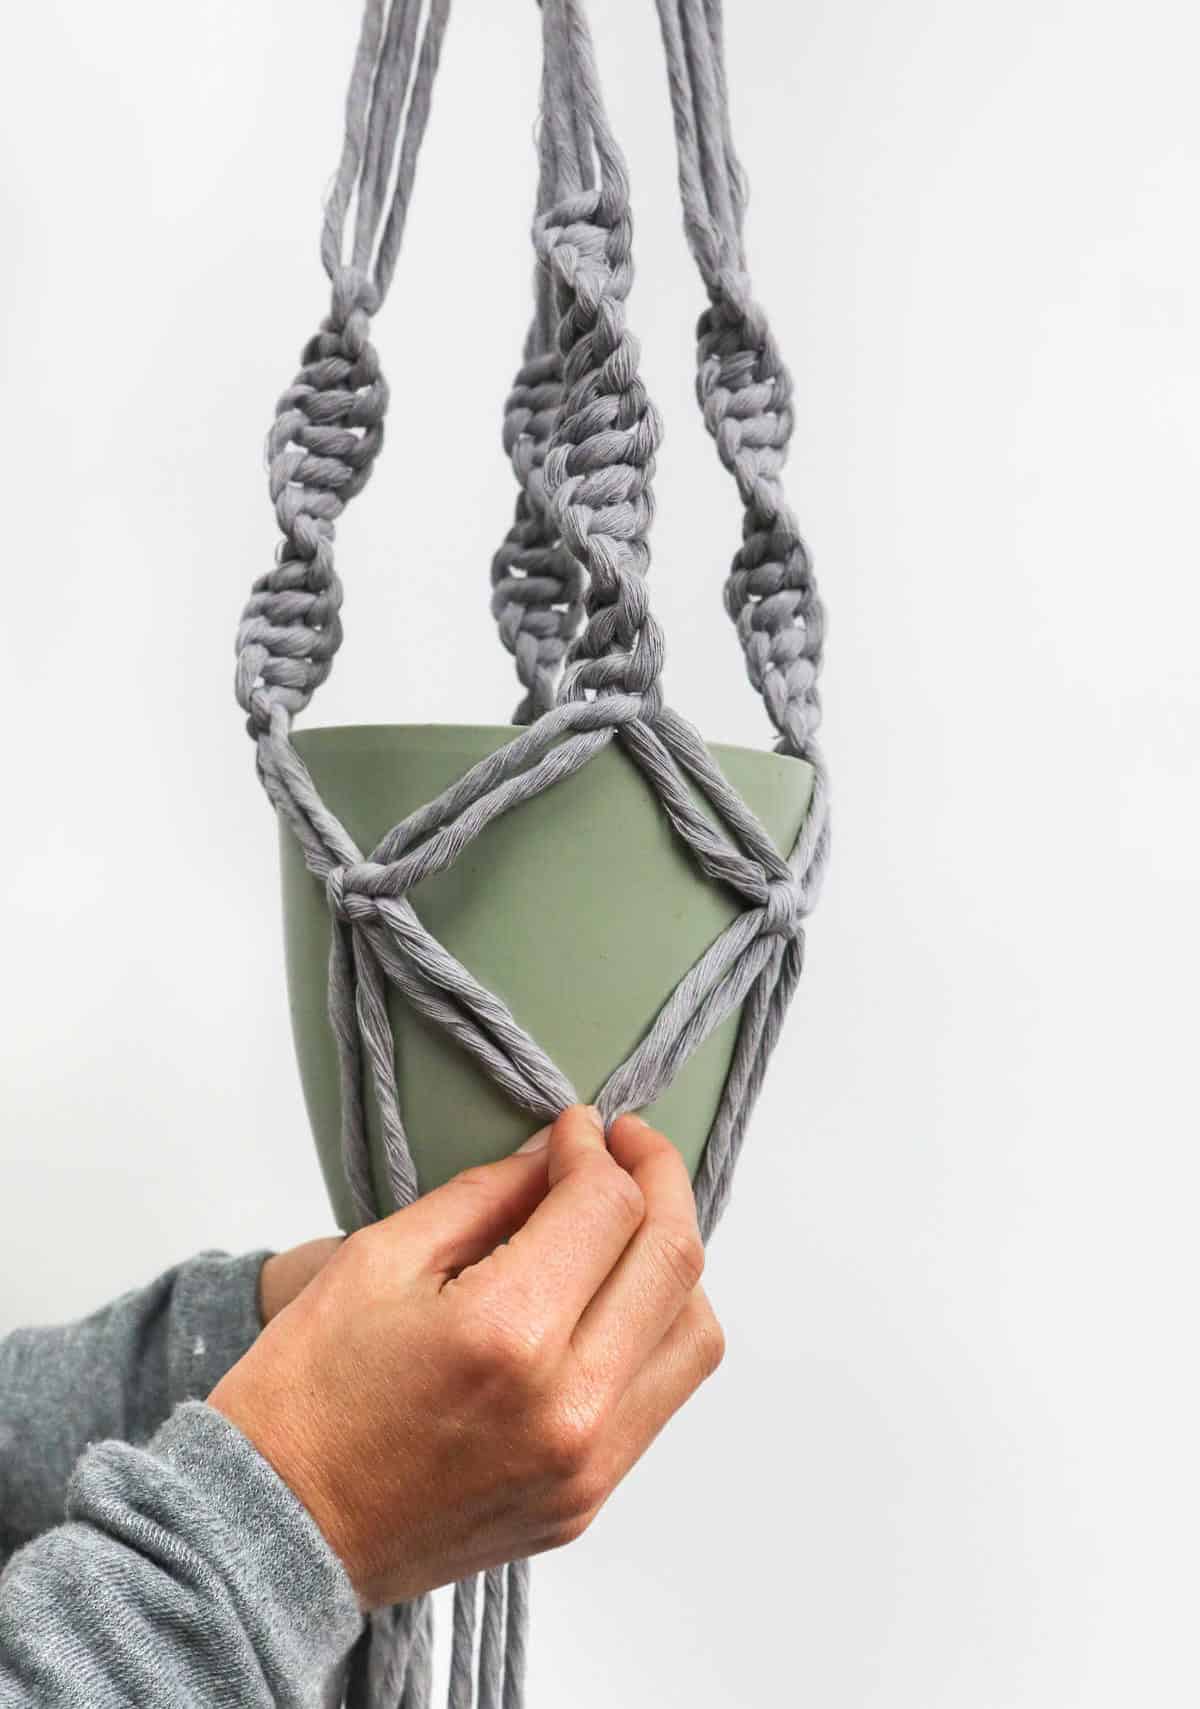
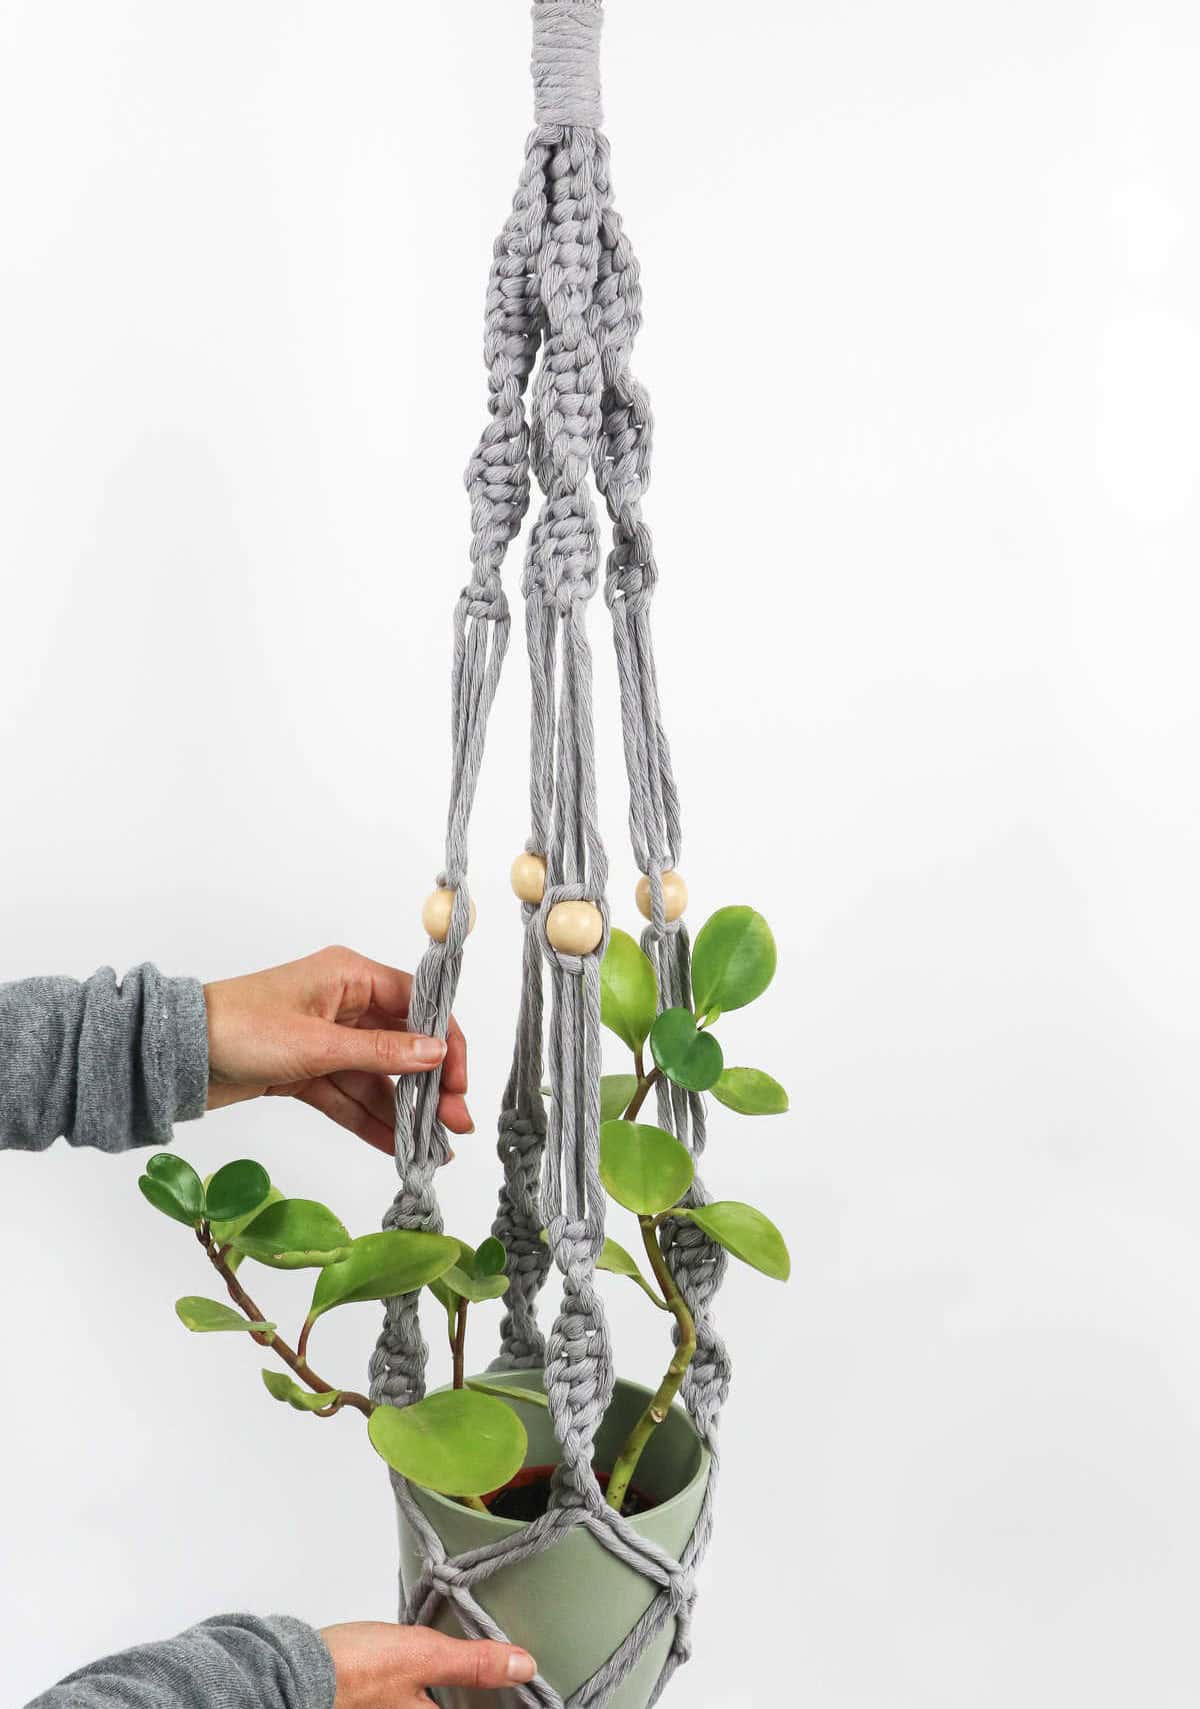
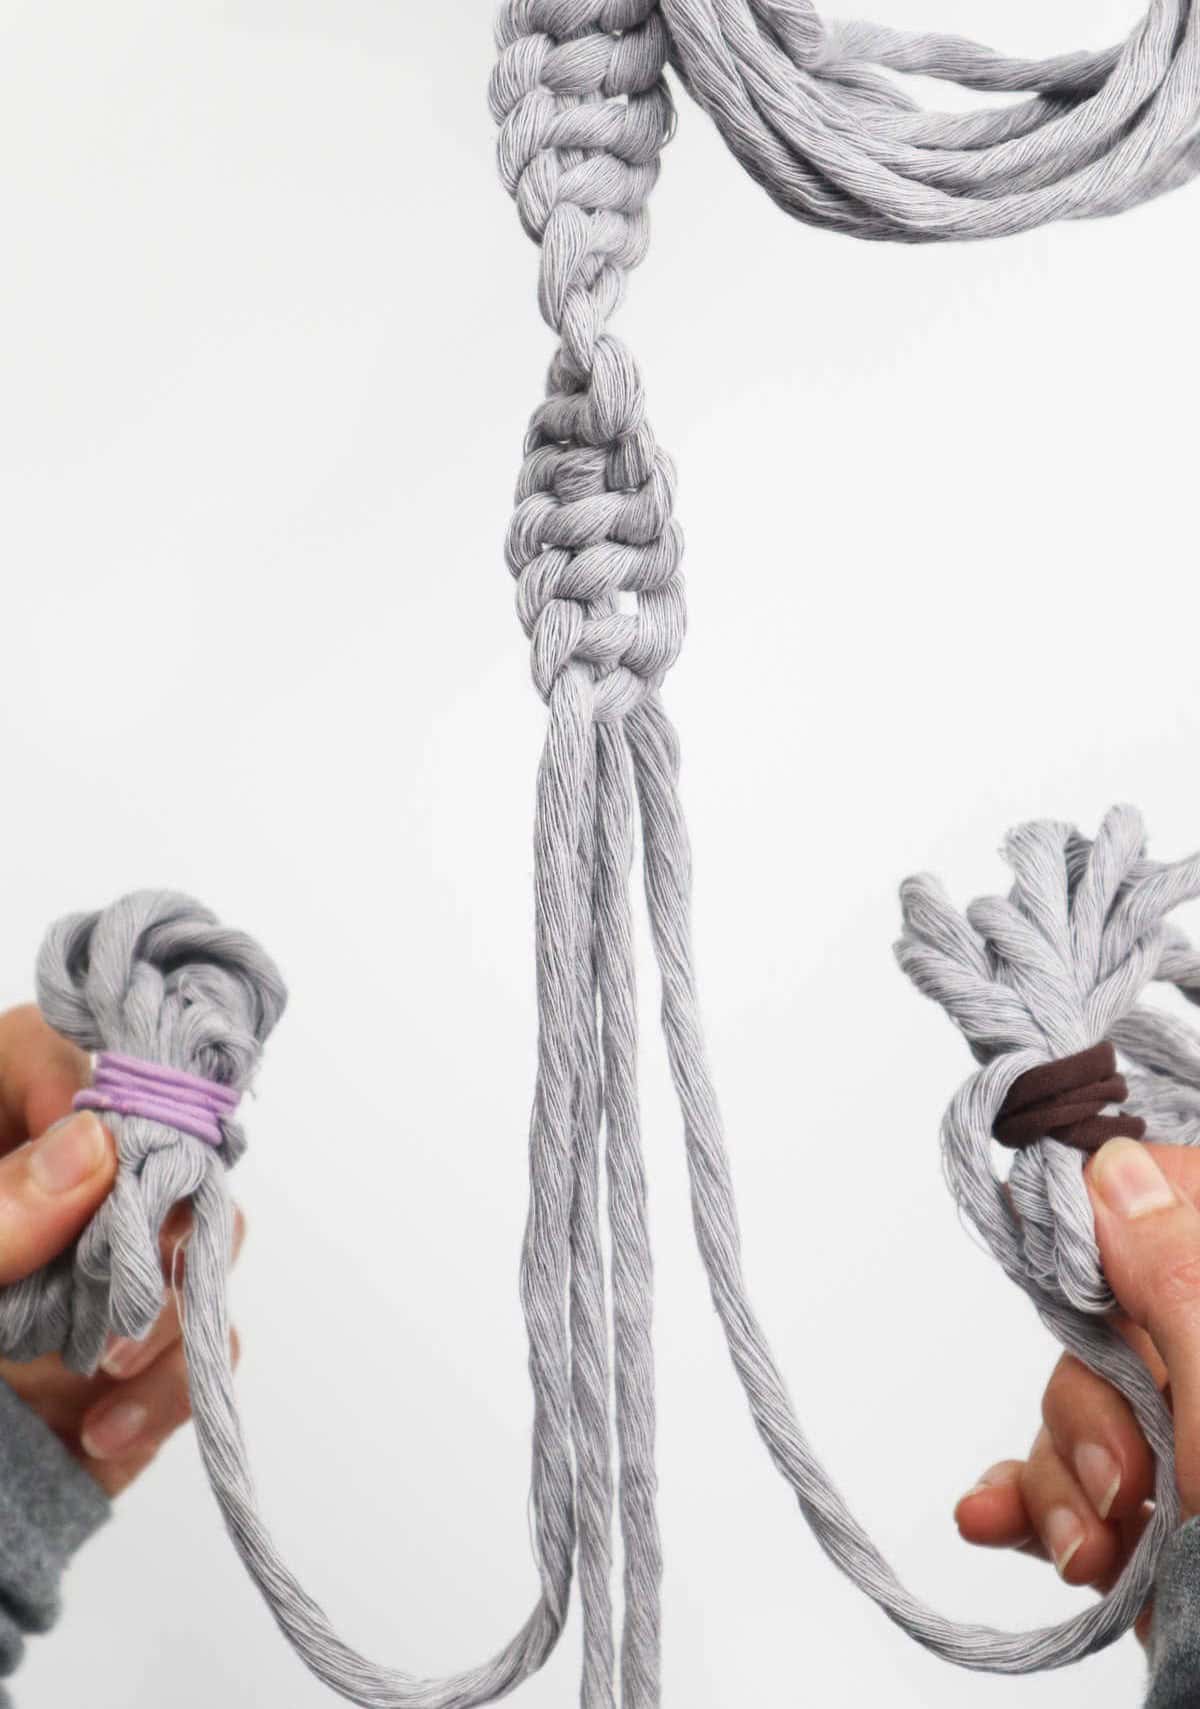
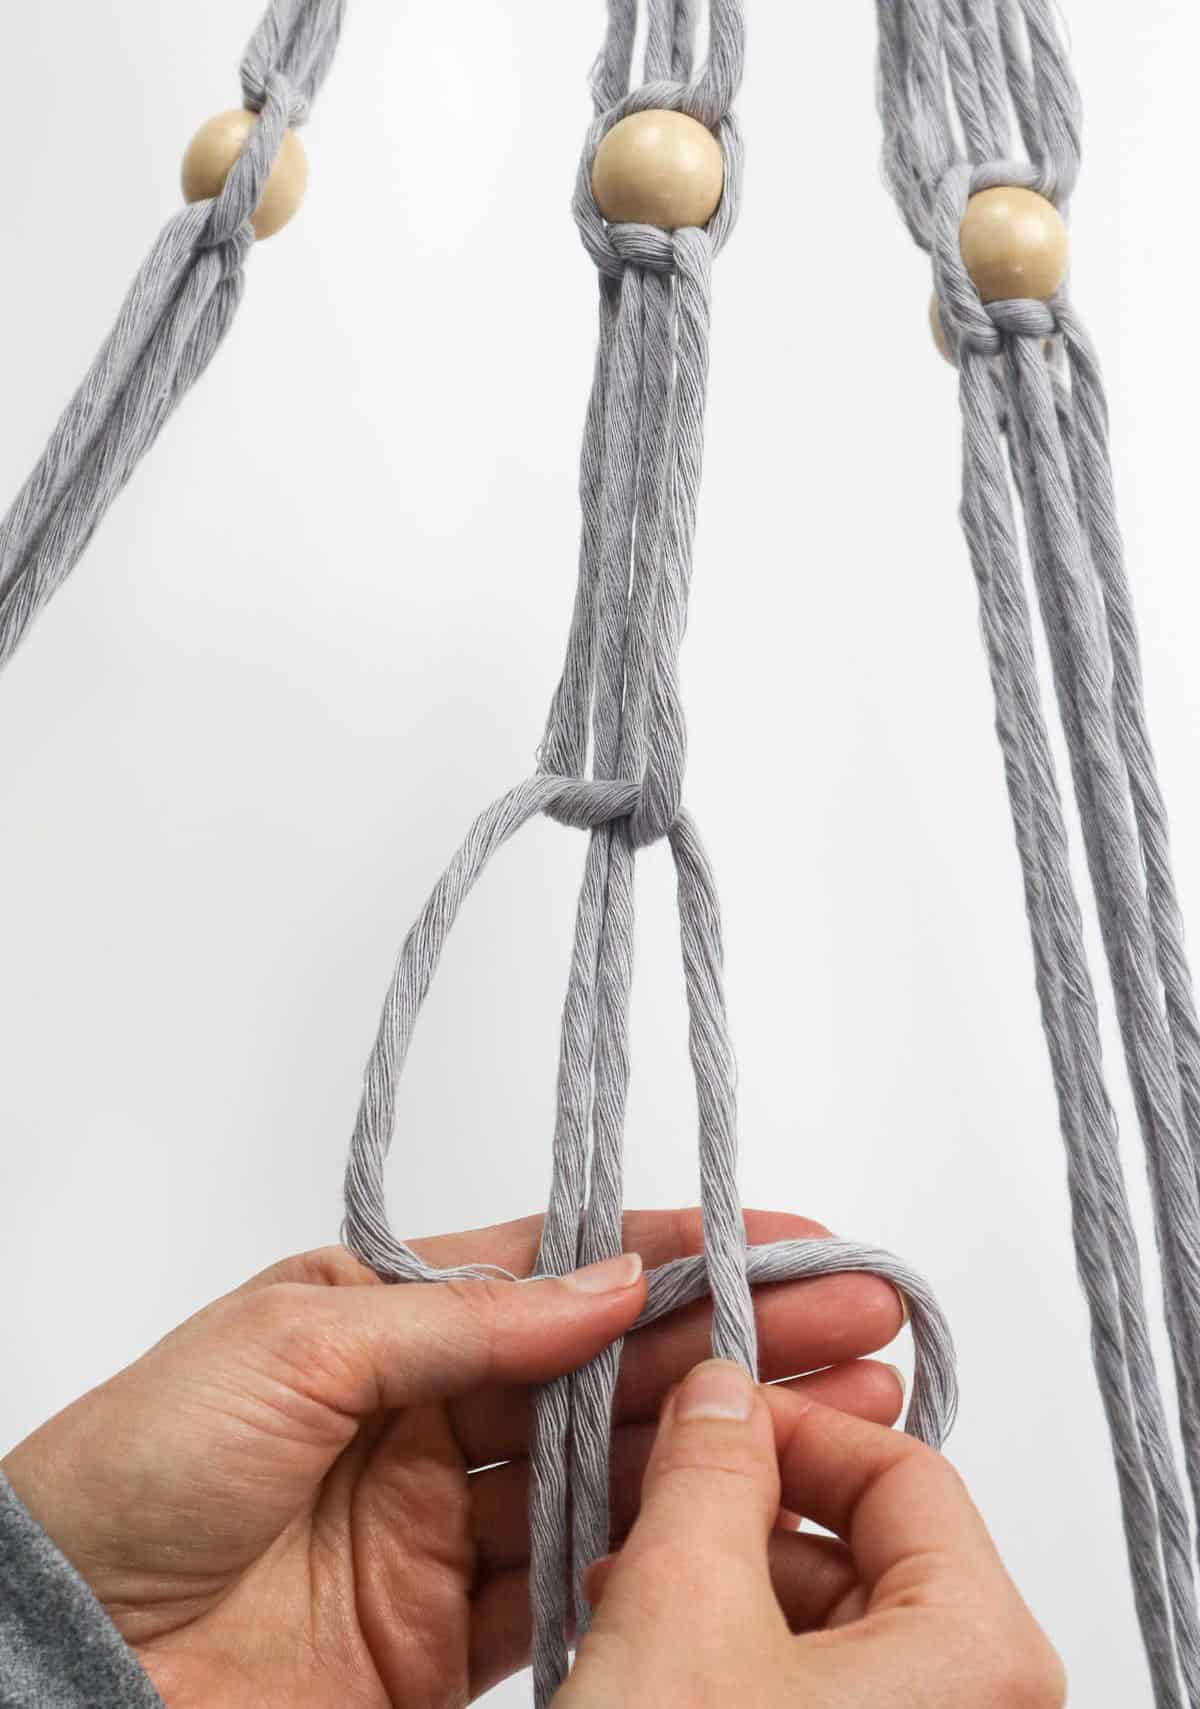
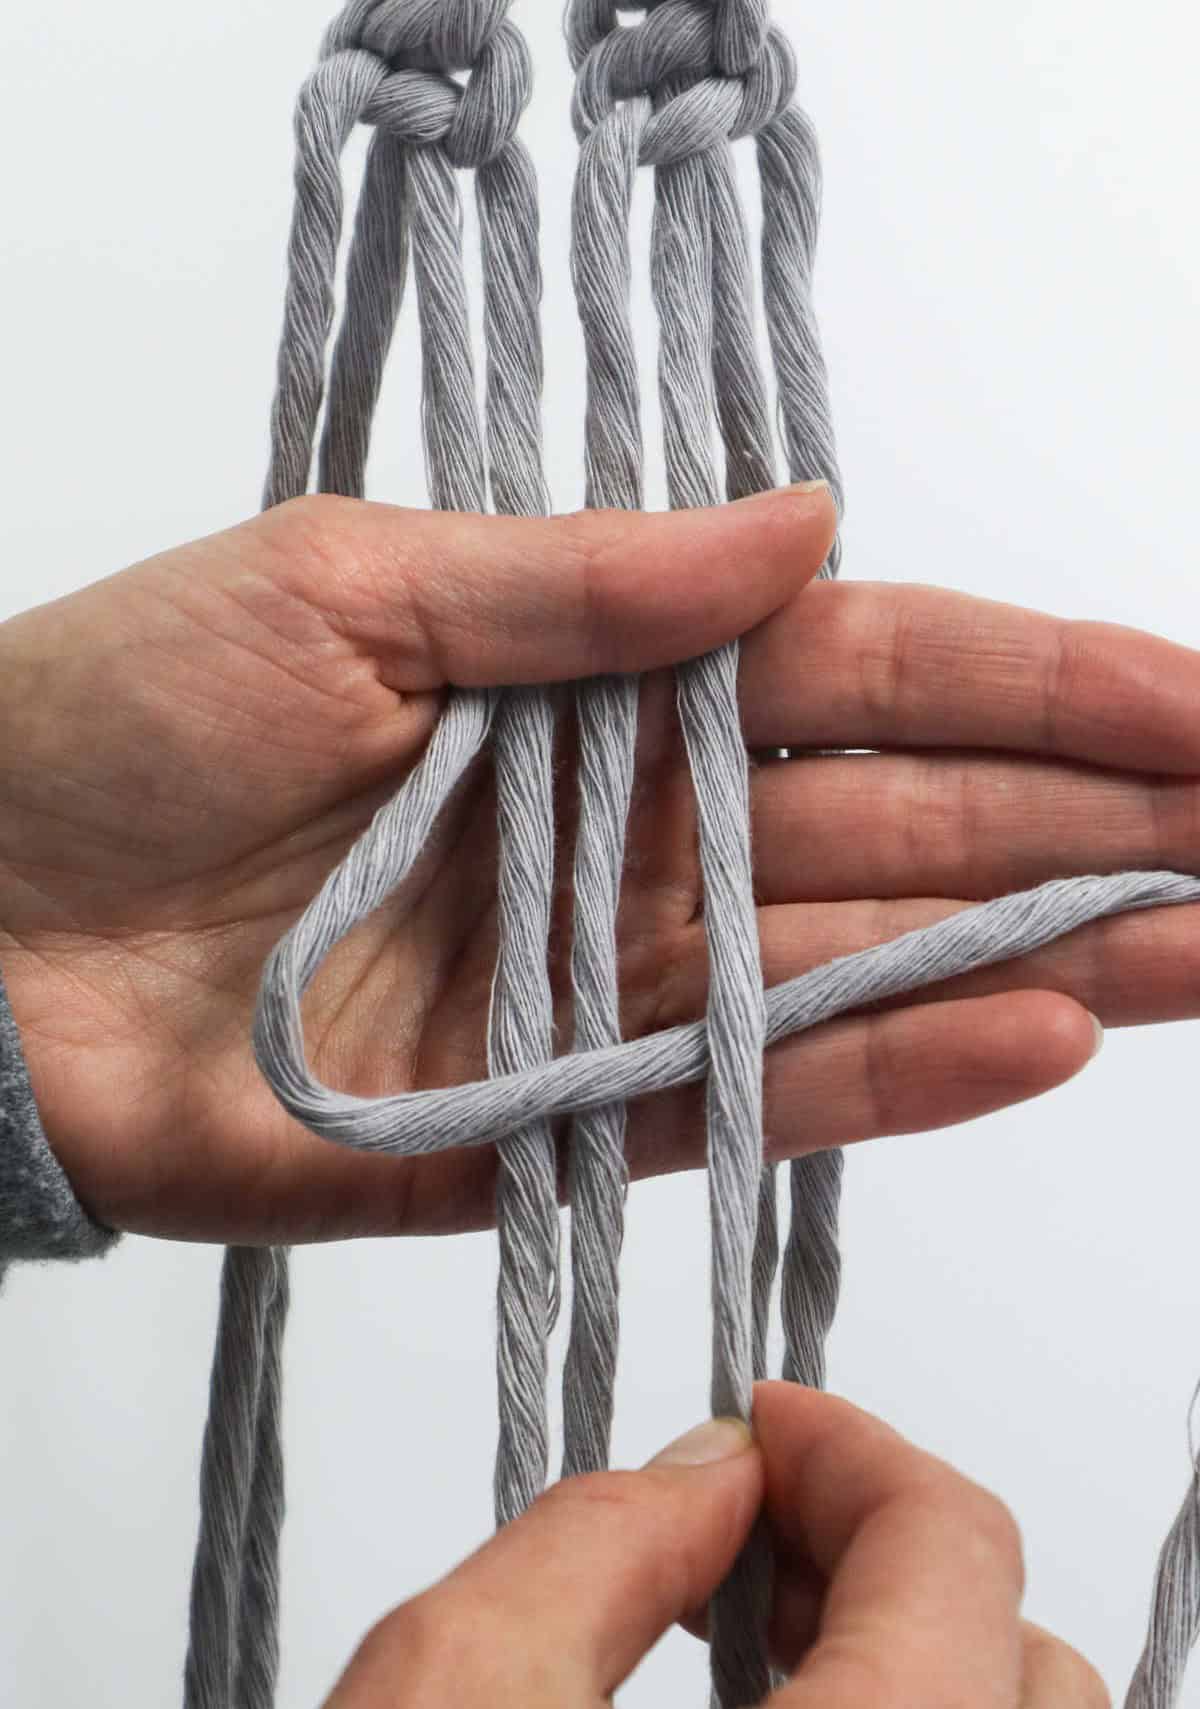
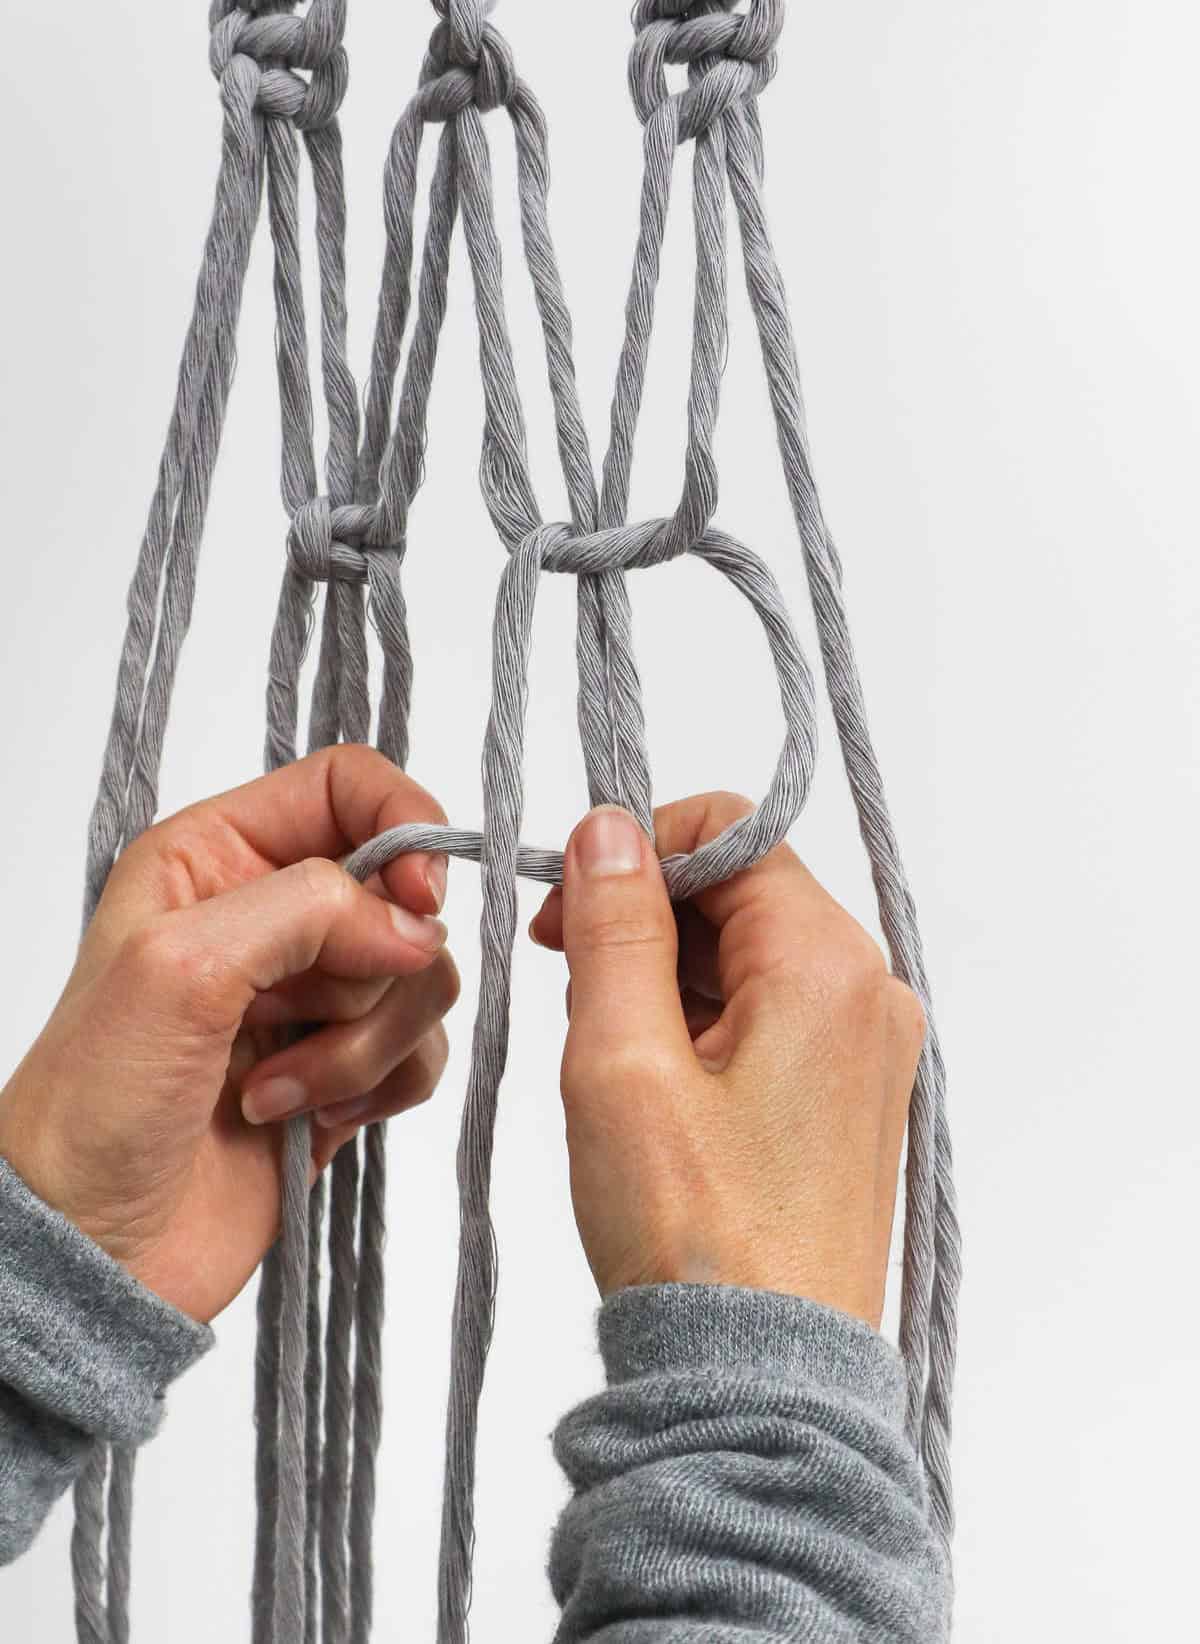
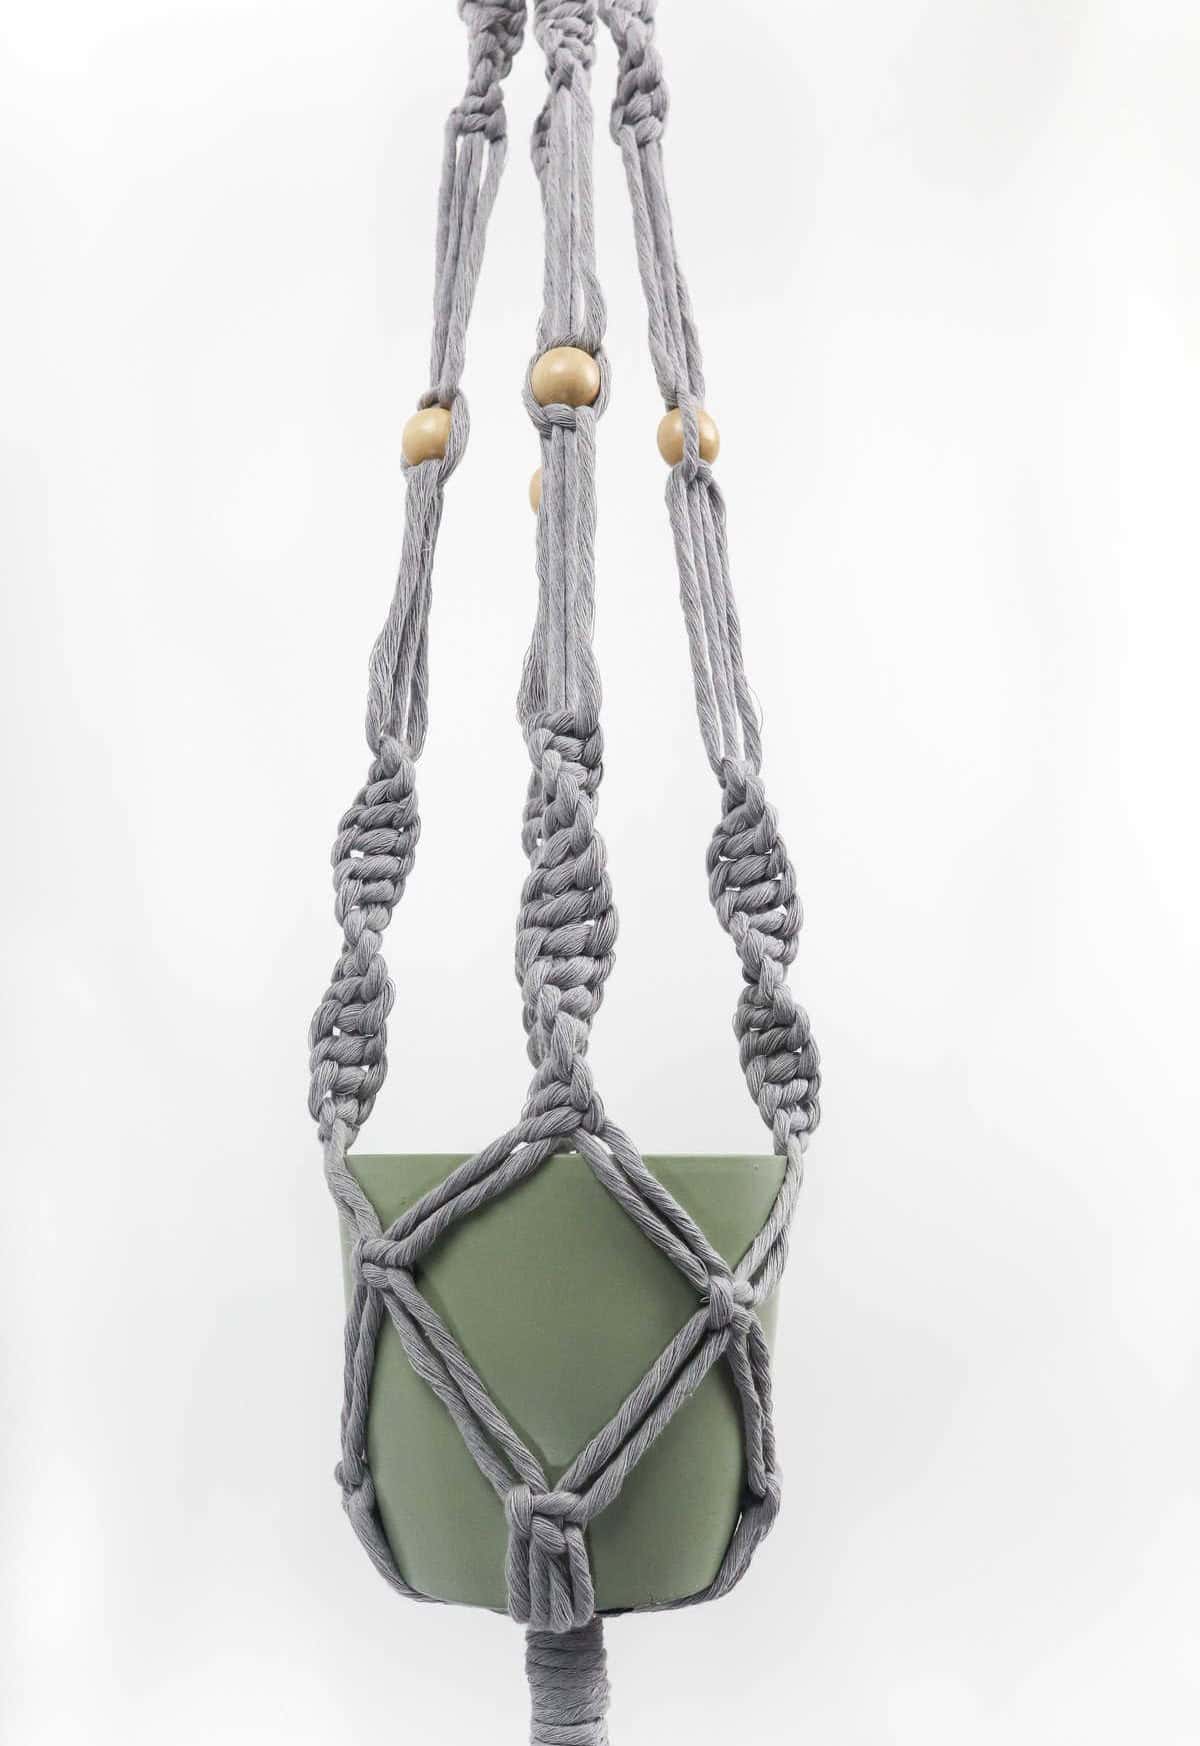
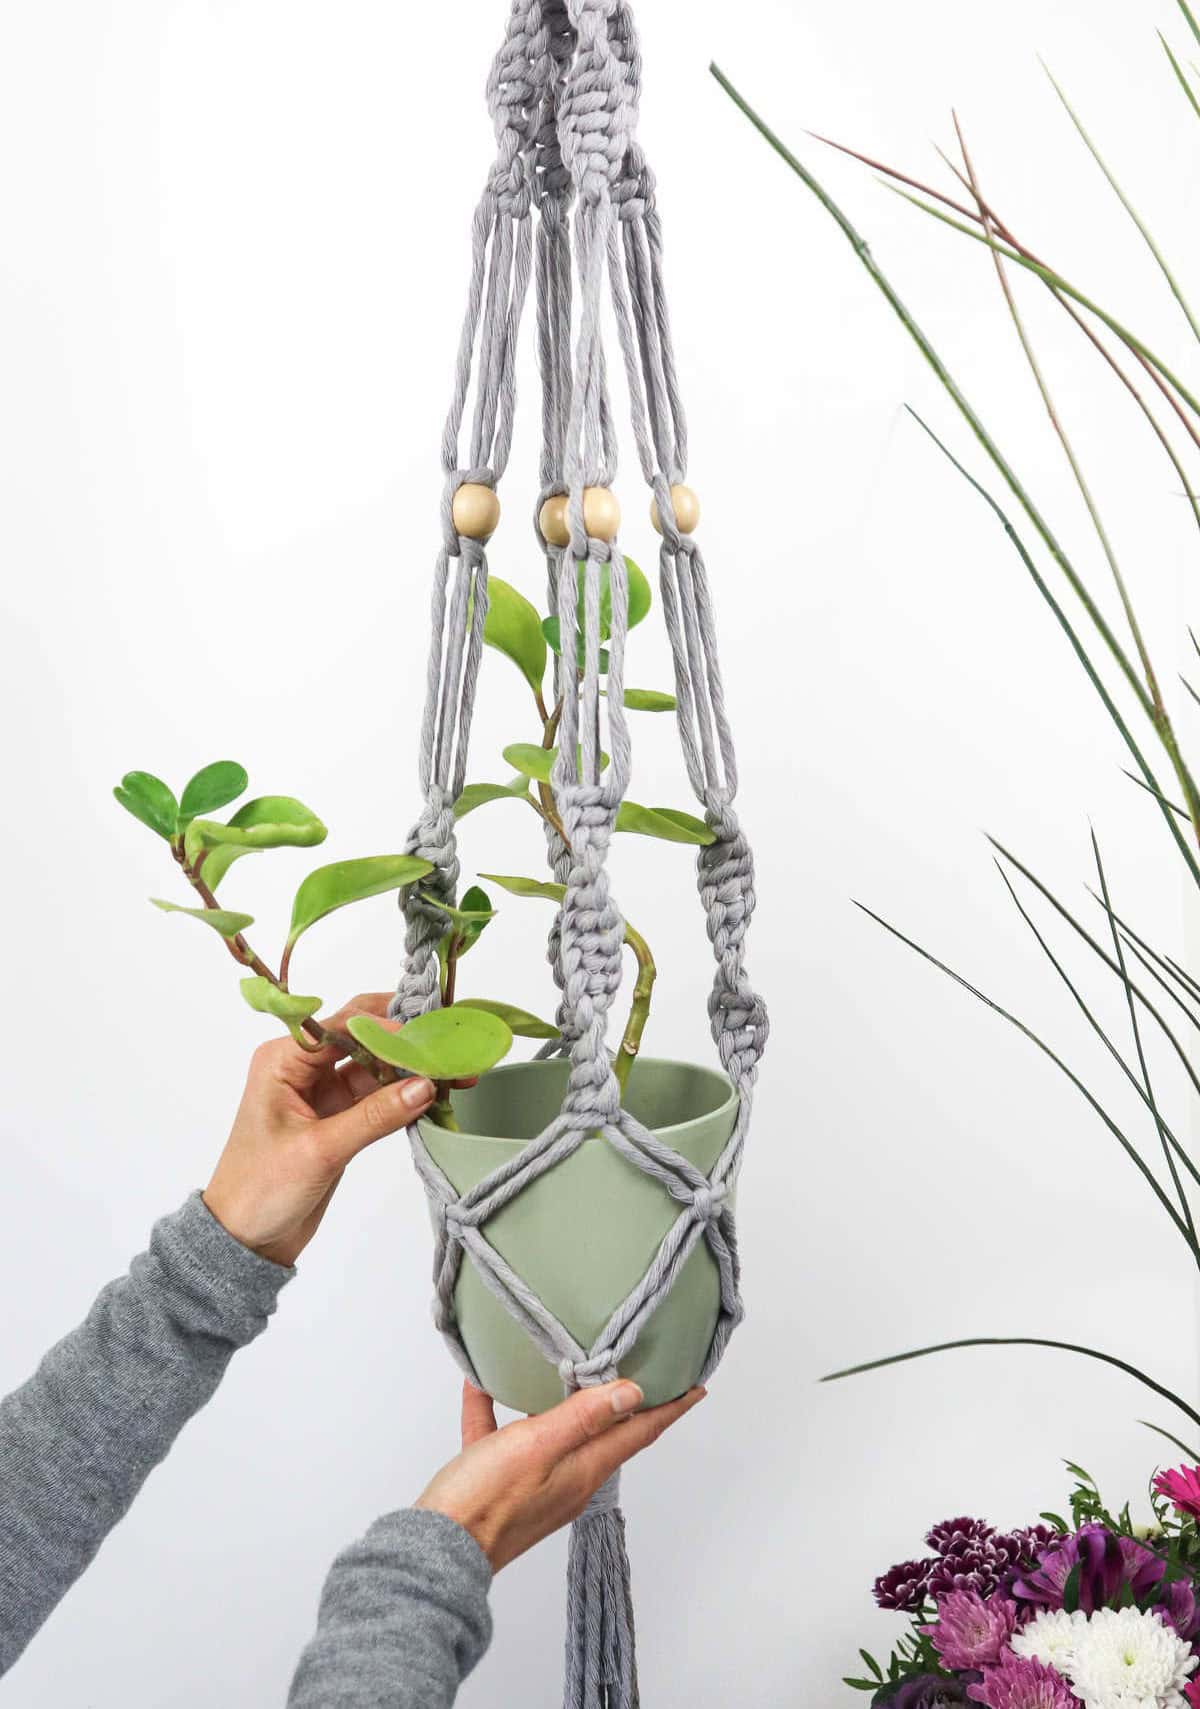
To complete your hanger, it’s now time to measure the length of cord needed for your planter or pot. To do this, place the planter snugly between the four sets of cords, as illustrated below. This will give you a reference point to work with. Next, you’ll need to create another section of cord by tying square knots. Start by selecting two strands from each of the two sections and pull them together to form a new four-strand section.
Use your planter to locate the center point where the next square knot needs to be tied. This will ensure that your hanger is evenly spaced and secure.
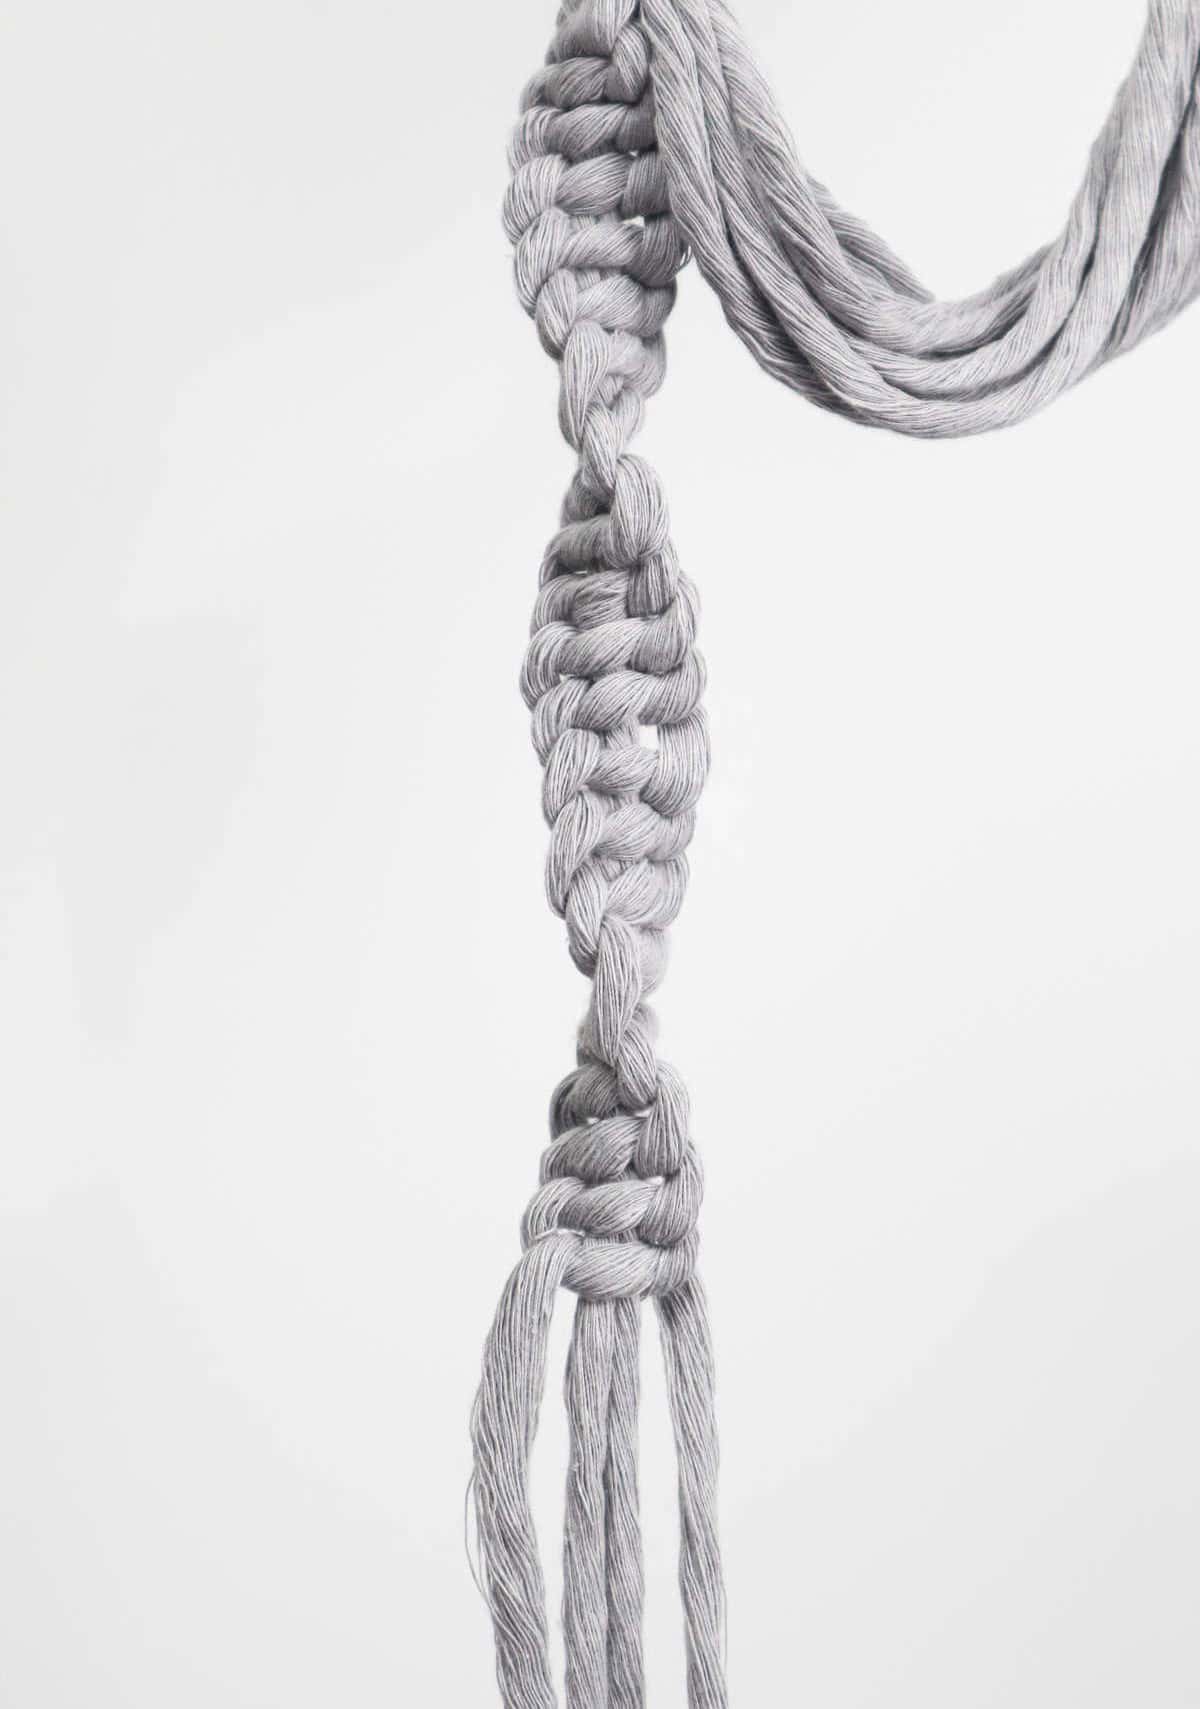
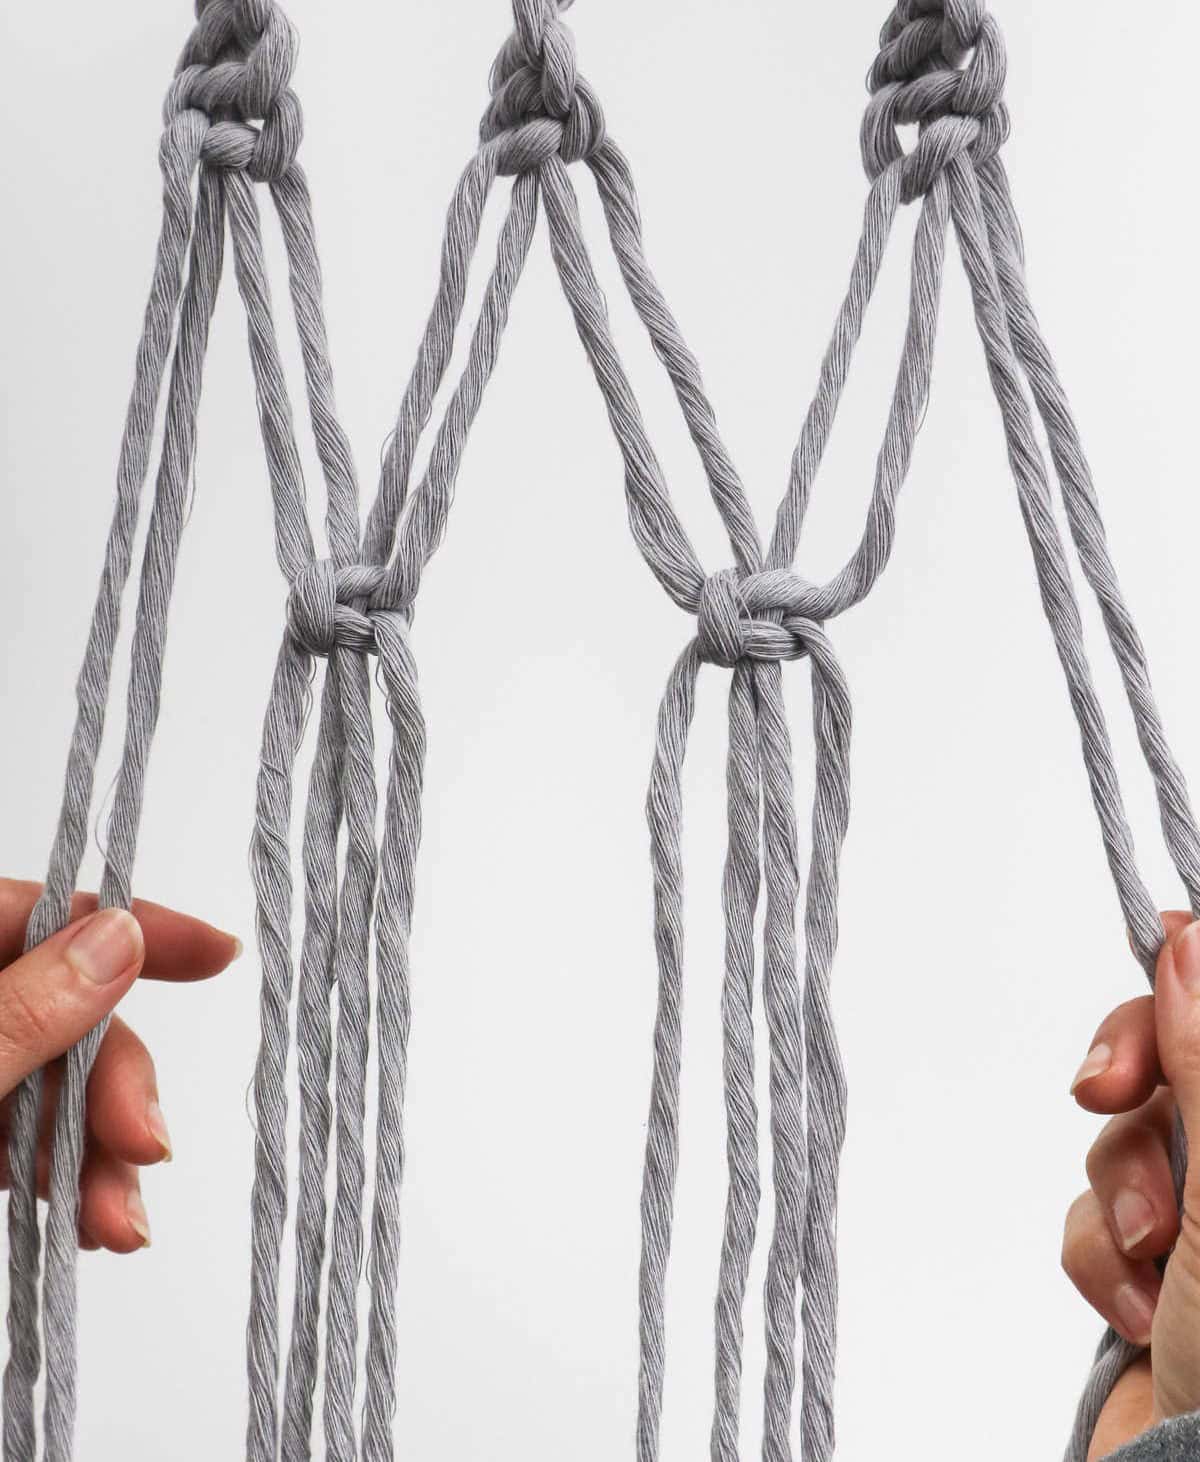
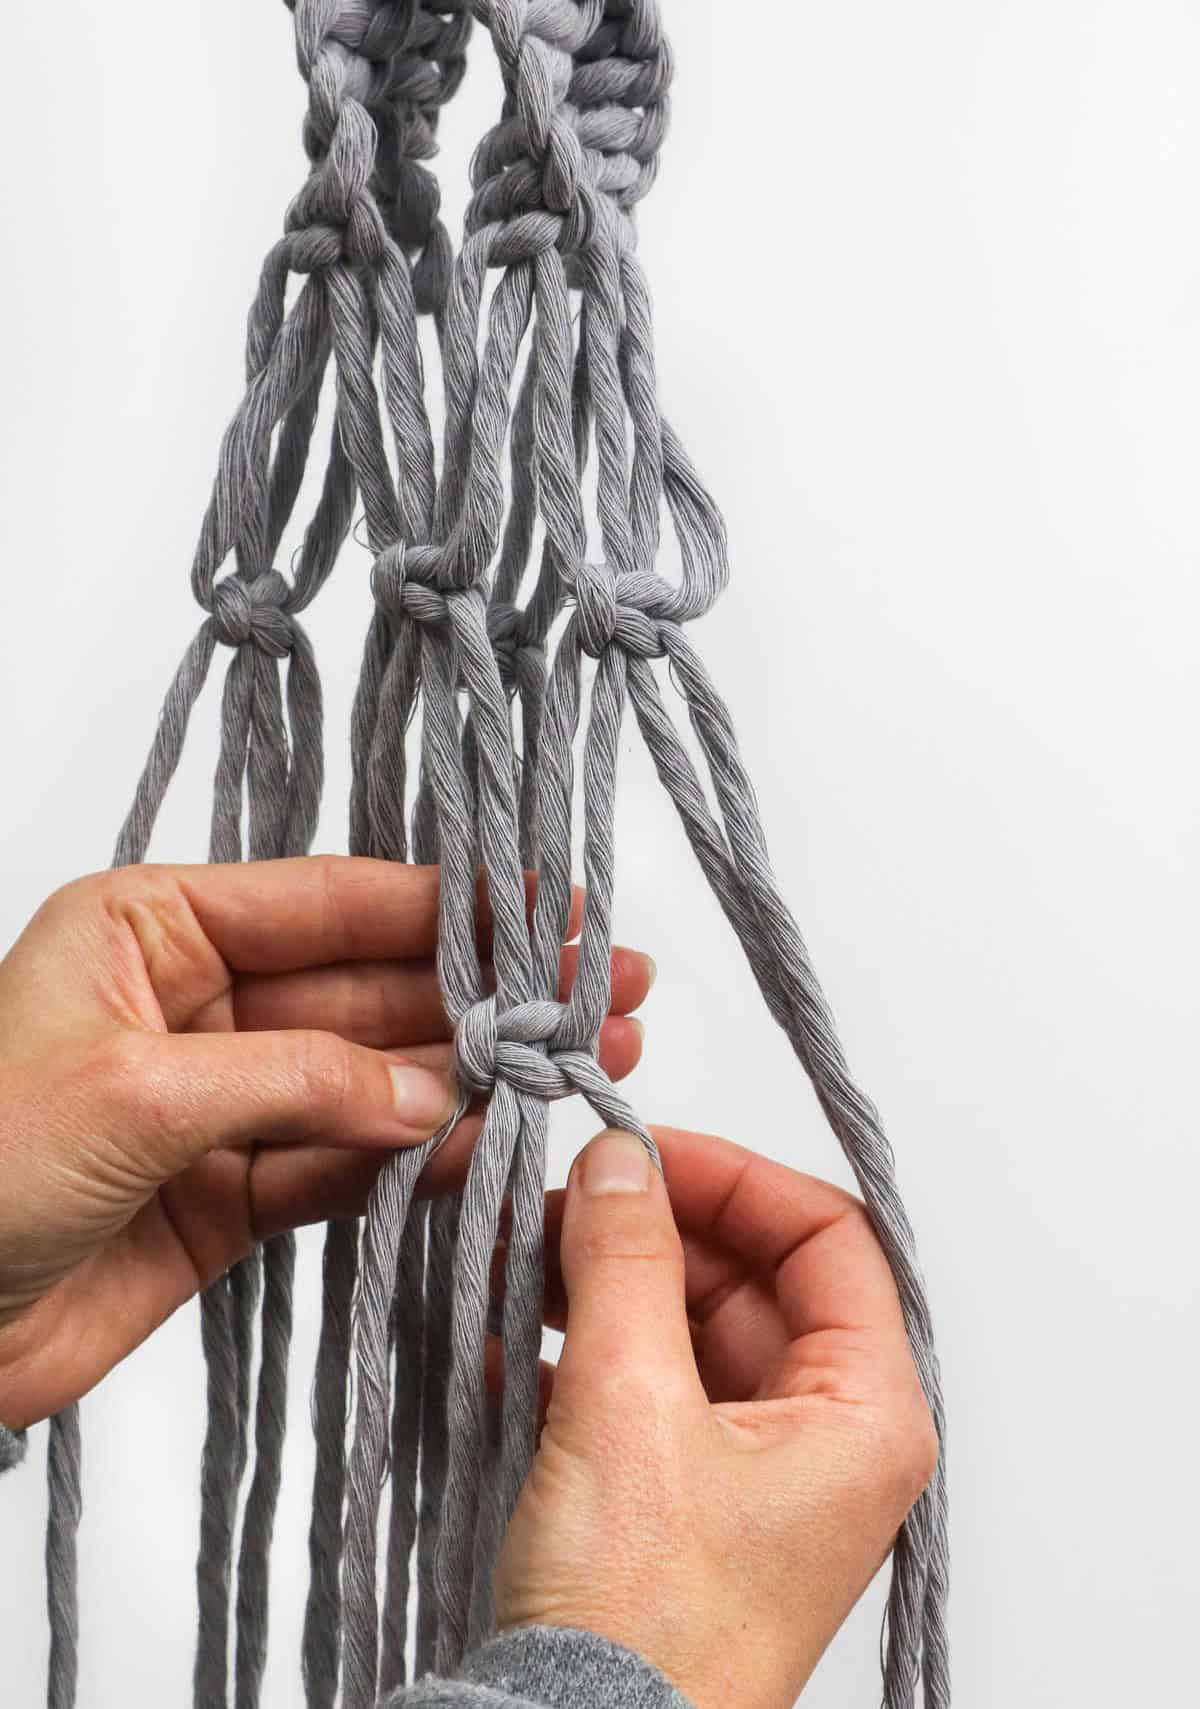
Step 16
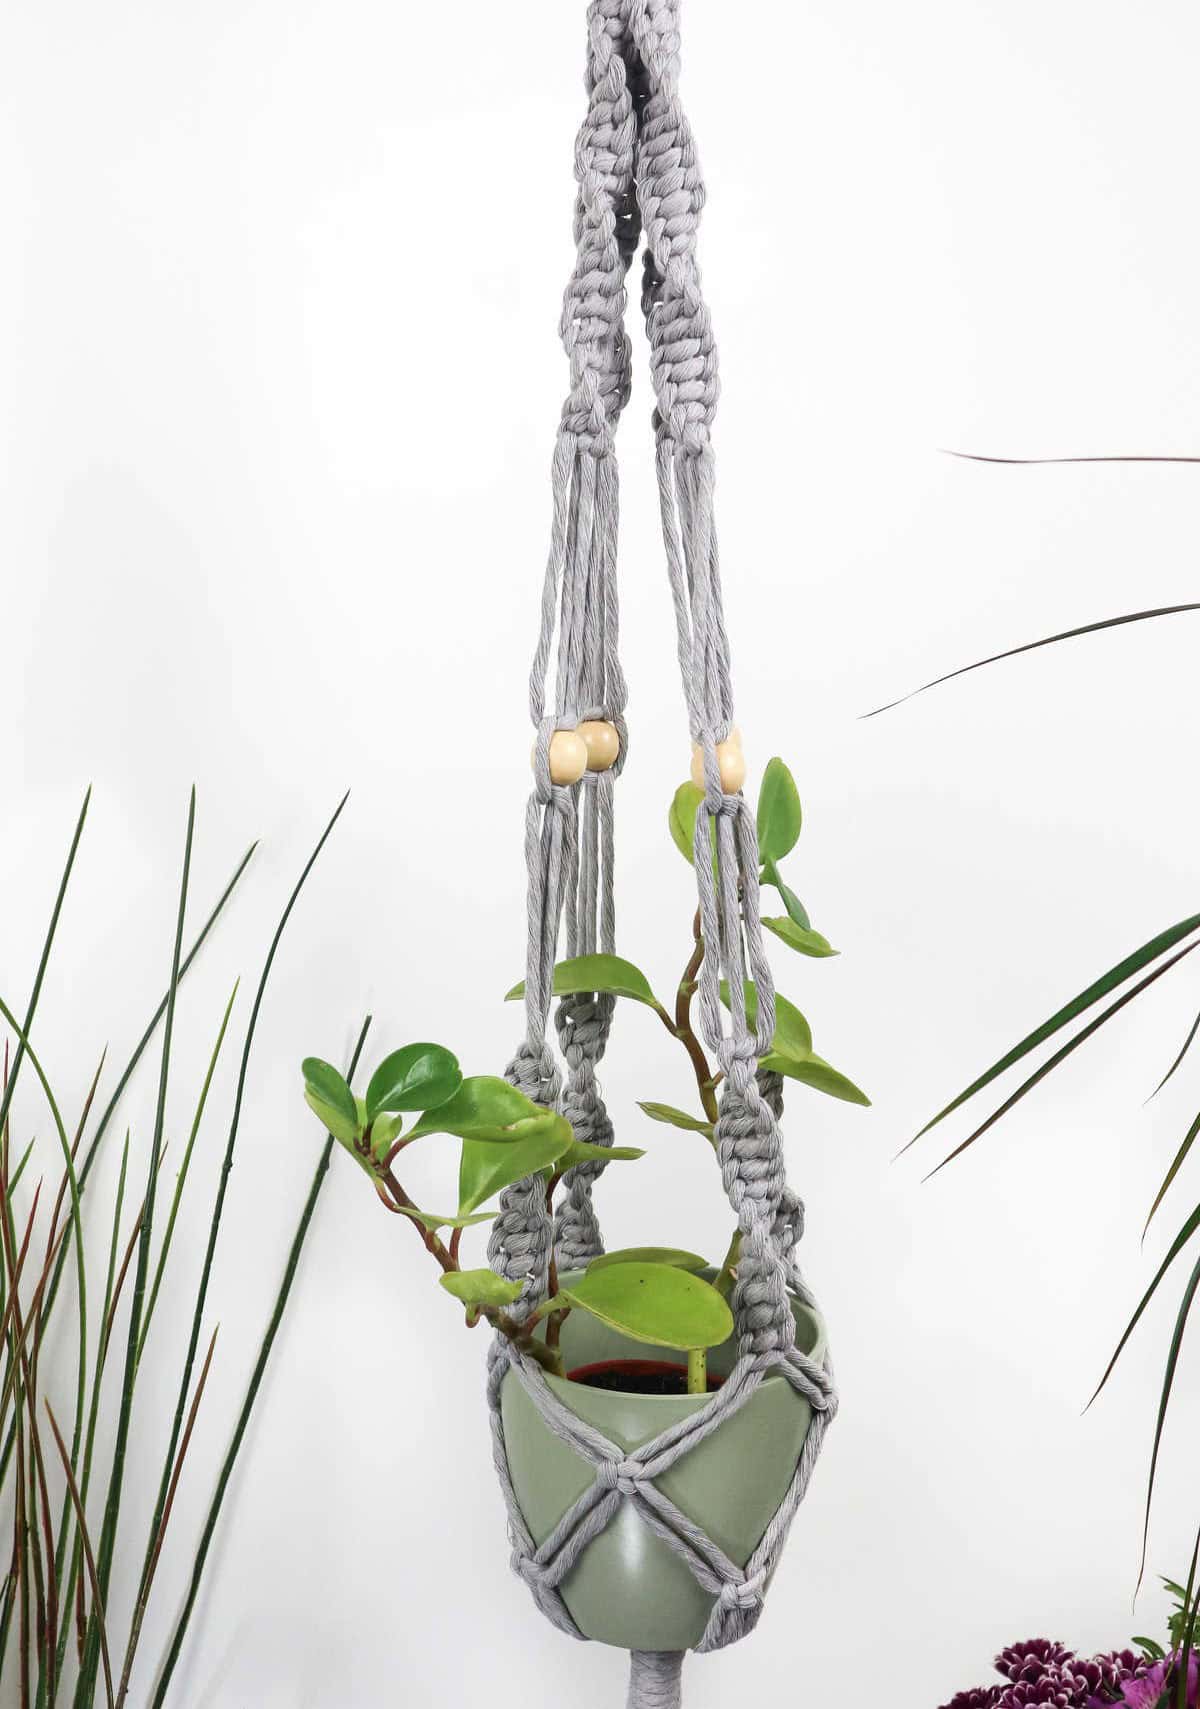
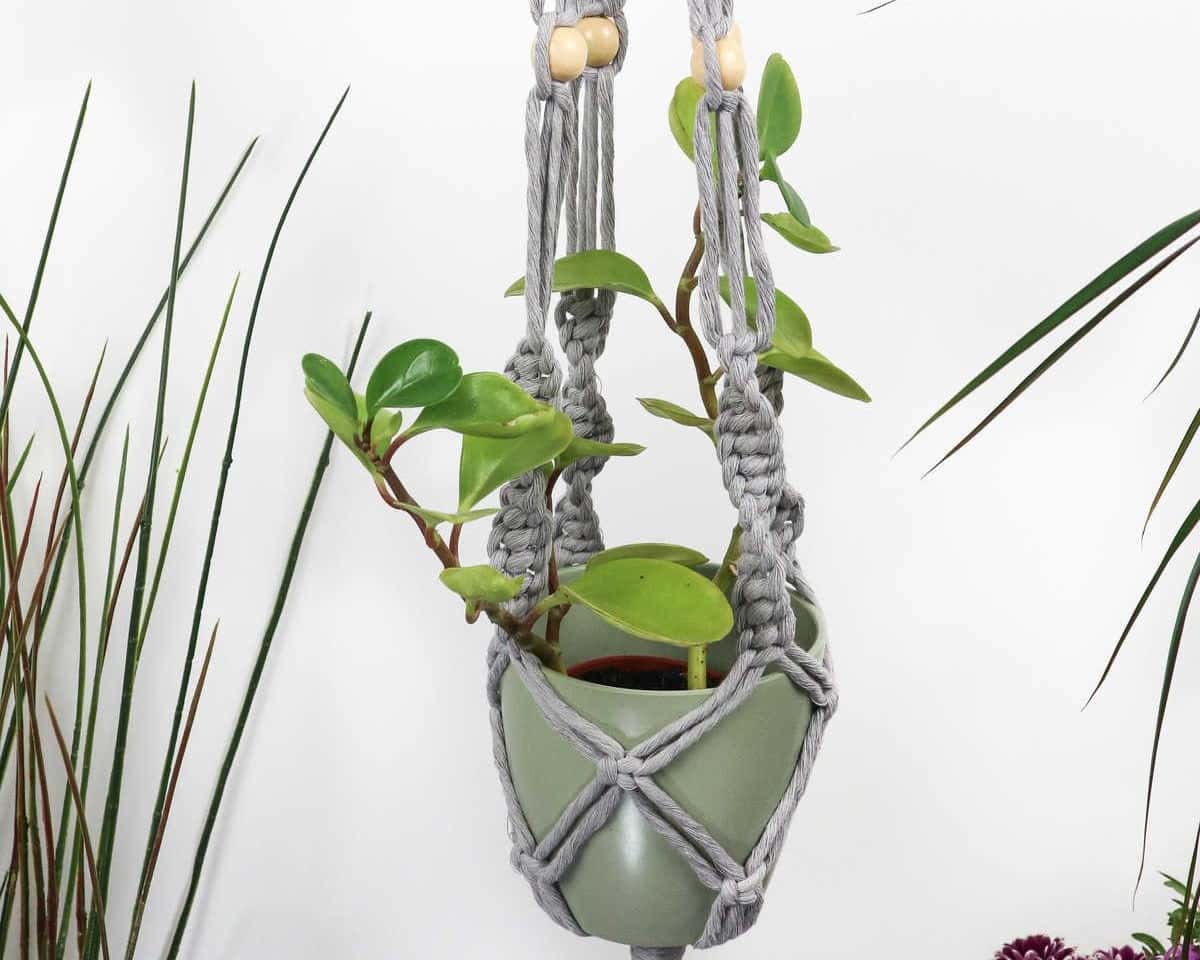
Continue to navigate through the series of steps until you reach a second row of square knots, mirroring the visual representation depicted in the accompanying image.
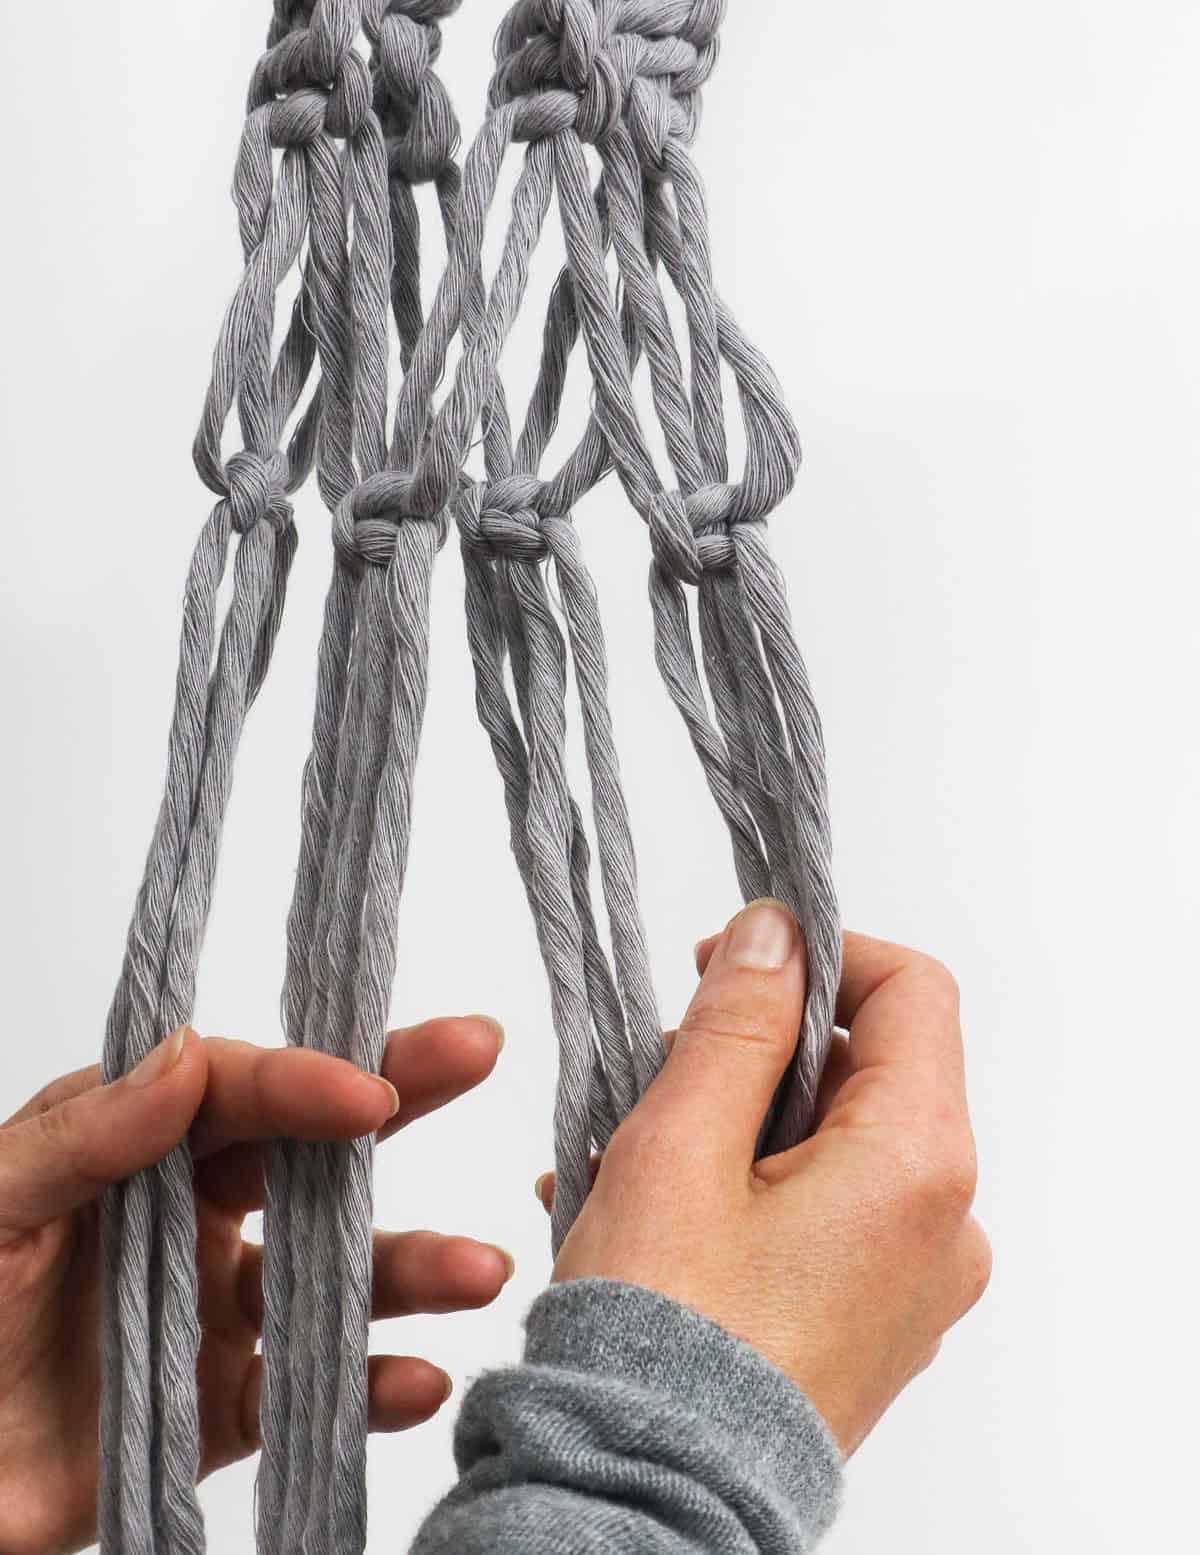
Step 17
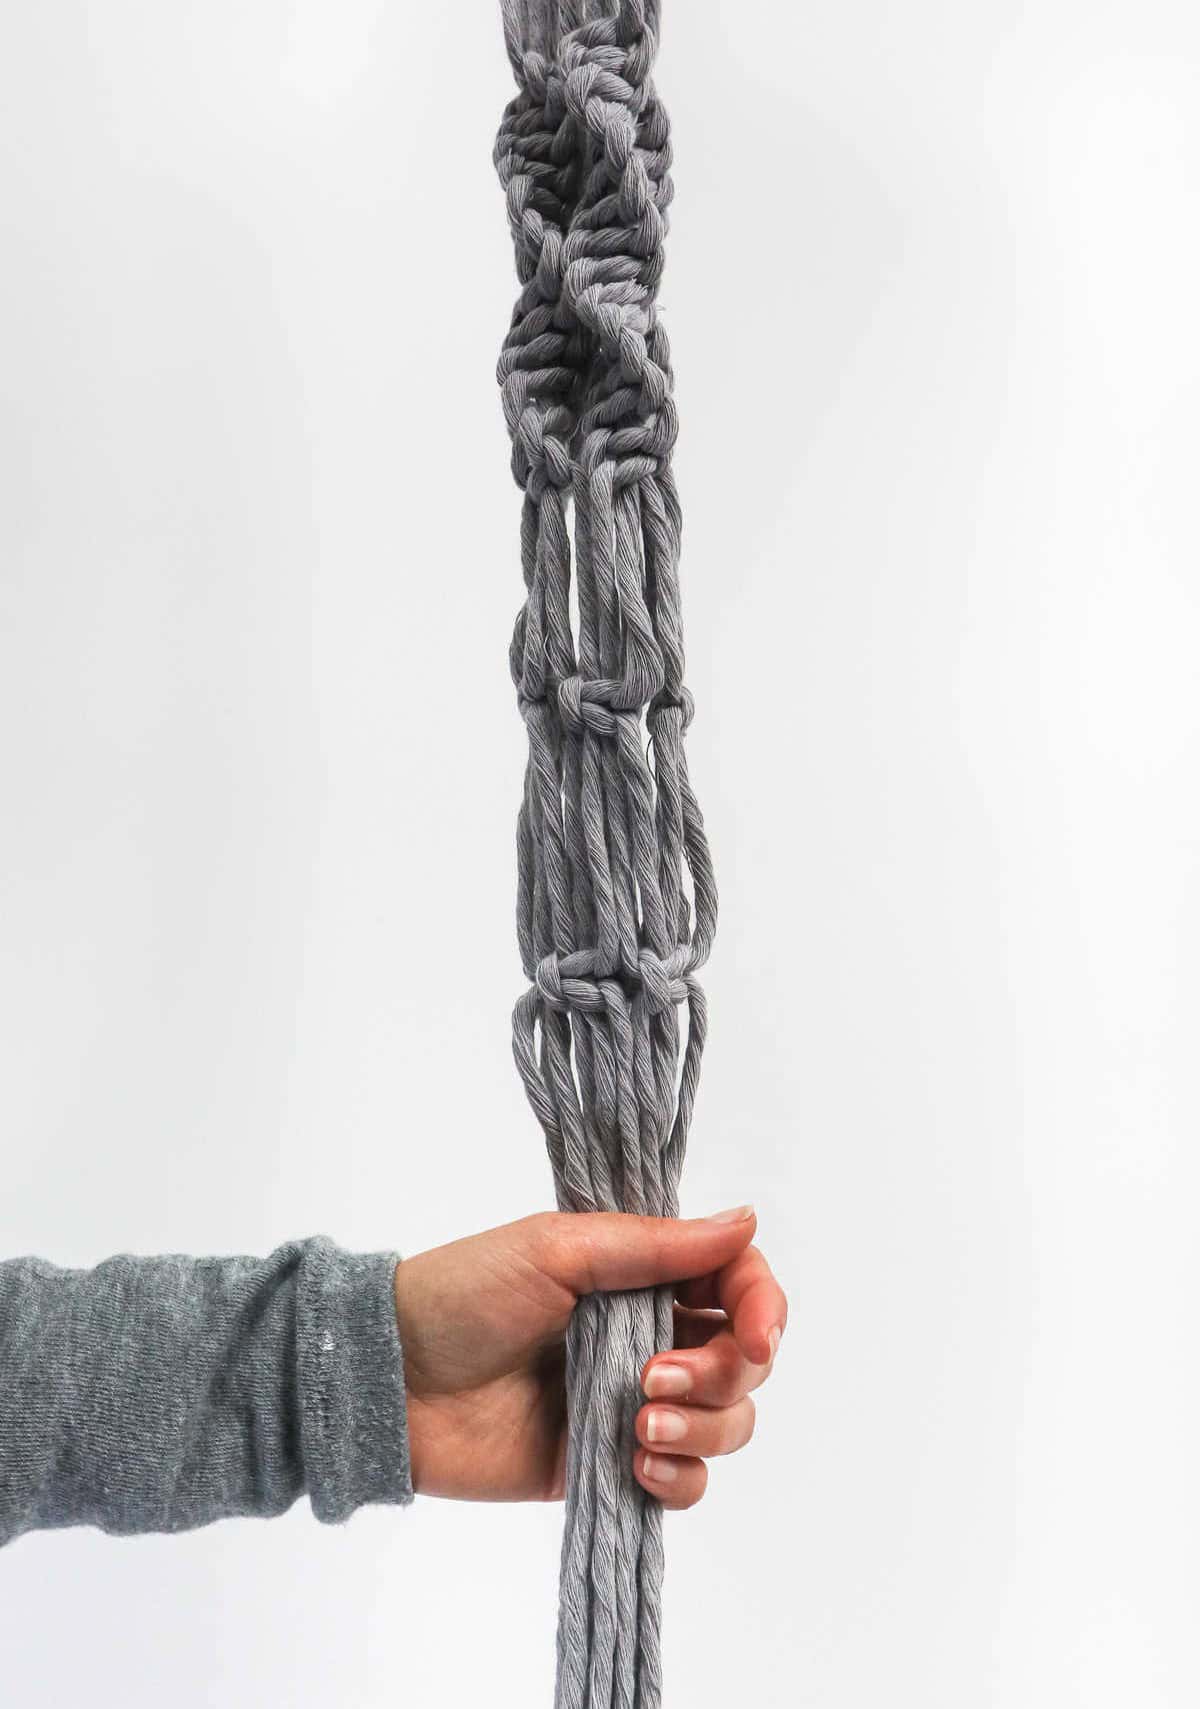
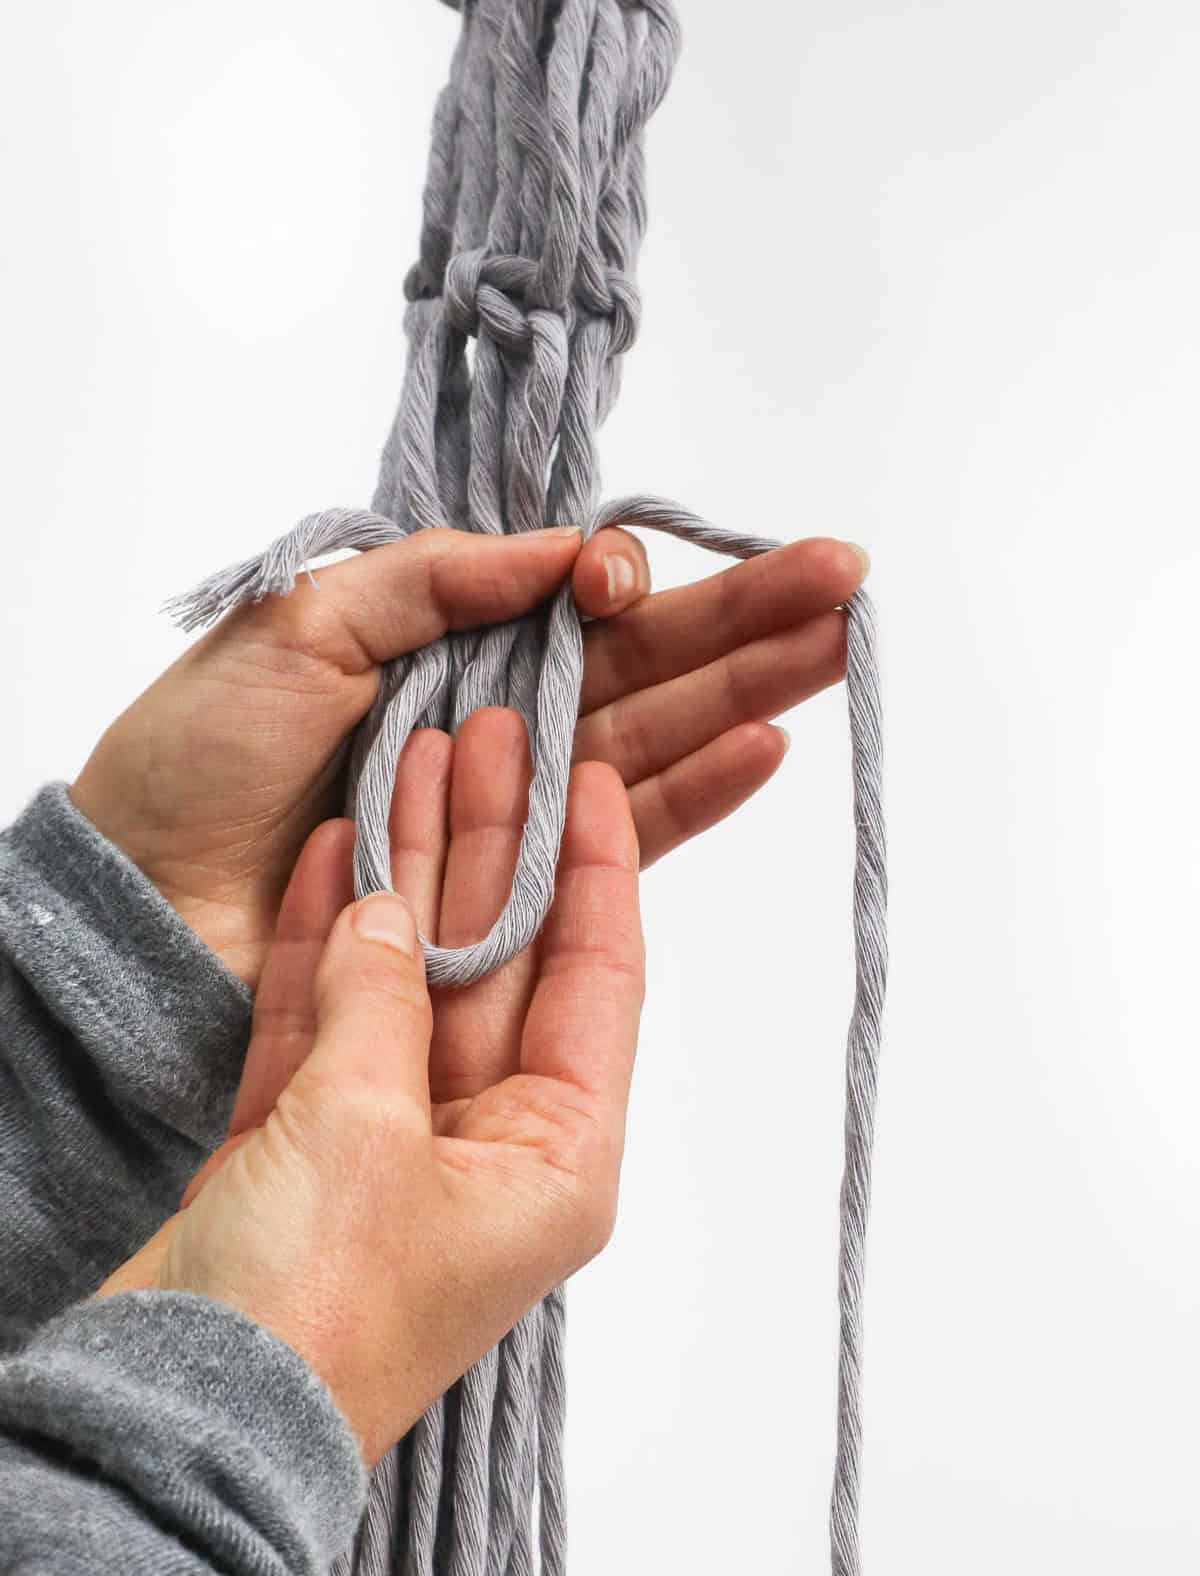
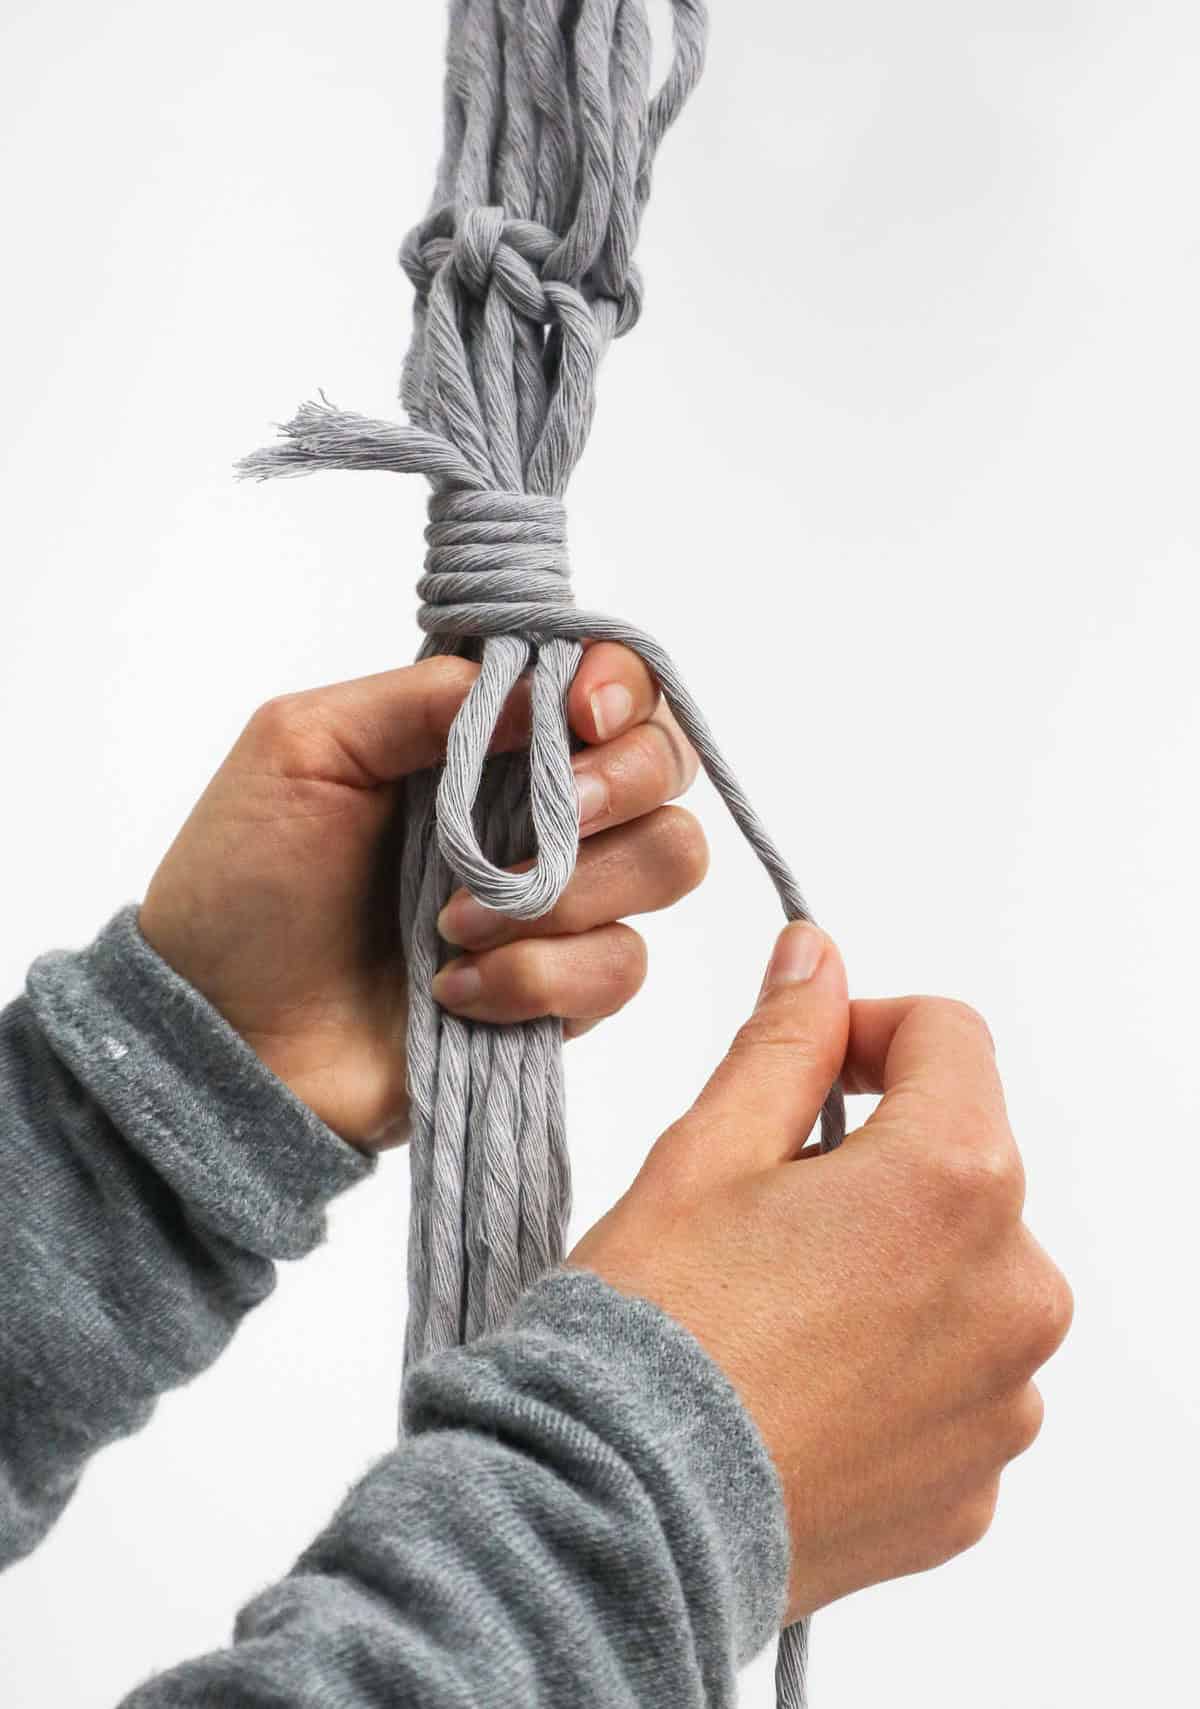
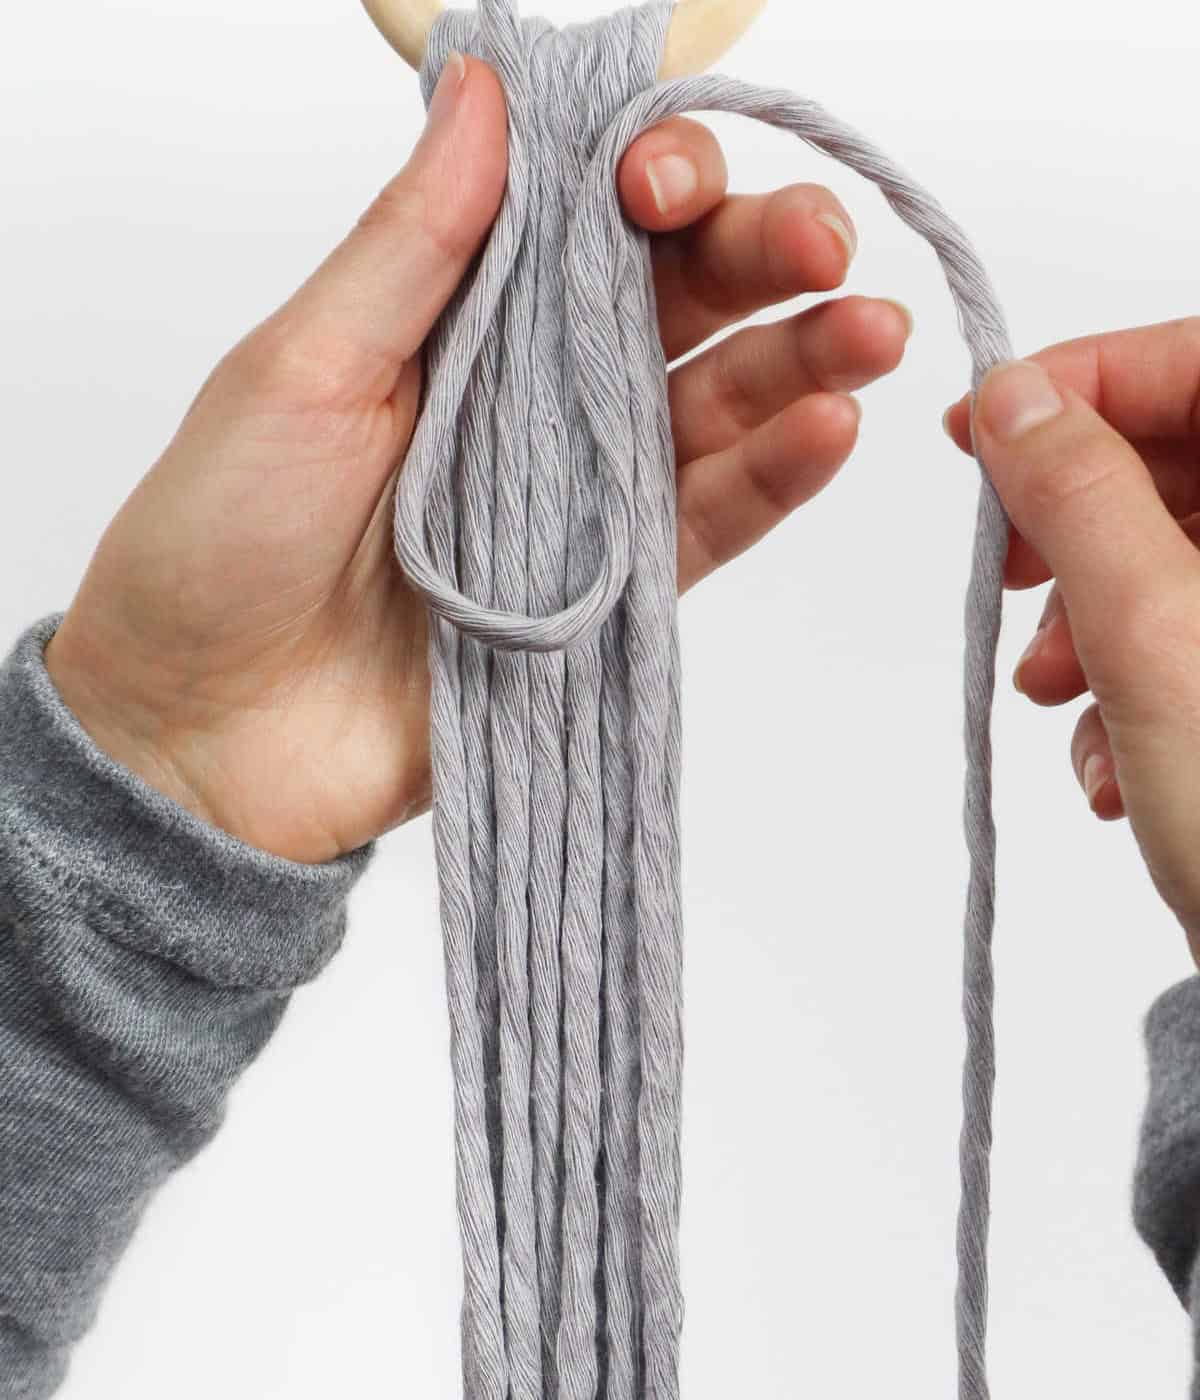
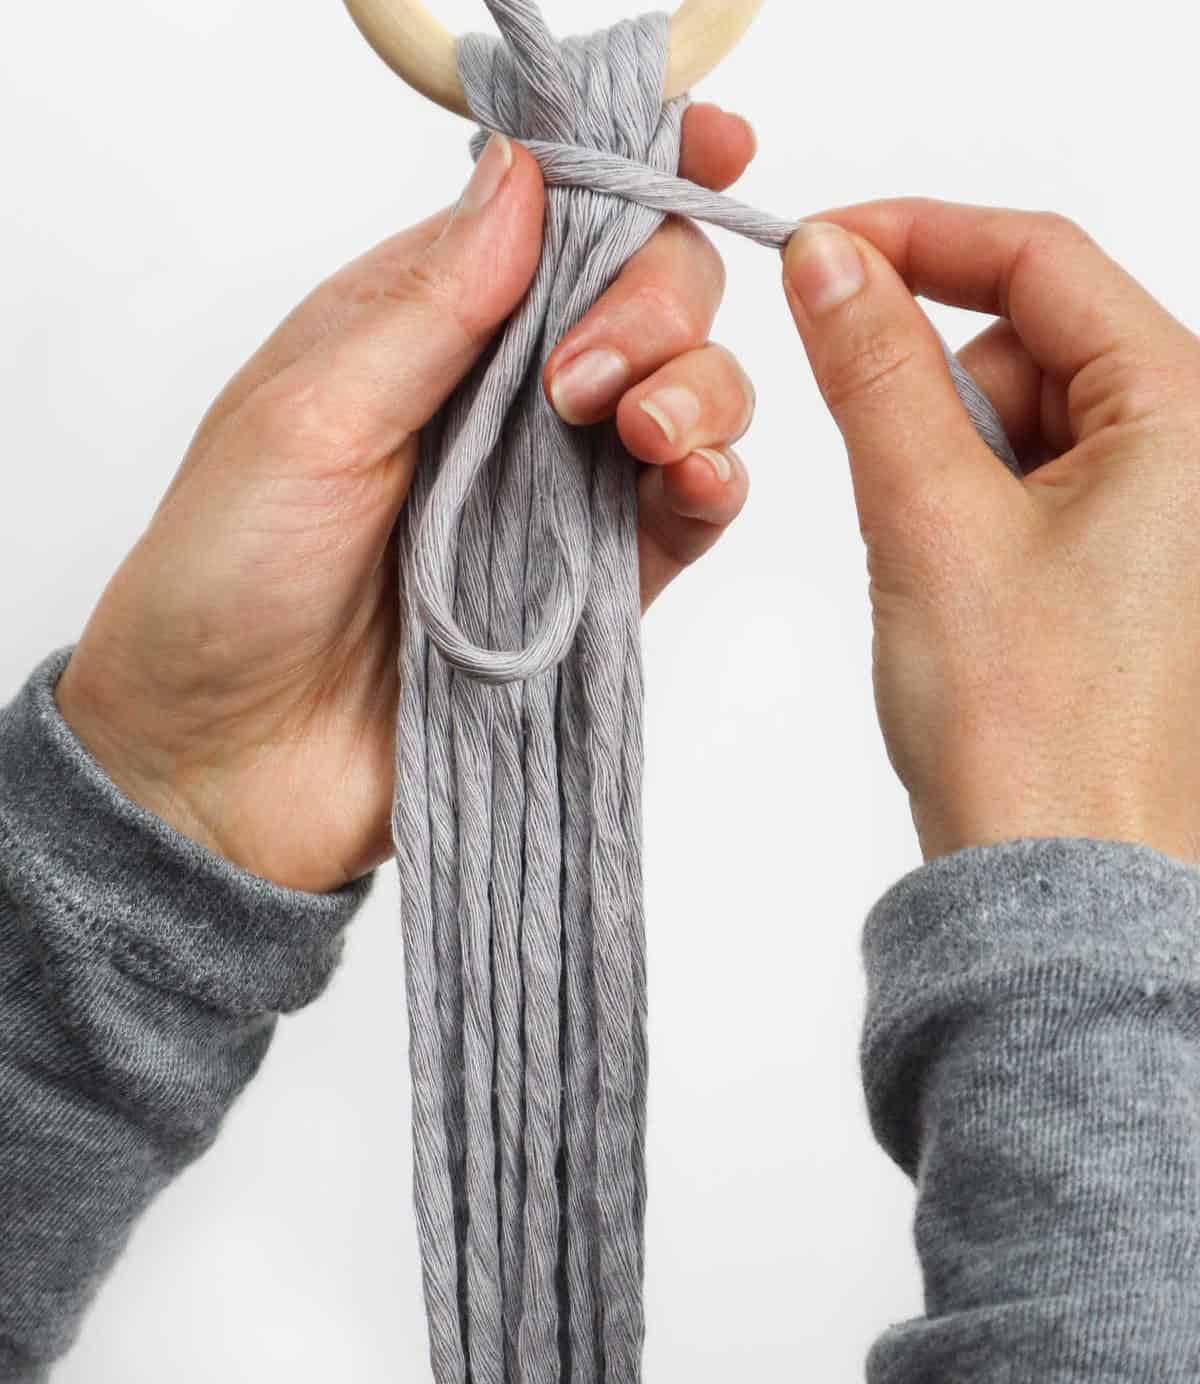
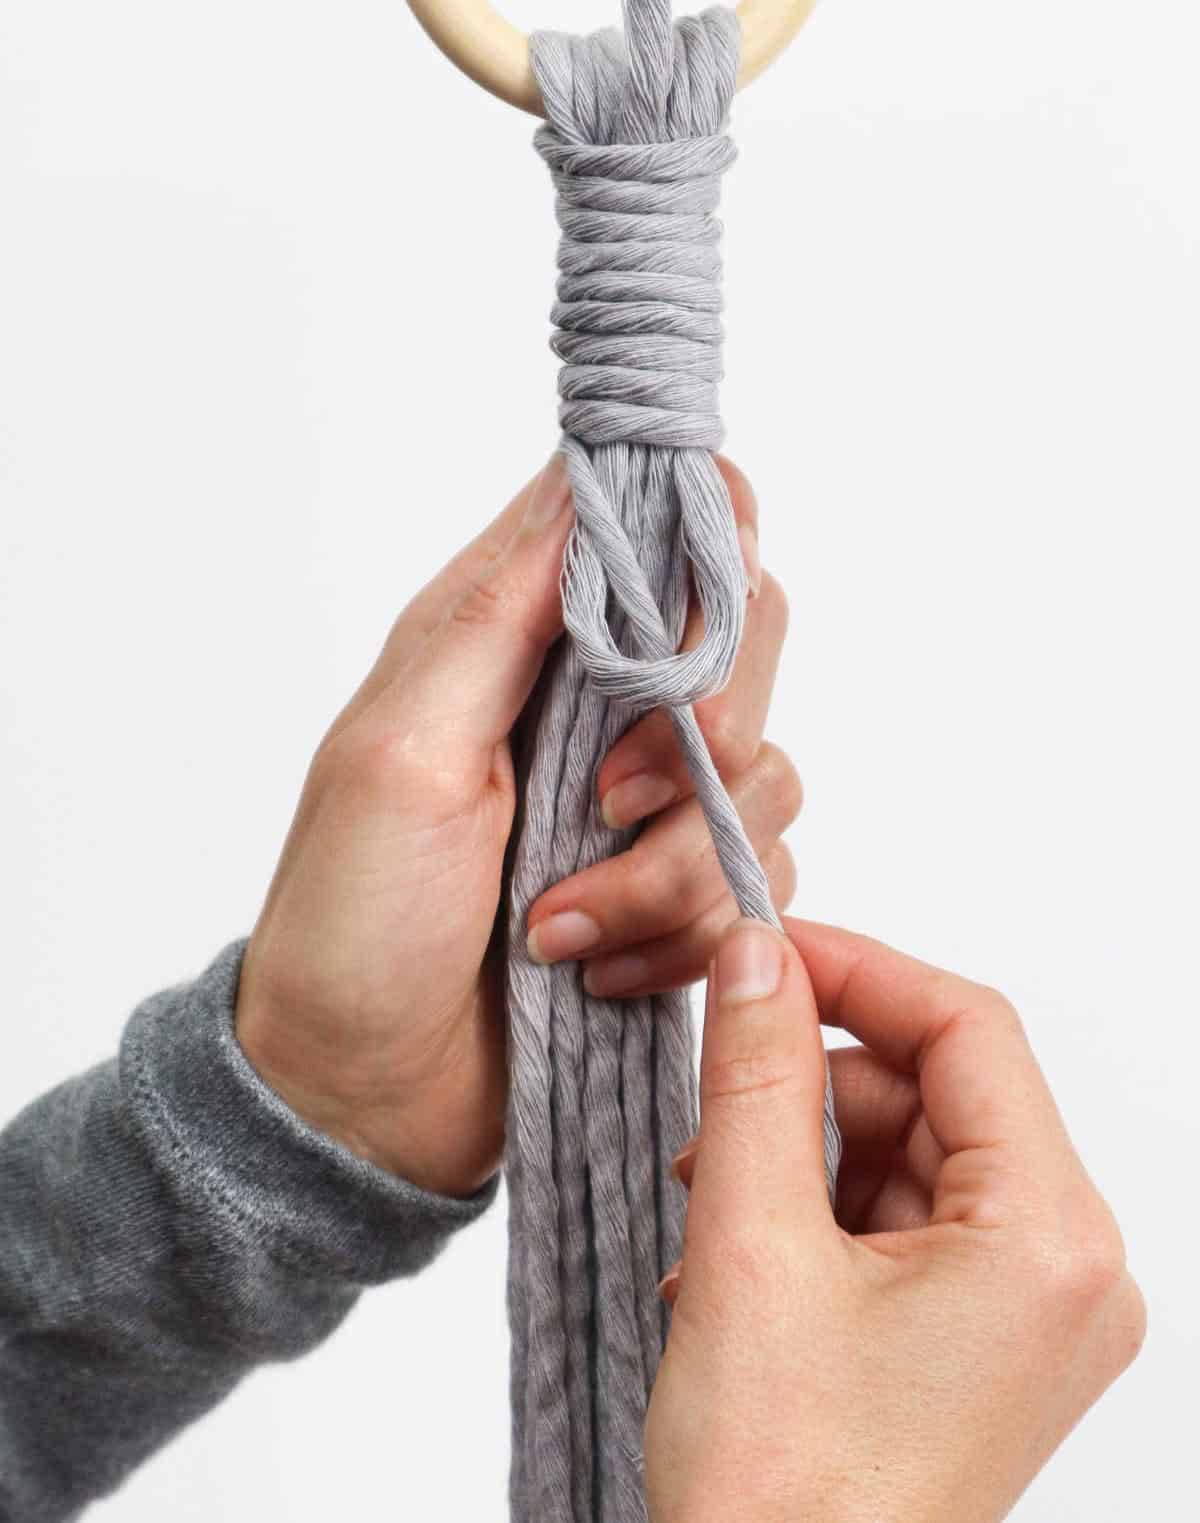
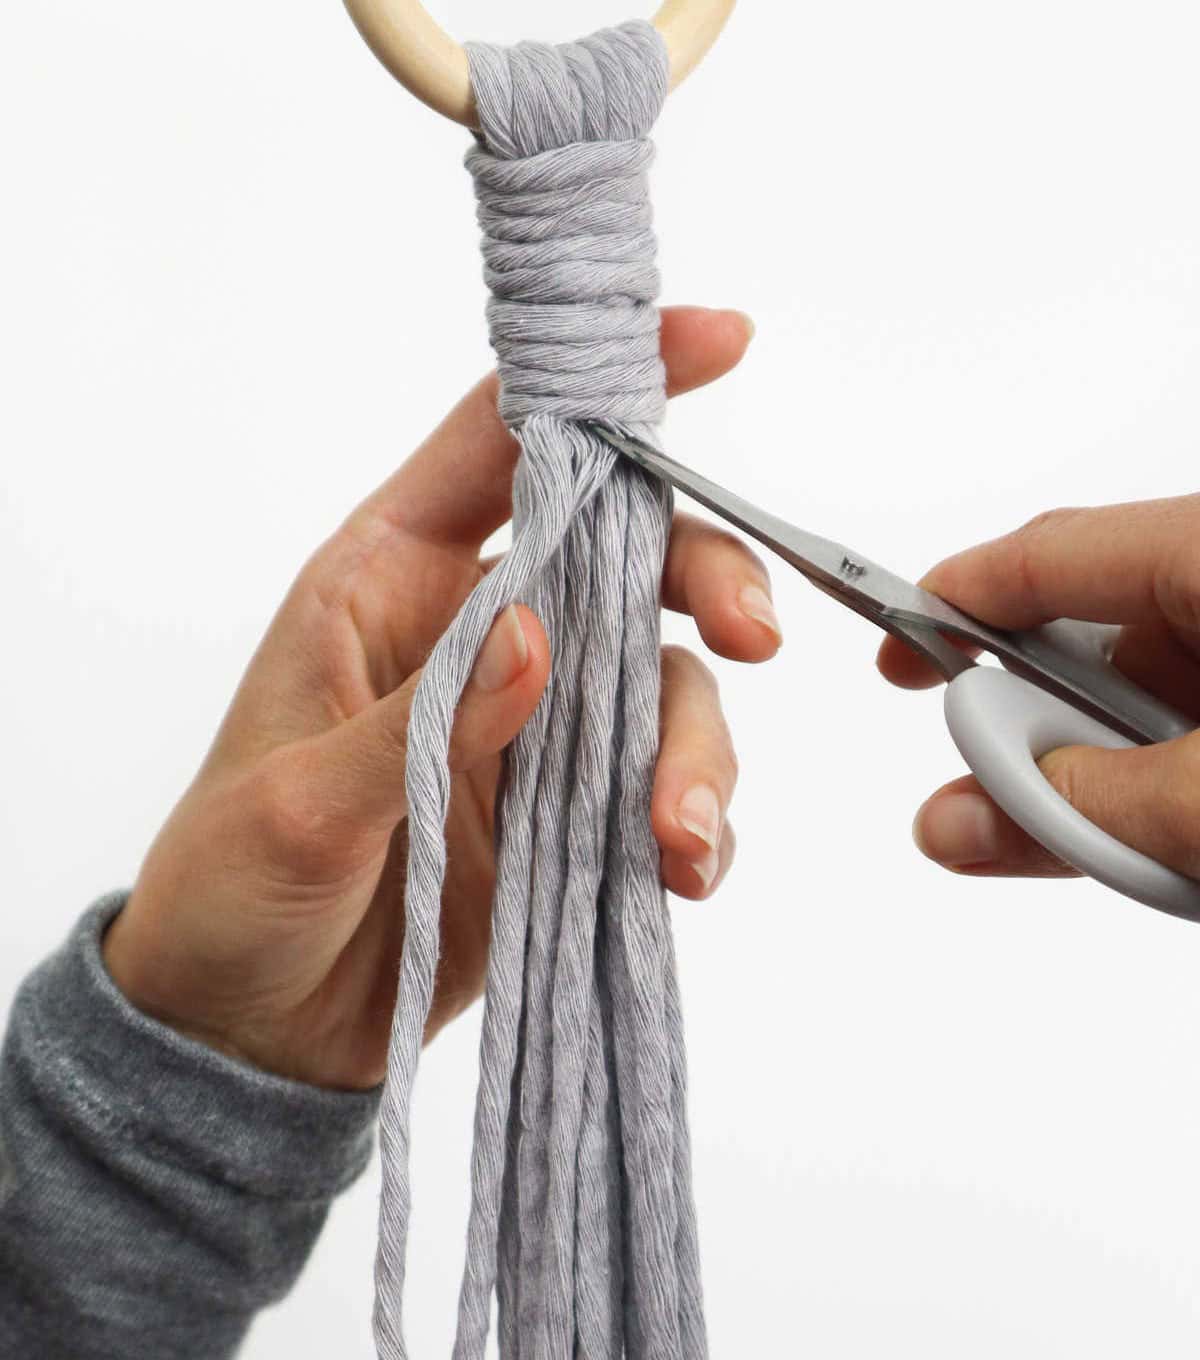
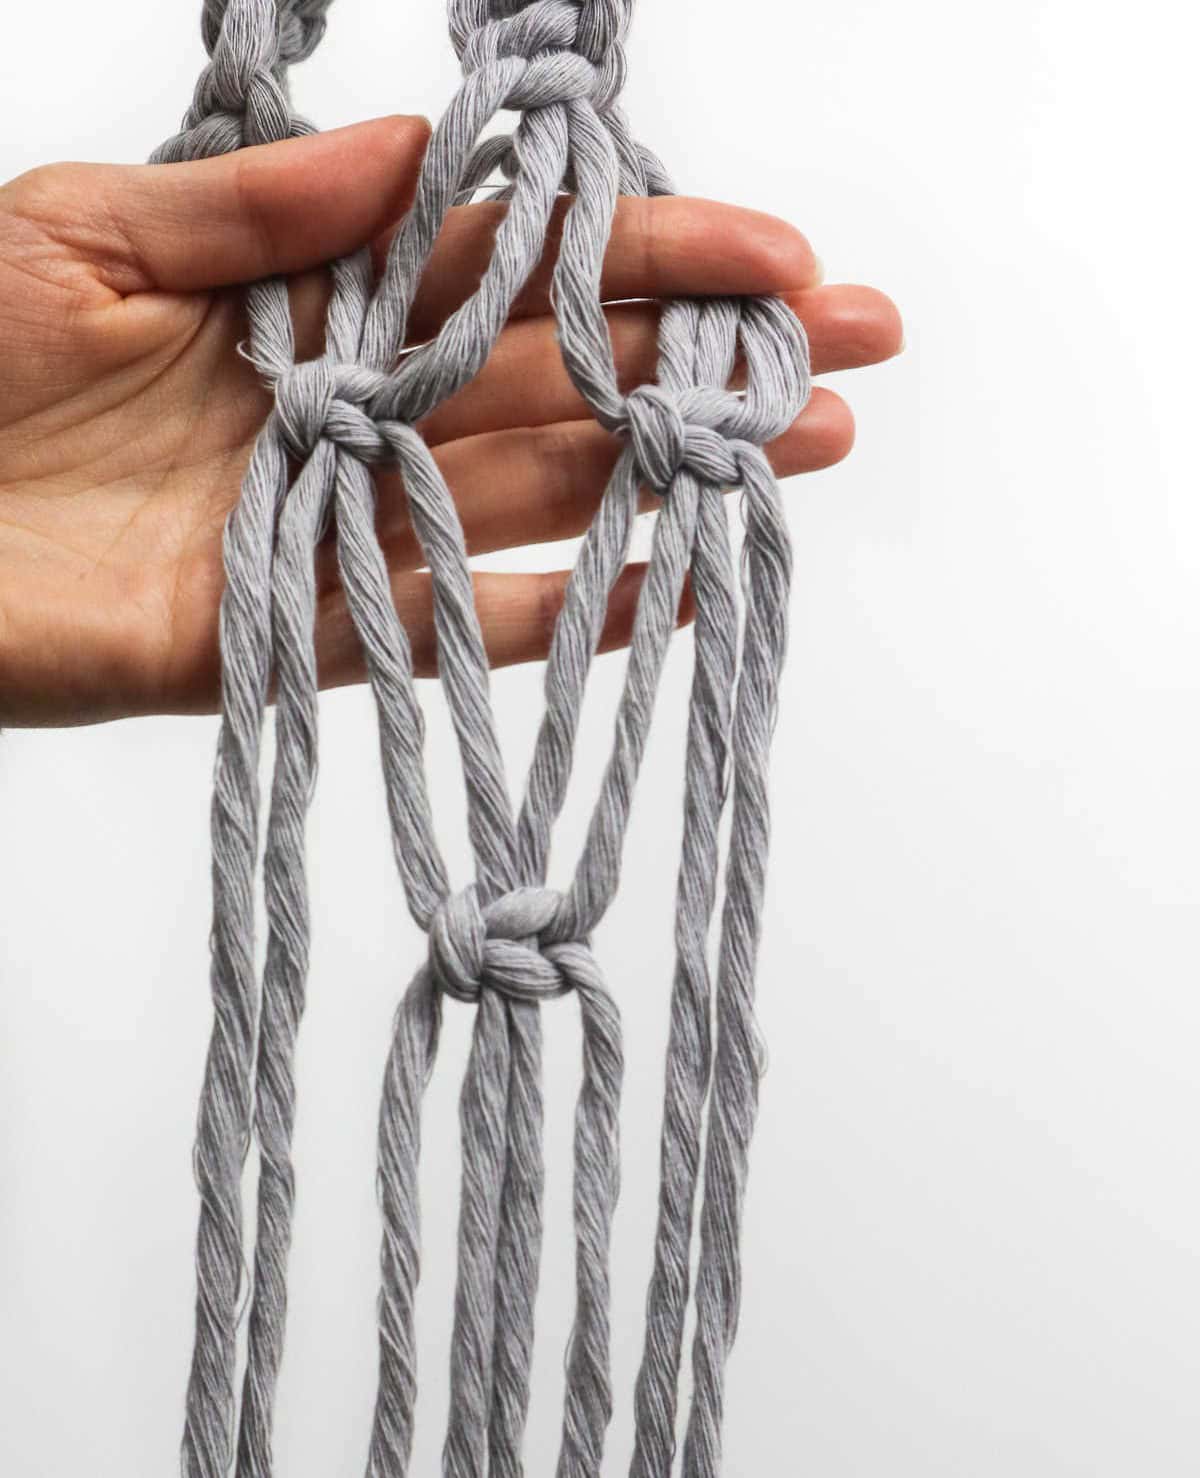
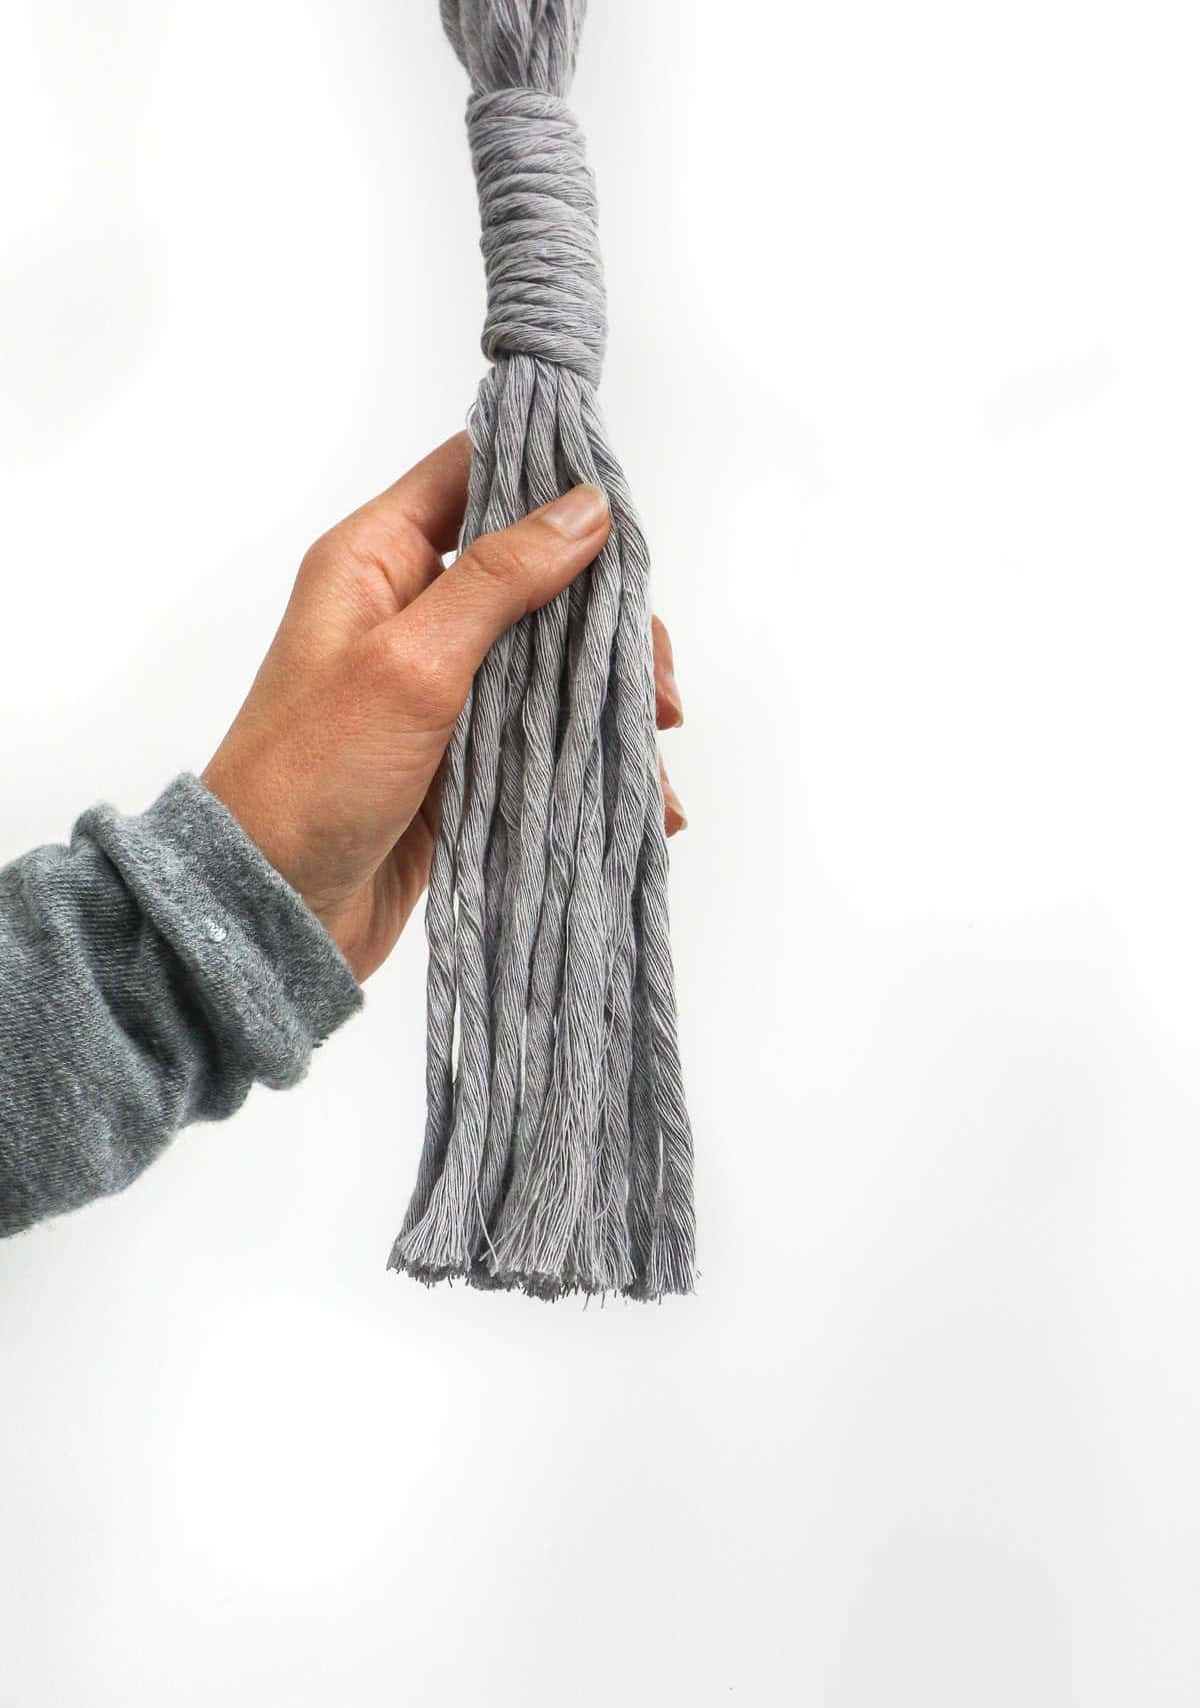
Once you’re satisfied with the hanger’s appearance, it’s time to secure everything in place. Start by gathering all 16 strands together, holding them steady while you prepare to create another crucial knot at the base.
You may remember this process from earlier – simply loop one end of the 40″ strand into a U-shape and wrap the longer portion around the gathered cords and over the loop itself.
Next, pass the end through the loop and gently tug on both ends to coax the loop beneath the strands. Finally, give the two ends a firm tug to tighten the knot in place.
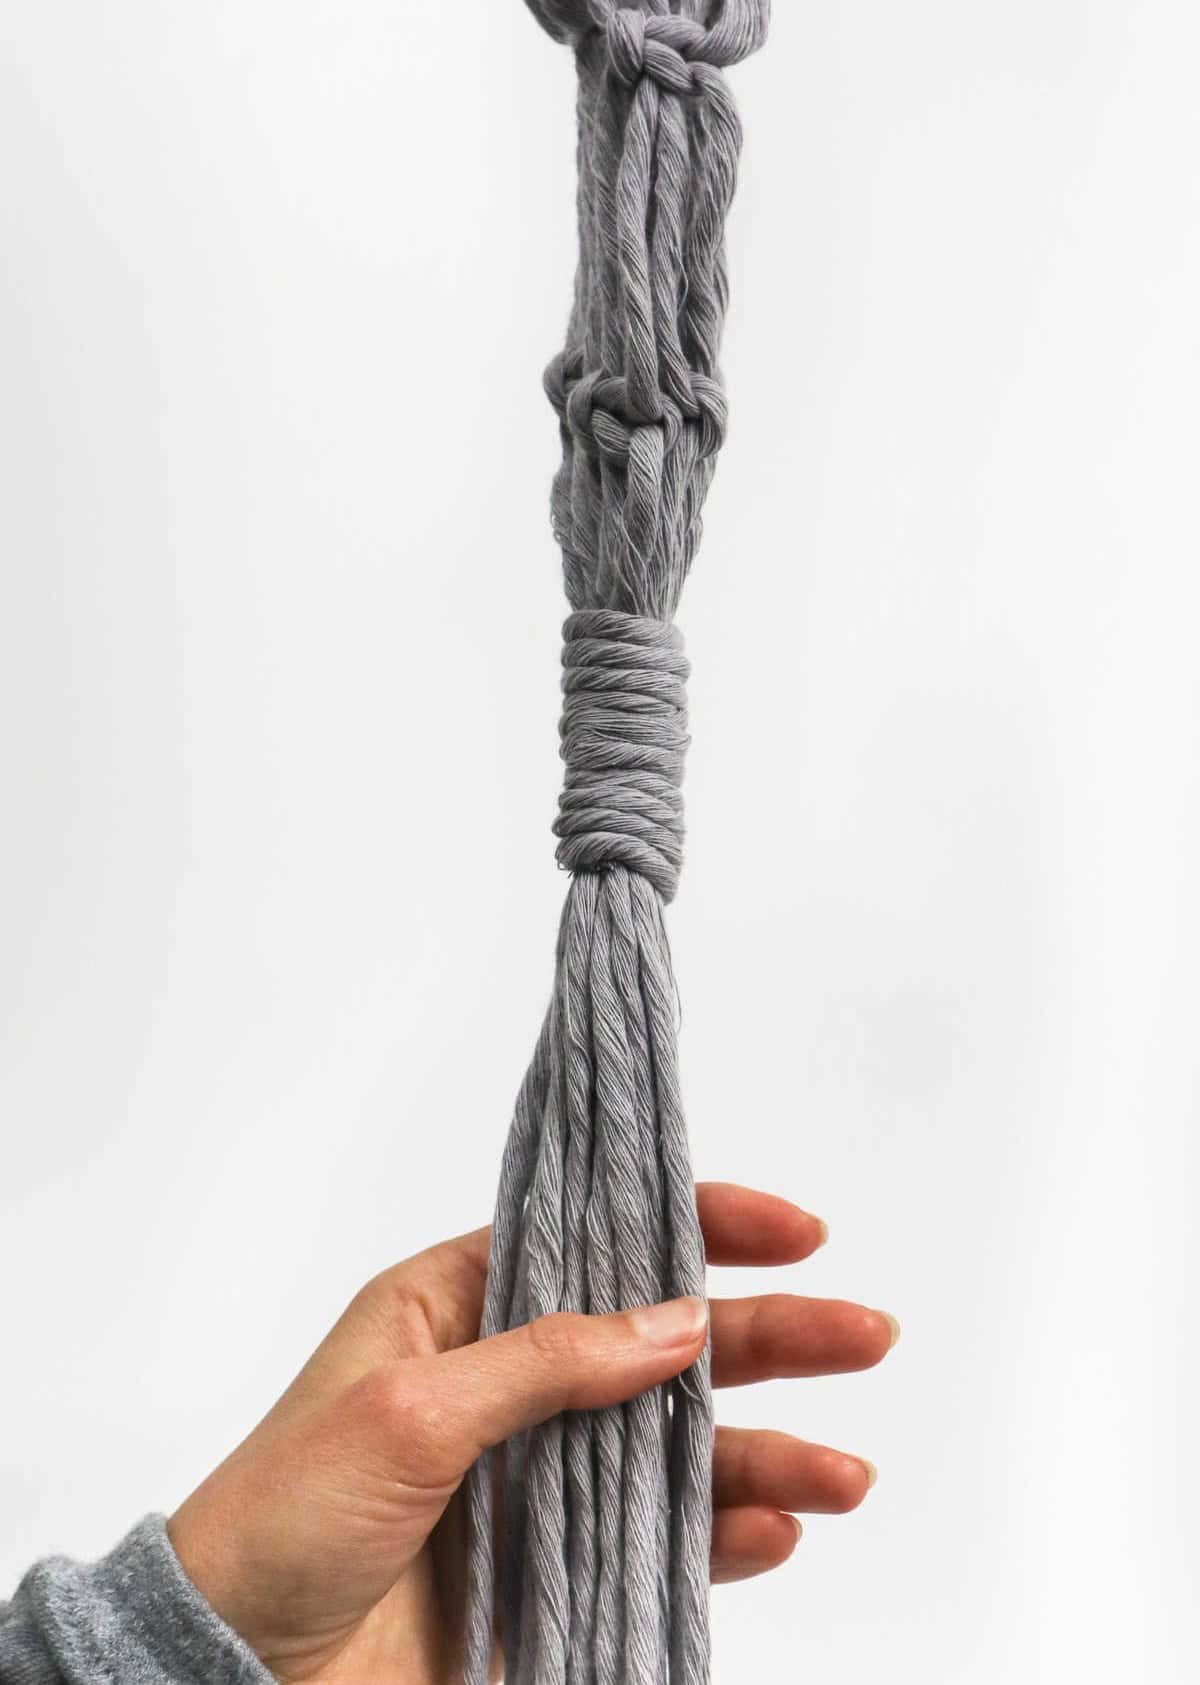
Step 18
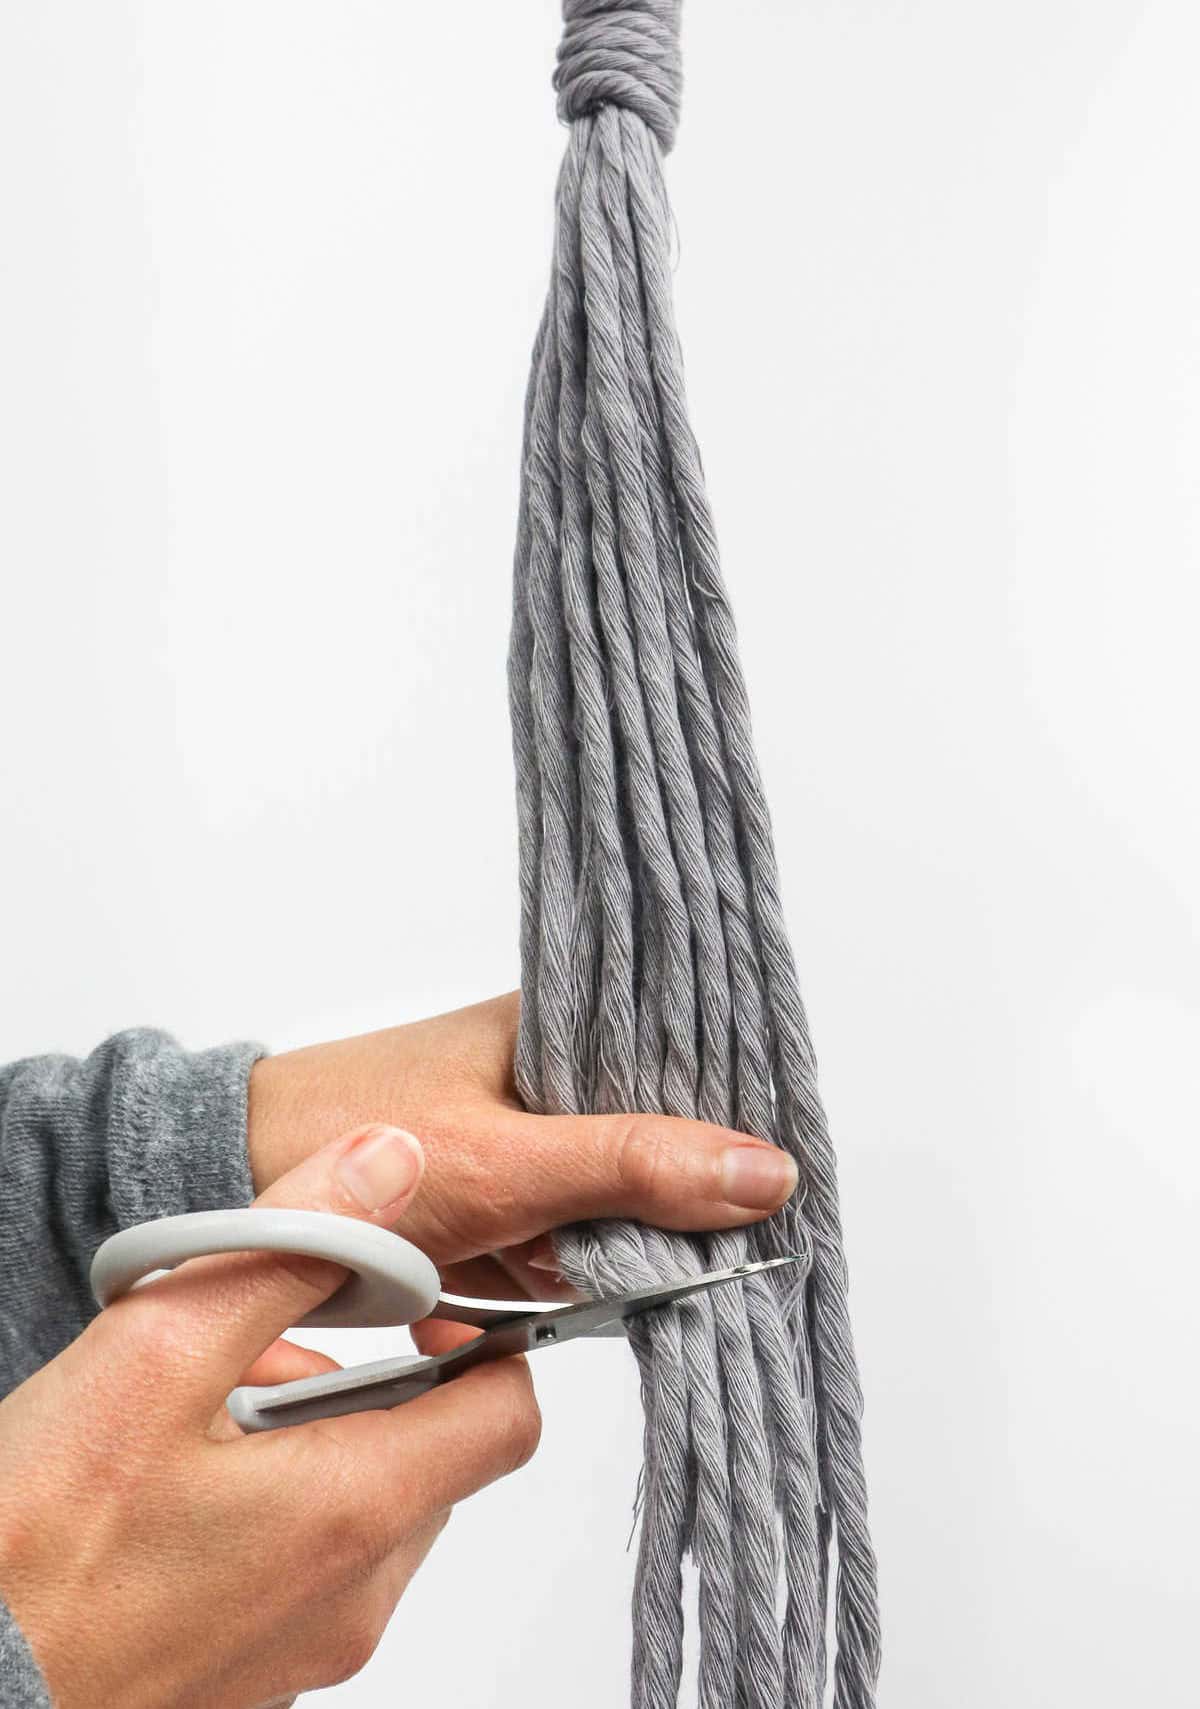
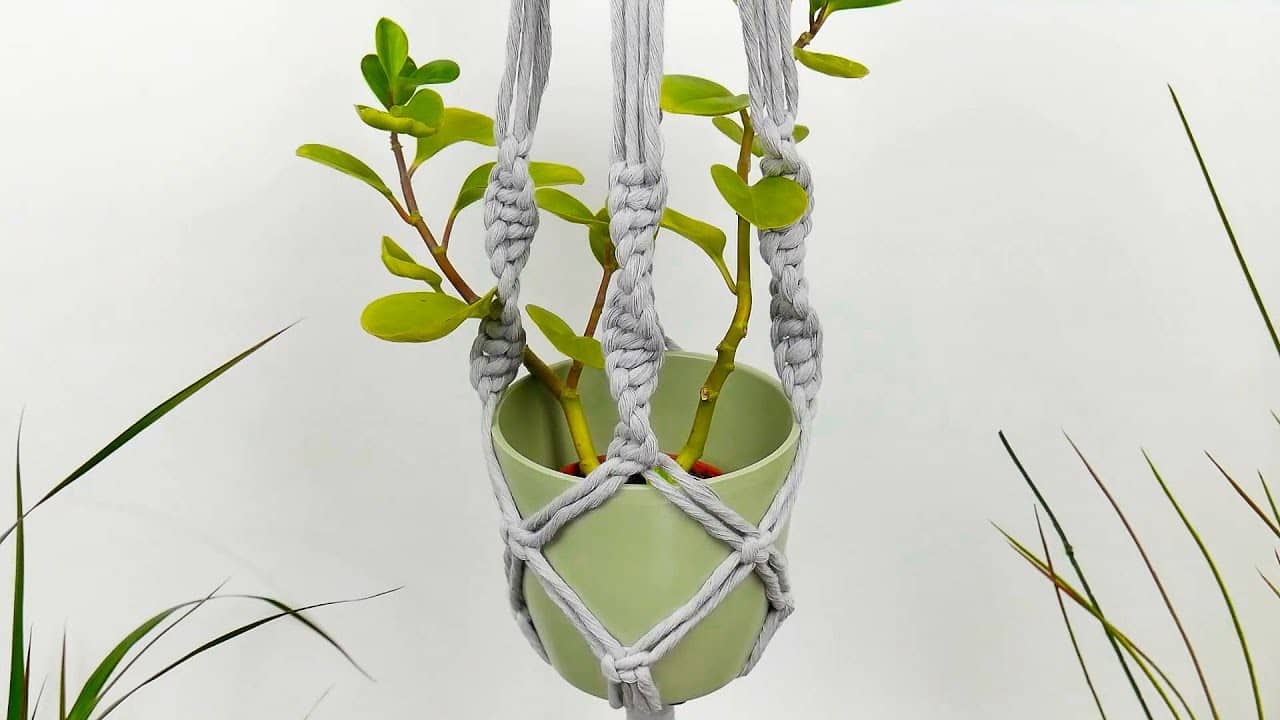
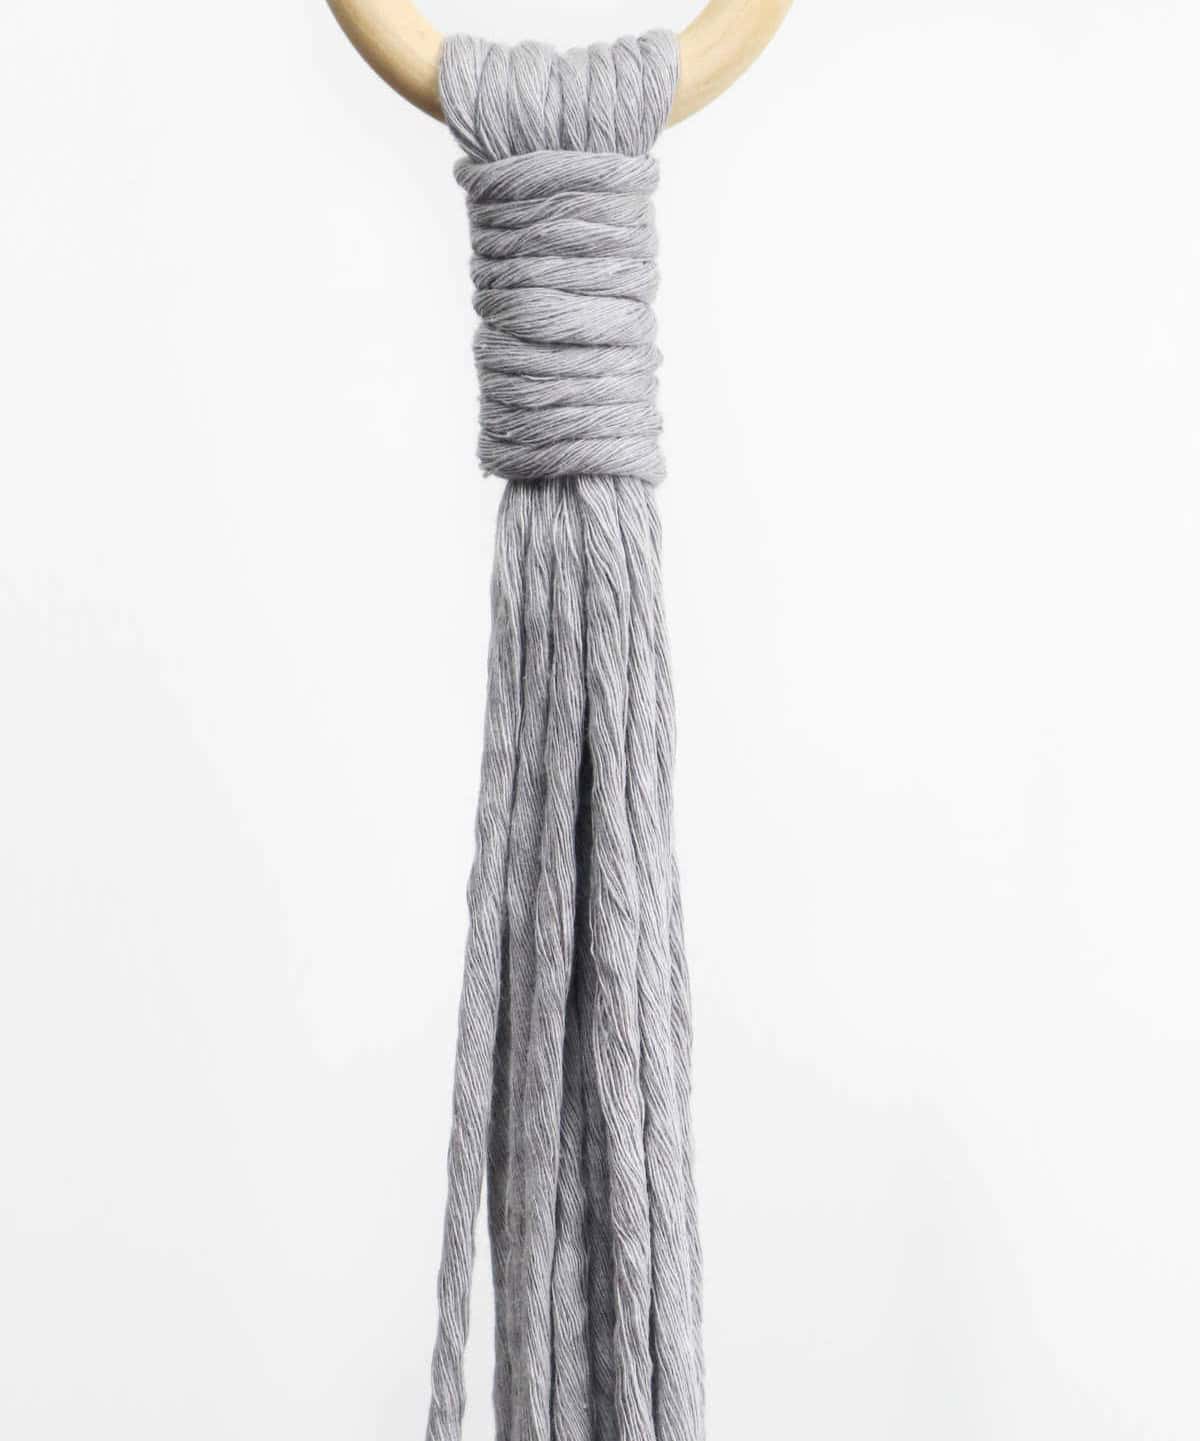
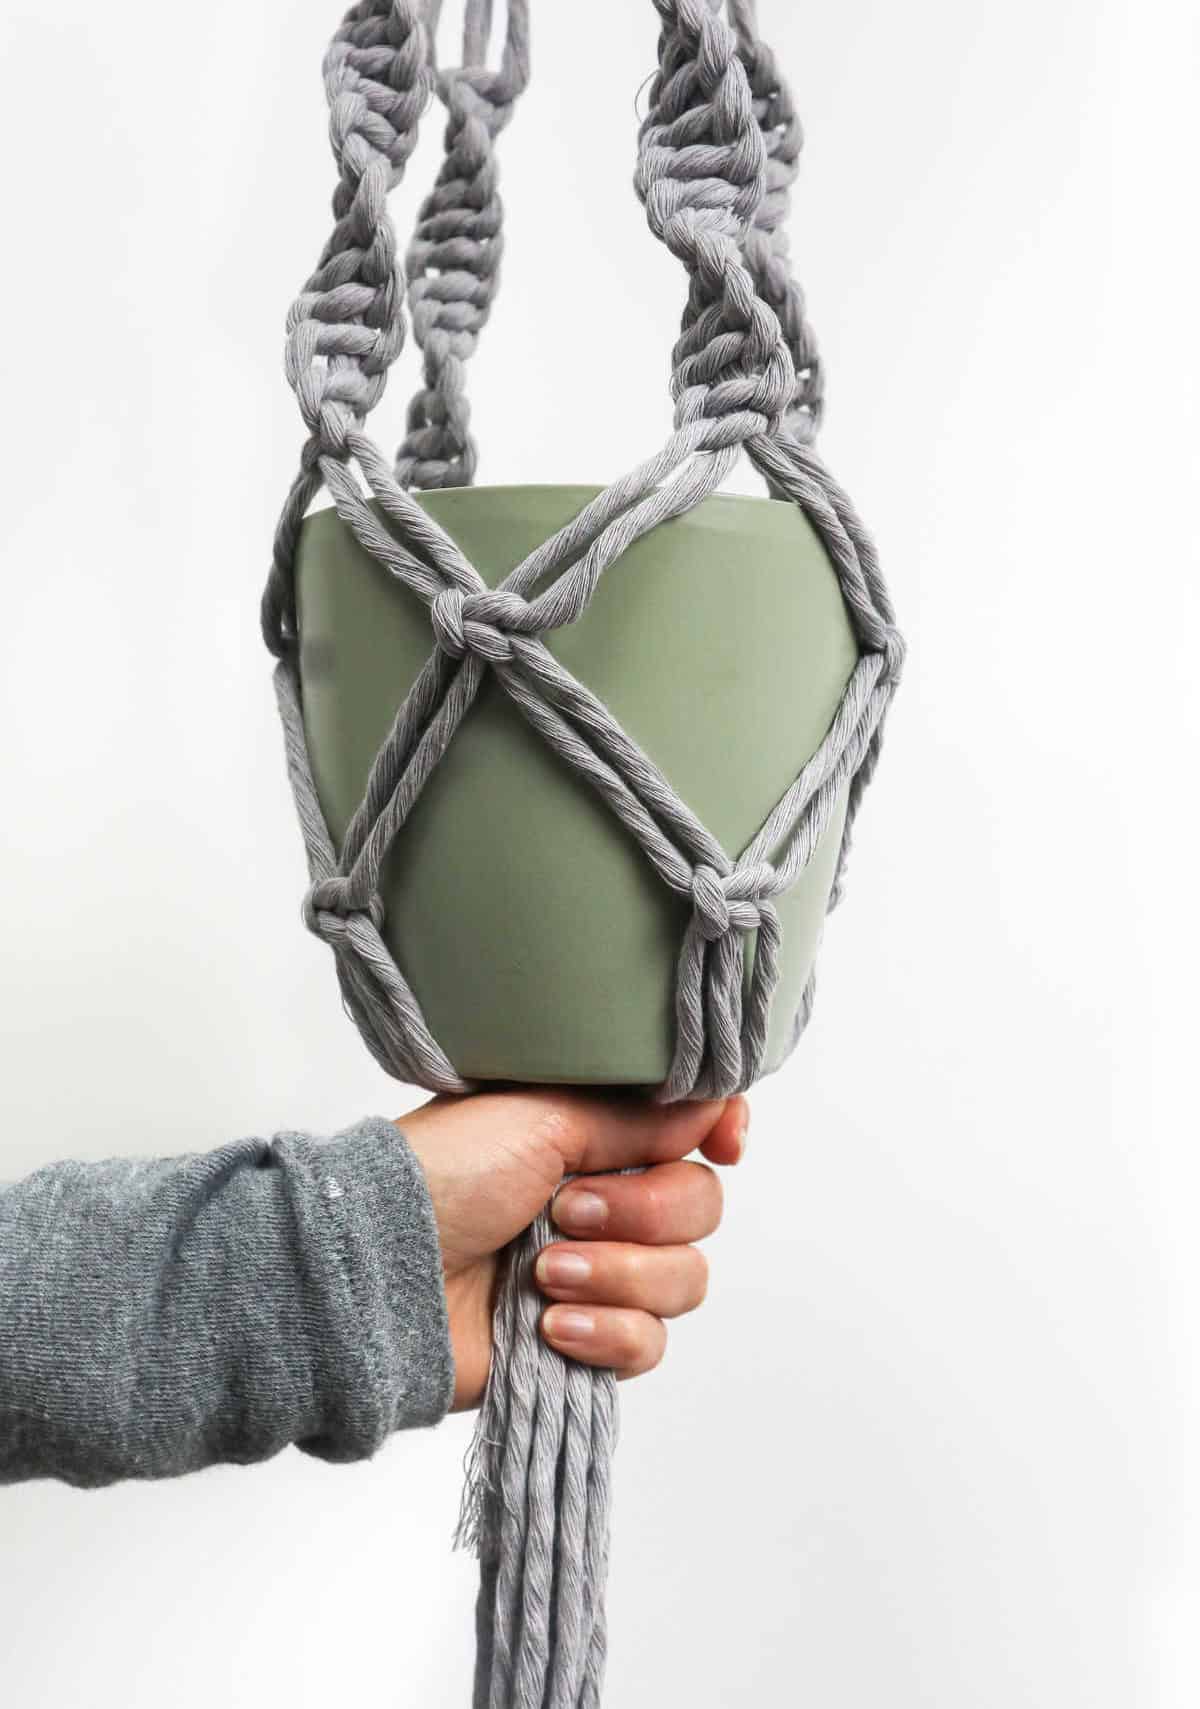
To complete your macrame hanger, simply trim the ends of the strands with scissors, ensuring they are cut evenly. You may choose to leave a short tail beneath the pot if you prefer. With this final step, your piece is now ready for display. Simply place the pot inside and hang it up – voilà, your beautiful macrame hanger is complete! The end result will be a stunning, handmade piece that adds a touch of elegance to any room.
How to Use This Macrame Plant Hanger?
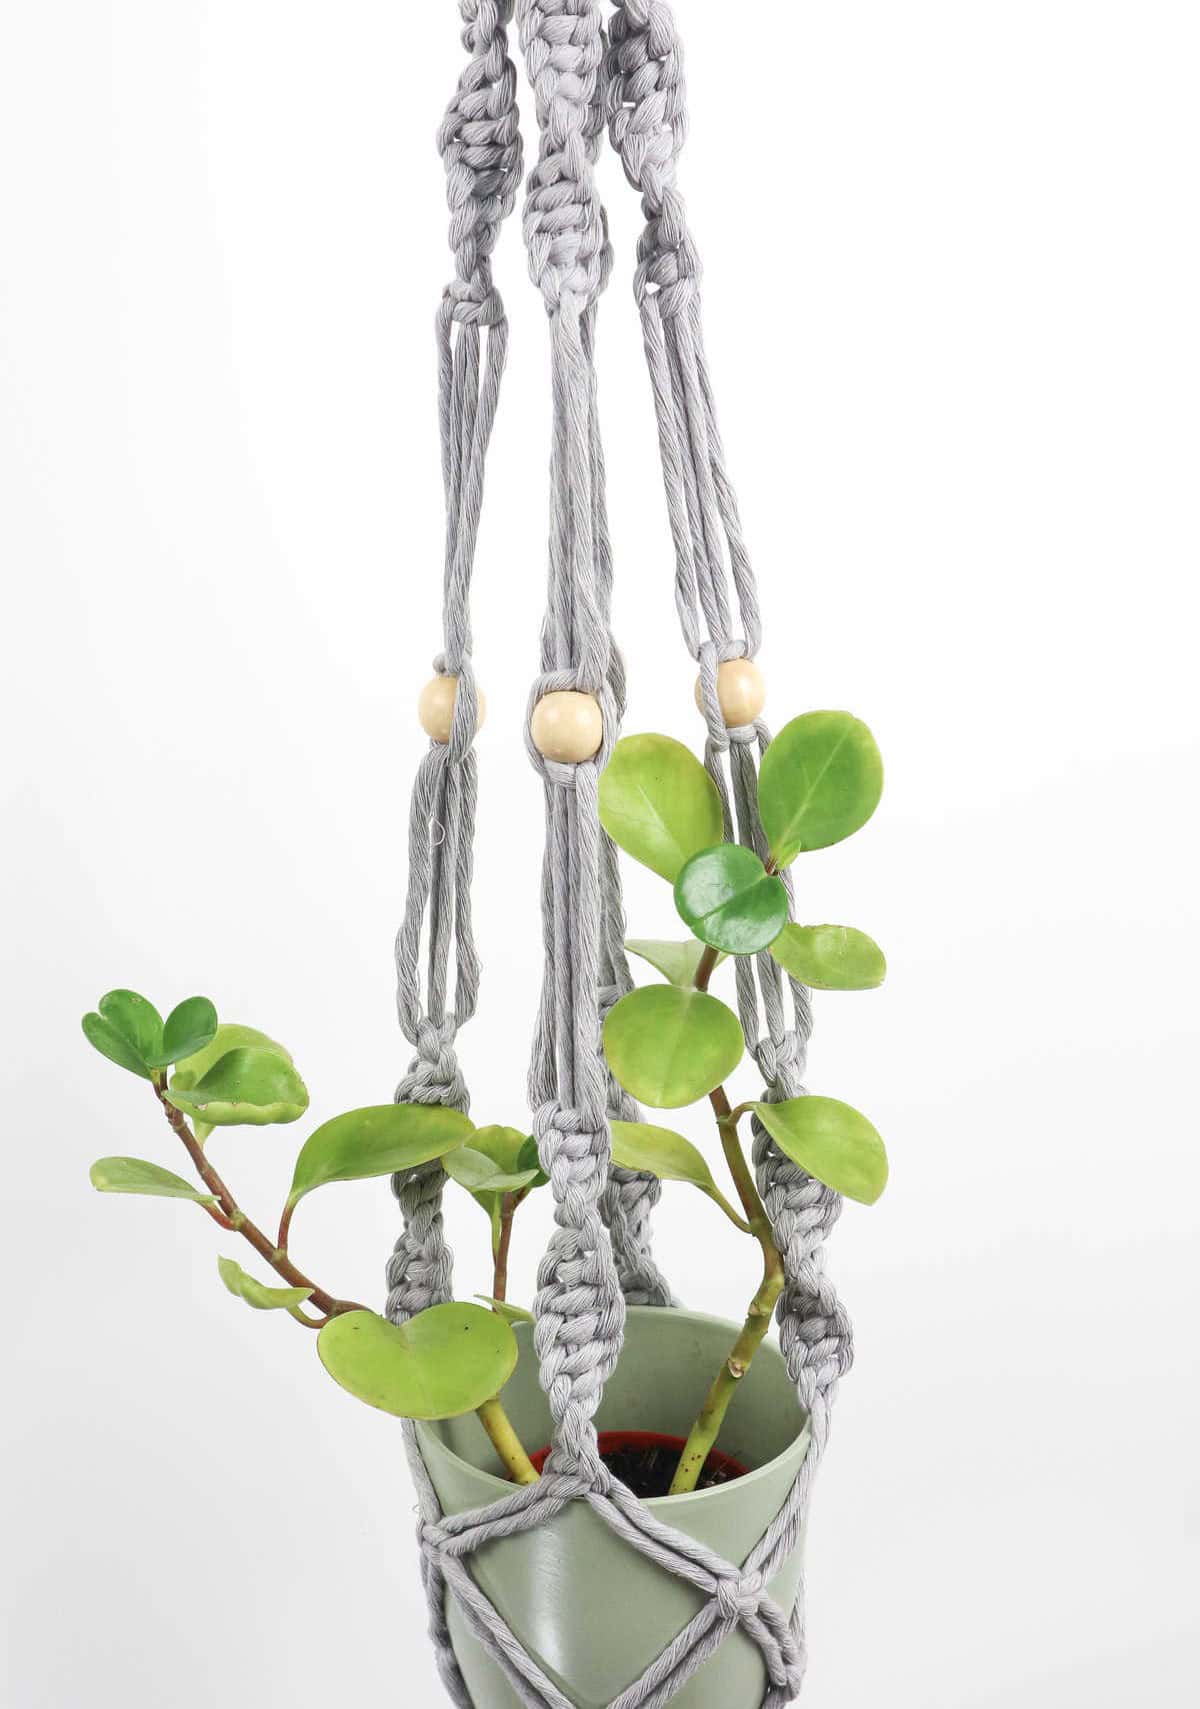
Whether you’re looking to add some greenery to your front porch, deck, or simply want to bring the outdoors in, this versatile plant hanger is perfect for displaying your favorite plants – from money plants and succulents to a wide variety of other species. Its ability to be easily installed using a hook makes it a great addition to any space that can accommodate a little extra flair.
Other Crafts You Might Enjoy Making
Get creative with these DIY projects that will keep you hooked! Macrame enthusiasts, rejoice – we’ve got a fantastic collection of DIY macrame keychains, earrings, and more. But that’s not all! We also have a treasure trove of yarn-based crafts, including rope coasters and scrappy fabric creations. For the upcyclers out there, check out our dollar tree lantern tutorial and tin can crafts galore.
And for those looking to monetize their crafting skills, don’t miss our guide on making crafts to sell. Whether you’re a fan of leafy candle holders or shoelace jewelry, we’ve got 47 DIY projects that’ll keep your hands busy and your creative juices flowing – including upcycled crafts and scrap fabric ideas galore!
DIY Macrame Plant Hanger (Step-by-Step Tutorial)
For those who adore the art of macrame, crafting a DIY plant hanger is an ideal way to unwind and create something stunning. With only 5 minutes of prep time and 55 minutes spent actively working on the project, this endeavor can be completed in just one hour. Whether you’re new to the world of macrame or a seasoned pro, this beautiful decoration is accessible for anyone looking to add a touch of handmade elegance to their space.
Materials
When it comes to crafting your own jewelry, the right materials can make all the difference. For this project, you’ll need a few basic components. Start with a 3-millimeter cotton cord – its softness and texture will add a unique touch to your finished piece. Next, gather a 2-inch wooden ring, which will serve as the foundation for your design. Finally, consider adding some beads if desired, allowing you to customize the look of your jewelry to fit your personal style.
Instructions
To begin, prepare all necessary materials. Cut 8 cords of 170 inches (14ft) and 2 cords of 40 inches (3.5 ft). Feed all eight strands through a wooden ring, aligning their ends. You should now have 16 equal cords, each measuring 85” in length. Gather the cords just beneath the ring and secure them with a 40” cord using a gathering knot. Tug gently to ensure the knot is tight. Next, divide the 16 cords into four sections of four strands each.
Hold the two middle cords in place as you create spiraling knots with the left strand serving as the lead. Repeat this process for the remaining three sections. Verify that all four sections are equal in length and that you’ve created the same number of spiraling knots for each. This will ensure a balanced hanger. Now, it’s time to attach a bead to each section. Starting with one section, leave a 2-3 inch gap from the final spiral knot and create half of a square knot using the left strand.
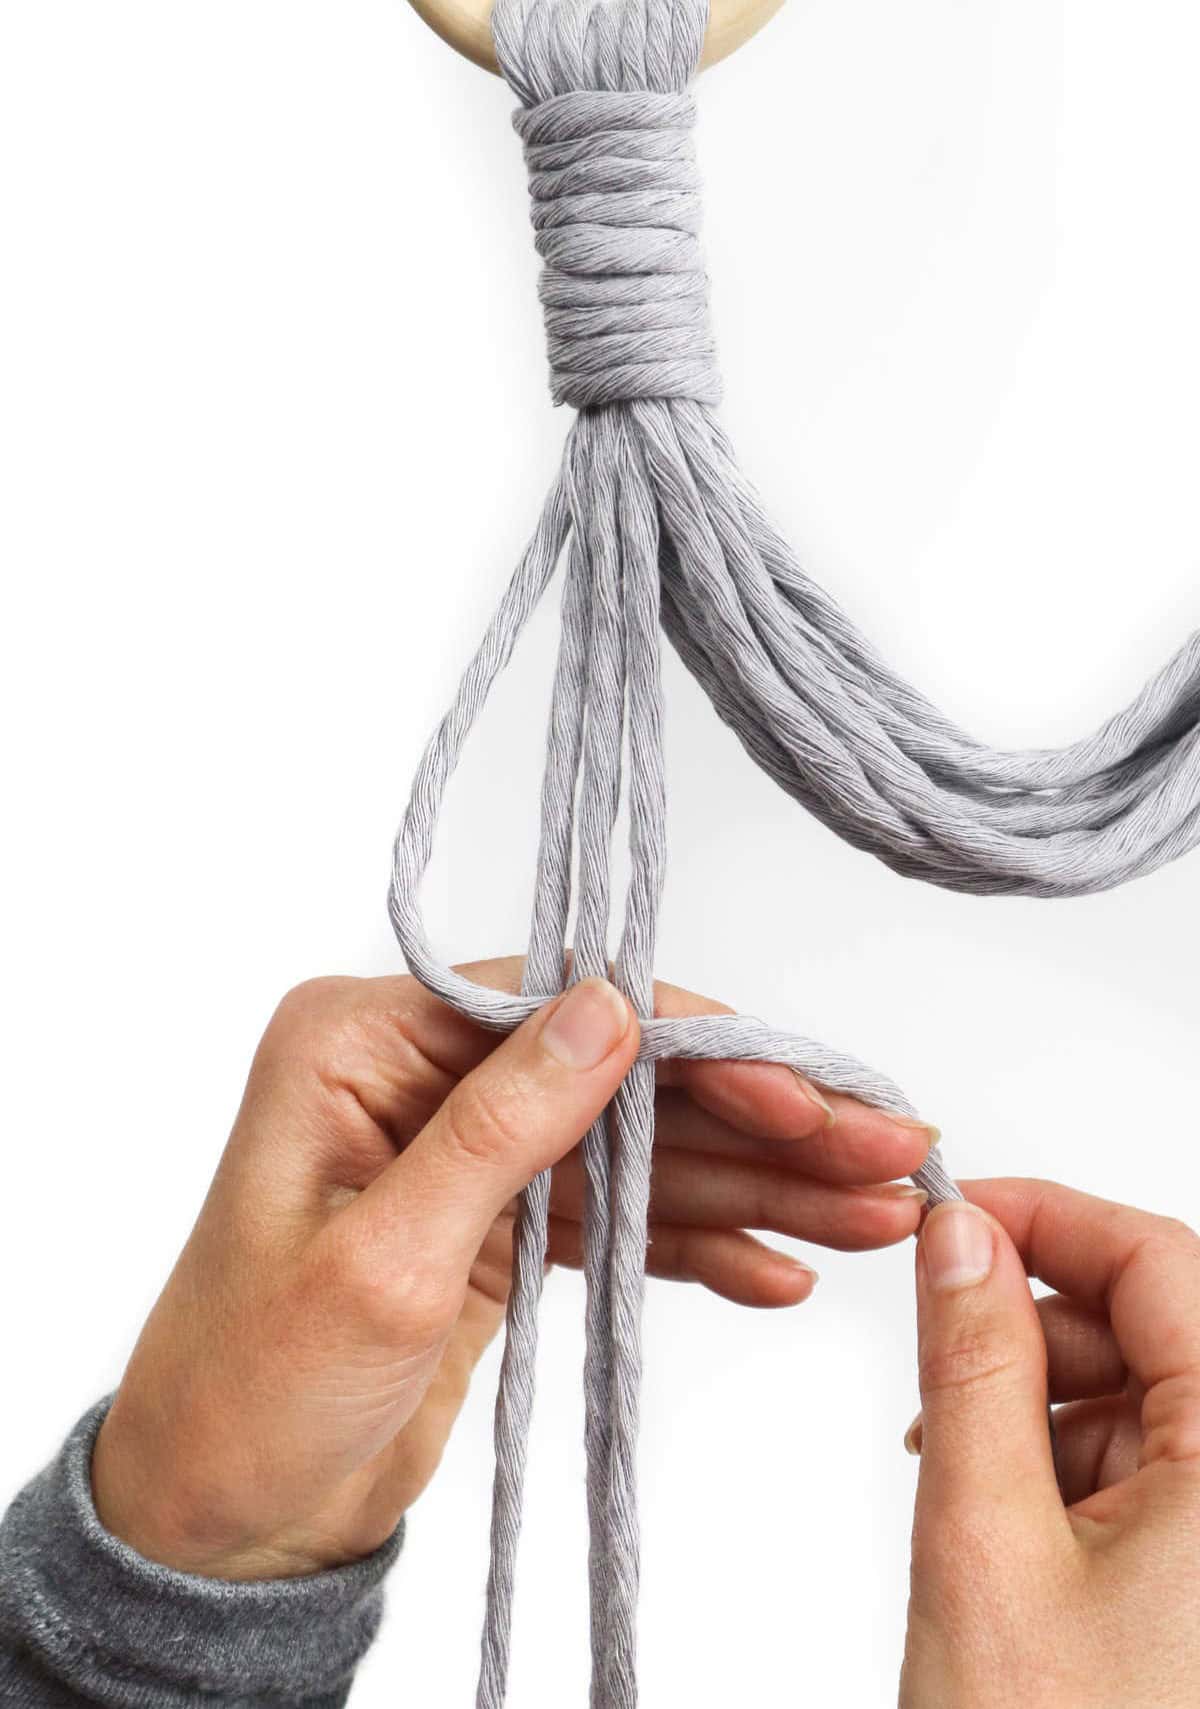
Insert the bead through the middle strands and secure it in place by completing the second half of the square knot (using the right strand). Repeat this process for the remaining three sections. Once again, leave a 2-3 inch gap and create another set of spiraling knots along all four sections. Subsequently, take two adjacent sections and select two strands from the right side of the first section and two strands from the left side of the second section.
Leave a couple of inches gap and make one square knot. Then, grab the two strands on the right from the second section and two strands from the left of the third section and create another square knot. Continue working your way around the four sections until you have a row of four square knots aligned. To determine where to fasten off, place your pot in this hanger and ensure the rim sits just below the last spiral knot. The row of square knots should run along the body of the pot.
Next, gather two strands each from two consecutive sections and create another square knot. This one should be directly under a spiral knot and between two square knots from the previous row. Refer to the image for confirmation on placement. Repeat this process three more times to complete another row. Finally, fasten off your strands by holding the pot in place and gathering the strands beneath its base. Carefully remove the pot without disturbing the strands.
Using the second 40” cord, create another gathering knot and tug gently to secure it. You can then trim the excess cords evenly. If desired, you can leave a few inches for a tail before trimming the ends.