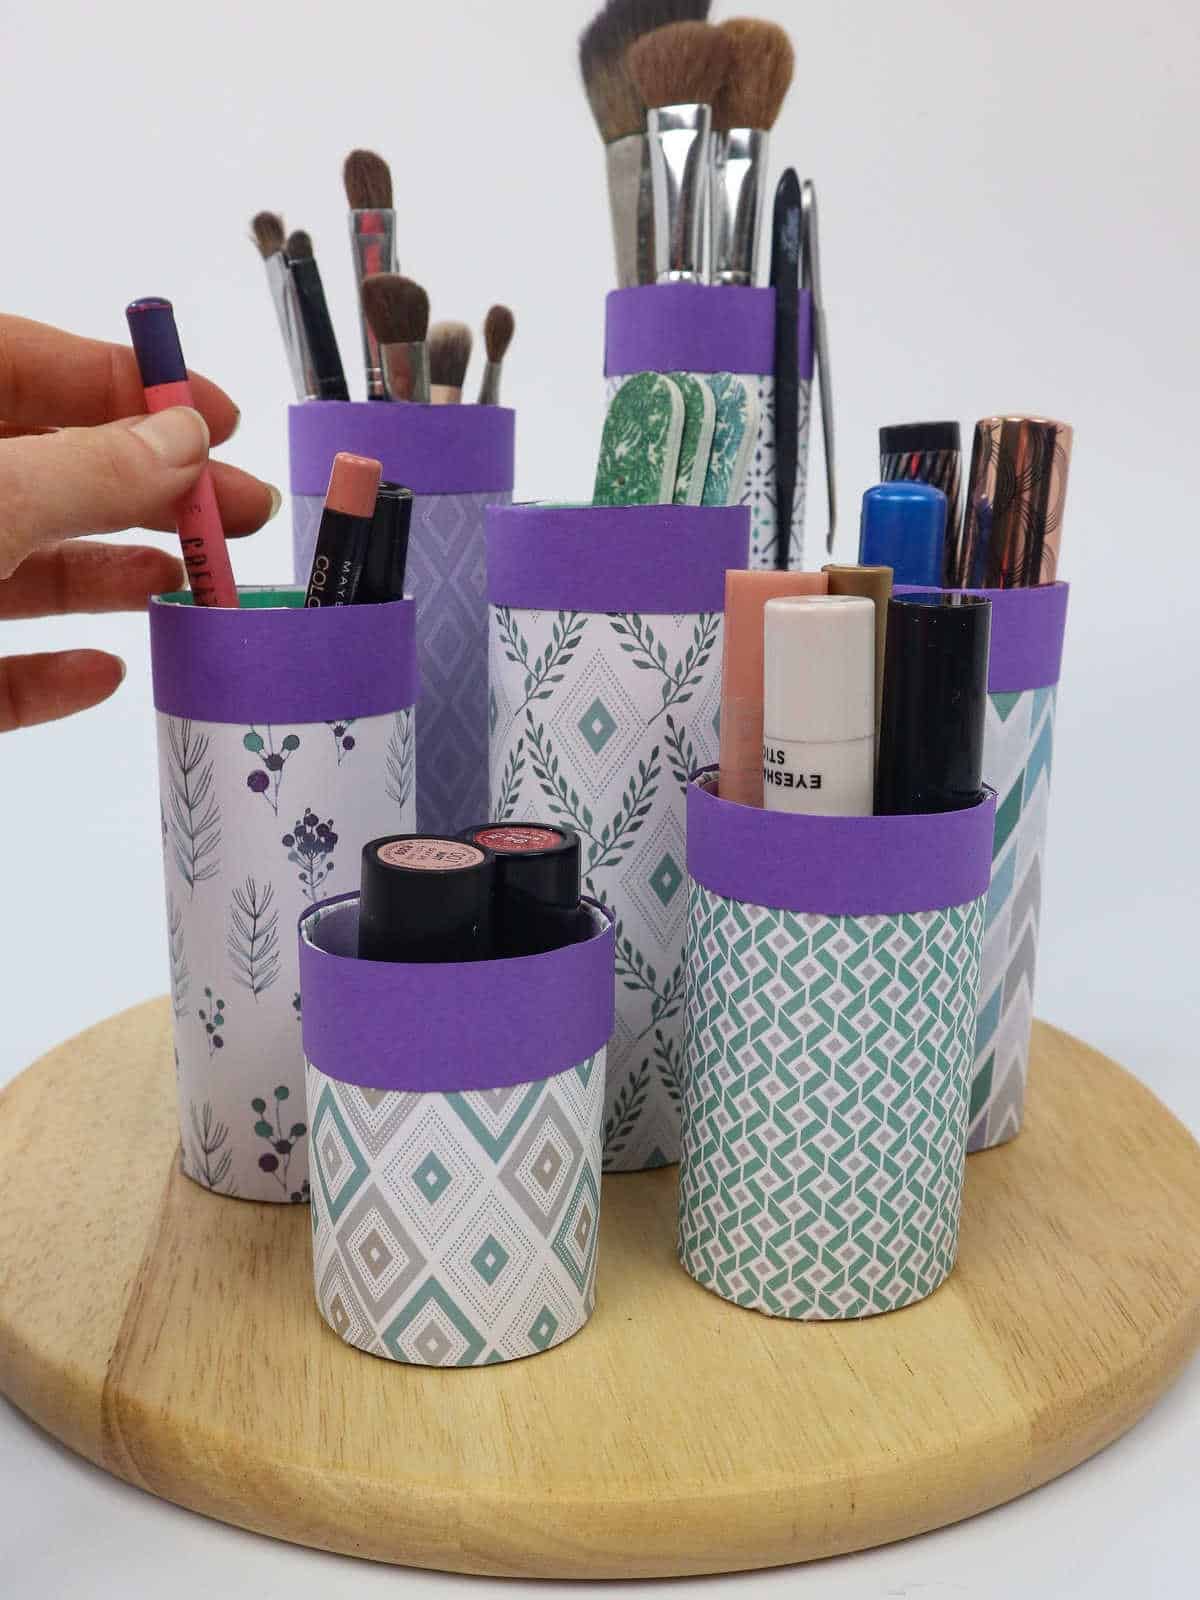
If you’re seeking a straightforward yet engaging approach to organizing your makeup collection, you’ve come to the right place! Today, I’ll be sharing a creative DIY project that will transform your daily routine into a fun and personalized experience. The beauty of this project lies in its adaptability – feel free to customize it according to your needs and preferences. You can opt for as many or as few toilet paper tubes as you like, depending on the size of your makeup collection.
Additionally, the design is entirely up to you; you can keep it simple or get creative with decorations. The example I’ll be sharing falls somewhere in between these two extremes. I’m confident that you’ll have a blast creating this DIY masterpiece and making it your own. If you need any guidance along the way, don’t hesitate to check out my YouTube tutorial for additional support.
Supplies You’ll Need
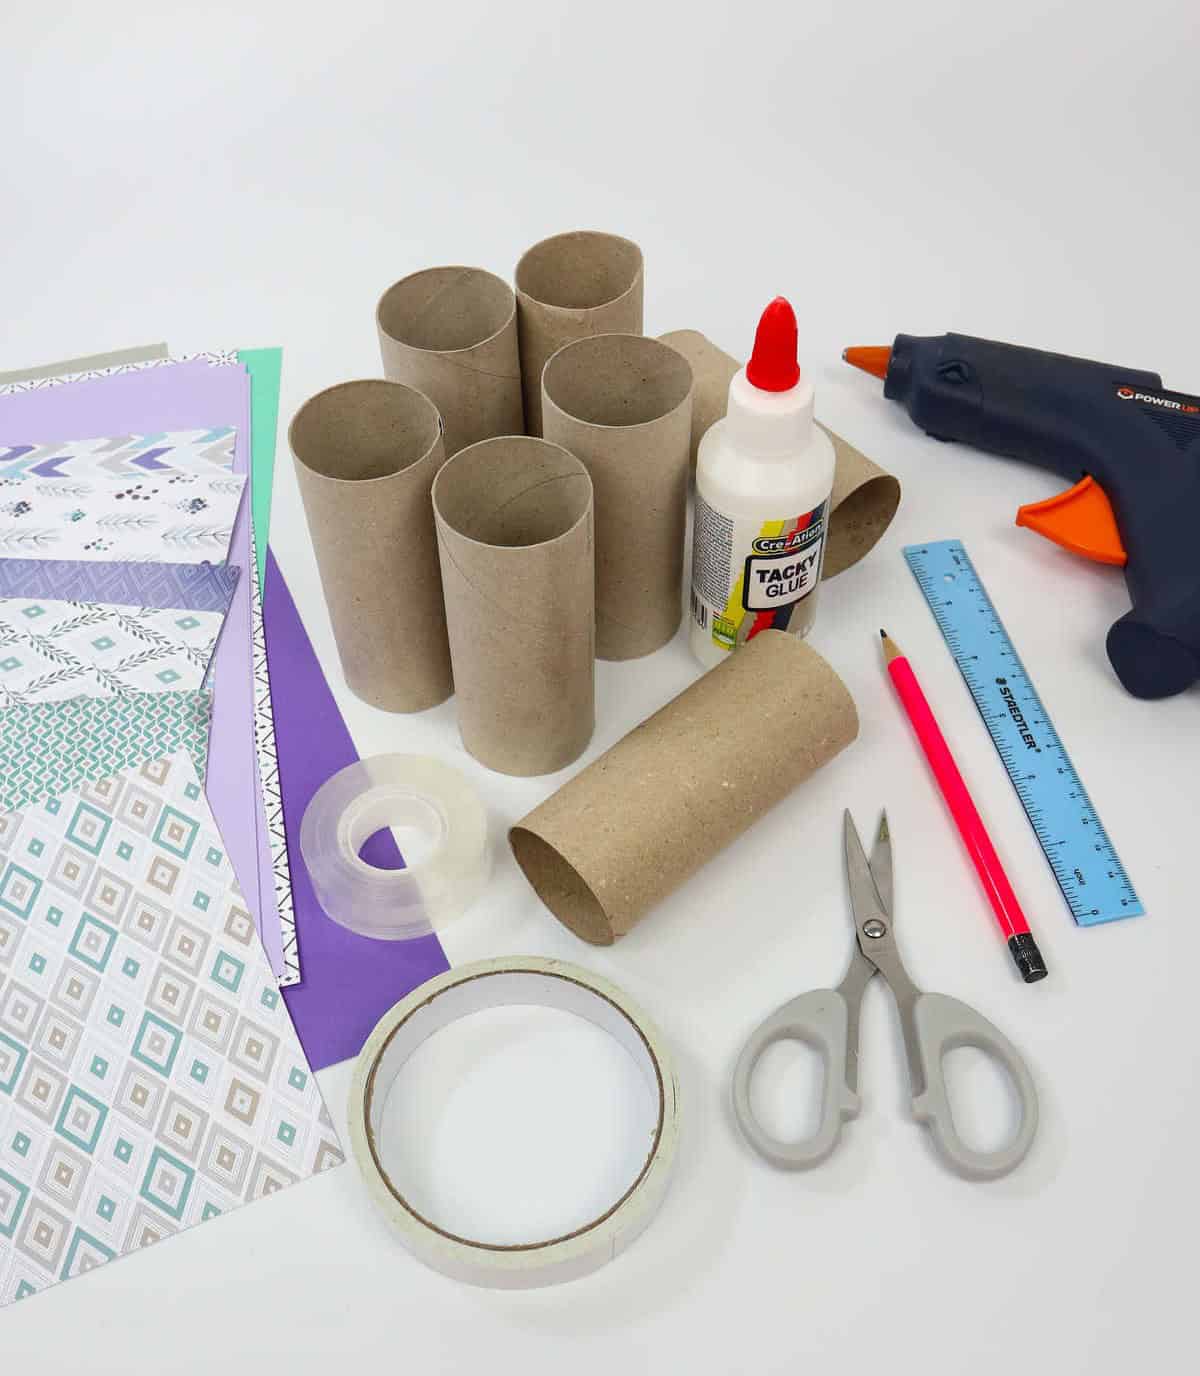
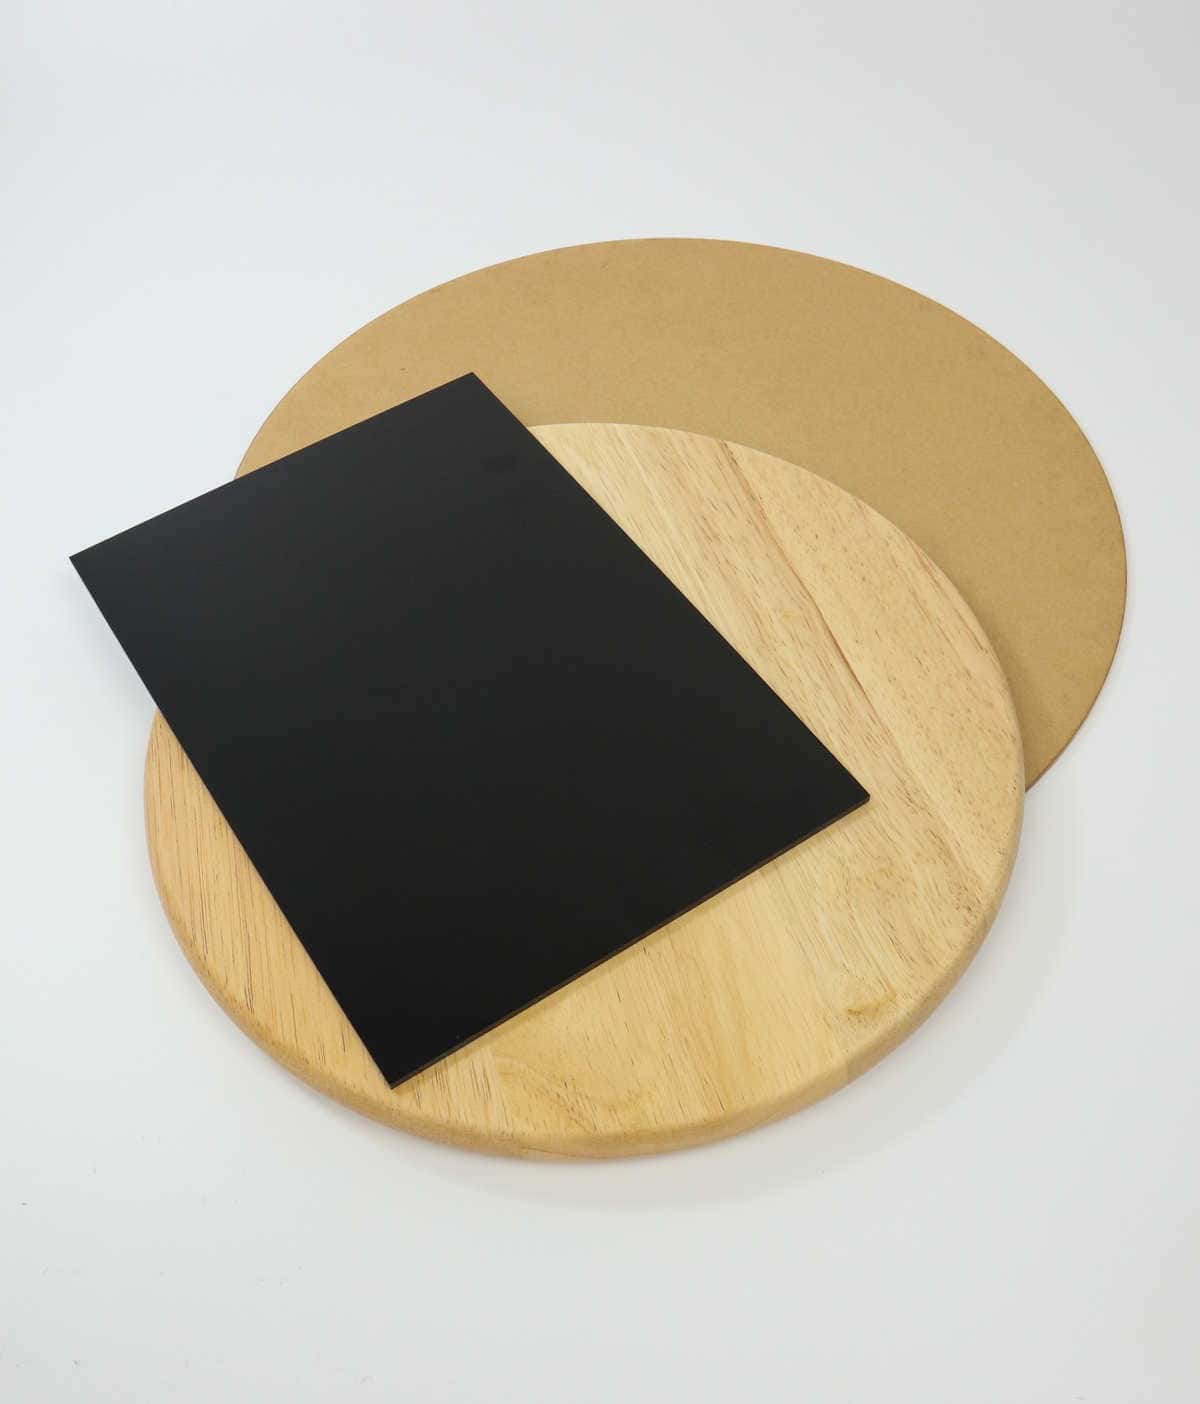
The creative process often requires a mix of conventional and unconventional materials. In this context, we find ourselves combining everyday items with more traditional crafting supplies to produce unique results. Toilet rolls, hot glue guns, craft paper sheets, double-sided tape, clear tape, scissors, rulers, pencils, and paper glue are all staples in the world of DIY projects. Meanwhile, an 8-inch round wood board or a sturdy cardboard/sheet provides a solid foundation for our creations.
How to Make This Makeup Organizer
Step 1
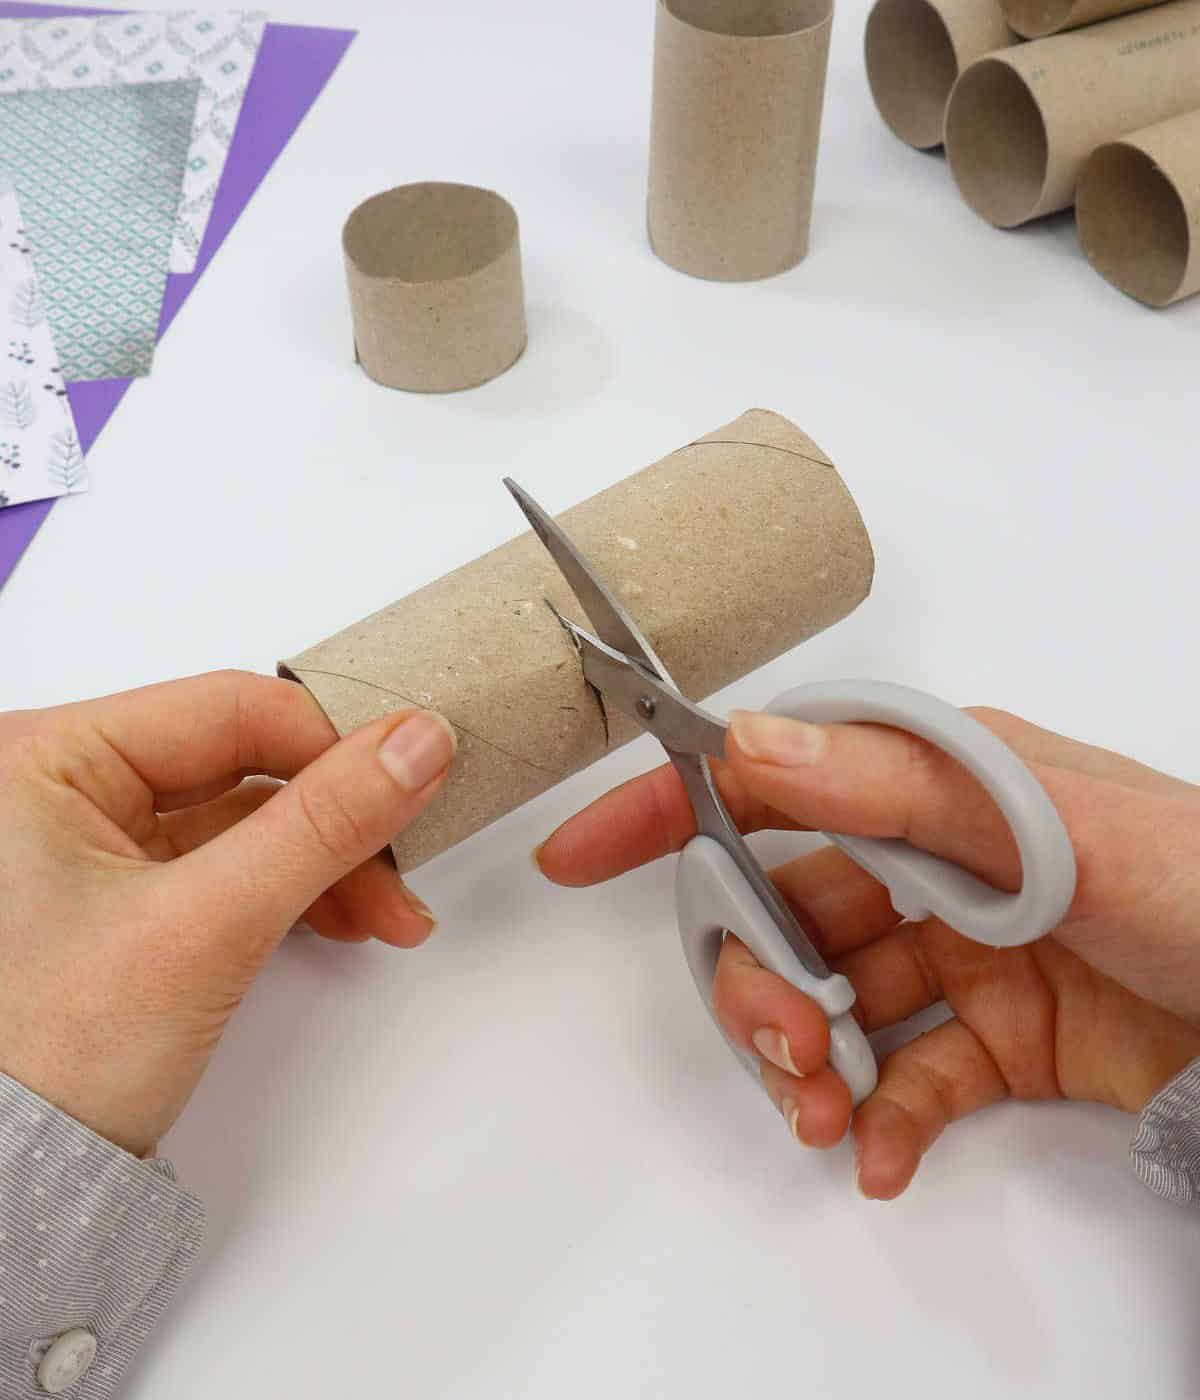
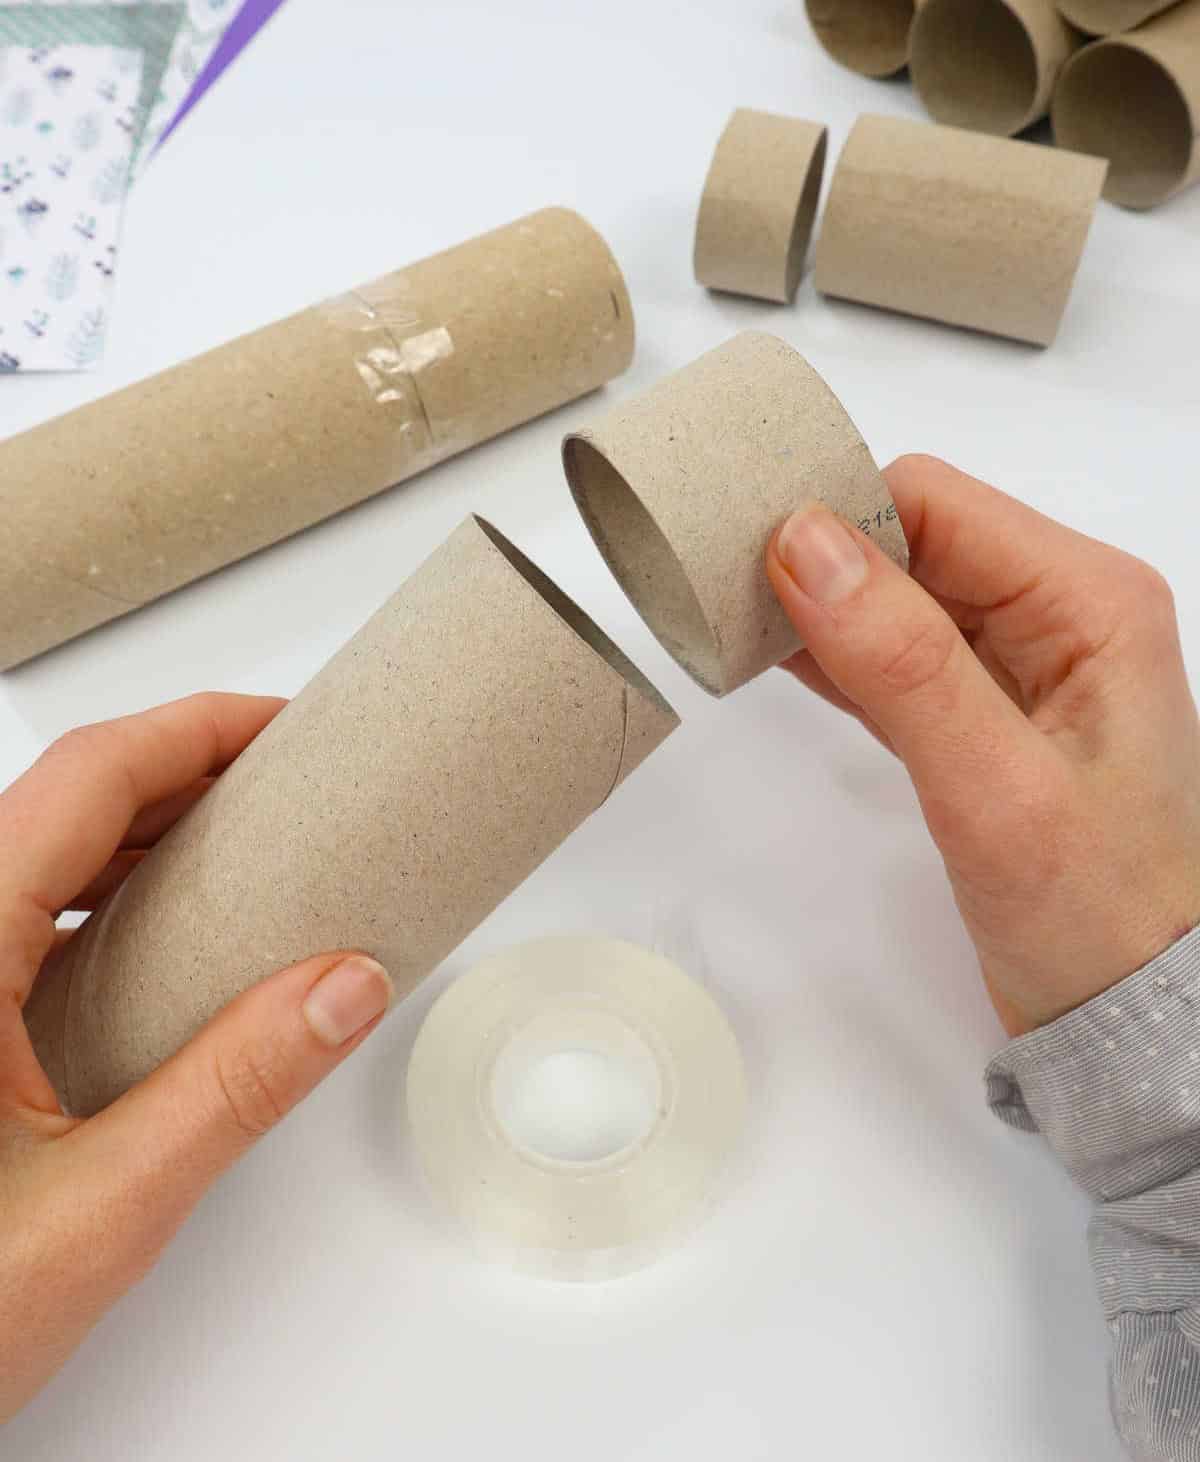
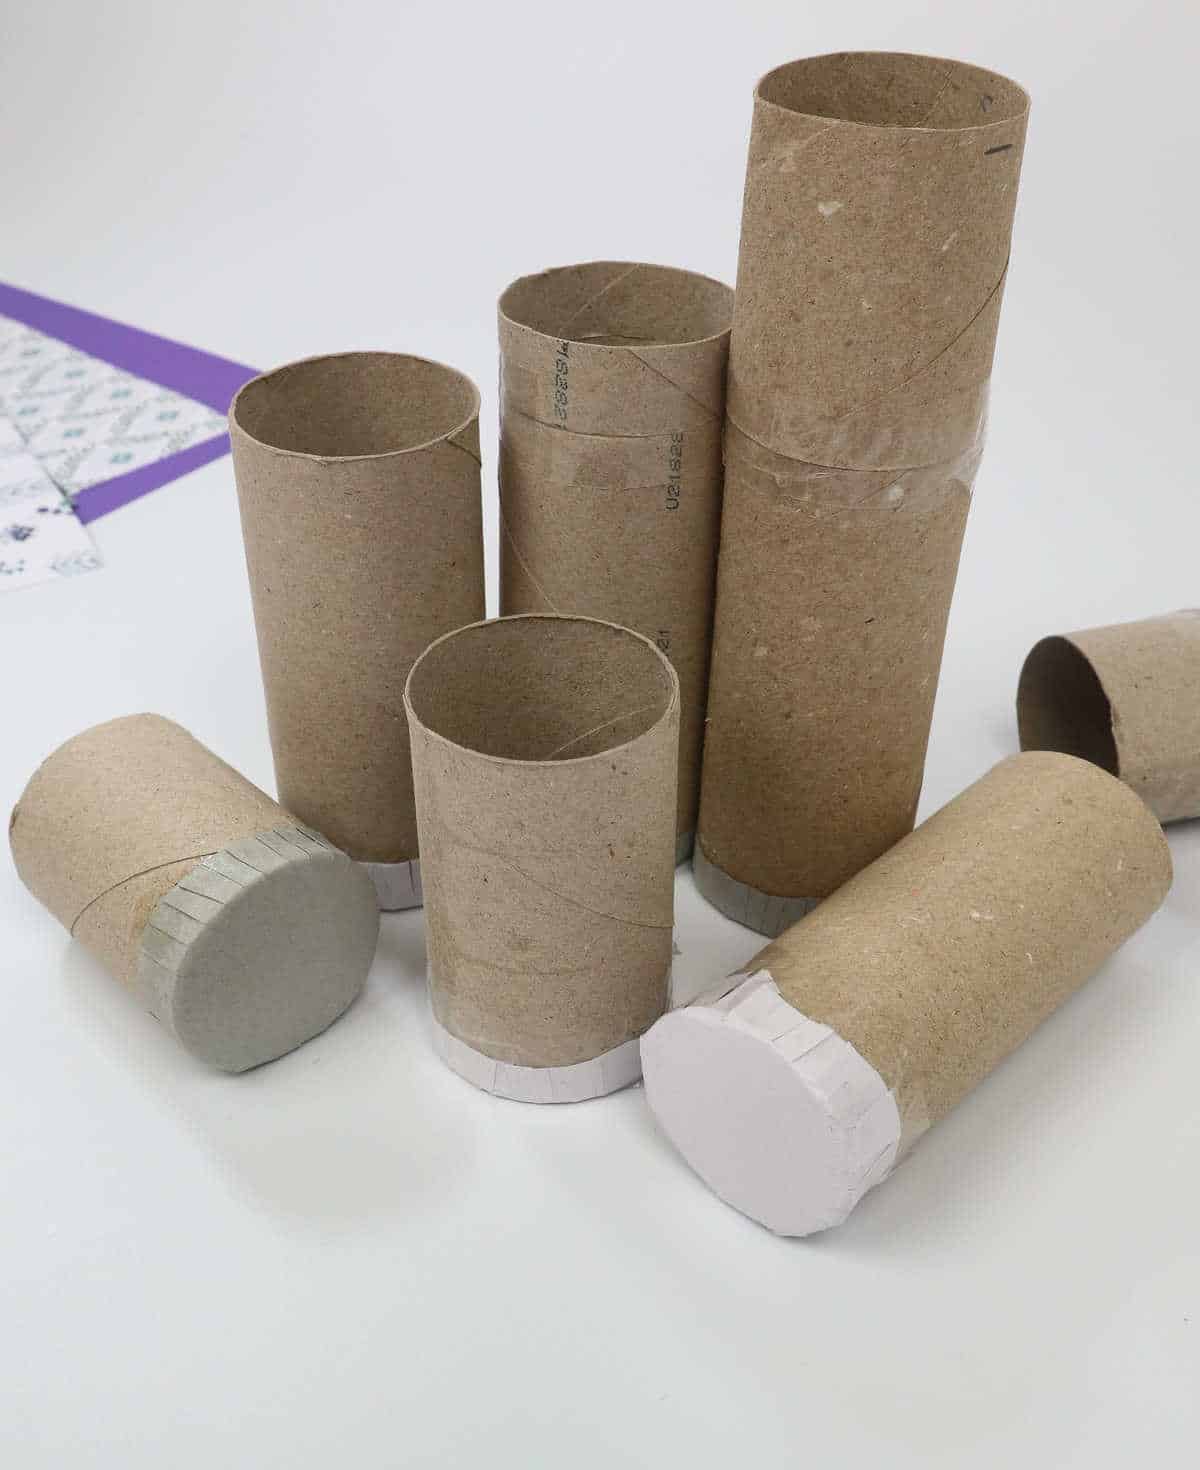
Before you begin constructing your organizer, take the time to cut the tubes into unique lengths that will accommodate the varying heights of the items it’s designed to store. This initial step is crucial in ensuring a seamless fit and maximum functionality. When handling the leftover rolls, don’t discard them just yet – they can be repurposed as makeshift extensions for other tubes that require an extra boost of height.
To achieve this, simply grab some tape and creatively combine any excess material onto the desired tubes, effectively elevating their overall stature.
Step 2
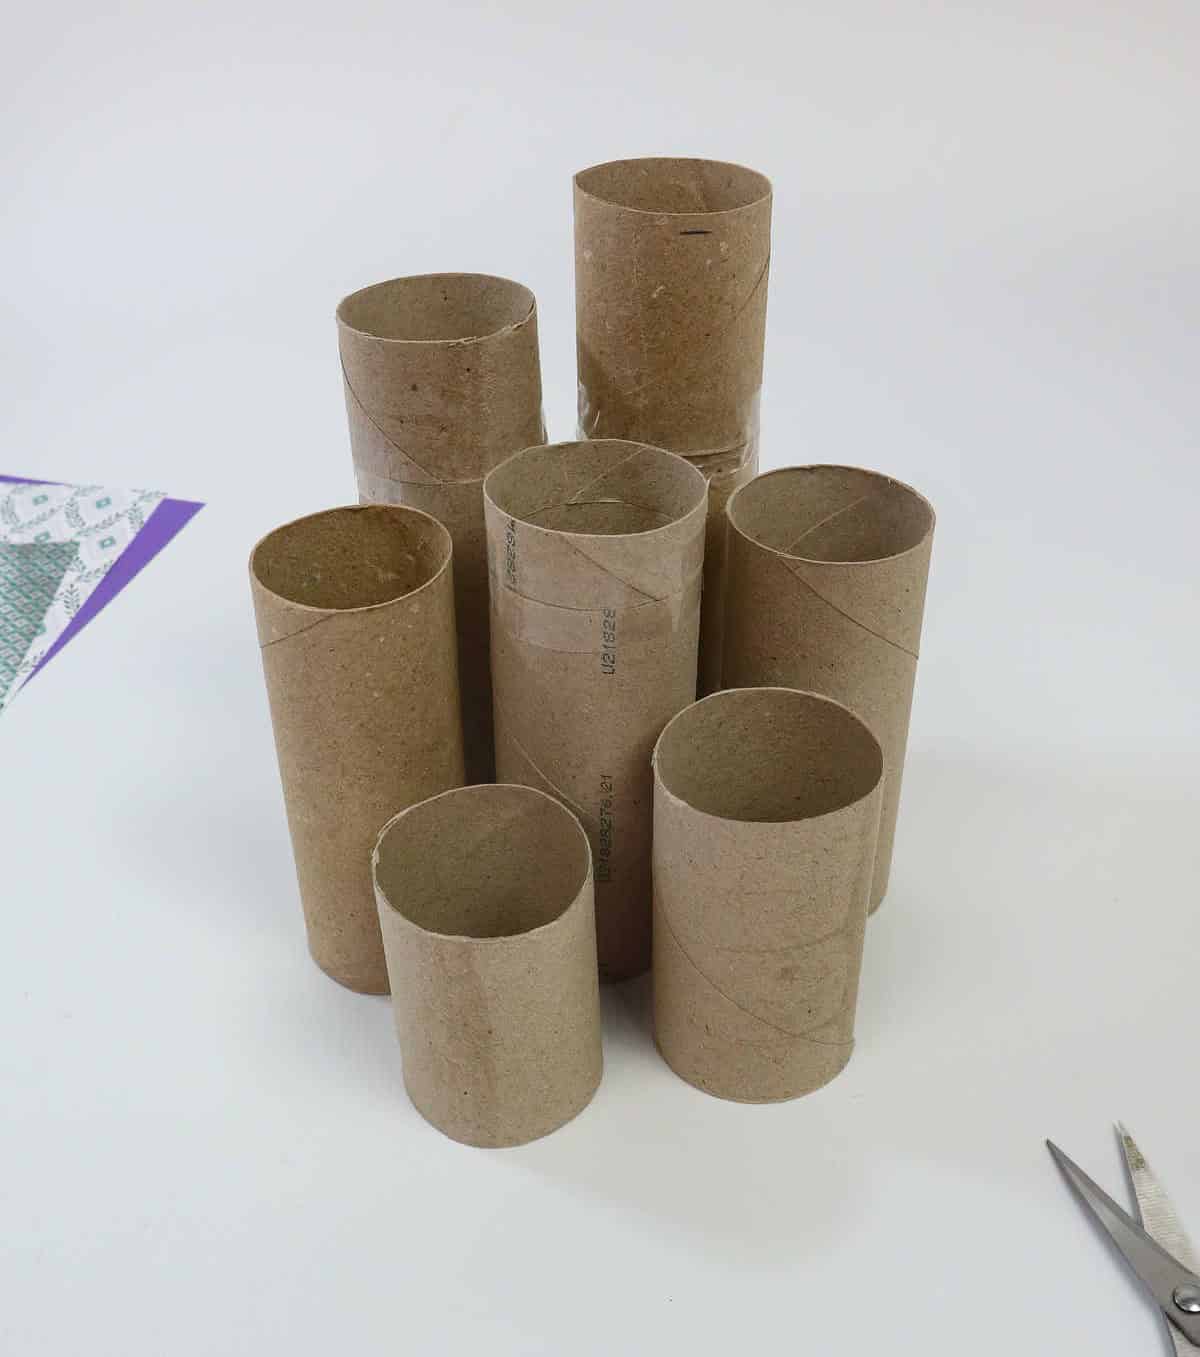
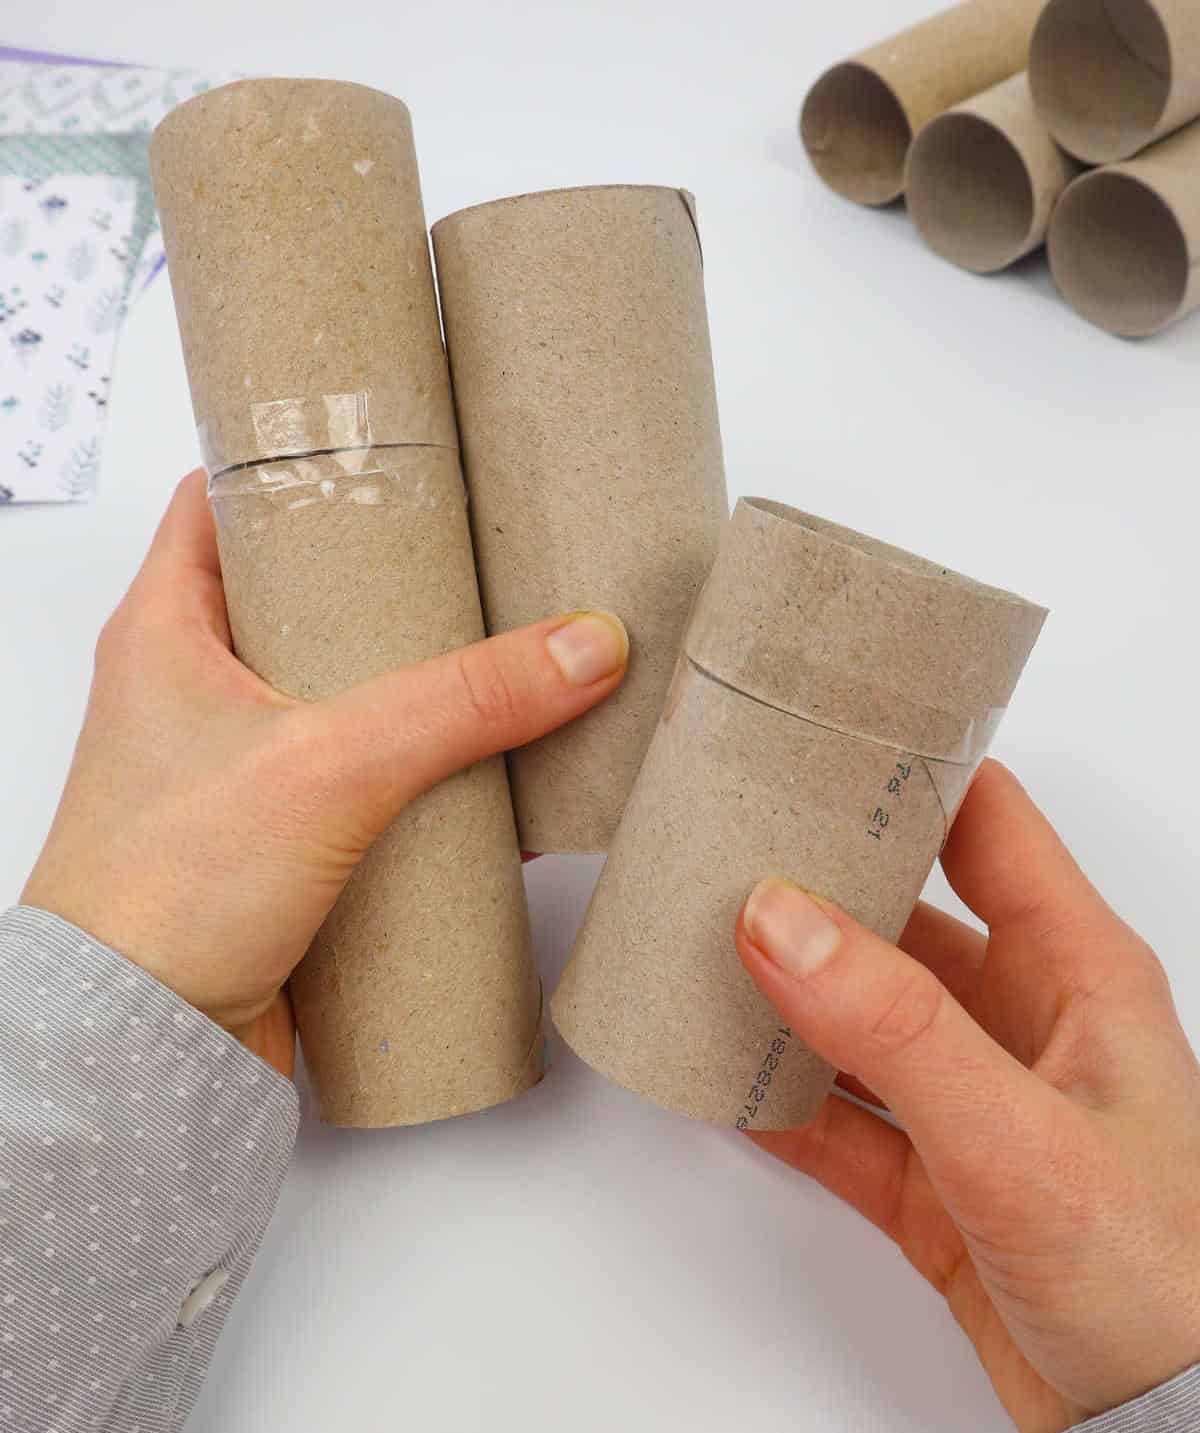
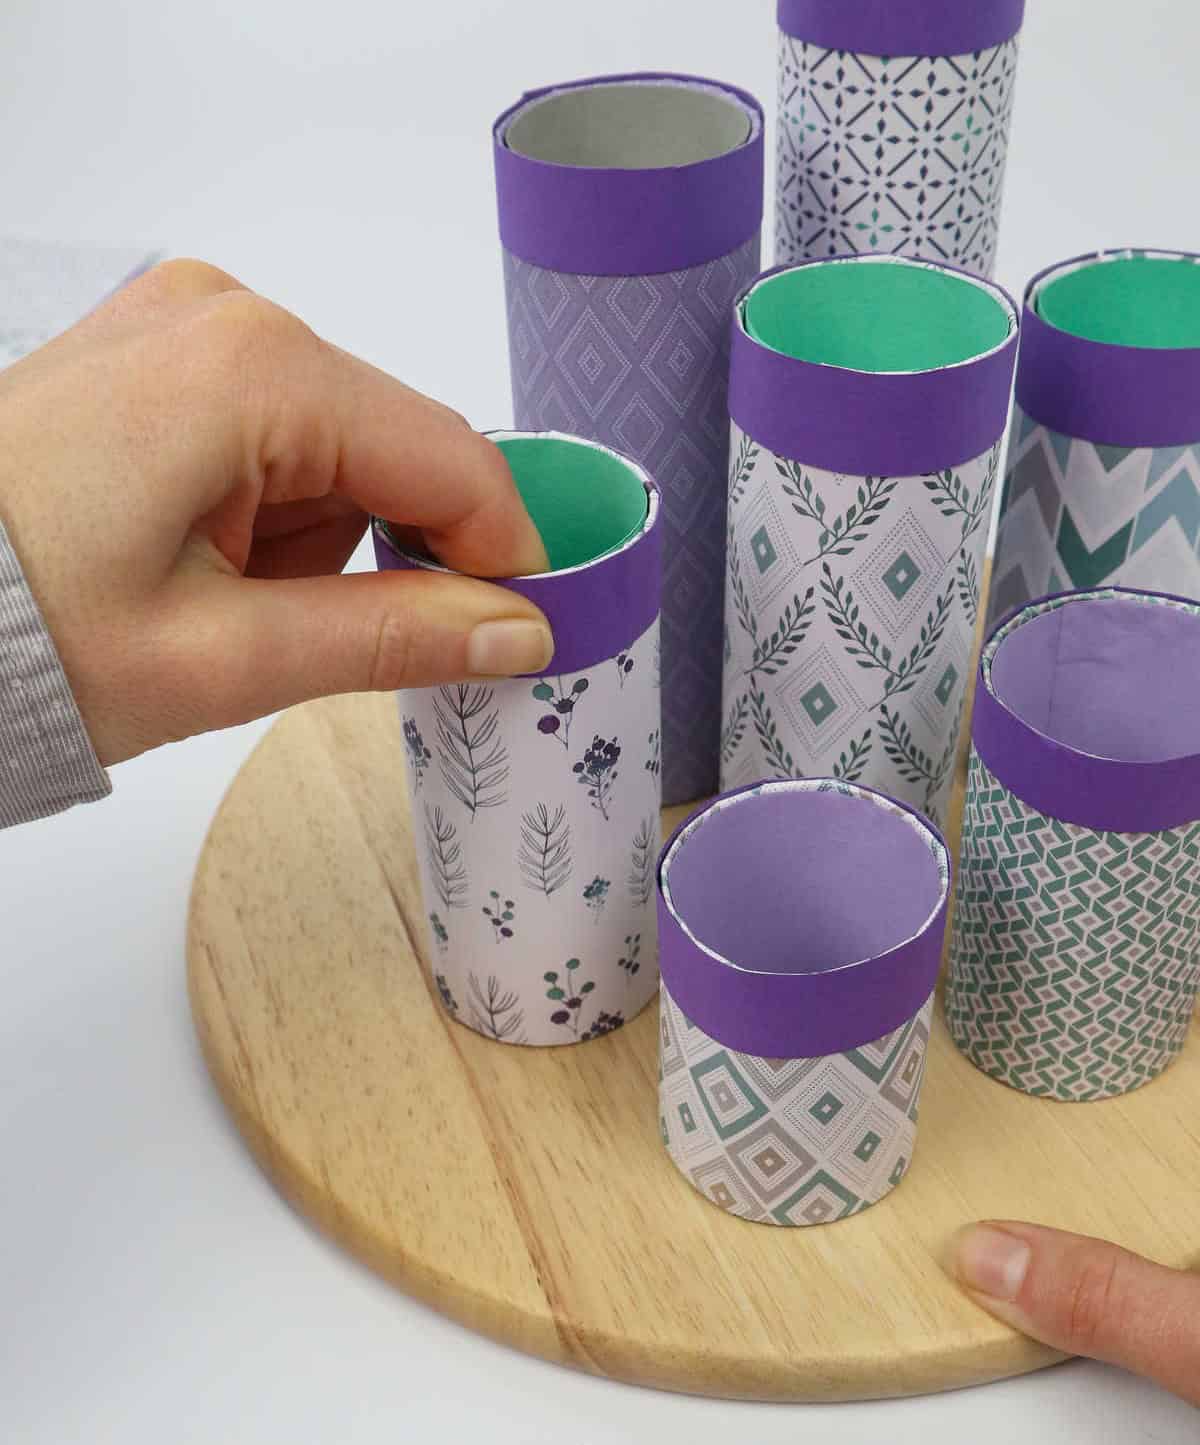
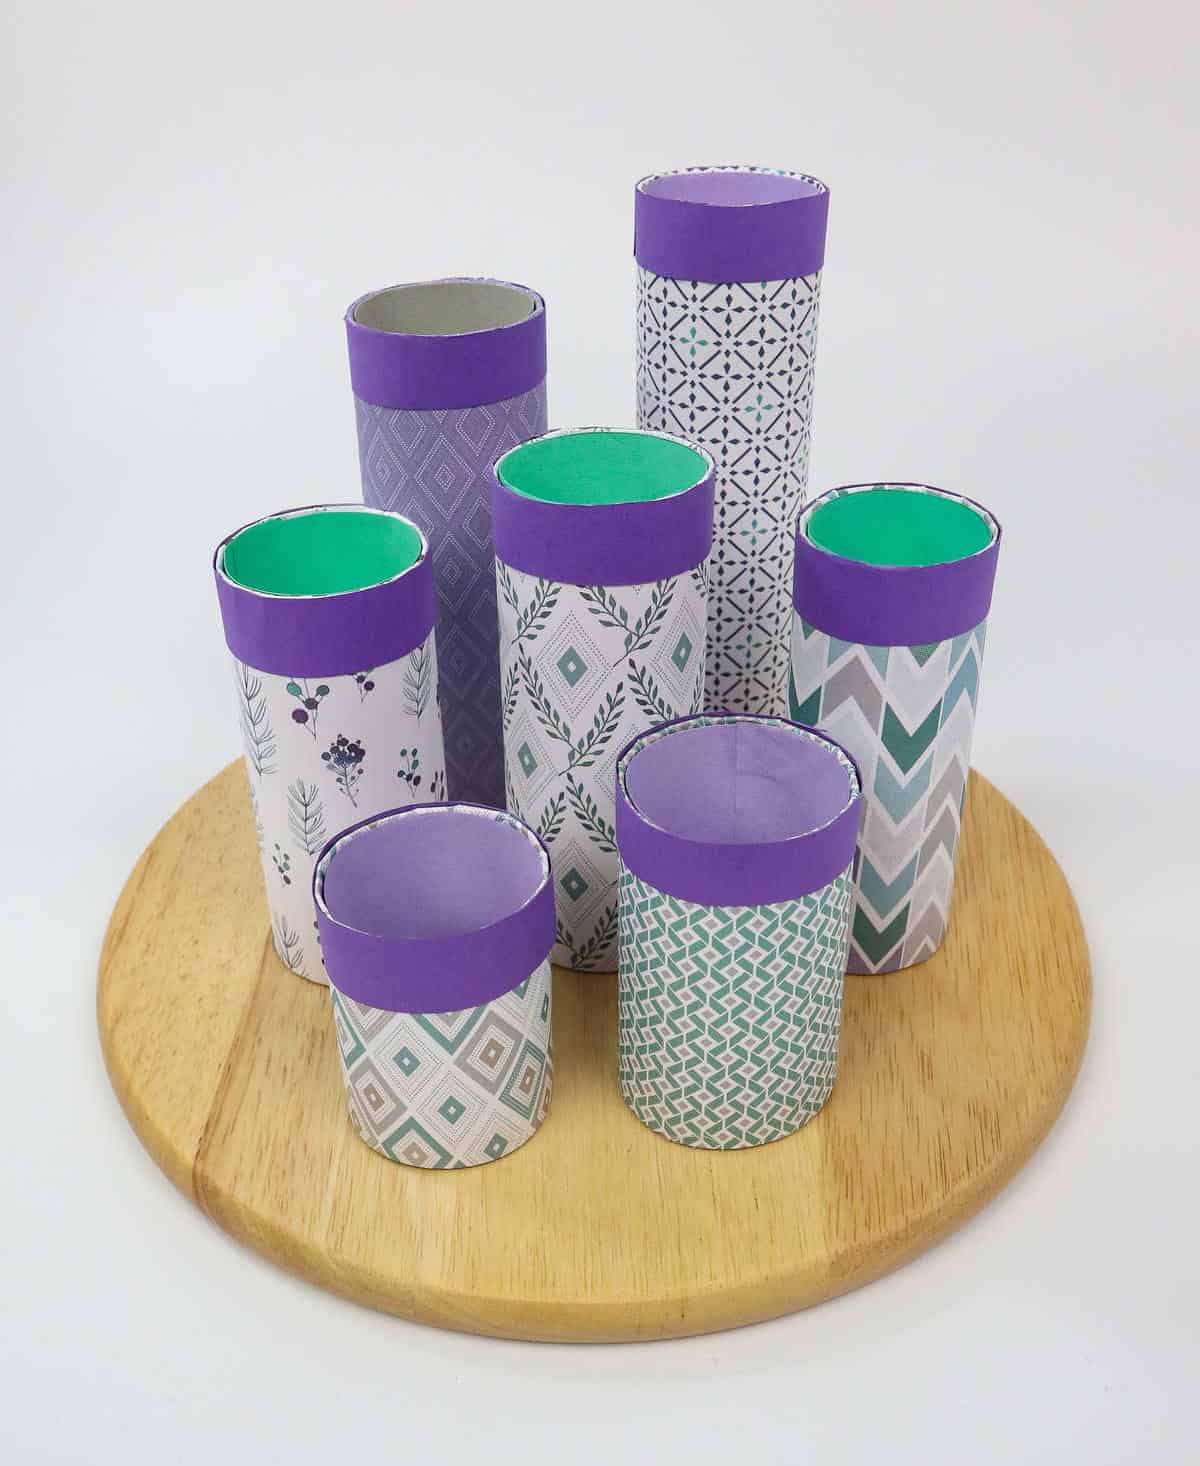
When it comes time to configure the toilet paper roll arrangement, take a moment to consider what layout works best for your board’s unique display needs. Don’t be afraid to get creative and experiment with different patterns or formations until you find one that strikes a balance between aesthetics and functionality.
Step 3
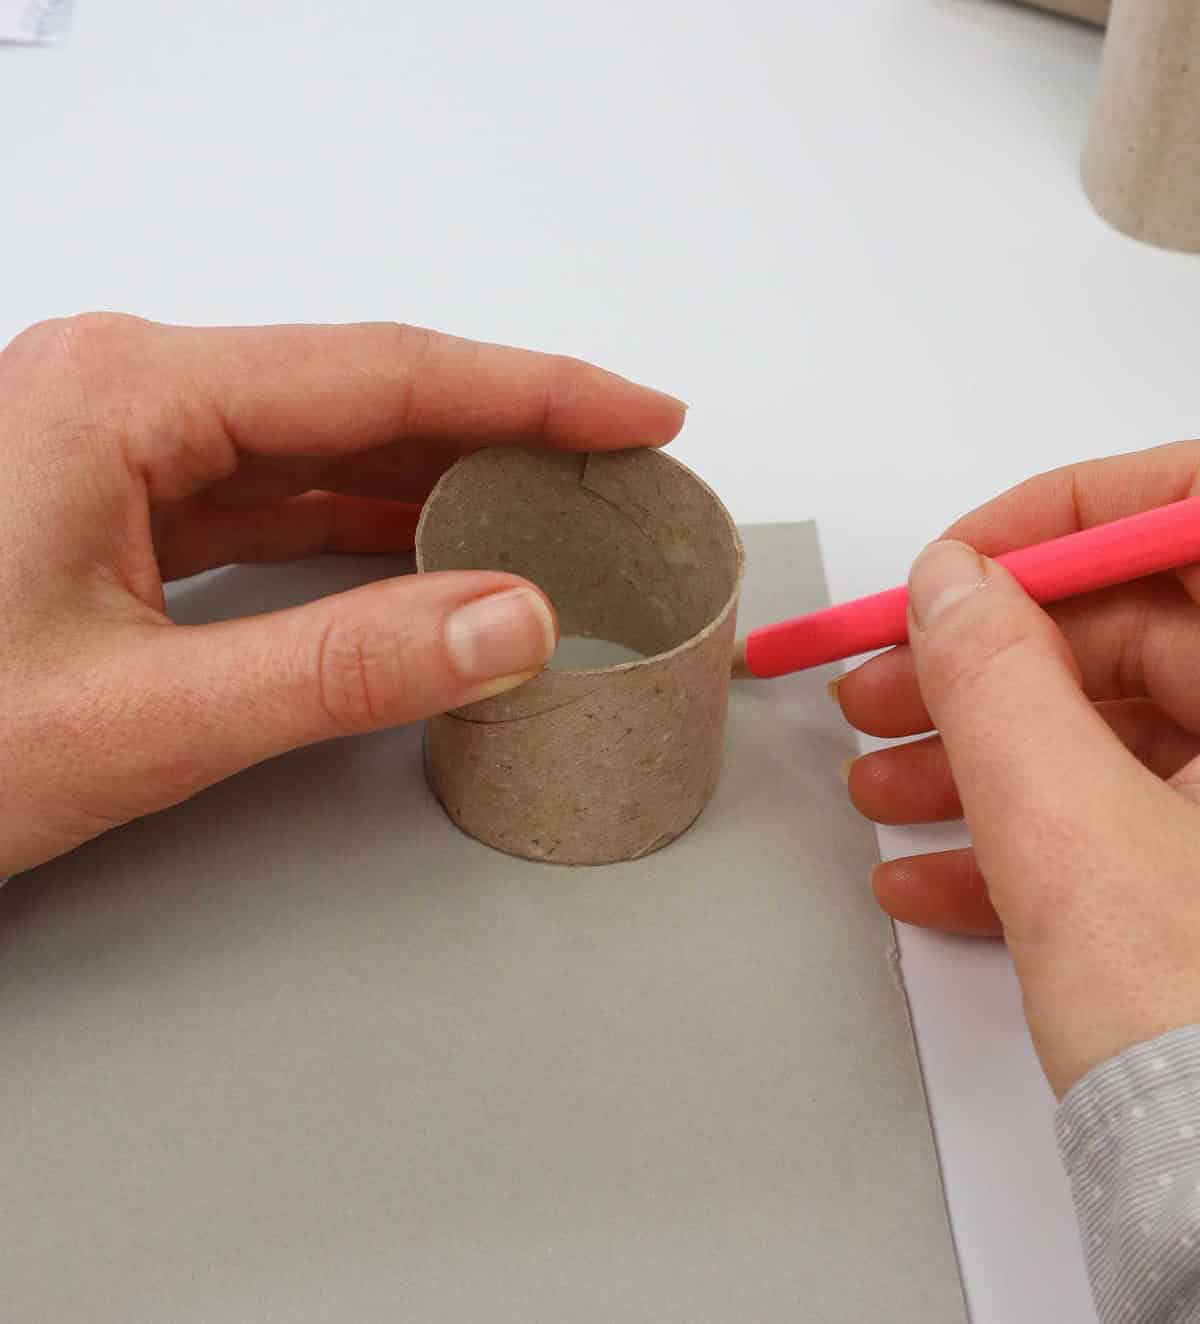
While not a crucial step, adding a simple base to your organizer’s tube can actually prolong its lifespan. This base serves as a weight stabilizer, preventing the tools from relying too heavily on the tube itself. To create this base, simply take a blank piece of paper and trace the opening of the roll, effectively forming a foundation for the tube.
Step 4
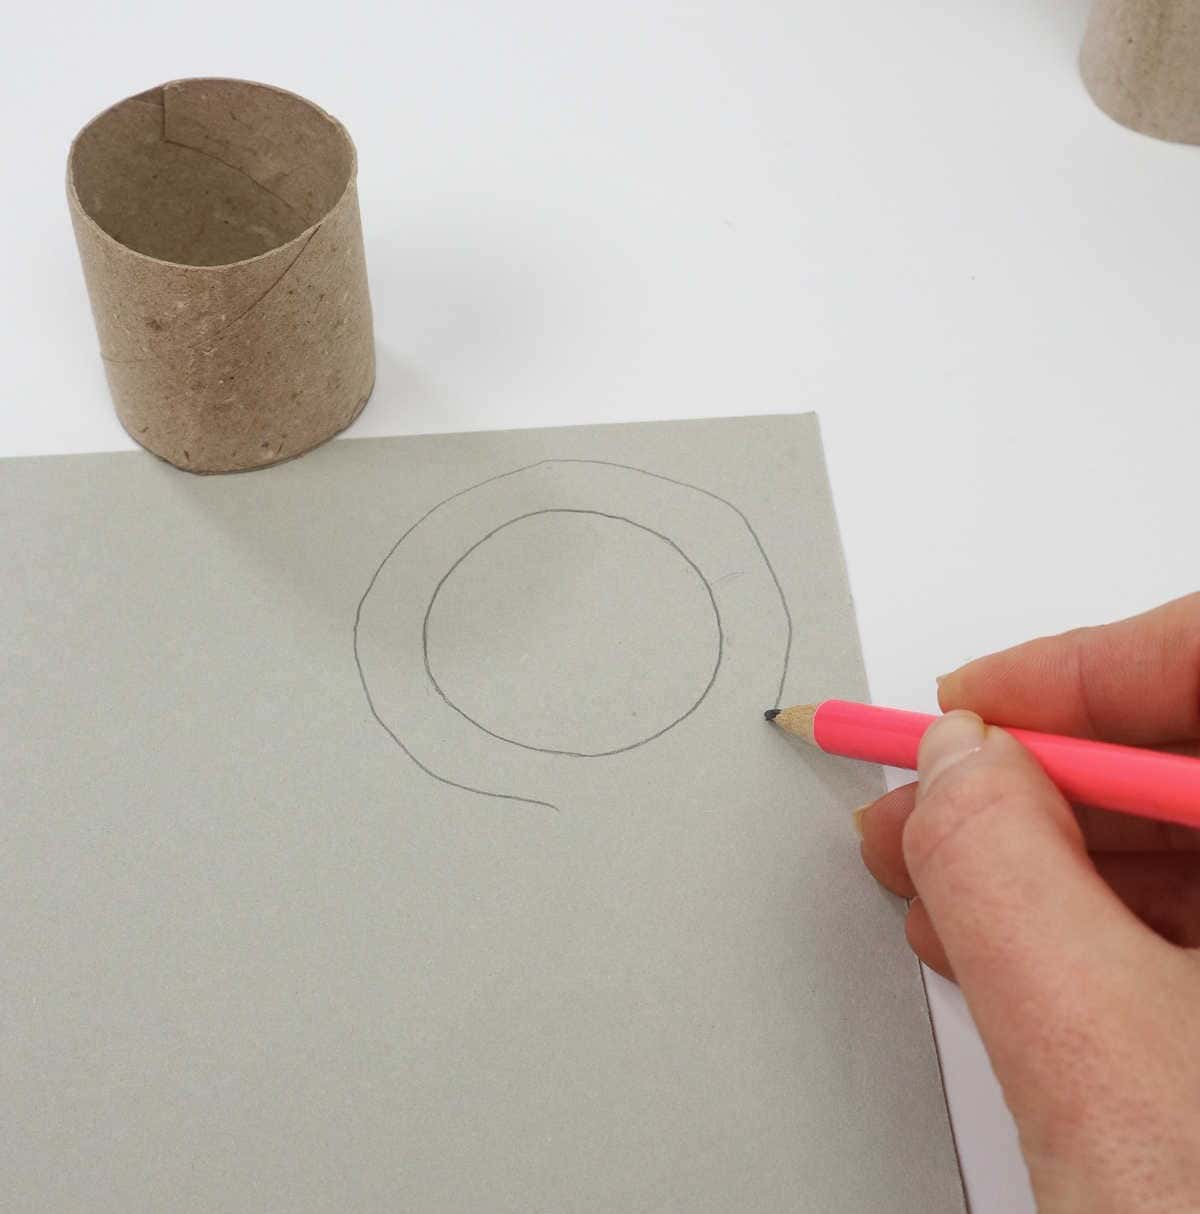
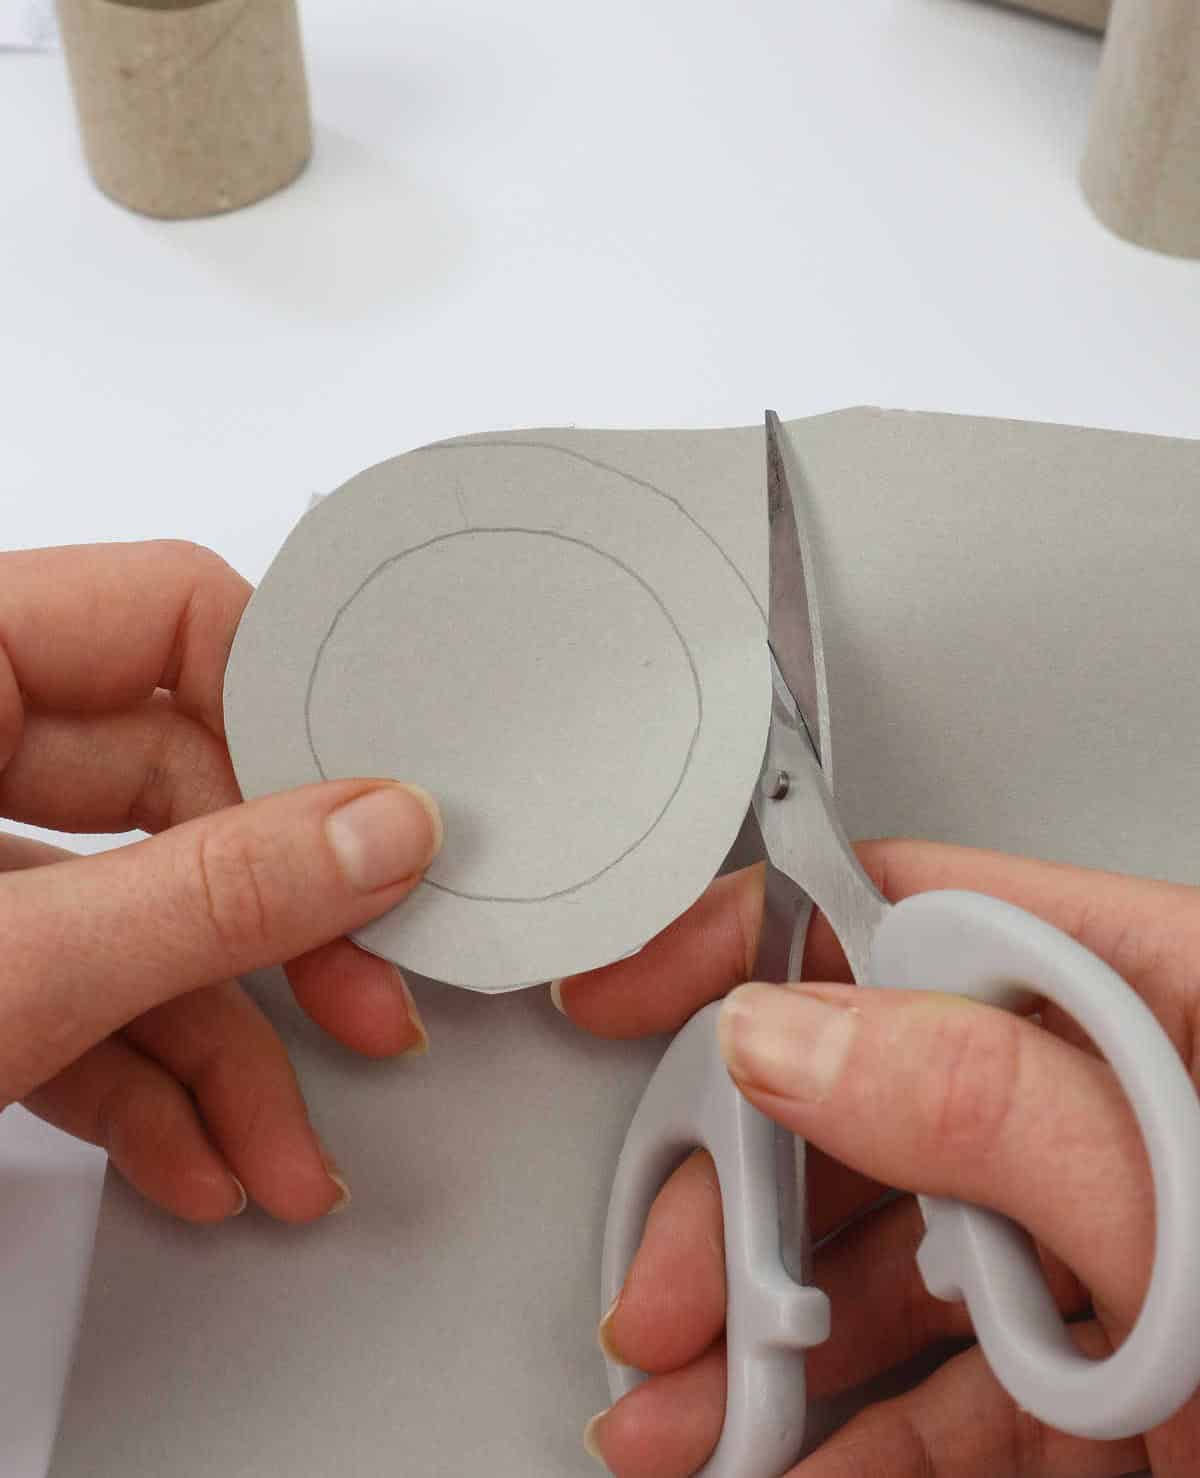
Next, you’ll create a larger boundary by drawing a circle that’s roughly half an inch wider than your initial ones. Don’t worry if it’s not a precise circle – the goal is simply to establish a slightly broader perimeter around each original shape.
Step 5
Step 6
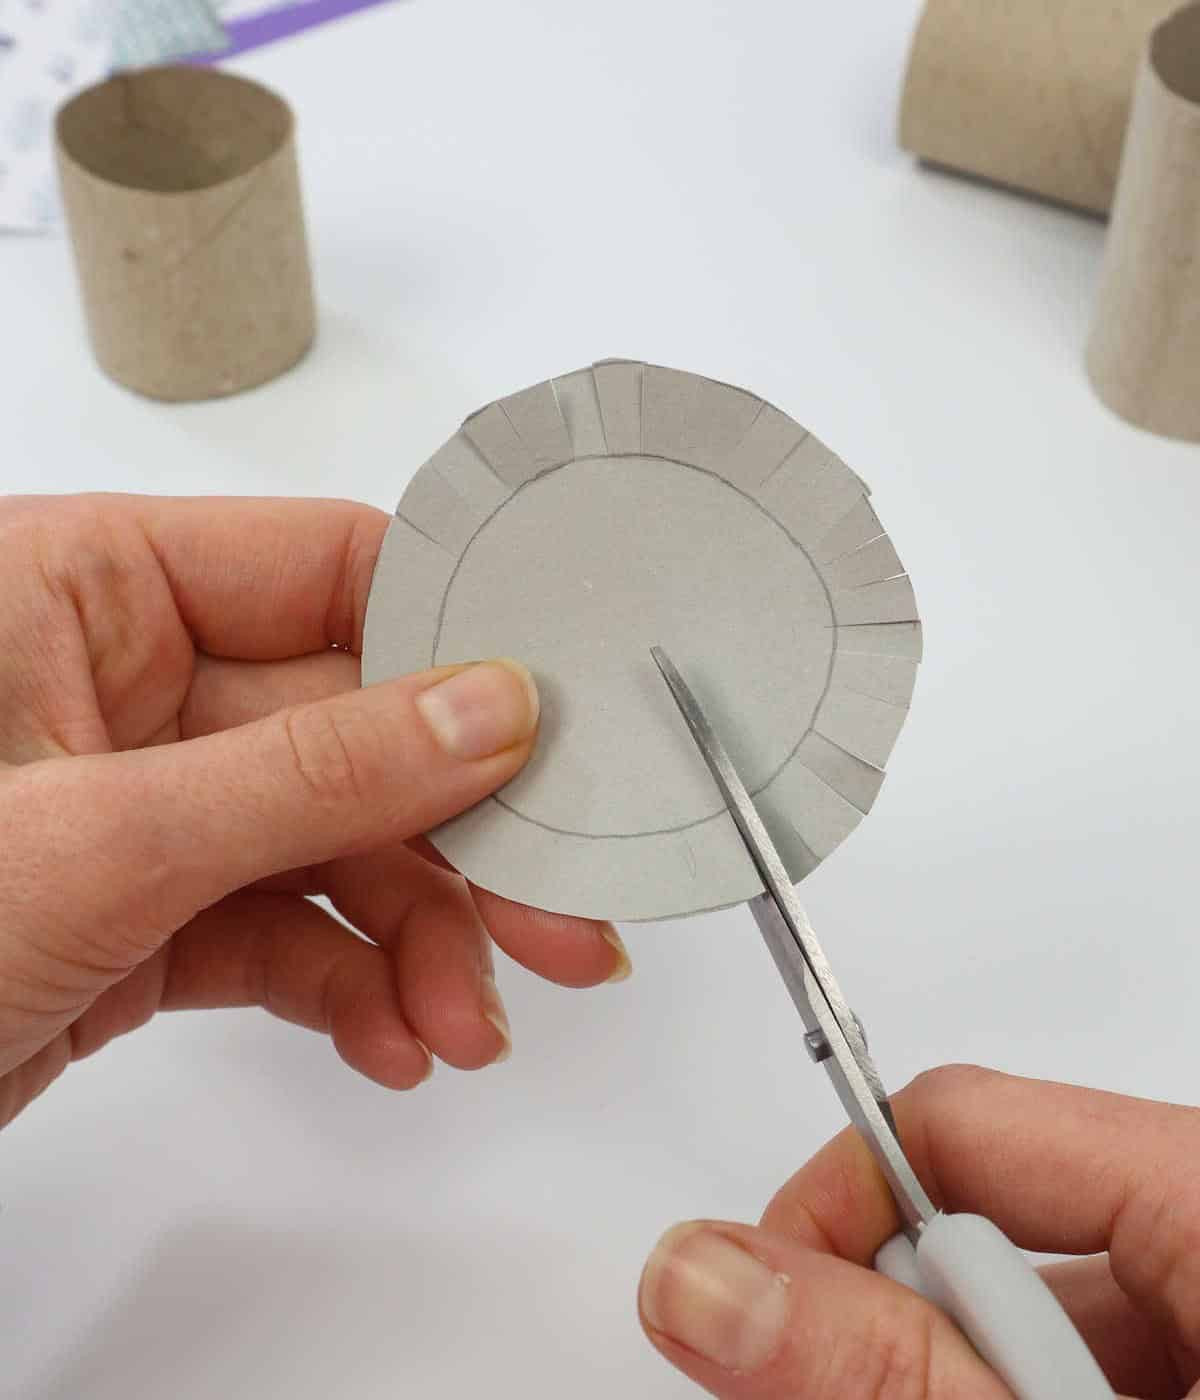
Once you’ve completed the initial cutting process for each circle, it’s time to refine the edges further. To do this, revisit each piece and make a series of smaller, more targeted cuts that bring you in closer proximity to the inner ring. This meticulous attention to detail is crucial for achieving a smooth, even finish.
Step 7
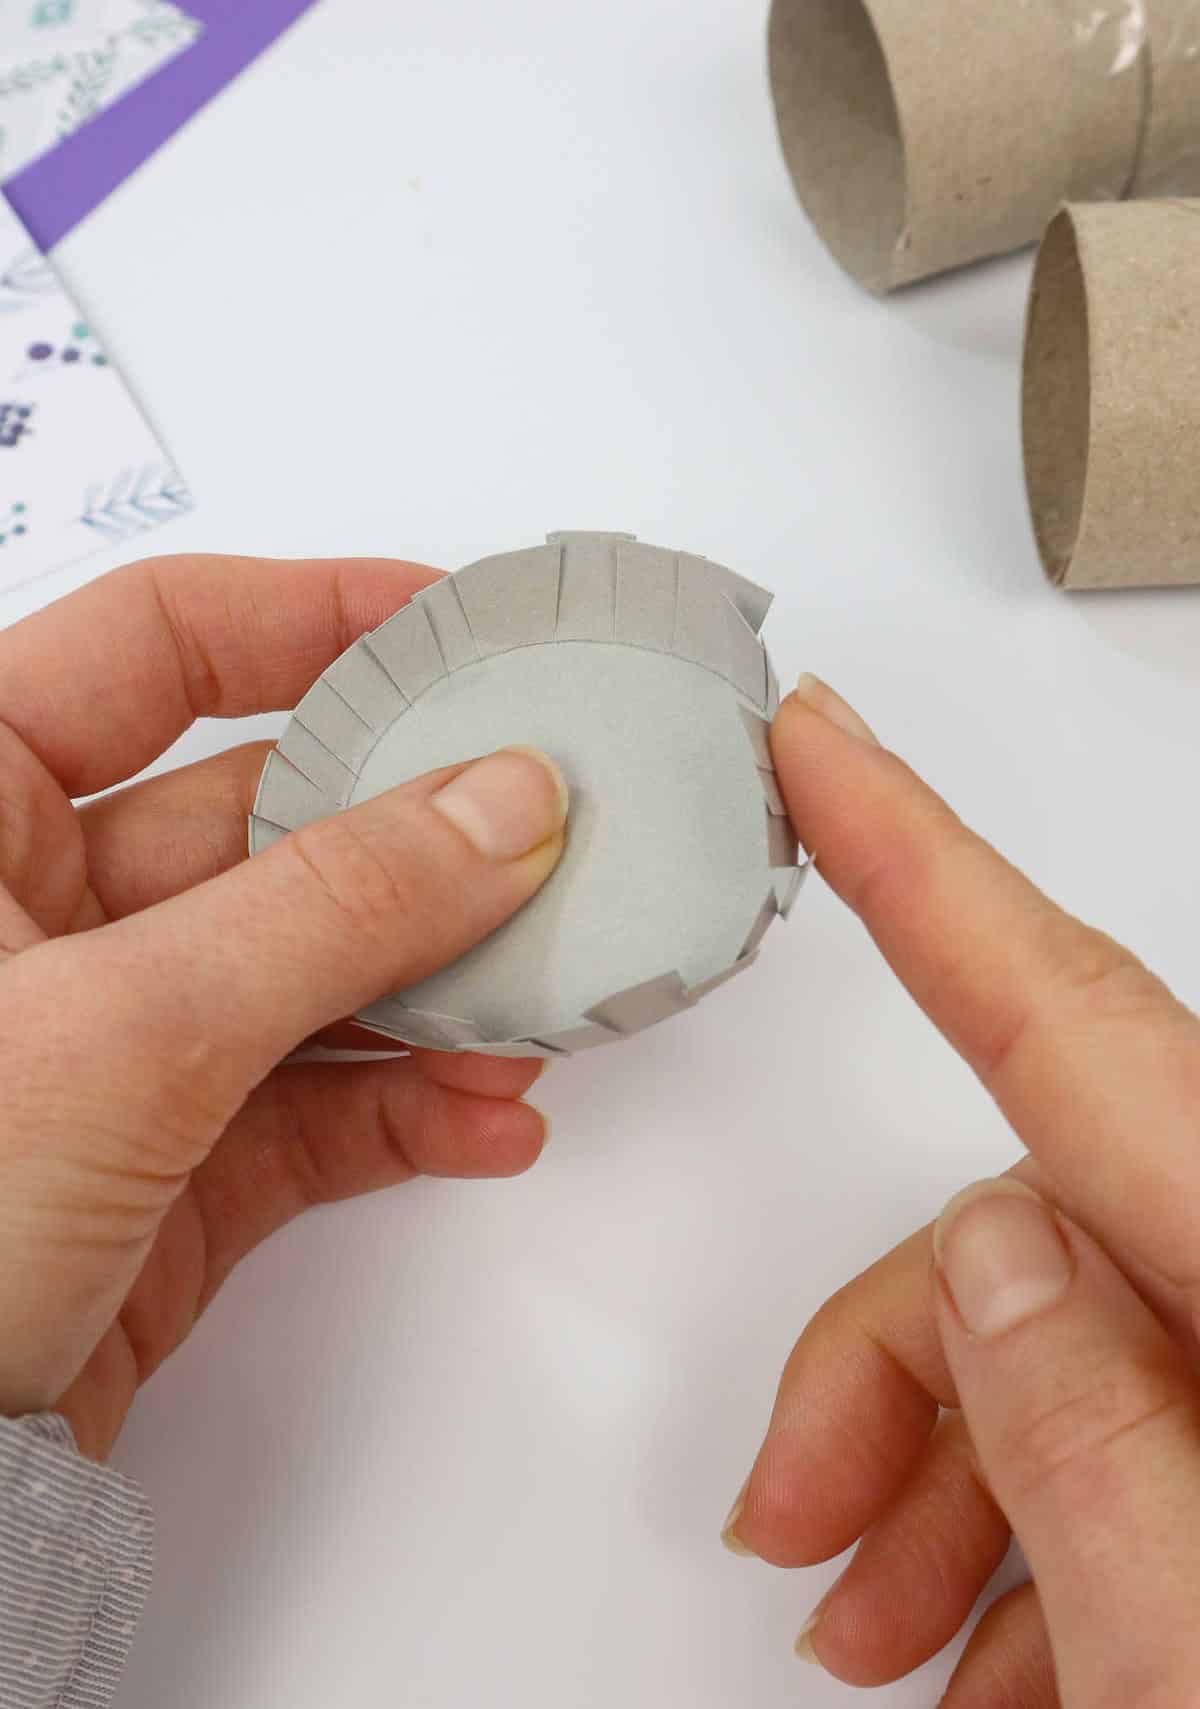
When you’re folding the edges of your cut fabric, imagine you’re wrapping it in a gentle hug. You want to create a clean fold that tucks the raw edge of the material inward, much like you would with a delicate muffin paper or a dessert wrapper.
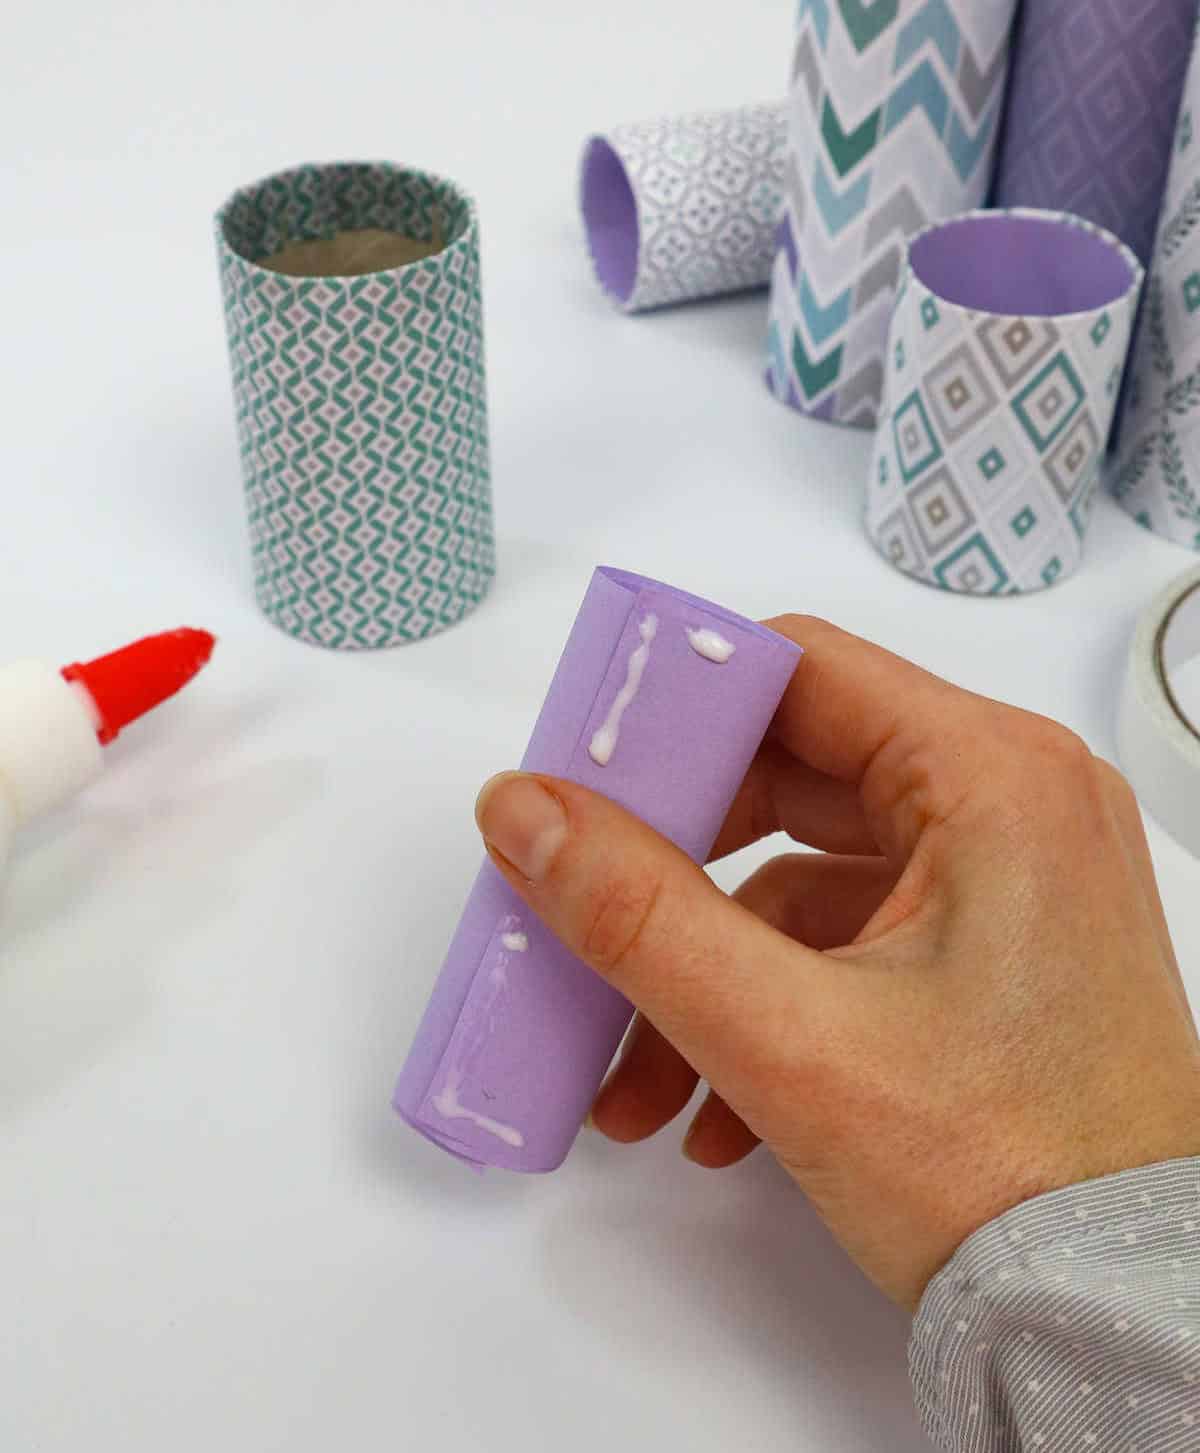
Step 8
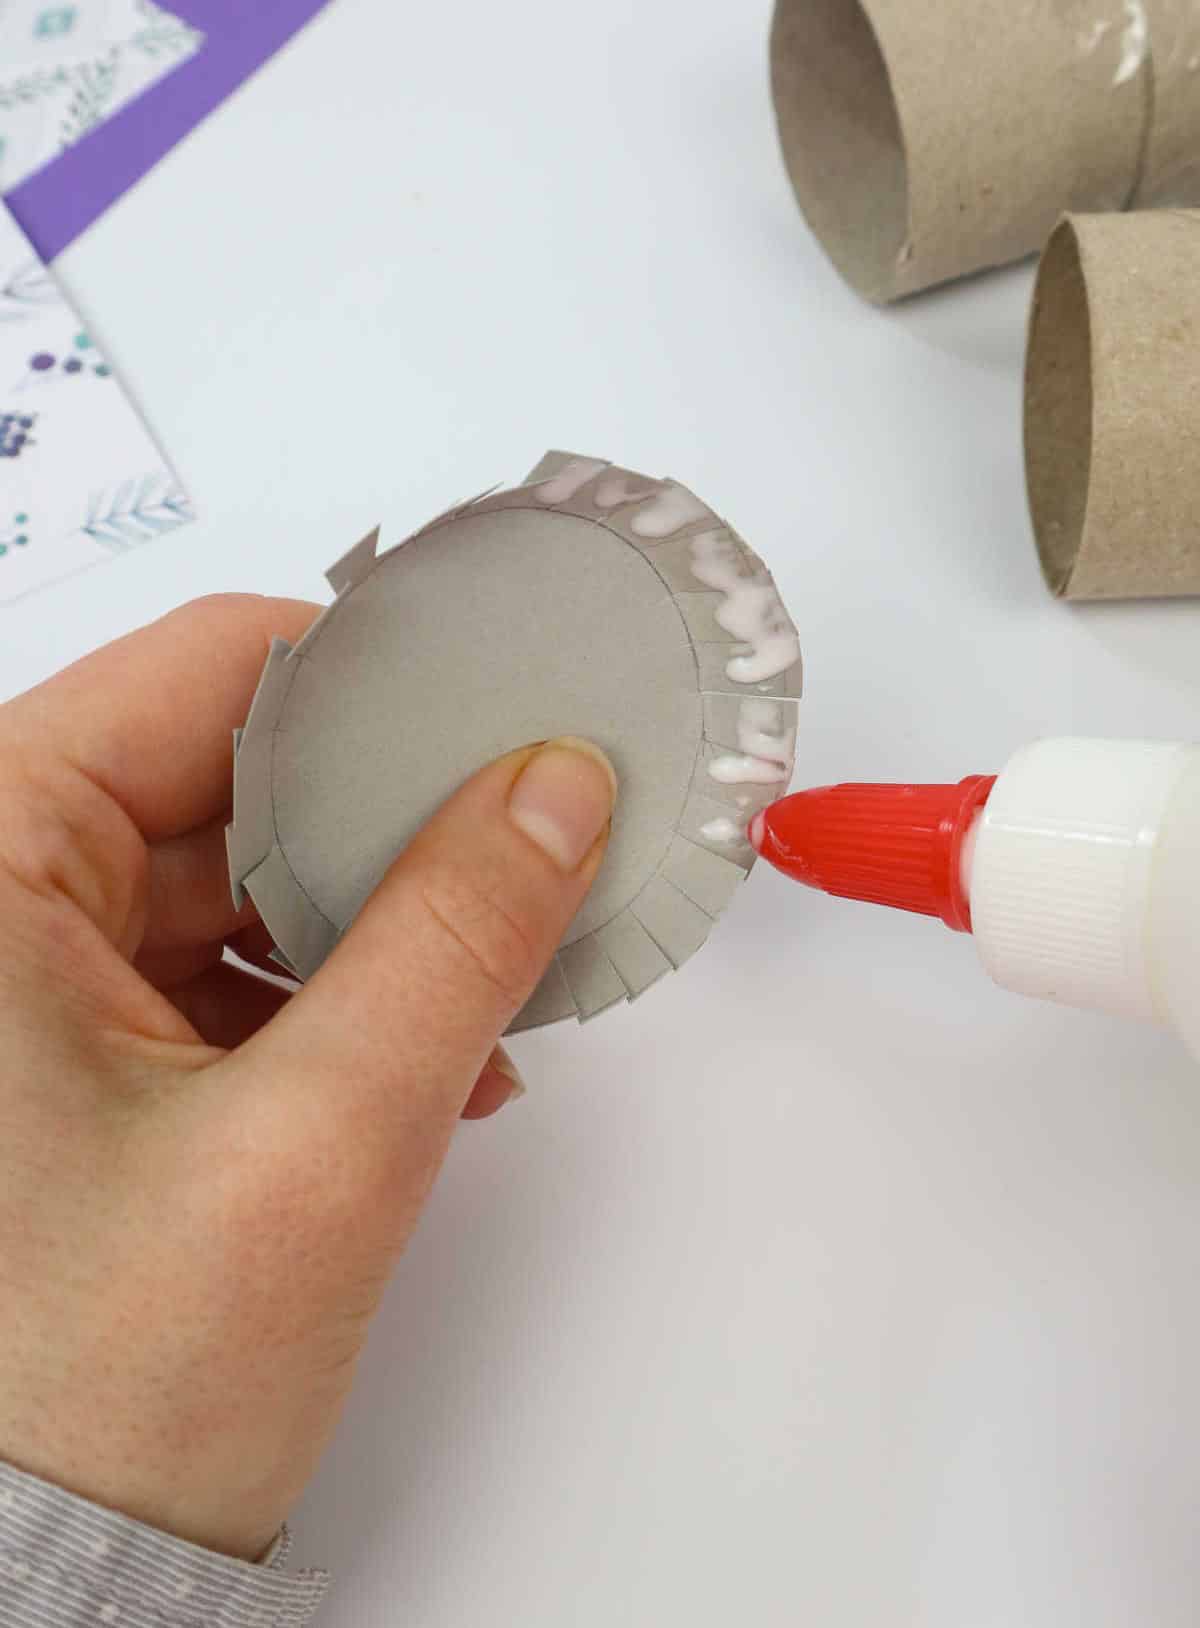
To secure the structure, begin by applying a small amount of adhesive or glue along the outer rim of the base plates. Then, gently press the two flaps together, ensuring they are properly aligned and forming a solid bond.
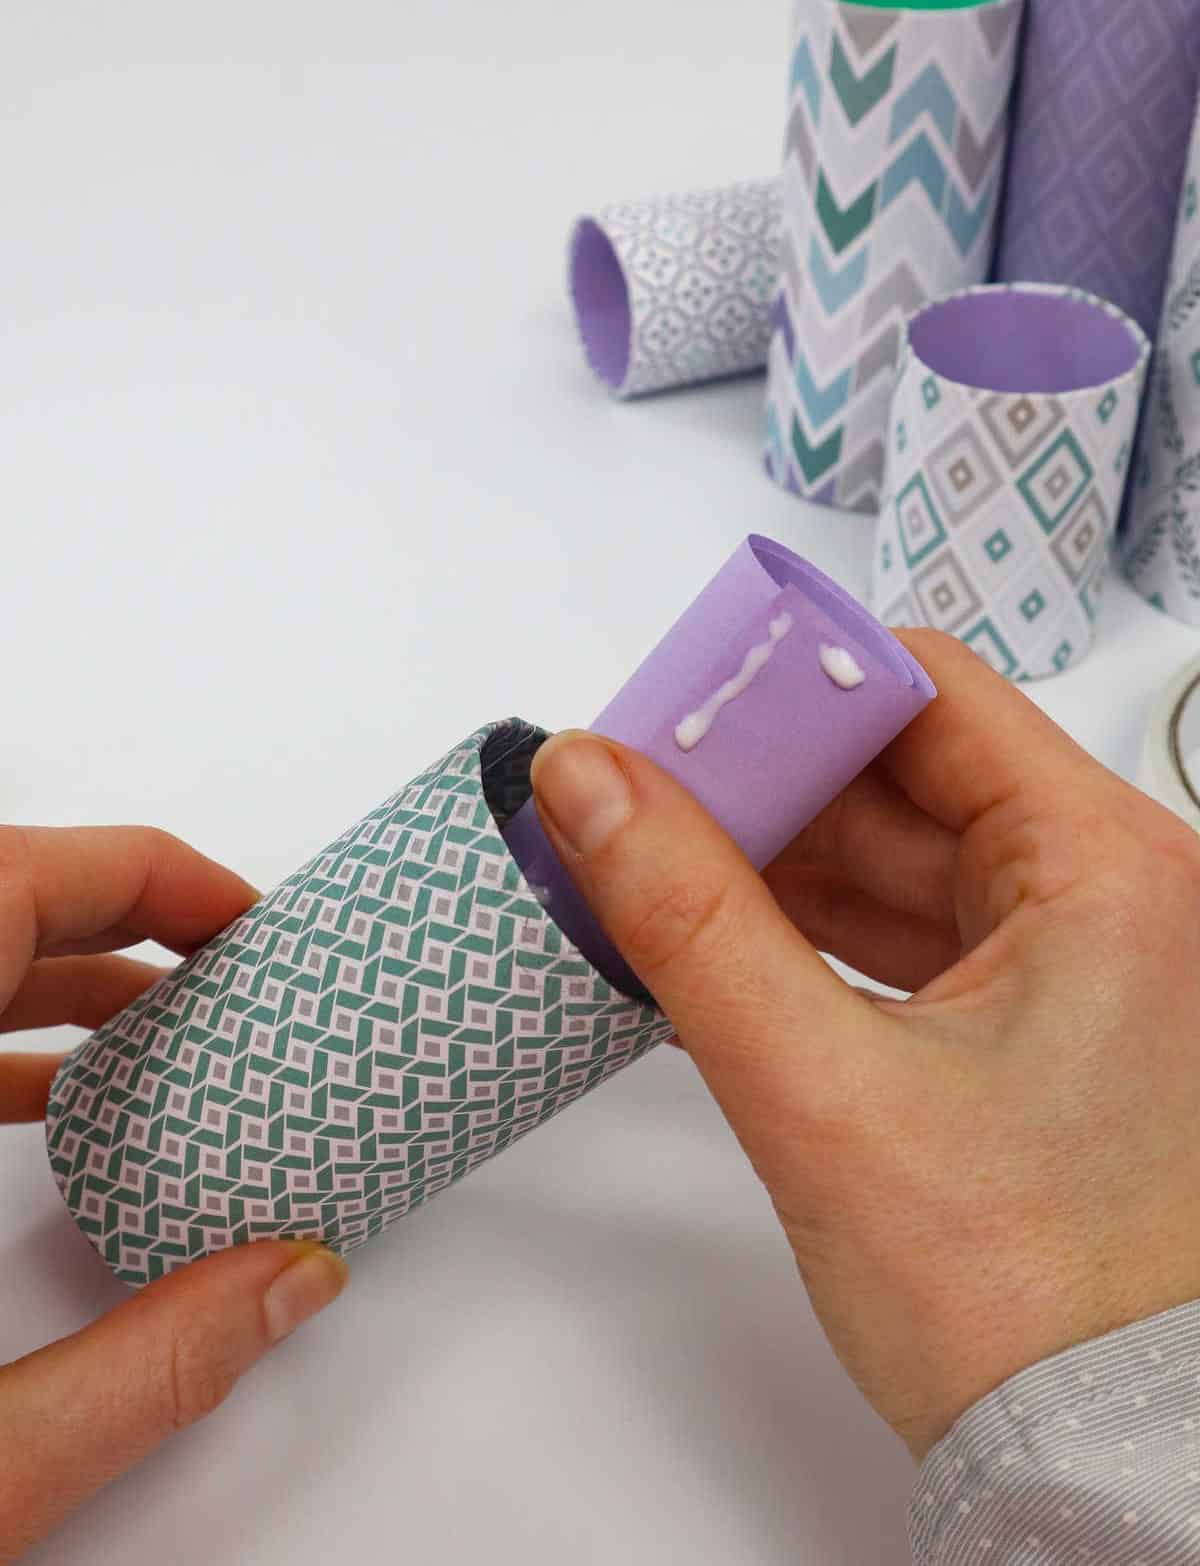
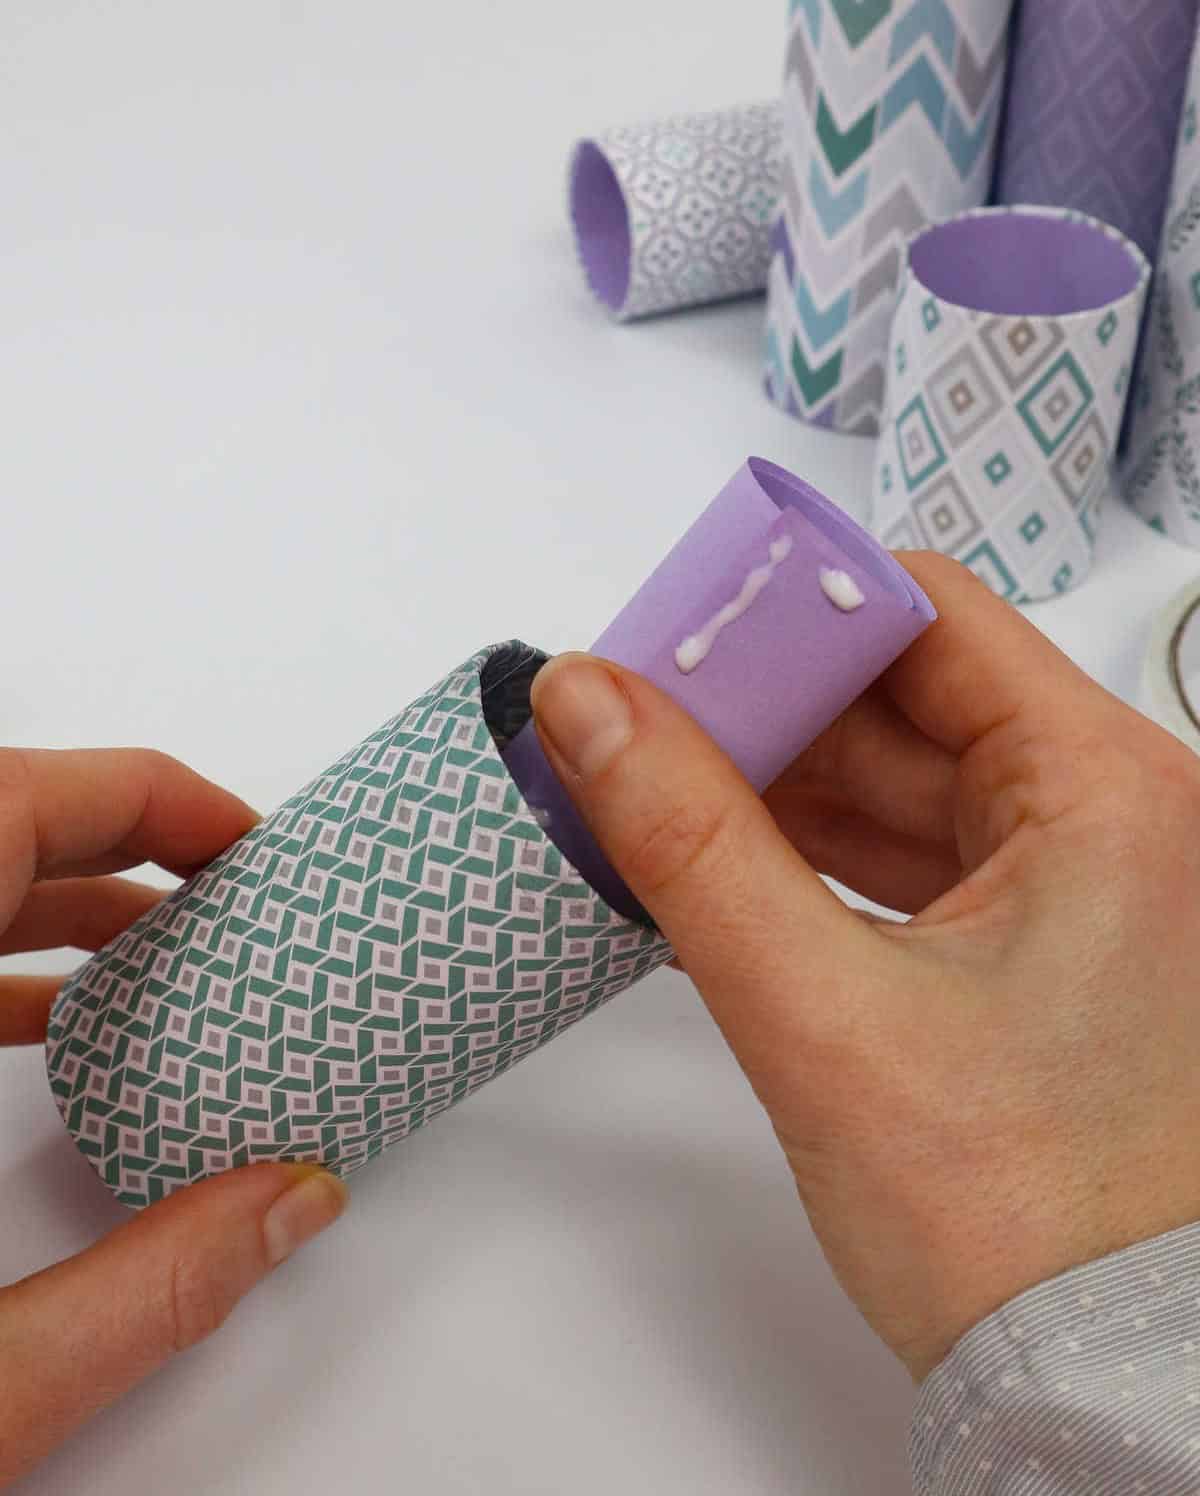
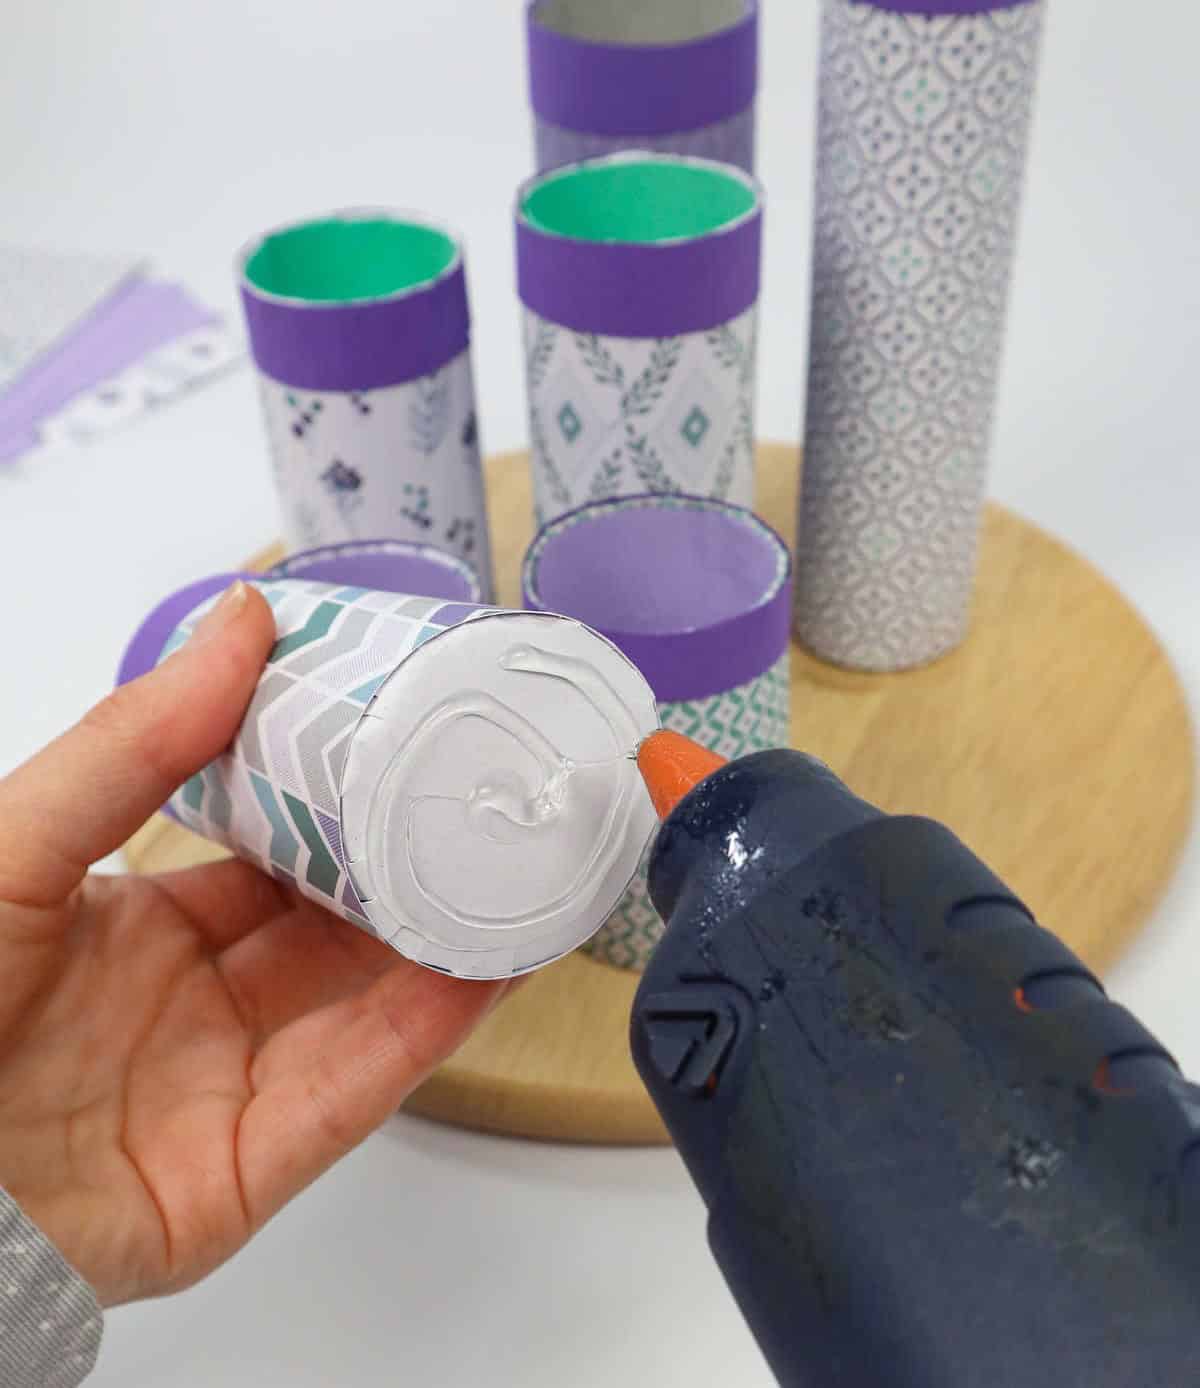
Step 9

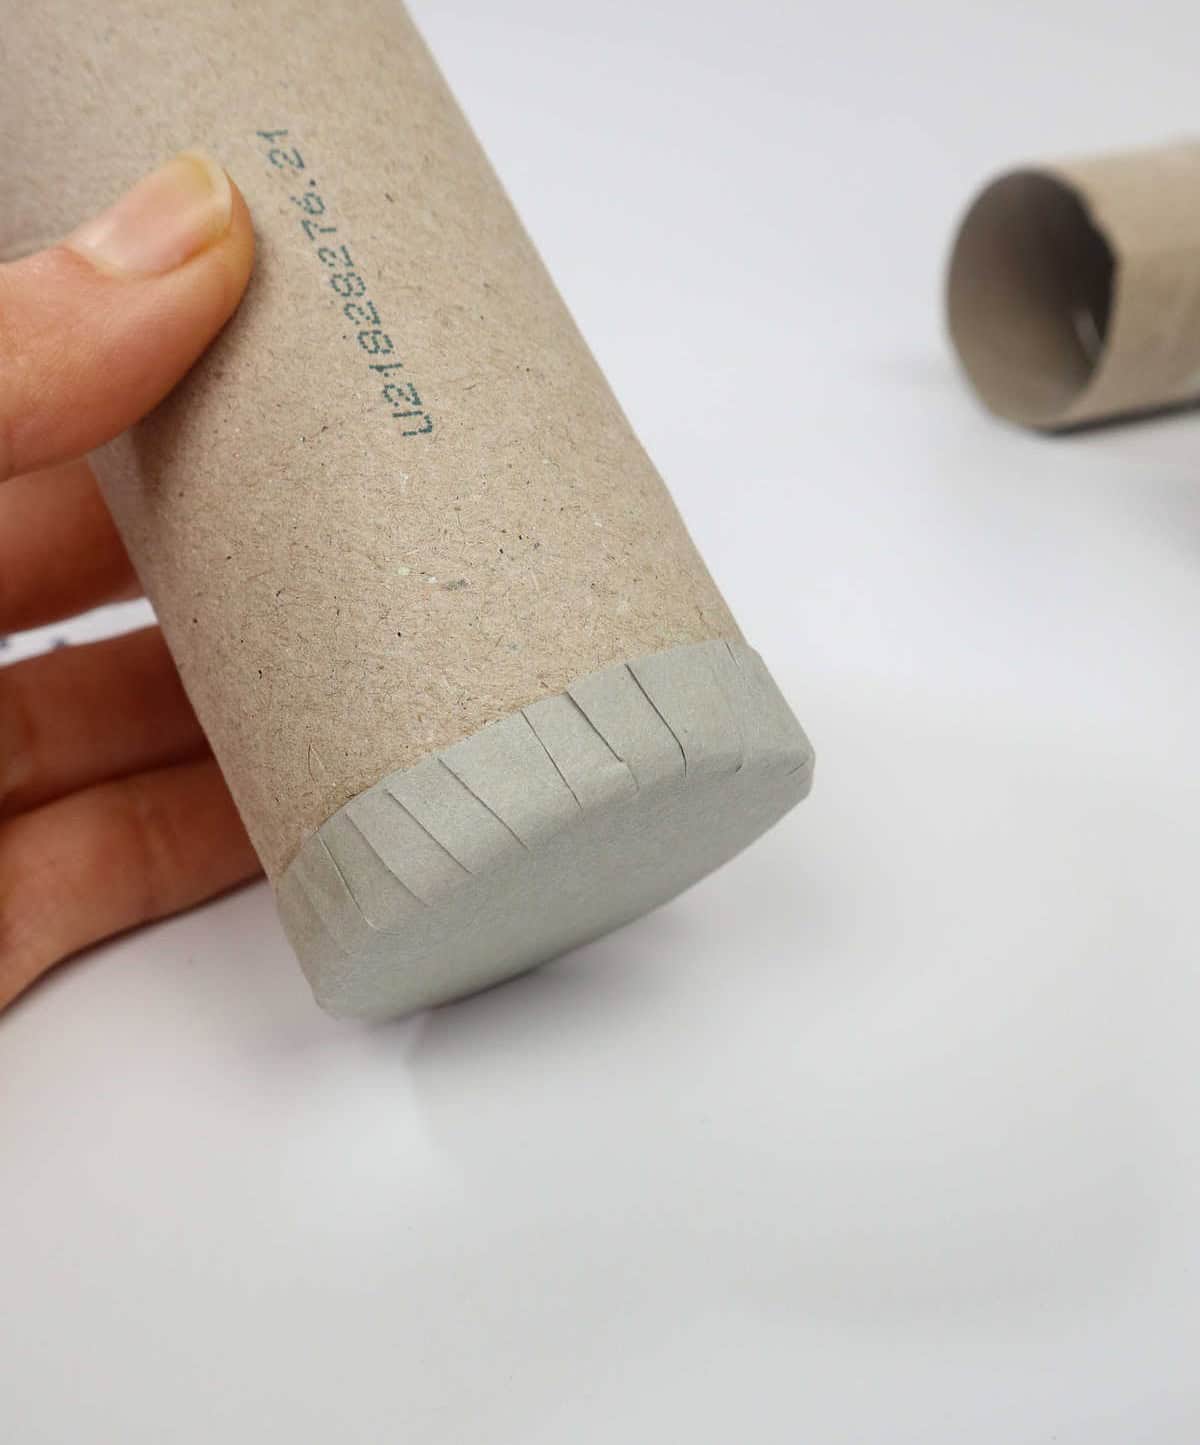
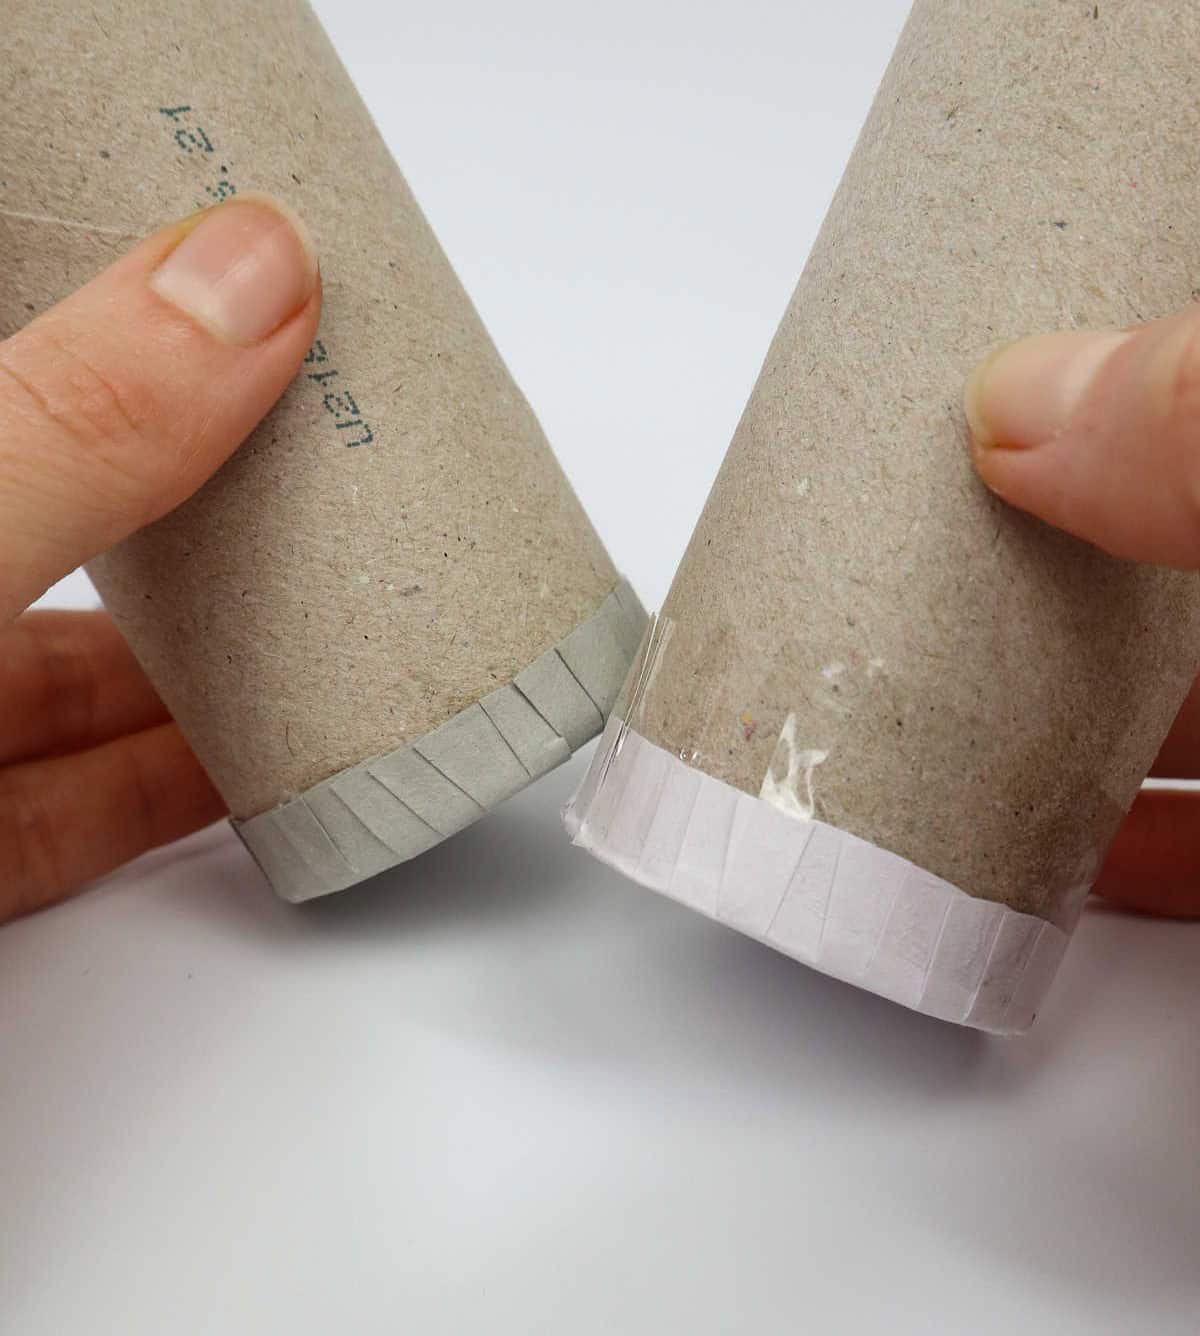
To assemble the toilet paper holder, place the toilet paper roll at the center of its base and apply a small amount of glue to the outer ring. Press the ring firmly onto the tube’s sides to secure it. Allow the glue to dry before proceeding.
Alternatively, you can hasten the process by securing the base with tape instead. Don’t worry about the tape showing, as we’ll be covering it up with decorative paper later.
Simply repeat this step for each of your tubes, either gluing or taping the bases in place.
Step 10
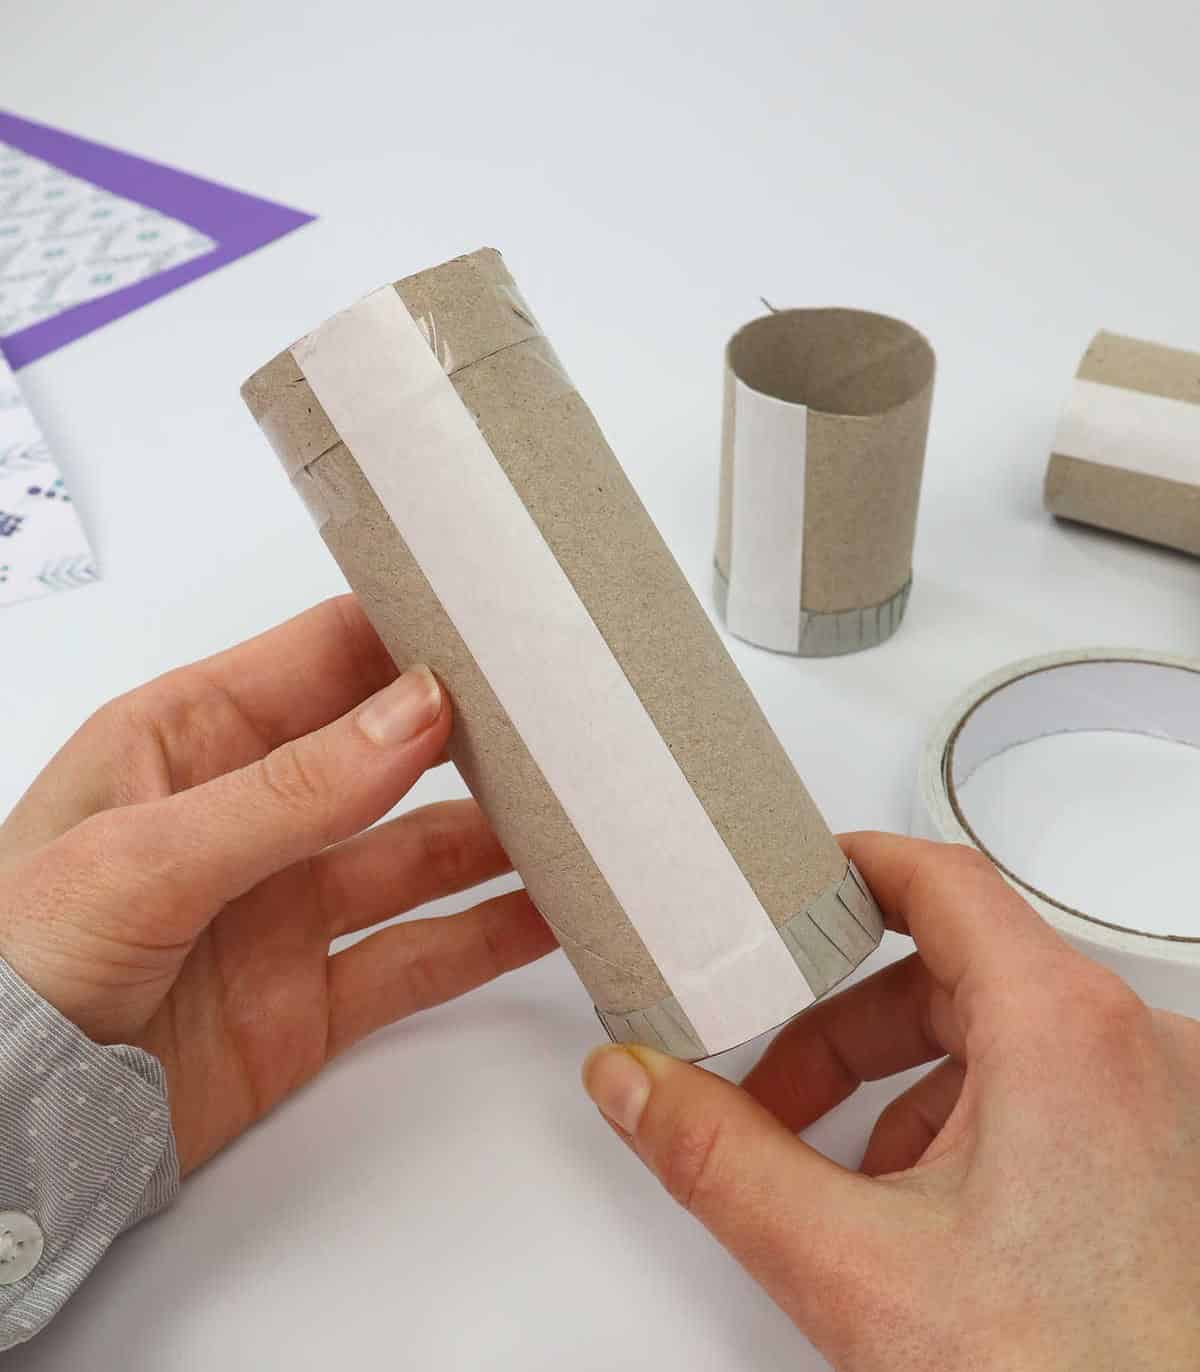
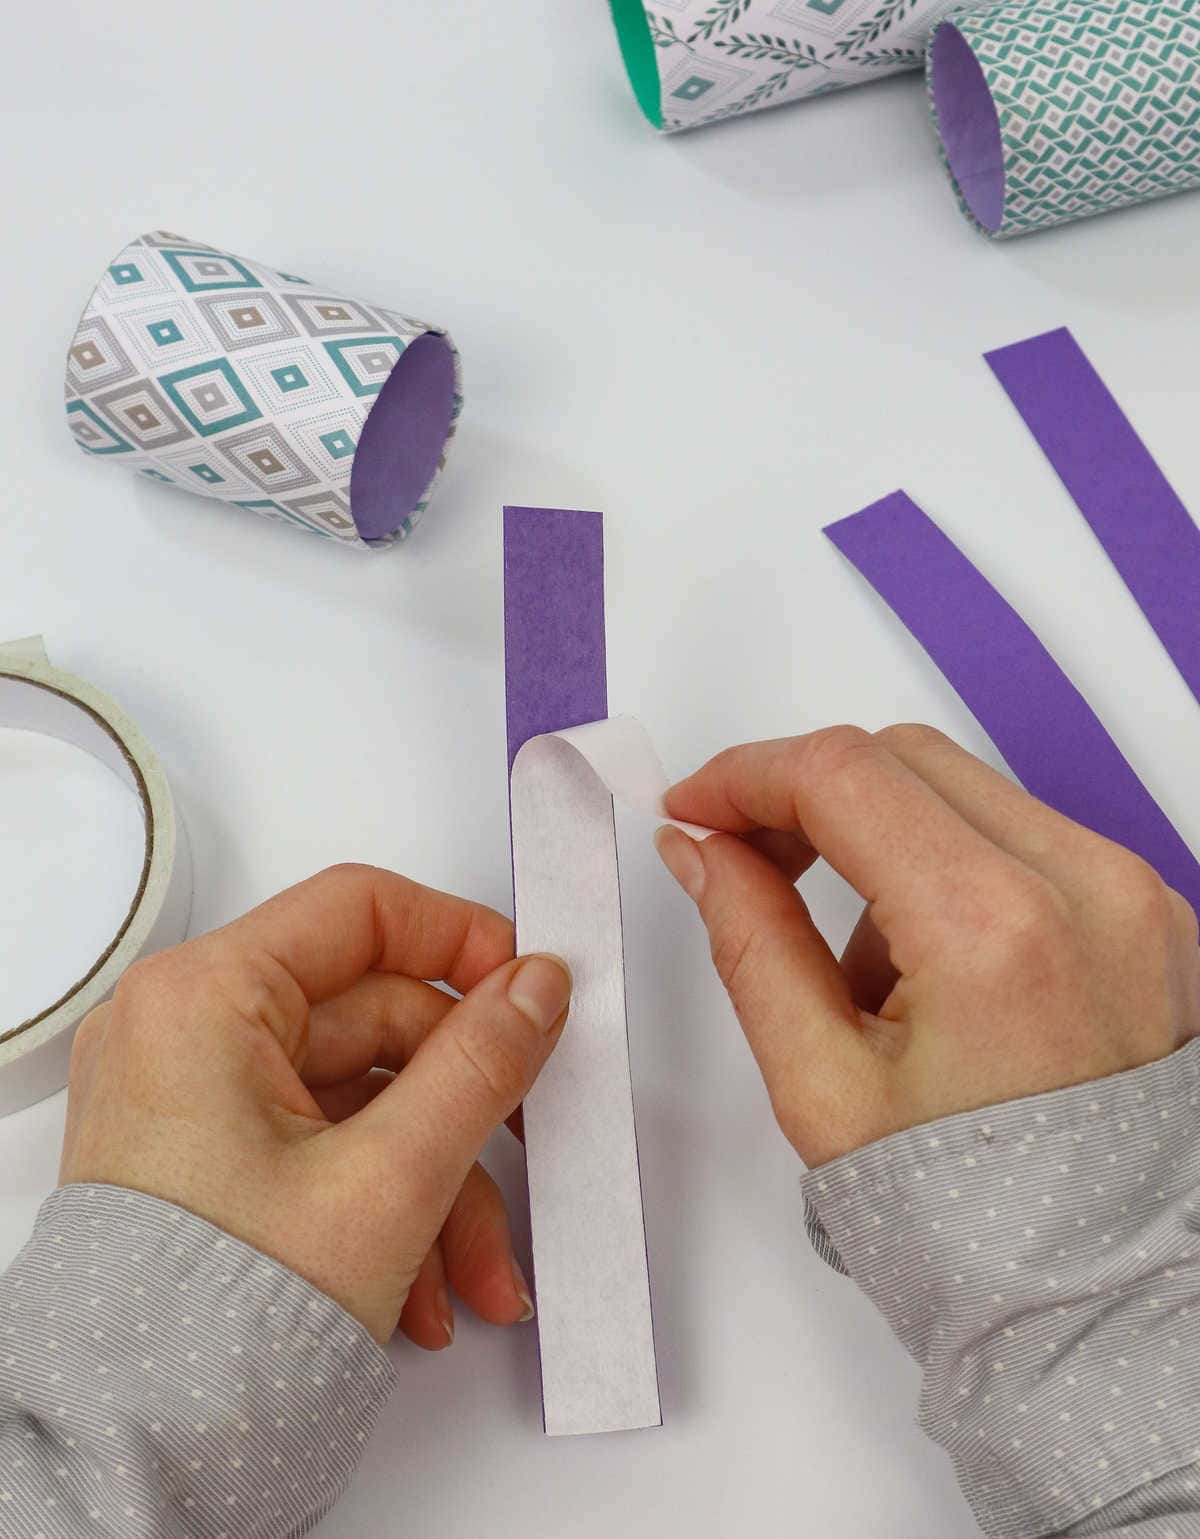
Secure the toilet paper tube by attaching a narrow strip of double-sided tape along its length. For added stability, apply a smaller piece of tape to the opposing side. Once positioned, carefully remove the backing from both pieces of tape, allowing them to bond firmly with the tube.
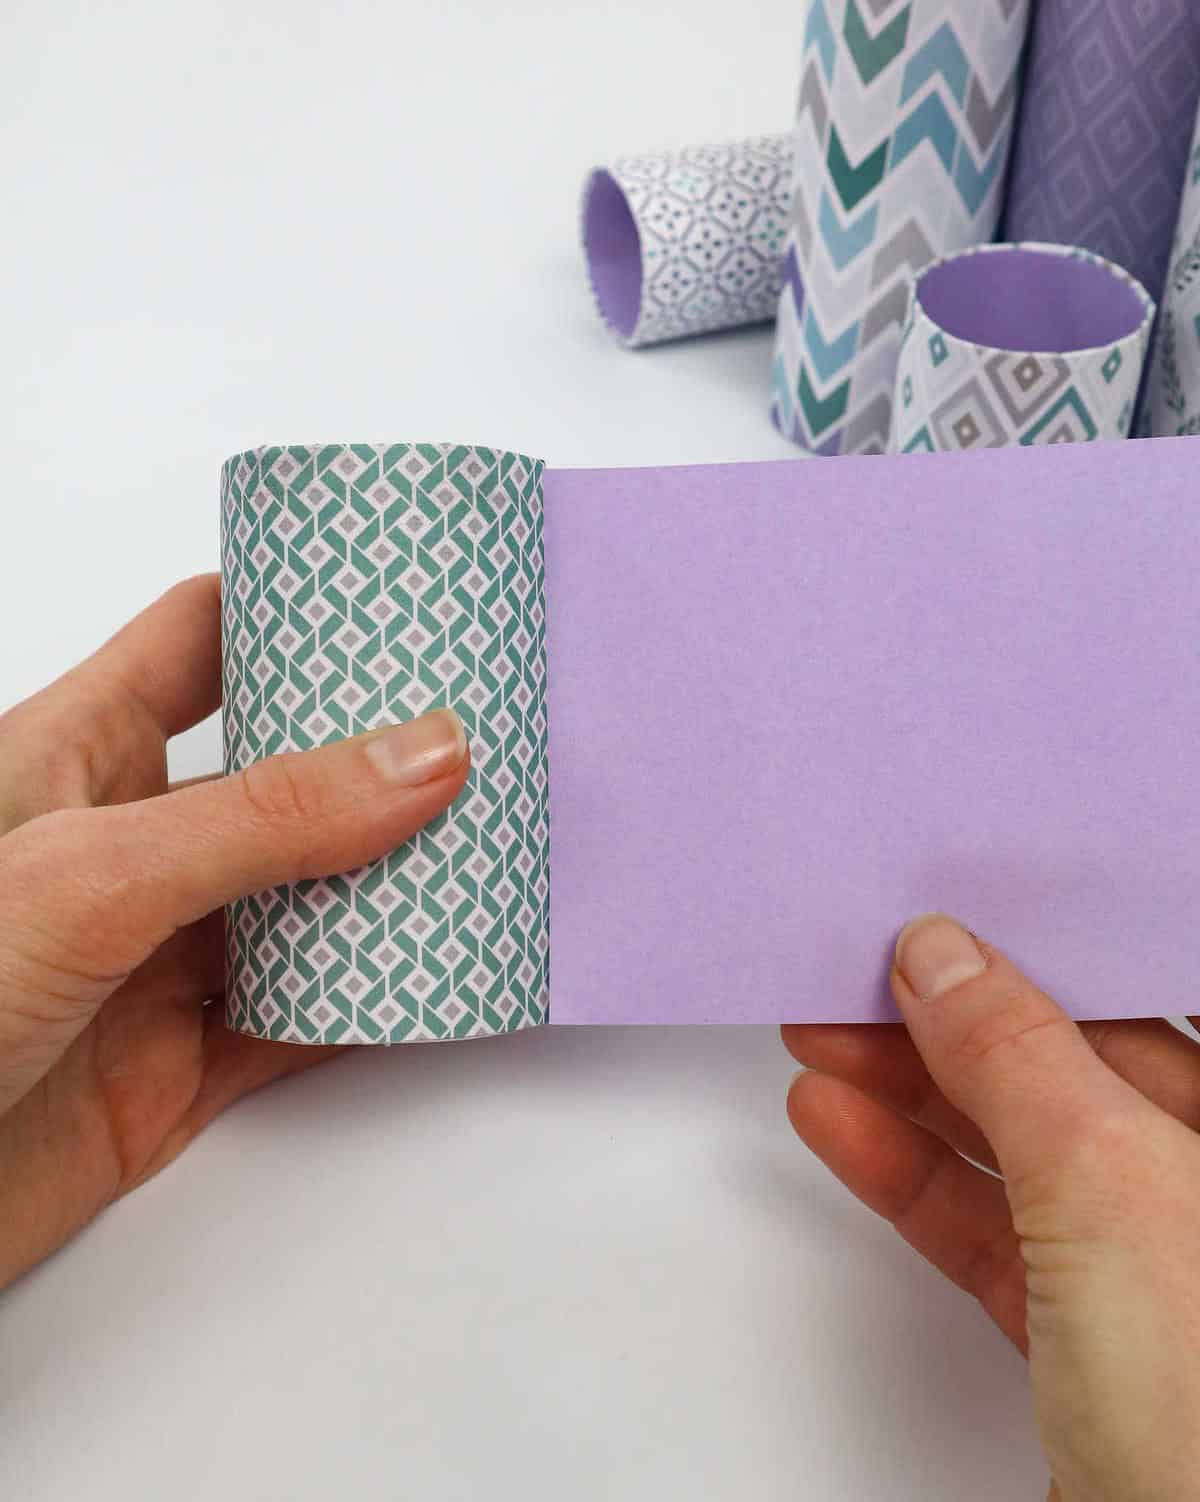
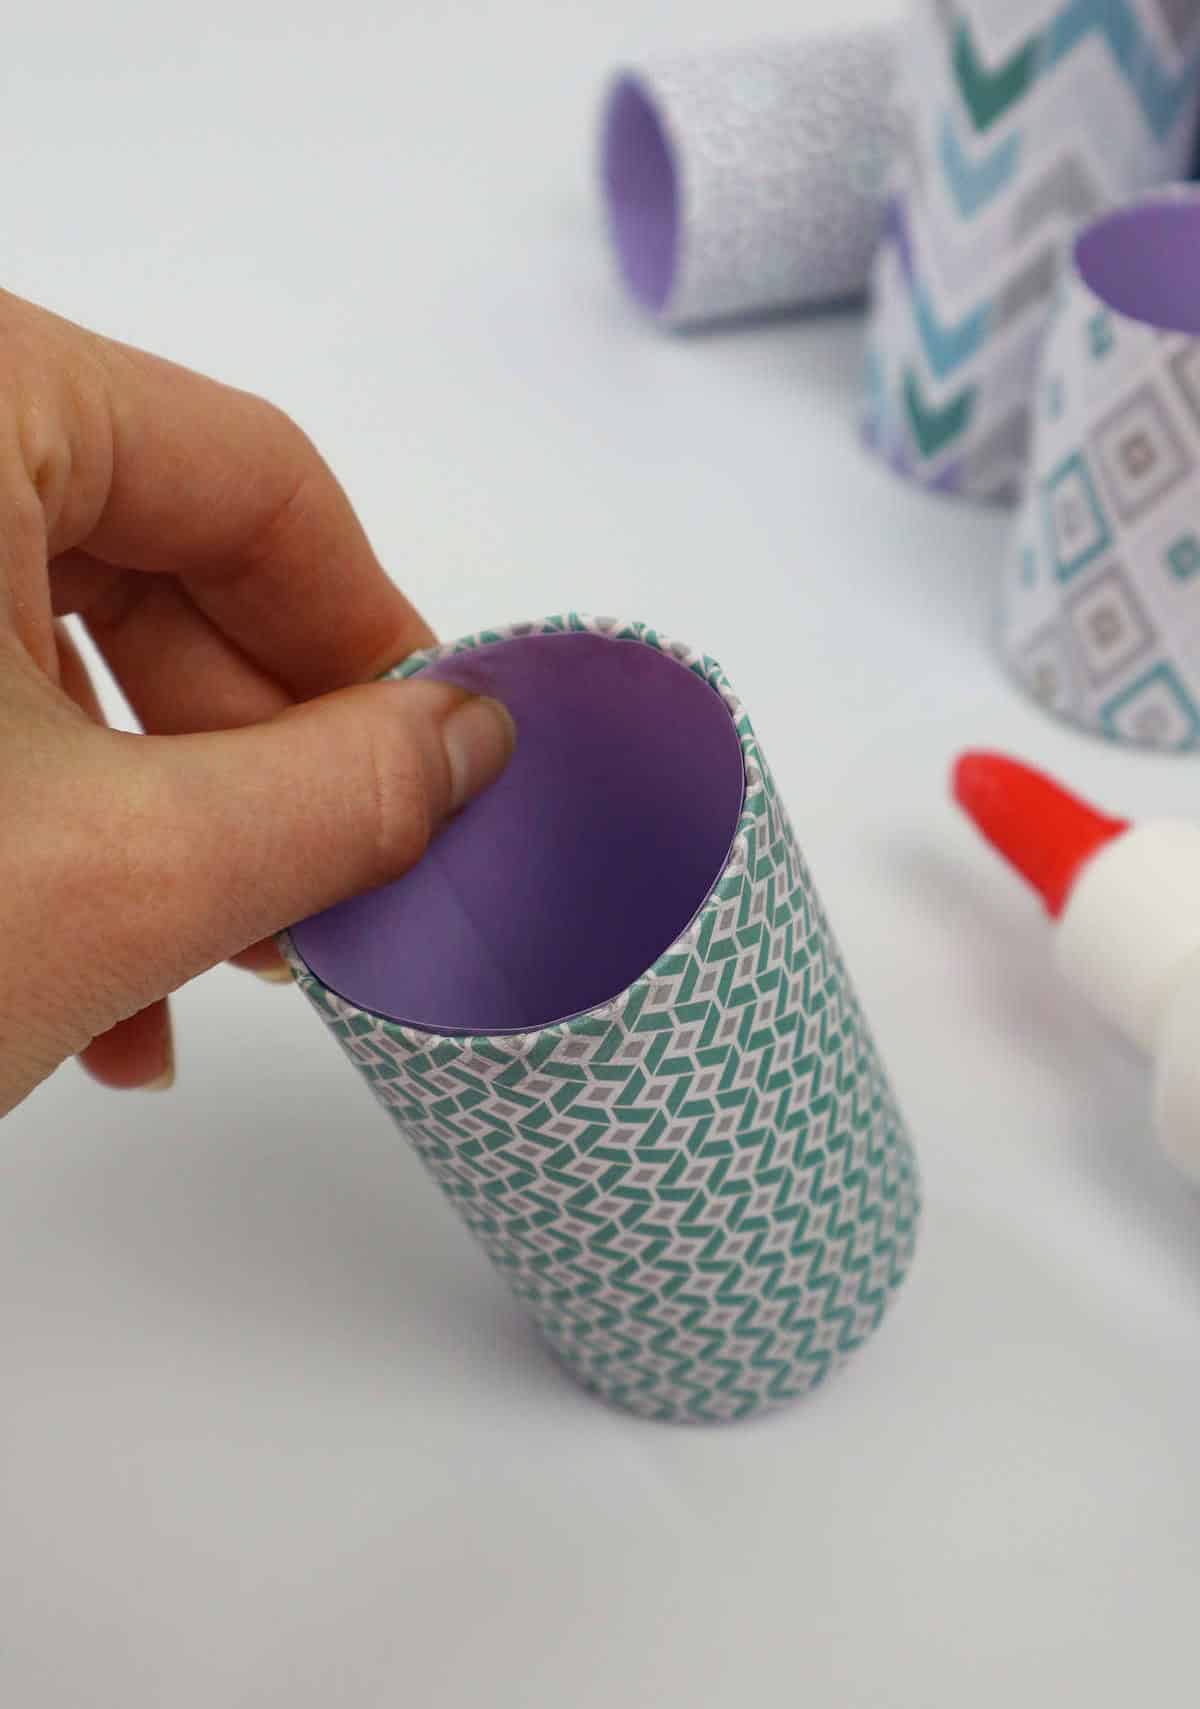
Step 11
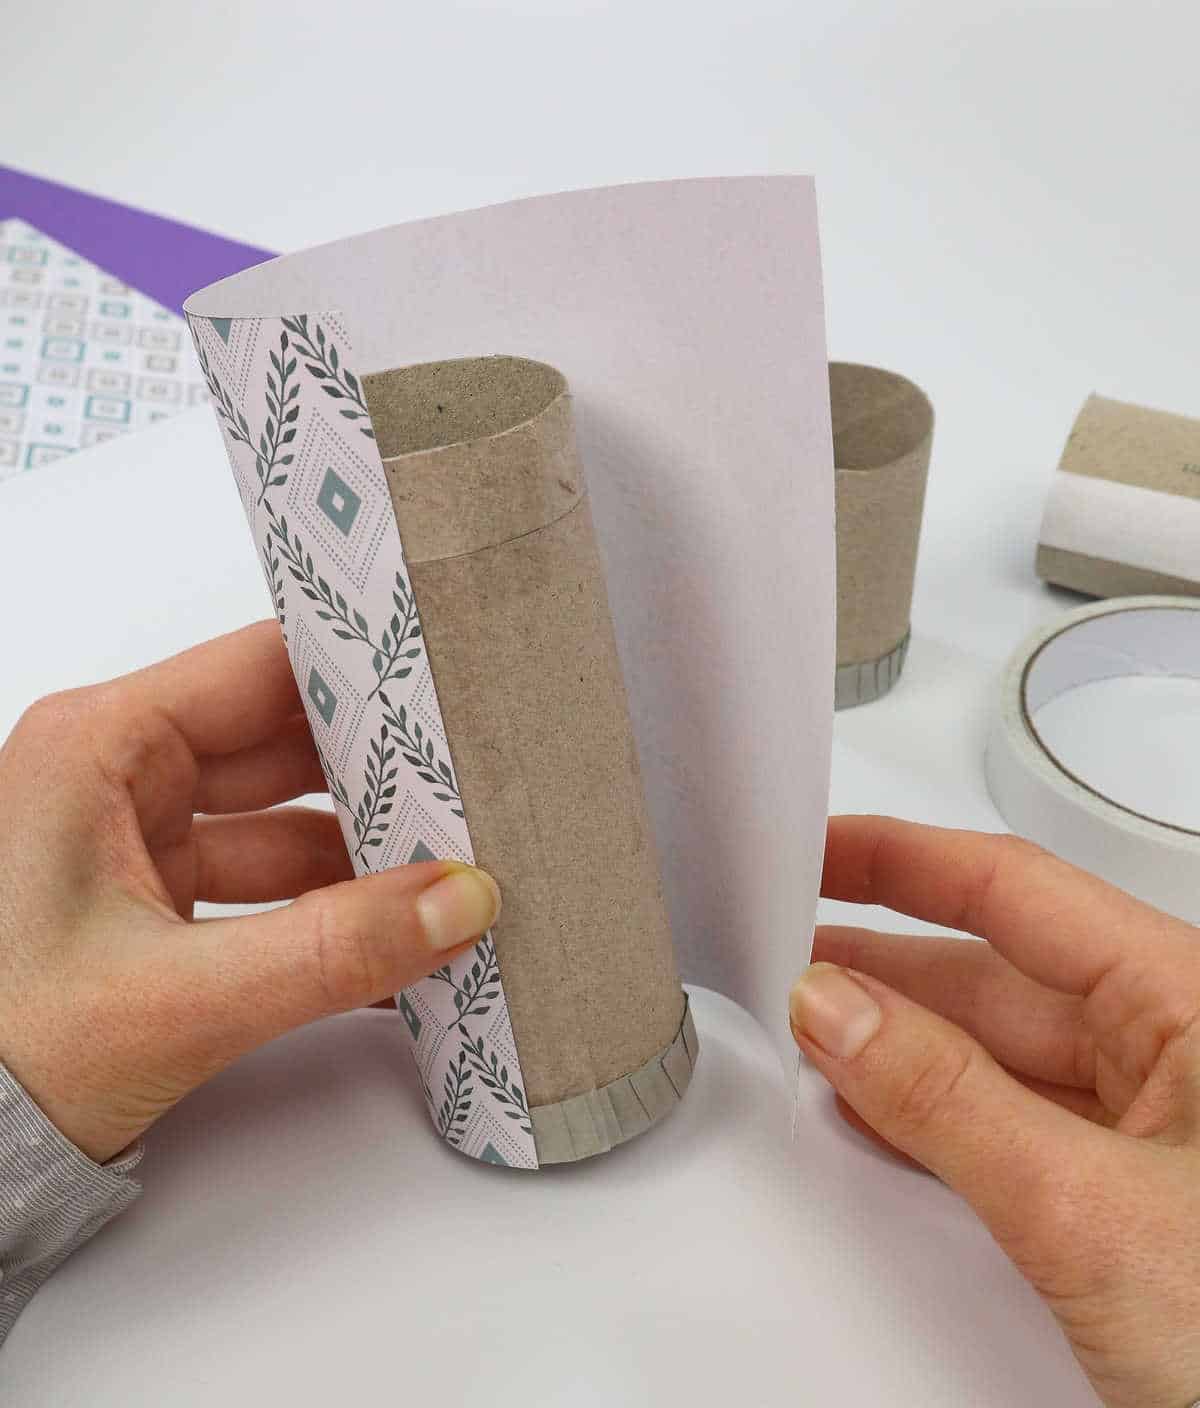
Begin by selecting a piece of patterned paper and placing one half of it onto a strip of tape. Wrap the rest of the paper around the strip, ensuring that the other end sits on the second half. Observe that the paper has approximately an inch of overhang at this stage; leave it in place for now. It’s also important to note that using thicker patterned papers will generally produce better results.
Step 12
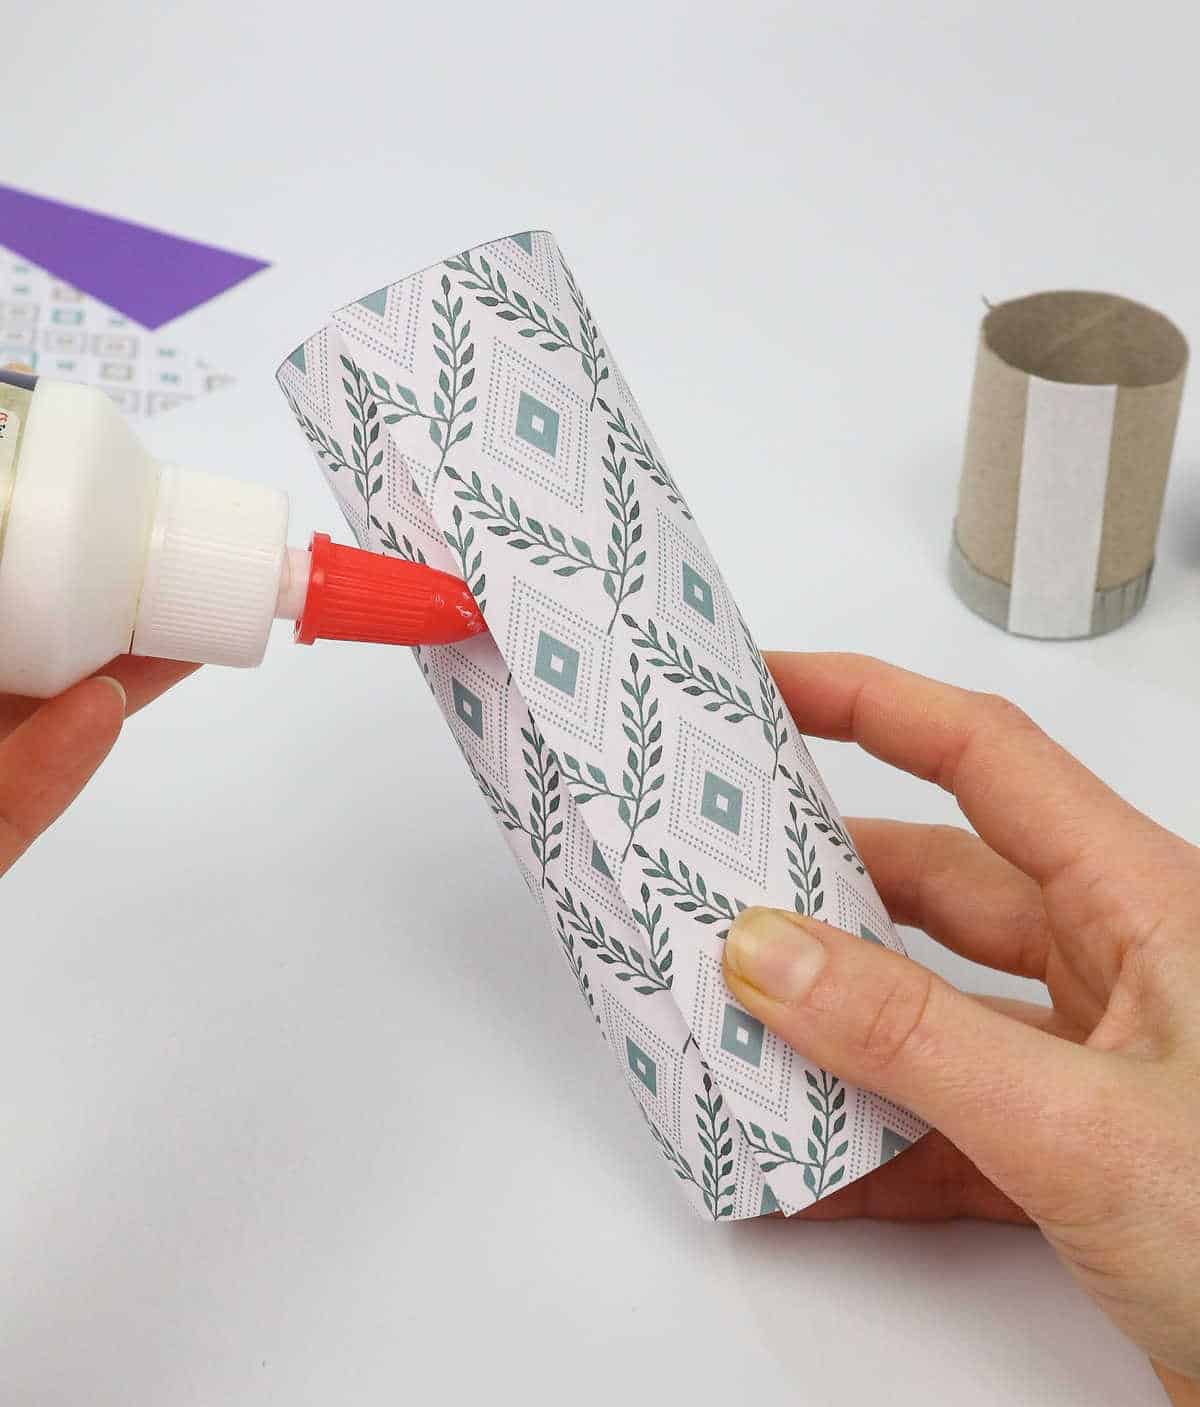
To ensure a professional-looking finish, apply a small amount of adhesive to the back of the decorative paper, pressing firmly to secure it in place. If any excess material extends beyond the edges, use scissors to trim it neatly or gently fold it inward and reapply glue for a seamless bond.
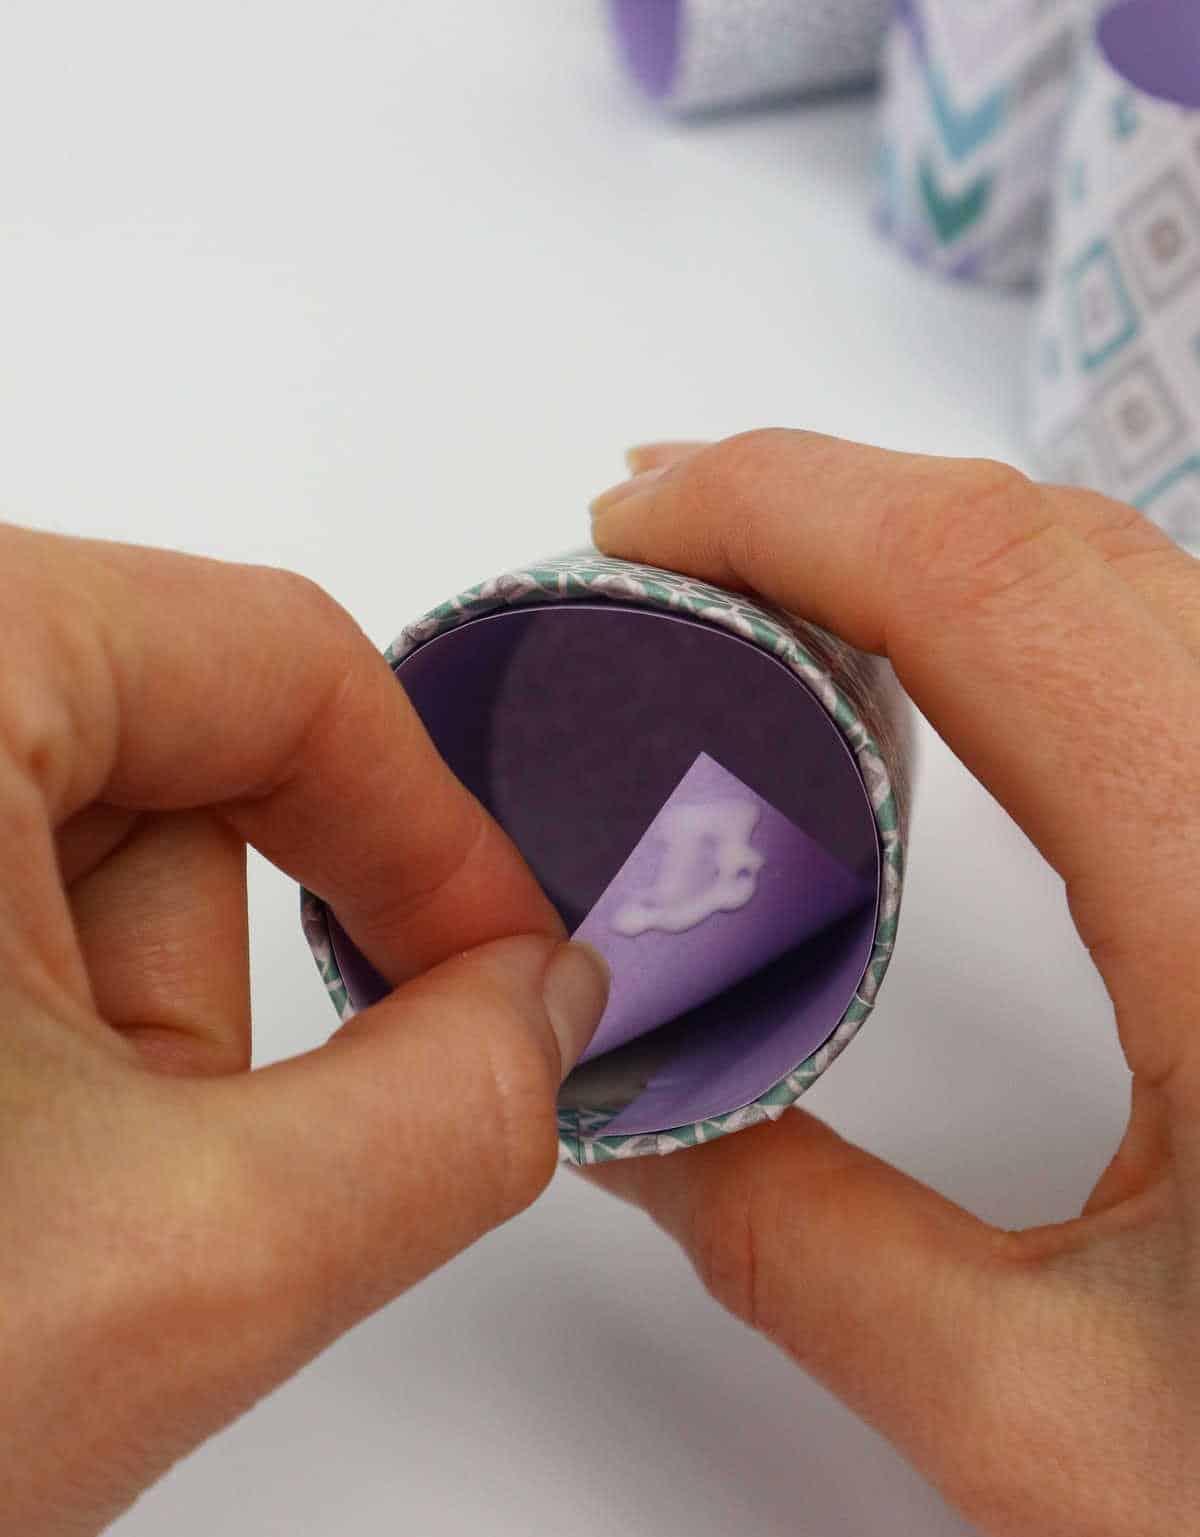
Step 13
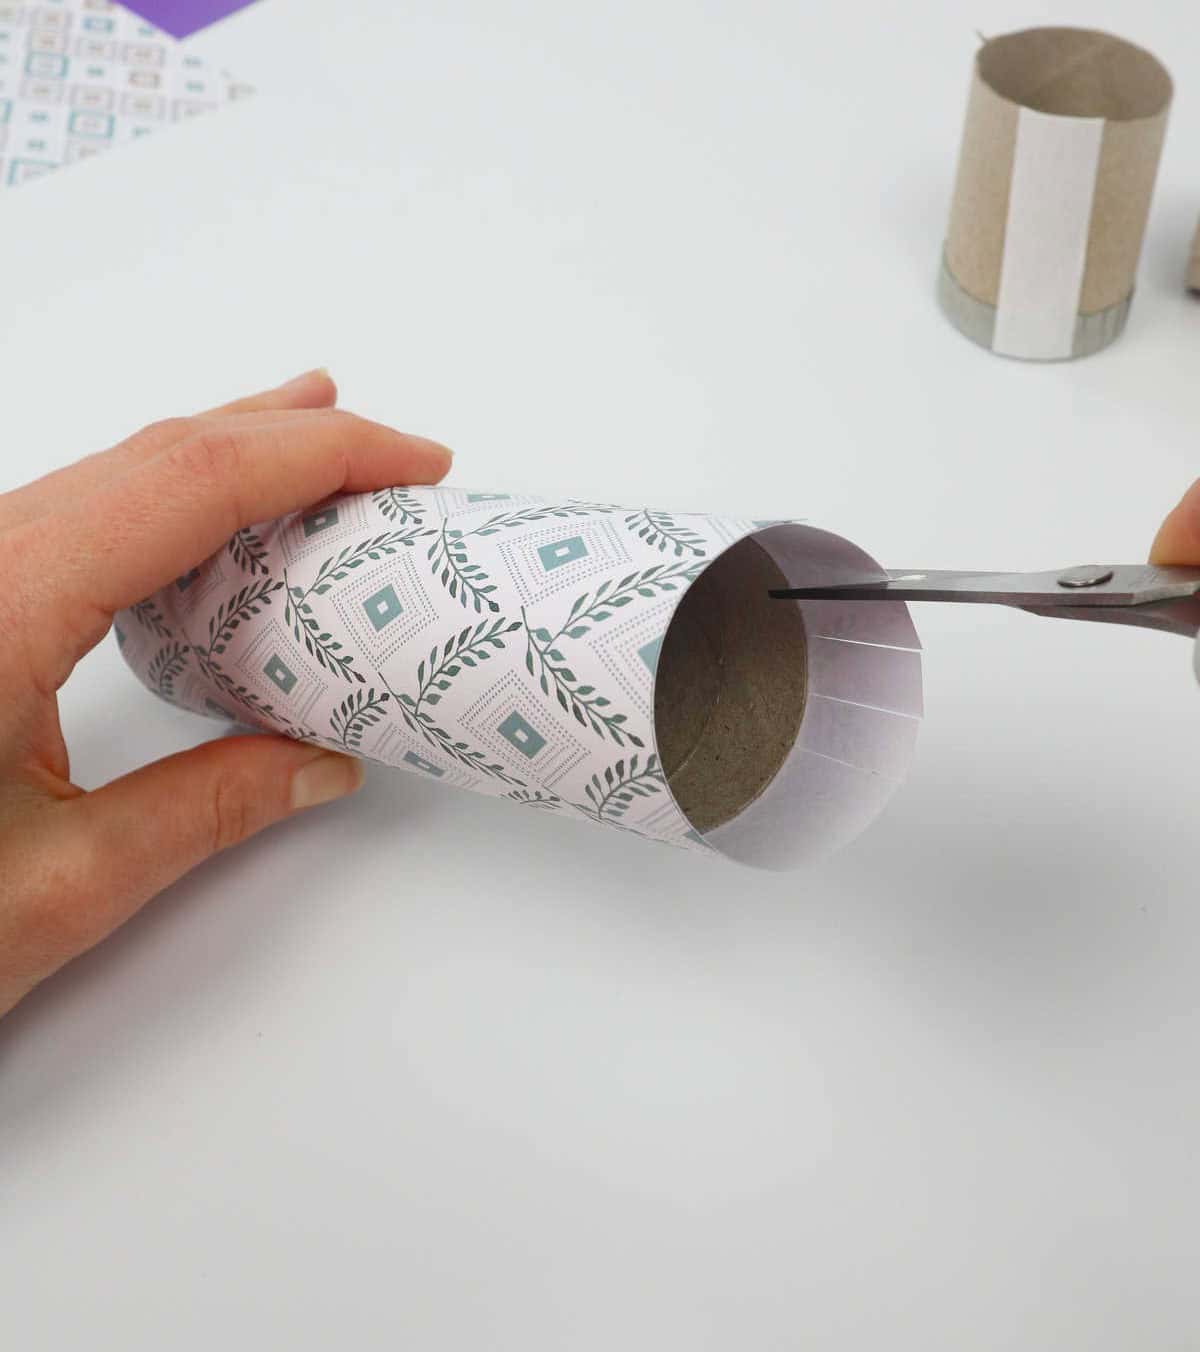
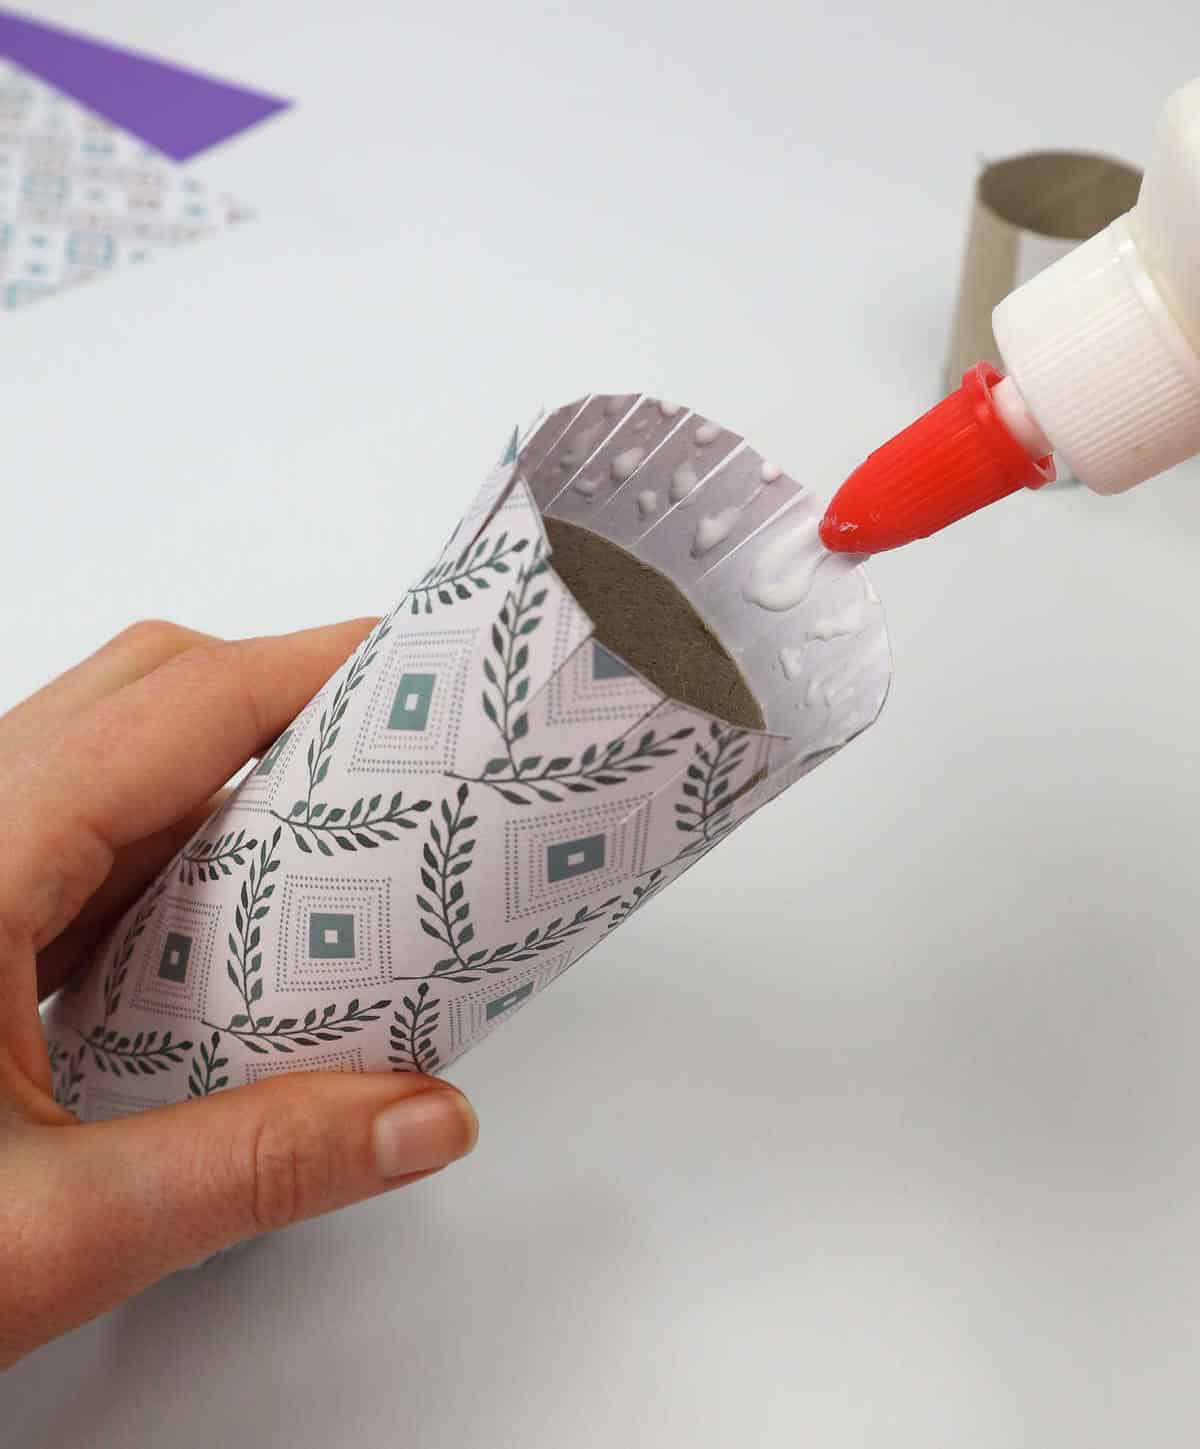

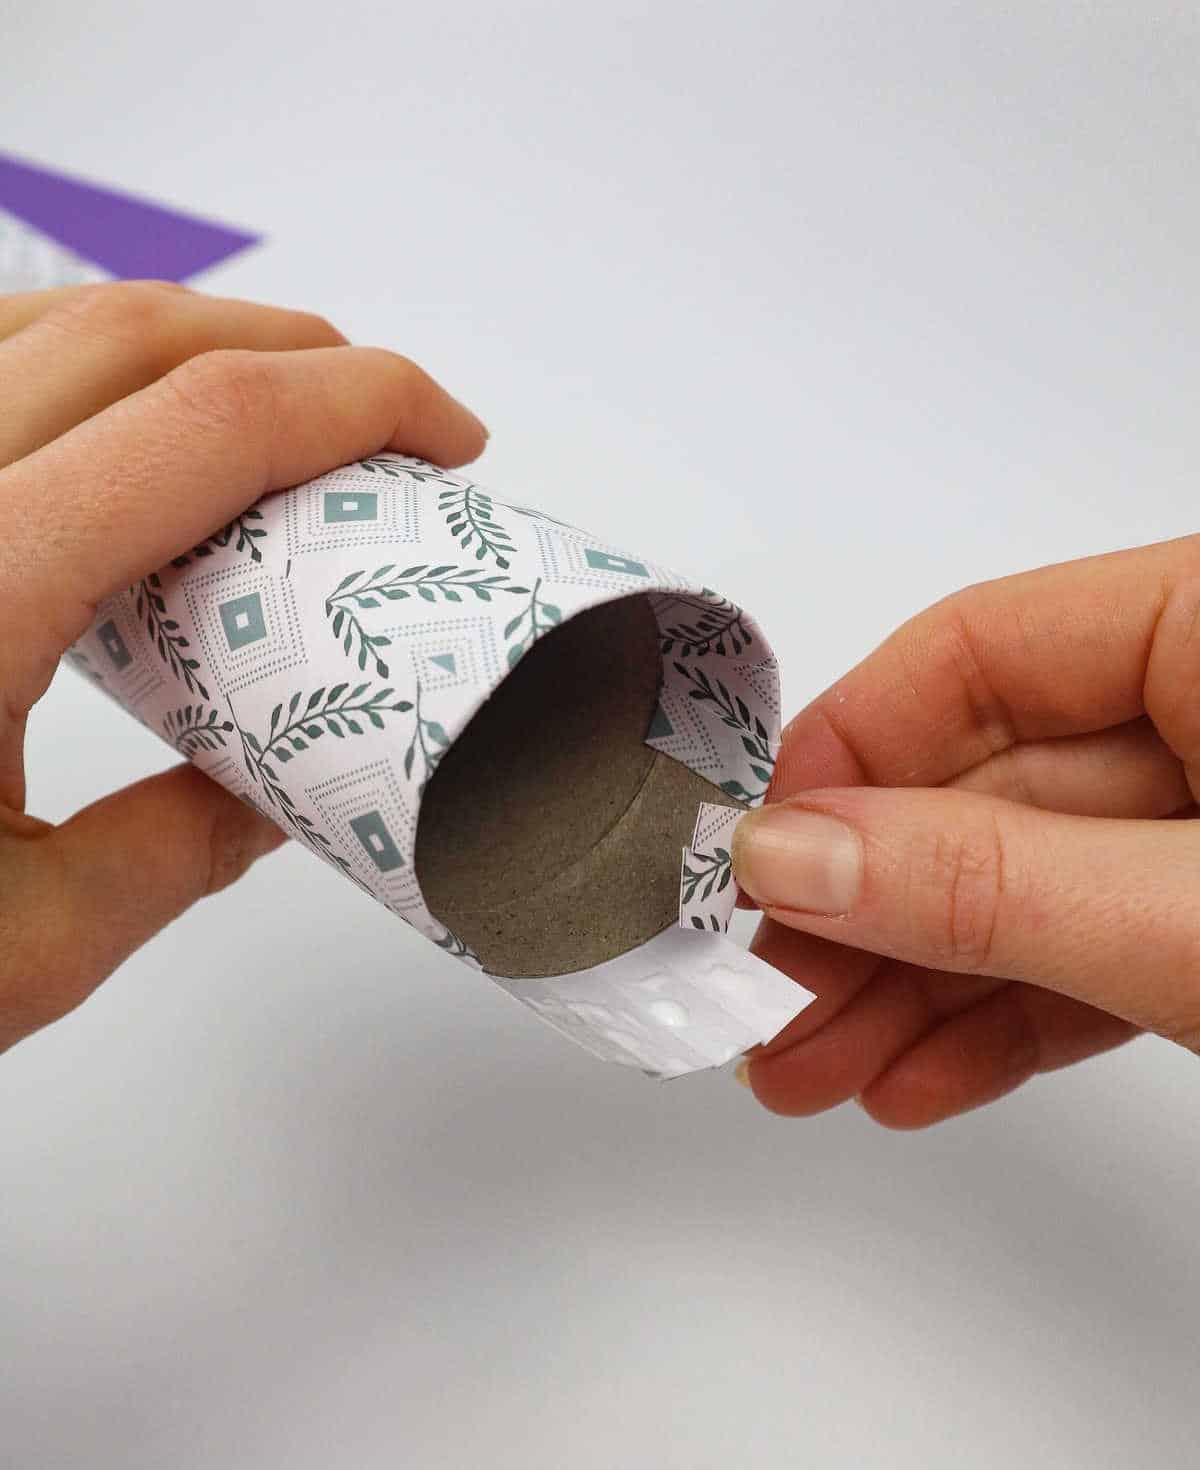
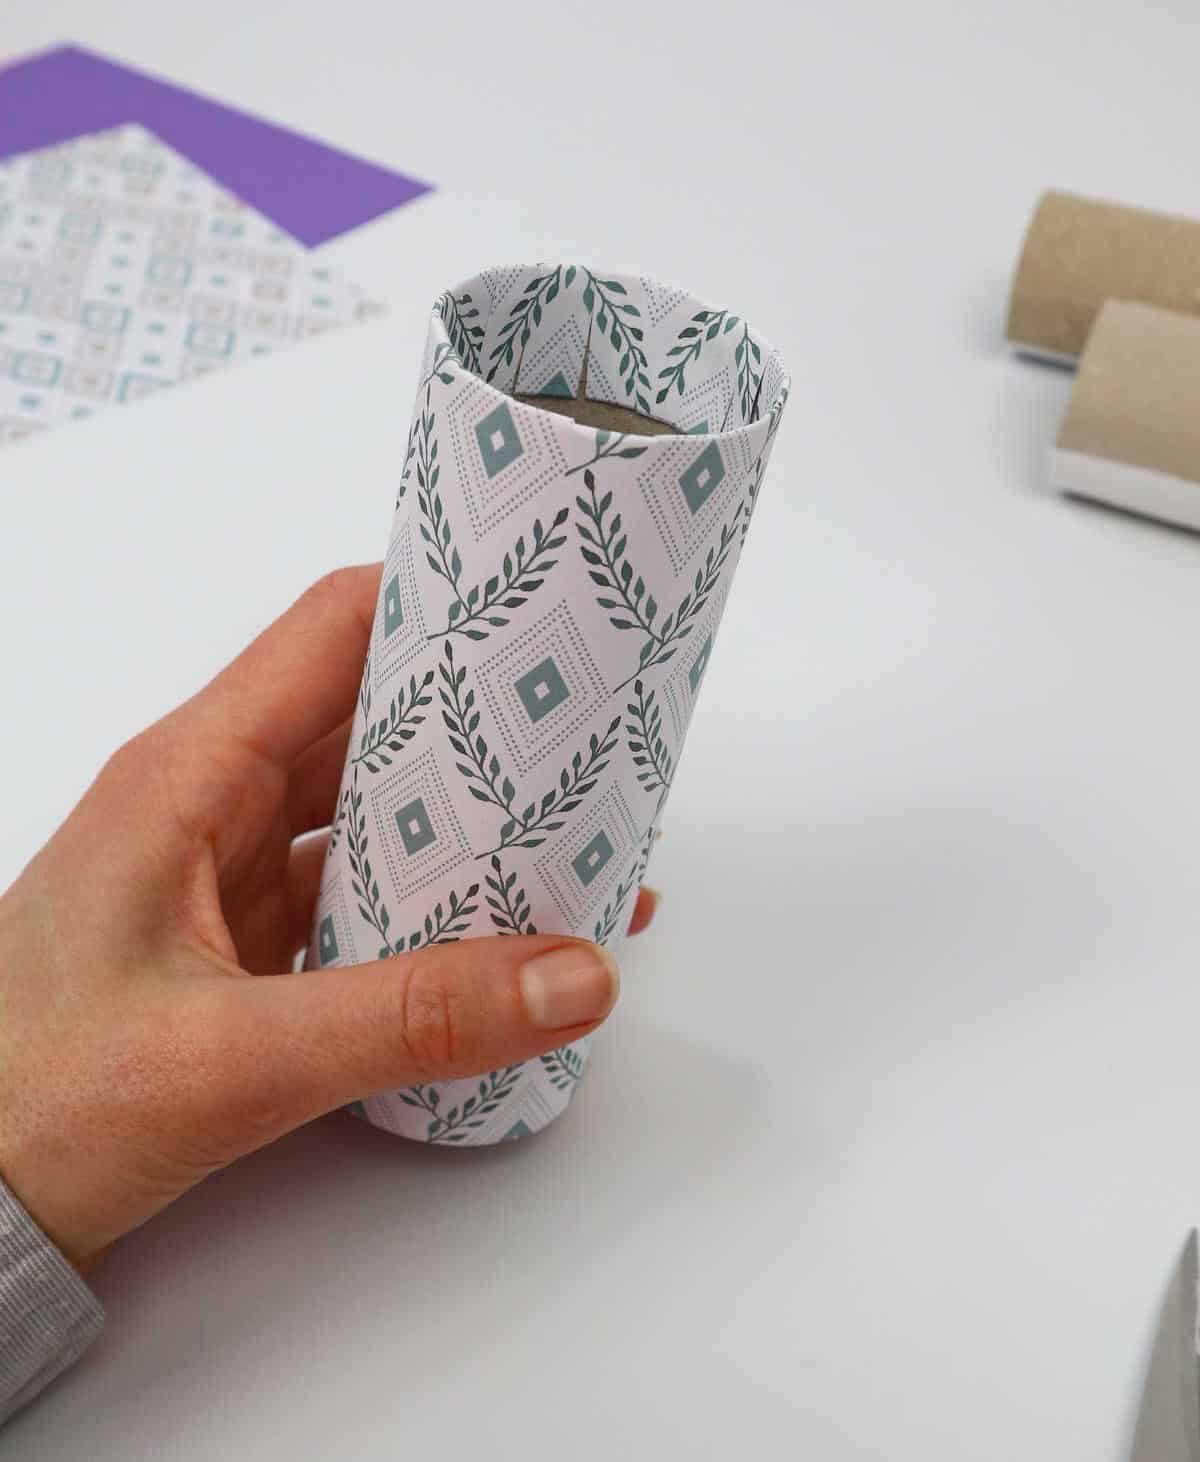
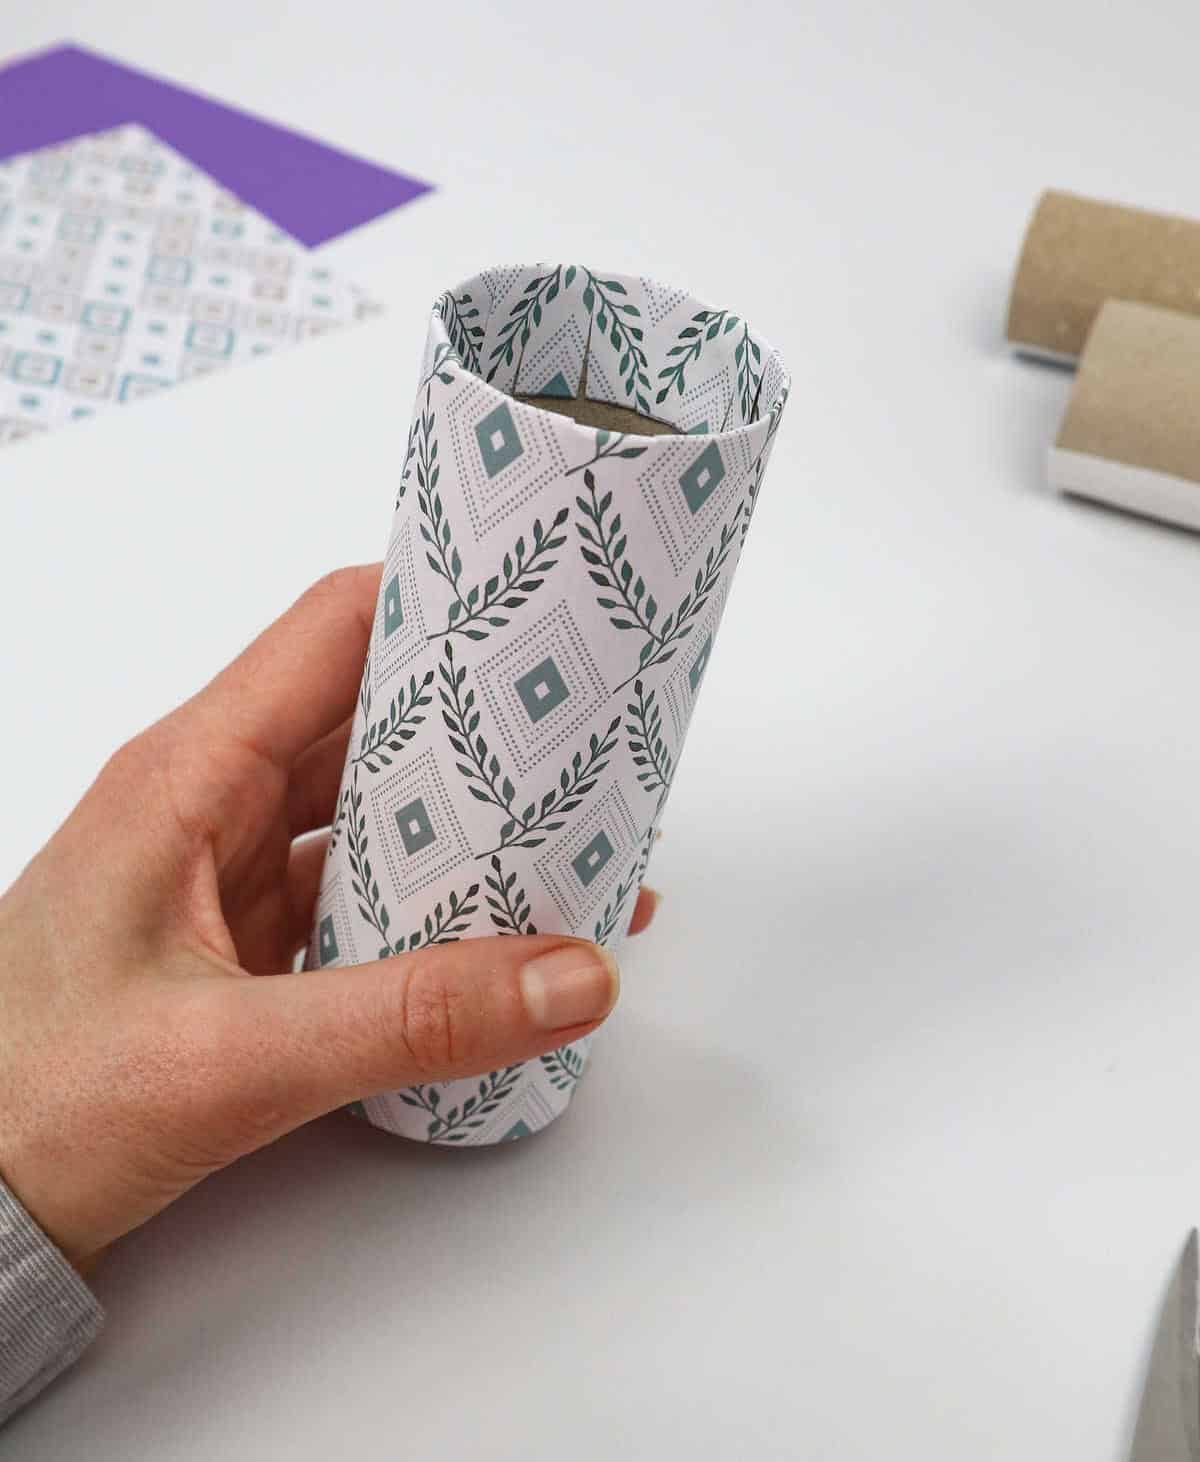
To create a secure bond, make a series of small incisions in the paper, mimicking the process from step 9. Next, carefully assemble the strips within the toilet paper tube, repeating this action for each tube. Allow the glue to set before proceeding to the next one. Once dry, press the flaps firmly into the roll’s interior, ensuring a tight seal. Repeat this process for all tubes, then set them aside to complete the drying process.
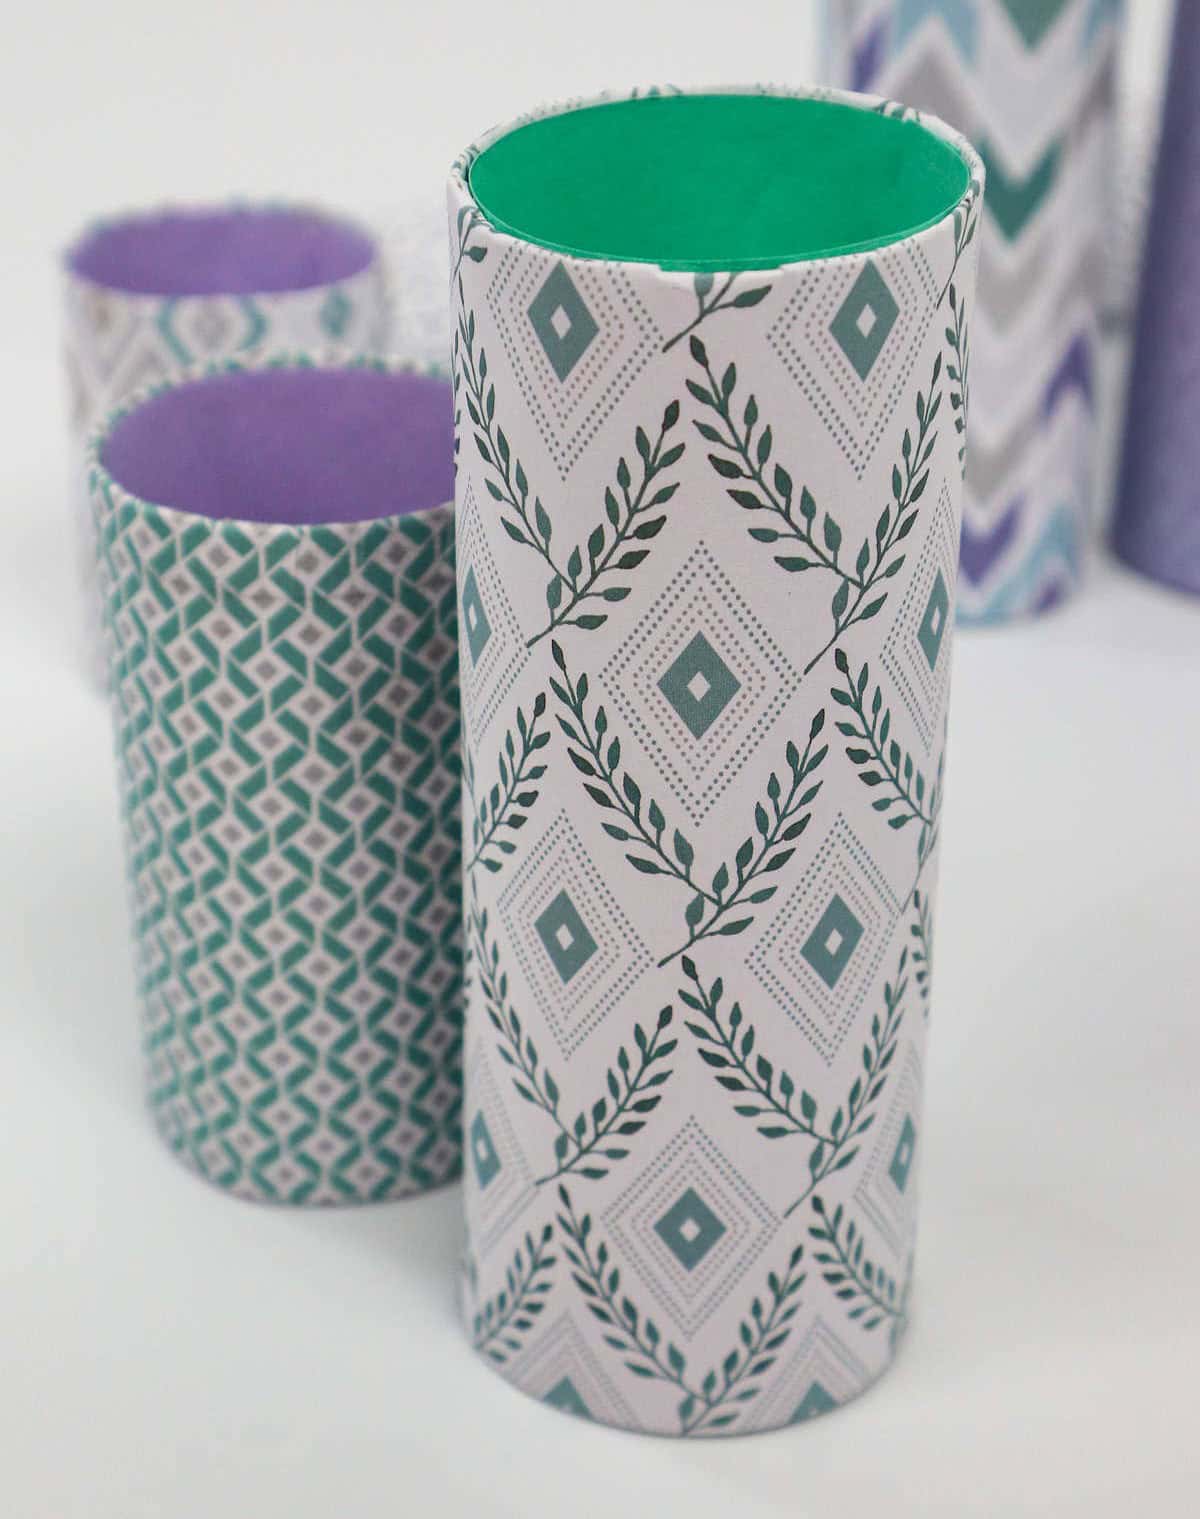
Step 14

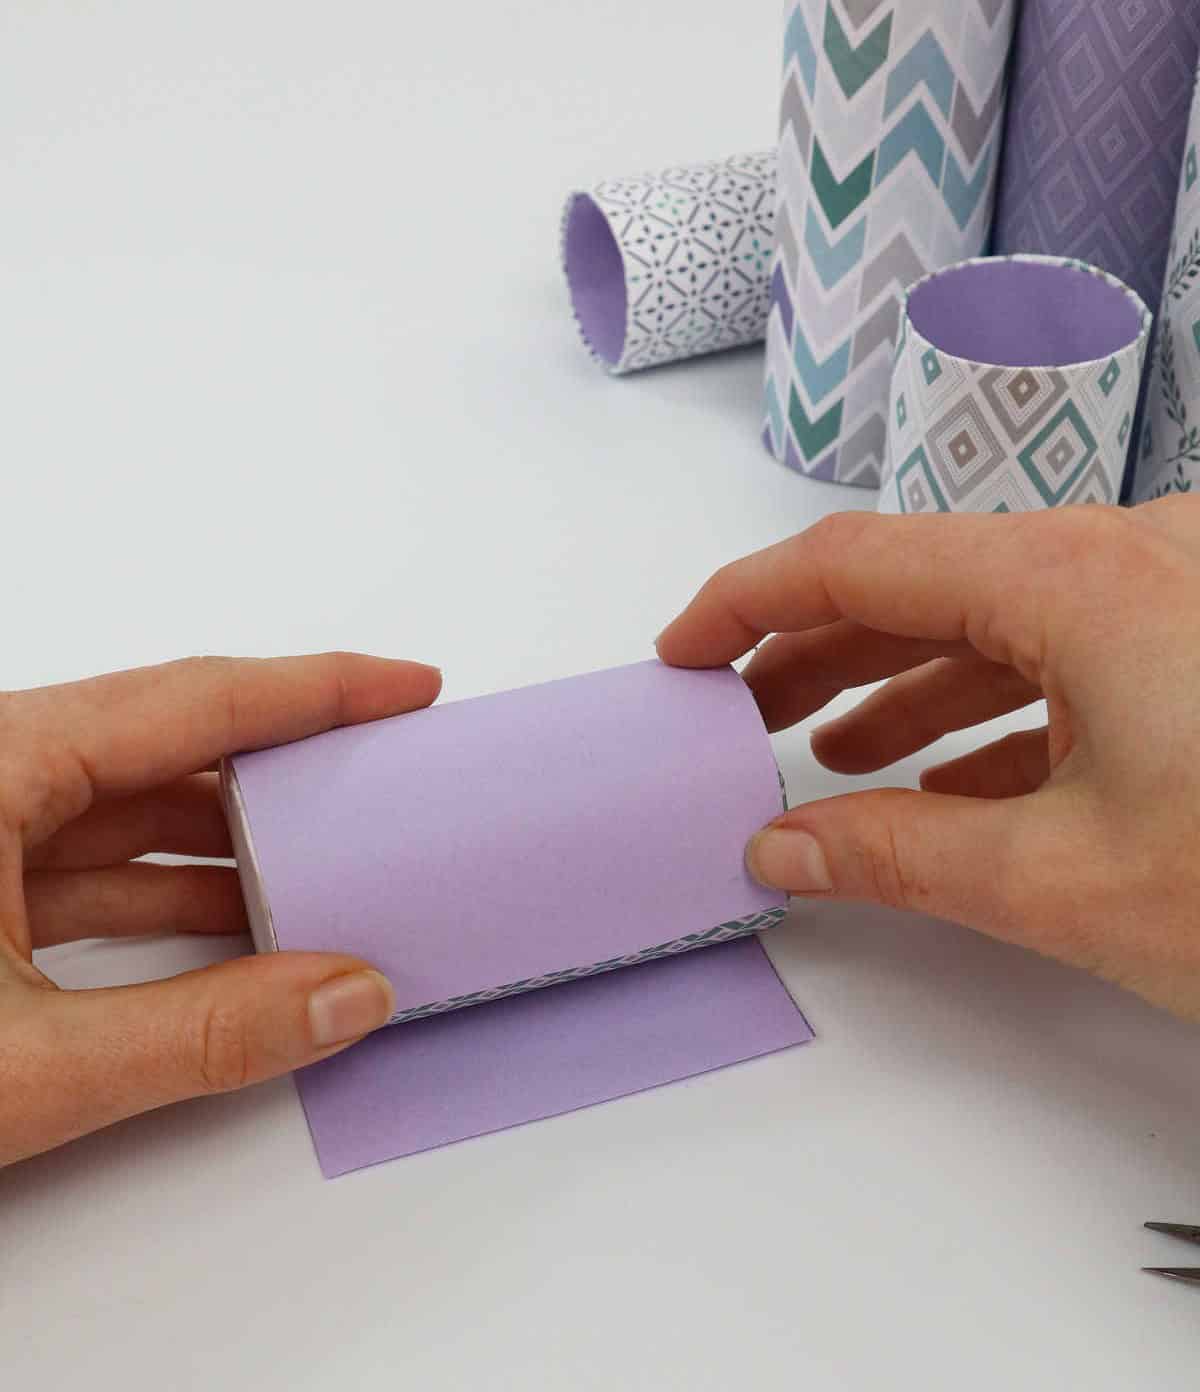
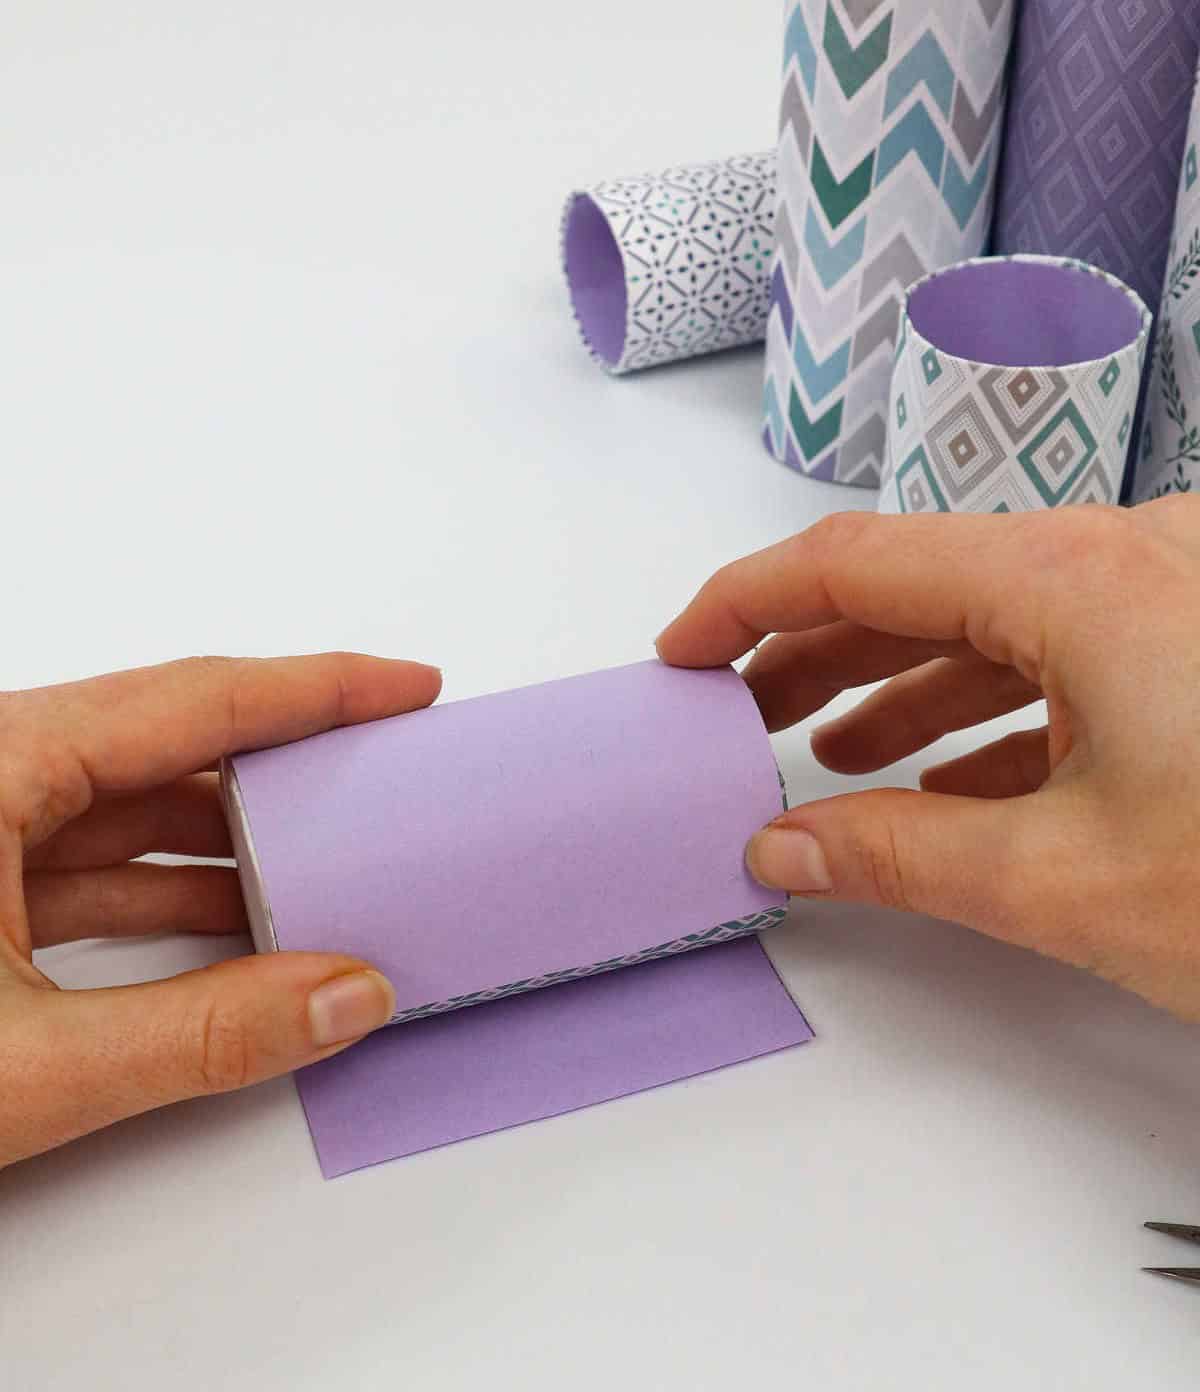
To accurately determine the required paper length, a simple yet effective method is to pair the paper alongside the height of the tube. Start by wrapping the paper around the exterior of the tube, then carefully trim any excess material. Continue this process until you’ve achieved the desired amount, and you’ll have a precise measurement to work with.
Step 15
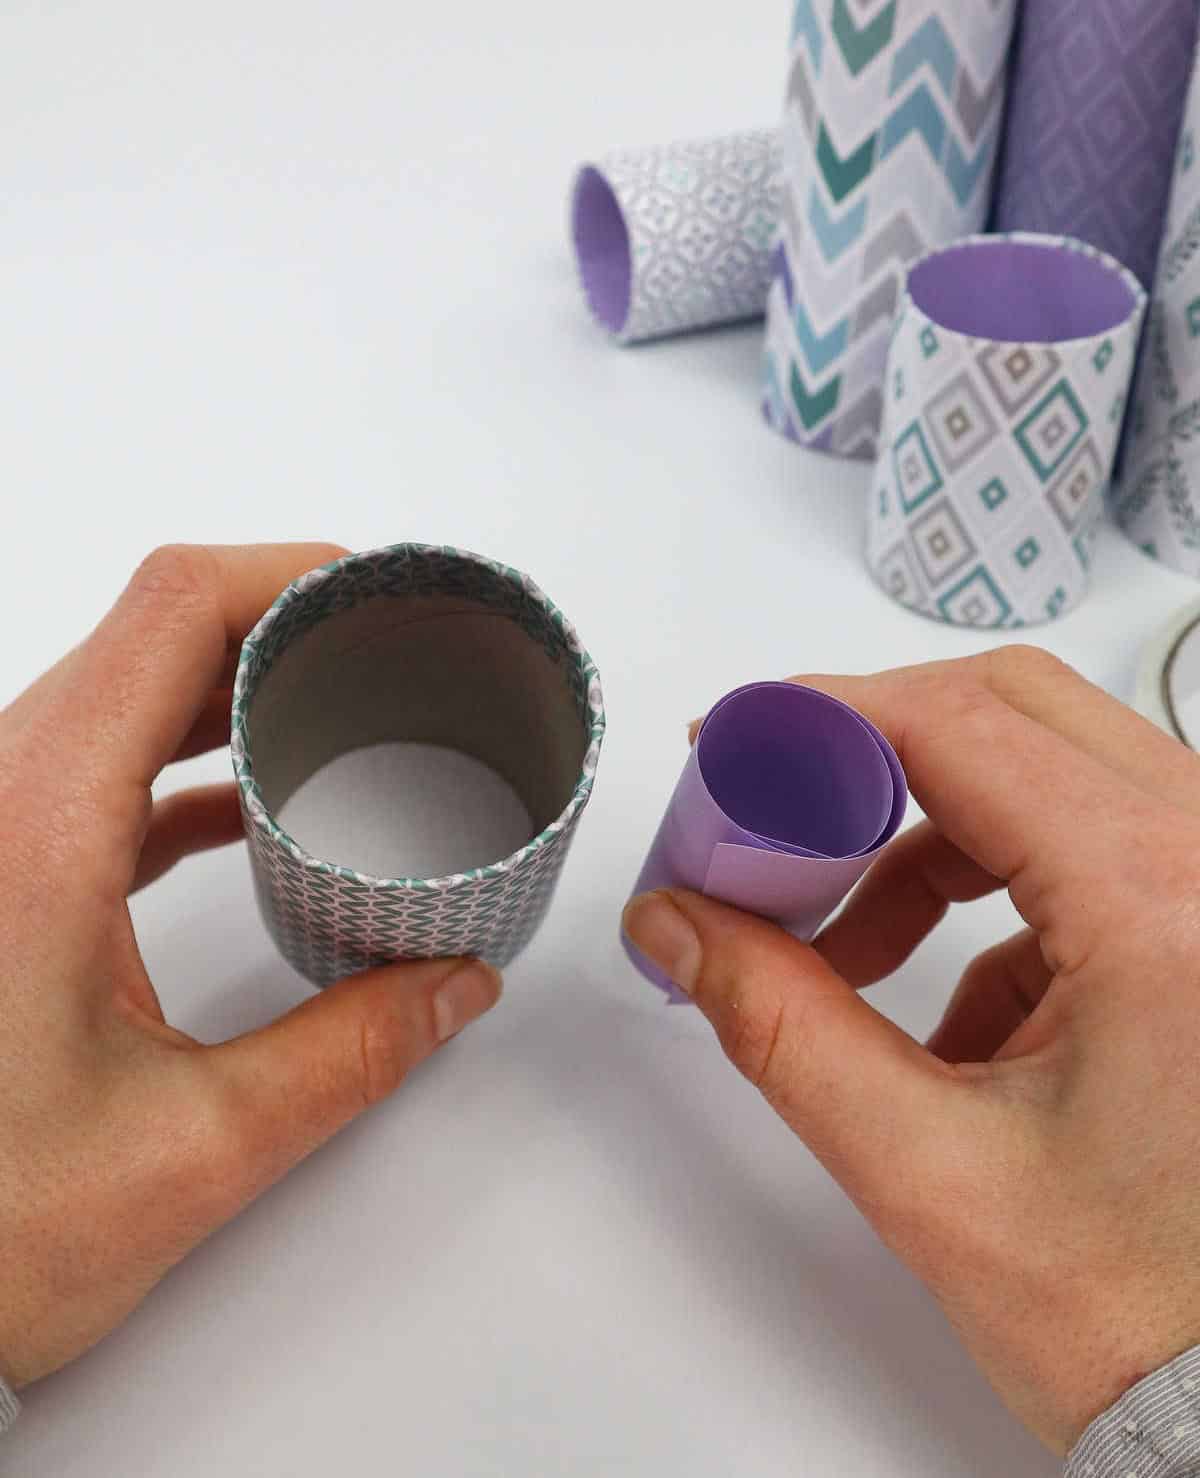
To create a miniature version of the typical toilet paper tube, simply curl the paper into smaller coils than what you’d normally see on a bathroom roll. This technique will allow you to transform ordinary paper into a tiny, makeshift tube that can be used for various creative endeavors or even as a unique craft material.
Step 16

To ensure the wrap stays intact, apply a small amount of adhesive to the top and bottom edges of the roll. Repeat this process several times, gradually moving along the length of the roll as you go.
Step 17
To initiate the process, carefully place the paper roll within each toilet paper tube. This simple step will lay the foundation for a successful outcome. As you complete this task, ensure that each tube is fully stocked to guarantee a seamless experience moving forward.
Step 18

When inserting the paper into the tube, a crucial step is to press it firmly against the sides, allowing the paper to conform to the shape of the tube’s interior. This ensures a snug fit and prevents any wrinkles or creases from forming.
Step 19
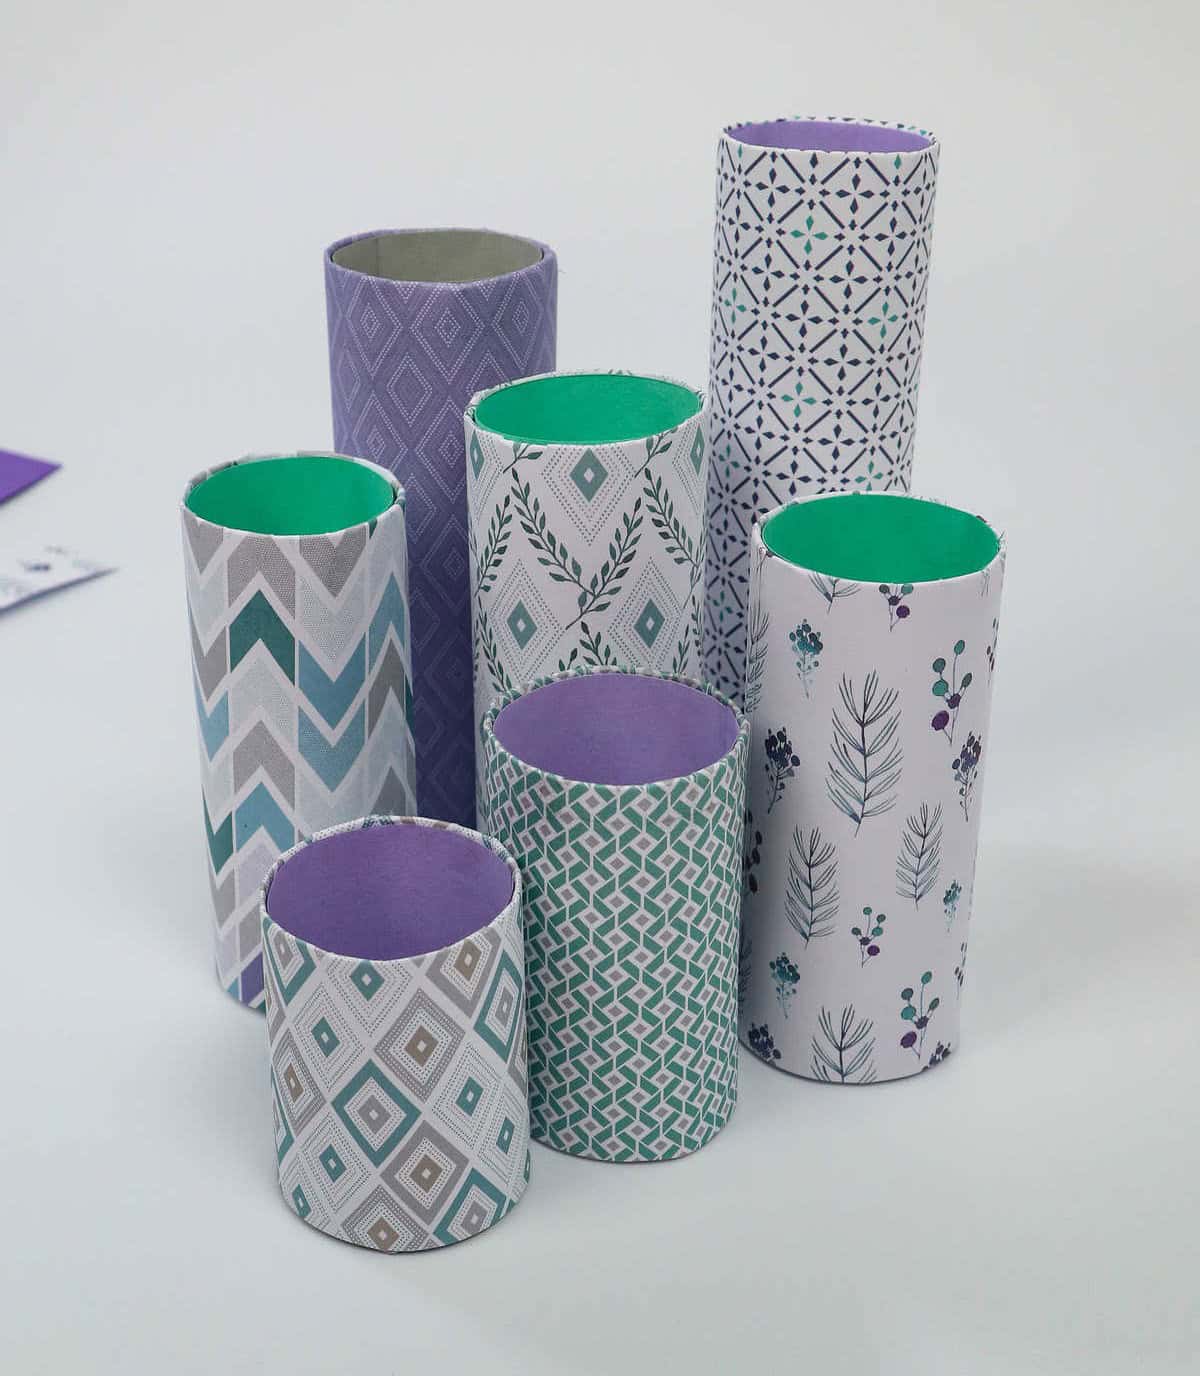
To ensure the paper remains securely in place, start by applying a small amount of adhesive to the top edges and any loose fibers. Gently press the material to facilitate penetration. Next, reapply glue to the open ends, pressing firmly to secure the paper. This process should be repeated until all loose areas are sealed, at which point you can proceed with confidence.
Step 20
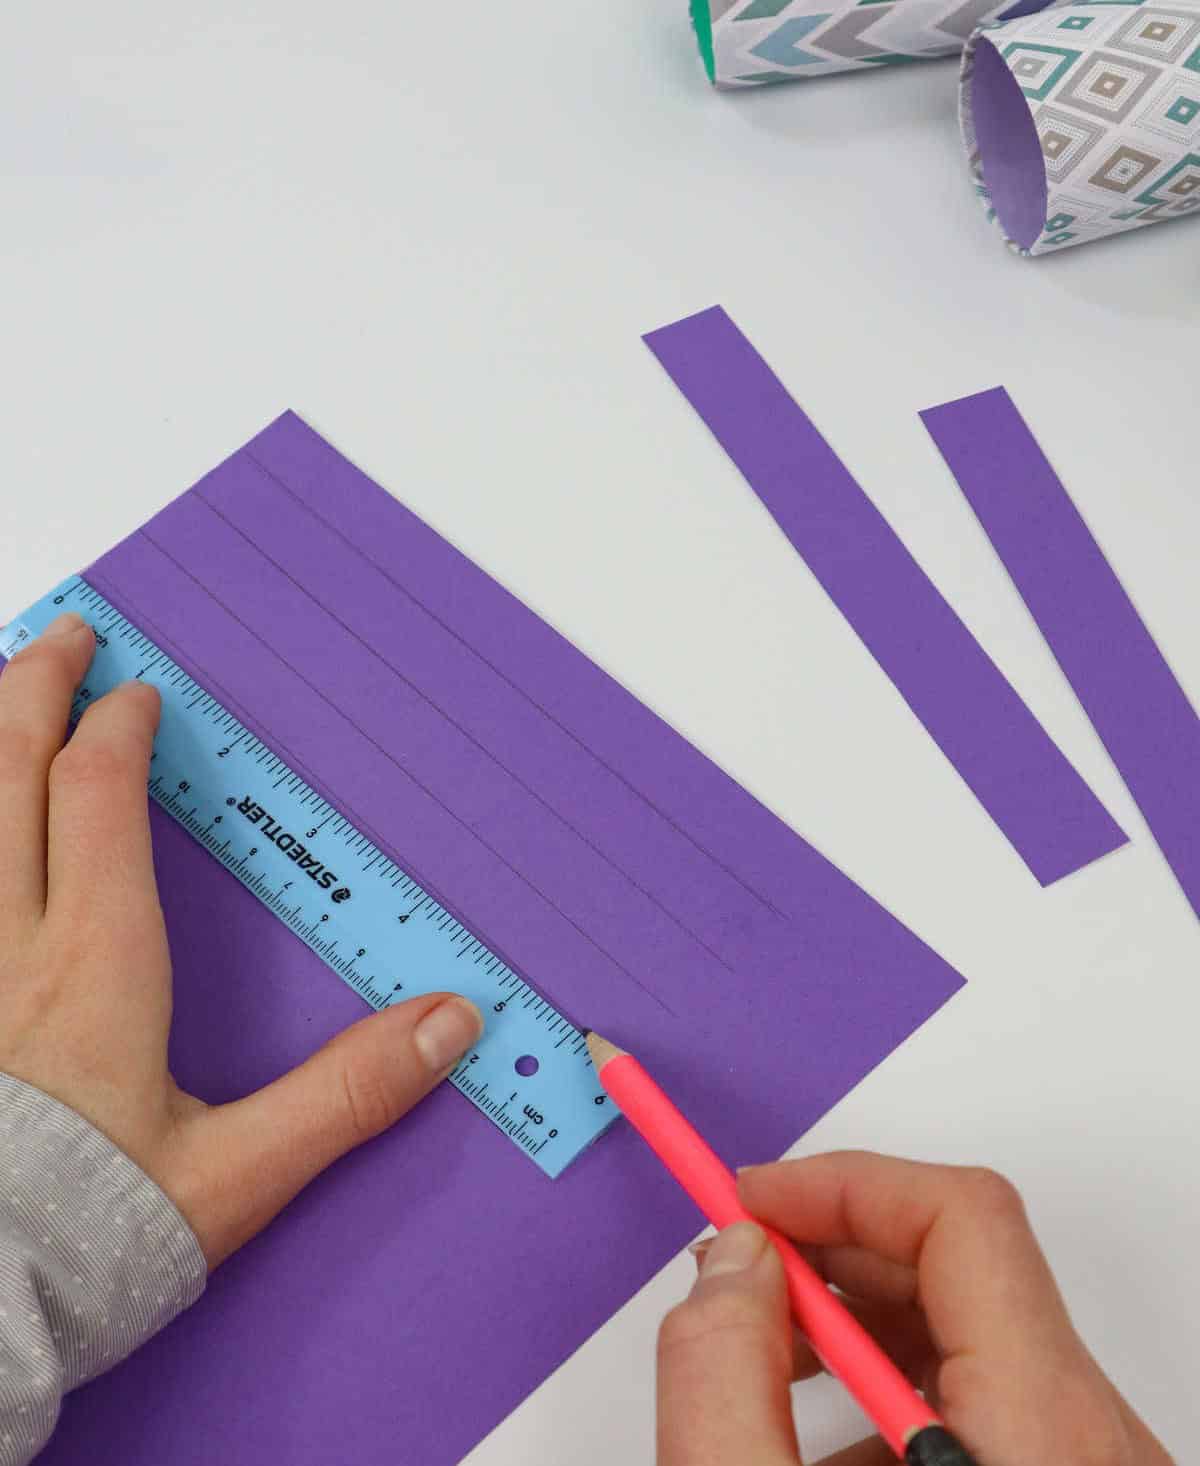
While trimming is an optional step, if you’d like to achieve a more polished look, grab your ruler and draw a series of straight lines where the edges will eventually meet. This will help guide your cutting and prevent any unwanted fraying.
Similarly, feel free to get creative with decorating your tubes by wrapping them in colorful paper or tape. Use double-sided tape or stick tape to secure your design as desired, allowing you to add a personal touch to each piece.
Step 21

Begin by orienting all the tubes with their closed ends facing upwards, ensuring they’re stacked neatly. Next, prepare a small amount of adhesive for applying to the tops of the toilet paper rolls. This will facilitate the process of attaching them to the plate later on.
Step 22
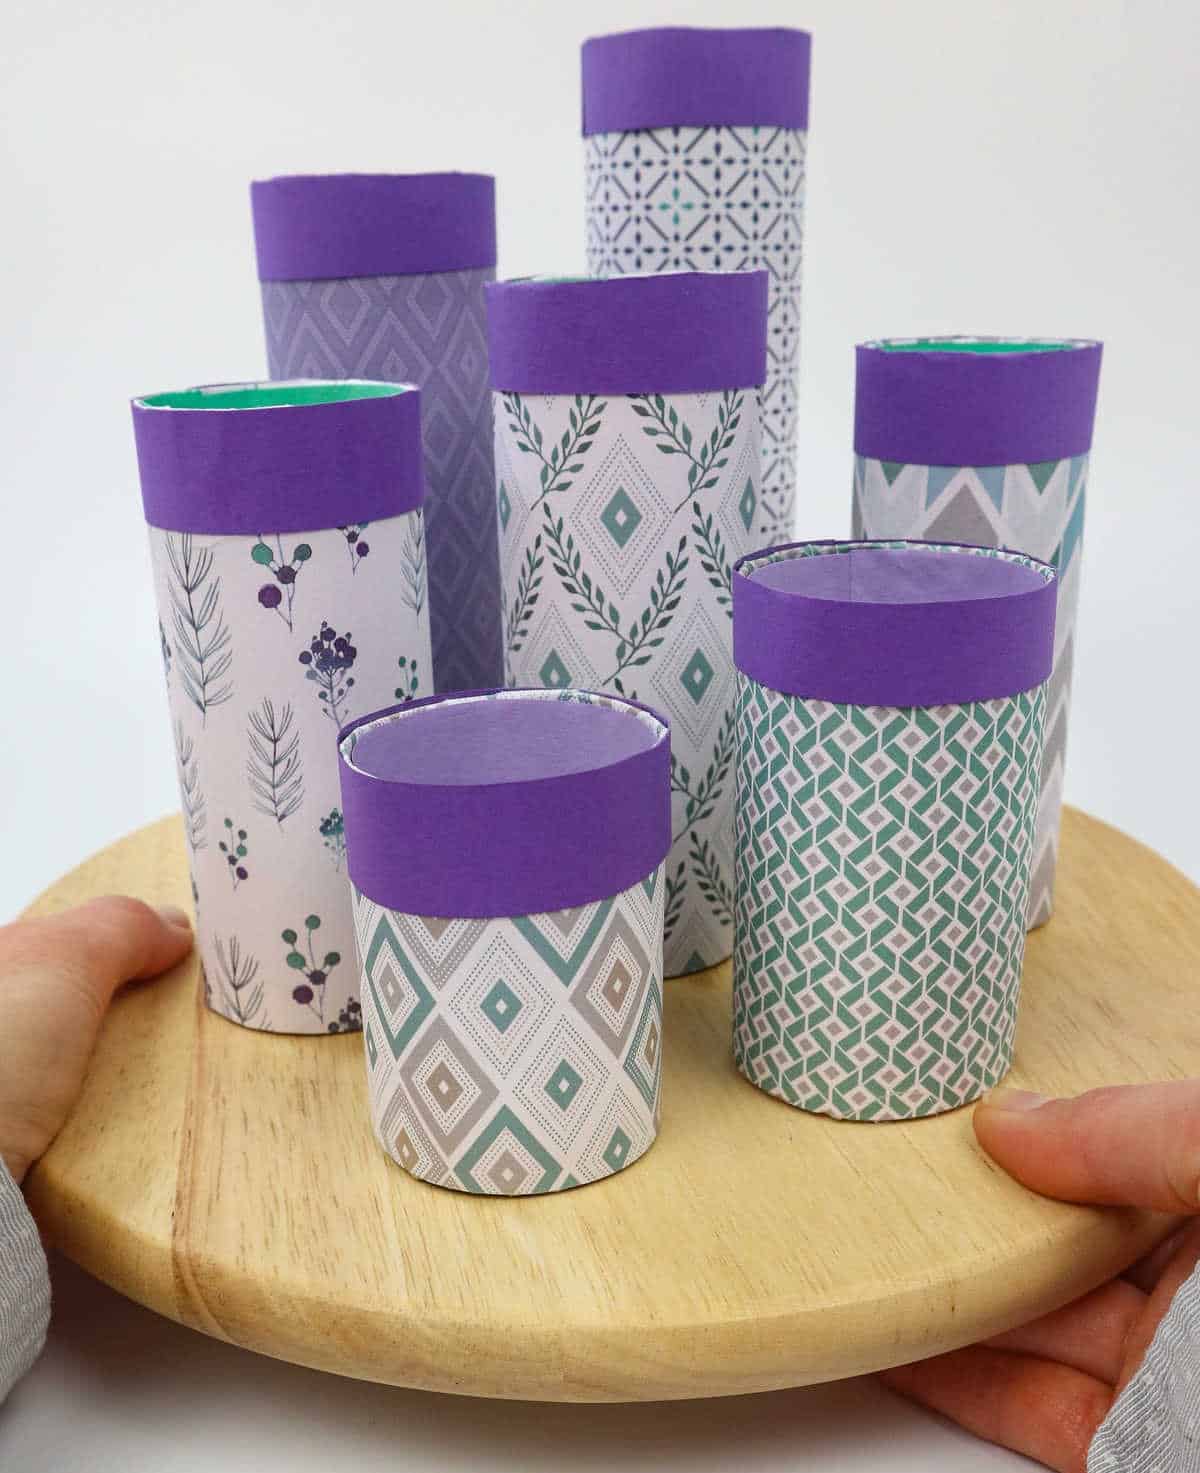
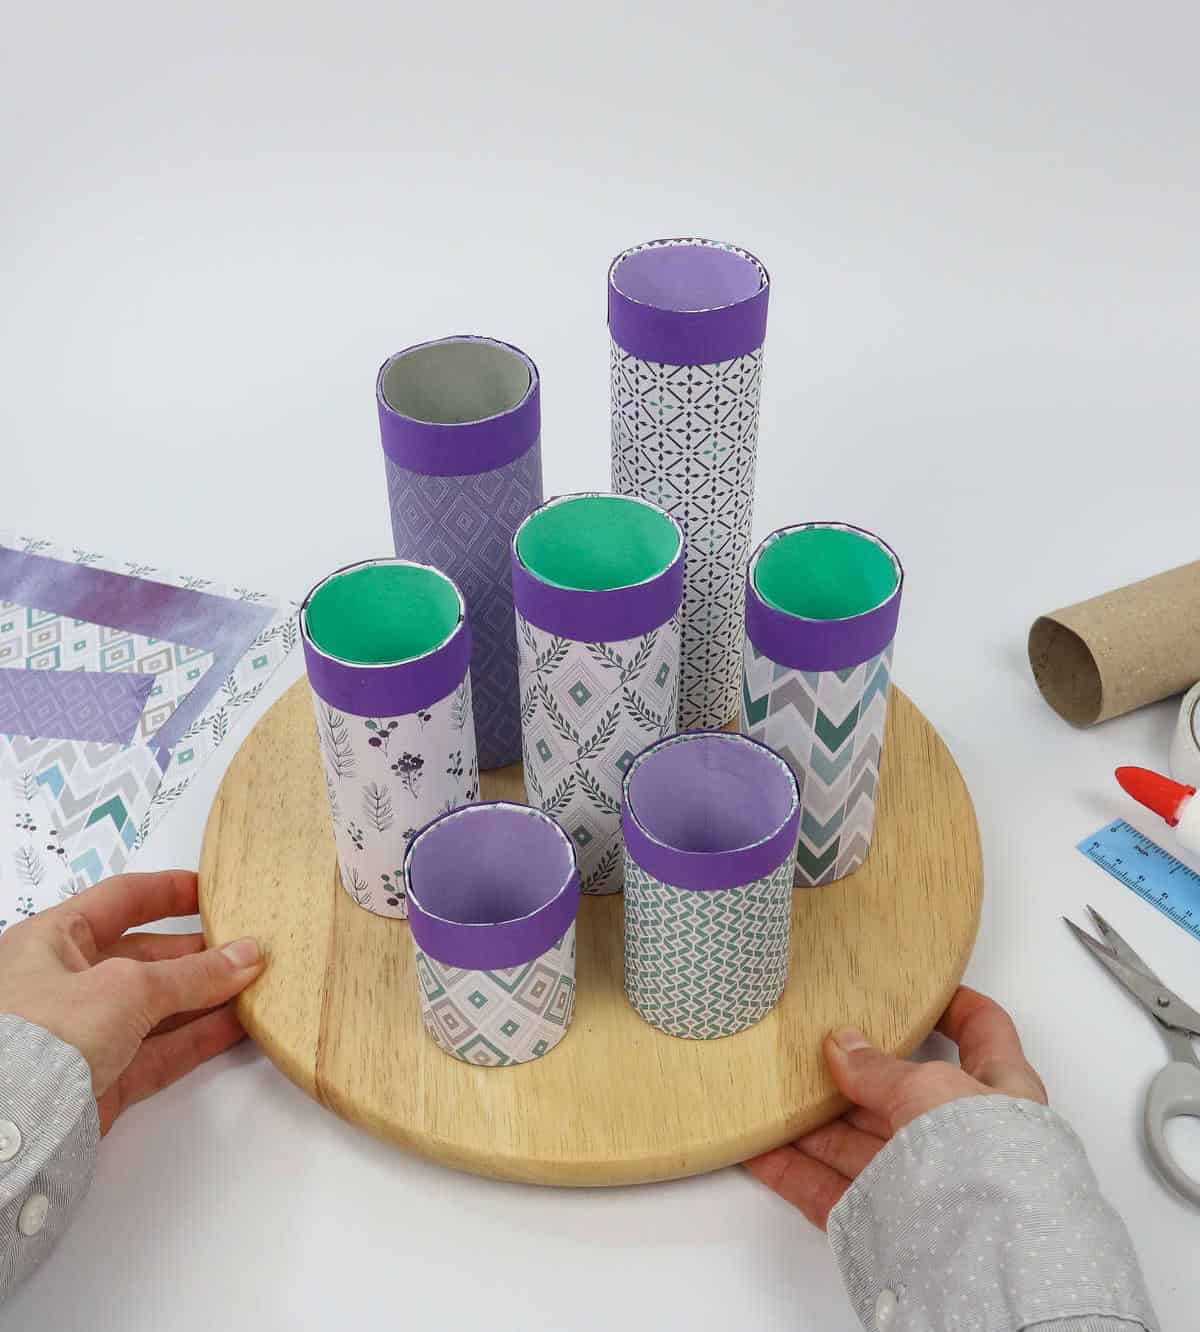
To begin creating your makeup organizer, use a hot glue gun to securely attach the closed bottom of each toilet paper tube to the board. This will provide a sturdy base for your project. For an added layer of protection and aesthetic appeal, consider covering your plate with craft paper or paint. Acrylic paint can be used, followed by a coat of mod podge once dry. Alternatively, double-sided tape or glue can be employed depending on the material of your tray.
To maintain a visually appealing design, I chose not to have my toilet paper tubes touching. This allowed me to showcase the unique designs and colors of each piece of paper. Once all the tubes are in place, it’s essential to attach them together to provide support for the organizer as you add your makeup items. Allow everything to dry before handling or use, and you’ll be left with a one-of-a-kind makeup organizer tailored to your personal needs.
More DIYs for You:
Imagining the possibilities with DIY projects, one can effortlessly transform everyday items into unique and functional creations.
A range of inspiring ideas exists, including crafting a personalized phone case that reflects your style, designing a practical zipper pouch to store small essentials, weaving a mystical dreamcatcher to ward off bad dreams, shaping air dry clay into beautiful jewelry trays that showcase your creativity, creating a customized phone holder that keeps your device within easy reach, and upcycling tin cans into functional containers or decorative pieces.
These innovative DIY endeavors not only save money but also foster a sense of accomplishment and self-sufficiency.