
Take your fashion upcycling skills to new heights with this effortless, stylish no-sew t-shirt transformation. Infuse it with personal flair using fabric paint and embroidery, or admire its sleek simplicity – either way, you’ll be rocking a unique, eco-friendly DIY shirt project! This versatile craft is an excellent addition to your sustainable fashion repertoire, allowing you to breathe new life into discarded garments.
In today’s era of heightened awareness about the environmental impact of fast fashion, revamping old clothes is more relevant than ever. Enter: this ingenious DIY No Sew Shirt! With just a dash of creativity and a vintage shirt as your starting point, you’re ready to unleash your inner crafty genius. So, what are you waiting for? Let’s dive in and give new meaning to that old favorite!
What You’ll Need for the Shirt
When it comes to sewing, having the right tools at your disposal can make all the difference. At the heart of any sewing project lies a few essential items that you’ll be reaching for again and again. Take, for instance, an old t-shirt – a humble piece of fabric that may have seen better days but still holds a wealth of potential waiting to be unlocked. Next, you’ll need some way to mark your fabric, which is where the chalk pencil or tailor’s chalk comes in.
This simple yet effective tool allows you to make precise marks on your fabric, guiding your scissors as you begin to shape and cut your material into the desired form. And speaking of scissors, having a good pair of fabric scissors is crucial for any sewing project. Whether you’re cutting through delicate silk or tough denim, a reliable scissor will be your trusted companion throughout the process.
How to Make a DIY No-Sew Shirt
Give new life to an old favorite by transforming it into a stylish and functional piece. Follow these easy steps to breathe fresh air into your wardrobe!
Step One

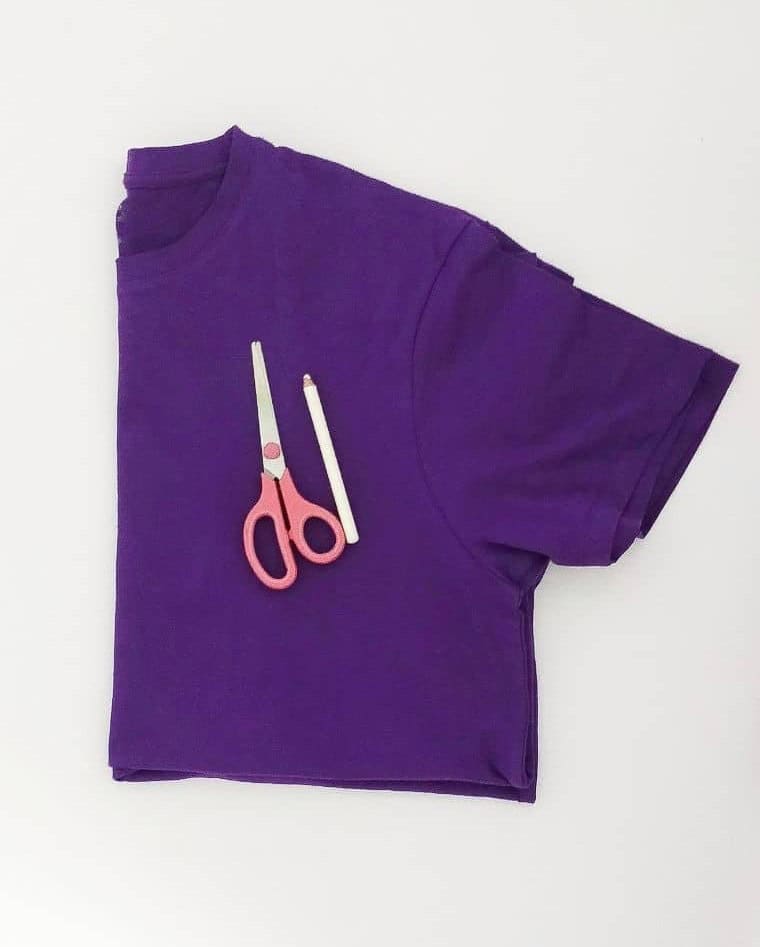
When searching for the perfect t-shirt to repurpose, start by selecting an item that’s one or two sizes larger than your typical fit. Visit your local thrift store and you’ll discover a vast array of options available. As you prepare to transform this shirt, keep in mind that the process will likely reduce its size by a notch or two. To ensure the final product fits comfortably, opt for an initial size that’s slightly roomier, allowing it to mold to your body like a well-tailored glove.
Alternatively, if you prefer a looser fit, choose a shirt with even more excess fabric and adjust as needed.
Step Two
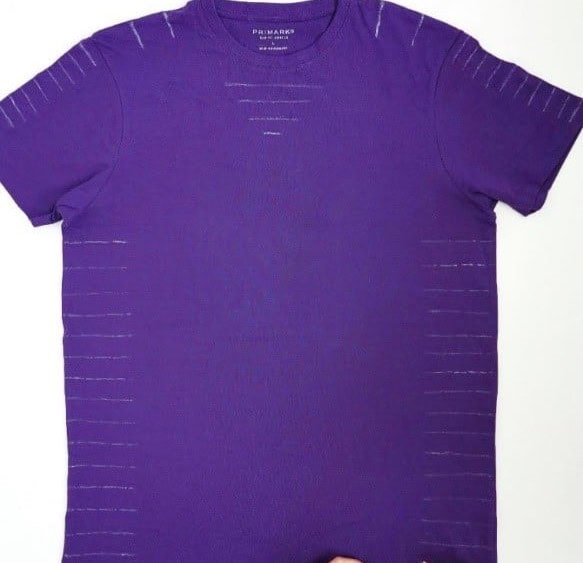
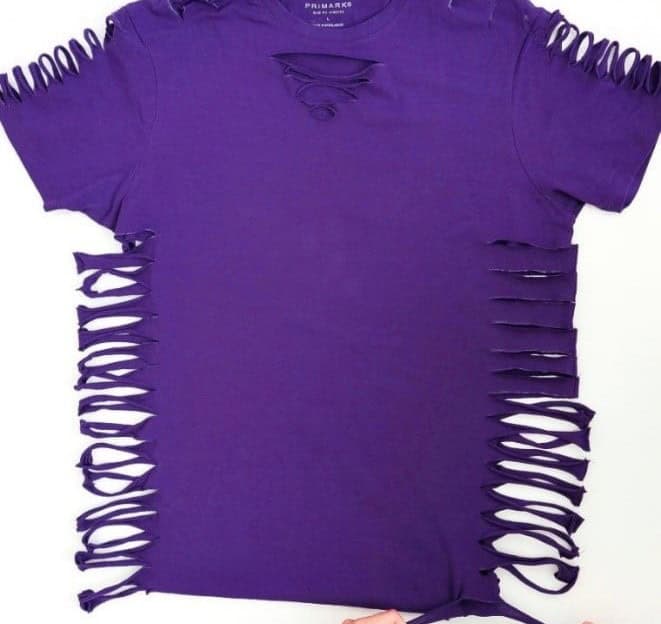
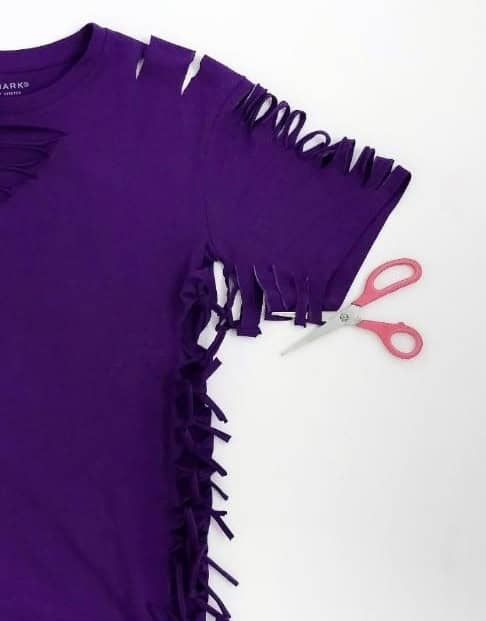
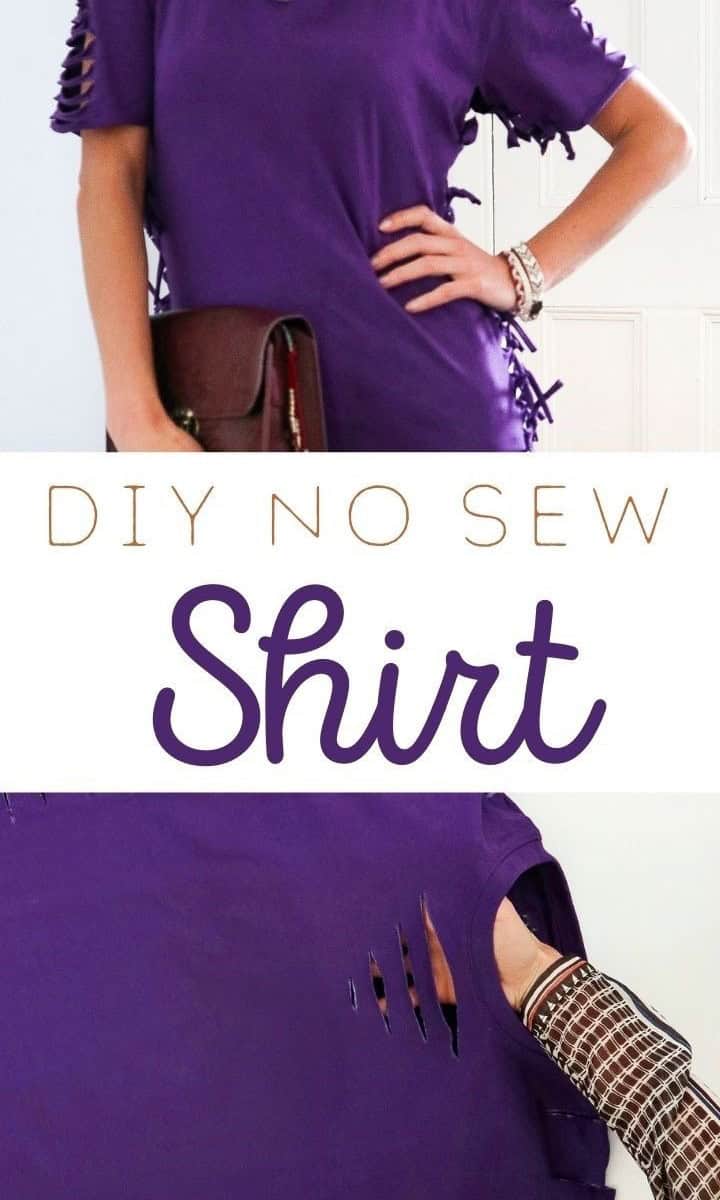
To begin, carefully place your shirt flat on a stable surface. Next, grab some chalk and start making marks for your cutting lines. The number of lines you draw will depend on the size of your t-shirt and how much smaller you want to make it. Essentially, the more lines you create, the greater the opportunity to achieve a tighter fit. For this particular t-shirt, I opted for roughly 1.5-centimeter intervals between marks.
When making cuts along the sides, I aimed for lengths of approximately four centimeters.
Step Three
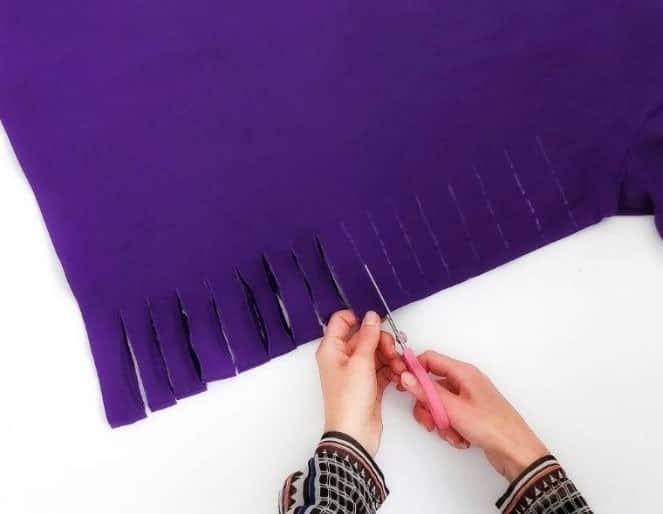
As you begin cutting along the folds, ensure that each line is precise and symmetrical. To verify your work, try putting on the shirt and assess the placement of the cutouts. If you’re satisfied with the result, you can stop here. Alternatively, proceed to step four, giving yourself the flexibility to tailor the DIY project to your personal preferences.
Step Four
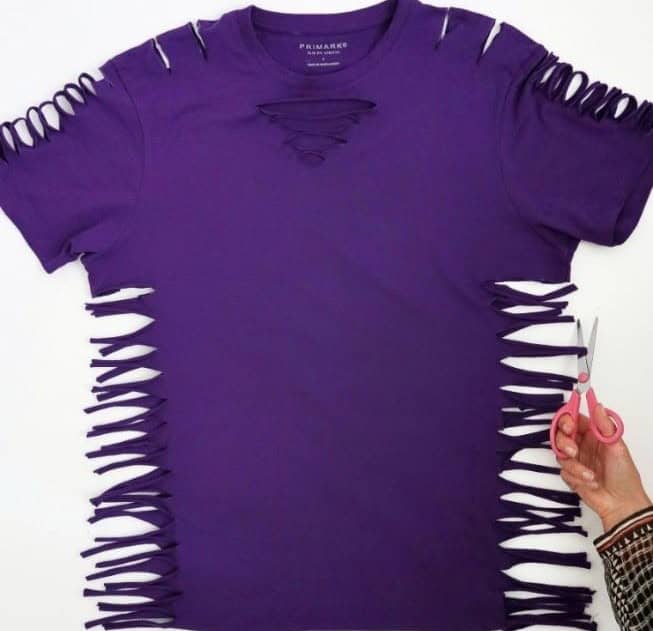
As you begin to stretch each strip of fabric, apply a gentle and even pressure from both sides. To avoid any tears or damage, take your time and ease into the process. Since stretching is a one-way adjustment, it’s crucial to keep an eye on how the shirt fits as you go. If needed, you can always add more stretches later to achieve the desired fit.
Step Five
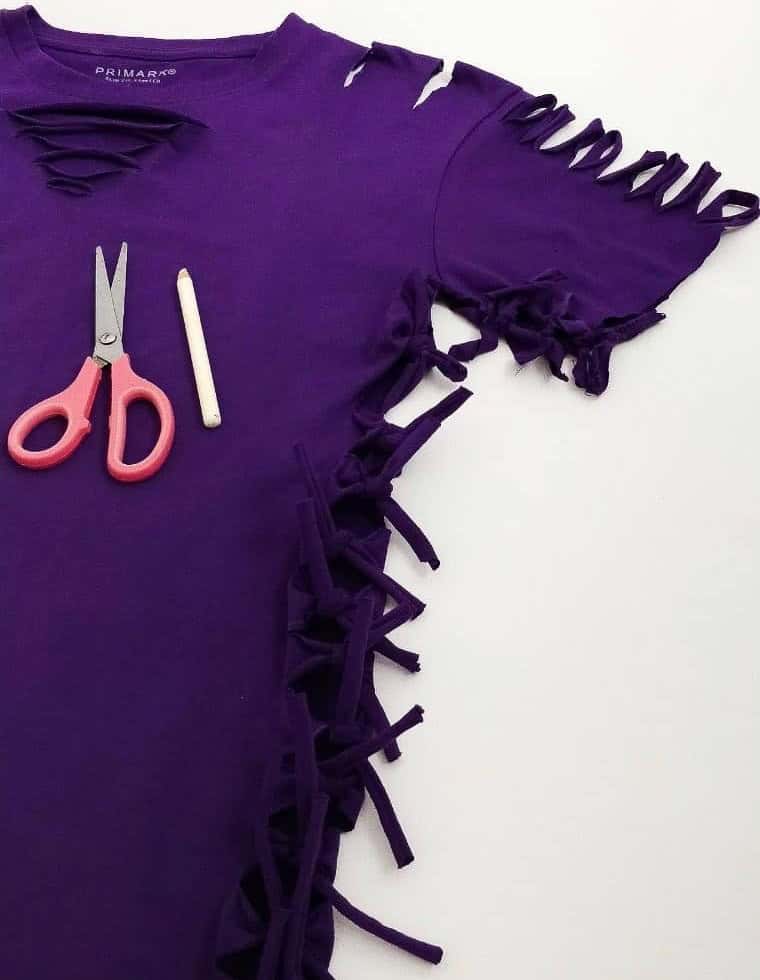
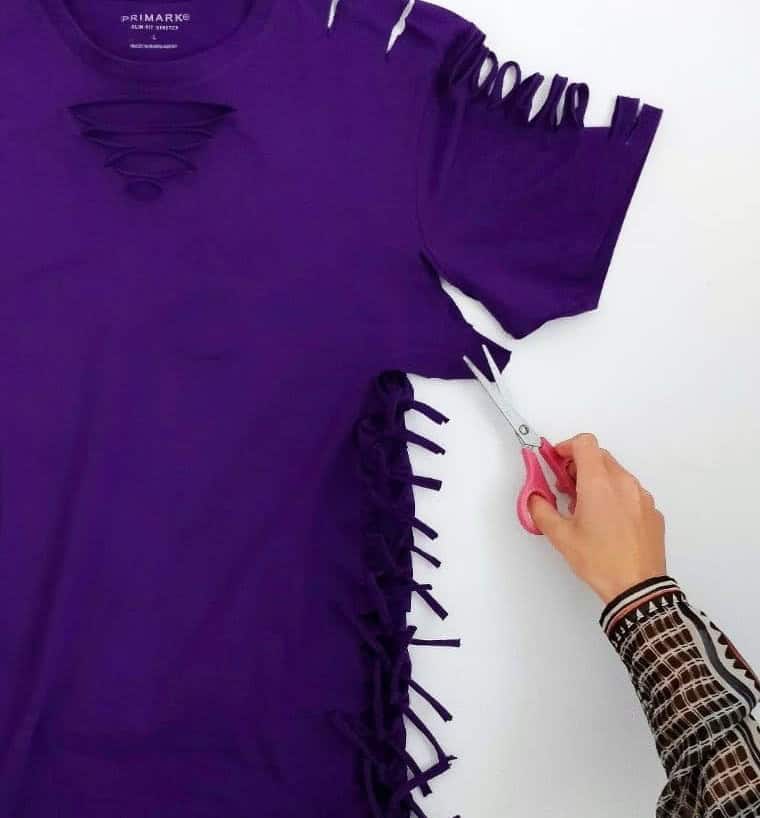
To transform those extended loops into sleek ties, retrieve your scissors and snip through the excess fabric along the edges. Crucial to this process is ensuring you’re carefully cutting just the looped sections, avoiding any contact with the shirt’s shoulders, arms, or collar. This precision will help maintain the integrity of these crucial areas.
Step Six

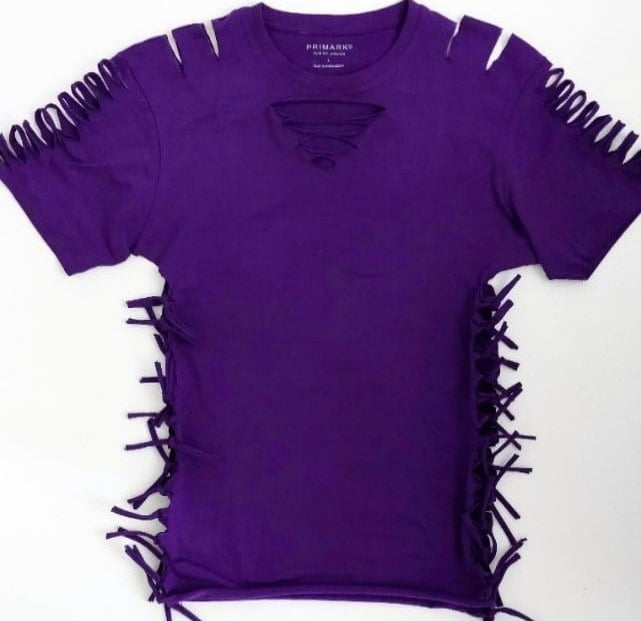
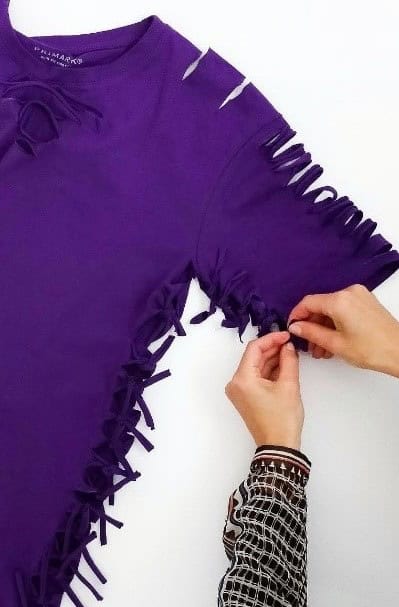
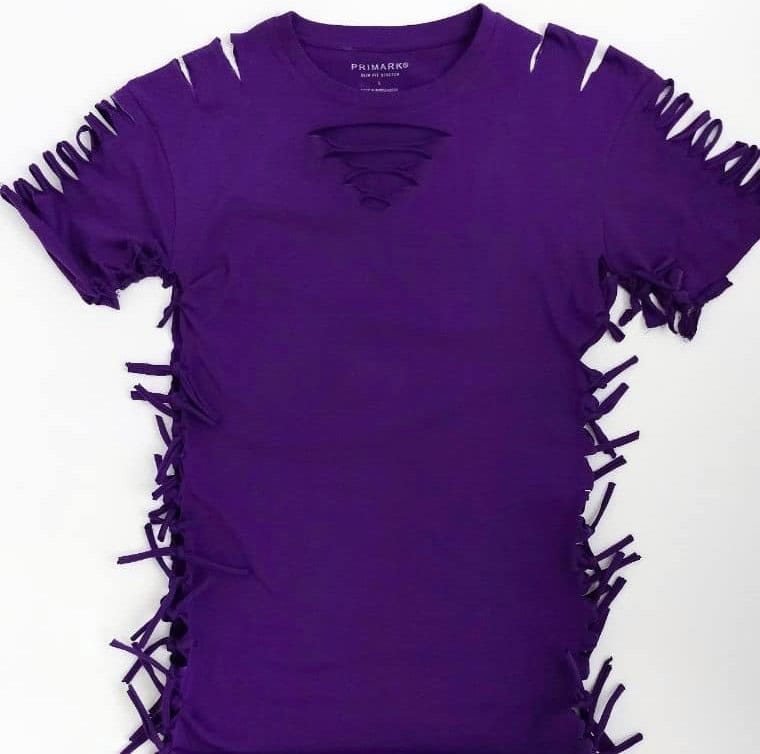
Now that you’ve got your strings organized, it’s time to begin the knot-tying process. Start by pairing up the strips from the front and back of your shirt, securing them together with a standard double knot. The resulting loose ends will give the appearance of a frayed edge. As you work through this process, don’t be afraid to try on the shirt multiple times to ensure a comfortable fit. Repeat the tying procedure on both sides of the t-shirt for a secure and stylish result.
Step Seven
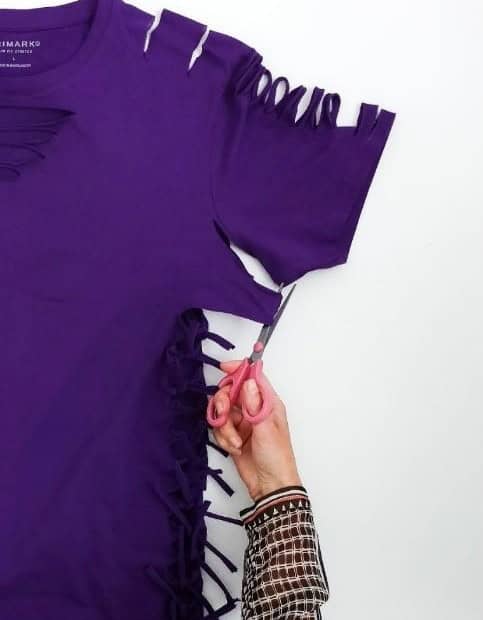
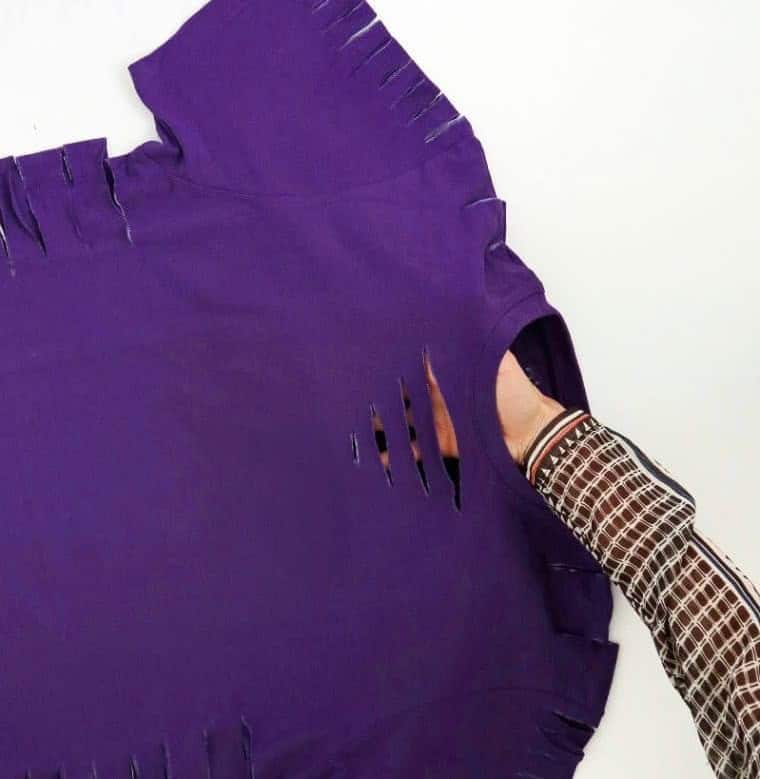
To further enhance the fit and create a more polished look, we’ll make some strategic adjustments to the t-shirt. Starting at the armpit seam on each side, carefully cut a slit up the fabric, being mindful not to cut too deeply into the shirt. The goal is to create a flap that can be tied back for a customized fit. As you work your way through this process, recall the steps used to snip the previous loops and apply them here as well.
Step Eight
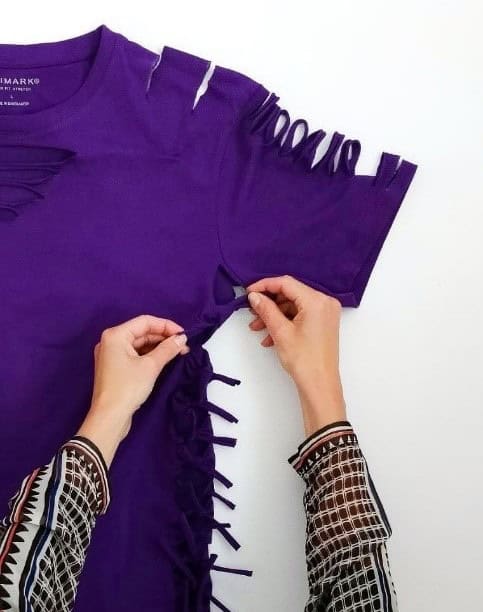
To secure the knot, tie the loop under your armpit with a double knot for added strength. This ingenious mechanism serves as a natural tailor, cinching the shirt snugly around your physique, yielding a flattering and cozy silhouette.
Step Nine
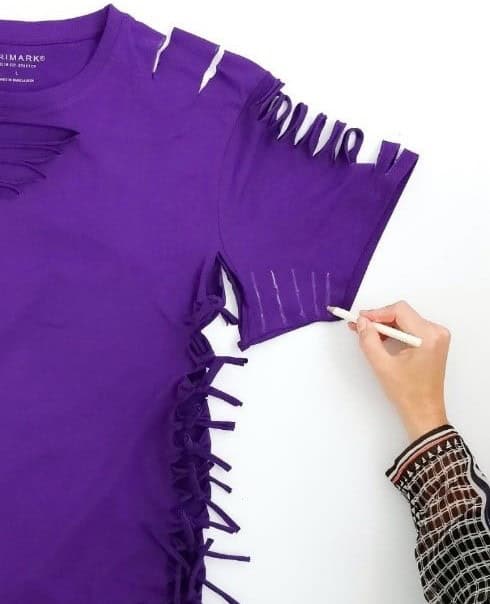
To further enhance the tailored appearance of your shirt, continue sketching additional lines along the bottom of the sleeve. Ensure these new lines are spaced equally apart, matching the consistency established by the previous ones. This strategic placement will create a slimming effect, making the shirt appear more fitted and streamlined as it hugs the body under the arm.
The subtle design detail will give your outfit a polished, put-together look without drawing attention away from the overall style.
Step Ten
To complete the DIY alteration, start by carefully cutting along the edge of each loop to release the fabric. Next, take a pair of scissors and trim the excess thread at the end of each tie, ensuring they are even and neatly finished.
Step Eleven


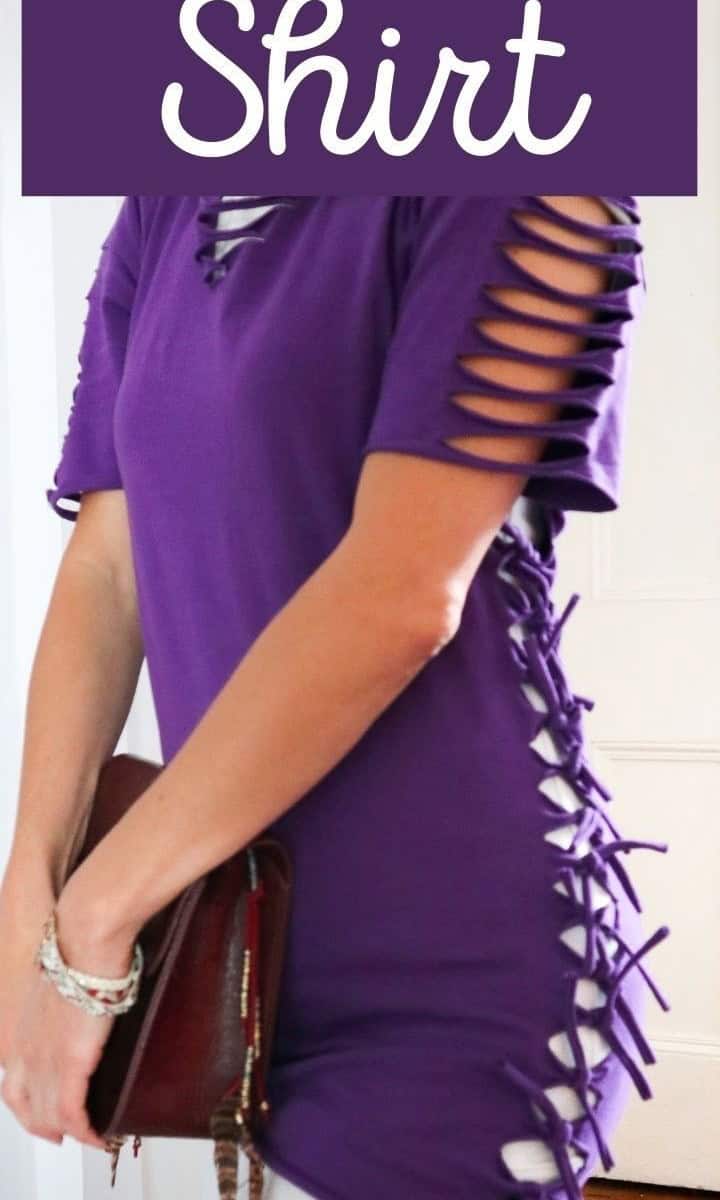
As you work your magic, use the ties to cinch the shirt’s sleeves, transforming it from a loose tee to a stylish, fashion-forward garment. It’s crucial to periodically try on the shirt as you go along, ensuring a perfect fit that’s both comfortable and visually appealing. Without ever having to break out the sewing kit, you’ve managed to craft a beautifully tailored and fashionable t-shirt.
Other Crafts You Can Make

Get ready to unleash your creativity and have a blast with these 20 craft projects designed specifically for adults. From the intricate details of weaving a bowl with yarns, to the trendy flair of macrame leaf earrings, there’s something for everyone. And if you’re looking for some inspiration to share with the younger generation, why not try out one of the many cute DIY crafts perfect for teens?
Whether you’re a seasoned crafter or just starting out, these projects are sure to bring a smile to your face and a sense of accomplishment to your doorstep.
DIY No-Sew Shirt (Cut T-Shirt)
Transforming a humble shirt into a stunning blouse with zero sewing required – that’s the magic of this no-sew DIY project! With just 5 minutes of prep and 20 minutes of active time, you can give your wardrobe a creative boost. Simply follow along to learn how to take a simple shirt and turn it into a unique piece of clothing you’ll love wearing.
Equipment
When it comes to crafting and sewing, having the right tools at hand can make all the difference. This is particularly true when working with delicate fabrics or intricate patterns that require precision and control. Two essential items that every seamstress should have in their arsenal are chalk pencils and tailor’s chalk, alongside high-quality fabric scissors that can accurately cut through even the thinnest of materials.
By using these tools, you’ll be well on your way to creating beautiful garments and home decor pieces that will withstand the test of time.
Materials 1x2x3x
Instructions
To tailor your t-shirt, start by laying it flat on a surface, ensuring the seams are aligned and the fabric lies straight. Use a chalk pencil to sketch cutting lines about 1.5cm apart along the sides of the shirt, shoulders, arms, and front. Next, carefully cut along these lines using scissors, taking care to align the front and back pieces when cutting through both layers.
Once you’ve made your first cuts, gently stretch out the loops on the shirt’s sides until they become thin strips, then cut them in half. Join the ties from the front and back of the shirt together, securing them with a double knot that’s tight enough to withstand washing but not so tight it’s uncomfortable. You can even complete this step while wearing the shirt for the most flattering fit. If you’re satisfied with the sizing at this point, you can stop here.
Alternatively, you can continue to adjust the sleeves by cutting along the armpit seam about halfway through and then tying the resulting loop under the armit to tighten the sleeve. Repeat this process on the other side and check the tightness as you go to ensure a comfortable fit. Finally, once your shirt is tailored to perfection, you’ll be left with a unique garment that fits your body like a glove.