Unleash your children’s creativity with this engaging DIY project – making paper wallets! It’s a fantastic way to spend quality time together while keeping them occupied and away from screens. With minimal supplies and no prior crafting experience required, you can easily create these functional and attractive wallets that will keep their treasures safe and organized.
Supplies You’ll Need for Wallets
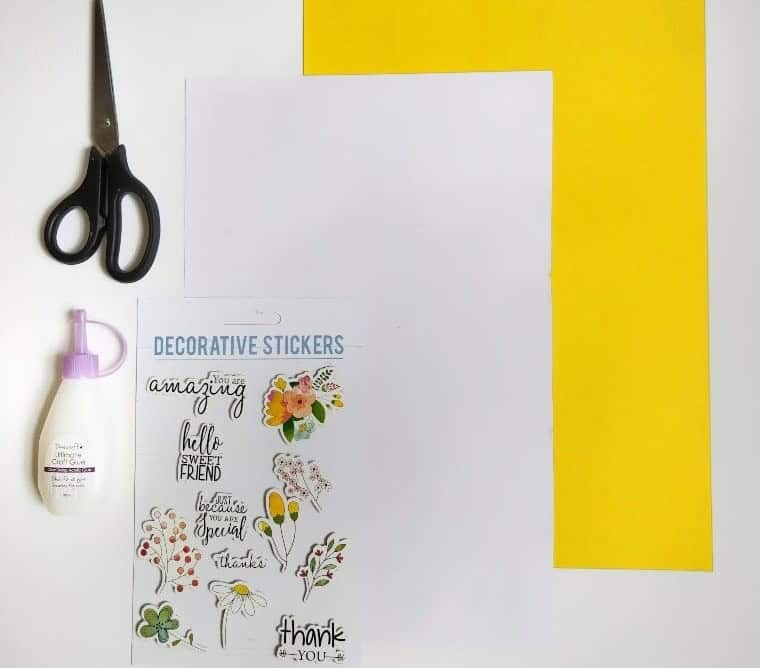
To create a unique and personalized journal, one can start by gathering some essential materials. These include scissors for cutting and shaping the paper to suit their creative vision, glue for binding the pages together, two sheets of A4 paper as the foundation for the journal’s content, and decorative stickers that can be used to add visual interest and personalize the design.
How Do You Make a Homemade Paper Wallet?
Creating a paper wallet is a simple and fun activity that can be accomplished with minimal materials. In fact, you probably already have everything you need lying around your home. With just two sheets of paper and the imagination of your little ones, you can craft these lovely wallets in under 30 minutes.
STEP 1: Prepare Your Supplies
Before diving into the creative process, take some time to gather all the necessary supplies for your customized wallet. This is an exciting part, as you get to choose from a wide variety of colors and stickers that will make your project truly unique. With so many options available, you’re sure to find the perfect combination to reflect your personality. Once you have all the materials within arm’s reach, you’ll be ready to embark on the next step in this fun and creative process.
STEP 2: Create Creases
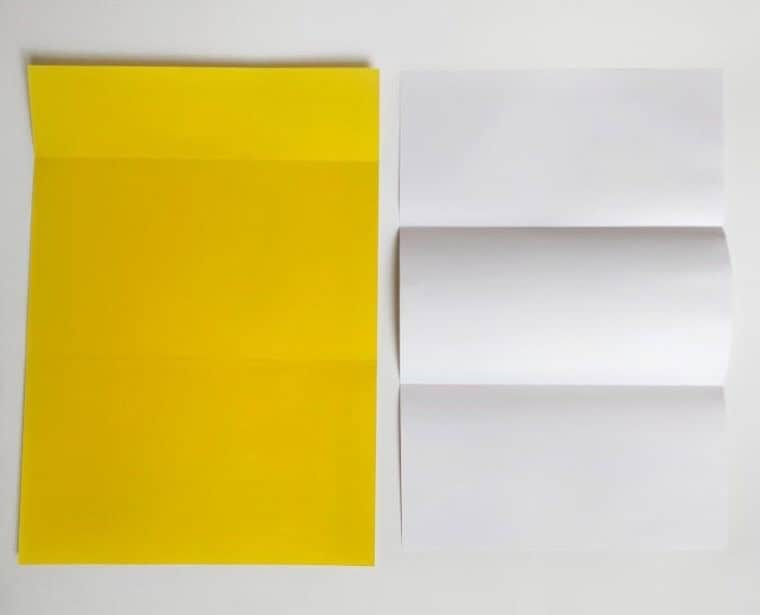
To begin creating your wallet, start by preparing the sheets for folding. Place one sheet on a flat surface and divide it into thirds using folds. The first and second sections should be of equal size, covering approximately 2/5 of the sheet each. Meanwhile, the third section will comprise the remaining 1/5 portion. This division is similar to that seen in the yellow sheet illustration provided earlier.
Next, fold the second sheet into three parts, as depicted in the accompanying image (white sheet).
STEP 3: Get Folding
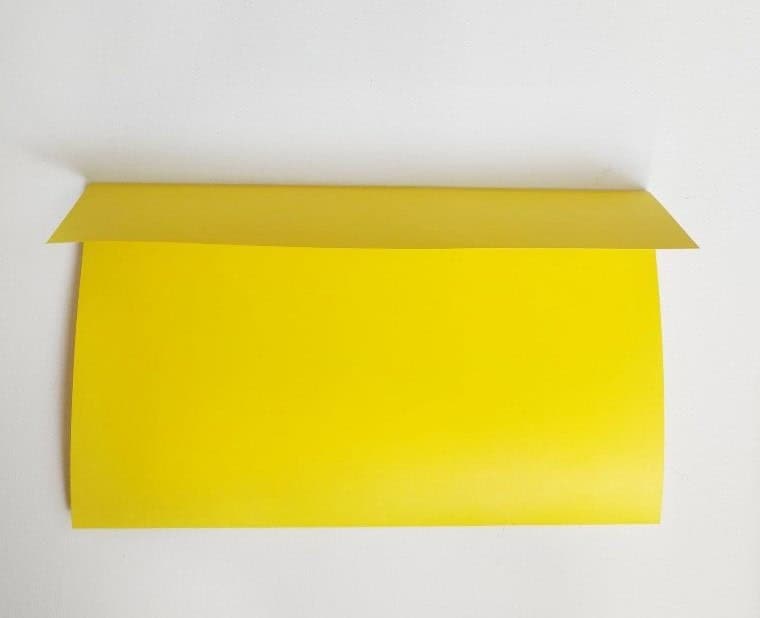
To complete the third step, take the first sheet and utilize the creases you created earlier as a guide. Begin by folding the bottom of the paper up to the first mark, ensuring a precise fold. Next, fold the top of the paper over the initial fold, using it as a reference point. This will create two equal folds that intersect at the top, creating a seamless connection.
By following these steps, you’ll achieve a crisp and even fold that sets the stage for the remaining steps in your origami project.
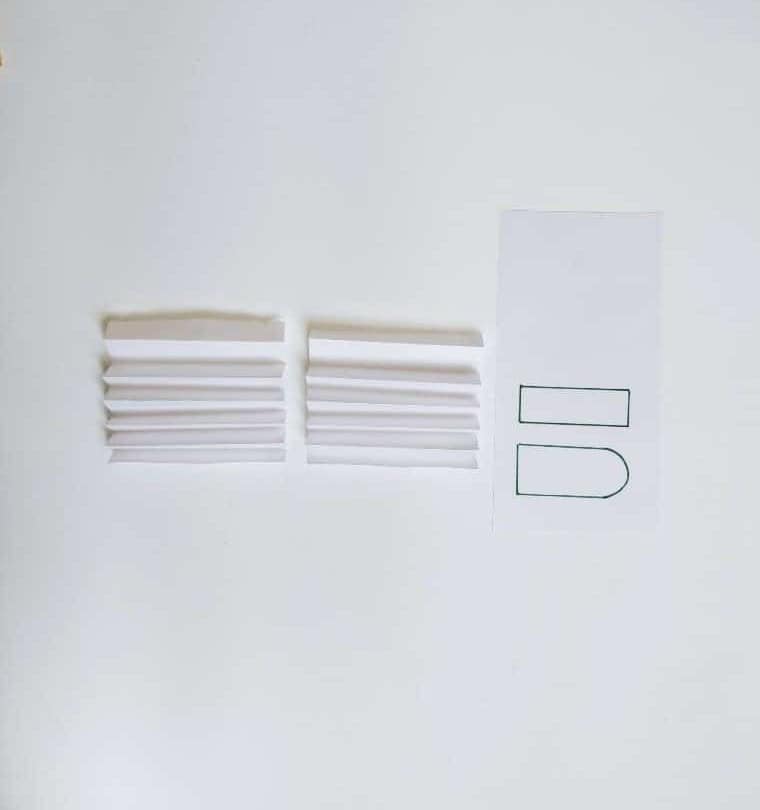
STEP 4: Zigzag Folds
As you move on to this step, make sure to utilize the second sheet provided. To do so, carefully follow the fold lines and divide the sheet into three equal parts. It’s essential to retain all three pieces, as each one will be necessary for the subsequent steps.
Begin by folding the first two sections horizontally in a zigzag pattern, similar to an accordion fold, and set them aside for now.
The third piece requires a slightly different treatment.
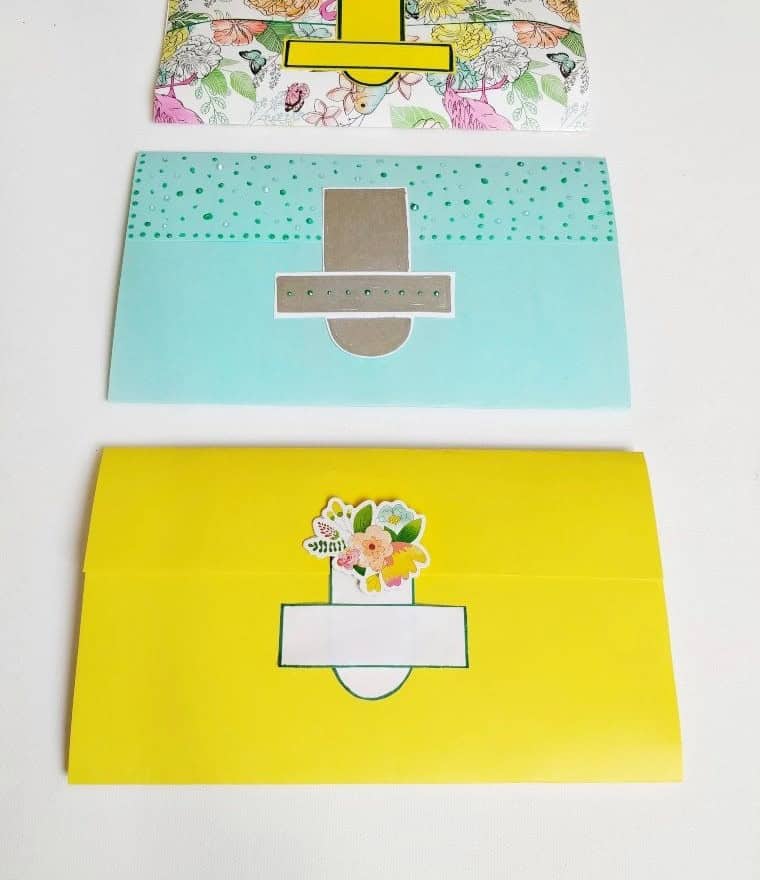
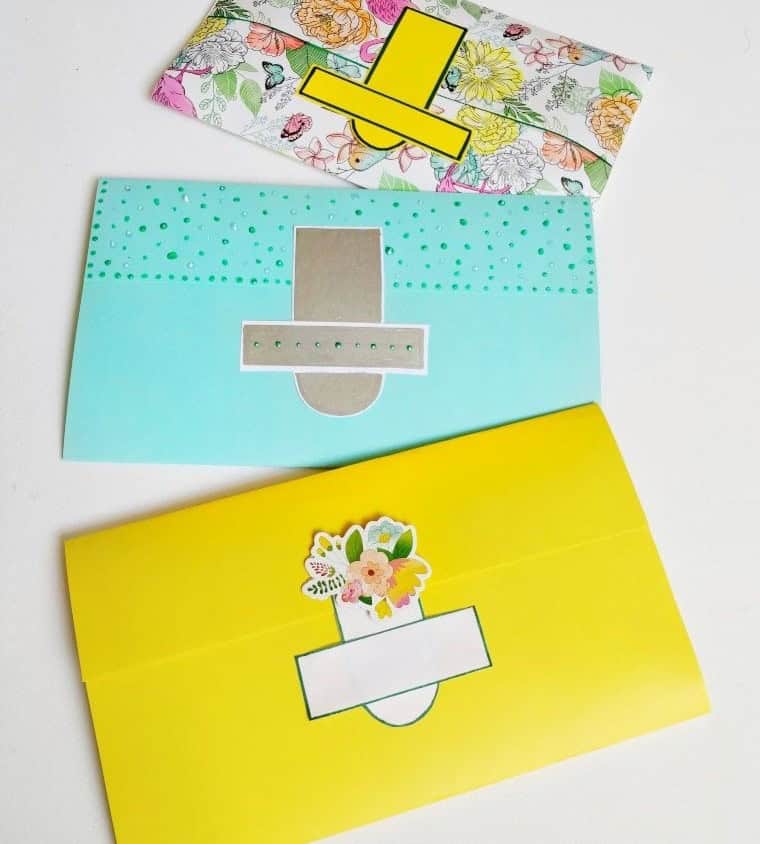
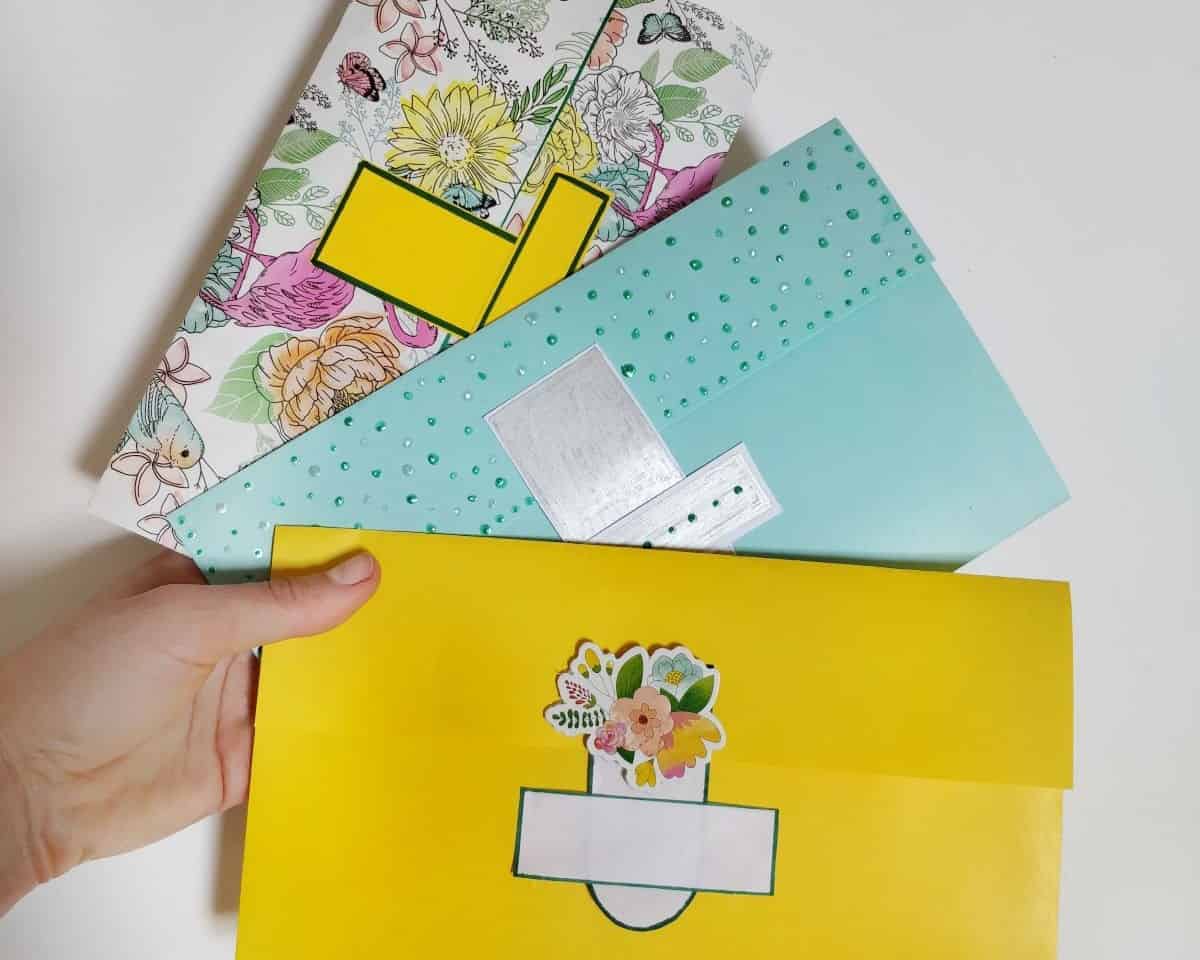
Start by drawing a rectangle across the width of the paper, making sure it’s even and symmetrical. Next, draw a slightly wider rectangle with one side rounded, as depicted in the accompanying image. Once you’ve completed these drawings, use your scissors to carefully cut out both shapes.
STEP 5: Assemble the Wallet
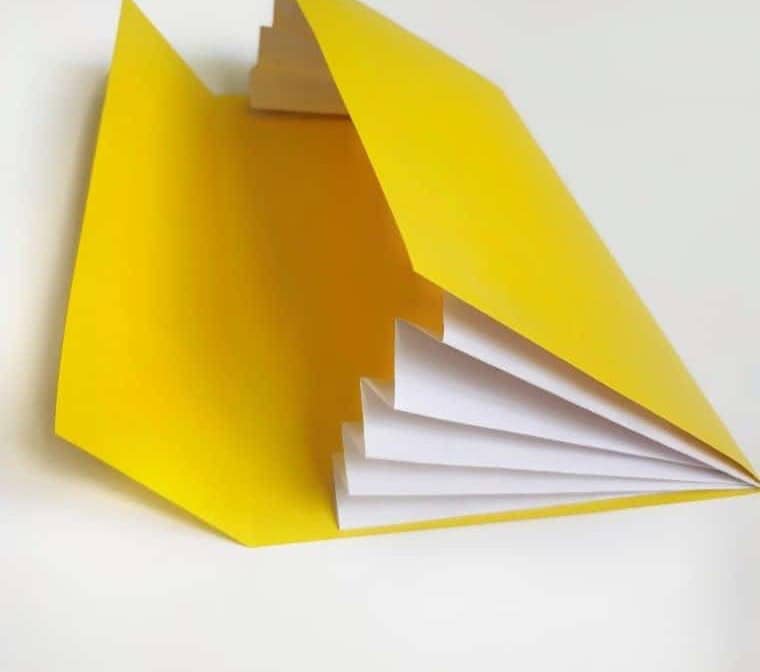
Begin by applying a small amount of glue to both top and bottom edges of the accordion sheets, then secure them to the interior of the first sheet (yellow) with the adhesive. Repeat this process on both sides, allowing the glue to dry before proceeding. This will create additional space within the wallet, enabling you to store more items.
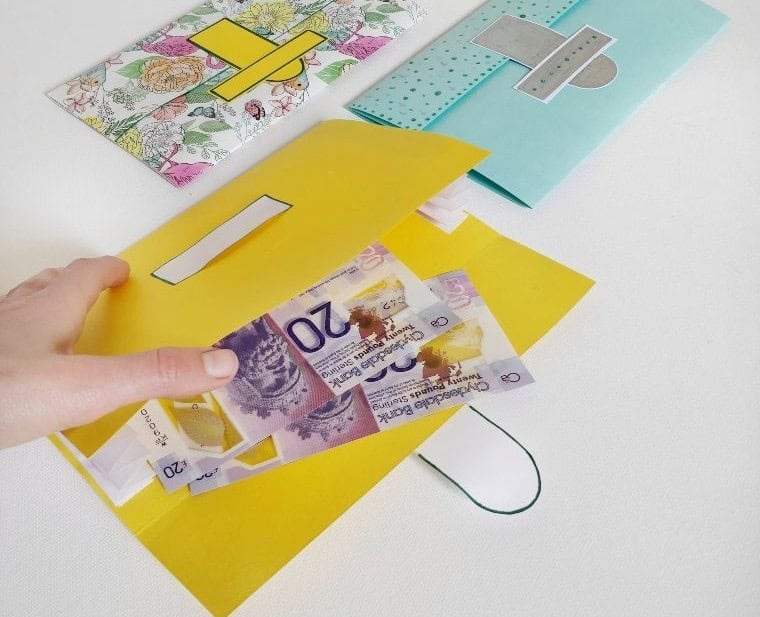
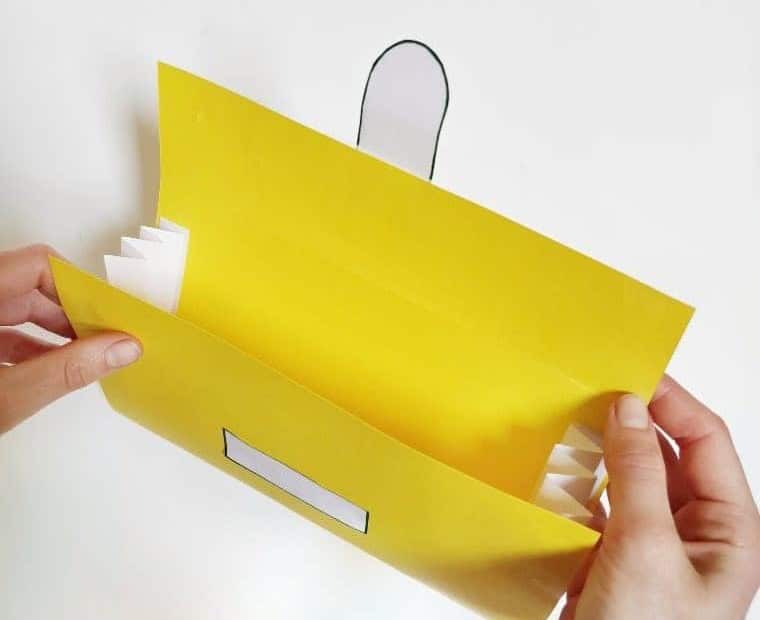
Next, take the previously set-aside cutouts and attach the rounded rectangle to the center of the overlap, ensuring that the curved side faces downwards once the flap is folded. Finally, position the other rectangle on the front of the wallet, centered in the middle. Be cautious not to obstruct the buckle by securing only the corners of the rectangle, leaving sufficient space for it to be inserted.
STEP 6: Make Sure the Wallet Closes

To secure the flap, simply slide the rounded strap through the small opening you created using the rectangular strip. This will keep it closed. For a more elaborate design, consider substituting the strip with a button and the strap with a loop made from thread. While this alternative may be more challenging for young DIY enthusiasts, it’s an excellent opportunity to introduce them to more advanced techniques later on.
STEP 7: Stick On Those Stickers
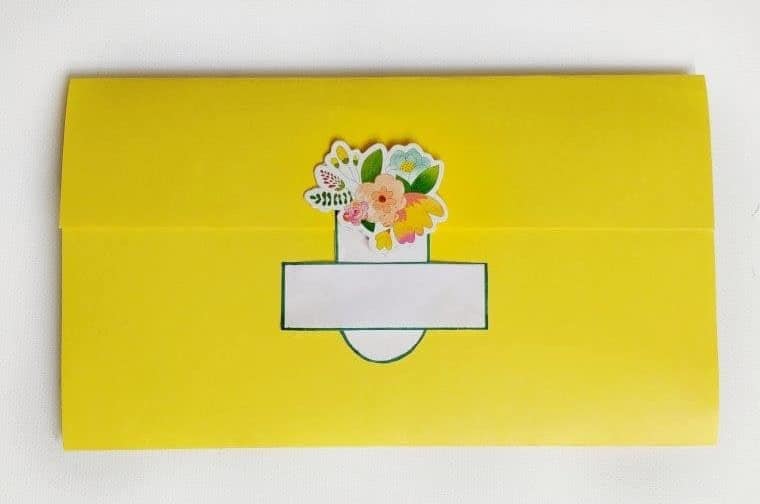
As a finishing touch, why not unleash your child’s creativity by adding some decorative flair? Whether it’s stickers or glitters, this is an excellent opportunity for them to express themselves and make their handmade paper wallet truly one-of-a-kind. With the final touches in place, your project is now complete – a unique and functional keepsake that showcases your child’s imagination.
Where Can You Use These Paper Wallets?
The versatility of paper wallets is one of their most appealing aspects. Not only can they be used for everyday purposes, but they also offer a wealth of creative possibilities. For instance, you could create multiple wallets as gifts for your kids’ friends or loved ones. Alternatively, you could use them as makeshift wallets when heading out on a family day trip.
The wallets can even serve as a valuable teaching tool, allowing you to instruct your children in the basics of counting and managing money. Finally, don’t overlook their potential as decorative pieces – they can add a touch of personal flair to your kids’ rooms or living spaces, proudly showcasing their artistic endeavors.
Other Little Crafts You Might Like
Get ready to unleash your kids’ creativity with these 20 fun and easy crafts! From classic DIY picture frames to unique salt dough ornaments, we’ve got you covered. For those looking for something a bit more eco-friendly, our list of creative paper crafts is sure to inspire. And who says you can’t get crafty on a budget? Our roundup of dollar store crafts and toilet paper roll crafts prove that creativity doesn’t have to break the bank.
DIY Paper Wallets for Kids to Make
Creating DIY paper wallets with kids is a fantastic way to spend quality time together. Not only do these little crafts provide a practical means of storing small items like money and receipts, but they’re also an enjoyable activity that can be tailored to your child’s skill level. With just 10 minutes of active time required, this project is perfect for busy families looking to foster creativity and bonding.
Equipment
In everyday life, scissors are often overlooked as a humble tool that serves a vital purpose. However, their simple design belies the impact they can have on our daily routines. For instance, the ability to prevent sleep is one often-overlooked benefit of having scissors readily available. By keeping your screen from going dark, you can continue working or browsing without interruptions, allowing you to stay focused and productive for longer periods.
Materials 1x2x3x
To create a unique and eye-catching display, start by gathering a few essential materials. You’ll need two sheets of A4 paper, which will serve as the foundation for your design. Additionally, have some decorative stickers on hand to add an extra touch of personality to your project.
Instructions
Begin by folding the initial sheet in two equal parts, leaving an overlap on top. Next, fold the second sheet into three equal segments. Cut each segment into a separate piece. Then, fold the first two pieces accordion-style and trim the remaining piece into both a rectangle and a one-sided rounded rectangle.
Once these shapes are prepared, glue the accordion-like pieces inside the initial folded sheet and the rectangular and rounded rectangles outside, effectively creating the wallet’s closures. With these steps complete, you’ll have successfully crafted your very own wallet.
Conclusion
While the concept of paper wallets may not be a conventional activity for most families, it’s an intriguing idea that can spark creativity and bonding among children. The simplicity of using plain paper to create a functional wallet is both fascinating and educational. If you’re considering engaging your kids in this project, I’d love to hear about their experience!