In many ways, small changes can have a profound impact on our daily lives – including our workspaces. A cluttered desk, for instance, can make it difficult to focus and be productive. This is where simple storage solutions come in. By using small rope organizers or other decorative pieces, you can quickly tidy up your workspace and create a more organized environment that invites productivity.
Similarly, adding a few well-placed decorative elements to a modern kitchen can instantly warm up the space. The key is to find small ways to make big impacts. And sometimes, this means getting creative with DIY projects. With just a few inexpensive materials, you can whip up your own cute little baskets for storing small items – no extensive crafting skills required.
Not only will you save money, but you’ll also avoid the hassle of searching for a perfect store-bought solution that fits your style and budget. So why not give it a try? With minimal time and effort, you can create beautiful storage solutions that reflect your unique taste and add some personality to your workspace.
Ways to Use These Rope Baskets at Home
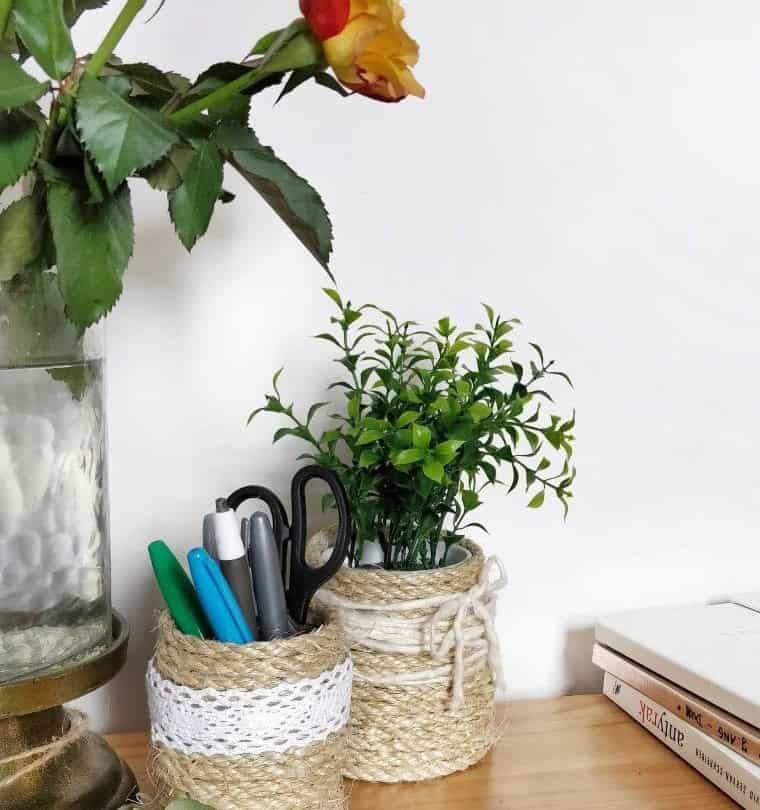
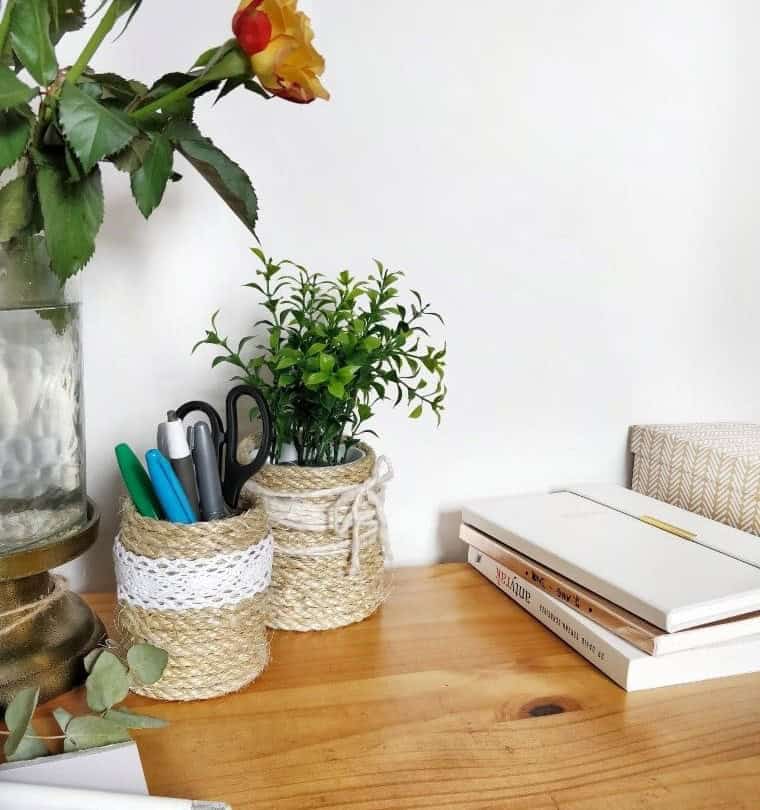
These versatile rope baskets aren’t just visually appealing – they’re also incredibly practical. With ample space, you can store a variety of items such as pens, scissors, paintbrushes, kitchen utensils, remote controls, and even decorative plants or art supplies. If you don’t want to fill it with anything, the basket’s natural charm makes it a lovely decorative accent on its own. However, by utilizing the storage space, you can keep your home tidy and clutter-free.
Simply stash away tiny knick-knacks that might otherwise create chaos, and still appreciate the aesthetic appeal.
Supplies for the Organizer
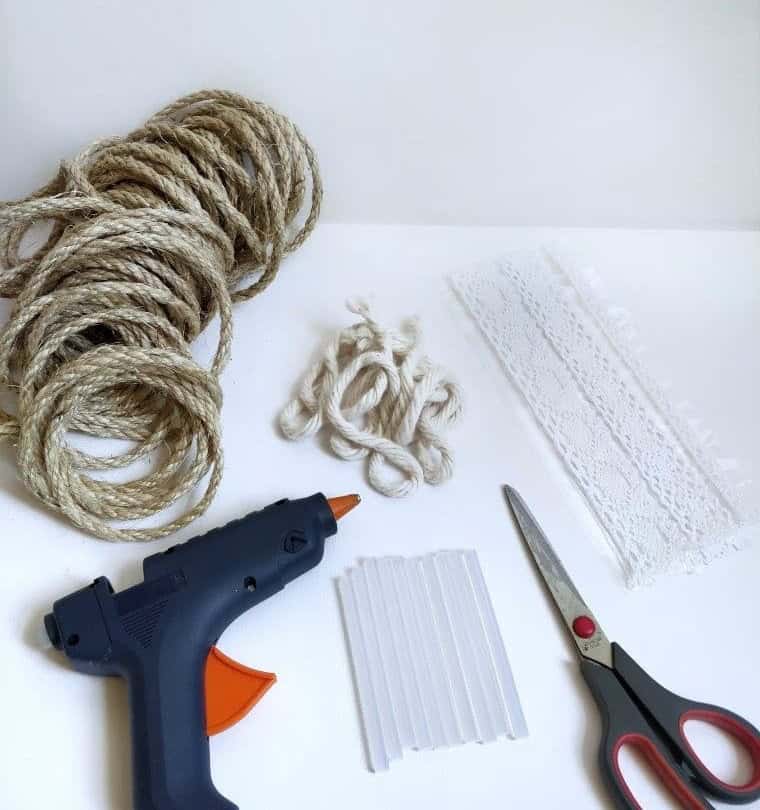
When creating your rope baskets, there are a few essential materials you’ll need to get started. One key consideration is the thickness of the rope you choose – thicker ropes work well for larger baskets, while thinner options are better suited for smaller ones. To bring your design to life, you’ll also require: a hot glue gun and accompanying glue sticks; scissors for trimming and shaping; some yarn for added embellishments; and finally, white lace ribbon for that extra touch of elegance.
STEP 1
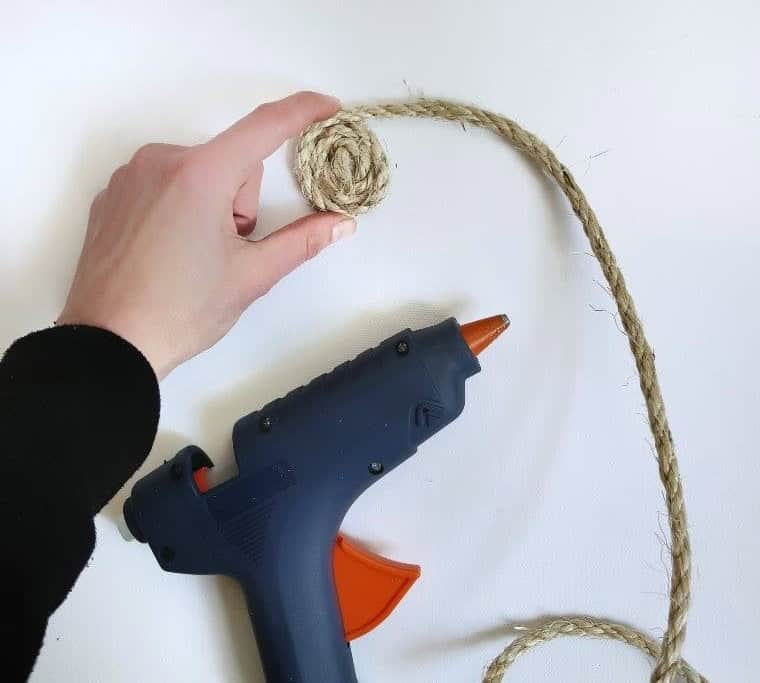
Begin by forming the foundation of your wicker basket by rolling the rope into a circular shape with the hot glue gun at the ready. Ensure the rope is coiled tightly, eliminating any gaps that may form between the layers as you build the base.
STEP 2
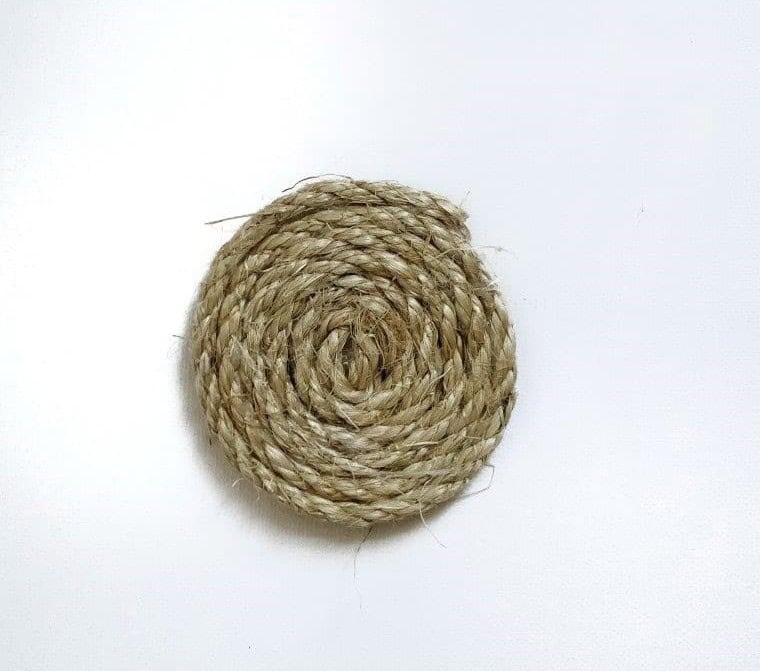
As you continue rolling and gluing the rope, aim to achieve your desired circumference for the base of the basket. When you reach this point, cut the rope and secure it firmly to the rolled-up bottom, ensuring a strong bond that won’t come loose. To maintain the integrity of the rope bristles, apply glue to the ends of the rope immediately after cutting, preventing individual threads from detaching or protruding.
It’s essential to create a base circumference that is slightly larger than your desired basket size, as this will provide room for the walls to be built around it. A smaller base will result in an even smaller basket, which may not be practical for storage purposes.
STEP 3
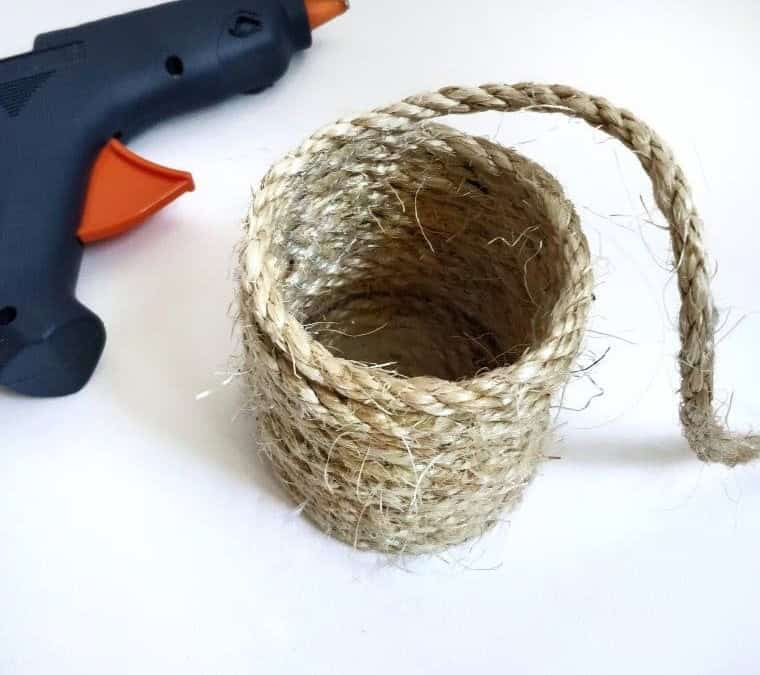
To form the walls of the basket, begin by rolling out the rope from the outer corner of the foundation layer. As you work, apply a thin layer of glue in between each coil, ensuring a seamless bond. It’s crucial to maintain precision when stacking each layer, as any deviation will impact the overall width of the basket. A slight misalignment can compromise the structural integrity of your handmade basket. For added control and accuracy, consider using a tin or glass container as a mold.
Position it on top of the base layer, then carefully wind the rope around its walls, taking care not to adhere the rope to the mold. This technique will help you achieve a symmetrical and uniform shape for your finished basket.
STEP 4
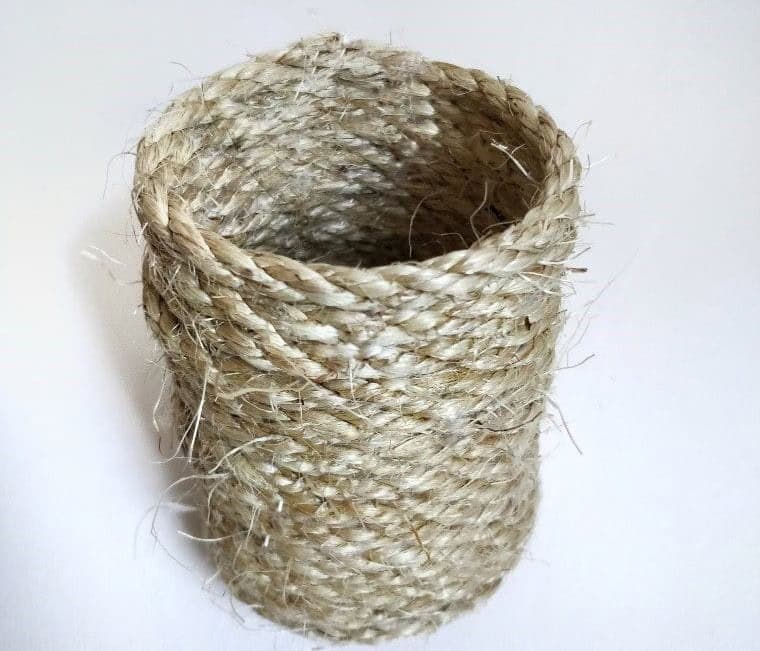
As the basket nears its intended height, carefully sever the rope and reinforce the structure by adding an extra layer of glue to ensure it remains stable. This crucial step is essential in preventing any potential collapse or movement. When seeking to create a taller basket, keep in mind that a larger base is necessary to maintain stability and balance.
The fundamental principle to remember is that a narrow foundation paired with a lofty framework can compromise the overall structural integrity of your creation.
STEP 5
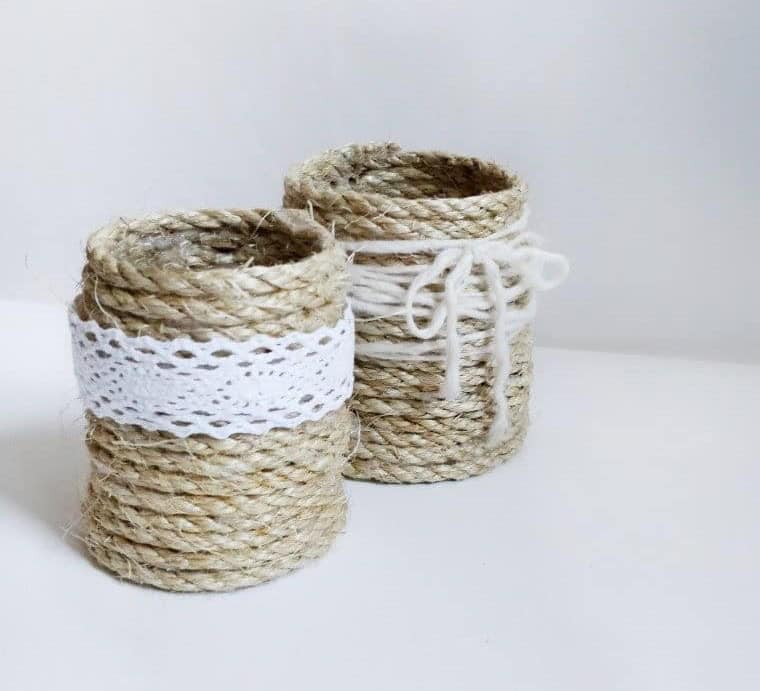
Elevate the charm of your DIY rope basket by incorporating various decorative elements such as laces, ribbons, wool, buttons, or other materials that catch your eye. For added visual flair, consider matching the décor to the color scheme of your room’s interior design. Alternatively, you can add embellishments or beads for a more playful and eclectic look.
Who Can Make These DIY Rope Organizers?
Whether or not you’re a seasoned crafter or embarking on your first DIY adventure, this elegant rope basket project is accessible to everyone. Success lies in having the necessary materials and following a clear set of instructions. While age isn’t a barrier, it’s wise to exercise caution when working with hot glue guns, especially around children. Consider supervising youngsters if you plan to involve them in this creative activity.
Where Do You Want to Avoid Having Rope Baskets?
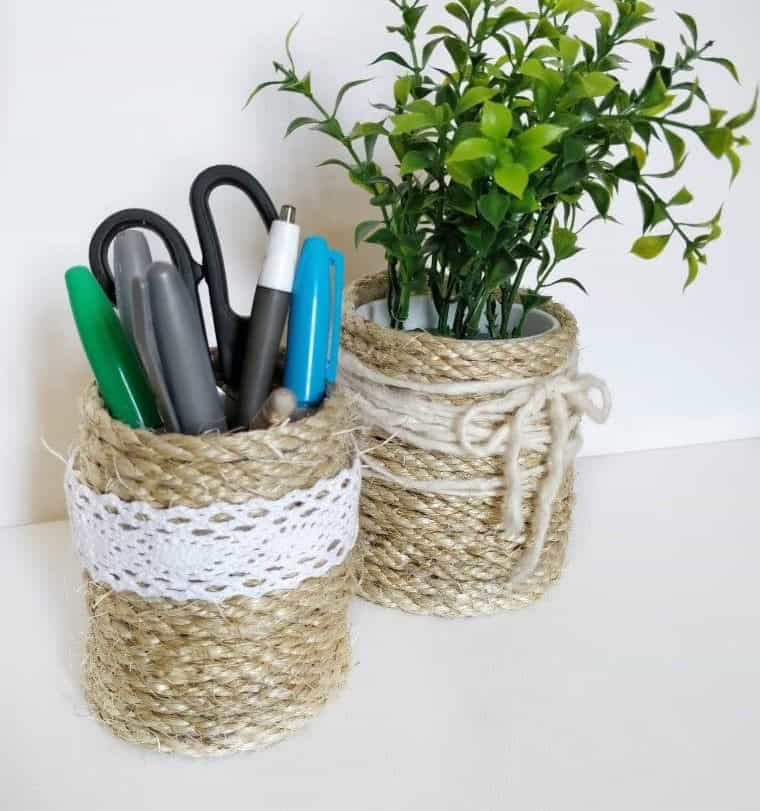
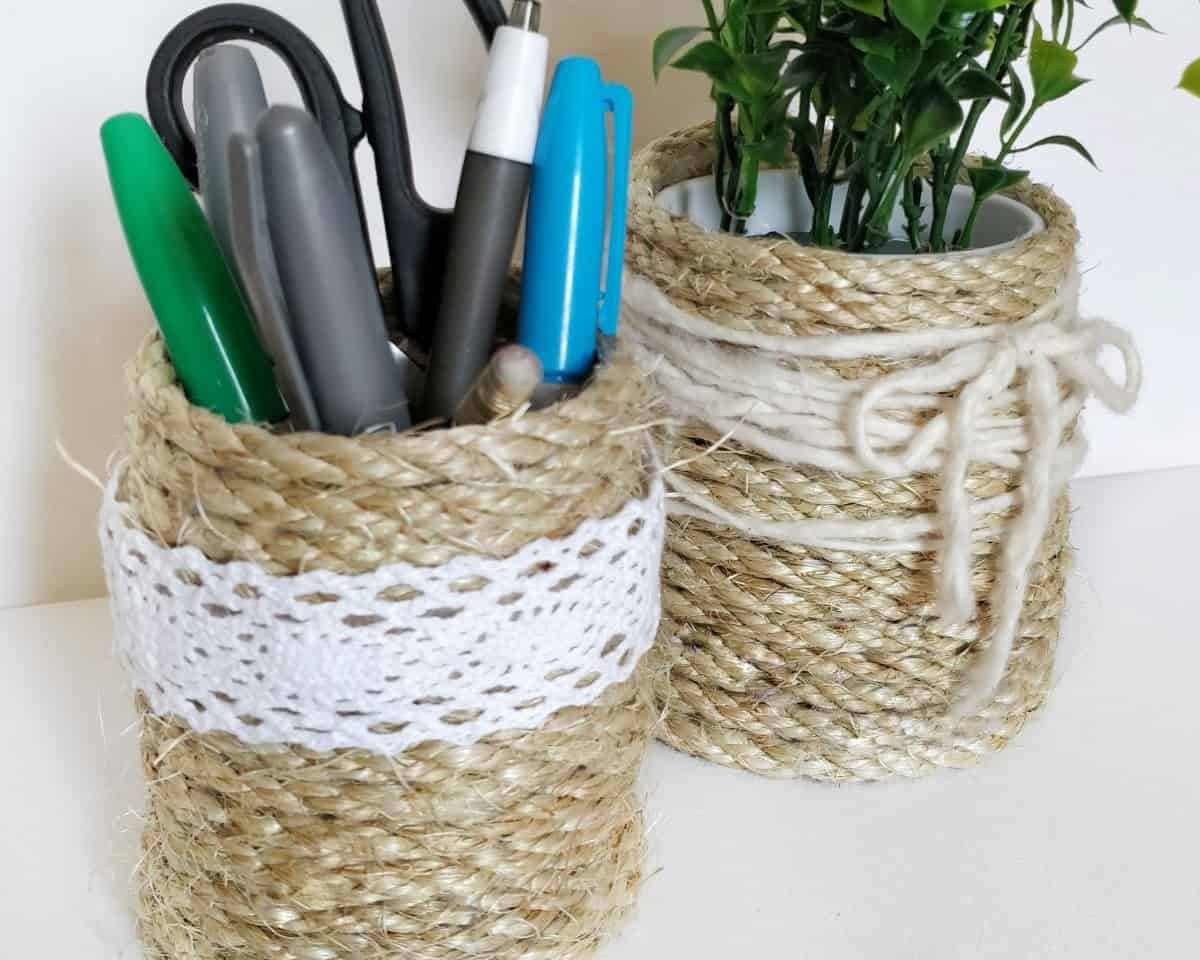
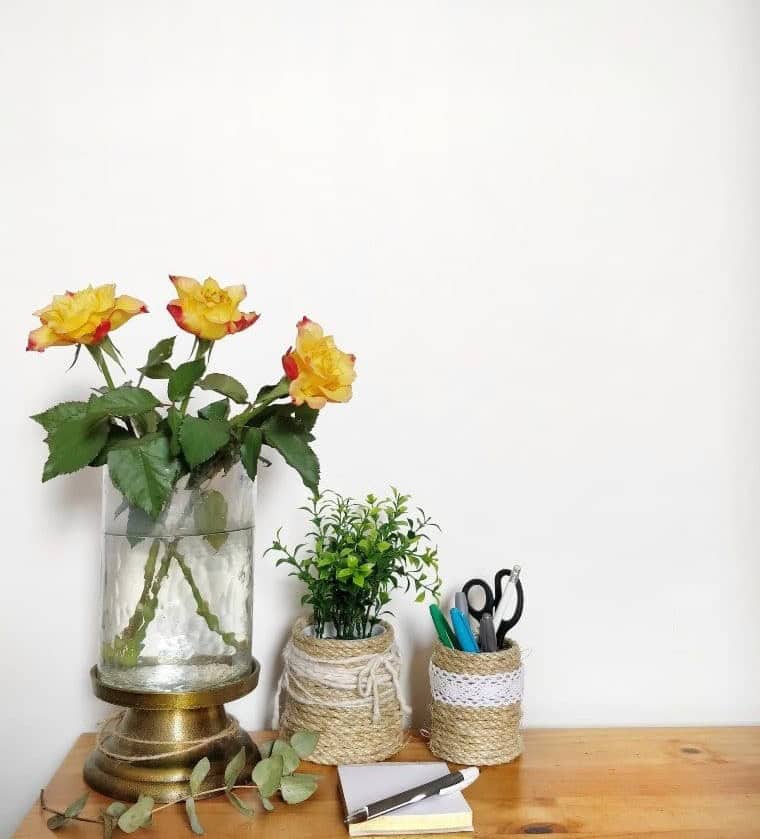
When it comes to placing your DIY rope basket, you’ll want to consider its functionality and aesthetics. A desk or table is an ideal spot, where it can store your items while also adding a decorative touch. However, it’s essential to keep the basket away from areas that may expose it to water. Ropes that are frequently submerged in water will lose their strength over time, leading to sagging and eventual collapse.
For this reason, it’s best to avoid placing the basket near water sources like sinks or toilets, where it could potentially be used as a toothbrush holder. In general, if an area is dry, your rope basket can stay put. But for wet areas, you’ll want to consider alternative storage solutions.
DIY Rope Organizer for Your Desk
Transform your workspace with a functional and stylish DIY rope organizer! With just an hour of active time, you can create a unique storage solution for your desk essentials. Utilize these clever baskets to corral pens, pencils, and other office supplies, keeping them within easy reach. And the best part? You’ll have a one-hour total project that’s perfect for busy schedules.
Equipment
When you’re engrossed in a good article or video, it’s frustrating when your screen suddenly goes dark. To prevent this from happening, there are a few simple steps you can take. First, make sure your device’s auto-lock feature is turned off. This setting allows your screen to stay on for a set period of time before turning off. You can adjust the length of this timer in your device’s settings.
Alternatively, you can use an app like Twilight, which gradually adjusts the brightness of your screen to a more comfortable level for reading, eliminating the need for frequent screen lockouts.
Materials
To craft a unique and eye-catching embellishment, you can combine various materials to create a one-of-a-kind piece. For instance, you could use thick rope as the base, adding texture and interest to your design. Next, utilize a hot glue gun with glue sticks to attach decorative elements such as yarn or white lace ribbon. The possibilities are endless, allowing you to express your creativity and add a personal touch to any project.
Instructions
To establish the foundation of your handmade basket, begin by twisting the rope into a solid core and securing it tightly with adhesive. Next, trim any excess rope and start constructing the walls on the exterior of the base. As you approach the desired height of your basket, cut the remaining rope and secure it to the wall using a strong bond. Finally, add a decorative touch with a lace ribbon to complete your unique handicraft.
Conclusion
Imagine a clutter-free living space where everything has its designated place. No more frantic searches for misplaced items or stressing over disorganized countertops. The sense of calm and control that comes with a tidy home is just a DIY project away. Start by tackling the chaos and create a rope organizer to keep your workspace streamlined and efficient.