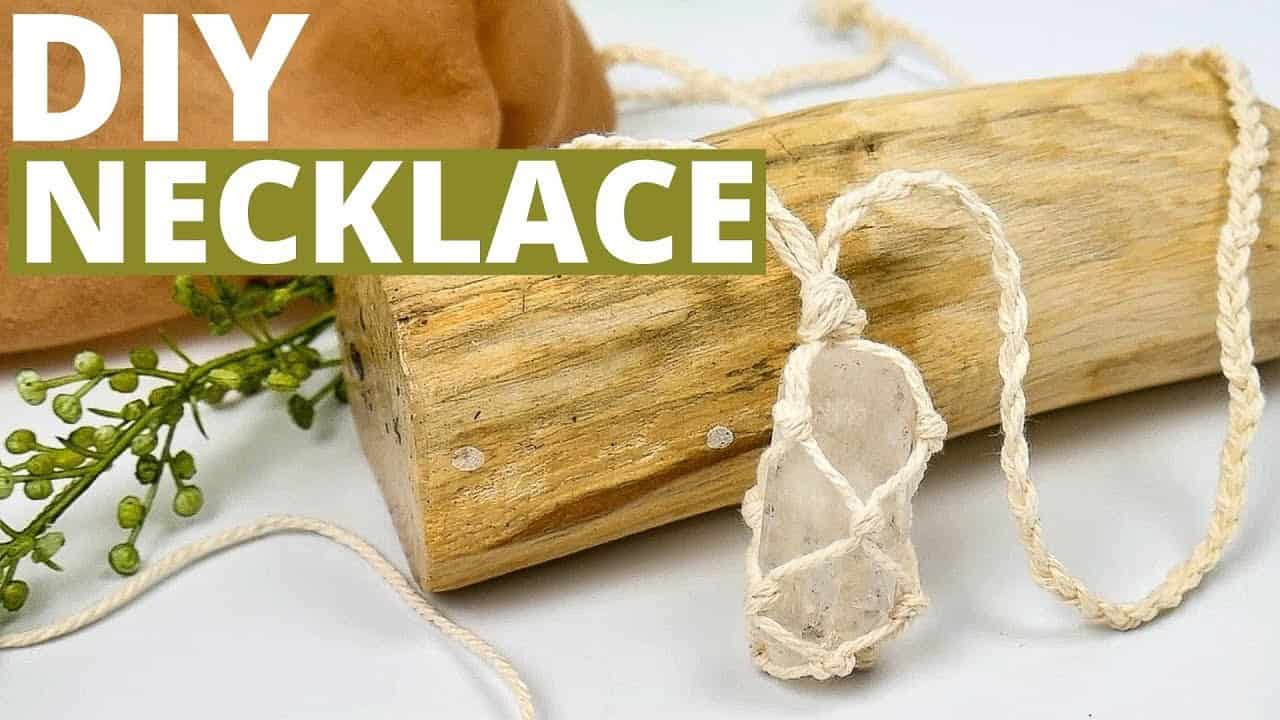
Looking to create a stunning yet effortless DIY macrame piece? Look no further than this beautiful macrame necklace! Not only is it a lovely accessory to wear yourself, but it also makes a thoughtful gift for loved ones. What’s more, the versatility of this project allows you to customize it with personalized elements that reflect the recipient’s style. So, let’s dive into the details and explore what you’ll need to get started.
Supplies and Tools You’ll Need for the Necklace
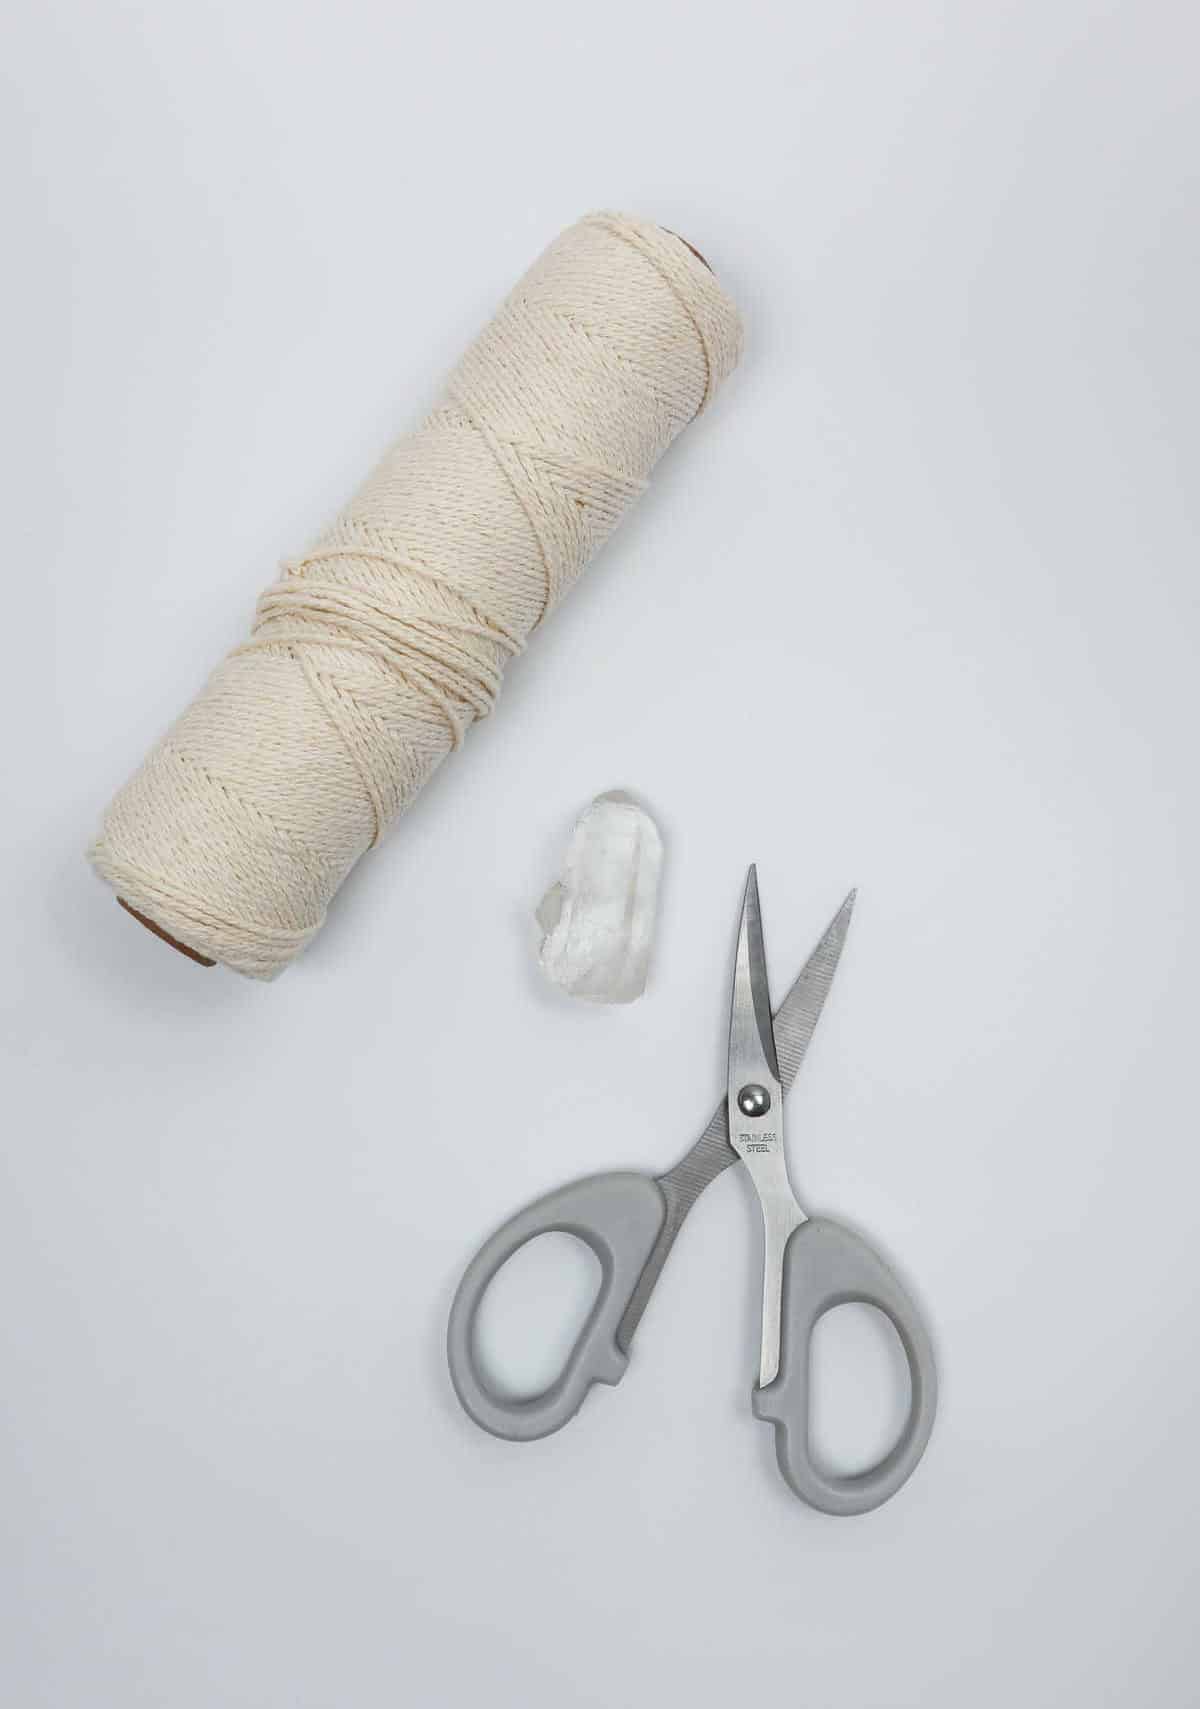
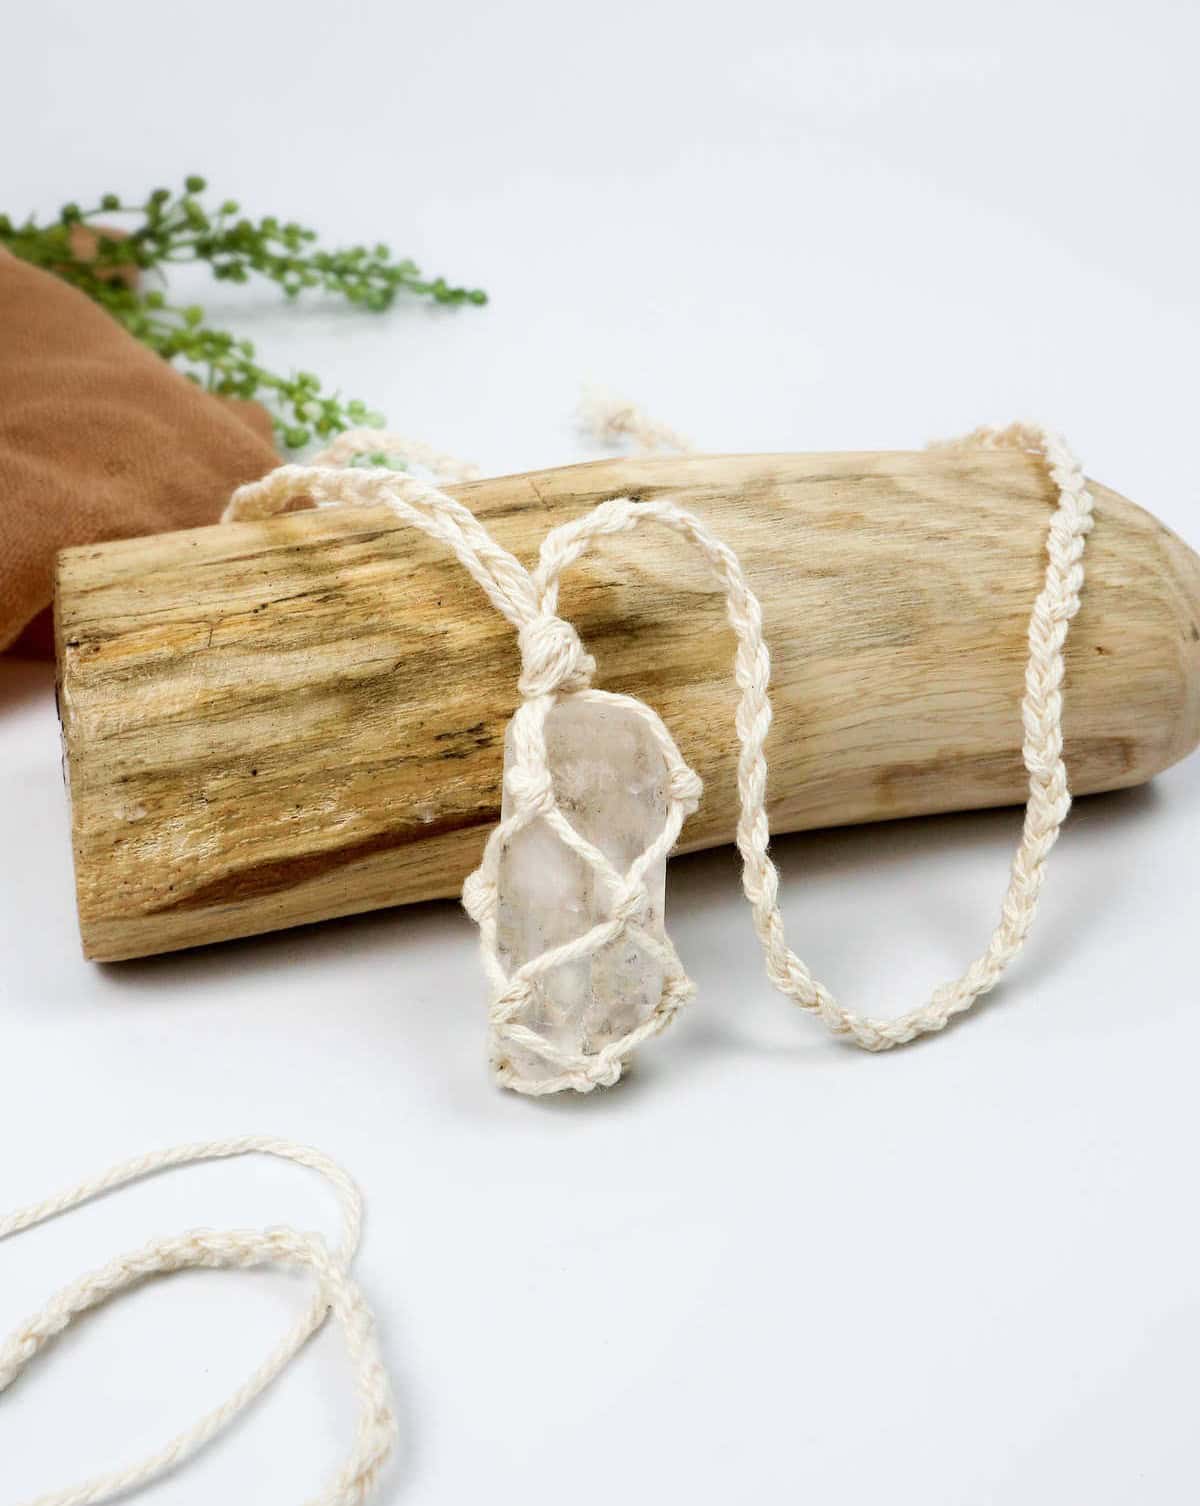
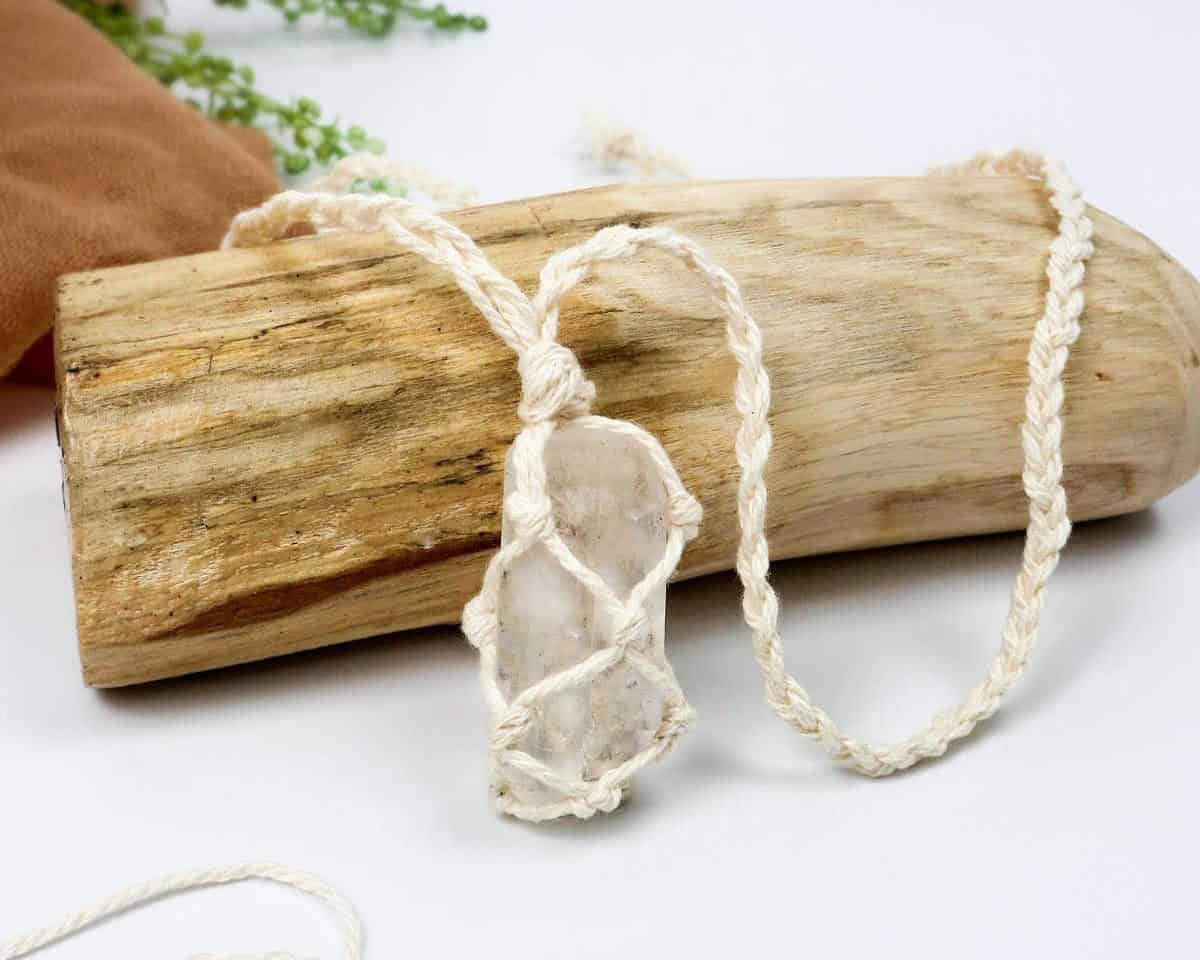
To initiate this straightforward project, you’ll need just a few basic components. These include a rock or crystal of your choice, some 1-millimeter cotton twine, and a pair of scissors. With these simple materials at hand, you’ll be well on your way to getting started with the process.
Watch: DIY Stone Necklace
If you’re not naturally drawn to reading, there’s still an opportunity to get creative with jewelry-making. Why not try your hand at creating a beautiful piece of jewelry by following along with our step-by-step video tutorial?
How to Make a Stone Necklace
With your necessary supplies in order, you’re now poised to begin. Don’t be afraid to employ a colored cord that suits your personal preference or is readily available, as long as it meets the required length stipulated in the instructions, ensuring a seamless setup process.
Step 1
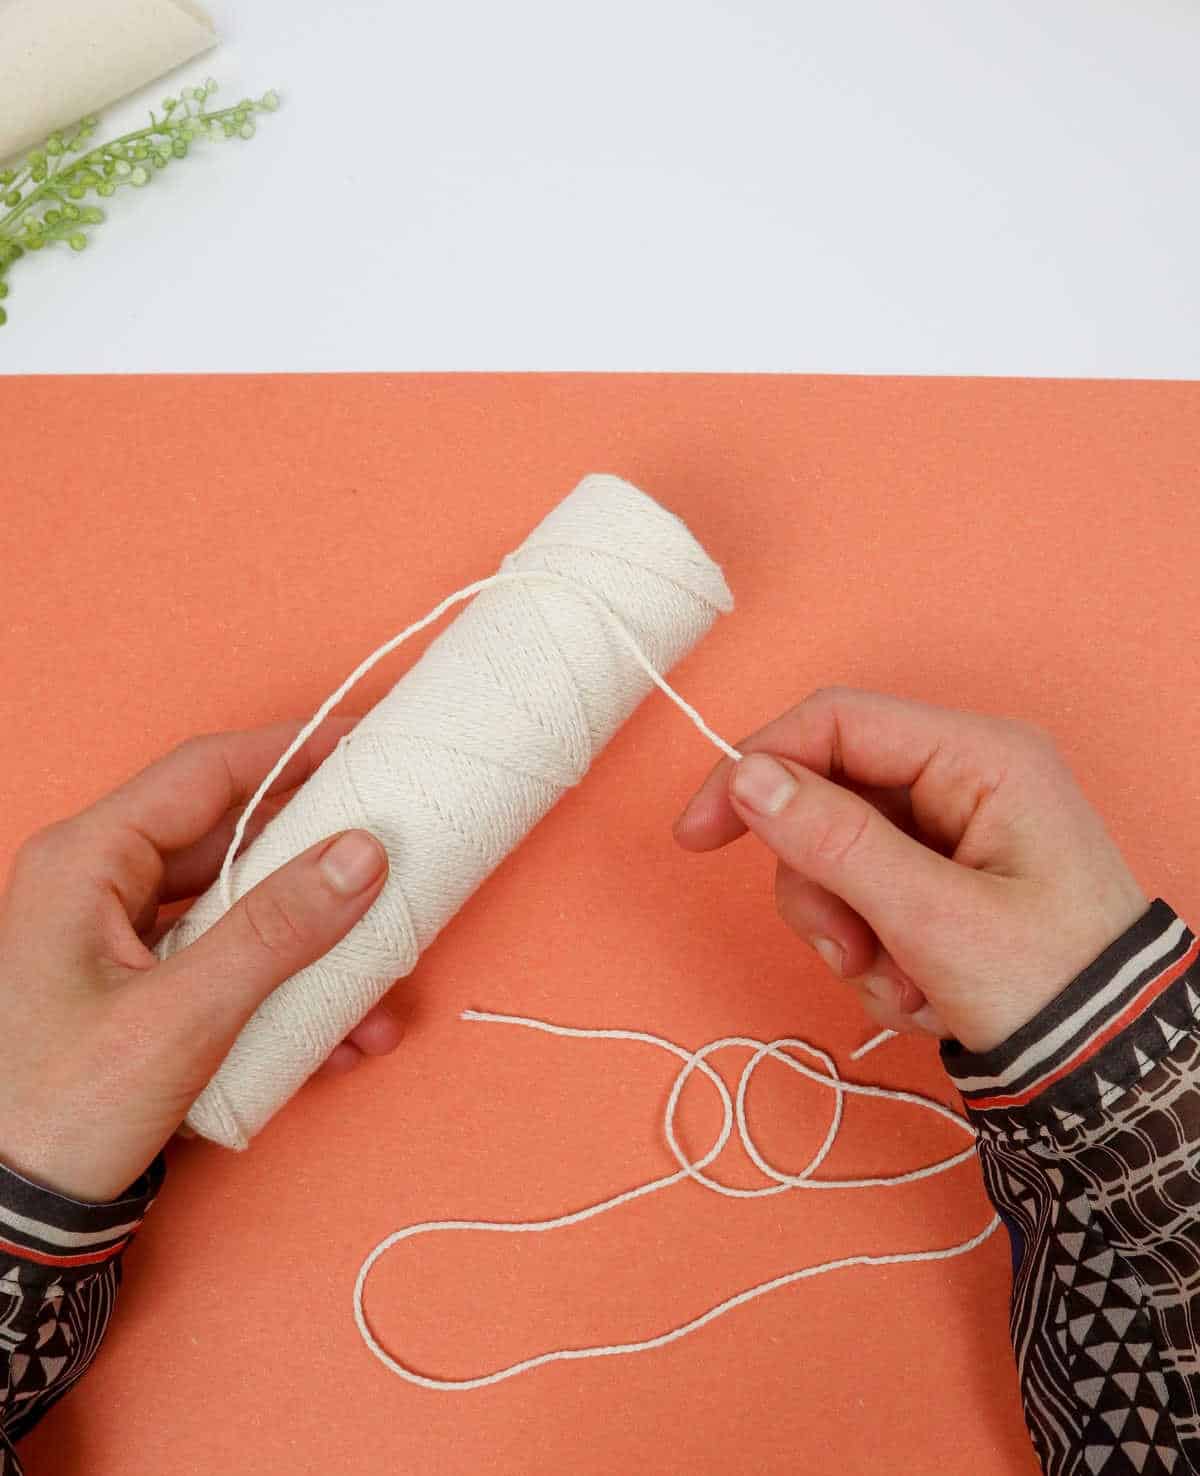
To begin, carefully uncoil your cord and trim it to approximately 32 inches in length. It’s essential to consider both the desired length of the necklace and the size of your stone when making this measurement. This initial step sets the foundation for a beautifully crafted piece that will showcase your chosen gemstone.
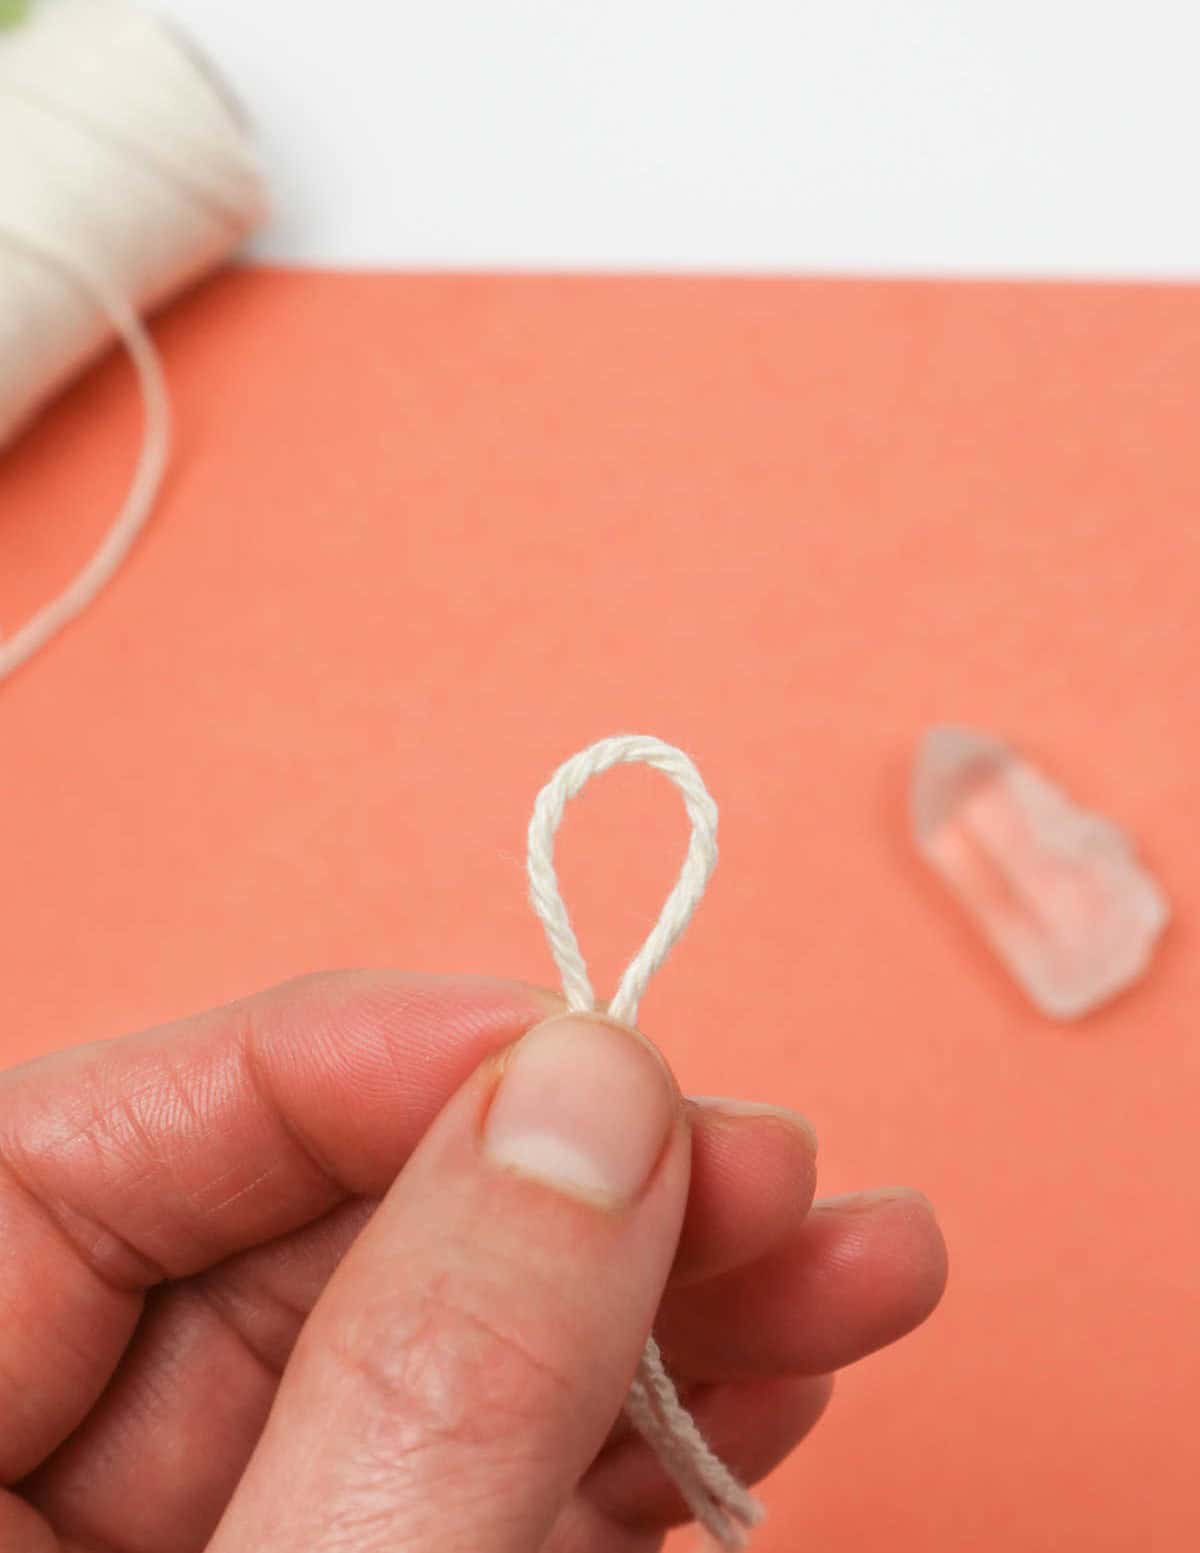
Step 2
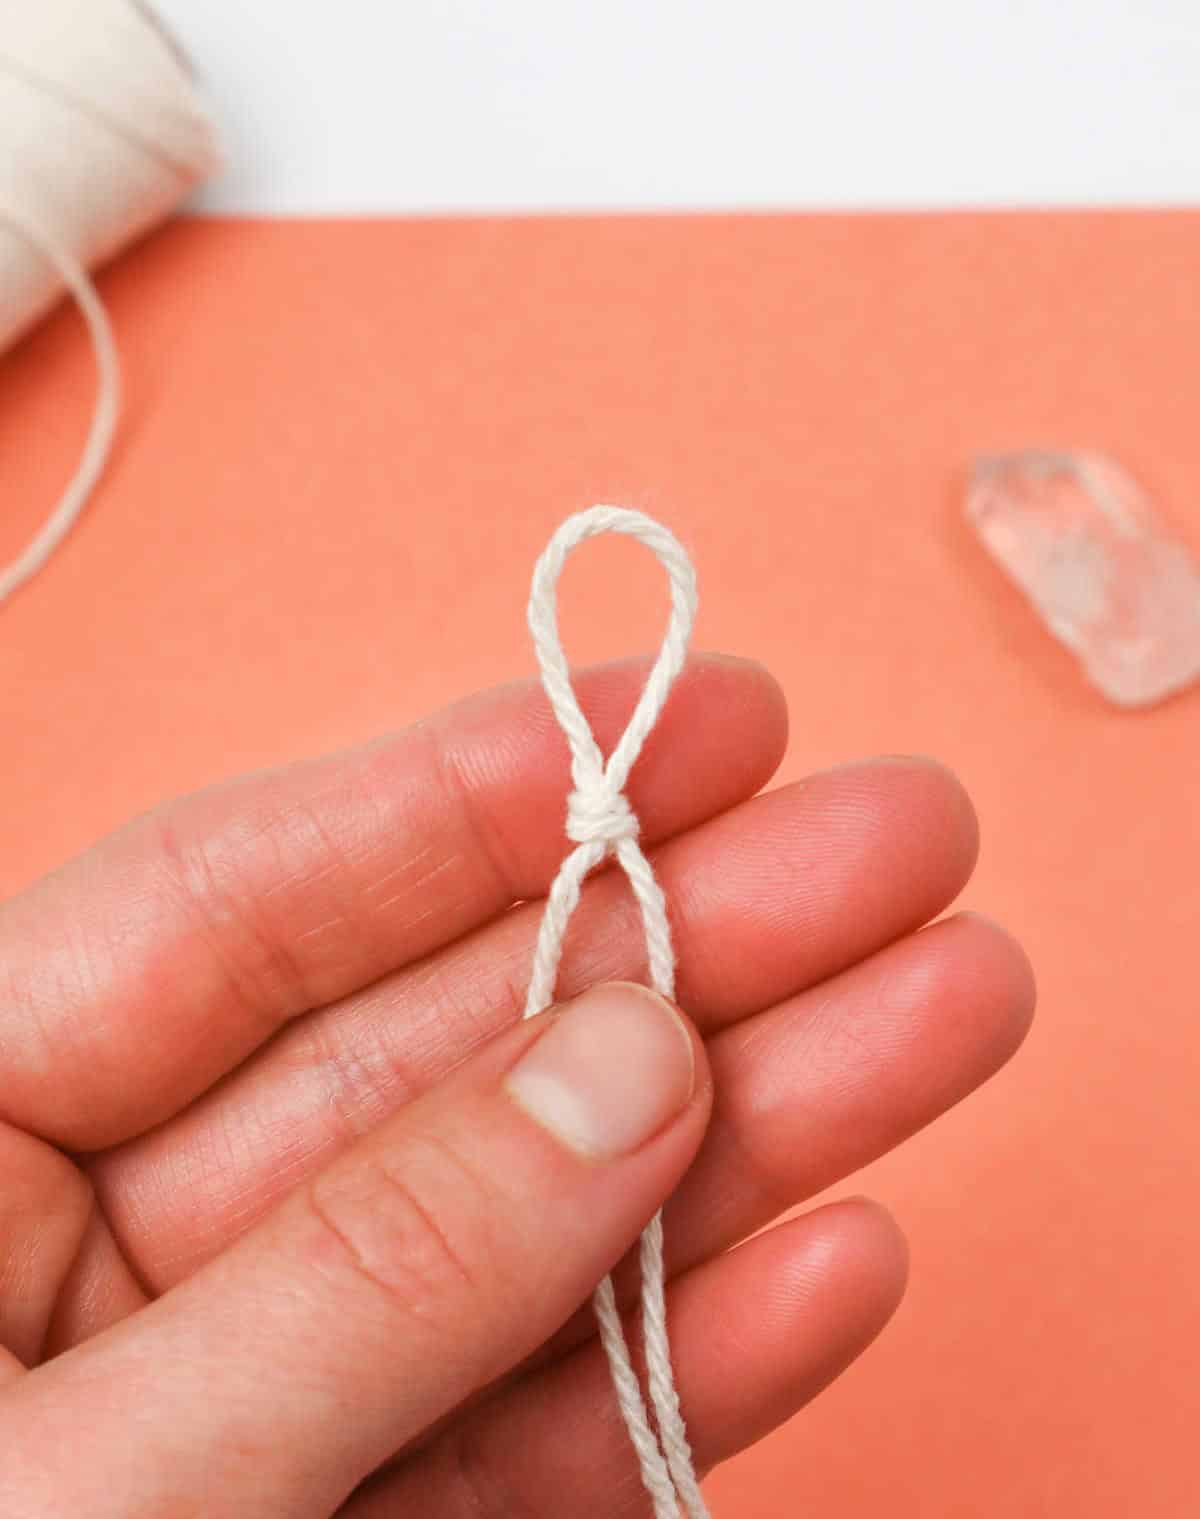
To create a makeshift hook, begin by folding the cord in half, ensuring the loop remains at one end while the excess material lies at the opposite end. This simple manipulation will enable you to use the cord as an impromptu hook for hanging or securing items.
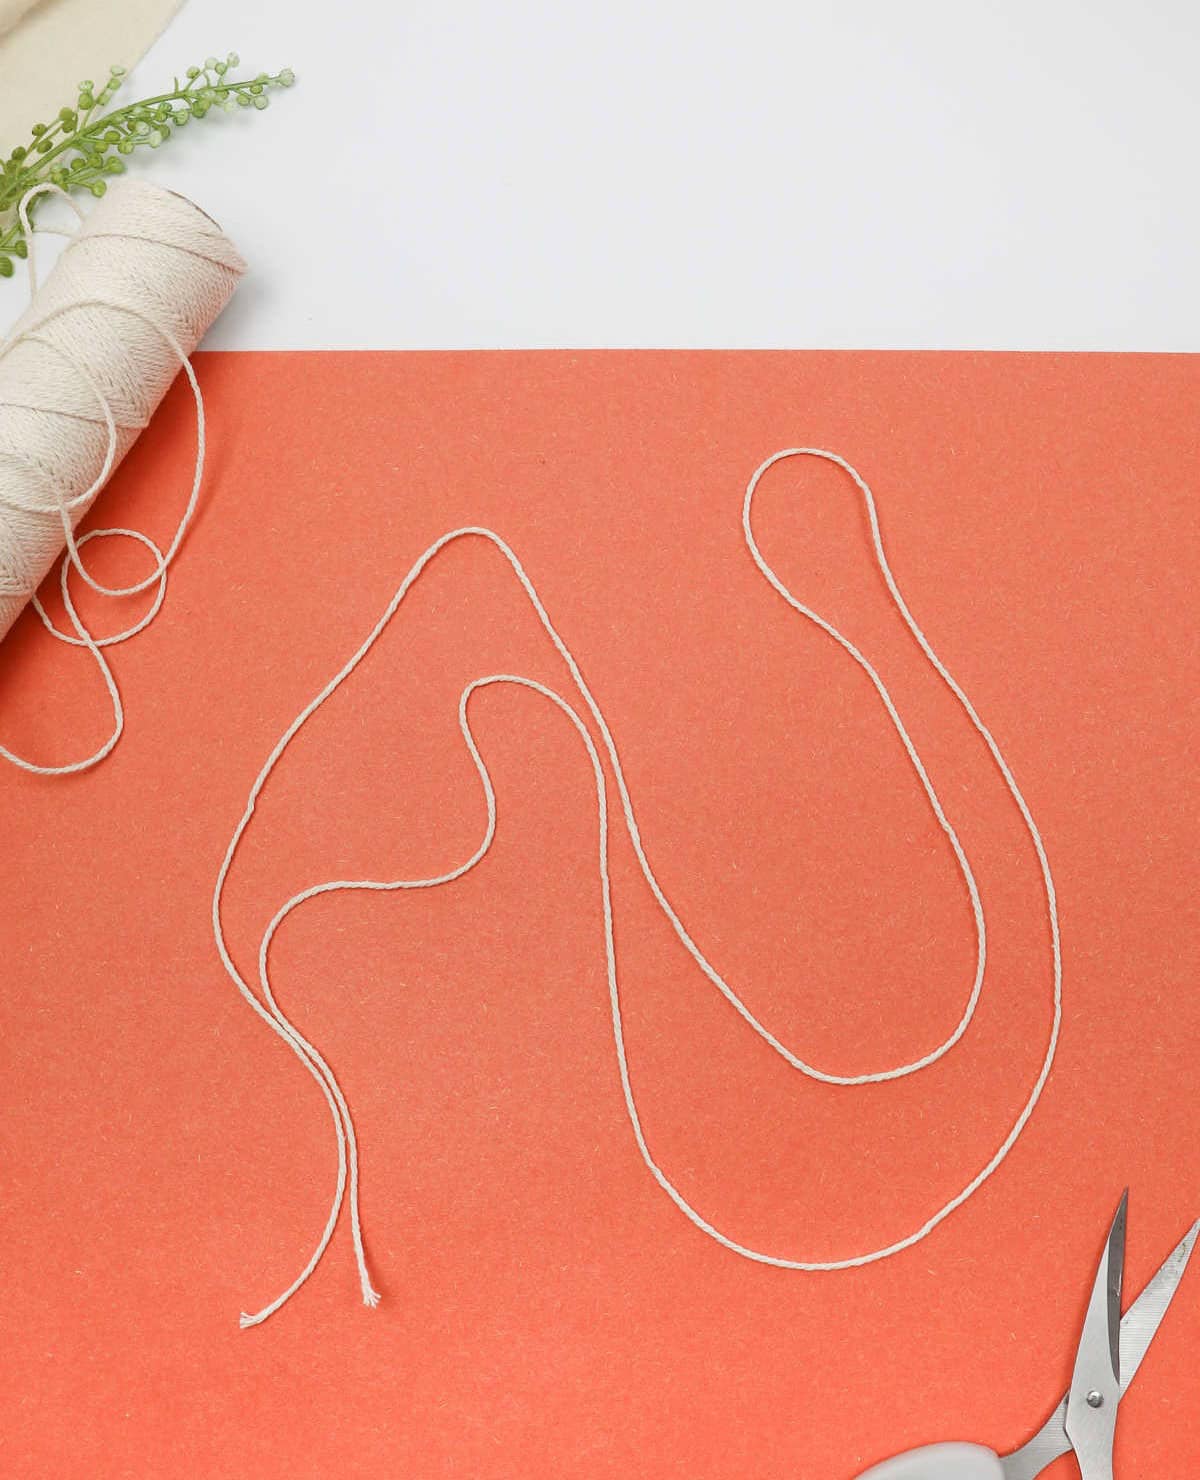
Step 3
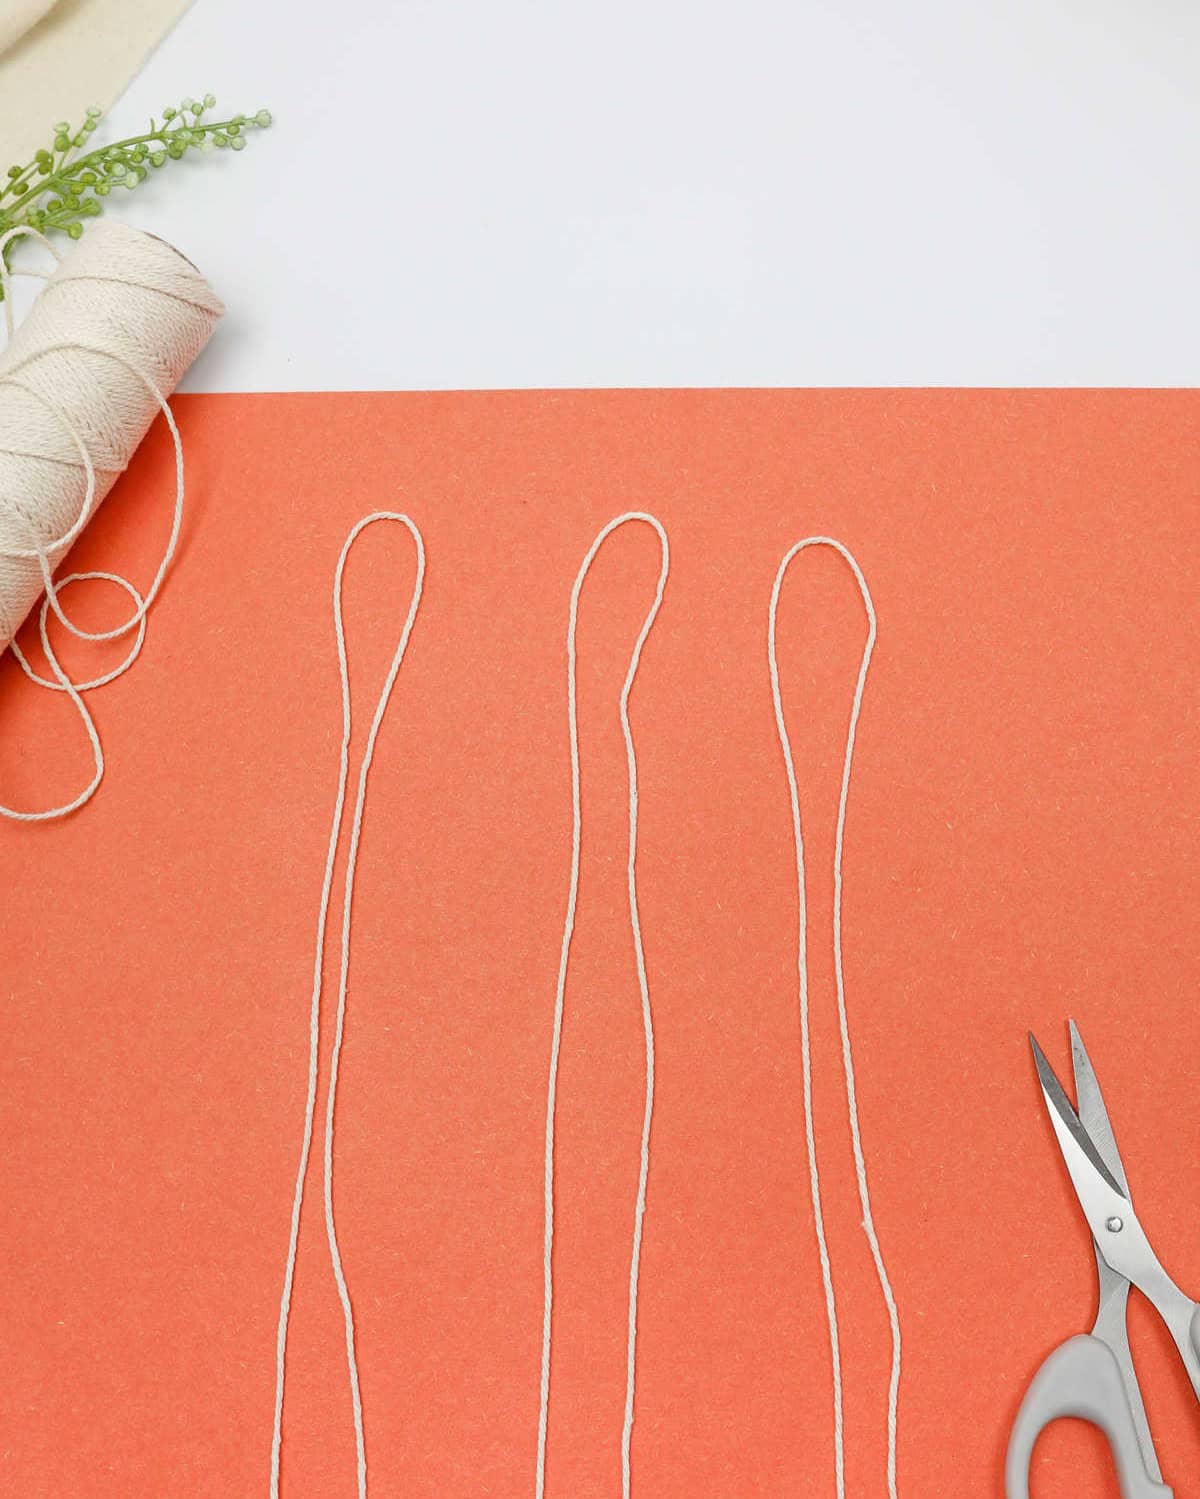
To complete the preparation phase, cut out two additional strips, each matching the initial measurement. Place these strips alongside the first cord, mirroring the arrangement. With your cords now ready, you can move forward to the most exciting aspect of this endeavor – creating the knots that will give your project its unique character.
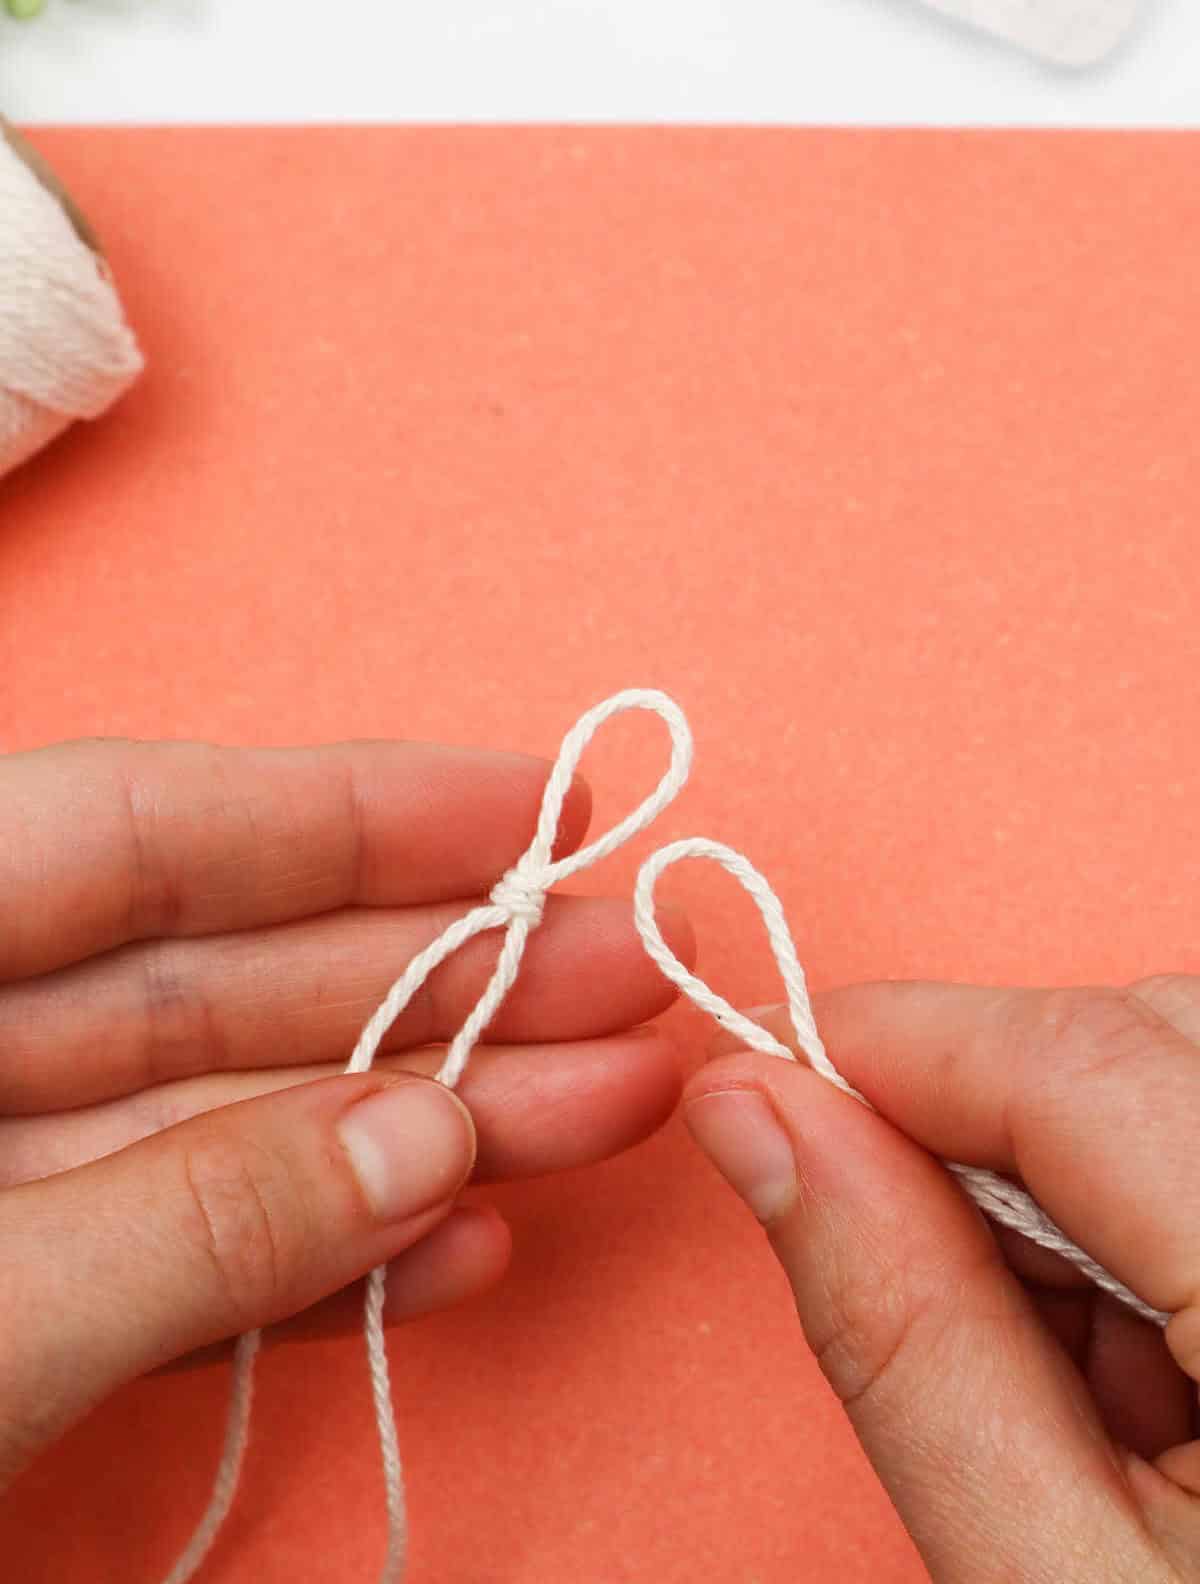
Step 4
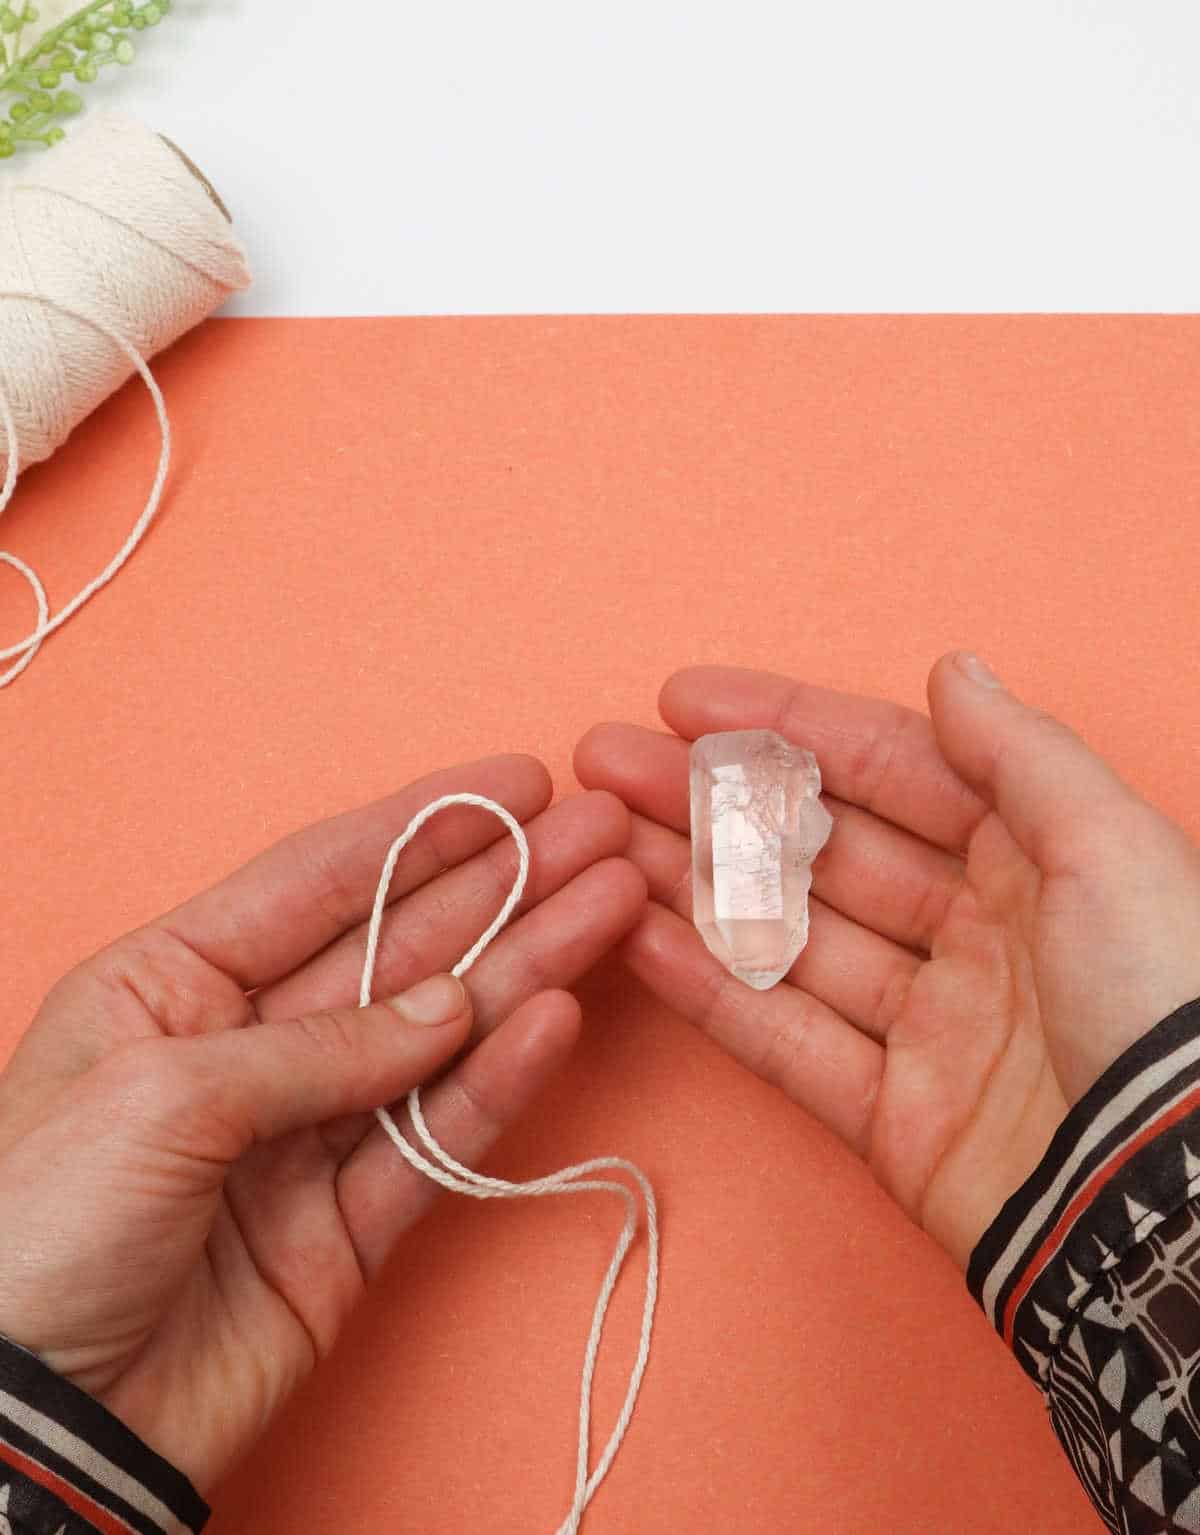
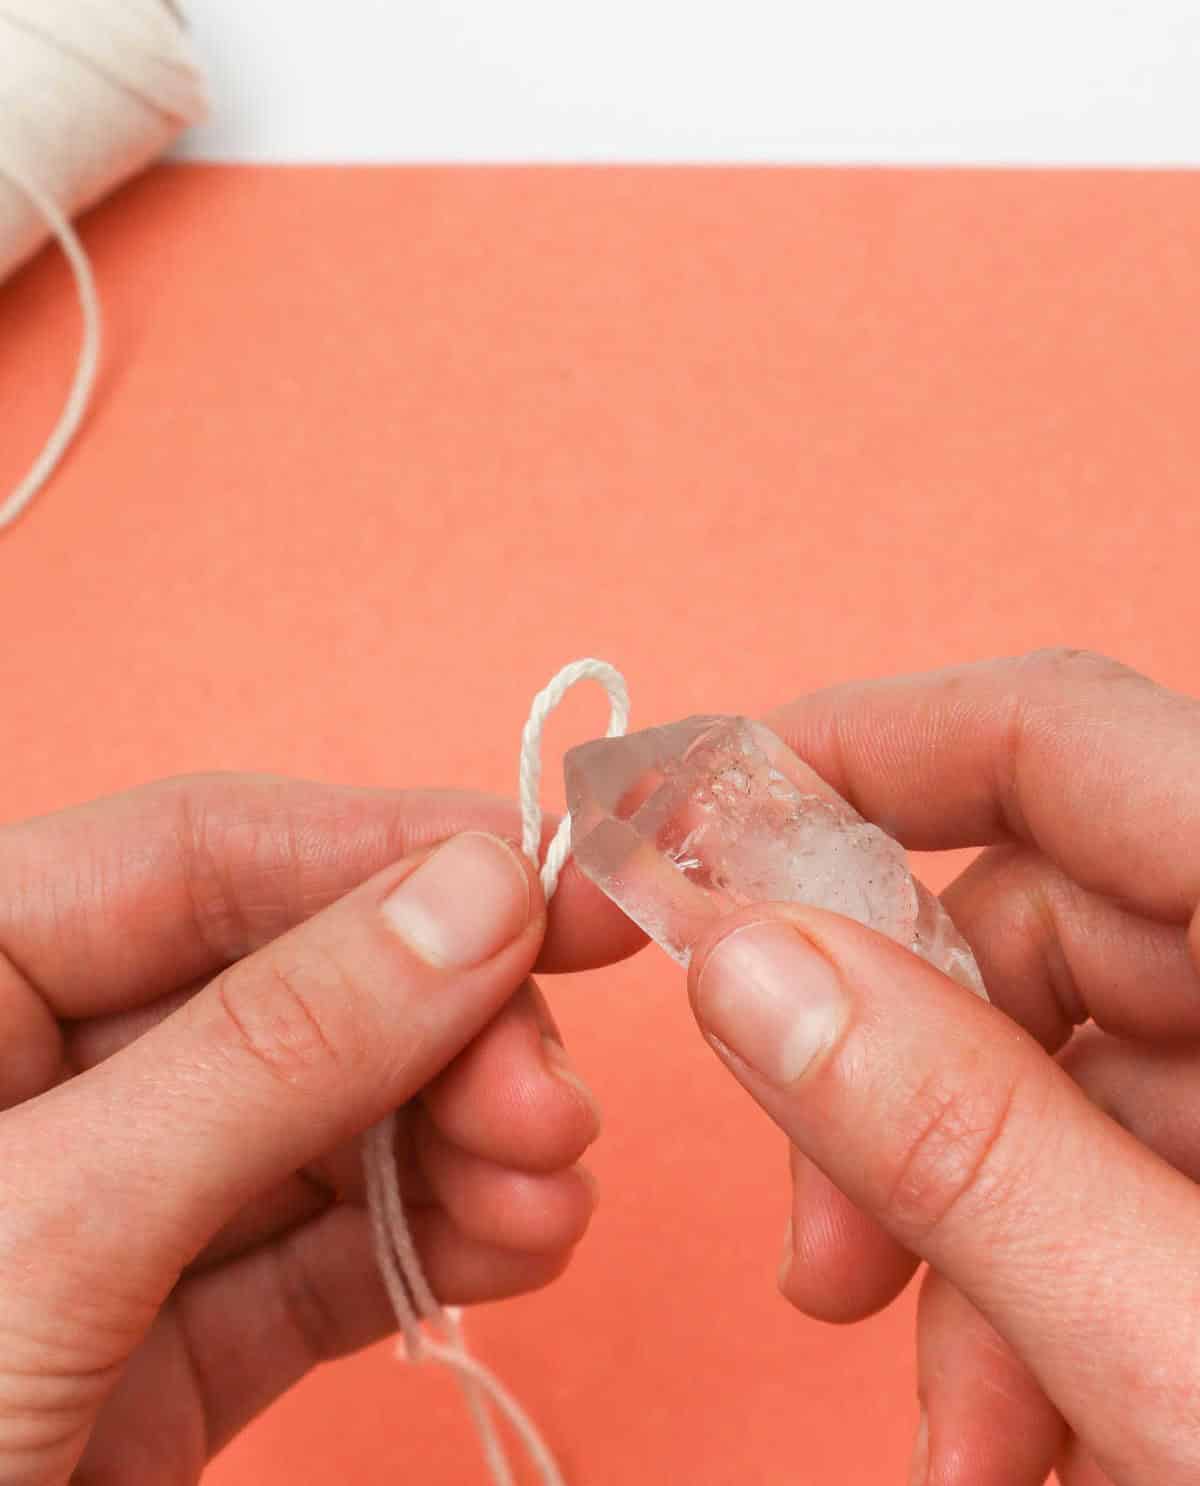
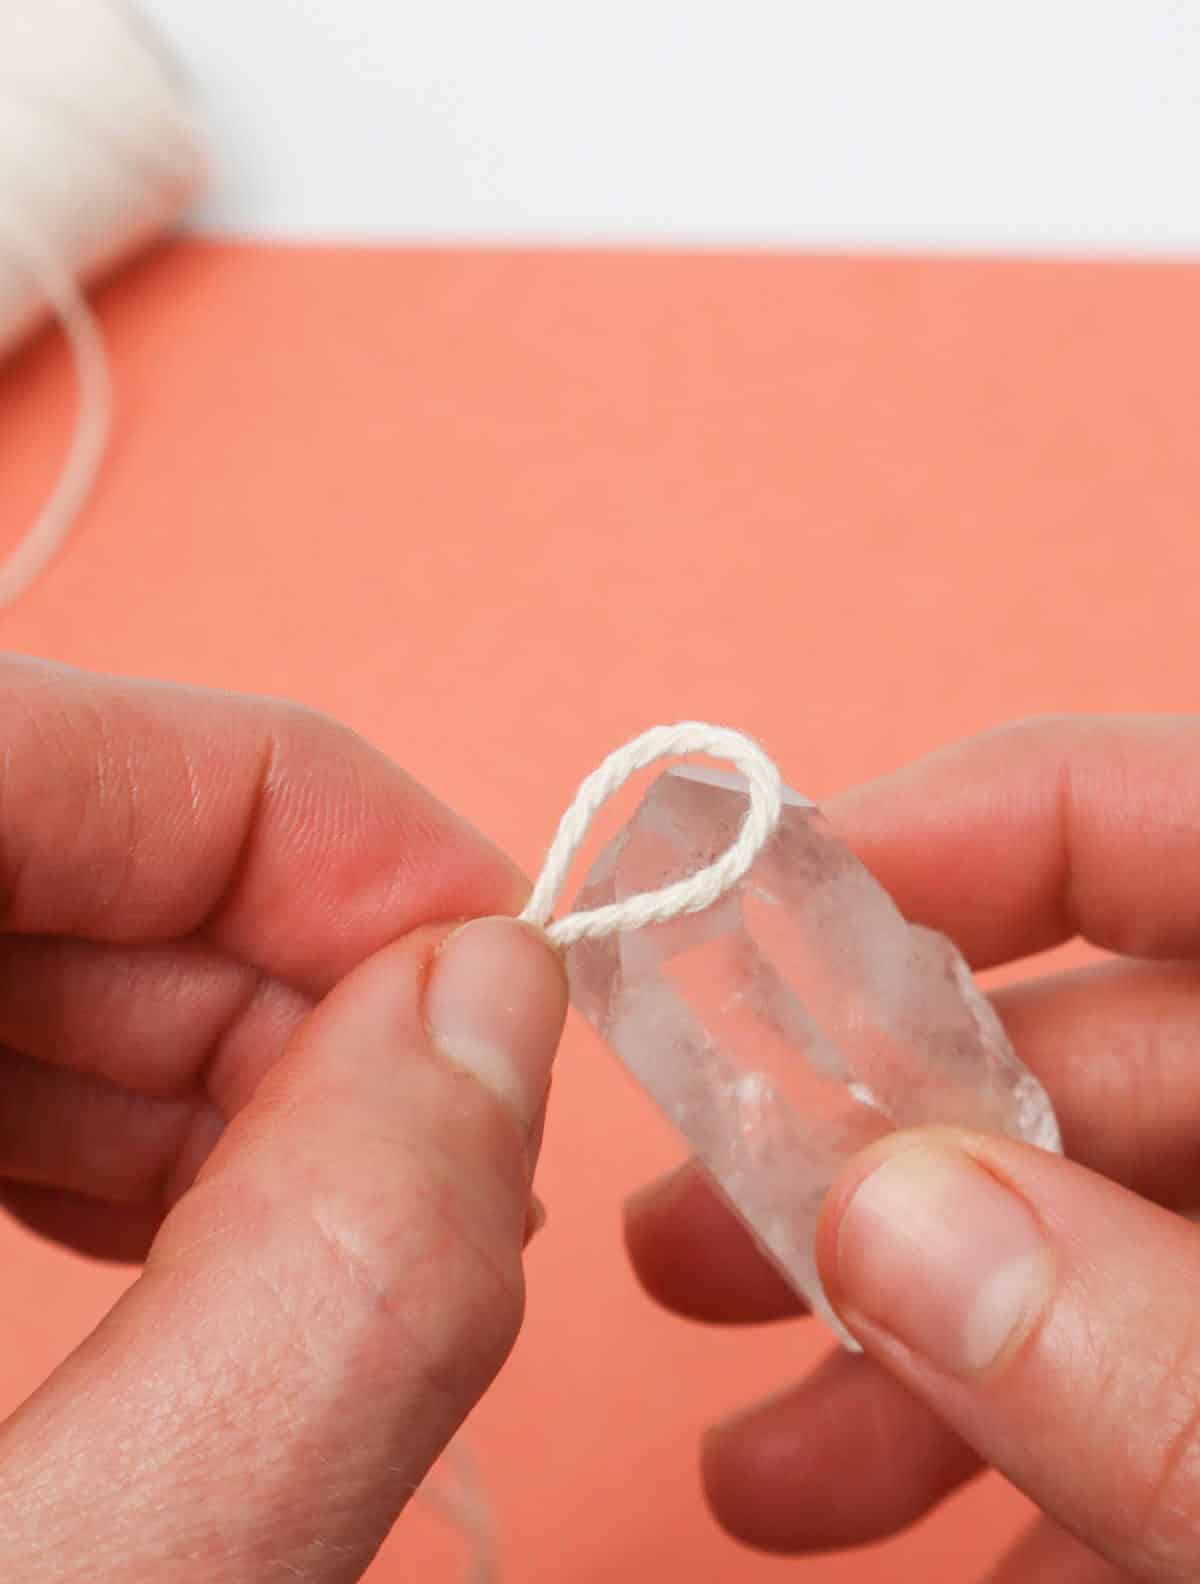
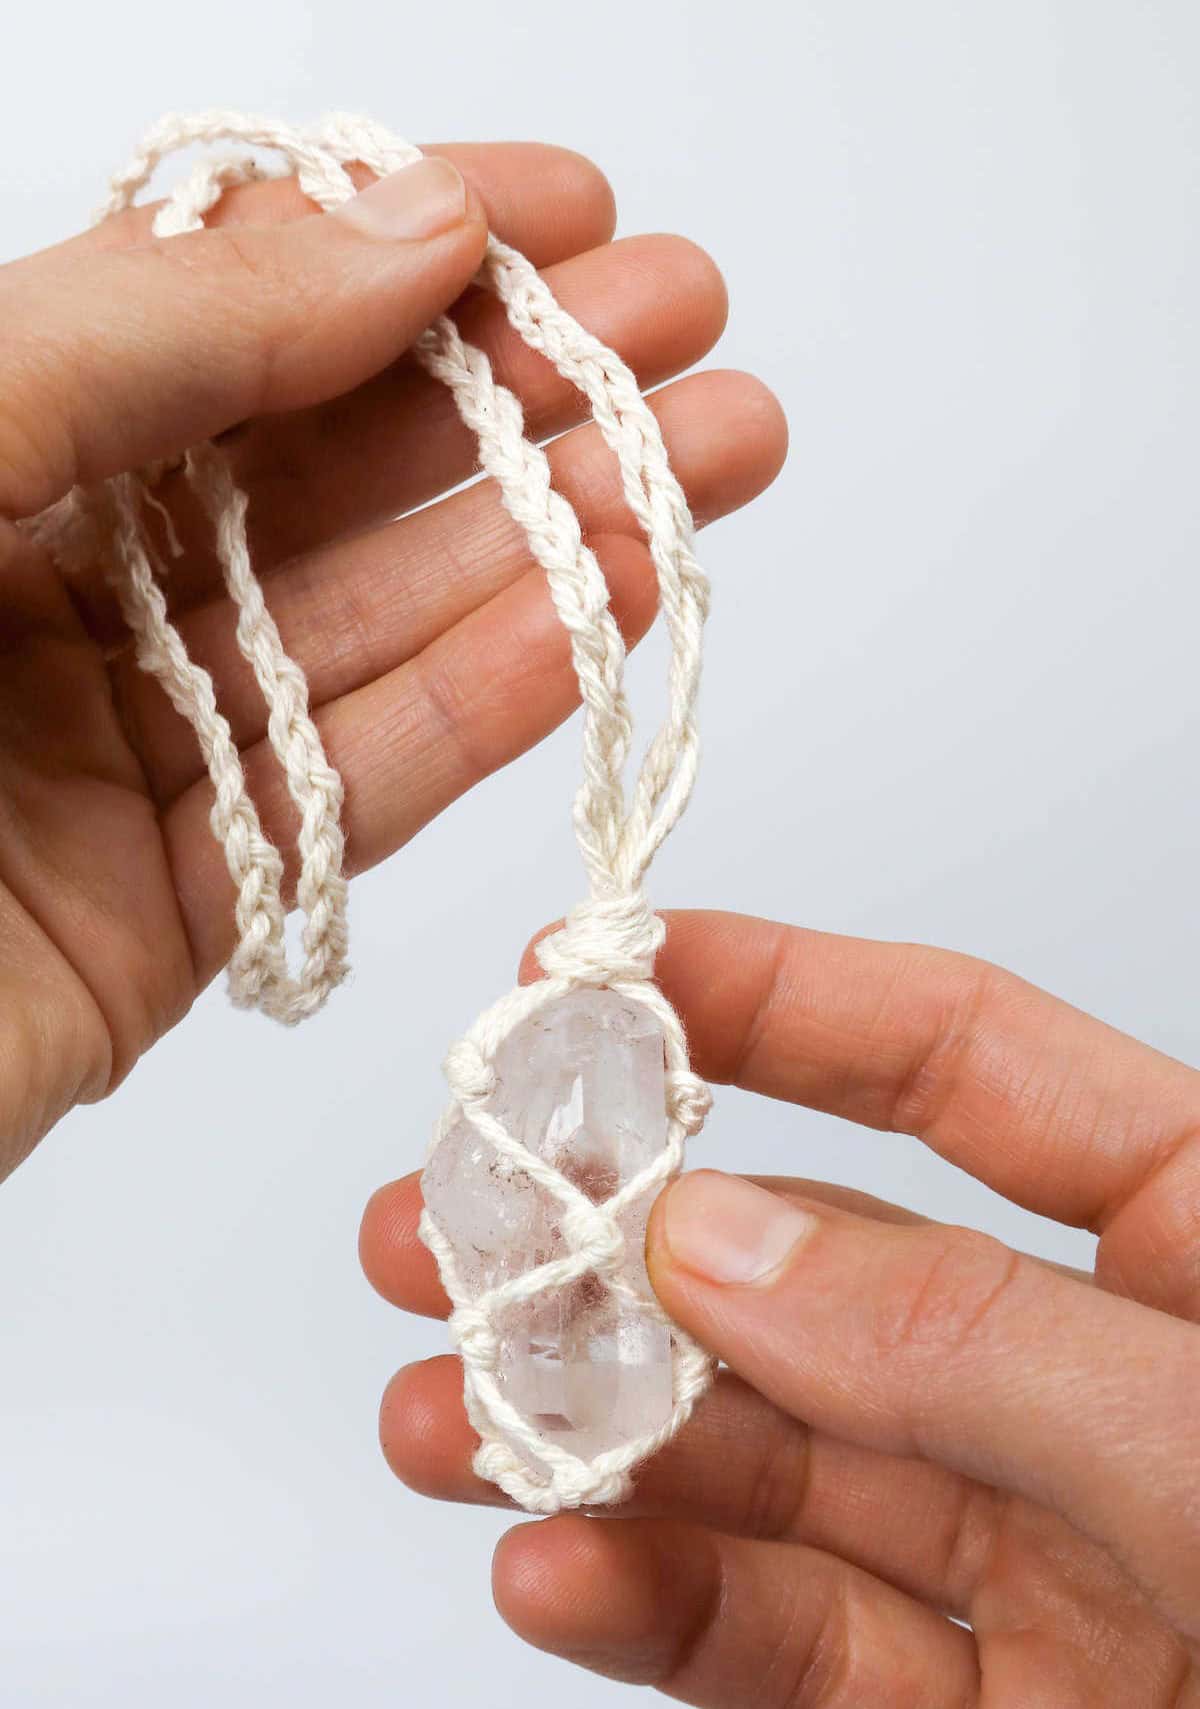
As you hold the stone, rock, or crystal in your hands, take a moment to envision its optimal positioning. Decide which part of the crystal will face downward and mentally prepare for the next step. To secure it in place, wrap your cord around the base of the crystal, ensuring the loop is neither too tight nor too loose. A delicate balance must be struck to prevent the crystal from slipping through or becoming stuck.
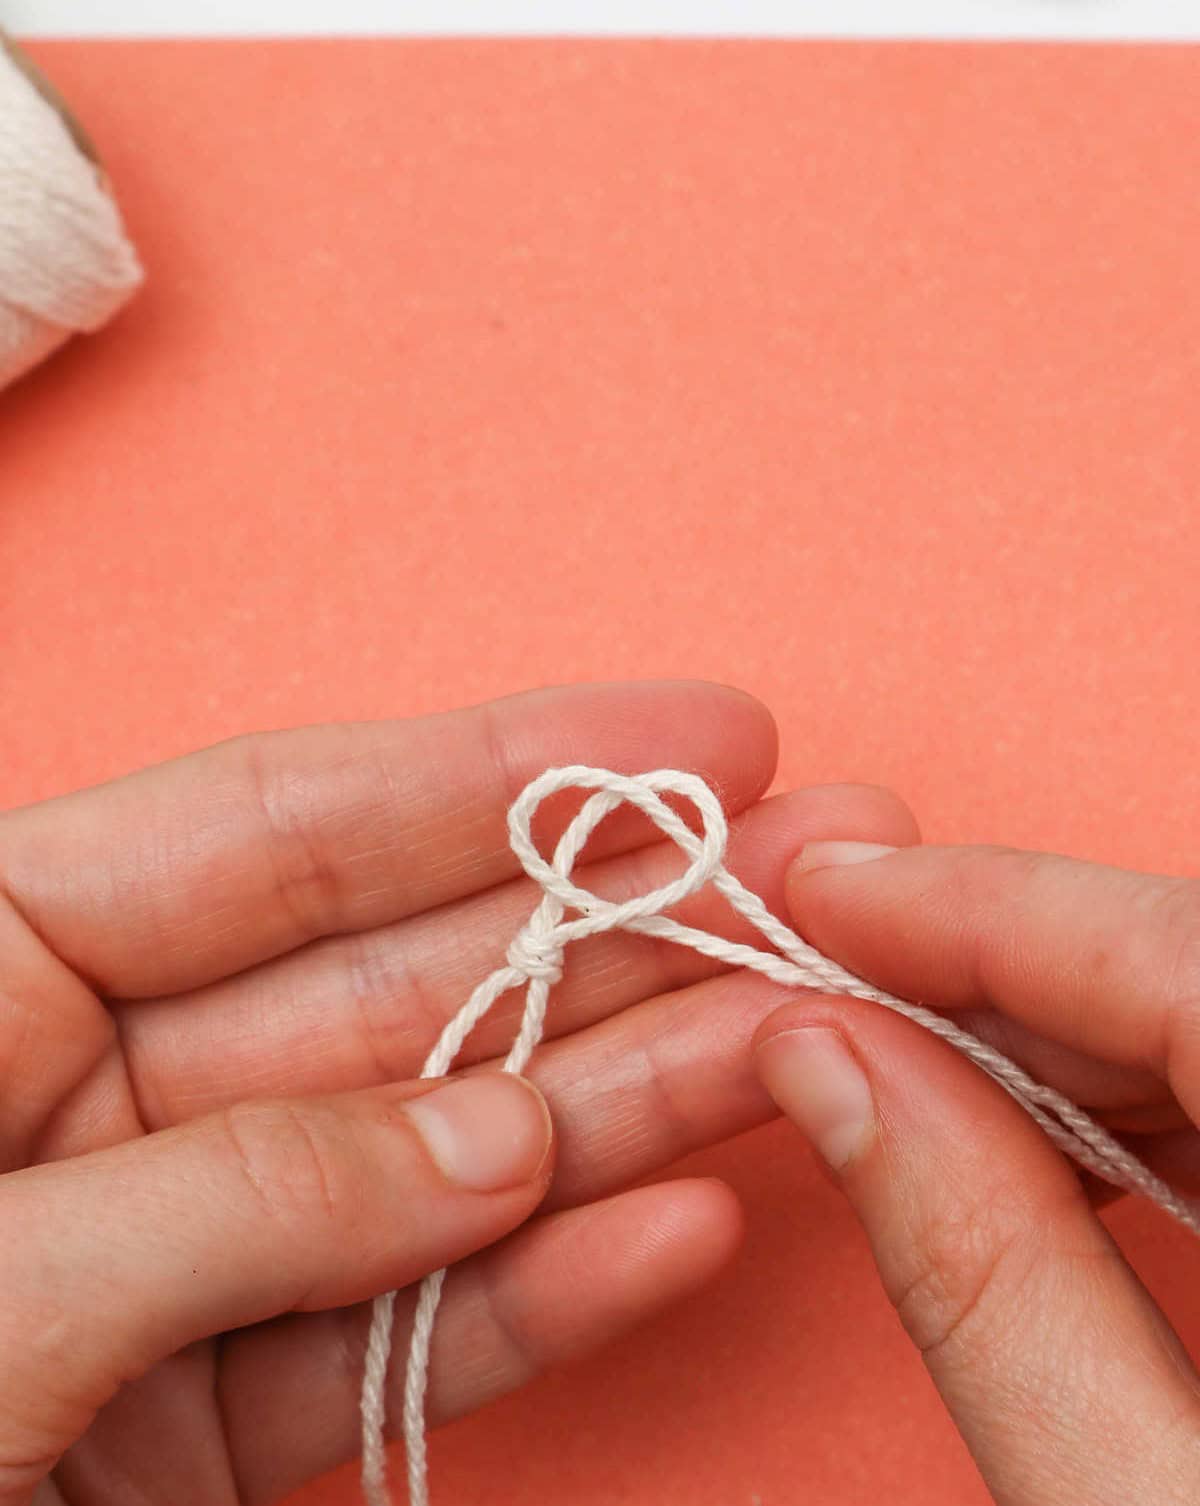
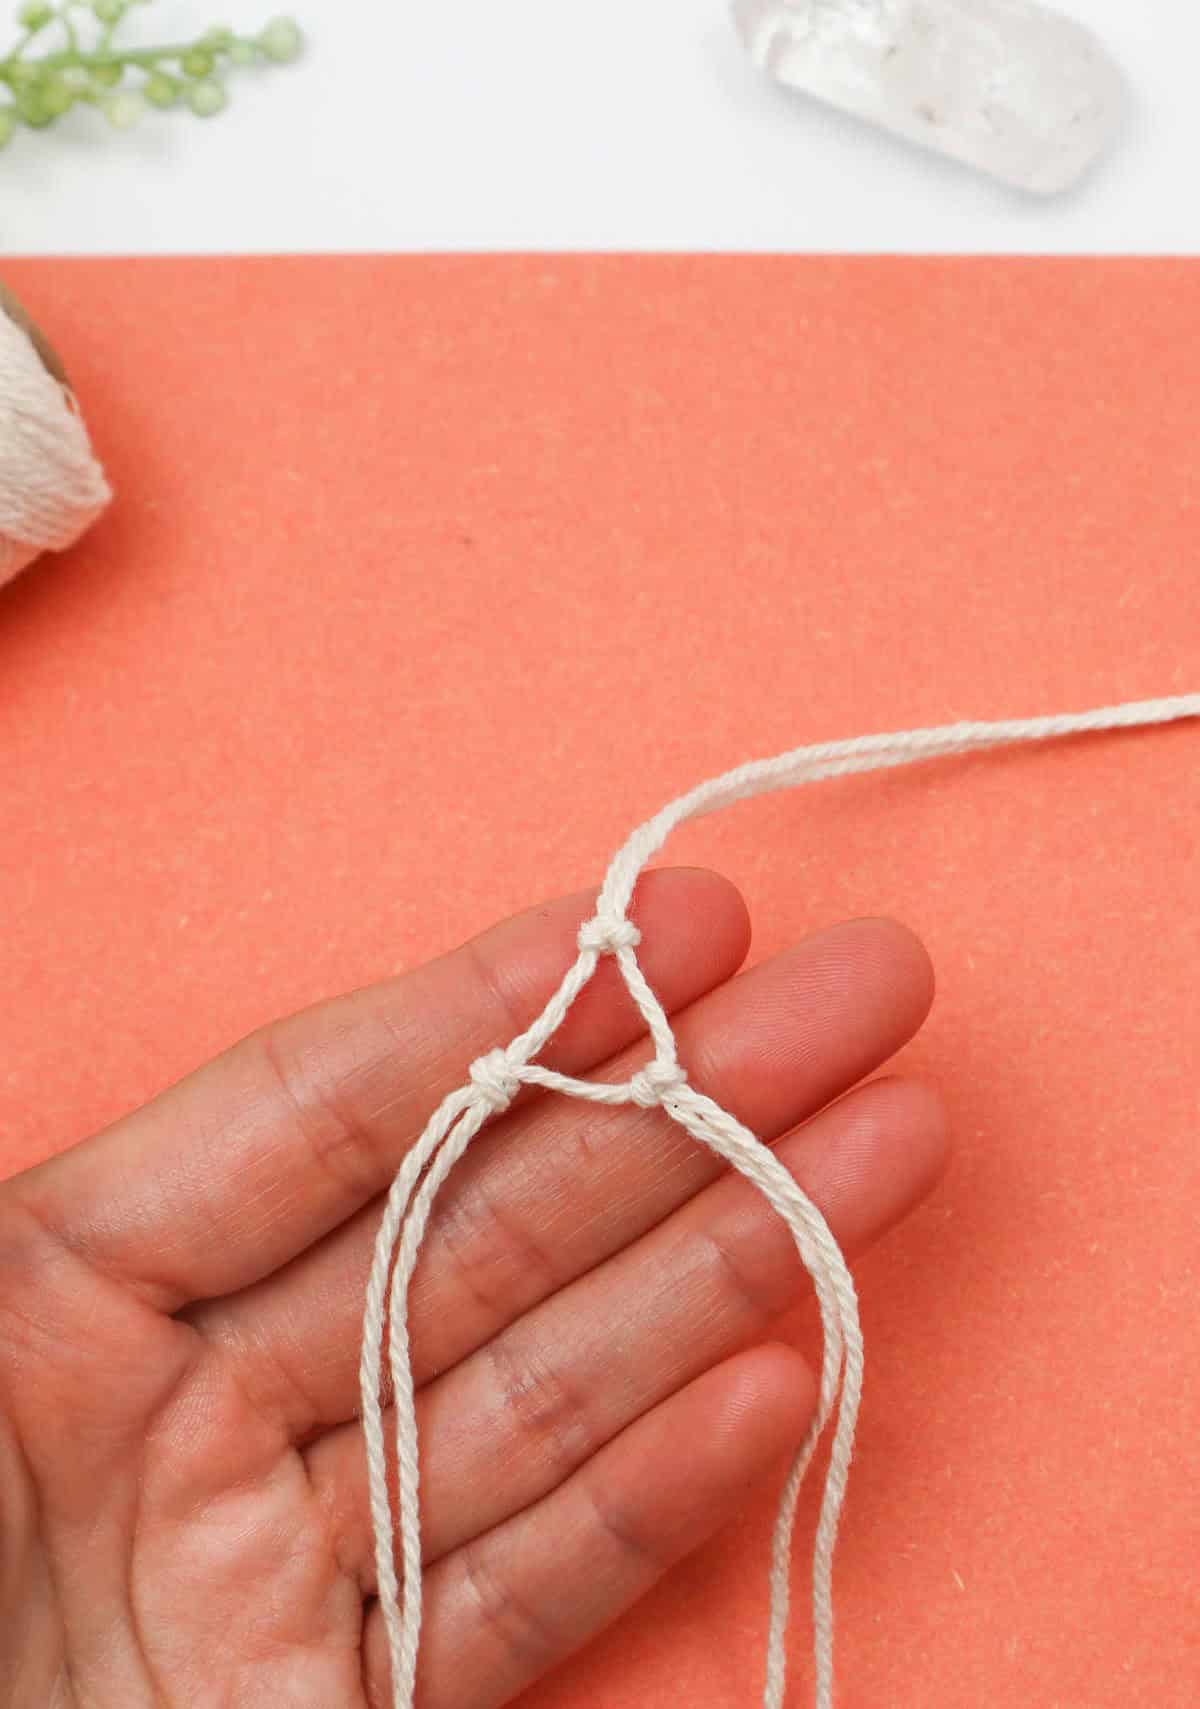
Step 5
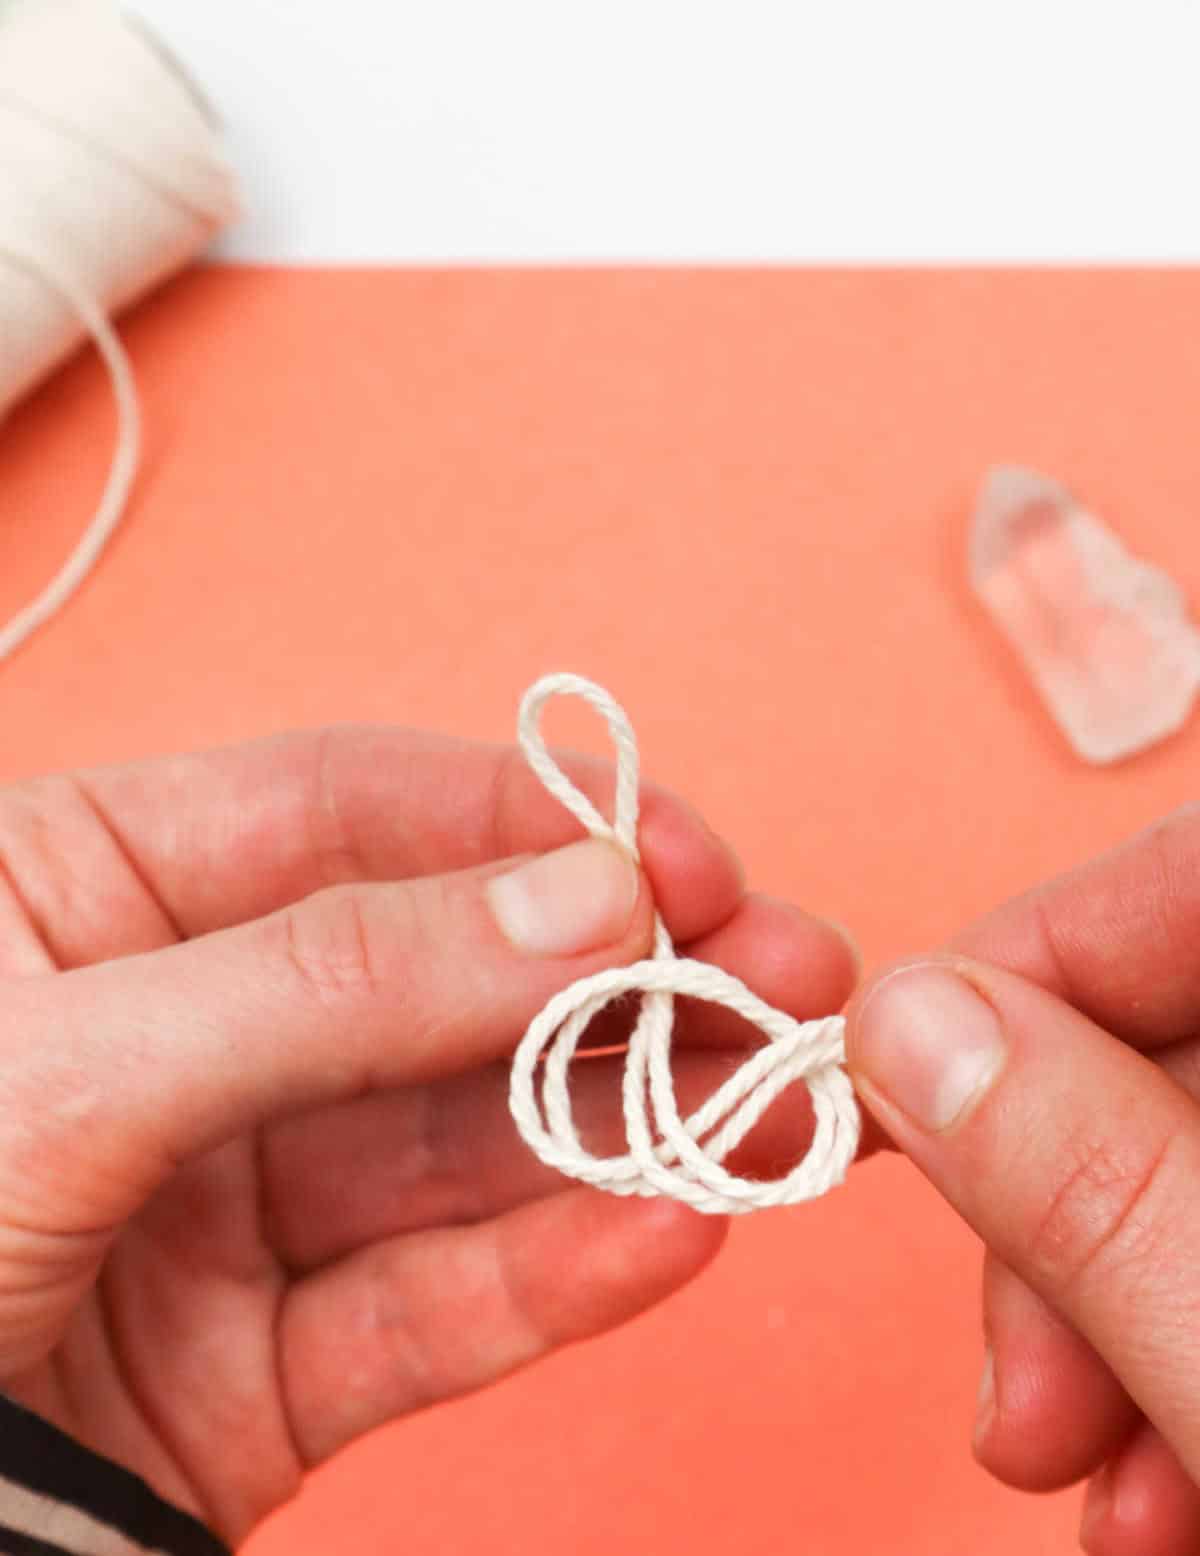
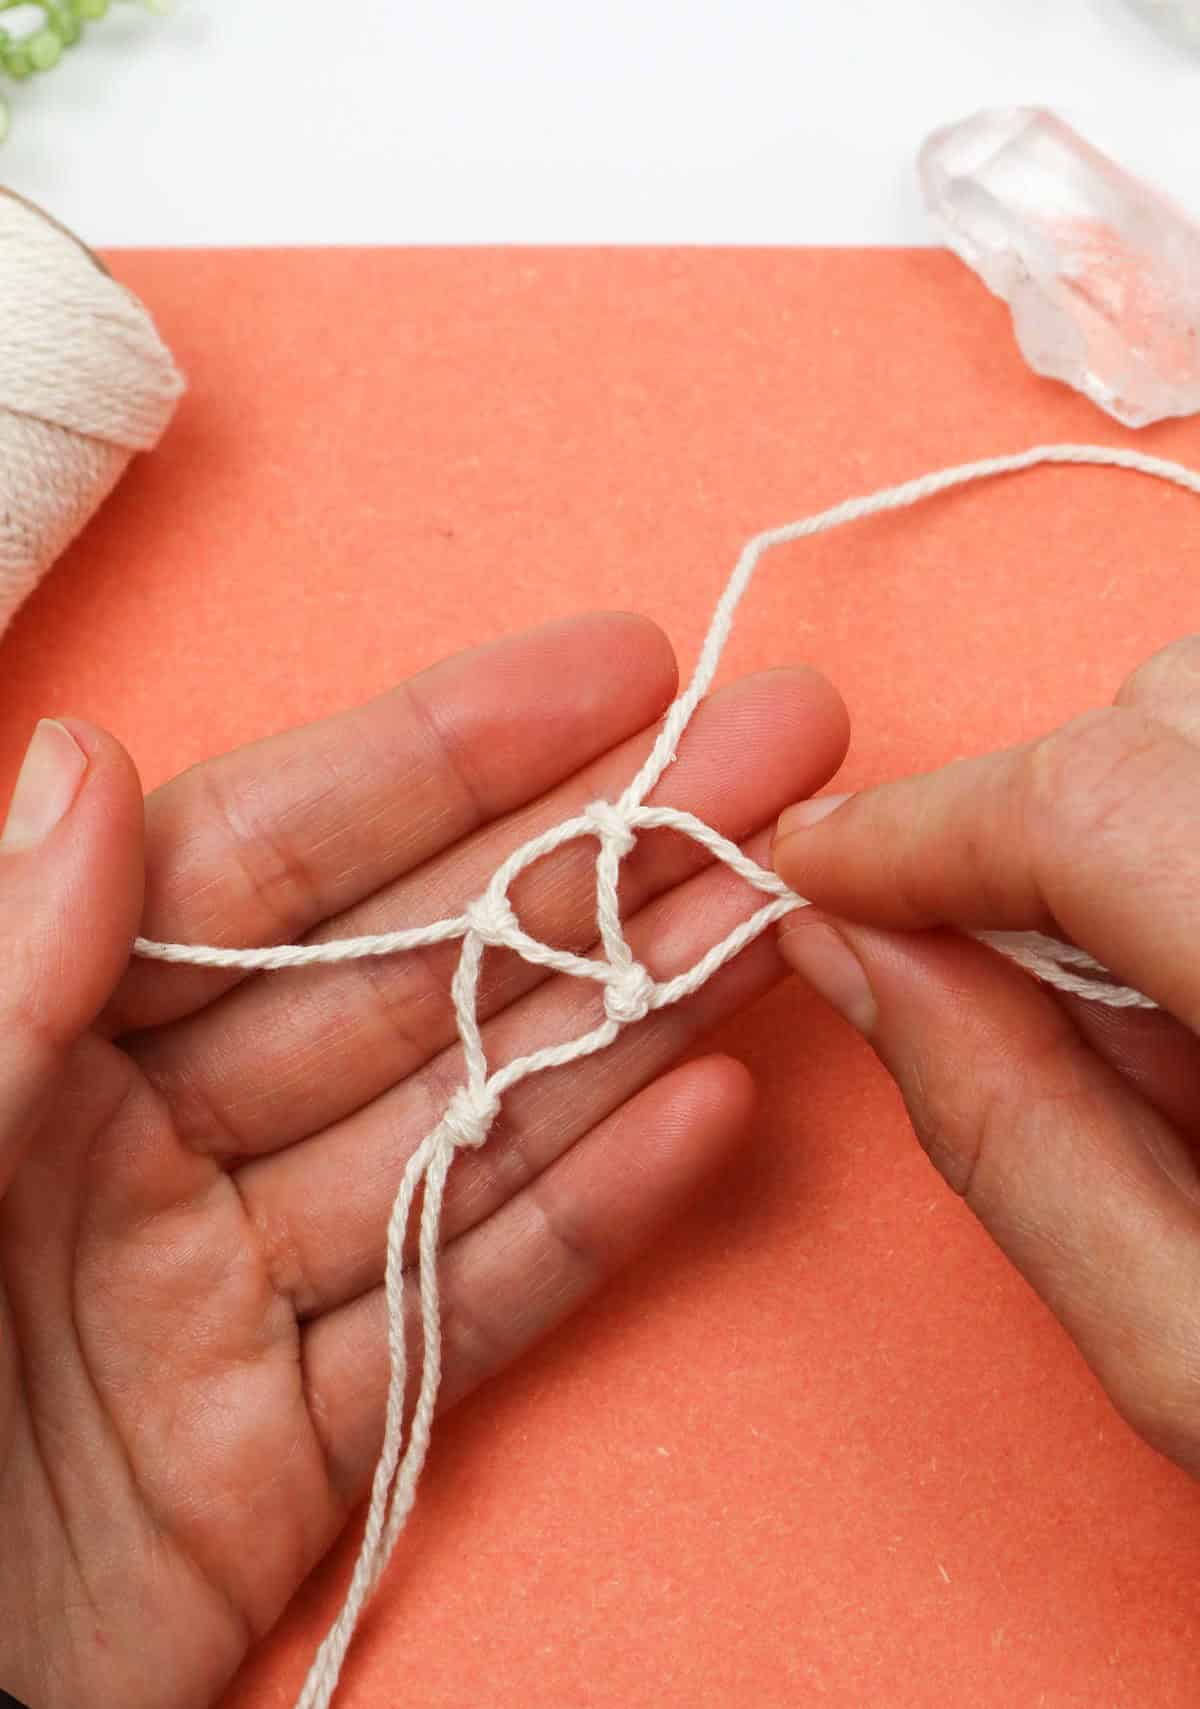
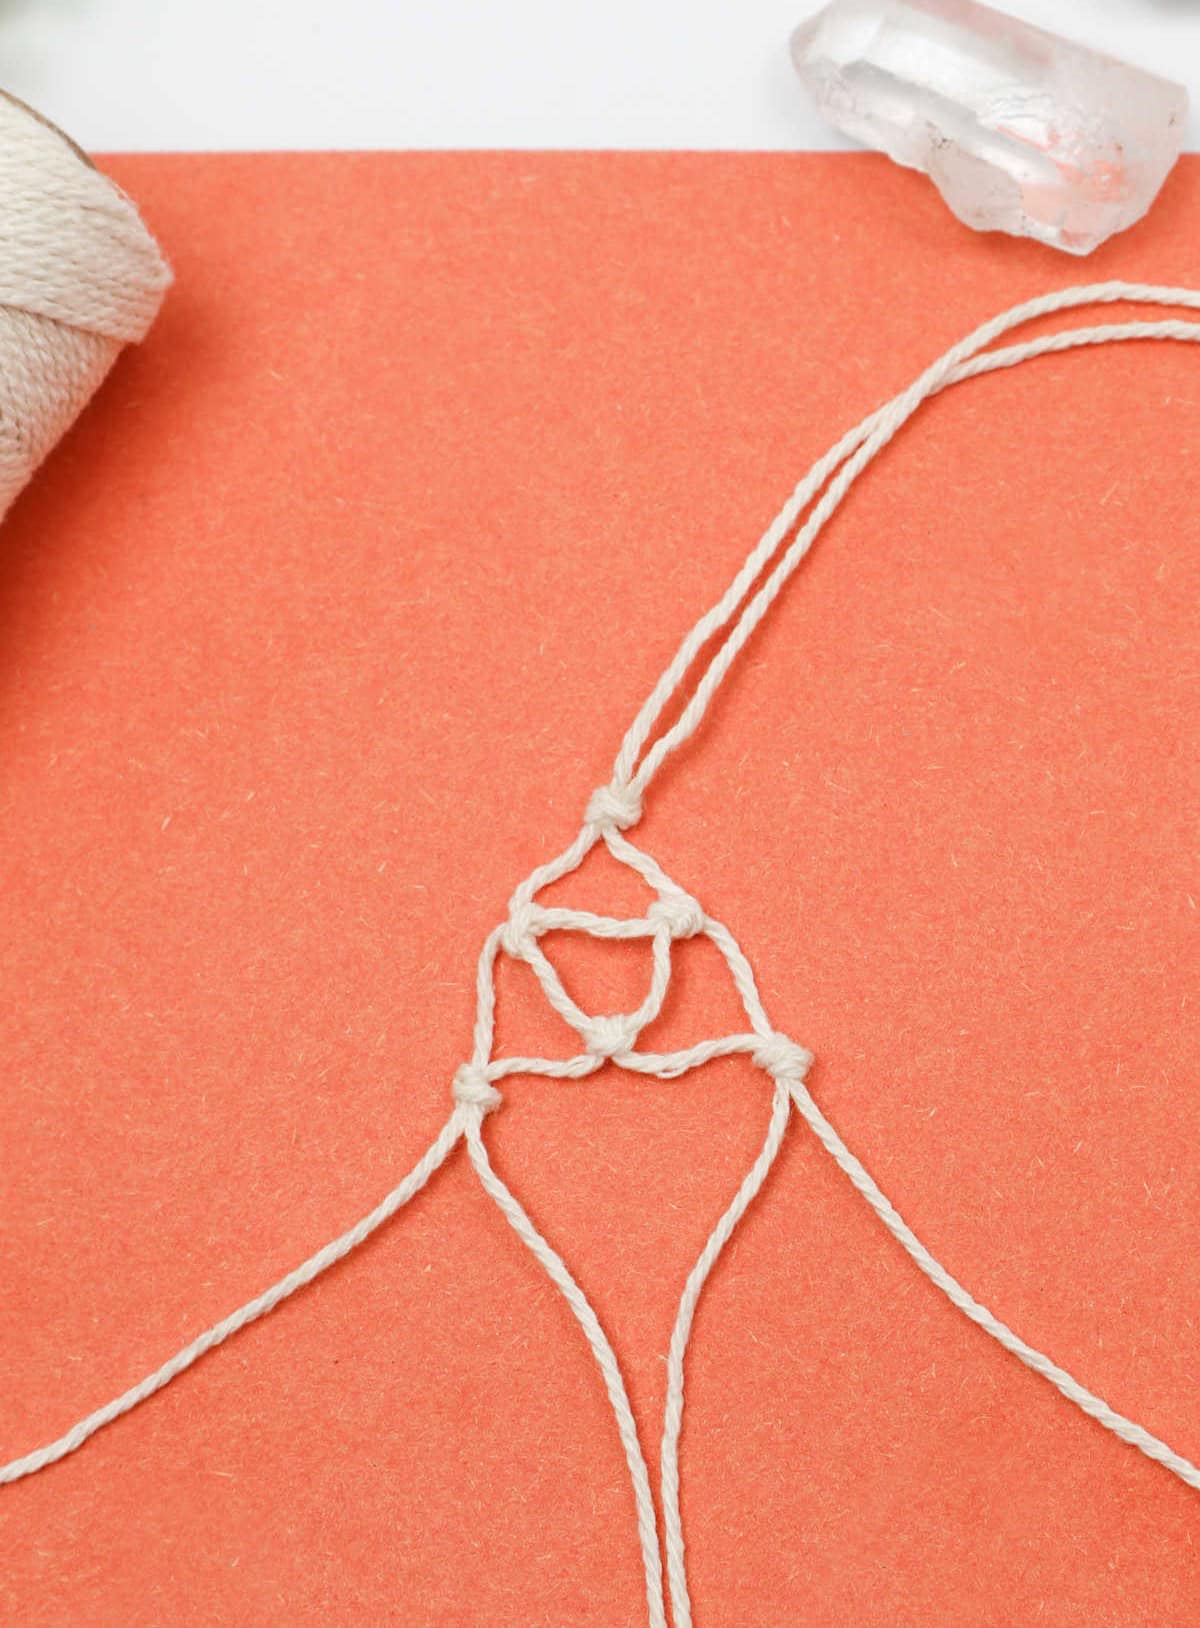
To secure your crystals, begin by creating a simple yet effective knot. This is an overhand knot, the same type you’d typically use when tying up two cords together. The key difference here is that you’ll be working with both cords simultaneously to accommodate the crystal’s unique shape and size. As you make the knot, ensure the crystal is properly seated within its bounds, taking care to adjust the measurement as needed. Once satisfied, set the knot aside for later use or storage.
Step 6
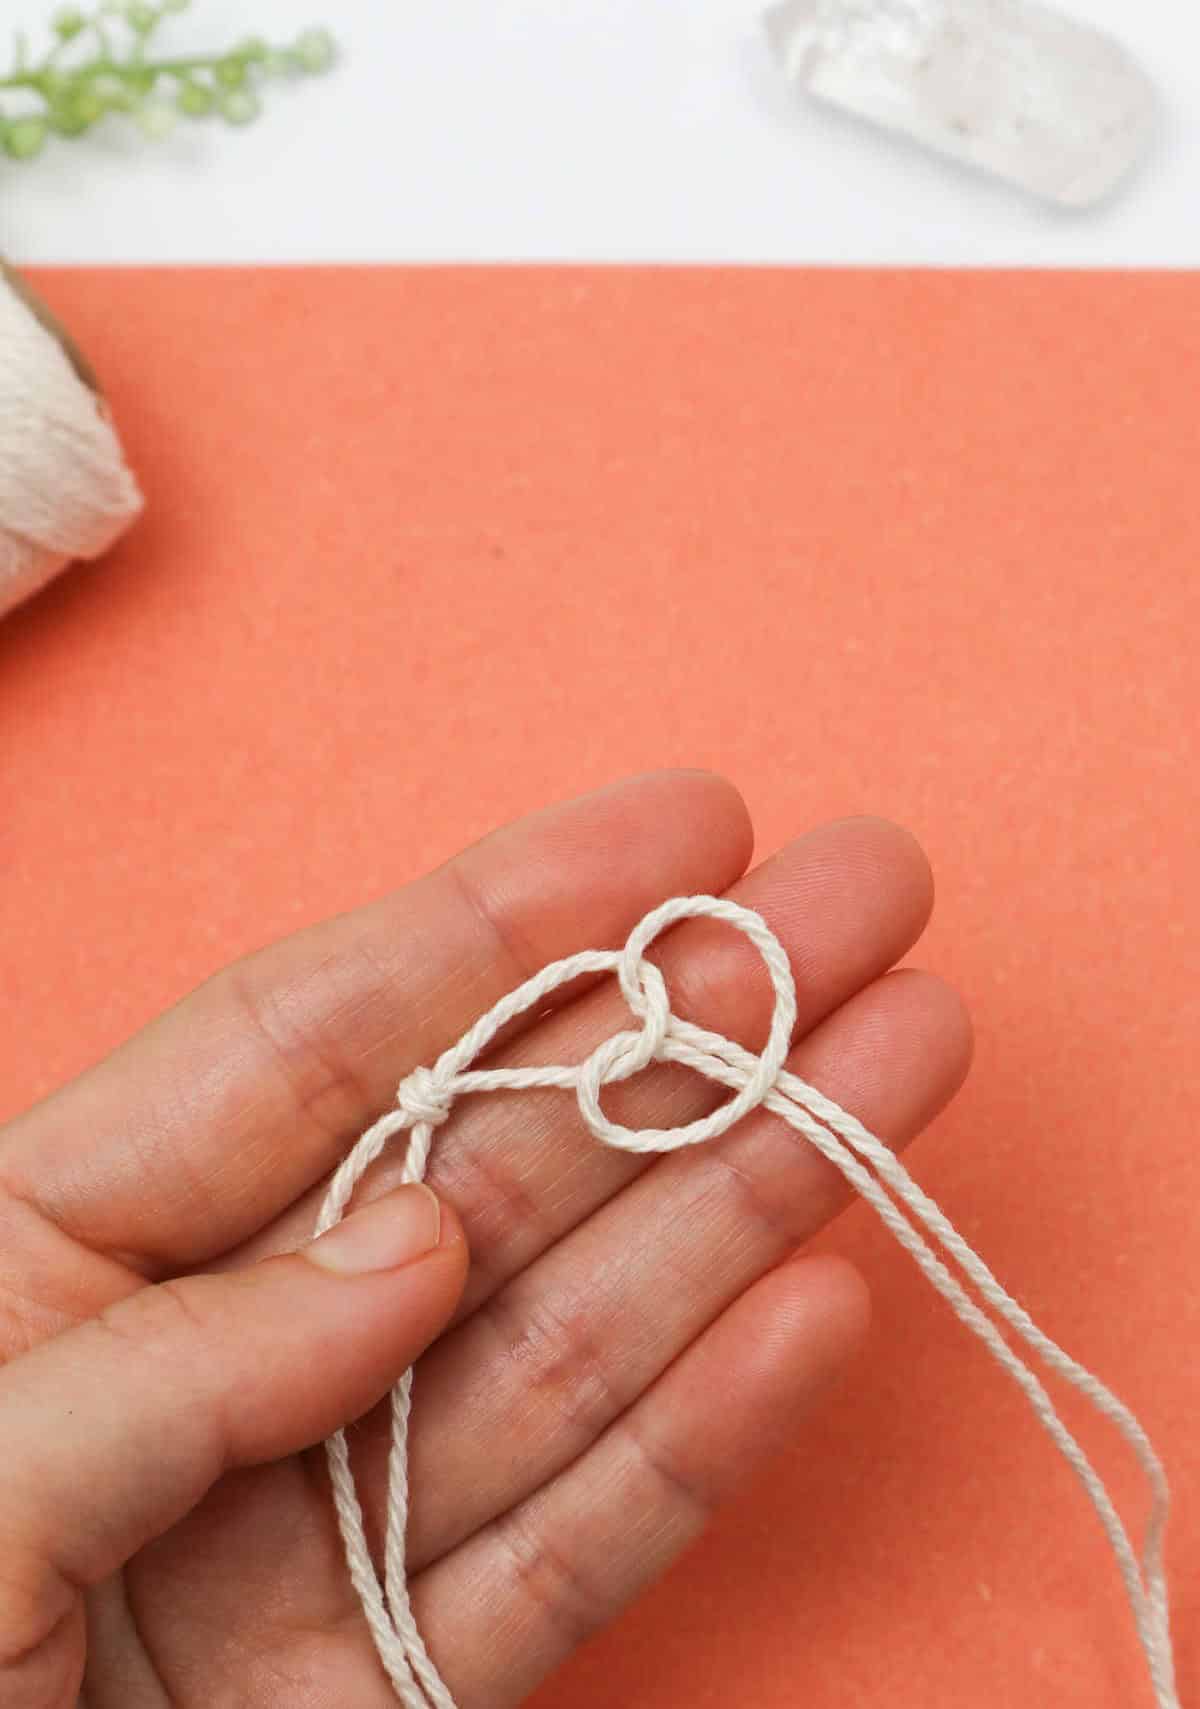
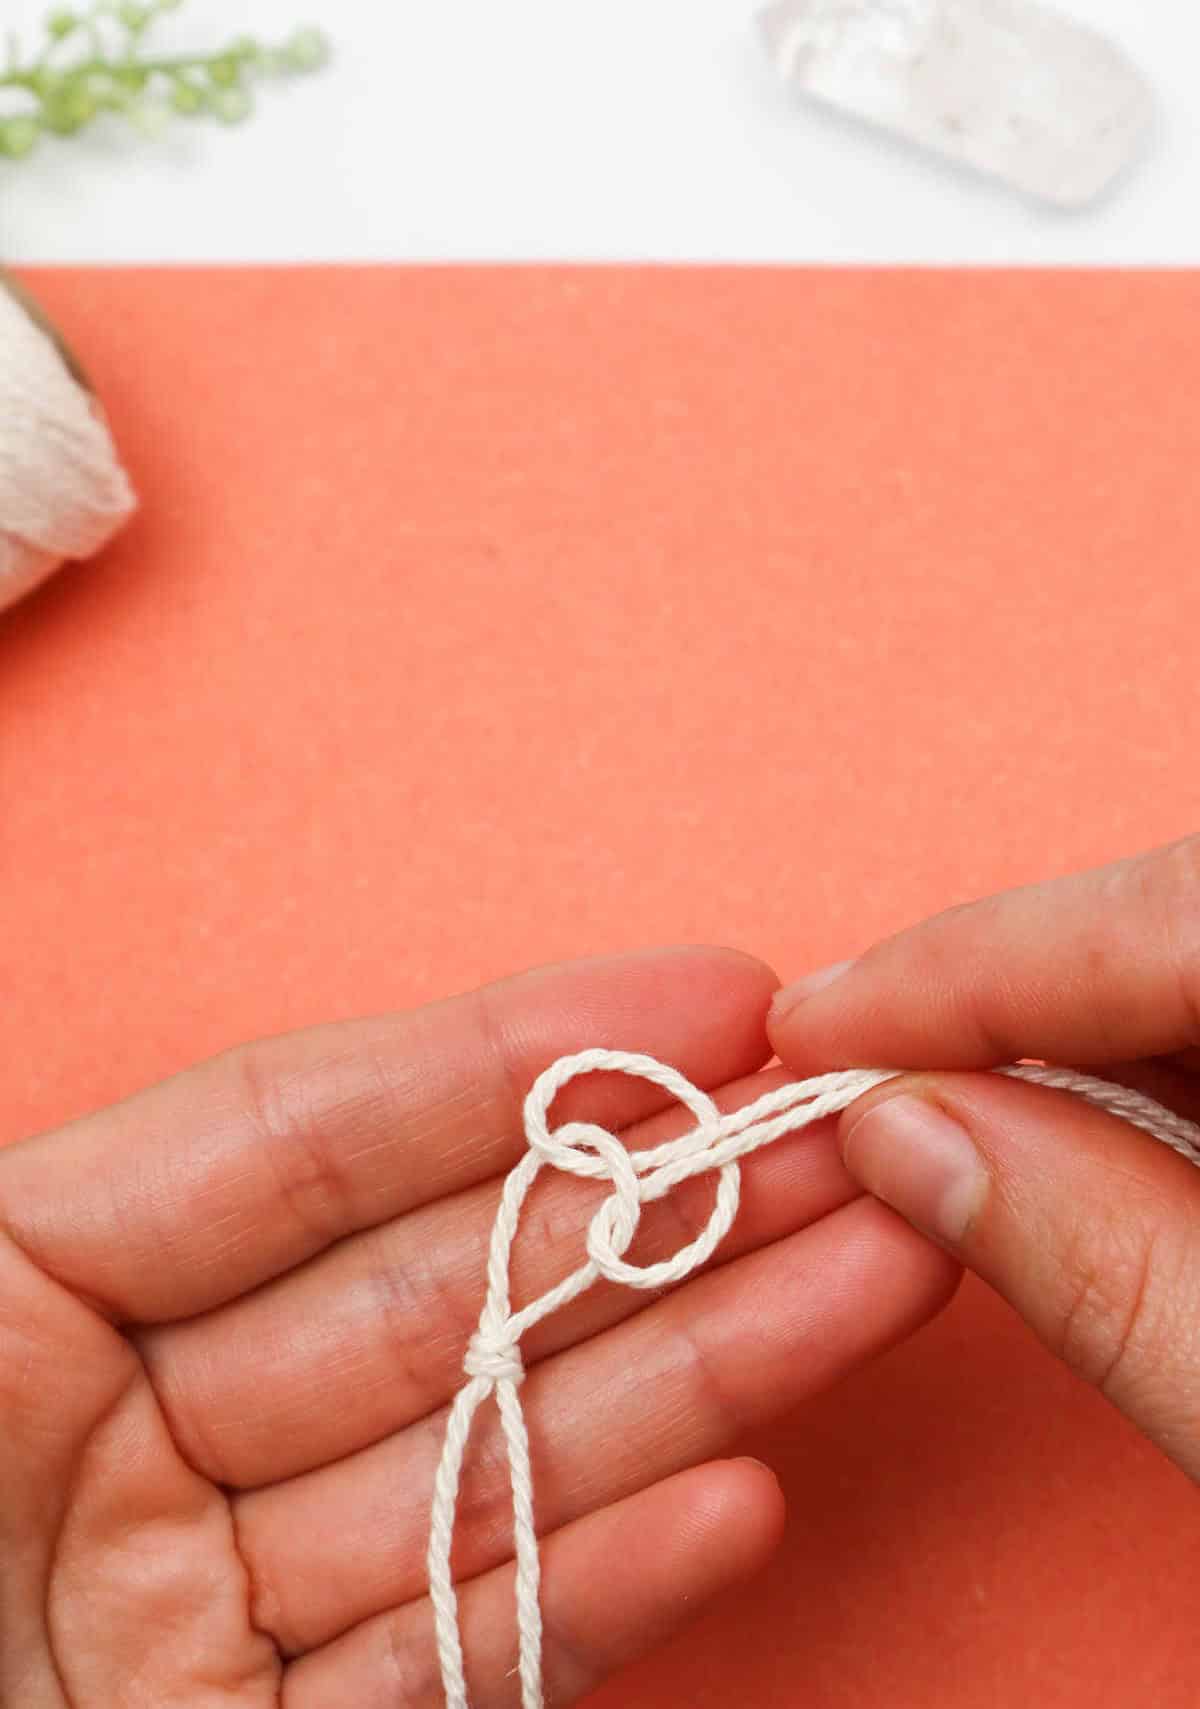
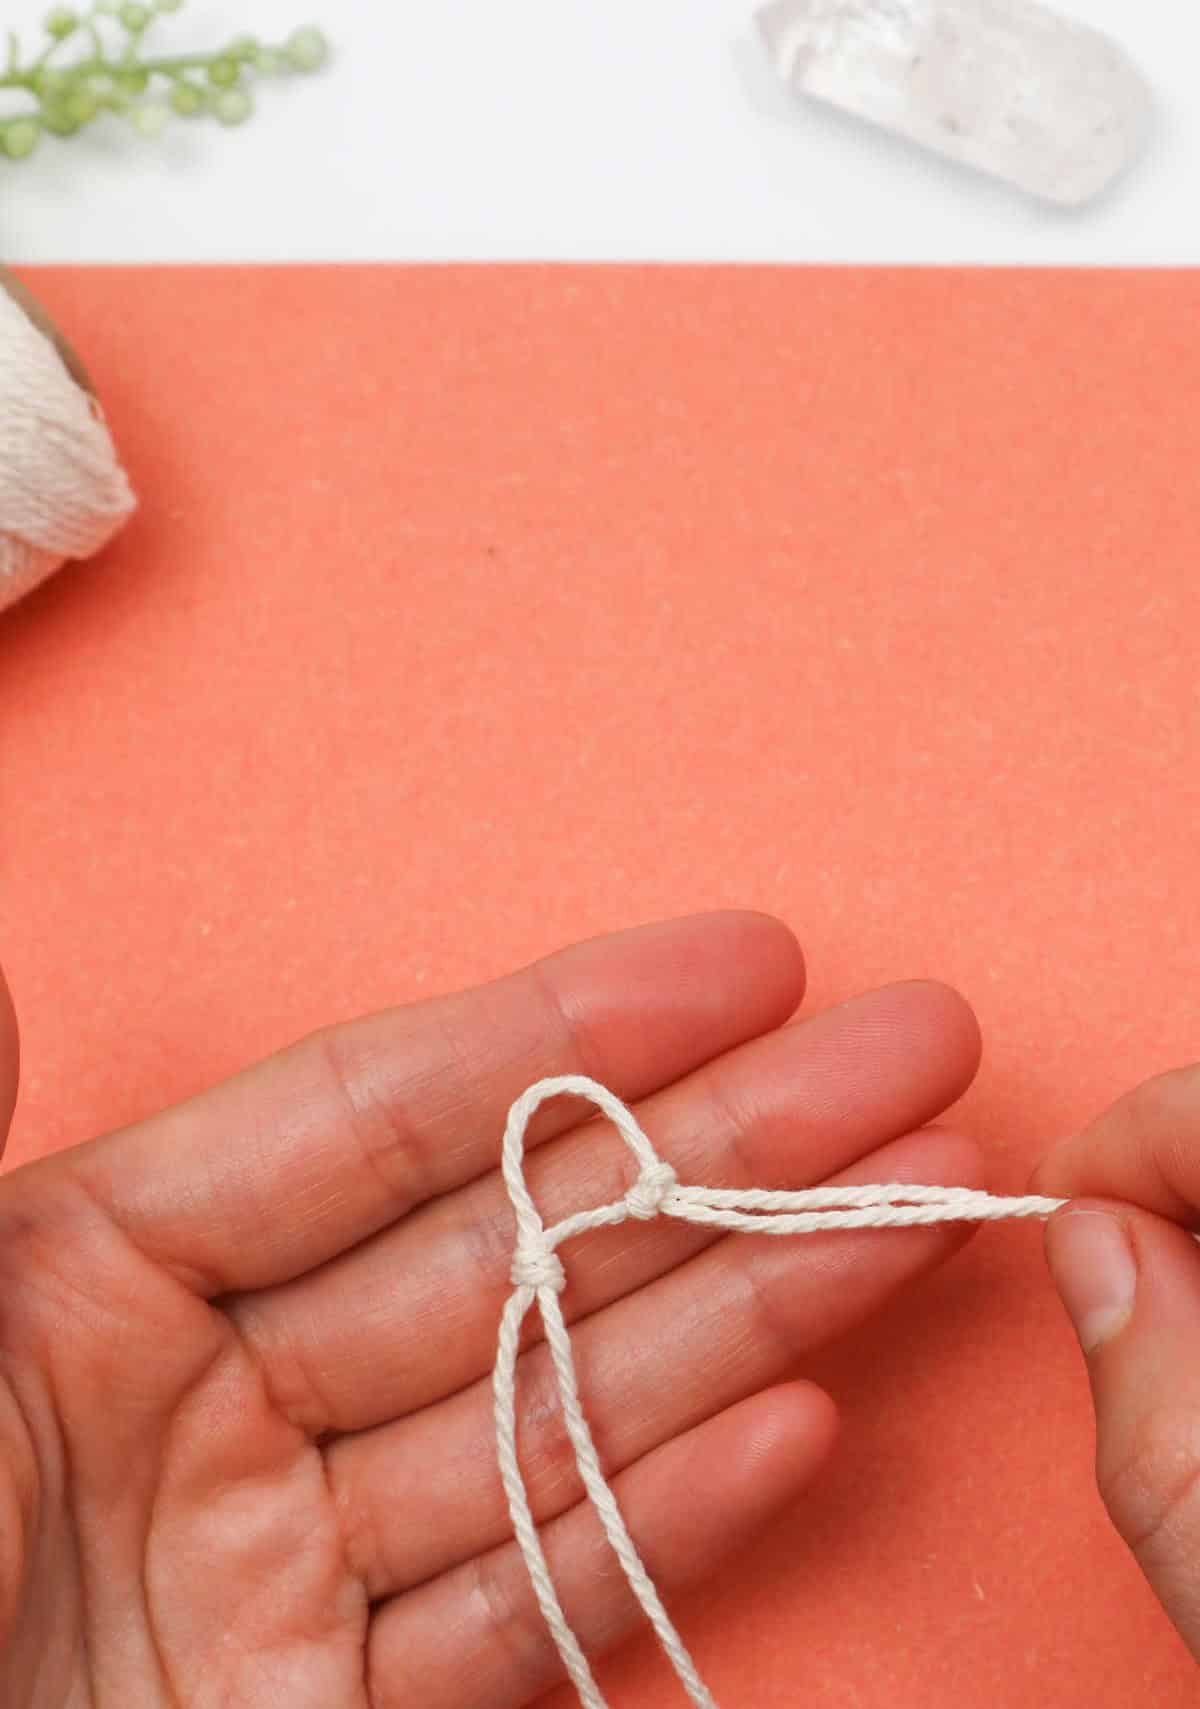
To complete the process, take the second cord and pull its loop through the initial knot’s loop, mirroring the earlier steps. Subsequently, grasp the loose ends of both cords and pass them through the newly formed loop, creating a second knot. Ensure that there is sufficient space between the three knots to accommodate another turn, aiming for an even spacing throughout.
Once you’re satisfied with the positioning, tug gently but firmly to secure the knot on the first loop, resulting in a visually consistent appearance.
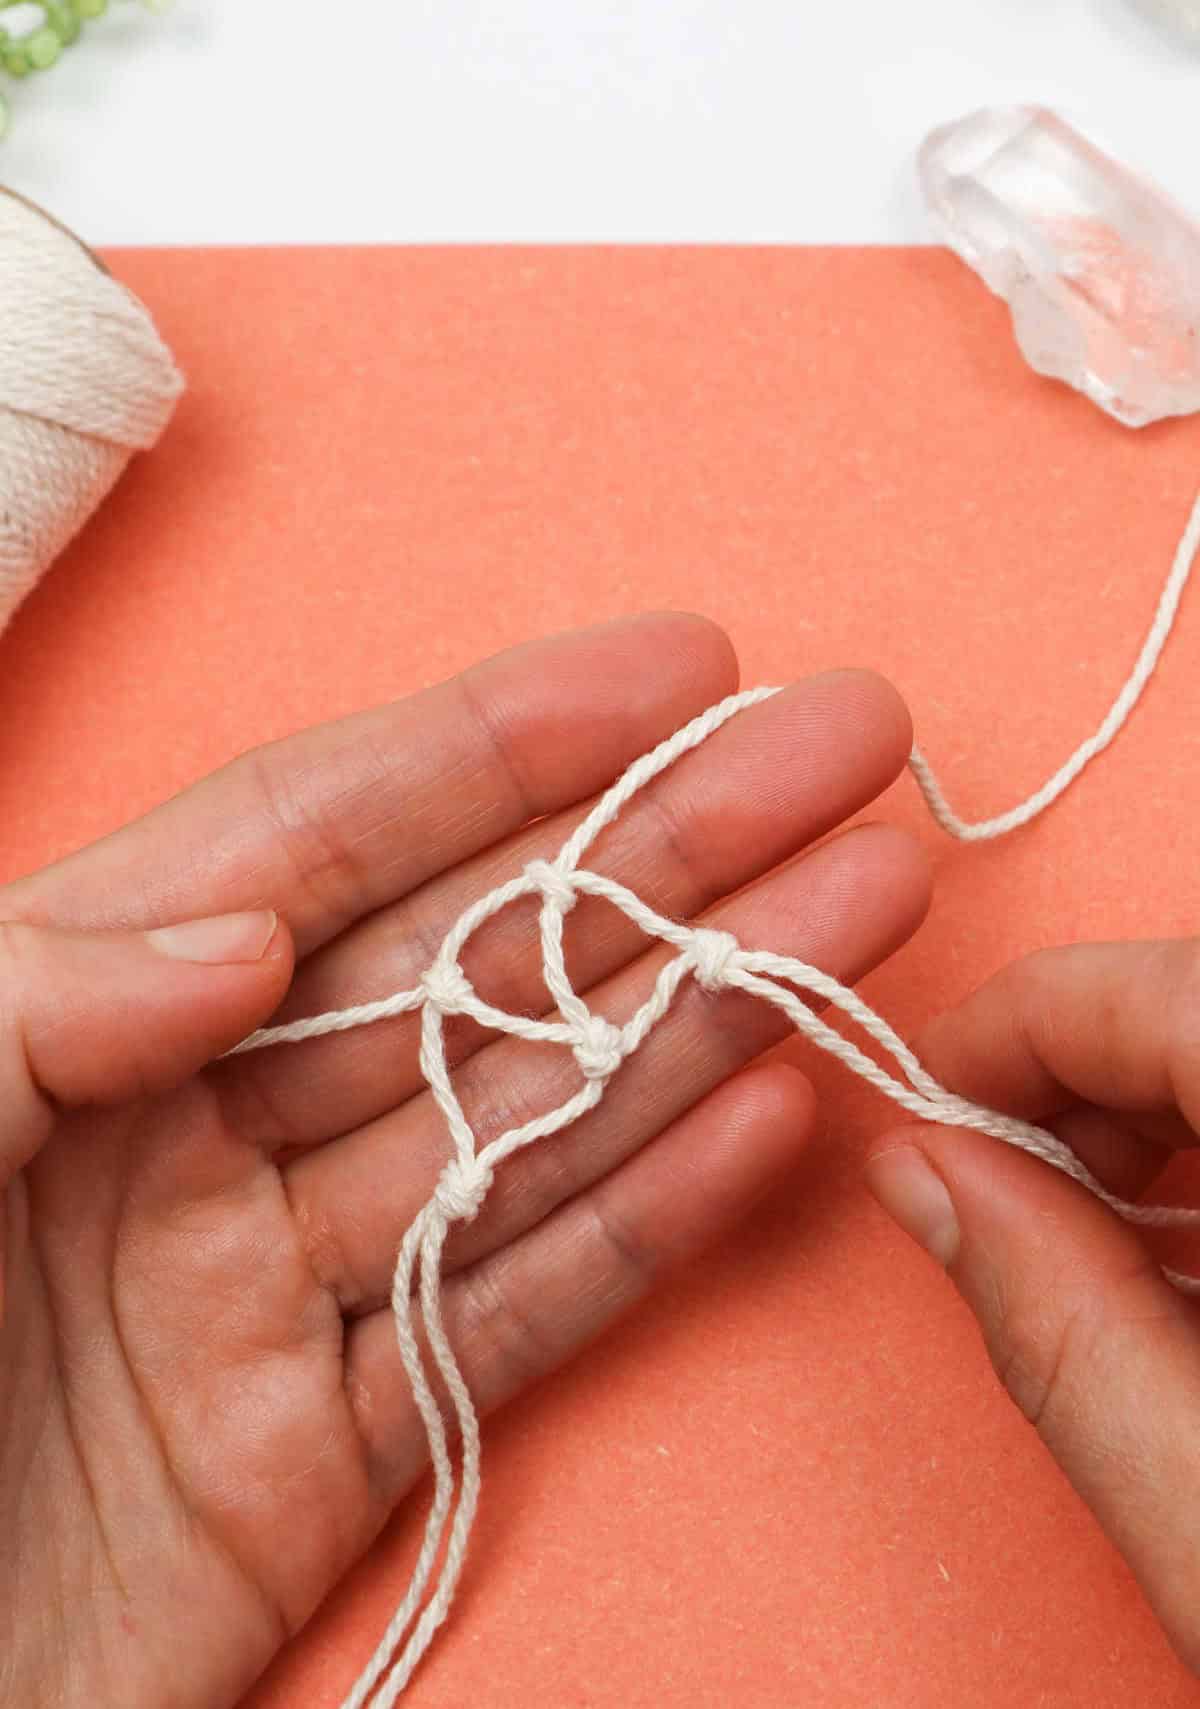
Step 7
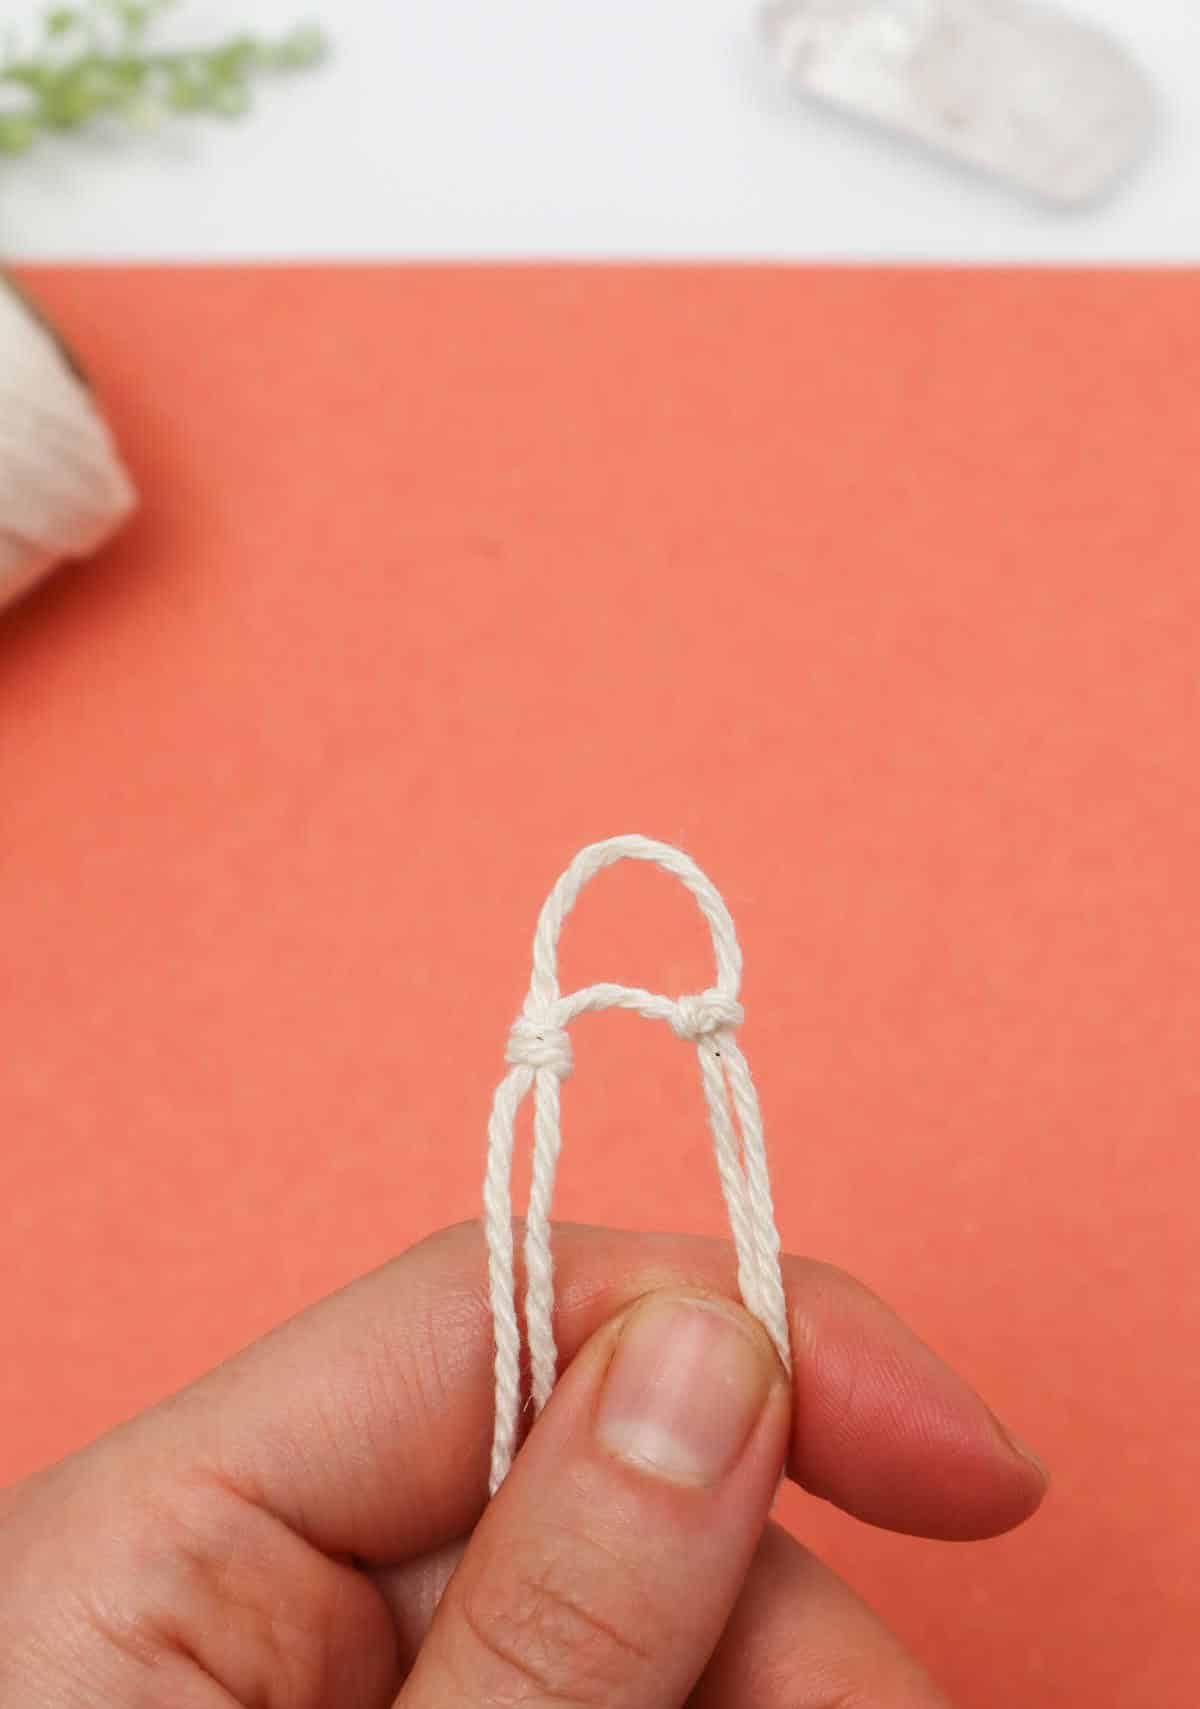
As you progress, grasp the third cord and meticulously follow the instructions to secure the final component of your crystal structure. The resulting triangular foundation will be a direct result of the precise manipulation of the previous two knots, which should now be in place.
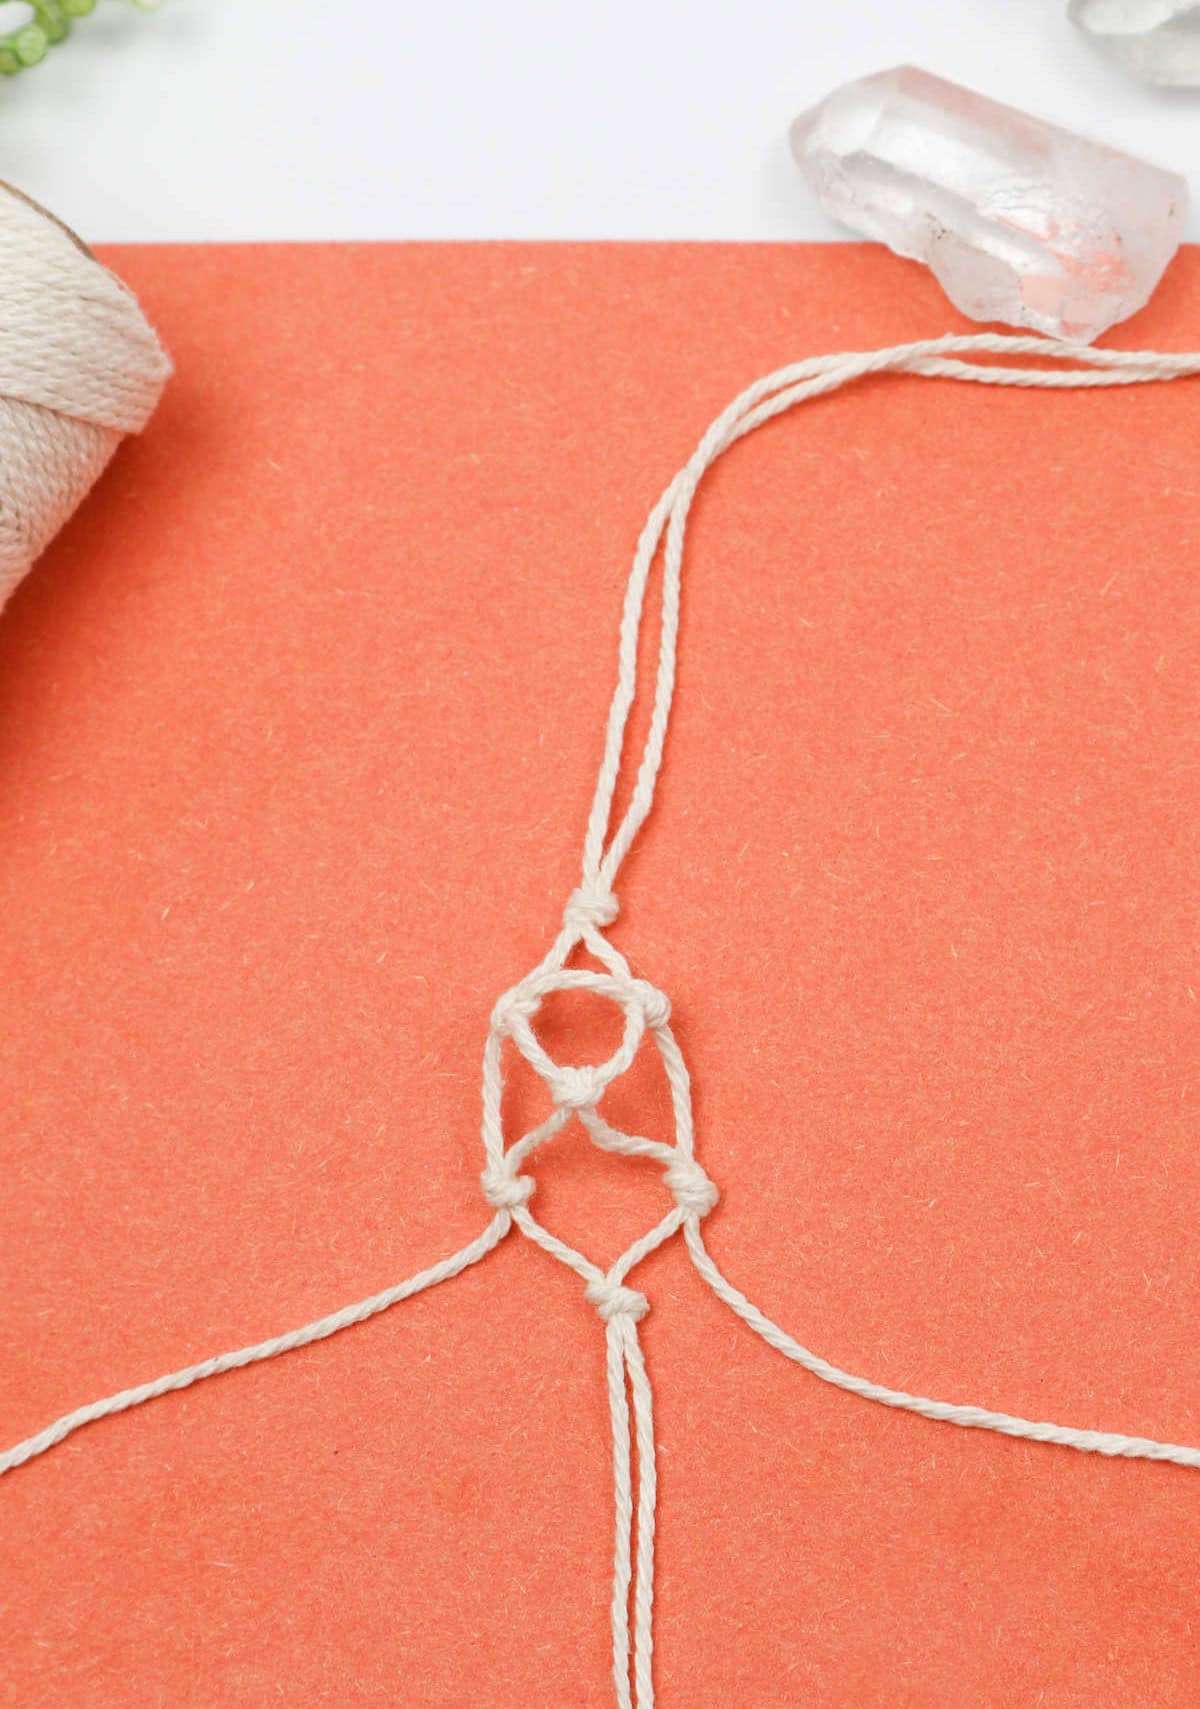
Step 8
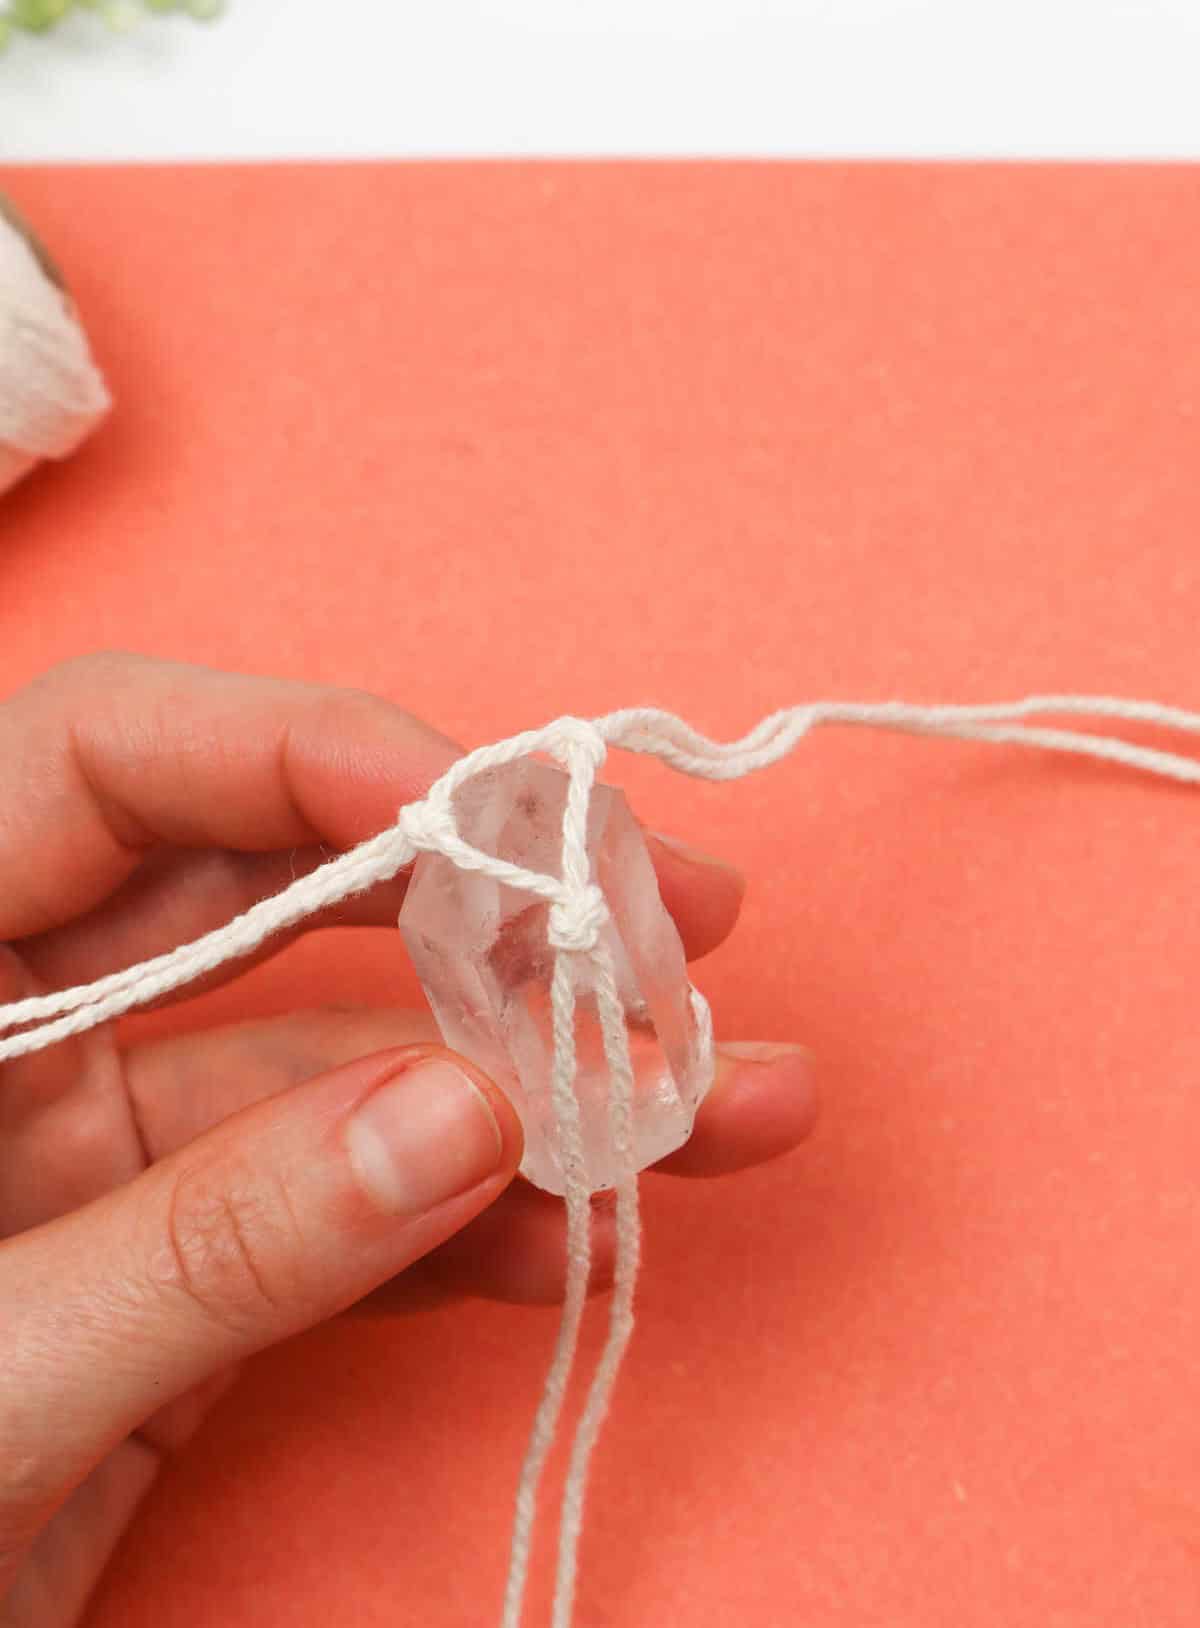
As you near completion of the knot-tying process, carefully position the crystal within the loop, ensuring a secure and comfortable fit. To maintain accuracy, continuously monitor the crystal’s positioning throughout the procedure.
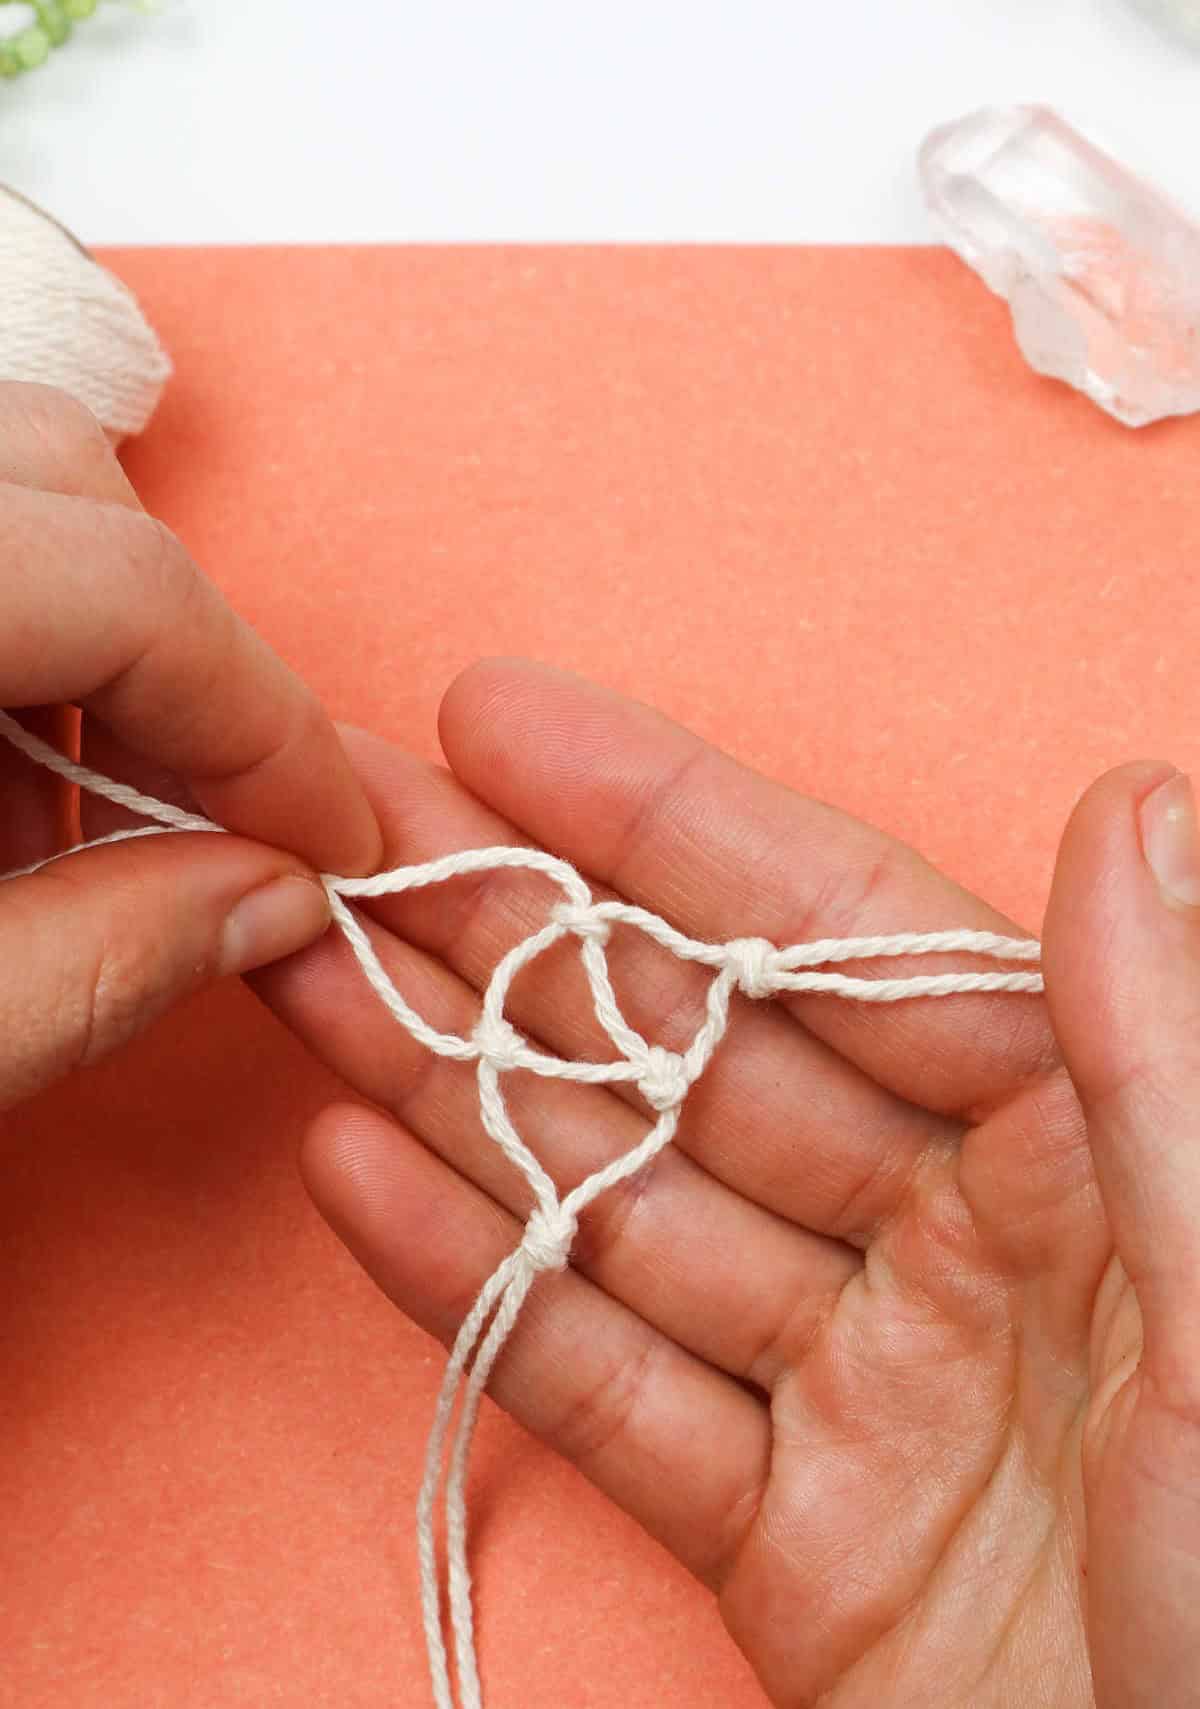
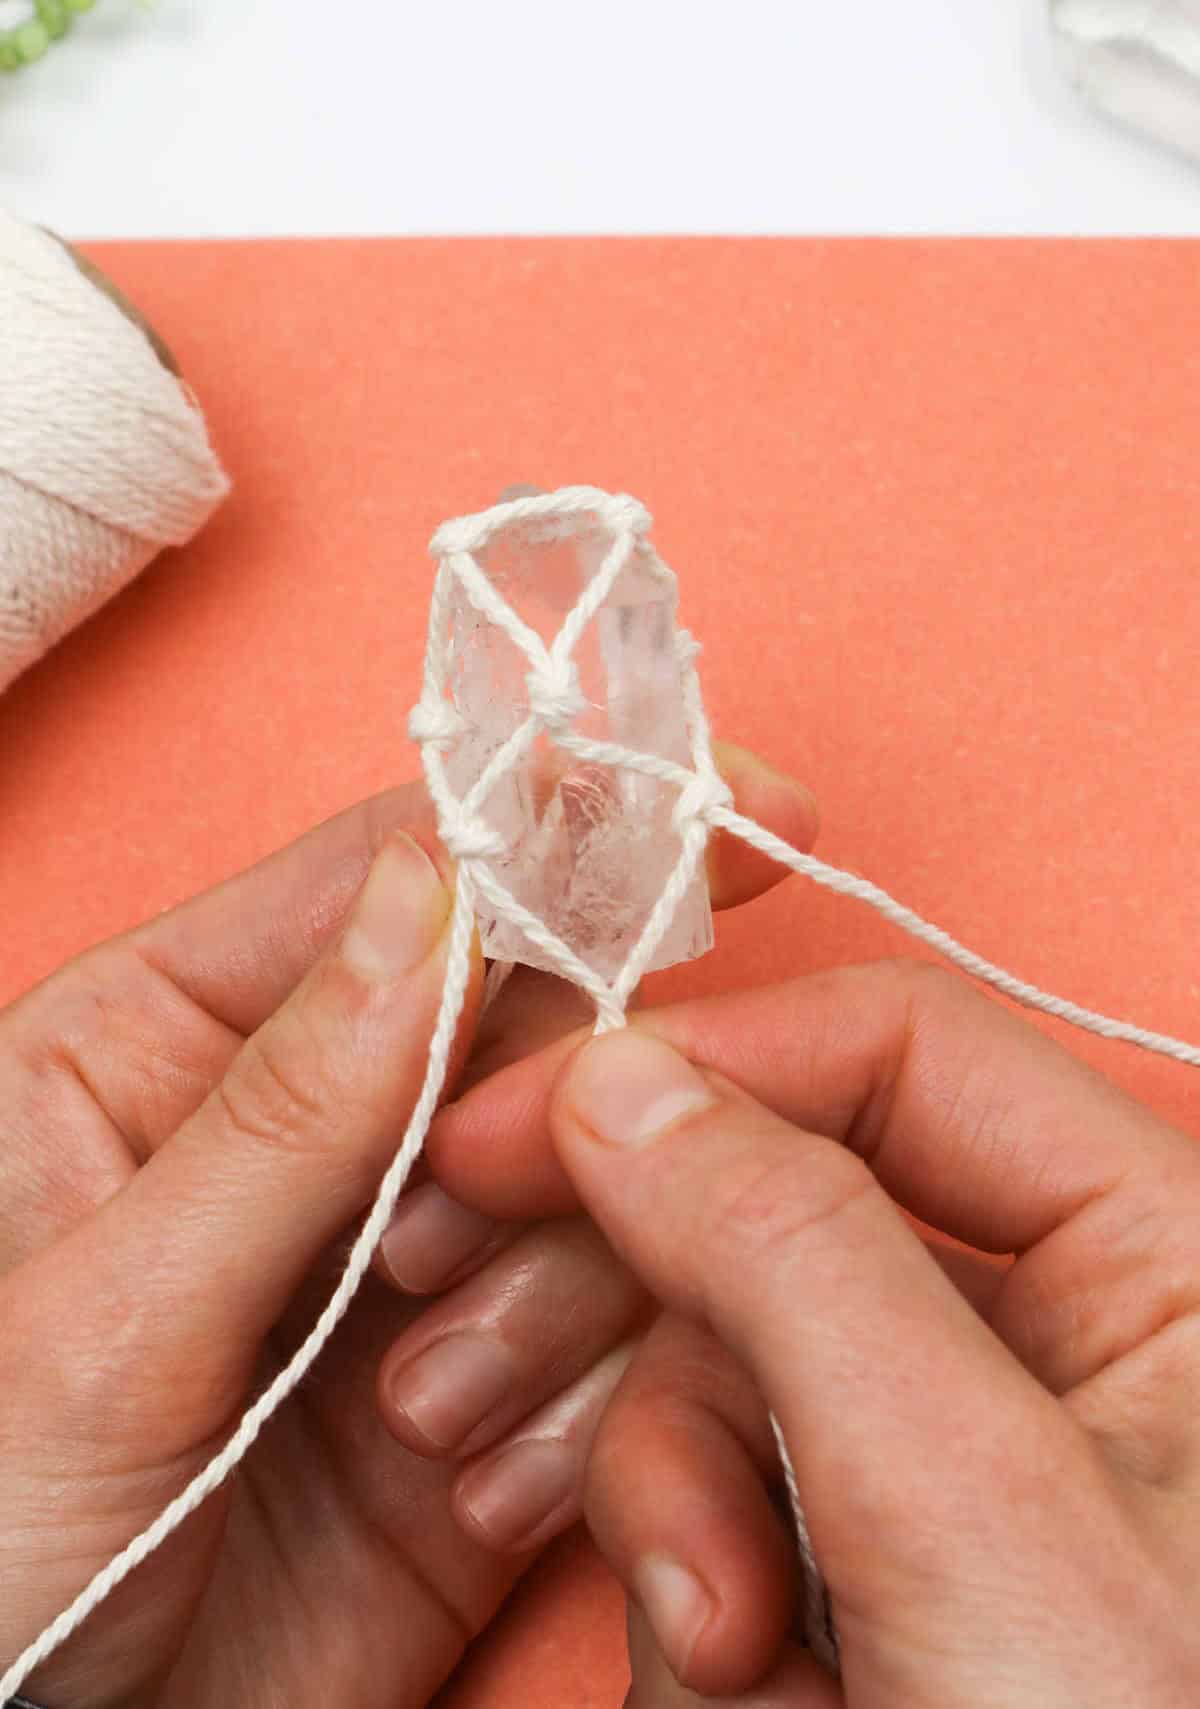
Step 9
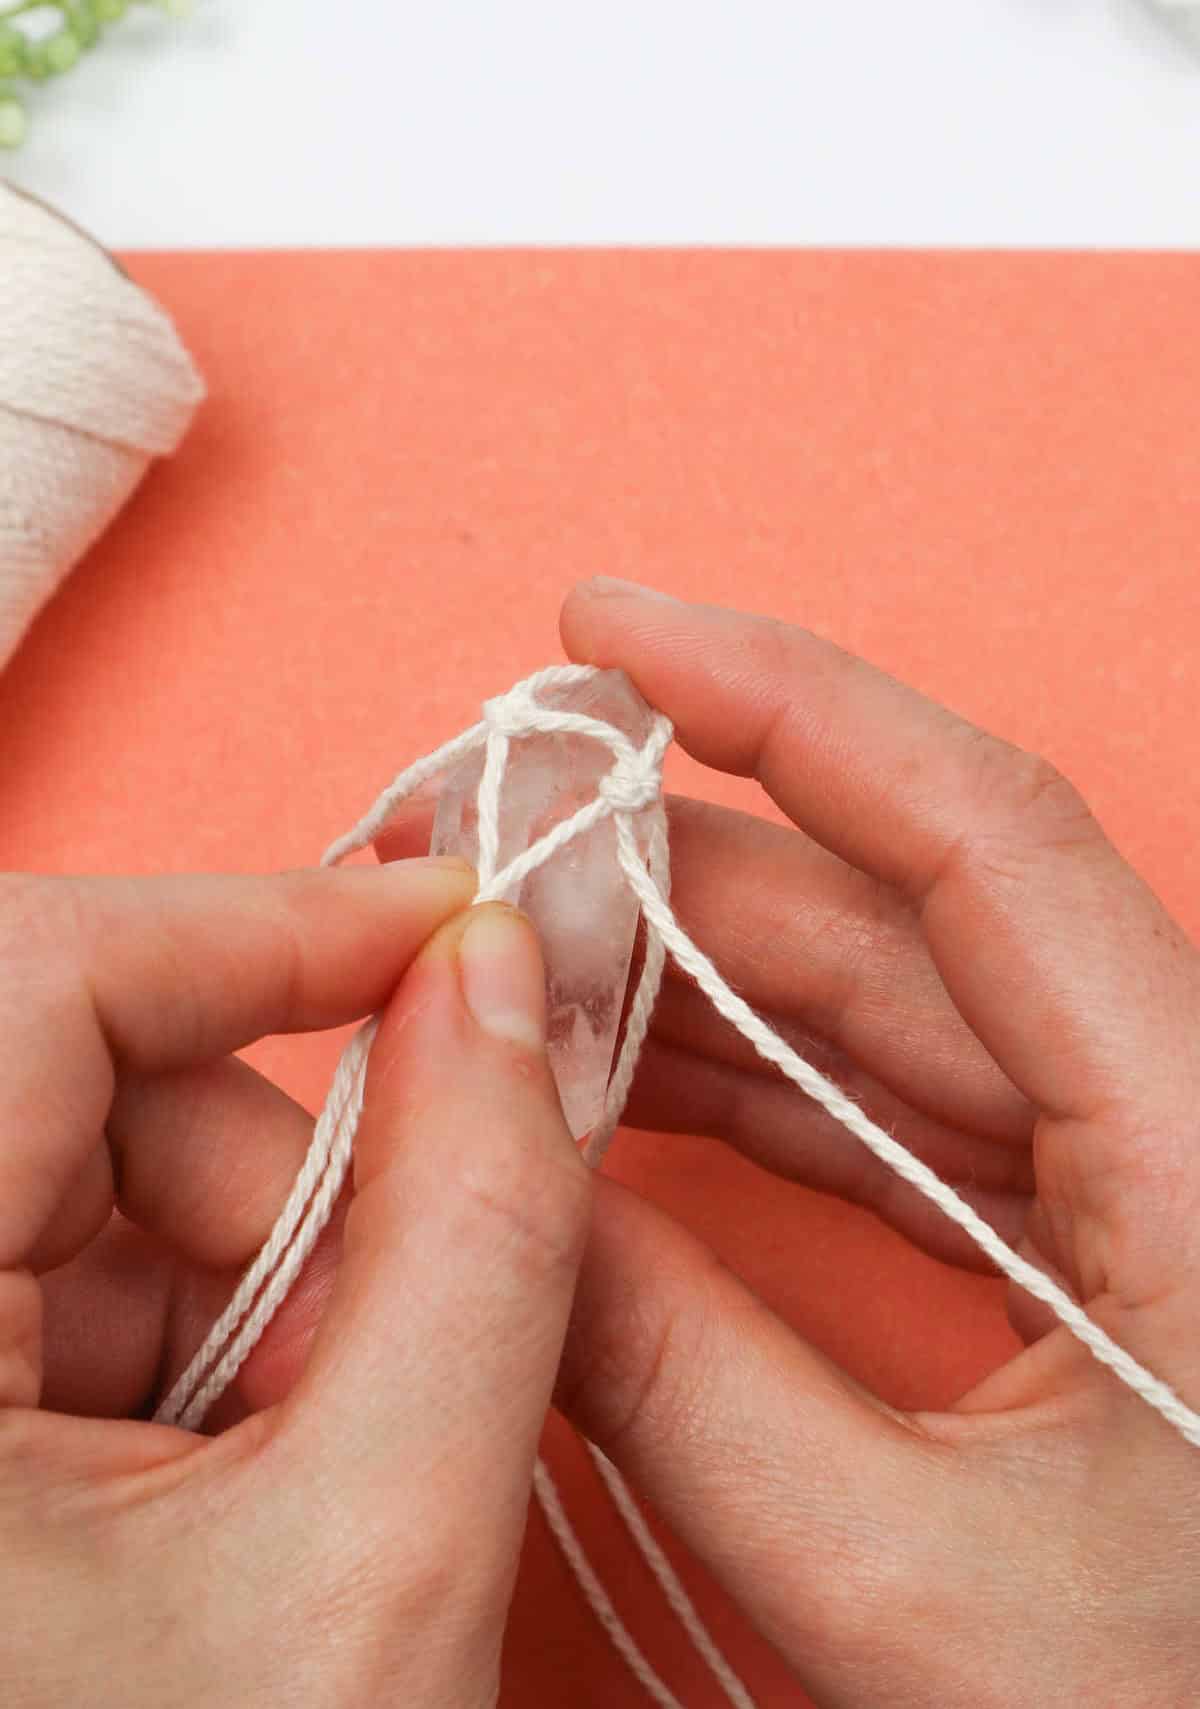
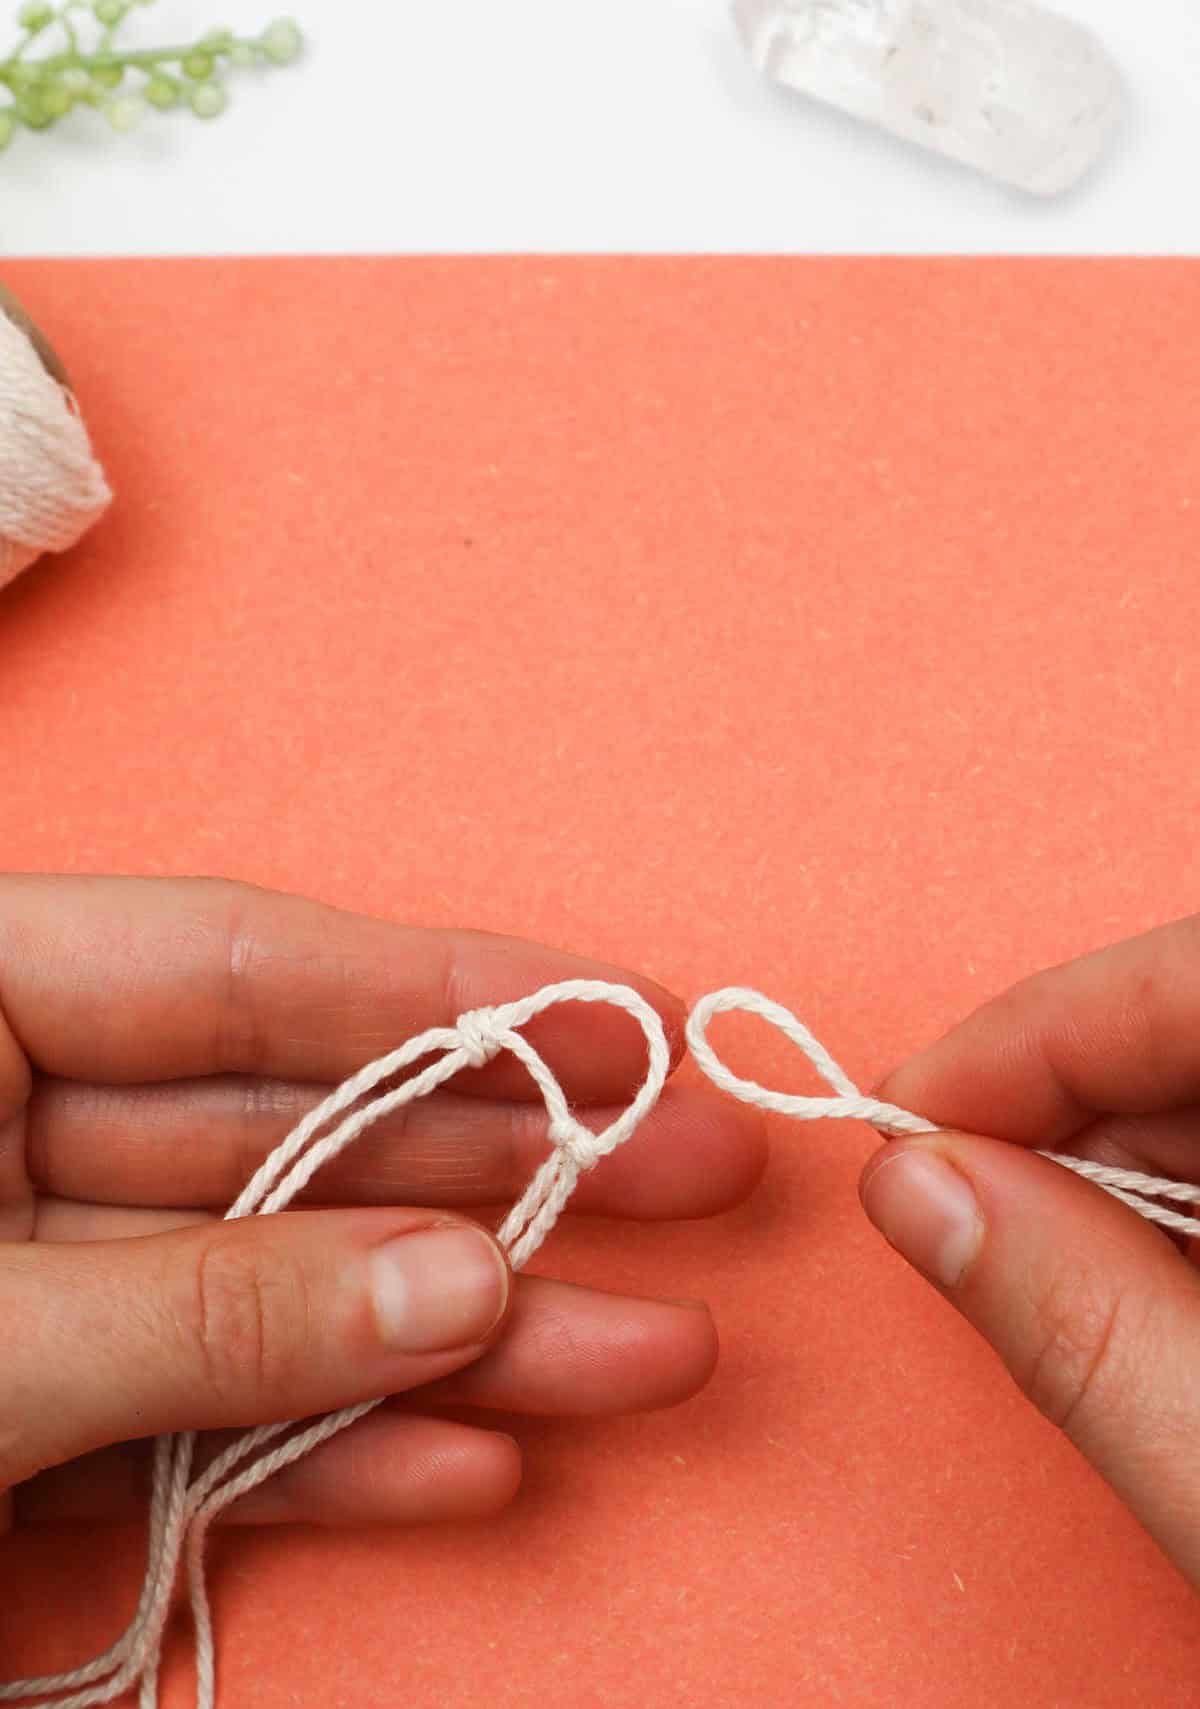
As you begin working on the netting around the crystal, start by combining one strand from the initial cord with another strand from a neighboring cord. Carefully bring them together, ensuring they meet at the desired point.
Next, tie these two cords into an overhand knot, much like the ones you’ve been practicing. The resulting knot should form a triangle of similar size to your original triangle. To achieve this, aim for the midpoint between the knots at the base of the combined cords.
For visual guidance, refer to the provided picture or consult your crystal for accurate sizing.
Step 10
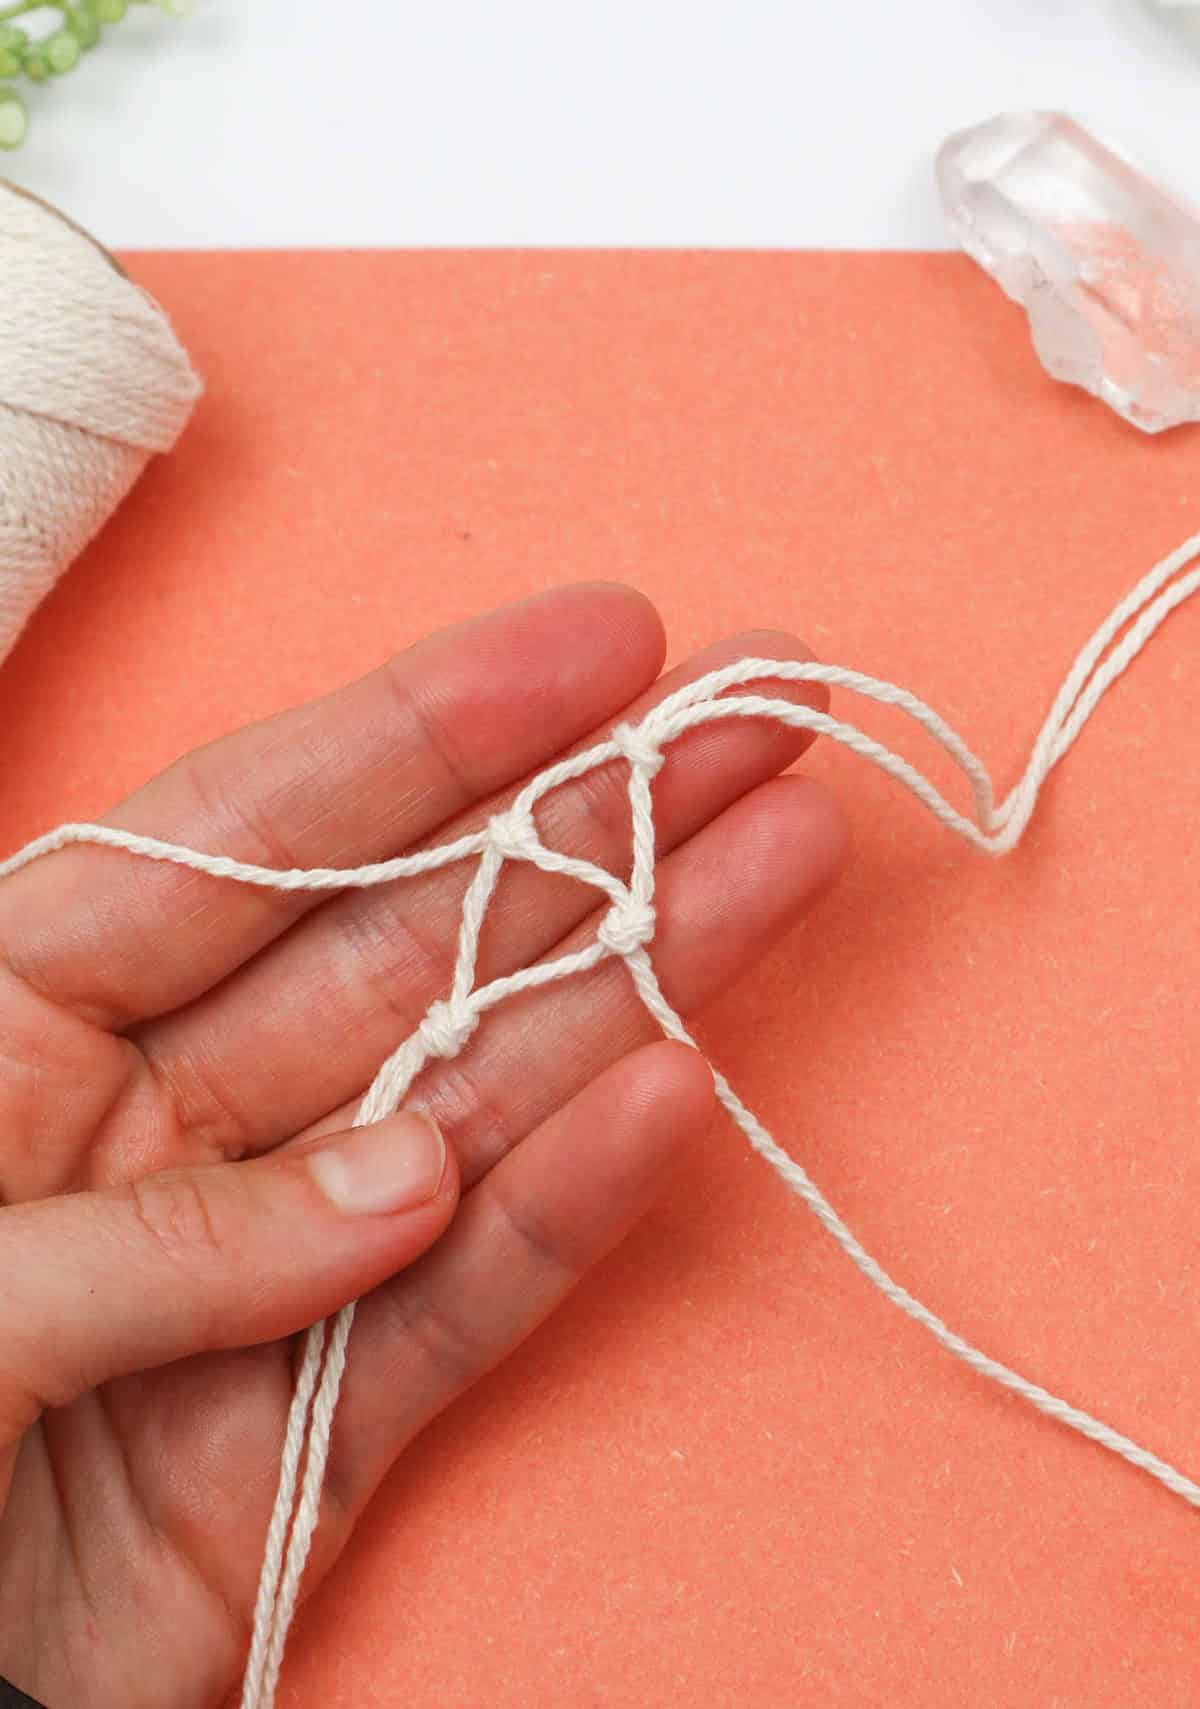
As you navigate this process, keep in mind that your starting point – the original triangle – will serve as a reference for the rest of your work. To create a new triangular shape, take the next set of cords and weave them together to form a third knot. This step-by-step approach ensures that every cord is accounted for and helps you maintain the overall structure of your project.
Step 11
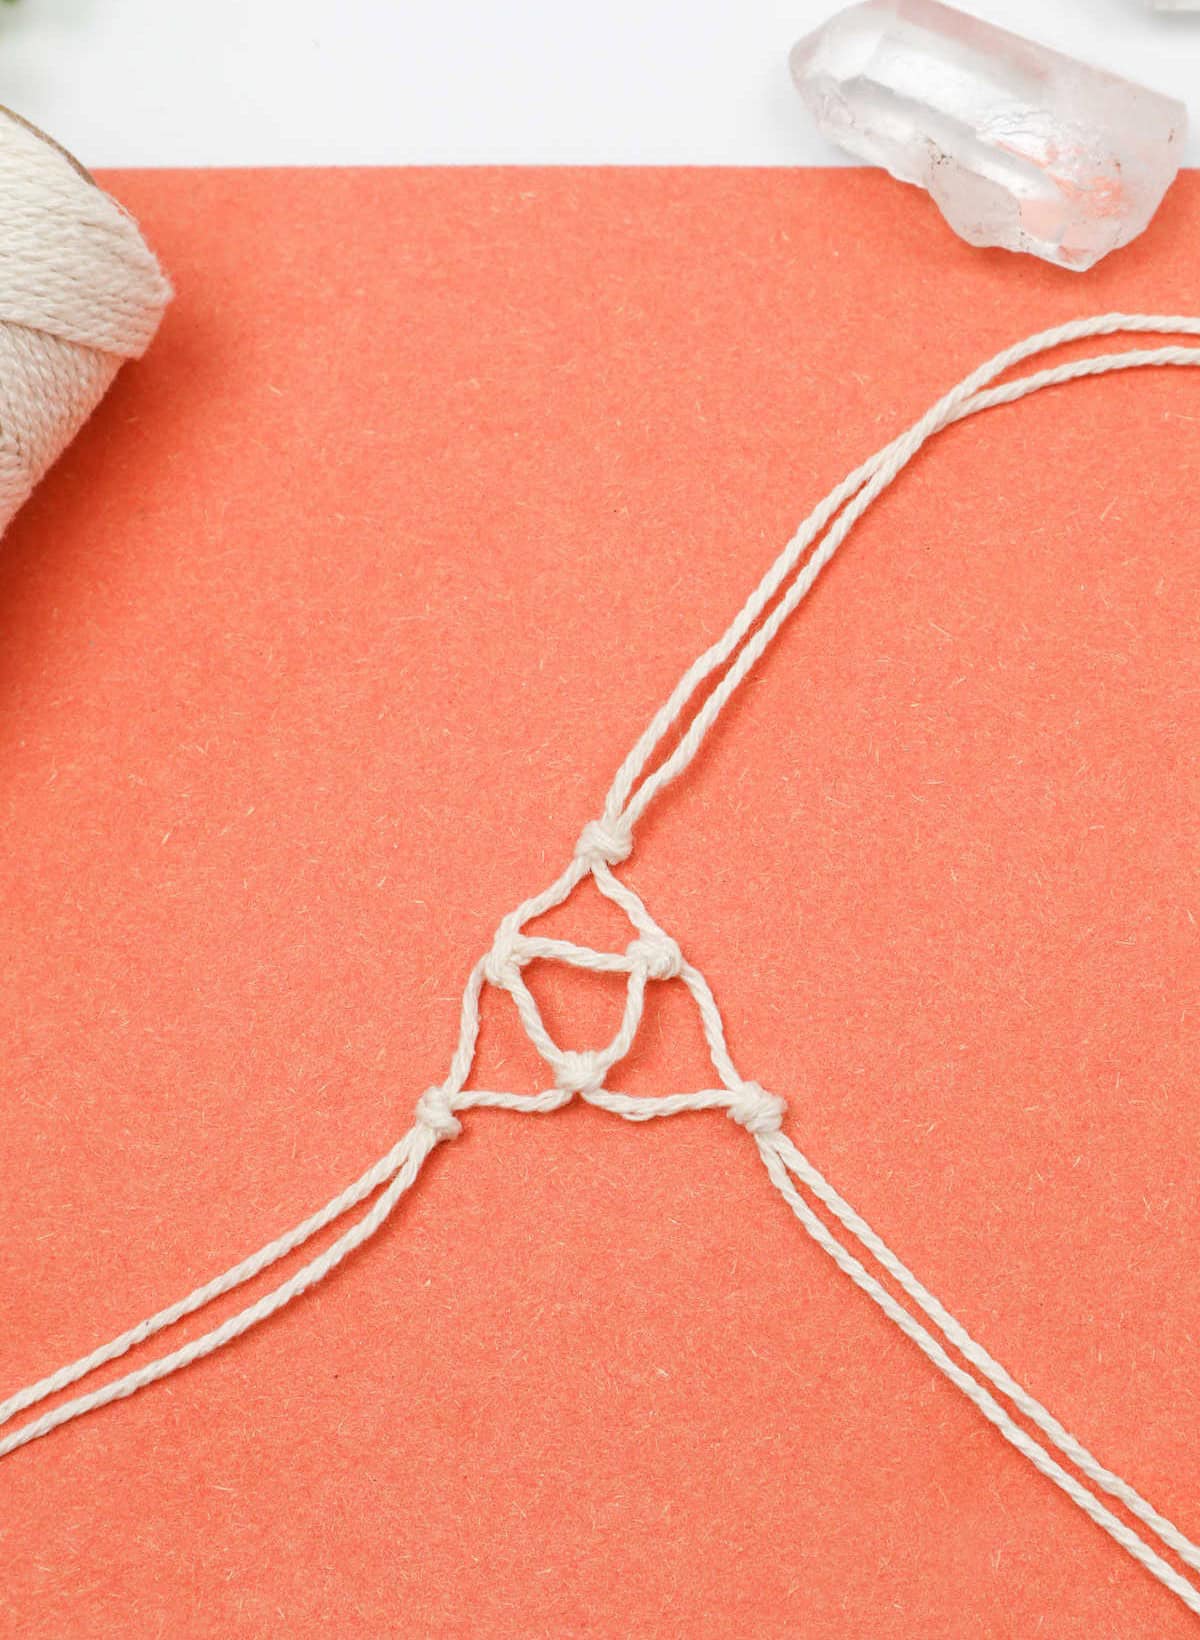
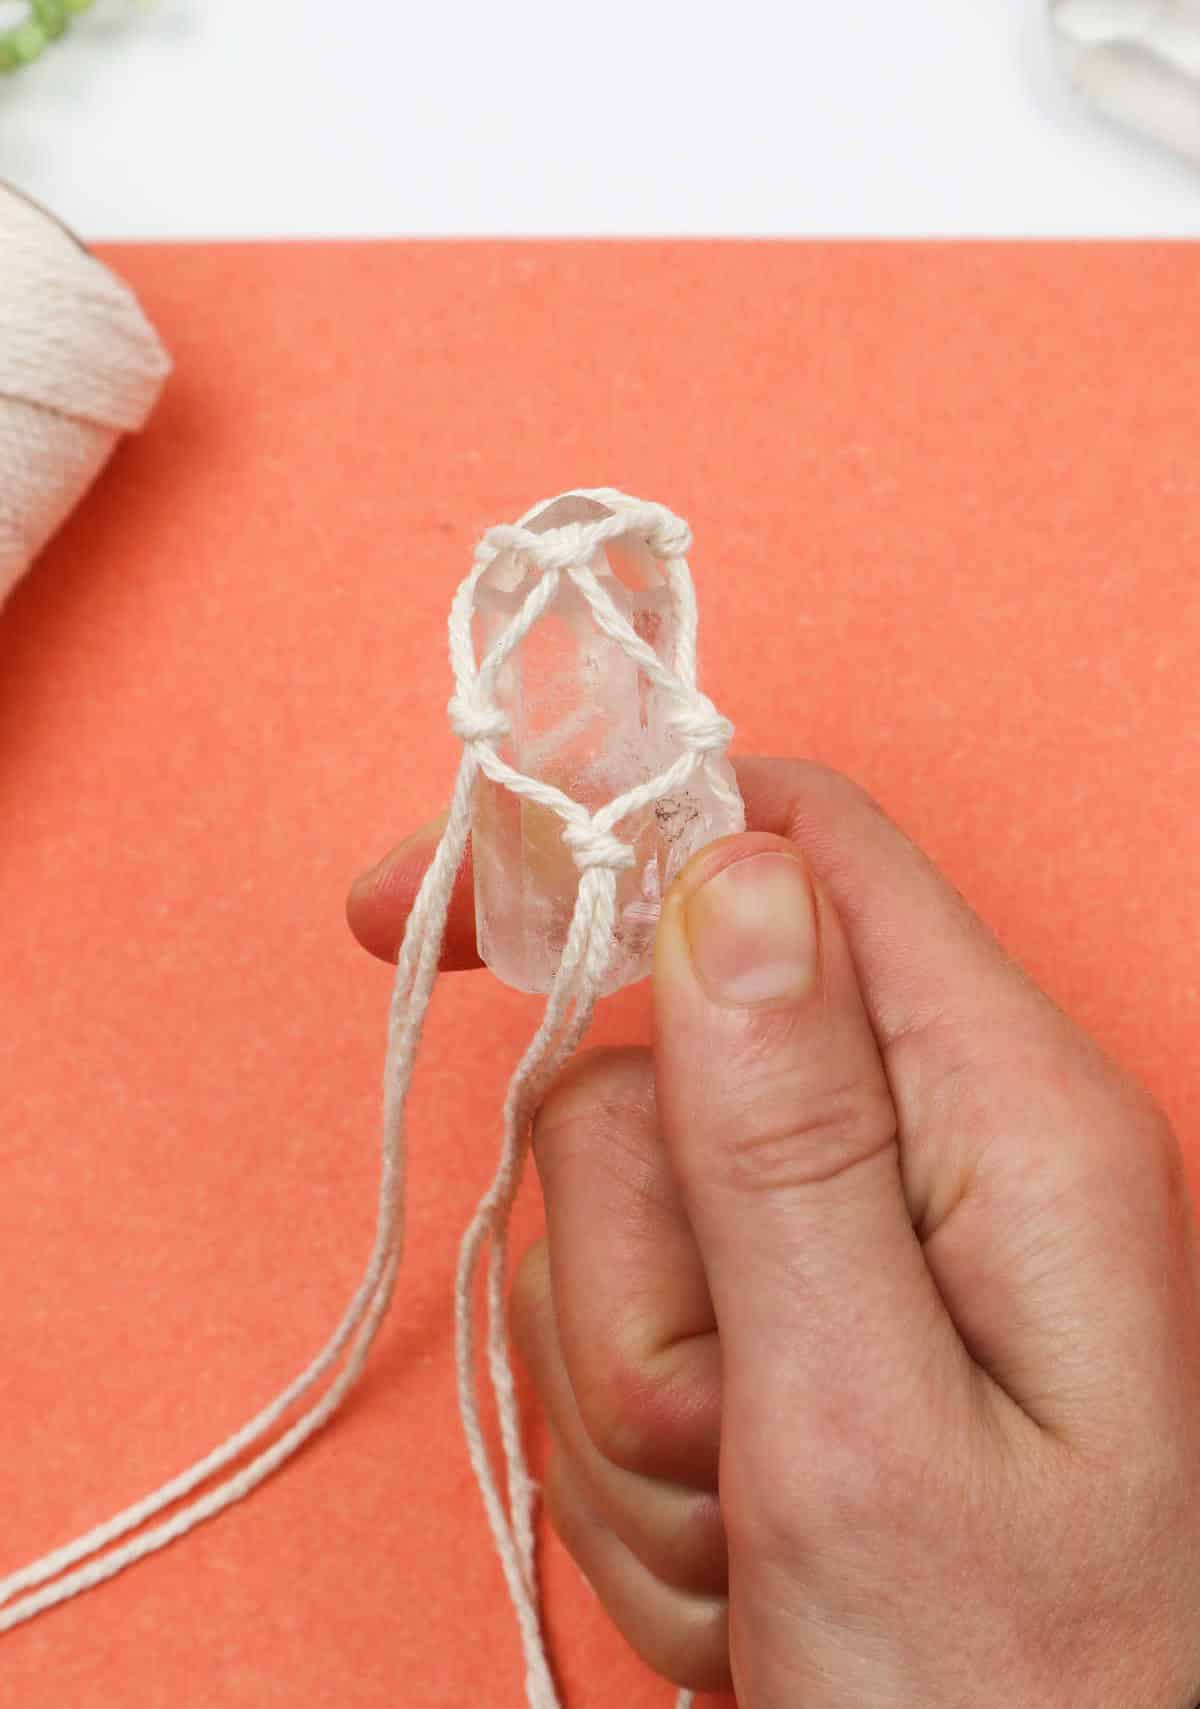
As you continue working on your design, remember to maintain a flat surface for easy reference. This makes it simpler to keep track of each triangle’s placement and also facilitates sectioning the cords. Your pattern may not always remain flat – in fact, as you progress around and up, the design will naturally rise. This is a normal part of the process. To ensure the correct tension on your cords, consistently place the crystal in its designated position.
If needed, temporarily hold the crystal steady while working the knots around it. Once you’ve completed one round, holding it in place becomes much easier as you work with different cords. The final result will resemble the netting pattern when you reach the top of the crystal.
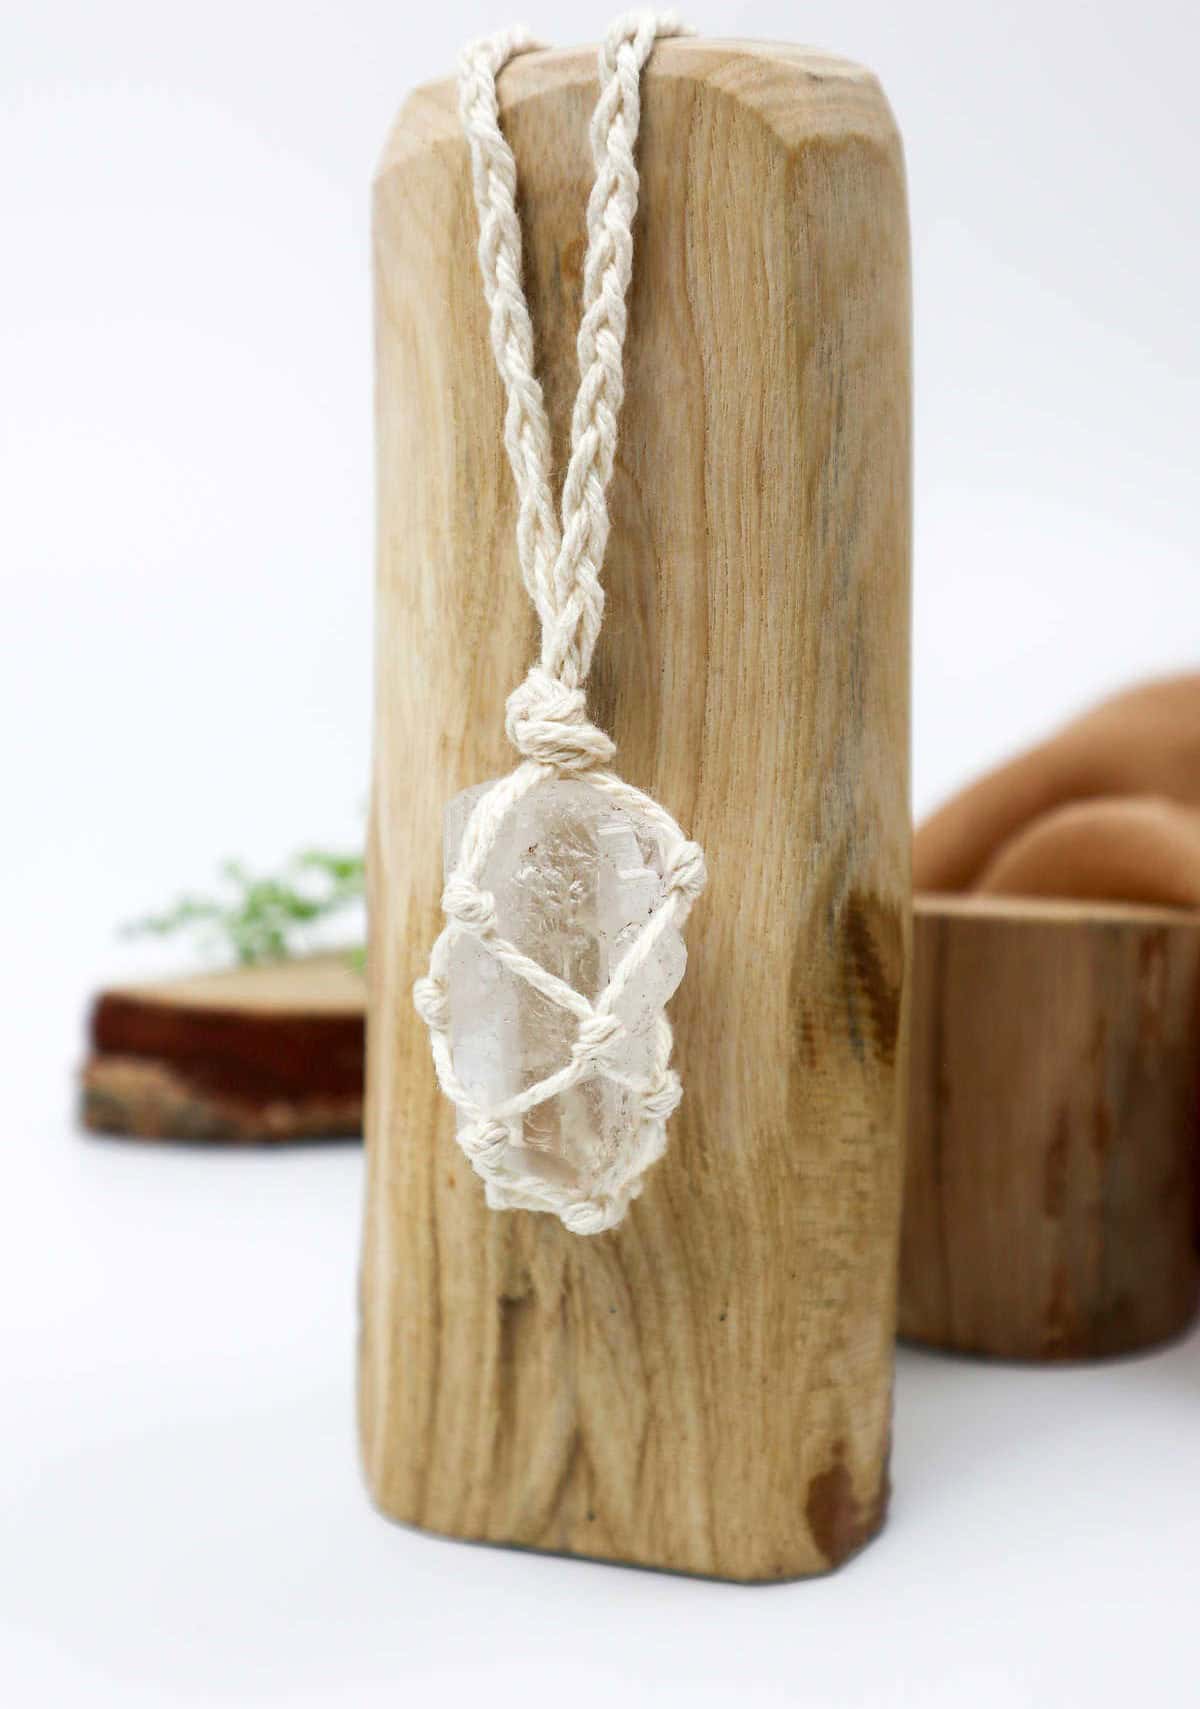
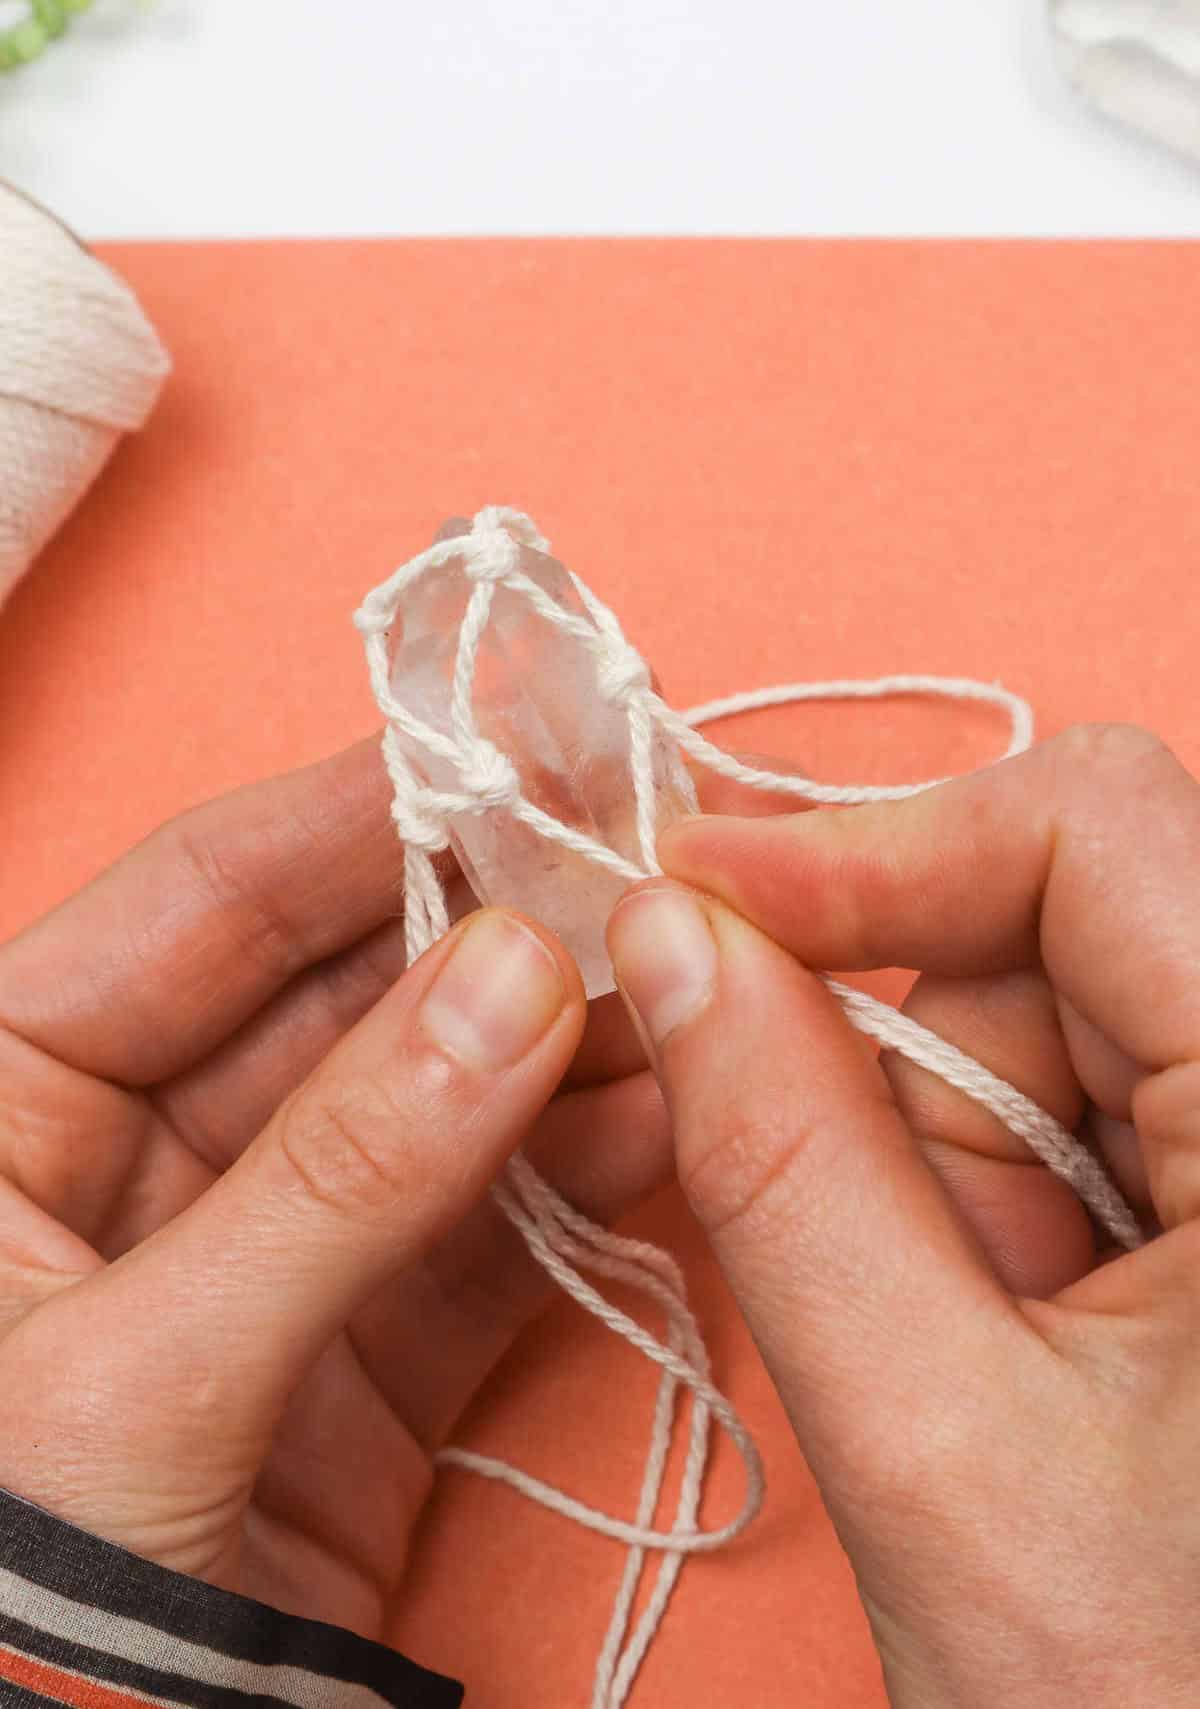
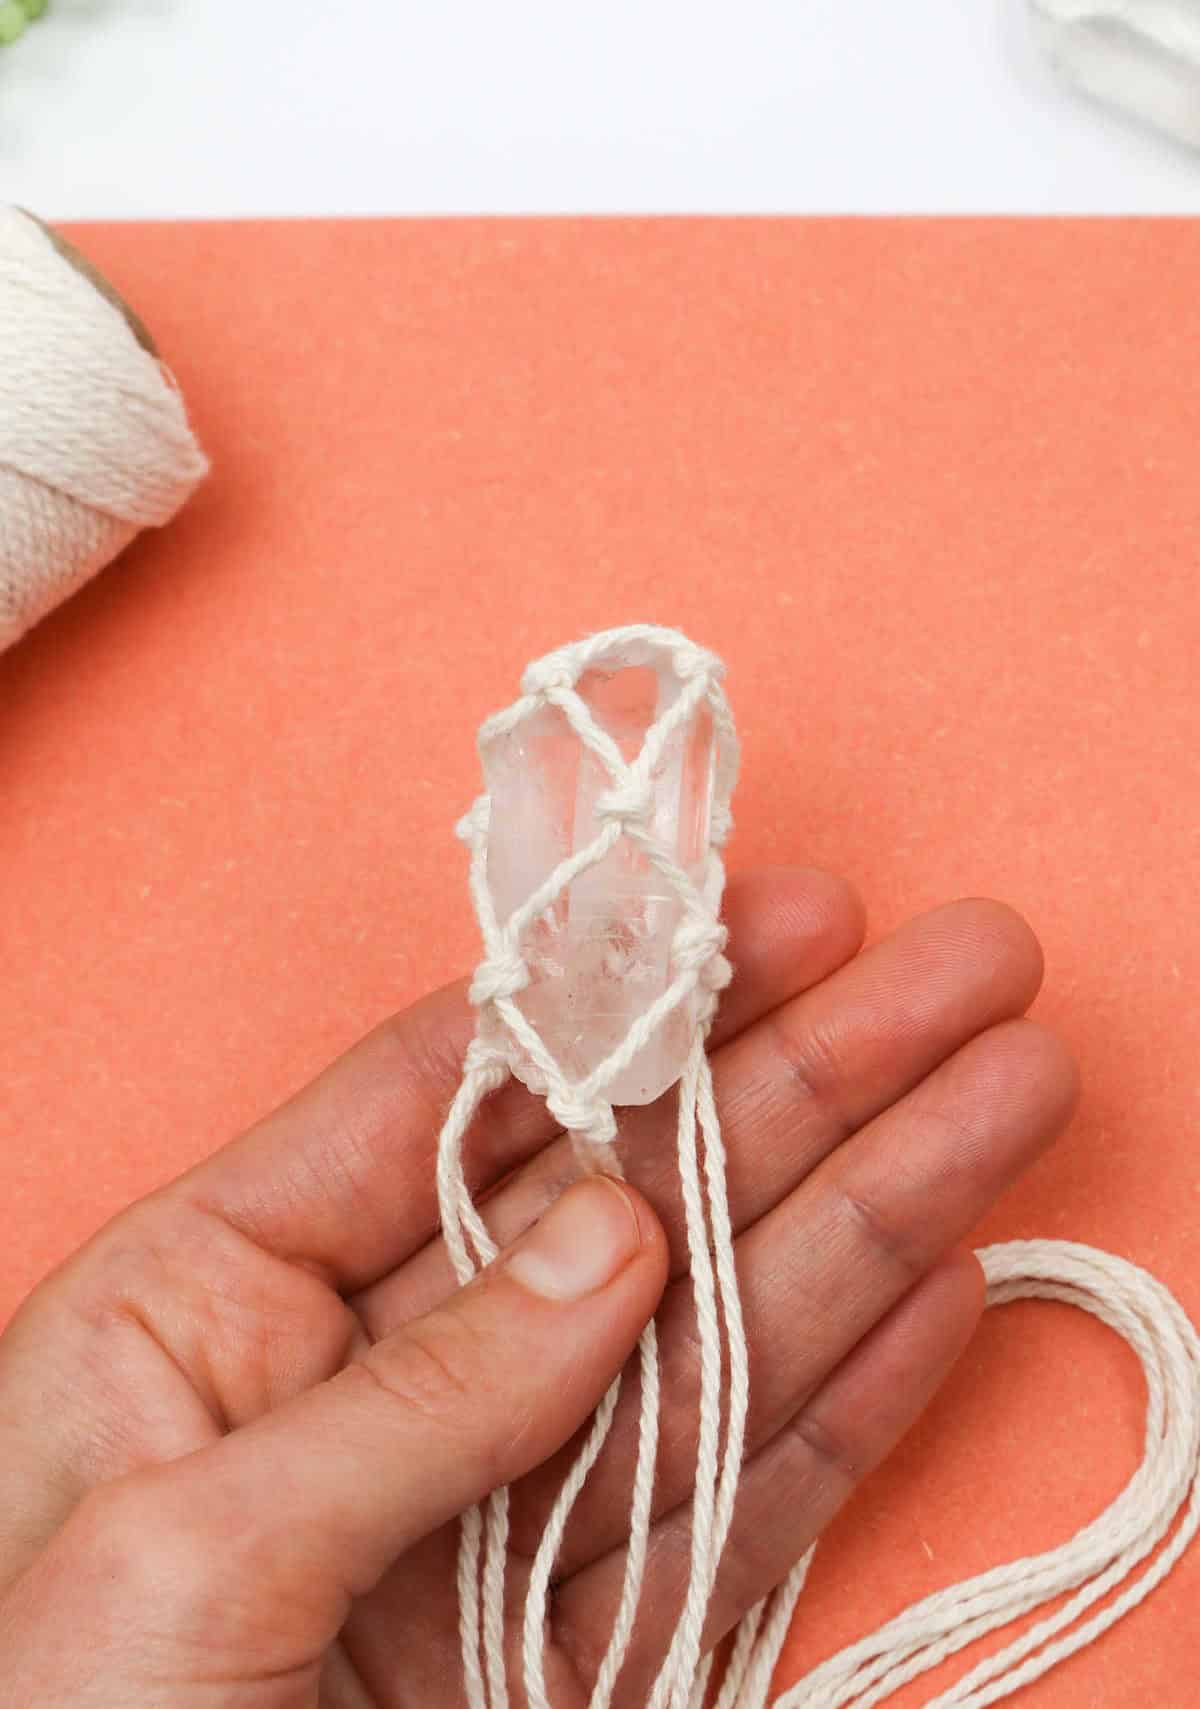
Step 12
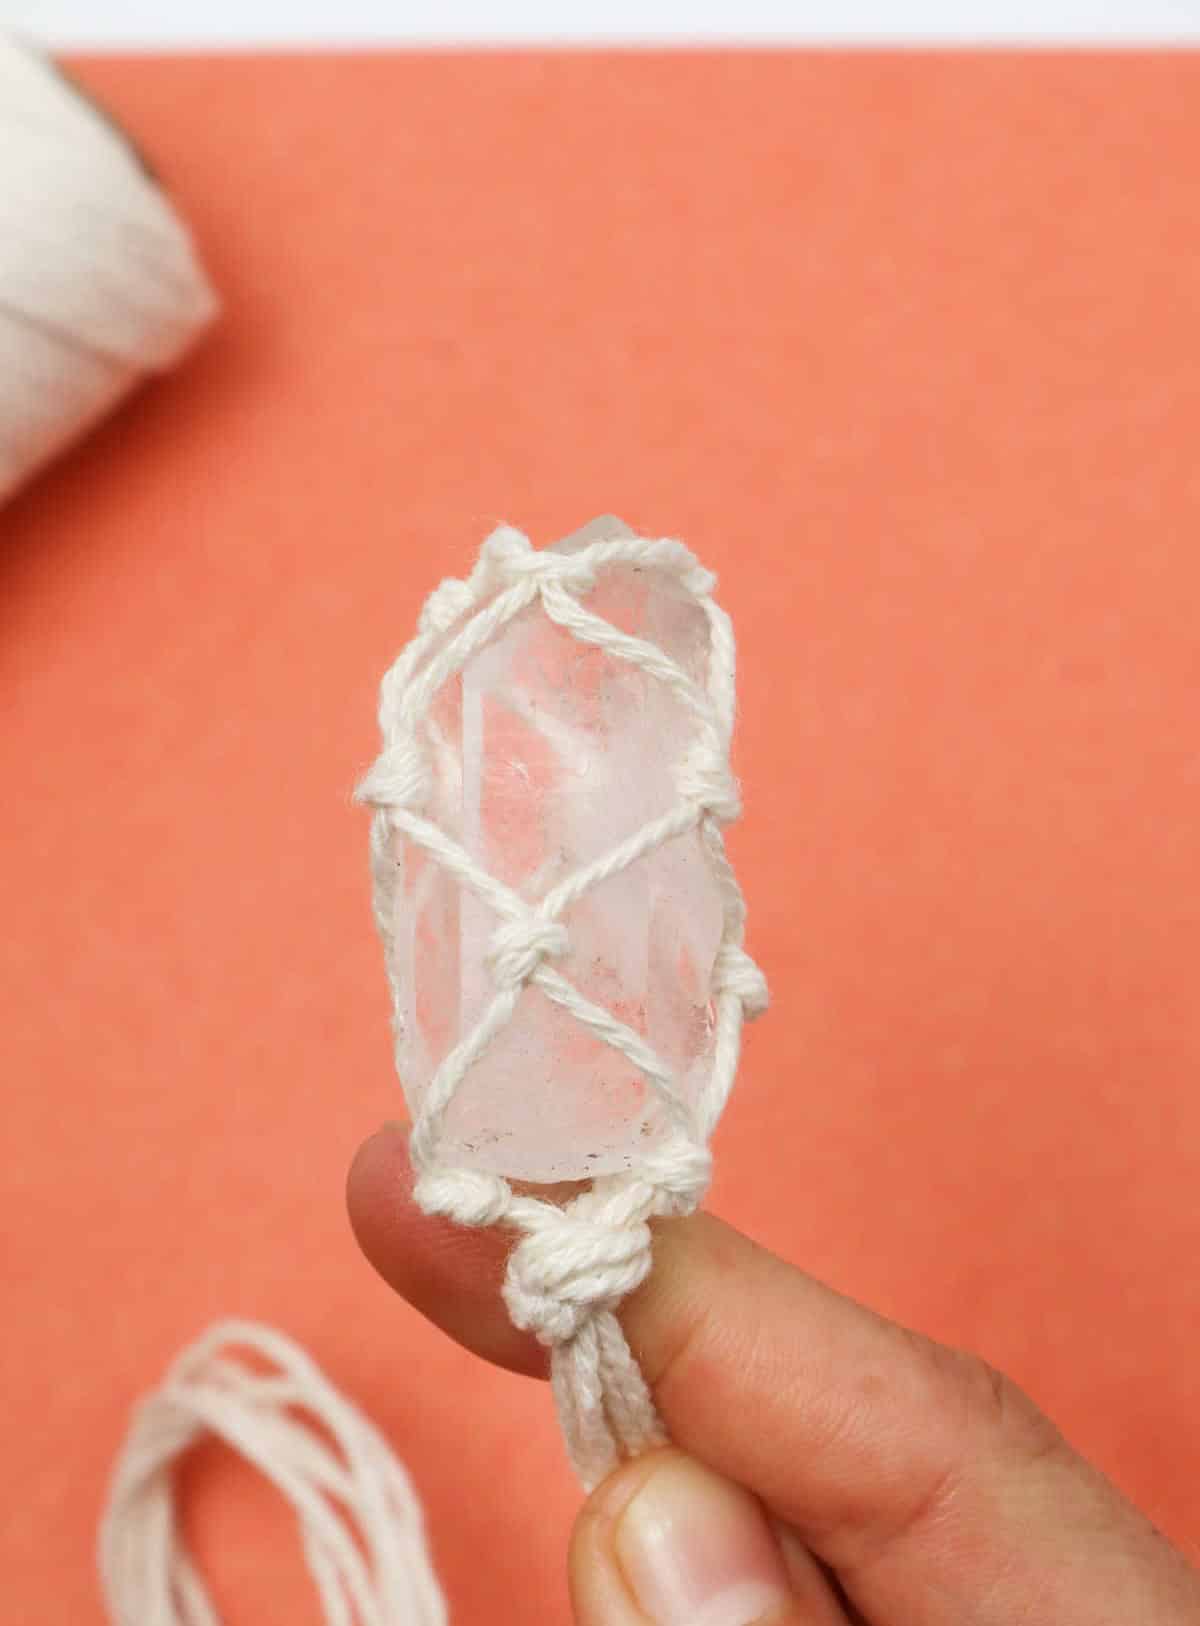
To complete the wrapping process, secure the cords together by creating a central overhand knot at the apex of the crystal. Gently push the knot towards the heart of the stone, then adjust and tighten each strand individually to ensure a snug and even hold.
Step 13
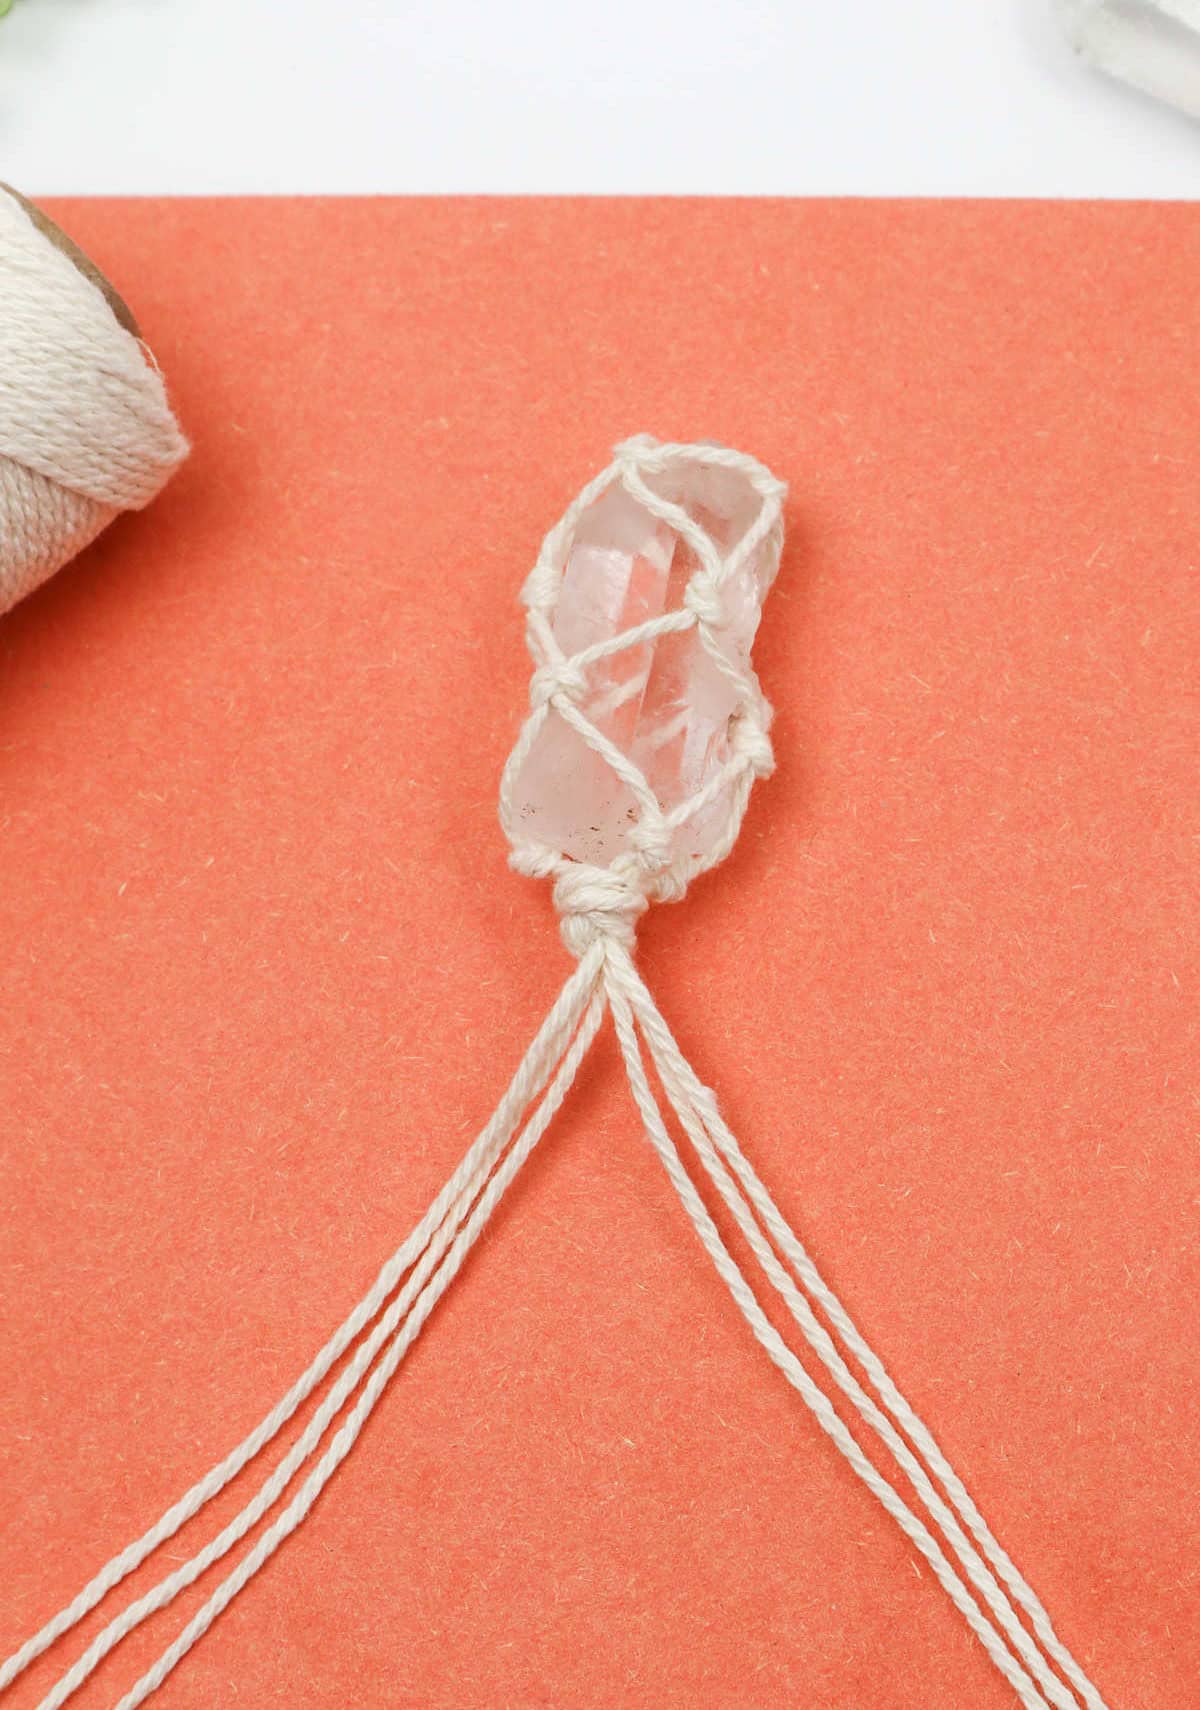
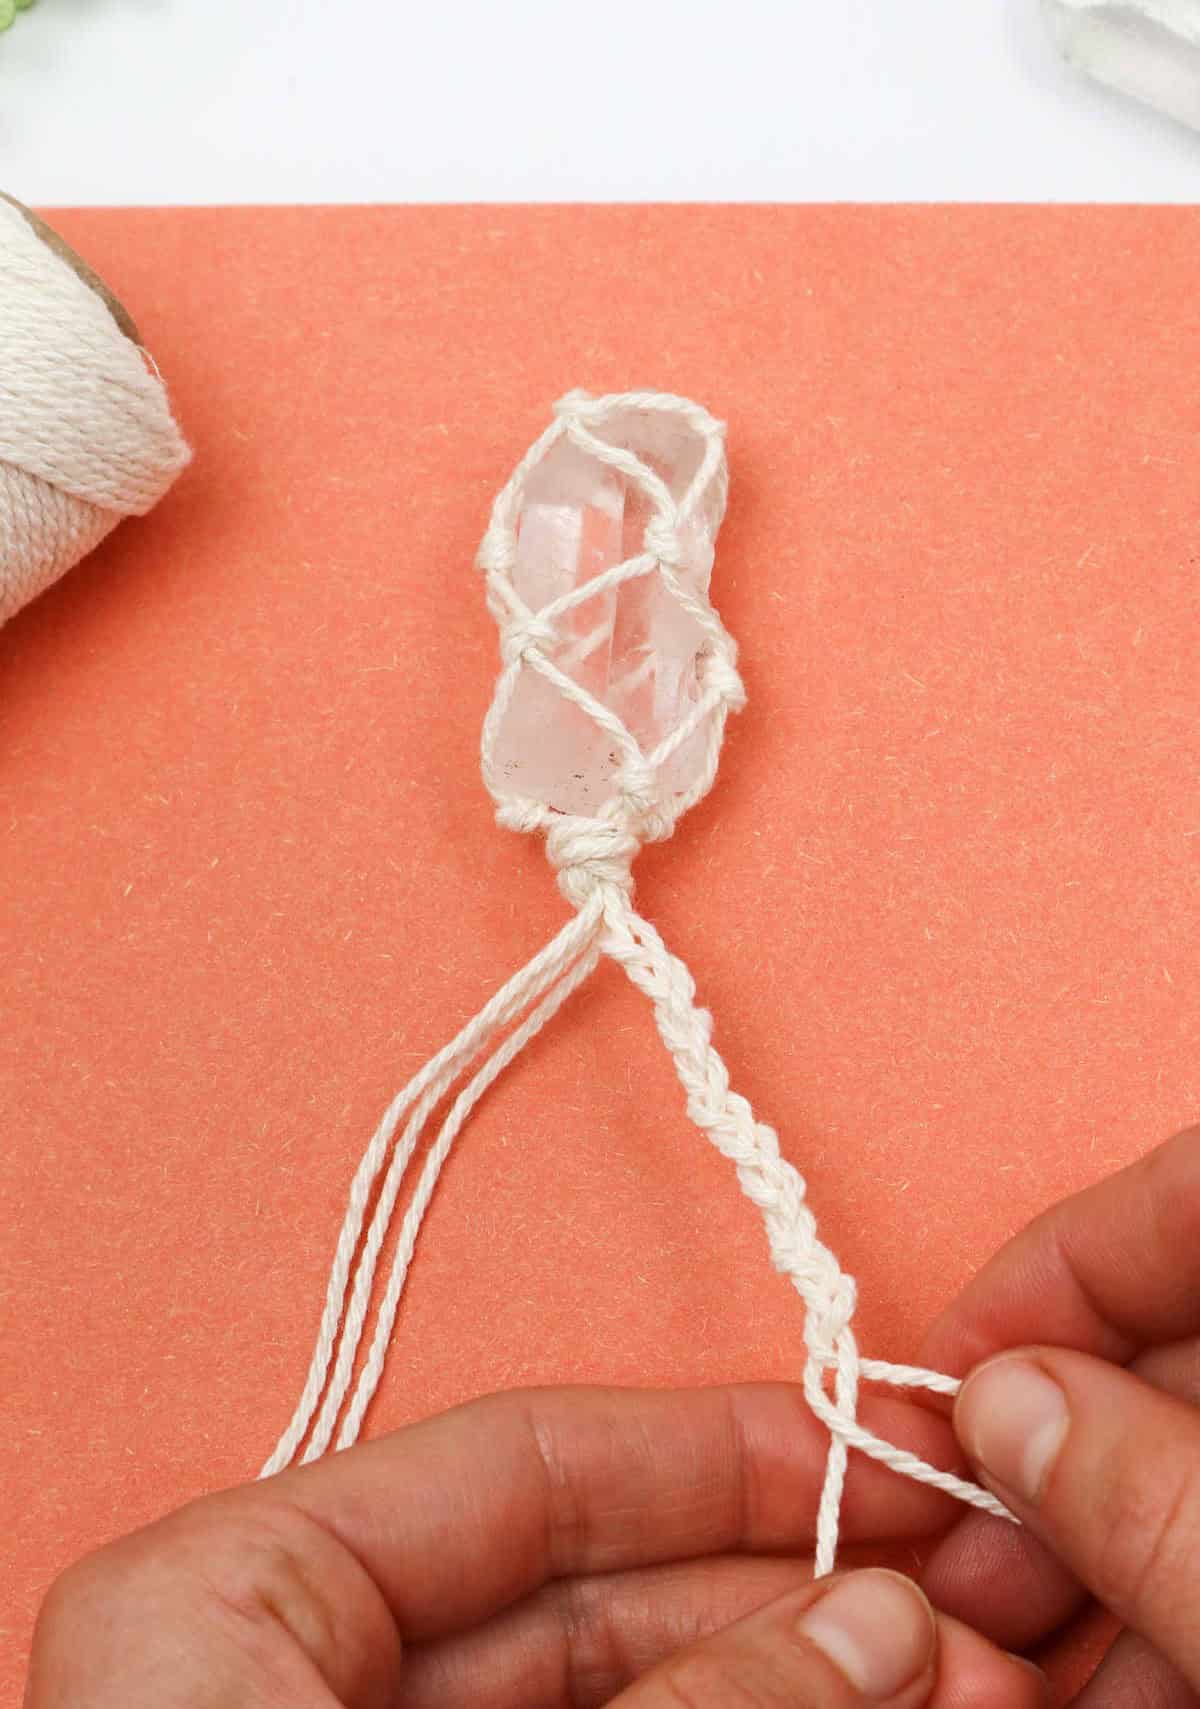
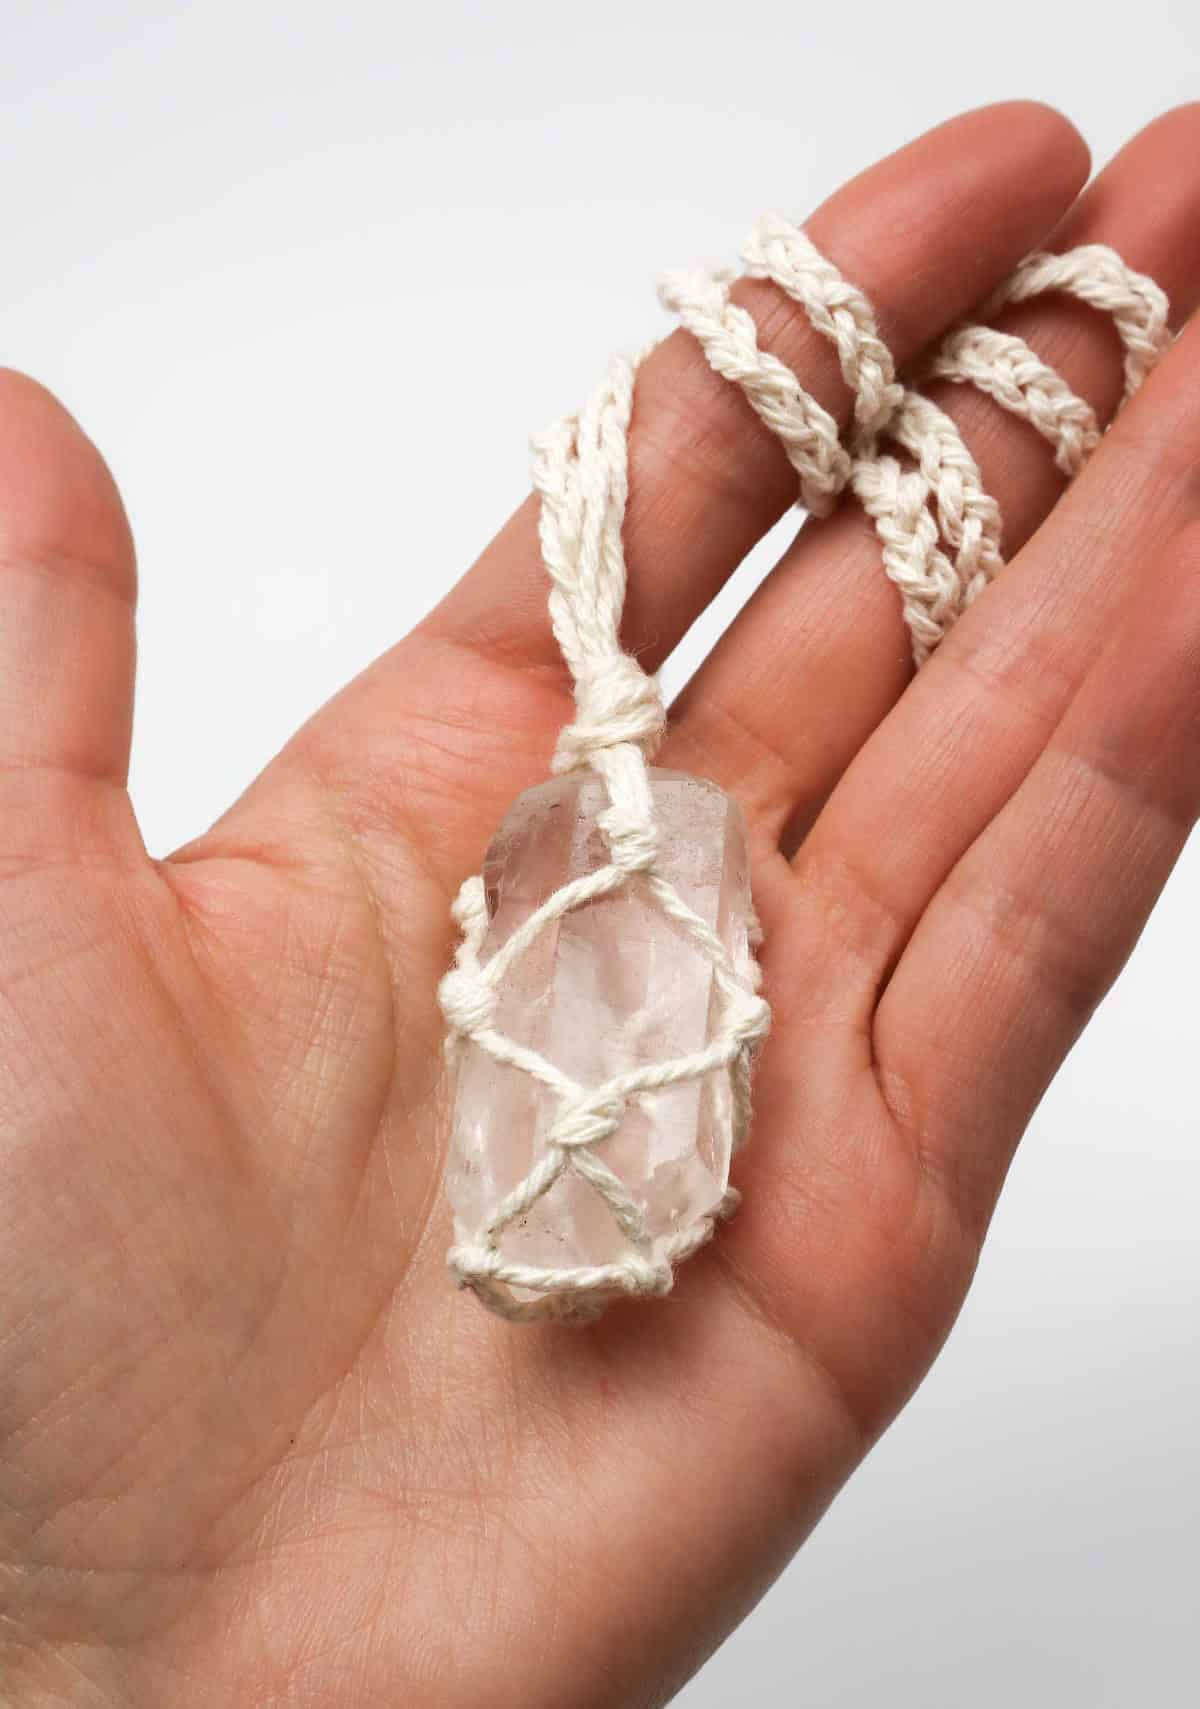
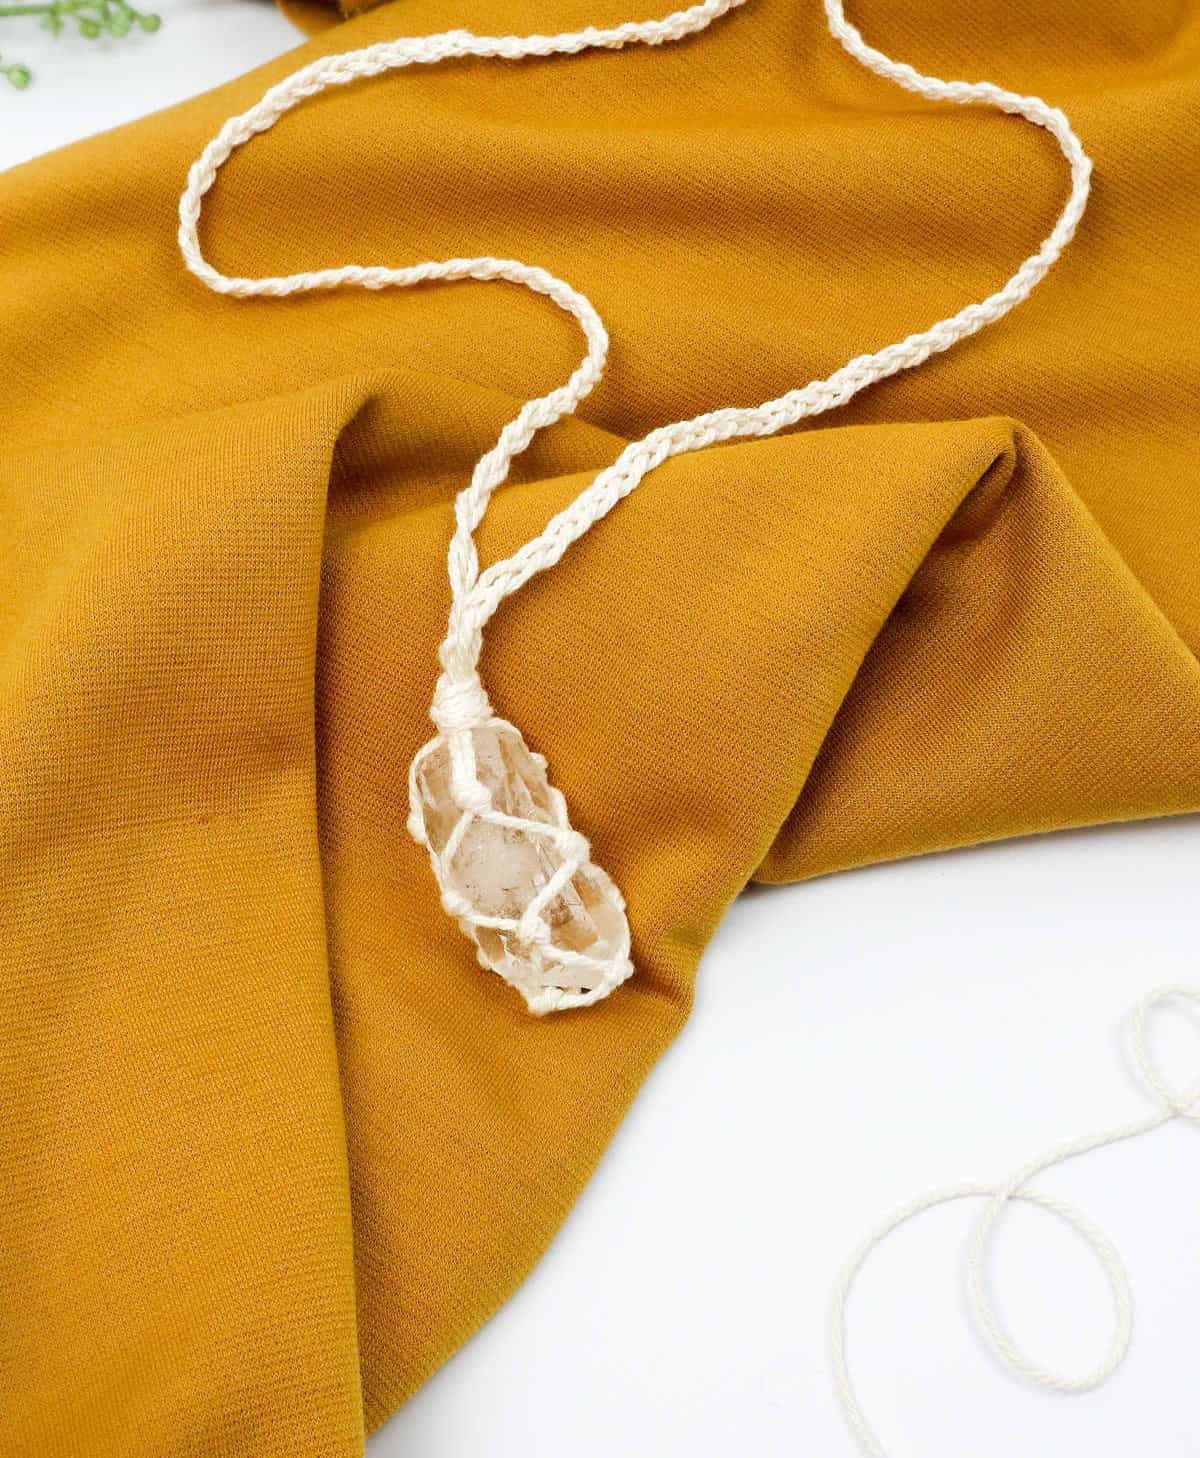
To begin crafting the necklace, separate the six cords into two equal groups of three. Then, initiate a braiding process for each group, working from top to bottom, ensuring even tension throughout.
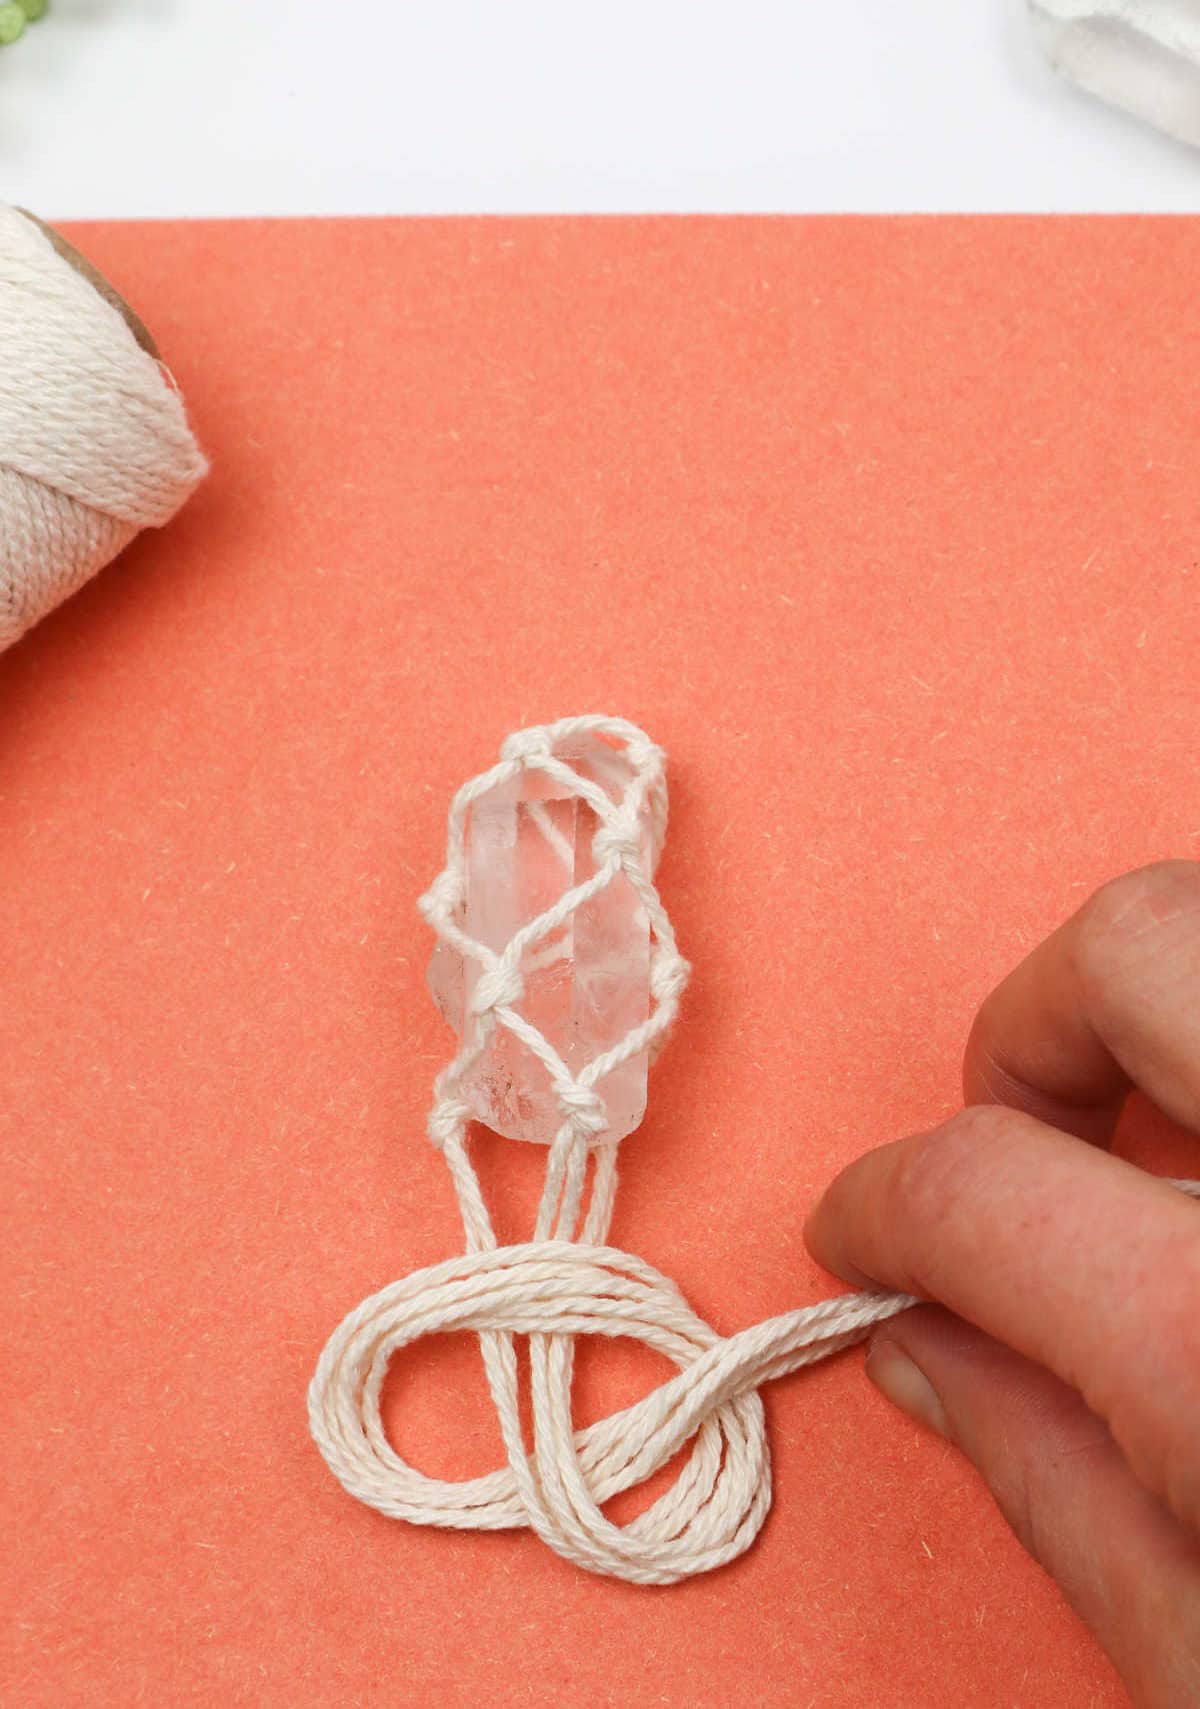
Step 14
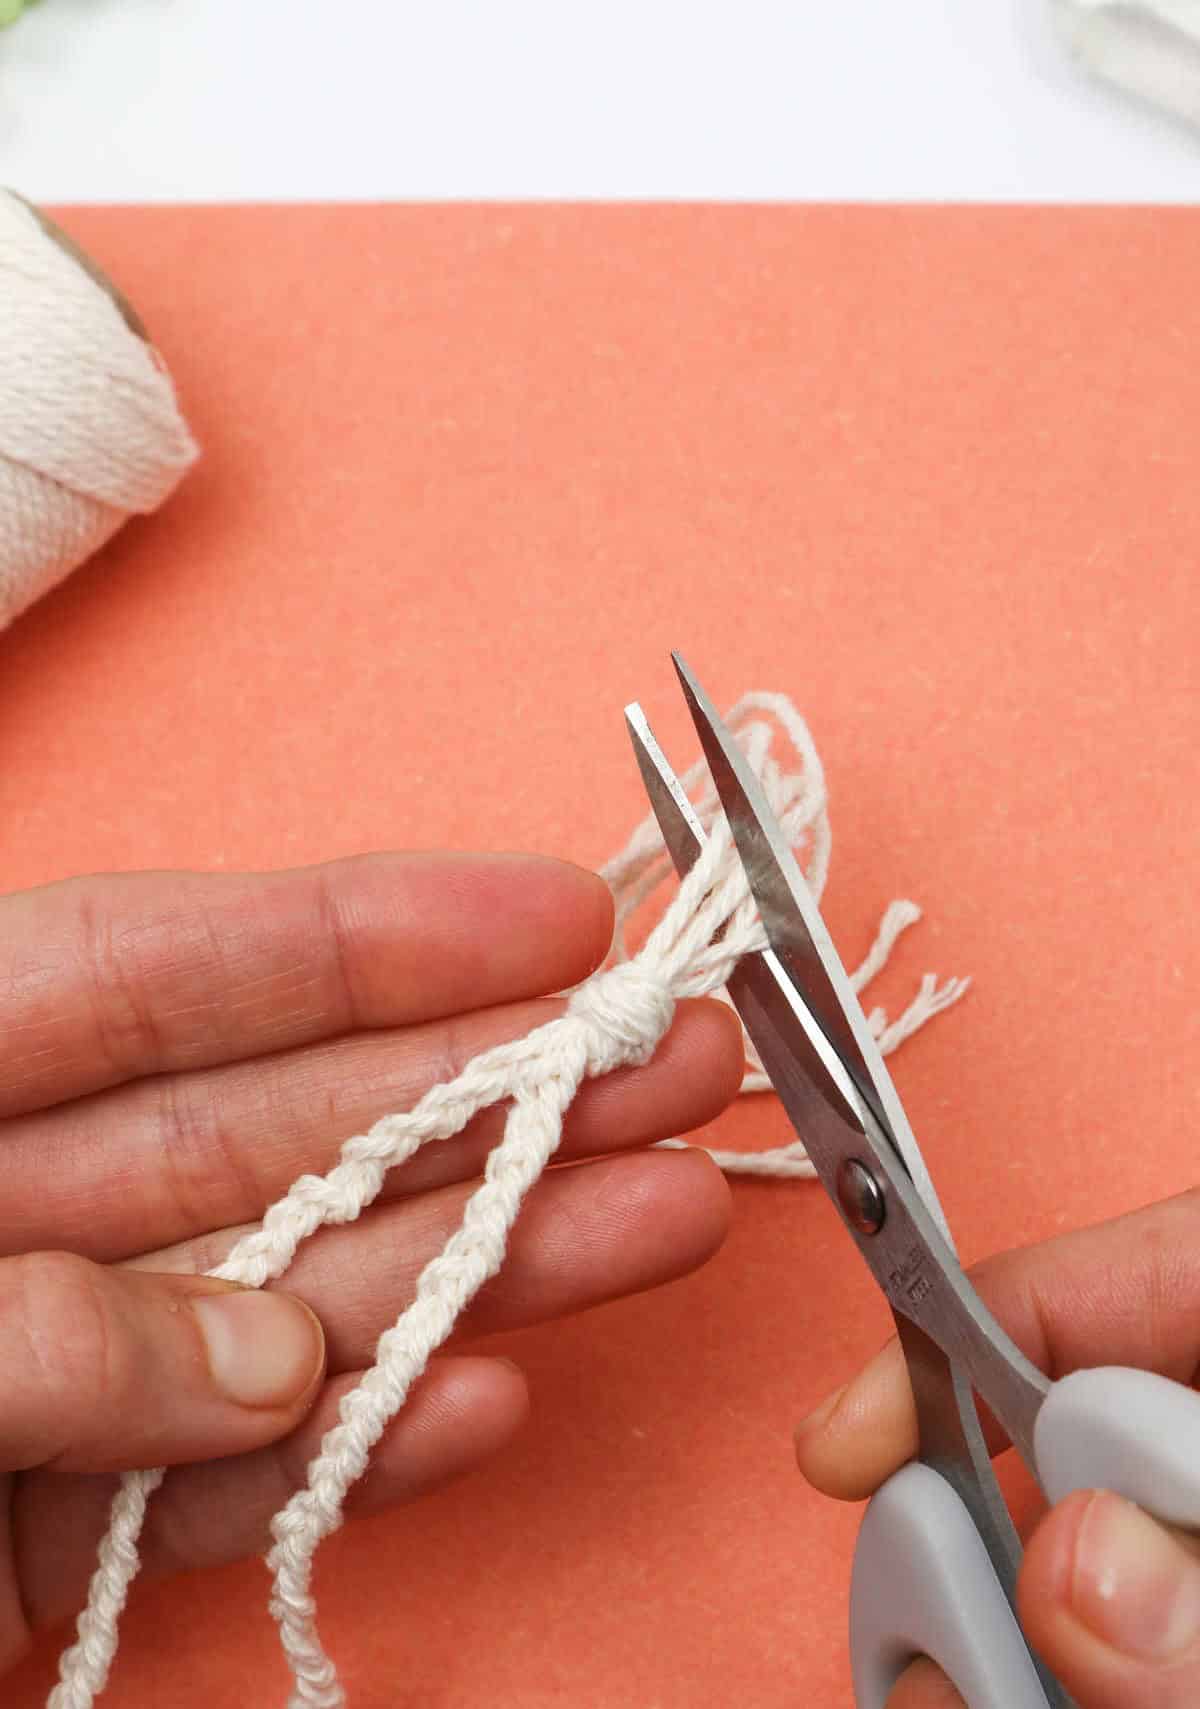
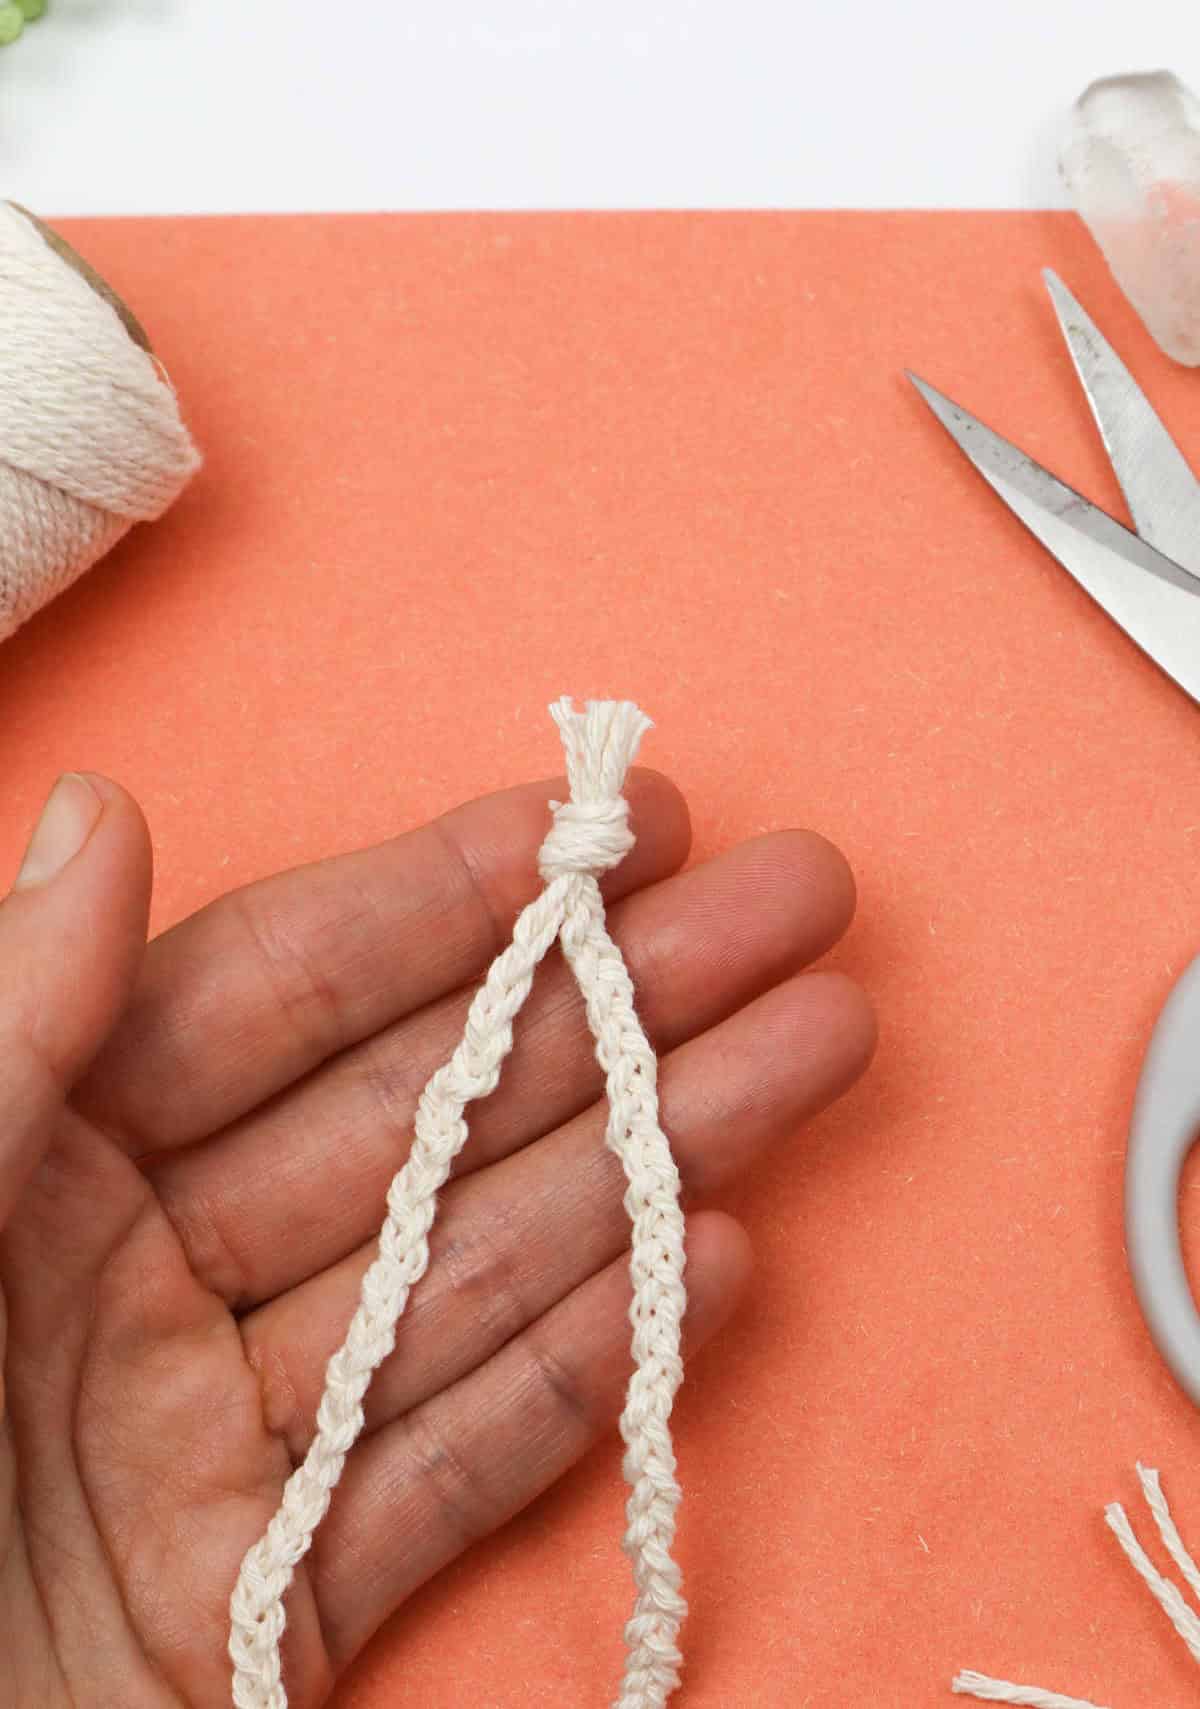
To complete your DIY macrame necklace, join the two braided sections together by creating a knot. Once you’re satisfied with the knot’s security, trim the excess material from both ends.
Who Can Make This Macrame Stone Necklace?
This DIY project’s simplicity makes it an excellent activity for people of all ages, from teenagers to adults. With some guidance, even children can quickly grasp the concept and start creating their own unique necklaces. The lack of complexity means that anyone can pick up this craft and enjoy the process.
A Perfect Craft to Sell and Gift
What truly sets this project apart is its remarkable customizability. This isn’t just limited to the size of the necklace, which can be particularly useful when creating pieces for both adults and children. The level of customization extends far beyond that. You can select from a vast array of crystals and stones, each with its unique color and size. Additionally, you can craft birthstone necklaces or choose crystals with distinct healing properties.
Furthermore, the ability to incorporate beads and embellishments, as well as use different colored and textured cords, only adds to the versatility of this project. This customizability not only makes it an excellent gift option but also presents opportunities for selling these unique pieces on platforms like Etsy or at local events.
Other Crafts You Might Like to Make
Get creative with these unique DIY craft ideas! From statement-making earrings to stylish hair accessories, there’s something for everyone. Make a bold statement with paper rings, or add some whimsy to your wardrobe with yarn projects. For a more rustic look, try making DIY hair bows or pinecone crafts. If you’re feeling adventurous, rock out with some hand-painted rocks or create a one-of-a-kind bracelet using shoelaces.
And for the ultimate in flexibility, craft wire rings that can be customized to fit any style.
Easy DIY Stone Necklace (Step-by-Step)
Embark on a DIY adventure by crafting a stunningly simple stone necklace. This effortless accessory is perfect for everyday wear, requiring only 30 minutes of active time to complete. With its understated elegance, it’s an ideal addition to your casual wardrobe.
Equipment
To avoid the frustration of dealing with a dark screen, it’s crucial to take control of your device’s sleep settings. By doing so, you’ll be able to work or play without interruptions caused by your screen automatically turning off. This can be achieved by adjusting your screen’s auto-lock feature, which allows you to customize the length of time before your screen goes dark.
For instance, you can set it to lock after 15 minutes of inactivity, ensuring that your screen remains on for as long as needed, preventing any potential disruptions.
Materials
Instructions
To begin, acquire the necessary materials listed below. Measure out 32 inches of cord and cut three equal sections, as this length may vary depending on the size of your stone or crystal and the desired necklace length. Fold each cord in half and place a stone or crystal at the center of the first loop. Make a simple overhand knot to secure it, leaving enough room for subsequent knots.
Take the second looped cord and pass it through the first loop, then pull its ends through and knot them around the first loop. Repeat this process for the third loop, ensuring evenly spaced knots. This base triangle will serve as your foundation, so keep an eye on it as you work around it. Next, grab two adjacent cords and knot them about halfway between the base knots. The new triangle should match the size of your original base triangle.
Lay out your pattern flat and continue sectioning and knotting the cords in a similar manner, working your way up. Remember to reposition the crystal within the base loop as you go to ensure proper alignment. As you near the top of the crystal, gather all the cords and secure them with a central knot at the crystal’s apex. Tighten the knots to firmly hold the crystal in place.
Once you’ve reached the desired length, divide the remaining cords into two groups of three each and begin braiding them up the necklace. When you’ve achieved your desired length, fasten off with an overhand knot and trim the excess cord. Feel free to embellish your creation with beads or other decorations.
Notes
Have you had the opportunity to try out this particular craft? Your thoughts are highly valued, so please take a moment to share your experience by leaving a comment below. I’m eager to hear from you and will personally respond to each and every comment!