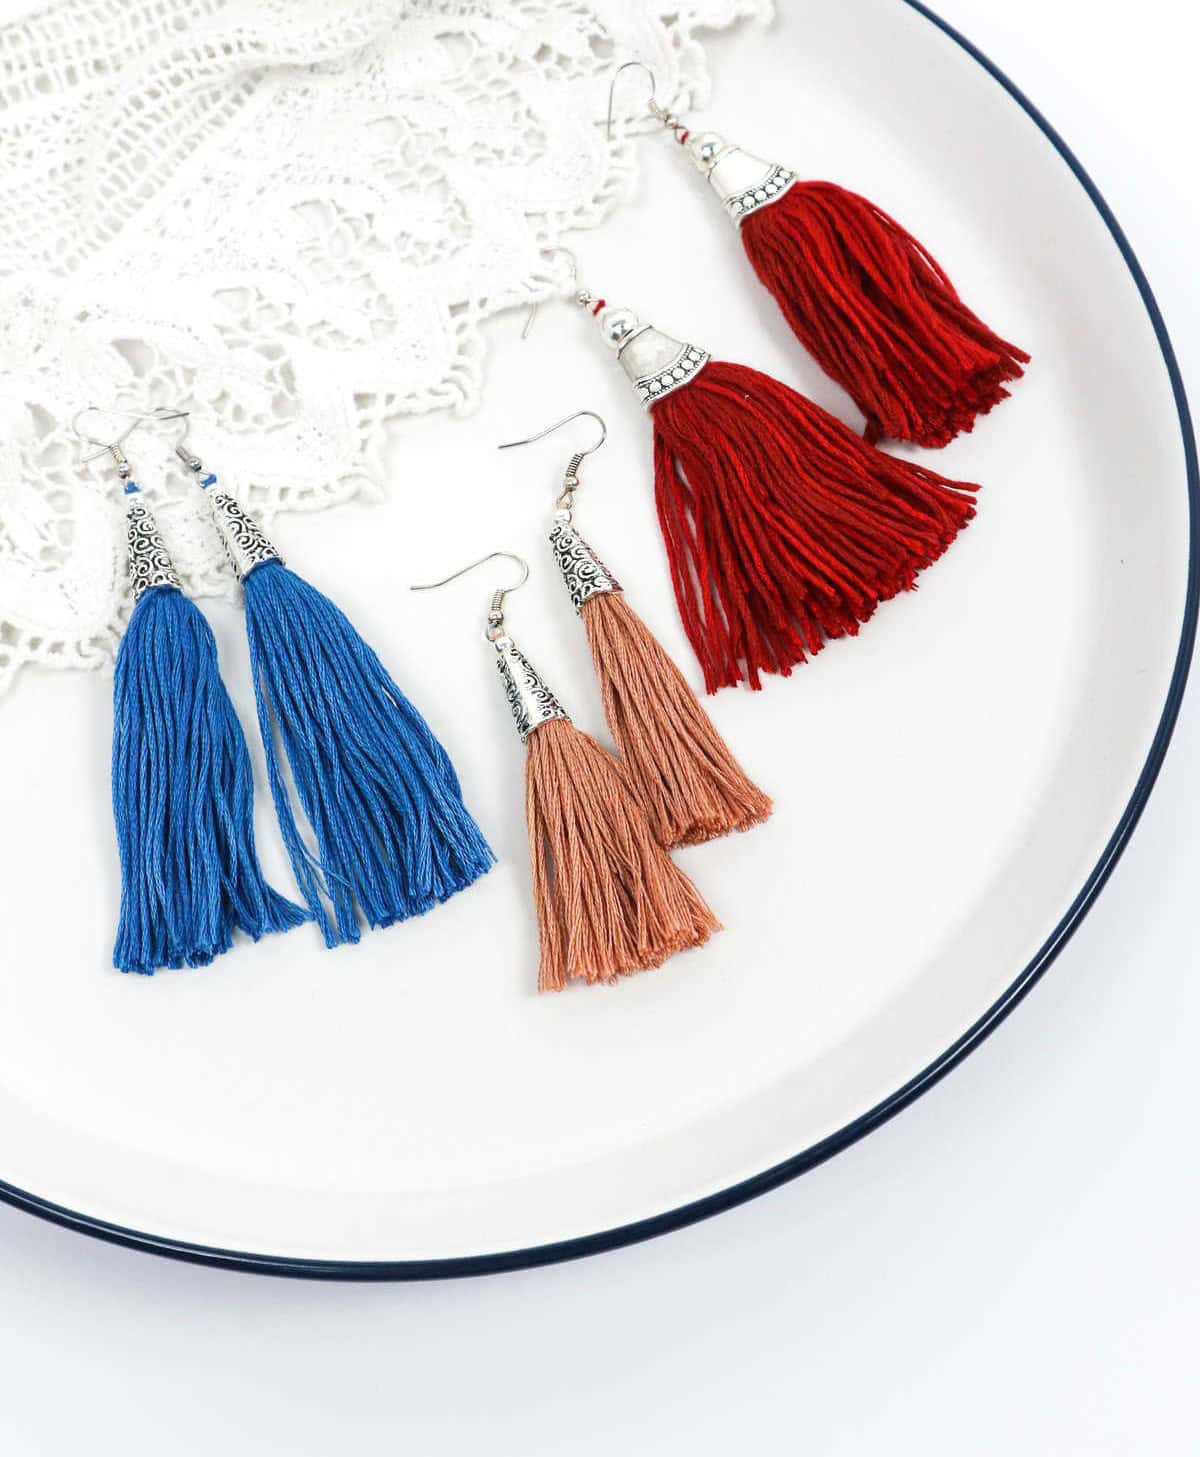
Tassel earrings are not only a stunning accessory but also a thoughtful gift for special occasions. Who says DIY jewelry is exclusive to professionals? With just a few simple materials, you can create your own beautiful tassel earrings that add a playful touch to any outfit. If you’re familiar with using tassels as decorative accents in your home decor, you’ll love how they transform into eye-catching jewelry pieces. And the best part? They’re incredibly easy to make!
With minimal effort and time, you can whip up half a dozen pairs or more, making them perfect for gifting or party favors. Simply create your DIY projects ahead of time and store them until you need them – it’s that simple!
Supplies and Tools You’ll Need
To create your tassel earrings, you’ll require a few essential tools and materials.
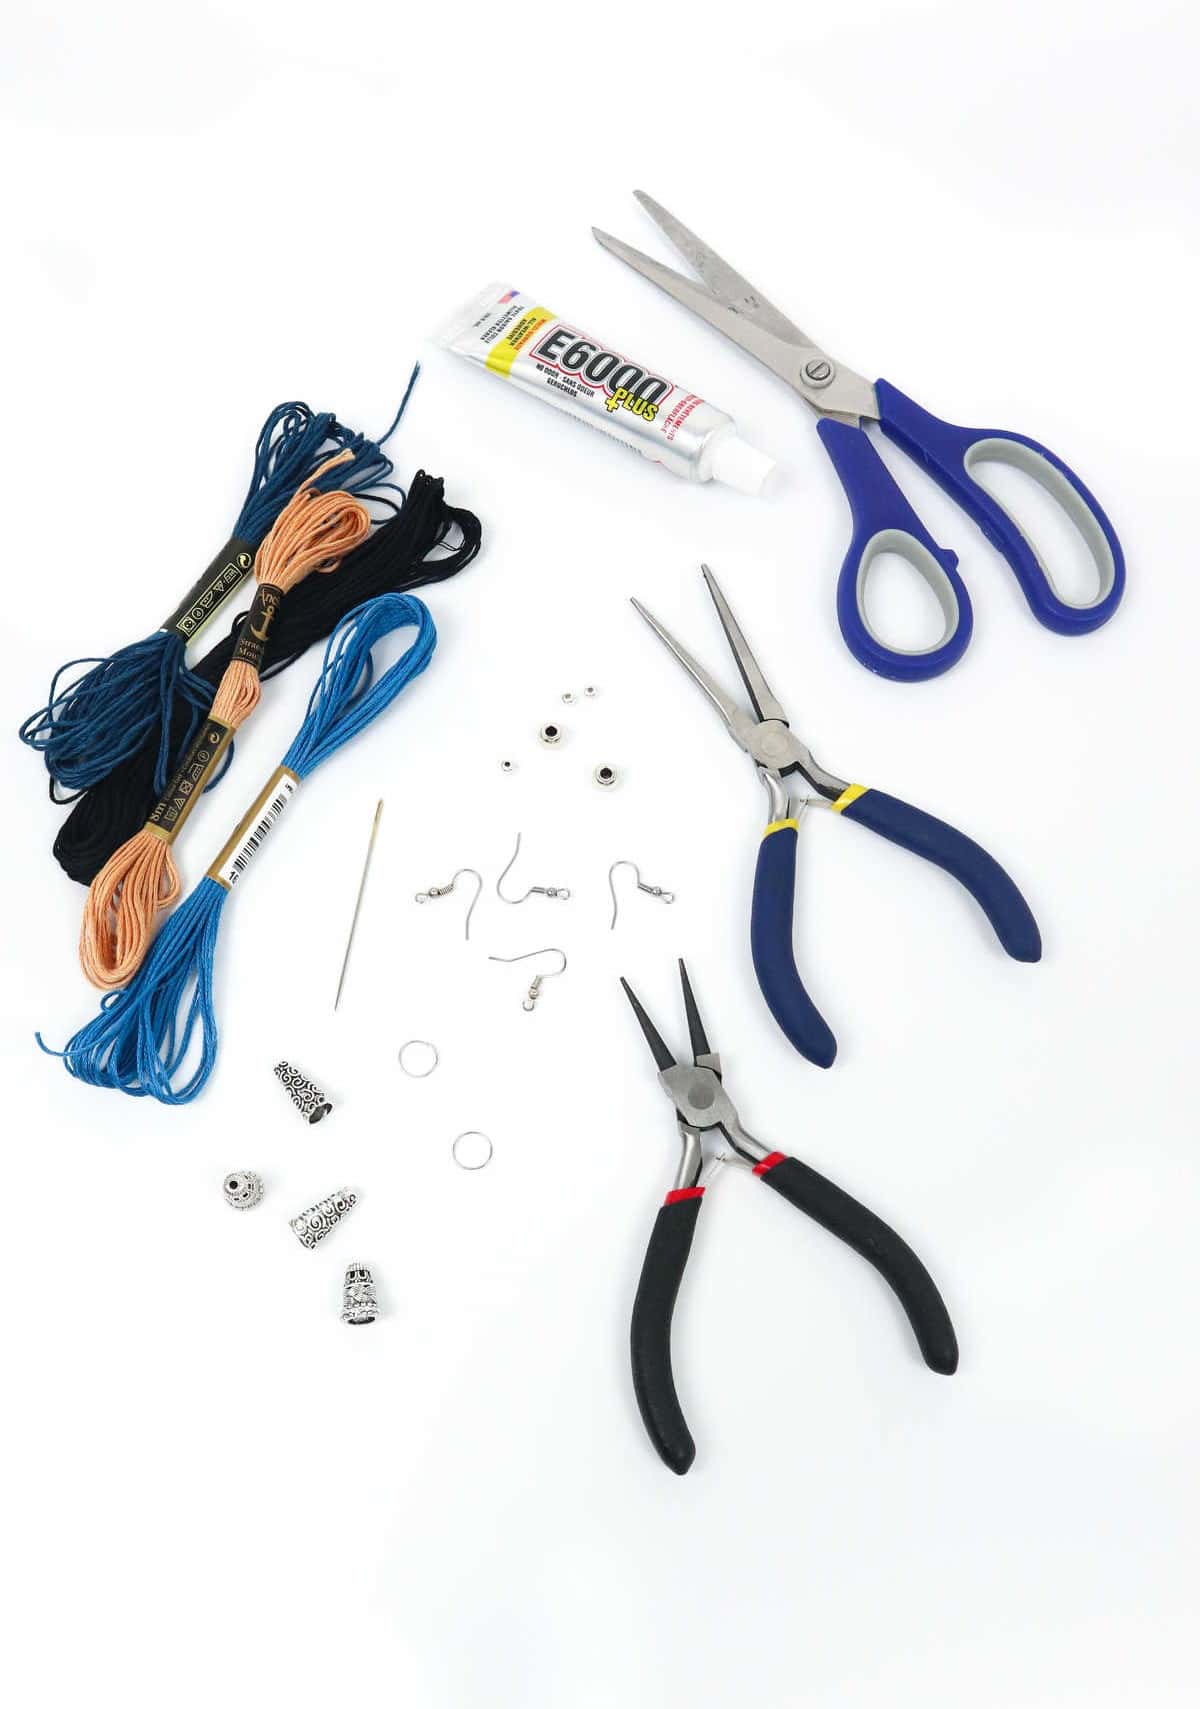
Specifically, you’ll need to gather: scissors for trimming any excess material; pliers to help shape and bend the metal components; embroidery thread for adding the finishing touches to your tassels; a pony eye needle for sewing on those all-important beads; earring hooks that will securely hold the earrings in place; jump rings to attach the hooks to the rest of the design; E6000, a strong adhesive that will help keep everything together; and finally, beads themselves – along with cone bead caps to add an extra layer of style.
How to Make Tassel Earrings
When selecting the perfect thread for your earrings, consider choosing your absolute favorite hue or mix and match to create a unique blend. The possibilities are endless!
Step 1
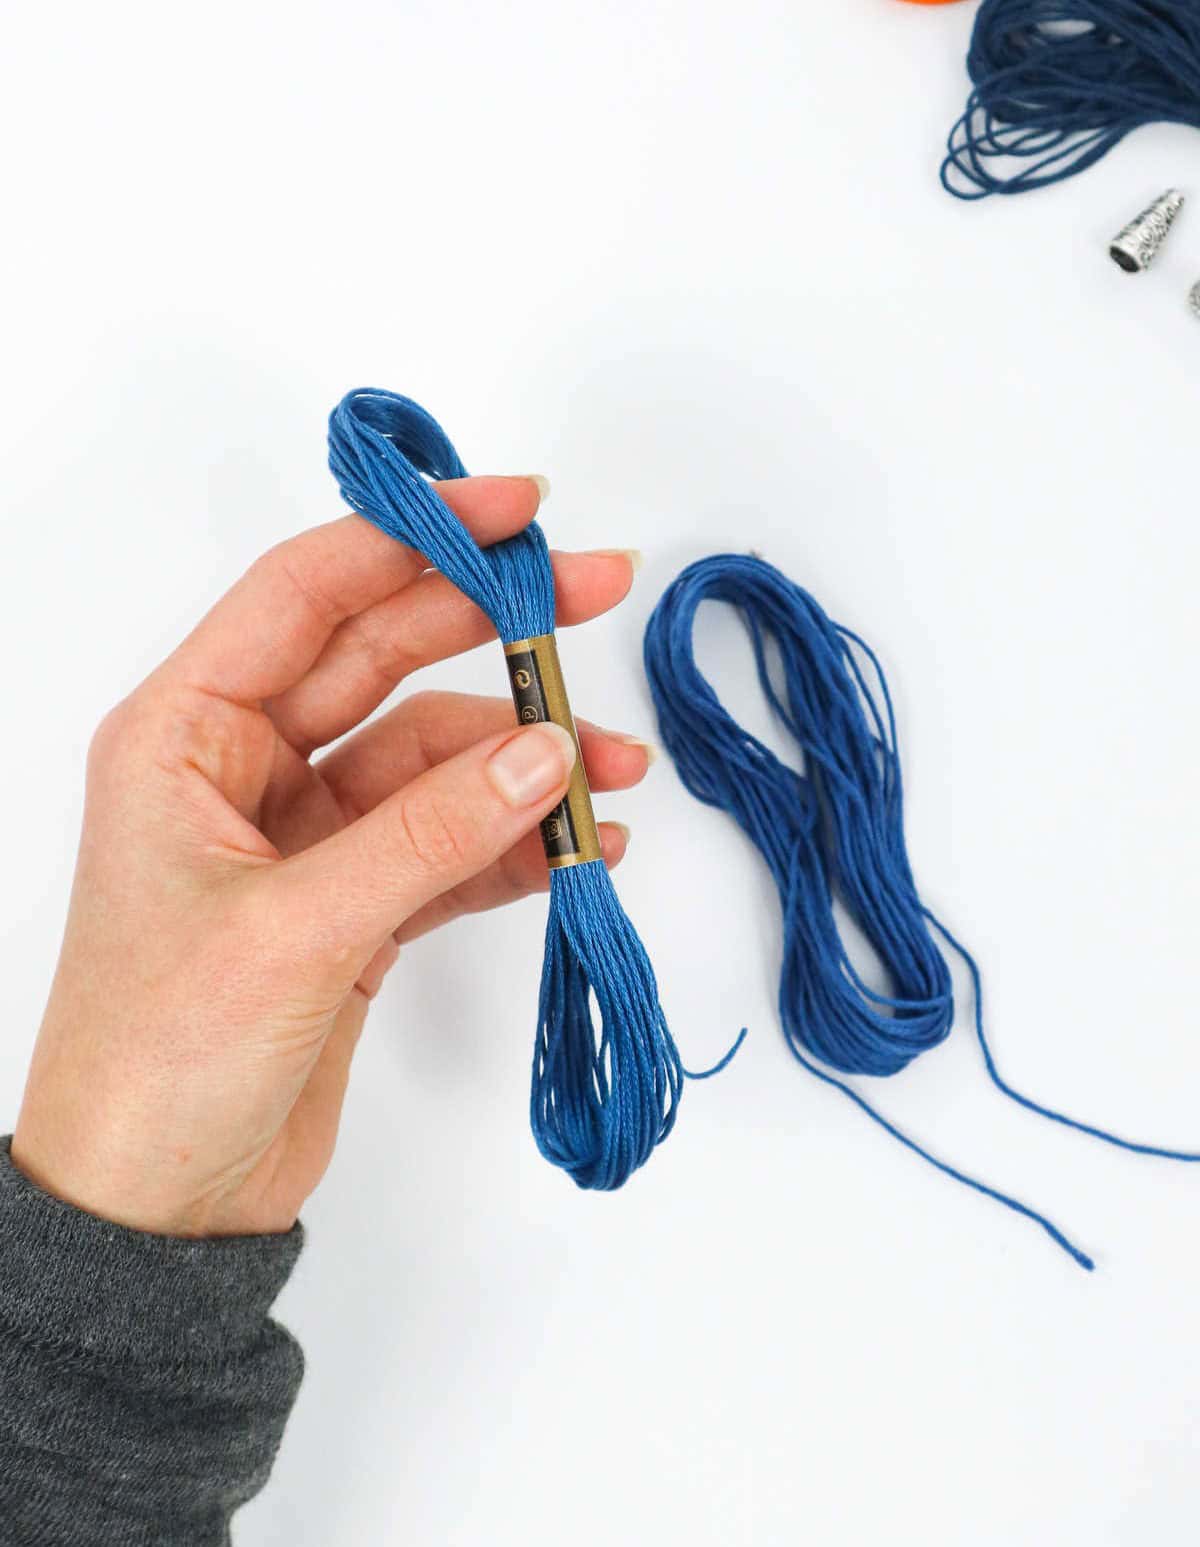
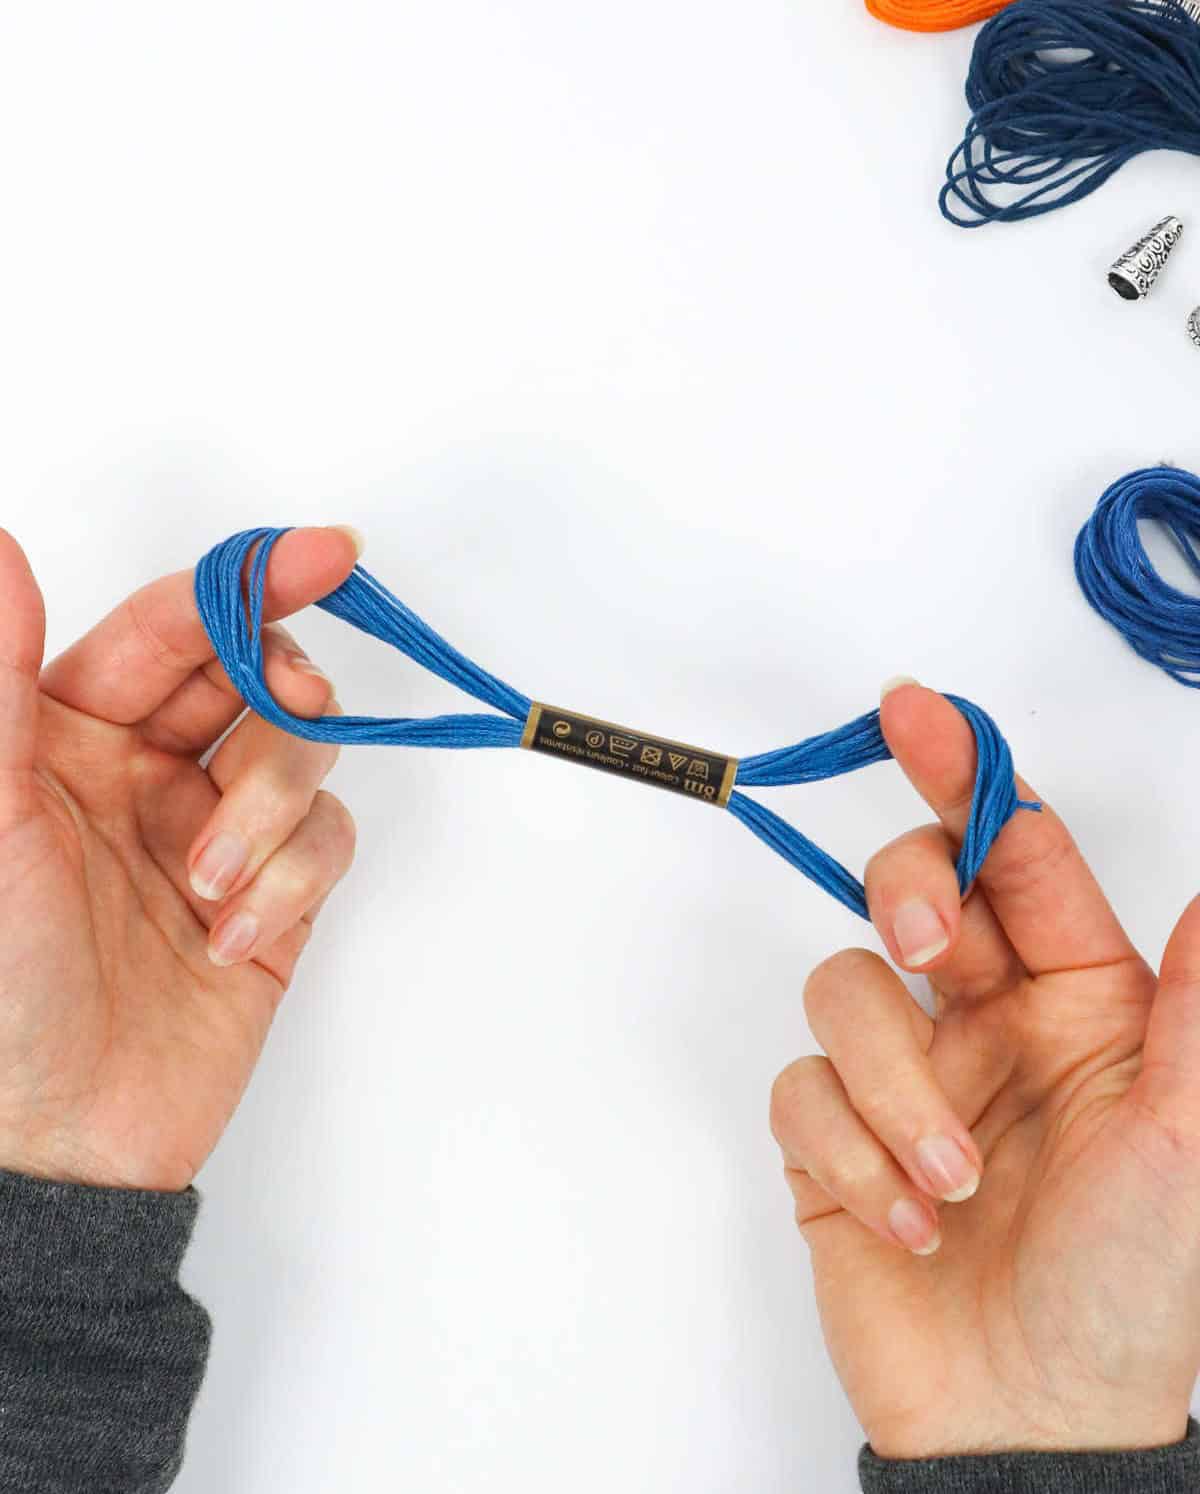
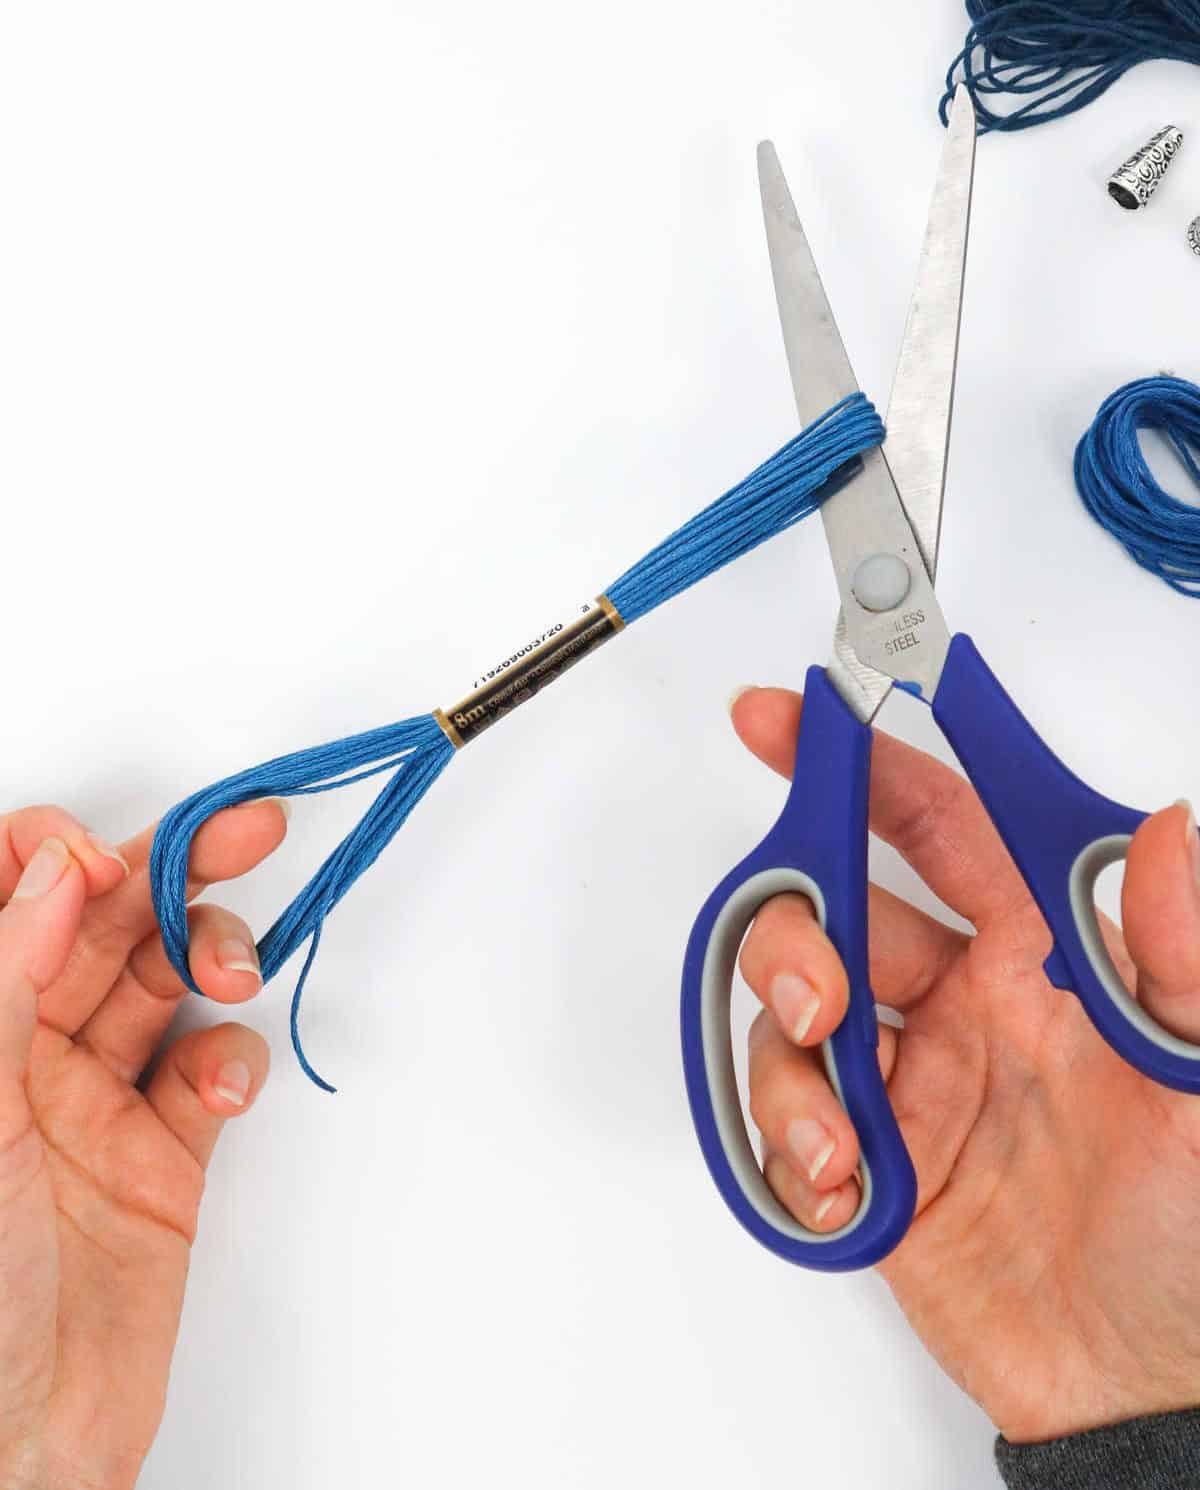

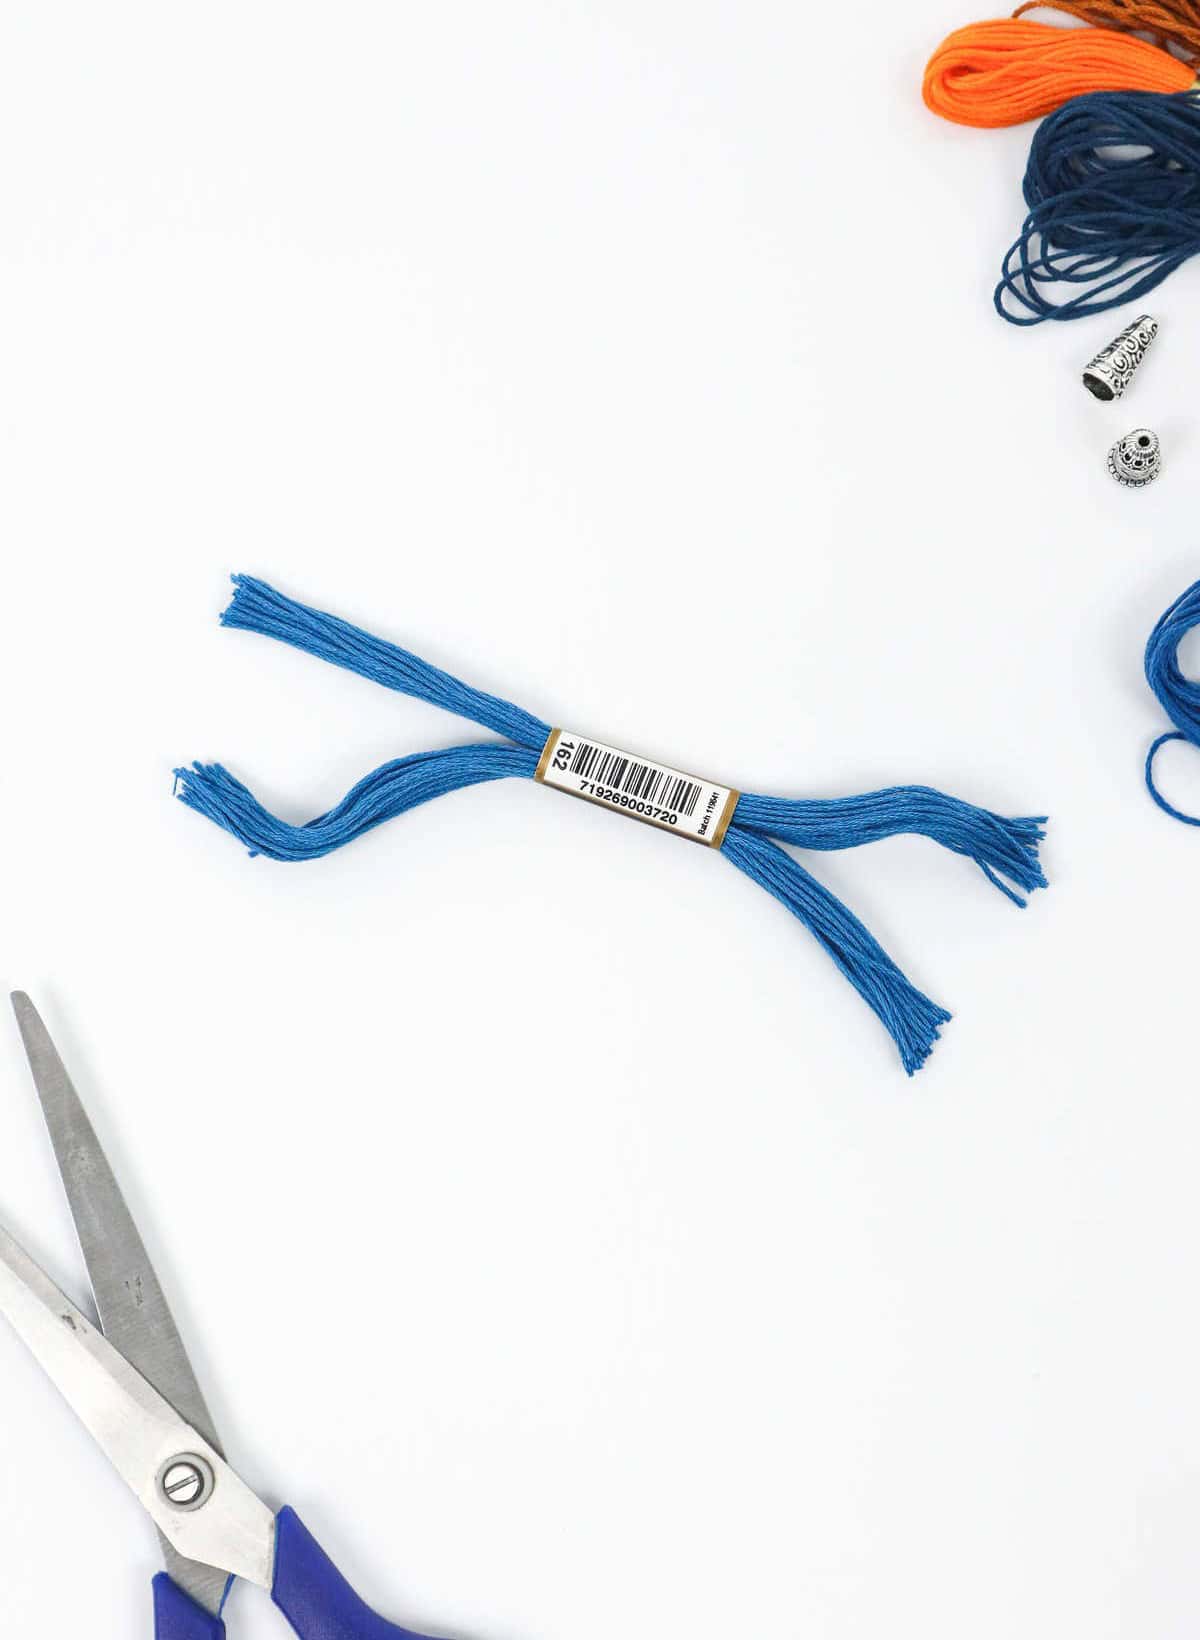
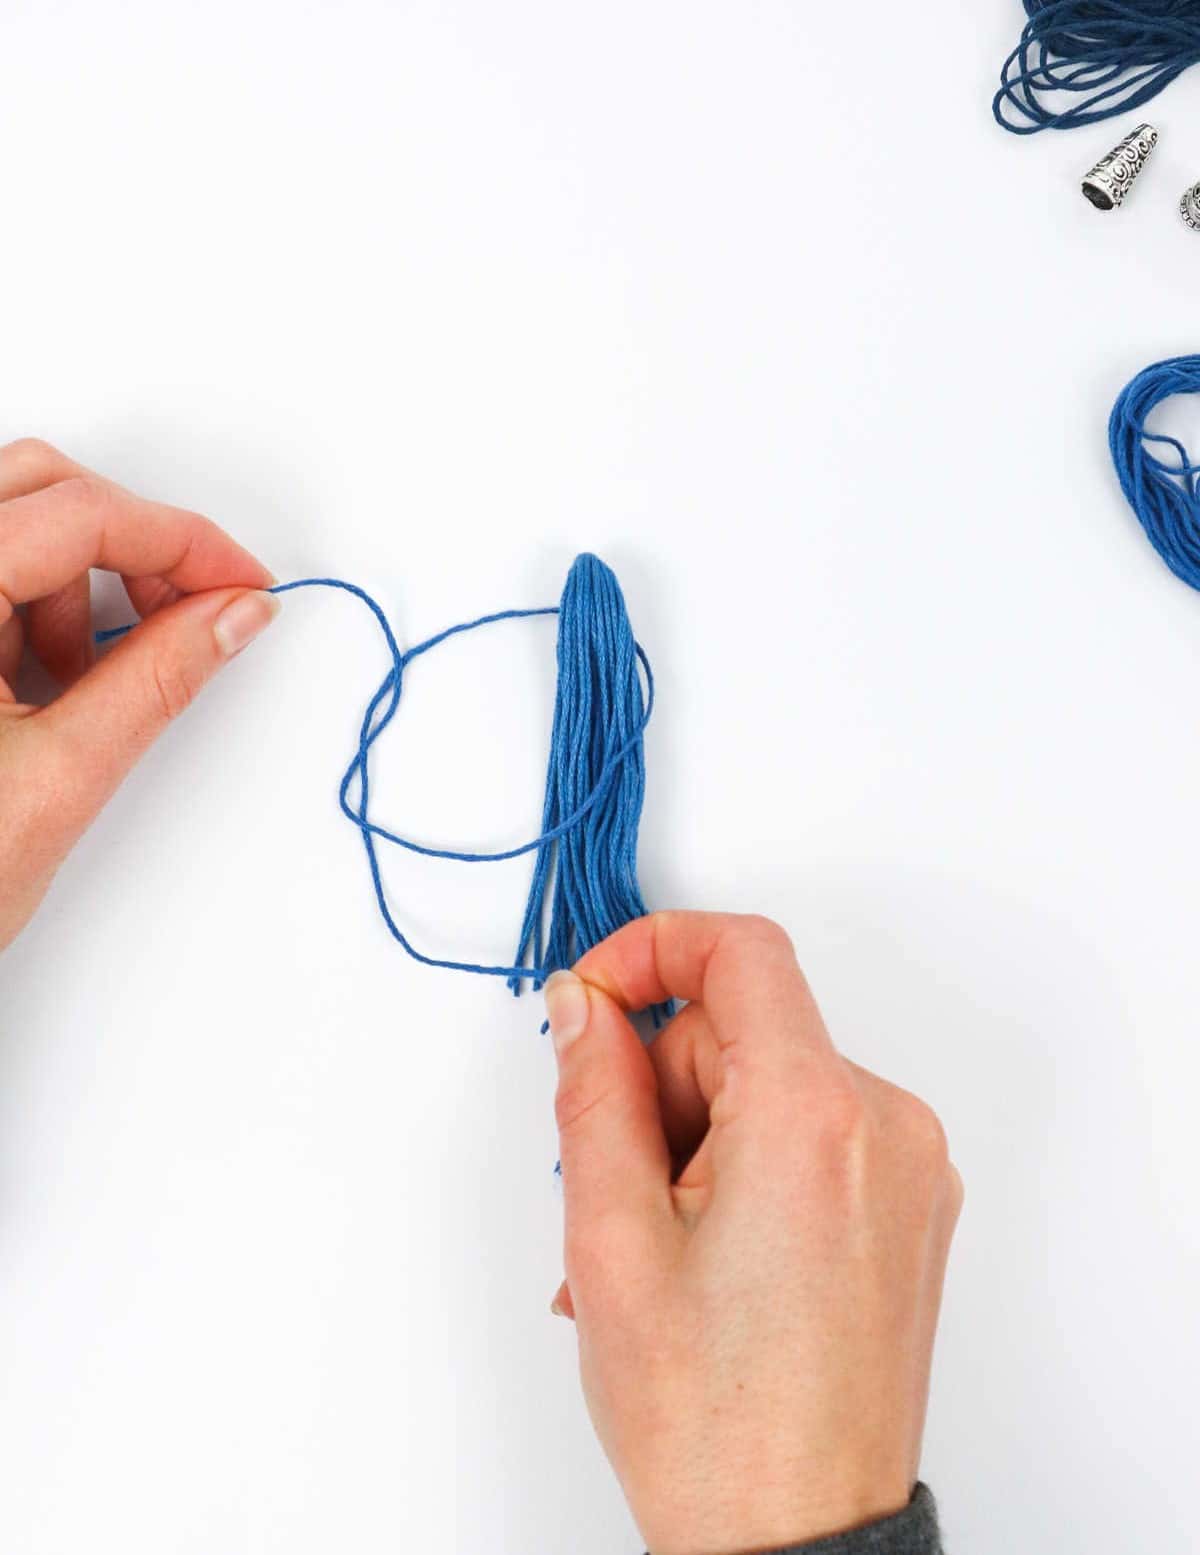
To begin the process, locate the central loop at either extremity of the thread, ensuring that the small plastic wrapping surrounding the midpoint remains unscathed. Next, utilizing a pair of scissors, carefully trim the two ends by cutting through all the threads encircling the center loop, achieving a precise and deliberate snip.
Step 2
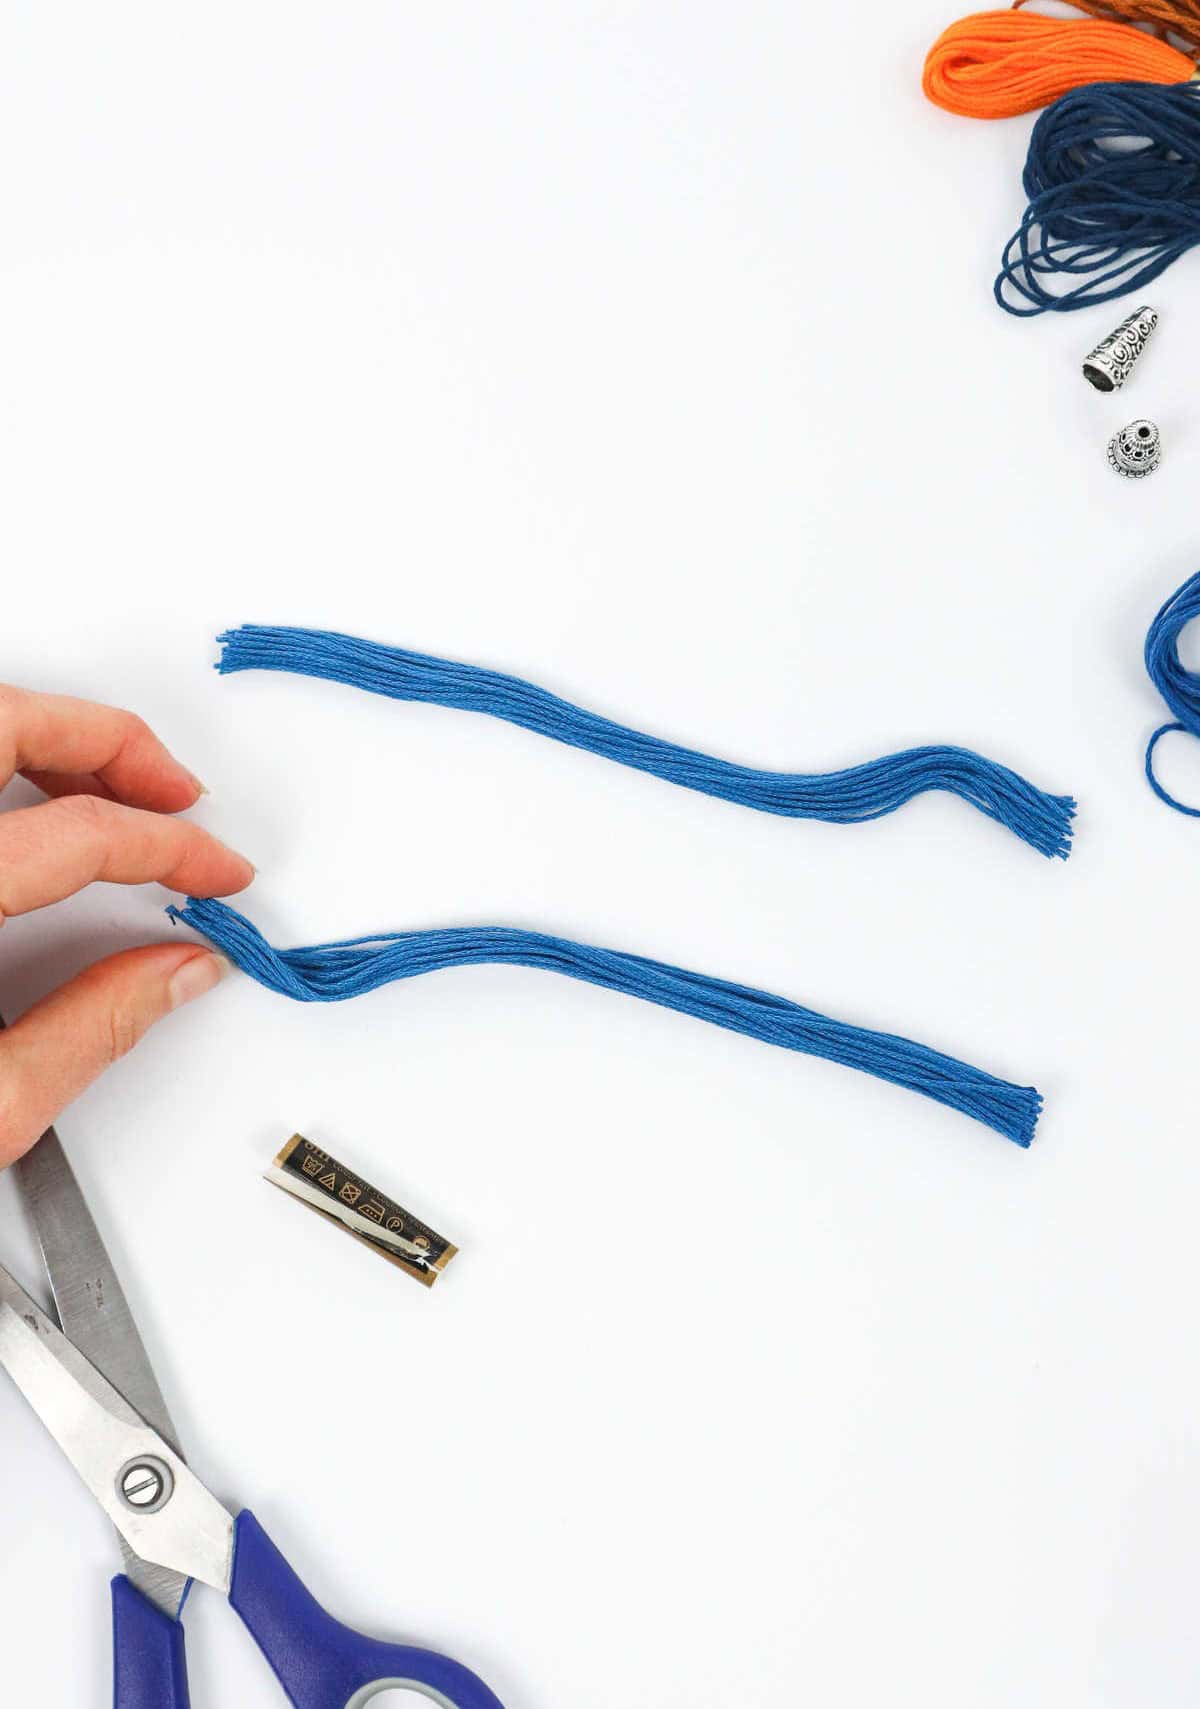
As you prepare to begin embroidering, it’s essential to first divide your threads into manageable sections. To do this, gently remove the wrapper from the thread bundle and then split it into two identical portions.
Step 3
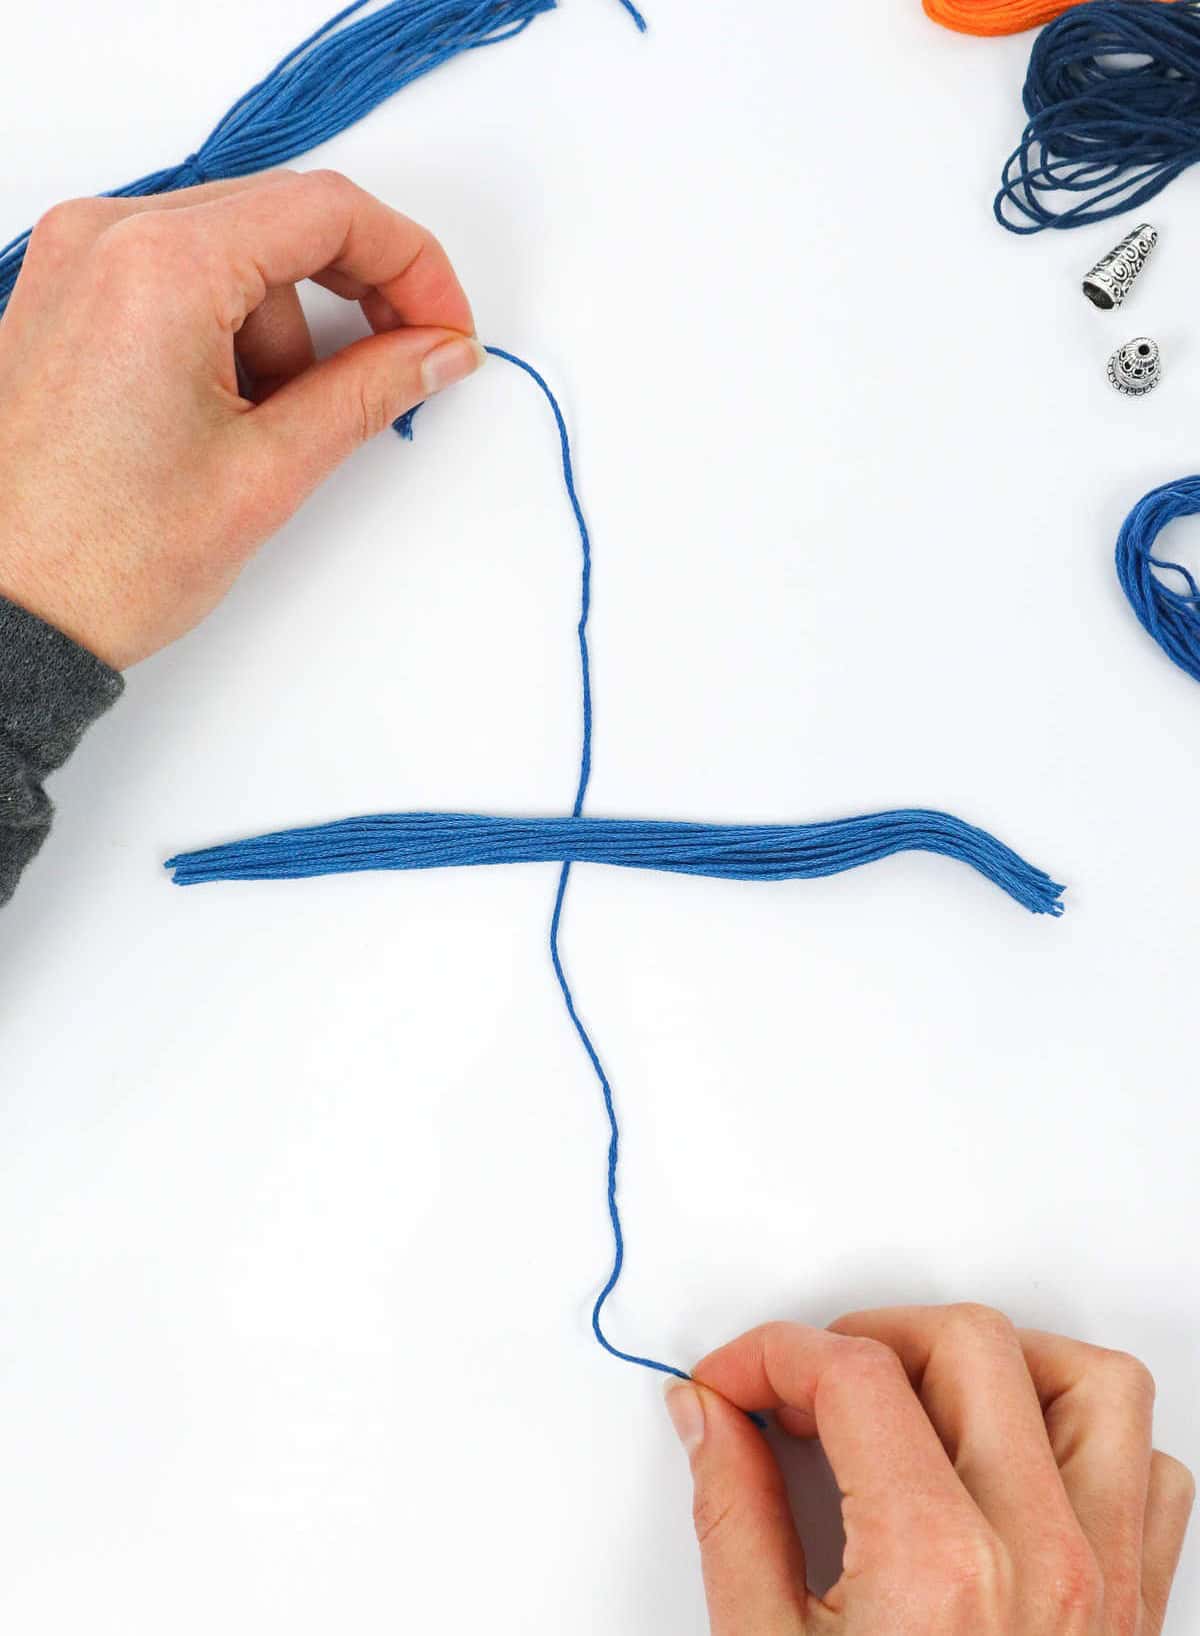
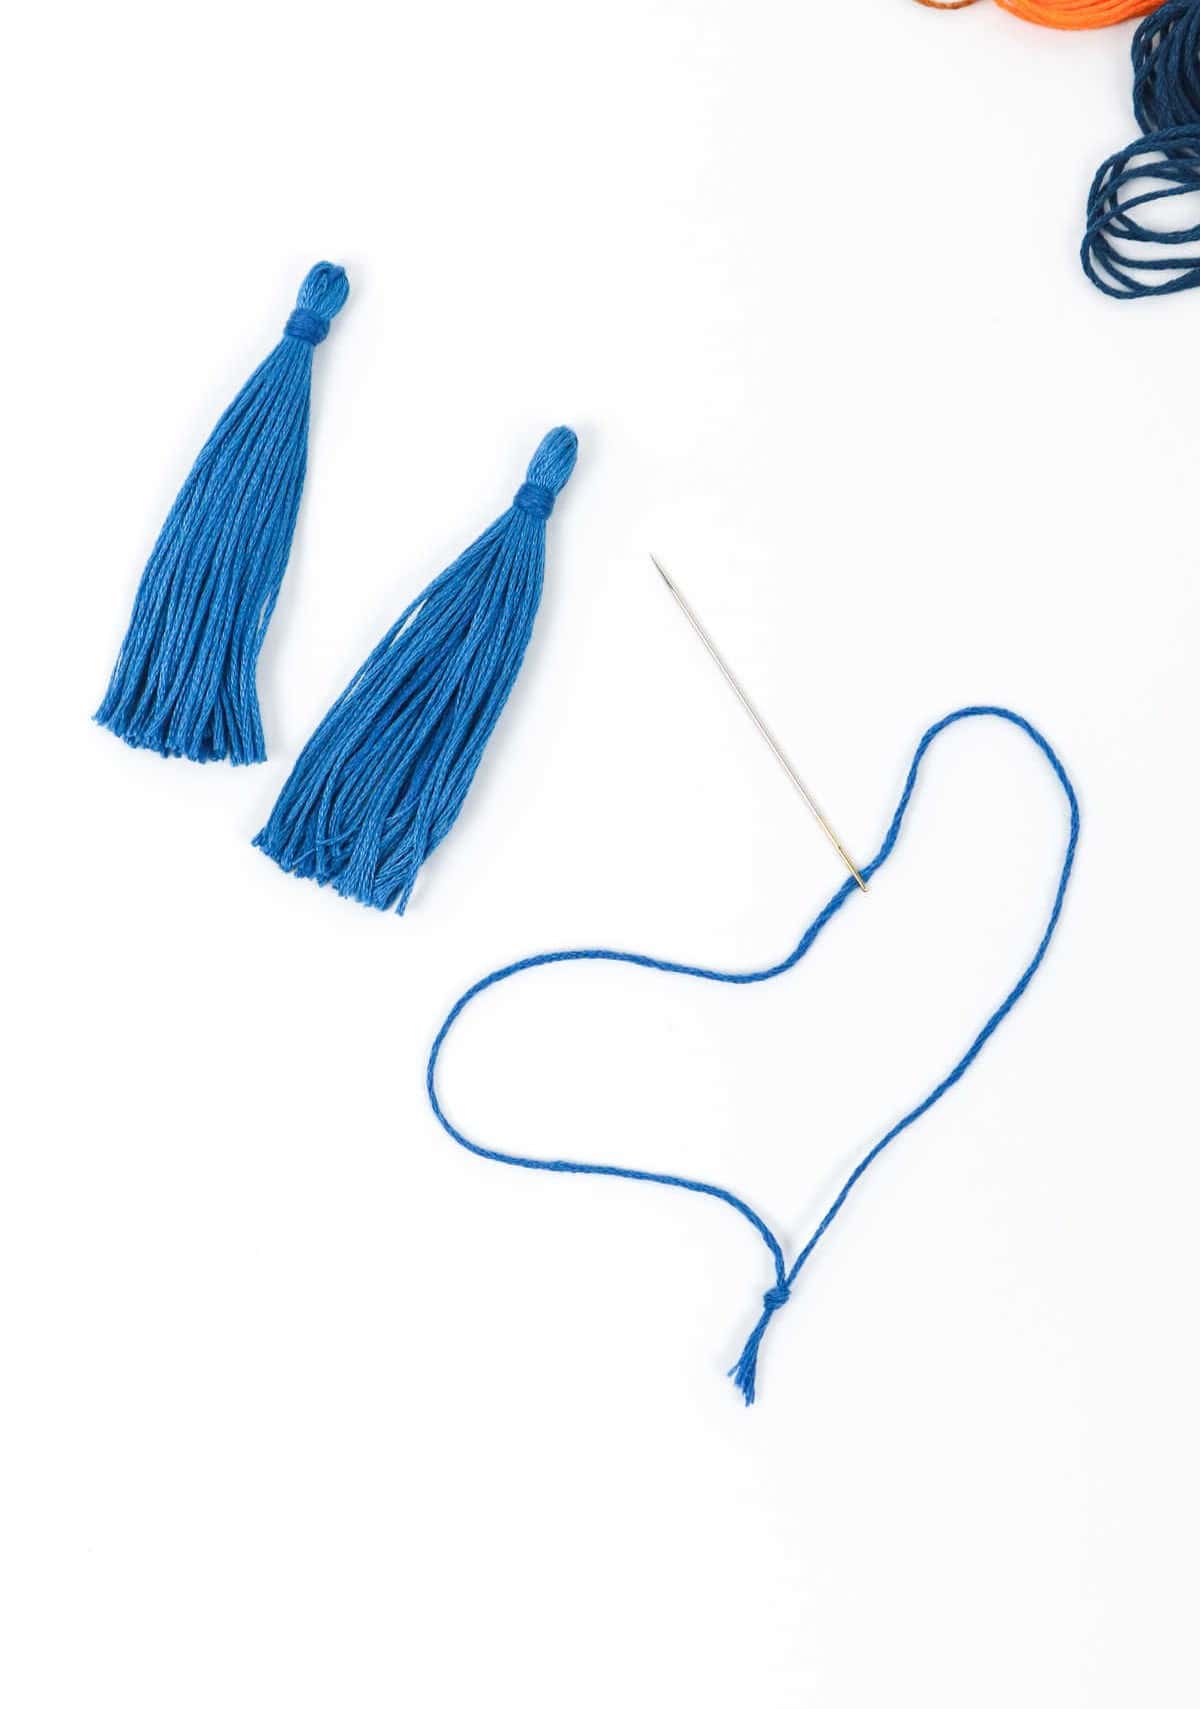
To secure the two halves together, start by cutting an 8-inch length of embroidery thread in a matching color. Next, carefully pull the thread beneath one half, positioning it roughly at the midpoint. Create a knot to keep the thread in place. Repeat this process with the other half, ensuring that both knots are evenly spaced and secure.
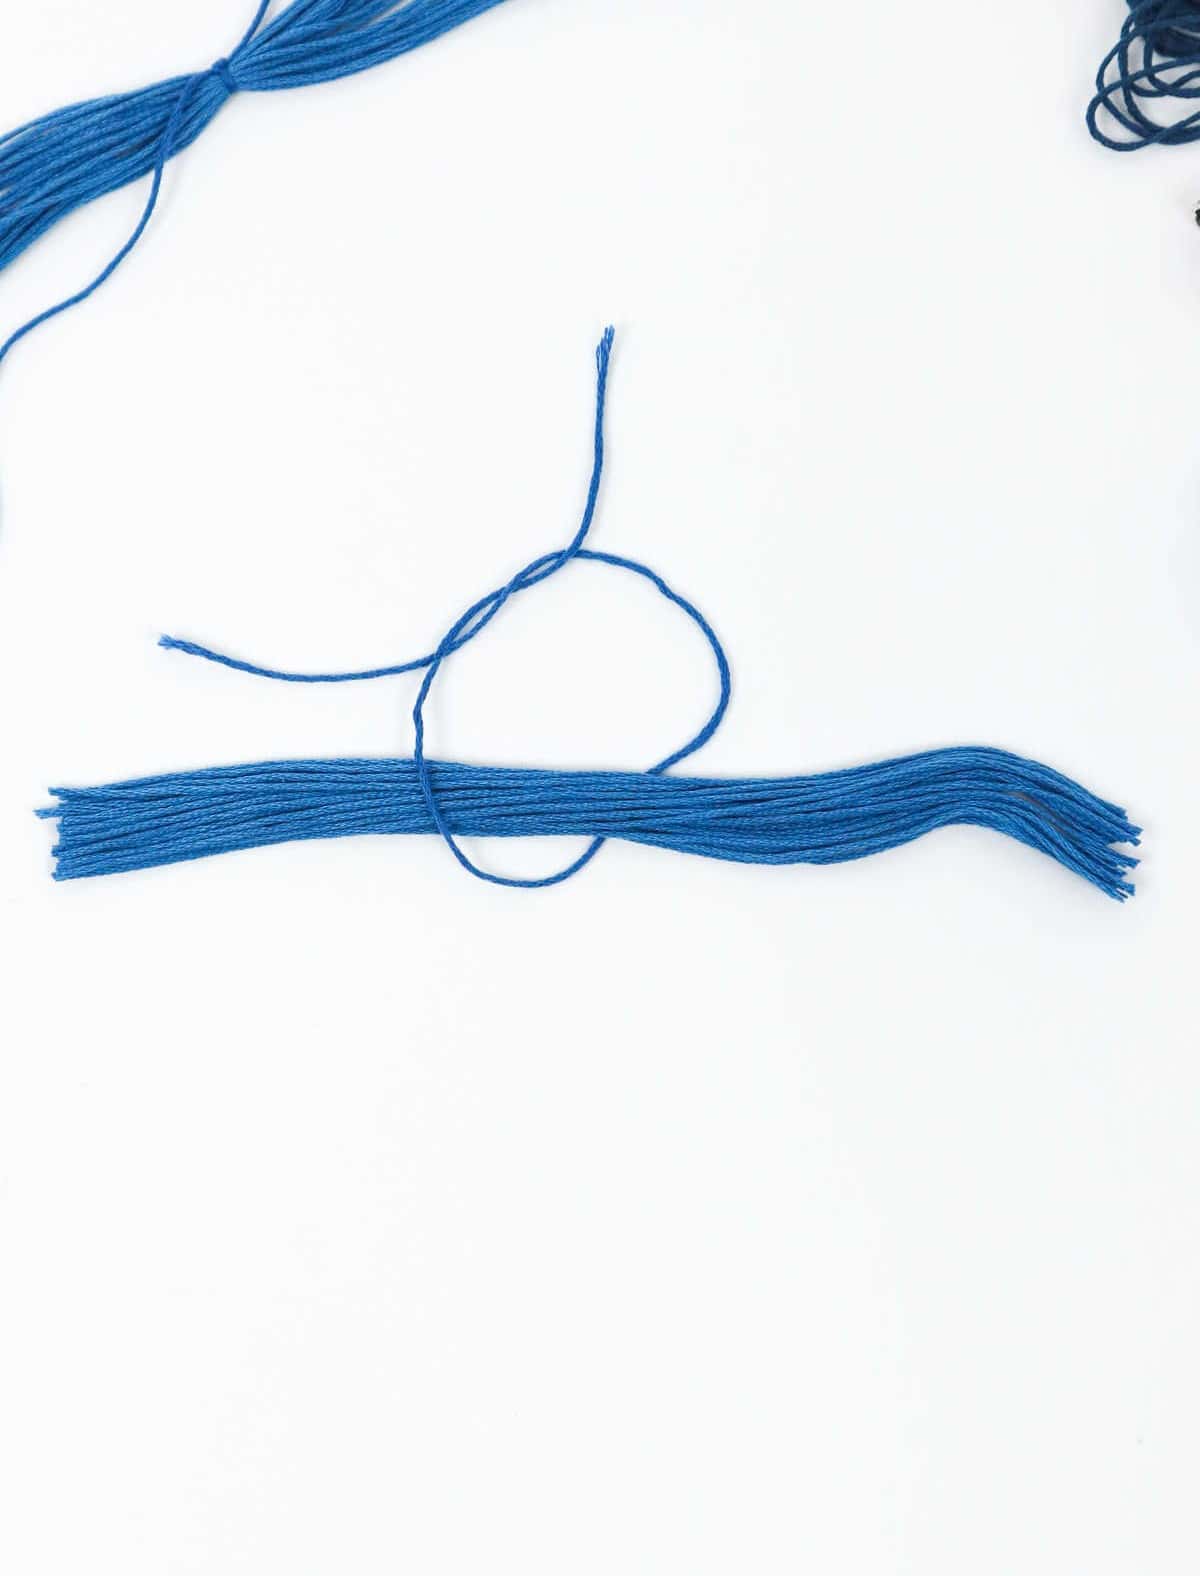
Step 4

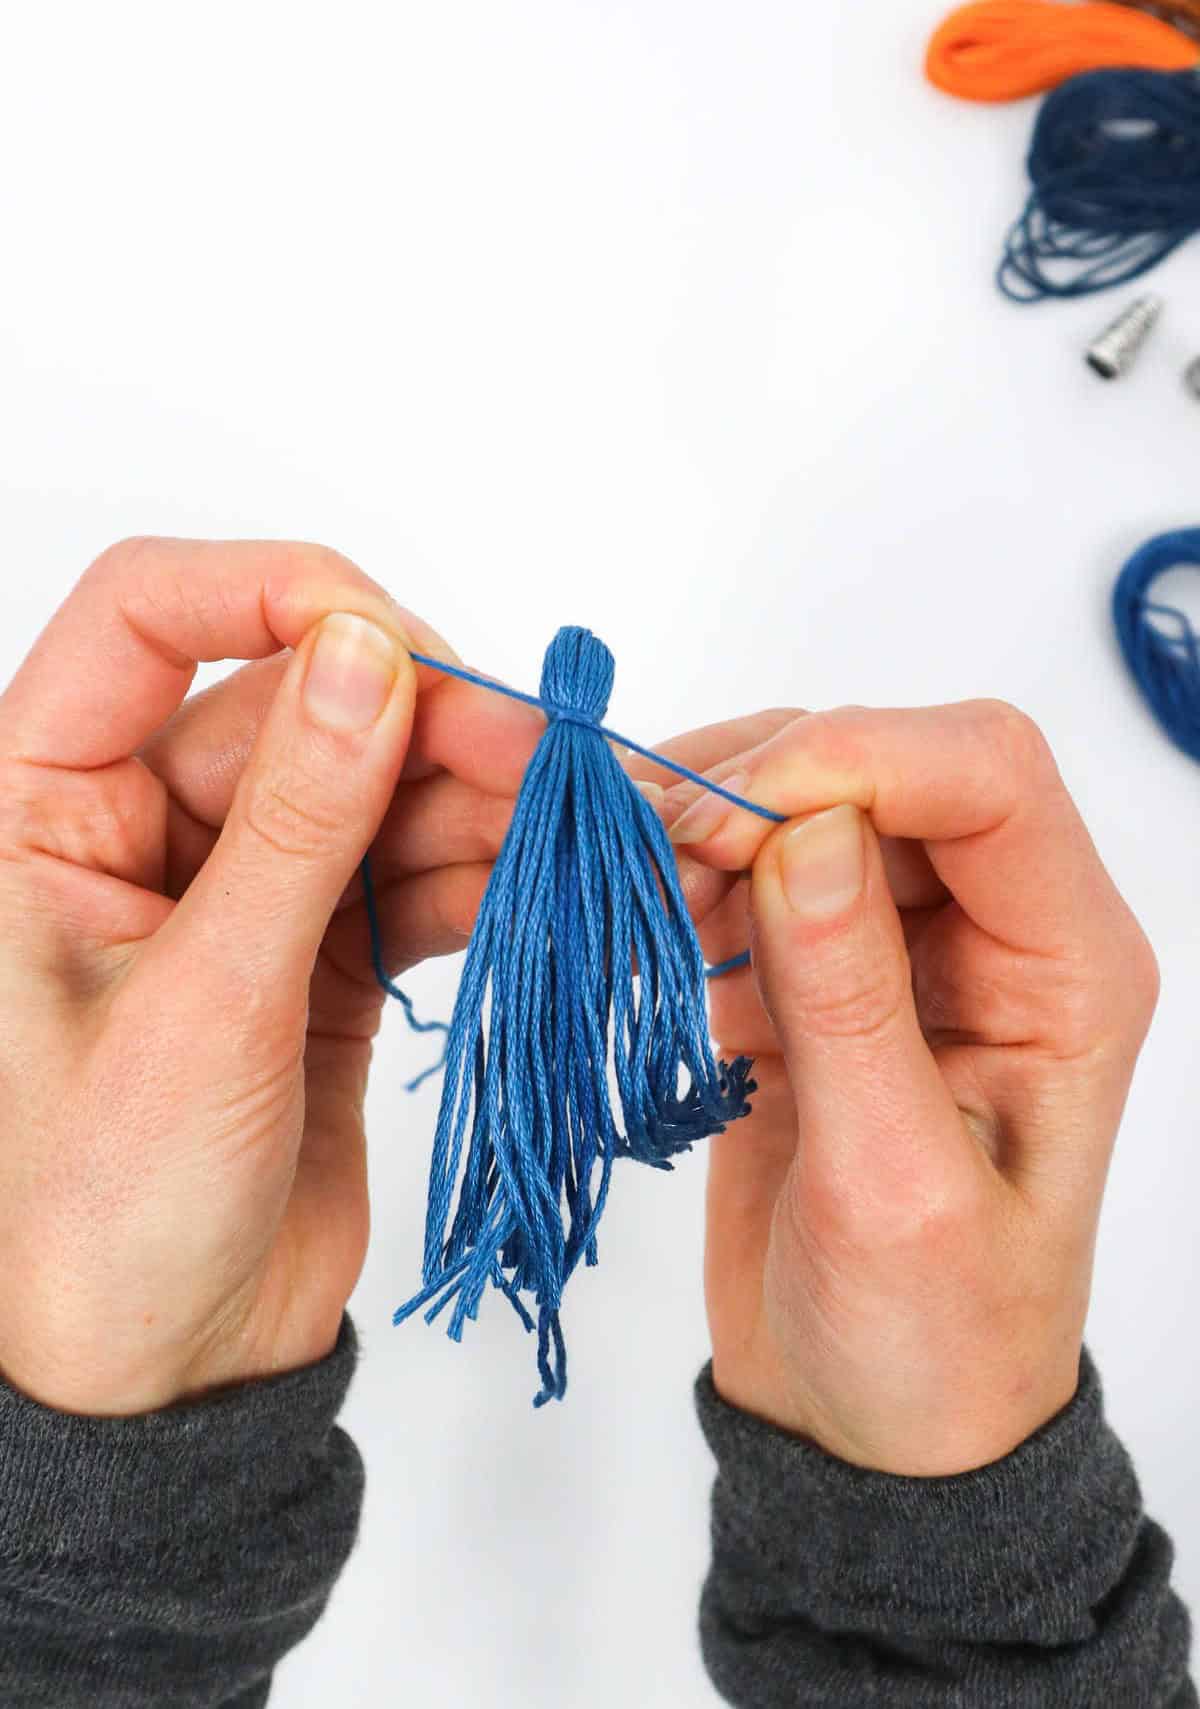
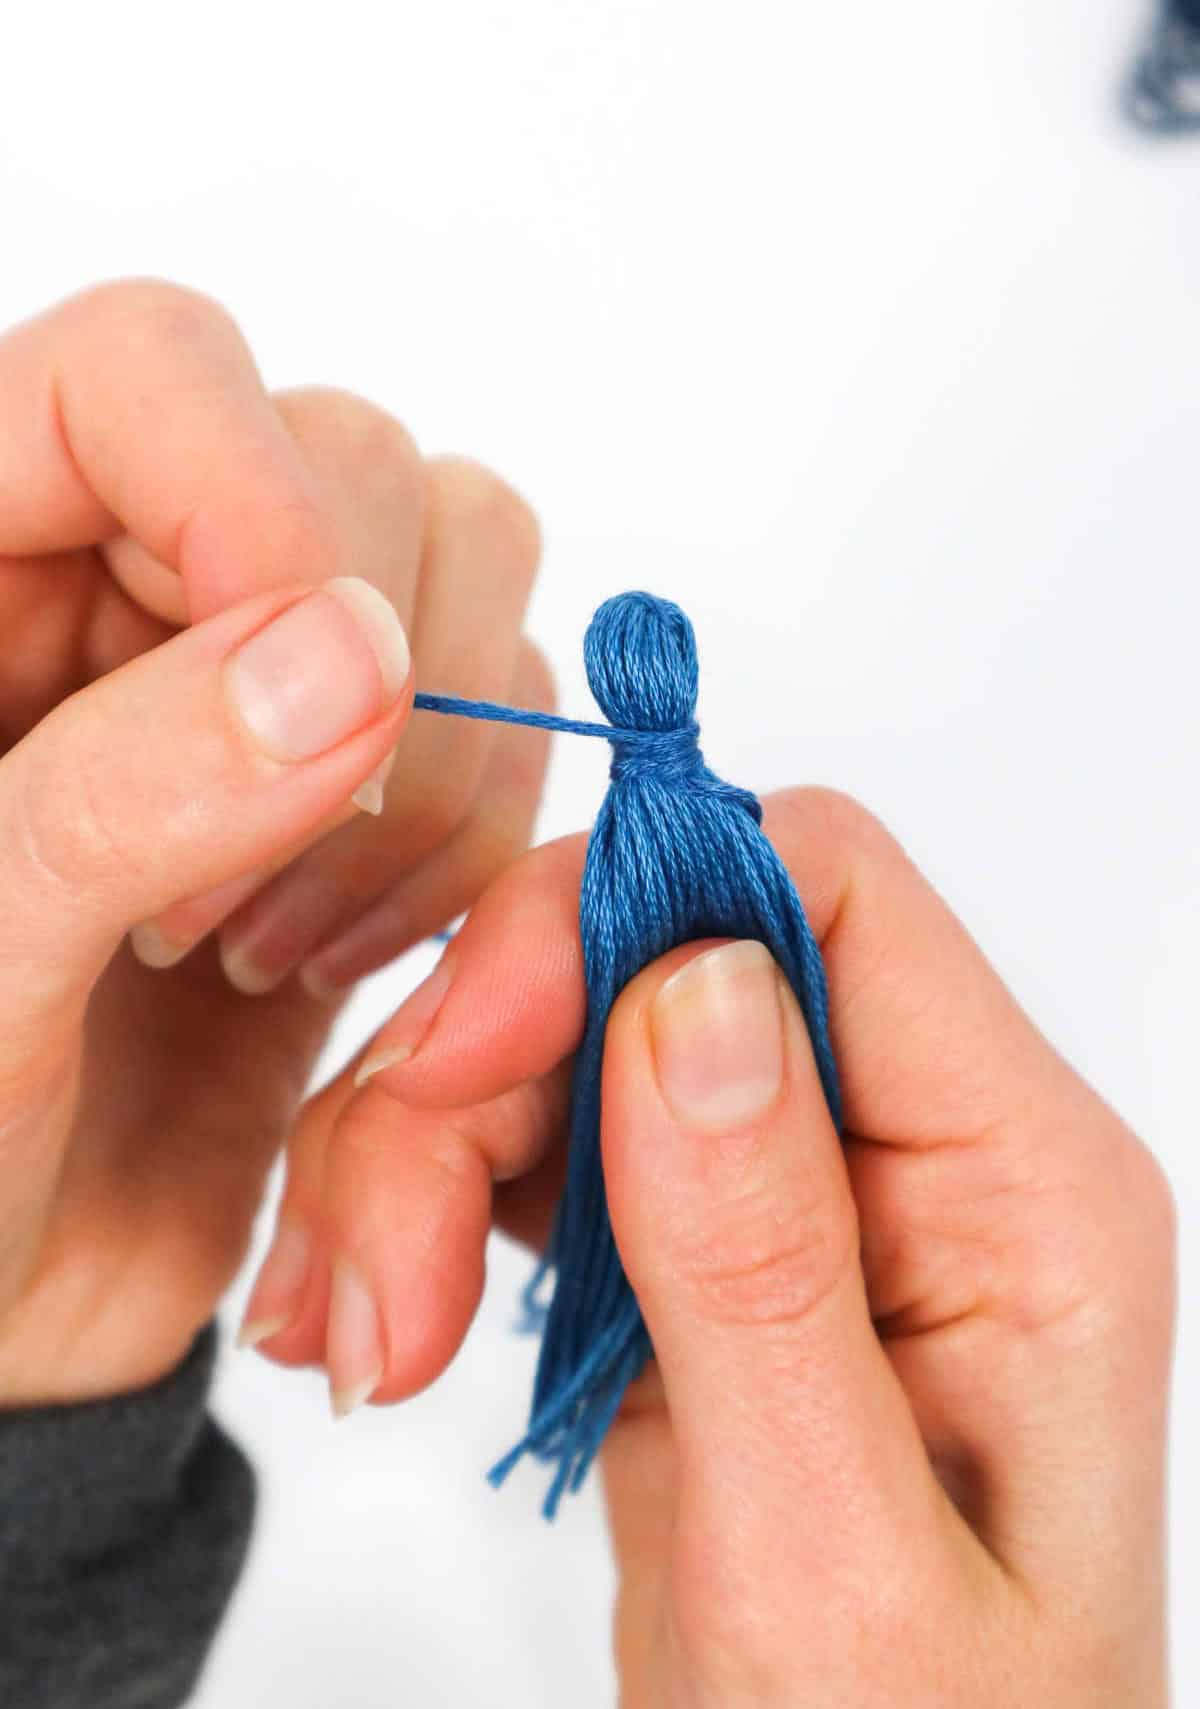
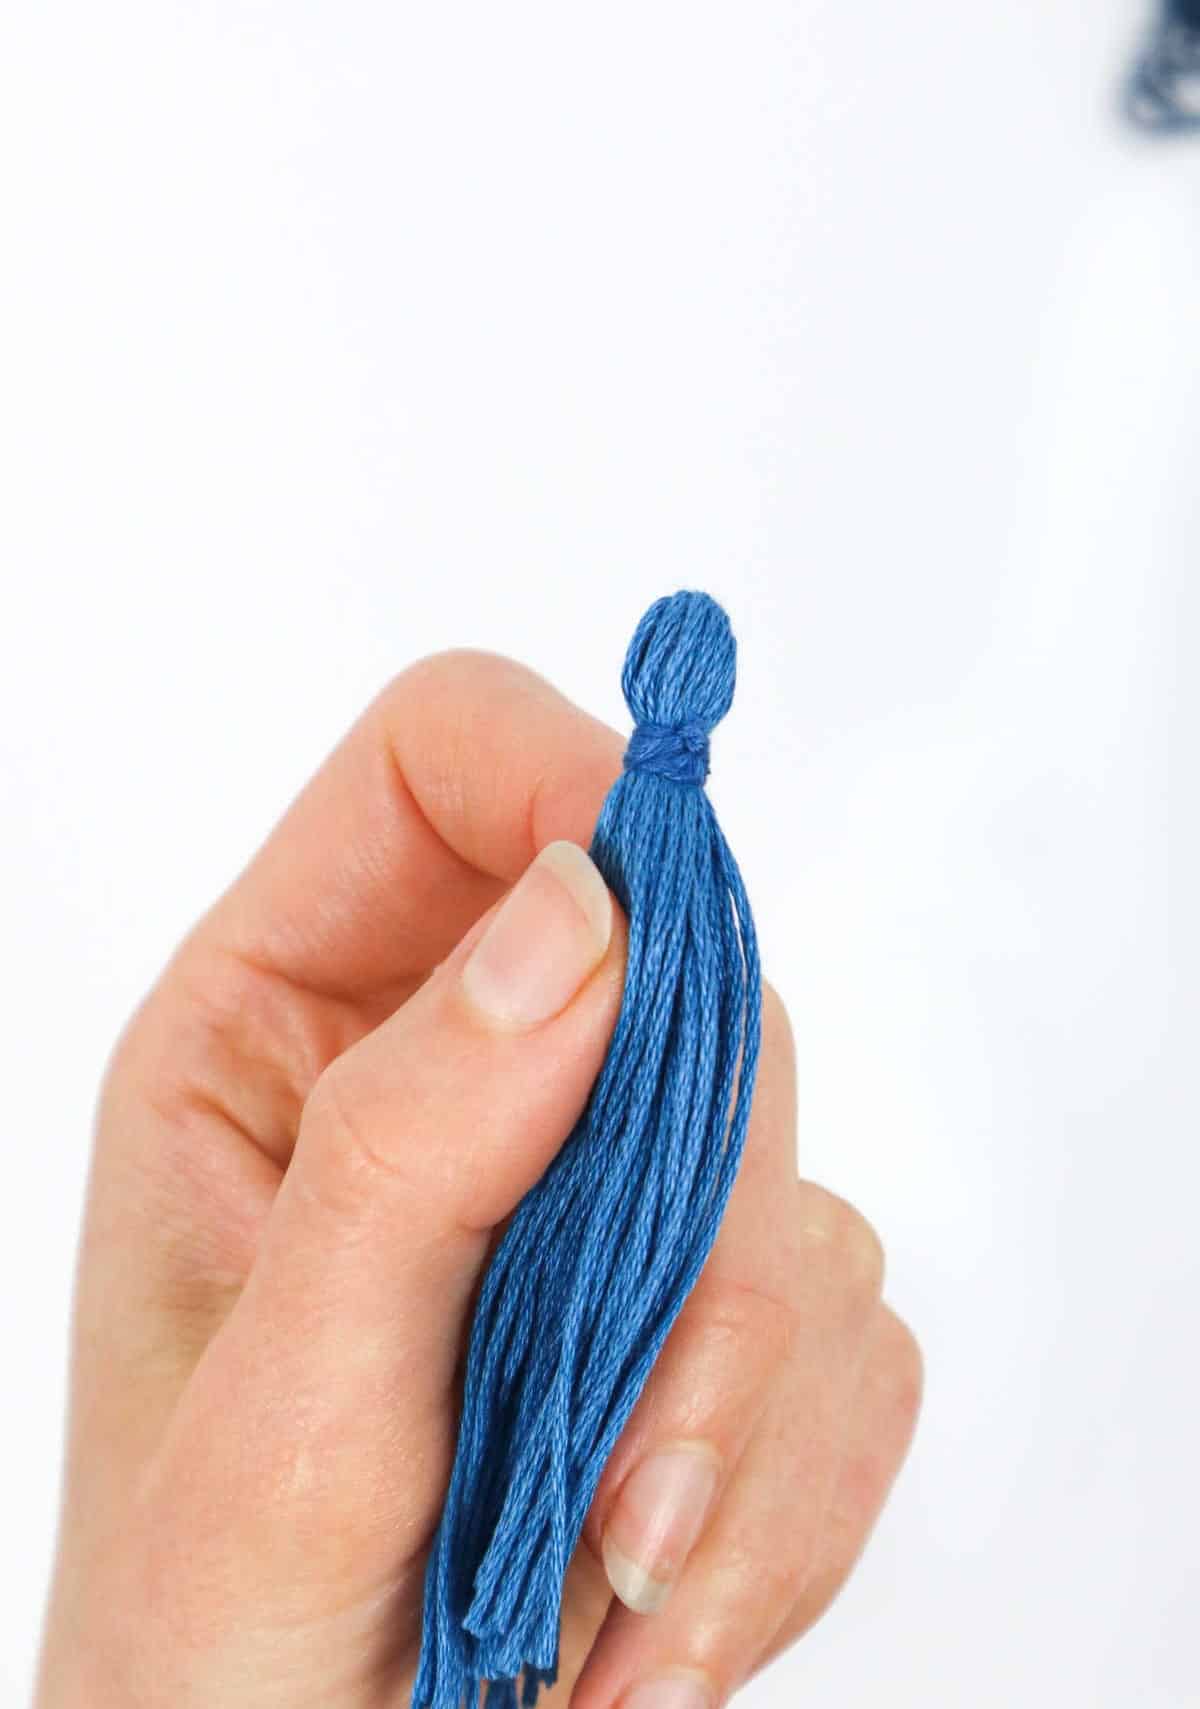
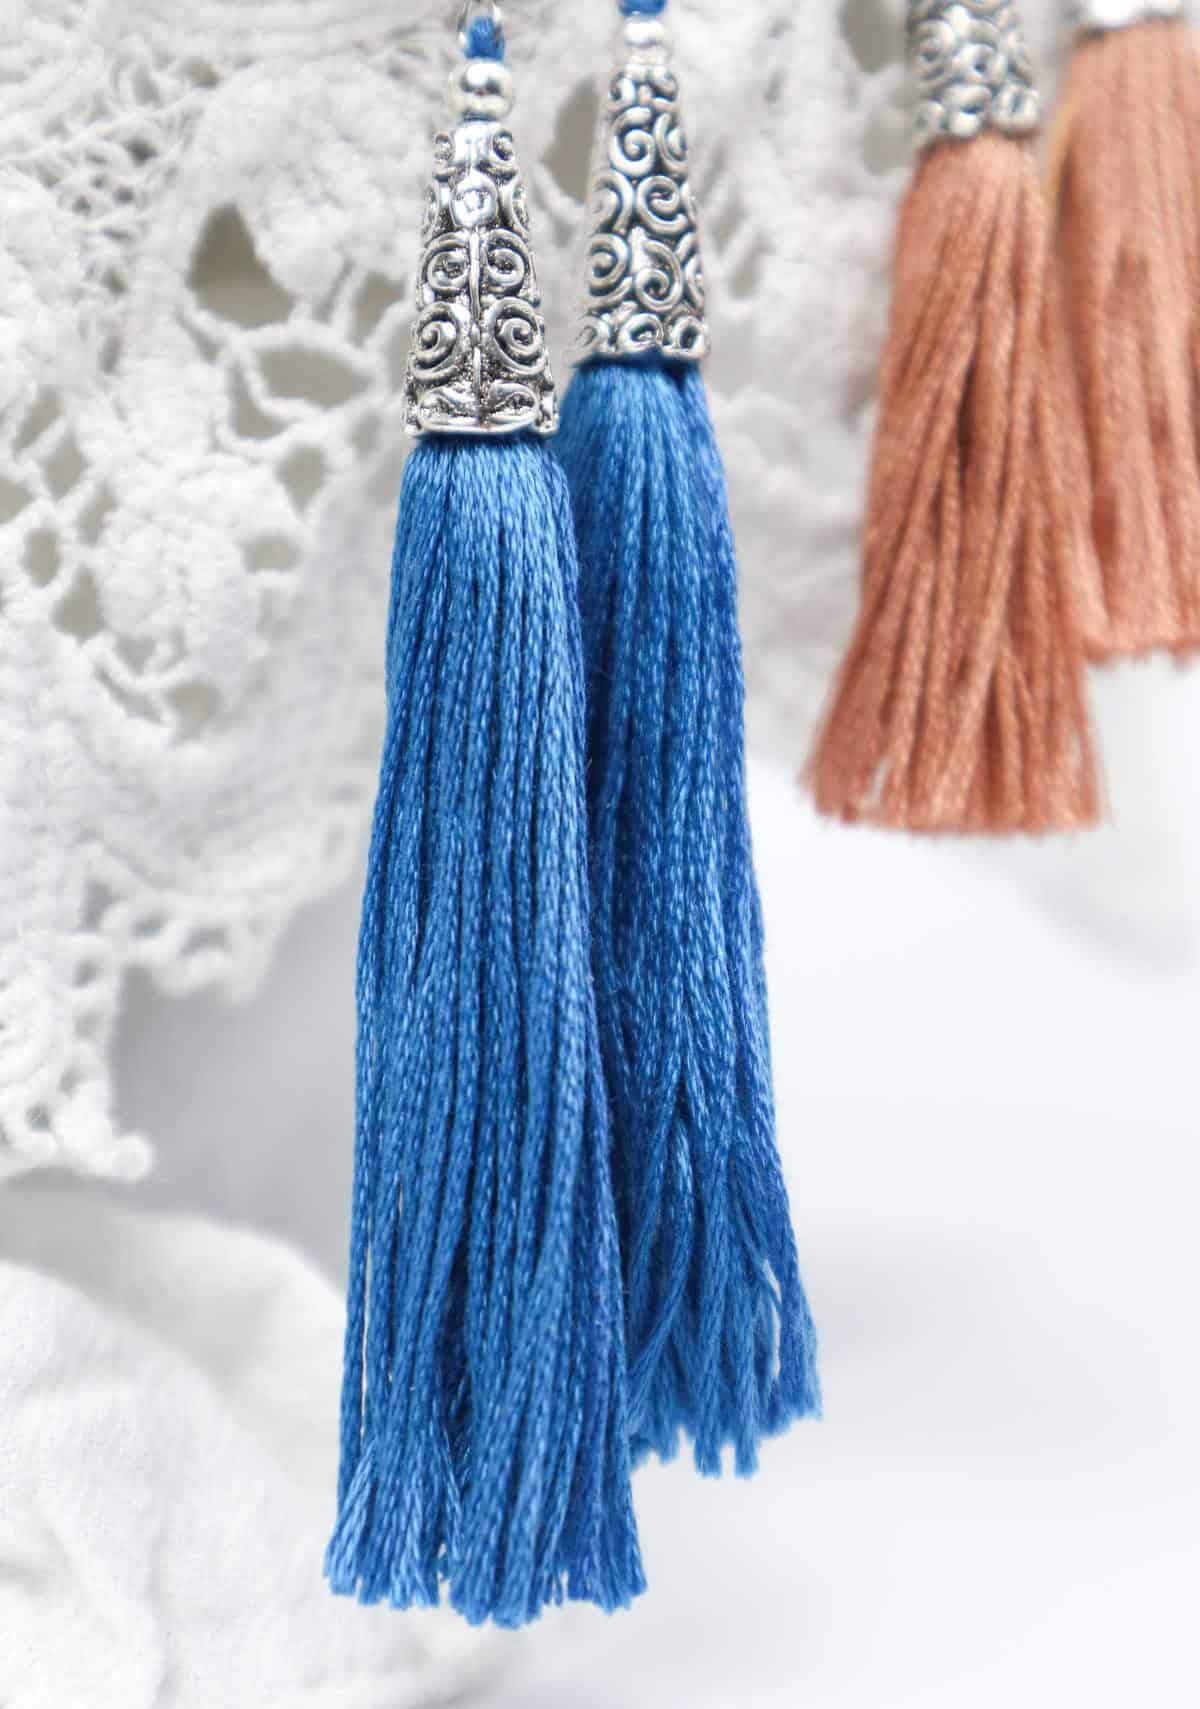
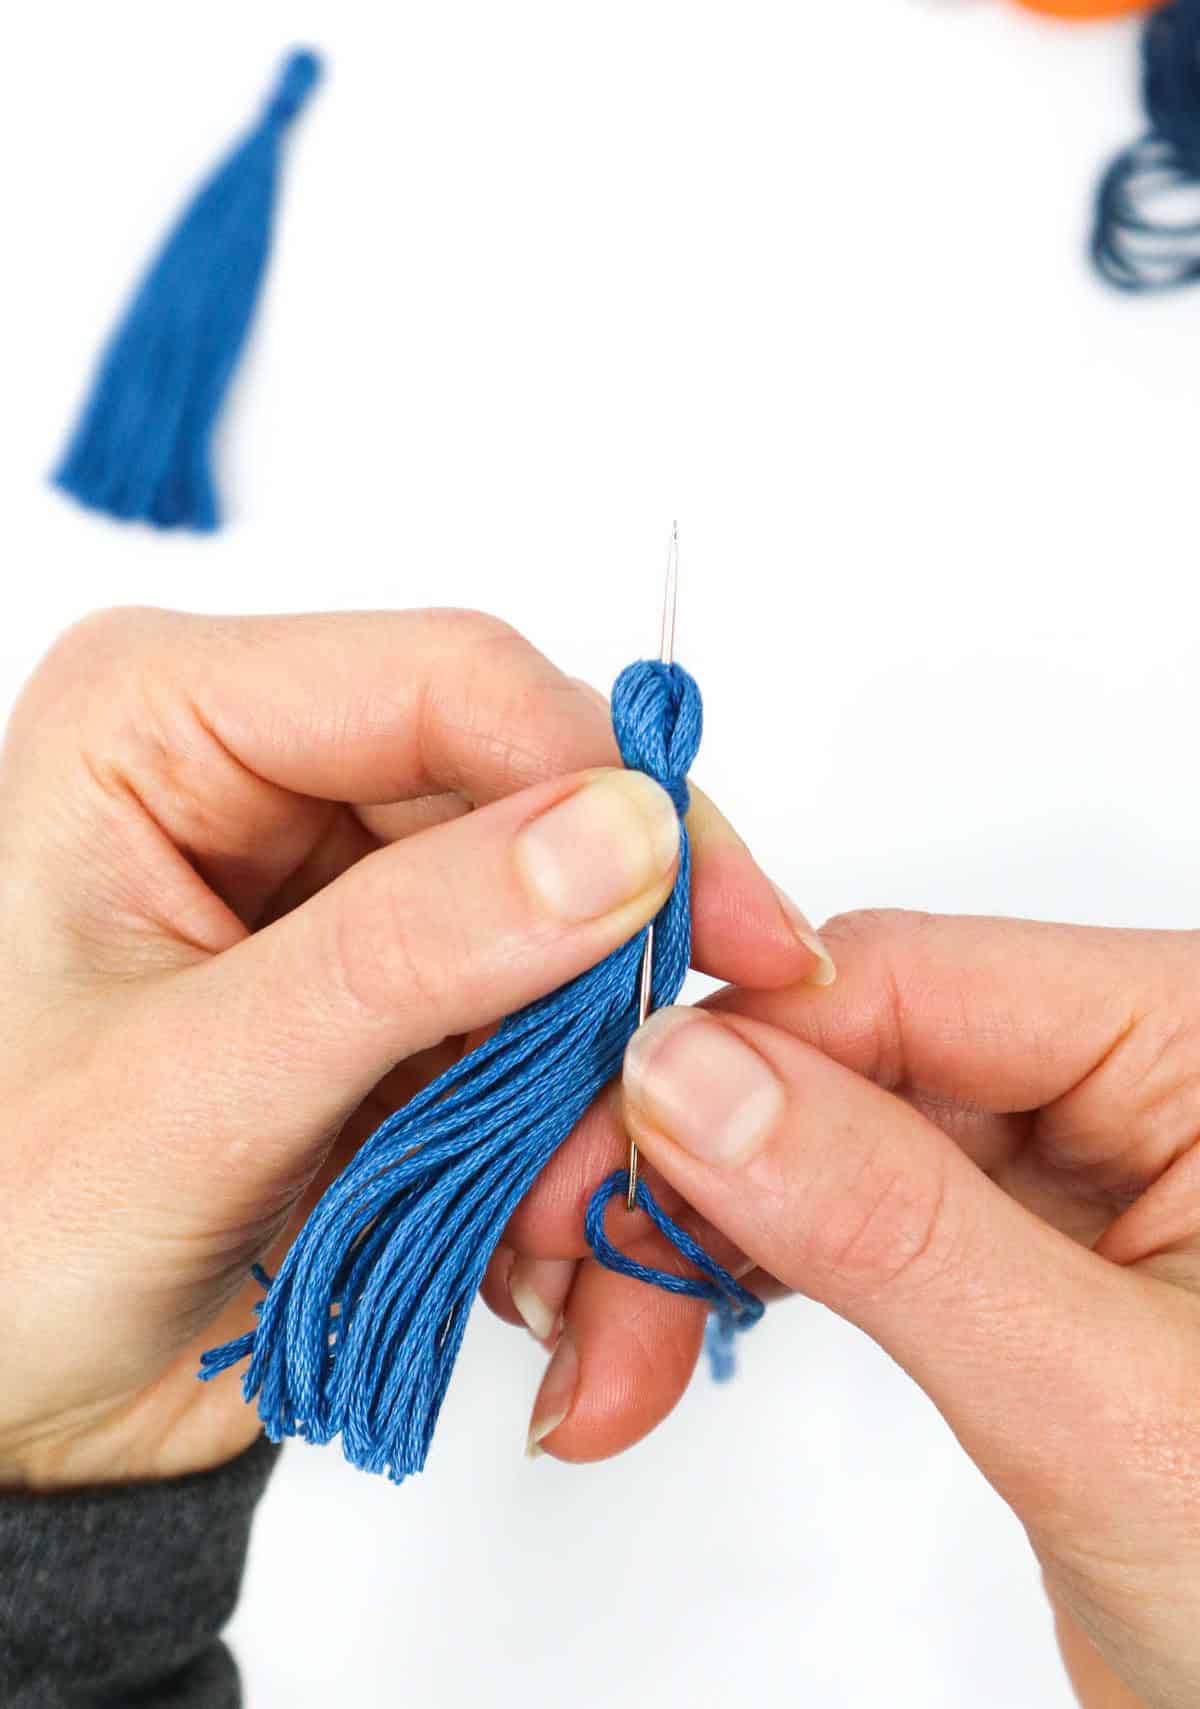
To begin with, take the folded thread bundle and fold it in half along the knotted seam, as depicted below. Next, cut another thread strand measuring 10 inches in length and wrap it around the head of the folded threads, roughly 1 centimeter down from the top. Secure the knot by tugging gently at both ends. Subsequently, grasp the longer end and coil it around the head a few times. Finally, tie a double knot to stabilize the strand and trim the excess thread ends.
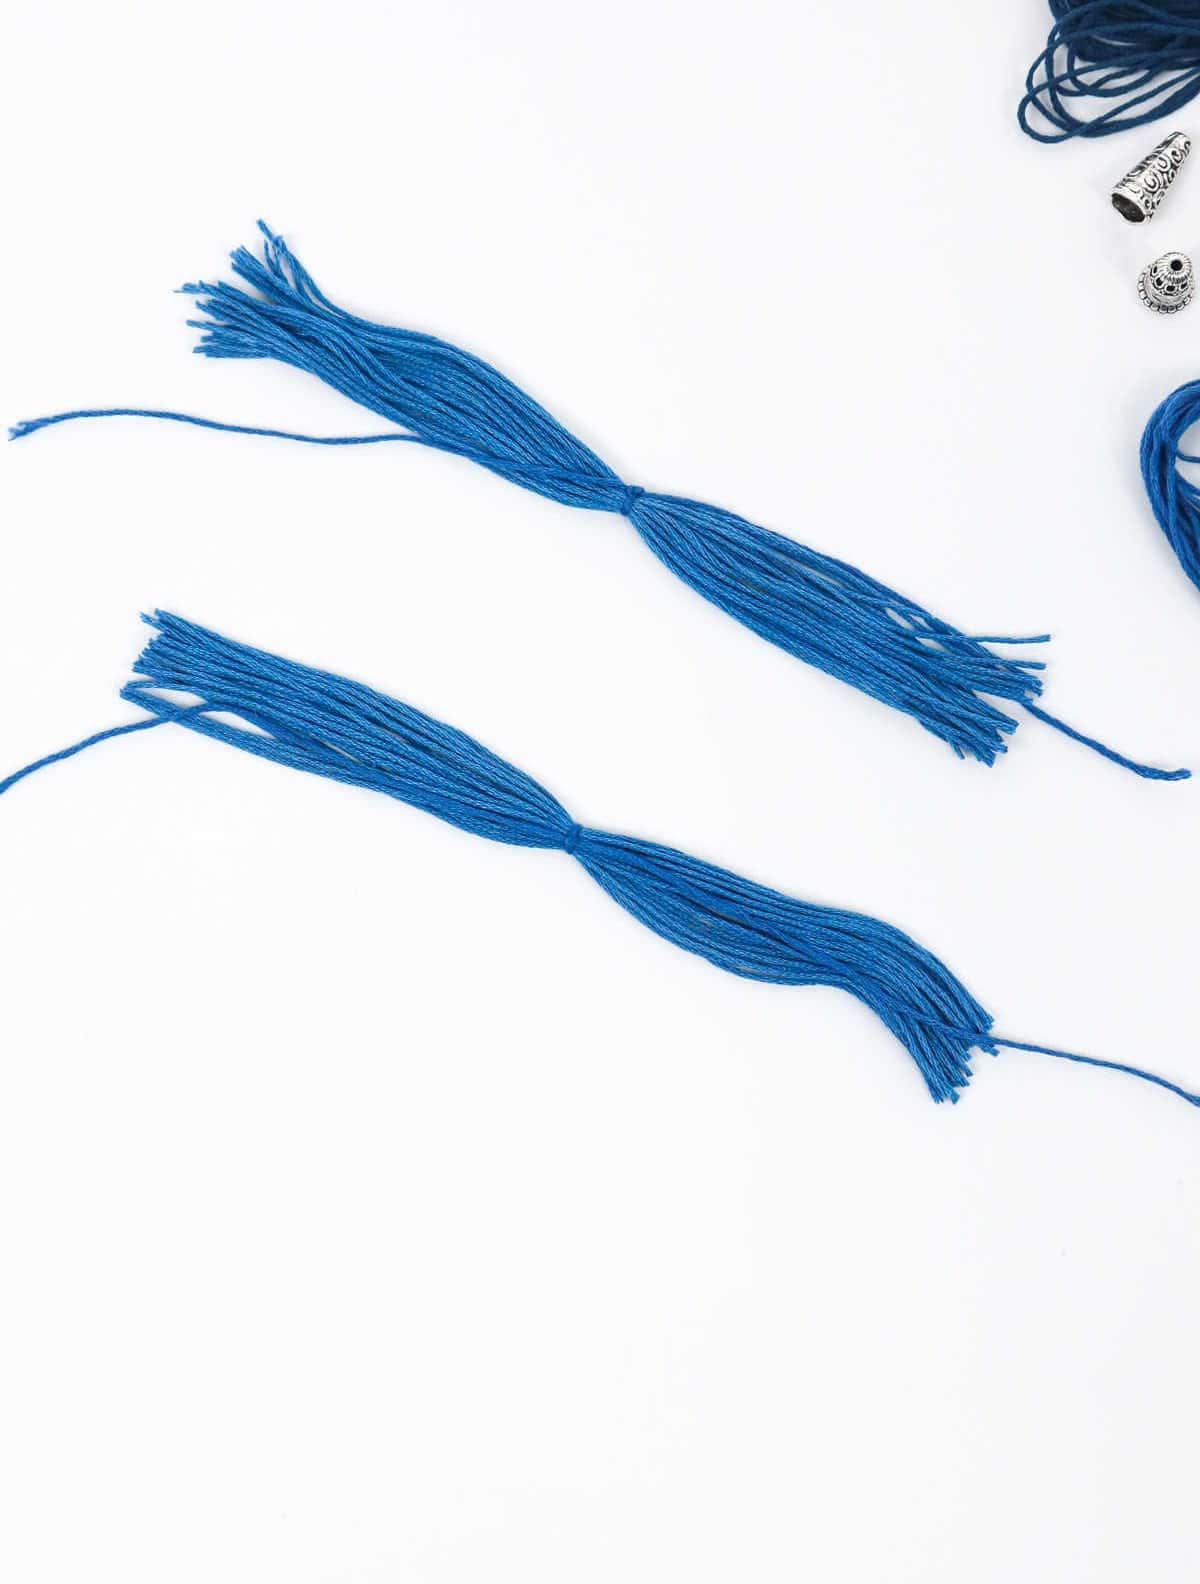
Step 5
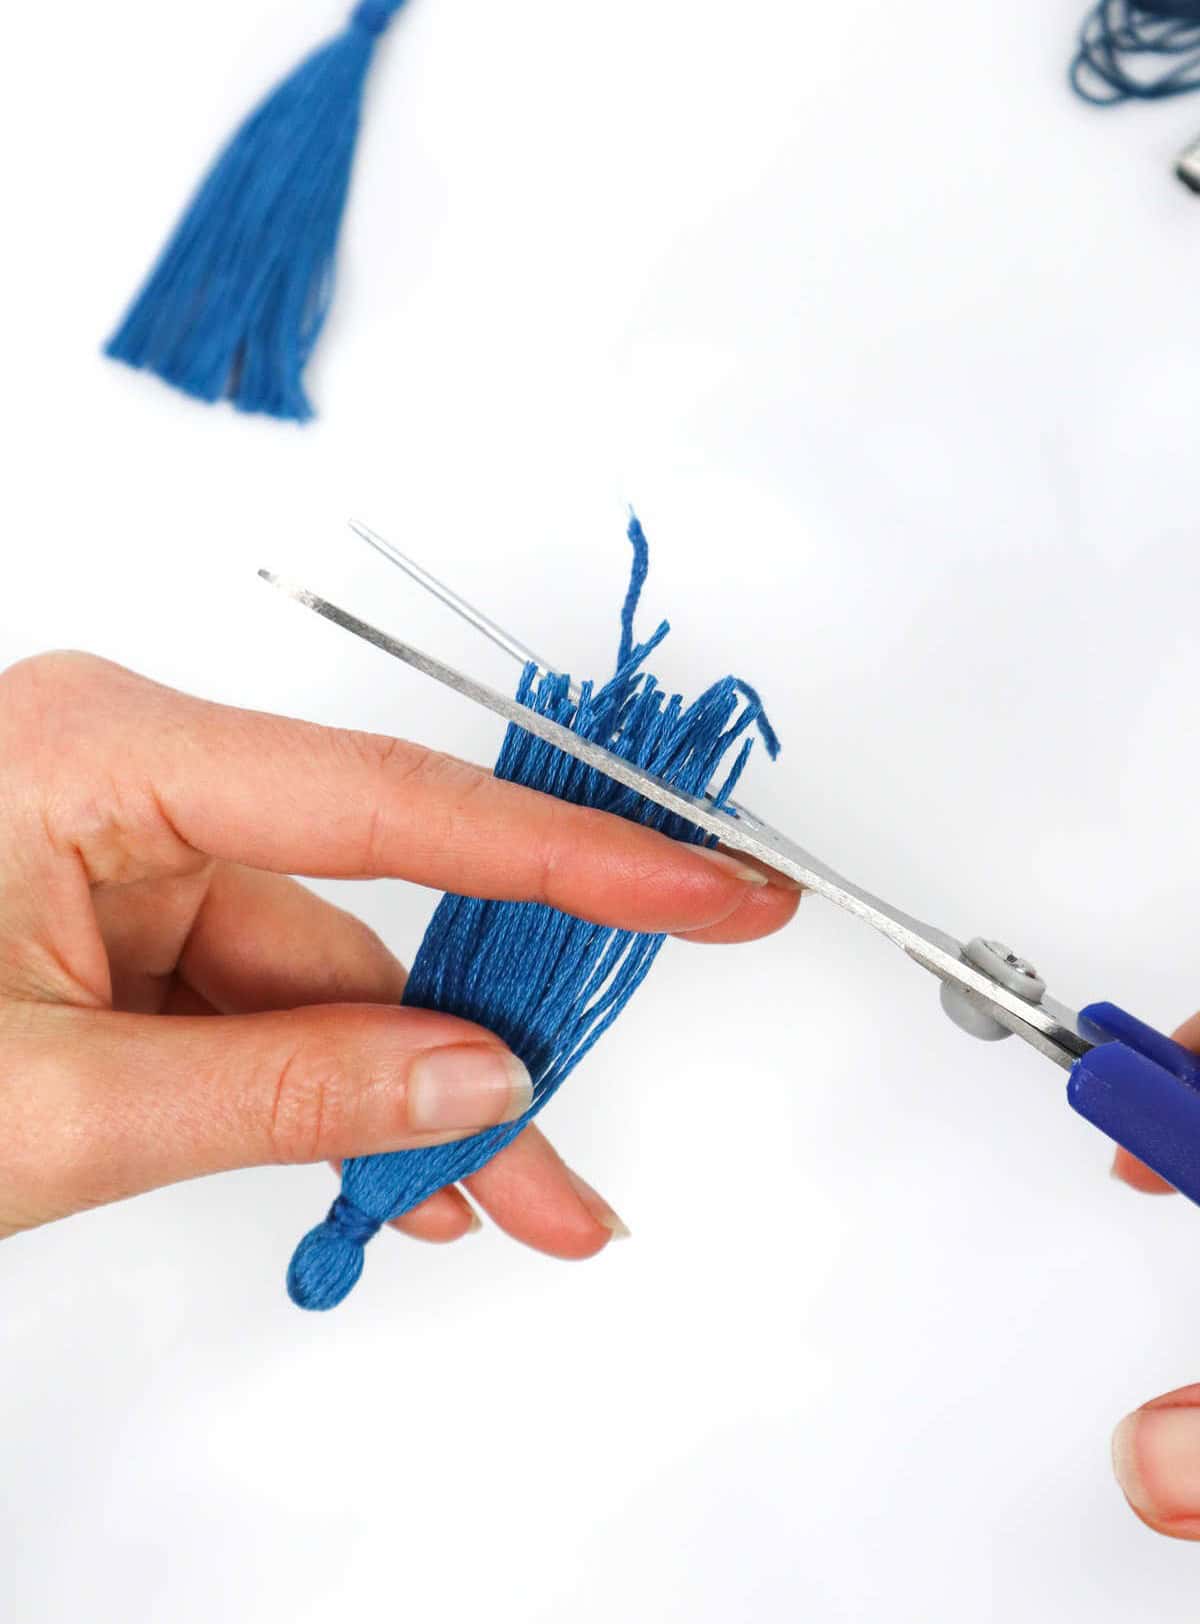
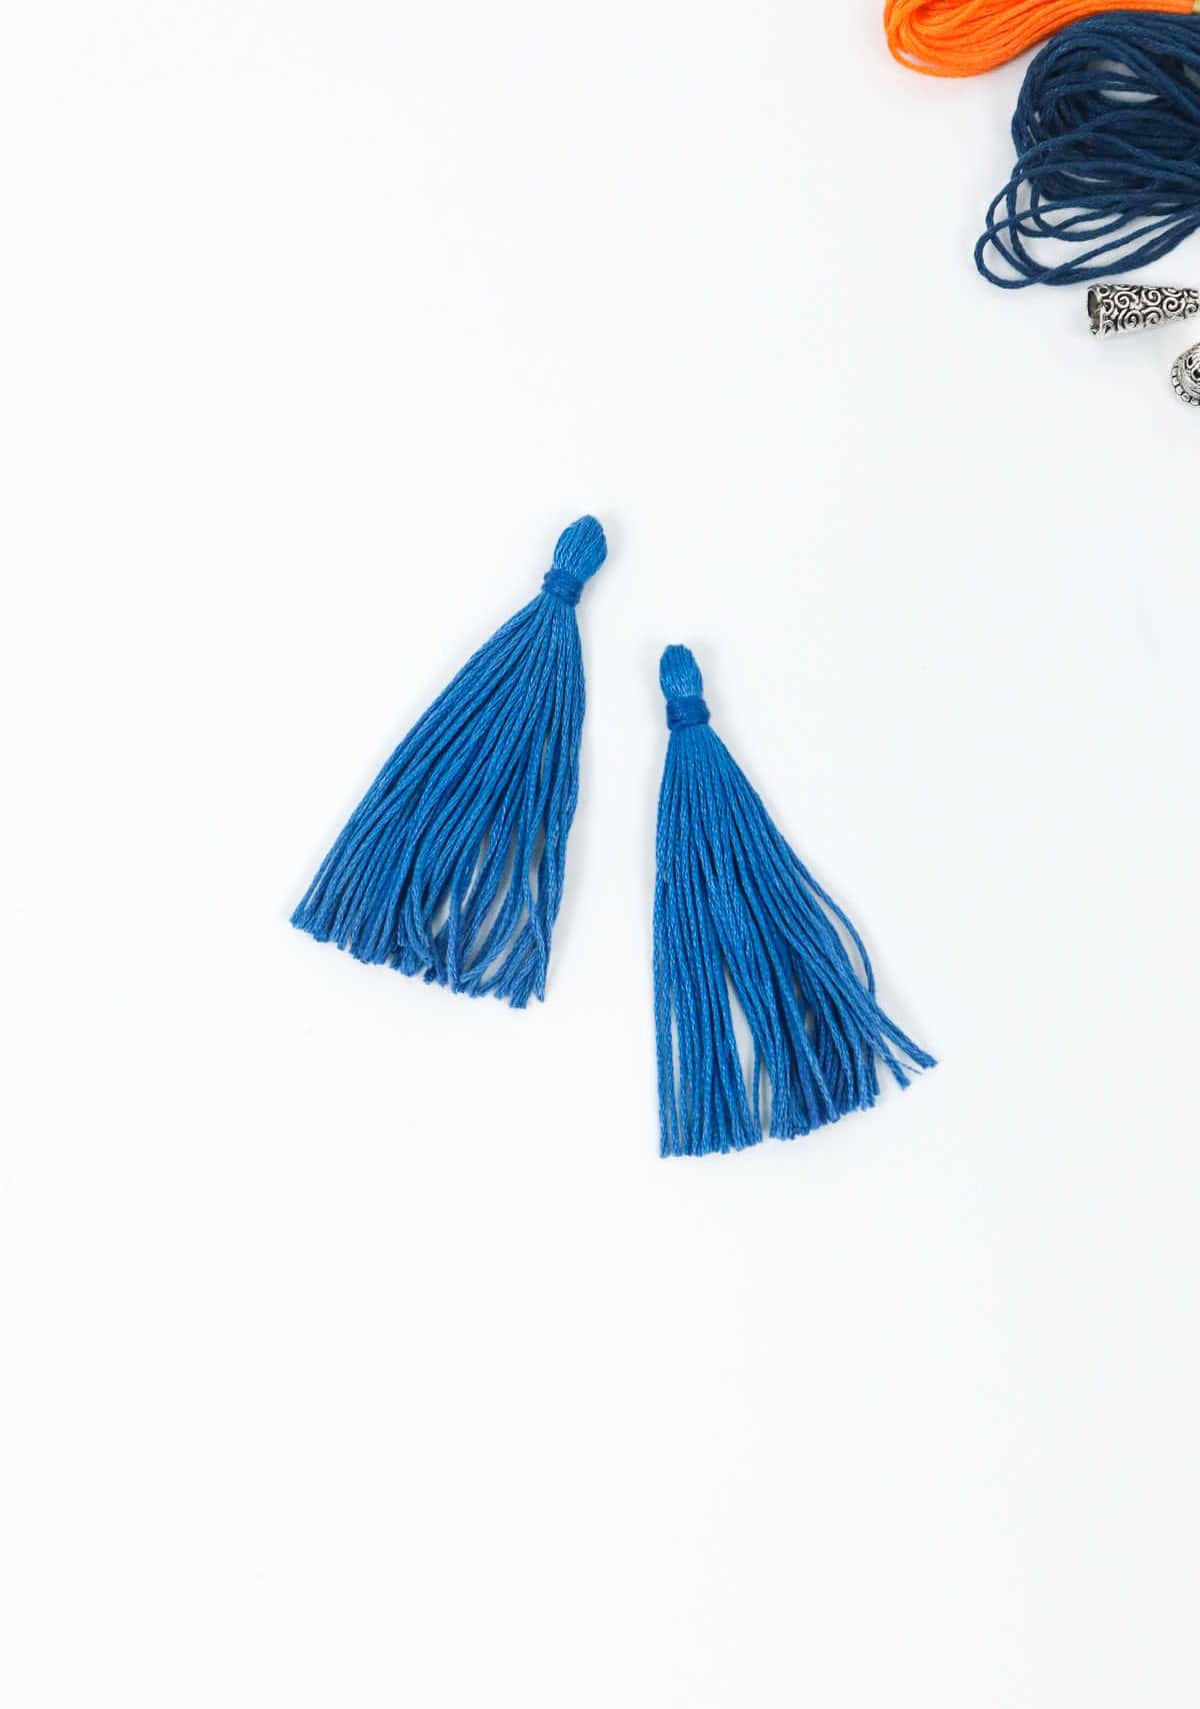
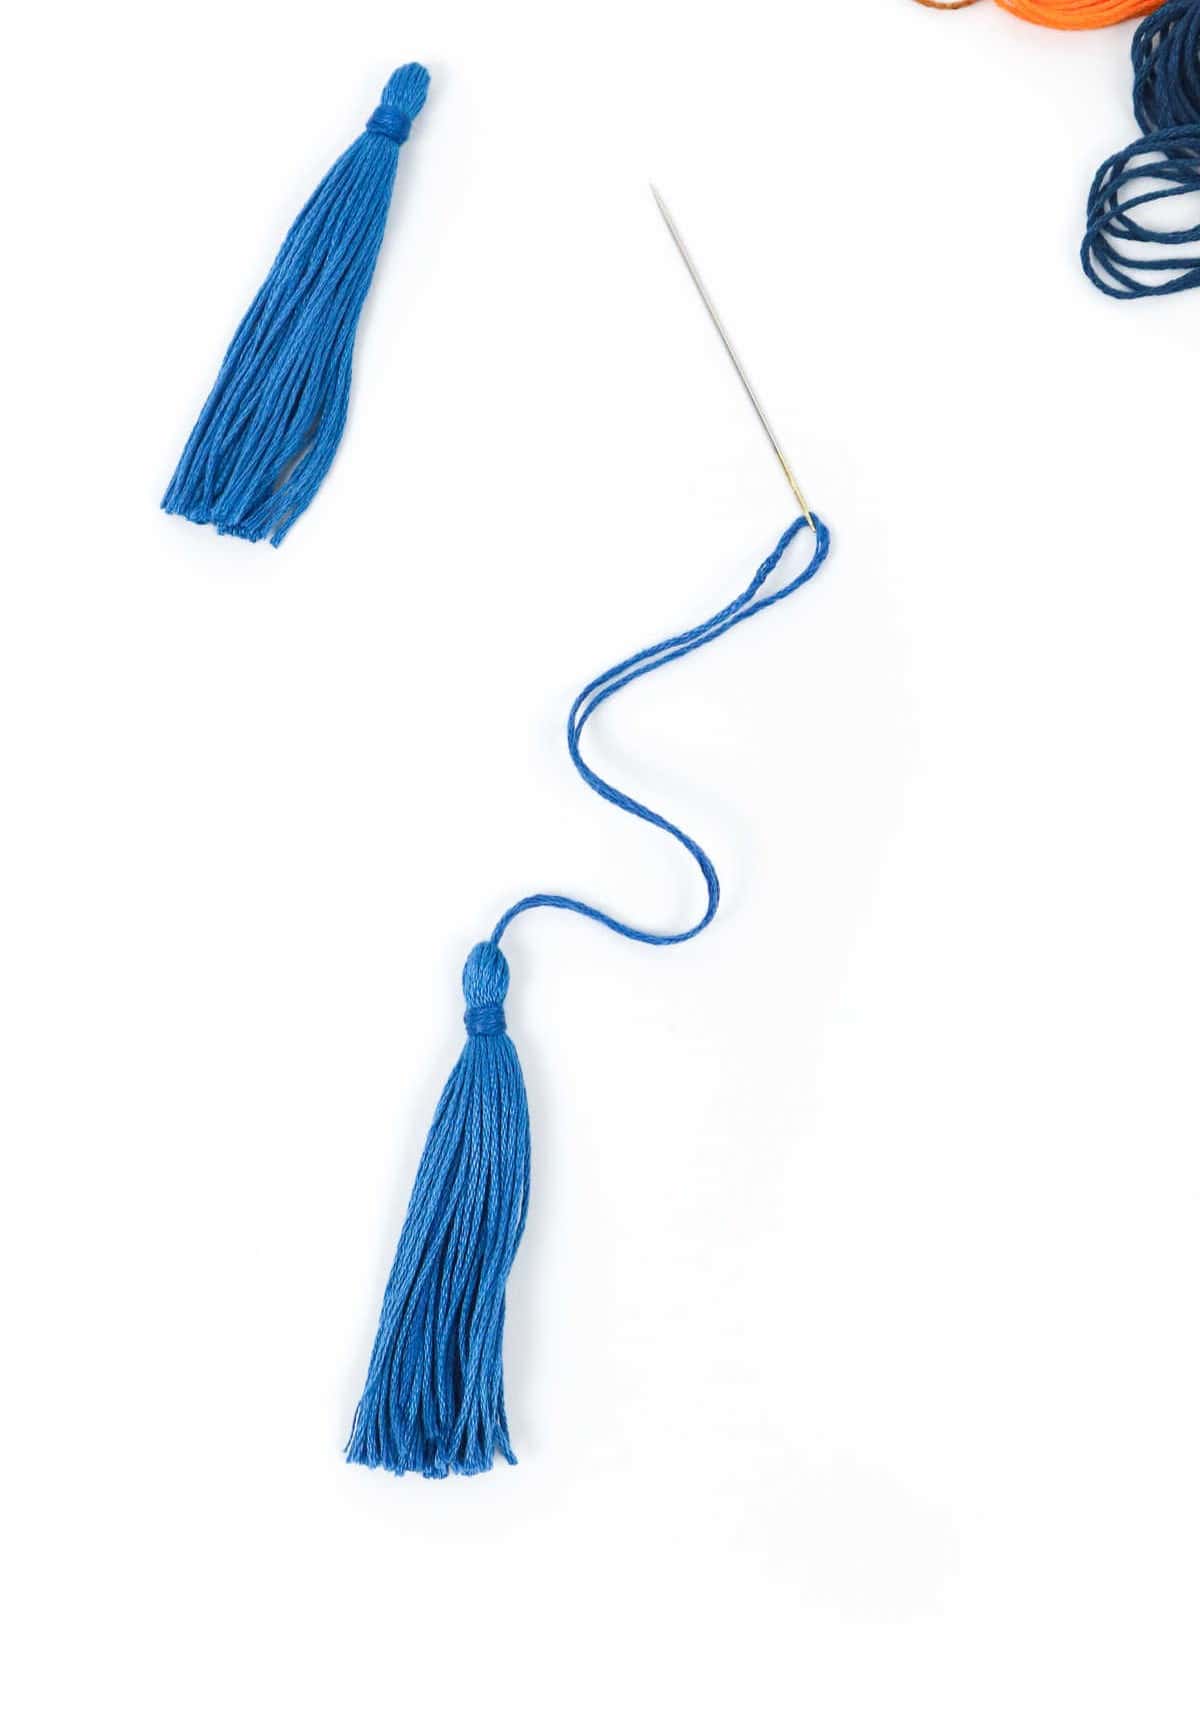
Hold off on putting those scissors away – there’s still work to be done. With the tassel’s threads now evenly trimmed, it’s time to create its matching counterpart using the reserved thread halves. Once both are complete, you’ll have the foundation for a unique earring creation. The possibilities are endless, so feel free to experiment and find the method that suits your style best!
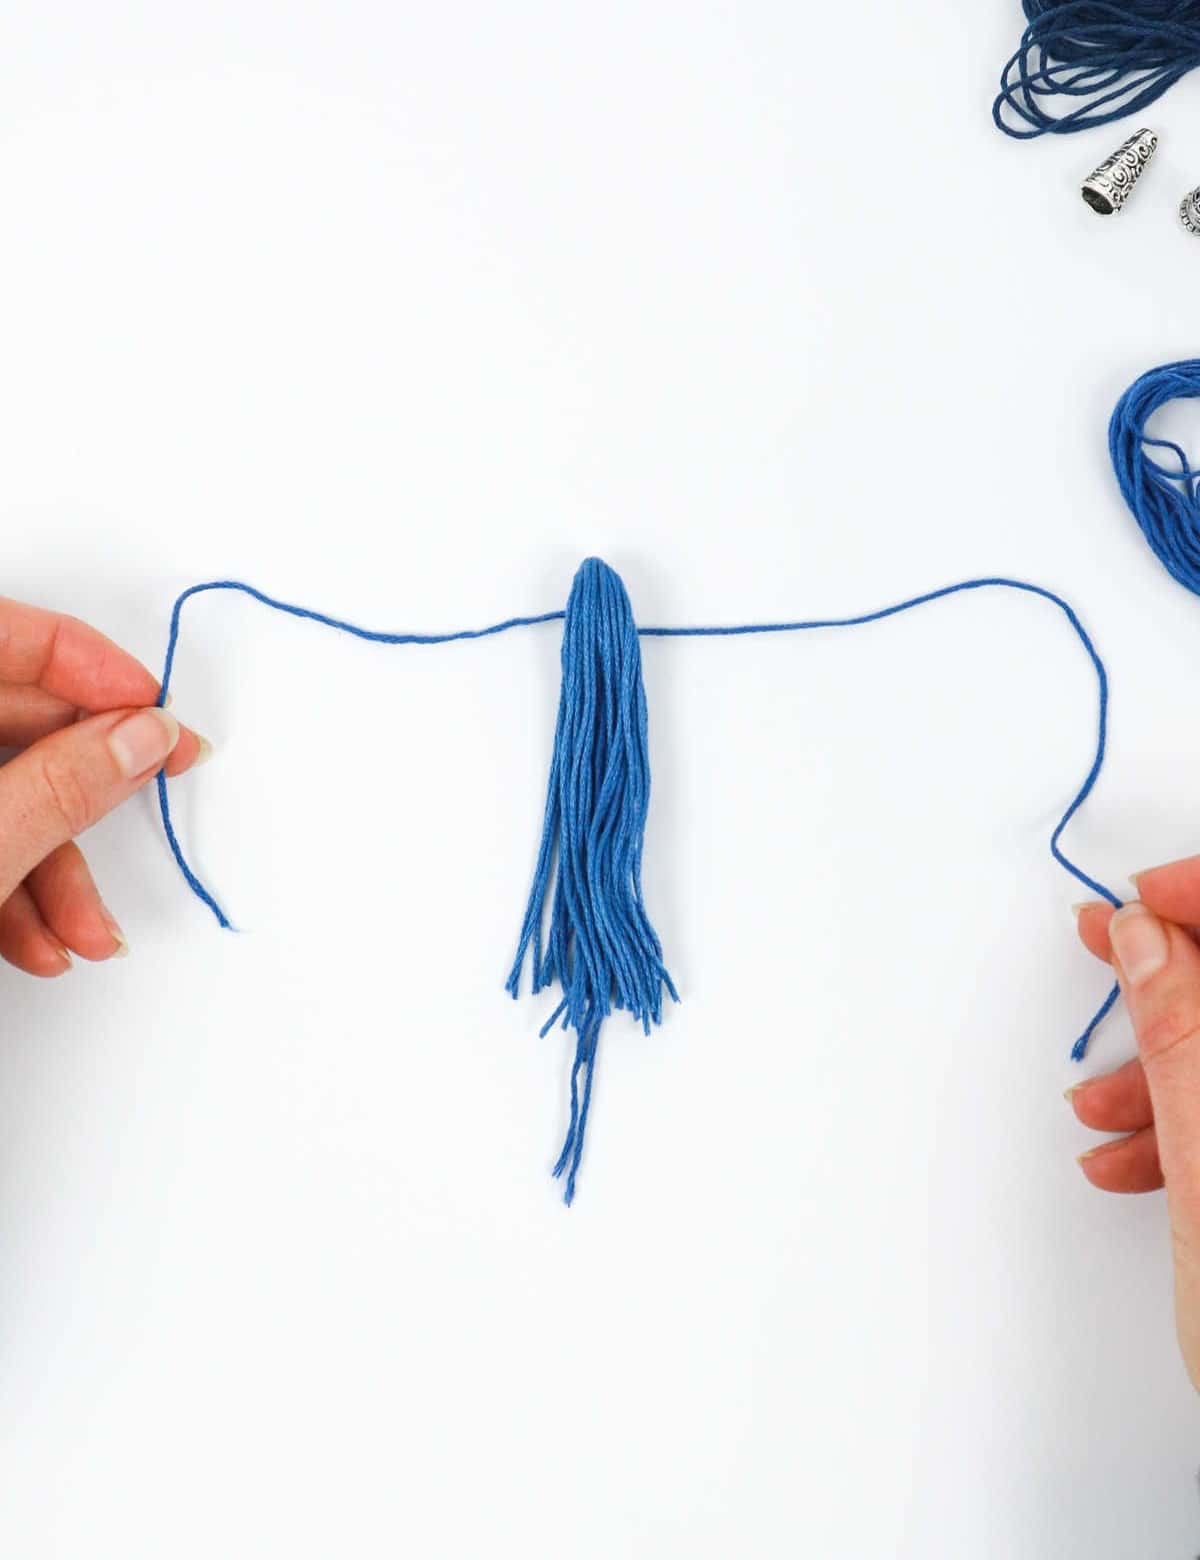
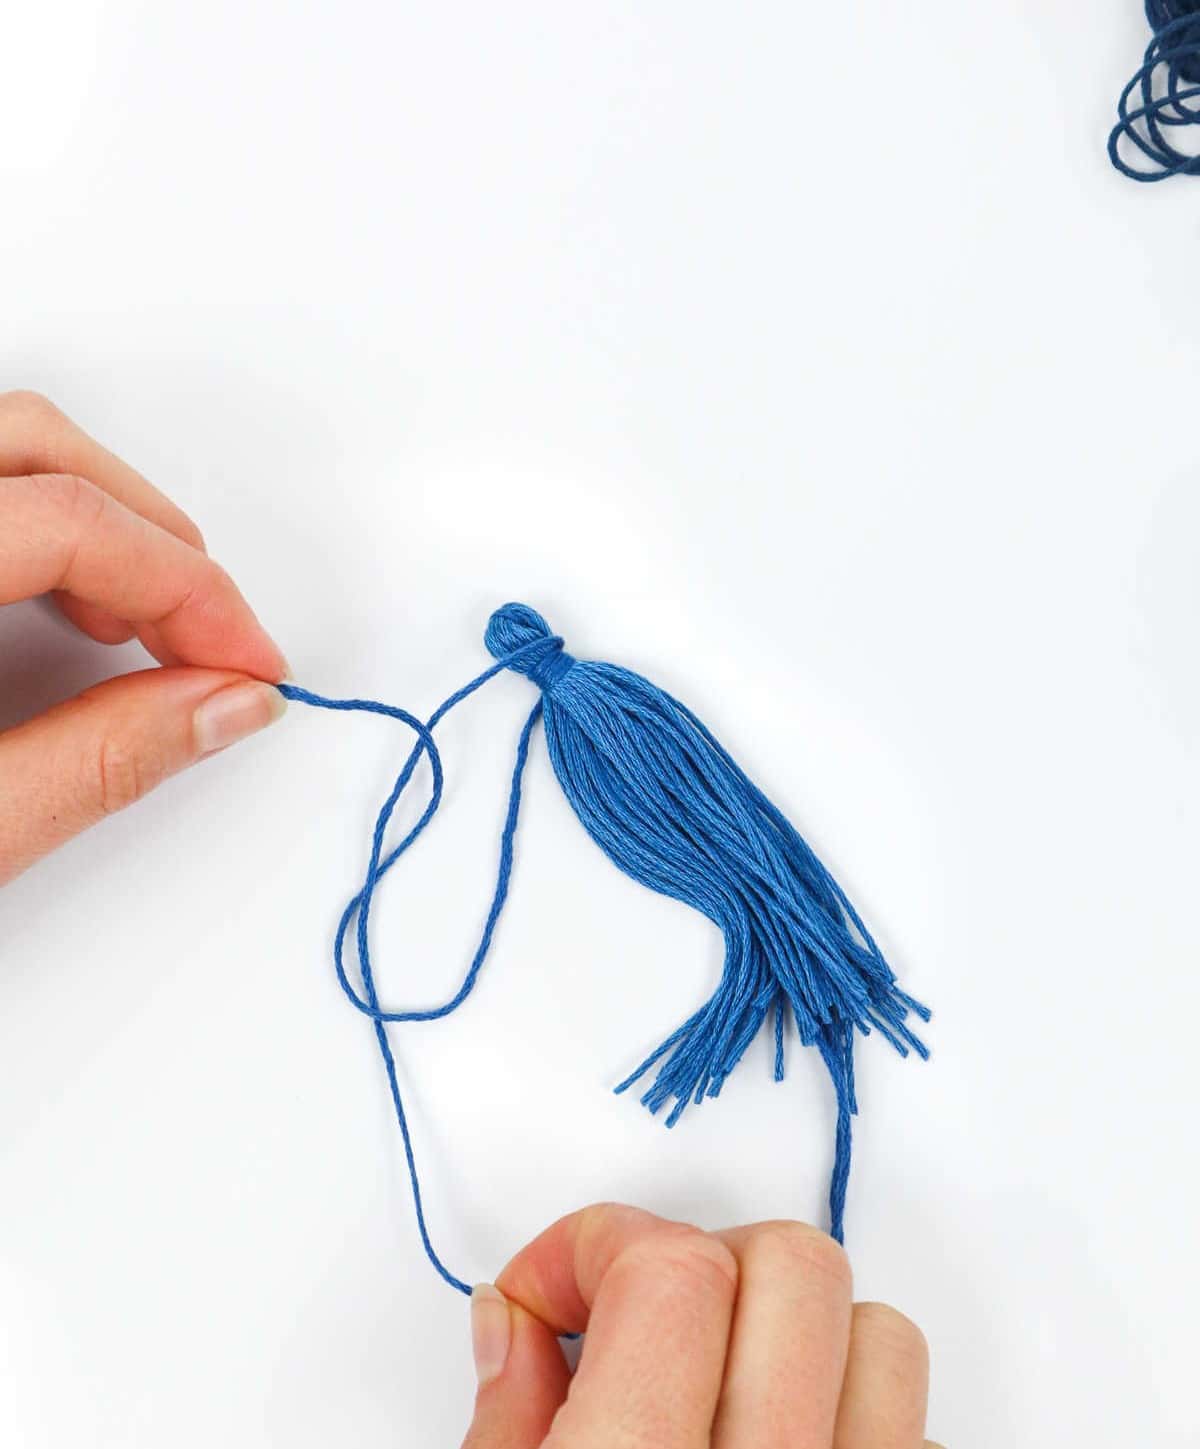
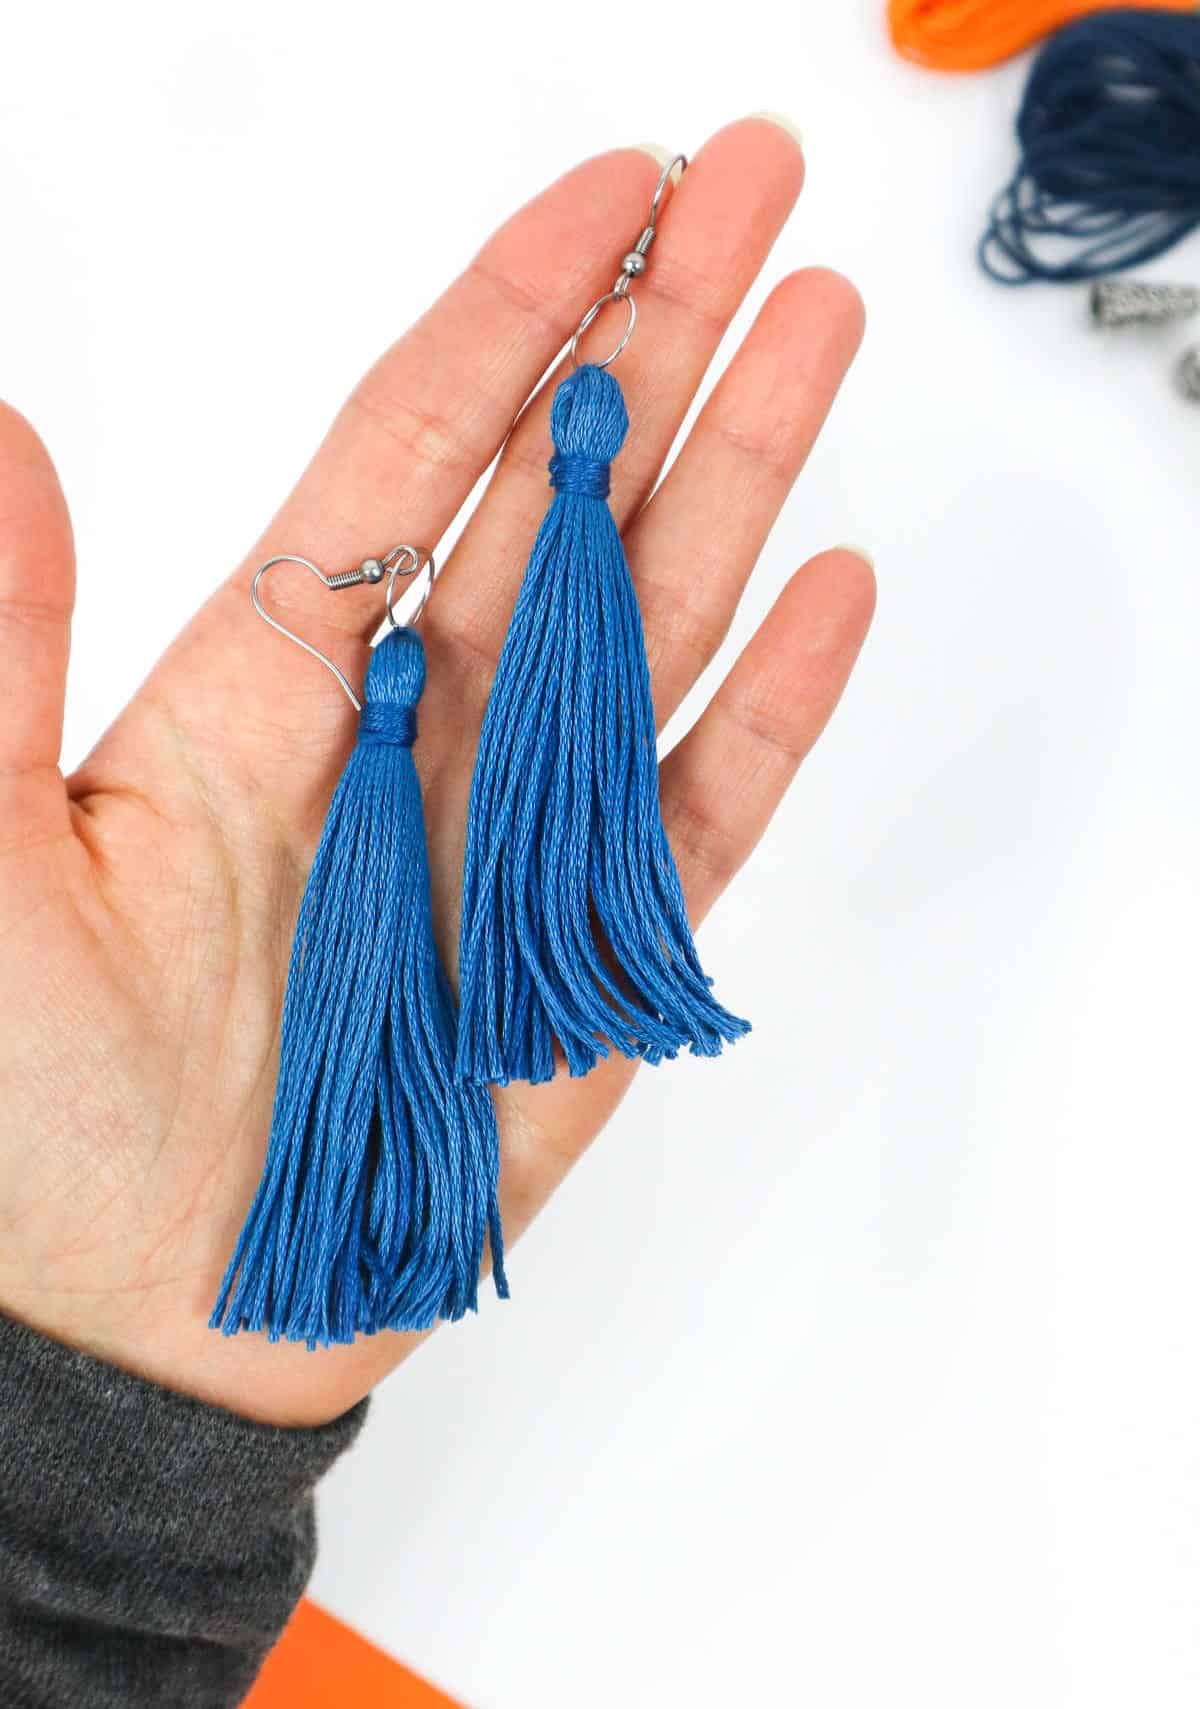
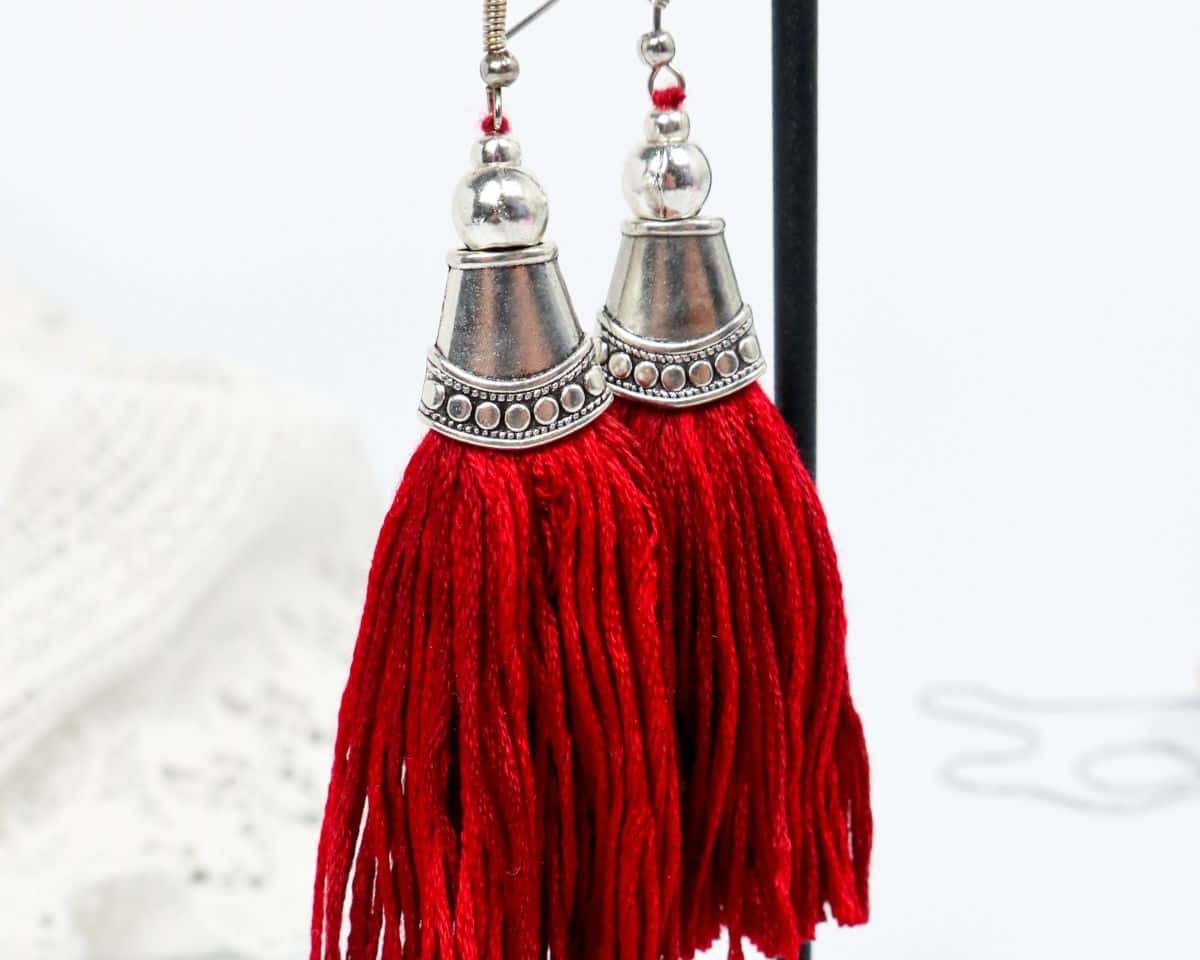
Turn Tassels Into Earrings – Method 1
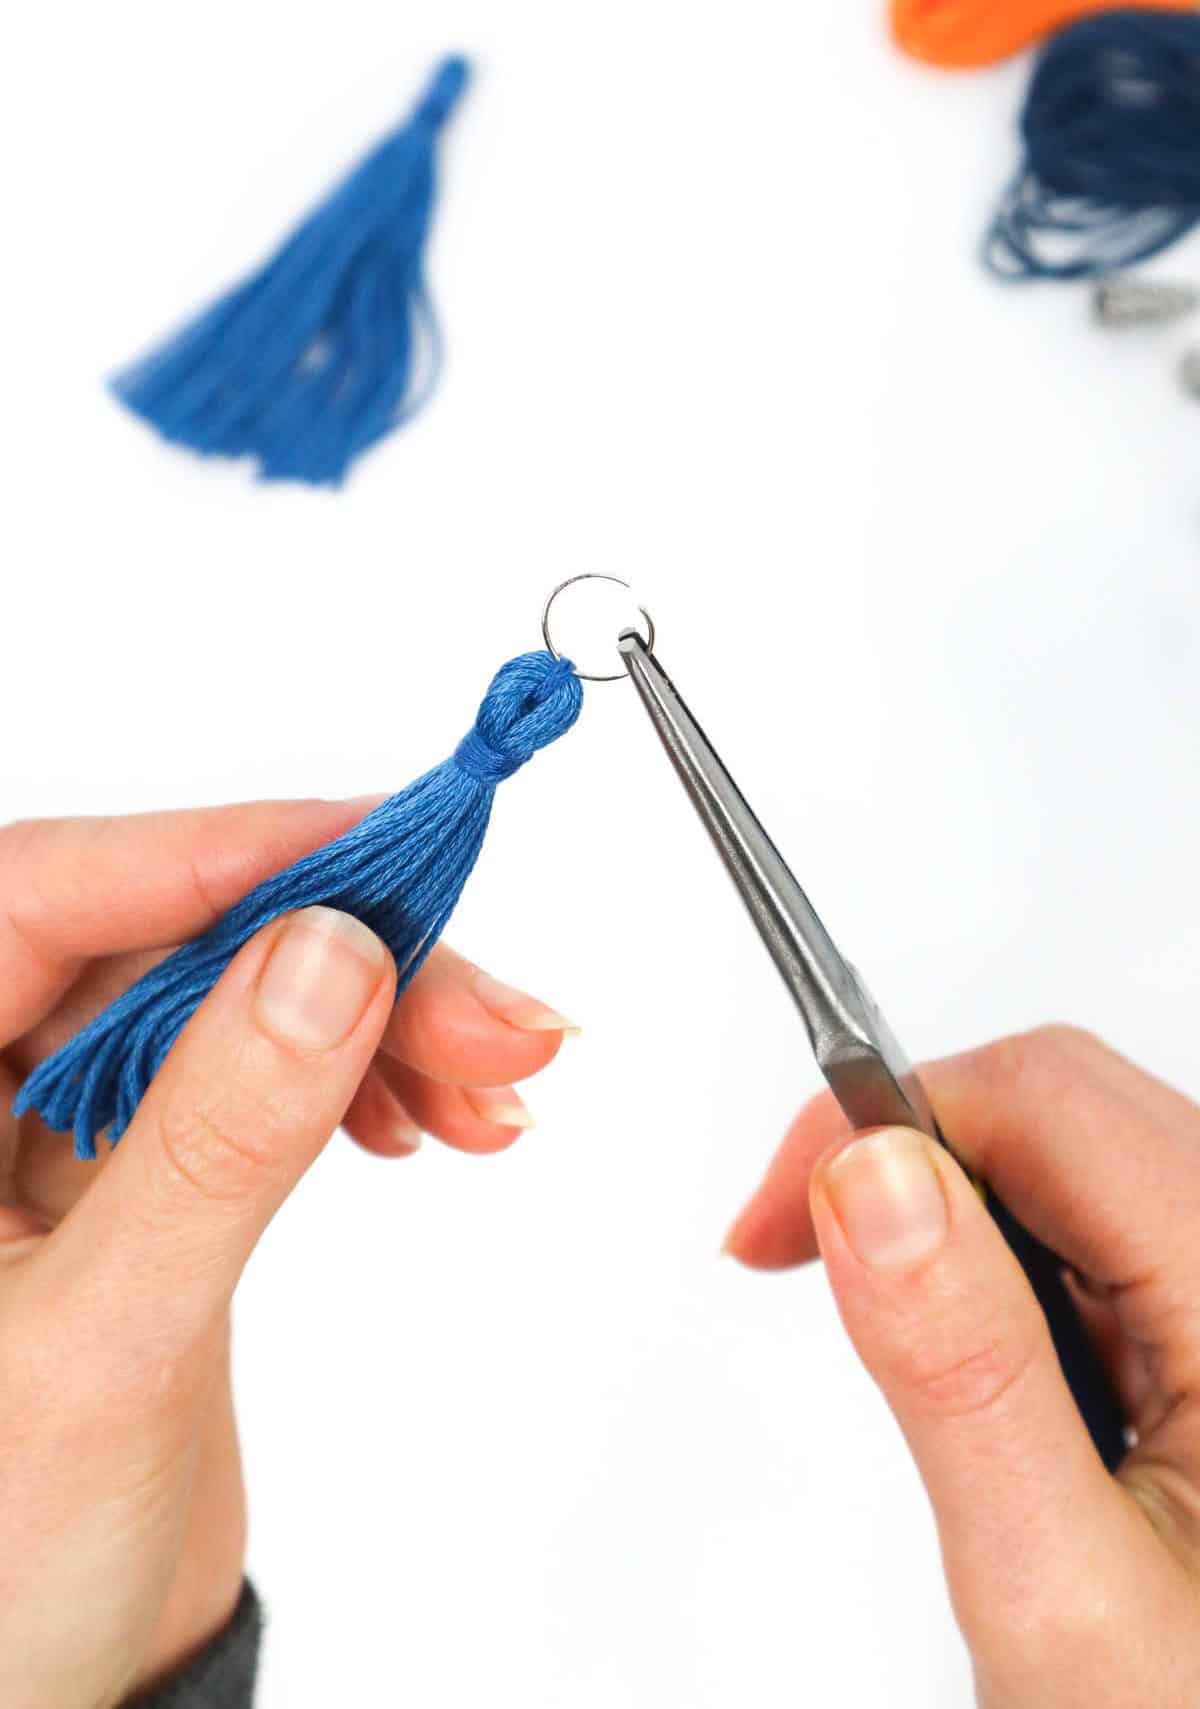
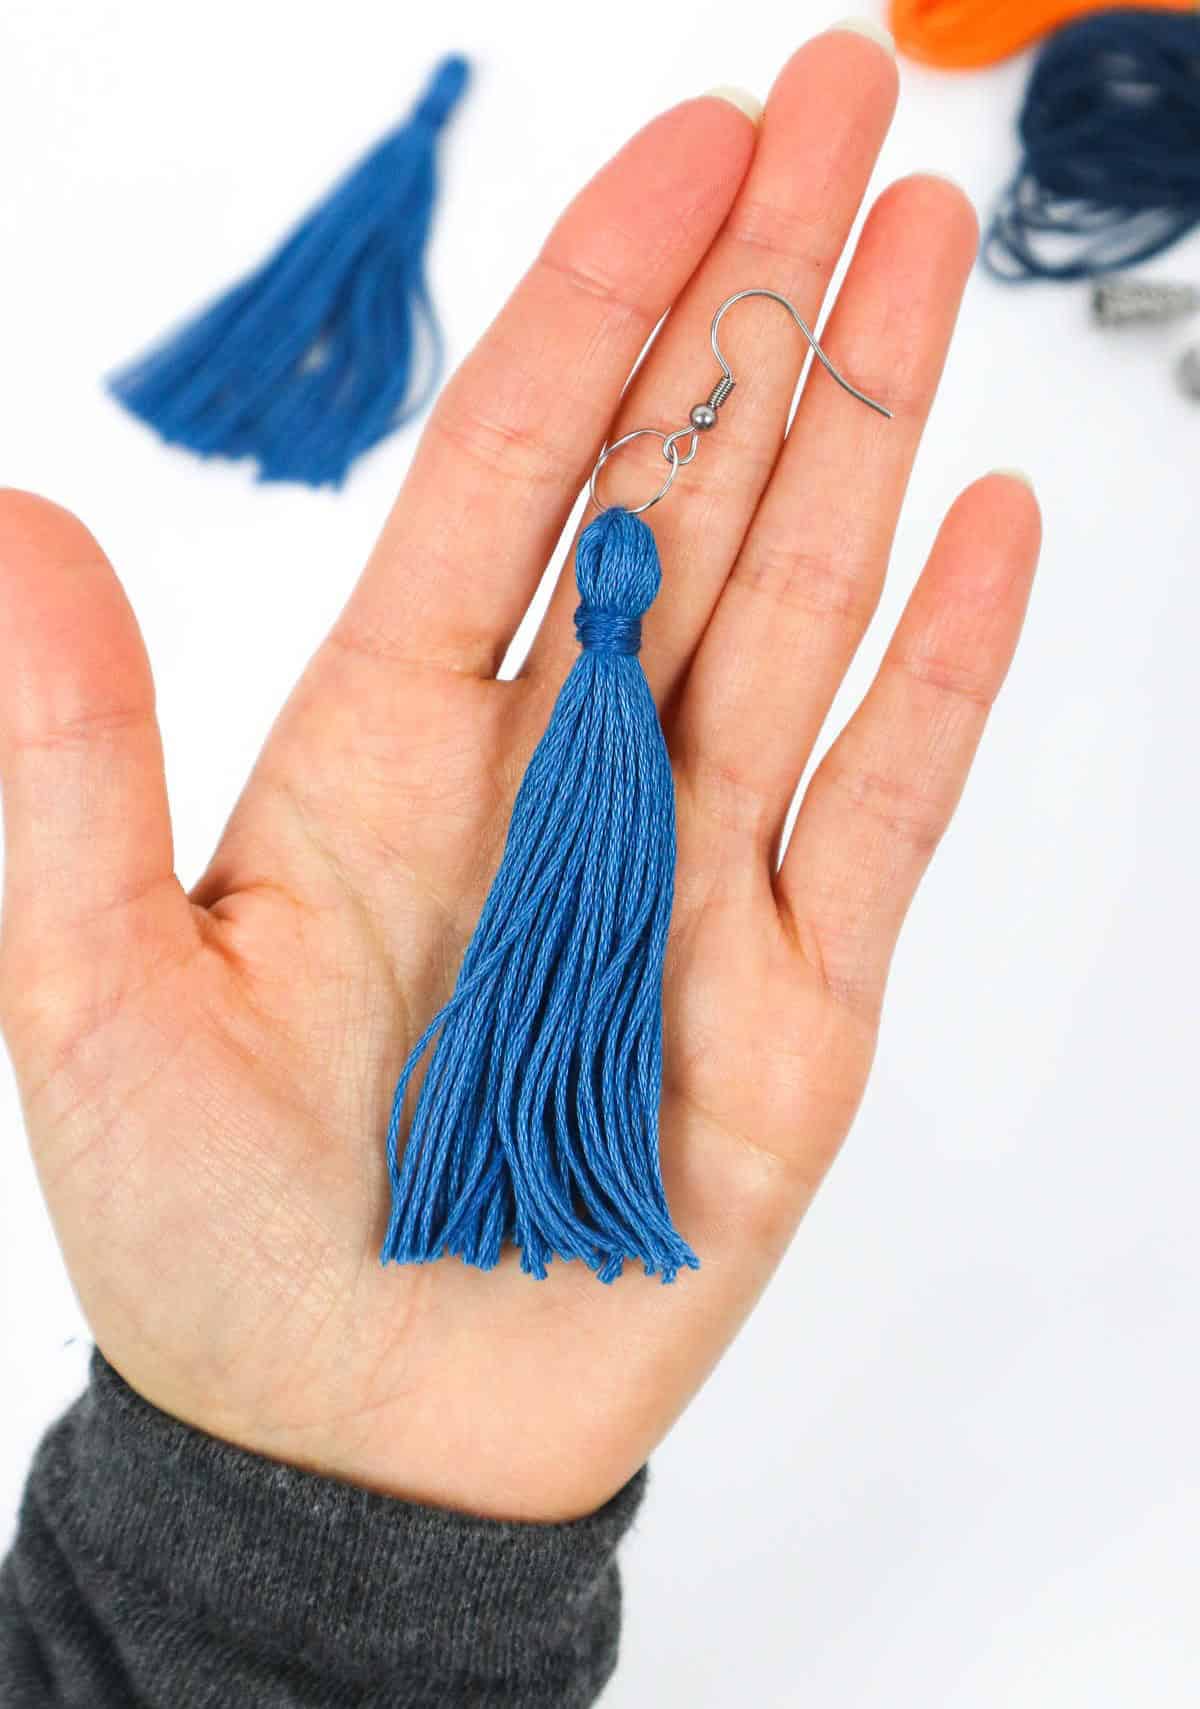
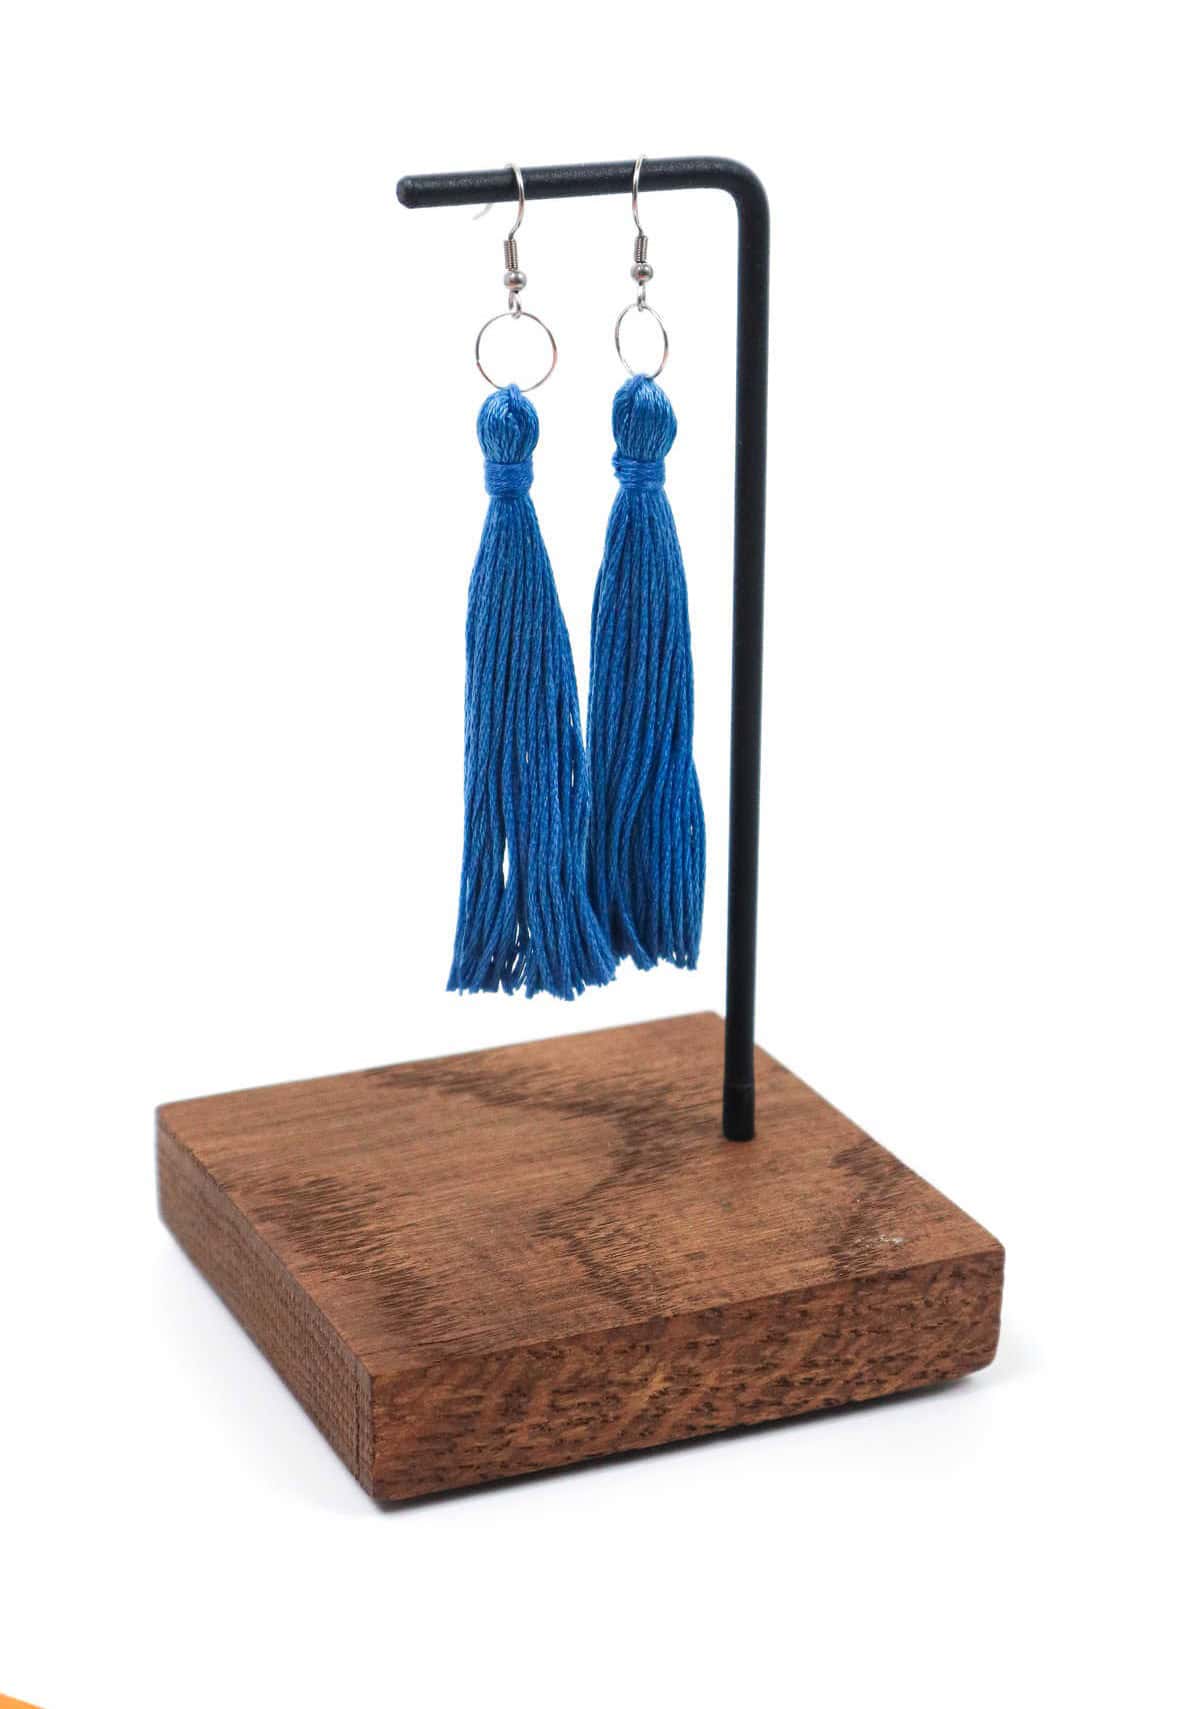
To complete your DIY earring, start by threading a small jump ring or metal hoop through one of the top threads. For added precision, utilize pliers to secure the loop into place.Next, attach the earring hook to the jump ring. This marks the final step in crafting your unique piece. With these simple steps, you now possess a fully functional DIY earring.
Method 2

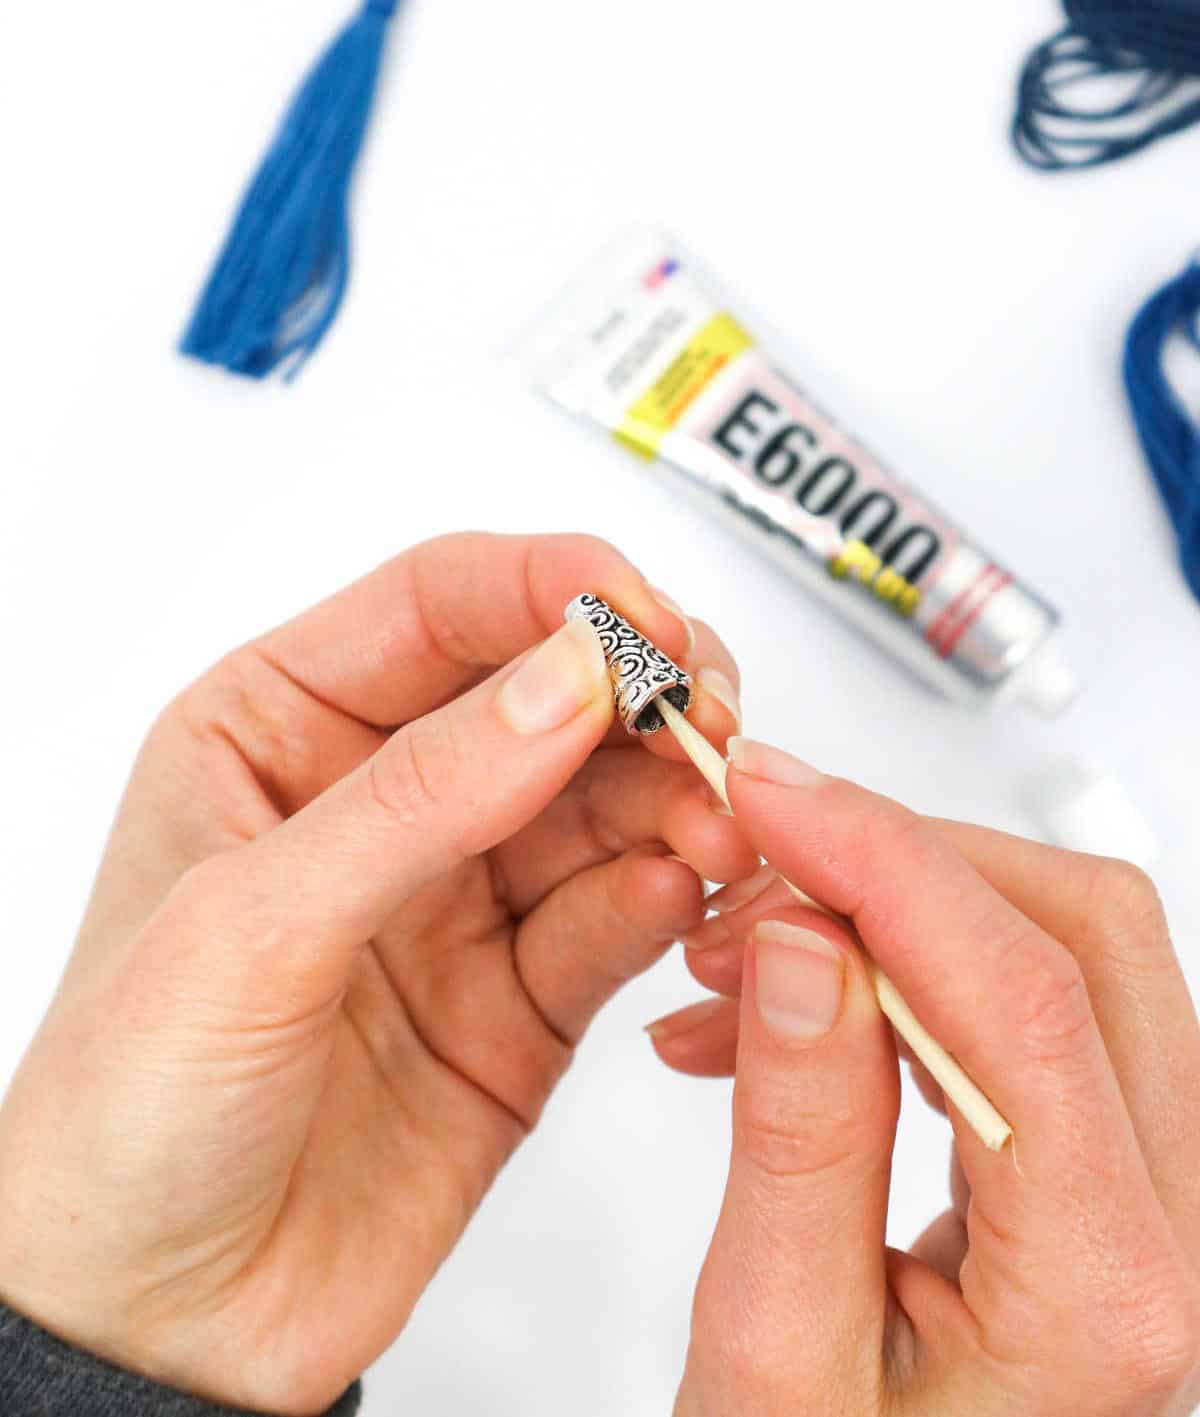

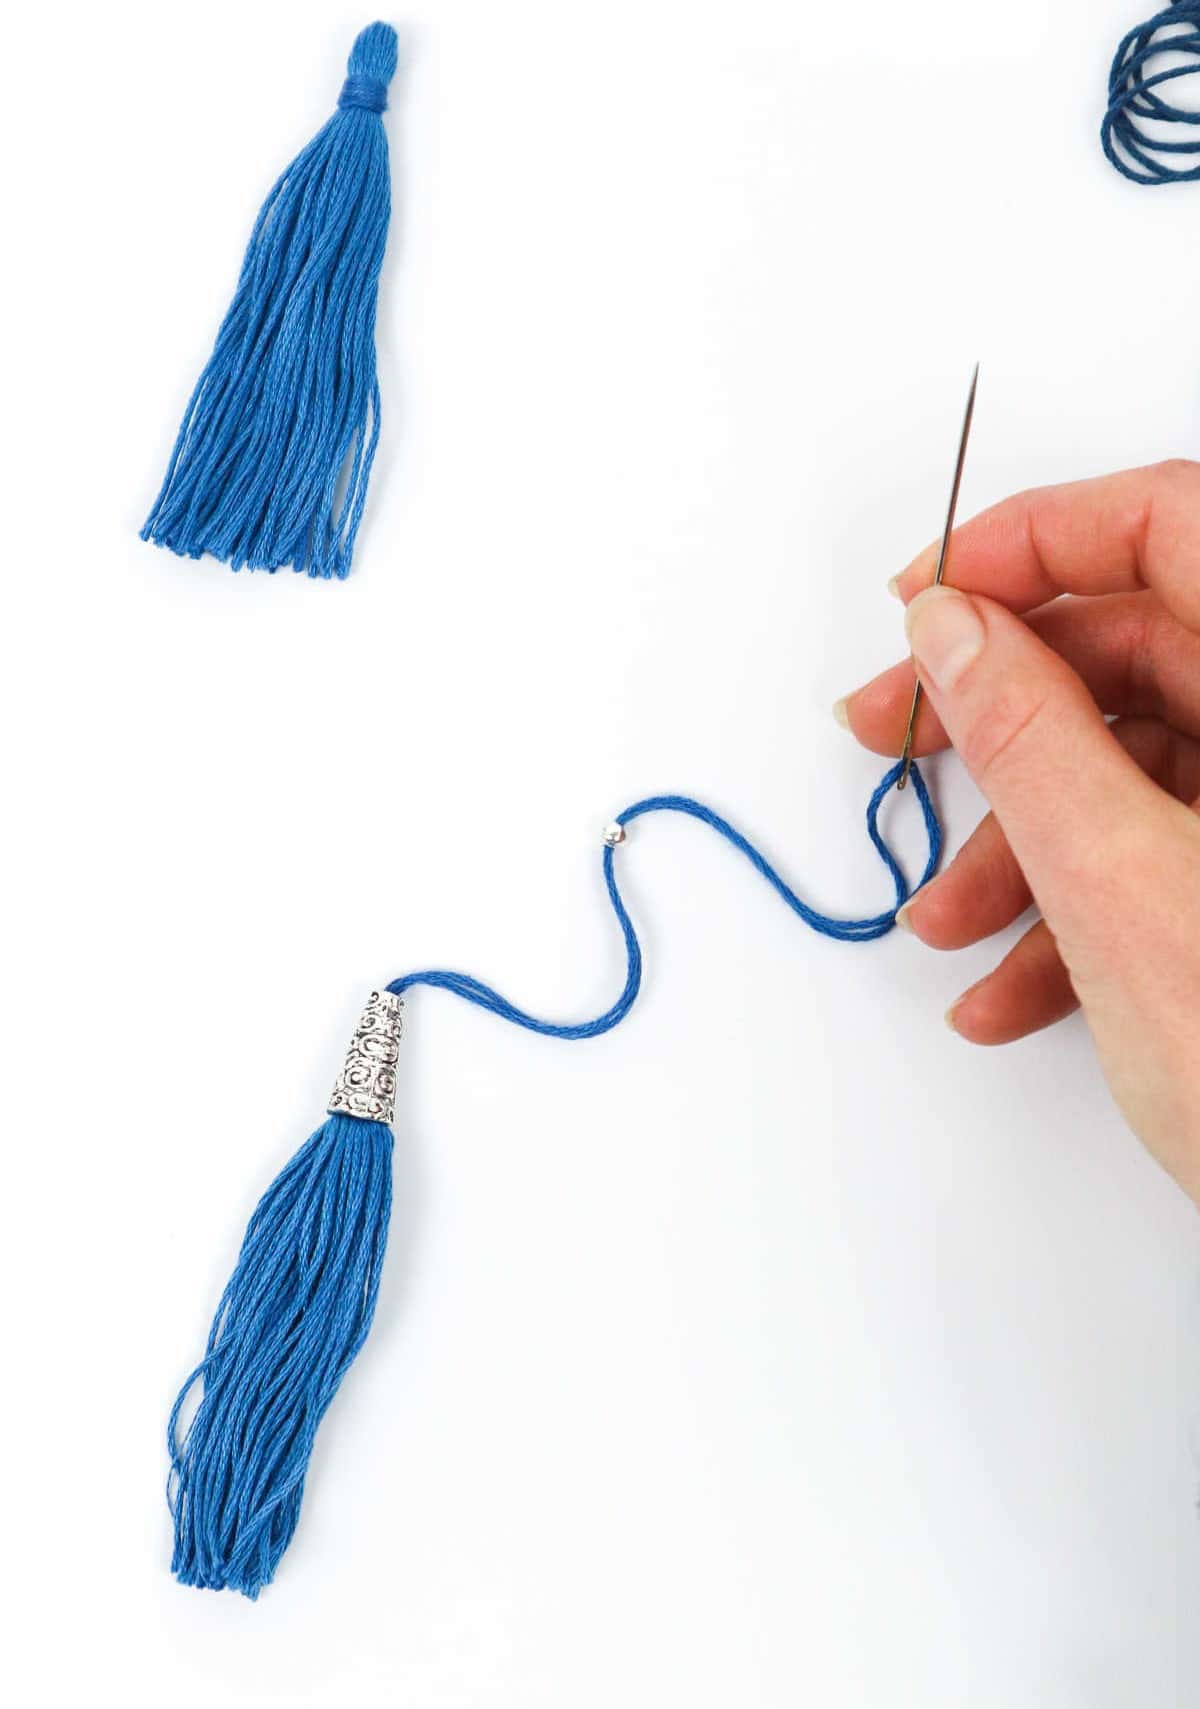
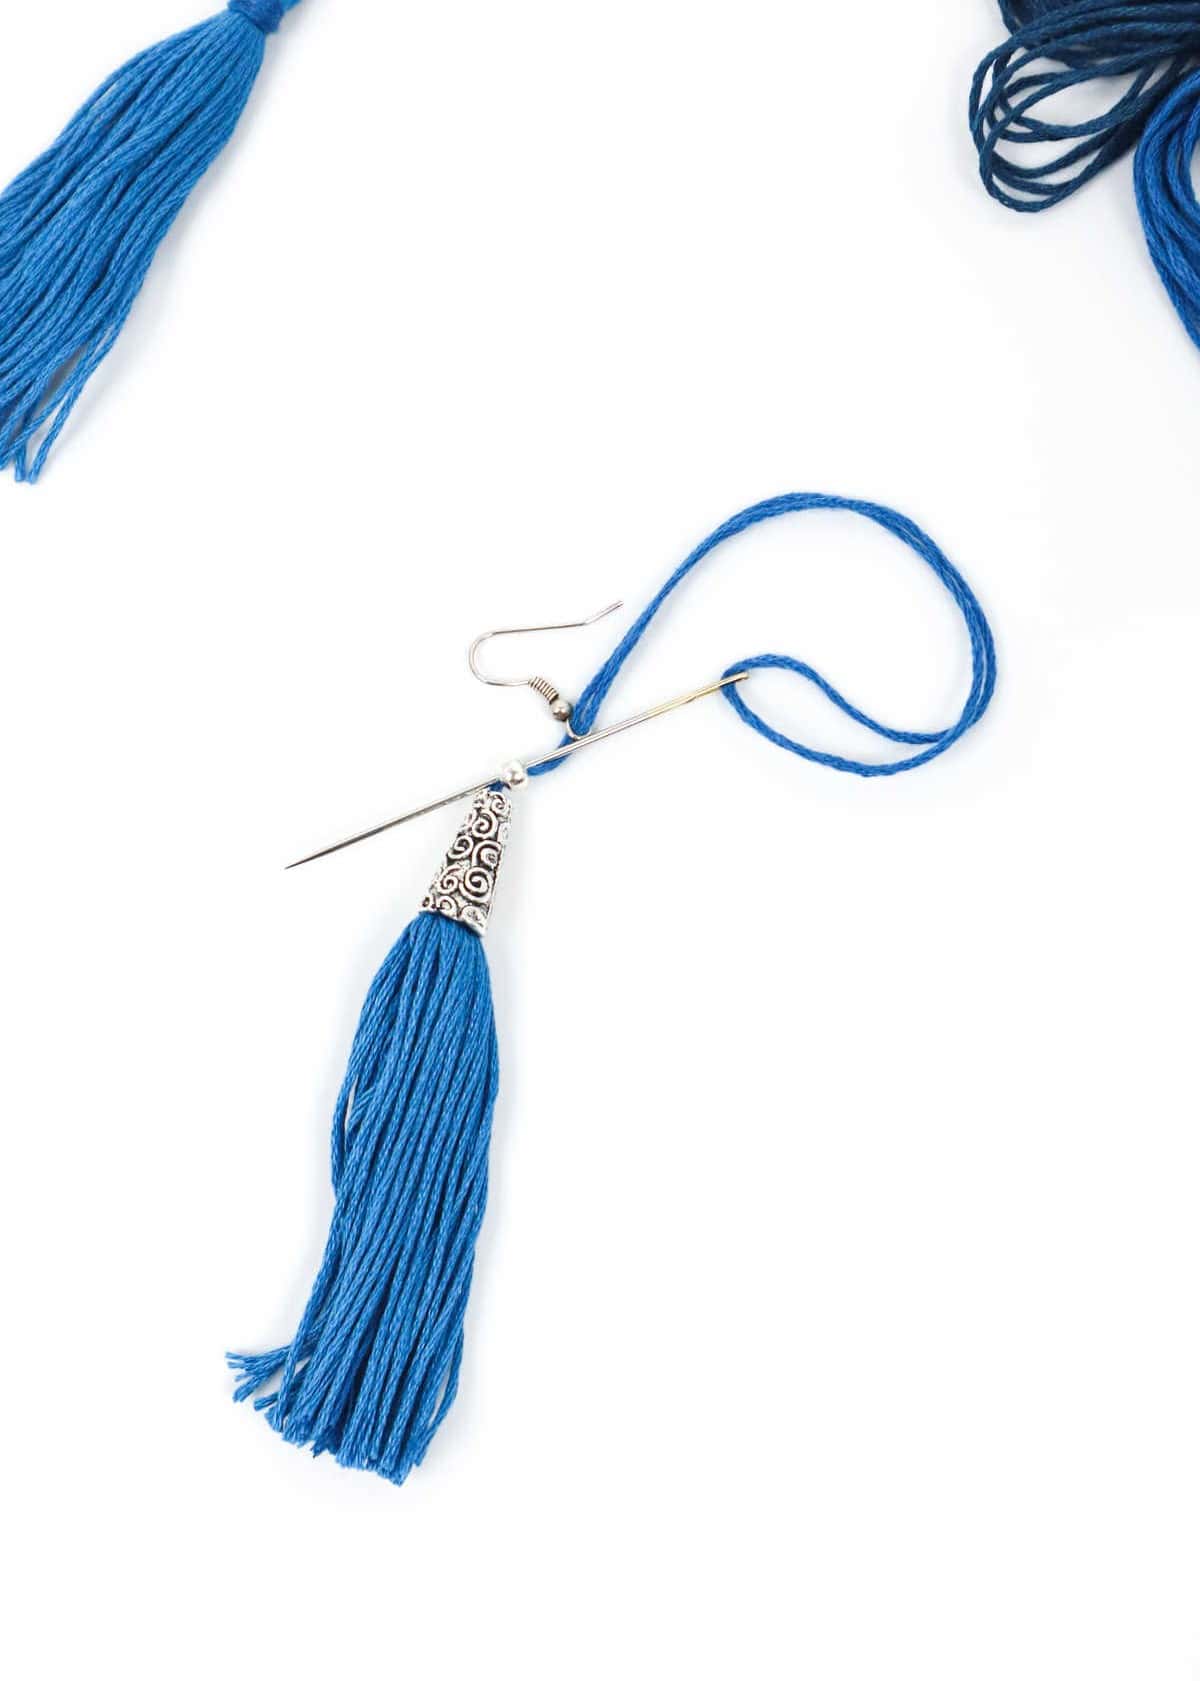
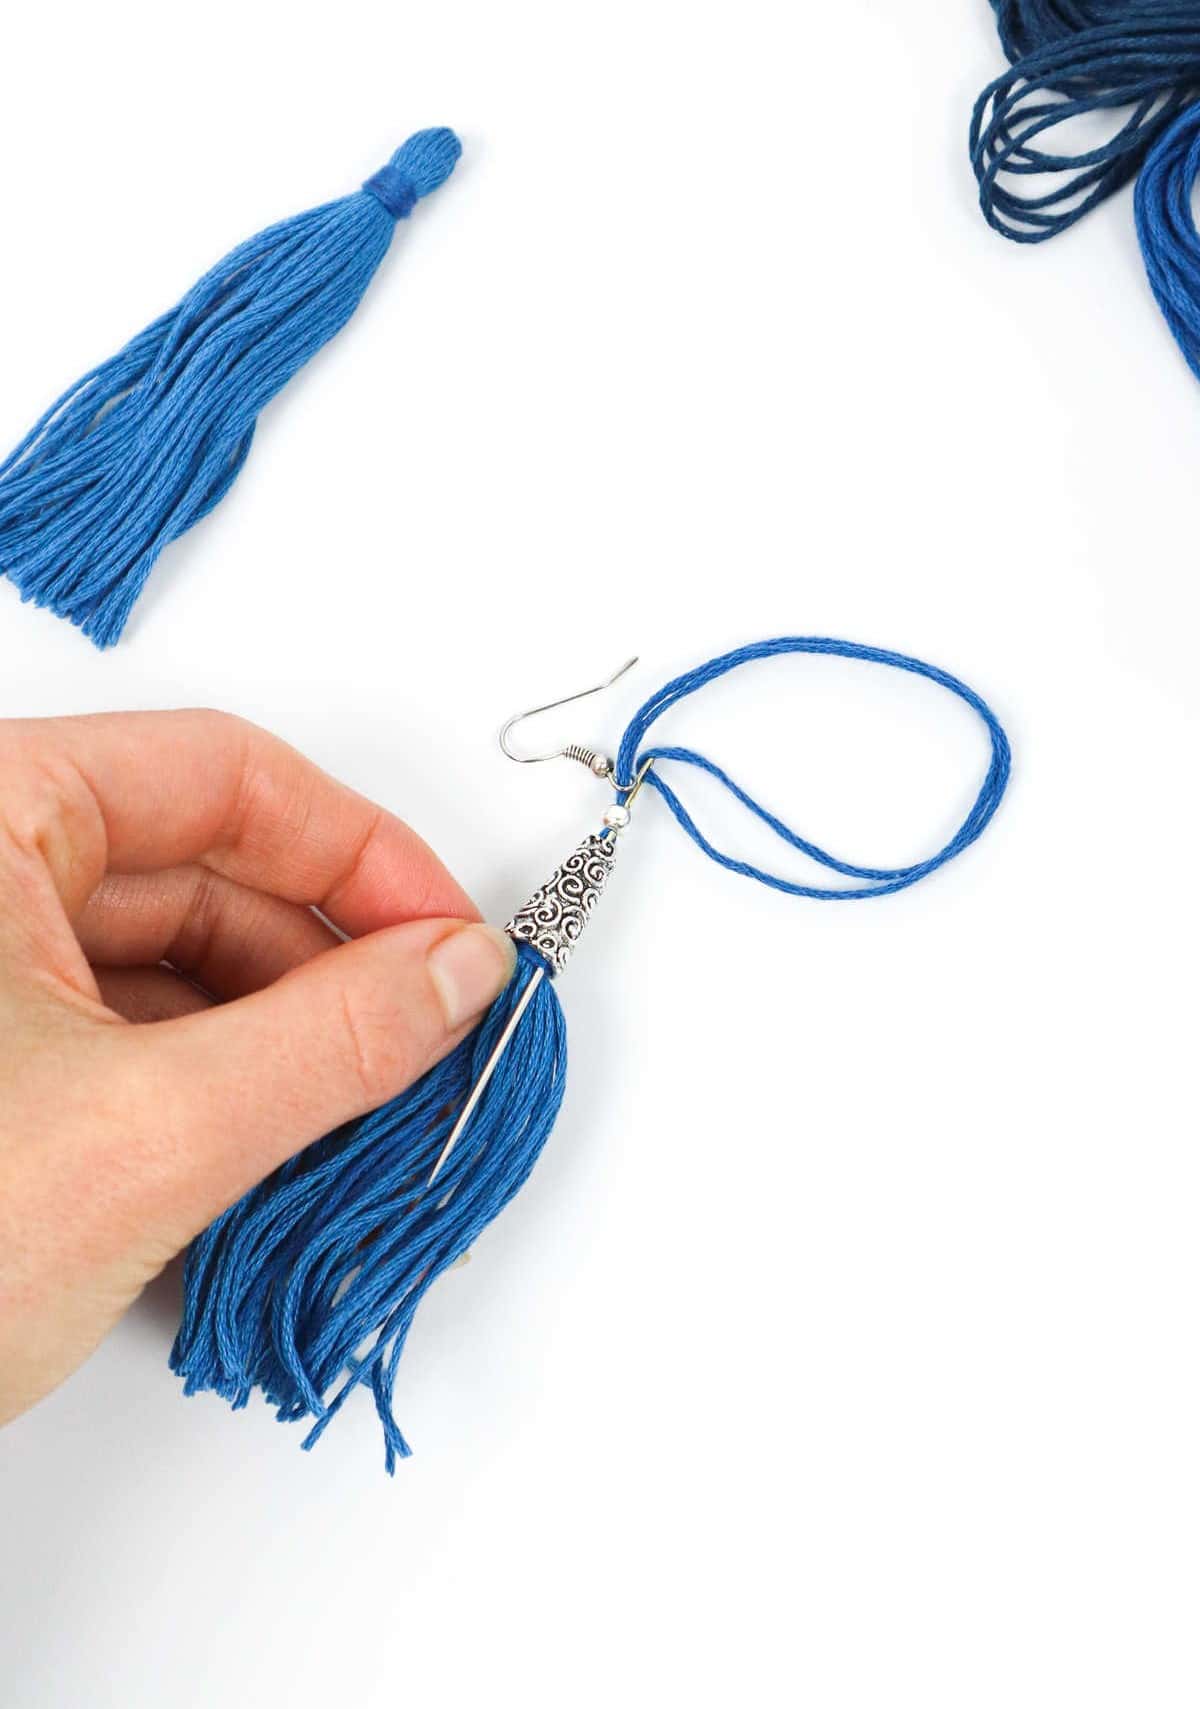
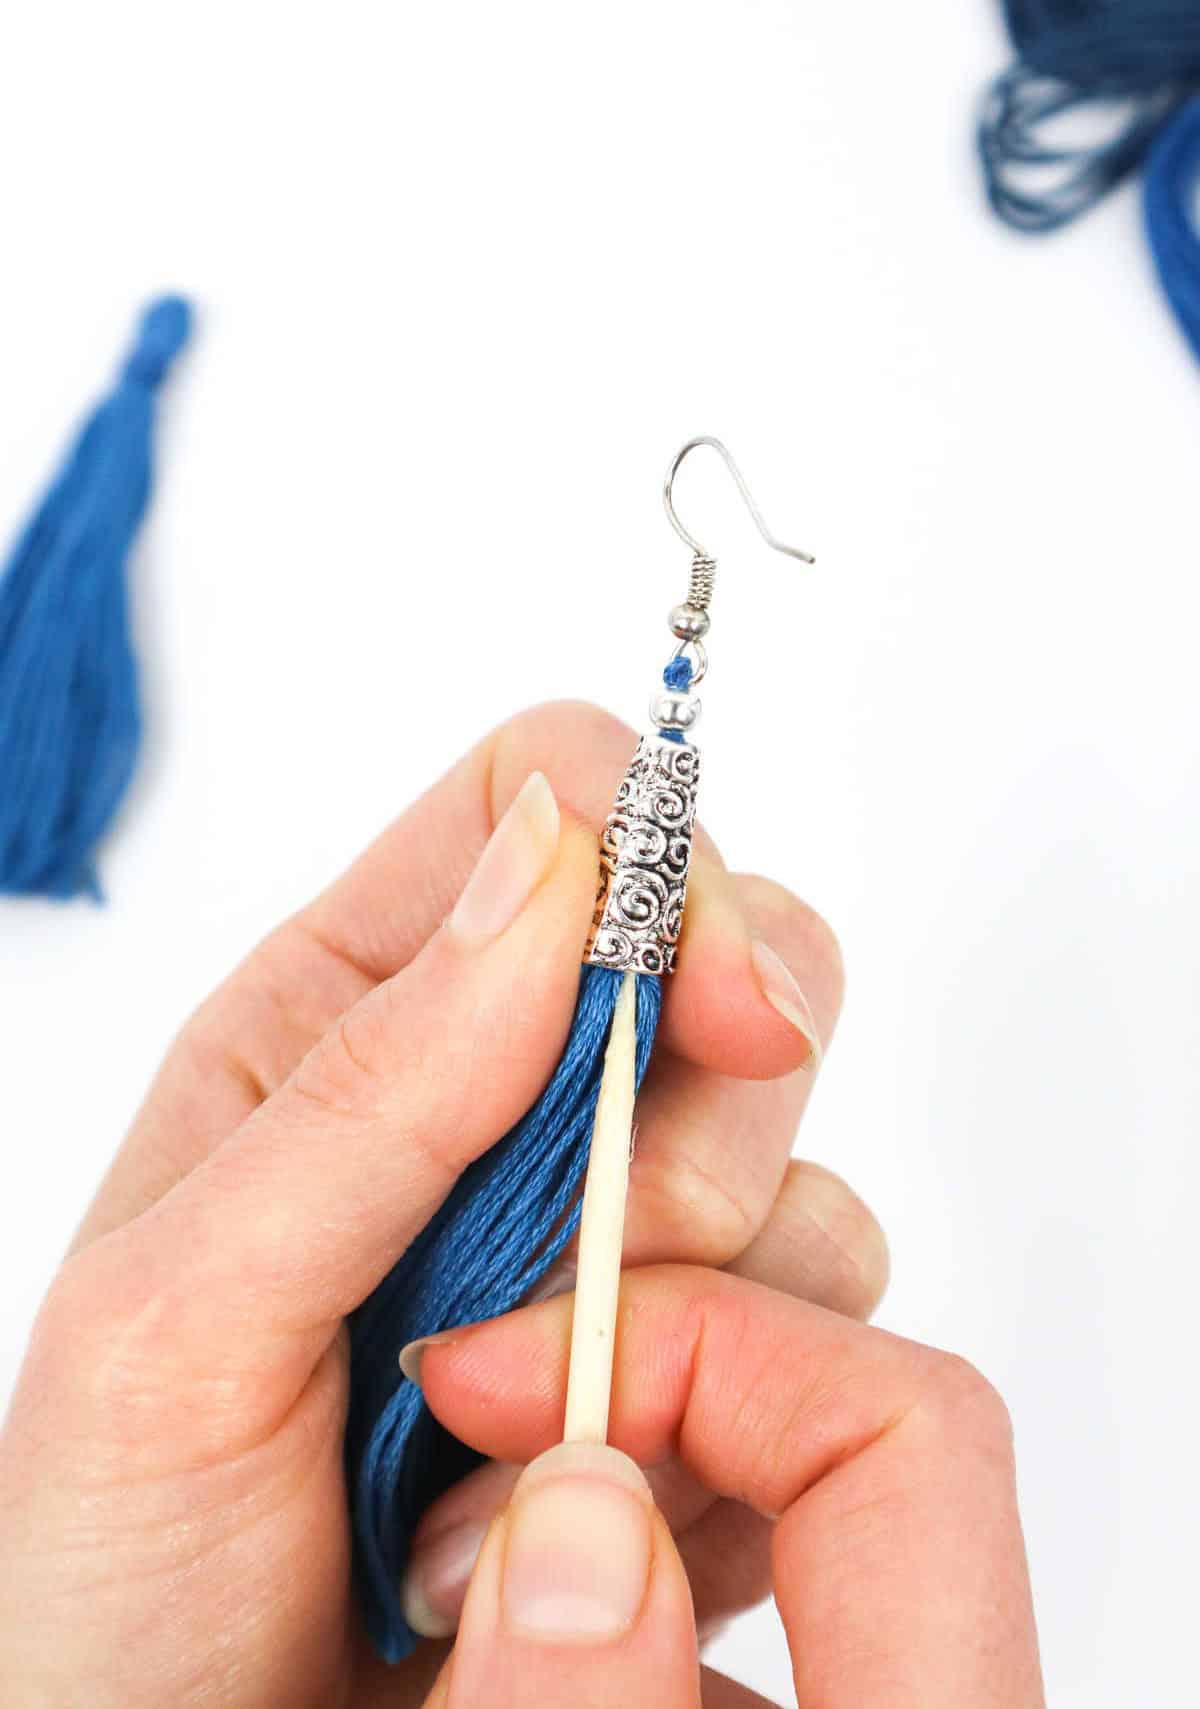
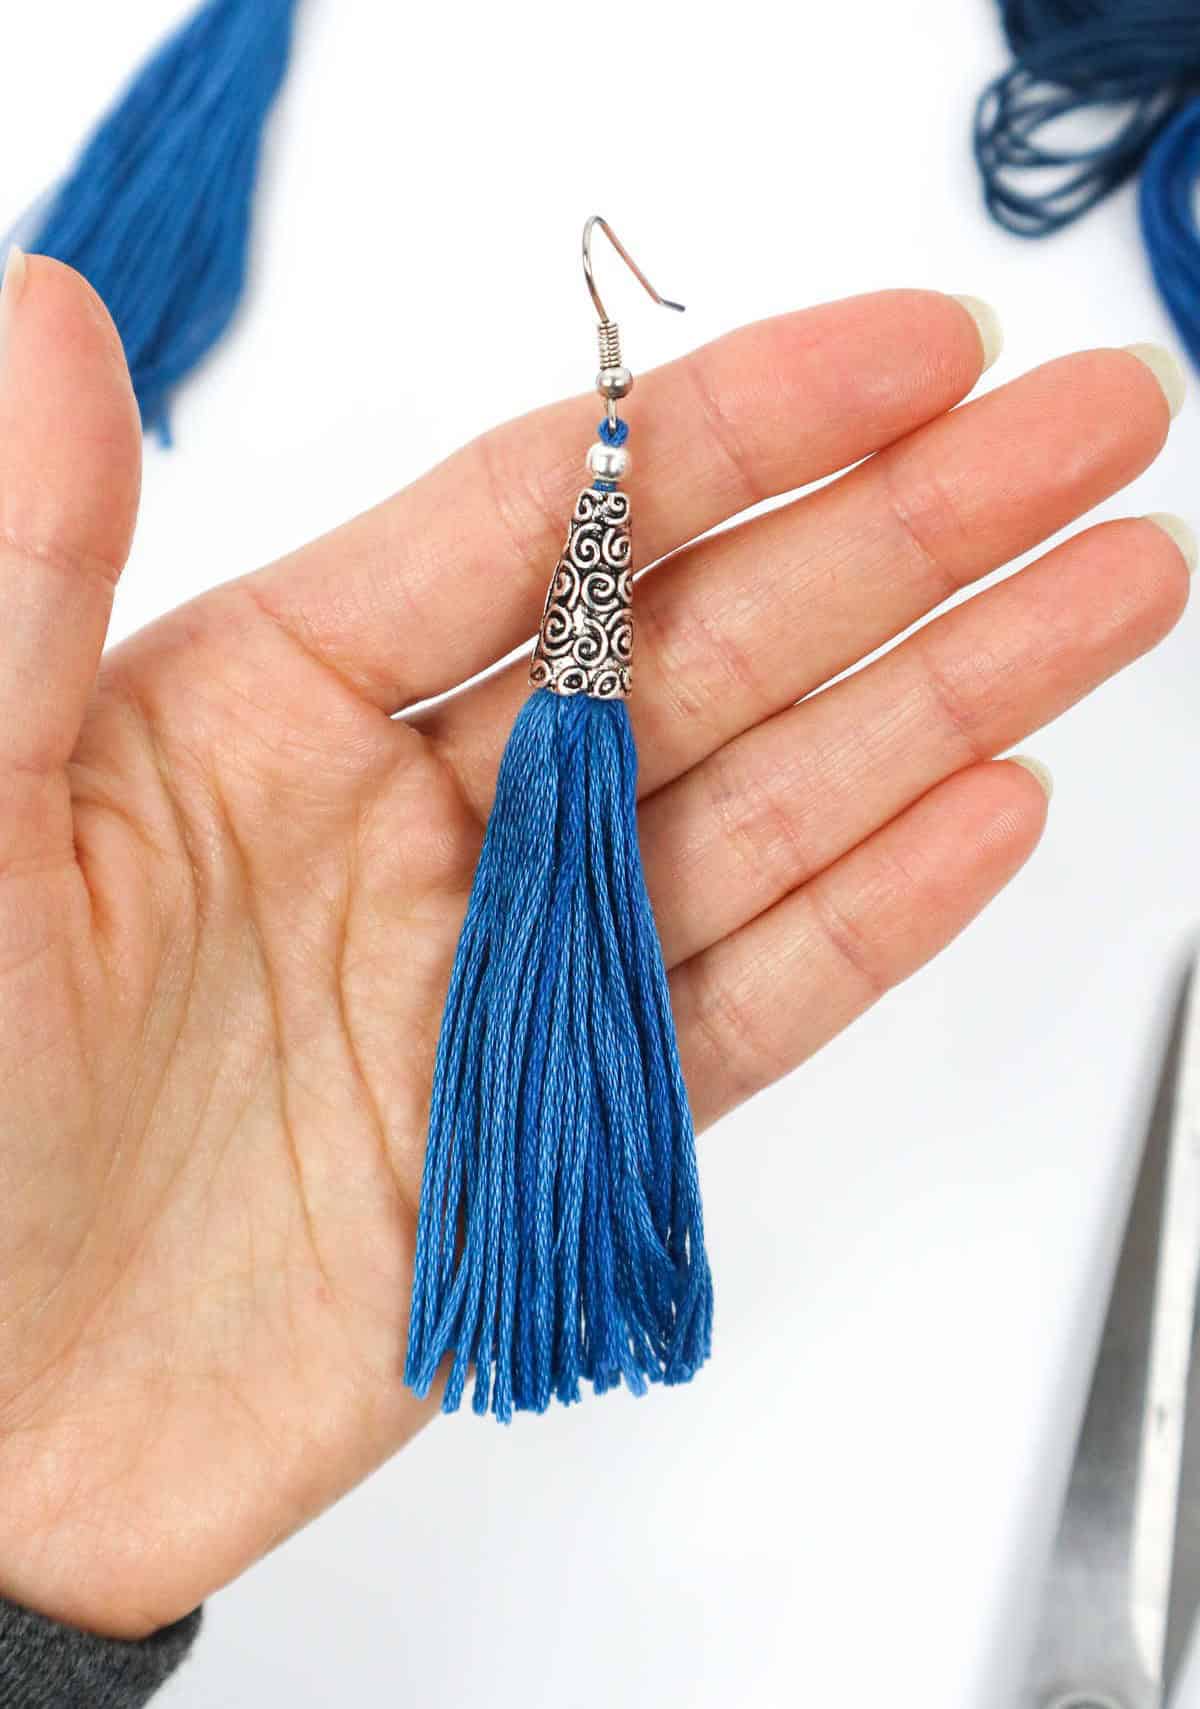
To create a more intricate design, you can thread a large embroidery needle with a double knot at the end. Begin by inserting the needle into the center of the tassel and out through the top of the head. Pause for a moment before proceeding. One way to personalize your earrings is by adding charms or beads. For instance, silver charms can add a touch of elegance to your design. You can also incorporate beads in various colors or shapes to give your earrings extra flair.
Before attaching the charm, apply a small amount of glue to the inside of the piece. This will ensure a strong bond between the tassel and the charm. To secure the charm, push the needle through the bottom and out the top of the charm, then gently slide the charm over the head of the tassel. Hold the charm in place for a brief moment to allow the glue to set. You can further embellish your design by adding beads or charms between the threads.
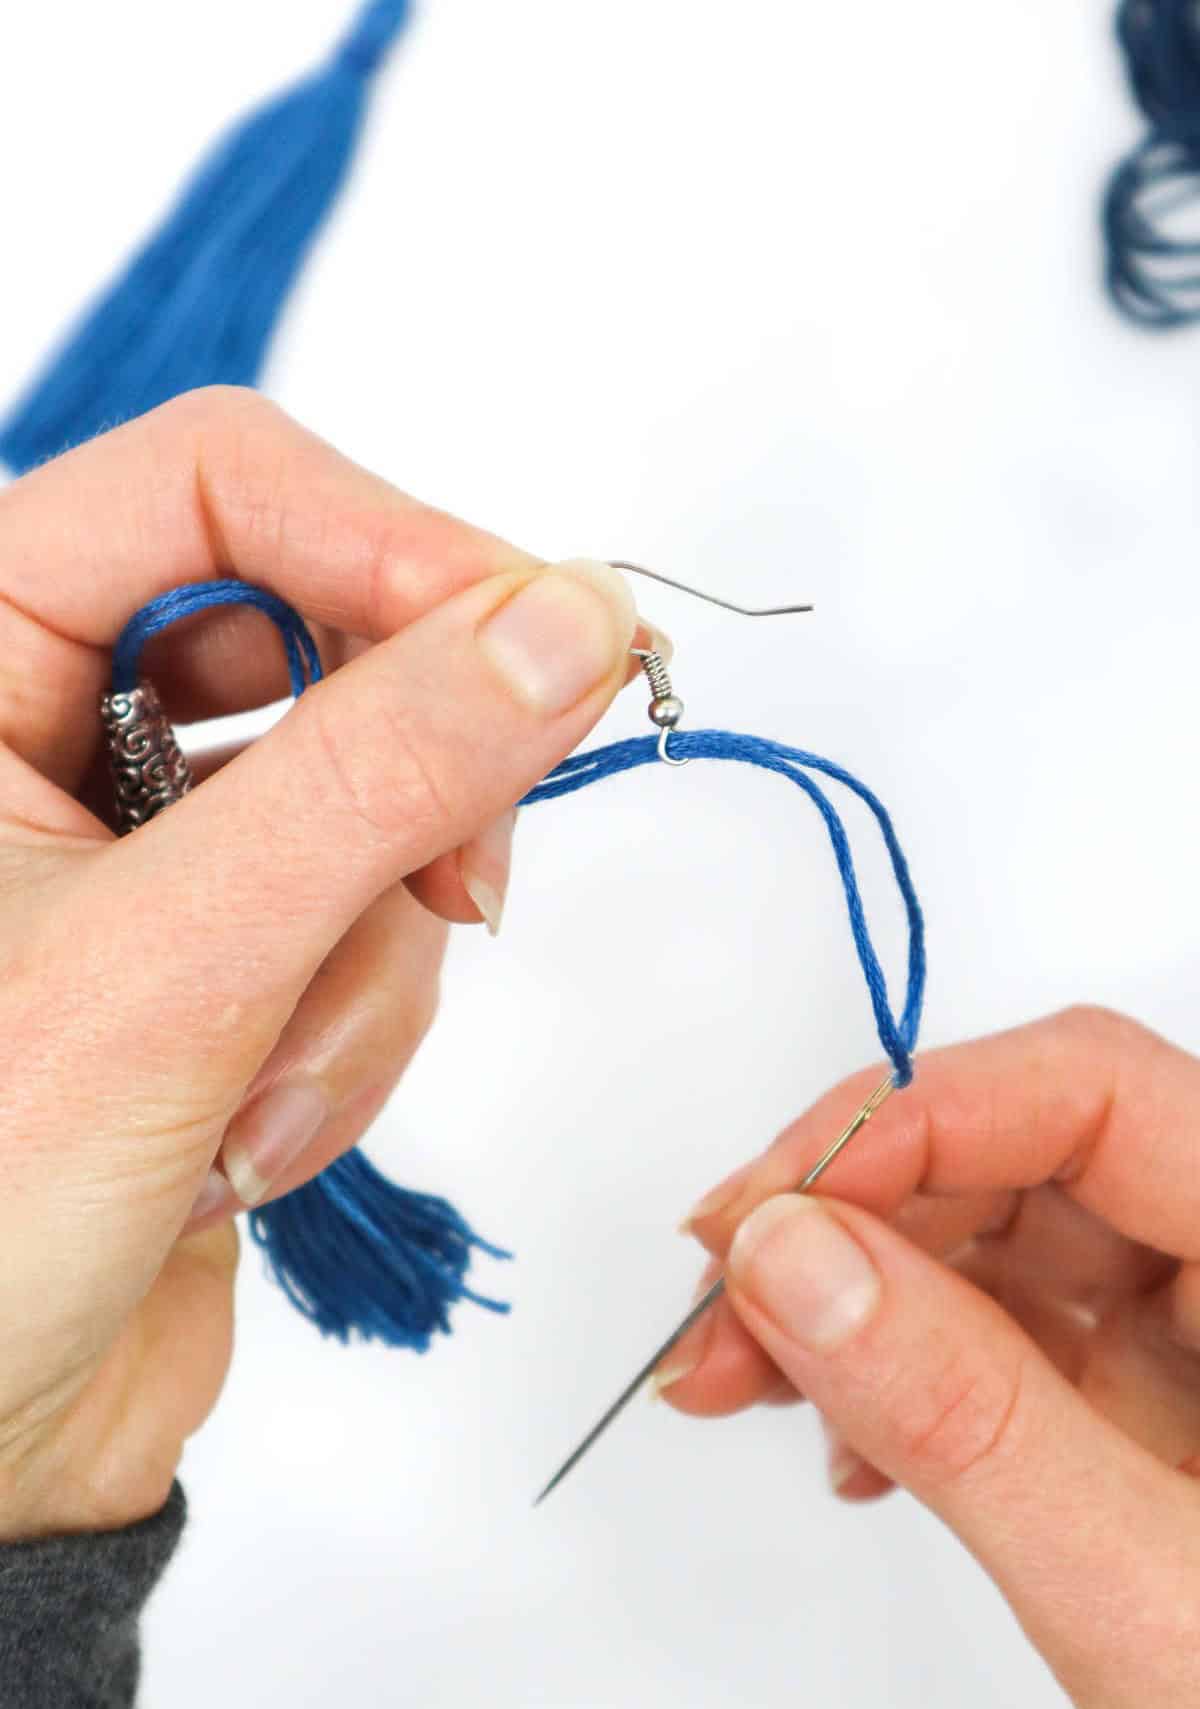
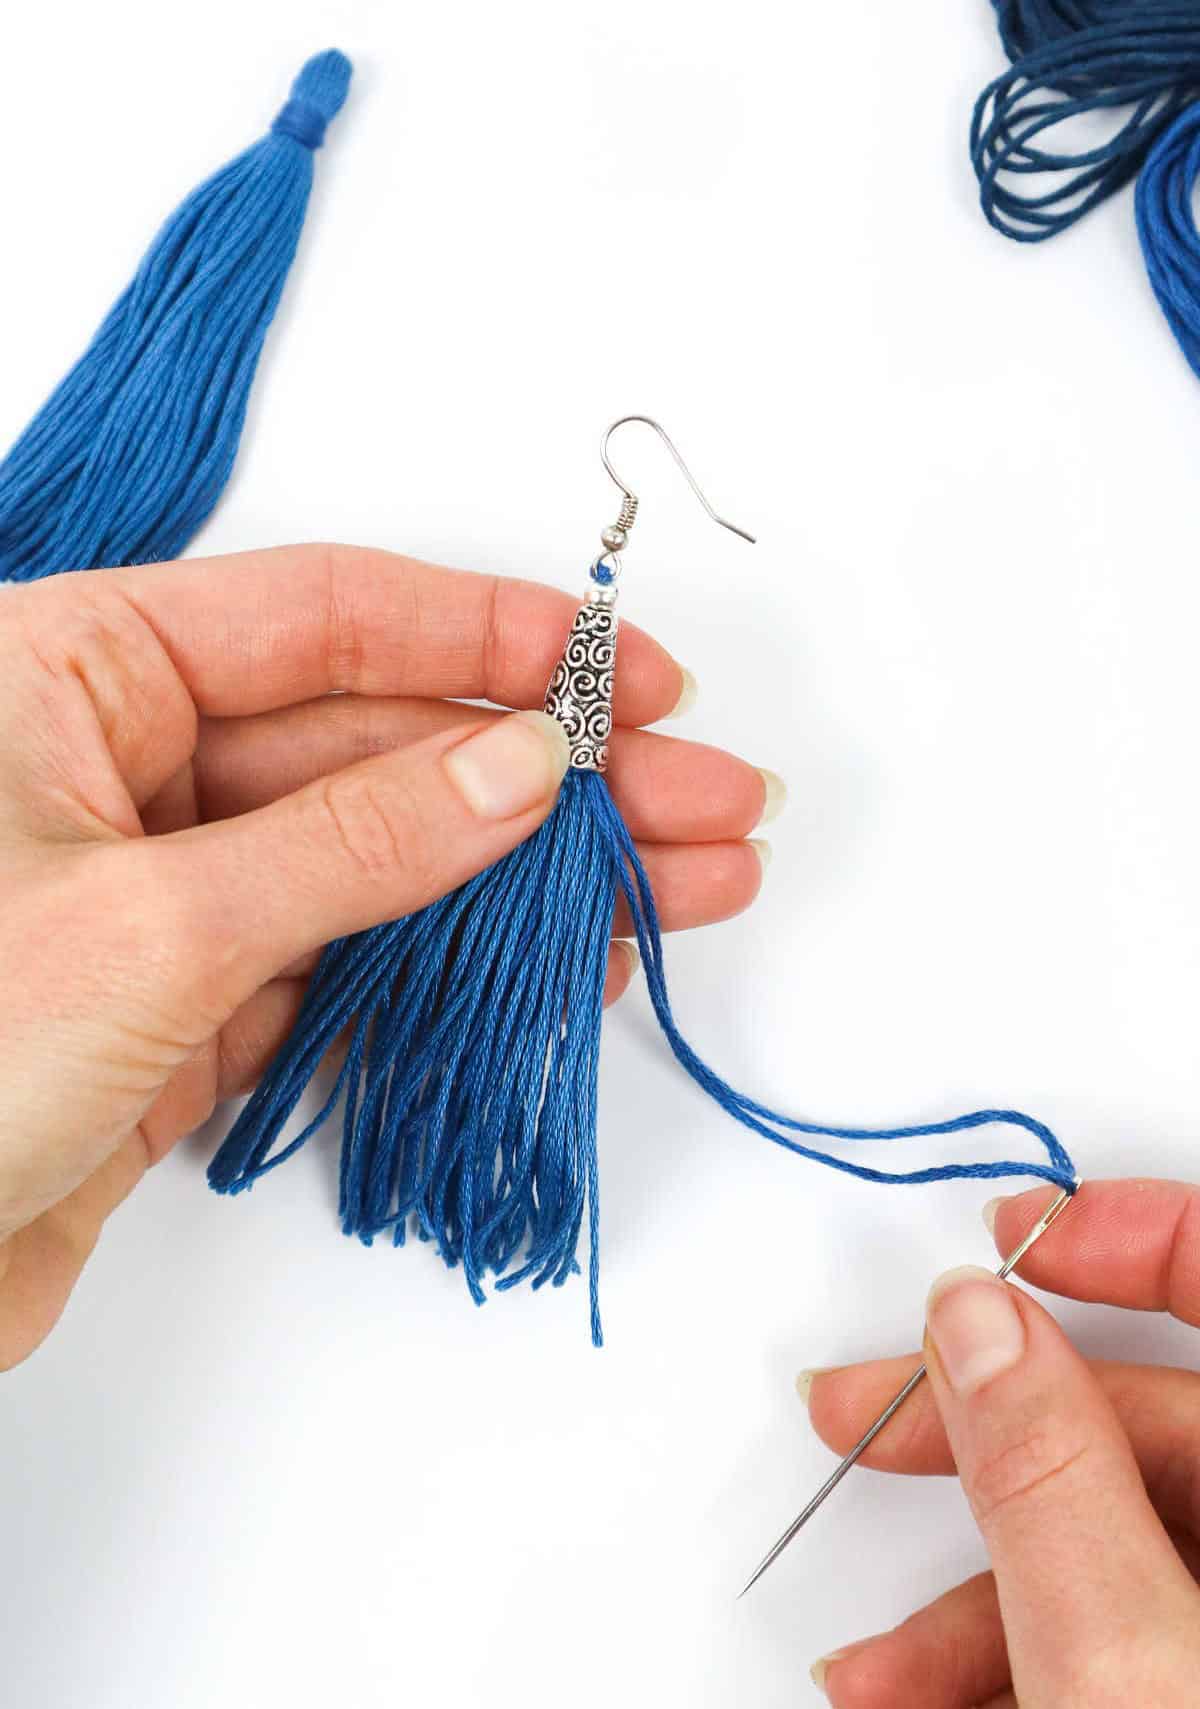
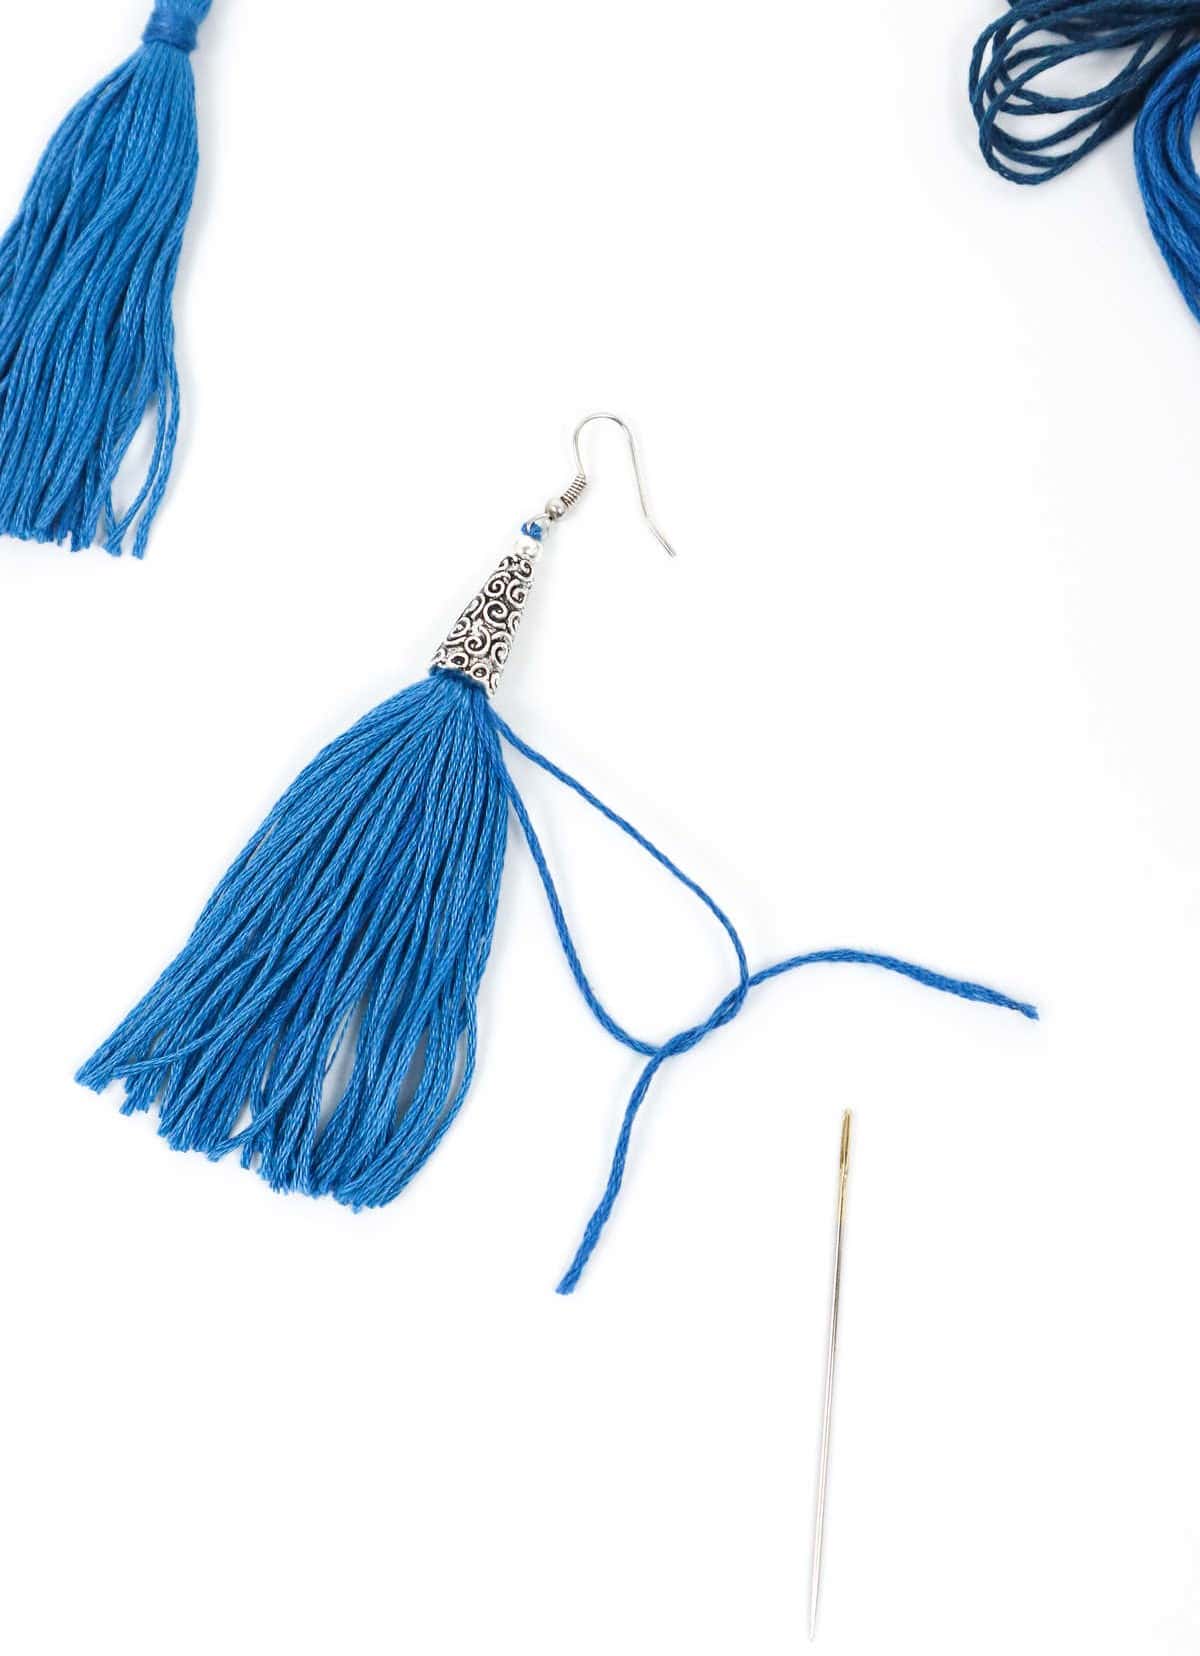
To do this, simply thread the needle through the bead or charm and push it down onto the tassel. For added security, you can tie a knot at the end of the thread before trimming the excess. To attach the hook, pass the needle through the small loop underneath it and pull through until the hook is securely in place. When it’s time to fasten off, thread the needle back through the small bead that was previously inserted. Then, pull the needle back through the large charm and out through the tassel.
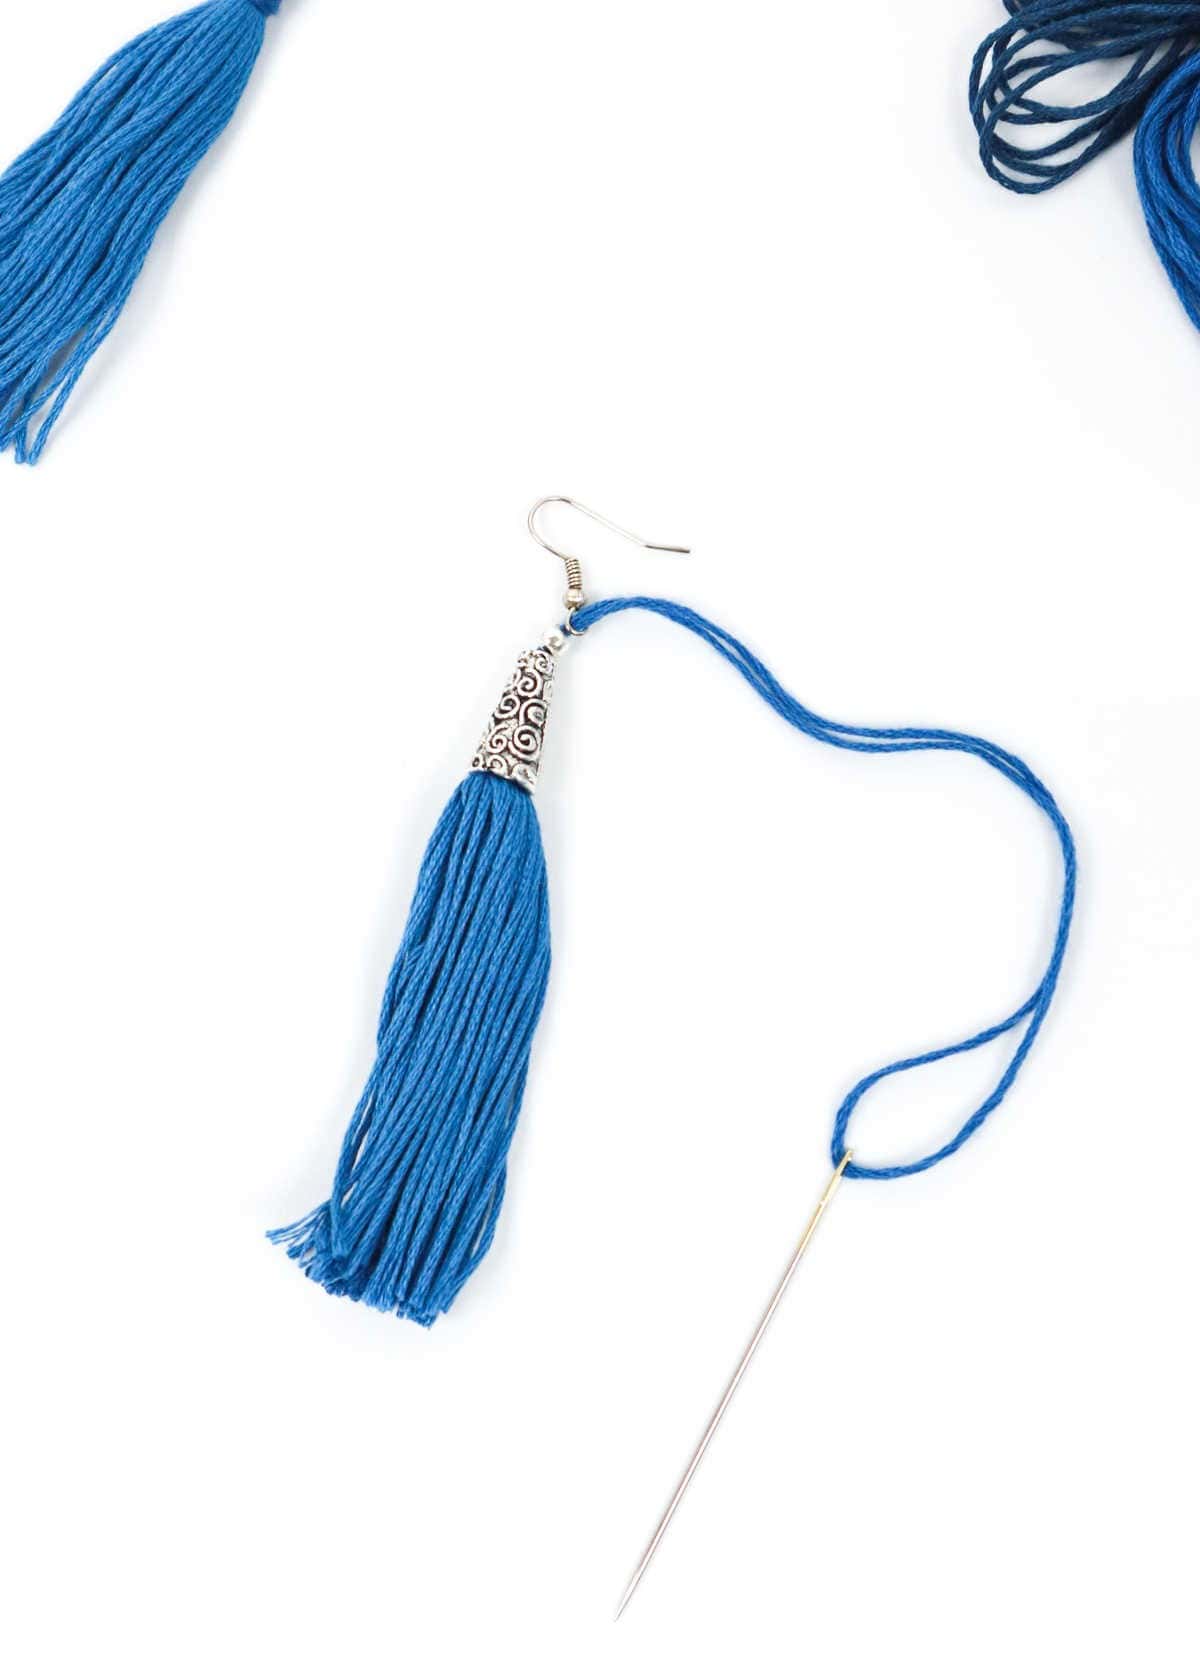
Finally, secure the ends by tying a knot and applying a small dot of glue for added stability. With these steps complete, your macrame earrings are now finished!
What Thread Do You Use for Tassel Earrings?
When it comes to choosing the ideal thread for embroidery floss, rayon is often the top pick. This is because many embroidery floss products are already made of rayon, making them suitable for use without modification. The thread size is also a major advantage – not too thin or chunky, and minimal fuzzing ensures a smooth finish. While cotton threads are also well-liked options, thinner silk floss can be used to achieve a refined, sleek appearance in tassel embroidery.
What Can You Wear These Earrings With?

The versatility of these earrings makes them an excellent choice for everyday wear. You can effortlessly pair them with a flowy summer dress for a relaxed look, or add a touch of elegance to your evening attire by teaming them up with jeans and a blouse. For a more upscale vibe, consider using chunky silver charms that will instantly elevate the overall style of your outfit.
Other Projects You Might Want to Make
Looking for creative ways to express yourself and potentially earn some extra income? This collection of 37+ crafts offers a wealth of inspiration. From jewelry making, including polymer clay earrings and macrame leaf earrings, to DIY rings and yarn projects, there’s something for everyone. Additionally, this treasure trove includes fun and unique projects suitable for adults, such as DIY macrame keychains.
Whether you’re looking for a hobby or a way to monetize your skills, these 37+ crafts are sure to spark creativity and imagination.
DIY Tassel Earrings (Step-by-Step Tutorial)
Create Your Own Unique Earrings with This Simple DIY Tassel Earring Guide. Not only is this project a blast to make, but the end result is absolutely stunning. With just a few simple steps, you can craft your own pair of tassel earrings that reflect your personal style.
Equipment
To avoid losing your train of thought, keep your screen illuminated by taking a few simple steps. Firstly, adjust the settings on your device to prevent the screen from dimming or going dark automatically. This will ensure that you can continue working without interruption.
Materials
A treasure trove of materials, carefully curated to bring your creativity to life. The foundation of this artistic journey begins with the humble embroidery thread, its versatility allowing it to transcend traditional boundaries and find new expression in jewelry-making. Next, the earrings hooks, sturdy and reliable, provide a secure fastening point for any design.
Jump rings, those clever little loops, enable the effortless connection of beads and other components, while E6000, that magical adhesive, holds everything together with ease. And then, of course, there are the beads themselves – an array of colors, textures, and shapes waiting to be crafted into unique and captivating pieces. Finally, cone bead caps, those diminutive yet mighty helpers, add a touch of elegance and sophistication to even the most intricate creations.
Instructions
To create a stunning tassel, start by preparing your embroidery floss. Take one bundle and locate the center of the loop on either end. Cut both threads at the ends, just through the loop, and remove the wrapper. Divide the bundle into two equal parts, setting one aside for now. Cut another thread, 8 inches long, and tie a knot under the remaining threads in the middle. Fold the threads in half over the knot, then cut a new thread, 10 inches long.
Tie another knot about 1 centimeter from the looped top to form the tassel’s head. Loop the 10-inch thread around the knot a few times, tie a double knot, and trim the ends. You now have one tassel; repeat the process with the remaining threads. To attach earring hooks, you can use either of two methods. The first is simple: loop a jump hoop into one of the top threads using pliers, then secure the hook through the hoop. The second method requires more effort.
Thread a large embroidery needle with floss and make a double knot at one end. Insert the needle down the center of the tassel head and pull it through from below. Add matching silver charms and beads to the needle, securing them over the tassel’s head with glue if needed. Then, thread the needle with beads (or more) and sit them atop the charm. To insert the earring hook, pull the needle through the little hoop under the hook and then through one of the beads.
Next, push the needle through the silver charm and pull it through from underneath. Cut the thread and secure a knot, pushing it up into the charm’s base to hide it. You can also add glue over the knot for extra security.