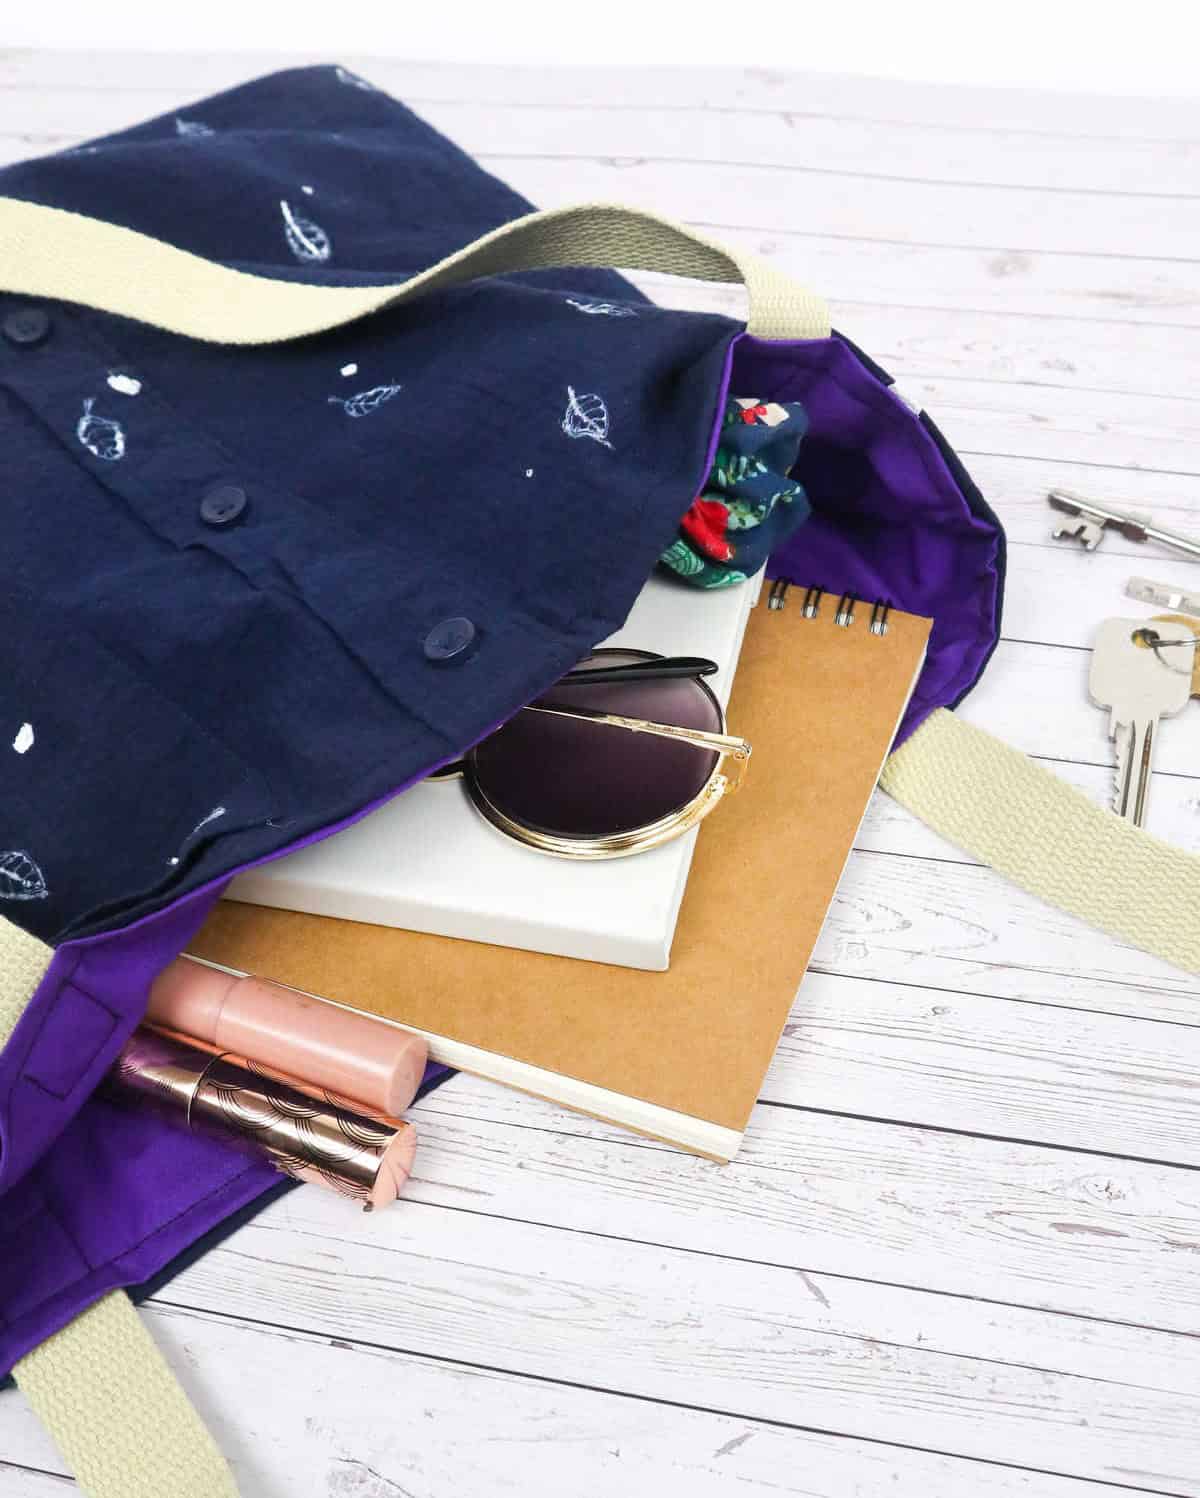
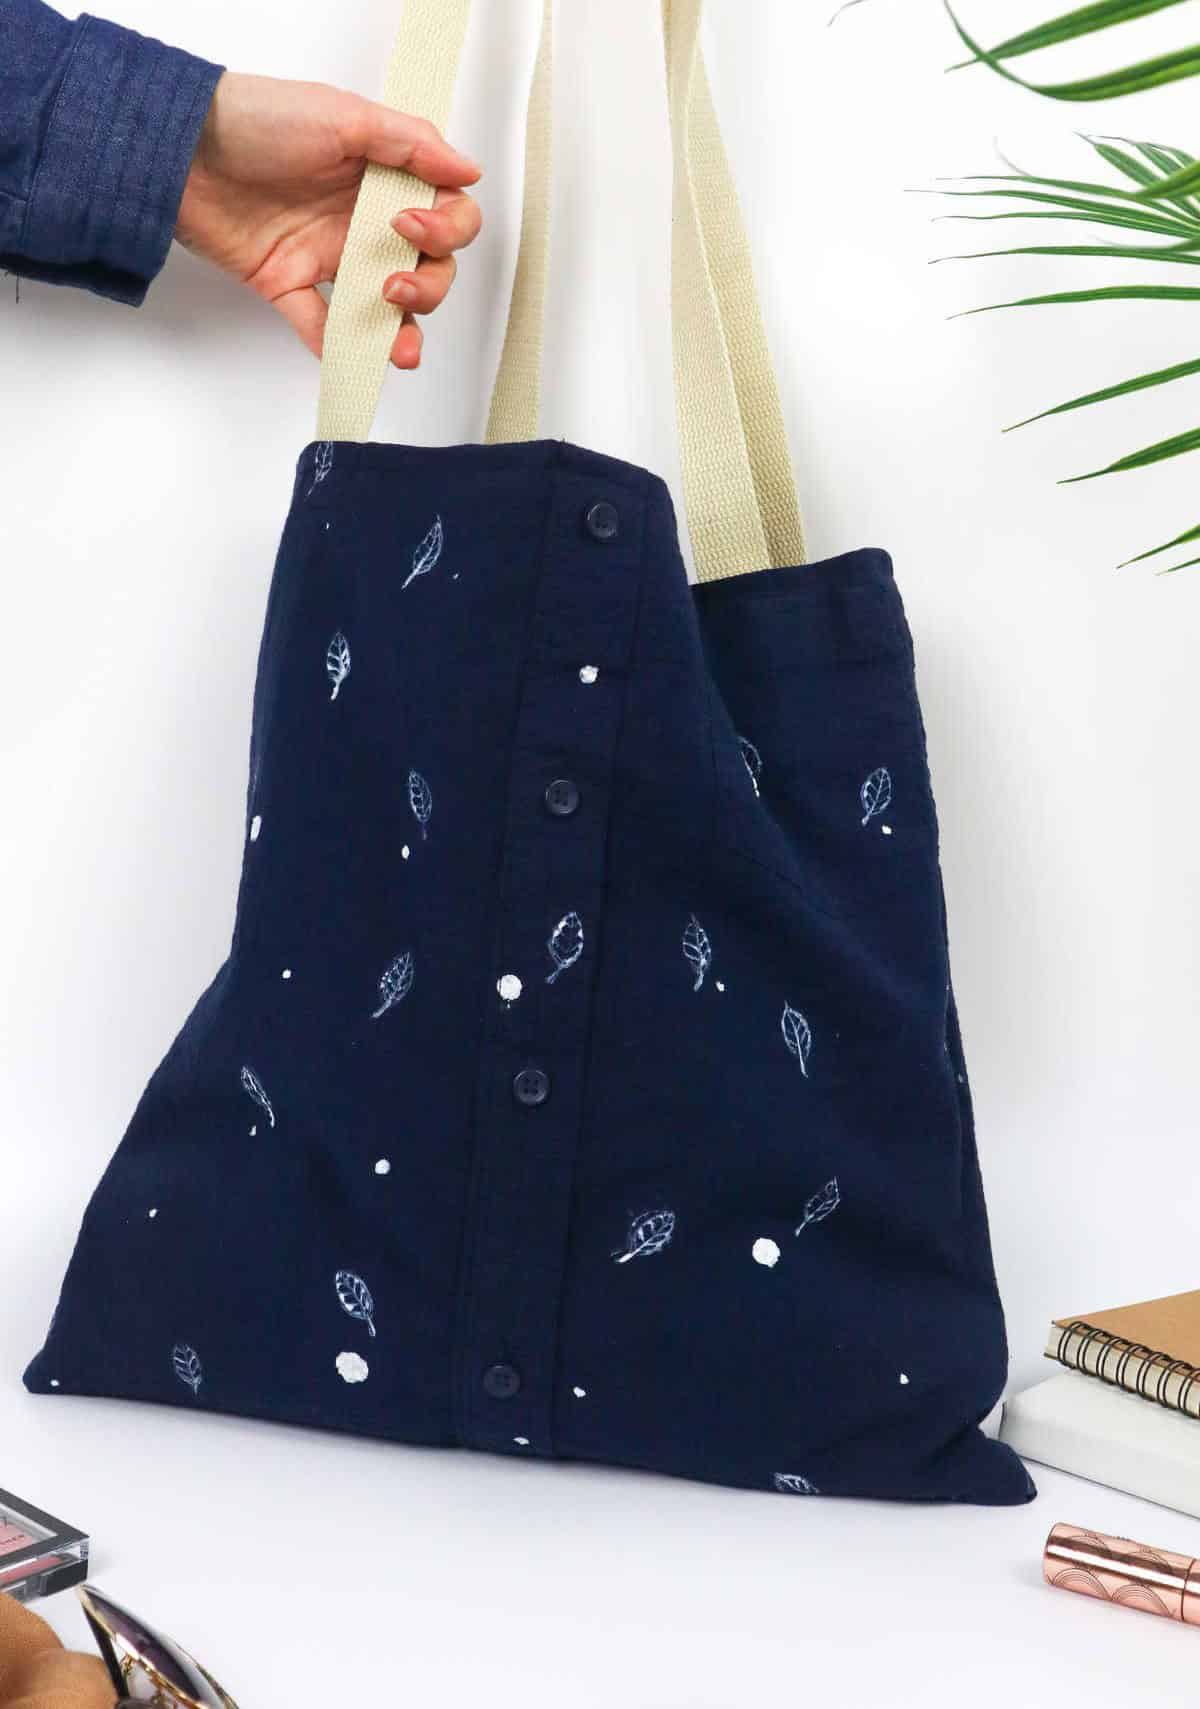
For sewing enthusiasts and DIY enthusiasts alike, transforming an old shirt into a fun and functional tote bag is a fantastic upcycling project. If you’re like many of us, you likely have a stash of retired tees and shirts collecting dust in your closet. Perhaps they’ve been sitting there for a while, or maybe you’ve meant to donate them but haven’t had the chance yet. Whatever the reason, don’t worry – I’ve got just the project for you!
With this DIY tutorial, you’ll be able to breathe new life into one of those old shirts by turning it into a stylish and practical tote bag. And let’s be honest, who couldn’t use another tote? They’re perfect for carrying everything from groceries to books to beach towels – the possibilities are endless!
Watch on Youtube: DIY Tote Bag


Supplies and Tools You’ll Need
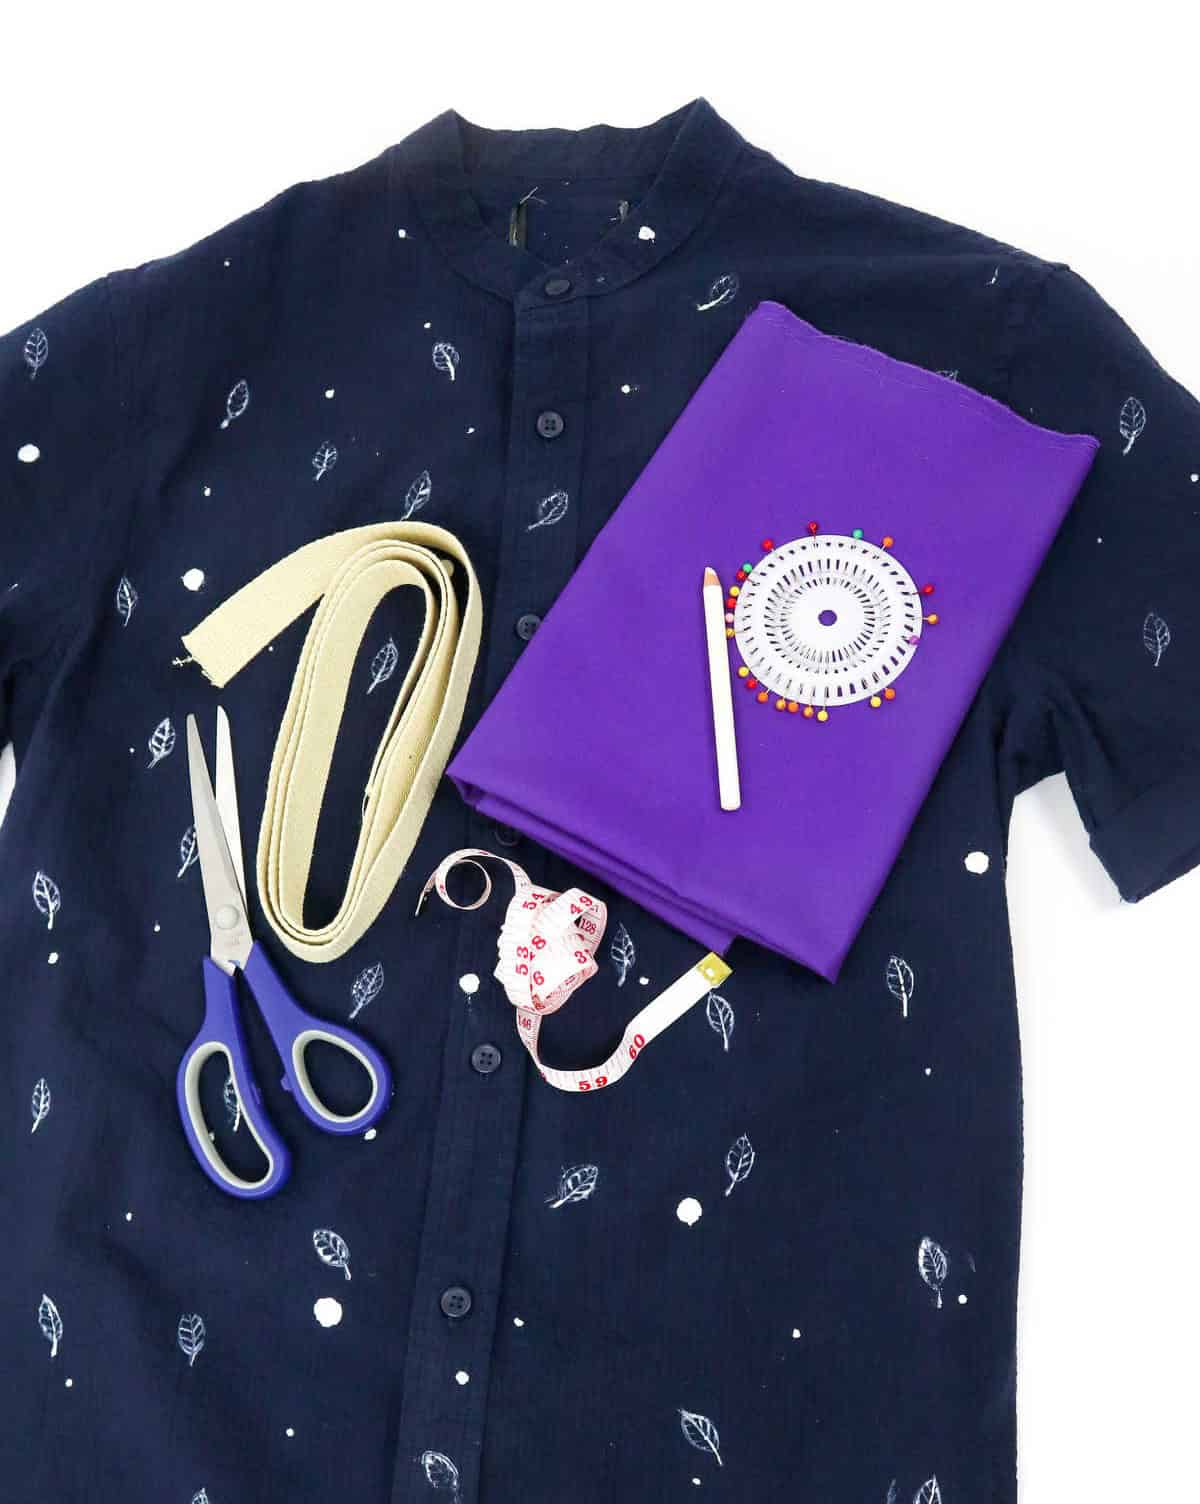
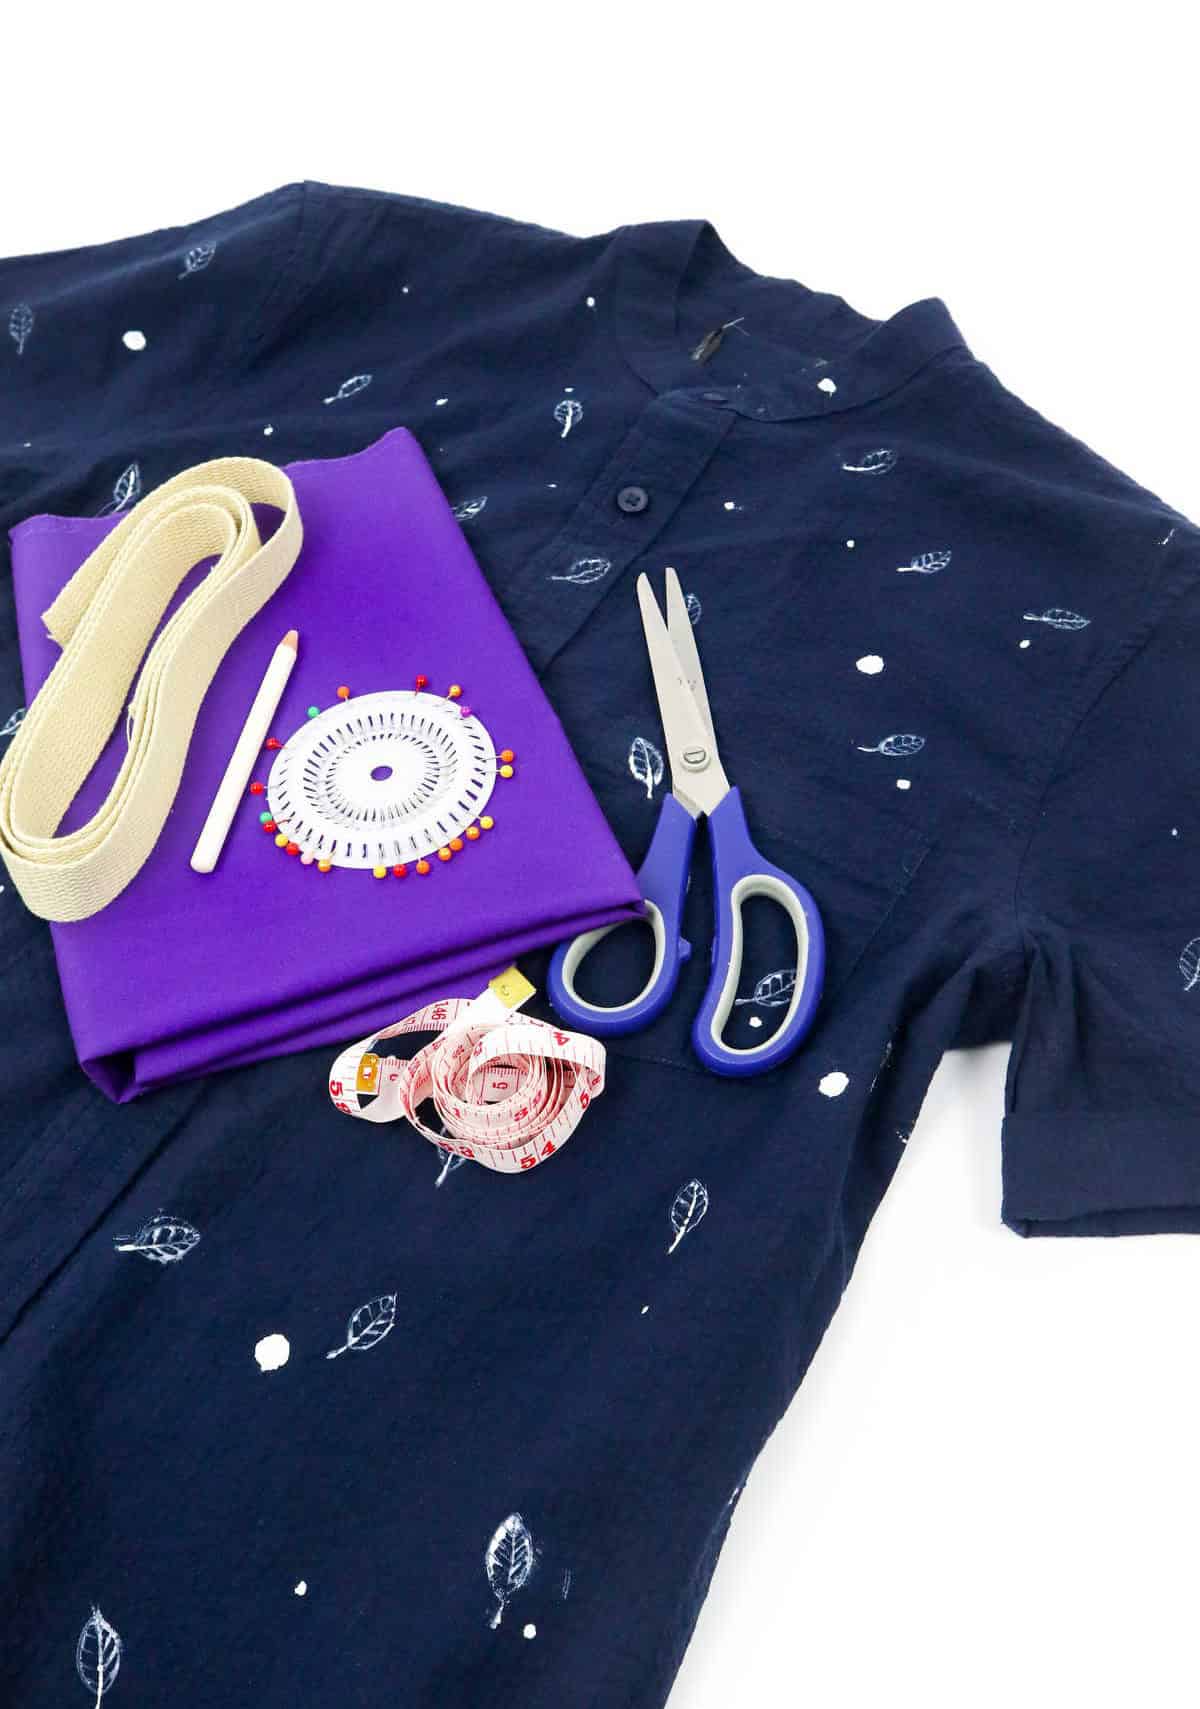
To get started, you’ll need the following materials: The list of essentials includes a few basic sewing tools and some specific fabrics. Make sure to have these on hand before beginning your project.
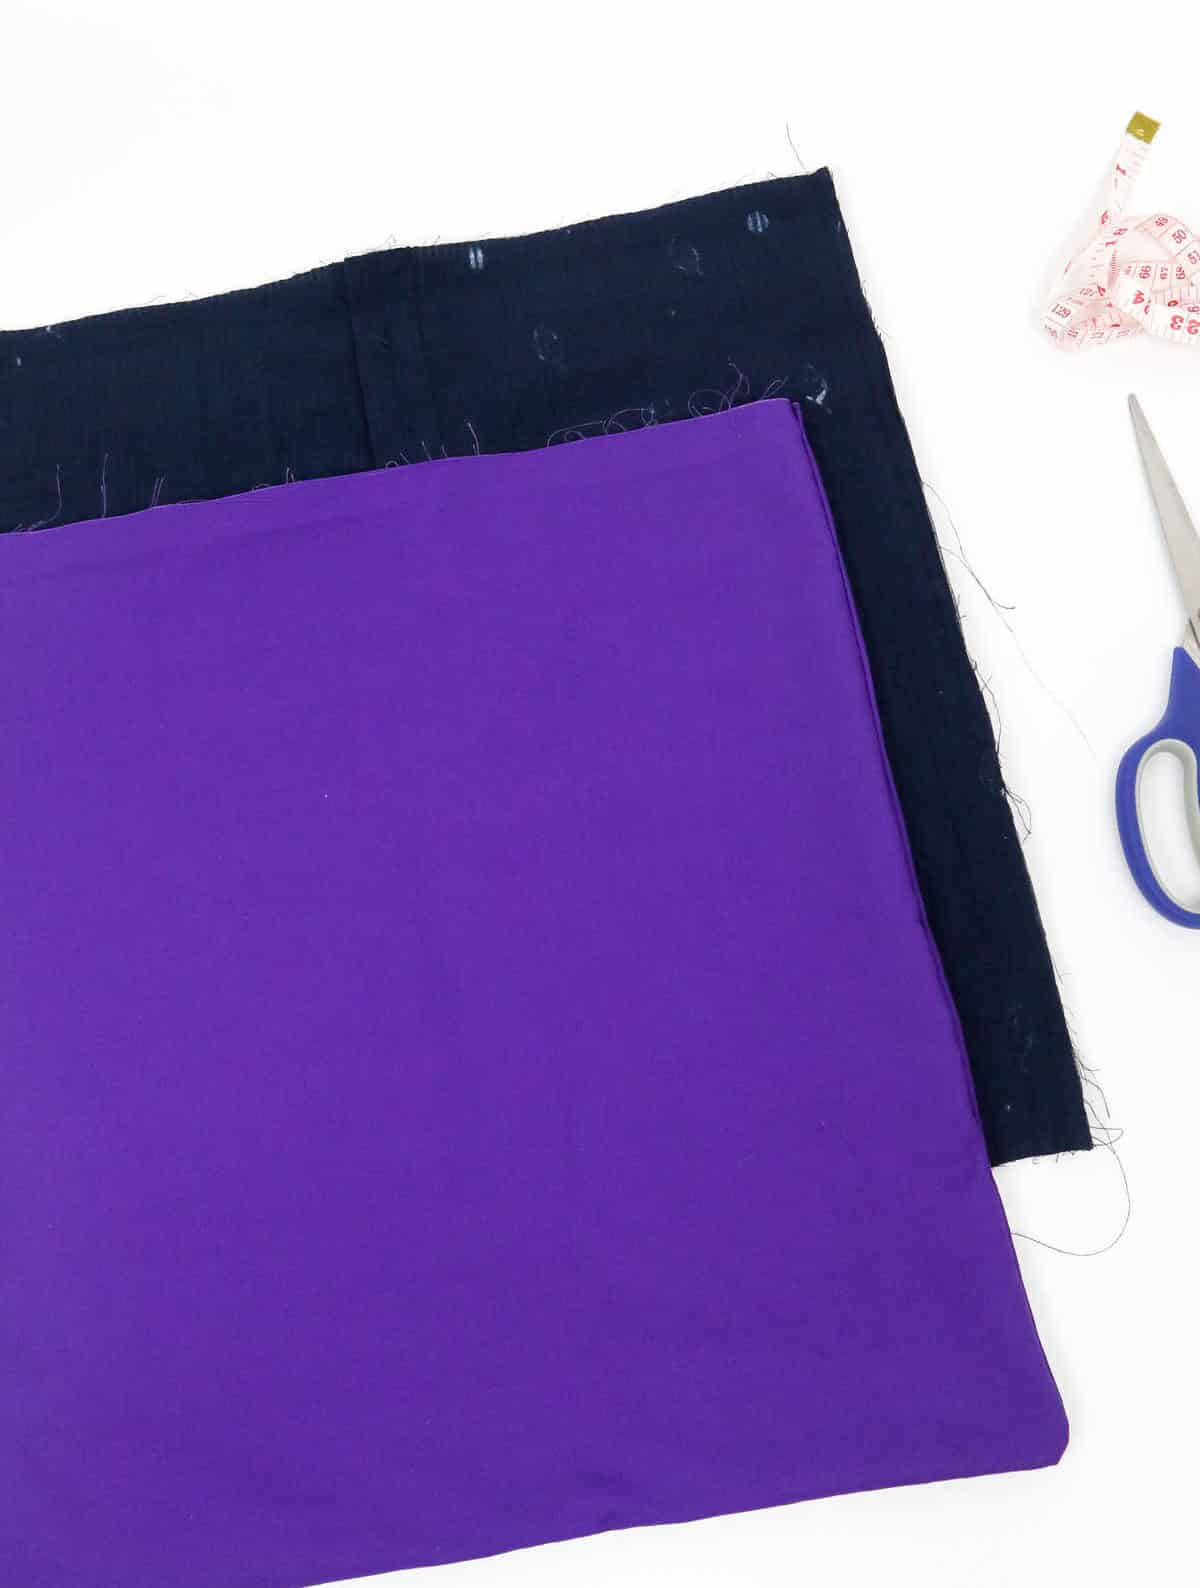
Among the must-haves are a comfortable cotton shirt, a larger piece of polycotton fabric measuring 40 inches by 40 inches, scissors for cutting through various materials, sewing pins to secure your work in place, a tape measure for taking precise measurements, and a fabric pencil for marking patterns onto your fabric. You’ll also need 52 inches of sturdy cotton webbing to provide structure and support to your finished project.
How to Make a DIY Tote Bag
When selecting a button-down shirt or one featuring unique decal work, embroidery, or trendy designs, consider how it can elevate the overall style of your tote. Feel free to pick out a shirt from your collection that complements the design you have in mind for your bag.
Something important to keep in mind is that the size of the bag will be determined by the distance between the sleeves of your chosen shirt, so choose one that fits your desired dimensions.
Step 1


To initiate the process, identify the spot just below the sleeve on either side of the shirt. This marks the starting point for creating your bag’s outline. Next, determine the desired length and proportions of your bag and transfer these measurements onto the shirt using tailor’s chalk or a fabric pencil. As you mark out the dimensions, ensure to connect all four dots, which will ultimately reveal the shape and size of your bag.
Step 2
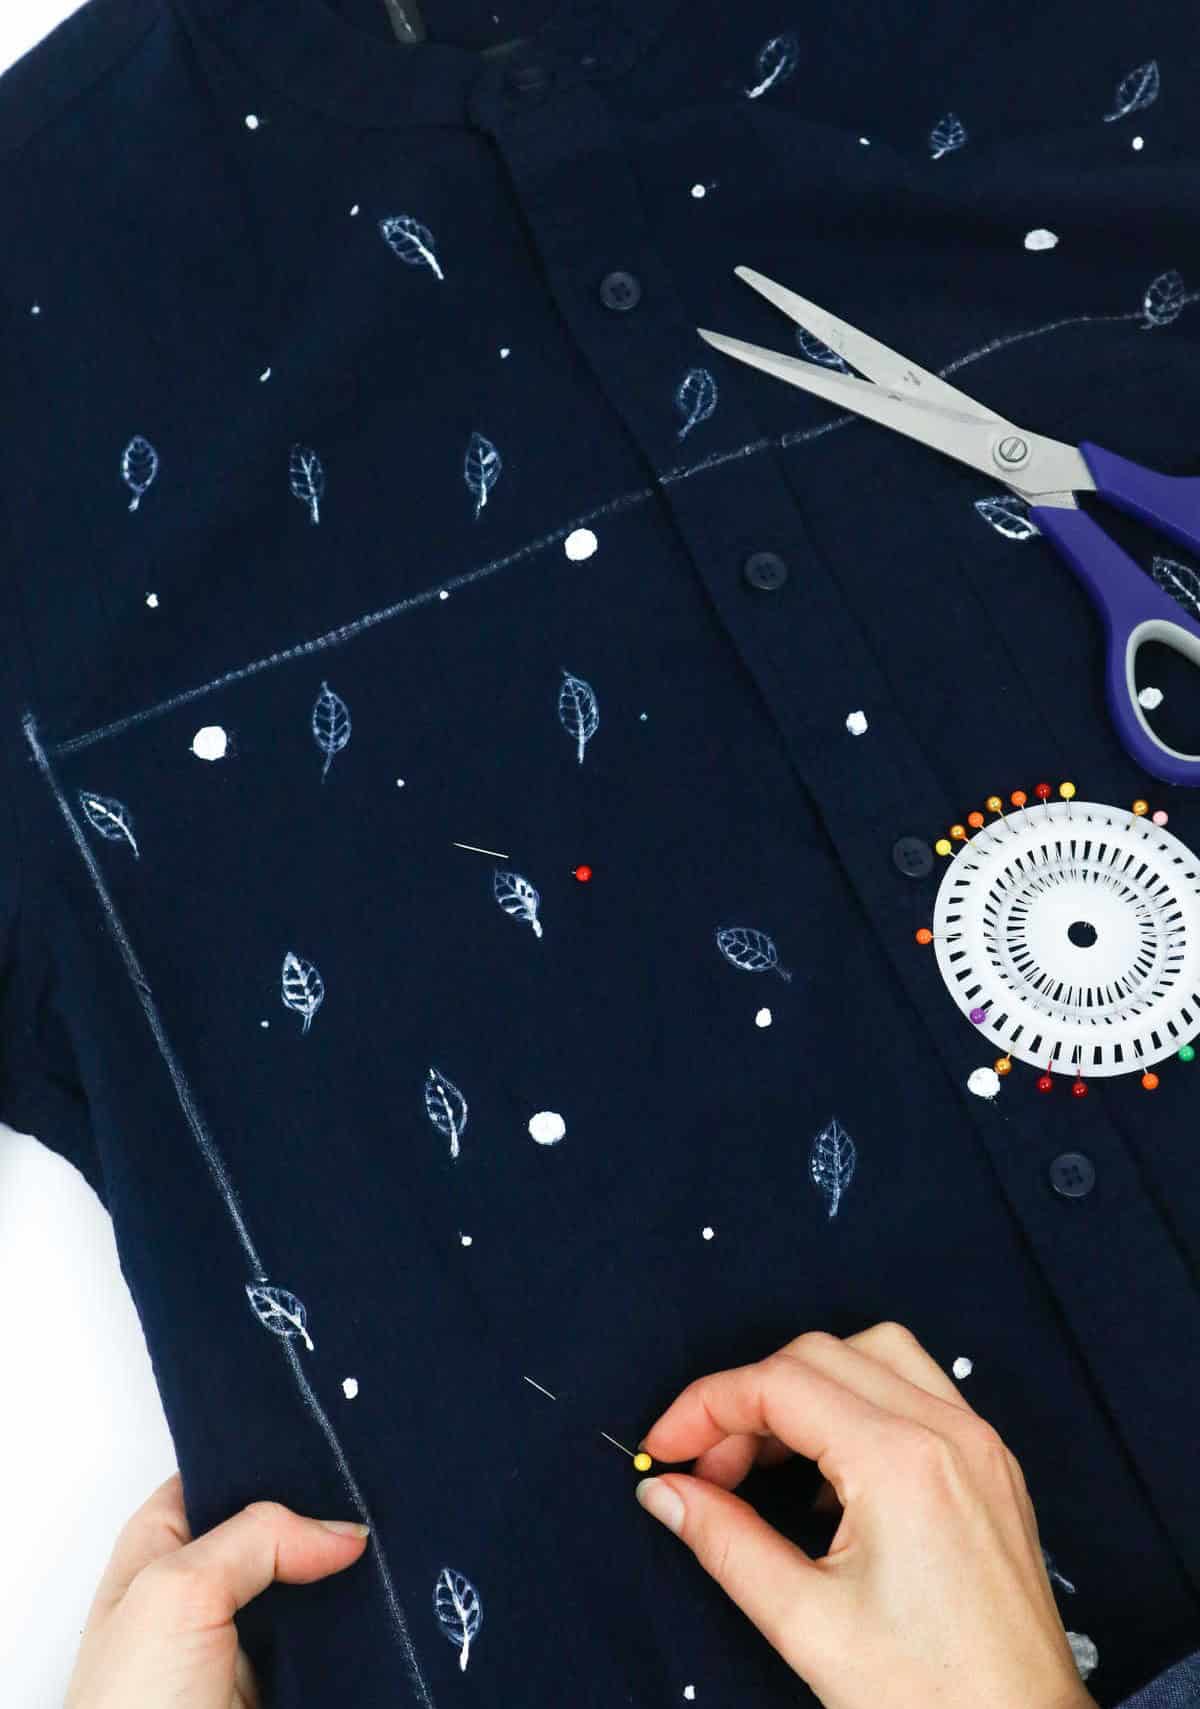
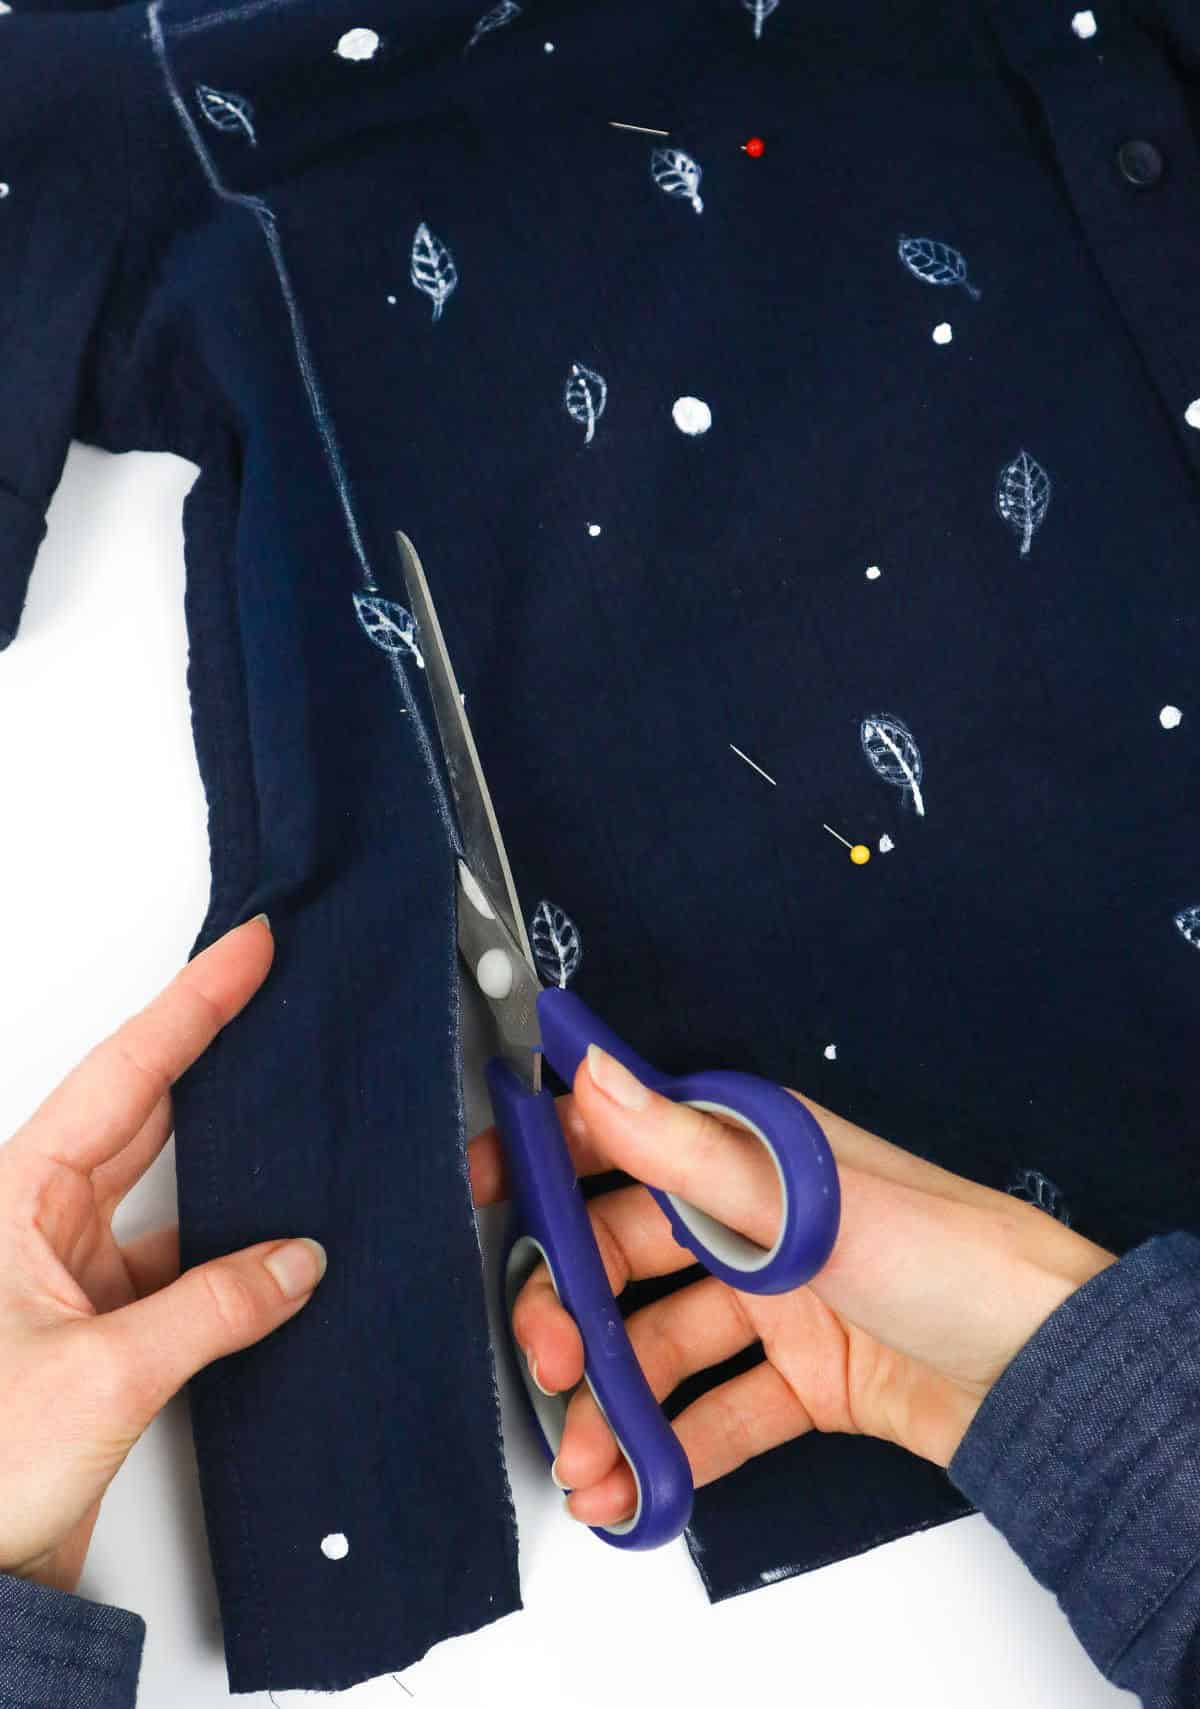

Prior to initiating the cutting process on your fabric, it’s essential to secure the two layers with sewing pins. This simple step ensures that the materials remain stationary and consistent during the cutting process. As a result, you’ll be left with two neatly cut swatches of fabric once the shirt has been transformed.
Step 3
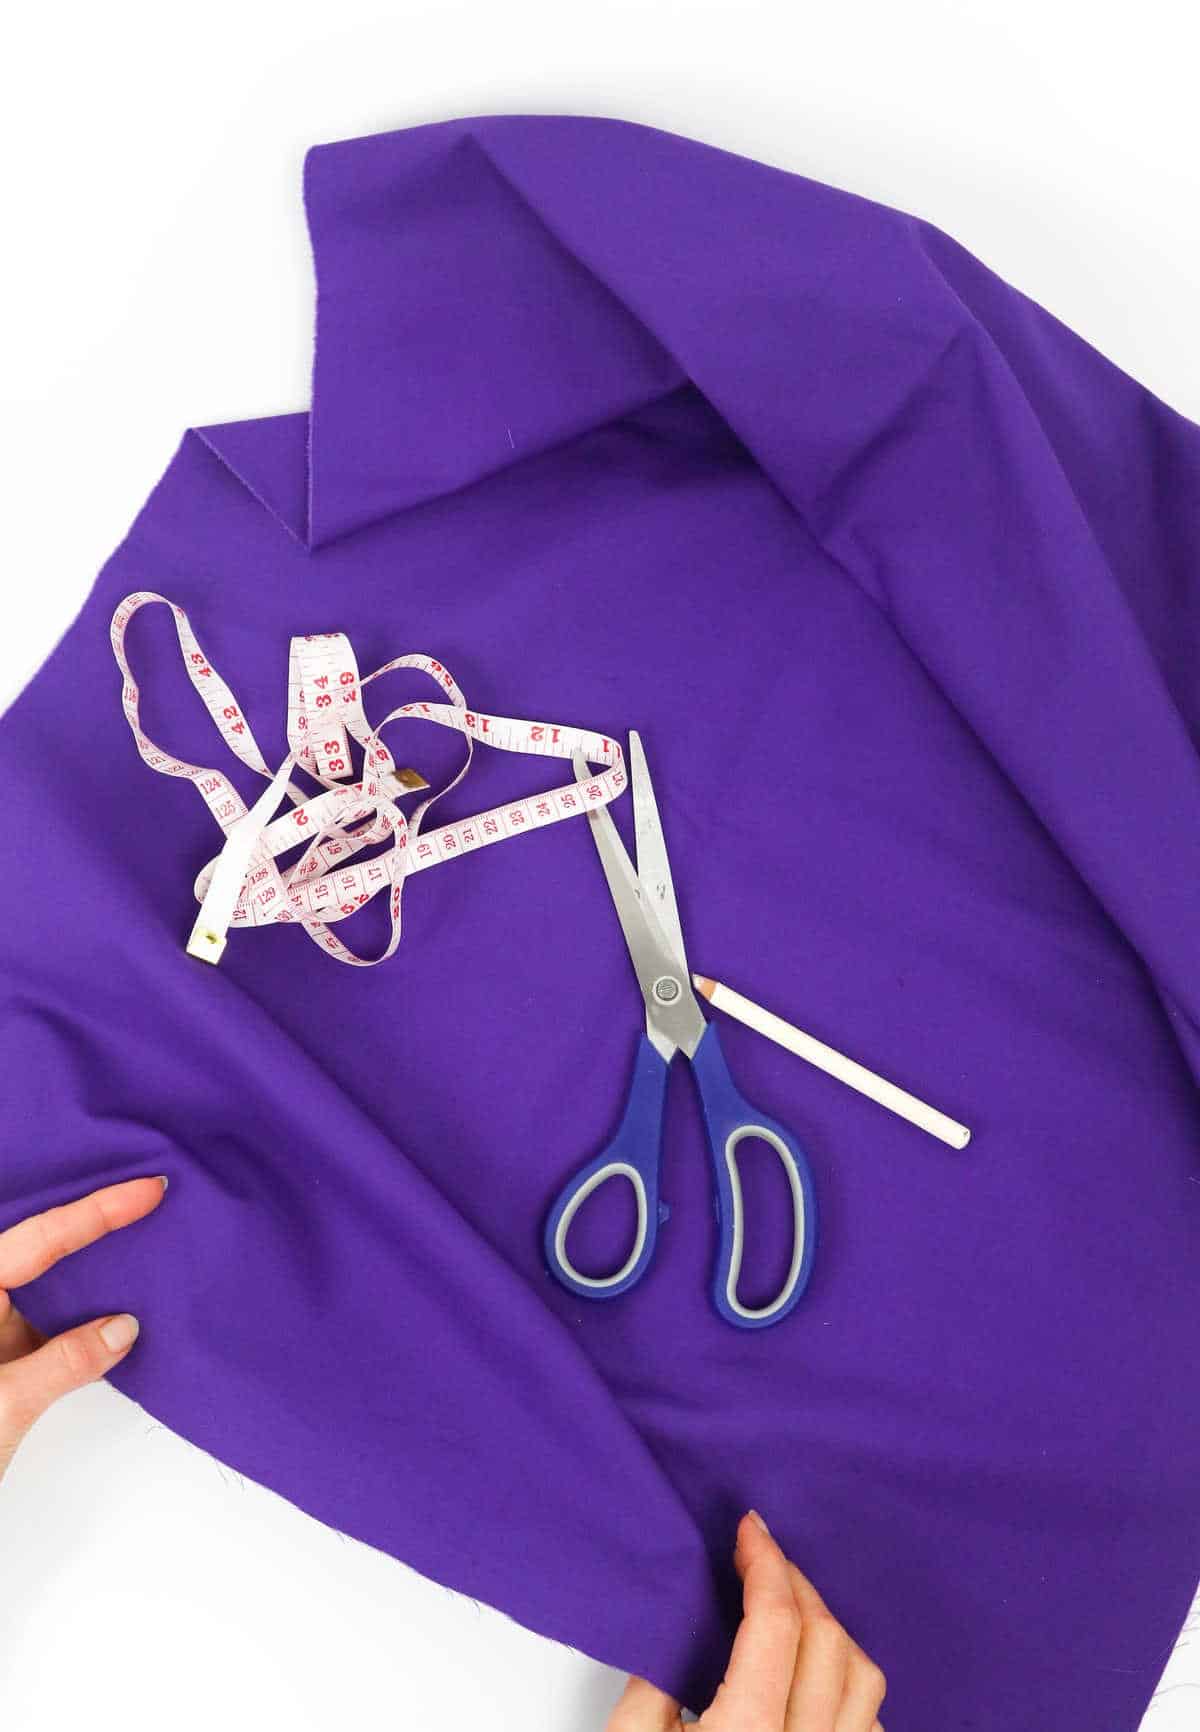
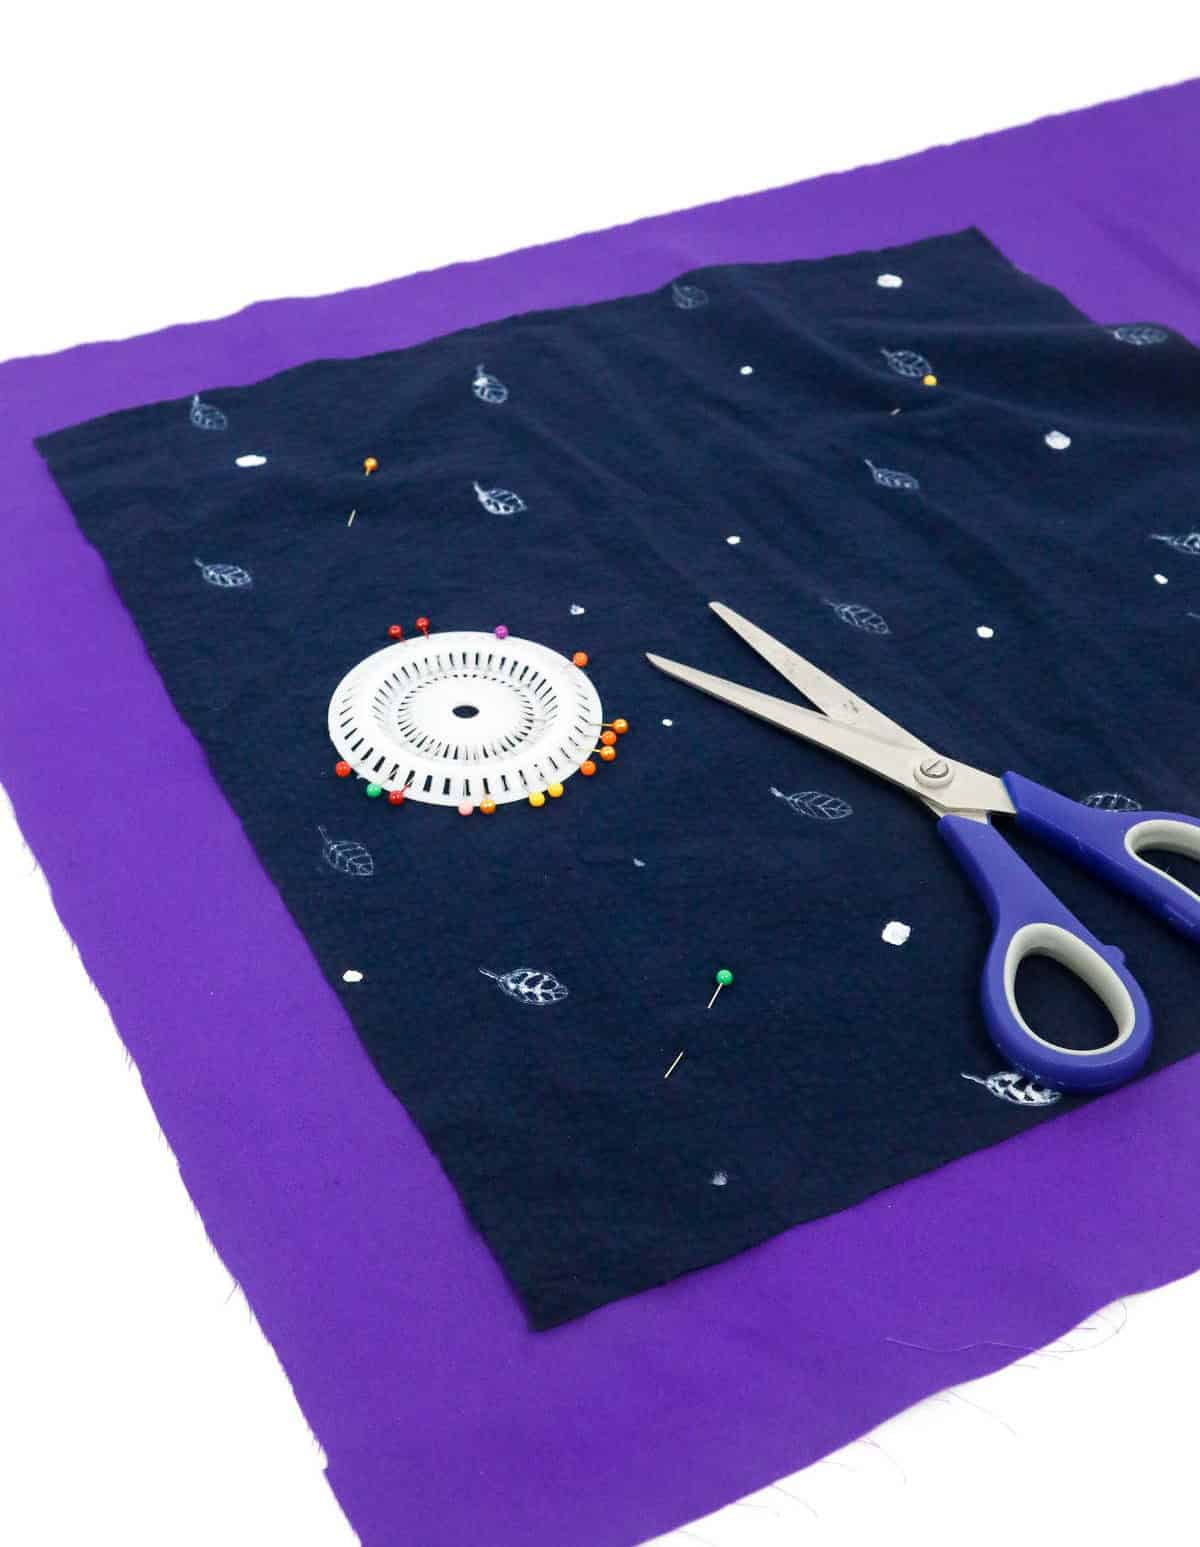
When it comes to creating a sturdy bag, measuring and cutting out a lining fabric is an essential step. While it’s possible to get away without one if your outer fabric is particularly robust, adding a lining can significantly enhance the overall sturdiness of the finished product. To begin, place your outer fabric on top of the lining fabric, ensuring they’re aligned properly. Then, using your scissors, carefully cut along the edges, working your way around the perimeter.
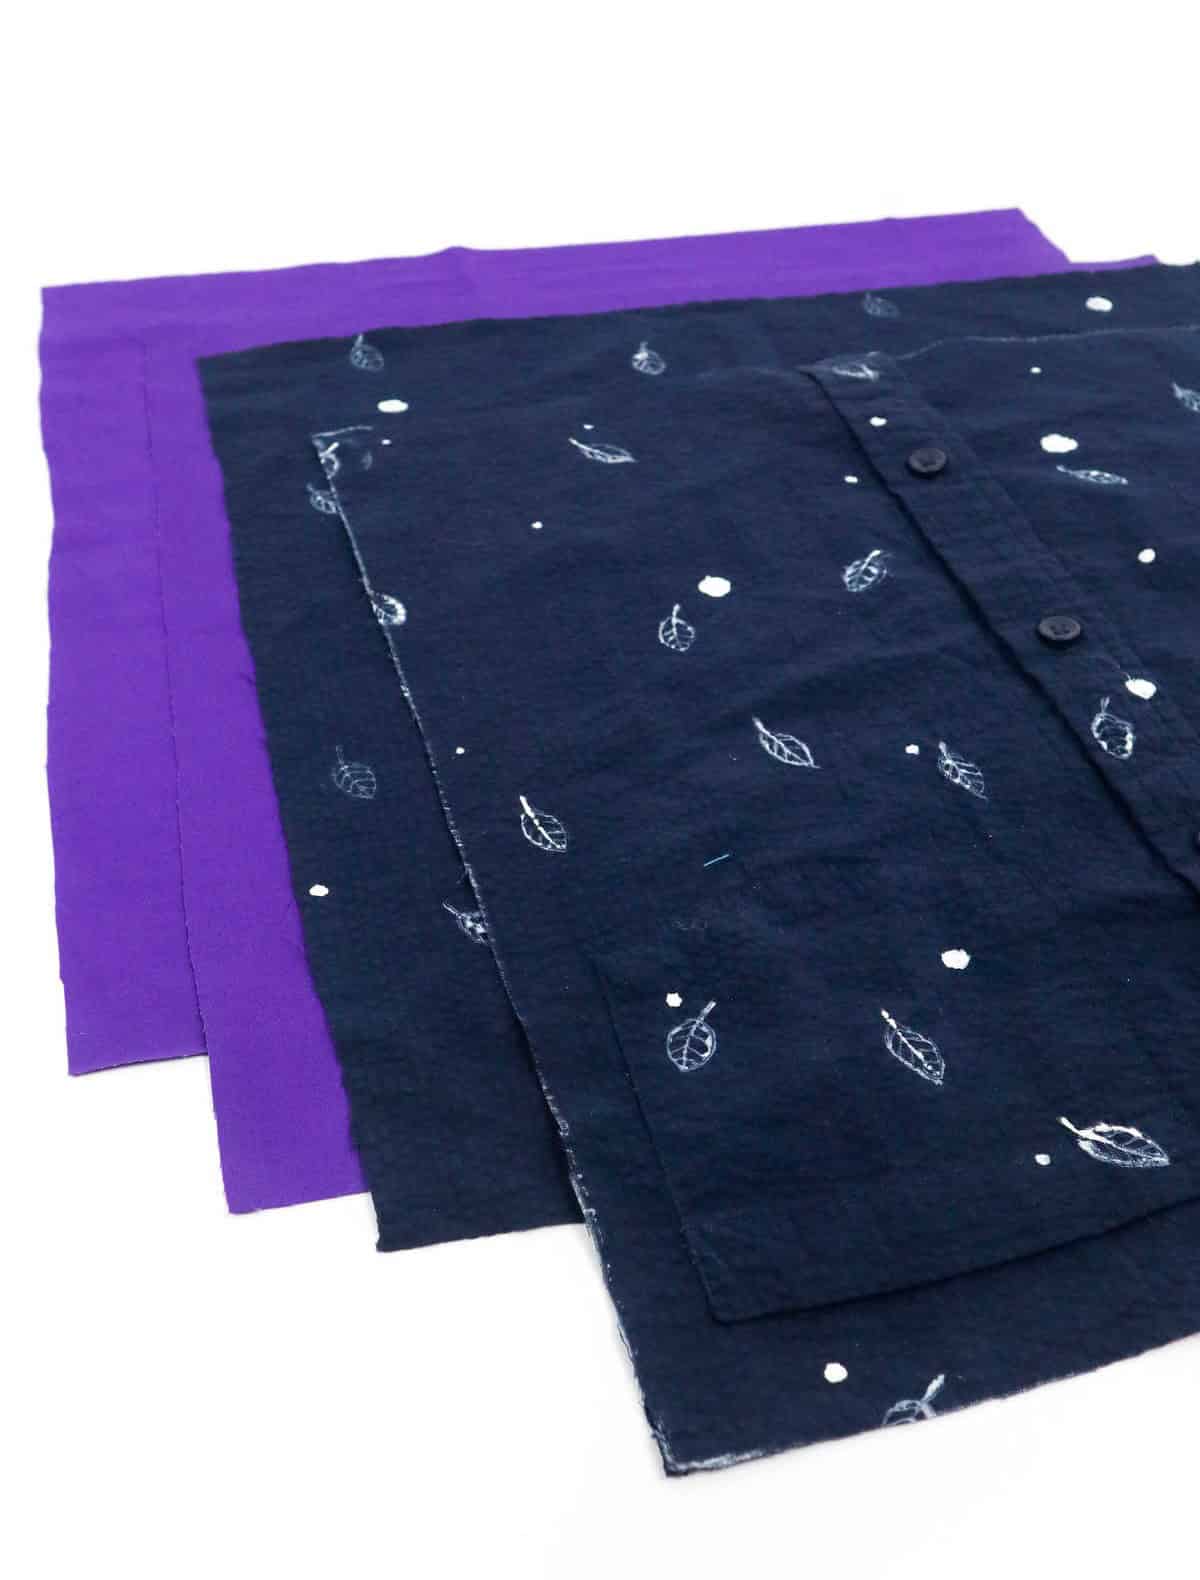
This should leave you with four distinct fabric swatches – two each for the lining and outer material.
Step 4
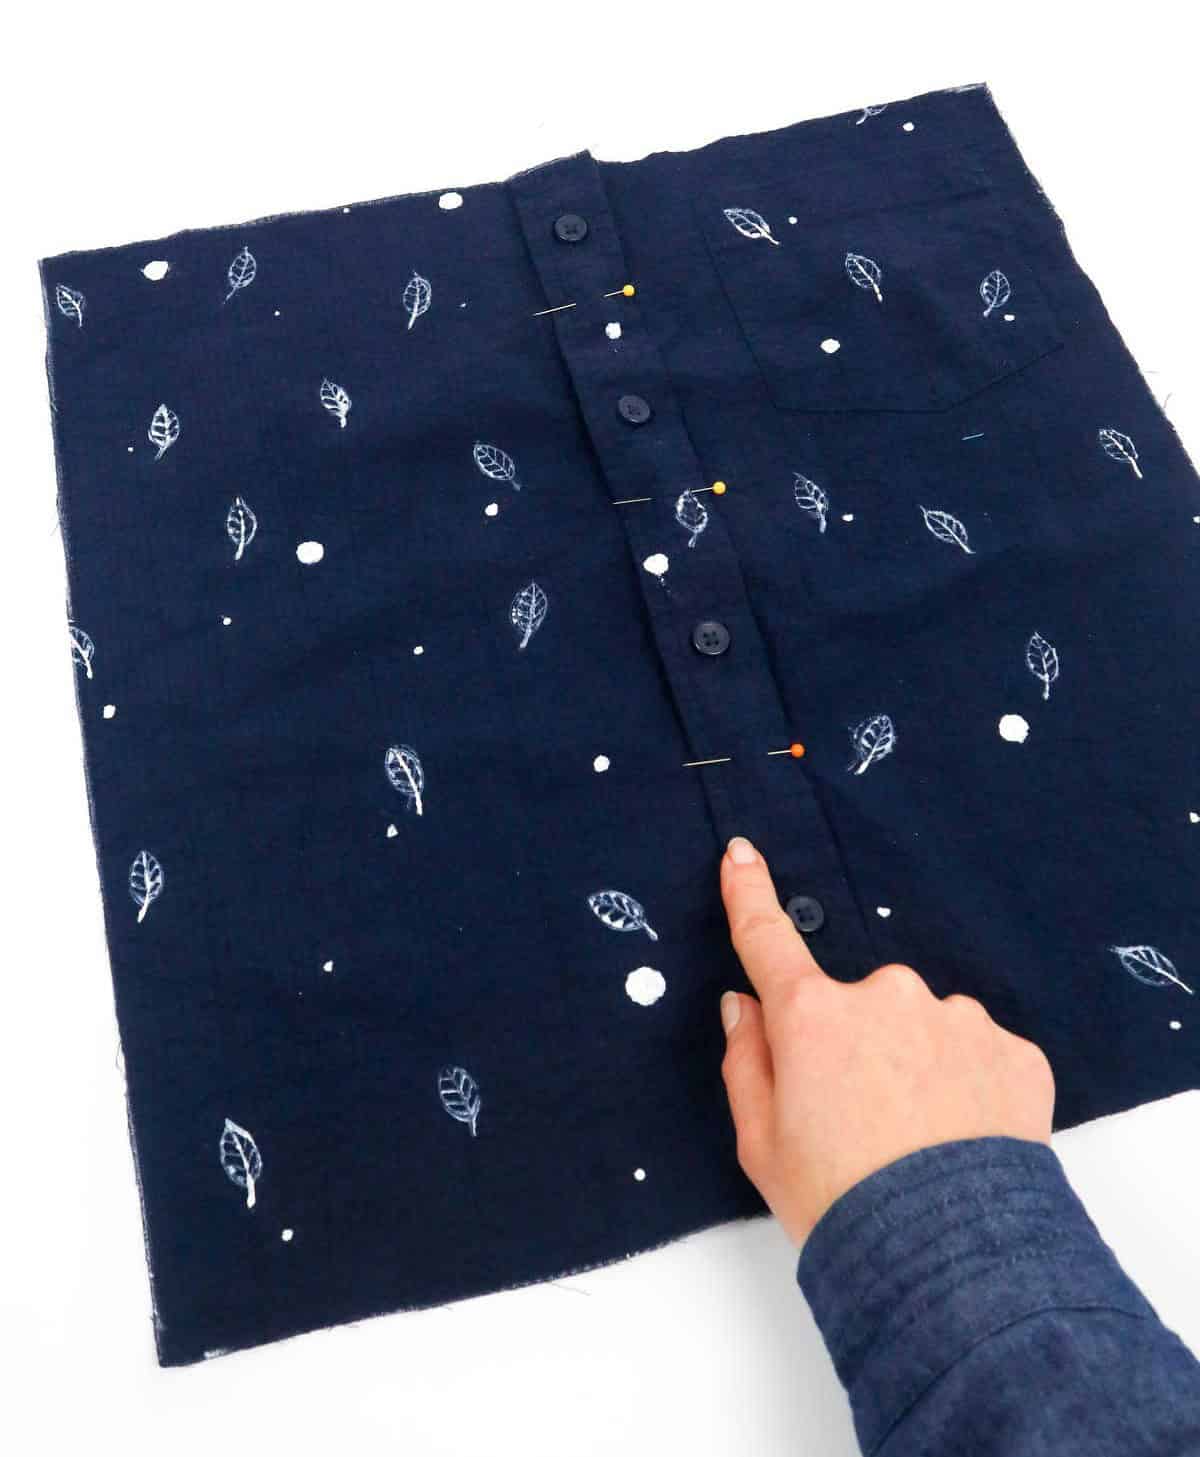
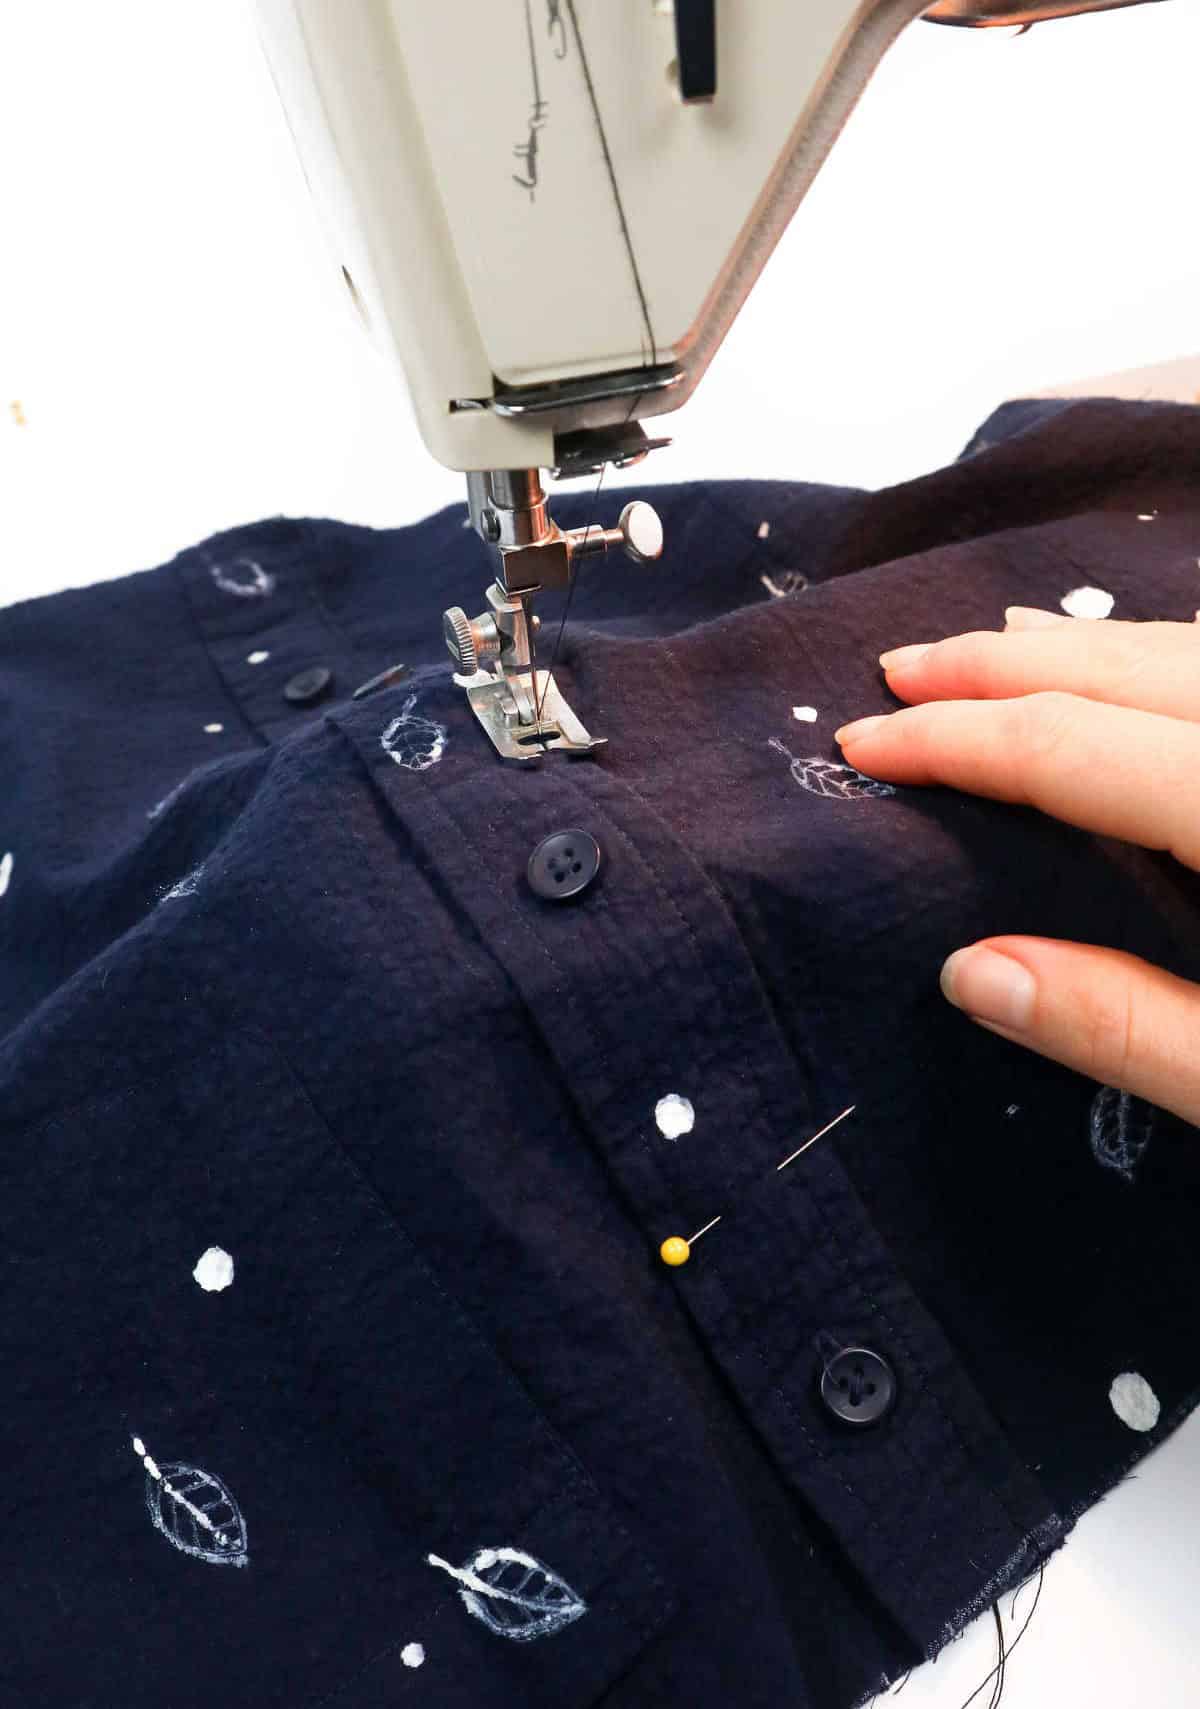
When working with button-down shirts, it’s essential to address any gaps between the buttons before proceeding with alterations. To do this, simply insert a few sewing pins into these openings to secure them temporarily. This will prevent any shifting or further opening of the gaps during the sewing process. Once prepared, proceed by operating your sewing machine along the length of each button gap, effectively closing and securing them for a professional finish.
Step 5
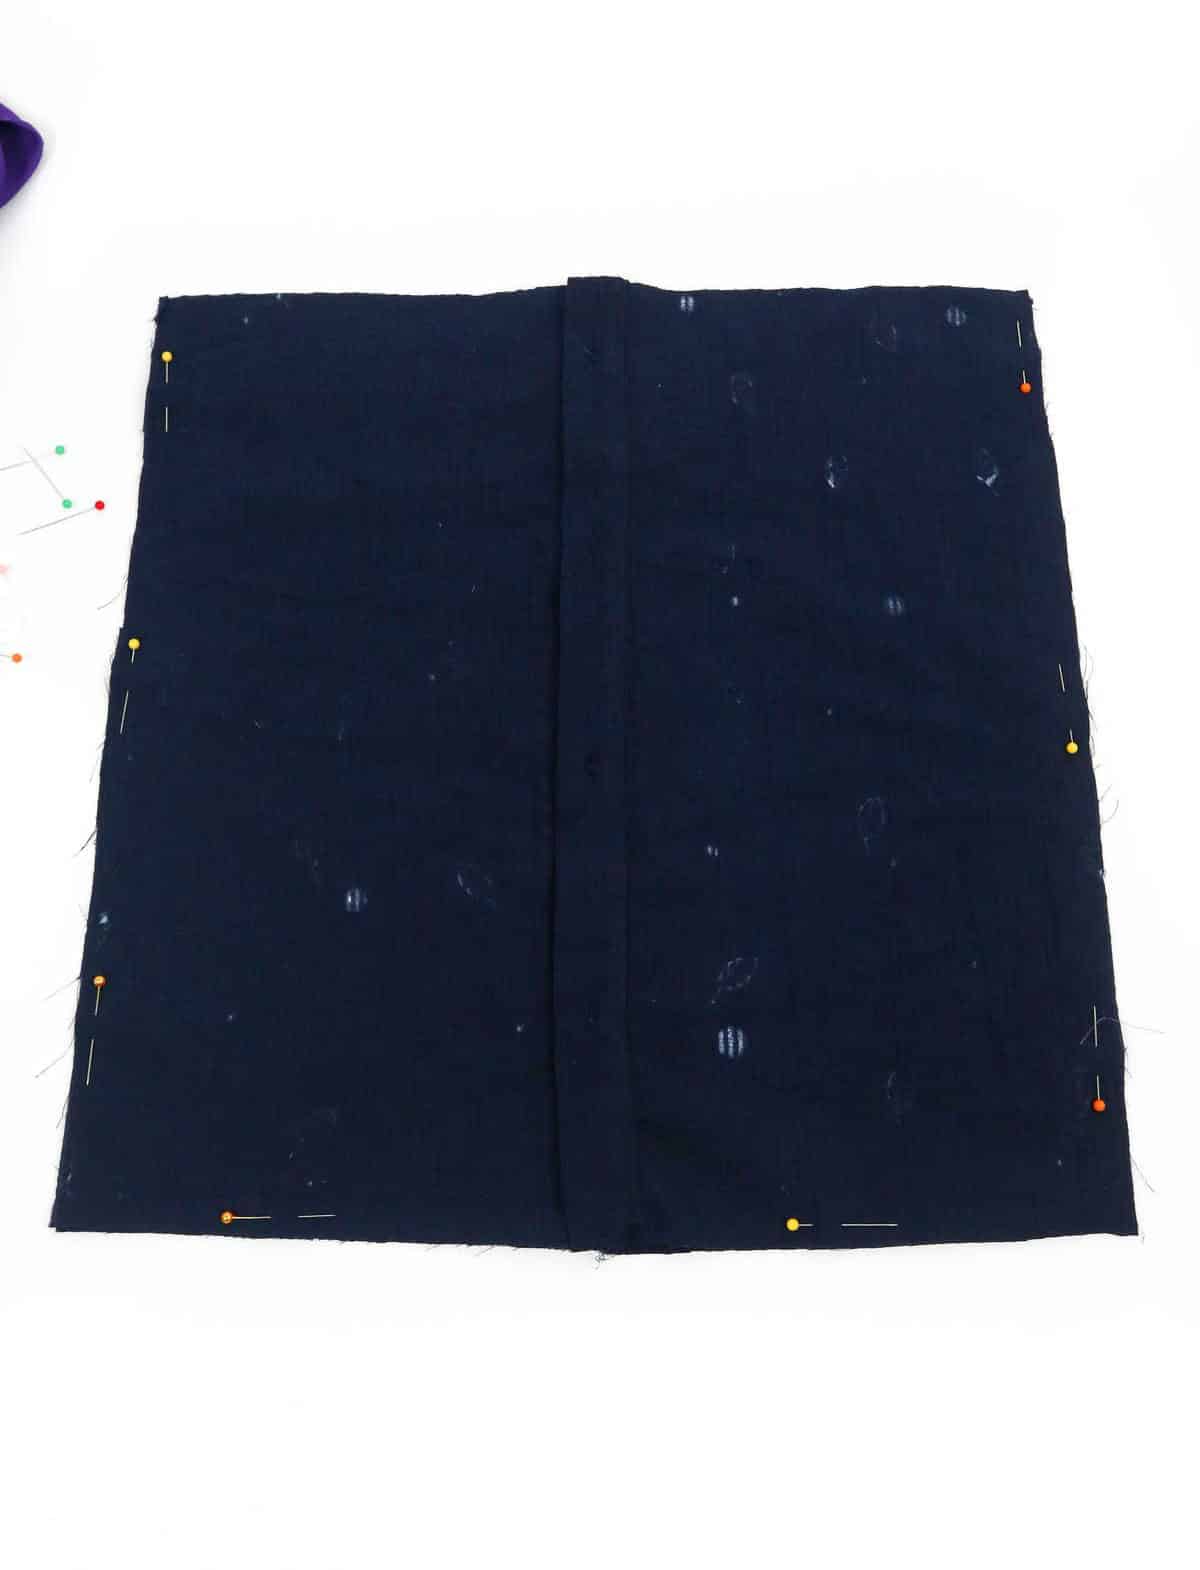
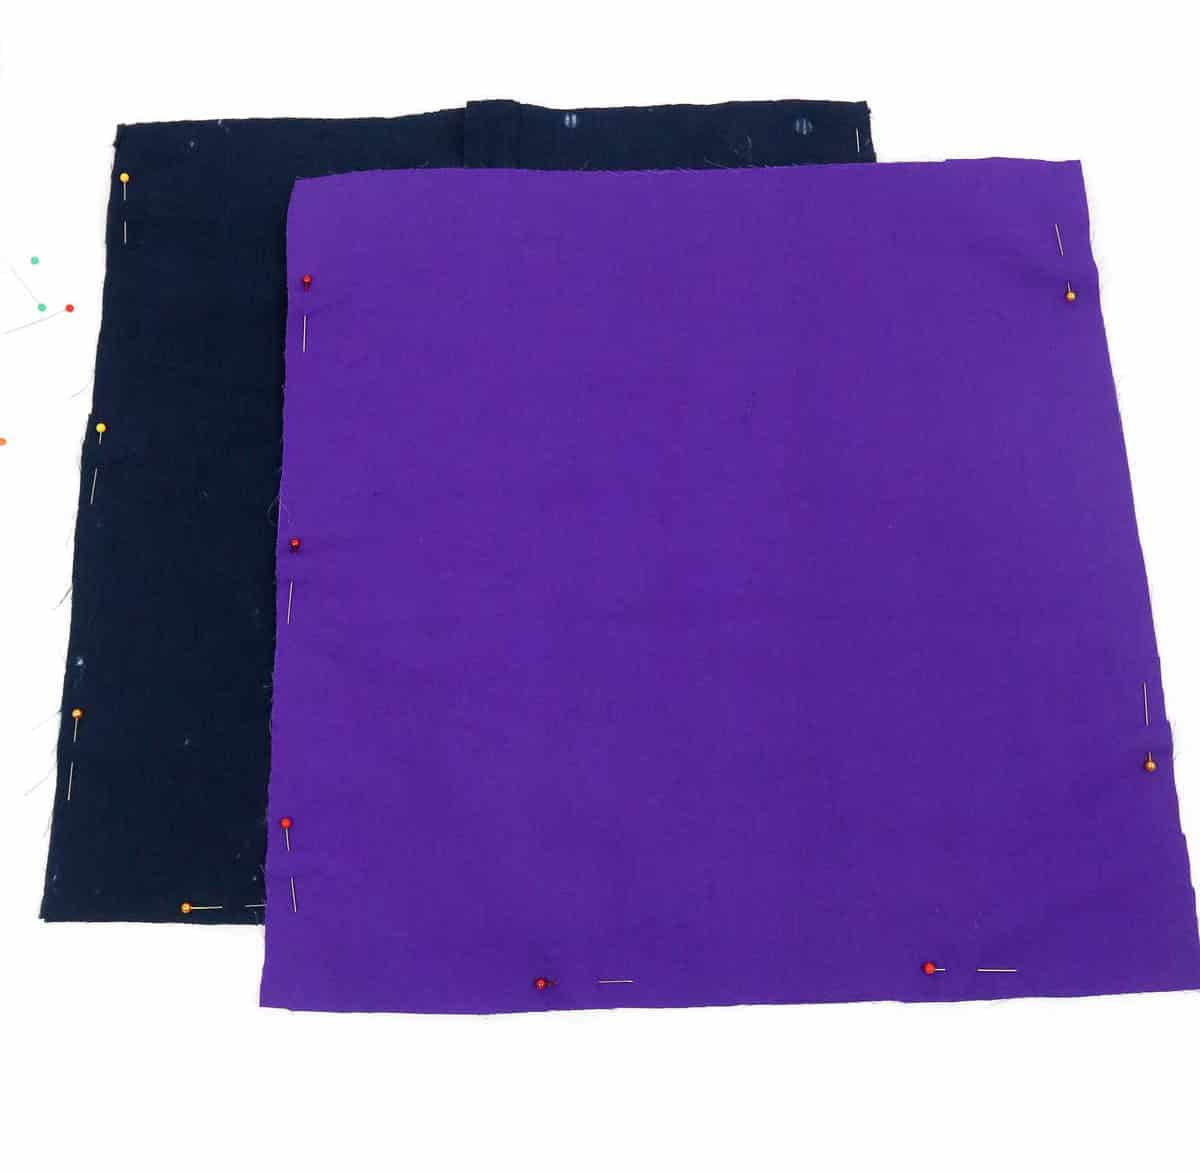
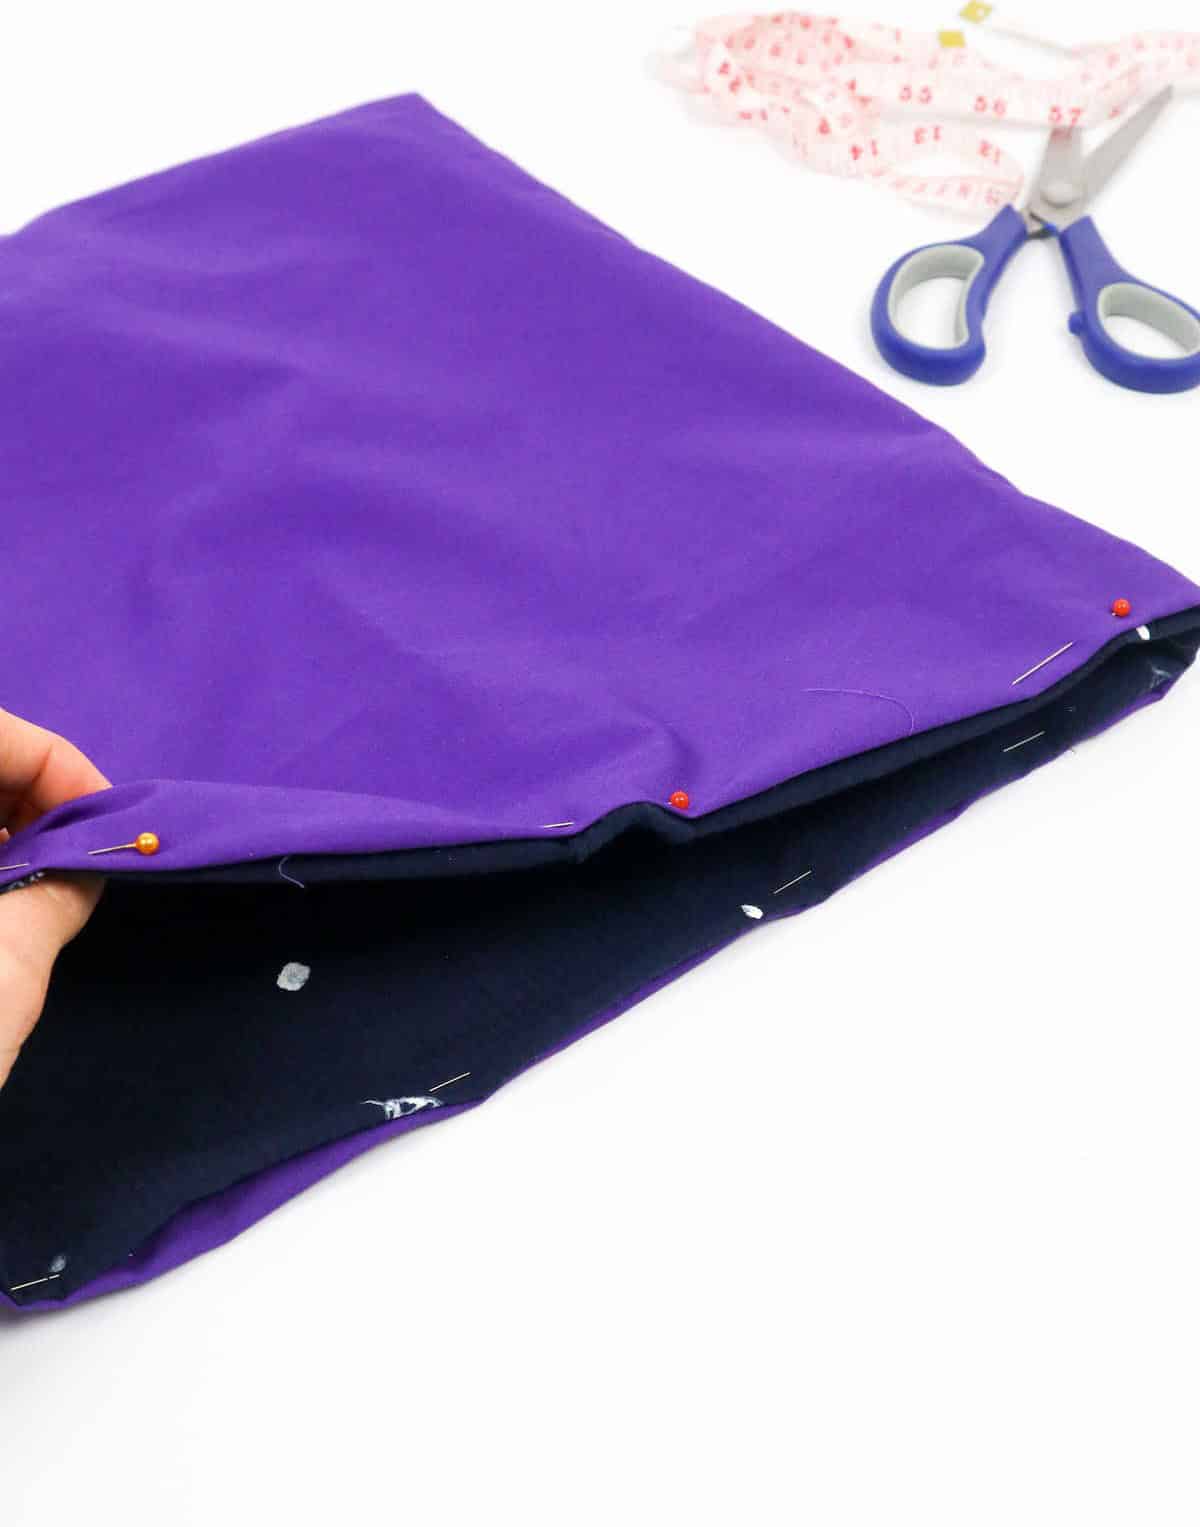
As you prepare to sew your bag, it’s essential to arrange the fabric swatches in the correct order first. Begin by placing the two squares of outer fabric together, with their right sides facing inward towards each other, ensuring that the ends are precisely aligned. To keep them in place, use a few sewing pins and secure the two pieces on three sides: the left, right, and bottom. Leave the top edge open for now, as this will allow you to create the bag’s opening.
Step 6
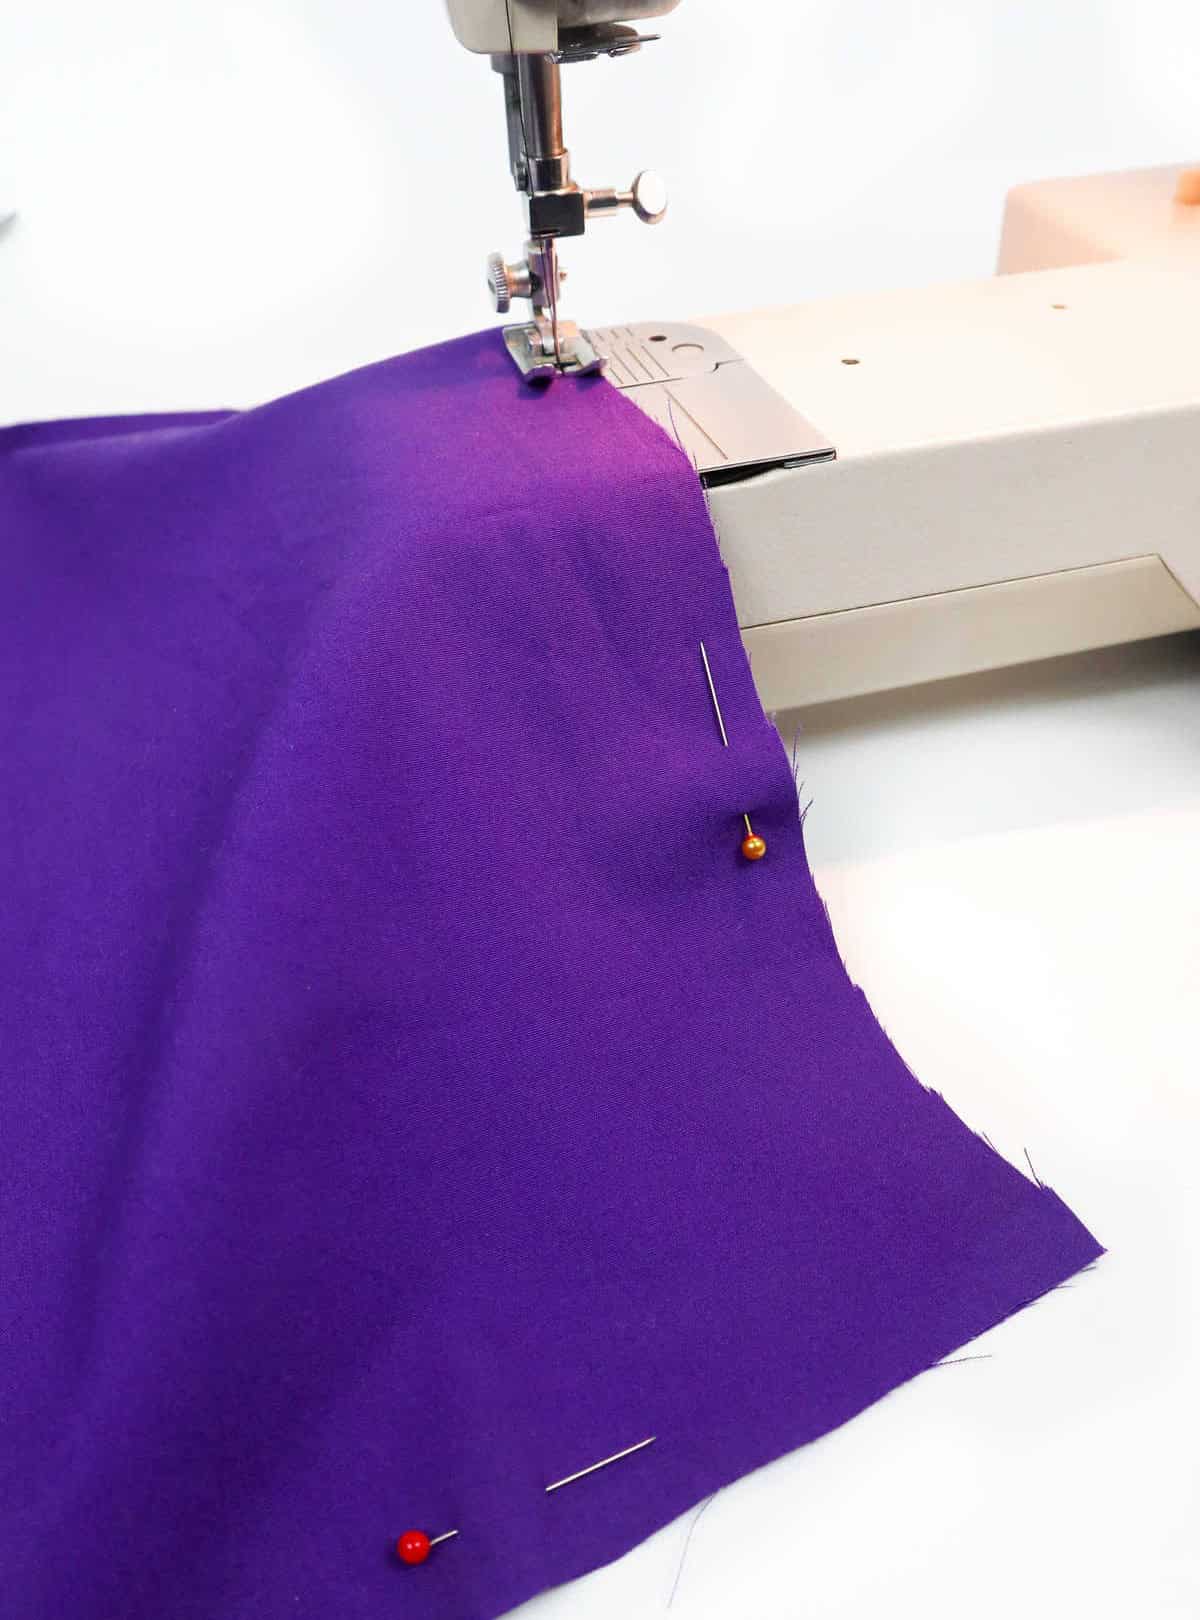
For both lining fabric swatches, follow the same steps. Pin each one into position, making sure they’re securely fastened. Then, move on to sewing the perimeter of the lining fabric. As you do this, feel free to also work on attaching the outer fabric if needed.
Step 7
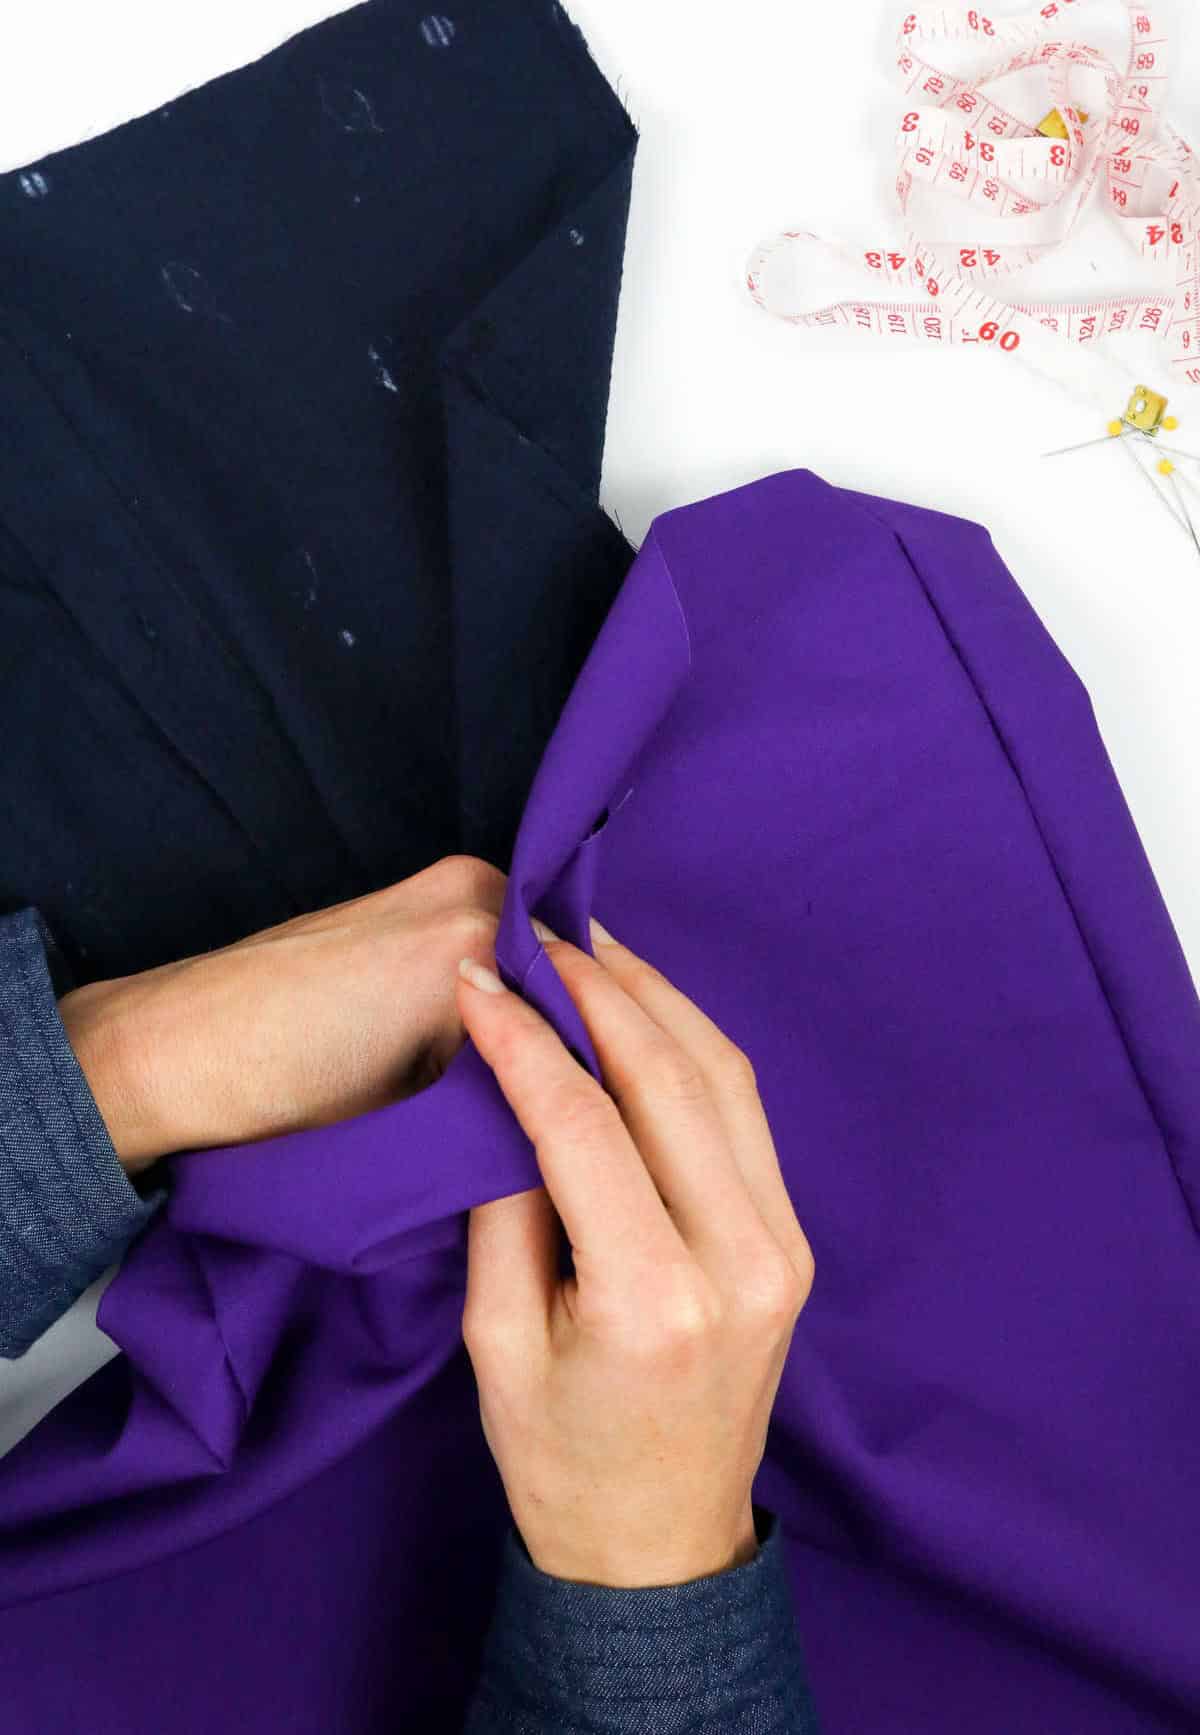
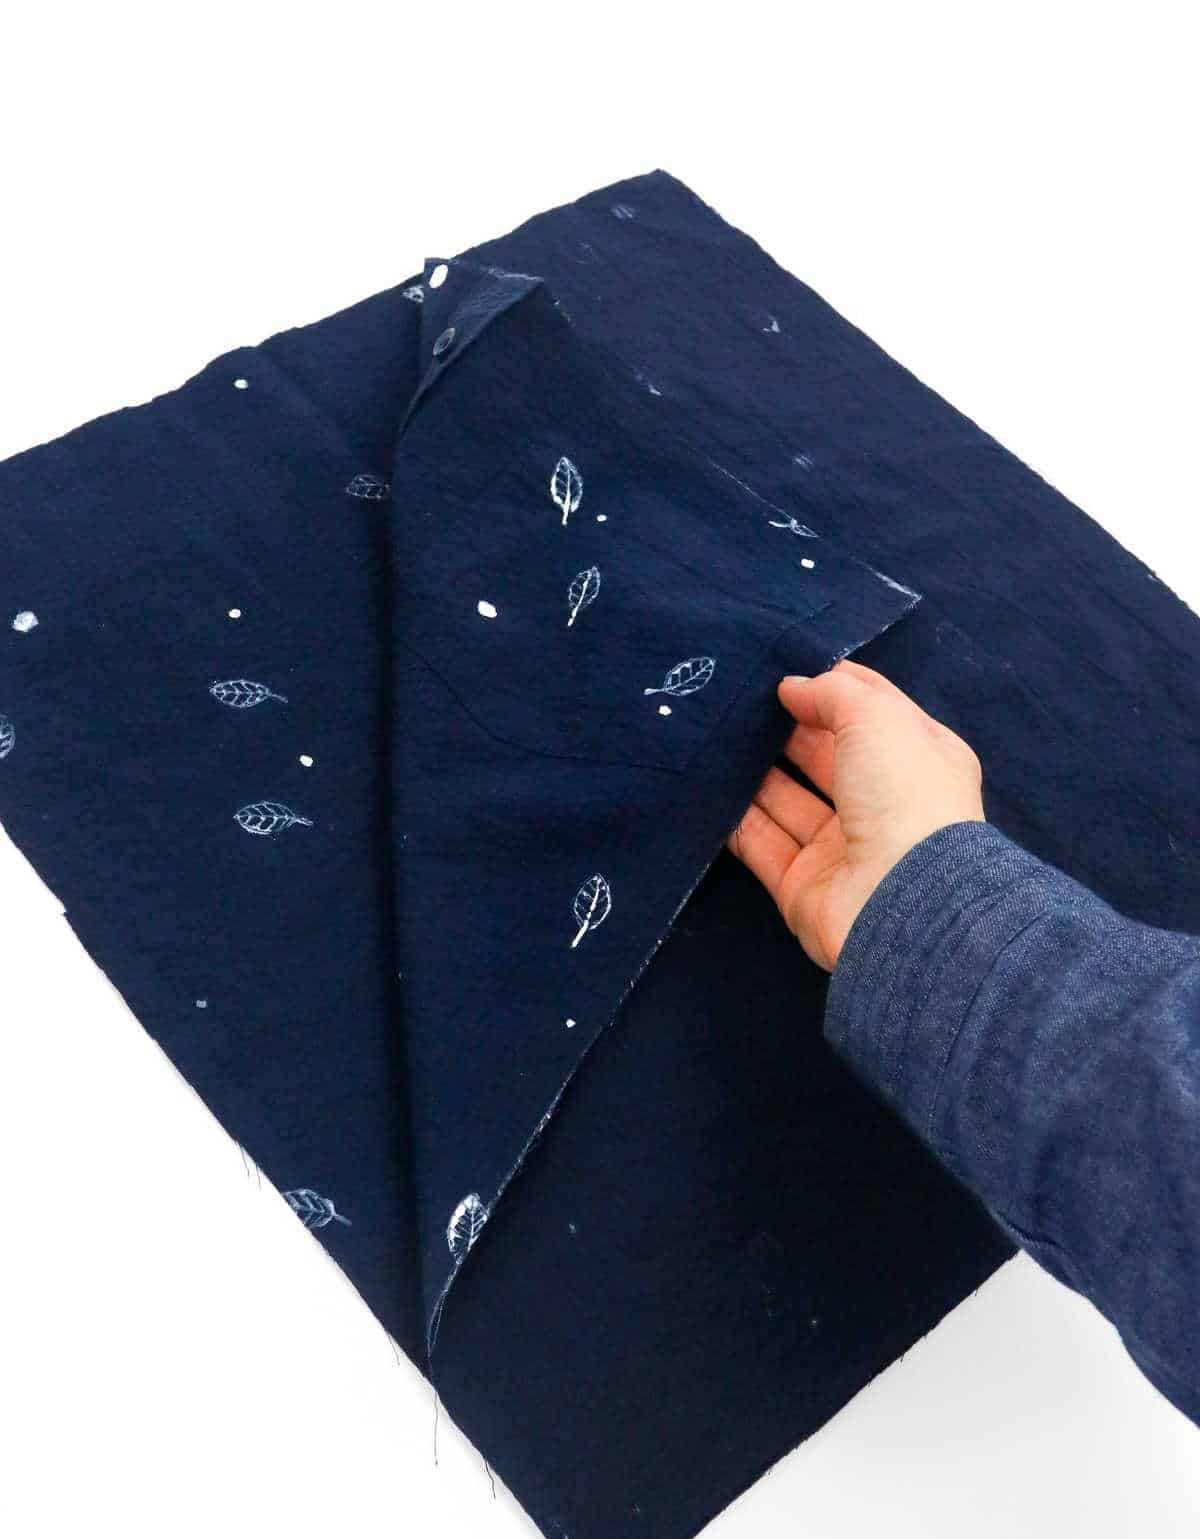
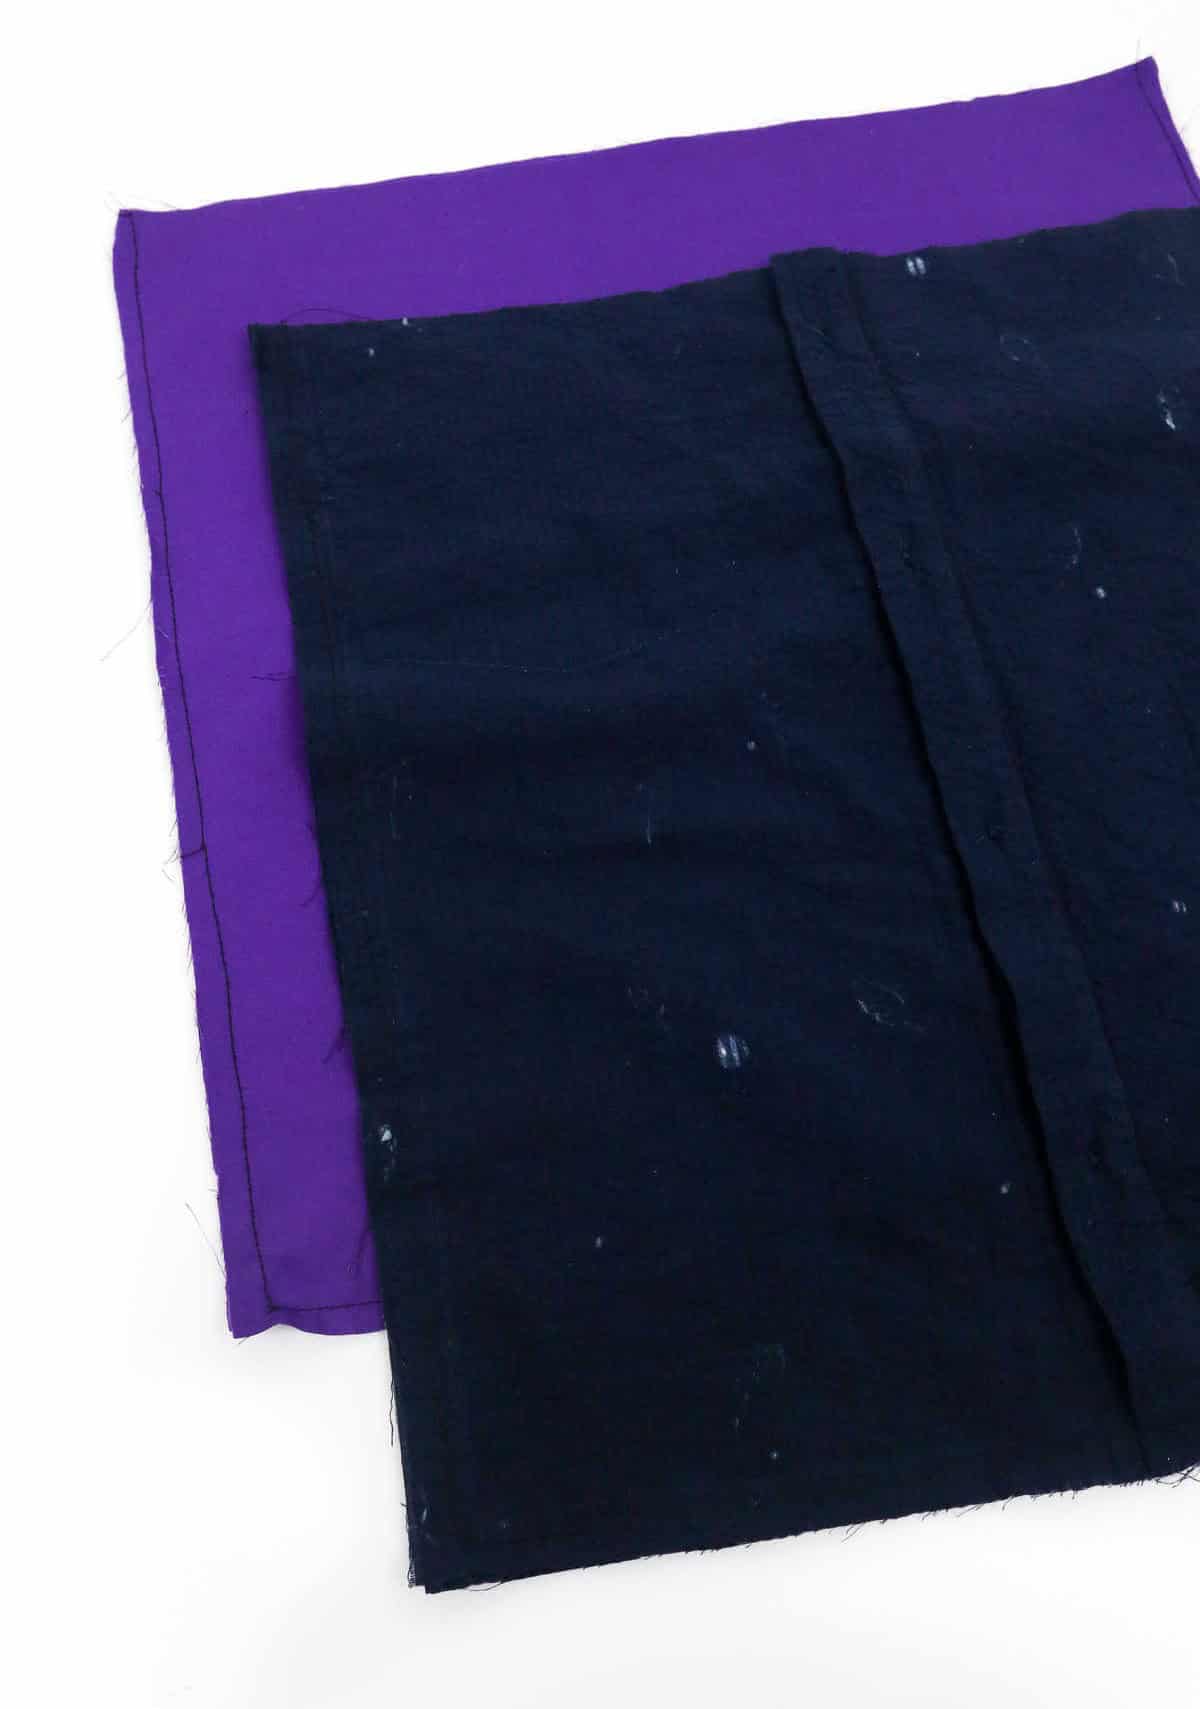
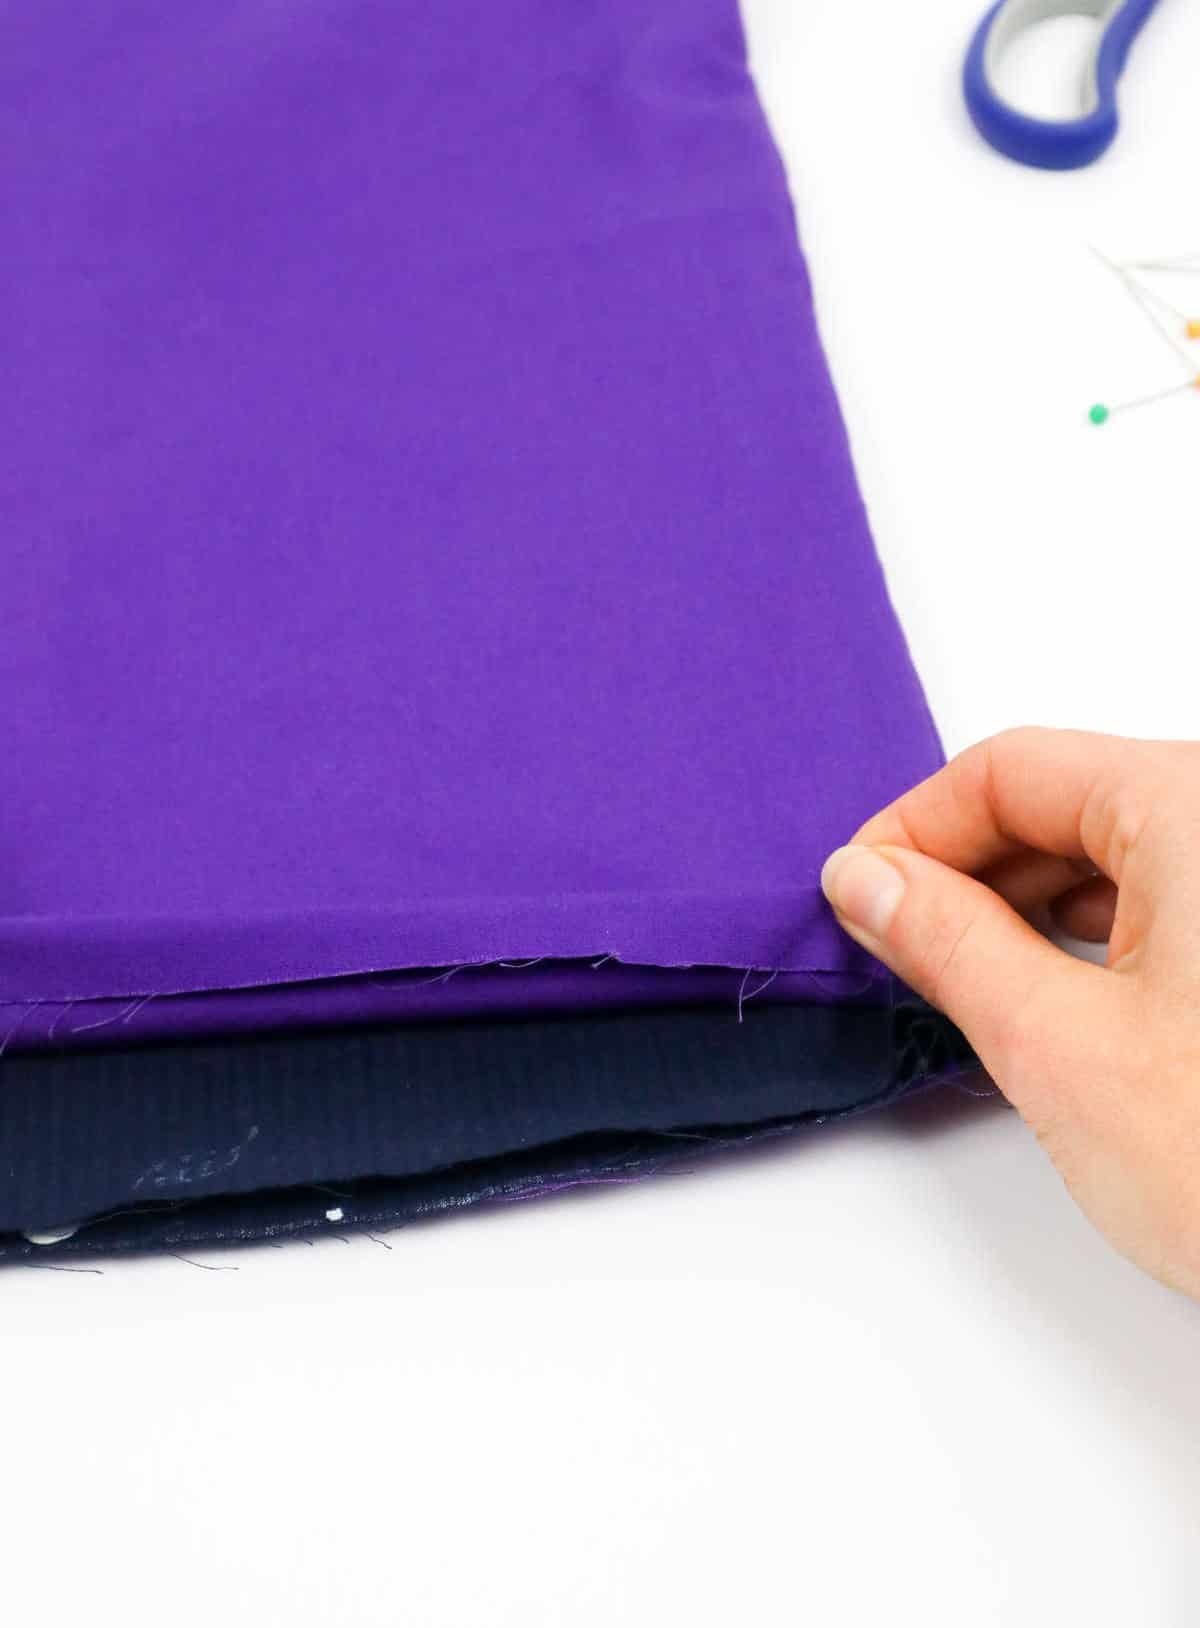
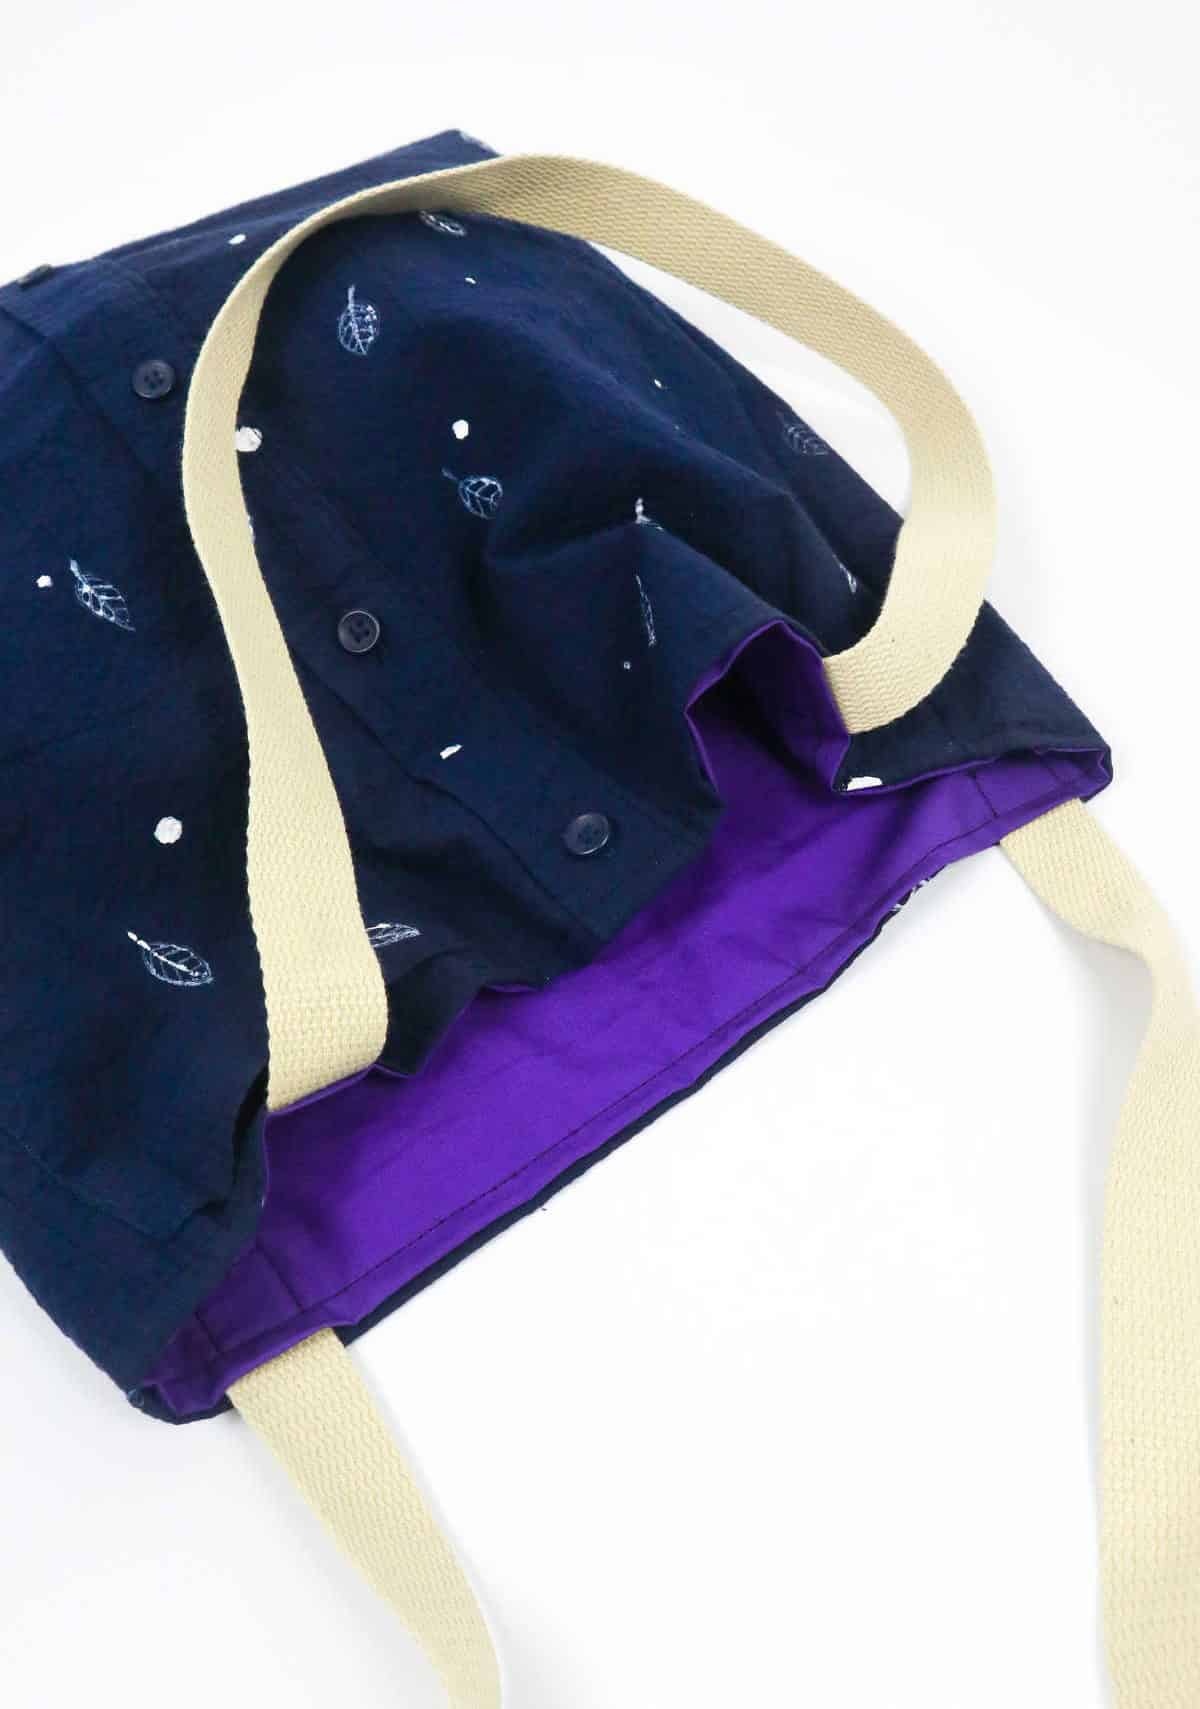
Begin by flipping the lining fabric outward, ensuring the right side is facing outwards. As you do this, use your fingers to gently push the edges away from the center. Meanwhile, keep the shirt fabric with its wrong side facing out, leaving it untouched for now.
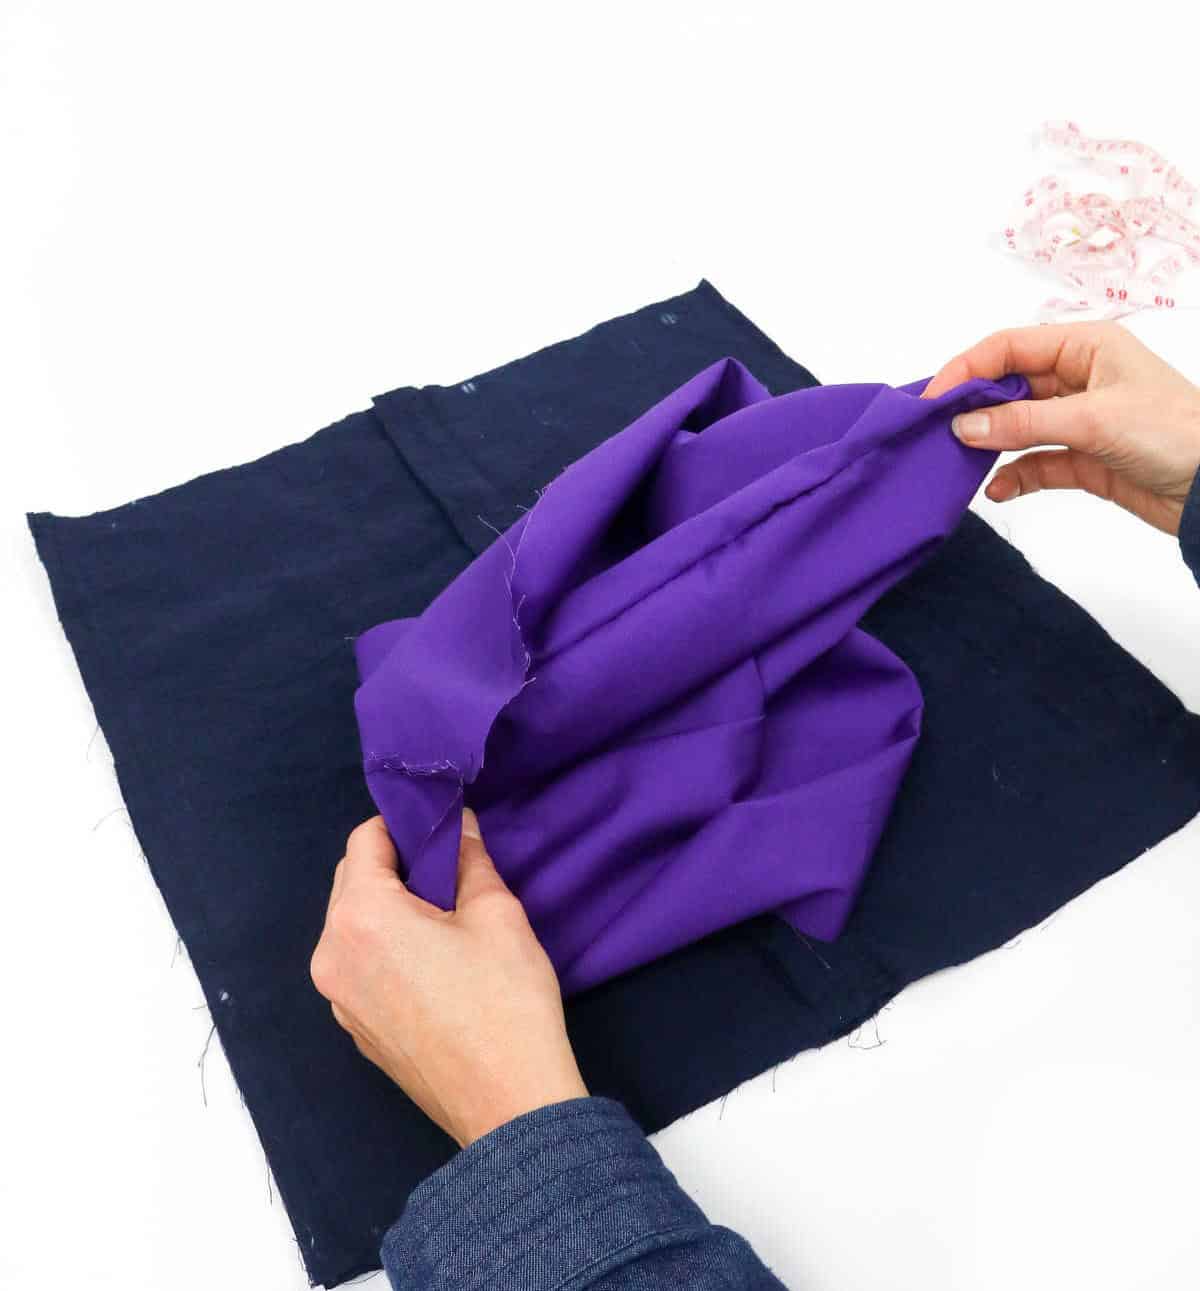
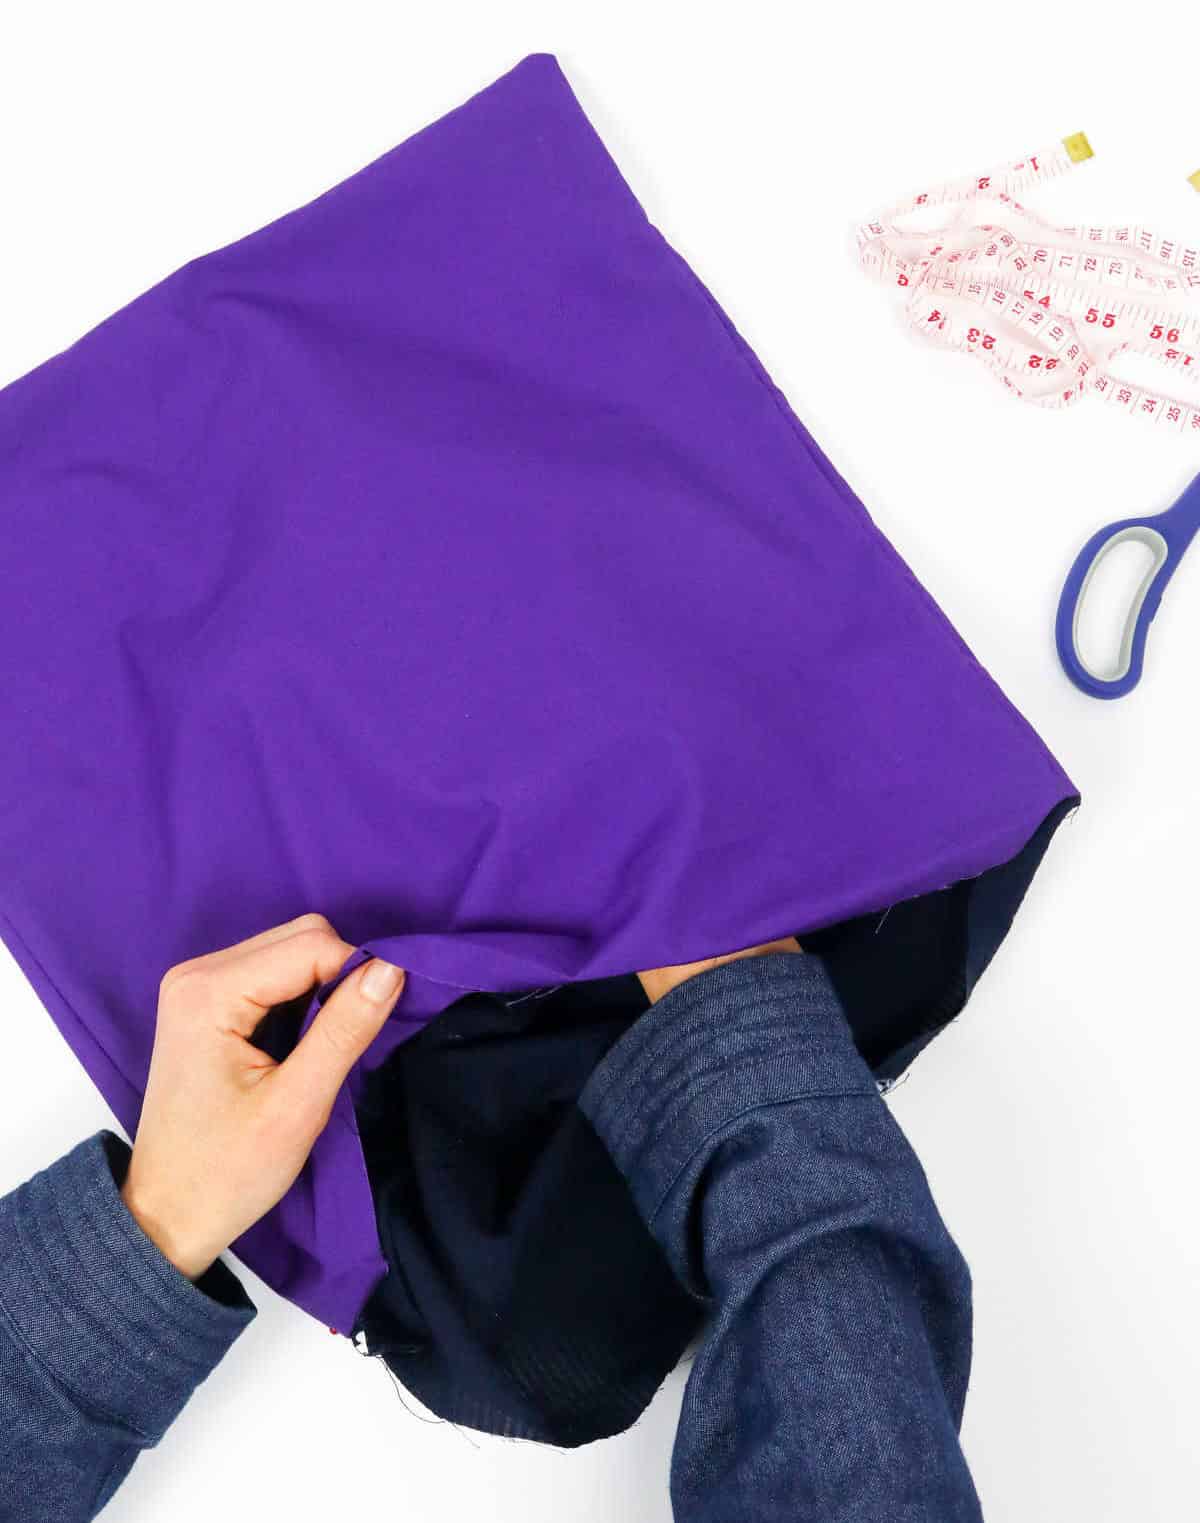
Next, take the shirt fabric and insert it into the lining fabric, aligning the bottom edges of both fabrics. Use your hands to smooth out any wrinkles or creases, ensuring a seamless fit within the lining.
Step 8

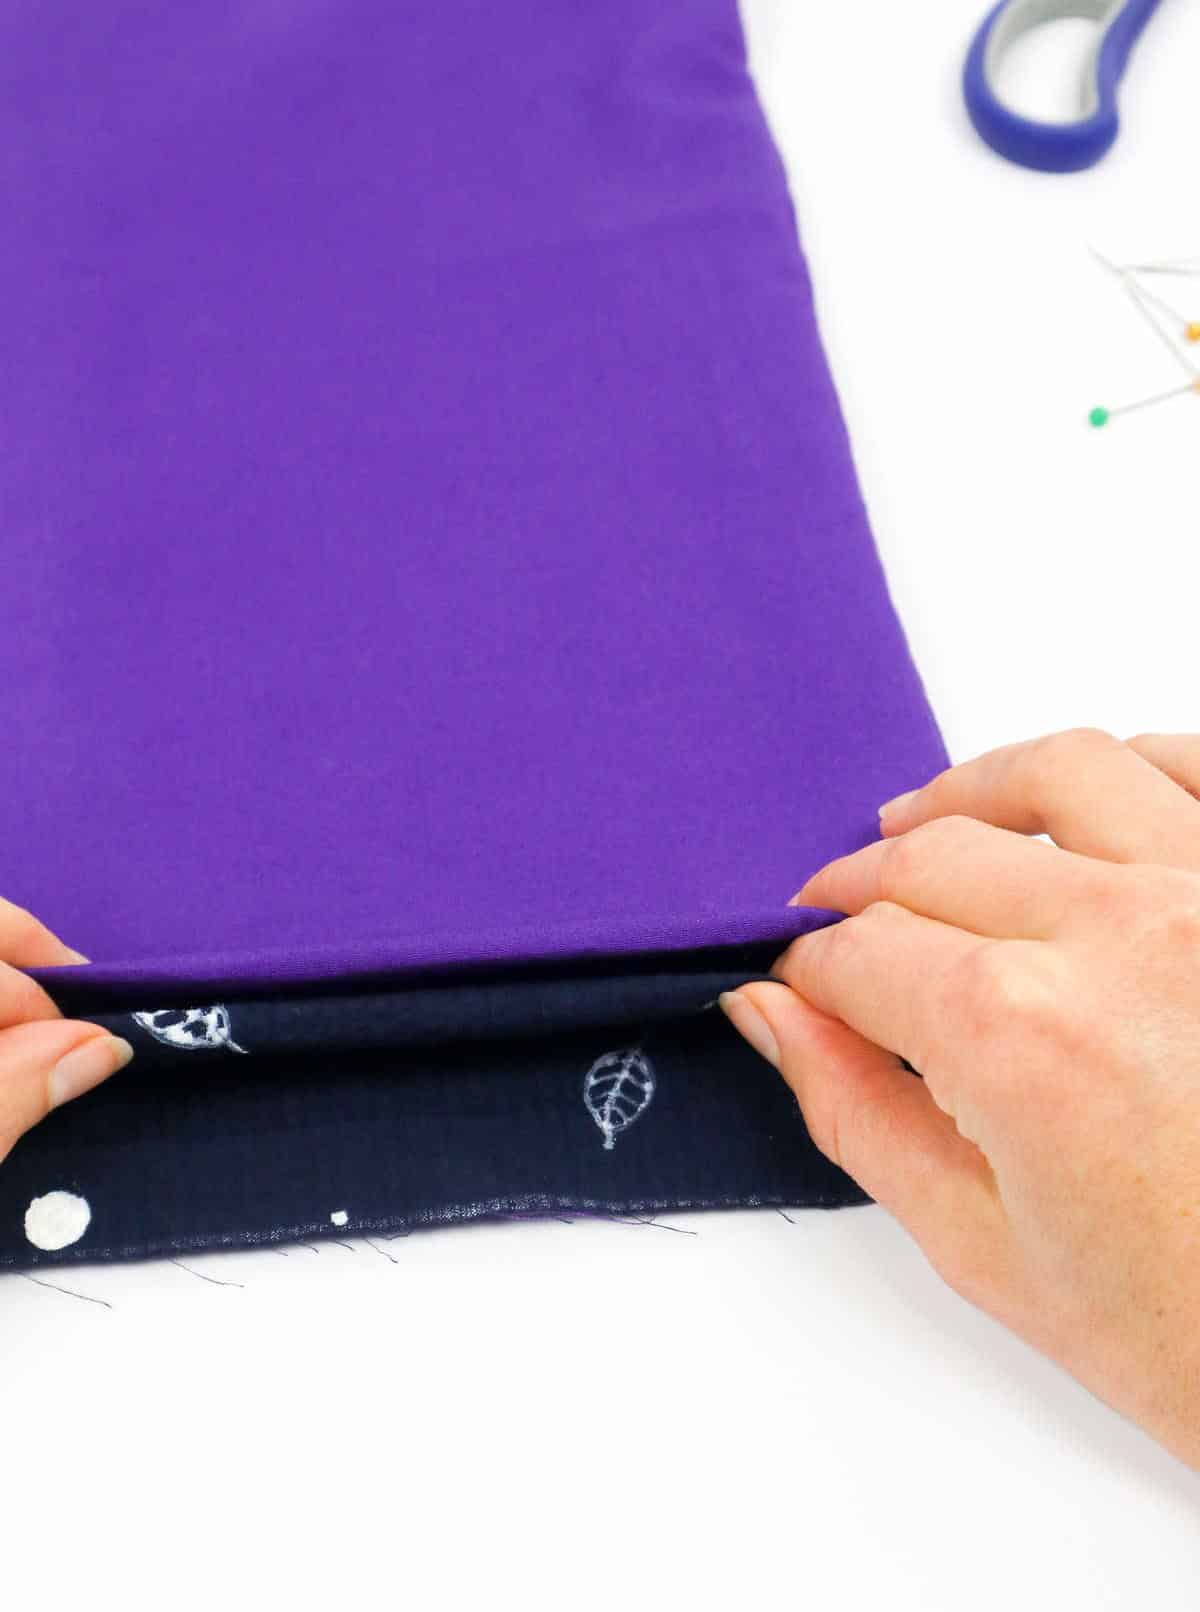
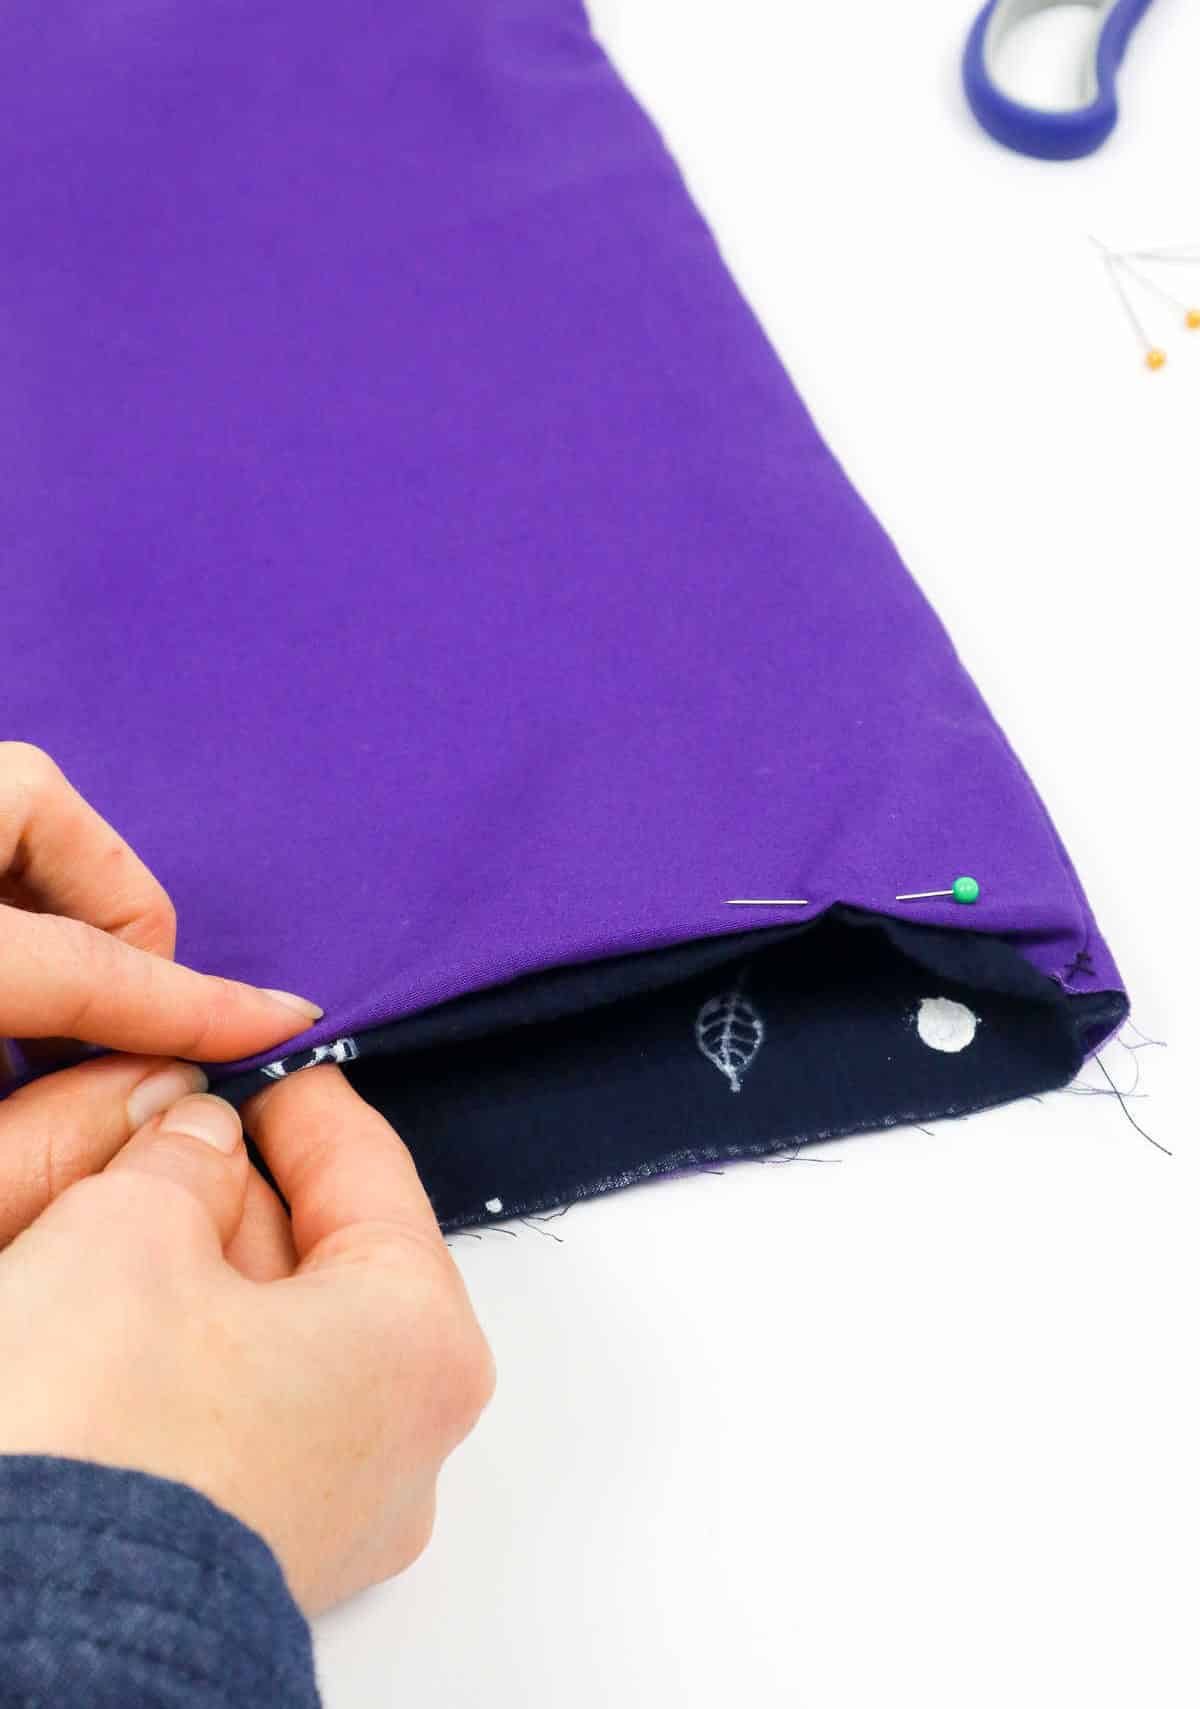
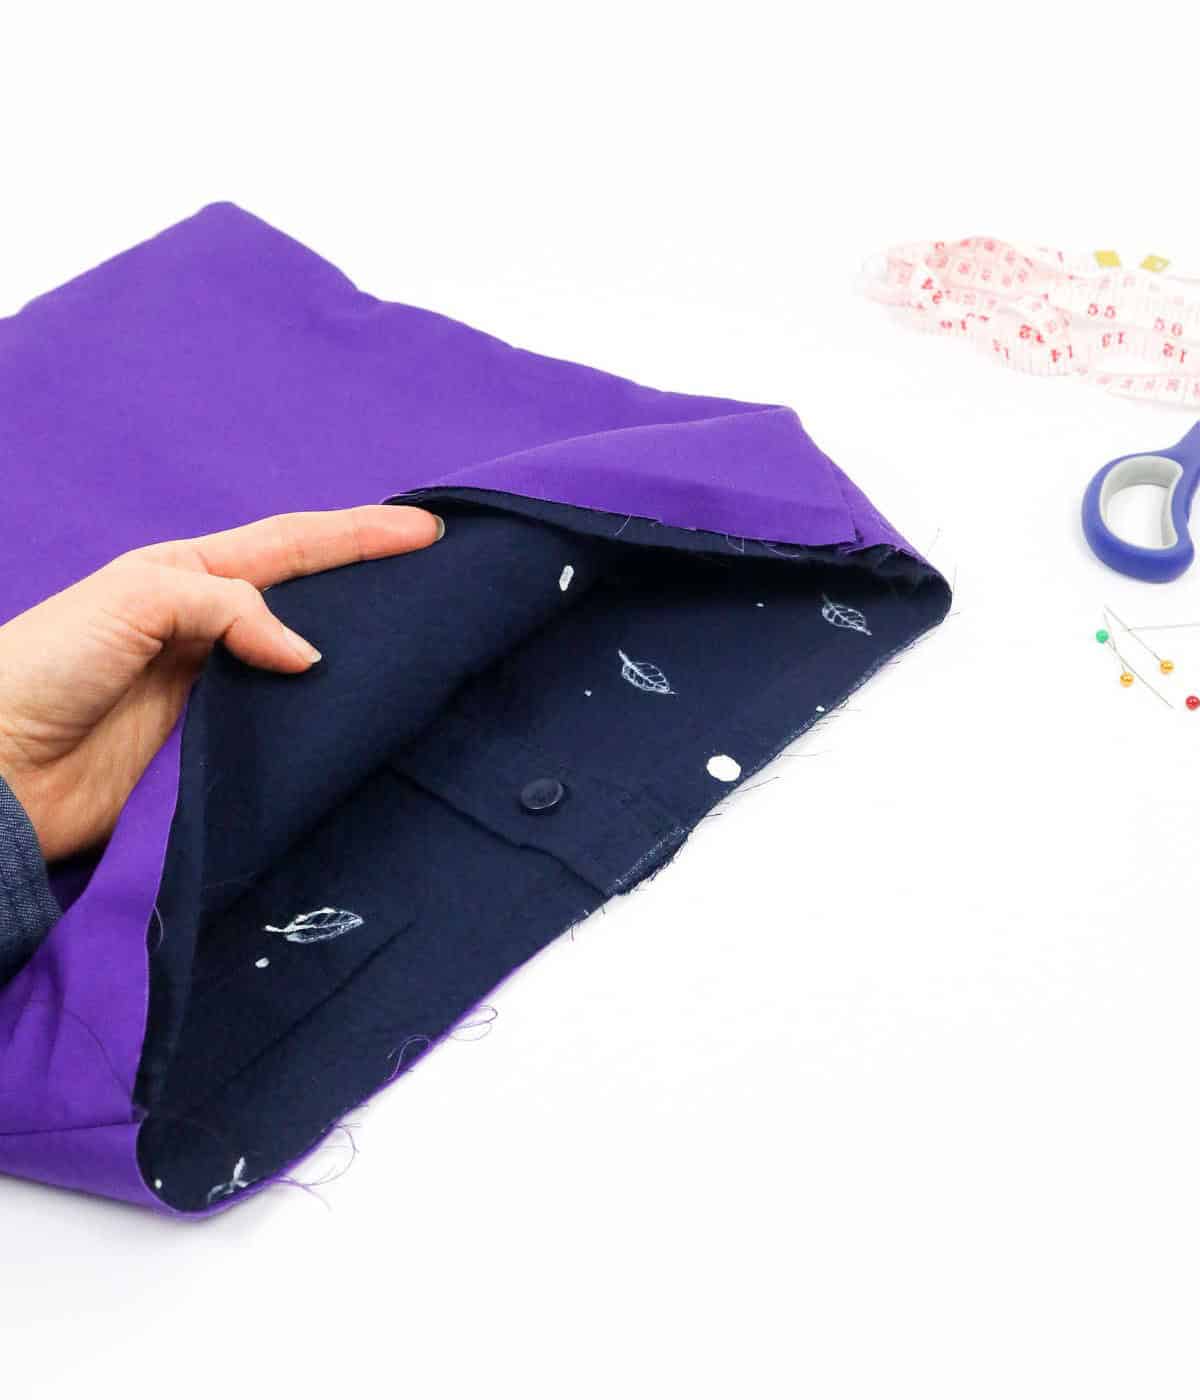
To complete the bag, it’s essential to address any remaining irregular edges at the opening. Start by folding the lining and shirt inward towards the interior of the bag, ensuring a smooth and even finish.
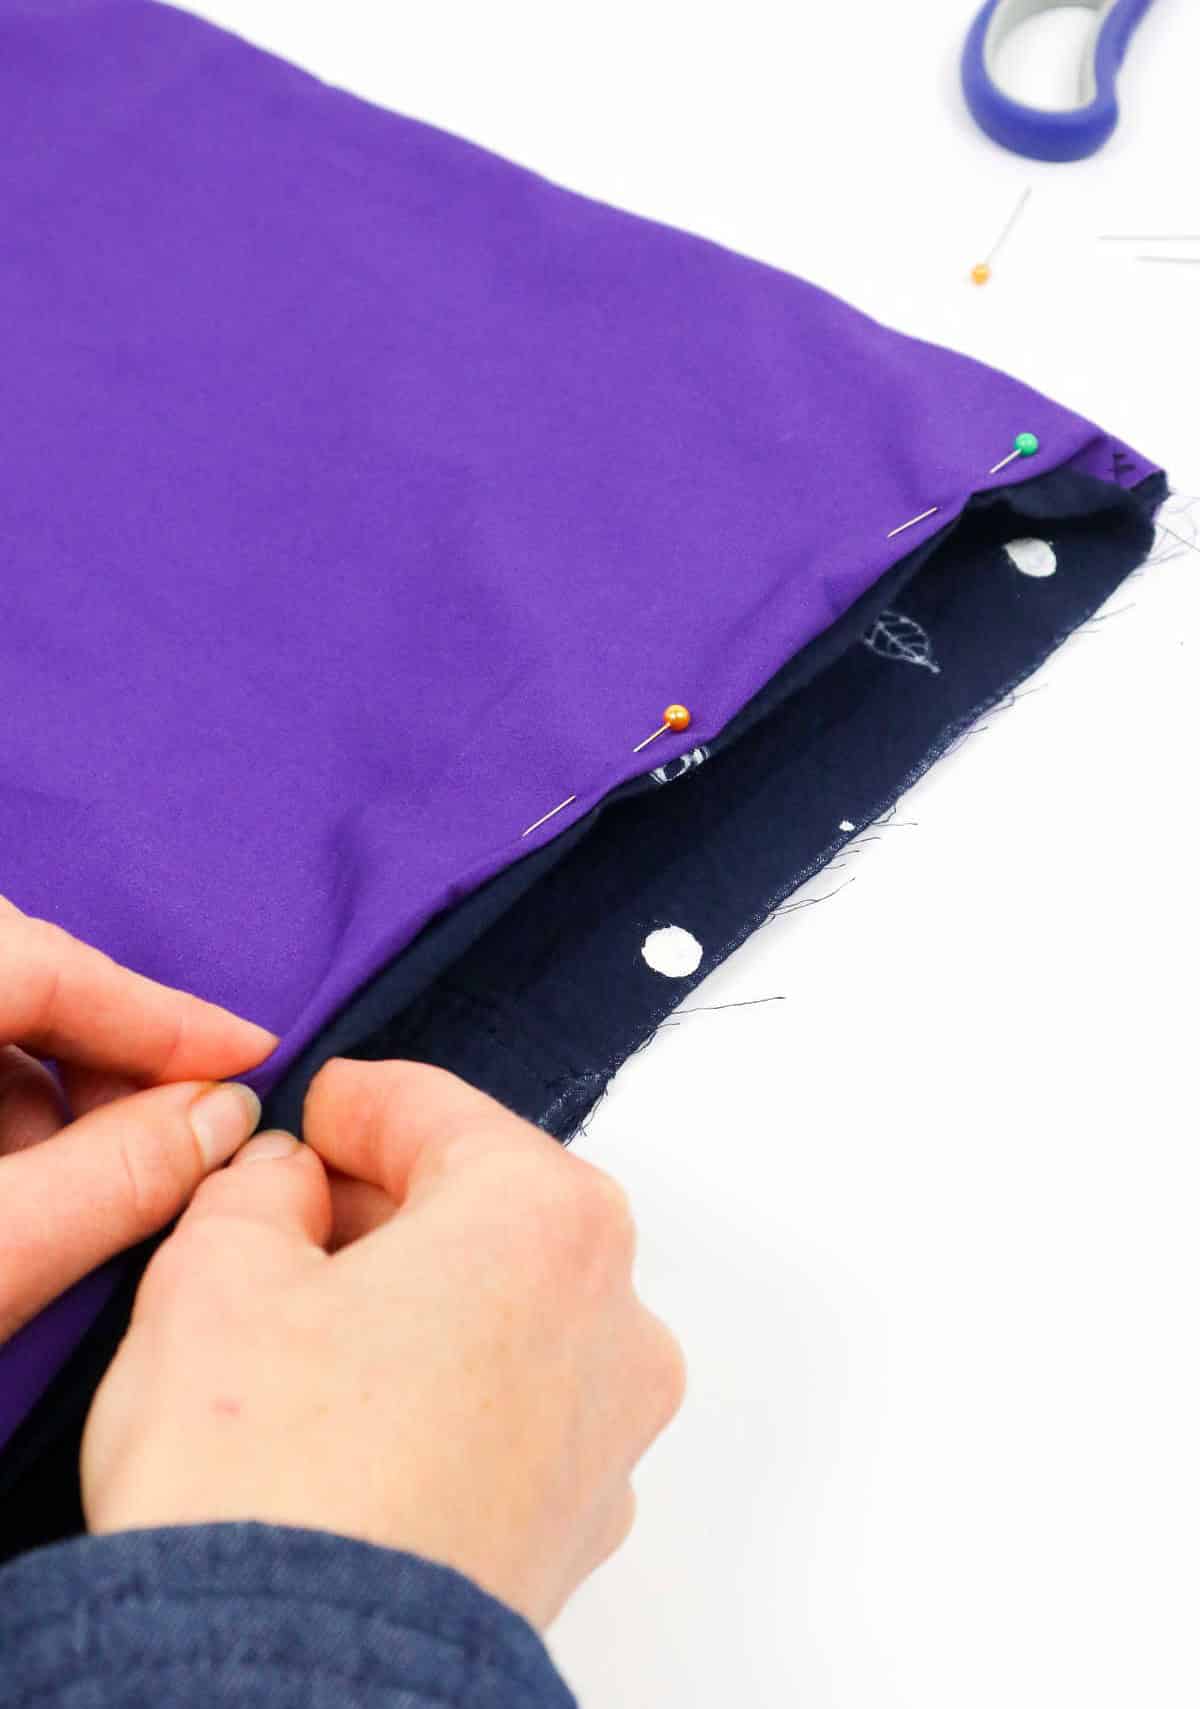
Next, secure both fabric hems with sewing pins, taking care to align them precisely before moving on. Repeat this process around the entire mouth of the bag until you achieve a seamless rim.
Step 9
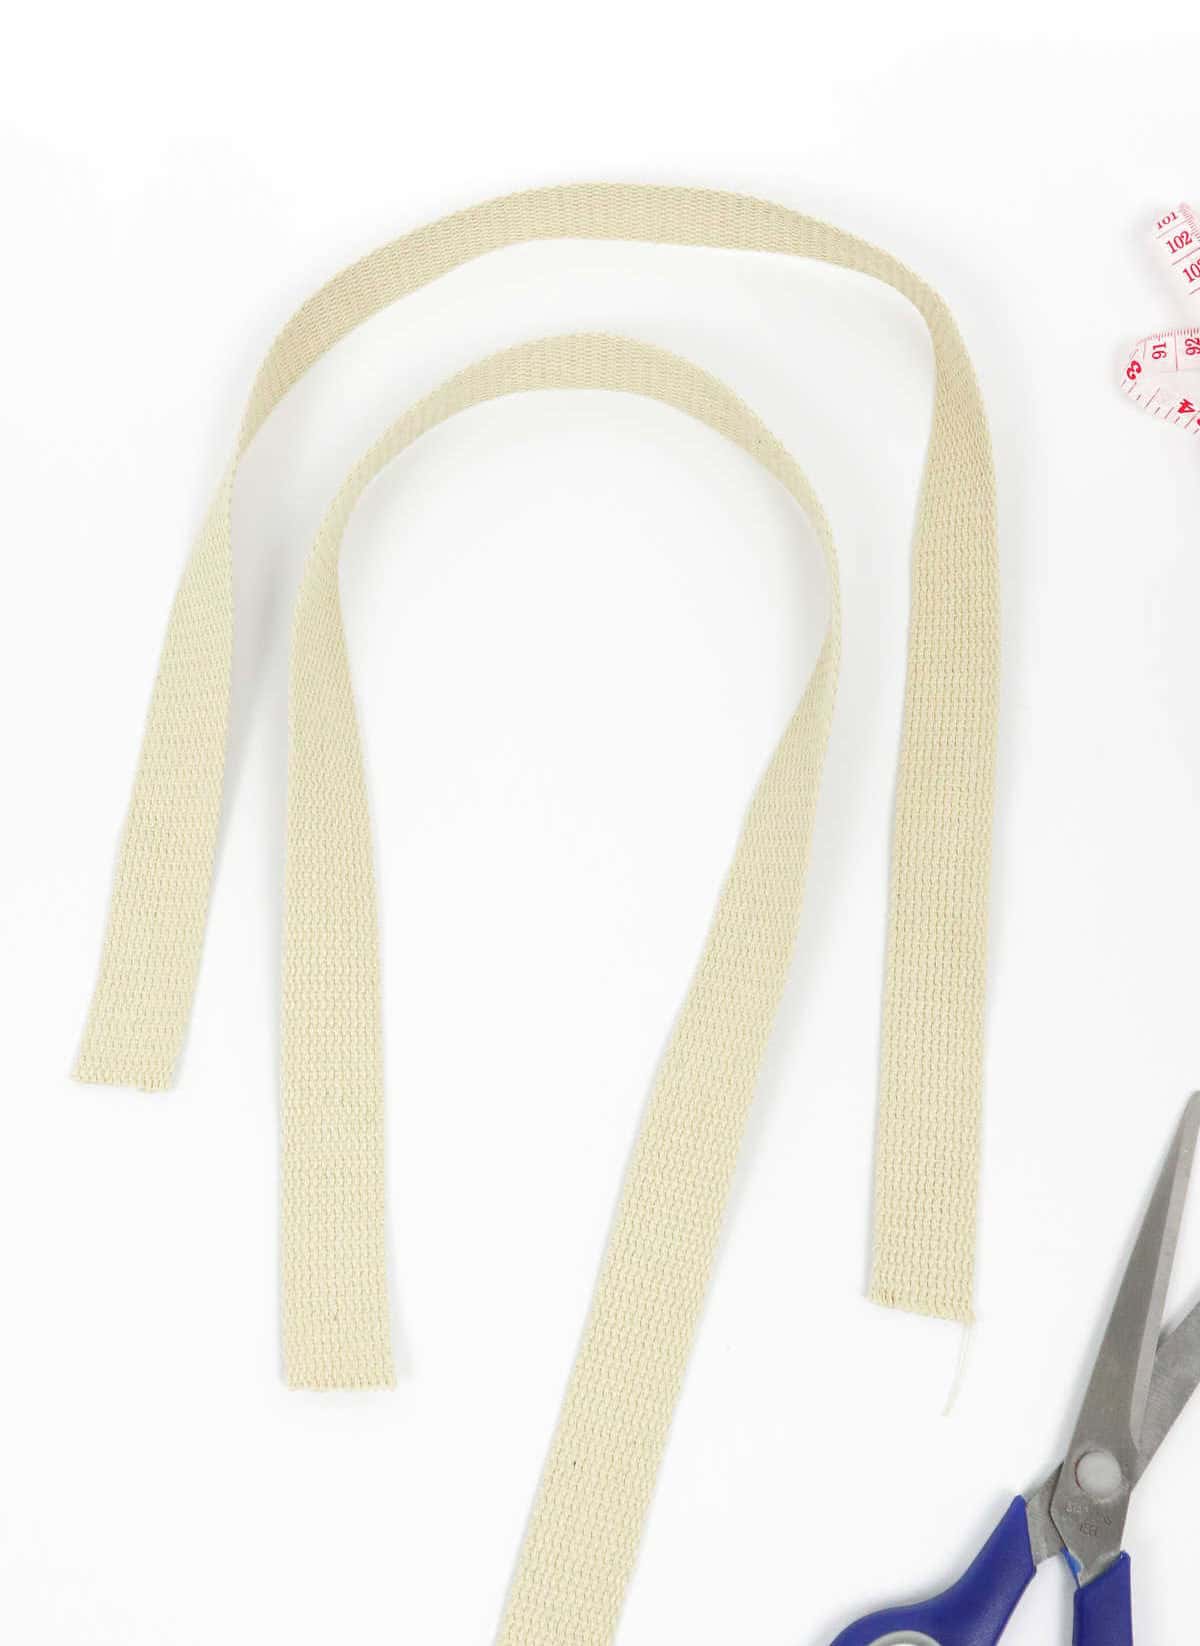
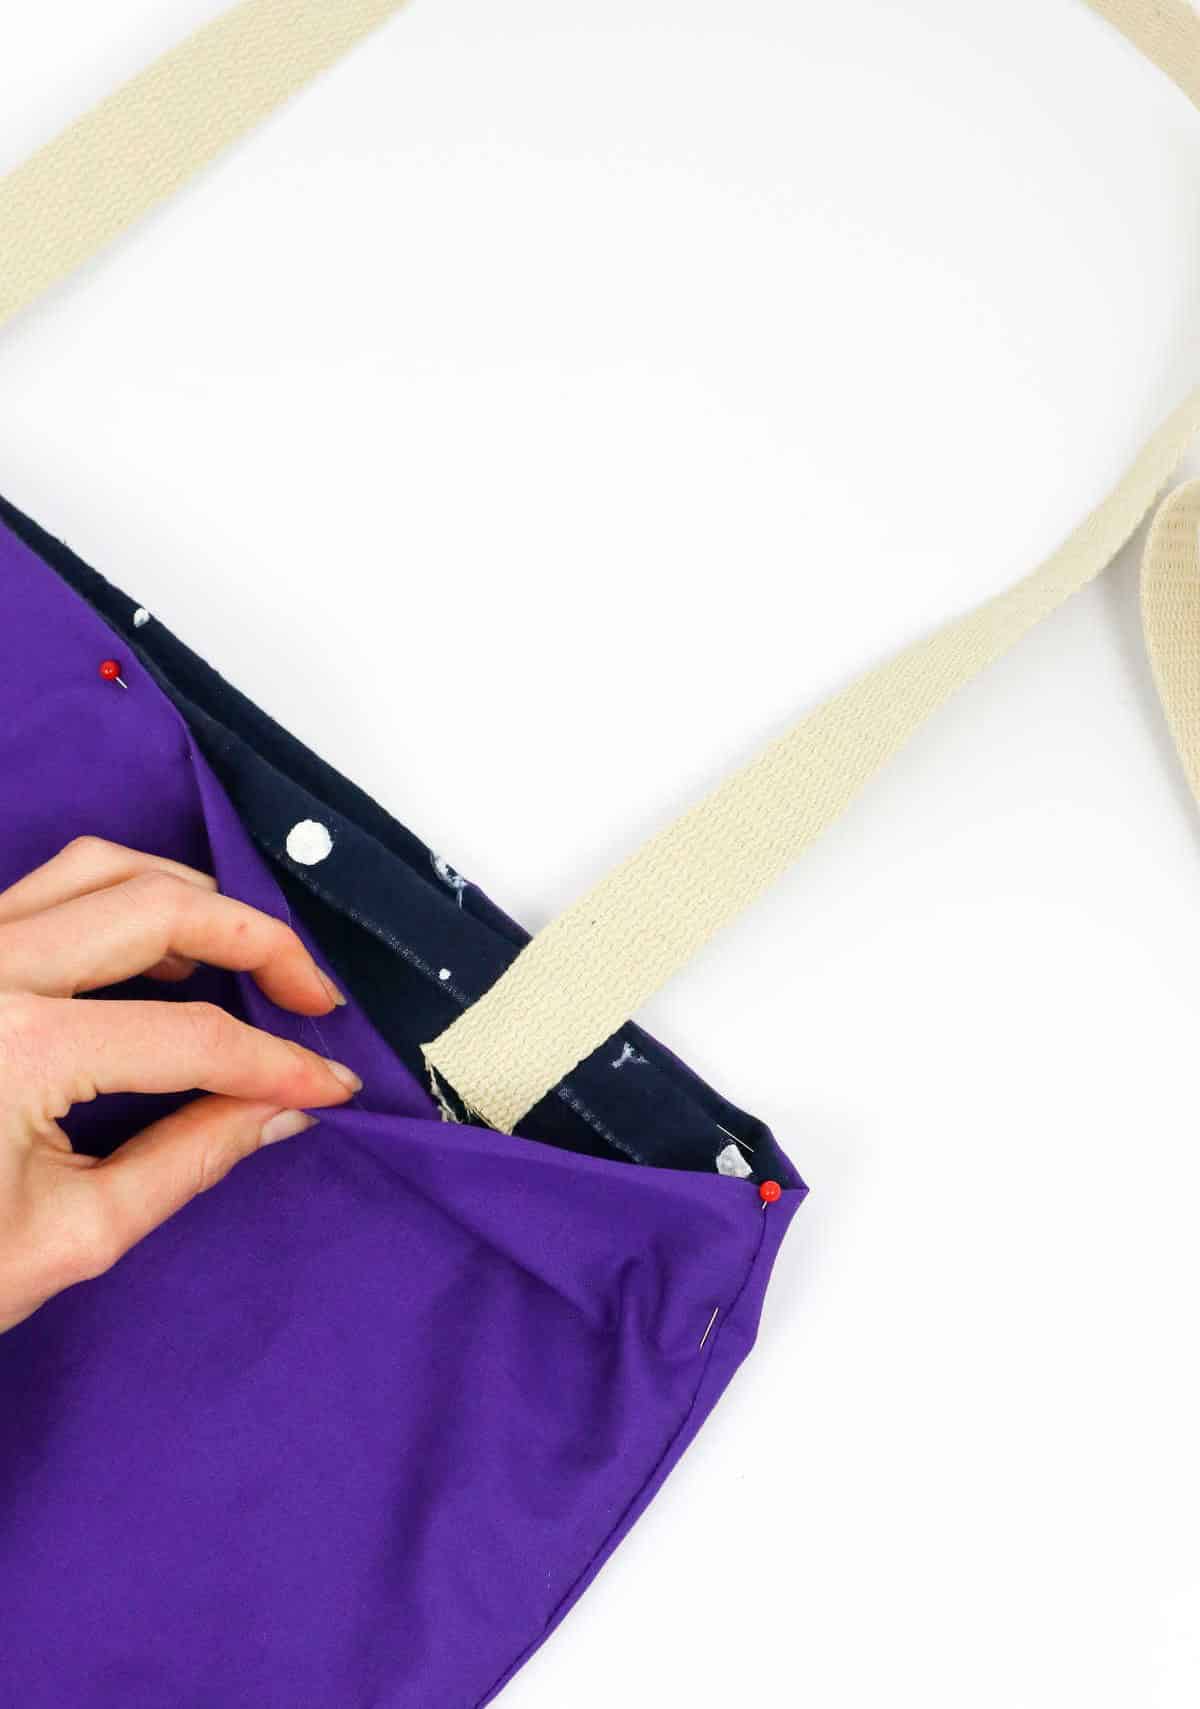
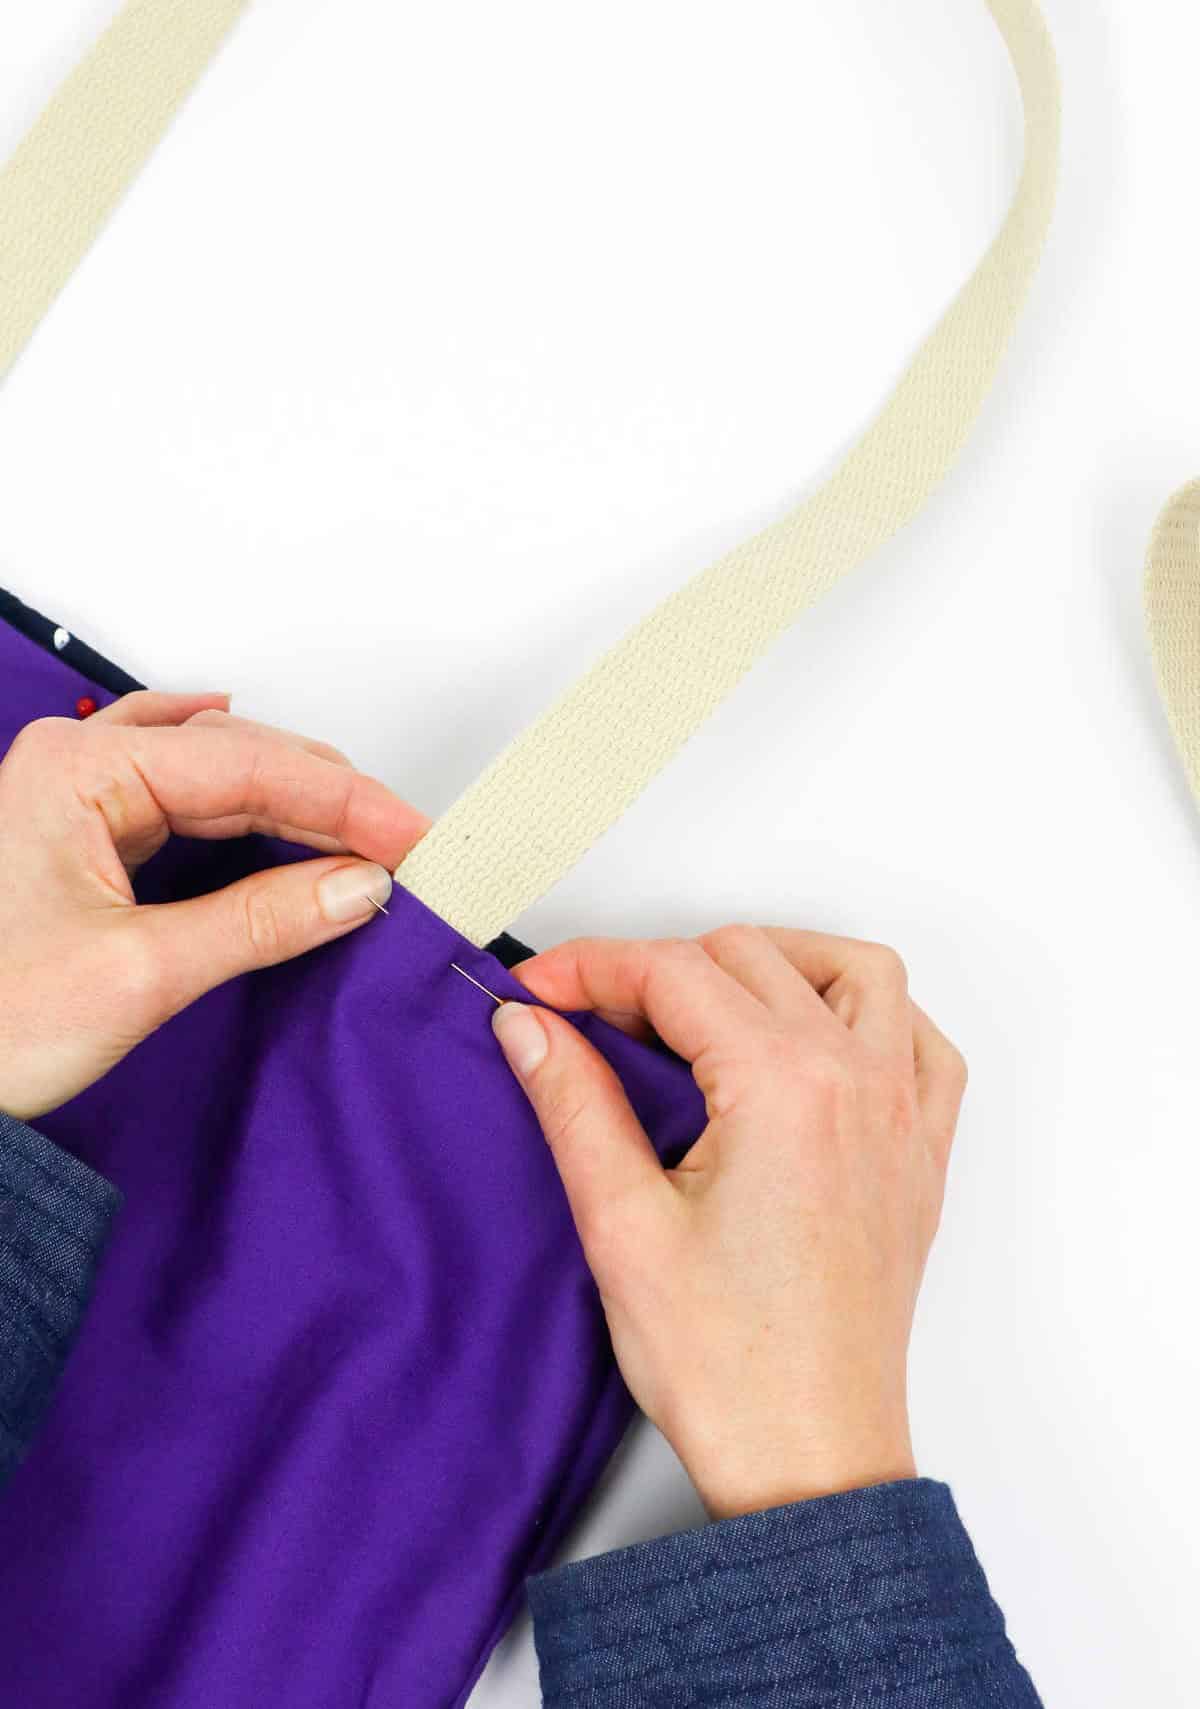
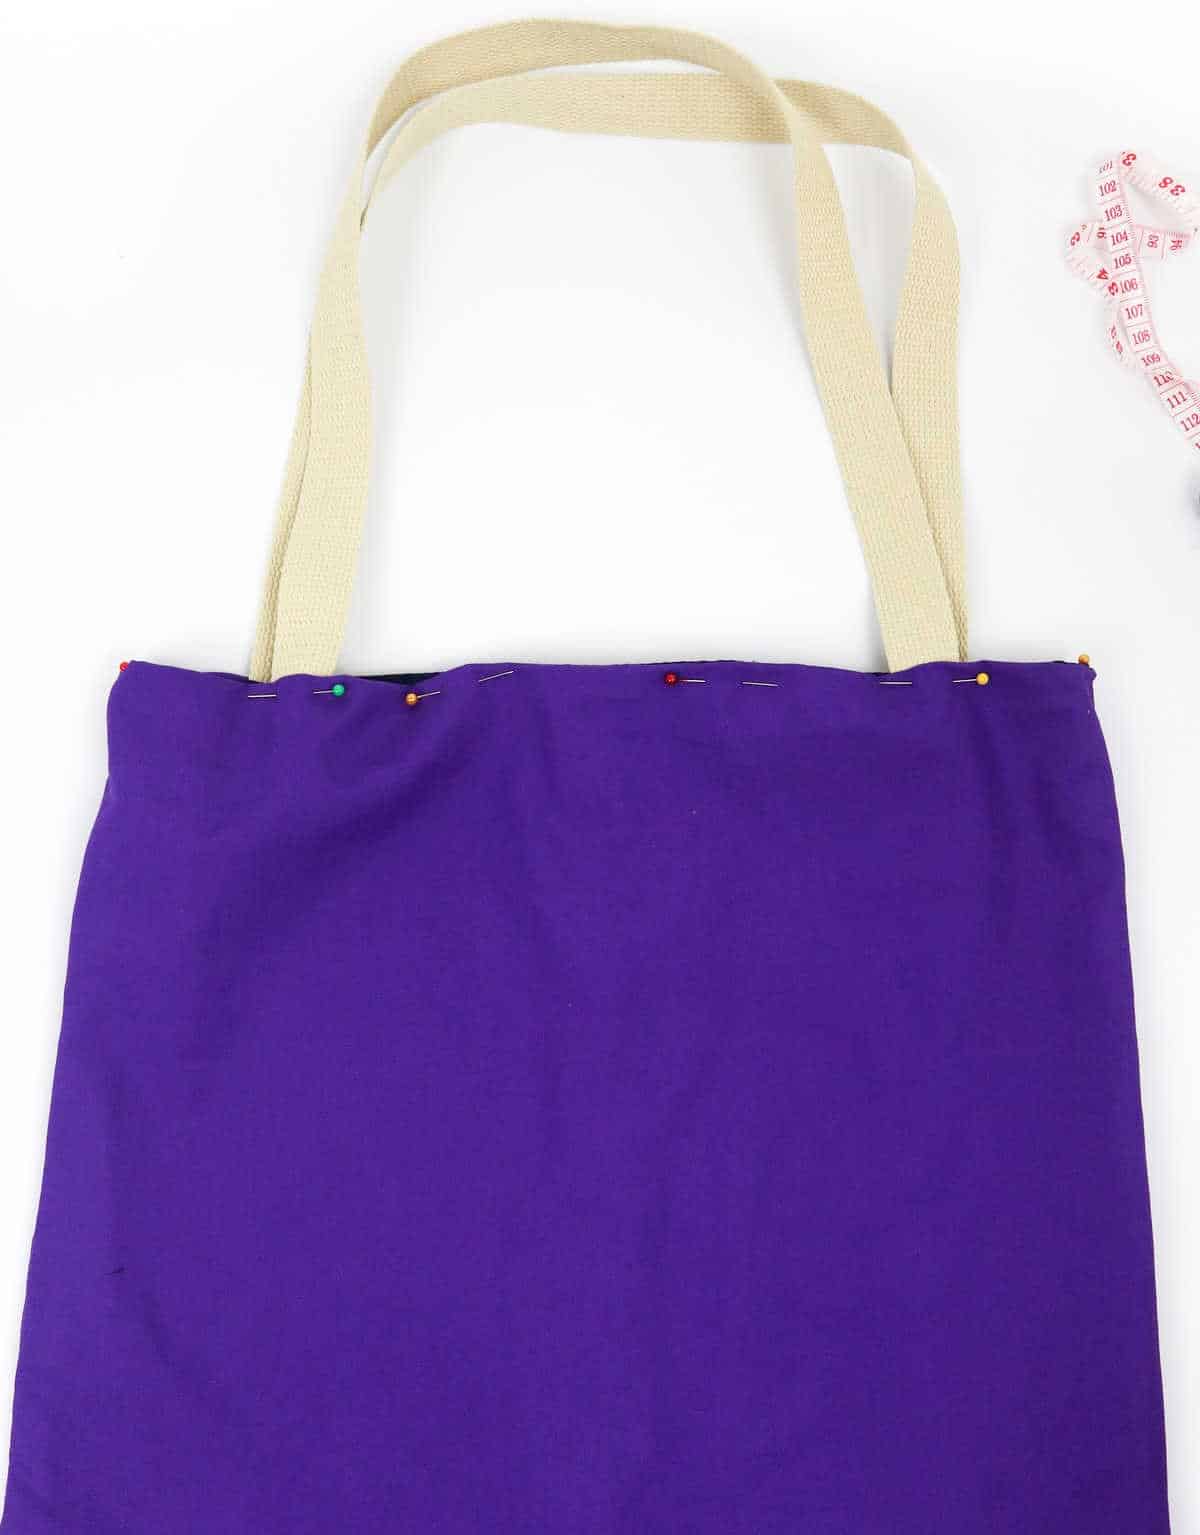
To complete your tote bag’s straps, start by cutting two strips of cotton ribbon or webbing, approximately 36 inches long each. Feel free to customize the length according to your preference. Next, carefully tuck one strip’s ends into the bag between the lining and the outer fabric, ensuring a secure fit. For added stability, use a sewing pin to pin the straps in place. As you work, double-check that both straps are evenly aligned and of consistent height to maintain a polished appearance.
Step 10
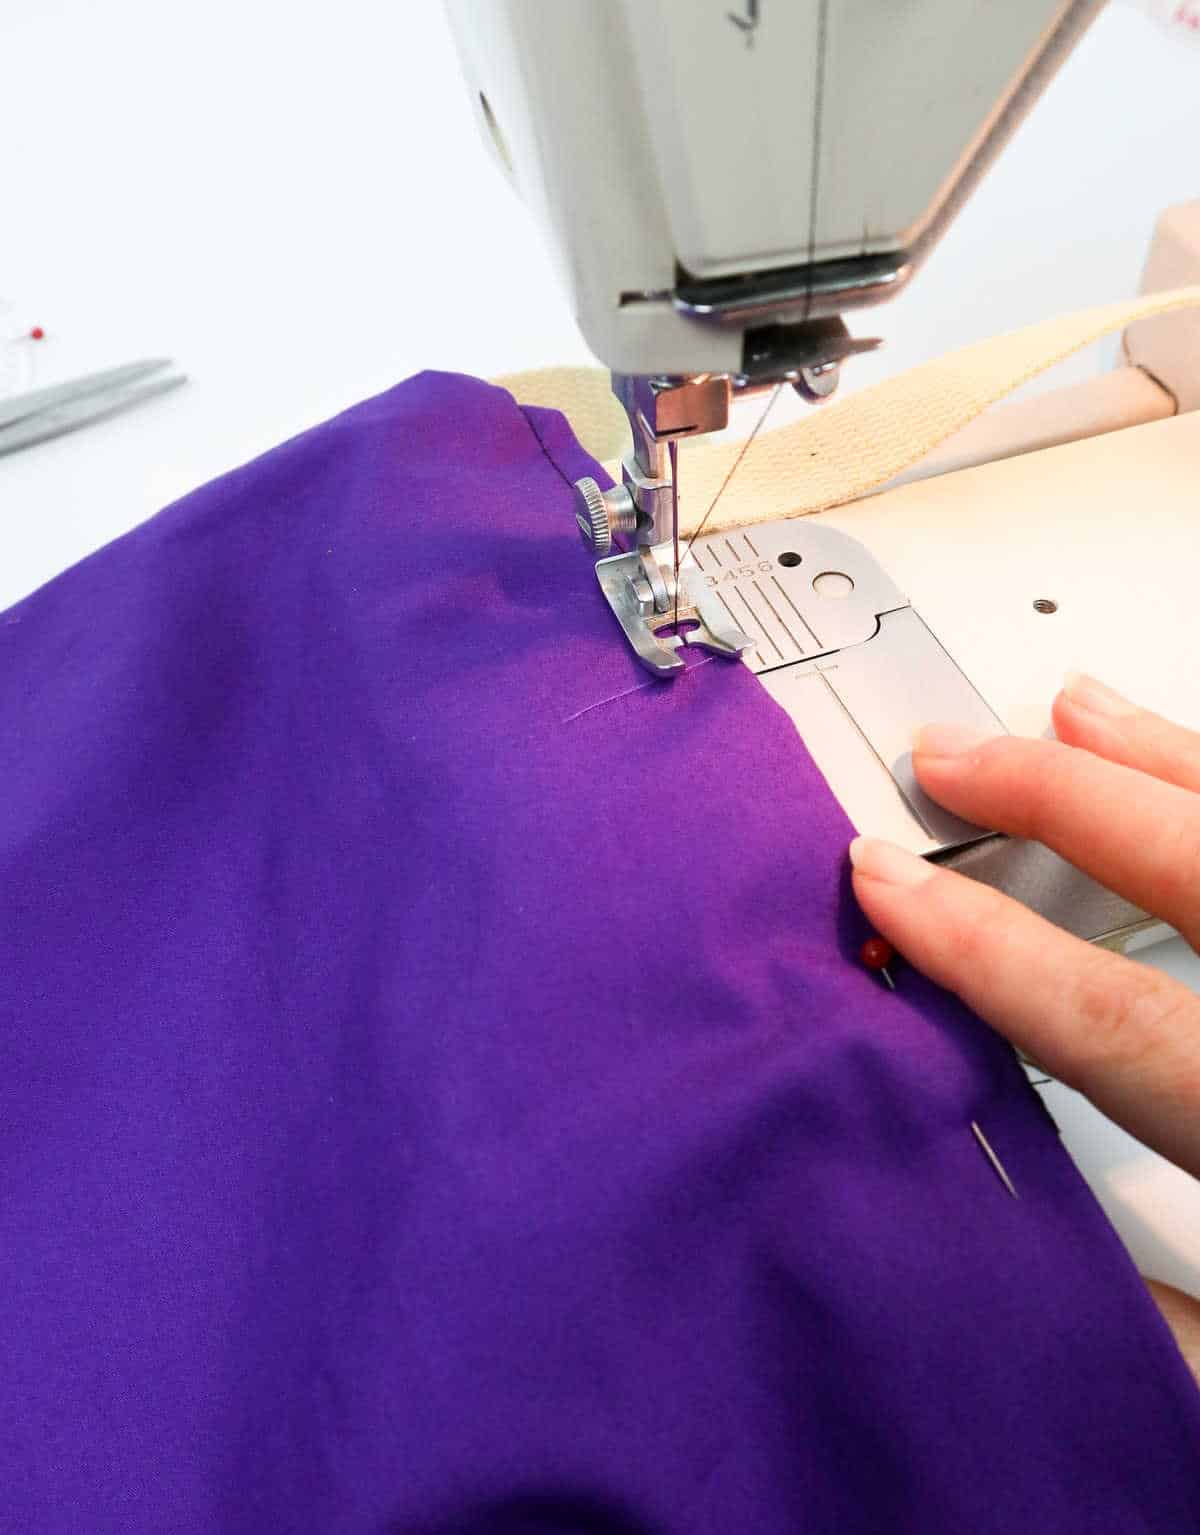
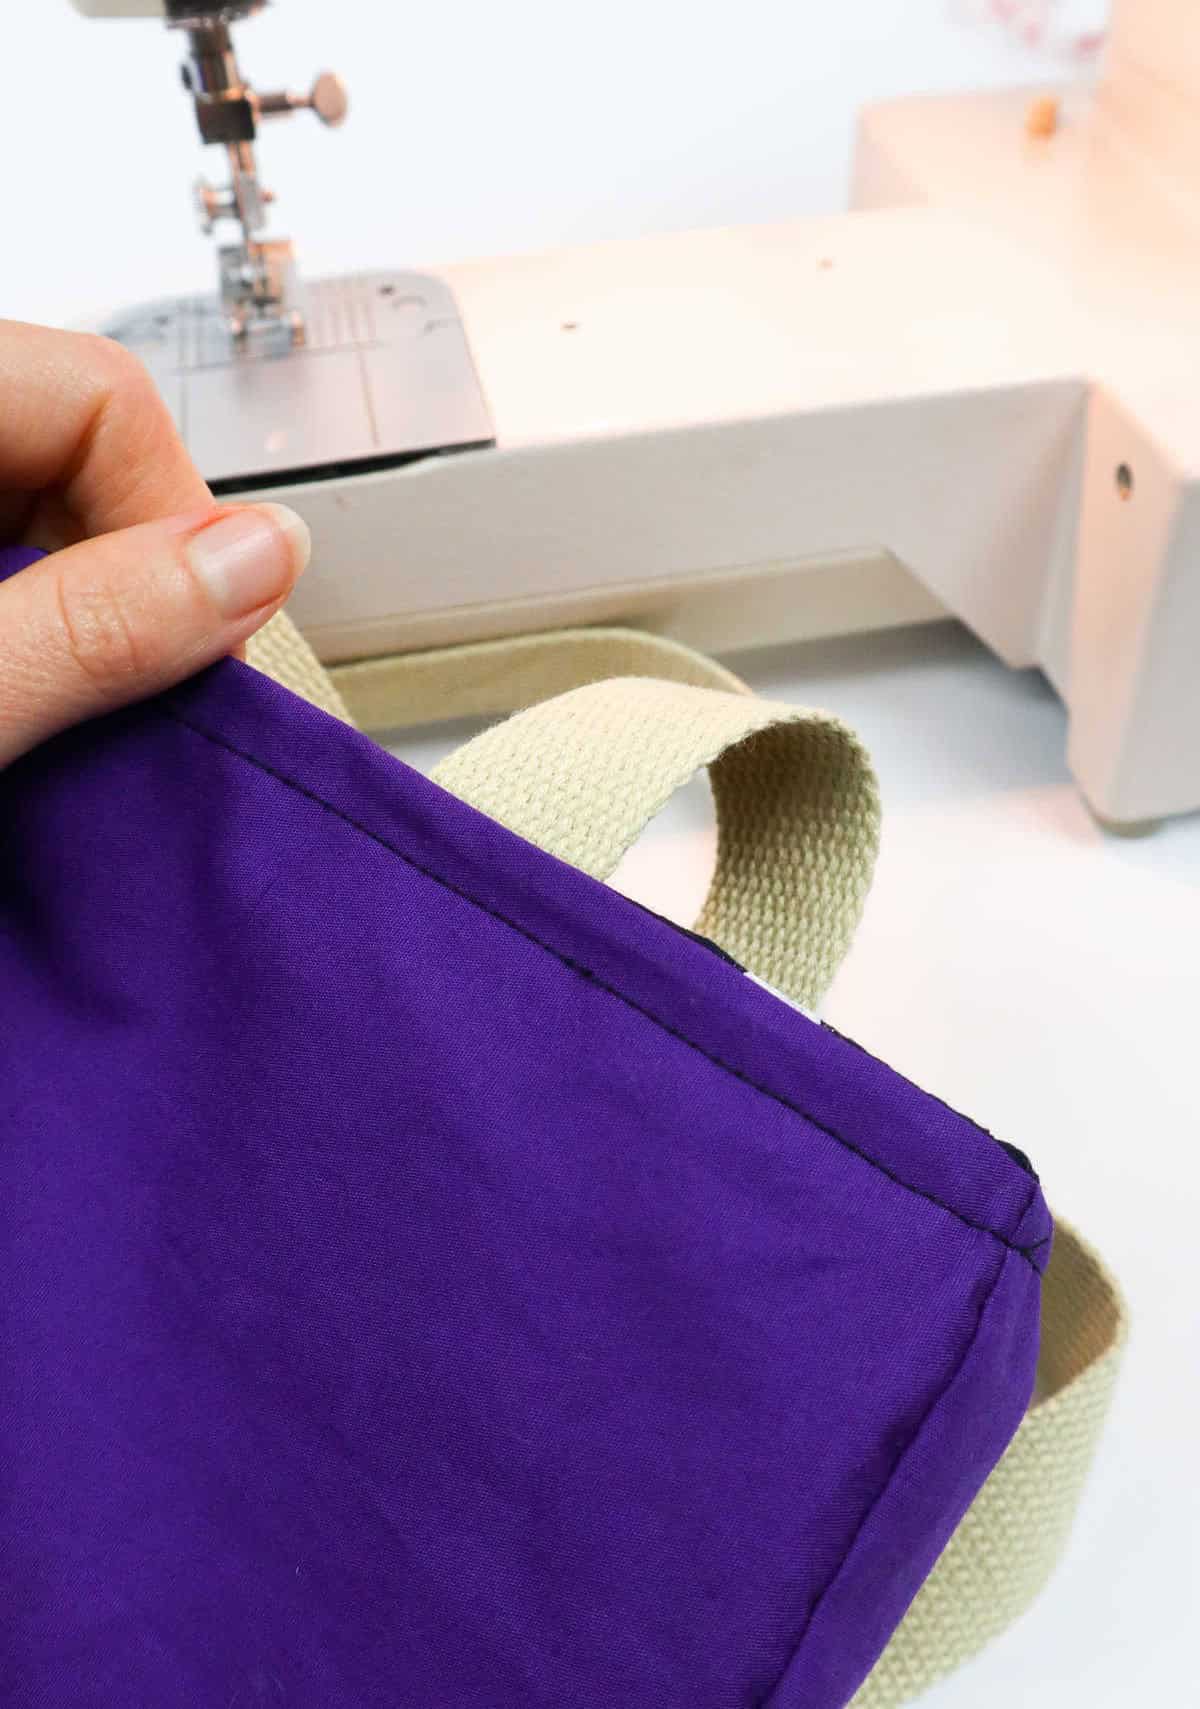
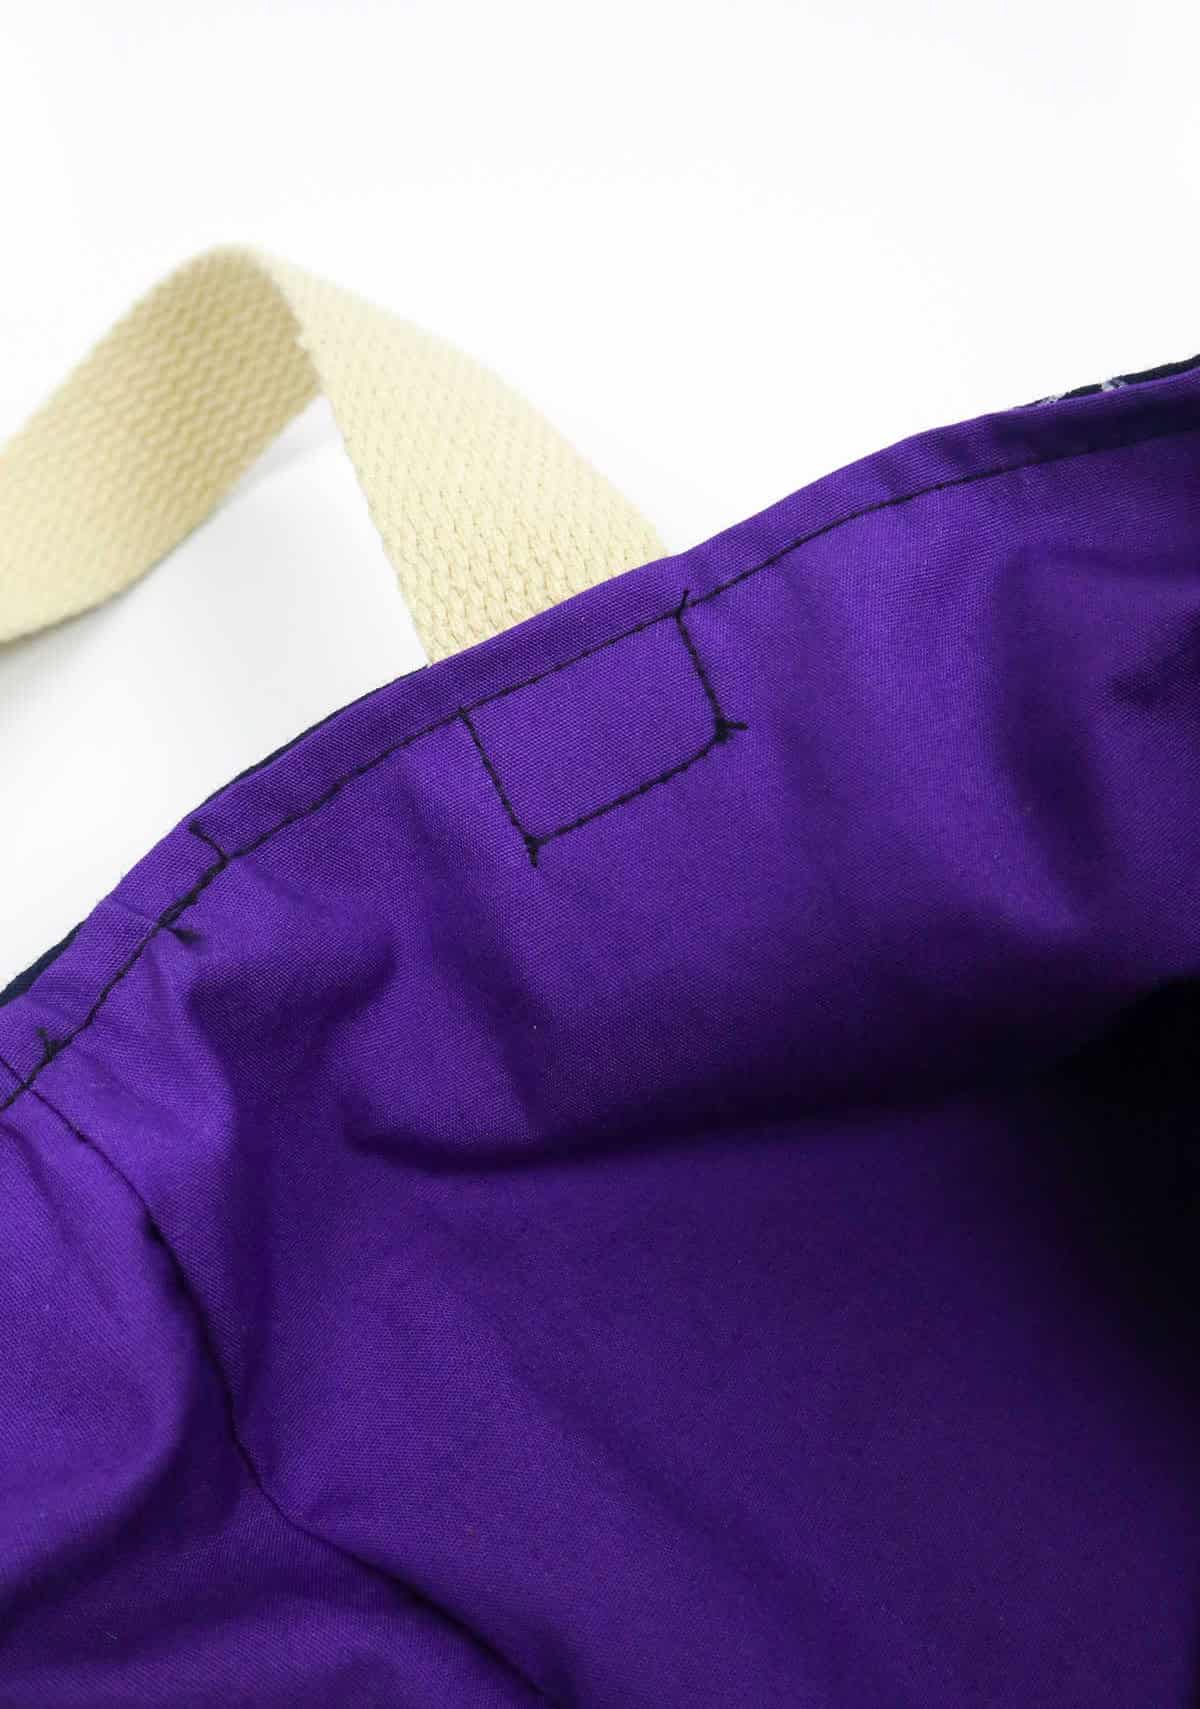
As you prepare to begin sewing your tote bag, take a moment to set up your machine and ensure it’s functioning properly. For added stability, consider reinforcing the strap ends by sewing a square around them, as demonstrated below. This simple step will help keep the straps secure and in place. Once complete, simply turn the bag inside out and you’ll be ready to use your finished tote.
How Much Fabric Do I Need for a Tote Bag?

When it comes to determining the amount of fabric needed for a tote bag, several factors come into play. The desired size of your bag is one crucial consideration, as well as the type of shirt you’re using as your material source. Larger shirts are often ideal for creating bigger bags that require more fabric, with men’s shirts being a popular choice for this purpose.
To ensure you have enough fabric to work with, it’s helpful to recall that you cut the shirts from sleeve to sleeve.
This serves as a reliable marker for estimating how much fabric is available and what additional quantities might be needed for the lining. By taking these factors into account, you’ll be well-equipped to make informed decisions about your fabric requirements.
How Do You Make a Tote Bag Without a Sewing Machine?
While it may take more time and effort, it’s entirely possible to create a tote bag without the aid of a sewing machine. One approach is to opt for hand-stitching, which may require multiple passes around the fabric to ensure secure stitching. For those who prefer a quicker solution, alternative methods include utilizing fabric tape, bonding tape, iron-on fusible appliqué, or fabric glue.
By employing these techniques, you can create a no-sew DIY tote bag that’s just as functional and stylish as its machine-made counterpart.
Other Crafts You Might Want to Make

With a plethora of creative possibilities at your fingertips, it’s no wonder why crafting has become an integral part of many people’s lives. From making unique gifts for loved ones to upcycling old materials into something new and exciting, the options are truly endless. In fact, there are over 47 fabric crafts that can be used to create everything from home decor items to accessories like hair bows.
Additionally, 37 crafts to make and sell offer a great way to turn your creative passion into a profitable venture. Whether you’re looking for sewing projects or yarn-based creations, this list of ideas is sure to inspire and guide you in your crafting journey. With over 47 sewing gifts that can be made, it’s easy to find the perfect present for any occasion.
And when it comes to classroom crafts, there are plenty of fun and educational activities that can be used to engage students and foster creativity.
DIY Tote Bag from Old Shirt (Step-by-Step Tutorial)
Transform a vintage shirt into a unique DIY tote bag in just under an hour. With minimal prep and 40 minutes of active time, you’ll be enjoying your new accessory in no time. Simply follow these steps to give old cloth a new life.
Equipment
When it comes to sewing, having the right tools and supplies can make all the difference. But did you know that there are some simple tricks to prevent your screen from going dim in the middle of a project? By keeping scissors, sewing pins, and a tape measure within arm’s reach, you’ll be able to keep working without interruption. Additionally, keeping a fabric pencil handy can help you mark important measurements or patterns on your fabric with ease.
With these tools at your fingertips, you’ll be well-equipped to tackle any sewing project that comes your way – and stay awake and focused in the process!
Materials
When it comes to crafting a unique and practical tote bag, the choice of materials is crucial. In this instance, we’re using a blend of natural and synthetic fibers. The main body of the bag will be made from polycotton fabric, which offers a durable and easy-to-clean surface. The fabric measures 40 inches by 40 inches, providing ample space for your daily essentials. Additionally, the straps are crafted from high-quality cotton webbing, specifically designed to withstand heavy use.
At 52 inches long, these straps provide excellent support and comfort when carrying the bag.
Instructions
To begin creating this DIY tote, first gather all necessary supplies and tools. Lay your shirt flat on a work surface and mark the spots just under the sleeve using fabric pens. Measure and mark the desired length of the bag as well. Use sewing pins to secure both the front and back of the shirt in place while cutting the fabric. Next, take an additional fabric for the lining and place your shirt swatch over it, aligning and pinning both pieces together.
Cut two identical swatches of lining, each the same size as the outer fabric. If using a button-down shirt, pin and sew down the length of the fabric to close any buttonholes. Once prepared, lay both shirt fabrics side by side with their right sides facing inward and pin them in place. Repeat this process for the lining. Sew both sets of fabrics together, leaving one side open for the bag’s opening.
Turn only the lining fabric outwards with the right side showing, then carefully place the shirt fabric inside the lining and align all edges. Use your hands to smooth out any wrinkles or creases in the fabric. Fold the raw ends of both the lining and shirt inward towards the bag’s interior, ensuring a neat and even alignment. Pin the hem in place while creating the shoulder straps. For the shoulder straps, cut two strips of cotton webbing, approximately 26 inches long.
Tuck the ends between the lining and shirt fabric, securing with pins. Sew the bag on all three sides, sewing the strap ends into a box-shaped pattern for added security. Finally, turn the bag outwards and it’s ready to use.