Planning a wedding on a budget can be overwhelming, with numerous ‘little’ details to attend to. While the big-ticket items like cake, dress, and flowers may dominate your attention, it’s easy to overlook the smaller expenses that add up quickly. Case in point: choosing the perfect centerpiece for your reception tables. To make matters worse, these decorative elements can often break the bank.
The good news is that with a little creativity, you can create a stunning and budget-friendly DIY wedding centerpiece using upcycled bottles. This cost-effective solution not only saves you money but also reduces waste, making it an eco-friendly choice for your special day.
Supplies and Tools You’ll Need
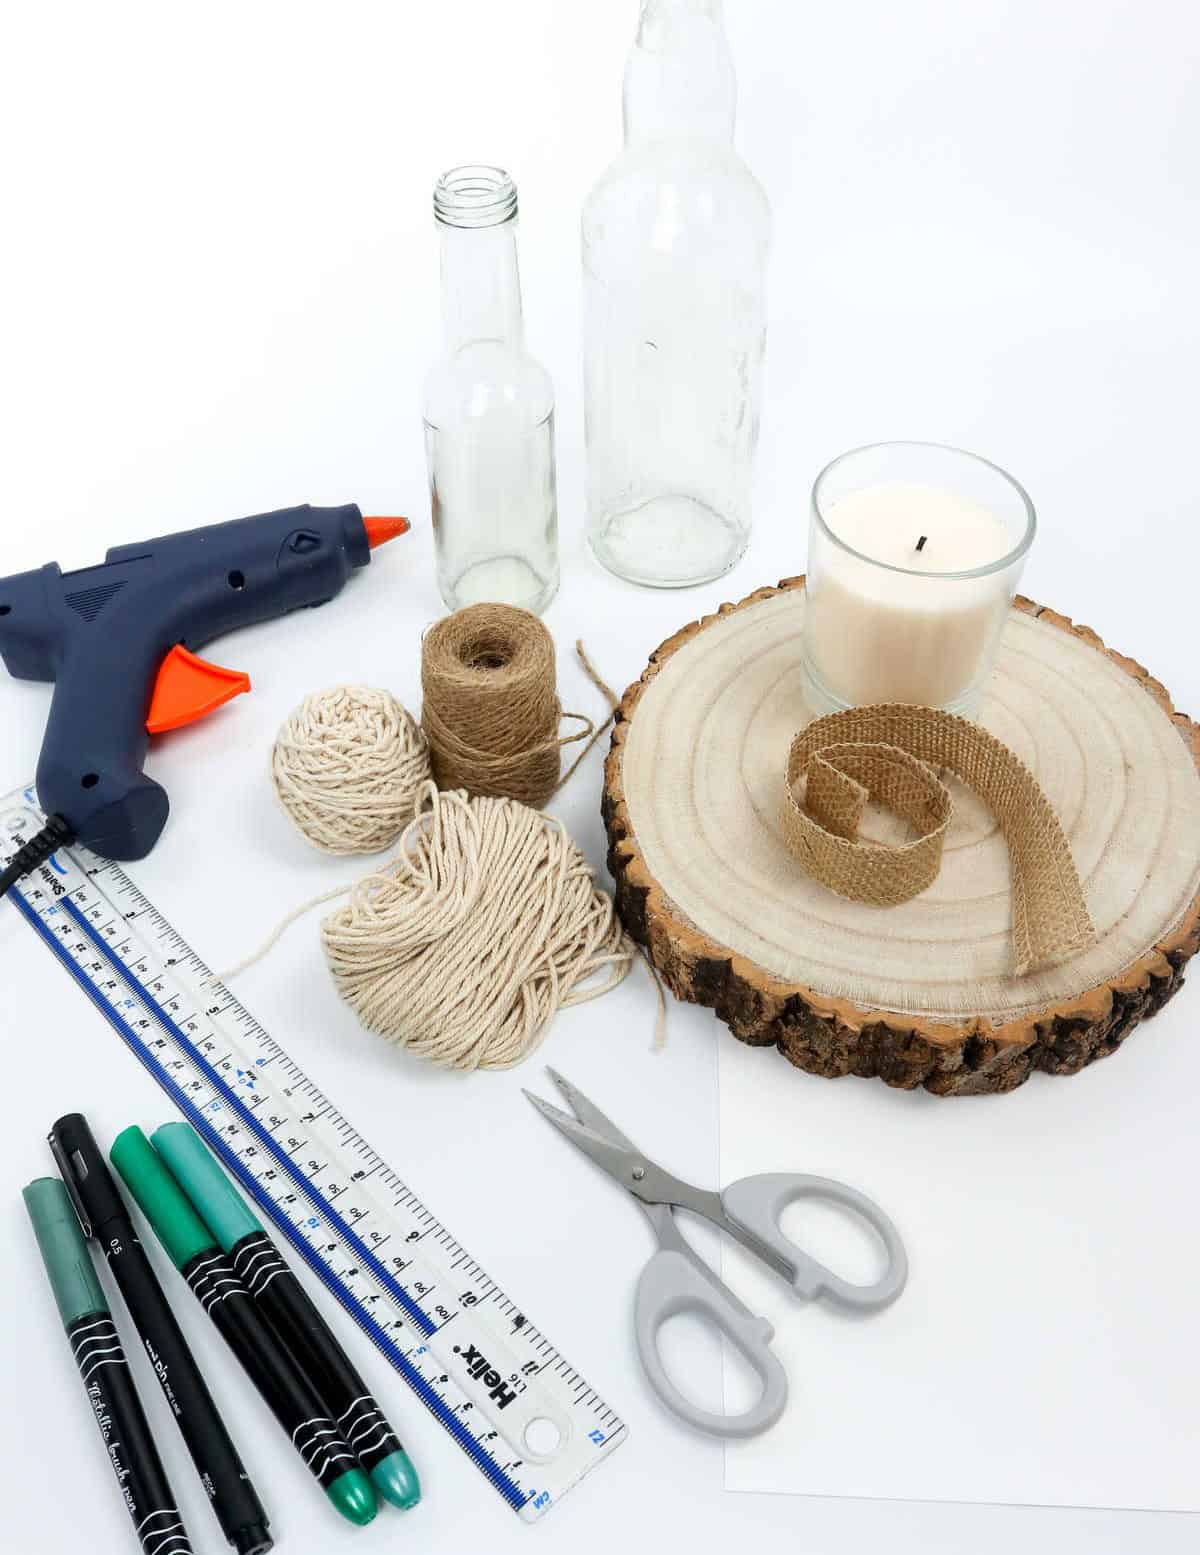
To create these unique DIY centerpieces, you’ll need a few basic supplies. Here’s what you should gather before we dive into the project: A wooden plaque will serve as the base for your centerpiece. Two bottles of different sizes will add visual interest and provide a home for the jar candle. You’ll also need a jar candle to create warm, cozy ambiance. The 5mm cotton cords or thicker will be used to create a decorative wrapping effect.
A hot glue gun will help you attach the various components together. You’ll also need scissors for trimming any excess material. In addition to these essentials, you’ll want some paper crafting supplies: thick white A5 paper and a ruler will come in handy for creating custom details. Markers or other coloring tools can be used to add personalized touches to your design. Finally, consider adding some finishing touches with 1” wide jute ribbon.
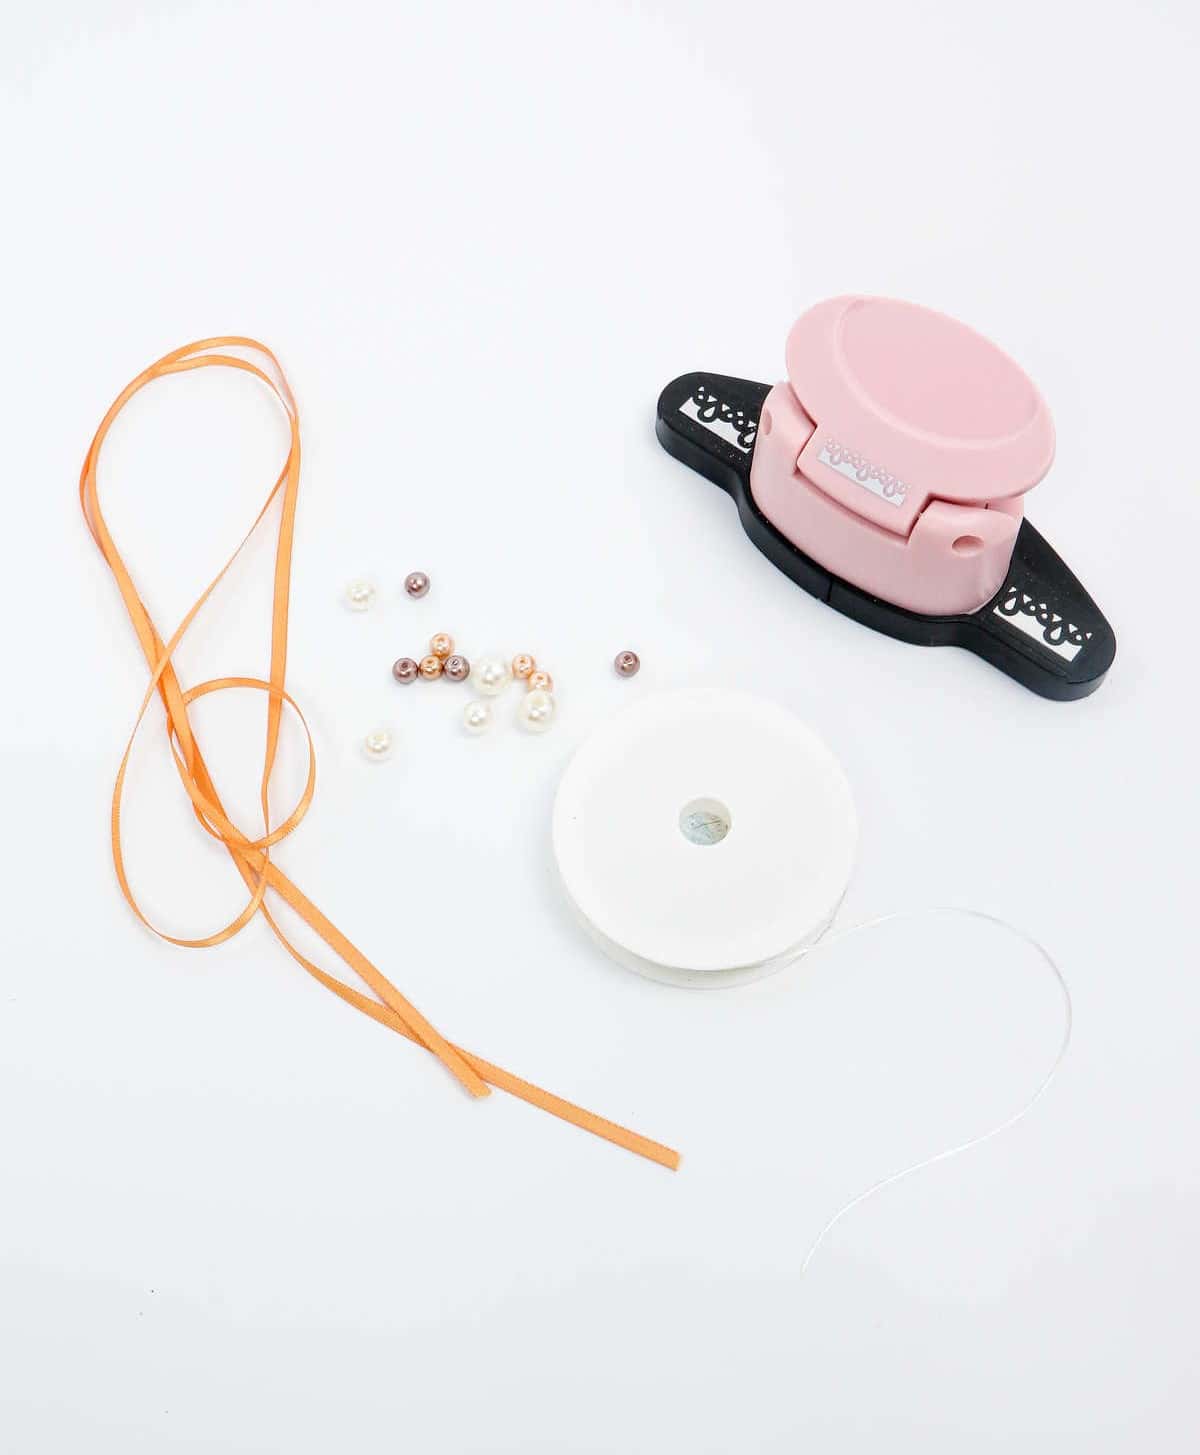
Optional extras include additional ribbon, pearl beads, and a thin thread that can be used to create intricate patterns.
How to Make Your Own Wedding Centerpiece
As you prepare to embark on your DIY project, it’s crucial to take care of a seemingly mundane yet vital task: thoroughly cleaning the bottles you’ll be using. This involves a meticulous process of deep cleaning, followed by gentle scrubbing, rinsing, and finally, allowing the bottles to air dry completely before they’re ready for use.
Ignoring this step can have unfortunate consequences – if your bottles are dirty or greasy, it can significantly impact the overall aesthetic of your finished project.
Step 1
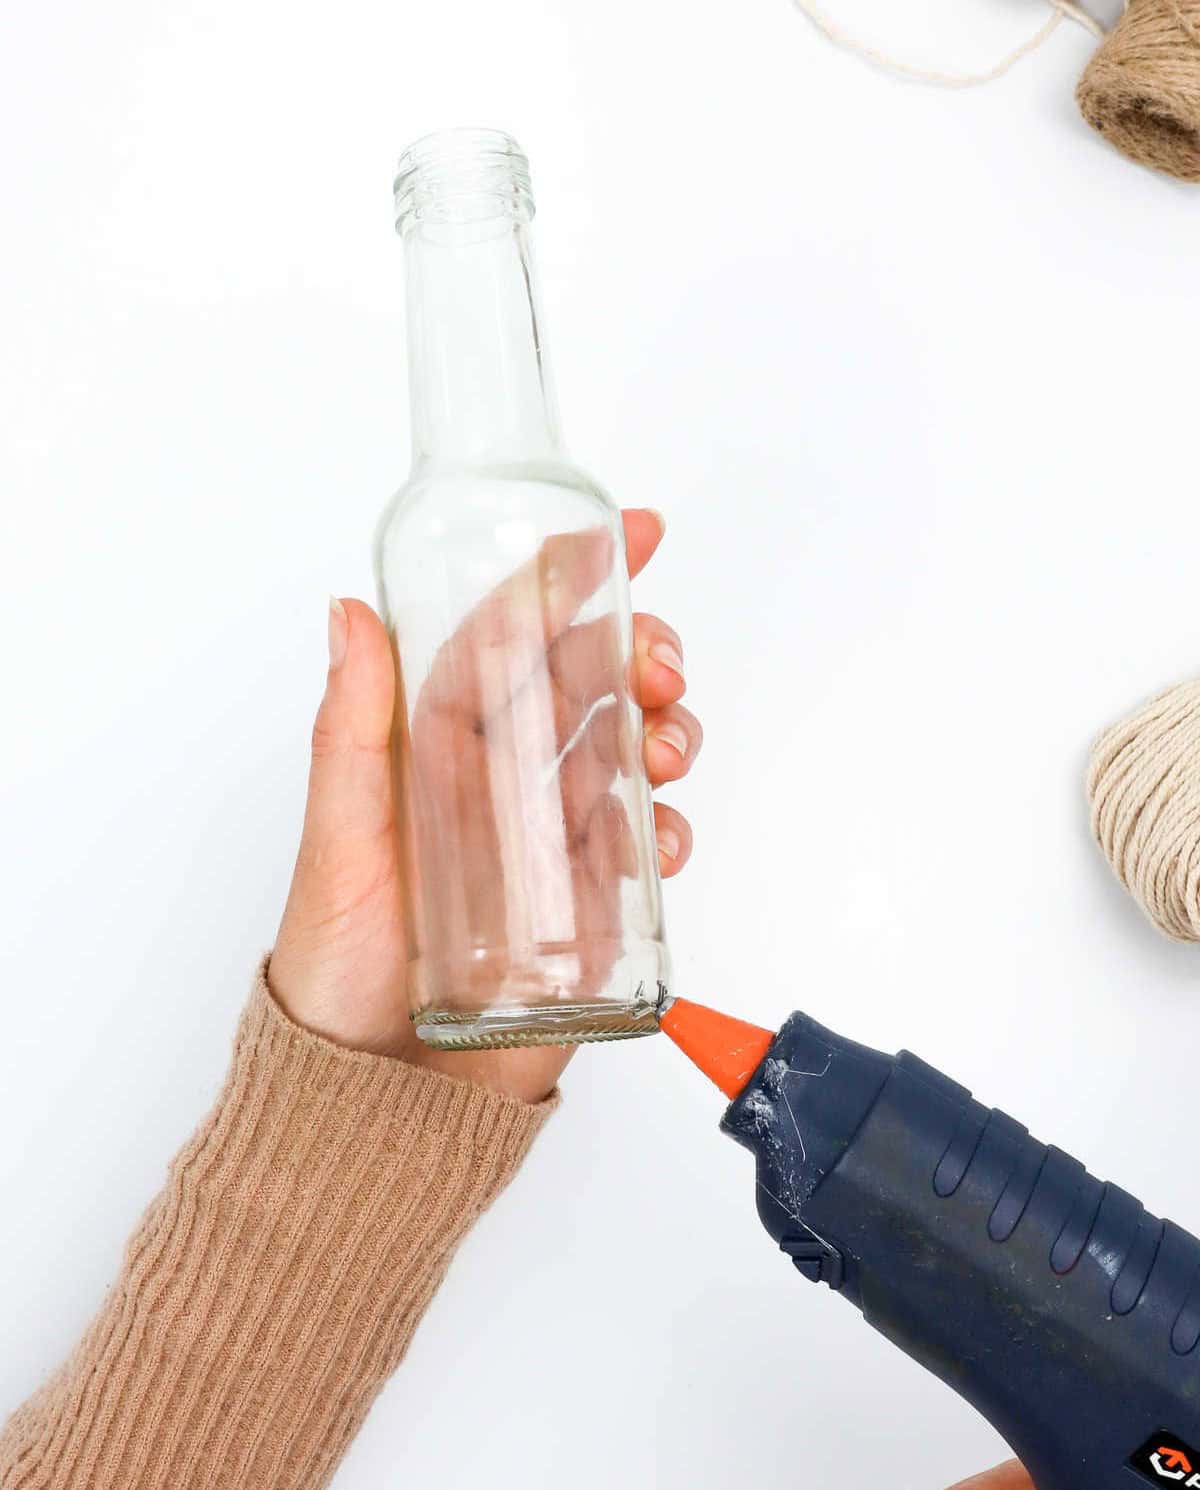
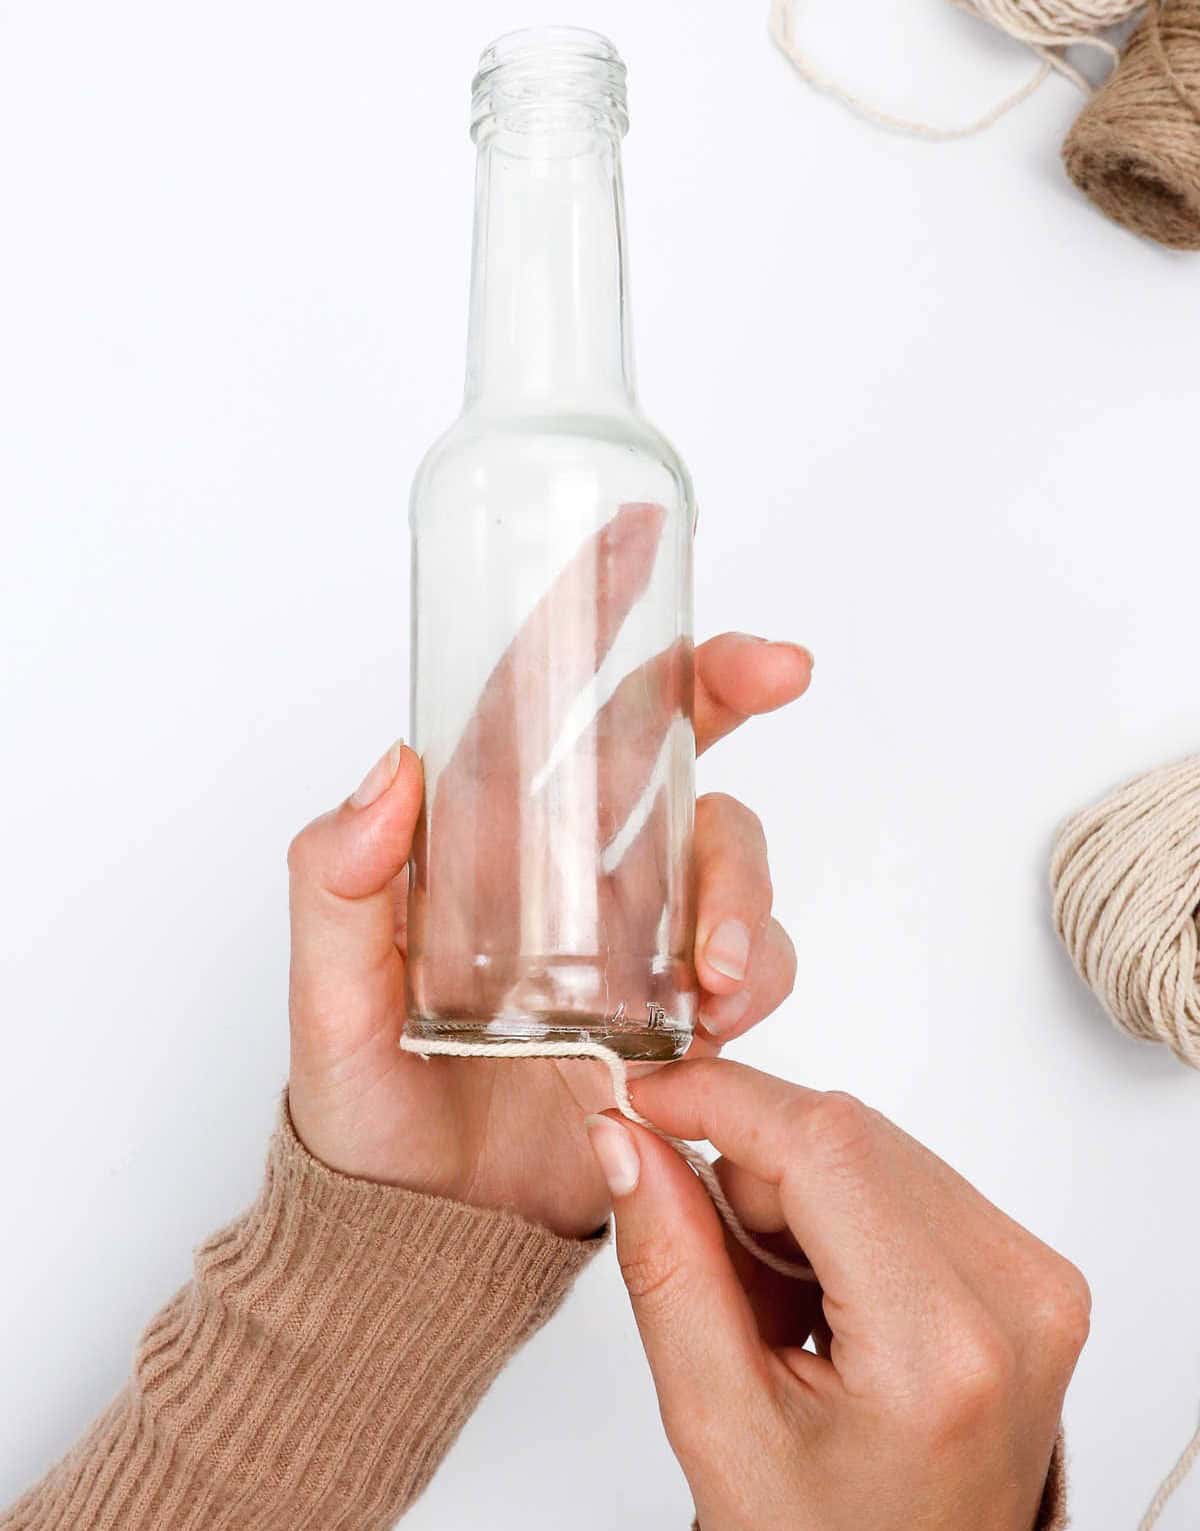
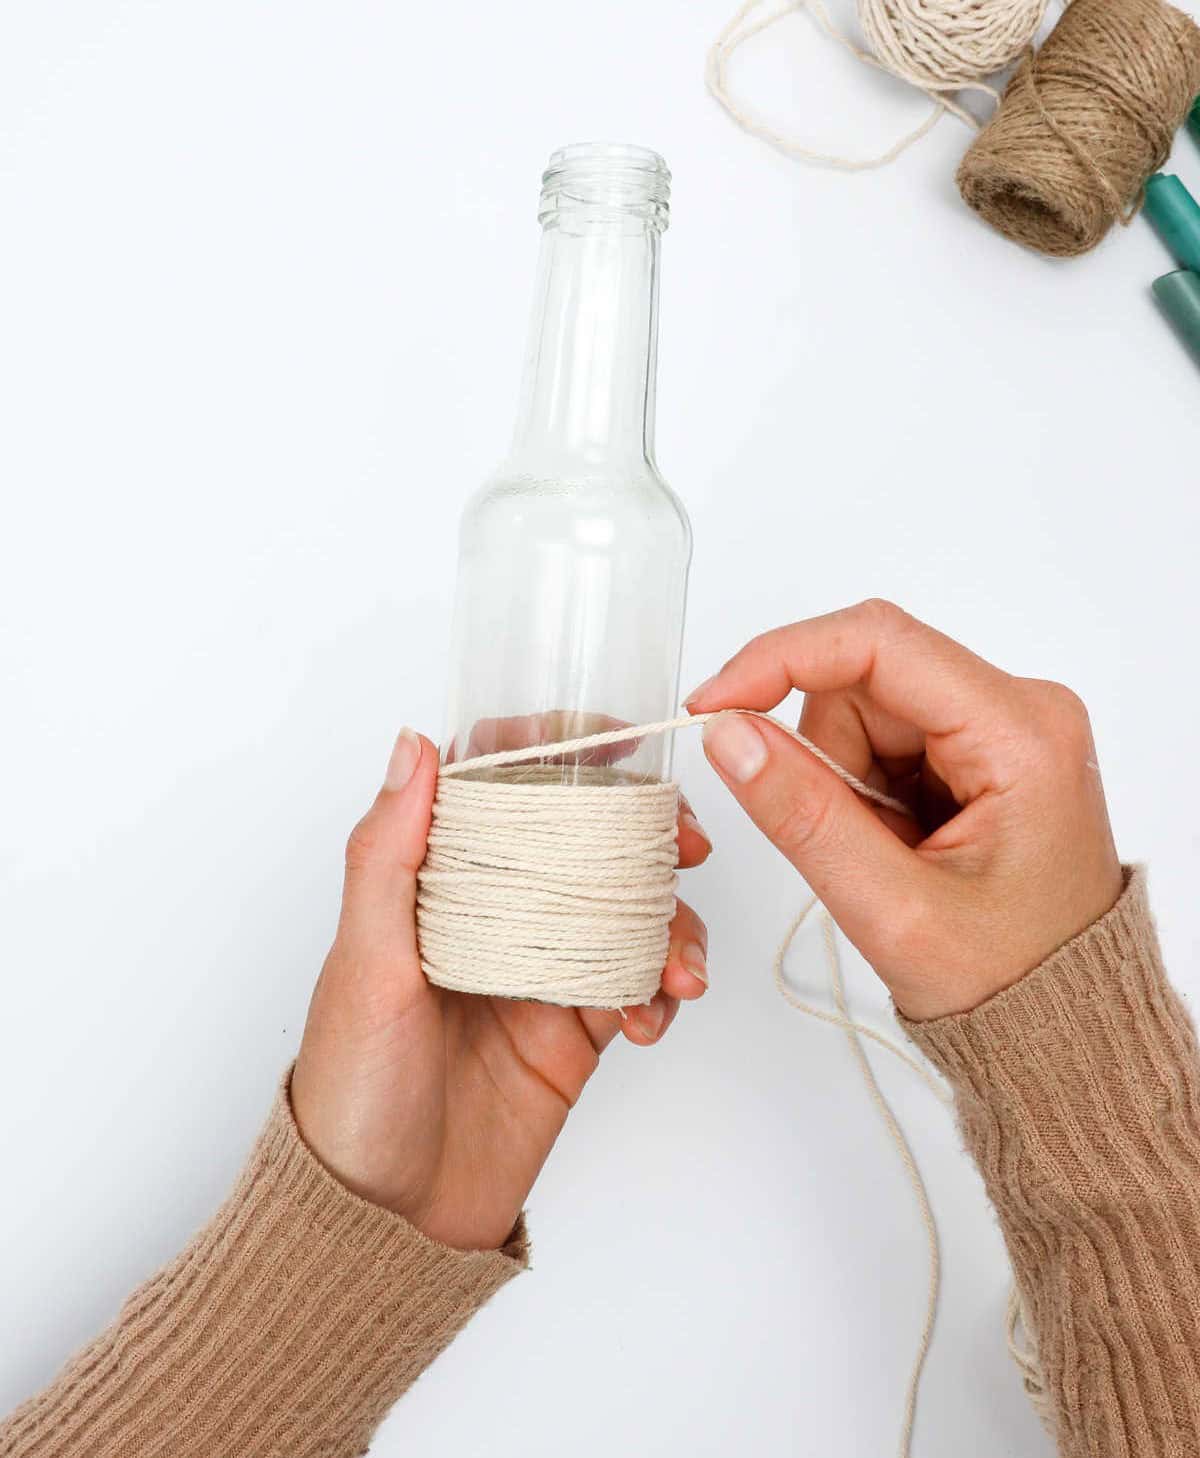
To initiate your project, begin by uncoiling the cotton rope. The thickness of the rope isn’t crucial, but a medium-thickness rope does make the process easier. Next, take your hot glue gun and apply a small amount of adhesive to the bottle’s bottom. Subsequently, place the cord onto the glue, pressing it firmly in place for a few seconds to ensure a strong bond. It’s essential to secure the cord correctly at this early stage, as any missteps may cause the rope to unravel later on.
Step 2

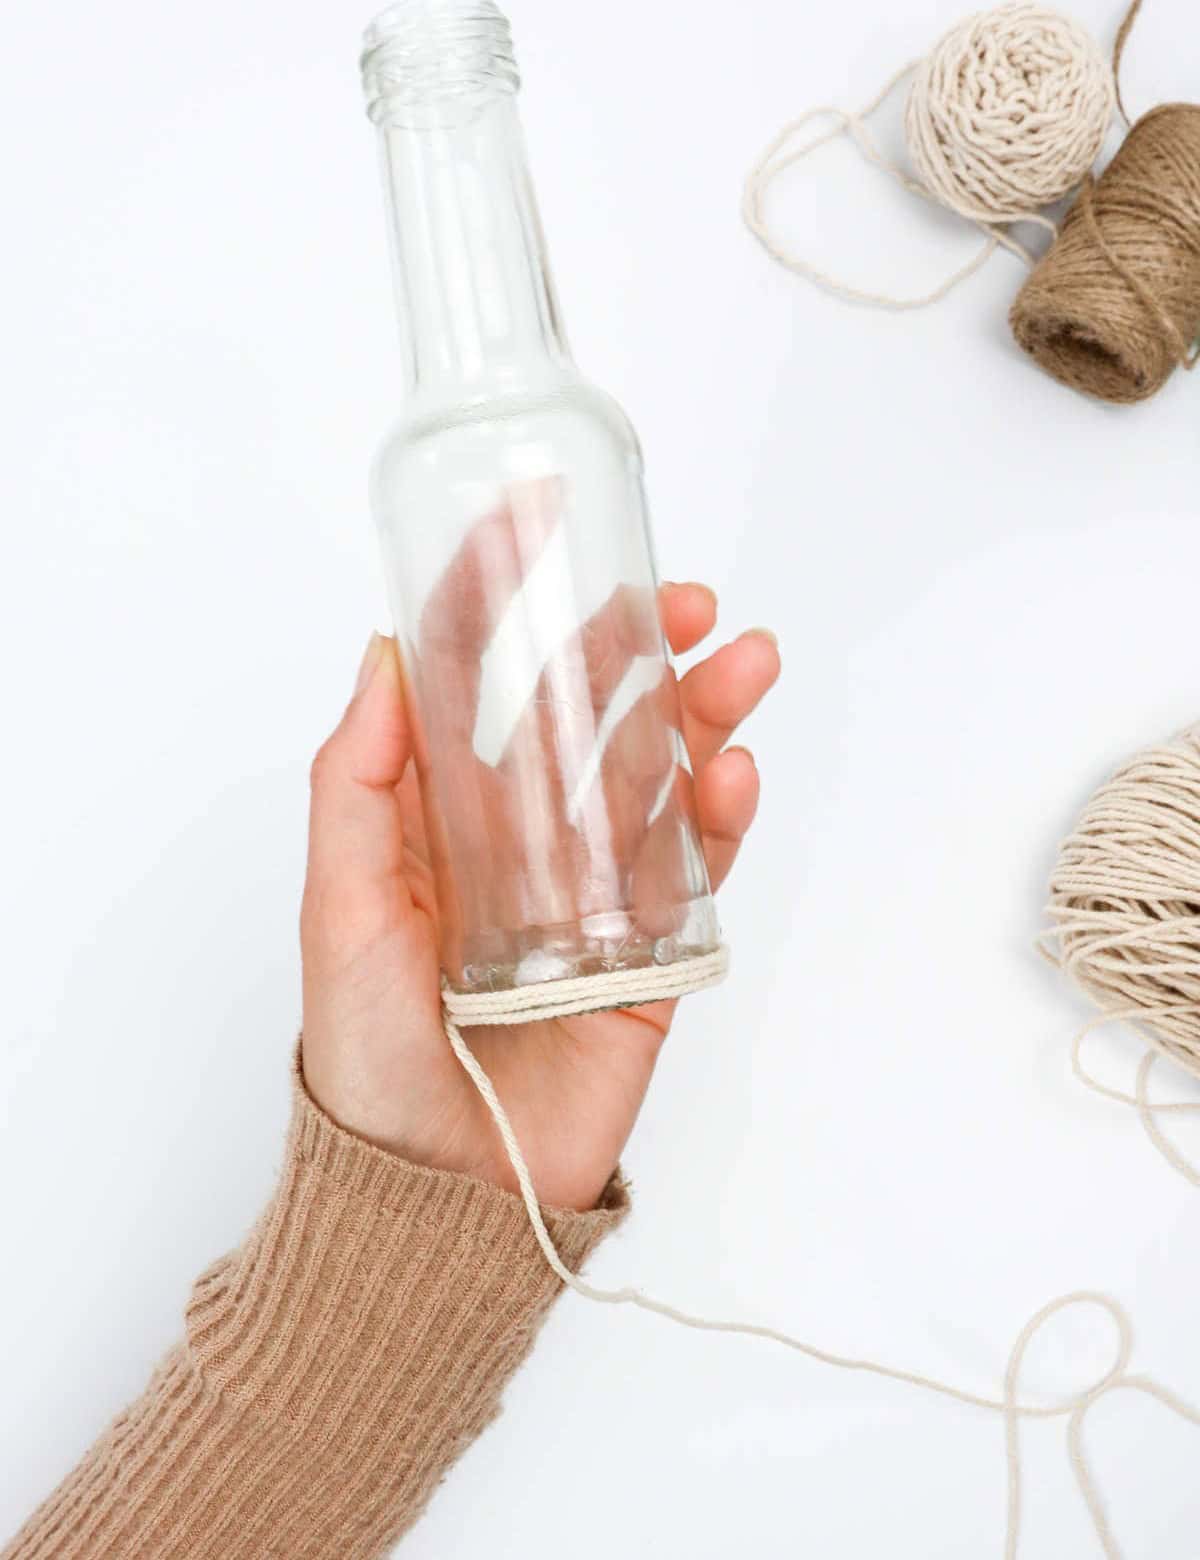
Now, take your trusty glue gun and begin building upon the foundation you’ve established. As you apply layers of glue around the base, gradually work your way back to where you started, ensuring a seamless connection between each pass. Think of it as creating a strong bond – literally! With each subsequent layer, reinforce the previous one by layering glue over cord, ultimately crafting a sturdy and cohesive structure.
Step 3
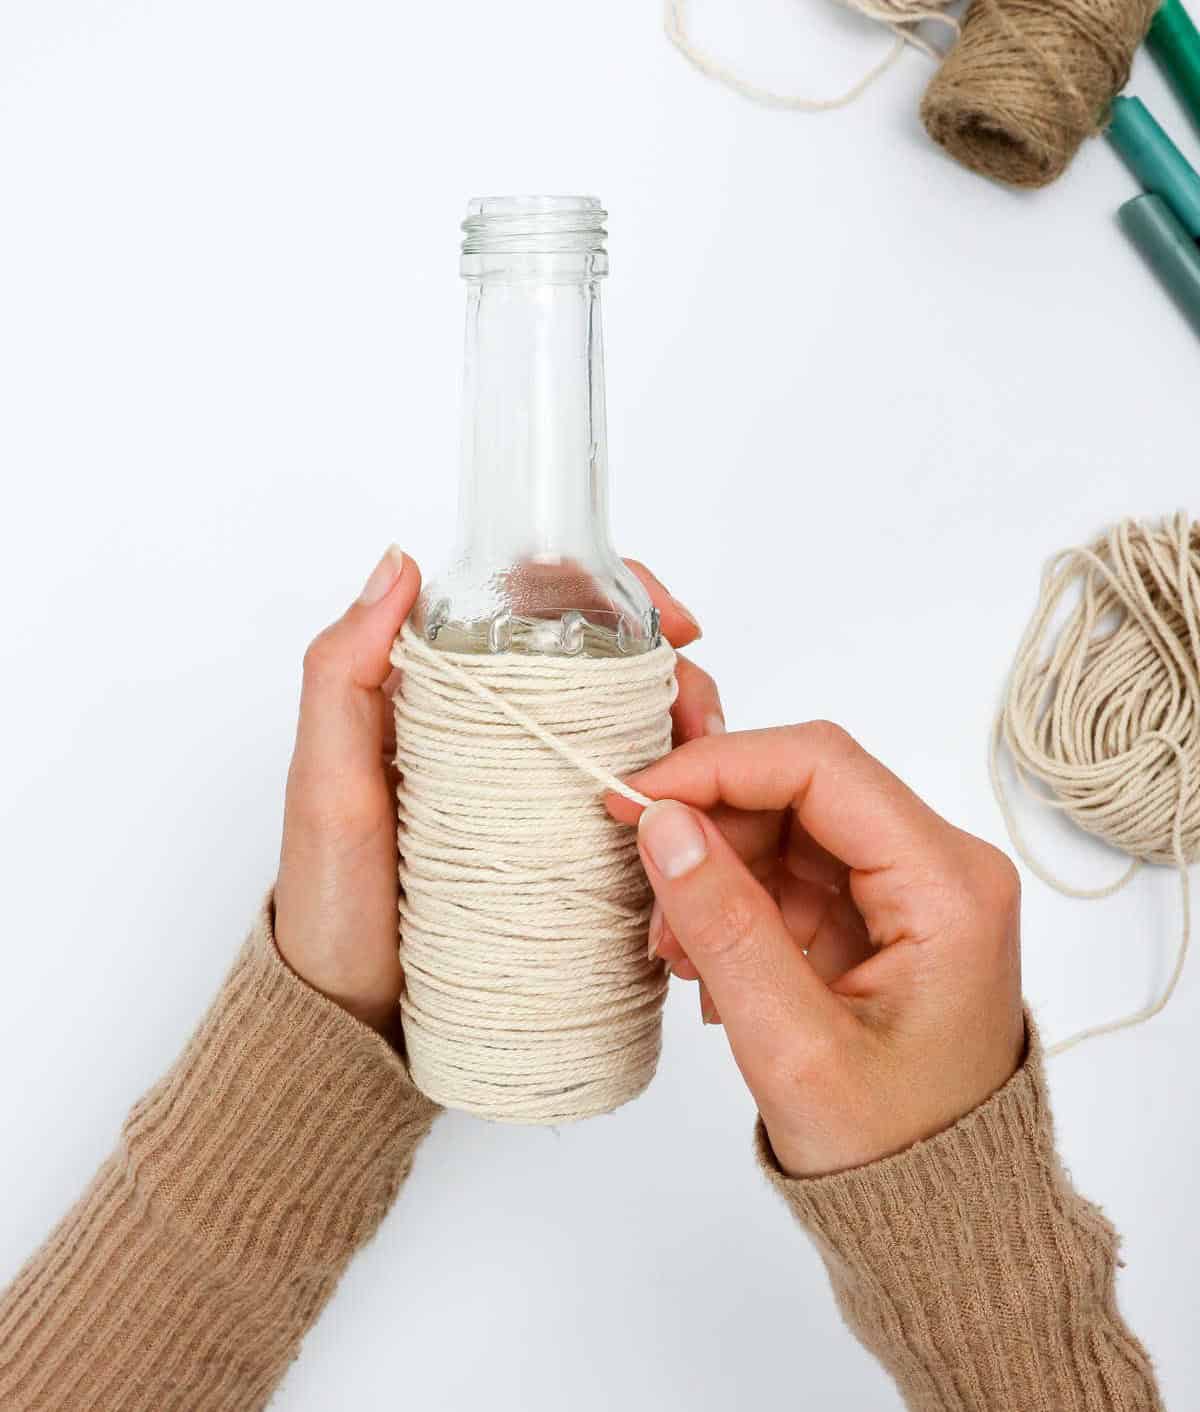
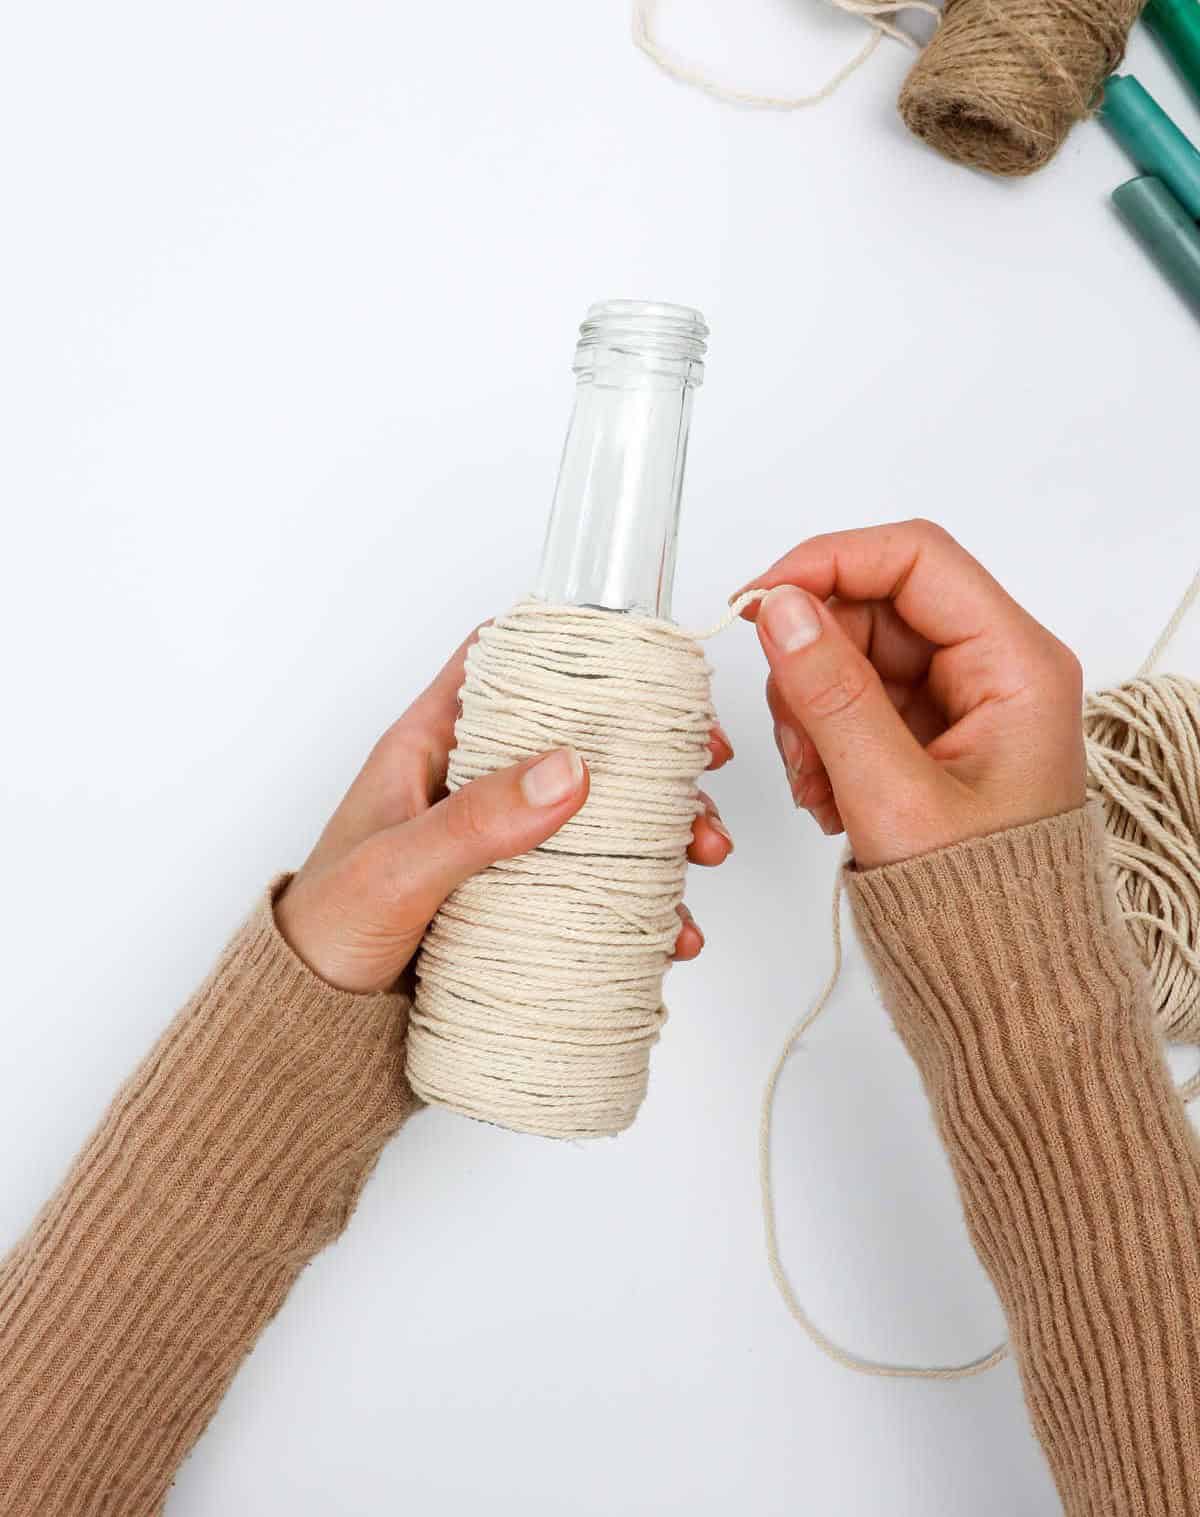
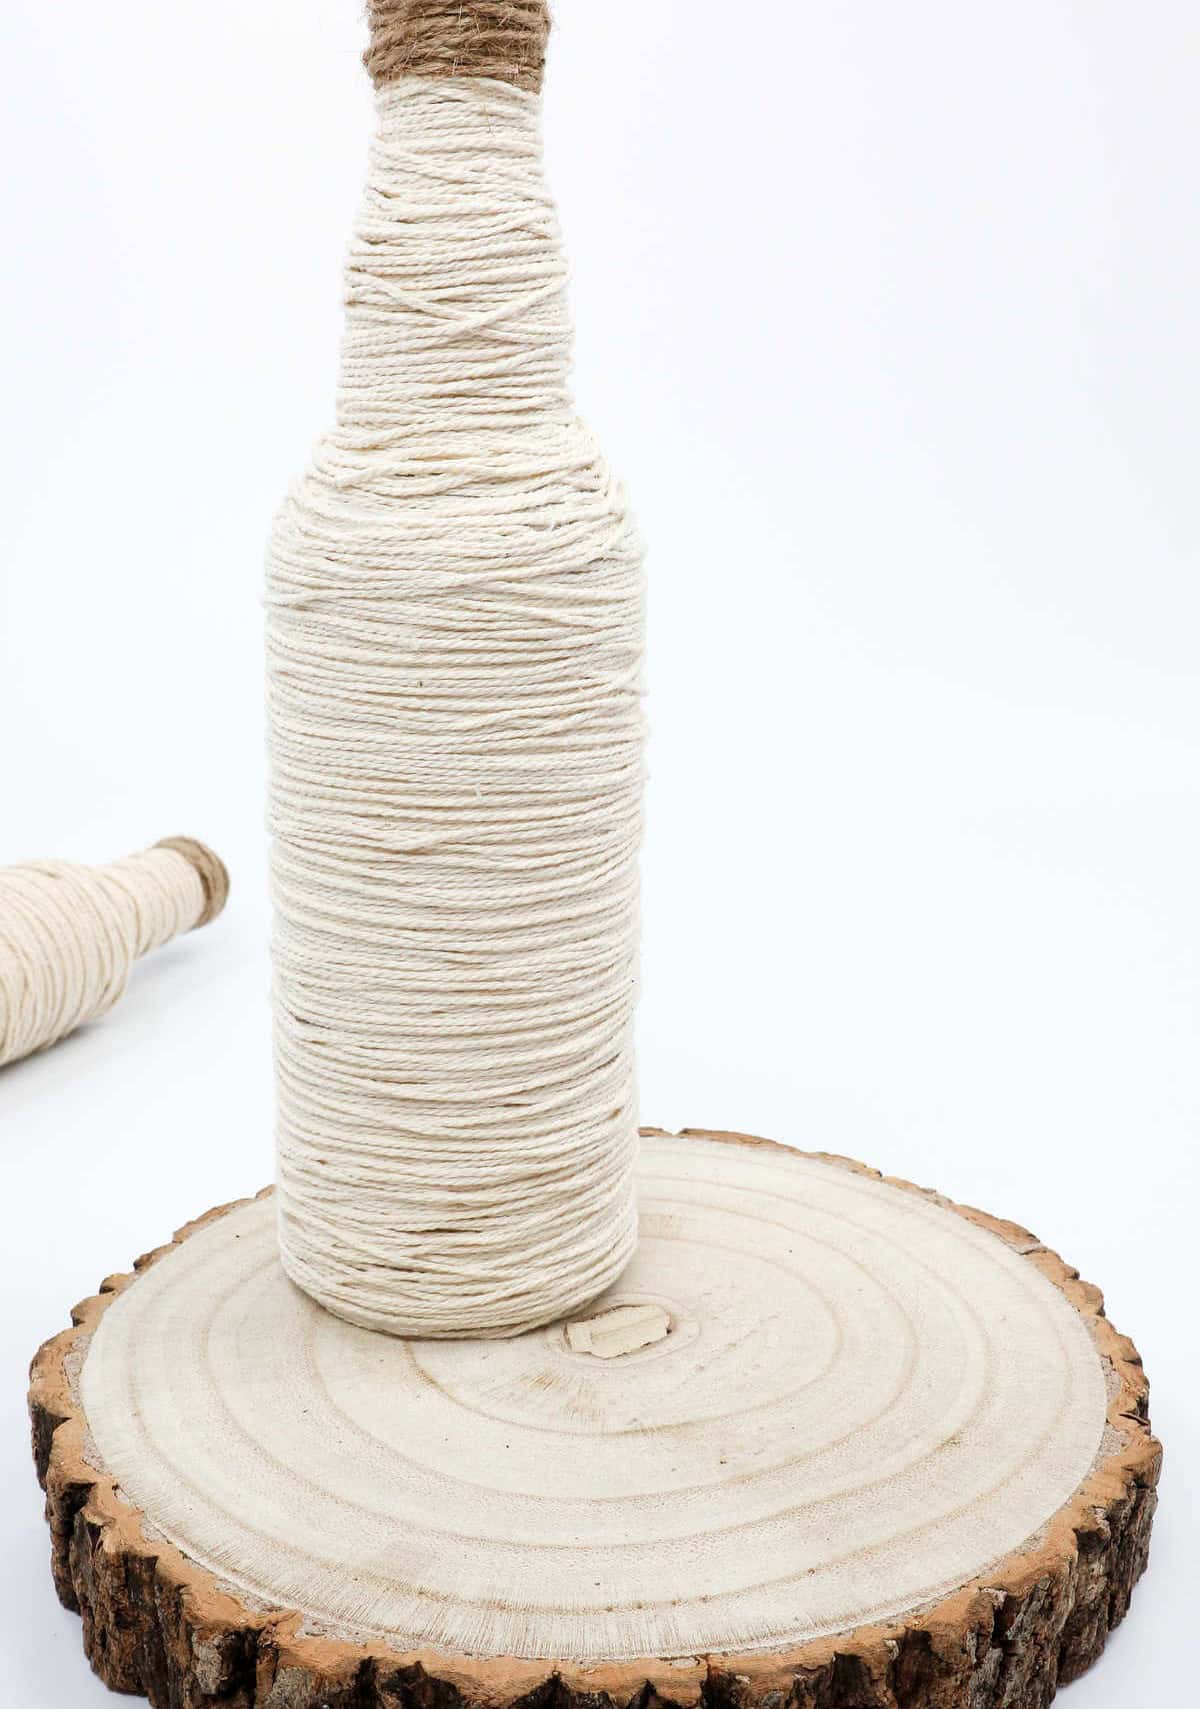
As you progress in gluing the cord, focus on building momentum by working your way up the bottle. Don’t worry about achieving perfect precision or symmetry; instead, embrace a more organic approach. For a chunky, rustic look, feel free to overlap the cords as needed, allowing for a unique and imperfectly charming aesthetic.
Step 4
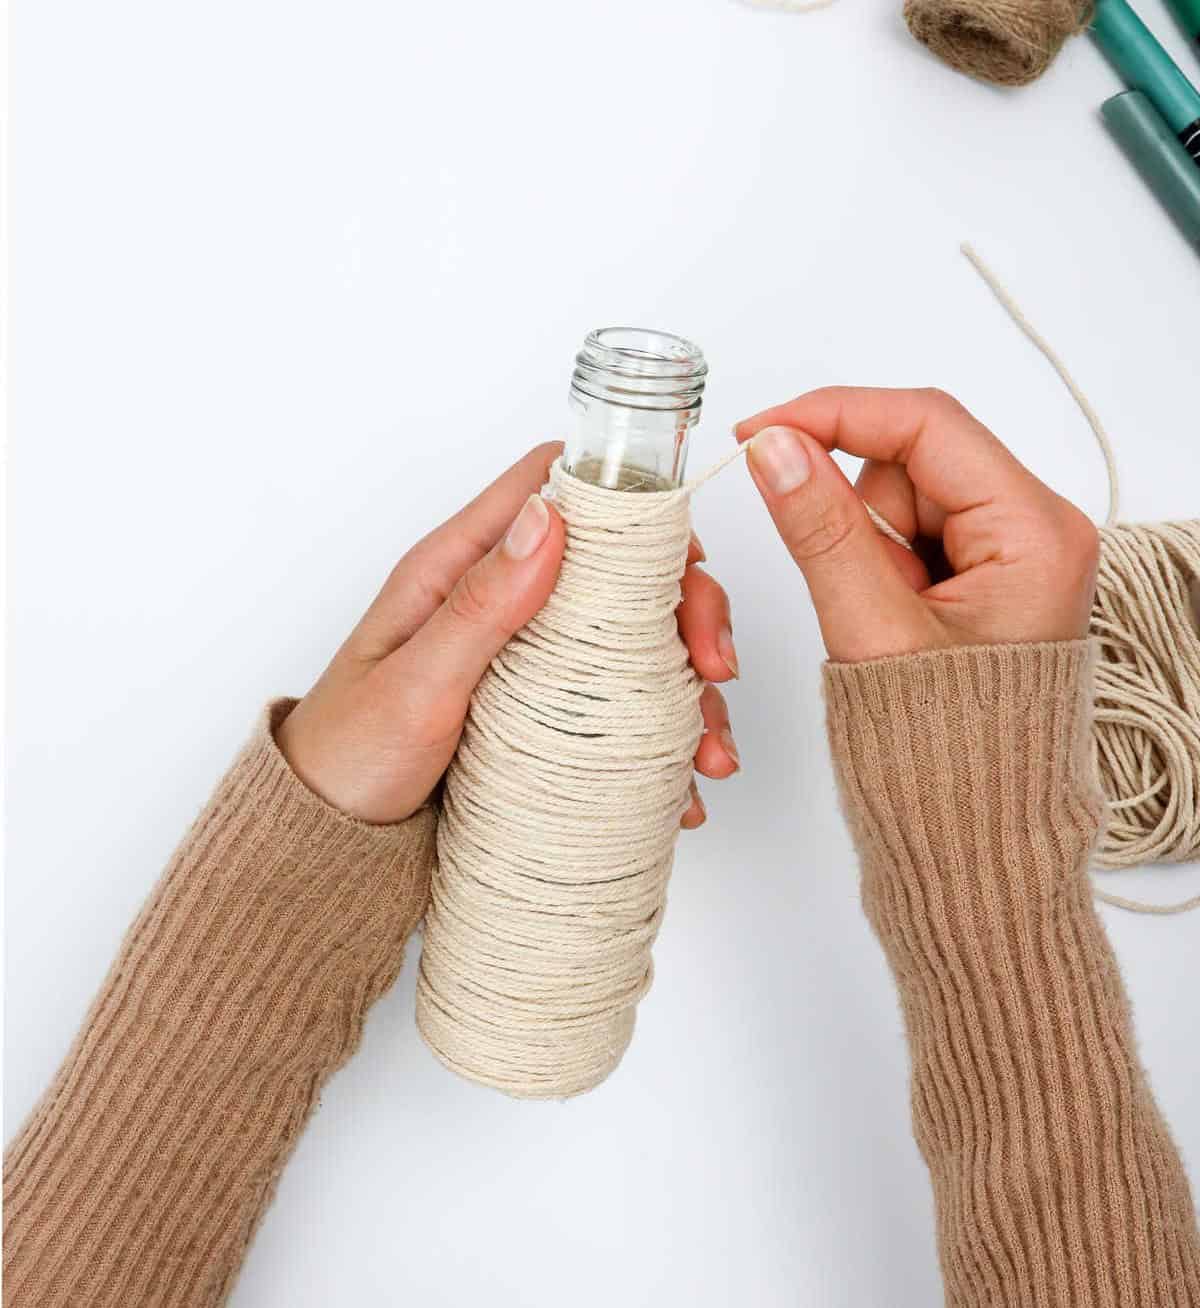

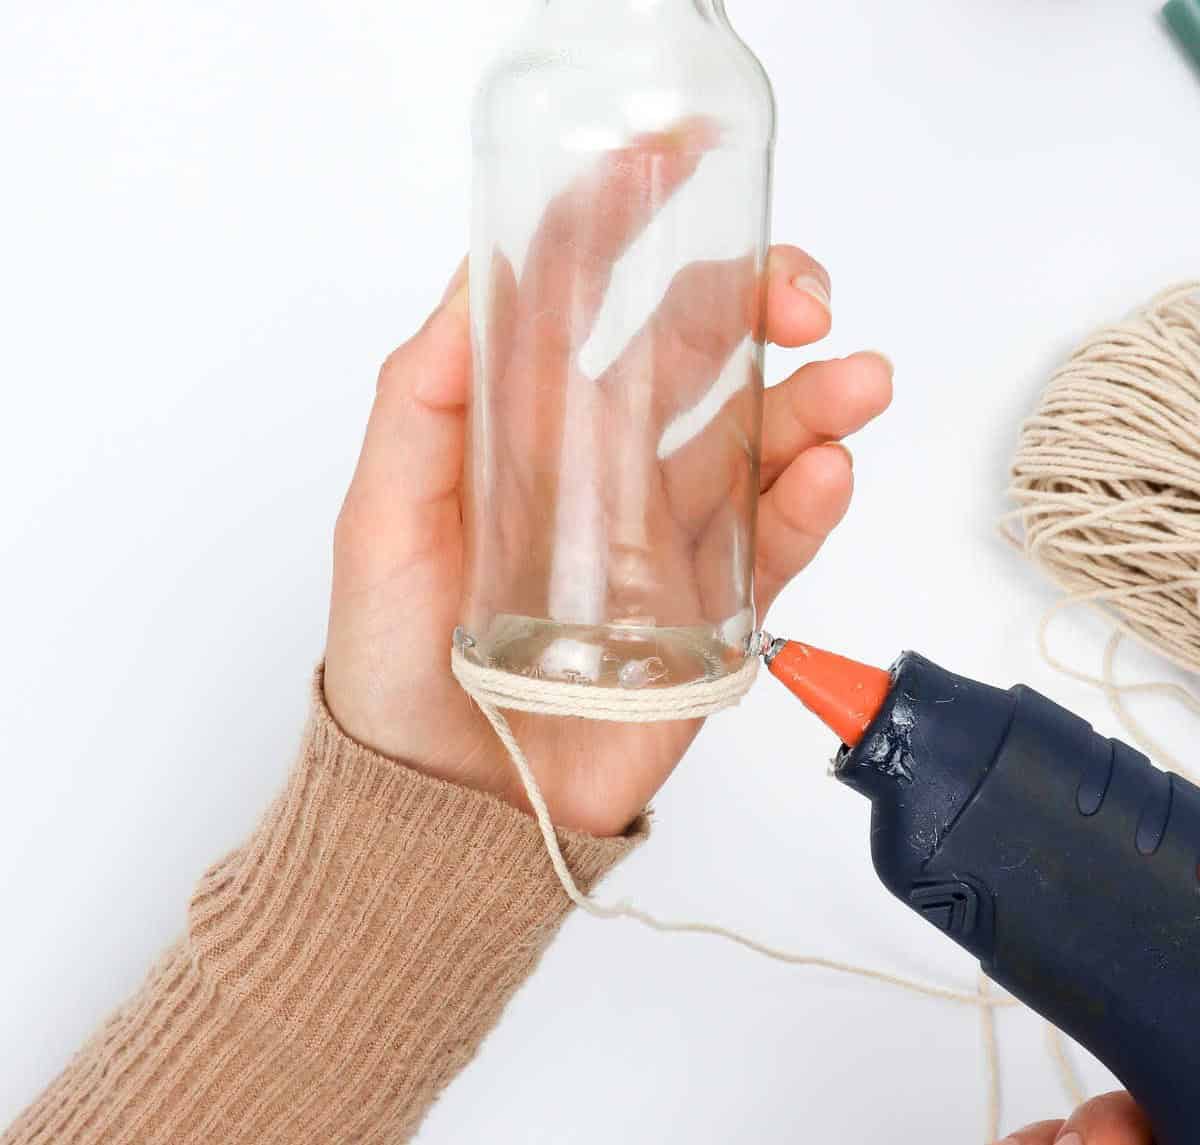
To complete the bottle stopper, first ensure that the cord reaches the top of the bottle, right to the rim. Then, secure the excess string by cutting it off. Next, apply a small amount of hot glue to the end of the string and press it firmly into place. Make sure to blend the new layer seamlessly with the previous one, ensuring a smooth finish.
Step 5
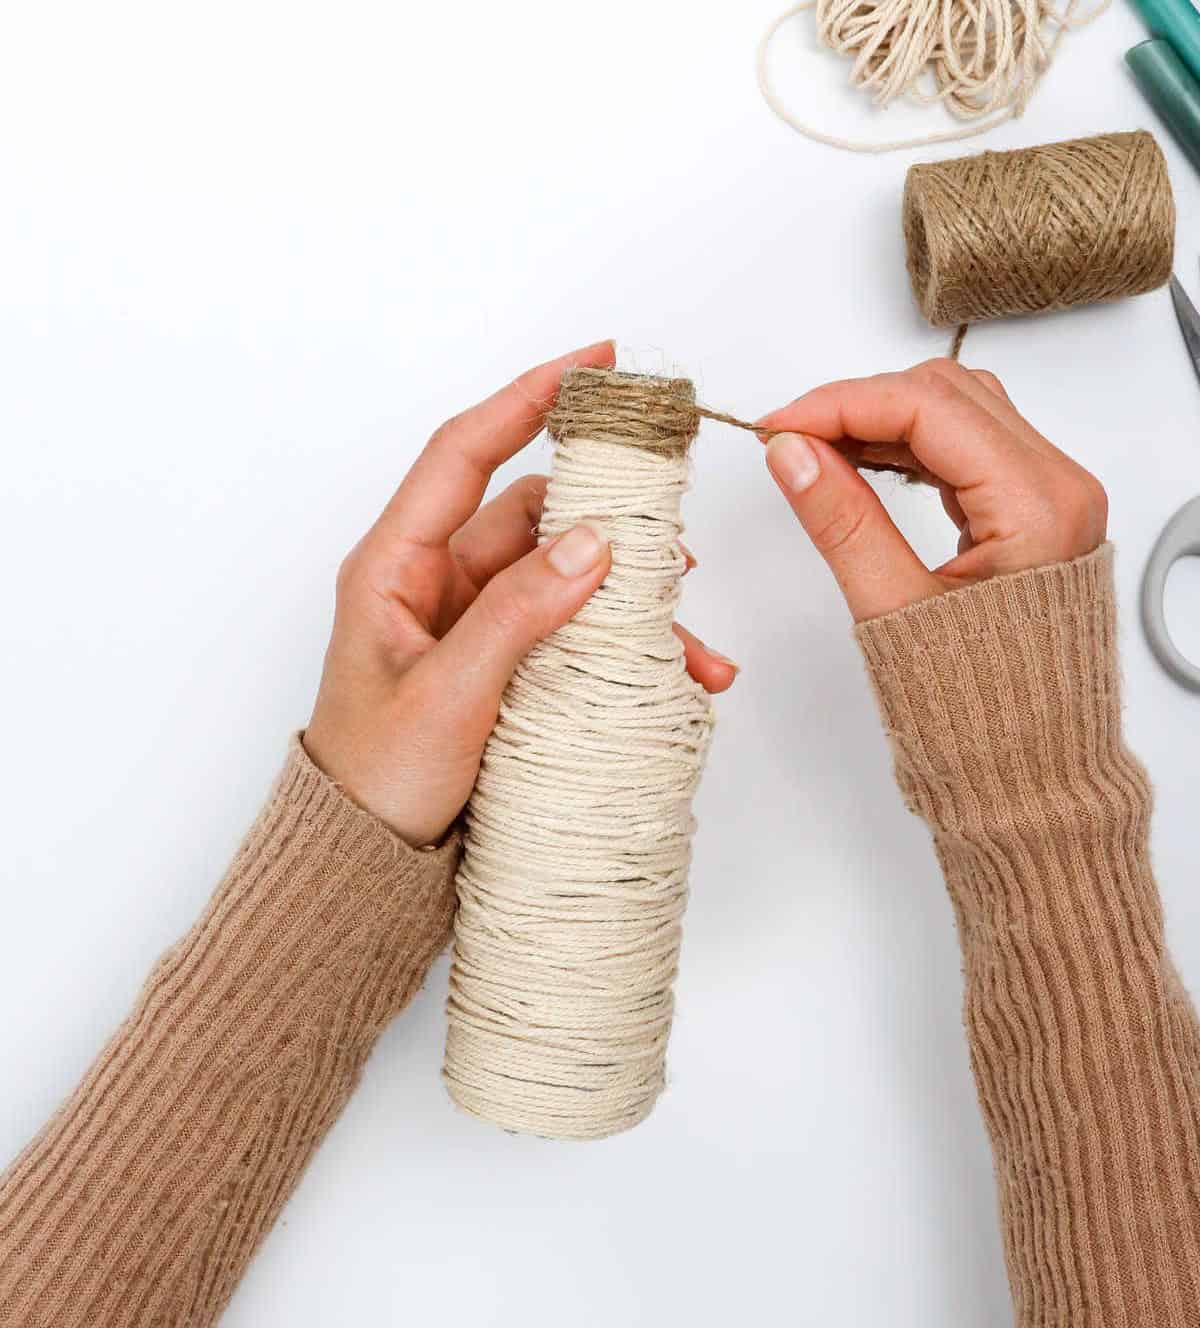
To add a rustic touch, consider replacing the traditional cotton cord with jute twine. Once you’ve made this swap, take your time to carefully wrap the twine around the mouth and rim of the glass bottle, ensuring it’s evenly distributed and securely in place.
Step 6

To create a second bottle with the same unique charm as the first one, simply replicate the process. Take the empty glass bottle and carefully wrap it in a mixture of twine and decorative tape, ensuring that the material is evenly distributed around the vessel. As you work your way around the bottle, adjust the tension and pattern to achieve the desired bohemian-inspired look.
With patience and attention to detail, you’ll be able to create two beautiful bottles with distinctive textures and visual interest, perfect for adding a touch of free-spirited elegance to any room or event.
Step 7

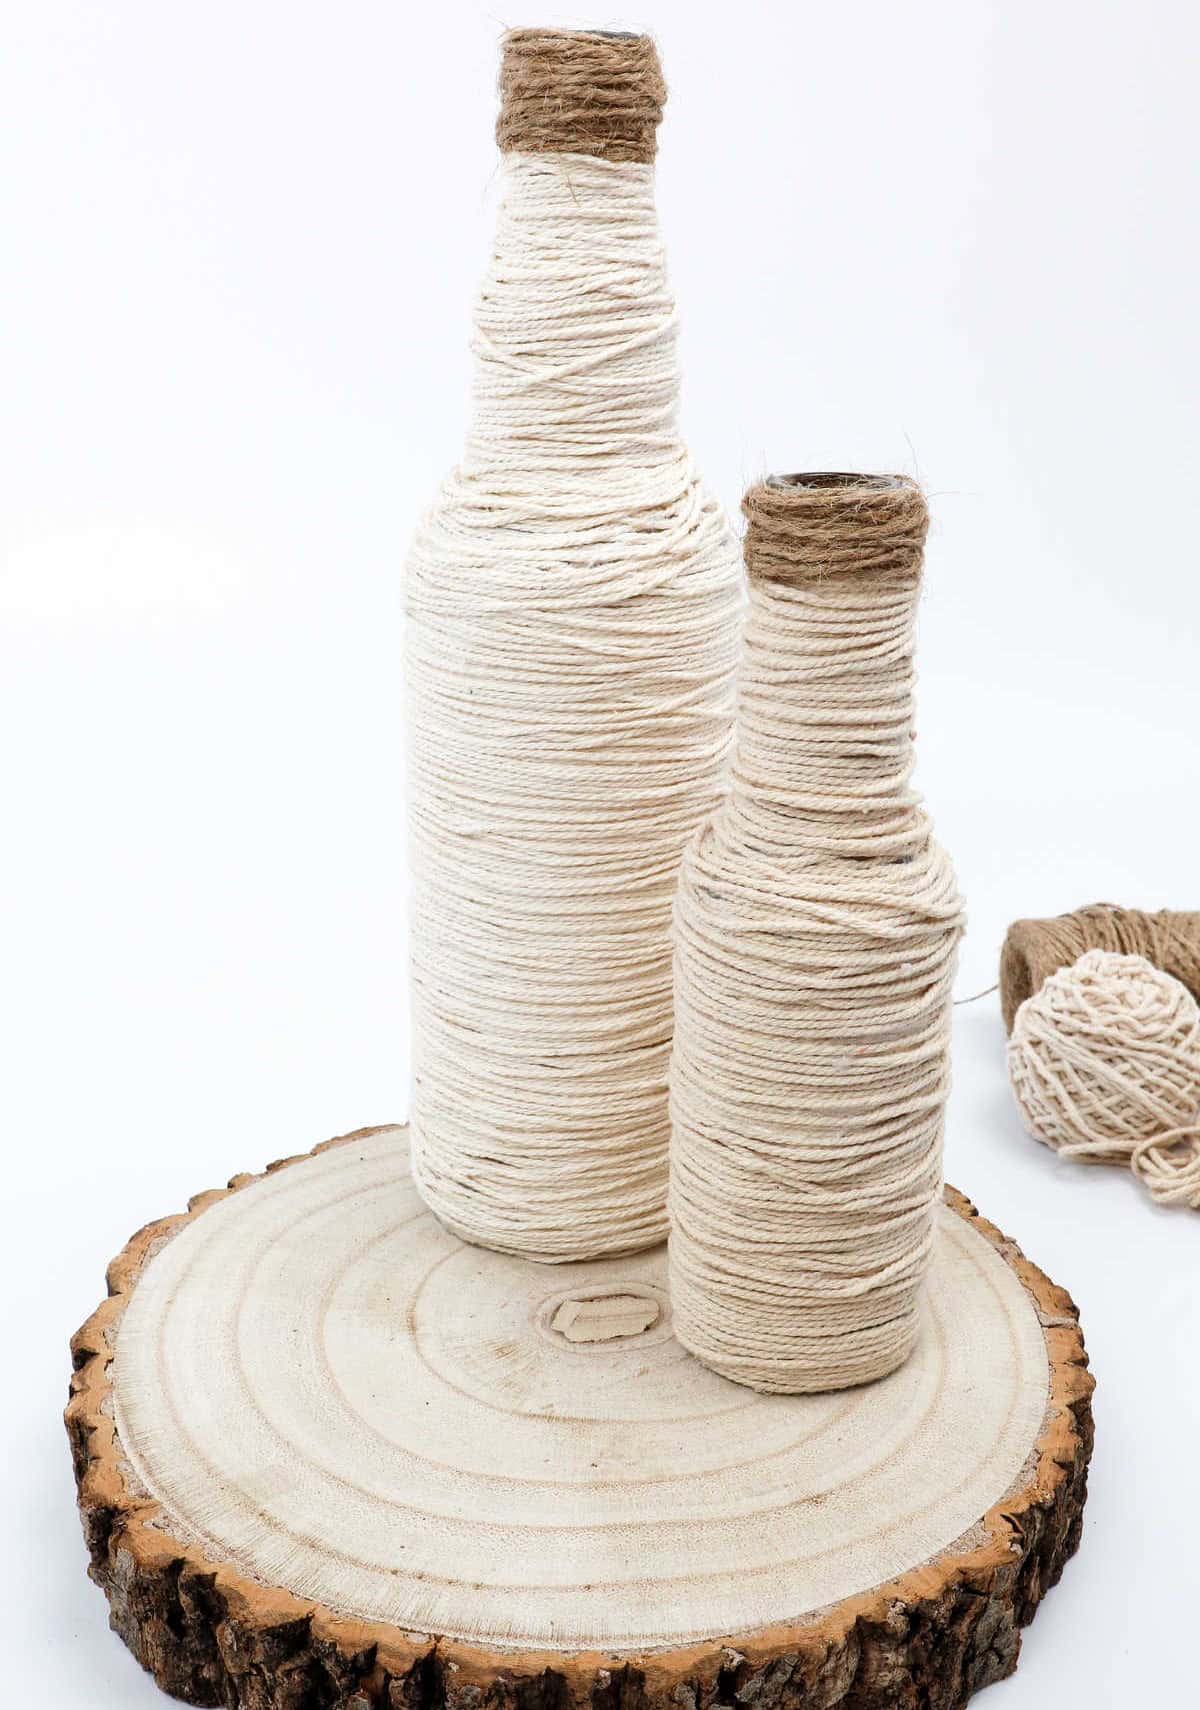
To take your centrepiece to the next level, don’t just stop at adding a few decorative elements. You need to create a visually appealing display that draws the eye. Start by placing your wooden slice base as the foundation of your design. Then, strategically arrange the bottles on top of the stand, considering balance and visual harmony. For an extra touch, you can use hot glue to secure the bottom of each glass bottle to the base, ensuring they don’t topple over.
Repeat this process for each bottle, building a unique and captivating display that will be the focal point of any room.
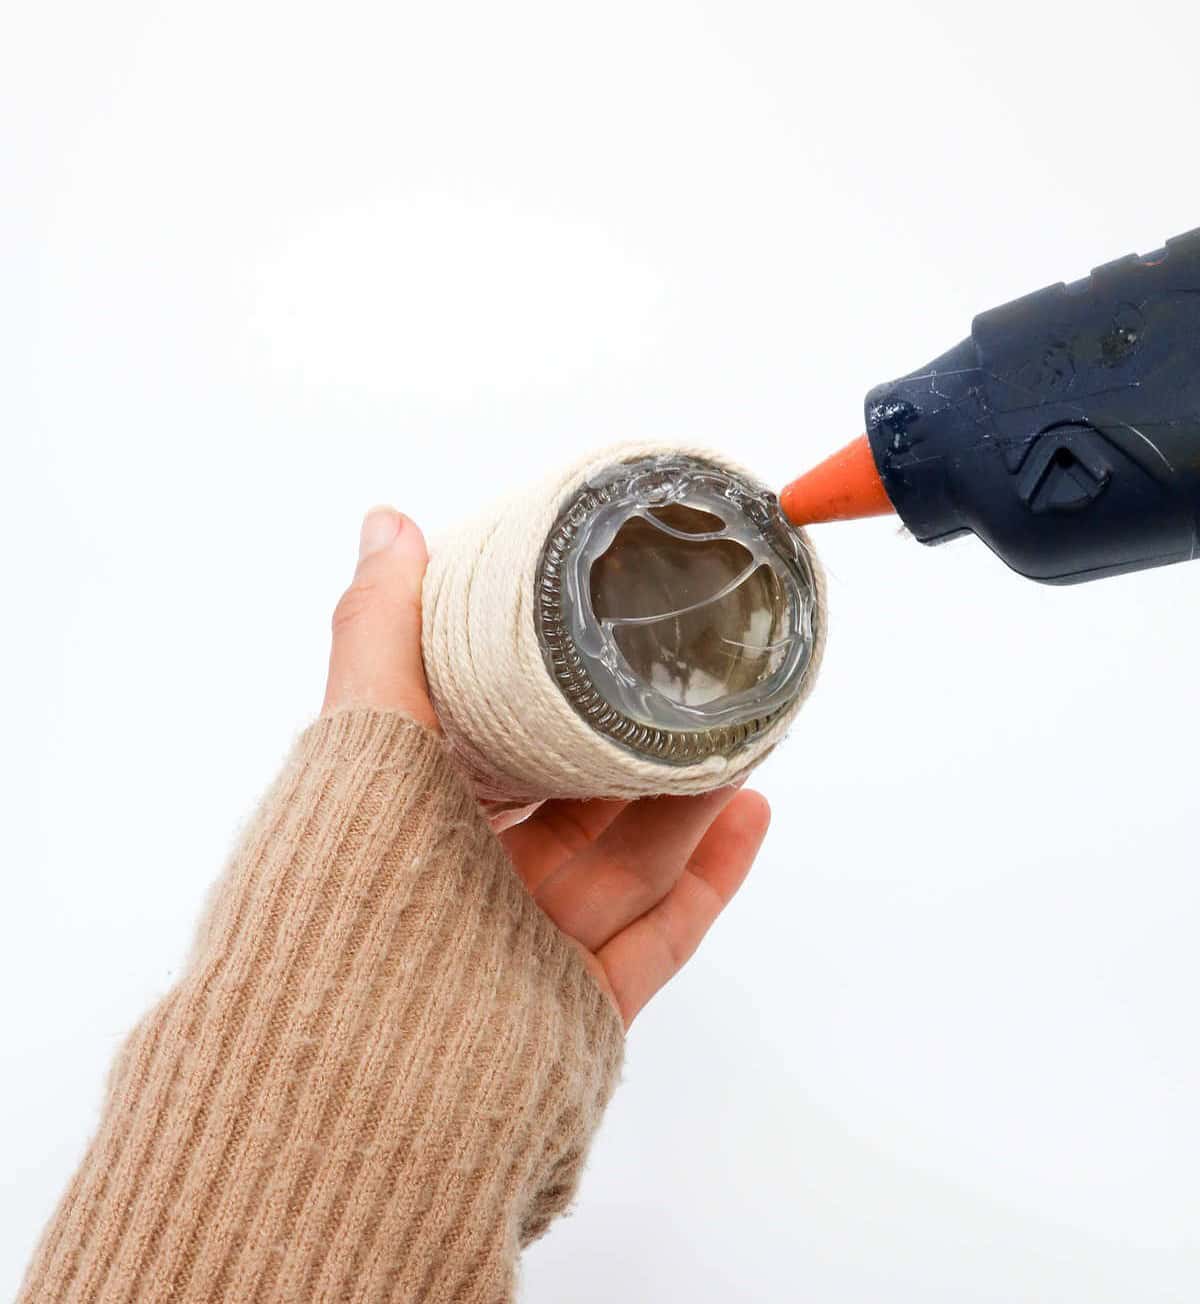
Step 8

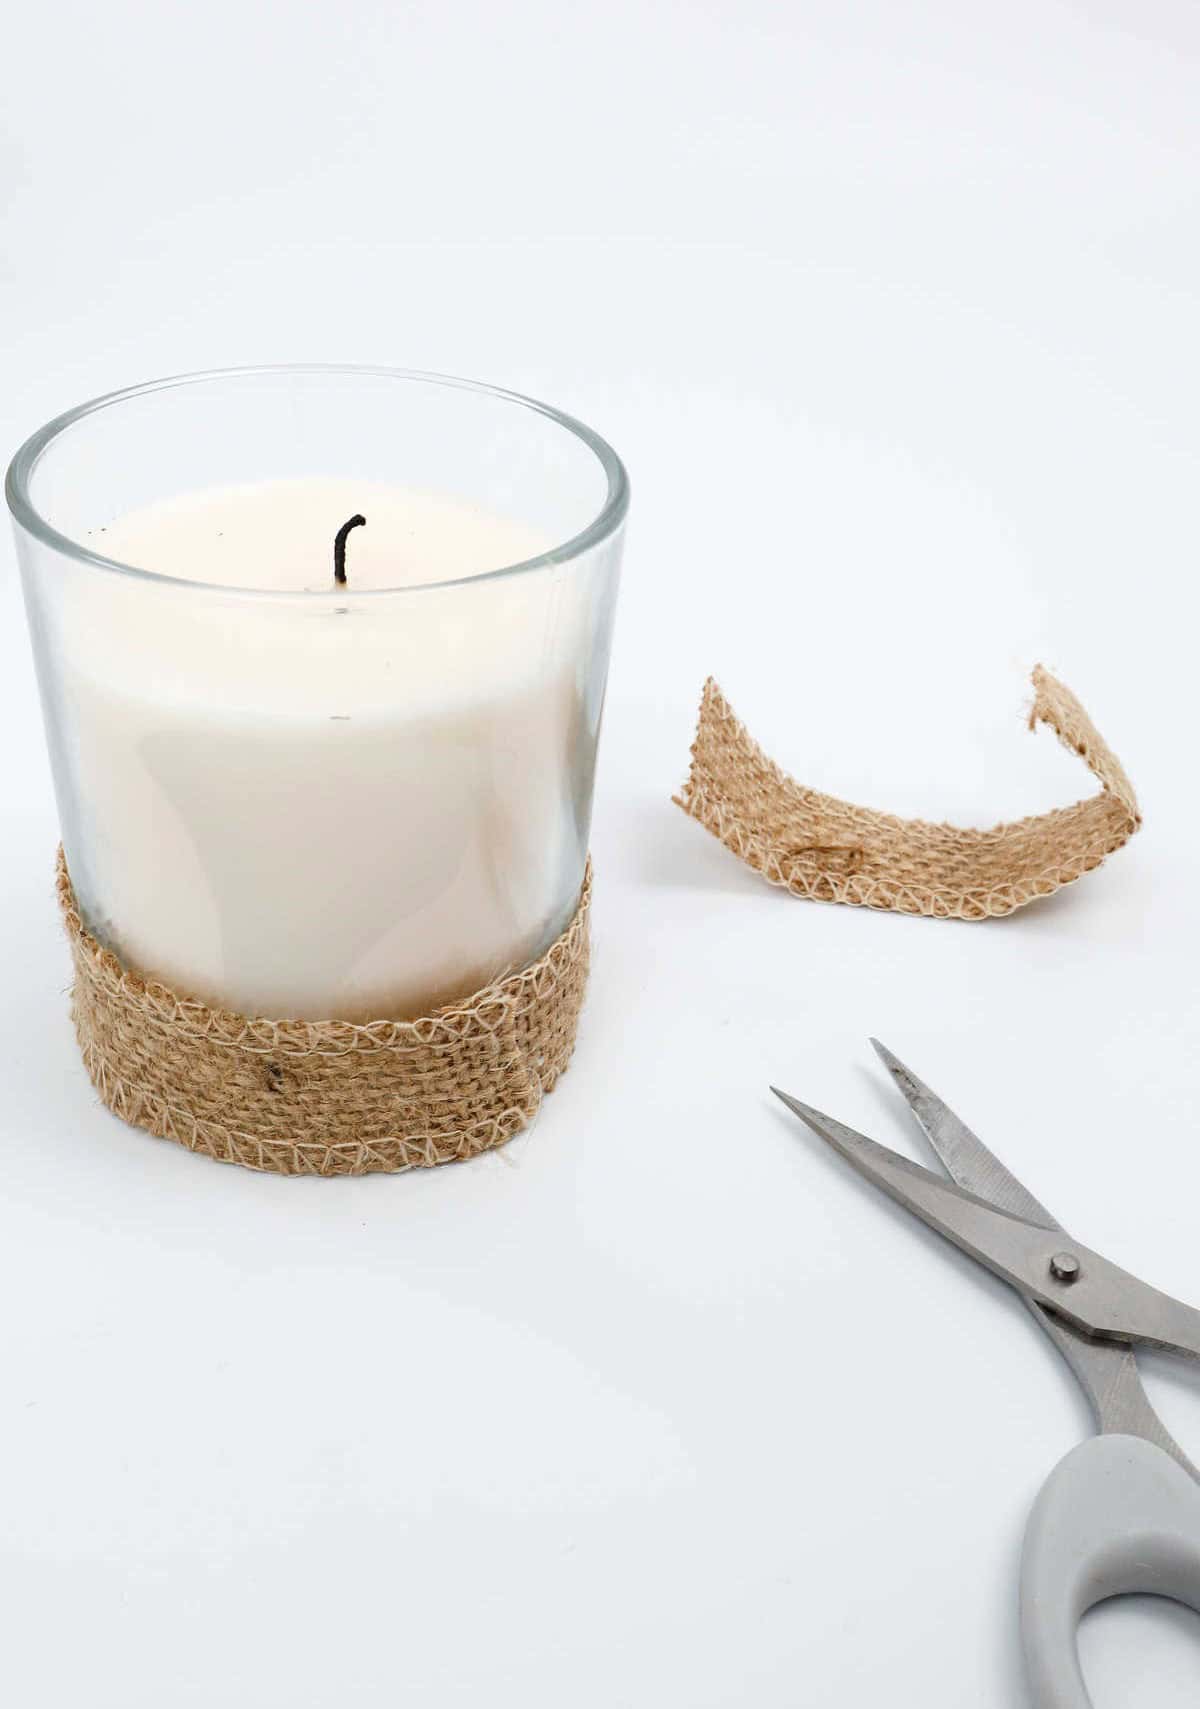

To add a rustic touch to your centerpiece, start by preparing a simple glass jar candle. Apply a small amount of hot glue around the base of the candle, leaving enough room for the ribbon to cover it. Next, wrap jute ribbon around the glue, securing it in place. Once the glue has dried and the ribbon is tied off, you can attach the candle to the wooden base beside the bottles. With your candle now in place, you may be wondering what’s missing from your design.
Fear not, as we’re about to complete our centerpiece by adding number cards to the table.
Step 9
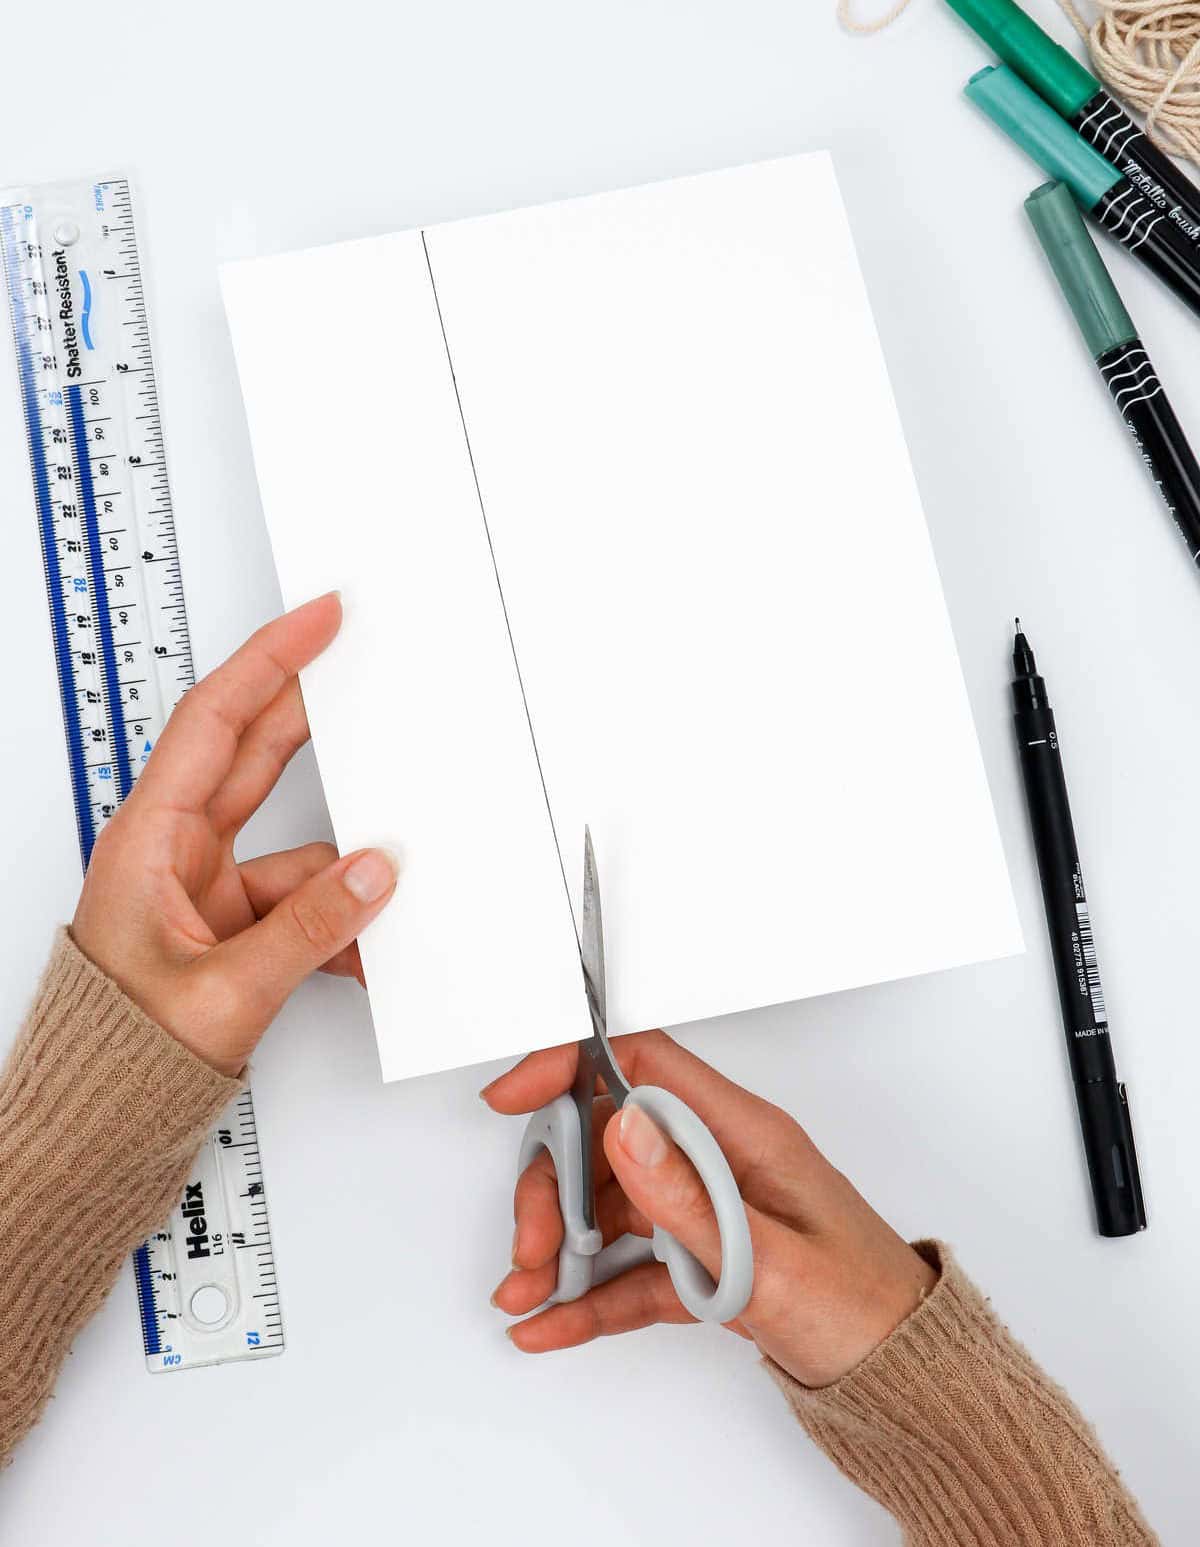
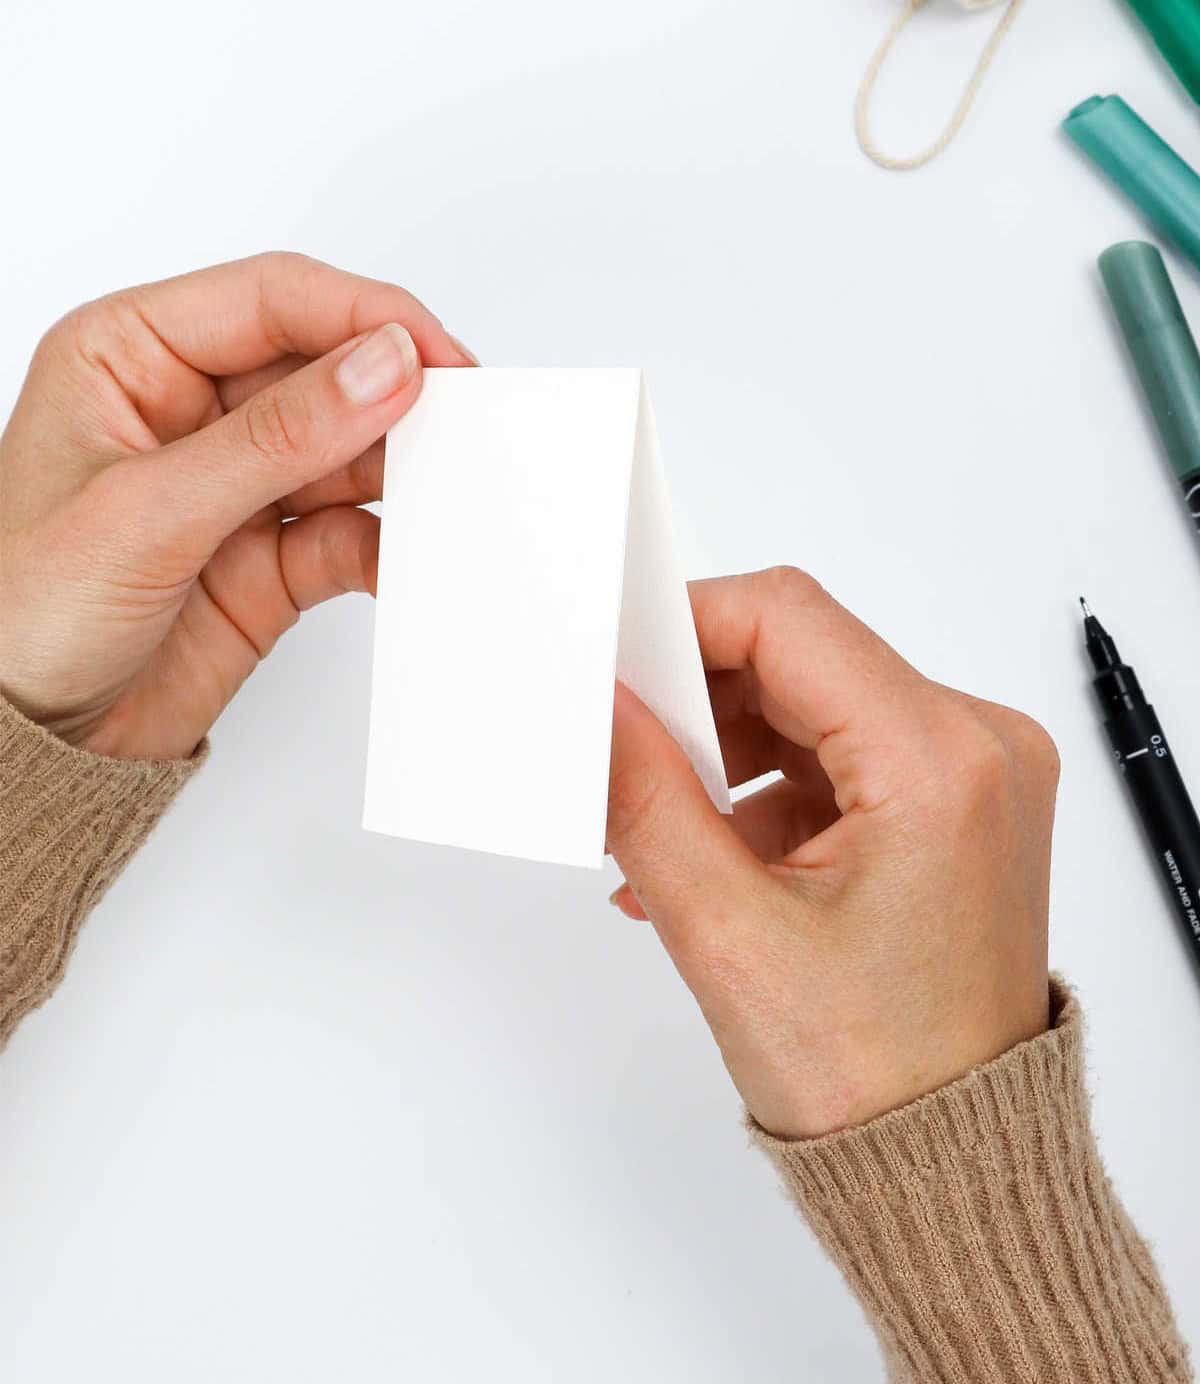
To craft the perfect place setting, start by cutting a 2-inch wide and 7-inch long rectangle from thick cream- or white-colored card stock. This will serve as the foundation for your unique placard design. Once you have your strip ready, fold it in half to create a compact, symmetrical shape reminiscent of traditional place cards.
Step 10
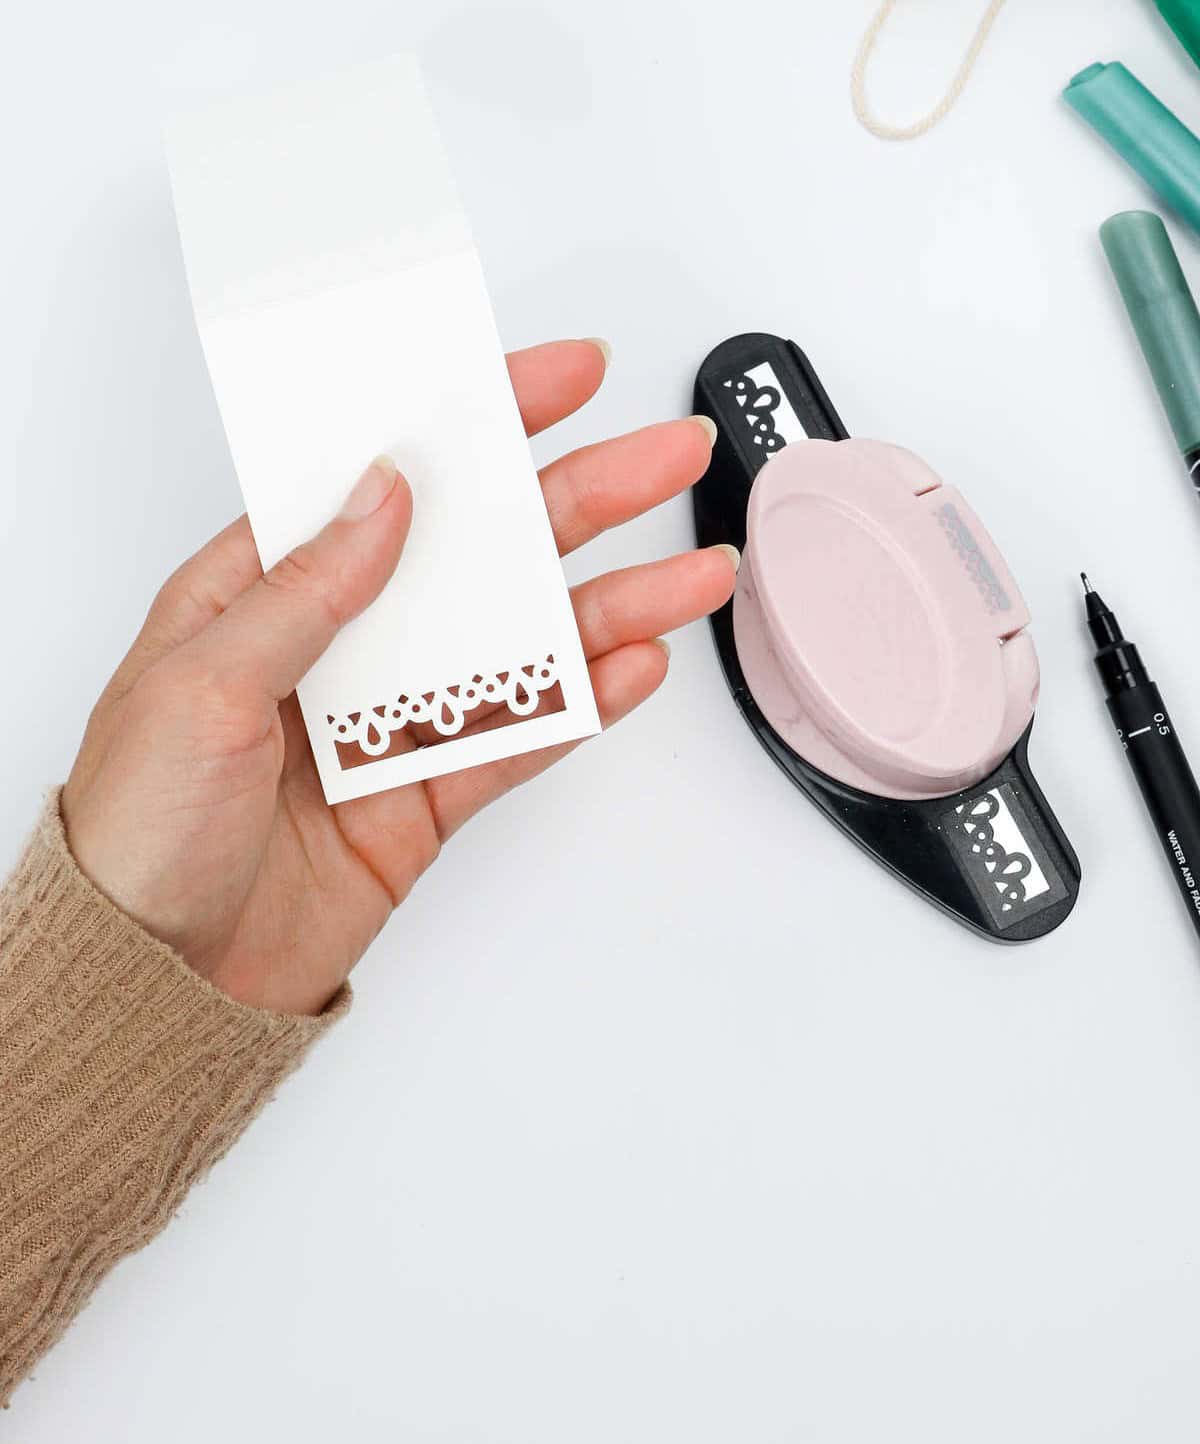
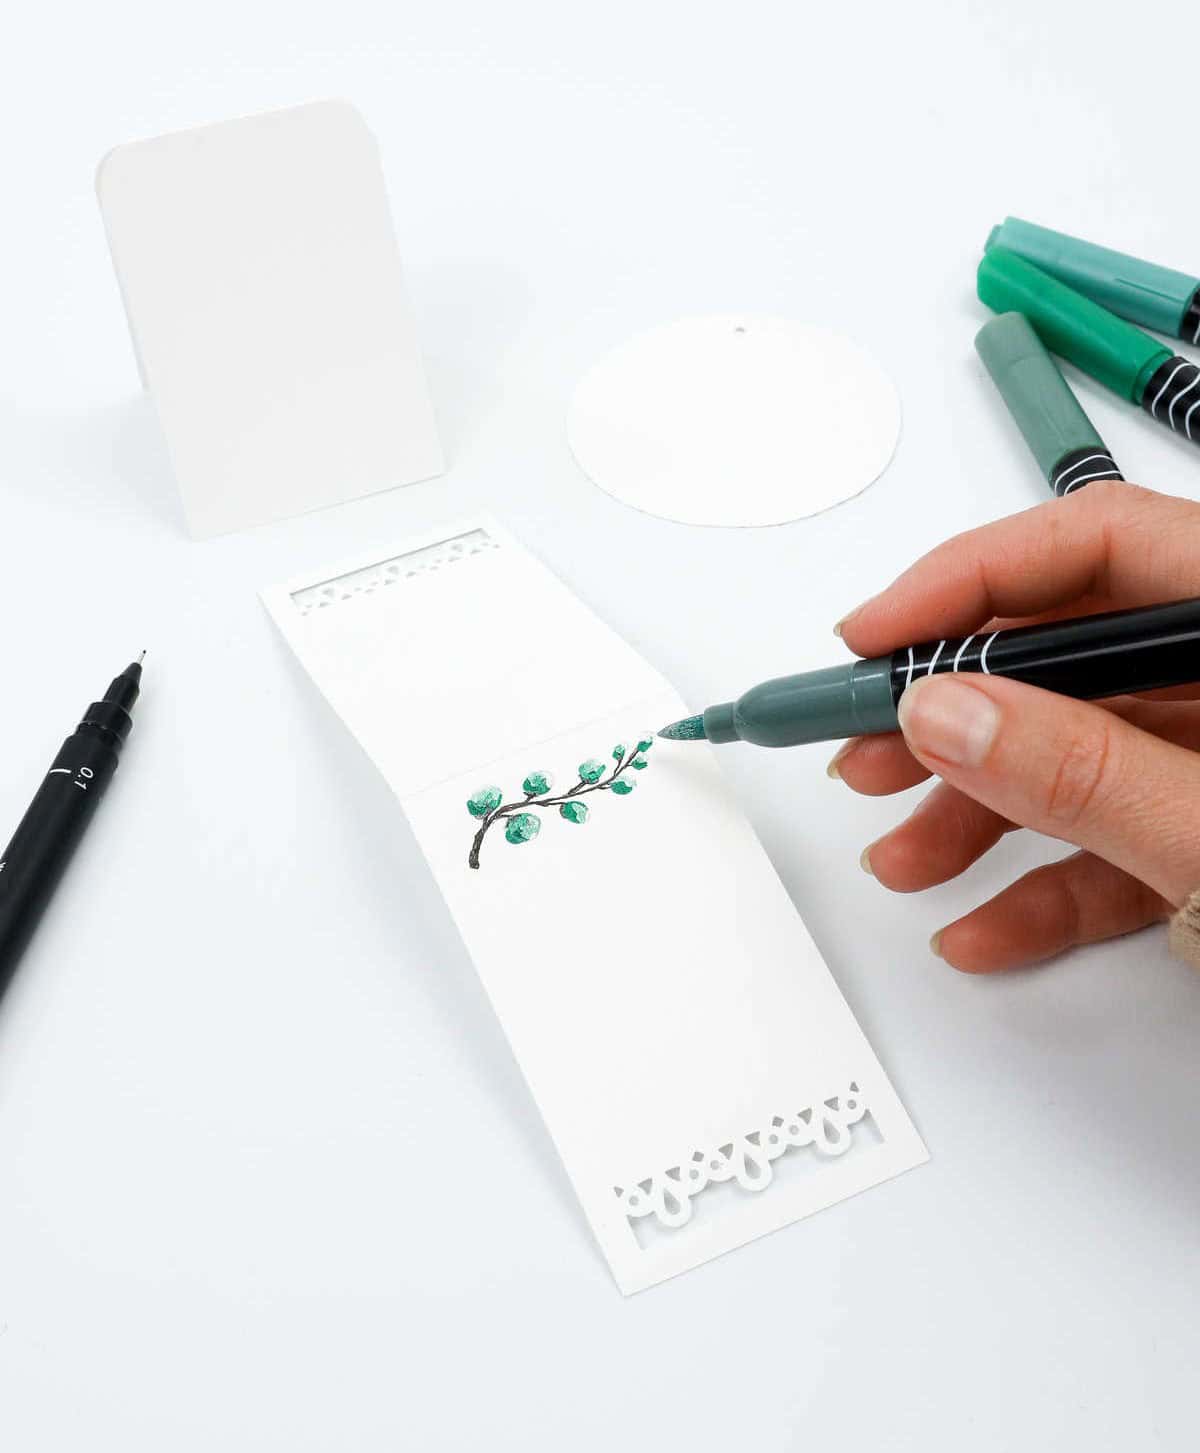
Feel free to unleash your creativity and decorate your card in whatever style suits your taste. To add some visual interest, consider using a decorative border punch hole to create intricate strips or filigree patterns. Alternatively, you can also get artistic and draw on the cards themselves, if you’re confident in your drawing skills.
Step 11
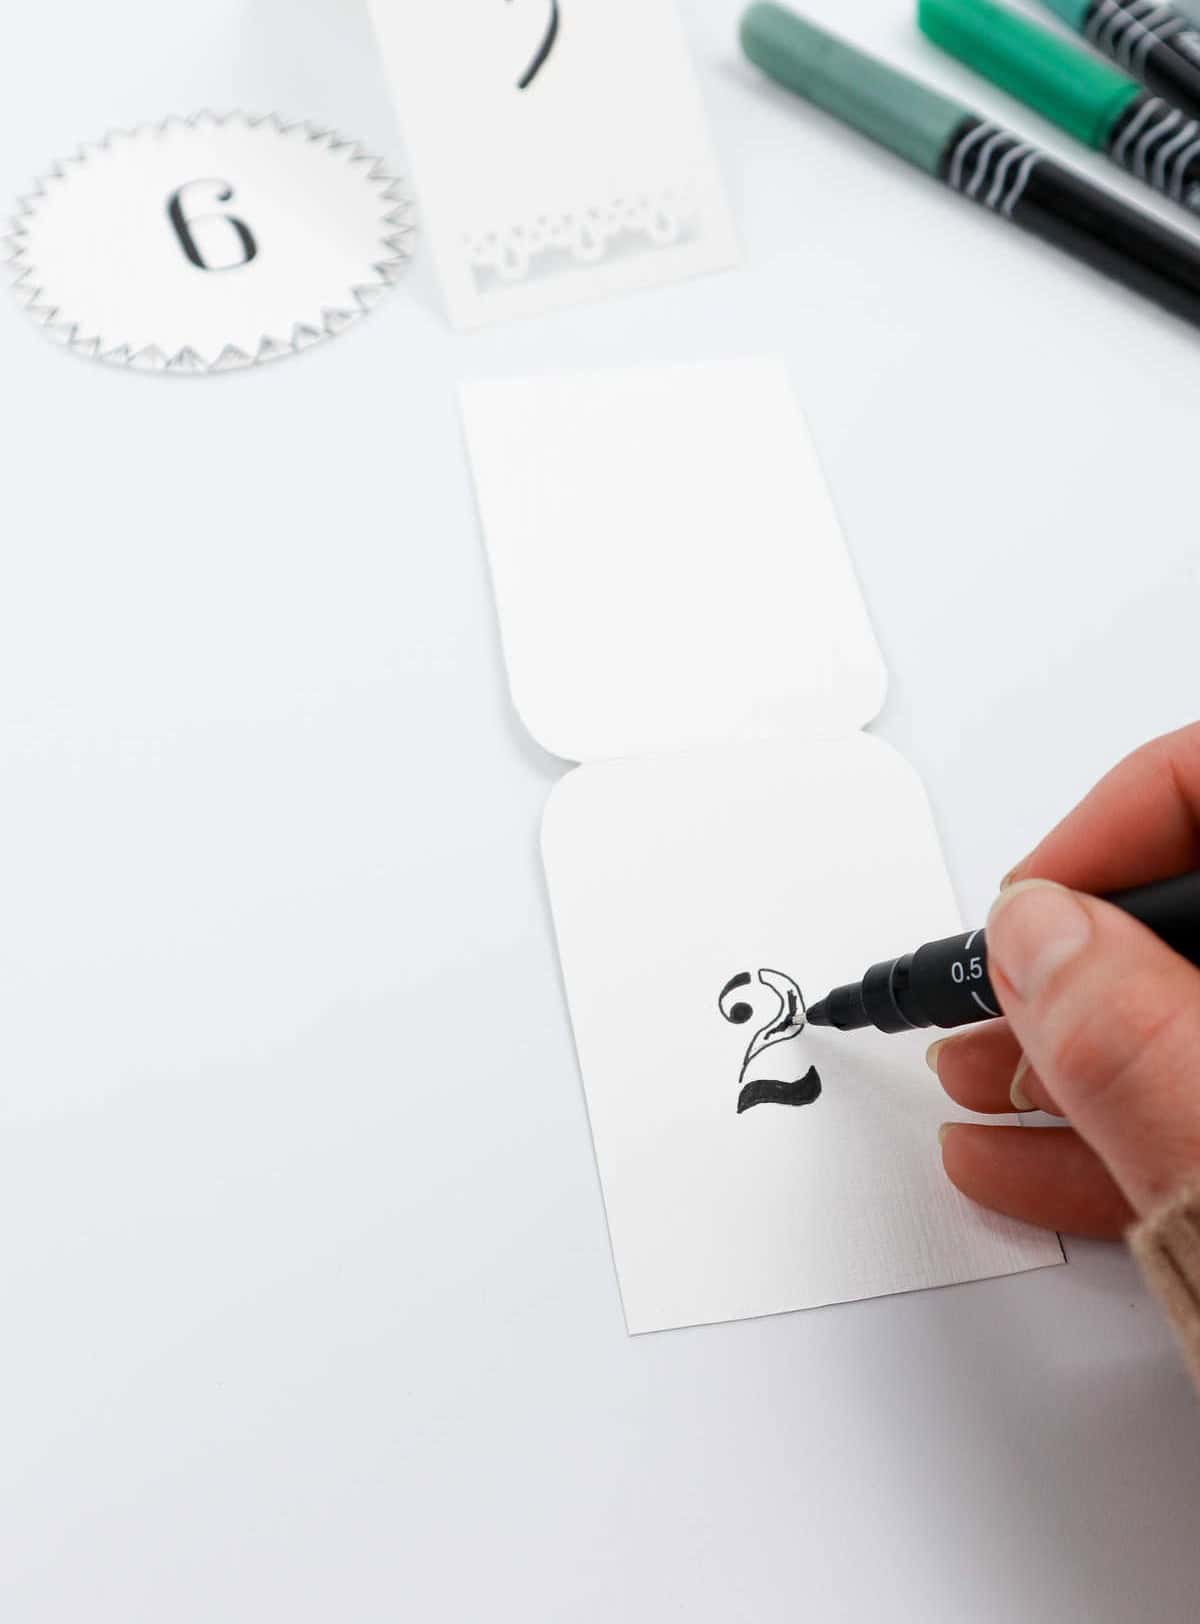
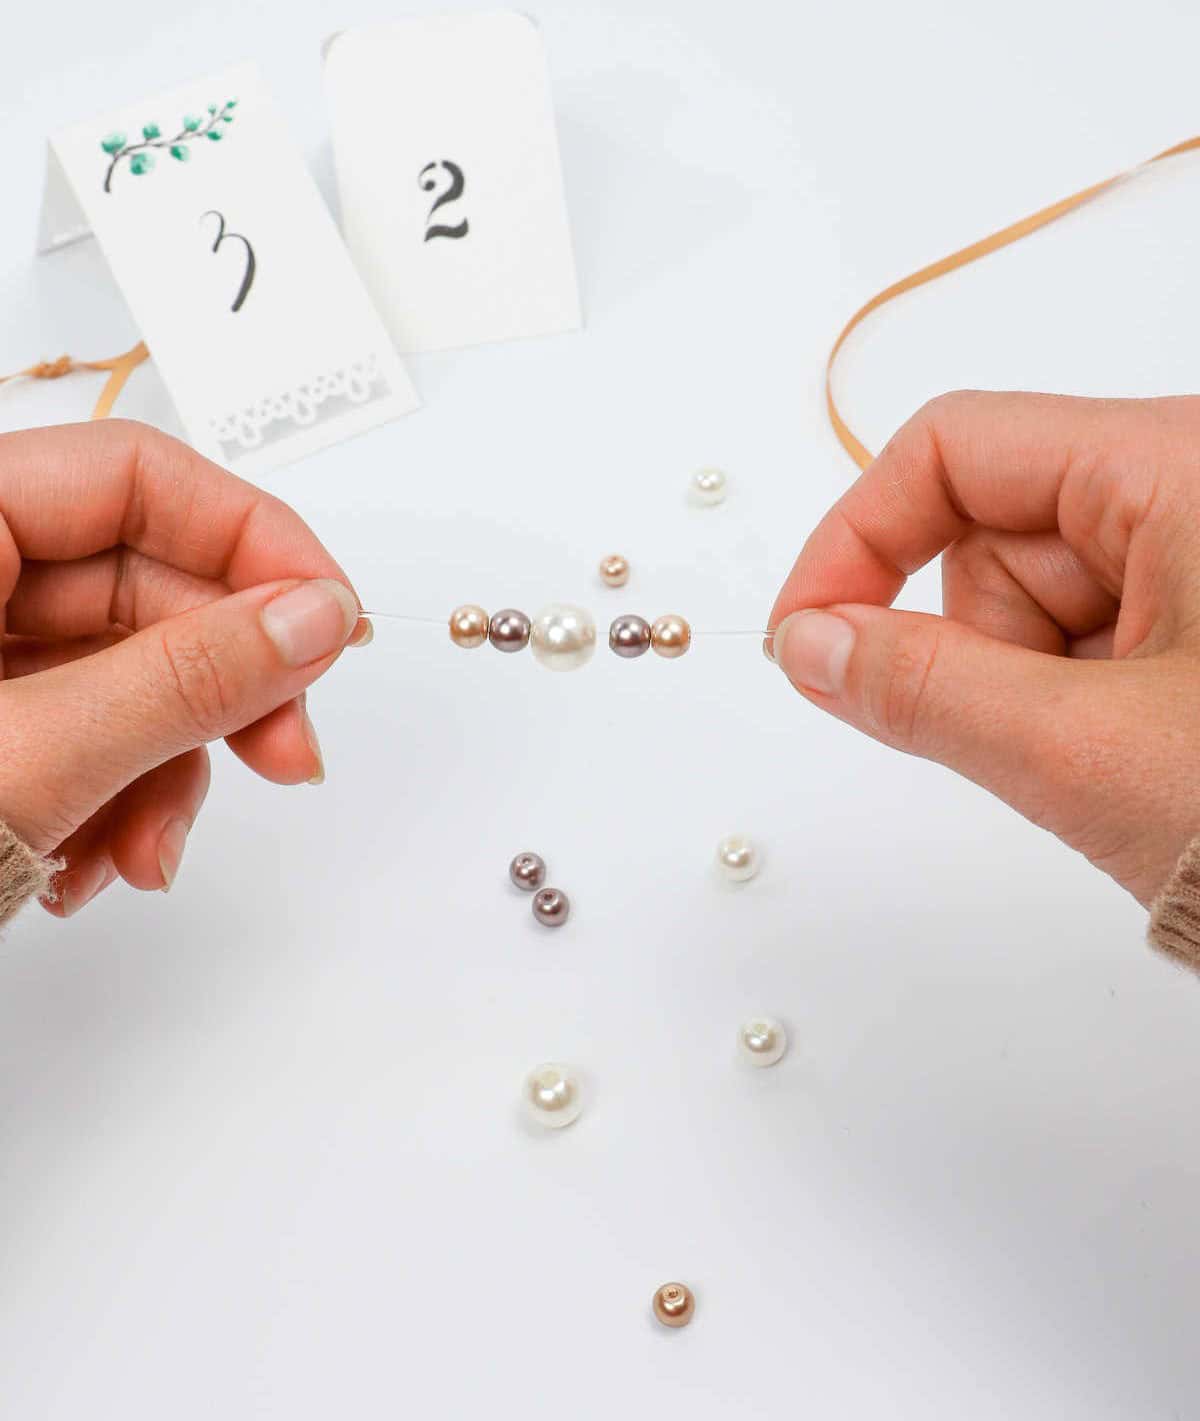
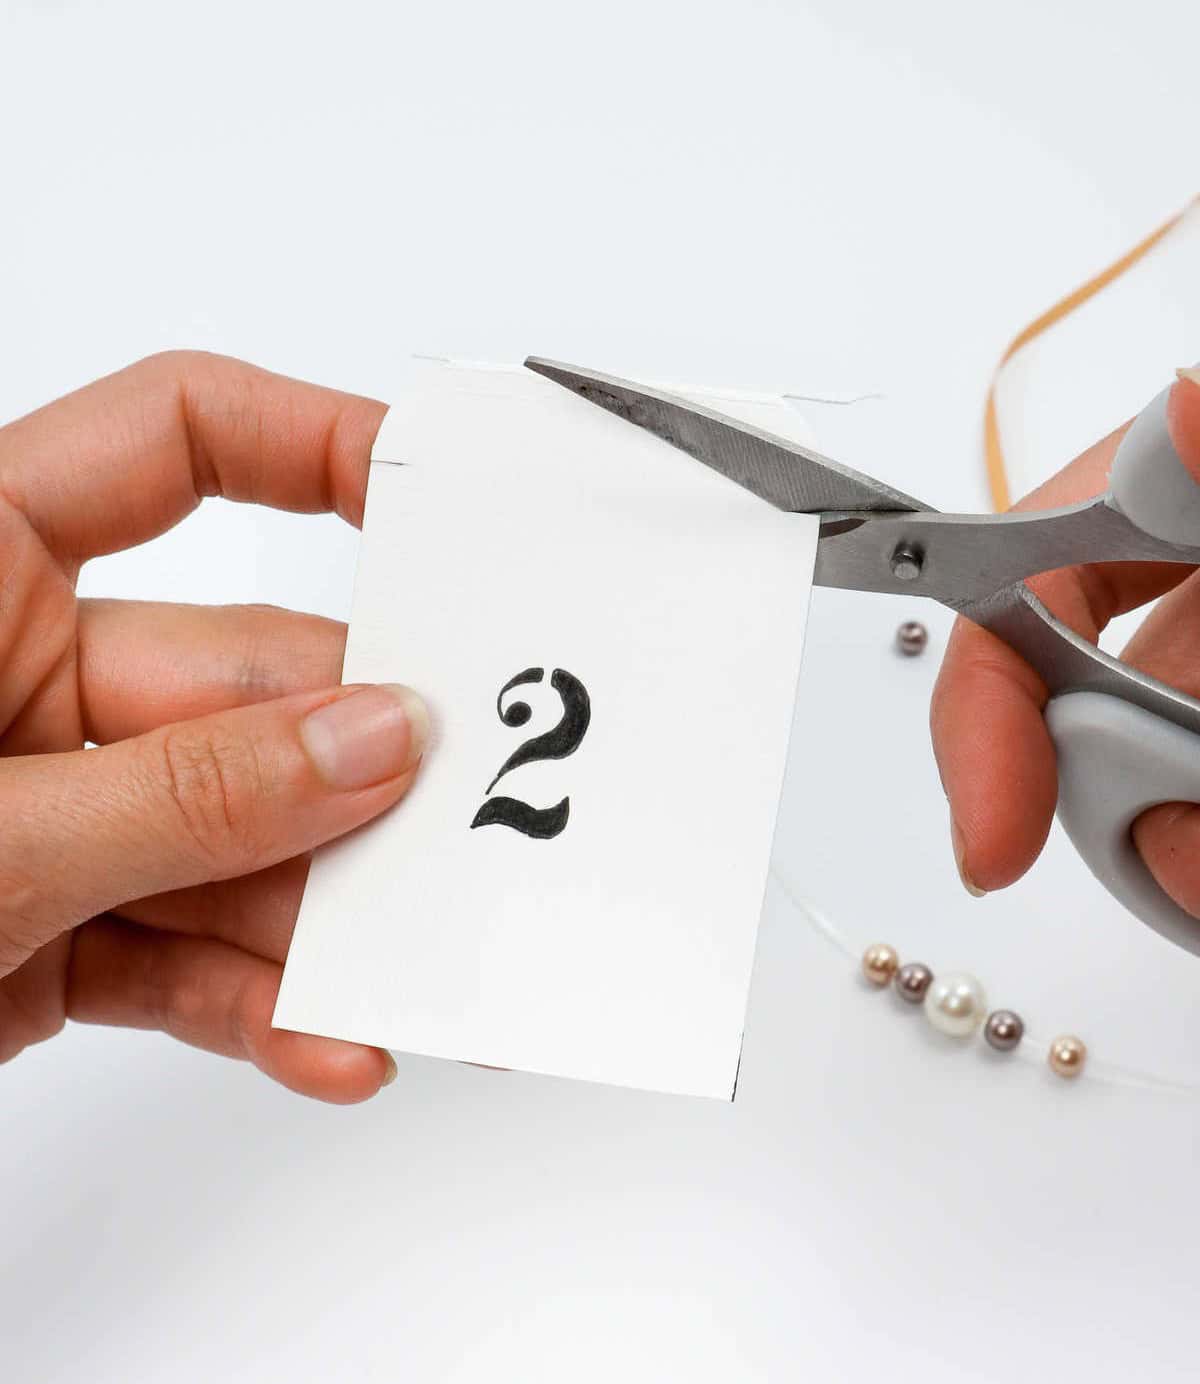

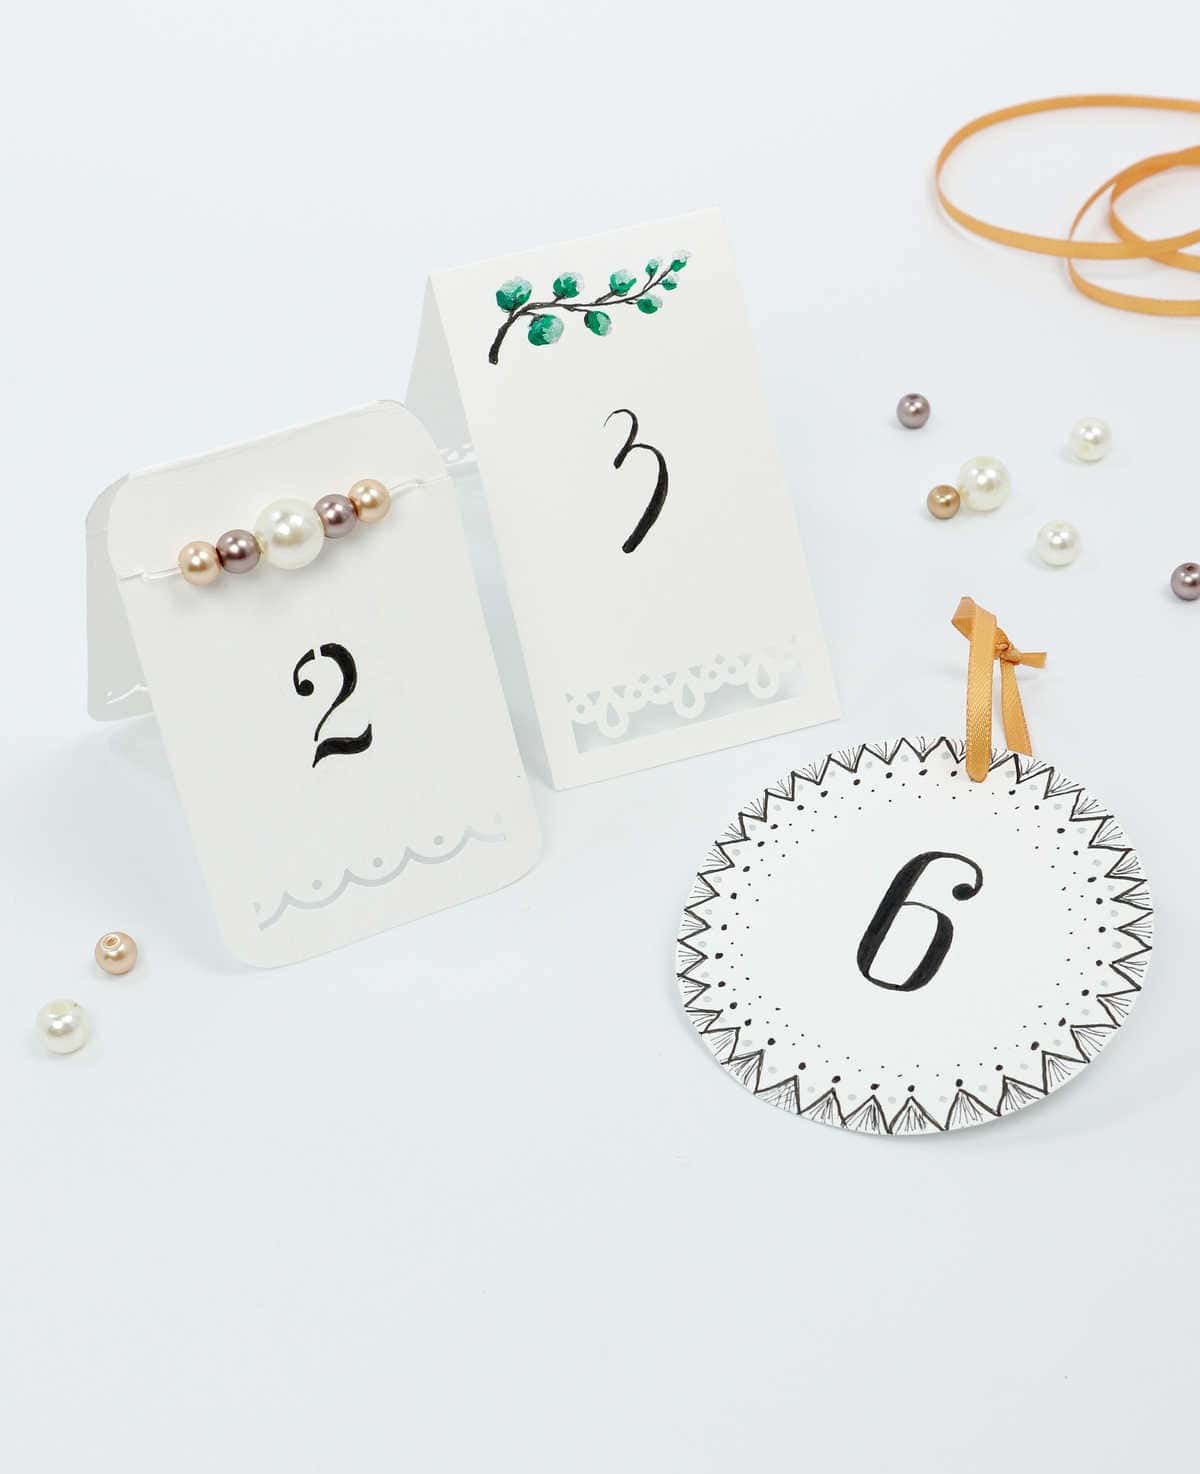
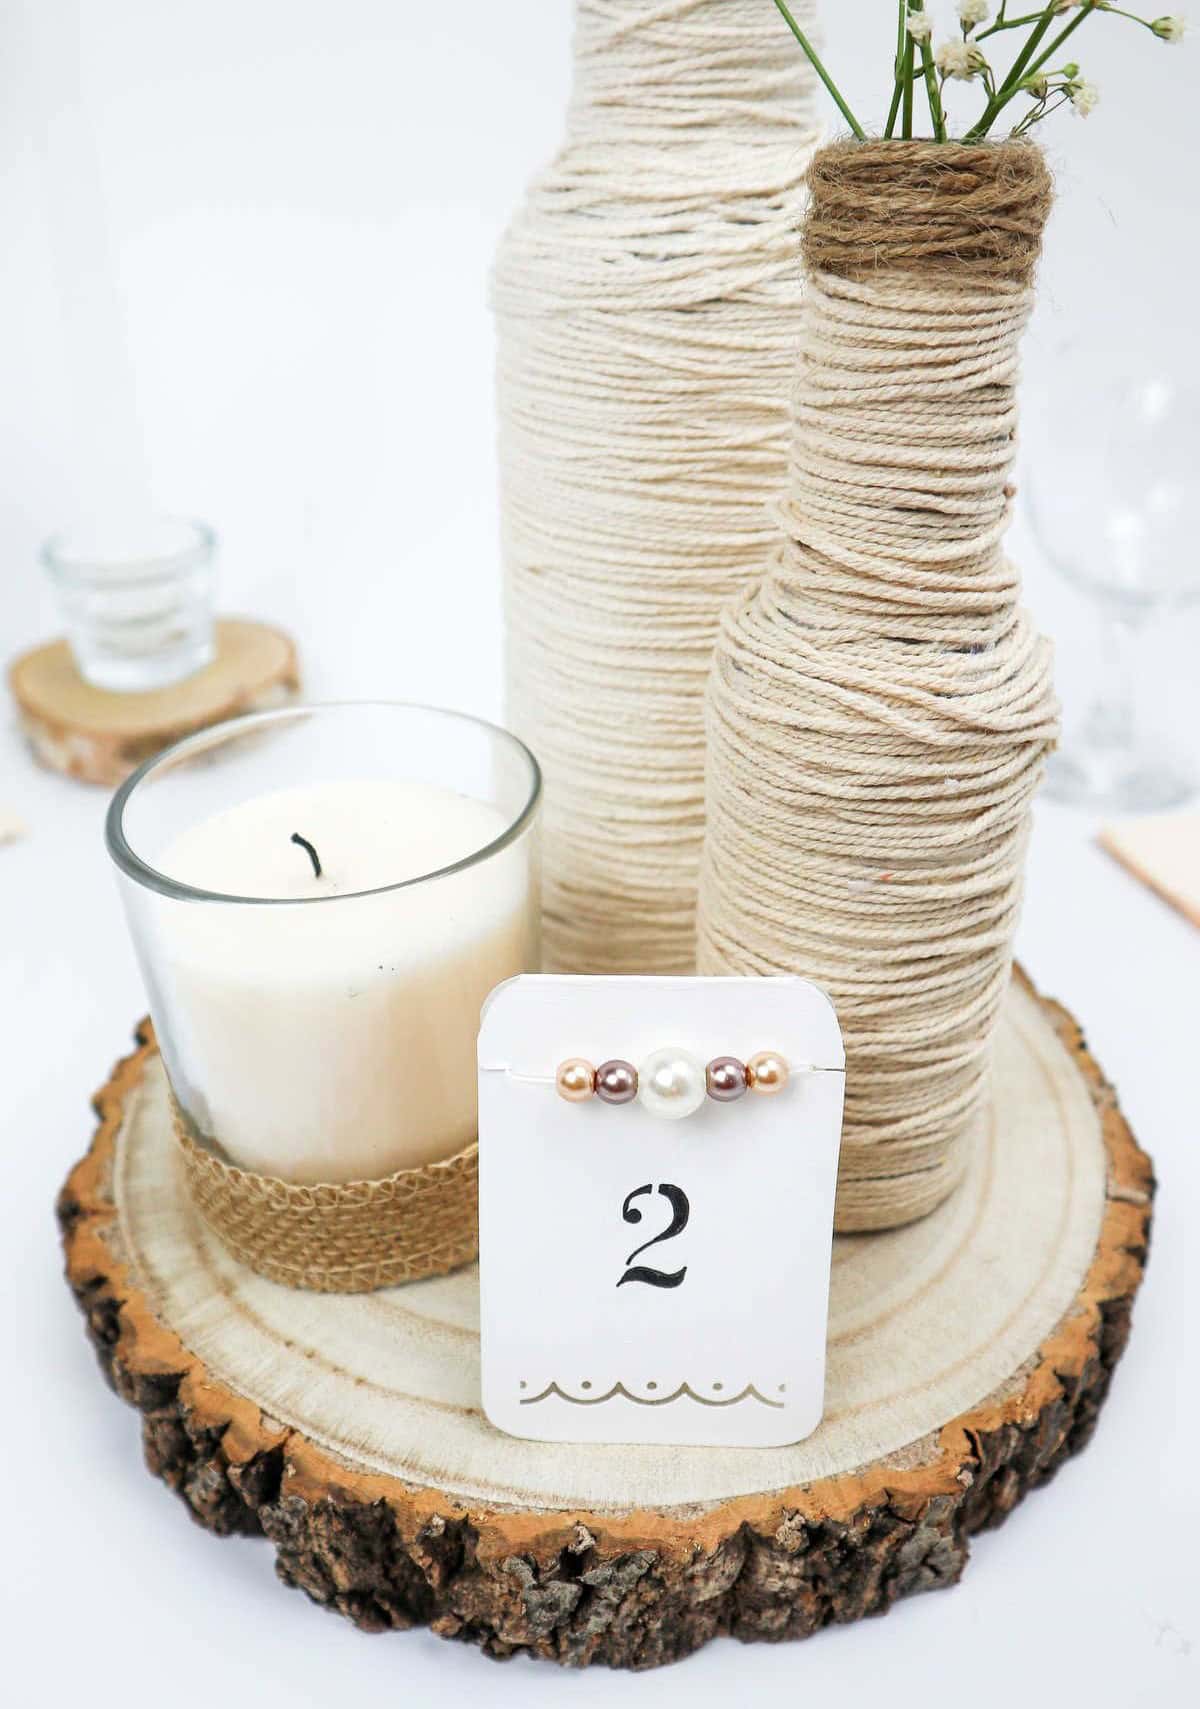
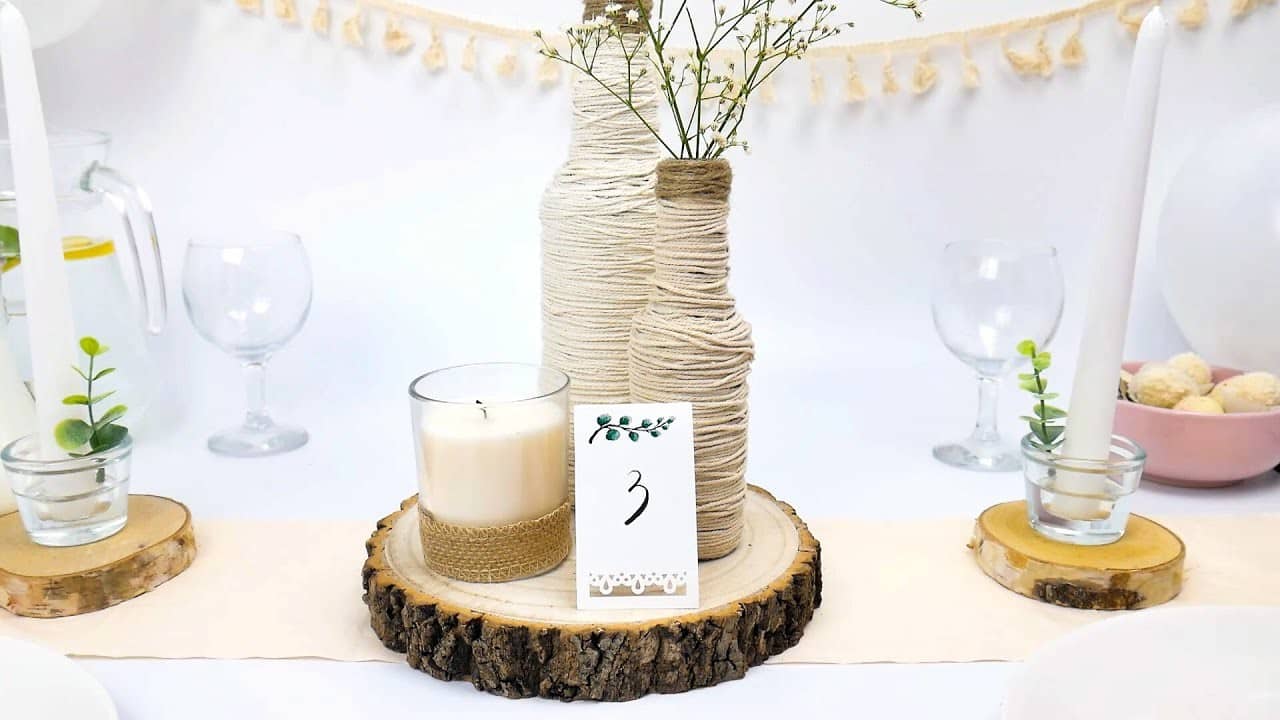
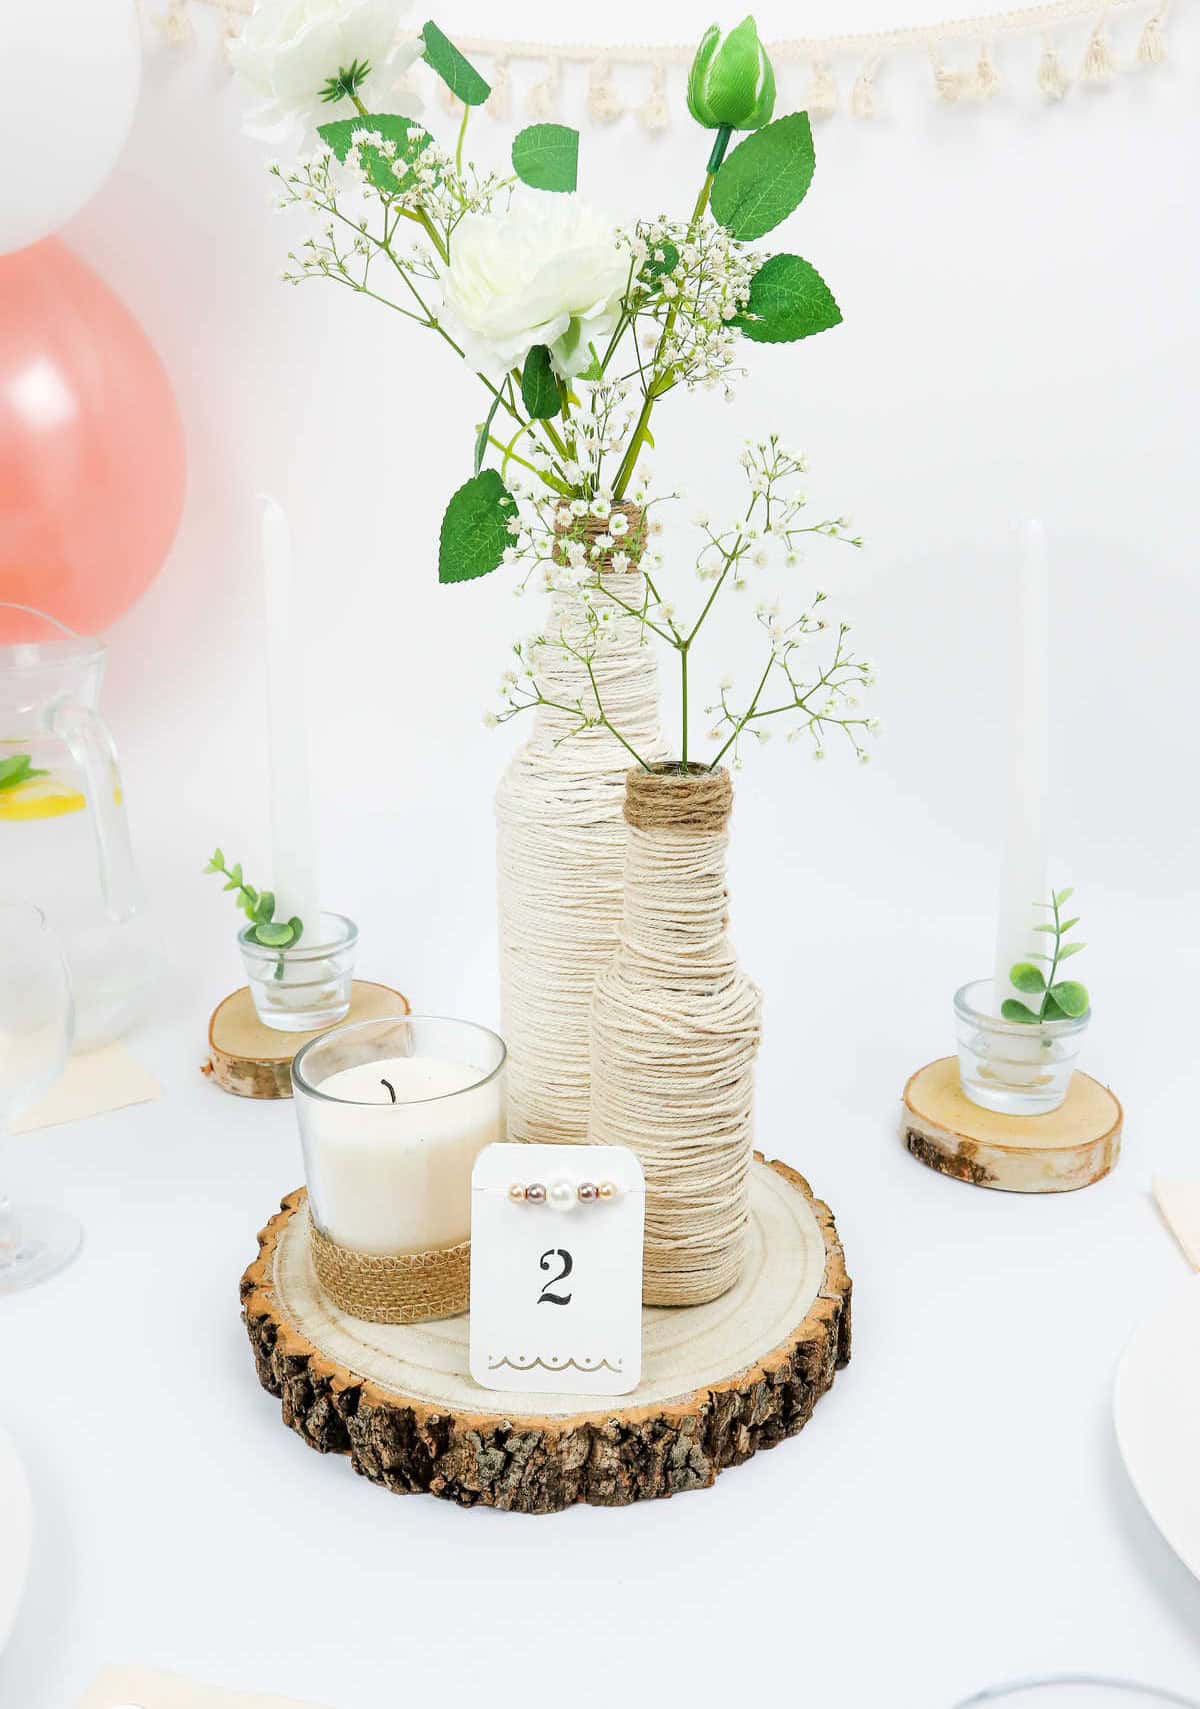
To complete the process, you’ll need to number the cards you’ve created. While there are various ways to achieve this, you can find inspiration by looking at the images provided! For this specific card, simply stencil a bold font and fill it in with a marker. Next, add some embellishments by stringing pearly beads onto the card. To do this, make small incisions on either side of the top of the card and thread the beads through the openings.
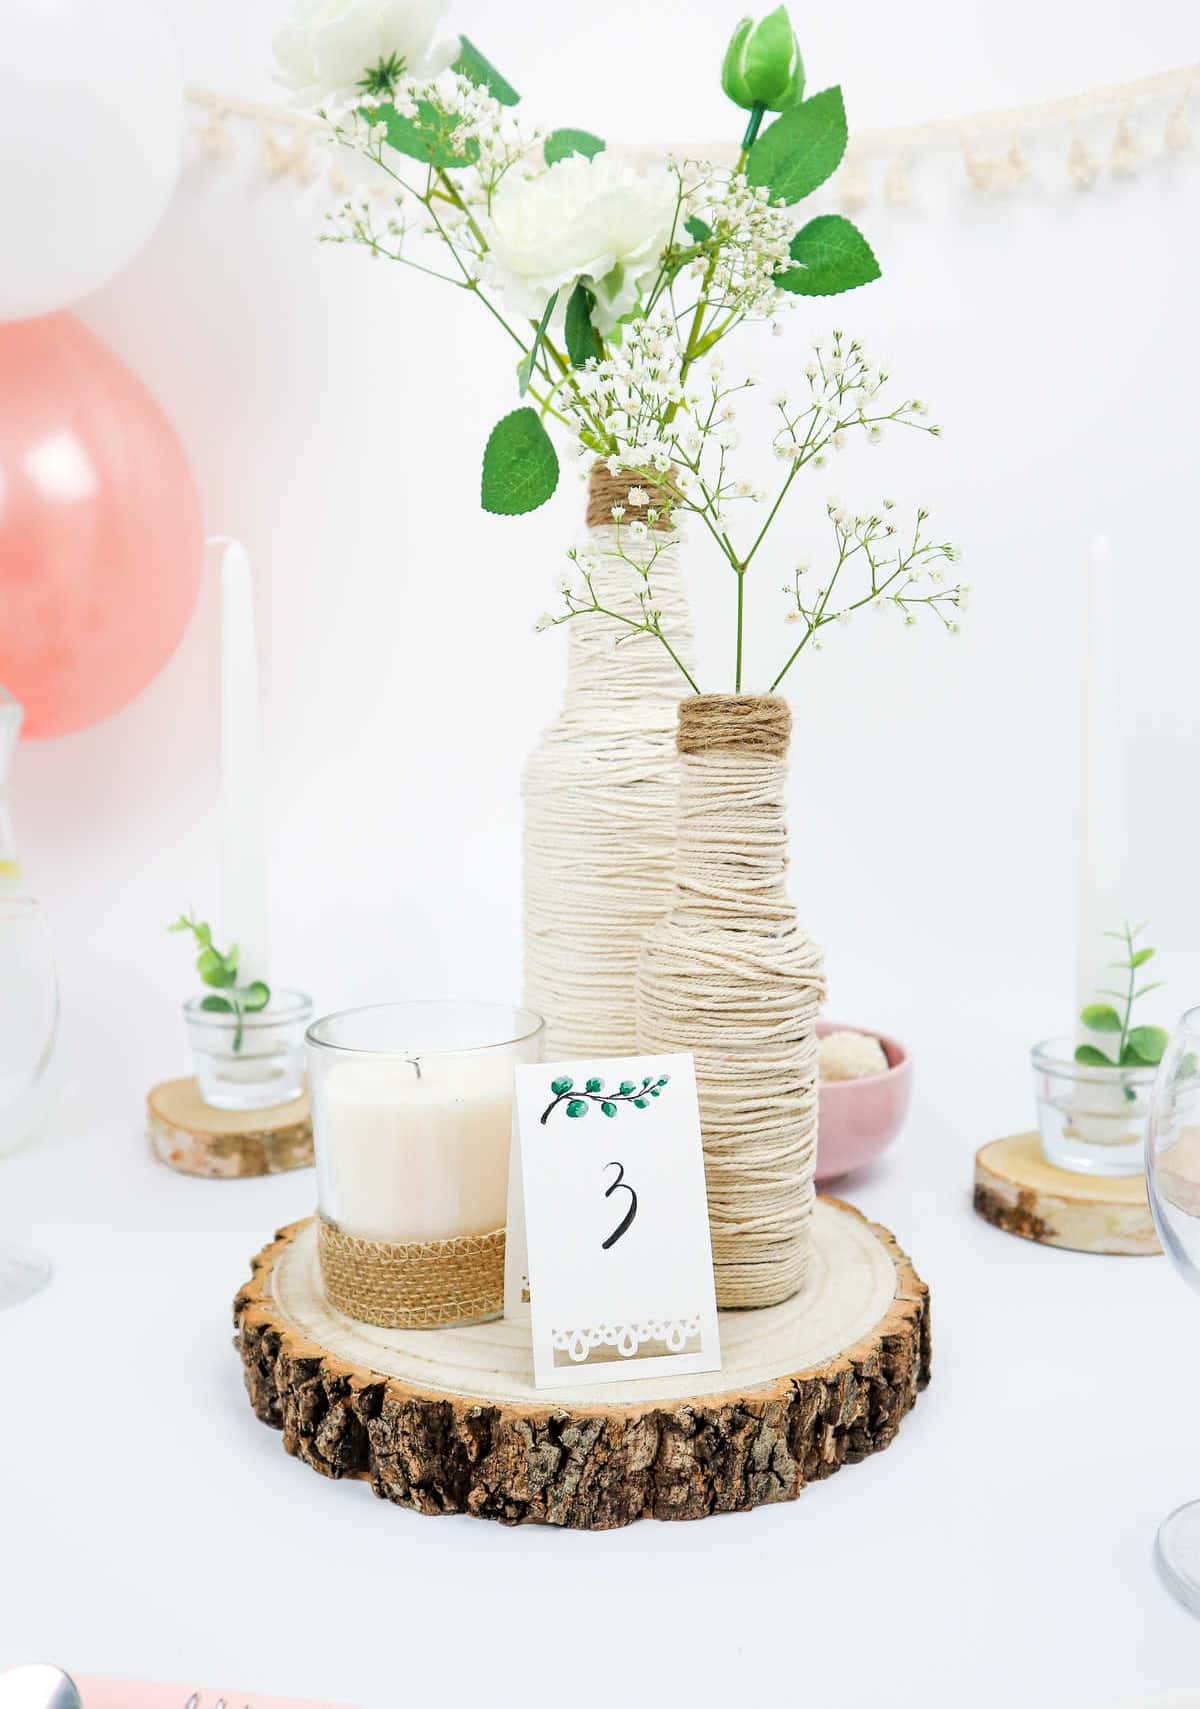
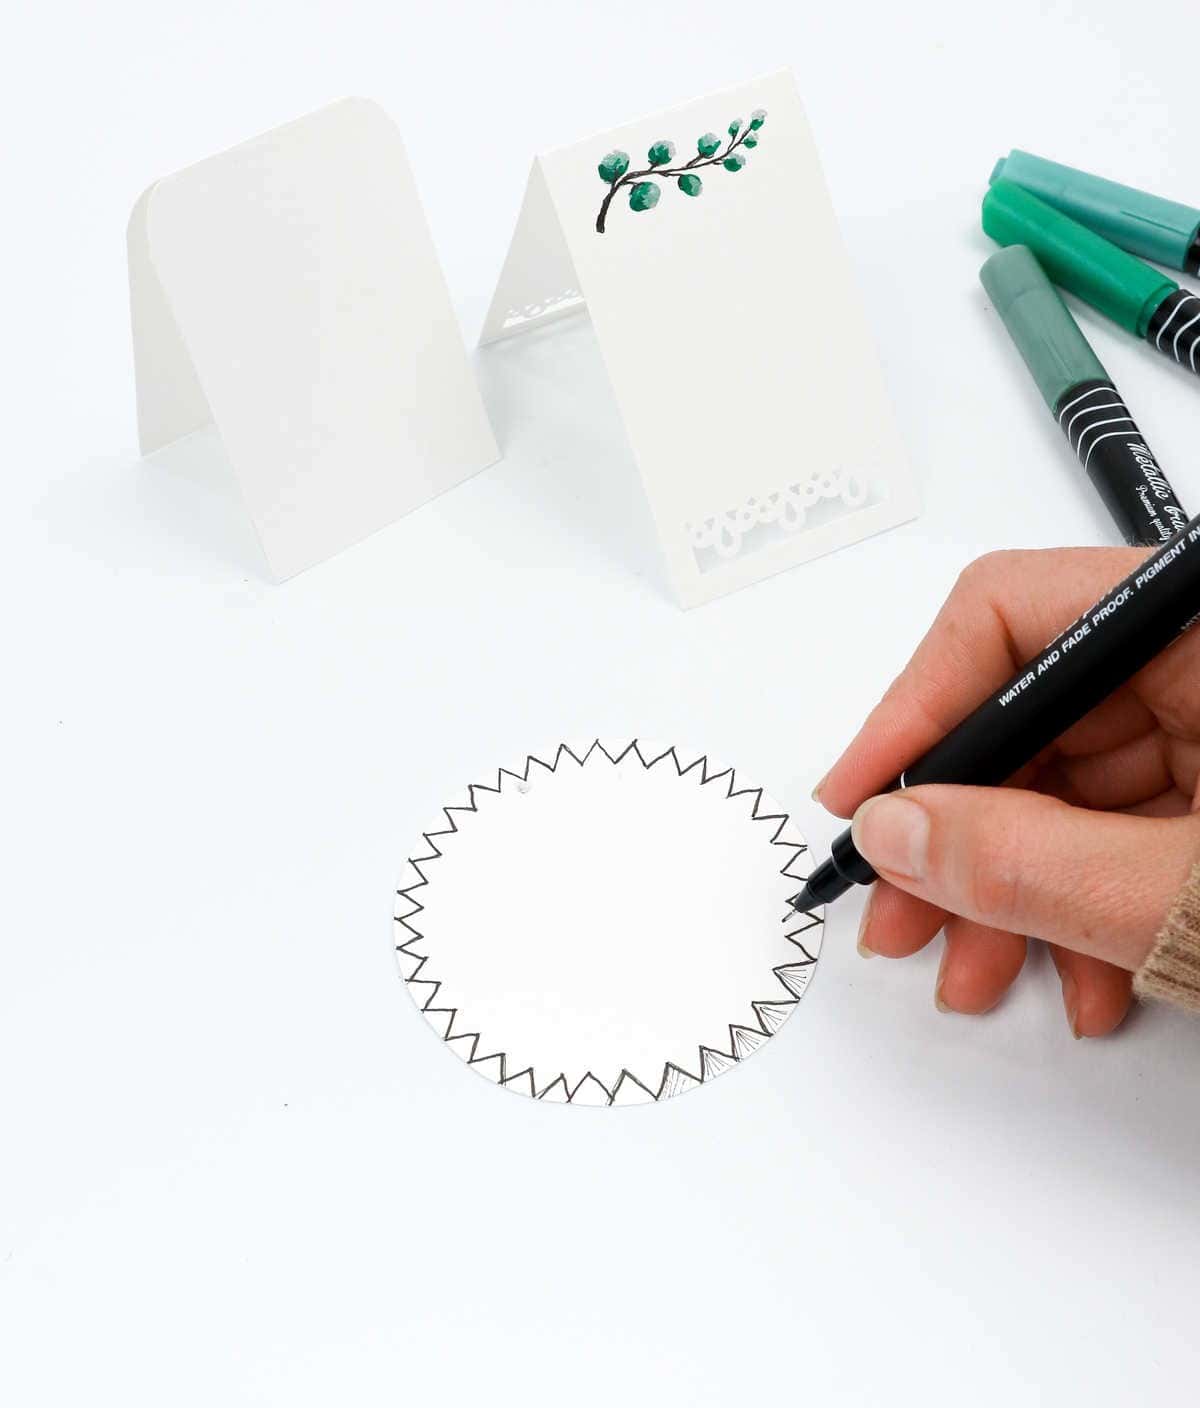
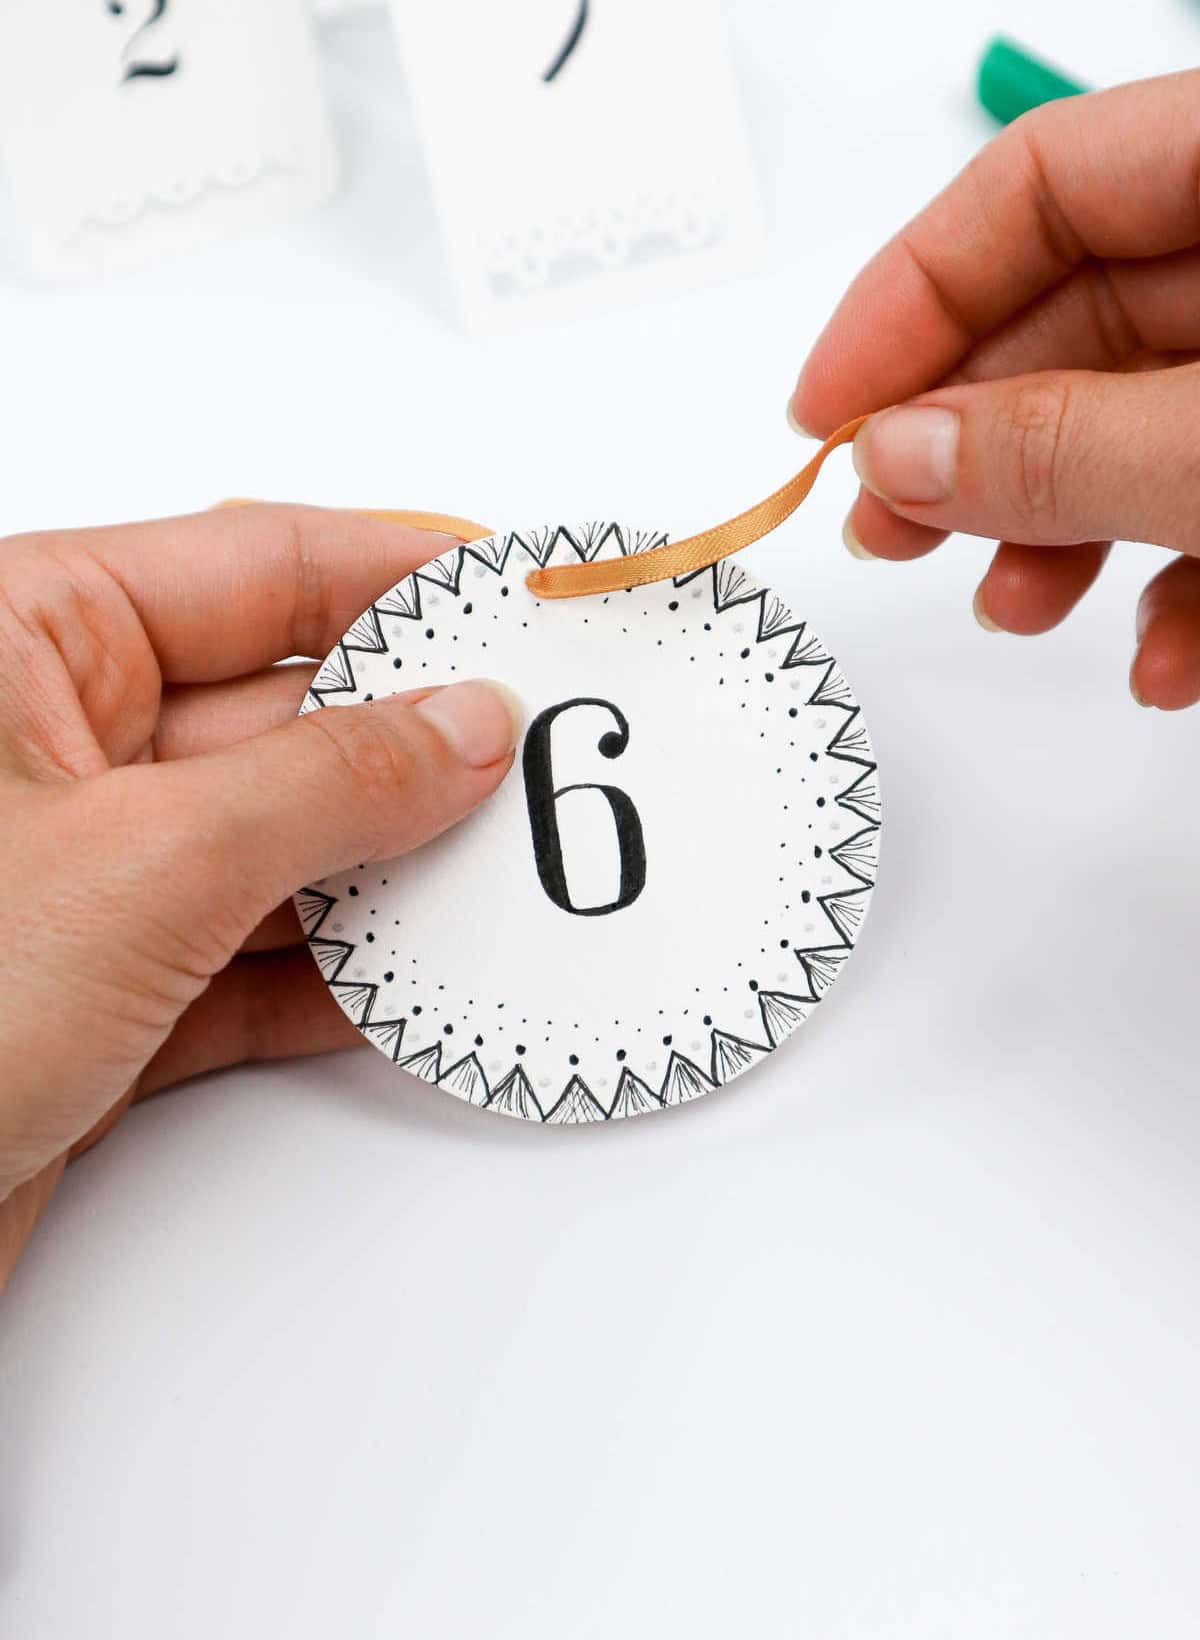
Alternatively, you can create a circular design by cutting out a circle from your cardstock. Add simple yet elegant touches to decorate it, then string some ribbon through the design for a beautiful finishing touch.
Step 12

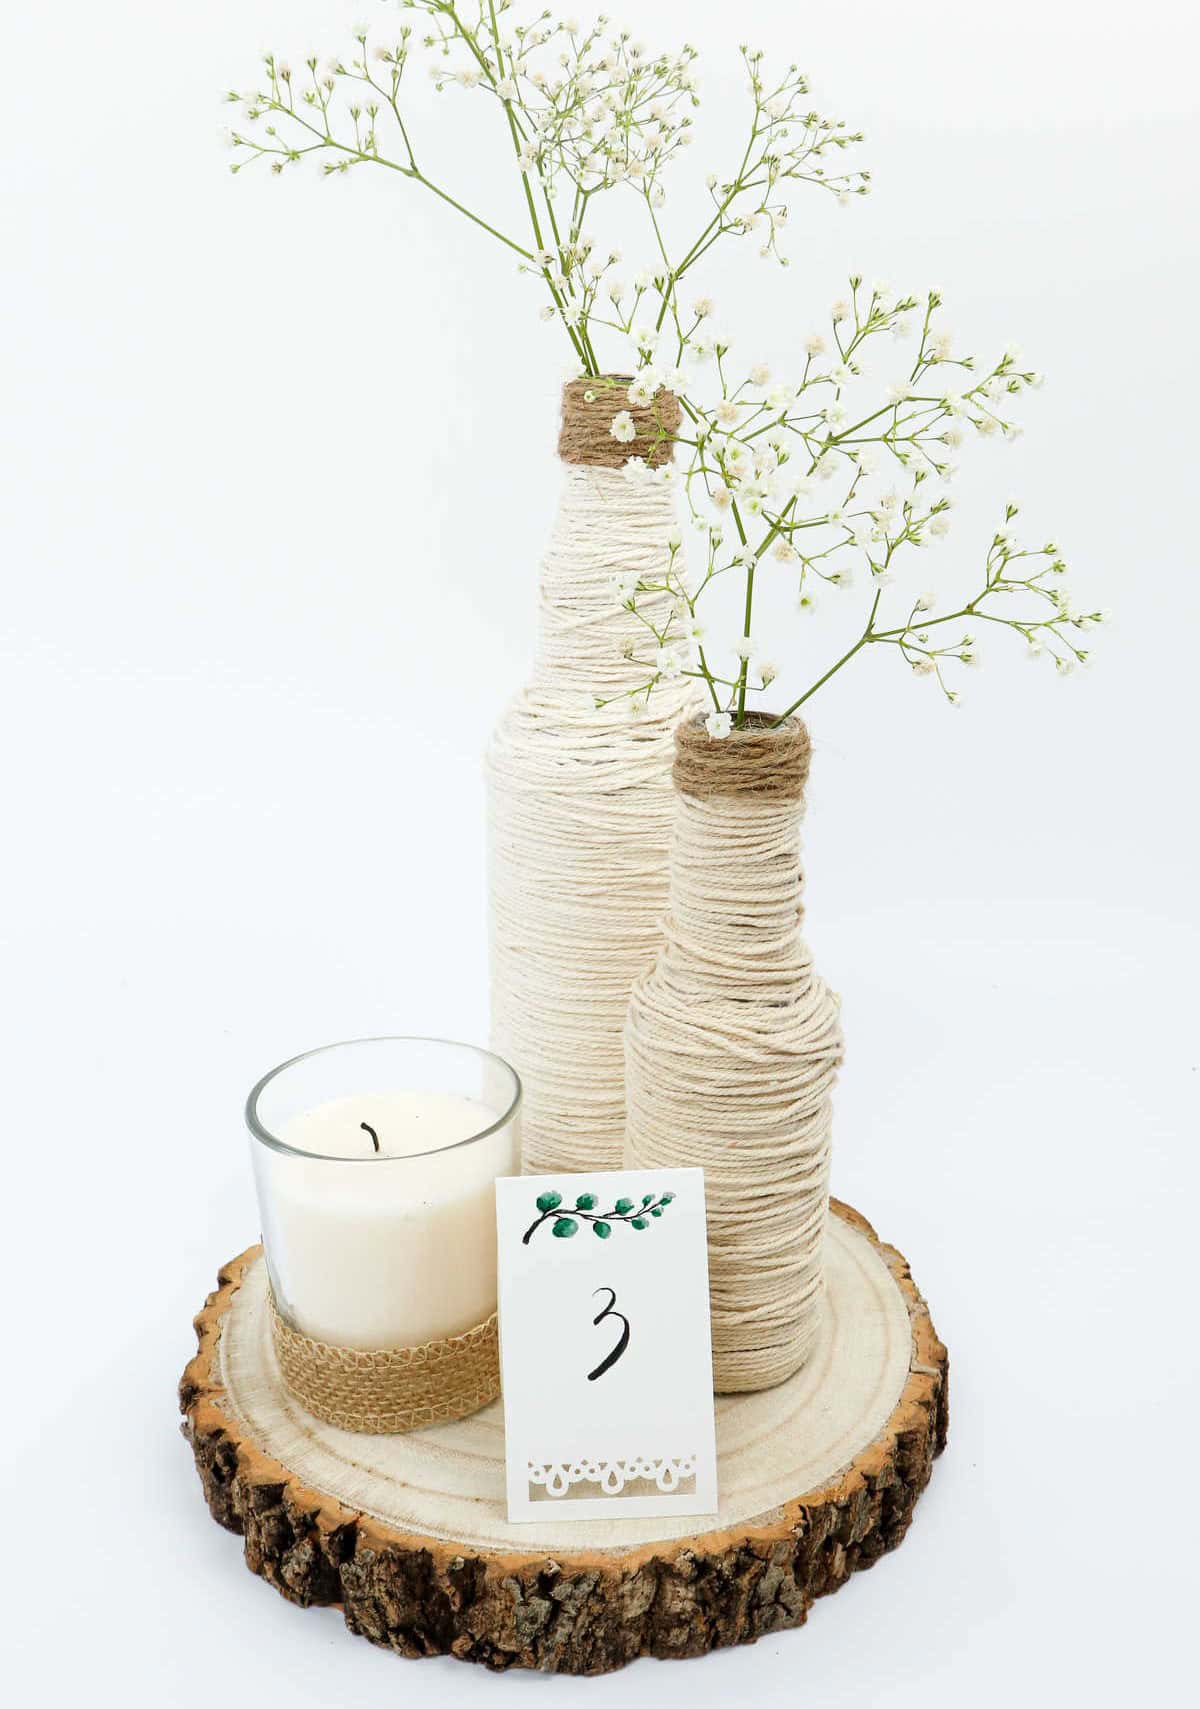
With your centerpiece now taking shape, it’s time to add the finishing touches. Place your table number cards onto the wooden baseboard, and voilà! Your masterpiece is complete. To give your arrangement an extra layer of depth and visual interest, consider adding a few sprigs of baby’s breath, reed, or pampas grass. This subtle addition will tie everything together and create a cohesive look that’s sure to impress.
Watch: DIY Wedding Centerpiece
How Much Do Wedding Centerpieces Usually Cost?
When it comes to wedding centerpieces, the cost can vary significantly, ranging from $100 to $450 on average, depending on the arrangement and number of tables. Florals alone can account for a substantial portion of this expense, with additional elements like candles, plants, or decorative items adding to the total cost. However, by taking matters into your own hands and creating your own centerpieces, you can significantly reduce the financial burden.
Upcycling, in particular, offers an attractive solution, allowing you to bring costs down to a mere $5-$7 per table – a truly remarkable savings.
Other Wedding Projects You Might Like

As you’re planning your special day, you might be thinking of unique and creative ways to decorate your wedding table. One idea that stands out from the crowd is creating a DIY centerpiece using an old beer 4-pack. This clever hack can add a touch of rustic charm to your reception, and it’s surprisingly easy to make. Simply grab some decorative items like pebbles, flowers, or candles, and arrange them inside the beer cartons.
You can also add some greenery like eucalyptus leaves or ferns to give it a more whimsical feel. This DIY project is perfect for couples on a budget who want to add a personal touch to their big day.
DIY Wedding Centerpiece Out of Upcycled Bottles
Transforming a special day like a wedding into a memorable and beautiful celebration doesn’t have to break the bank. This DIY project is an excellent way for anyone involved in the planning process to contribute their creativity and make the occasion even more unique. A stunning centerpiece can be crafted in just under two hours, requiring only 5 minutes of preparation, 50 minutes of active work, and a supplementary 15 minutes to account for any necessary adjustments.
Equipment
To ensure uninterrupted productivity, it’s crucial to take steps to prevent your computer or device’s screen from automatically turning off. A common practice among professionals is to use a combination of tools and settings to keep their screens on for extended periods. Some of the essential items to have within arm’s reach include a hot glue gun, scissors, ruler, and markers.
By having these materials nearby, you can stay focused and avoid any frustrating interruptions caused by your screen suddenly going dark.
Materials
To create a unique and thoughtful gift, you can combine a variety of elements, starting with a wooden plaque as the base. To add some visual interest, include two bottles in different sizes to create a sense of depth. A jar candle can also be included, providing a warm and inviting ambiance. For added texture and dimensionality, incorporate 1.5 mm cotton cords or thicker, which can be used to create a beautiful display.
A sheet of thick white A5 paper can serve as a clean and elegant backdrop for the entire arrangement. Finally, add a touch of rustic charm with a 1 inch wide jute ribbon that can be used to tie everything together.
Instructions
To kick-start your DIY centerpieces, gather all necessary supplies first. Before diving in, ensure your bottles are free from dust, grease, or grime by thoroughly scrubbing, rinsing, and drying them. Begin by adding a dash of hot blue to the bottom of each bottle. Next, unravel the cord and secure one end to the bottle, holding it in place until the adhesive sets. Then, reapply more hot glue around the bottle’s circumference, followed by wrapping the cord over it.
Continue this process, applying hot glue and then wrapping the cord around the bottle, working your way up to the mouth. Secure the end with a small amount of extra glue. Swap out the cotton cord for jute twine and wrap it around the mouth, allowing for overlapping as needed – imperfection is okay, as long as it’s stuck in place. Repeat this process with another bottle. Move on to attaching both wrapped bottles to a wooden baseboard using hot glue.
For the centerpiece’s focal point, grab a plain white candle in a glass jar and apply hot glue around the bottom. Then, wrap a length of ribbon around the candle’s base before placing it next to the bottles on the board. To complete the setup, create table cards indicating the table number. Feel free to get creative with doodles, sketches, decorative borders, beaded wire, or bold font for the numbers.
Finally, add some finishing touches with baby’s breath, faux florals, and other embellishments to bring your centerpiece arrangement together!