Transforming a humble paper plate into a beautiful woven bowl is a testament to the versatility and therapeutic benefits of weaving. As someone who finds solace in this tactile craft, I’m excited to share this DIY project with you, which showcases how a few simple materials can be combined to create something both functional and visually appealing. Weaving isn’t just about creating something practical – it’s also an opportunity to unwind and express oneself creatively.
The end result is often surprisingly satisfying, making it a perfect activity for anyone looking to relax and get creative.
What You’ll Need
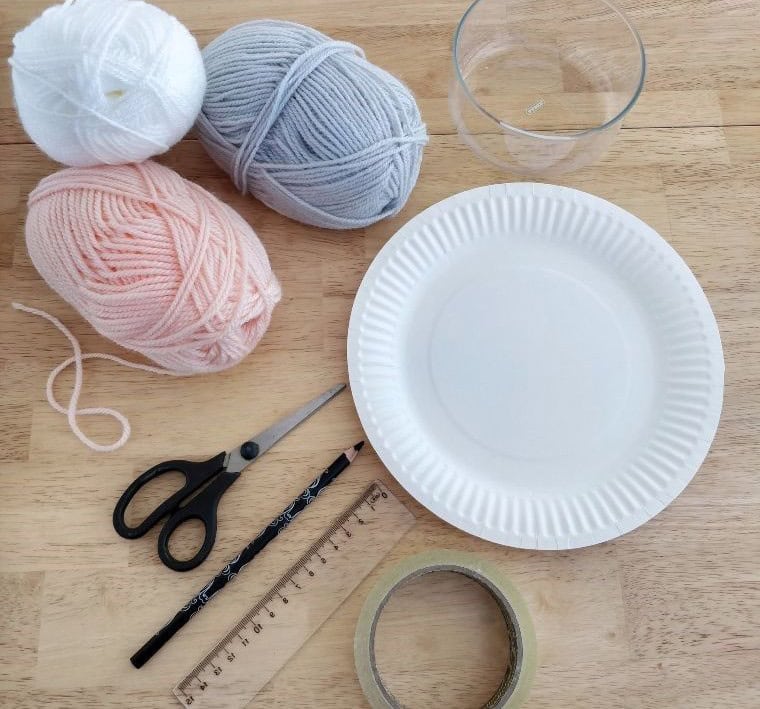
To create a simple and fun DIY craft project, you’ll need the following materials: a humble paper plate, some scissors for cutting, a pencil to mark your design, a sturdy bowl to use as a base, thick yarns in various colors to add texture and depth, some scotch tape to hold everything together, and a ruler to ensure straight lines. With these basic supplies, you’re ready to start crafting!
How to Make DIY Woven Bowl
STEP 1
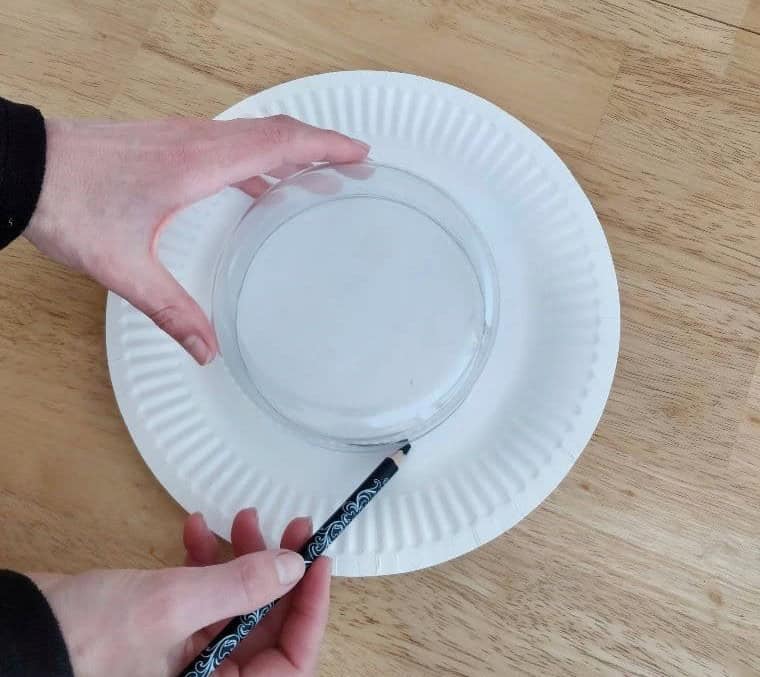
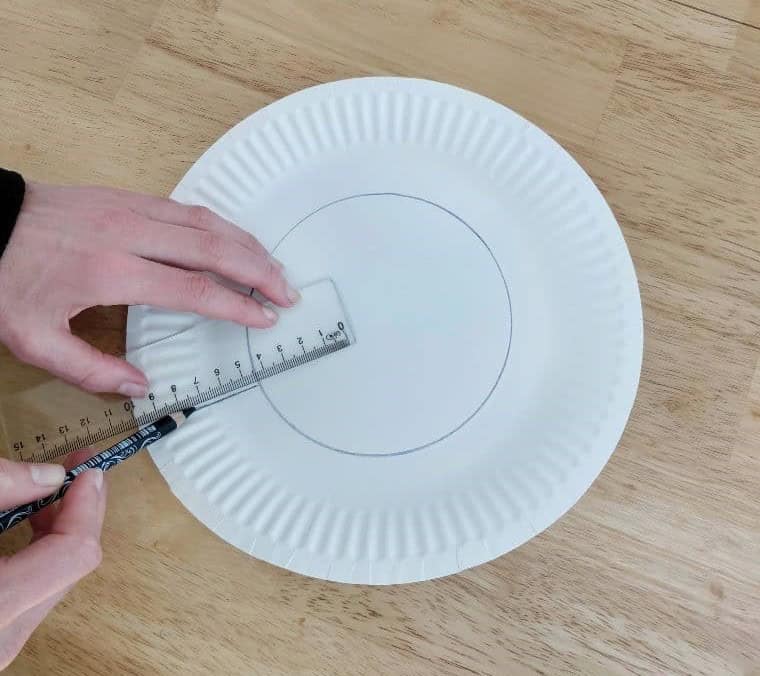
Begin by placing the paper plate upright. Next, carefully flip the bowl over, ensuring that its base aligns with yours and its opening points directly towards the plate. This precise positioning will form the foundation of your creative project.
STEP 2
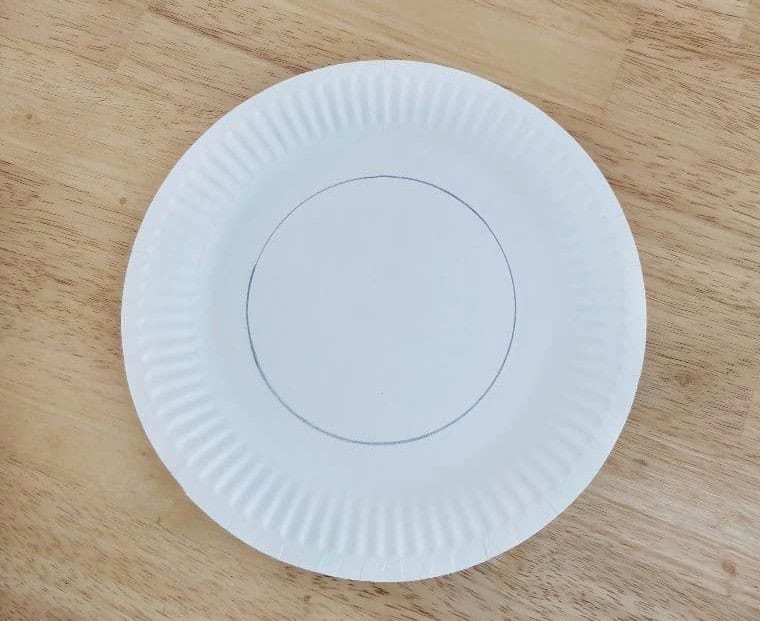
To achieve a precise circular shape, start by lightly sketching the outline of the bowl onto the paper plate using your pencil. Focus on capturing the curves and contours of the bowl’s edge as you draw, taking care not to press too hard or apply excessive pressure that might distort the line. By carefully tracing along the bowl’s edges, you’ll create a symmetrical and accurate circle within the plate, setting the stage for a harmonious and visually appealing design.
STEP 3
To achieve precision, start by grasping a ruler firmly and extend its edge to touch the perimeter of the circle. From this point, carefully draw a straight line all the way to the edge of the paper plate, ensuring a smooth and accurate transition between the two surfaces.
STEP 4
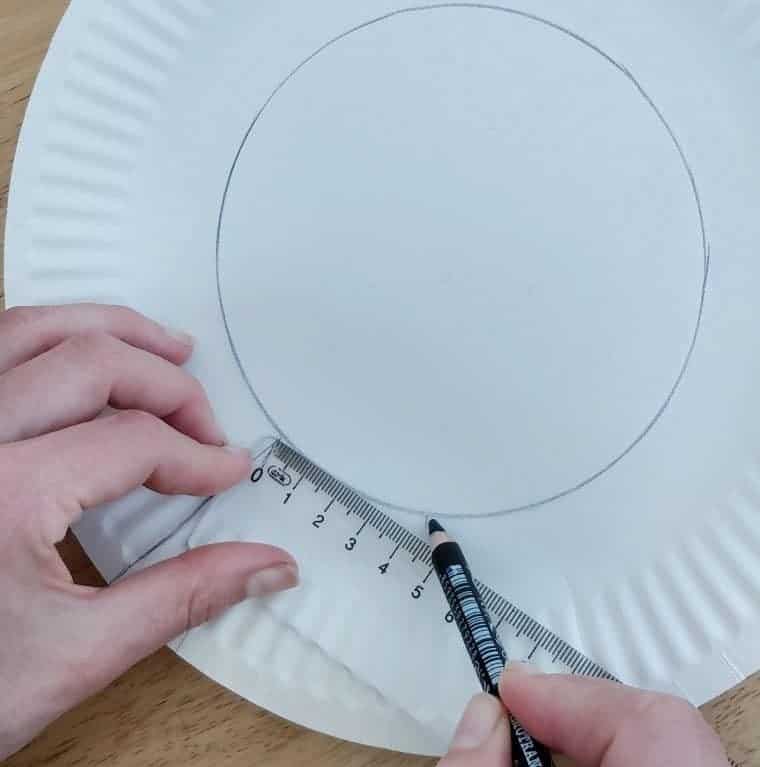
To begin, measure 4.5 centimeters (1.8 inches) from the tip of your first line and mark this point using your pencil. This marks the start of a series of gap markers that will be crucial in achieving accurate results. From here, measure another 4.5 cm (1.8 inch) to create the next gap marker, and continue this process until you’ve marked the entire circumference of the circle, with each mark serving as a visual guide for your ruler.
STEP 5
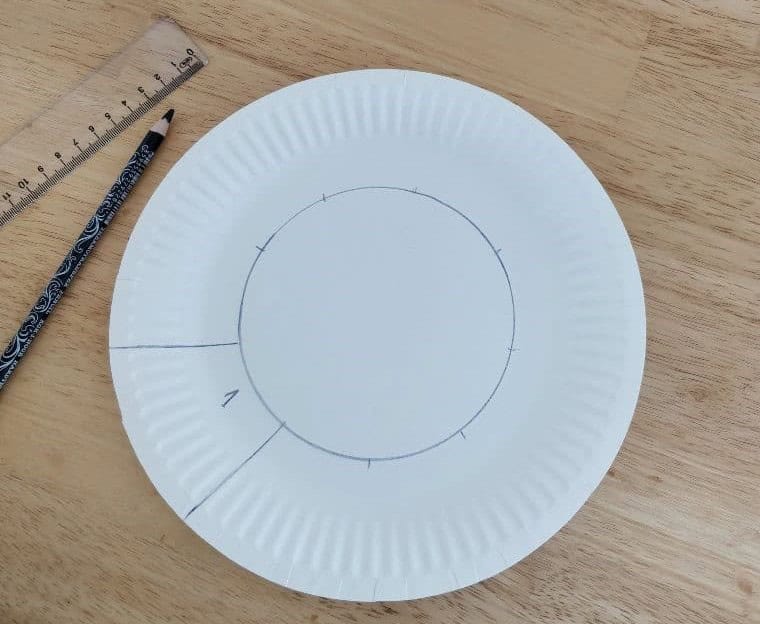
Take out your ruler and pencil, and begin by drawing a line that connects the initial gap mark to the edge of the plate. As you do this, envision a slice of cake taking shape before your eyes, much like the one depicted in the accompanying image. Once you’ve completed the line, mark the resulting shape with a ‘1’ for future reference.
STEP 6

To complete the cake slice-inspired design, draw lines from each gap mark to the perimeter of the plate. As you work, ensure that each shape is assigned a unique identifier through numbering. Upon finishing this step, you should be left with nine symmetrical and evenly proportioned shapes, all bearing their respective numbers.
STEP 7
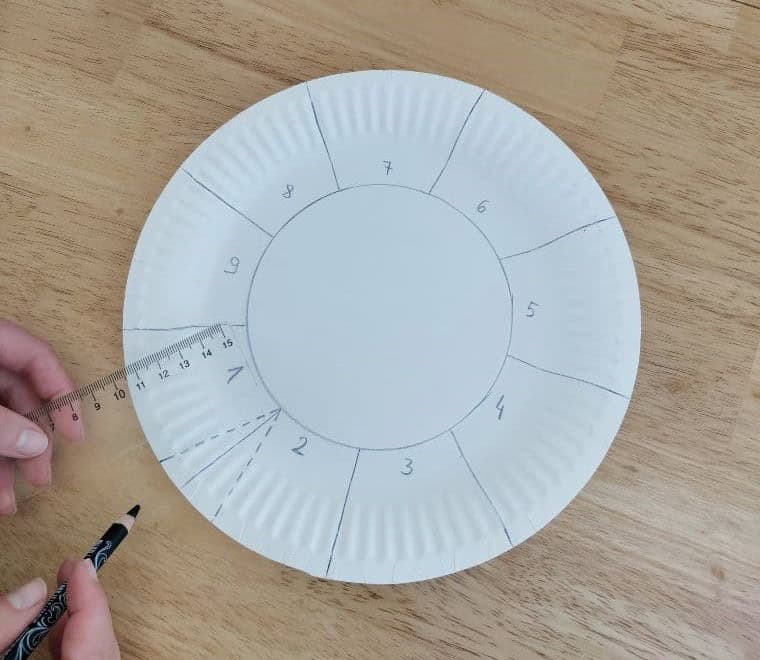
To create the iconic hexagonal pattern, start by using your pencil and ruler to draw a triangle along the first line, treating it as your midpoint. To avoid any confusion with the solid lines previously drawn, utilize dashed lines for the outline of the triangle. Repeat this process until you’ve completed the entire diameter of the paper plate, resulting in a series of interconnected triangles that form the signature hexagonal design.
STEP 8
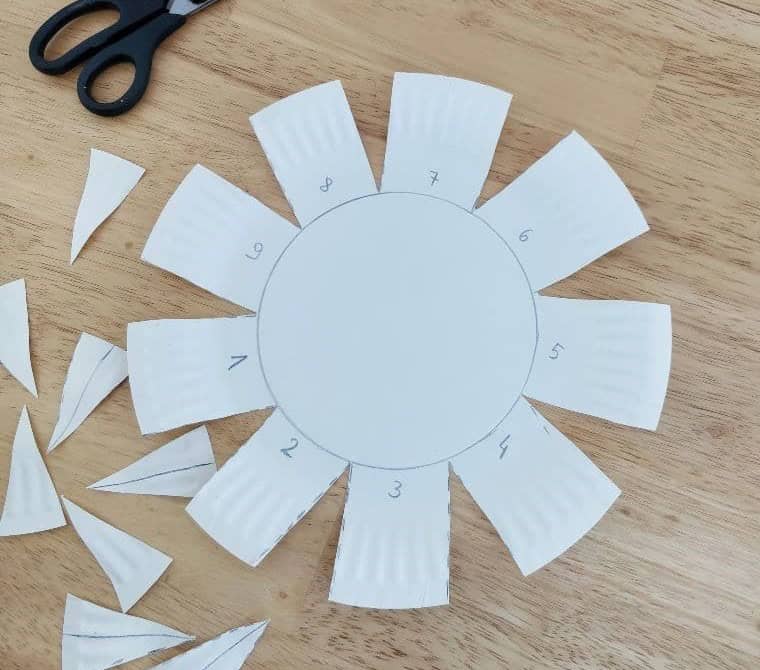
To complete the design, carefully follow the dotted lines you’ve drawn and carefully snip through each section using your scissors. This should yield a total of nine distinct triangular shapes.
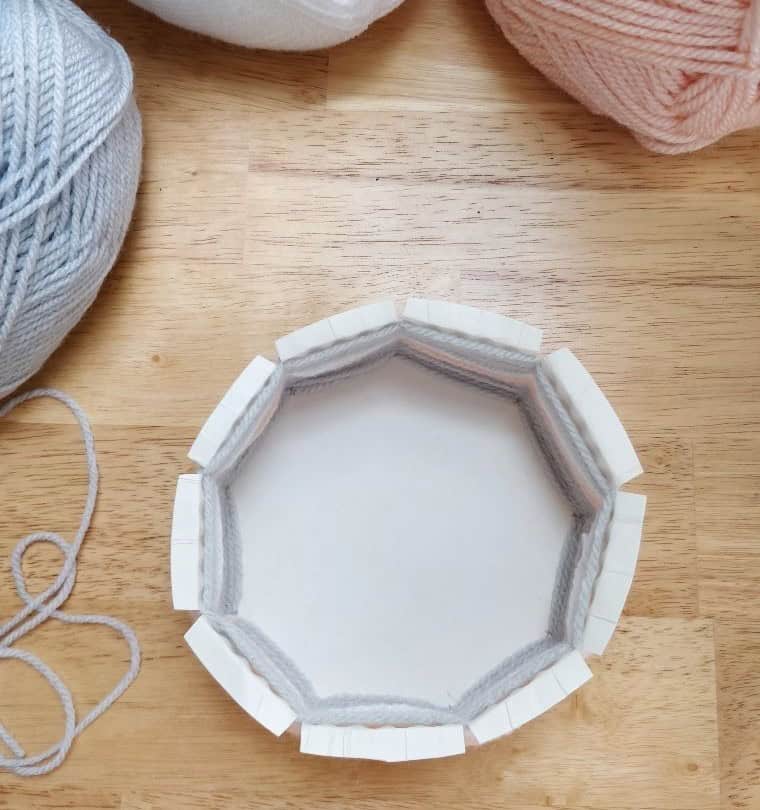
STEP 9
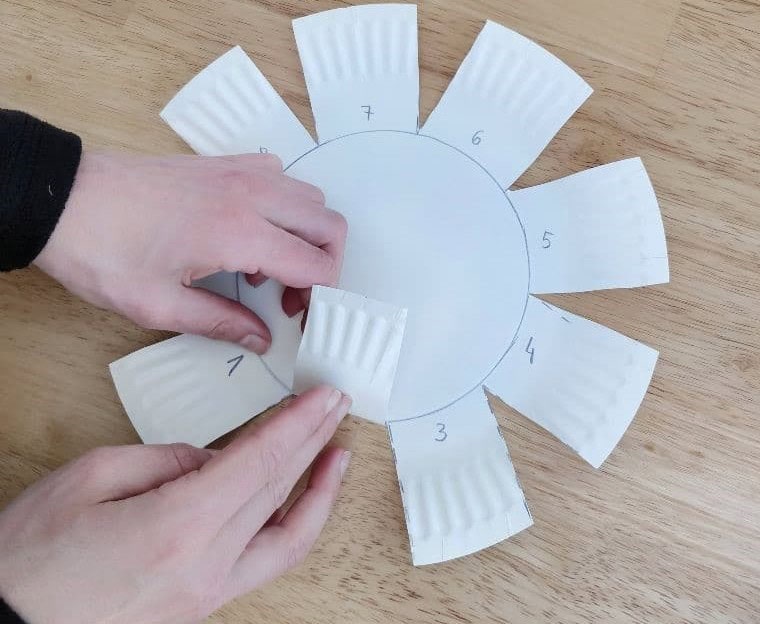
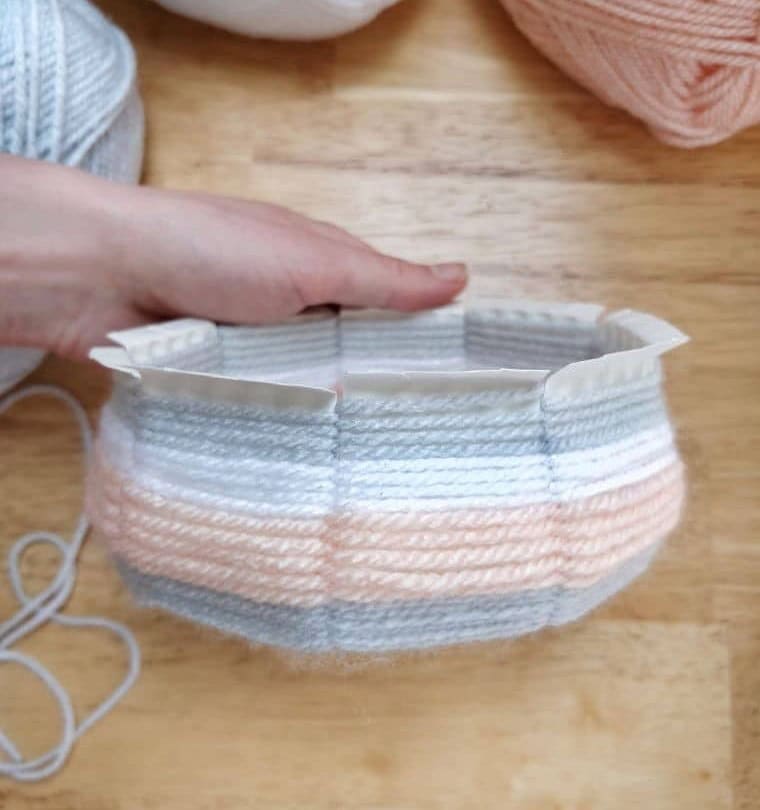
When tackling the DIY bowl project, it’s essential to begin by folding up the triangular flaps that create the bowl’s base. As you do so, take care to make a gentle crease in each flap to enhance the overall structural integrity and stability of your creation.
STEP 10

As you complete each flap, continue the process by folding up the remaining flaps, gradually shaping the origami into a bowl-like base. This step is crucial in setting the foundation for the rest of your creation.
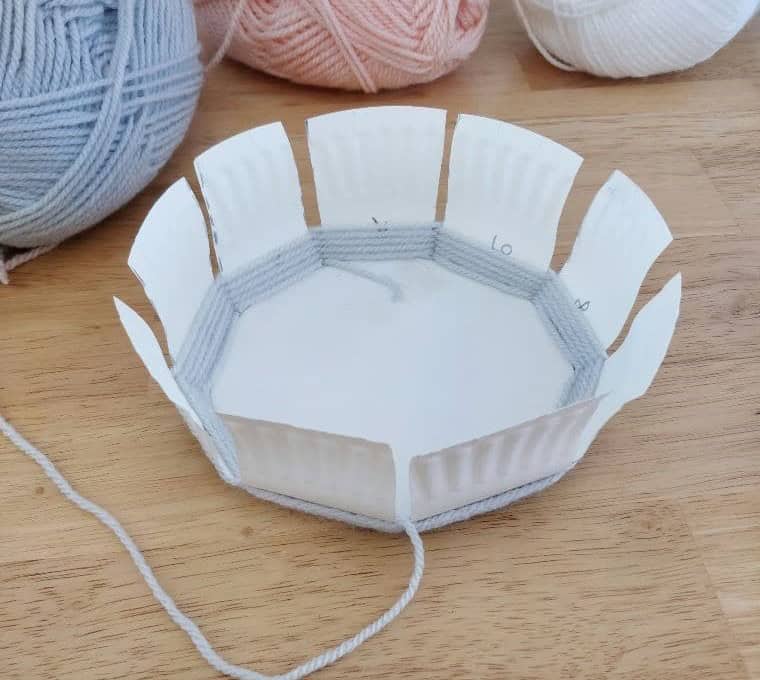
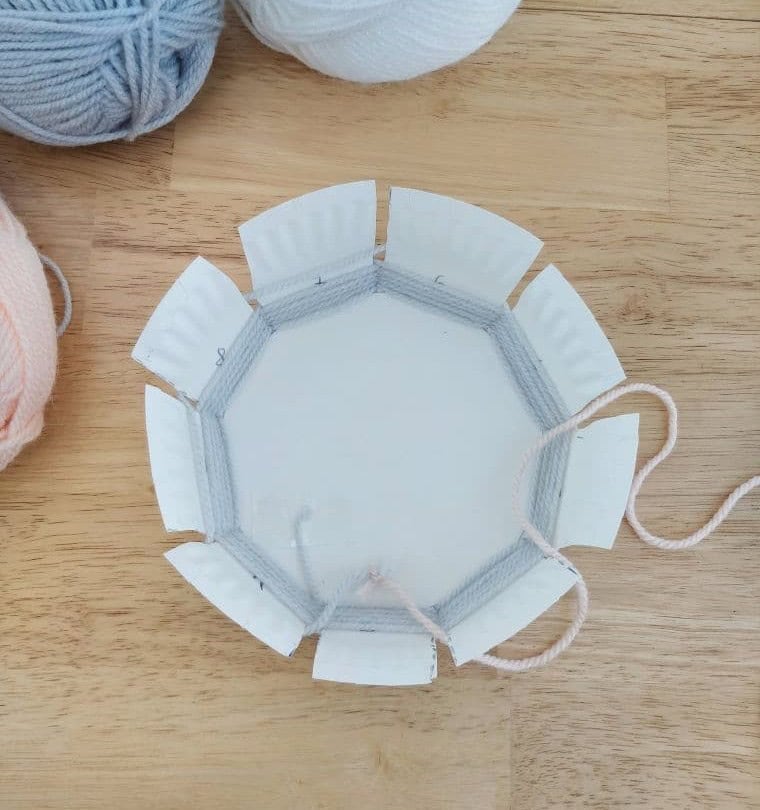
STEP 11
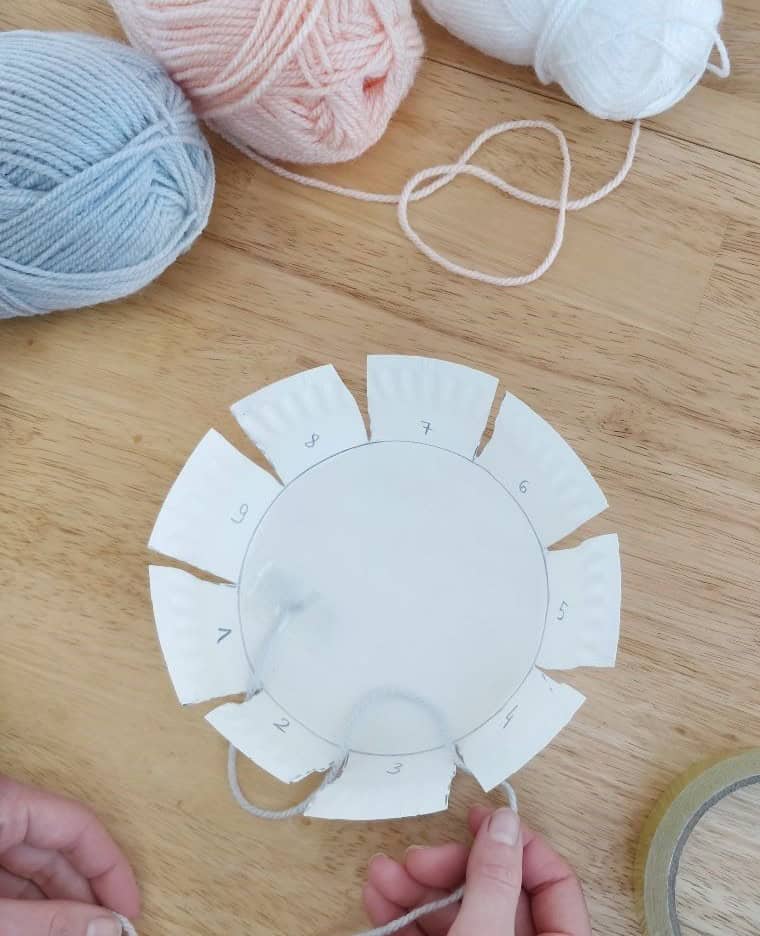
As you’ve established a solid foundation, it’s time to let your creativity shine through the intricate weaving process. Begin by securing the first yarn color with Scotch tape along the interior of your pre-drawn circle. Once in place, start weaving through the numbered flaps in an alternating pattern. This involves passing the yarn outside of flap number 2, then inside of flap number 3, and so on, as you continue to alternate between the two directions.
STEP 12
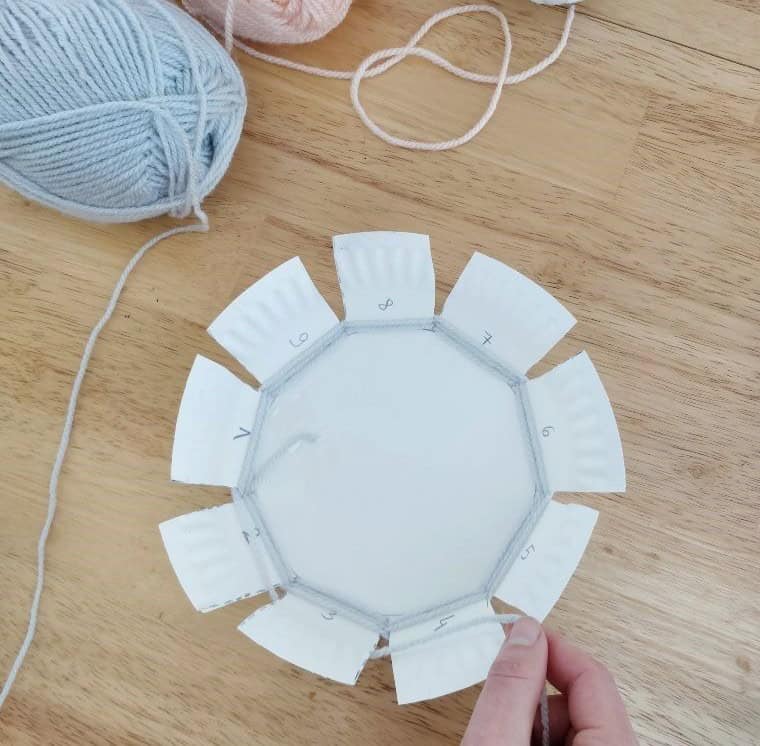
To achieve the desired design, continue to weave in an alternating sequence, completing one full circle at a time. Aim to repeat this process approximately 5-6 times, or until you have reached the desired height for each specific color.
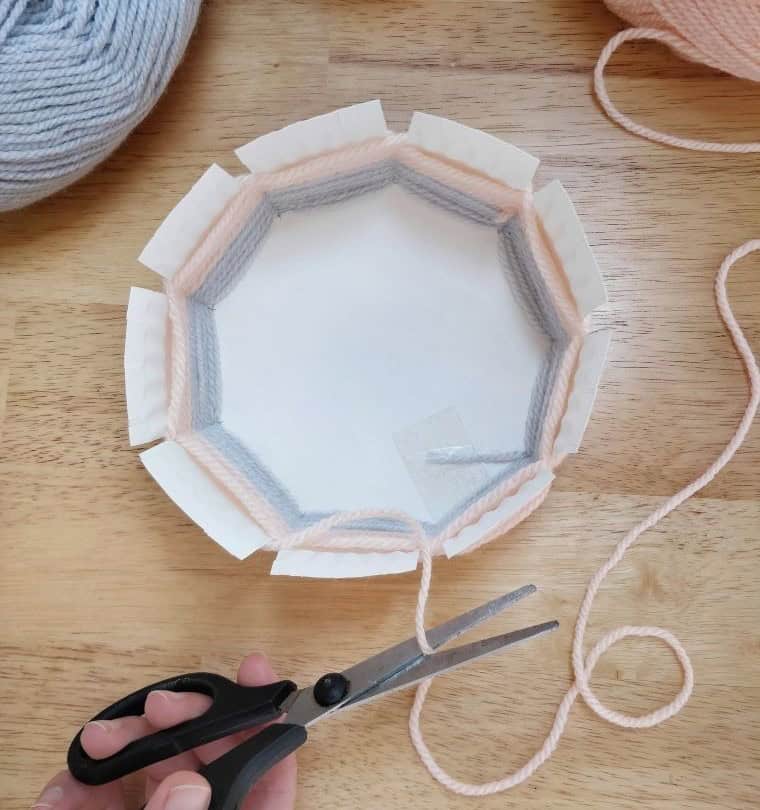
STEP 13
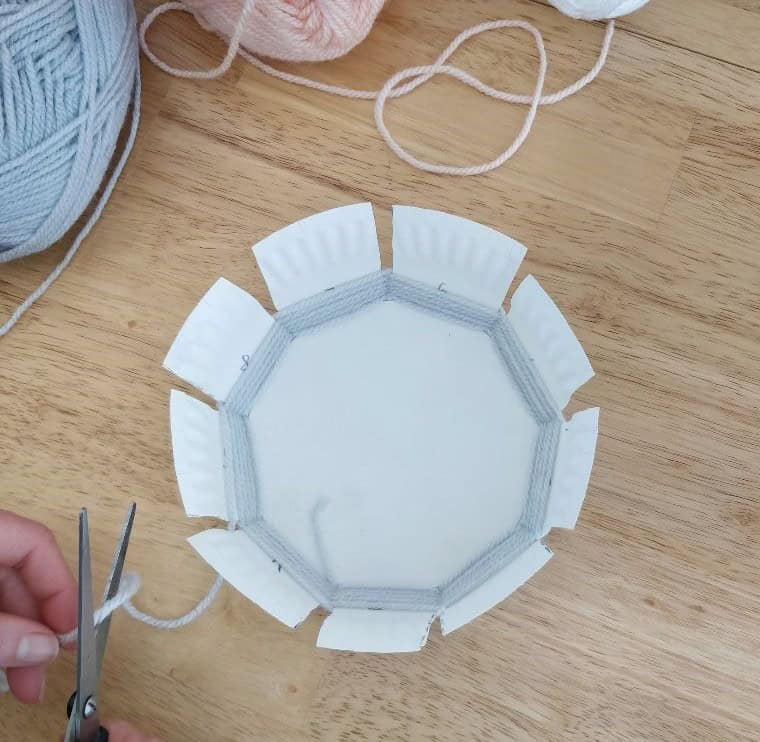
When you’ve reached the desired height for your first yarn color, pause about two flaps away from where you began weaving. Trim the yarn with scissors, leaving at least a 2-inch tail beyond your most recent woven section. The excess yarn should be sufficient to cover the next two flaps, but refrain from weaving it in just yet. Instead, allow it to remain loose and ready for the next step.
STEP 14
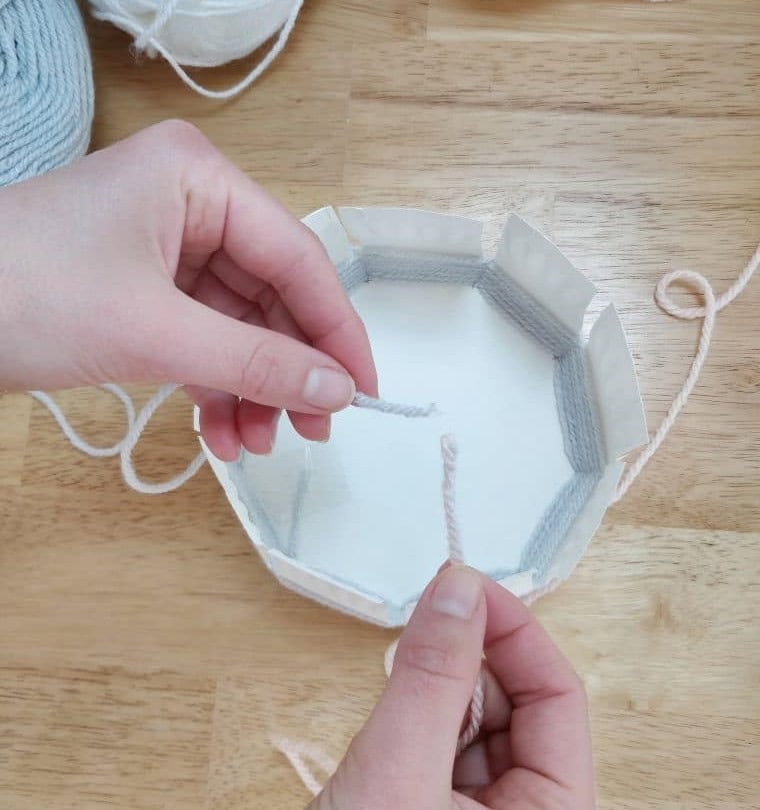
To merge the two yarn colors, simply tie them together using a basic knot. This will create a seamless transition between the two hues, allowing you to effortlessly work with multiple colors in your knitting or crochet project.
STEP 15
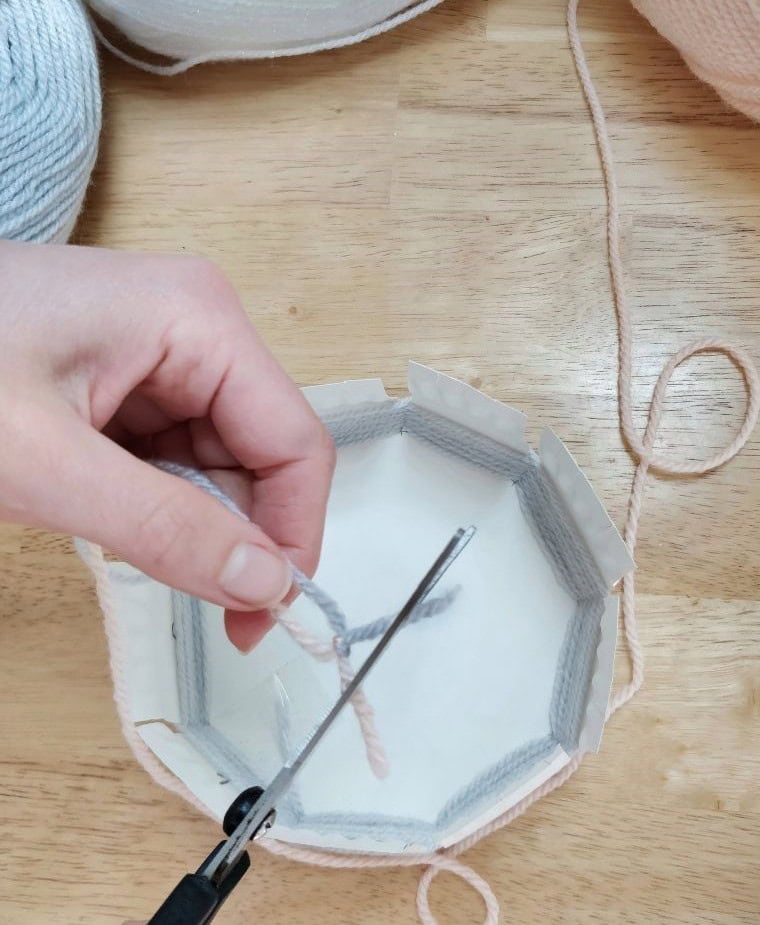
To achieve a seamless and professional-looking knot finish, it’s essential to trim away any excess yarn. This simple step can make a significant difference in the overall appearance of your handiwork. By removing any stray fibers or loose ends, you’ll be left with a tidy and well-defined knot that complements the rest of your project.
STEP 16
To begin weaving, ensure that the knotted ends are neatly tucked away within the bowl’s interior. As you continue with the second color, maintain the alternating pattern established earlier.
STEP 17
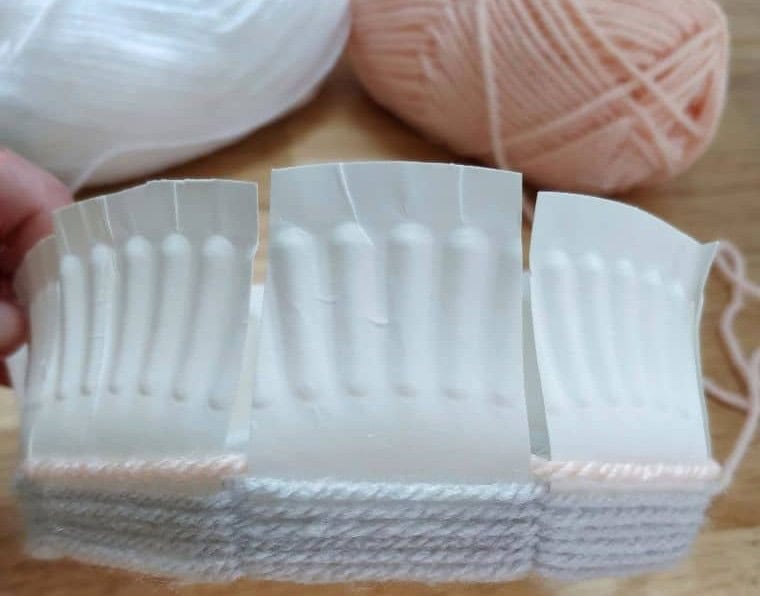
When it comes to weaving, a well-executed fabric should be smooth and knot-free, with a consistent texture that mirrors the original yarn’s pattern. The ideal weave should be uniform, with no visible imperfections or inconsistencies in the second in-and-out patterns, just like the first.
STEP 18
To complete the gradient, simply continue the yarn-weaving process as you initially began. Keep going until you reach the same height you aimed for when introducing the second color, at which point the two colors should be evenly blended.
STEP 19
To complete the second color’s weave, maintain consistency by ending it in a similar manner to how you finished the first color’s weave. Specifically, ensure that the flaps of the second color’s weave are positioned away from where you concluded the first yarn color’s weave.
STEP 20
To complete the last portion of the project, trim the secondary yarn color to leave approximately a 5-centimeter (2-inch) tail. This excess yarn will be used to securely fasten the final two flaps, ensuring they remain in place and maintain their intended shape.
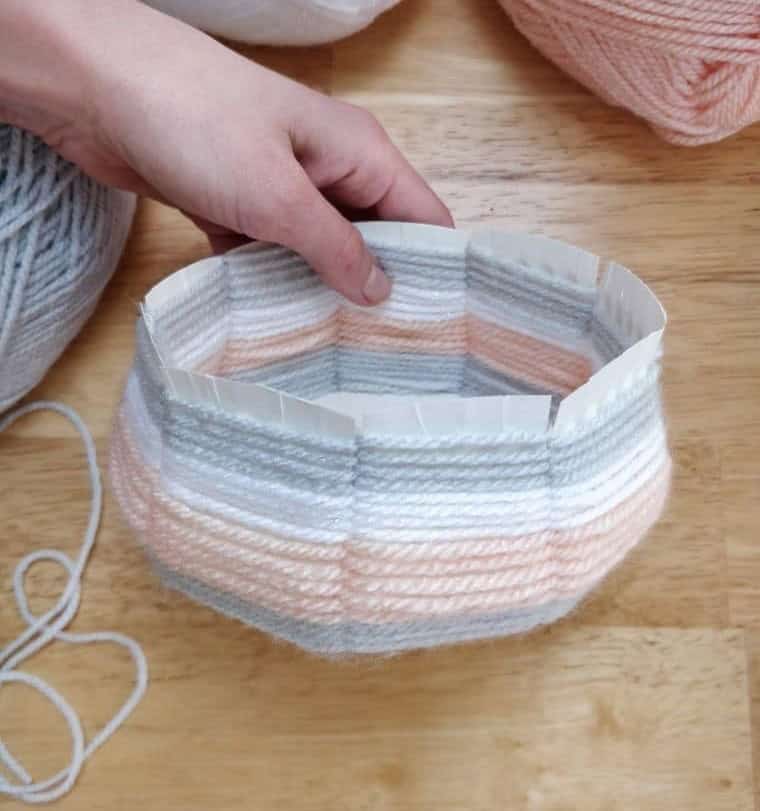
STEP 21
To build upon your previous work, take the third yarn color and utilize a similar knitting and weaving technique as before. This time, however, you’ll be combining it with the initial two colors to create a unique and intricate design.
STEP 22
To achieve the desired height for your woven bowl, be sure to stop short of covering the entire circumference. Aim to leave a small gap of approximately 1 centimeter or two on each side. As you near the end of your weaving process, bring the yarn to a natural stopping point inside the bowl, as illustrated in the accompanying photo.
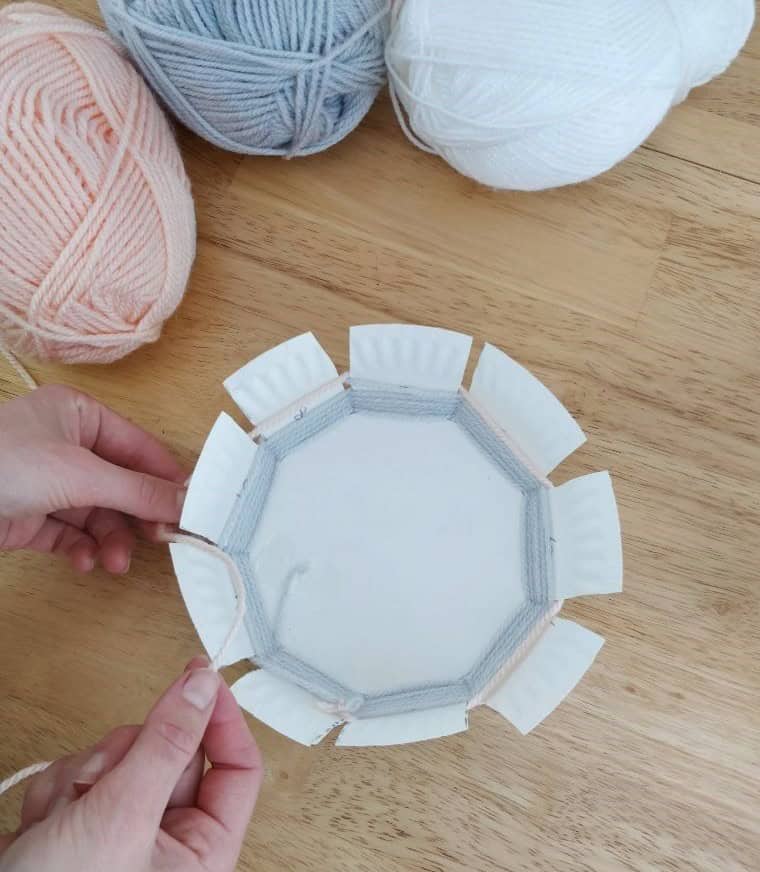
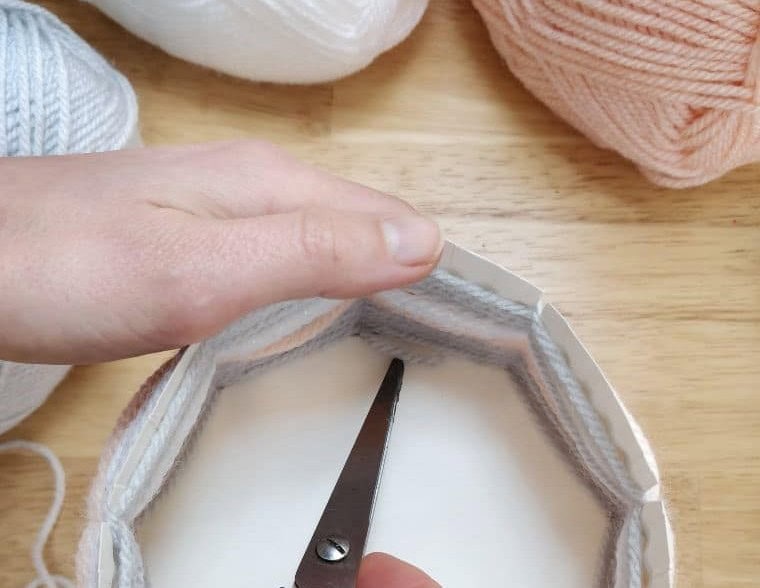
STEP 23
To complete the tidy wrapping process, gently slide the tip of your closed scissors under the remaining loose end and carefully coax it towards the foundation of yarn layers beneath. As you do this, make sure the final strand is securely tucked away, creating a smooth and professional finish to the wrapped skein.
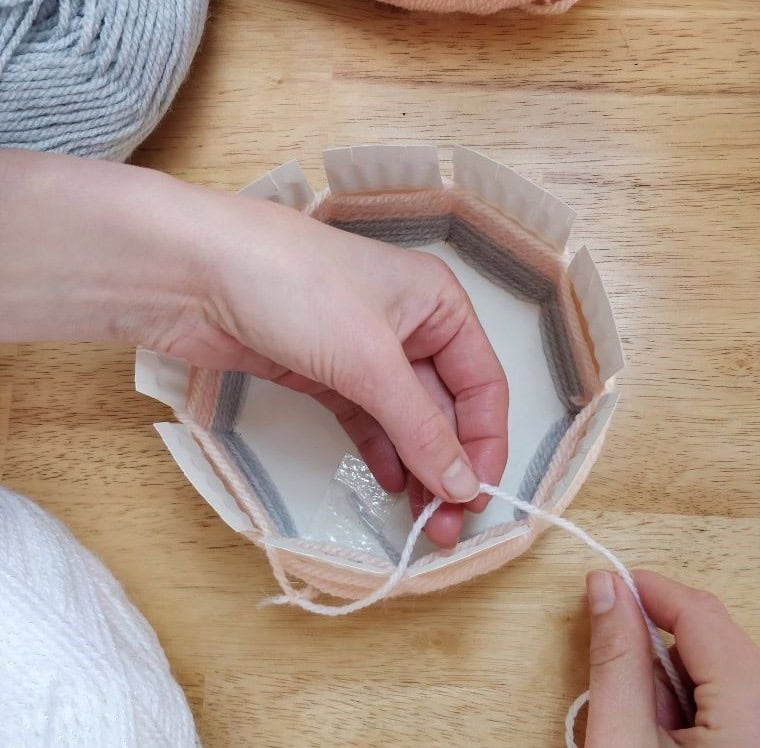
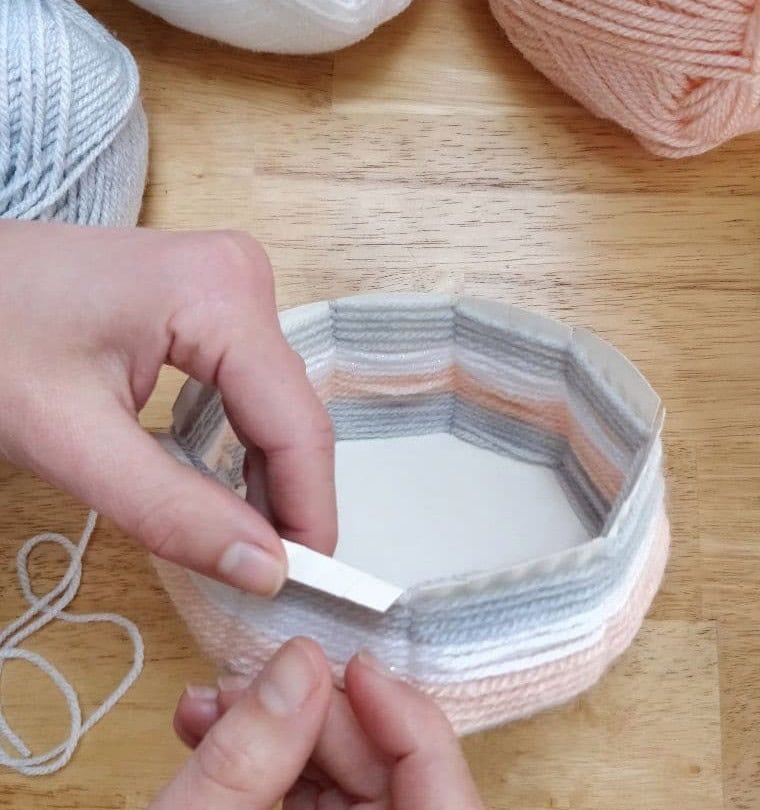
STEP 24
As a reminder, go back to the initial piece of yarn you secured with tape. Carefully remove the tape and then utilize your scissors to skillfully tuck the free end of the yarn into the layered fibers above it, ensuring a tidy and secure finish.
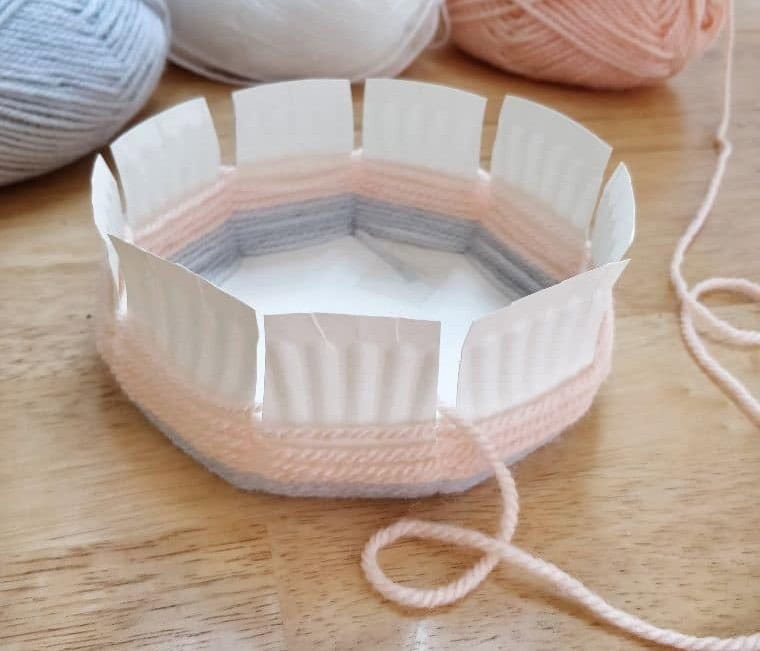
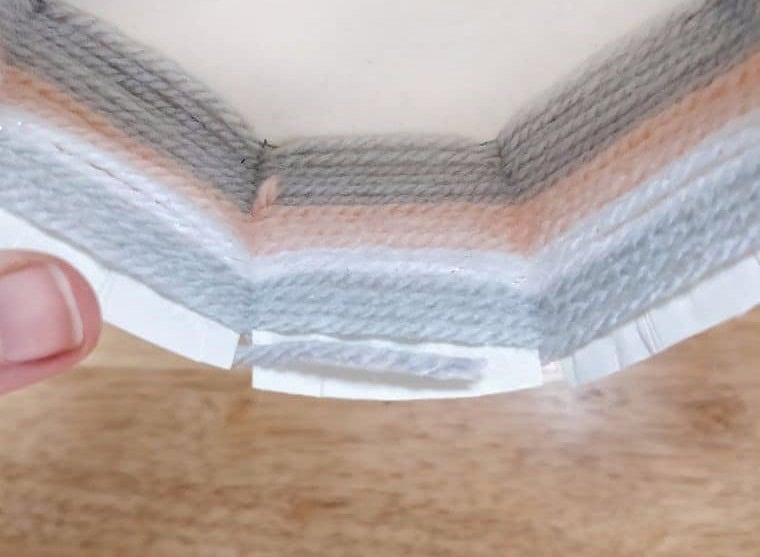
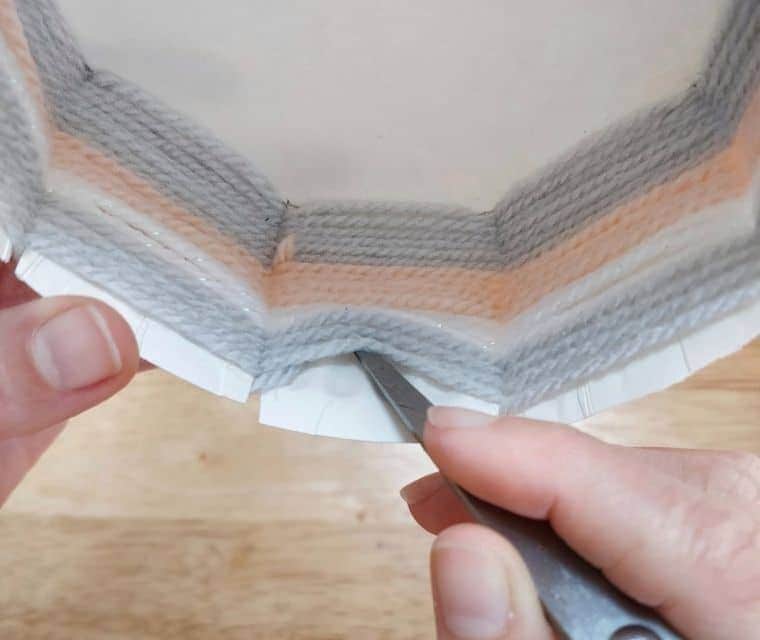
STEP 26
As I began wrapping the yarn around the bowl, I deliberately left some areas uncovered to achieve a distinct rim. To accomplish this, I gently folded the excess yarn outward, allowing it to overlap and create a clean, defined edge.
Where Can You Use These DIY Woven Bowls?
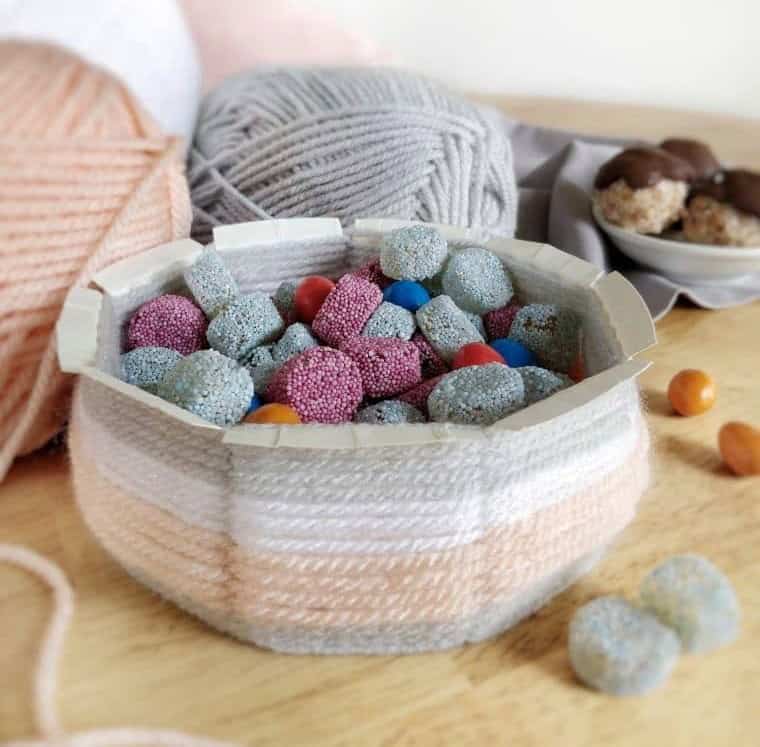
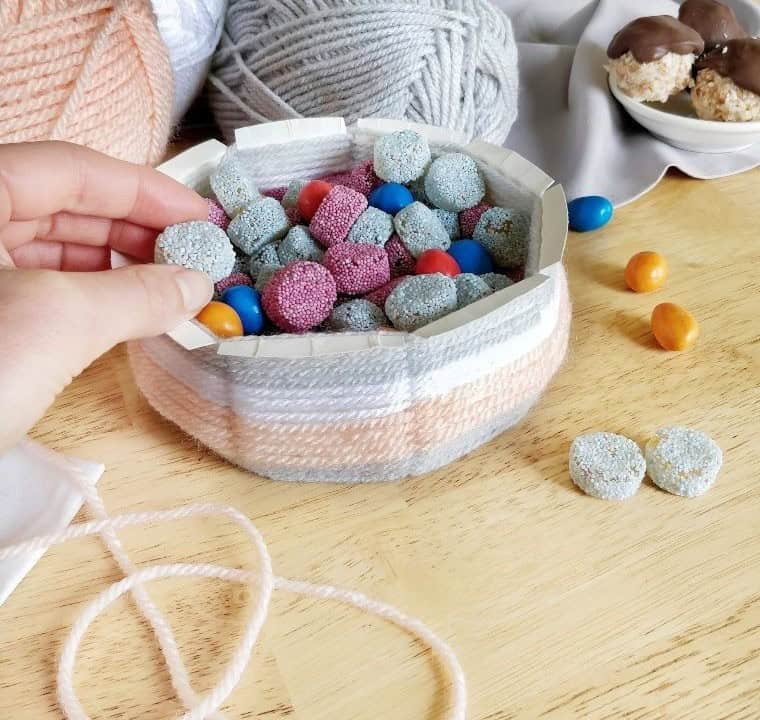
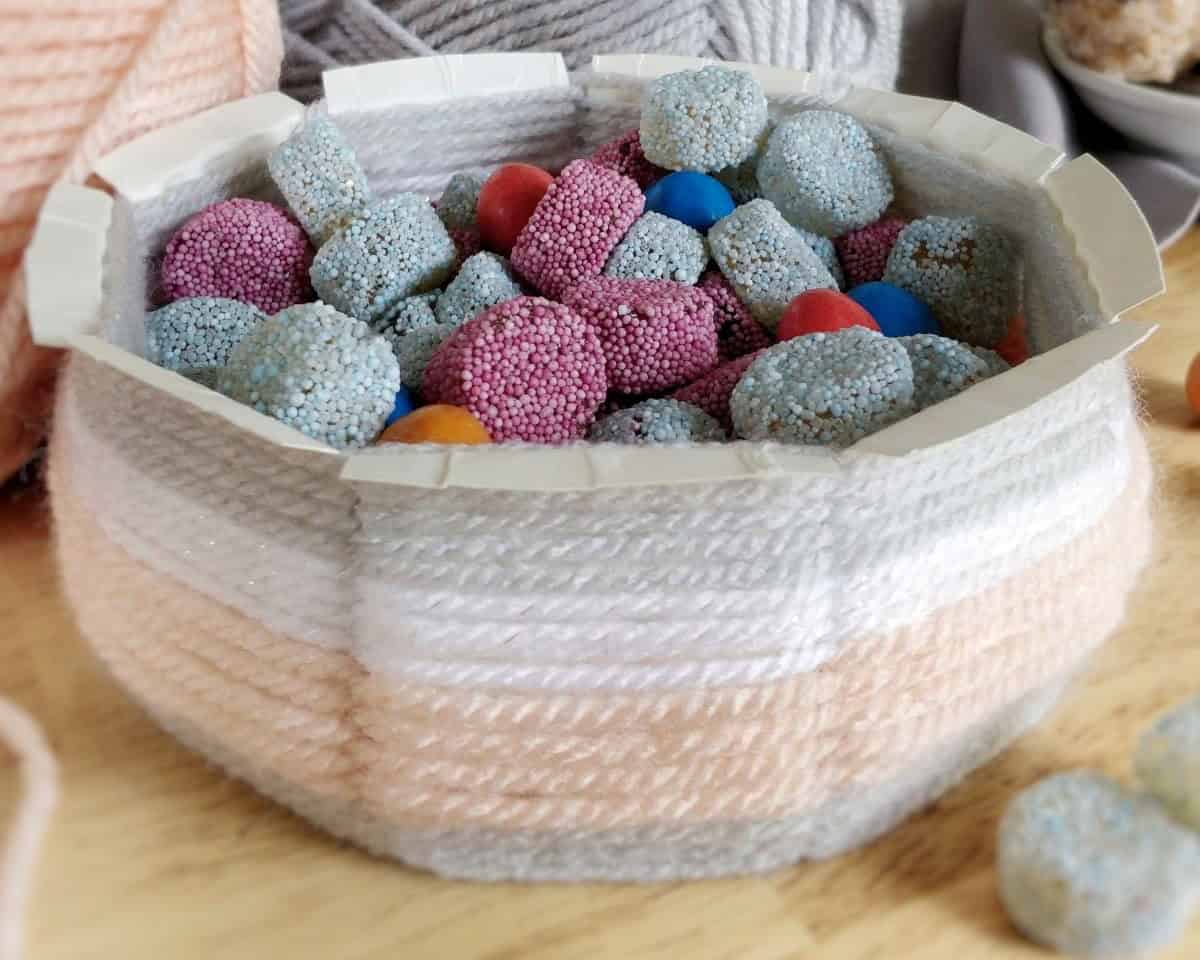
The woven bowls’ versatility is truly remarkable. From practical uses to creative applications, they can be employed in a multitude of ways. For instance, place one on your desk or your child’s to store small trinkets and knick-knacks, or use it as a key holder on your hallway table. Their usefulness extends to concealing unsightly indoor plant pots with colorful yarn that matches the theme of your party.
You can also utilize these bowls to hold wrapped food items like candies for a birthday celebration. Moreover, they make great containers for storing hair accessories like clips and ties. The possibilities are endless, really – as long as it’s dry, you can place almost anything in one of these bowls! The key is to be creative and think outside the box (or bowl)
Other Crafts You Can Make
Elevate your home decor with creative and budget-friendly solutions! From a unique yarn-wrapped flower pot to 20 dollar store decorating ideas, we’ve got you covered. For adults looking to unleash their inner crafty side, explore our collection of 20 craft projects that are easy on the wallet. And for those on an even tighter budget, discover 21 creative ways to repurpose items from Dollar Tree and create something truly special.
DIY Woven Bowl
Create a unique and functional DIY woven bowl using just yarn and a paper plate. This simple craft is perfect for kitchen storage and can be completed in under an hour. With only 30 minutes of active time, you’ll have a beautiful and functional bowl to add to your kitchen decor.
This recipe makes one woven bowl, ideal for storing small items like kitchen utensils or snacks.
Equipment
To avoid the frustration that comes with a suddenly darkened screen, consider implementing a few simple strategies to keep your device lit up. First, you can adjust your display settings to prevent the screen from dimming or turning off after a certain period of inactivity. This way, even when you step away for a moment, your screen will remain at its usual brightness. Another approach is to use an app specifically designed to prevent screens from going dark.
These tools often offer customizable options and can be set to maintain a consistent level of brightness throughout your work or study session.
Materials 1x2x3x
Instructions
To craft your woven bowl, begin by collecting all necessary materials. On the paper plate, draw a circle pattern using the rim of a bowl as a guide. Next, use a ruler to create a series of straight lines radiating from the edge of the circle to the plate’s edge. Measure 4.5 cm increments along each line and mark these spots. Continue this process until you’ve completed a full circle, resulting in nine distinct shapes. Number each shape as you go.
Once your lines are complete, use your ruler to create triangles around each one, employing dashed lines as the edges. Cut out the triangles, yielding a total of nine individual pieces. Fold the flaps up to form the sides of the bowl. With your first yarn color, attach the edge to the plate’s surface using Scotch tape. Then, weave an alternating pattern around the bowl until you reach your desired height for that particular color.
For each subsequent yarn color, attach it to the previous one using a knot and continue weaving. Make sure to leave at least 1 cm of paper plate material exposed between each layer. Finally, neatly tuck the end of your last yarn into the layers below, then repeat this process for the initial edge of yarn you taped onto the surface of the plate. To finish, fold out any excess paper plate material to create an overlapping rim for the bowl.
With these steps complete, you’ll have a beautifully woven bowl to admire.