

Zipper Pouches: The Ultimate DIY Project for Adults and Teens In today’s fast-paced world, having multiple zipper pouches is not only practical but also stylish. These versatile bags are perfect for storing a variety of items, from makeup and office supplies to craft materials and travel essentials. What makes these pouches so special is their endless possibilities.
You can customize them with different fabrics, colors, and embellishments to match your personal style or create themed sets for gifts or personal use. To get started, you’ll need a few basic supplies: fabric of your choice, zipper, interfacing, thread, and sewing machine. With these simple materials, you can whip up a batch of zipper pouches that are both functional and fashionable.
Supplies and Tools You’ll Need
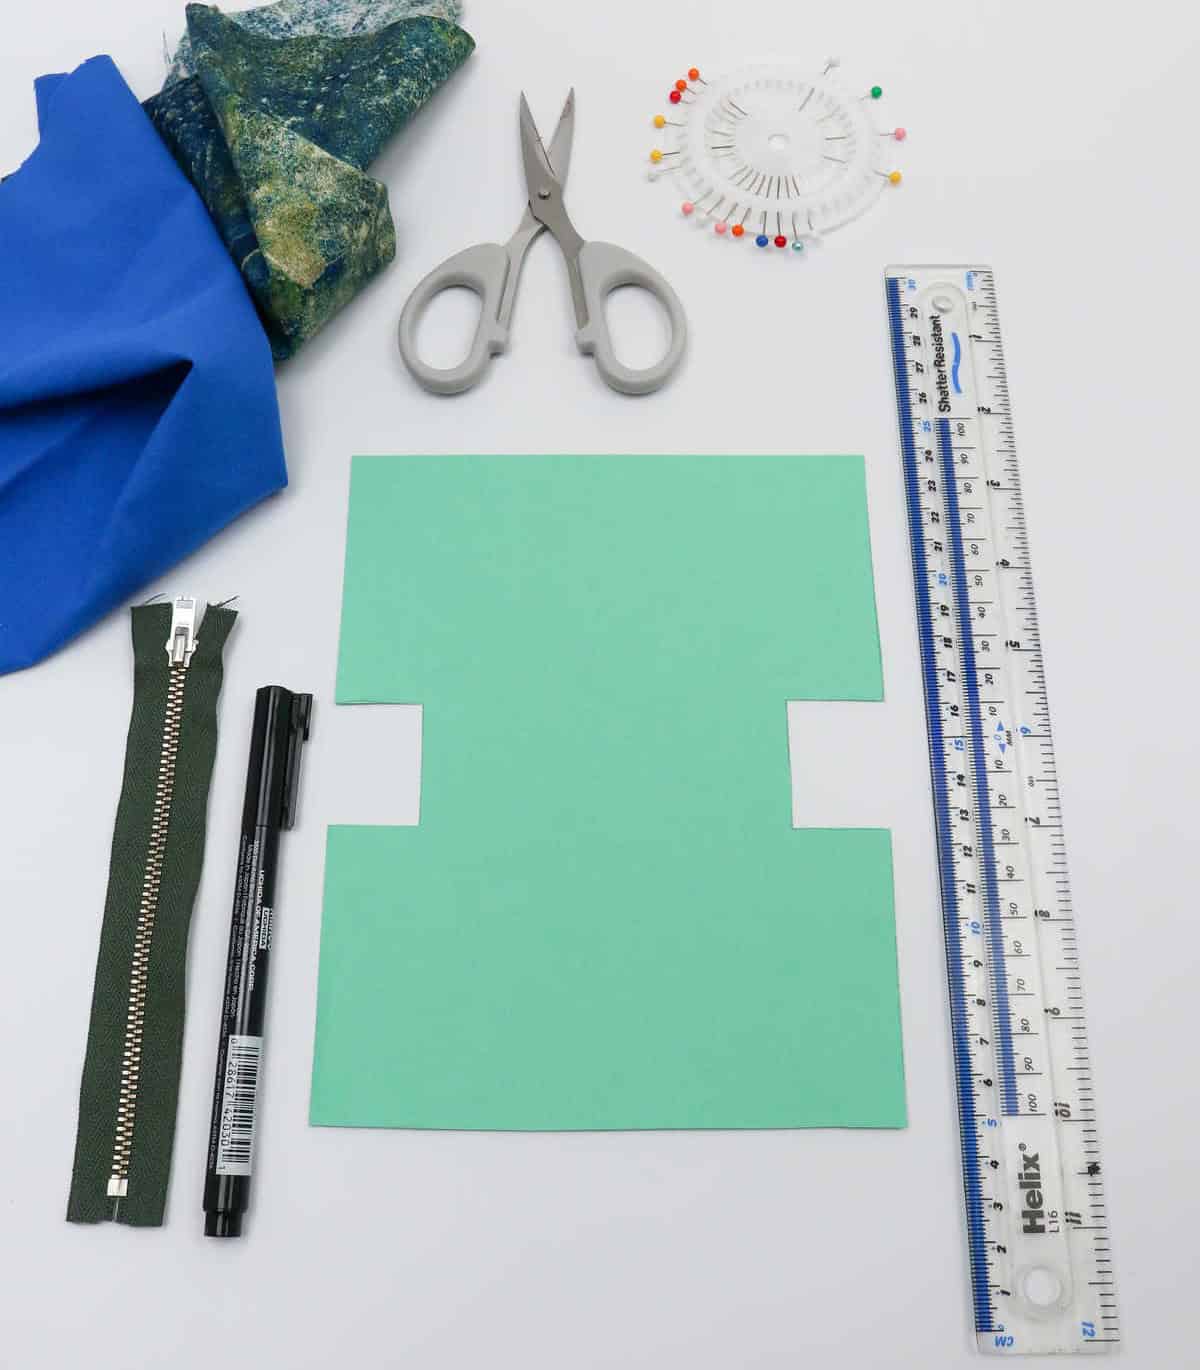
To get started, gather the essential materials needed for this project. These include two pieces of cotton fabric, each measuring 10 inches by 10 inches, a zipper that is approximately 6 inches long, a paper pattern (introduced in Step 1), scissors, a ruler, a marker, and sewing pins. Make sure to have all these items readily available before proceeding with the tutorial.
How to Sew a Zipper Pouch
When embarking on the DIY journey of creating a zipper from scratch using scrap fabric, it’s essential to prepare your sewing machine. Although it’s possible to hand-sew the zipper with needle and thread, using a machine is crucial for ensuring strong and durable stitches – particularly when sewing the zipper itself.
Step 1
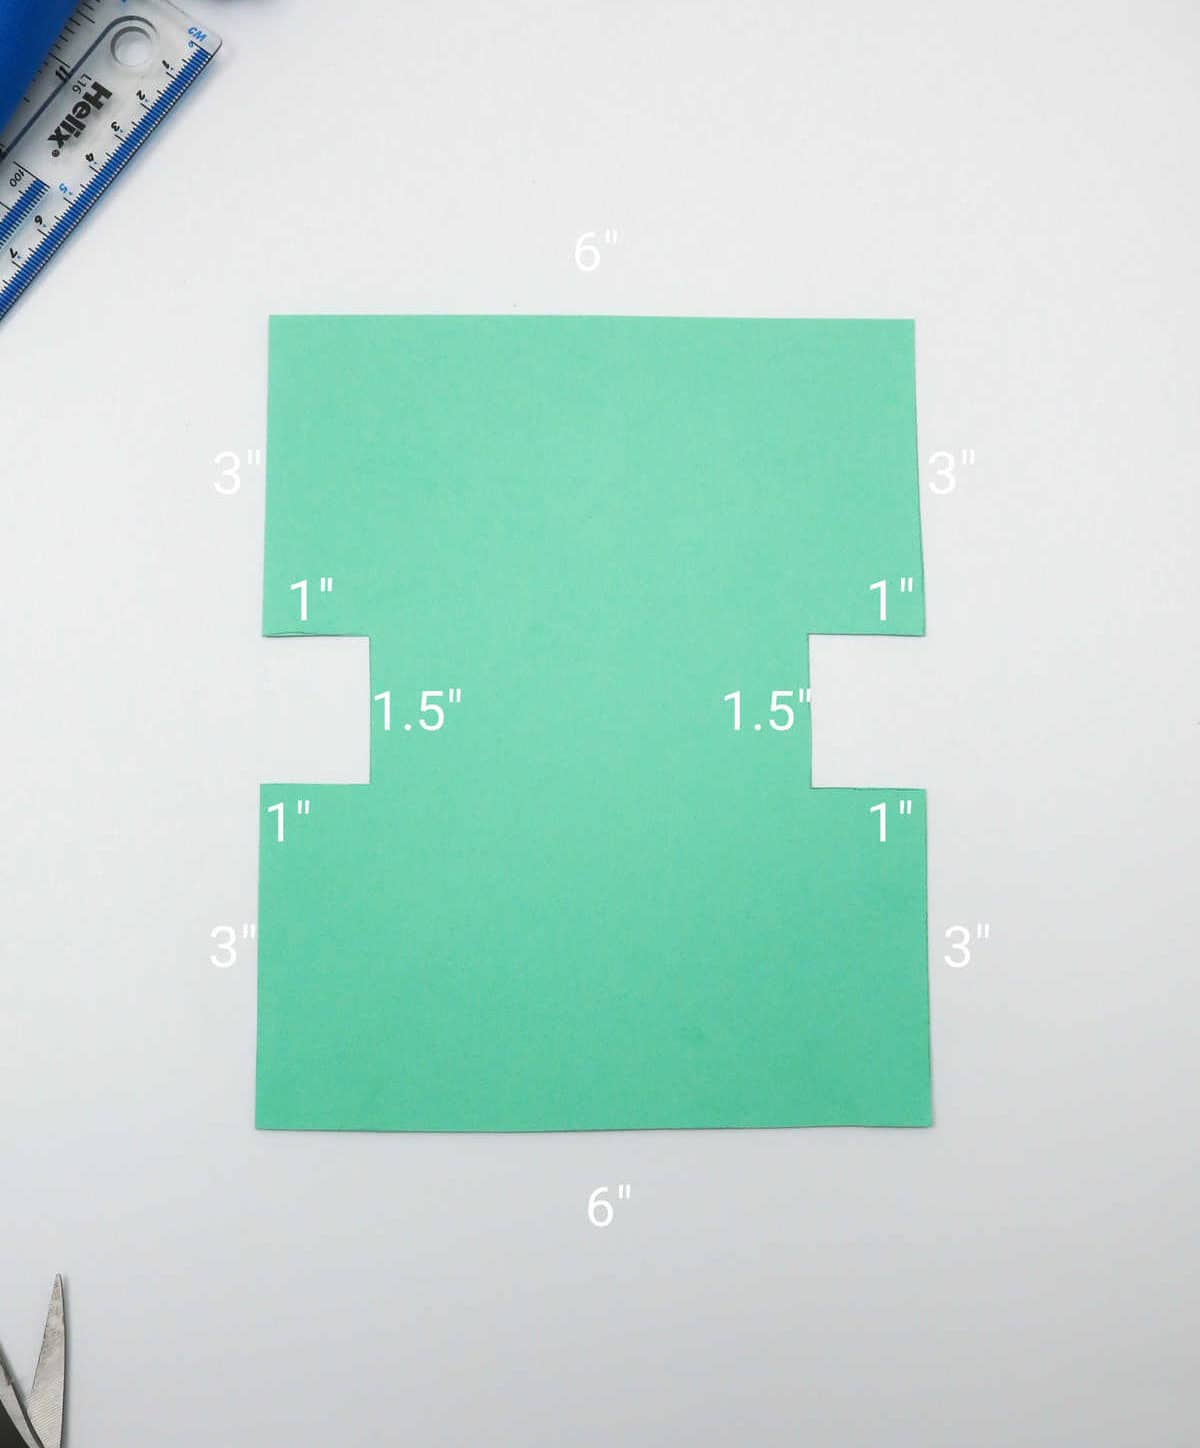
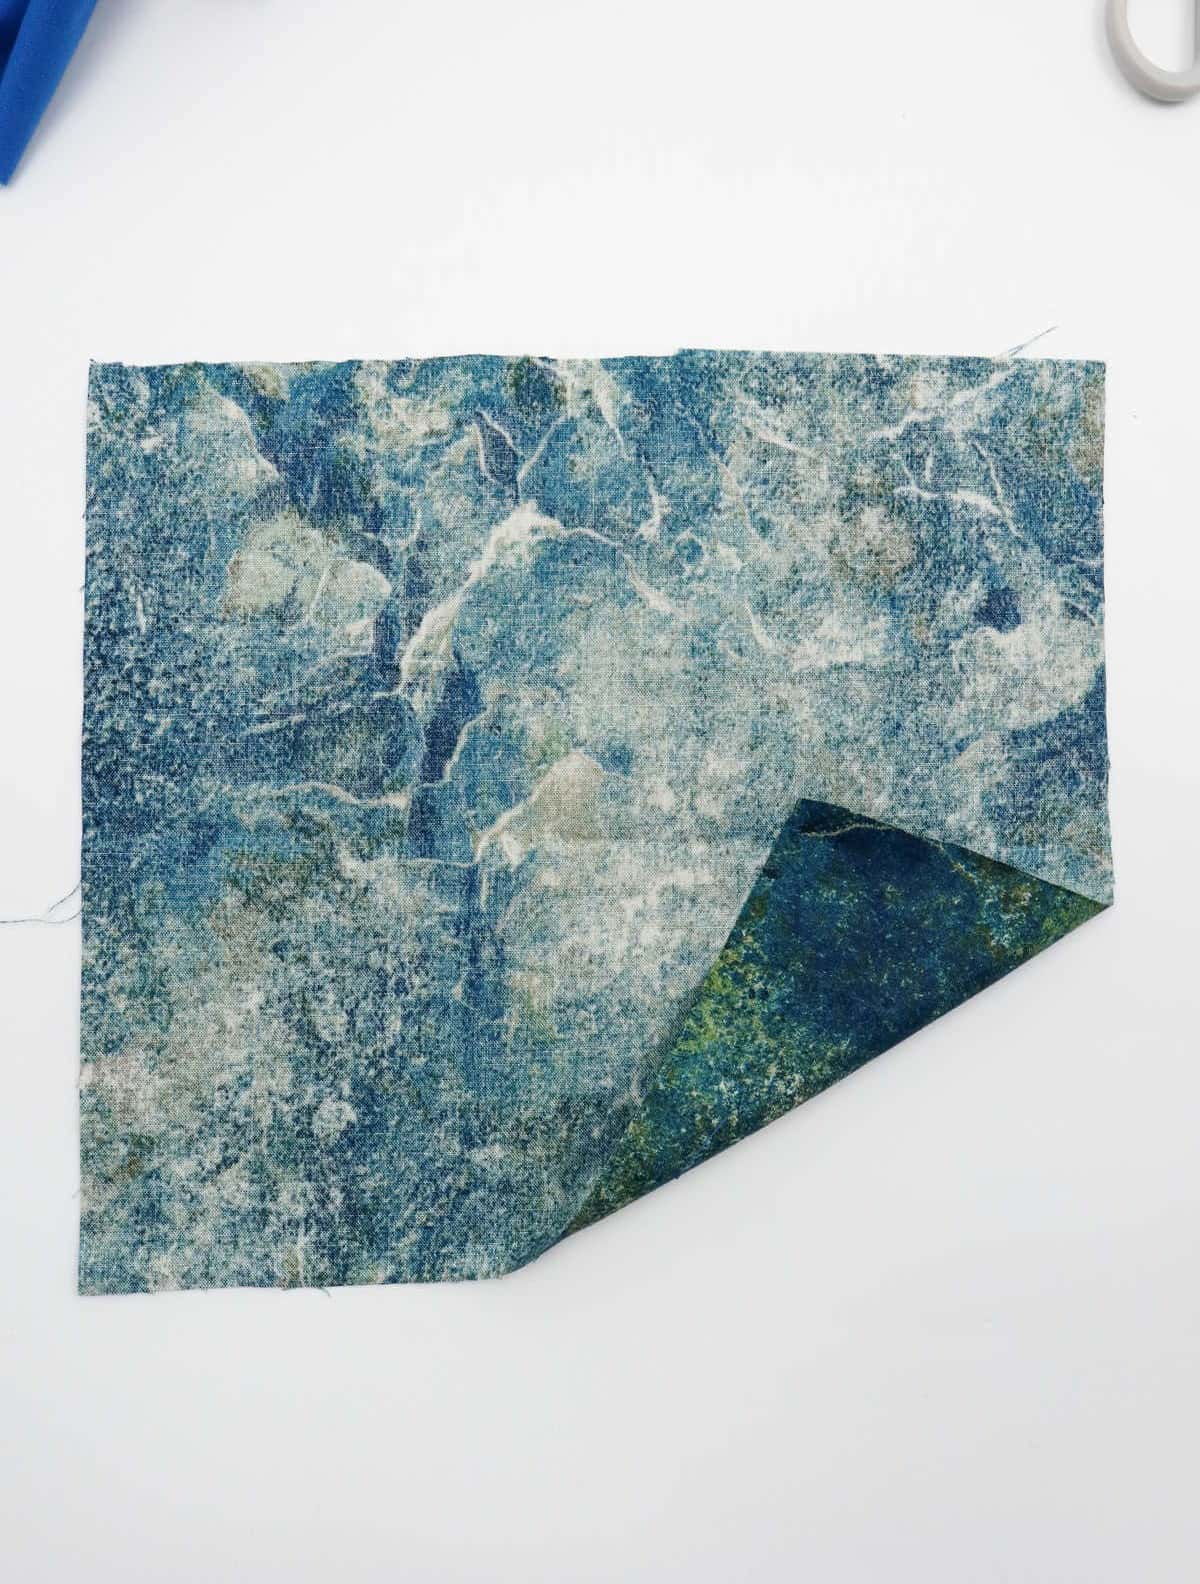
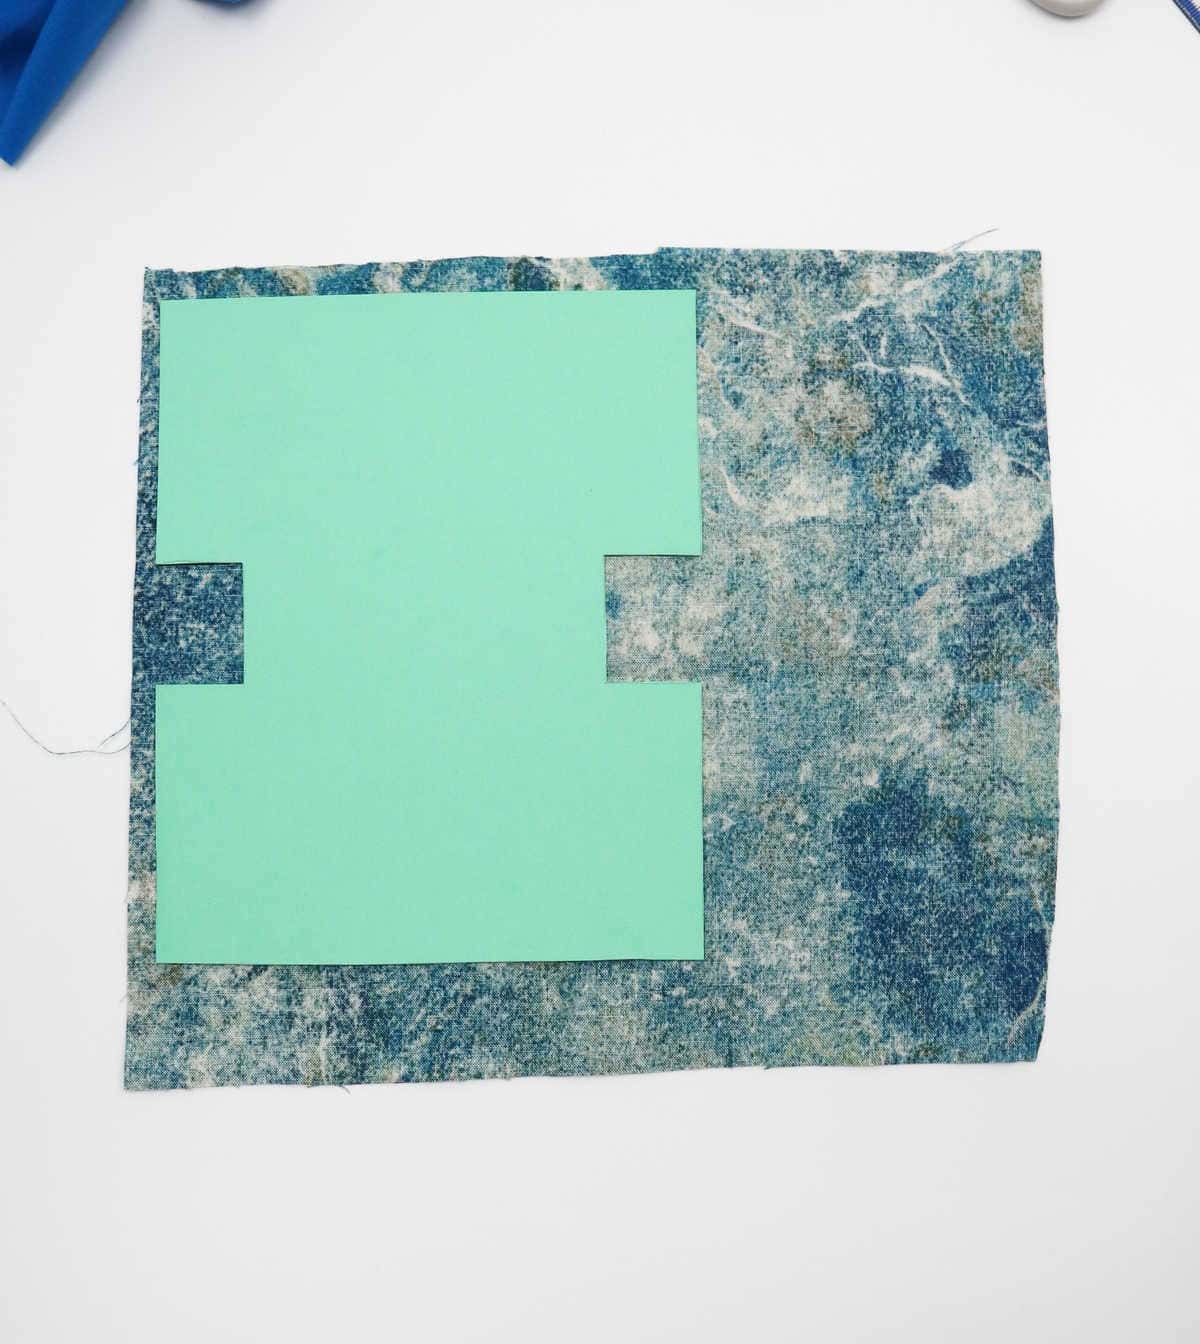
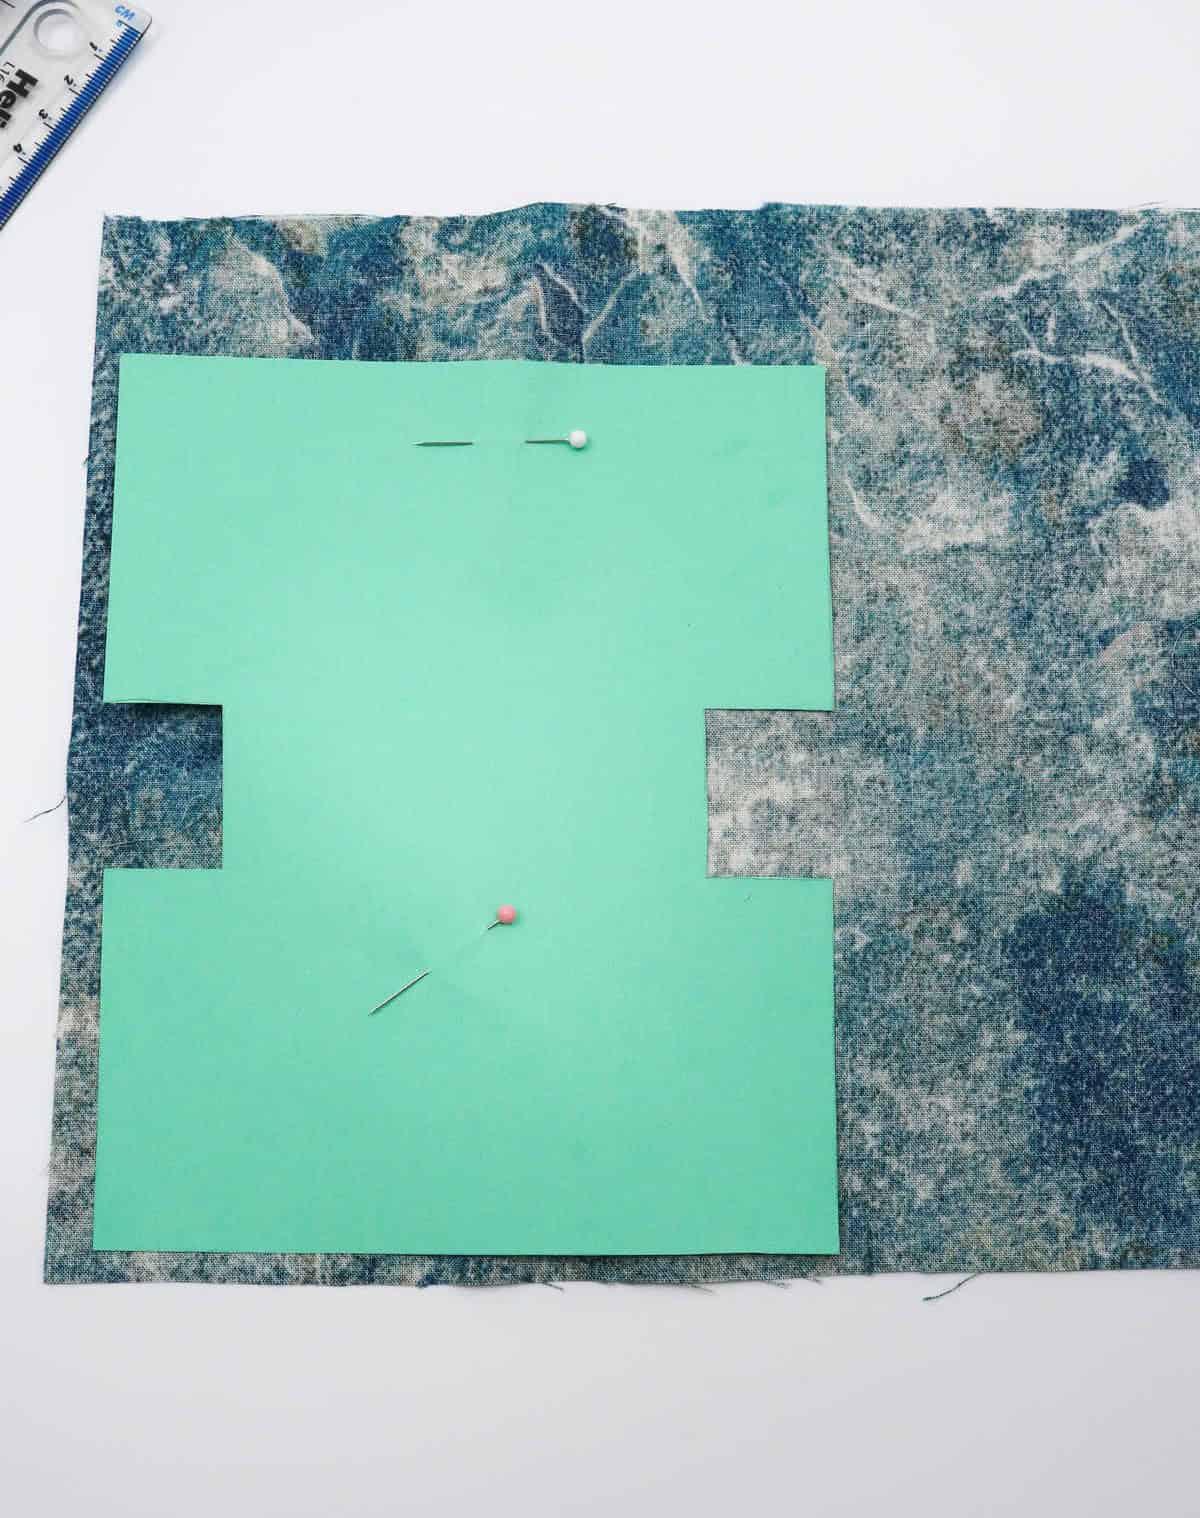
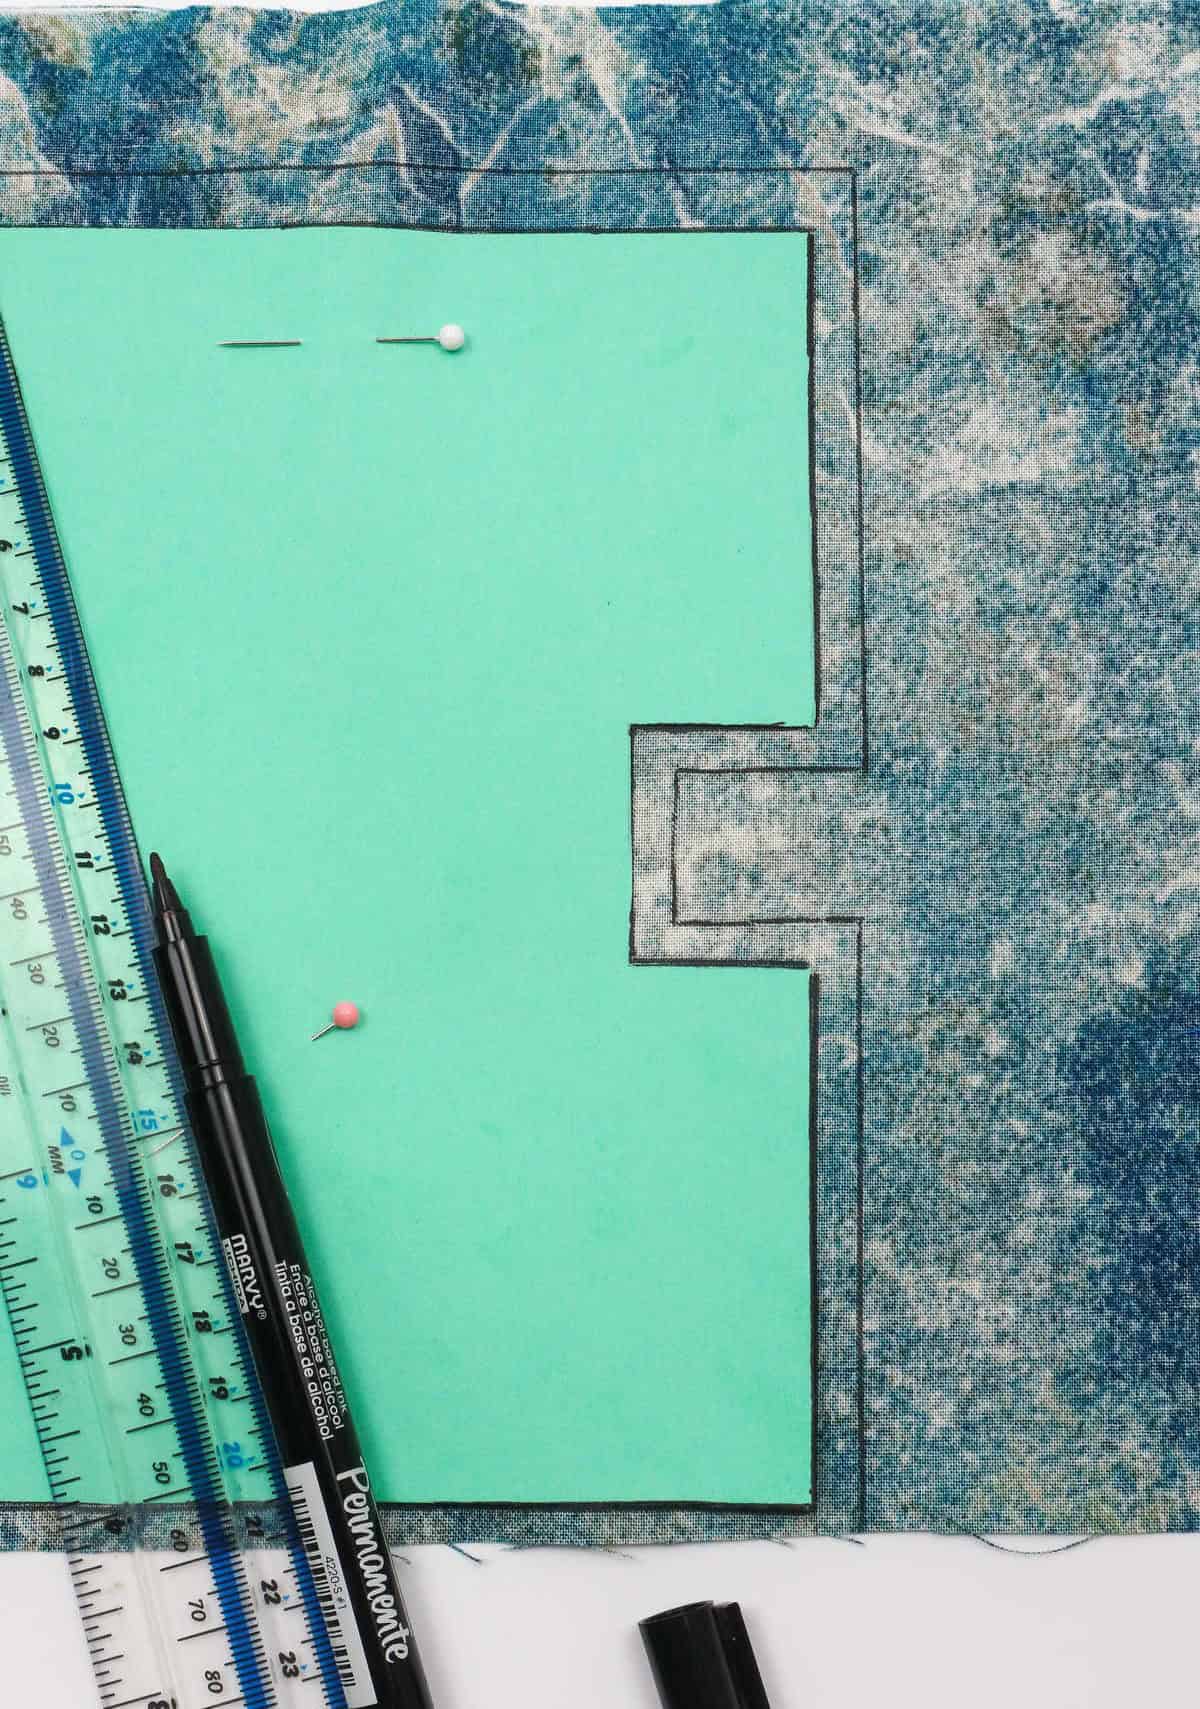
To ensure accurate cutting of fabric for your sewing projects, consider creating a paper template. This simple tool can save you time and frustration by helping to prevent errors. To create this template, start by laying your fabric on a flat surface with the wrong side facing up. Next, place the cut-out pattern over the fabric, aligning it carefully before securing it in place using sewing pins.
By following these steps, you’ll be able to achieve precise cuts and a professional finish for your projects.
Step 2
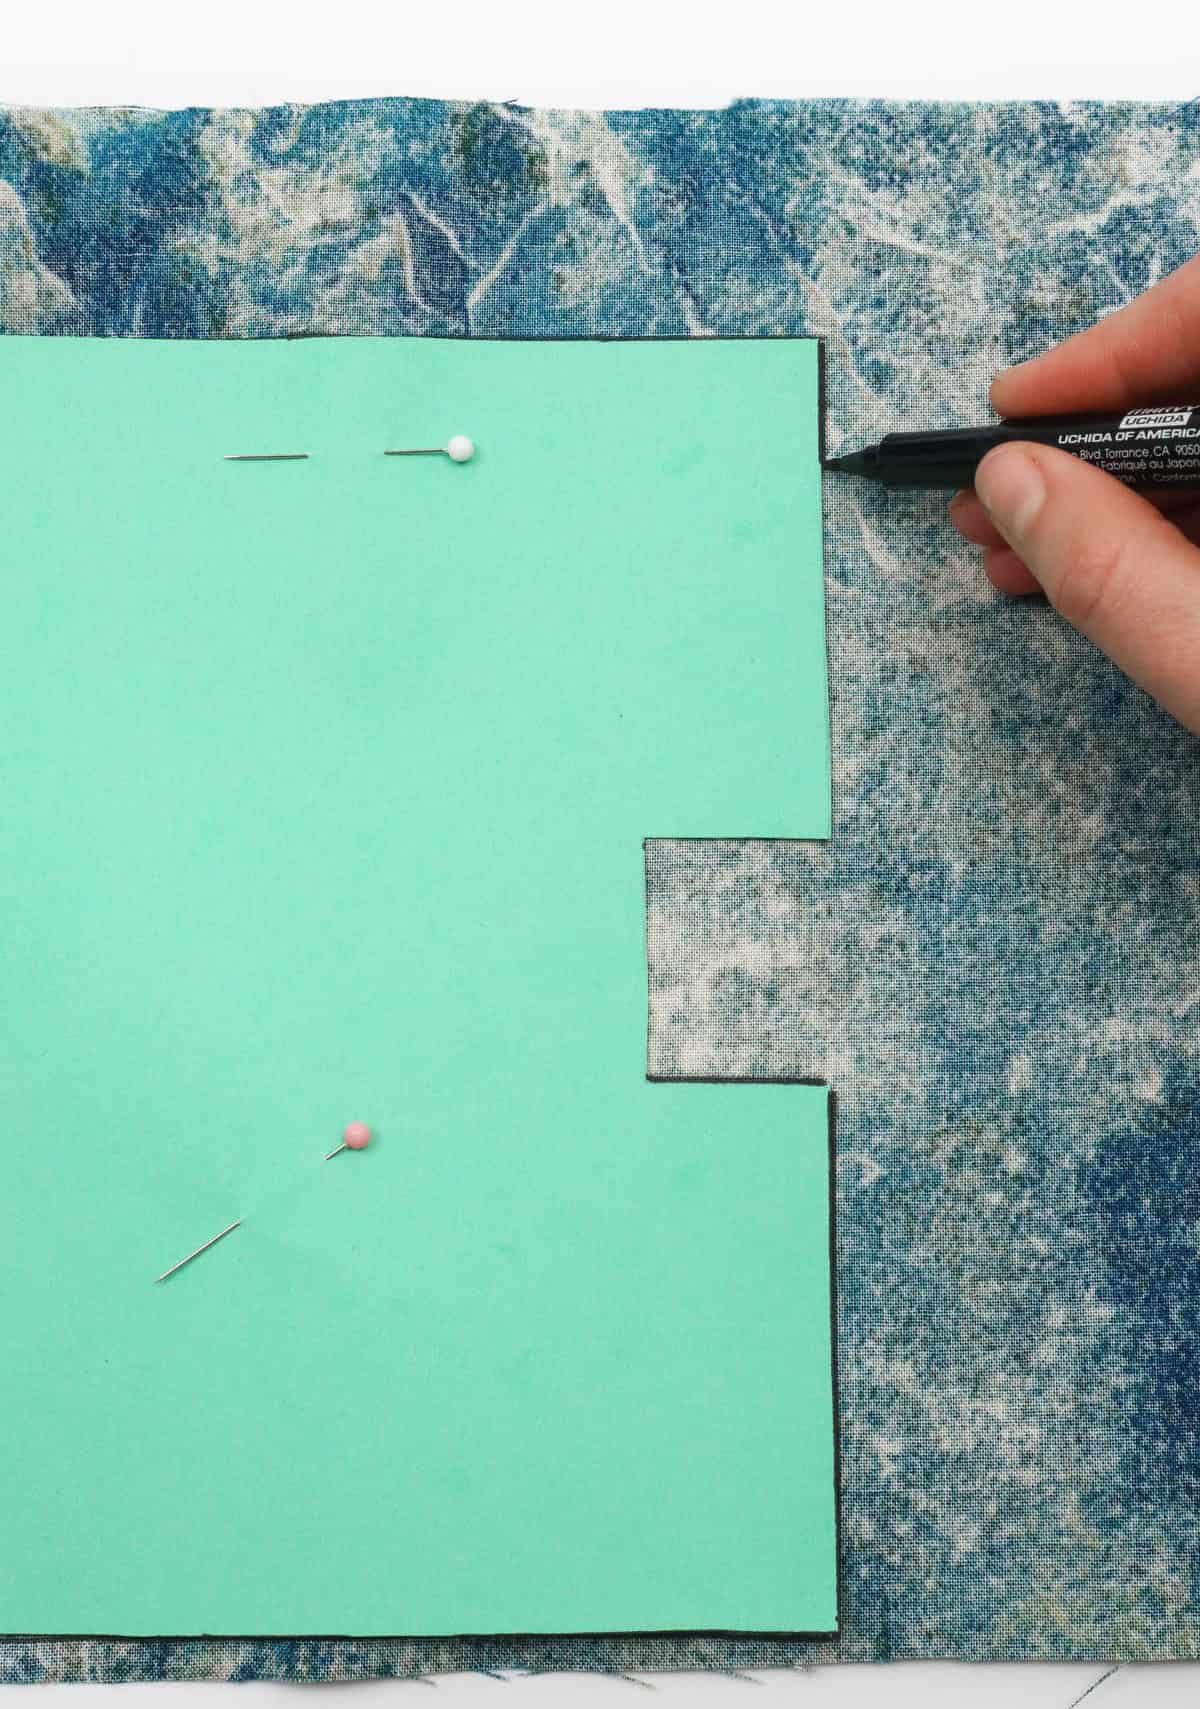
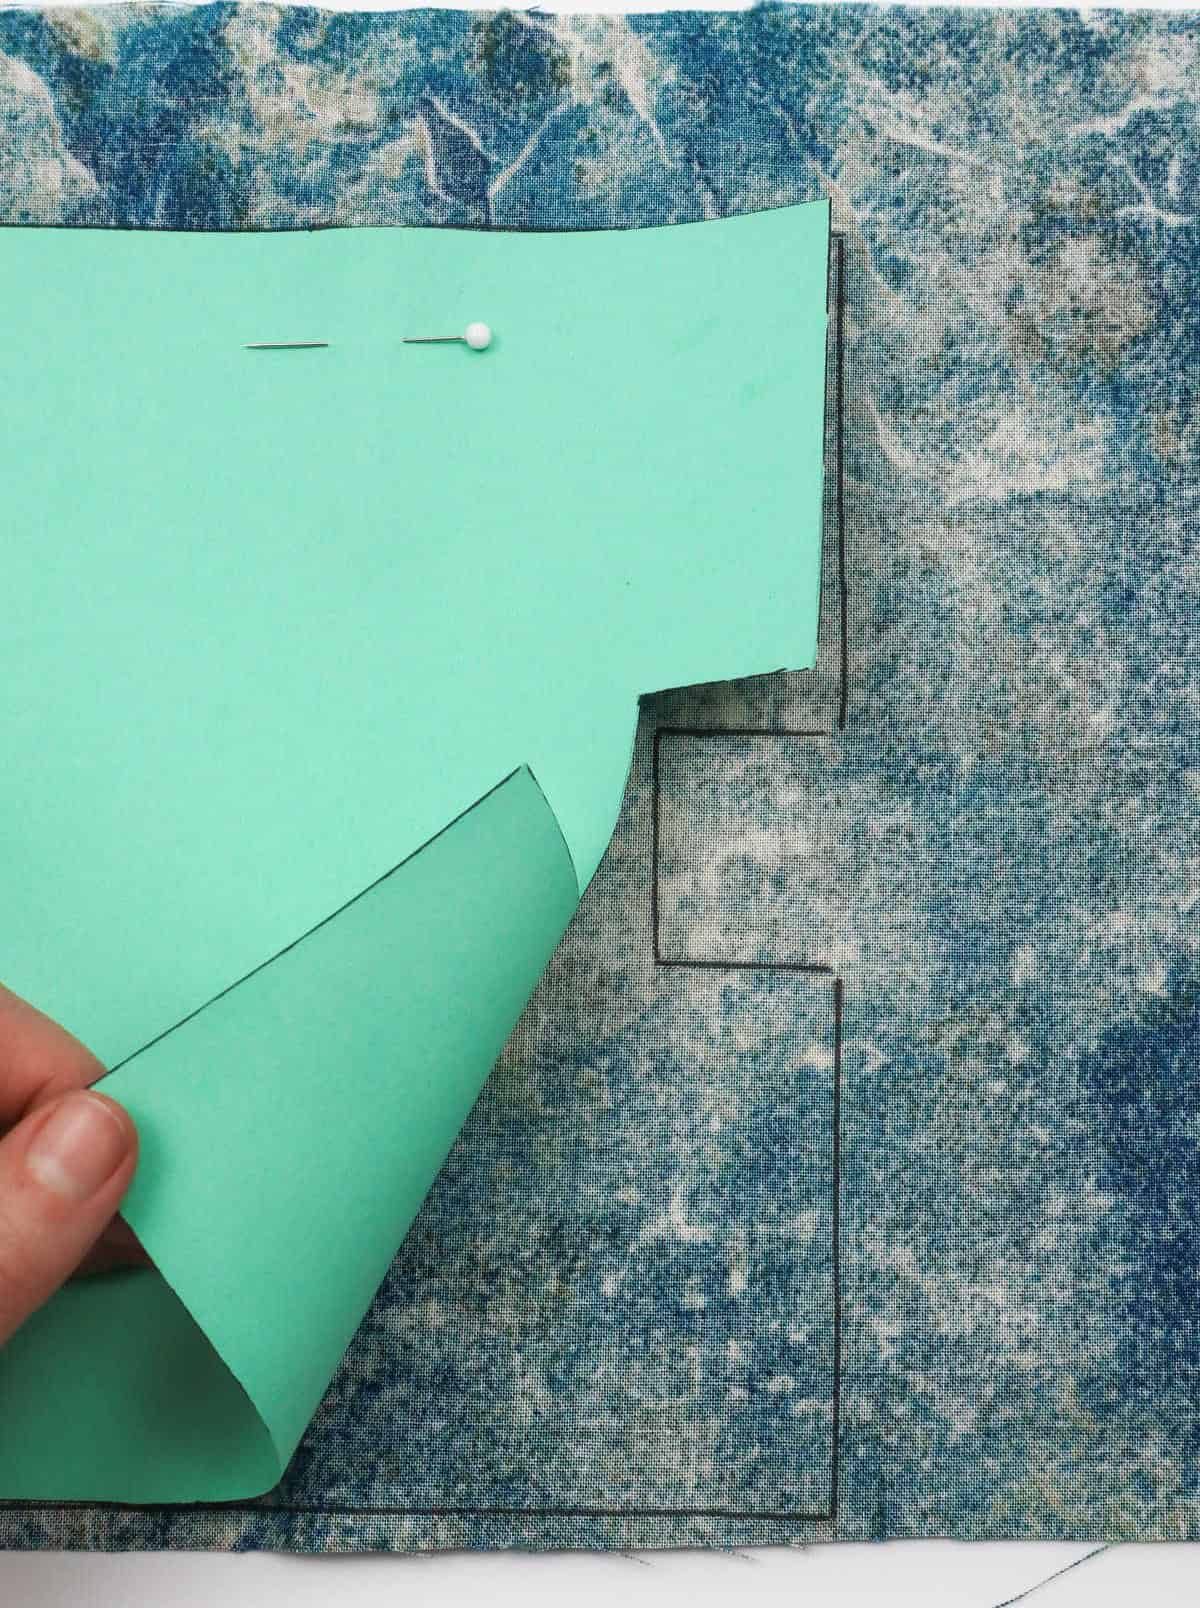
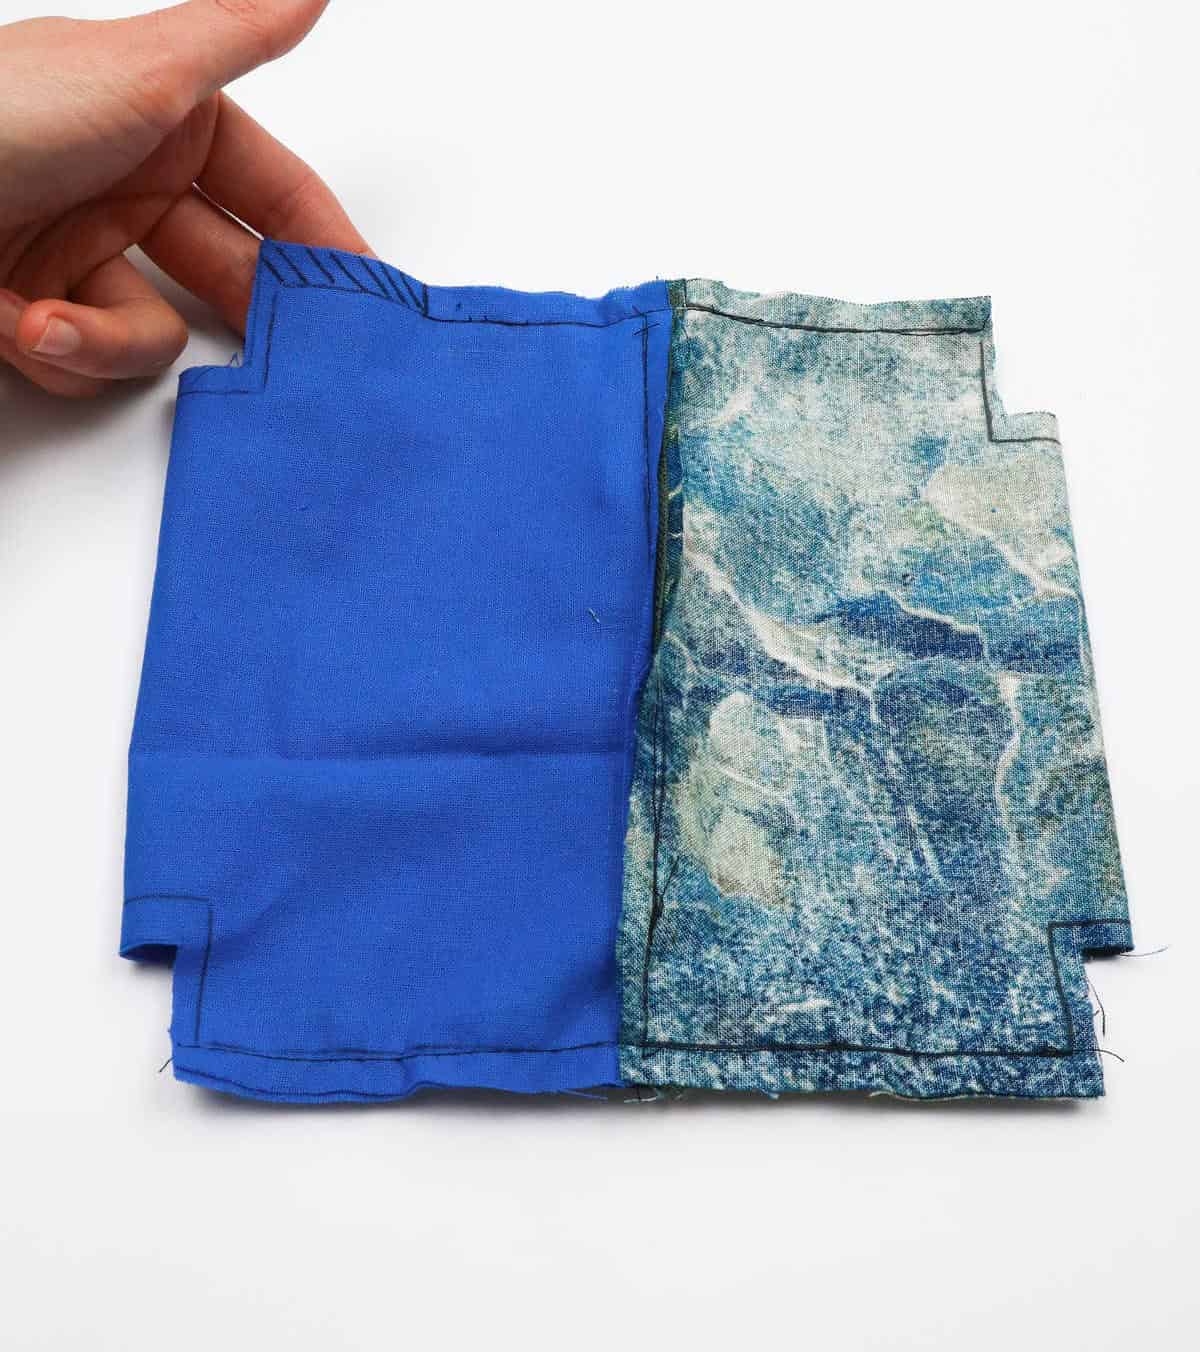
To begin tracing the design onto your fabric, grab a black marker and carefully outline the pattern’s shape. For added precision, consider using a ruler to draw straight lines. As you work, take a moment to lift the paper pattern and inspect your marks for accuracy.
Step 3
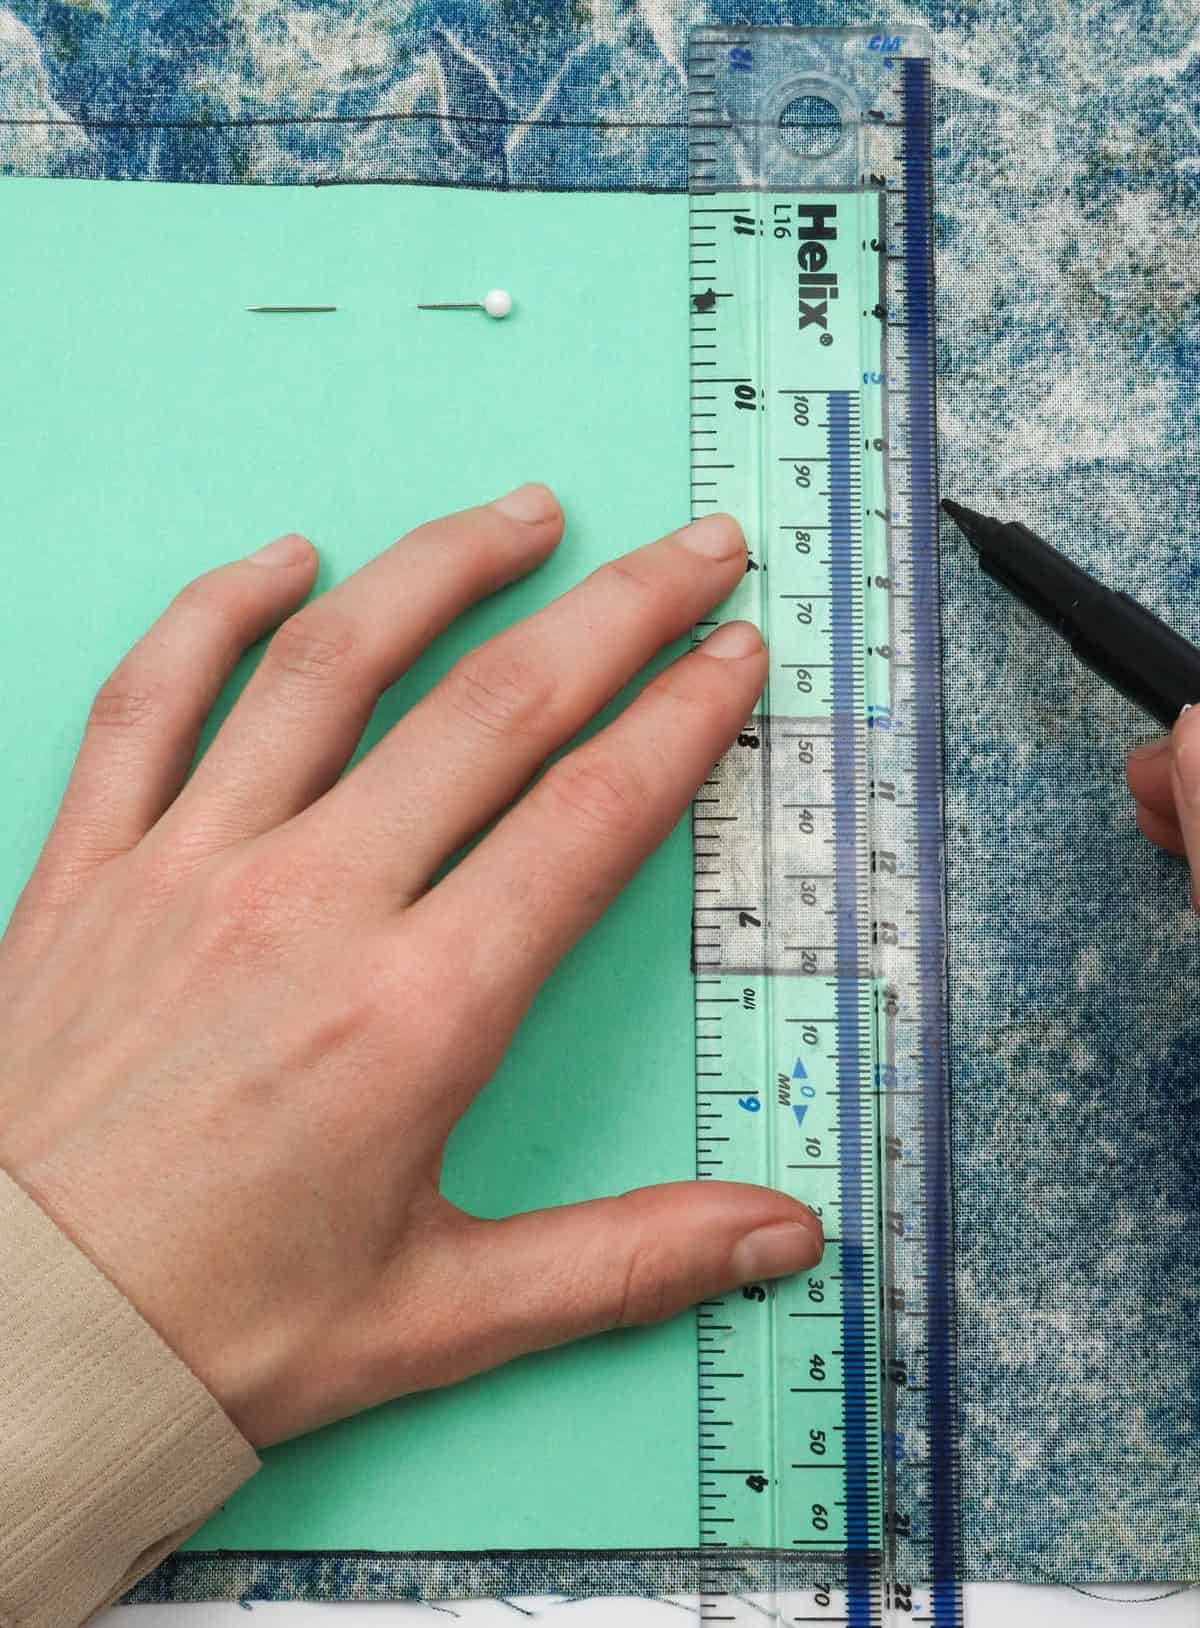
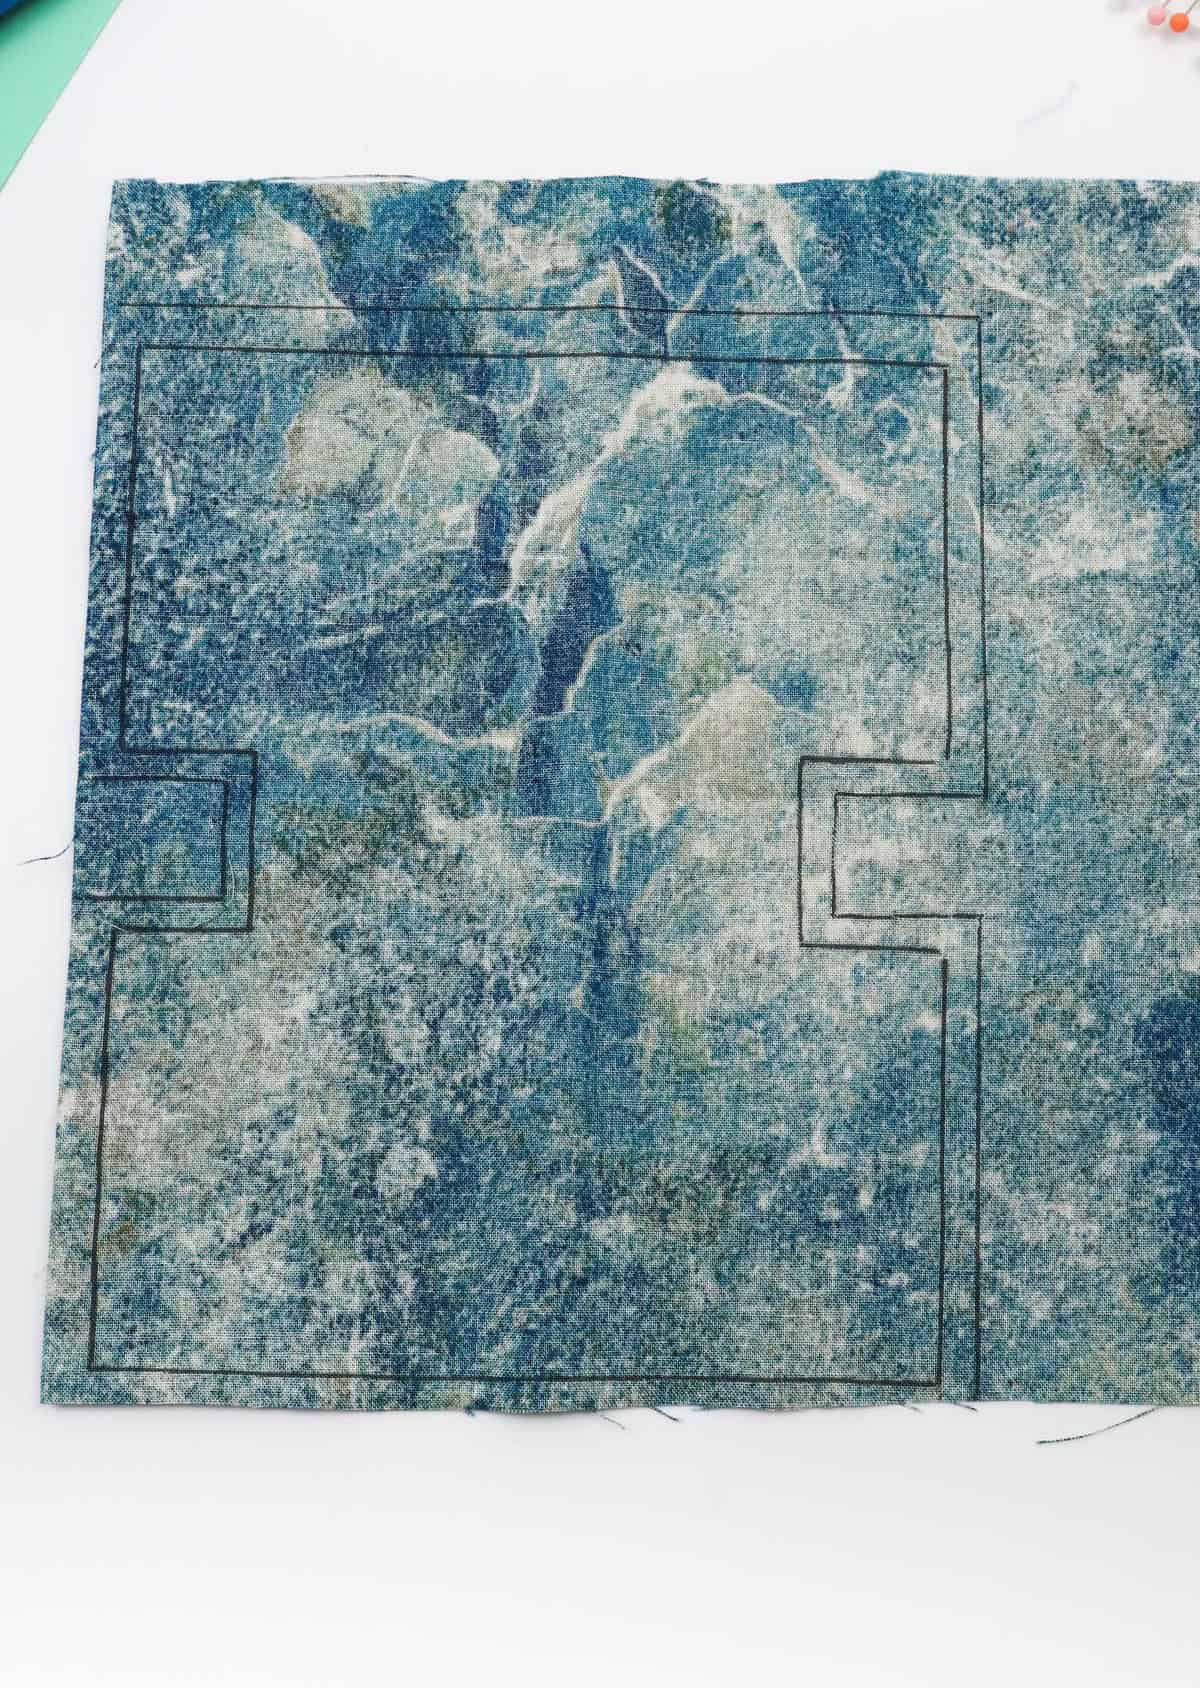
To complete the pattern, draw another outline around the entire piece of fabric. However, this time, maintain a quarter-inch distance from your initial outline. This added edging will serve as your seam allowance, ensuring a seamless join and concealing any raw edges. Once you’ve drawn the new outline, unpin it and set it aside for now. The resulting marking on your fabric should resemble a slightly offset border.
Step 4
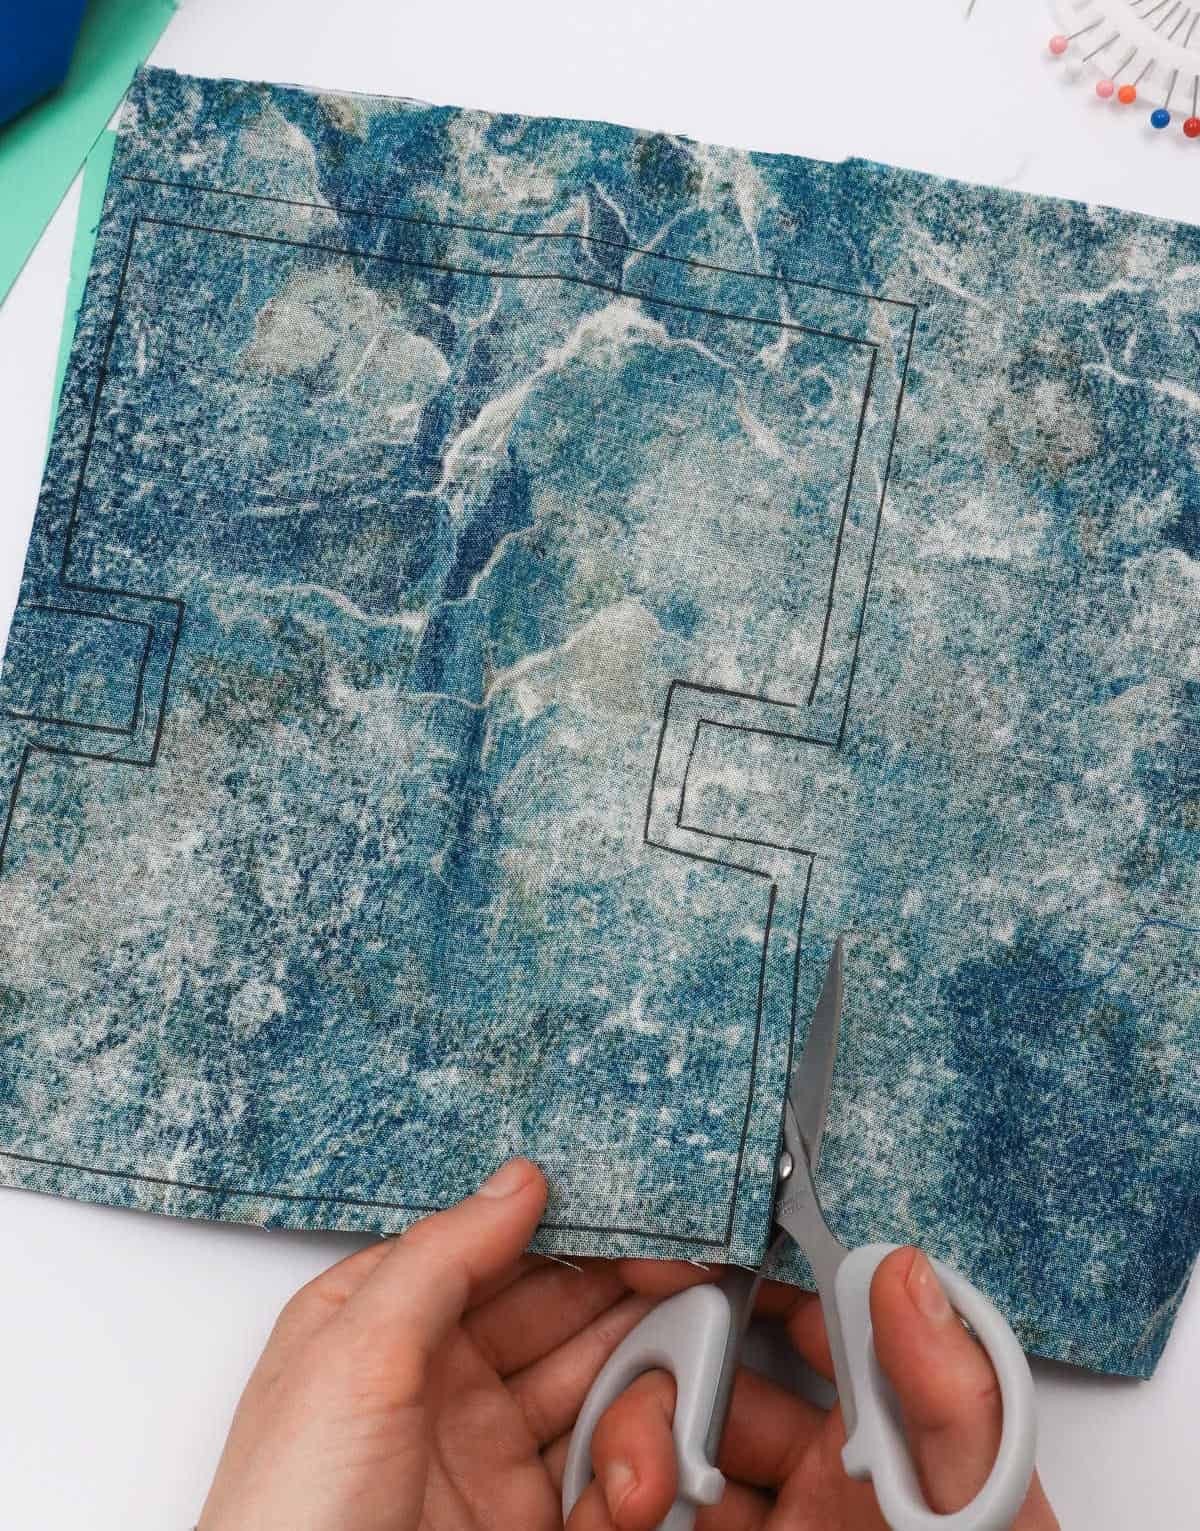
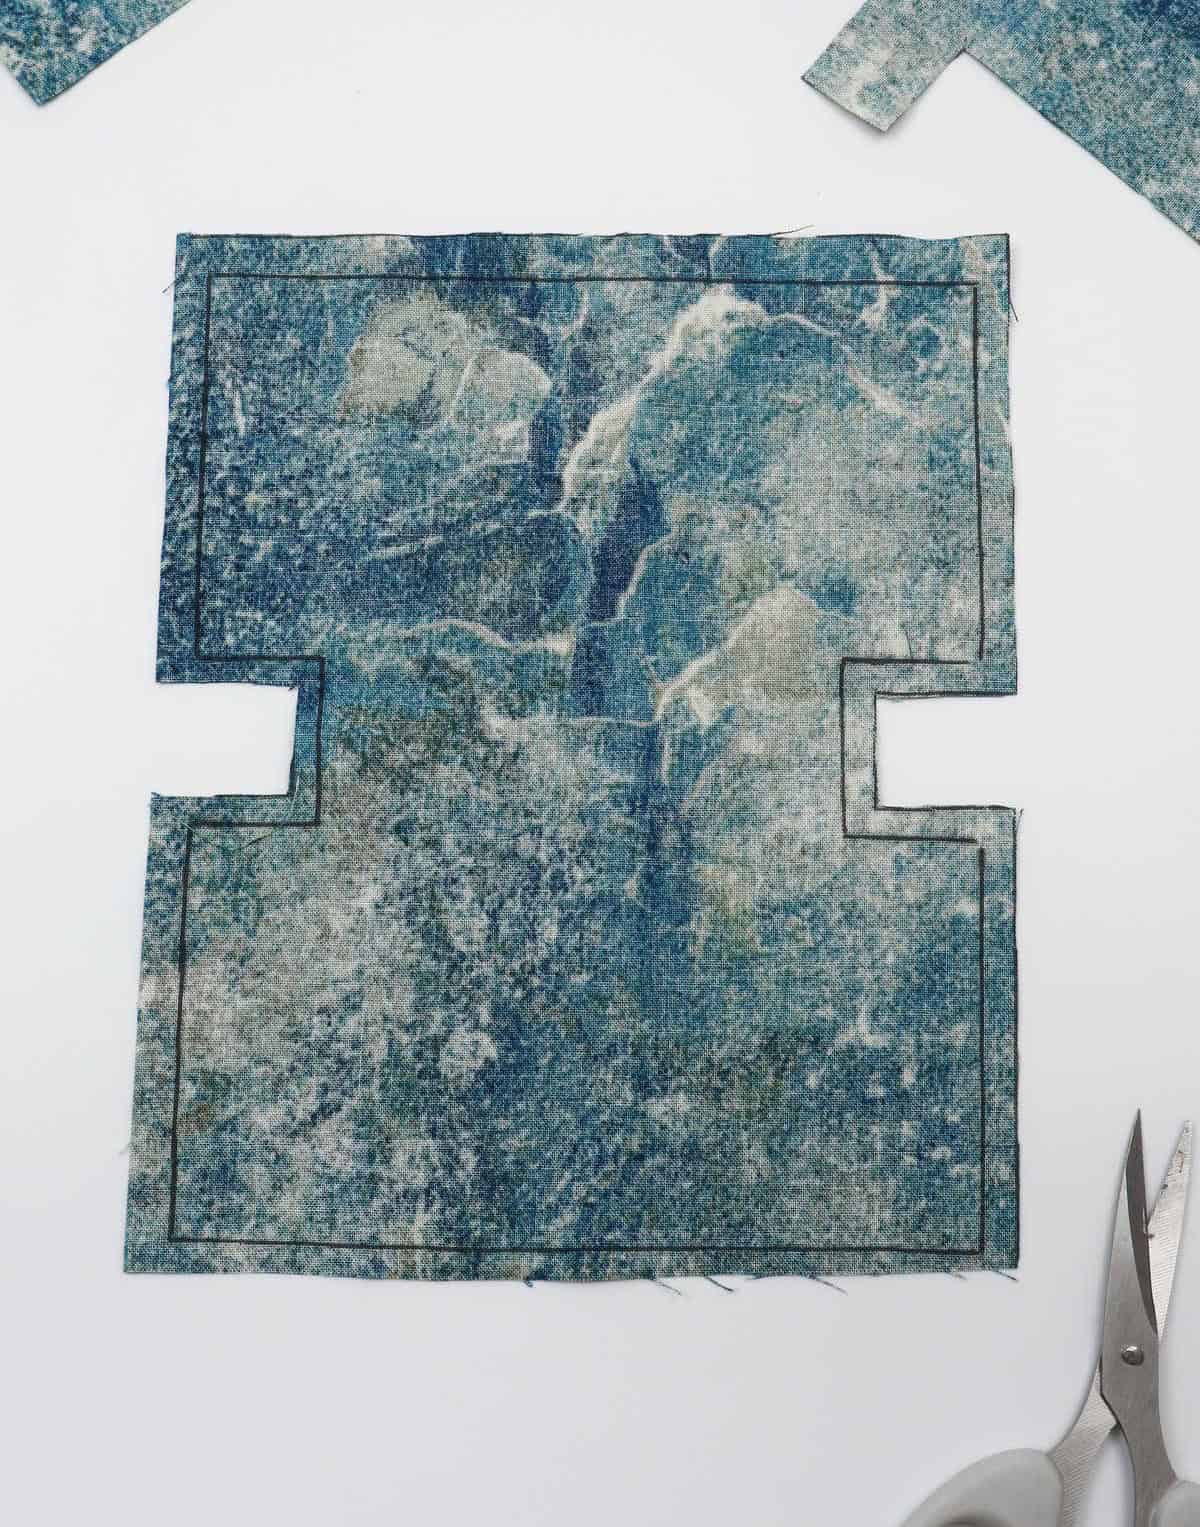
To complete the first step in your DIY project, carefully gather a pair of cloth scissors that are designed to provide smooth, accurate cuts. With these high-quality tools in hand, place the fabric along the edge guide or the outer outline you drew earlier. Proceed to cut along this border, ensuring a clean and precise finish.
Step 5
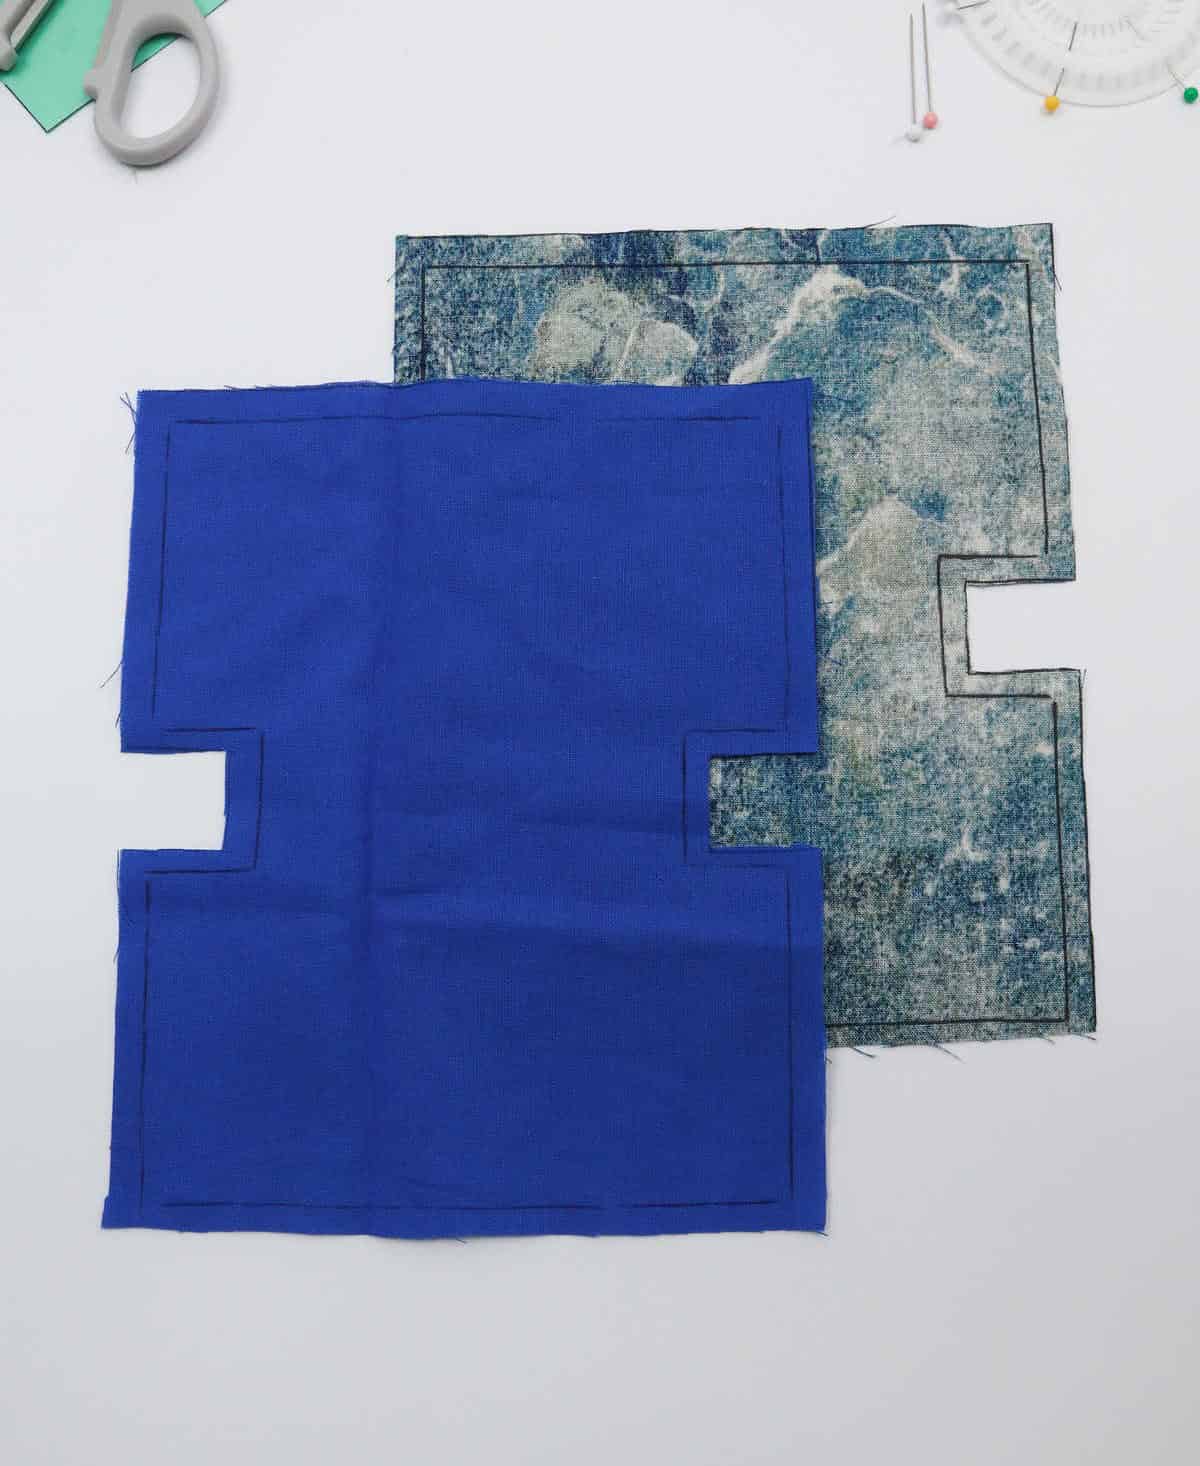
For optimal results, follow the same instructions for the second swatch of fabric as you did for the first one. This ensures that both samples are treated and analyzed consistently, allowing you to make accurate comparisons between them.
Step 6
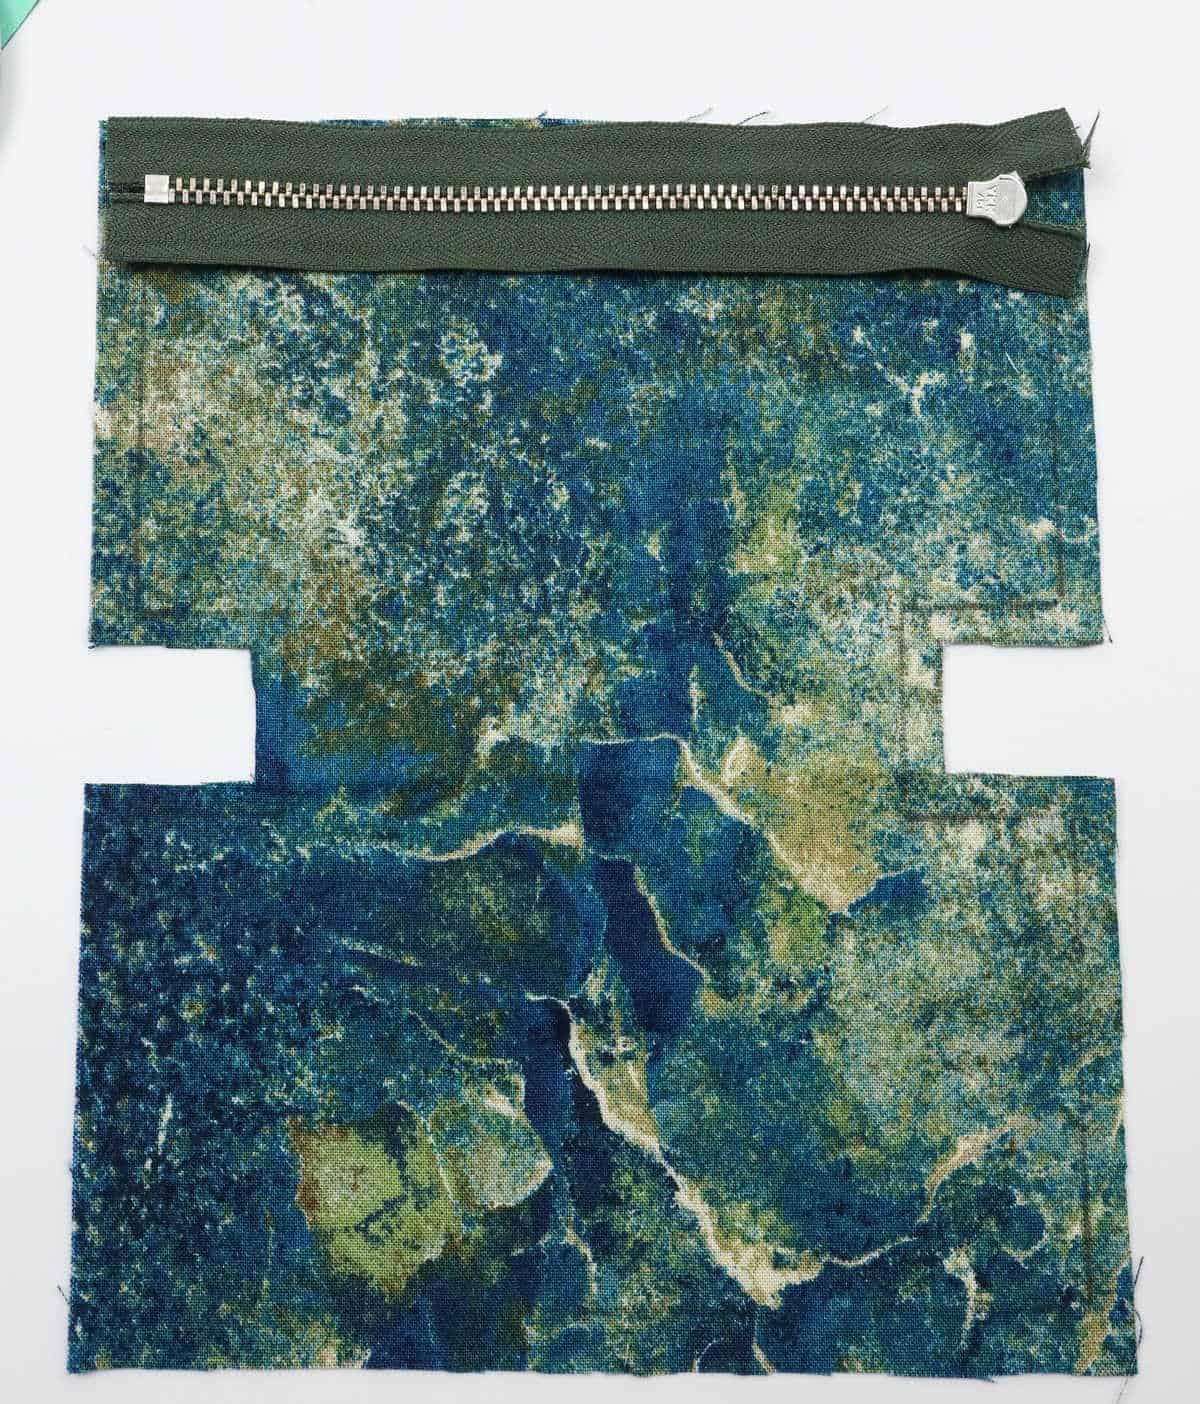
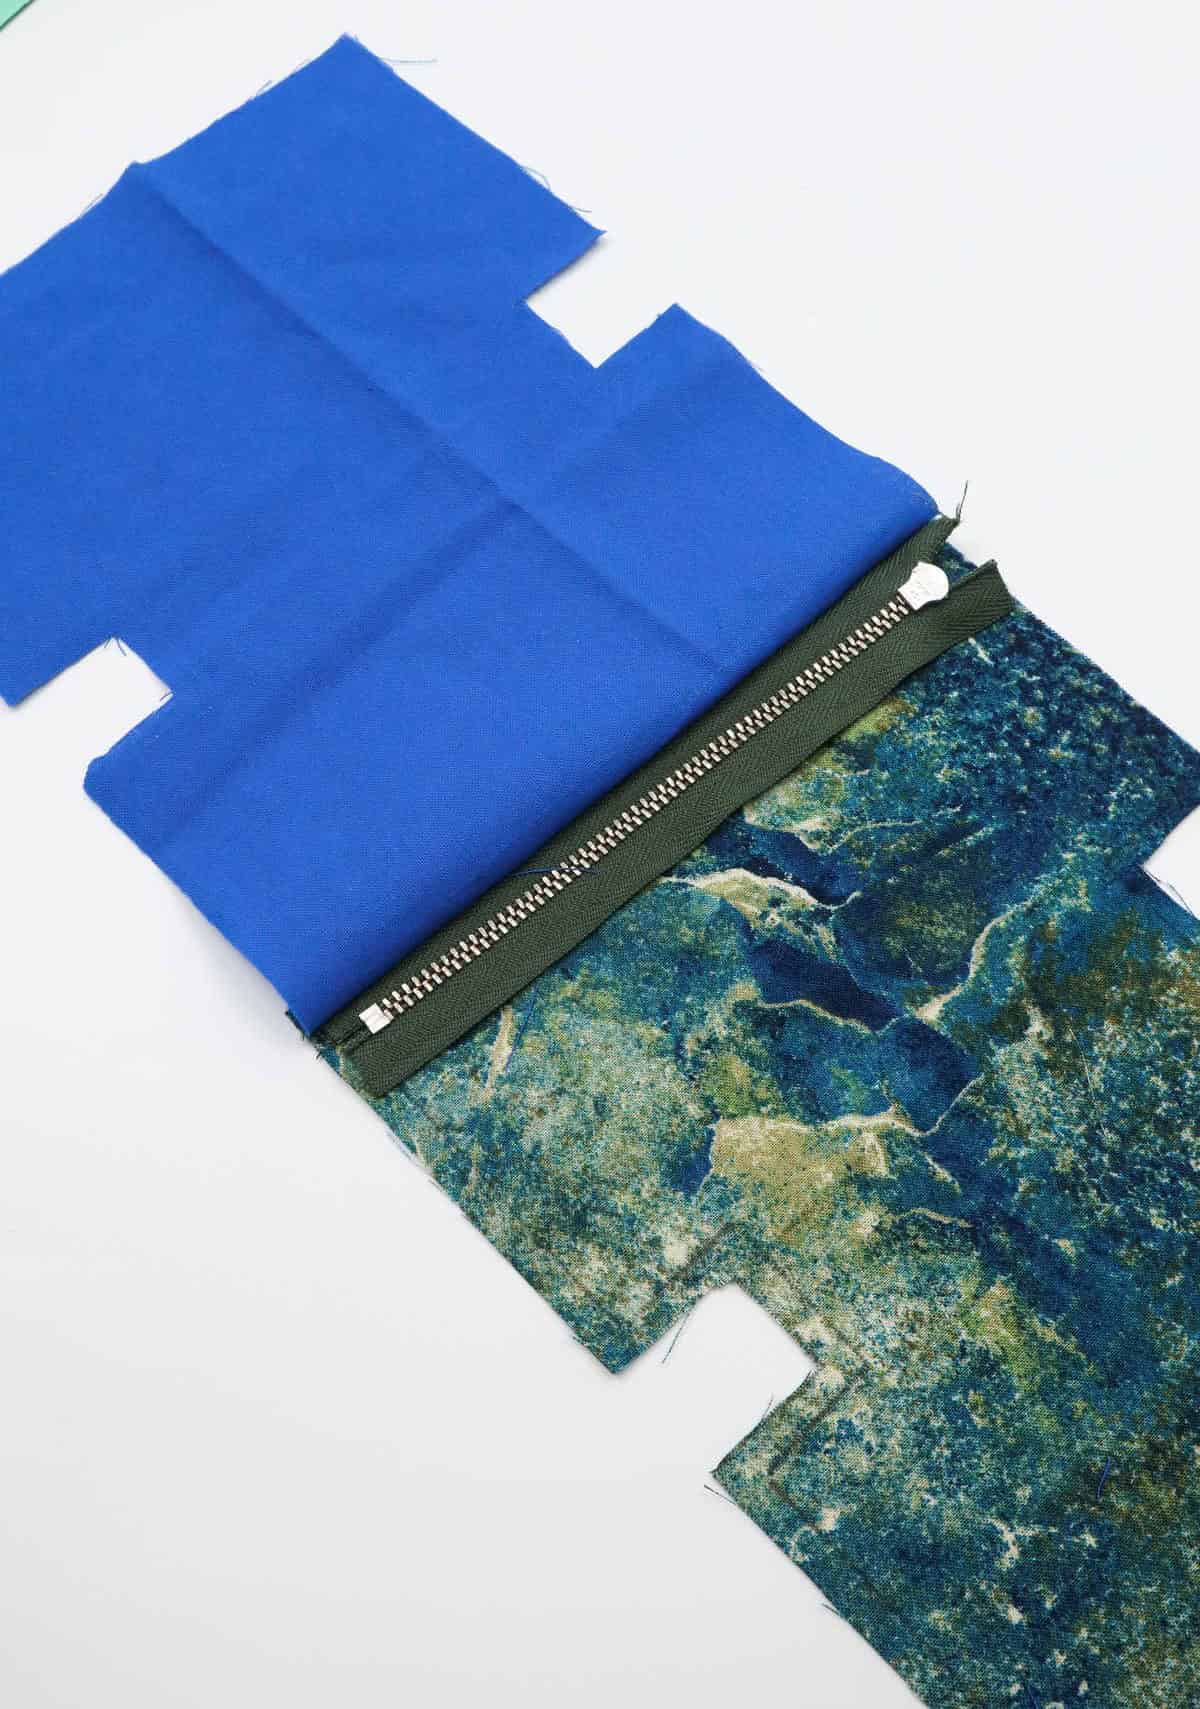
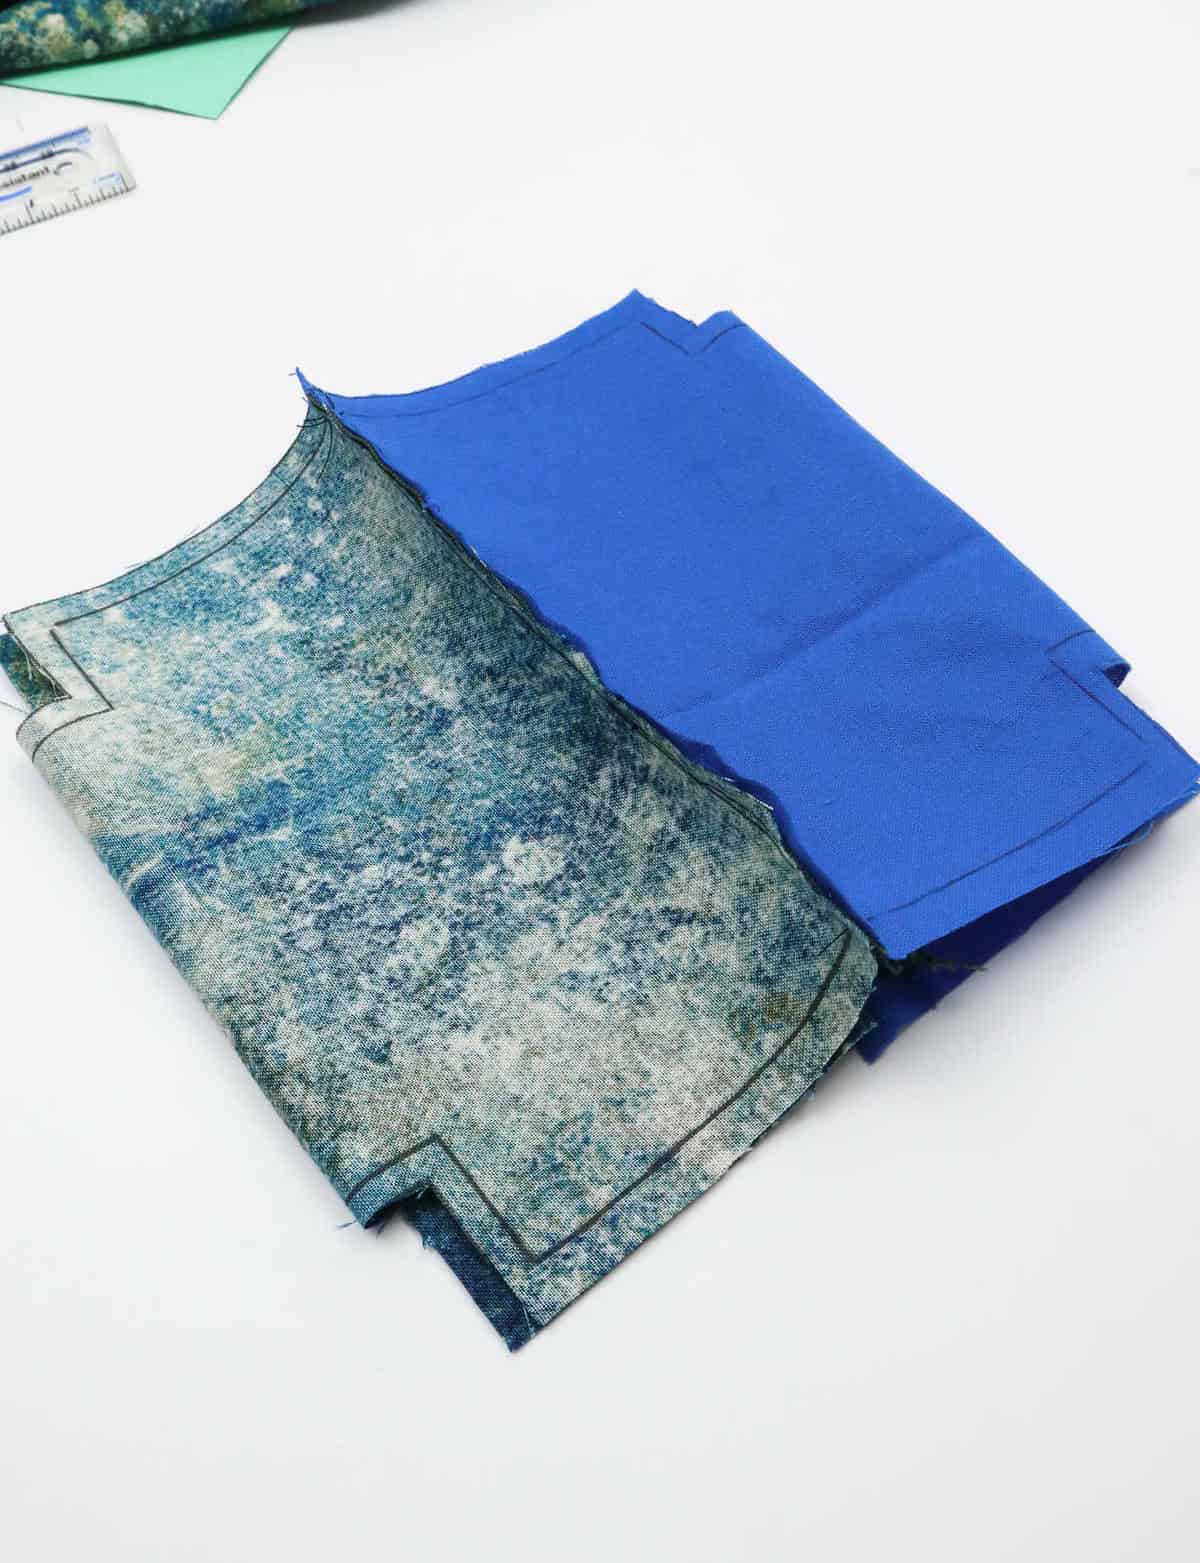
As you prepare to bring your project together, begin by laying out the outer fabric on a stable work surface. Ensure it’s positioned with the right side facing upwards. Next, carefully place the zipper atop the fabric, ensuring it’s centered and the zipper itself is facing downwards. The alignment should resemble what’s depicted here. Following this step, take the second fabric cutout and position it over the zipper. As you do so, make sure the outlined edging remains visible.
This means both fabric swatches will have their right sides facing inward, towards each other. Before commencing sewing, double-check that all edges are neatly aligned and smooth out any wrinkles in the fabric as needed.
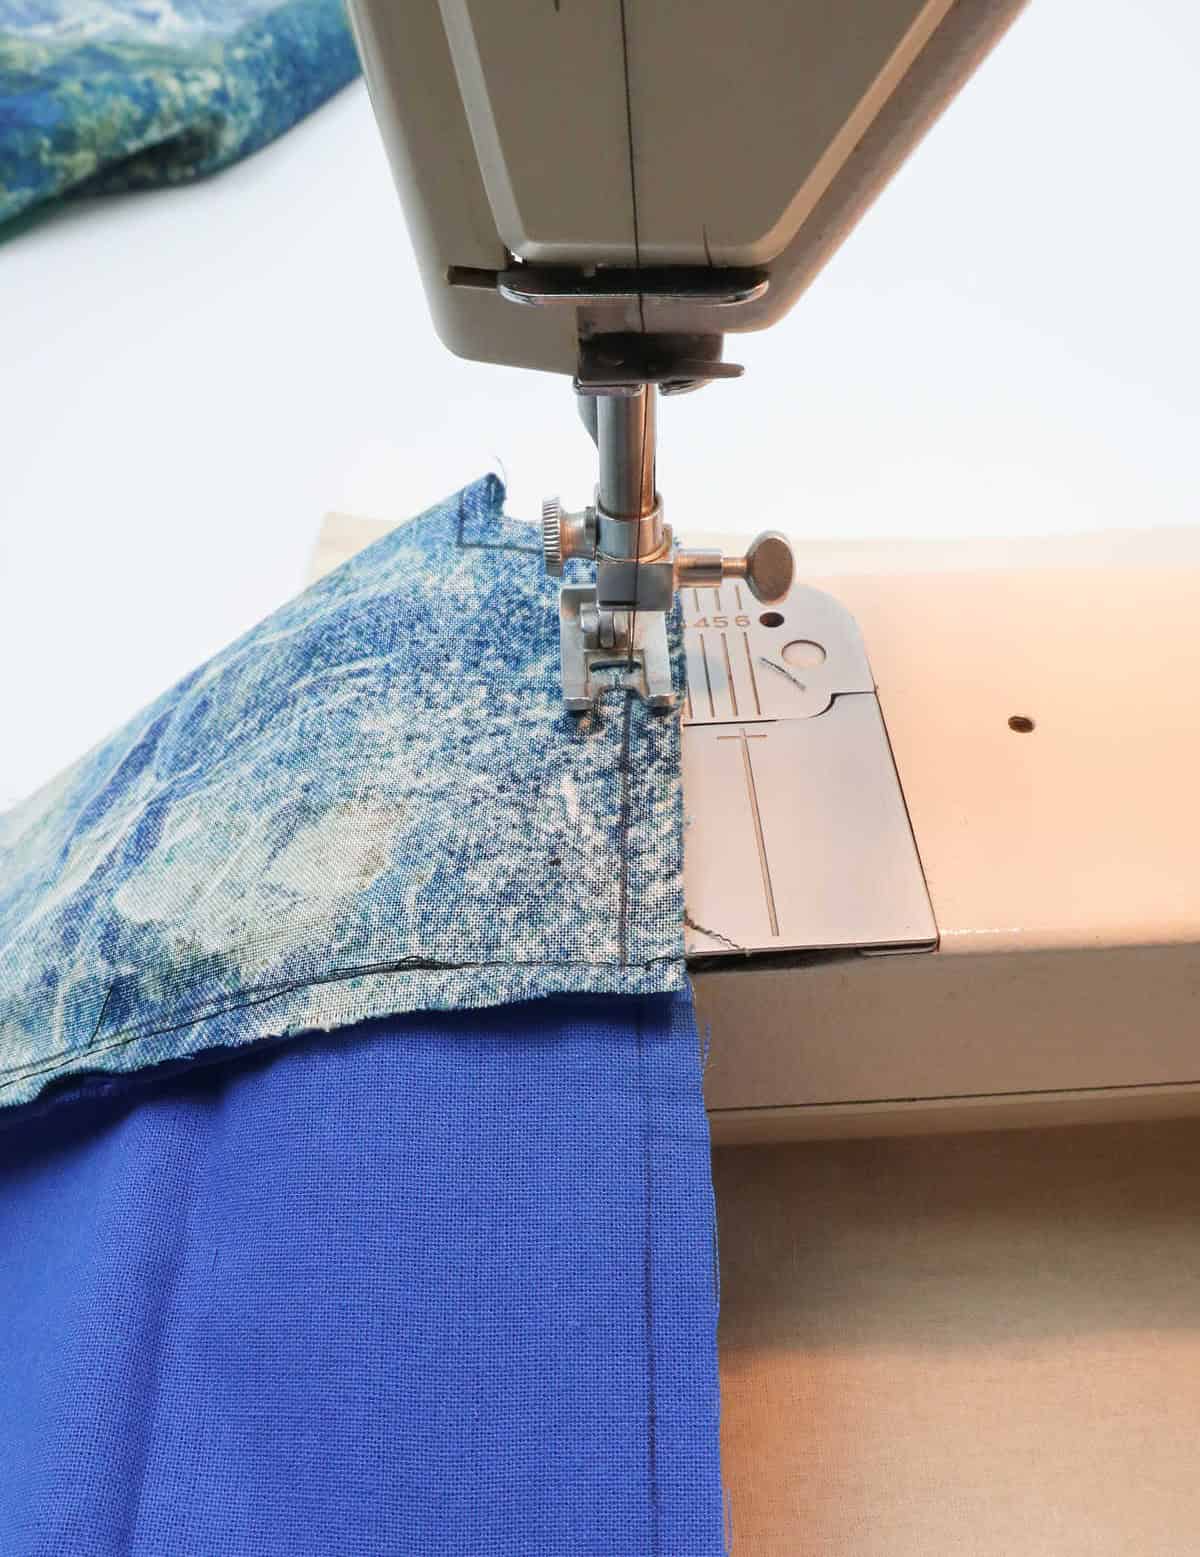
Step 7
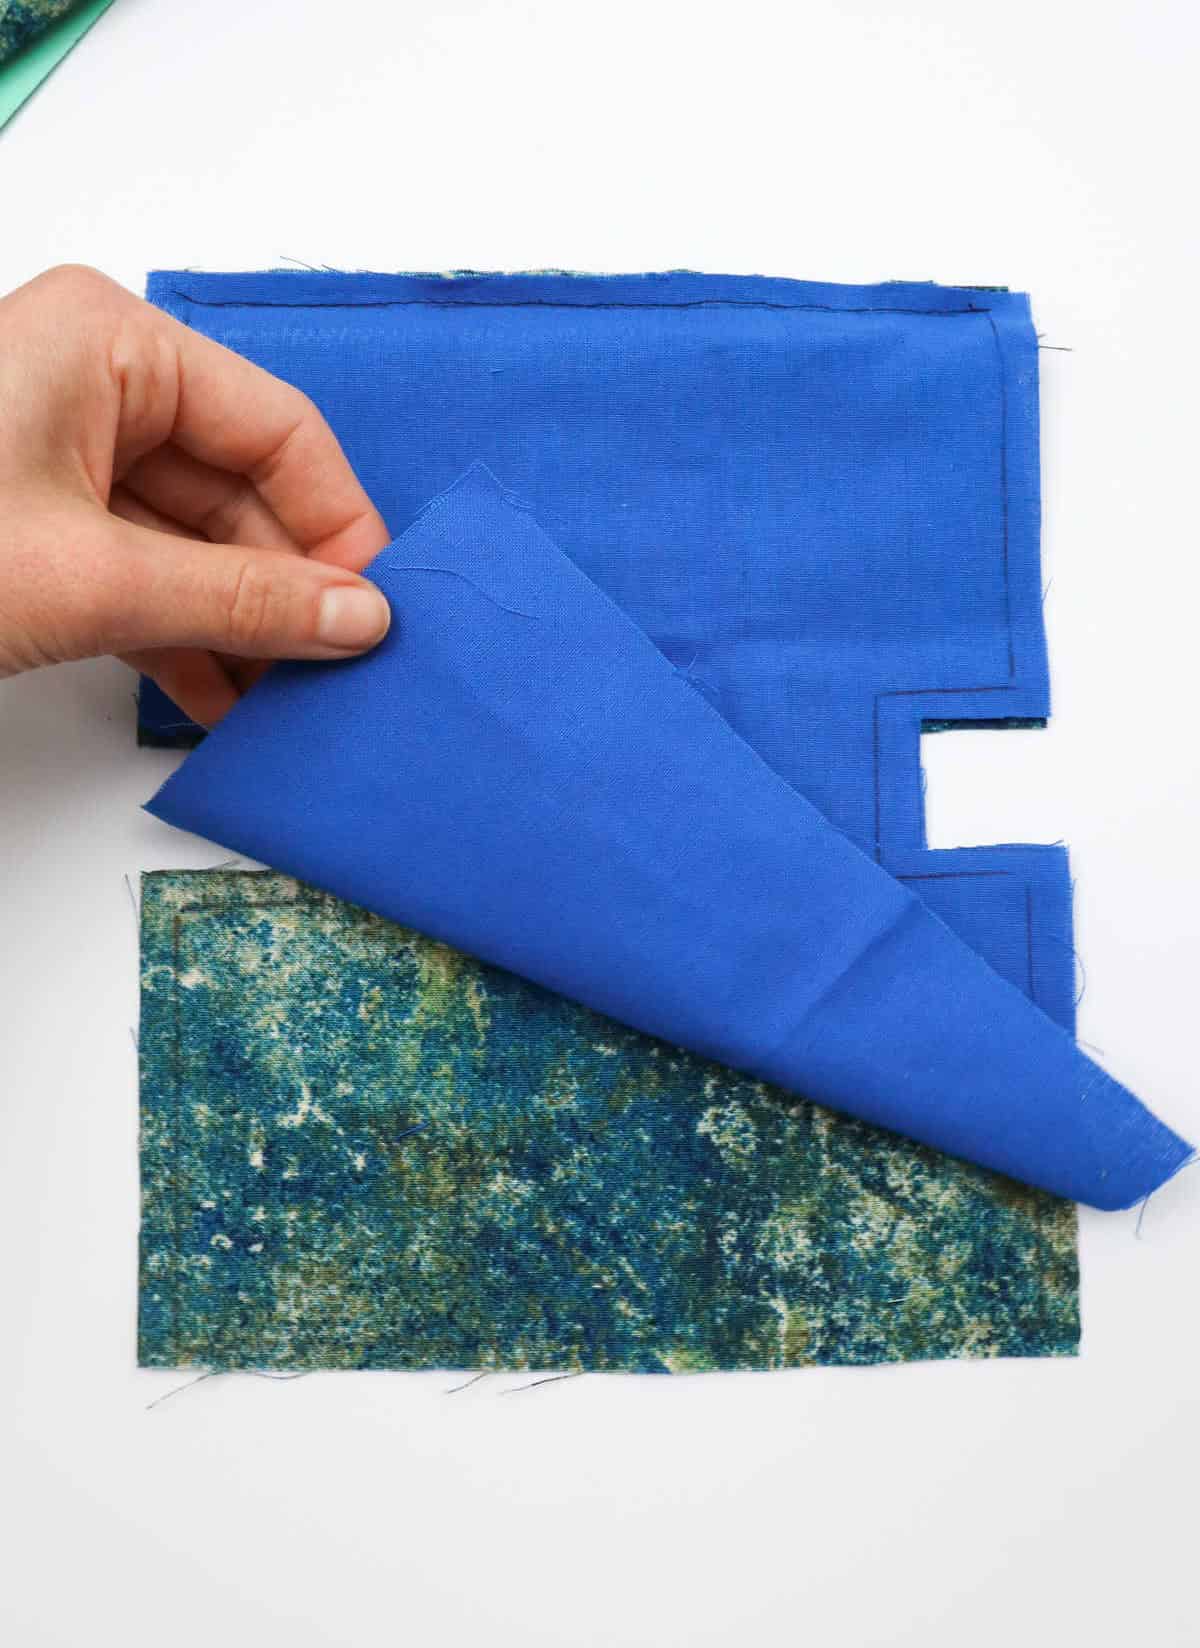
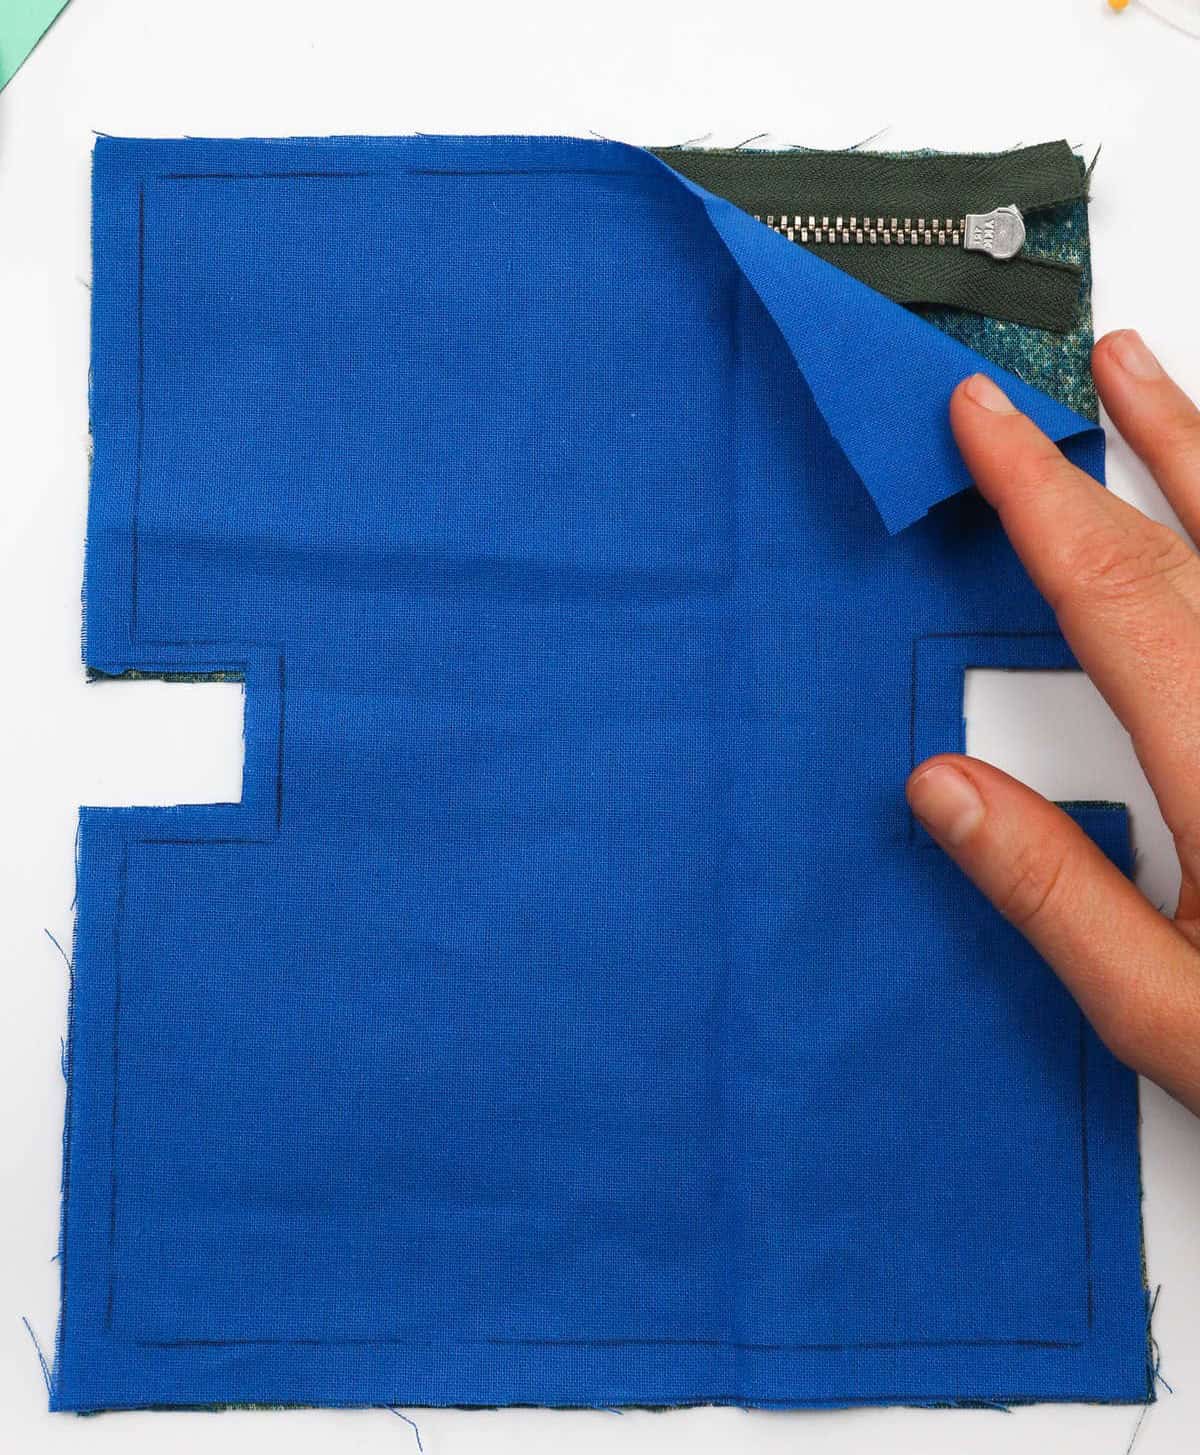
After securing the edges with pins, proceed to sew along the initial inner outline you drew, carefully following the teeth of the zipper. It’s essential to only complete one side for now, allowing you to easily pull up the opposing fabric and position it over the newly secured zipper. Gently lay the upper fabric down, ensuring it aligns as depicted.
Step 8

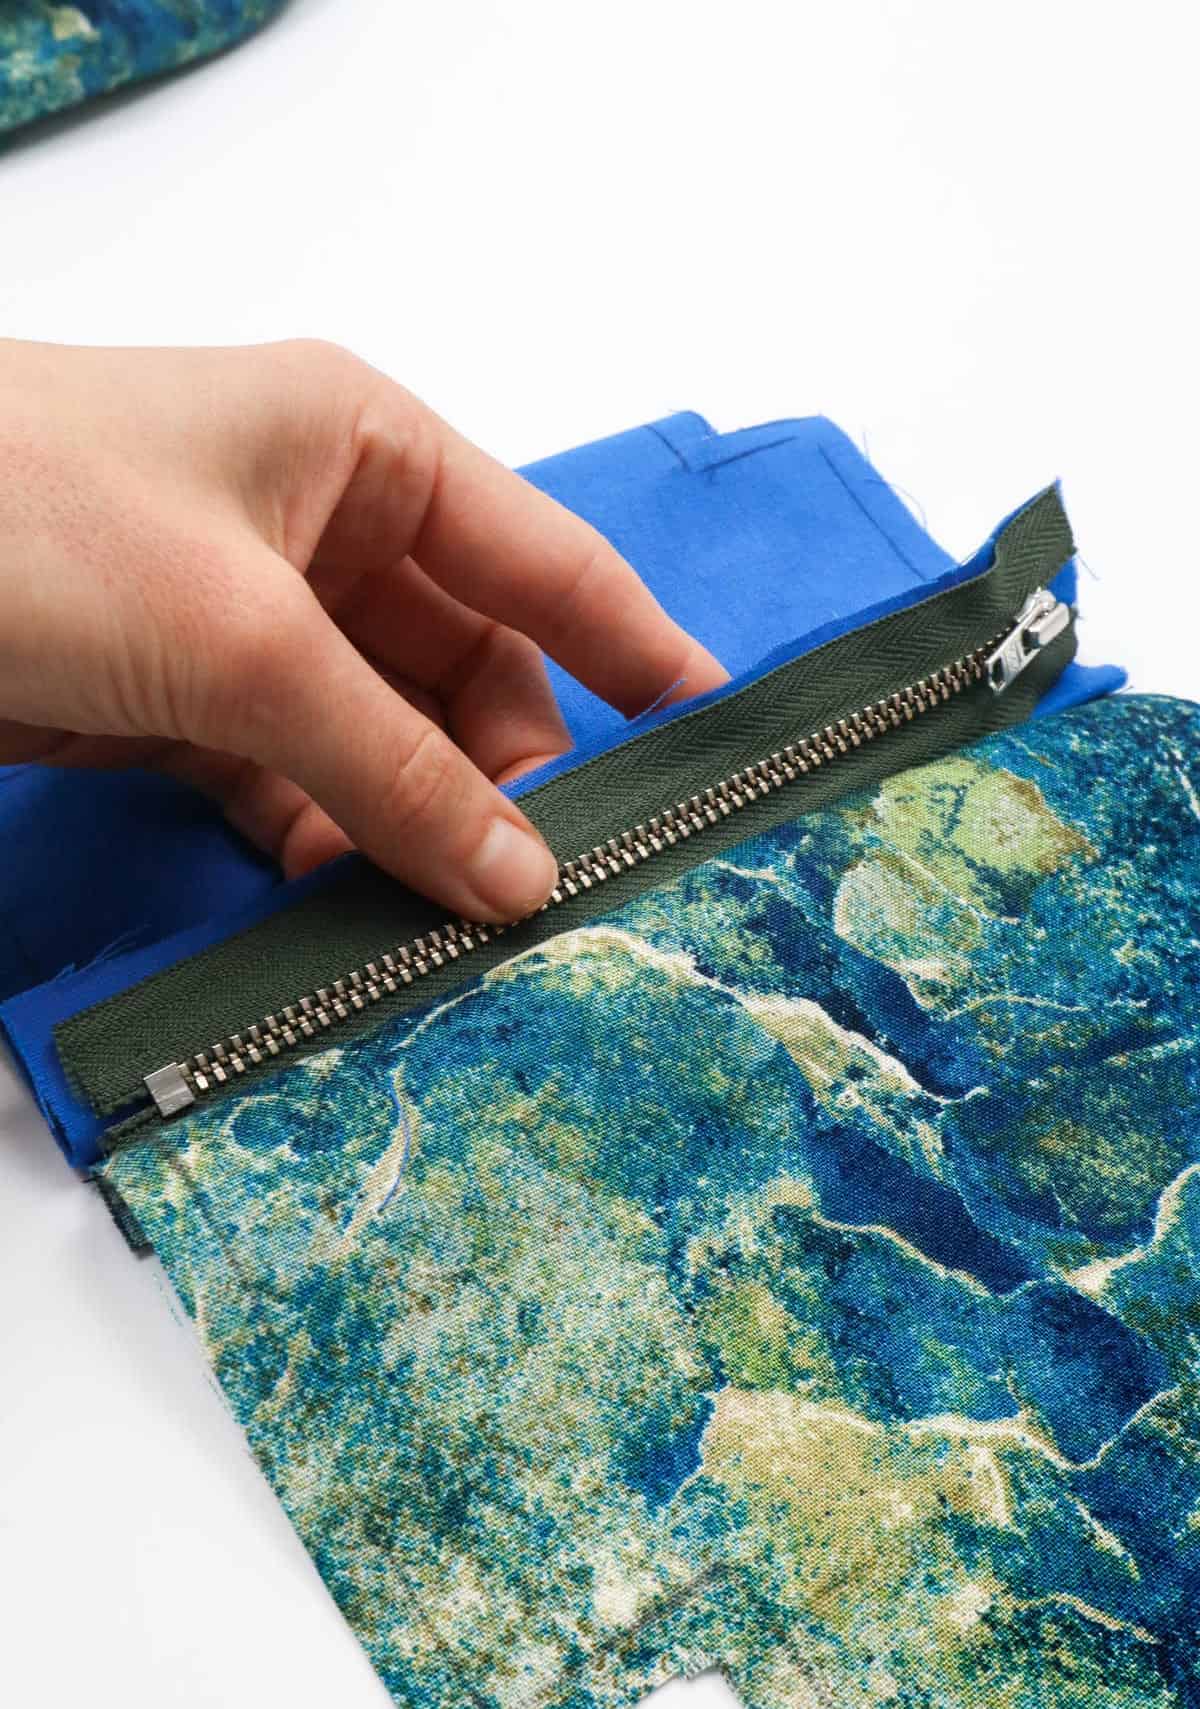
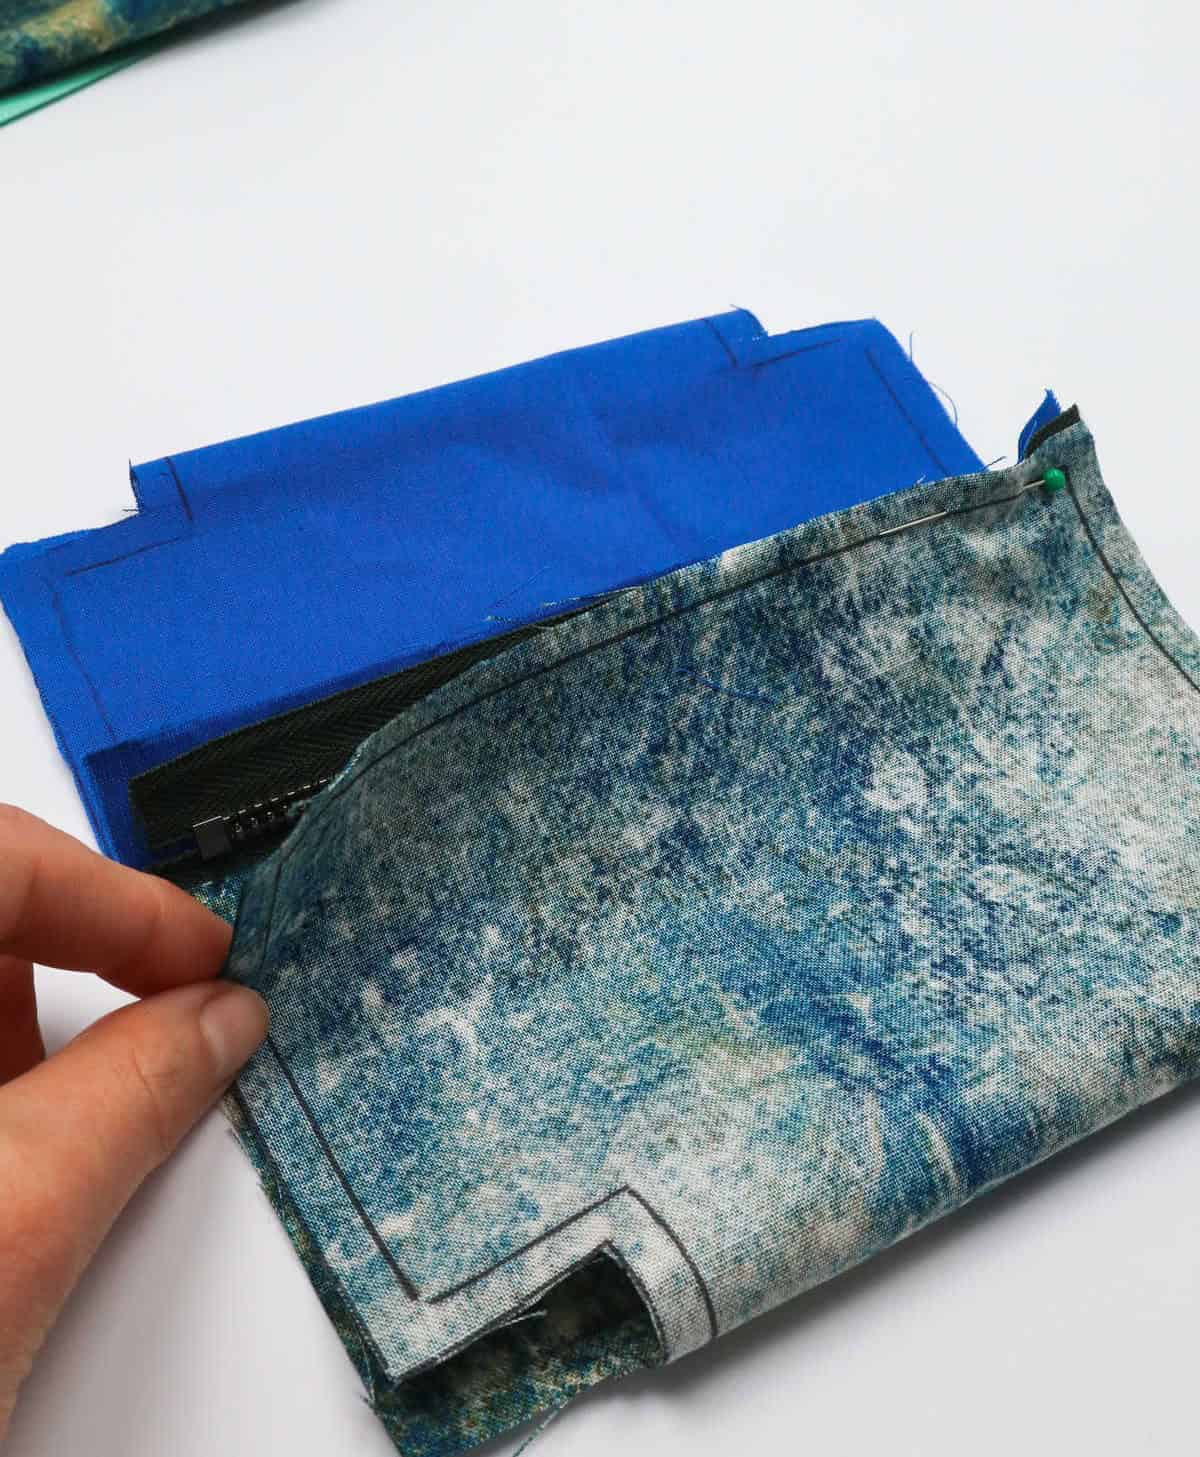
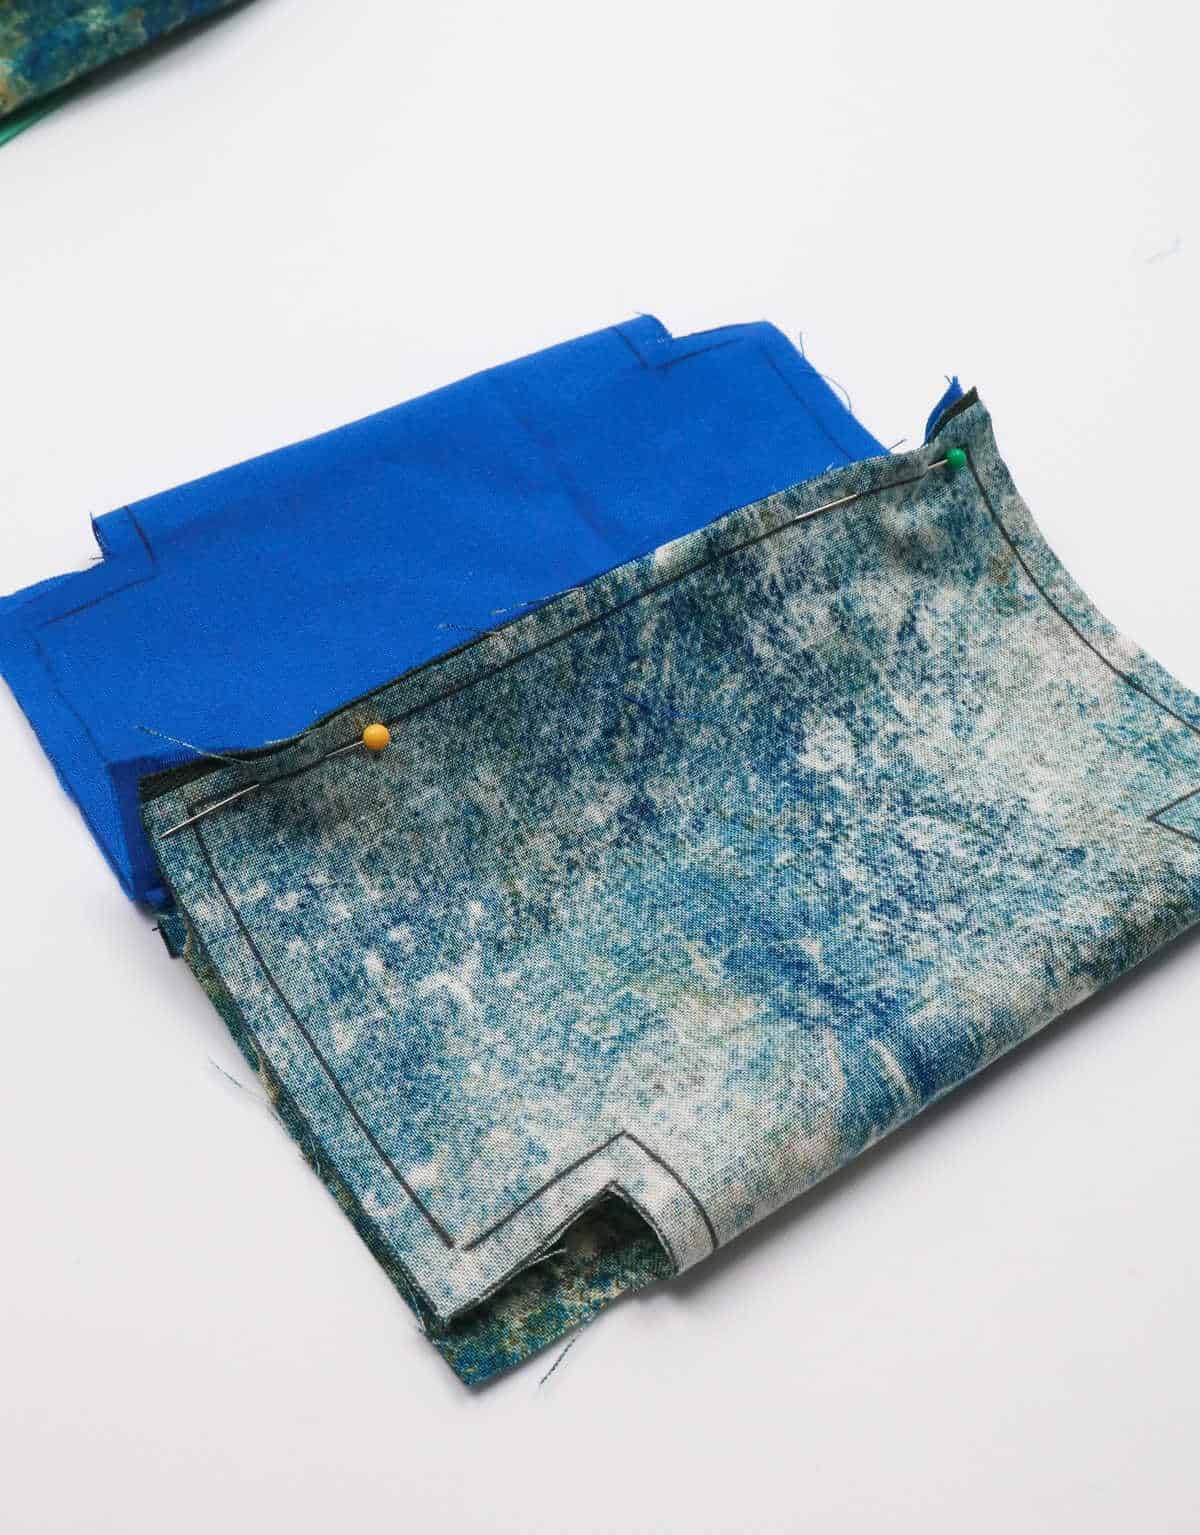
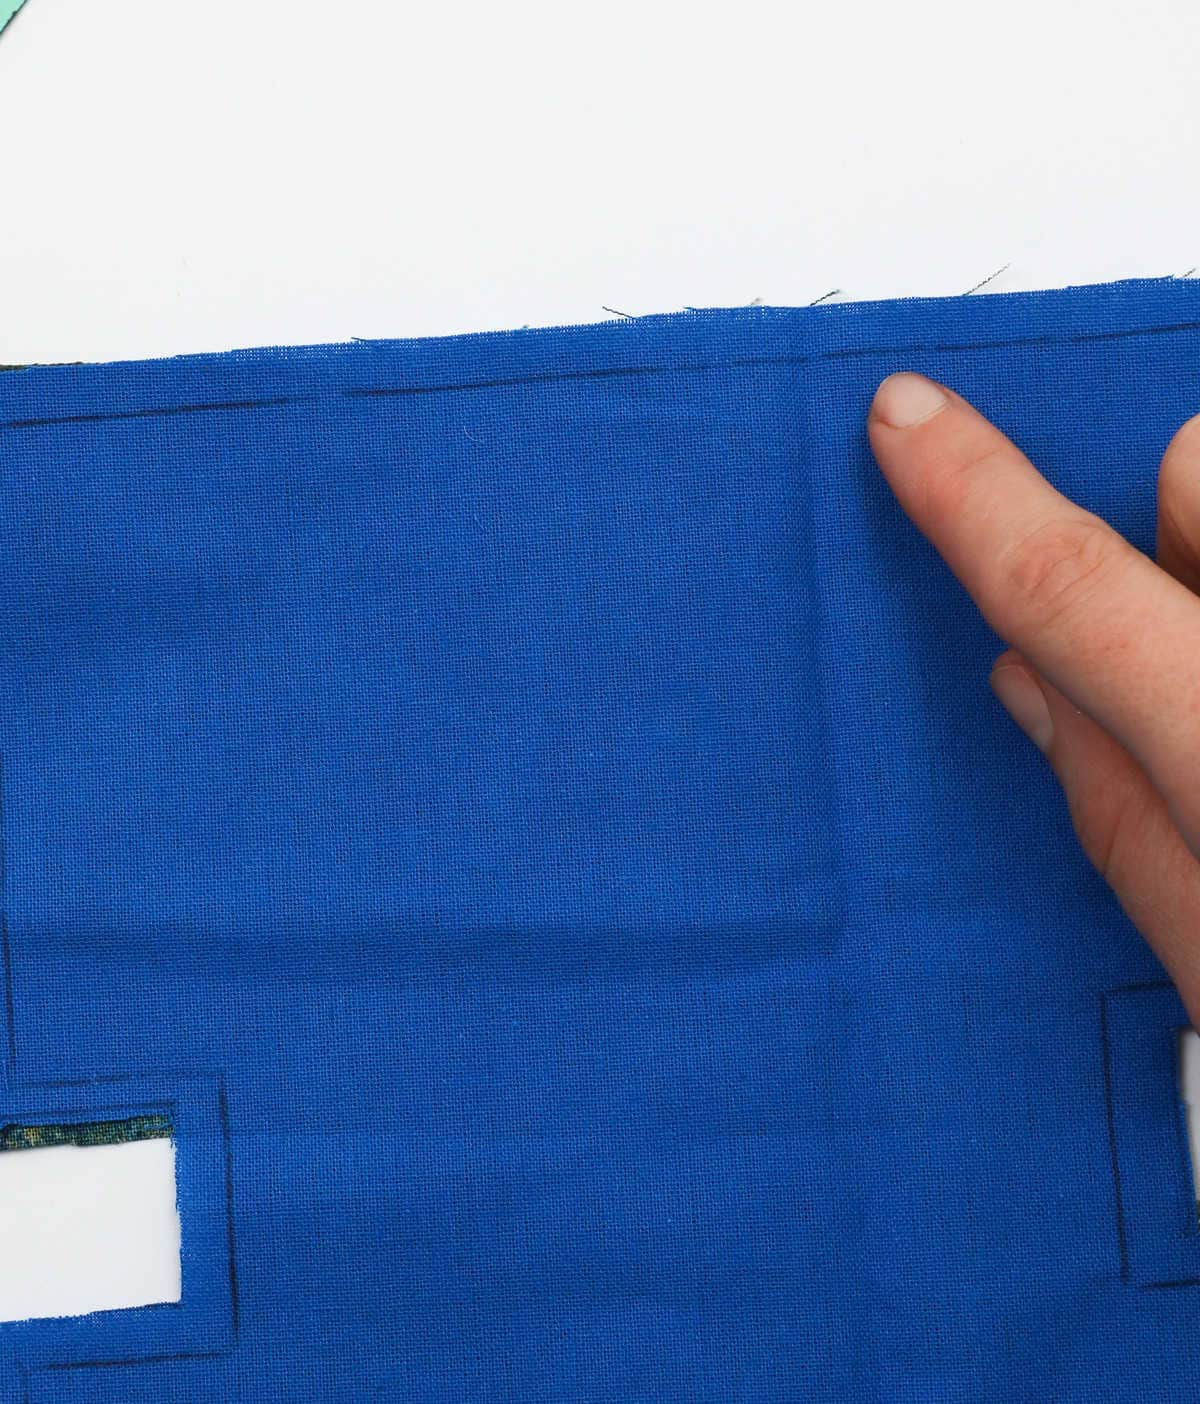
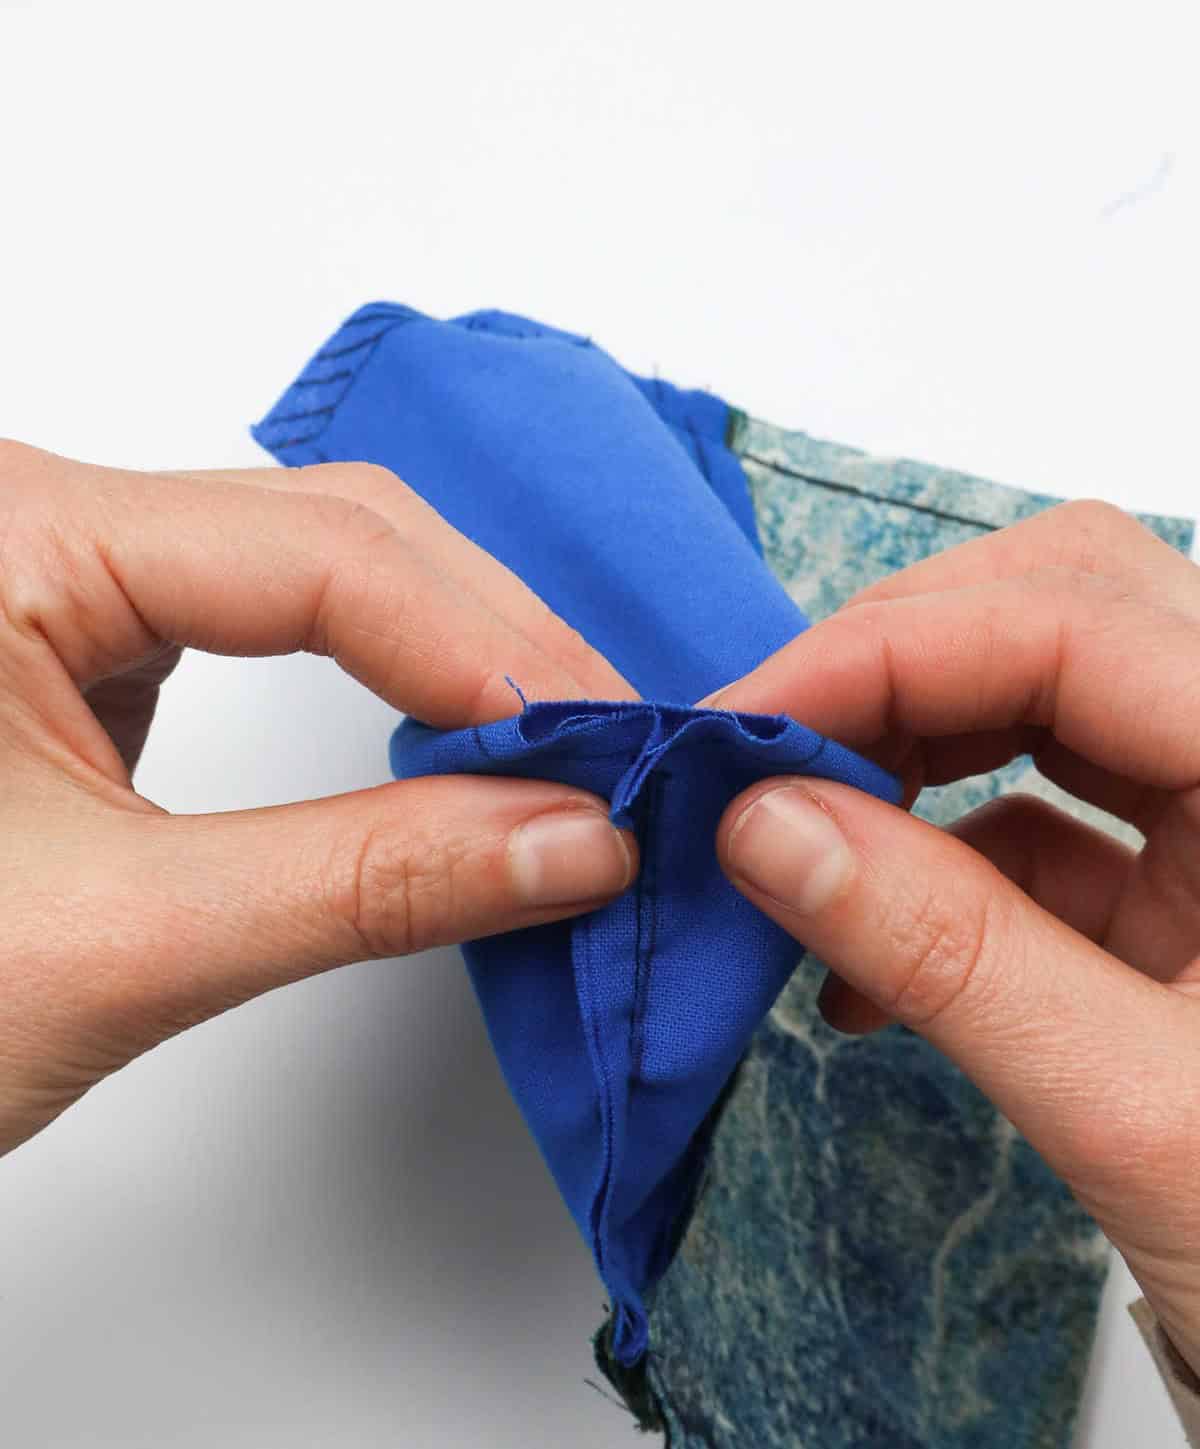
To complete the first stage of attaching the zipper, begin by grasping the opposite end of the fabric on the side opposite the zipper and draw it over. Align the edges, creating a fold that resembles a hinge. Secure this fold in place using a couple of sewing pins. Next, repeat this process with the second fabric cutout. Bring the opposite edge of the fabric up and align it along the zipper’s edge, effectively sandwiching the zipper between both fabric pieces.
The resulting configuration should resemble a swatch with three layers: the two fabric ends bookending the zipper’s edge. Secure all three components together using pins to ensure they remain in place until you’re ready to sew them.
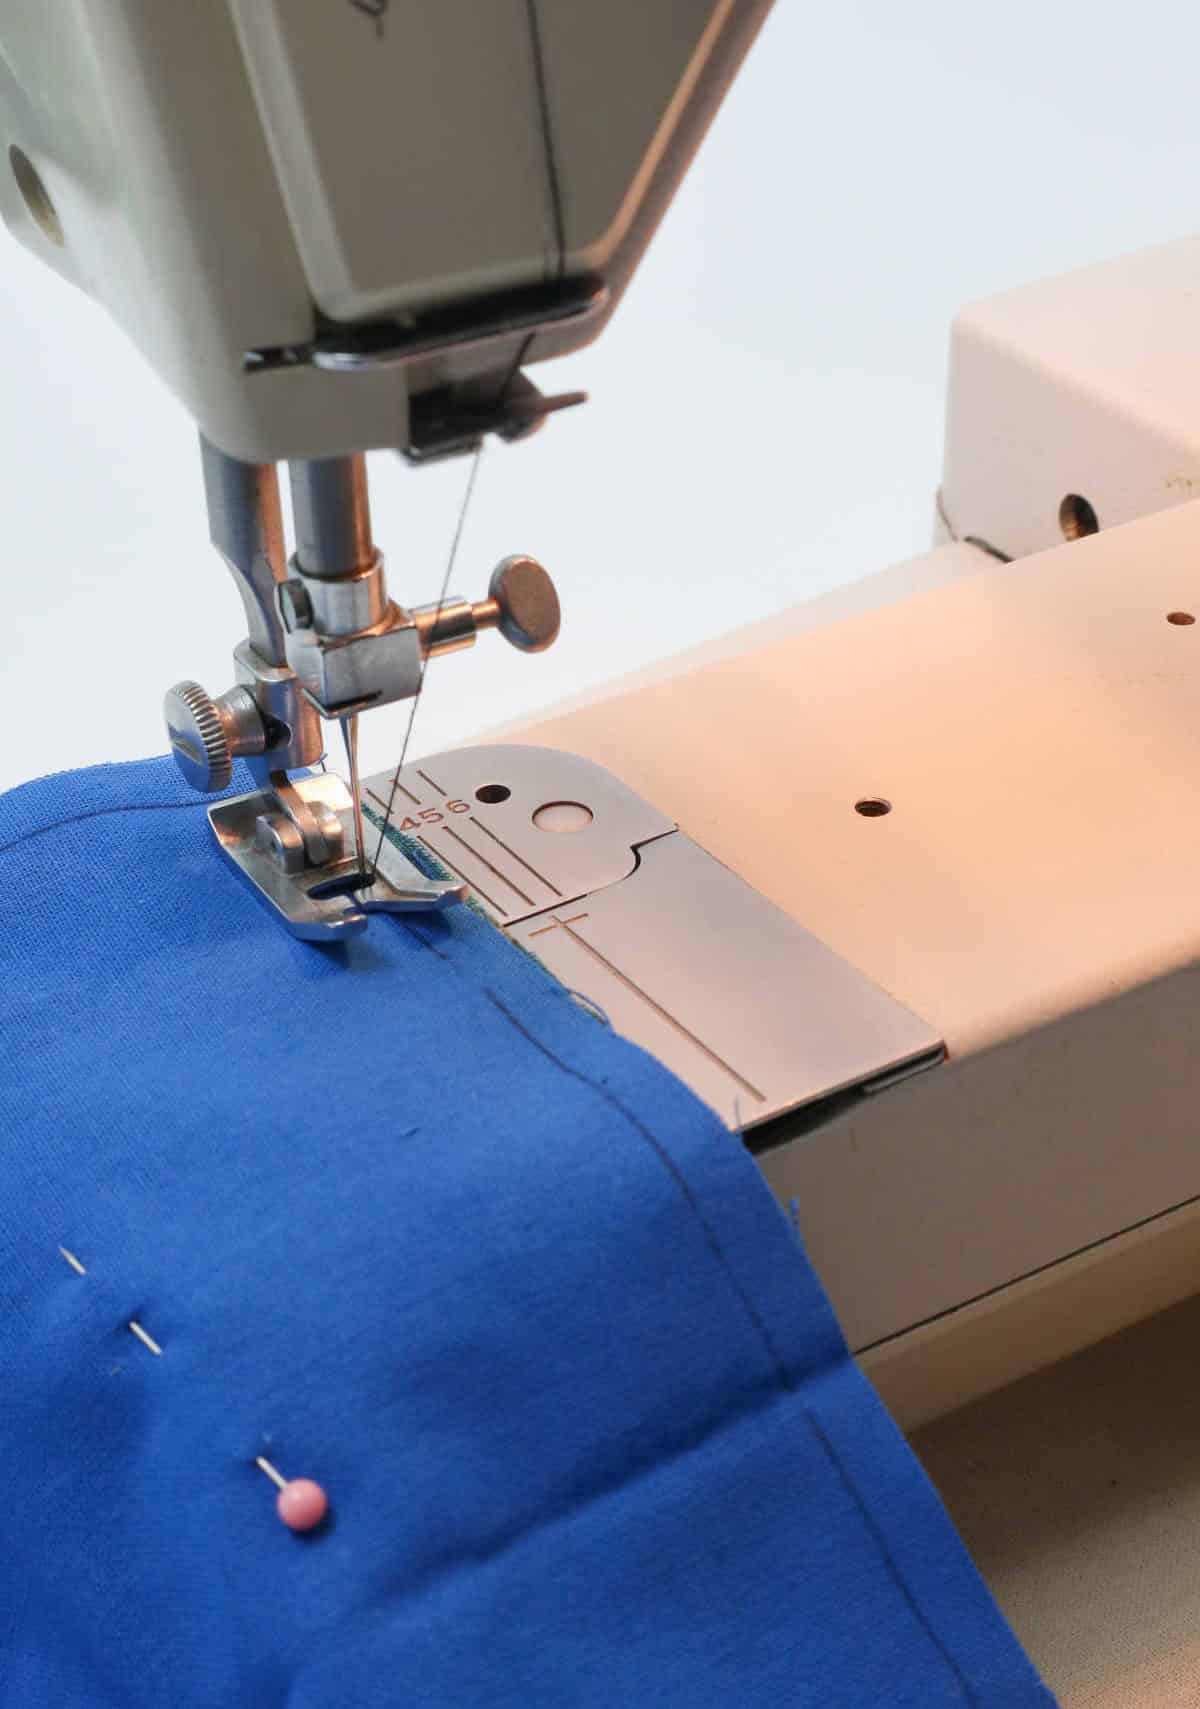
Step 9
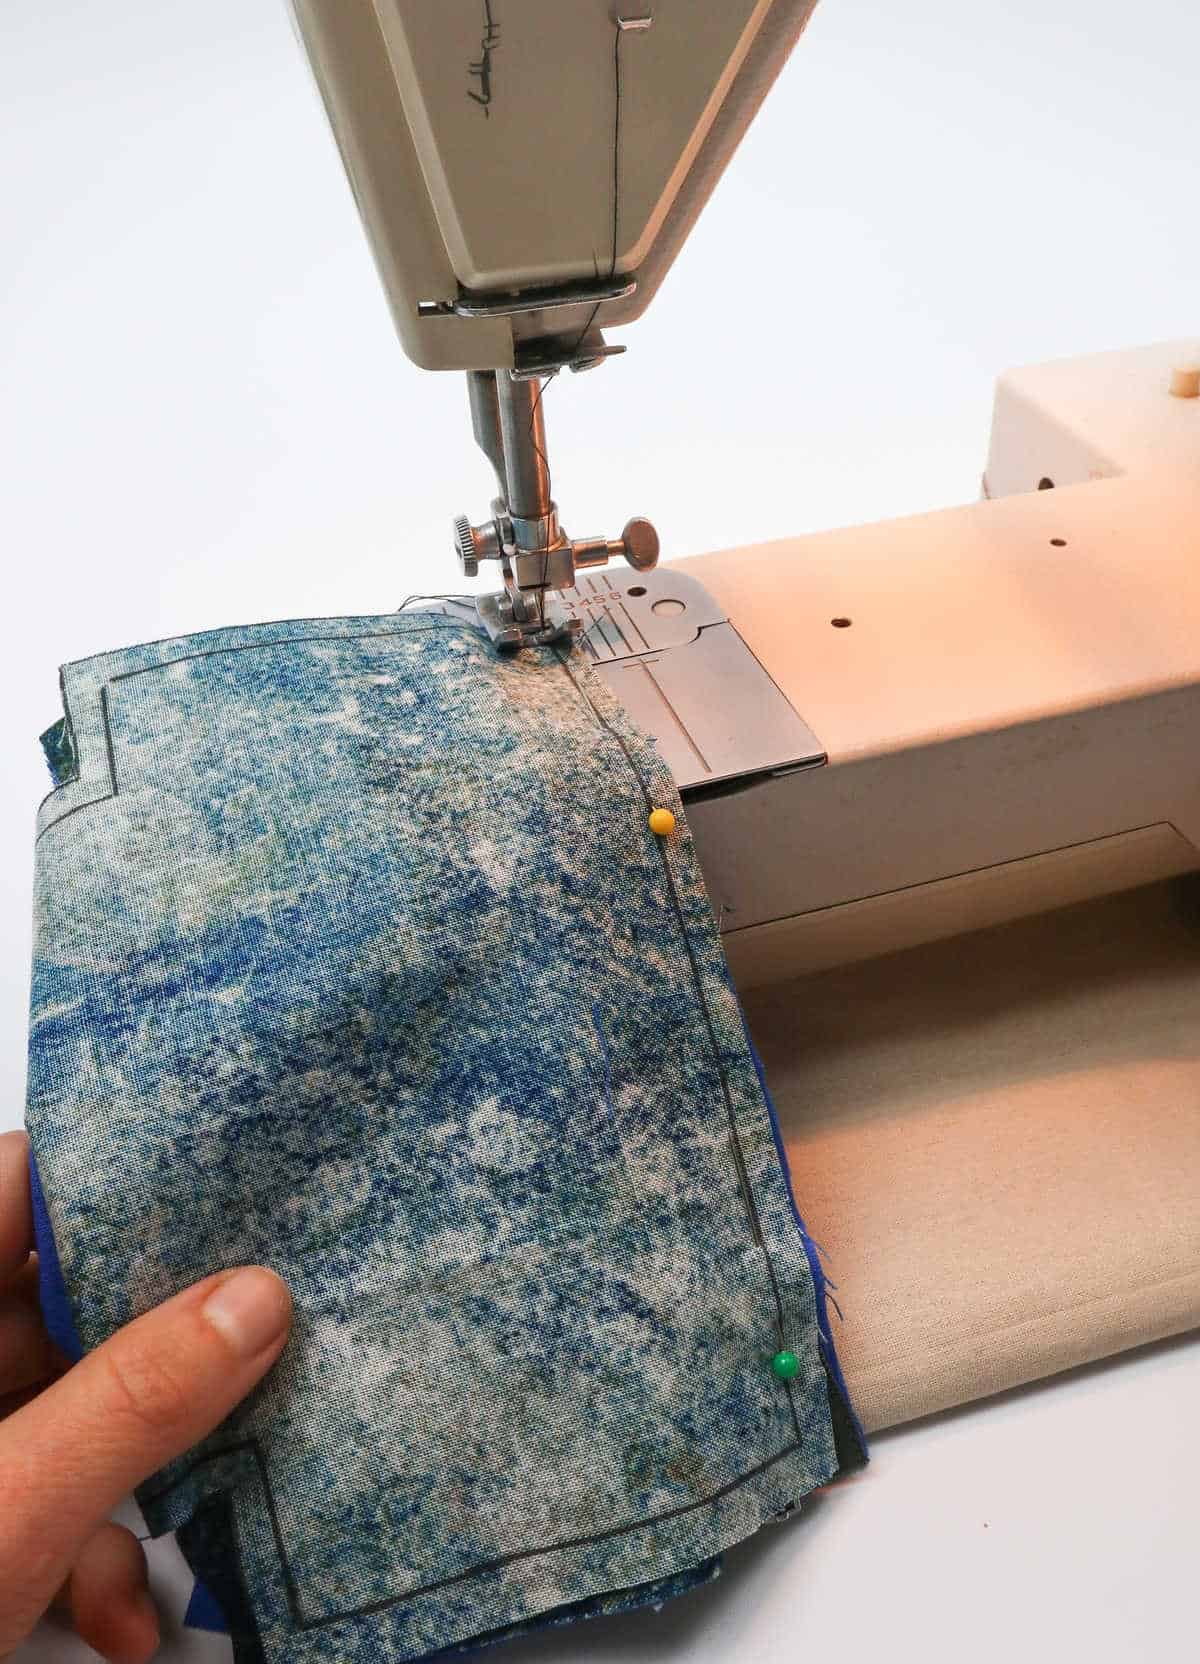
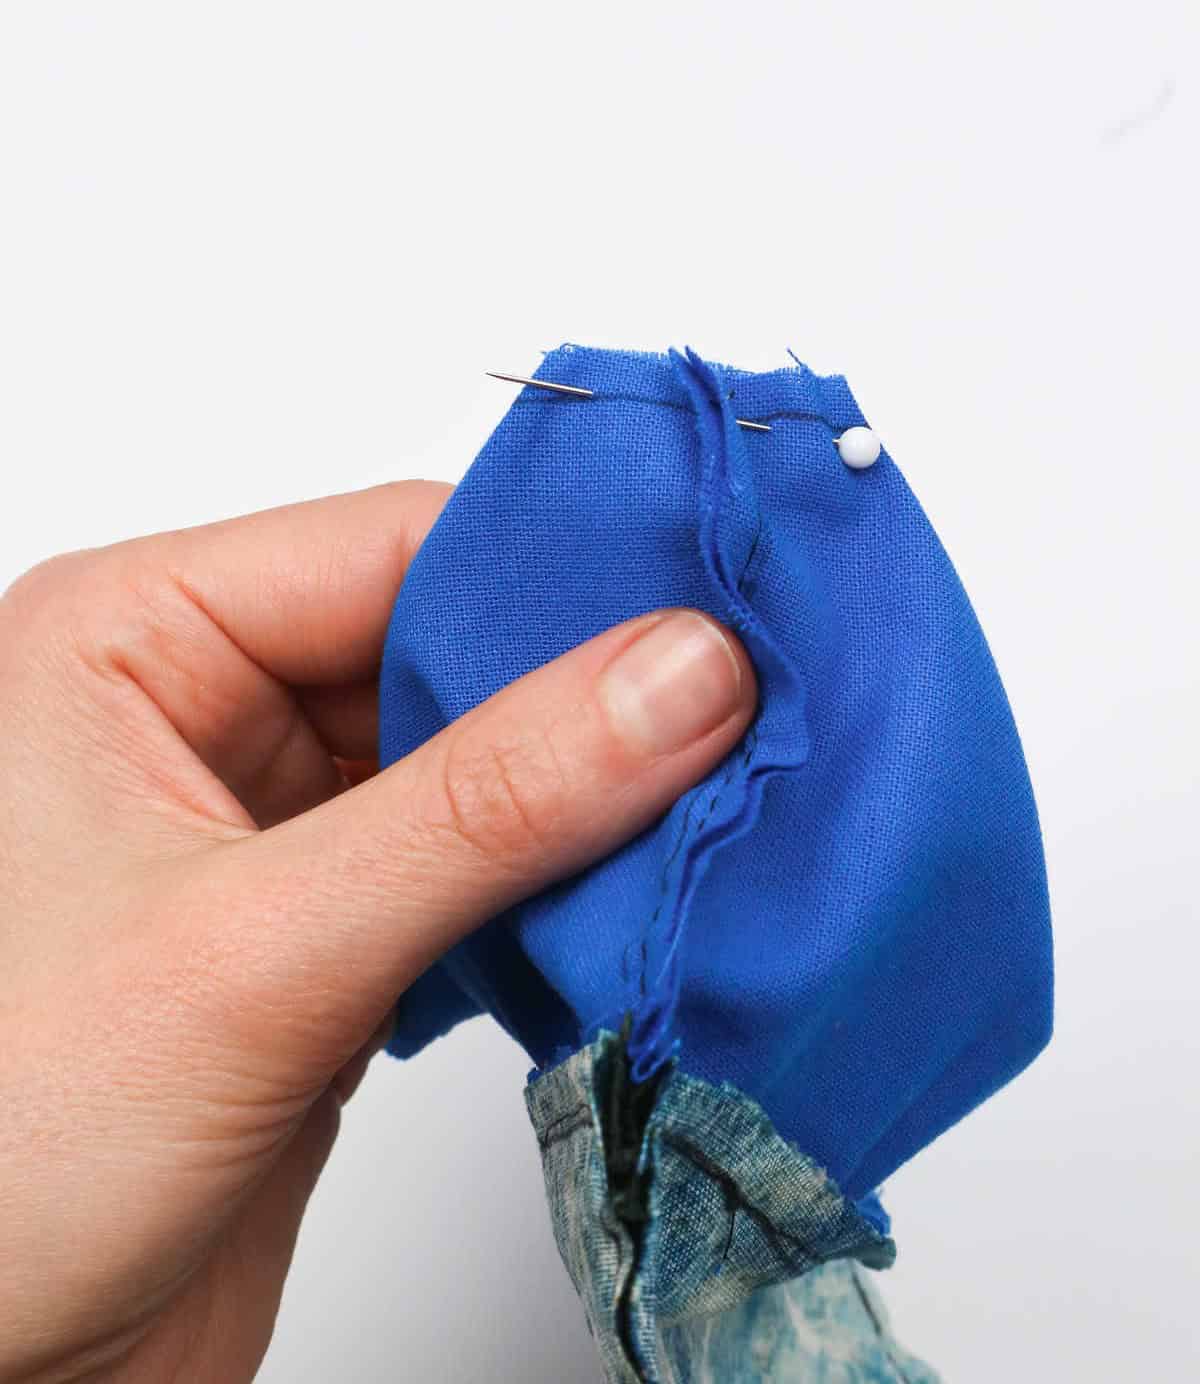
As you’ve carefully pinned the edges together, it’s time to sew them securely in place. Use a steady hand and your sewing machine or needle and thread to stitch along the outline, ensuring that each seam is strong and even. The zipper’s teeth will provide a natural guide for your stitches, helping you achieve a precise finish. Your pouch should now be taking shape, with its seams neatly sewn and its edges aligned.
With this foundation in place, you’re ready to move on to the next step and add the finishing touches to bring your project to life.
Step 10
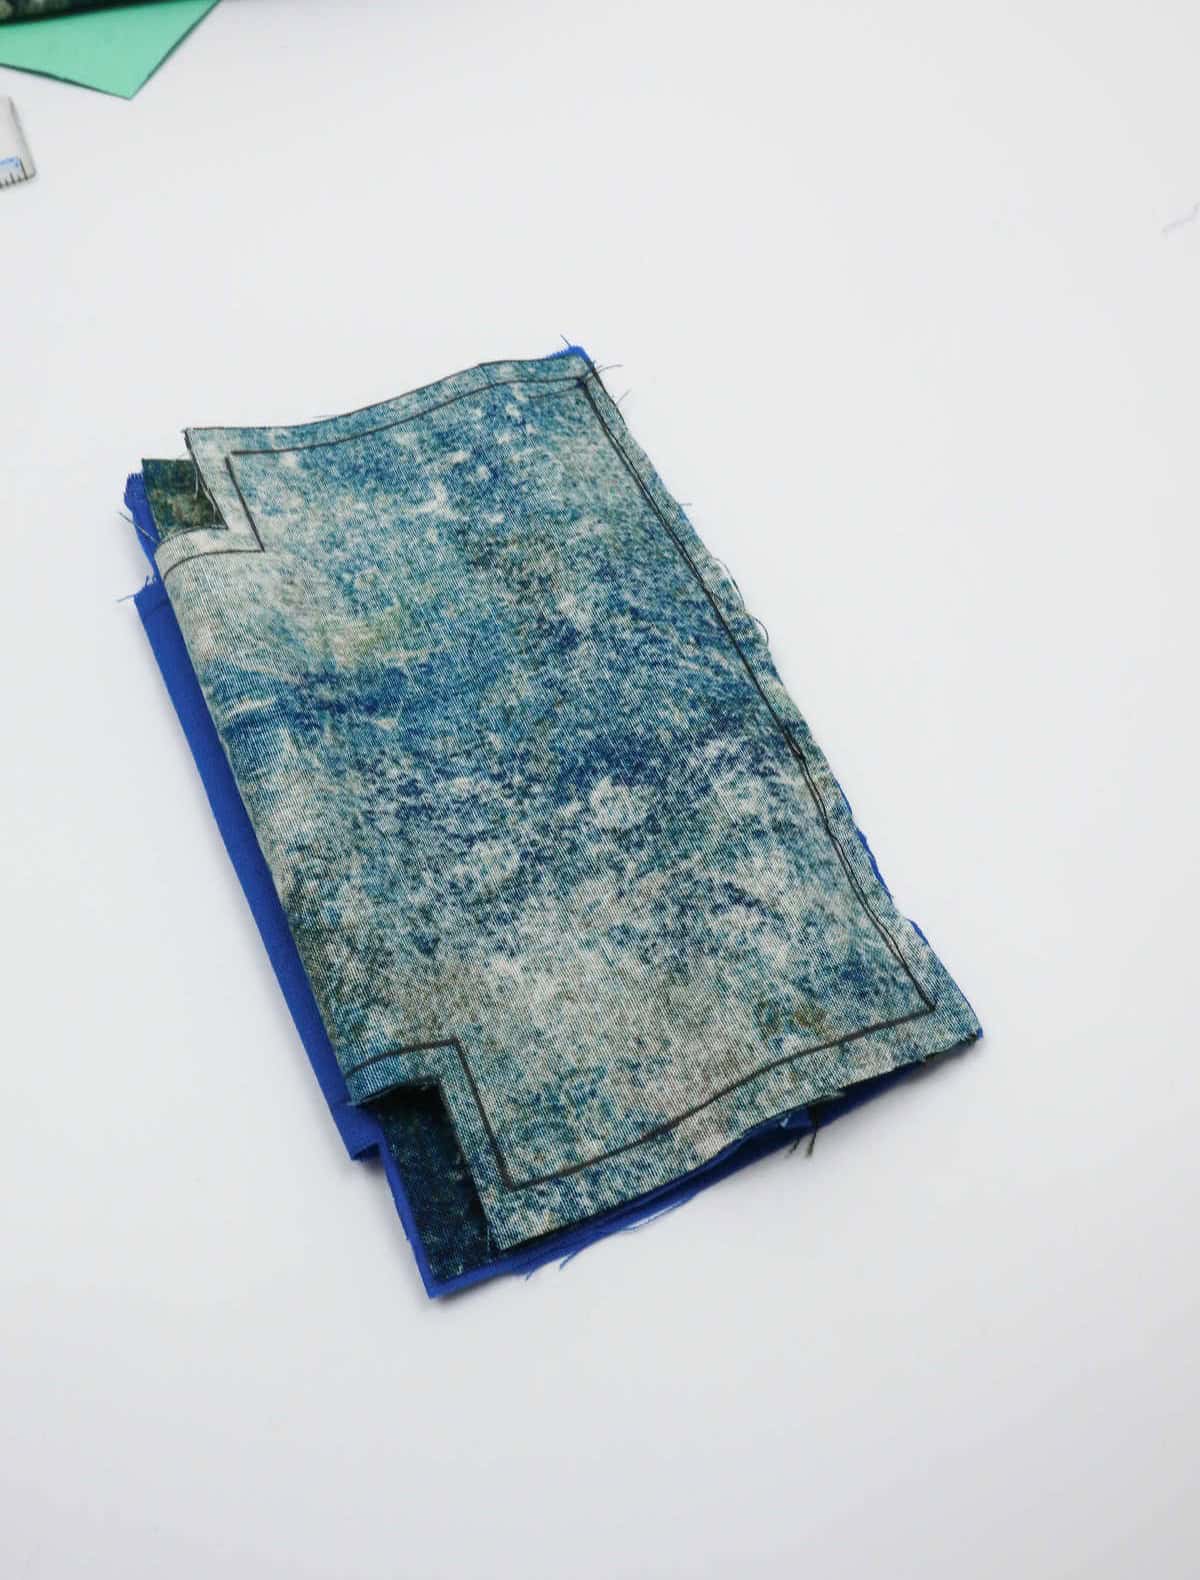
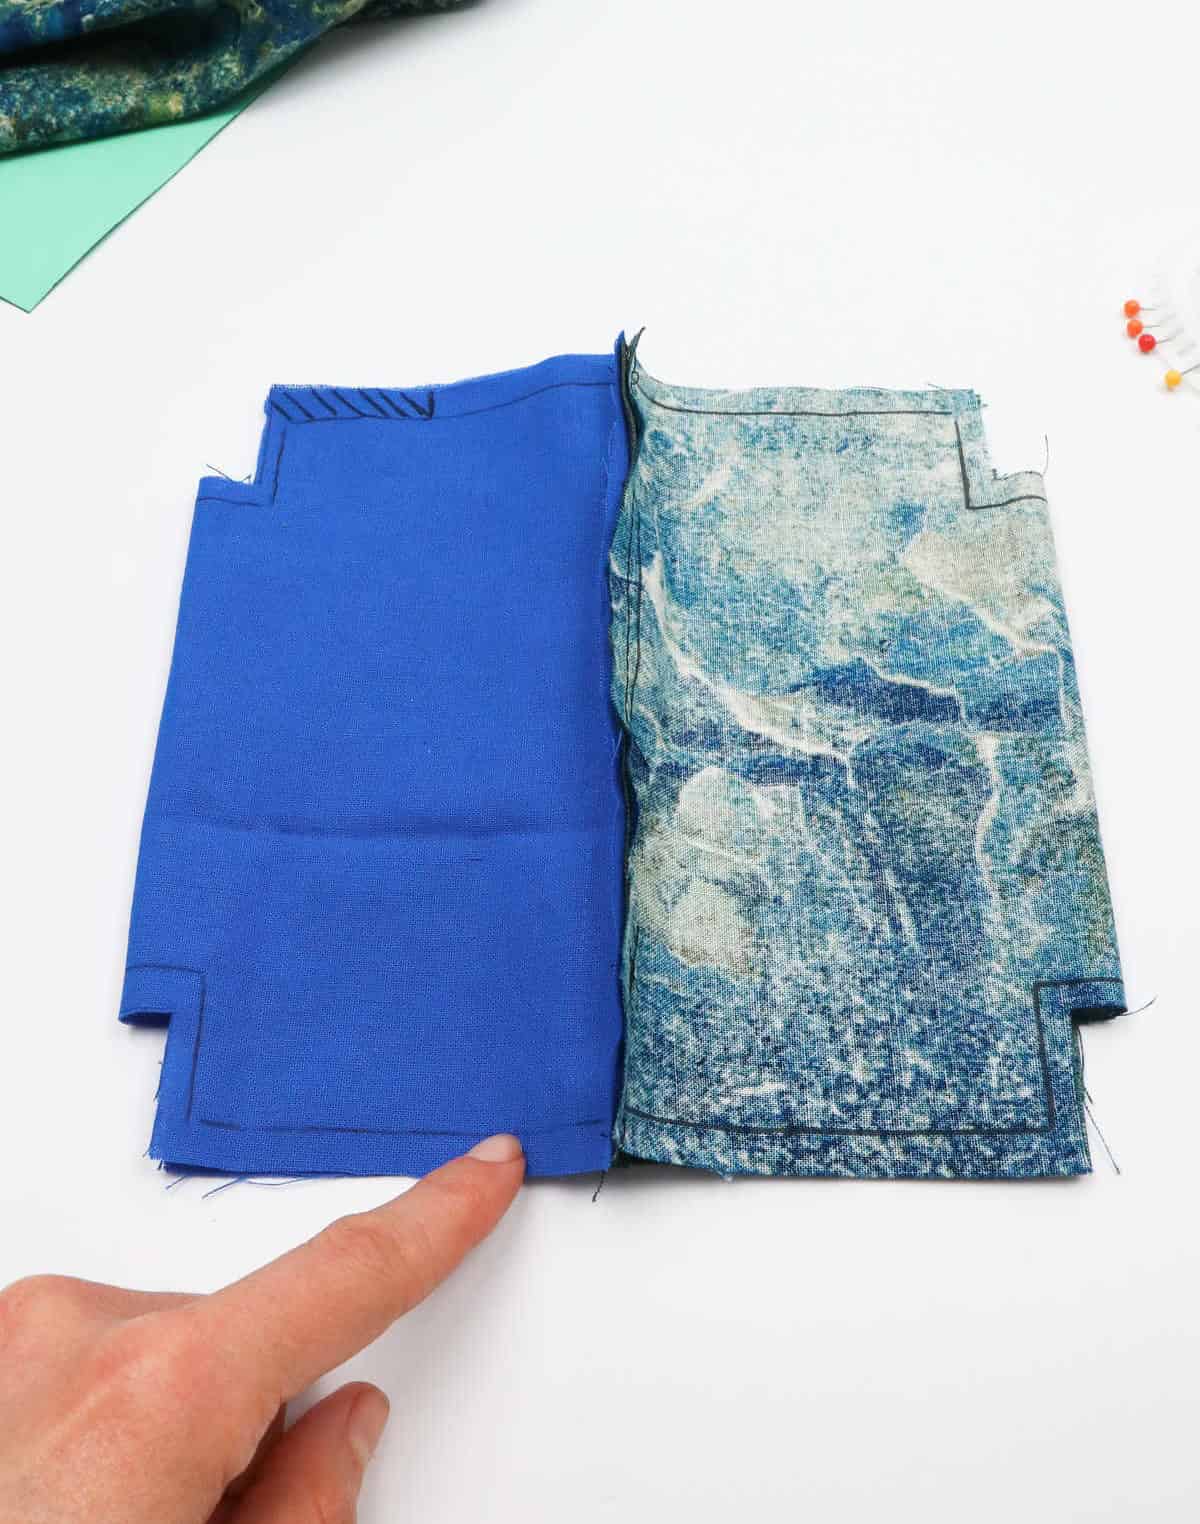
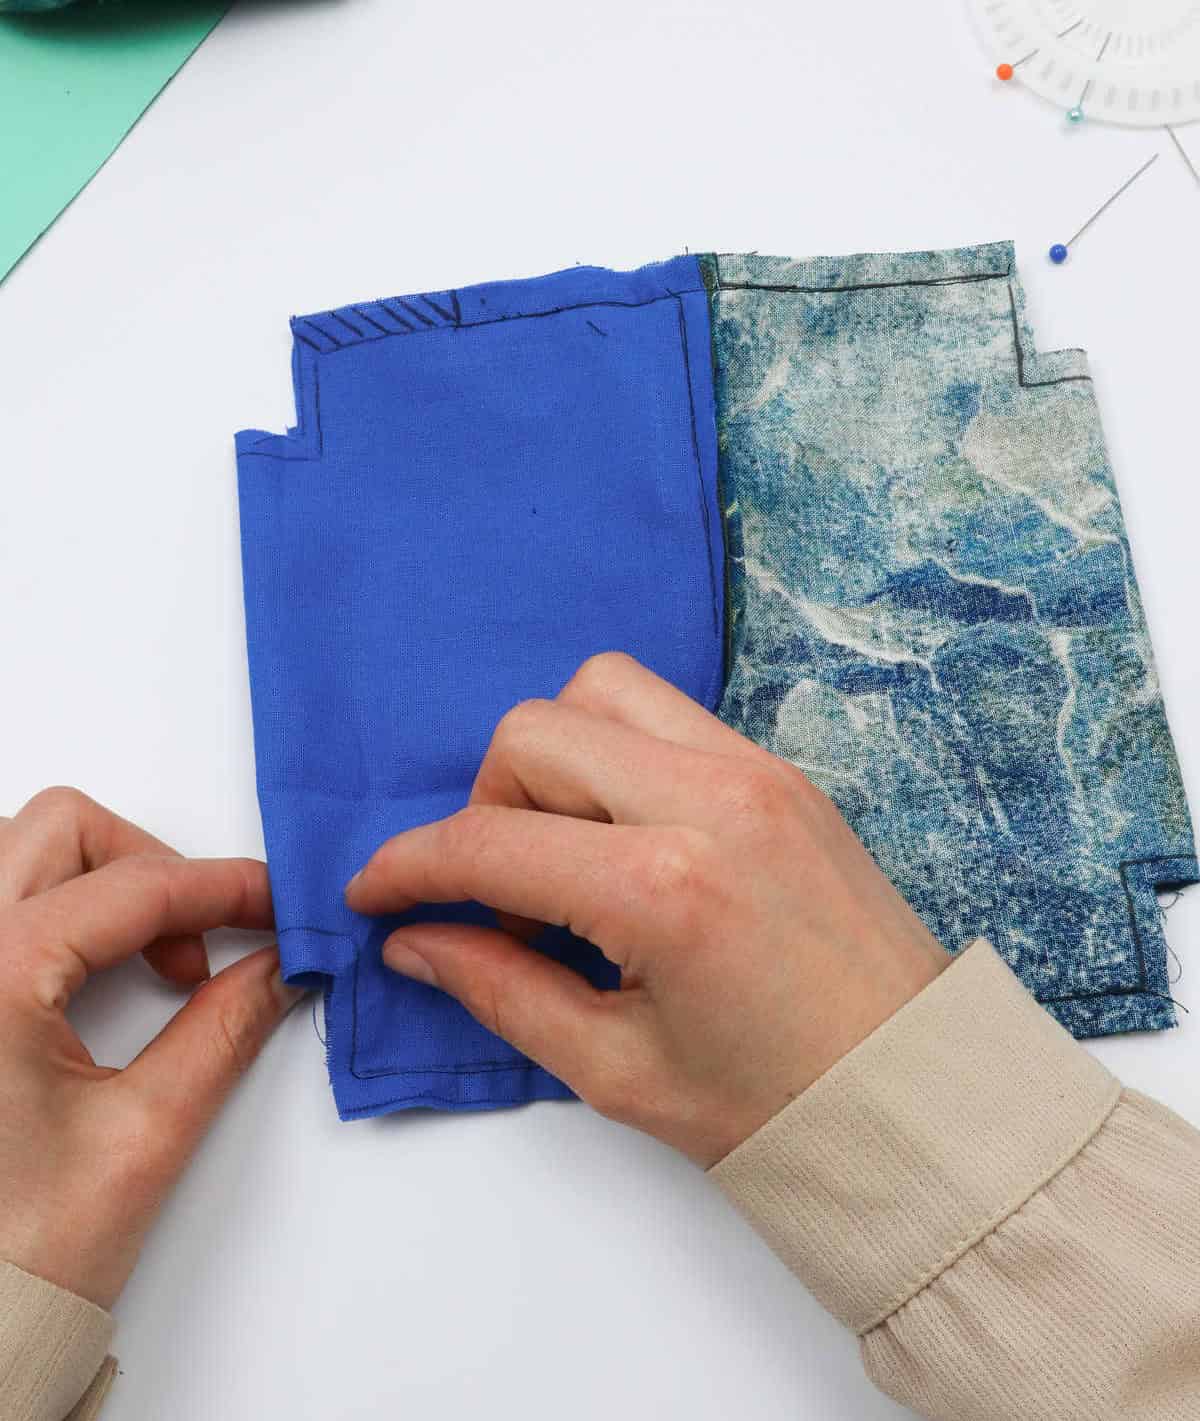
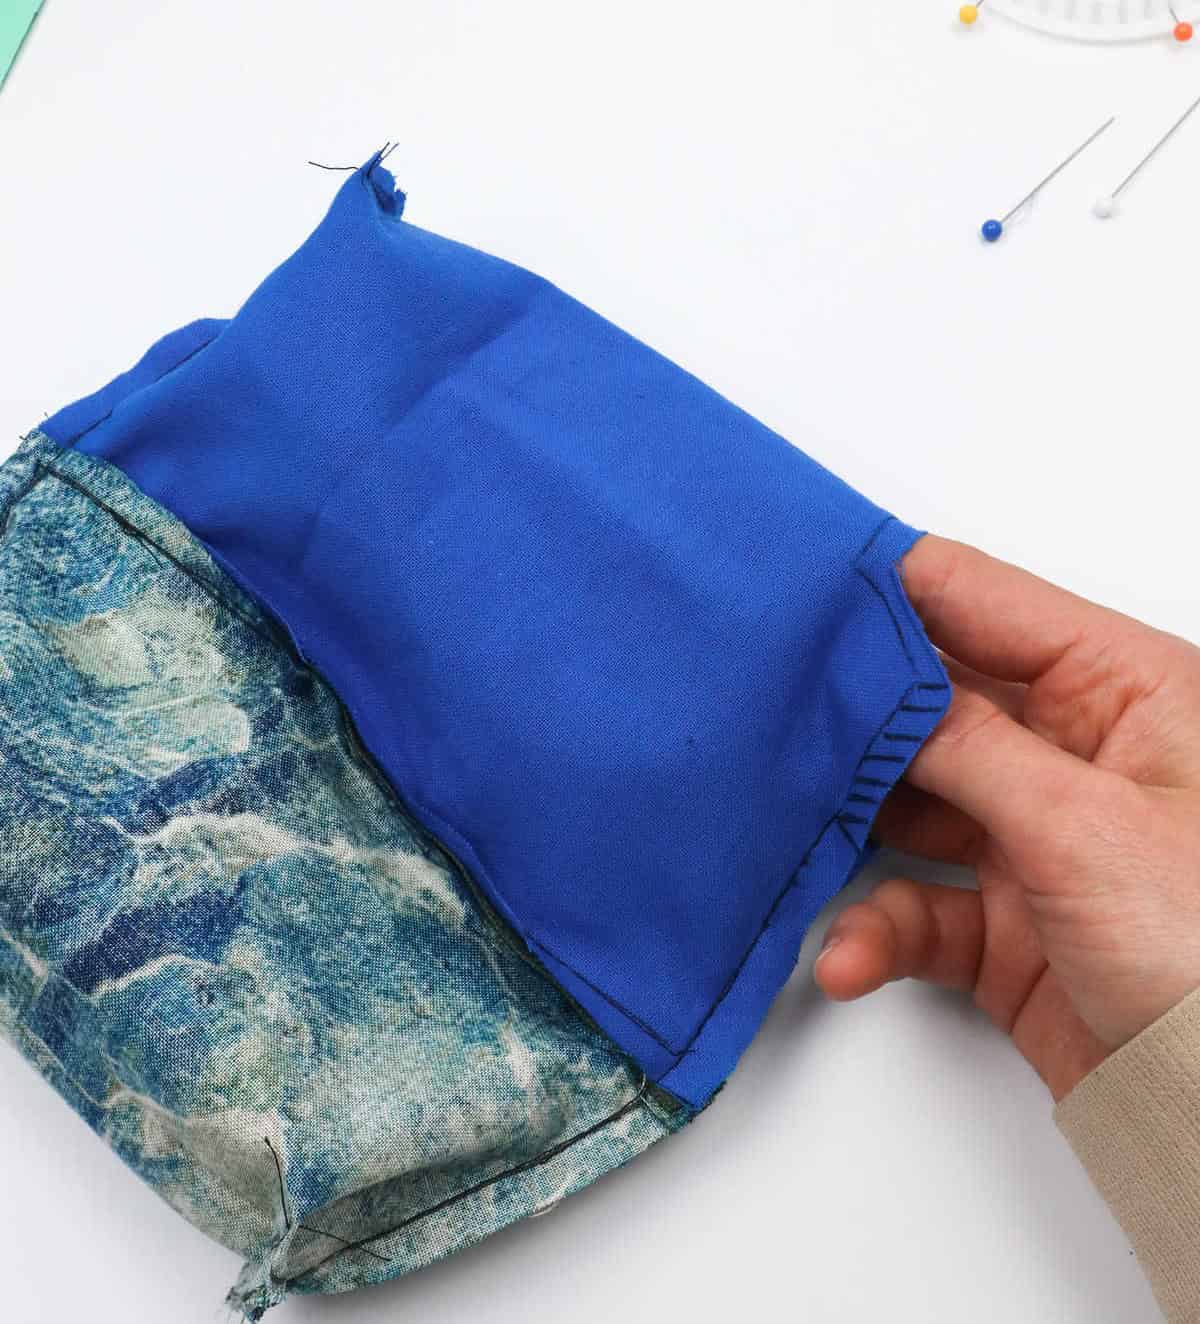
To complete the process, carefully unroll the garment’s exterior fabric, positioning one cut-out on one side and the lining fabric unfolded on the other. Ensure that the corners and edges align precisely, with folded creases neatly overlapping each other, much like a neat seam.
Step 11
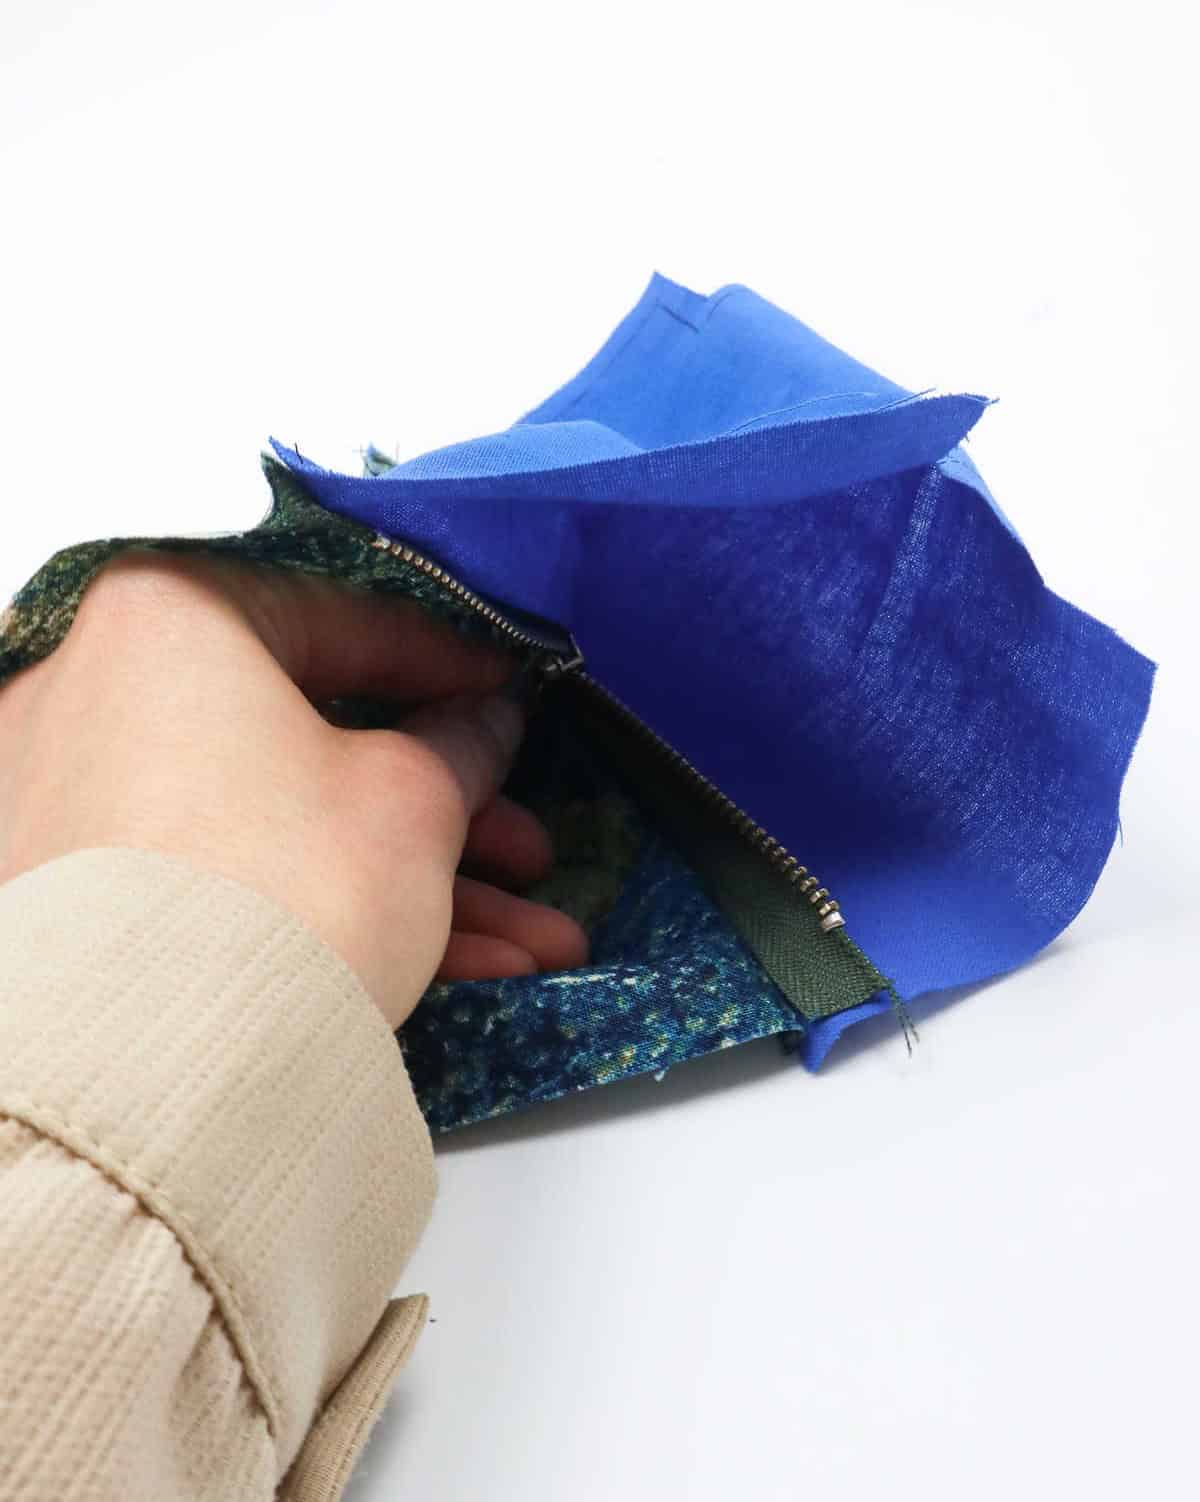
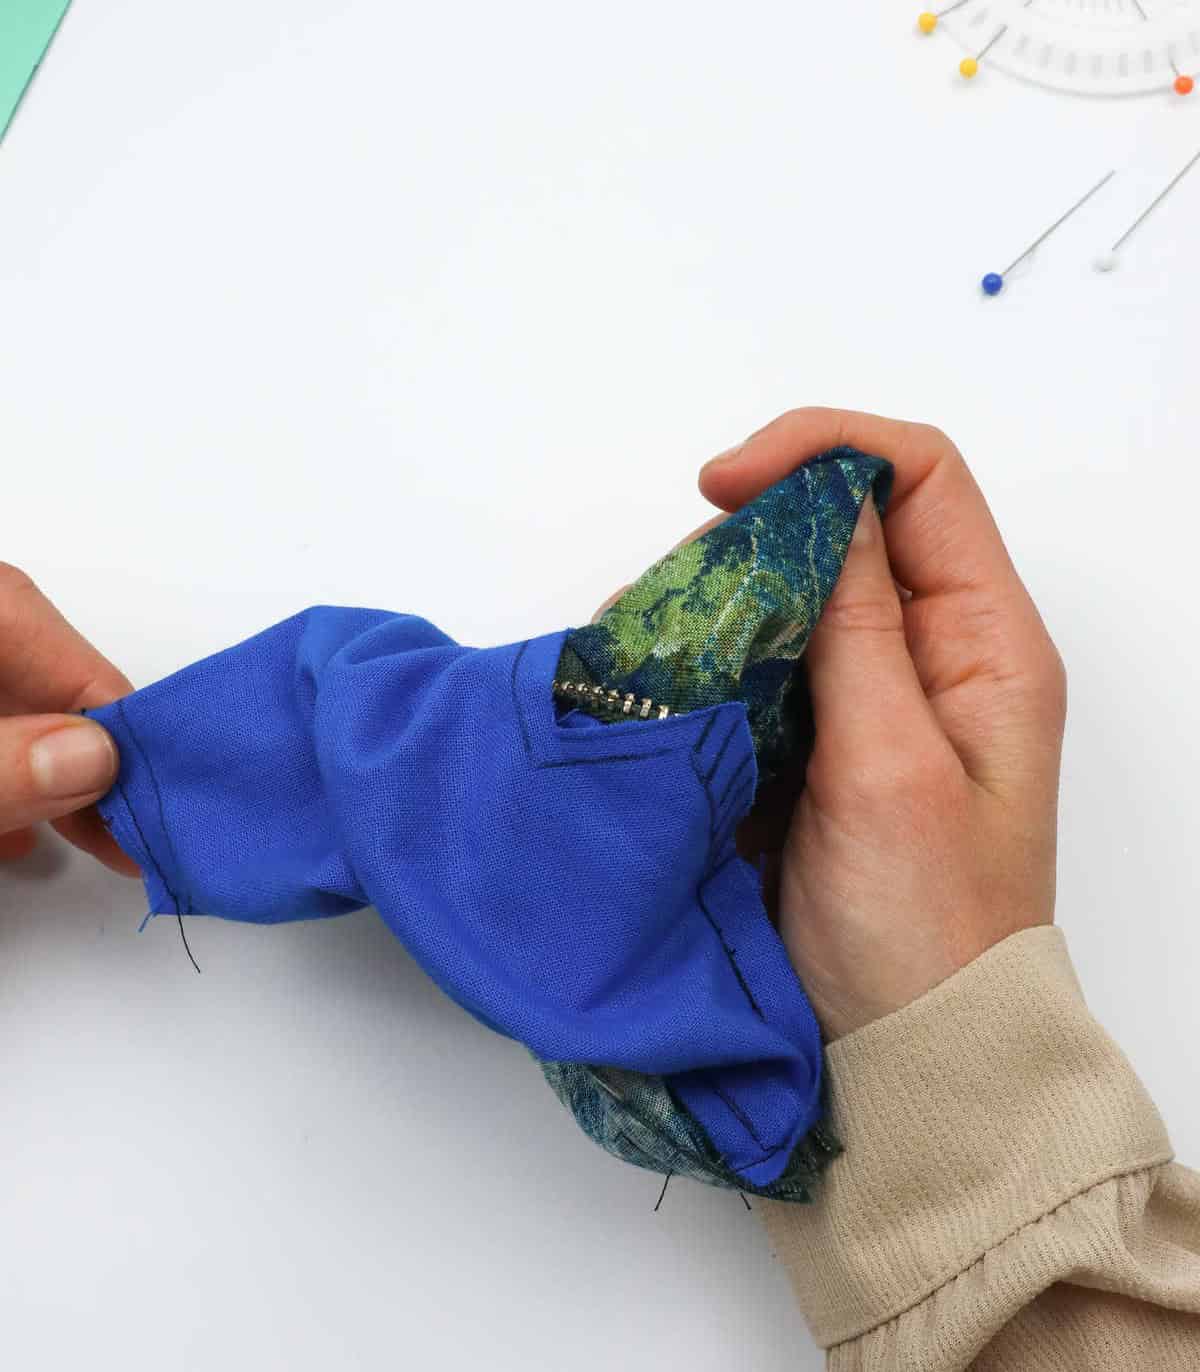
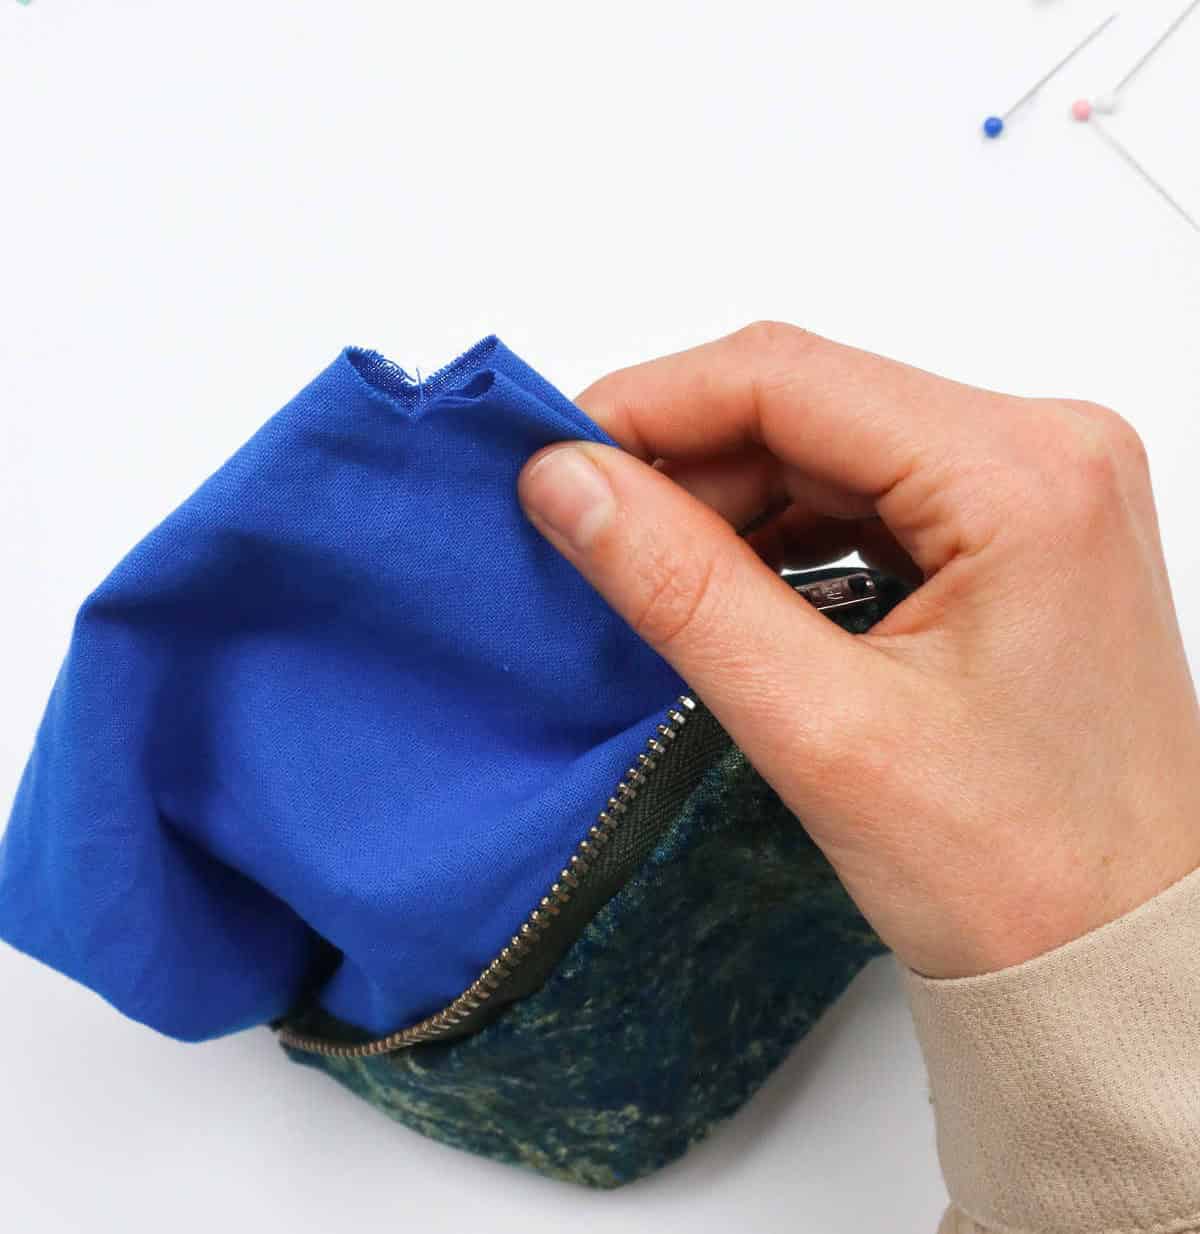
To access the zipper, insert your hand into the seam allowance and locate the zipper’s starting point. Gently pull it open until it reaches approximately halfway. As you do this, you’ll notice that the exterior fabric and lining fabric both have corresponding corner pieces. You’re making progress – keep going!
Step 12
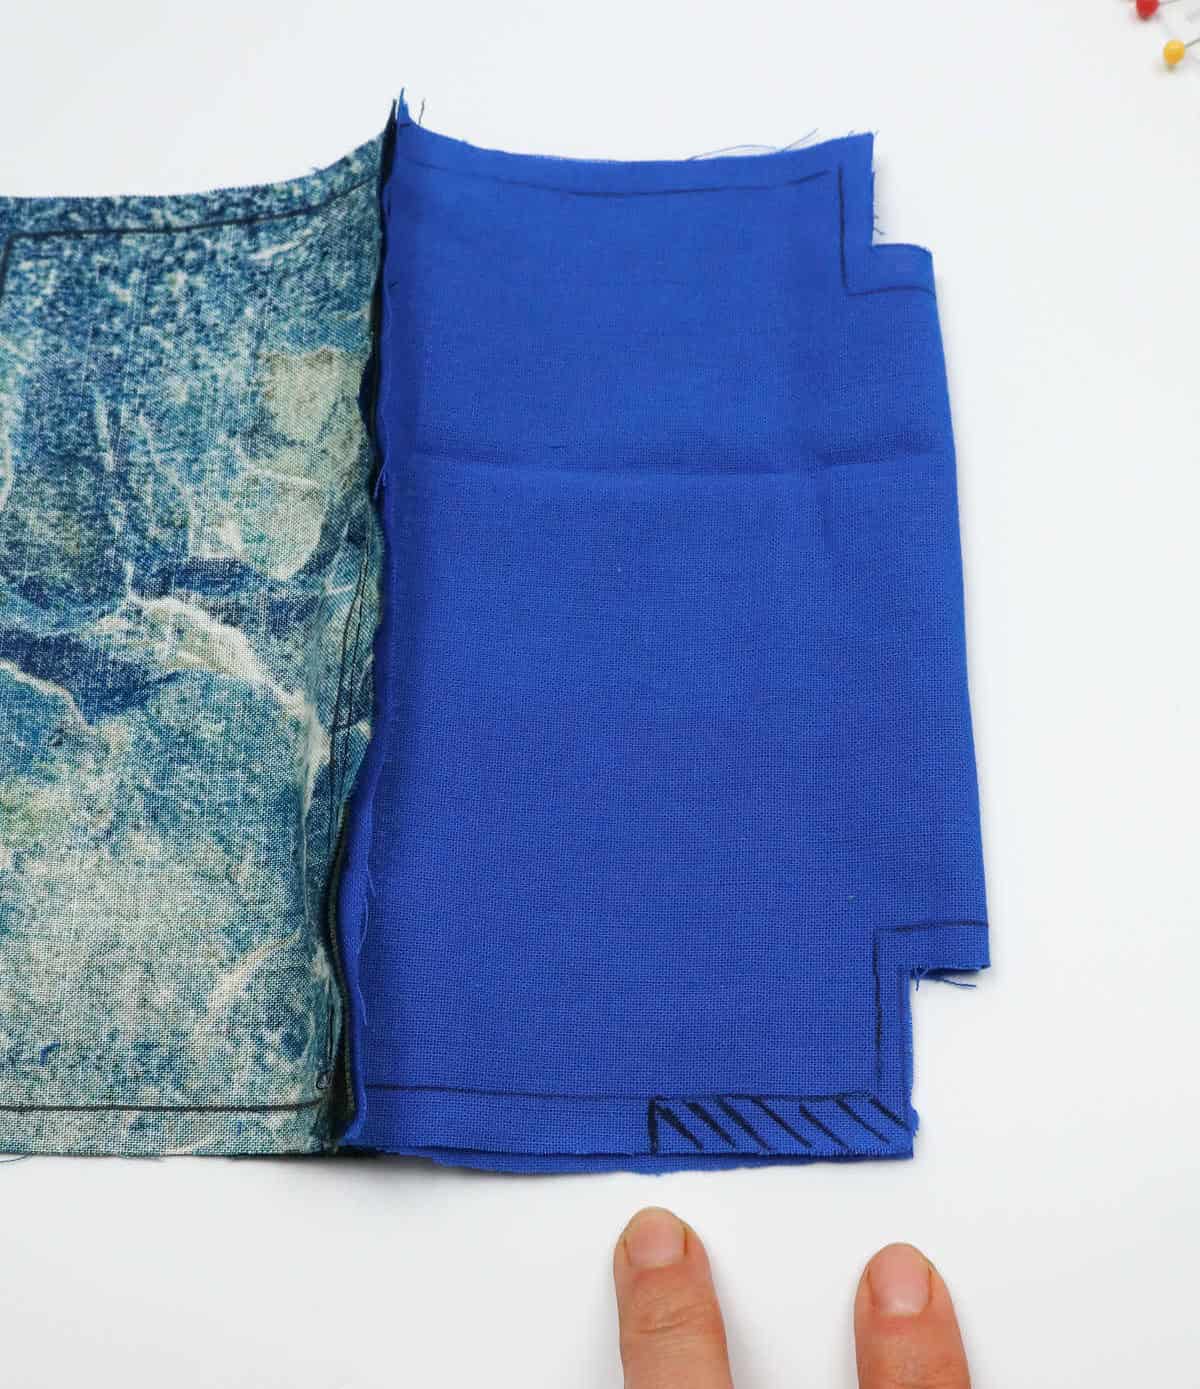
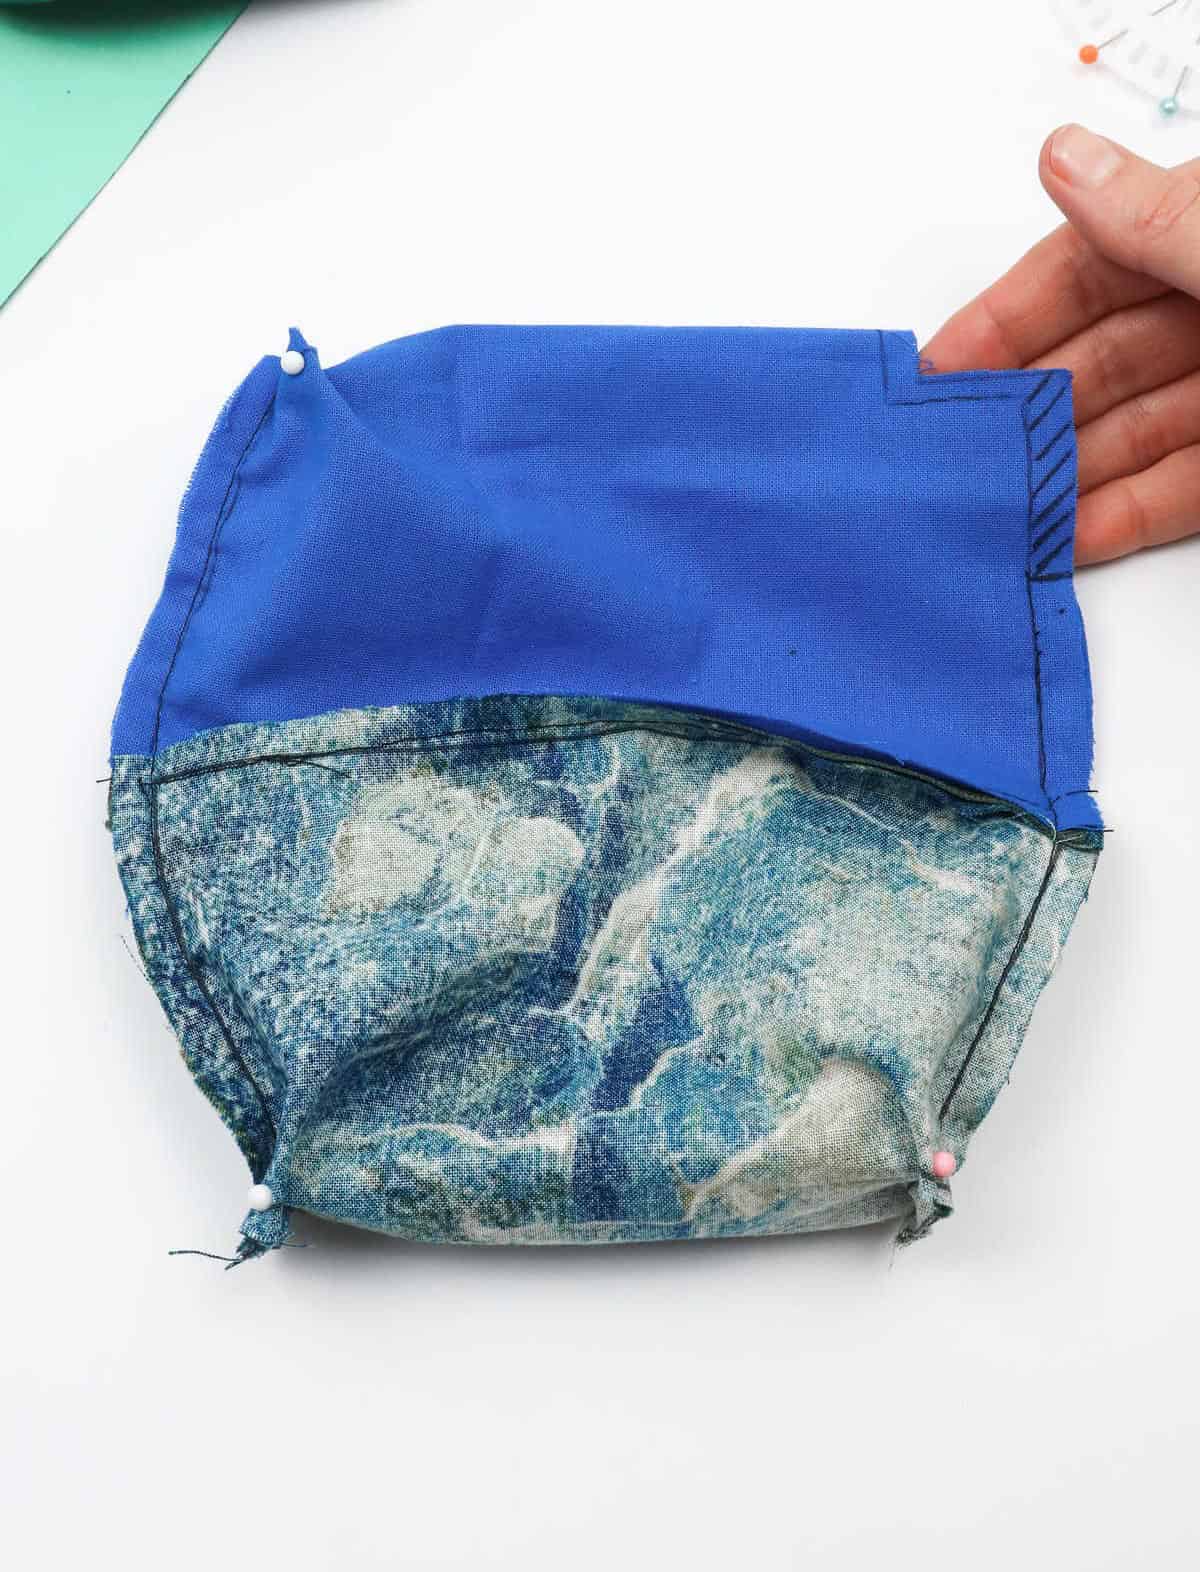
Before assembling the entire project, take a moment to prepare for the final steps. Obtain a fabric pen or tailor’s chalk and use it to mark off about an inch of space in the top left corner of the lining fabric. This opening will remain unfilled, so keep this in mind as you approach the edges of your sewing project.
Step 13
Now that we’ve made significant progress on our pouch, it’s time to bring everything together by sewing along the outline we drew earlier. Make sure to cover all three corners of your pouch, but don’t forget about the one-inch gap we left open for the opening. As you sew, your pouch should start taking shape and begin to resemble a finished product.
Step 14
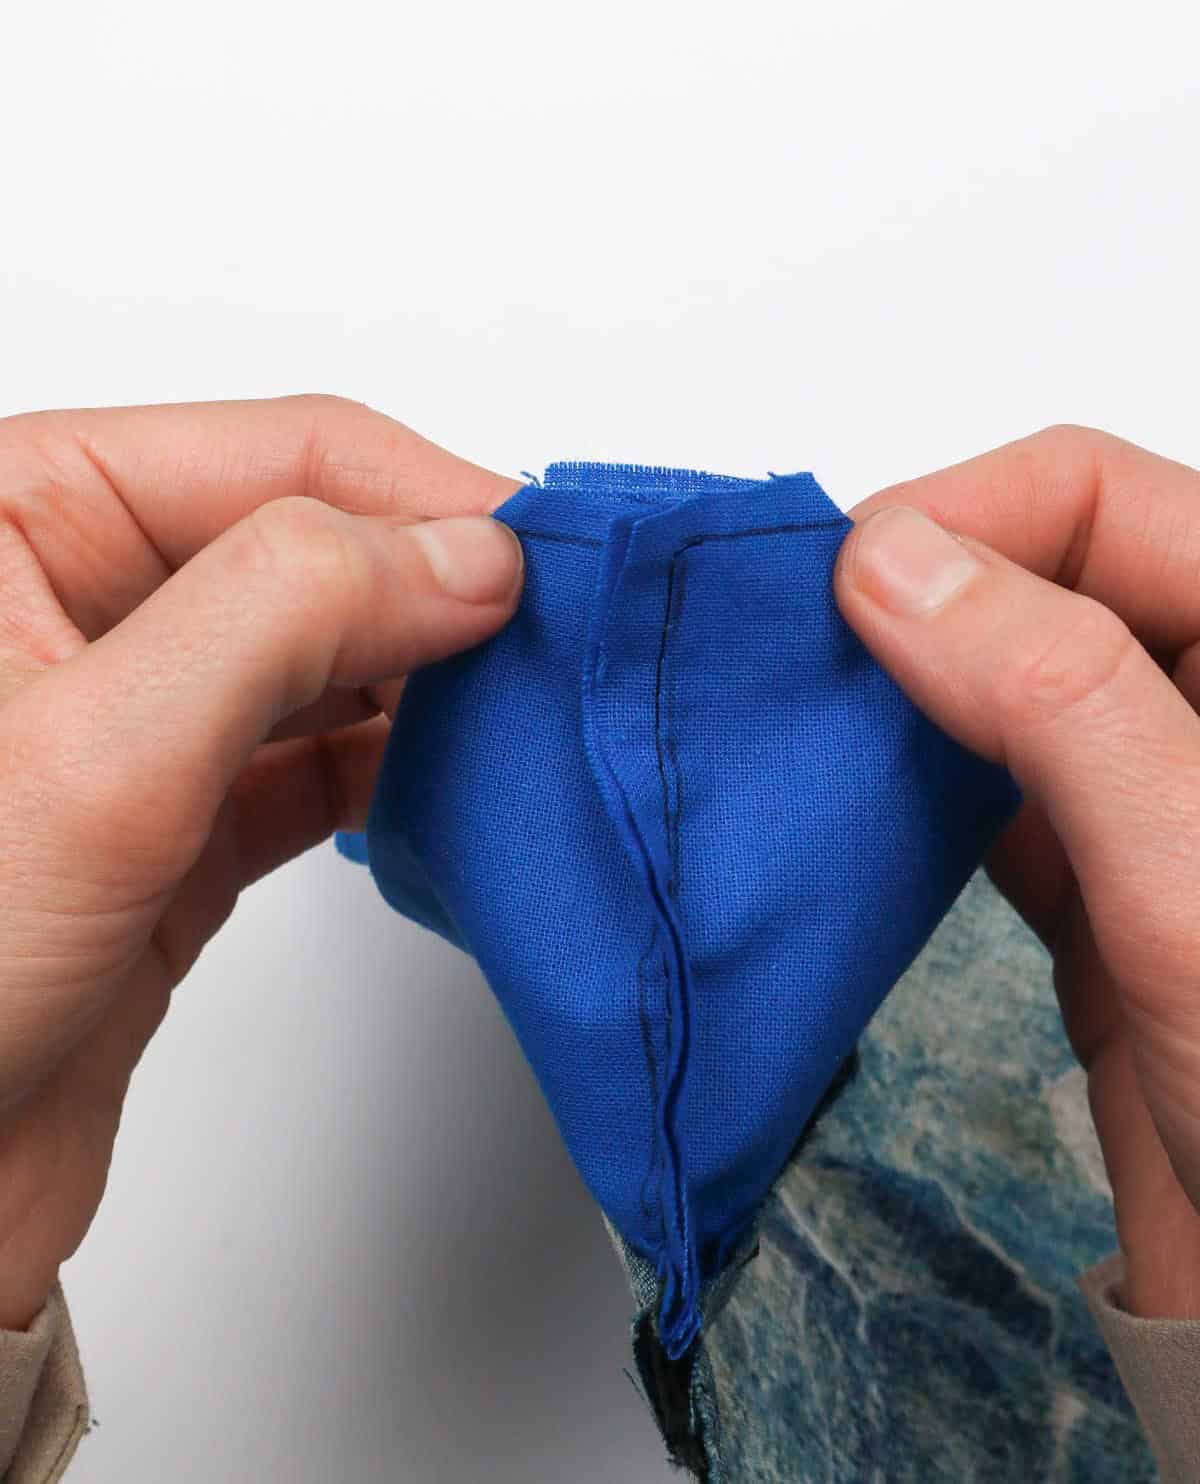
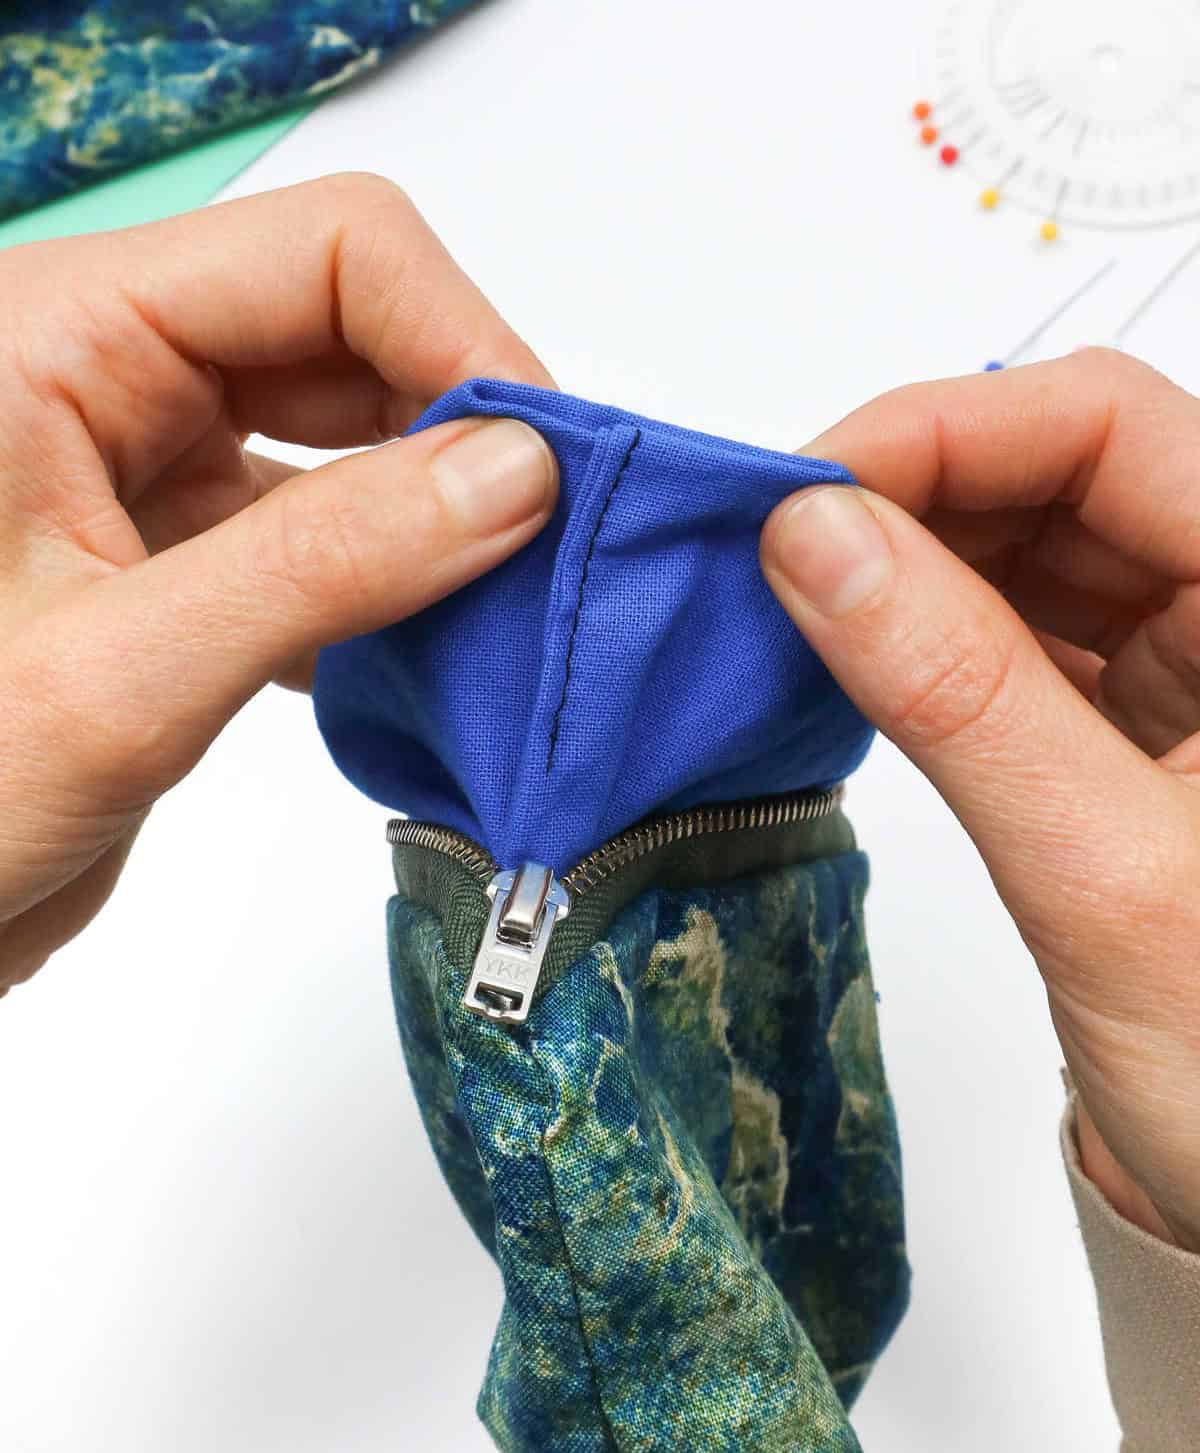
To complete the edging process, start by targeting the indented corners. Begin by grasping the edges of one corner and gently pull them apart to create a flat surface. Secure these edges in place before moving on to the other two corners. As you work your way around the box, be mindful not to disturb the gap left at the fourth corner. By following this procedure for each corner, you’ll ensure a clean and secure finish to your box’s edges.
Step 15
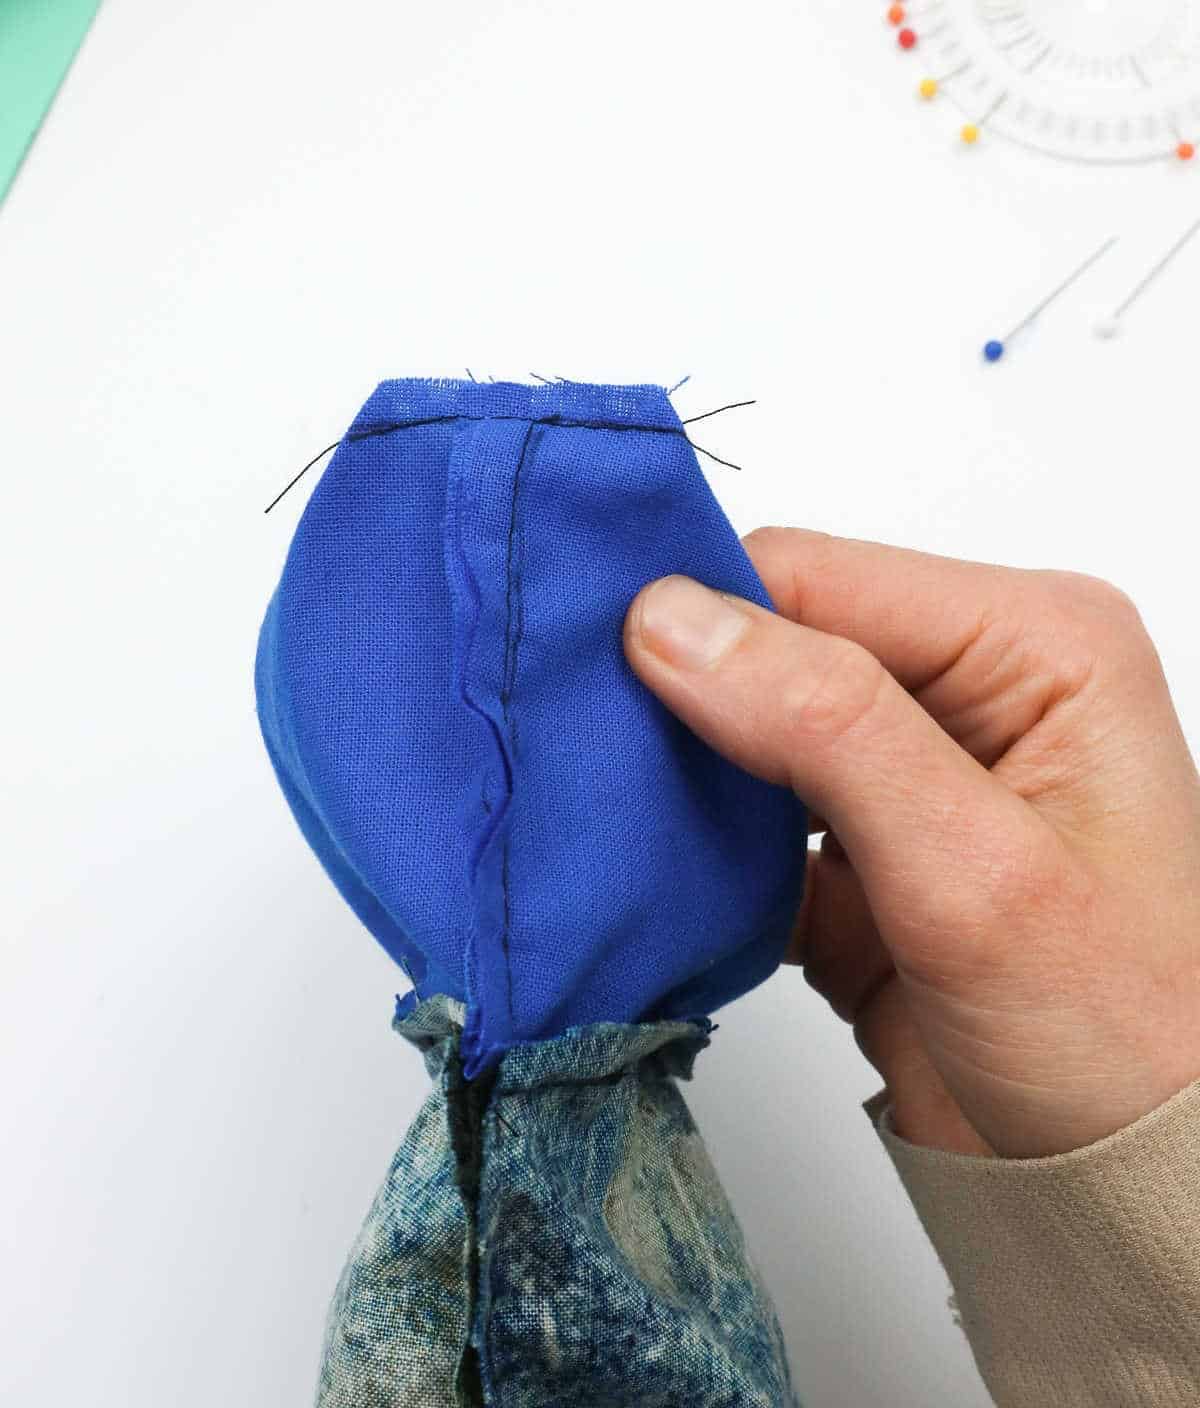
Leave your sewing machine and stitch the indented edges according to the illustration provided. You might be wondering why this step is crucial. In reality, boxing the ends offers a multitude of benefits. Once you’ve taken care of this task, the bottom of your pouch will no longer sag or lose its shape. Instead, it will sit upright and evenly distributed, providing the overall structure and form that gives your pouch definition and harmony.
Step 16
When designing a drawstring pouch, it’s crucial to leave a small gap, typically an inch, at one of the corners. This might seem counterintuitive, but this intentional opening serves as a pathway for you to turn the pouch inside out later on.
Step 17
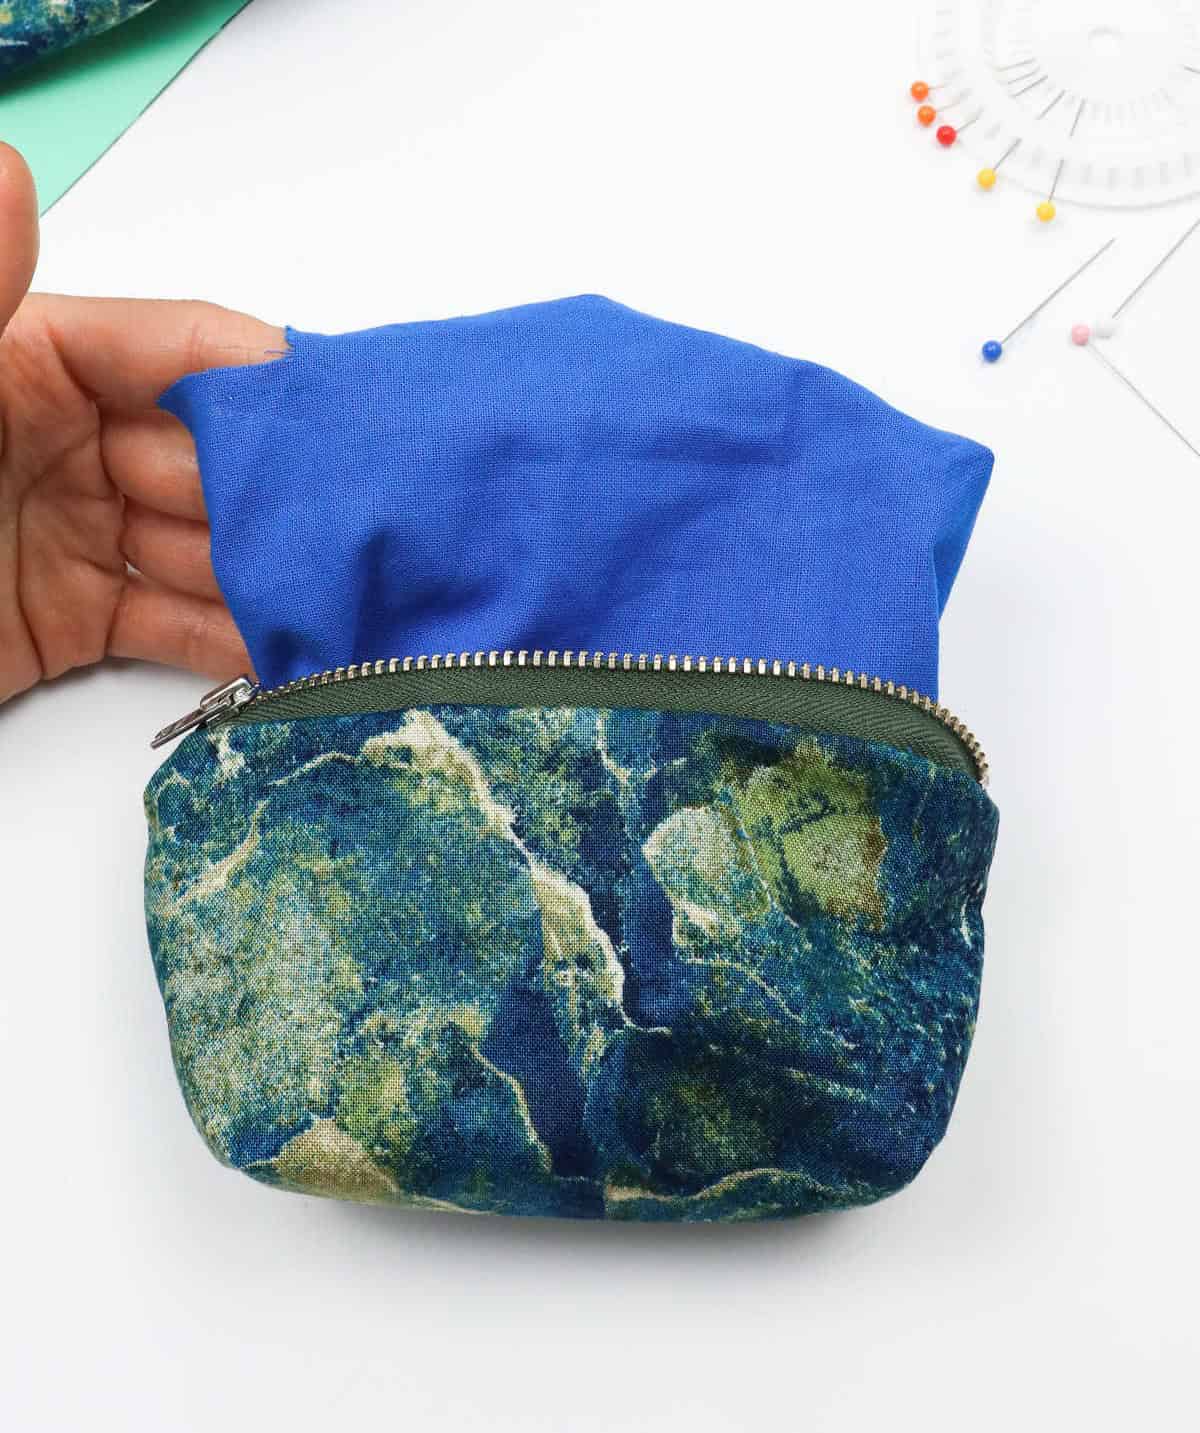

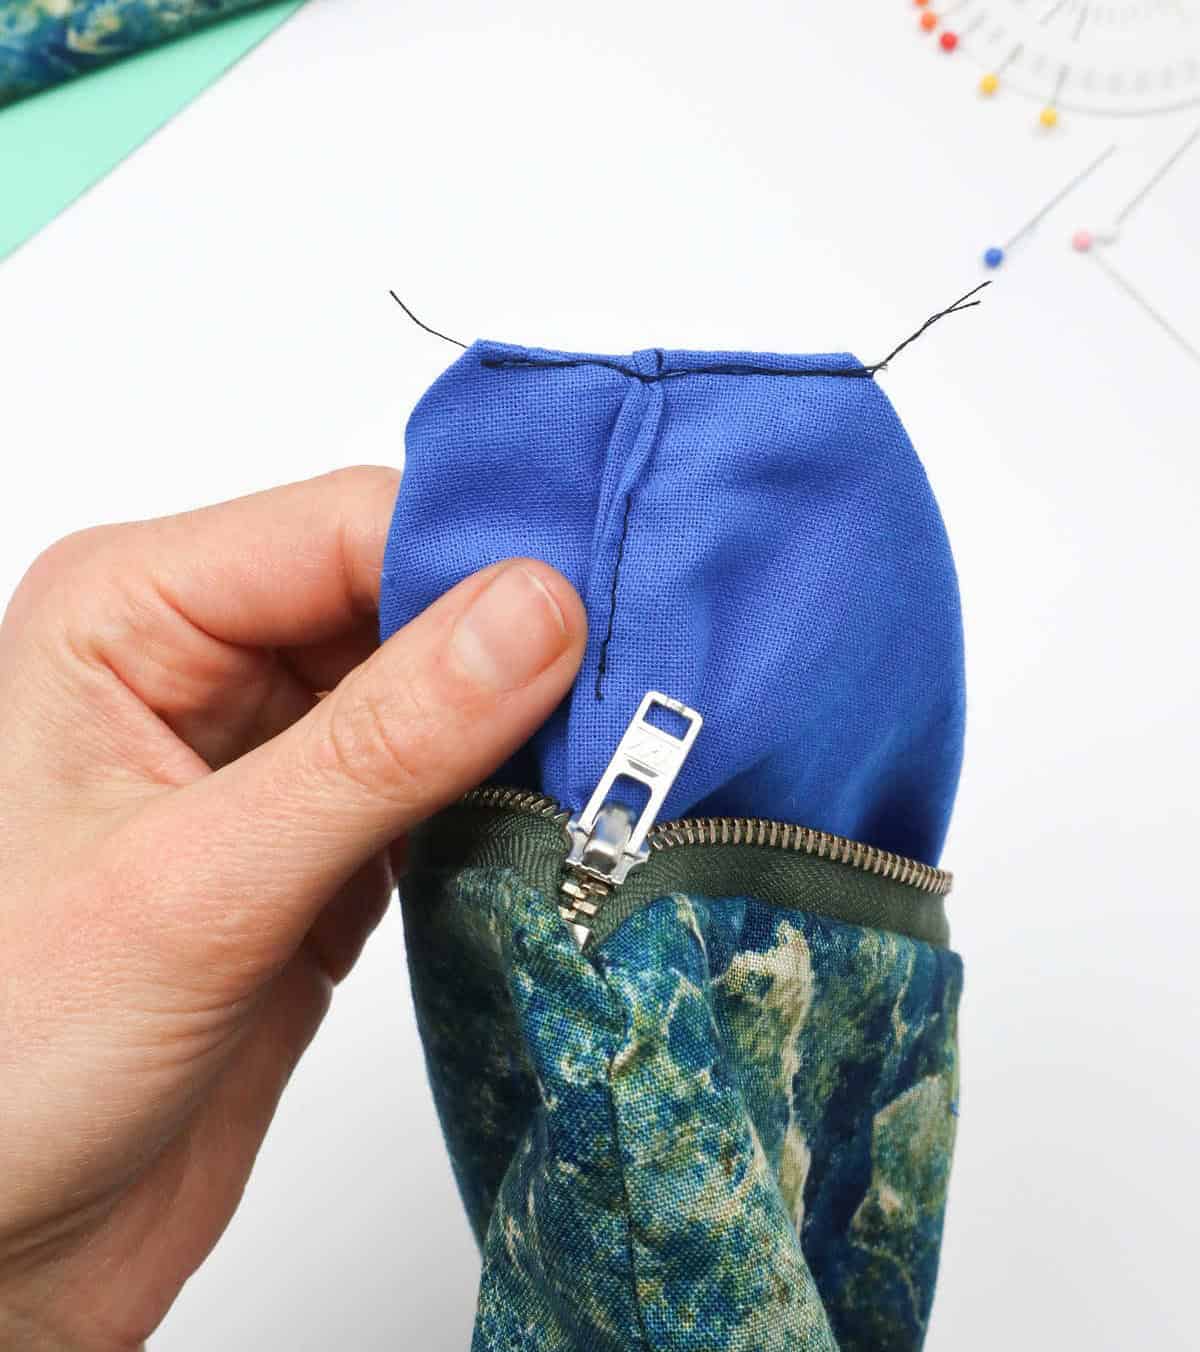
As you complete the reversal of the fabric’s orientation, you’ll notice that a small opening remains. To eliminate this gap, begin by folding the flaps inward and ensuring they’re properly aligned. Secure the folds with pins and press them firmly to create a crisp crease. Next, sew a precise line across the pinned area to close the gap entirely. You’re nearing completion!
The final step involves creating a box-like formation at the edge of the corner by folding the fabric once more and aligning it evenly before sewing a neat topstitch along the edge.
Step 18
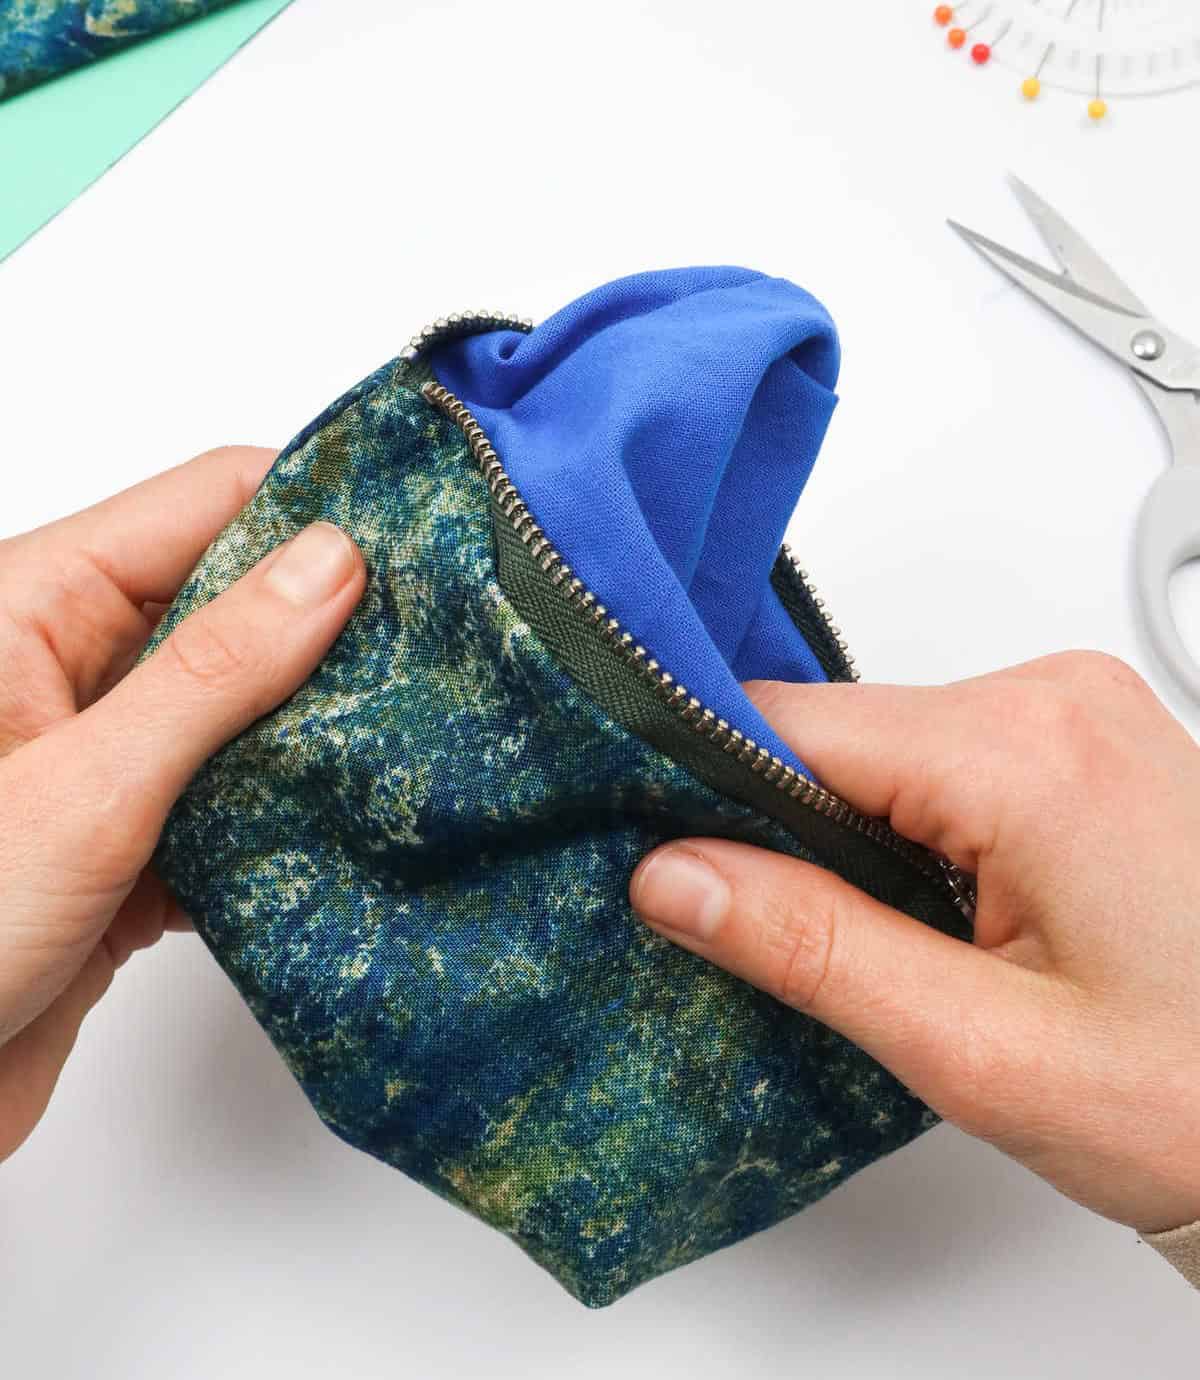
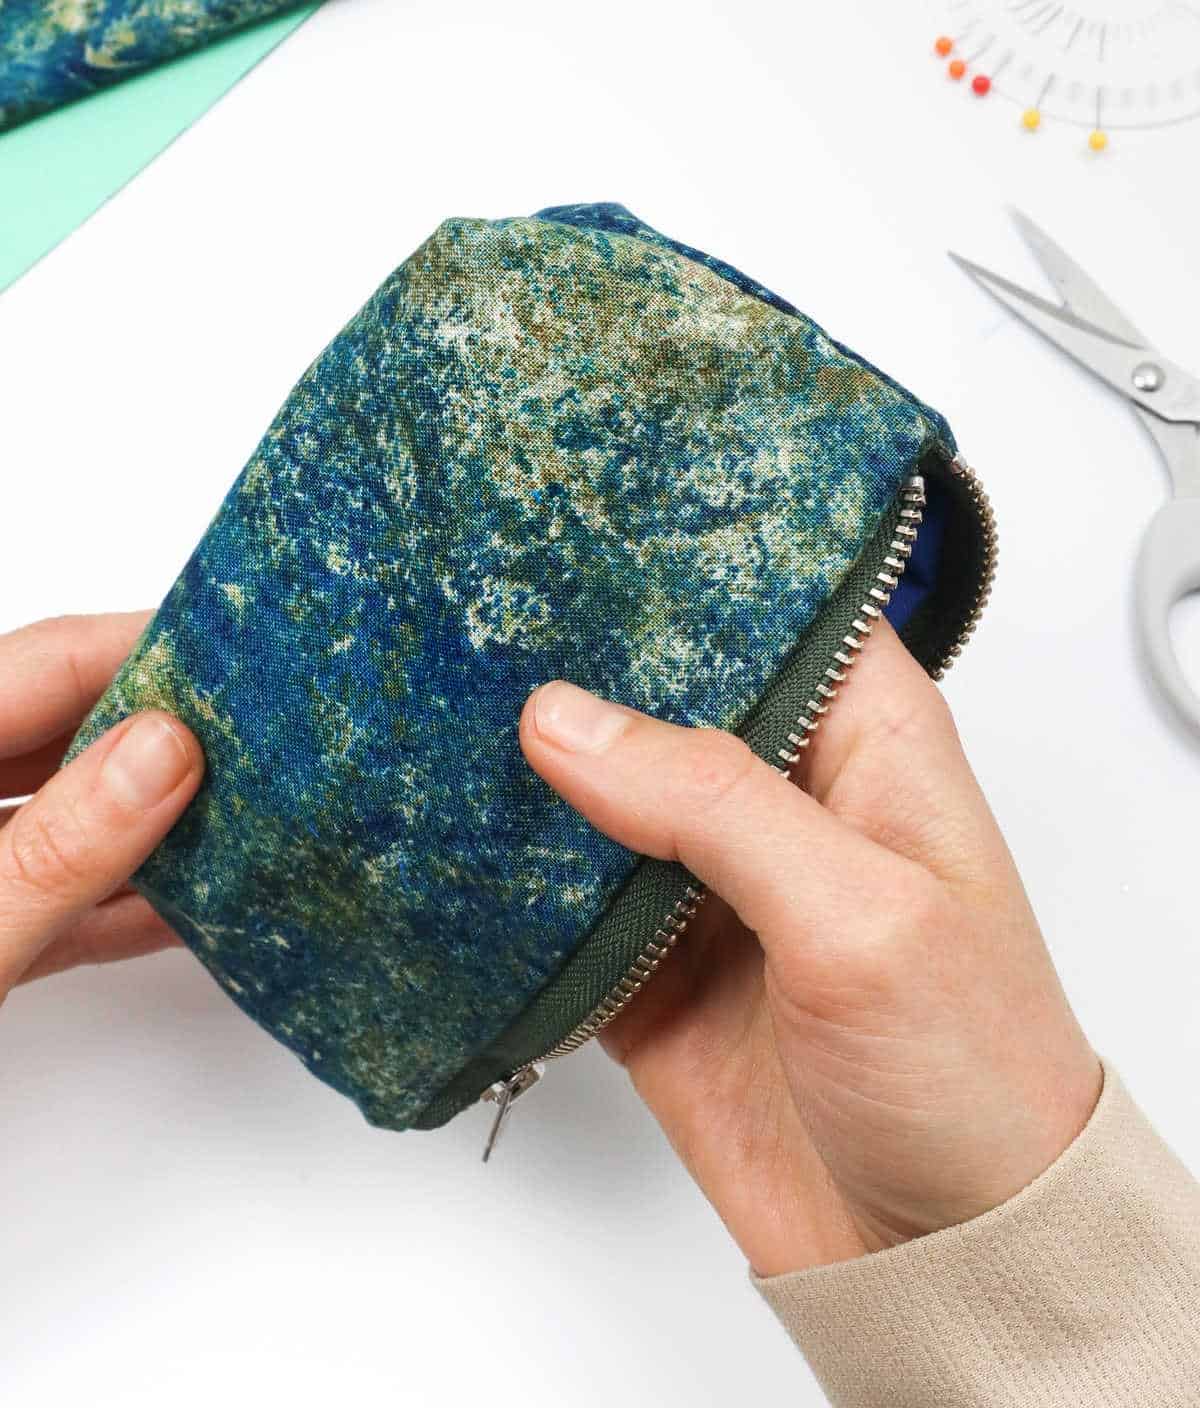

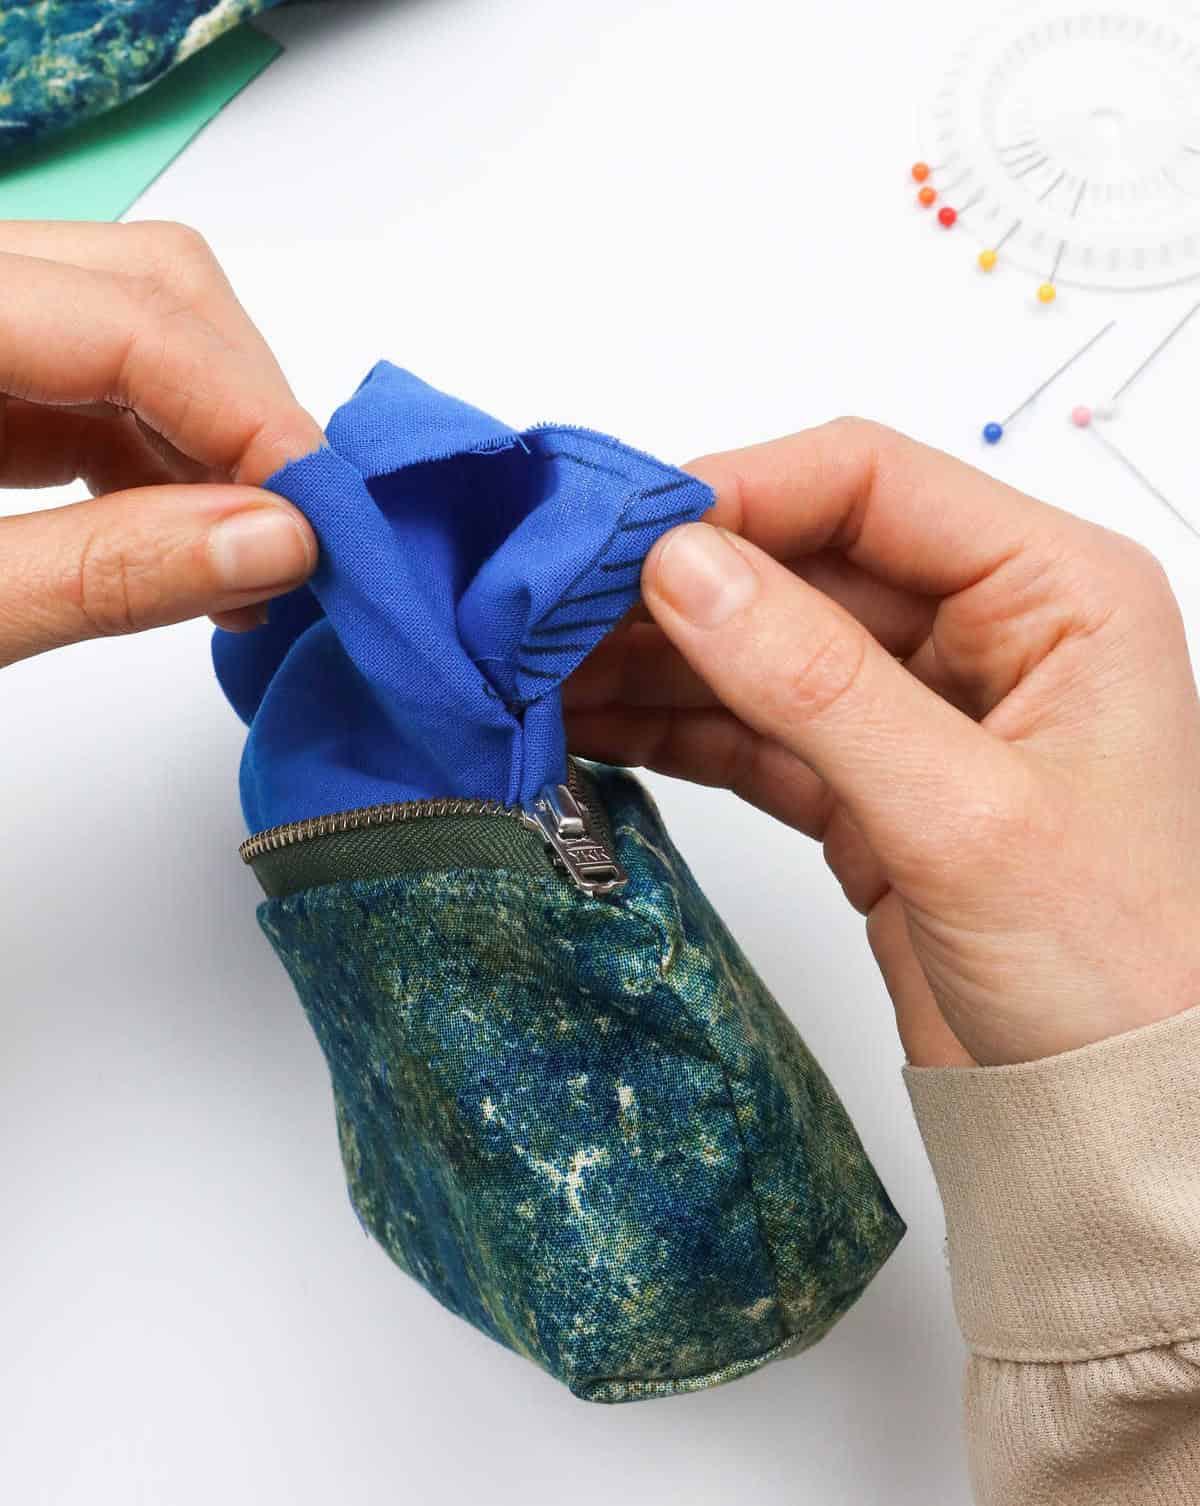
Assemble the lining by gently pushing it into the pouch, ensuring it aligns properly along the inside. Utilize your fingers to adjust the boxed ends, fine-tuning them until they sit comfortably in place. With this final step complete, you can proudly display your finished DIY pouch with zipper – a satisfying project perfect for adults looking to unleash their creativity and produce a functional, stylish accessory.
Watch Full Tutorial

Visual learners may find it particularly intuitive to grasp the concepts presented in the tutorial by watching a video walkthrough. The moving images and accompanying audio narration can make complex ideas more accessible and engaging, allowing for a deeper understanding of the material.
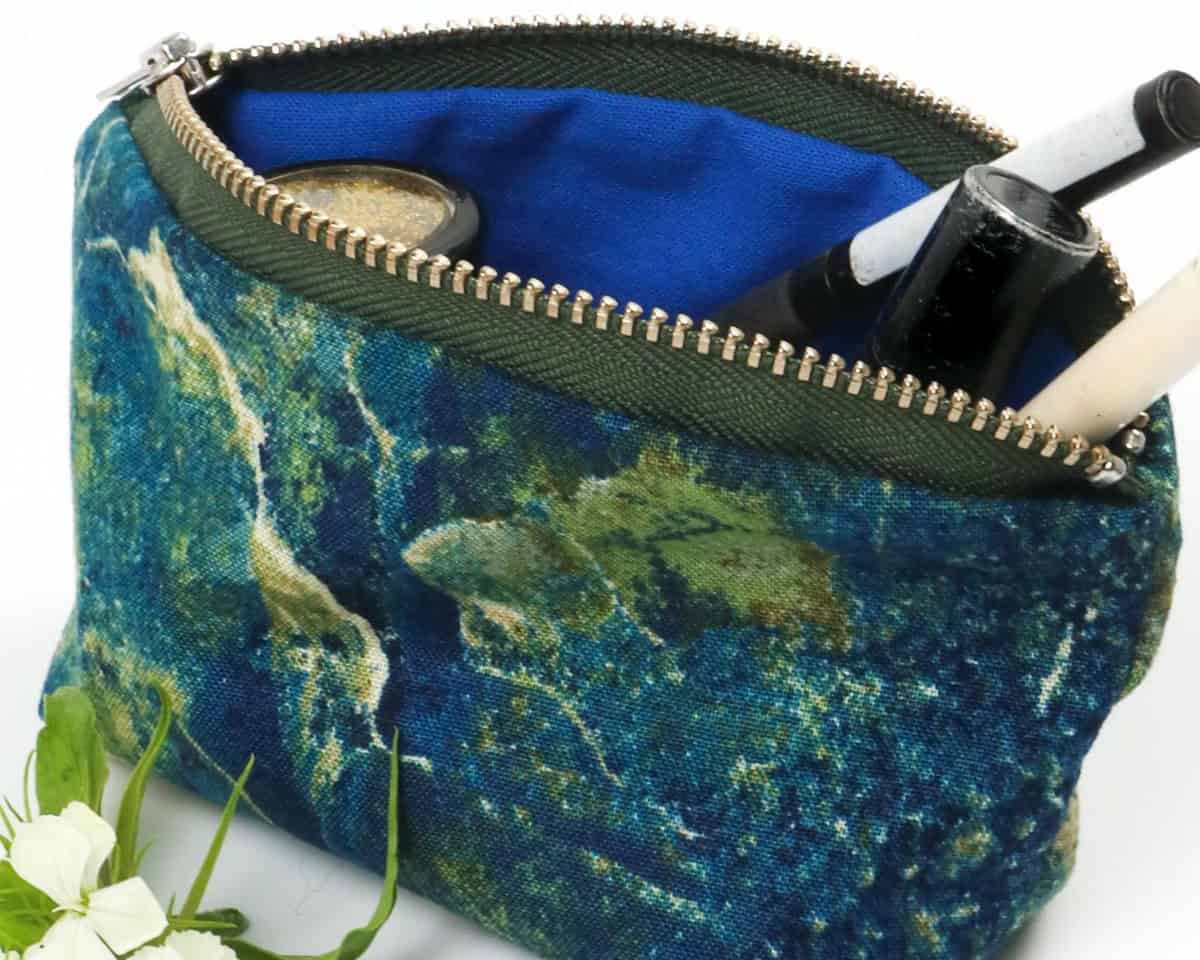
What Can You Store in This Zipper Pouch?

The versatility of pouches is undeniable. What’s intriguing is what you can’t store in them. Depending on the size, these containers can hold a wide range of items, from beauty essentials to writing utensils. While they’re great for storing various goods, there are certain things that just don’t belong in pouches.
Here’s a list of some common items people often keep in their pouches: keys, wallet, phone, cards, and cash; passport and travel documents; makeup, cosmetics, and toiletries; accessories and hair clips; chargers and headphones; school and office supplies, stationery, and craft materials.
Who Can Make This Pouch?

For crafters of all levels, this zipper pouch is an excellent project that offers a perfect balance between challenge and ease. While beginners will find it an ideal mini-project to hone their cutting and sewing skills, experienced sewists will appreciate the simplicity of the design, allowing them to quickly create a few pouches for personal use or as gifts.
Other Crafts You Might Like
With an array of creative endeavors, crafting can be a fantastic way to express oneself while also producing unique items. If you’re looking to get started with making decorative pieces, there are numerous options to consider. One approach is to create air dry clay bowls, which require minimal equipment and can be customized to suit various tastes. For instance, you could add paint or glaze for a personalized touch.
Alternatively, you might want to explore sewing projects, such as simple accessories like hair bows or even more complex garments like dresses. Paper lanterns are another fun DIY project that can add a pop of color to any room. If you’re drawn to bohemian-inspired decor, consider making a succulent planter or stone necklace. For a sense of calm, try crafting scented candles or rope coasters.
When it comes to upcycling, there are countless possibilities for transforming old items into functional or decorative pieces. You could also look into fabric crafts, such as quilting or embroidery, which offer a wealth of creative opportunities. Finally, paper crafts like origami or card making can be both soothing and result in beautiful finished products. With so many options available, it’s no wonder that crafting has become an increasingly popular pastime.
DIY Zipper Pouch (Step-by-step Tutorial)
By Karo @ CraftsyHacks. com, this DIY zipper pouch is an ideal fabric project for sewing enthusiasts of all skill levels. Its simplicity and ease of execution make it a perfect introduction to the world of sewing for beginners. To get started, you’ll need only 10 minutes for preparation and 30 minutes for active sewing time, resulting in a completed zipper pouch that can be used as a storage container or decorative accent.
This project serves one zipper pouch, making it an excellent addition to any sewing collection.
Equipment
To ensure a seamless writing experience, it’s essential to maintain a consistent work environment. One way to achieve this is by using a few simple tools that help you stay focused and alert. First, consider investing in a set of scissors, ruler, and marker – these will come in handy for any last-minute editing or note-taking. Additionally, if you’re working on a sewing project or crafting activity, having a stash of sewing pins nearby can be incredibly helpful.
Finally, make sure to prevent your screen from going dark by adjusting your device’s settings accordingly.
Materials 1x2x3x
To create a simple pouch, you’ll need the following materials: two 10-inch by 10-inch pieces of cotton fabric and one 6-inch long zipper. You should also have a paper pattern, which will be referenced throughout the project’s steps.
Instructions
To begin, gather all necessary supplies and create a paper pattern to guide your fabric cutting. Place the pattern over the outer fabric first, followed by the lining fabric, ensuring accurate placement. Use sewing pins to secure the pattern in position. Next, utilize a ruler to draw an outline around the fabric, leaving a quarter-inch gap for the seam allowance. Remove the paper pattern and set it aside. With scissors, cut both fabric swatches along the outer outline.
Position the outer fabric with the right side facing up and place the zipper across the top, ensuring it faces downwards. Next, position the lining fabric with the right side inward, effectively creating a mirrored connection between the two fabrics when they’re pulled together. Sew the top side of the fabric where the zipper is, along the inner outline. Once complete, pull the lining fabric over the zipper and lay it flat to ensure both fabric swatches are aligned at the zipper.
Pull the lining fabric inward, aligning its edge with the zipper’s, and repeat the process with the outer fabric. This will sandwich the zipper between both fabrics. Sew this side shut along the inner outline. Open the fabric and lay them out flat. Reach in and open the zipper halfway to reveal two corners each of both the outer fabric and lining fabric. Now it’s time to sew the remaining three corners shut, leaving one corner unsealed.
Mark a one-inch section on the lining fabric’s designated corner using a pen. Leaving this marked corner aside, sew all other corners closed. To box the indented corners, pinch the fabric and flatten it with your thumb. Pin it in place before sewing across each corner. Repeat this process for the remaining two indented corners. Pull the fabric through the gap to reveal the pouch’s right side up. Sew the gap shut and remember to box it as well.
Finally, push the lining fabric back into the pouch, and your DIY zipper pouch is now complete.