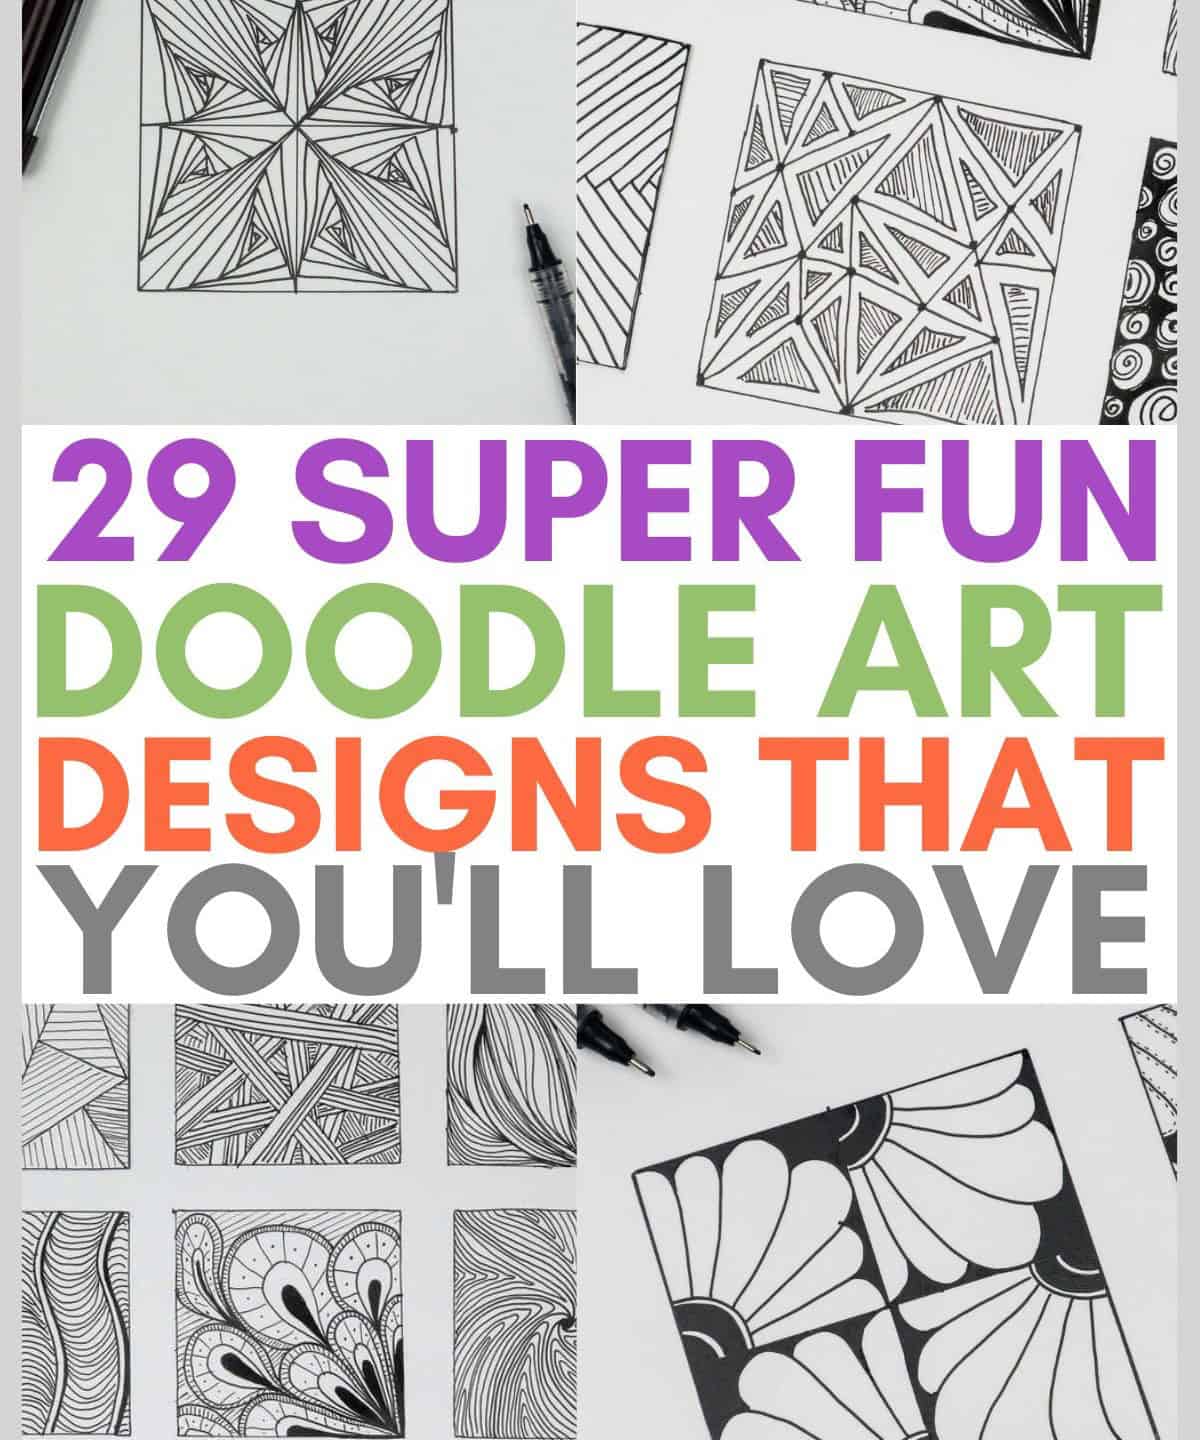
Whether you’re looking for a creative outlet or simply a way to unwind, expanding your doodling skills can be a fun and rewarding experience. As someone who has become quite fond of doodling, I’ve found that it’s not only a great way to express myself creatively but also a meditative practice that can help me clear my mind. For those who, like me, have been known to get lost in the world of doodles, these easy pattern ideas are perfect for passing the time on scrap paper, journals, and more.
And if you’re looking to take your doodling skills to the next level, I’ve learned that with practice, it’s possible to turn this hobby into a side hustle. When it comes to the materials I like to use for my doodles, I’m quite particular about them. In fact, I find that having the right tools can really make all the difference in terms of the final product. For this project, I stuck to a few trusty favorites: this paper, this ruler, these pens, and these pencils.
And if you’d like to see a visual demonstration of most doodles, be sure to check out the YouTube video with almost the same name – 23 Easy Doodle Pattern Ideas.
Watch: 23 Easy Doodle Pattern Ideas
1-4
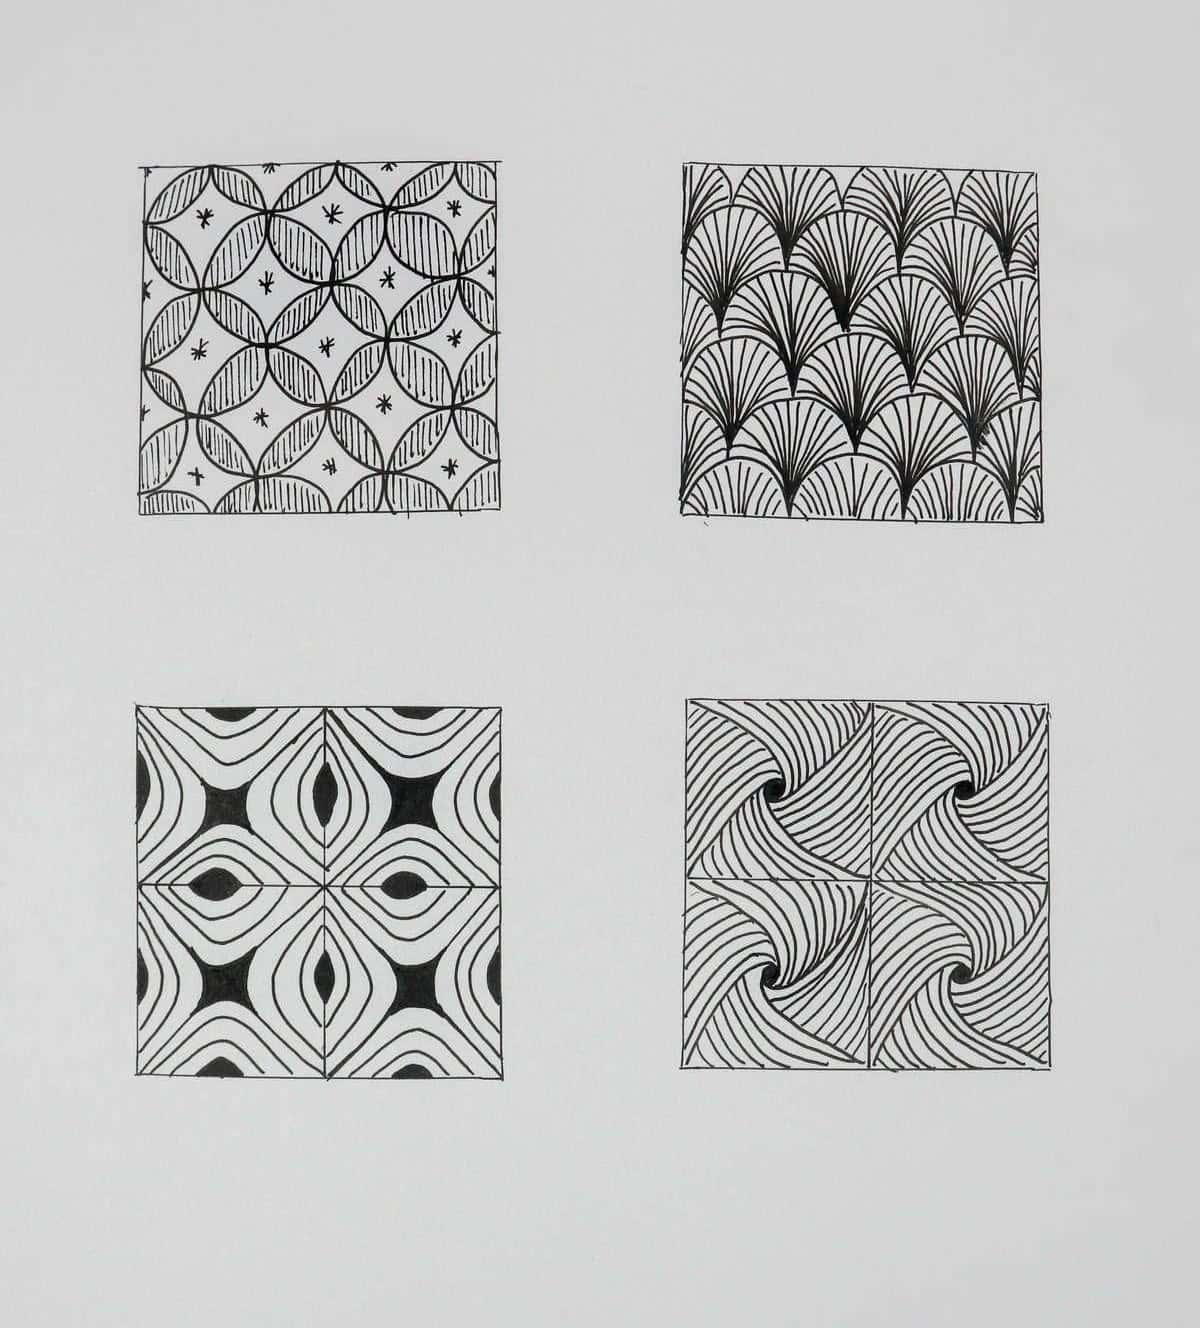
To start, fill the workspace with evenly spaced circles that extend off the page if needed. This will create a foundation for our design. Next, add another layer of rings, staggering them so that the previous negative space is now in the center of the new circles. Once this layer is complete, you can begin adding color and stars to the remaining holes. Start at the bottom of the page and work your way up by drawing small arcs.
Fill the entire page and then return to the areas created with lines that mirror the shape of the mounds. To begin our intricate design, divide the surface into four equal parts and add large ‘X’s to create triangles in each section. Then, draw small web-like lines from the center point of each triangle. Next, add soft, peaked arced lines that mirror the diamond shape just drawn, continuing until all negative space has been filled with lines.
Finally, color in the centers, even if it’s just half a circle going off the page. Repeat this process for each section, then continue adding wavy lines as you fill in the remaining space, shortening them as you go. This intricate design can be used to store your doodling pens in a DIY pencil case or inspire more creative drawings.
5-8
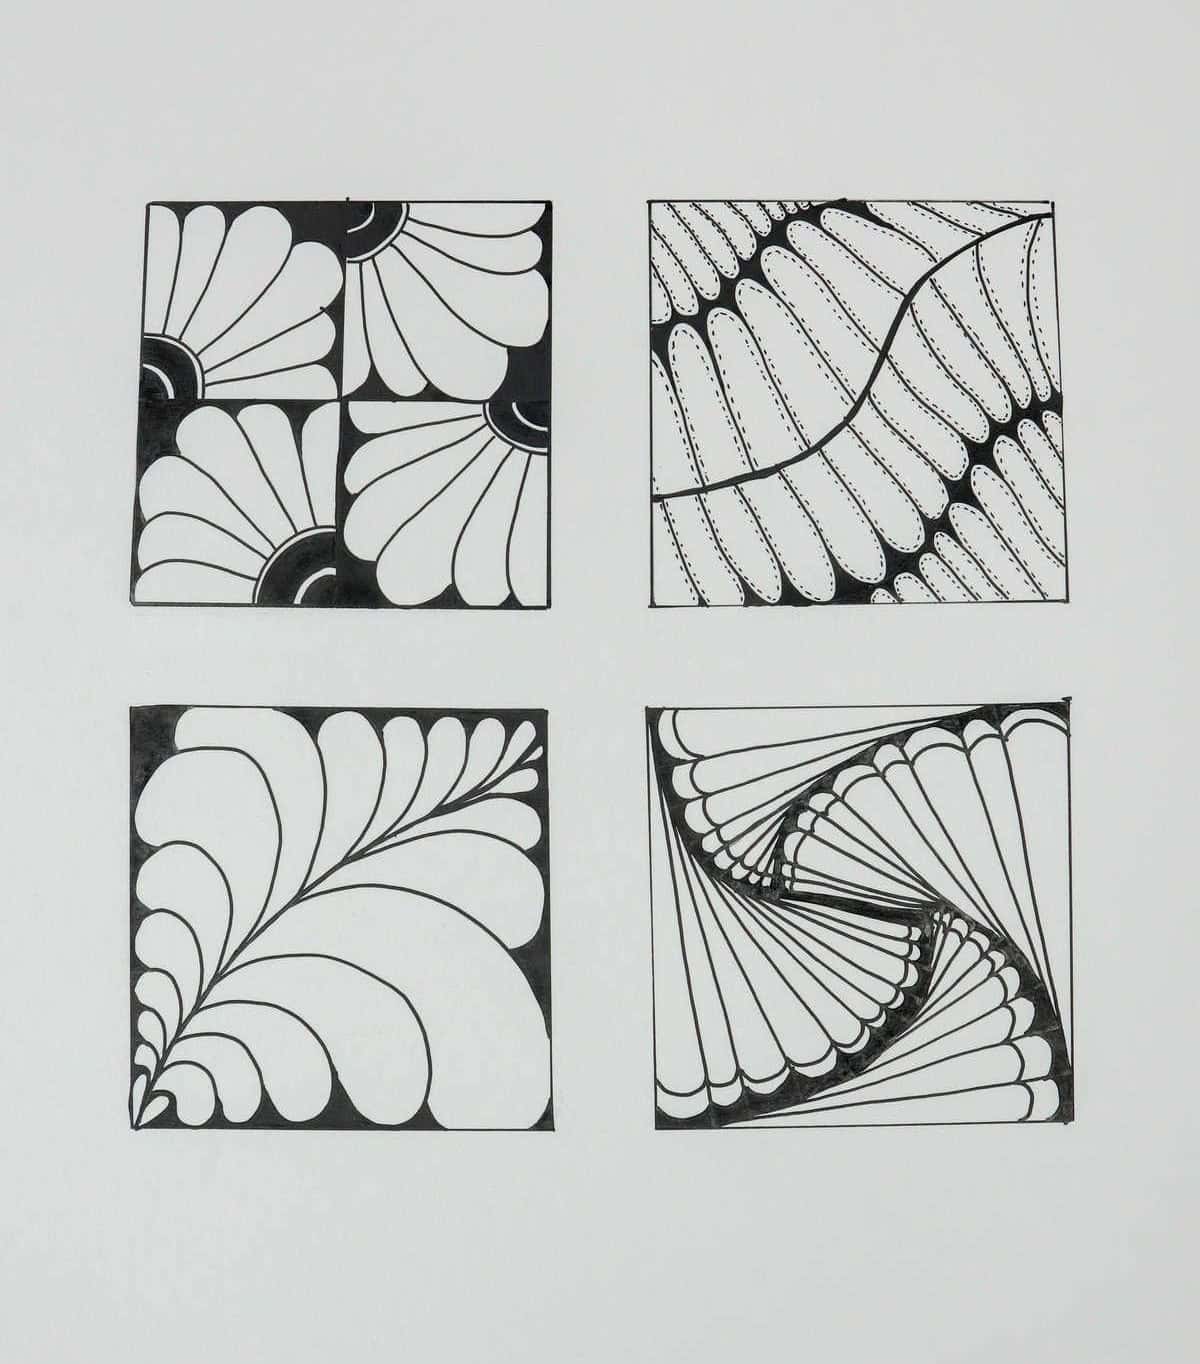
Start by dividing your space into four equal sections. In each section, draw an arc in one corner and then fill in the rest of the box with petal-like shapes. Repeat this process for all areas, making sure to leave no gaps. Next, create a central axis by drawing three wavy lines that divide the page into thirds. Fill in each section fully with the petal-like shapes. Once you’ve completed the first round of petals, go back and make the centerline bolder.
Add little dashes to each rounded shape to give it some texture. To add some whimsy to your design, start by drawing a wavy line diagonally across the space. At the bottom left corner of the page, draw a heart shape. Build off this shape with leaf-like drawings that grow and taper as you move towards the middle and then back outwards again. Fill in any gaps or areas where your lines didn’t quite reach.
Then, bring a line down from the top left corner of the page at an angle to create a small isosceles triangle. Repeat this process for each side of the page, staggering the angles as you get closer to the center. Finally, add a cloud-like or spider web-like line to the bottoms of all the triangle bases. Above this line, color in the widest points and then create another line that mimics the original. You can try again with these easy paintings for beginners or these aesthetic drawing ideas.
9-17
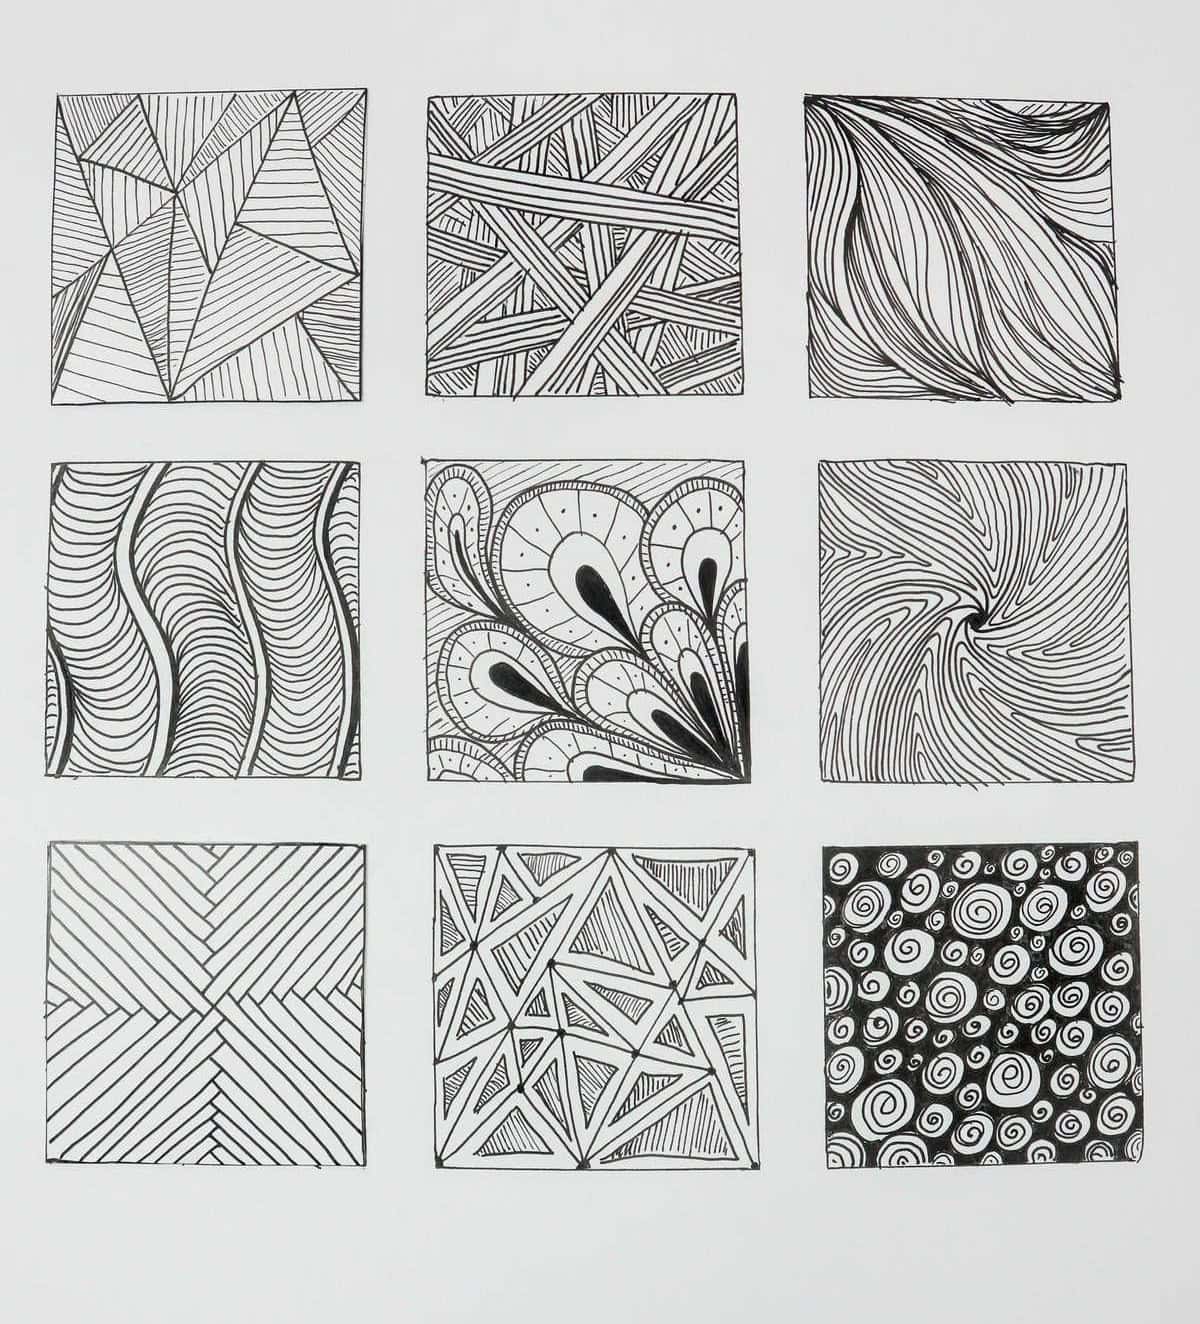
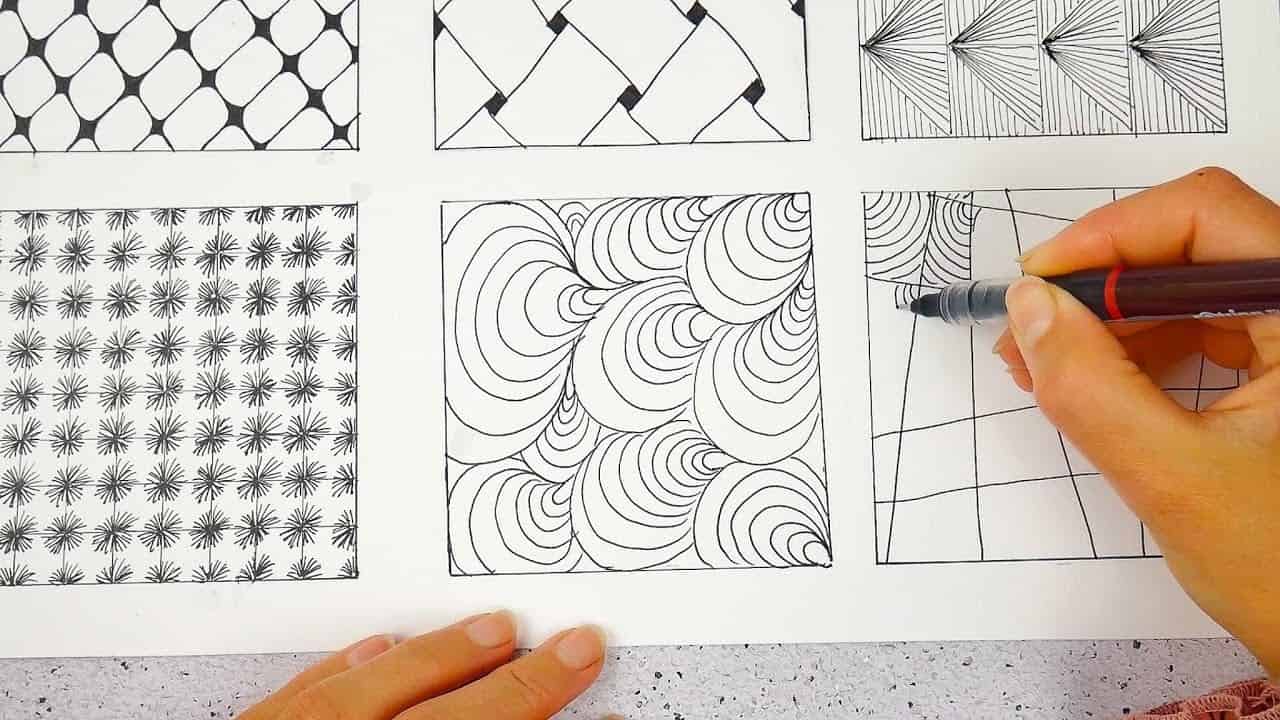
Embark on a creative journey by starting with a series of intersecting lines. Experiment with varying the number of lines within each triangle, allowing for depth and visual interest. Next, focus on creating a central structure that won’t overlap with the surrounding lines. Vary the boldness and placement to add texture and dimension. The direction and size of your lines will dictate the overall composition.
Envision groupings of lines angled in various directions, with some overlapping or meeting at points. Another variation involves drawing wavy lines. Begin by creating a series of bold and subtle lines that ebb and flow across the page. Stagger some lines at different points to add visual tension. For this design, start with four sets of two wavy lines, alternating between bold and subtle. From there, incorporate rounded arcs that alternate direction and blank space.
This will create a sense of movement and fluidity. As you reach the bottom right corner, introduce the petal shape, extending it to roughly the halfway point of the page. Follow this with rounded pieces that fit snugly within the allotted space. Next, mirror every shape with smaller, mirrored lines, adding hash marks to separate the new from the old markings. This will create a sense of continuity and visual interest.
The final step involves drawing two smaller arcs at the base of each shape, coloring one, and then adding more prominent hash marks to the background and horizontal lines. This will add depth and visual complexity. To conclude, draw curved lines radiating outward from the center, creating a wave-like effect. Fill in these waves with smaller, mirrored lines for added texture and interest.
18-26
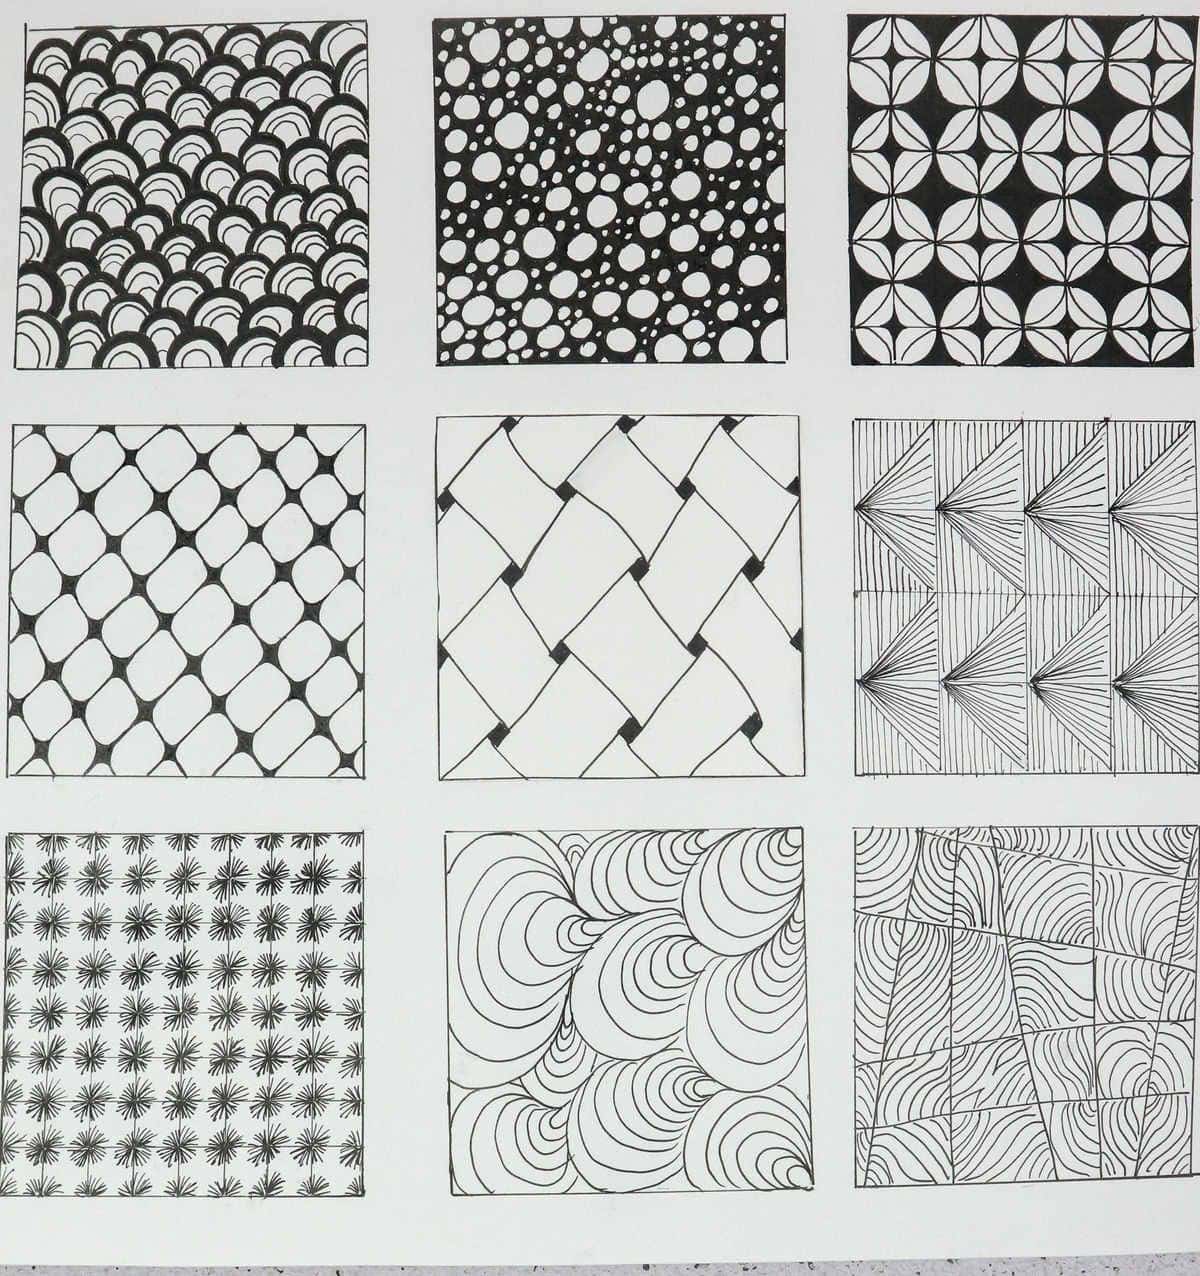
Begin by creating a repeating pattern of shapes on your paper. Start with a curved arc and continue the design until your page is filled. Next, add mirrored lines to each shape, and then color in the top band. For a unique design, start with a circle and fill in the background around it. Divide your circle into four sections, then quarter those sections again, creating an 8×8 grid. Place a small circle at the center of every fourth square and draw a diagonal line within each cell.
Once you’ve completed the circles, add diamond shapes to the intersection of each one. Fill in any leftover crosses with color. To create a textured look, start by drawing diagonal lines and then cross-hatch them as you go. Finally, trace over the entire design, making the center points bolder. To add more interest to your design, draw diamonds across the page, staggering them as you work. Connect each diamond with soft lines, alternating sides with each new shape.
Complete one direction before moving on to the next. Create a 4×4 grid and then add diagonal hashes that alternate by row, giving you an ‘M’ or triangle pattern. Add vertical lines to all squares except where the triangles meet, and taper those lines as they reach the edge of the paper. Repeat this process for an 8×8 grid, adding angled lines to the bottom left corner of each square and then mirroring that design in the opposite corner.
Fill in the top right and bottom right areas next, creating a cohesive look. For added texture and interest, create small horseshoe shapes at any angle you like, anchoring each shape to the one before it. Add a natural-looking cross-hatch pattern to your design, along with wavy rainbow lines inside each square. These doodle designs can be used to decorate your DIY journal cover or inspire new circle drawing ideas.
27
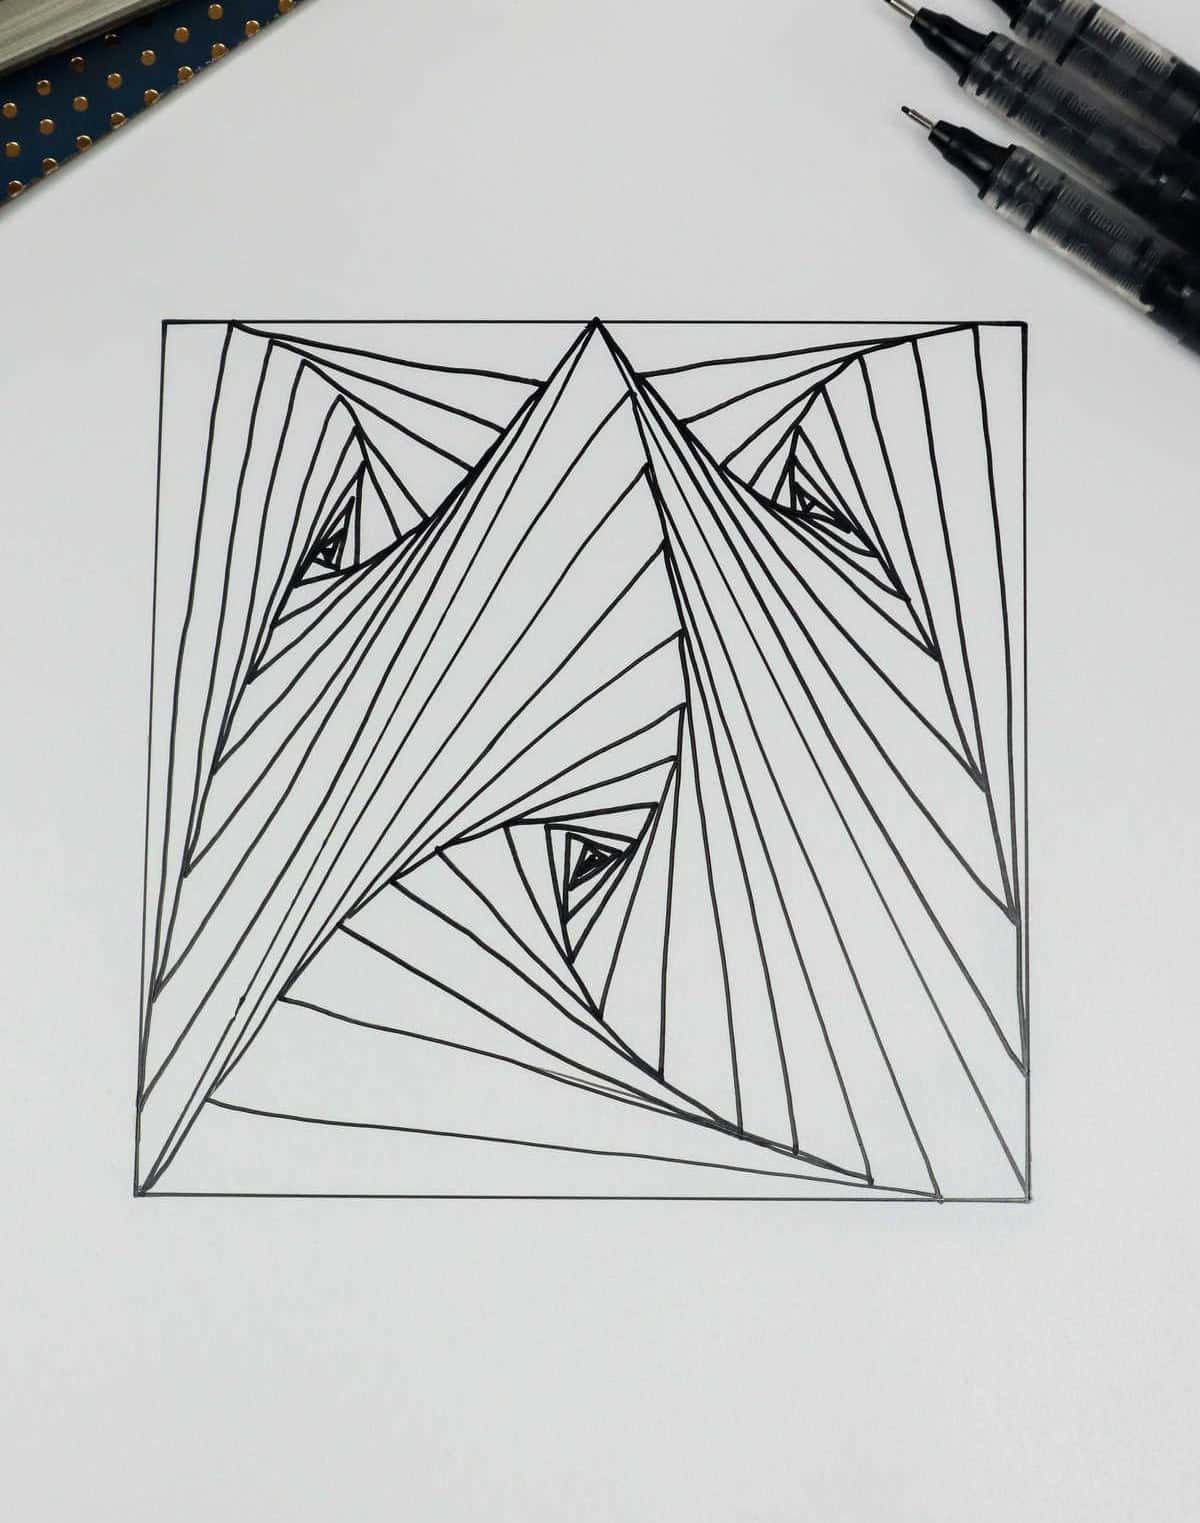
To create an intricate design, start by drawing an isosceles triangle from the middle top of your page, leaving the bottom open. Next, draw a smaller, slightly angled triangle within the original shape, taking care not to overlap any previous lines. Repeat this process line by line, ensuring each addition maintains proportionate harmony. Perform this exercise on both sides of the triangle for a visually appealing and balanced design.
28
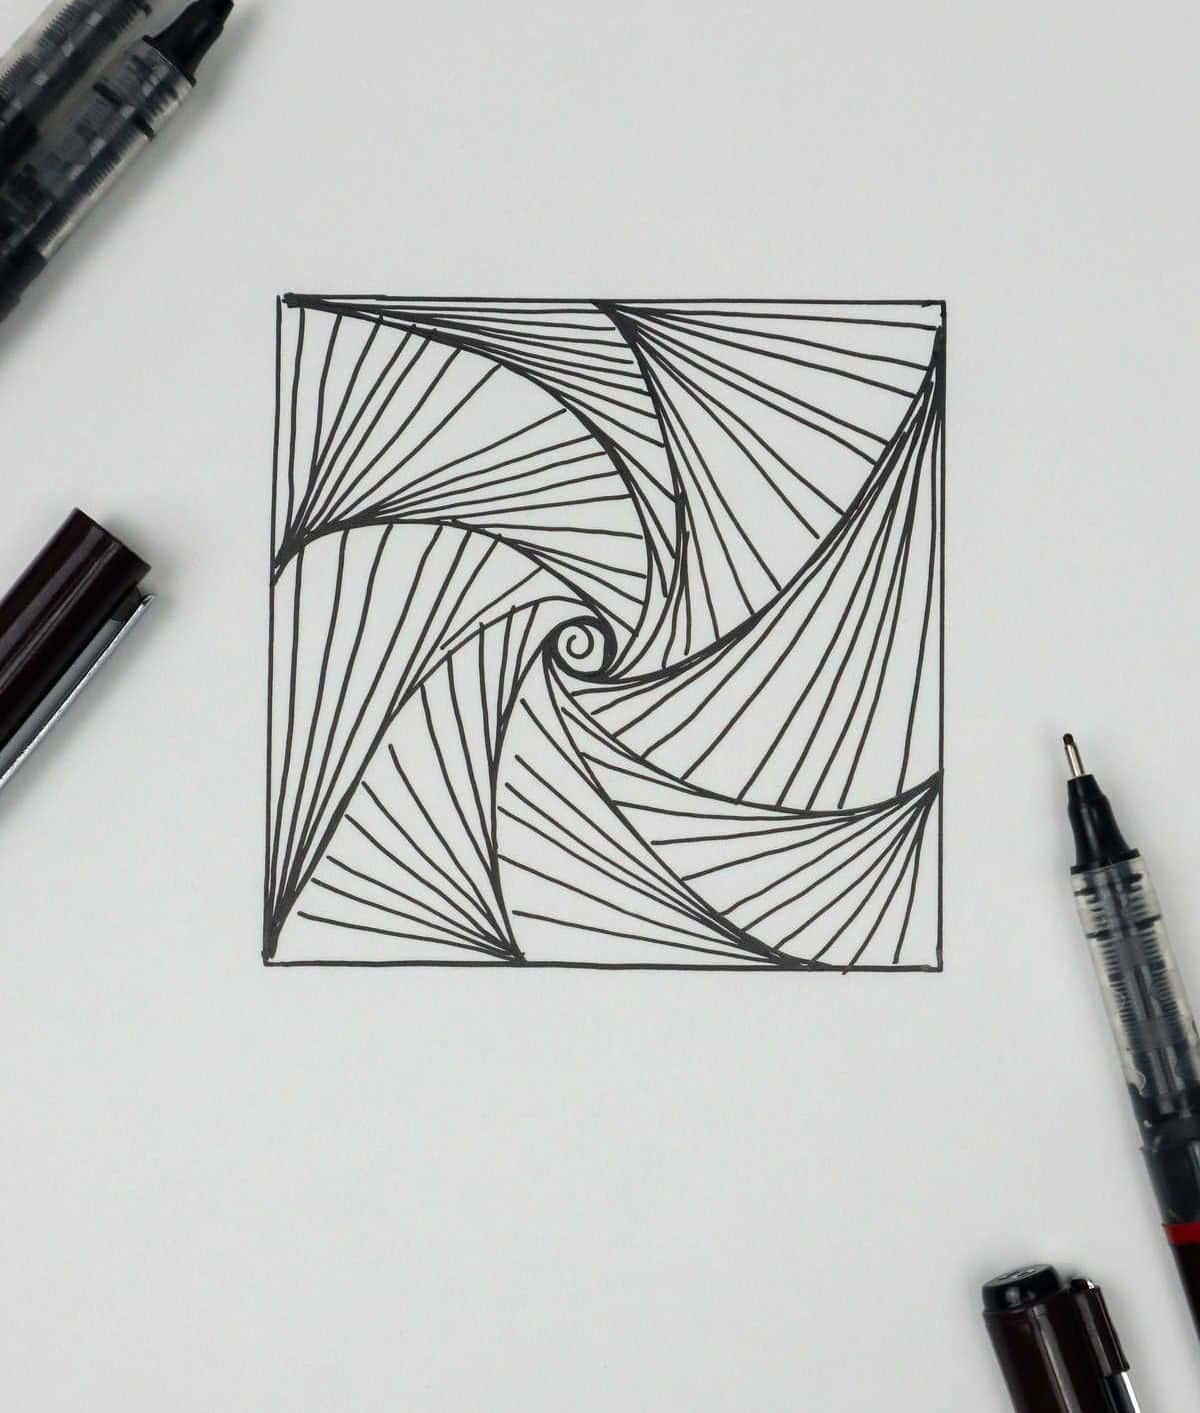
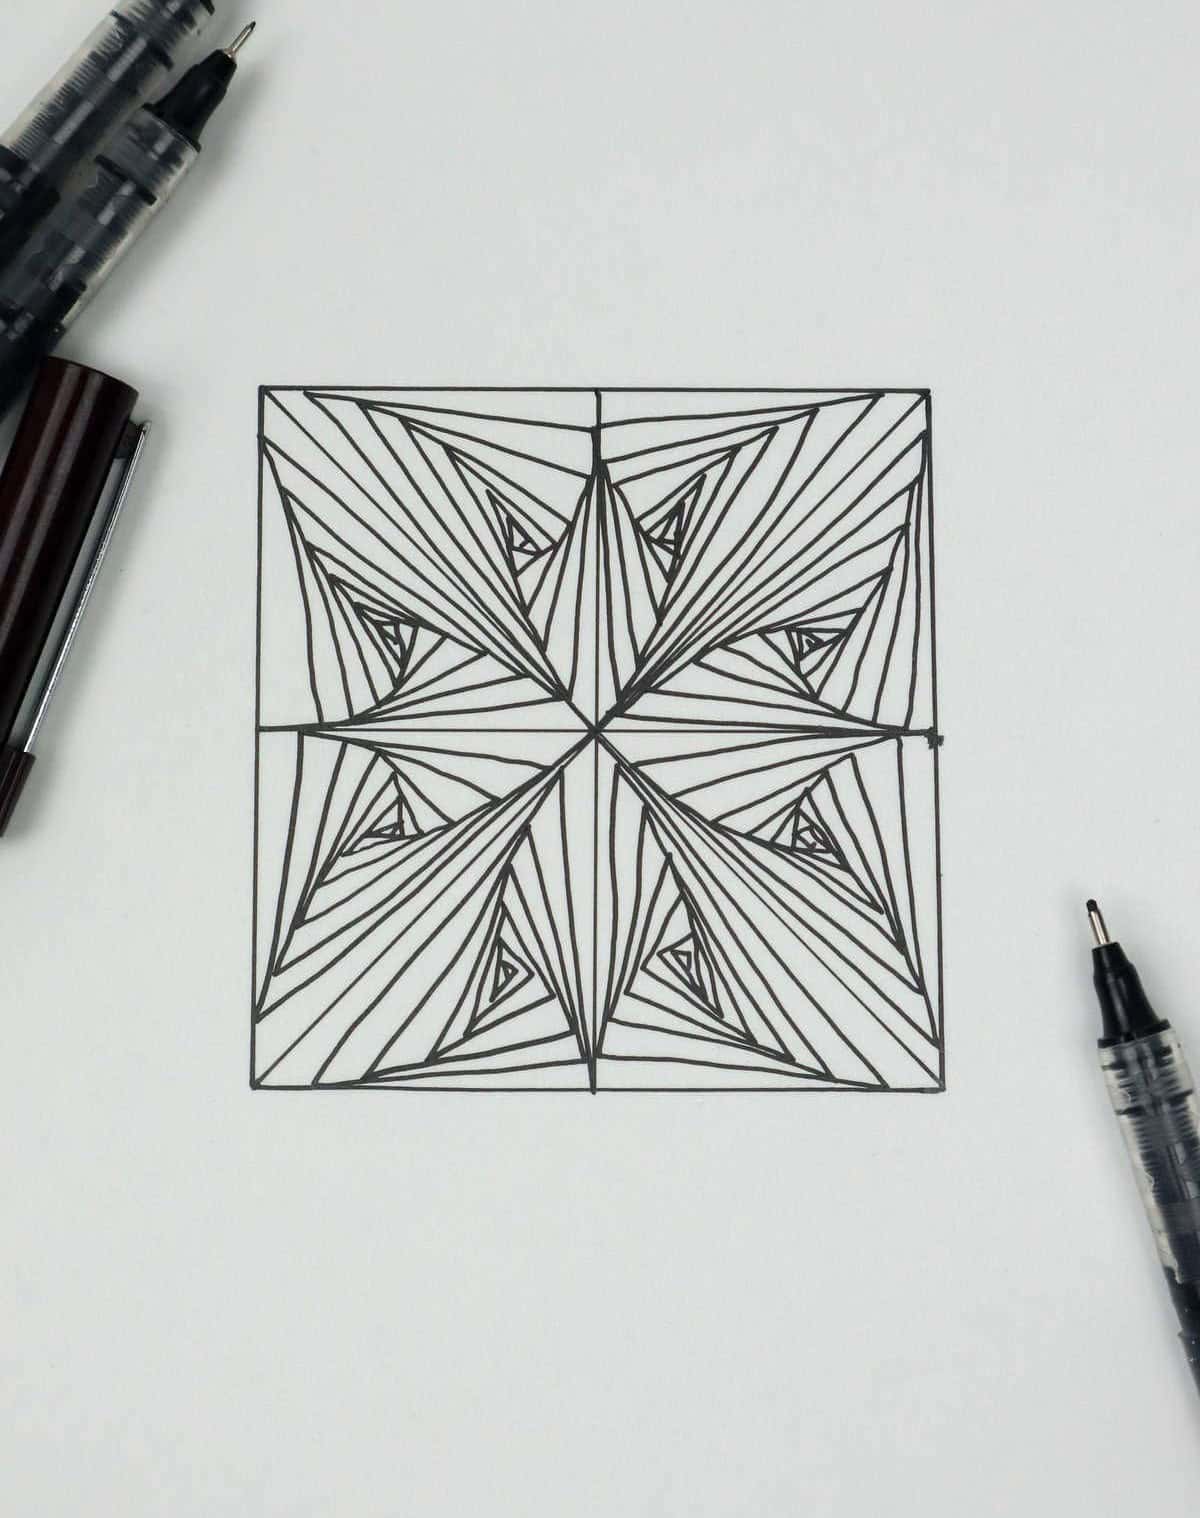
To create the foundation of your design, begin by drawing a small spiral with your pen. However, instead of lifting the pen off the paper, bring the line to the top left corner and let it flow naturally. As you continue drawing, stagger each subsequent line as needed to ensure that the larger spiral starts on the page. This initial foundation is crucial in establishing the overall shape and harmony of your design.
Once you have this basic structure in place, add a series of strokes from the smallest part of each swirl to fill in any gaps or create a sense of depth. By doing so, you’ll be able to enhance the visual interest and texture of your design.
29
Start by creating a simple yet iconic design element – an asterisk or snowflake on your page. To create the next level of complexity, use the tilted triangle method we explored earlier. This process should result in eight unique designs for each triangle. And that’s it! You now have some of my personal favorite and most visually striking doodles to enjoy. If you’re ready to take your creative skills to the next level, be sure to check out our additional cute animal drawings.