There’s something undeniably special about creating your own soap bars. Not only can they serve as unique DIY gifts, but they also make for a fun and engaging project for individuals of all ages. In this tutorial, we’ll delve into the step-by-step process of crafting homemade soaps from scratch. The allure of handmade soaps lies in their simplicity, yet luxurious nature. Who hasn’t been thrilled to receive a gift basket filled with artisanal soap cakes, only to be eager to use them immediately?
Their visual appeal is undeniable, and when combined with enticing aromas, it’s hard not to fall under their spell. What if I told you that you’ll never have to wait for or purchase expensive handmade soaps again? With this tutorial, you’ll learn the skills necessary to create your very own soap bars, granting you the freedom to gift them or enjoy them yourself.
Supplies and Tools You’ll Need

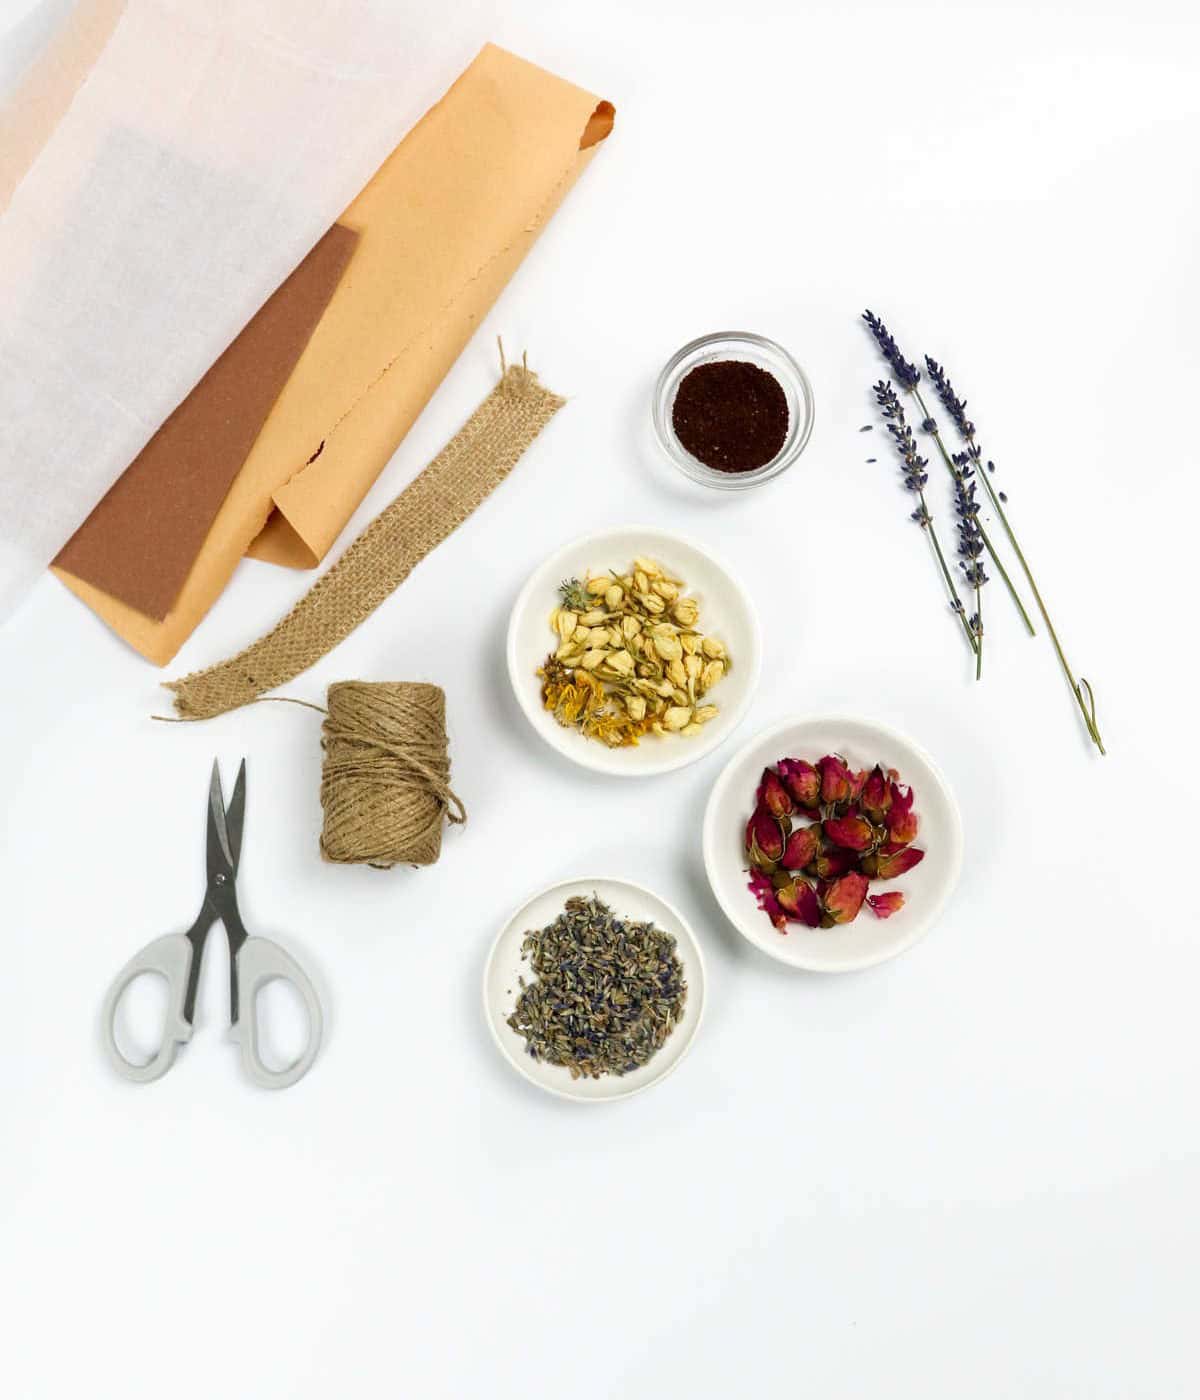
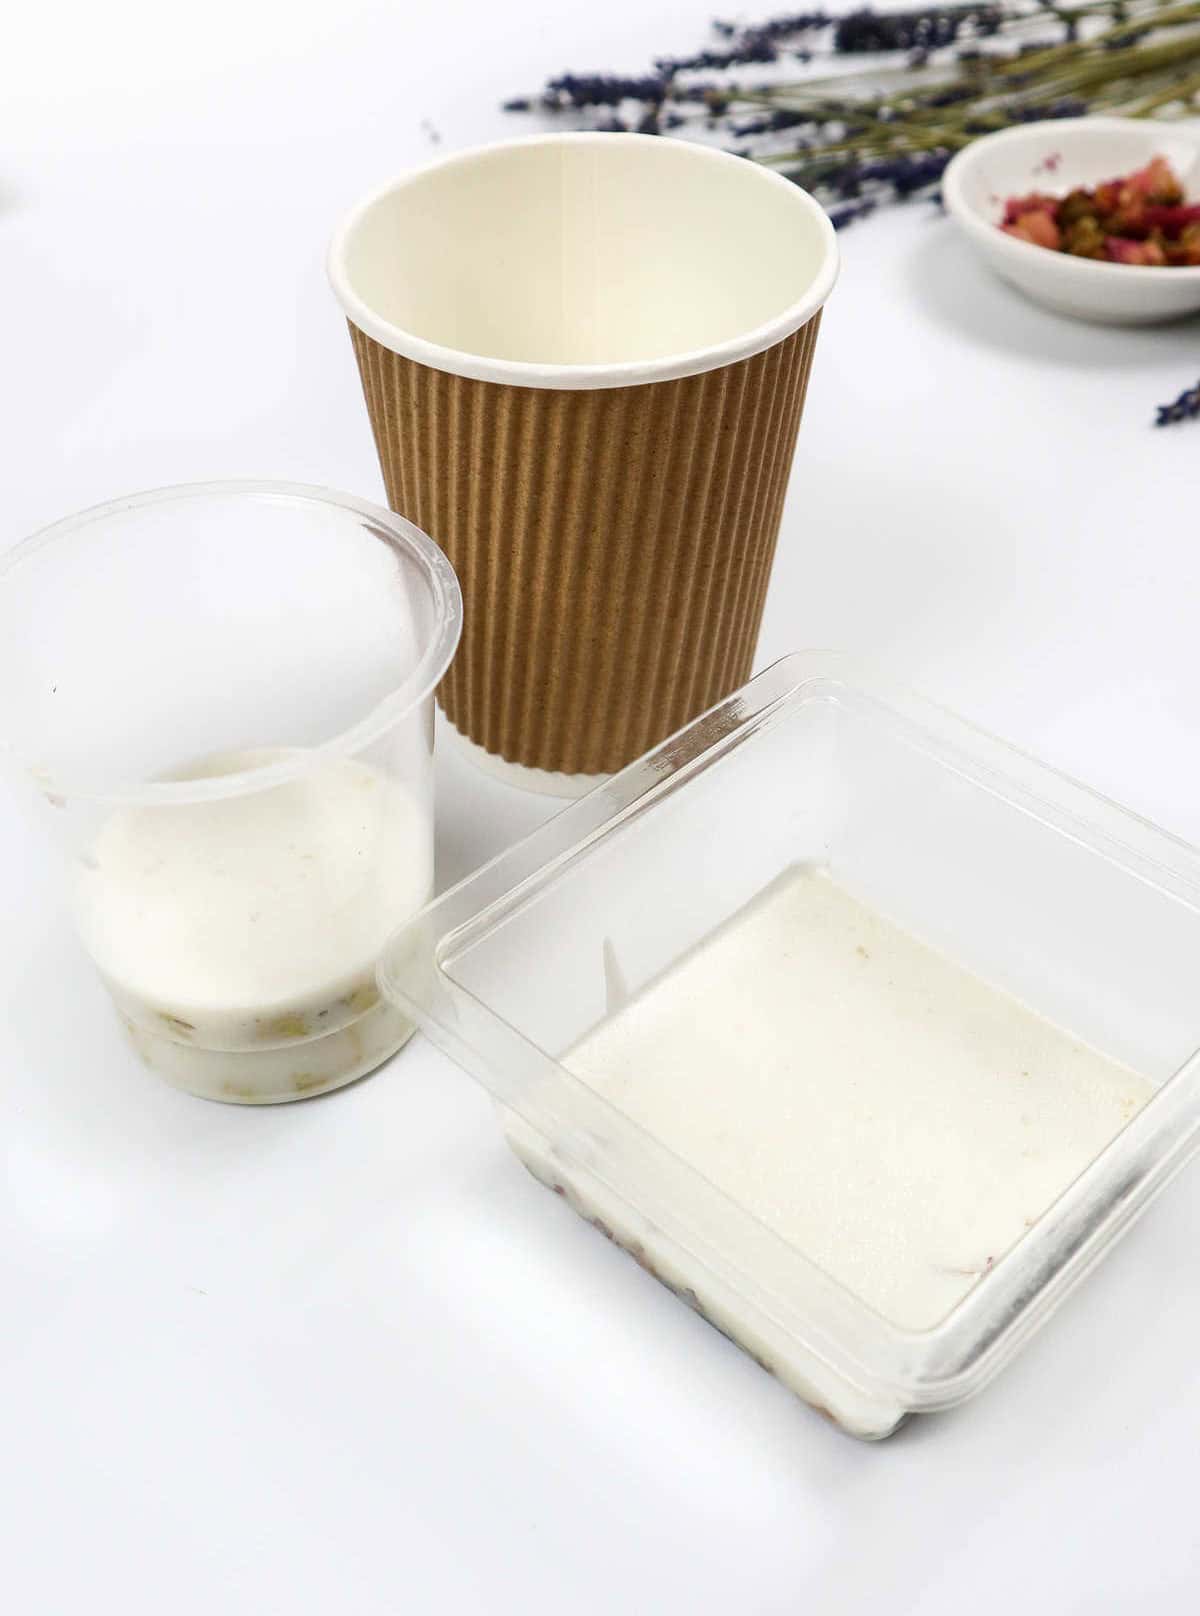
To create unique and visually appealing homemade soaps, you’ll need the right supplies. These include a melt and pour soap base, silicone molds or plastic cups to shape your creations, and various tools for mixing and handling the soap. For added decoration and packaging, consider incorporating elements like dried herbs and flower petals, ground coffee, scissors, jute twine, jute ribbon, craft paper, and cheesecloth.
Essential oils and mica powder will also help bring out the natural colors and fragrances of your soaps. Simply melting the soap base, adding a touch of heat safe container to prevent overheating, and blending with a spatula or knife is all it takes to get started.
How to Make Soap at Home
To craft exceptional soap from scratch, follow these guidelines: start by combining a precise blend of oils, carefully considering their properties and proportions to achieve the perfect balance. This meticulous approach will yield a rich, luxurious lather that leaves skin feeling pampered and refreshed.
Step 1
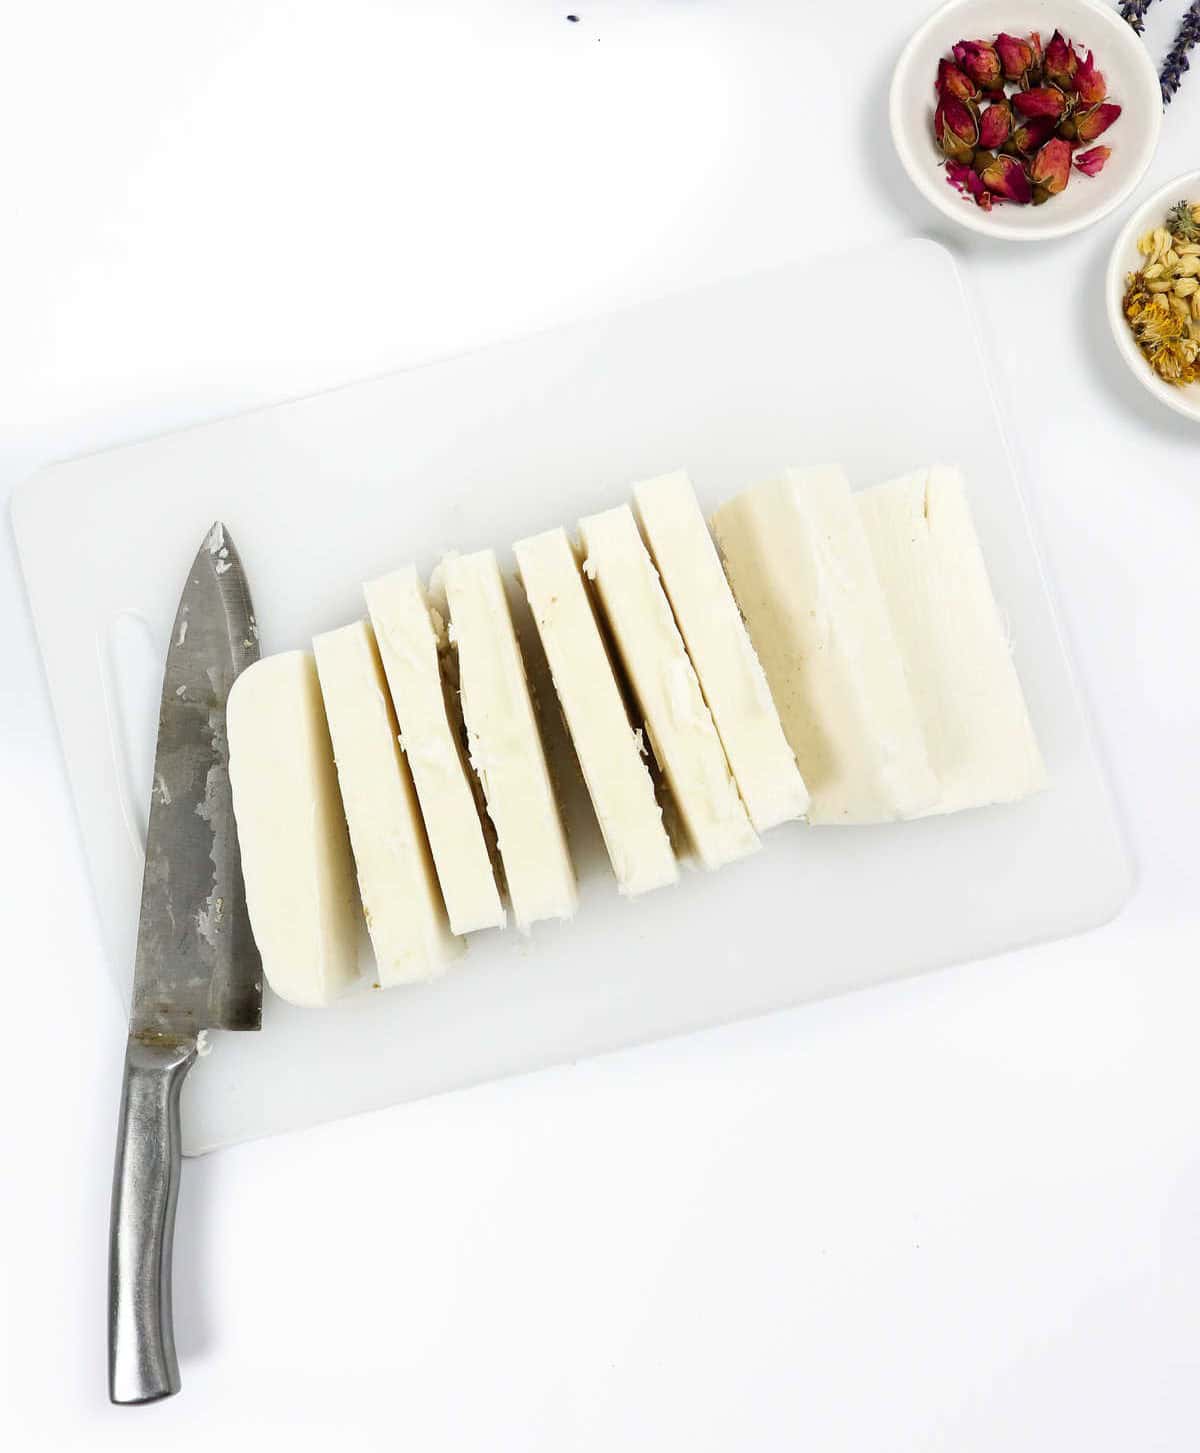

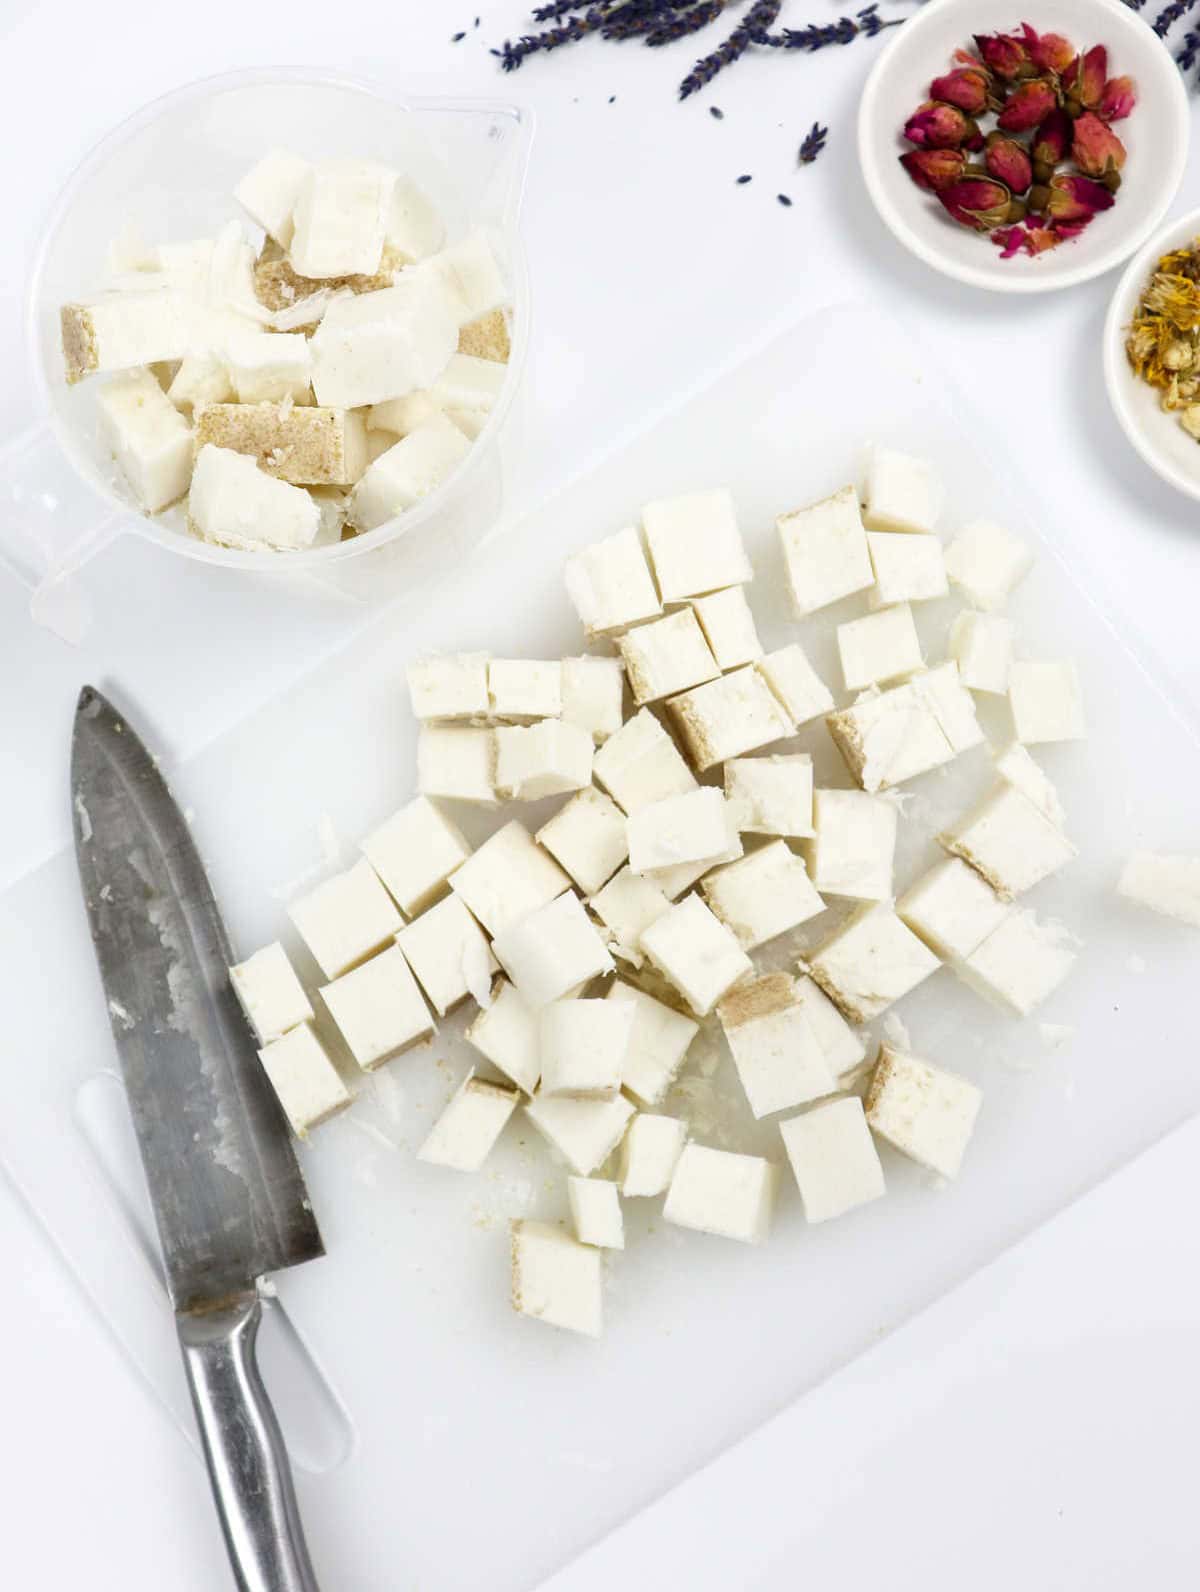
To initiate the soap-making process, start by placing a block of your chosen soap base on a clean cutting board. Next, take a sharp knife and divide the block into smaller, uniform cubes. This initial step is crucial, as it enables the soap to melt evenly and reduces the likelihood of lumps forming during the mixing process.
Step 2
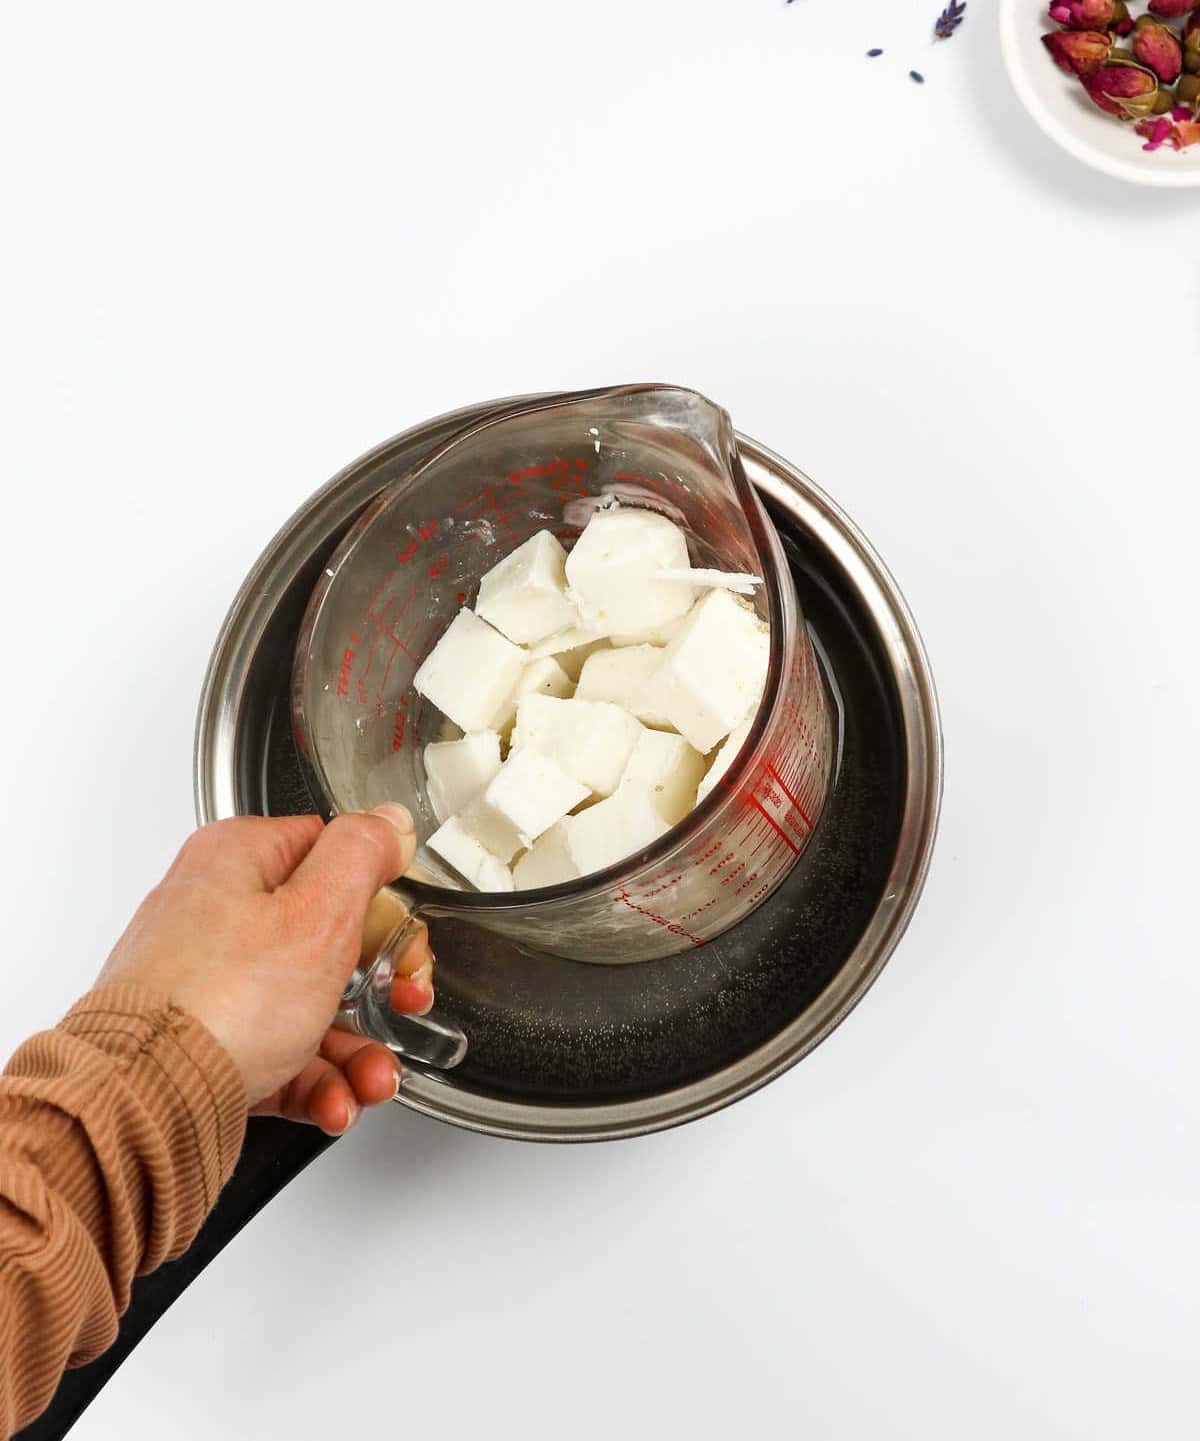
You have two options for melting your soap: microwave or stovetop. For the microwave method, carefully place the soap in a microwave-safe bowl, ensuring it’s not overflowing. Every 20-30 seconds, stop and stir the mixture before returning it to the microwave. This will prevent overheating and allow for even melting.
Alternatively, use the stovetop approach by placing a large pot of water on the stove. Place your soap in a smaller heat-resistant container and submerge it into the hot water.
As the water heats the container, the soap will slowly melt.
To ensure smooth melting, use a spoon or spatula to stir the mixture periodically, removing any lumps that may form. This also helps prevent the soap from burning or sticking to the container.
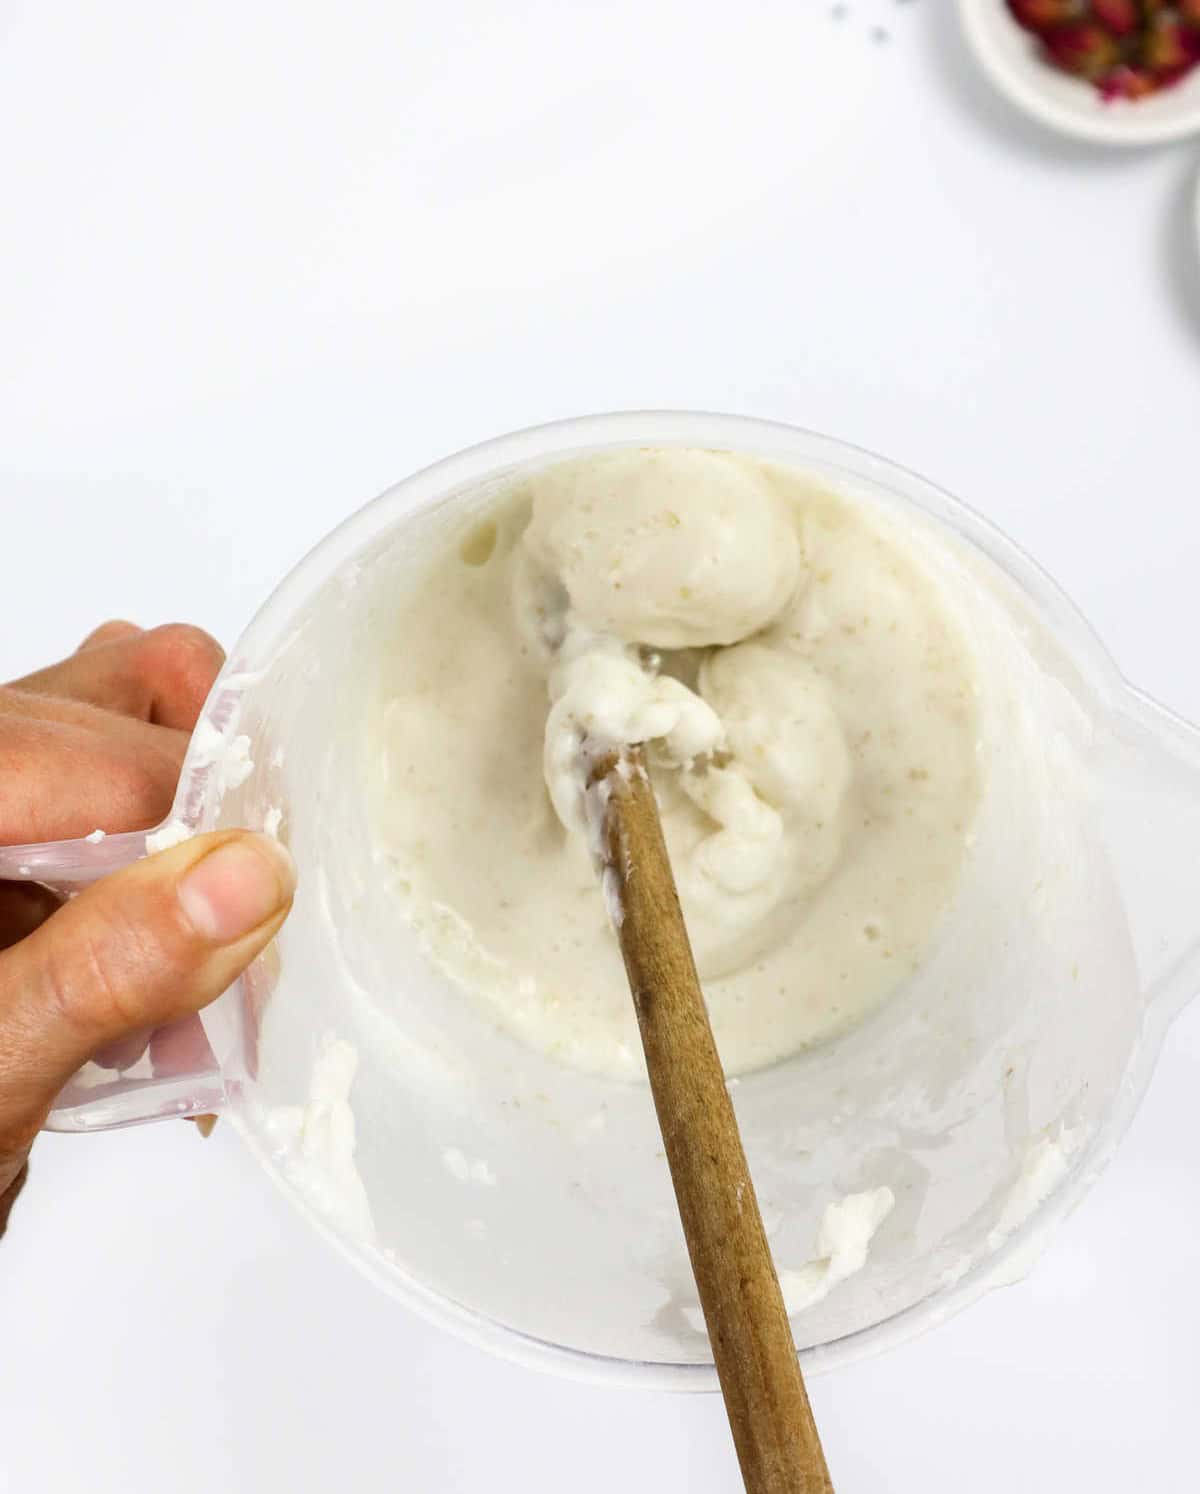
Step 3

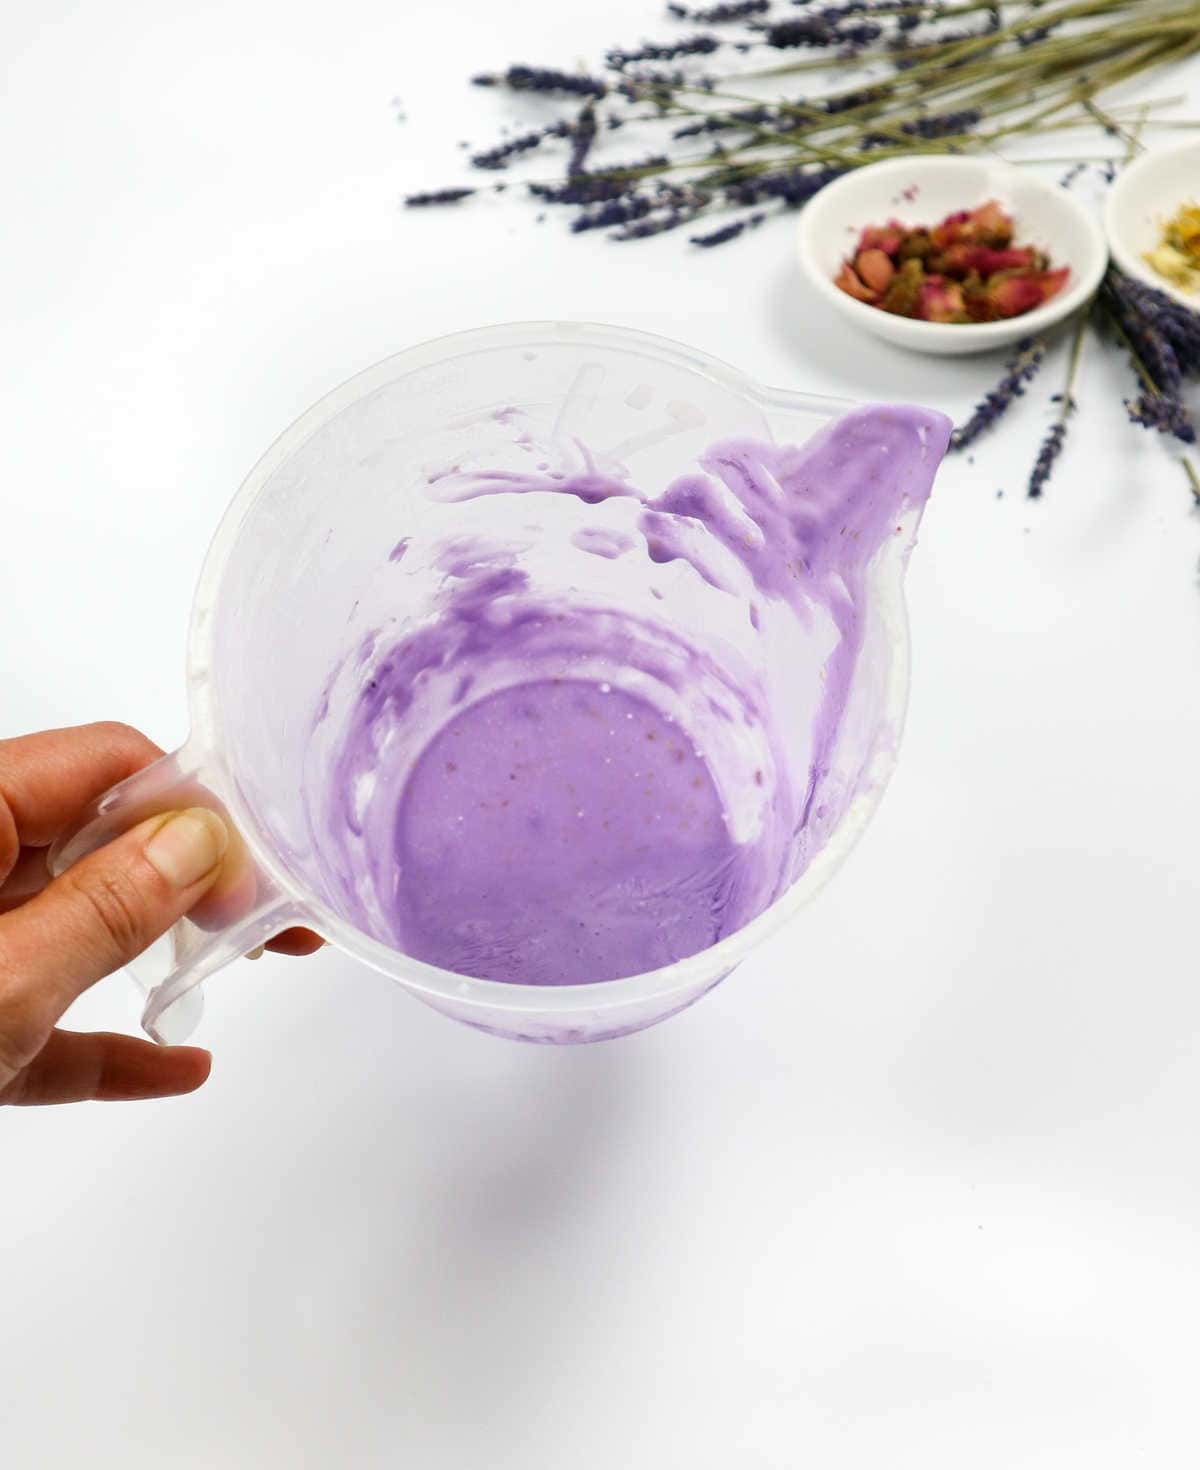
As the soap melts, it’s time to incorporate the essence of your preferred scent by carefully blending in a few droplets of essential oil. This is an excellent moment to explore the world of fragrances and identify the perfect aroma for your creation.
Step 4
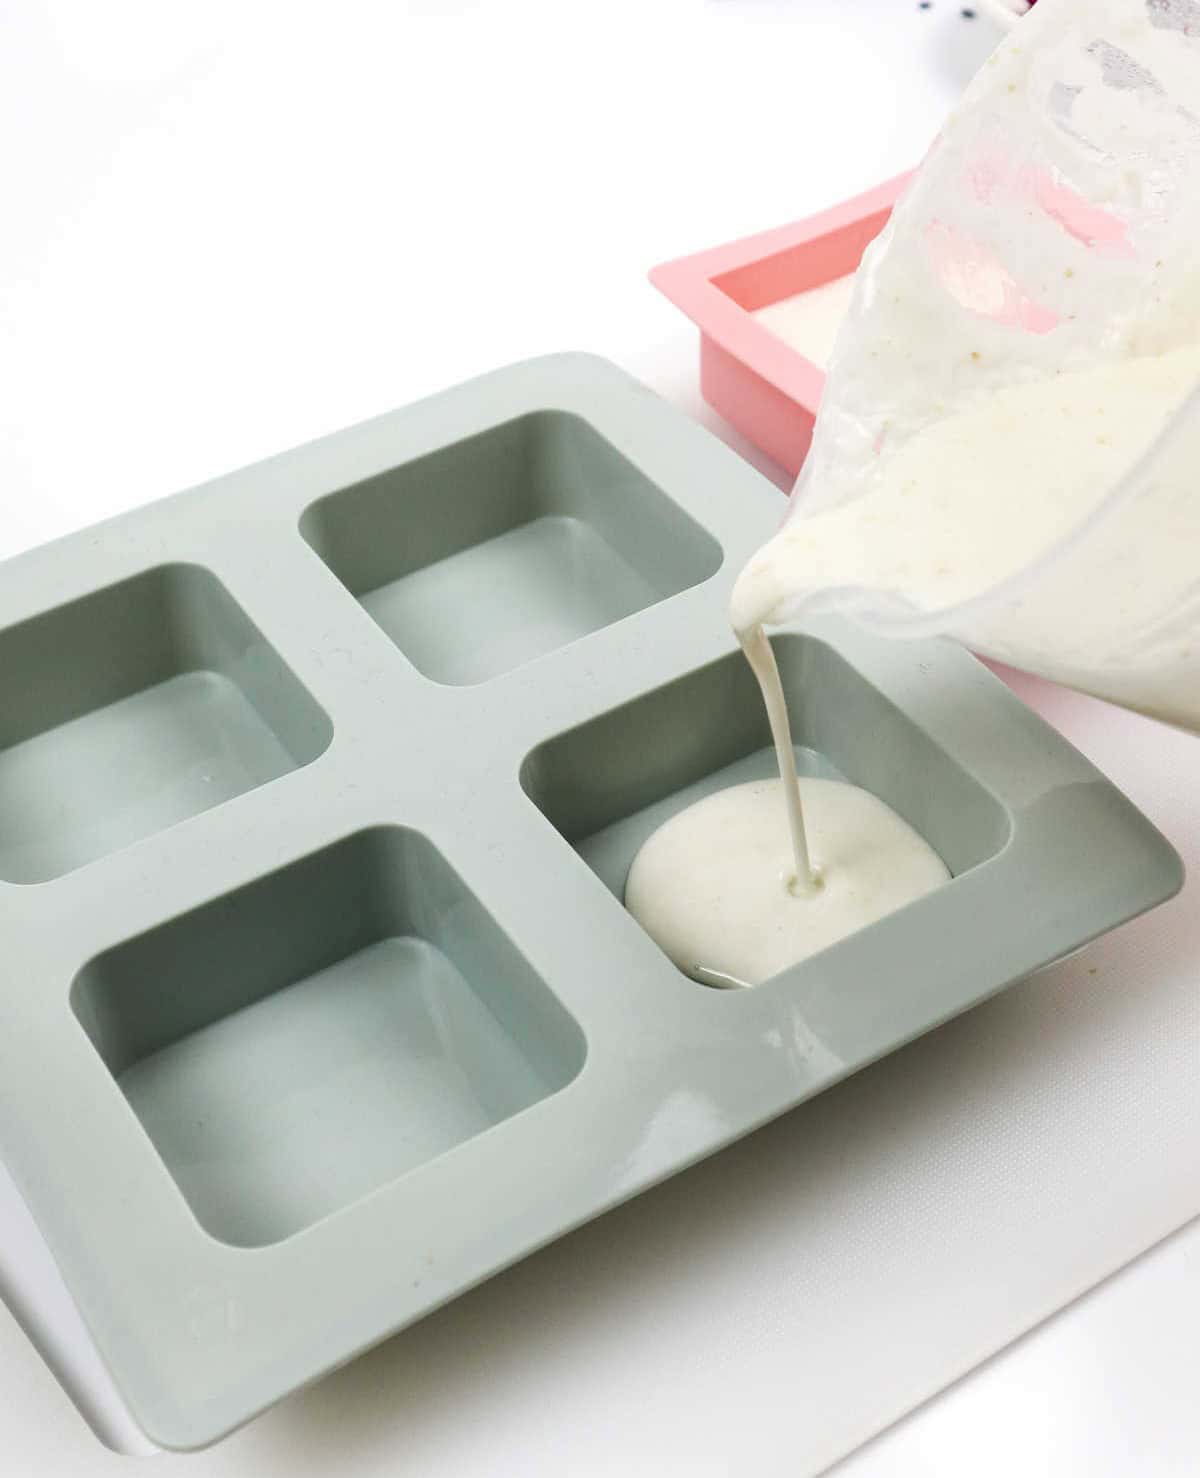

As soon as the oils have been well incorporated into the melted soap, it’s time to pour the mixture into your silicone molds. You’ll need to work quickly, though, because once you remove the soap from the heat source, it will begin to harden rapidly. This means you should aim to fill each mold as soon as possible.
After pouring the soap into each mold, use a spray of isopropyl alcohol to quickly eliminate any bubbles that may have formed on the surface.
While your soap is now technically ready, let’s be real – it’s not quite complete without some decorative flair, is it?
Step 5


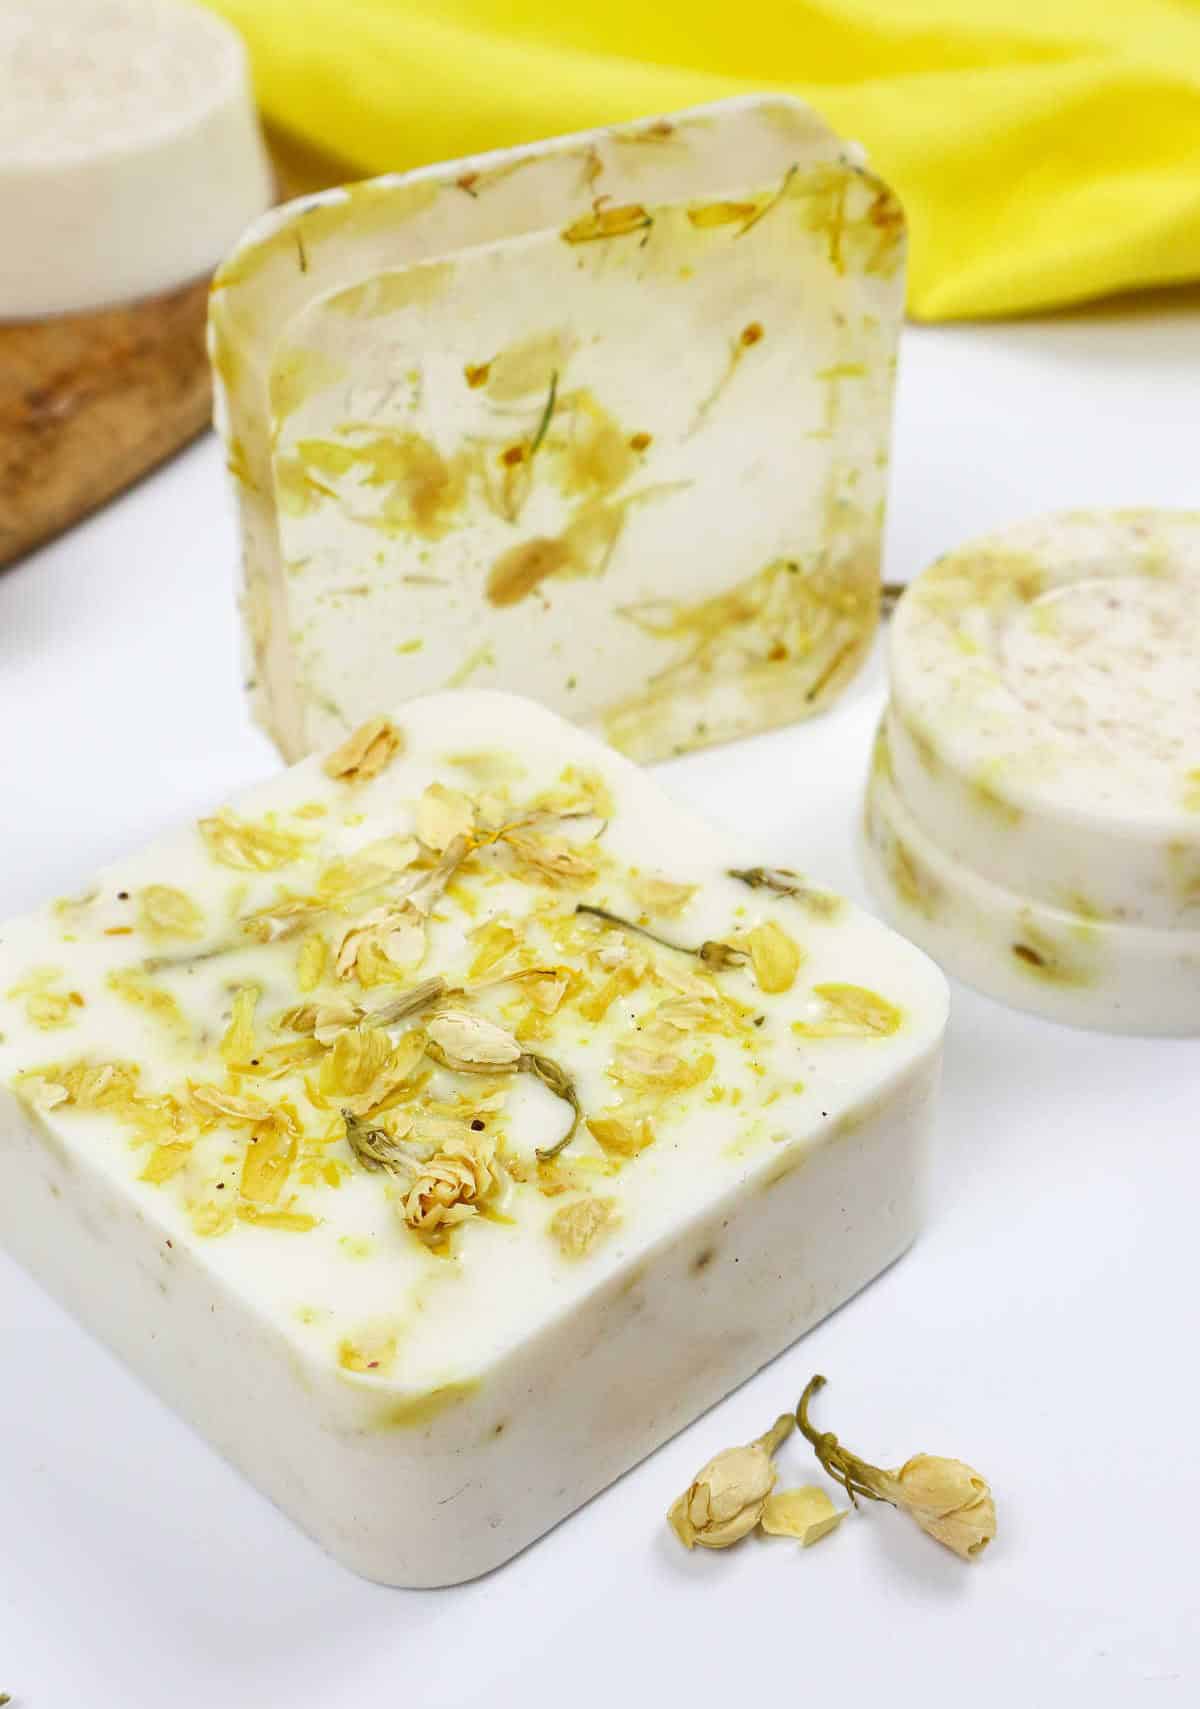
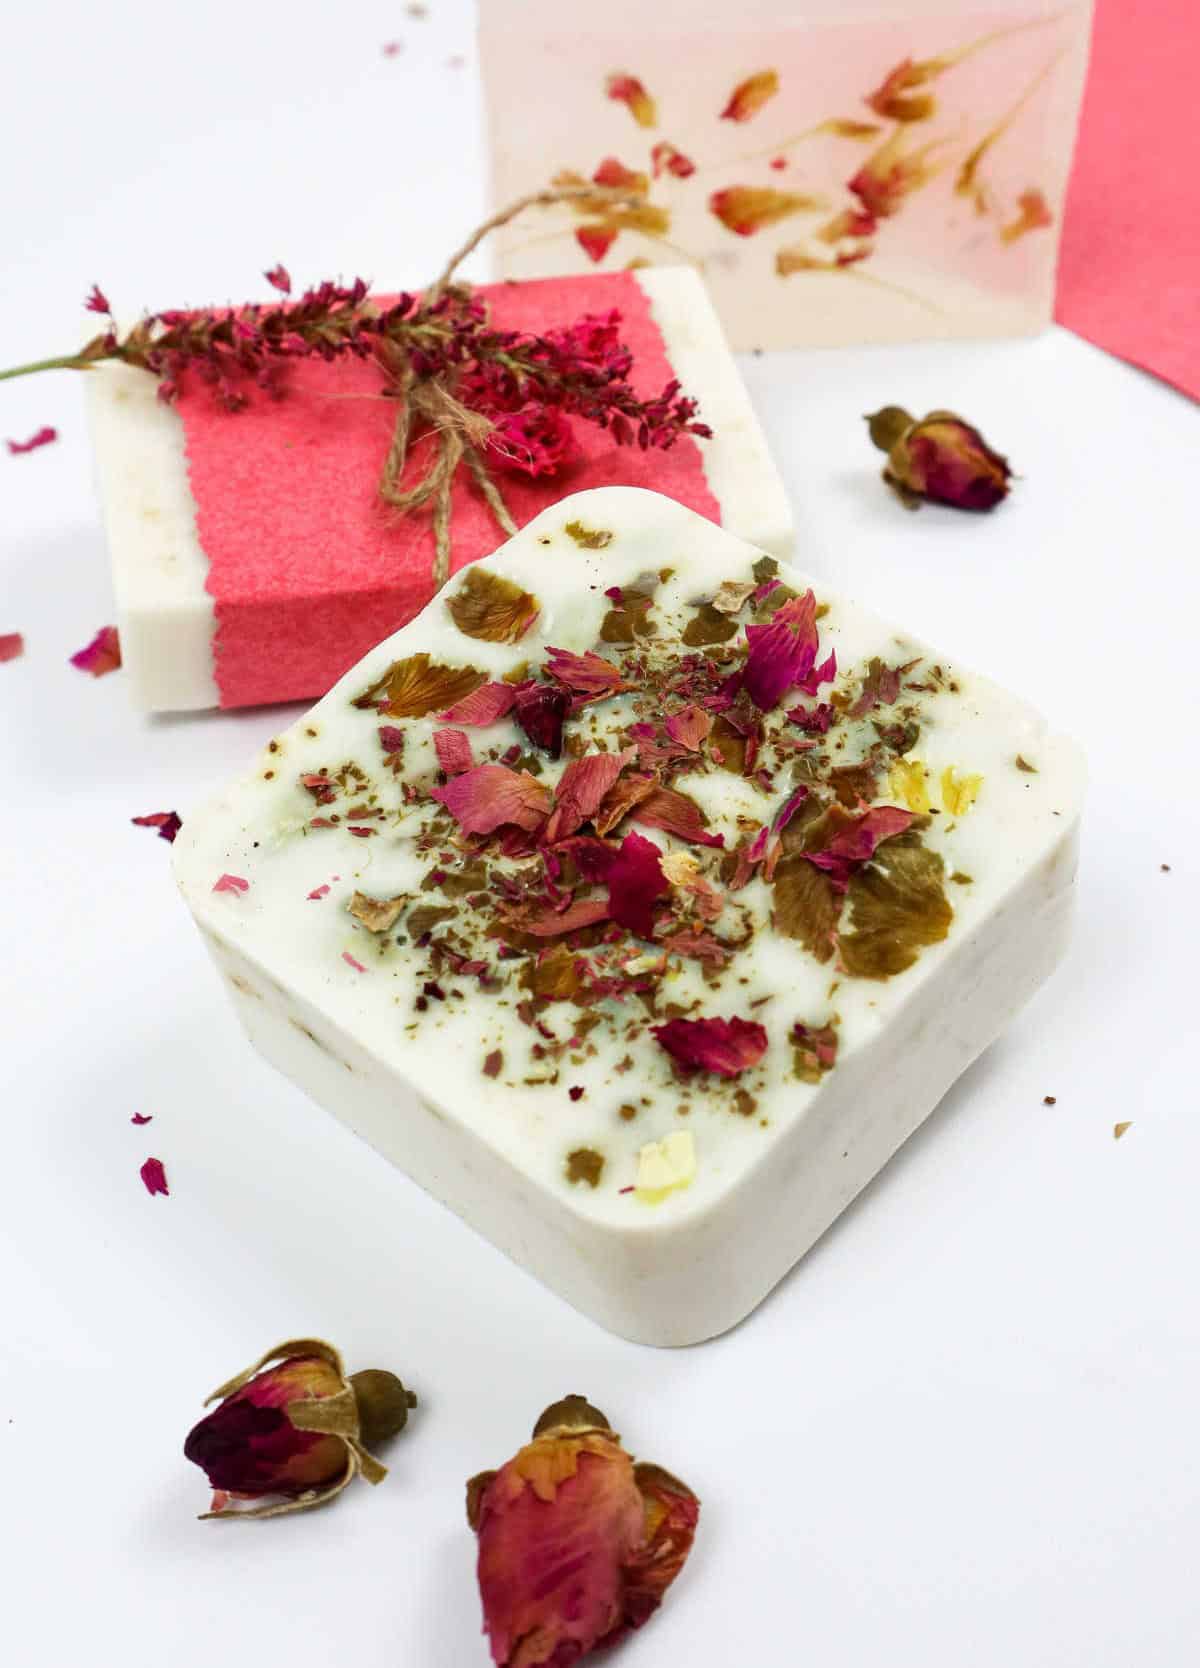
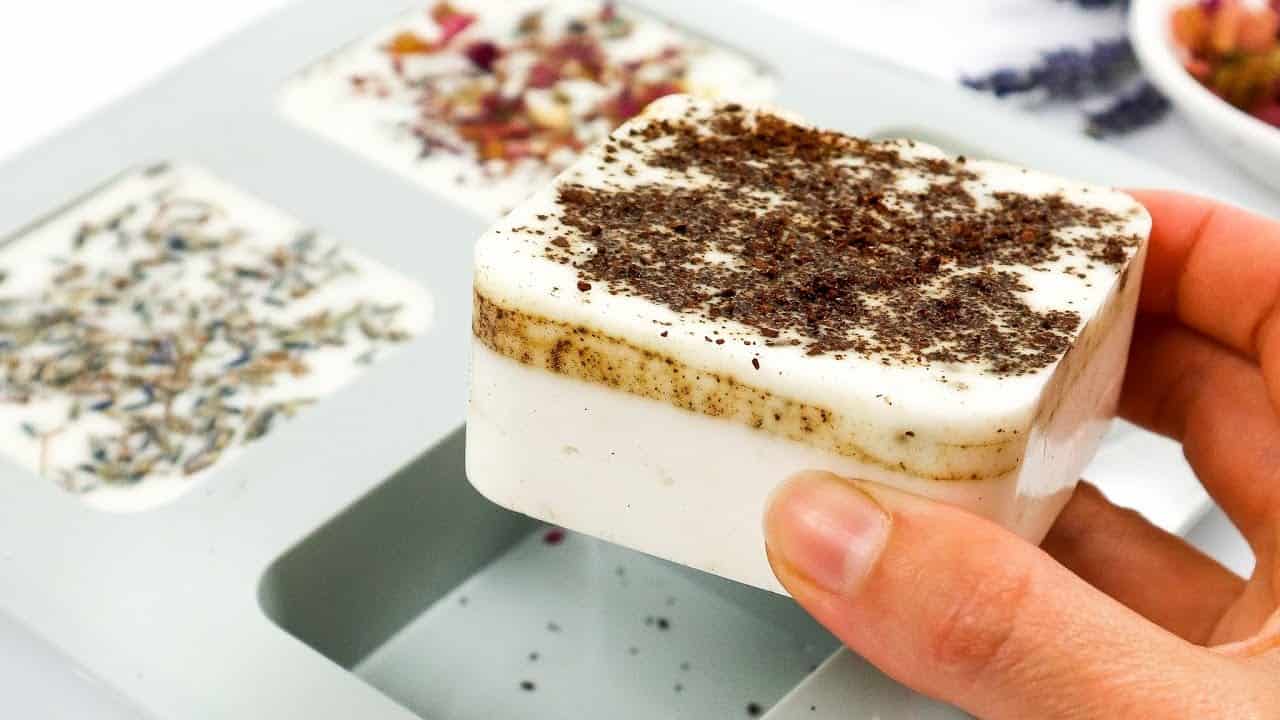
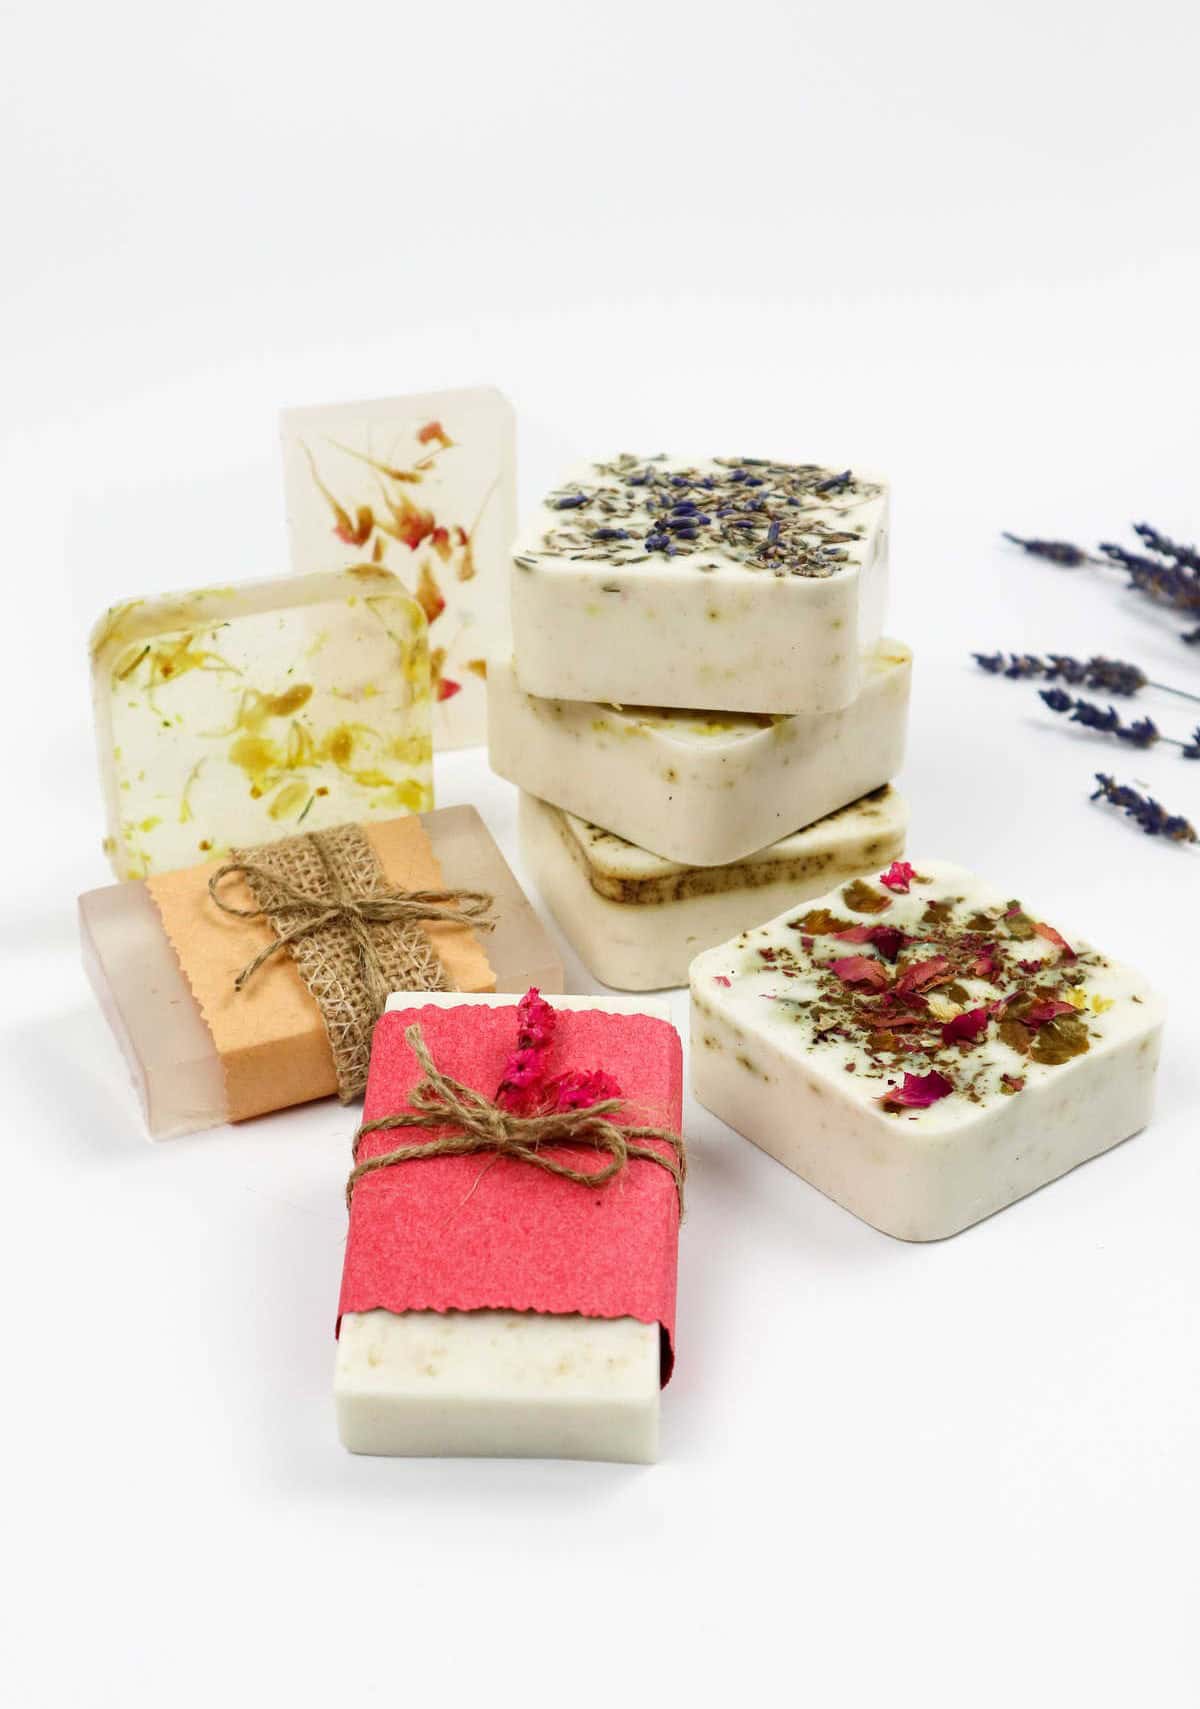
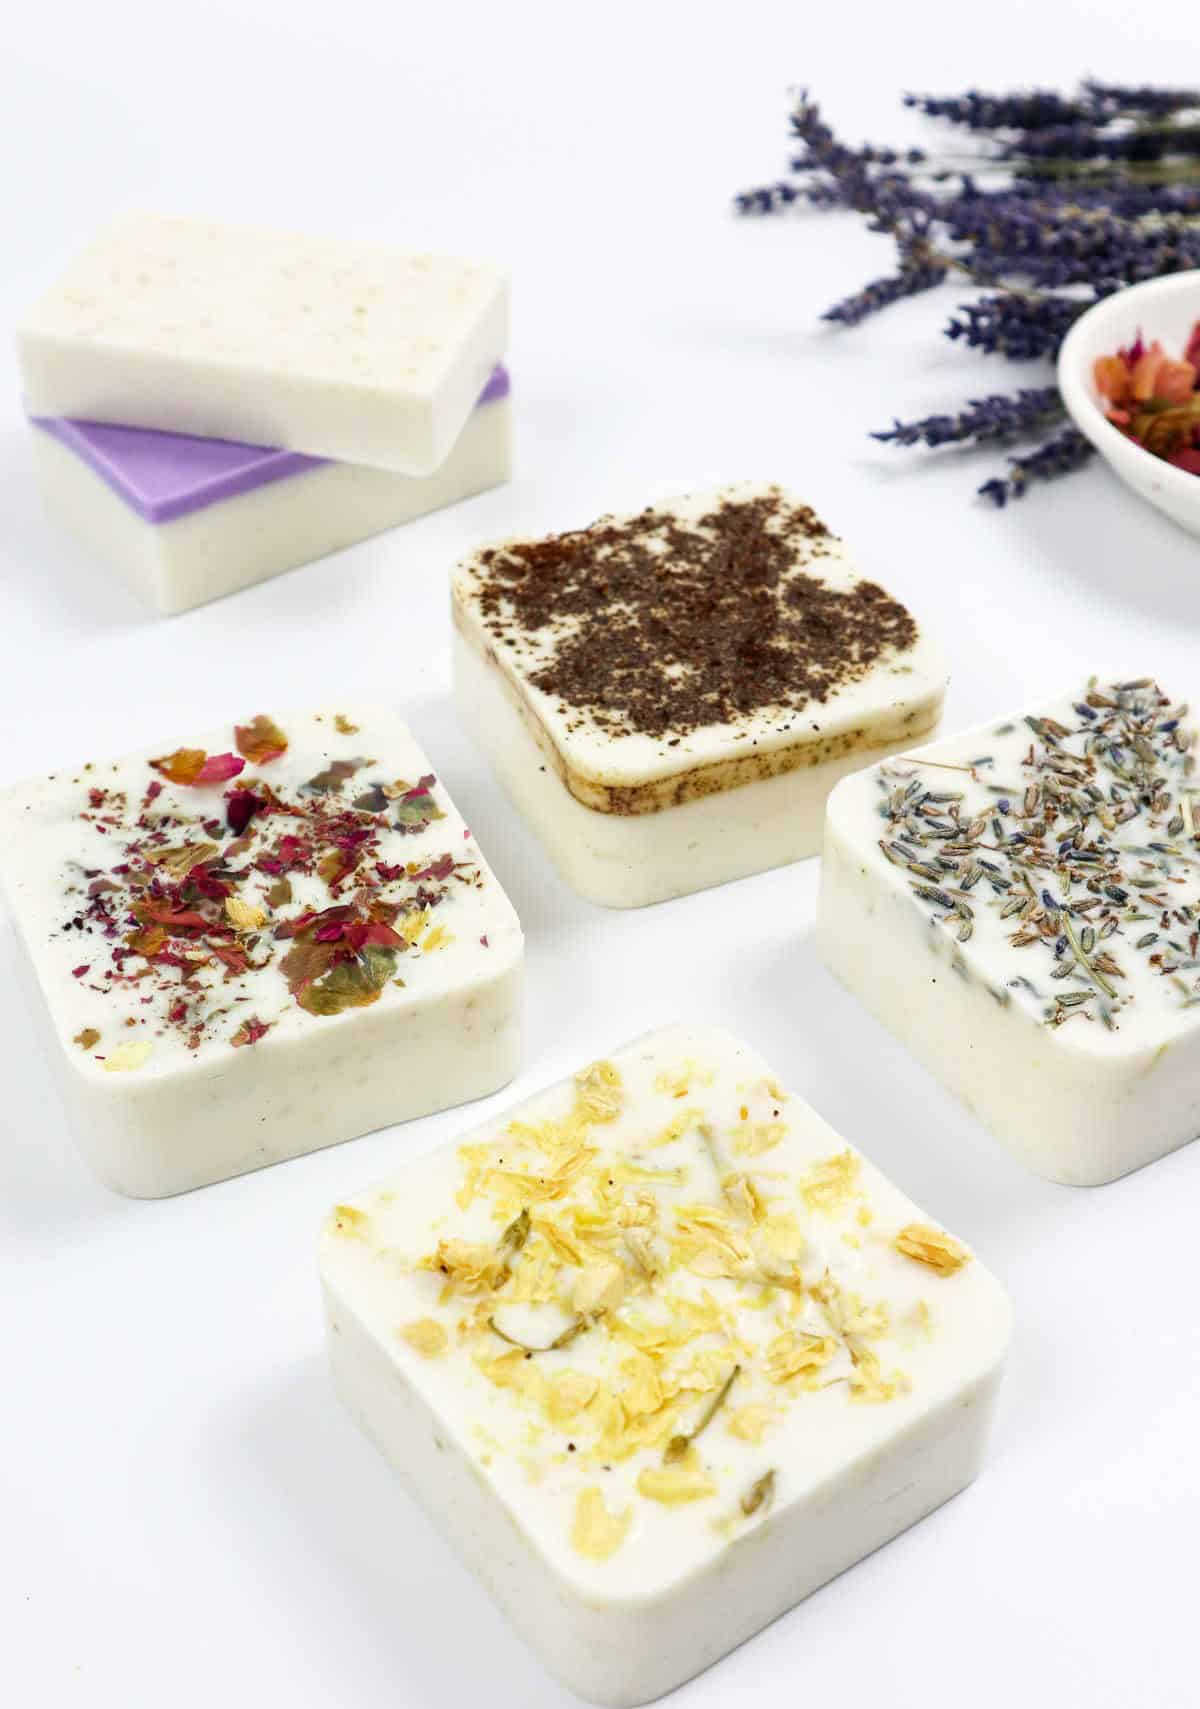
Decorating homemade soap can be a true form of artistry. The process allows for endless creativity and personalization. You’ve likely already curated a selection of decorative elements to adorn your soap, including dried flowers, herbs, and other embellishments. Here’s how you can effectively incorporate these items into your soap-making project. When working with herbs and flowers, it’s essential to add them promptly after pouring the melted soap into the mold and spraying the alcohol.
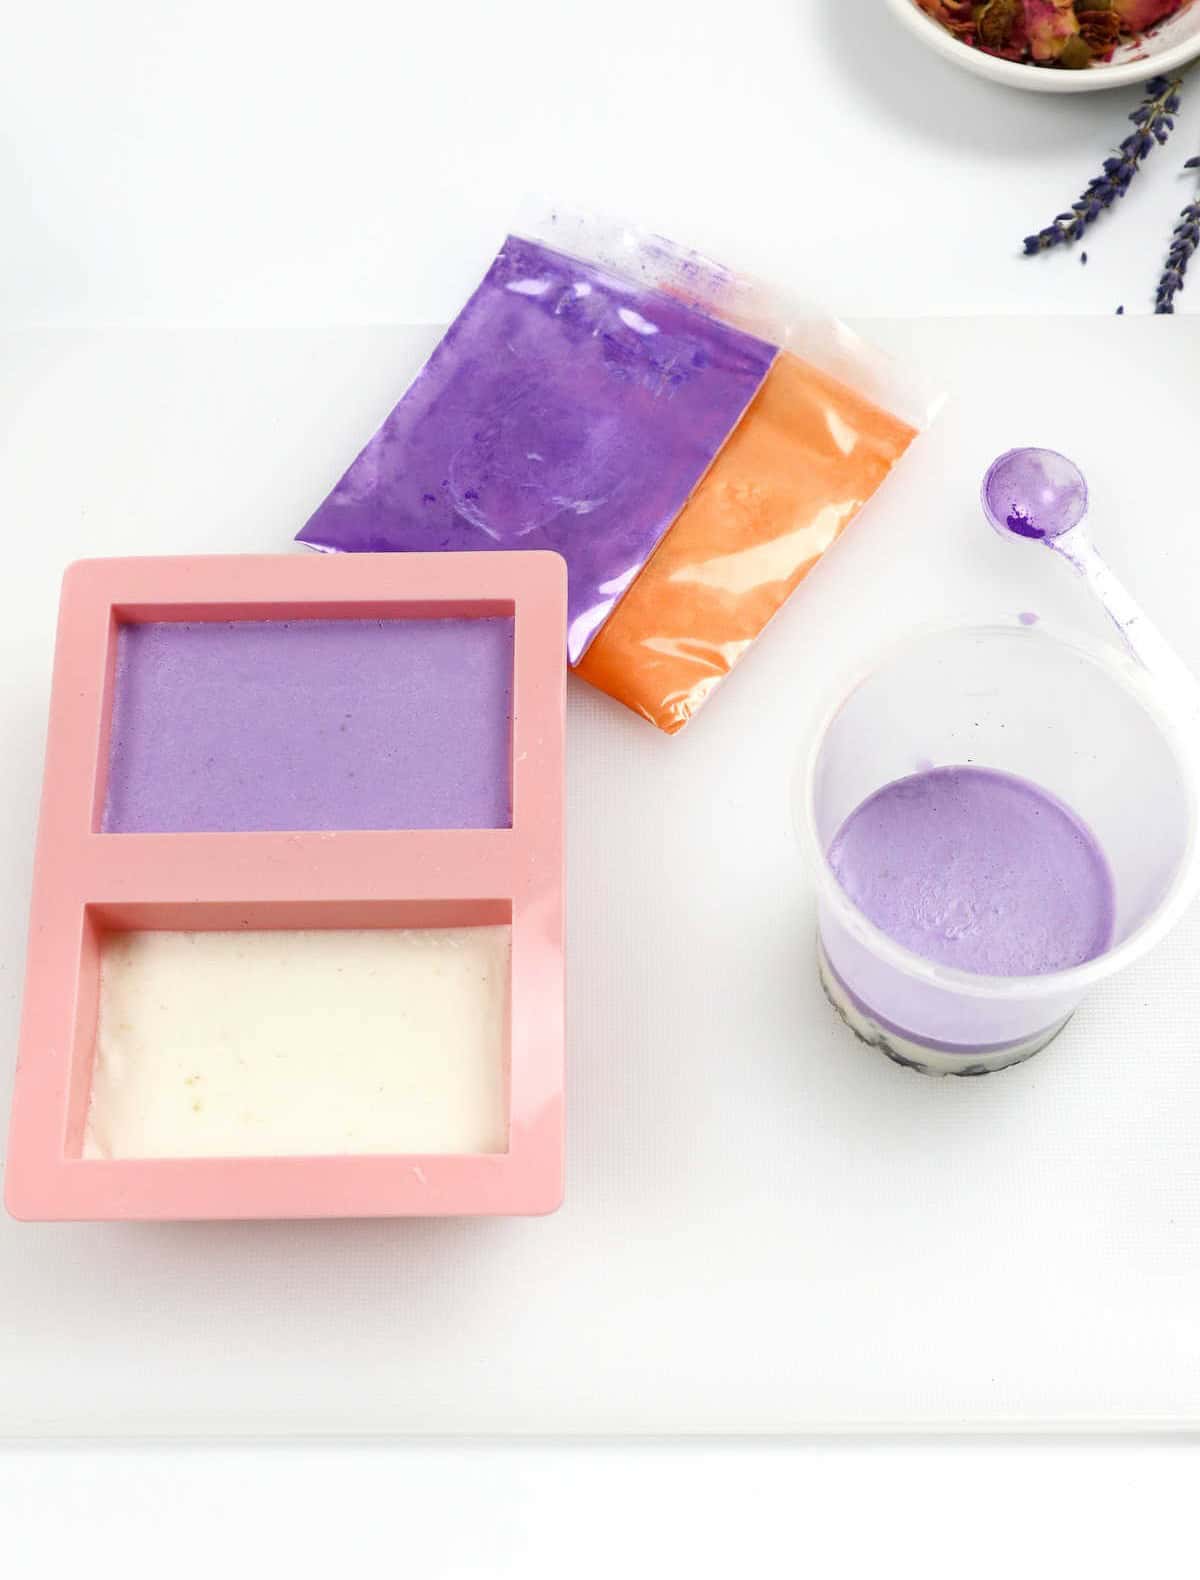
This ensures that they’re evenly distributed throughout the soap. Alternatively, you can layer the bottom of the mold with your chosen dried botanicals before adding the soap mixture. For unique soap shapes or without silicone molds, everyday items like paper cups or plastic containers can serve as suitable substitutes. In addition to decorative elements, you can also experiment with dyeing your soaps. This can involve layering colored soap over a white base or coloring the entire soap.
When creating layered colors, it’s crucial to wait for each surface layer to harden before adding the next. To prevent the layers from blending together, spray the surface with isopropyl alcohol prior to pouring in the subsequent layer.
Step 6
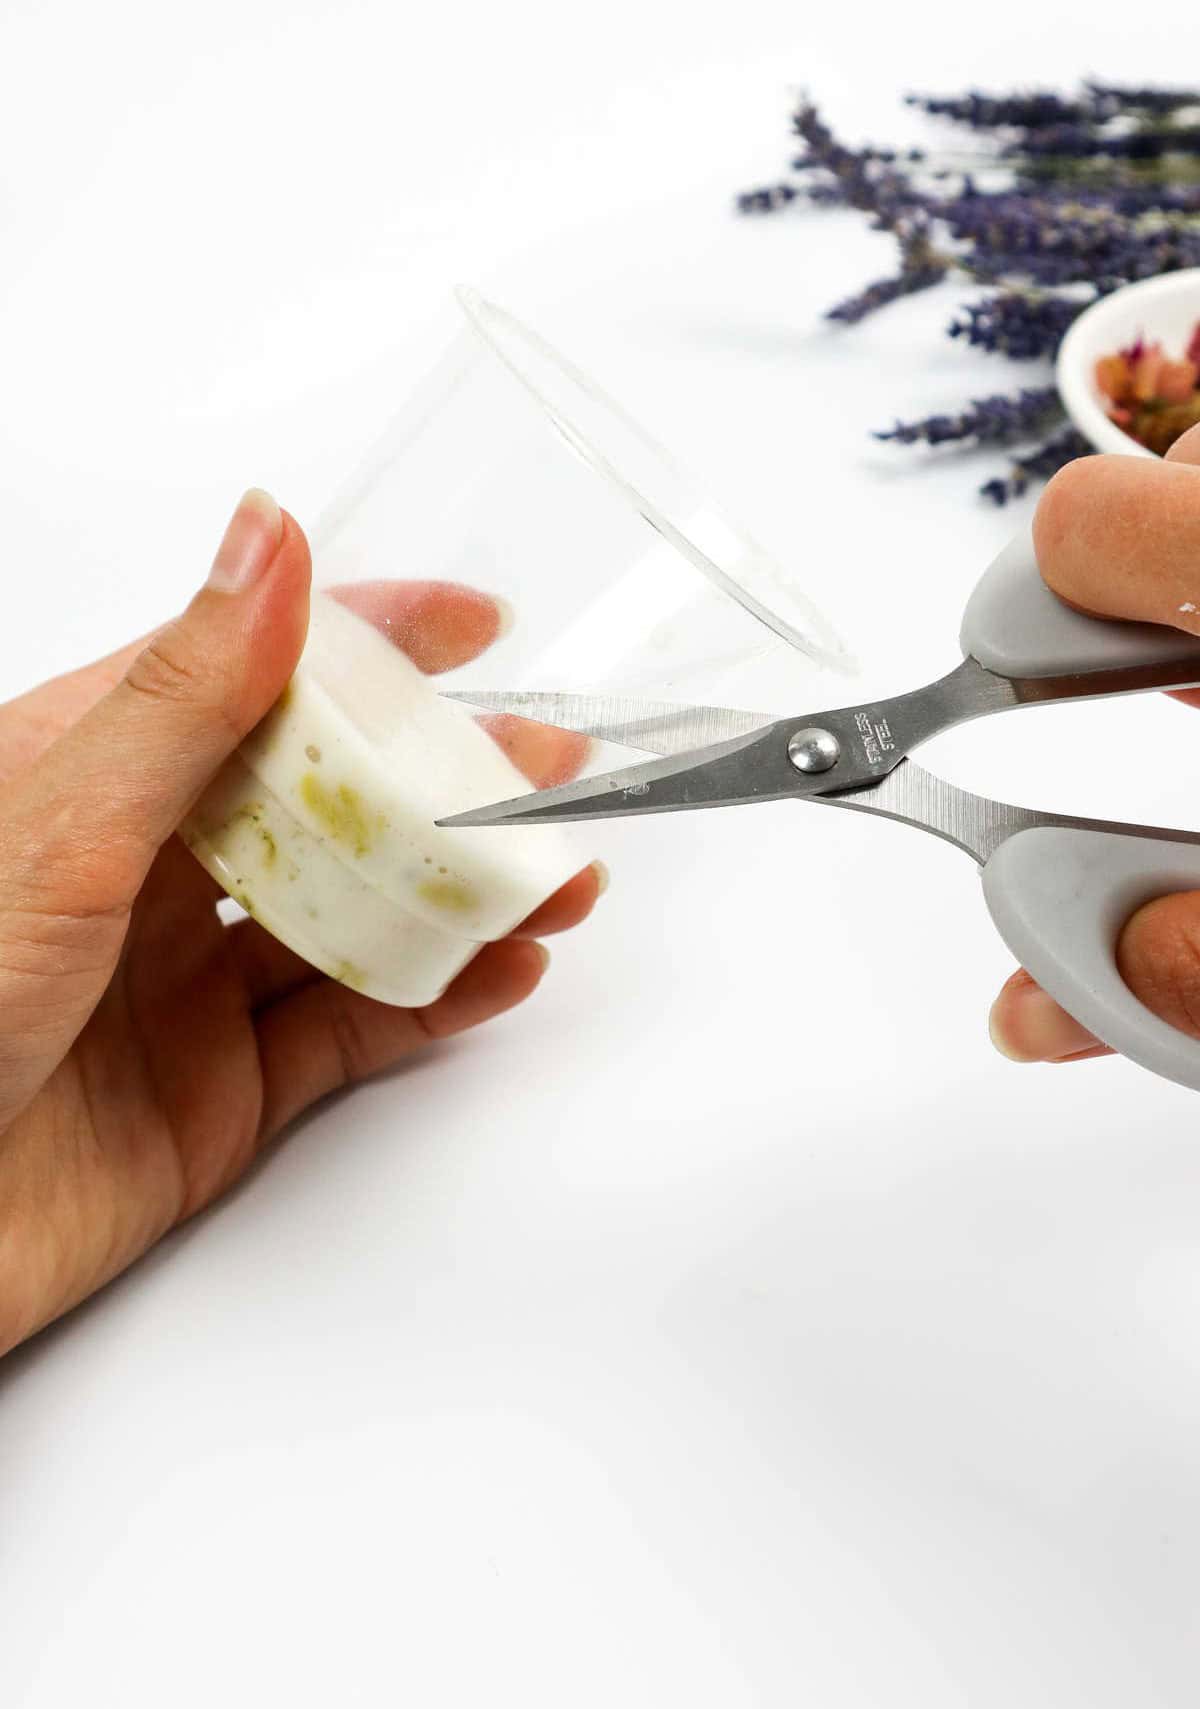
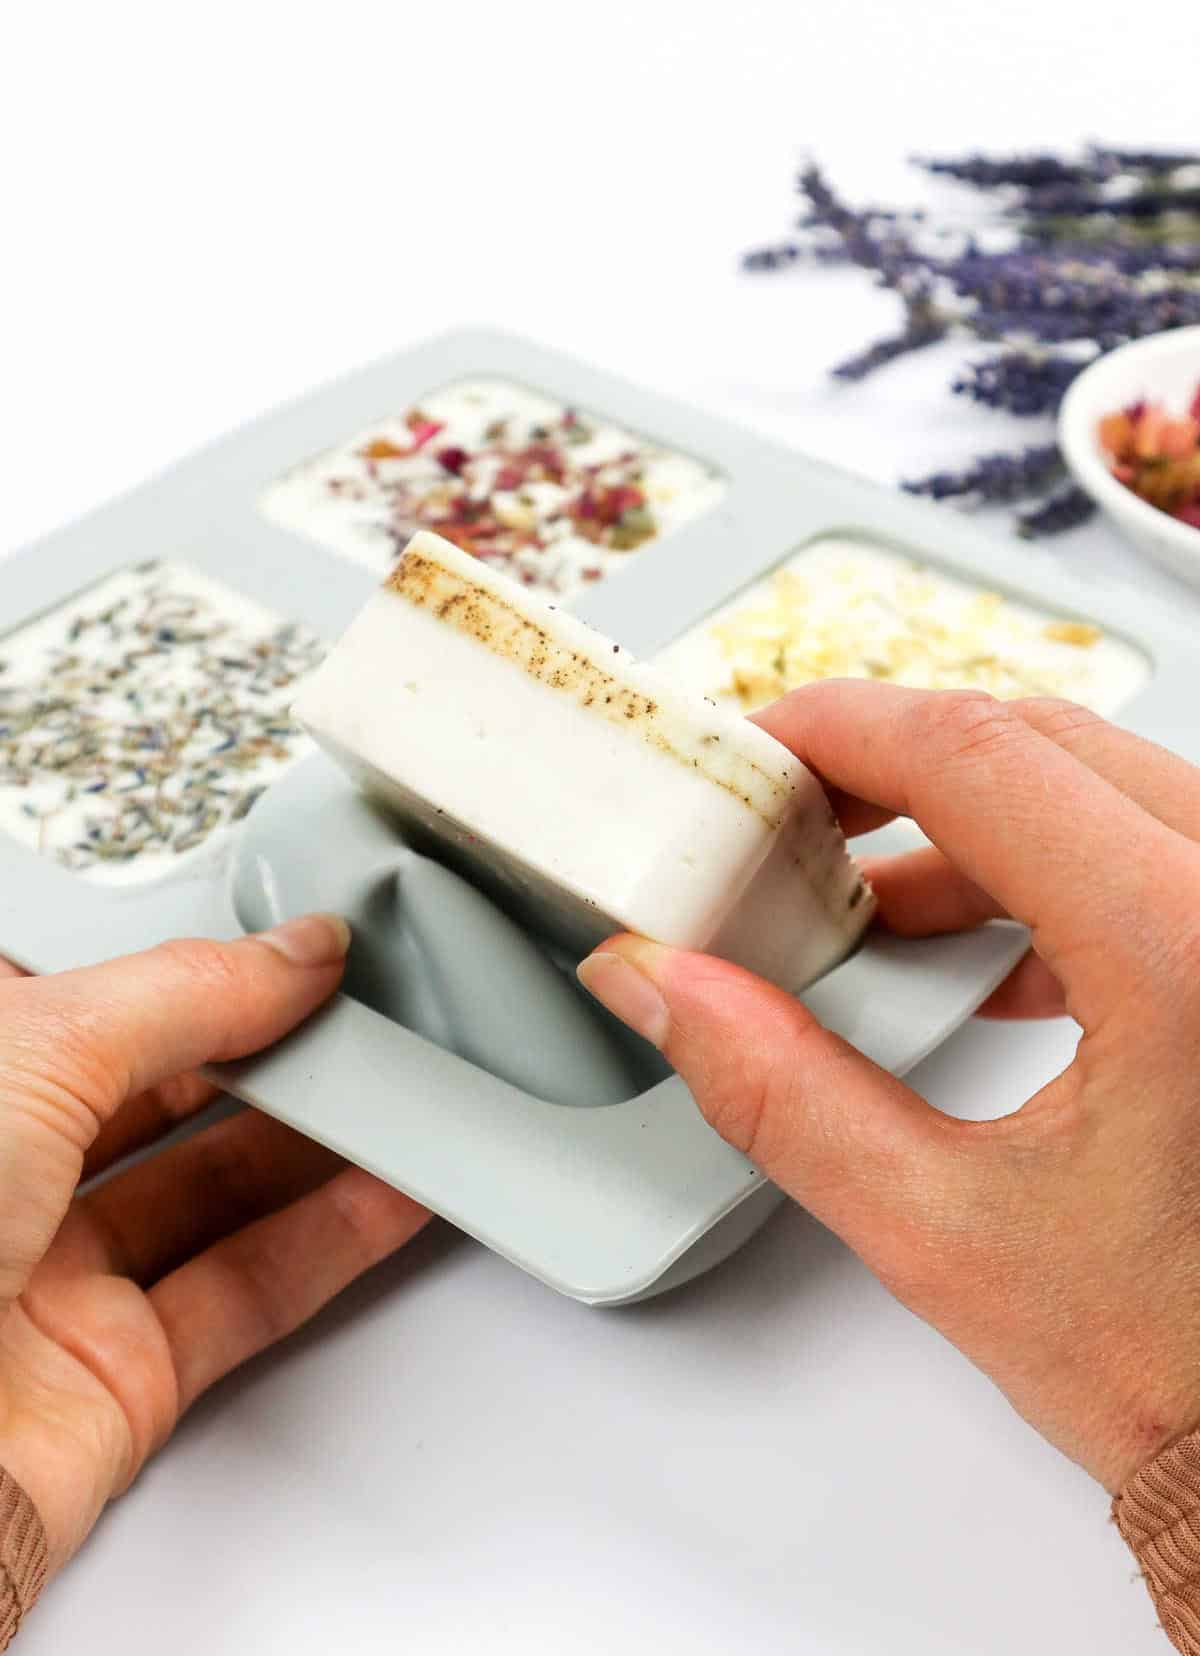
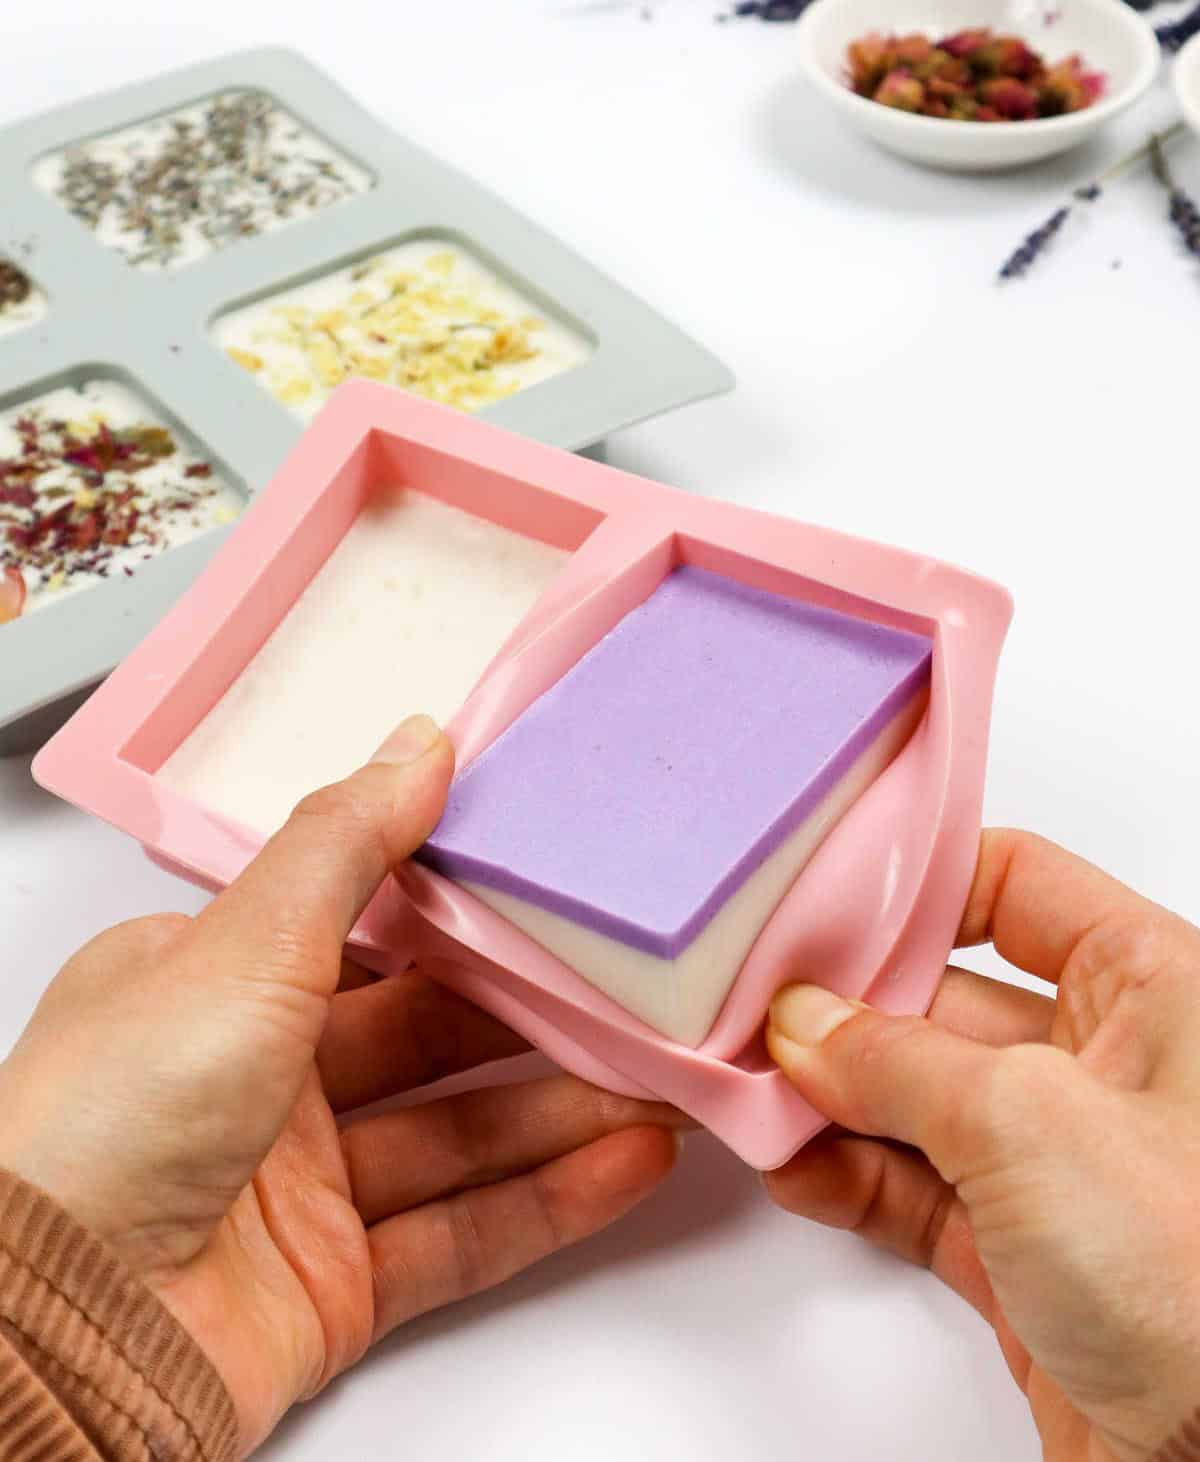
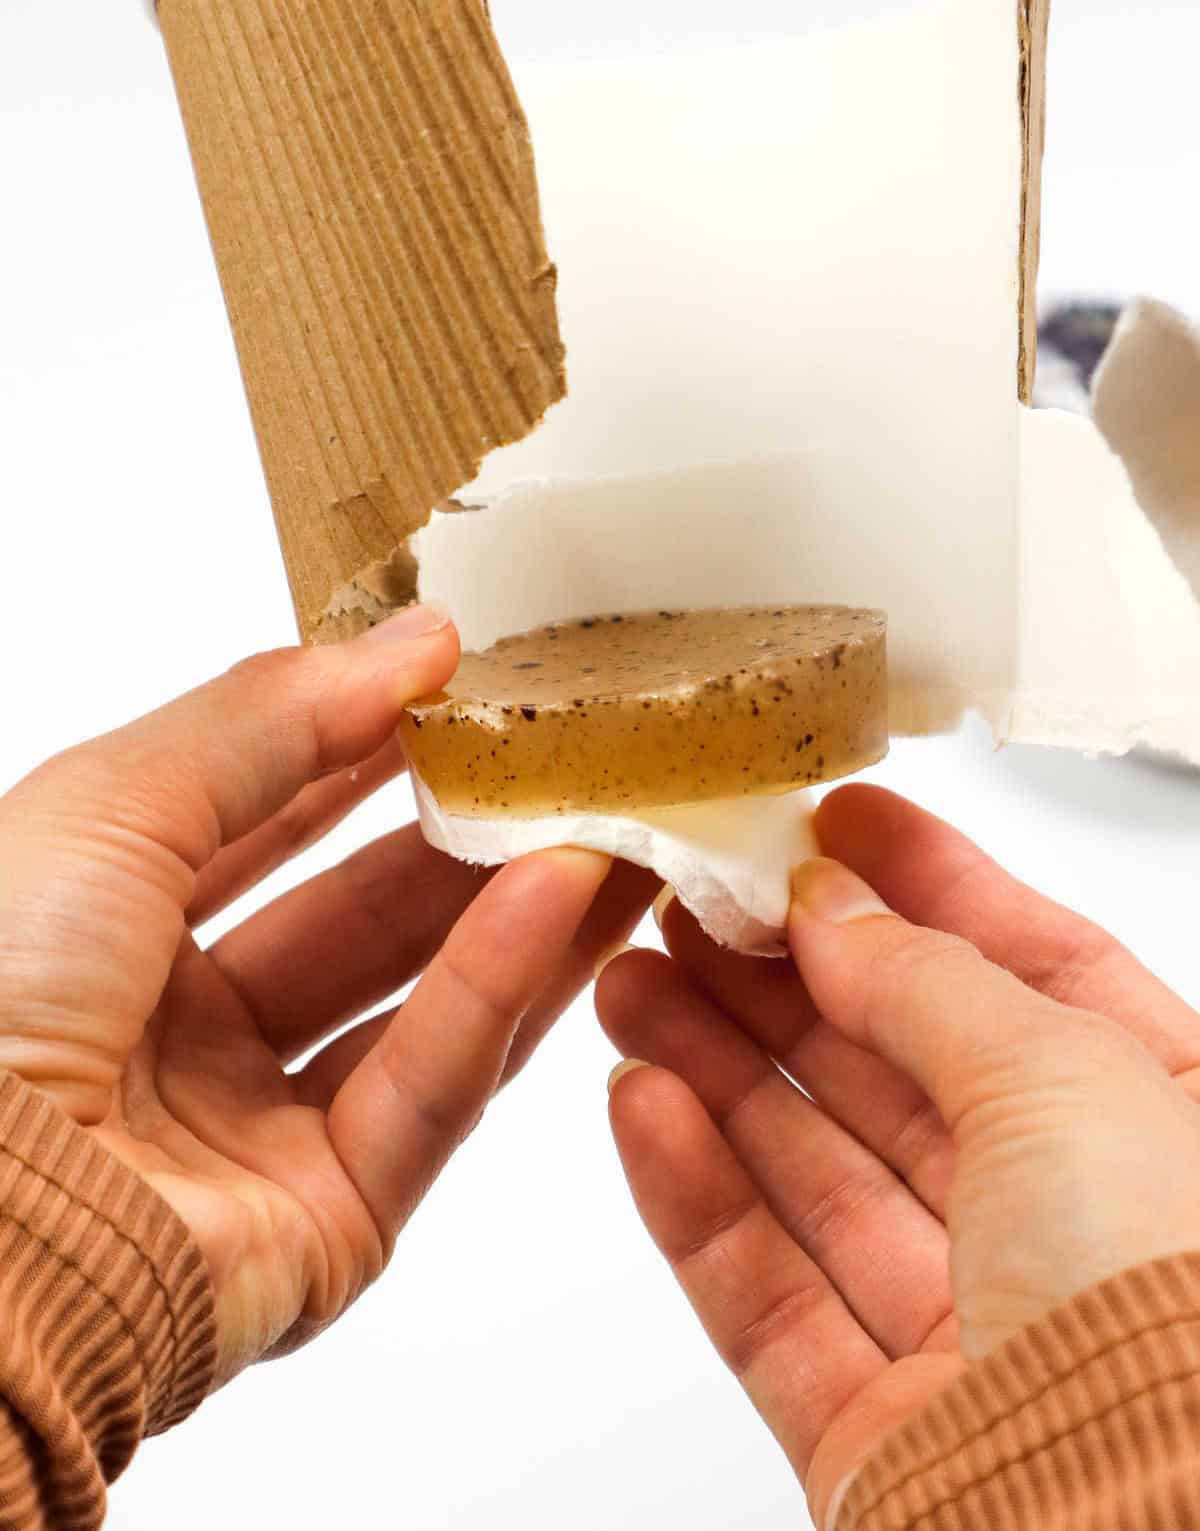

Once your soap has reached its desired consistency and hardness, you can safely eject it from its mold. If you employed paper or plastic containers for molding, a simple cutting motion with scissors will allow you to carefully pry the soap away from the container’s surface. This process is remarkably straightforward and effective.
In contrast, silicone molds offer an even more effortless removal experience, as all you need to do is gently push the mold inward and the soap will effortlessly spring free.
Step 7

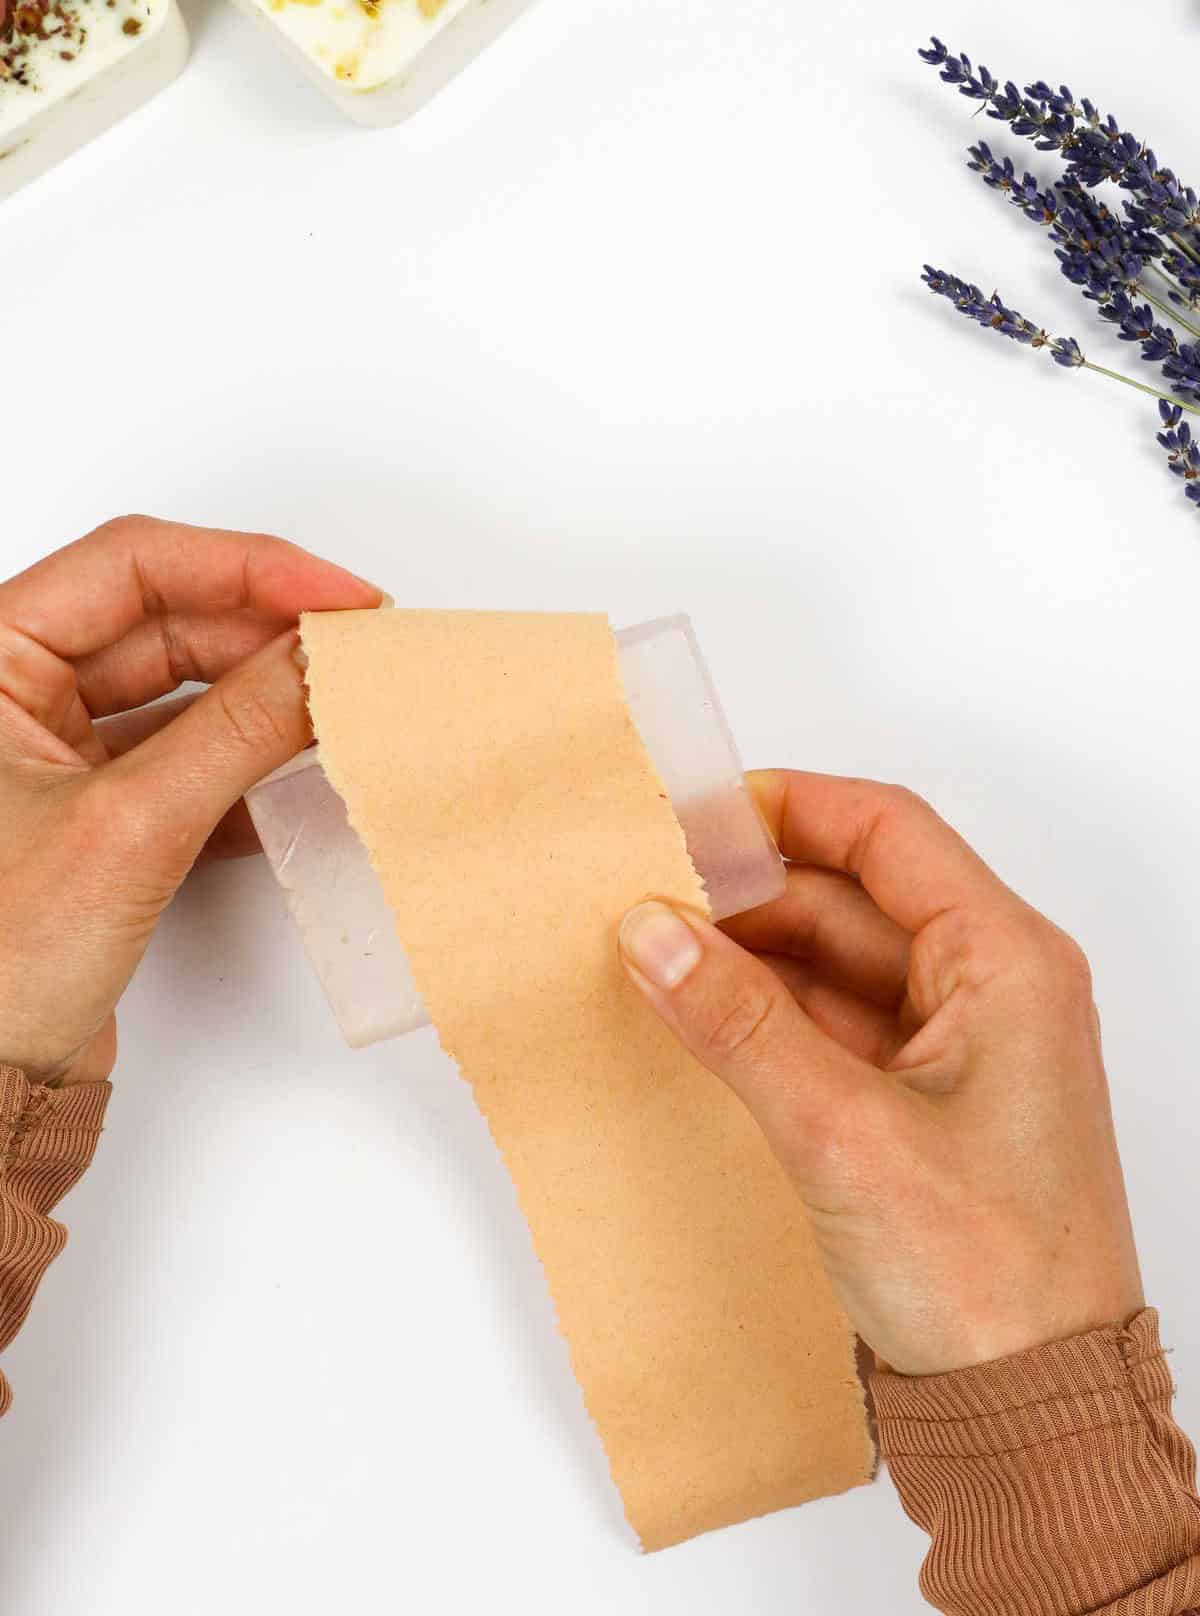
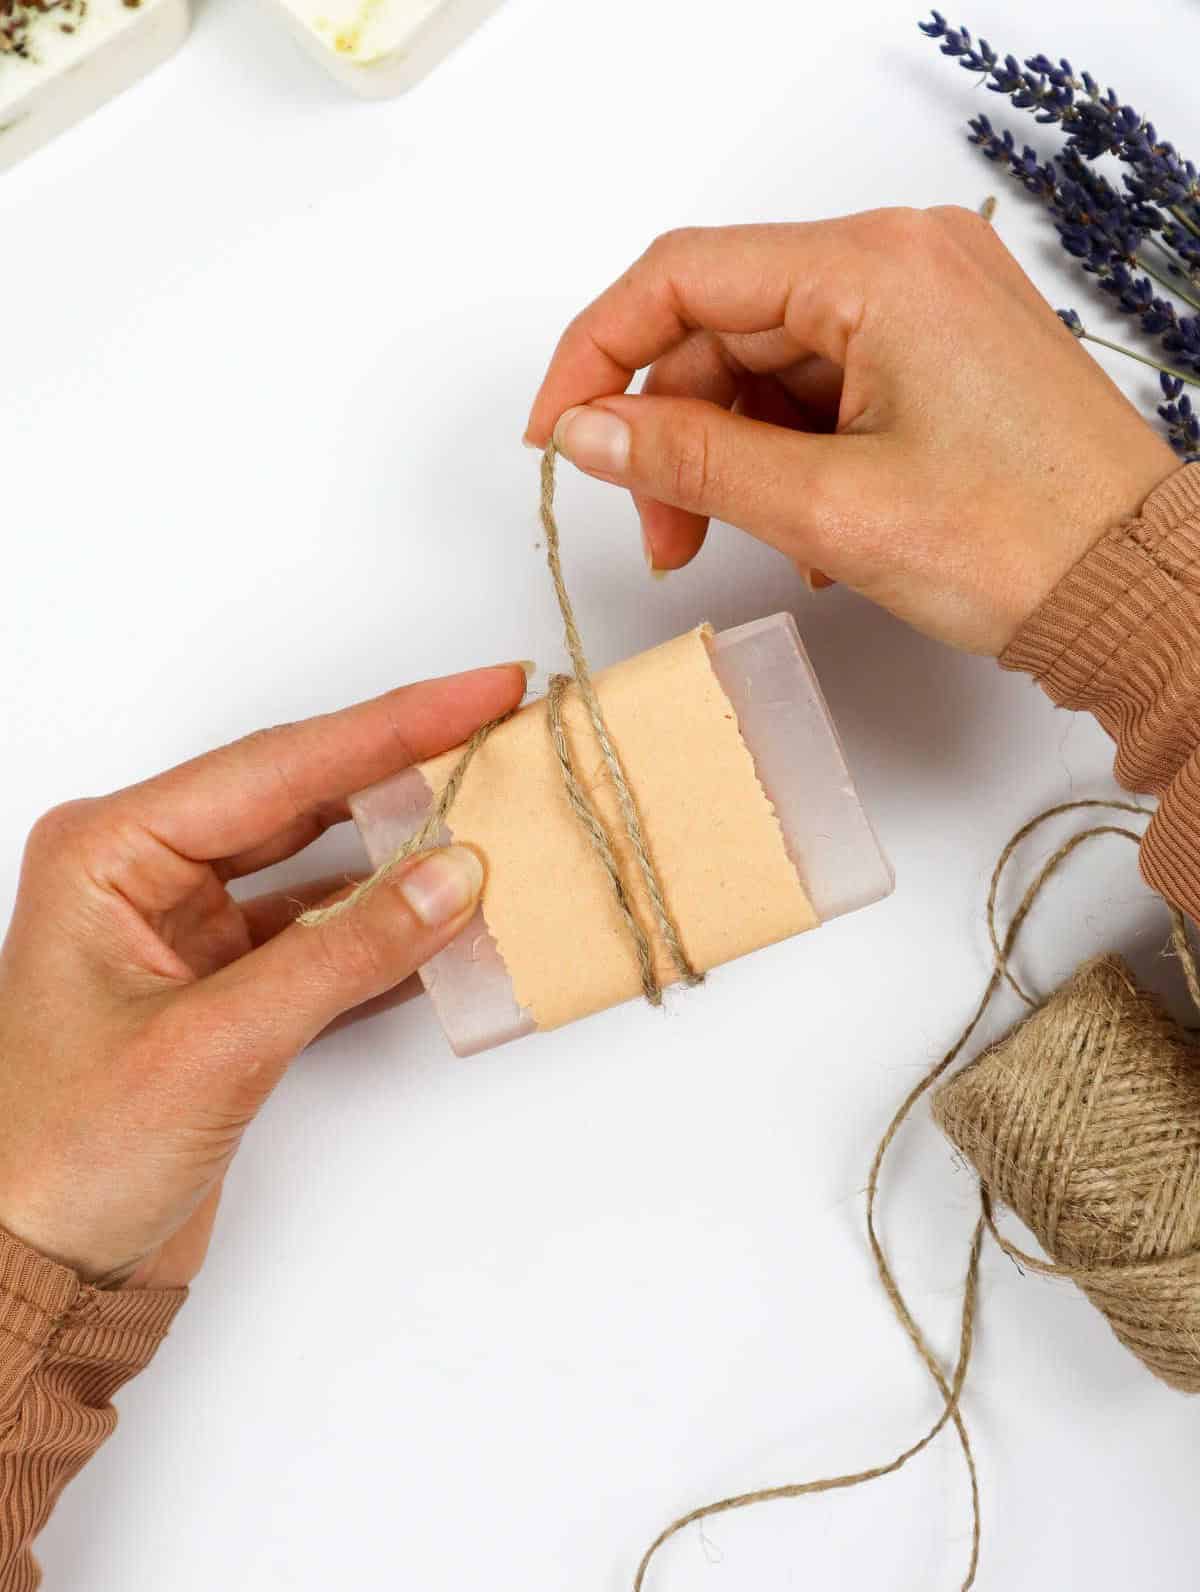

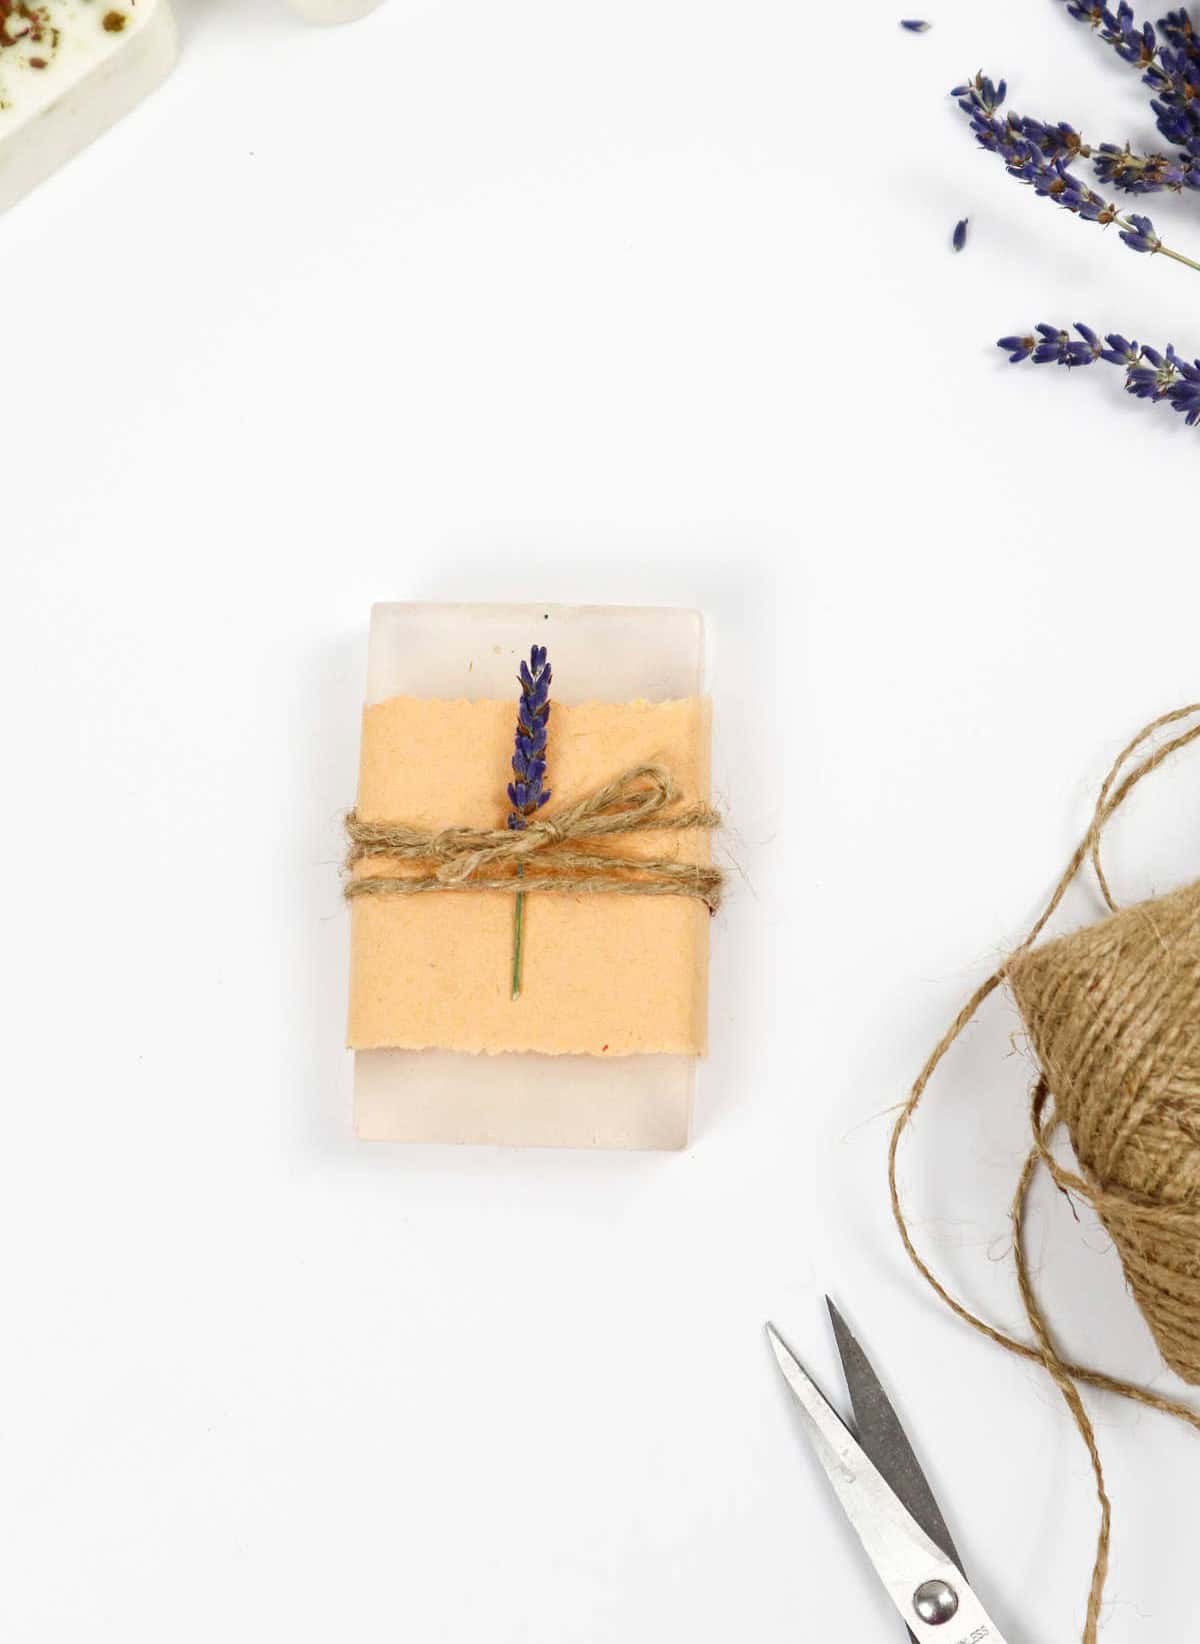
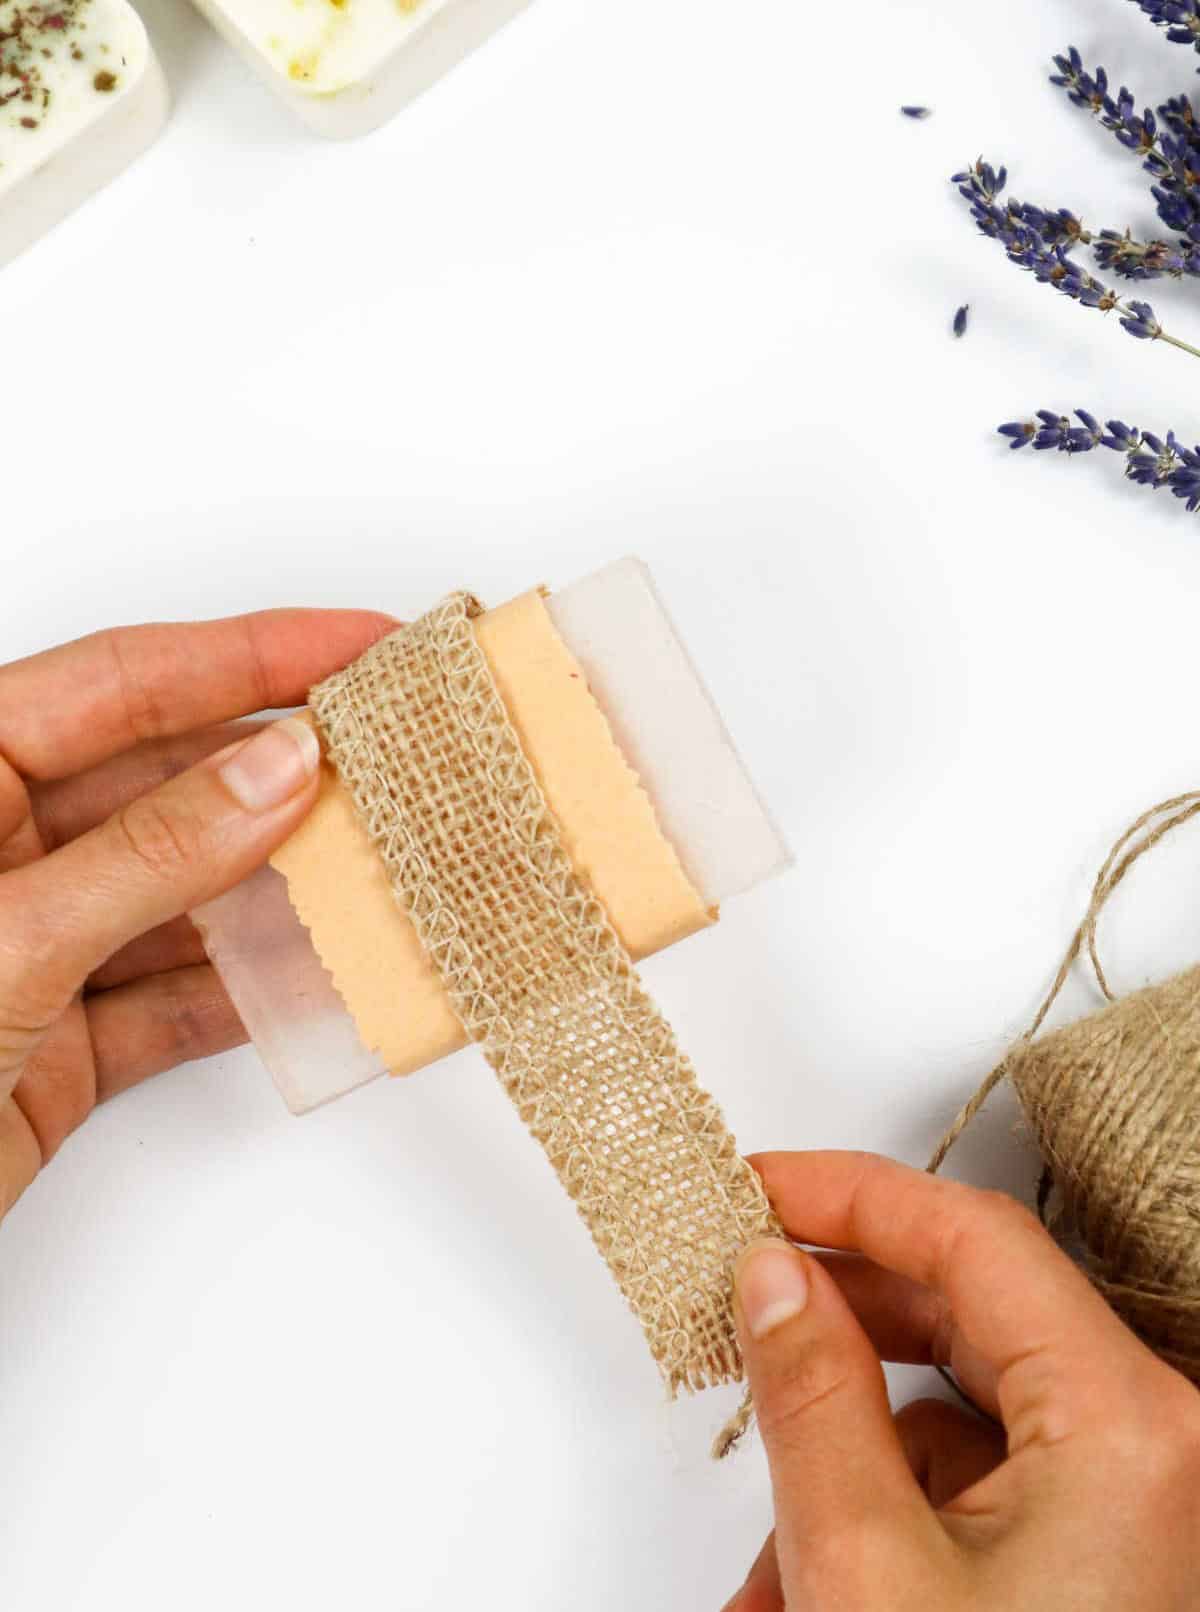
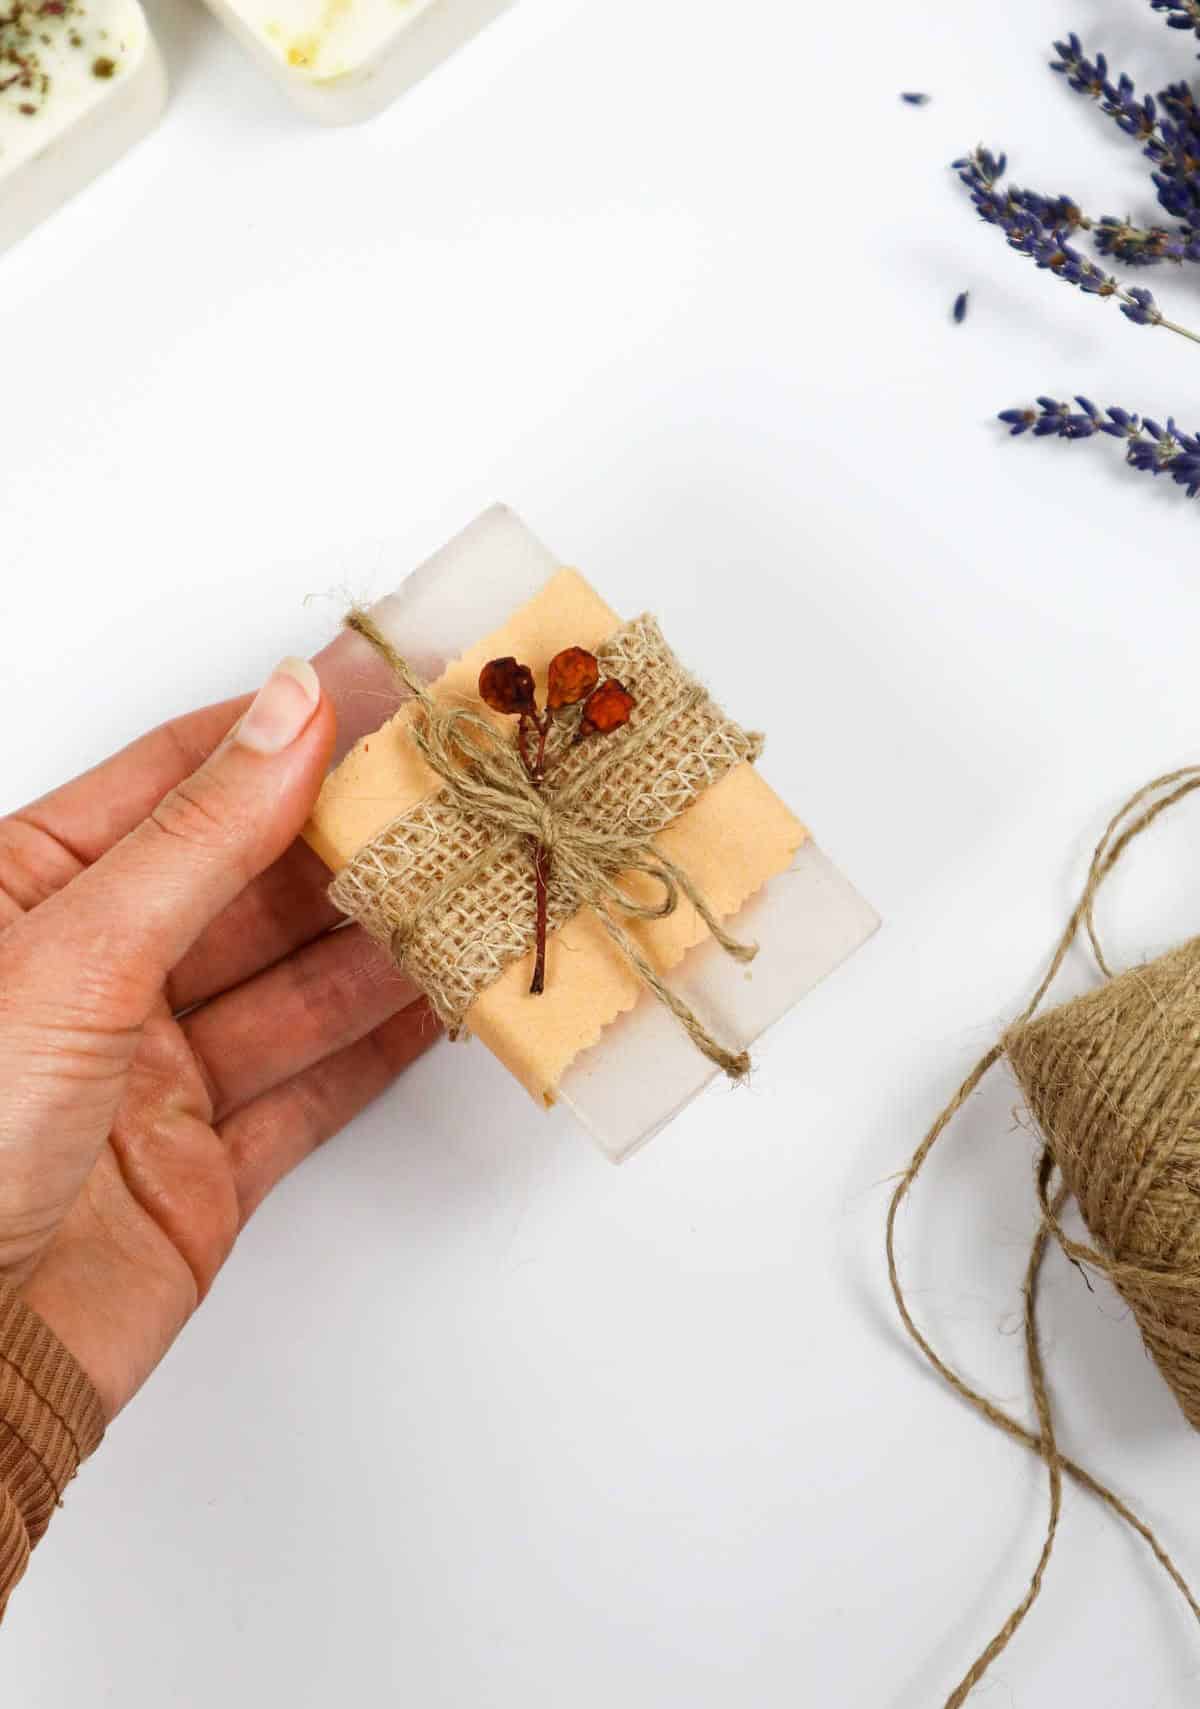
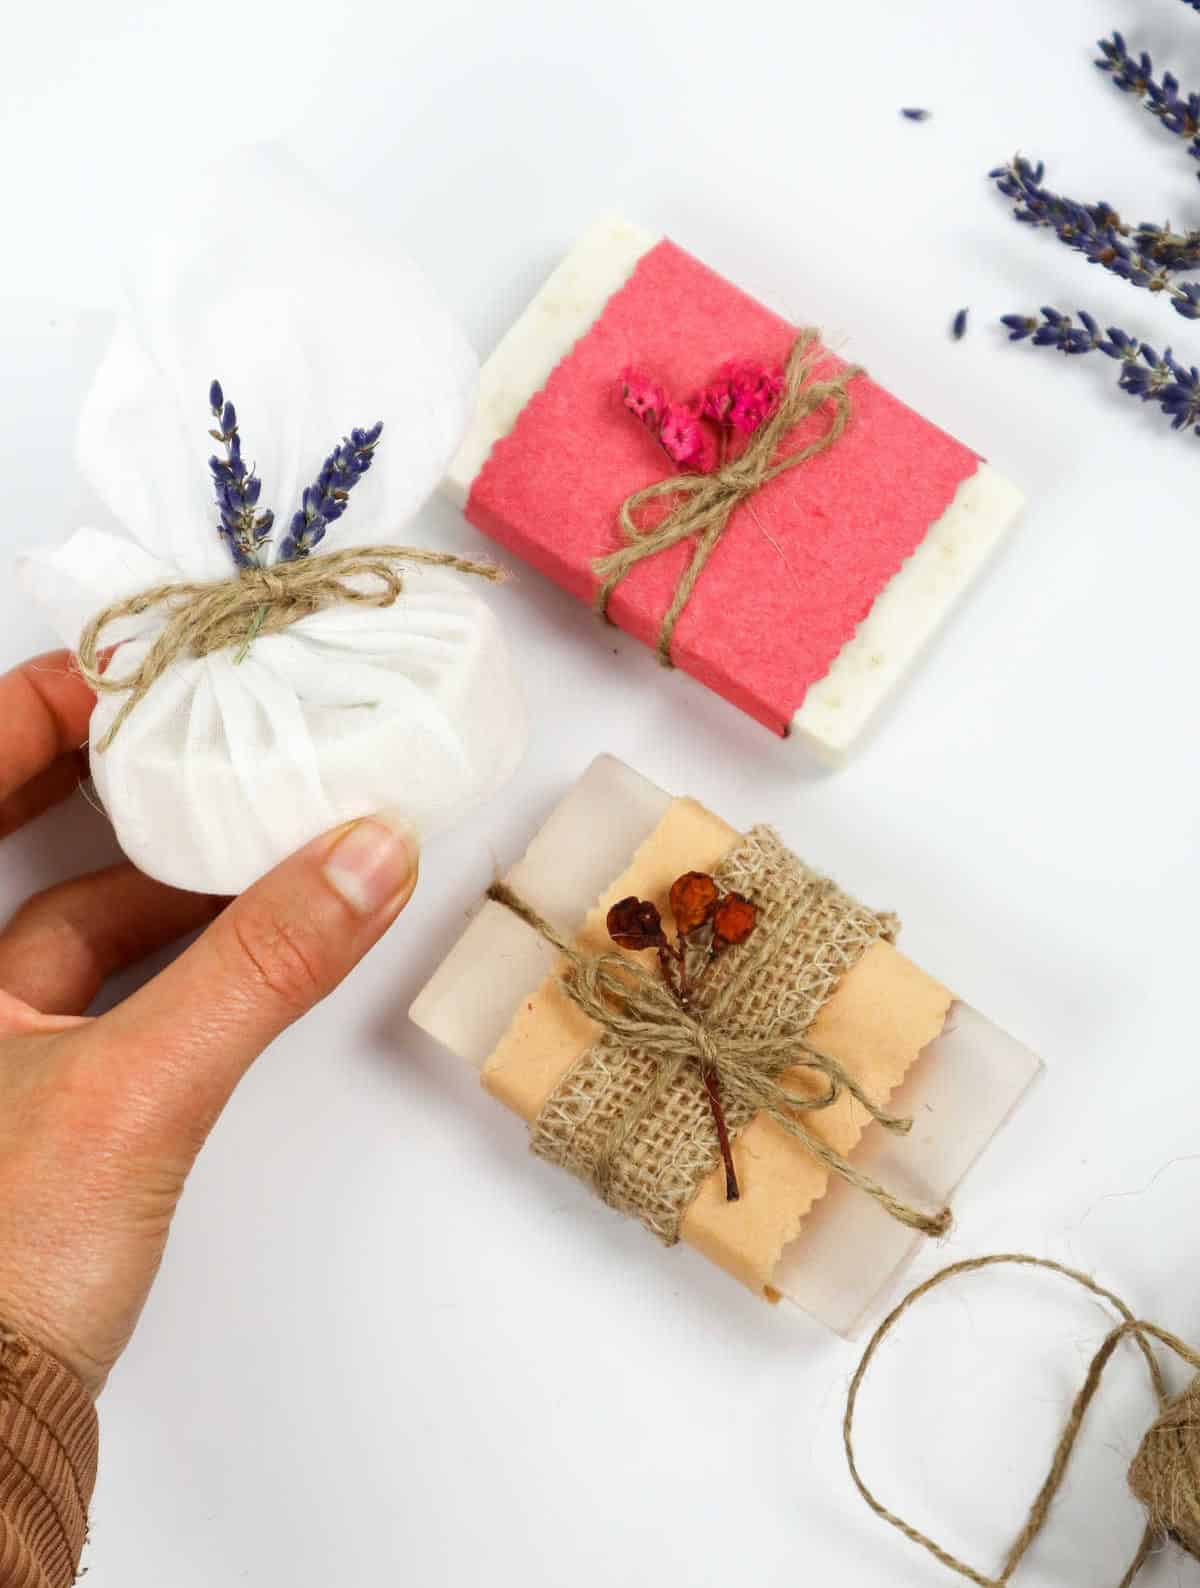
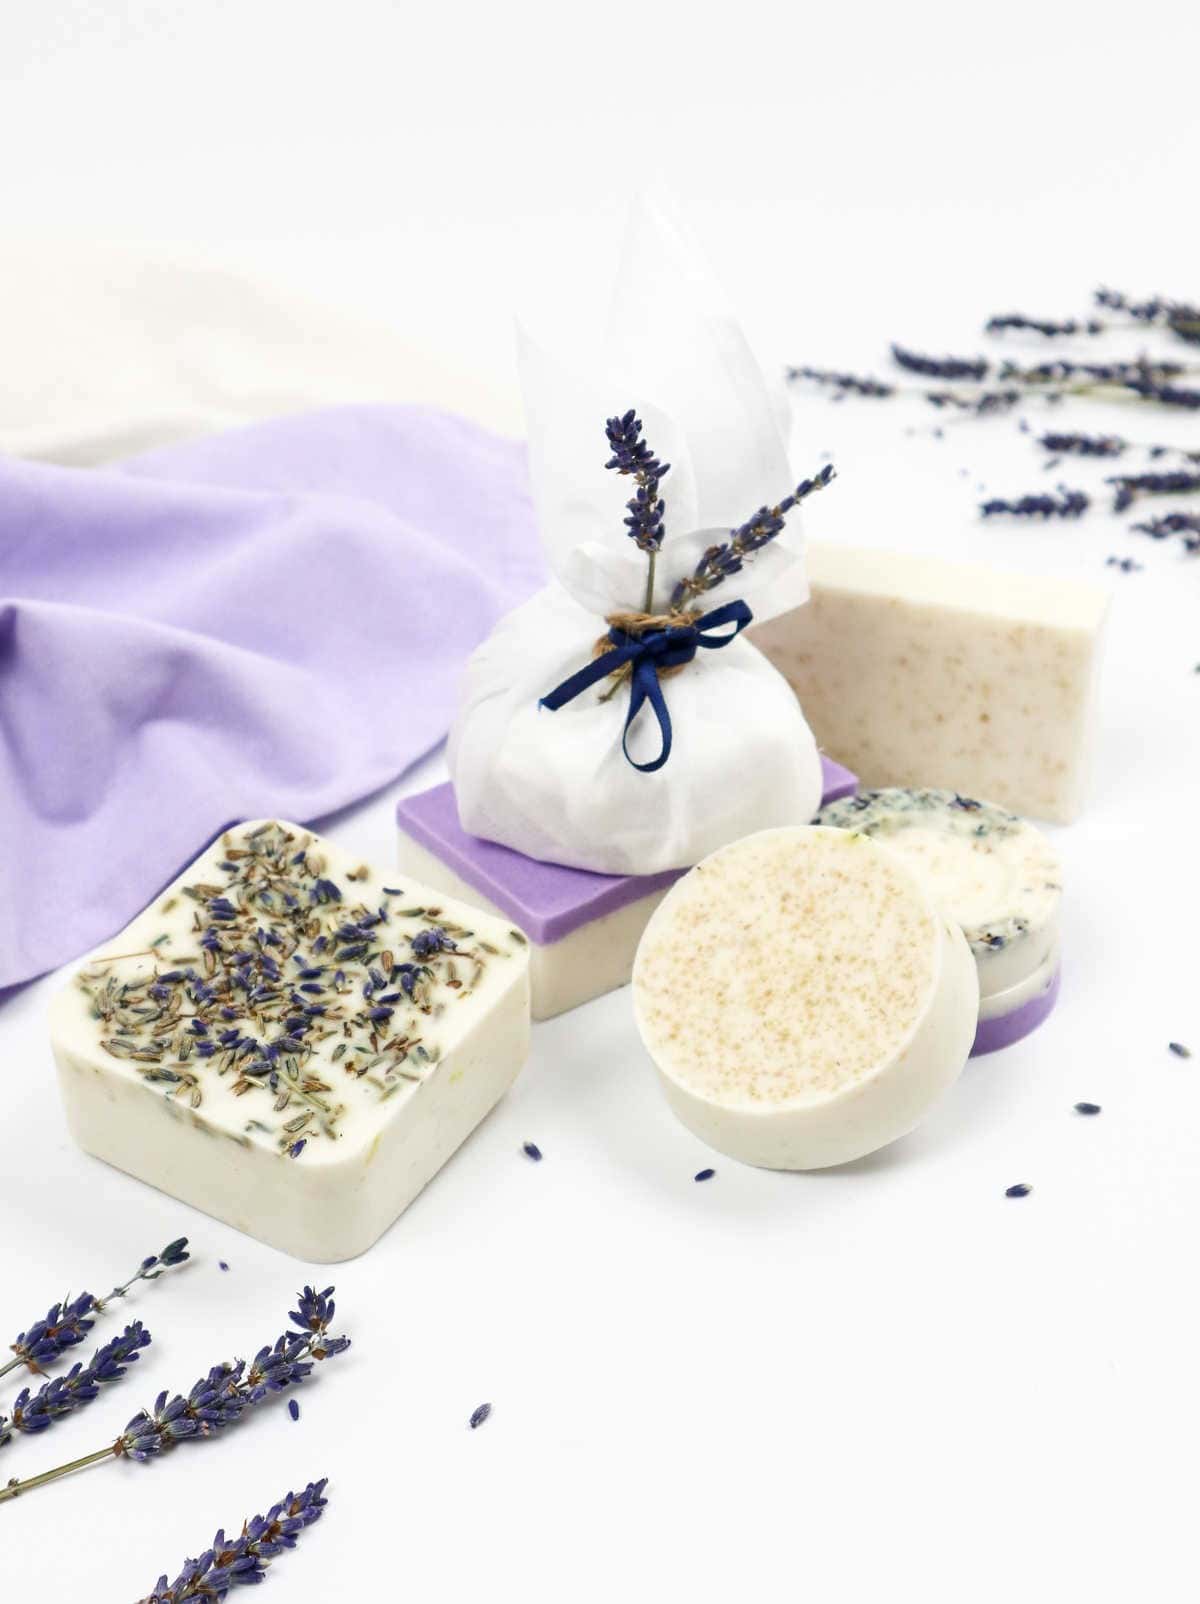
To ensure your handmade soap bars are properly stored or gifted, a thoughtful packaging approach is crucial. Consider adorning the soap with craft paper, carefully arranging it in a visually appealing manner.
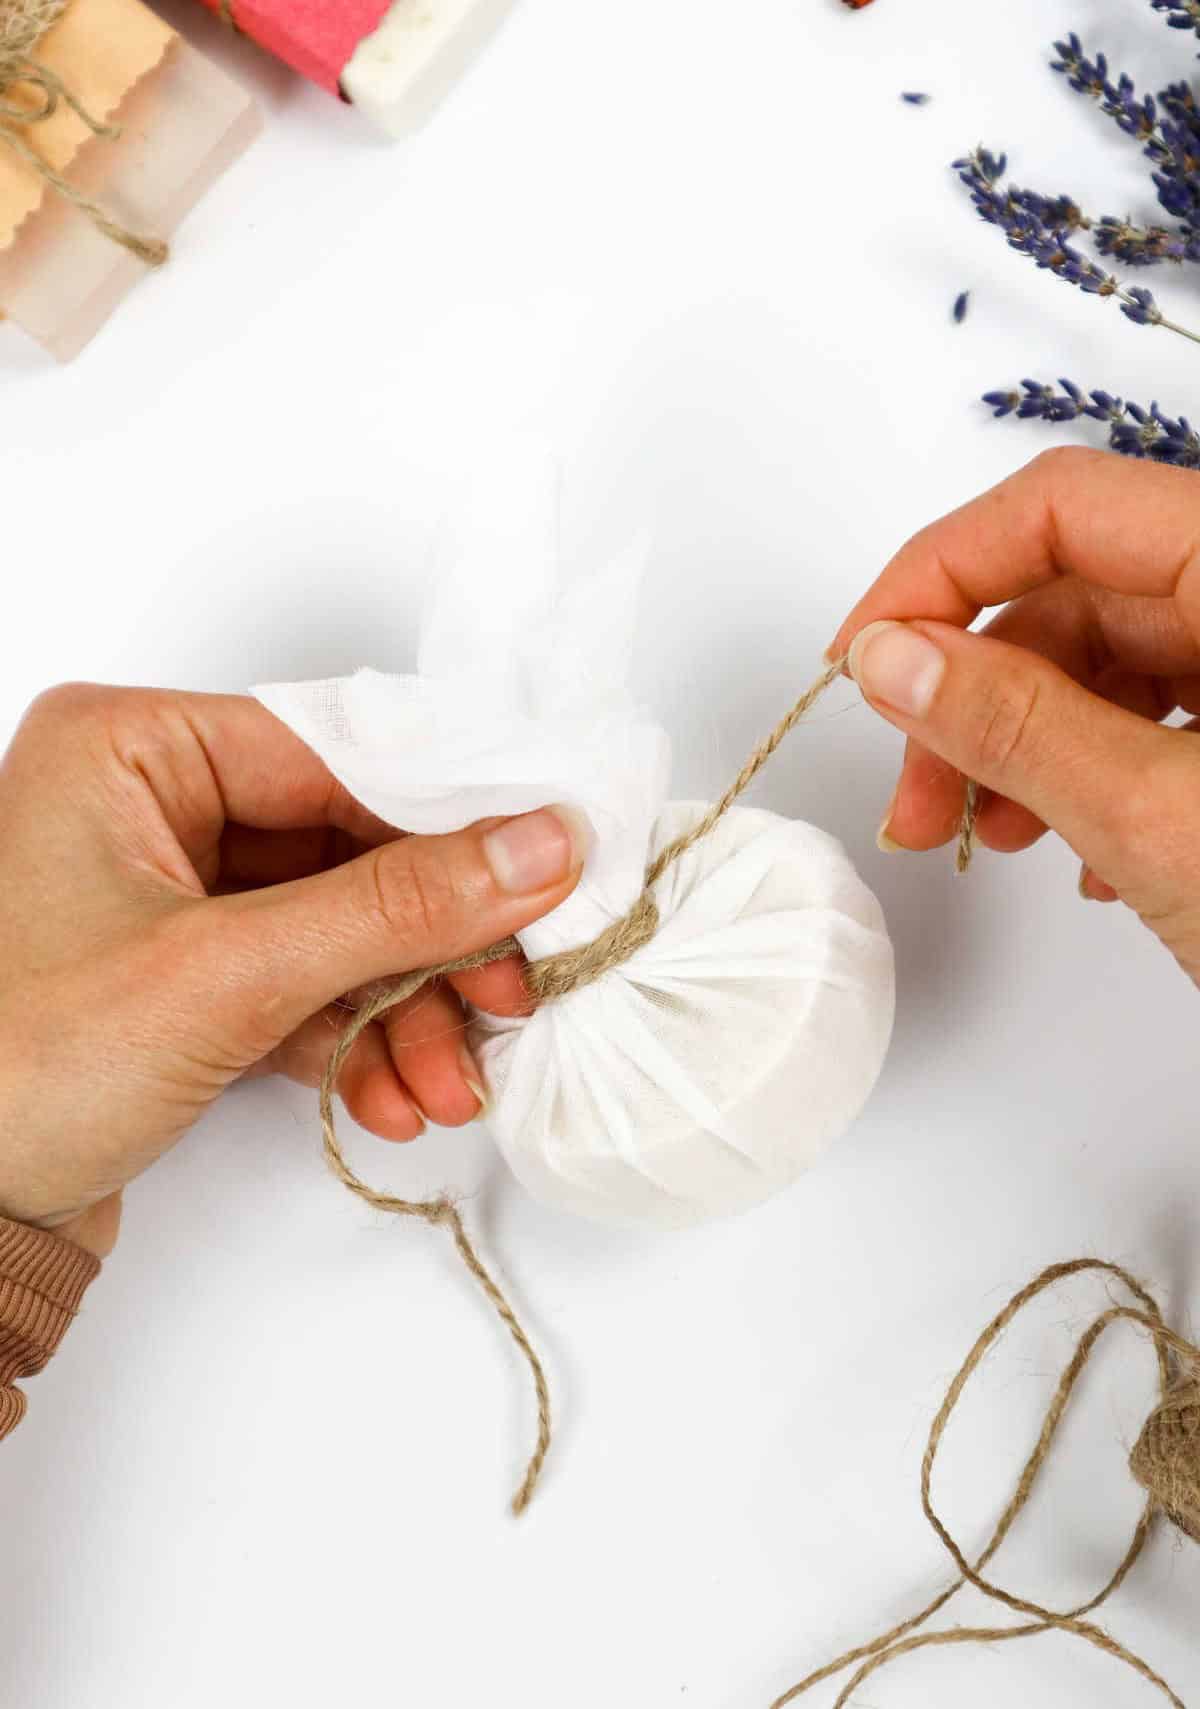
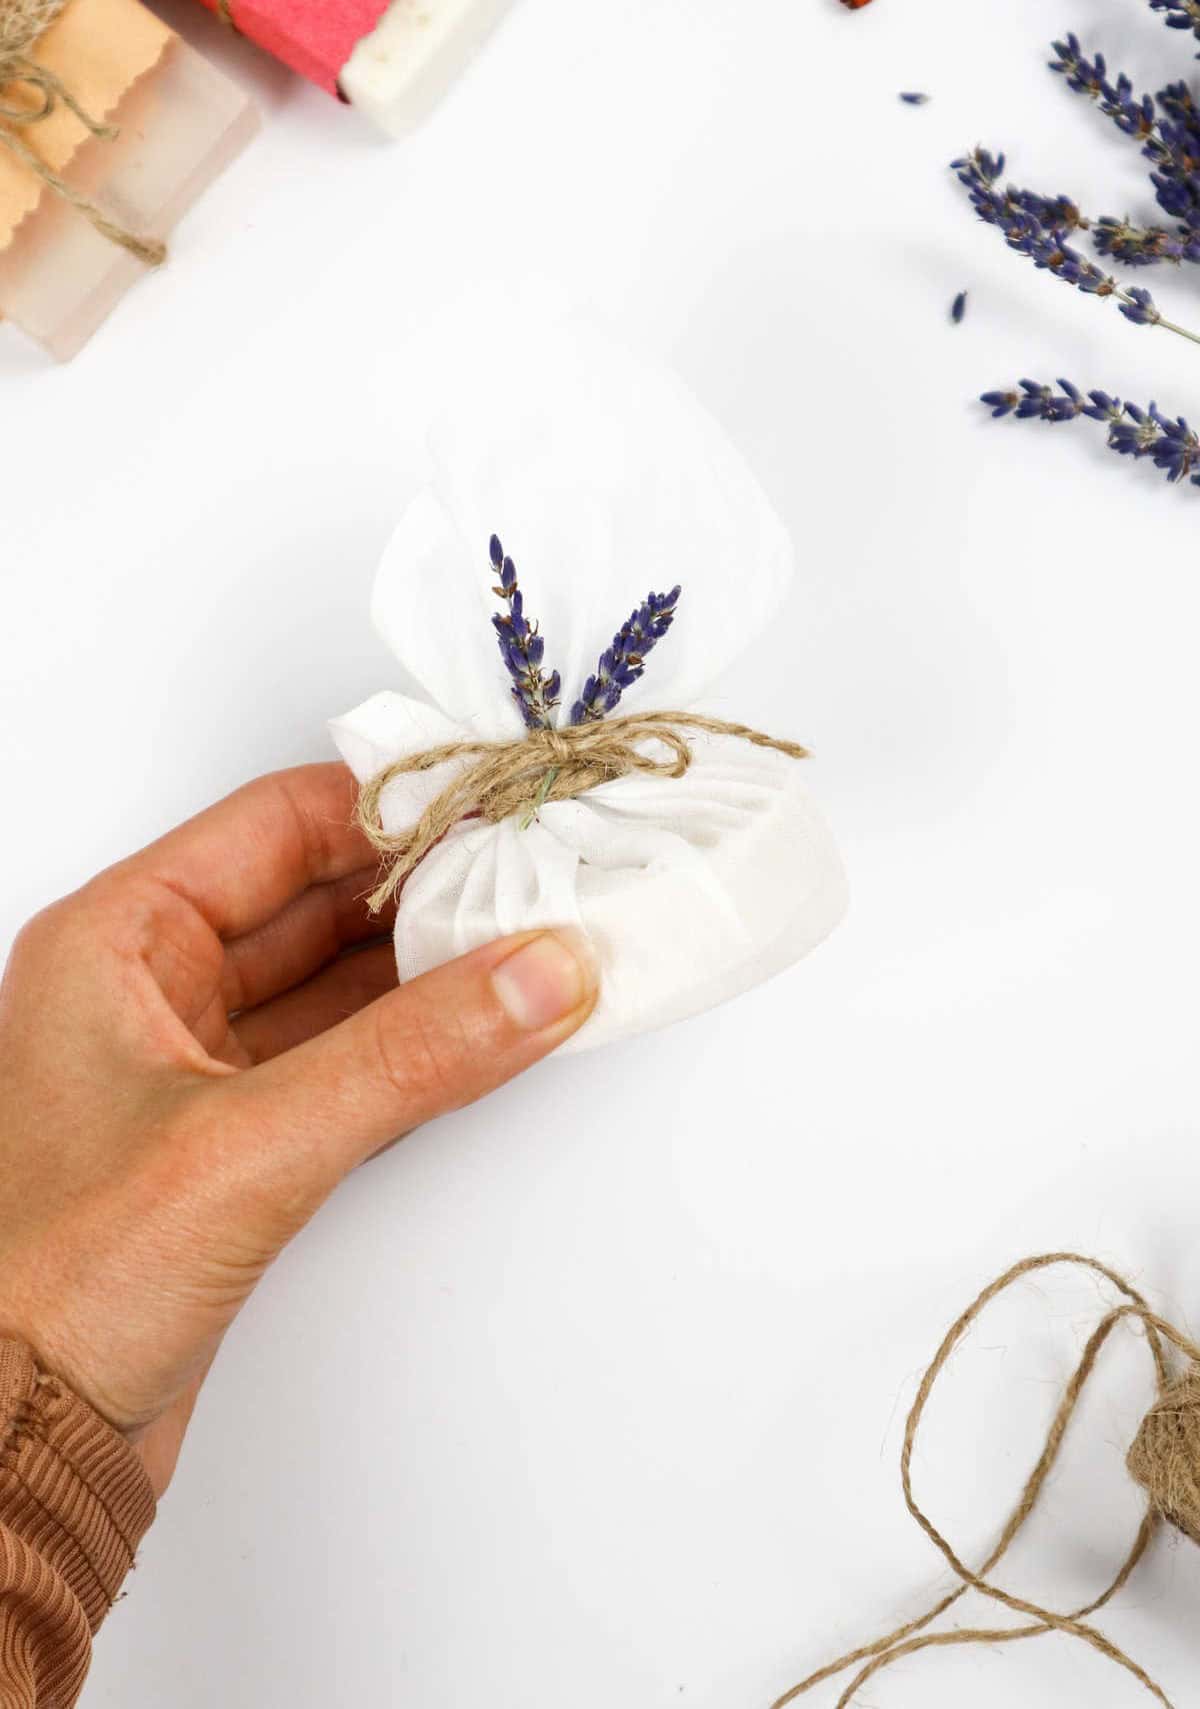
Take it a step further by securing the package with natural twine, jute, or burlap ribbon for a charming touch. To add an extra layer of whimsy, incorporate a sprig of dried lavender, flowers, or herbs into the packaging.
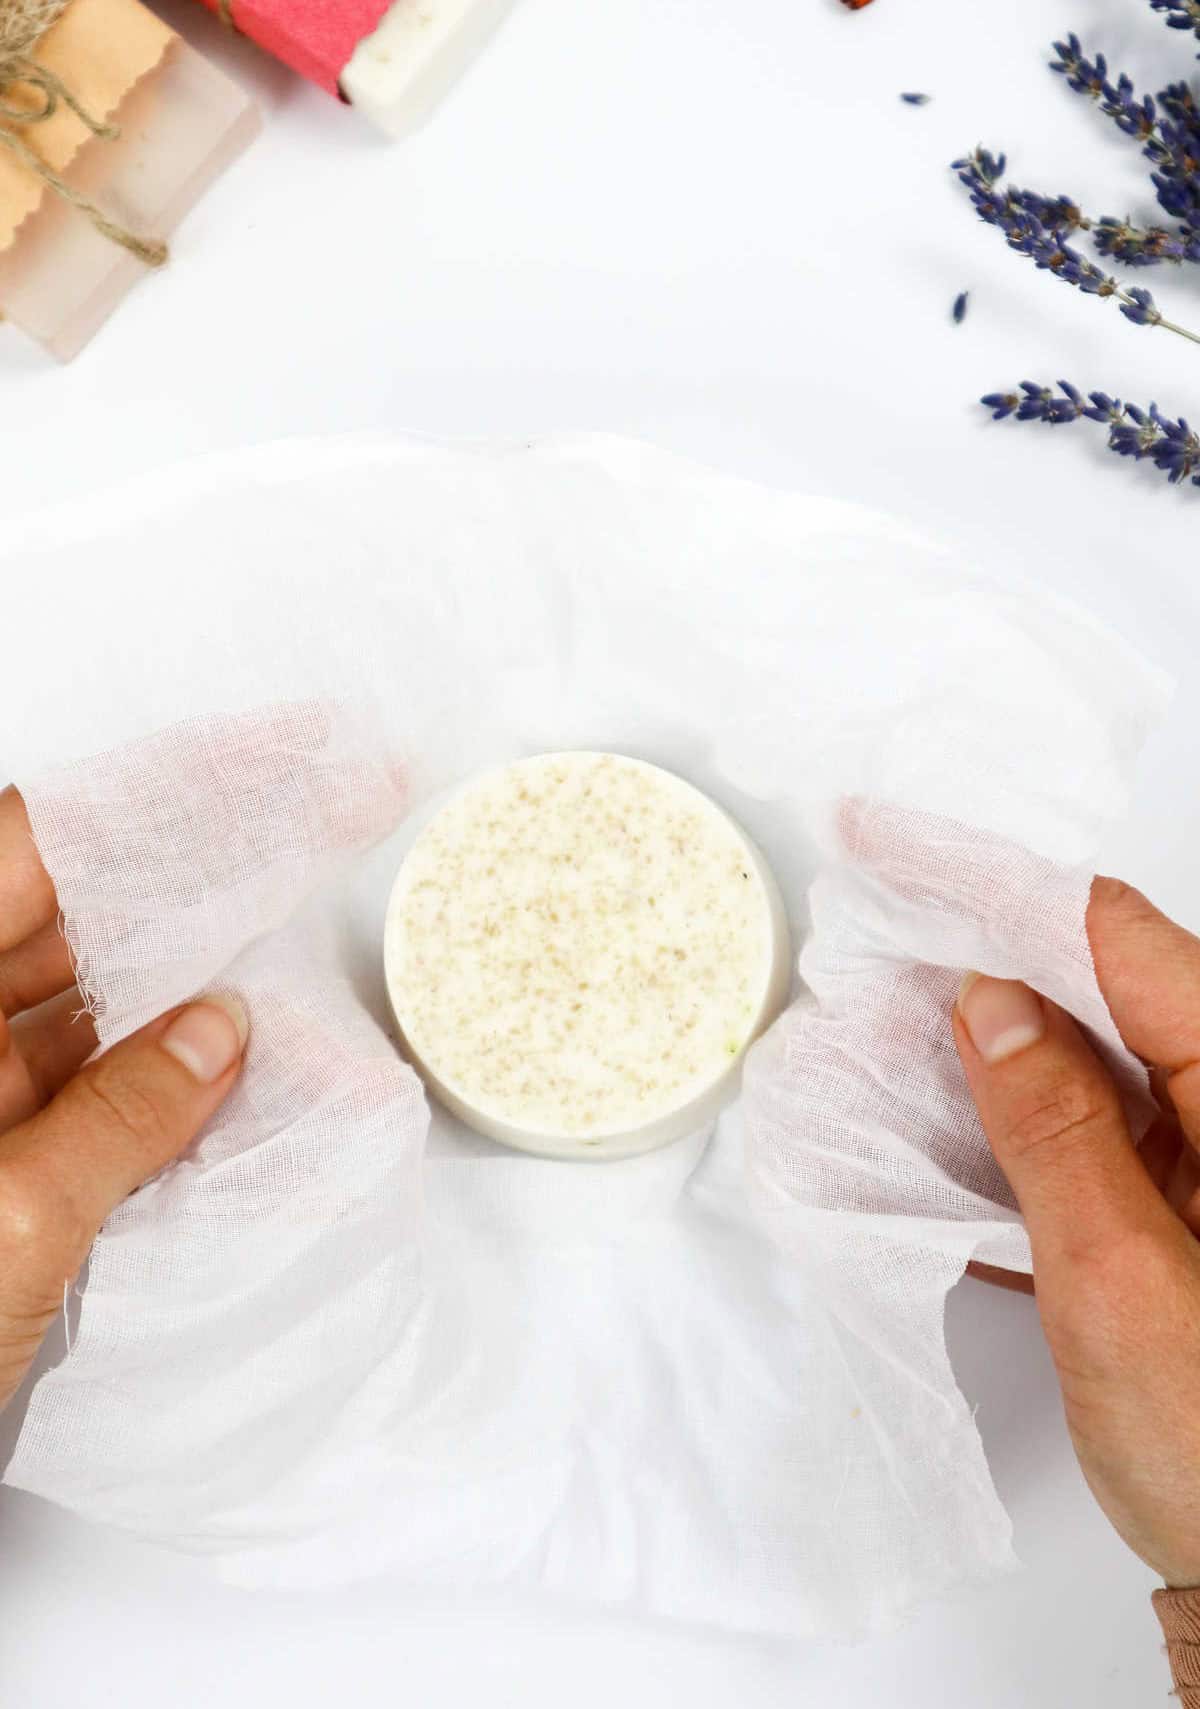
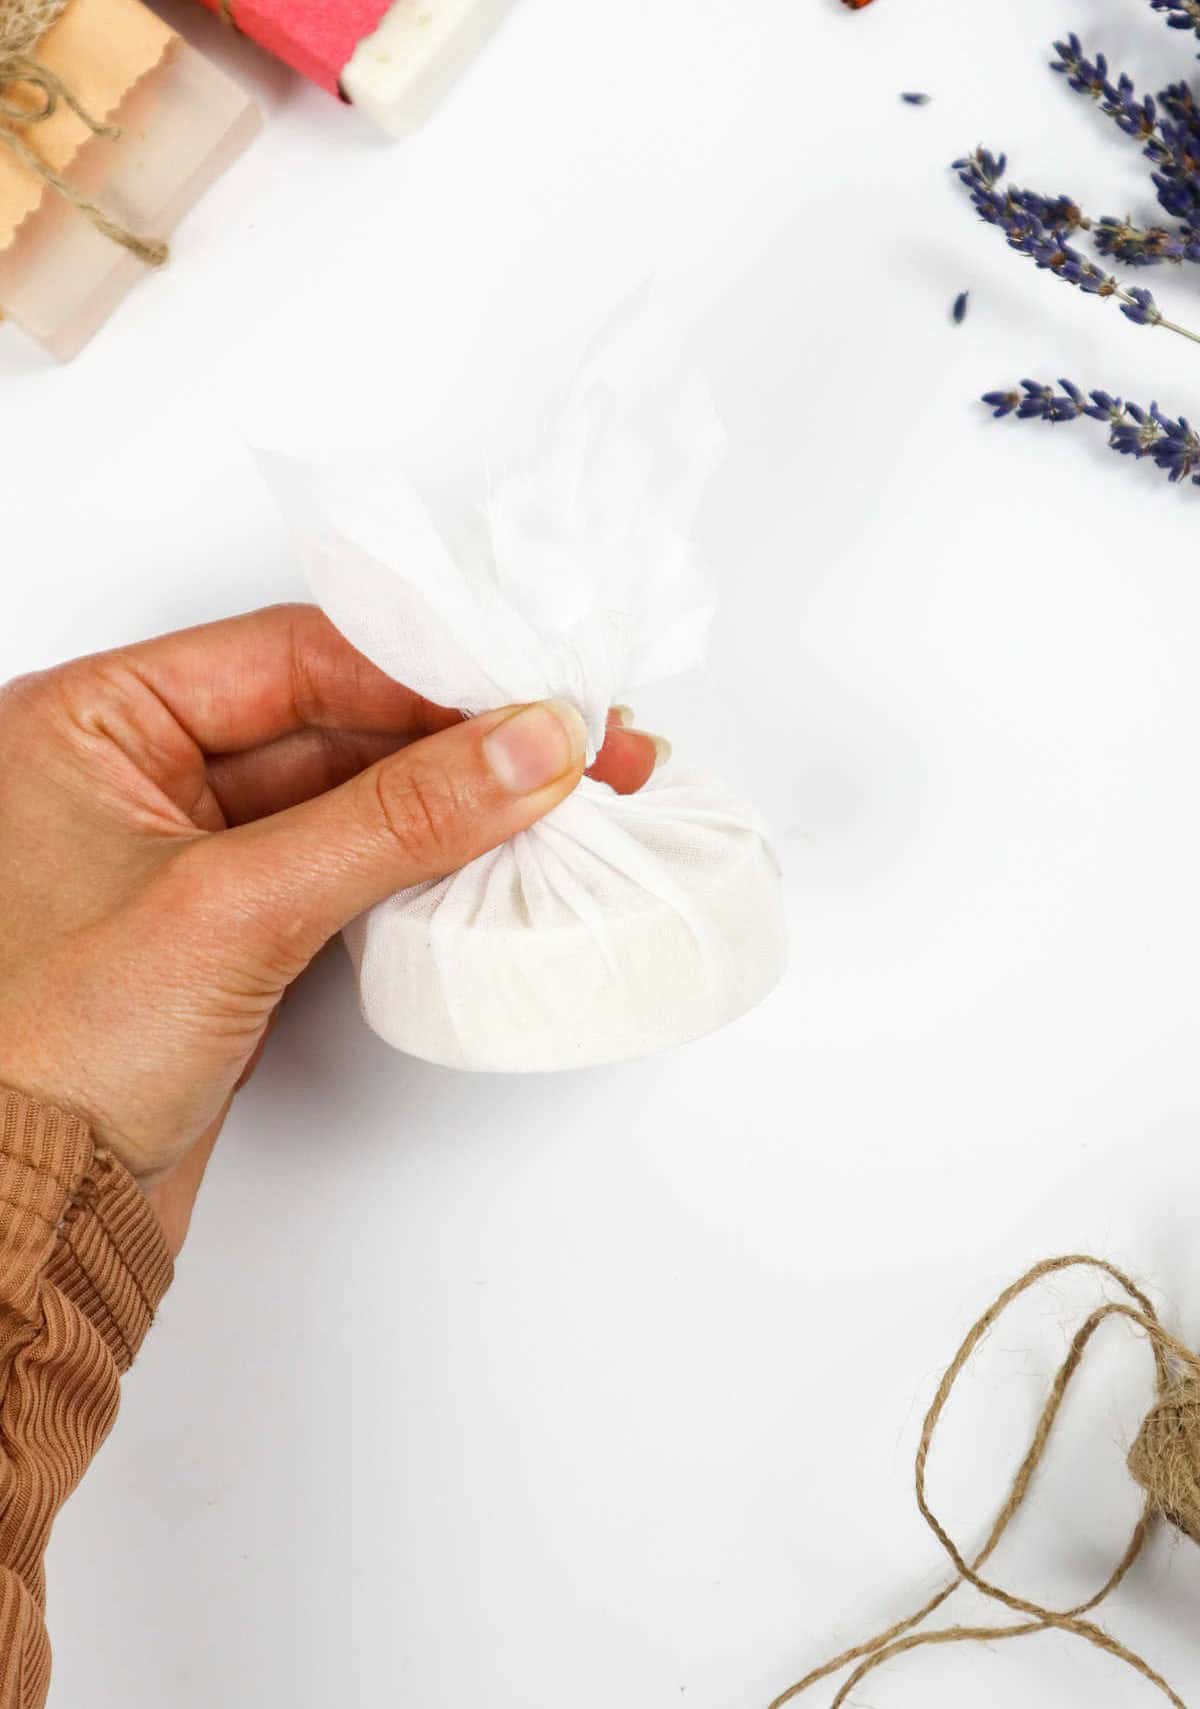
Alternatively, you can opt for a more rustic presentation by wrapping the soap in cheesecloth, lending a earthy charm to your gift.
With these finishing touches in place, your homemade soaps are now ready to be used and enjoyed, or shared with loved ones as a thoughtful present.
Watch: How to Make Your Own Soap
For those who prefer learning through visual aids, there’s an excellent video tutorial available that will guide you step-by-step in crafting your own unique soap. By watching the video and following along with the instructions, you’ll be able to develop a better understanding of the process and gain the confidence to create your own personalized soaps.
Fragrances You Can Use to Make Soaps
The world of fragrances can be overwhelming when selecting a scent for your soap. With countless options available, it’s easy to feel lost in the sea of aromas. To help guide you through this process, here are some popular fragrance suggestions: You may consider combining citrus notes like lemon balm or lemongrass, with earthy scents such as coffee, rose, and sandalwood. Alternatively, floral notes like lavender, jasmine, orange, or grapefruit can create a lovely combination.
For something sweeter, fruity options like strawberry or vanilla are great choices. If you prefer a refreshing scent, mint or eucalyptus may be the way to go. Additionally, bergamot and tree oil offer unique characteristics that can add depth to your soap’s fragrance.
What Else Can I Add to These Soaps?
When creating your own natural soap, you have the freedom to incorporate a wide range of ingredients that not only enhance its appearance and fragrance but also provide numerous benefits for your skin. In addition to using essential oils, you can add natural elements like coconut flakes, oatmeal, chia seeds, or apricot kernels to create texture and visual interest.
These ingredients also possess anti-inflammatory and antioxidant properties, making them perfect for nourishing and hydrating your skin. For added moisturizing and conditioning properties, consider incorporating rich butters and oils such as shea butter, cocoa butter, coconut oil, apricot oil, almond oil, avocado oil, or olive oil. You can also use oat and almond milk, honey, or other natural ingredients that provide these benefits.
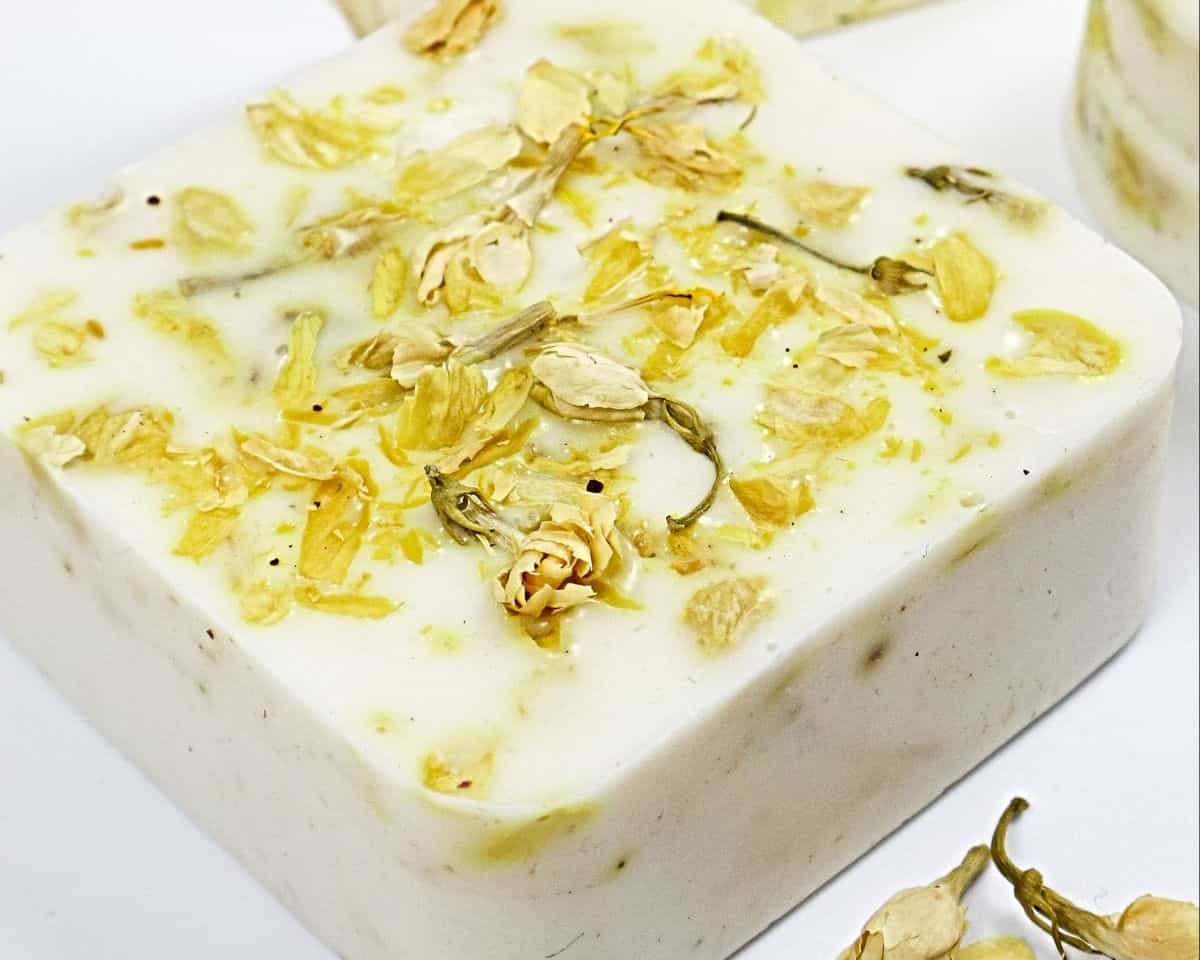
To create a soap with exfoliating properties, you can add dry herbs like thyme, rosemary, lavender, chamomile, mint, or calendula. For a pop of color, consider adding dried flowers and petals such as rose, jasmine, lavender buds, cornflower, or marigold. Vitamin E and C oils, activated charcoal, and citrus peels or zest can also be used to create unique textures and fragrances.
Even vegetable and fruit ingredients like beetroot powder for a natural coloring agent, dried berries, or scraps of loofah can be incorporated into your soap recipe. The possibilities are endless when it comes to creating a truly personalized and beneficial bar of soap that meets your skin’s specific needs.
How to Make Soaps into Nice Gifts
Presenting your homemade soaps in an attractive package is crucial to make them look as good as they smell. Whether you’re planning to gift them or simply want to showcase their aesthetic appeal, thoughtful packaging can elevate the overall experience. Consider wrapping your soap completely in colored craft paper for a polished finish or opt for a rustic touch by adding a strip of paper around the middle.
Alternatively, place the soap in cheese cloth and artfully fold it over or bunch it up around the soap for a unique, handmade look. To keep everything in place, you can use natural materials like jute twine, burlap, lace trim, or ribbon to secure the soap. Add some visual interest by incorporating dried flowers, herbs, or sprigs of lavender to the twine.
You can also tailor your packaging to different seasons by adding seasonal elements like cinnamon sticks in the fall, holly and cranberries in winter, or baby’s breath for a springtime feel.
Other Crafts You Might Like
To unleash your creativity, consider taking on a fun craft project. There are numerous options available, including making tissue paper flowers, creating dreamcatchers, and crafting with air dry clay bowls. If you’re looking for something more unique, try making DIY bottle vases or scented candles. For those who enjoy selling their handmade creations, there are plenty of opportunities to do so, such as making paper lanterns, cute crafts for girls, or even creating air dry clay bowls.
With 47 fun crafts for adults and 37 crafts to make and sell, the possibilities are endless!
How to Make Homemade Soap (Step-by-Step)
Create Your Own Soap Masterpiece at Home! If you’re eager to try your hand at crafting something truly unique, making homemade soap is an excellent starting point. Not only will you have a fun and rewarding experience, but you’ll also end up with a thoughtful gift for friends and family. To get started, set aside 10 minutes of prep time before dedicating 20 minutes to active creation. After that, all that’s left is waiting for the magic to happen over the course of 6 hours and 30 minutes.
Equipment
To ensure seamless food preparation, it’s essential to gather the right tools. A silicone mold or a heat-safe plastic cup is necessary for portioning and presentation purposes. In addition to this, having a sturdy chopping board on hand will facilitate the cutting of ingredients. It’s also crucial to have a spork at your disposal, as well as a knife and scissors – not only are these essential for food preparation, but they’re also vital for decorating and packaging your creations.
Finally, to prevent your screen from going dark while you’re in the midst of cooking, it’s helpful to take steps to prolong its battery life.
Materials
When it comes to creating a unique and personalized gift, melt and pour soap can be an excellent choice. To get started, you’ll need a few basic supplies including a high-quality melt and pour soap base, isopropyl alcohol (which can come in concentrations of either 99% or 91%), and essential oils for fragrance. Mica powder adds a touch of sparkle to your creations, while dried herbs and flower petals provide a beautiful decorative element.
For an extra-special touch, consider incorporating ground coffee, jute twine, jute ribbon, or craft paper into your design. Finally, cheese cloth can be used to add a rustic, homespun feel to your packaging.
Instructions
To initiate the process, collect all necessary materials. Begin by breaking down a block of soap into smaller pieces and melting them. This can be achieved through microwaving the soap or submerging it in boiling water, stirring frequently to ensure even melting and prevent burning. Once melted, you can incorporate a few drops of essential oil if desired.
Next, pour the molten soap mixture into your chosen mold – silicone, plastic/paper cups or containers are suitable options – before it has a chance to harden. To remove any air bubbles that may form, lightly spray the surface with isopropyl alcohol. With the foundation established, you can now experiment with decorative techniques. Consider layering herbs and dried flowers within your mold, followed by pouring the soap over them.
Alternatively, you can combine the flowers and herbs directly into the melted soap mixture before pouring it into the mold. To add a pop of color, introduce a few drops of liquid soap colorant or mica powder, stirring thoroughly to ensure an even distribution. You may choose to marble your soap creation or opt for distinct, layered colors by allowing each layer to harden, spraying with isopropyl alcohol, and then pouring the subsequent color over it.
Finally, allow the soap to dry for 4-6 hours before wrapping it in cling film, paper, or cheesecloth and embellishing with twine or ribbon if you’re looking to gift them.