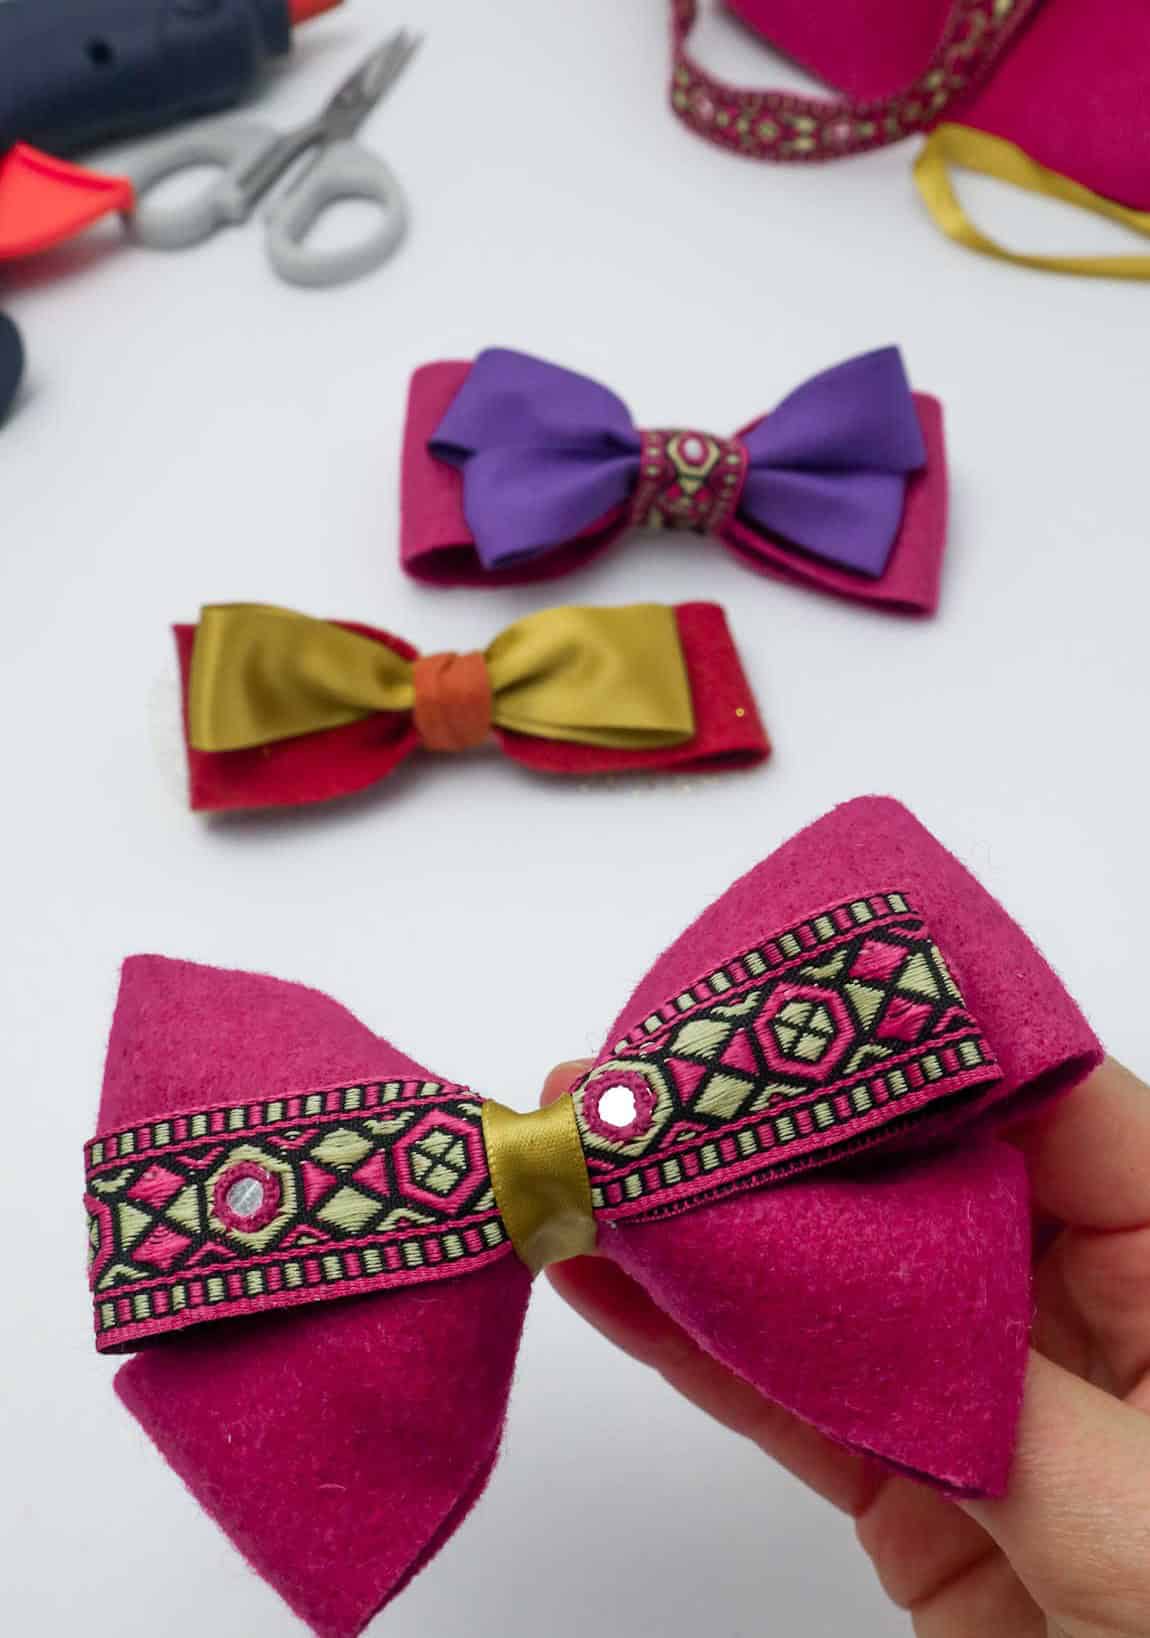
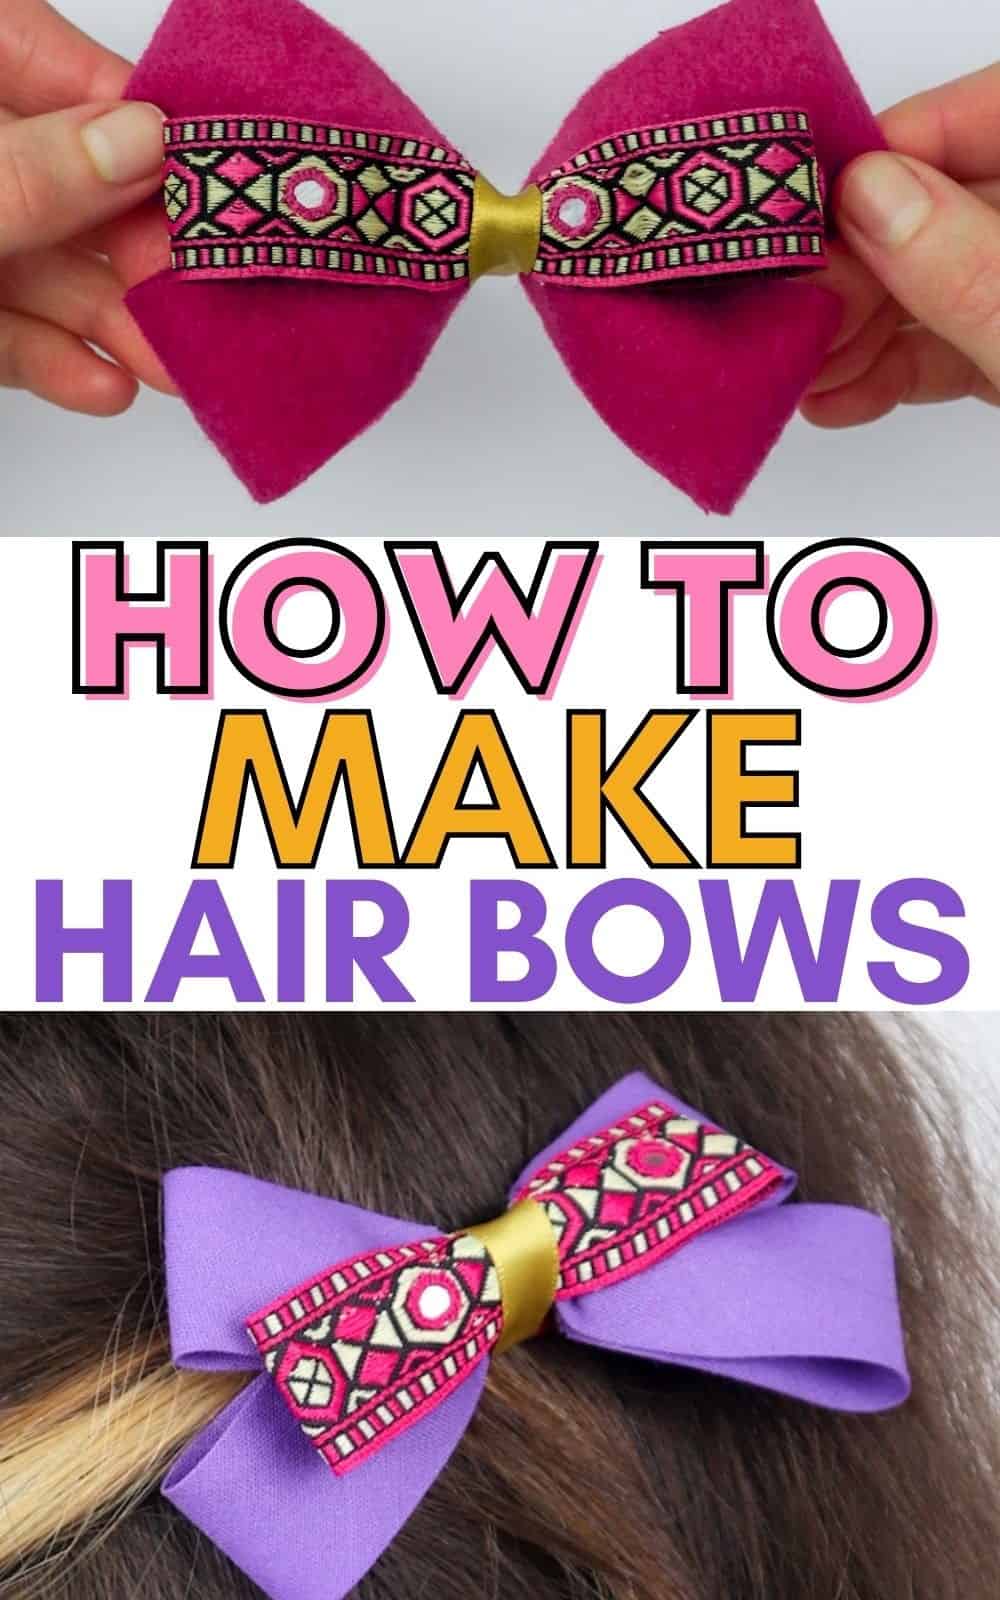
Elevate any outfit with a DIY accessory that’s uniquely yours – create your very own hair bows! This fun and easy project is perfect for teens and adults alike.
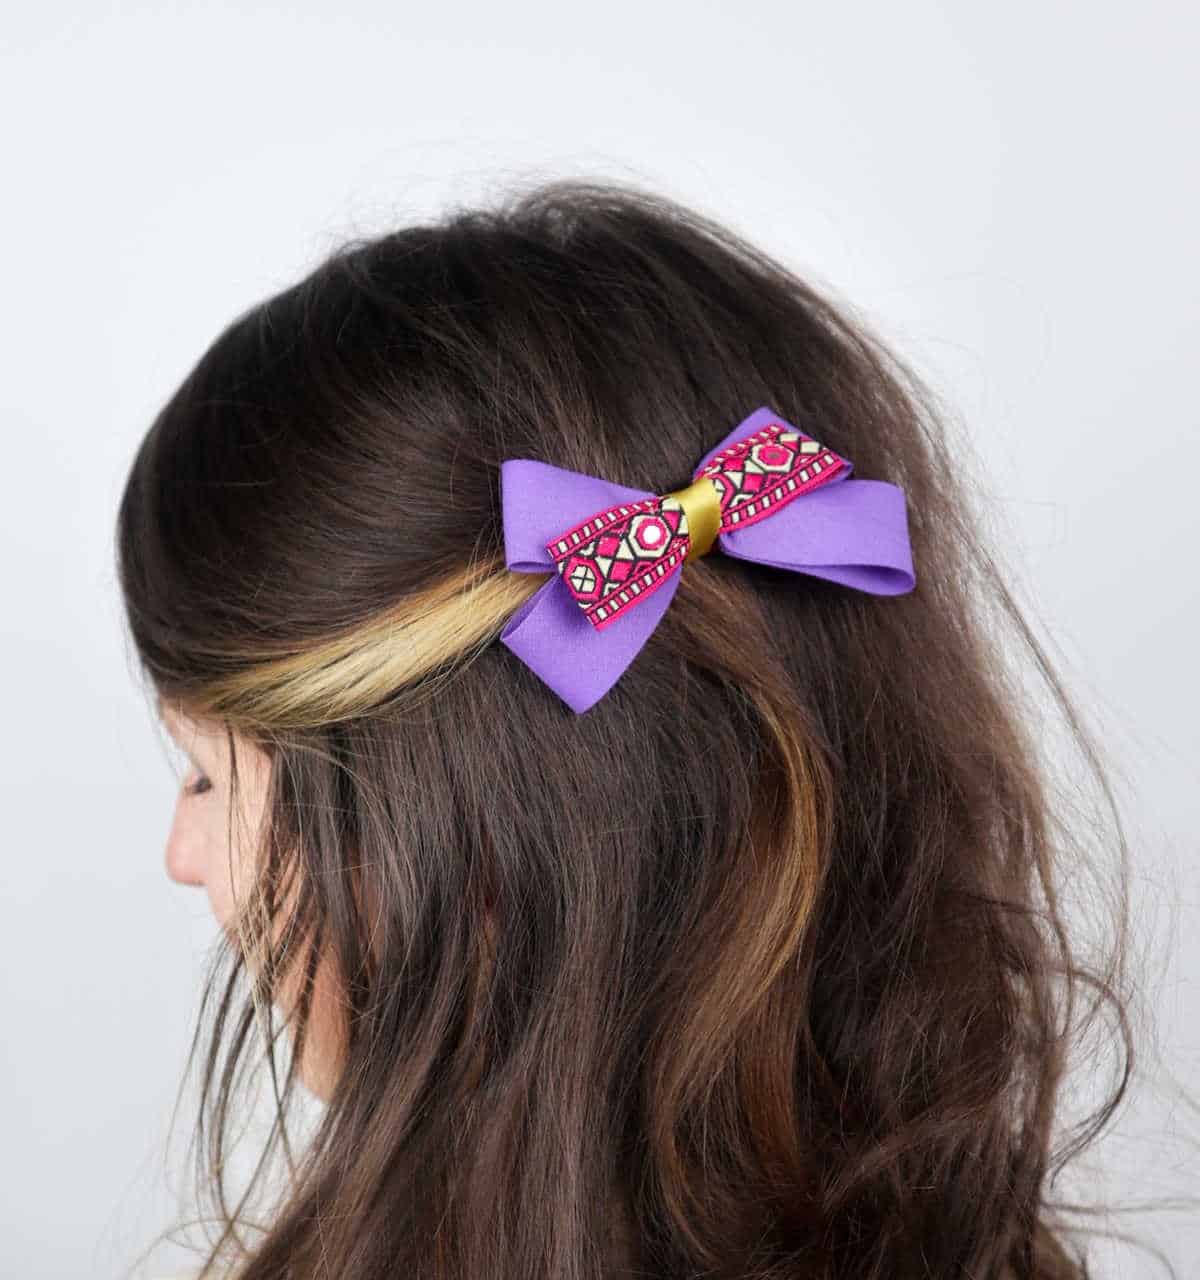
You’ve got the perfect ensemble going, with shoes, accessories, and makeup all on point. But what really takes it to the next level? A stylish hair bow that adds a pop of personality!
We often find ourselves wishing we had a matching hair bow for every outfit in our wardrobe – but who has time (or money) to collect a dozen or more?! The solution is simpler than you think: make your own hair bows at home! With this step-by-step guide, you’ll be whipping up a batch of gorgeous bows in no time.
What You’ll Need for Hair Bows
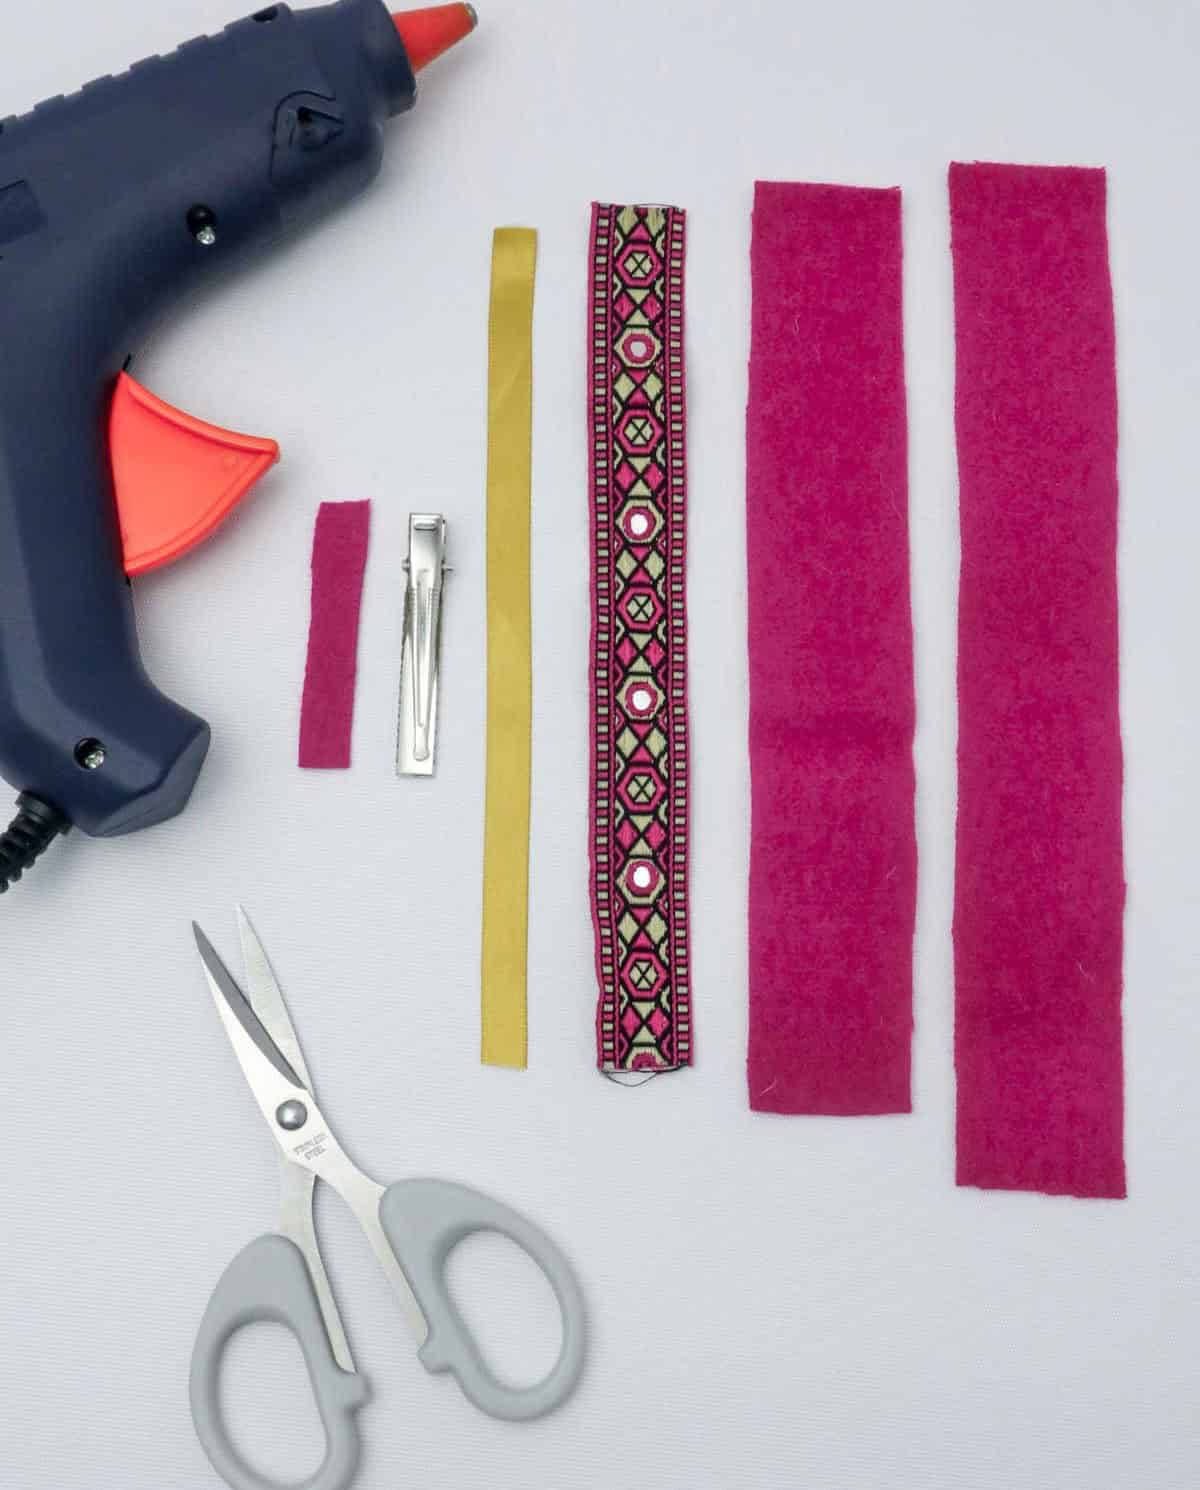
To create your own DIY hair bow, you’ll need a few simple materials. First, gather two felt strips measuring 8.2 inches by 1.6 inches – these can be replaced with textiles or ribbons if preferred. Additionally, you’ll require a longer wide ribbon, approximately 7 inches in length, as well as a narrower ribbon for contrast. A crocodile hair clip will serve as the base of your bow, and a small piece of felt will come into play during the assembly process.
To secure everything together, hot glue will be used, along with some scissors to trim any excess material.
How to Make Hair Bows
When it comes to crafting hair bows, the quality of the material you use can greatly impact their longevity. Instead of buying new materials, consider repurposing scraps you already have lying around. You might be surprised by just how much usable fabric is collecting dust in your stash. As a matter of fact, why not take this opportunity to explore some creative ways to reuse and recycle your scrap fabric?
There are countless DIY projects out there that can help you breathe new life into your old materials. With a little creativity, you might just find yourself with a fresh supply of inspiration for future crafting endeavors. And, of course, let’s get started on making those hair bows – the perfect way to put your newfound skills to the test.
Step 1
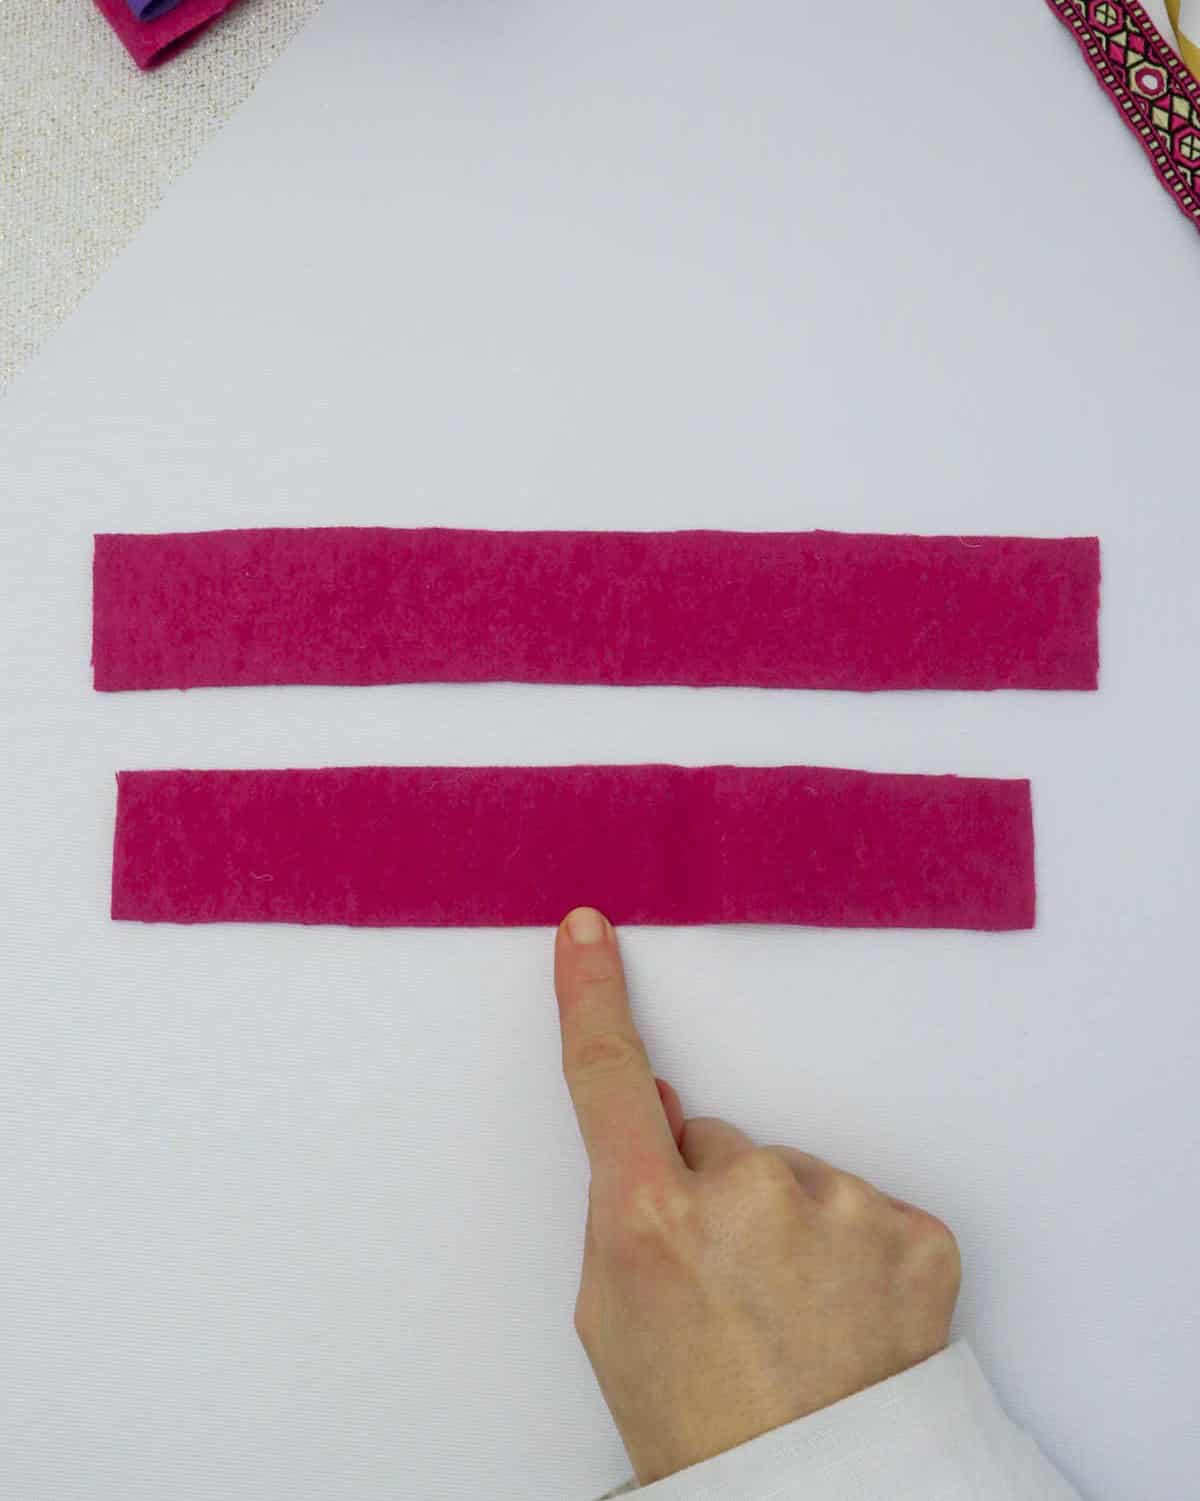
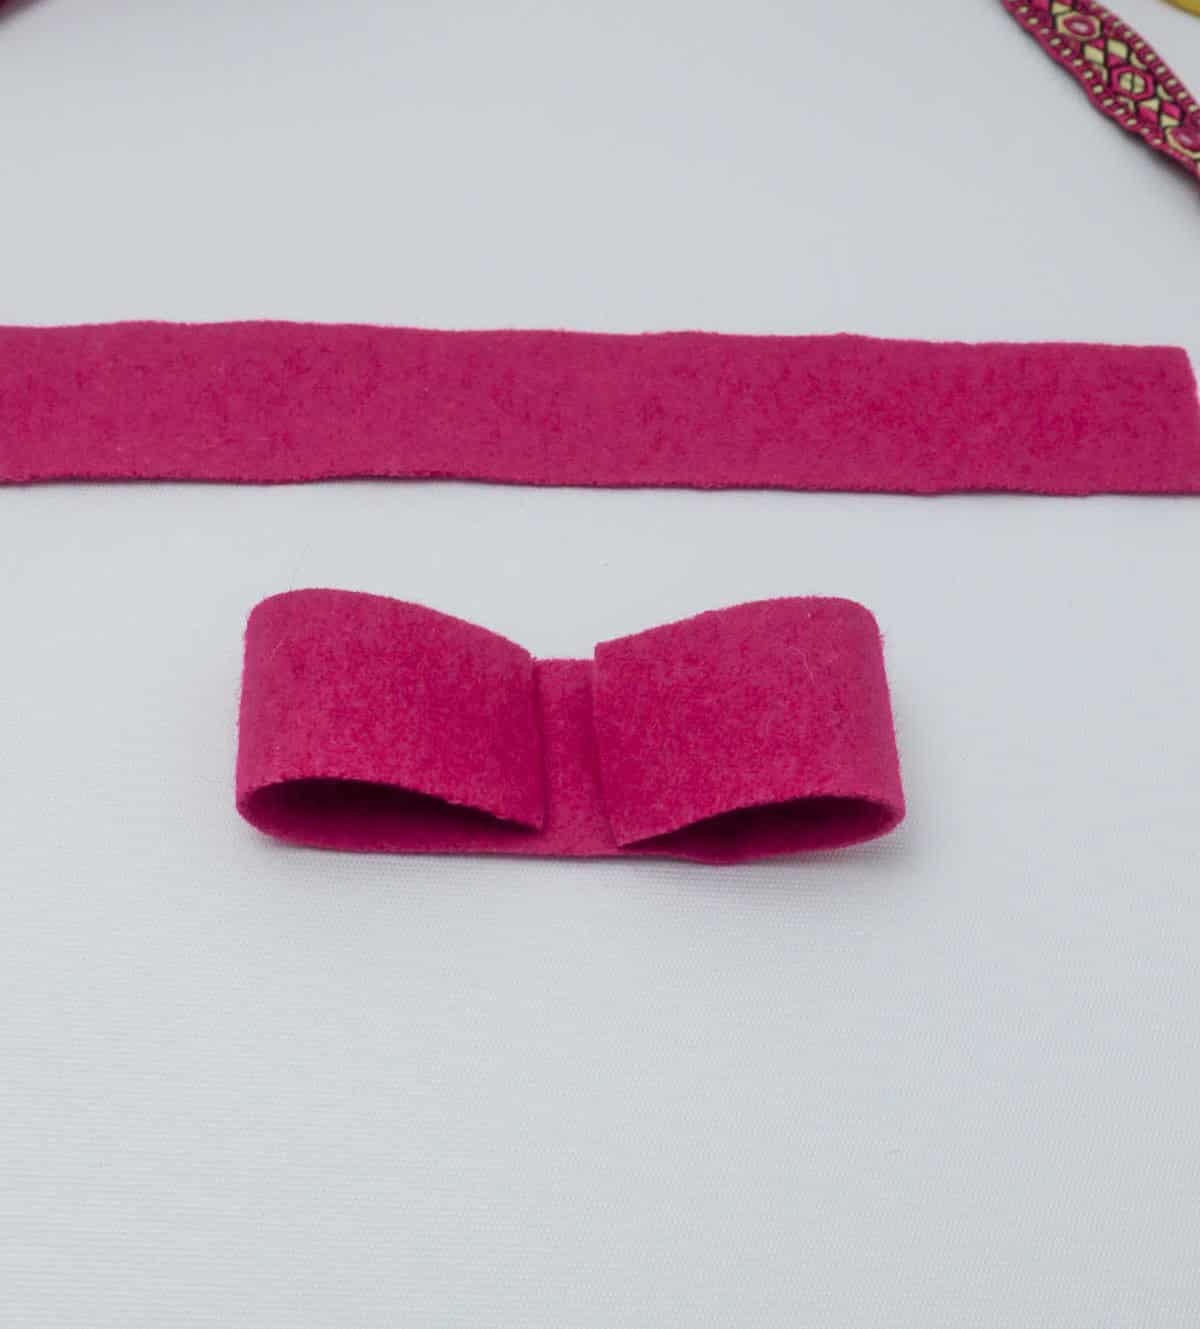
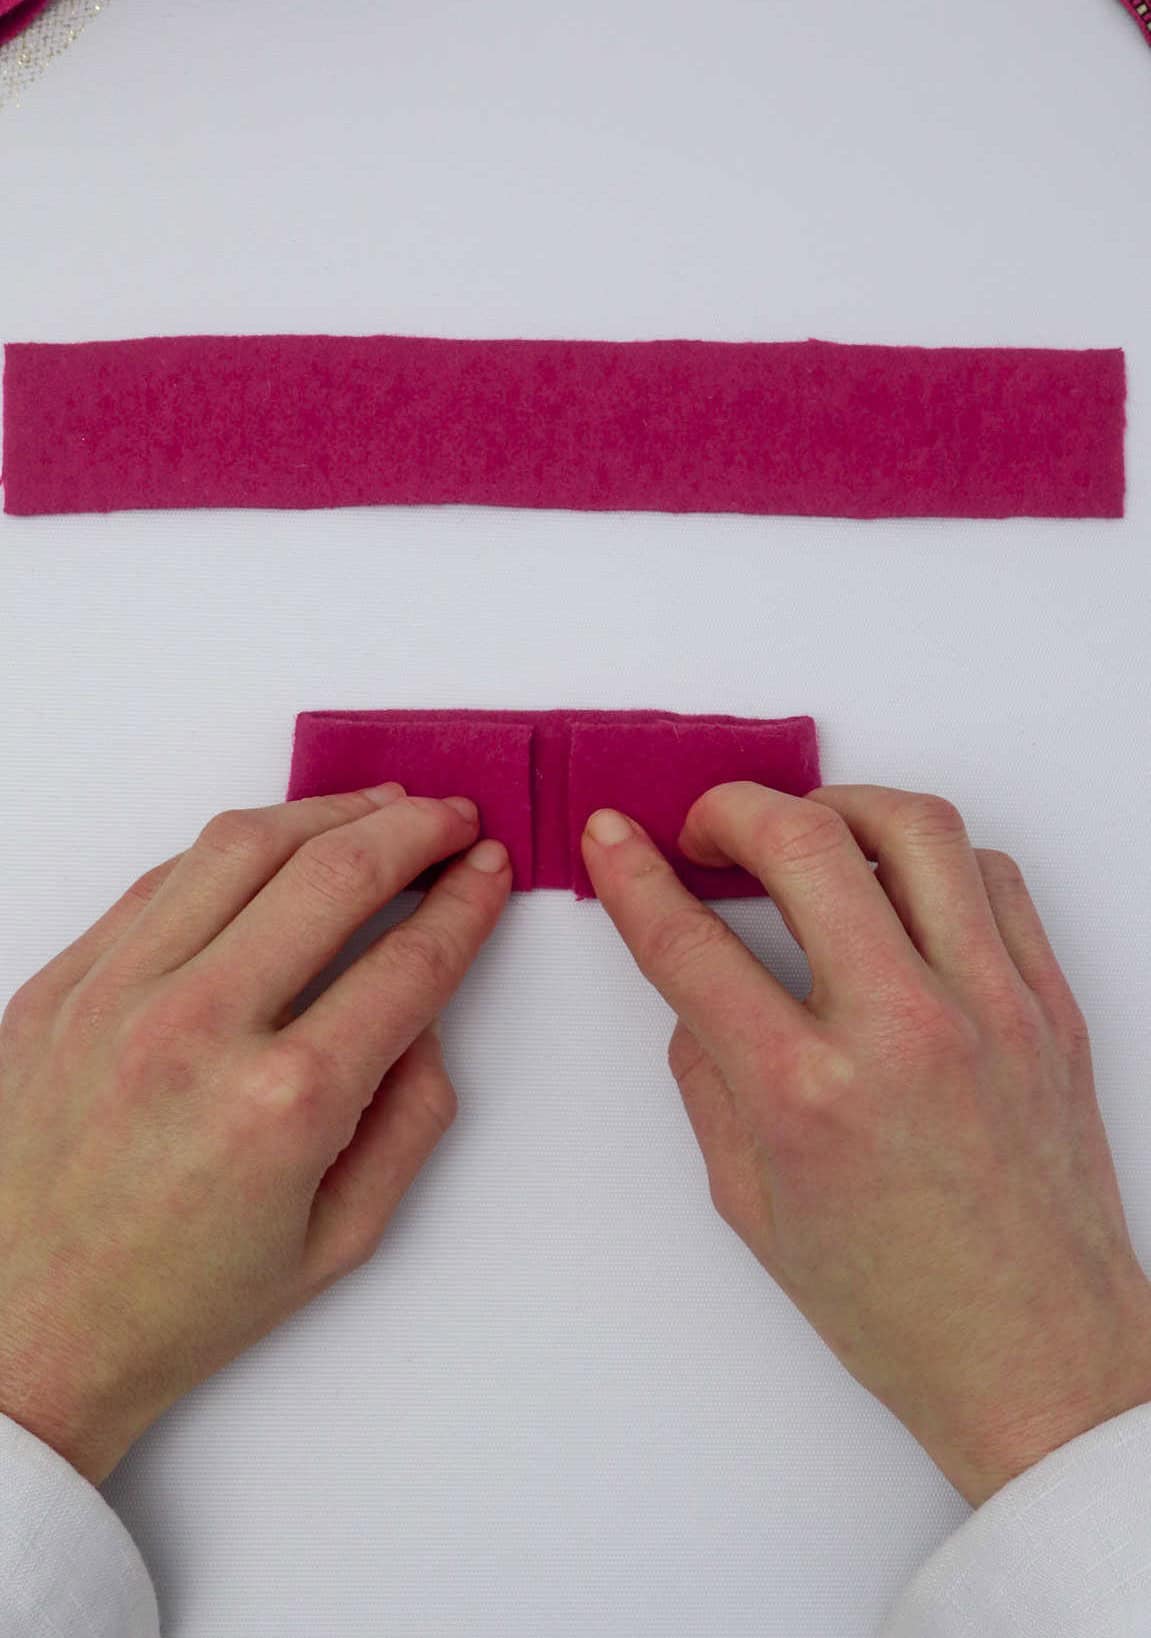
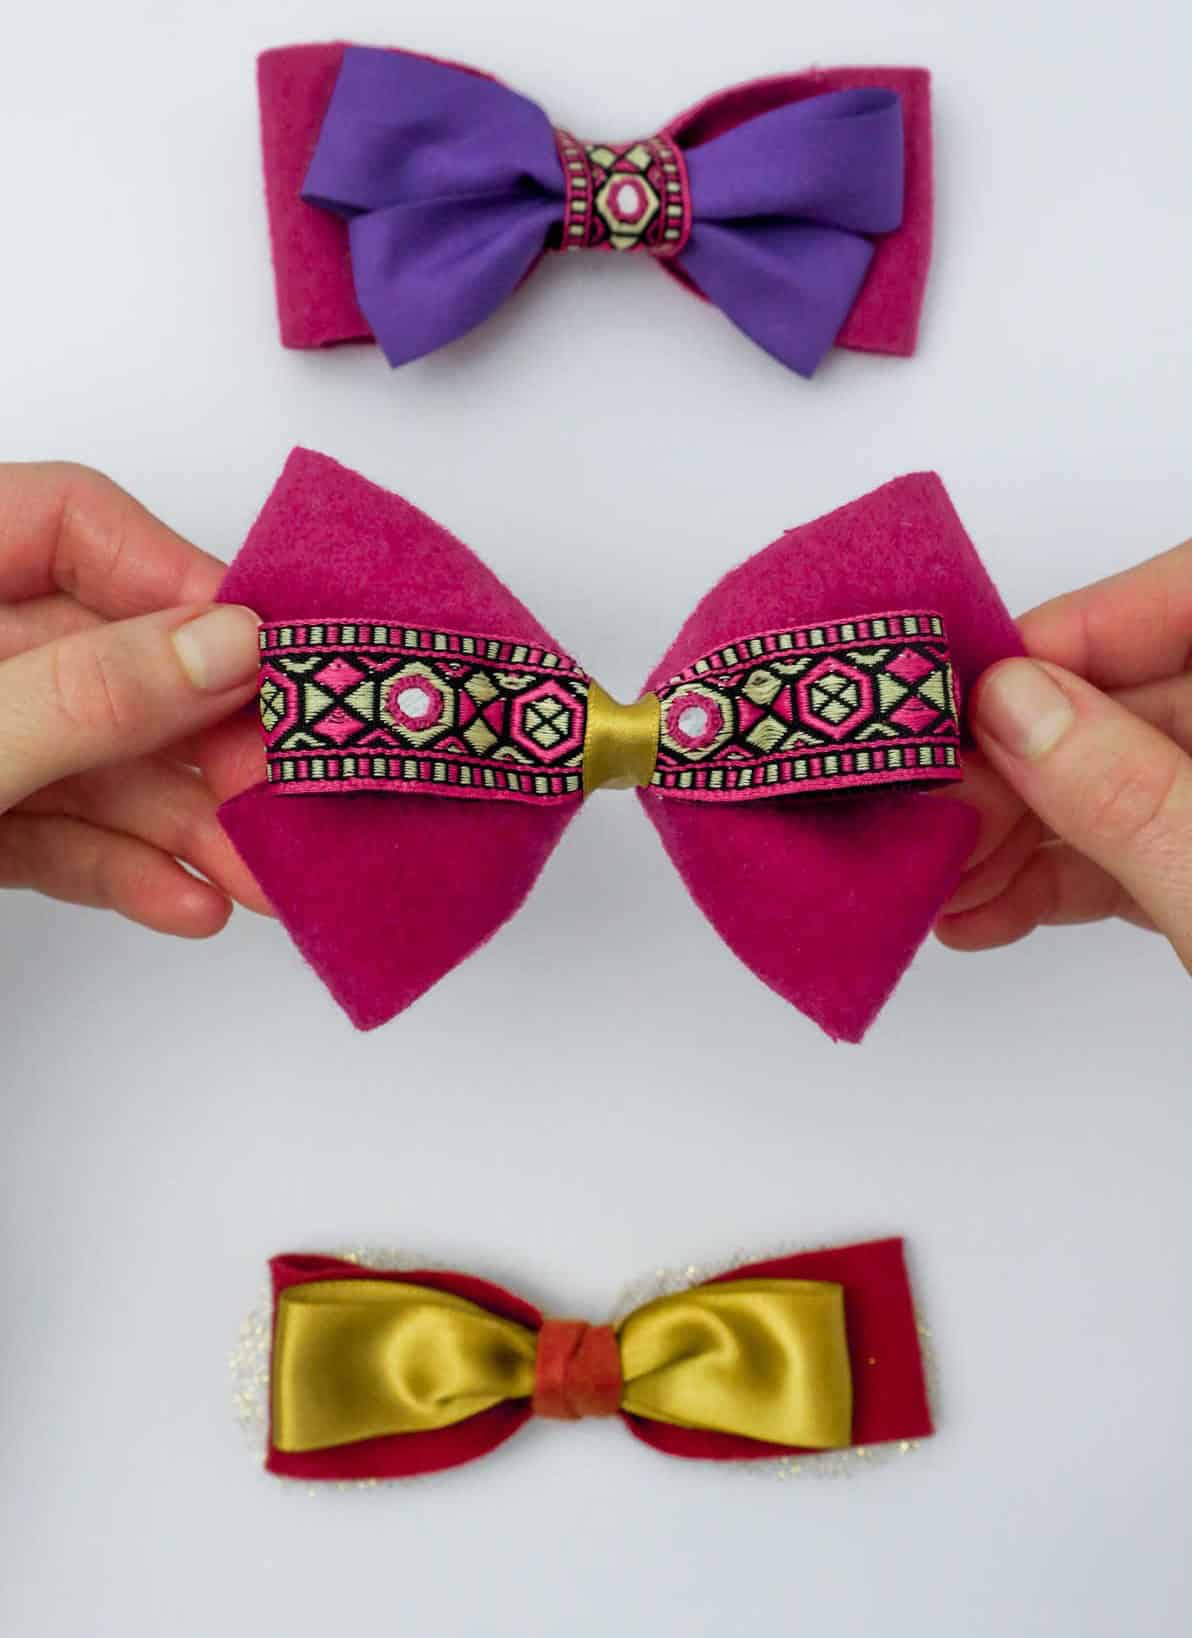
Begin by positioning the two pieces of felt scraps parallel to each other on a flat surface, as illustrated. Next, grasp both ends of the felt strips and gently tug them inward, towards the center, allowing the edges to meet.
Step 2
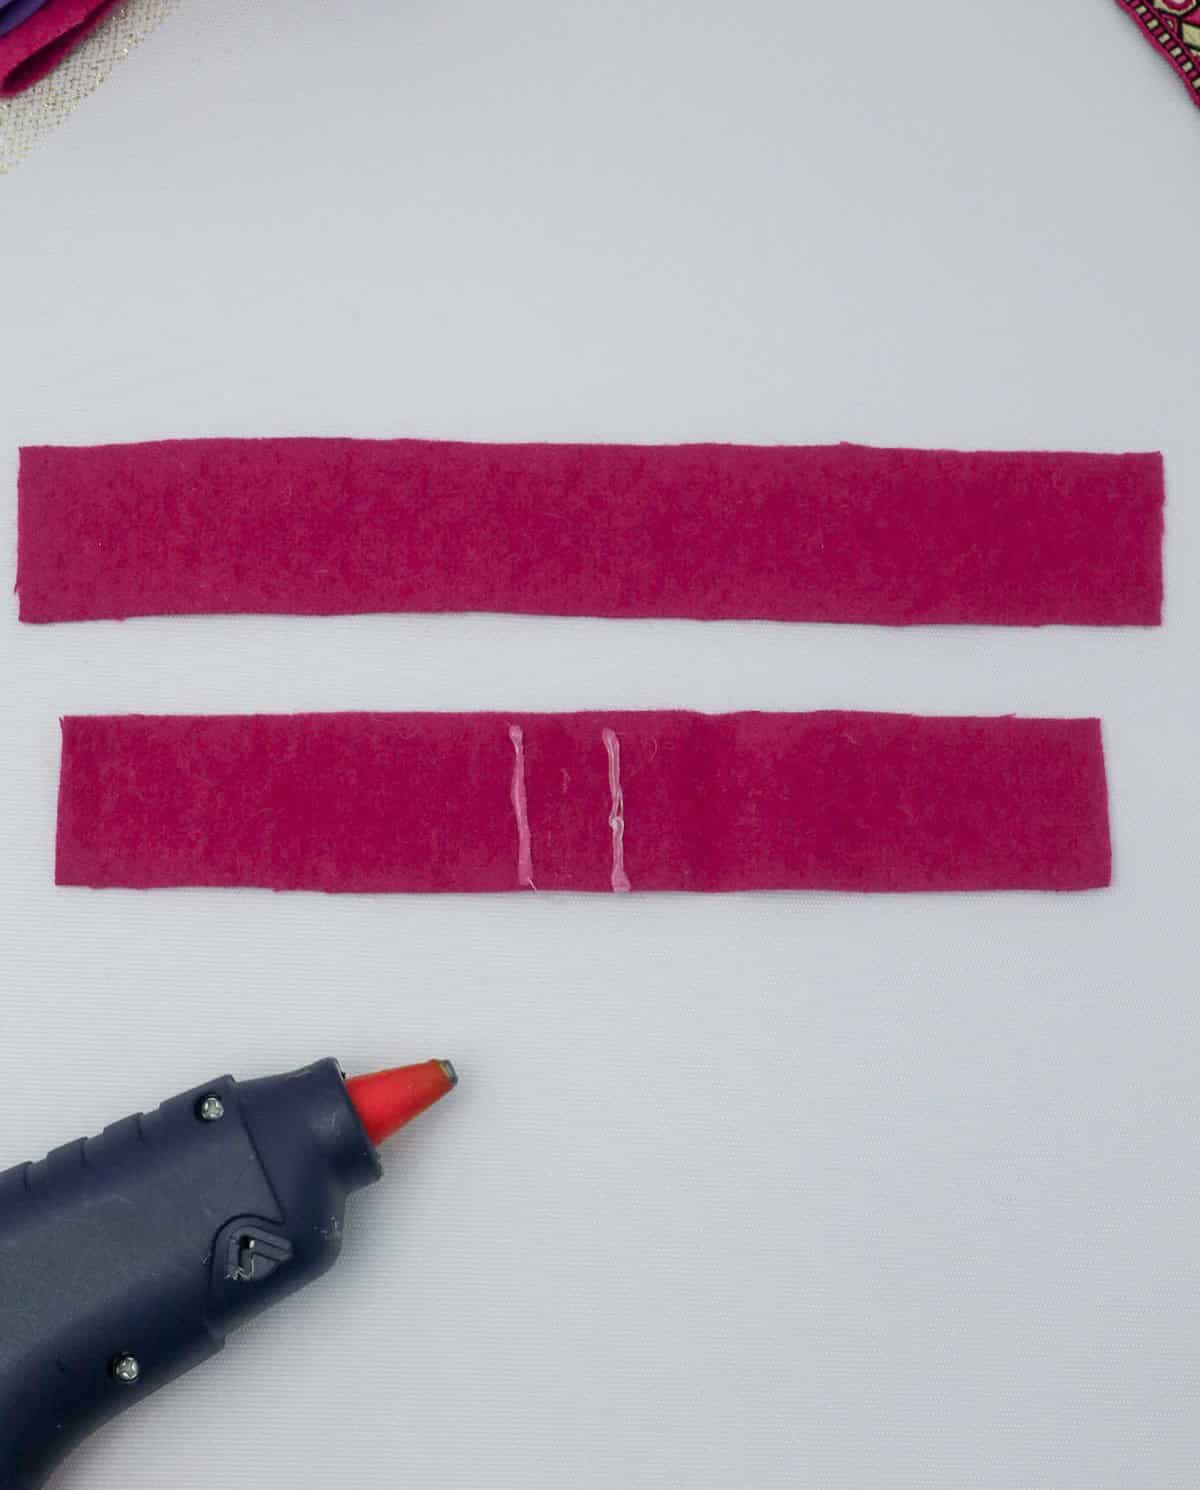
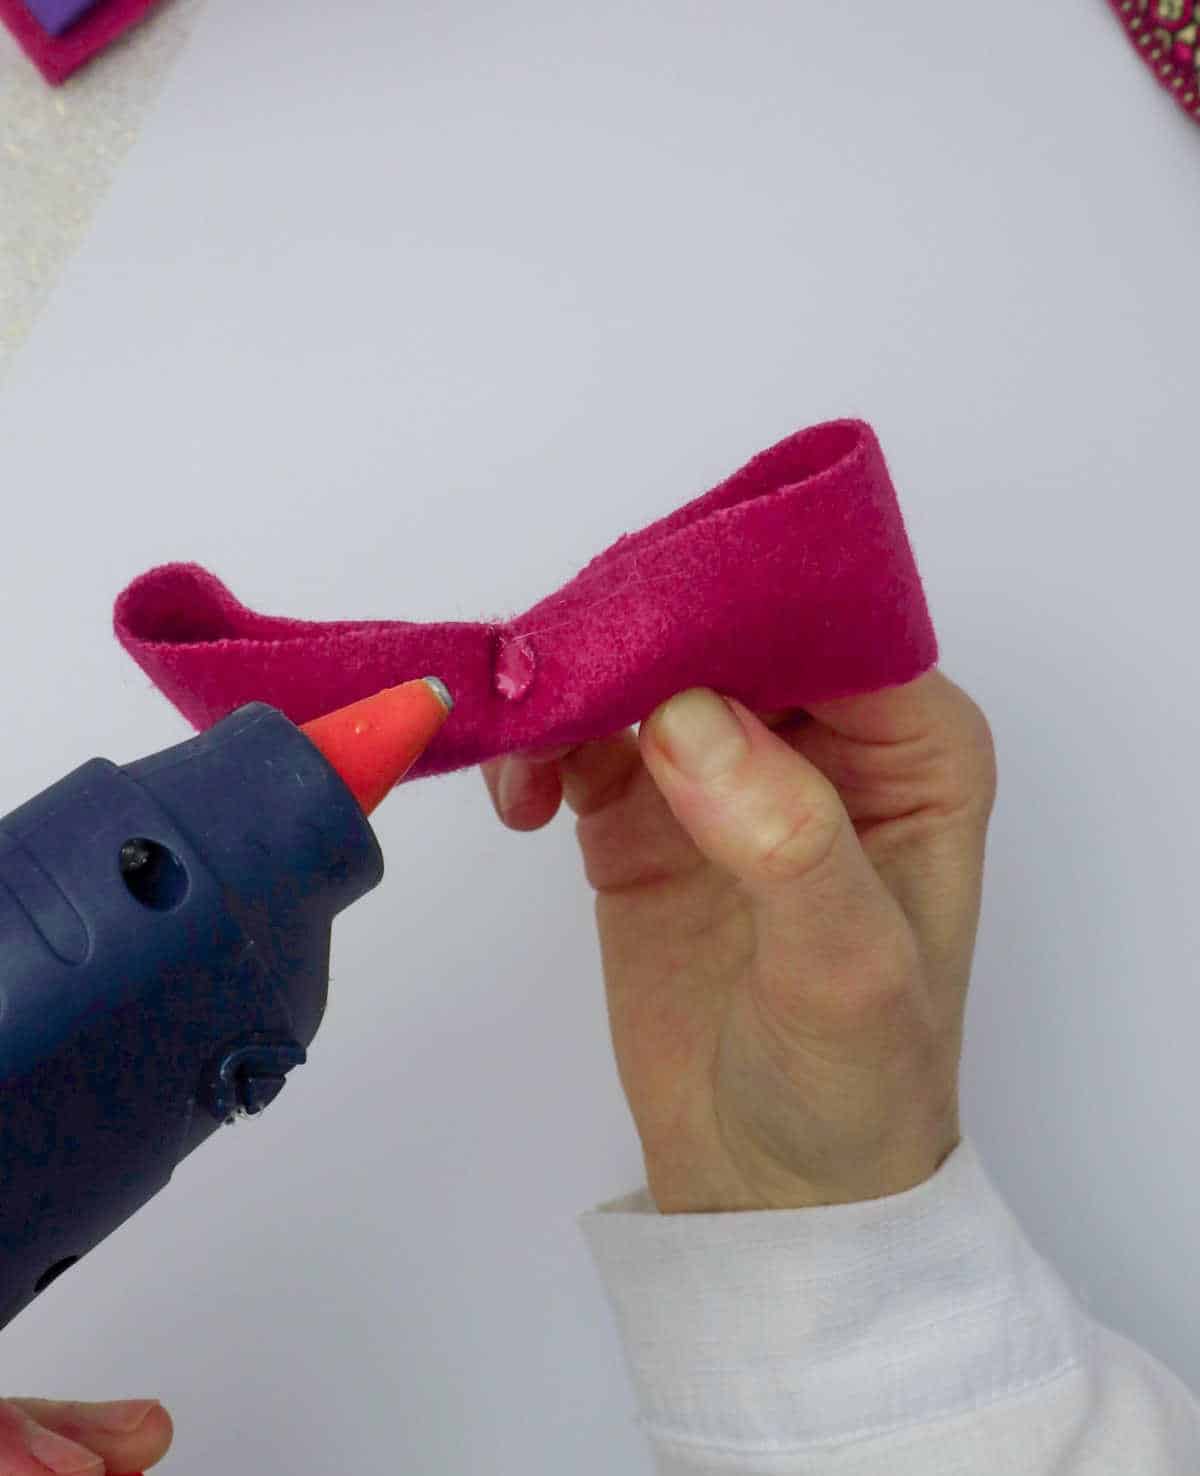
When you’ve identified the areas requiring attention, start by applying a small amount of adhesive to the affected region. Gently but firmly press the ends into position, taking care not to inadvertently smooth out the curvature of the bow. It’s crucial to maintain the natural shape of the bow to ensure a professional-looking finish.
Step 3

As you repeat the process for the second strip of fabric, take a moment to admire the shape taking form – two bows with a beautifully curved arch where the fold was made. This subtle detail will give your finished hair bows an extra boost, adding depth and dimension when worn.
Step 4
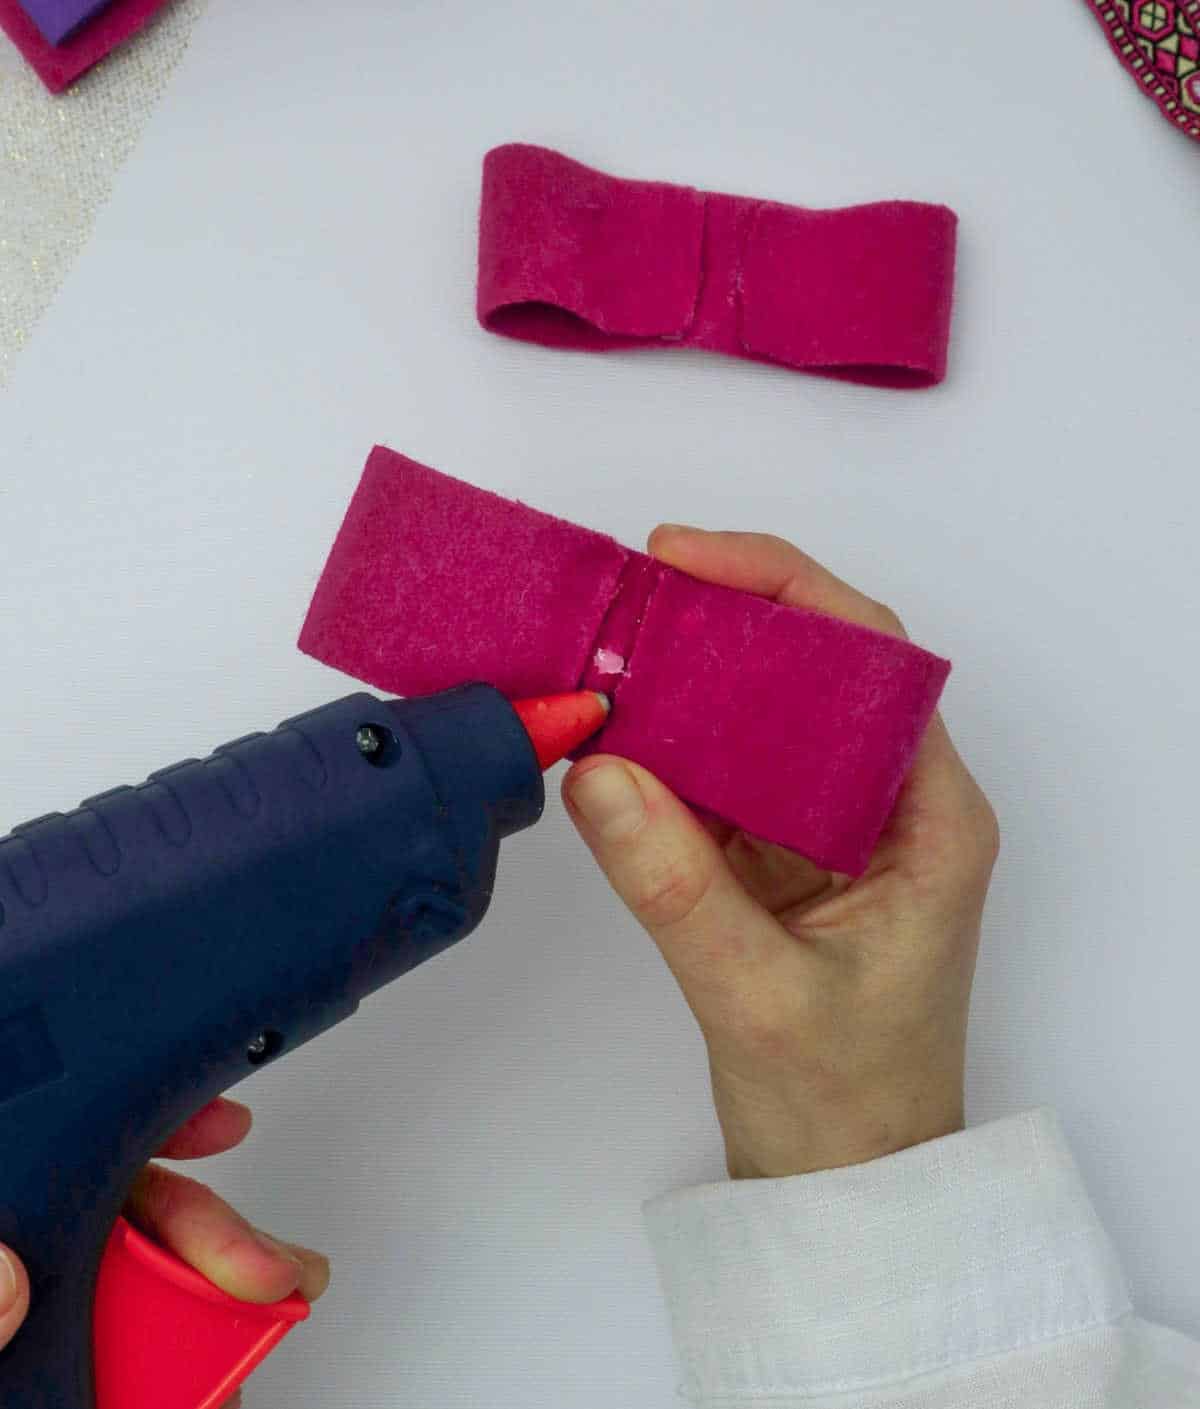
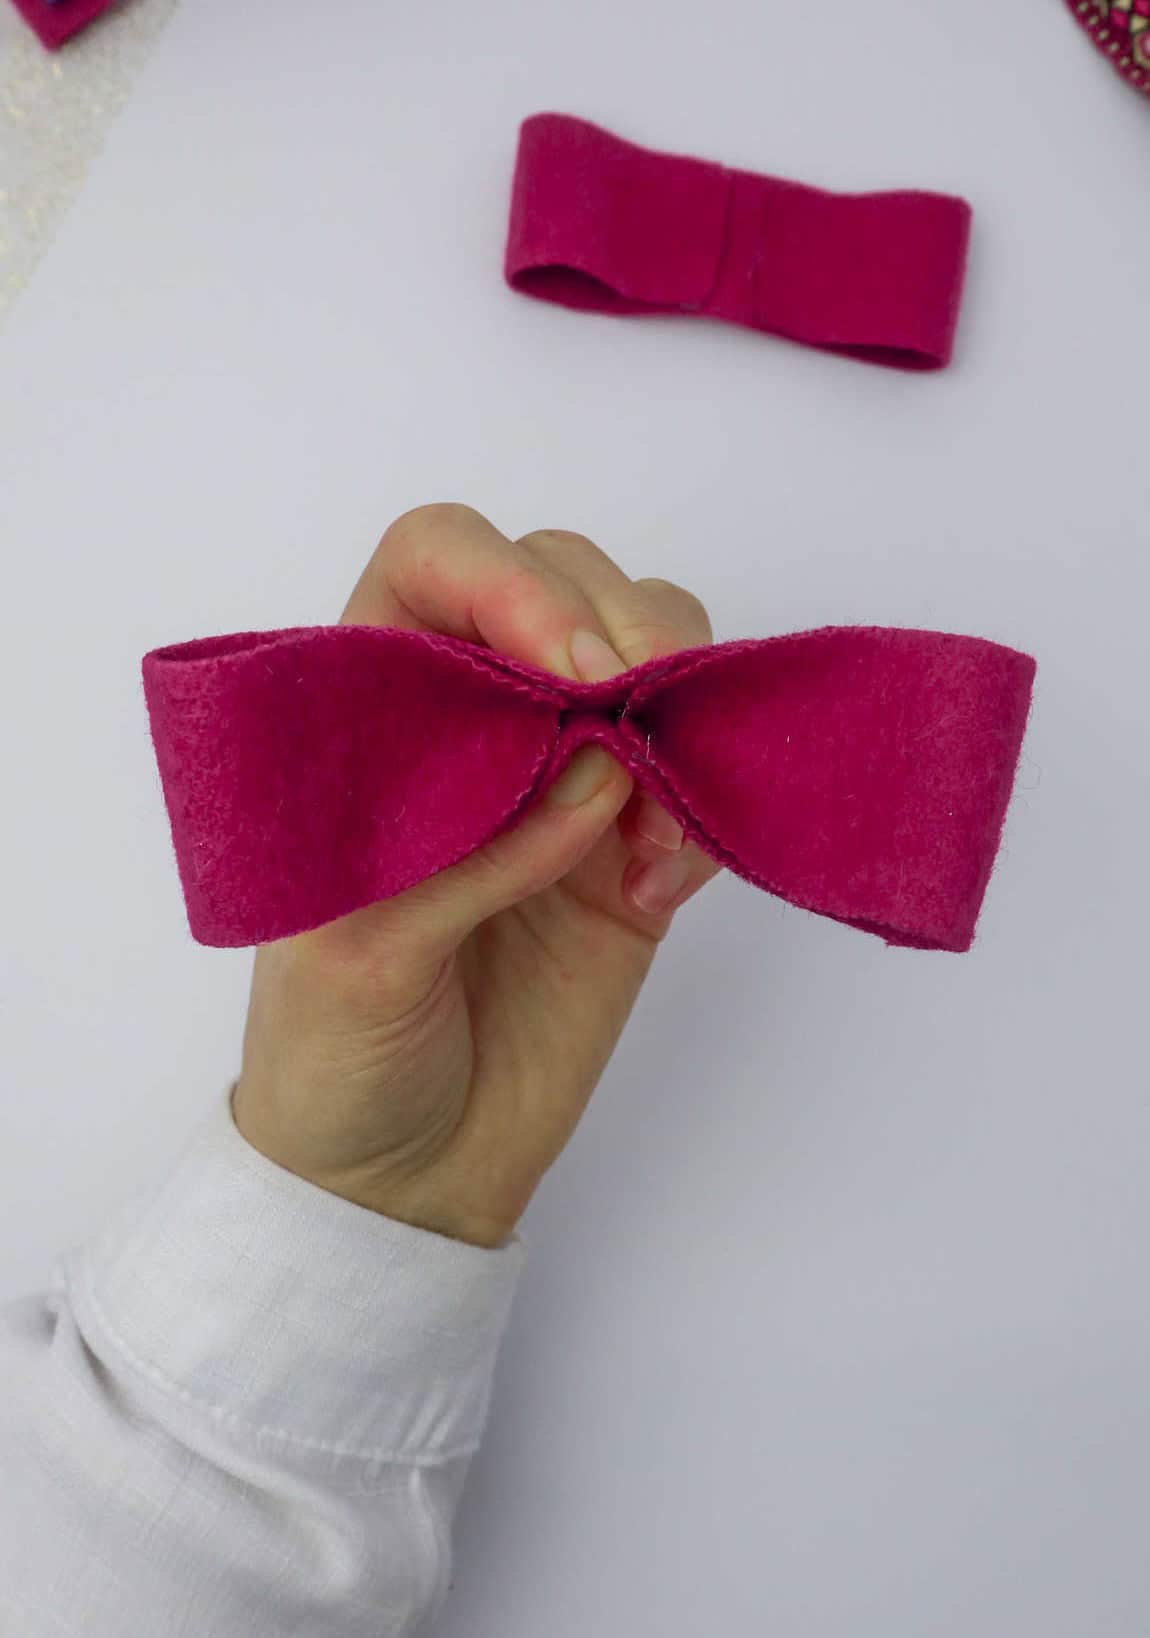

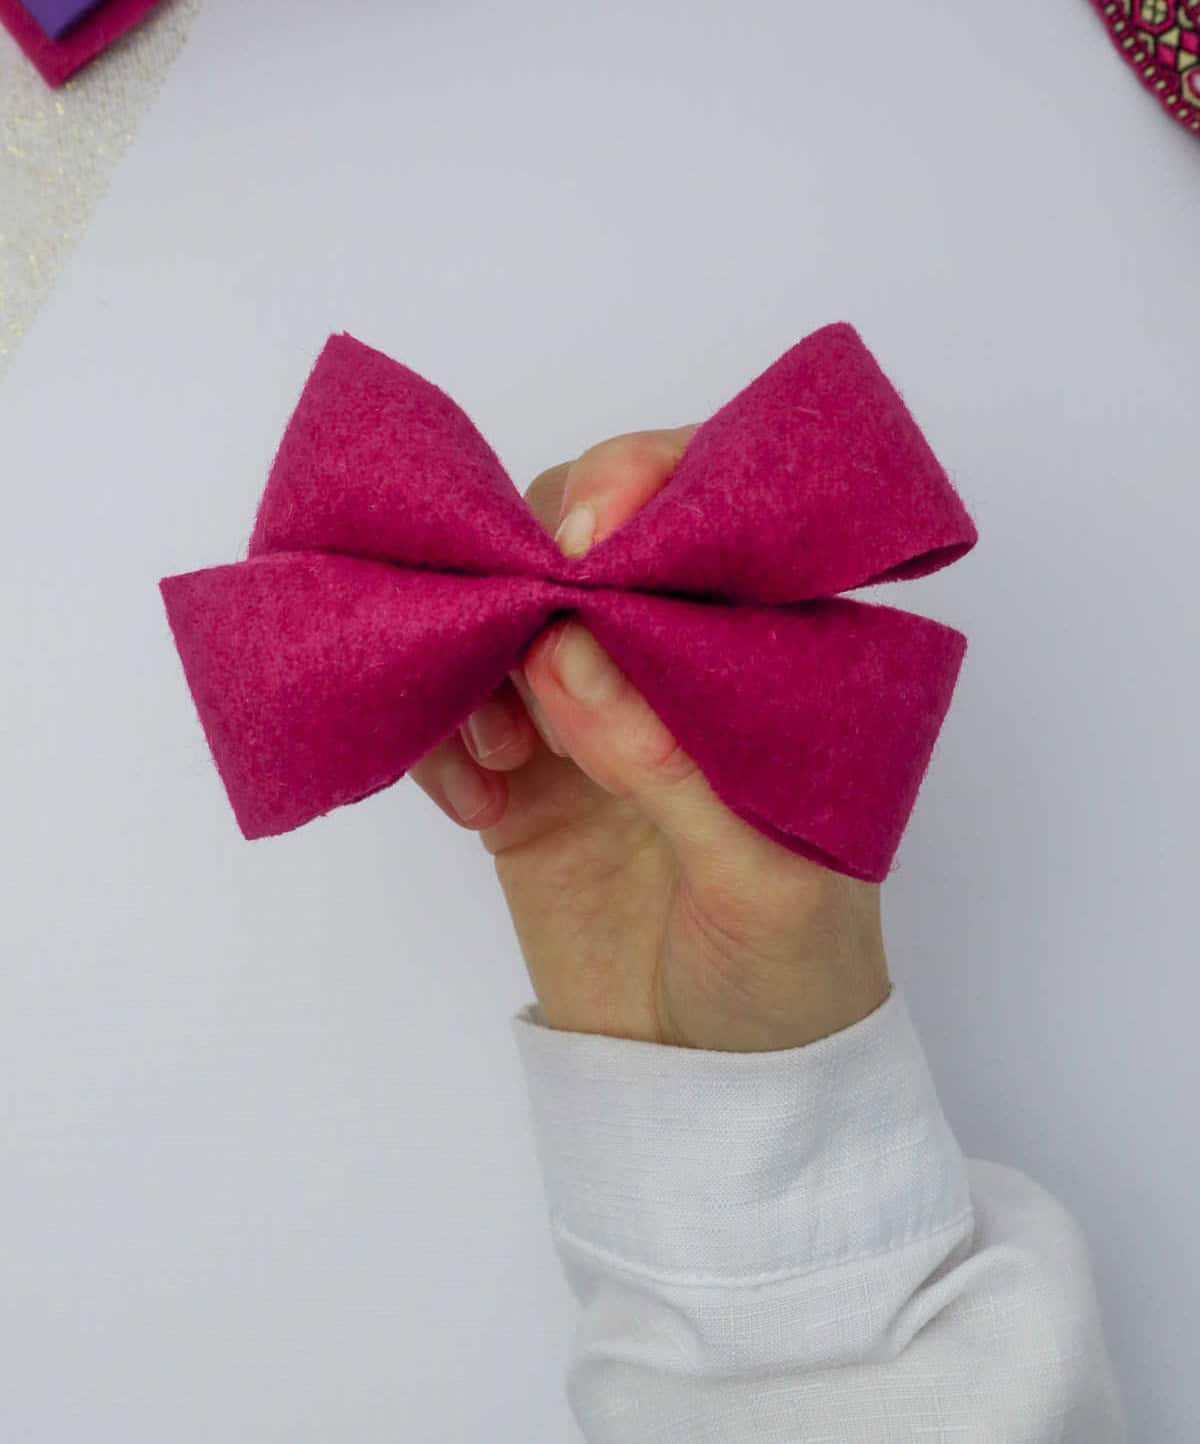
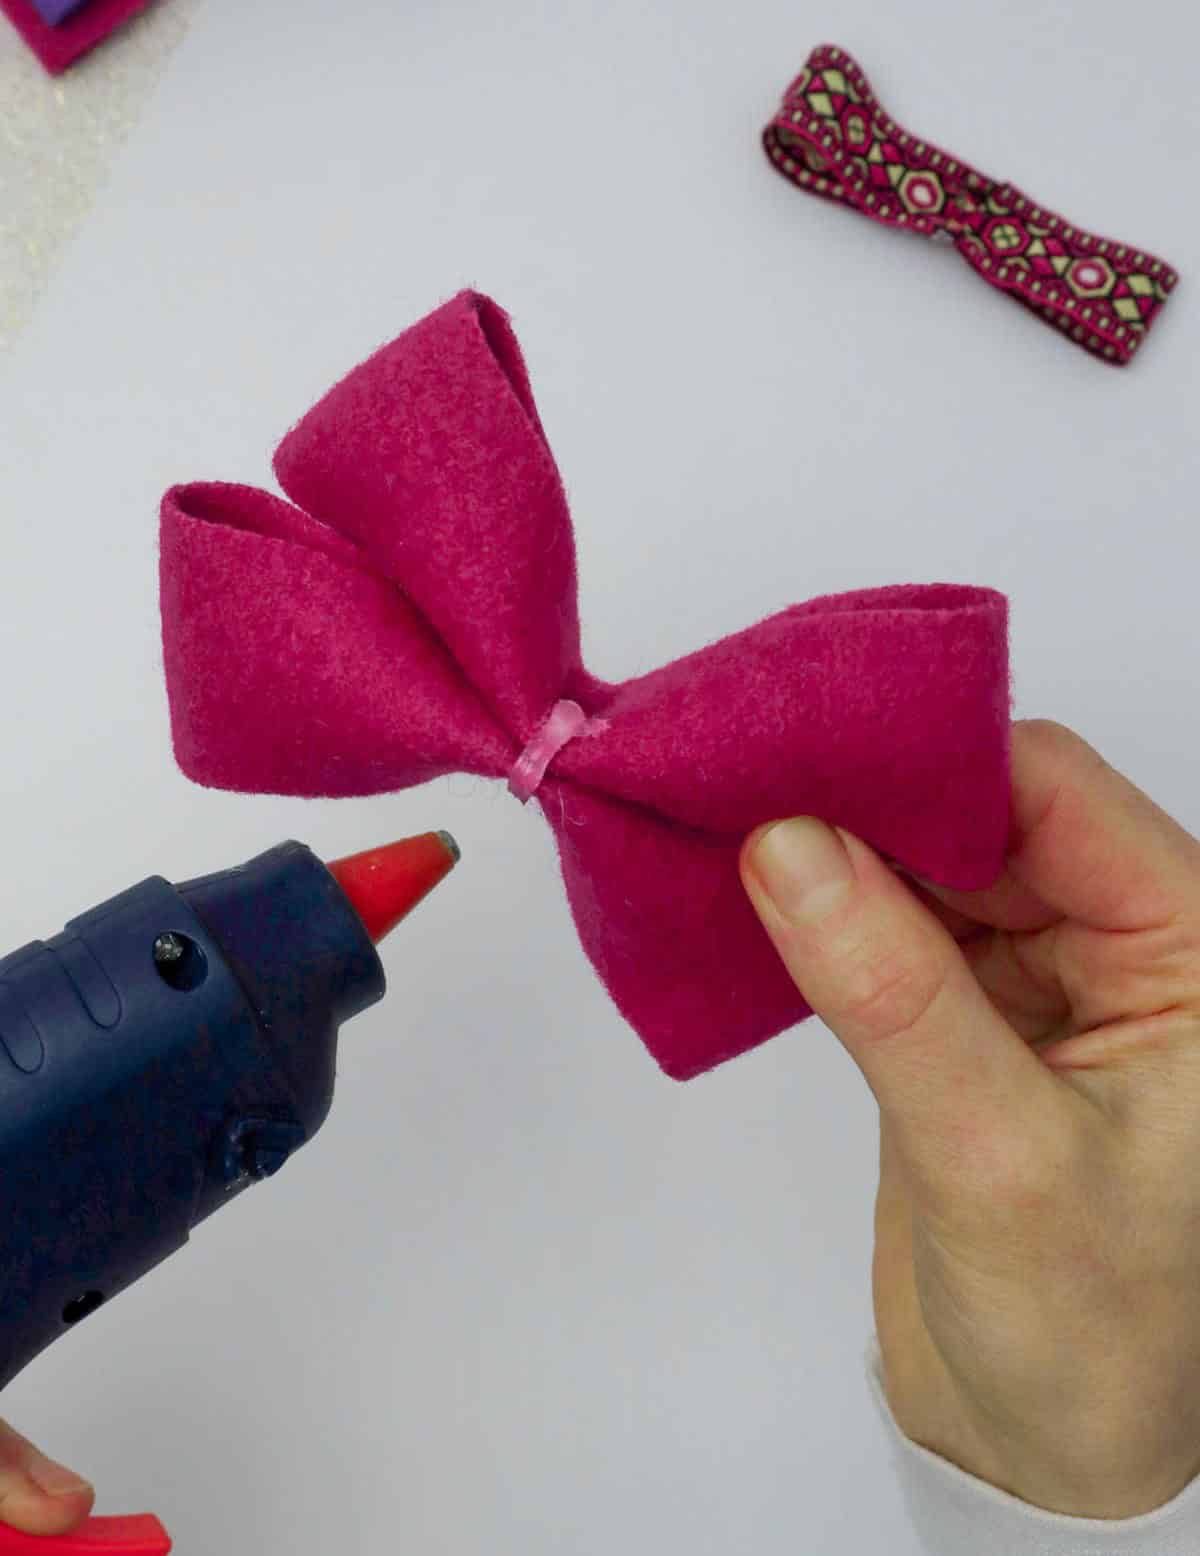
To create the bow-like shape, begin by applying a small amount of glue to the center of each component. Next, use your fingers or a tool to gently pinch the middle section inward, creating a slight indentation. As you work on both components, you’ll start to see the bow take shape. Simply repeat this process with each piece, ensuring they’re aligned and symmetrical as possible.
Step 5
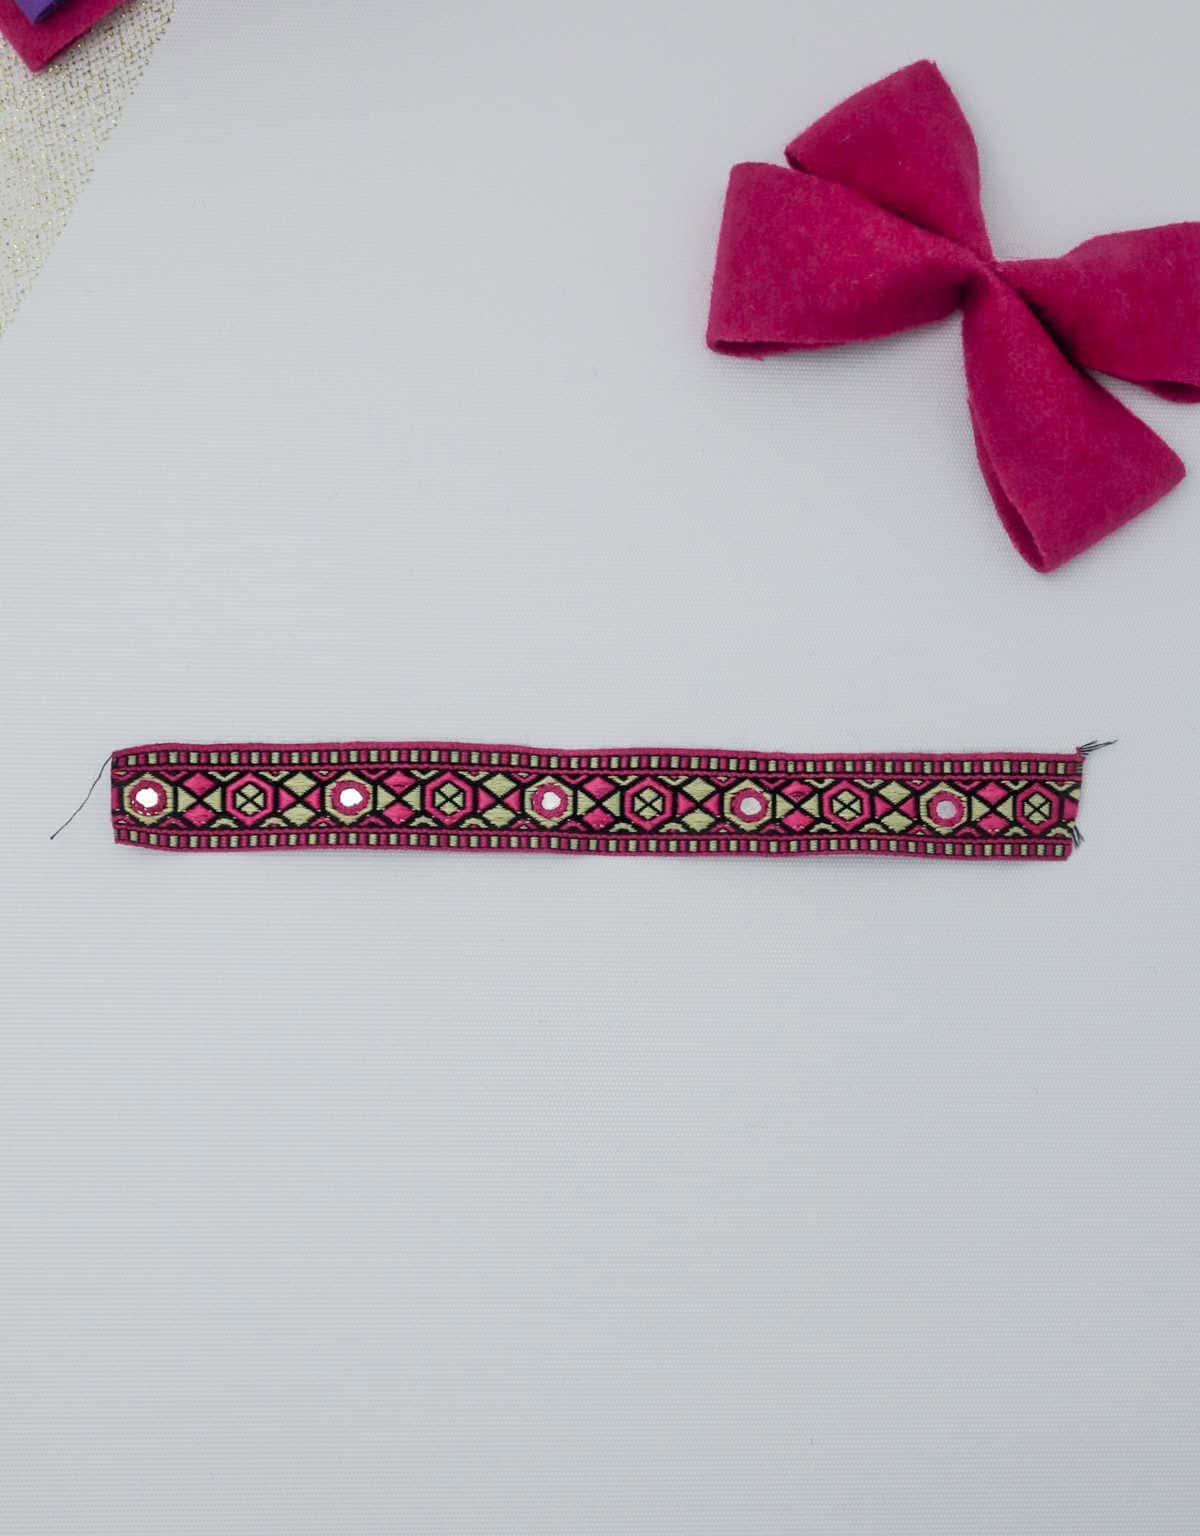
There’s a certain charm to elevating a humble hair bow to new heights. It’s an opportunity to add a touch of elegance to an otherwise understated accessory. All it takes is a small, yet striking piece of fabric, like the one pictured below. This simple addition can instantly transform your hair bow from cute to couture. So, take the first step by selecting a decorative fabric that suits your style.
Step 6
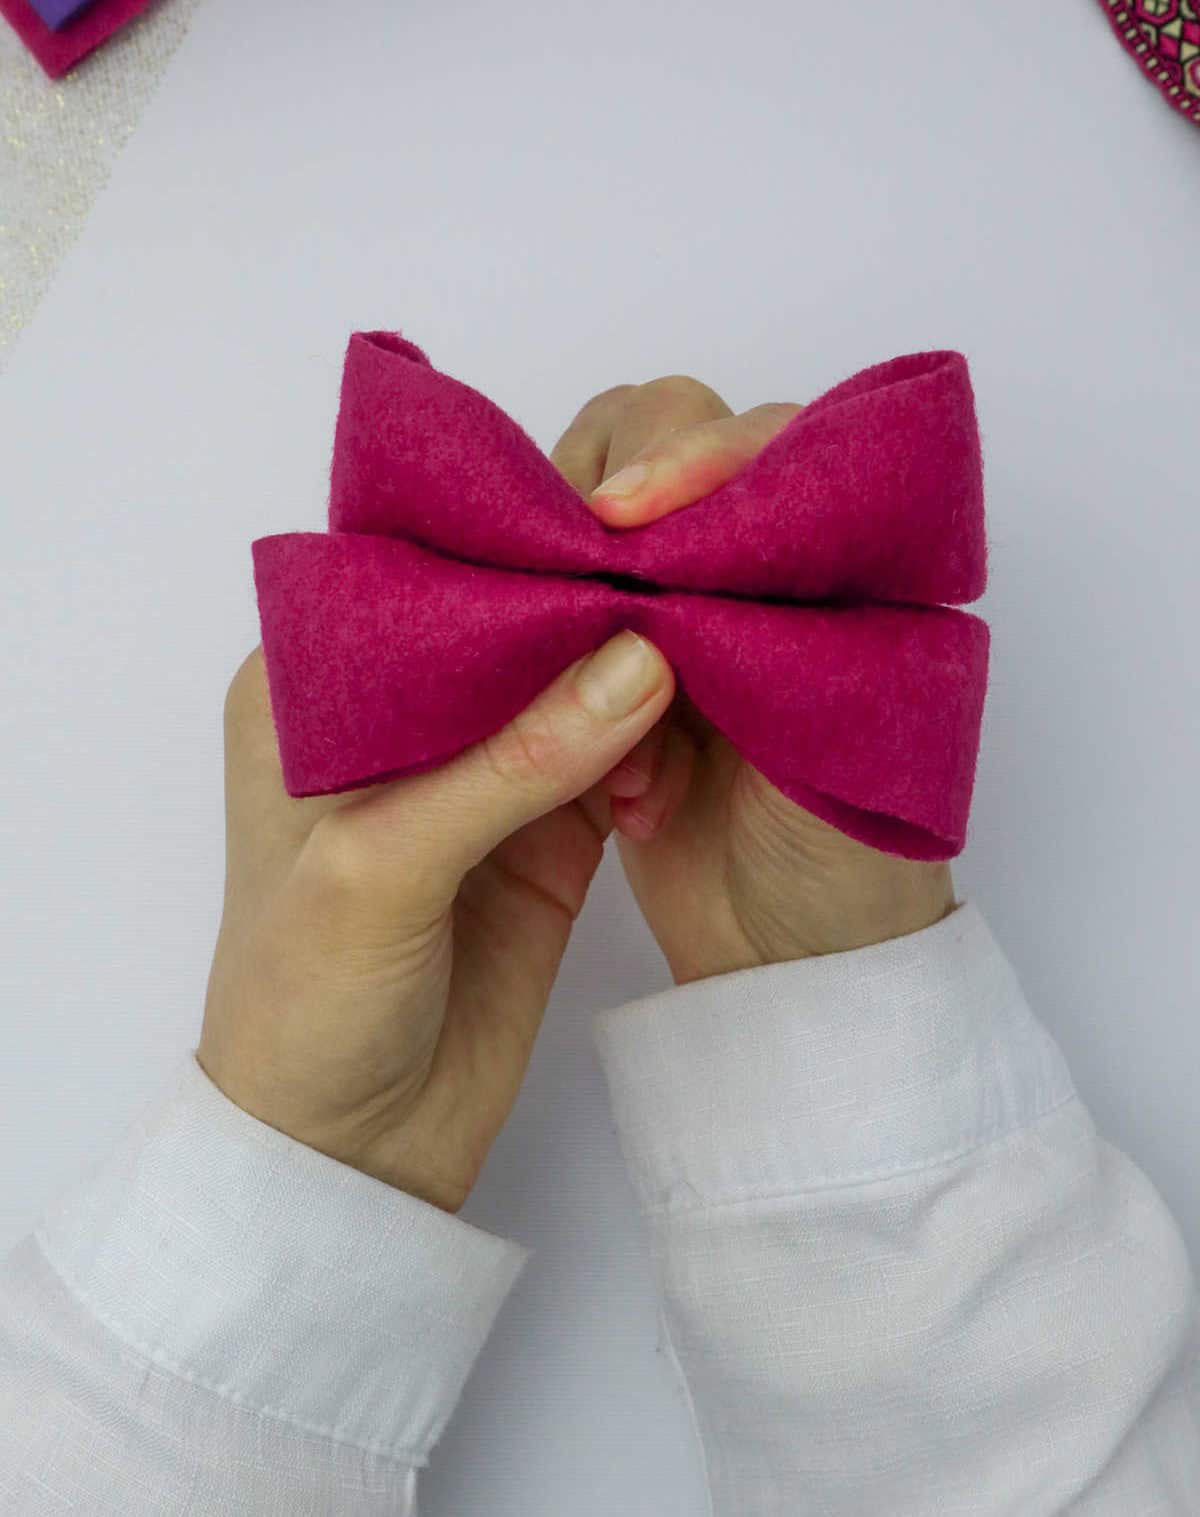
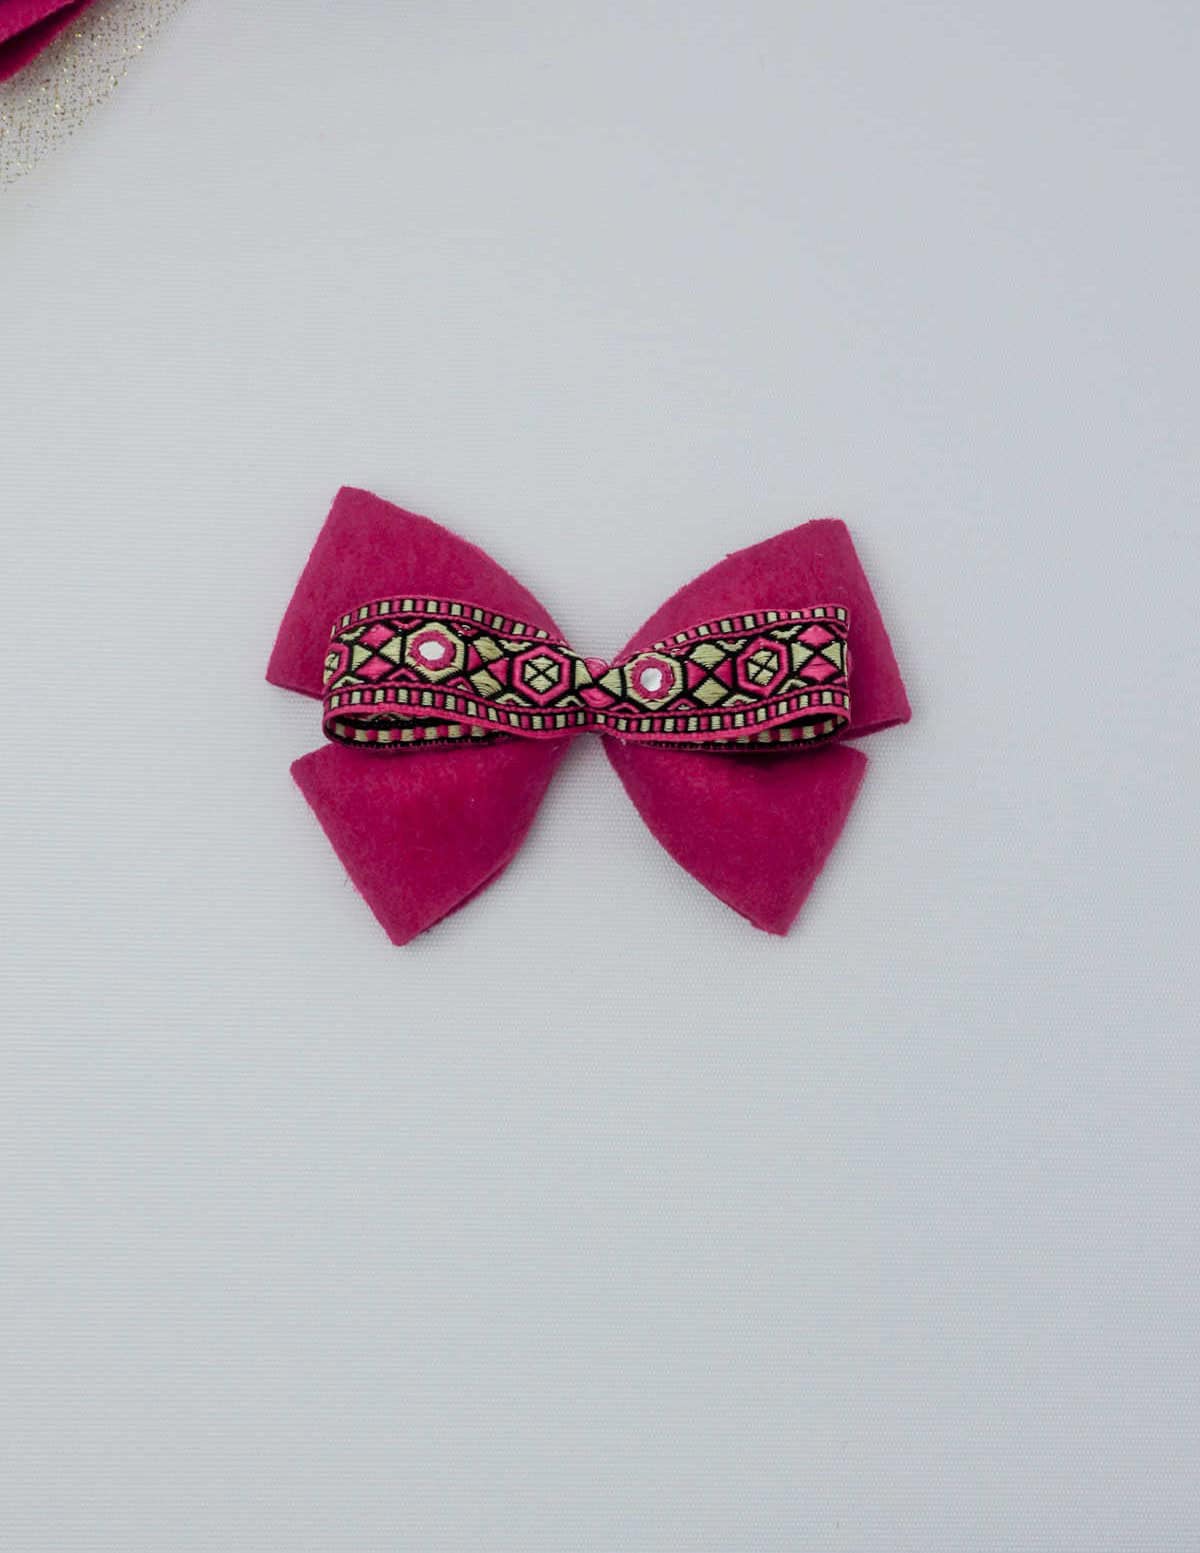
To complete the look, bring all the elements together by securing the two fabric bow components with hot glue. Hold the larger piece underneath the smaller one, as depicted below. This will create a striking, dramatic bow appearance. Simply apply a small amount of hot glue to bond the pieces together, ensuring the larger piece is positioned beneath the smaller one for an added flair.
Step 7
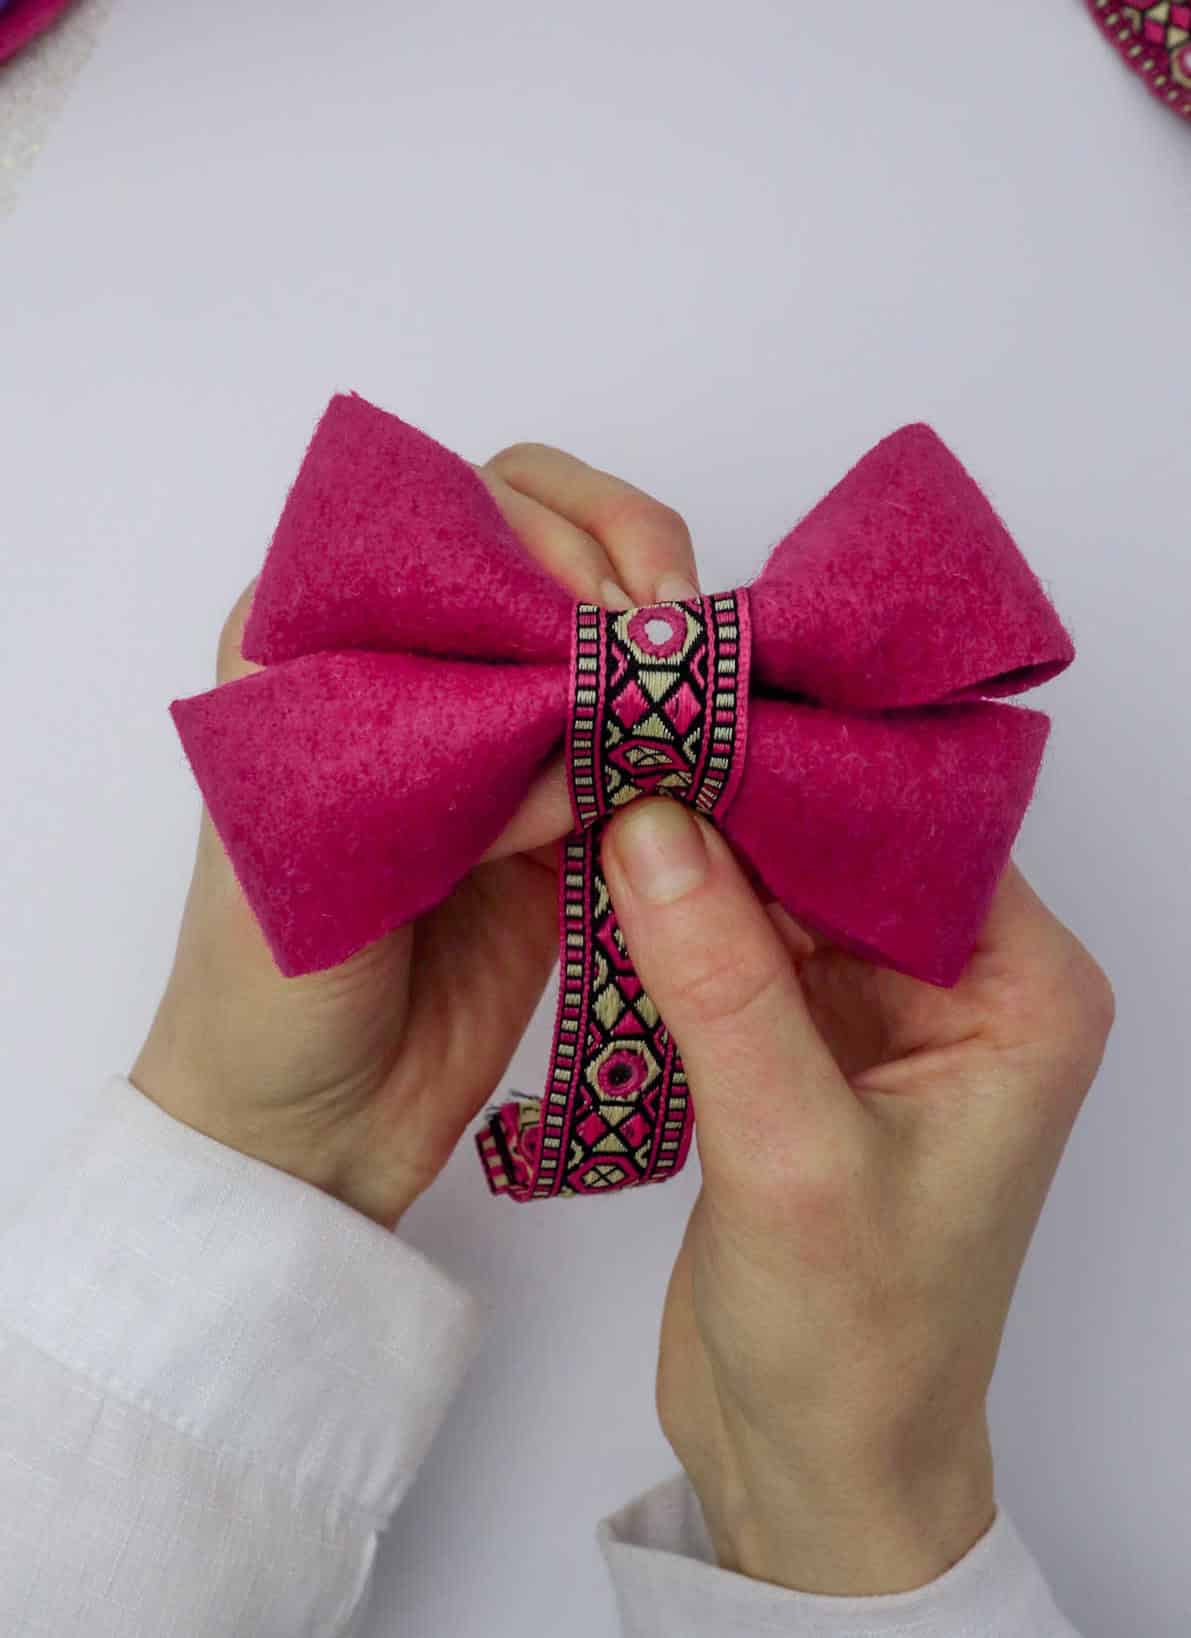
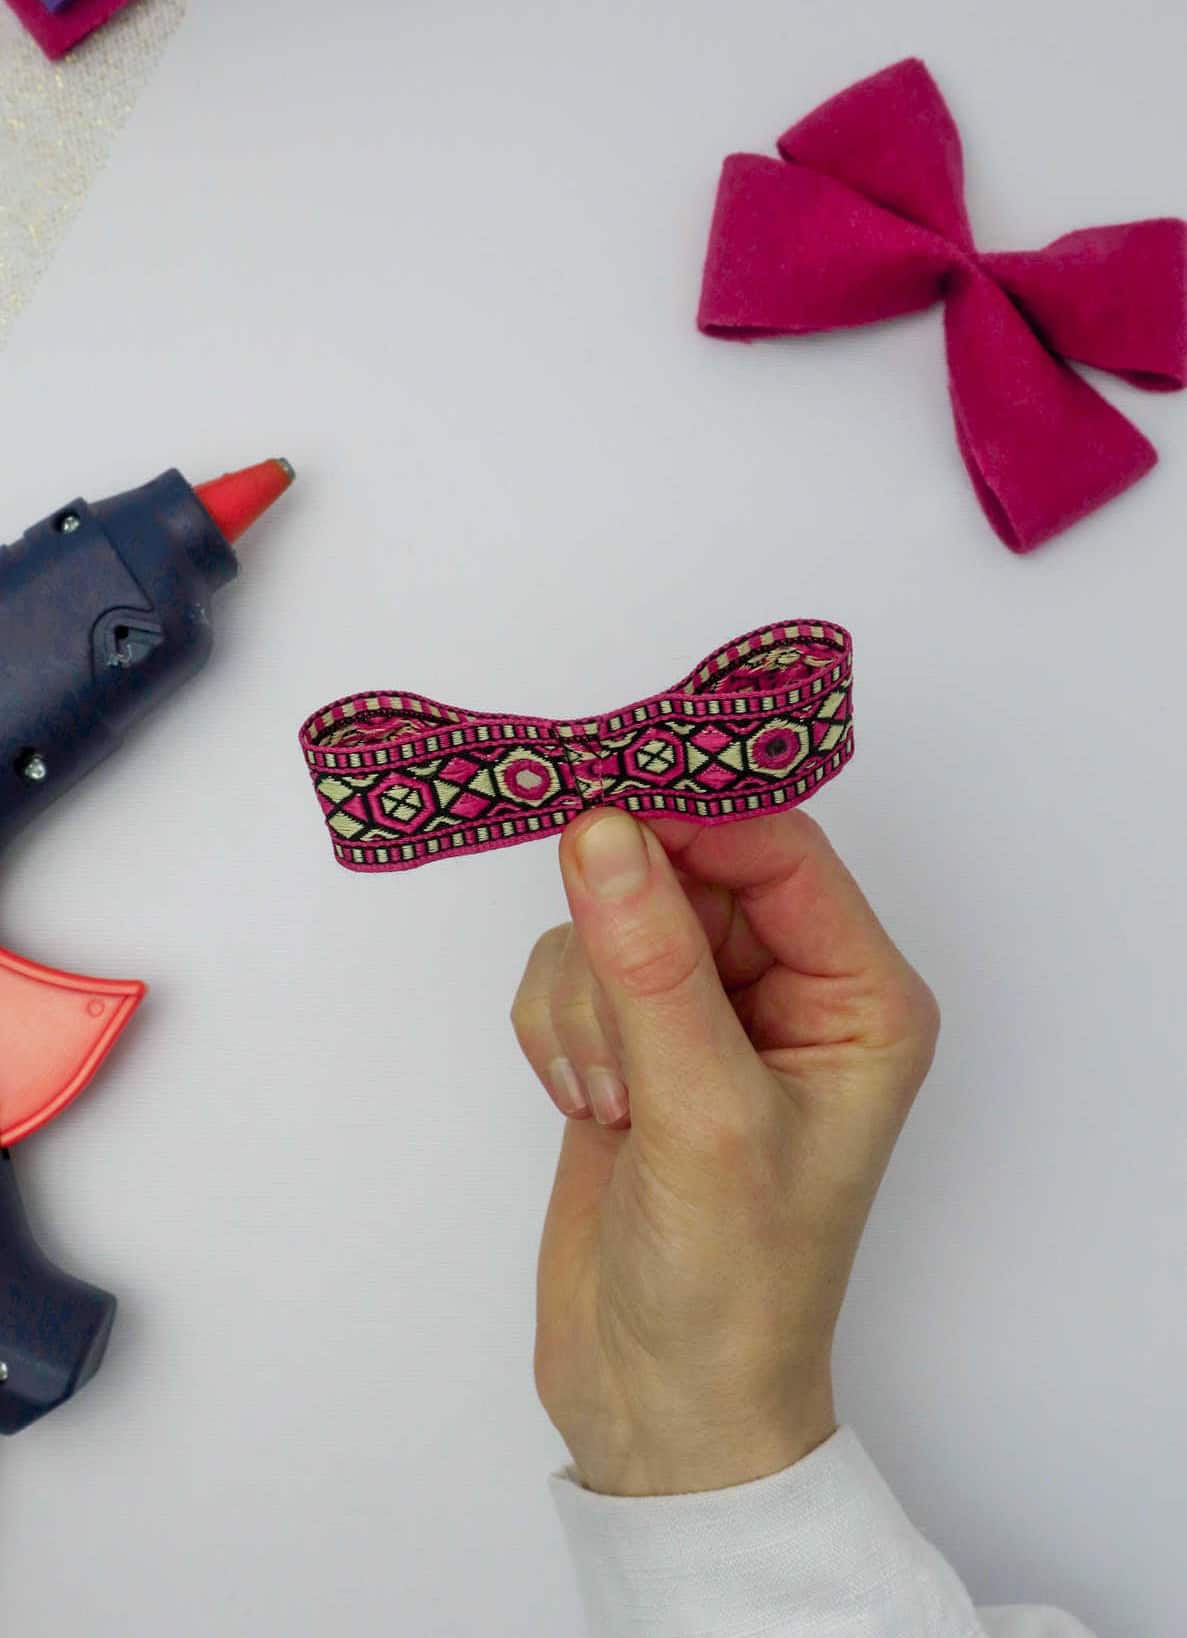
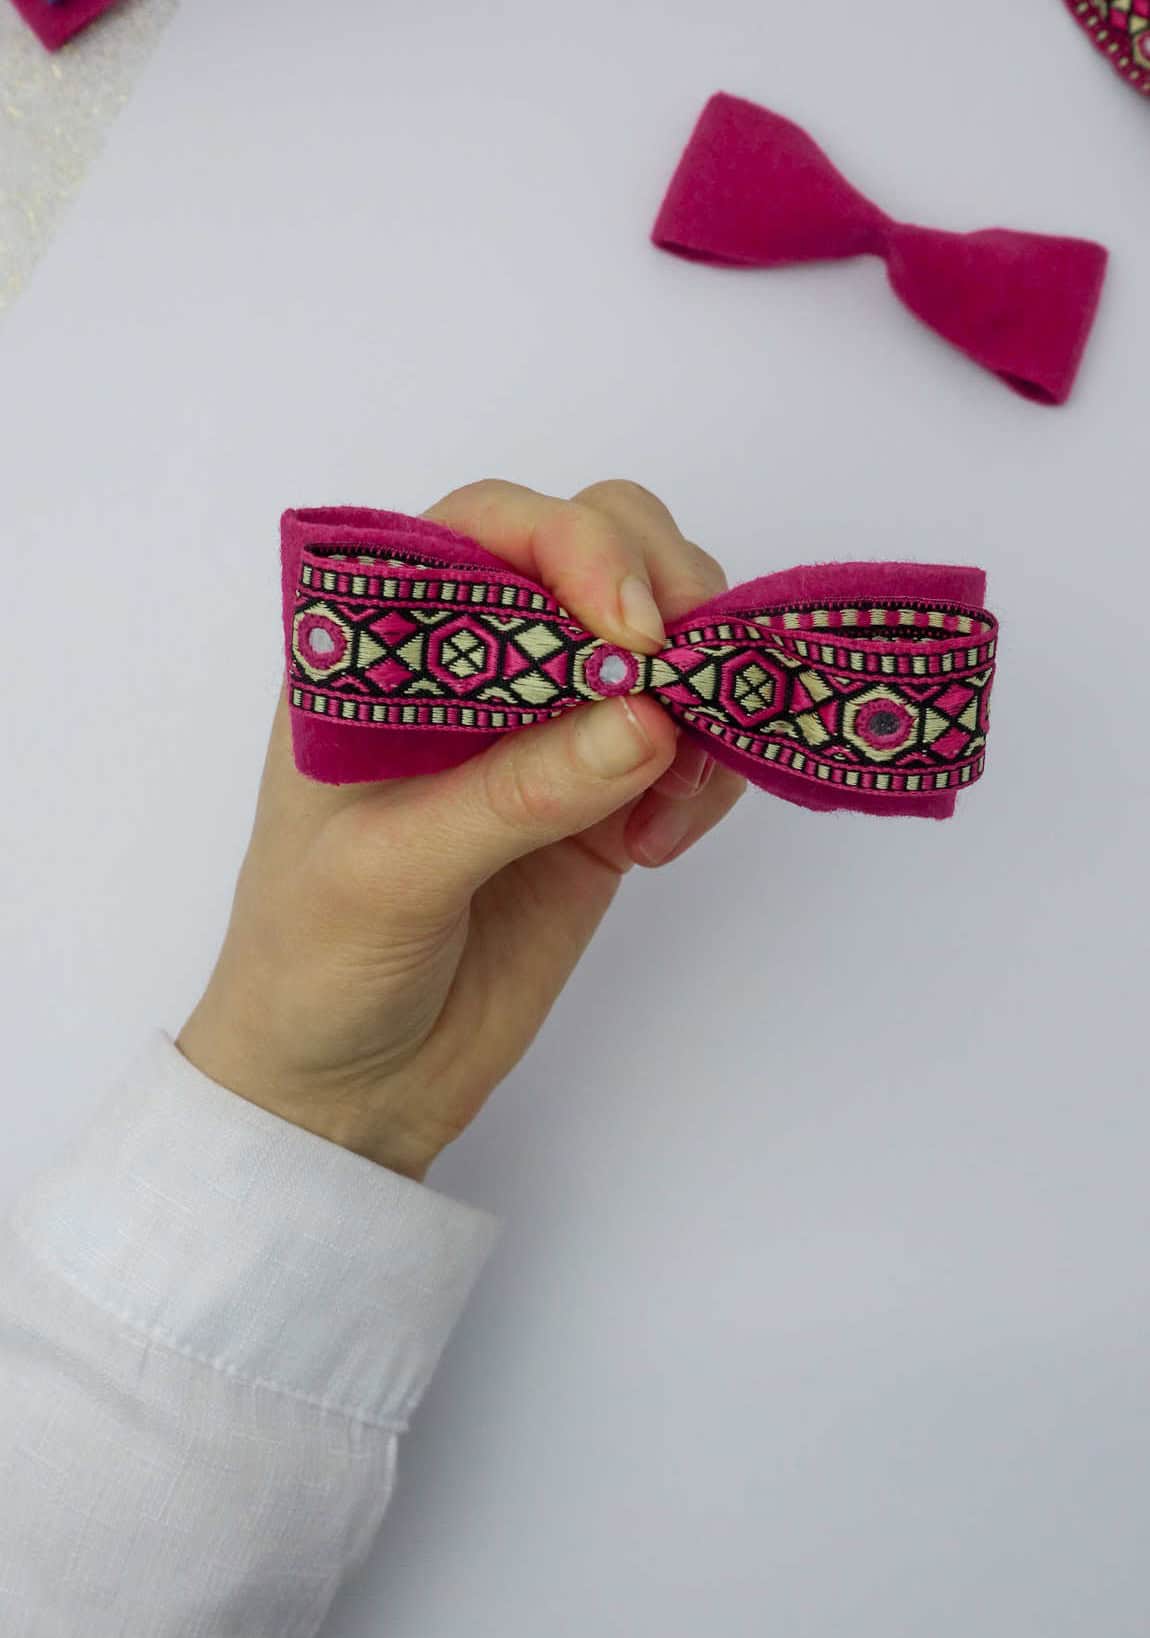
Once the adhesive has fully set, proceed to the subsequent stage. Take hold of the embellished fabric strip, folding it in a deliberate manner before securing it in its designated position – much like you accomplished with the preceding elements, wrapping it tightly around
Step 8
To securely fasten the components together, generously apply a suitable adhesive to the primary piece. Then, with precision, gently position the intricately embellished fabric ribbon in the middle, sandwiched between the two parts.
Step 9
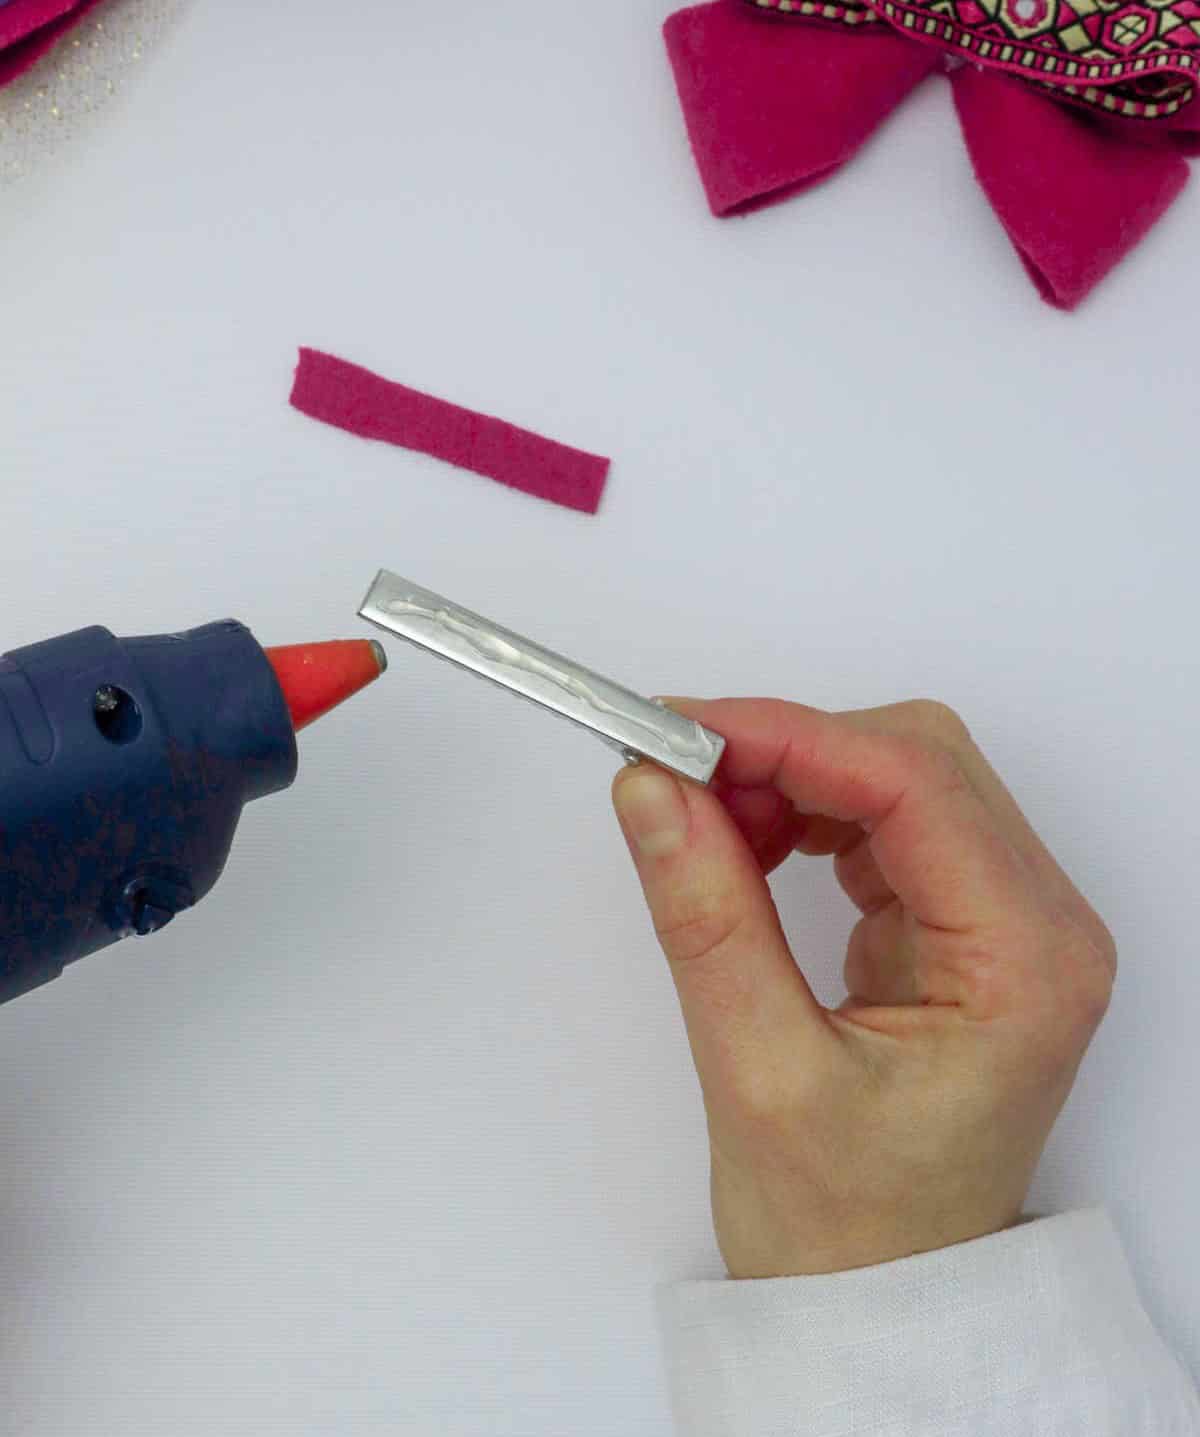
As you near the final stages of crafting your unique crocodile hair clip, it’s time to attach the backing. Start by applying a small amount of hot glue to the reverse side of the clip, ensuring a secure bond. Next, cut a thin strip from the same fabric used for the bow and apply it to the back of the clip, effectively concealing any metal components. Allow this layer to dry completely before moving forward with your project.
Step 10
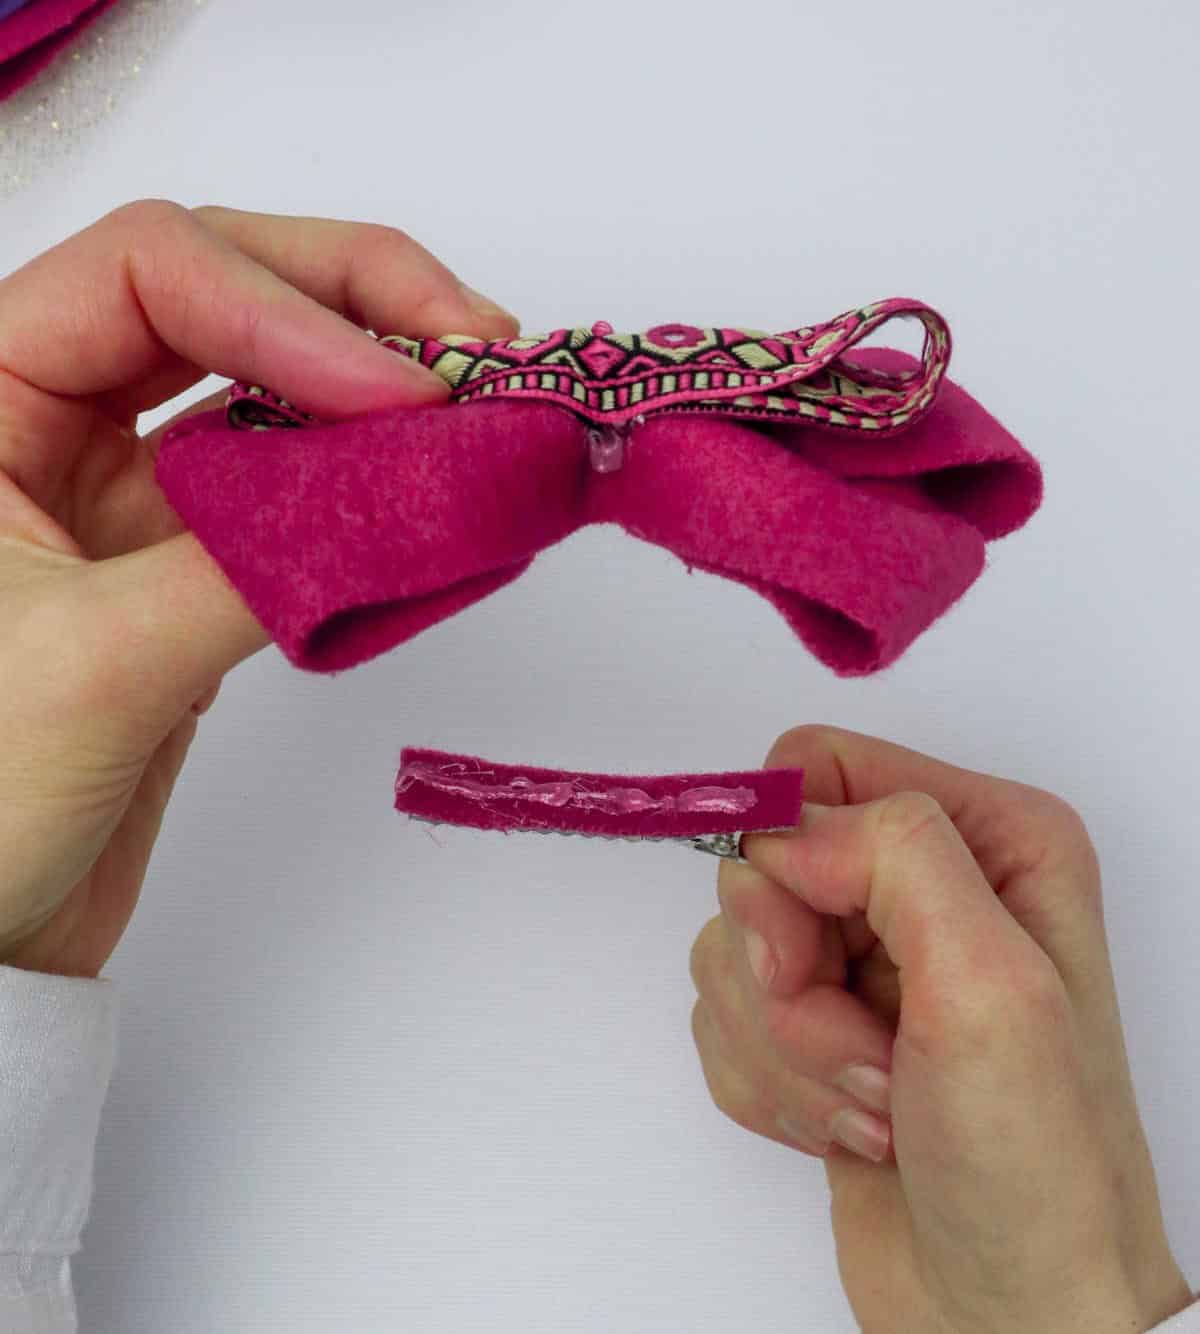
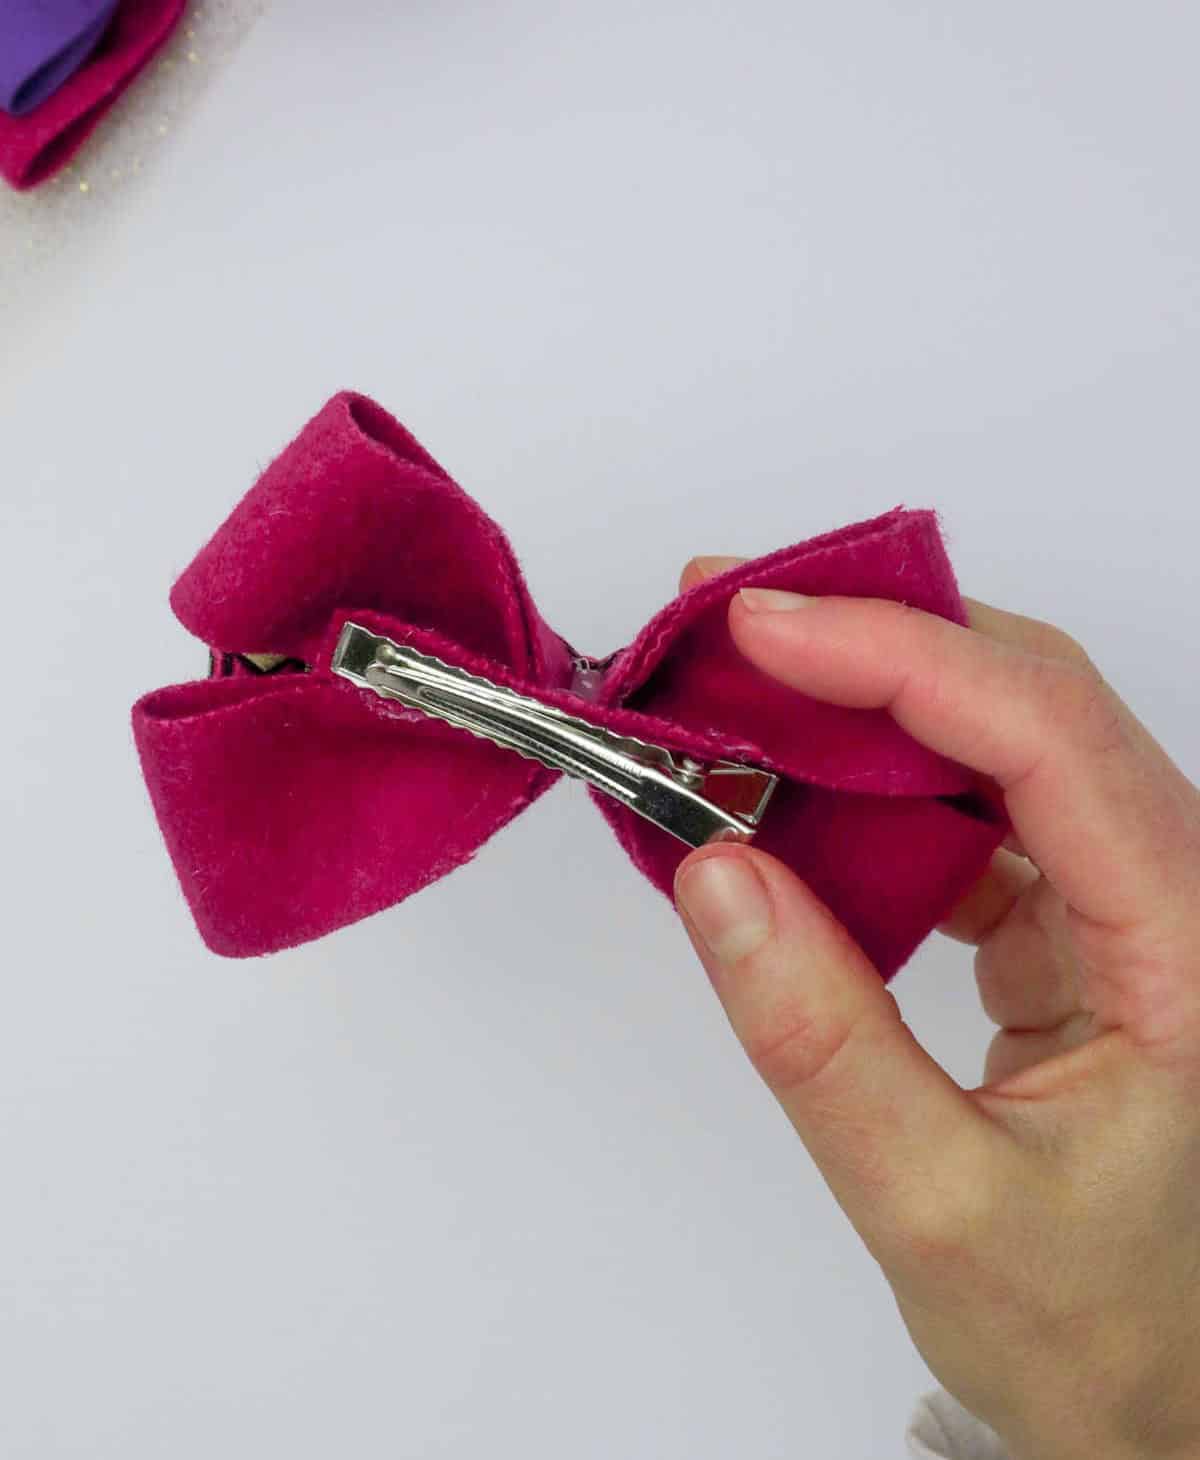
Once you’ve got your felt strip ready, apply a small amount of adhesive to the back of the hair clip and carefully place the felt along the length of the strip, ensuring it’s centered. Then, gently press the hair bow onto the clip, making sure it’s facing forward with the right side up. Hold the two pieces together for a minute or two to allow the glue to set. Be patient and let the adhesive dry completely before attempting to wear your new hair accessory.
Step 11
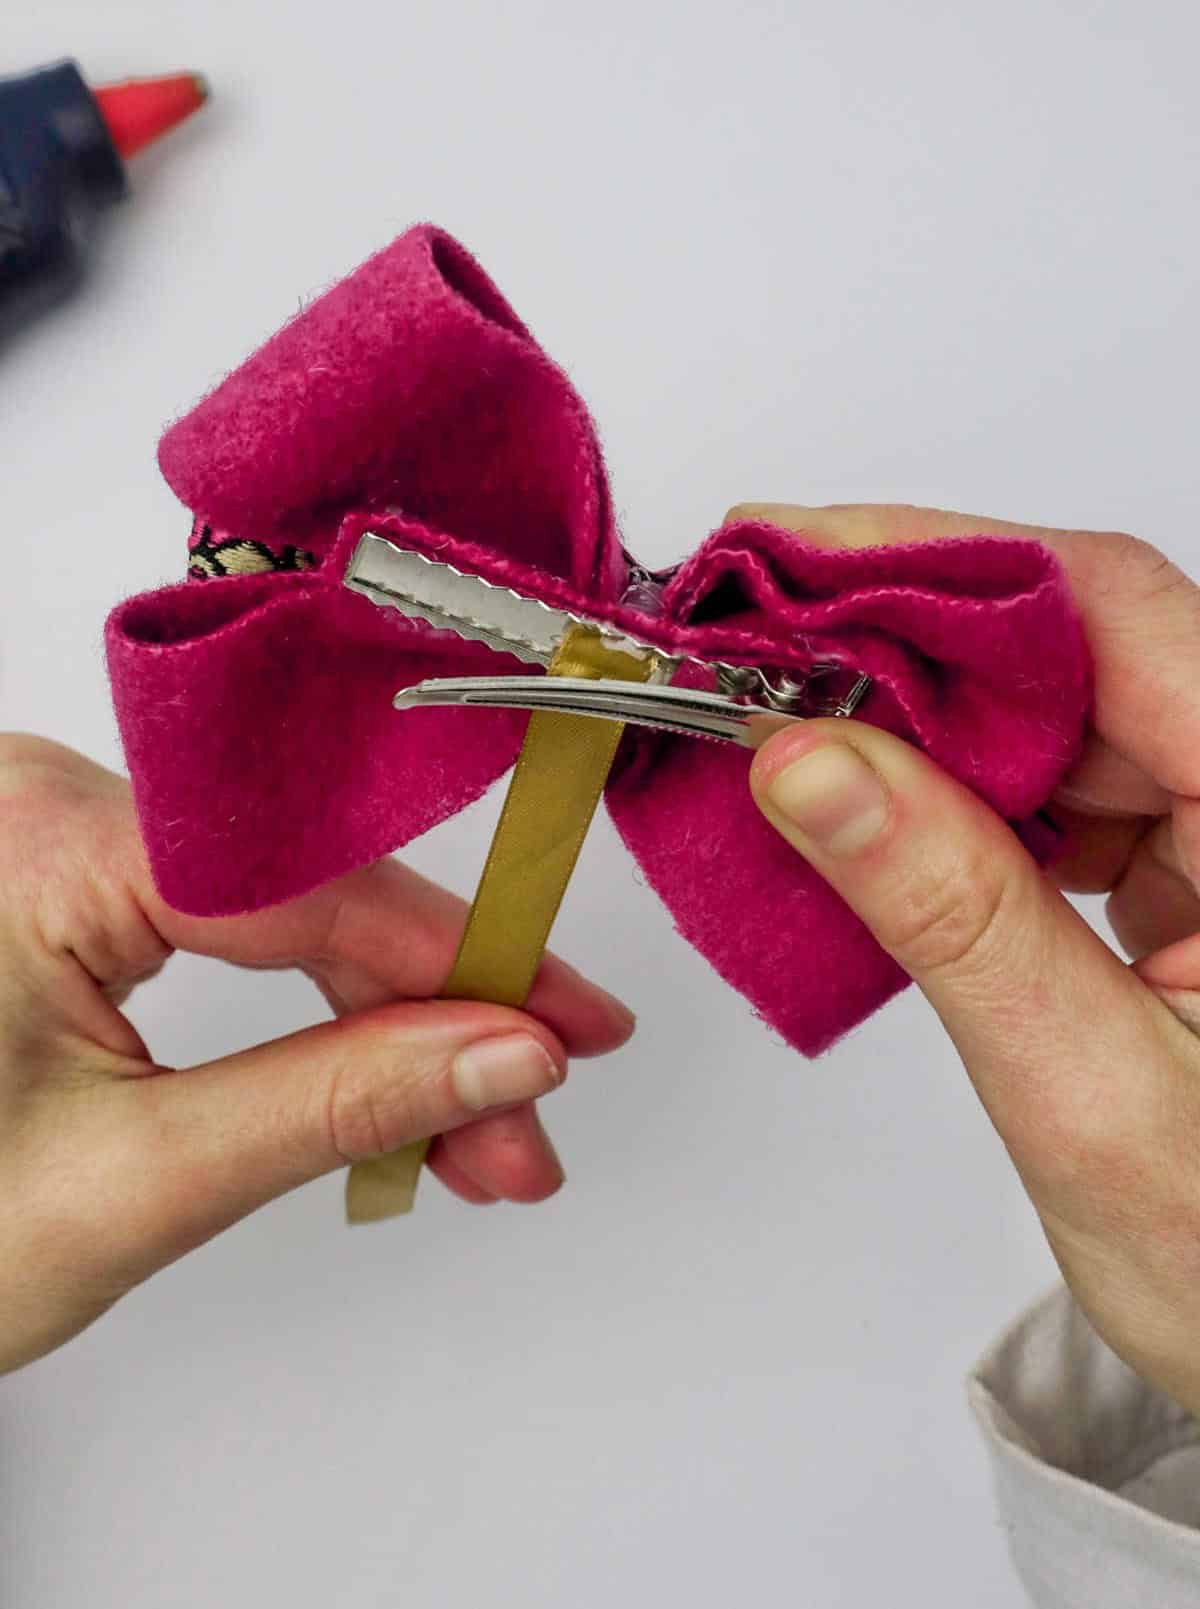
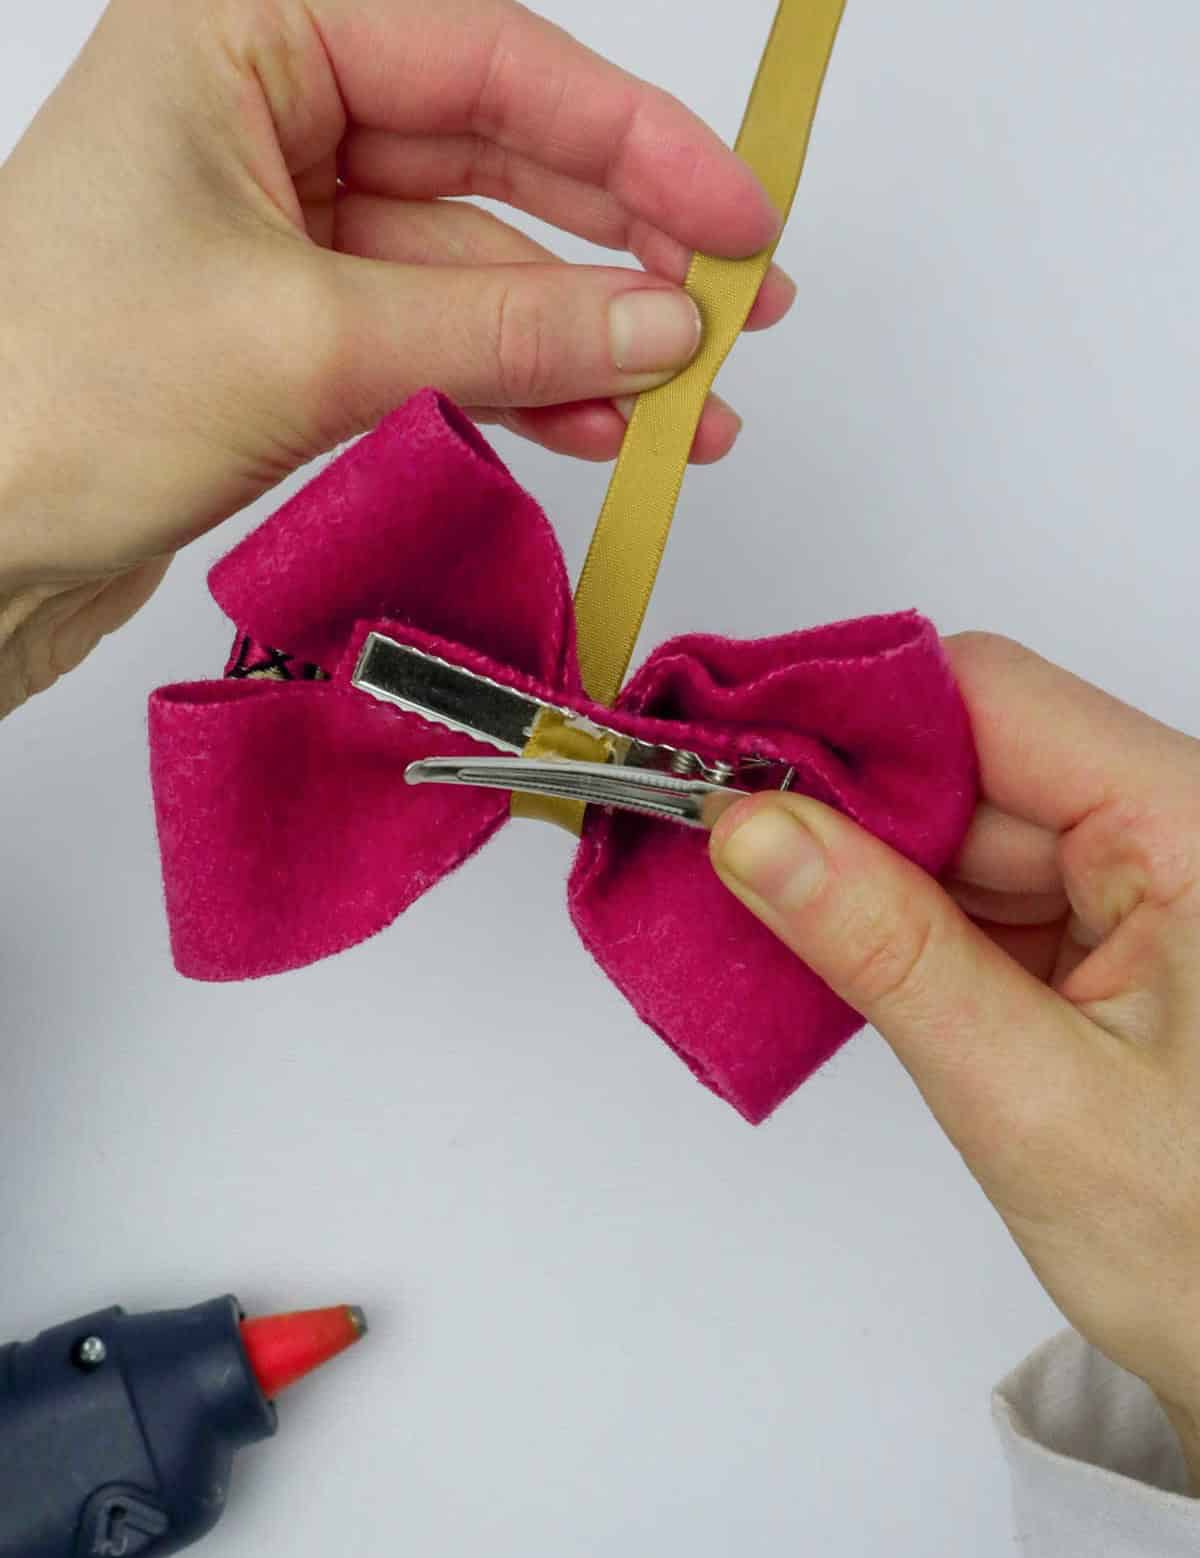
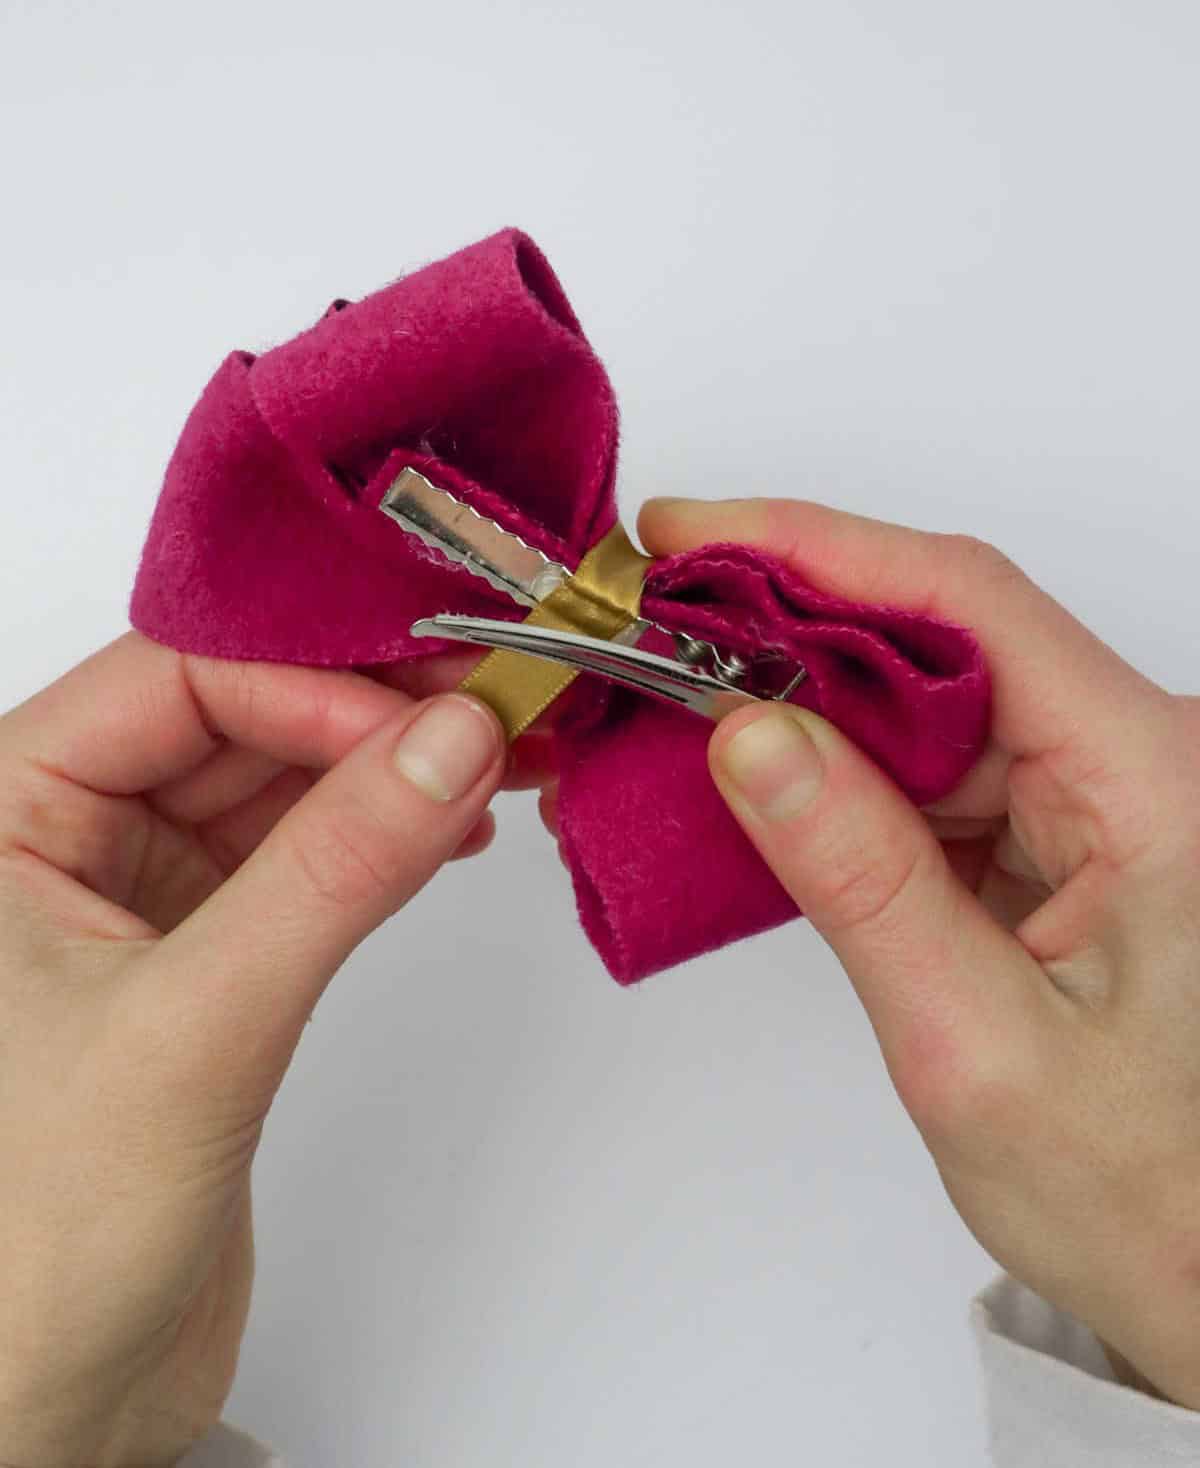
To create a charming hair bow, start by threading a narrow strip of ribbon through your crocodile clip. Work the ribbon up and over the bow, wrapping it snugly around the center to form the foundation of the design. Next, bring the ribbon back down and under, then loop it into the crocodile clip once more to secure the bow in place. Voilà! Your hair bow is now complete.
With this simple technique, you can create a dozen or so bows in various sizes, featuring different patterns and designs – the perfect accessory for any hairstyle.
What Fabric is Best for Hair Bows?
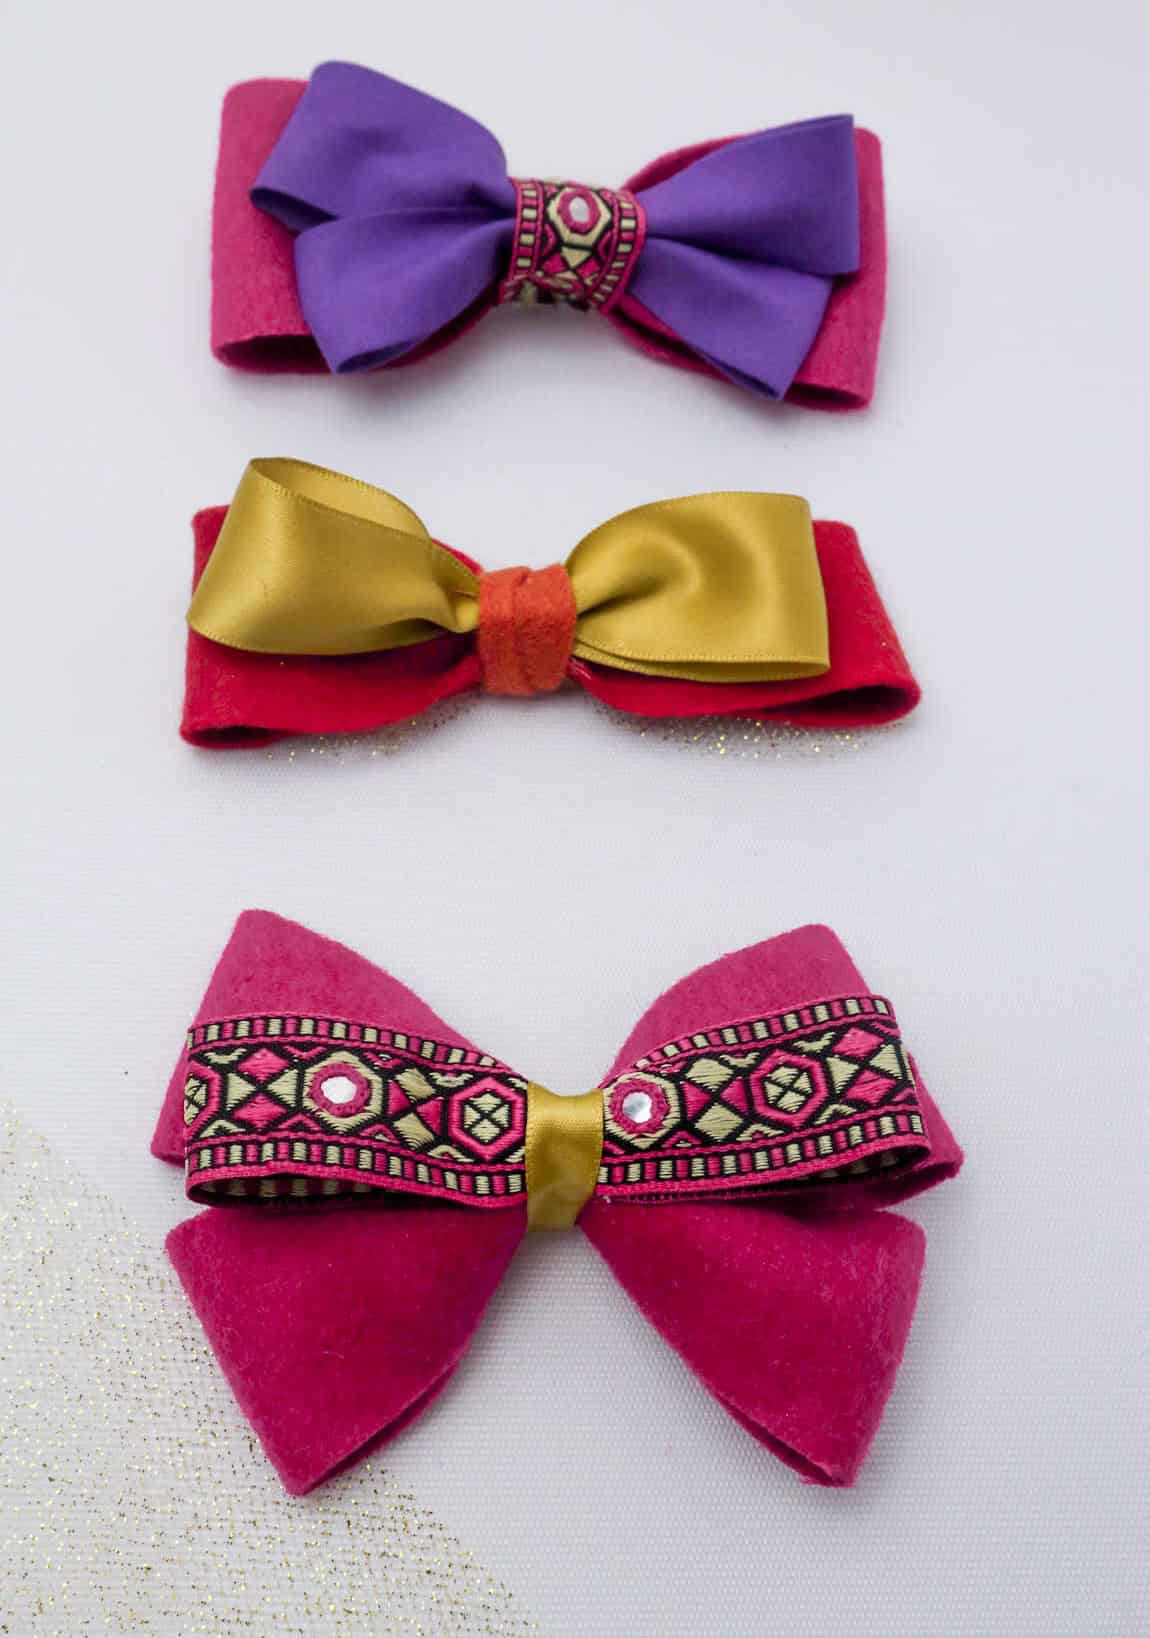
When crafting hair bows, I suggest opting for felt or satin as the primary material. These fabrics fold more effortlessly, resulting in bows with a more defined shape. To add an extra layer of flair to your bow, you can incorporate various strips of fabric, such as embroidered, metallic mesh, netting, or even plain ribbon, allowing for endless creative possibilities.
How to Make Hair Bows
Create a chic and personalized accessory for yourself or as a thoughtful gift with this easy-to-make hair bow DIY project. With just 45 minutes of your time, you can craft a unique piece that reflects your personal style. The tutorial provides step-by-step guidance to ensure success, making it accessible to anyone looking to get creative.
Equipment
To avoid the frustration of being startled awake by a dark screen, it’s essential to find ways to prevent your device from automatically turning off. One simple solution is to adjust the screen timeout setting on your phone or computer. This will ensure that your screen remains illuminated for as long as you need it to be. Additionally, consider using a hot glue gun to attach a small LED light to your device’s case.
The constant glow can provide a gentle reminder of the time without disturbing your sleep. As an alternative, keep a pair of scissors nearby to quickly cut any excess cord or wire that may be obstructing your view.
Materials 1x2x3x
To complete the project, you’ll need a few essential materials. These include two pieces of felt stripes measuring 8.2 inches by 1.6 inches, which can be made from textile or ribbon. You’ll also require a longer wide ribbon that’s approximately 7 inches in length, as well as a narrower ribbon for added detail. Additionally, you’ll need a crocodile hair clip and a small piece of felt to bring everything together.
Instructions
To create this charming hair accessory, start by gathering all your supplies and placing them on a work surface. Select your fabric and cut it into strips. Fold each strip’s two ends together to form individual bows with varying lengths. Apply a small amount of glue to the center of each bow and carefully pinch it to enhance its shape. Repeat this process for both bows. Next, take the decorated fabric strip and follow the same steps to create another bow-like component.
Allow all these components to dry completely.
Once the bows are dry, attach them together by first placing the larger bows side-by-side on your work surface with one facing down. This will create a beautiful, arching shape for the hair clip. Then, use hot glue to secure the decorative fabric across the middle of the bow. The main component is now ready and should be allowed to dry completely.
Meanwhile, take your crocodile clip and attach a small piece of felt fabric to its backside, covering any metal exposed. This will add an extra layer of protection and aesthetics.
Next, apply a small amount of adhesive to the felt fabric on the clip and carefully attach the hair bow to it. You may need to hold it in place for a short time to allow the components to bond together.
Finally, take a piece of ribbon and loop it around the crocodile clip, over the center of the bow, and then bring it back down into the clip, securing the ends in place.