Imagining a pristine kitchen where creativity flows freely is a lovely thought. But, let’s face it – keeping the kitchen spotless can be a daunting task. It’s not just about wiping down surfaces and sweeping the floor; it requires dedication and elbow grease. That’s why I’m excited to share 15 simple yet effective cleaning hacks that won’t break the bank. These clever tips will transform your cooking space into a haven where you can whip up your favorite dishes with ease.
Say goodbye to messy countertops, sticky floors, and pesky crumbs – these hacks are here to help you achieve kitchen nirvana.
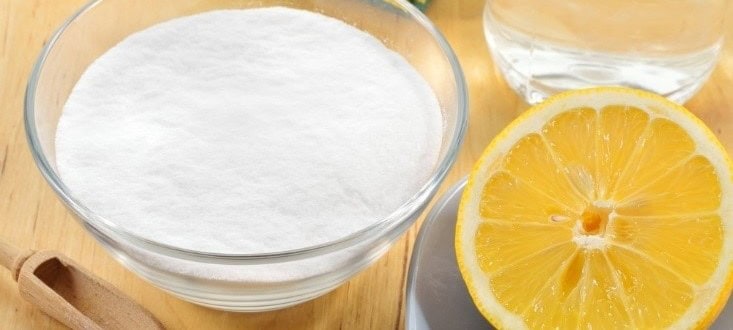
Polish Your Sink With Baking Soda and Rubbing Alcohol
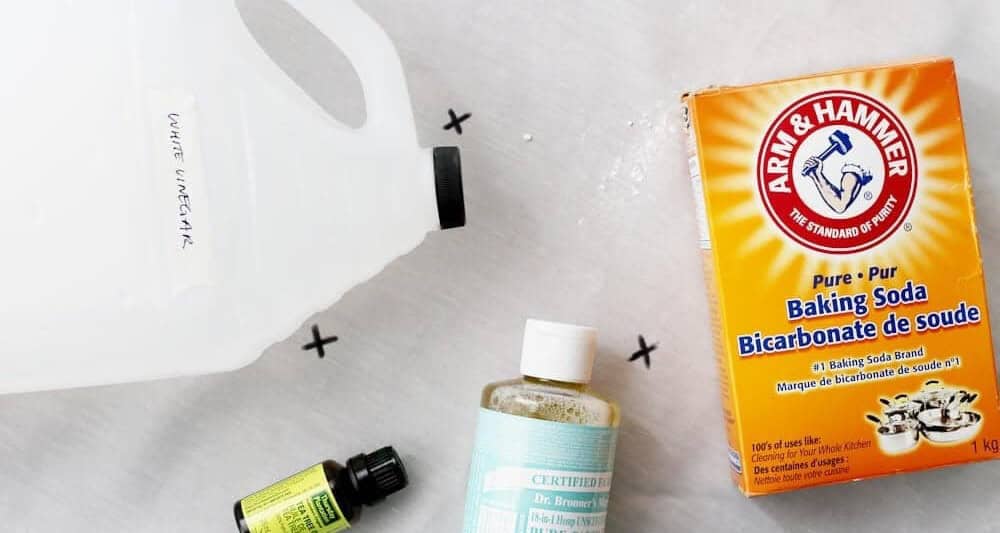
In many households, sinks are the workhorses of the kitchen, handling everything from food scraps to dishes. Given their heavy use, maintaining a clean and sparkling sink is essential. One effective method I’ve discovered for achieving this is by combining baking soda and rubbing alcohol. Baking soda, in particular, stands out as an exceptional cleaning agent due to its ability to effectively remove dirt without damaging or discoloring the sink’s surface.
To get started, rinse your sink with water, followed by a generous sprinkling of baking soda. Allow it to sit for approximately 15 minutes before gently scrubbing with a soft sponge and rinsing once more. Finally, give your sink a finishing touch by spraying some rubbing alcohol, which will leave it looking radiant and well-maintained.
Use Citrus Peels As Your All-Purpose Cleaner
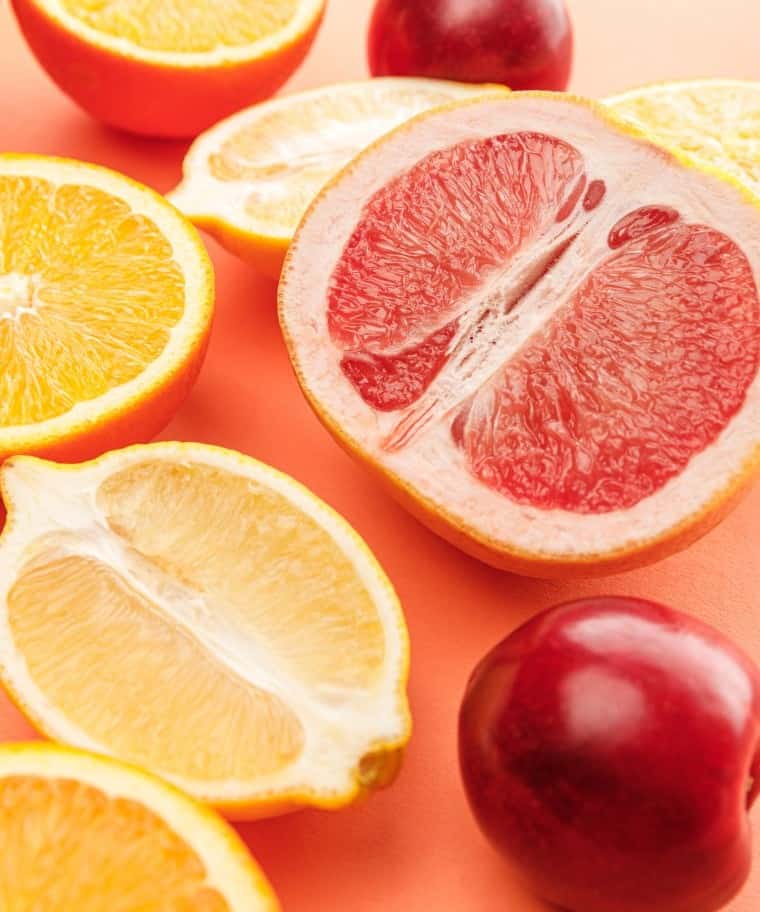
When you’re tackling household chores, don’t forget to repurpose citrus peels as a natural cleaning agent. The peels contain D-limonene, a potent solvent capable of breaking down even stubborn grease and grime. Collect the peels in a large jar and cover them with vinegar, allowing the mixture to steep for about two weeks. Once the infusion has finished, strain the liquid into a spray bottle and voilà!
You’ve got yourself an all-purpose cleaner suitable for countertops, kitchen floors, stovetops, and virtually any surface in your cooking space. As an added bonus, this homemade solution will leave your kitchen with a refreshing citrus aroma.
Clean Burnt Pans And Pots with Vinegar and Baking Soda
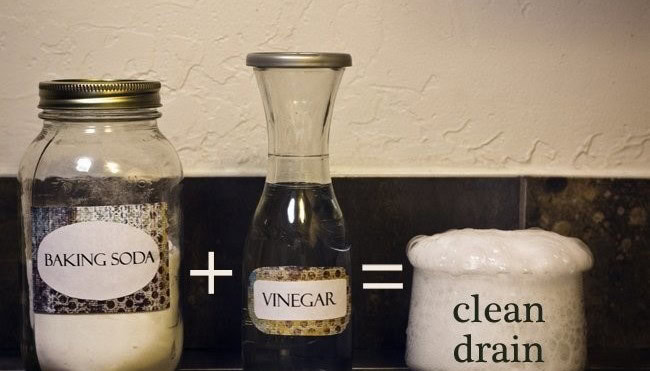
Combining baking soda and vinegar might seem like an unconventional cleaning method, but it’s surprisingly effective. One area where it shines is in removing stubborn stains from burnt pans and pots. To give it a try, start by adding one cup of water to the affected vessel. Next, add another cup of vinegar, then bring the mixture to a rolling boil on high heat.
Once it reaches this stage, remove it from the heat source and transfer it to your sink.
Here’s where things get interesting – add 2 tablespoons of baking soda to the solution. As you do so, you should notice it start to fizz and bubble.
After the fizzle dies down, take a scouring pad and gently scrub away at the stains. You’ll likely find that they come off with ease, leaving your pan or pot looking good as new. Finally, rinse everything thoroughly and dry your vessel to prevent water spots.
Clean Wooden Kitchen Cabinet with Hydrogen Peroxide and Baking Soda
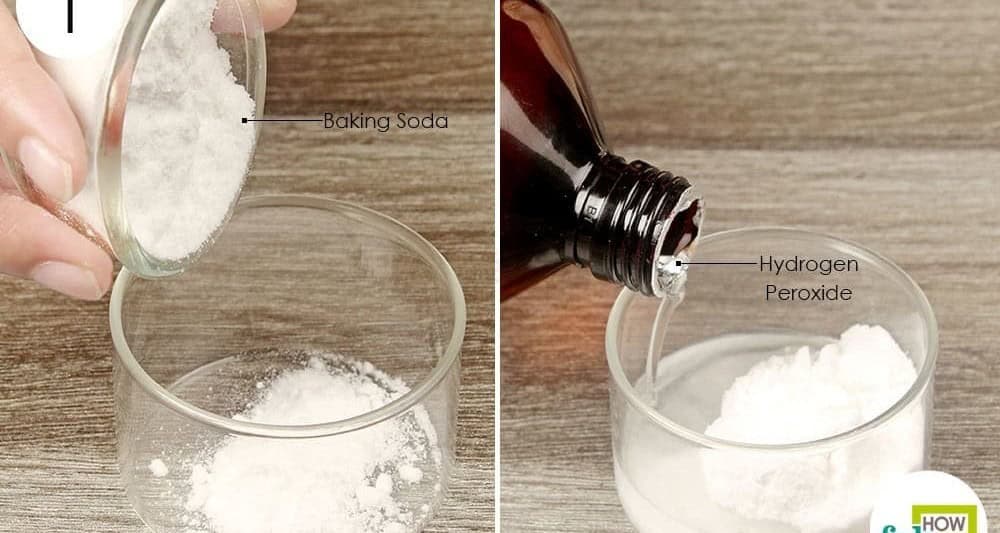
For grease-stained cabinets, a potent combination lies in a mixture of hydrogen peroxide and baking soda. The key to success is striking the right balance: use slightly less baking soda than hydrogen peroxide when blending the two ingredients. Once you’ve achieved the perfect paste consistency, apply it to your cabinets using a soft cloth or sponge, gently massaging the area until the grime disappears.
Use Lemon and Salt To Remove Stains From Cutting Boards
Are you tired of dealing with stubborn stains on your cutting board after using it for meat and other messy foods? Fortunately, a simple solution lies in the power of lemons! To effectively remove those pesky marks, start by sprinkling a pinch of salt over the surface of the board. Then, use half a lemon to scour away the grime, squeezing gently as you go. Allow the mixture to sit for a few minutes before rinsing it off with water – and for best results, do this under the warm glow of sunlight.
The combination of lemon juice’s natural acidity and sunshine’s bleaching properties makes for a potent stain-fighting duo, making it easier than ever to keep your cutting board looking like new.
Boil Greasy Stove Vents In a Pot Of Water
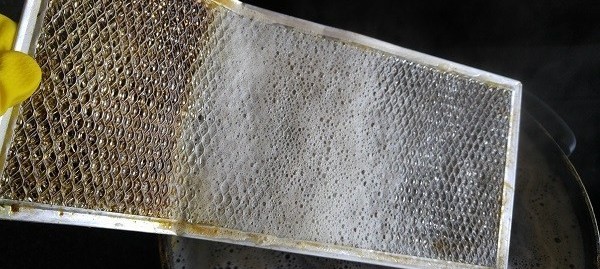
Neglected kitchen vents can harbor a significant amount of grease, providing an ideal environment for germs and bacteria to thrive. When cleaning your kitchen, it’s essential to include these often-overlooked areas in your routine. To effectively scrub away the built-up grime, start by boiling water in a large stainless steel pot and adding about 1/4 cup of baking soda as it reaches a rolling boil.
Next, submerge your vents into this mixture and allow them to simmer for a while, watching as the grease and grime effortlessly dissolve. The result is a cleaner, healthier kitchen that’s free from hidden hazards.
A Hack For Cleaning Kitchen Tiles
When it comes to cleaning tiles, whether big or small, one common challenge is dealing with the buildup of dirt. With numerous cleaners on the market, selecting the right one for your floor can be overwhelming. To simplify the process and avoid frustration, consider using a natural approach that’s gentle yet effective. Start by sprinkling baking soda evenly over the tile surface. Next, fill a spray bottle with cleaning vinegar and spritz it over the baking soda.
Allow the mixture to fizz for a few minutes before mopping off any dirt and grime. Be mindful not to wait too long, as dirt can settle back in if you linger. With this method, you’ll be able to effectively clean your tiles without breaking a sweat.
Disinfect Sponges in the Microwave
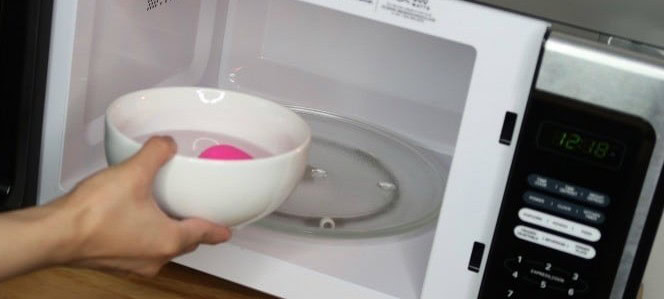
While sponges may seem like a mundane tool in our daily cleaning routine, it’s crucial not to overlook their importance. In fact, giving your sponges some TLC can make all the difference in keeping them effective and hygienic. One simple yet effective way to revive your sponges is by submerging them in water and microwaving for 30 seconds.
This process has a dual benefit – it softens the sponge, making it easier to remove dirt and oil, while also killing bacteria and restoring its original texture.
Use a Mesh Laundry Bag In Your Dish Washer
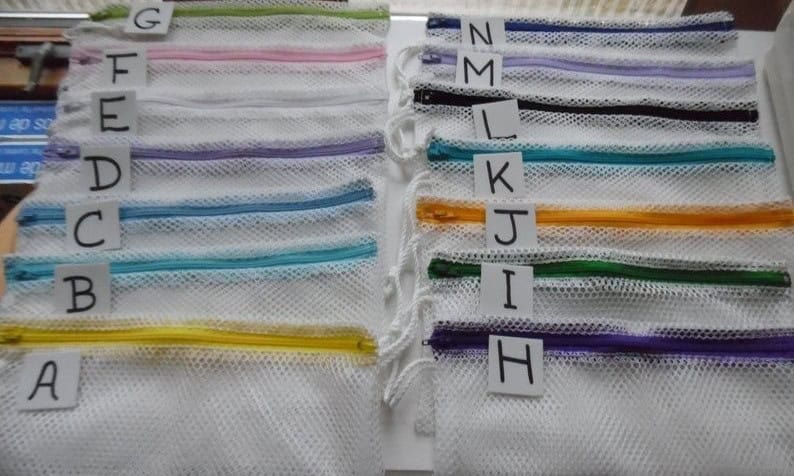
When it comes to keeping your kitchen organized, mesh laundry bags can be a game-changer. Not only do they provide a convenient way to store delicate items together, but they can also help with household chores like cleaning. For instance, you can use these bags to wash and sanitize items like sponges, cleaning brushes, and silicone scrubbers. Simply place all of these items in one bag and toss it into the dishwasher for an easy and efficient clean.
Clean Your Microwave With Water and Lemon!
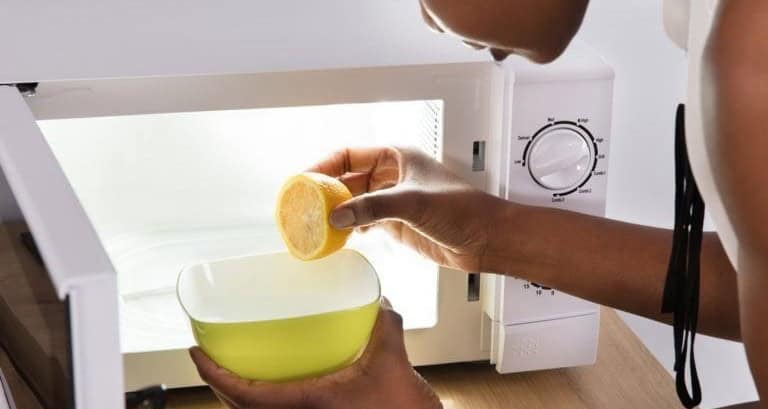
To restore your microwave’s former glory, tackle the grime that has accumulated over time. A simple yet effective solution is to combine water and lemon in a bowl, then heat it under moderate conditions for approximately 5 minutes until boiling. Allow the mixture to sit for a few additional minutes as the steam works its magic. Once done, use a cloth to wipe down the interior surface, effortlessly removing dirt and grime.
This method is a tried-and-true spring cleaning hack that will leave your microwave looking like new.
Restore Water-Marked Kitchen Furniture With Hairdryer
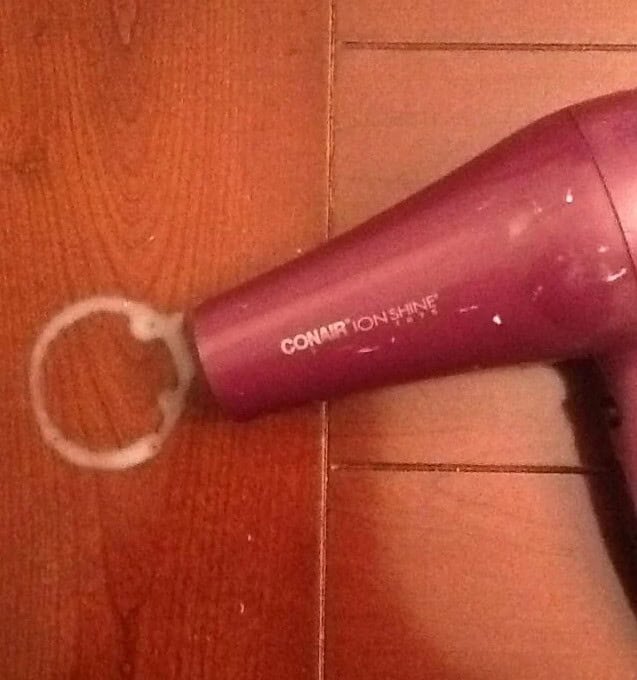
While it may seem counterintuitive, a hairdryer can be a surprisingly effective tool for removing water stains from wood surfaces. By holding the dryer close to the affected area and blasting it with hot air, you can actually make the stain vanish. This simple hack is a great solution for those pesky water rings that seem to appear out of nowhere.
Clean Your Stainless Steel Appliances With Dish Soap and White Vinegar
Revamping your kitchen’s stainless steel appliances is easier than you think! The combination of white wine vinegar, water, and a small amount of liquid soap can work wonders. To get started, mix equal parts of the mixture with one part water (two-thirds white vinegar to one-third water). Add just a few drops of the soap for good measure. Next, grab a microfiber cloth – an investment worth making for its effectiveness in cleaning.
Simply apply the solution to the stainless steel surface and watch as the grease dissolves, leaving it shining like new.
Use Aluminium Foil As Glassware Scrubber
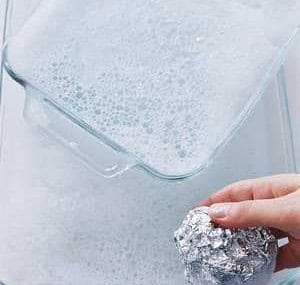
When considering alternatives to traditional glass scrubbers like wired brushes or metals, aluminum foil stands out as a superior option. Unlike its competitors, aluminum foil won’t scratch the surface of your glassware, making it a safe and effective choice. Next time you’re preparing to dispose of used aluminum foil, don’t immediately toss it away. Instead, crumple the foil into a ball, add a few drops of dish soap, and use it as a makeshift scrubber to clean your glassware.
The gentle abrasion provided by the crumpled aluminum will effectively remove any dirt or grime without causing scratches or damage.
Chalk On a Grease Wall Stain
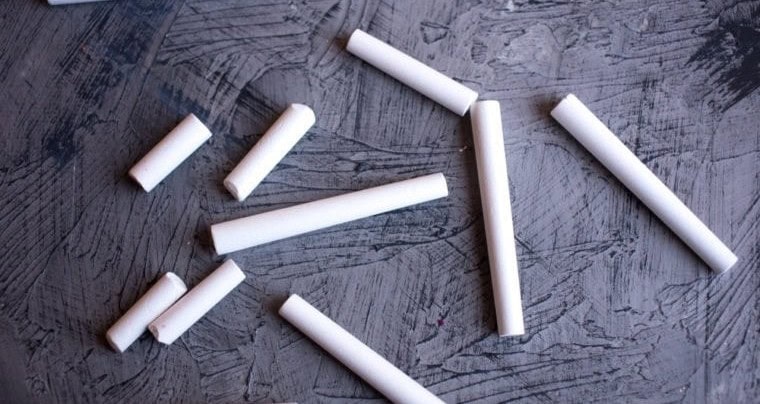
When it comes to maintaining the appearance of your kitchen walls, one common challenge is dealing with greasy fingerprints marks and oil stains. These imperfections can leave your walls looking dull and uninviting. However, there’s a simple and effective solution. By combining white chalk, a cloth, and a small amount of water, you can easily remove these unwanted marks.
To start, sprinkle the affected area with white chalk, allowing it to sit for a few minutes before wiping it off with a damp cloth. This not only restores your walls to their original state but also adds an element of fun to what would otherwise be a mundane task.
Use Onions To Make Your Grill Grates Sparkle
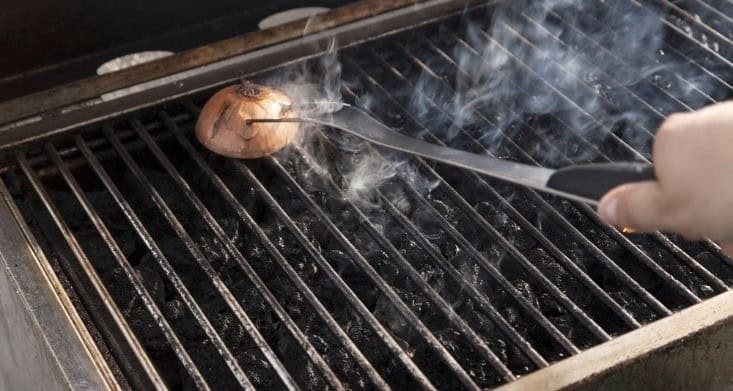
When it comes to removing stubborn residue from grill grates, a little-known trick among seasoned grill enthusiasts is leveraging the natural properties of onions. This simple yet effective method can be easily replicated in your own kitchen. To get started, simply cut an onion in half and place each half facedown on the heated grates. As you do this, gently scrub the onion halves back and forth across the surface to loosen any stuck-on particles.