Starting a painting journey can be daunting, especially when considering the various techniques and methods involved. Fear not, as this collection of painting tips and tricks is designed to guide you every step of the way. Whether you’re a seasoned painter or just beginning your artistic adventure, these easy-to-follow hacks are perfect for experimenting with different paints, including latex, oil-based, and water-based options.
While results may vary depending on the type of paint used, these painting tips will provide a solid foundation for any artistic endeavor.
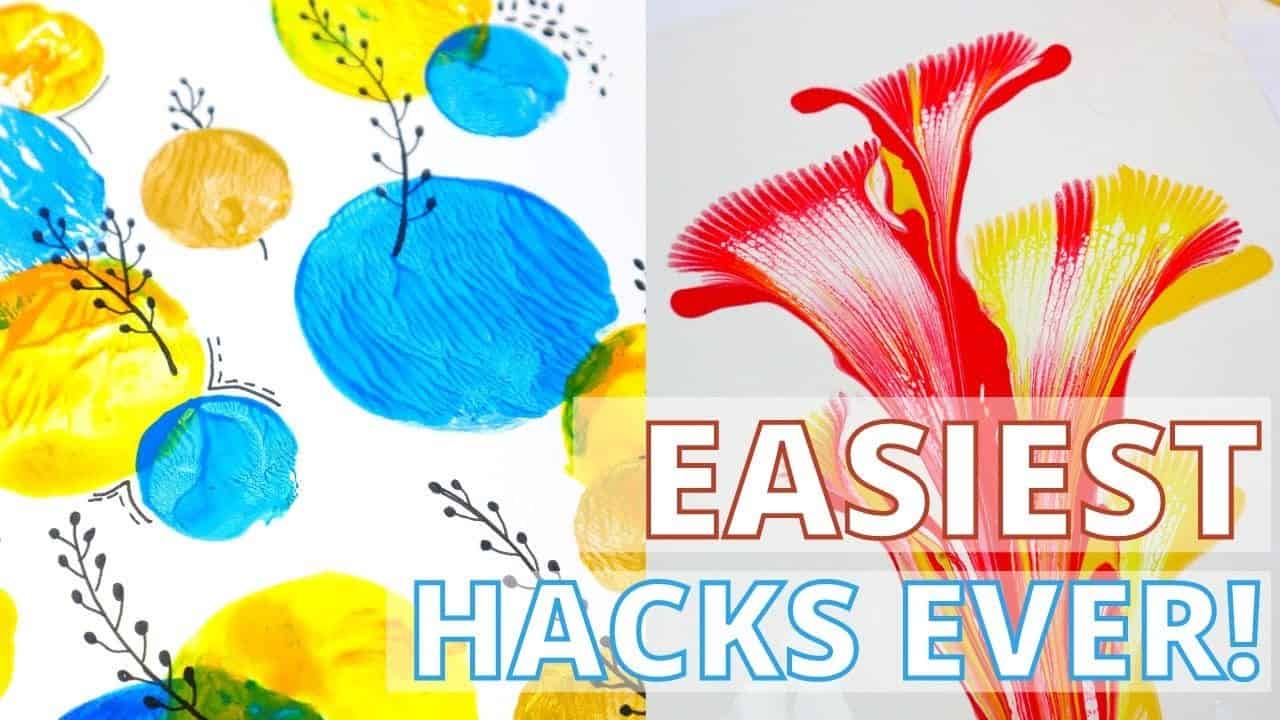
Watch: Painting Hacks for Absolute Beginners!
User Markers with Water
For those looking to incorporate a unique touch into their artwork, there are several creative ways to repurpose old markers. One approach involves soaking the markers in clean water overnight, allowing the remaining ink to dissolve and transform into vibrant watercolours. This method is ideal for creating subtle, blended hues that can be used to add depth and dimension to your piece.
Alternatively, you can use the markers directly on the page, applying them over the brush strokes you plan to use. By layering the colours in this way, you can achieve a beautiful, watercolour-inspired effect where the colours blend and bleed into one another. Once the ink is dry, you can add additional layers or textures to your artwork, further enhancing its overall appearance.
If you’re looking for more inspiration, be sure to explore our collection of easy canvas painting ideas perfect for beginners.
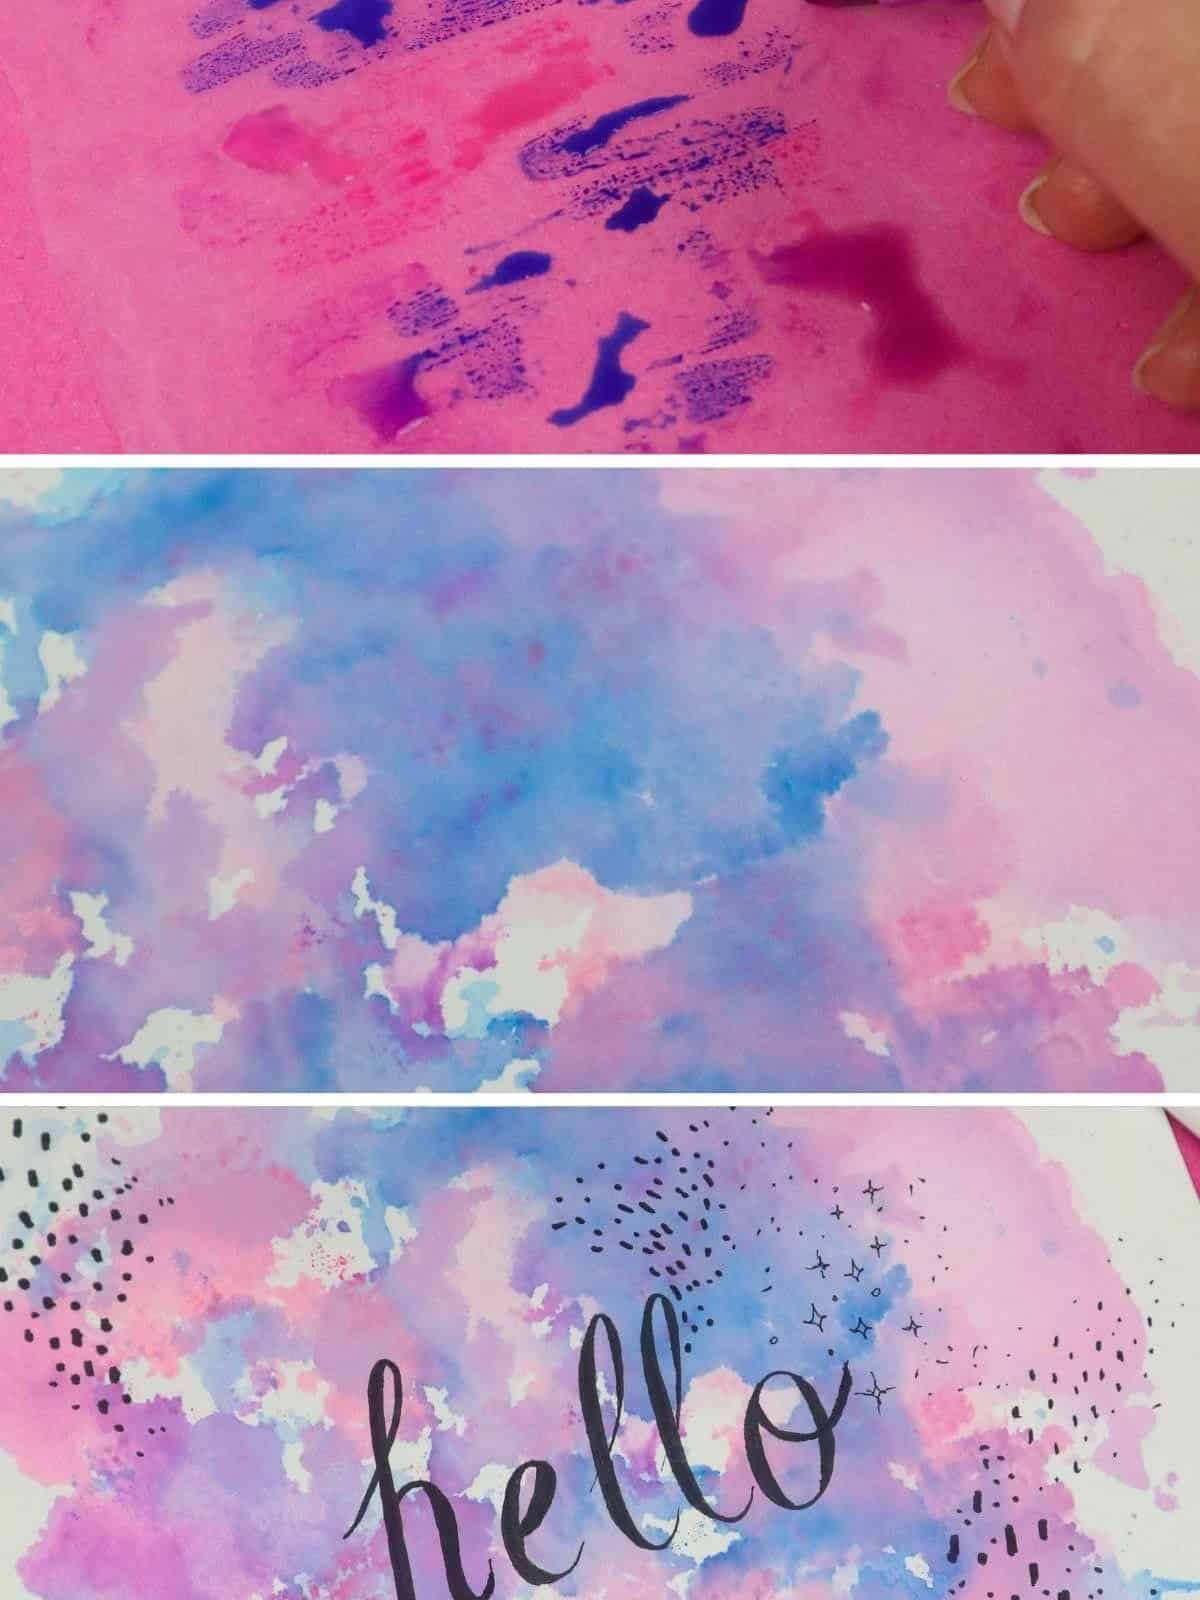
Use Your Ruler
To create this unique design, you’ll need a few basic materials: new paint, a ruler, and painter’s tape. These can be easily found at your local paint store. Begin by securing your paper with painter’s tape to a flat surface. Next, apply a varied assortment of small dots of wet paint onto the page. Once you’re satisfied with the number of dots, use your ruler to create a design by dragging it across the page in any direction – straight or curved.
You can experiment with different angles and motions to achieve the desired effect. If needed, simply wipe away any excess paint for a clean finish.
Create Texture with Cornstarch
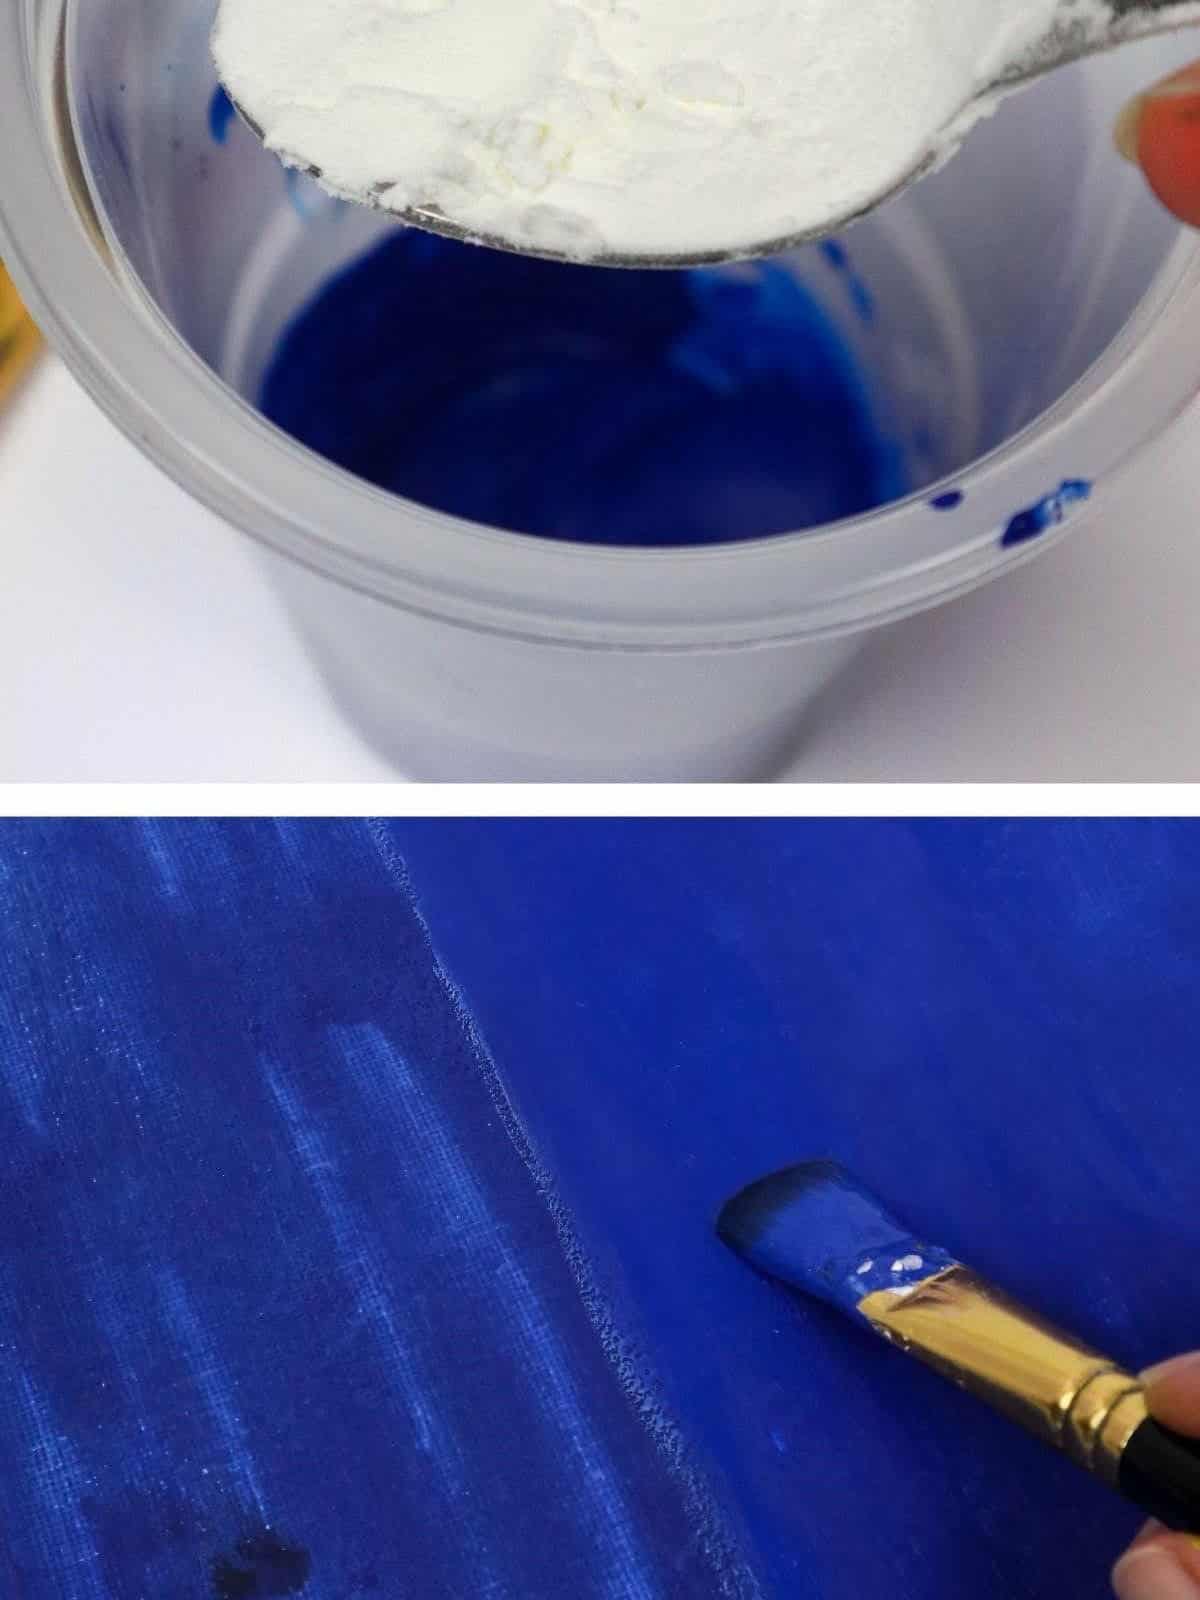
To introduce texture to your paint project, consider incorporating cornstarch into the mixture. For this process, you’ll need a small container or plastic bag where you can combine the paint color of your choice with the cornstarch. Start by squeezing the desired paint amount into the mixing vessel and then gradually add the cornstarch while stirring until the mixture reaches the desired consistency.
The first time around, feel free to experiment with different proportions and colors to achieve unique effects.
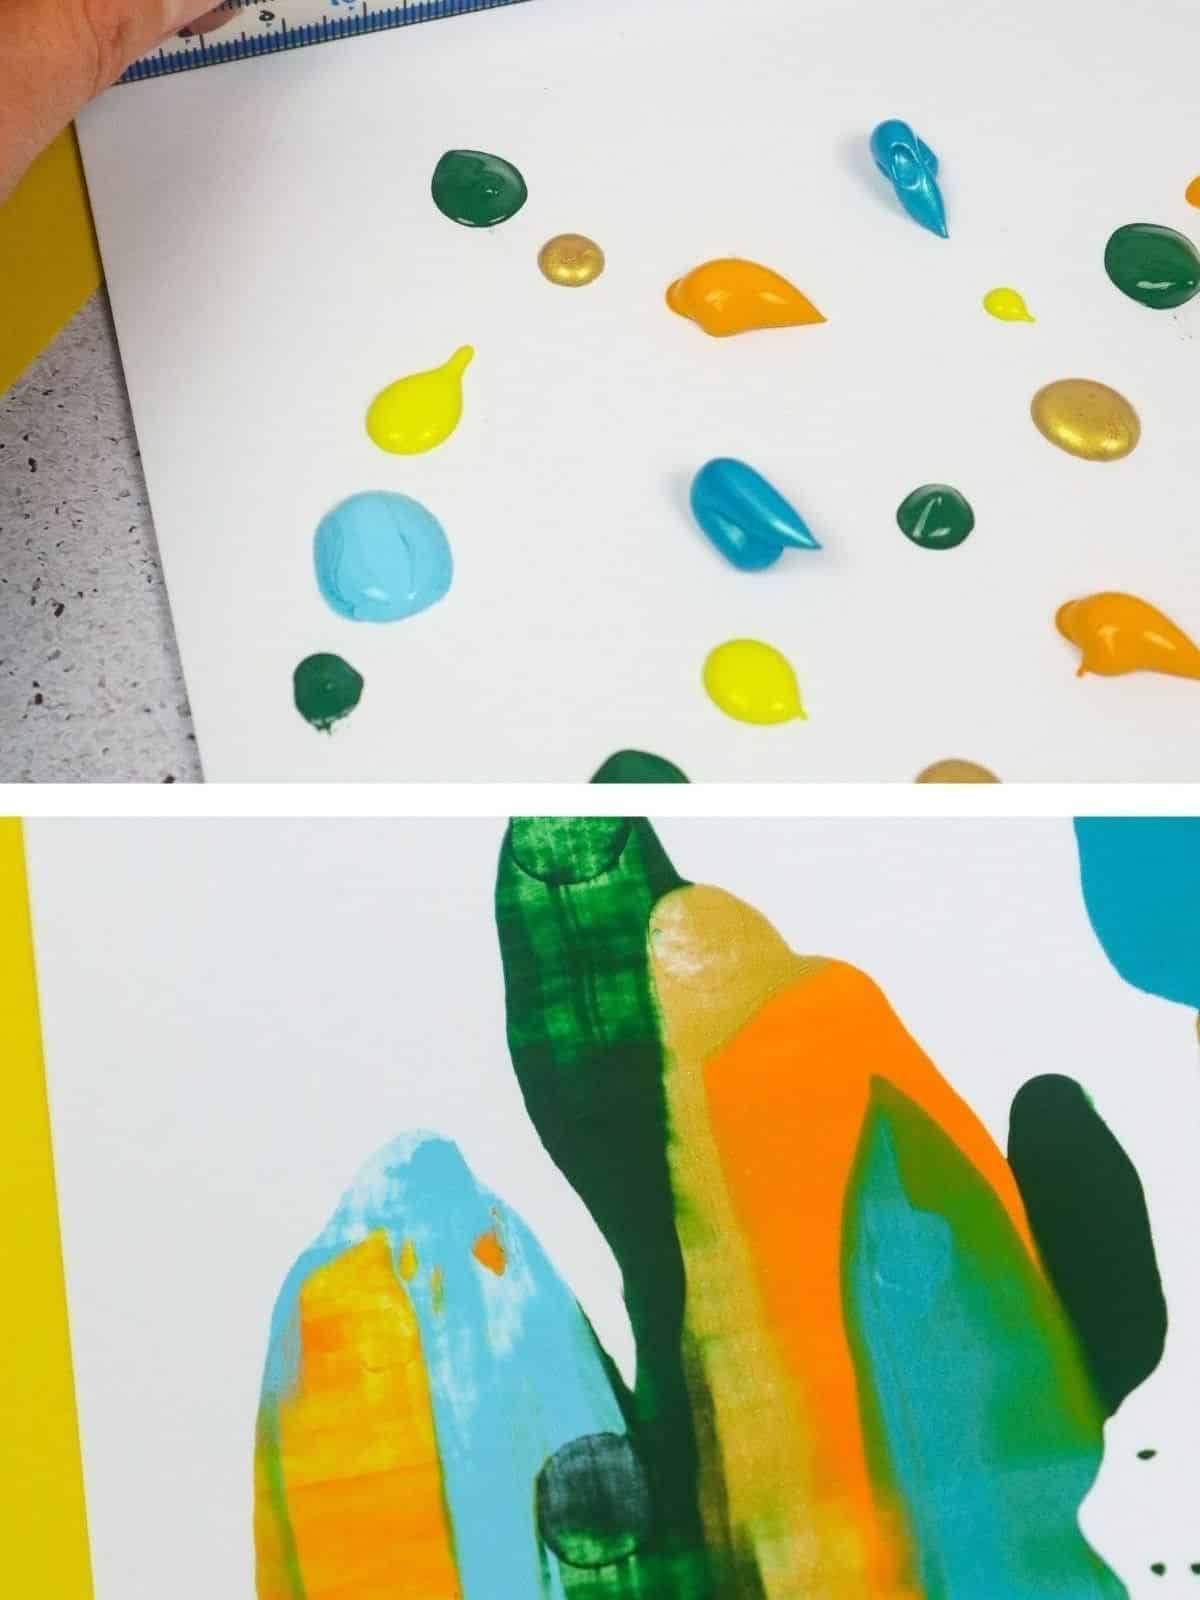
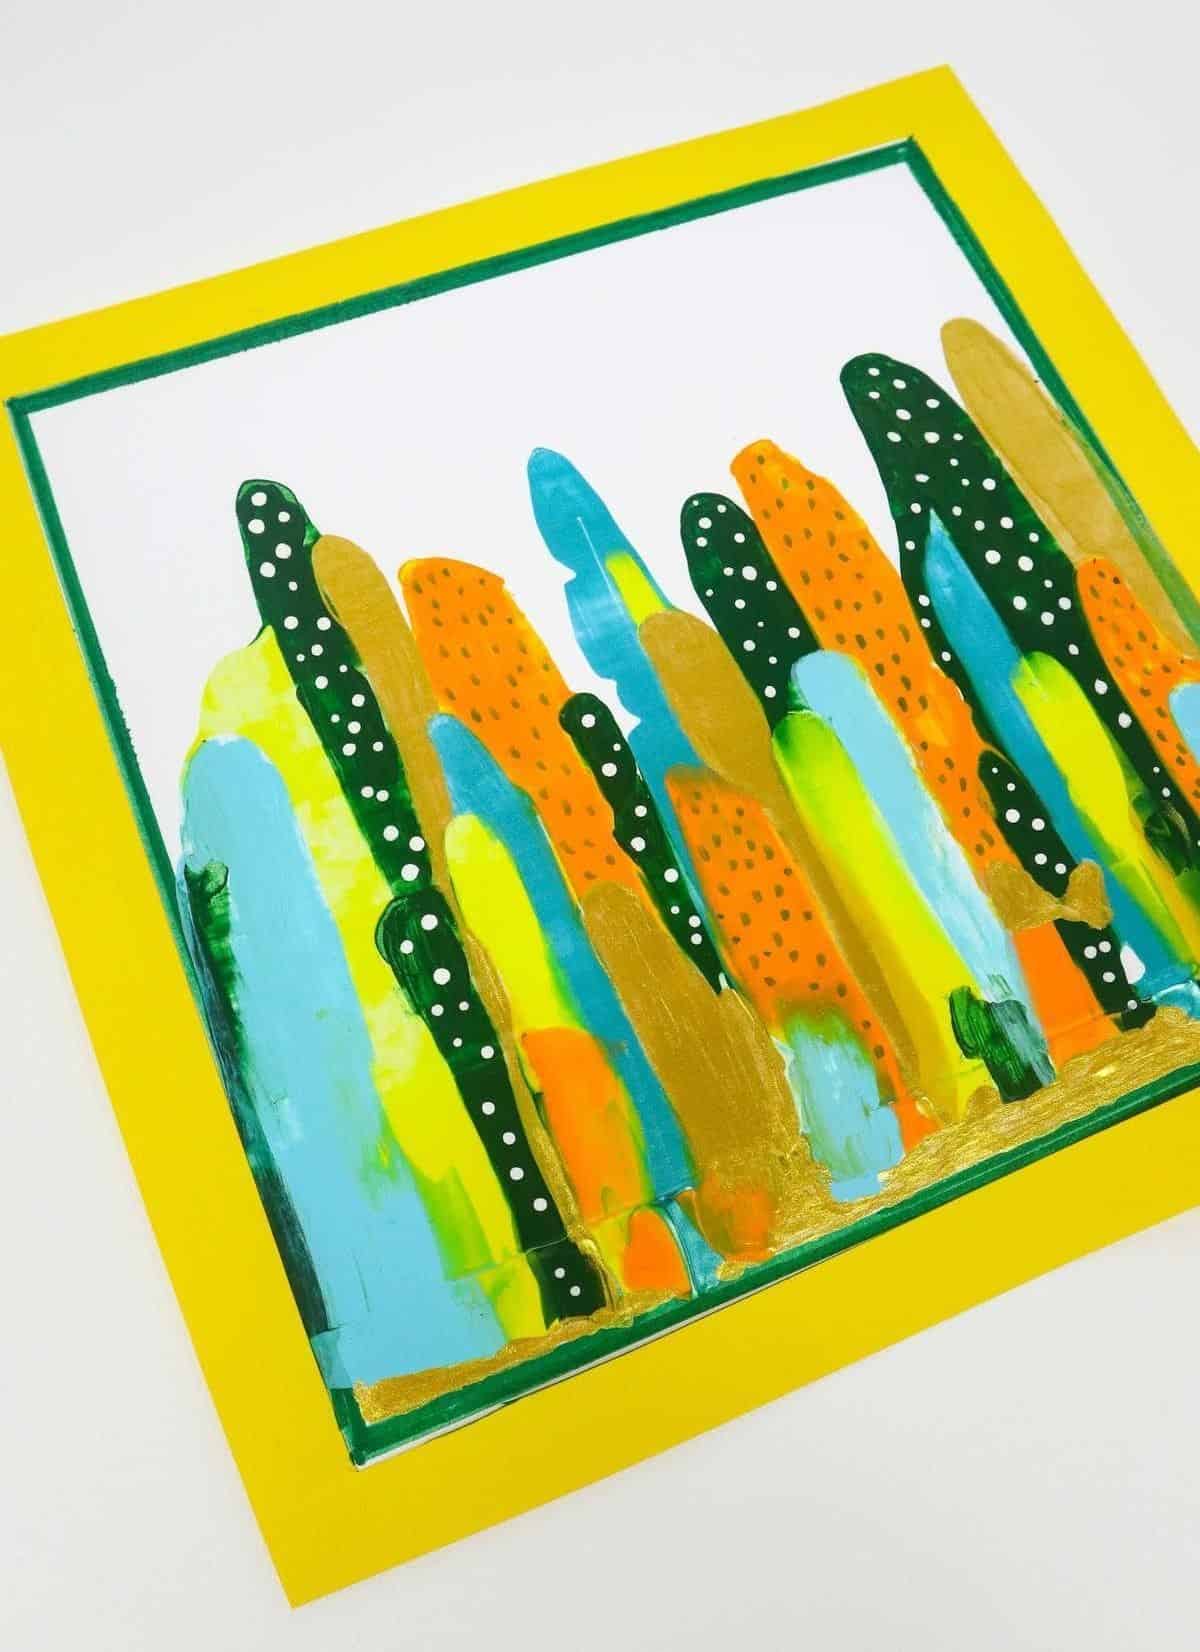
Use Cut-out Shapes
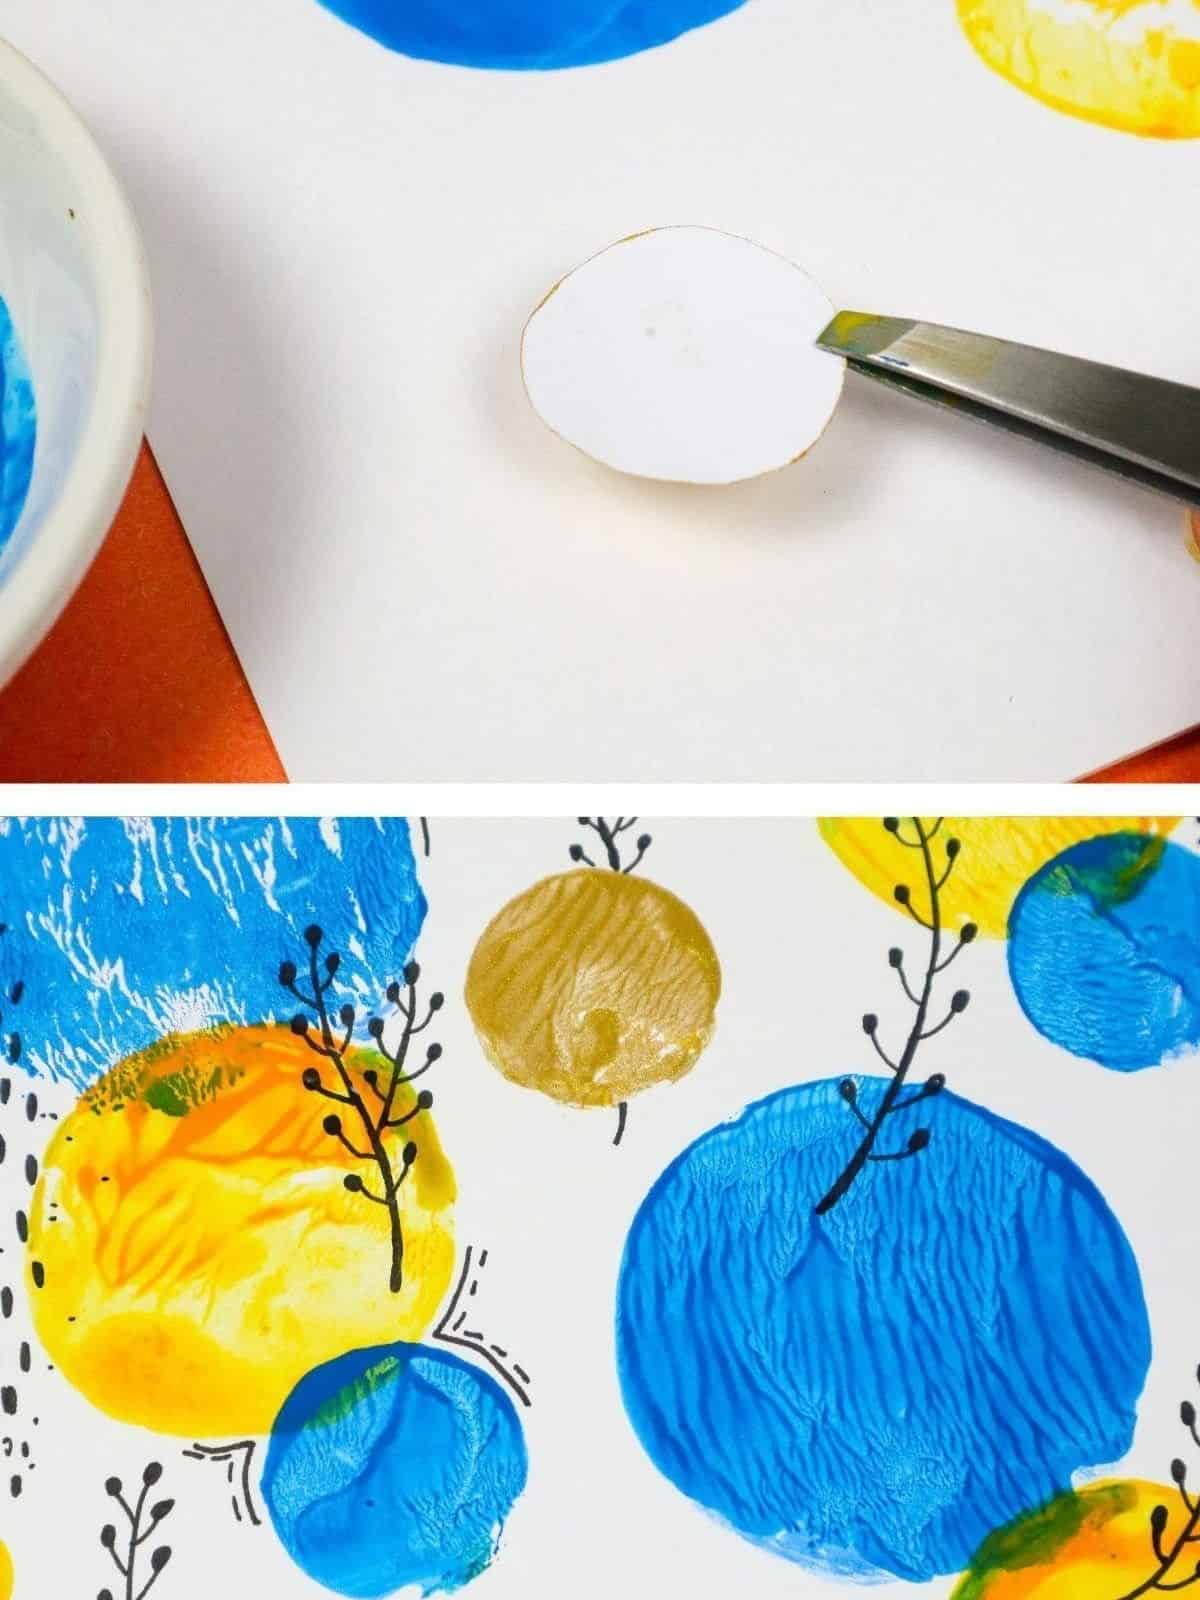
To streamline your workflow, incorporate uniform geometric shapes that will significantly reduce the time spent on cutting and arranging materials. Experiment with various materials that can be cut into desired forms, such as cardstock or craft paper. For added convenience, use a roll of duct tape to secure the shapes to a backing material. If you’re feeling creative, consider decorating your shapes using a paint pen in a dark color.
Just remember to wait for the wet edge to dry before adding any final touches.
Blow Your Ink with Straws
When it comes to adding intricate details to a project, things can quickly become complicated. To achieve a more organic appearance, consider using a straw to manipulate ink or paint droplets with precision. This technique is particularly useful when aiming to create a one-of-a-kind effect in motion. With the right tools and minimal paint, you can effortlessly produce a natural-looking result that will add an extra layer of uniqueness to your work.
Use Leaves as Stamps
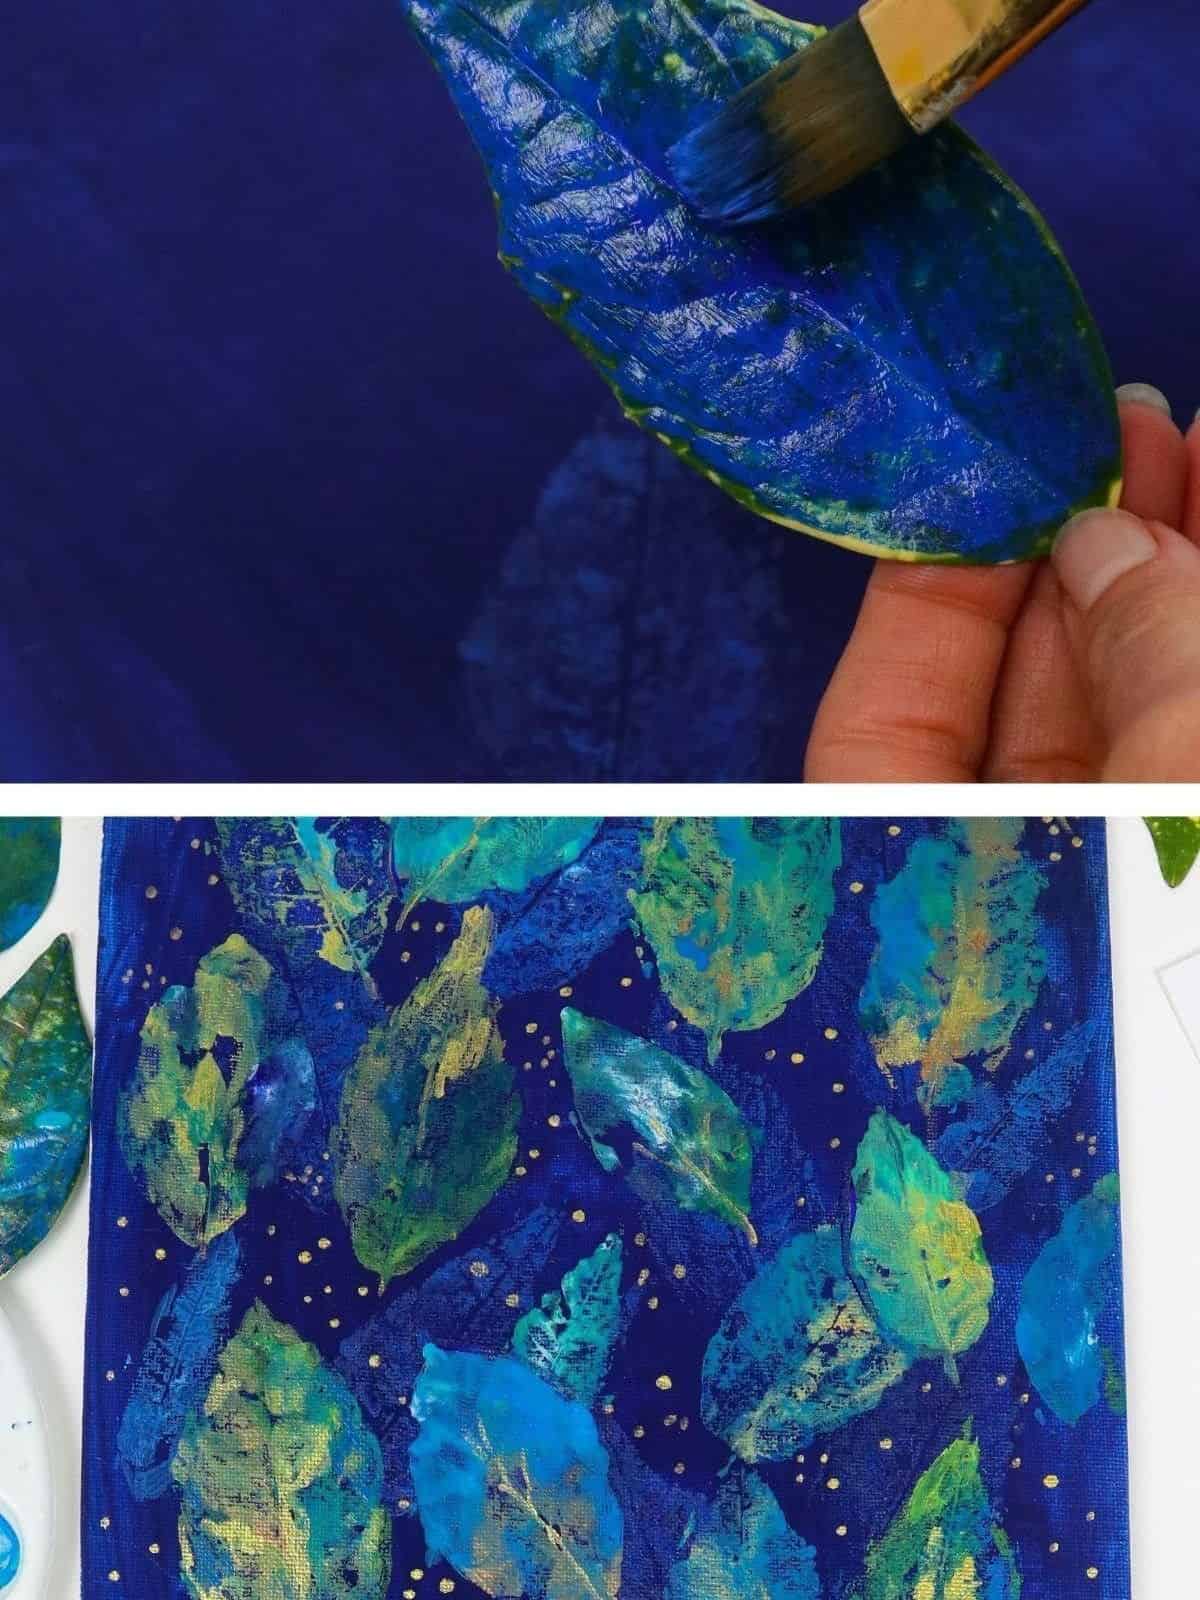
Engaging in creative activities with my children has always brought us joy. One such activity is playing with natural stampers. When working on patterned projects, I find it enjoyable to incorporate these stampers and experiment with different elements. For instance, incorporating leaves into the design can add a unique touch. Interestingly, it’s the slightly worn or less brittle leaves that tend to work better than those that are too crumbly.
To further enhance our creative experience, we like to mix things up by using various paints, inks, or color mediums. This not only allows us to achieve diverse boldness levels but also opens up new possibilities for artistic expression. Moreover, this technique can be applied to rock painting, making it a fun and unique idea.
Use Balloons
Incorporating creative flair into my printmaking practice has led me to experiment with an unexpected yet engaging technique – painting balloons! By inflating these spheres to various sizes, I’ve discovered a wealth of possibilities for manipulation and exploration. The sheer versatility of balloons adds an exciting dimension to the printing process, allowing me to push the boundaries of what’s possible.
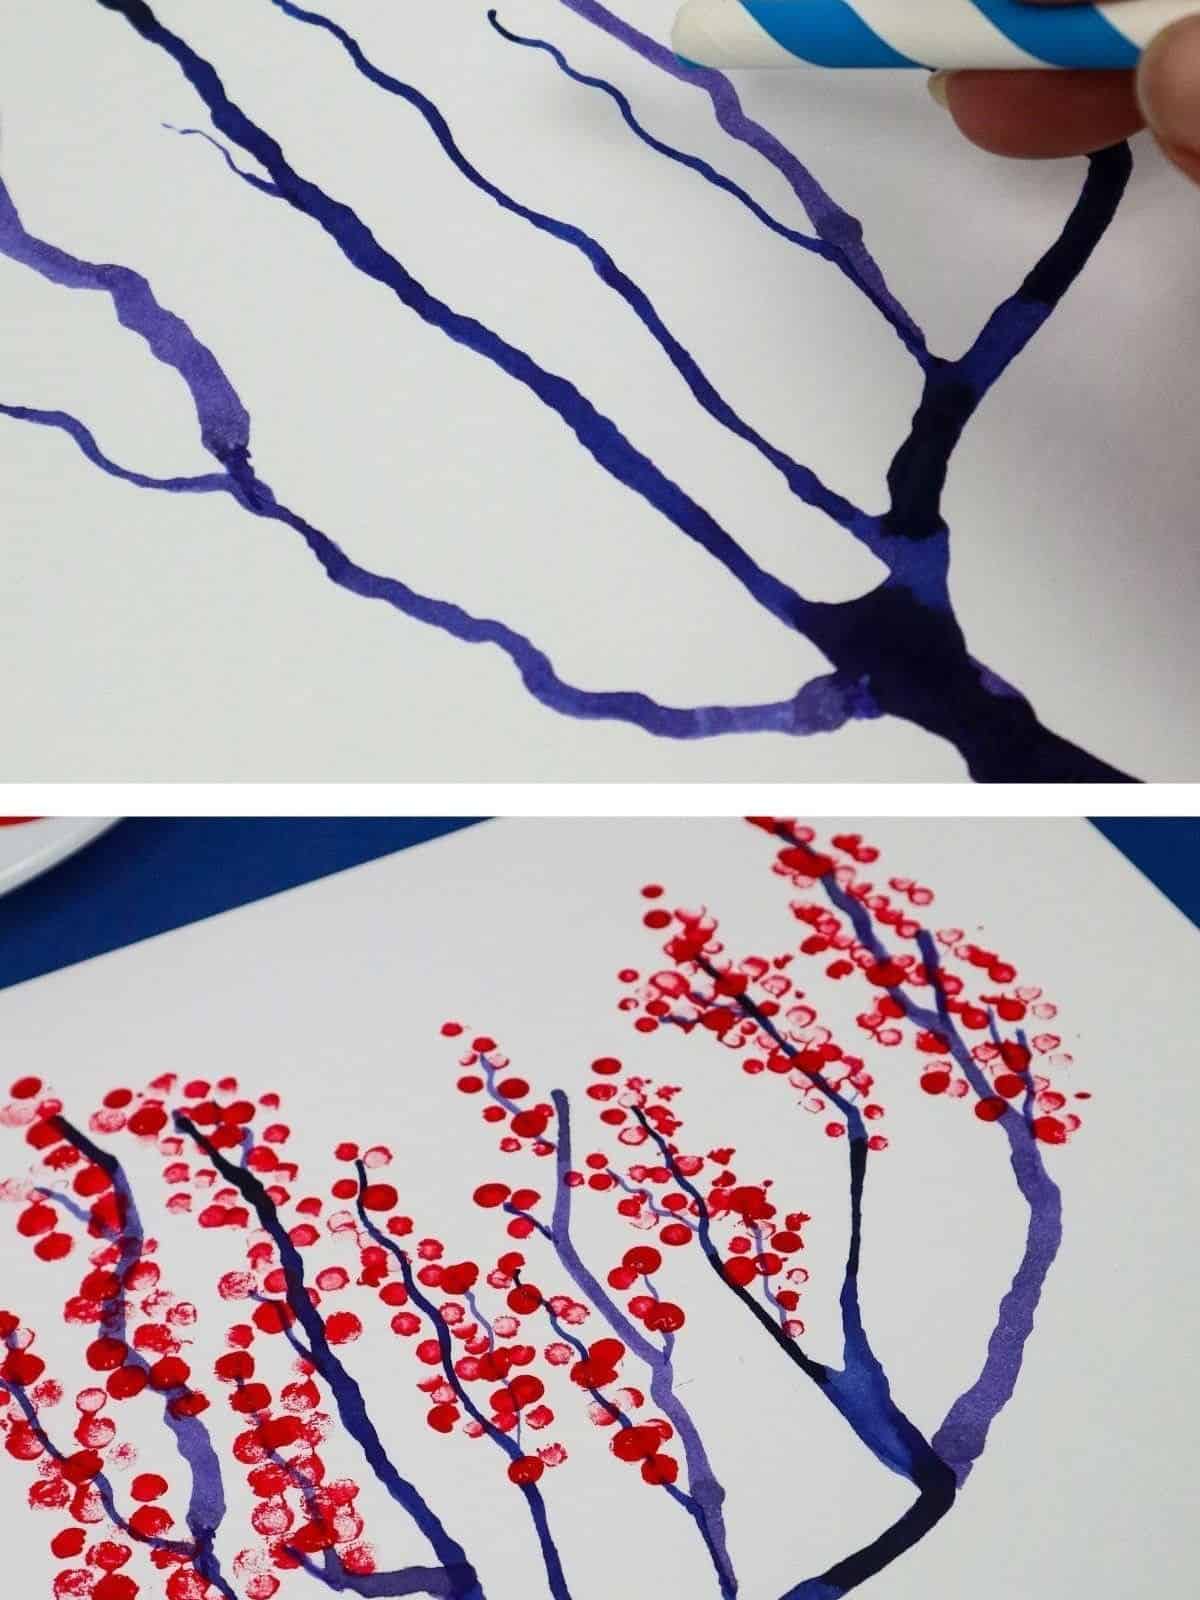
Don’t Forget the Power of Cotton Buds
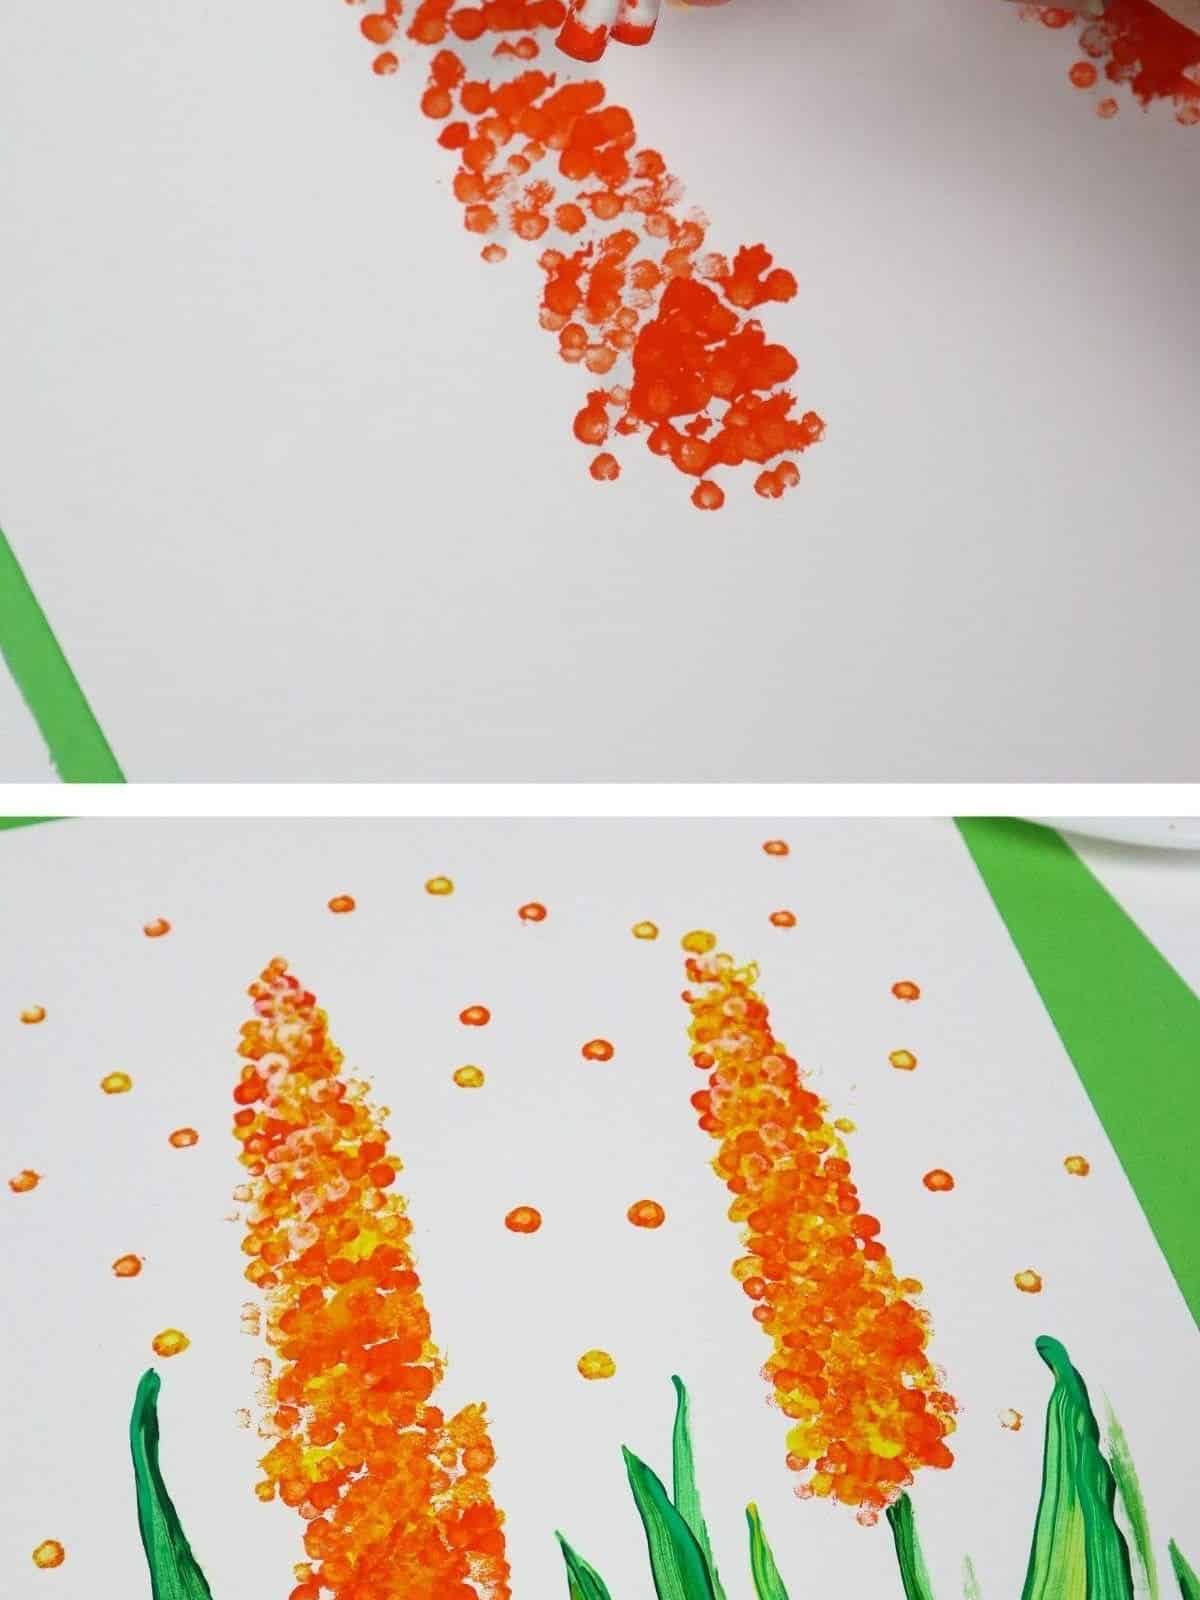
When it comes to adding a touch of creativity to your painting, Q-tips are an essential tool. By using them to accentuate pictures or create intricate designs with multiple colors, you can achieve a stunning visual effect. I’ve found that blending different paint types on the same image produces a beautiful balance of bold and pastel hues. The versatility of these small wonders has impressed me, and I’m excited to incorporate the various sizes into my future projects.
Incorporate Bubble Wrap
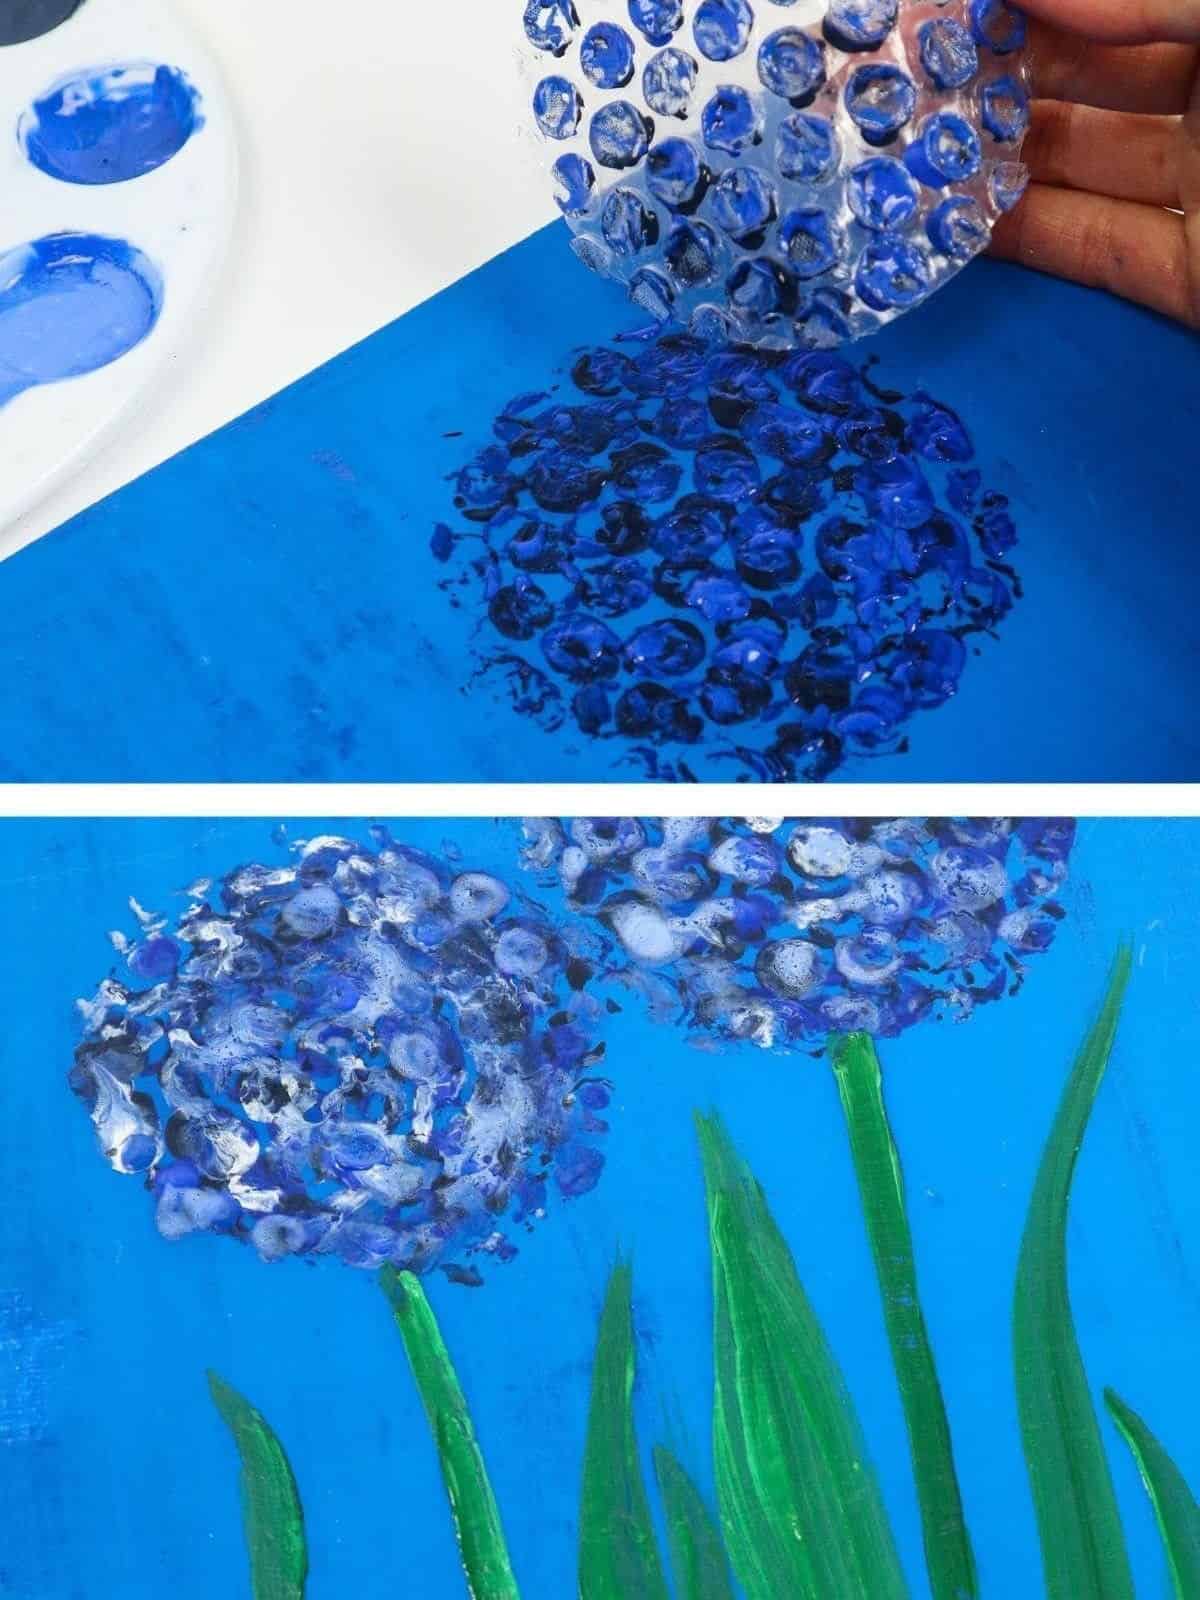
I’ve recently incorporated bubble wrap into my creative endeavors, and it’s been a game-changer. The versatility of this material is unparalleled, allowing me to craft unique shapes tailored to each project. Once I’ve cut out the desired template, I gently dip it into paint, taking care not to overload the surface. After carefully pulling it away from the paint, I transfer the design to my project and repeat the process as needed to achieve the desired effect.
What’s even more impressive is that once the templates are no longer needed, they can be washed clean and stored with my art supplies for future use. This hack has not only saved me time but also reduced waste in the long run.
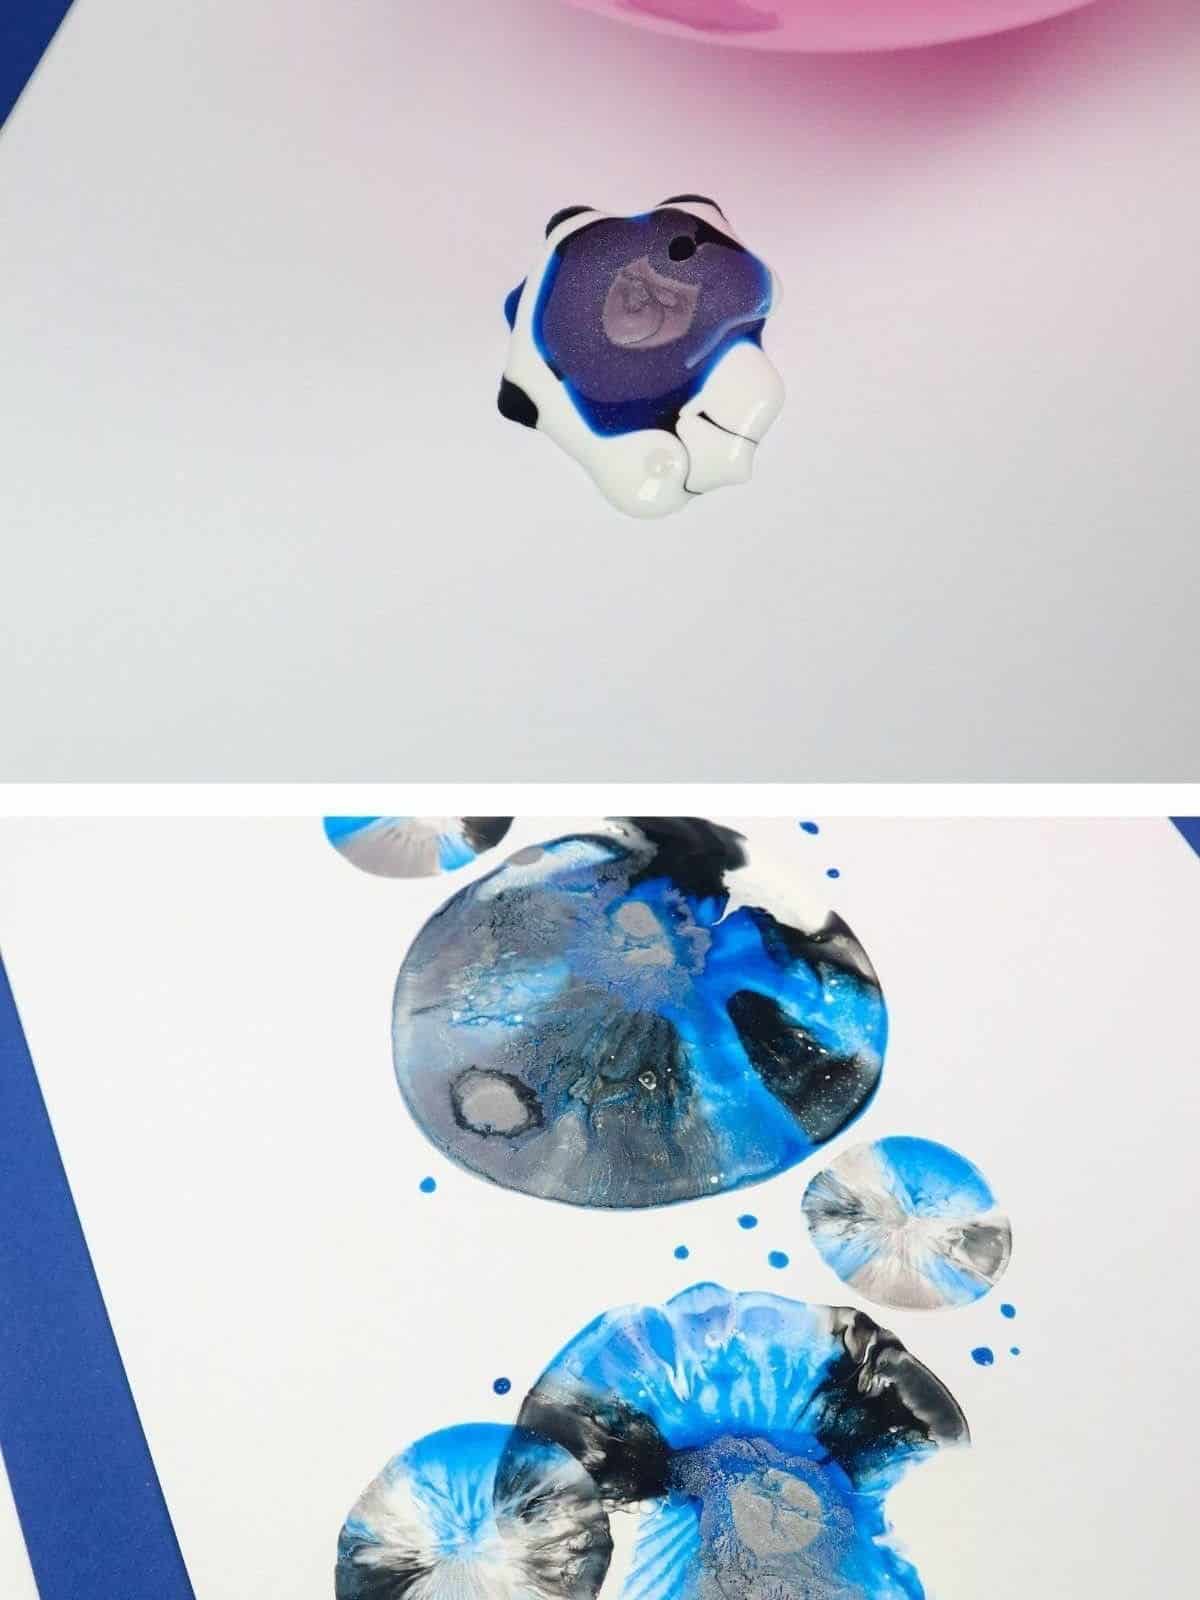
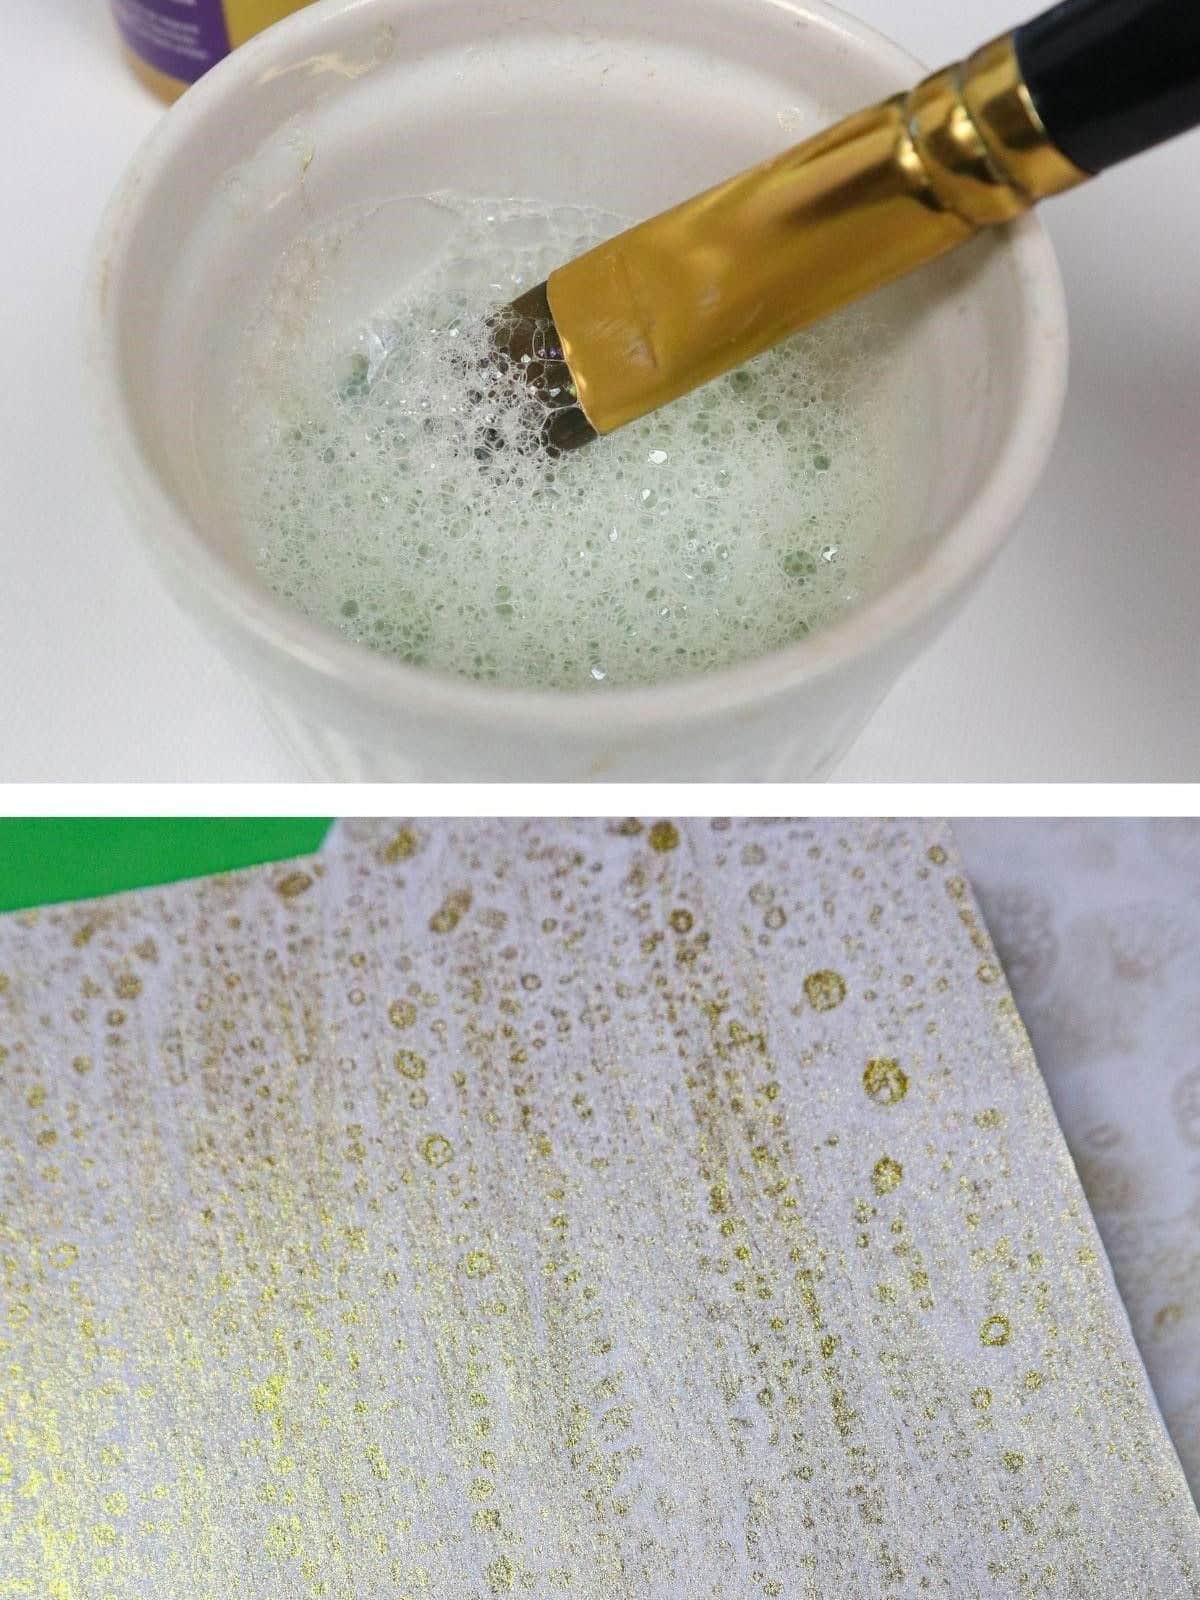
Use the Power of Bubbles
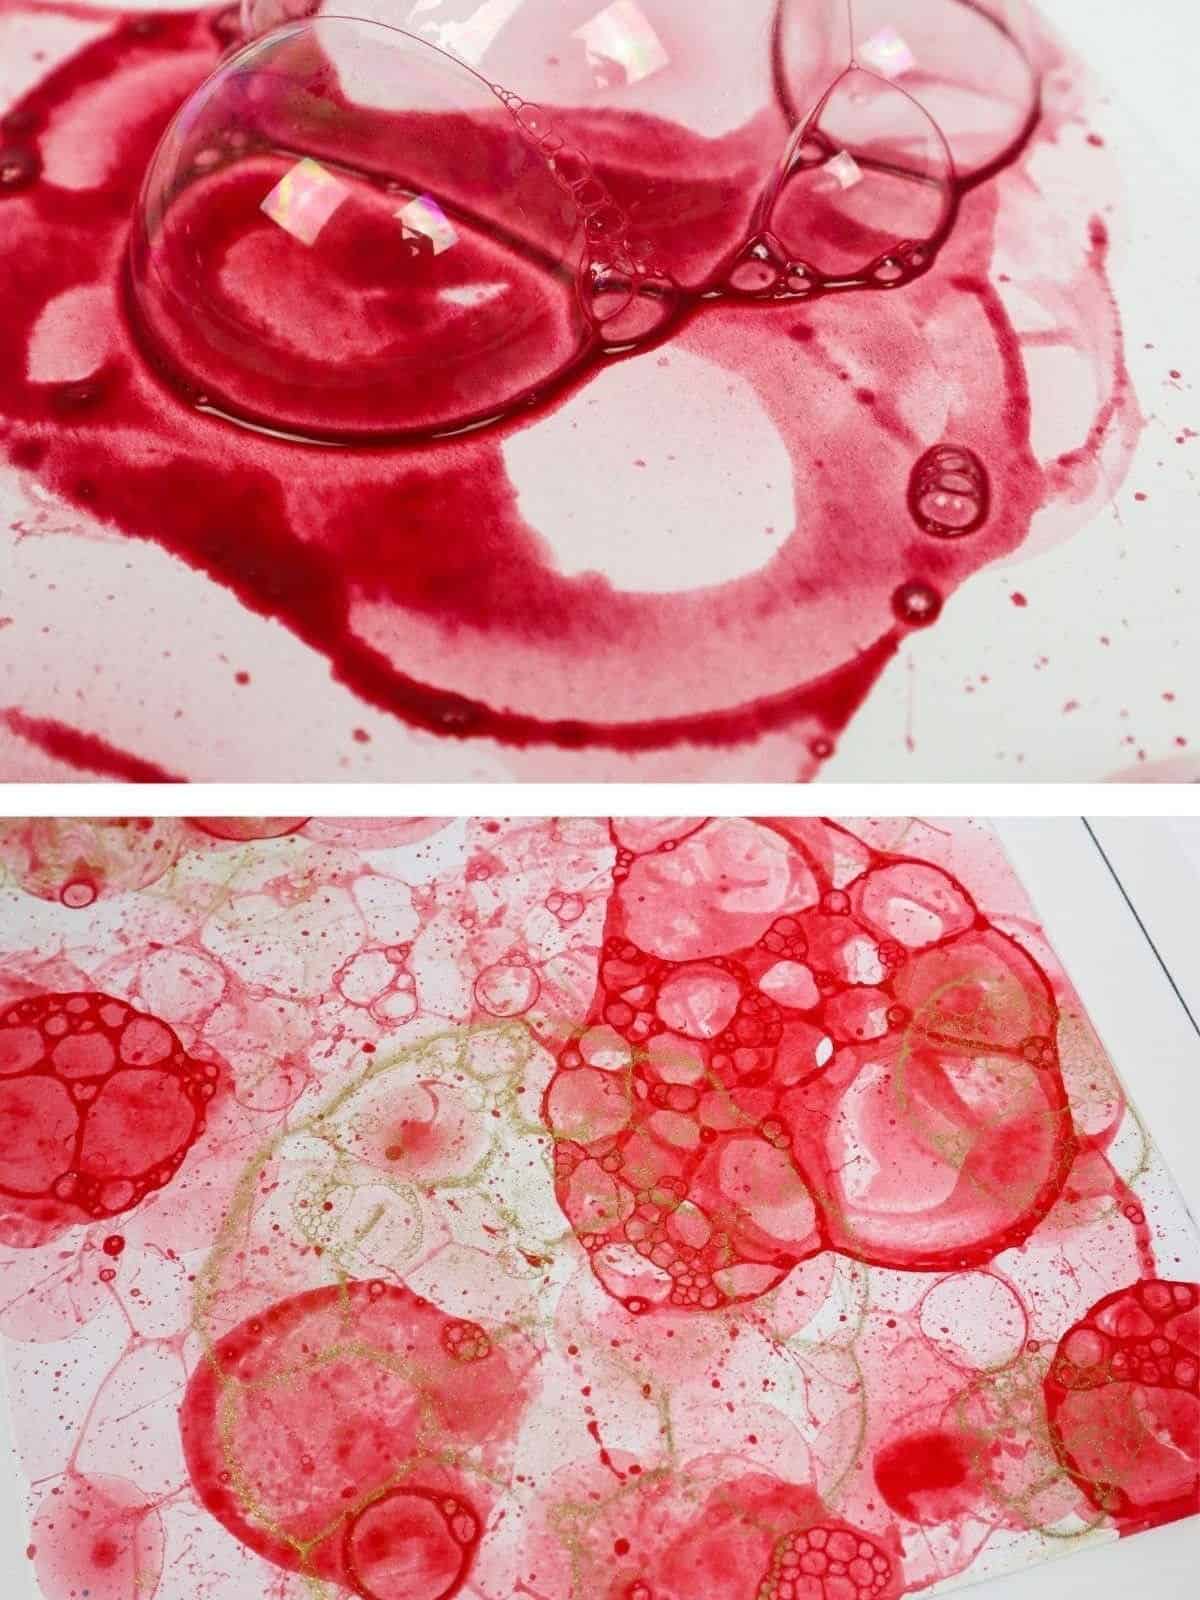
When exploring creative techniques with my kids, we stumbled upon an innovative approach – painting with bubbles. This method not only yields exciting depth in our art but also sparks imagination. To get started, gather the necessary materials: tempera paint in your desired colors, dish soap, and a small amount of water. Experiment with the ratios to achieve the perfect shade intensities for your project.
Once you’ve mixed everything, grab a bubble blower or multiple blowers (like this fun pack, which includes wands of varying widths) and dip it into the concoction. Then, simply blow away! The pack’s different wand sizes allow for unique results and endless creativity.
Add Dish Soap to the Paint
While it may seem like a simple concept – blending soap with paint – there’s actually tremendous scope for creativity. By experimenting with different proportions of soap to paint, you can create an array of unique and fascinating effects. The key is to find the perfect balance between the two, allowing you to manipulate the texture, color, and even the level of bubble formation to suit your desired outcome.
As you play around with various types of paints and soapy water mixtures, you’ll discover a world of endless possibilities and creative expressions waiting to be explored.
Use Cling Film
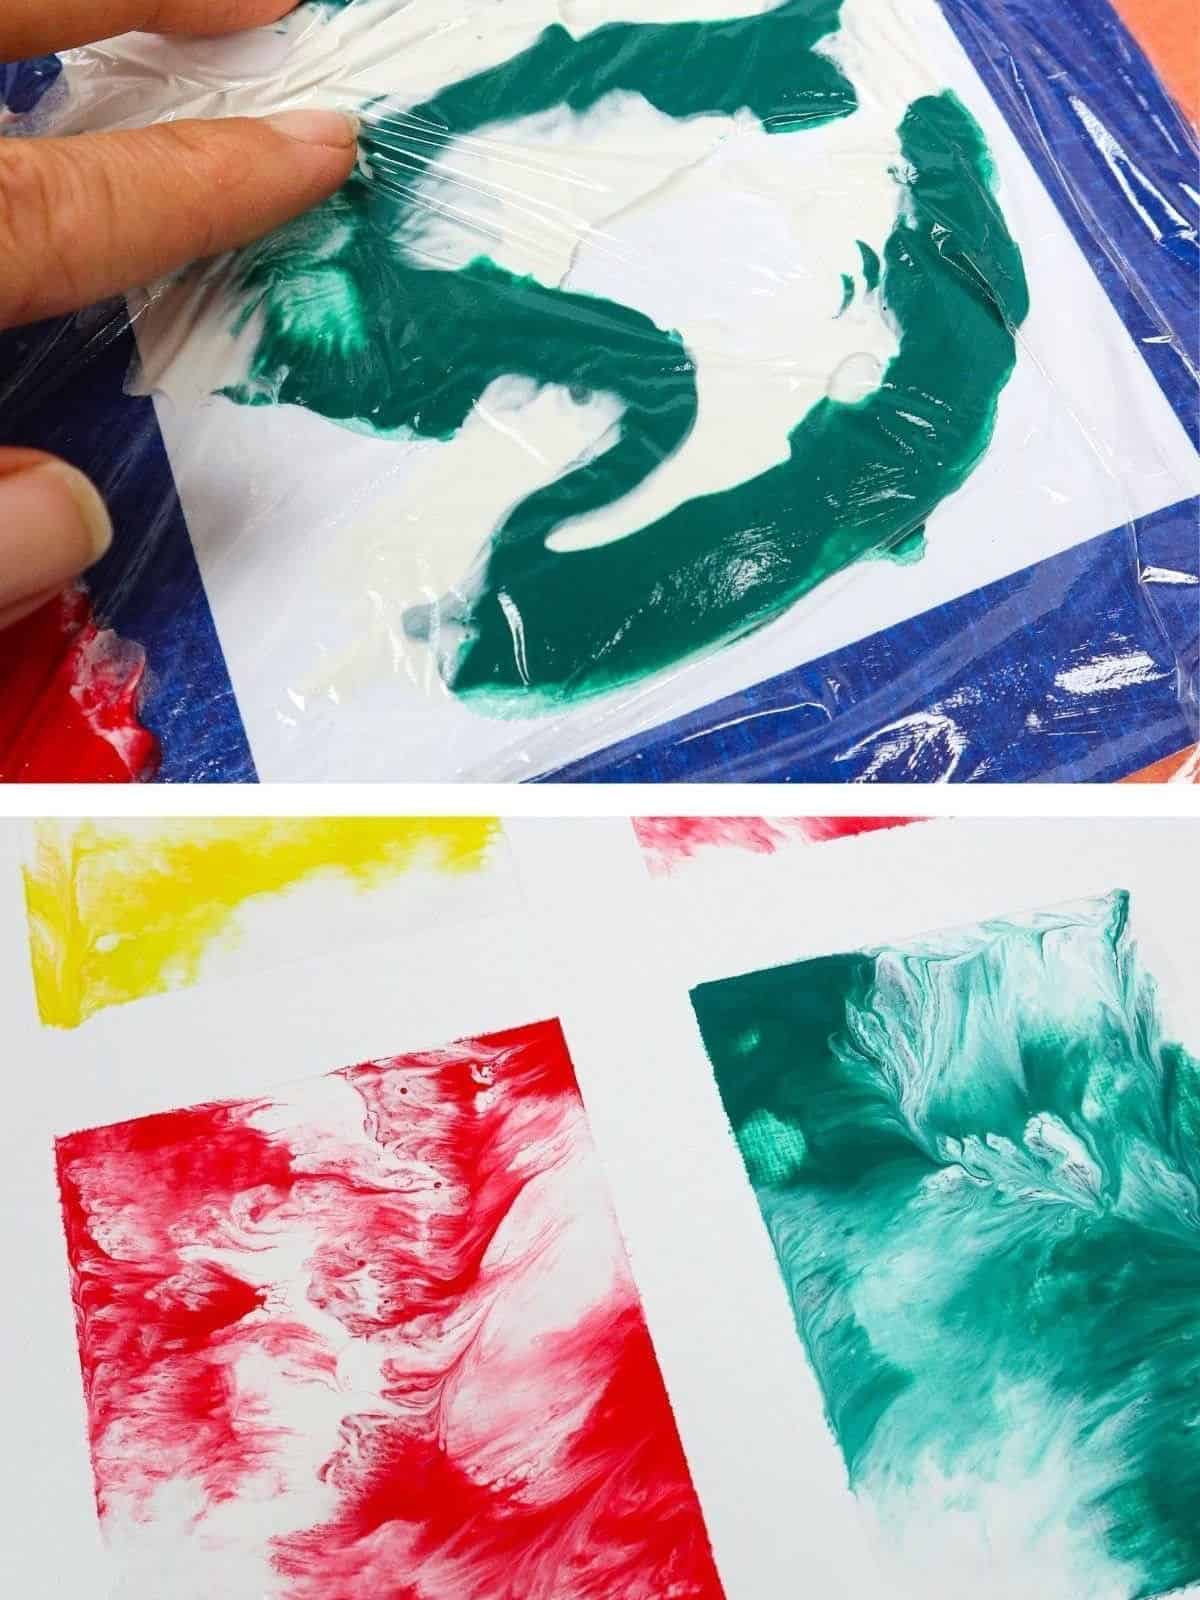
Get ready to unleash your inner artist! For a unique marbling effect, simply apply masking tape to your page, followed by a dollop of your favorite paint. Next, place cling wrap or plastic wrap on top and use any available tool – be it a paint roller, fingers, or even a credit card – to manipulate the colors. When you’re satisfied with the design, carefully peel away the wrap and let the artwork dry. And if you don’t have cling wrap, no worries!
A well-sealed ziploc bag can produce similar results.
Paint Flowers with a String of Beads
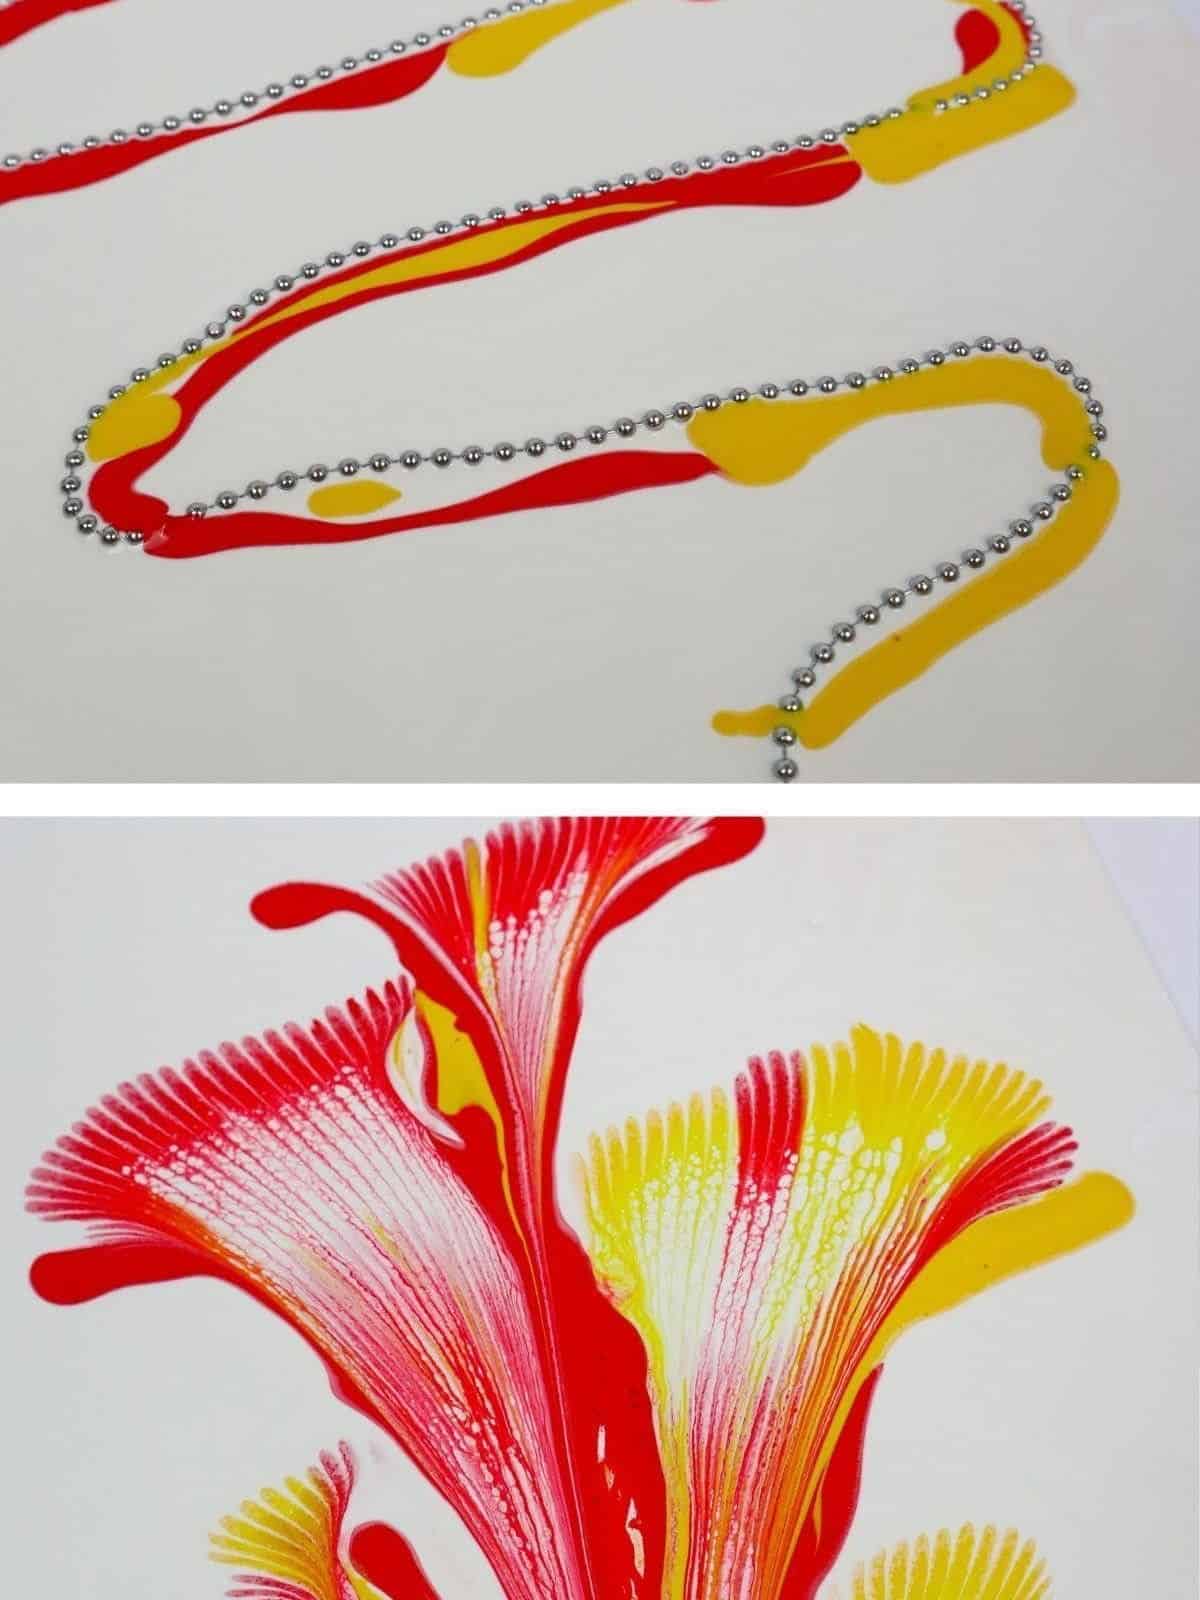
I often experiment with abstract art by dragging unexpected elements through paint, which yields one-of-a-kind shapes. A favorite material of mine to use is beaded strings, which simultaneously create subtle and striking lines as they traverse the color palette. The process begins by applying paint to the page, then gently pulling the beads in various directions. Once I’ve achieved the desired effect, I rinse the strings and set them aside for future uses in my watercolor flower paintings.
Dab Your Brush into Multiple Colors
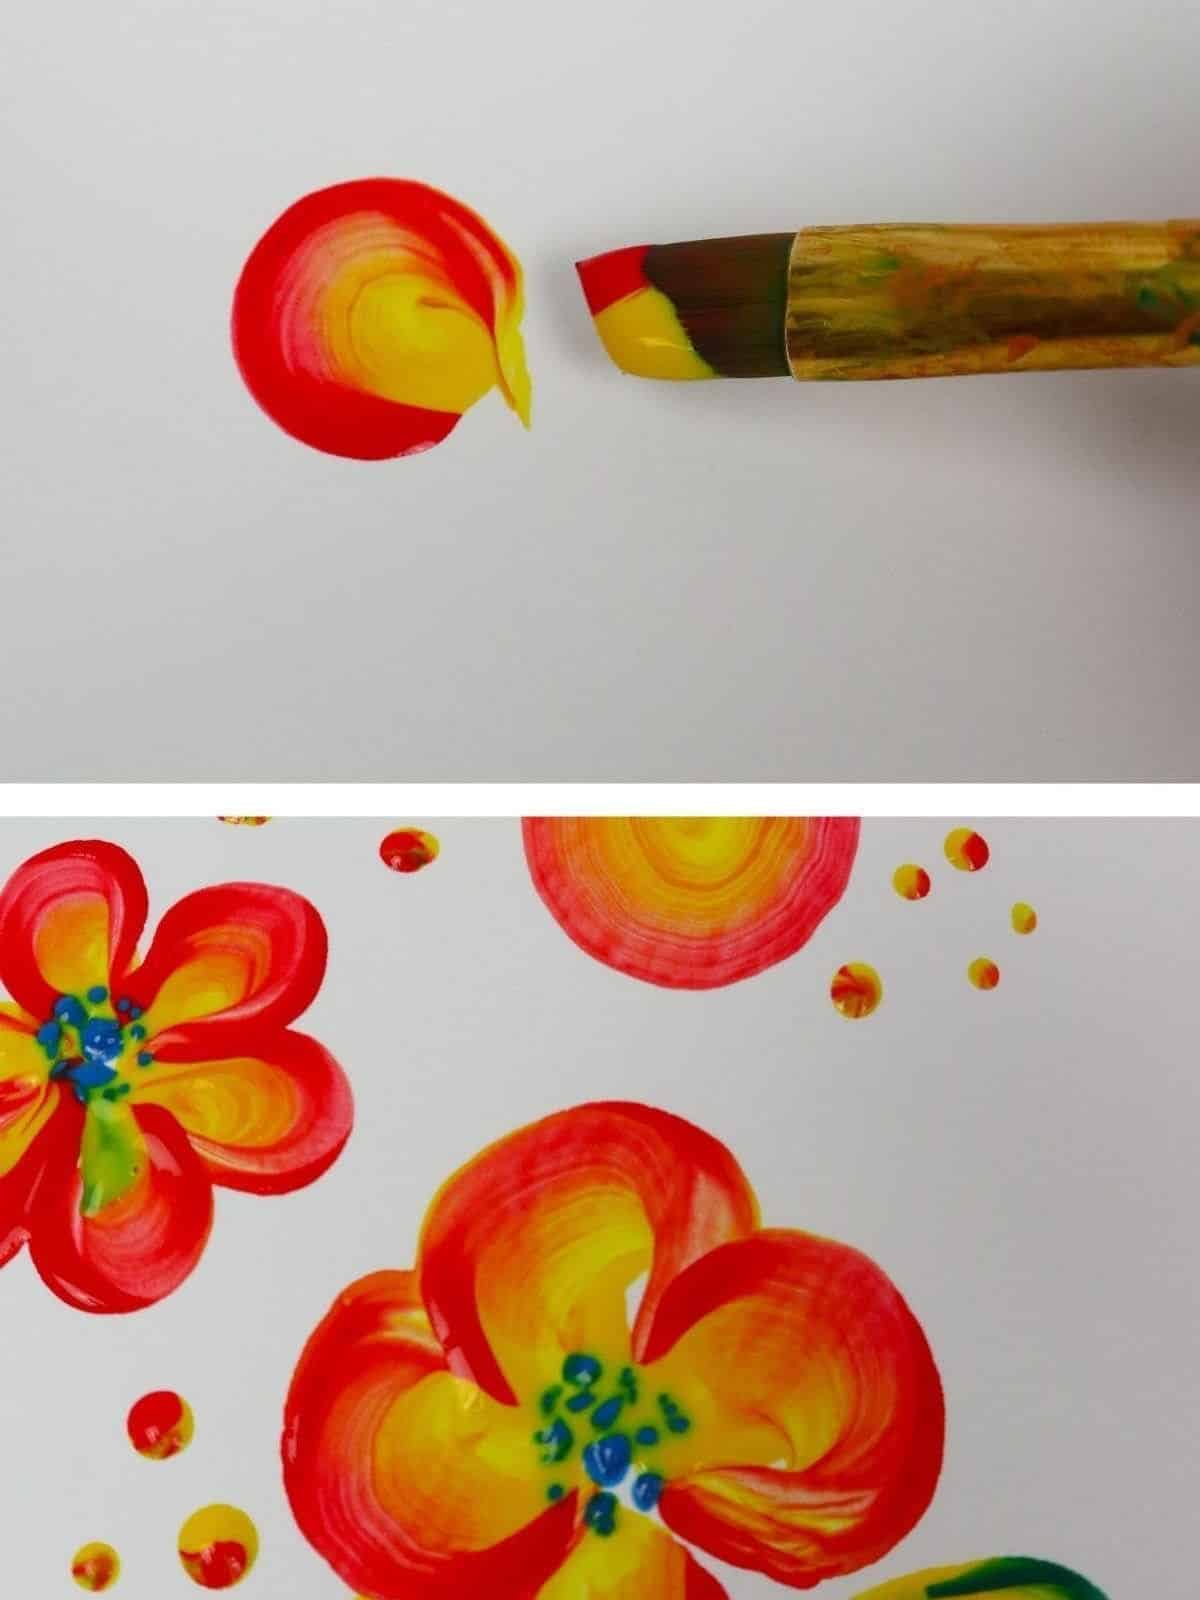
When mastering this hack, it’s crucial to develop proficiency through experimentation on a separate medium before applying it to your actual work. This is particularly important when aiming to create intentional designs on your page. As you work with this technique, keep in mind that the outer colors should be applied first, followed by the inner color, which should be closer to the angled part of the brush. Additionally, it’s vital to test the amount of color used to achieve the desired effect.
Use Strings to Create Art of Your Dreams
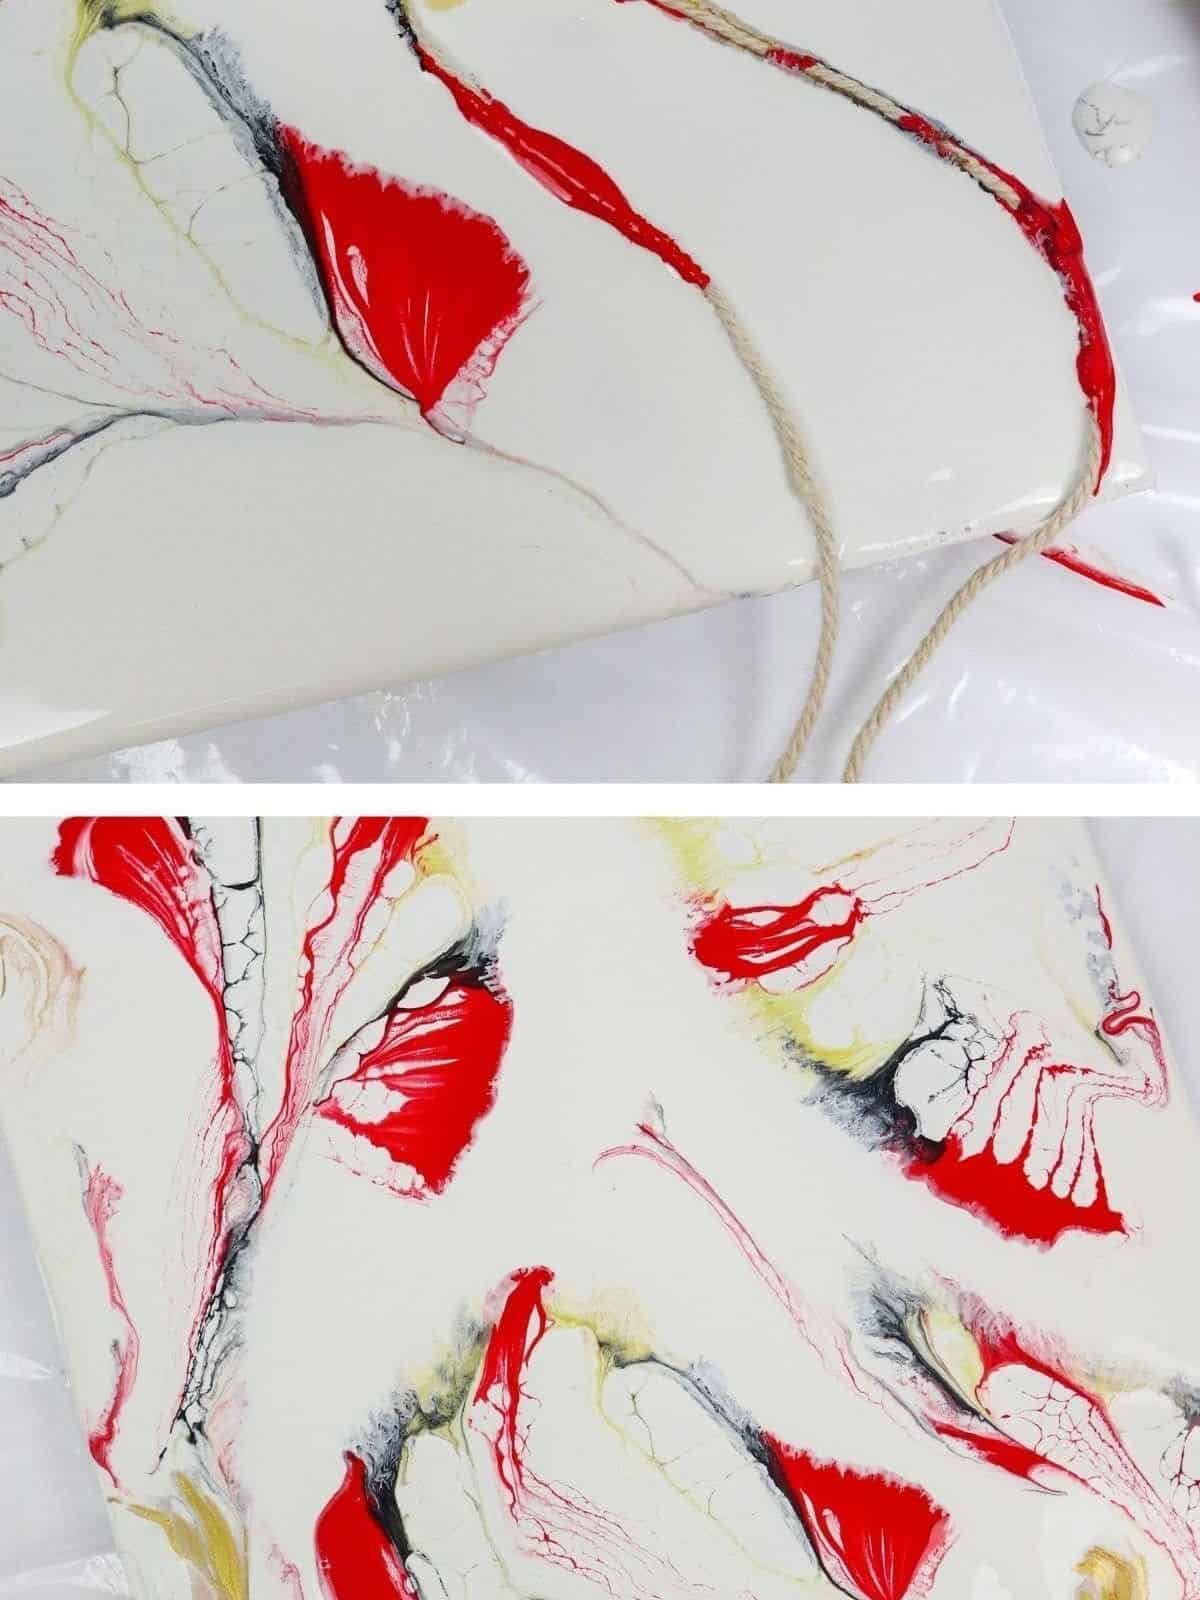
When experimenting with pulling items through paints, I find it fascinating. To achieve unique effects, try varying string sizes, combining multiple strings together, or incorporating knots into the line. Among my most successful endeavors has been using tempera paint; however, I believe diving into diluted marker water might lead to an intriguing project. The possibilities are endless, and I’m eager to explore them further.
Pour Away
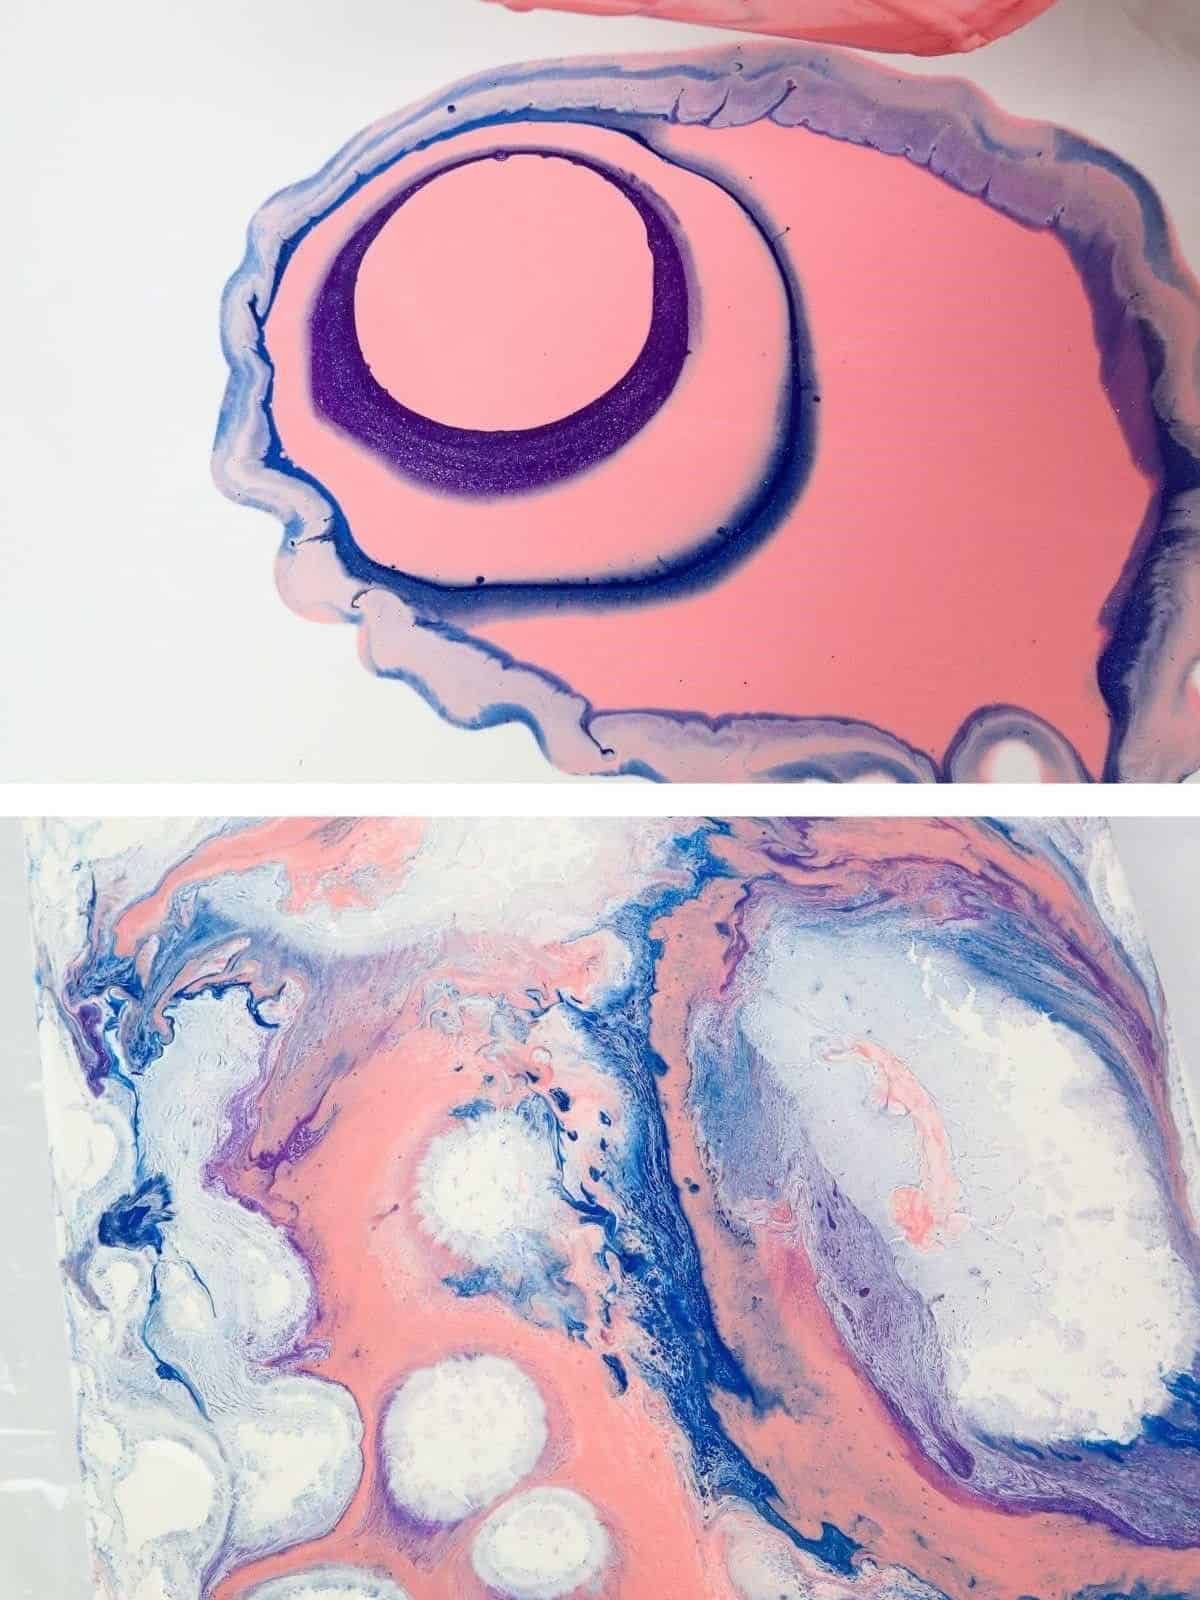
When experimenting with this creative technique, it’s crucial to have ample space to let your imagination run wild. I’ve found that tempera or acrylic paints work particularly well for achieving stunning pooling effects. To further optimize the process, I recommend setting up a dedicated workspace by placing the canvas or material you’re about to paint on in an oversized tub.
This not only provides a comfortable surface for tilting and manipulating the poured paint but also serves as a convenient storage solution for various art supplies.
Layer Your Colors in a Funnel
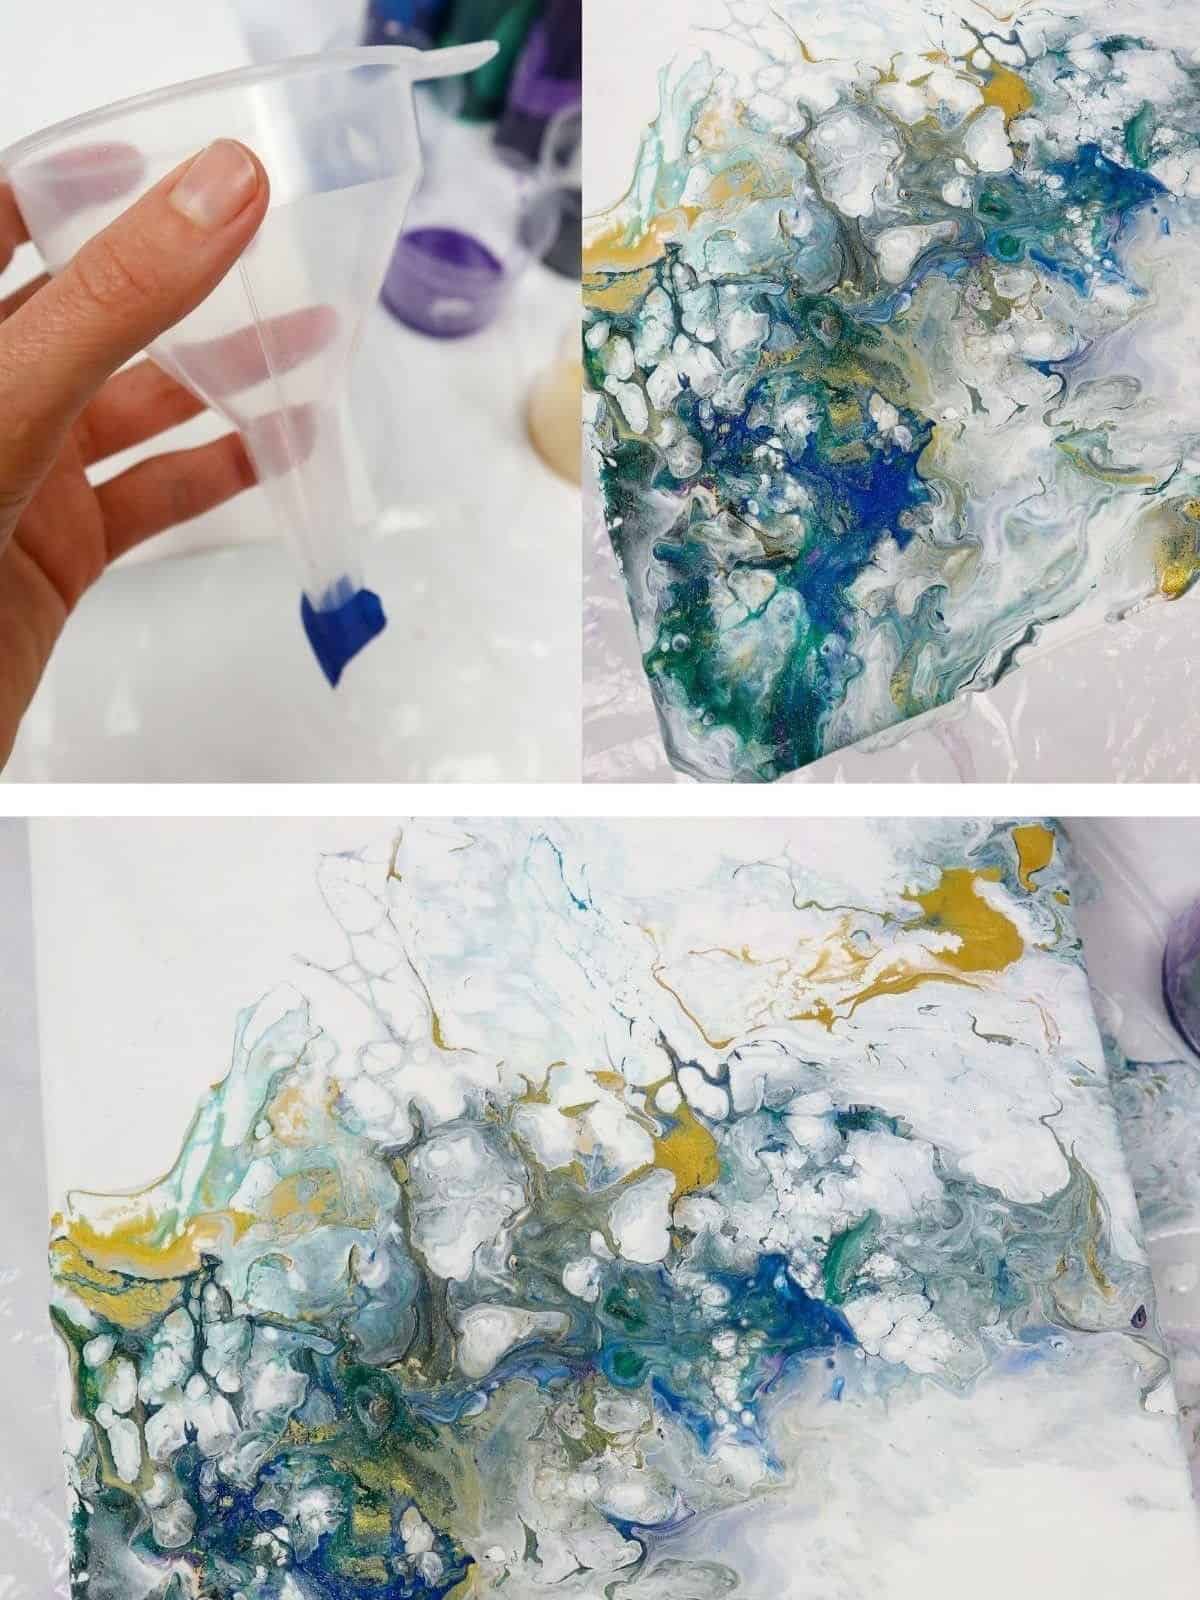
The art of layering paint with a funnel is a technique that has fascinated me for some time now. To achieve this look, start by holding the funnel over the canvas, allowing the paint to flow smoothly and evenly. I’ve found that using a funnel with an effective stopper at the bottom helps minimize mess and makes the process even more enjoyable. Feel free to stay in one spot while releasing the paint or experiment with moving the funnel around for unique effects.
Create with a Hair Dryer

When exploring unconventional artistic methods, one often overlooked tool is the humble blow dryer. Chances are, you already have one at home, making it an accessible addition to your creative arsenal. In fact, I’ve discovered some incredibly talented artists who credit their success to experimenting with blow dryer art. The key to unlocking this hack’s full potential lies in exploring various materials and paints to find the perfect combination for your unique style.
For a smooth, flat surface that’s begging to be highlighted, apply a sealant layer once it’s fully dry to give your artwork an extra layer of protection and visual appeal.
Make Use of Your Plastic Bottles
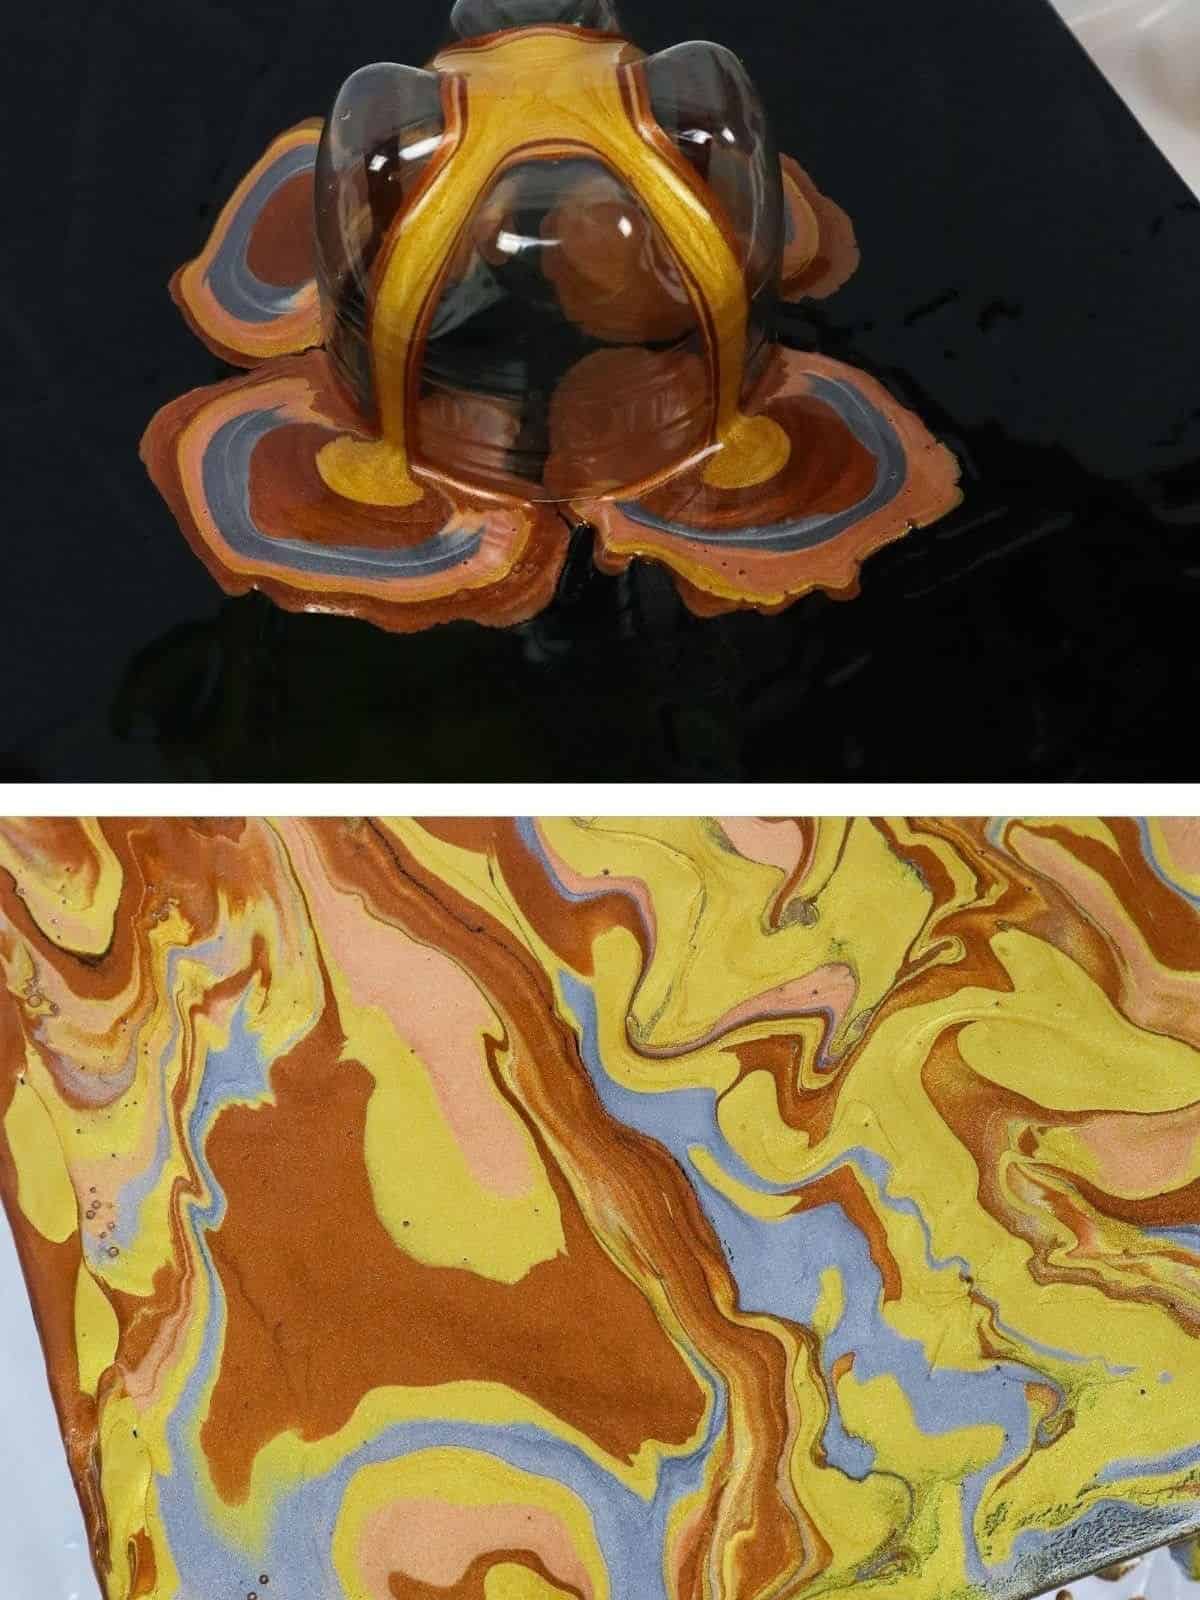
To effortlessly layer paint on your page, consider using the bottom of a plastic bottle as a makeshift funnel. Any four-pointed bottle will work well with pourable paint. Begin by cutting off the top quarter of the bottle and recycling the remaining portion or reusing it as another funnel. Place the cut-off bottom onto your surface with the points facing upwards. Next, gather your paints and start pouring!
The first colors to be applied will flow farther away from the bottle as you work, creating a unique marbled effect when you lift the funnel. If you’re unsure what to paint with this technique, try out some beginner-friendly ideas and get creative!
Use Decorative Tape

Tape is an invaluable resource for artists, serving as a versatile tool that can transform a project from ordinary to extraordinary. Not only does it provide stability and definition, but it also enables the creation of unique negative spaces and bespoke canvas shapes. In this creative exploration, we’ll delve into crafting a personalized triangle ombre effect using tape.
To get started, simply tape out your desired shape onto a surface, then apply paint dots within the boundaries.
Once you’ve achieved the desired level of coloration, use a brush or other tool to blend the hues together, allowing the mixture to dry completely.
After the paint has fully set, carefully remove the adhesive to reveal your one-of-a-kind artwork, expertly crafted by your own hands.
Use Your Hair Brush
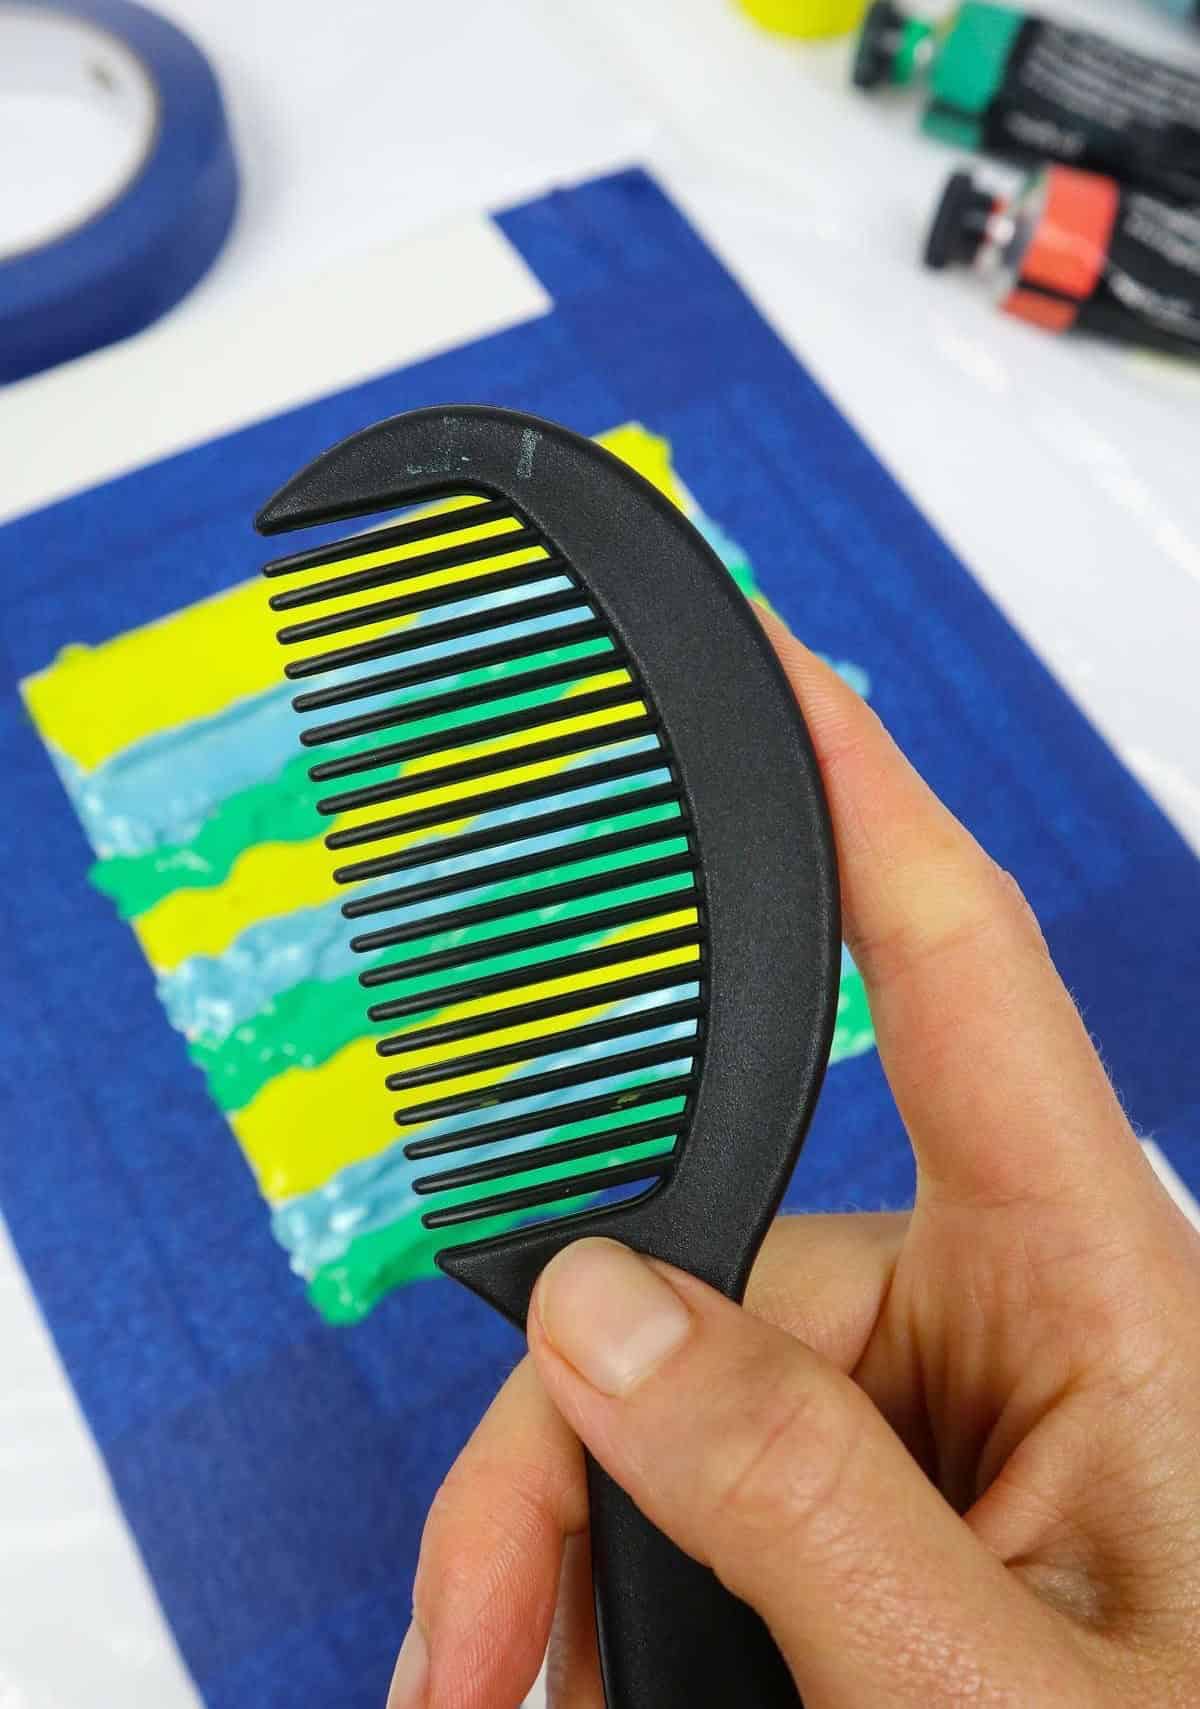
This seemingly unusual technique has become an essential tool in my creative process. When working on various projects, I’ve found that this pack of combs and brushes is incredibly versatile and effective. To get the most out of it, I like to experiment with different techniques, such as applying paint directly to the comb or brush, then manipulating the tines or bristles to achieve unique effects.
Another great way to test its possibilities is by creating a test sheet using various combs or brushes you’re willing to try. This will give you a sense of the different results you can achieve with this tool. If you’re looking for more innovative painting ideas, I encourage you to check out these watercolor hacks specifically designed for beginners.