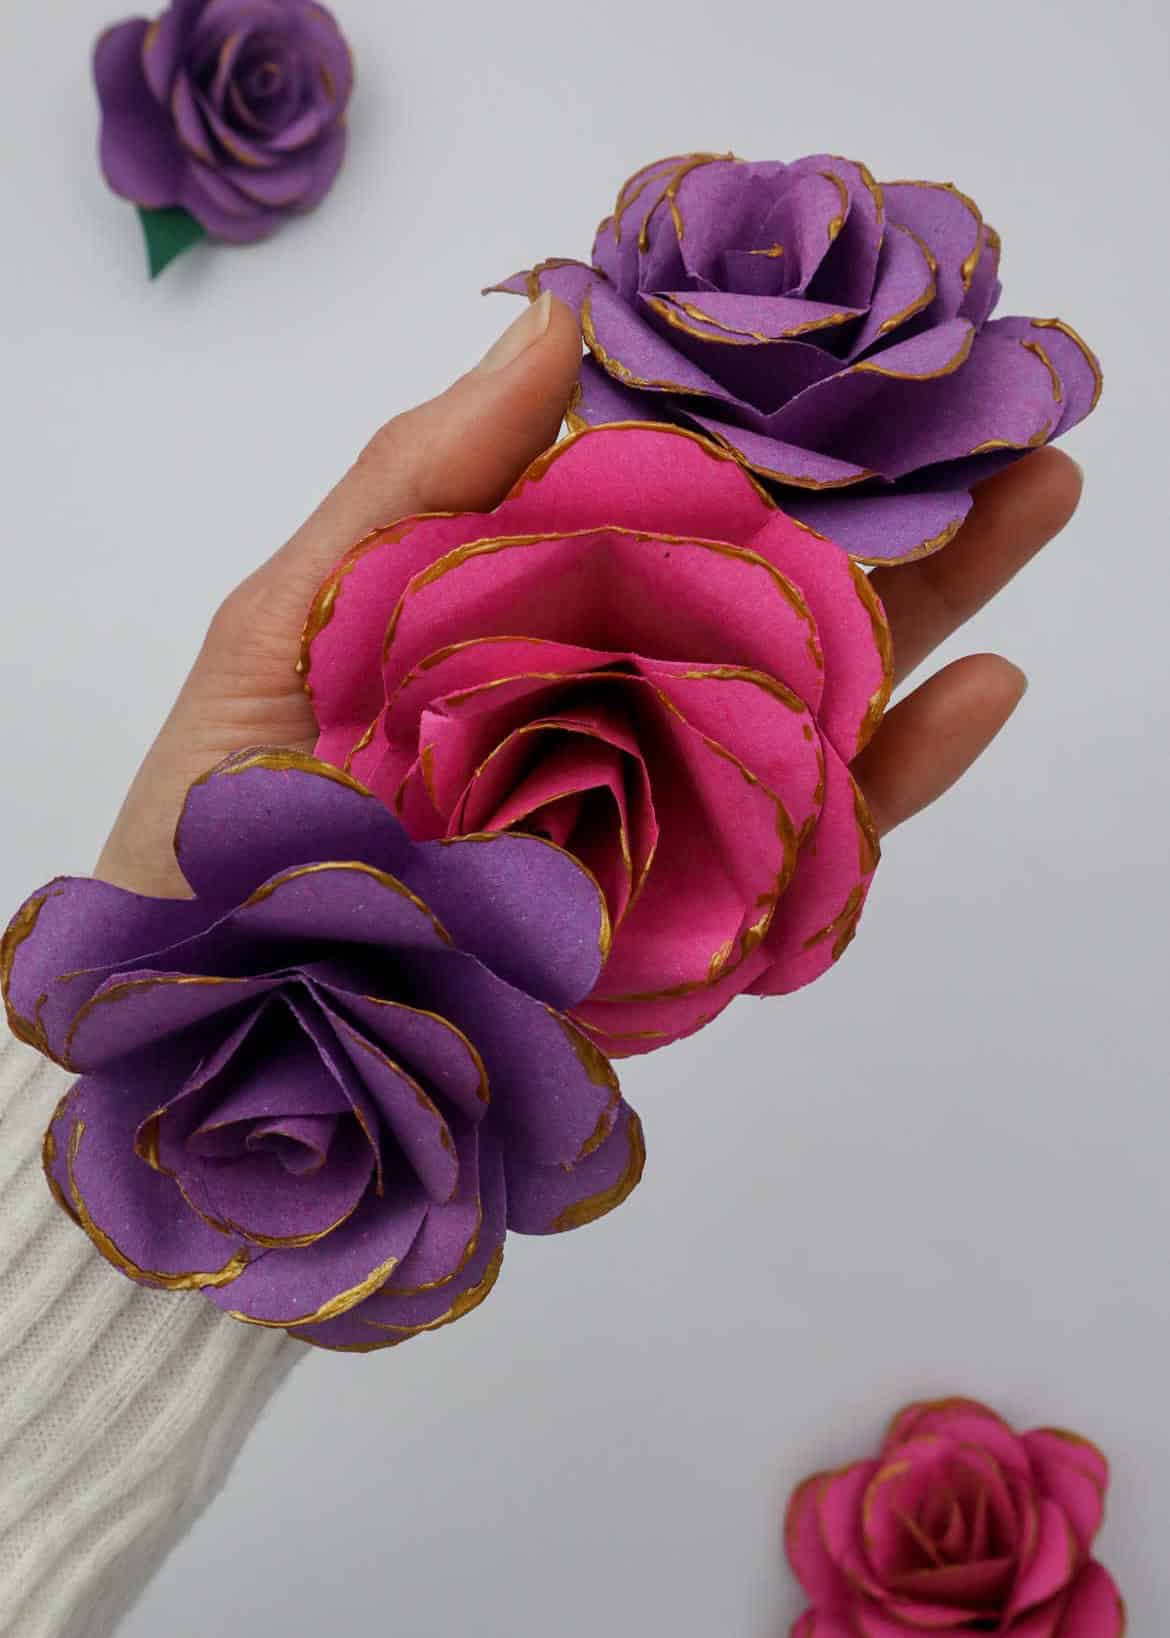

Transform ordinary paper into extraordinary flowers! This versatile craft is perfect for kids, teens, and adults alike. Whether you’re an art enthusiast or a crafting newbie, creating your own paper flowers is a great way to add a personal touch to any project. Imagine being able to elevate your crafts from good to great with the addition of these delicate, yet impressive blooms. They can be used to adorn photo frames, birthday cards, or as a standalone creative expression.
With this simple and fun activity, you’ll never run out of ways to get creative and make the most of those leftover papers!
Supplies You’ll Need for Flowers
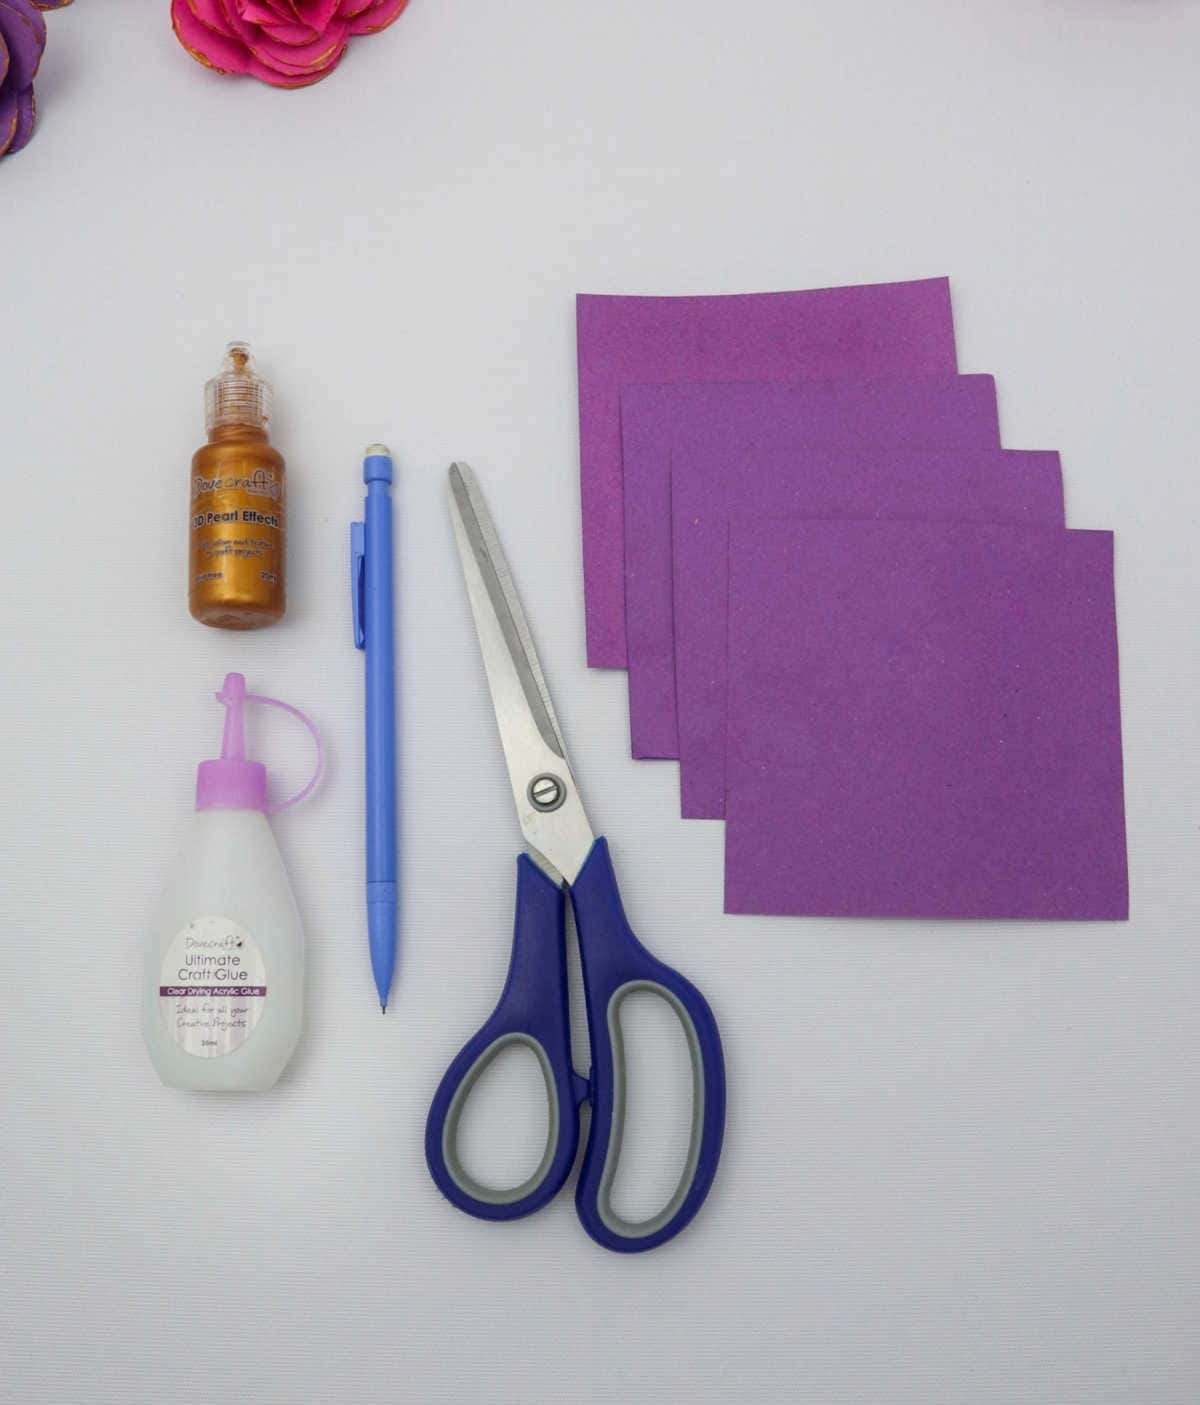
When preparing for an upcoming craft session with children, it’s essential to have the necessary materials on hand. To ensure a fun and creative experience, make sure you’ve got the following supplies ready: four paper squares measuring 4 inches by 4 inches, scissors for cutting, a reliable glue stick, a pencil for sketching out designs, and some added flair with glitter glue.
How to Make Paper Flowers
With your paper and supplies at the ready, it’s time to kick off your DIY project. The anticipation is palpable, isn’t it? Before diving in, take a moment to appreciate the journey that lies ahead.
Step 1
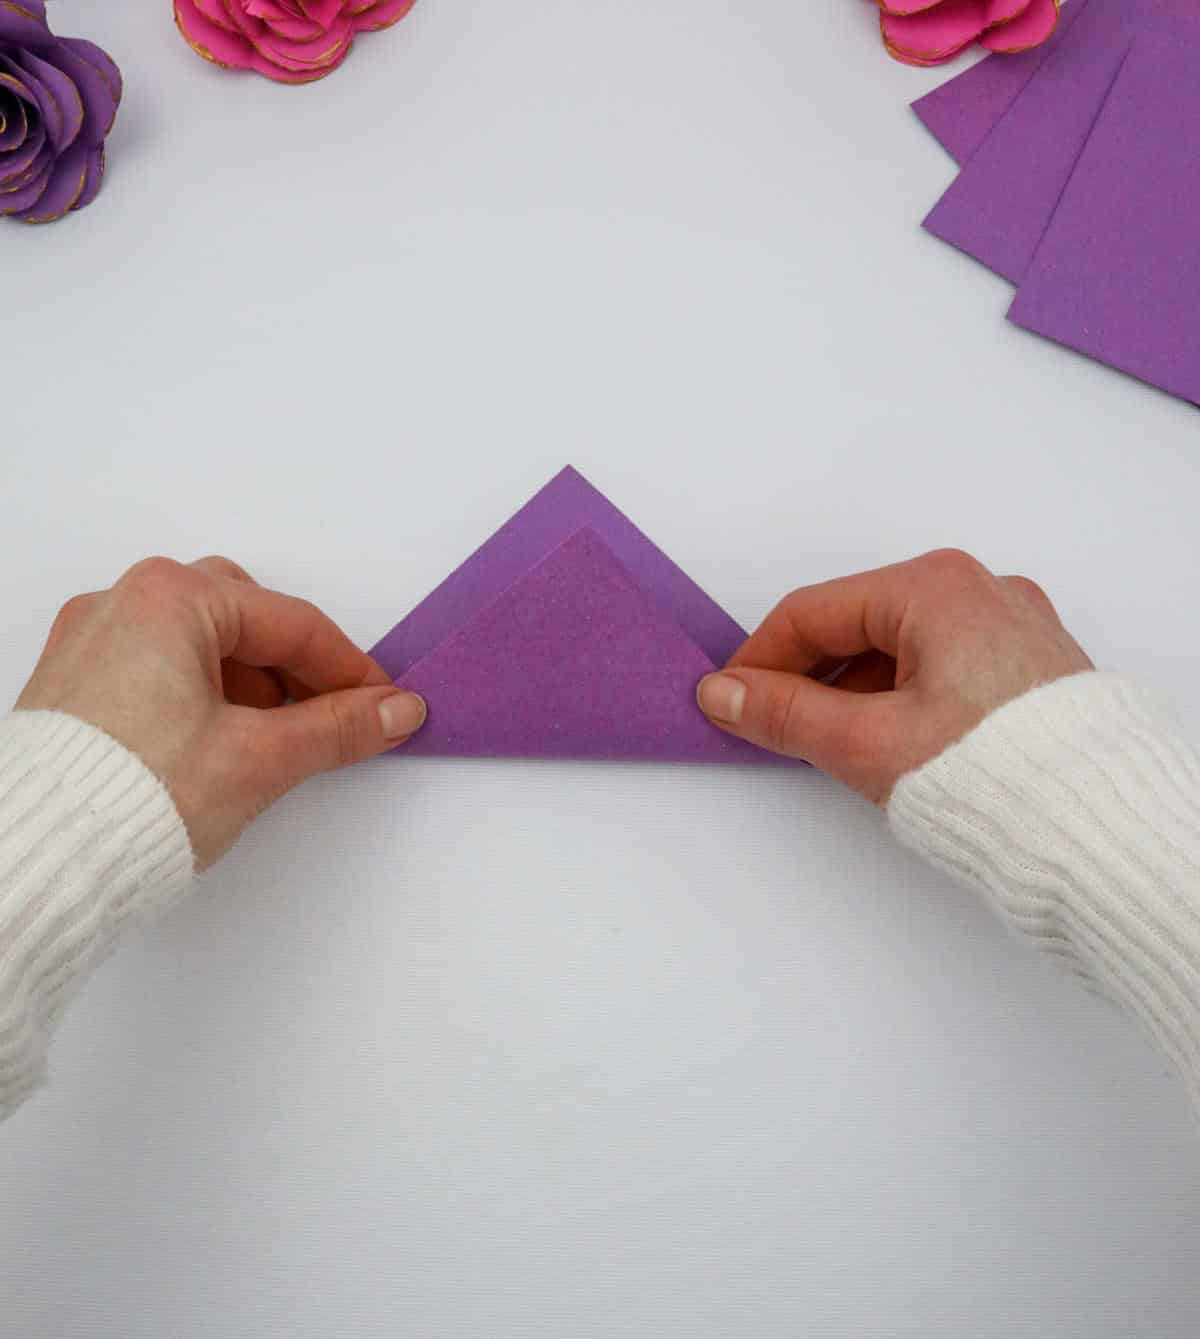
When embarking on this DIY endeavor, opt for a flat surface to ensure smooth and precise folds. Begin by bringing one edge of the paper across to the opposite side, folding it diagonally in a gradual motion. As you complete the fold, make sure that the ends overlap each other, just as depicted below. With these folds in place, you should now be left with a triangular piece of paper resembling the illustration provided.
Step 2
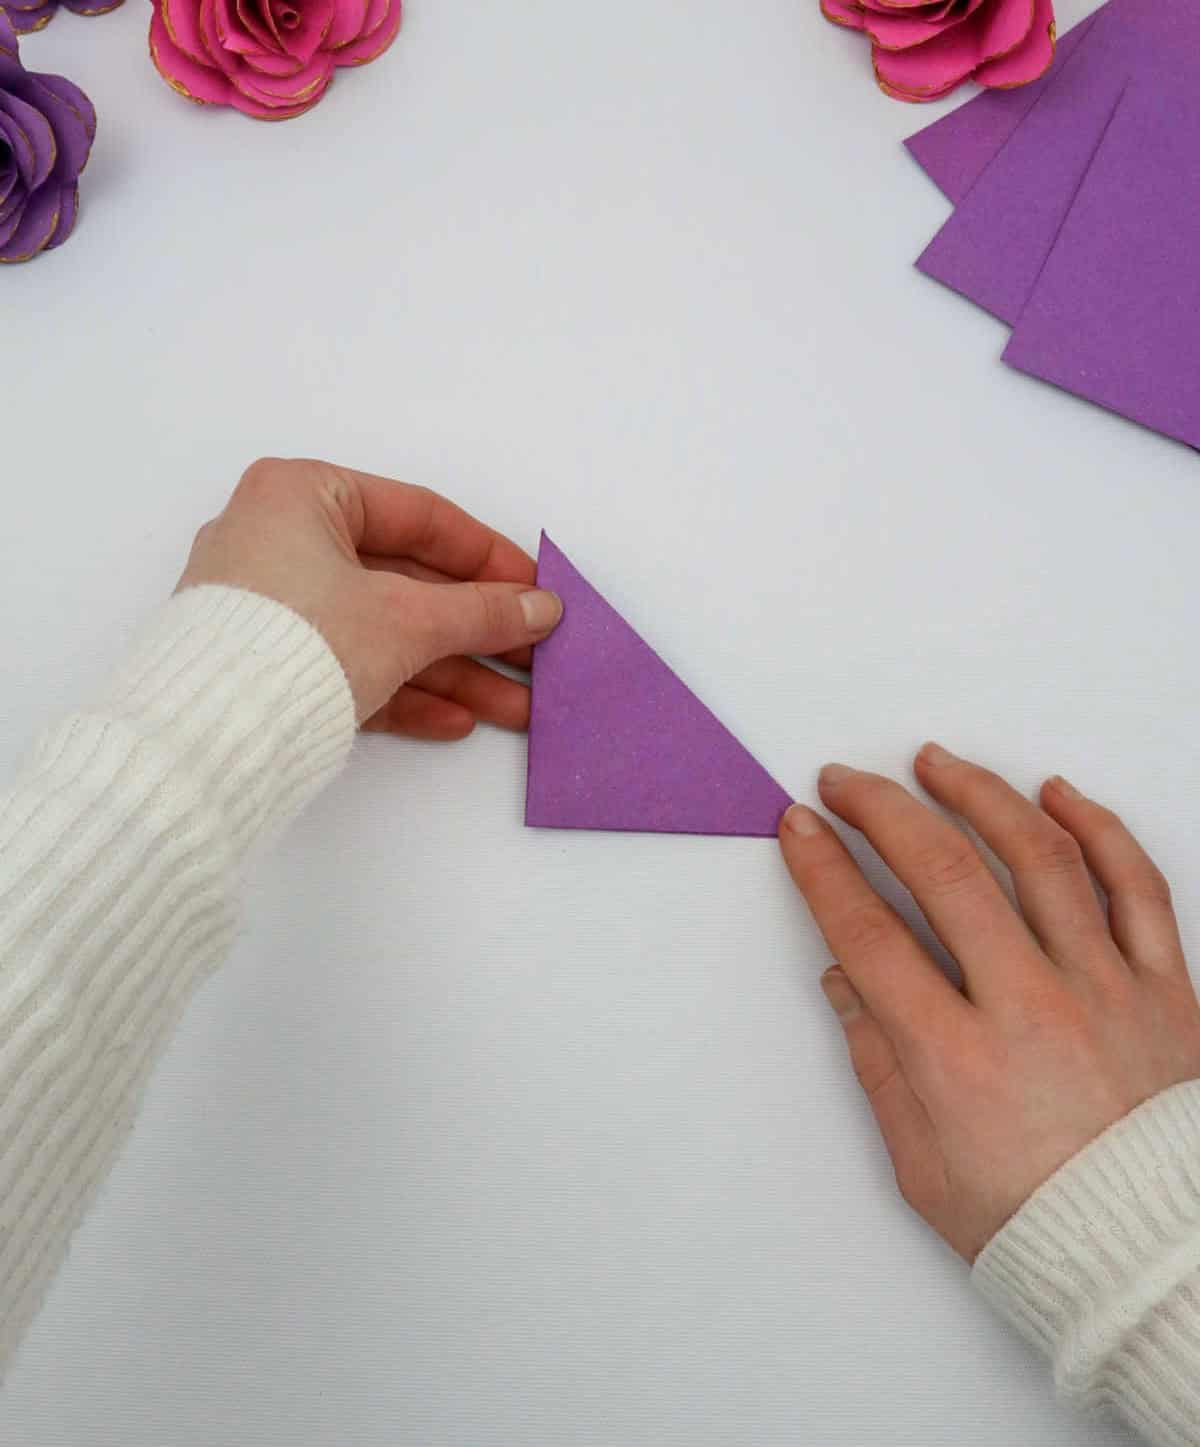
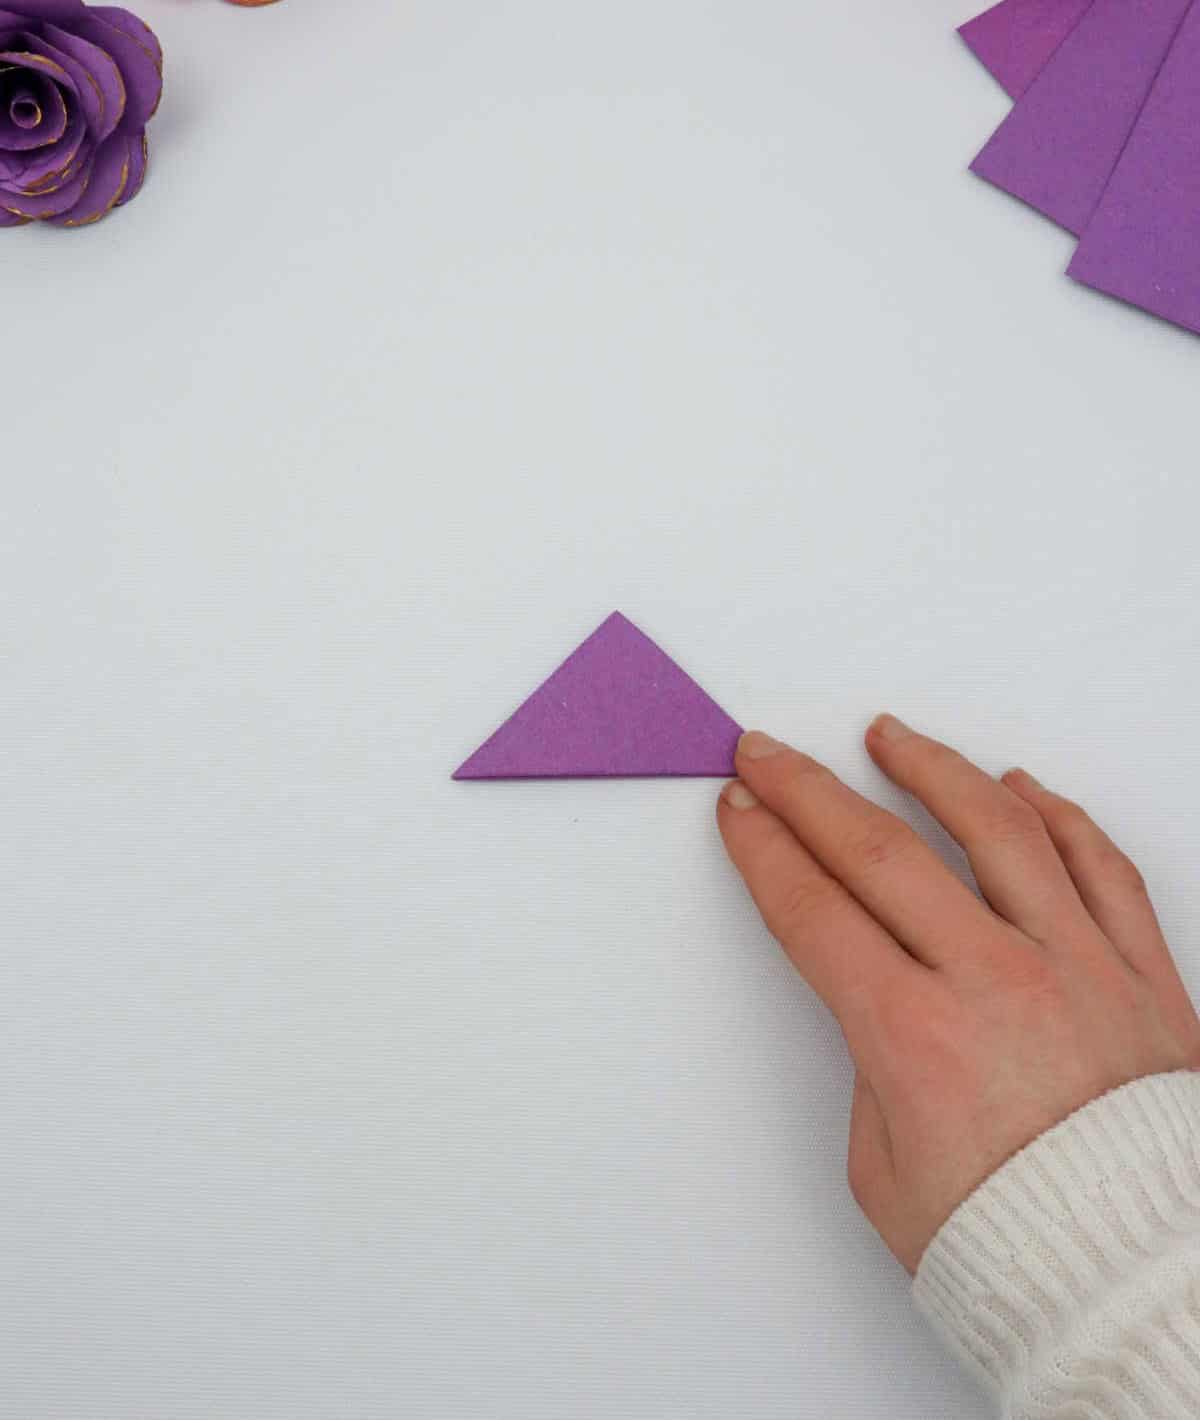
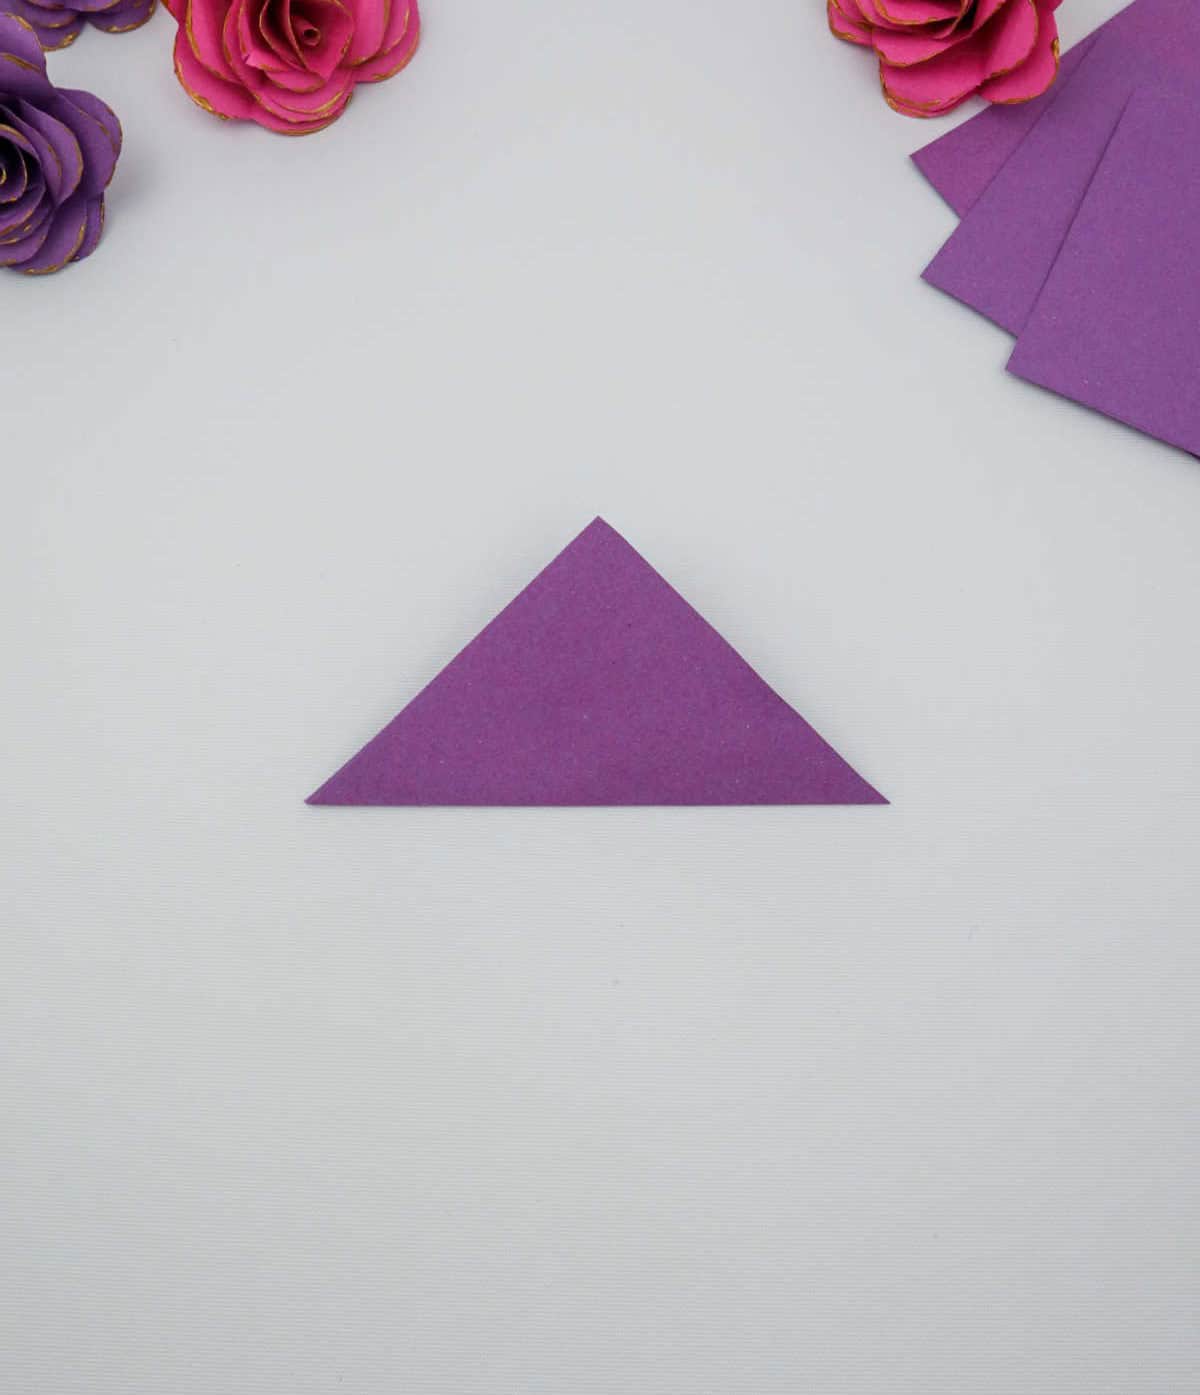
To continue your journey towards creating a geometric shape from the folded paper, take hold of one of the longer edges and perform another fold, this time bringing it inwards to create a smaller triangle.
Step 3
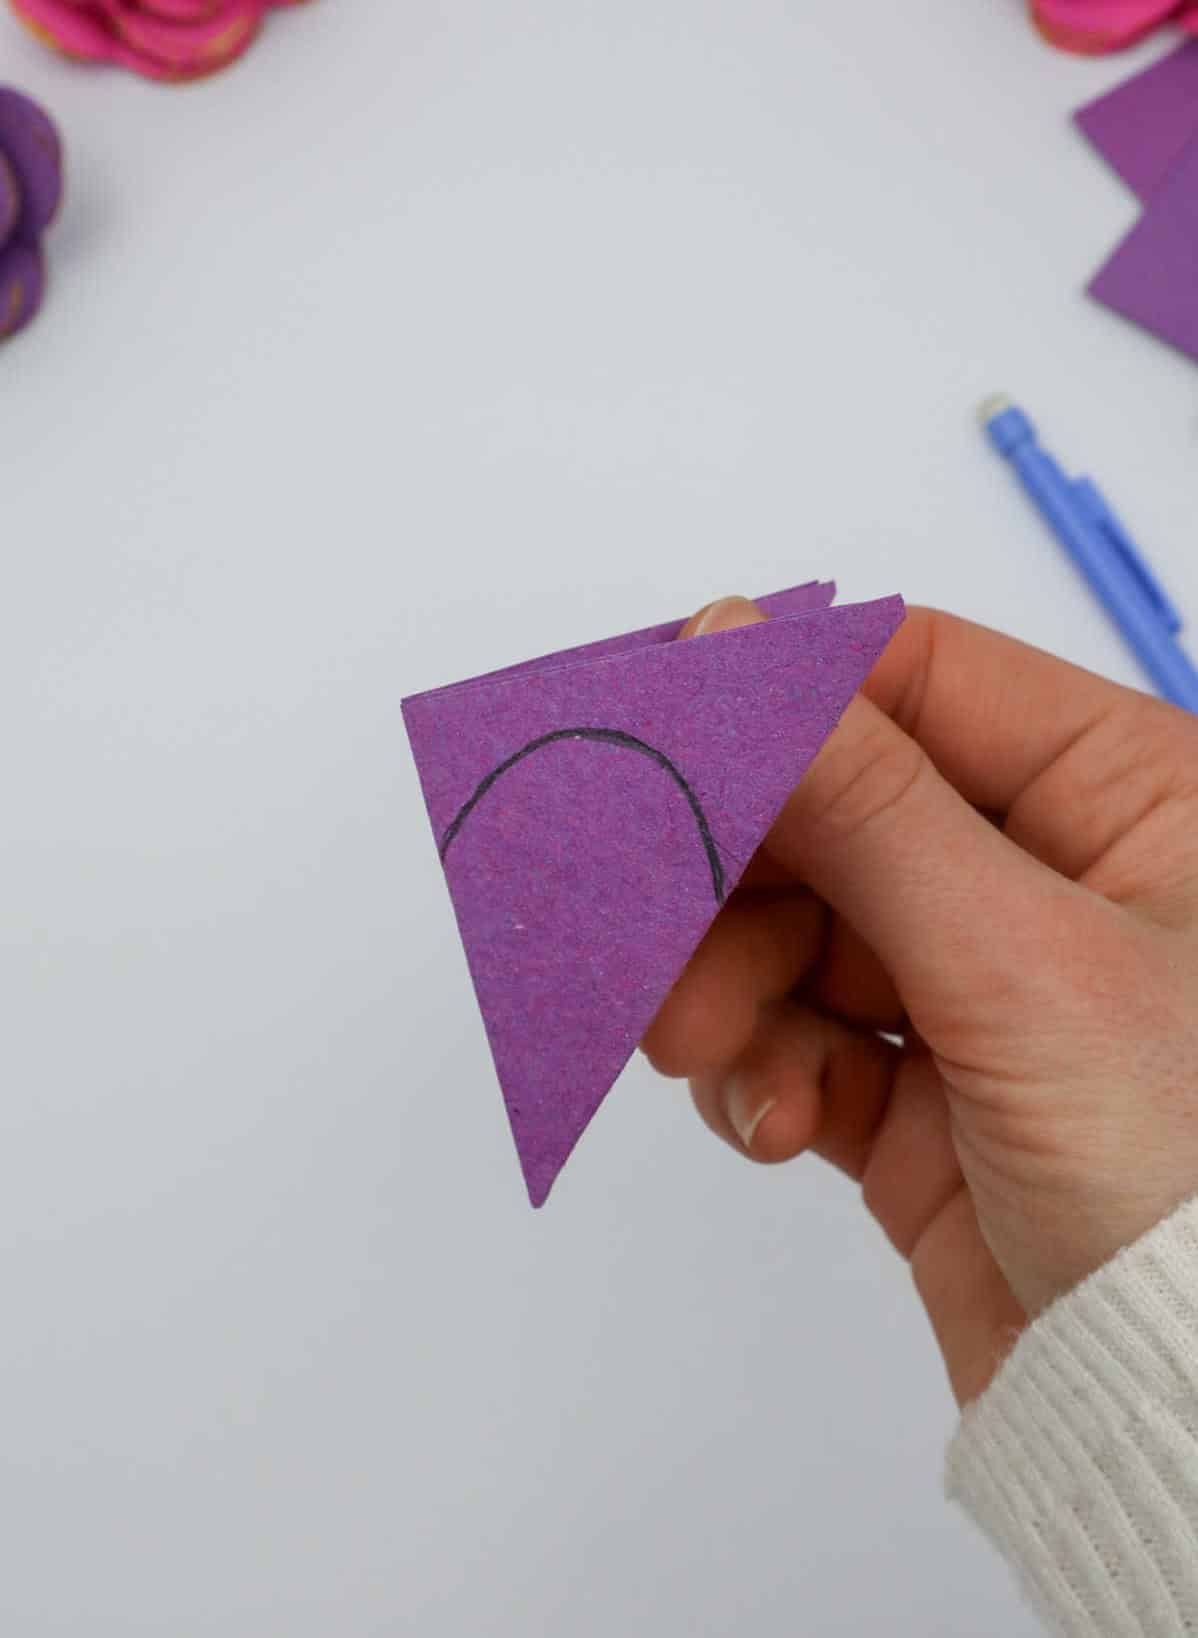
As you start to bring your flower to life, take a moment to add some gentle curves. Hold your marker or pen at a comfortable angle and begin drawing an arc around one corner of the triangle. This flowing shape will serve as the foundation for your flower’s petal, much like the illustration below illustrates.
Step 4
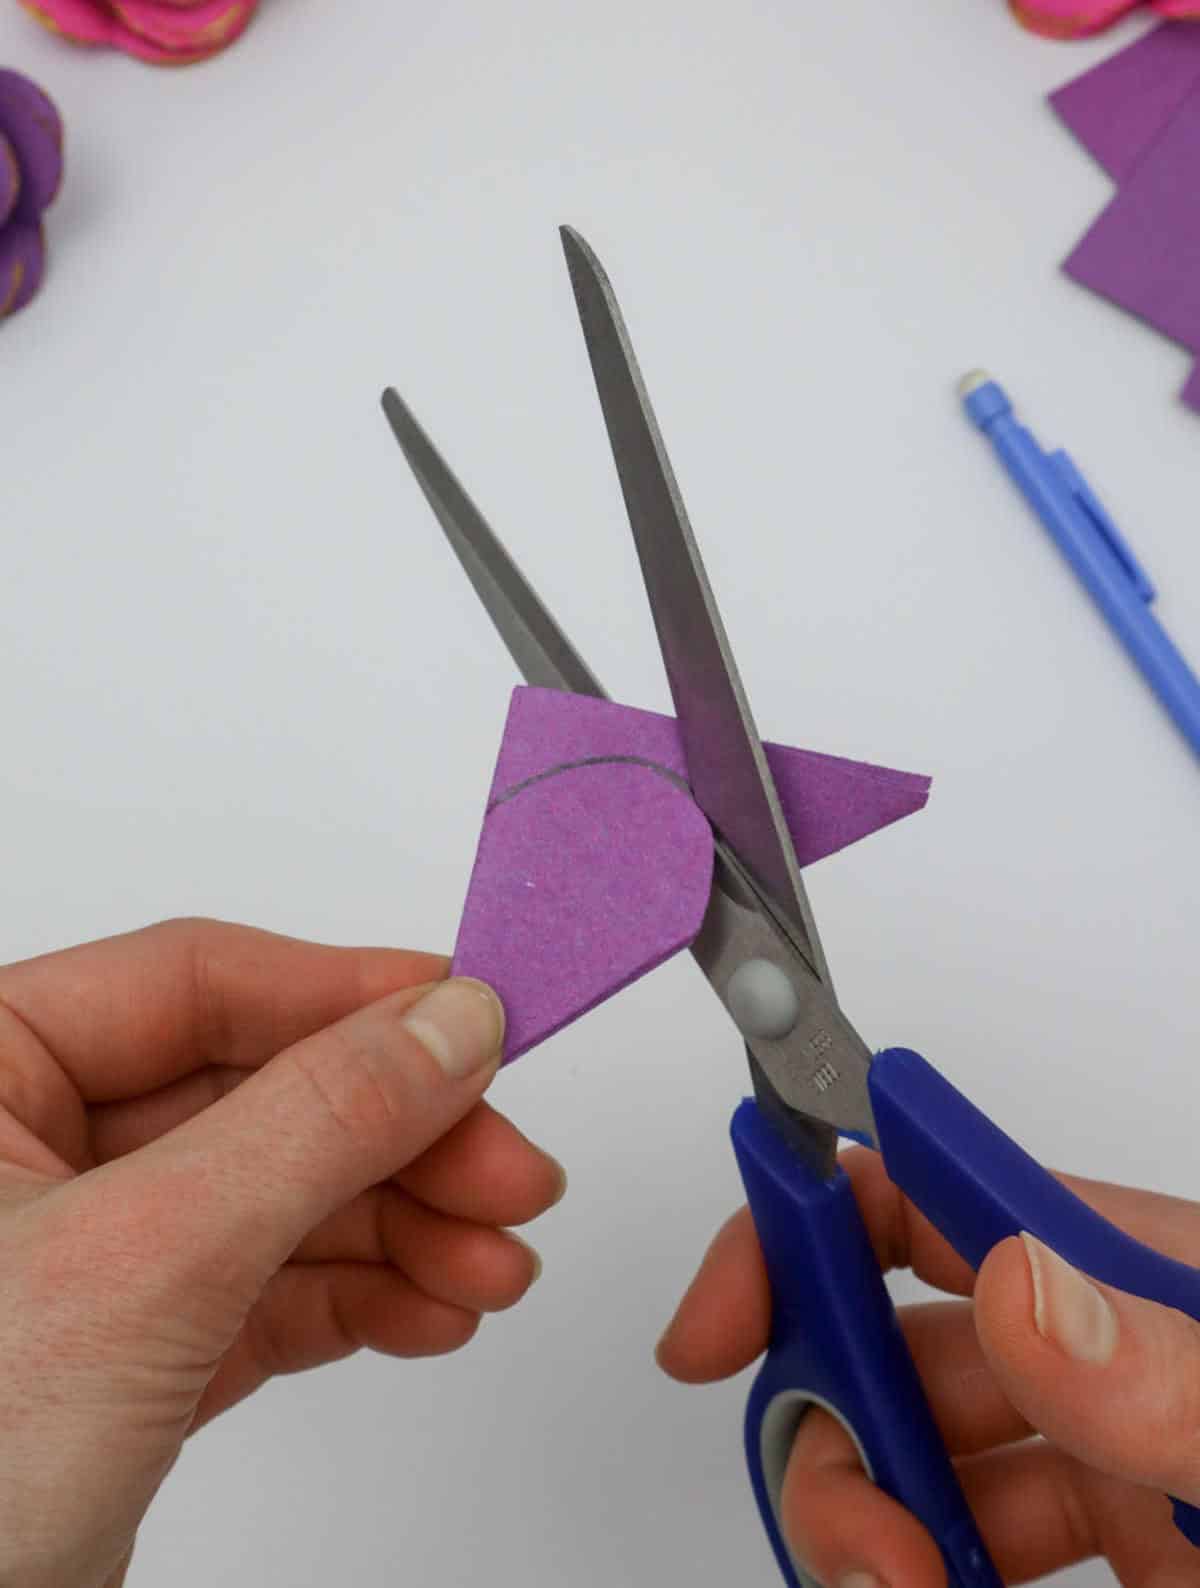
To achieve the desired effect, start by grasping a pair of scissors firmly and take precise control over them. Then, slowly and deliberately move the scissors along the curved edge of the paper, making sure to maintain a steady pace as you work your way around the shape. By doing so, you’ll be able to create a clean and accurate cut that follows the natural arc of the paper’s curve.
Step 5
As you carefully unfold the paper, the first layer of your exquisite paper flower begins to take shape, revealing the intricate details that will eventually form the foundation of your beautiful creation.
Step 6
To create the signature curve of your flower, start by carefully cutting a single arc from the outermost layer of petals. This initial step is crucial in setting the tone for the rest of the folding process.
Step 7
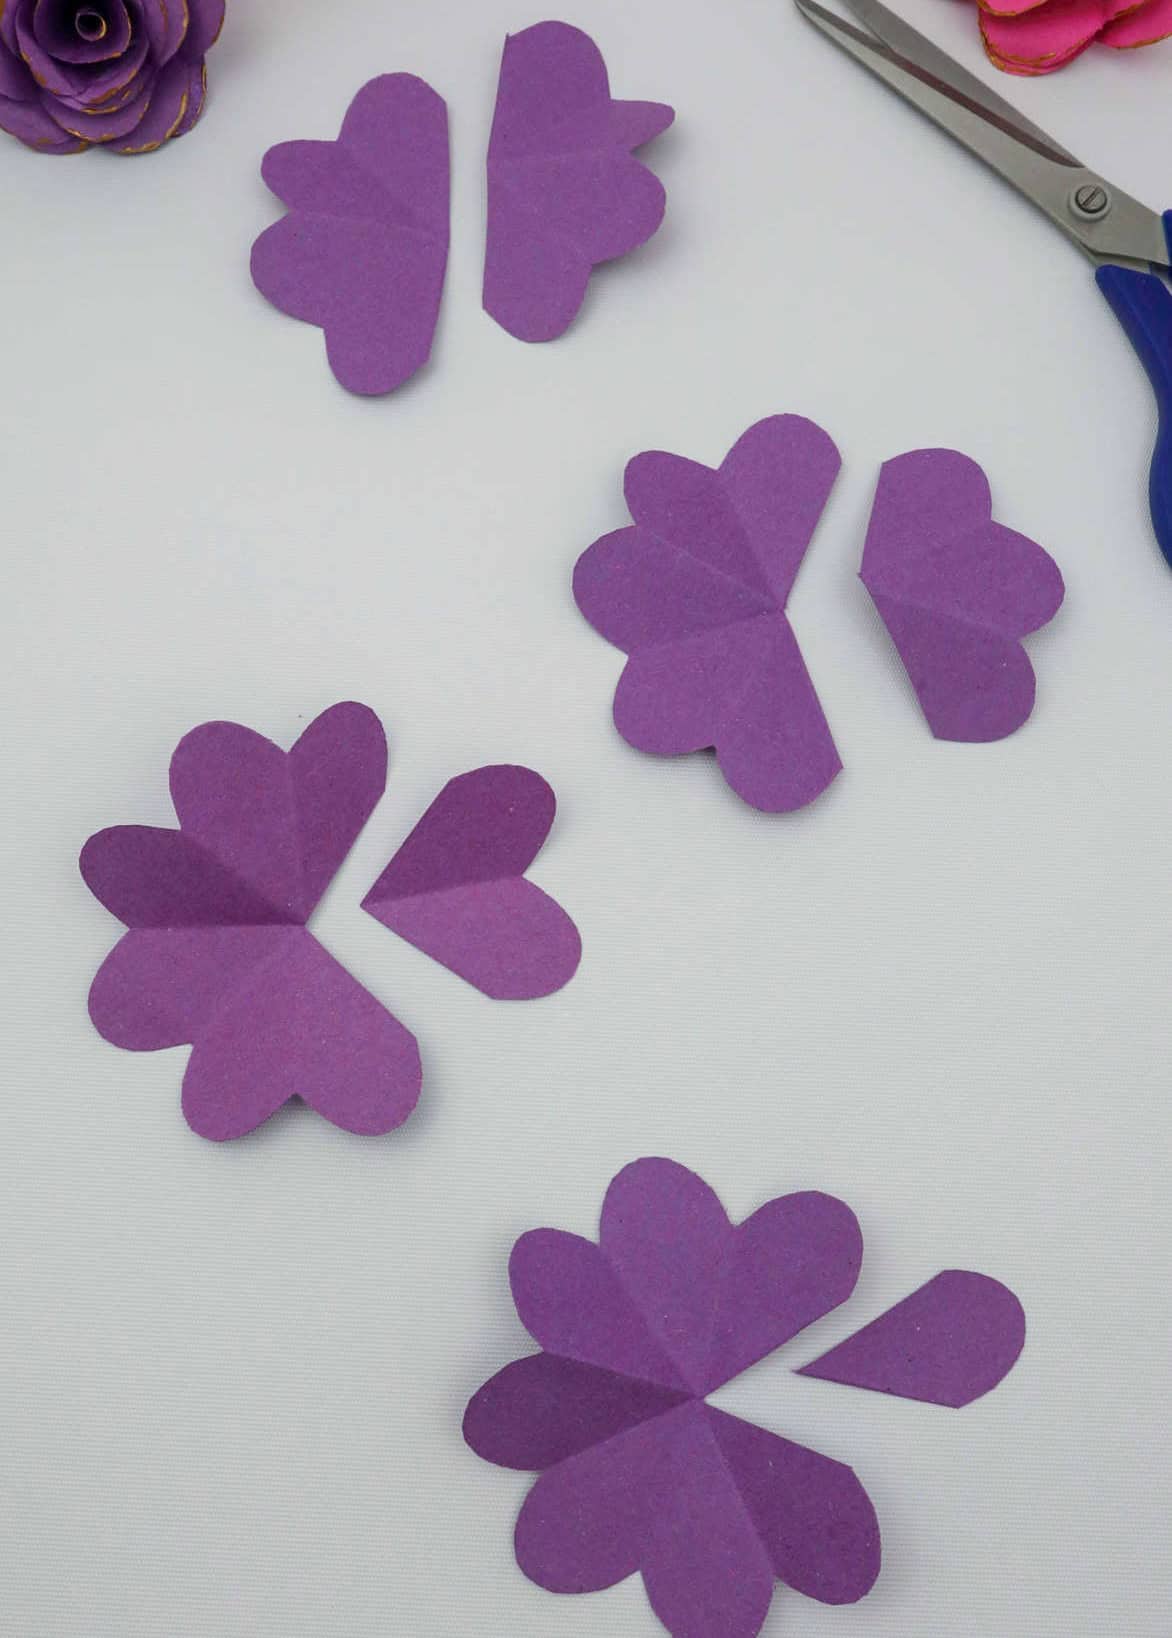
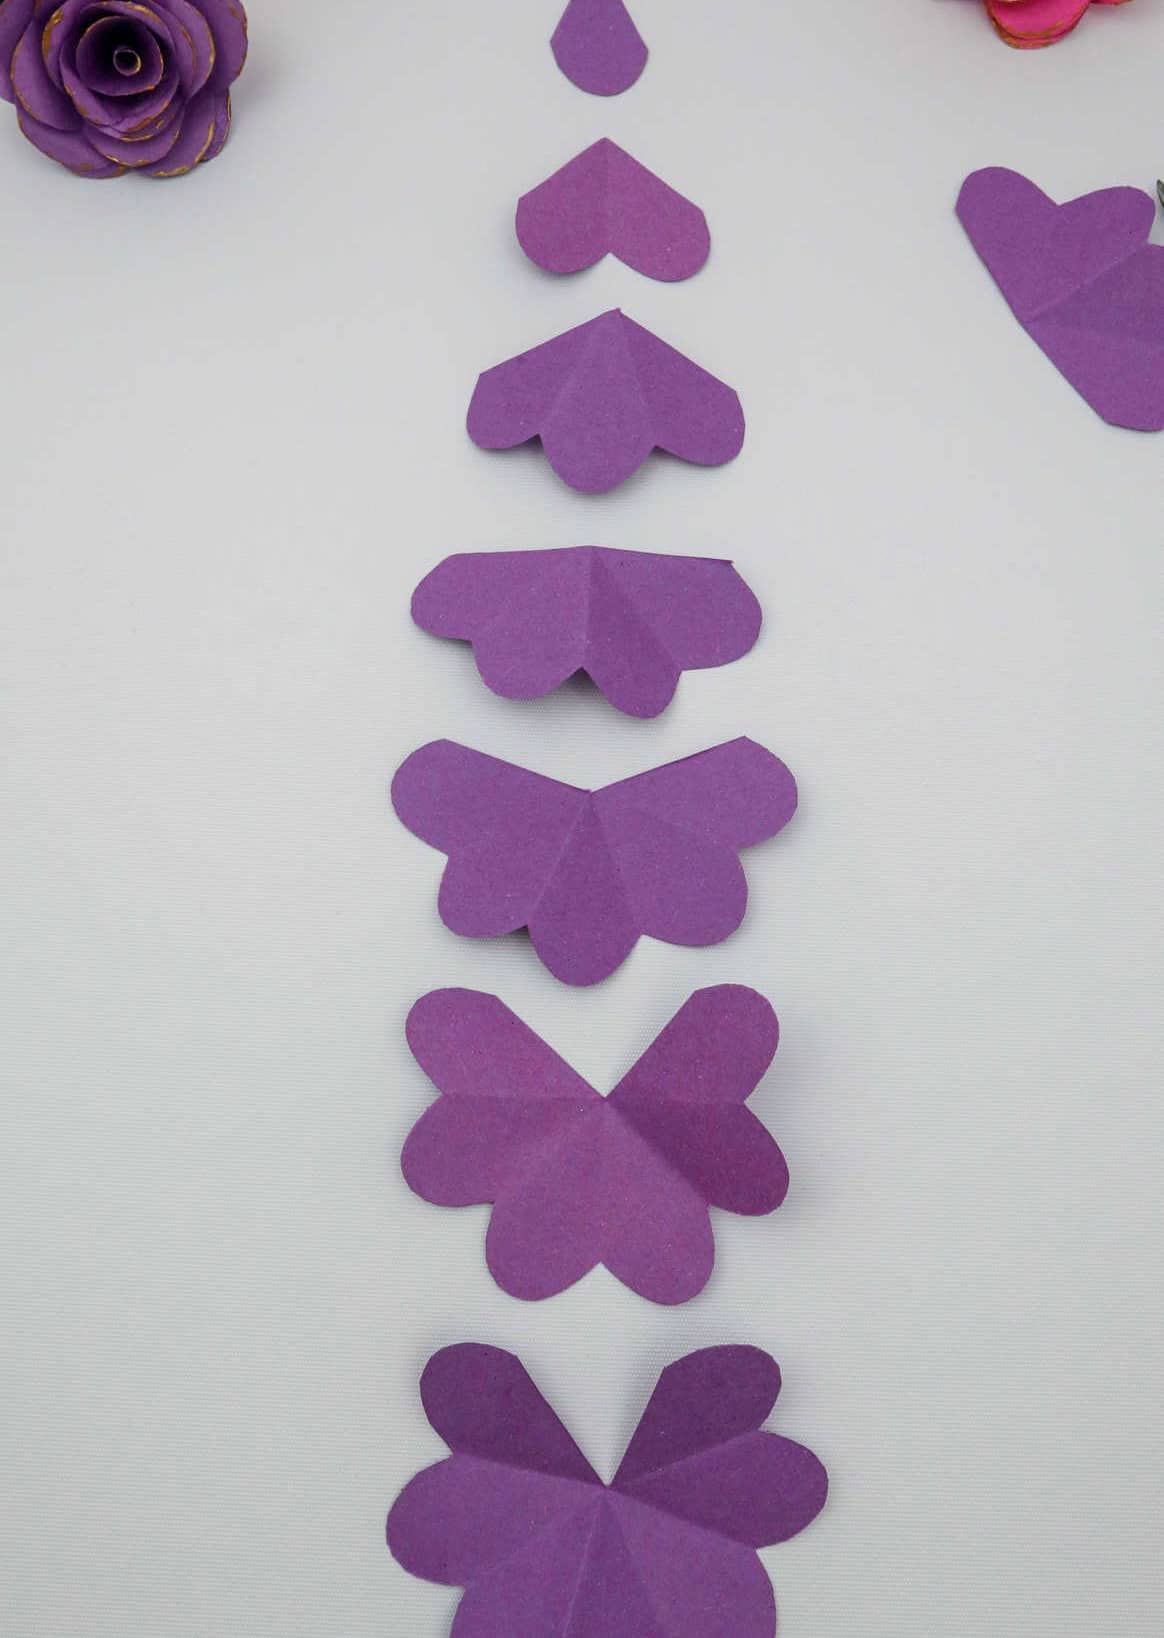
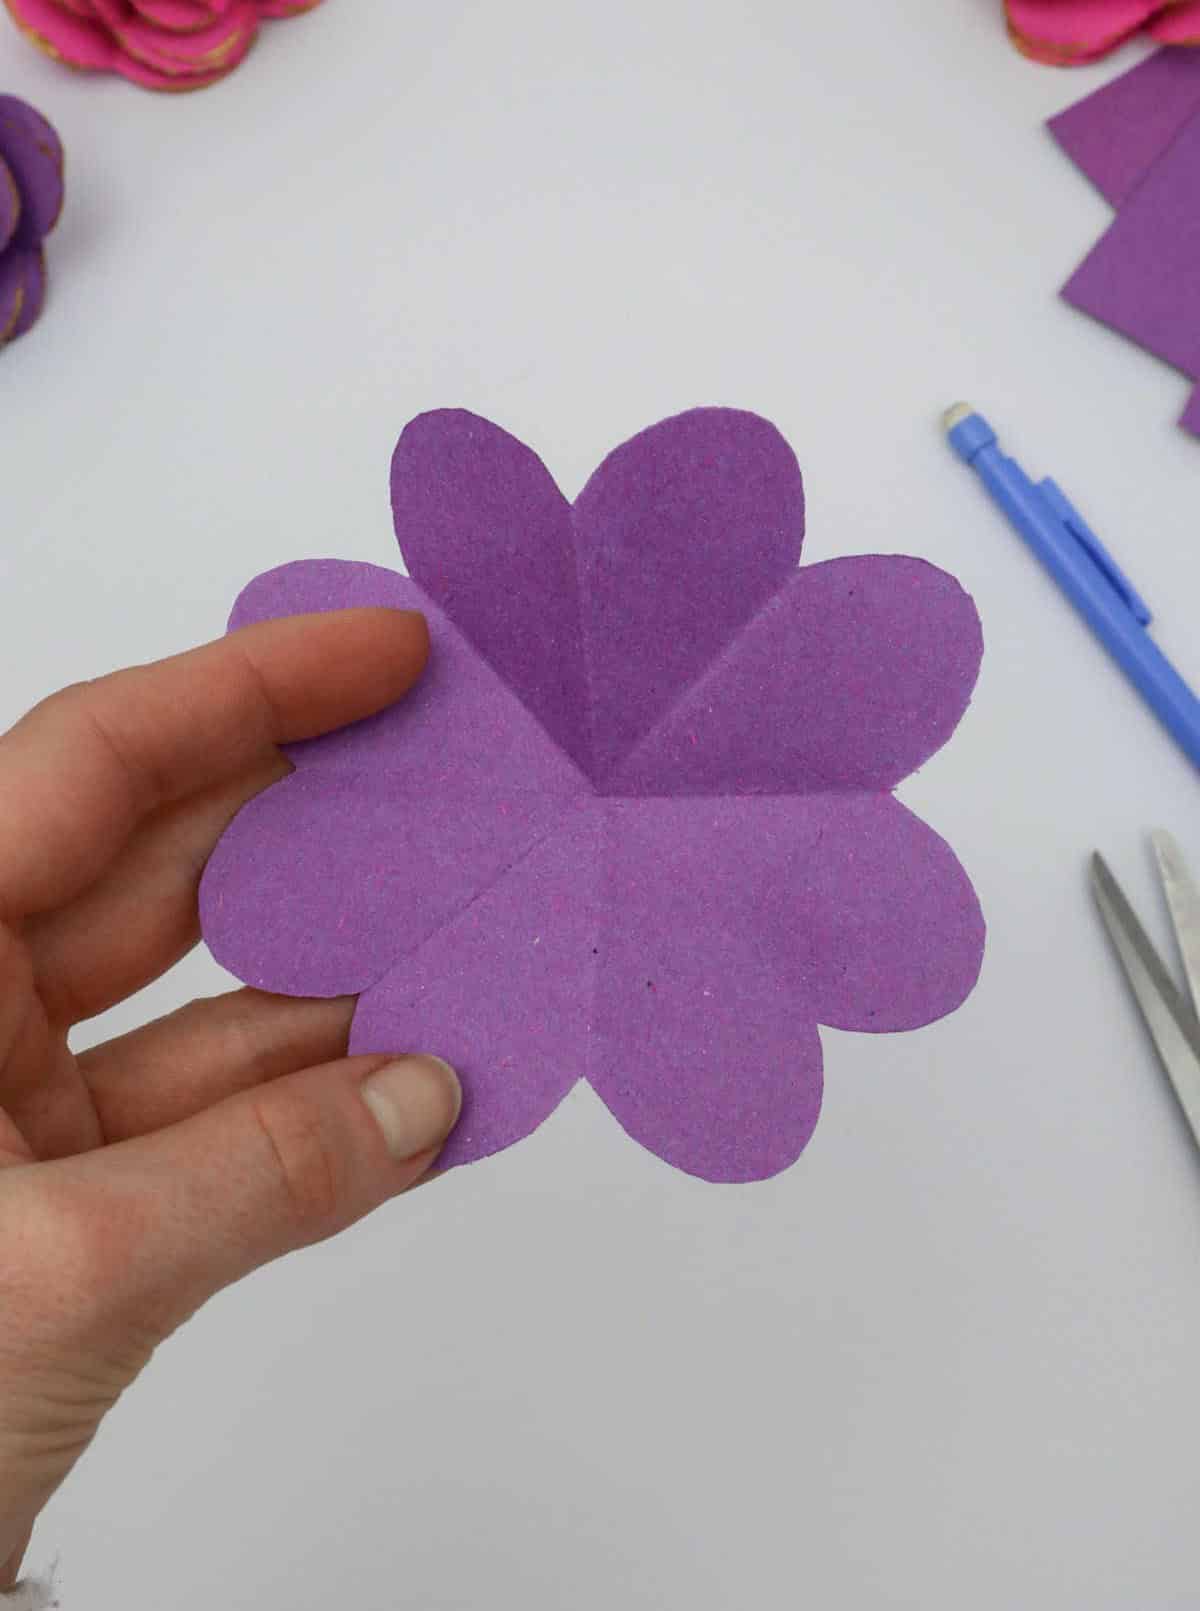
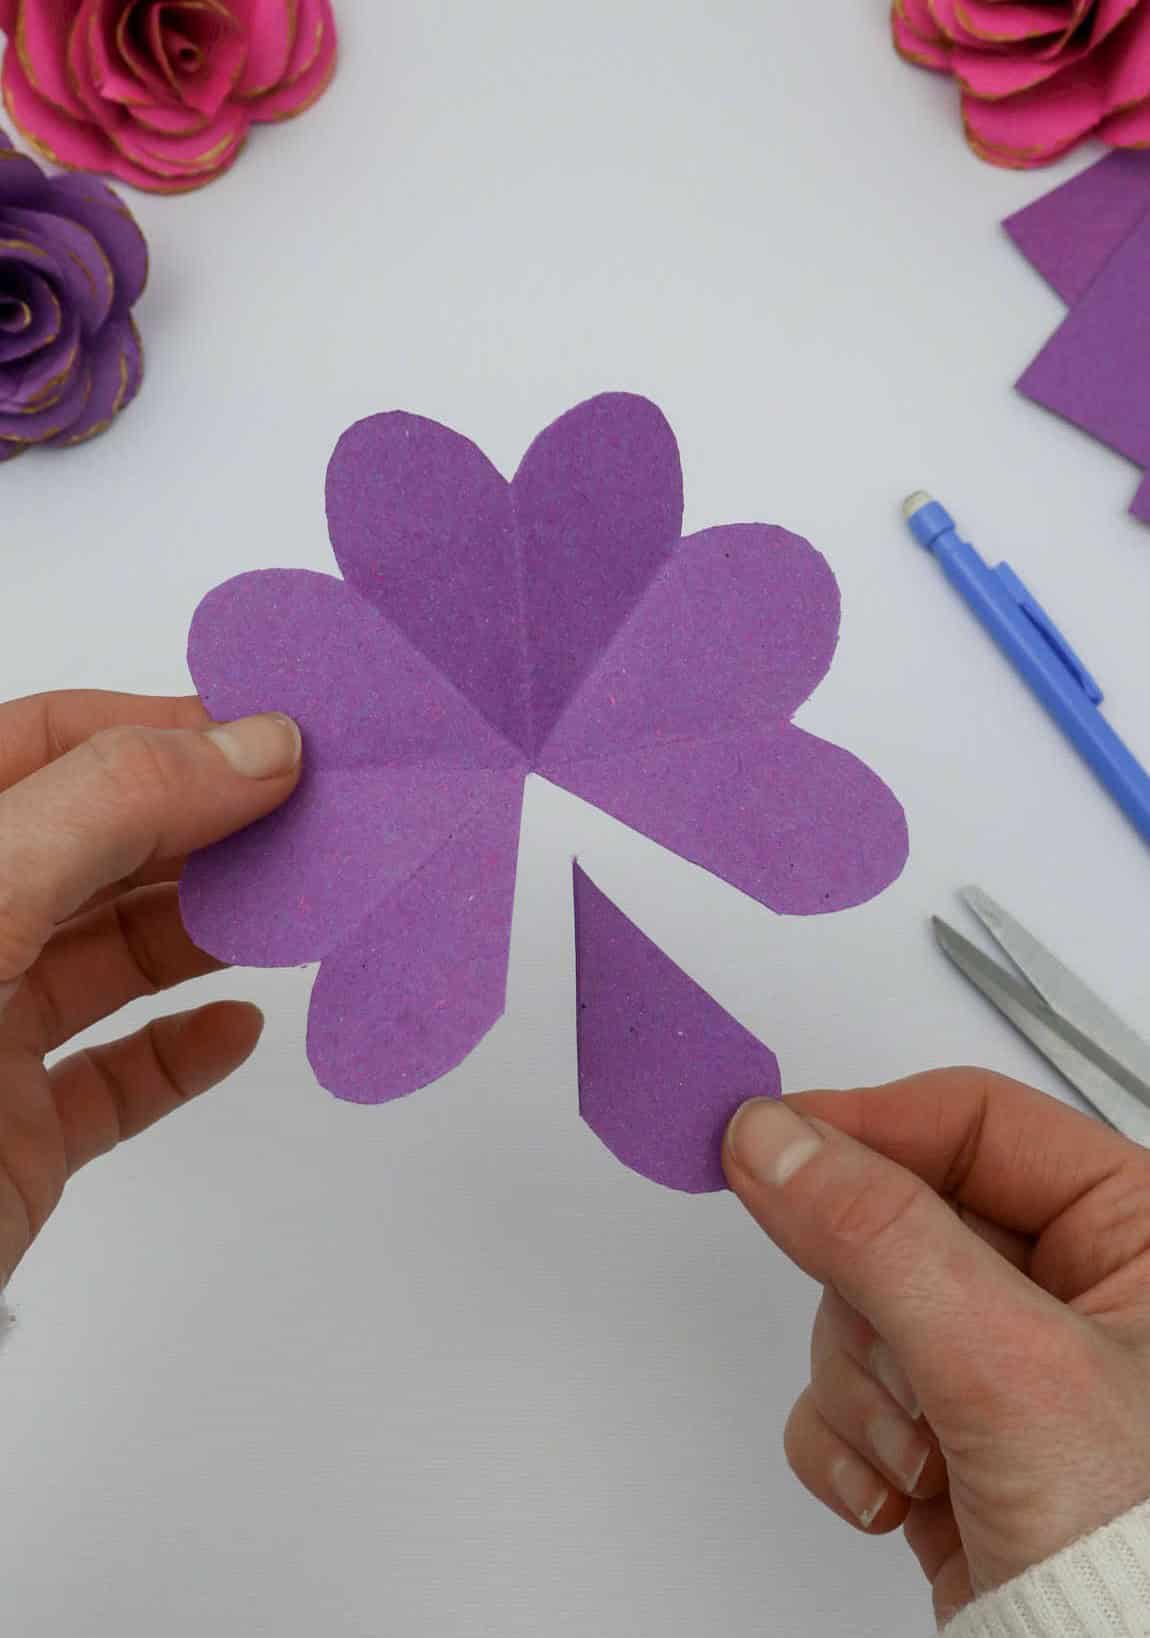
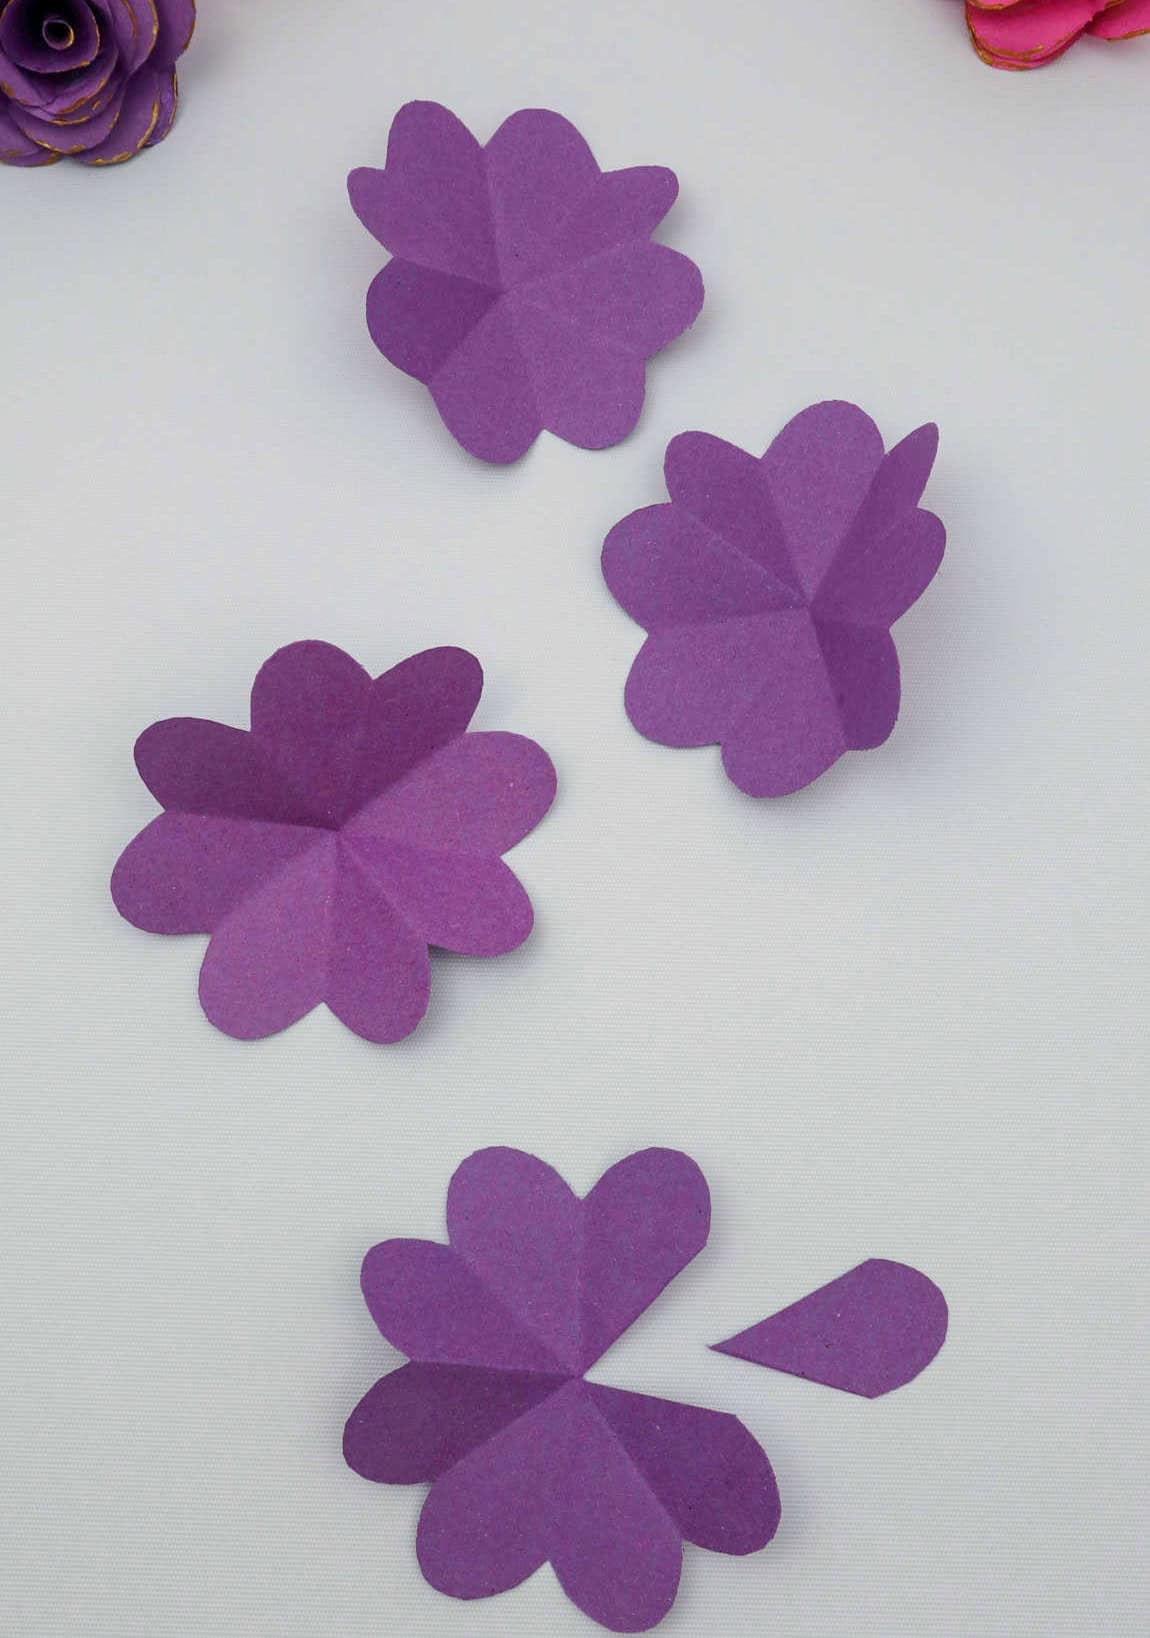
To achieve the desired tiered flower arrangement, it’s essential to carefully trim the petals to create the required number of layers. The process begins with a single petal cut out for the outermost layer, followed by two petals for the second layer, three for the third, and so on. For this specific pattern, a total of seven layers are needed, as illustrated below.
Step 8
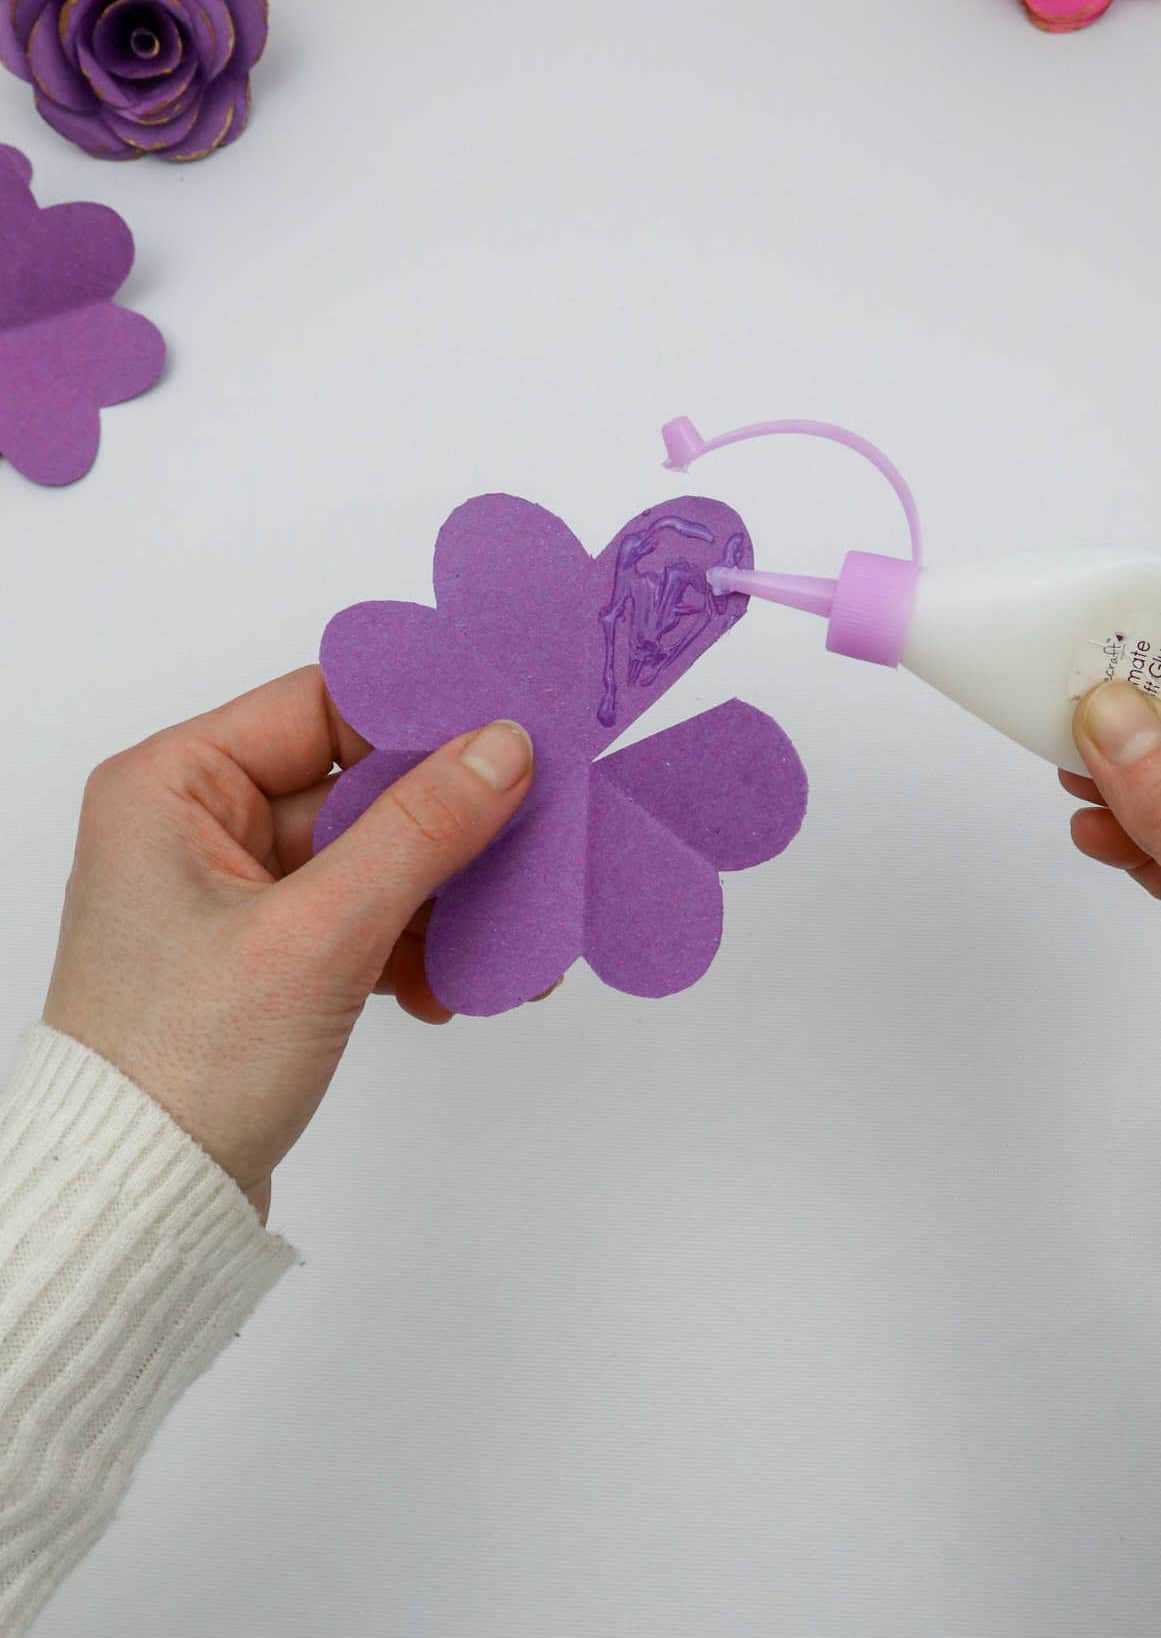
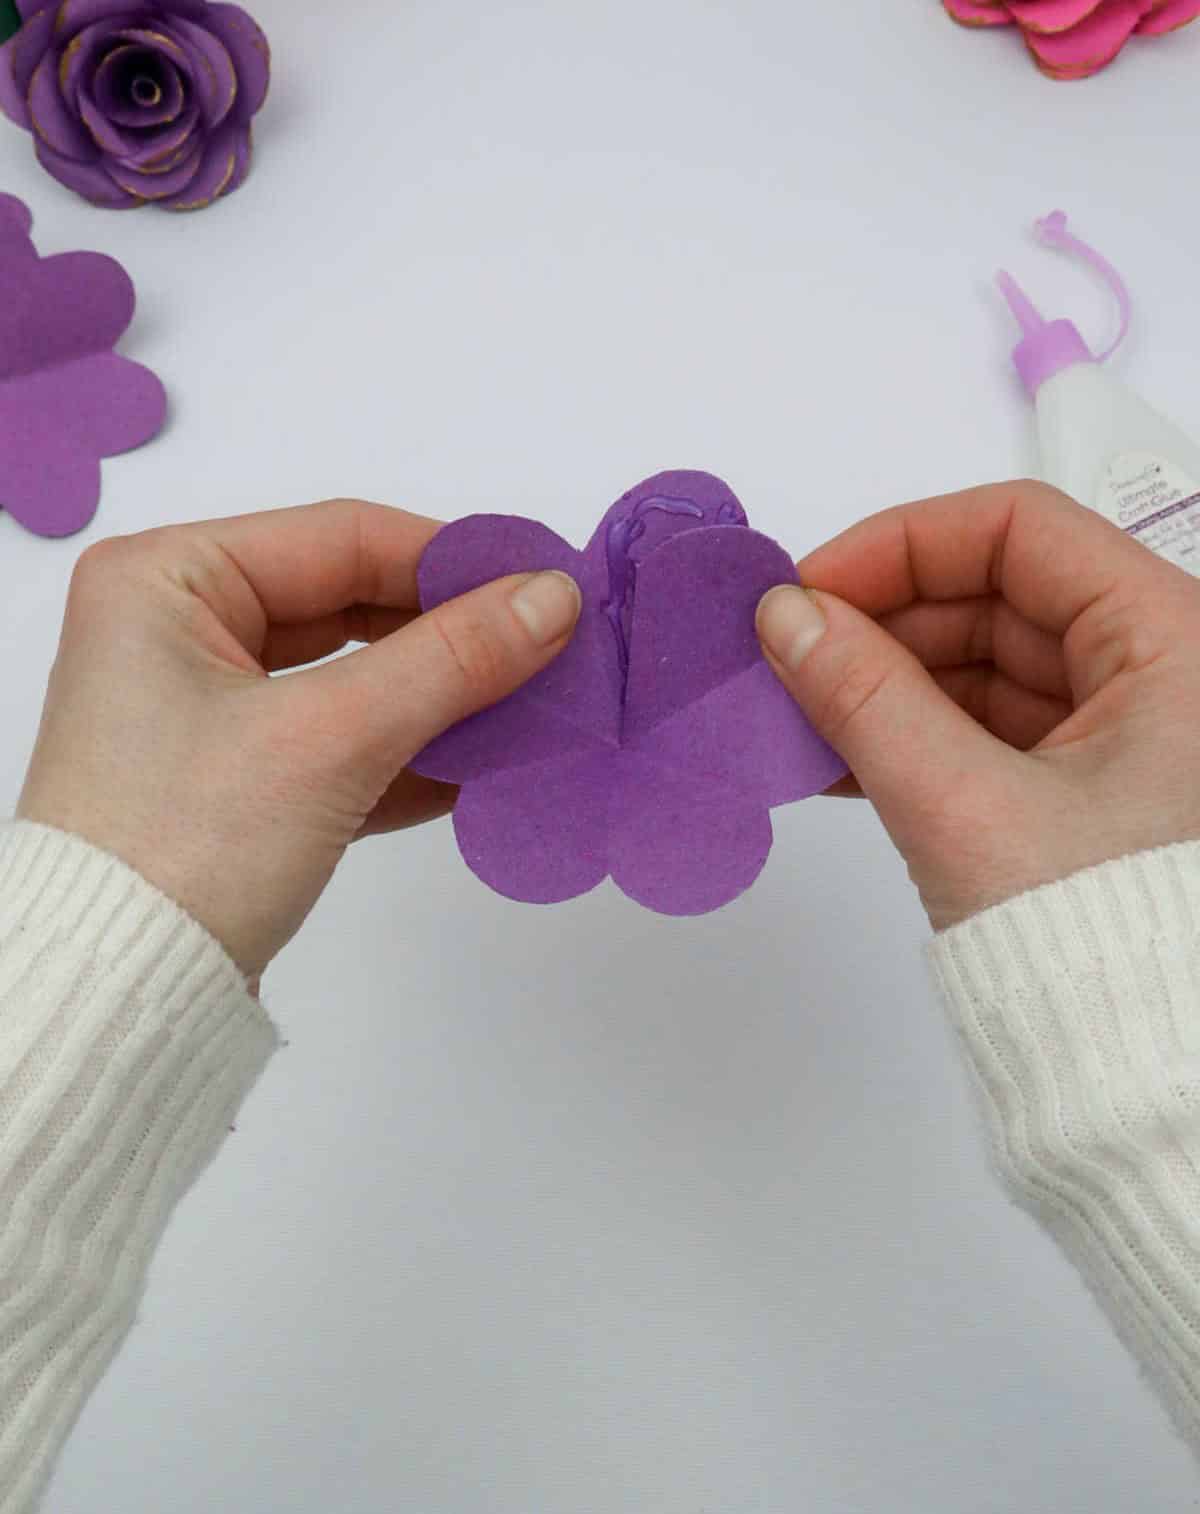
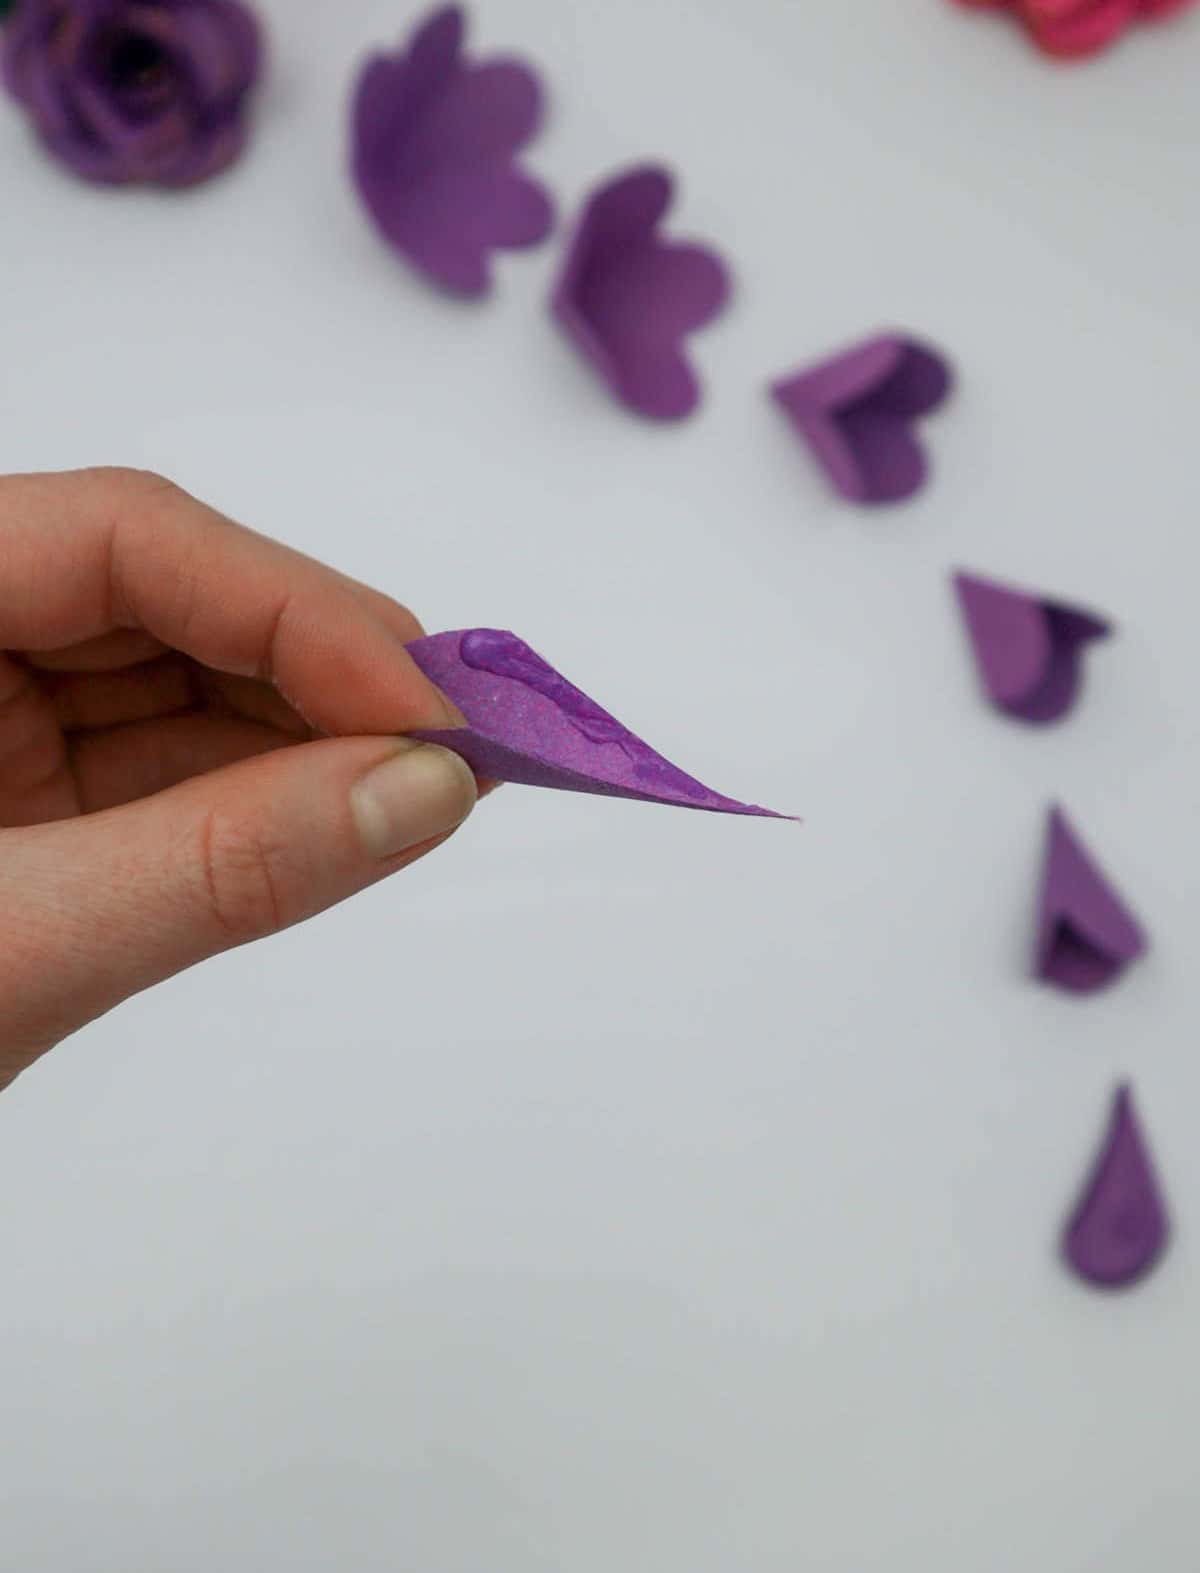
To assemble your paper flower, start by grasping the largest petal layer. Apply a small amount of glue to the base of the petal, as demonstrated in the accompanying illustration. Next, carefully bring the opposite edge of the paper over the top of the glued area, ensuring it lies flat against the curved surface. The resulting shape should resemble a pointed tip with gently sloping walls, much like the image shown above.
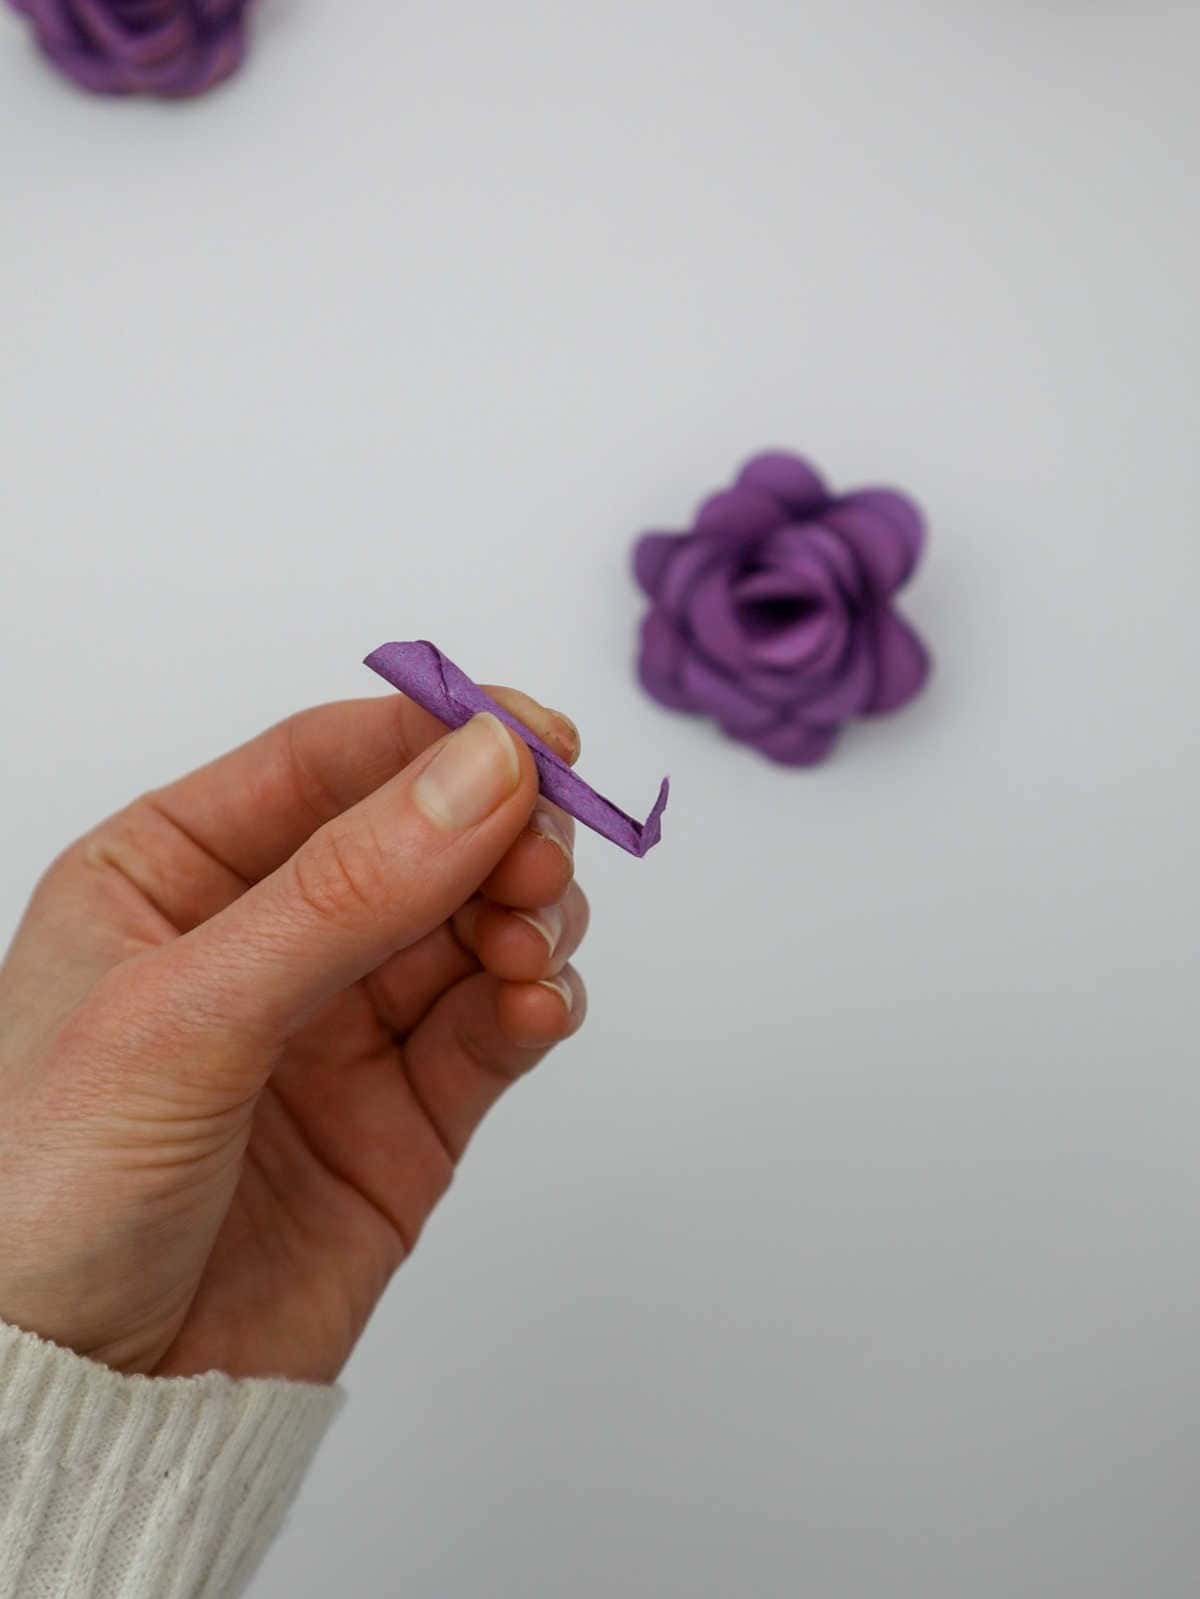
Step 9
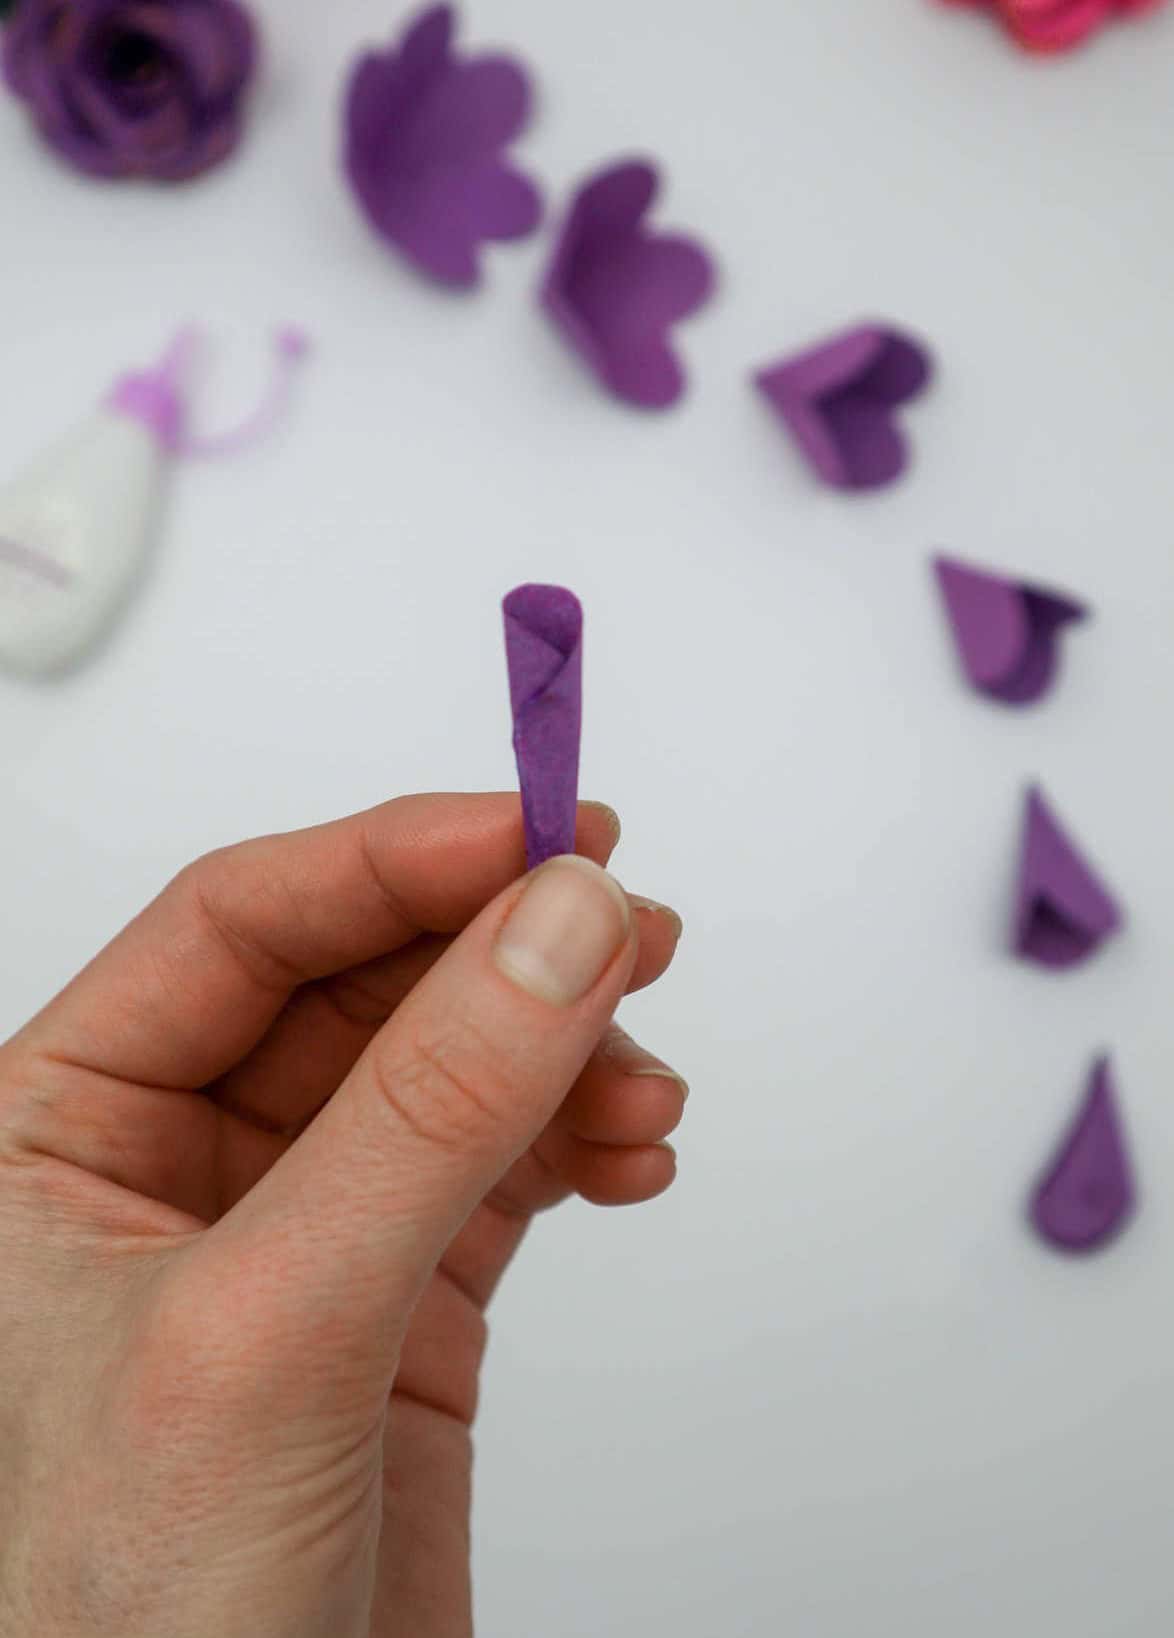
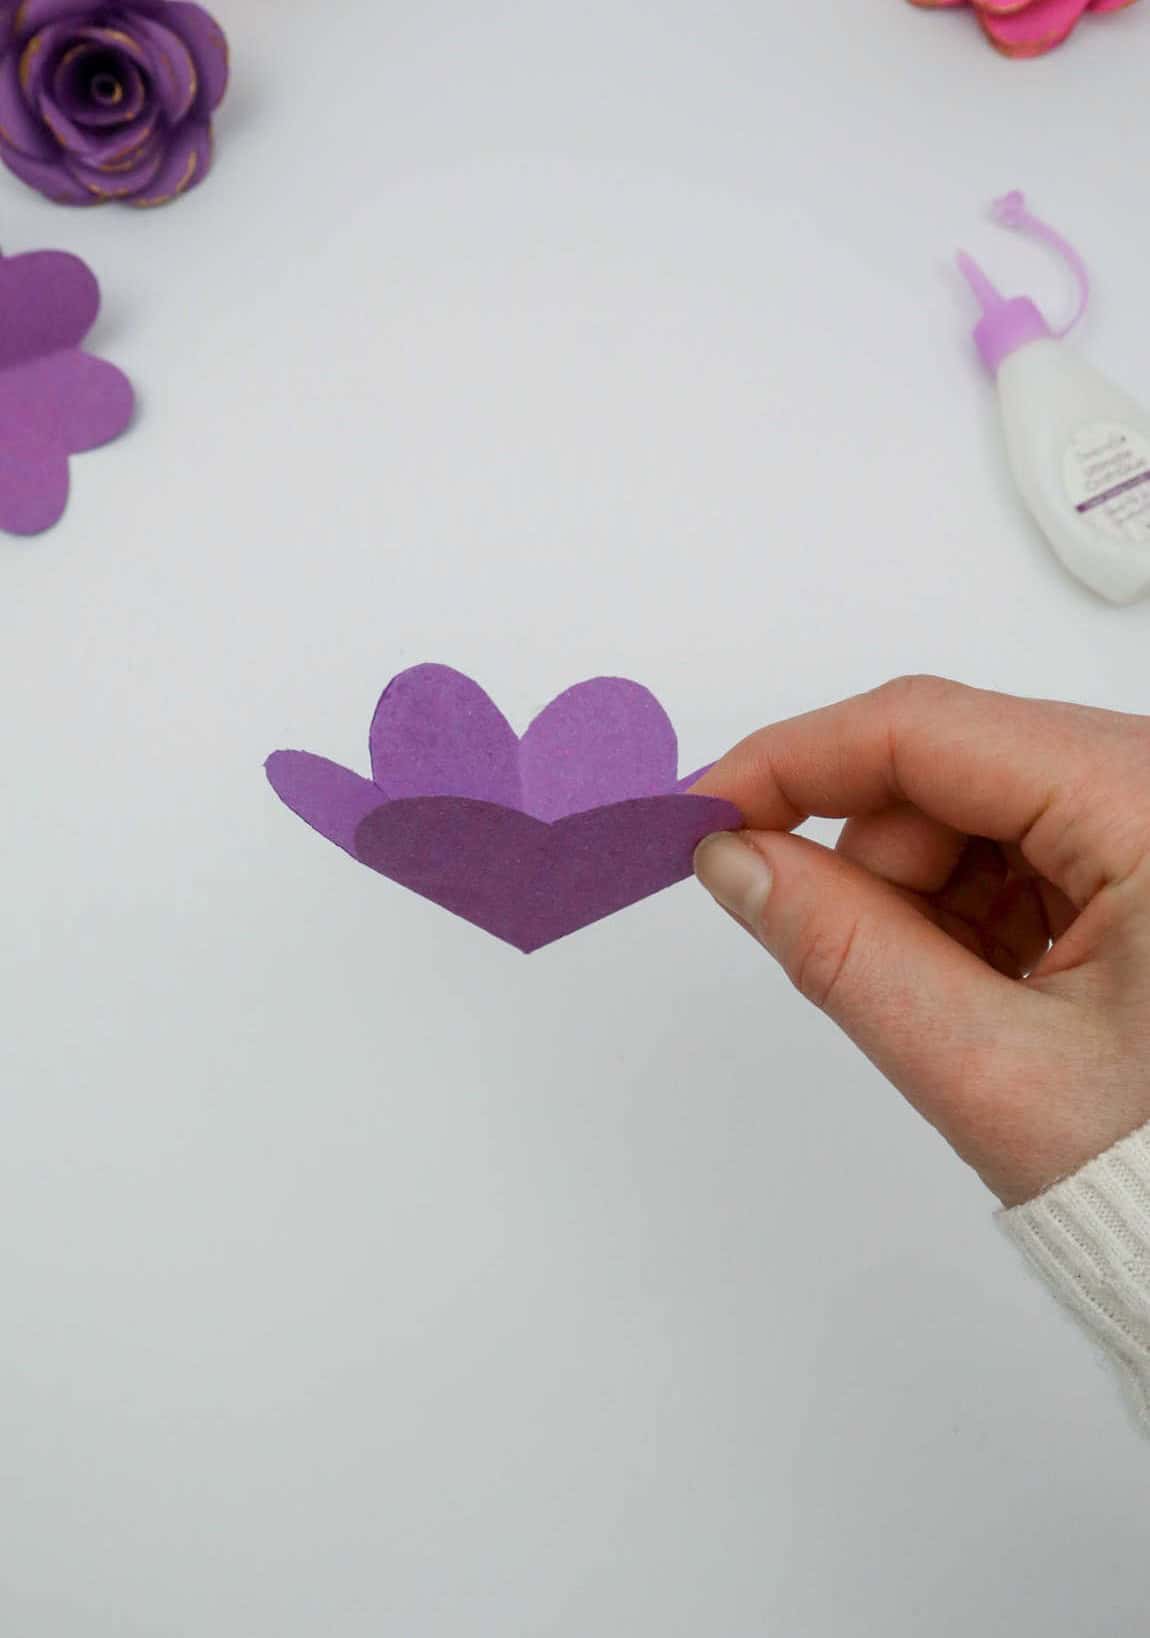
To complete the construction of your paper flower, start by working your way down through the layers of petals. As you reach each new layer, roll the individual petal into a conical shape that will eventually form the central core of your flower. Secure each petal in place with a gentle press or a dab of adhesive, ensuring they remain firmly anchored to one another.
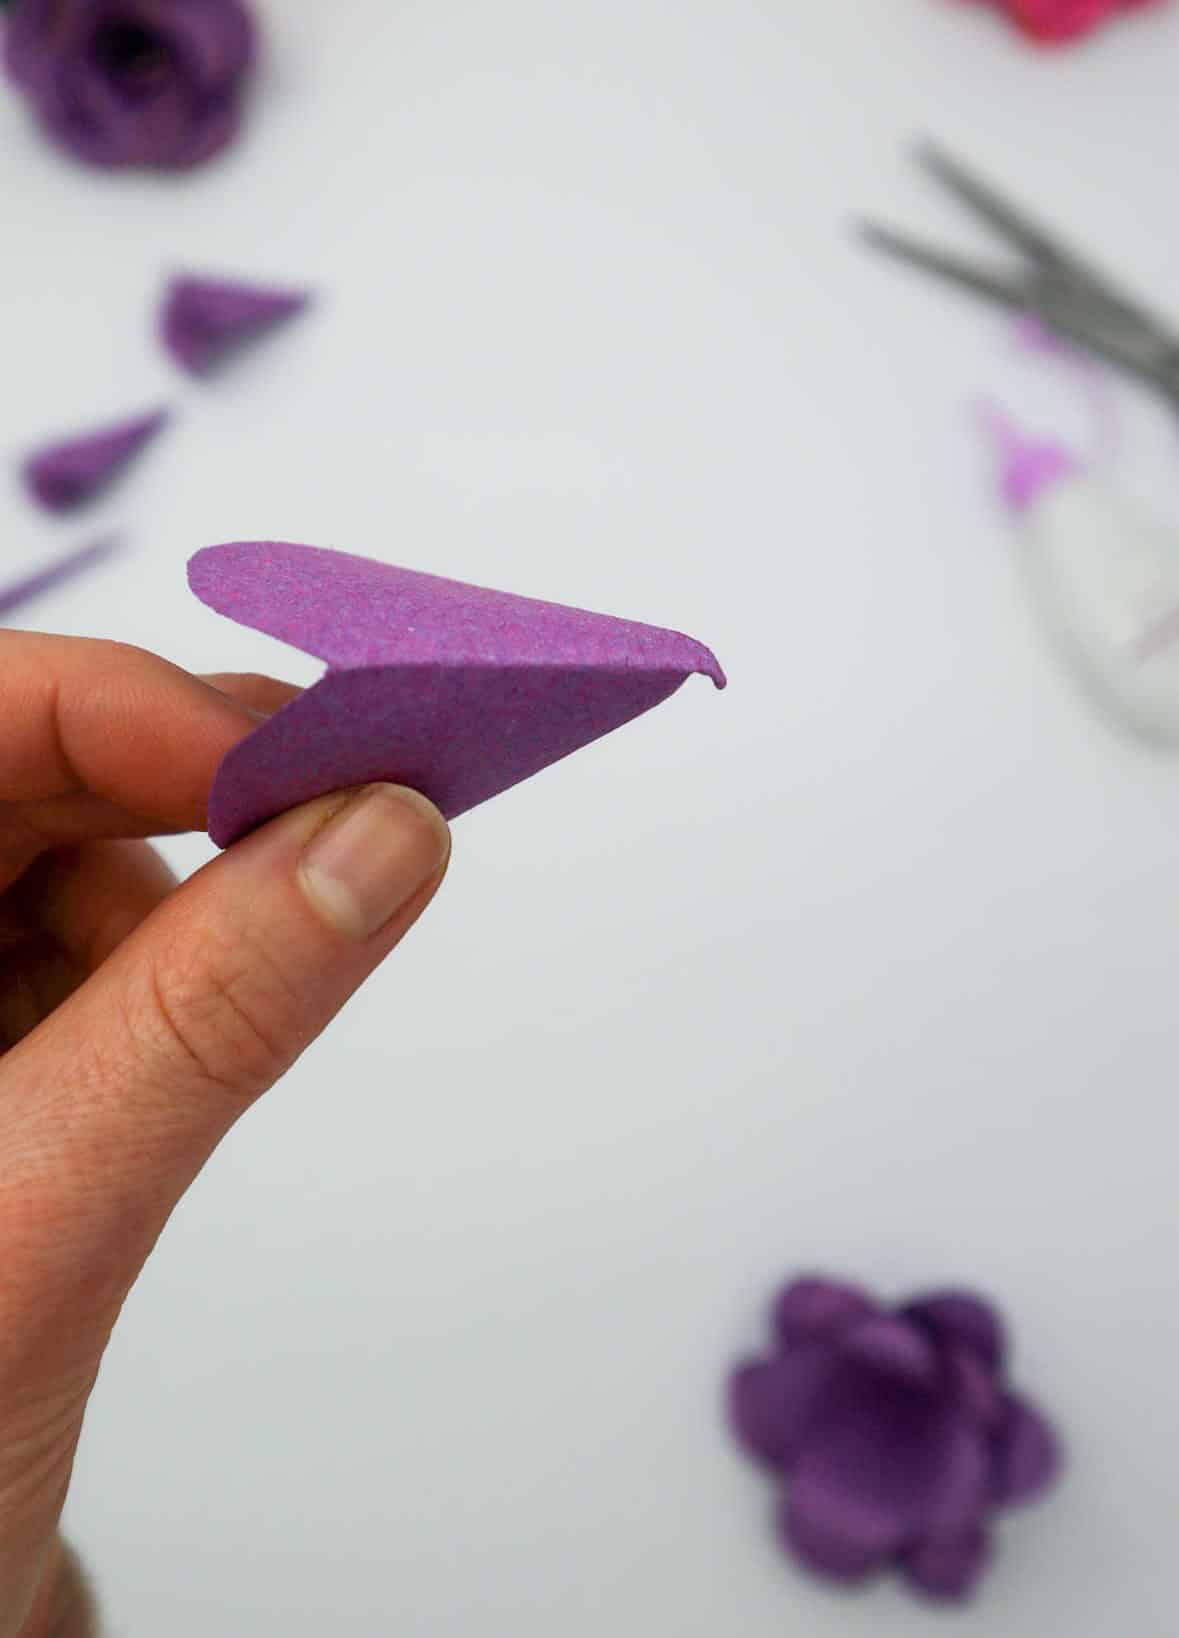
Step 10
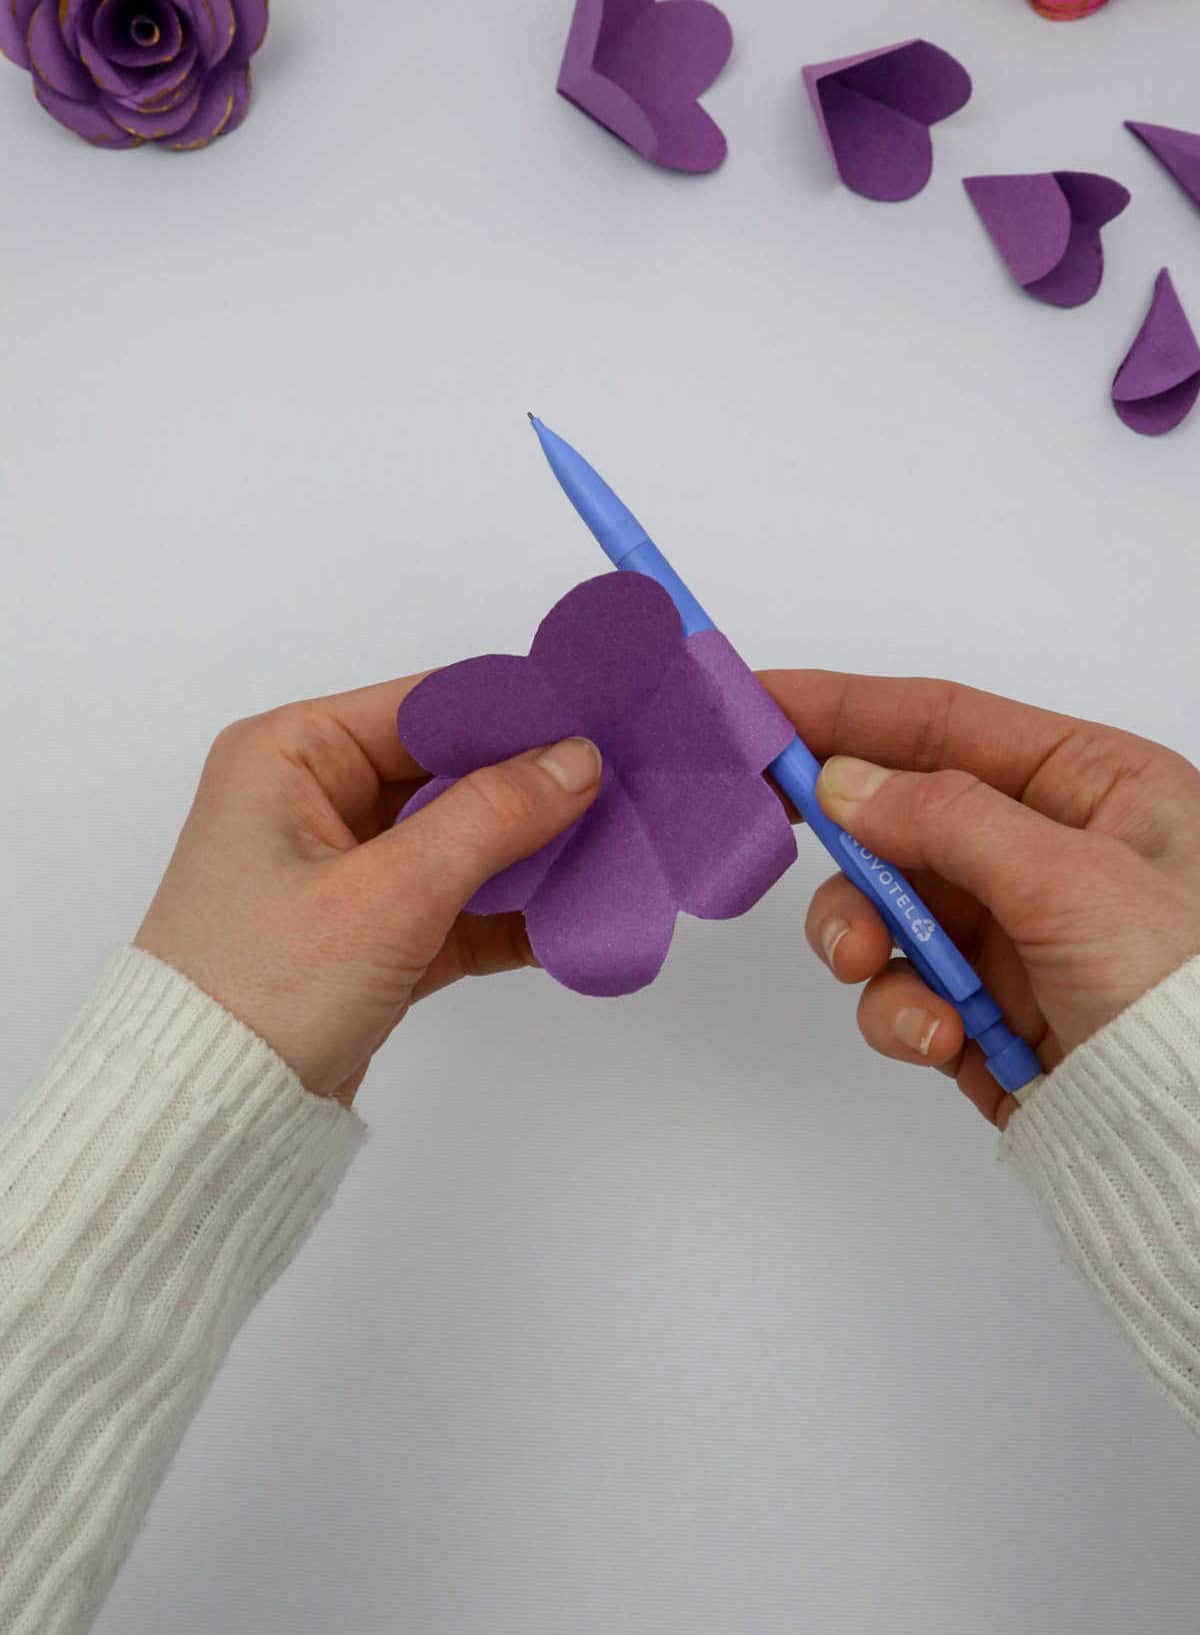
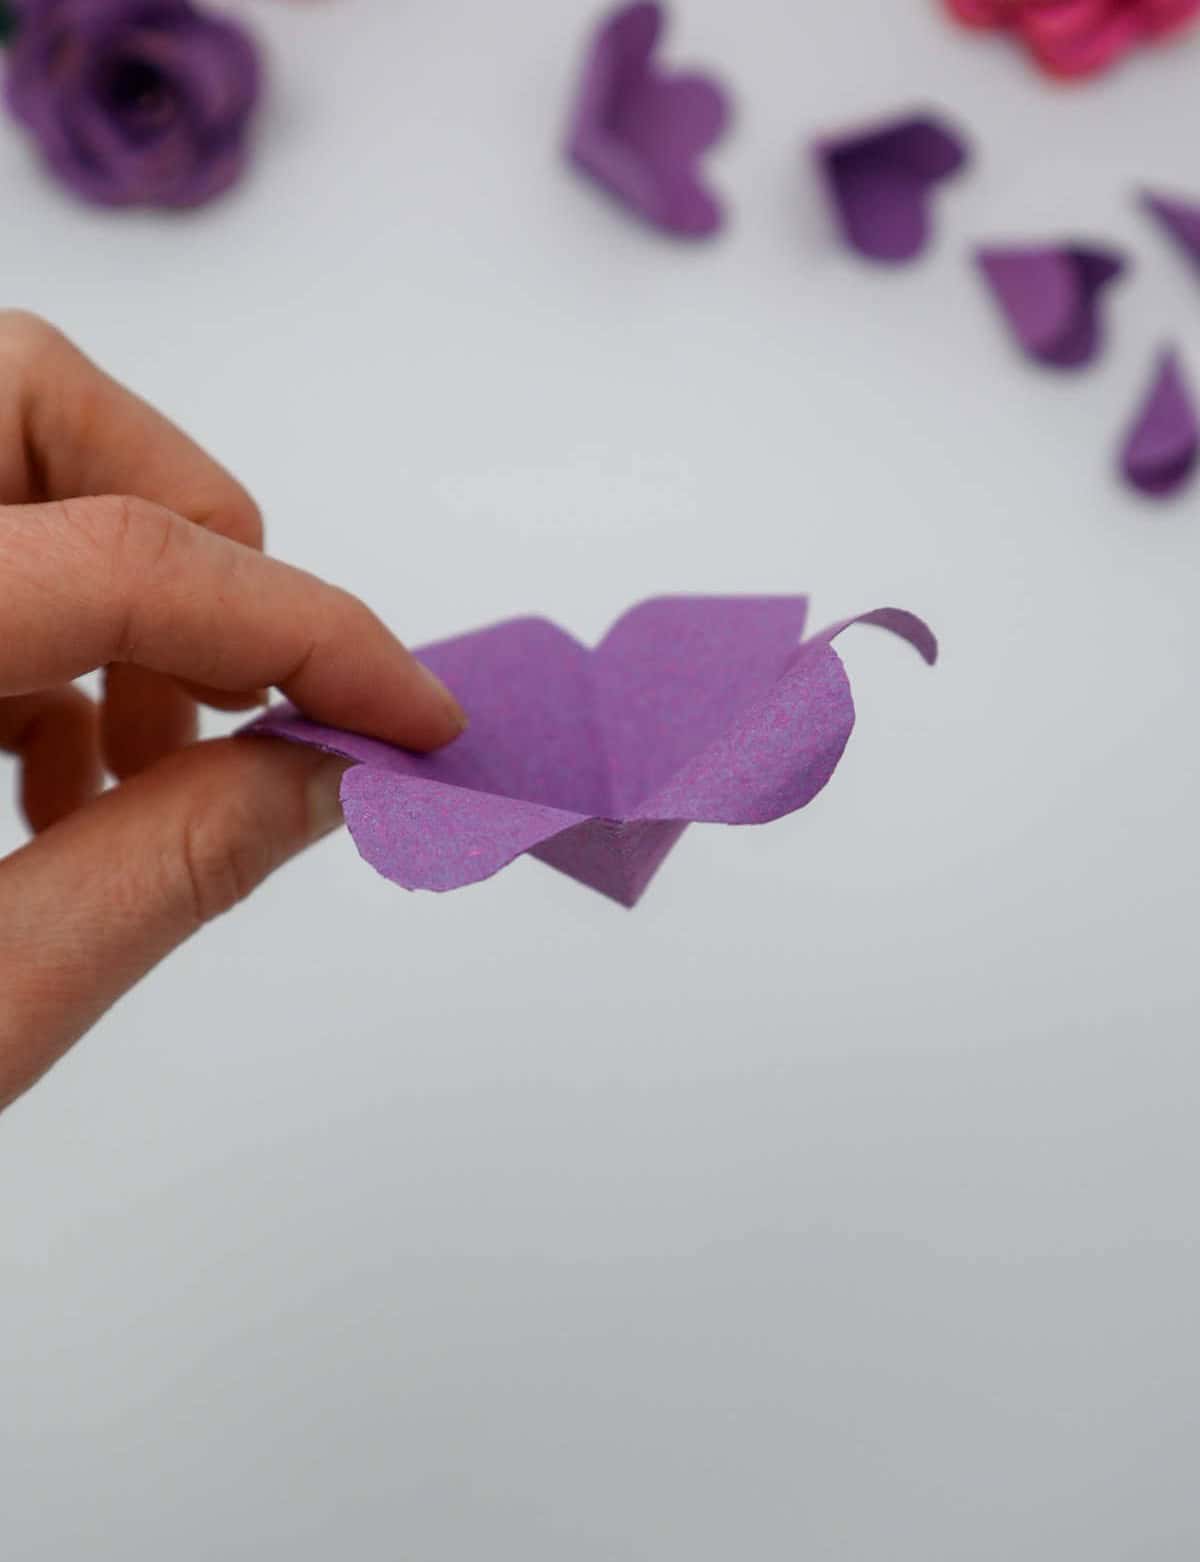
To shape the edges of your flower petals, start by curling them around a pen or marker. Hold the petal firmly and gently roll it into a curved shape, much like a scroll. This technique is called ‘furling.’ Repeat this process for each petal and layer of your paper flower, making sure to maintain consistent curves throughout.
Step 11
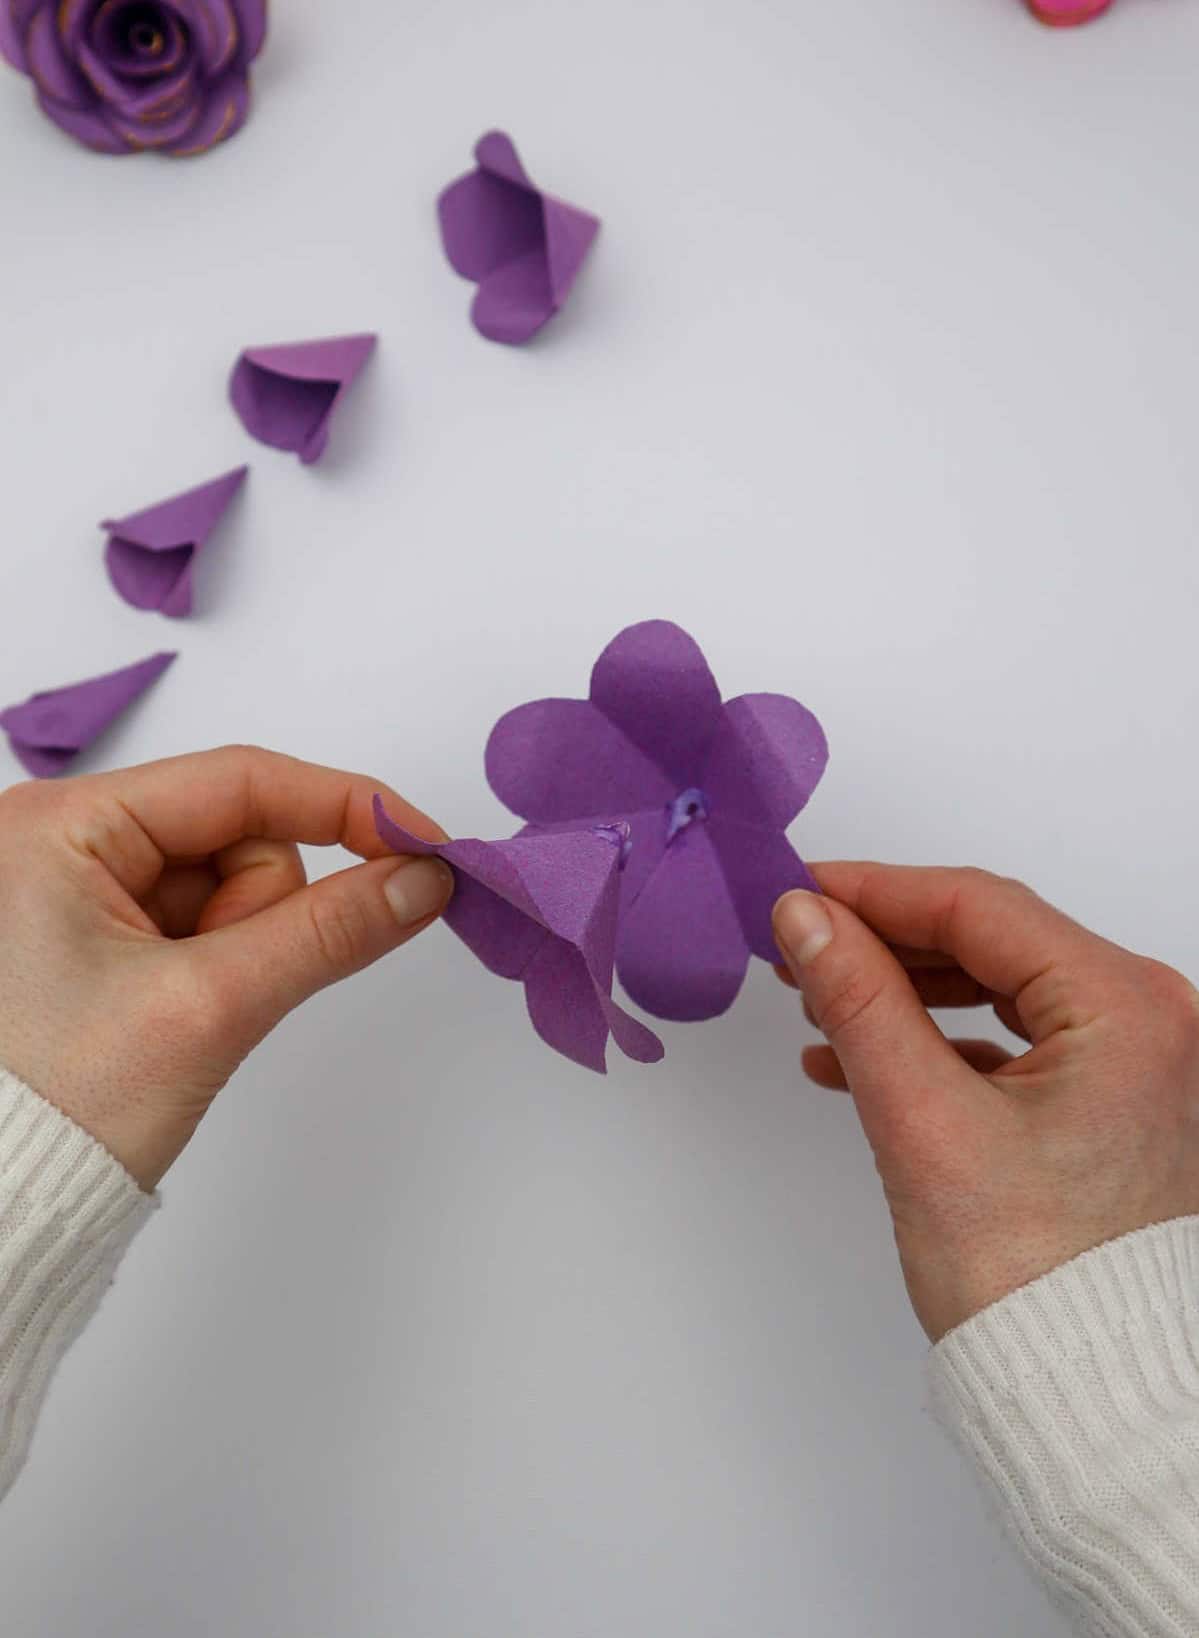
As you near the final stages of constructing your paper flower, it’s time to bring everything together. To do this, apply a small amount of adhesive to the inner surface of each layer’s pointed tip, then carefully align the outer edge of the next layer and press firmly into place. Hold each layer steady for a few moments to allow the layers to meld together, before moving on to the next one. This process is crucial in ensuring that your flower maintains its shape and appearance.
Repeat this procedure for all the layers, gradually building up the fullness of your creation.
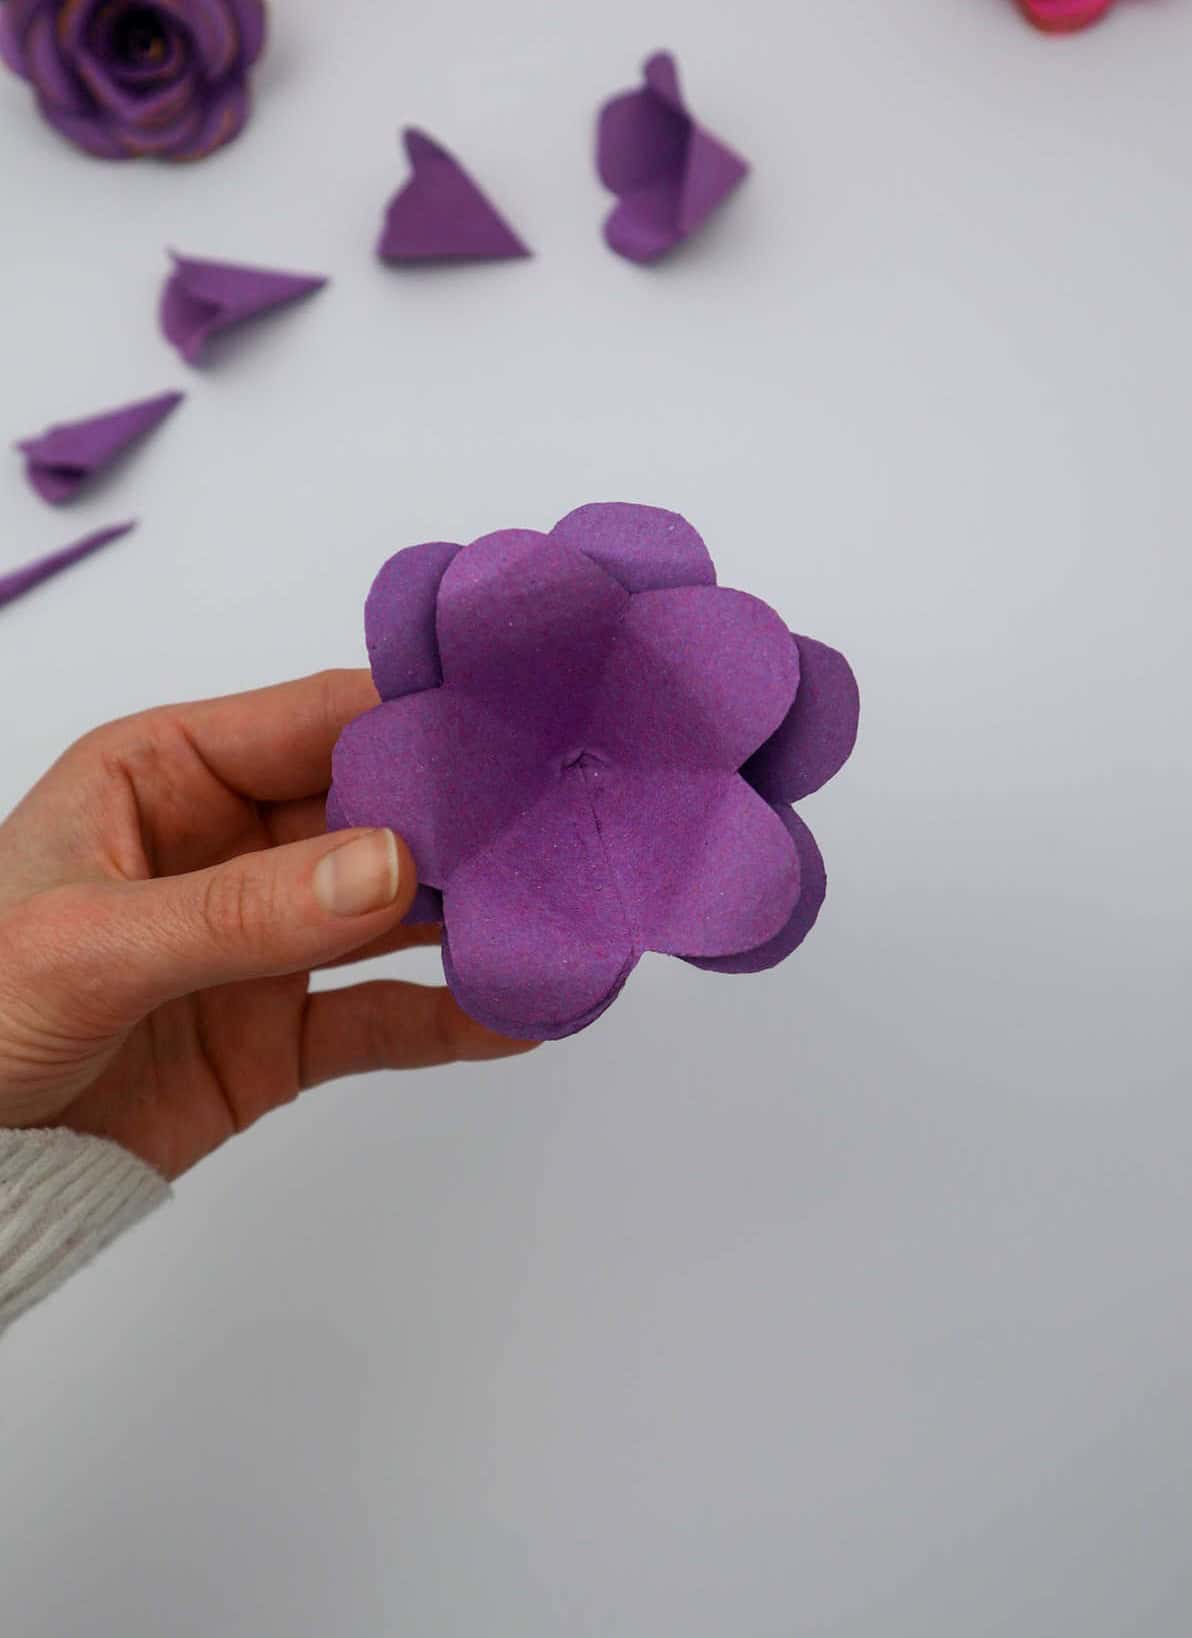
Step 12

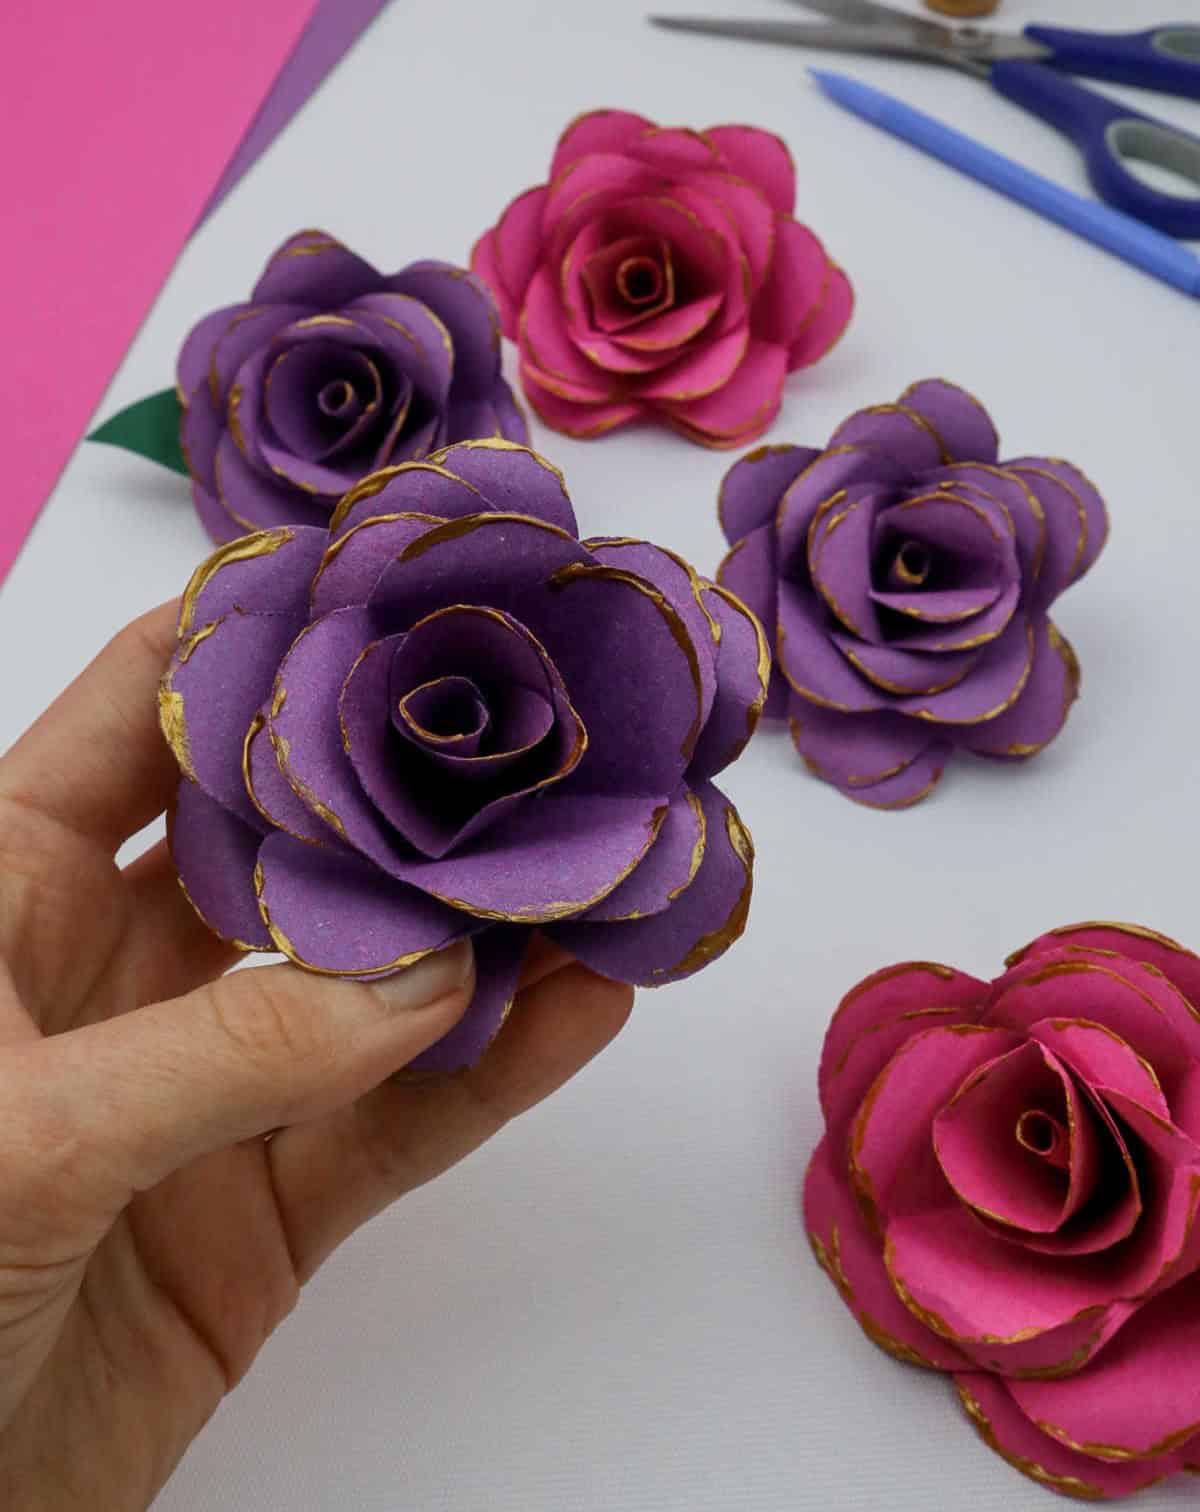
As you approach the last few layers of petals, you may encounter a slight resistance. To overcome this, apply a thin line of adhesive along the edges of the petals rather than the tips. Hold the petal in place until it sets, ensuring a secure bond with the preceding layer. And just like that, your DIY paper flower is complete! You can create a batch of these delicate blooms and store them for future use, adding a personal touch to special occasions or decorations.
Step 13
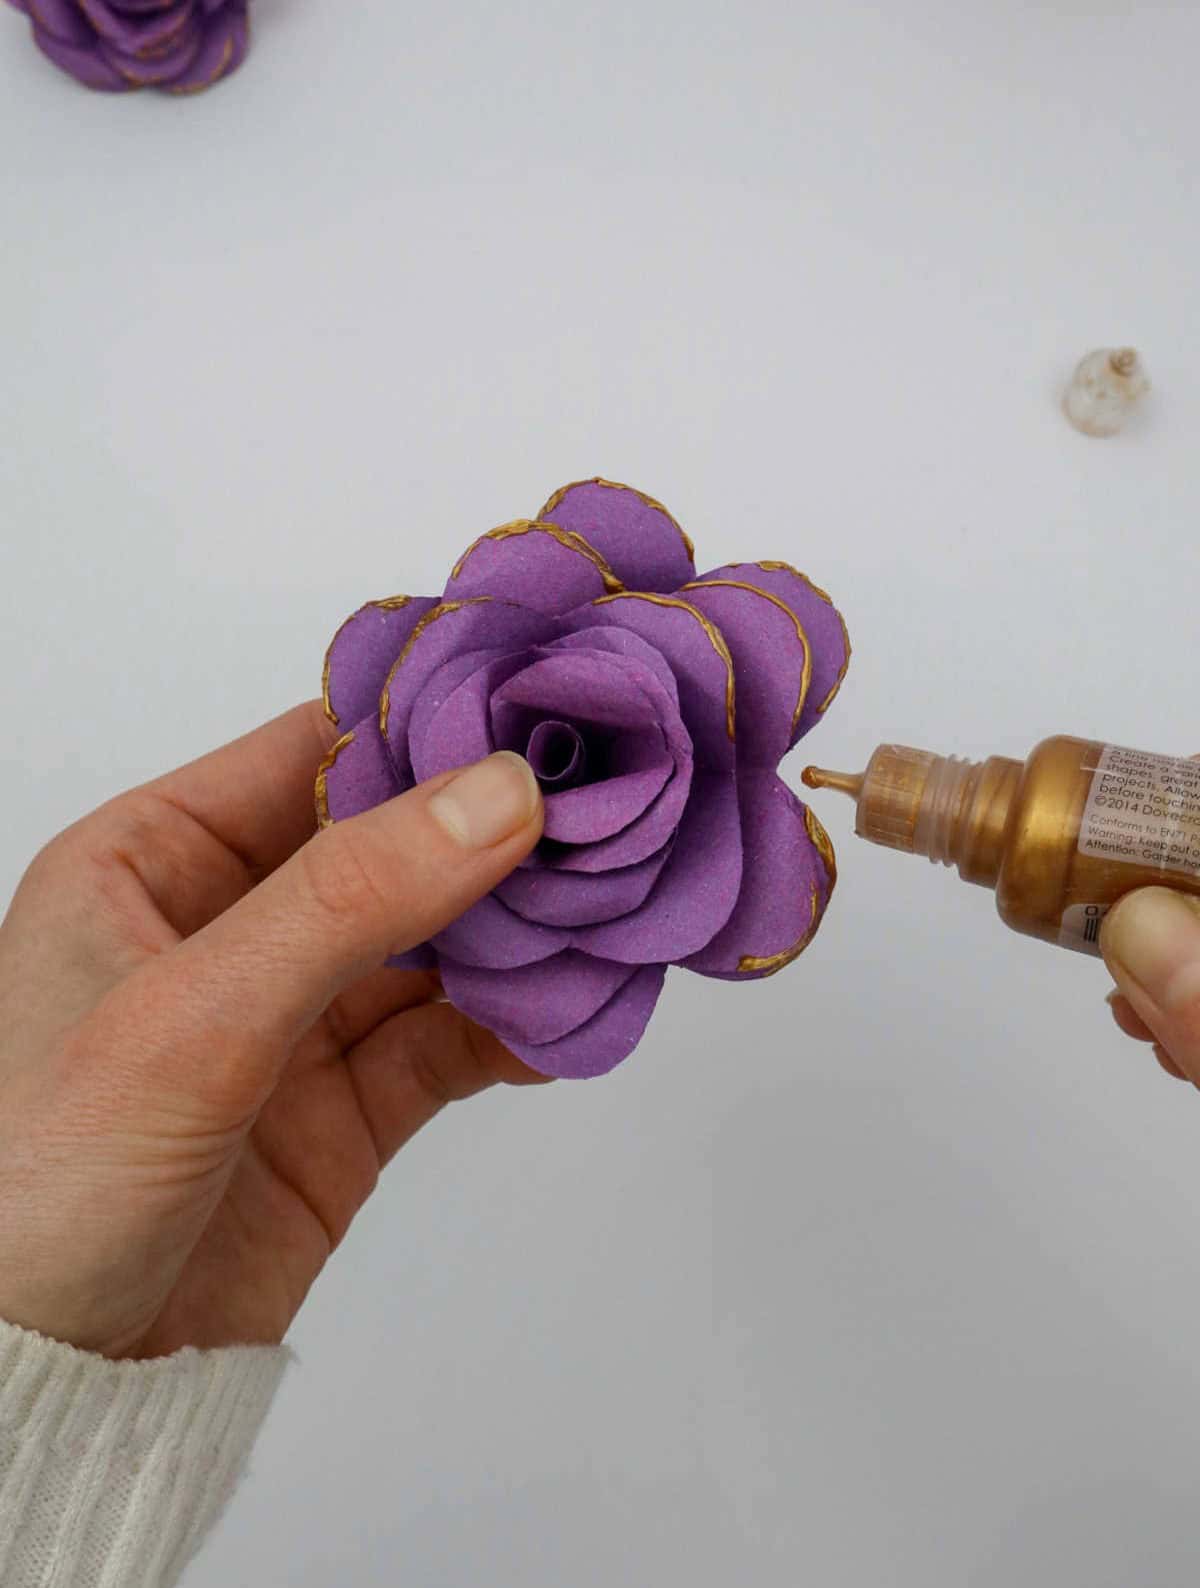
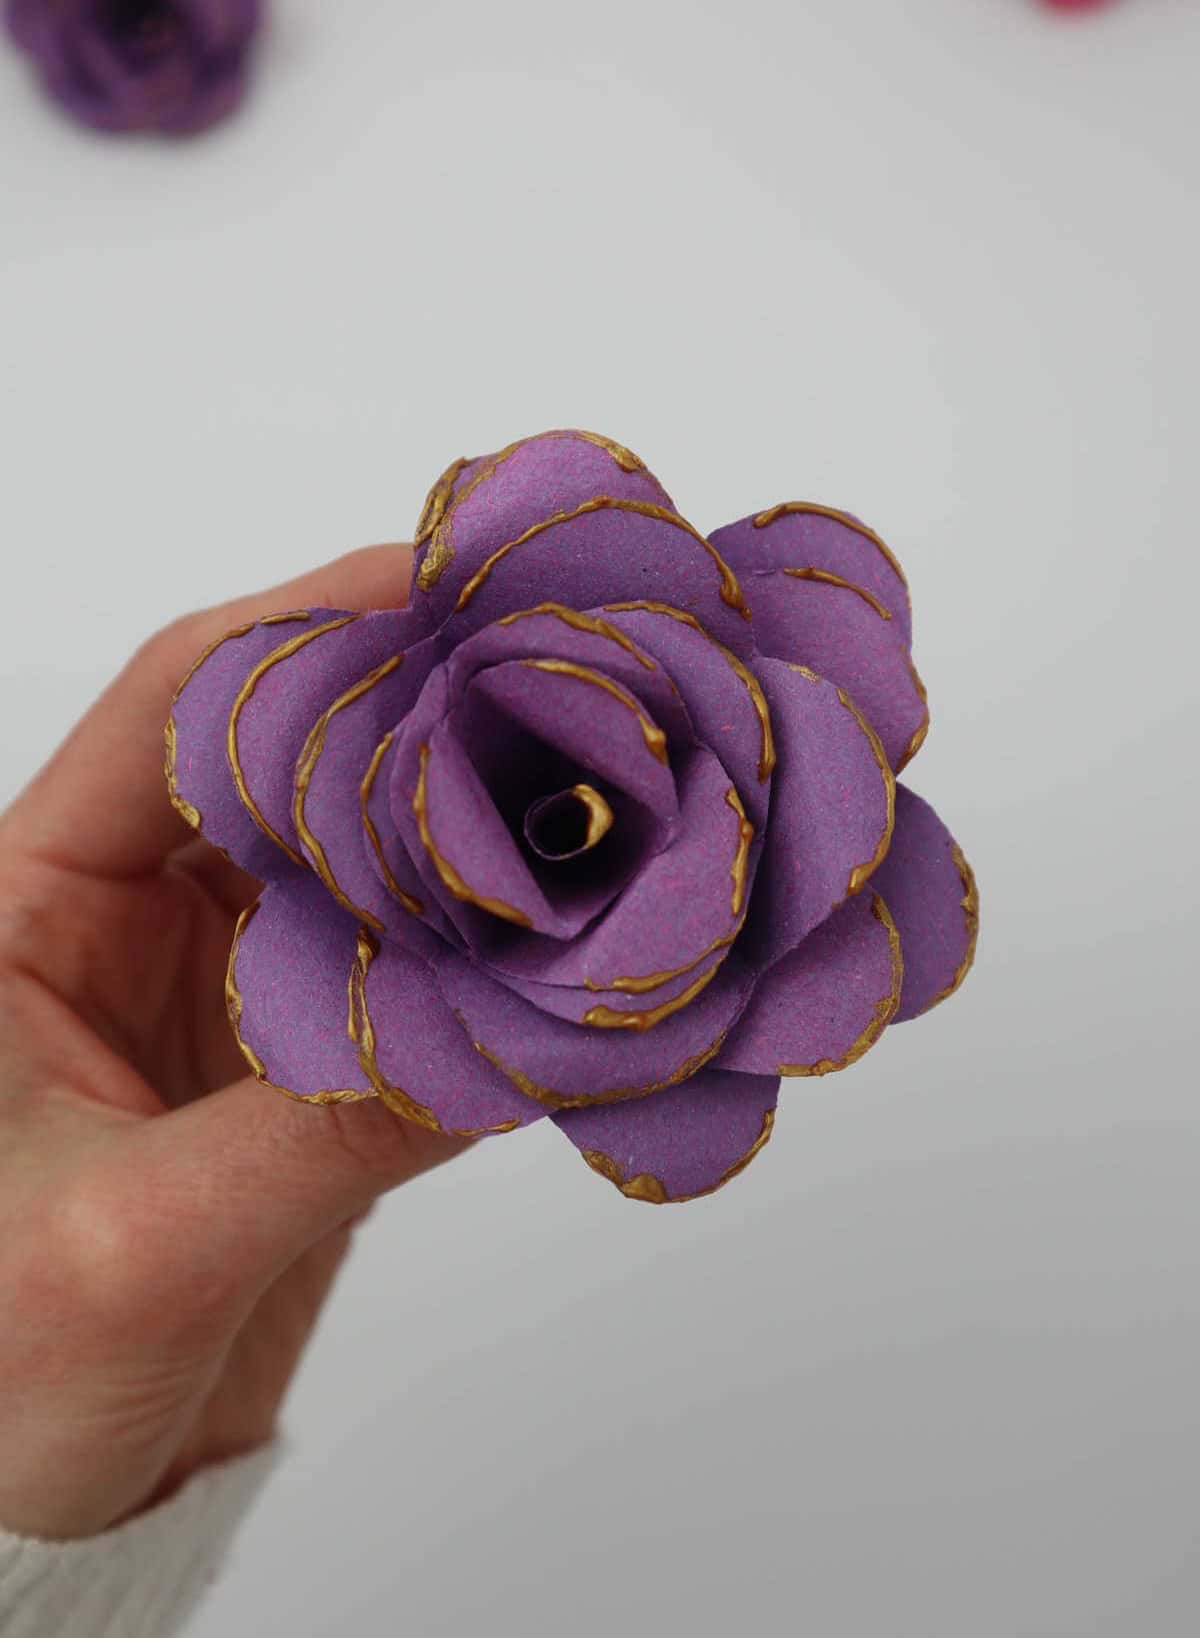
As you’ve now completed crafting your paper flower, it’s time to add the final touches. Consider embellishing the edges with glitter glue for a subtle shine, or opt for a light layer of shimmer spray to give your creation an extra burst of radiance.
Where Can You Use These Paper Flowers?
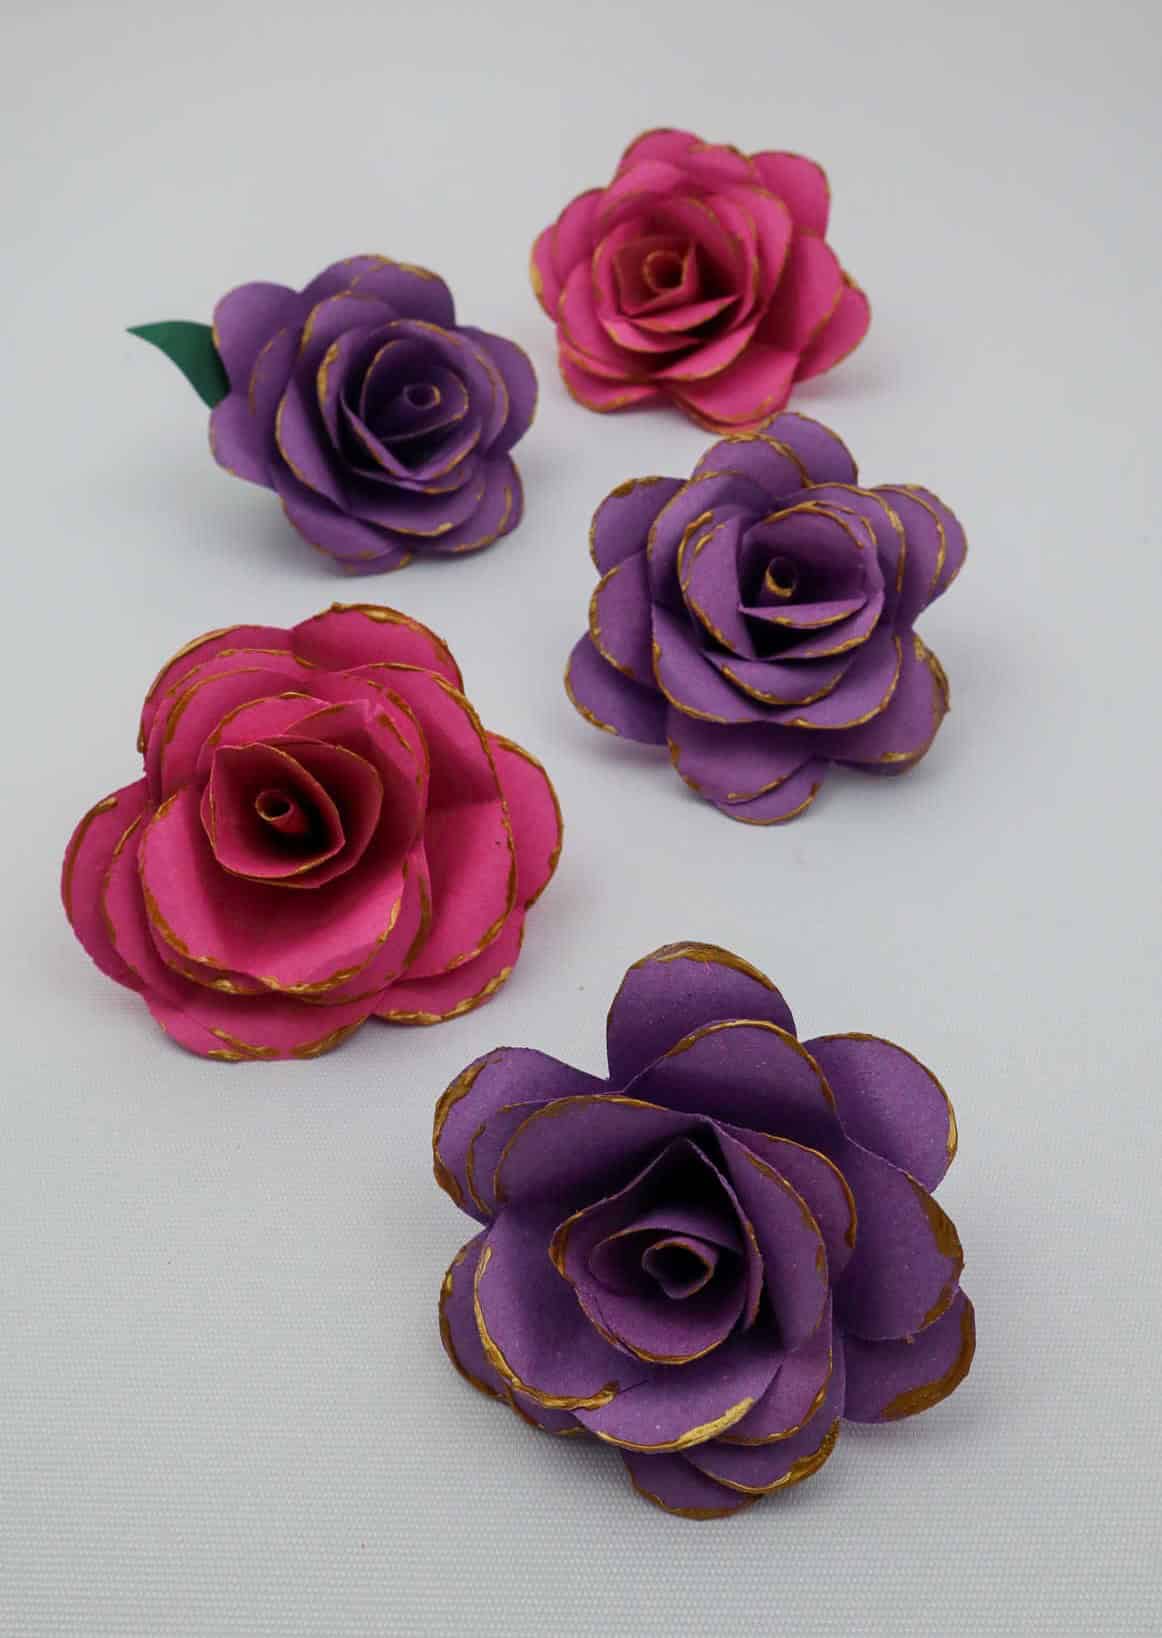
Are you looking to add some extra flair to a craft project or enhance its overall aesthetic? Perhaps a plain picture frame needs a touch of elegance, or a birthday card requires a dash of whimsy? The solution lies in creating your own paper flowers! These delicate creations can be used to elevate a multitude of projects, from a single framed piece to an entire box filled with them.
Why not take it to the next level by combining these paper blooms with tissue paper pom poms and unleashing your creativity?
Other Crafts You May Like
Discover the world of paper crafting with our comprehensive guide. From creating stunning photo albums to making adorable summer crafts for kids, we’ve got you covered. Learn how to make a beautiful paper envelope or create unique DIY bookmarks that showcase your personality. For a touch of elegance, try making a paper plate flower craft or add some color to your life with tissue paper pom poms.
Explore the endless possibilities of paper crafts with our list of fun and creative projects for all ages, including kids, teens, and adults alike. Whether you’re looking for inspiration for a special occasion or just want to unwind with a fun activity, our collection of DIY paper crafts has something for everyone.
How to Make Paper Flowers
Transform ordinary paper into exquisite DIY flowers that can be used to add a personal touch to any room or gift. This fun and easy craft project is perfect for the whole family to enjoy together, making it an ideal activity for a rainy day or a creative afternoon. With just 20 minutes of active time and an additional 10 minutes to let your creations dry, you can create beautiful paper flowers in under an hour. So grab some paper, get creative, and start crafting!
Equipment
To ensure uninterrupted work or play, it’s essential to prevent your screen from going dark prematurely. One effective way to achieve this is by adjusting the display settings on your device. By doing so, you can set a custom sleep timer that suits your needs, whether you’re binge-watching a show, gaming for hours, or simply working on a project. This simple tweak will allow you to focus without worrying about the screen suddenly turning off in the middle of something important.
Materials
To create a dazzling and festive decoration, you’ll need four 4-inch by 4-inch paper squares, some craft glue, and a bottle of glitter glue. These simple materials will come together to form a unique and eye-catching piece that’s perfect for adding a touch of whimsy to any room.
Instructions
Begin by laying out all the necessary supplies on a flat surface. Starting with a square sheet of paper, fold it diagonally into a triangle and press firmly to create a crisp crease. Repeat this process, folding the paper into a smaller triangle. Next, take your marker and draw an arc shape, which will serve as the template for your first layer’s petal. Cut out the petal along the lines you drew, then unfold the paper.
Set aside one of these petals, as it will be used to form the center of the flower. As you progress through each subsequent layer, you’ll need to cut more and more of the paper to achieve a tapered effect. For example, the second layer requires two petals, while the third layer calls for three, and so on. To create the tip of the flower, simply curl one petal into a cone-like shape. Secure all the layers together by overlapping their ends, ensuring they curve inward.
Once the individual components are stuck in place, it’s time to assemble the entire flower. Begin by layering the insides of the first layer and attaching the next layer on top, holding it in place until it sets. Allow your flower to dry completely before using a pen to curl the ends. Finally, decorate your paper flowers with glitter glue and they’re ready for display.