These charming Chinese paper lanterns are an ideal creative outlet for anyone. Not only do they create beautiful and cozy decorations, but they also add a personal touch to any room. The versatility of paper lanterns is truly fascinating – in different cultures, they hold distinct meanings and symbolism, often reflecting local traditions and celebrations. From delicate silk creations to intricately designed bamboo or wood masterpieces, each unique piece tells a story.
As we celebrate the magic of light and festivities around the world, let’s embark on a fun DIY adventure by crafting our own paper lanterns at home! If you’re looking for more creative outlets, be sure to check out these engaging paper crafts for adults and get inspired by the world of DIY paper projects.
Supplies and Tools You’ll Need
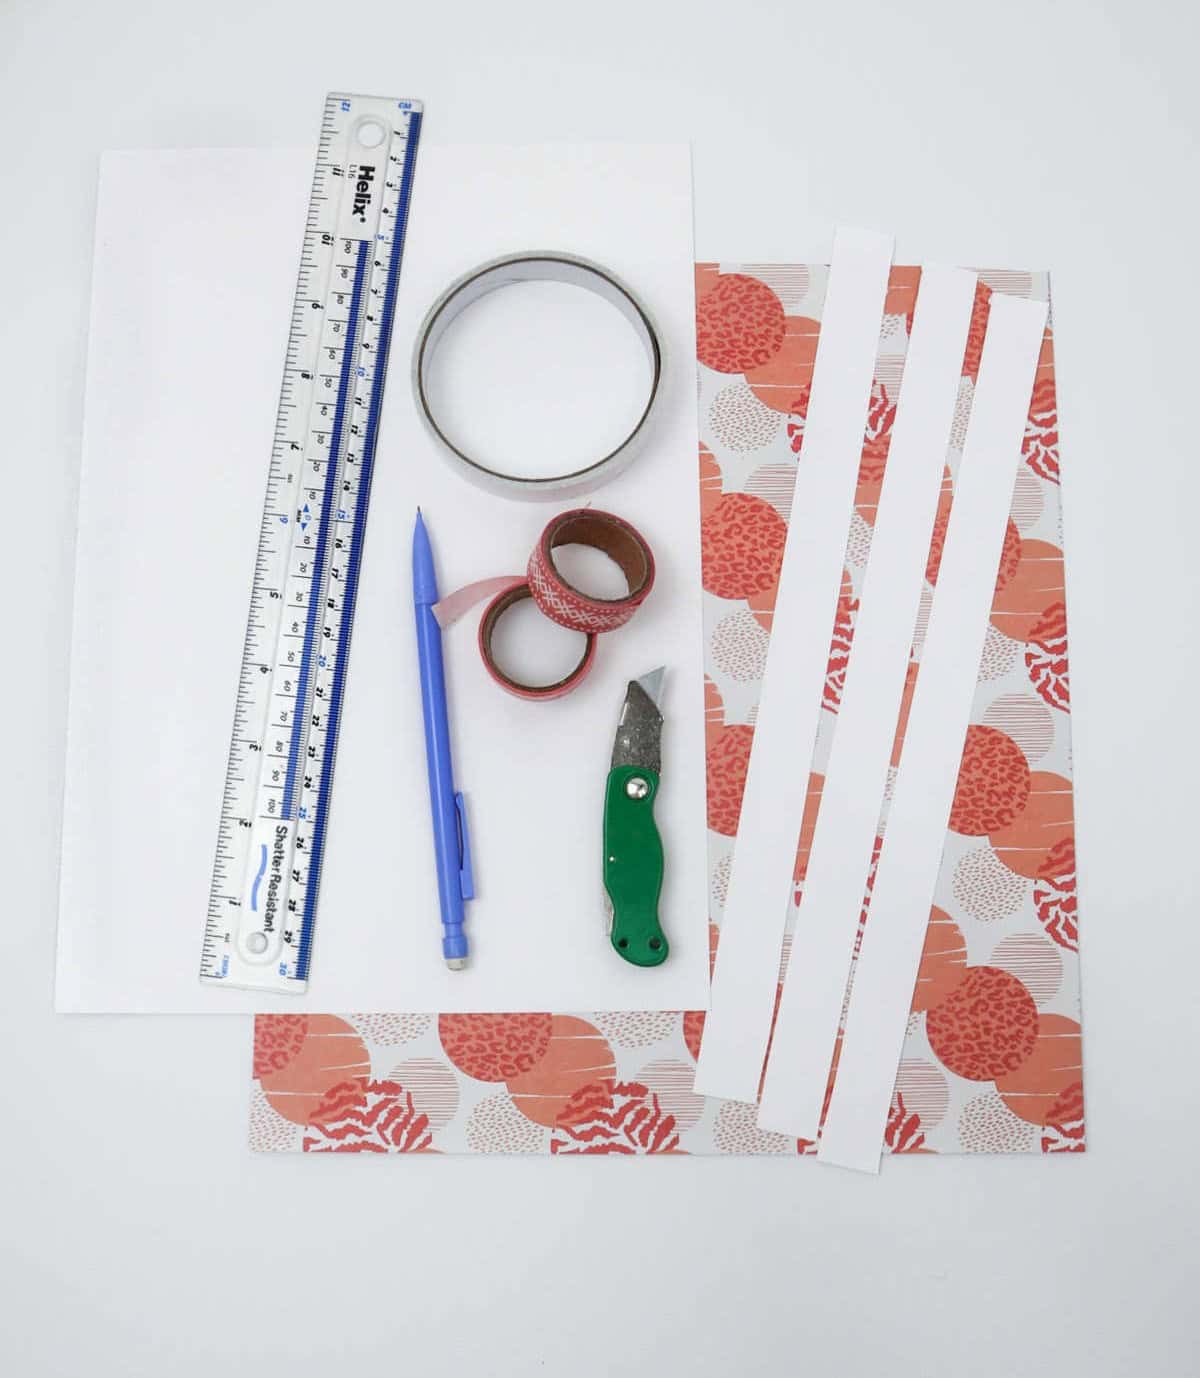
To get started, gather the following essential materials:A single sheet of white paper measuring 10 inches by 12 inches. One sheet of craft paper with a size of 12 inches by 12 inches. A pencil for creating designs and writing notes. A ruler to ensure precise measurements and straight lines. Decorative tape for adding a touch of flair and personality to your project. Double-sided tape for securely attaching different elements together.
A retractable blade knife, which will come in handy for various tasks throughout the project. Finally, prepare three paper strips measuring 12 inches by 1 inch. These will be useful for a variety of purposes later on.
Watch: DIY Paper Lanterns
For those who aren’t avid readers, there’s no need to miss out on the fun. In fact, you can explore the world of crafting through an alternative medium – video tutorials. And the best part? You can find a comprehensive guide on how to create these projects step-by-step, right before your eyes.
How to Make Paper Lanterns
Now that you have all the necessary supplies, let’s move on to the next step – crafting your very own paper lanterns. With the materials at hand, you’re just a few simple steps away from creating a beautiful and unique decorative piece for your home or special event.
Step 1
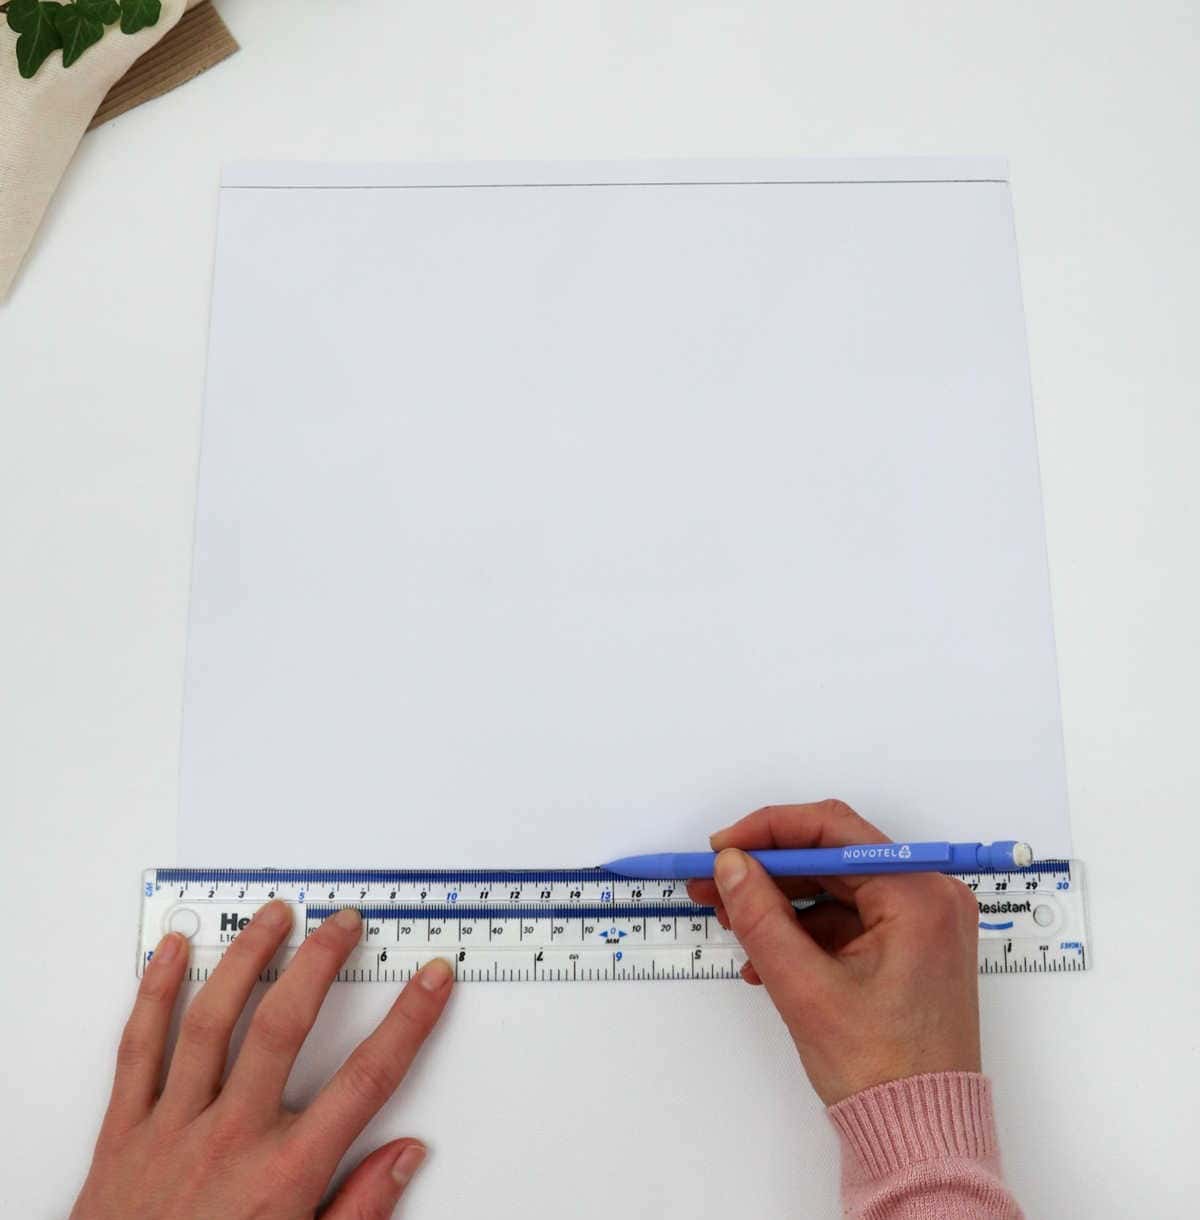
To begin, select craft paper that catches your eye. The key is to choose a material that’s vibrant, attractive, and not overly opaque, allowing light to filter through. Once you’ve narrowed down your options, place the chosen paper face-down on your workspace. Using a ruler and pencil, create two parallel lines, one approximately half an inch (or 1 cm) from both the top and bottom edges of the paper.
Step 2
As you near the end of the creative process, it’s tempting to set aside your trusty ruler and pencil. However, there’s a crucial step remaining. Place the ruler along the edge of each line, carefully drawing markers every 10 centimeters. This meticulous attention to detail is essential for achieving precise results. Be sure to apply this same level of care to the second line at the bottom of the sheet.
Step 3
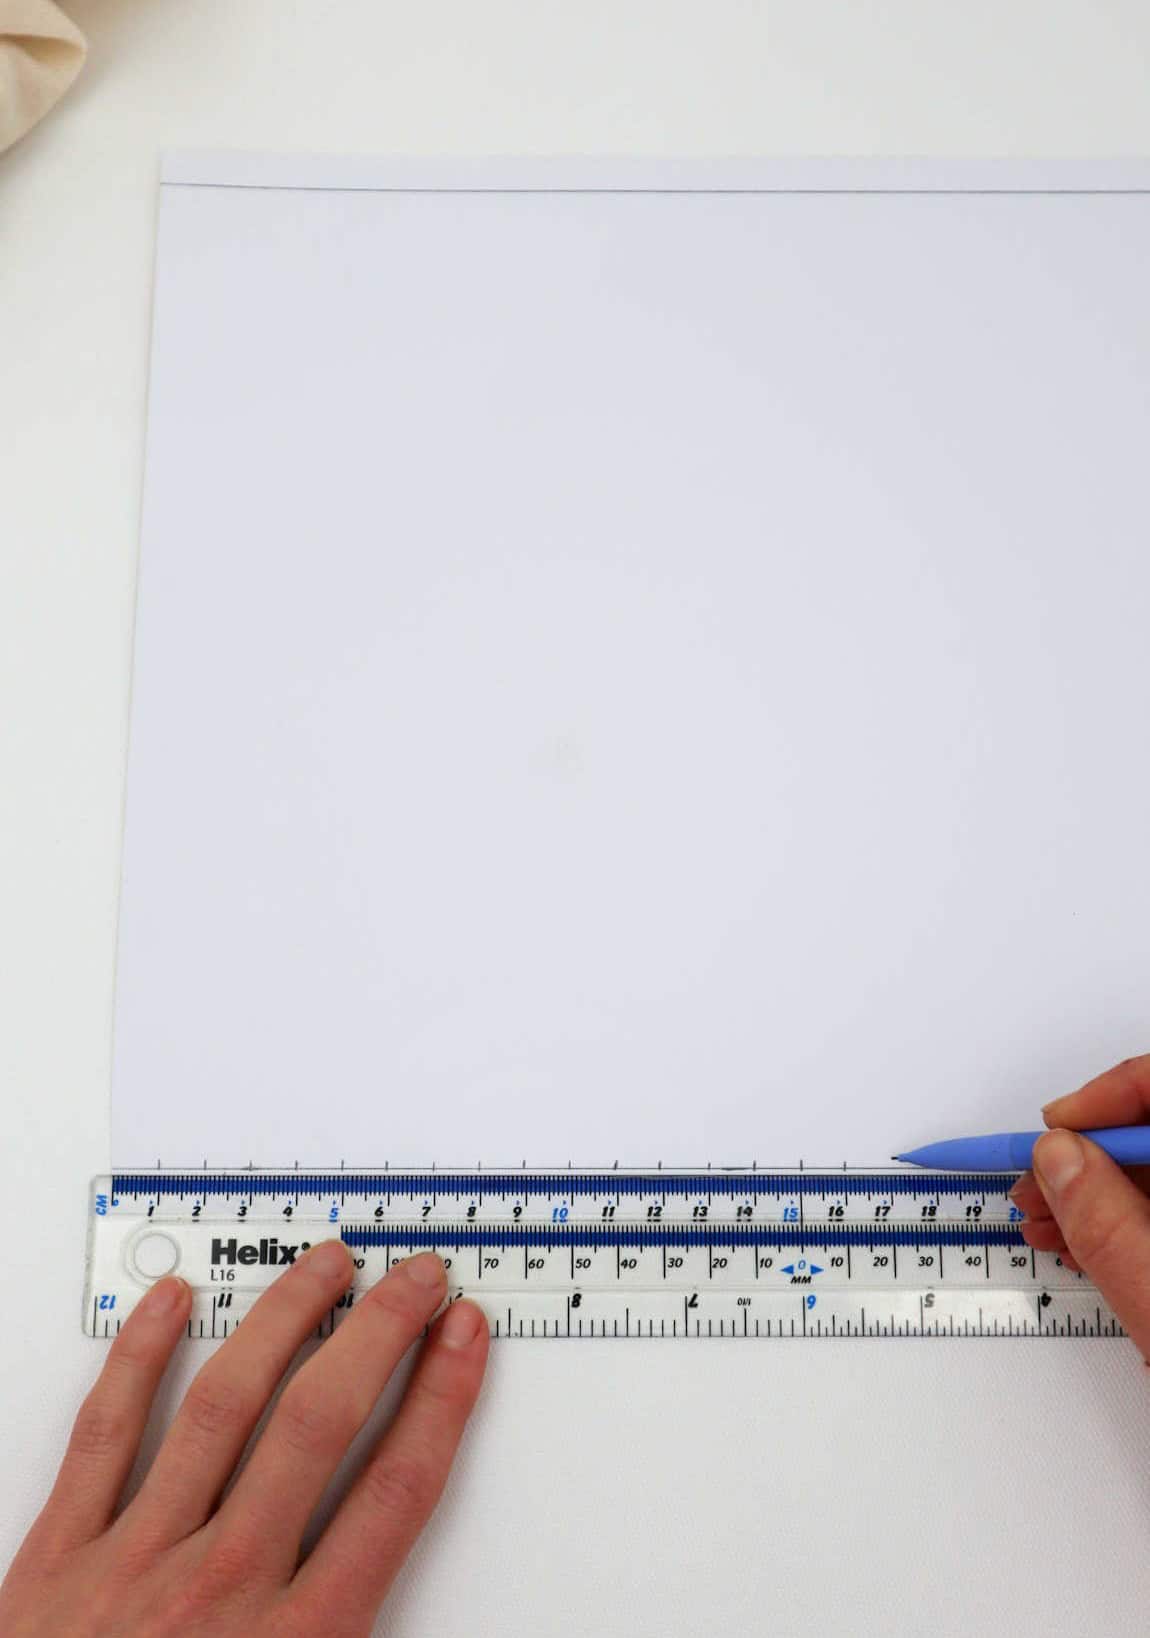
To continue, rotate your ruler around so that its top edge and bottom edge align with the first marks on either side of the lines. Then, create a horizontal line by drawing from one mark to the other. After that, use the ruler to draw vertical lines connecting each marker on the top line with its corresponding subordinating counterpart.
Step 4
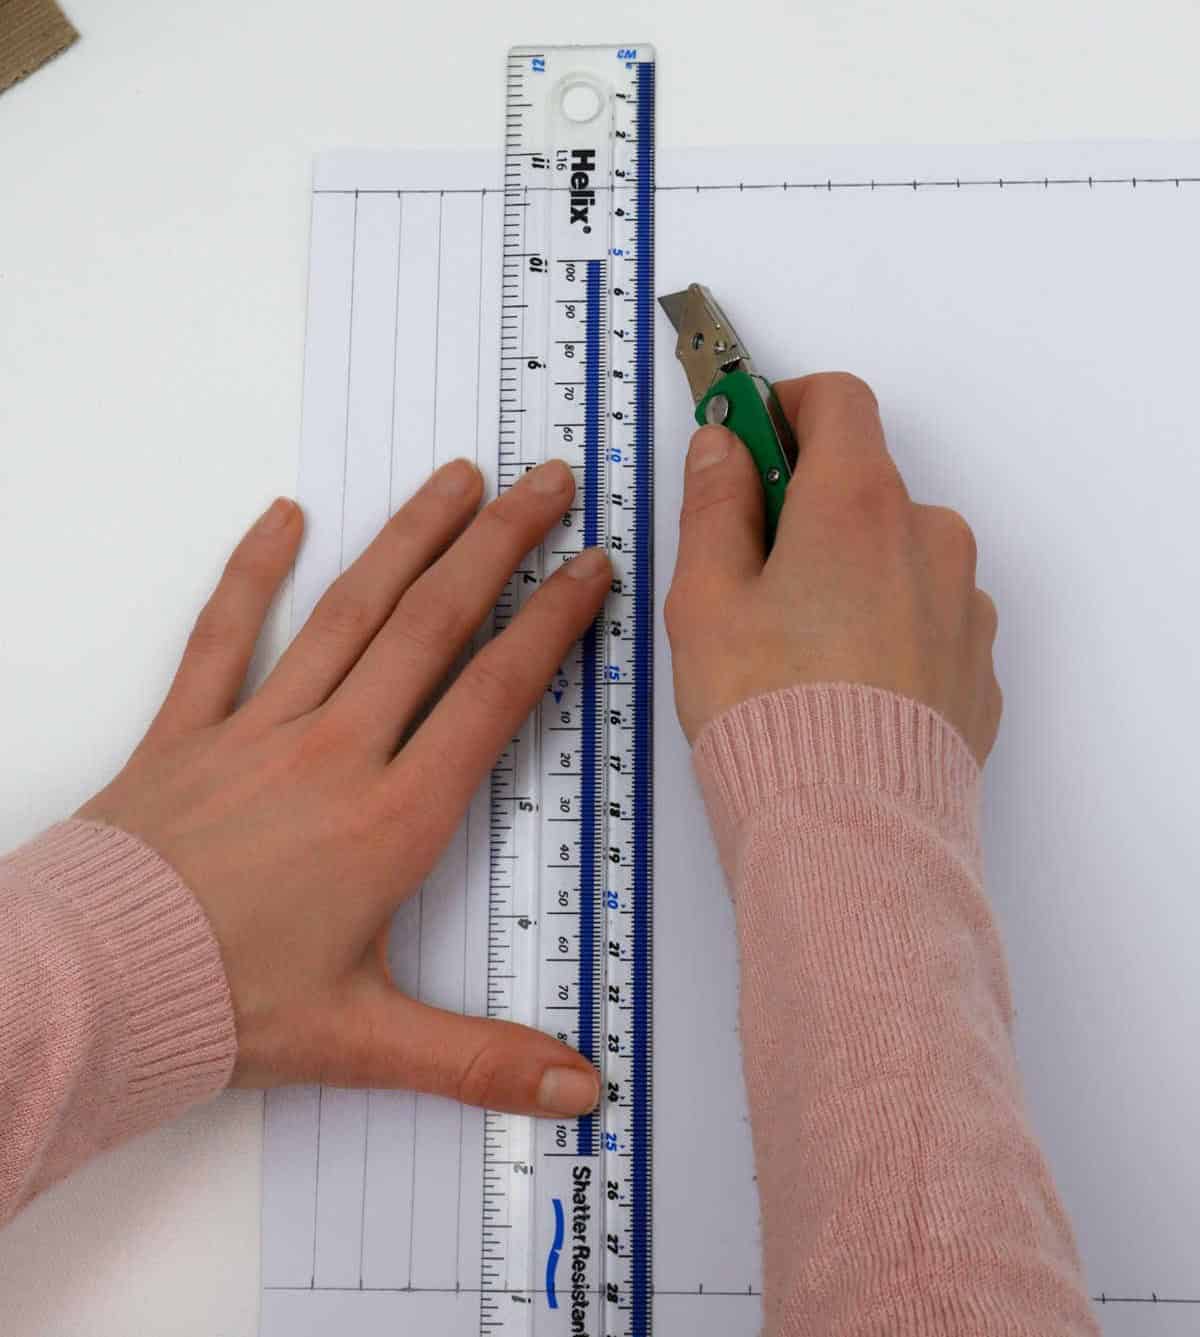
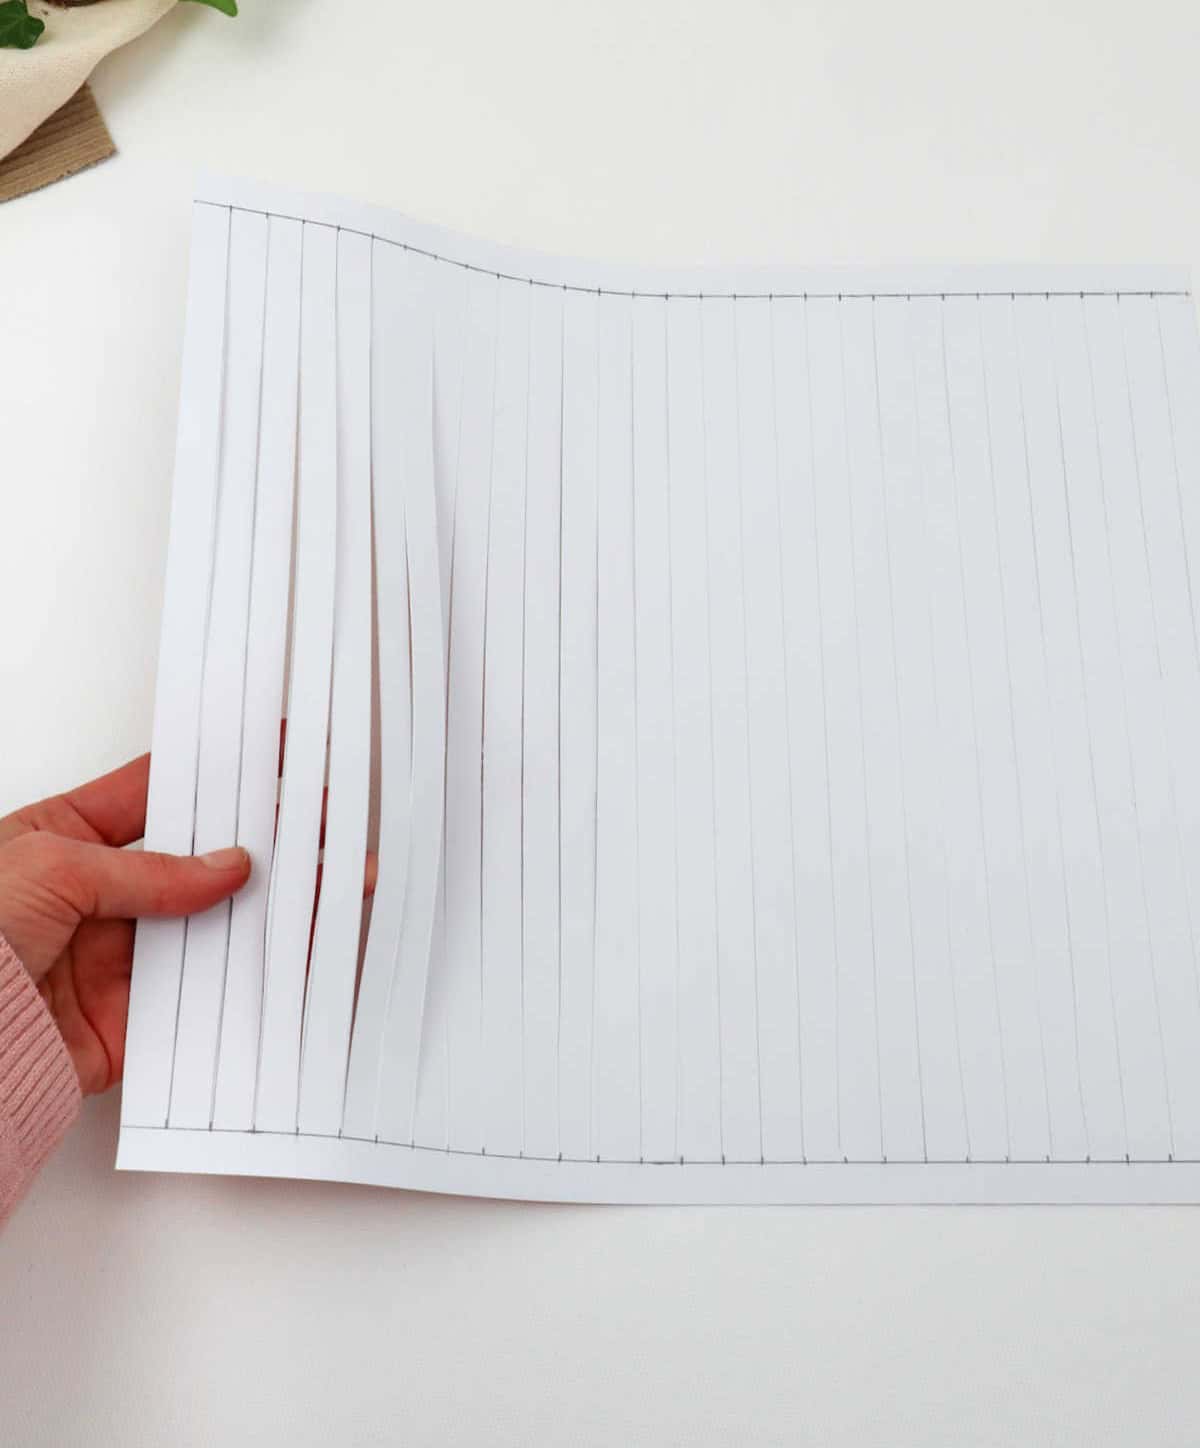
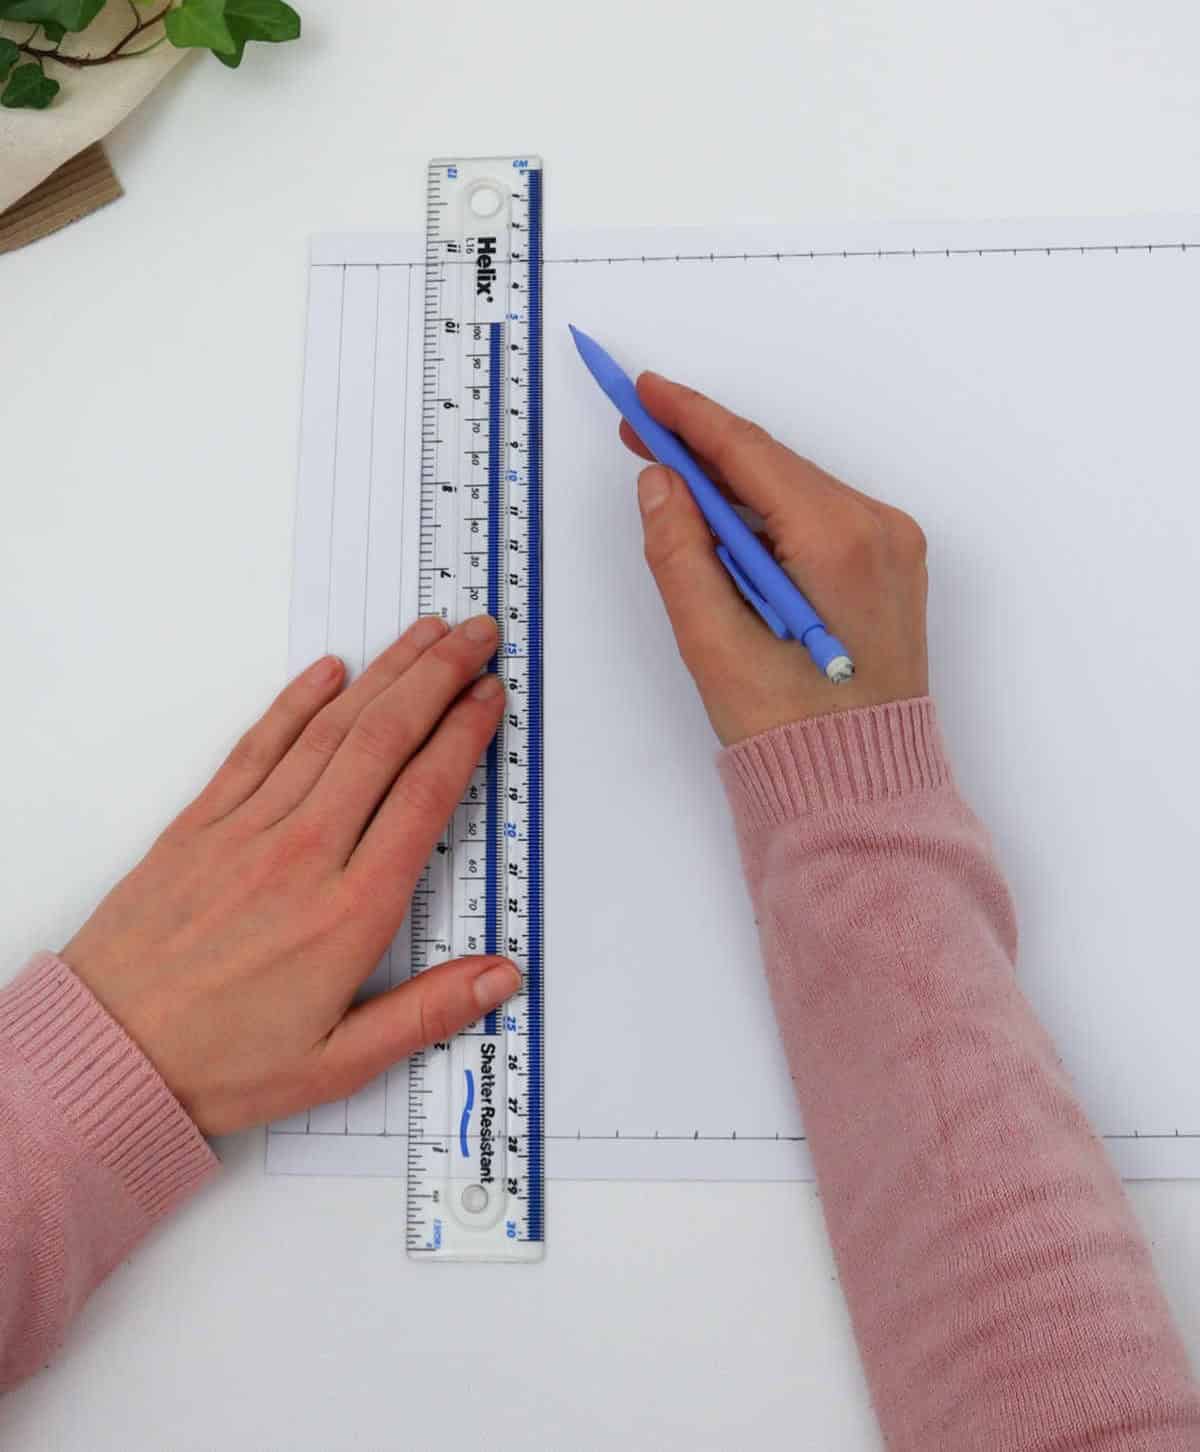
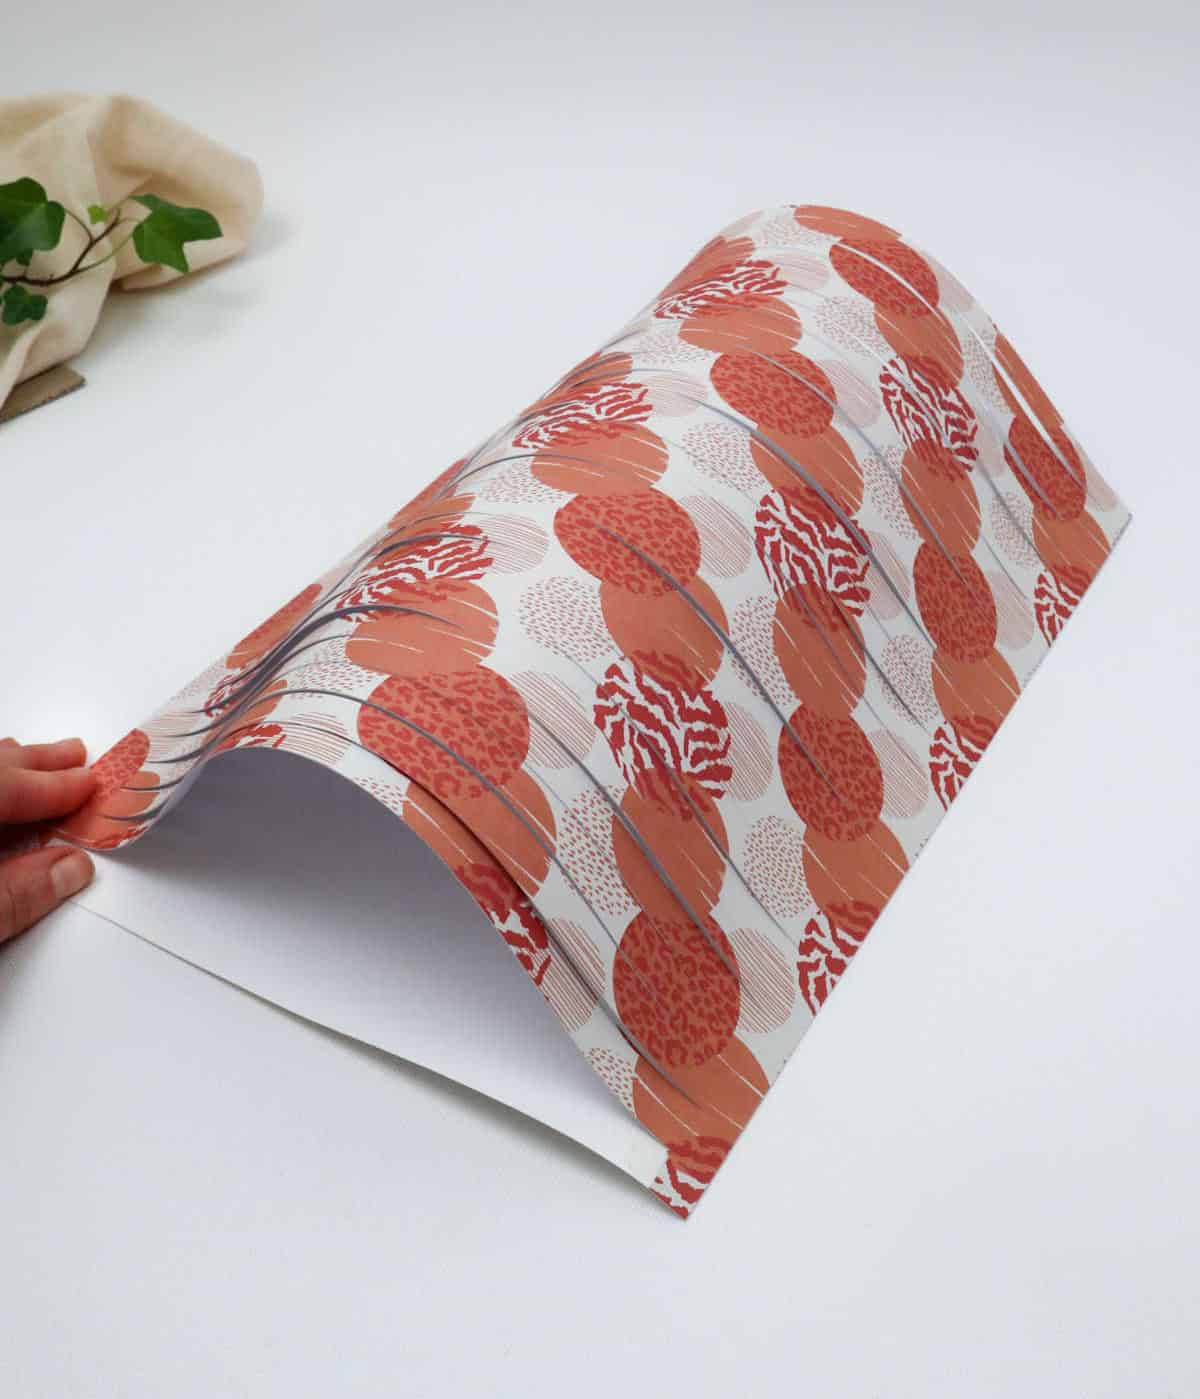
When it’s time to get creative with your craft cutter, start by using a ruler to carefully cut along the lines, as demonstrated below. A crucial tip to keep in mind is to refrain from cutting beyond the top and bottom edges of the page, as doing so can lead to a lantern that simply won’t hold together. Once you’ve completed the cutting process, your paper strips should resemble the image that follows, marking a key step in the craft project’s progression.
Step 5
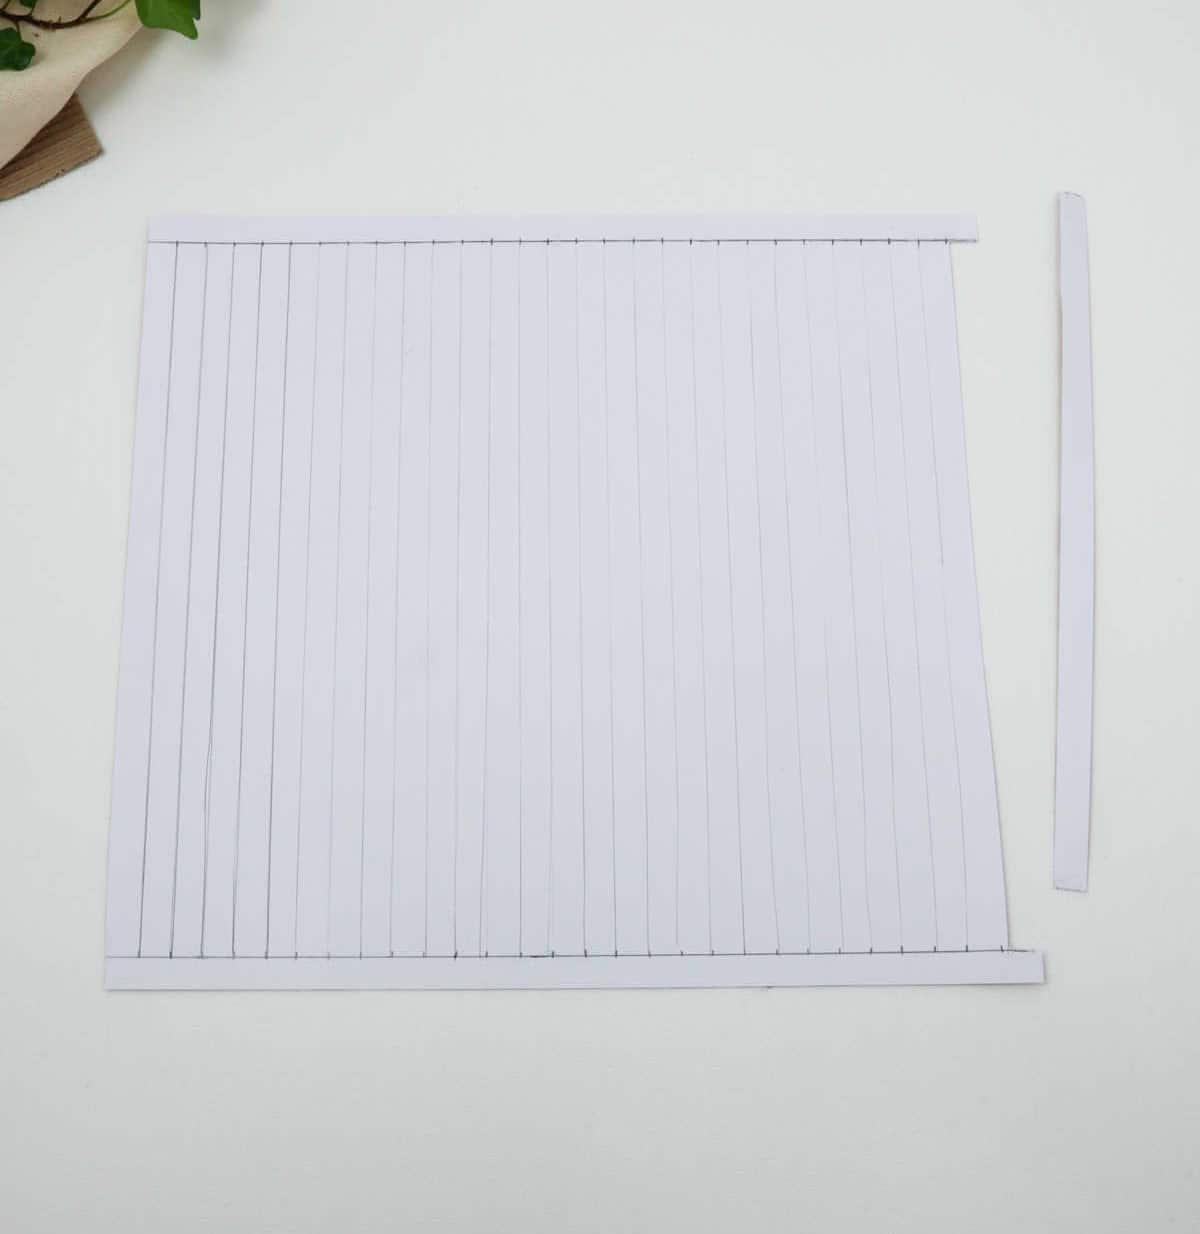
To create the necessary gap, carefully utilize your cutter to excise a single strip from the farthest extremity of the sheet. This subtle modification will enable you to form a discernible separation, much like the illustration provided.
Step 6
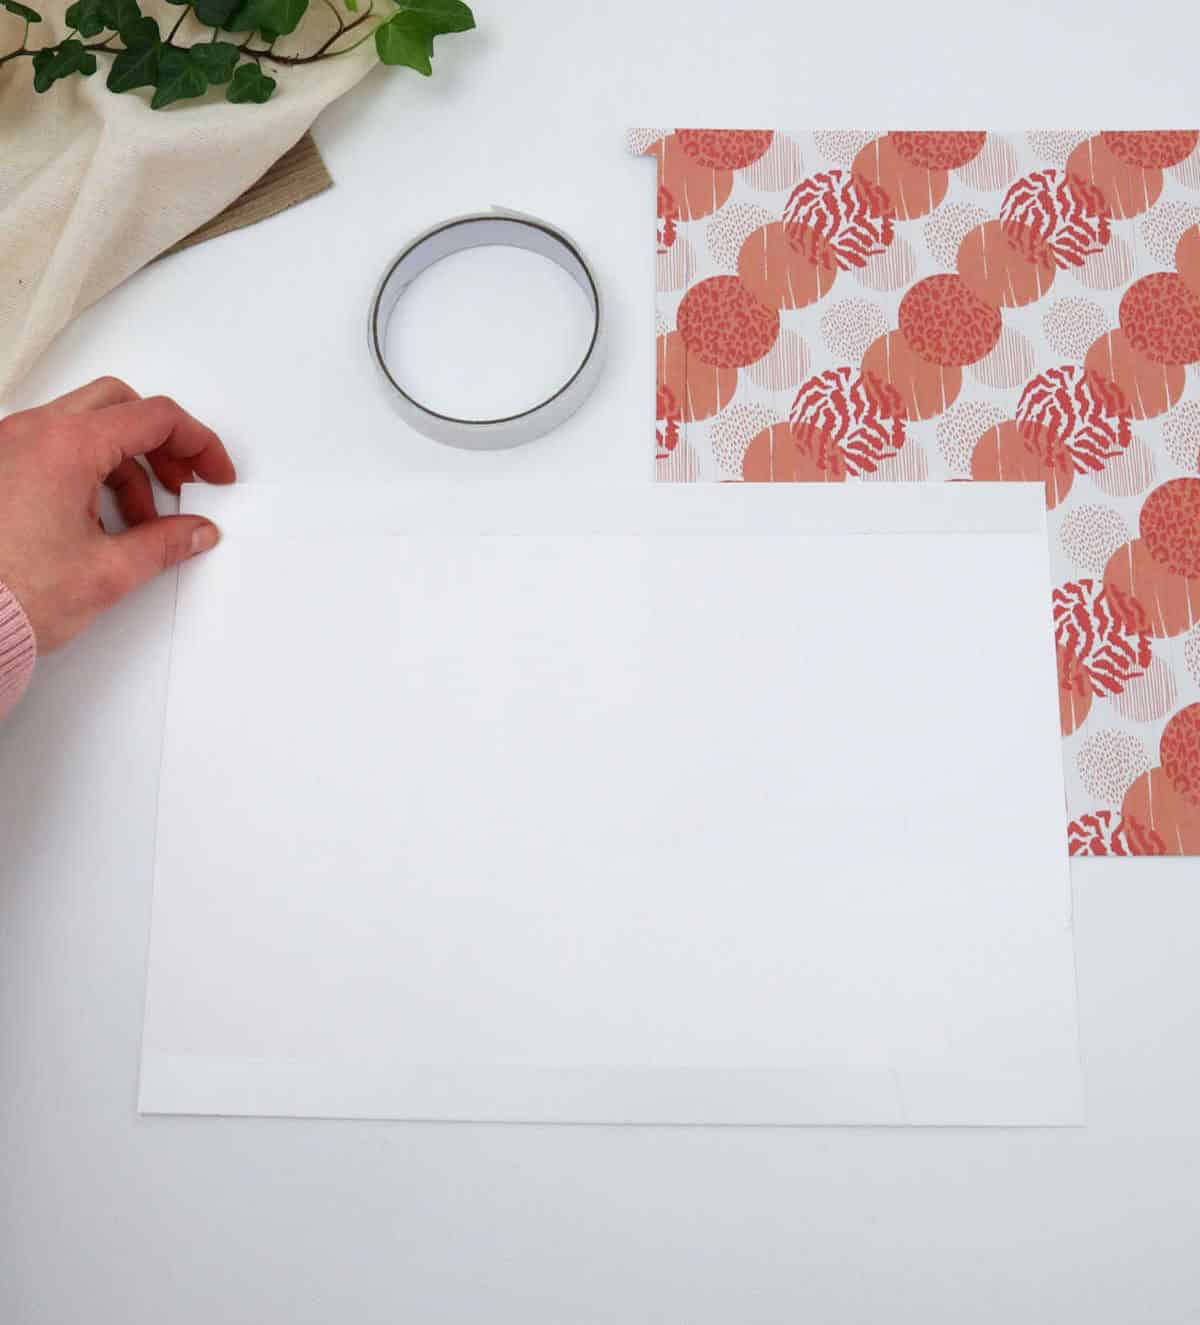
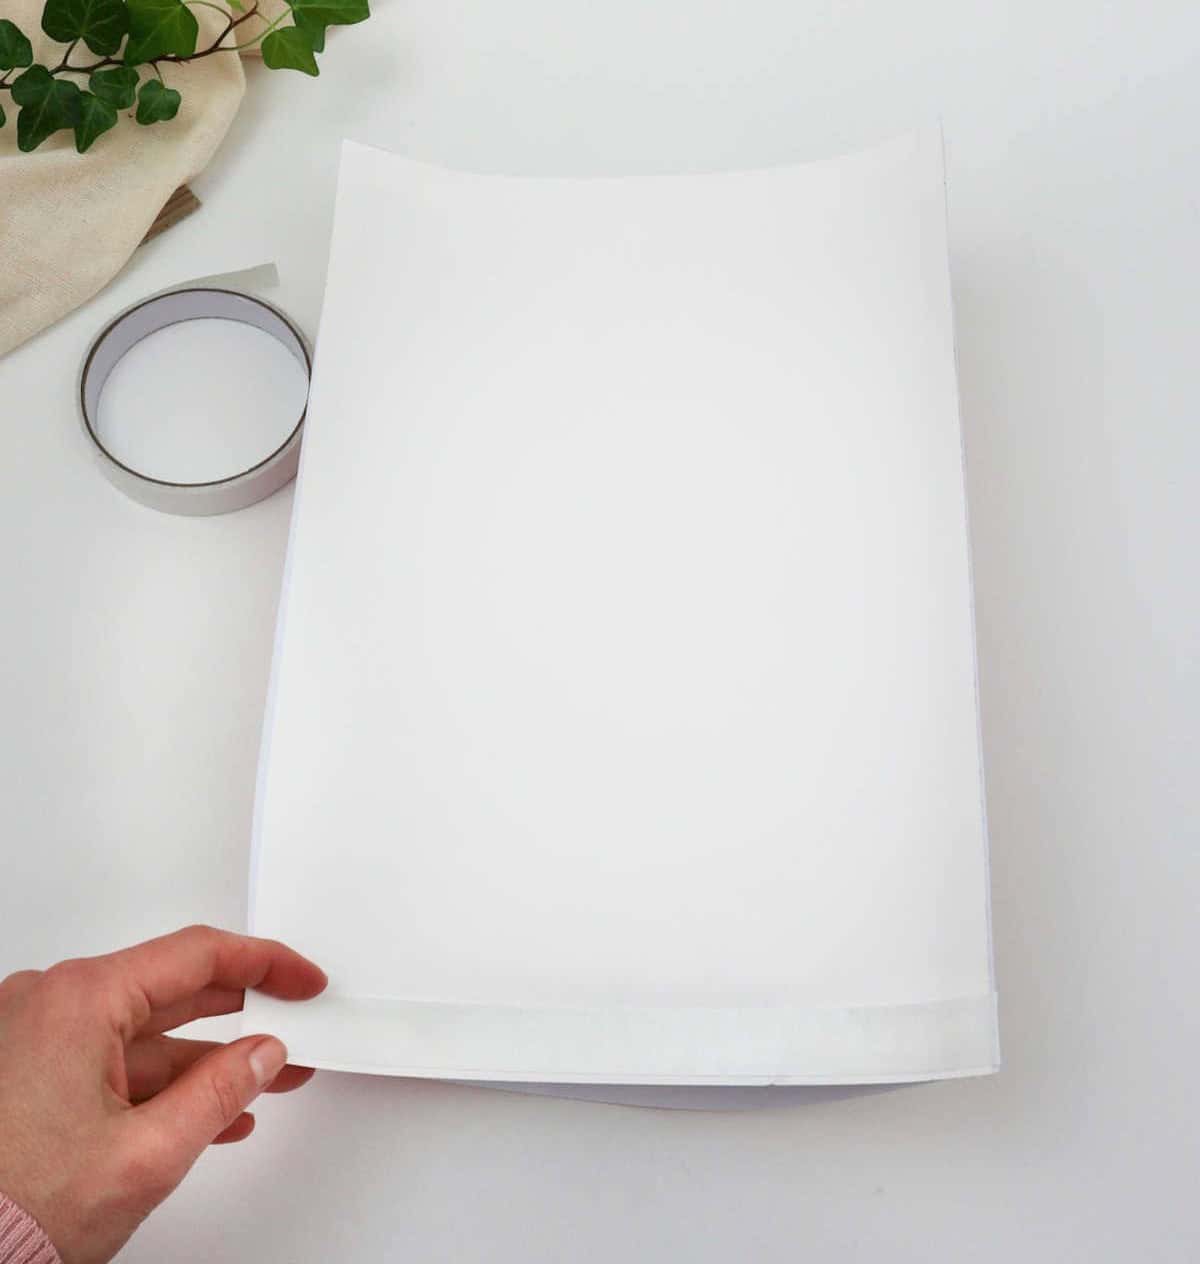
To create your DIY photo display, start by gathering a few simple materials: a roll of double-sided tape and a plain white sheet of paper. Begin by applying two long strips of the adhesive-backed tape to the top and bottom edges of the paper, ensuring a secure bond that will hold your photos in place.
Step 7
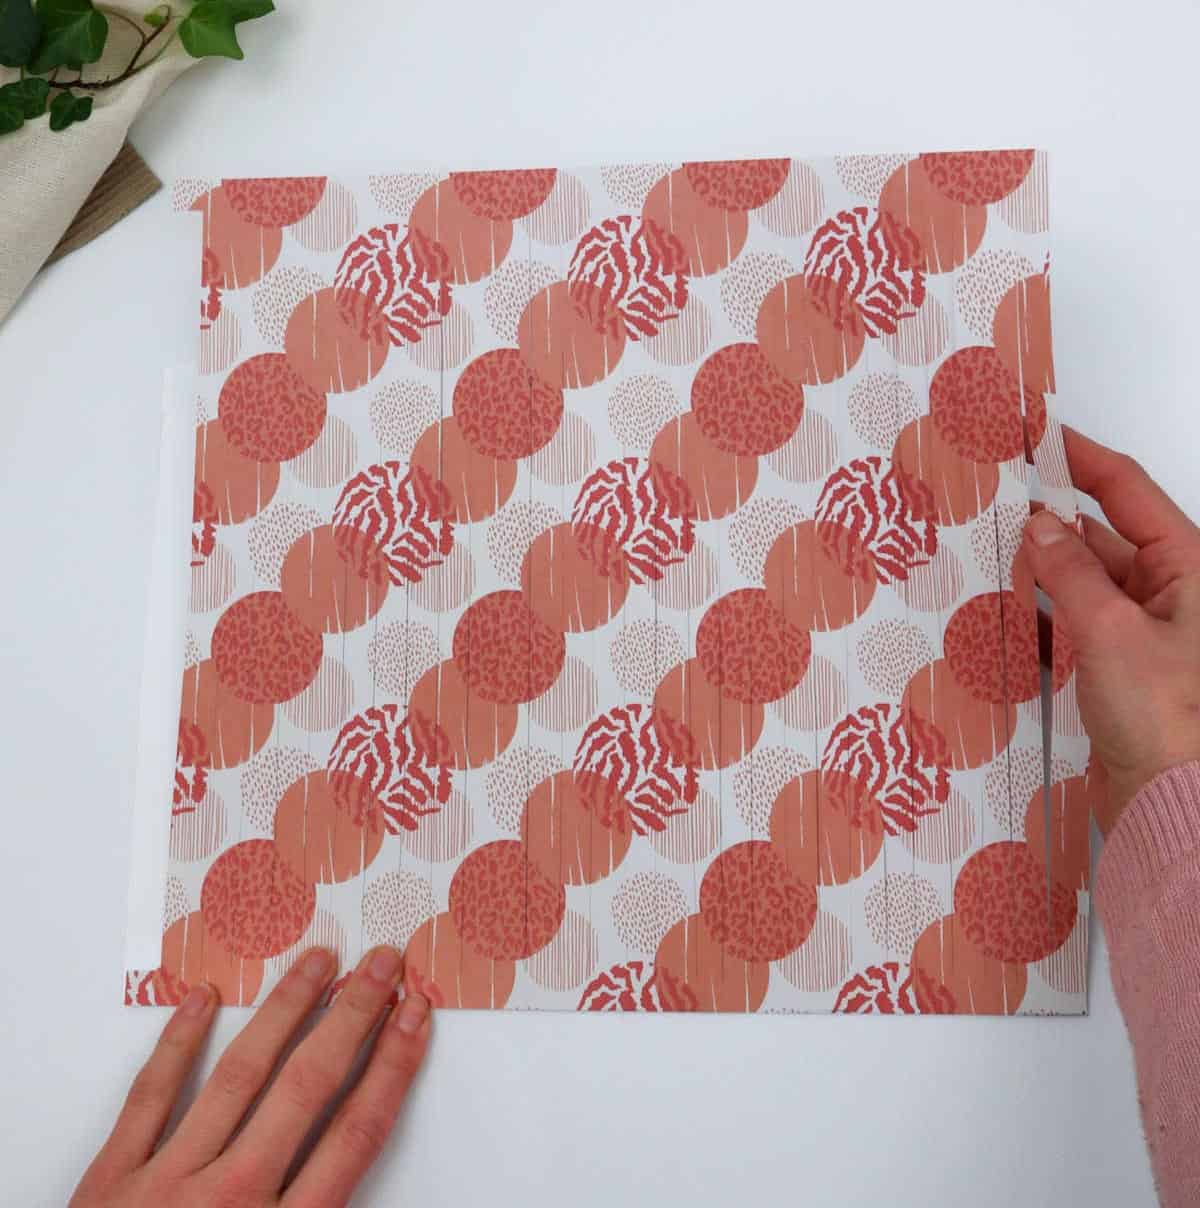
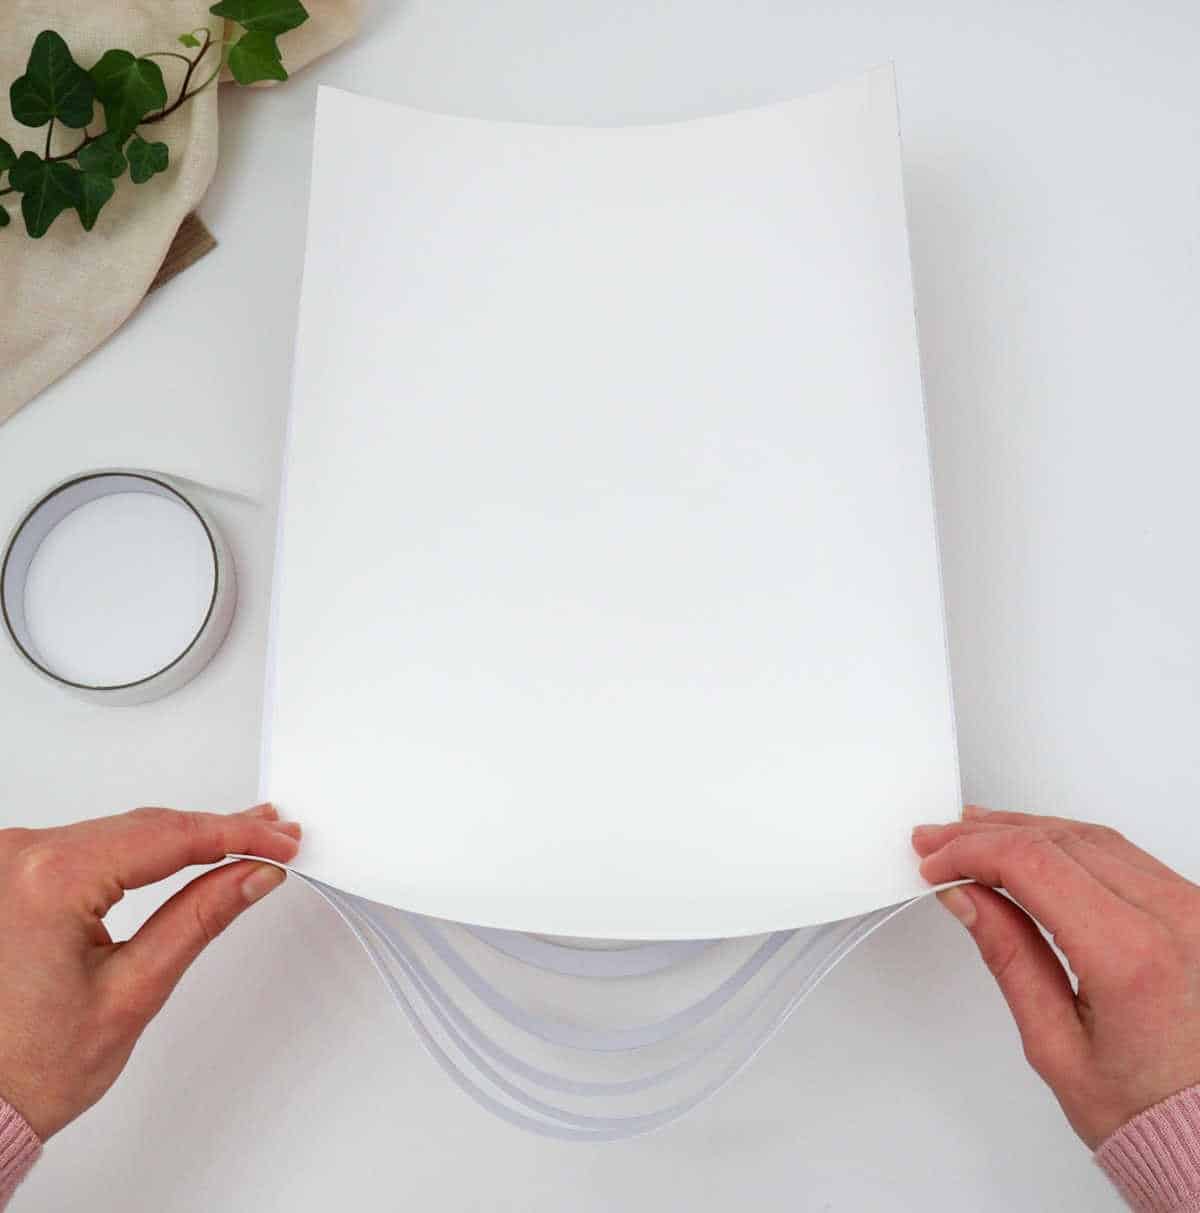
To secure the craft paper in place, attach both its top and bottom edges to the corresponding parts of the white sheet. As the craft paper is slightly larger than the white sheet, you’ll notice that it creates a subtle tunnel or bump along the center of the sheet when secured.
Step 8
Flip the paper over and secure a new strip of double-sided tape to its edge, mirroring the previous application. As you do so, remember that patience is key, for this unconventional approach will soon reveal its purpose, dispelling any concerns about scale or proportion.
Step 9
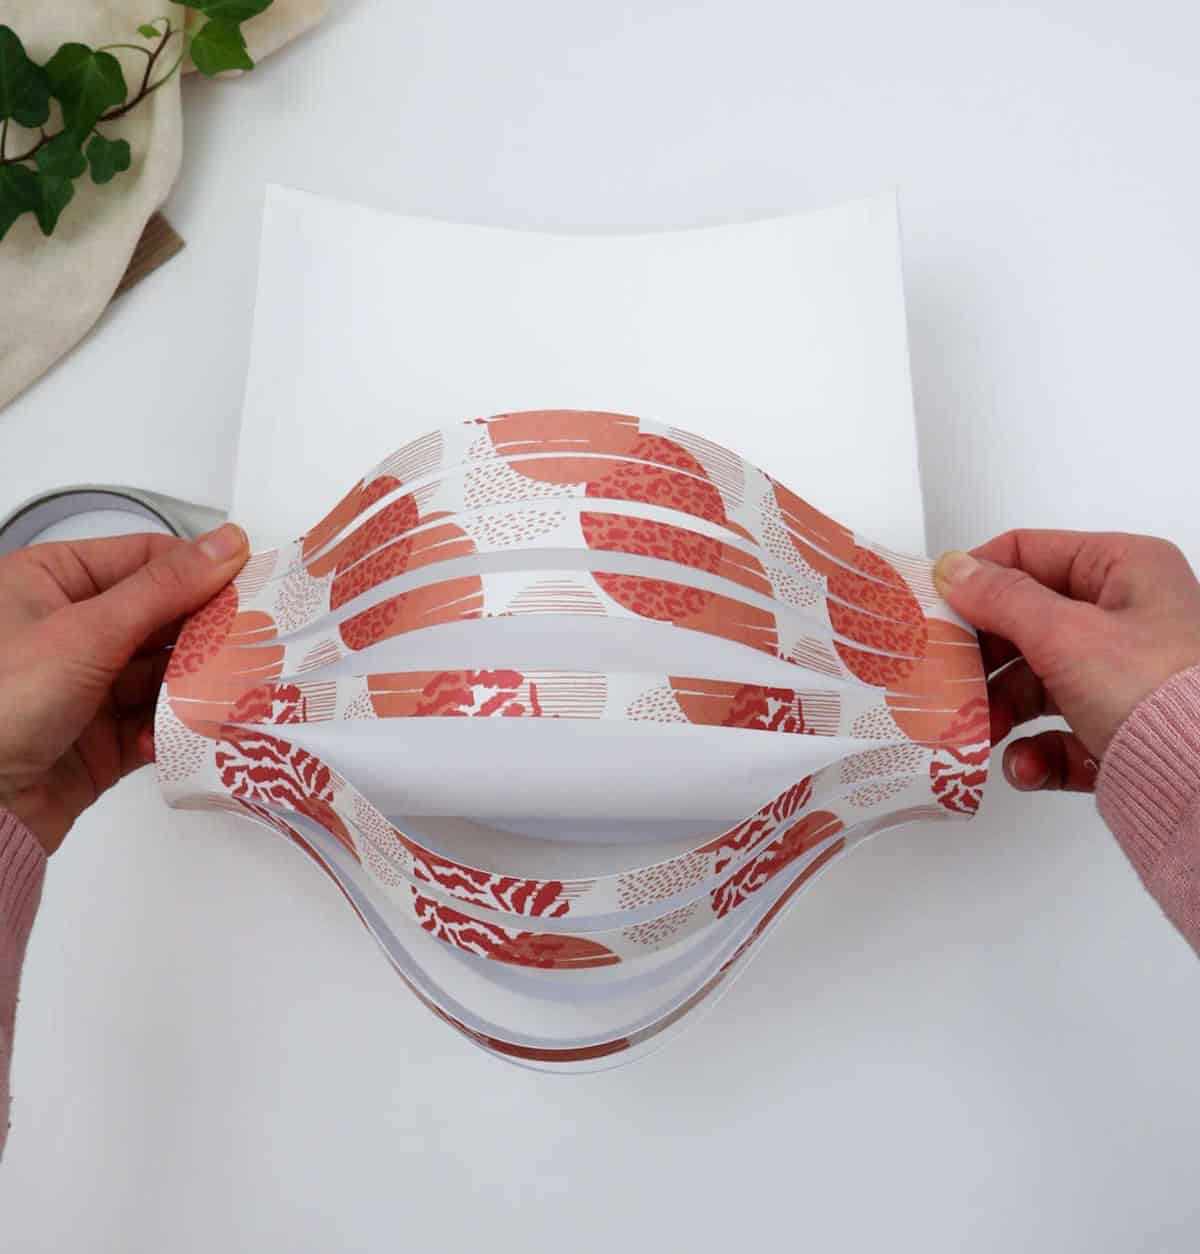
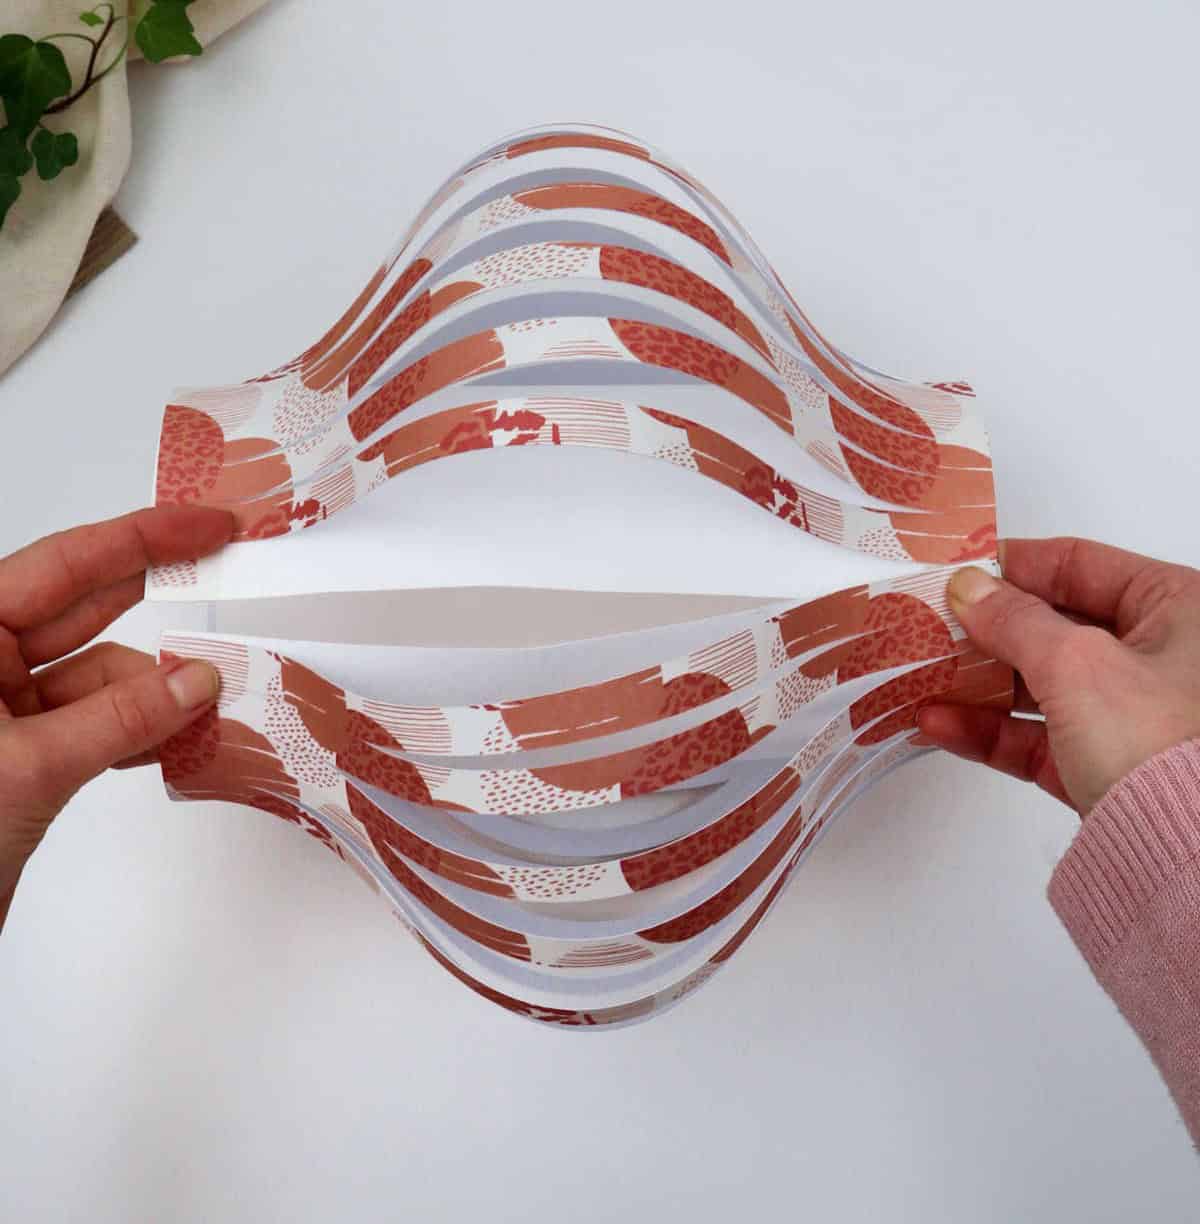
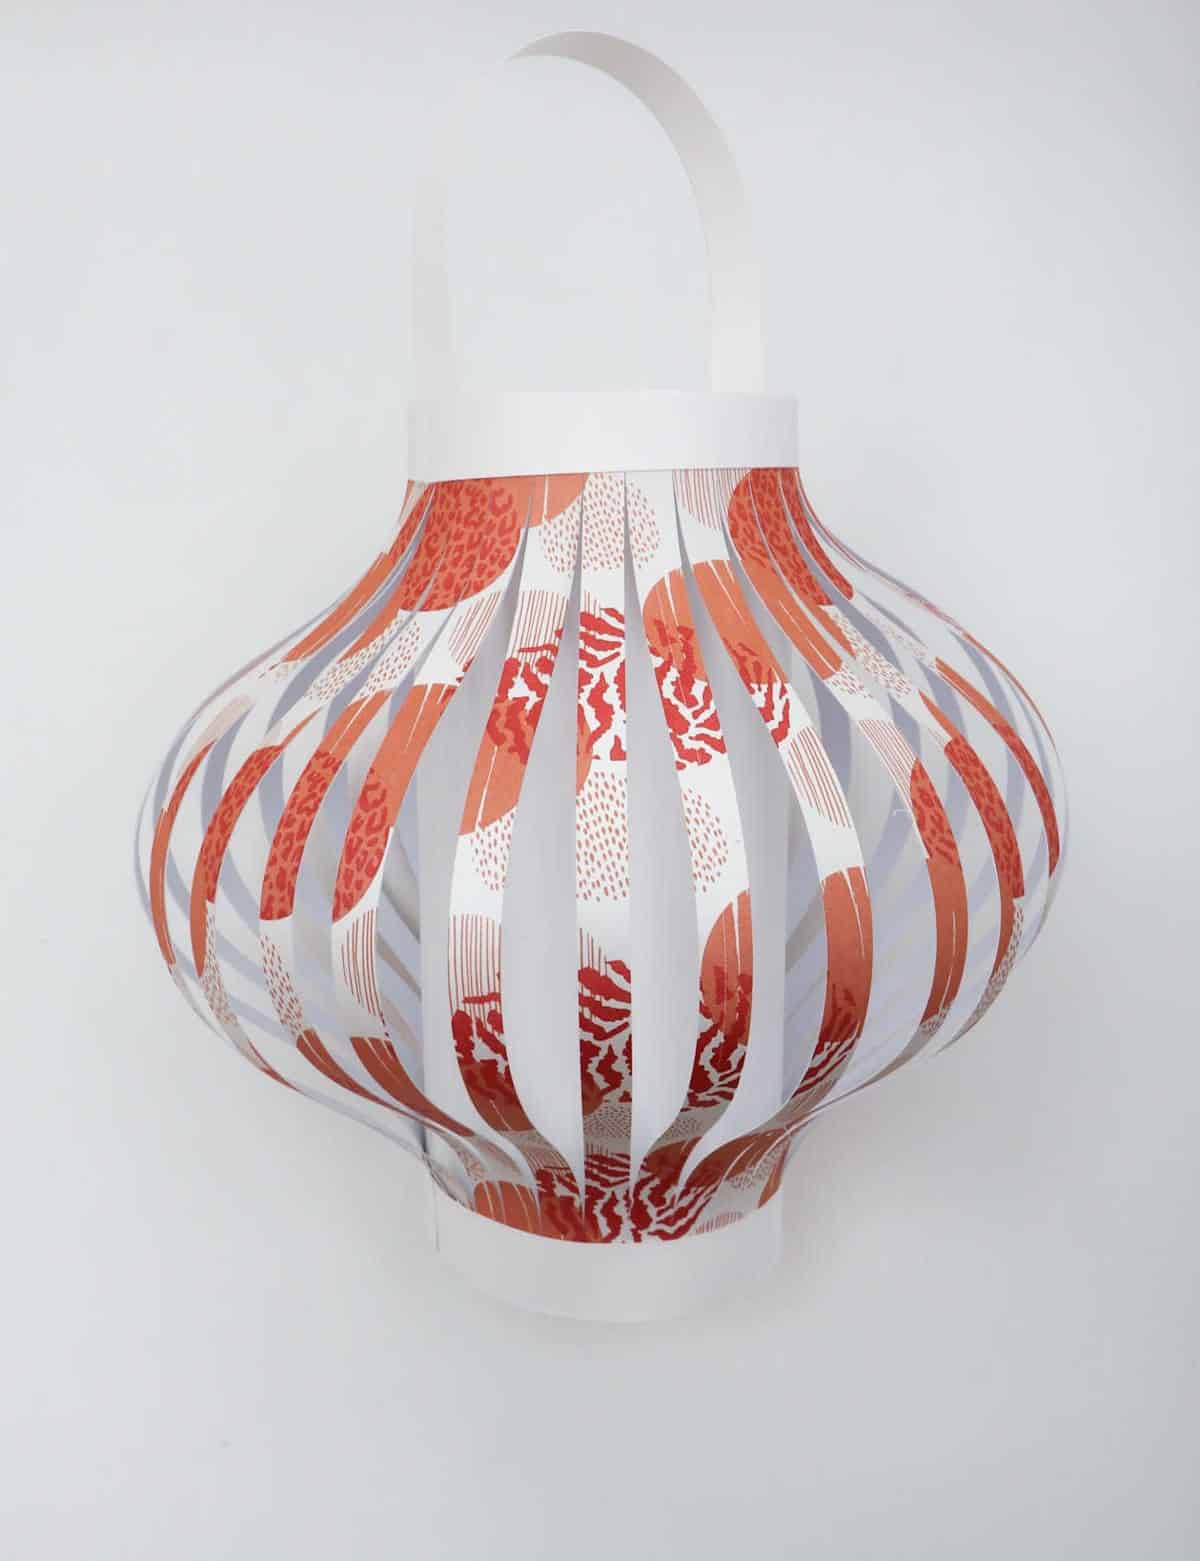
Next, take the folded strip and align it with the opposite edge, carefully pressing it into place. Make sure to line up the edges precisely, ensuring a secure bond. As you work, appreciate how the paper strips unfold in a beautiful, flowing manner. Your lantern’s framework should start to take shape, resembling the illustration once the ends are securely attached.
Step 10
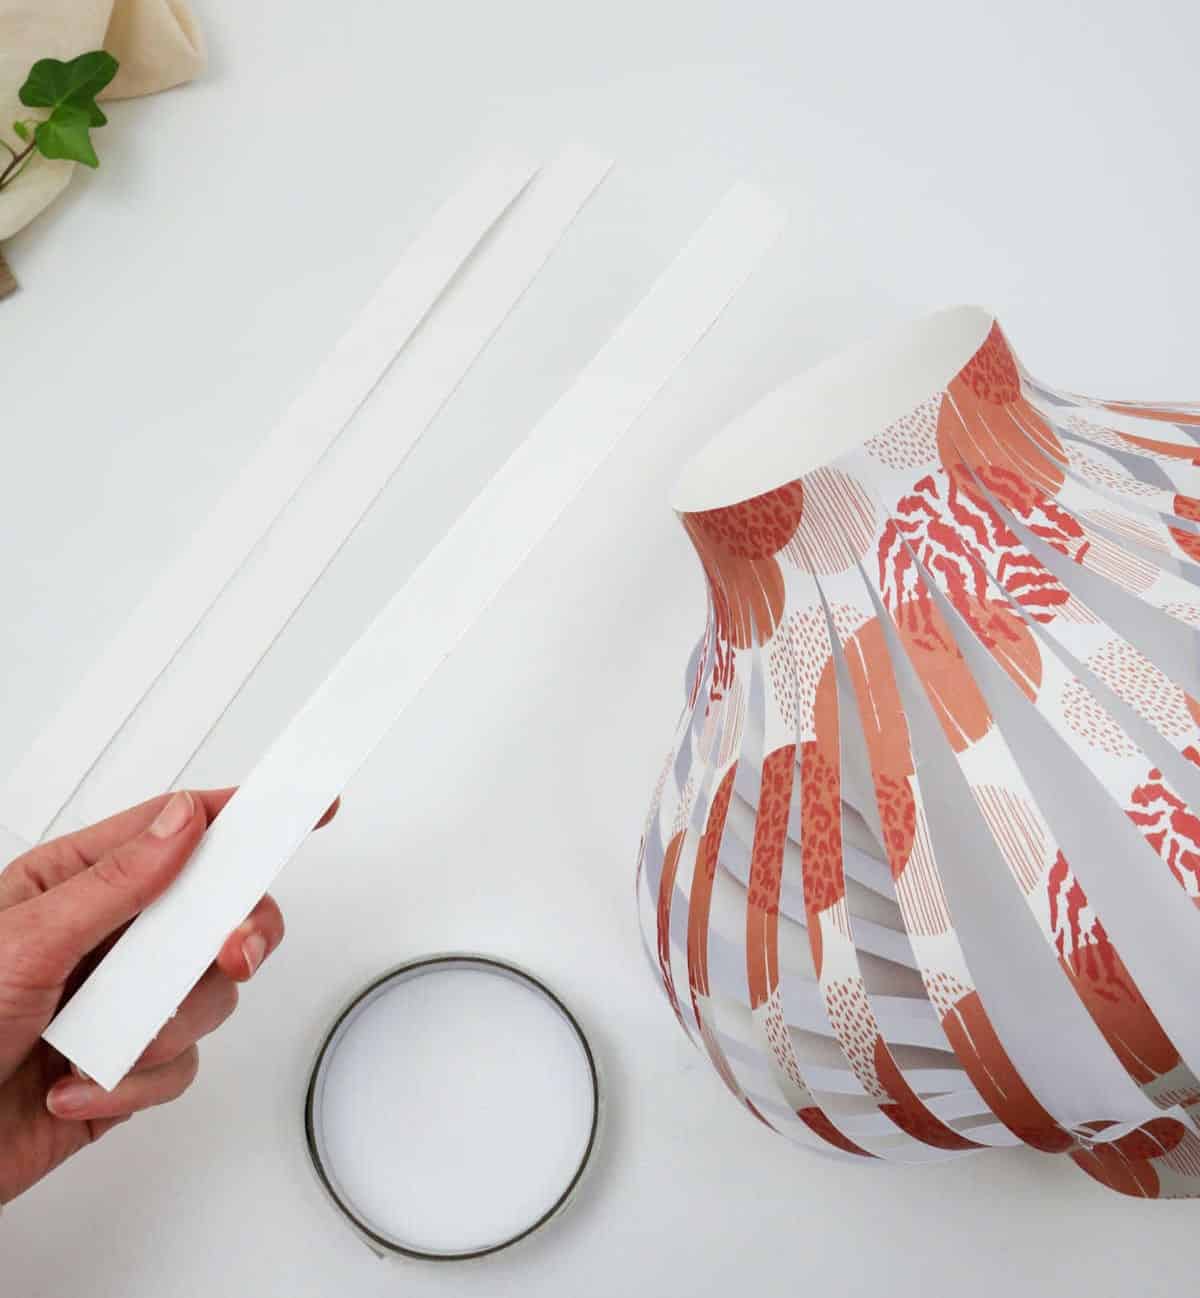
To add the finishing touches to your lantern, begin by cutting two strips of white paper, or three if you’d like to include a handle. This small step can make all the difference in giving your project a polished appearance.
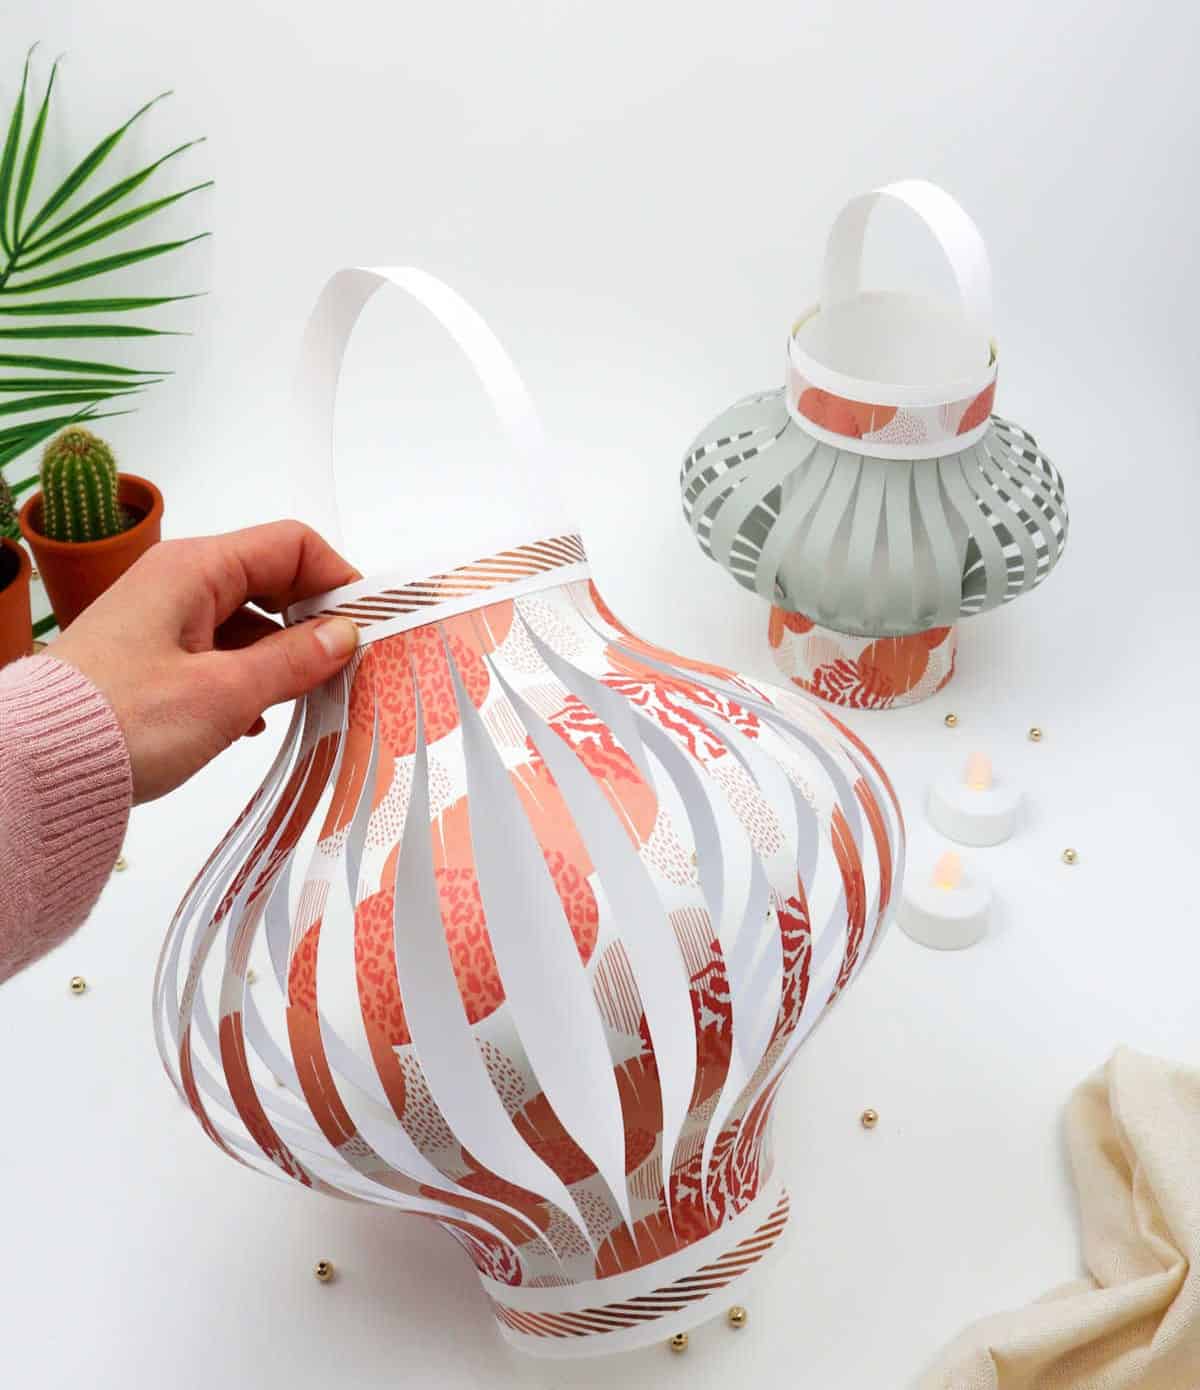
Step 11
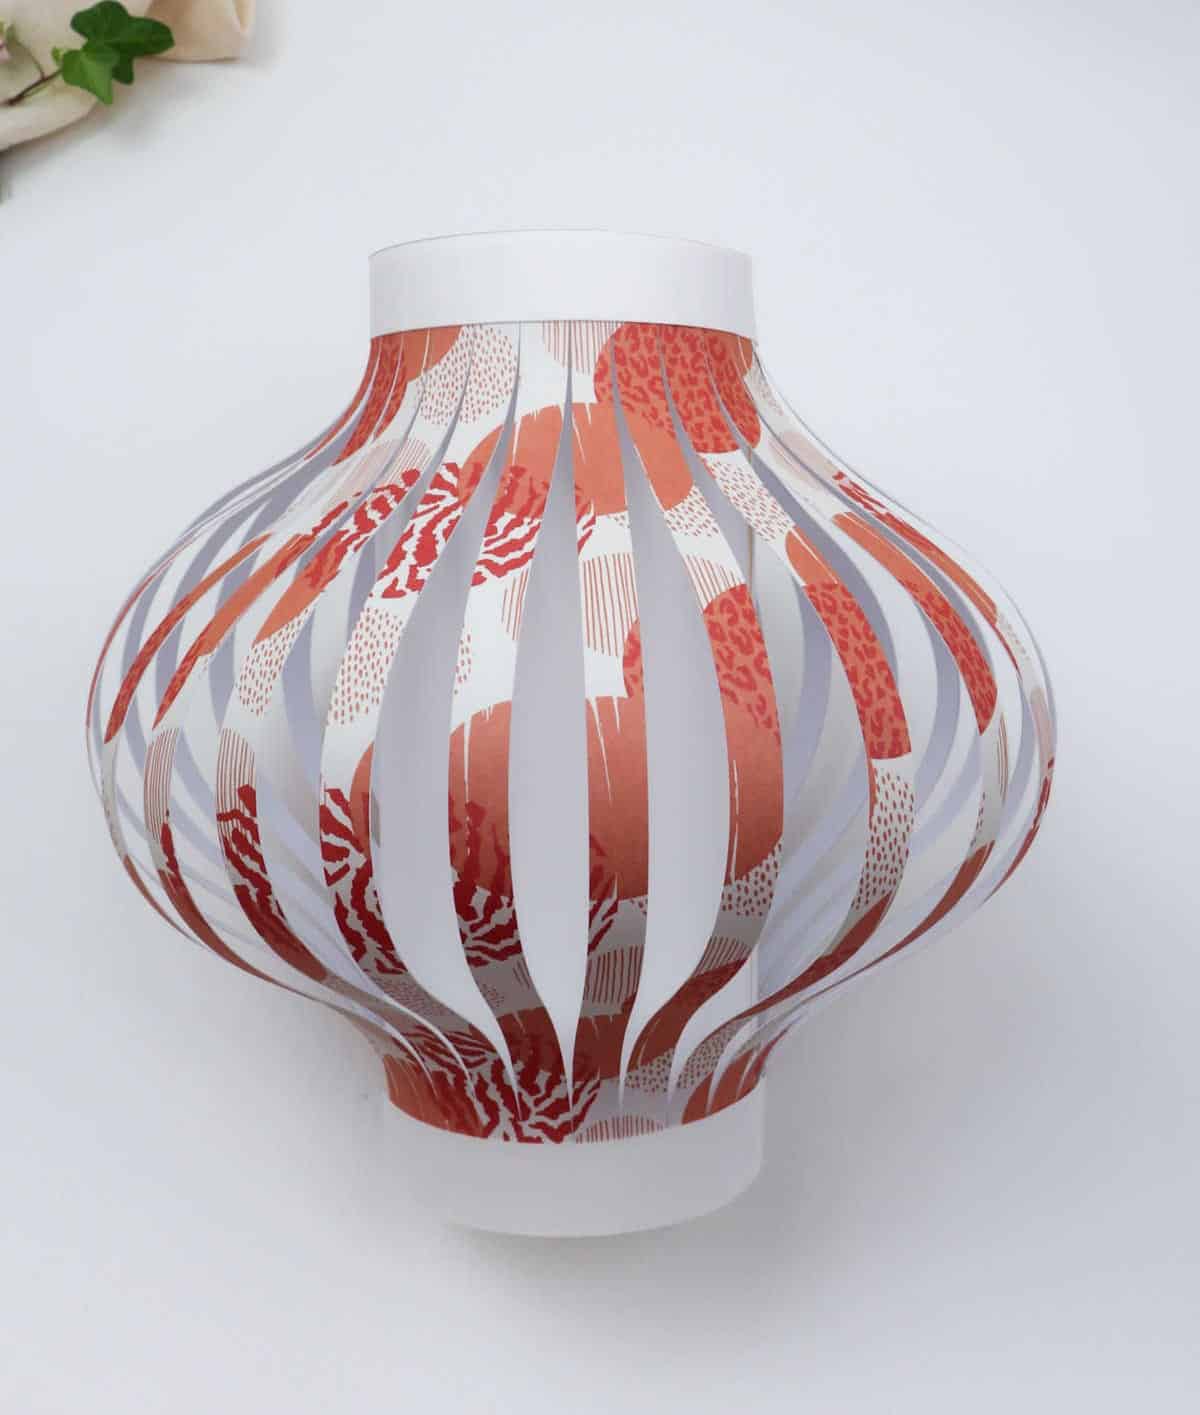
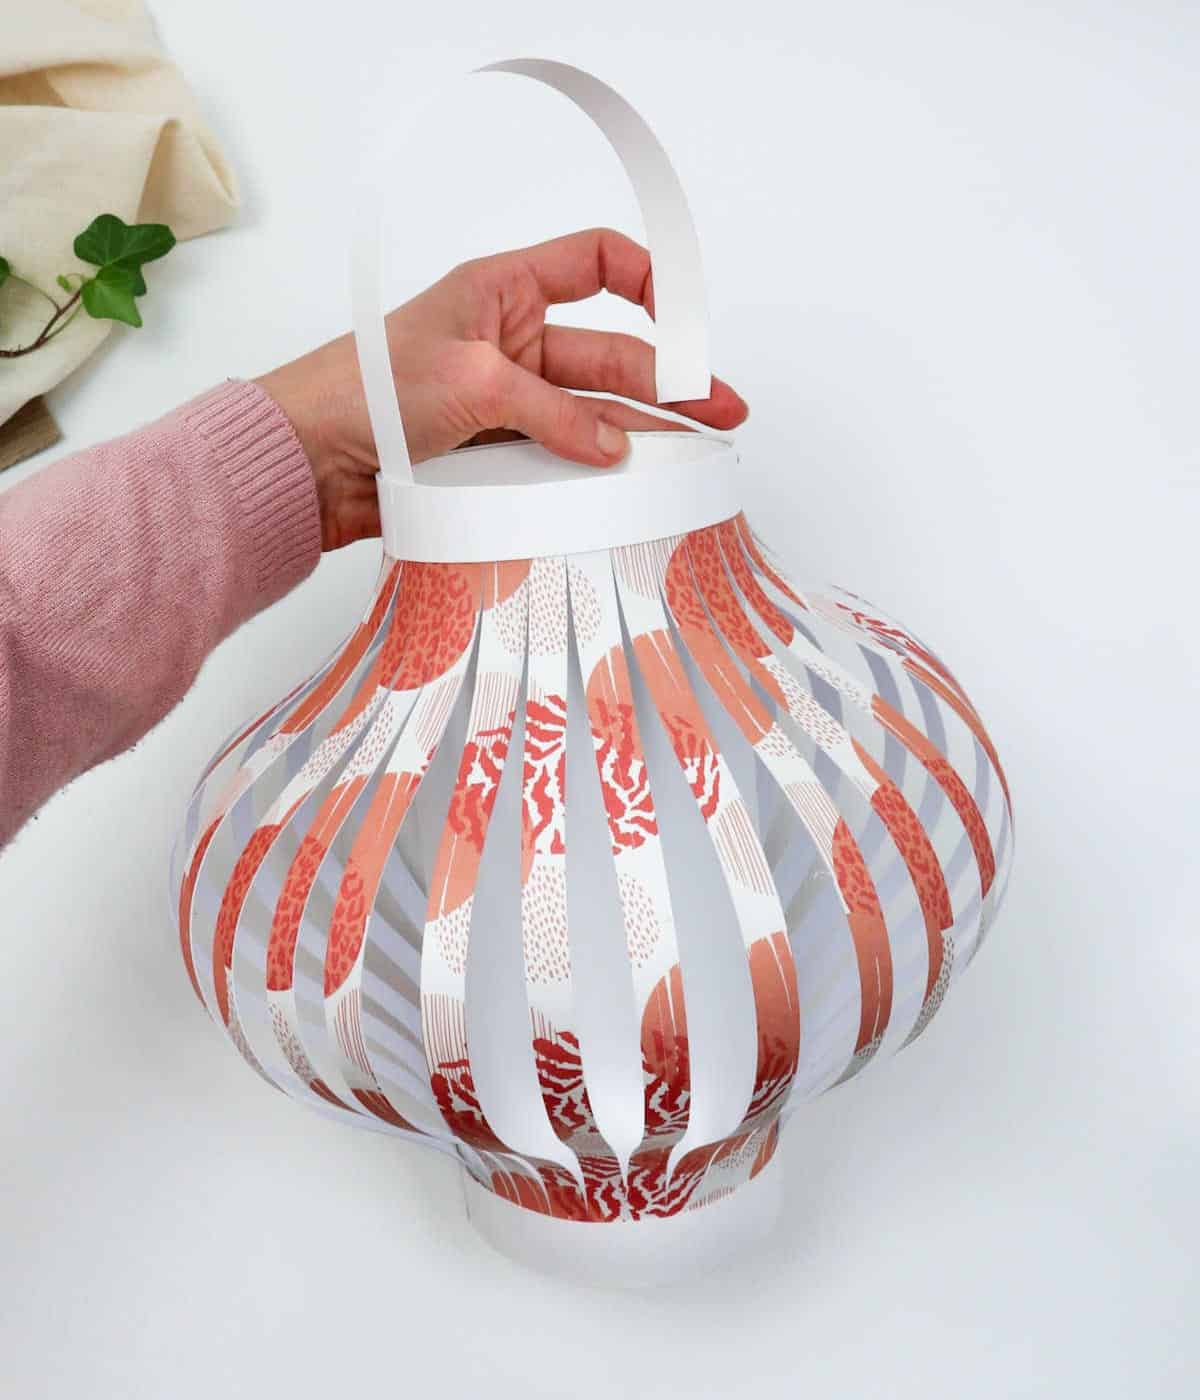
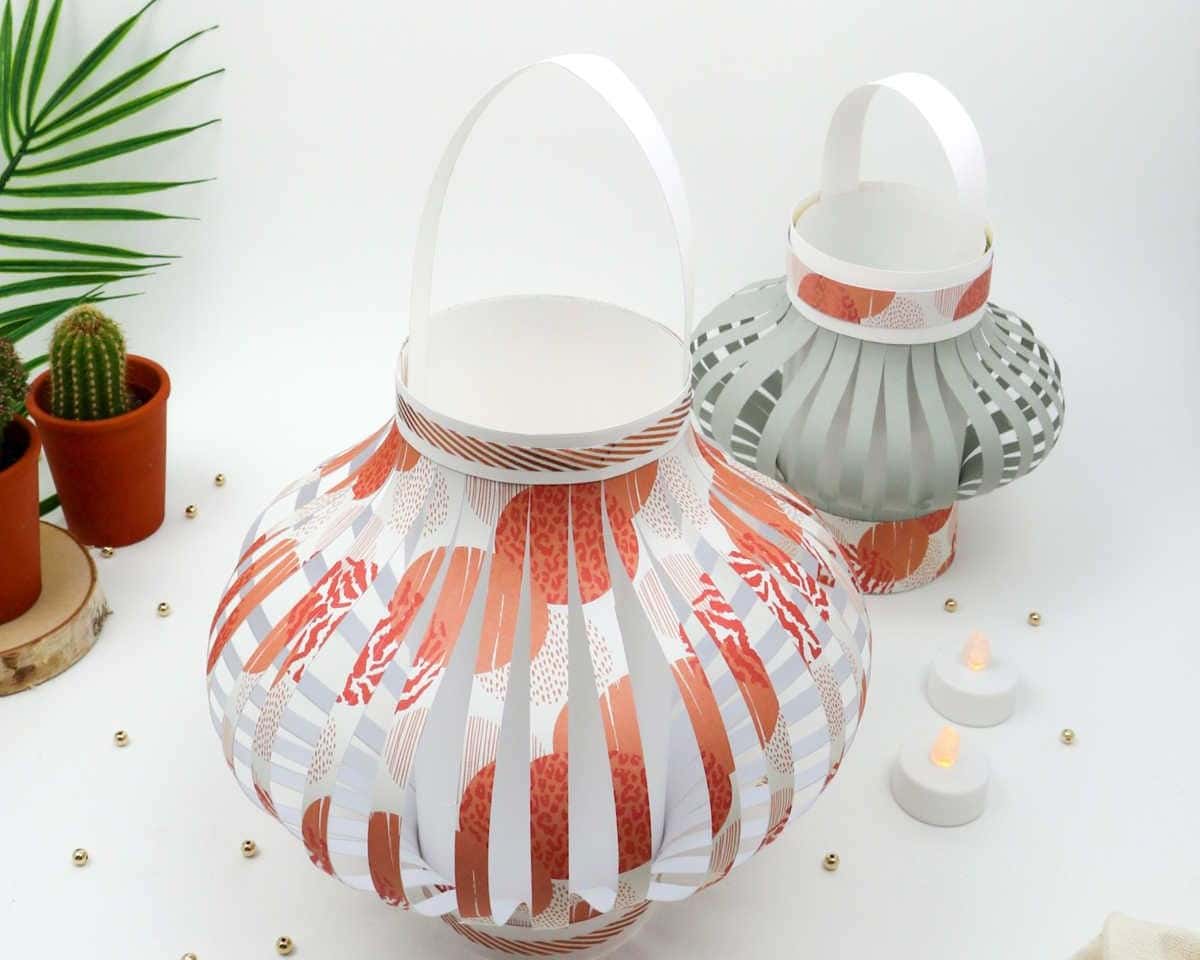
To secure the lantern’s stability, apply double-sided tape to two strips, placing them along the top and bottom edges. For the final strip, attach one end with tape and create a curved handle by folding the paper as you adhere it to the top of the lantern.
Step 12
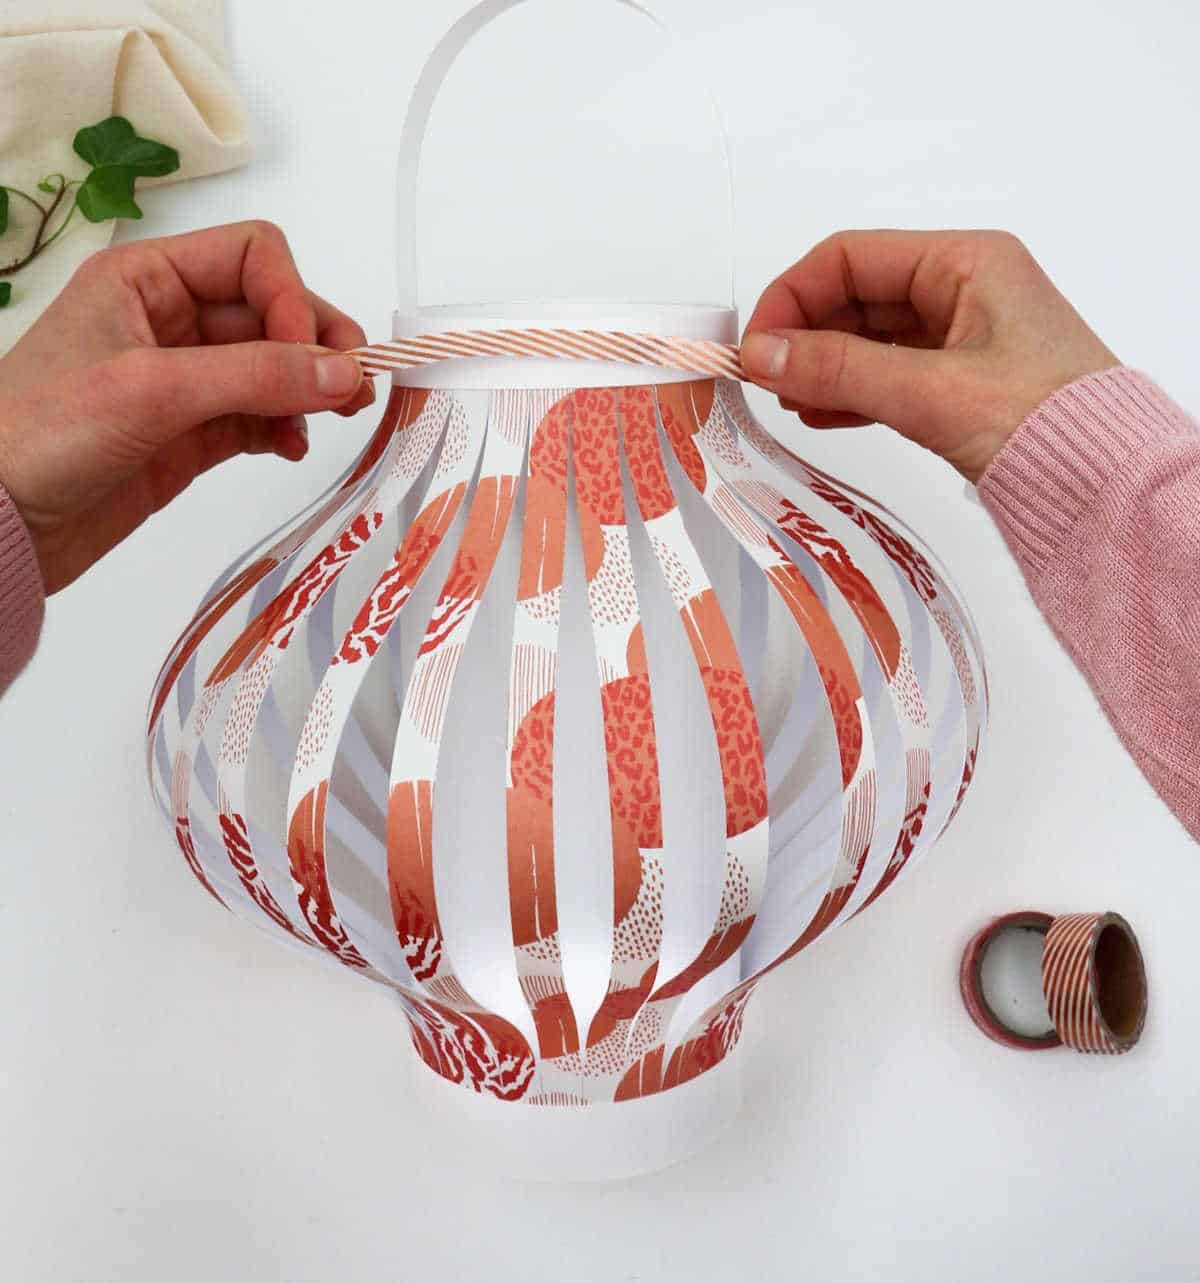
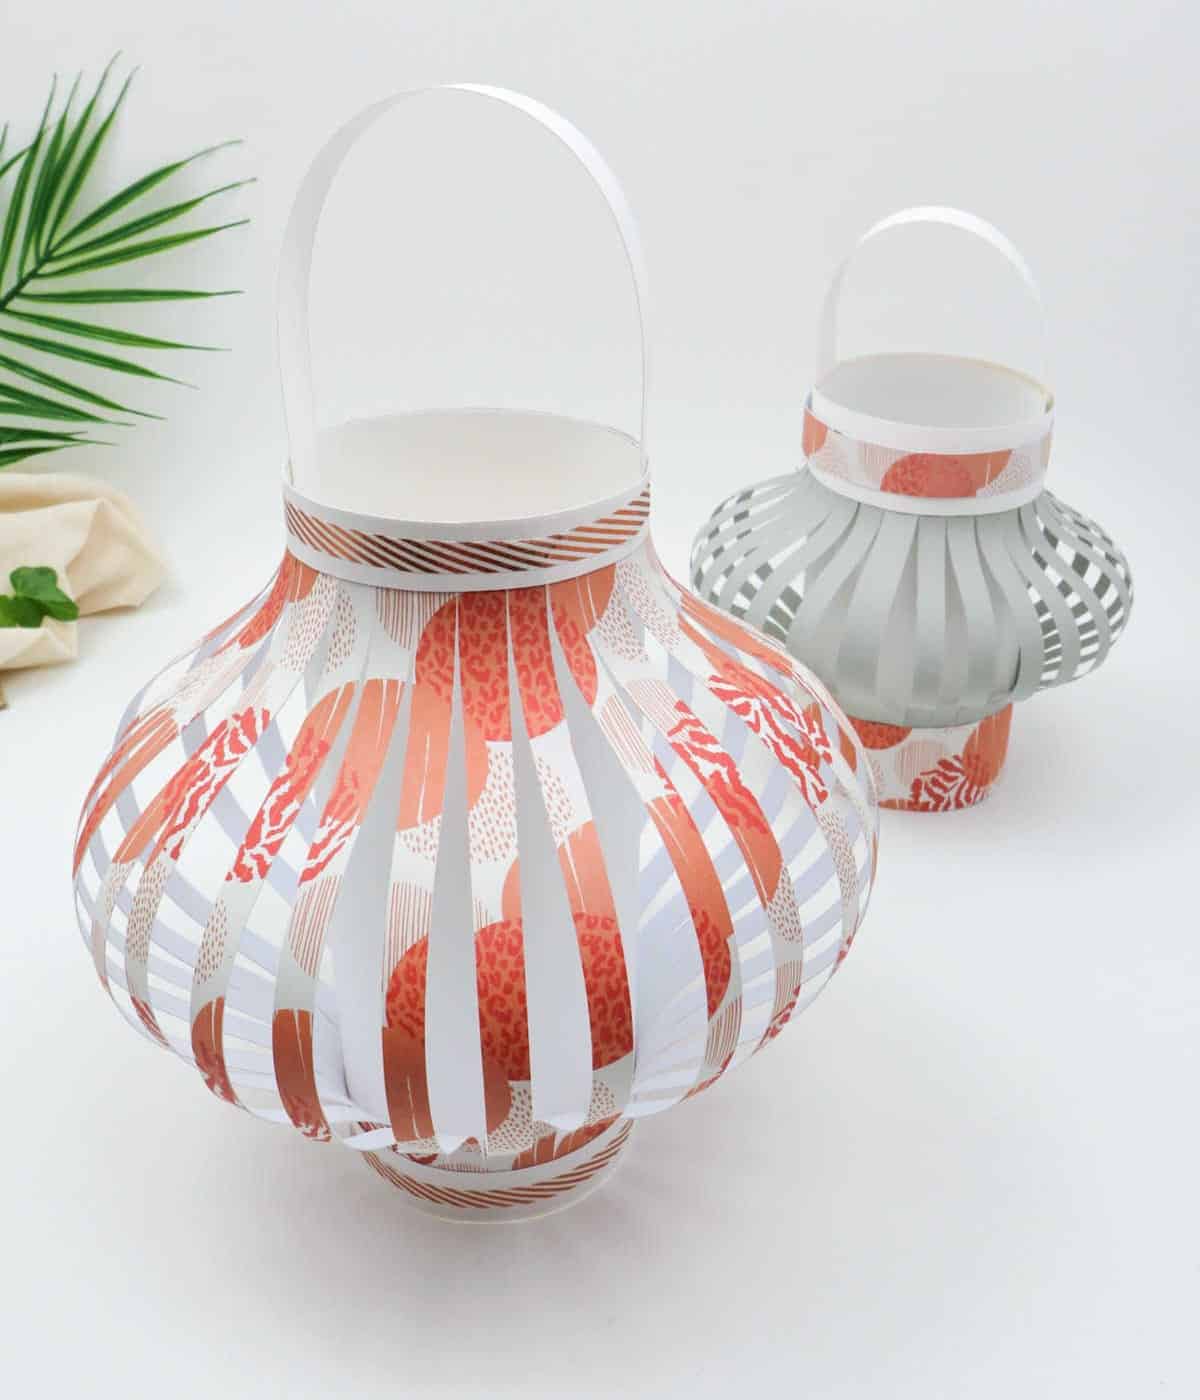
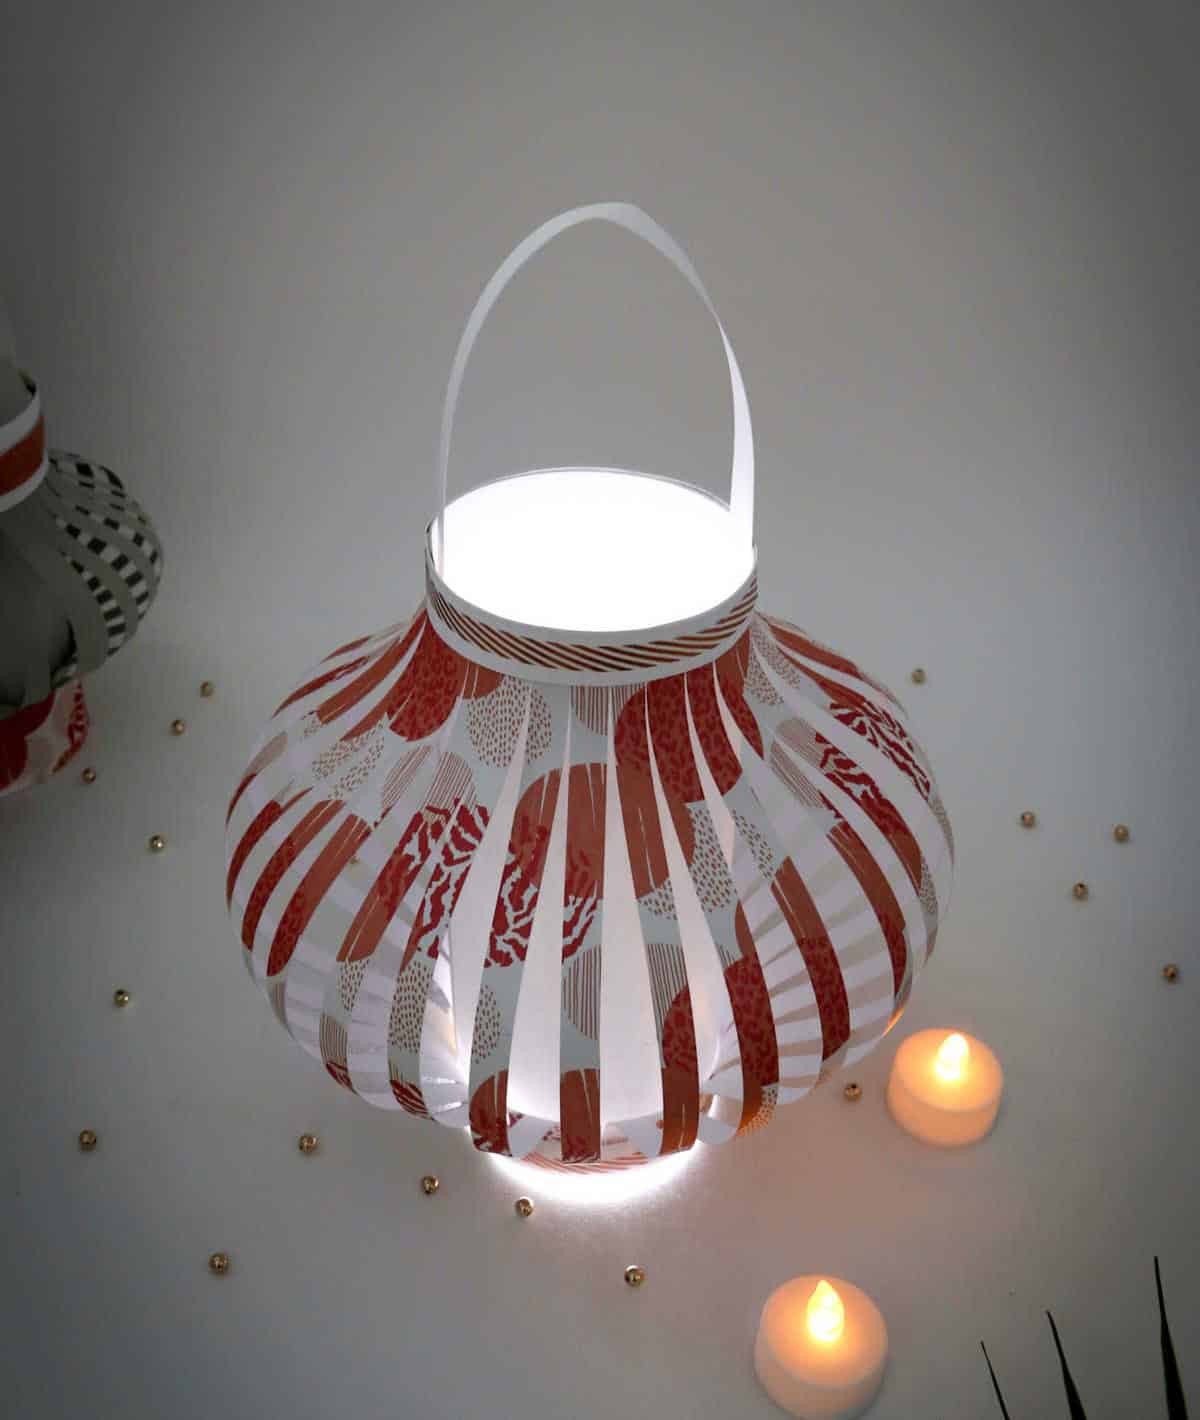
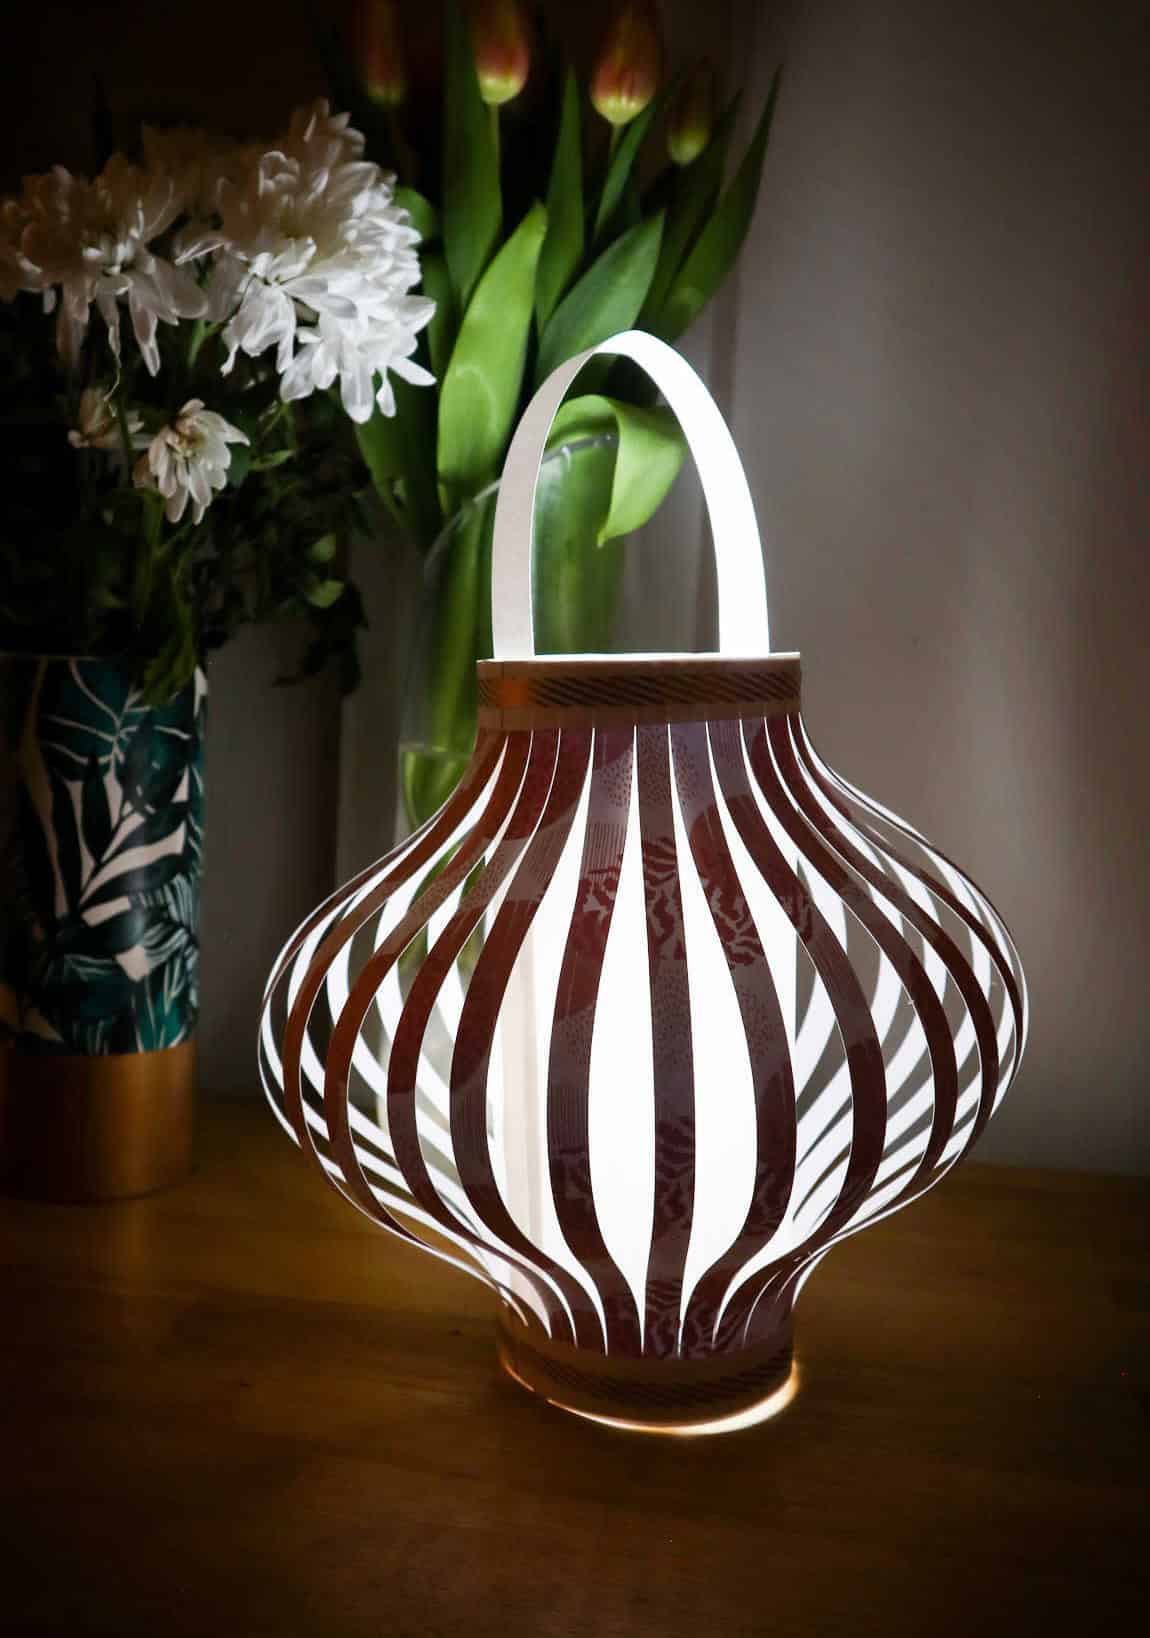
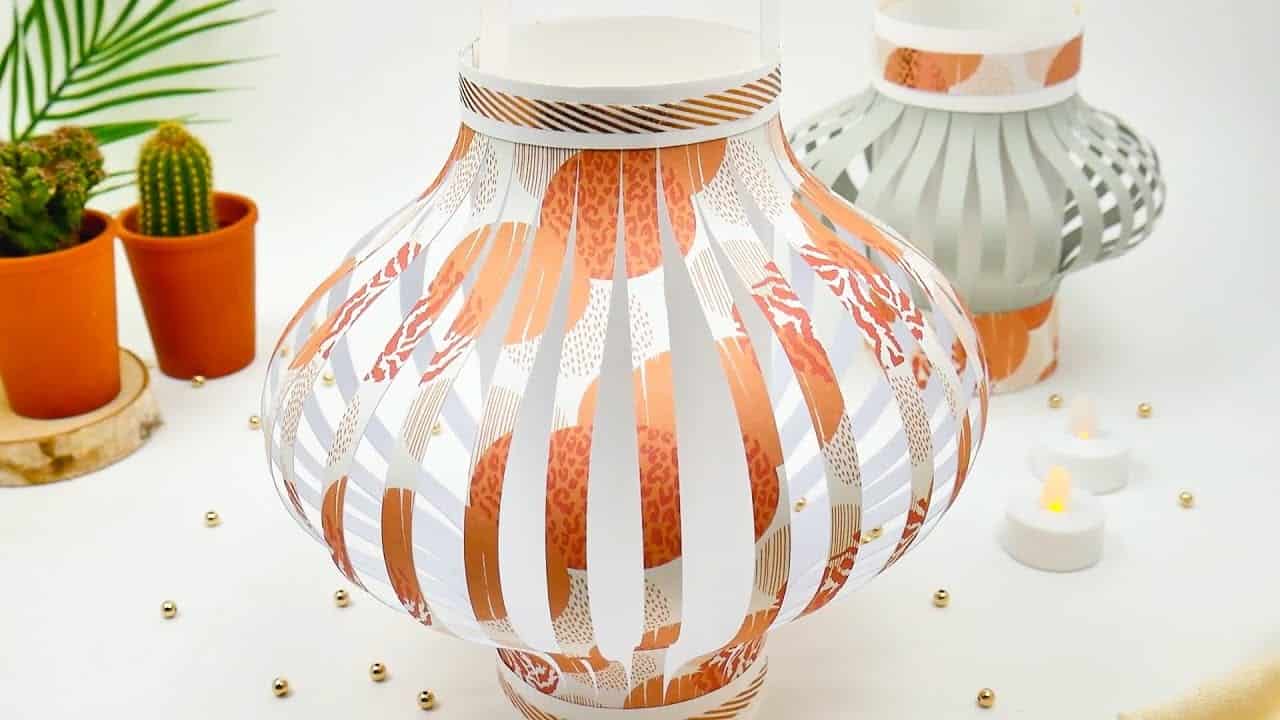
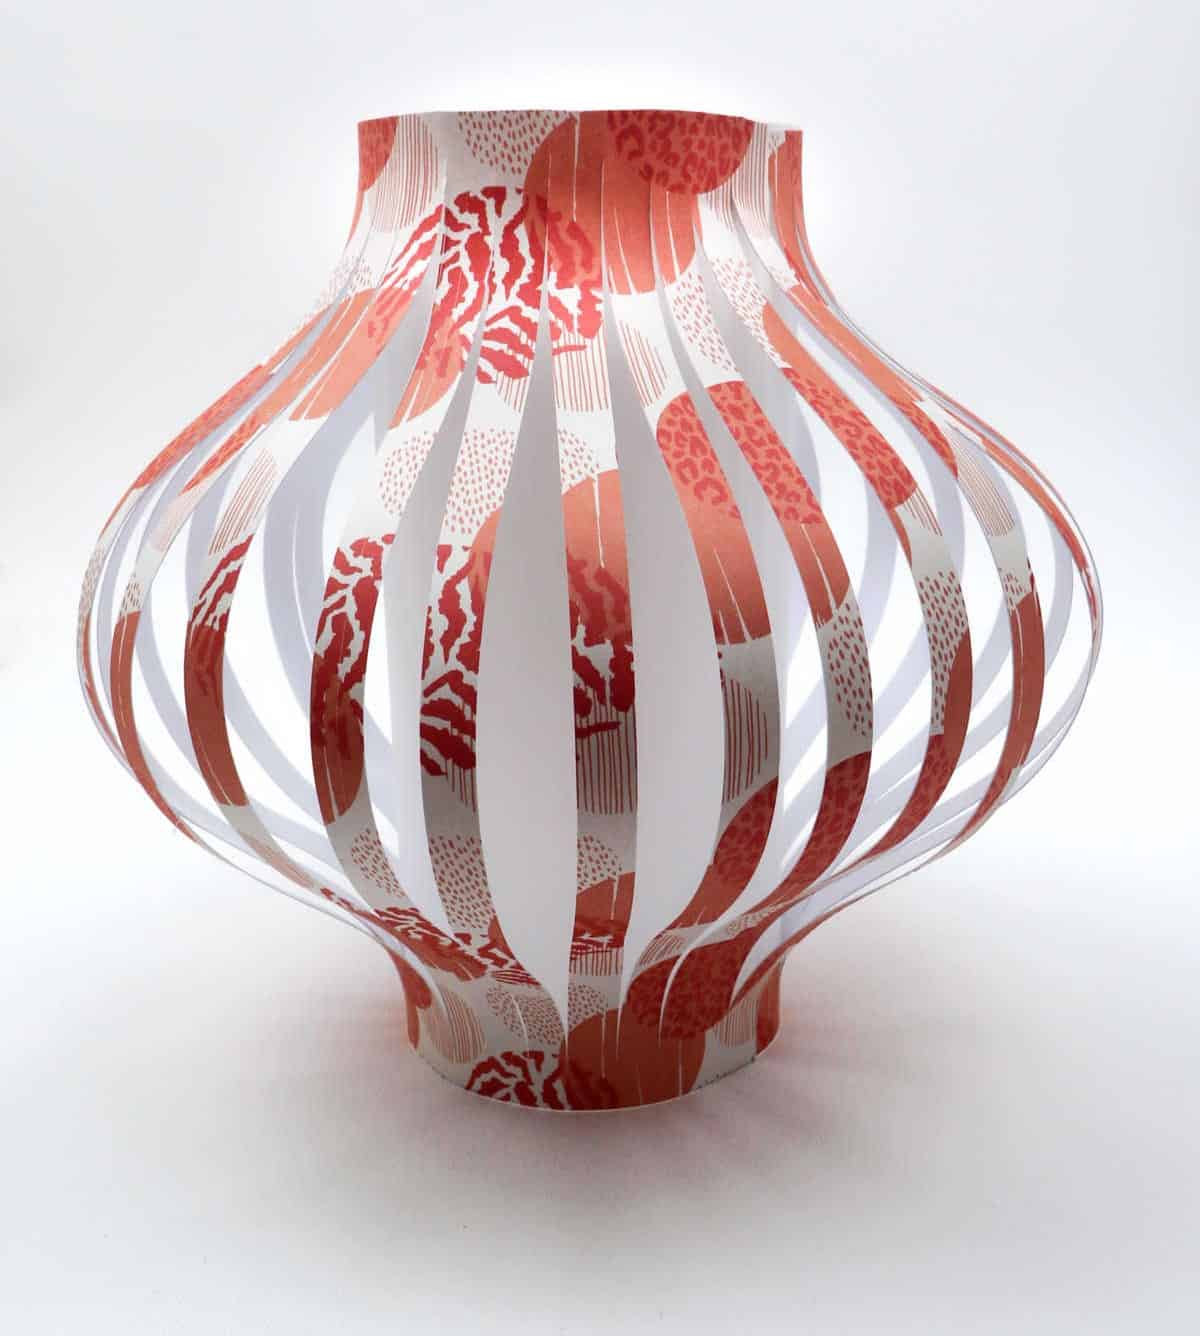
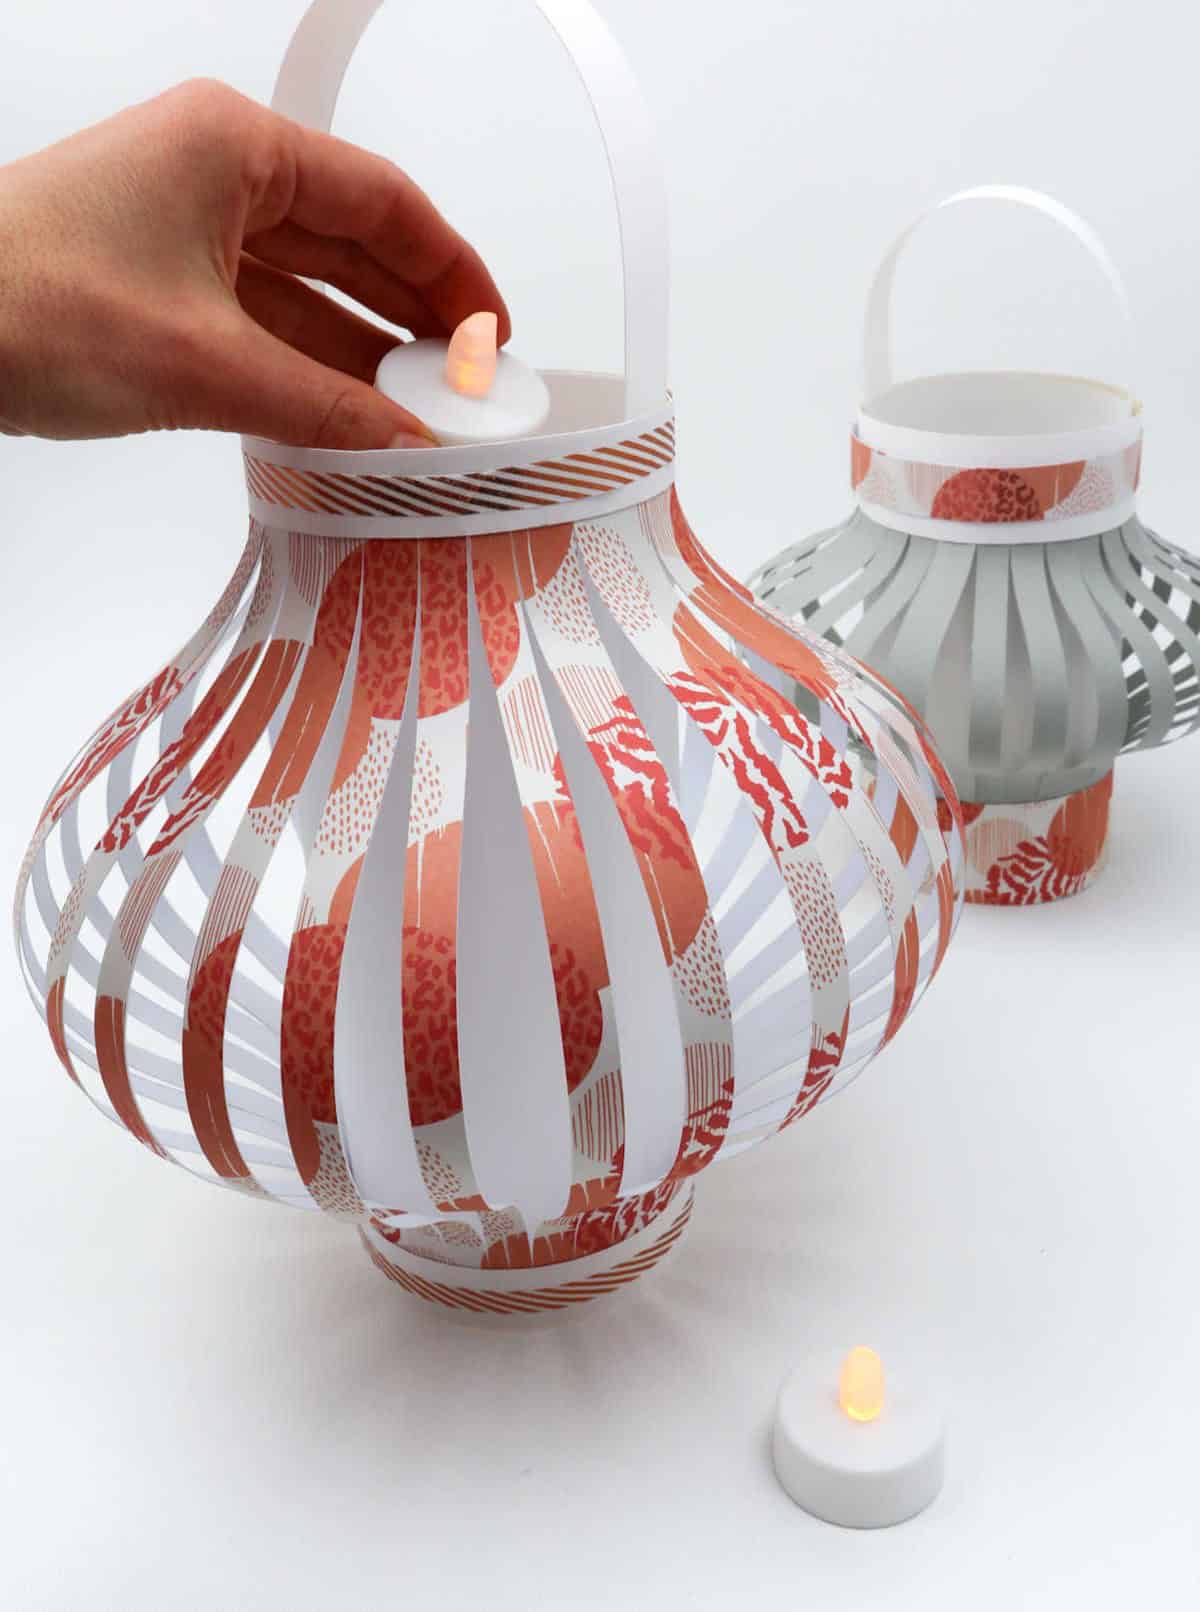
Transform your paper lantern into a masterpiece by adorning it with vibrant washi tape, sparkling glitter, and other creative embellishments that spark your imagination. To add an extra touch of warmth and ambiance, consider inserting an electric tea light candle within the lantern, allowing its soft glow to illuminate your surroundings.
What Kind of Paper Do You Use to Make Lanterns?
When crafting your paper lantern, you’re spoiled for choice when it comes to materials. Consider the following options: construction paper, which is widely available, budget-friendly, and features a range of vibrant colors and prints. Card stock is another popular choice, but be aware that heavier varieties can result in a slightly opaque final product.
For a more delicate look, you might opt for tissue paper or copy paper, although these may not offer the same level of durability or ease of handling as construction or card stock.
How to Use these Chinese Paper Lanterns?
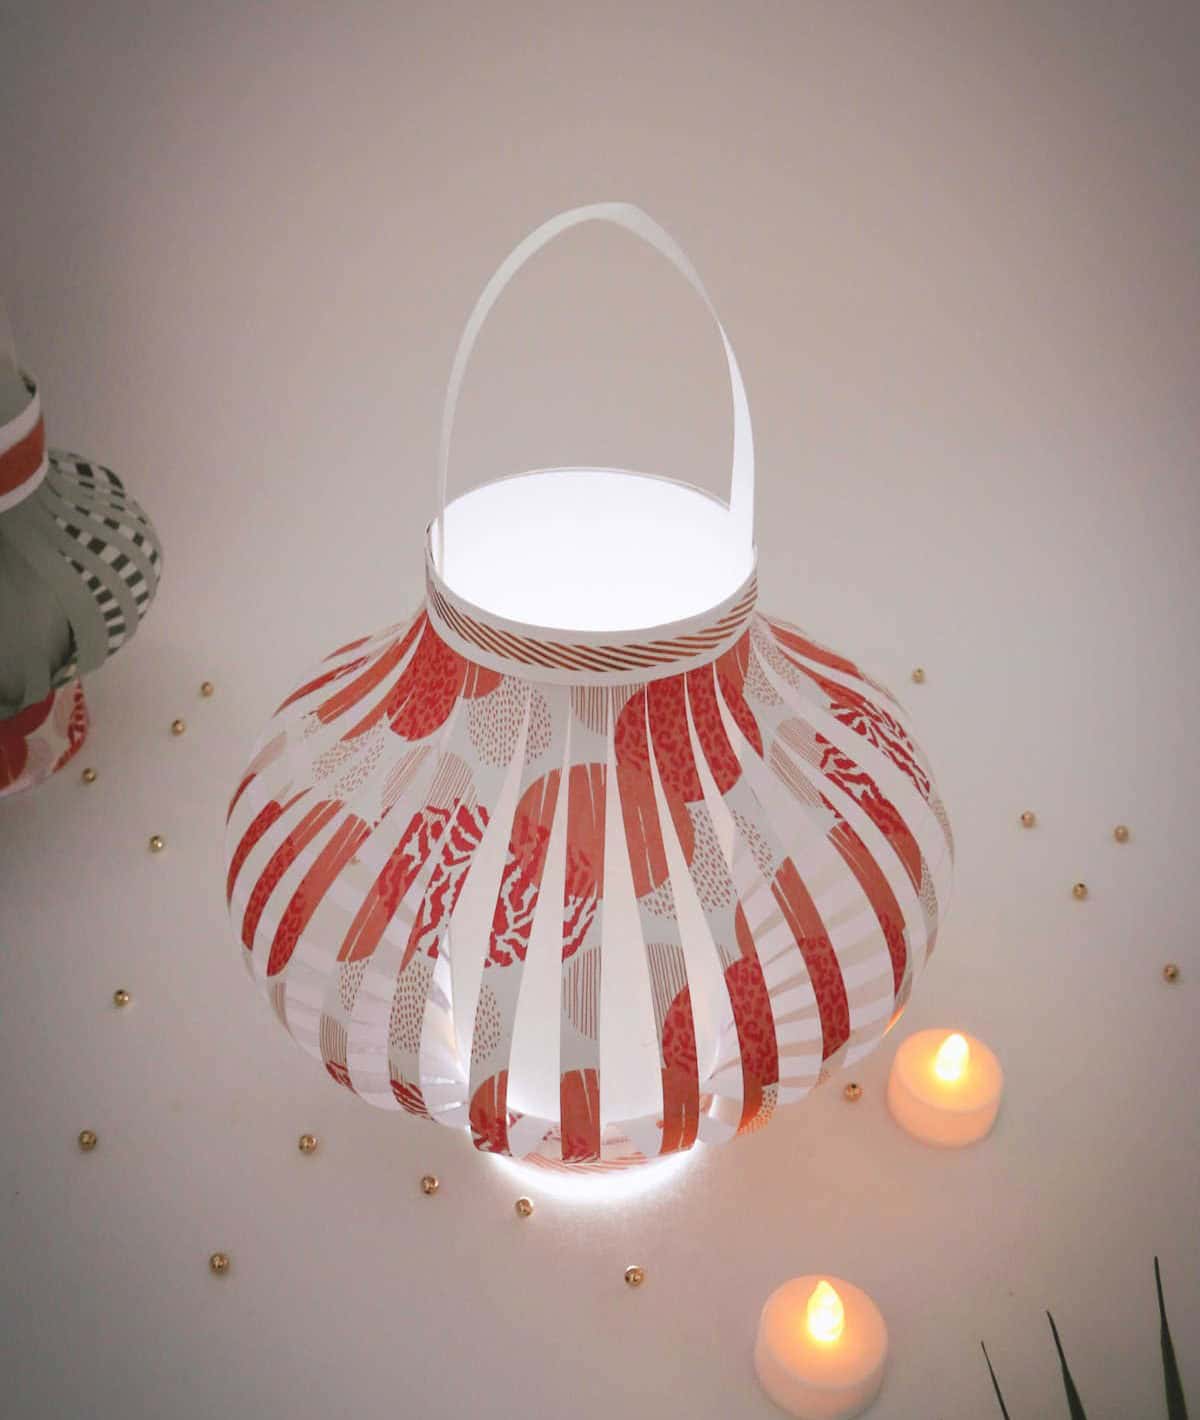
Paper lanterns are incredibly versatile and can add a touch of elegance to any setting. Not only can you use them as decorative pieces at parties and gatherings, but they’re also perfect for adding ambiance during festivals and rituals. Here are some creative ways to incorporate paper lanterns into your celebrations:Hang them from the porch, deck, awning, or rooftop to create a magical atmosphere. Use them to add warmth and light to your mantel, side table, or craft desk.
Transform your backyard or doorway with a string of lanterns suspended from twine or wire.
Other Crafts You Might Want to Make
If you’re looking for a creative outlet that’s easy on the wallet, consider delving into the world of DIY crafts. From tactile treats like paper squishies and scented candles to adornments like hair bows and phone holders, there are countless projects waiting to be explored. For those with a green thumb, construction paper crafts offer endless possibilities for creative expression. Meanwhile, fans of fine art can get lost in rock painting ideas that range from simple to complex.
And let’s not forget the sweet serendipity of creating your own flowers and rings – a true treat for the senses. With 47 DIY projects and 41 rock painting ideas at your fingertips, you’re just a few clicks away from unleashing your inner crafter.
How to Make Paper Lanterns (Step-by-Step)
Transform your space with a touch of elegance without breaking the bank! These DIY paper lanterns are an excellent creative outlet for both adults and teens, offering a fun and accessible craft experience. With a mere 25 minutes spent on active crafting, you’ll be delighted to discover that these lanterns can add a pop of color and warmth to any room.
To make one stunning paper lantern, simply allocate 5 minutes for additional preparation time, making this project an ideal way to spend quality time with friends or family while creating something truly unique.
Equipment
Say goodbye to the frustration of a suddenly dark screen with our ultimate guide. To begin, we’ll focus on the PencilRulerRetractable blade knife – yes, you read that right! This tool might not seem directly related to preventing screens from dimming, but bear with us. The retractable blade is actually quite useful in various settings. Now, let’s dive into the main event: how to keep your screen lit and ready for use at all times.
Materials 1x2x3x
For this creative project, you’ll need a few basic supplies to get started. These include a single sheet of white paper measuring 10 inches by 12 inches, as well as one sheet of craft paper in the same dimensions (12 inches by 12 inches). Additionally, you’ll require some decorative tape and double-sided tape for embellishments and securing materials. Finally, three strips of paper measuring 12 inches long by 1 inch wide will also come in handy.
Instructions
To begin this project, gather all necessary supplies. Turn your craft paper over with the right side facing down and mark two parallel lines at the top and bottom, each about a centimeter away from the edge. Every centimeter along these lines, create markers using a ruler and pencil. Then, connect the markers on either end by drawing a line across the paper. Repeat this process for all markers to create a grid-like pattern.
Next, use a craft cutter to make incisions along each individual line, dividing the paper into strips joined by tabs. Cut out the final strip to create an opening. With your white paper, apply double-sided tape along both top and bottom edges. Carefully attach the top and bottom of the craft paper (with the printed side facing up) to the white paper, allowing the craft paper to billow outward due to its smaller size.
Roll in the sides of the white paper using double-sided tape, securing the ends together. Remember to leave a gap at one end, which you’ll later fill by attaching the rolled-up edge. To enhance the lantern’s finish, cut three additional strips of white paper and apply double-sided tape along two of them. Adhere these strips around the top and bottom of the lantern. The third strip can be folded into a handle and attached to the top.
Embellish your lantern with washi tape, stickers, glitter, or other decorations. You can also insert an electric tea light candle for illumination.